
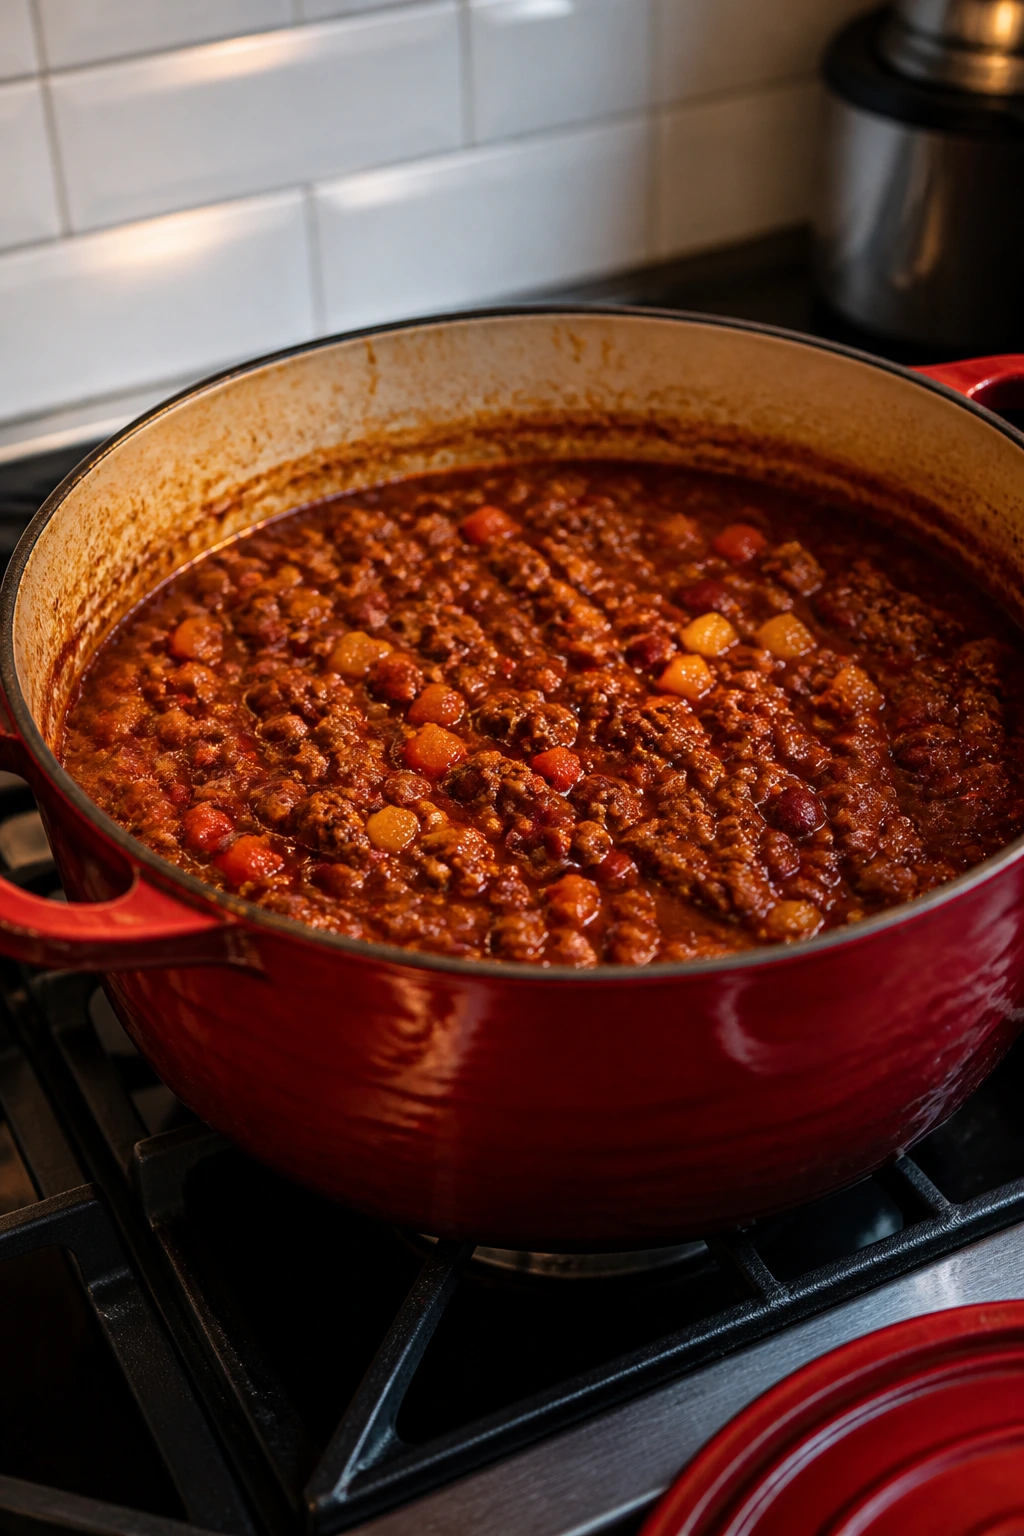
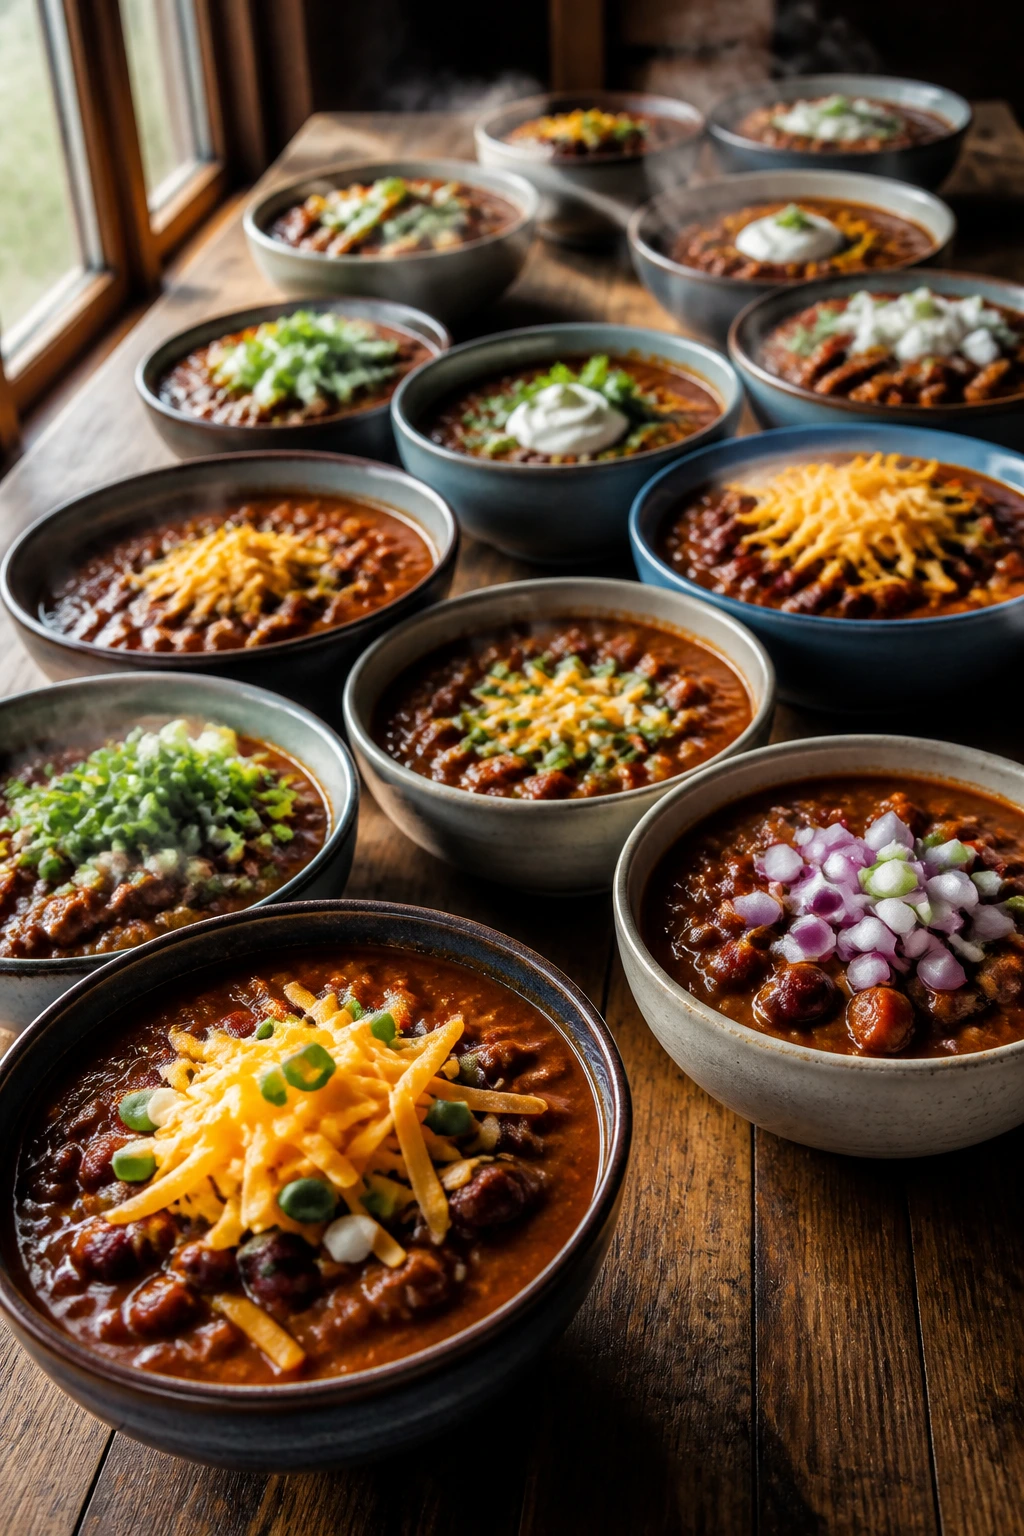
Chili dinners for game day crowds work because they forgive almost everything except blandness. You can start them early, hold them warm, ladle them into bowls, and let the room handle the rest. The first good sign is always the same: onions turning sweet in fat, cumin waking up in the pot, and a deep, savory smell building before anyone has even asked for seconds.
That’s the real charm here. A pot of chili can feel casual and still feed a noisy group with real comfort, which is rarer than it should be. Some versions are smoky and thick, some are brothy and bright with lime, and some sit somewhere in the middle with beans, tomatoes, and enough heat to keep things interesting without scaring off half the table.
What you want on game day is food that keeps its shape under pressure. Not fussy food. Not delicate food. Chili has that sturdy, reliable quality that makes it one of the smartest crowd dinners around, especially when toppings are lined up like little trophies beside it. Keep reading, because the best pots here solve different problems: feeding a big group, stretching a budget, pleasing spice-skeptics, and still tasting like somebody cared.
Why You’ll Love This Collection

-
Big-batch friendly: Every one of these chili dinners scales cleanly, so you can feed 6, 8, or 12 without the pot turning into a science project.
-
Built for holding: Chili sits well on low heat, and the flavors often settle into something deeper after a short rest, which is exactly what a crowded table needs.
-
Different heat levels: Some bowls lean smoky and mild, others bring jalapeños, chipotles, or green chiles, so nobody has to negotiate with the entire room.
-
Budget-smart ingredients: Beans, tomatoes, onions, ground meat, and squash show up often here because they stretch well and still taste like dinner.
-
Topping-bar magic: Shredded cheese, sour cream, cilantro, lime, tortilla strips, cornbread, and hot sauce turn one pot into a spread.
-
Make-ahead friendly: Several of these taste even better the next day, which means less stress when kickoff gets close.
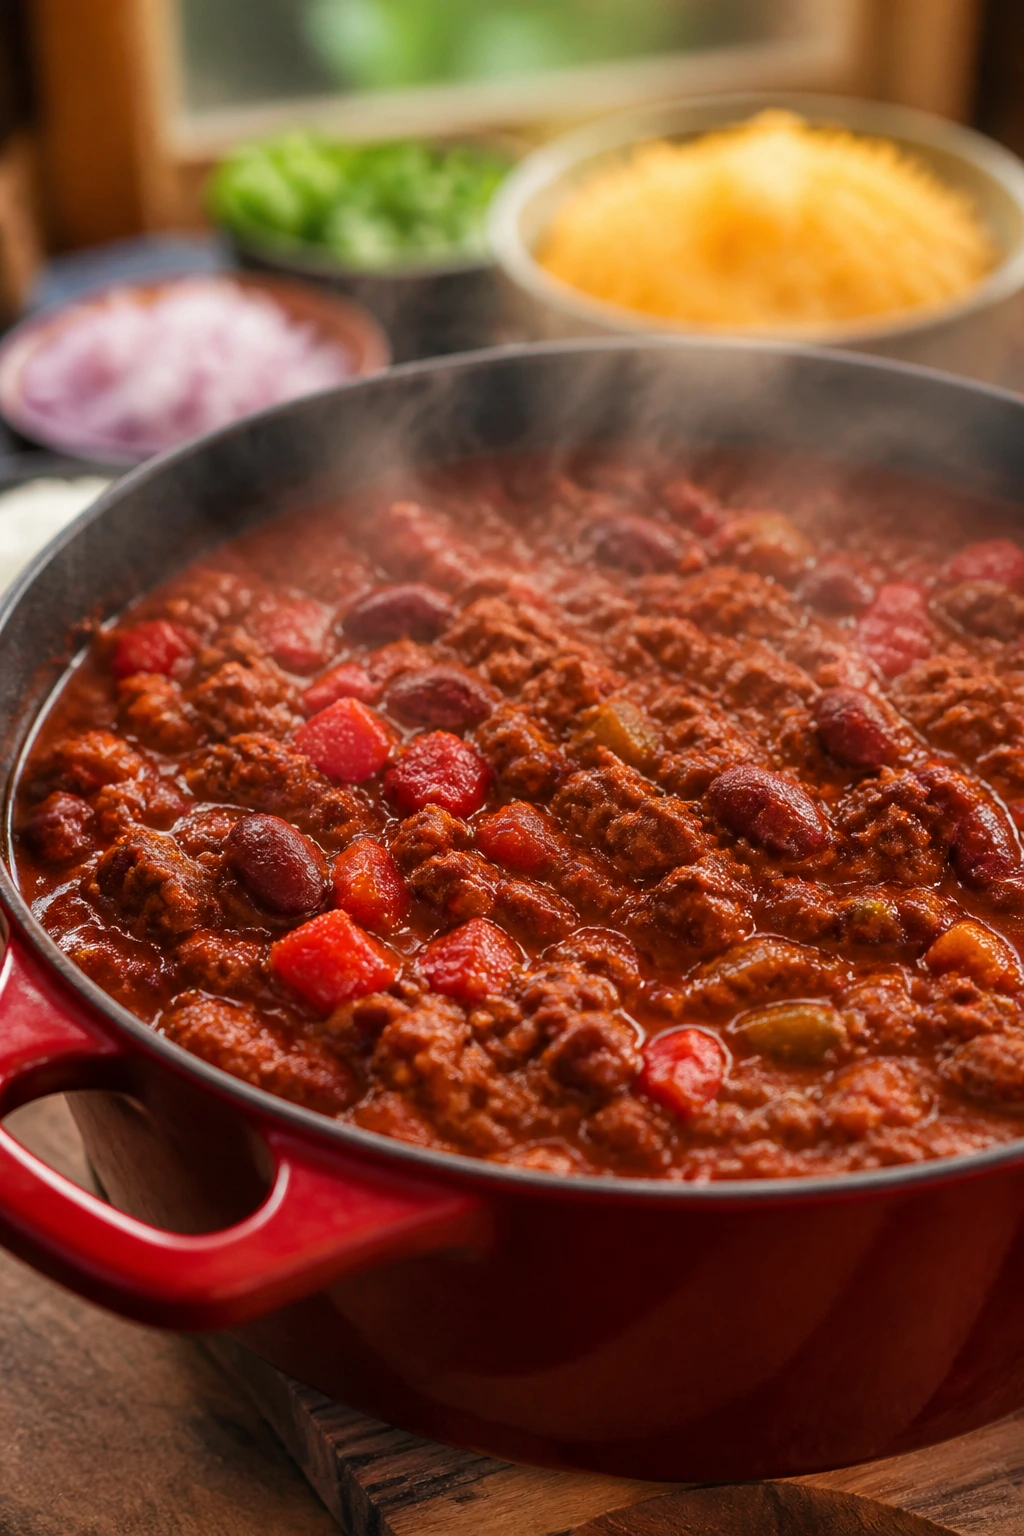
1. Smoked Beef and Bean Tailgate Chili
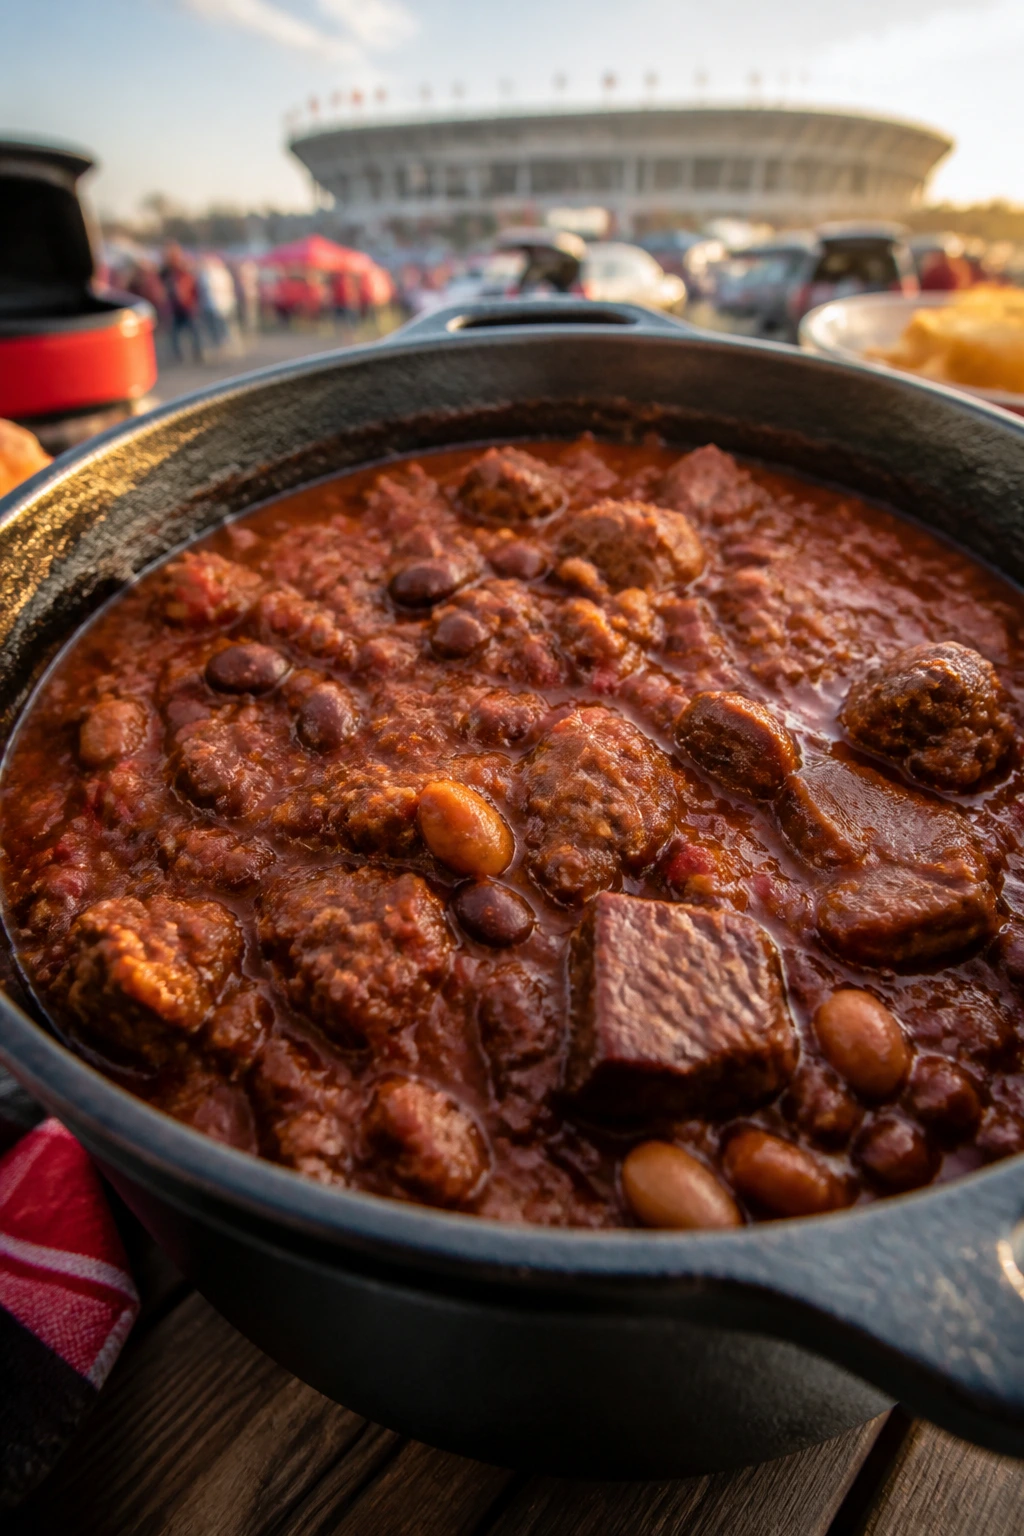
This is the kind of chili that smells like a parking lot full of grills and folding chairs, even if you’re making it in a plain old Dutch oven. It’s rich, deep red, and built on browned beef, beans, and a tomato base that gets thick enough to coat a spoon without feeling heavy. I like this one when I want the familiar, classic chili flavor that almost everyone at the table will recognize immediately.
Why It Works:
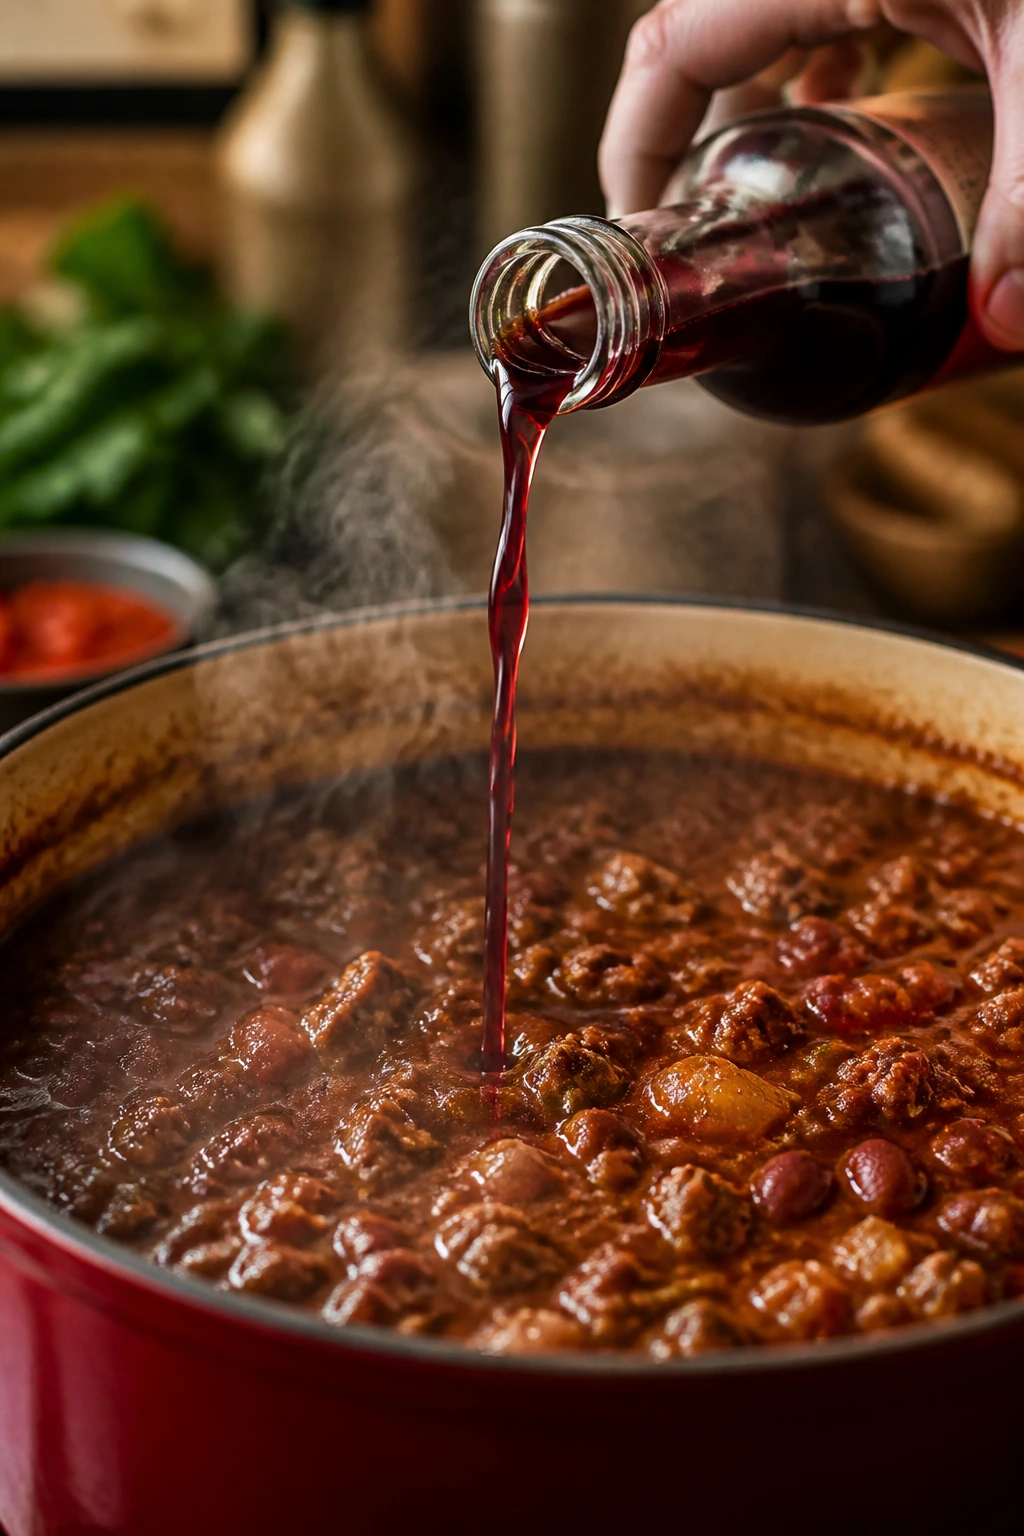
Ground beef gives you that meaty backbone, while kidney beans and pinto beans stretch the pot without making it feel thin. The smoked paprika matters more than people think; it gives the chili a subtle campfire edge even if you never go near charcoal. A short simmer of 35 to 45 minutes is enough to pull everything together, and the final splash of vinegar keeps the whole thing from tasting flat.
Key Ingredients:
- 2 tablespoons olive oil, for browning and building flavor
- 2 pounds ground beef, preferably 80/20 for the best balance of richness and texture
- 1 large onion, diced small so it softens into the pot
- 1 red bell pepper, diced for sweetness and color
- 4 garlic cloves, minced fine so they melt into the sauce
- 2 tablespoons chili powder, 2 teaspoons cumin, 1 teaspoon smoked paprika, and 1/4 teaspoon cayenne
- 2 tablespoons tomato paste, for depth and a darker base
- 2 cans diced tomatoes, 14.5 ounces each
- 1 can tomato sauce, 15 ounces
- 1 can kidney beans and 1 can pinto beans, both drained and rinsed
- 2 cups beef broth
- 1 tablespoon Worcestershire sauce
- 1 tablespoon apple cider vinegar
- Salt and black pepper
Quick Steps:
-
Brown the beef: Heat the olive oil in a large Dutch oven over medium-high heat. Add the ground beef, break it up, and cook for 6 to 8 minutes until well browned, not gray. Drain excess fat if needed, leaving about 1 tablespoon in the pot.
-
Cook the vegetables: Add the onion and bell pepper and cook for 5 minutes, stirring often, until the onion turns translucent and the pepper starts to soften. Add the garlic and cook for 30 seconds until fragrant.
-
Bloom the spices: Stir in the chili powder, cumin, smoked paprika, cayenne, and tomato paste. Cook for 1 minute so the tomato paste darkens slightly and the spices smell toasted.
-
Build the pot: Add the diced tomatoes, tomato sauce, beans, beef broth, and Worcestershire sauce. Stir well and scrape up the browned bits from the bottom.
-
Simmer slowly: Bring the chili to a gentle boil, then reduce to low and simmer uncovered or partially covered for 35 to 45 minutes. Stir every so often until it looks thick and glossy.
-
Finish and season: Stir in the vinegar, then taste and add salt and black pepper as needed. Let it sit for 10 minutes before serving so it settles into a fuller texture.
Tips and Variations:
- A spoonful of sour cream on top softens the smoke and heat without dulling the flavor.
- If you want a thicker chili, mash a small scoop of beans against the side of the pot near the end.
- Make it a day ahead if you can. The texture tightens up overnight in a very good way.
2. White Chicken Chili with Roasted Green Chiles
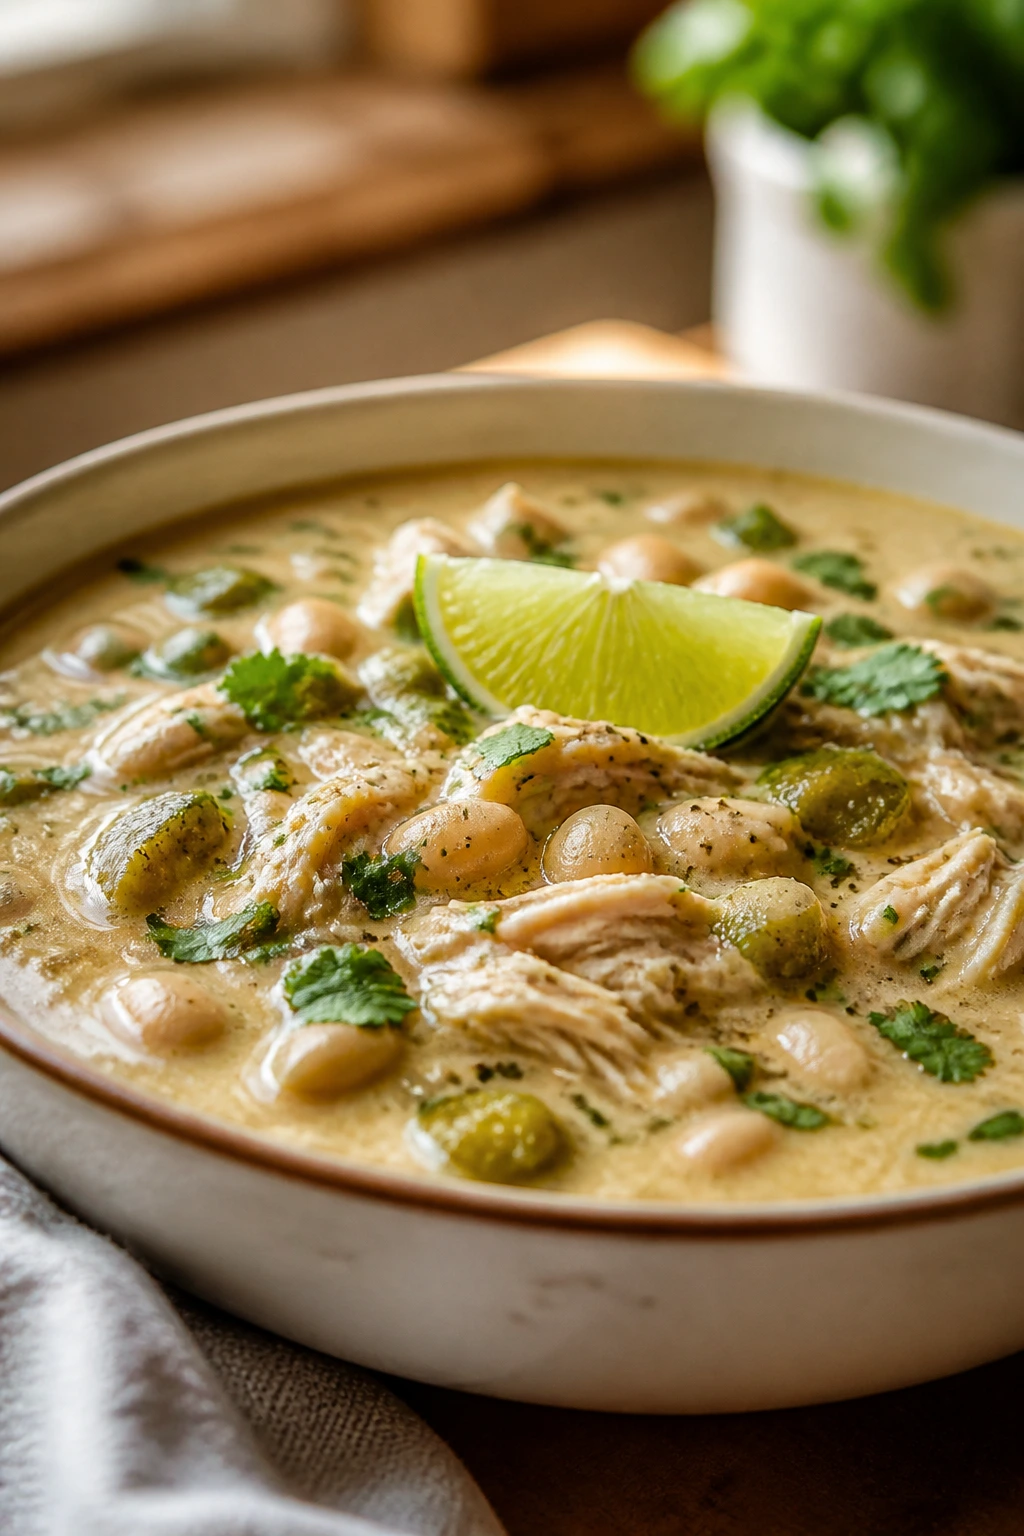
This one is quieter than a red chili, but don’t mistake quiet for boring. White chicken chili has a creamy, green, almost silky feel, with tender chicken, mild heat, and the kind of lime finish that wakes everything up. It’s the bowl I reach for when half the room wants comfort and the other half wants something lighter than beef.
Why It Works:
Cannellini beans give the chili body without turning it pasty, and the green chiles keep the flavor bright instead of muddy. Cream cheese adds a smooth finish, but only if you stir it in at the end and let it melt gently. Chicken thighs hold up better than breasts if you want extra tenderness, though either one works as long as you stop cooking when the chicken reaches 165°F.
Key Ingredients:
- 2 tablespoons olive oil
- 1 large onion, diced
- 3 garlic cloves, minced
- 1 tablespoon ground cumin, 1 teaspoon dried oregano, and 1/2 teaspoon ground coriander
- 4 cups chicken broth
- 2 cans cannellini beans, drained and rinsed
- 1 can diced green chiles, about 4 ounces
- 1 1/2 pounds boneless, skinless chicken thighs or breasts
- 4 ounces cream cheese, cubed and softened
- 1/2 cup sour cream
- 1 lime, juiced
- Fresh cilantro and tortilla chips for serving
Quick Steps:
-
Soften the aromatics: Heat the oil in a large pot over medium heat. Add the onion and cook for 4 to 5 minutes until softened and sweet, then stir in the garlic, cumin, oregano, and coriander for 30 seconds.
-
Add the base: Pour in the chicken broth, beans, and green chiles. Stir well and bring the pot to a gentle simmer.
-
Cook the chicken: Nestle the chicken into the liquid. Simmer for 18 to 20 minutes, or until the thickest piece reaches 165°F and feels tender when pressed.
-
Shred and return: Remove the chicken, shred it with two forks, and drop it back into the pot. Keep the heat low so the broth stays calm.
-
Make it creamy: Stir in the cream cheese a few cubes at a time until fully melted. Then fold in the sour cream and lime juice.
-
Serve hot: Taste and season with salt and pepper. Ladle into bowls and finish with cilantro and crushed tortilla chips.
Tips and Variations:
- Use rotisserie chicken if you want a faster path; stir it in during the last 5 minutes.
- A handful of shredded Monterey Jack melts nicely on top without making the bowl too heavy.
- Add diced avocado at the table for a cooler, softer finish.
3. Three-Bean Vegetarian Chili with Sweet Peppers
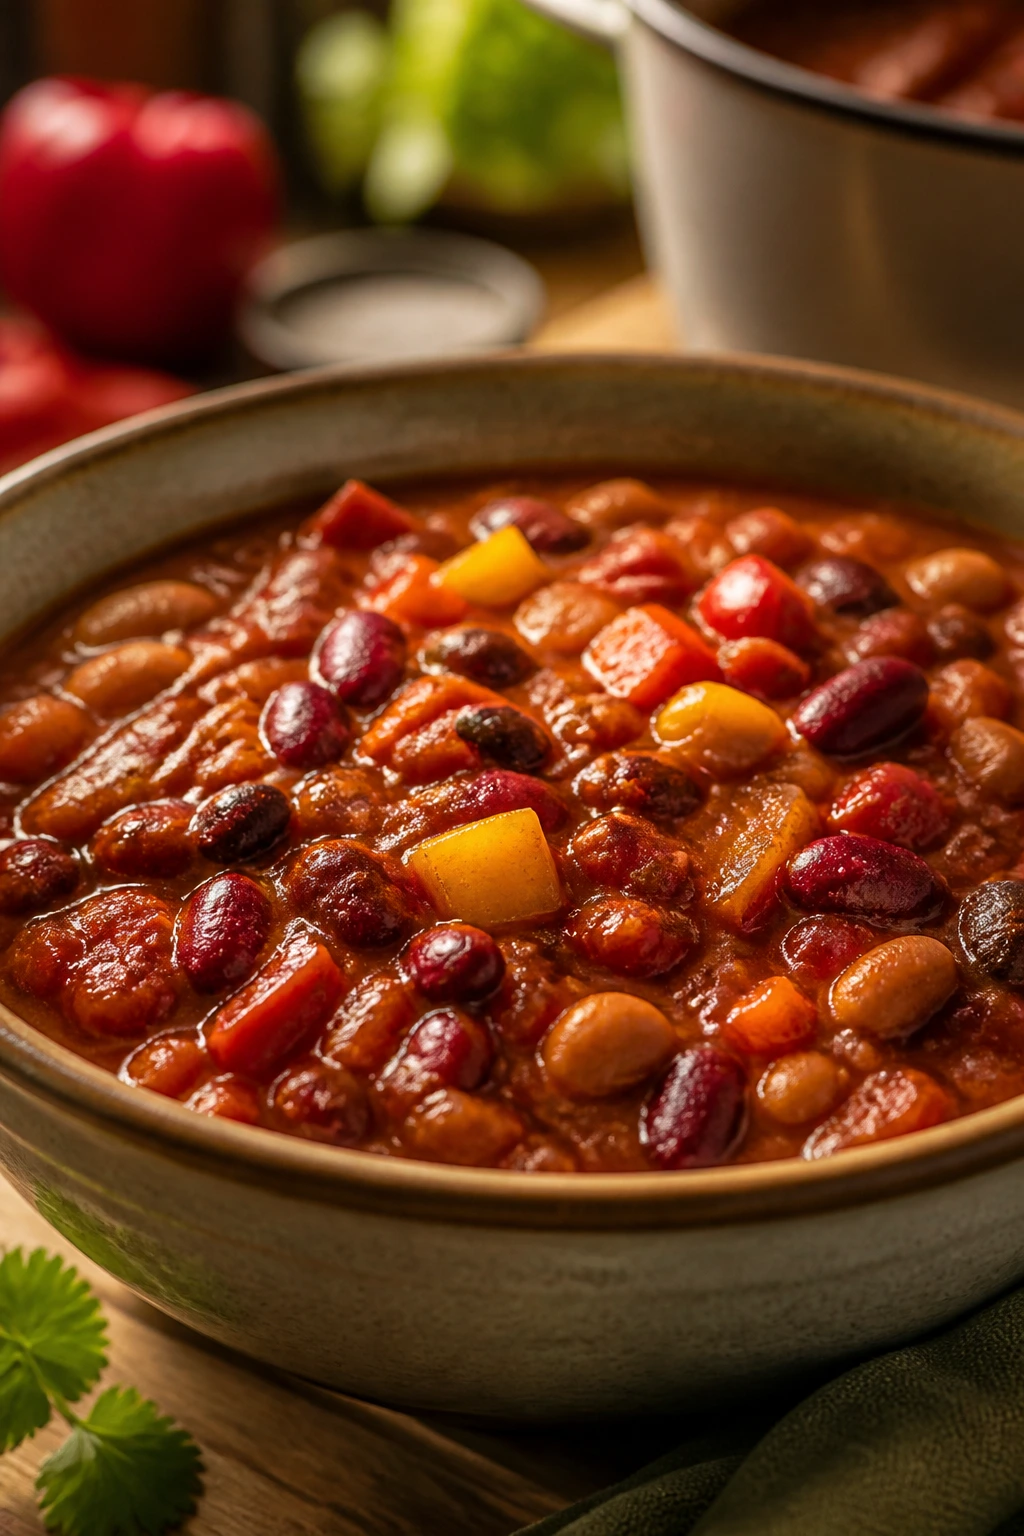
The first thing you notice here is color. Bright peppers, dark beans, red tomatoes, and a surface that looks almost glossy when it’s done right. This vegetarian chili doesn’t feel like a compromise at all; it feels like the bowl that makes meat-eaters nod quietly and ask for more bread.
Why It Works:
Three different beans give you layers of texture, which matters more than people realize when there’s no meat in the pot. The carrot and peppers add sweetness, the cocoa powder rounds out the tomato edge, and the bean mash near the end gives the chili a thicker, more spoonable finish. It’s the sort of recipe that tastes even better after a rest because the vegetables settle in and stop tasting separate.
Key Ingredients:
- 2 tablespoons olive oil
- 1 large onion, diced
- 2 bell peppers, diced, any color you like
- 1 carrot, finely diced for quiet sweetness
- 4 garlic cloves, minced
- 2 tablespoons chili powder, 2 teaspoons cumin, 1 teaspoon smoked paprika, and 1 teaspoon cocoa powder
- 2 tablespoons tomato paste
- 2 cans diced tomatoes
- 1 can black beans, drained and rinsed
- 1 can kidney beans, drained and rinsed
- 1 can pinto beans, drained and rinsed
- 2 cups vegetable broth
- 1 cup corn, frozen or fresh
- 1 tablespoon apple cider vinegar
Quick Steps:
-
Cook the vegetables first: Warm the olive oil in a heavy pot over medium heat. Add the onion, peppers, and carrot, then cook for 7 to 8 minutes until softened and lightly golden at the edges.
-
Wake up the spices: Stir in the garlic, chili powder, cumin, smoked paprika, cocoa powder, and tomato paste. Cook for 1 minute until the paste darkens and the spices smell toasted.
-
Add the beans and tomatoes: Pour in the diced tomatoes, black beans, kidney beans, pinto beans, vegetable broth, and corn. Stir well and bring the pot to a simmer.
-
Let it thicken: Cook uncovered for 30 to 35 minutes, stirring occasionally. The chili should look deeper in color and a little glossy around the edges.
-
Build more body: Mash about 1 cup of the beans against the side of the pot with a spoon or potato masher.
-
Finish bright: Stir in the vinegar, then taste for salt and pepper. Serve with chopped onion, cilantro, or a crackly piece of cornbread.
Tips and Variations:
- A little lime juice at the end gives this chili a sharper, cleaner finish than salt alone.
- Swap one can of beans for lentils if you want a softer, more stew-like texture.
- This one reheats beautifully and usually tastes even better the next day.
4. Texas-Style Brisket Chili
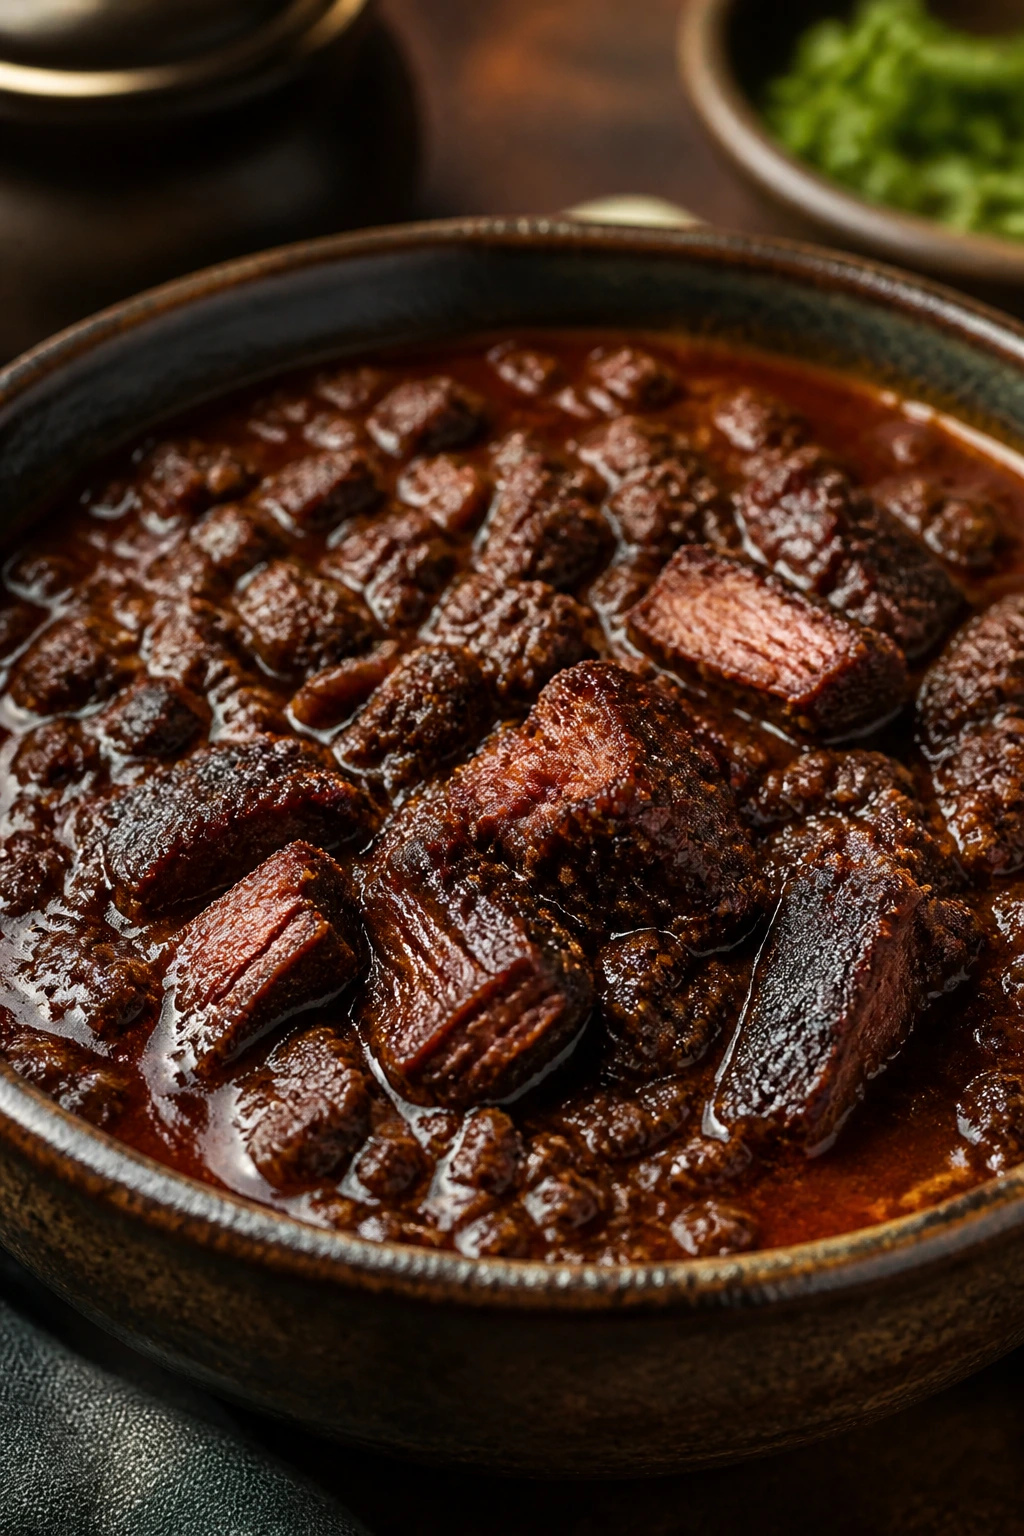
This is a bigger, deeper pot. No beans, no shortcuts, no apology. Texas-style chili leans into beef and chile flavor, and when the brisket or chuck has time to braise, the sauce turns dark and almost velvet-like around the meat. If your crowd likes a chili that eats more like a serious bowl of dinner than a snack, this is the heavyweight.
Why It Works:
Chuck roast or brisket brings connective tissue that slowly melts into the sauce, which gives you body without needing flour or beans. Chipotle and ancho chile powder add heat with actual smoke, not just raw sting. Masa harina is the trick that many home cooks miss; a small slurry at the end thickens the pot with a faint corn note that feels right at home here.
Key Ingredients:
- 2 1/2 pounds chuck roast or brisket, cut into 1-inch cubes
- Salt and black pepper
- 2 tablespoons oil
- 1 large onion, chopped
- 4 garlic cloves, minced
- 2 tablespoons ancho chile powder, 1 tablespoon chili powder, 2 teaspoons cumin, 1 teaspoon oregano, and 1 teaspoon smoked paprika
- 2 tablespoons tomato paste
- 1 can crushed tomatoes, 28 ounces
- 3 cups beef broth
- 1 to 2 chipotles in adobo, minced, plus 1 tablespoon adobo sauce
- 1 cup beer or extra broth
- 2 tablespoons masa harina mixed with 1/4 cup water
- 1 tablespoon apple cider vinegar
Quick Steps:
-
Season and sear the beef: Pat the beef dry and season it with salt and black pepper. Heat the oil in a heavy pot over medium-high heat and brown the meat in batches until each side has a deep crust, about 3 to 4 minutes per batch.
-
Cook the onions: Add the onion to the pot and cook for 5 minutes, scraping up the browned bits as they loosen. Stir in the garlic for 30 seconds.
-
Toast the chile base: Add the ancho chile powder, chili powder, cumin, oregano, smoked paprika, and tomato paste. Cook for 1 minute until the mixture looks dark and smells rich.
-
Build the braise: Pour in the crushed tomatoes, beef broth, chipotles, and beer. Return the beef to the pot and stir well.
-
Simmer until tender: Cover partially and cook on low for 2 to 2 1/2 hours, stirring now and then, until the beef shreds easily with a fork.
-
Thicken and finish: Stir in the masa slurry and simmer for 10 more minutes. Add the vinegar, then taste for salt. The chili should be thick enough to mound on a spoon.
Tips and Variations:
- If you want a sharper chile bite, add more adobo sauce instead of extra salt.
- Leftovers freeze well, but the flavor is even better after a night in the fridge.
- Serve with chopped onion and shredded cheese, or keep it plain and let the beef do the talking.
5. Turkey and Sweet Potato Chili
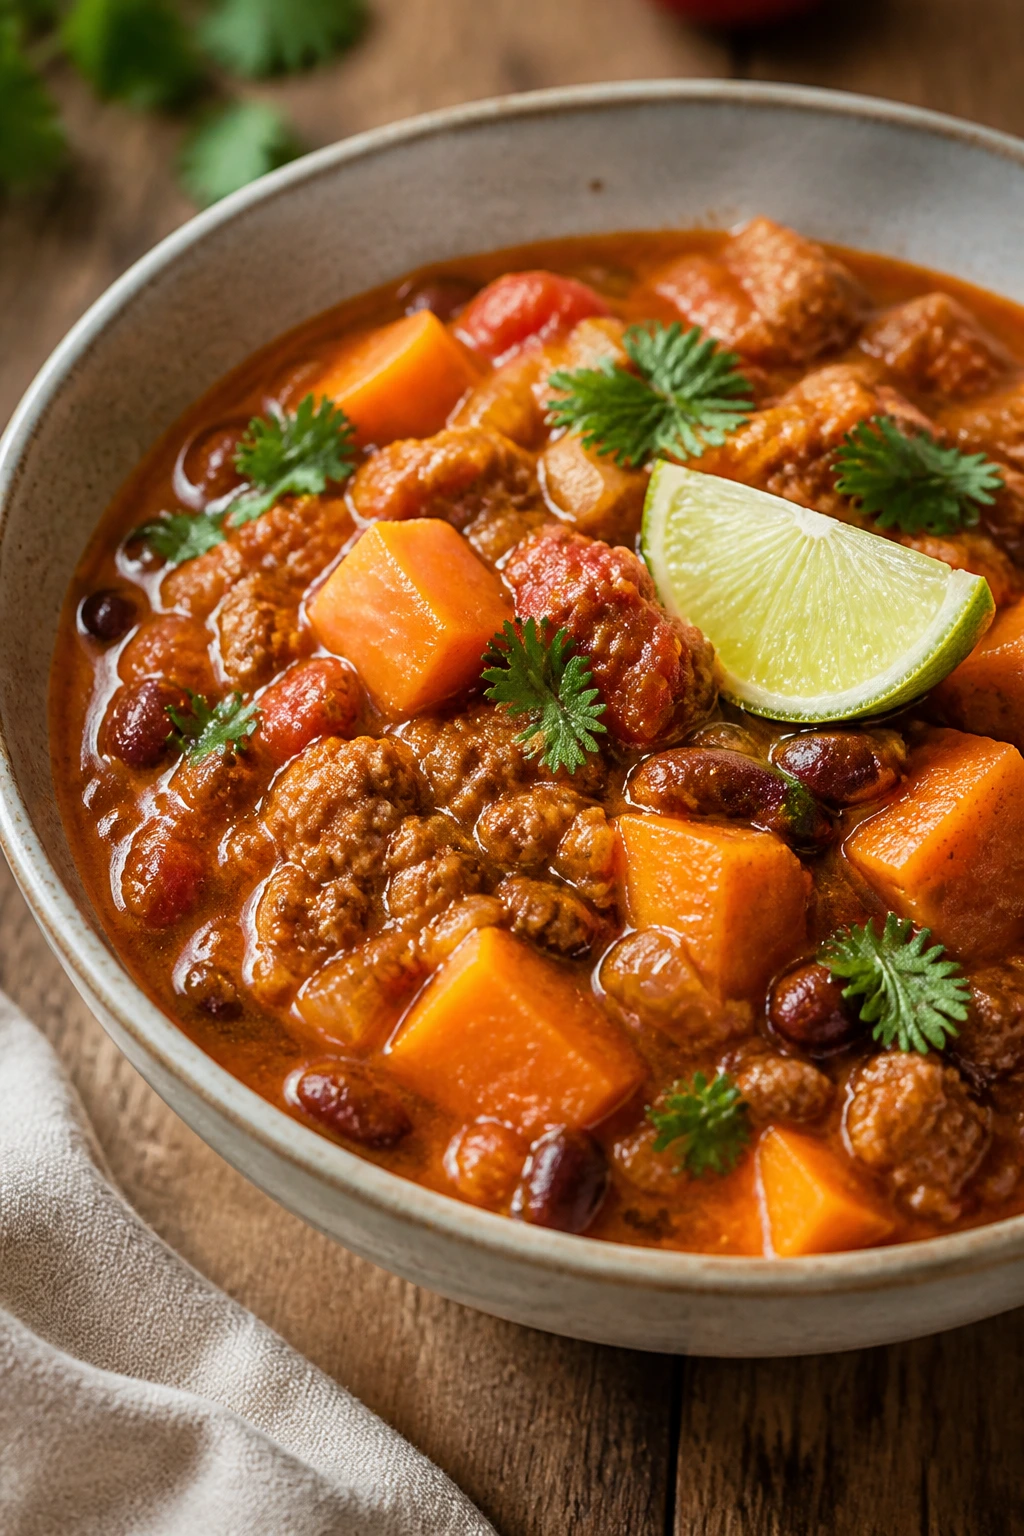
Sweet potato gives this chili a soft, earthy sweetness that plays nicely against ground turkey and warm spices. It’s a little lighter than beef chili, but not thin, and not shy. I like the way the orange pieces hold their shape in the pot while still breaking down enough to make the broth look silkier.
Why It Works:
Ground turkey can taste flat if you don’t season it early, and this recipe fixes that by building flavor from the onion, pepper, garlic, and spices before the tomatoes go in. Sweet potato adds both body and a hint of sweetness, so the chili doesn’t need much sugar or extra thickeners. The black beans bring chew and protein, and the lime at the end keeps the whole pot from tipping into heavy territory.
Key Ingredients:
- 2 tablespoons olive oil
- 2 pounds ground turkey
- 1 large onion, diced
- 1 red bell pepper, diced
- 3 garlic cloves, minced
- 2 medium sweet potatoes, peeled and cut into 1/2-inch cubes
- 2 tablespoons chili powder, 2 teaspoons cumin, and 1 teaspoon cinnamon
- 2 cans diced tomatoes
- 1 can black beans, drained and rinsed
- 2 cups chicken broth
- 1 tablespoon lime juice
- Fresh cilantro for serving
Quick Steps:
-
Brown the turkey: Heat the olive oil in a large pot over medium-high heat. Add the turkey and cook for 6 to 8 minutes, breaking it apart until no pink remains.
-
Add the vegetables: Stir in the onion and bell pepper and cook for 4 to 5 minutes until softened. Add the garlic and cook for 30 seconds.
-
Season the pot: Sprinkle in the chili powder, cumin, and cinnamon. Stir for 30 seconds so the spices coat the meat and smell fragrant.
-
Build the chili: Add the sweet potatoes, diced tomatoes, black beans, and chicken broth. Stir, bring to a simmer, and lower the heat.
-
Cook until tender: Simmer for 25 to 30 minutes, partly covered, until the sweet potatoes are soft but not falling apart. Mash a few pieces against the side of the pot if you want a thicker base.
-
Finish cleanly: Stir in the lime juice and taste for salt and pepper. Garnish with cilantro before serving.
Tips and Variations:
- A little hot sauce at the table helps the sweetness feel more balanced.
- If you want extra body, add a handful of corn in the last 10 minutes.
- This is an easy one to portion into freezer containers for later.
6. Chicken Tortilla Chili
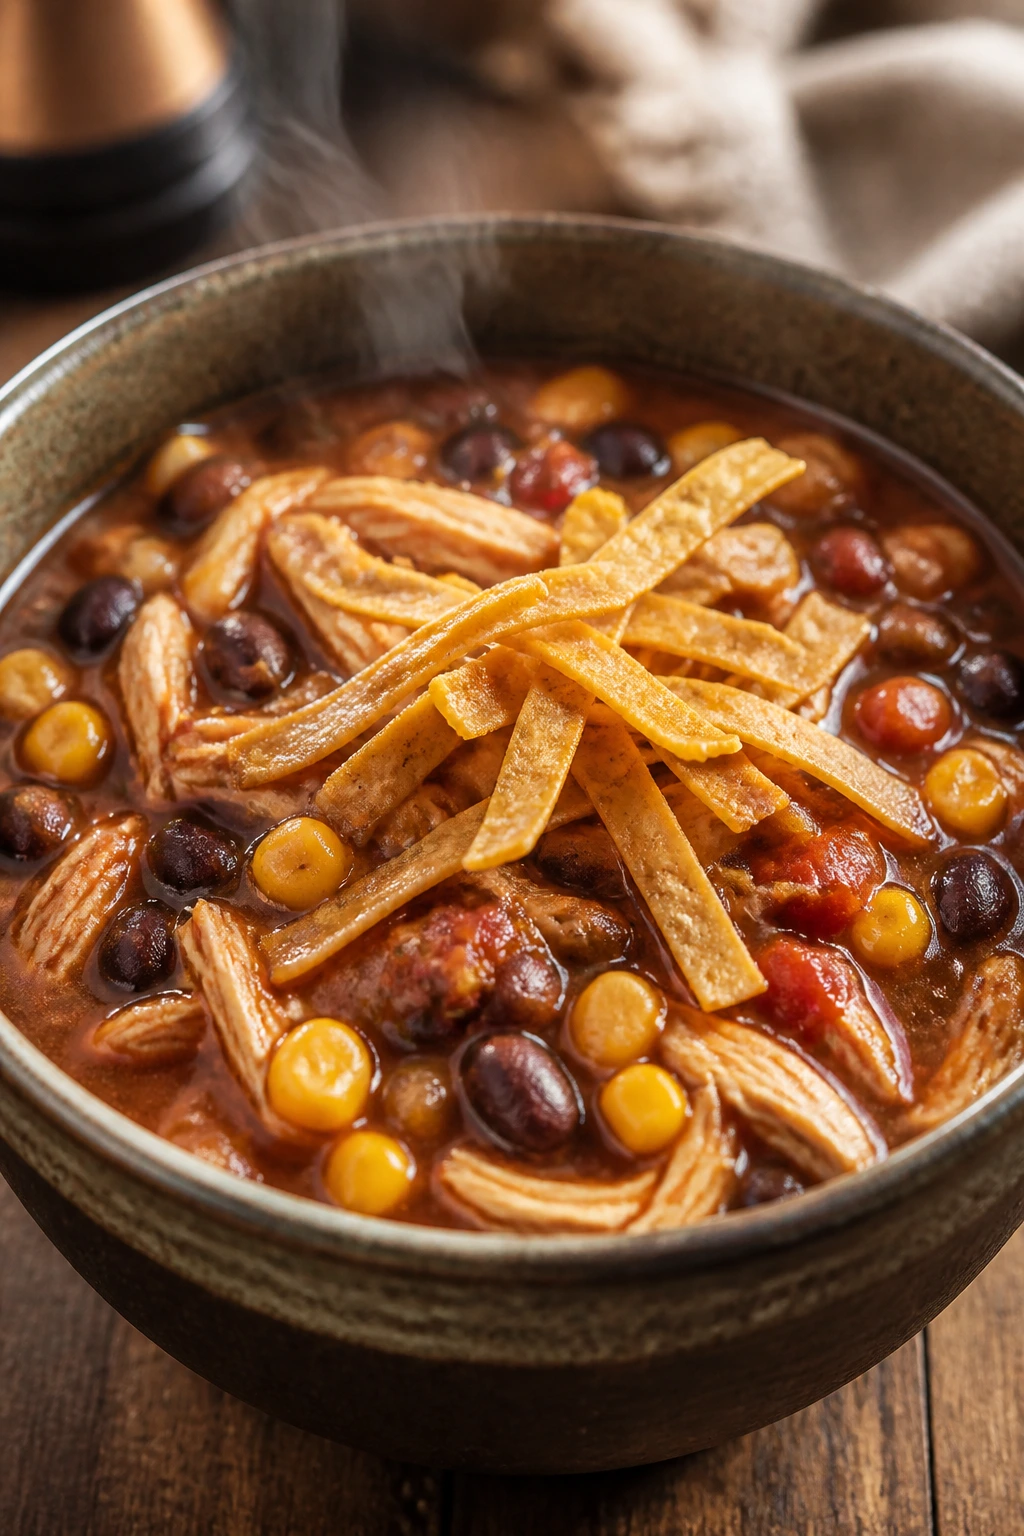
This chili has more attitude than the average chicken pot. It’s built on tomatoes, enchilada sauce, corn, beans, and shredded chicken, then finished with tortilla strips that go from crisp to pleasantly soft at the edges. The result is half chili, half tortilla soup, and completely at home on a crowded table.
Why It Works:
The enchilada sauce adds depth fast, which matters when you want a big pot without standing at the stove for an hour just to build base flavor. Corn gives sweetness, black beans bring chew, and the chicken absorbs all the chile-tomato seasoning without getting stringy. If you use already cooked chicken, this becomes a near-effortless dinner that still tastes layered and complete.
Key Ingredients:
- 2 tablespoons oil
- 1 large onion, chopped
- 1 jalapeño, seeded and minced
- 3 garlic cloves, minced
- 2 tablespoons chili powder, 1 teaspoon cumin, and 1 teaspoon taco seasoning
- 1 can red enchilada sauce, 10 ounces
- 2 cans fire-roasted diced tomatoes
- 2 cups chicken broth
- 1 can black beans, drained and rinsed
- 1 cup corn
- 4 cups shredded cooked chicken
- Tortilla strips, shredded cheddar, and avocado for serving
Quick Steps:
-
Cook the aromatics: Warm the oil in a large pot over medium heat. Add the onion and jalapeño and cook for 5 minutes until soft, then add the garlic for 30 seconds.
-
Toast the seasoning: Stir in the chili powder, cumin, and taco seasoning. Cook for 30 seconds, just until the spices smell warm.
-
Add the liquids: Pour in the enchilada sauce, diced tomatoes, and chicken broth. Stir well.
-
Build the body: Add the black beans and corn, then let the pot simmer for 15 minutes.
-
Add the chicken: Stir in the shredded chicken and simmer for another 10 minutes until everything is hot and the broth has thickened slightly.
-
Serve with crunch: Spoon into bowls and top with tortilla strips, cheddar, and avocado.
Tips and Variations:
- If you start with raw chicken breasts, simmer them in the broth until they reach 165°F, then shred.
- A squeeze of lime right before serving keeps the sauce from tasting heavy.
- This one is especially good with crushed tortilla chips stirred in right at the end.
7. Cincinnati-Style Chili Spaghetti
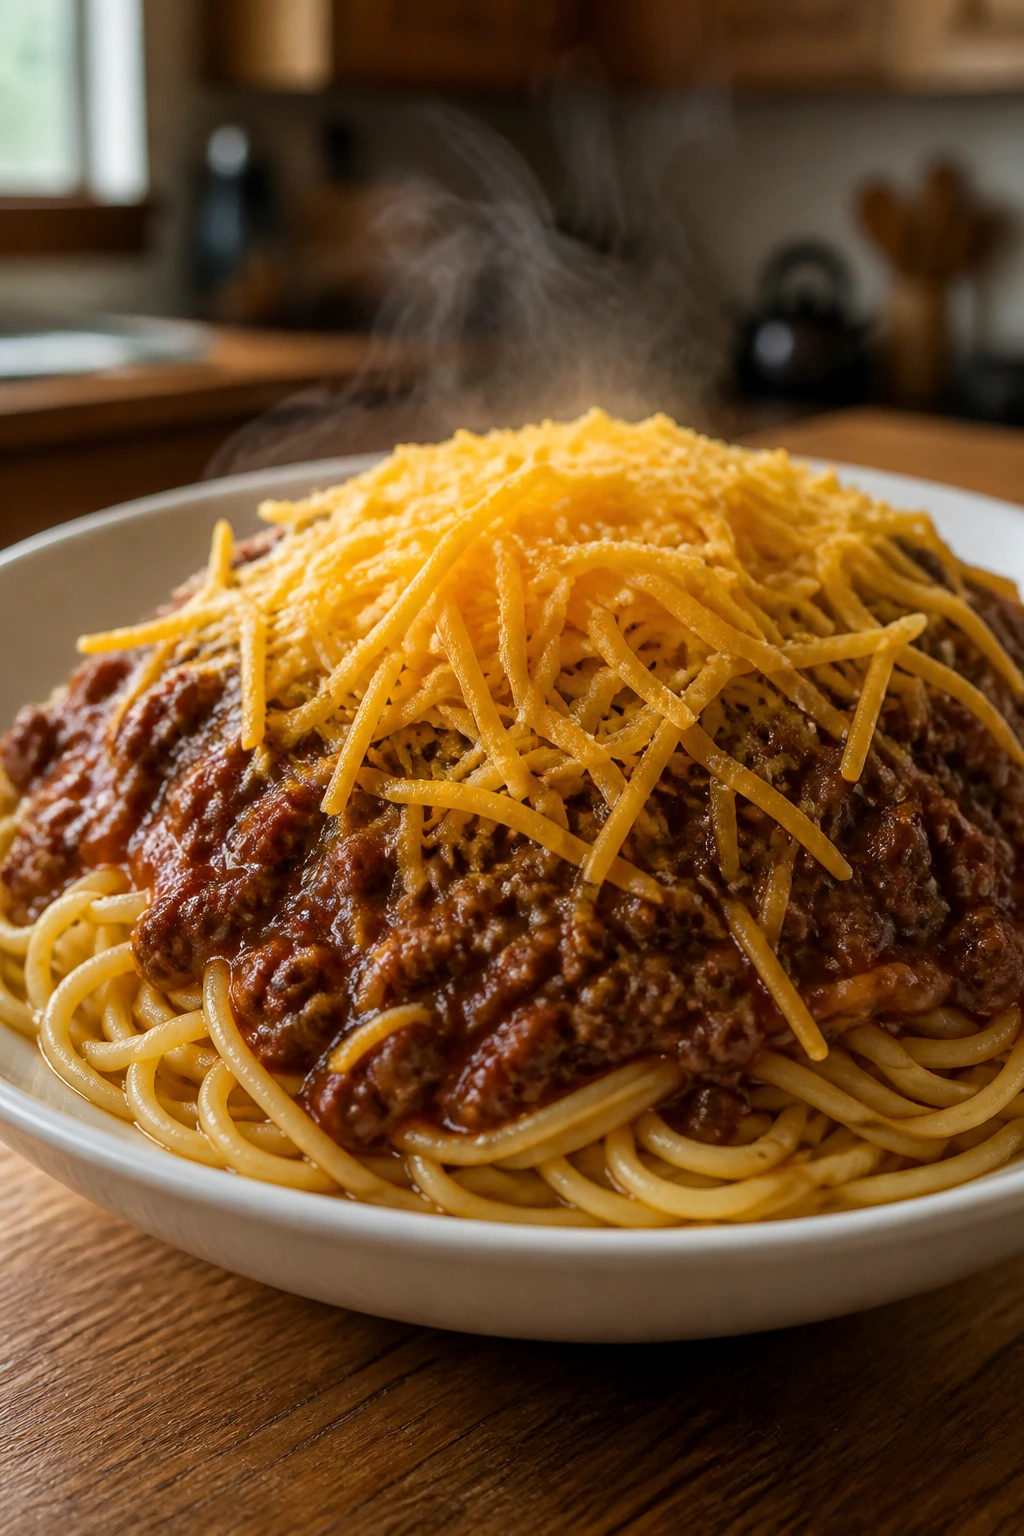
This is the wildcard in the lineup, and I mean that as praise. Cincinnati-style chili is thinner than the bean-heavy pots most people expect, scented with cinnamon, allspice, and cocoa, then ladled over spaghetti with a tumble of cheese on top. It’s the bowl people argue about, which is usually a sign that it’s doing something memorable.
Why It Works:
The spice profile is what makes this chili different from the pack. Cinnamon and allspice don’t make it taste sweet; they make the beef taste deeper and rounder, especially after a long simmer. Because the sauce is meant to be spooned over pasta, it can stay a little looser than other chilis, which actually helps when you’re feeding a crowd and people want a dish that feels fun rather than heavy.
Key Ingredients:
- 2 tablespoons oil
- 2 pounds ground beef
- 1 large onion, finely chopped
- 4 garlic cloves, minced
- 2 tablespoons chili powder, 2 teaspoons cocoa powder, 1 teaspoon cinnamon, 1/2 teaspoon allspice, and 1 teaspoon cumin
- 2 tablespoons tomato paste
- 1 can tomato sauce, 15 ounces
- 4 cups beef broth
- 1 tablespoon Worcestershire sauce
- 1 tablespoon apple cider vinegar
- 1 bay leaf
- 1 pound spaghetti
- Shredded cheddar, diced onion, and kidney beans for serving, if you like
Quick Steps:
-
Brown the beef: Heat the oil in a large pot over medium-high heat. Add the beef and onion and cook for 8 minutes, breaking the meat up until it is no longer pink and the onion softens.
-
Add the garlic and spices: Stir in the garlic, chili powder, cocoa powder, cinnamon, allspice, cumin, and tomato paste. Cook for 1 minute.
-
Build the sauce: Pour in the tomato sauce, beef broth, Worcestershire sauce, vinegar, and bay leaf. Stir well.
-
Simmer patiently: Lower the heat and simmer uncovered for 45 to 60 minutes, stirring now and then. The sauce should stay loose but take on a deeper brown-red color.
-
Cook the spaghetti: Boil the pasta in salted water until just al dente, then drain.
-
Serve the classic way: Spoon the chili over the spaghetti and top with cheddar, onion, or beans if your crowd likes the extra layers.
Tips and Variations:
- The spice blend tastes better after a rest, so this is a smart make-ahead choice.
- If the sauce gets too thick, loosen it with a splash of broth before serving.
- A little hot sauce on the side lets people adjust the heat without changing the base.
8. Beer-Braised Bacon and Beef Chili
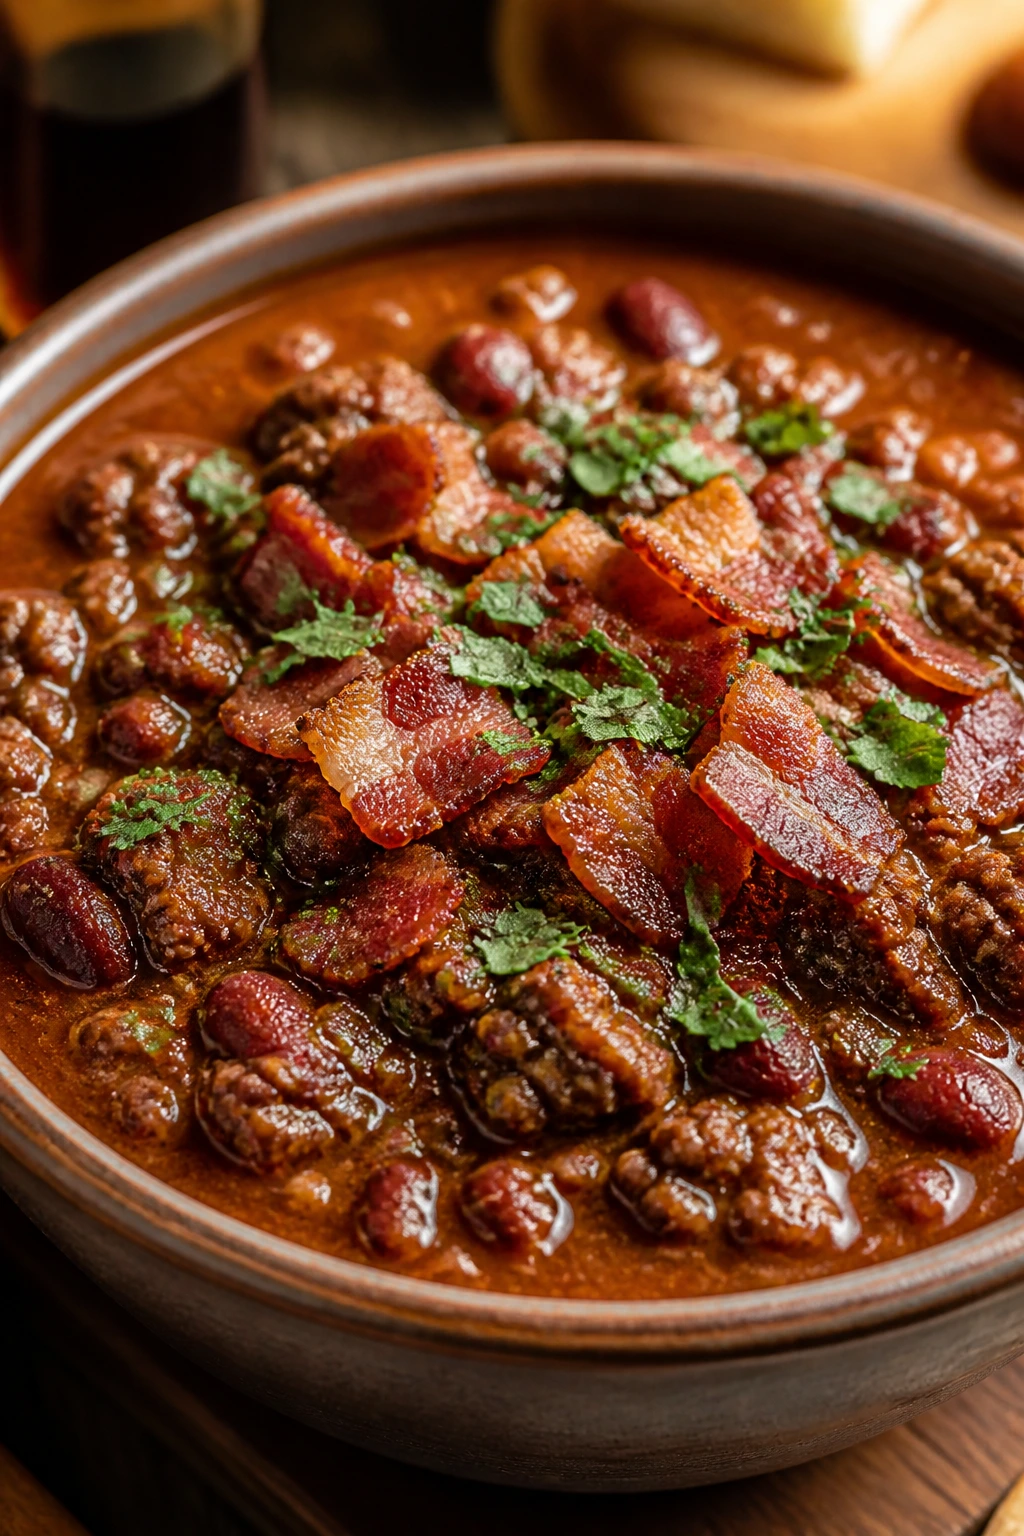
If you want a chili that tastes like someone paid attention for the first 10 minutes, make this one. Bacon gives you a salty, smoky base before the beef even hits the pot, and the beer adds a malty edge that makes the whole bowl feel a touch more grown-up. It’s bold, a little messy, and excellent with a cold drink nearby.
Why It Works:
Bacon fat is a flavor engine, and it also helps brown the beef without drying it out. Dark beer does more than add liquid; it brings bitterness and sweetness in the background, which keeps the chili from tasting one-note. A small amount of cocoa or dark seasoning can deepen the sauce even more, especially if you simmer long enough for the beans to pick up the edges of the broth.
Key Ingredients:
- 6 slices thick-cut bacon, chopped
- 1 1/2 pounds ground beef
- 1 large onion, diced
- 1 jalapeño, seeded and minced
- 4 garlic cloves, minced
- 2 tablespoons chili powder, 2 teaspoons cumin, 1 teaspoon smoked paprika, and 1 teaspoon cocoa powder
- 2 tablespoons tomato paste
- 1 cup dark beer
- 1 can diced tomatoes
- 1 can kidney beans and 1 can black beans, both drained and rinsed
- 2 cups beef broth
- 1 tablespoon apple cider vinegar
Quick Steps:
-
Render the bacon: Cook the chopped bacon in a large pot over medium heat until crisp, about 6 to 8 minutes. Remove most of the bacon with a slotted spoon and leave a few tablespoons of fat in the pot.
-
Brown the beef: Add the ground beef to the bacon fat and cook until browned, about 6 minutes. Stir in the onion and jalapeño and cook for another 4 minutes.
-
Add garlic and spices: Stir in the garlic, chili powder, cumin, smoked paprika, cocoa powder, and tomato paste. Cook for 1 minute.
-
Deglaze with beer: Pour in the beer and scrape up the bottom of the pot. Let it bubble for 2 minutes.
-
Simmer the chili: Add the tomatoes, beans, and beef broth. Lower the heat and simmer for 40 to 45 minutes until thick and deeply flavored.
-
Finish with balance: Stir in the vinegar and return the bacon to the pot. Taste and season before serving.
Tips and Variations:
- If you don’t want the beer note, use beef broth and a teaspoon of soy sauce instead.
- This chili loves pickled jalapeños on top.
- Make extra. The leftovers are the best part for a lot of people.
9. Black Bean and Corn Chipotle Chili
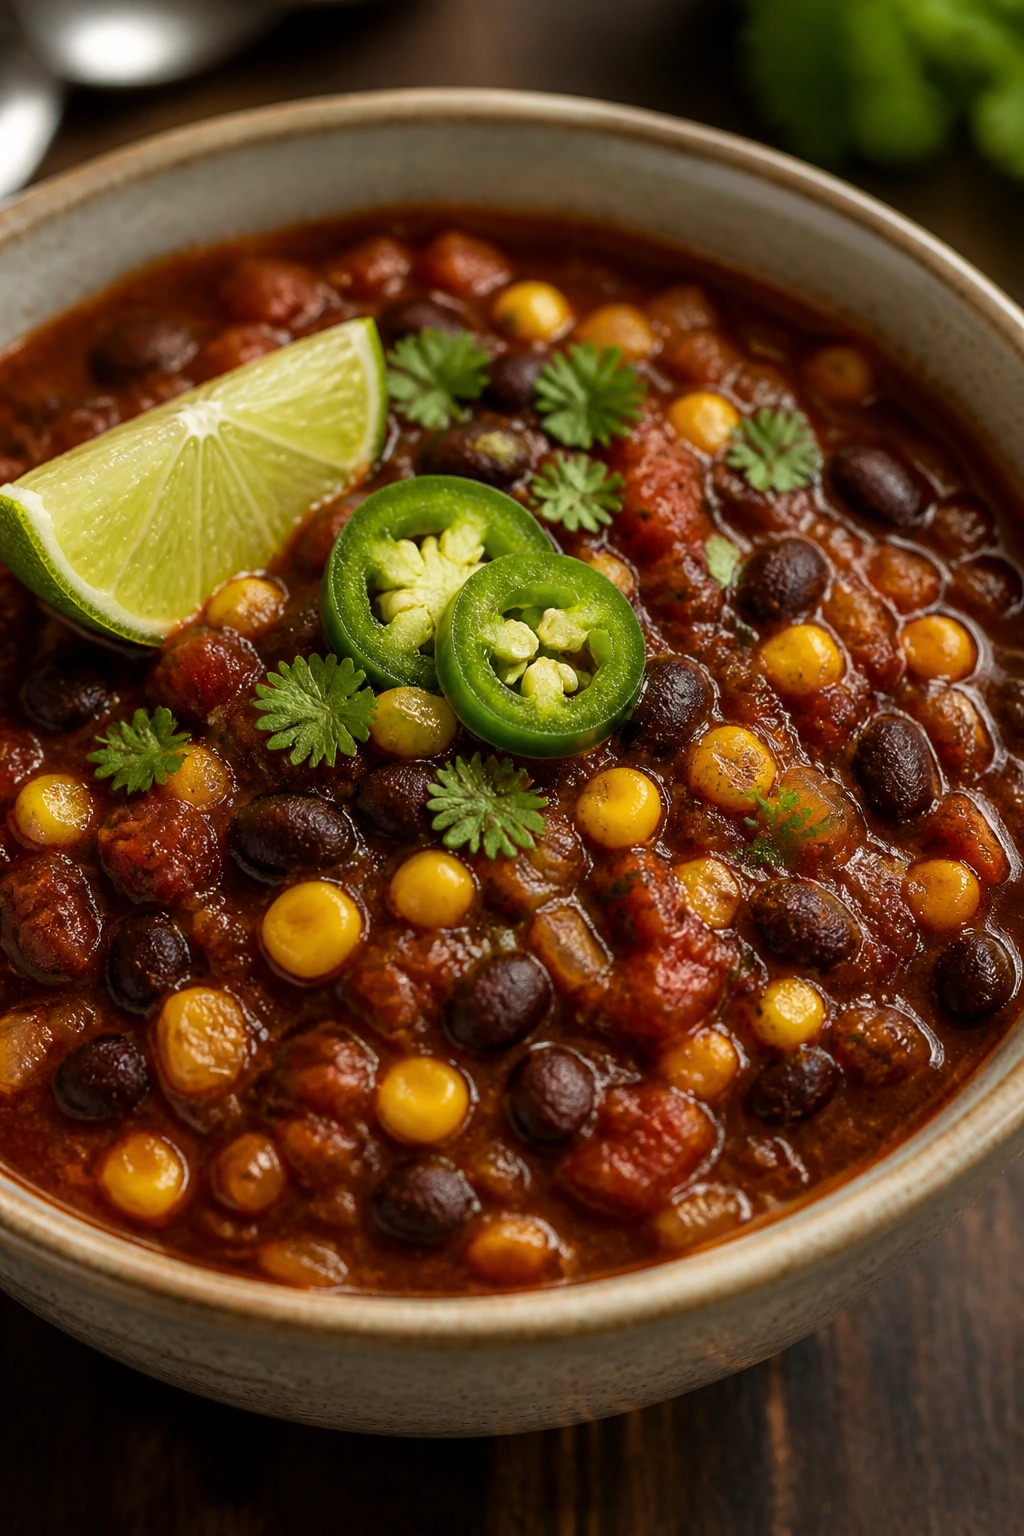
This one is smoky, bright, and a little sweet from the corn. The chipotles bring a low, steady heat that lingers without taking over, and the black beans give the chili a dense, almost creamy feel when they simmer long enough. It’s a vegetarian bowl with enough personality to hold its own in a room full of meat chilis.
Why It Works:
Chipotle in adobo has a huge amount of flavor packed into a small can, which is why this chili tastes like it took far longer than it did. Black beans naturally soften into the broth, and a mash near the end turns the whole thing thick and rich without cream. The corn brightens every spoonful, and lime at the end keeps the smoky notes from getting too dark.
Key Ingredients:
- 2 tablespoons olive oil
- 1 large onion, diced
- 1 poblano pepper, diced
- 3 garlic cloves, minced
- 2 chipotle peppers in adobo, minced, plus 1 tablespoon adobo sauce
- 1 tablespoon chili powder, 2 teaspoons cumin, and 1 teaspoon smoked paprika
- 2 cans black beans, drained and rinsed
- 1 can corn, drained, or 1 1/2 cups frozen corn
- 2 cans diced tomatoes
- 2 cups vegetable broth
- 1 lime, juiced
- Fresh cilantro and avocado for serving
Quick Steps:
-
Start with the vegetables: Heat the olive oil in a pot over medium heat. Add the onion and poblano and cook for 6 minutes until softened.
-
Add the garlic and chipotle: Stir in the garlic, chipotles, adobo sauce, chili powder, cumin, and smoked paprika. Cook for 30 seconds.
-
Pour in the base: Add the black beans, corn, diced tomatoes, and vegetable broth. Stir and bring to a simmer.
-
Let it cook down: Simmer uncovered for 30 minutes, stirring now and then. The broth should look darker and a little thicker.
-
Thicken naturally: Mash about 1 cup of the beans against the side of the pot.
-
Brighten and serve: Stir in the lime juice, taste for salt, and top with cilantro and avocado.
Tips and Variations:
- If you want more smoke, add an extra teaspoon of smoked paprika before serving.
- A handful of crushed tortilla chips stirred into each bowl gives it extra body.
- This chili holds well in a slow cooker on low for a couple of hours.
10. Pulled Pork Chili Verde
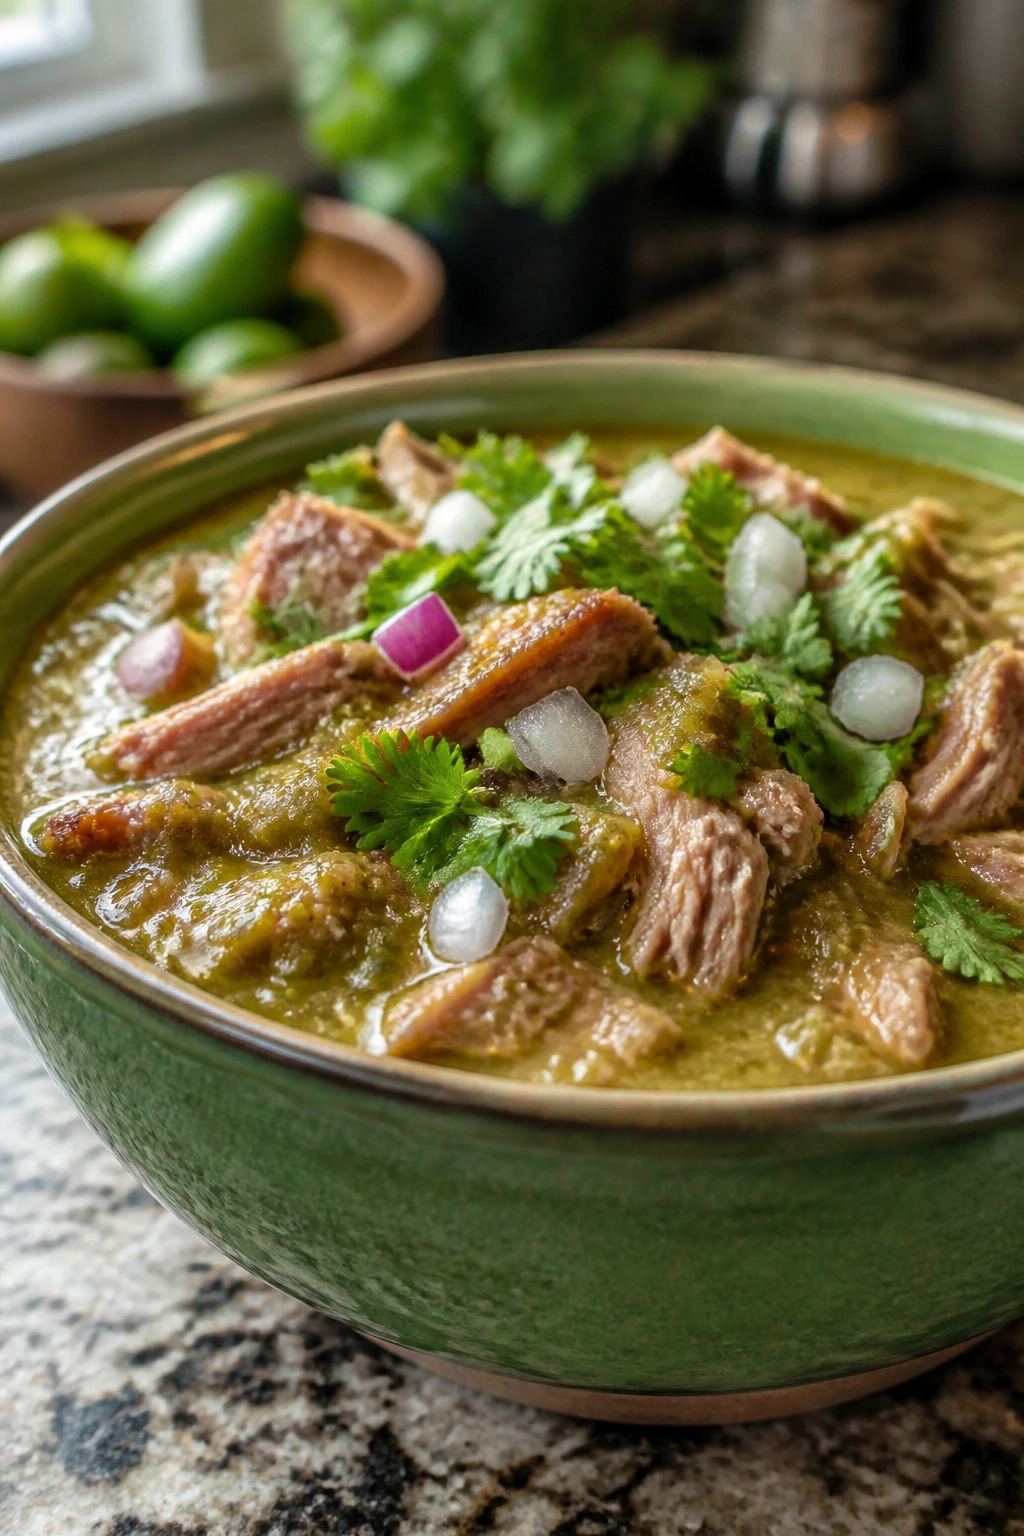
Green chili has a different mood from the red pots. It’s bright, tangy, and savory, with tomatillos giving the broth a sharp edge that cuts through rich pork. I like this one when the table already has heavy snacks around it and you want a bowl that feels lively instead of weighed down.
Why It Works:
Pork shoulder brings fat and collagen, which means the meat gets tender during the simmer and helps flavor the broth from the inside out. Salsa verde, poblanos, and cumin create a green chile base that tastes fresh, not grassy. White beans or hominy fit nicely here because they absorb the sauce without competing with it.
Key Ingredients:
- 2 tablespoons oil
- 2 pounds pork shoulder, cut into 1-inch cubes
- 1 large onion, chopped
- 2 poblano peppers, seeded and diced
- 4 garlic cloves, minced
- 1 jar salsa verde, about 16 ounces, or 2 cups tomatillo salsa
- 3 cups chicken broth
- 1 teaspoon cumin and 1 teaspoon dried oregano
- 1 can cannellini beans or hominy, drained and rinsed
- 1 lime, juiced
- Fresh cilantro for serving
Quick Steps:
-
Brown the pork: Heat the oil in a heavy pot over medium-high heat. Season the pork with salt and brown it in batches until all sides pick up color, about 6 minutes per batch.
-
Cook the vegetables: Add the onion and poblano peppers to the pot and cook for 5 minutes until softened. Stir in the garlic for 30 seconds.
-
Build the verde base: Add the salsa verde, chicken broth, cumin, and oregano. Return the pork to the pot and stir well.
-
Simmer until tender: Bring the pot to a low simmer, cover, and cook for 70 to 90 minutes, stirring occasionally, until the pork is fork-tender.
-
Add the beans: Stir in the cannellini beans or hominy and simmer for 10 more minutes.
-
Finish with acid: Stir in the lime juice and taste for salt. Serve with cilantro and warm tortillas.
Tips and Variations:
- If you want a smoother sauce, blend one cup of the chili before adding it back.
- This is a strong candidate for a toppings bar with radishes and queso fresco.
- Leftovers are excellent with eggs the next morning, if any remain.
11. Pumpkin Turkey Chili
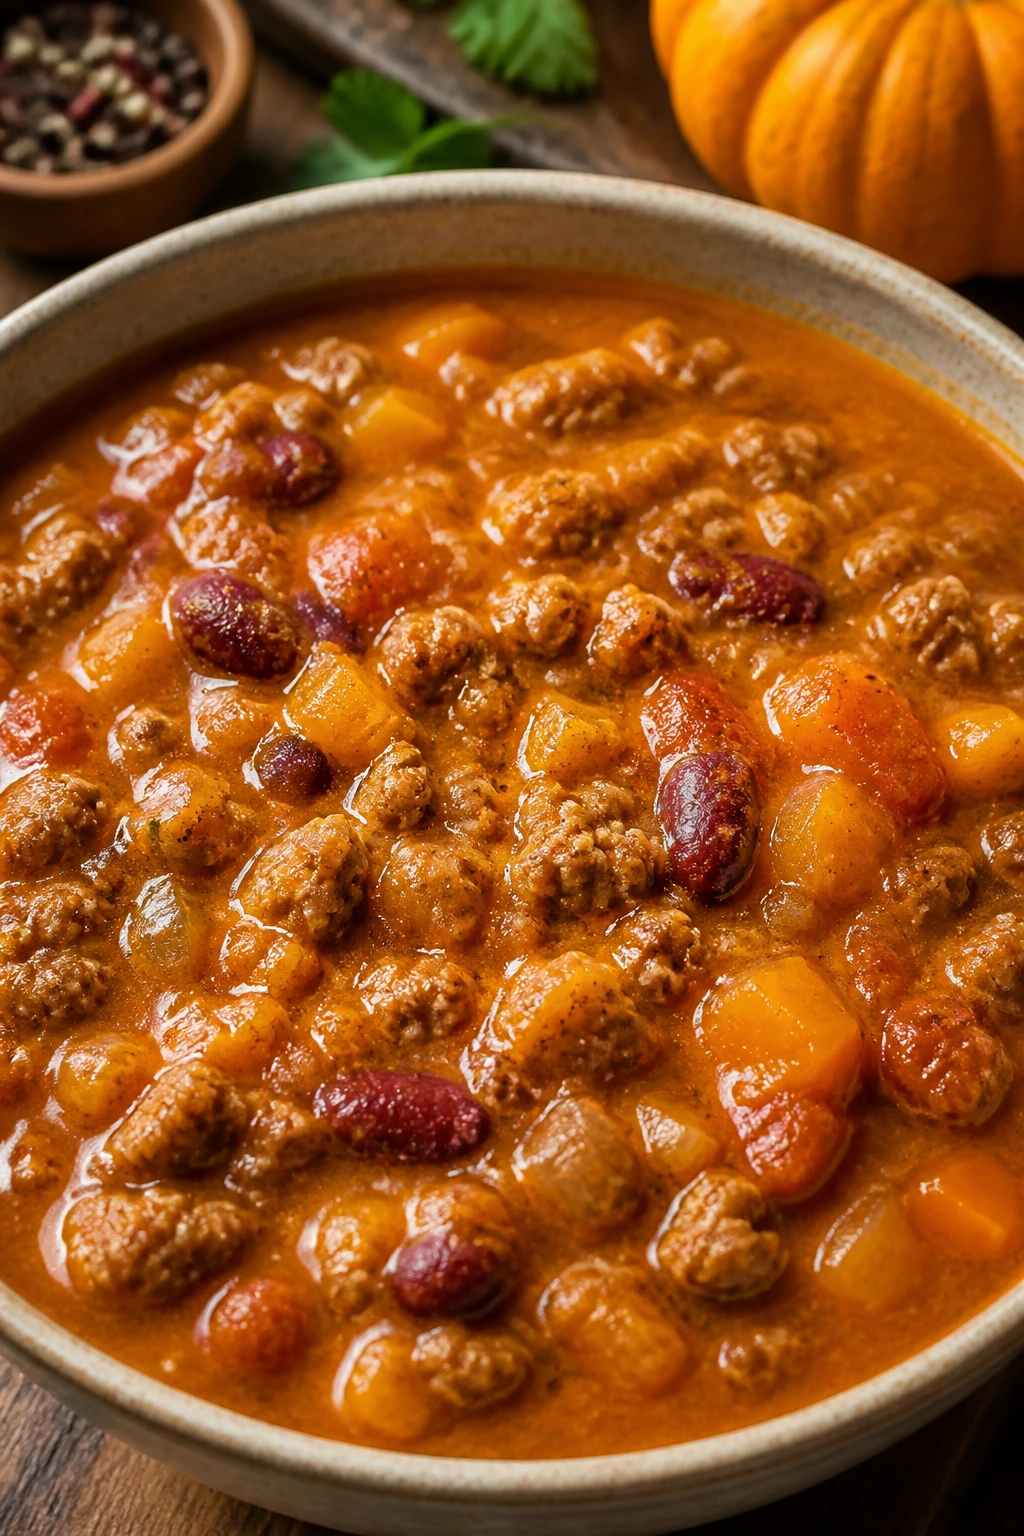
Pumpkin chili has a strange reputation, mostly because people assume it tastes like pie filling with beans. It doesn’t. What pumpkin does here is smooth out the broth and make the chili taste fuller, almost rounder, while the turkey keeps everything light enough for a room full of snackers who still want a real dinner.
Why It Works:
Pumpkin puree acts like a quiet thickener, so you get body without adding flour or a lot of extra fat. Turkey gives you a lean base, but it needs good seasoning and enough tomato to keep the flavor from feeling thin. The spice mix is what saves the dish from blandness; cinnamon and chili powder create warmth, while vinegar at the end keeps the pumpkin from tasting sleepy.
Key Ingredients:
- 2 tablespoons olive oil
- 2 pounds ground turkey
- 1 large onion, diced
- 1 red bell pepper, diced
- 3 garlic cloves, minced
- 2 tablespoons chili powder, 2 teaspoons cumin, and 1 teaspoon cinnamon
- 1 cup pumpkin puree, not pumpkin pie filling
- 2 cans diced tomatoes
- 1 can kidney beans, drained and rinsed
- 1 can black beans, drained and rinsed
- 2 cups chicken broth
- 1 tablespoon apple cider vinegar
- Pepitas or sour cream for serving
Quick Steps:
-
Brown the turkey: Heat the oil in a pot over medium-high heat. Add the turkey and cook for 6 to 8 minutes until fully cooked and lightly browned.
-
Add the vegetables: Stir in the onion and bell pepper and cook for 4 to 5 minutes. Add the garlic for 30 seconds.
-
Season early: Sprinkle in the chili powder, cumin, and cinnamon. Stir for 30 seconds so the turkey gets coated.
-
Build the chili: Add the pumpkin puree, diced tomatoes, kidney beans, black beans, and chicken broth. Stir well until the pumpkin disappears into the liquid.
-
Simmer and thicken: Cook for 30 to 35 minutes over low heat, uncovered or partly covered, until the chili looks dense and glossy.
-
Finish with lift: Stir in the vinegar and taste for salt and pepper. Top with pepitas or a spoonful of sour cream.
Tips and Variations:
- A pinch of smoked paprika gives the pumpkin a deeper edge.
- If the pumpkin flavor feels too soft, add a little more vinegar rather than more spice.
- This one freezes well, though the texture is best if you reheat it gently on the stove.
12. Venison and Mushroom Chili
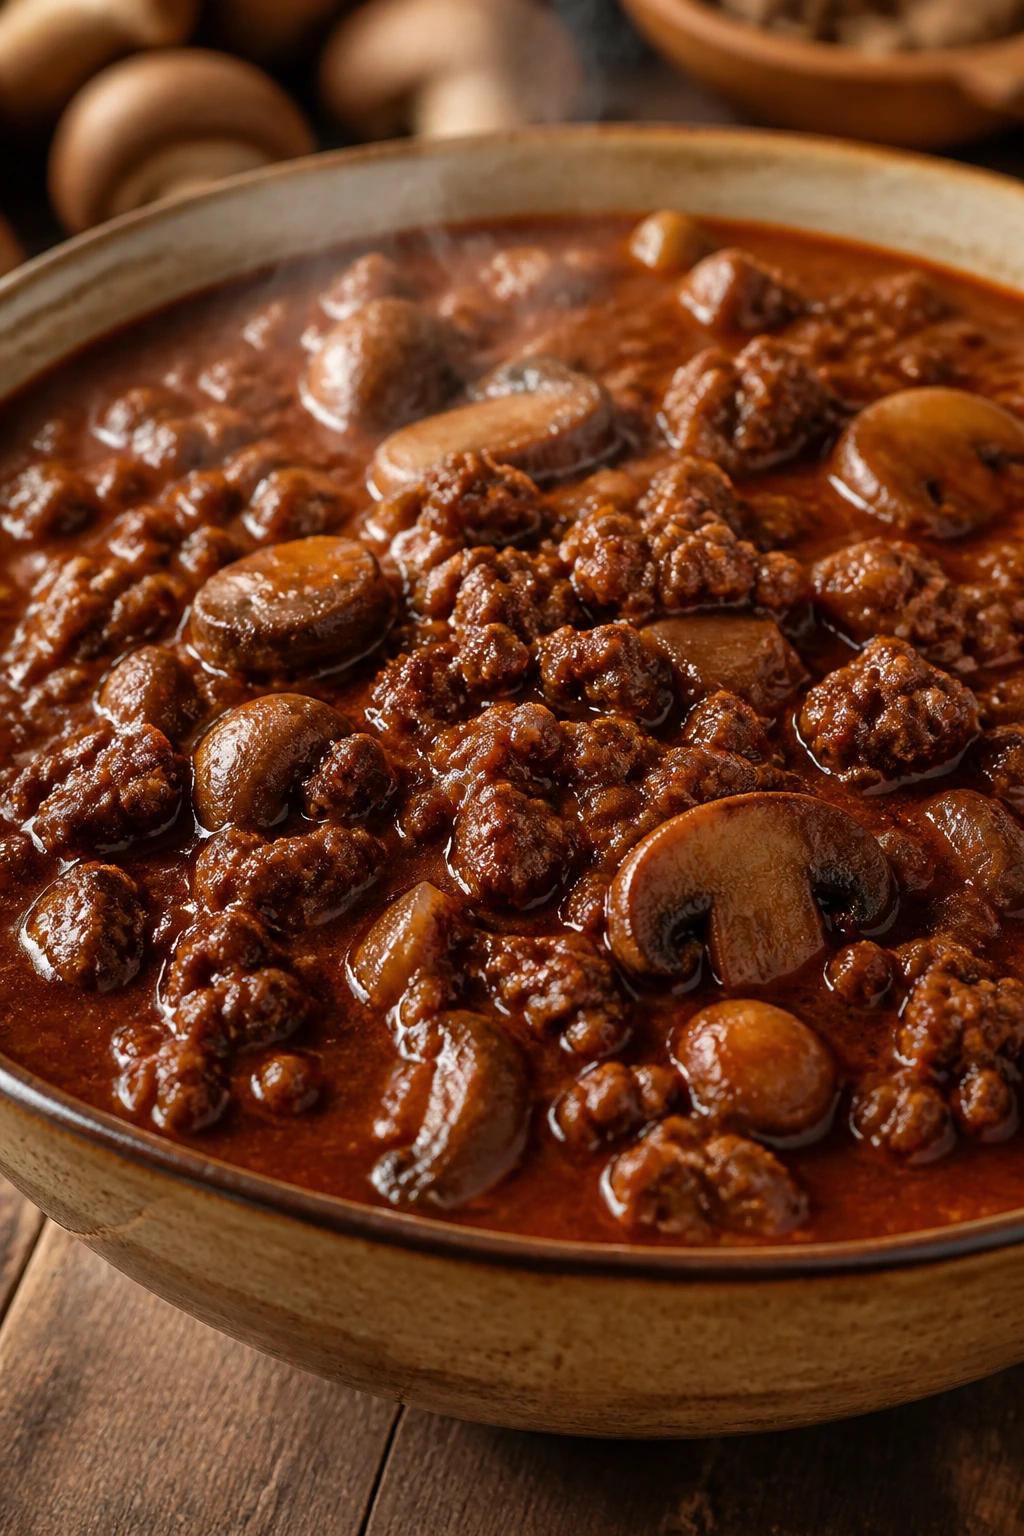
Venison chili has a clean, lean flavor that needs a little help, and mushrooms are the help I like best. They bring moisture, a meaty chew, and a dark savory note that makes the whole pot taste fuller than the ingredient list suggests. This is the bowl for people who like their chili rustic, earthy, and not remotely precious.
Why It Works:
Ground venison can dry out if you rush it, so mushrooms and tomato paste step in to add richness and texture. The mushrooms also brown beautifully, which gives the chili a deeper flavor base before the liquid goes in. Because venison is so lean, the broth needs a little more attention at the end; a splash of vinegar or Worcestershire sharpens the flavor and keeps the bowl from feeling muddy.
Key Ingredients:
- 2 tablespoons oil
- 1 pound ground venison
- 8 ounces cremini mushrooms, finely chopped
- 1 large onion, diced
- 3 garlic cloves, minced
- 2 tablespoons chili powder, 2 teaspoons cumin, and 1 teaspoon smoked paprika
- 2 tablespoons tomato paste
- 2 cans crushed tomatoes
- 2 cups beef broth
- 1 can kidney beans, drained and rinsed
- 1 tablespoon Worcestershire sauce
- 1 tablespoon red wine vinegar
Quick Steps:
-
Brown the mushrooms: Heat the oil in a wide pot over medium-high heat. Add the mushrooms and cook for 5 to 6 minutes until they release their moisture and start to brown.
-
Cook the venison: Add the ground venison and onion to the pot and cook for 6 to 8 minutes, breaking up the meat until it is browned and no longer pink.
-
Build the seasoning base: Stir in the garlic, chili powder, cumin, smoked paprika, and tomato paste. Cook for 1 minute.
-
Add the liquids: Pour in the crushed tomatoes, beef broth, kidney beans, and Worcestershire sauce. Stir well and bring to a simmer.
-
Slow the pot down: Reduce the heat and simmer for 35 to 45 minutes, stirring occasionally, until the chili thickens and the mushrooms are soft.
-
Finish cleanly: Stir in the red wine vinegar, taste for salt, and serve hot.
Tips and Variations:
- If you’re using wild venison, do not overcook it at the end; just warm it through.
- A little chopped parsley on top gives the dark bowl a fresh finish.
- If you want more richness, add a small splash of beef broth right before serving rather than more tomato.
Why Chili Works So Well on a Game-Day Table
Chili has the rare advantage of being casual and strategic at the same time. It can simmer while people arrive, it can sit on low heat without falling apart, and it can absorb a whole mess of toppings without losing its own identity. That matters when you’re feeding a room full of people who are talking over each other, checking the score, and reaching for chips between plays.
A good chili table also gives you control. Set out one mild pot and one smoky one, or keep the base moderate and let hot sauce, jalapeños, and extra pepper live on the side. If you’re holding chili for more than a short stretch, keep it at 140°F or hotter, stir it now and then, and add a splash of broth if it starts to tighten too much. That little bit of attention is enough.
And honestly, that’s why chili keeps winning. It is sturdy food. It feeds people without acting delicate about it, and that’s a quality I never get tired of.
Tools That Make Big-Batch Chili Easier
- Heavy Dutch oven or stockpot: The best all-purpose vessel for browning meat and simmering chili without scorching the bottom.
- Large slow cooker: Great for tailgate-style serving or long holding times; use it once the meat and aromatics are browned.
- Wide wooden spoon or spatula: Helpful for scraping up browned bits and mashing beans against the side of the pot.
- Sharp chef’s knife: Makes quick work of onions, peppers, and anything else that needs clean chopping.
- Cutting board: A large board keeps prep from feeling cramped when you’re cooking for a crowd.
- Can opener: Not glamorous, but very necessary when half the recipe lives in cans.
- Measuring spoons and cups: Chili tolerates improvisation, but spice and liquid ratios still matter.
- Ladle: Keeps serving neat and helps you portion evenly into bowls.
- Potato masher or immersion blender: Optional, but useful when you want a thicker bean chili without adding flour.
- Airtight storage containers: Important if you want leftovers that don’t taste like the fridge.
Buying the Right Meat, Beans, and Chiles
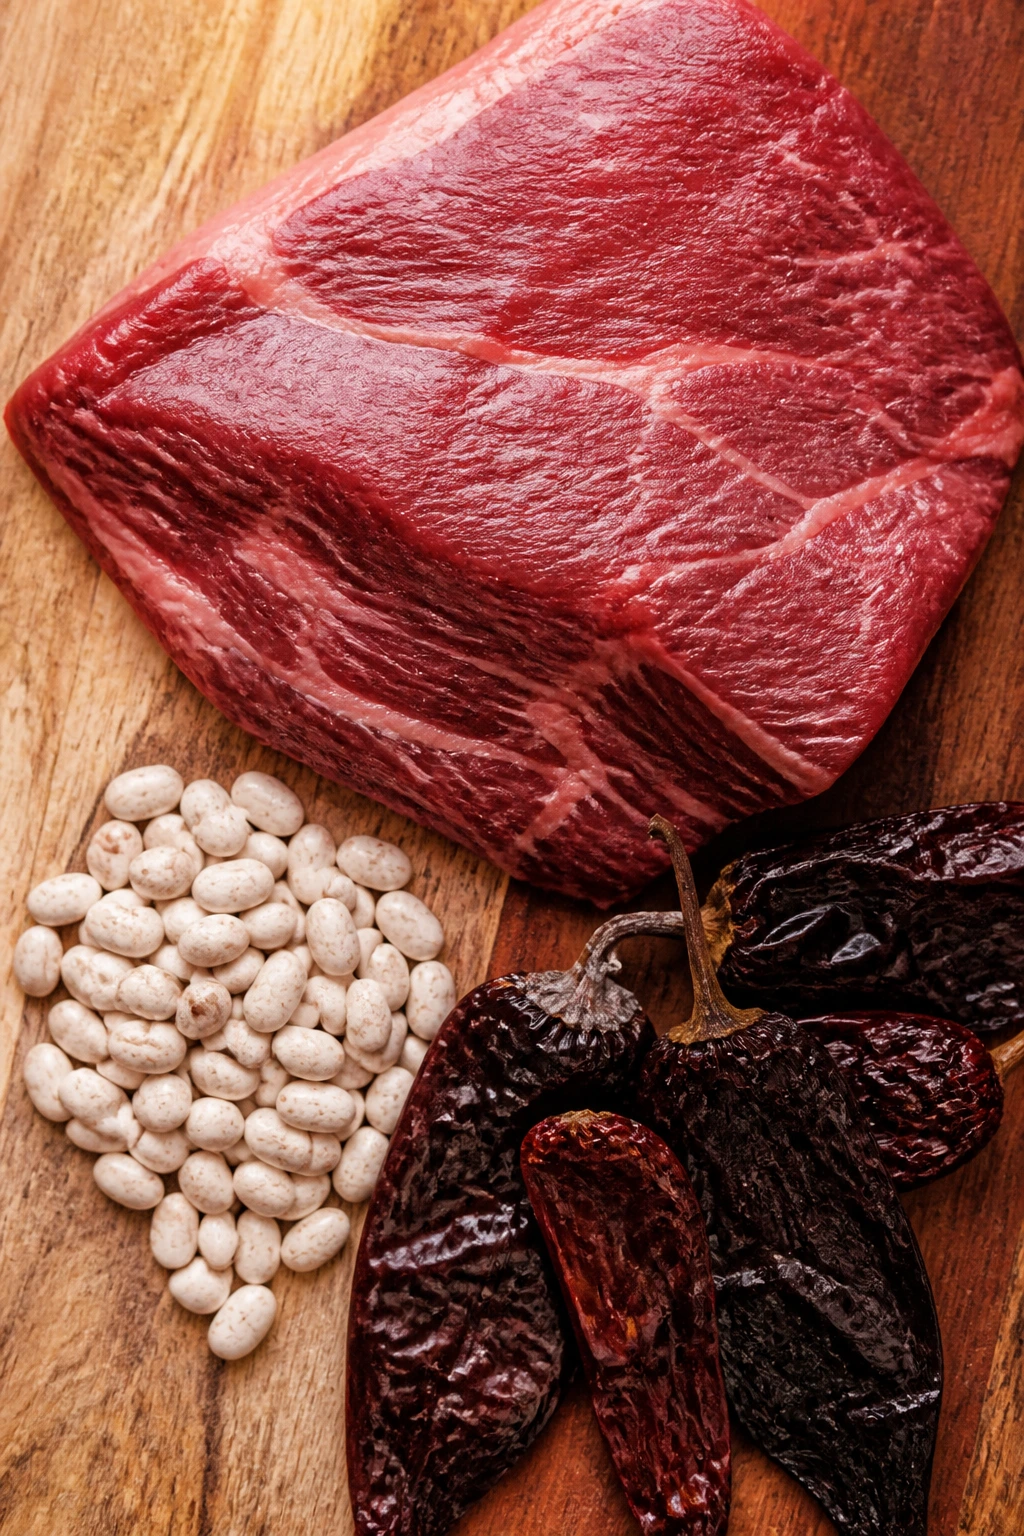
The meat you choose changes the whole mood of the pot. Ground beef with some fat gives you a richer, more classic chili; lean turkey works, but it needs a stronger hand with spice and acid; chuck roast or brisket rewards patience with a deeper, more luxurious texture; pork shoulder brings a softer, almost buttery richness to green chili. If you’re using ground meat, look for enough fat to brown properly. Too lean, and the pot starts tasting dry before you’re halfway done.
Beans deserve more respect than they usually get. Canned beans are fine, and for chili they’re often the right call because they’re already tender and ready to absorb flavor. Rinse them unless the recipe depends on the canning liquid for thickness. If sodium is a concern, buy low-sodium beans and stock, then season the pot yourself at the end.
Tomatoes and chiles need one simple test: smell them. Good canned tomatoes should taste bright rather than metallic, and a decent chili powder should smell warm and peppery the second you open it. Chipotles in adobo should look dark and glossy, not dry or shriveled. If you buy dried chile powders that smell dusty and weak, the whole chili suffers. Fresh spices are not a luxury here. They are the difference between a pot that tastes brown and a pot that tastes alive.
How to Serve These Chili Dinners
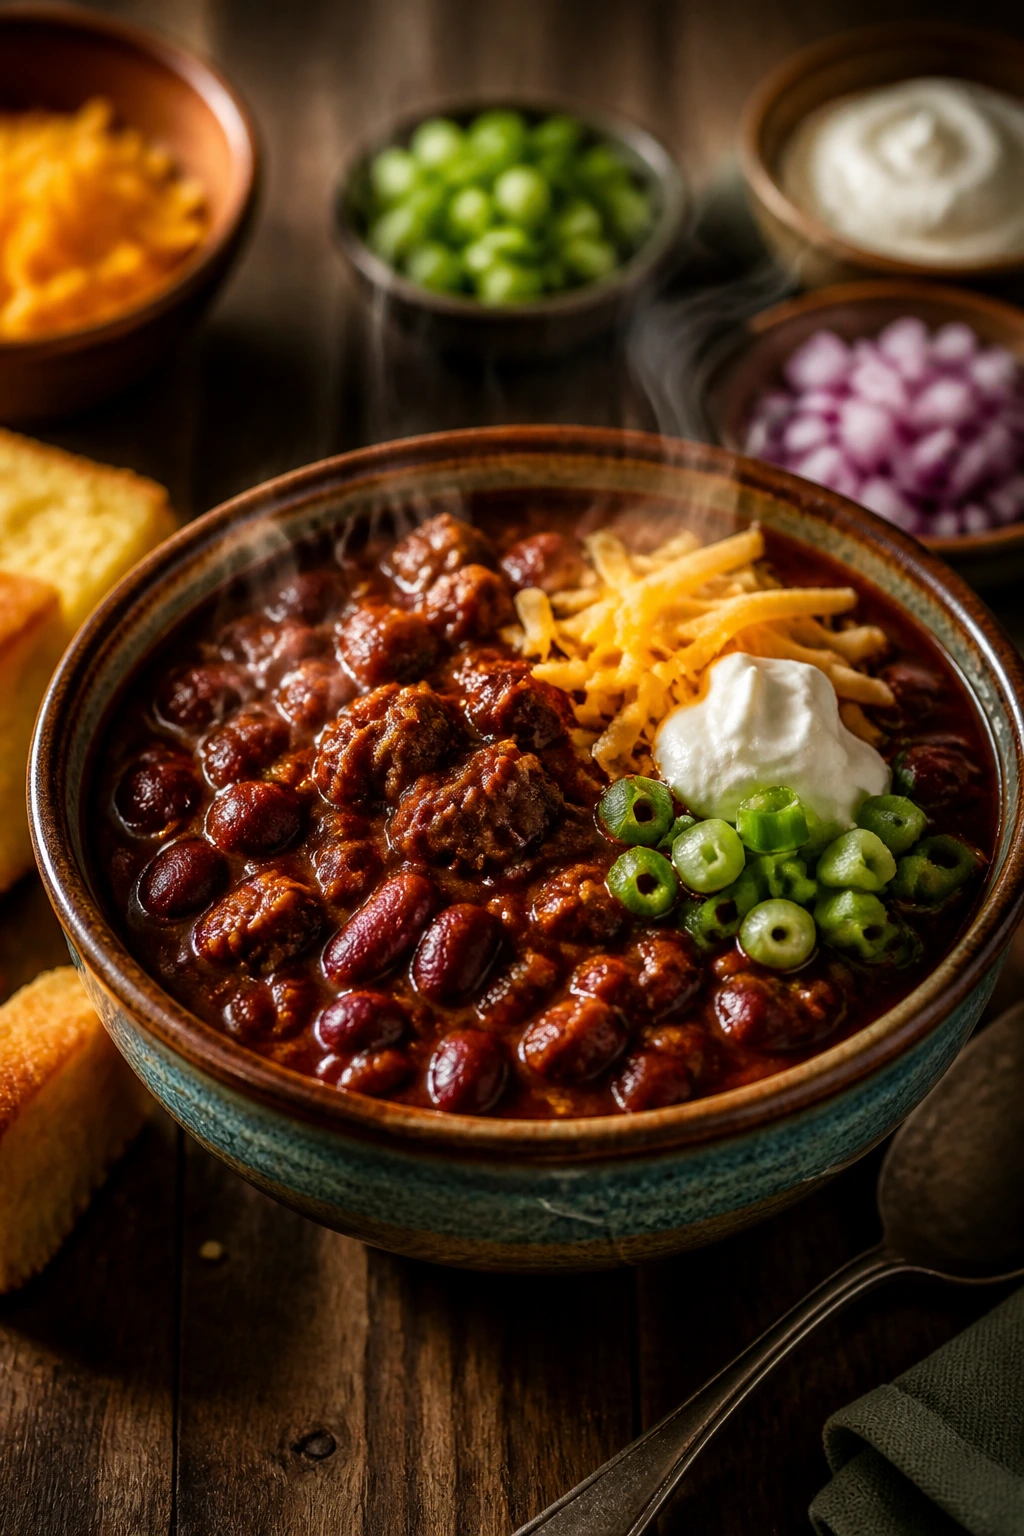
Presentation:
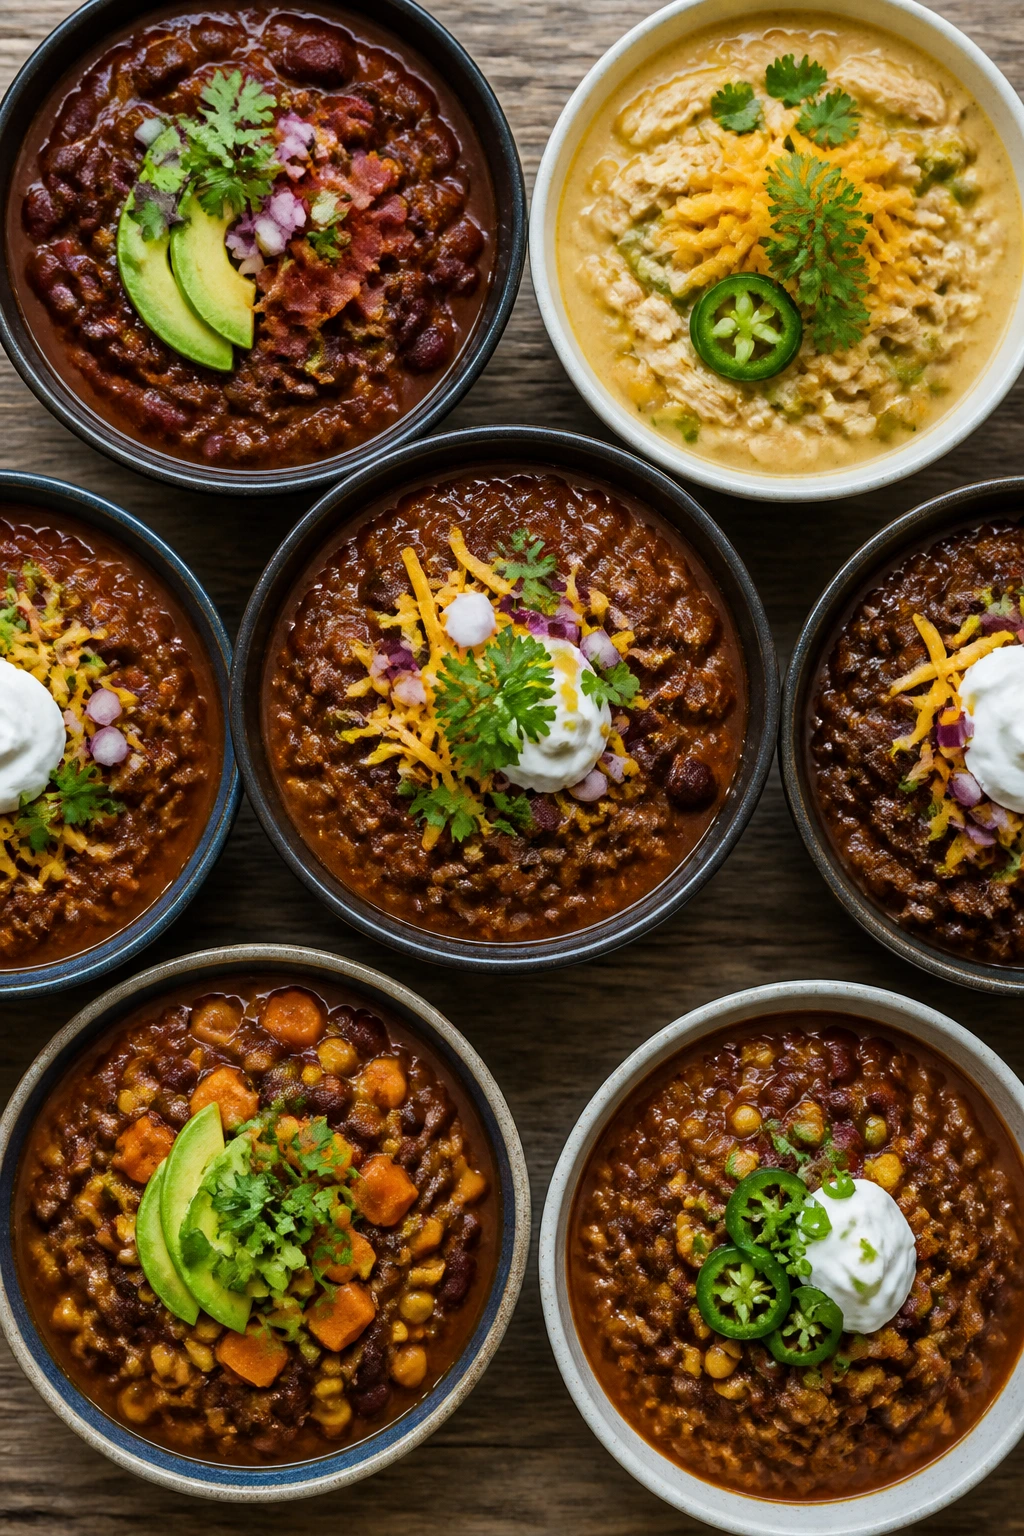
Use wide, pre-warmed bowls if you can. Chili looks better and stays hotter when it has space to settle instead of being crammed into a mug. I like a small pile of toppings on one side of each bowl rather than burying everything under cheese at the start. People eat with their eyes first, even at a messy game-day table.
Accompaniments:
Cornbread is the obvious good choice, and there’s a reason it keeps showing up. Tortilla chips, warm flour tortillas, baked potatoes, rice, or a simple green salad all work depending on how heavy the chili is. White chicken chili likes tortilla chips and lime. Texas-style beef chili wants cornbread or saltines. Cincinnati chili needs spaghetti, and nobody should apologize for that.
Portions:
Plan on about 1 1/2 cups per adult if chili is the main dinner, a little less if you’ve got a big spread of snacks and sides. For a crowd, figure that one batch should serve 6 to 8 people comfortably. If you’re scaling up, increase the spices a little less aggressively than the meat and liquid; a doubled pot usually needs a 1 1/2-times increase in chile powder, not always a full double.
Beverage Pairing:
Cold beer makes sense with smoky beef chili, especially something crisp and plain. For milder bowls, sparkling water with lime or a simple iced tea keeps the meal from feeling too heavy. If you’re serving a green chile or chicken chili, a light lager or a citrusy nonalcoholic drink can keep the plate feeling bright.
Small Tweaks That Change the Whole Pot
Flavor Enhancement:
A final spoonful of vinegar, lime juice, or even a little pickled jalapeño brine can wake up a pot that tastes sleepy. Acid is not decoration here. It sharpens meat, trims sweetness, and makes beans taste cleaner.
Customization:
Want more smoke? Add smoked paprika or a spoon of chipotle adobo. Want more body? Mash beans, add masa harina, or let the pot simmer uncovered a little longer. Want a softer chili for mixed crowds? Cut the cayenne and serve hot sauce on the side so the people who want heat can build their own.
Serving Suggestions:
Chopped onion, shredded cheese, cilantro, sour cream, avocado, tortilla strips, and lime wedges do more than decorate the bowl. They change the texture every time you take a bite. That’s why chili bars work so well; they turn one recipe into a dozen small choices.
Make-It-Yours:
For dairy-free bowls, skip the sour cream and use avocado or a cashew crema. For gluten-free chili, check the broth, Worcestershire, and beer, then use masa harina instead of flour if you need thickening. For low-carb tables, lean into meat-forward pots and use extra peppers, mushrooms, or zucchini rather than beans.
Make-Ahead, Storage, and Reheating Guidance
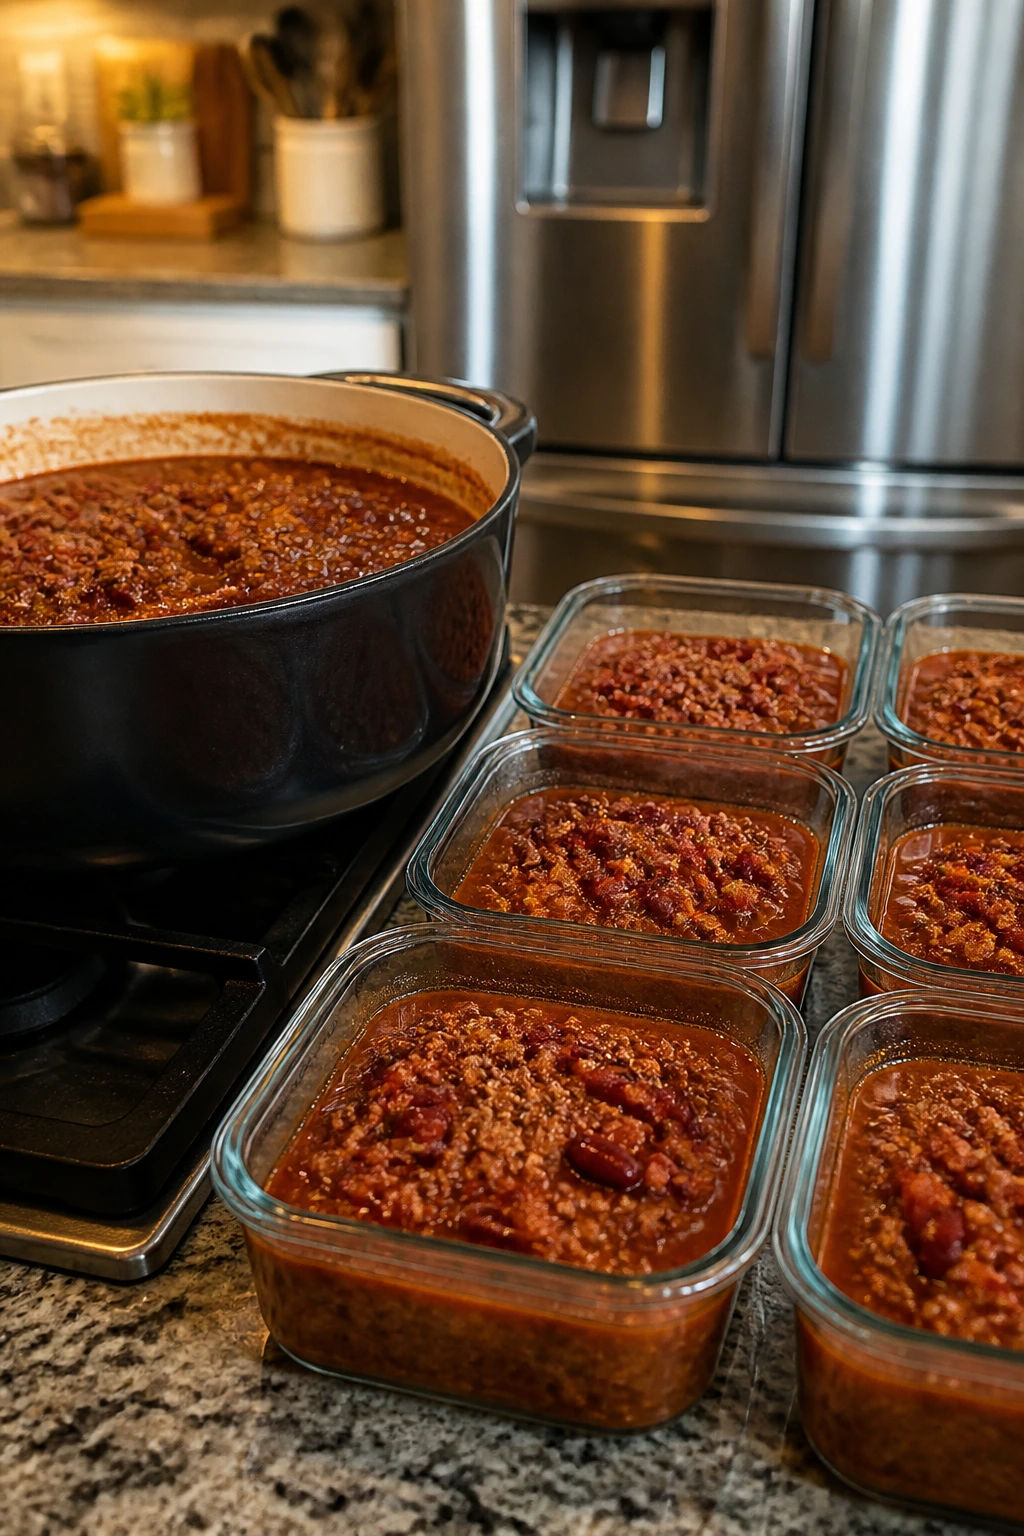
Chili is one of the easiest big-batch dinners to plan ahead because it behaves well in the fridge and freezer. Most meat- and bean-based chilis keep for 3 to 4 days refrigerated in a covered container, and they freeze for up to 3 months if you cool them quickly and pack them in airtight portions. Let the chili cool for no more than 2 hours before refrigerating, and if you’re freezing it, portion it into meal-size containers so you’re not thawing a giant block later.
The stove is the best reheating method for nearly every chili here. Use low to medium-low heat, stir often, and add a splash of broth or water if the pot has tightened up. For white chicken chili or any chili with cream cheese or sour cream, reheat gently and stir in fresh dairy only after the pot is hot. That keeps the texture smooth instead of grainy.
Microwave reheating works fine for single bowls, but cover the bowl loosely and stir halfway through so the heat doesn’t collect in one corner. For a party, a slow cooker on low or warm is the cleanest hold. Stir every 20 to 30 minutes and keep the lid on when you can. If a chili starts to get too thick during holding, add broth in small splashes rather than all at once. The goal is looseness, not soup.
One more practical detail: bean chilis and tomato-based chilis often taste even better the next day, while creamy versions can lose a little charm if they’re frozen with the dairy already mixed in. If you know a batch is destined for the freezer, hold the sour cream and extra cheese until serving time.
Variations and Adaptations to Try

The No-Bean Red Pot:
If your crowd prefers a bean-free bowl, start with beef chuck or ground beef and lean on tomatoes, broth, and a little masa harina for texture. This works especially well for Texas-style chili and beer-braised beef chili. The flavor gets denser, and the pot feels more like a pure meat stew.
The Milder Family Batch:
Pull back on cayenne, jalapeño, and chipotle, then serve hot sauce on the side. This is the easiest way to keep a chili crowd-friendly without flattening the flavor. Smoked paprika, cumin, and lime still carry enough personality to keep the bowl from tasting shy.
The Vegetarian Pantry Bowl:
Use black beans, kidney beans, pinto beans, corn, peppers, and mushrooms, then thicken with bean mash or masa harina. This path works beautifully when you want a pot that costs less and feeds more. It also holds up well on a buffet, which is useful when people keep drifting back for more.
The Creamy White Swap:
For chicken chili, add cream cheese, sour cream, or a dairy-free cashew blend at the end. Keep the broth modest and let beans do some of the thickening. This gives you a softer, smoother bowl that pairs well with tortilla chips and lime.
The Smoky Heat-Lover’s Version:
Add chipotle in adobo, extra smoked paprika, or a little dark beer to the base. That combination gives the chili a deeper, rounder burn instead of a sharp one. It’s the right move when your crowd likes heat but doesn’t want the whole bowl to taste like a dare.
Common Mistakes to Avoid
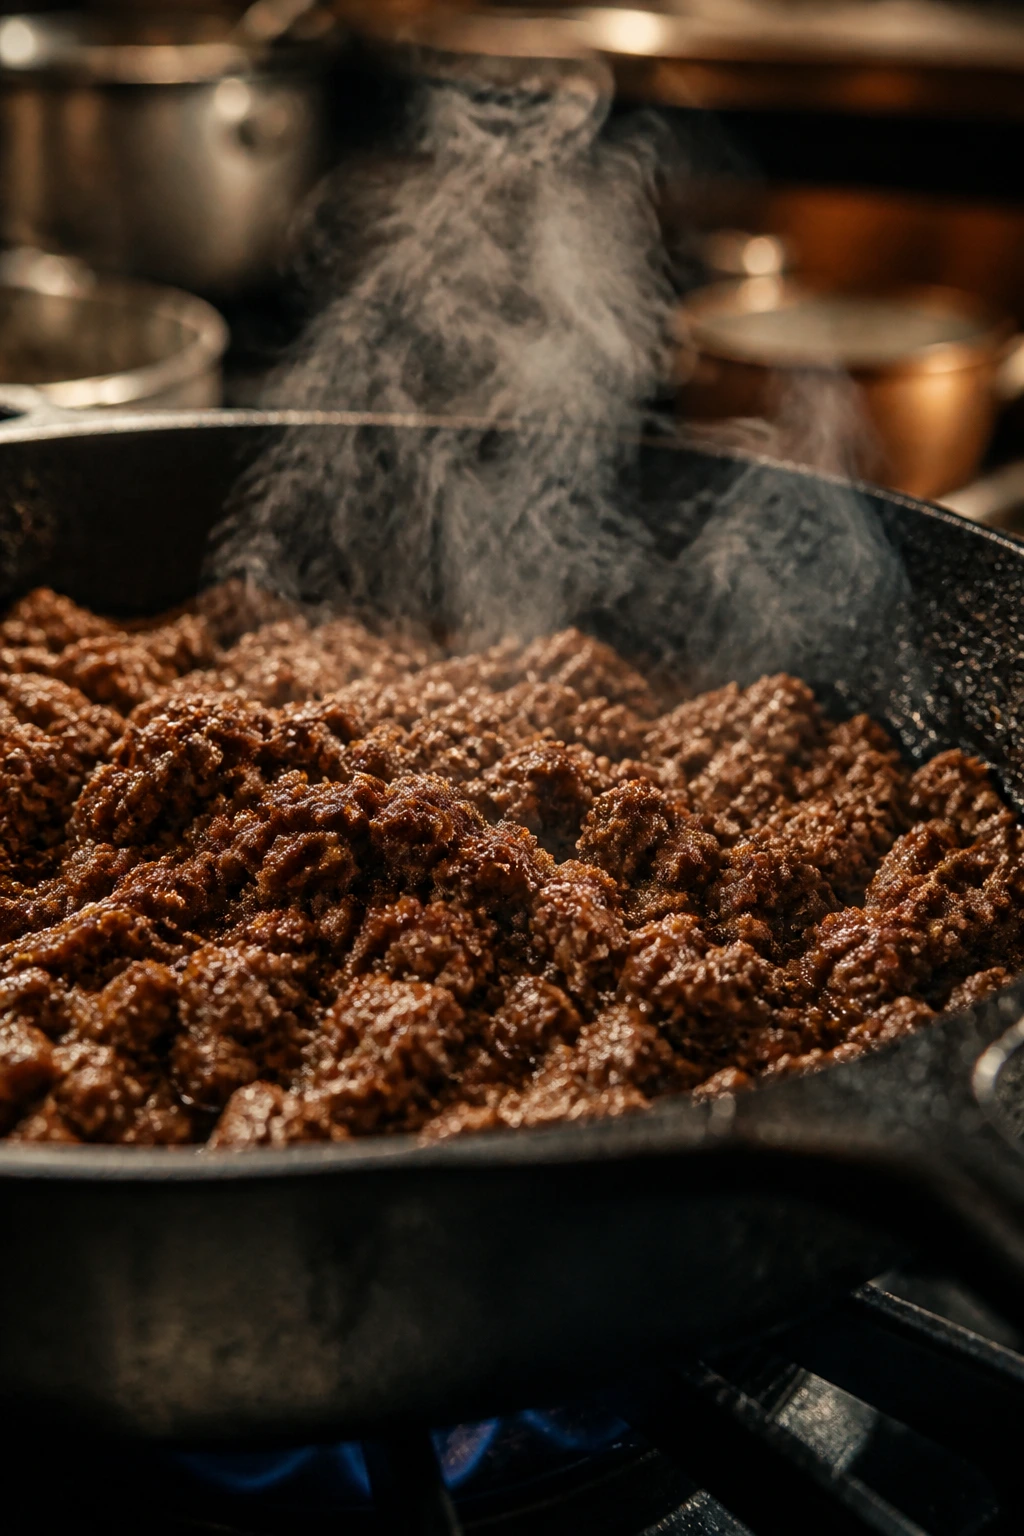
Skipping the browning step:
If the meat goes into the pot pale, the chili usually tastes pale too. Brown in batches and give the meat room to color; that browned bottom is where a lot of the flavor lives. Crowding the pan makes the meat steam, and steamed meat is the enemy of good chili.
Adding too much liquid too soon:
A thin chili is easy to create and annoying to fix. Start with the liquid amount listed, simmer uncovered if needed, and only add more broth when the pot has already reduced a bit. Chili thickens as it rests, so it usually needs less liquid than you think.
Forgetting acid at the end:
Without vinegar, lime, or another bright finish, chili can taste heavy and flat. A small splash right before serving makes the meat taste richer and the beans taste cleaner. Do not skip this if the pot feels dull.
Stirring in dairy too early:
Cream cheese, sour cream, and heavy cream can split if they cook too hard. Lower the heat before you add them, or stir them in after the pot comes off the burner. That small patience step saves the whole texture.
Underseasoning after simmering:
Chili changes as it cooks, and salt that seemed right at minute 10 may vanish by minute 40. Taste at the end, not just at the start. A final salt check and a little pepper often make the difference between “fine” and “I need another bowl.”
Questions People Actually Ask About Crowd Chili
Can I make these chili dinners in a slow cooker?
Yes. Brown the meat and aromatics first, then move everything to the slow cooker and cook on low until the flavors come together, usually 4 to 6 hours depending on the recipe. Creamy add-ins like sour cream or cream cheese should go in near the end.
Which chili holds up best for a buffet?
Beef-and-bean chili, vegetarian bean chili, and Texas-style beef chili are the strongest buffet choices because they stay thick and stable. White chicken chili works too, but it needs gentler heat and a little more attention so the dairy stays smooth. Keep everything above 140°F if it’s sitting out.
How do I thicken chili without flour?
Mash some of the beans, simmer the pot uncovered, or add a little masa harina mixed with water. Crushed tortilla chips also work in a pinch, though they add a different texture. The easiest fix is often just giving the pot 10 more minutes.
Can I make chili the day before game day?
Absolutely, and I usually prefer it that way. The flavors settle, the seasoning becomes easier to judge, and the pot is one less thing to worry about during the rush. Reheat gently and add fresh toppings right before serving.
What if my chili tastes flat?
Add salt first, then acid, then a touch more spice if needed. A dull pot is often missing one of those three pieces. A spoonful of vinegar or lime juice can do more than another tablespoon of chili powder.
Can I freeze chili with beans and meat?
Yes. Meat-and-bean chilis freeze very well for up to 3 months in airtight containers. Cream-based versions are best frozen before the dairy goes in, then finished after reheating.
How spicy should I make chili for a mixed crowd?
Aim for moderate heat in the pot itself and put hot sauce, jalapeños, and chipotle sauce on the side. That way the spice lovers can push their bowls where they want, and nobody else has to tap out after three bites. Control belongs at the table, not only in the pot.
What’s the best way to keep chili hot without drying it out?
A slow cooker on warm or low is the easiest option, especially if you stir it every so often and add a splash of broth when it gets too thick. On the stove, keep the heat low and use a heavy pot with the lid cracked slightly. Gentle heat beats a hard boil every time.
A Table Full of Bowls
A good chili spread doesn’t need to be fancy to feel generous. It just needs one or two pots with real flavor, a few bright toppings, and enough patience to let the meat, beans, vegetables, or green chiles settle into their own rhythm. That’s the part I keep coming back to: chili rewards steady hands more than dramatic gestures.
If you’re feeding a crowd, choose the style that fits the room. Smoke for the beef people, lime for the white chili crowd, beans and peppers for the vegetarian bowl, and maybe one spicy wildcard for the person who always asks for “the hot stuff.” Then stop fussing. Chili does better when you let it be chili.
Chili at a Glance
| Recipe | Prep Time | Cook Time | Total Time | Servings | Standout Detail |
|---|---|---|---|---|---|
| Smoked Beef and Bean Tailgate Chili | 20 min | 45 min | 1 hr 5 min | 8 | smoky classic with a thick, spoon-coating finish |
| White Chicken Chili with Roasted Green Chiles | 15 min | 30 min | 45 min | 6 to 8 | creamy, bright, and lime-forward |
| Three-Bean Vegetarian Chili with Sweet Peppers | 20 min | 40 min | 1 hr | 8 | deep bean flavor with sweet pepper color |
| Texas-Style Brisket Chili | 25 min | 2 hr 30 min | 2 hr 55 min | 8 | bold no-bean pot with braised beef richness |
| Turkey and Sweet Potato Chili | 20 min | 35 min | 55 min | 6 to 8 | sweet potato body with a lighter finish |
| Chicken Tortilla Chili | 15 min | 30 min | 45 min | 6 | enchilada-style comfort with tortilla crunch |
| Cincinnati-Style Chili Spaghetti | 20 min | 1 hr 15 min | 1 hr 35 min | 6 to 8 | cinnamon-spiced chili served over spaghetti |
| Beer-Braised Bacon and Beef Chili | 20 min | 1 hr 15 min | 1 hr 35 min | 8 | bacon, beer, and deep smoky beef flavor |
| Black Bean and Corn Chipotle Chili | 15 min | 40 min | 55 min | 6 | smoky vegetarian chili with chipotle heat |
| Pulled Pork Chili Verde | 20 min | 1 hr 20 min | 1 hr 40 min | 8 | bright tomatillo base with tender pork |
| Pumpkin Turkey Chili | 15 min | 40 min | 55 min | 6 to 8 | pumpkin adds body without tasting sweet |
| Venison and Mushroom Chili | 20 min | 1 hr 10 min | 1 hr 30 min | 8 | earthy, lean, and deeply savory |