
Fifteen minutes is a ruthless dinner deadline. There’s no room for a roast that needs an hour, no patience for a pot that wants to simmer, and very little mercy for ingredients that need babysitting. Air fryer dinners work because they strip the process down to the part that matters: thin cuts, hot air, and enough seasoning to make the food taste intentional.
The basket does a peculiar thing with fish, chicken, shrimp, sausage, and vegetables. It dries the surface fast enough to brown it, while the inside stays juicy if you stop cooking at the right moment. That’s why a salmon bite can taste rich without a pan full of butter, and why a pile of peppers can come out with edges that look touched by a grill.
These 18 recipes are built for the real world, not a fantasy kitchen with three extra hands and a clean counter. Some lean on pre-cooked sausage or meatballs, some use thin-cut chicken or fish, and some pair a protein with a fast vegetable so dinner lands as a full plate, not a snack pretending to be one. Good weeknight food should feel brisk, not rushed. The basket earns its keep here.
Why This Set of Air Fryer Dinners Works So Well
-
Fast cuts, not fast guesses: Every recipe uses thin, bite-size, or pre-cooked ingredients so the cooking time stays honest and the center is done when the outside looks ready.
-
One basket, little mess: Most of these dinners need one air fryer basket, one bowl, and a knife, which means the cleanup doesn’t swallow the time you saved.
-
Real dinner portions: These aren’t appetizer ideas dressed up in dinner clothes; each one gives you protein plus vegetables, bread, or a proper filling base.
-
Flexible with what’s in the fridge: If you’ve got salmon, chicken cutlets, shrimp, kielbasa, tofu, or a can of chickpeas, you’ve got a path to dinner.
-
Built for a single layer: Air fryers get cranky when crowded. These recipes respect the airflow, which is the whole reason the food gets crisp instead of soggy.
-
Easy to scale for two or four: Double the ingredients if your basket is big enough, or cook in two rounds and keep the first batch warm in a low oven.
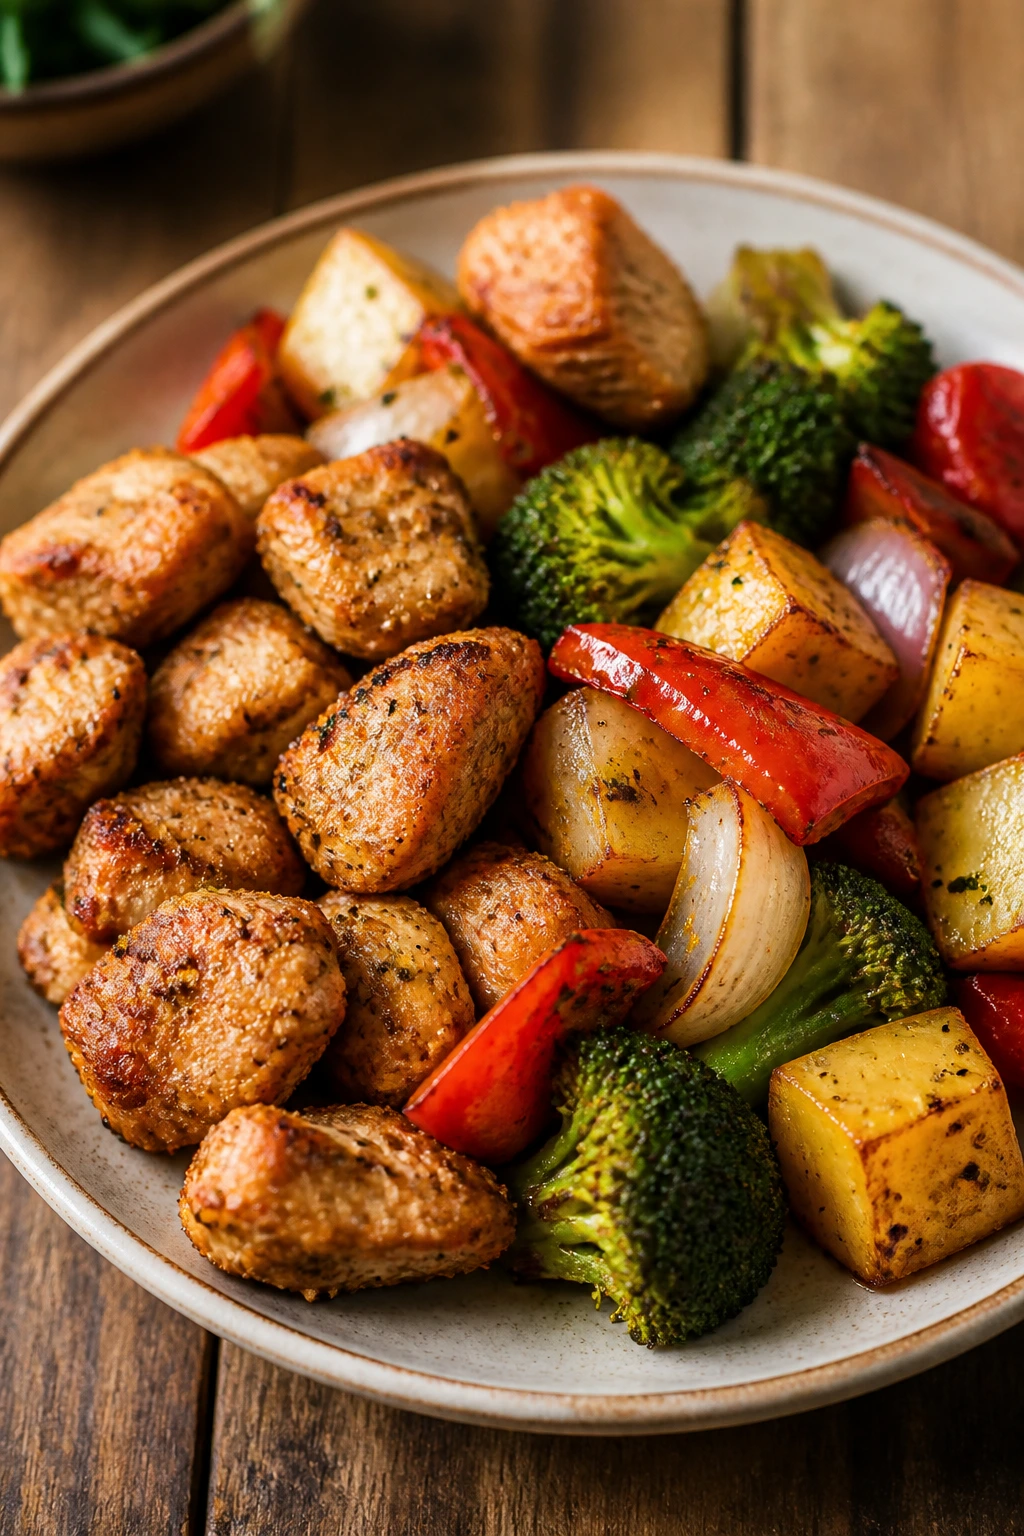
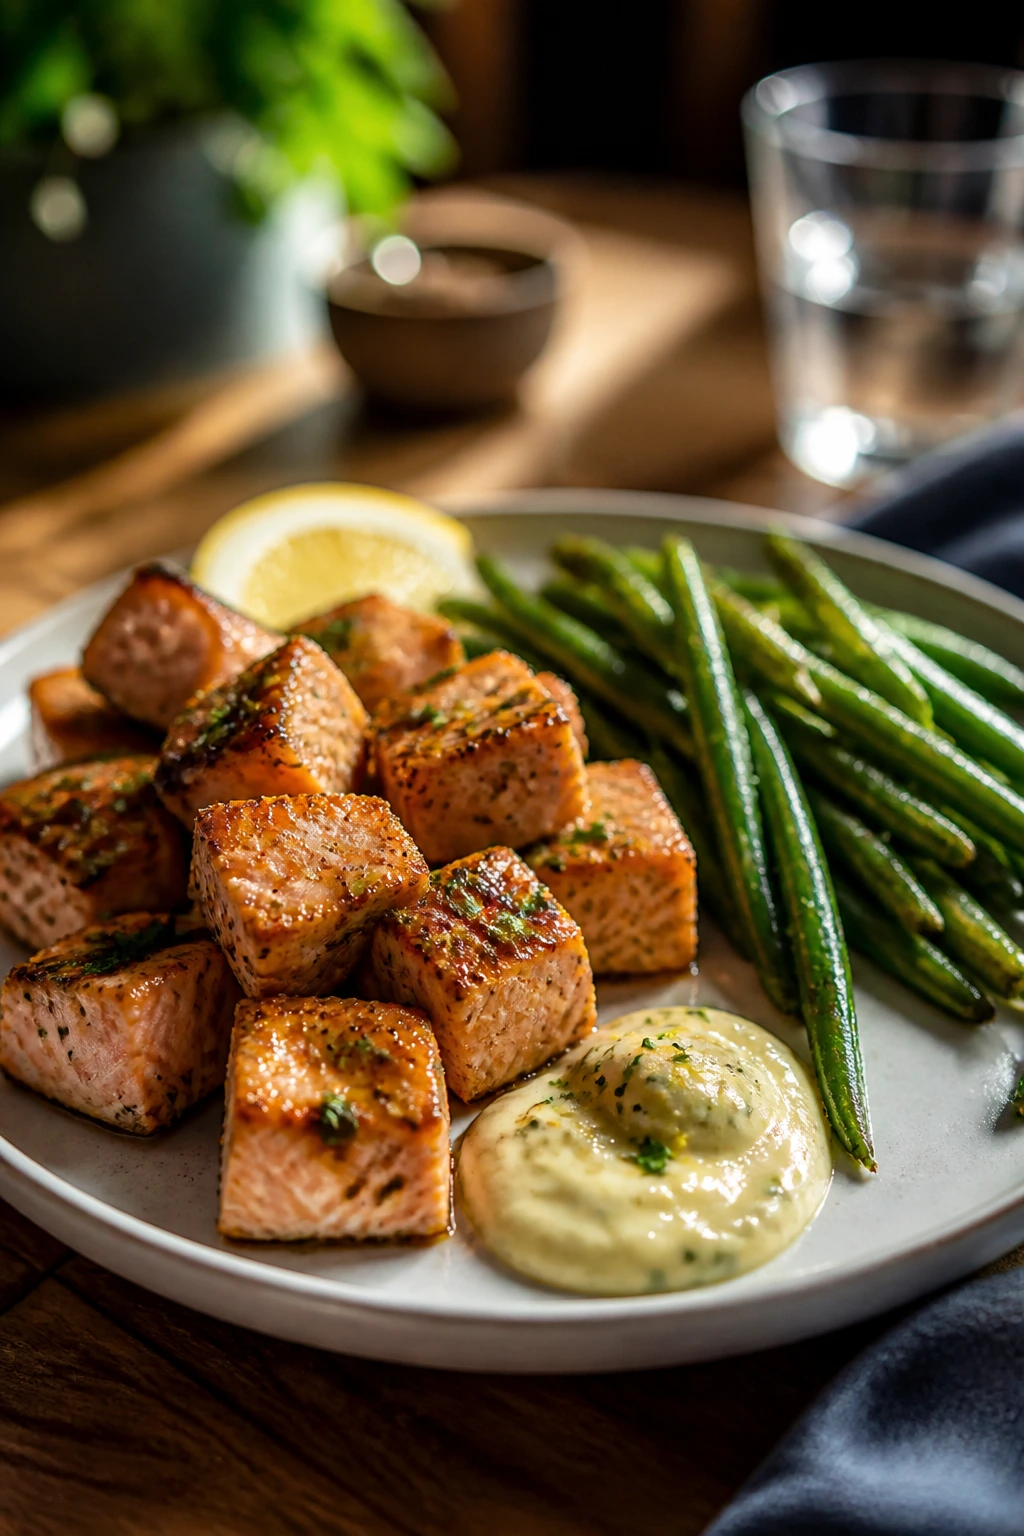
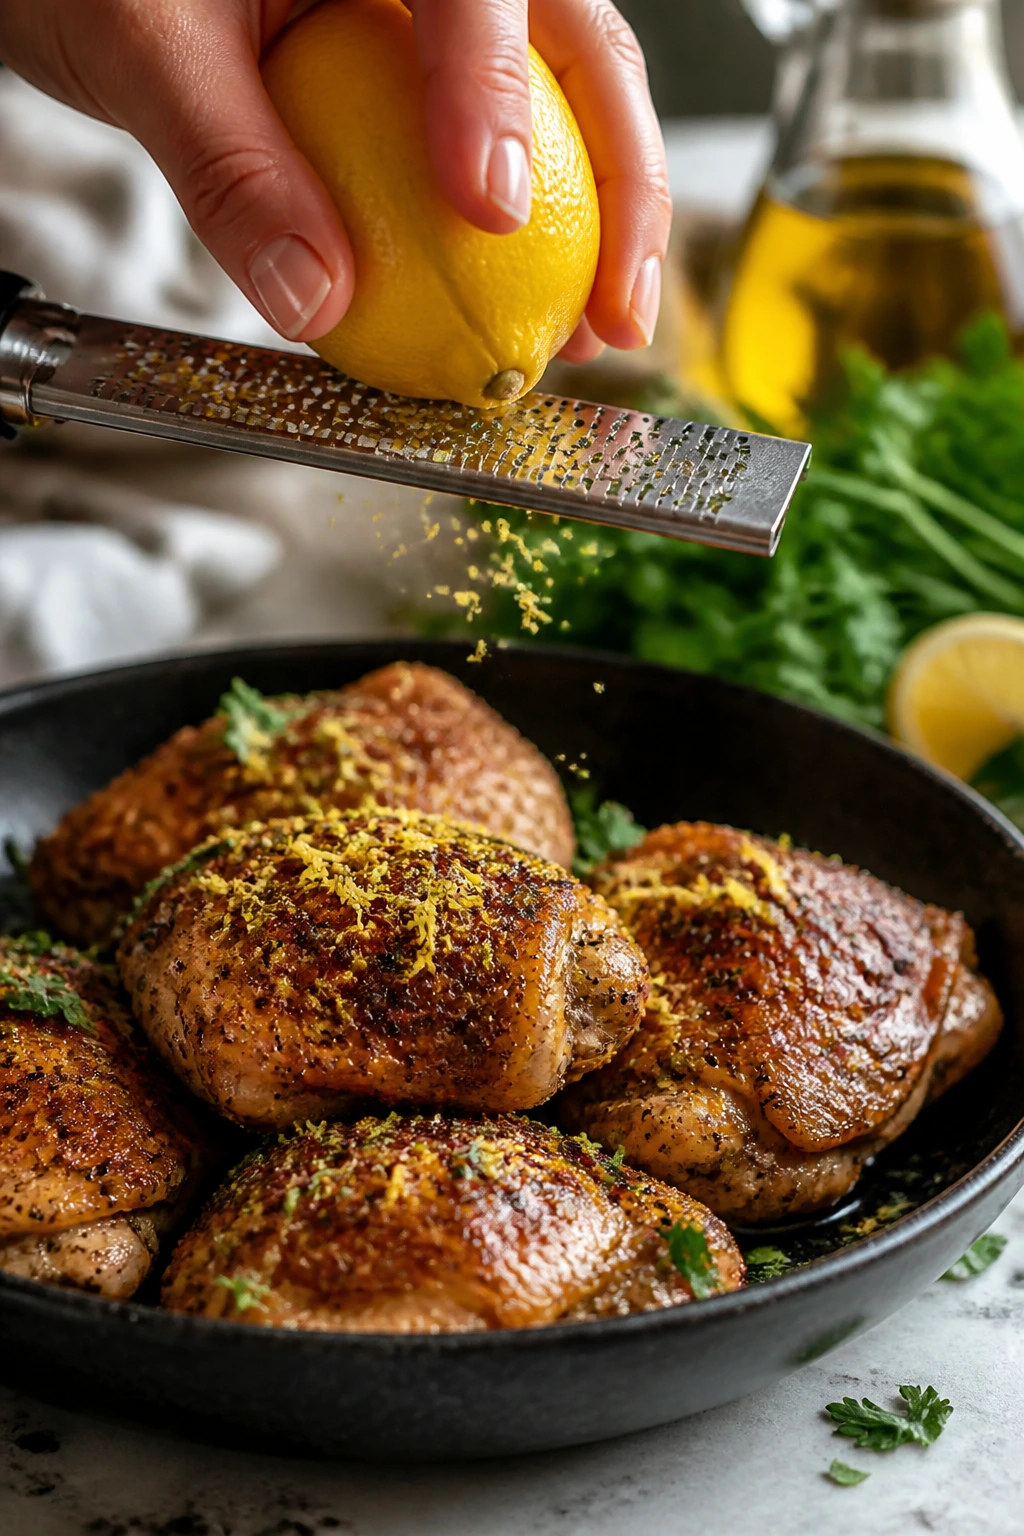
1. Lemon-Garlic Salmon Bites and Green Beans

Salmon is one of those ingredients that looks fussy and behaves the opposite. Cut into chunks, it cooks fast, stays soft in the middle, and picks up lemon-garlic seasoning without acting like it needs a sauce to rescue it. Add green beans to the basket and dinner starts looking organized, not improvised.
The bite-size shape matters here. A whole fillet can take longer and needs a little more care, but salmon cubes brown in the air fryer the same way chicken nuggets do, only with a much better dinner feel. The green beans get a few blistered spots, the fish stays juicy, and the whole tray smells like butter and citrus when it comes out.
Why It Works
This dinner works because the salmon and green beans cook at nearly the same pace at 400°F. Salmon bites need only a short blast to stay tender, and green beans handle that heat without turning limp if you keep them in a single layer. The lemon zest wakes up the fish before the first bite lands, and the butter gives the seasoning something to cling to. If your air fryer runs hot, the edges will take on a bit of color fast. That’s a good thing here.
Key Ingredients
- 1 lb salmon fillet, skin removed and cut into 1-inch cubes — Look for center-cut salmon so the pieces stay even.
- 8 oz green beans, trimmed — Thin haricots verts cook faster and get better browning.
- 1 tbsp olive oil — Helps the seasoning stick and keeps the beans from drying out.
- 1 tbsp melted butter — Adds a soft finish to the salmon and keeps it from tasting lean.
- 1 tsp garlic powder — Garlic powder handles high heat better than fresh garlic here.
- 1 tsp lemon zest — This gives the dish its bright top note.
- 1/2 tsp kosher salt — Enough to season both the fish and the vegetables.
- 1/4 tsp black pepper — A small amount is enough once the lemon shows up.
- Lemon wedges, for serving — A squeeze at the end sharpens everything.
Quick Steps
-
Preheat the air fryer to 400°F (205°C) for 3 minutes.
-
Toss the green beans with half the olive oil, half the salt, and a pinch of pepper. Spread them in the basket in a single layer.
-
Mix the salmon cubes with the melted butter, remaining olive oil, garlic powder, lemon zest, and the rest of the salt and pepper. Coat every piece lightly. Do not leave pools of butter in the bowl or the fish will steam instead of brown.
-
Cook the green beans for 4 minutes, then shake the basket.
-
Add the salmon cubes to the basket and cook for 5 to 6 minutes more, until the fish flakes easily and reaches 145°F in the thickest piece.
-
Finish with lemon wedges and, if you want, a few flakes of sea salt.
Tips and Variations
- Make-it-faster: Buy green beans that are already trimmed. It sounds small. It isn’t.
- Flavor swap: Use lime zest and a pinch of chili flakes if you want a sharper, spicier finish.
- Serving idea: Spoon the salmon and beans over microwaved rice or couscous if you need a larger dinner.
2. Chicken Fajita Strips with Peppers and Onions
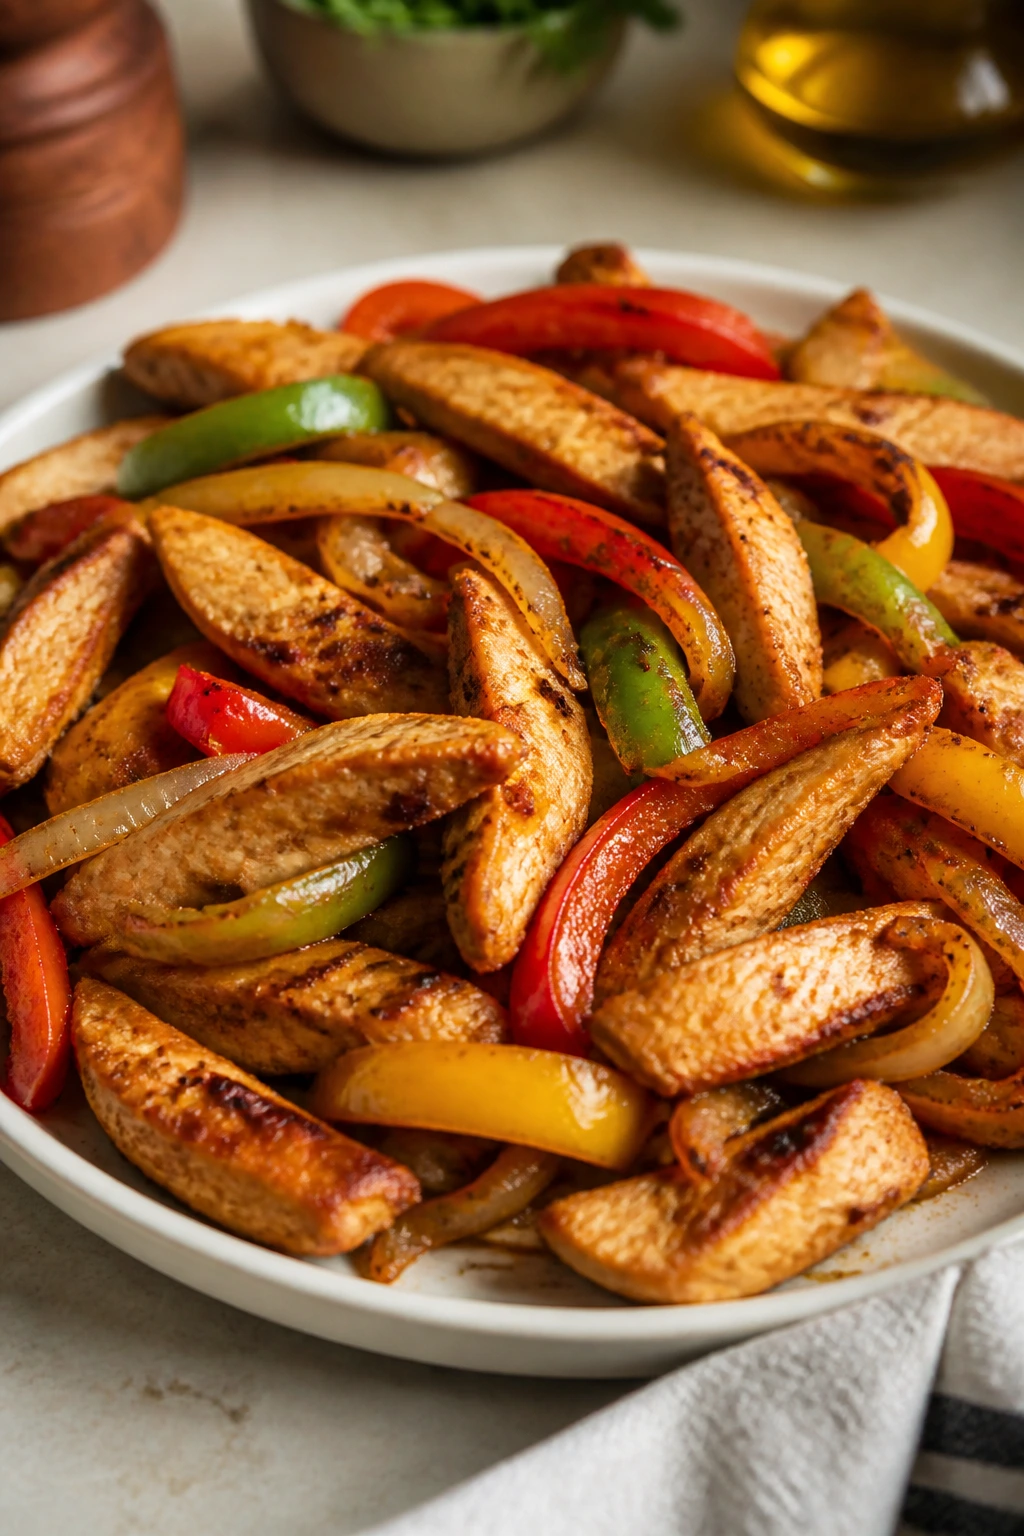
Chicken fajitas belong in the air fryer more than most people expect. Thin strips of chicken breast cook fast, the peppers soften at the edges without collapsing, and the onions turn sweet in a way that tastes like you spent more time than you did. It smells like a sizzling skillet, only the basket did the work.
This is a smart dinner when the fridge gives you bell peppers and a lonely onion. The seasoning is bold enough to carry the meal, and the lime at the end keeps the whole plate from tasting flat. I like this one because it feels like a full dinner, not a protein with a side note.
Why It Works
Chicken cut into 1/2-inch strips hits the sweet spot for a 15-minute dinner. It cooks through quickly at 400°F, and the peppers and onions share the same time window if they’re sliced thin. Fajita seasoning usually has cumin, paprika, garlic, and chili powder, which means the air fryer doesn’t need a long marinade to build flavor. The citrus finish matters too; it cuts through the roasted edges and keeps the chicken from tasting dry.
Key Ingredients
- 1 lb boneless, skinless chicken breast, cut into 1/2-inch strips — Thin strips cook evenly and finish on time.
- 2 bell peppers, sliced into thin strips — Use different colors if you like a sweeter, brighter mix.
- 1 medium onion, sliced thin — Keep the slices about the same width as the peppers.
- 1 tbsp olive oil — Helps the seasoning cling and keeps the vegetables from sticking.
- 1 tbsp fajita seasoning — Store-bought is fine, or use your own blend.
- 1/2 tsp kosher salt — Adjust if your seasoning blend is already salty.
- 1 lime, cut into wedges — Squeeze over the top right before serving.
- Small flour or corn tortillas, for serving — Warm them briefly in the air fryer or microwave.
Quick Steps
-
Preheat the air fryer to 400°F (205°C).
-
Toss the chicken strips with olive oil, fajita seasoning, and salt in a bowl until every piece is coated.
-
Add the peppers and onion to the bowl and toss again so the vegetables pick up a little seasoning. If the mixture looks dry, add a teaspoon more oil.
-
Spread everything in the basket in a single layer. Crowding here gives you steamed fajitas, which is not the same thing.
-
Cook for 8 to 10 minutes, shaking halfway through, until the chicken reaches 165°F and the vegetables are tender with browned edges.
-
Serve with lime wedges and warm tortillas, or pile the mixture over rice if you want a bowl instead.
Tips and Variations
- Shortcut: Buy pre-sliced peppers and onions if you find them. The price bump is often worth the saved minutes.
- Add heat: A pinch of chipotle powder turns the seasoning smokier without changing the method.
- Leftover trick: Chop the cooked fajita mix and tuck it into a quesadilla the next day.
3. Steak Bites, Mushrooms, and Garlic Butter
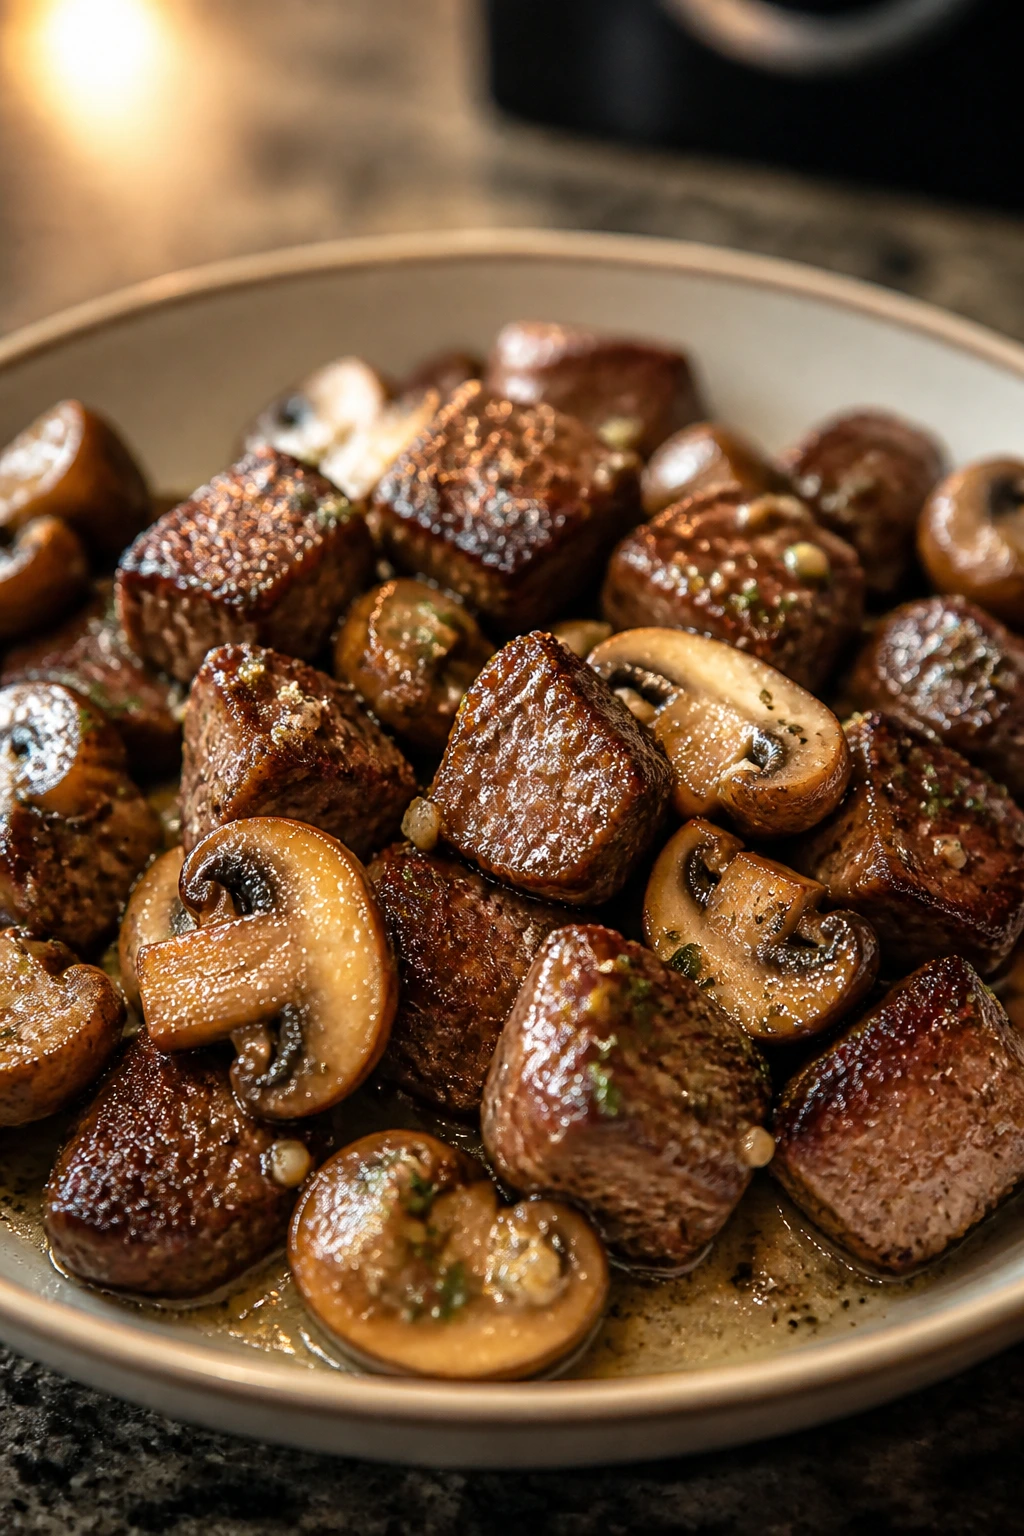
Steak bites are the air fryer’s answer to the “I want something that feels like a treat” problem. Cut the meat small enough, and you get browned edges, a rosy center, and a dinner that tastes far more expensive than it is. Mushrooms ride along and soak up the garlic butter like they’ve been waiting for it.
There’s a little swagger to this one. Not too much. Just enough. The mushrooms soften and shrink, the steak gets a crust, and the butter clings to the pan after the cook, which is the moment when you know dinner is going to land well.
Why It Works
Sirloin or strip steak cut into 1-inch pieces cooks fast enough for a 15-minute dinner, especially at 400°F. Mushrooms are built for high heat; they release moisture early, then brown once that moisture cooks off. The garlic butter goes in at the end so it perfumes the meat without burning. A quick rest after cooking matters here too, because steak bites leak juice fast if you pile them straight onto a plate.
Key Ingredients
- 1 lb sirloin steak, cut into 1-inch cubes — Trim off thick fat, but keep a little marbling.
- 8 oz cremini mushrooms, halved — Baby bellas hold their shape better than delicate white mushrooms.
- 1 tbsp olive oil — A thin coat is enough for the air fryer.
- 1 tsp kosher salt — Season the steak well; it needs it.
- 1/2 tsp black pepper — Freshly ground pepper gives better bite.
- 1 tsp garlic powder — Easy garlic flavor without the risk of burning.
- 1 tbsp butter, melted — Added after cooking for shine and richness.
- 1 tsp Worcestershire sauce — A small splash makes the steak taste deeper.
- Chopped parsley, for serving — Optional, but it wakes up the plate.
Quick Steps
-
Preheat the air fryer to 400°F (205°C).
-
Toss the mushrooms with half the olive oil, half the salt, and a little pepper. Put them in the basket first and cook for 3 minutes.
-
Season the steak cubes with the remaining oil, salt, pepper, garlic powder, and Worcestershire sauce. Mix lightly so the outside gets coated without bruising the meat.
-
Add the steak to the basket and cook 4 to 5 minutes more, shaking once, until the outside is browned and the center is cooked to your liking.
-
Finish with melted butter and parsley. Let the steak rest for 2 minutes before serving. Do not skip the rest unless you enjoy juice on the cutting board instead of on the meat.
Tips and Variations
- Best cut: Sirloin is the sweet spot, but strip steak or ribeye works if that’s what you’ve got.
- Sauce idea: A spoonful of chimichurri over the top turns this into a bigger dinner without extra work.
- Serving idea: Pair with a bagged salad and warm bread if you want a plate that feels finished.
4. Chili-Lime Shrimp Tacos with Crunchy Slaw
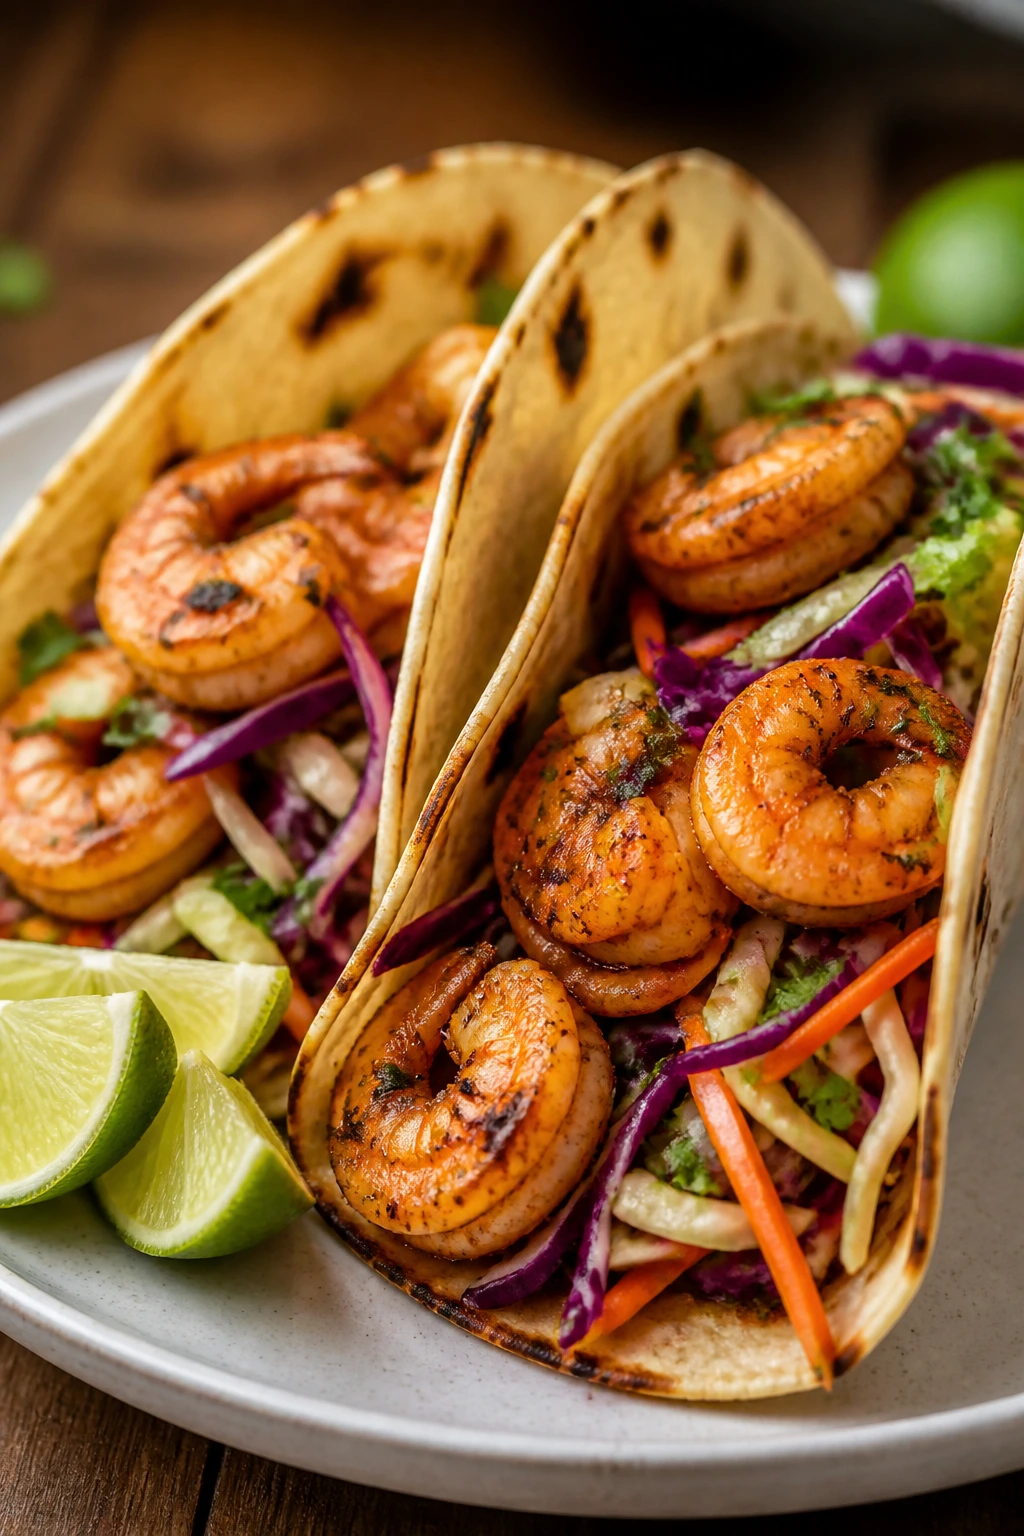
Shrimp is the cheat code when dinner needs to happen fast. It cooks in a blink, takes on seasoning eagerly, and tastes bright with almost no fuss. Tacos make the whole thing feel like a plan instead of a backup.
The slaw is the part that keeps this from feeling thin. Crunch matters. A lot. The creamy lime dressing and the hot shrimp do a nice little dance, and the tortillas catch everything that falls through.
Why It Works
Shrimp cooks in about 6 minutes at high heat, which is exactly why it belongs in a 15-minute dinner. Medium shrimp are the right call here; jumbo shrimp take longer and can land rubbery if you’re not careful. The chili-lime seasoning gives the shrimp a loud first note, while the slaw cools the heat and adds texture. Warm tortillas matter too, because cold tortillas make the whole meal feel unfinished.
Key Ingredients
- 1 lb peeled, deveined shrimp, tails removed — Medium shrimp cook fastest and are easier to eat in tacos.
- 1 tbsp olive oil — Helps the spice coat the shrimp evenly.
- 1 tsp chili powder — Gives warmth without burying the shrimp.
- 1/2 tsp ground cumin — Adds a little earthy depth.
- 1/2 tsp kosher salt — Shrimp needs salt more than people think.
- 2 cups coleslaw mix — Cabbage and carrot are fine; pre-shredded saves time.
- 2 tbsp plain yogurt or mayonnaise — Just enough to bind the slaw.
- 1 lime, juiced — Pulls the whole taco together.
- 8 small tortillas — Corn or flour both work.
- Fresh cilantro, optional — A few leaves make the tacos taste brighter.
Quick Steps
-
Mix the coleslaw, yogurt or mayo, and half the lime juice in a bowl. Set it aside so the cabbage softens a little.
-
Preheat the air fryer to 390°F (200°C).
-
Toss the shrimp with olive oil, chili powder, cumin, salt, and the remaining lime juice until lightly coated.
-
Arrange the shrimp in a single layer and cook for 5 to 6 minutes, shaking once, until they’re pink, curled, and opaque. Stop there; overcooked shrimp go springy fast.
-
Warm the tortillas for 30 to 45 seconds in the air fryer or in a dry skillet.
-
Fill the tortillas with shrimp and slaw, then finish with cilantro or a few extra drops of lime.
Tips and Variations
- Heat control: Add a pinch of cayenne if you want the shrimp to land with more edge.
- Texture trick: Let the slaw sit for 5 minutes so it softens just enough to bite cleanly.
- Meal stretch: Add avocado slices if you want the tacos to feel more like a full plate.
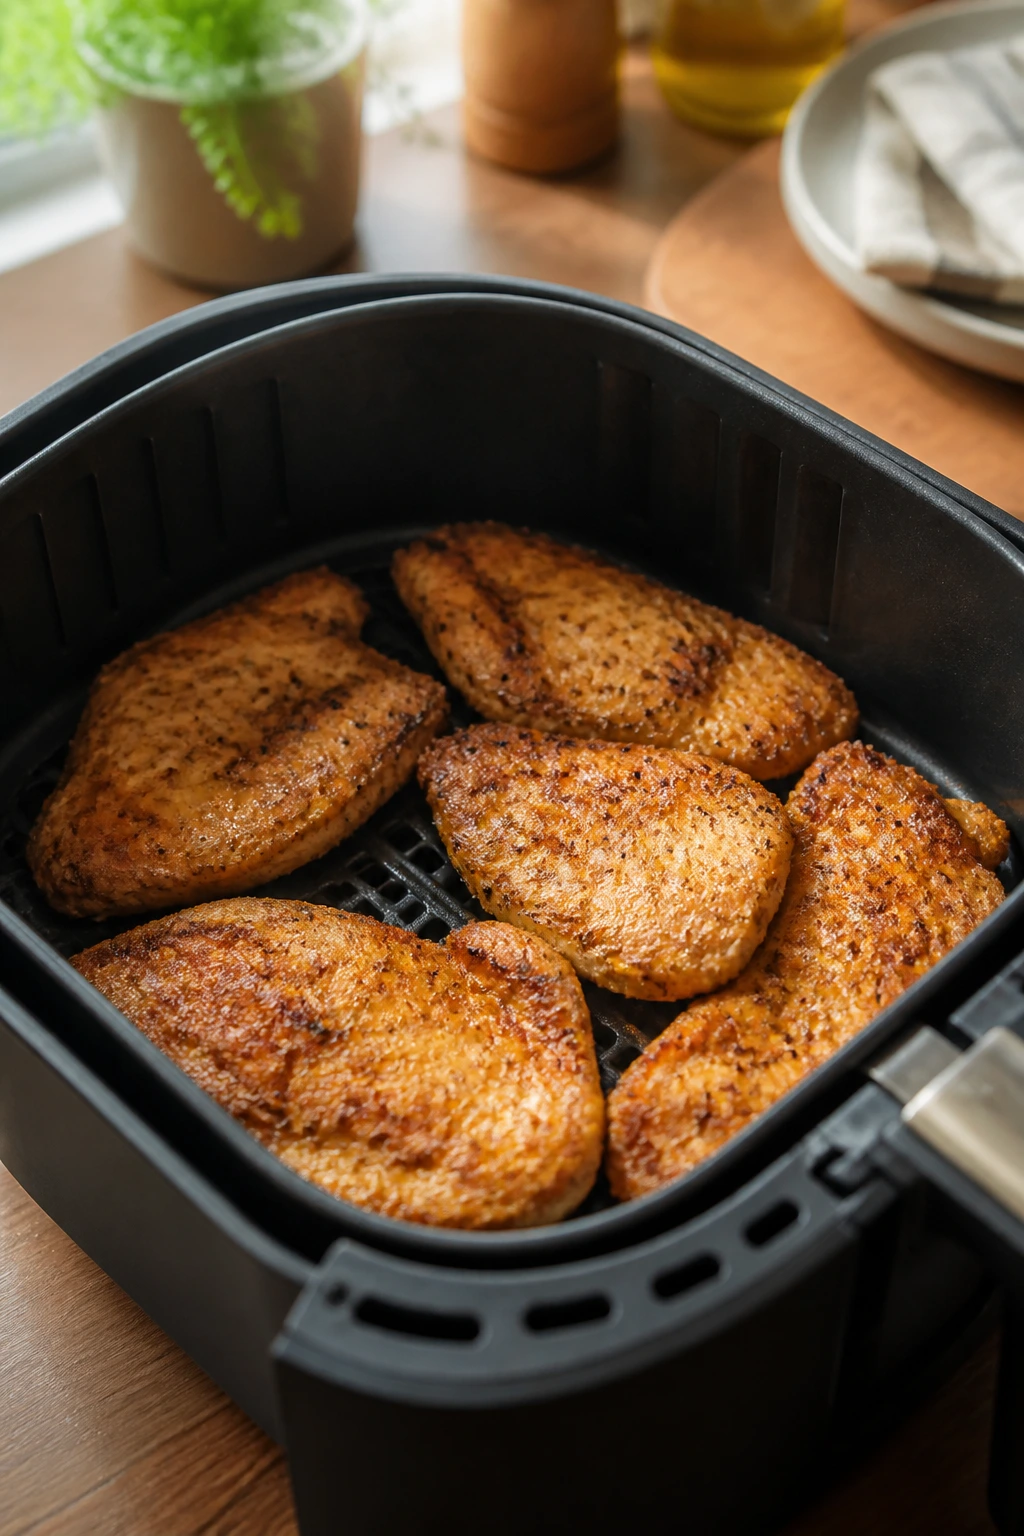
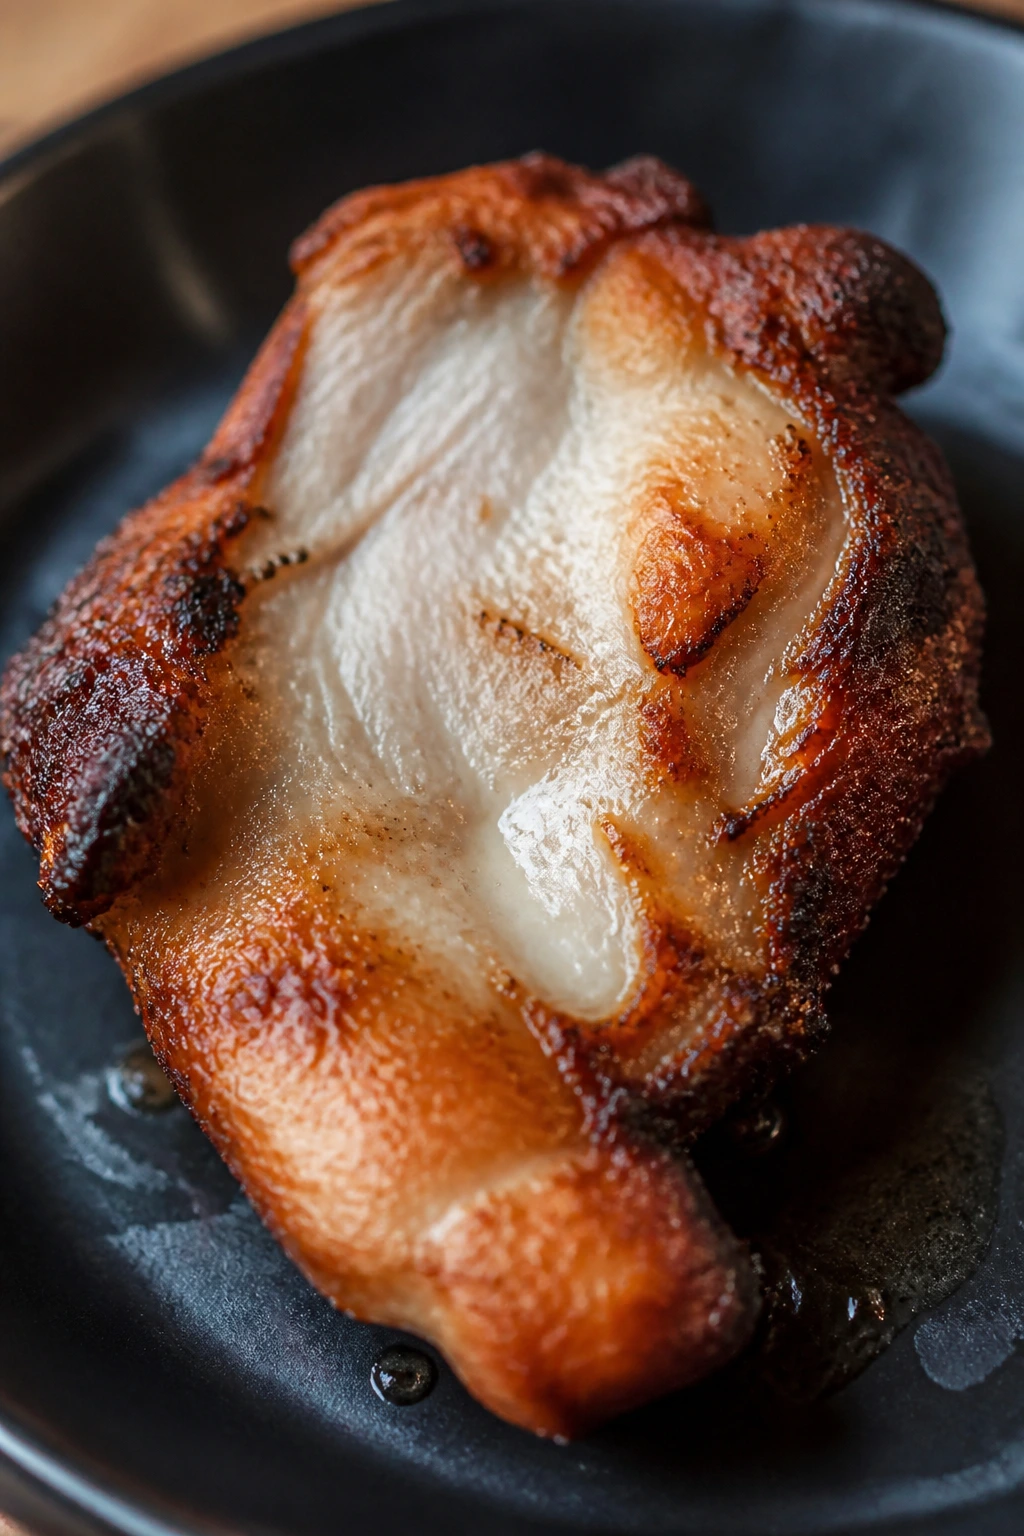
5. Thin-Cut Pork Chops with Dijon Apples
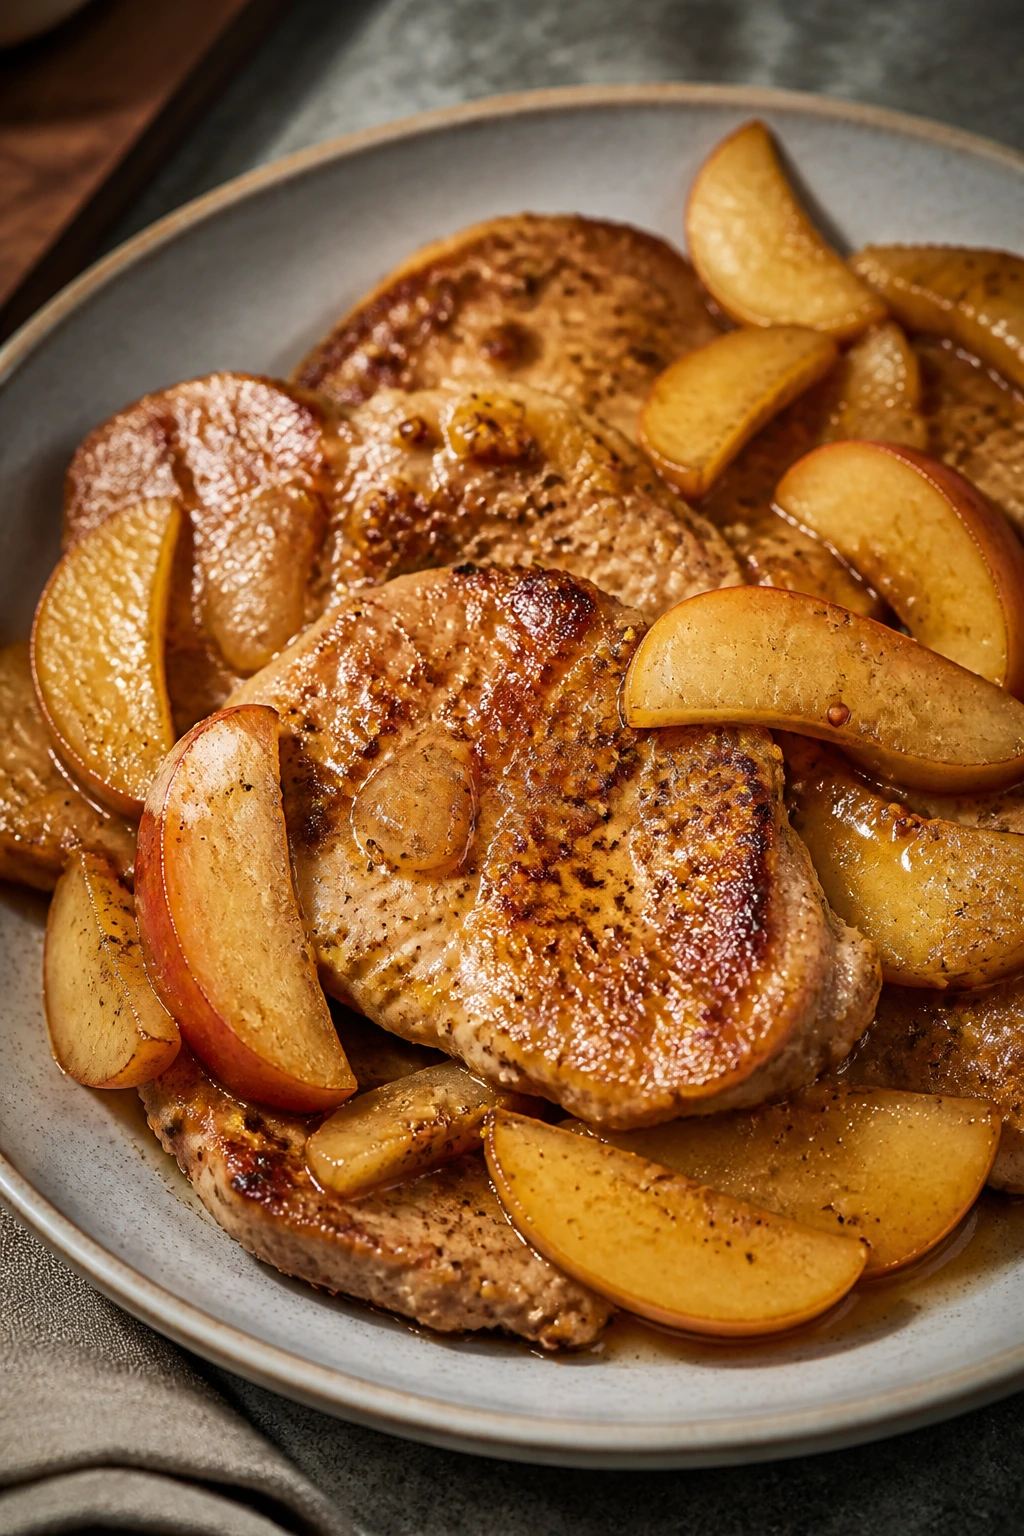
Thin pork chops are one of the safest bets for a fast air fryer dinner. They brown quickly, stay juicy if you stop on time, and pair with apples in a way that feels old-fashioned without being dull. Dijon keeps the sweet side in check, which is the part too many pork-and-apple dinners miss.
This is the kind of recipe that does a lot with a little. A few apple slices, a smear of mustard, a quick spice rub, and dinner suddenly tastes layered instead of hurried. I like it when the fruit cooks just enough to soften but doesn’t collapse into jam.
Why It Works
Thin-cut chops cook all the way through in a short burst at 400°F, which is exactly why they fit this kind of dinner. Pork loves salt, pepper, paprika, and mustard; the apple adds sweetness and moisture, but the Dijon keeps the plate from drifting into dessert territory. If you use chops that are too thick, the outside dries out before the center is done. Thin is the rule here, not a suggestion.
Key Ingredients
- 4 thin-cut boneless pork chops, about 1/2 inch thick — Thick chops need more time than this recipe allows.
- 1 tbsp olive oil — Helps the seasoning stick and supports browning.
- 1 tsp paprika — Adds color and a little warmth.
- 1 tsp kosher salt — Pork needs a proper seasoning hit.
- 1/2 tsp black pepper — Keeps the flavor sharp.
- 1 medium apple, thinly sliced — Honeycrisp or Fuji hold up nicely.
- 1 tsp Dijon mustard — A small amount goes a long way.
- 1 tsp honey — Just enough to soften the mustard’s bite.
- 1 tbsp butter — Optional, but useful for a glossy finish.
Quick Steps
-
Preheat the air fryer to 400°F (205°C).
-
Rub the pork chops with olive oil, paprika, salt, and pepper on both sides.
-
Toss the apple slices with Dijon, honey, and a tiny pinch of salt.
-
Place the pork chops in the basket and scatter the apples around them. Cook for 4 minutes, then turn the chops and stir the apples.
-
Cook 4 to 5 minutes more, until the pork reaches 145°F and the apples are soft around the edges but still hold their shape. If you like, melt the butter over the apples right after cooking.
Tips and Variations
- Best apple choice: Use a firm apple, not a mealy one. Soft apples disappear too fast.
- Flavor swap: A pinch of rosemary gives the pork a more savory feel.
- Serving idea: Add quick green beans or a chopped salad and dinner is done.
6. Air Fryer Turkey Burgers with Melted Cheddar
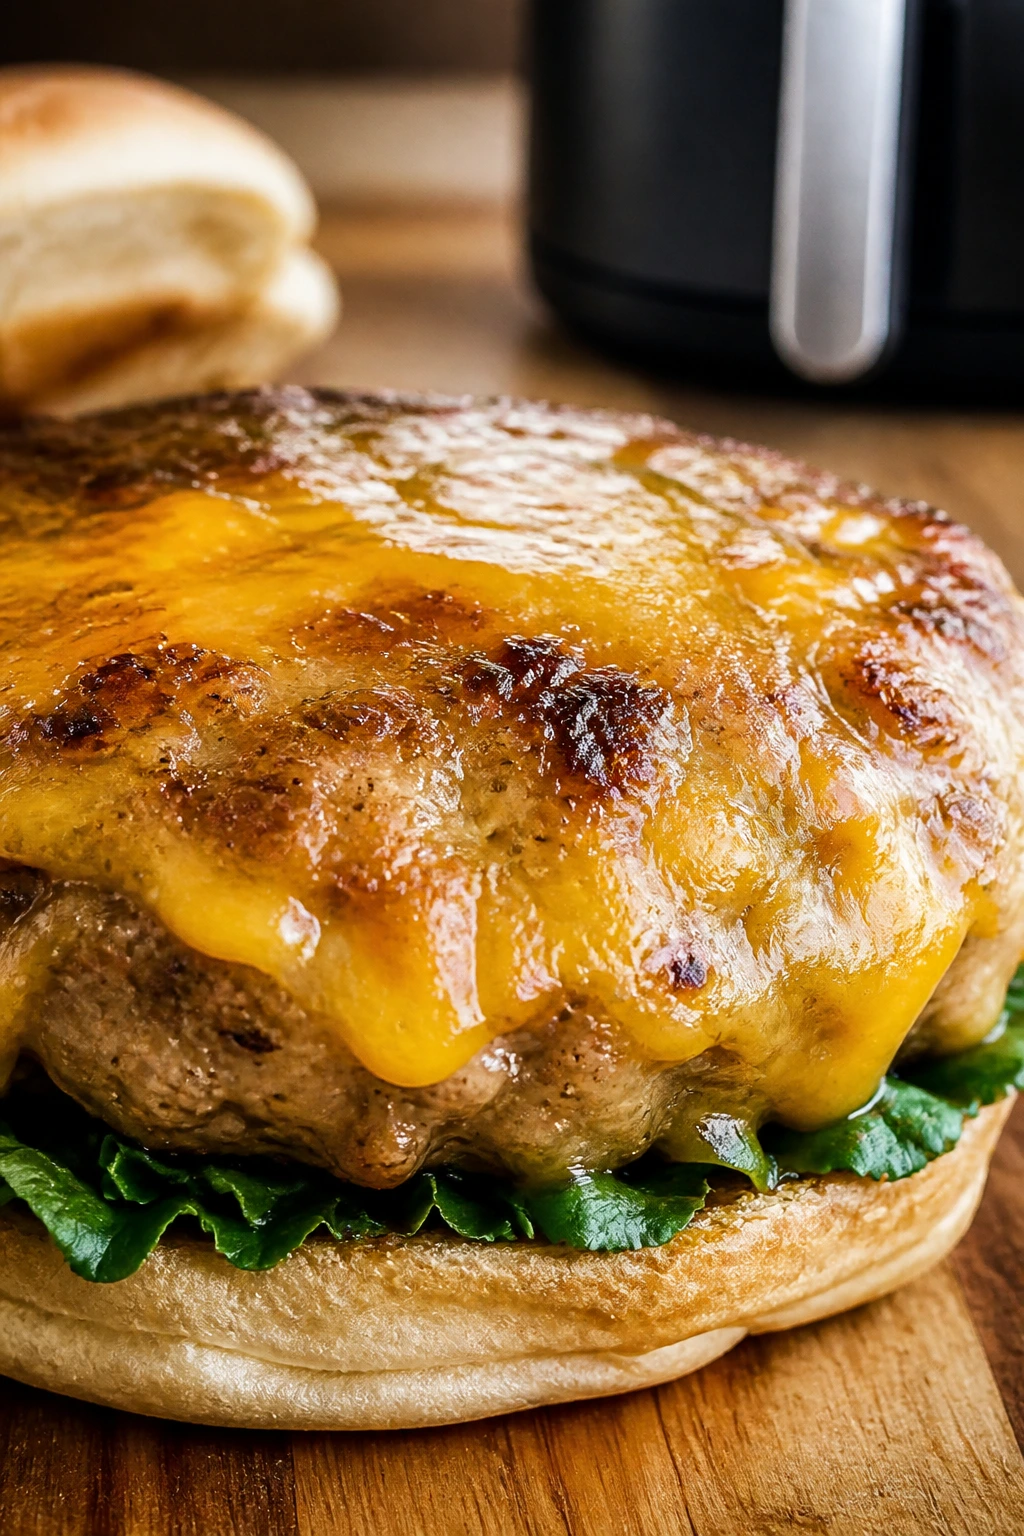
Turkey burgers can be dry, boring, or both if they’re handled lazily. They can also be terrific when you keep the patties thin, season them properly, and stop cooking at the right moment. The air fryer gives you a clean sear without standing over a skillet.
This version leans into the stuff turkey actually likes: onion powder, a little breadcrumb for tenderness, and cheese at the end so the burger feels generous. The air fryer browns the outside without requiring extra oil. That’s the useful part. Not the glamorous part. Just the useful part.
Why It Works
Ground turkey cooks quickly in the air fryer, but it needs a little structure so it doesn’t turn crumbly. An egg and a small amount of breadcrumbs help the patties hold together, while a thumb dent in the center keeps them from puffing into little meat domes. The cheese goes on during the last minute so it melts without leaking all over the basket. If you use 93/7 turkey, watch the clock closely; lean meat dries fast.
Key Ingredients
- 1 lb ground turkey — 85/15 or 93/7 both work; the richer mix stays juicier.
- 1 large egg — Helps bind the patties.
- 1/3 cup plain breadcrumbs — Holds moisture without turning the burger dense.
- 1 tsp onion powder — Gives the turkey more savory depth.
- 1 tsp kosher salt — Needed for flavor, not optional.
- 1/2 tsp black pepper — A basic but necessary finish.
- 4 slices cheddar cheese — Melted on top at the end.
- 4 burger buns — Toast them if you like a sturdier bite.
- Pickles or sliced onion, for serving — Optional, but they add crunch.
Quick Steps
-
Preheat the air fryer to 380°F (193°C).
-
Mix the ground turkey, egg, breadcrumbs, onion powder, salt, and pepper in a bowl just until combined. Do not overmix or the patties will turn dense.
-
Shape the mixture into 4 thin patties and press a shallow dent in the center of each one.
-
Cook the patties for 8 minutes, flip them, and cook 1 to 2 minutes more, until the thickest part reaches 165°F.
-
Add a slice of cheddar to each patty and cook for 30 to 60 seconds more, just until melted.
-
Serve on buns with pickles, onion, or lettuce if you want extra crunch.
Tips and Variations
- Moisture help: A teaspoon of mayonnaise in the mix keeps lean turkey from drying out.
- Better shape: Make the patties slightly wider than the buns; they shrink as they cook.
- Quick swap: Serve over salad if you’d rather skip the bread.
7. Kielbasa, Peppers, and Onions
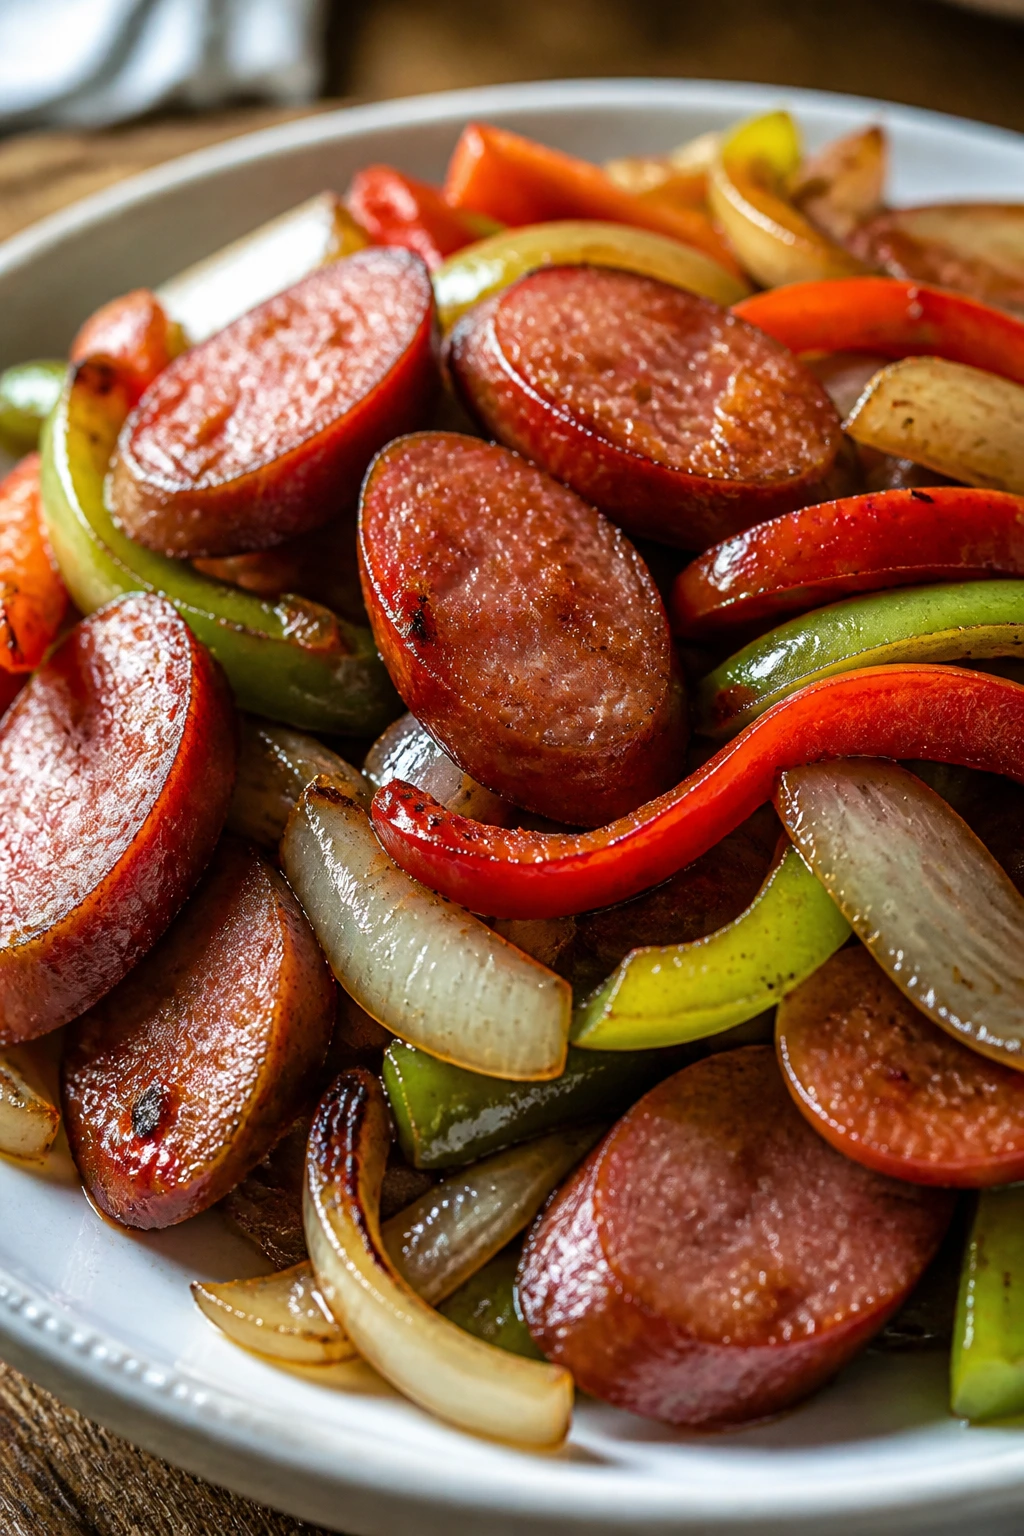
Kielbasa is one of the easiest ways to make dinner feel handled. It’s already cooked, already seasoned, and happy to brown fast in the air fryer. Add peppers and onions, and you get a meal that smells like a street cart and eats like a proper plate.
This is an excellent “I need something in 15 minutes and I am not interested in a lecture” dinner. The sausage gives salt and smoke, the vegetables soften at the edges, and the whole thing is good in buns, over rice, or straight from the bowl. There’s no wrong fork path here.
Why It Works
Because kielbasa is pre-cooked, the air fryer only has to brown it and warm it through. That saves time and gives the peppers and onions enough room to soften without the sausage drying out. Sliced on a diagonal, the kielbasa gets more browned surface area, which makes the whole dish taste bigger. This is one of the best places to use a hot air fryer because the fat from the sausage helps the vegetables roast instead of steam.
Key Ingredients
- 12 to 14 oz kielbasa, sliced into 1/2-inch rounds — Beef or pork both work.
- 2 bell peppers, sliced thin — Use any color you like.
- 1 medium onion, sliced thin — Keep the slices fairly even.
- 1 tbsp olive oil — Lightly coats the vegetables.
- 1 tsp smoked paprika — Boosts the smoky flavor already in the sausage.
- 1/2 tsp garlic powder — Gives the vegetables more depth.
- 1/2 tsp kosher salt — Go easy, since kielbasa is salty.
- Buns or cooked rice, for serving — Choose the base you want.
- Dijon mustard, optional — A sharp finish works well here.
Quick Steps
-
Preheat the air fryer to 400°F (205°C).
-
Toss the peppers and onion with olive oil, smoked paprika, garlic powder, and salt.
-
Add the kielbasa slices and toss gently again so everything gets a thin coating.
-
Spread the mixture in the basket and cook for 9 to 10 minutes, shaking halfway through, until the sausage edges are browned and the vegetables are soft with a little char.
-
Serve in buns, over rice, or with mustard on the side.
Tips and Variations
- Best texture: Cut the kielbasa slightly thicker if you want more chew, thinner if you want more browning.
- Add crunch: A handful of pickles or sauerkraut turns this into a more complete sandwich dinner.
- Budget move: Use one bell pepper and one onion if you want the sausage to stay the main event.
8. Crispy Tofu and Broccoli with Sesame Glaze
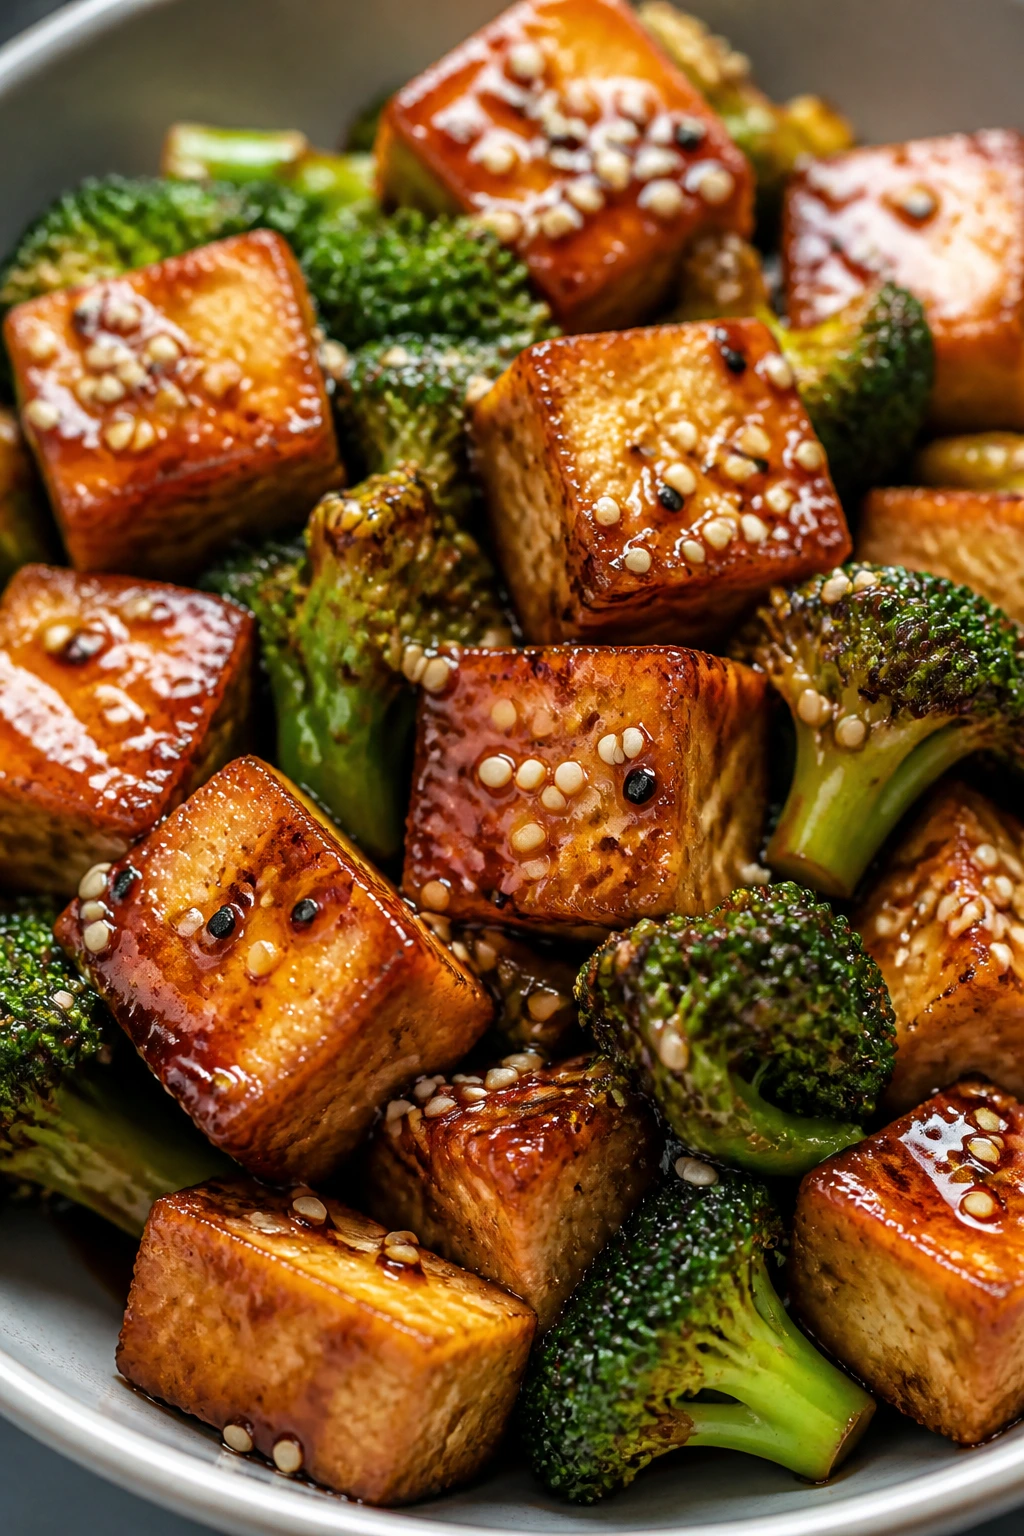
Tofu can be very good in the air fryer, but it needs a firm hand. Dry it well, cut it small, and give it something to crisp against, and it turns into a dinner that feels deliberate instead of apologetic. Broccoli helps because the florets catch the glaze in all the good little ridges.
This is the vegetarian dinner in the group that still feels substantial. The soy, sesame, and honey glaze gives you salt, sweetness, and shine without needing a long sauce reduction. It’s fast. It’s tidy. And the tofu gets better than people expect.
Why It Works
Extra-firm tofu has enough structure to hold up under high heat, especially when you press out the moisture and coat it in cornstarch. That coating creates the shattery edge that people complain tofu never has. Broccoli handles 390°F well if the florets are small, and the glaze goes on after cooking so the sugar doesn’t burn. If the tofu is wet, it steams. If it’s dry, it crisps. That’s the whole trick.
Key Ingredients
- 14 oz extra-firm tofu, pressed and cut into 1-inch cubes — Press it for at least 10 minutes if it isn’t pre-pressed.
- 2 cups broccoli florets, cut small — Smaller pieces cook fast and brown better.
- 1 tbsp cornstarch — Creates the crisp shell on the tofu.
- 1 tbsp olive oil — Helps with browning.
- 1 tbsp soy sauce — Seasons the tofu before it cooks.
- 1 tsp garlic powder — Easy flavor with no burning.
- 1 tbsp sesame seeds — Toasted if you have them.
- For the glaze: 2 tbsp soy sauce, 1 tbsp honey, 1 tsp sesame oil, 1 tsp rice vinegar — Mix separately.
- Cooked rice, optional — Useful if you want a bowl instead of a side plate.
Quick Steps
-
Preheat the air fryer to 390°F (199°C).
-
Pat the tofu dry, then toss it with cornstarch, olive oil, soy sauce, and garlic powder until lightly coated.
-
Toss the broccoli with a little olive oil and a pinch of salt.
-
Cook the tofu for 5 minutes, then add the broccoli to the basket and cook 5 minutes more, shaking once, until the tofu is crisp on the edges and the broccoli is browned in spots.
-
Whisk the glaze ingredients together and toss them with the hot tofu and broccoli right after cooking.
-
Sprinkle with sesame seeds and serve over rice if you want a fuller dinner.
Tips and Variations
- Pressing matters: If the tofu still feels damp, wrap it in a clean towel and press again. Wet tofu will not crisp.
- Sauce swap: Hoisin and a little lime juice work if you want a sweeter finish.
- Meal trick: Add sliced scallions at the end for a fresher bite.
9. Parmesan Cod with Cherry Tomatoes
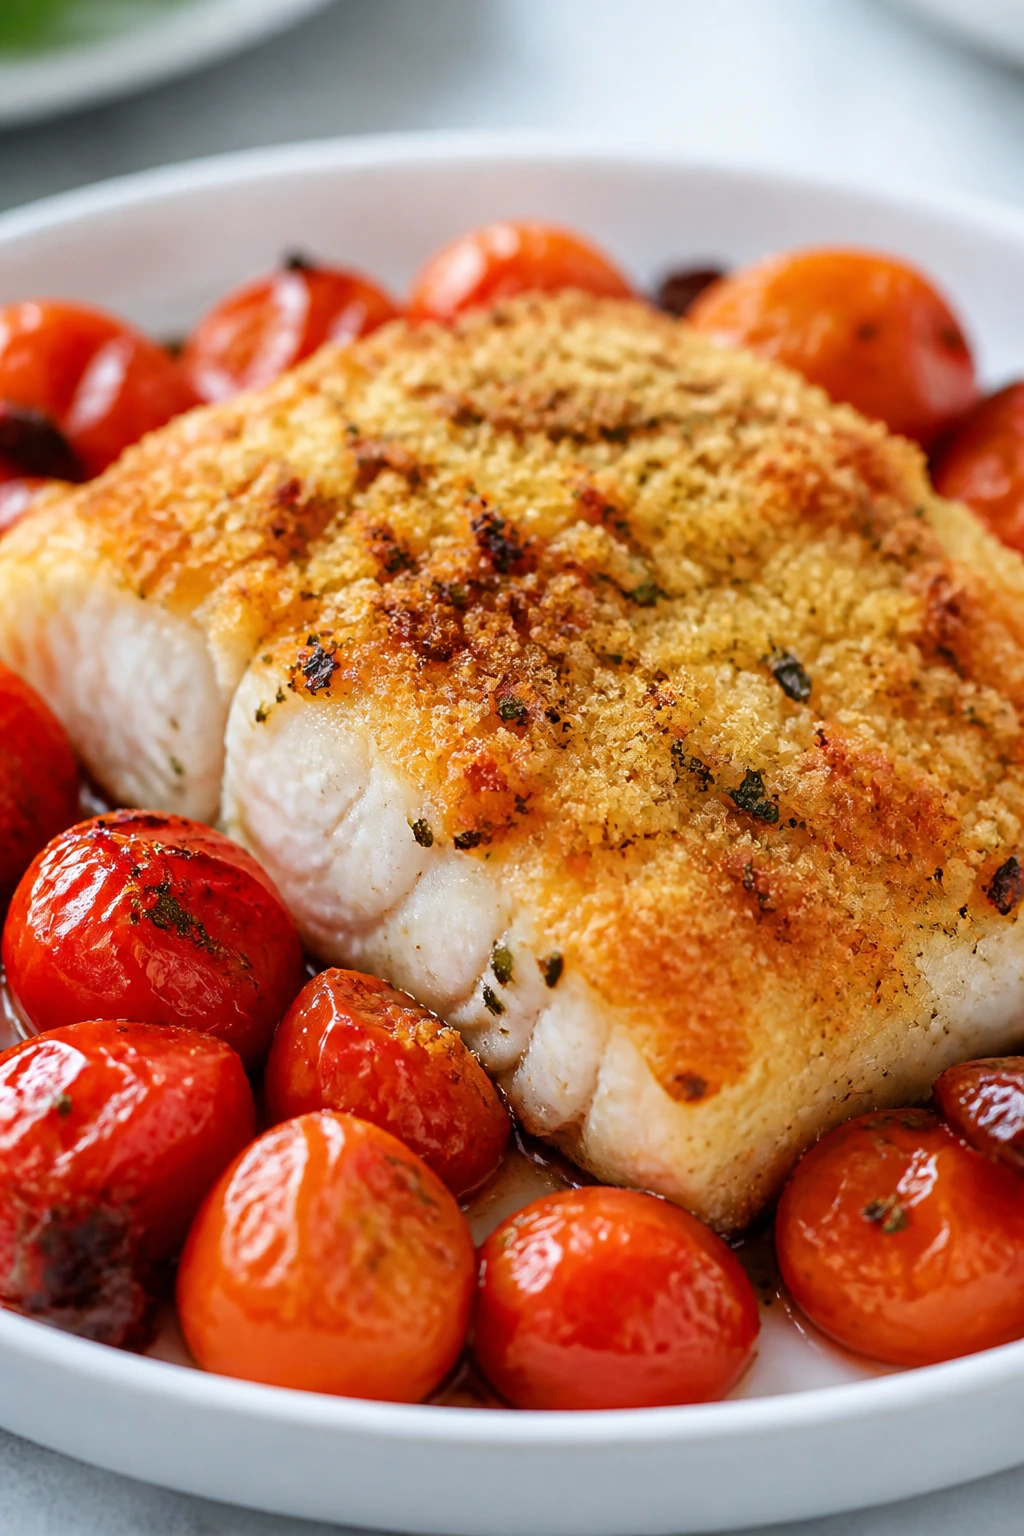
Cod is mild, quick, and a little bit underappreciated. That’s useful when you want dinner on the table without a lot of argument. A Parmesan top gives the fish some texture, and cherry tomatoes blister beside it, which means the plate ends up juicy, salty, and bright.
This is one of those recipes that looks like more effort than it is. The tomatoes burst just enough to make a natural little sauce, and the cheese on top gives the cod a savory crust. If you like fish but not fishiness, cod is a very pleasant place to land.
Why It Works
Cod fillets are thin enough to cook through in about 8 minutes at 400°F, which is why they suit this dinner so well. A Parmesan topping adds flavor and helps protect the fish from drying out. Cherry tomatoes soften fast and release juices that catch on the fish and the basket. The key is not overcooking the cod; once it flakes easily, it’s done.
Key Ingredients
- 1 lb cod fillets, patted dry — Try to use fillets of similar thickness.
- 1 cup cherry tomatoes — Halved if they’re large.
- 1 tbsp olive oil — Keeps the fish and tomatoes from sticking.
- 1/4 cup grated Parmesan — Finely grated works better than big shreds.
- 1 tsp Italian seasoning — A quick herb mix for the fish.
- 1/2 tsp garlic powder — Adds a little savory backbone.
- 1/2 tsp kosher salt — Helps the cod taste like something.
- 1/4 tsp black pepper — Enough to support the cheese.
- Lemon wedges, for serving — The sharp edge this dish wants.
Quick Steps
-
Preheat the air fryer to 400°F (205°C).
-
Mix the Parmesan, Italian seasoning, garlic powder, salt, and pepper in a small bowl.
-
Brush the cod lightly with olive oil and press the Parmesan mixture onto the top of each fillet.
-
Toss the cherry tomatoes with a little olive oil and scatter them in the basket around the fish.
-
Cook for 8 to 9 minutes, until the cod flakes at the thickest part and the tomatoes have started to burst.
-
Serve with lemon wedges and spoon the tomatoes over the fish.
Tips and Variations
- Dry fish works best: Pat the cod dry before seasoning so the topping sticks.
- Crumb variation: Add 2 tablespoons of panko to the Parmesan if you want a more crackly crust.
- Side idea: A chopped cucumber salad makes a clean, cool partner.
10. Buffalo Chicken Tenders with Celery Slaw
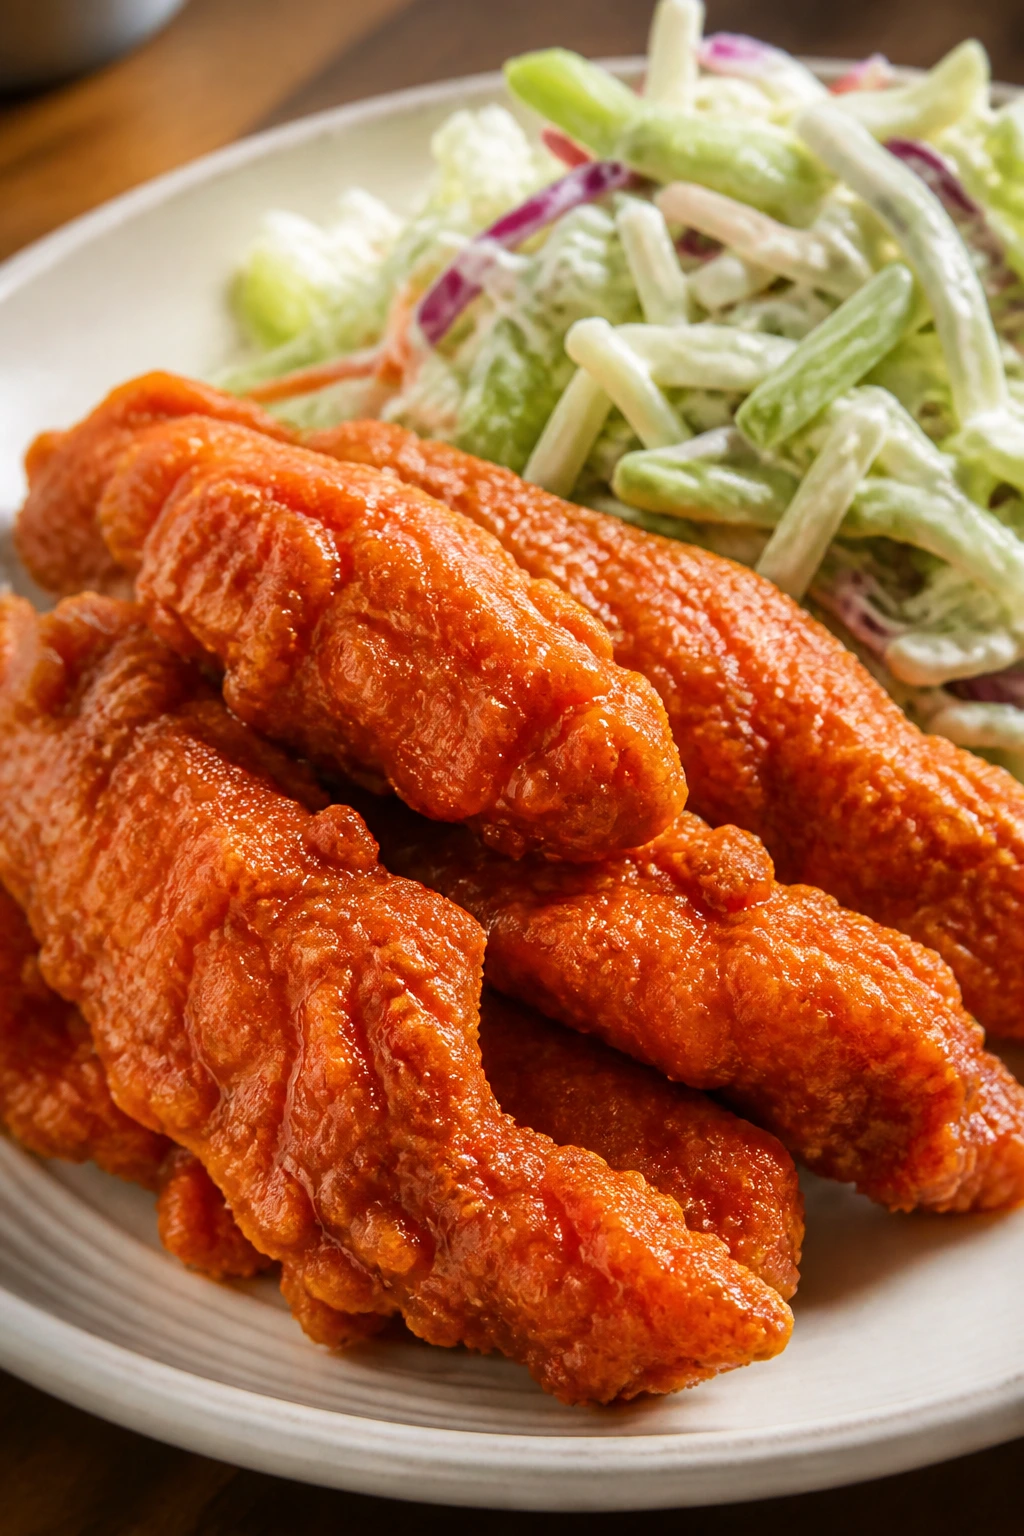
Buffalo chicken is usually associated with a pile of wings and a stack of napkins. Tenders are cleaner to eat and faster to cook, which makes them a better fit for an actual dinner. The slaw cools the heat and gives the whole plate a crunch that ranch alone can’t supply.
This one is a little messy, in a good way. The hot sauce butter gets glossy, the coating crisps in the basket, and the celery slaw adds the sort of snap that keeps your mouth awake. If you like game-day food that can stand upright on a weeknight, this is your lane.
Why It Works
Chicken tenderloins cook fast because they’re already a thin cut, and the air fryer can crisp the breading without deep oil. A light panko coating gives the tenders a rough surface that grabs the buffalo sauce after cooking. The sauce goes on at the end so the coating stays crunchy rather than soggy. Celery slaw adds coolness and texture, which is the whole point of buffalo food if you ask me.
Key Ingredients
- 1 lb chicken tenderloins — Trim any loose bits of tendon if needed.
- 1/2 cup all-purpose flour or cornstarch — Helps the egg cling.
- 1 large egg, beaten — The sticky layer for the breading.
- 3/4 cup panko breadcrumbs — Lighter and crisper than regular crumbs.
- 1 tsp paprika — Adds color to the crust.
- 1/2 tsp kosher salt — Needed in the breading.
- 3 tbsp hot sauce — Frank’s-style sauce works well here.
- 1 tbsp butter, melted — Mixed with the hot sauce after cooking.
- 2 cups celery slaw mix — Or thinly sliced celery and cabbage.
- Ranch or blue cheese dressing, for serving — Use the one you actually like.
Quick Steps
-
Preheat the air fryer to 390°F (199°C).
-
Set up three shallow bowls: flour, beaten egg, and panko mixed with paprika and salt.
-
Coat each chicken tender in flour, then egg, then panko. Press the crumbs on lightly so they stick.
-
Arrange the tenders in a single layer and cook for 8 to 10 minutes, turning once, until golden and the chicken reaches 165°F.
-
Mix the hot sauce and melted butter, then toss the cooked tenders in the sauce.
-
Serve with celery slaw and ranch or blue cheese.
Tips and Variations
- Heat control: Add a little honey to the sauce if you want a milder finish.
- Crispness tip: Spray the breaded tenders very lightly with oil before cooking.
- Serve it differently: Tuck the tenders into wraps with lettuce and ranch for an easy handheld dinner.
11. Cajun Chicken Cutlets and Corn
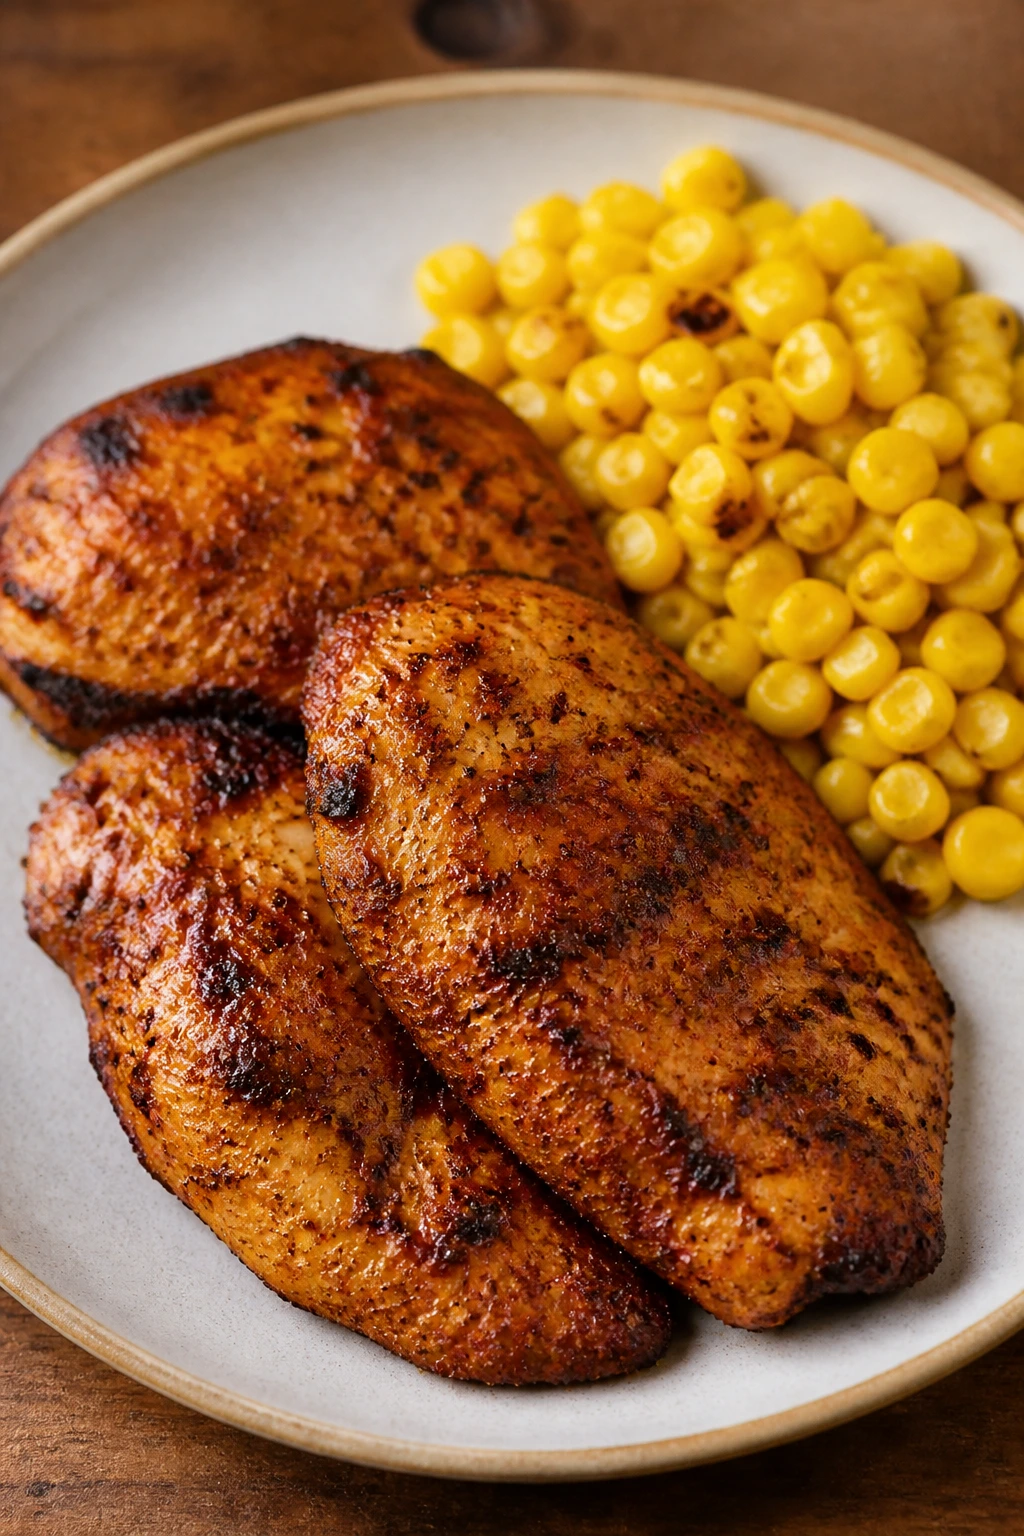
Cajun seasoning does heavy lifting in a short amount of time. That’s why it works so well on thin chicken cutlets: the spice mix brings smoke, heat, and salt in one shot. Corn softens the edges and makes the plate feel fuller than it really is.
This meal has a little heat and a little sweetness, which is a very useful combination on a weeknight. The chicken browns fast, the corn gets buttery, and the whole thing tastes like it came from a pan with much more attention than it actually got. That’s the sweet spot.
Why It Works
Thin chicken cutlets are built for fast cooking because they don’t need the air fryer to do much more than brown and finish them. Cajun seasoning carries paprika, pepper, garlic, and herbs, which means the chicken tastes layered with no marinade time. Corn gives the plate a natural sweetness and can be warmed in a small heat-safe dish inside the basket or tossed in after cooking. If your cutlets are thick, pound them first. Otherwise the outside cooks ahead of the middle.
Key Ingredients
- 2 large boneless, skinless chicken cutlets, about 1 lb total — Pound them to even thickness if needed.
- 1 tbsp olive oil — Helps the seasoning stick.
- 1 tbsp Cajun seasoning — Choose a blend with salt or adjust separately.
- 1/2 tsp kosher salt — Use less if your seasoning is salty.
- 1 cup corn kernels — Frozen thawed or canned drained both work.
- 1 tbsp butter — For the corn.
- 1 tsp lime juice — Sharpens the sweetness.
- 1 tbsp chopped scallion or parsley — Optional for color.
Quick Steps
-
Preheat the air fryer to 400°F (205°C).
-
Rub the chicken cutlets with olive oil, Cajun seasoning, and salt.
-
Place the chicken in the basket and cook for 4 minutes.
-
Add the corn to a small heat-safe dish or foil pan with butter and lime juice, then return it to the basket beside the chicken. Cook 4 to 5 minutes more, until the chicken reaches 165°F and the corn is hot with a few toasted spots.
-
Finish with scallion or parsley and serve right away.
Tips and Variations
- Quick fix: If your basket won’t fit a dish, warm the corn in the microwave while the chicken cooks.
- Flavor twist: A spoonful of sour cream over the chicken cools the spice nicely.
- Dinner stretch: Serve over rice if you want a larger bowl meal.
12. Greek Halloumi Pitas with Cucumber Salad
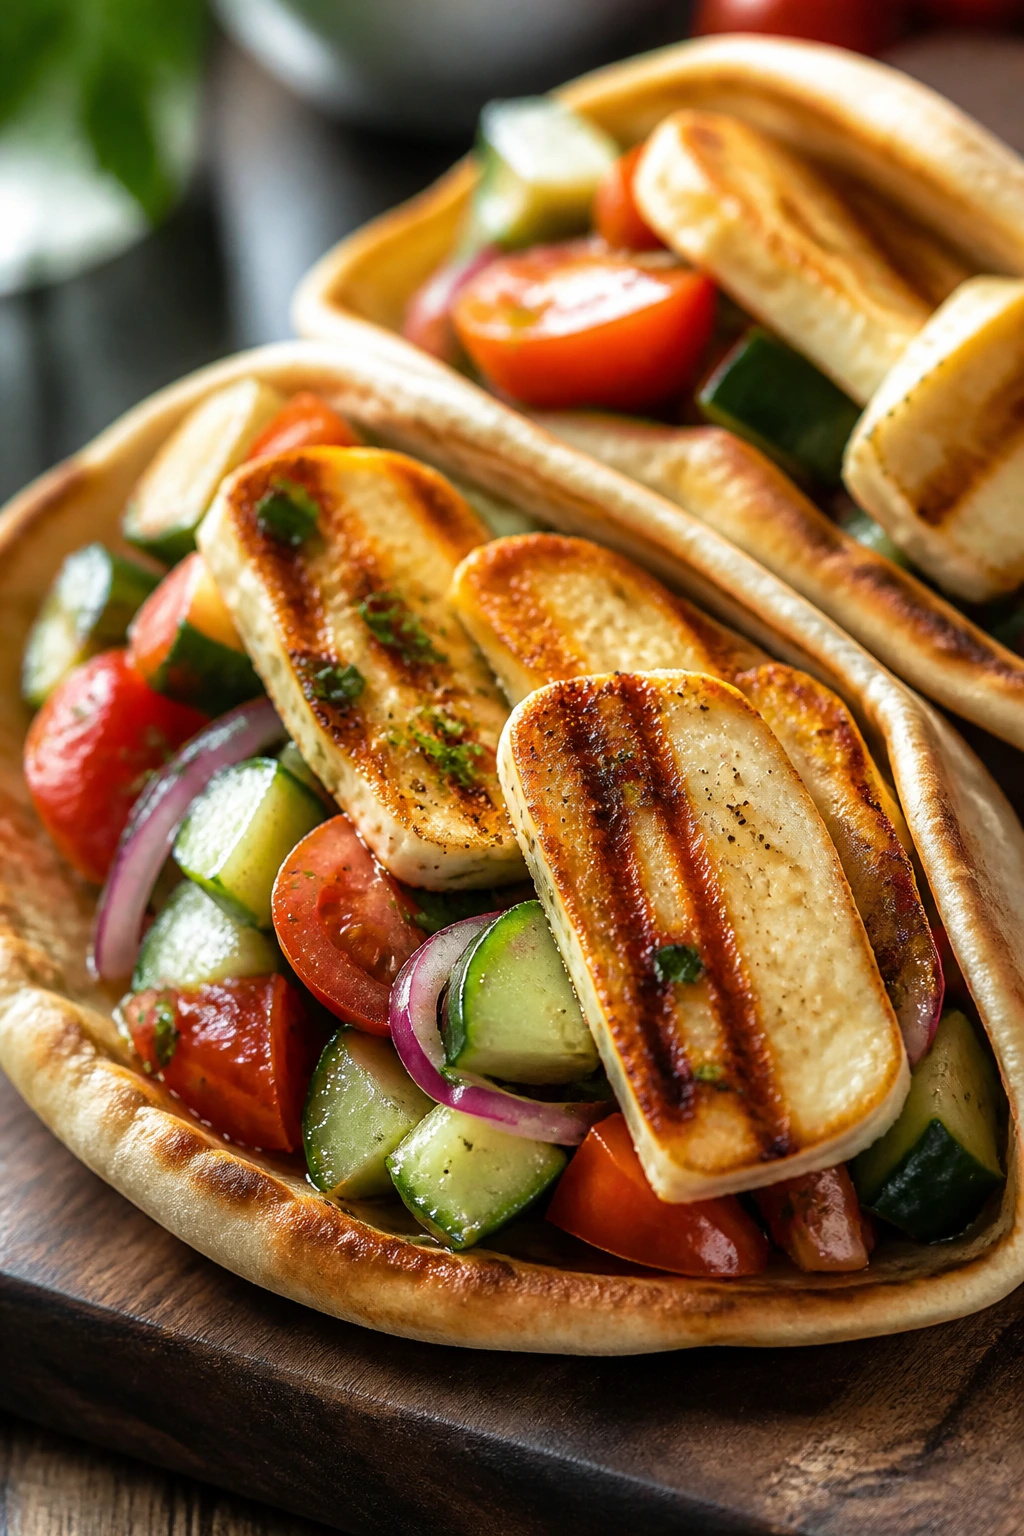
Halloumi is one of those cheeses that behaves like it has a second job. It browns, it stays intact, and it gives you salty chew instead of melting into a puddle. Paired with cucumber, tomato, and pita, it turns into a dinner that feels bright and complete without a lot of moving parts.
This recipe is especially good when you want meatless dinner ideas that don’t feel like a compromise. The salad stays crisp, the cheese gets golden at the edges, and tzatziki ties it all together with coolness and garlic. It’s fast, but it doesn’t taste like you hurried.
Why It Works
Halloumi has a high melting point, which is why it can take the heat of the air fryer and still hold its shape. That makes it one of the best cheeses for a quick dinner because you get color, chew, and salt in a short time. The pita only needs warming, and the cucumber salad can be mixed while the cheese cooks. There’s no delicate sauce to rescue and no complicated timing to juggle. That simplicity is the point.
Key Ingredients
- 8 oz halloumi, sliced into 1/2-inch slabs — Pat it dry before cooking.
- 4 small pitas, split if needed — Warm them briefly so they fold well.
- 1 cucumber, diced — Peel it if the skin is thick.
- 1 cup cherry tomatoes, halved — Juicy and easy.
- 1/4 small red onion, thinly sliced — A little goes a long way.
- 1 tbsp olive oil — For the salad.
- 1 tbsp lemon juice — Keeps the vegetables bright.
- 1/2 tsp dried oregano — Gives the dish a Greek flavor.
- 1/4 cup tzatziki — Store-bought or homemade.
Quick Steps
-
Preheat the air fryer to 390°F (199°C).
-
Toss the cucumber, tomatoes, red onion, olive oil, lemon juice, oregano, and a pinch of salt in a bowl.
-
Arrange the halloumi slices in the basket and cook for 5 to 6 minutes, flipping once, until golden at the edges.
-
Warm the pita in the air fryer for 30 to 45 seconds just until soft and pliable.
-
Fill each pita with salad, halloumi, and a spoonful of tzatziki.
Tips and Variations
- Halloumi tip: Dry the slices well or they’ll steam before browning.
- Add protein: Toss in chickpeas if you want the pitas to feel more substantial.
- Serve it bowl-style: Skip the pita and use the fillings over greens.
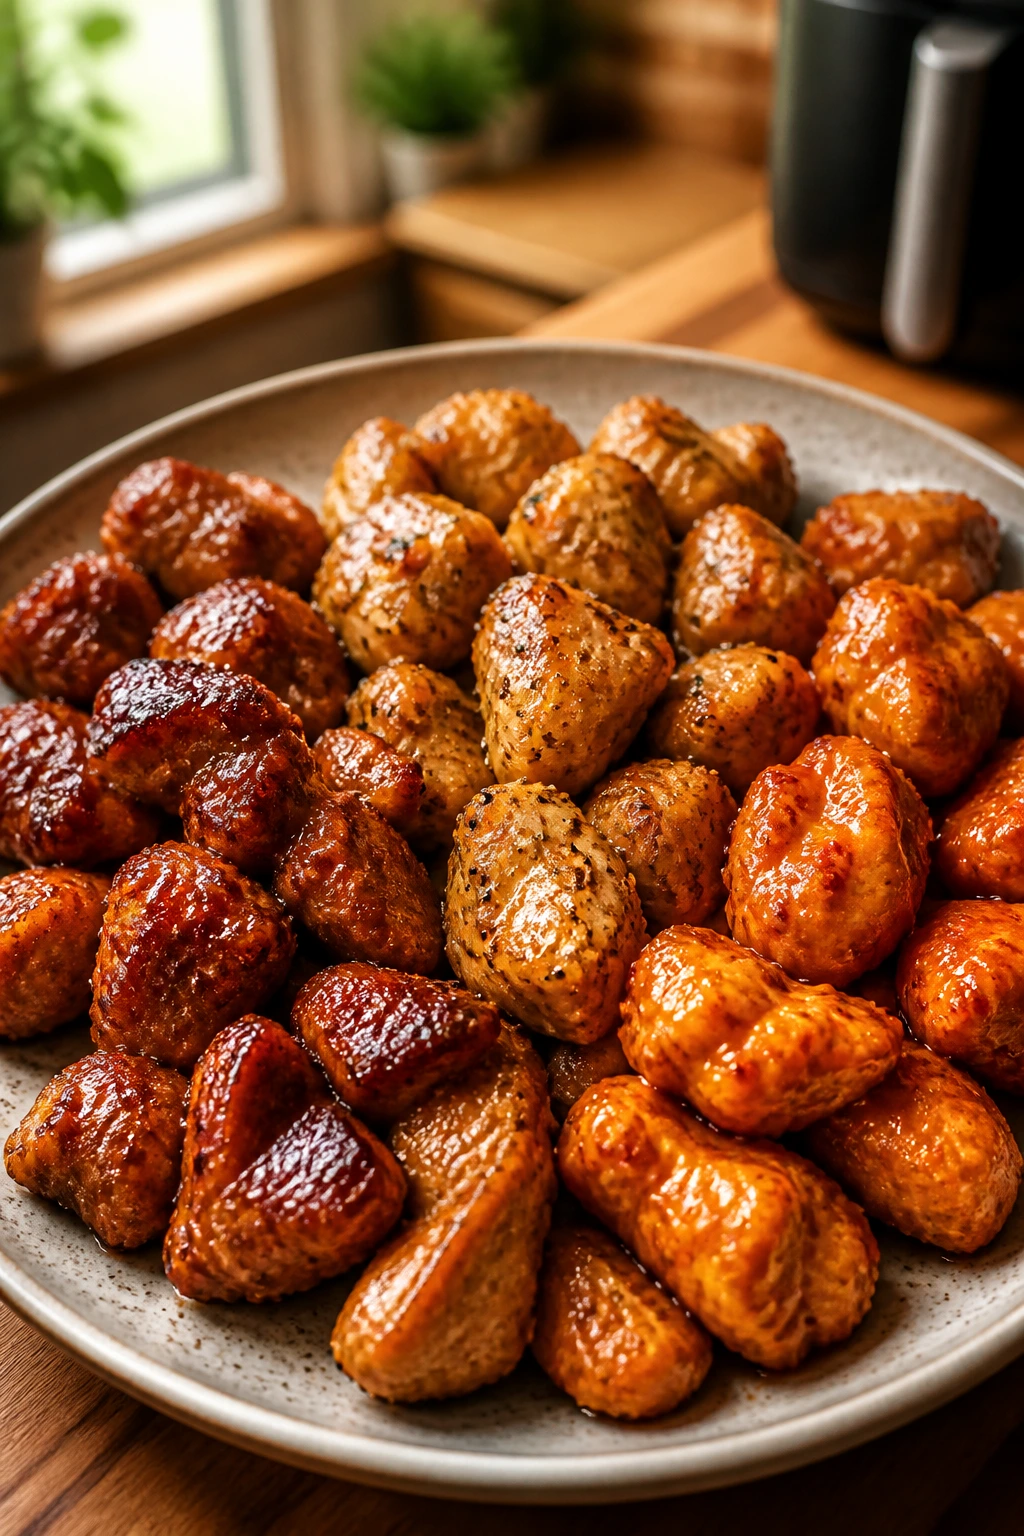
13. Meatball Sub Melts

Fully cooked meatballs are one of the better shortcuts in the freezer aisle. They save the long part of dinner and leave you with the fun part: saucy bread, melted cheese, and the kind of meal that feels like a minor event. The air fryer crisps the roll edges while the centers stay soft.
This is a good one when you want something hot, sturdy, and a little indulgent. It’s not subtle. That’s fine. The marinara clings to the meatballs, the mozzarella melts into strings, and the roll catches the sauce at the bottom. That’s dinner with a pulse.
Why It Works
Pre-cooked meatballs shorten the job without turning the meal into a compromise. The air fryer can warm and brown them quickly, then toast the rolls at the same time once they’re filled. A heat-safe dish or a small foil pan helps contain the sauce so it doesn’t fall through the basket. Because the meatballs are already cooked, you’re just building heat and texture, which is exactly what a 15-minute dinner needs.
Key Ingredients
- 12 fully cooked meatballs, thawed if frozen — Beef, turkey, or chicken all work.
- 1 cup marinara sauce — Use a sauce you actually like on its own.
- 2 hoagie rolls — Split but not cut all the way through.
- 1 cup shredded mozzarella — Melts faster than slices.
- 1 tbsp olive oil — For the rolls, optional.
- 2 tbsp grated Parmesan — Adds a salty finish.
- Fresh basil or parsley, optional — For brightness.
- Red pepper flakes, optional — Good if you want heat.
Quick Steps
-
Preheat the air fryer to 380°F (193°C).
-
Warm the meatballs in a small heat-safe dish with marinara for 4 to 5 minutes.
-
Brush the roll insides lightly with olive oil if you want extra browning.
-
Fill the rolls with the meatballs and sauce, then top with mozzarella and Parmesan.
-
Cook for 3 to 4 minutes more, until the cheese melts and the roll edges are toasted.
-
Finish with basil or red pepper flakes and serve immediately.
Tips and Variations
- Sauce control: Keep the sauce thick so the sandwich doesn’t collapse.
- Cheese swap: Provolone gives a sharper, more sandwich-shop finish.
- Meal idea: Serve with a simple salad if you want something to cut the richness.
14. Blackened Tilapia with Mango Salsa
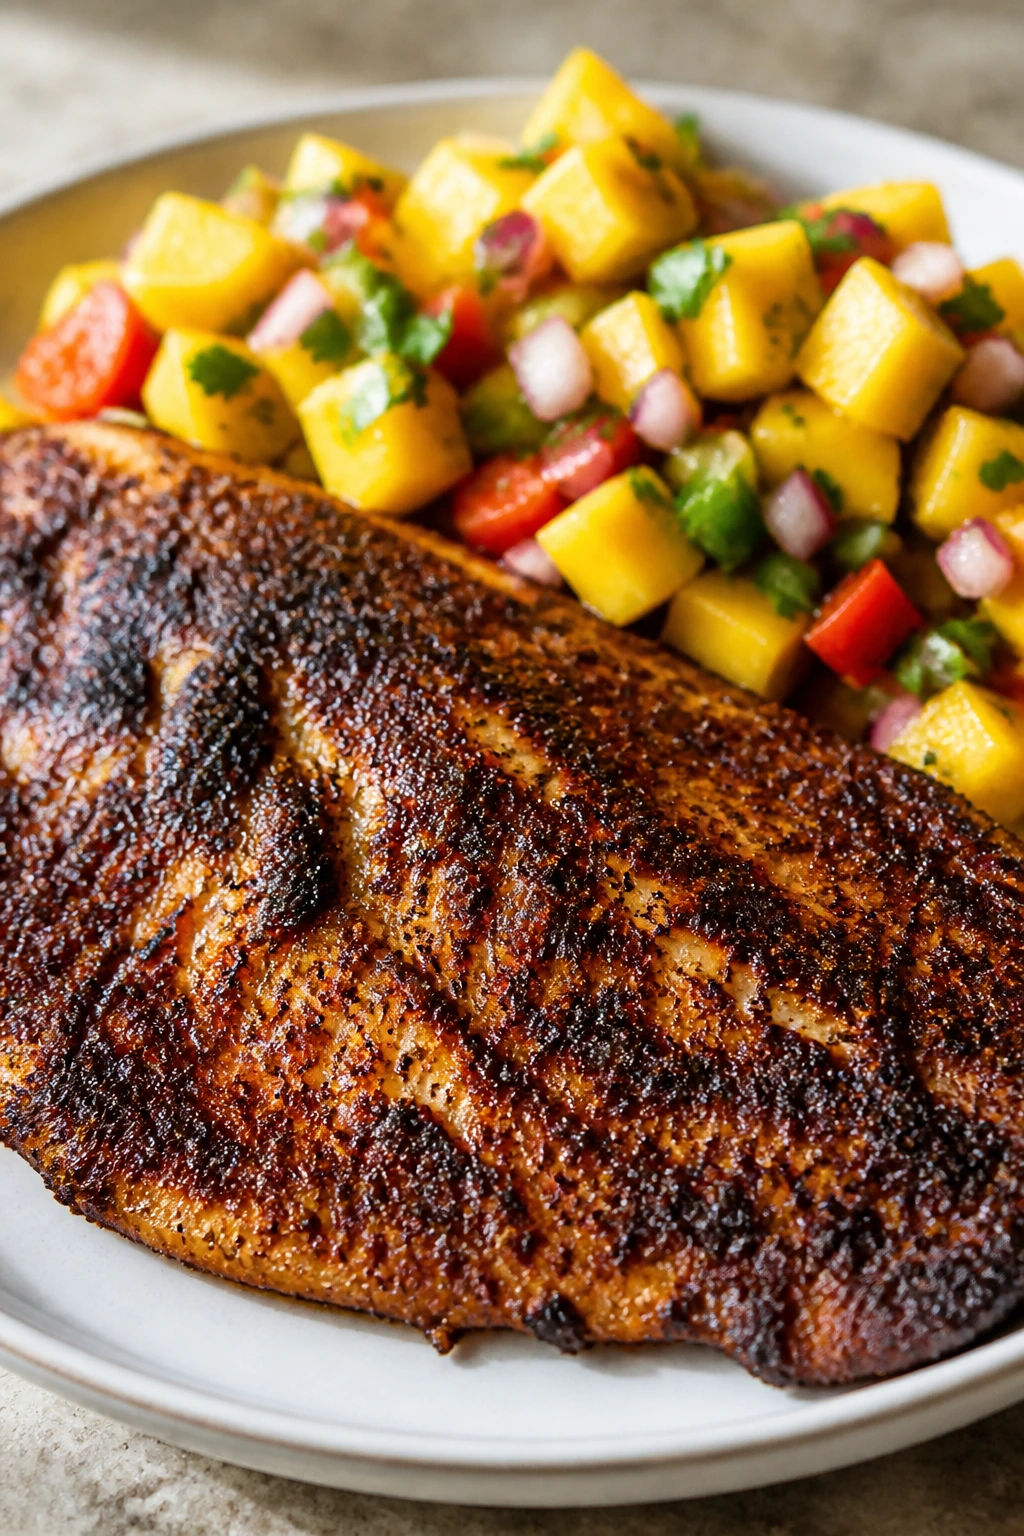
Tilapia doesn’t need much help if it’s seasoned well and cooked at the right pace. The blackening spice gives it a dark, savory shell, and the mango salsa cuts through with sweetness and acid. That contrast is what makes the plate wake up.
This recipe is clean and quick in the best sense. The fish cooks fast, the salsa can be chopped while the basket runs, and dinner lands with color. I like it when fish is done in a way that still looks like fish—flaky, opaque, and just tender enough to split with a fork.
Why It Works
Tilapia fillets are thin, so they can be cooked through in under 10 minutes without drying out if the heat stays high. Blackening seasoning tends to include paprika, garlic, cayenne, and herbs, which builds a crust quickly. Mango salsa works especially well here because it brings juice and sweetness to a fish that doesn’t have a strong flavor on its own. That means the fish doesn’t need a heavy sauce. It needs contrast.
Key Ingredients
- 1 lb tilapia fillets — Similar thickness helps them finish evenly.
- 1 tbsp olive oil — Keeps the spice blend in place.
- 1 tbsp blackening seasoning — Store-bought is fine.
- 1 mango, diced — Choose one that gives slightly when pressed.
- 1/4 small red onion, finely diced — Sharpens the salsa.
- 1 tbsp chopped cilantro — Optional, but useful.
- 1 lime, juiced — Holds the salsa together.
- 1/4 tsp kosher salt — For the salsa and fish, if needed.
Quick Steps
-
Preheat the air fryer to 400°F (205°C).
-
Rub the tilapia with olive oil and blackening seasoning.
-
Mix the mango, red onion, cilantro, lime juice, and salt in a bowl. Set aside.
-
Cook the fish for 7 to 8 minutes, until it flakes easily and reaches 145°F at the thickest part.
-
Spoon the mango salsa over the top and serve right away.
Tips and Variations
- Fish tip: Pat the fillets dry first so the seasoning sticks.
- Heat move: Add a diced jalapeño to the salsa if you like more bite.
- Serving idea: This is excellent in corn tortillas or over shredded lettuce.
15. BBQ Pork Medallions with Tangy Slaw
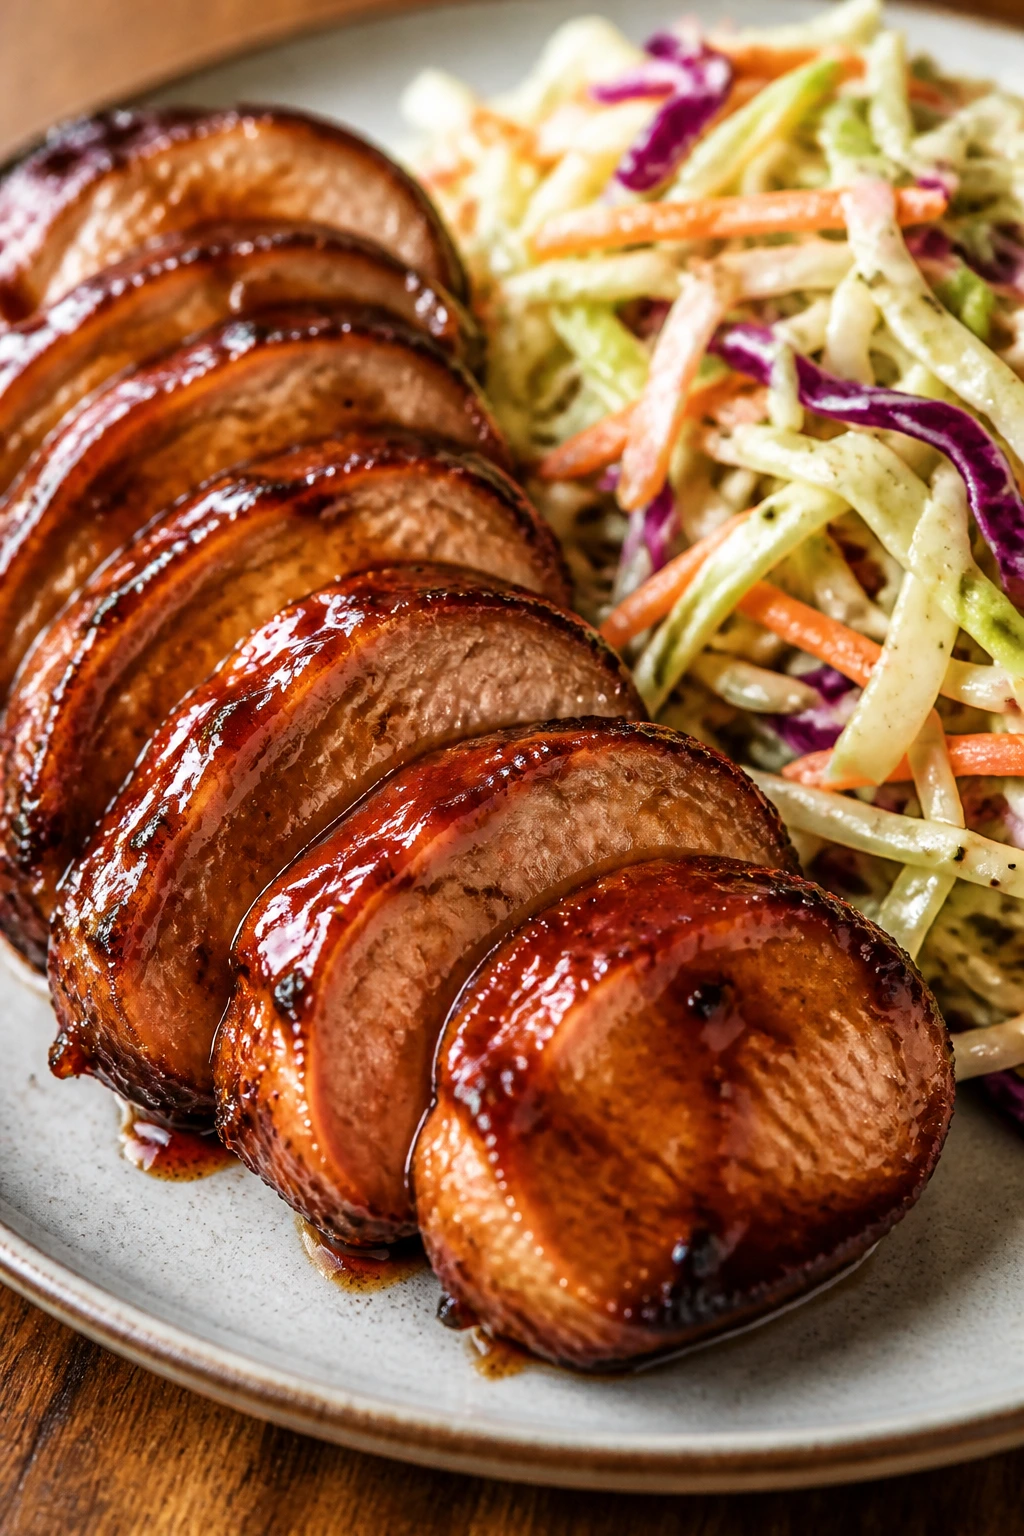
Pork tenderloin is one of the fastest cuts you can put in an air fryer, and slicing it into medallions makes it even quicker. A quick BBQ glaze gives you sticky edges, while the slaw keeps the meal from feeling heavy. It’s a very good balance for a weeknight.
The medallions brown fast because they’re small and evenly cut. That matters. The slaw brings crunch and acidity, which is the thing barbecue flavors need when they’re not getting a smoker to help them out. This dinner feels familiar in the nicest way.
Why It Works
Pork tenderloin is lean, which means it cooks quickly but can dry out if you leave it in too long. Cutting it into 1-inch medallions shortens the cook time and gives more browned surface area. The barbecue sauce goes on near the end because most sauces contain sugar, and sugar burns fast under hot air. The slaw adds the acid and crunch that keep the pork from tasting flat.
Key Ingredients
- 1 lb pork tenderloin, cut into 1-inch medallions — Trim the silvery membrane if needed.
- 1 tbsp olive oil — Helps the rub cling.
- 1 tsp smoked paprika — Gives the pork a barbecue-like base.
- 1/2 tsp garlic powder — Easy flavor.
- 1 tsp kosher salt — Important for lean pork.
- 2 tbsp barbecue sauce — Brush it on at the end.
- 2 cups coleslaw mix — Pre-shredded saves time.
- 2 tbsp mayonnaise — Or Greek yogurt if you want it lighter.
- 1 tsp apple cider vinegar — Keeps the slaw sharp.
Quick Steps
-
Preheat the air fryer to 390°F (199°C).
-
Toss the pork medallions with olive oil, smoked paprika, garlic powder, and salt.
-
Mix the coleslaw mix, mayonnaise, and vinegar in a bowl.
-
Cook the pork for 6 minutes, then brush with barbecue sauce and cook 2 minutes more, until the pork reaches 145°F.
-
Serve the medallions with tangy slaw on the side or piled on top.
Tips and Variations
- Sauce rule: Add most of the sauce at the end so it stays glossy instead of burnt.
- Coleslaw trick: Let the slaw sit for 5 minutes before serving so it softens a little.
- Bowl idea: Serve over rice if you want a more filling base.
16. Chicken Sausage and Brussels Sprouts
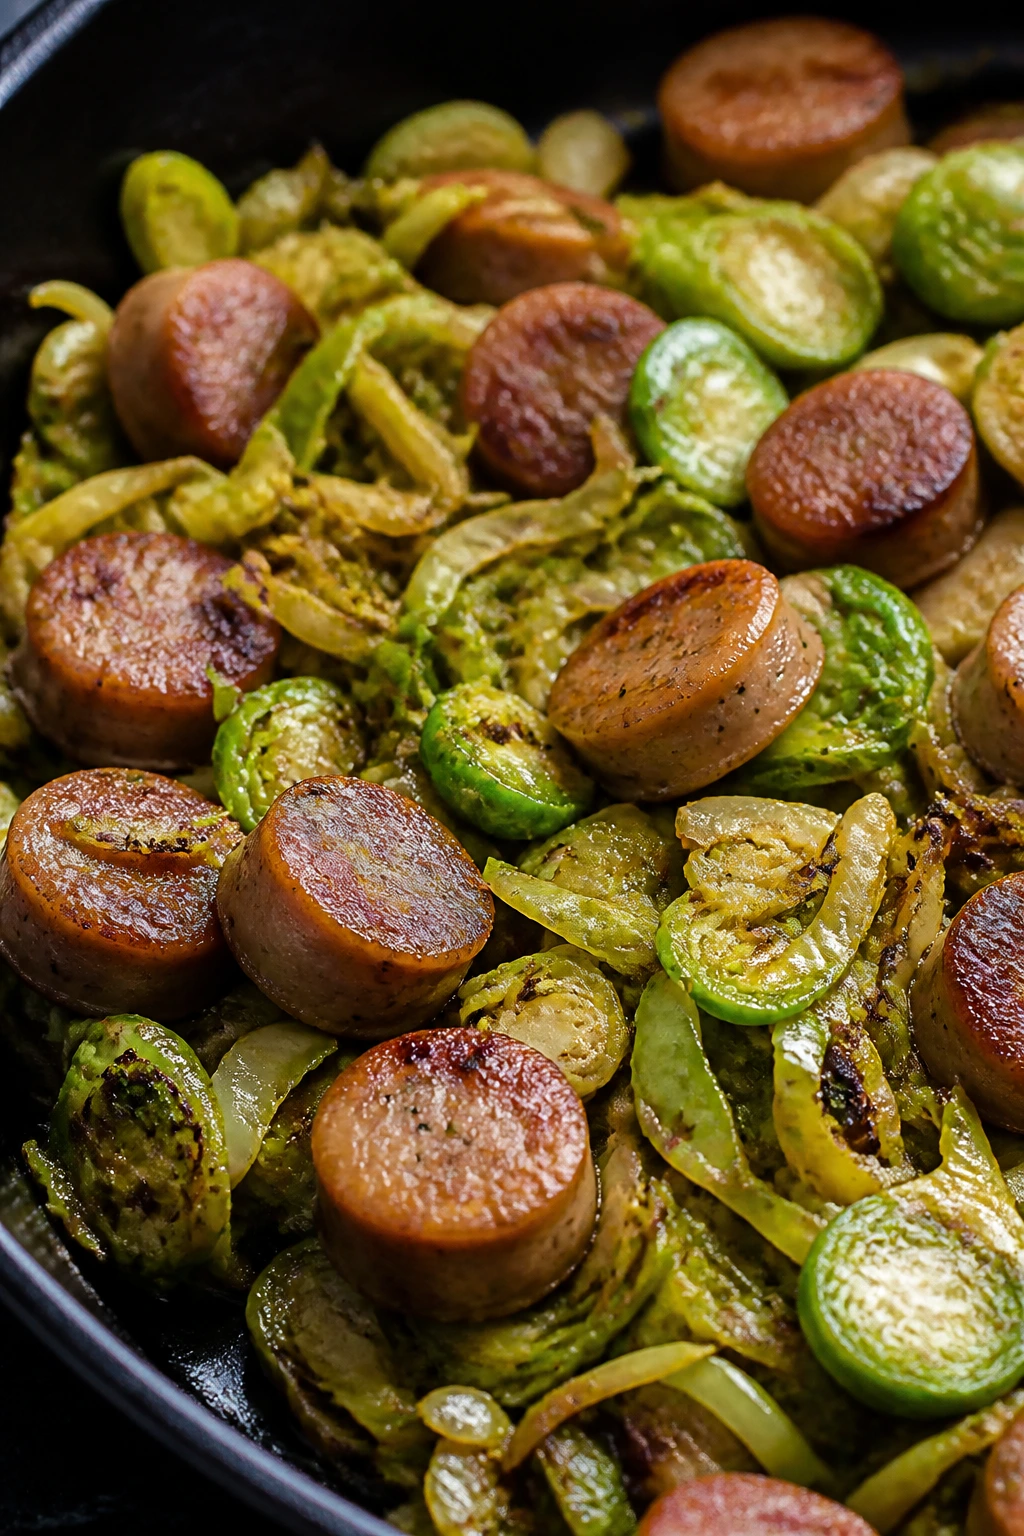
Pre-cooked chicken sausage is a fast dinner ingredient that doesn’t get enough credit. It browns well, tastes seasoned already, and holds up to the air fryer without losing its shape. Pair it with shaved Brussels sprouts and you’ve got a dinner with salt, caramelization, and a bit of bite.
This one is especially handy because there’s not much to manage. The sausage does its job, the sprouts crisp around the edges, and a little mustard or maple at the end can send the whole thing in a new direction. I like dinners that can be pushed either savory or sweet without starting over.
Why It Works
Chicken sausage is already cooked, so the air fryer only needs to warm it and brown the outside. Brussels sprouts cook faster when they’re shaved or sliced thin, because the smaller pieces get more surface contact with the hot air. That means you get crisp leaves before the stems turn stubborn. A short cook at 390°F lets both ingredients finish together without waiting around.
Key Ingredients
- 12 oz pre-cooked chicken sausage, sliced into coins — Apple, garlic, or Italian all work.
- 2 cups shaved Brussels sprouts — Use a bagged mix if you can find it.
- 1 tbsp olive oil — Helps the sprouts brown.
- 1 tsp garlic powder — Sharpens the vegetable flavor.
- 1/2 tsp kosher salt — Adjust depending on sausage saltiness.
- 1/4 tsp black pepper — Small but useful.
- 1 tsp Dijon mustard or maple syrup — Optional finish, depending on the flavor direction you want.
Quick Steps
-
Preheat the air fryer to 390°F (199°C).
-
Toss the sausage and Brussels sprouts with olive oil, garlic powder, salt, and pepper.
-
Spread everything in the basket and cook for 8 minutes, shaking halfway through.
-
Cook 2 minutes more, until the sprouts have browned edges and the sausage is hot.
-
Finish with Dijon or maple syrup if you want a sharper or sweeter note.
Tips and Variations
- Fastest version: Use shaved sprouts from a bag. They cook more evenly and save knife work.
- Flavor shift: Add a pinch of chili flakes for a little heat.
- Serving idea: A fried egg on top turns this into a very good late dinner.
17. Crispy Gnocchi with Sausage and Pesto
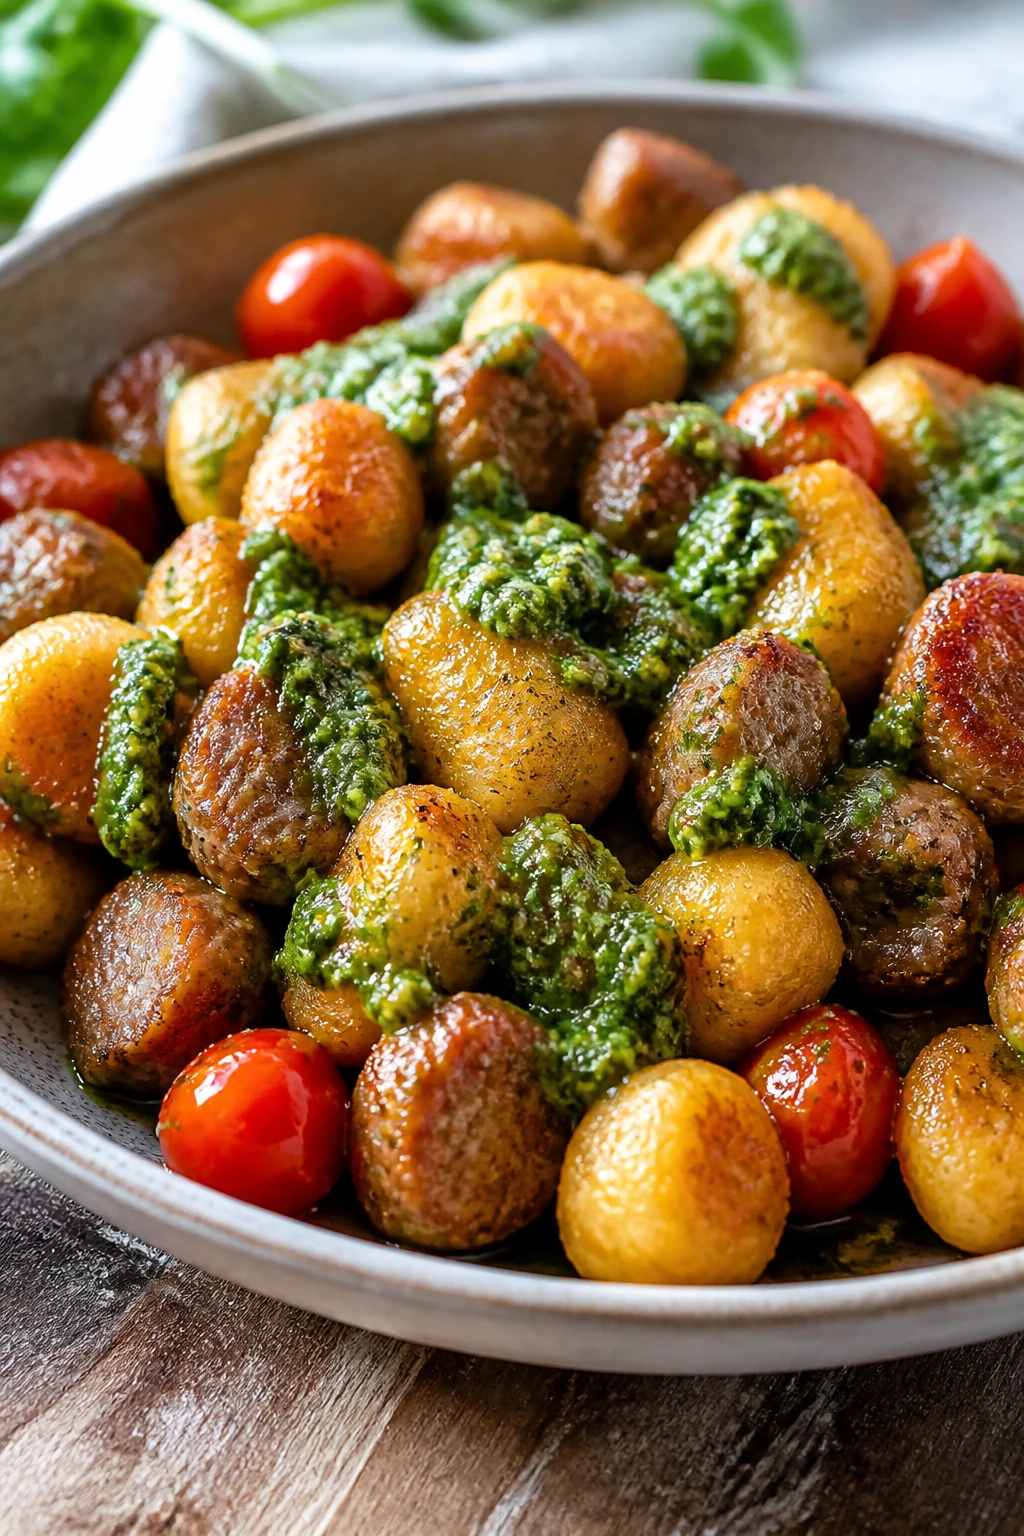
Shelf-stable gnocchi is one of the better pantry tricks for air fryer dinners. It doesn’t need boiling first, and it crisps on the outside while staying tender inside, which is a nice little surprise if you’ve only had it from a pot. Add pre-cooked sausage and pesto, and dinner becomes a fast, salty, herb-heavy bowl.
This one feels a touch more substantial than the other quick dinners, which is useful when you want comfort without waiting. The gnocchi picks up the sausage drippings, the tomatoes burst a little, and the pesto goes on at the end so it stays green and sharp. That sequence matters.
Why It Works
Shelf-stable gnocchi can go straight into the air fryer because it only needs heat and fat to crisp. Pre-cooked sausage adds flavor and protein without adding a second long cook, and cherry tomatoes soften fast enough to share the same basket. Pesto should be added after cooking; otherwise the basil darkens and the cheese can clump. The result is a dinner that feels rich without needing a saucepan.
Key Ingredients
- 16 oz shelf-stable gnocchi — Do not boil it first.
- 8 oz pre-cooked Italian sausage, sliced — Mild or hot, depending on your mood.
- 1 cup cherry tomatoes — They burst and make the dish juicier.
- 1 tbsp olive oil — Helps the gnocchi brown.
- 2 tbsp pesto — Add after cooking.
- 2 tbsp grated Parmesan — For a salty finish.
- 1/4 tsp kosher salt — Lightly season if the sausage is mild.
- Black pepper, to taste — Optional but useful.
Quick Steps
-
Preheat the air fryer to 390°F (199°C).
-
Toss the gnocchi, sausage, tomatoes, olive oil, salt, and pepper in a bowl.
-
Spread the mixture in the basket and cook for 8 minutes, shaking halfway through.
-
Cook 2 to 3 minutes more, until the gnocchi is lightly crisp and the tomatoes have split.
-
Toss with pesto and Parmesan right after cooking and serve warm.
Tips and Variations
- Crisp tip: Dry gnocchi stays crisper than damp gnocchi, so don’t rinse it.
- Add greens: Stir in baby spinach after cooking if you want the bowl to feel a little lighter.
- Heat option: Hot Italian sausage gives the whole dish more backbone.
18. Smoked Paprika Chickpea Wraps with Feta

Canned chickpeas are one of the easiest ways to make a meatless dinner feel like a meal. They crisp on the outside, stay creamy inside, and take on spices without much fuss. Feta, cucumber, and lettuce make the wraps fresh enough to keep you from getting bored halfway through.
This is not trying to imitate meat. Good. It doesn’t need to. The chickpeas bring enough substance on their own when they’re dried properly and seasoned well. Add a yogurt sauce or hummus, and you’ve got a wrap that lands with a little crunch and a lot of texture.
Why It Works
Chickpeas need to be as dry as you can get them before they hit the air fryer. That dryness helps the skins tighten and crisp under high heat. Smoked paprika and cumin give the beans a deeper, warmer flavor, while feta adds salt and tang after cooking. Wrapping everything in a tortilla or pita keeps the meal portable, but the important part is the contrast between hot chickpeas and cool vegetables.
Key Ingredients
- 1 can chickpeas, drained, rinsed, and patted dry — Drying is the part that matters most.
- 1 tbsp olive oil — Helps the spices coat the chickpeas.
- 1 tsp smoked paprika — Gives the chickpeas a savory edge.
- 1/2 tsp ground cumin — Adds warmth.
- 1/2 tsp garlic powder — Easy background flavor.
- 1/2 tsp kosher salt — Needed to wake up the beans.
- 4 tortillas or pitas — Warmed briefly before filling.
- 1 cup chopped lettuce — For crunch.
- 1/2 cucumber, diced — Cool and fresh.
- 2 oz feta, crumbled — Salty finish.
- Yogurt sauce or hummus, optional — Useful if you want more richness.
Quick Steps
-
Preheat the air fryer to 390°F (199°C).
-
Pat the chickpeas dry with a towel, then toss them with olive oil, smoked paprika, cumin, garlic powder, and salt.
-
Cook the chickpeas for 8 to 10 minutes, shaking halfway through, until the skins look a little wrinkled and the edges feel crisp.
-
Warm the tortillas or pitas for 30 seconds to 1 minute.
-
Fill each wrap with lettuce, cucumber, chickpeas, feta, and a spoonful of yogurt sauce or hummus.
Tips and Variations
- Dryness matters: If the chickpeas are wet, they’ll go soft instead of crisp.
- Flavor swap: Add lemon zest for a brighter finish.
- Make it fuller: Toss in avocado slices or a handful of pickled onions.
Why the Air Fryer Wins on a 15-Minute Clock
The air fryer is fast because it moves hot air hard and close. That sounds almost boring until you use it for dinner and realize how much time a stove usually spends asking you to pay attention. A pan needs stirring. An oven needs preheating and patience. A slow cooker needs a whole personality.
This is why thin cuts matter so much. Chicken cutlets, shrimp, salmon cubes, pork medallions, and pre-cooked sausage all give the hot air something to work with right away. If the ingredient is too thick, the basket loses the race before it starts. If it’s too wet, the surface won’t brown. The appliance itself isn’t magic. It’s a very good tool for the right job.
The other win is control. A thermometer tells you when chicken is at 165°F, pork is at 145°F, and fish is just flaky enough. That’s the part that keeps these dinners from drifting into overcooked territory. I trust the clock for the first pass and the thermometer for the final one. That combination saves a lot of disappointment.
Essential Equipment for These Recipes
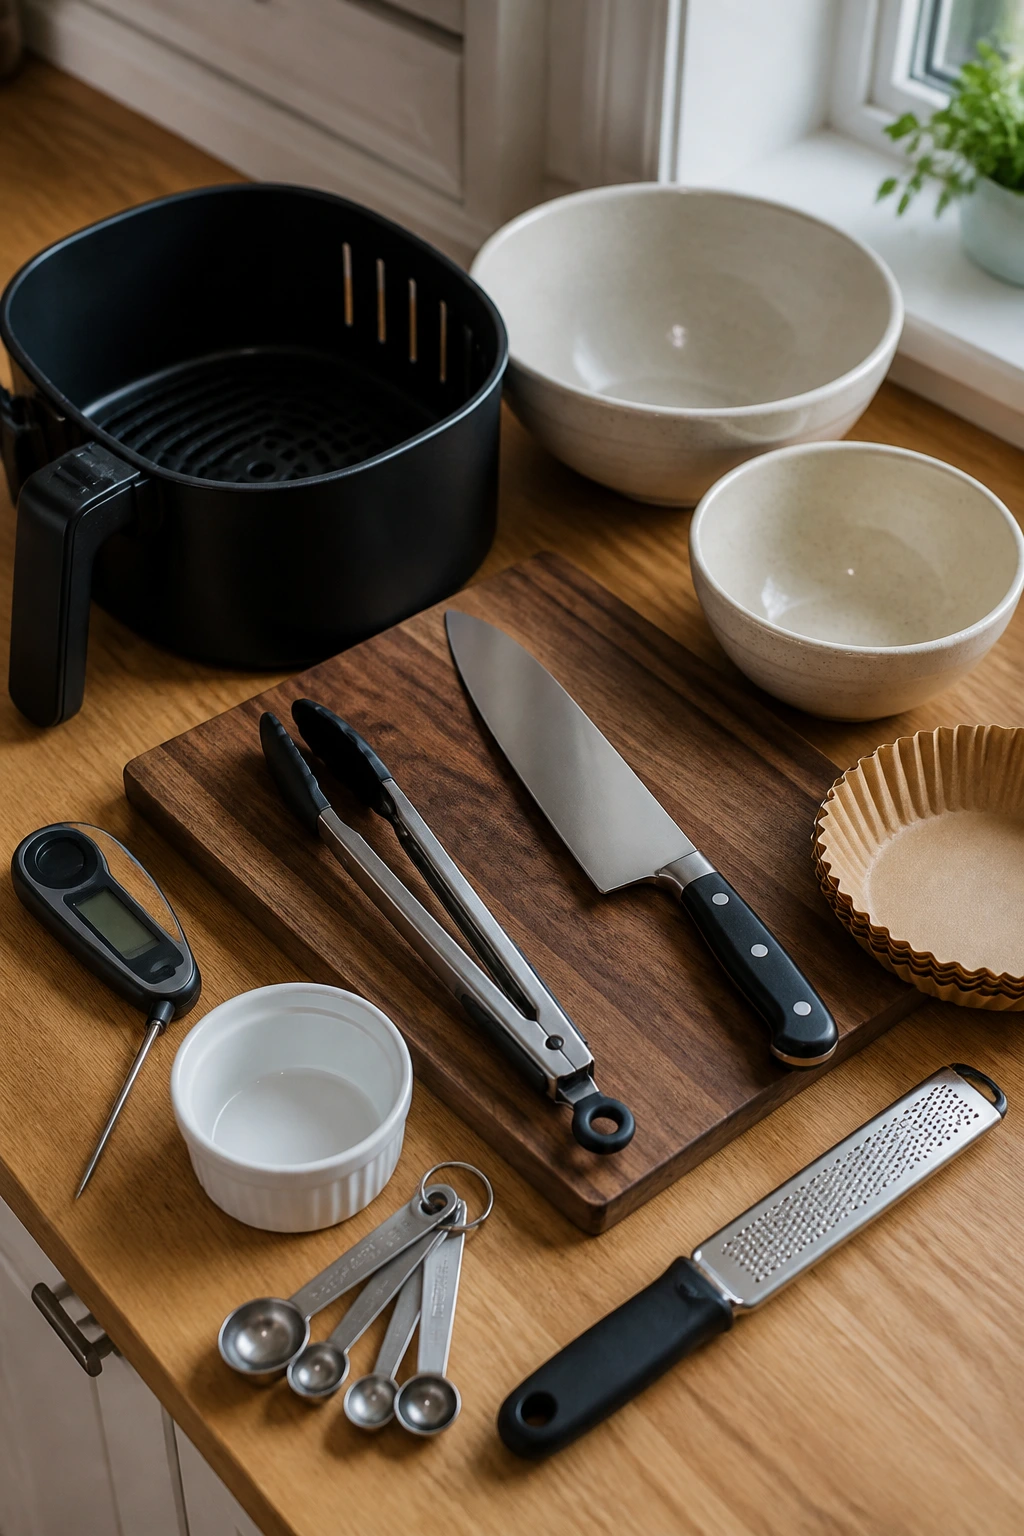
- Air fryer basket or tray, 5-quart or larger — Big enough to hold most dinners in a single layer.
- Instant-read thermometer — The easiest way to stop chicken, pork, and fish at the right point.
- Tongs — Useful for turning shrimp, steak bites, sausage, and cutlets without tearing them.
- Sharp chef’s knife — Thin, even cuts are the reason these meals finish on time.
- Cutting board — A big one helps when you’re slicing peppers, onions, or chicken.
- Two mixing bowls — One for protein, one for vegetables or slaw.
- Small heat-safe dish or ramekin — Handy for saucy meatballs, warmed corn, or glaze.
- Measuring spoons — Air fryer cooking depends on seasoning balance, not guesswork.
- Parchment liners with holes, optional — Good for sticky marinades if your air fryer tolerates them.
- Microplane or fine grater, optional — Useful for lemon zest, Parmesan, or garlic.
Smart Shopping and Ingredient Tips
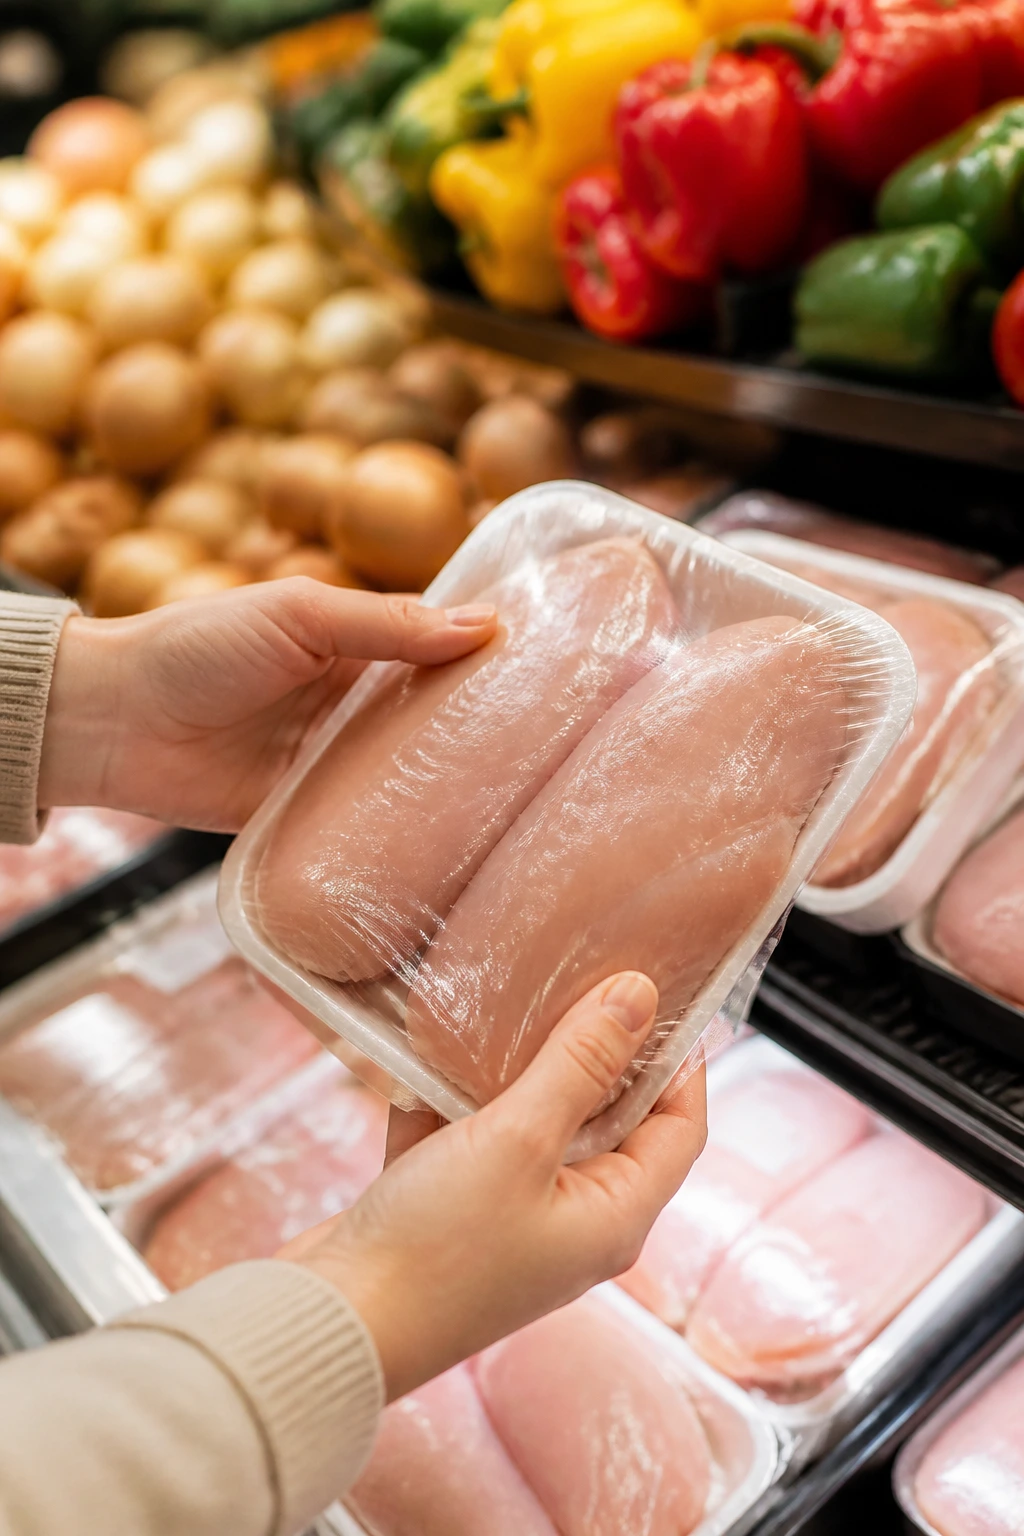
Thin cuts are the secret to making 15-minute dinners real instead of wishful. Look for chicken cutlets, thin pork chops, peeled shrimp, cod fillets that are even in thickness, and salmon that can be cut into neat cubes. If the meat is thick, you’re buying future frustration.
Pre-cooked ingredients are your friend here. Kielbasa, chicken sausage, fully cooked meatballs, and shelf-stable gnocchi all shorten the cook time without making dinner feel lazy. That’s not cheating. That’s using the aisle the way it was intended. Frozen shrimp can work too, as long as you thaw it and pat it dry. Wet shrimp cooks badly. Wet anything cooks badly.
Produce matters more than people think in fast dinners because there isn’t time for long seasoning or sauces to hide behind. Buy bell peppers that feel heavy, onions that are firm, green beans that snap, and cherry tomatoes that are not wrinkled. For fruit-based sides and salsas, choose mangoes and apples that give just slightly when pressed. Halloumi, feta, and Parmesan should taste salty enough to need no apology. If a cheese needs a speech, skip it.
One more thing: read the label on spice blends. Some fajita, Cajun, and blackening mixes are loaded with salt. That’s fine, but it changes how much extra salt you need. The dinner gets better when you season with intent instead of habit.
How to Serve These Recipes
Presentation: Put the crisp or browned item front and center, then tuck the softer parts around it so the plate looks lively. Salmon bites look best with the green beans on the side, tacos look best when the slaw peeks out, and anything sauced—meatballs, buffalo chicken, pork medallions—should get the sauce spooned on at the very end so the texture stays visible.
Accompaniments: Rice, couscous, tortillas, pita, warm rolls, salad greens, and simple slaws all make sense across this group. If the dinner is already carb-heavy, a crunchy cucumber salad or quick tomato side keeps the plate from feeling heavy. If the meal is lighter, add bread or rice and call it done.
Portions: Most of these recipes serve 2 to 4 people depending on how much you add around them. Seafood and chicken cutlets usually feel right at 4 ounces per person, while sausage, meatballs, or gnocchi can stretch a little farther. If you’re cooking for a bigger table, cook in batches and keep the first round warm in a low oven rather than crowding the basket.
Beverage Pairing: Lemon water, sparkling water with lime, unsweetened iced tea, or a crisp lager all work better than anything syrupy. Shrimp and fish like citrusy drinks. Buffalo chicken likes something cold and plain. Pork and sausage are happy with tea or beer. Nothing here needs a complicated pairing. The food already does enough.
Additional Tips and Flavor Boosters
Flavor Enhancement: Finish most of these dinners with acid. A squeeze of lemon, lime, a few pickled onions, or a splash of vinegar can wake up browned food in a way salt alone cannot. Air fryer food often tastes richer than it looks; acid keeps it from feeling flat.
Customization: Use your favorite sauce as a finish instead of burying the food in it. Pesto on gnocchi, ranch on buffalo chicken, tzatziki on halloumi, salsa on tilapia, or a quick mustard drizzle on pork all work because they land after the cooking is done. That’s the cleanest way to change a recipe without breaking it.
Serving Suggestions: Fresh herbs matter more here than they do in slow-cooked food. Parsley, cilantro, dill, scallions, or basil give a quick dinner a brighter edge and make the plate look finished without extra calories or fuss. A tiny shower of flaky salt at the end doesn’t hurt either.
Make-It-Yours: If you need dairy-free, skip butter finishes and use olive oil plus lemon. If you need gluten-free, use corn tortillas, rice, or certified gluten-free crumbs where needed. If you want extra heat, add chili flakes or hot sauce at the table so the base recipe stays balanced for everyone else.
Make-Ahead, Storage, and Reheating Guidance
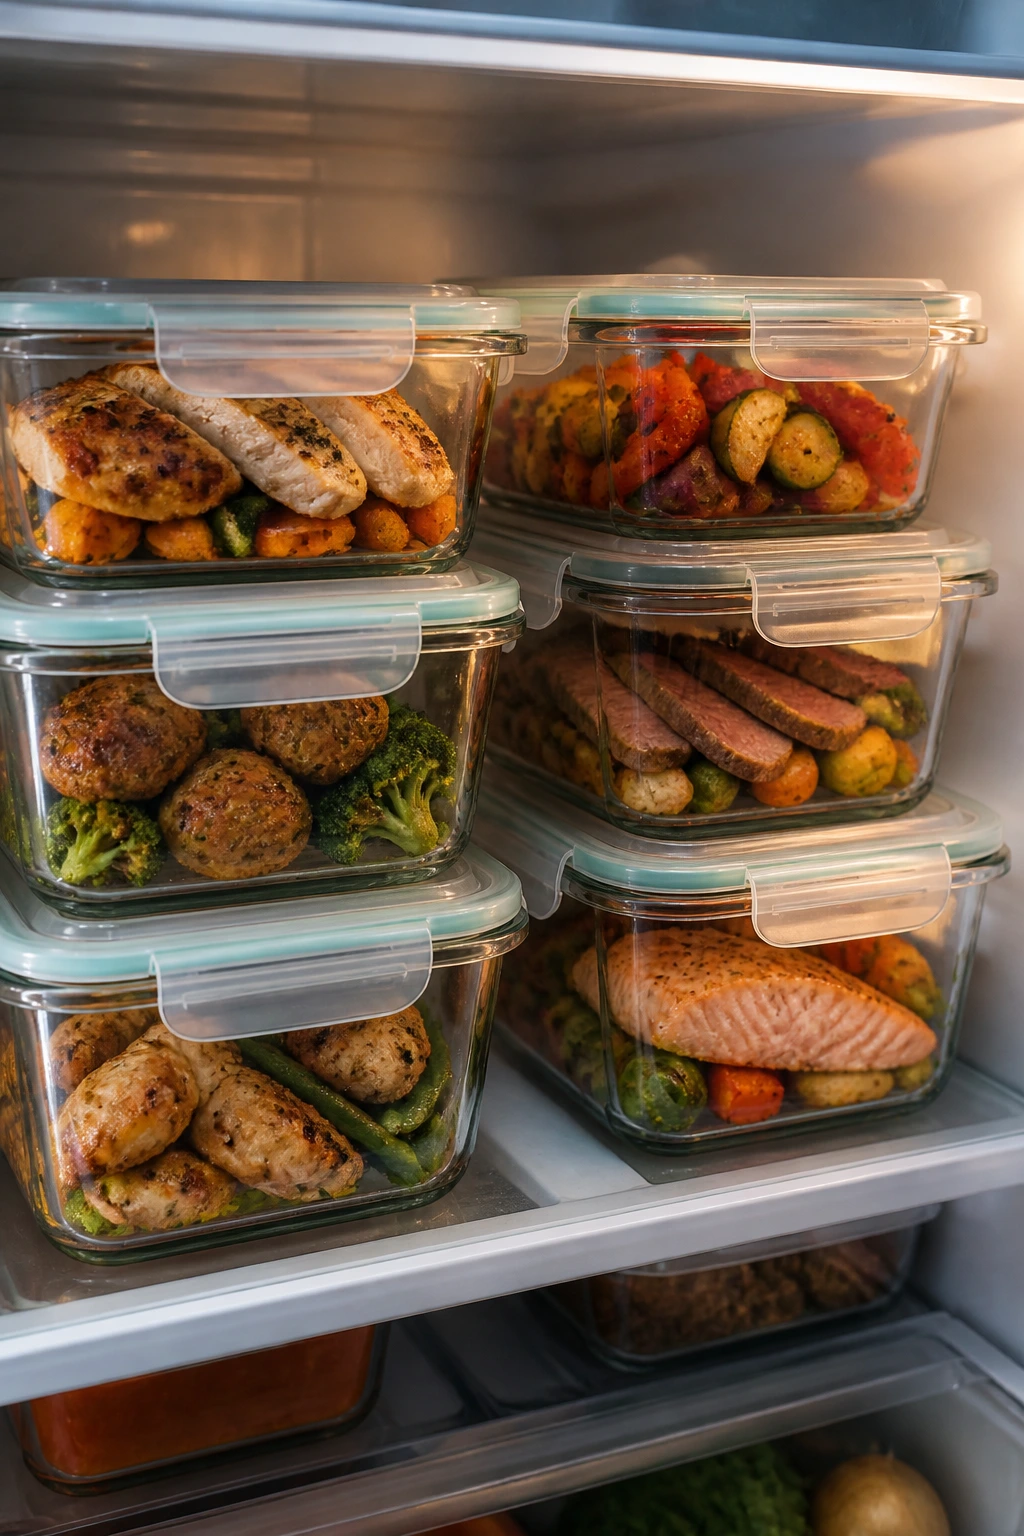
Most of these dinners hold well for 3 to 4 days in the refrigerator, with a few seafood exceptions. Cooked chicken, pork, sausage, steak bites, meatballs, gnocchi, tofu, and halloumi all keep reasonably well if they’re cooled quickly and stored in airtight containers. Fish and shrimp are more fragile; they’re best eaten within 2 days so the texture doesn’t turn chalky or dry. For food safety, get leftovers into the fridge within 2 hours of cooking, sooner if the room is warm.
Freezing is useful for the meatier recipes. Chicken cutlets, pork medallions, turkey burgers, sausage, and meatballs can usually be frozen for up to 2 months without much trouble, though the texture is best sooner. Shrimp and fish can be frozen, but they’re not my first choice for leftovers because reheating tends to expose every weakness. Wrap items tightly, press out as much air as possible, and label the container. Future-you is always grateful for the label.
Reheating in the air fryer is the best path for crisp food. Use 350°F (175°C) for 3 to 5 minutes, depending on the size of the piece. Salmon, fish, shrimp, tofu, and gnocchi all do better with a shorter reheat so they don’t tighten up. Chicken and pork can take the full 5 minutes, especially if they were chilled straight from the fridge. Sauced items like meatballs or buffalo chicken should be reheated with the sauce only if it was already on the food; otherwise, reheat plain and add the sauce after so it stays bright.
For wraps, tacos, and sandwiches, store the fillings and the bread separately. That one habit saves more dinners than any other. If you mix everything together in the fridge, you’ll reopen the container to a soggy, sad middle that no amount of enthusiasm can fix.
Variations and Adaptations to Try
Gluten-Free Basket Nights: Use corn tortillas, rice, lettuce cups, or gluten-free buns where bread is involved, and swap panko for crushed gluten-free crackers or gluten-free crumbs in breaded recipes. The texture stays good if you still spray lightly with oil before cooking.
Dairy-Free Swaps That Still Taste Rich: Skip butter finishes and lean on olive oil, lemon, lime, pesto without cheese, or a spoonful of tahini. Shrimp tacos, salmon bites, and fajita strips barely miss the dairy once they get a strong acid finish.
Lower-Carb Bowl Mode: Serve the chicken, steak, pork, shrimp, tofu, or sausage over greens, shredded cabbage, or cauliflower rice. The same seasoning works, but the base shifts the meal from sandwich territory to bowl territory without changing the cook.
Kid-Friendly Mild Mode: Cut back on cayenne, buffalo sauce, blackening seasoning, and Cajun spice, then serve the heat on the side. Cheese, honey, and a little ranch or ketchup can make the same dinner land with a different crowd without a second cooking session.
Big-Heat Finish: Add chili crisp, hot honey, jalapeños, or extra black pepper after cooking if you want more bite. Fast dinners often taste better when the heat comes at the end instead of baked into the whole thing.
Budget Pantry Version: Swap fresh vegetables for frozen ones where it makes sense, use canned chickpeas, buy store-brand spice blends, and lean on kielbasa, sausage, or meatballs for protein. The air fryer doesn’t care much where the ingredients came from; it cares whether they’re dry enough and cut small enough.
Common Mistakes to Avoid
Crowding the basket: This is the big one. If the food is piled up, it steams instead of browns, and you end up with soft peppers, pale chicken, or limp tofu. The fix is simple: keep the pieces in a single layer and cook in two batches if you have to.
Using thick cuts when the clock says thin: A thick pork chop or full chicken breast won’t finish in the same window as shrimp or salmon bites. The symptom is browned outsides and underdone centers. Buy cutlets, slice larger pieces thinner, or pound them even before seasoning.
Skipping the dry step: Wet fish, wet tofu, wet chickpeas, and wet vegetables all resist browning. You’ll know the mistake by the pale, slick surface and the lack of crisp edges. Pat things dry with a towel before they hit the basket.
Saucing too early: Sugar burns faster than people expect under hot air. If you glaze meatballs, pork, or chicken too soon, the sauce turns dark and sticky in a bad way. Add sweet sauces in the last minute or after cooking.
Trusting color alone: Air fryer food can look done before it actually is. Chicken still needs 165°F, pork needs 145°F, shrimp should be opaque and curled, and fish should flake easily at the thickest part. A thermometer removes guesswork, and guesswork is where dry dinners live.
Skipping the preheat: A cold basket delays browning and makes timing less reliable. Three minutes of preheat time is tiny compared with the time you waste fixing a pale, uneven batch. Hit the preheat button first, then start chopping.
Frequently Asked Questions

Can I use frozen chicken, shrimp, or fish in these dinners?
Yes, but thawing first gives better texture and more even seasoning. Frozen shrimp and fish can cook well after thawing and patting dry, while chicken is much easier to manage once it’s no longer icy in the center. If you cook from frozen, add a few minutes and watch the center closely.
Do I really need to preheat the air fryer?
For these dinners, yes, if you want the timing to stay honest. A preheated basket starts browning right away, which matters when you only have 15 minutes to work with. Skipping preheat often gives you pale food with a soft surface.
What if my air fryer runs hot?
Drop the temperature by 10 to 25 degrees and check a minute or two early. Air fryers vary more than people expect, and a model with a strong fan can brown the outside before the middle is ready. The thermometer is the tie-breaker.
Can I cook the protein and vegetables together every time?
Not always. Shrimp and green beans, salmon and asparagus, sausage and peppers, or pork medallions and apples all work because the pieces share a similar cook window. Broccoli and tofu can work too if the pieces are small. When the cook times don’t match, start the slower item first and add the faster one later.
What basket size works best for these recipes?
A 5-quart basket or larger makes life easier because the ingredients can stay in a single layer more often. Smaller baskets still work, but you’ll need more batches and a little patience. The recipe doesn’t change much; the timing between batches does.
Can I make these dinners ahead for meal prep?
Yes, especially the chicken, pork, sausage, meatball, tofu, and gnocchi recipes. Store the components separately and reheat in the air fryer at a lower temperature so the food warms without drying out. Seafood is the least meal-prep-friendly of the group, so cook it close to serving time if you can.
Are parchment liners safe in the air fryer?
They can be, as long as they’re perforated and weighed down with food so they don’t fly into the heating element. Use them only if your air fryer allows it and follow the manufacturer’s guidance. Bare metal basket contact often gives the best browning.
How do I keep chicken from drying out?
Use cutlets or thin strips, season well, and stop cooking at 165°F instead of waiting for visual perfection. A little oil helps, but thickness is the real issue. Thick chicken takes too long for a 15-minute dinner.
Can I double these recipes for a bigger crowd?
You can, but not always in one batch. Doubling is fine if the basket is large enough and you keep everything in a single layer, otherwise the food steams and the timing slips. Cooking two quick batches is usually better than overcrowding one big one.
Dinner on a Short Fuse
Fifteen minutes is not much time, but it is enough when the ingredients are chosen with care and the basket is used the way it wants to be used. Thin cuts, quick vegetables, pre-cooked sausage, and a few smart shortcuts can turn a regular evening into a working dinner without much drama. That’s the real appeal here. Not speed for its own sake. Speed that still tastes like a meal.
Keep a few of these recipes in your back pocket and weeknights stop feeling like a race you’re already losing. The next time the clock gets loud, start with the basket and work outward.