
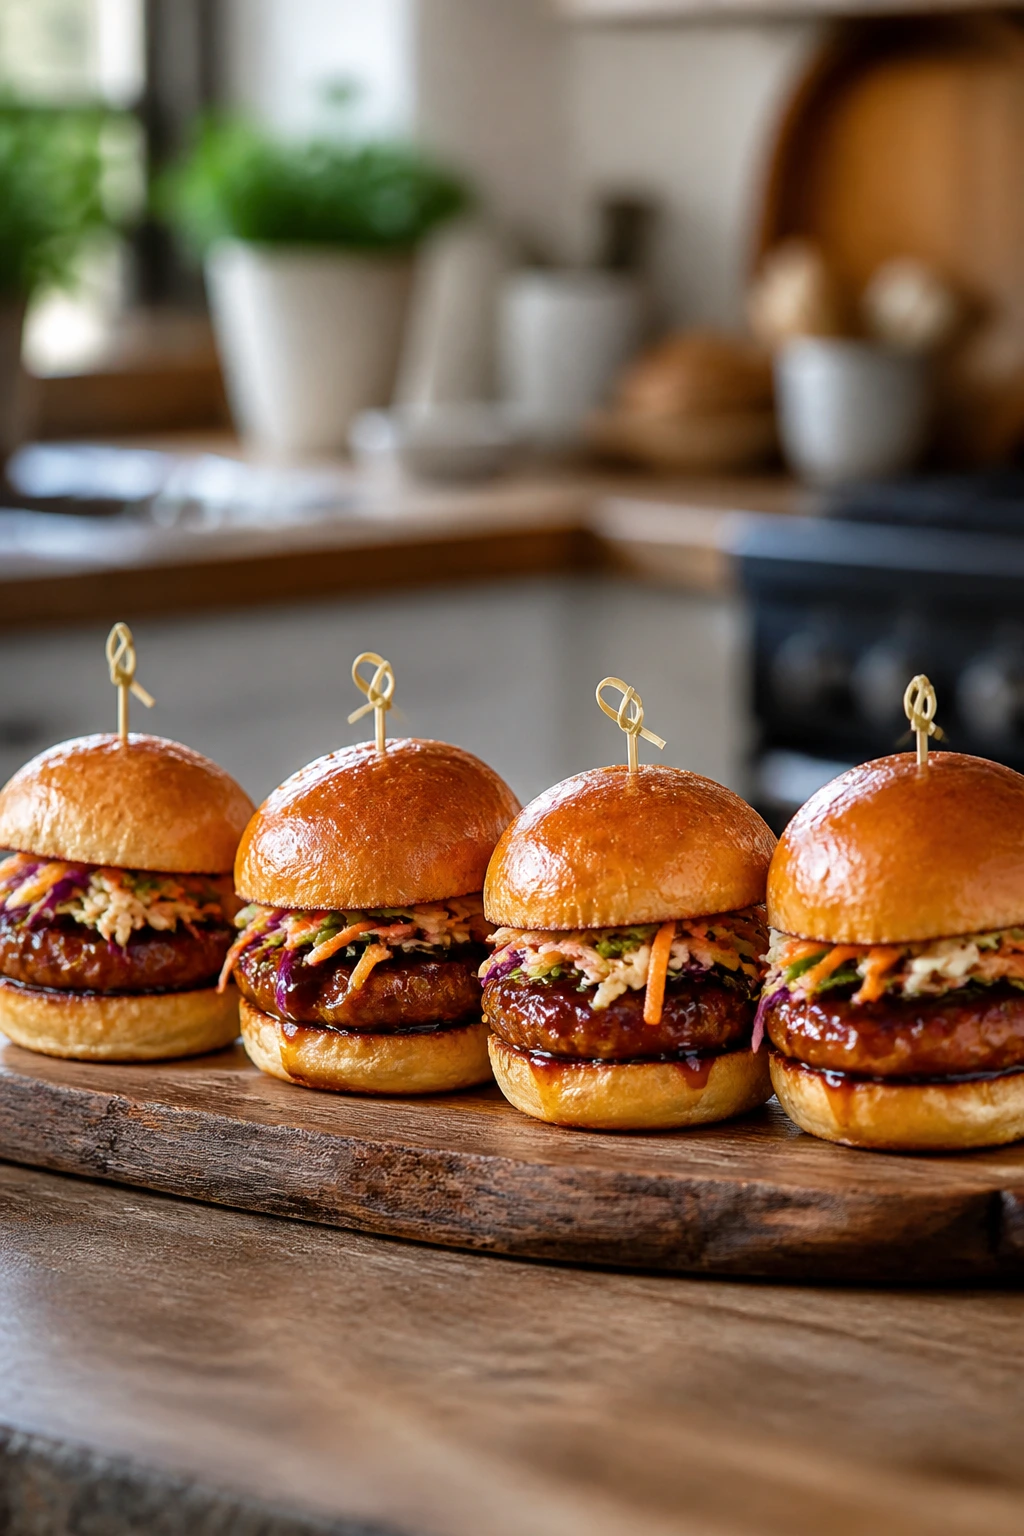
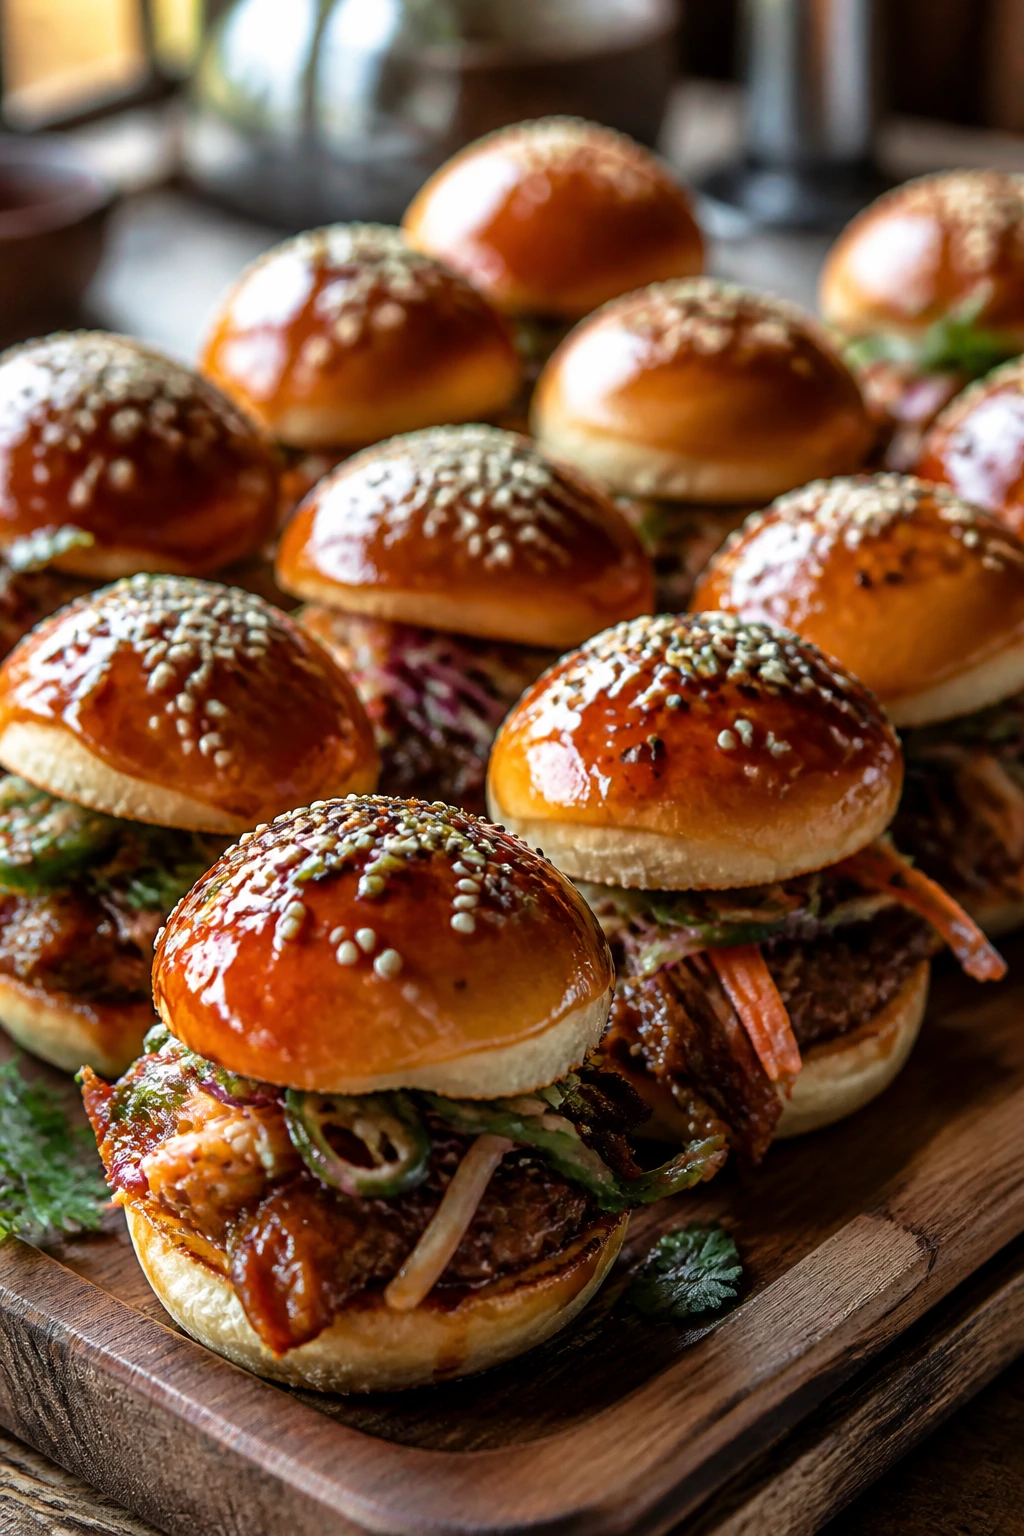
A tray of Asian sliders can rescue a half-empty pantry faster than almost anything else. A spoonful of soy sauce, a ribbon of hoisin, a splash of rice vinegar, and a little sesame oil can make ground meat, tofu, mushrooms, or canned fish taste deliberate instead of improvised. That’s the whole trick here: small buns, big seasoning, no wasted motion.
These Asian sliders that use pantry staples are built for the sort of night when the fridge has odds and ends, but your brain still wants dinner to feel like dinner. Soft buns, sticky glaze, sharp pickles, crunchy slaw — the sandwiches hit all the right notes in two or three bites. And because the flavor base leans on shelf-stable condiments, you can pivot between beef, chicken, pork, tofu, tuna, shrimp, or jackfruit without rebuilding the whole meal from scratch.
I love this style of cooking because it rewards a few smart bottles on the shelf. Not a fancy pantry. Just the right ones. Once you know how to balance salty, sweet, acid, heat, and a little fat, the rest gets almost playful. One batch can lean smoky and sweet, another can be punchy and gingery, and another can go crunchy and bright with cabbage and cucumber. Same size. Different mood.
Why You’ll Love This Batch of Asian Sliders
- Shelf-stable flavor, fresh finish: Soy sauce, hoisin, vinegar, chili crisp, sesame oil, and peanut butter do the heavy lifting, while cabbage, cucumber, scallions, and carrots keep the sliders from tasting heavy.
- Small-batch friendly: Most of these recipes scale cleanly to 8 or 16 sliders, which makes them handy for game-day trays, casual dinners, or a mixed spread.
- Many proteins, one method: Ground beef, turkey, chicken, pork, tofu, mushrooms, canned tuna, shrimp, salmon, chickpeas, and jackfruit all fit the same bun-friendly format.
- Fast cleanup: Skillet recipes, sheet-pan bakes, and one-bowl mixes keep the dish count down, which matters more than people admit.
- Built for customization: Heat level, sweetness, bun choice, and toppings can all shift without breaking the recipe.
- Leftovers work hard: Most fillings taste even better after a night in the fridge, especially the glazed ones and the slaws.
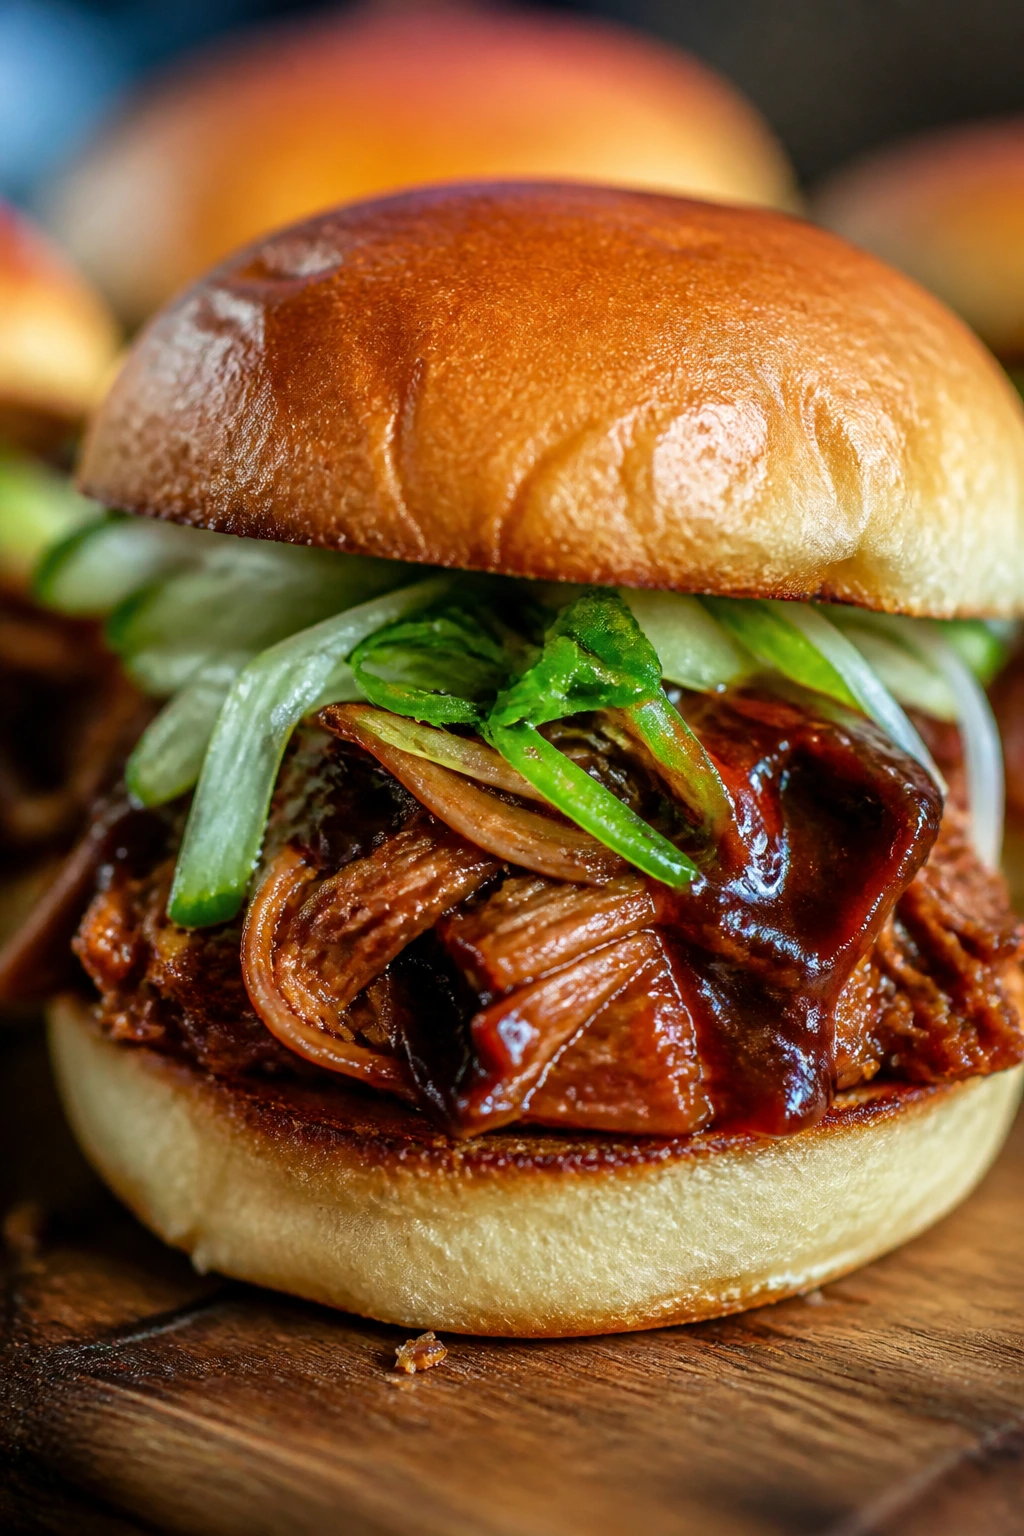
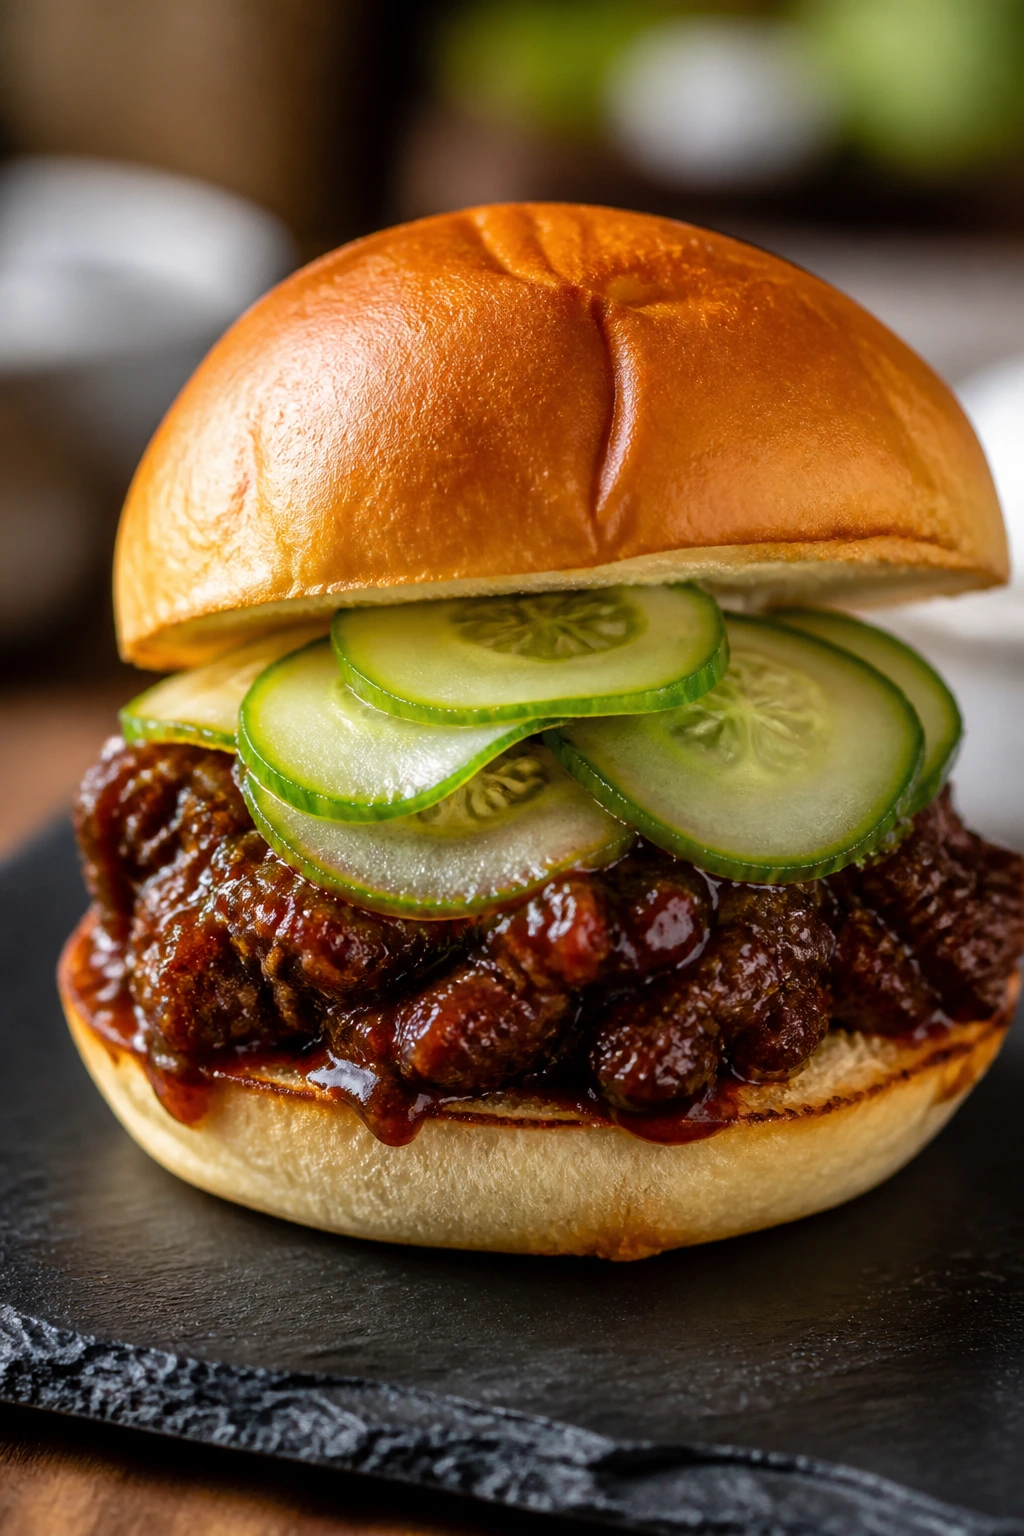
1. Hoisin Beef Sliders with Quick Pickled Cucumber
Hoisin and beef have a way of tasting richer than they ought to. The beef gets glossy, the buns pick up a little stickiness, and then the cucumber slices cut straight through with cold crunch and vinegar. It’s a tidy, no-drama slider that still feels like somebody paid attention.
Why It Works:
Ground beef brings enough fat to carry hoisin, soy, garlic, and ginger without turning dry. The quick pickle is not decorative; it keeps the slider from collapsing into sweet-salty mush after the first bite. I also like this one because the glaze clings better than a loose sauce, so nothing drips through the bun before you sit down.
Key Ingredients:
- 1 1/2 lb ground beef, preferably 80/20 — the fat keeps the patties juicy.
- 1/3 cup hoisin sauce — this is the backbone of the glaze.
- 2 tbsp soy sauce — adds salt and depth.
- 2 cloves garlic, minced — sharpens the beef.
- 1 tbsp grated fresh ginger — keeps the flavor bright.
- 1 small cucumber, thinly sliced — for the quick pickle.
- 2 tbsp rice vinegar — gives the pickle its snap.
- 1 tsp sugar — smooths the vinegar.
- 8 slider buns, split — soft buns soak up the glaze well.
- 2 scallions, thinly sliced — a clean finishing note.
Quick Steps:
- Quick-pickle the cucumber: Toss the cucumber slices with rice vinegar, sugar, and a pinch of salt. Let them sit 10 to 15 minutes while you cook the beef; they should look glossy and slightly softened.
- Mix the patties: Combine the beef, hoisin, soy sauce, garlic, ginger, and scallions in a bowl. Mix only until combined. Overmixing makes the patties dense.
- Form and cook: Shape into 8 small patties. Cook in a lightly oiled skillet over medium-high heat for 3 to 4 minutes per side, until browned and the center reaches 160°F.
- Toast the buns: Set the buns cut-side down in the same skillet for 30 to 45 seconds, or until lightly golden.
- Assemble: Spoon a little extra hoisin on the bottom bun, add the patty, a few cucumber slices, and the top bun. Serve right away.
Equipment for This Recipe:
- 12-inch skillet — gives the patties enough room to brown.
- Mixing bowl — for the beef mixture.
- Small bowl — for the quick pickle.
- Thin spatula — makes flipping small patties easier.
- Tongs — useful for toasting buns.
How to Serve This Dish:
Serve these with sesame slaw or salt-and-vinegar chips if you want a sharp, snacky side. They look best stacked with the cucumber peeking out from the edge, because the pale green against the dark glaze does half the work for you.
Pro Tips for This Recipe:
- Chill the formed patties for 10 minutes before cooking if the mixture feels soft.
- Use a skillet instead of a grill; the hoisin caramelizes better on direct contact.
- If your hoisin is very thick, loosen it with 1 teaspoon of warm water before mixing.
- Let the cooked patties rest for 2 minutes before assembling so the juices settle.
Variations on This Dish:
- Spicy Chili-Crisp Beef: Stir 1 to 2 teaspoons chili crisp into the beef mixture and finish with a tiny drizzle on top.
- Chicken Hoisin Swap: Use ground chicken and add 2 tablespoons panko so the patties hold together.
- Lower-Sugar Version: Cut the sugar from the pickle and use only 1/4 cup hoisin mixed with 1 tablespoon soy.
Common Mistakes to Avoid with This Dish:
- Packing the patties too tightly: The sliders turn springy instead of tender. Shape them gently.
- Skipping the pickle: Without acid, the hoisin reads heavier than it should. The cucumber is doing real work here.
- Cooking on high heat until the glaze burns: Medium-high is enough. Hoisin goes from caramelized to bitter in a hurry.
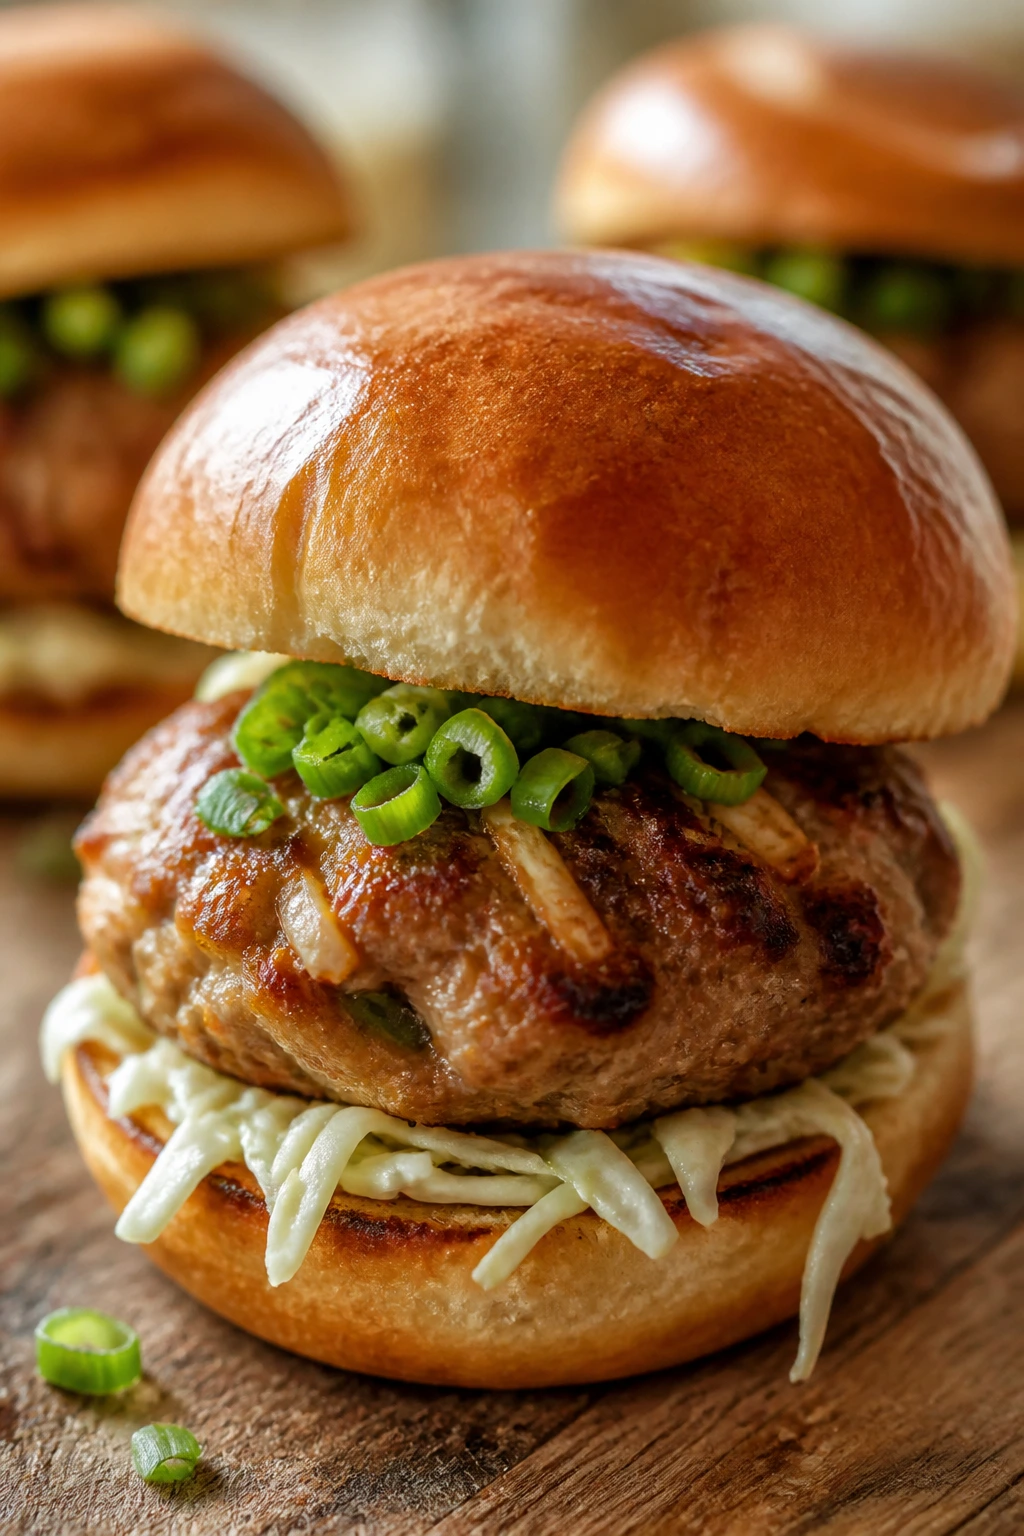
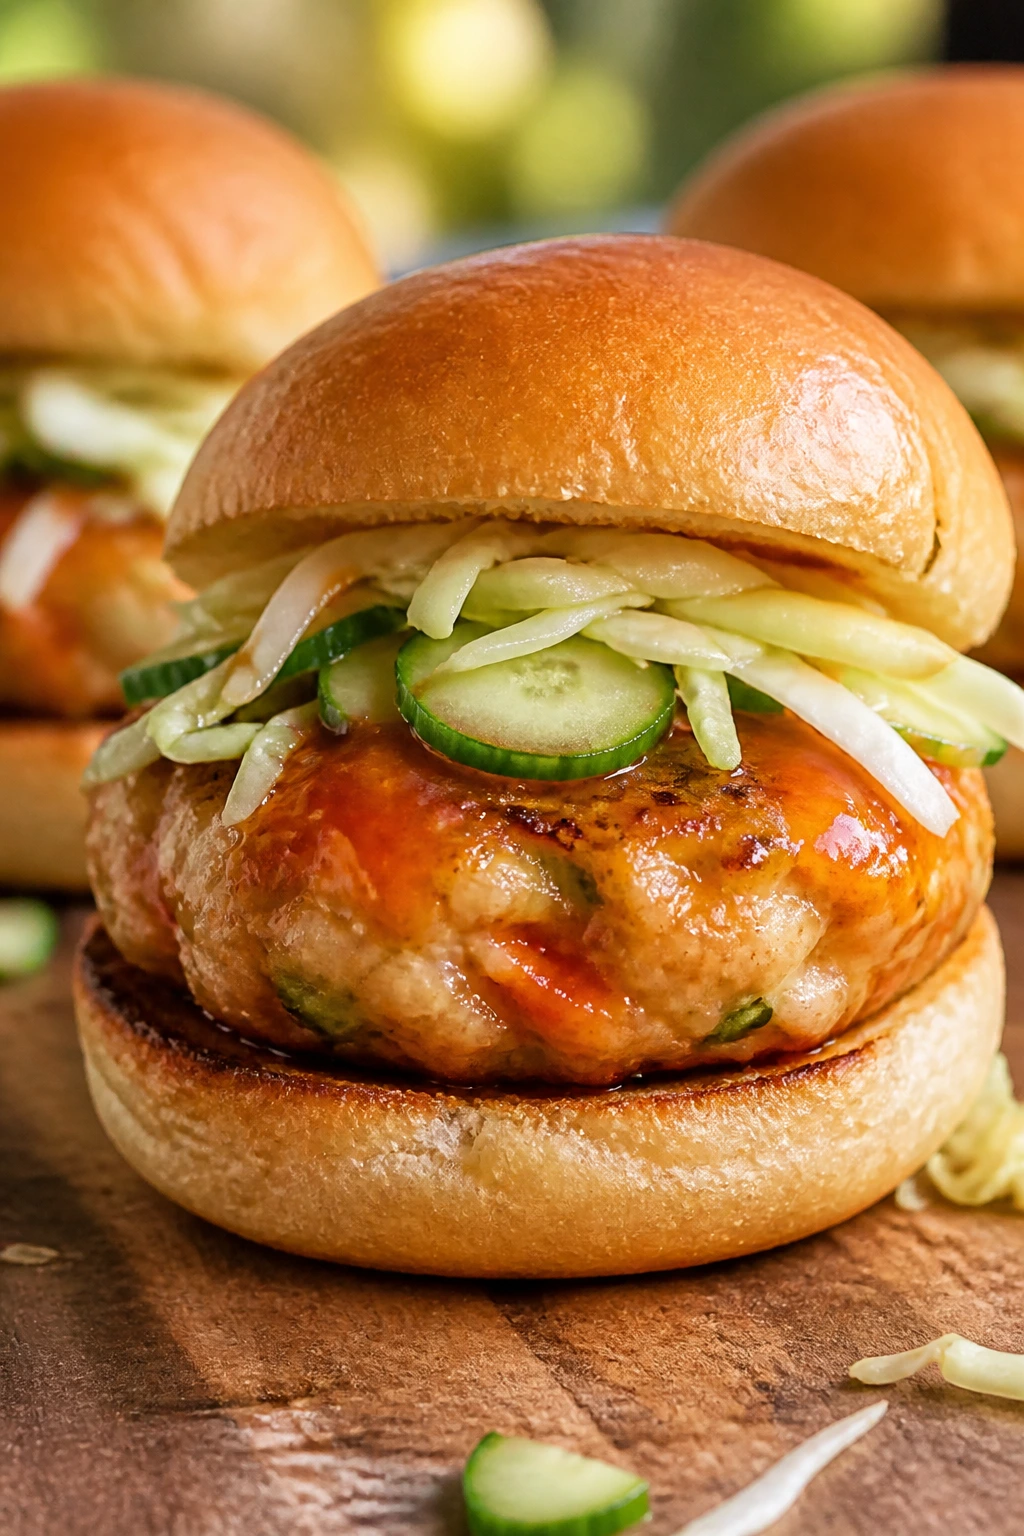
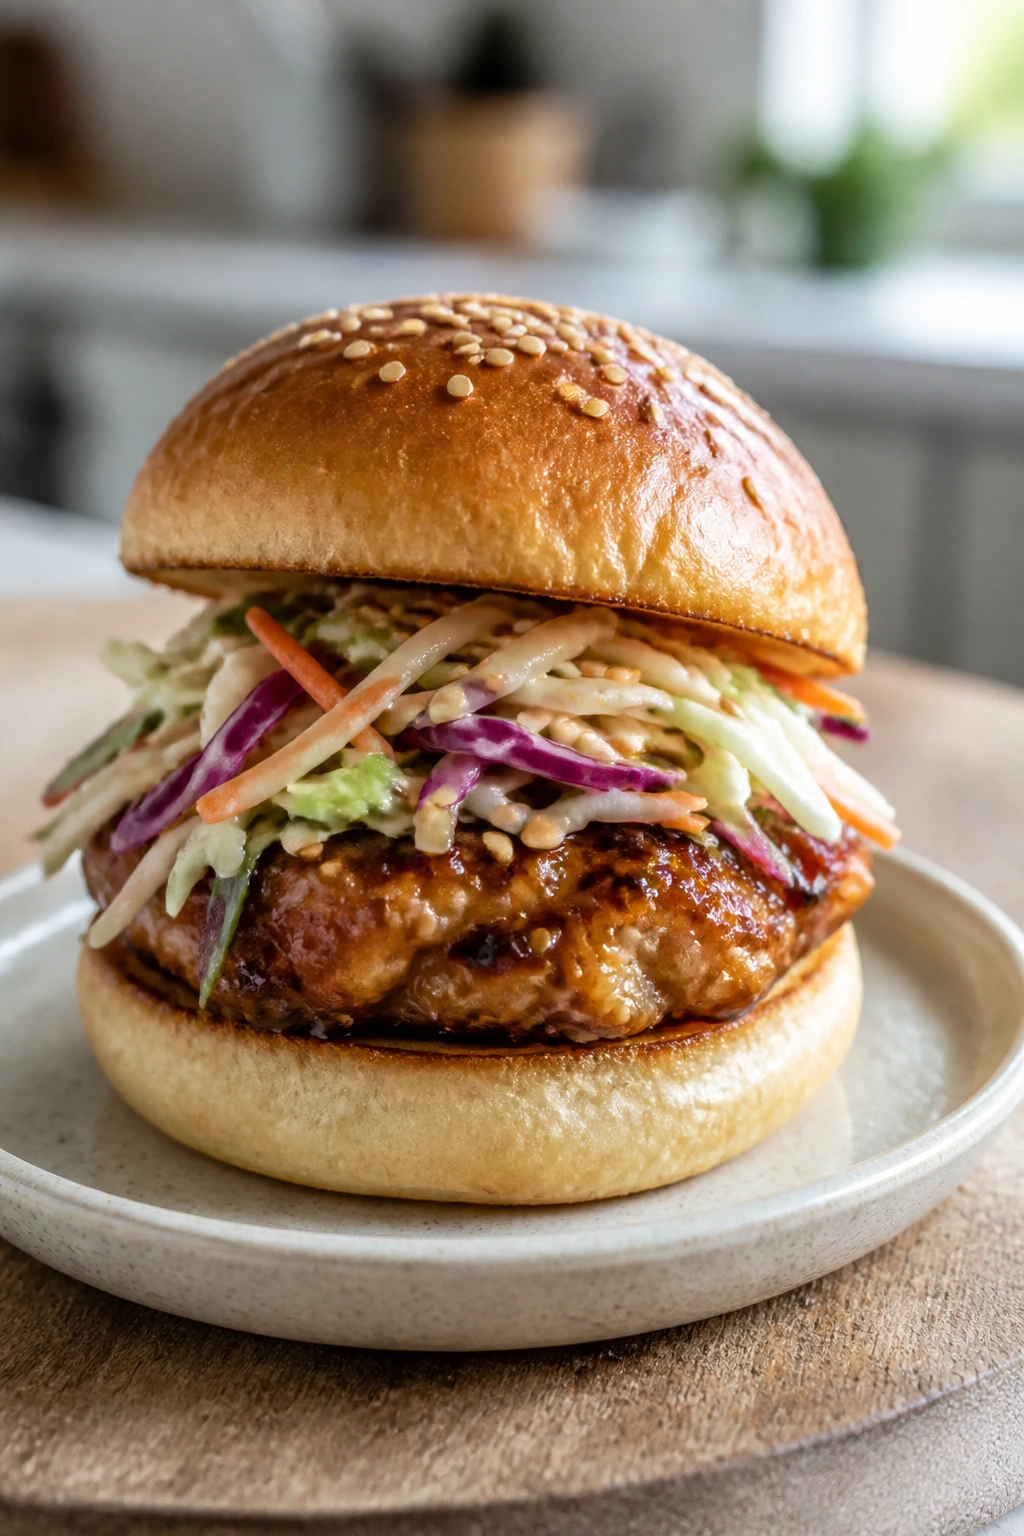
2. Ginger Soy Chicken Sliders with Sesame Slaw
This one tastes like a clean pantry raid in the best possible way. Ginger, soy, sesame, and cabbage do nearly all the talking, and the chicken gives them a soft, savory base. You get a juicy patty, a cool slaw, and a bite that snaps from one texture to the next.
Why It Works:
Ground chicken needs help, and this recipe gives it plenty. Panko keeps the patties from feeling rubbery, while ginger and soy give them a sharper edge. The sesame slaw cools the whole thing down, which matters because chicken sliders can taste flat if all the action stays inside the patty.
Key Ingredients:
- 1 1/2 lb ground chicken — choose dark-meat chicken if you can.
- 1/2 cup panko breadcrumbs — helps the patties stay tender.
- 1 large egg — binds the mixture.
- 2 tbsp soy sauce — seasons the chicken all the way through.
- 1 tbsp grated ginger — adds heat and freshness.
- 2 cloves garlic, minced — keeps the flavor savory.
- 1 tbsp sesame oil — a little goes a long way.
- 3 cups shredded cabbage or coleslaw mix — for the slaw.
- 3 tbsp mayo — gives the slaw body.
- 1 tbsp rice vinegar — sharpens the slaw.
- 8 slider buns — soft rolls work best.
Quick Steps:
- Mix the chicken patties: Combine chicken, panko, egg, soy, ginger, garlic, and sesame oil. Stop mixing as soon as everything is evenly combined.
- Build the slaw: Toss cabbage, mayo, rice vinegar, and a pinch of salt in a second bowl. Let it sit while you cook; the cabbage will soften slightly.
- Form and cook: Shape 8 patties and cook in a lightly oiled skillet over medium heat for 4 to 5 minutes per side, until the centers reach 165°F and the juices run clear.
- Toast the buns: Toast cut-side down in a dry skillet for 30 seconds, just until warm.
- Assemble: Add slaw to the bottom bun, place the chicken patty on top, then finish with the top bun.
Equipment for This Recipe:
- Large mixing bowl — for the chicken mixture.
- Medium bowl — for the slaw.
- 12-inch skillet — best for even browning.
- Spatula — a thin one helps turn soft patties.
- Measuring spoons — sesame oil is easy to overdo.
How to Serve This Dish:
These pair well with edamame, cucumber salad, or a handful of plain potato chips. I like them with the slaw piled loosely so a few strands fall out — it looks casual, and that’s the right energy for this sandwich.
Pro Tips for This Recipe:
- Wet your hands before shaping the patties; ground chicken sticks like glue.
- Don’t rush the slaw. Five minutes of sitting time makes the cabbage less brittle.
- If the mixture feels loose, add 1 to 2 more tablespoons of panko.
- Pull the patties at 165°F, not earlier. Chicken needs the full temperature.
Variations on This Dish:
- Honey-Ginger Version: Add 1 tablespoon honey to the chicken mix and brush a little on the patties after cooking.
- Spicy Sesame Slaw: Stir 1 teaspoon chili crisp into the slaw dressing.
- Rice-Bowl Shortcut: Skip the buns and serve the chicken over warm rice with the slaw on top.
Common Mistakes to Avoid with This Dish:
- Using ultra-lean chicken and no binder: The patties dry out and crack. Panko and egg are not optional here.
- Making the slaw too far ahead: It gets watery after a few hours. Toss it close to serving.
- Cooking over high heat: The outside browns before the inside is done, and the texture turns grainy.
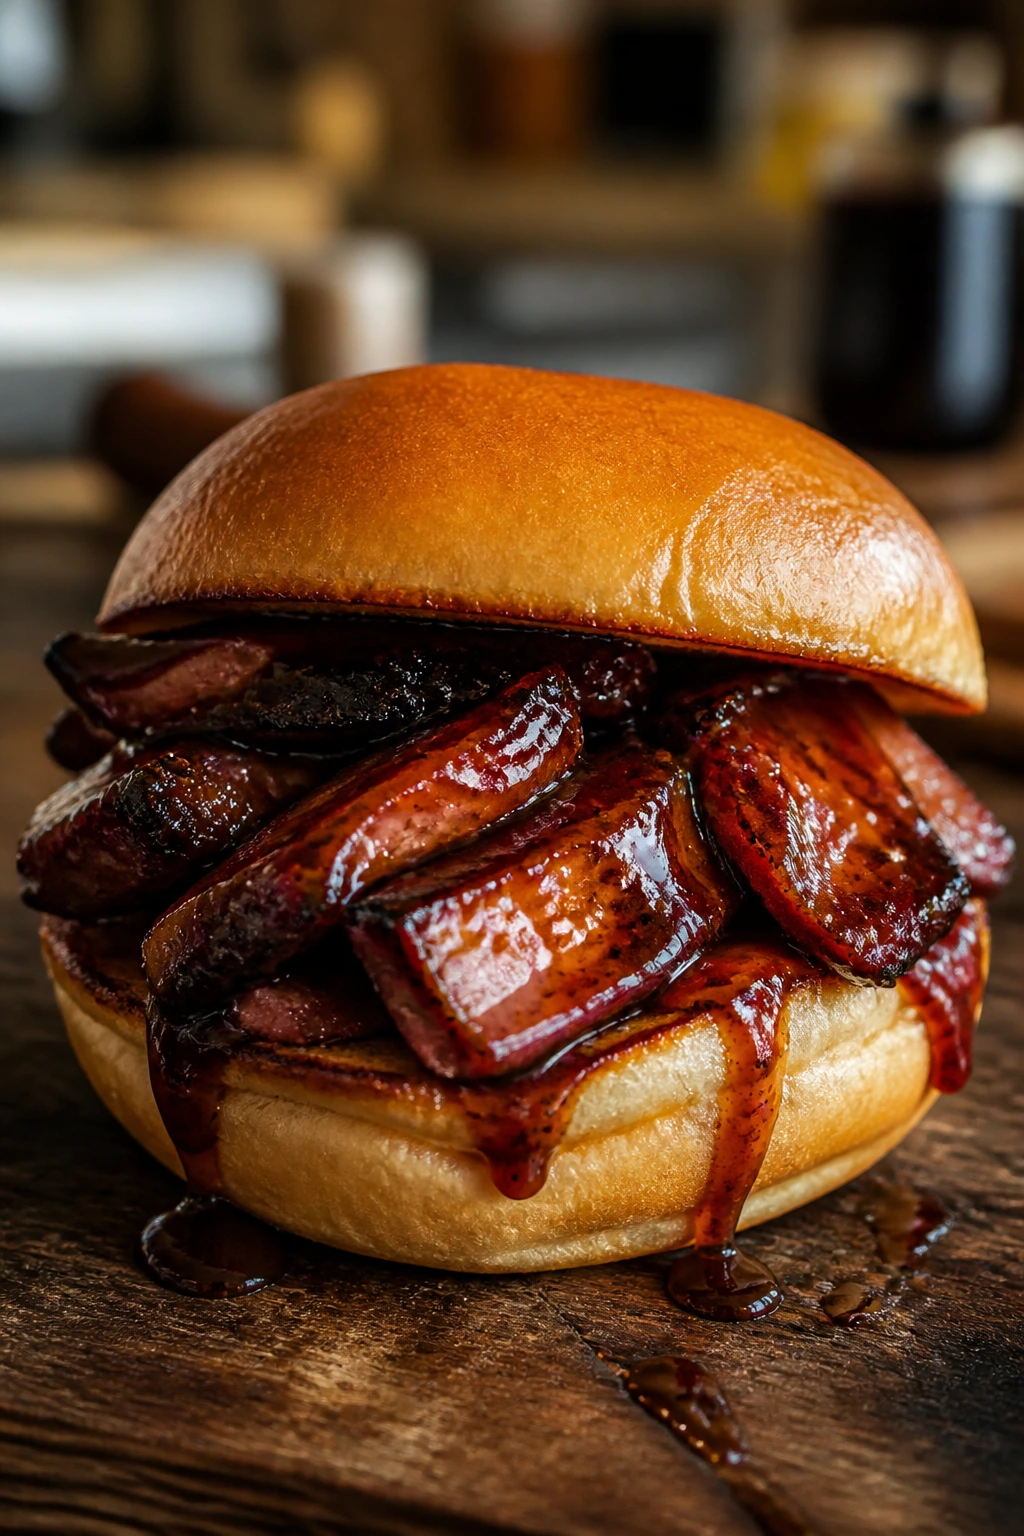
3. Char Siu Pork Sliders
Char siu flavor loves a soft bun. Sweet, savory, a little smoky, and a little sticky — it’s the kind of glaze that makes the bread feel like part of the sauce. This version keeps the pantry list short and leans on hoisin, soy, honey, and five-spice to do the heavy lifting.
Why It Works:
Ground pork has enough richness to handle a sweeter glaze without tasting cloying. Five-spice gives it that unmistakable Chinese barbecue note, while a little ketchup in the glaze adds body and sheen. Pineapple is optional, but I like it because the acidity keeps the finish from becoming one-note.
Key Ingredients:
- 1 1/2 lb ground pork — a little fat helps the sliders stay juicy.
- 1/4 cup hoisin sauce — the char siu backbone.
- 2 tbsp soy sauce — deepens the saltiness.
- 1 tbsp honey — helps the glaze cling.
- 1 tsp Chinese five-spice powder — gives the signature aroma.
- 2 cloves garlic, minced — sharpens the pork.
- 1 tbsp ketchup — adds color and thickness.
- 8 slider buns — soft rolls handle the glaze well.
- 1 cup sliced canned pineapple or fresh pineapple — optional but useful.
- 2 scallions, sliced — for a clean finish.
Quick Steps:
- Make the glaze: Stir hoisin, soy, honey, five-spice, ketchup, and garlic together in a small bowl.
- Season the pork: Mix the ground pork with half the glaze until just combined.
- Form and cook: Shape 8 patties and cook in a skillet over medium-high heat for 3 to 4 minutes per side, until browned and the center reaches 160°F.
- Brush and finish: Spoon the remaining glaze over the patties during the last minute so it caramelizes lightly.
- Assemble: Add pineapple, the patty, and scallions to the buns. Serve hot.
Equipment for This Recipe:
- Mixing bowl — for the pork mixture.
- Small bowl — for the glaze.
- Skillet — for browning and glaze reduction.
- Spatula — helpful for flipping sticky patties.
- Tongs — useful for pineapple slices, if you’re searing them.
How to Serve This Dish:
Set these beside fried rice or a simple cabbage salad dressed with rice vinegar. They’re rich enough that I usually keep the sides plain; the slider itself already brings plenty of personality.
Pro Tips for This Recipe:
- Use canned pineapple if that’s what you have; pat it dry before searing.
- Don’t drown the pork in glaze before cooking or the patties will steam.
- If your five-spice is old, replace it. Stale five-spice smells dusty, not warm.
- Let the glaze caramelize for the final minute only; longer heat can turn the sugars bitter.
Variations on This Dish:
- Pulled Pork Shortcut: Use 3 cups shredded cooked pork and toss it with the glaze in a skillet.
- Heat-Forward Char Siu: Add 1 teaspoon chili flakes or a squeeze of sriracha to the glaze.
- Pineapple-Free Version: Skip the fruit and add quick-pickled onions instead.
Common Mistakes to Avoid with This Dish:
- Using too much glaze in the meat: The patties can get soft and break. Save half for the finish.
- Forgetting the five-spice: Without it, the sliders taste like sweet soy burgers, which is not the point.
- Adding pineapple before the bun is toasted: The juice can soften the bread fast. Toast first.
4. Korean BBQ Turkey Sliders
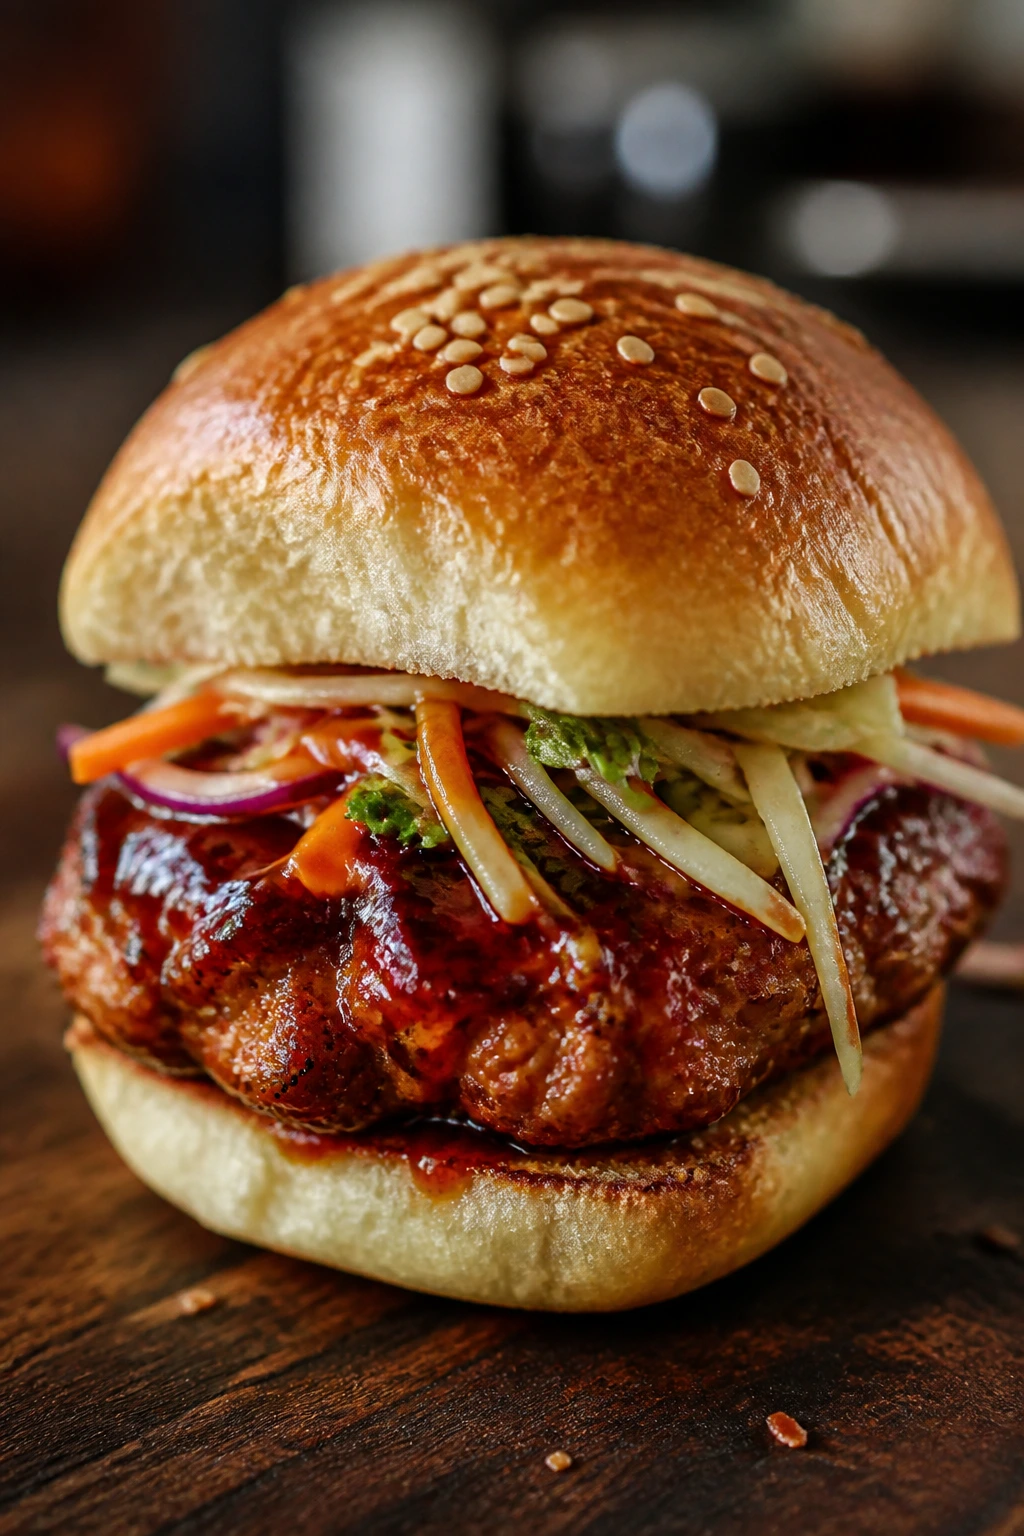
These smell like a weeknight version of a grill-side Korean barbecue plate. Gochujang brings heat and a deep red color, soy adds salt, and a little brown sugar keeps the edges sticky instead of sharp. Turkey is the right blank canvas here; it soaks up the sauce without fighting it.
Why It Works:
Turkey can go bland fast, so the mix needs both fat and aggression. Sesame oil, garlic, ginger, and gochujang solve that in one go. The slaw keeps the heat in check, and the bun catches the sauce before it runs off the plate.
Key Ingredients:
- 1 1/2 lb ground turkey — use 93% lean for the best balance.
- 2 tbsp gochujang — the heat and savoriness come from here.
- 2 tbsp soy sauce — seasons the meat.
- 1 tbsp brown sugar — softens the chili paste.
- 1 tbsp grated ginger — adds a fresh edge.
- 2 cloves garlic, minced — keeps the turkey from tasting flat.
- 1 tbsp sesame oil — finish the mix with it.
- 2 cups shredded cabbage — for a quick slaw.
- 2 tbsp mayo — gives the slaw body.
- 1 tbsp rice vinegar — wakes up the cabbage.
- 8 slider buns — split and ready.
Quick Steps:
- Mix the turkey: Combine turkey, gochujang, soy, brown sugar, ginger, garlic, and sesame oil. Mix gently.
- Make the slaw: Toss cabbage with mayo, rice vinegar, and a pinch of salt.
- Shape and cook: Form 8 patties and cook over medium heat for 4 to 5 minutes per side, until the center reaches 165°F.
- Let the glaze set: Brush any extra gochujang mixture on the patties during the final minute.
- Build the sliders: Add slaw first, then the patty, then the top bun.
Equipment for This Recipe:
- Large bowl — for mixing the turkey.
- Medium bowl — for slaw.
- Skillet — medium heat gives the best browning.
- Spatula — for turning the soft patties.
- Measuring spoons — gochujang is strong; measure it.
How to Serve This Dish:
I’d put these next to steamed rice or sesame noodles if the sliders are the whole meal. A few sesame seeds sprinkled on top make them look finished, even if you only spent 20 minutes getting there.
Pro Tips for This Recipe:
- Don’t overwork ground turkey. It turns bouncy fast.
- If the mix feels loose, add 2 tablespoons panko.
- Taste your gochujang first; some jars run hotter than others.
- A squeeze of lime at the table can brighten the whole tray.
Variations on This Dish:
- Soy-Lighter Batch: Cut the soy to 1 tablespoon and add 1 tablespoon water plus extra ginger.
- Garlic Chili Version: Stir 1 tablespoon chili crisp into the meat.
- Meal-Prep Bowls: Serve the patties over rice with slaw and a fried egg instead of buns.
Common Mistakes to Avoid with This Dish:
- Using too much sugar in the mix: It can burn before the turkey cooks through. Keep it at 1 tablespoon.
- Skipping the slaw: The sliders need something cold and crunchy to offset the heat.
- Cooking on very high heat: Gochujang scorches faster than plain meat seasoning.
5. Crispy Tofu Sliders with Peanut-Sesame Sauce
This is the one I make when I want a vegetarian slider that does not apologize for being vegetarian. The tofu gets a crisp shell, the sauce brings peanut richness and a little tang, and the cabbage gives the whole thing the crunch a bun absolutely needs. Nothing here is shy.
Why It Works:
Firm tofu can taste bland if you let it, so the trick is moisture control and surface texture. Pressing it, coating it lightly with cornstarch, and baking or frying it until the edges dry out makes the interior creamy and the outside crisp. Peanut sauce sticks beautifully to that surface, which means each bite lands with actual flavor instead of vague nuttiness.
Key Ingredients:
- 1 block extra-firm tofu, 14 to 16 oz — press it well.
- 2 tbsp cornstarch — helps the tofu crisp.
- 2 tbsp soy sauce — seasons the tofu.
- 1 tbsp sesame oil — adds aroma.
- 1/4 cup peanut butter — the sauce base.
- 1 tbsp rice vinegar — cuts the richness.
- 1 tbsp honey or maple syrup — balances the sauce.
- 1 to 2 tbsp hot water — loosens the sauce.
- 2 cups shredded cabbage — for crunch.
- 8 slider buns — lightly toasted.
Quick Steps:
- Press the tofu: Wrap the tofu in a towel and press for 15 minutes. Cut into 8 slabs.
- Season and coat: Brush with soy sauce and sesame oil, then dust lightly with cornstarch.
- Cook until crisp: Bake at 425°F for 20 to 25 minutes, flipping halfway, or pan-fry in a thin layer of oil for 3 to 4 minutes per side.
- Mix the sauce: Whisk peanut butter, rice vinegar, honey, and hot water until smooth and spoonable.
- Assemble: Spread sauce on the bun, add tofu, add cabbage, then top with more sauce if you like it messy.
Equipment for This Recipe:
- Tofu press or clean kitchen towel — for moisture removal.
- Sheet pan or skillet — baking or frying both work.
- Mixing bowl — for the sauce.
- Silicone brush — handy for soy and sesame oil.
- Spatula — for turning tofu carefully.
How to Serve This Dish:
Serve these with cucumber salad or steamed edamame. They’re also strong with a handful of crushed peanuts on top, which gives the sandwich a louder crunch and helps the sauce feel less soft.
Pro Tips for This Recipe:
- Press the tofu longer if it’s been packed in extra water.
- Use smooth peanut butter for a cleaner sauce; chunky peanut butter can get gluey.
- If the sauce is too thick, add hot water 1 teaspoon at a time.
- Toast the buns. Peanut sauce needs a little grip.
Variations on This Dish:
- Chili-Peanut Heat: Add sriracha or chili crisp to the sauce.
- Air-Fryer Version: Cook the tofu at 390°F for 15 to 18 minutes, shaking once.
- Gluten-Free Swap: Use tamari instead of soy sauce and gluten-free buns.
Common Mistakes to Avoid with This Dish:
- Skipping the press: Wet tofu steams instead of crisping.
- Coating too heavily with cornstarch: You want a thin dusting, not a shell.
- Assembling too early: The tofu softens the bun if it sits in the sauce for long.
6. Garlic Miso Mushroom Sliders
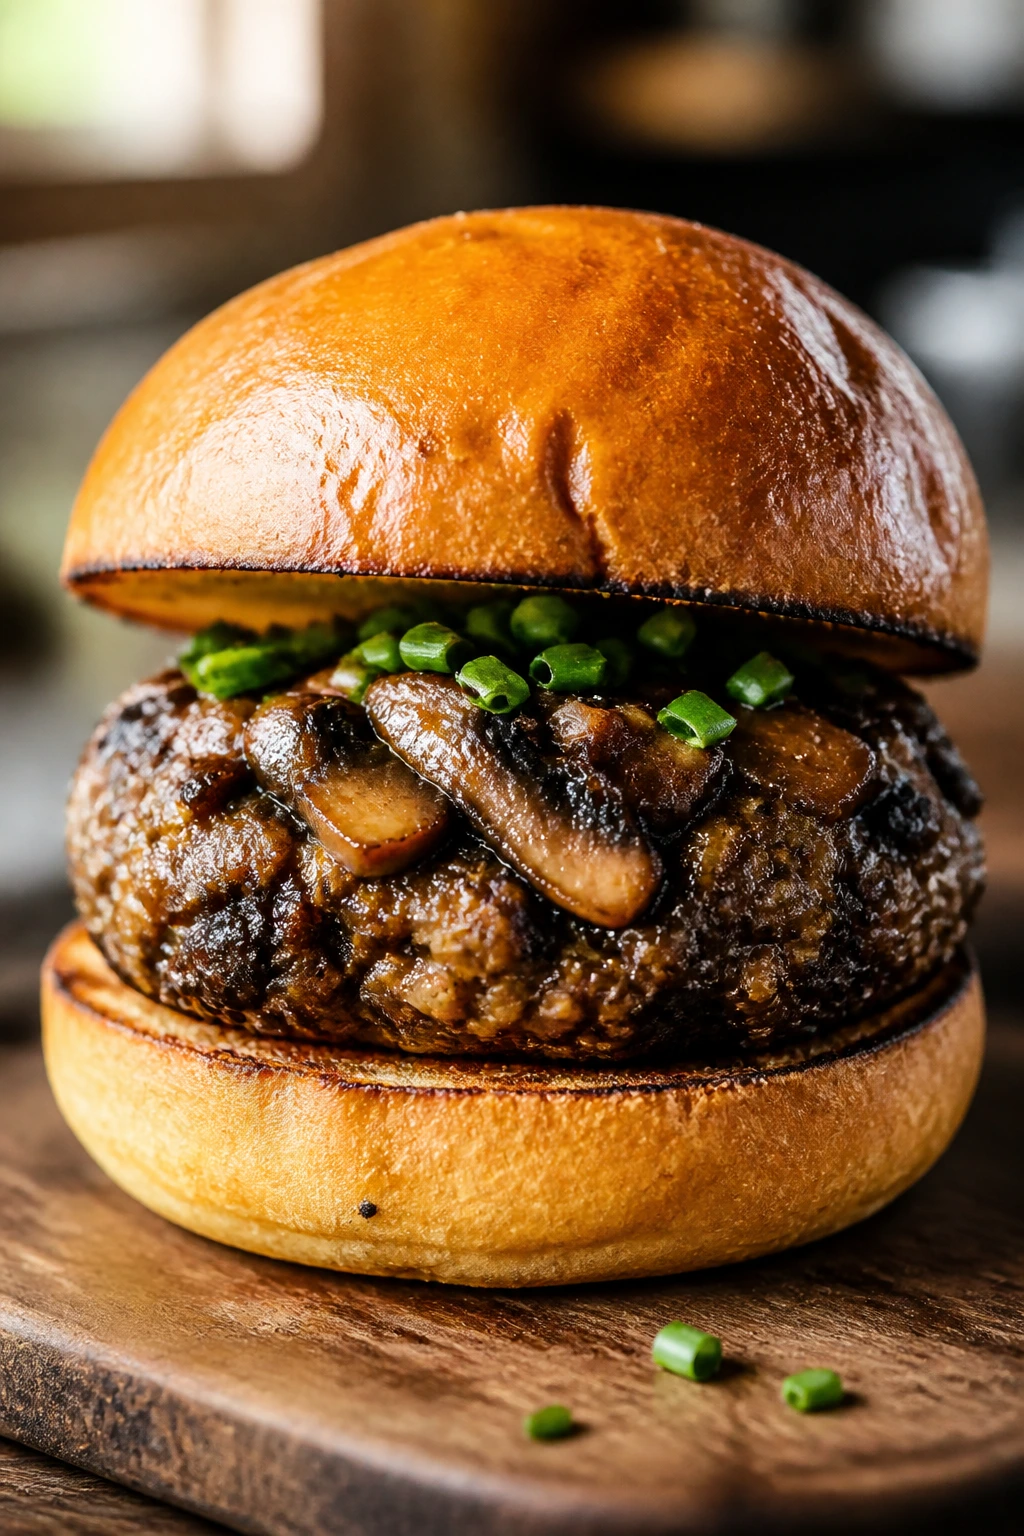
If you want a slider that tastes deeper than the ingredient list suggests, this is the one. Mushrooms do that trick where they shrink, darken, and suddenly smell meaty enough to anchor a bun. Miso rounds them out, garlic pushes them forward, and the whole thing ends up tasting like it took more work than it did.
Why It Works:
Mushrooms need heat and space, not constant stirring. Letting them sear first gives you browned edges before the moisture leaves the pan. White miso adds salt and a little fermented sweetness, which is exactly why the filling tastes rich without needing a long sauce reduction.
Key Ingredients:
- 1 lb cremini or button mushrooms, sliced — they cook down fast.
- 1 small onion, thinly sliced — gives the filling a little sweetness.
- 3 cloves garlic, minced — essential here.
- 2 tbsp white miso paste — the salty backbone.
- 1 tbsp soy sauce — deepens the umami.
- 2 tbsp olive oil or butter — for browning.
- 1 tbsp rice vinegar — brightens the mushrooms at the end.
- 8 slider buns — toasted.
- 2 scallions, sliced — for garnish.
- 2 tbsp mayo — optional but useful on the bun.
Quick Steps:
- Sear the mushrooms: Heat oil or butter in a skillet over medium-high heat. Add mushrooms and cook without crowding for 6 to 8 minutes until browned and their liquid mostly evaporates.
- Add onion and garlic: Stir in onion and cook 3 minutes, then add garlic for 30 seconds until fragrant.
- Mix in miso: Whisk miso with soy sauce and 2 tablespoons warm water, then stir it into the pan. Cook 1 minute until glossy.
- Finish with vinegar: Add rice vinegar off the heat.
- Assemble: Spread mayo on the buns, pile in the mushrooms, and top with scallions.
Equipment for This Recipe:
- Wide skillet — mushrooms need room to brown.
- Wooden spoon — good for scraping the fond.
- Small bowl — for dissolving miso.
- Knife and cutting board — nothing fancy here.
- Tongs — handy for moving the filling around.
How to Serve This Dish:
Put these beside miso soup or a simple cucumber salad. I like them with a little extra black pepper on top, which sounds minor but wakes up the mushrooms after the miso settles in.
Pro Tips for This Recipe:
- Don’t salt the mushrooms early; it pulls out water before they brown.
- If the pan looks crowded, cook the mushrooms in two batches.
- White miso is softer than red miso and works better in a small sandwich.
- Toast the buns well. Mushroom filling carries a lot of moisture.
Variations on This Dish:
- Miso-Butter Upgrade: Stir 1 tablespoon butter into the filling at the end.
- Shiitake Blend: Swap half the mushrooms for sliced shiitakes for a deeper flavor.
- Spicy Sesame Finish: Add a few drops of chili oil before serving.
Common Mistakes to Avoid with This Dish:
- Crowding the pan: Mushrooms steam and go pale instead of brown.
- Adding miso too early over high heat: It can taste harsh. Stir it in near the end.
- Serving on soft buns without toasting: The bottom bun goes damp fast.
7. Mongolian-Style Beef Sliders
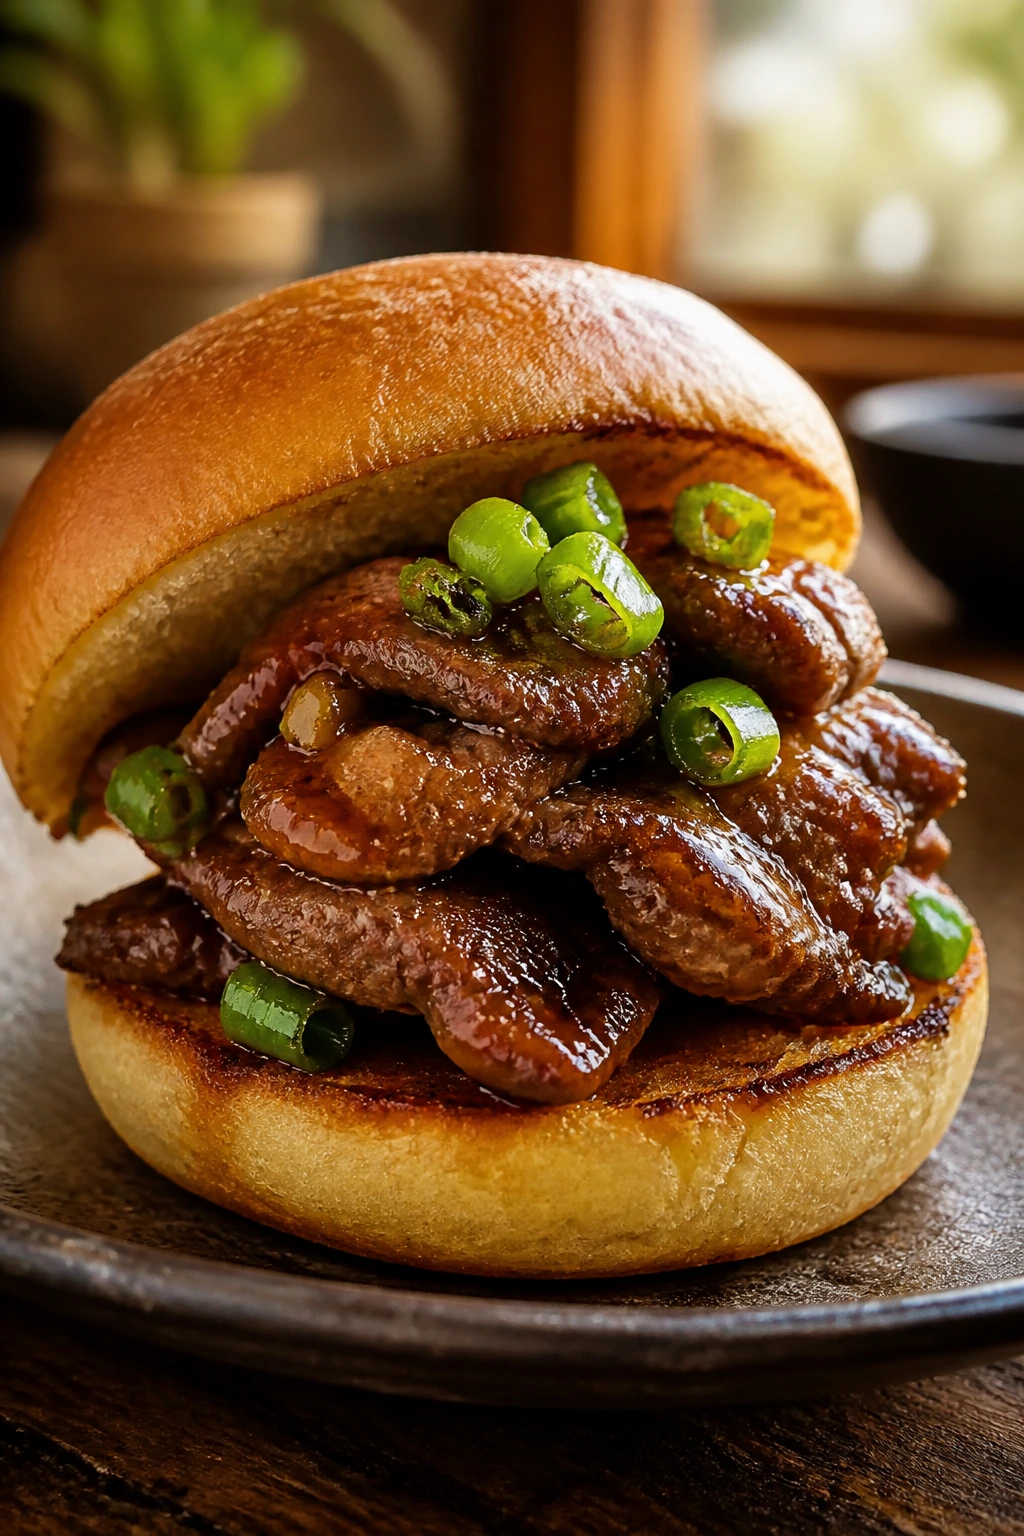
This is the sweet-savory beef slider for people who like a little edge on the finish. The sauce goes glossy and dark, the beef stays tender, and the scallions bring a green bite that keeps the whole thing from tasting like candy. It’s fast, which is fortunate, because the pan smells good almost immediately.
Why It Works:
Thin-sliced beef gives you more surface area for the sauce than a thick patty would. Brown sugar and soy build the classic Mongolian profile, while a little cornstarch helps the sauce cling instead of pooling at the bottom of the plate. The trick is to cook hot and fast so the meat stays tender.
Key Ingredients:
- 1 1/2 lb flank steak or sirloin, thinly sliced — freeze for 15 minutes first if slicing by hand.
- 2 tbsp cornstarch — helps the sauce stick.
- 1/4 cup soy sauce — salty base.
- 2 tbsp brown sugar — gives the glaze its depth.
- 3 cloves garlic, minced — sharp and necessary.
- 1 tbsp grated ginger — keeps the sauce lively.
- 2 tbsp neutral oil — for searing.
- 4 scallions, sliced — add them at the end.
- 8 slider buns — lightly toasted.
Quick Steps:
- Coat the beef: Toss the sliced beef with cornstarch until lightly dusted.
- Mix the sauce: Stir soy sauce, brown sugar, garlic, ginger, and 2 tablespoons water together.
- Sear fast: Heat oil in a skillet over high heat. Cook beef in a single layer for 1 to 2 minutes per side until browned.
- Glaze it: Add the sauce and cook 30 to 60 seconds until it thickens and clings to the meat.
- Finish and build: Fold in scallions, spoon the beef onto the buns, and serve immediately.
Equipment for This Recipe:
- Sharp knife — thin slices matter.
- Large skillet or wok — high heat and space help.
- Mixing bowl — for the cornstarch toss.
- Tongs — for quick turning.
- Small bowl — for the sauce.
How to Serve This Dish:
These are good with plain rice, but on the slider side of the plate they pair nicely with a quick cucumber salad or roasted broccoli. Serve them right away; the sauce thickens as it sits, which is useful in the pan and less useful on a bun.
Pro Tips for This Recipe:
- Slice the beef against the grain. That’s the difference between tender and chewy.
- Use high heat, but don’t walk away. The sauce reduces quickly.
- If the sauce gets too thick, splash in 1 tablespoon water.
- A tiny handful of sesame seeds on top makes the finish look intentional.
Variations on This Dish:
- Orange-Black Pepper Beef: Add 1 teaspoon orange zest and extra black pepper to the sauce.
- Ground Beef Shortcut: Swap in 1 1/2 lb ground beef and simmer the sauce into the cooked meat.
- Peppery Onion Version: Add sliced onion to the skillet and cook it before the beef.
Common Mistakes to Avoid with This Dish:
- Slicing beef thick: The sliders get chewy and hard to bite.
- Overcrowding the skillet: The beef steams instead of searing.
- Waiting too long to assemble: The glaze tightens as it cools, so build the sliders while the meat is still hot.
8. Five-Spice Pork and Apple Sliders
There’s a little sweetness here, but it’s the good kind — the kind that lets the spice smell louder. Apple and pork like each other for a reason, and five-spice gives the mix a warm, almost perfumed note that reads clearly even in slider form. It’s a sharp little sandwich with a soft center.
Why It Works:
Pork welcomes sweetness, and grated apple keeps the patties moist without tasting fruity. Five-spice gives the slider its backbone, while soy and scallions keep the flavor grounded. A cabbage topping adds crunch, which matters because the pork-apple mix is soft by design.
Key Ingredients:
- 1 1/2 lb ground pork — enough fat to stay juicy.
- 1 small apple, peeled and grated — use a crisp one.
- 1 tsp Chinese five-spice powder — the main flavor note.
- 2 tbsp soy sauce — adds salt and depth.
- 2 scallions, minced — fresh and sharp.
- 2 cloves garlic, minced — rounds out the pork.
- 1/3 cup panko — helps the patties hold together.
- 2 cups shredded cabbage — for a simple topping.
- 2 tbsp mayo — optional for the buns.
- 8 slider buns — split and toasted.
Quick Steps:
- Make the filling: Combine pork, grated apple, five-spice, soy, scallions, garlic, and panko.
- Shape patties: Form 8 small patties and chill them for 10 minutes if the mix feels sticky.
- Cook: Pan-fry over medium heat for 4 to 5 minutes per side, until browned and cooked through to 160°F.
- Dress the cabbage: Toss cabbage with a pinch of salt and a teaspoon of rice vinegar if you want extra lift.
- Assemble: Spread mayo, add cabbage, then the pork patty, then the top bun.
Equipment for This Recipe:
- Mixing bowl — for the pork mix.
- Box grater — for the apple.
- Skillet — medium heat keeps the apple from scorching.
- Spatula — for flipping.
- Small bowl — for the cabbage.
How to Serve This Dish:
They’re strong with a cold beer or a glass of iced tea, and I like them beside roasted sweet potatoes or a simple green salad. The apple makes the sliders feel a little autumnal, even if you’re eating them on a random Tuesday.
Pro Tips for This Recipe:
- Use a crisp apple, not a mealy one. Soft apples disappear into the pork.
- Don’t add extra sugar. The apple already covers that job.
- If the mix feels loose, add another tablespoon of panko.
- Let the patties rest for 2 minutes before stacking.
Variations on This Dish:
- Chili-Garlic Apple Pork: Add 1 teaspoon chili flakes and 1 minced garlic clove extra.
- Cabbage-Heavy Version: Double the cabbage and add a little rice vinegar for a sharper finish.
- Ground Turkey Swap: Use turkey and keep the apple for moisture.
Common Mistakes to Avoid with This Dish:
- Using too much apple: The patties can get soft and slippery. One small apple is enough.
- Skipping the rest time: Juices spill out the first bite.
- Cooking on very low heat: The pork won’t brown, and the sliders taste flat.
9. Sriracha Honey Chicken Sliders
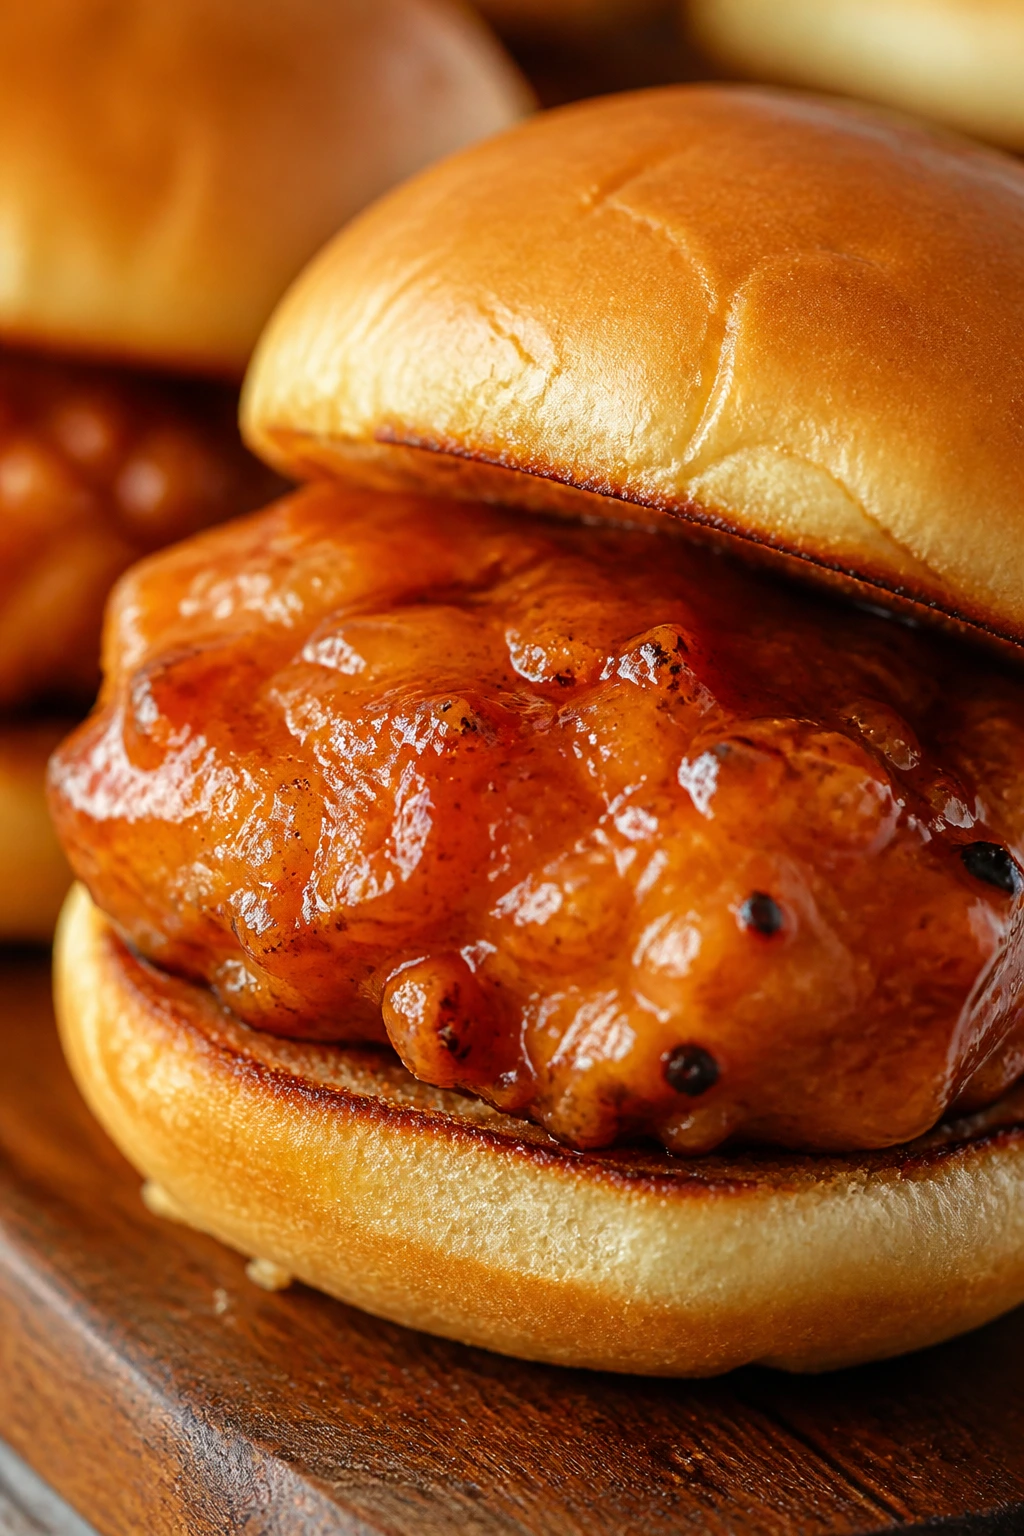
Sticky heat is the whole point here. Sriracha and honey coat the chicken in a lacquer that tastes louder than it looks, and the bun catches the drips before they escape. If you like a slider that leaves your fingers shiny, this one is for you.
Why It Works:
Chicken takes on glaze well, especially when it’s ground and shaped into small patties. Honey softens sriracha’s burn, soy adds depth, and a bit of rice vinegar keeps the sweetness from sticking to the roof of your mouth. I like these best when the glaze is brushed on late, not simmered to death.
Key Ingredients:
- 1 1/2 lb ground chicken — dark meat gives the best texture.
- 2 tbsp sriracha — adjust for heat.
- 2 tbsp honey — balances the chili.
- 1 tbsp soy sauce — adds salt.
- 1 clove garlic, minced — keeps the chicken savory.
- 1 tsp rice vinegar — brightens the glaze.
- 1/2 cup panko — helps the patties stay tender.
- 8 slider buns — split and toasted.
- 2 cups shredded lettuce or cabbage — for crunch.
Quick Steps:
- Mix the patties: Combine chicken, panko, garlic, and 1 tablespoon each of sriracha, honey, and soy.
- Cook: Shape into 8 patties and pan-fry over medium heat for 4 to 5 minutes per side, until the center reaches 165°F.
- Make the glaze: Stir the remaining sriracha, honey, soy, and rice vinegar together in a small bowl.
- Brush and tighten: Brush the glaze on the patties during the last minute of cooking so it turns sticky but does not burn.
- Build the sliders: Add lettuce or cabbage to the bun, place the chicken on top, and close it up.
Equipment for This Recipe:
- Mixing bowl — for the chicken.
- Skillet — medium heat keeps the glaze sane.
- Small bowl — for the finishing glaze.
- Spatula — helpful for turning patties.
- Pastry brush — optional, but useful.
How to Serve This Dish:
These are good with plain rice and a cucumber salad to cool the heat, or with fries if you want the whole thing to feel more bar-snack than dinner. They look best with a little glaze on the bun edge — messy, but controlled.
Pro Tips for This Recipe:
- Taste your sriracha first; some brands are sweeter than others.
- Add the glaze at the end, not at the start, or the sugar darkens too fast.
- A handful of shredded cabbage adds more crunch than lettuce.
- If the chicken mix is loose, add another 2 tablespoons panko.
Variations on This Dish:
- Garlic-Forward Version: Add another minced clove and skip the lettuce.
- Peanut-Chili Finish: Drizzle with a little thinned peanut butter sauce.
- Mild Batch: Halve the sriracha and add 1 tablespoon ketchup for color.
Common Mistakes to Avoid with This Dish:
- Burning the glaze: Honey scorches fast. Brush it late.
- Using dry chicken breast mince only: It can get chalky. A little fat helps.
- Putting wet lettuce on first: The bun slips. Keep the crunch dry if you can.
10. Teriyaki Tuna Salad Sliders
Cold sliders are underrated. This one tastes like a dressed-up pantry lunch and works because the tuna gets enough seasoning to stop tasting like canned tuna. A little soy, a little vinegar, a little sweetness, and suddenly the filling tastes planned.
Why It Works:
Canned tuna is lean and needs moisture, so mayo carries the texture while soy and rice vinegar wake up the flavor. A touch of honey gives the filling a teriyaki-ish finish without turning it into dessert. Toasted buns matter here because the filling is soft and the bread needs structure.
Key Ingredients:
- 2 cans tuna, 5 oz each, drained well — squeeze out excess liquid.
- 1/3 cup mayo — binds the salad.
- 1 tbsp soy sauce — the salty teriyaki note.
- 1 tsp honey — just enough sweetness.
- 1 tsp rice vinegar — sharpens the mix.
- 2 scallions, thinly sliced — for freshness.
- 1 celery stalk, finely chopped — optional but useful for crunch.
- 1 tsp sesame seeds — nice if you have them.
- 8 slider buns — toasted.
- Butter or extra mayo for the buns — optional.
Quick Steps:
- Mix the filling: Combine tuna, mayo, soy, honey, rice vinegar, scallions, celery, and sesame seeds.
- Taste and adjust: Add a pinch more soy if it needs salt or another teaspoon mayo if it feels dry.
- Toast the buns: Toast cut-side down in a dry skillet until lightly golden.
- Assemble: Spoon the tuna salad onto the bottom buns and cap them.
- Serve cold or barely warm: These are best at room temperature, not hot.
Equipment for This Recipe:
- Mixing bowl — for the tuna salad.
- Fork — to break the tuna into fine flakes.
- Skillet or toaster oven — for the buns.
- Measuring spoons — the sauce balance matters.
- Spoon — for filling.
How to Serve This Dish:
Serve these with seaweed snacks, cucumber slices, or a simple green salad. They work nicely for lunch trays because they don’t demand a stove once the salad is mixed.
Pro Tips for This Recipe:
- Drain the tuna well or the filling goes loose.
- Toast the buns even if you think you don’t need to; soft tuna salad needs a firm base.
- If you want more body, add 1 tablespoon finely chopped pickles.
- Use solid-packed tuna if you prefer a firmer texture.
Variations on This Dish:
- Spicy Mayo Tuna: Stir chili crisp into the mayo before mixing.
- Avocado Version: Add sliced avocado right before serving.
- Nori Crunch Finish: Crumble roasted seaweed on top for a salty edge.
Common Mistakes to Avoid with This Dish:
- Leaving tuna watery: The slider falls apart fast. Drain it thoroughly.
- Overdressing: Too much mayo buries the soy and honey.
- Serving on soft, untoasted buns: The bread goes limp in minutes.
11. Chili-Garlic Shrimp Sliders
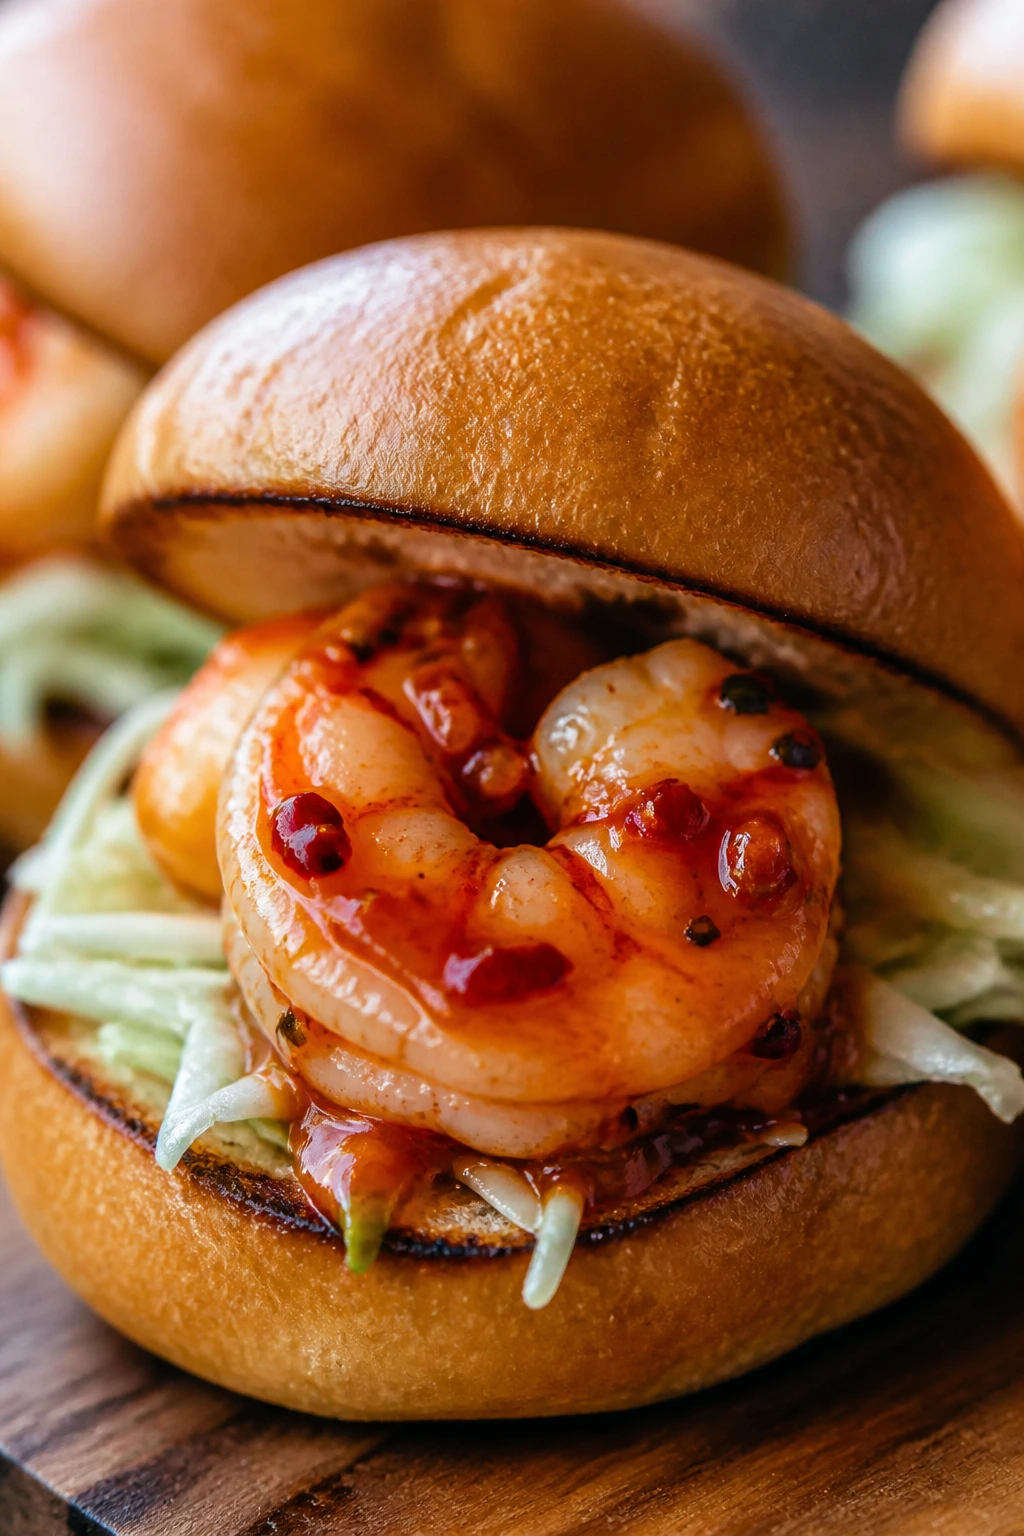
Shrimp brings a clean, fast kind of sweetness that plays well with heat. Chili-garlic sauce and soy turn it glossy, and a little lime at the end keeps the sandwich from feeling heavy. This is one of the quickest sliders in the batch, which makes sense — shrimp never wants to linger in a hot pan.
Why It Works:
Shrimp cooks in minutes, so the whole recipe depends on timing and a sticky glaze. Garlic and chili bring the aggression, soy adds salt, and lime cuts through the richness of mayo or slaw. You want the shrimp just opaque and curled, not shriveled into little commas.
Key Ingredients:
- 1 lb large shrimp, peeled and deveined — pat them dry.
- 2 tbsp soy sauce — seasons the shrimp.
- 1 to 2 tbsp sriracha or chili-garlic sauce — heat to taste.
- 1 tbsp honey — helps the glaze cling.
- 2 cloves garlic, minced — do not skip this.
- 1 tbsp lime juice — brightens the finish.
- 2 tbsp mayo — optional on the buns.
- 2 cups shredded cabbage — for crunch.
- 8 slider buns — lightly toasted.
- 1 tbsp neutral oil — for the skillet.
Quick Steps:
- Make the glaze: Stir soy, sriracha, honey, garlic, and lime juice together.
- Cook the shrimp: Heat oil in a skillet over medium-high heat. Add shrimp in a single layer and cook 1 to 2 minutes per side until pink and opaque.
- Toss in glaze: Add the sauce to the pan and cook for 30 seconds, just until glossy.
- Toast the buns: A quick toast helps against the shrimp juices.
- Assemble: Add mayo if using, then cabbage, then shrimp.
Equipment for This Recipe:
- Skillet — wide enough for a single shrimp layer.
- Mixing bowl — for the glaze.
- Spatula or tongs — for quick turning.
- Knife and cutting board — for garlic and lime.
- Plate — for the shrimp to rest briefly.
How to Serve This Dish:
Serve with rice noodles, cucumber salad, or even plain kettle chips. I like a few extra lime wedges on the plate; the shrimp tastes cleaner and brighter with one last squeeze.
Pro Tips for This Recipe:
- Dry the shrimp well so they sear instead of steam.
- Keep the pan hot, but not smoking.
- If using chili-garlic sauce, taste before adding more; some jars are saltier than they look.
- Pull the shrimp off the heat as soon as they curl into a loose C.
Variations on This Dish:
- Peanut-Shrimp Version: Stir 1 tablespoon peanut butter into the glaze.
- Mild Lime Shrimp: Cut the chili sauce in half and add extra lime.
- Crunchy Slaw Swap: Replace the cabbage with cucumber ribbons.
Common Mistakes to Avoid with This Dish:
- Overcooking the shrimp: They tighten up and turn rubbery in a minute.
- Adding the glaze too early: Sugars burn before the shrimp finish.
- Stacking the buns with too much sauce: The bottom gets soggy fast.
12. Spicy Chickpea Sliders with Cabbage
A chickpea slider needs texture more than anything else. Mash too much and you get paste; leave some beans intact and you get a patty that bites back a little. The chili crisp, garlic, and ginger make the filling taste fuller than a simple bean mash ever could.
Why It Works:
Chickpeas bring a mild, nutty base that can handle garlic and heat. Panko helps the patties hold their shape, while a small egg binds the mash just enough. I like cabbage on top because the slider itself is soft and needs a dry, crackly layer to keep it from feeling heavy.
Key Ingredients:
- 2 cans chickpeas, 15 oz each, drained and rinsed — pat them dry.
- 1 large egg — binding.
- 1/2 cup panko — gives the patties structure.
- 1 tbsp chili crisp — the heat source.
- 2 cloves garlic, minced — sharpens the chickpeas.
- 1 tsp grated ginger — adds lift.
- 1 tbsp soy sauce — seasons the mash.
- 2 cups shredded cabbage — for the top.
- 8 slider buns — toasted.
- 1 tbsp neutral oil — for frying.
Quick Steps:
- Mash the chickpeas: Use a fork or potato masher and leave some beans whole for texture.
- Mix the patties: Stir in egg, panko, chili crisp, garlic, ginger, and soy.
- Shape and chill: Form 8 patties and chill them for 10 minutes.
- Fry: Cook in oil over medium heat for 3 to 4 minutes per side until deeply golden.
- Assemble: Add cabbage to the bun, then the chickpea patty, then a little more chili crisp if you want it louder.
Equipment for This Recipe:
- Mixing bowl — for the chickpeas.
- Potato masher or fork — don’t puree them.
- Skillet — medium heat browns without burning.
- Spatula — to turn fragile patties.
- Baking sheet — optional, for chilling.
How to Serve This Dish:
These go well with sesame cucumbers or a hot bowl of miso soup. A squeeze of lime is nice here, too; beans like acid more than people expect.
Pro Tips for This Recipe:
- Drain the chickpeas well or the patties collapse.
- Leave some beans chunky for a better bite.
- If the mix feels soft, add 2 more tablespoons panko.
- Fry in batches so the pan stays hot.
Variations on This Dish:
- Tahini-Chili Version: Swap mayo for tahini on the buns.
- Carrot-Cabbage Mix: Add shredded carrot to the topping for sweetness.
- Vegan Binder Swap: Use 2 tablespoons ground flax + 4 tablespoons water instead of egg.
Common Mistakes to Avoid with This Dish:
- Pureeing the chickpeas into paste: You lose the texture that makes the slider hold together.
- Skipping the chill: Warm patties break in the pan.
- Using too little oil: The crust won’t set.
13. Sesame Meatball Sliders
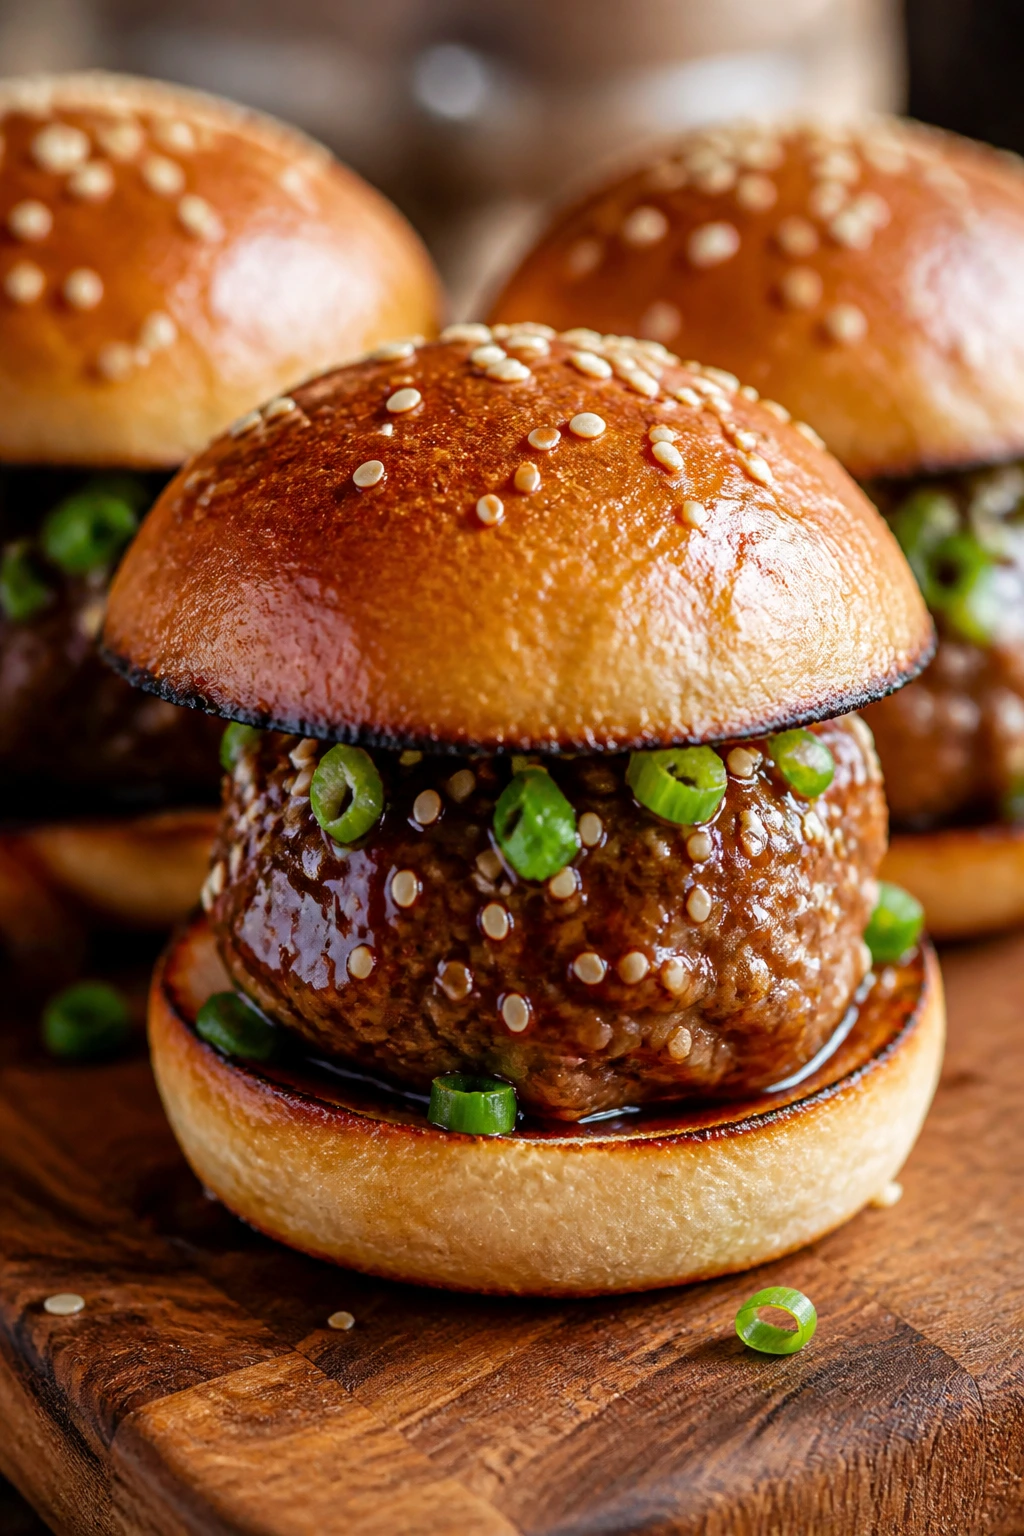
Meatballs on a bun sound messy because they are messy, and that’s part of the appeal. The sesame glaze gives them shine, the scallions keep the flavor from drifting too sweet, and the panko-egg mix keeps the meatballs light enough to bite cleanly. Two meatballs per slider is the sweet spot.
Why It Works:
Meatballs are a good fit for Asian-inspired glazing because they have so much surface area. Once baked, they soak up sauce without losing shape. A sauce built from soy, hoisin, and sesame oil turns them sticky instead of slippery, which is what you want on a small bun.
Key Ingredients:
- 1 1/4 lb ground pork or beef — pork is richer, beef is bolder.
- 1/2 cup panko — keeps the meatballs tender.
- 1 large egg — binds the mix.
- 2 scallions, minced — light onion flavor.
- 2 cloves garlic, minced — essential.
- 1 tbsp grated ginger — keeps the glaze bright.
- 1/4 cup soy sauce — for the glaze.
- 1/4 cup hoisin sauce — sweet and glossy.
- 1 tbsp sesame oil — the finish.
- 8 slider buns — split and toasted.
Quick Steps:
- Mix the meatballs: Combine meat, panko, egg, scallions, garlic, and ginger.
- Shape: Form 16 small meatballs, about 1 tablespoon each.
- Bake: Cook on a parchment-lined sheet at 400°F for 12 to 15 minutes, until browned and cooked through.
- Glaze: Simmer soy, hoisin, and sesame oil in a skillet for 1 minute, then toss the meatballs to coat.
- Assemble: Place 2 meatballs in each bun and spoon a little extra glaze over the top.
Equipment for This Recipe:
- Rimmed sheet pan — keeps the meatballs contained.
- Parchment paper — easier cleanup.
- Mixing bowl — for the meat mixture.
- Small saucepan or skillet — for the glaze.
- Spoon — for sauce.
How to Serve This Dish:
Serve with cucumber salad, steamed broccoli, or a pile of rice if you want the meal to stretch. I like a few sesame seeds on top; they make the glaze look and taste a little nuttier.
Pro Tips for This Recipe:
- Wet your hands before rolling the meatballs.
- Keep them small so they fit the buns without falling out.
- Bake first, glaze after — raw glaze burns in the oven.
- If the meat is lean, add 1 tablespoon mayo to the mix.
Variations on This Dish:
- Spicy Sesame Meatballs: Add chili flakes or chili crisp to the glaze.
- Turkey Version: Use ground turkey and a little extra panko.
- Pineapple Glaze: Stir in 2 tablespoons pineapple juice for a sweet finish.
Common Mistakes to Avoid with This Dish:
- Making giant meatballs: They slide out of the bun.
- Adding glaze before baking: The sugar darkens too much.
- Dry meat mixture: The meatballs turn dense. A little moisture goes a long way.
14. Black Pepper Beef Sliders with Onions
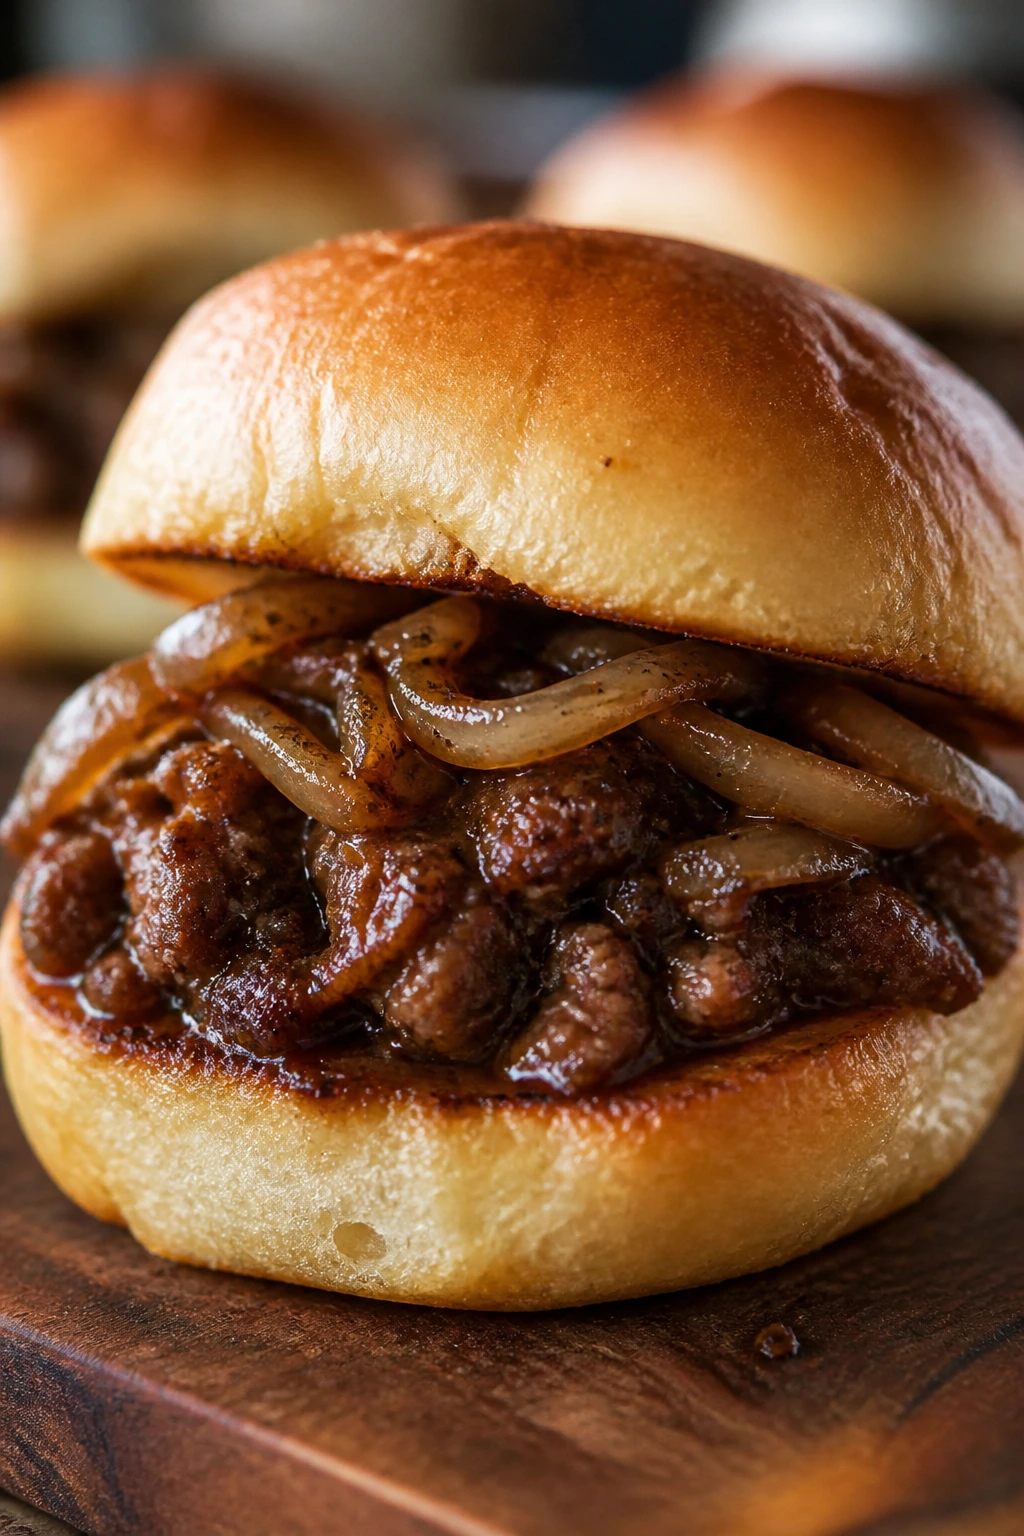
This one tastes like a fast stir-fry stuffed into a roll. Black pepper is the loud note, onions bring sweetness, and the soy-oyster sauce combo gives the beef that familiar Chinese takeout depth. I like it because it tastes bolder than the ingredient list looks.
Why It Works:
Black pepper needs heat to bloom, which is why the onions and beef should cook in a hot pan rather than a timid one. Oyster sauce adds body and a little gloss, and a small bit of cornstarch helps the sauce cling instead of separating. The sliders are rich, but the onion keeps them from feeling flat.
Key Ingredients:
- 1 1/2 lb ground beef or thin-sliced flank steak — beef gives the right chew.
- 1 large onion, thinly sliced — essential for sweetness.
- 2 tbsp soy sauce — the salt base.
- 1 tbsp oyster sauce — for depth and shine.
- 2 tsp coarse black pepper — don’t be shy.
- 2 cloves garlic, minced — keeps the beef savory.
- 1 tsp cornstarch — thickens the pan sauce.
- 2 tbsp neutral oil — for cooking.
- 8 slider buns — toasted.
Quick Steps:
- Season the beef: Toss the beef with soy, oyster sauce, black pepper, garlic, and cornstarch.
- Cook the onions: Sauté onion in oil over medium-high heat for 4 to 5 minutes until soft and lightly browned.
- Add the beef: Cook until browned and the sauce turns glossy; if using sliced beef, keep it moving so it stays tender.
- Reduce briefly: Let the pan simmer for 30 seconds so the pepper blooms.
- Assemble: Spoon the beef and onions onto the toasted buns.
Equipment for This Recipe:
- Large skillet or wok — needs enough heat.
- Wooden spoon — for stirring.
- Spatula or tongs — if using sliced beef.
- Small bowl — for mixing the sauce.
- Knife and cutting board — for onions.
How to Serve This Dish:
These work well with simple steamed rice or roasted green beans. The pepper flavor is strong enough that I usually skip extra sauces on the side; a pickle or two is enough.
Pro Tips for This Recipe:
- Use coarse pepper, not fine dust. You want actual pepper bite.
- Don’t crowd the pan or the onions won’t brown.
- If the sauce feels thin, let it bubble for another 20 seconds.
- Toast the buns well so they can take the juices.
Variations on This Dish:
- Ginger Pepper Beef: Add 1 tablespoon grated ginger with the garlic.
- Ground Beef Shortcut: Use ground beef and simmer until the sauce clings.
- Mild Version: Reduce the pepper by half and add extra onion.
Common Mistakes to Avoid with This Dish:
- Using weak black pepper: The whole dish flattens. Freshly ground is better.
- Overcooking sliced steak: It turns stringy fast.
- Serving on soft buns straight from the bag: They collapse under the sauce.
15. Thai Peanut Chicken Sliders
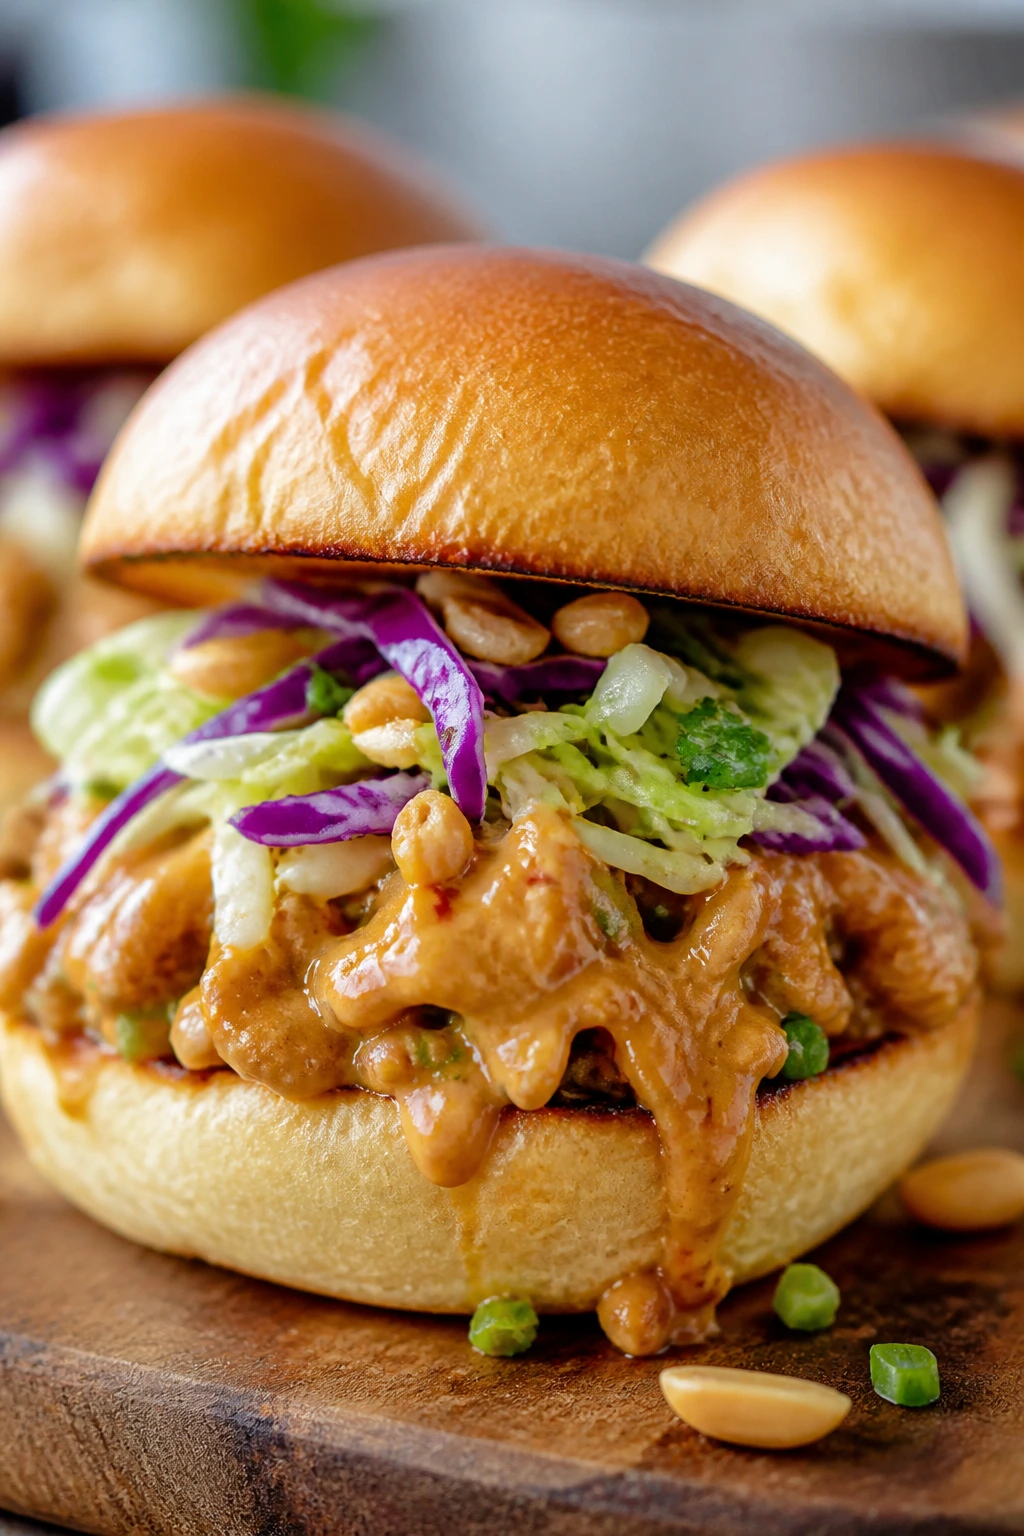
Peanut sauce on a bun sounds odd until you taste it with chicken, cabbage, and a little lime. Then it makes complete sense. The sauce is creamy, the chicken is savory, and the cabbage keeps the slider from tasting like a spoonful of peanut butter in disguise.
Why It Works:
Peanut butter needs acid and salt to behave, which is why soy sauce and lime juice are doing so much of the balancing here. Ground chicken provides a mild base that lets the sauce stay in charge. I like to keep the peanut sauce slightly thin so it coats the meat instead of sitting in a heavy layer.
Key Ingredients:
- 1 1/2 lb ground chicken — dark meat is better if available.
- 1/4 cup peanut butter — smooth works best.
- 2 tbsp soy sauce — salt and savoriness.
- 2 tbsp lime juice — brightens the sauce.
- 1 tbsp sriracha — adjust heat to taste.
- 2 cloves garlic, minced — keeps the chicken from tasting flat.
- 1/2 cup panko — for tenderness.
- 2 cups shredded cabbage — for the topping.
- 8 slider buns — toasted.
- 1 tbsp neutral oil — for the skillet.
Quick Steps:
- Mix the chicken: Combine chicken, panko, garlic, and a pinch of salt.
- Cook the patties: Form 8 patties and sear over medium heat for 4 to 5 minutes per side, until 165°F.
- Make the peanut sauce: Whisk peanut butter, soy, lime juice, sriracha, and 2 to 3 tablespoons warm water until smooth.
- Coat the chicken: Spoon sauce over the patties or toss the patties lightly in the sauce.
- Assemble: Add cabbage to the bun, then chicken, then an extra drizzle of sauce.
Equipment for This Recipe:
- Mixing bowl — for the chicken.
- Skillet — medium heat is enough.
- Small bowl — for the peanut sauce.
- Whisk or fork — to smooth the sauce.
- Spatula — to turn the patties.
How to Serve This Dish:
Serve with cucumber salad, plain rice, or a crisp slaw with no extra mayo. A few chopped peanuts on top are worth the effort if you have them; they give the slider a little crunch that the sauce can’t.
Pro Tips for This Recipe:
- Thin the sauce with warm water, not cold, or it can seize.
- Keep the buns toasted; peanut sauce softens them fast.
- If the chicken mix feels loose, add another tablespoon of panko.
- Lime at the table makes this recipe taste fresher.
Variations on This Dish:
- Curry-Peanut Version: Add 1 teaspoon curry powder to the sauce.
- Lettuce Cup Swap: Skip the buns and serve the chicken in butter lettuce.
- Low-Heat Batch: Use half the sriracha and a little extra lime.
Common Mistakes to Avoid with This Dish:
- Using thick peanut butter without thinning it: The sauce smears instead of coating.
- Skipping the acid: Peanut flavor gets dull fast.
- Overcooking the chicken: Dry chicken makes the peanut sauce feel heavier.
16. Sweet Chili Salmon Sliders
These are what I make when I want something that feels a little richer without turning fussy. Canned salmon, breadcrumbs, egg, and sweet chili sauce create a cake that browns beautifully in a skillet, and the result lands somewhere between a fish cake and a fast dinner sandwich. It’s sturdier than people expect.
Why It Works:
Canned salmon already has a cooked, flaky texture, so the challenge is binding it without making it pasty. Egg and panko fix that, and sweet chili sauce gives the cakes both sweetness and lacquer. Because salmon is rich, a little cucumber or cabbage on top keeps the sandwich from feeling too soft.
Key Ingredients:
- 2 cans salmon, about 14 to 15 oz total, drained and flaked — remove big bones if you want.
- 1 large egg — binds the cakes.
- 1/2 cup panko — adds structure.
- 1/4 cup sweet chili sauce — flavor and glaze.
- 2 scallions, minced — fresh bite.
- 1 tsp soy sauce — rounds the seasoning.
- 1 tbsp mayo — optional, for the bun.
- 1 cup shredded cabbage or cucumber slices — for crunch.
- 8 slider buns — toasted.
- 1 tbsp neutral oil — for frying.
Quick Steps:
- Mix the cakes: Combine salmon, egg, panko, sweet chili sauce, scallions, and soy.
- Shape: Form 8 small patties and chill for 10 minutes so they hold together.
- Fry: Cook in oil over medium heat for 3 to 4 minutes per side, until golden and heated through.
- Toast the buns: A quick toast keeps the buns from going soft.
- Assemble: Spread mayo if using, add cabbage or cucumber, then the salmon cake.
Equipment for This Recipe:
- Mixing bowl — for the salmon mixture.
- Skillet — medium heat browns the cakes evenly.
- Spatula — for careful flipping.
- Fork — to break up the salmon.
- Plate or tray — for chilling the patties.
How to Serve This Dish:
These are good with a green salad, roasted broccoli, or a few sesame cucumbers. I like them with extra sweet chili sauce on the side, but only if the bun can handle it.
Pro Tips for This Recipe:
- Drain the salmon thoroughly or the cakes go soft.
- Chill the shaped patties before frying.
- Use a gentle hand when flipping; the cakes are delicate until browned.
- Add chopped cucumber inside the slider only if it’s well-drained.
Variations on This Dish:
- Spicy Salmon Cakes: Stir chili crisp into the mixture.
- Lemon-Sesame Version: Add lemon zest and a pinch of sesame seeds.
- Air-Fryer Shortcut: Cook at 390°F for about 10 minutes, flipping once.
Common Mistakes to Avoid with This Dish:
- Too much panko: The cakes dry out and taste bready.
- Skipping the chill: They break in the skillet.
- Using watery toppings: The soft salmon cake needs a dry layer underneath.
17. Scallion Egg Sliders with Chili Crisp Mayo
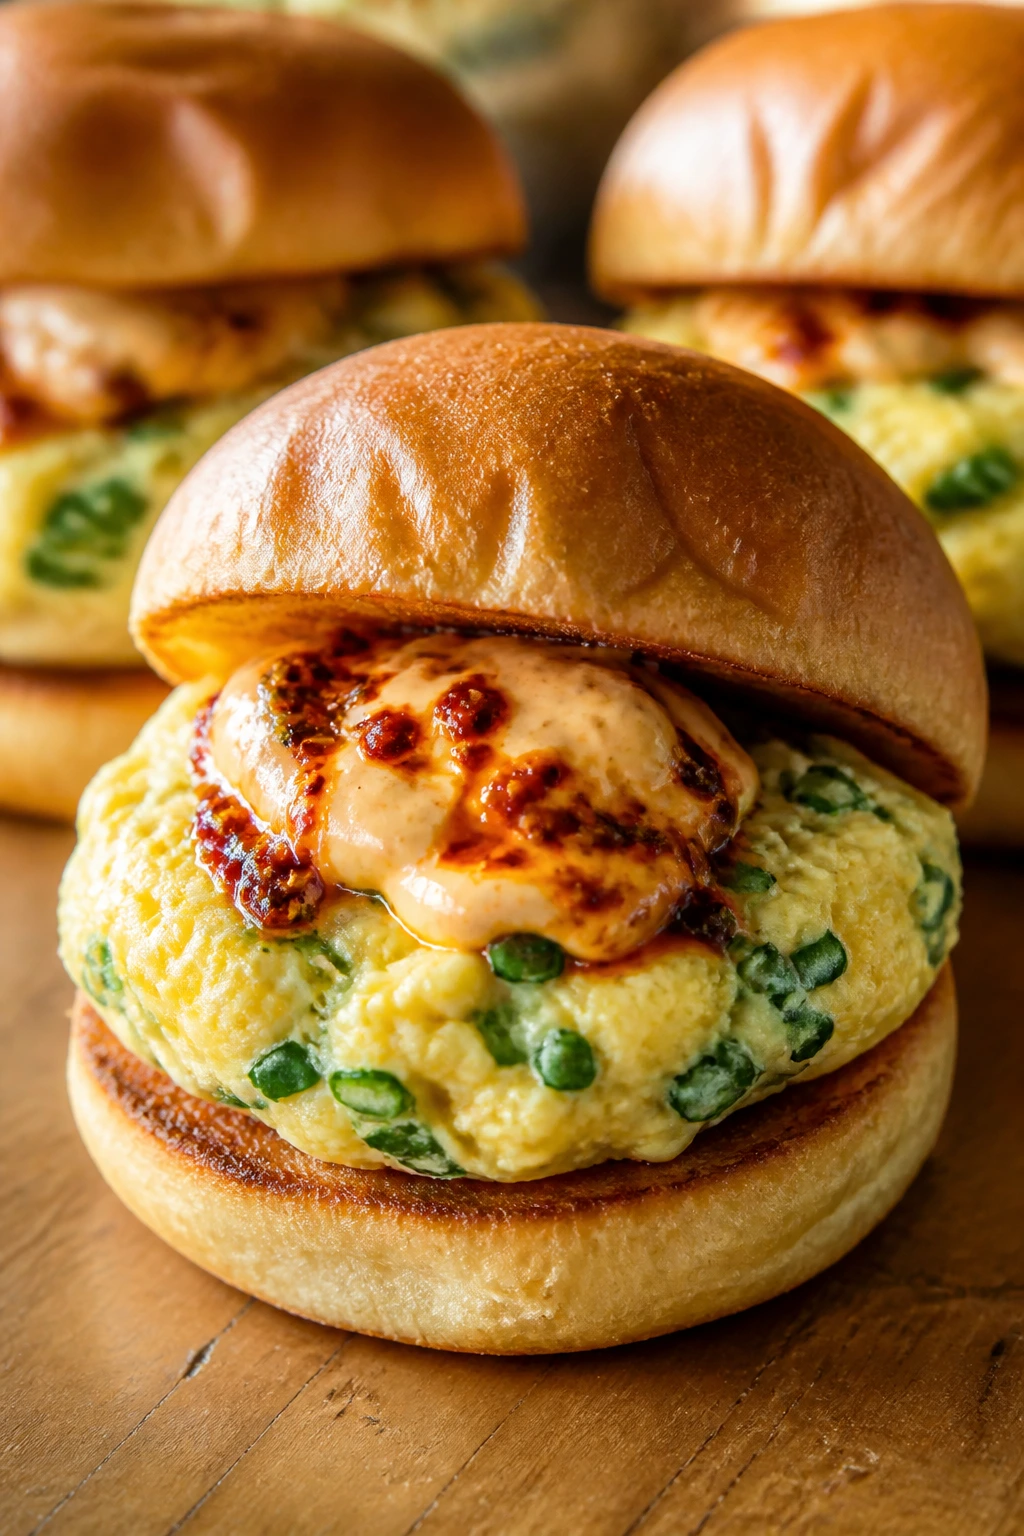
This one sits at the edge of breakfast and snack food, and that’s exactly why I like it. The eggs are soft and savory, the scallions keep them green and sharp, and the chili crisp mayo wakes up a bun that would otherwise be too mild. It’s cheap, fast, and surprisingly satisfying.
Why It Works:
Eggs are one of the best pantry proteins because they absorb seasoning quickly and cook in a minute or two. A little soy sauce gives them a savory note, while chili crisp mayo adds fat, heat, and crunch. You need the bun toasted well because the eggs are soft and a little glossy.
Key Ingredients:
- 6 large eggs — for 8 small slider-sized egg rounds.
- 3 scallions, thinly sliced — both the white and green parts.
- 1 tsp soy sauce — seasons the eggs.
- 2 tbsp mayonnaise — for the chili crisp sauce.
- 1 to 2 tbsp chili crisp — heat and texture.
- 1 tbsp butter or oil — for the pan.
- 8 slider buns — toasted.
- Pinch of salt — use lightly; soy adds salt too.
Quick Steps:
- Mix the eggs: Whisk eggs with scallions, soy sauce, and a pinch of salt.
- Cook the rounds: Melt butter or heat oil in a nonstick skillet over medium-low heat. Pour in the egg mixture and cook until just set, 1 to 2 minutes per side if making small rounds or an omelet you can cut into slider pieces.
- Stir the mayo: Mix mayo with chili crisp to taste.
- Toast the buns: Keep them light golden, not dark.
- Assemble: Spread chili crisp mayo on both bun halves, add egg, then top with the bun.
Equipment for This Recipe:
- Nonstick skillet — eggs need a calm surface.
- Whisk — for the egg mixture.
- Spatula — for lifting the eggs.
- Small bowl — for the mayo.
- Knife — if you cut one large omelet into squares.
How to Serve This Dish:
Serve these with fruit, a small salad, or a bowl of miso soup if breakfast is pretending to be lunch. They’re also good with pickled vegetables, which sounds odd until you realize how well pickles behave with eggs.
Pro Tips for This Recipe:
- Cook the eggs gently. High heat makes them rubbery.
- Use a bun that toasts well; eggs soften bread fast.
- If chili crisp is very salty, use less soy in the eggs.
- A slice of tomato works only if it’s well drained.
Variations on This Dish:
- Ham and Egg Version: Add a thin slice of ham or Canadian bacon.
- Kimchi Twist: Add a spoonful of chopped kimchi, squeezed dry.
- Sesame Egg Sliders: Stir 1 teaspoon sesame oil into the eggs.
Common Mistakes to Avoid with This Dish:
- Overcooking the eggs: They turn dry and spongy.
- Using too much chili crisp mayo: It can overpower the scallions.
- Skipping the toast: The bun turns flimsy quickly.
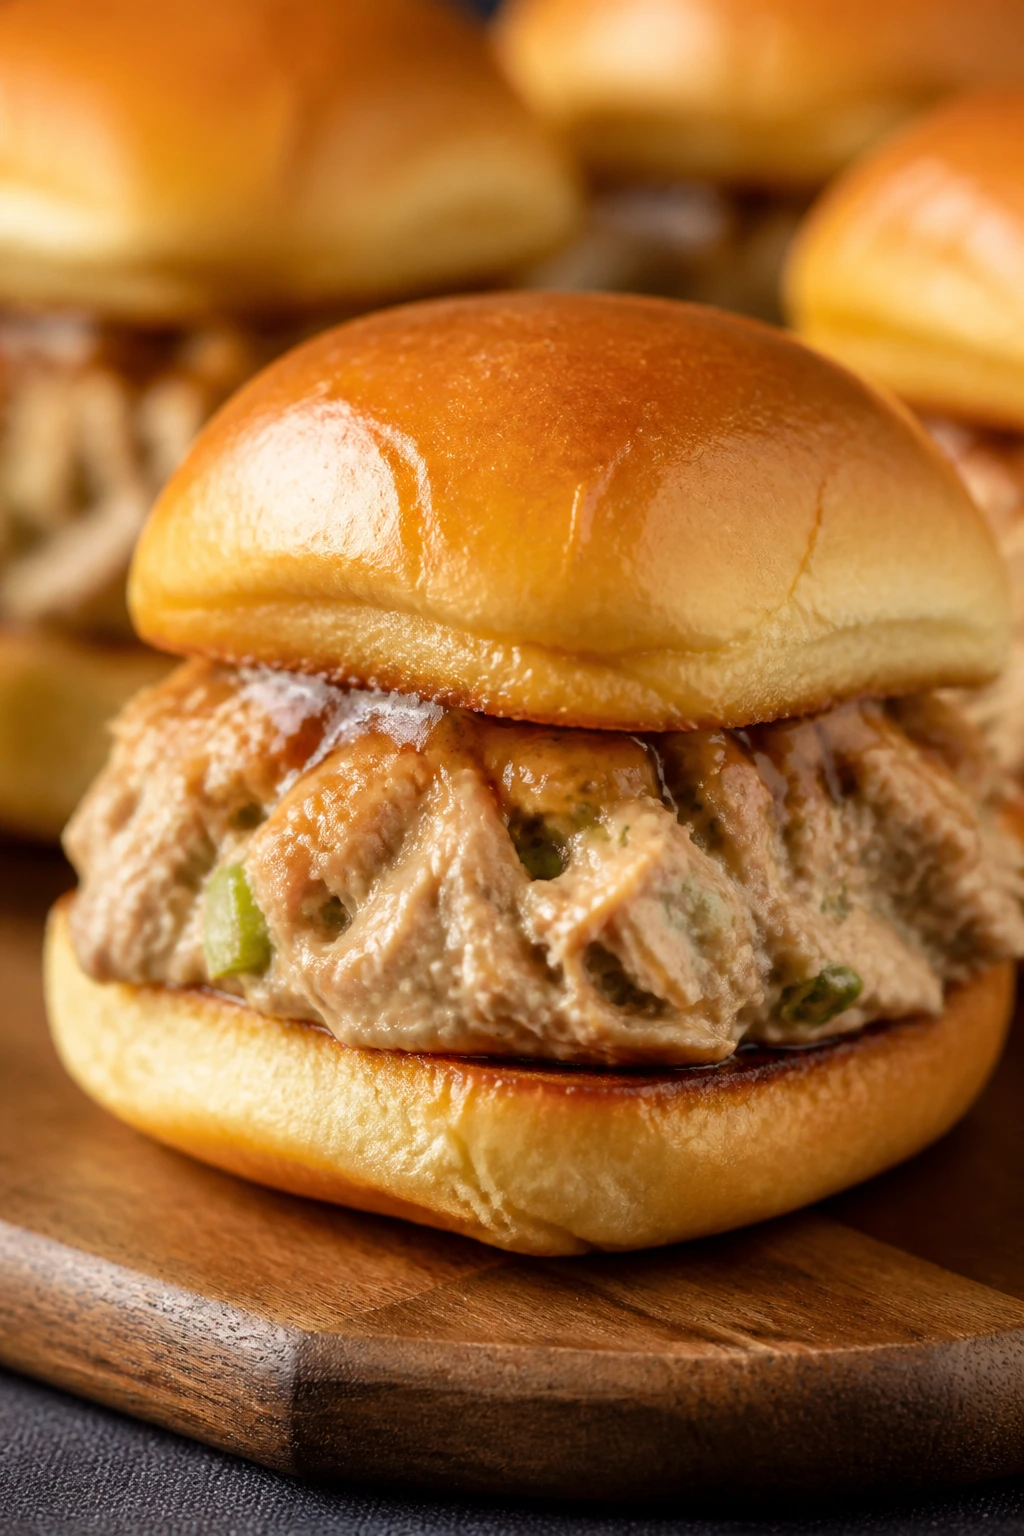
18. Hoisin Turkey Sliders with Carrot Slaw
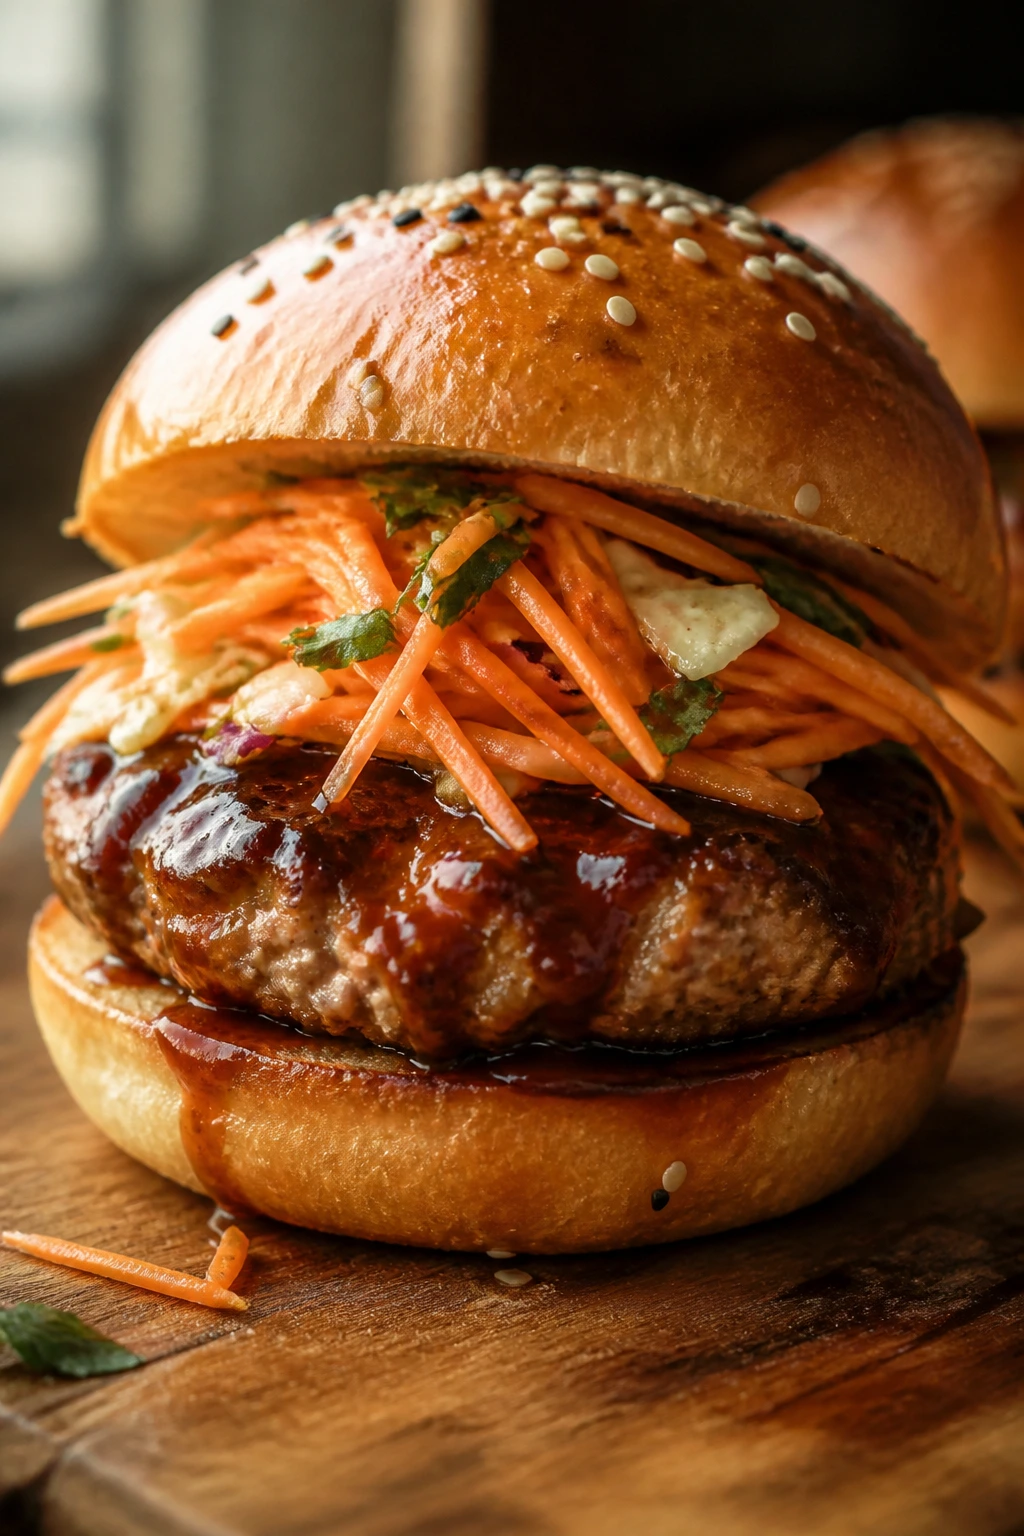
Turkey and hoisin are one of those pairings that seem too simple until you taste them. Hoisin softens turkey’s lean edge, carrot slaw brings sweetness and crunch, and the whole sandwich lands in that sweet spot between takeout flavor and clean pantry cooking. It’s tidy, which I appreciate.
Why It Works:
Ground turkey needs help with moisture, and hoisin gives it both flavor and a little sugar to encourage browning. Carrot slaw is a better match than lettuce here because it has a natural sweetness that echoes the glaze. Rice vinegar keeps the carrots sharp enough to stay interesting.
Key Ingredients:
- 1 1/2 lb ground turkey — 93% lean works best.
- 1/4 cup hoisin sauce — the main seasoning.
- 2 tbsp soy sauce — deepens the flavor.
- 1 tbsp grated ginger — keeps it from tasting flat.
- 2 cloves garlic, minced — necessary.
- 1/2 cup panko — for tenderness.
- 2 cups shredded carrots — for the slaw.
- 2 tbsp mayo — gives the slaw body.
- 1 tbsp rice vinegar — brightens the carrots.
- 8 slider buns — toasted.
Quick Steps:
- Mix the turkey: Combine turkey, hoisin, soy, ginger, garlic, and panko.
- Make the slaw: Toss carrots with mayo, rice vinegar, and a pinch of salt.
- Shape and cook: Form 8 patties and cook over medium heat for 4 to 5 minutes per side, until they reach 165°F.
- Toast the buns: A quick toast helps them stand up to the sauce.
- Assemble: Add carrot slaw first, then the turkey patty, then the top bun.
Equipment for This Recipe:
- Mixing bowl — for the turkey.
- Medium bowl — for the carrot slaw.
- Skillet — medium heat browns the patties well.
- Spatula — for turning.
- Box grater or food processor — for shredding carrots quickly.
How to Serve This Dish:
These sit nicely with a cucumber salad or a bowl of plain rice. If you want a prettier plate, pile a little extra carrot slaw beside the slider so the orange color shows up against the bun.
Pro Tips for This Recipe:
- Add panko if the turkey feels wet. Hoisin can loosen the mix.
- Let the slaw sit 5 minutes so the carrots soften slightly.
- Use medium heat, not high, or the hoisin will darken too fast.
- A few sesame seeds on the slaw make the whole thing look finished.
Variations on This Dish:
- Spicy Hoisin Turkey: Add chili flakes or chili crisp to the turkey mix.
- Cabbage-Carrot Blend: Mix cabbage into the slaw for extra crunch.
- Lighter Version: Use yogurt instead of mayo in the slaw.
Common Mistakes to Avoid with This Dish:
- Overmixing the turkey: The patties get tight and dry.
- Using thick carrot ribbons instead of a fine shred: The slaw falls off the bun.
- Cooking too hot: The outside browns before the middle is done.
19. Canned Jackfruit “Char Siu” Sliders
This is the plant-based slider that most people underestimate. Young jackfruit shreds into stringy pieces that behave a bit like pulled meat, and once it hits hoisin, soy, five-spice, and garlic, it turns sticky and dark in a way that feels oddly convincing. Not identical. Close enough to be fun.
Why It Works:
Jackfruit has a mild flavor, which is the entire advantage here. It absorbs sauce well, and if you cook off enough moisture, the edges turn caramelized instead of watery. The trick is using young green jackfruit in brine or water, not the sweet canned fruit from a dessert aisle.
Key Ingredients:
- 2 cans young green jackfruit, 14 oz each, drained and rinsed — not syrup-packed fruit.
- 1/4 cup hoisin sauce — the char siu base.
- 2 tbsp soy sauce — adds salt and depth.
- 1 tbsp brown sugar — helps the glaze stick.
- 1 tsp Chinese five-spice powder — gives the familiar aroma.
- 2 cloves garlic, minced — keeps it savory.
- 1 tbsp neutral oil — for cooking.
- 8 slider buns — toasted.
- 1 cup sliced cucumber or quick-pickled onion — for crunch.
- 1 scallion, sliced — for garnish.
Quick Steps:
- Prep the jackfruit: Trim any tough core pieces and shred the chunks with your fingers or a fork.
- Cook off the moisture: Heat oil in a skillet over medium-high heat and cook the jackfruit for 5 to 7 minutes until the edges begin to dry and brown.
- Add the glaze: Stir in hoisin, soy, brown sugar, five-spice, and garlic. Cook 2 to 3 minutes until sticky.
- Toast the buns: Keep them light golden.
- Assemble: Pile on the jackfruit, add cucumber or onions, and finish with scallions.
Equipment for This Recipe:
- Skillet — for reducing the jackfruit filling.
- Forks or clean hands — for shredding.
- Mixing bowl — optional, for the glaze.
- Spatula — for stirring and scraping.
- Knife and cutting board — for garnishes.
How to Serve This Dish:
Serve these with slaw, steamed rice, or roasted broccoli. A little extra pickle on the plate helps a lot, because the jackfruit filling is sweet and sticky by design.
Pro Tips for This Recipe:
- Buy young jackfruit in brine or water, never in syrup.
- Cook off moisture before adding the glaze or the filling stays soupy.
- Add a tiny splash of water only if the pan starts to scorch.
- Toast the buns well; the filling is moist even when cooked correctly.
Variations on This Dish:
- Smoky Version: Add a pinch of smoked paprika.
- Spicy BBQ-Char Siu: Stir in chili sauce or sriracha.
- Mushroom Blend: Mix in chopped sautéed mushrooms for more body.
Common Mistakes to Avoid with This Dish:
- Using the wrong jackfruit: Sweet canned fruit ruins the dish.
- Leaving it wet: The filling slips out of the bun.
- Expecting a meat clone: Treat it as its own thing and it tastes better.
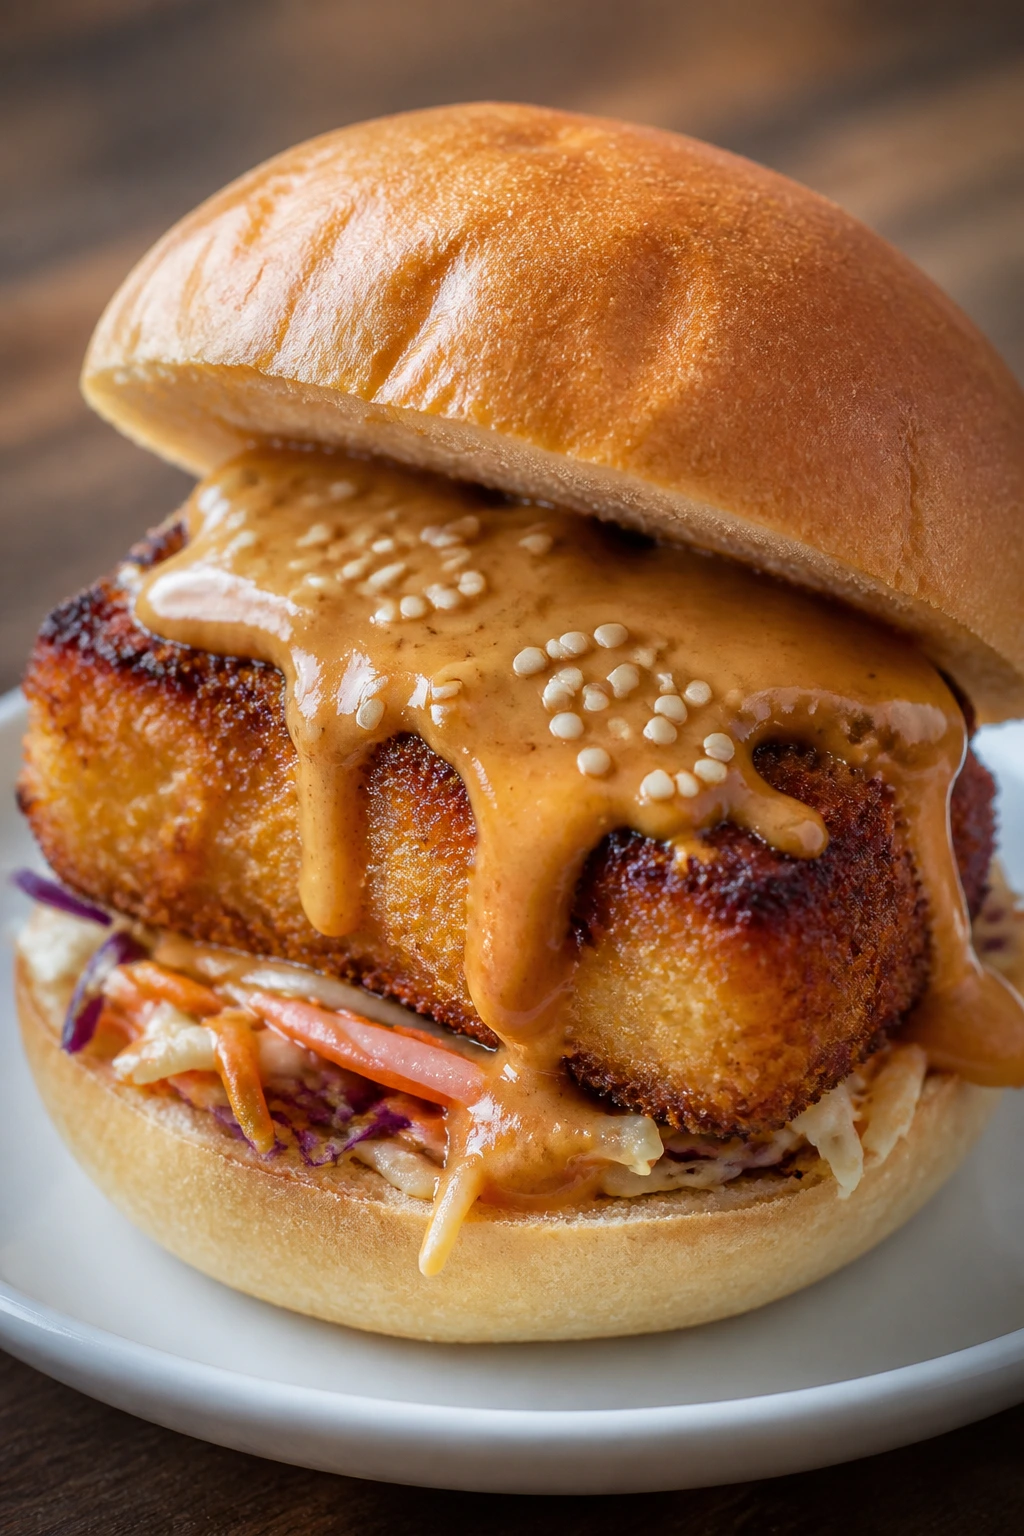
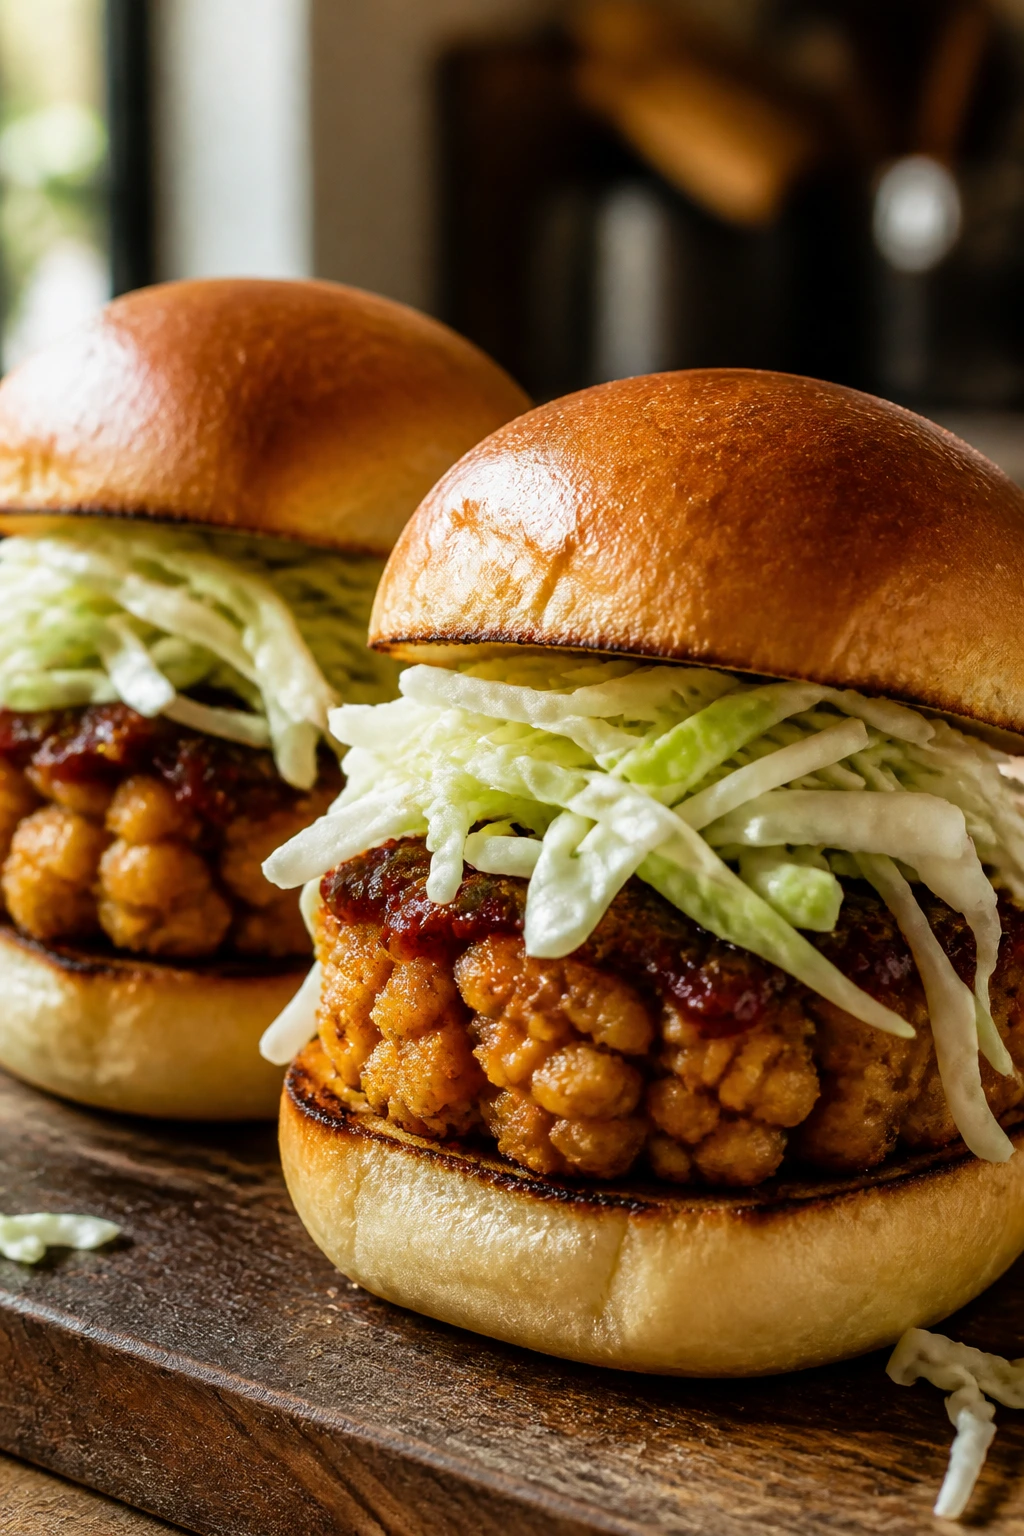
20. Chicken Katsu Sliders with Sesame Cabbage
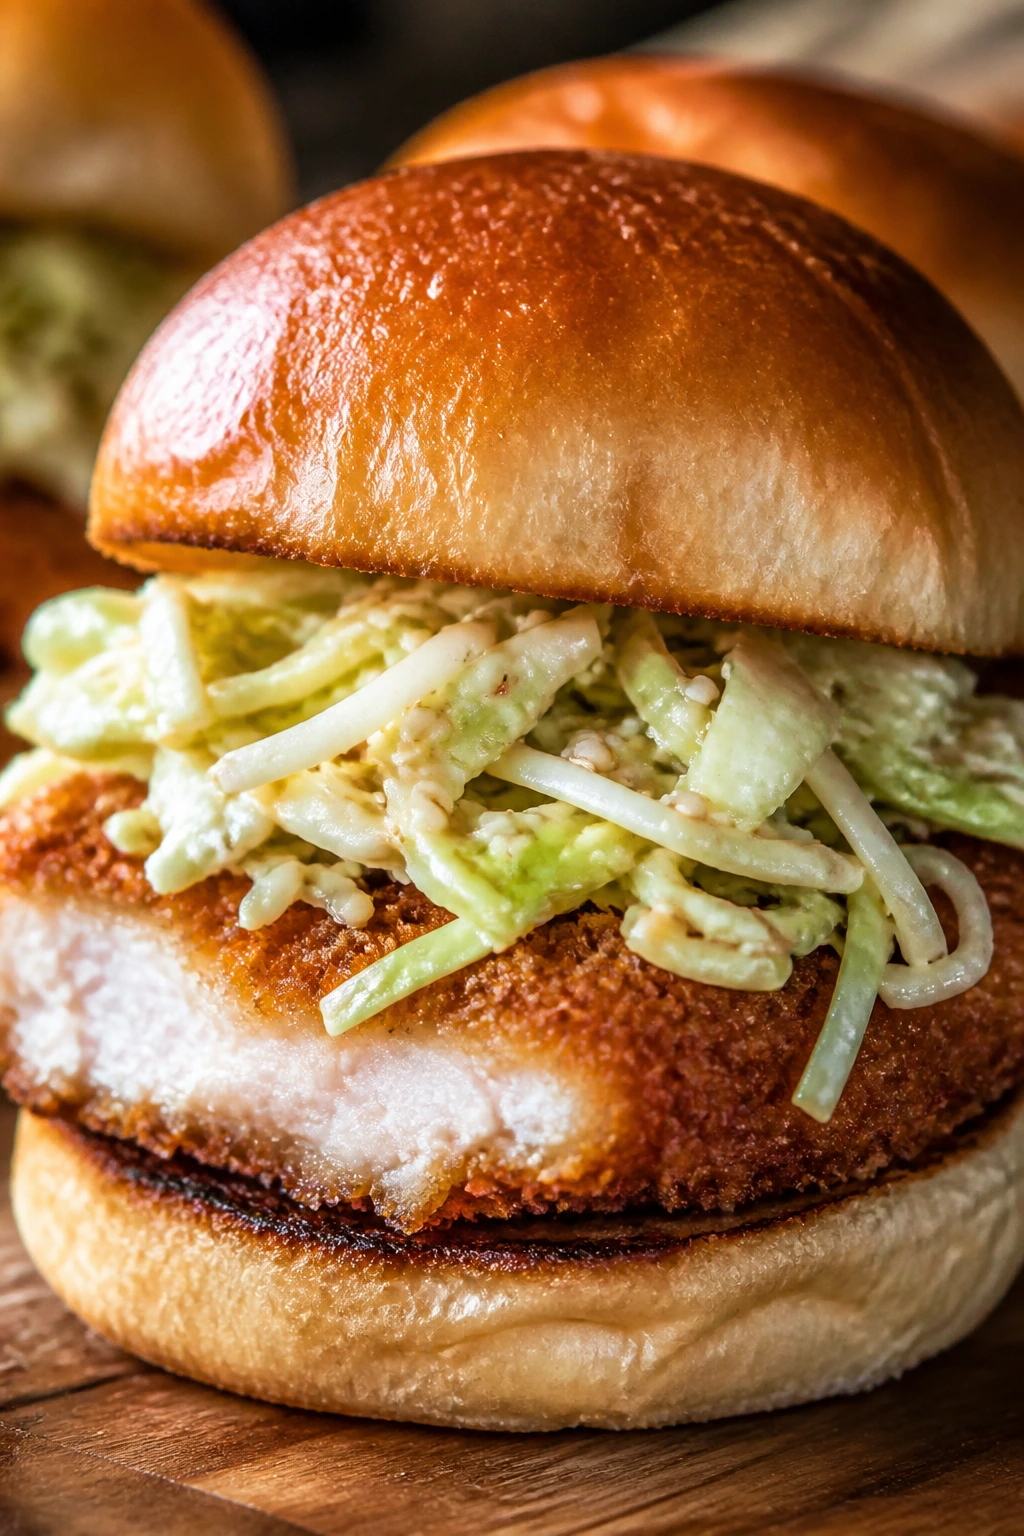
Crisp breaded chicken is one of the easiest ways to make a slider feel special without making the recipe complicated. The panko crust gives you crunch, the cabbage adds freshness, and a quick tonkatsu-style sauce ties the whole sandwich together. It’s basically a tiny cutlet sandwich with better manners.
Why It Works:
Thin chicken cutlets cook fast and stay juicy if the breading is set correctly. Panko gives more crunch than regular breadcrumbs, and a quick pan-fry or air-fry keeps the crust light. Sesame cabbage is the right sidekick because it cuts through the fried coating without stealing the spotlight.
Key Ingredients:
- 4 thin chicken cutlets, about 1 1/4 lb total — pound them evenly if needed.
- 1/2 cup flour — for the first breading layer.
- 2 large eggs, beaten — helps the crumbs stick.
- 1 1/2 cups panko — for the crust.
- 1 tsp soy sauce — mixed into the sauce or cabbage.
- 2 cups shredded cabbage — for the topping.
- 2 tbsp mayo — optional for the buns.
- 8 slider buns — toasted.
- 1/4 cup tonkatsu sauce or a quick mix of 2 tbsp ketchup, 1 tbsp Worcestershire, and 1 tsp soy.
- Neutral oil for frying, or cooking spray for air-frying.
Quick Steps:
- Bread the chicken: Dredge each cutlet in flour, dip in egg, then press into panko until fully coated.
- Cook: Pan-fry in 1/4 inch oil over medium heat for 3 to 4 minutes per side, or air-fry at 390°F for 10 to 12 minutes, until the chicken reaches 165°F.
- Make the cabbage: Toss cabbage with a teaspoon of soy and a little mayo if you want a creamier topping.
- Slice the chicken: Cut each cutlet into slider-sized pieces if needed.
- Assemble: Add cabbage, chicken, sauce, and the top bun.
Equipment for This Recipe:
- Shallow bowls — for the breading station.
- Skillet or air fryer — depending on your method.
- Tongs — for frying.
- Knife — for slicing the cutlets.
- Paper towels — to drain excess oil.
How to Serve This Dish:
These pair beautifully with potato salad, cucumber salad, or a small bowl of soup. They’re sturdy enough for a lunch spread and neat enough to serve on a platter without needing forks.
Pro Tips for This Recipe:
- Pound the chicken to an even thickness so it cooks at the same speed.
- Press the panko on firmly; loose crumbs fall off in the pan.
- Let the breaded chicken sit 5 minutes before frying so the coating adheres.
- Toast the buns — fried chicken and soft buns are a soggy combination.
Variations on This Dish:
- Spicy Katsu: Add a little chili crisp to the sauce.
- Curry Mayo Version: Mix a pinch of curry powder into the mayo.
- Air-Fryer Batch: Spray the breaded cutlets well so the crust browns.
Common Mistakes to Avoid with This Dish:
- Using chicken that’s too thick: The coating burns before the center cooks.
- Skipping the flour layer: The egg slides off and the crust peels.
- Serving immediately without draining: Extra oil weakens the bun.
Why Pantry-Backed Asian Sliders Work So Well
These recipes keep working because the pantry ingredients are not random. Soy sauce brings salt and depth, hoisin gives sweetness and body, rice vinegar cuts through fat, sesame oil adds perfume, and chili crisp or sriracha supplies heat without asking for a lot of other ingredients. That flavor structure is sturdy enough to support beef, turkey, pork, tofu, mushrooms, fish, chickpeas, and even jackfruit.
There’s also a practical reason sliders fit this style of cooking. Tiny buns force you to season more deliberately, which is a good thing. A full-size sandwich can hide weak seasoning behind volume. A slider cannot. The bun-to-filling ratio is tighter, so a glossy glaze, a crisp pickle, or a crunchy slaw shows up in every bite instead of just the first one.
And honestly, the scale is part of the charm. You can make a tray of 8 for dinner or 24 for guests without learning a new method. That kind of flexibility is worth more than a fussy recipe that only works when all the stars line up.
Essential Equipment for These Recipes
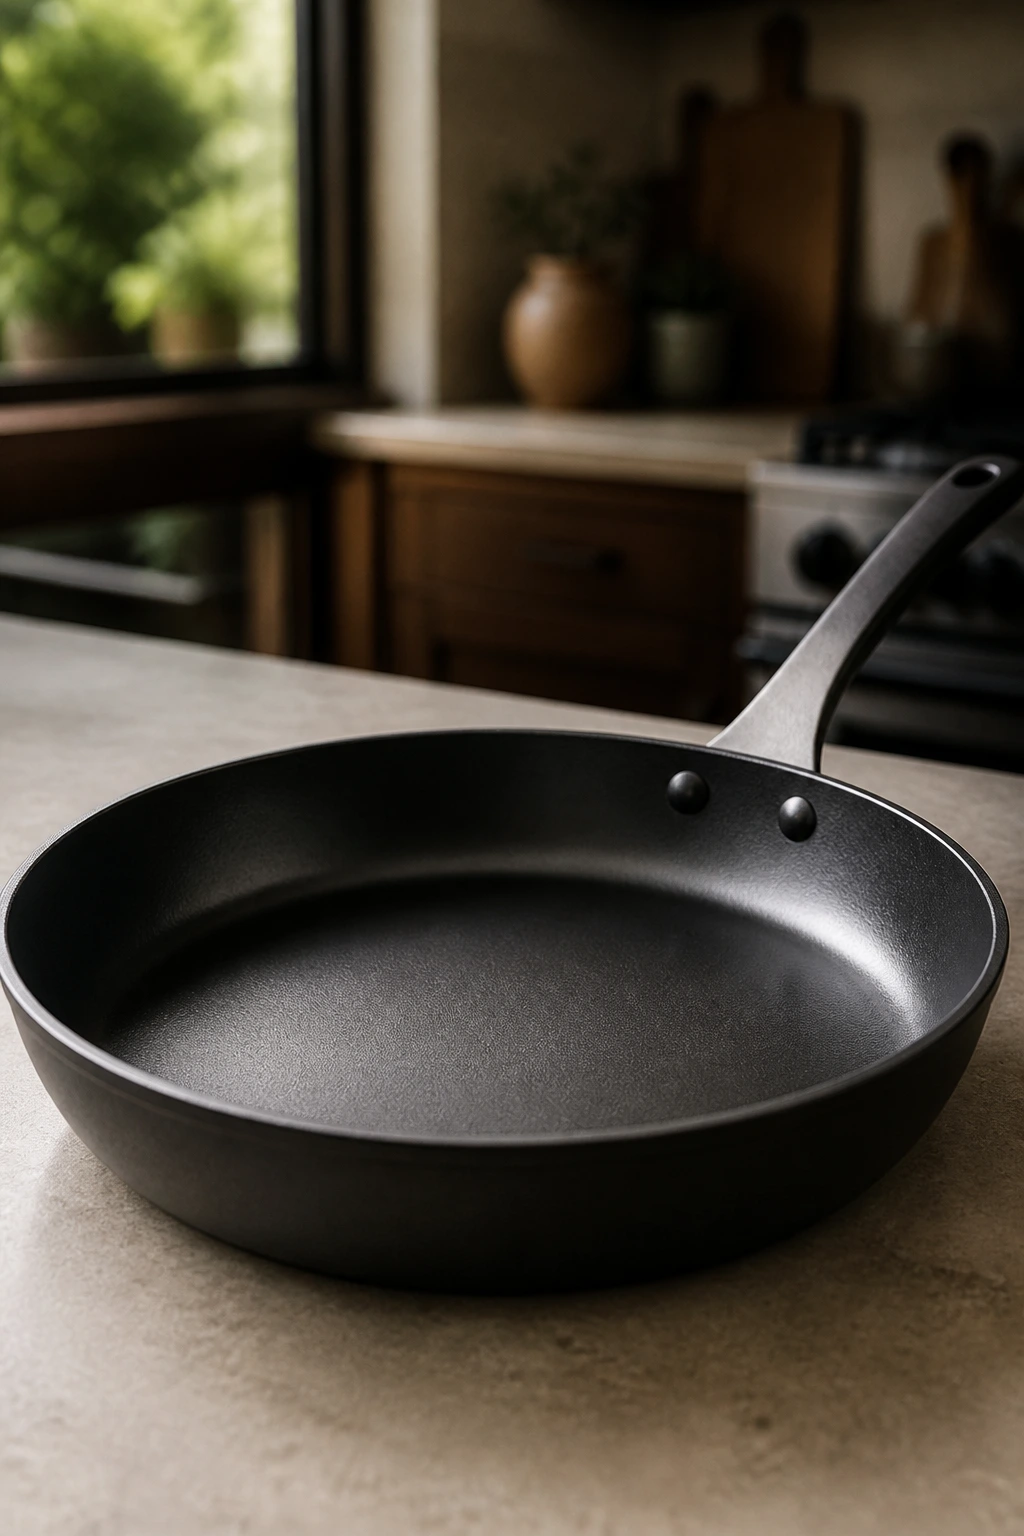
- 12-inch skillet: The workhorse for patties, mushrooms, and quick glazes.
- Rimmed sheet pan: Useful for baking meatballs, tofu, chicken katsu, or keeping finished sliders warm.
- Mixing bowls in 2 or 3 sizes: One for the filling, one for slaws or sauces, one for breading if you need it.
- Thin metal spatula: Better than a bulky turner for flipping small patties and fish cakes.
- Tongs: Handy for buns, shrimp, and anything sticky.
- Instant-read thermometer: The easiest way to avoid dry chicken or undercooked pork.
- Small saucepan: Good for reducing glazes without burning them.
- Microplane or fine grater: Best for ginger and garlic when you want them to disappear into the filling.
- Parchment paper: Helps with meatballs, tofu, and clean-up.
- Toaster oven or broiler: Useful for warming buns fast without drying them out.
Smart Shopping for Soy, Sesame, and the Rest
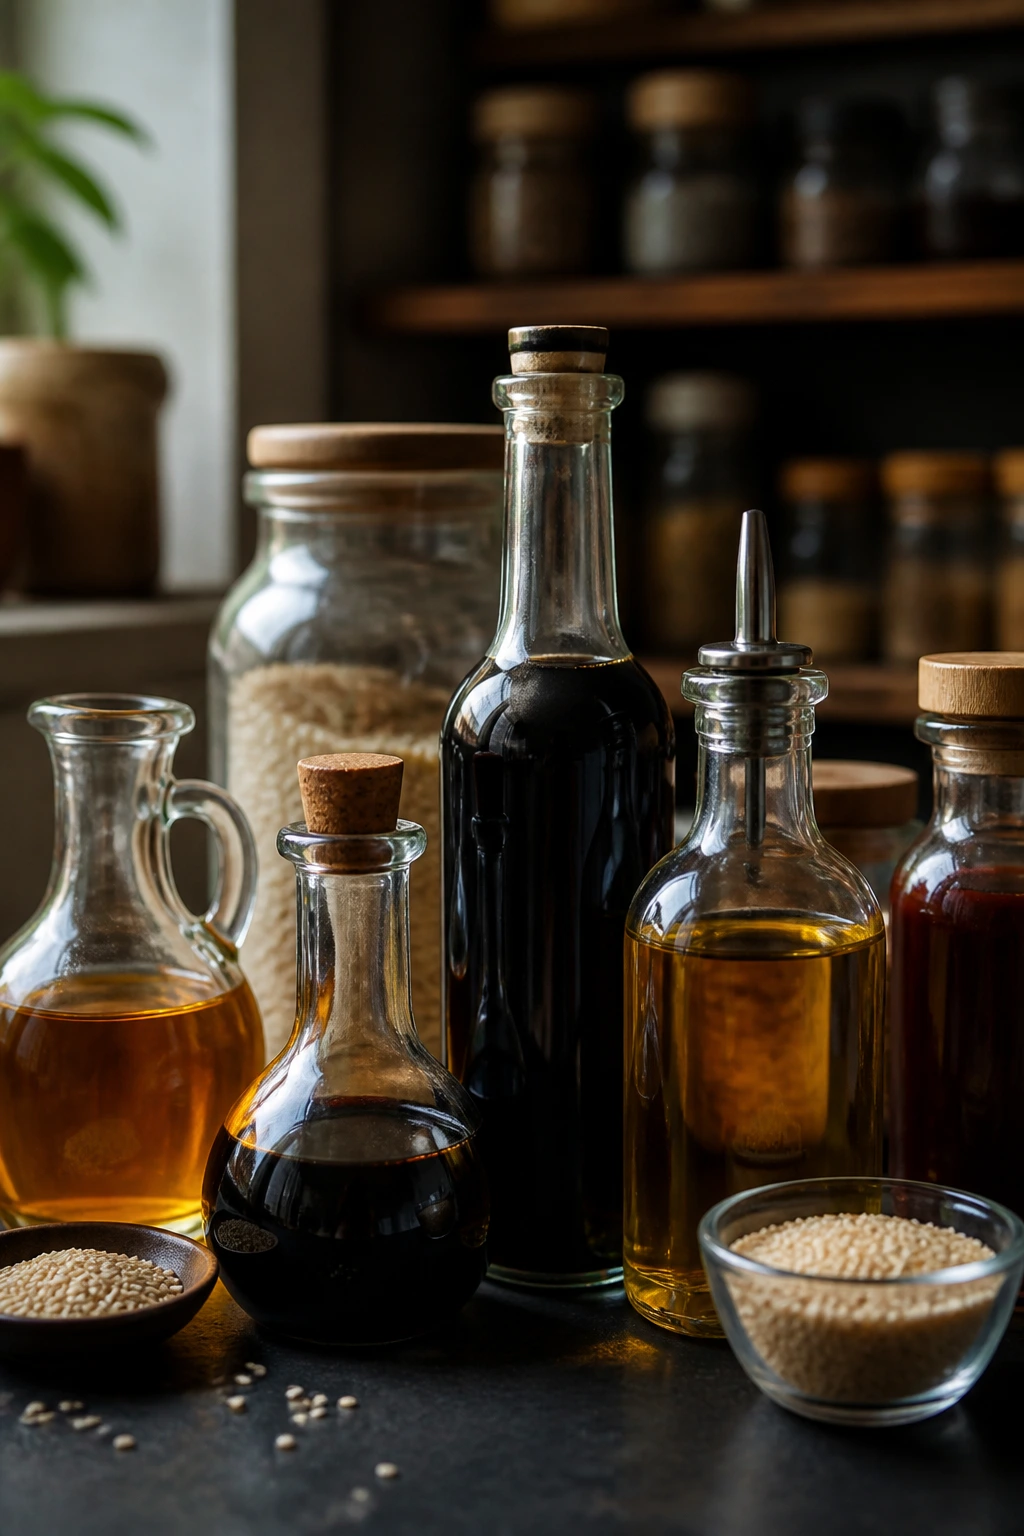
The pantry side of these sliders matters more than people think. Low-sodium soy sauce gives you room to reduce and thicken sauces without oversalting the filling. Regular soy works too, but if that’s what you buy, taste before adding extra salt. Hoisin should be thick and glossy, not separated or watery; if it pours like syrup, it tends to make fillings loose instead of sticky.
Buy sesame oil and use it like a finishing spice, not a cooking oil. A teaspoon or two is enough for most of these recipes, and more than that can make a whole tray taste perfumed in a bad way. Rice vinegar is milder than white vinegar, which is why it shows up so often in the slaws and pickles. It sharpens without barking.
For proteins, think about fat content. Ground beef around 80/20, pork around 80/20, and turkey around 93% lean usually give the best texture for sliders. Chicken needs panko or another binder. Tofu should be extra-firm and pressed. For canned fish, drain it thoroughly and break it up before mixing so the filling doesn’t turn pasty.
Buns matter too. Soft potato buns or slider rolls hold sauces well, but they need to be toasted. A half-browned cut side gives you just enough resistance to keep the fillings from soaking through. If you’re buying cabbage or coleslaw mix, choose the dryest bag you can find. Wet slaw is the fastest way to ruin a good slider.
How to Serve These Recipes
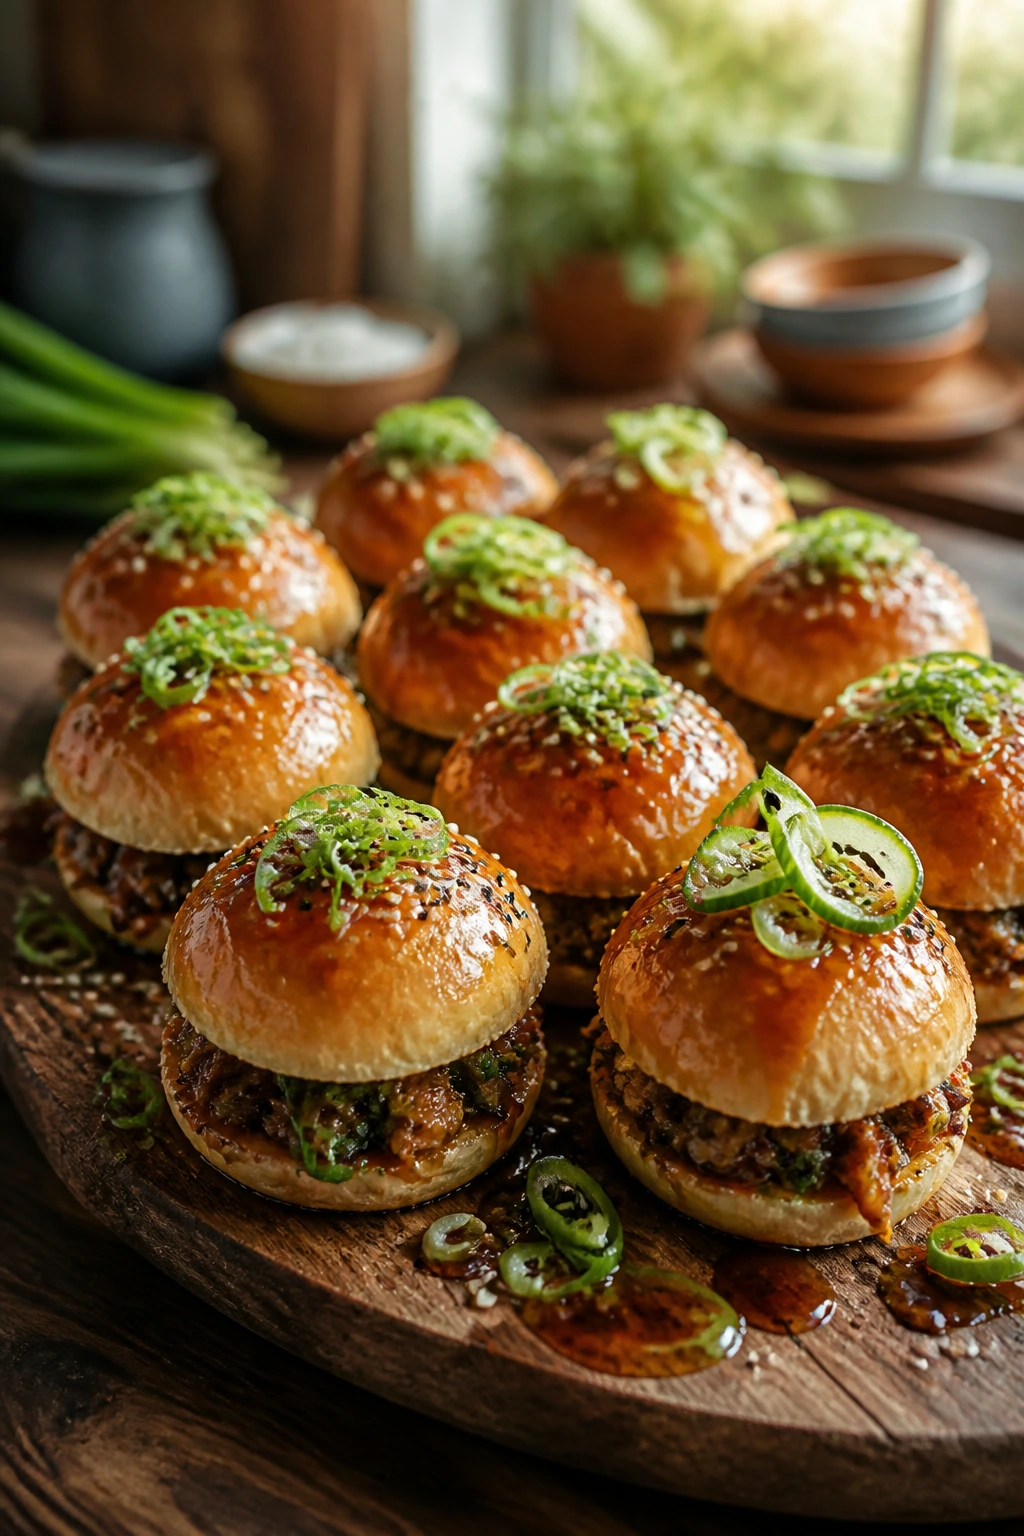
Presentation:
Pile the sliders seam-side down on a platter so they hold together, then scatter scallions, sesame seeds, or thin cucumber ribbons over the top. A little mess is fine; puddles of sauce are not.
Accompaniments:
Cucumber salad, sesame slaw, edamame, roasted broccoli, plain rice, simple miso soup, and kettle chips all fit the theme. Fried sides work too, but a cold crunchy dish usually balances the sliders better than another rich one.
Portions:
Plan on 2 sliders per adult for dinner, 3 if the rest of the meal is light, and 1 slider per person if you’re serving a broader spread. If you’re cooking for kids, halve the sauce on the buns and keep the pickles or chili crisp on the side.
Beverage Pairing:
I like iced jasmine tea, cold lager, or sparkling water with lime for most of these. For the sweeter sliders, ginger beer is a good call. For the spicier ones, anything cold and plain works.
Additional Tips and Flavor Boosters
Flavor Enhancement:
A quick brush of soy-honey glaze on the cooked patties or tofu right before assembly gives the sandwiches a finished look and a stickier bite. Even a teaspoon or two makes the flavor feel deeper.
Customization:
Add pickled onions, shredded cabbage, cucumber slices, or a little kimchi depending on the slider. These are the easiest ways to shift the balance without rebuilding the whole recipe.
Serving Suggestions:
Brush the cut sides of the buns with butter or mayo before toasting. That little step gives you color and keeps the bread from tasting stale next to bold fillings.
Make-It-Yours:
Use tamari and gluten-free buns for a gluten-free batch, swap mayo for yogurt or tahini in slaws if you want something lighter, and cut the chili component in half if you’re feeding people who like flavor but not fire.
Make-Ahead, Storage, and Reheating Guidance
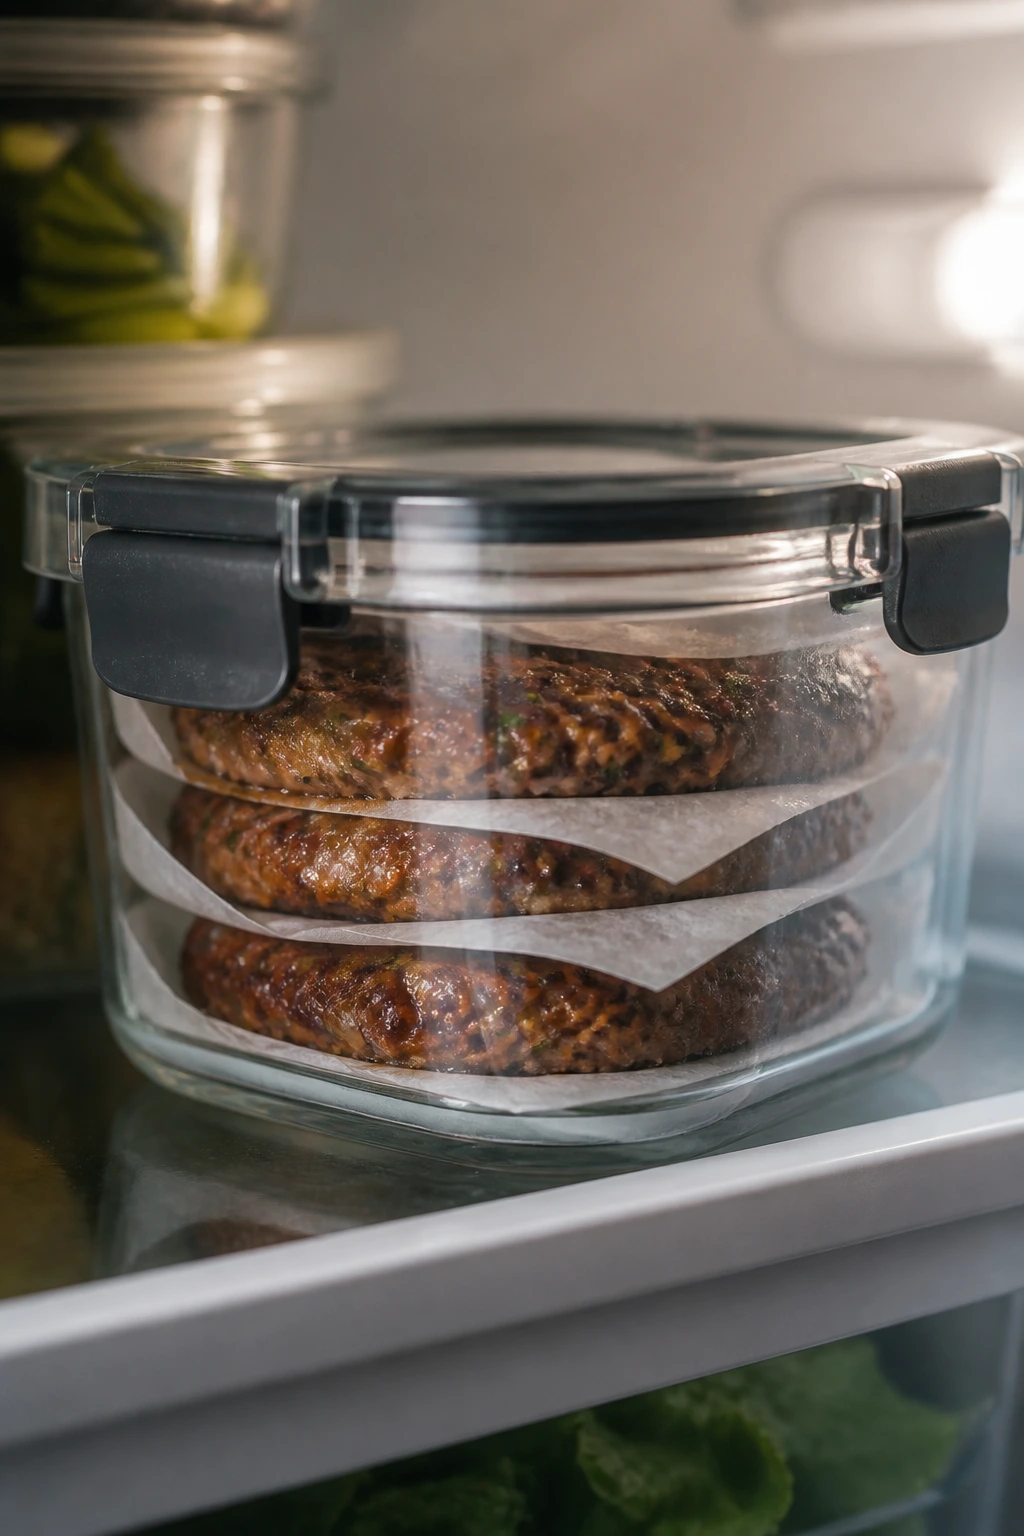
Most of these fillings keep well for 3 to 4 days in the refrigerator once cooked, and the glazed ones often taste better on day two because the sauce settles into the meat or tofu. Keep slaws separate if you can. Once cabbage or cucumber meets mayo or vinegar for too long, the texture shifts from crisp to tired.
Cooked patties, meatballs, tofu slabs, mushroom filling, jackfruit filling, and chicken katsu all freeze reasonably well for up to 2 months. Wrap them tightly, then tuck them into an airtight container or freezer bag. Fish-based sliders like tuna, salmon cakes, or shrimp are better fresh, though cooked salmon cakes can still be frozen if you don’t mind a little texture loss.
For reheating, use the oven when the filling needs to stay crisp. A 325°F oven for 8 to 12 minutes works for patties and meatballs, while chicken katsu does better at 350°F for 8 to 10 minutes on a rack so the crust stays dry. Shrimp and tuna salad should not be blasted in the oven; keep those gentle or eat them cold. Skillet reheating works for beef, pork, chicken, tofu, and mushrooms — a medium-low pan with a splash of water or a lid for 1 or 2 minutes usually brings them back without drying them out.
Assembled sliders are best eaten right away, but if you need to prep ahead, keep the buns, fillings, and toppings separate. Build them at the last minute. That’s the difference between a decent tray and one that disappears fast.
Variations and Adaptations to Try

Gluten-Free Bun Swap:
Use tamari instead of soy sauce and choose gluten-free slider buns or lettuce cups. Watch the hoisin, too, because not every bottle is gluten-free. The flavor stays the same; the texture just shifts.
Vegetarian Pantry Tray:
Mix tofu, mushrooms, chickpeas, and jackfruit on one platter. That sounds like a lot of change, but the same sesame, soy, vinegar, and chili palette ties the whole tray together. It’s a smart move when you’re cooking for mixed diets.
Kid-Mild Build:
Cut chili crisp, sriracha, and gochujang in half, then put the heat on the table instead of inside the filling. Most kids will happily eat the sweet-salty versions if the sauce isn’t shouting at them.
Street-Style Heat Batch:
Add chili crisp, pickled jalapeños, extra garlic, or a dusting of Sichuan pepper to the stronger sliders. This works best on beef, pork, mushroom, and tofu versions, where the flavor can take a beating.
Oven-Only Party Tray:
If you don’t want to stand over a skillet, bake the patties or meatballs on a rack at 400°F, then broil briefly for color. It’s not identical to pan-searing, but it keeps the batch moving when you’re feeding a room.
Crisp-and-Fresh Finish:
Swap creamy slaws for straight vinegar slaws, add cucumber, or tuck in radish slices. A dry, crunchy topping often makes the slider taste sharper and less heavy.
Common Mistakes to Avoid
Underseasoning the filling:
Slider buns mute flavor. If the raw mixture tastes timid, the cooked slider will taste flatter. Season the filling a little more aggressively than you would a full-size sandwich filling.
Skipping the toast on the buns:
Soft buns and saucy fillings are a bad pairing unless the bread gets a little color first. Even 30 seconds in a dry skillet helps.
Overstuffing the slider:
A good slider is compact. If the filling spills out before the first bite, the sandwich is too tall. Keep the layers tight and use less sauce than you think.
Using wet toppings straight from the bowl:
Cabbage, cucumbers, and pickles need to be drained. Water is the fastest way to make the bottom bun soggy.
Cooking sugary glazes too early:
Hoisin, honey, and sweet chili sauce can burn if they sit over high heat too long. Add them late, and let them tighten for only a minute or two.
Ignoring doneness on poultry:
Chicken and turkey need to reach 165°F. Guessing here is how people end up with dry or unsafe fillings.
Frequently Asked Questions
Can I make these Asian sliders ahead of time?
Yes, but keep the components separate. Cook the fillings and chill them, make the slaws or pickles, and toast the buns right before serving. Assembled sliders go soft quickly, especially if the filling is saucy.
What buns work best for these recipes?
Soft slider rolls, potato buns, and split dinner rolls all work well. The key is to toast the cut sides so they can stand up to sauce, glaze, and slaw without collapsing.
Can I use leftover chicken, pork, or beef instead of cooking from scratch?
Absolutely. Shredded leftover chicken works well with hoisin, peanut, or sriracha sauces. Leftover pork or beef can be chopped and reheated in a skillet with a little soy, vinegar, or hoisin to bring the flavor back to life.
How do I keep sliders warm for a party?
Hold the cooked fillings in a low oven around 200°F and keep the buns covered in a towel so they don’t dry out. Assemble just before serving. If you must hold assembled sliders, keep them no longer than 20 to 30 minutes.
What if my filling tastes too salty?
Add acid, not more sugar first. A little rice vinegar, lime juice, or unsweetened cabbage slaw can pull the flavor back into line. If the mixture is still too aggressive, serve it with extra plain rice or extra buns to dilute the bite.
Can I make these without soy sauce?
You can use tamari if gluten is the issue, or coconut aminos if you want a different salt source. The flavor changes a bit, so you may need a touch more vinegar or a pinch of salt to make the filling taste complete.
Do I need sesame oil in every recipe?
No, but it helps when used lightly. Think of it as a finishing note, not a cooking oil. If you leave it out, the sliders still work; they just lose a little of that toasted, nutty smell.
What if my patties fall apart in the pan?
The mix probably needs more binder or more chill time. Add panko or egg where appropriate, and let the shaped patties rest in the fridge for 10 minutes before cooking. Also, wait for the pan to heat fully before flipping.
One More Batch
The nice part about Asian sliders is that they don’t ask for a special occasion. A half-pack of buns, a bottle of soy sauce, and whatever protein or can of beans is sitting around can turn into dinner with actual personality. That’s useful. More useful than a recipe that only behaves when the pantry is perfect.
What I keep coming back to is the balance: salty, sweet, acid, heat, crunch. Get those five things lined up in a small sandwich and the result feels complete, even if the ingredient list is mostly the kind of stuff you already own. That’s the quiet appeal of this style of cooking.
So the next time the fridge looks unhelpful, reach for the condiments first. Then the buns. Then make one more batch.