
A crispy stir fry better than takeout lives or dies on one thing: the chicken has to hit the pan dry, hot, and alone. Not in a puddle. Not under a mountain of sauce. Not jammed into a skillet that’s too small for the job. If you’ve ever opened a delivery container and found pale, soft chicken hiding under limp broccoli, you already know the disappointment I’m talking about.
The fix isn’t complicated, but it is unforgiving. Stir-fry food wants heat, speed, and a little restraint. The chicken needs a thin starch coating so it picks up color instead of just steaming. The vegetables need enough space to blister at the edges before they give up their crunch. And the sauce has to go in at the end, when the pan is already doing its work and the cornstarch can tighten into a glossy coat instead of turning into soup.
That’s the whole trick here. A wok helps, sure. A big skillet works too. What matters most is rhythm: coat, sear, cook in batches, sauce last. Once you get that flow in your hands, dinner stops tasting like a compromise and starts tasting like the version you keep ordering because it seems impossible to make at home. It isn’t impossible. It just needs a hot pan and a little nerve.
Why This Stir Fry Beats the Usual Soggy Version
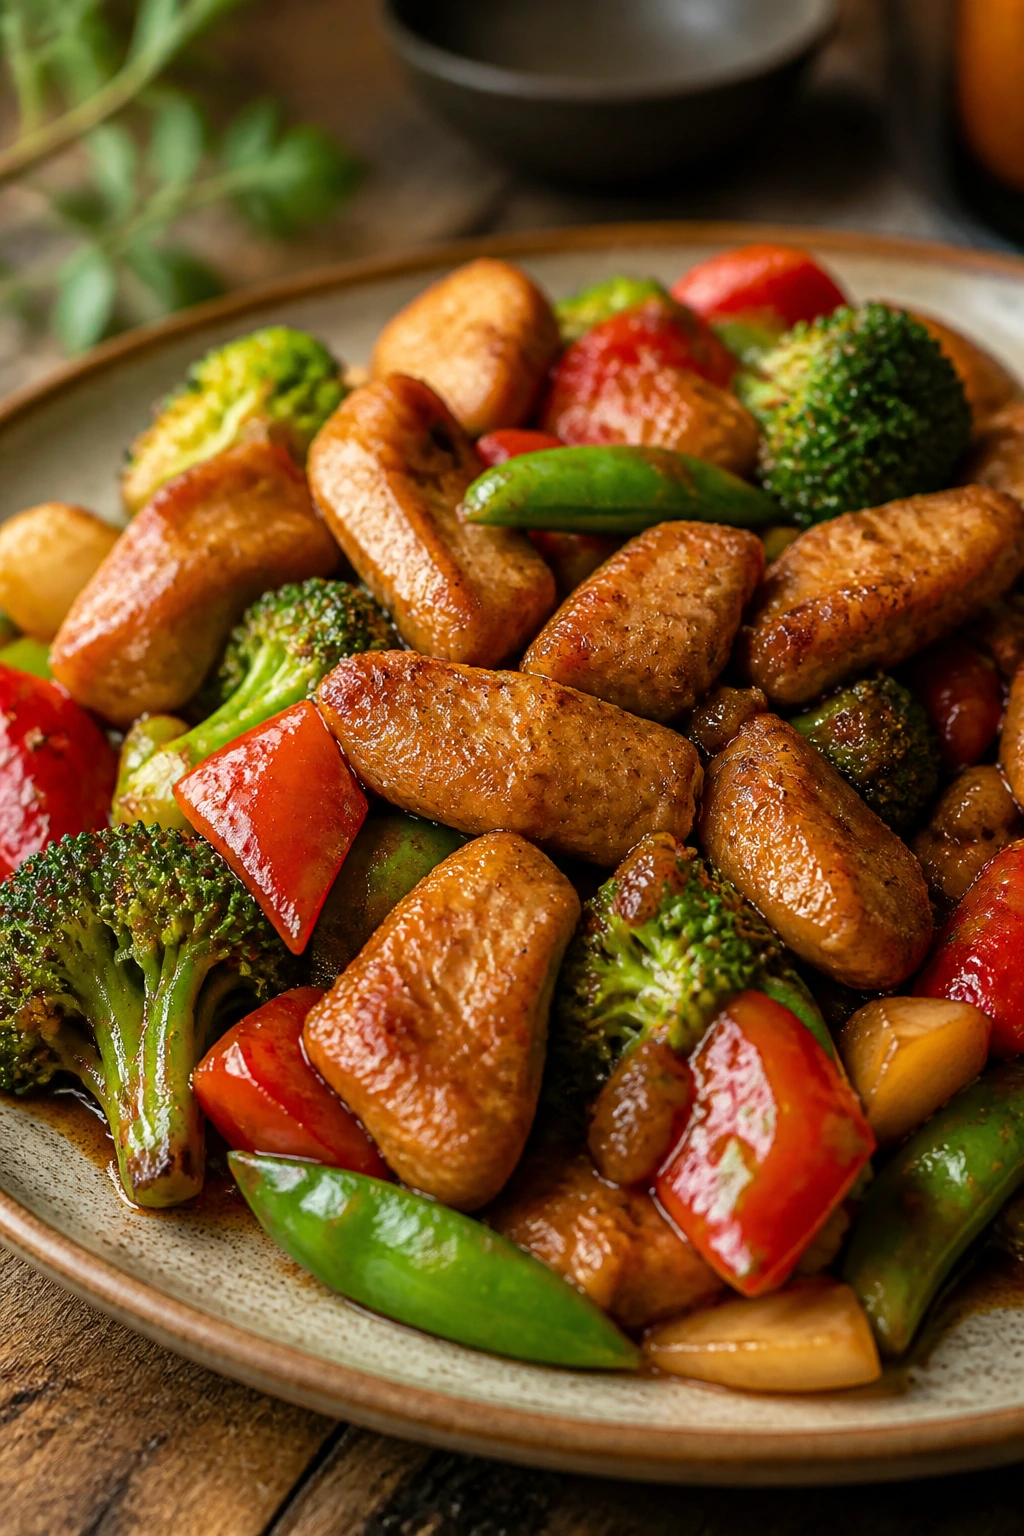
A good stir fry should have contrast. That’s the part most home cooks miss, and honestly, it’s the part takeout sometimes misses too when the lid stays on too long. You want chicken with a thin, craggy shell, broccoli with browned edges and a bright green center, peppers that bend but still snap, and sauce that clings without drowning the pan.
The cornstarch coating does a lot of heavy lifting here. It isn’t breading. It’s thinner than that, almost dusty when you first toss it on, and it turns into a delicate crust the moment it meets hot oil. If the chicken is wet, though, the coating slips off and the pan starts steaming. That’s why drying the meat first matters more than most people think.
Takeout stir fry often gets flattened by packaging. Steam rises, condenses on the lid, and drips back down. You can’t fix that after the fact. What you can do is build in a little more texture from the start: cook the chicken in one layer, pull it out before it gets leathery, then bring it back only after the vegetables and sauce are ready.
The vegetables matter as much as the chicken. Broccoli florets cut small cook faster and brown better. Snap peas give you that clean pop at the end. Bell pepper adds sweetness, but only if it spends enough time on contact with the hot metal to lose its raw edge. This is not a dump-and-stir dinner. It’s a quick, controlled sequence, and that’s why the finished plate tastes sharper, cleaner, and, yes, better than the average carton of takeout.
Why You’ll Love This Stir Fry
-
The chicken stays crisp at the edges. A light cornstarch coat and a hot pan give you browned bits instead of pale, rubbery pieces.
-
The sauce clings instead of pooling. The cornstarch slurry thickens fast, so every bite gets a shiny coat without turning the pan into gravy.
-
The vegetables keep their bite. Broccoli, snap peas, and bell pepper each go in at the right moment, which keeps the texture lively.
-
It uses one main pan, not a whole sink. You’ll still need a bowl or two, but there’s no deep-fry setup and no greasy cleanup.
-
It’s friendly to substitutions. Chicken thighs, chicken breast, shrimp, tofu, cabbage, carrots, or green beans can all work with the same basic method.
-
Leftovers reheat better than you’d expect. The sauce thickens a little overnight, which helps the whole dish hold together if you warm it properly.
How Much It Makes and How Long It Takes
Some dinners look fast on paper and then chew up your whole evening. This one doesn’t, as long as your chopping happens before the burner goes on. The actual cooking is quick. The part that deserves your attention is the prep.
Yield: Serves 4
Prep Time: 20 minutes
Cook Time: 15 minutes
Total Time: 35 minutes
Difficulty: Intermediate — the ingredient list is simple, but the pan needs to stay hot and the chicken has to cook in batches without crowding.
Rest Time: 10 minutes, optional, for the coated chicken to sit before cooking
Best Served: Right away, while the chicken edges are crisp and the vegetables still have some snap
The Ingredients at a Glance
For the Chicken
- 1 1/2 lbs boneless, skinless chicken thighs, cut into 1-inch pieces
- 2 tbsp low-sodium soy sauce
- 1 tbsp Shaoxing wine or dry sherry
- 1 egg white
- 3 tbsp cornstarch
- 1 tsp kosher salt
- 1/2 tsp white pepper or black pepper
For the Stir-Fry
- 2 tbsp neutral high-heat oil, divided
- 1 small yellow onion, thinly sliced
- 1 red bell pepper, sliced into 1/4-inch strips
- 3 cups broccoli florets, cut into bite-size pieces
- 1 cup sugar snap peas, strings removed
- 3 cloves garlic, minced
- 1 tbsp fresh ginger, minced
- 2 scallions, sliced, whites and greens kept together or separated
For the Sauce
- 1/2 cup low-sodium chicken broth
- 3 tbsp low-sodium soy sauce
- 2 tbsp oyster sauce
- 1 tbsp rice vinegar
- 1 tbsp honey or light brown sugar
- 1 tsp toasted sesame oil
- 1 tbsp cornstarch
- 2 tbsp cold water
For Finishing
- 1 tsp toasted sesame seeds
- 1 tsp chili crisp or red pepper flakes, optional
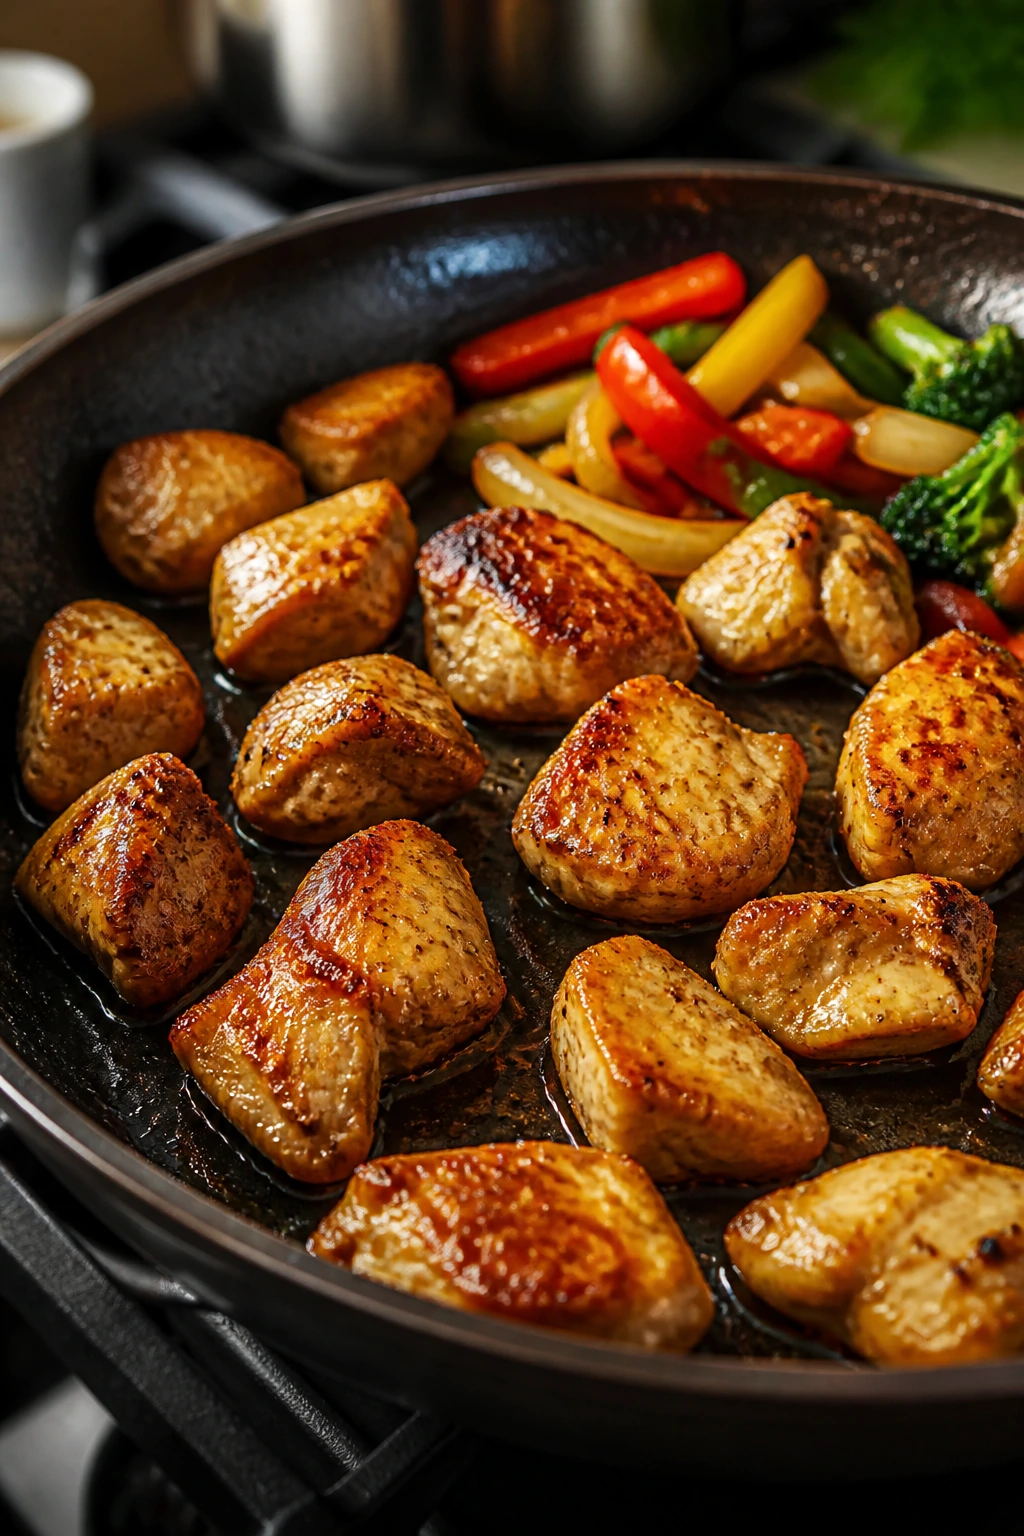
The Chicken and the Coating That Fries Cleanly
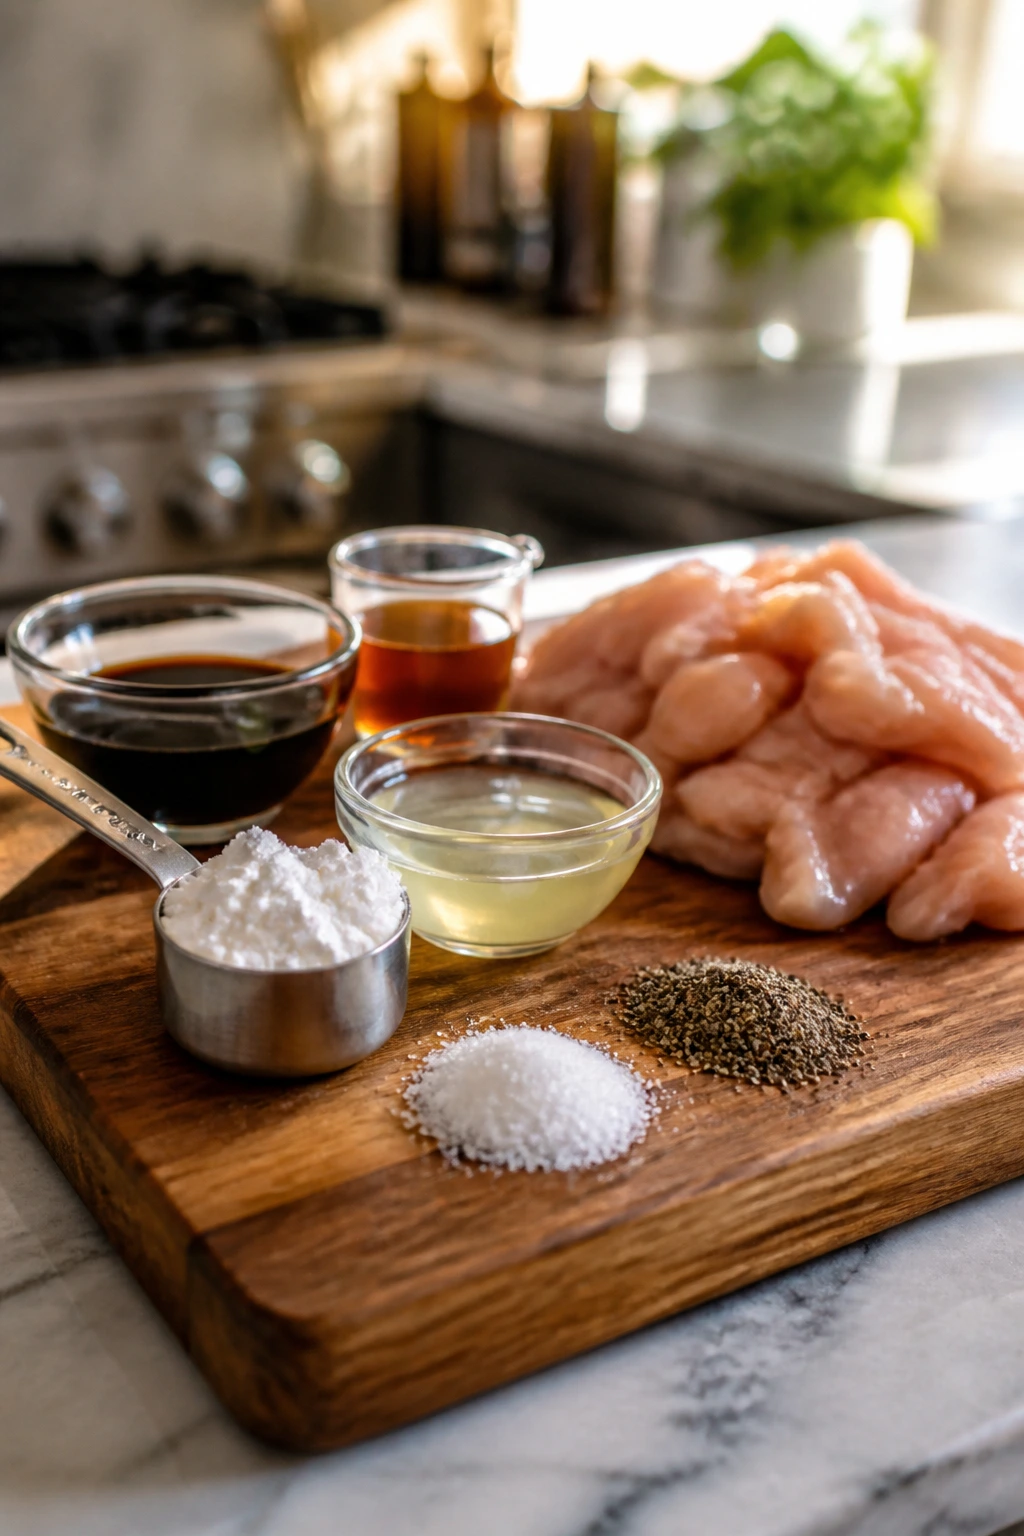
What to use: 1 1/2 lbs boneless, skinless chicken thighs, 2 tbsp soy sauce, 1 tbsp Shaoxing wine or dry sherry, 1 egg white, 3 tbsp cornstarch, 1 tsp kosher salt, and 1/2 tsp white pepper.
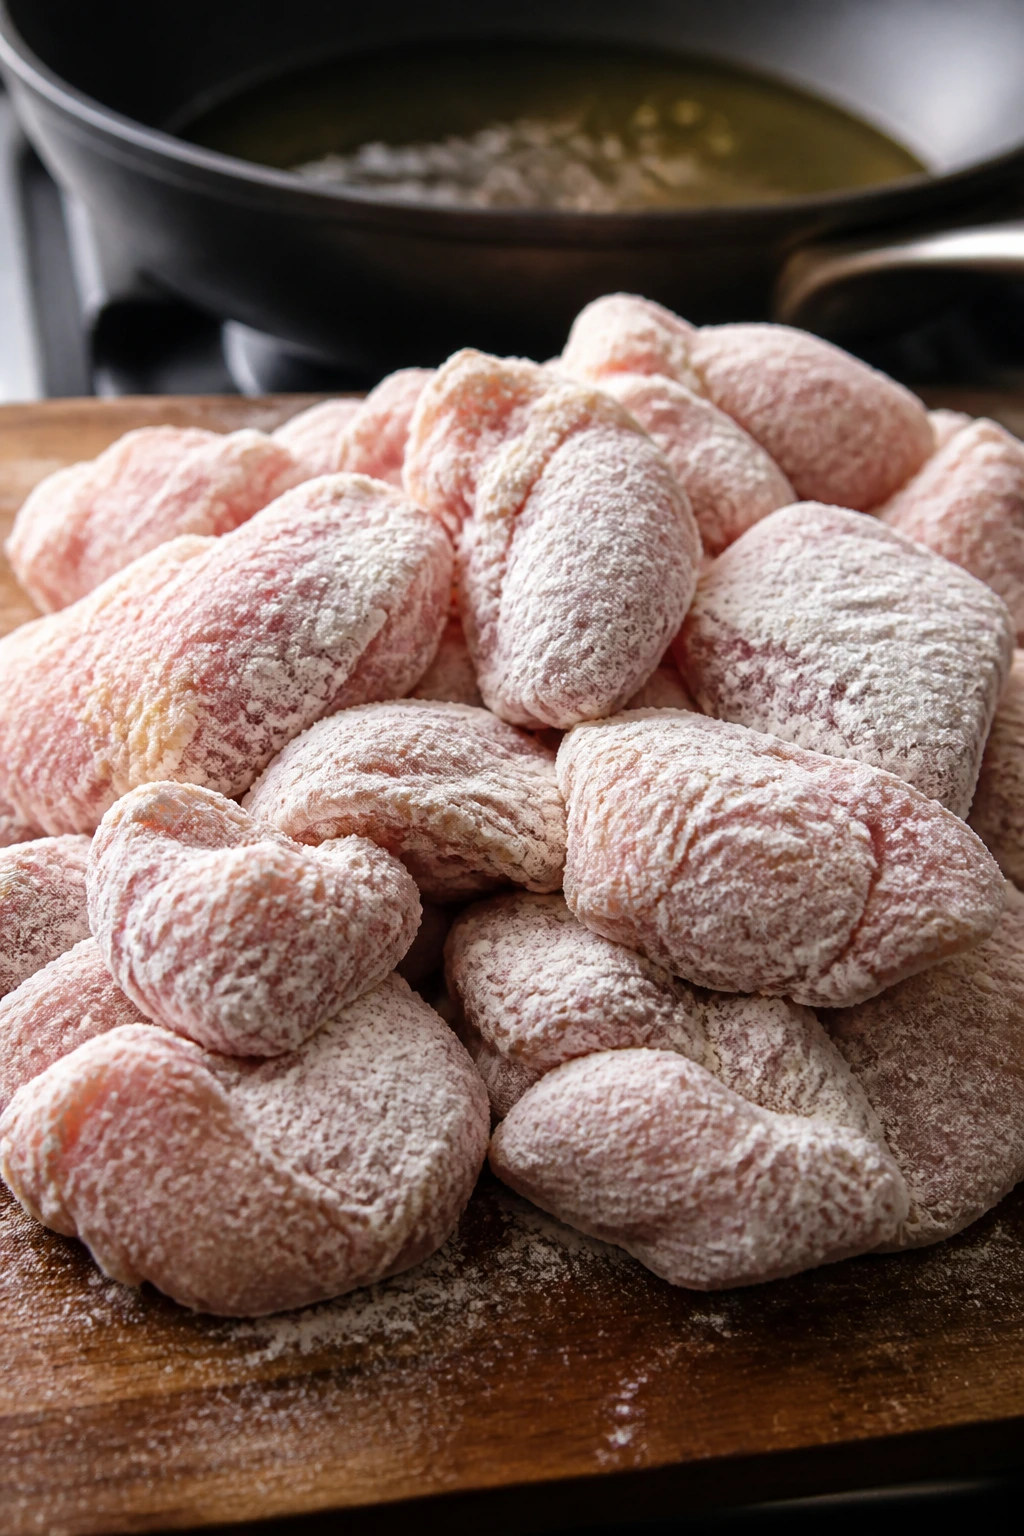
Preparation: Cut the chicken into loose 1-inch pieces so the edges brown before the centers dry out. Toss the pieces with the soy sauce, wine, egg white, salt, and pepper first, then add the cornstarch and mix until every piece looks lightly chalky rather than wet.
Substitutions: Chicken breast works if you slice it thin and stop cooking the second it reaches 165°F in the thickest piece. Shrimp is another good swap, but it needs a shorter sear — think 60 to 90 seconds per side — or it turns bouncy in a hurry.
Tips: Pat the chicken dry before you season it. If there’s too much surface moisture, the coating turns gummy instead of crisp, and the oil starts splattering in all the wrong ways.
Chicken thighs are my first choice here because they forgive a little extra heat. They stay juicy even when the pan gets aggressive. Breast meat can work, but it’s less forgiving and it dries out faster if you lose focus for thirty seconds.
The cornstarch does more than help with browning. It creates a thin shell that grabs onto the sauce later. That means the chicken tastes seasoned all the way through instead of tasting plain under a slick of glaze. If you’ve ever had restaurant stir fry with that faintly crisp, almost velvety surface, this is the part that gets you there.
The Vegetables That Keep Their Bite
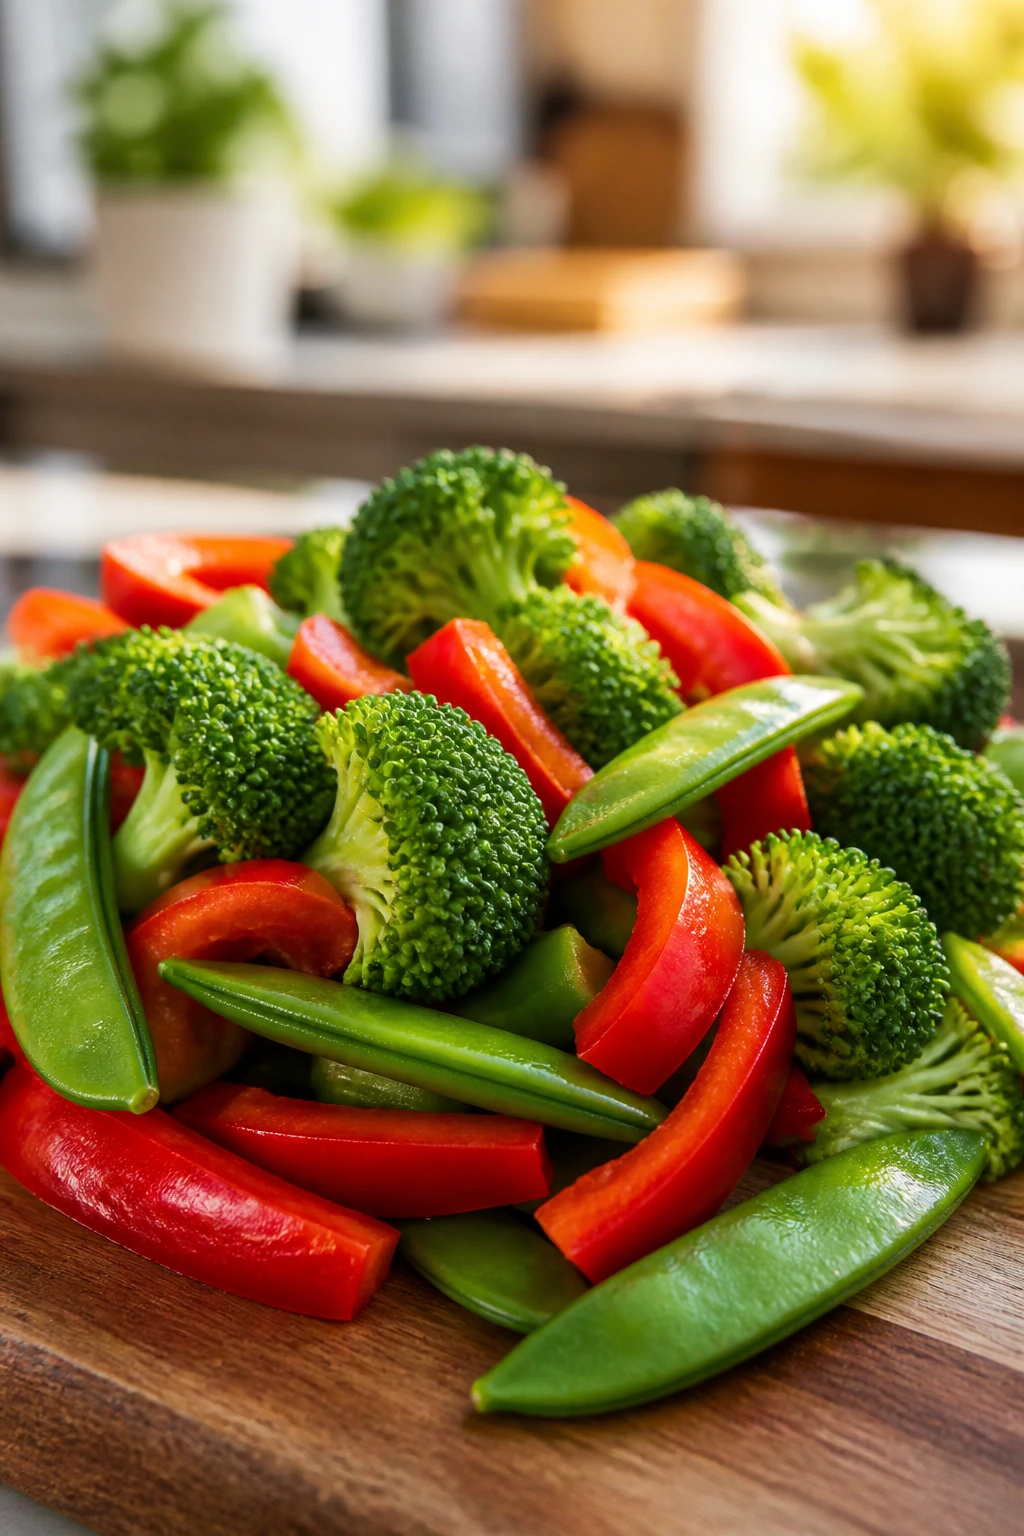
What to use: 1 small yellow onion, 1 red bell pepper, 3 cups broccoli florets, 1 cup sugar snap peas, 3 cloves garlic, 1 tbsp fresh ginger, and 2 scallions.
Preparation: Slice the onion thin so it softens fast. Cut the broccoli into small florets; big clumps stay raw in the stems while the tops burn. Keep the garlic and ginger separate from the vegetables until the last minute, because they can go from fragrant to bitter in the time it takes you to blink.
Substitutions: Broccolini, green beans, snow peas, carrots, napa cabbage, or sliced mushrooms all fit this method. If you swap in carrots, cut them thin on a diagonal so they cook in the same window as the peppers.
Tips: Dry vegetables matter here, too. If you rinse them and throw them in damp, the pan loses heat and the whole stir fry starts tasting boiled.
I like broccoli in this dish because it catches sauce in the little treetops. Every bite gets a pocket of flavor. Bell pepper is there for sweetness and color, but the snap peas are the quiet star if you ask me — they stay clean and crisp when everything else is relaxing into the sauce.
If you want to save time, buy pre-cut broccoli florets. I don’t say that lightly. For stir fry, convenience ingredients can be the right move because the knife work isn’t the point; the heat is. Just trim any giant florets down to bite size so they cook evenly.
The Sauce That Glosses Instead of Floods
What to use: 1/2 cup low-sodium chicken broth, 3 tbsp low-sodium soy sauce, 2 tbsp oyster sauce, 1 tbsp rice vinegar, 1 tbsp honey or light brown sugar, 1 tsp toasted sesame oil, 1 tbsp cornstarch, and 2 tbsp cold water.
Preparation: Whisk the sauce in a bowl before you heat the pan. The cornstarch has to disappear completely into the liquid, or you’ll get little starchy lumps that cling to the spoon and never fully melt down.
Substitutions: If you don’t use oyster sauce, add 1 extra tablespoon of soy sauce plus 1 teaspoon of brown sugar and a little more broth. Tamari works in place of soy sauce if you need a gluten-free version.
Tips: Keep the sesame oil in the sauce, not in the frying oil. Sesame oil has a lower smoke point and a stronger flavor, and it’s better used as a finish than as the main cooking fat.
The sauce is built to do two jobs at once. It should taste balanced on its own — salty, a little sweet, a little sharp — and it should thicken fast enough to coat the chicken without soaking the vegetables. That balance is what gives you takeout flavor without the syrupy aftertaste some bottled sauces leave behind.
Oyster sauce is the backbone here. It brings that dark, savory depth that people often can’t name but always notice. Rice vinegar brightens the whole pan so the finished dish doesn’t feel heavy. And the honey or brown sugar rounds the edges just enough to make the sauce taste finished instead of sharp.
The Aromatics, Oil, and Finish That Tie It Together
What to use: 2 tbsp neutral high-heat oil, 3 cloves garlic, 1 tbsp fresh ginger, 2 scallions, 1 tsp toasted sesame seeds, and 1 tsp chili crisp or red pepper flakes if you want heat.
Preparation: Mince the garlic and ginger finely so they melt into the sauce instead of floating around in big sharp chunks. Slice the scallions and keep the pale parts separate from the dark green tops if you want a cleaner finish.
Substitutions: If you’re out of fresh ginger, 1/2 tsp ground ginger works in a pinch, though the flavor is flatter. Frozen minced garlic is also fine here; I use it more than I’d like to admit on a busy night.
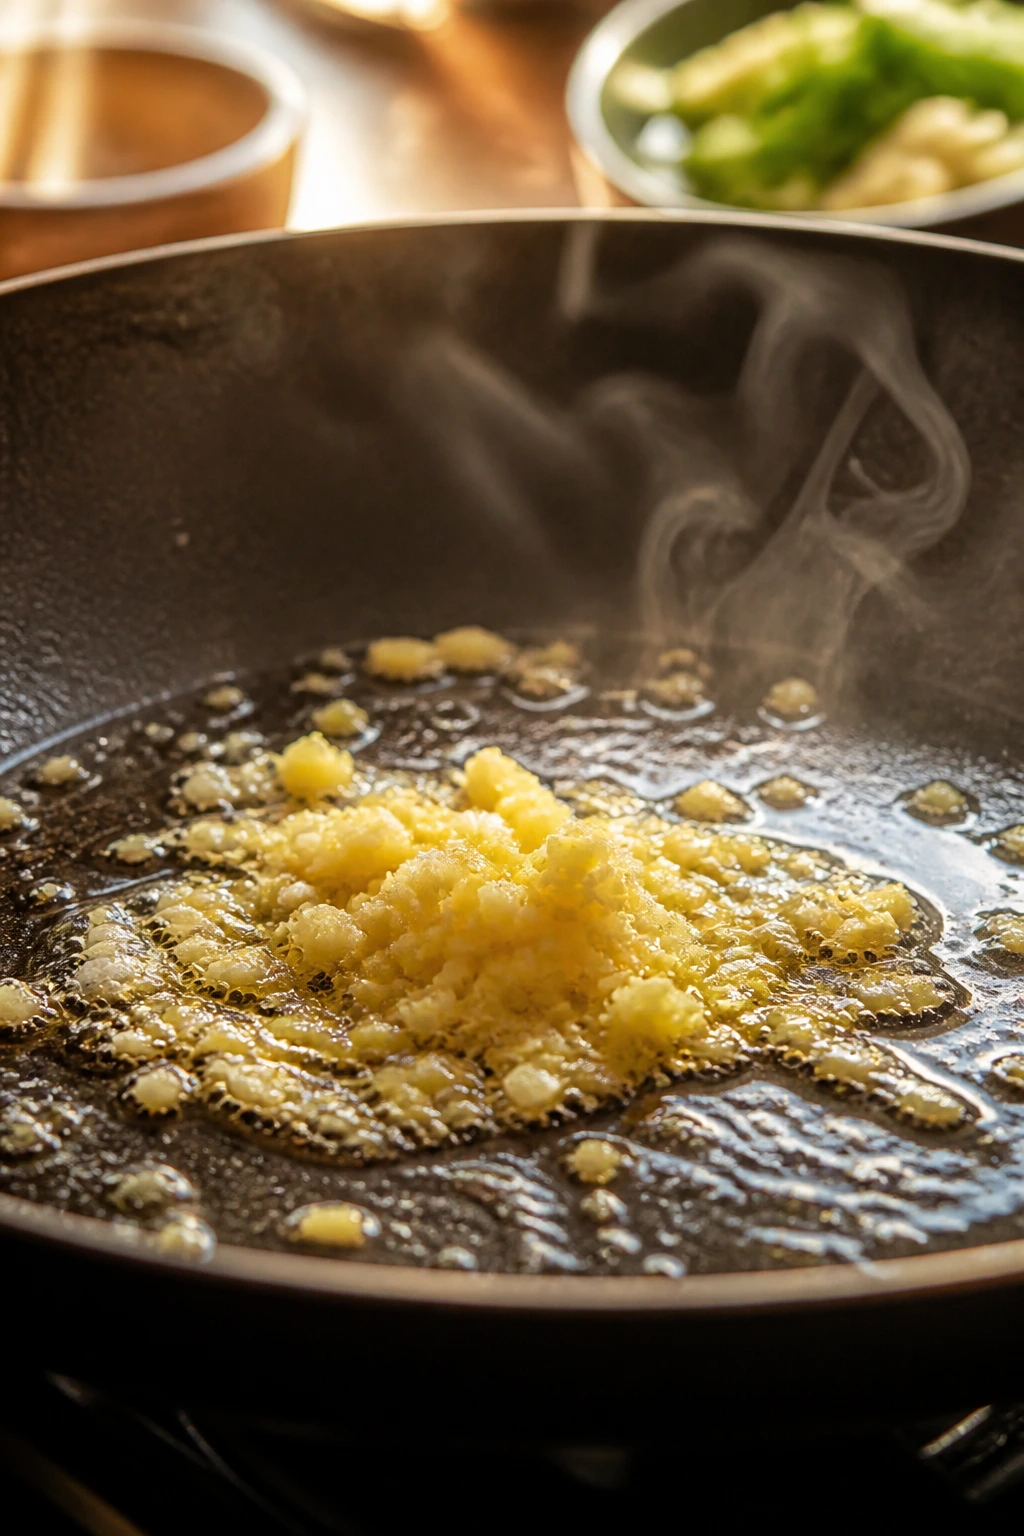
Tips: Add garlic and ginger only after the vegetables have already softened a bit. If they hit the pan too early, they burn before the sauce goes in, and burned garlic tastes harsh no matter how much soy sauce you pour over it.
This is also the place where the dish starts smelling right. Not “good” in some vague sense. Right. The second the garlic and ginger hit the oil, the kitchen should smell warm and savory, not acrid or raw. That smell tells you the pan is hot enough and the aromatics are moving in the right direction.
The finishing seeds and chili crisp are optional, but they’re not decoration. Sesame seeds add a tiny nutty crunch. Chili crisp gives the dish a little heat and a bit of texture if you spoon it over the top right before serving. Use a light hand. You want contrast, not a second sauce.
The Tools That Make the Job Easier
-
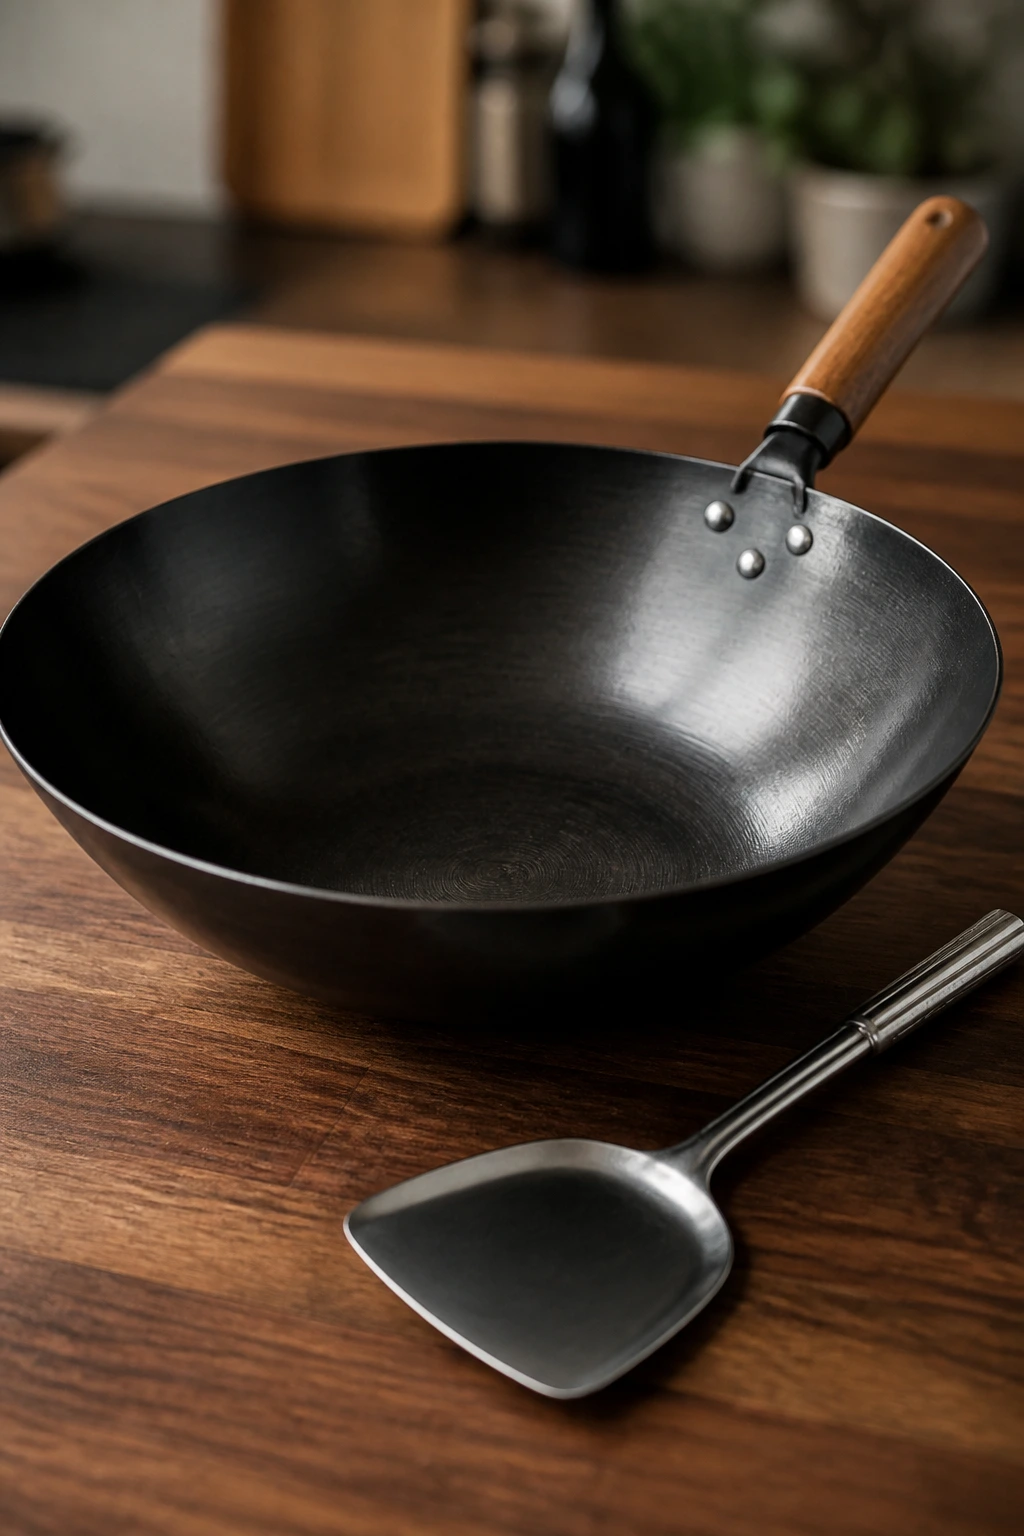
12-inch wok or large stainless skillet — You need enough surface area to sear the chicken in a loose single layer; a small pan will steam the meat.
-
Tongs or a metal spatula — Either one helps you turn the chicken fast without scraping off the coating.
-
Medium mixing bowl — Use this for the chicken marinade and starch coating.
-
Small bowl and whisk — The sauce should be fully mixed before it ever touches heat.
-
Sharp chef’s knife and cutting board — The vegetables cook more evenly when the pieces are the same size.
-
Instant-read thermometer — Useful for chicken; the USDA safe minimum is 165°F at the thickest piece.
-
Fine-mesh strainer, optional — If your ginger is fibrous or your sauce has a stubborn lump, this saves the day.
-
Wire rack, optional — Set the cooked chicken on it while you finish the vegetables if you want the crust to stay drier on the underside.
How the Stir-Fry Comes Together, Step by Step
Prep the Sauce and Chicken
-
Whisk together the chicken broth, soy sauce, oyster sauce, rice vinegar, honey, sesame oil, cornstarch, and cold water in a small bowl until the mixture looks smooth and the cornstarch disappears.
-
Pat the chicken thighs dry with paper towels, then toss them with the soy sauce, Shaoxing wine, egg white, salt, and pepper in a medium bowl. Let that sit for 5 minutes so the surface starts to season.
-
Sprinkle in the cornstarch and toss again until the chicken pieces look lightly coated and a little tacky. Let the chicken rest for 10 minutes if you have the time. Do not let it sit so long that the coating turns pasty.
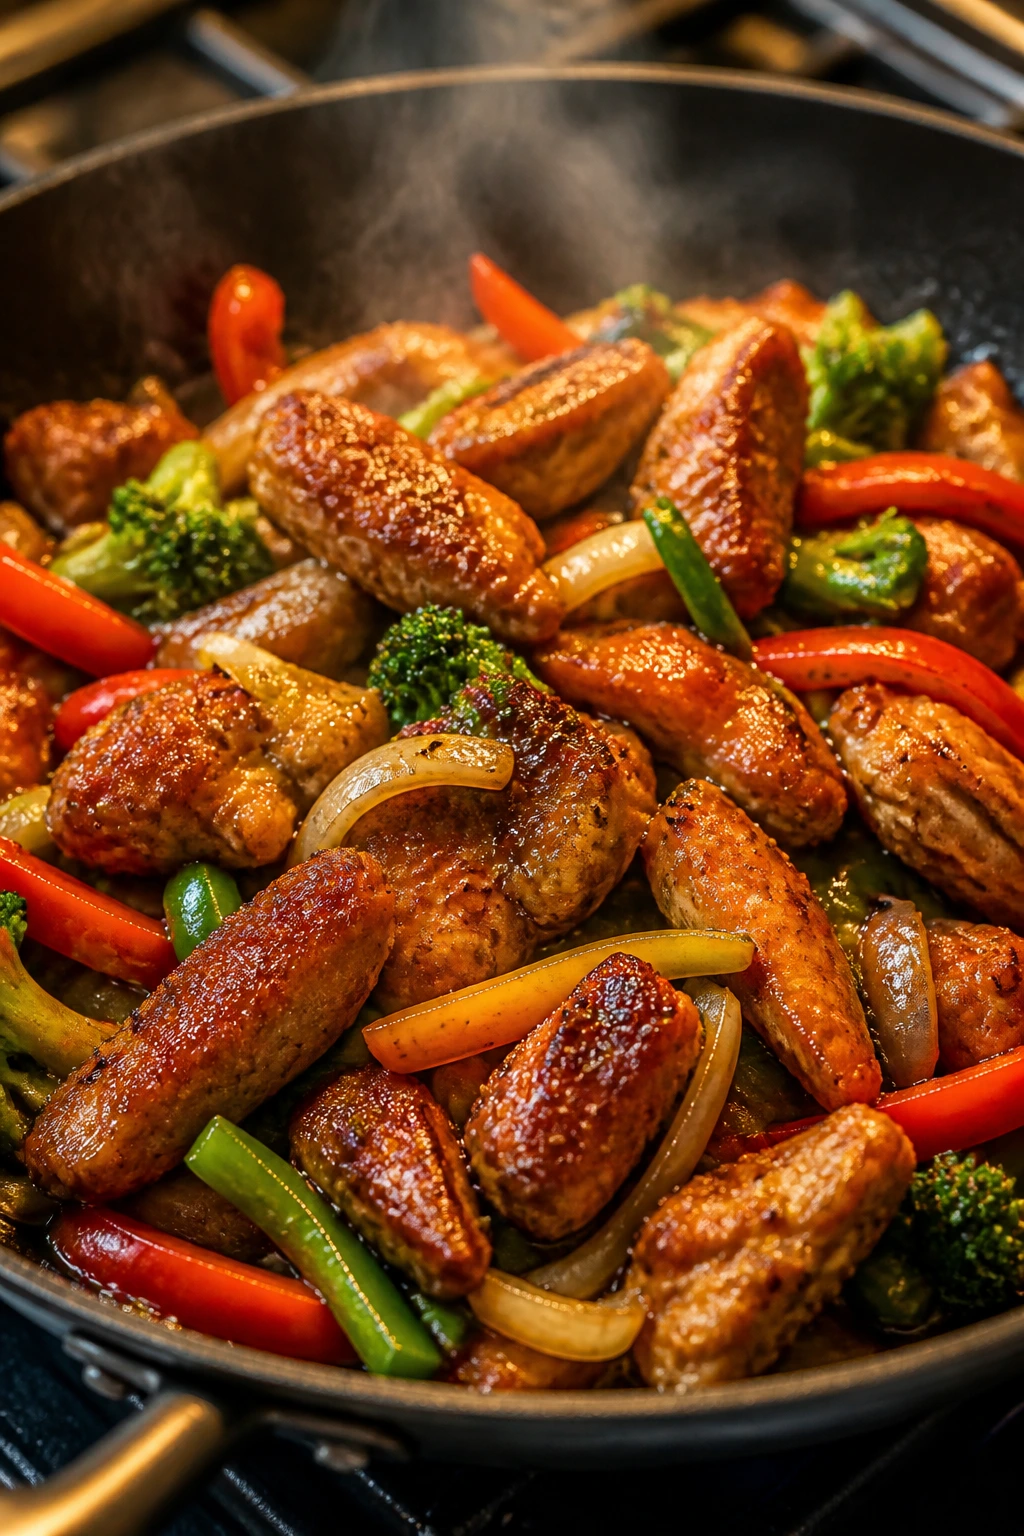
Sear the Chicken and Cook the Vegetables
-
Heat a wok or large skillet over high heat for 1 to 2 minutes, until a drop of water evaporates almost instantly. Add 1 tablespoon of the oil and swirl to coat the pan.
-
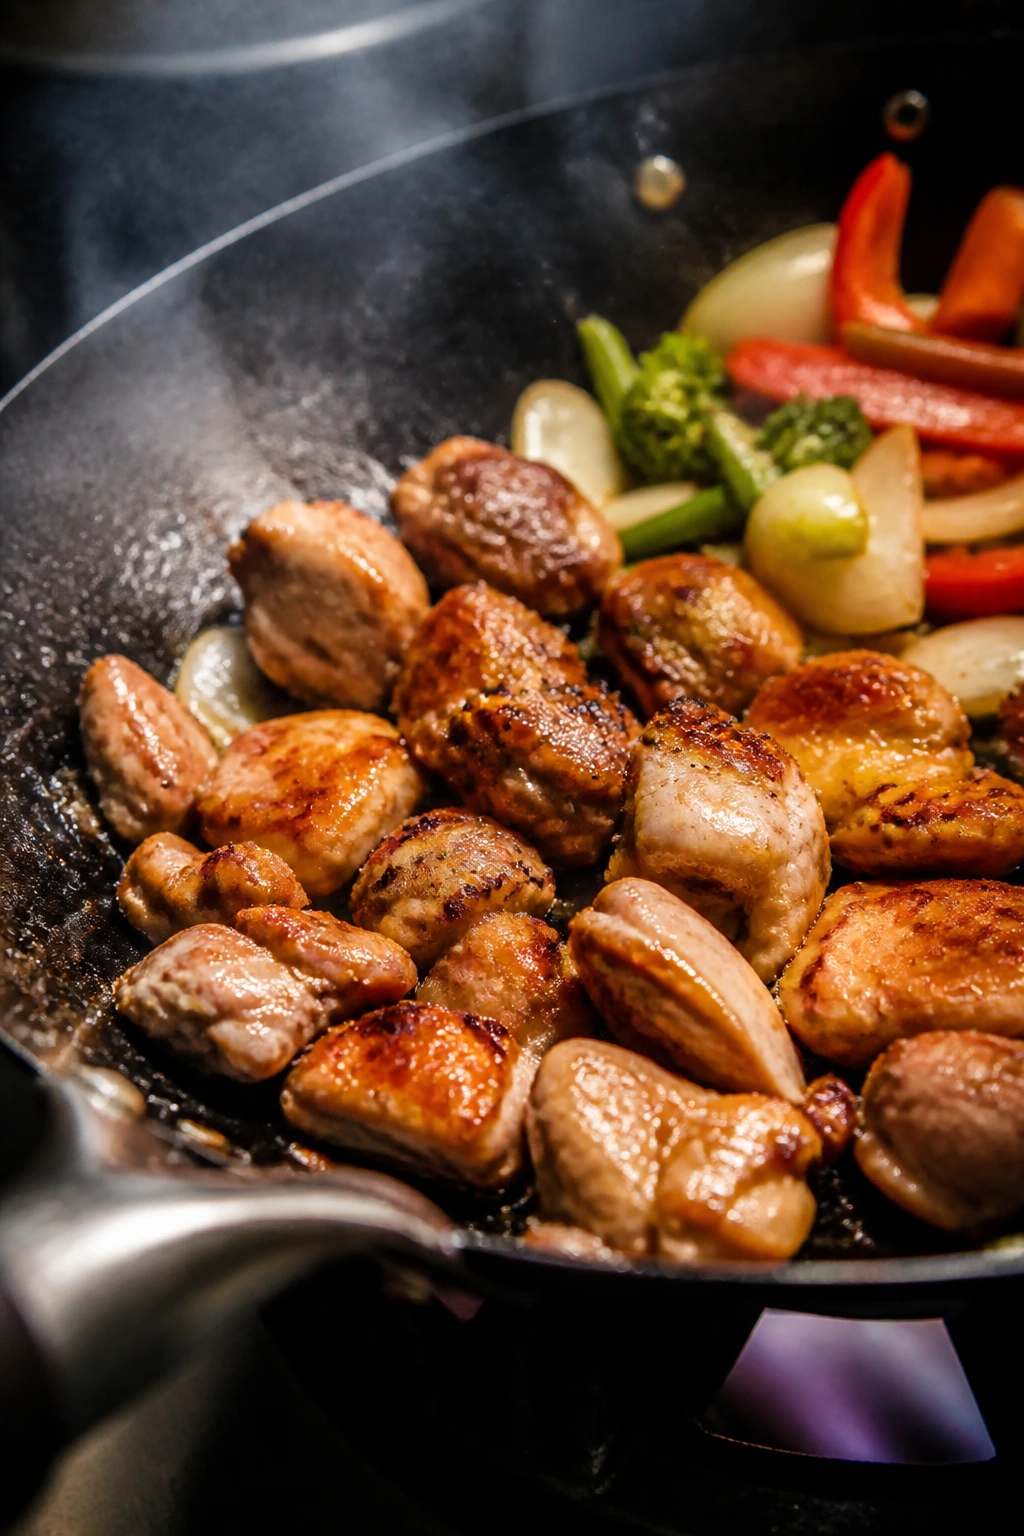
Add half the chicken in a single layer and leave it alone for 2 minutes. Flip the pieces and cook for another 1 to 2 minutes, until the edges are golden and the thickest pieces register 165°F. Transfer the chicken to a plate. If you crowd the pan, you will steam the coating off.
-
Add the remaining oil. Stir-fry the onion and broccoli for 2 minutes, tossing often, until the onion starts to turn translucent and the broccoli turns bright green with a few browned spots.
-
Add 2 tablespoons of water if the broccoli still feels too firm, then cover the pan for 45 to 60 seconds. Lift the lid and the steam should smell sweet, not stale. Add the bell pepper and snap peas, stir for 1 minute, then add the garlic and ginger and stir for 30 seconds more.
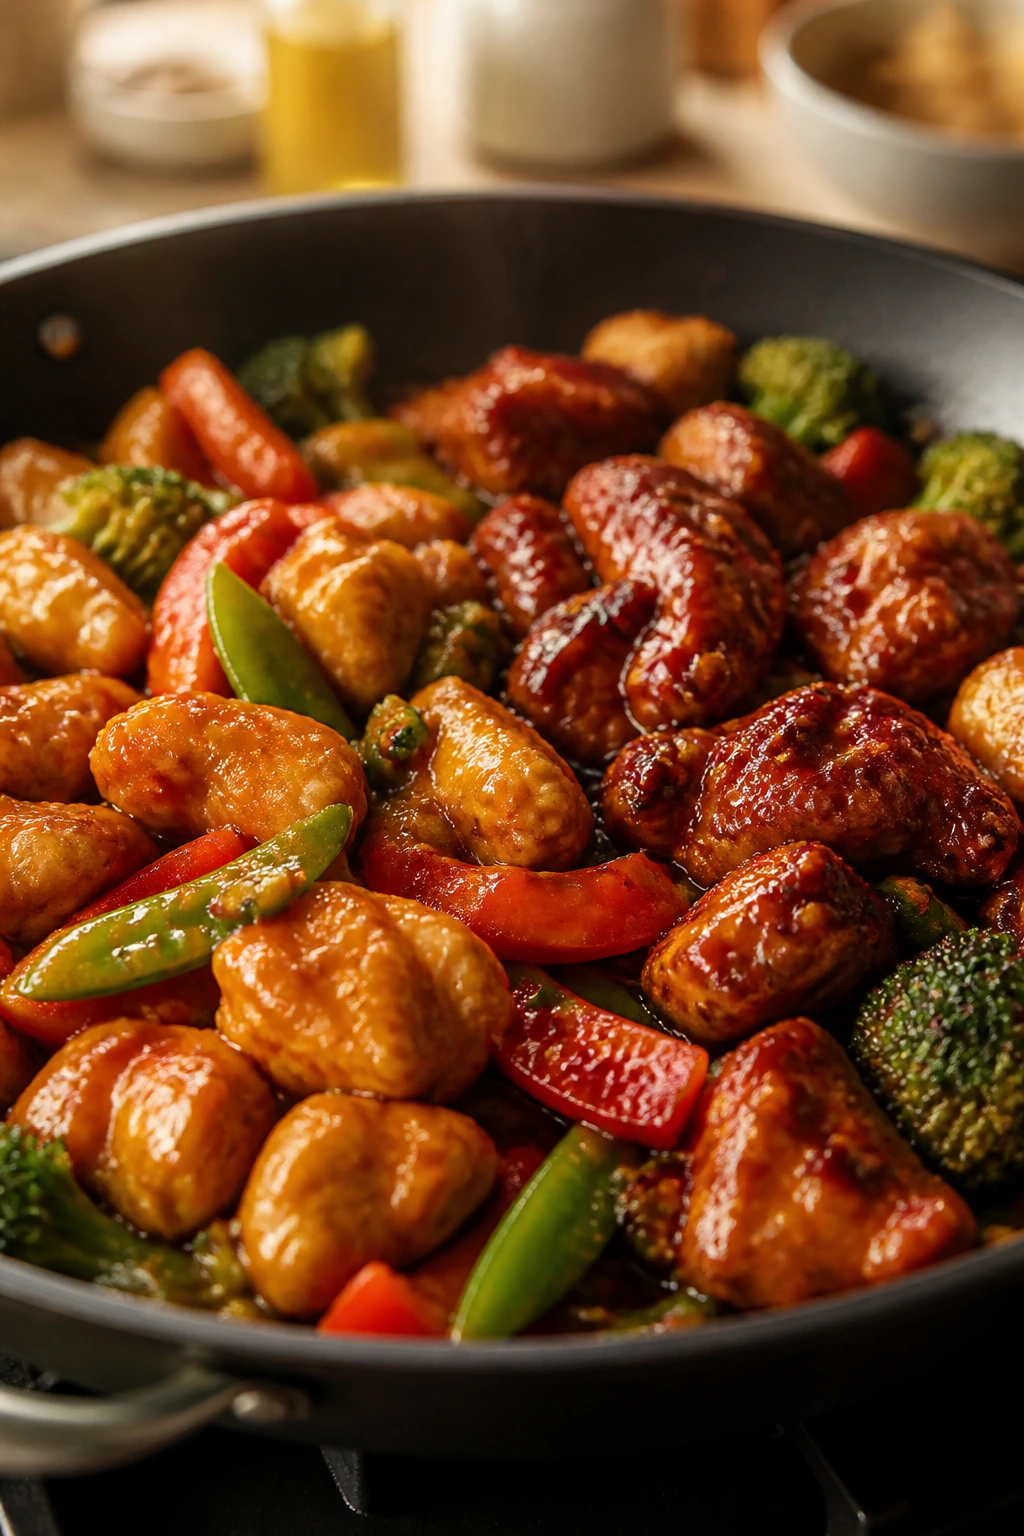
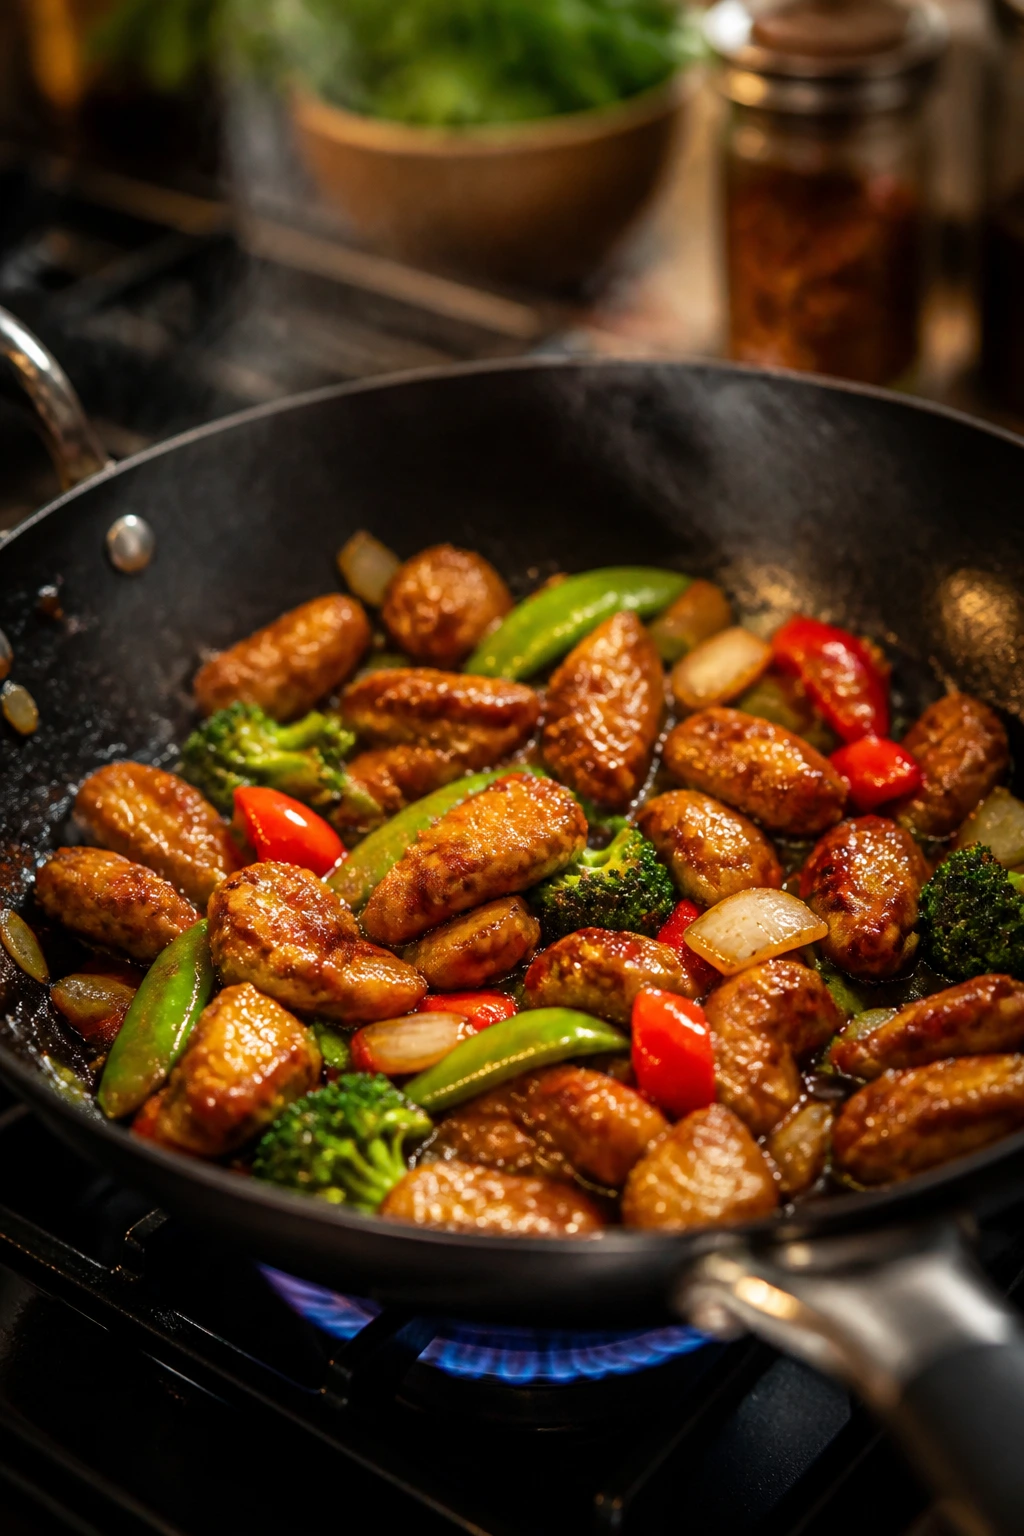
Glaze and Finish
-
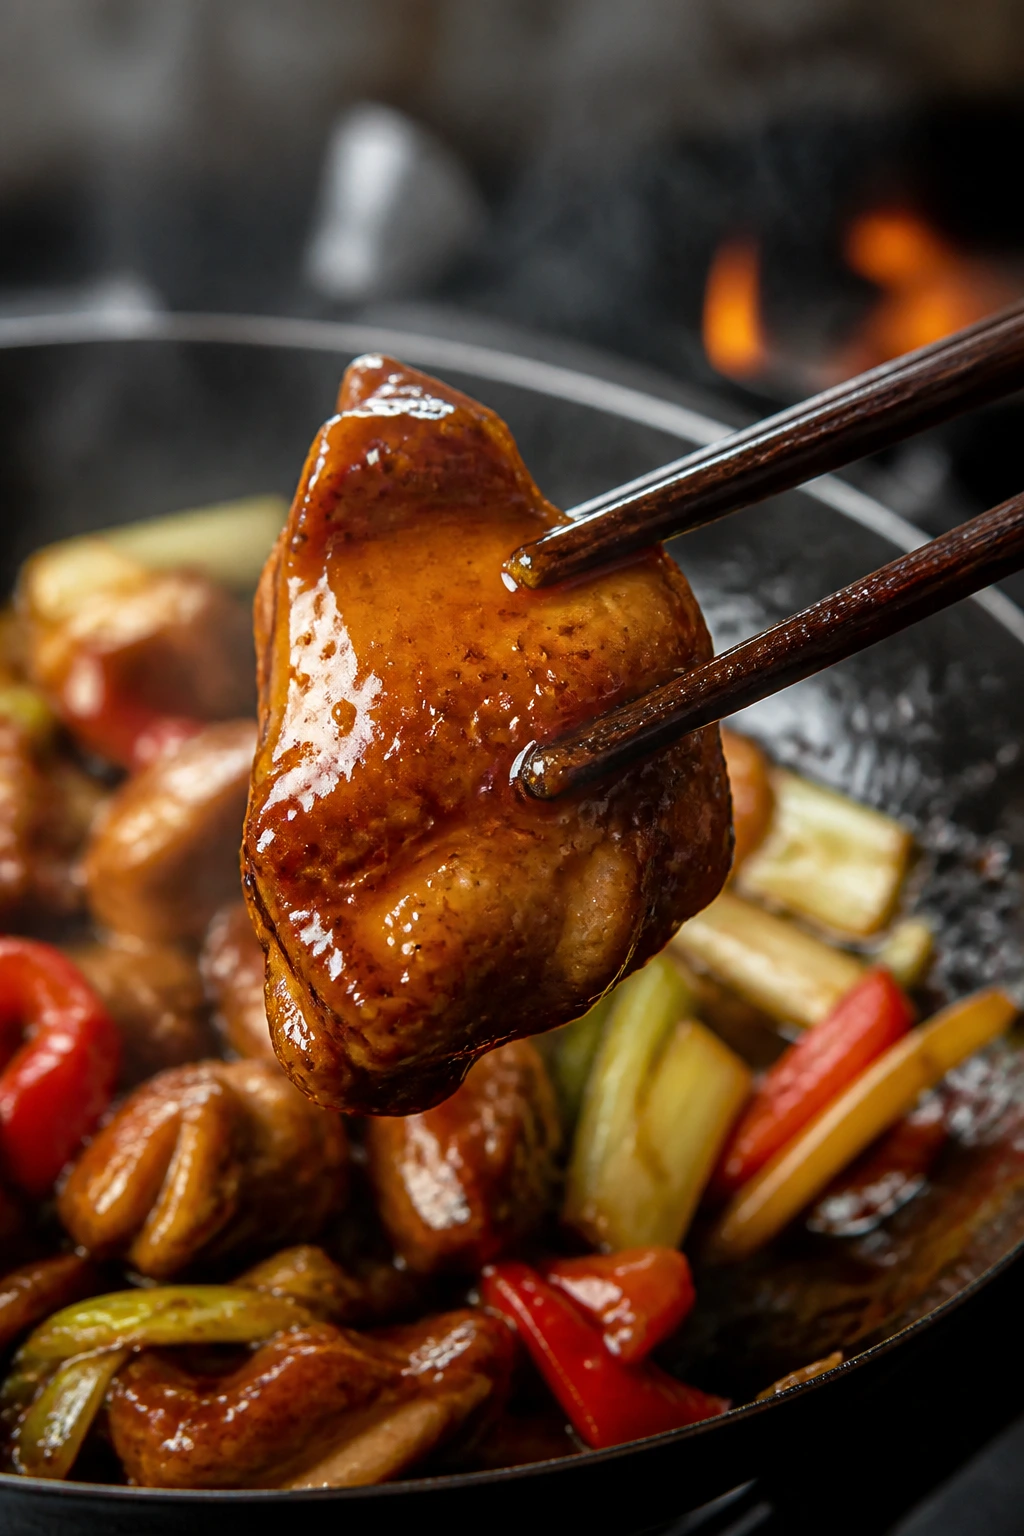
Stir the sauce again and pour it around the edge of the pan, not straight into the middle. Cook for 45 to 60 seconds, stirring, until the liquid bubbles and turns glossy enough to coat the back of a spoon.
-
Return the chicken and any juices to the pan. Toss for 30 seconds, just long enough for the sauce to cling to the meat and vegetables. Add the scallions, sesame seeds, and chili crisp if you’re using it.
-
Turn off the heat and serve immediately. If the sauce looks too thick, add a tablespoon of water; if it looks thin, give it 20 more seconds, not 2 minutes.
How to Serve It Without Losing the Crunch
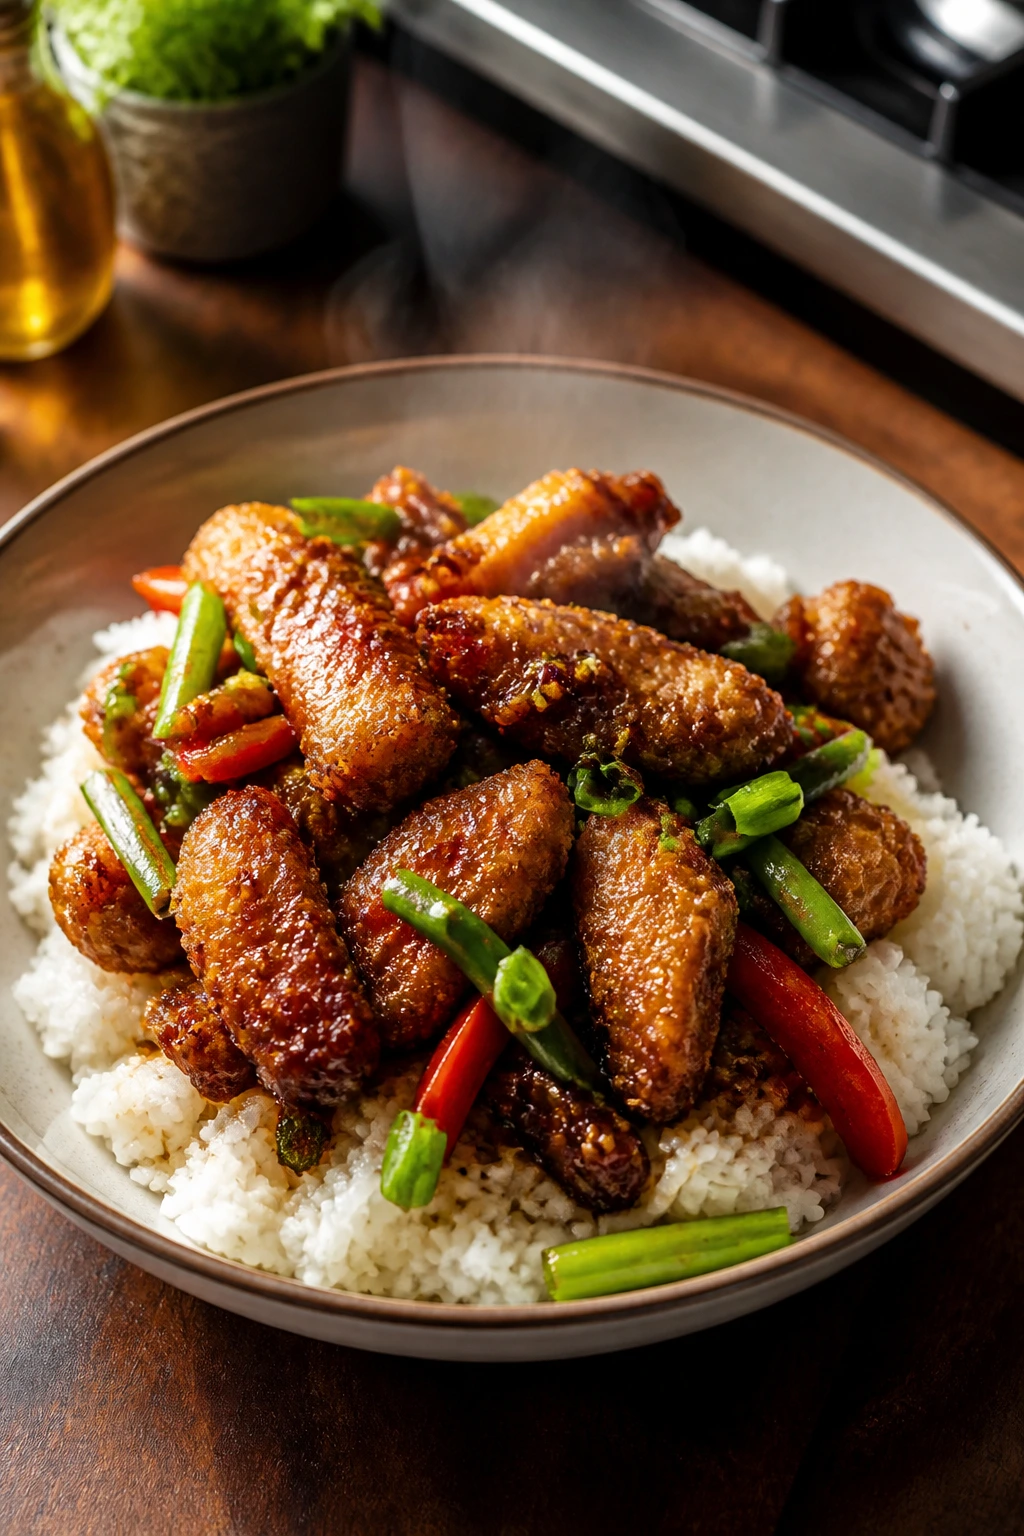
Presentation: I like to spoon steamed jasmine rice into a shallow bowl, then pile the stir fry over one side instead of burying the whole thing. That keeps the crisp chicken exposed for a few minutes longer, and it also looks less like a cafeteria tray. If you want the cleanest finish, scatter the scallion greens and sesame seeds right at the end so they stay bright.
Accompaniments: Plain jasmine rice is the obvious match, and for once the obvious answer is the right one. Steamed rice soaks up the sauce without smothering the vegetables. If you want more on the plate, serve it with cucumber salad, simple sesame noodles, or a bowl of clear broth with a few sliced mushrooms floating in it.
Portions: Four servings is honest here if you’re serving it with rice. If you want a heavier main, plan on about 1 1/2 cups stir fry plus 3/4 cup rice per person. For lighter eating, stretch the pan with extra broccoli or a side salad and keep the rice to a half cup per plate.
Beverage Pairing: Cold jasmine tea is my favorite non-alcoholic match because it cleans up the garlic and soy without fighting the ginger. A dry lager or a crisp white wine like riesling also works if you want something with a little bite and a little chill.
Tips, Mistakes, and Small Fixes That Matter
Flavor Enhancement: A teaspoon of chili crisp at the end adds heat and crunch, but don’t stir it into the sauce too early. If you want a deeper savory note, a tiny pinch of MSG in the sauce will round off the edges without making the dish taste salty.
Time-Saver: If the vegetable prep is what slows you down, buy pre-cut broccoli florets and a bag of trimmed snap peas. Then spend your energy on drying the chicken and keeping the pan hot, which matter more than knife-perfect vegetables ever will.
Cost-Saver: Broccoli, cabbage, and carrots stretch well here and cost less than a full mix of snap peas and peppers. Cabbage is especially useful because it wilts fast, takes on sauce, and gives you more volume for the same money.
Pro Move: Set the seared chicken on a wire rack instead of a plate while the vegetables cook. A plate traps steam under the meat, which softens the crust on the bottom, and there’s no reason to invite that problem in.
Make-It-Yours: If you like more acid, add another teaspoon of rice vinegar right before serving. If you like more sweetness, use brown sugar instead of honey; it gives the sauce a darker, slightly caramel note that sits nicely with the oyster sauce.
Common Mistakes to Avoid with This Stir Fry
-
Crowding the pan with chicken. The pieces go pale, the coating sloughs off, and the pan fills with juices. Fix it by cooking in two batches and giving the chicken room to brown.
-
Adding the sauce too early. If the vegetables are still hard when the sauce goes in, you’ll either overcook the sauce or end up with underdone broccoli. Cook the vegetables first, then glaze at the end.
-
Using wet chicken or wet vegetables. Moisture kills browning fast. Dry everything with paper towels before it hits the pan, especially the chicken after marinating.
-
Turning the heat down too far. A medium pan gives you soft, gray chicken and limp vegetables. Keep the heat high until the final toss, then turn it off as soon as the sauce clings.
-
Letting the sauce boil too long. It goes from glossy to sticky, then to glue. Once the sauce thickens and coats the spoon, stop.
-
Forgetting to stir the sauce before pouring it. Cornstarch settles fast. If you don’t whisk it again, the first splash into the skillet can come out watery and the last splash can come out lumpy.
Smart Variations Worth Trying
Orange-Ginger Crunch
Add 1 tablespoon orange zest and 1/4 cup orange juice to the sauce, then reduce the broth to 1/4 cup so the pan doesn’t get watery. The result is brighter and a little sweeter, which works well if you’re serving this with plain rice and want a more citrusy finish.
Chili Crisp Heat
Stir 1 to 2 tablespoons chili crisp into the finished dish and use red pepper flakes in the chicken seasoning. This version is what I make when I want the pan to feel louder — salty, spicy, and a little oily in the best way.
Gluten-Free Pantry Bowl
Swap the soy sauce for tamari and make sure your oyster sauce is labeled gluten-free. Cornstarch is already doing the thickening, so you don’t need to change the structure of the recipe at all.
Tofu and Cabbage Swap
Press 14 oz extra-firm tofu for 20 minutes, cube it, and use the same cornstarch coating before searing. Replace the broccoli and snap peas with shredded cabbage and sliced carrots if you want a cheaper, quieter version that still holds texture.
Shrimp Night
Use 1 lb peeled, deveined shrimp instead of chicken and cut the sear time way down. Shrimp only needs a fast toss in the hot pan, which makes this version even quicker, but it also means you have less room for error.
Storage, Make-Ahead, and Reheating
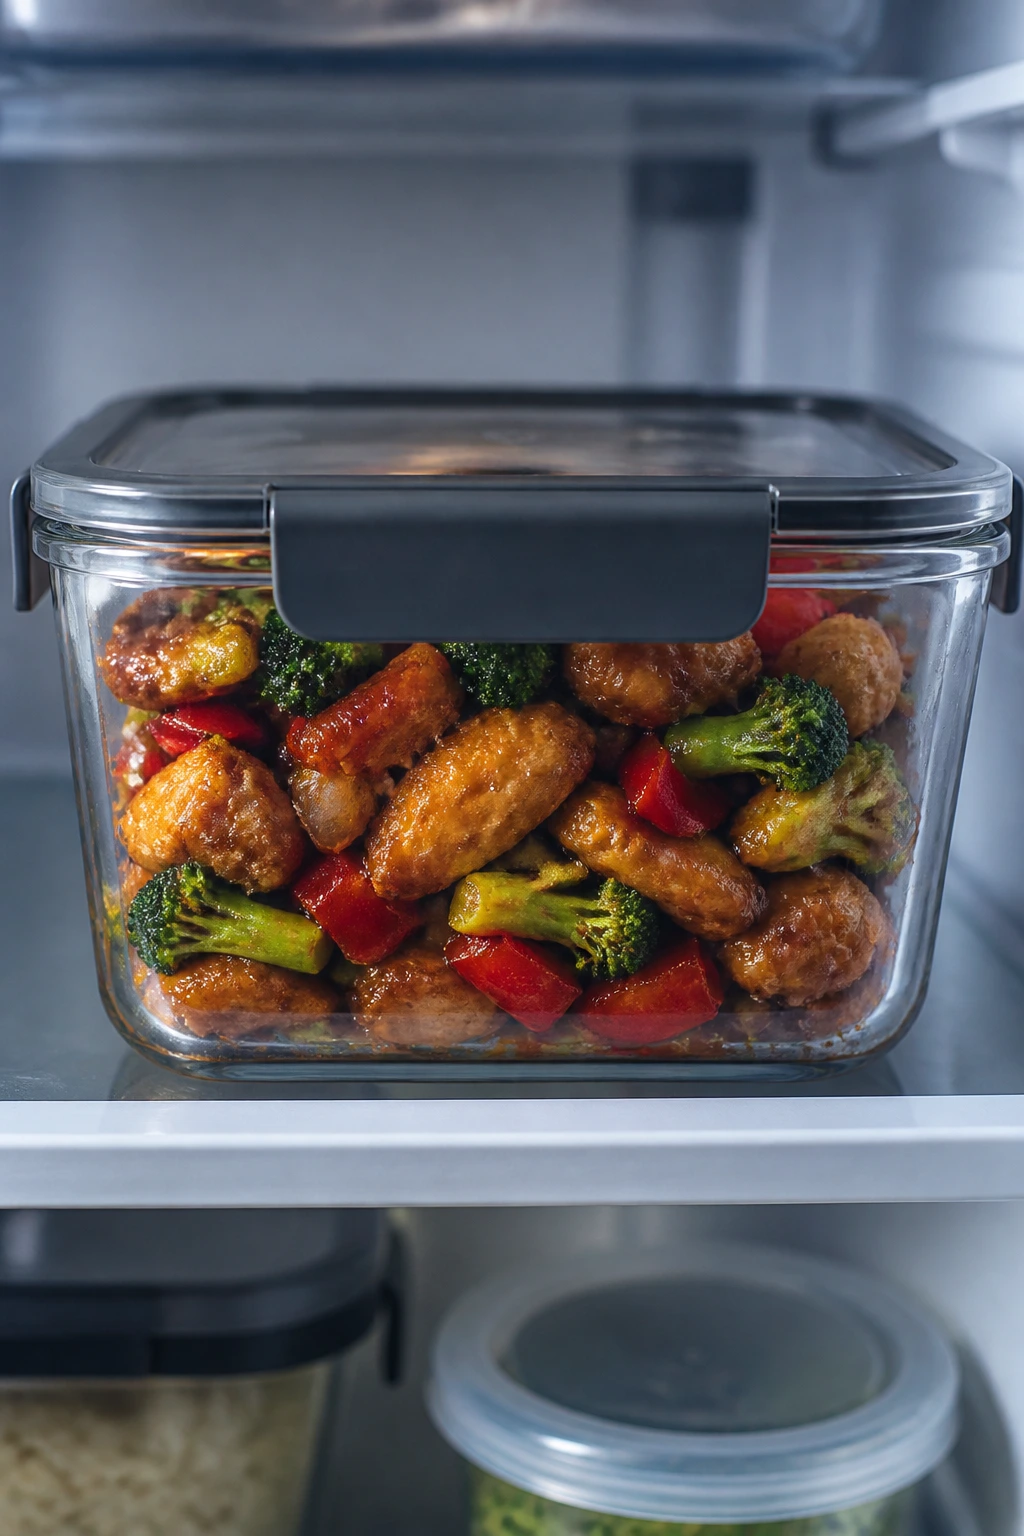
This stir fry is best the minute it comes out of the pan. That said, leftovers are workable, which is more than you can say for a lot of crisp-coated dishes. The chicken will soften a bit in the fridge, but the sauce helps it stay pleasant instead of dry.
Store leftovers in an airtight container in the refrigerator for 3 to 4 days. If you want to freeze it, portion it into freezer-safe containers and keep it frozen for up to 2 months. The broccoli and peppers will soften after thawing, so I prefer freezing only if I’m making a batch for convenience and texture matters less than speed.
For reheating, the skillet beats the microwave. Add the leftovers to a pan over medium heat with 1 to 2 tablespoons of water and stir for 3 to 4 minutes until the sauce loosens and the chicken is hot. If you use the microwave, warm it in short bursts at 50% power, then finish in a hot skillet for 30 seconds if you want the edges to wake back up.
You can make the sauce 3 days ahead and keep it in the fridge. The chicken can be marinated and coated up to 30 minutes ahead, but I wouldn’t stretch that much longer or the coating starts to thicken in an unhelpful way. Vegetables can be chopped 1 day ahead and stored in a sealed container with a paper towel to catch extra moisture.
Questions People Always Ask
Can I use chicken breast instead of thighs?
Yes, but slice it thinner than you would thighs and watch it closely. Breast meat dries out faster, so pull it the moment the thickest piece reaches 165°F.
Do I need a wok to make this?
No. A 12-inch skillet works as long as it can get hot and you don’t overload it. A wok gives you easier tossing, but the pan shape matters less than keeping the ingredients in contact with high heat.
Why did my sauce turn watery?
Usually the pan was too crowded, the vegetables released too much moisture, or the cornstarch wasn’t whisked in well. The fix is simple: keep the sauce mixed, cook in batches, and let the sauce bubble for only 45 to 60 seconds before you add the chicken back in.
Can I use frozen vegetables?
You can, but thaw them first and pat them dry, or the pan will steam. Frozen broccoli and snap peas need a little more heat management, so I’d use them only when fresh produce isn’t available.
How do I make this gluten-free?
Use tamari in place of soy sauce and check that your oyster sauce is certified gluten-free. Cornstarch is already gluten-free, so the texture of the sauce doesn’t need to change.
Can I make any part of this ahead of time?
Yes. The sauce can be mixed a few days ahead, and the vegetables can be chopped the day before. I would keep the chicken coating step close to cooking time, though, because the starch works best when it still looks dry and separate.
What if I want it spicier without changing the whole recipe?
Add red pepper flakes to the chicken seasoning or spoon chili crisp over the finished bowls. That keeps the base sauce balanced, which is useful if not everyone at the table wants the same heat level.
When You Want the Takeout Feeling Without the Takeout Box
A really good stir fry doesn’t need a long ingredient list or a complicated sauce. It needs heat, timing, and a little discipline. That’s the part people skip when they’re chasing convenience, and it’s also why the finished dish so often lands flat. A hot pan and a dry coating will do more for flavor than another splash of bottled sauce ever will.
What you get here is the version with actual edges. Crisp chicken, vegetables that still have some bite, and sauce that coats instead of puddling. It’s the kind of dinner that rewards paying attention for fifteen minutes, which is not a bad trade at all.
Crispy Chicken Stir Fry — Recipe Card
Recipe Name: Crispy Chicken Stir Fry
Description: Crisp-edged chicken thighs, broccoli, bell pepper, and snap peas tossed in a glossy ginger-garlic sauce with soy, oyster sauce, and rice vinegar. Serve it over jasmine rice for a takeout-style dinner with better texture.
Prep Time: 20 minutes
Cook Time: 15 minutes
Total Time: 35 minutes
Course: Main Course
Cuisine: Chinese-Inspired
Servings: 4
Calories: About 390 kcal per serving
Ingredients
For the Chicken:
- 1 1/2 lbs boneless, skinless chicken thighs, cut into 1-inch pieces
- 2 tbsp low-sodium soy sauce
- 1 tbsp Shaoxing wine or dry sherry
- 1 egg white
- 3 tbsp cornstarch
- 1 tsp kosher salt
- 1/2 tsp white pepper or black pepper
For the Stir-Fry:
- 2 tbsp neutral high-heat oil, divided
- 1 small yellow onion, thinly sliced
- 1 red bell pepper, sliced into 1/4-inch strips
- 3 cups broccoli florets, cut into bite-size pieces
- 1 cup sugar snap peas, strings removed
- 3 cloves garlic, minced
- 1 tbsp fresh ginger, minced
- 2 scallions, sliced
For the Sauce:
- 1/2 cup low-sodium chicken broth
- 3 tbsp low-sodium soy sauce
- 2 tbsp oyster sauce
- 1 tbsp rice vinegar
- 1 tbsp honey or light brown sugar
- 1 tsp toasted sesame oil
- 1 tbsp cornstarch
- 2 tbsp cold water
For Finishing:
- 1 tsp toasted sesame seeds
- 1 tsp chili crisp or red pepper flakes, optional
Instructions
-
Whisk the chicken broth, soy sauce, oyster sauce, rice vinegar, honey, sesame oil, cornstarch, and cold water until smooth.
-
Toss the chicken with soy sauce, Shaoxing wine, egg white, salt, and pepper. Add cornstarch and coat evenly.
-
Let the coated chicken rest for 10 minutes if possible.
-
Heat a wok or large skillet over high heat, then add 1 tablespoon oil.
-
Cook half the chicken in a single layer for 2 minutes without moving, then flip and cook 1 to 2 minutes more until golden and 165°F. Remove to a plate.
-
Add the remaining oil, then stir-fry the onion and broccoli for 2 minutes. Add 2 tablespoons water and cover for 45 to 60 seconds if the broccoli is still firm.
-
Add the bell pepper and snap peas, then stir-fry for 1 minute. Add the garlic and ginger and cook for 30 seconds.
-
Stir the sauce again, pour it into the pan, and cook for 45 to 60 seconds until glossy and thick.
-
Return the chicken and any juices to the pan, toss for 30 seconds, and finish with scallions, sesame seeds, and chili crisp if using.
-
Serve immediately over jasmine rice or noodles.
Notes: Keep the pan hot, don’t crowd the chicken, and add the sauce only after the vegetables are cooked. For gluten-free cooking, use tamari and gluten-free oyster sauce.