
Weekend food can get sloppy fast. One extra pour of olive oil, one oversized stack of pancakes, one too-generous scoop of rice, and suddenly the plate that was supposed to feel light sits in your stomach like a brick. That’s why healthy weekend meals under 500 calories matter more than they sound. They let you eat with a little ceremony — real flavor, a proper portion, something that looks cooked rather than assembled — without blowing past the line before the day has even started.
The sweet spot is balance. A skillet of eggs with tomatoes and feta. Salmon roasted on one pan with asparagus and potatoes. A shawarma bowl with crunchy cucumbers, herbs, and a measured spoon of hummus. None of that feels like “diet food” in the tired sense people usually mean. It feels like dinner, or brunch, or a late lunch you’d actually sit down for.
The trick is that the calories are doing a lot of the work behind the scenes. Measured fats. Protein that browns instead of dries out. Vegetables that carry volume. Grains and bread used with a watchful hand, not a shrug. That’s the difference between a skimpy plate and a meal that lands well.
Why These Meals Work Without Feeling Trimmed Down
-
Measured fats do the heavy lifting: A tablespoon of olive oil, a spoon of pesto, or a little feta gives these meals enough richness to taste finished without letting the calorie count run wild.
-
Protein is never an afterthought: Most of these recipes lean on chicken, fish, eggs, turkey, tofu, beans, or shrimp, which helps a plate feel like an actual meal instead of a pile of sides.
-
Vegetables bring real volume: Roasted cauliflower, zucchini, peppers, greens, tomatoes, and broccoli make the plates look generous and keep the forkfuls interesting all the way through.
-
Weekend cooking methods fit the pace: Sheet pans, skillets, slow simmers, and oven bakes give you time to build flavor without standing over the stove every minute.
-
Leftovers don’t collapse into sadness: Chili, curry, stuffed peppers, and grain bowls hold up in the fridge, which means Sunday lunch can be as useful as Saturday dinner.
-
The calorie math stays honest: Everything here is built around specific portions, not wishful thinking, so you can serve the food with confidence instead of playing guess-and-hope.
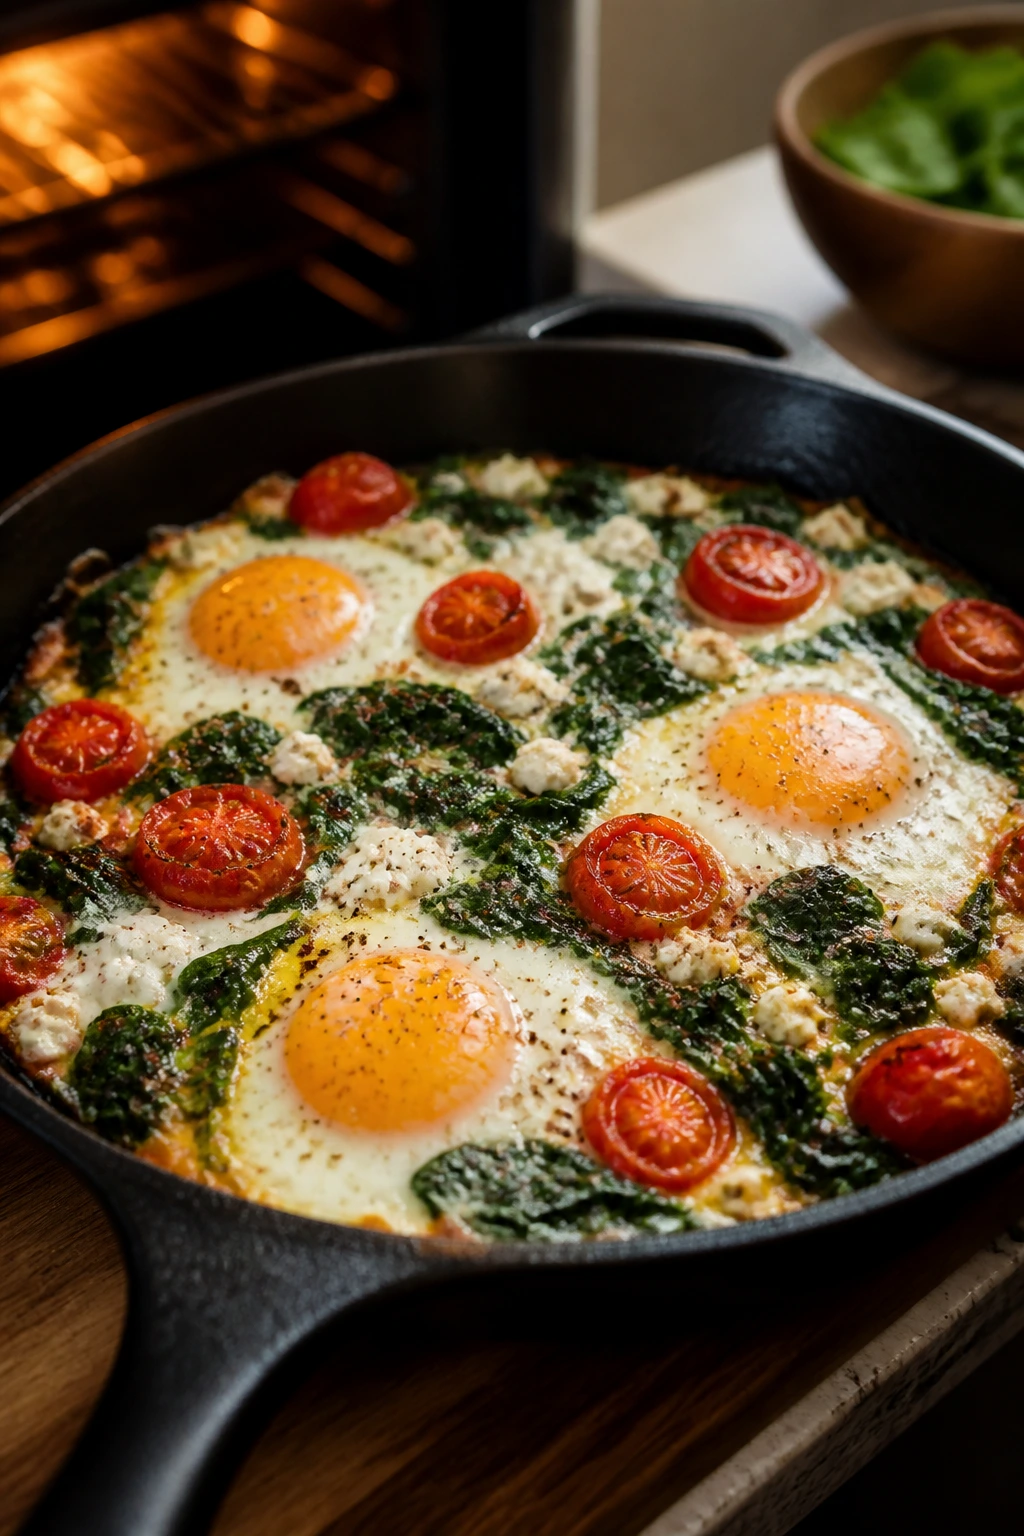
1. Spinach-Feta Baked Egg Skillet with Tomatoes
A skillet full of eggs, spinach, and feta can look almost too simple right before it goes into the oven. Then the tomatoes slump, the onion sweetens, the whites set, and the yolks stay soft enough to run into the edges of the pan. At roughly 360 calories per serving with toast, this is the kind of breakfast that feels generous without turning into a brunch coma.
Why It Works: The eggs set in the oven instead of being stirred into toughness on the stove, which keeps the texture silky around the edges and tender in the middle. Spinach and tomatoes add bulk and moisture, while feta gives you salty punch in a tiny amount. This is one of those meals where the food looks much bigger than the ingredient list, and that’s exactly the point.
Key Ingredients:
- 1 tbsp olive oil — enough to coat the pan and soften the onion.
- 1 small yellow onion, diced — brings sweetness after a few minutes in the skillet.
- 2 cups cherry tomatoes, halved — they collapse and make little juicy pockets.
- 2 packed cups baby spinach — add it last so it wilts instead of disappearing.
- 4 large eggs — the center of the dish, obviously.
- 1/4 cup crumbled feta — salty, sharp, and worth measuring.
- 1 tbsp chopped fresh dill or parsley — a bright finish that keeps the skillet from tasting heavy.
- 1/4 tsp kosher salt and 1/8 tsp black pepper — enough seasoning to wake up the eggs.
- 2 slices whole-grain bread, toasted, for serving — optional, but it turns this into a real meal.
Quick Steps:
- Preheat and soften the onion: Set the oven to 375°F (190°C). Heat the olive oil in a 10-inch oven-safe skillet over medium heat, then cook the onion for 3 to 4 minutes until translucent and sweet-smelling.
- Build the vegetable base: Add the tomatoes, salt, pepper, and red pepper flakes if using. Cook for 2 to 3 minutes until the tomatoes start to split and release juice, then stir in the spinach and let it wilt completely.
- Make room for the eggs: Use a spoon to create 4 small wells in the vegetable mixture. Crack one egg into each well so the whites stay mostly separated.
- Bake until just set: Transfer the skillet to the oven and bake for 8 to 11 minutes, until the whites are opaque and the yolks still wobble when you tap the pan. Do not overbake or the yolks will turn chalky.
- Finish and serve: Scatter the feta and herbs over the top, then serve immediately with toast if you want a little crunch.
Equipment for This Recipe:
- 10-inch oven-safe skillet — cast iron works especially well.
- Wooden spoon or silicone spatula — for moving the vegetables around without scratching the pan.
- Small knife and cutting board — for the onion and tomatoes.
- Measuring spoons — the salt and oil matter here.
How to Serve This Dish: Spoon the eggs into warm shallow bowls or serve straight from the skillet with the toast on the side. A few cucumber slices or a small handful of arugula keeps the plate fresh if you want a bigger breakfast without many more calories.
Pro Tips for This Recipe:
- If your tomatoes are watery, cook them a full minute longer before adding the spinach.
- For runnier yolks, pull the skillet at the 8-minute mark; the residual heat keeps cooking them.
- Frozen spinach works in a pinch, but squeeze it dry in a towel first or the pan will turn soupy.
Variations on This Dish:
- Shakshuka Shortcut: Add 1/2 tsp cumin and 1/2 cup marinara to the tomatoes for a saucier, spiced version.
- Mushroom-Feta Swap: Replace the tomatoes with 1 cup sliced mushrooms for a deeper, earthier skillet.
- Dairy-Free Green Skillet: Skip the feta and finish with chopped olives and herbs instead.
Common Mistakes to Avoid with This Dish:
- Adding too much liquid from the tomatoes: The pan looks glossy at first, then turns wet. Cook the tomatoes until some of the juice evaporates.
- Leaving the eggs in too long: The yolks lose their softness fast. Check early and pull the skillet while they still jiggle.
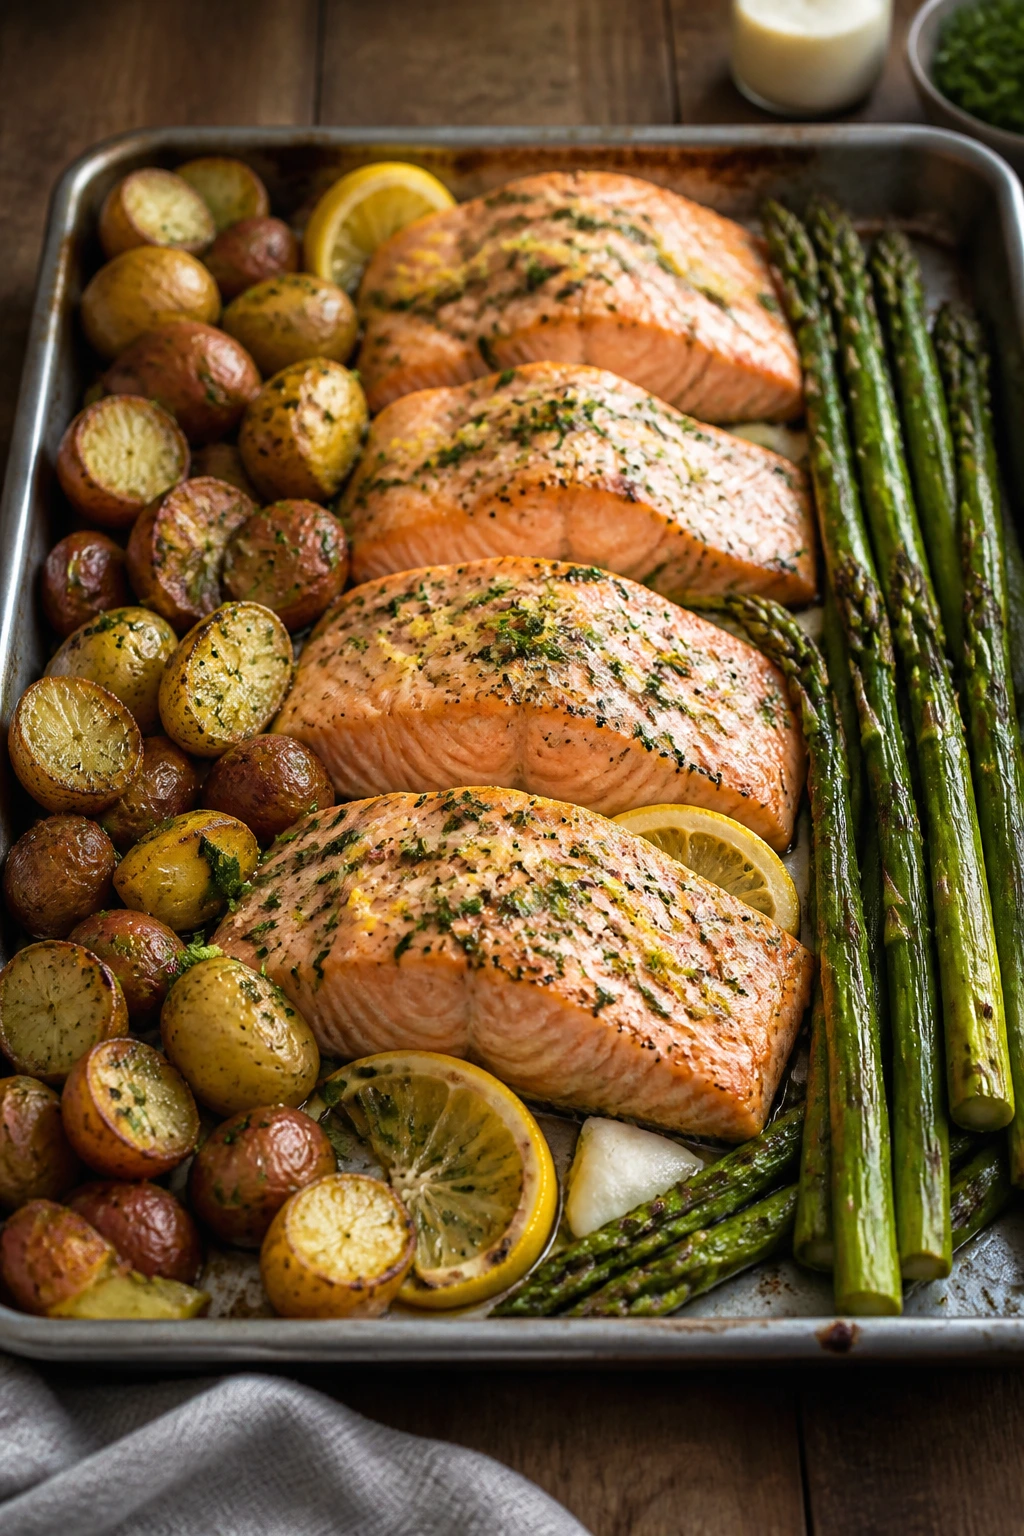
2. Lemon-Herb Salmon with Asparagus and Baby Potatoes
Roasting salmon with potatoes and asparagus on one pan is the kind of weekend move that looks fussy and behaves lazily. The potatoes get edges that crackle a little, the asparagus tips blister, and the salmon turns flaky without drying out if you watch it. This lands around 460 calories per serving and still looks like a proper dinner.
Why It Works: You get starch, protein, and vegetables on one sheet pan, which keeps the cooking simple and the portion size easy to control. Salmon brings enough fat and flavor to feel rich, while the lemon, Dijon, and herbs cut through the oil so the whole tray tastes brighter than it sounds. A little measured olive oil goes a long way here.
Key Ingredients:
- 1 1/2 lb baby potatoes, halved — choose small ones so they roast before the fish overcooks.
- 1 lb asparagus, trimmed — thin spears cook quickly, thick spears need a minute longer.
- 4 salmon fillets, 5 oz each — this keeps the portions honest.
- 2 tbsp olive oil — split between the potatoes and the salmon.
- 1 lemon, zested and juiced — the zest matters; it makes the whole tray smell alive.
- 2 garlic cloves, minced — use fresh garlic, not powder, for the glaze.
- 1 tsp Dijon mustard — helps the lemon and oil cling to the fish.
- 1 tsp chopped dill or parsley — a finishing note, not a decoration.
- 1/2 tsp kosher salt and 1/4 tsp black pepper — simple seasoning, but not optional.
- Lemon wedges for serving — they make the salmon taste freshly cooked even on the second bite.
Quick Steps:
- Start the potatoes first: Heat the oven to 425°F (220°C). Toss the potatoes with 1 tbsp olive oil, half the salt, and pepper on a rimmed sheet pan, then roast for 15 minutes.
- Mix the glaze: Whisk the remaining olive oil, lemon zest, lemon juice, garlic, Dijon, dill, and the rest of the salt in a small bowl.
- Add the asparagus and salmon: Push the potatoes to one side, arrange the asparagus on the pan, and place the salmon fillets in the empty space. Brush the fish with the lemon mixture.
- Roast until just done: Bake for 10 to 12 minutes more, until the salmon flakes easily and reaches 125°F to 130°F for a moist finish, or 145°F if you want it fully opaque. Watch the asparagus closely so it stays green with a little snap.
- Serve right away: Spoon the potatoes and asparagus onto plates, top with salmon, and finish with extra lemon if you want more sharpness.
Equipment for This Recipe:
- Rimmed sheet pan — the potatoes need the edges.
- Small mixing bowl — for the lemon-herb glaze.
- Instant-read thermometer — the easiest way to avoid dry salmon.
- Microplane or fine grater — best for lemon zest and garlic.
How to Serve This Dish: Serve the salmon over the potatoes with the asparagus fanned to the side, then add a lemon wedge to each plate. A spoonful of plain yogurt with dill on the side works if you want a cool, creamy contrast without adding much.
Pro Tips for This Recipe:
- Cut the potatoes evenly or they roast at different speeds and you end up with some soft halves and some hard ones.
- If your salmon fillets are thick, give them an extra 2 minutes and check the center with a thermometer.
- Line the pan with parchment if you want the salmon skin to release more easily.
Variations on This Dish:
- Mustard-Crust Salmon: Add 1 extra teaspoon of Dijon and a pinch of paprika to the glaze.
- Parchment Packet Version: Fold the salmon and asparagus into parchment parcels and bake for a softer, more delicate texture.
- Garlic-Dill Swap: Use chopped dill and a little extra garlic instead of parsley for a sharper herb profile.
Common Mistakes to Avoid with This Dish:
- Crowding the pan: The vegetables steam instead of roast, and the potatoes go pale. Give everything a little space.
- Overcooking the salmon: It goes dry and chalky fast. Start checking at the 10-minute mark.
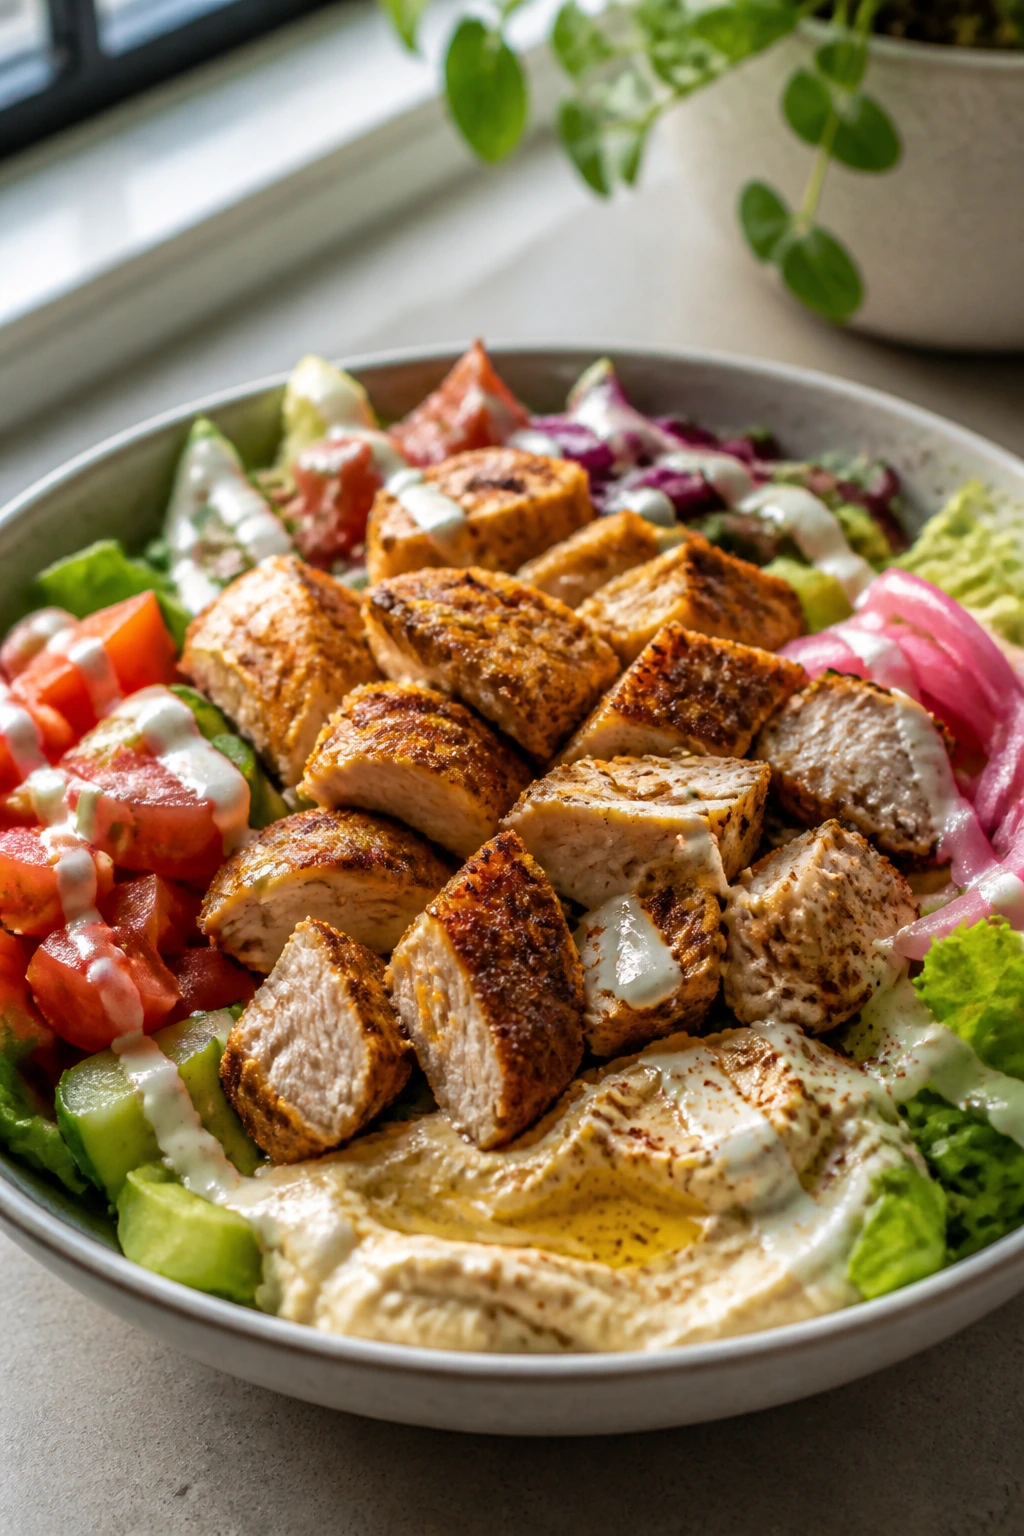
3. Chicken Shawarma Salad Bowls
Shawarma spice does the heavy lifting here, and it should. The chicken gets deeply browned in spots, the salad stays cold and crunchy, and the hummus adds just enough richness to make the bowl feel complete. At about 430 calories per serving with a small pita, this is a weekend lunch that eats like dinner.
Why It Works: The yogurt in the marinade helps the spices cling to the chicken and encourages browning instead of drying. You get a warm protein base, cold vegetables, and a creamy element in one bowl, which keeps every bite changing just enough to stay interesting. It’s also one of the easier meals to stretch with extra lettuce or cucumber if you want a bigger plate.
Key Ingredients:
- 1 1/4 lb boneless skinless chicken breasts, cut into 1-inch strips — thin pieces cook fast and stay juicy.
- 2 tbsp plain Greek yogurt — helps tenderize the chicken.
- 1 tbsp olive oil — for the marinade and the pan.
- 2 tsp ground cumin — the backbone of the shawarma flavor.
- 2 tsp smoked paprika — gives color and a little smoke.
- 1 tsp ground coriander — warm and citrusy.
- 1/2 tsp turmeric — mostly for color, but it helps.
- 1/2 tsp kosher salt — enough to season the meat without overdoing it.
- 2 garlic cloves, grated — better than minced here because it disappears into the marinade.
- 1 lemon, juiced — brightens the whole bowl.
- 6 cups chopped romaine — the crunchy base.
- 1 cup cucumber, diced — cold and clean-tasting.
- 1 cup cherry tomatoes, halved — a little sweetness.
- 1/2 small red onion, thinly sliced — use sparingly if you want less bite.
- 1/2 cup hummus — the creamy anchor.
- 1/4 cup chopped parsley — the fresh finish.
- 4 small pitas, warmed, optional — useful if you want a fuller meal.
Quick Steps:
- Marinate the chicken: Whisk the yogurt, oil, spices, salt, garlic, and lemon juice in a bowl. Toss in the chicken strips and let them sit for at least 20 minutes, or up to 8 hours in the fridge.
- Cook the chicken hard enough to brown: Heat a large skillet over medium-high heat. Add the chicken in a single layer and cook for 3 to 4 minutes per side until browned and cooked through.
- Build the salad base: Spread the romaine, cucumber, tomatoes, and onion across four bowls.
- Add the warm chicken and hummus: Spoon the chicken over the salad, then add a scoop of hummus to each bowl.
- Finish and serve: Sprinkle with parsley and warm pita on the side if using. Do not drown the bowl in dressing — the hummus and chicken already carry the flavor.
Equipment for This Recipe:
- Large skillet — stainless steel or cast iron both work.
- Mixing bowl — for the marinade.
- Sharp knife — for thin chicken strips and vegetables.
- Tongs — for turning the chicken without tearing it.
How to Serve This Dish: Serve the bowls wide and shallow so the chicken sits on top instead of sinking into the greens. A few pickles or olives on the side make the plate feel more complete without adding much weight.
Pro Tips for This Recipe:
- If the chicken sticks, it isn’t ready to flip yet; let it release on its own.
- Cut the chicken strips evenly so the thickest pieces don’t lag behind.
- A quick pinch of sumac or extra lemon at the end gives the bowl a sharper edge.
Variations on This Dish:
- Warm Rice Bowl: Swap half the romaine for 1/2 cup cooked brown rice per serving.
- Lettuce-Wrap Lunch: Skip the pita and tuck the chicken into butter lettuce leaves.
- Tahini Drizzle Upgrade: Mix 1 tbsp tahini with lemon juice and water for a thinner, nutty sauce.
Common Mistakes to Avoid with This Dish:
- Using too much marinade: The chicken steams instead of browns. Shake off the excess before it hits the pan.
- Slicing the vegetables too thick: The bowl loses its crunch. Keep the cucumber and onion thin and crisp.
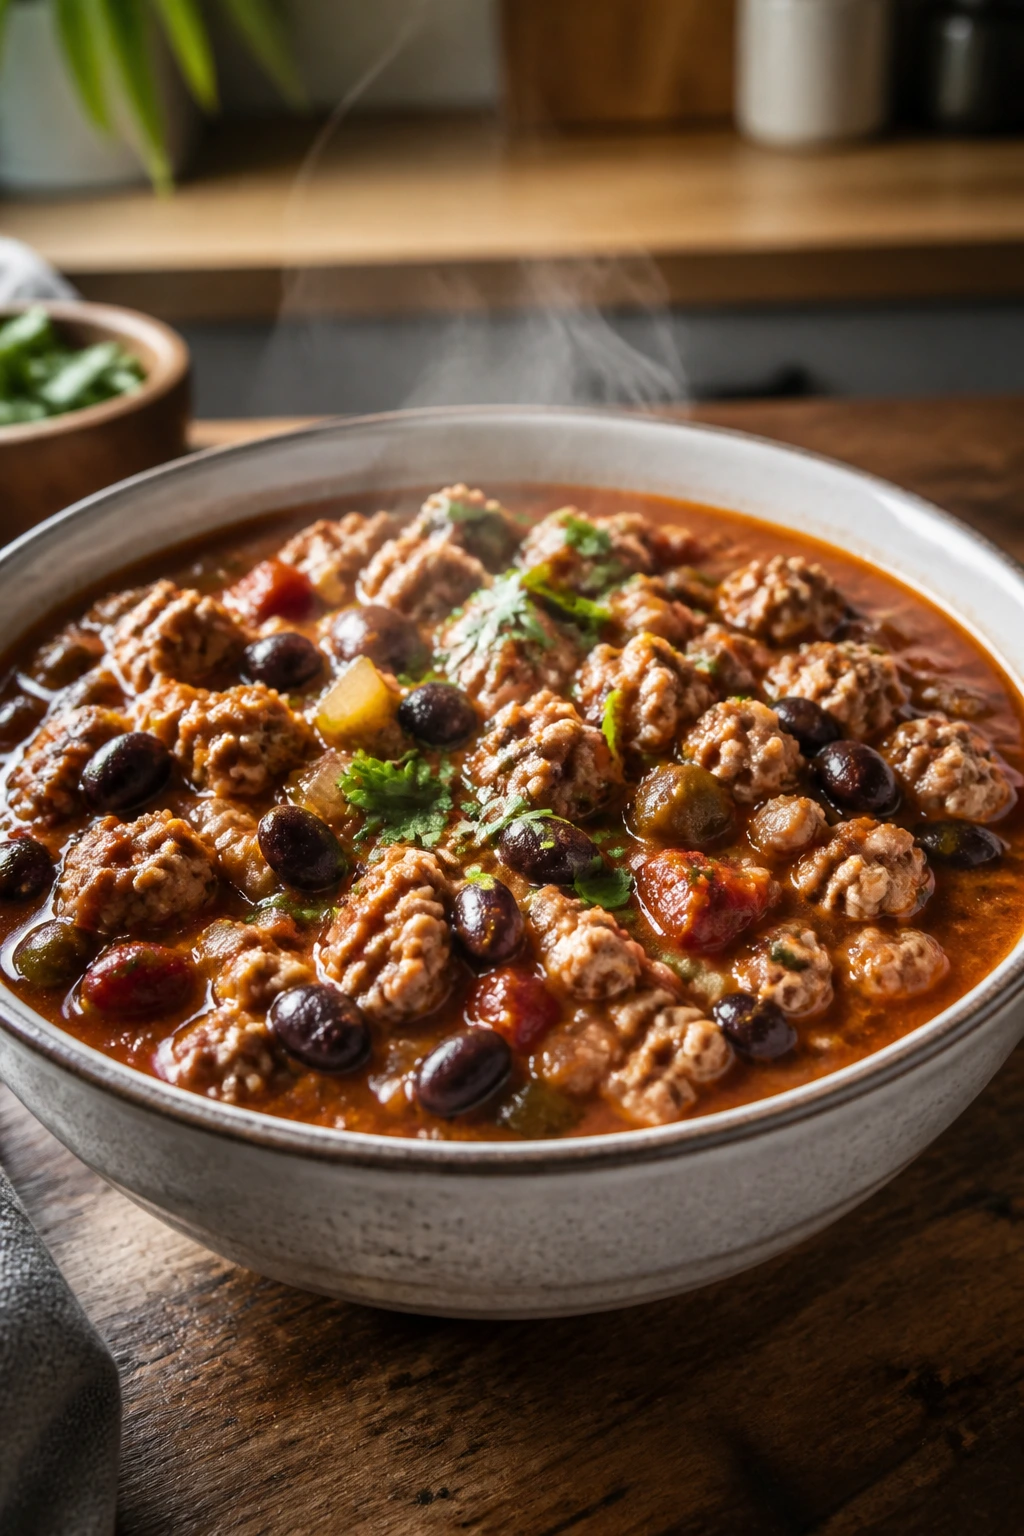
4. Turkey and Black Bean Chili
Chili earns its place on a weekend table when it tastes like it simmered all afternoon but barely asked anything from you. The turkey browns, the beans thicken the pot, and the tomatoes pull everything together into a spoonable, smoky bowl. This version lands around 390 calories before toppings, which leaves room for a spoonful of yogurt or avocado without crossing the line.
Why It Works: Lean turkey keeps the chili light enough for the calorie target, while black beans add body and enough fiber to make the bowl feel substantial. The simmer matters here; even 20 minutes gives the tomatoes time to mellow and the spices time to stop tasting raw. A pot like this gets better if you let it sit for 10 minutes before serving.
Key Ingredients:
- 1 tbsp olive oil — just enough to start the onions.
- 1 lb lean ground turkey — 93% lean is the sweet spot.
- 1 medium yellow onion, diced — forms the flavor base.
- 1 red bell pepper, diced — sweetens the pot.
- 3 garlic cloves, minced — chili needs garlic.
- 2 tbsp chili powder — the main seasoning.
- 1 tsp ground cumin — for warmth.
- 1 tsp smoked paprika — adds depth.
- 1/2 tsp dried oregano — keeps the flavor from flattening out.
- 1/2 tsp kosher salt — start here and adjust after simmering.
- 1 (28 oz) can crushed tomatoes — gives the chili its body.
- 2 (15 oz) cans black beans, rinsed and drained — the bulk and the fiber.
- 1 cup low-sodium chicken broth — helps it simmer without getting too thick.
- 1 cup frozen corn — optional, but nice for sweetness.
- Toppings: chopped cilantro, sliced scallions, plain Greek yogurt, avocado.
Quick Steps:
- Brown the turkey: Heat the olive oil in a Dutch oven over medium-high heat. Add the turkey and cook for 5 to 6 minutes, breaking it into crumbles until it loses the raw pink color and picks up a few browned edges.
- Soften the vegetables: Add the onion and bell pepper, then cook for 4 minutes until the onion is translucent. Stir in the garlic for 30 seconds until fragrant.
- Bloom the spices: Add the chili powder, cumin, paprika, oregano, salt, and black pepper. Stir for 20 to 30 seconds so the spices smell toasted, not dusty.
- Simmer the chili: Add the tomatoes, beans, broth, and corn. Bring to a gentle boil, then lower the heat and simmer for 20 to 25 minutes, stirring now and then, until the chili thickens slightly.
- Finish and rest: Taste for salt, then let the pot sit off the heat for 10 minutes before serving. That pause makes the texture better.
Equipment for This Recipe:
- Dutch oven or heavy soup pot — gives the chili enough room.
- Wooden spoon — for breaking up the turkey.
- Measuring spoons — especially for the spices.
- Can opener — obvious, but somehow always forgotten.
How to Serve This Dish: Ladle the chili into deep bowls and keep the toppings modest: a spoon of yogurt, a sprinkle of scallions, and maybe 1/4 avocado if you want it richer. Cornbread fits, but one small piece is plenty if you’re watching calories.
Pro Tips for This Recipe:
- If you want a thicker chili, simmer it uncovered for the last 5 minutes.
- Rinsing the beans knocks off a lot of the canned salt and keeps the broth cleaner.
- Chili powder brands vary a lot; taste before adding extra salt.
Variations on This Dish:
- Smoky Chipotle Chili: Add 1 minced chipotle in adobo for a deeper, hotter bowl.
- White Bean Turkey Pot: Swap black beans for cannellini beans and use cumin plus oregano a little more heavily.
- Taco Salad Leftover Bowl: Spoon leftovers over romaine with shredded lettuce and a few tortilla strips.
Common Mistakes to Avoid with This Dish:
- Skipping the browning step: The turkey tastes flat. Let it pick up real color.
- Boiling too hard: The beans split and the tomatoes get harsh. Keep the simmer gentle.
5. Shrimp Fajita Cauliflower Rice Bowls
Shrimp cook fast enough to make you feel efficient, which is a nice weekend feeling. The peppers soften at the edges, the onions sweeten, and the cauliflower rice picks up the fajita seasoning without turning mushy if you keep the heat up. At about 360 calories per bowl, these are bright, fast, and hard to mess up if you watch the shrimp closely.
Why It Works: Shrimp bring a lot of flavor for very few calories, which leaves room for avocado and vegetables without a fight. Cauliflower rice gives the bowl a real base but doesn’t weigh it down like a heavy starch would. A squeeze of lime at the end sharpens every bite.
Key Ingredients:
- 1 lb large shrimp, peeled and deveined — dry them well before cooking.
- 2 bell peppers, sliced — any color works.
- 1 medium red onion, sliced — stays sweet and a little crisp.
- 2 tbsp olive oil, divided — split between the vegetables and shrimp.
- 2 tsp chili powder — main seasoning.
- 1 tsp ground cumin — keeps the flavor grounded.
- 1 tsp smoked paprika — adds that skillet aroma.
- 1/2 tsp kosher salt — enough for the whole pan.
- 4 cups cauliflower rice — fresh or frozen both work.
- 1 lime, juiced — the finish.
- 1 avocado, sliced — use a few slices per bowl, not the whole fruit.
- 1/4 cup chopped cilantro — for the top.
- Salsa for serving — optional, but useful.
Quick Steps:
- Cook the peppers and onions: Heat 1 tbsp olive oil in a large skillet over medium-high heat. Add the peppers and onion, then cook for 6 to 7 minutes until the edges soften and brown slightly.
- Season the shrimp: Toss the shrimp with the remaining oil, chili powder, cumin, paprika, salt, and black pepper.
- Sear the shrimp quickly: Push the vegetables to the side and add the shrimp. Cook for 1 to 2 minutes per side until pink and opaque. Do not overcook them or they turn rubbery fast.
- Warm the cauliflower rice: In a separate skillet or in the cleared space of the pan, cook the cauliflower rice for 3 to 4 minutes until hot and just tender.
- Assemble the bowls: Divide the cauliflower rice between bowls, top with the shrimp and peppers, squeeze over lime, and add avocado, cilantro, and salsa.
Equipment for This Recipe:
- Large skillet — wide enough to keep the shrimp in one layer.
- Second skillet, optional — useful for the cauliflower rice.
- Sharp knife — for the peppers and onion.
- Citrus juicer — makes the lime finish easy.
How to Serve This Dish: Serve the bowls in wide dishes so the colors stay visible and the lime gets a chance to hit everything. If you want a little extra crunch, a few crushed tortilla chips go a long way without needing a full pile.
Pro Tips for This Recipe:
- Thaw frozen cauliflower rice first if you can; it dries out faster and browns better.
- Pat the shrimp dry before seasoning so they sear instead of steaming.
- Add the lime juice after the pan comes off the heat so it stays sharp.
Variations on This Dish:
- Taco Night Bowl: Add a spoonful of black beans and a little pico de gallo.
- Chipotle Heat Version: Mix a little chipotle powder into the seasoning blend.
- Salsa Verde Swap: Use salsa verde instead of red salsa for a tangier finish.
Common Mistakes to Avoid with This Dish:
- Cooking shrimp until they curl into tight little O’s: They’re done before that point. Pull them as soon as they turn pink and opaque.
- Leaving the cauliflower rice watery: Cook off the moisture or the bowl turns limp.
6. Pesto Chicken Zucchini Noodle Skillet
Zucchini noodles can be forgettable when they’re treated like a side note. Here, they’re the point. The pesto coats them in green gloss, the tomatoes burst a little, and the chicken gives the skillet enough substance to count as dinner. At roughly 410 calories per serving, it feels lighter than pasta but still lands with real comfort.
Why It Works: Chicken breast keeps the protein high, while pesto brings fat, basil, garlic, and parmesan in one measured scoop. Zucchini noodles cook in minutes, so you can keep them from turning watery if you stop before they slacken. The little bit of lemon at the end keeps the sauce from feeling heavy.
Key Ingredients:
- 1 lb boneless skinless chicken breast, cut into bite-size pieces — small pieces cook evenly.
- 2 tsp olive oil — enough to brown the chicken.
- 2 cloves garlic, minced — add it after the chicken so it doesn’t burn.
- 4 medium zucchini, spiralized — pat them dry before they hit the pan.
- 1 cup cherry tomatoes, halved — they break down and add sweetness.
- 1/4 cup basil pesto — a little goes a long way.
- 2 tbsp grated parmesan — for a salty finish.
- 1/4 tsp kosher salt and 1/4 tsp black pepper — season the chicken and sauce.
- 1 tbsp lemon juice — wakes the pesto up.
- Basil leaves for garnish — optional, but nice.
Quick Steps:
- Brown the chicken: Heat the olive oil in a large skillet over medium-high heat. Add the chicken, salt, and pepper, then cook for 5 to 6 minutes until golden and cooked through.
- Add the garlic and tomatoes: Stir in the garlic for 30 seconds, then add the tomatoes and cook for 1 to 2 minutes until they start to soften.
- Toss in the zucchini noodles: Add the zoodles and cook for just 1 to 2 minutes, tossing constantly until they look glossy but still have a little bite. Stop before they get floppy.
- Stir in the pesto: Remove the skillet from the heat and fold in the pesto and lemon juice so the sauce stays bright and does not turn dull.
- Finish with parmesan: Top with parmesan and basil, then serve immediately.
Equipment for This Recipe:
- Large skillet — a 12-inch pan gives the zoodles room.
- Spiralizer — handy, though a vegetable peeler works for ribbons.
- Paper towels — for drying the zucchini noodles.
- Tongs — easier than a spoon for tossing.
How to Serve This Dish: Pile it into shallow bowls and finish with a few extra tomato halves and a little parmesan on top. It doesn’t need bread unless you want it; if you do, keep it to one small slice of toast.
Pro Tips for This Recipe:
- If your zucchini is large and watery, salt it lightly and blot it after 10 minutes.
- Use pesto you actually like eating from the spoon; bland pesto makes the whole pan taste tired.
- Add the pesto off the heat so the basil stays fresh.
Variations on This Dish:
- Sun-Dried Tomato Pesto Bowl: Stir in 1 tbsp chopped sun-dried tomatoes for a deeper flavor.
- Caprese Twist: Add torn mozzarella pearls, but keep the amount small so the calories stay in range.
- Dairy-Free Basil Skillet: Use a dairy-free pesto and finish with toasted pine nuts instead of parmesan.
Common Mistakes to Avoid with This Dish:
- Overcooking zucchini noodles: They lose all structure in a minute or two. Treat them gently.
- Using too much pesto: The pan turns oily and blunt. Measure it.
7. Miso-Ginger Cod with Broccoli and Rice
Cod doesn’t shout, and that’s part of its appeal. It takes on miso, ginger, soy, and a little honey without fighting back, which makes the whole tray taste composed rather than busy. With a measured scoop of rice, this stays around 440 calories per serving and feels more polished than the effort suggests.
Why It Works: Cod is lean, mild, and fast, which is exactly what you want when you’re trying to keep a weekend meal under control without making it plain. The miso glaze adds salt, sweetness, and depth in a very small amount, so the flavor lands hard even though the calories stay moderate. Broccoli roasted on the same pan keeps the whole meal grounded.
Key Ingredients:
- 1 cup dry brown rice, rinsed — makes the base.
- 2 cups water — for the rice.
- Pinch of salt — for the rice only.
- 4 cod fillets, 5 oz each — keep them similar in size.
- 4 cups broccoli florets — the roastable side.
- 1 tbsp olive oil — for the broccoli and pan.
- 2 tbsp white miso paste — the backbone of the glaze.
- 1 tbsp low-sodium soy sauce — deepens the saltiness.
- 1 tbsp honey — just enough to caramelize.
- 1 tbsp rice vinegar — keeps the glaze sharp.
- 1 tbsp grated fresh ginger — fresh, not powdered.
- 2 garlic cloves, grated — disappears into the glaze.
- 1 tsp sesame oil — use a light hand.
- 2 scallions, sliced — for the top.
- Sesame seeds — optional crunch.
Quick Steps:
- Cook the rice first: Bring the rice, water, and salt to a boil, then cover and simmer on low for about 35 minutes, or until the grains are tender and the water is absorbed. Fluff and keep warm.
- Make the glaze: Whisk the miso, soy sauce, honey, vinegar, ginger, garlic, and sesame oil in a small bowl until smooth.
- Roast the broccoli: Heat the oven to 425°F (220°C). Toss the broccoli with olive oil and spread it on a sheet pan. Roast for 10 minutes.
- Add the cod: Push the broccoli aside, place the cod on the pan, and brush the glaze over the fillets. Roast for 8 to 10 minutes more, until the fish flakes and turns opaque. Do not leave it in until it looks dry.
- Plate and finish: Spoon rice into bowls, top with broccoli and cod, then scatter scallions and sesame seeds over everything.
Equipment for This Recipe:
- Sheet pan — for the roast.
- Small saucepan — for the rice.
- Whisk — to smooth the miso glaze.
- Instant-read thermometer, optional — useful if you like exact doneness.
How to Serve This Dish: Serve the cod over the rice so the glaze drips into the grains a little. A few quick-pickled cucumbers on the side make the bowl taste brighter if you want more contrast.
Pro Tips for This Recipe:
- If the miso paste looks lumpy, keep whisking; it will smooth out.
- Cod dries out fast, so check a minute early if your fillets are thin.
- Broccoli stems can be peeled and roasted too; they taste sweeter than most people expect.
Variations on This Dish:
- Salmon Swap: Use 5-ounce salmon fillets and roast them a minute or two longer.
- Broiled Glaze Finish: Broil the fish for the last 1 to 2 minutes for a more caramelized top.
- Vegetable-Heavy Bento: Double the broccoli and cut the rice to 1/2 cup per serving.
Common Mistakes to Avoid with This Dish:
- Using too much glaze: It drips and burns before the fish cooks through. Brush lightly.
- Letting the rice sit uncovered: It dries into a stiff pile. Keep it covered once it’s done.
8. Veggie Breakfast Burrito Bowls
A breakfast bowl like this is a useful thing on a weekend morning. Eggs, beans, potatoes, peppers, salsa, and avocado all show up in one place, and nobody has to wrestle a tortilla that tears before the filling goes in. This version stays around 430 calories per serving and still feels like breakfast with some personality.
Why It Works: The combination of eggs and black beans gives you enough protein to keep the bowl steady through lunch. Potatoes make it feel like a proper morning meal, but the portions stay small enough to preserve the calorie target. Salsa and cilantro keep the bowl from tasting heavy or starchy.
Key Ingredients:
- 1 tbsp olive oil — for the potatoes and vegetables.
- 1 cup diced Yukon gold or sweet potatoes — small pieces cook quickly.
- 1 small yellow onion, diced — sweet and savory in the pan.
- 1 bell pepper, diced — color and crunch.
- 6 large eggs — the main protein.
- 1 cup black beans, rinsed and drained — adds fiber and heft.
- 2 cups baby spinach — wilts into the eggs or sits beneath them.
- 1/2 cup salsa — the sauce.
- 1/2 avocado, sliced — keep it measured.
- 2 tbsp chopped cilantro — the fresh finish.
- Salt and pepper — to season each layer.
Quick Steps:
- Cook the potatoes first: Heat the oil in a skillet over medium-high heat. Add the potatoes, onion, salt, and pepper, and cook for 10 to 12 minutes, stirring occasionally, until the potatoes are browned and tender.
- Add the pepper and spinach: Stir in the bell pepper and cook for 2 minutes. Add the spinach and let it wilt into the vegetables.
- Warm the beans: Push the vegetables to one side and add the beans to the pan for 1 to 2 minutes, just until hot.
- Scramble the eggs: In a separate bowl, beat the eggs with a pinch of salt, then cook them in a lightly oiled pan over medium heat until just set and soft.
- Build the bowls: Divide the potato mixture between bowls, top with eggs, salsa, avocado, and cilantro. Do not bury everything in cheese or the calories climb fast.
Equipment for This Recipe:
- Large skillet — for the potatoes and vegetables.
- Nonstick pan, optional — for easier eggs.
- Mixing bowl — for the eggs.
- Sharp knife — for the potatoes and pepper.
How to Serve This Dish: Serve the bowls hot with a spoon and maybe a slice of fruit on the side if you want a fuller brunch plate. A little extra salsa on top gives the bowl more lift than salt alone.
Pro Tips for This Recipe:
- Dice the potatoes small; big chunks take too long and the eggs get cold.
- If you want less morning richness, use 4 eggs and 2 egg whites.
- Warm the beans separately if your skillet is crowded.
Variations on This Dish:
- Huevos Rancheros Bowl: Add a fried egg on top and use a little more salsa.
- Breakfast-for-Dinner Version: Add sliced roasted peppers and a spoon of yogurt.
- Egg-White Leaner Bowl: Replace half the eggs with egg whites for a lighter version.
Common Mistakes to Avoid with This Dish:
- Underbaking the potatoes: They stay hard and make the bowl feel unfinished. Let them brown.
- Adding salsa too early: The bowl gets watery. Spoon it on at the end.
9. Turkey Burger Lettuce Wraps with Sweet Potato Wedges
A turkey burger can be dry, yes, but only if you treat it like a beef burger and hope for the best. When you season it properly, keep the patties thick enough, and pair them with sweet potato wedges that actually brown, you get a dinner that feels like a cookout without the calorie pileup. This one lands around 470 calories per serving.
Why It Works: The turkey stays flavorful because it’s mixed with mustard and Worcestershire, not just salt and a prayer. Lettuce wraps cut the bun calories almost entirely, while the sweet potato wedges bring the weekend comfort people usually want from burgers anyway. The yogurt-dill sauce finishes the plate with something cool and sharp.
Key Ingredients:
- 2 medium sweet potatoes, cut into wedges — try to keep them the same size.
- 1 tbsp olive oil — for the wedges.
- 1/2 tsp kosher salt — for the wedges.
- 1/2 tsp paprika — gives them color.
- 1 lb ground turkey (93% lean) — juicy enough to stay pleasant.
- 1 tsp Worcestershire sauce — helps with savory depth.
- 1 tsp Dijon mustard — sharpens the patties.
- 1/2 tsp garlic powder — easier than fresh here.
- 1/2 tsp onion powder — keeps the burger flavor round.
- 1/2 tsp salt and 1/4 tsp black pepper — for the meat.
- 1 head butter lettuce, leaves separated — the wrap.
- 1 tomato, sliced — a fresh layer.
- 1/2 small red onion, sliced thin — bite and crunch.
- 1/2 cup plain Greek yogurt — for the sauce.
- 1 tbsp chopped dill — in the sauce.
- 1 tsp lemon juice — makes the sauce snap.
Quick Steps:
- Roast the sweet potato wedges: Heat the oven to 425°F (220°C). Toss the wedges with olive oil, salt, and paprika, then spread them on a sheet pan and roast for 25 to 30 minutes, flipping halfway through, until browned at the edges.
- Mix and shape the turkey: Combine the turkey, Worcestershire, Dijon, garlic powder, onion powder, salt, and pepper. Shape into 4 patties without packing them too tightly.
- Cook the patties: Heat a skillet over medium heat and cook the burgers for 4 to 5 minutes per side, until the centers reach 165°F and the edges are browned.
- Make the sauce: Stir the yogurt, dill, lemon juice, and a pinch of salt together.
- Assemble the wraps: Place each patty in lettuce leaves with tomato, onion, and sauce, then serve with the wedges. Do not press the patties too hard or they squeeze out their juices.
Equipment for This Recipe:
- Rimmed sheet pan — for the wedges.
- Large skillet — for the burgers.
- Mixing bowl — for the turkey and sauce.
- Meat thermometer — especially useful with turkey.
How to Serve This Dish: Stack the lettuce wraps on a platter and let everyone build their own. The sweet potato wedges sit well beside a few pickle spears if you want a sharper plate.
Pro Tips for This Recipe:
- Make the patties slightly wider than the bun shape would be; they shrink as they cook.
- Pull the wedges when the edges are browned and the centers are tender.
- Let the burgers rest for 3 minutes before wrapping so the juices settle.
Variations on This Dish:
- Spicy Harissa Turkey Wraps: Add 1 teaspoon harissa paste to the yogurt sauce.
- Bunless Club Version: Add a slice of tomato and a few strips of turkey bacon if you have calories to spare.
- Smash-Style Patties: Flatten the turkey more thinly and cook them hot for crisp edges.
Common Mistakes to Avoid with This Dish:
- Overworking the meat: The patties turn dense. Mix just until combined.
- Using lettuce that’s too small or limp: The wraps fall apart. Butter lettuce holds best.
10. Mediterranean Tuna Stuffed Peppers
Tuna stuffed into a raw bell pepper sounds plain until you taste the lemon, capers, celery, and yogurt working together. The peppers stay crisp, the filling stays cool, and the whole thing feels like a lunch that was built instead of thrown together. It’s around 300 calories per serving, which leaves a lot of room if you want fruit or a handful of crackers on the side.
Why It Works: Canned tuna is one of the easiest ways to keep protein high while calories stay low, and bell peppers carry the filling without needing a separate bread or grain. Greek yogurt gives the tuna salad enough creaminess to feel satisfying without drowning it in mayonnaise. This is one of the rare meals that improves if you let it sit for a few minutes before eating.
Key Ingredients:
- 4 large bell peppers, halved and seeded — choose firm peppers that sit flat.
- 2 (5 oz) cans tuna in water, drained — flake it well.
- 1/4 cup plain Greek yogurt — the creamy base.
- 1 tbsp lemon juice — brightens the filling.
- 1 tbsp olive oil — a small amount keeps the tuna from tasting dry.
- 1 celery stalk, finely diced — for crunch.
- 2 tbsp red onion, minced — use a little if you want a sharper bite.
- 1 tbsp capers, chopped — salty and briny.
- 1/4 cup chopped cucumber — cold and refreshing.
- 2 tbsp chopped parsley — fresh finish.
- 1/4 tsp black pepper and a pinch of salt — season to taste.
- 2 tbsp crumbled feta, optional — adds a salty finish if you want it.
Quick Steps:
- Mix the filling: In a bowl, combine the tuna, yogurt, lemon juice, olive oil, celery, onion, capers, cucumber, parsley, pepper, and salt. Stir until the tuna is evenly coated but still a little chunky.
- Prepare the peppers: If you want them softer, roast the pepper halves cut-side up at 400°F for 8 minutes before stuffing; if you prefer crunch, leave them raw.
- Fill the peppers: Spoon the tuna mixture into each pepper half, packing it lightly so the filling sits up instead of sliding out.
- Finish with feta, if using: Sprinkle a little feta over the top for extra salt and texture.
- Serve chilled or slightly warm: These are best at cool room temperature. Do not overbake if you roast the peppers, or they lose their shape.
Equipment for This Recipe:
- Mixing bowl — for the tuna salad.
- Sharp knife — to halve and seed the peppers.
- Baking sheet, optional — only if you roast the pepper halves.
- Spoon — for stuffing the peppers.
How to Serve This Dish: Serve two pepper halves per person with cucumber slices or a simple green salad. If you want a little more substance, a few whole-grain crackers on the side keep the meal within range.
Pro Tips for This Recipe:
- Drain the tuna thoroughly or the filling loosens.
- Use peppers with fairly flat bottoms so they don’t roll around.
- The filling tastes better after 10 minutes in the fridge.
Variations on This Dish:
- White Bean Tuna Salad: Mash in 1/4 cup white beans for a softer, more filling mix.
- Olive-Focused Mediterranean Cup: Swap capers for chopped Kalamata olives.
- No-Bake Lunch Box: Serve the filling with pepper strips instead of stuffed halves.
Common Mistakes to Avoid with This Dish:
- Over-salting: Capers and feta already bring salt. Taste before adding more.
- Skipping the drain: Wet tuna makes the filling slide and taste flat.
11. Sheet-Pan Pork Tenderloin with Apples and Brussels Sprouts
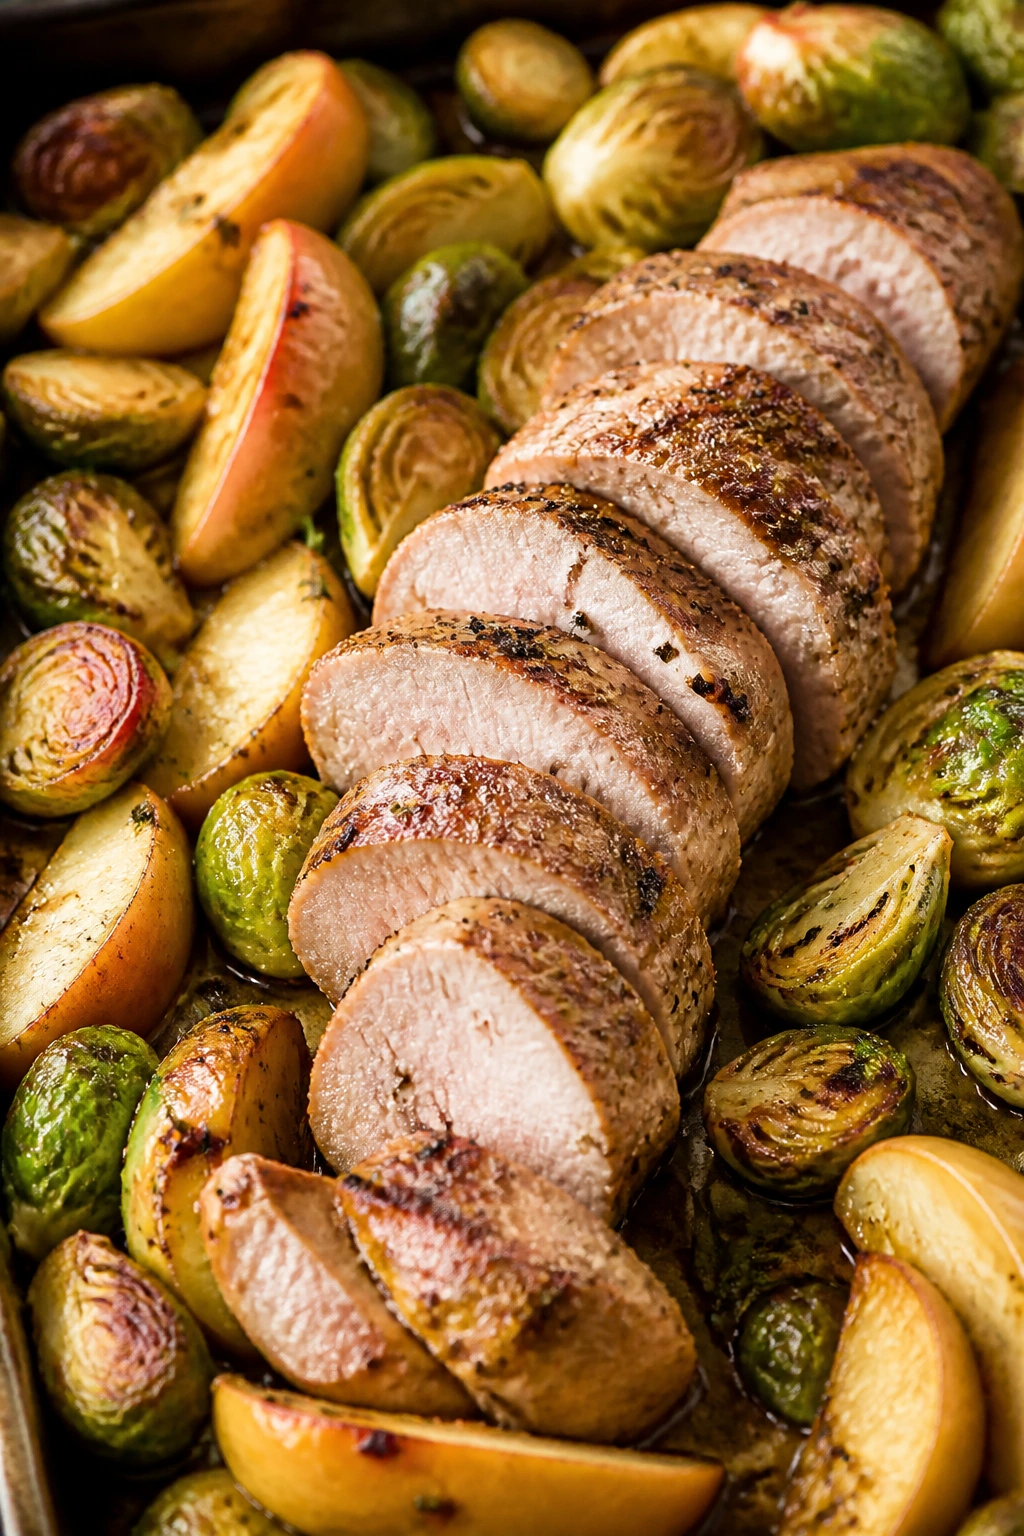
Pork tenderloin is one of those cuts that behaves well when you leave it alone. Pair it with apples and Brussels sprouts, and the oven does the odd but useful thing of making everything taste more like itself. The finished plate comes in around 480 calories per serving and feels like a much larger dinner.
Why It Works: Pork tenderloin is lean enough to stay within the calorie target but still has enough flavor to stand up to roast fruit and vegetables. Brussels sprouts soften at the edges, apples turn warm and a little jammy, and the Dijon-maple glaze gives the pan enough shine to make it taste finished. This is the meal I’d make when I want a roast without the heavy feeling that usually follows one.
Key Ingredients:
- 1 1/2 lb pork tenderloin, trimmed — trim off any silvery membrane.
- 1 lb Brussels sprouts, halved — small sprouts roast better.
- 2 medium apples, cored and sliced — Honeycrisp or Fuji both work.
- 2 tbsp olive oil — split between meat and vegetables.
- 1 tbsp Dijon mustard — for the glaze.
- 1 tbsp maple syrup — just enough for balance.
- 1 tsp dried thyme — works well with pork.
- 1/2 tsp garlic powder — background flavor.
- 1/2 tsp kosher salt and 1/4 tsp black pepper — season the whole pan.
- Optional: a splash of apple cider vinegar — if you want more tang.
Quick Steps:
- Heat the oven and coat the vegetables: Set the oven to 425°F (220°C). Toss the Brussels sprouts with 1 tbsp oil, half the salt, pepper, and thyme, then spread them on a sheet pan and roast for 15 minutes.
- Make the glaze: Whisk the Dijon, maple syrup, remaining oil, garlic powder, and a little pepper in a bowl.
- Prep the pork: Rub the pork tenderloin with the glaze and place it on the pan with the apples around it.
- Roast until done: Bake for 18 to 22 minutes, until the pork reaches 145°F in the thickest part and the apples are tender at the edges. Pull it early rather than late — pork tenderloin dries out fast.
- Rest and slice: Let the pork rest for 5 to 10 minutes before slicing. Spoon the apples and sprouts beside it.
Equipment for This Recipe:
- Rimmed sheet pan — enough room for everything.
- Mixing bowl — for the glaze.
- Sharp chef’s knife — for the apples and sprouts.
- Meat thermometer — the most useful tool in the kitchen here.
How to Serve This Dish: Slice the pork across the grain and fan it over the vegetables so the juices run into the pan vegetables a little. A spoonful of mustard on the side works if you want more bite.
Pro Tips for This Recipe:
- Cut the apples thick enough that they soften without collapsing.
- If your sprouts are large, quarter them so they roast evenly.
- Let the pork rest or the juices spill onto the board instead of staying in the meat.
Variations on This Dish:
- Pear and Sage Roast: Swap apples for pears and use chopped sage instead of thyme.
- Root Veg Version: Add carrots or parsnips to the pan and roast 5 minutes longer.
- Extra Tang Glaze: Add 1 tsp apple cider vinegar to the glaze for sharper flavor.
Common Mistakes to Avoid with This Dish:
- Overcooking the pork: The tenderloin turns chalky. Use a thermometer.
- Using huge Brussels sprouts: They roast unevenly and stay hard inside. Cut them smaller.
12. Chickpea Coconut Curry with Spinach
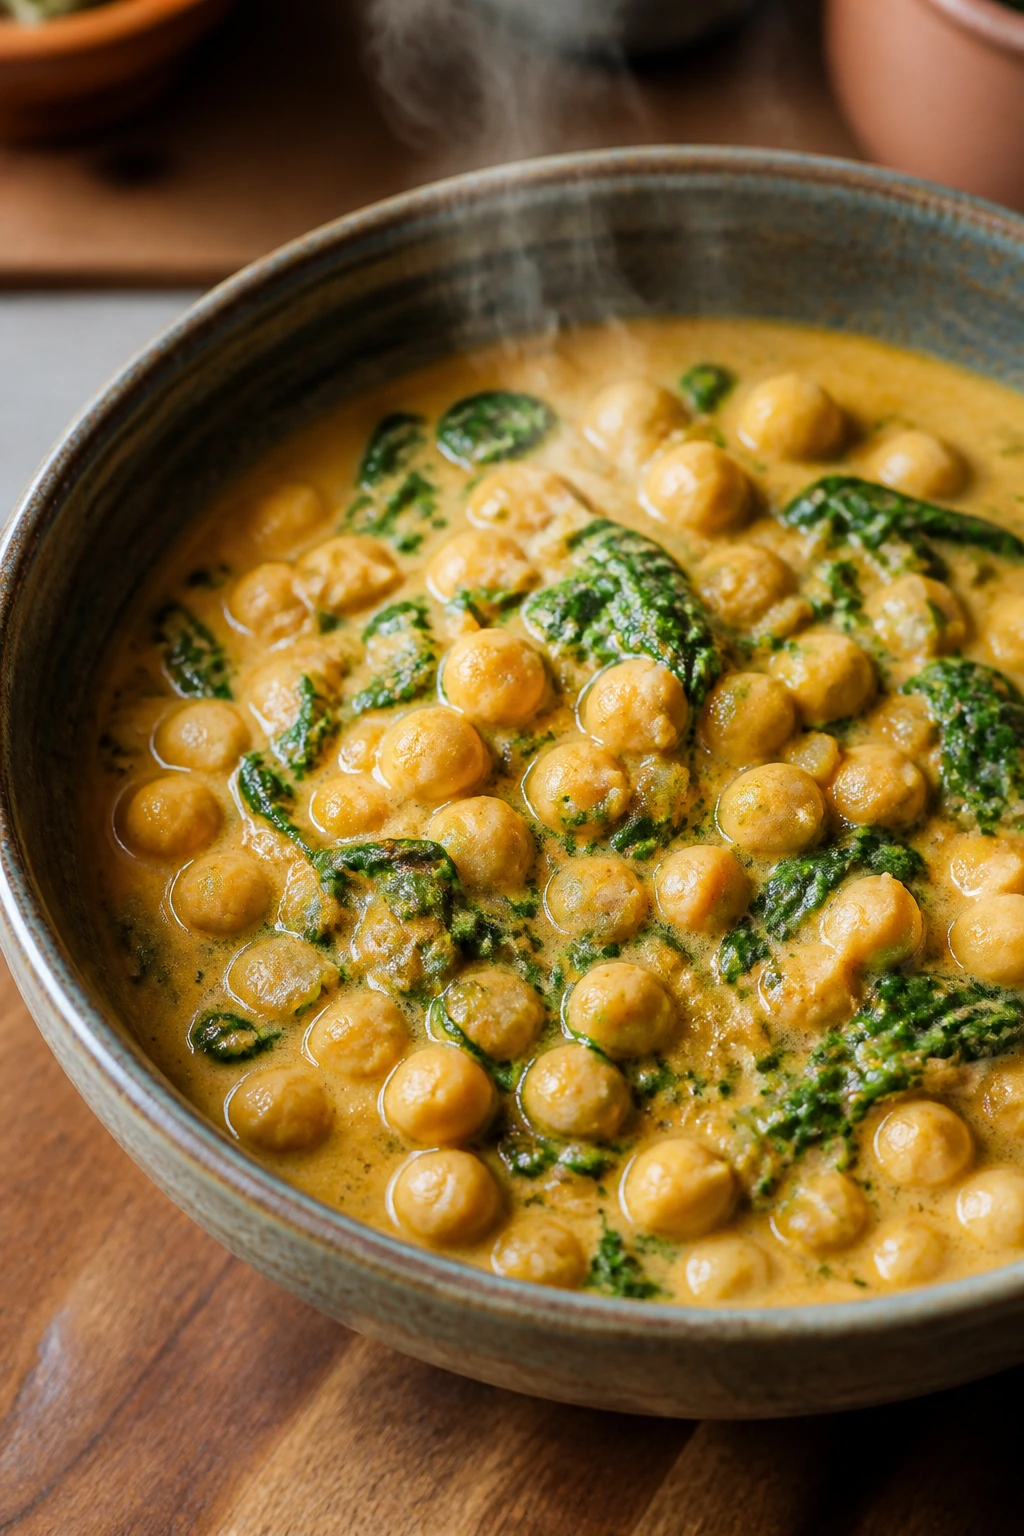
This curry has the kind of smell that makes the kitchen feel warmer before anyone sits down. Onion, garlic, ginger, and curry powder bloom in oil, then chickpeas and coconut milk turn the whole pot creamy and rich without needing a lot of fat. With a modest scoop of rice, it lands around 430 calories per serving.
Why It Works: Chickpeas bring protein and body, while light coconut milk makes the sauce feel lush without tipping the calorie count. Spinach wilts in at the end and gives the curry color and volume, which keeps the bowl from feeling like a sauce over starch. It’s also one of the better weekend meals for leftovers because the flavors settle in overnight.
Key Ingredients:
- 1 tbsp olive oil — for the aromatics.
- 1 medium yellow onion, diced — the flavor base.
- 3 garlic cloves, minced — use enough to notice.
- 1 tbsp grated ginger — fresh ginger matters here.
- 2 tbsp curry powder or 1 1/2 tbsp curry paste — your main seasoning.
- 2 (15 oz) cans chickpeas, rinsed and drained — the core of the dish.
- 1 (13.5 oz) can light coconut milk — creamy, but not too heavy.
- 1 cup low-sodium vegetable broth — loosens the sauce.
- 1 (14.5 oz) can diced tomatoes — adds acidity.
- 4 cups baby spinach — stirred in at the end.
- 1 tsp kosher salt — adjust after simmering.
- 1 cup dry basmati rice, cooked, for serving — keep the portion measured.
- Cilantro and lime — for the finish.
Quick Steps:
- Sauté the aromatics: Heat the oil in a saucepan or Dutch oven over medium heat. Cook the onion for 4 minutes, then add the garlic and ginger for 30 seconds until fragrant.
- Bloom the curry: Stir in the curry powder or paste and cook for 20 seconds so it smells toasted instead of raw.
- Build the sauce: Add the chickpeas, coconut milk, broth, tomatoes, and salt. Bring to a simmer, then cook for 15 minutes, stirring now and then.
- Wilt the spinach: Add the spinach and stir until it collapses into the curry, about 1 minute.
- Serve with rice: Spoon over cooked basmati rice and finish with cilantro and lime. Keep the rice portion modest or the calories climb quickly.
Equipment for This Recipe:
- Medium saucepan or Dutch oven — both work.
- Wooden spoon — for stirring the curry.
- Measuring cups — for the coconut milk and rice.
- Rice pot, if cooking the rice separately — optional.
How to Serve This Dish: Spoon the curry over the rice in shallow bowls and finish with lime and cilantro. A few sliced cucumbers on the side give you a cool crunch against the warm sauce.
Pro Tips for This Recipe:
- If the curry tastes flat, add a little salt and a squeeze of lime before anything else.
- Simmer uncovered if you want a thicker sauce.
- Canned chickpeas can be a little chalky; rinsing helps a lot.
Variations on This Dish:
- Sweet Potato Curry: Add diced sweet potato with the onions and simmer until tender.
- Red Lentil Version: Swap half the chickpeas for red lentils and add extra broth.
- Cauliflower Rice Lite Bowl: Serve it over cauliflower rice for a lower-carb plate.
Common Mistakes to Avoid with This Dish:
- Boiling the coconut milk hard: The sauce can split or lose its smoothness. Keep it at a gentle simmer.
- Adding spinach too early: It turns drab and thin. Stir it in at the end.
13. Greek Chicken Pita Pockets
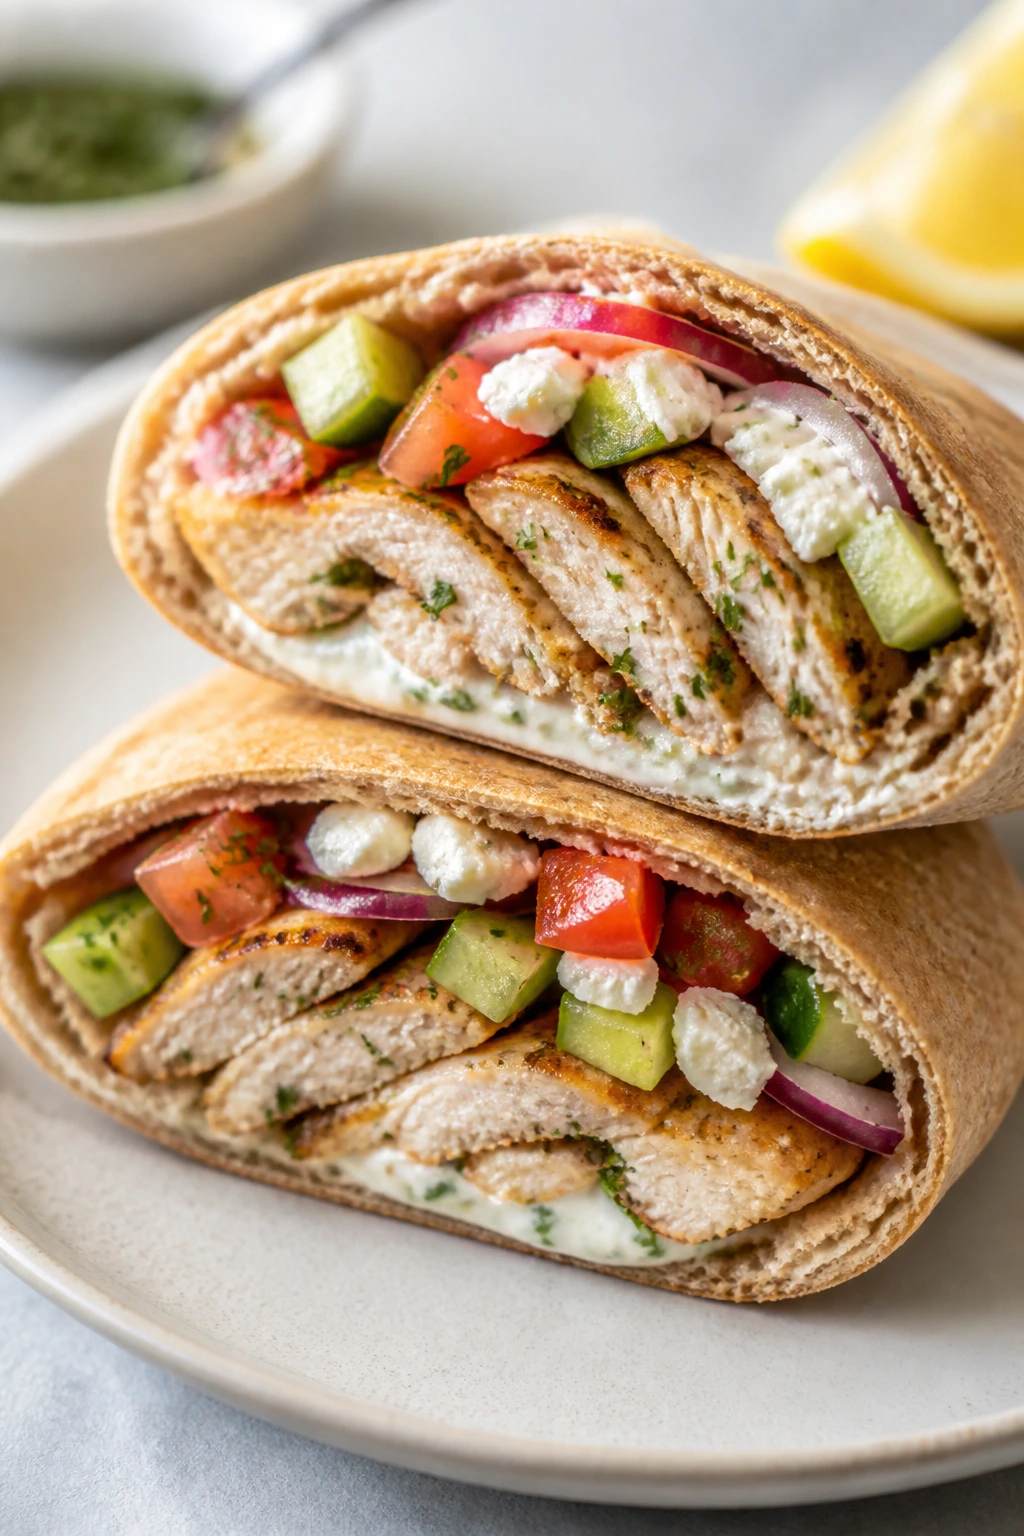
This is the meal you make when you want the feel of a little restaurant lunch without leaving your kitchen. The chicken stays lemony and salty, the vegetables stay cool and crisp, and the tzatziki does the work that a heavy sauce usually would. At about 450 calories per pita, it’s right in the weekend-meal lane without feeling skimpy.
Why It Works: Grilled or seared chicken breast gives you enough protein to make the pita feel satisfying, while the vegetables bring freshness and bite. Whole-wheat pita keeps the plate grounded, but the portion stays controlled because the filling carries most of the weight. The yogurt-based tzatziki gives you creaminess for very few calories.
Key Ingredients:
- 1 1/4 lb boneless skinless chicken breasts, pounded to even thickness — even thickness matters.
- 1 tbsp olive oil — for the chicken.
- 1 lemon, juiced — the main flavor.
- 2 garlic cloves, grated — works into the marinade better than chopped garlic.
- 2 tsp dried oregano — the Greek note.
- 1/2 tsp kosher salt and 1/4 tsp black pepper — for the chicken.
- 4 small whole-wheat pitas — keep them small enough to stay in range.
- 1 cup cucumber, diced — cool and crisp.
- 1 cup tomato, diced — juicy and bright.
- 1/2 small red onion, thinly sliced — adds bite.
- 2 cups shredded romaine — gives the pita a little bulk.
- 1/2 cup tzatziki — measured, not poured.
Quick Steps:
- Marinate the chicken: Combine the olive oil, lemon juice, garlic, oregano, salt, and pepper. Coat the chicken and let it sit for 15 to 30 minutes.
- Cook the chicken: Heat a skillet or grill pan over medium-high heat and cook the chicken for 5 to 6 minutes per side until the center reaches 165°F and the surface is browned.
- Rest and slice: Let the chicken rest for 5 minutes, then slice it thinly across the grain.
- Warm the pita: Heat the pitas in a dry skillet for 20 seconds per side or until soft and flexible.
- Build the pockets: Fill each pita with romaine, cucumber, tomato, onion, chicken, and tzatziki. Do not overstuff them or they tear.
Equipment for This Recipe:
- Grill pan or skillet — for the chicken.
- Sharp knife — for slicing the chicken.
- Cutting board — for the vegetables.
- Small bowl — for the marinade.
How to Serve This Dish: Serve the pockets wrapped loosely in parchment or piled on a plate with extra cucumber on the side. A few olives or a spoon of chopped tomato salad make the meal feel fuller without much extra effort.
Pro Tips for This Recipe:
- Pounding the chicken to even thickness keeps the thin edges from drying out.
- Warm pita tears less and folds more cleanly.
- Slice the chicken after resting so the juices stay inside.
Variations on This Dish:
- Chicken Shawarma Pita Hybrid: Add cumin and paprika to the marinade for a warmer spice profile.
- Lettuce-Wrap Version: Skip the pita and use romaine leaves for a lighter lunch.
- Hummus Layer: Add 2 tablespoons hummus inside each pita if you want a richer base.
Common Mistakes to Avoid with This Dish:
- Using cold pita straight from the package: It cracks. Warm it first.
- Packing the filling too tightly: The bread splits and the meal turns awkward. Keep it loose.
14. Sesame Soba Noodle Bowl with Tofu
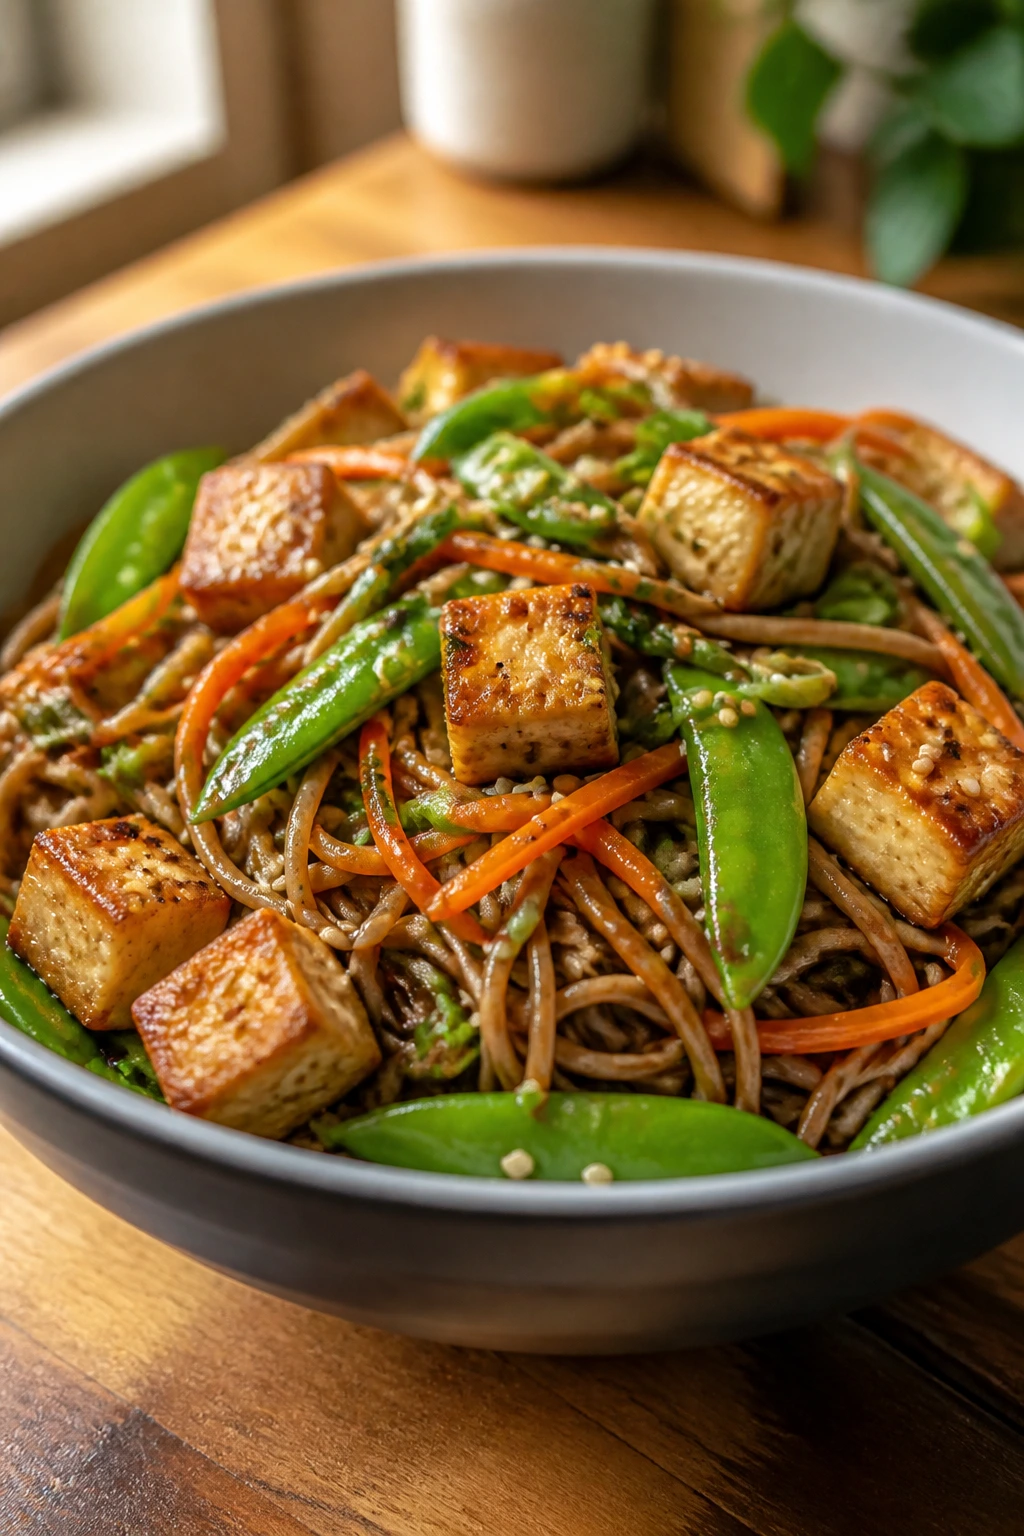
A soba bowl can go from bland to memorable the moment you give it a sauce with enough salt, acid, and sesame to stick. The tofu gets a crisp edge, the noodles stay chewy, and the snap peas keep the bowl from collapsing into one texture. At about 420 calories per serving, this is a nice way to get a noodle dinner that doesn’t sit like a brick.
Why It Works: Soba noodles are lighter than most pasta, and tofu brings steady protein without pushing the dish over the limit. The sauce is small but punchy: soy sauce, vinegar, sesame oil, and tahini create a coating that tastes richer than the ingredients suggest. A few crunchy vegetables keep every bite from feeling soft.
Key Ingredients:
- 8 oz soba noodles — cook them just until tender.
- 14 oz extra-firm tofu, pressed and cubed — pressing matters here.
- 1 tbsp neutral oil — for the tofu.
- 2 cups snap peas — quick cooking and crisp.
- 1 carrot, julienned — sweet crunch.
- 2 scallions, sliced — the top garnish.
- 2 tbsp low-sodium soy sauce — the salty base.
- 1 tbsp rice vinegar — for balance.
- 1 tbsp tahini or natural peanut butter — gives the sauce body.
- 1 tsp sesame oil — strong flavor, so measure it.
- 1 tsp grated ginger — bright and sharp.
- 1 garlic clove, grated — enough to notice.
- 1 tbsp sesame seeds — a little crunch at the end.
Quick Steps:
- Press and cube the tofu: Wrap it in towels and press for 10 to 15 minutes, then cut into cubes.
- Cook the noodles: Boil the soba according to the package, then drain and rinse under cool water so they stay springy.
- Crisp the tofu: Heat the oil in a skillet over medium-high heat and cook the tofu for 8 to 10 minutes, turning until the sides are golden.
- Make the sauce and toss: Whisk the soy sauce, vinegar, tahini, sesame oil, ginger, and garlic. Toss the noodles, tofu, snap peas, carrot, and scallions with the sauce.
- Finish with sesame seeds: Sprinkle them over the bowl and serve at once. Do not let the noodles sit in the sauce too long or they go soft.
Equipment for This Recipe:
- Medium saucepan — for the noodles.
- Large skillet — for the tofu.
- Mixing bowl — for the sauce.
- Fine-mesh strainer, optional — helpful for rinsing soba.
How to Serve This Dish: Serve the noodles in wide bowls so the vegetables and tofu stay visible. A few cucumber ribbons on top make it feel fresher if you want to push the bowl toward lunch instead of dinner.
Pro Tips for This Recipe:
- Pressing tofu longer gives you better browning.
- Rinsing soba after cooking keeps them from clumping.
- Add a splash of hot water if the sauce looks too thick before tossing.
Variations on This Dish:
- Peanut-Sesame Version: Use peanut butter instead of tahini for a richer sauce.
- Edamame Boost: Add 1/2 cup shelled edamame per serving for extra protein.
- Rice Noodle Swap: Use rice noodles if you need a gluten-free bowl.
Common Mistakes to Avoid with This Dish:
- Skipping the tofu press: The cubes steam instead of crisp. Dry them first.
- Letting soba overcook: They go mushy fast. Taste early.
15. Baked Chicken Parmesan Zucchini Boats
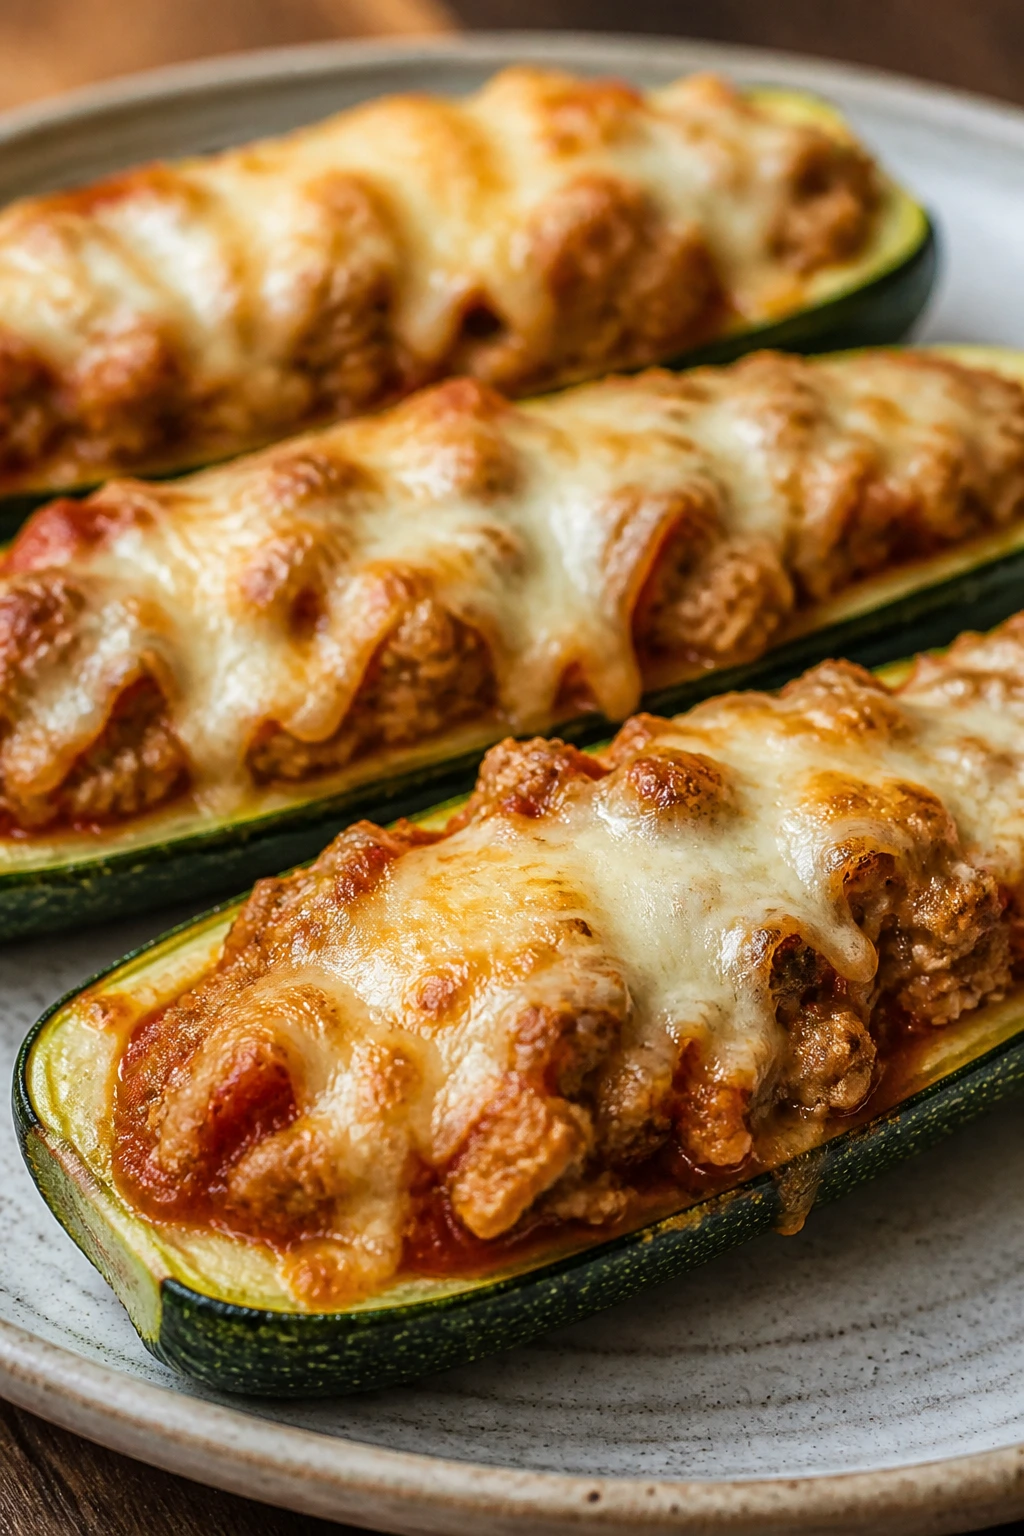
Chicken Parmesan gets a lot lighter when you move the pasta out of the way and let zucchini do the carrying. The boats hold marinara, seasoned chicken, and a measured layer of mozzarella, so you still get that familiar red-sauce dinner feeling without the pasta pile. This one sits around 380 calories per serving.
Why It Works: Zucchini gives you structure and volume while the ground chicken keeps the protein high enough to make the dish filling. Baking everything together lets the zucchini soften just enough without collapsing into mush. The cheese is measured, which matters, because Parmesan dishes can quietly drift upward if you’re careless.
Key Ingredients:
- 4 medium zucchini, halved lengthwise and scooped — leave a thin border so they hold together.
- 1 lb ground chicken — lean and quick.
- 1 cup marinara sauce — use a sauce you actually like.
- 1/2 cup part-skim shredded mozzarella — enough to melt over the top.
- 2 tbsp grated parmesan — for sharpness.
- 1 tsp Italian seasoning — all the herb notes in one place.
- 1 garlic clove, minced — goes into the filling.
- 1 tbsp olive oil — helps the chicken brown.
- 1/4 tsp kosher salt and 1/4 tsp black pepper — to season the filling.
- Basil for garnish — optional but useful.
Quick Steps:
- Prep the zucchini: Heat the oven to 400°F (205°C). Scoop out a shallow groove in each zucchini half and place them cut-side up on a baking sheet.
- Cook the chicken filling: Heat the olive oil in a skillet over medium heat. Add the ground chicken, salt, pepper, Italian seasoning, and garlic, then cook for 6 to 7 minutes until no pink remains.
- Add the marinara: Stir in the marinara and cook for 1 minute so the filling looks glossy and cohesive.
- Fill and bake: Spoon the chicken mixture into the zucchini boats, top with mozzarella and parmesan, and bake for 15 to 18 minutes until the zucchini is tender and the cheese is melted. Don’t bake so long that the zucchini collapses.
- Garnish and serve: Add basil and serve hot.
Equipment for This Recipe:
- Baking sheet — for the zucchini boats.
- Skillet — for the filling.
- Spoon — for scooping the zucchini.
- Grater — for the parmesan.
How to Serve This Dish: Serve two zucchini boats per person with a green salad or roasted broccoli. If you want something more substantial, a slice of crusty bread is enough; the boats already carry the meal.
Pro Tips for This Recipe:
- Salt the zucchini lightly if they seem especially watery, then blot them before filling.
- Don’t overfill the boats; the filling should sit inside, not spill everywhere.
- A little extra parmesan at the end gives you more flavor than doubling the mozzarella.
Variations on This Dish:
- Turkey-Parmesan Boats: Swap in ground turkey if that’s what you have.
- Spicy Arrabbiata Boats: Use arrabbiata sauce instead of plain marinara.
- Eggplant Version: Hollow thick eggplant halves and roast them a little longer.
Common Mistakes to Avoid with This Dish:
- Scooping too much zucchini out: The boat collapses. Leave a sturdy border.
- Using watery sauce: The filling turns loose. Simmer it briefly before stuffing.
16. Salmon Niçoise Salad
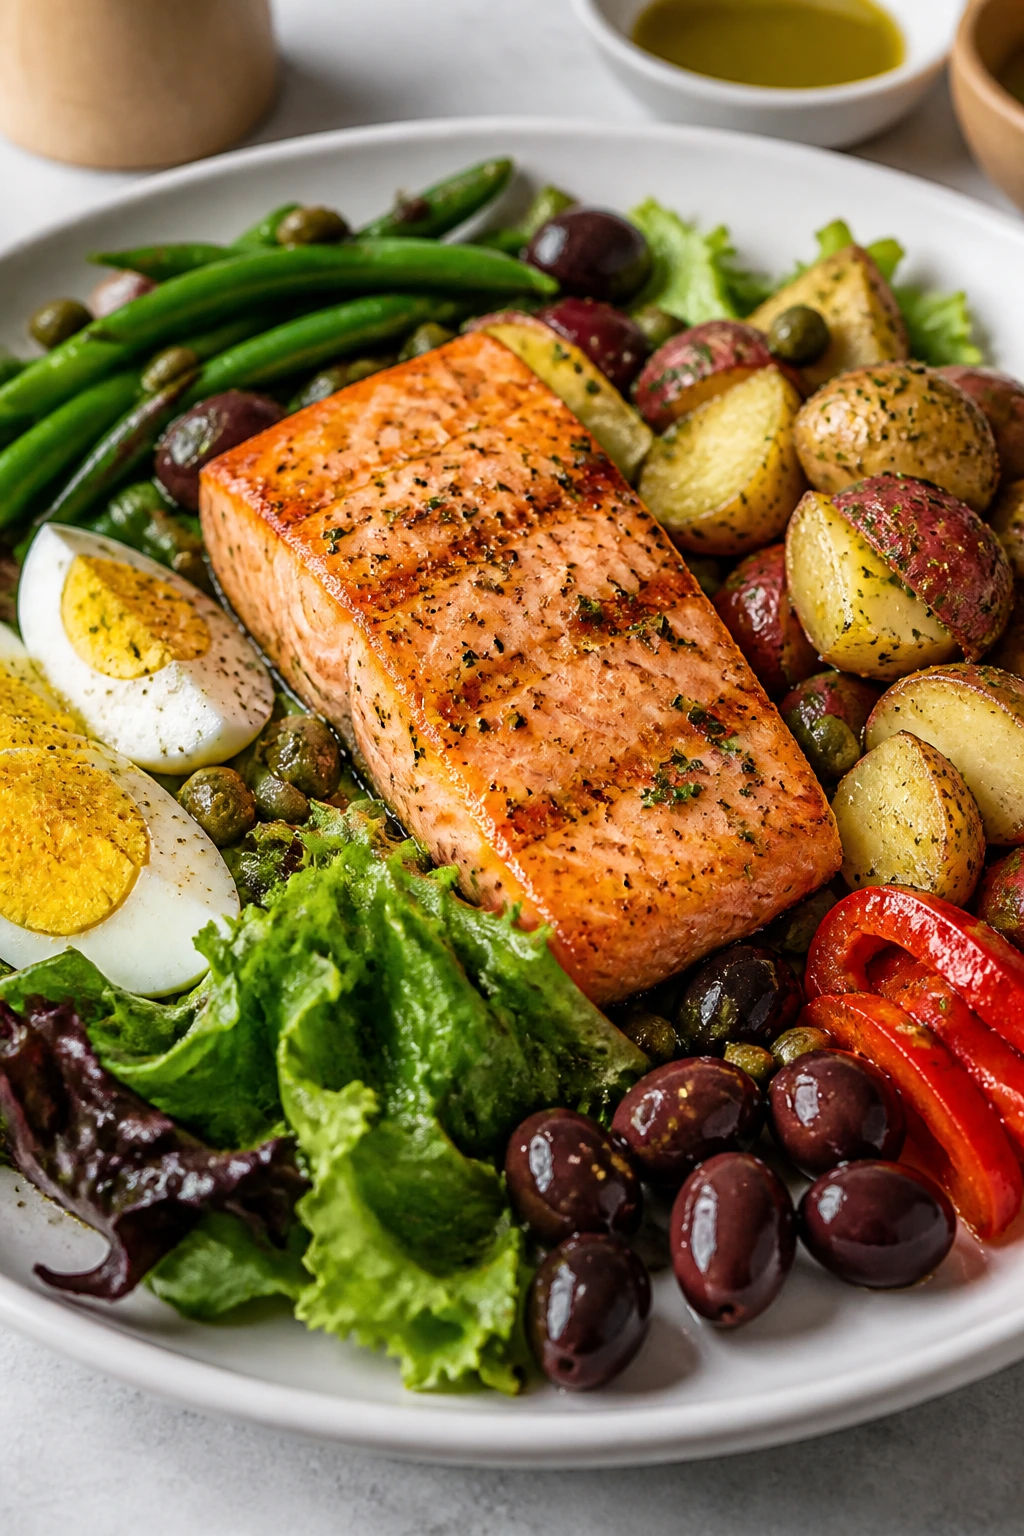
A Niçoise salad can look formal, but that’s a little misleading. It’s really just good ingredients arranged with enough thought that every bite has something different in it: potatoes, eggs, beans, salmon, greens, tomatoes, olives. This version hits around 460 calories per serving and feels like a meal, not a salad pretending to be one.
Why It Works: Salmon, eggs, and potatoes give you protein and substance without needing a giant portion of anything. The vinaigrette is bright and sharp, which keeps the whole plate from tasting like a pile of separate items. It’s also a smart weekend lunch because the components can be cooked ahead and assembled at the last minute.
Key Ingredients:
- 1 lb salmon fillets — cut into four portions.
- 1 lb baby potatoes, halved — they hold their shape well.
- 4 large eggs — for the classic Niçoise feel.
- 1 lb green beans, trimmed — crisp-tender is the goal.
- 4 cups mixed greens — the base.
- 1 cup cherry tomatoes, halved — a little sweetness.
- 1/4 cup Niçoise or Kalamata olives — salty and briny.
- 2 tbsp olive oil — for the vinaigrette.
- 1 tbsp Dijon mustard — helps the dressing emulsify.
- 1 tbsp red wine vinegar — sharp and clean.
- 1 tsp lemon juice — for extra lift.
- Salt and pepper — to taste.
- 1 tsp capers, optional — if you want more bite.
Quick Steps:
- Cook the potatoes: Simmer the potatoes in salted water for 12 to 15 minutes until just tender, then drain and cool slightly.
- Boil the eggs and beans: In a separate pot, cook the eggs for 9 to 10 minutes for hard-boiled centers. Blanch the green beans for 2 to 3 minutes, then rinse under cool water.
- Cook the salmon: Season the salmon with salt and pepper, then sear it in a skillet for 3 to 4 minutes per side or roast it at 400°F for 10 to 12 minutes.
- Make the vinaigrette: Whisk the olive oil, Dijon, vinegar, lemon juice, salt, and pepper until smooth.
- Assemble the salad: Arrange the greens, potatoes, beans, eggs, tomatoes, olives, and salmon on plates. Drizzle with vinaigrette and serve.
Equipment for This Recipe:
- Saucepan — for potatoes and eggs.
- Skillet or oven-safe pan — for salmon.
- Whisk — for the dressing.
- Slotted spoon — useful for the eggs and beans.
How to Serve This Dish: Plate the salad in a wide arrangement so the components stay separate and visible. A slice of baguette is optional, but the salad doesn’t need it.
Pro Tips for This Recipe:
- Chill the beans quickly so they stay bright green.
- Don’t overcook the salmon; it should flake, not dry out.
- Make the vinaigrette in a jar and shake it if you want less cleanup.
Variations on This Dish:
- Tuna Niçoise: Swap the salmon for good canned tuna if you want a colder lunch version.
- Potato-Lite Version: Use half the potatoes and add more greens.
- Olive-Free Salad: Skip the olives and add cucumber if you want a milder bowl.
Common Mistakes to Avoid with This Dish:
- Turning the salad into soup with too much dressing: Drizzle lightly and serve extra on the side.
- Overboiling the eggs: A dry yolk makes the plate feel flat. Set a timer.
17. Black Bean and Sweet Potato Enchilada Skillet
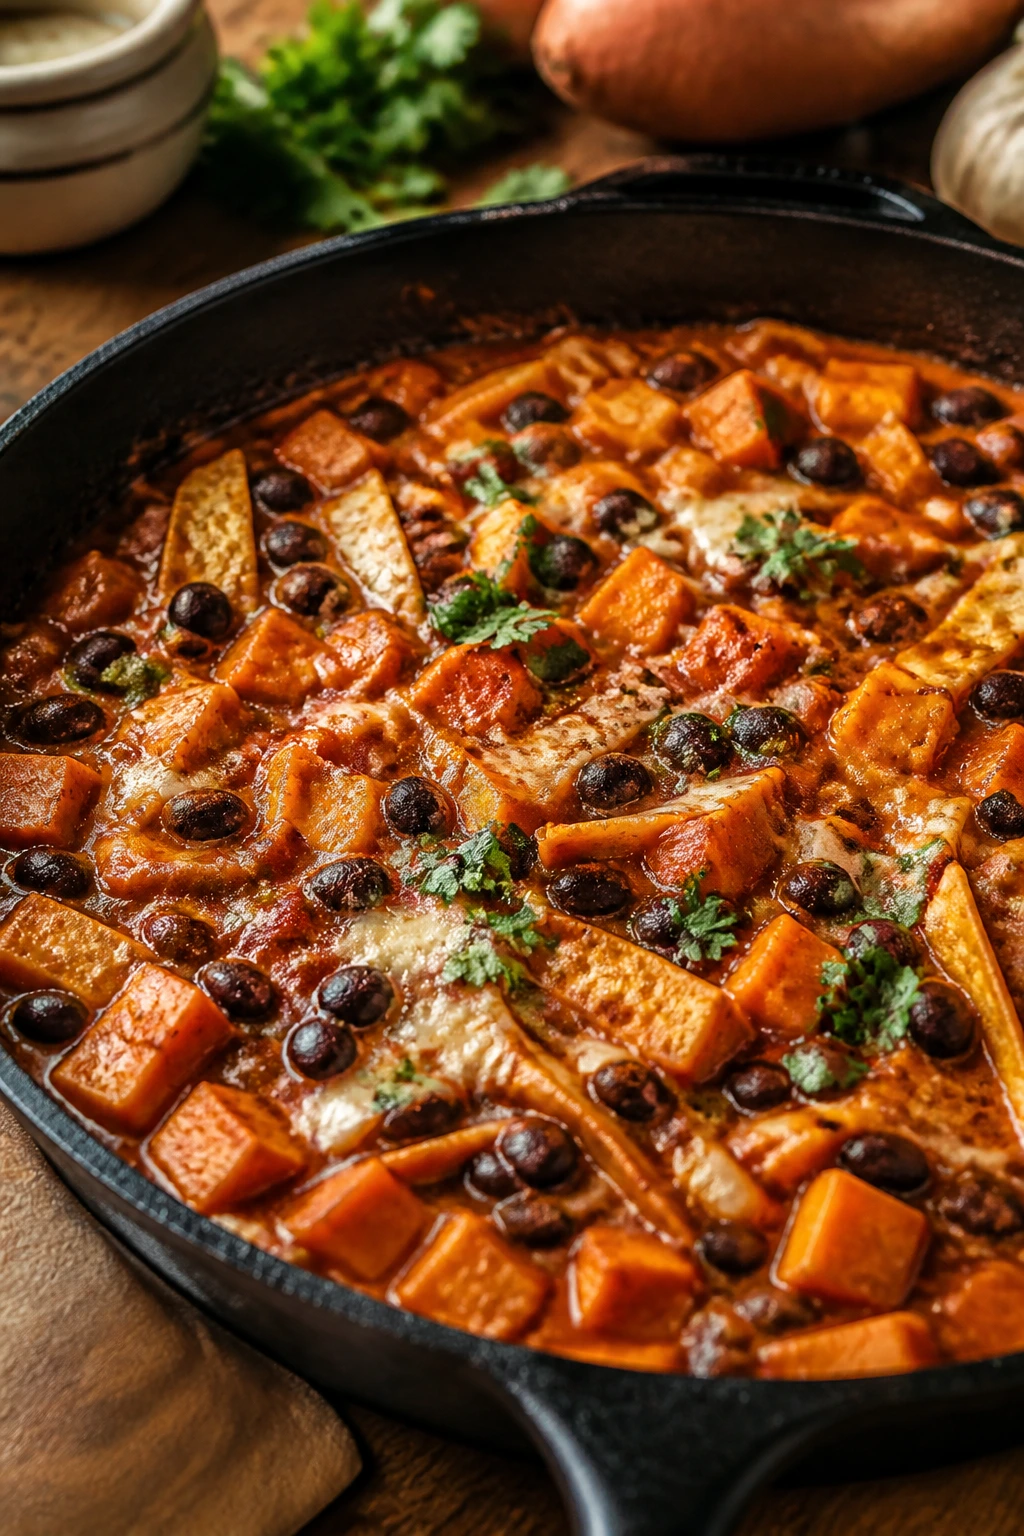
This skillet tastes like enchiladas without asking you to roll a single tortilla. Sweet potatoes soften into the sauce, black beans bring body, and the tortilla strips absorb some of the red sauce while still staying a little chewy around the edges. It lands around 430 calories per serving and makes a strong case for one-pan dinners.
Why It Works: Sweet potatoes and black beans create a filling base that doesn’t need much cheese to feel substantial. The enchilada sauce ties everything together, and a handful of tortilla strips gives you enough texture to keep the skillet from tasting like a stew. A little cheese goes a long way once the top is hot and bubbling.
Key Ingredients:
- 1 tbsp olive oil — for the skillet start.
- 2 medium sweet potatoes, peeled and diced small — small cubes cook fastest.
- 1 small yellow onion, diced — the flavor base.
- 2 garlic cloves, minced — build it in the skillet.
- 2 (15 oz) cans black beans, rinsed and drained — hearty and inexpensive.
- 1 cup red enchilada sauce — the main flavor.
- 6 small corn tortillas, cut into strips — the “enchilada” part.
- 3/4 cup shredded cheddar or Monterey Jack — measured, not dumped.
- 1 tsp ground cumin — gives the skillet warmth.
- 1/2 tsp kosher salt and 1/4 tsp black pepper — season it.
- Cilantro and sliced scallions — for the top.
Quick Steps:
- Cook the sweet potatoes first: Heat the olive oil in a large skillet over medium heat. Add the sweet potatoes, onion, salt, and pepper, then cook for 10 to 12 minutes, stirring now and then, until the potatoes are just tender.
- Add garlic and cumin: Stir in the garlic and cumin for 30 seconds until fragrant.
- Build the skillet: Add the beans and enchilada sauce, then stir in the tortilla strips. Let everything simmer for 3 to 4 minutes so the strips soften a little.
- Add the cheese: Scatter the cheese over the top, cover the pan for 2 minutes, and let it melt. Keep the heat low enough that the bottom doesn’t scorch.
- Finish and serve: Top with cilantro and scallions, then scoop into bowls.
Equipment for This Recipe:
- Large skillet with lid — the lid helps melt the cheese.
- Sharp knife — for the sweet potatoes.
- Wooden spoon — for stirring.
- Cutting board — obvious, but necessary.
How to Serve This Dish: Serve it straight from the skillet with a spoon and a little extra cilantro on top. A small dollop of Greek yogurt works if you want something cool against the sauce.
Pro Tips for This Recipe:
- Dice the sweet potatoes small or they’ll still be firm when the rest is done.
- Use a sauce with enough salt; bland enchilada sauce gives you a flat skillet.
- Let the skillet sit for 2 minutes before serving so it thickens.
Variations on This Dish:
- Chicken Enchilada Skillet: Add shredded rotisserie chicken if you have leftovers to use.
- Green Enchilada Version: Swap in salsa verde and pepper jack.
- Vegetable-Packed Skillet: Stir in chopped zucchini or bell pepper with the sweet potatoes.
Common Mistakes to Avoid with This Dish:
- Using too many tortilla strips: The skillet turns gummy. Keep the amount measured.
- Undercooking the sweet potatoes: They should be tender before you add the sauce or they stay stubborn.
18. Steak and Mushroom Stir-Fry with Brown Rice

A stir-fry needs heat, speed, and restraint. If you give the steak enough room to sear and keep the mushrooms from crowding the pan, the result is glossy and savory without feeling heavy. This version comes in around 490 calories per serving, which is about as high as this list gets while still staying inside the limit.
Why It Works: Flank steak has enough flavor to feel worth the calories, and the vegetables do the rest of the volume work. Brown rice brings chew and steadiness, but in a measured portion, not a giant mound. The sauce is built around soy, vinegar, ginger, and hoisin, so you get that takeout-style punch without the oil slick.
Key Ingredients:
- 1 cup dry brown rice, rinsed — the base.
- 2 cups water — for the rice.
- 1 lb flank steak, thinly sliced against the grain — this cut loves quick heat.
- 1 tbsp cornstarch — helps the steak sear and the sauce cling.
- 2 tbsp low-sodium soy sauce — for seasoning the steak.
- 1 tbsp sesame oil or neutral oil, divided — use only what you need.
- 8 oz mushrooms, sliced — they soak up the sauce.
- 2 cups broccoli florets — sturdy enough for stir-fry heat.
- 1 red bell pepper, sliced — a little sweetness and crunch.
- 2 garlic cloves, minced — the stir-fry smell you want.
- 1 tbsp grated ginger — sharp and clean.
- 1 tbsp rice vinegar — for brightness.
- 1 tbsp hoisin sauce or low-sugar stir-fry sauce — enough for shine.
- 2 scallions, sliced — for the finish.
Quick Steps:
- Cook the rice: Simmer the rice with water until tender, about 35 minutes, then fluff and keep warm.
- Season the steak: Toss the sliced steak with soy sauce and cornstarch until lightly coated.
- Sear the steak: Heat half the oil in a very hot skillet or wok. Cook the steak in one layer for 1 to 2 minutes per side, then move it to a plate. Do not crowd the pan or the meat steams instead of sears.
- Stir-fry the vegetables: Add the remaining oil, mushrooms, broccoli, and pepper. Cook for 4 to 5 minutes until the mushrooms brown and the broccoli turns bright green.
- Finish with sauce: Add the garlic, ginger, vinegar, and hoisin, then return the steak to the pan and toss for 1 minute. Serve over rice with scallions.
Equipment for This Recipe:
- Wok or large skillet — space matters here.
- Saucepan — for the rice.
- Sharp knife — for slicing the steak thinly.
- Mixing bowl — for the cornstarch coating.
How to Serve This Dish: Spoon the rice into bowls and top with the stir-fry so the sauce runs into the grains a little. A few sesame seeds or chili flakes work if you want more texture or heat.
Pro Tips for This Recipe:
- Slice the steak while it’s still slightly firm; it’s easier to cut thinly.
- Get the pan hot before the meat goes in.
- If the sauce looks too thick, add 1 or 2 tablespoons of water.
Variations on This Dish:
- Ginger-Garlic Beef and Broccoli: Increase the broccoli and reduce the mushrooms if you want a cleaner version.
- Mushroom-Heavy Stir-Fry: Double the mushrooms and cut the steak a bit smaller.
- Rice-Noodle Swap: Use rice noodles if you want a softer base.
Common Mistakes to Avoid with This Dish:
- Slicing the steak with the grain: It turns chewy. Cut across the grain.
- Stirring too much: The meat won’t brown. Let it sit.
19. Ricotta and Berry Oat Pancakes
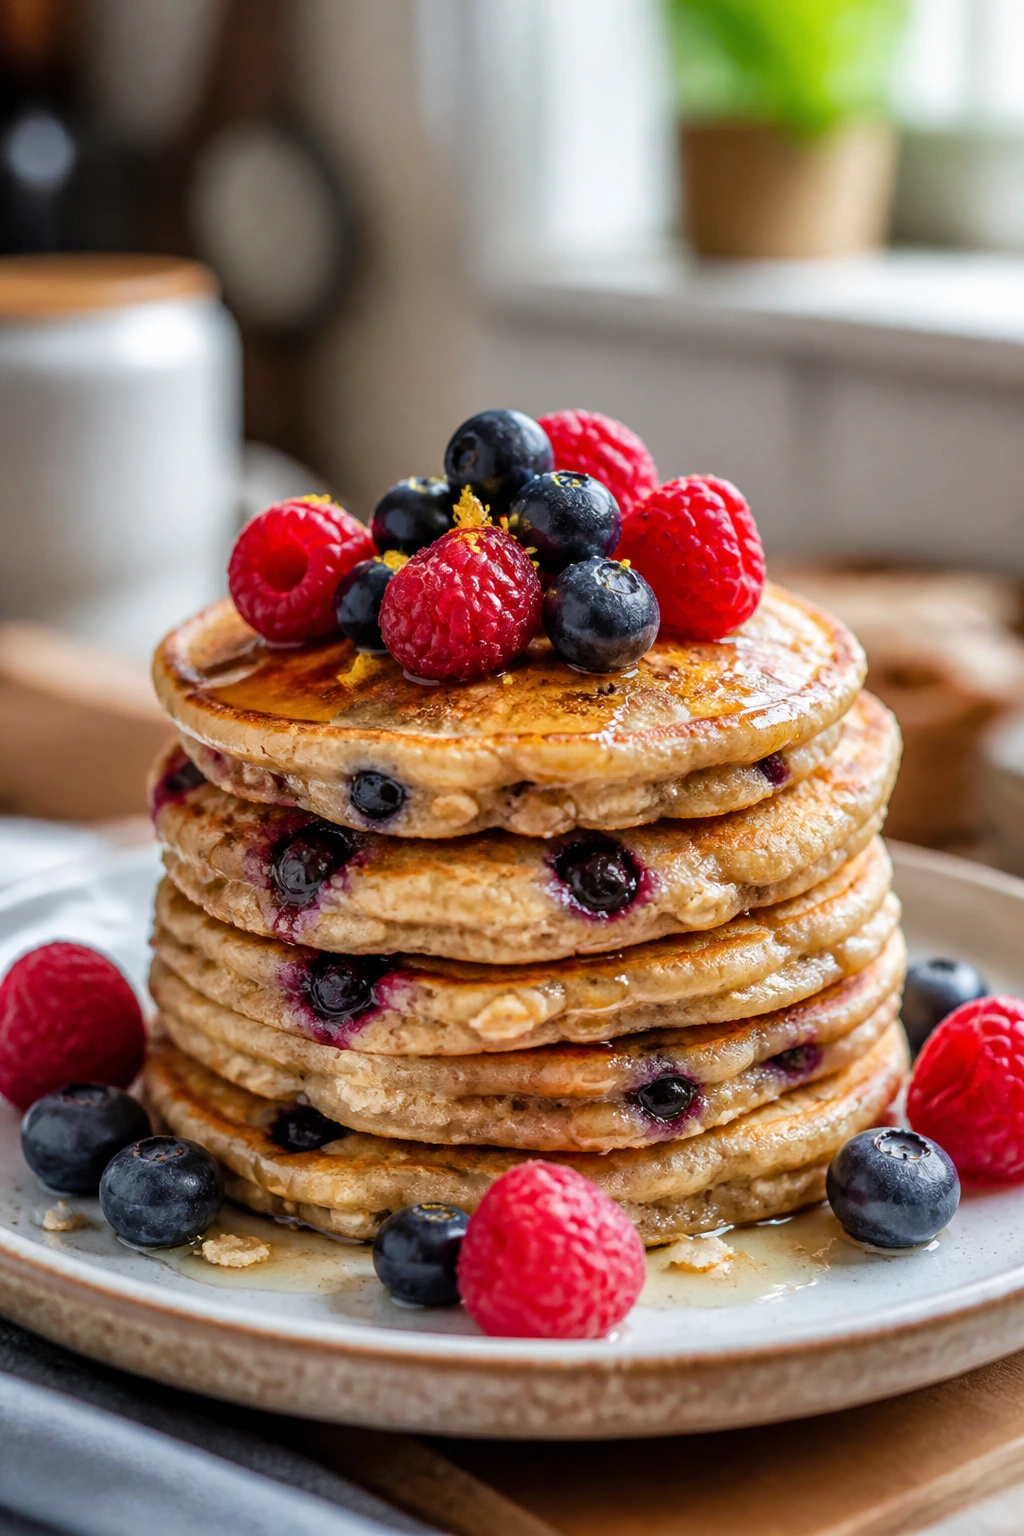
These pancakes lean more brunch than dessert, which is the right move if you want a weekend breakfast that feels special without feeling huge. The oats give them a little heft, the ricotta keeps them tender, and the berries add enough acidity that you don’t need much syrup. They come in around 410 calories per serving, depending on how generous you get with the drizzle.
Why It Works: Ricotta adds creaminess and protein to the batter, which keeps the pancakes moist without needing a ton of butter. Ground oats or blended oats give the pancakes a soft, almost nutty texture that works especially well with fruit. This is one of those recipes where the first pancake tells you what the pan wants, and the rest go easier.
Key Ingredients:
- 1 cup rolled oats — blend into a coarse flour.
- 1 cup part-skim ricotta — keeps the pancakes tender.
- 2 large eggs — bind the batter.
- 1/2 cup unsweetened milk — loosens the batter.
- 1/2 tsp baking powder — a little lift.
- 1 tsp vanilla extract — rounder flavor.
- Pinch of kosher salt — always helps sweet batter.
- 1 cup mixed berries — fresh or thawed frozen.
- 1 tsp butter or oil for the skillet — use only enough to coat the pan.
- 1 tbsp maple syrup, optional — measured, not poured.
- 2 tbsp plain Greek yogurt, optional — for serving.
Quick Steps:
- Blend the batter: Add the oats to a blender and pulse into a coarse flour. Add the ricotta, eggs, milk, baking powder, vanilla, and salt, then blend until just combined.
- Heat the skillet: Set a nonstick skillet or griddle over medium heat and lightly coat it with butter or oil.
- Cook the pancakes: Spoon the batter into 3-inch rounds and top each one with a few berries. Cook for 2 to 3 minutes until bubbles form on the surface, then flip and cook for 1 to 2 minutes more. Keep the heat moderate so the centers cook before the outside browns too much.
- Repeat: Cook the rest of the batter in batches, adding only a little more fat to the pan if needed.
- Serve warm: Top with the remaining berries, a spoon of yogurt if you want it, and a small drizzle of maple syrup.
Equipment for This Recipe:
- Blender — for the oat batter.
- Nonstick skillet or griddle — makes flipping easier.
- Spatula — a thin one works best.
- Measuring cups — for the wet ingredients.
How to Serve This Dish: Stack the pancakes on a warm plate and scatter berries over the top so the stack looks deliberate instead of messy. If you want more protein without many calories, a spoon of Greek yogurt works better than extra syrup.
Pro Tips for This Recipe:
- Let the batter sit 5 minutes after blending so the oats hydrate.
- Don’t make the pancakes too large; small ones flip more cleanly.
- Frozen berries can bleed into the batter, which is fine, but use them still frozen.
Variations on This Dish:
- Blueberry-Lemon Pancakes: Add lemon zest and use only blueberries.
- Whole-Wheat Version: Replace half the oats with whole-wheat flour.
- Protein-Boosted Stack: Add an extra 1/4 cup ricotta and skip the syrup.
Common Mistakes to Avoid with This Dish:
- Cooking on high heat: The outside browns before the middle sets. Medium heat is better.
- Overblending the batter: It gets gluey. Blend only until smooth.
20. Harissa Roast Cauliflower and Chickpea Couscous Bowl
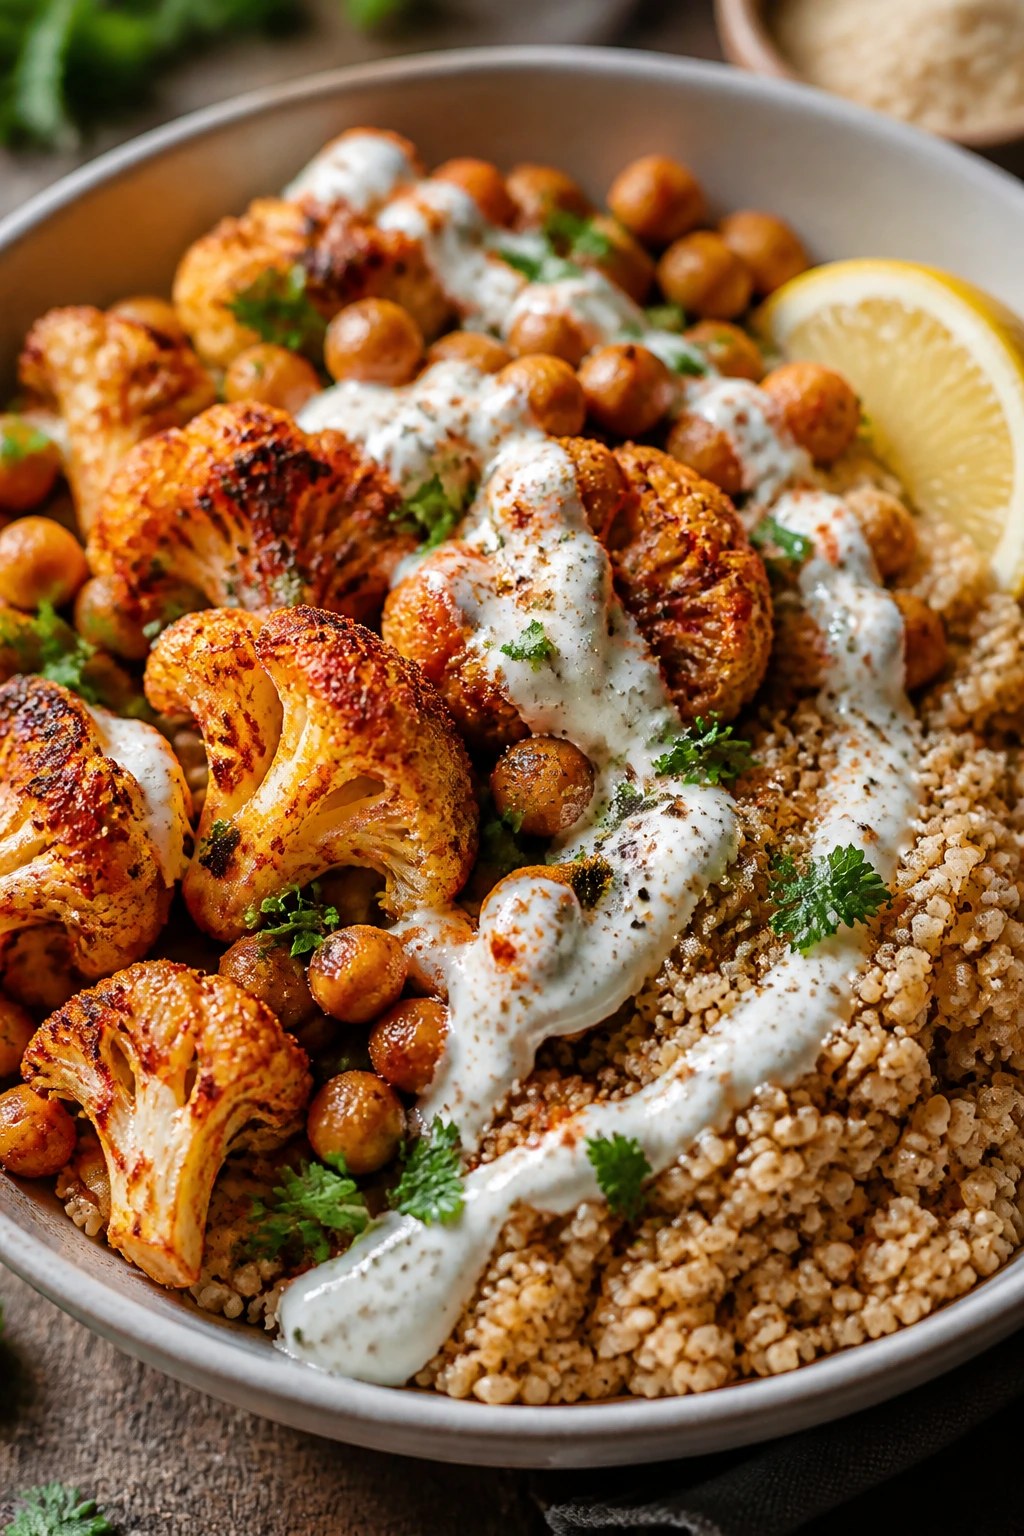
Harissa has a way of making vegetables taste louder. The cauliflower roasts into crisp-edged florets, the chickpeas dry out a little on purpose, and the couscous catches enough of the spice and lemon yogurt to feel like a full meal. At around 440 calories per serving, this is the bowl that closes out the list with warmth instead of heaviness.
Why It Works: Cauliflower and chickpeas give you bulk without a lot of calories, and harissa adds heat plus color in a very small amount. Couscous cooks quickly, which makes the bowl feel weekend-friendly without dragging you into a long stove session. The yogurt sauce cools the spice and gives the dish a creamy finish that still stays light.
Key Ingredients:
- 1 medium head cauliflower, cut into florets — keep the pieces bite-sized.
- 1 (15 oz) can chickpeas, rinsed and drained — dry them well first.
- 1 1/2 tbsp olive oil — enough to coat the roast.
- 1 1/2 tbsp harissa paste — the main flavor.
- 1/2 tsp kosher salt and 1/4 tsp black pepper — season the roast.
- 1 cup dry whole-wheat couscous — the base.
- 1 1/4 cups boiling water or low-sodium broth — for the couscous.
- 1/2 cup plain Greek yogurt — for the sauce.
- 1 tbsp lemon juice — sharpens the sauce.
- 1 small garlic clove, grated — keeps the yogurt interesting.
- 1 cup cucumber, diced — cool contrast.
- 1 cup cherry tomatoes, halved — freshness and color.
- 2 tbsp chopped mint or parsley — the top note.
Quick Steps:
- Roast the cauliflower and chickpeas: Heat the oven to 425°F (220°C). Toss the cauliflower and chickpeas with olive oil, harissa, salt, and pepper, then spread them on a sheet pan and roast for 20 to 25 minutes, stirring once, until the cauliflower edges brown.
- Make the couscous: Put the couscous in a bowl, pour over the boiling water or broth, cover, and let it stand for 5 minutes. Fluff with a fork.
- Stir together the sauce: Mix the yogurt, lemon juice, and garlic in a small bowl.
- Build the bowls: Divide the couscous between bowls and top with the roasted cauliflower and chickpeas.
- Finish cold and hot: Add cucumber, tomatoes, herbs, and a spoon of yogurt sauce. Do not skip the acid at the end or the harissa reads as one-note heat.
Equipment for This Recipe:
- Rimmed sheet pan — for the roast.
- Mixing bowl — for the couscous and yogurt sauce.
- Fork — to fluff the couscous.
- Small bowl — for the sauce.
How to Serve This Dish: Serve it in deep bowls with the yogurt sauce swirled over the top rather than dumped in one place. A few extra herbs on the surface make it look and taste fresher.
Pro Tips for This Recipe:
- Dry the chickpeas well before roasting or they steam.
- Stir the sheet pan once halfway through so the cauliflower browns evenly.
- If your harissa is very hot, mix in a little extra yogurt at the end.
Variations on This Dish:
- Tahini Drizzle Bowl: Swap half the yogurt sauce for a thin tahini-lemon drizzle.
- Quinoa Swap: Use quinoa instead of couscous if you want more chew.
- Mild Paprika Version: Replace some harissa with smoked paprika for less heat.
Common Mistakes to Avoid with This Dish:
- Roasting wet chickpeas: They stay soft. Pat them dry first.
- Underseasoning the couscous: Plain couscous can taste empty. Use broth or salt it well.
Why These Weekend Plates Stay Satisfying
The pattern in these meals is doing more work than the individual recipes might suggest. Protein gets browned, not buried. Vegetables get used for volume, not apology. Fat shows up in measured amounts, which sounds dull until you taste how much flavor a teaspoon of sesame oil, a spoon of pesto, or a little feta can carry when the rest of the plate is built properly.
Protein Does the Steady Work
A weekend meal under 500 calories can still be filling if it starts with the right protein portion. Chicken breast, salmon, cod, shrimp, turkey, tofu, eggs, tuna, pork tenderloin — none of them need huge amounts to do their job. The move is to cook them in a way that keeps moisture in the meat and color on the outside. Browning matters. So does resting.
Vegetables Make the Plate Feel Bigger
This is where a lot of low-calorie food goes wrong. People chop the vegetables too small, cook them until they go limp, and then wonder why the food feels sad. The recipes here use vegetables that keep their shape: Brussels sprouts, asparagus, peppers, cauliflower, zucchini, spinach, green beans, and tomatoes that still burst a little instead of dissolving into nothing.
Measured Fat and Starch Keep the Math Honest
Oil, cheese, rice, couscous, potatoes, pita, and noodles are all present here, but they’re used carefully. A tablespoon of olive oil is enough to roast a tray of vegetables if the oven is hot. Half a cup of rice can anchor curry or fish without swallowing the whole meal. That’s the difference between a plate that feels finished and one that quietly crosses the line while you’re not looking.
Essential Equipment for These Recipes
-
Rimmed sheet pans — useful for salmon, pork, sweet potatoes, roasted vegetables, and anything that needs enough surface area to brown instead of steam.
-
10- or 12-inch oven-safe skillet — perfect for baked eggs, enchilada skillets, and any dish that starts on the stove and finishes in the oven.
-
Large nonstick skillet — the easiest choice for zucchini noodles, shrimp, eggs, and pancakes when sticking would ruin the texture.
-
Dutch oven or heavy pot — chili and curry both need a pot that holds heat steadily and gives the ingredients room to simmer.
-
Instant-read thermometer — the simplest way to keep salmon moist, turkey safe, pork tender, and steak from overshooting.
-
Sharp chef’s knife — worth its weight when you’re slicing chicken thin, trimming Brussels sprouts, or cutting peppers and potatoes evenly.
-
Cutting board with a towel underneath — a small thing, but it keeps the board from skating around while you chop.
-
Measuring cups and spoons — not glamorous, but they keep the oil, cheese, and grains from creeping upward.
-
Mixing bowls — at least two sizes, because marinades, sauces, and dressings need their own space.
-
Fine grater or microplane — especially useful for garlic, ginger, lemon zest, and quick sauces.
-
Meal prep containers with tight lids — the leftovers in this collection are worth saving, and they reheat better when they’re stored cleanly.
Smart Shopping and Ingredient Tips
Buy protein with the final portion in mind, not the package weight. A 5-ounce salmon fillet, a modest chicken breast, or a 93% lean turkey pack tends to behave better in these recipes than oversized cuts that need trimming and guessing. For fish, look for fillets that are similar in thickness so they finish together; for chicken, even thickness matters more than the exact shape.
Beans, sauces, and dairy can quietly swing calories and texture in either direction. Low-sodium canned beans are worth rinsing, because the liquid adds salt without much else. Greek yogurt works in dressings, sauces, and marinades because it brings body without the heaviness of cream. Pesto, harissa, tahini, and miso are all powerful enough that one measured spoon can carry an entire dish, so don’t eyeball them like they’re parsley.
Vegetables need the right kind of firmness. Choose zucchini that are medium-sized rather than giant and seedy. Pick Brussels sprouts that feel tight, not loose. With bell peppers, go for ones that feel heavy for their size. Frozen vegetables are fine in several recipes — cauliflower rice, spinach, broccoli, peas — but dry them well if you want browning instead of steam.
Whole grains can still fit, but portion control matters. Dry rice, couscous, soba, and pita all shrink or expand in ways that make them easy to over-serve. Measure them once, then trust the number. A half-cup cooked grain portion can look small on a plate until you put it next to salmon, beans, and four cups of vegetables.
How to Serve These Recipes
Presentation: Use shallow bowls, wide dinner plates, or rimmed platters so the food has room to spread out. A scattered finish — herbs, scallions, lemon wedges, sesame seeds, or a few olives — makes the meals look brighter and keeps the surface from reading as one big beige block.
Accompaniments: A simple cucumber salad, a small slice of toast, warm pita, roasted fruit, or a bowl of greens pairs easily with most of these dishes. If you want to keep calories lower, add more vegetables before you add another starch. That’s the trade I’d make every time.
Portions: Most of these recipes are built for 2 to 4 servings. If you’re serving a bigger weekend dinner, scale up the vegetables and protein first, then add more rice, bread, or cheese only if you still need them. That approach keeps the meal generous without wrecking the calorie target.
Beverage Pairing: Sparkling water with lemon, unsweetened iced tea, or a dry white wine with the fish and chicken dishes all work cleanly. For brunch items like the baked eggs or pancakes, coffee with a splash of milk is enough; these plates don’t need a sugary drink to feel complete.
Additional Tips and Flavor Boosters

Flavor Enhancement: Acid is the easiest upgrade in this whole collection. A squeeze of lemon, a splash of vinegar, or a spoon of yogurt sauce sharpens the whole plate and makes moderate portions taste more alive. If a dish tastes “fine” but not memorable, it usually needs acid before it needs more salt.
Customization: If you want more heat, add chili flakes, harissa, chipotle, or hot sauce in small measured amounts. If you want more richness, add avocado slices, feta, tahini, or a second teaspoon of olive oil rather than a full extra scoop. Small additions change the feel of a plate much more than people expect.
Serving Suggestions: Fresh herbs are not decoration here; they change the taste of the last bite. Parsley, dill, cilantro, mint, basil, and scallions all pull these meals upward at the end. A sprinkle of sesame seeds or chopped nuts can also add crunch where the texture feels too soft.
Make-It-Yours: For dairy-free versions, use yogurt alternatives, skip the cheese, and lean on herbs and citrus instead. For gluten-free swaps, choose rice, corn tortillas, cauliflower rice, or potatoes. For higher-protein plates, add an extra egg white, a little more chicken, or a scoop of Greek yogurt sauce without increasing the carb load much.
Make-Ahead, Storage, and Reheating Guidance
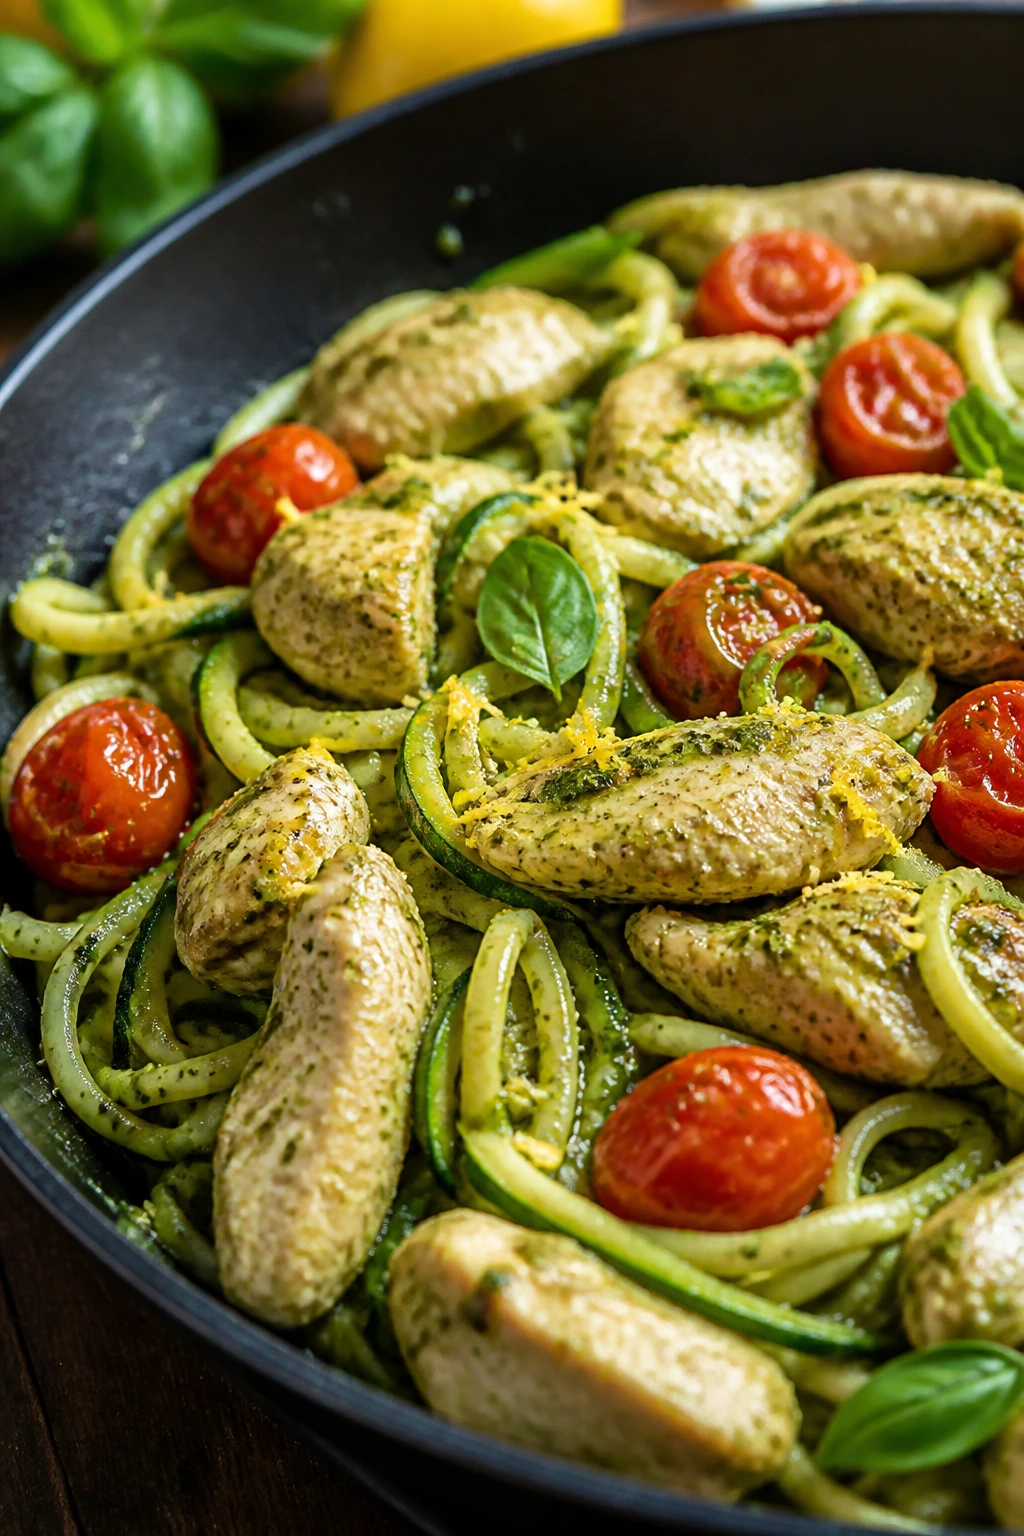
Most of these meals keep well for 3 to 4 days in the refrigerator, but a few need a shorter leash. Cooked fish is best within 2 days, and egg dishes are nicest within 2 days as well. Chili, curry, enchilada skillet, and stuffed peppers usually benefit from a night in the fridge because the seasoning settles and the sauce thickens.
Store components separately when you can. Keep greens apart from warm toppings, keep sauces in small containers, and keep rice or couscous in their own box so they don’t turn gummy. If you’re packing something like the salmon Niçoise salad or the Greek chicken pita, build only the dry components ahead of time and add the dressing or tzatziki at the last minute.
For reheating, use the method that protects the texture. Chili and curry reheat well on the stove over low heat with a splash of broth or water. Sheet-pan vegetables and pork do better in a 375°F oven for 8 to 12 minutes than they do in the microwave. Rice bowls can be microwaved with a damp paper towel over the top, and a spoonful of water stirred into the rice helps it loosen again.
Freezing works best for the saucy dishes: turkey chili, chickpea curry, and enchilada skillet hold up for up to 2 months if sealed well. Zucchini noodle dishes, tuna stuffed peppers, salads, and fish are not ideal freezer candidates. They’ll come back strange, and there’s no reason to force it.
Variations and Adaptations to Try
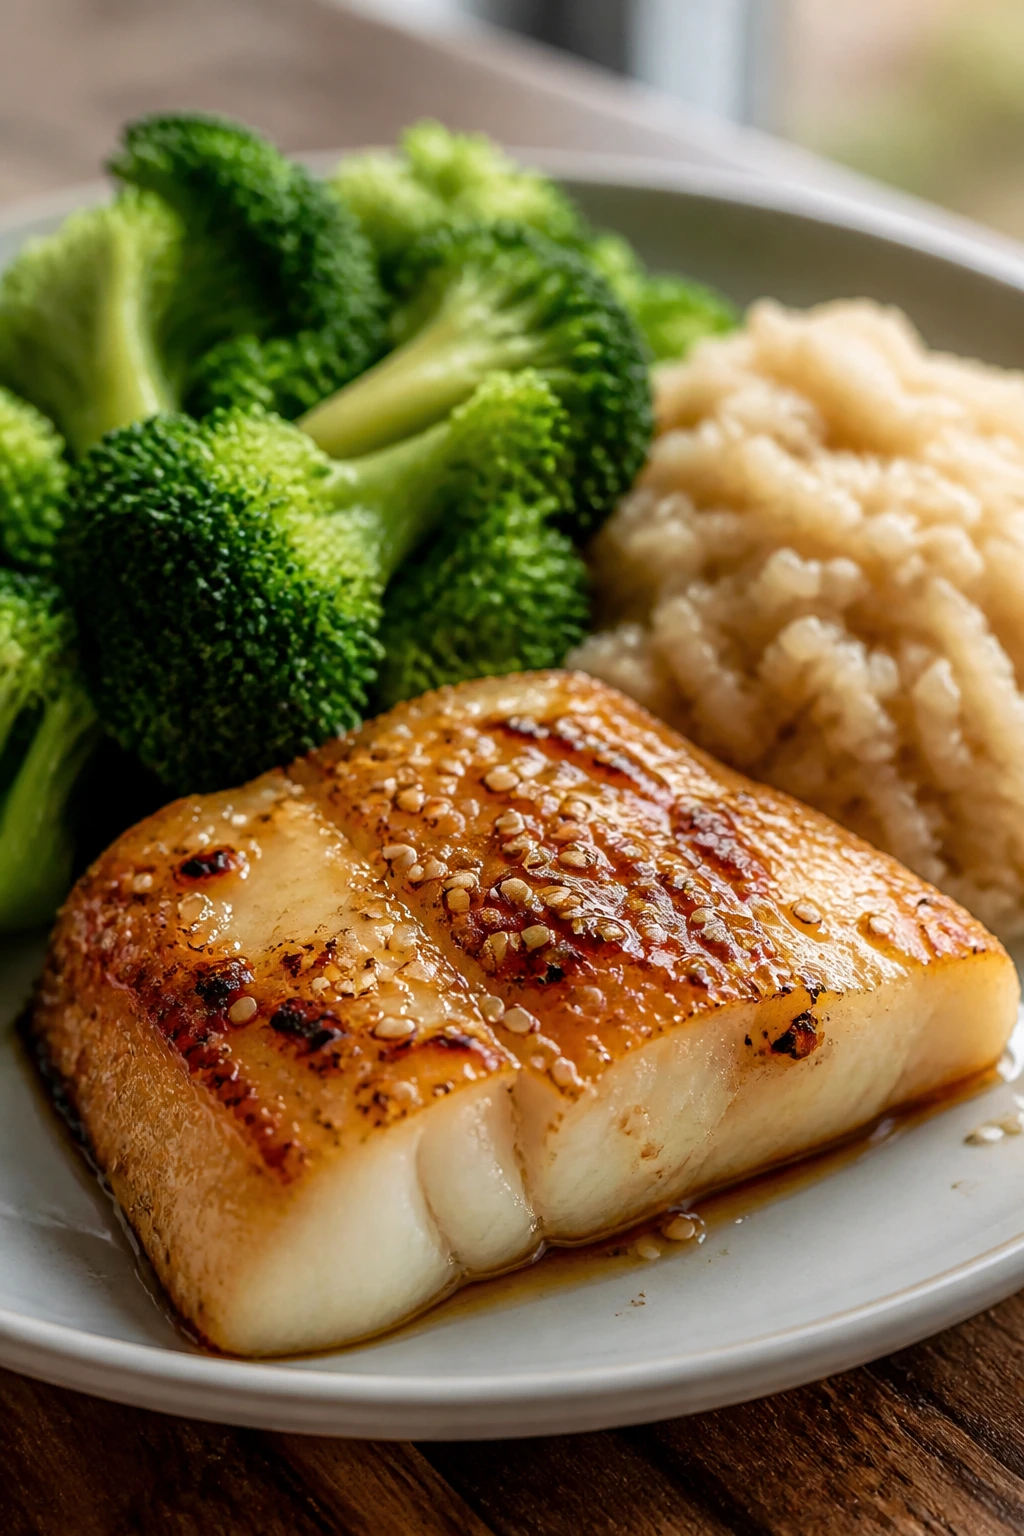
Lower-Carb Plate Swaps: Use cauliflower rice, extra greens, lettuce wraps, or roasted vegetables in place of rice, pita, couscous, and tortillas when you want to shave calories without changing the whole menu. This works especially well for the shrimp bowls, shawarma salad, and curry. The food still feels full because the protein and sauces do most of the flavor work.
Dairy-Free Finish Line: Replace feta, yogurt, ricotta, and parmesan with olive tapenade, avocado, a citrusy vinaigrette, or a nut-based sauce. You don’t need to replace every creamy element with another cream substitute. Sometimes a sharper finish is better anyway.
Vegetarian Weekend Shift: Swap chicken, turkey, and fish for chickpeas, tofu, eggs, white beans, or extra vegetables with a higher sear. The best vegetarian versions in this collection are the curry, the soba bowl, the stuffed peppers, and the breakfast bowl. Just remember to season more boldly, because plant proteins need more help.
Higher-Protein Brunch Boost: Add extra egg whites, Greek yogurt, or a slightly larger portion of lean protein if you want a meal that holds you longer. The pancakes, baked eggs, and breakfast bowl all take that treatment well. Keep the added fat in check so the calories do not drift upward without you noticing.
Budget Pantry Route: Use canned tuna, dry beans, frozen shrimp, frozen broccoli, and store-brand yogurt when fresh or premium ingredients feel too expensive. Season these meals a little harder and don’t skimp on acid. Cheaper ingredients usually need more help, not more money.
Common Mistakes to Avoid
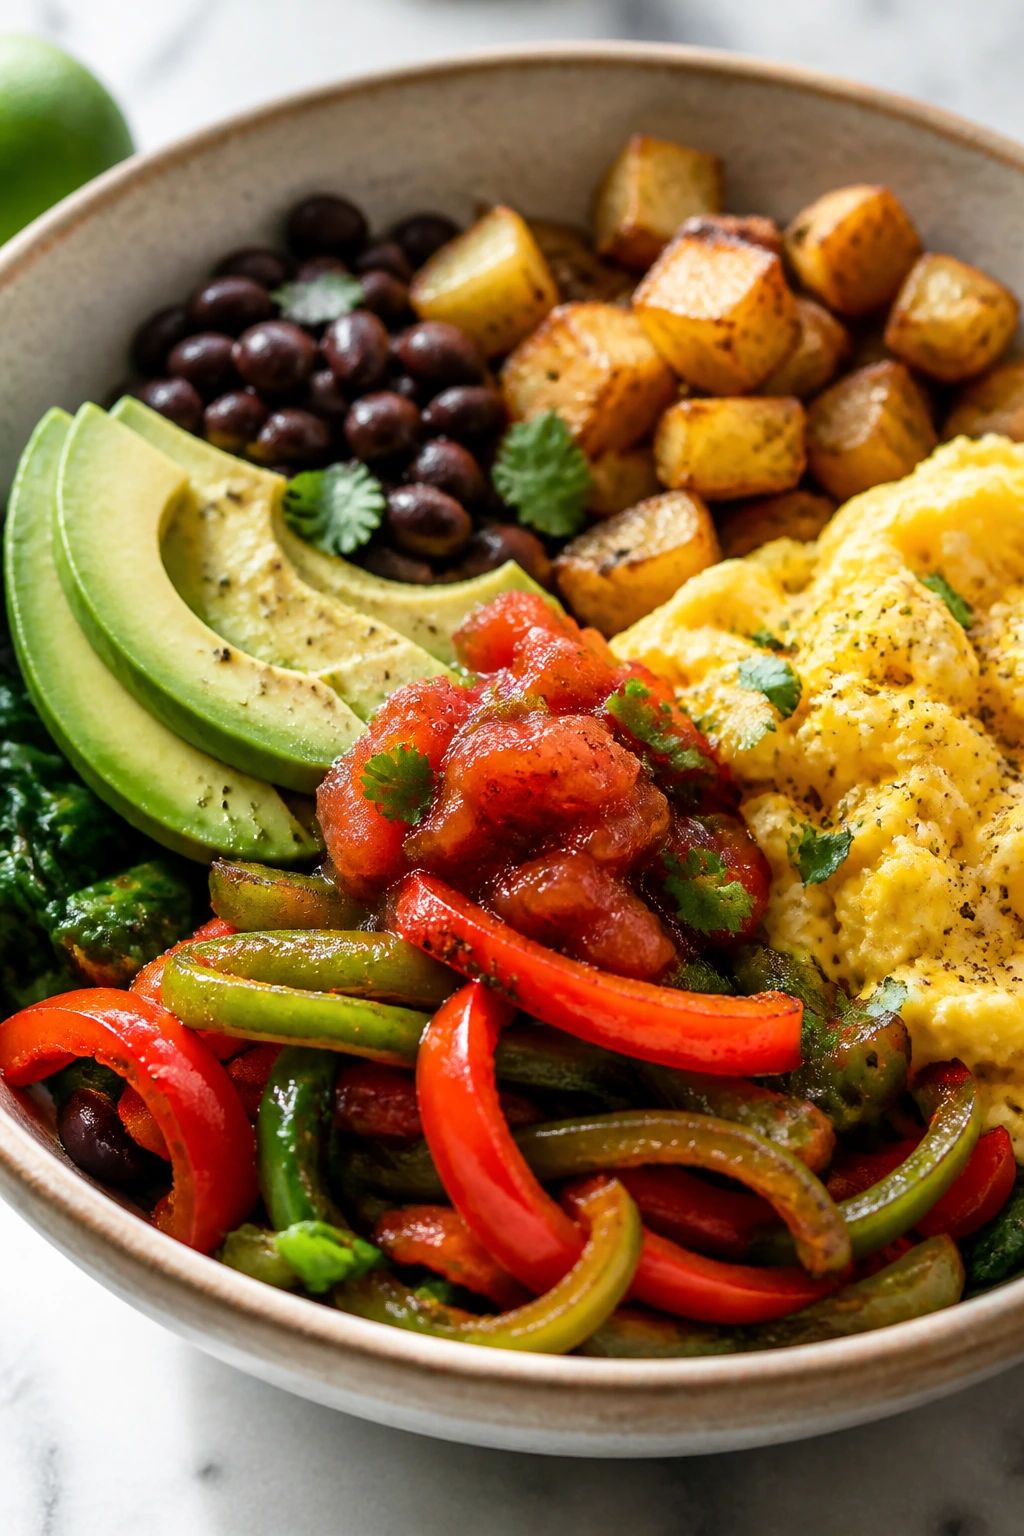
Eyeballing oil and dressings: A teaspoon disappears, but a free pour does not. The fastest way to blow past 500 calories is to treat oil like water and sauces like garnish. Measure the first time, then train your eye.
Making every plate too low in protein: A pile of vegetables with a spoon of sauce is not a meal. If you’re still hungry after eating, the problem is often protein, not willpower. Most of these recipes work because they start with a real protein portion.
Overcrowding the pan: This is the old enemy of browning. Chicken, shrimp, vegetables, and tofu all need enough room for steam to escape. If the pan looks packed, use two pans.
Underseasoning the vegetables: Lean protein can carry flavor, but it cannot fix flat peppers, pale cauliflower, or limp zucchini. Salt the vegetables at the right time and finish with citrus or herbs if the dish tastes dull.
Using oversized portions of starch: Rice, couscous, pasta, bread, tortillas, and potatoes are all fine here. The issue is volume. A measured half-cup or a small pita keeps the meal in the right lane; a vague scoop does not.
Reheating delicate foods too aggressively: Fish turns dry, eggs turn rubbery, and zucchini noodles go limp if you blast them in the microwave. Use lower heat, shorter bursts, or cold leftovers where that makes sense.
Frequently Asked Questions
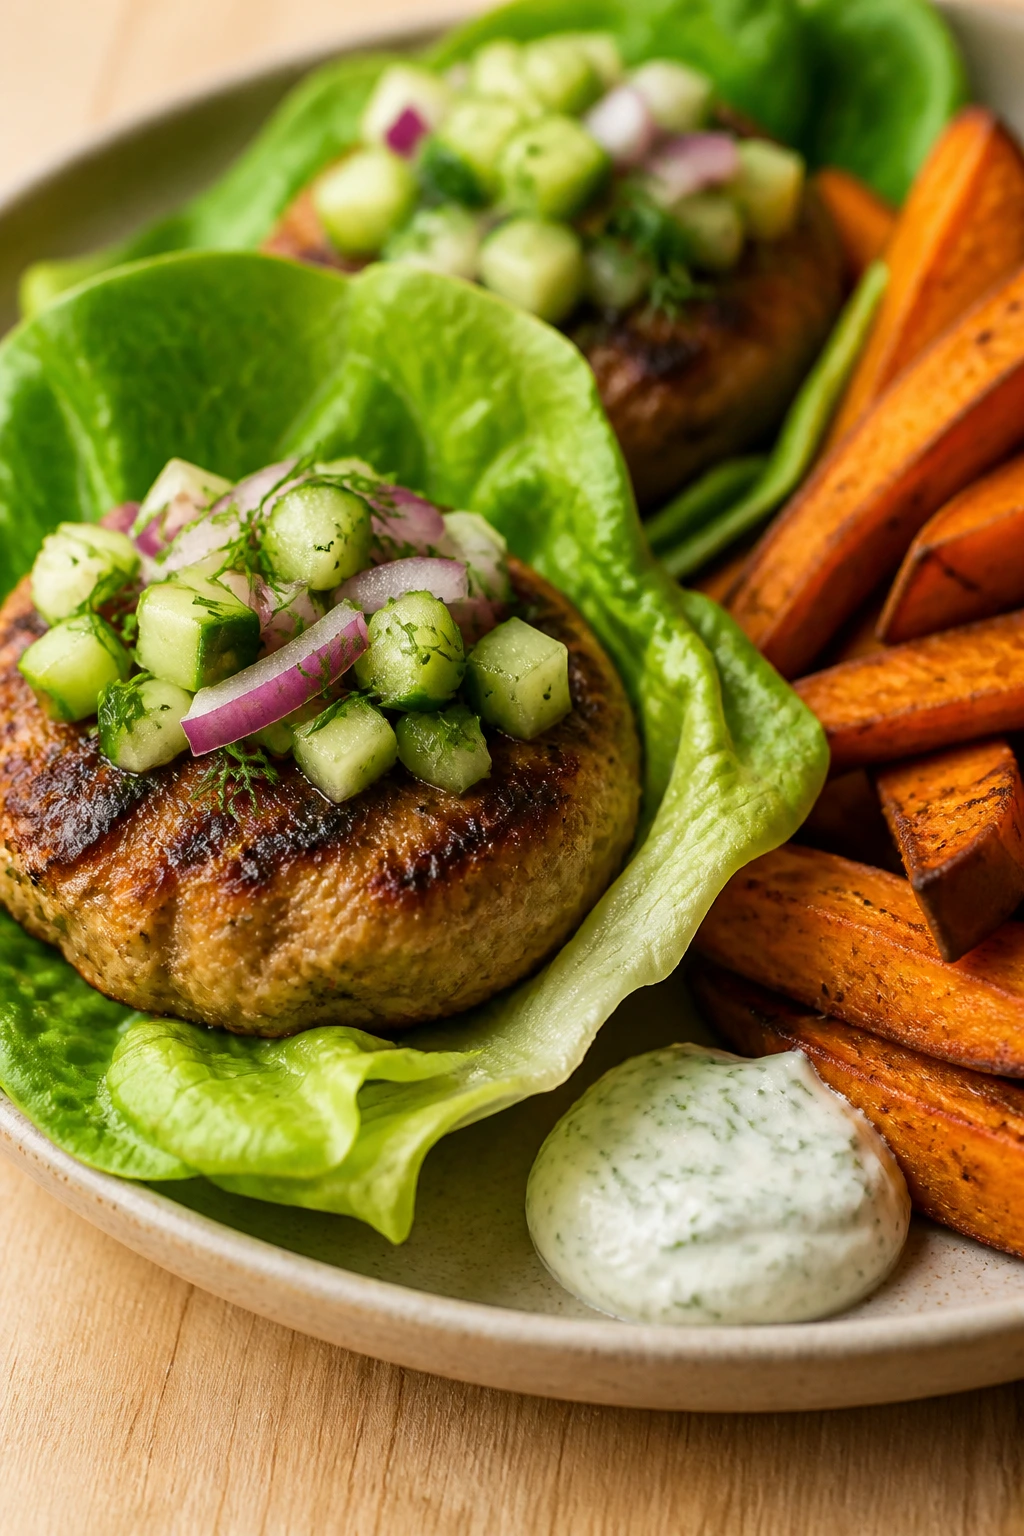
Can I still add a side and stay under 500 calories?
Yes, if the side is mostly vegetables or fruit. A simple green salad, cucumber slices, or a piece of fruit usually fits easily. The trouble starts when the side is bread, cheese, or a second starch.
Are the calorie counts before or after toppings?
The estimates here are built around the ingredients listed, with small garnish-level toppings included only when they’re clearly part of the plate. A big spoon of avocado, extra cheese, or a heavy sauce will change the count fast. If you want accuracy, weigh or measure the add-ons.
What if I want more protein without adding too many calories?
Add extra egg whites, use a slightly larger portion of lean chicken or fish, or stir Greek yogurt into sauces instead of cream or mayo. Beans and tofu also help if you want plant-based protein. The easiest move is usually to increase protein and reduce starch a bit.
Can I swap chicken breasts for thighs in these recipes?
You can, but the calories move upward because thighs carry more fat. If you make that swap, trim the portion size slightly or cut back on oil and cheese somewhere else. Thighs also stay juicier, so they’re best in recipes that need more flavor than polish.
Which recipes are best for leftovers?
The chili, curry, enchilada skillet, pork tenderloin, and turkey burger components keep especially well. The salad-style dishes are more fragile because the greens and toppings lose crunch. Fish is fine the next day if you like it cold in a salad, but it should not linger too long.
Can I use frozen vegetables?
Yes, and in some dishes they’re the right choice. Frozen spinach, cauliflower rice, broccoli, peas, and berries all work well. The only catch is moisture: thaw or dry them when browning matters.
How do I keep fish from drying out?
Use a thermometer and pull it early. Fish keeps cooking after it leaves the heat, so you want to stop when it’s just barely done rather than waiting for it to look firm and dry. Sauces and glazes help too, but timing is the real fix.
What if I don’t have the exact spice or sauce called for?
Start with the closest thing you have and lean on acid, salt, and herbs to bridge the gap. Cumin can stand in for part of a shawarma blend, yogurt can replace part of a creamy sauce, and vinegar can rescue a dish that tastes heavy. A good base matters more than a perfect pantry.
Meals That Still Feel Like the Weekend
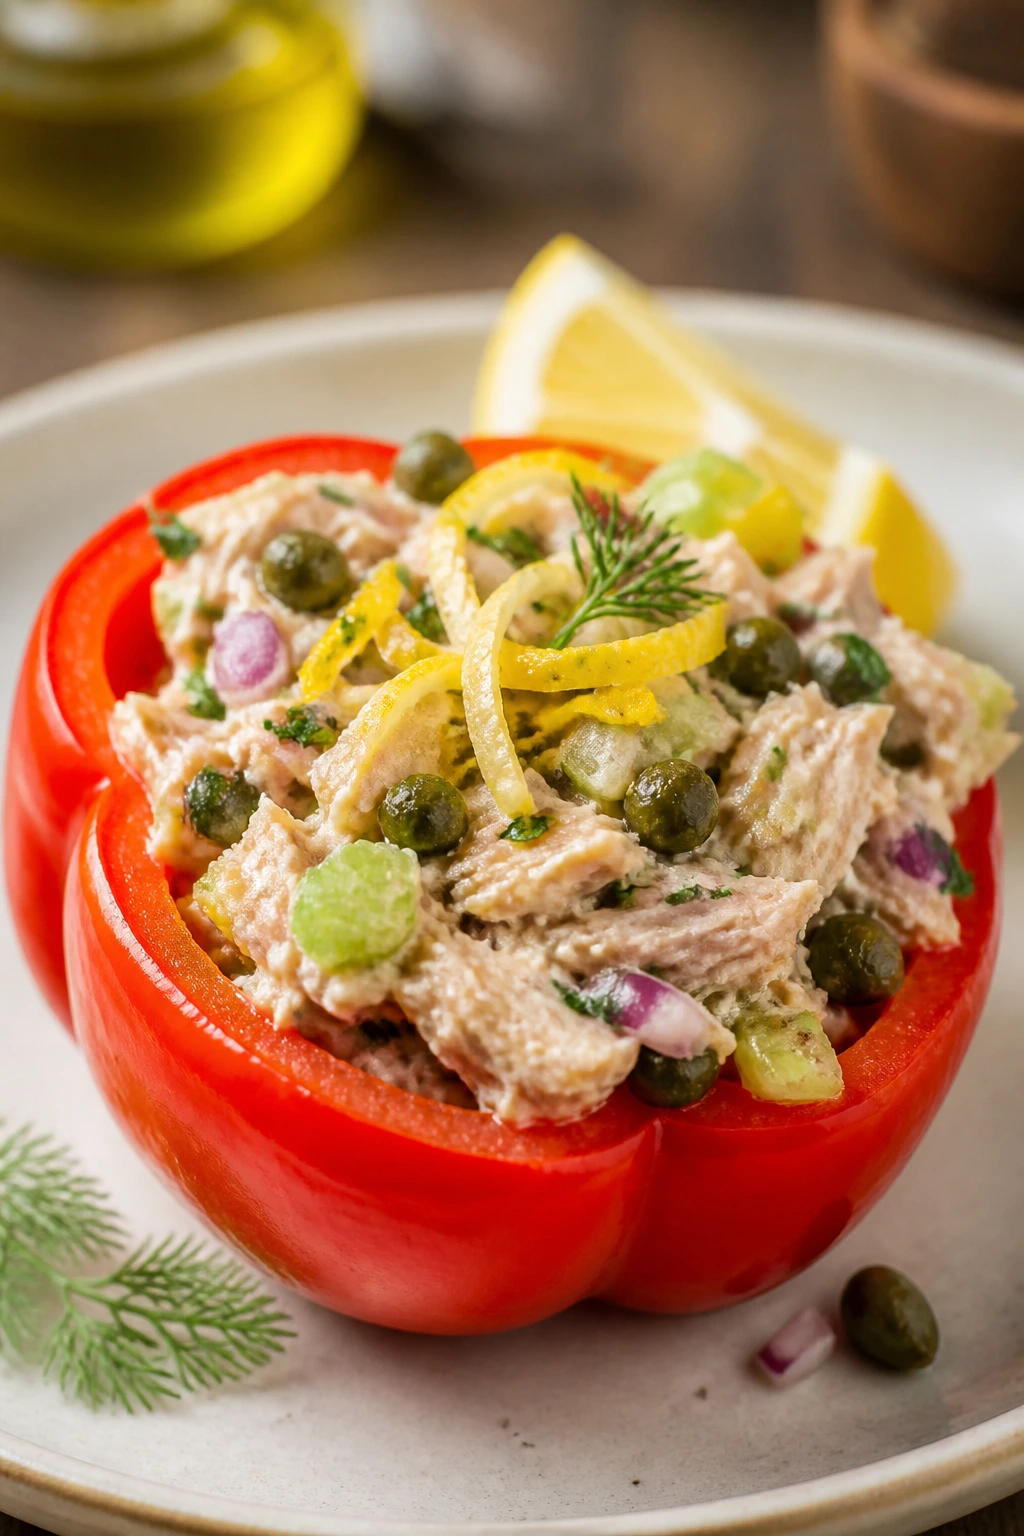
A weekend meal under 500 calories should not taste like a compromise, and none of these recipes do if you cook them with a little attention. The good ones are all here: a hot skillet, a bright salad bowl, a roast tray with crisp edges, a curry that smells better after ten minutes on the stove. That’s the pattern I keep coming back to.
You don’t need a tiny portion to eat lightly. You need smart portions, decent browning, enough salt, and a finishing touch that makes the plate wake up at the end. Do that, and the meal feels full long after the dish is cleared.