
Easter sugar cookies recipes have a funny reputation: people assume they’re fussy because they’re decorated with pastel icing and little candy eggs, but the dough itself is usually one of the most forgiving things you can make in a home kitchen. If your butter is soft, your flour is measured with a light hand, and you stop baking before the edges go dark, you’re already halfway there.
That’s why the best versions for beginner bakers don’t hinge on a flawless piping bag or a tray full of magazine-ready bunnies. They hinge on dough that rolls cleanly, cuts neatly, and keeps its shape without turning into pancakes. A cookie that stays pale in the middle and sets at the edge. A glaze that spreads enough to look polished, then dries without turning sticky for days.
The nice part is that Easter sugar cookies recipes can cover a lot of ground without getting complicated. You can go bright with lemon, rich with brown butter, soft with cream cheese, or playful with sprinkles and mini eggs. You can keep the decorating simple and still end up with a tray that looks like you spent far more time on it than you did.
Why You’ll Love This Collection

- Beginner-Friendly Dough: Most of these recipes use the same calm, reliable sugar cookie method, so you can learn the rhythm once and reuse it.
- Shape-Shifting Options: Some cookies are cut-outs, some are thumbprints, some are slice-and-bake, and some are drop cookies, which means you can pick the style that fits your confidence level.
- Pastel Without Fuss: Gel color, sanding sugar, jam, coconut, and simple glazes do the heavy lifting here; you do not need elaborate piping skills.
- Make-Ahead Friendly: Several of the doughs chill well, and a few improve after resting overnight, which takes the pressure off your schedule.
- Baking-Friendly for Groups: These trays are easy to mix and match, so one batch can feed kids, adults, and the person who always reaches for the lemon cookie first.
- Easy to Personalize: A batch can lean citrusy, nutty, chocolatey, or plain vanilla depending on what’s in your cupboard.
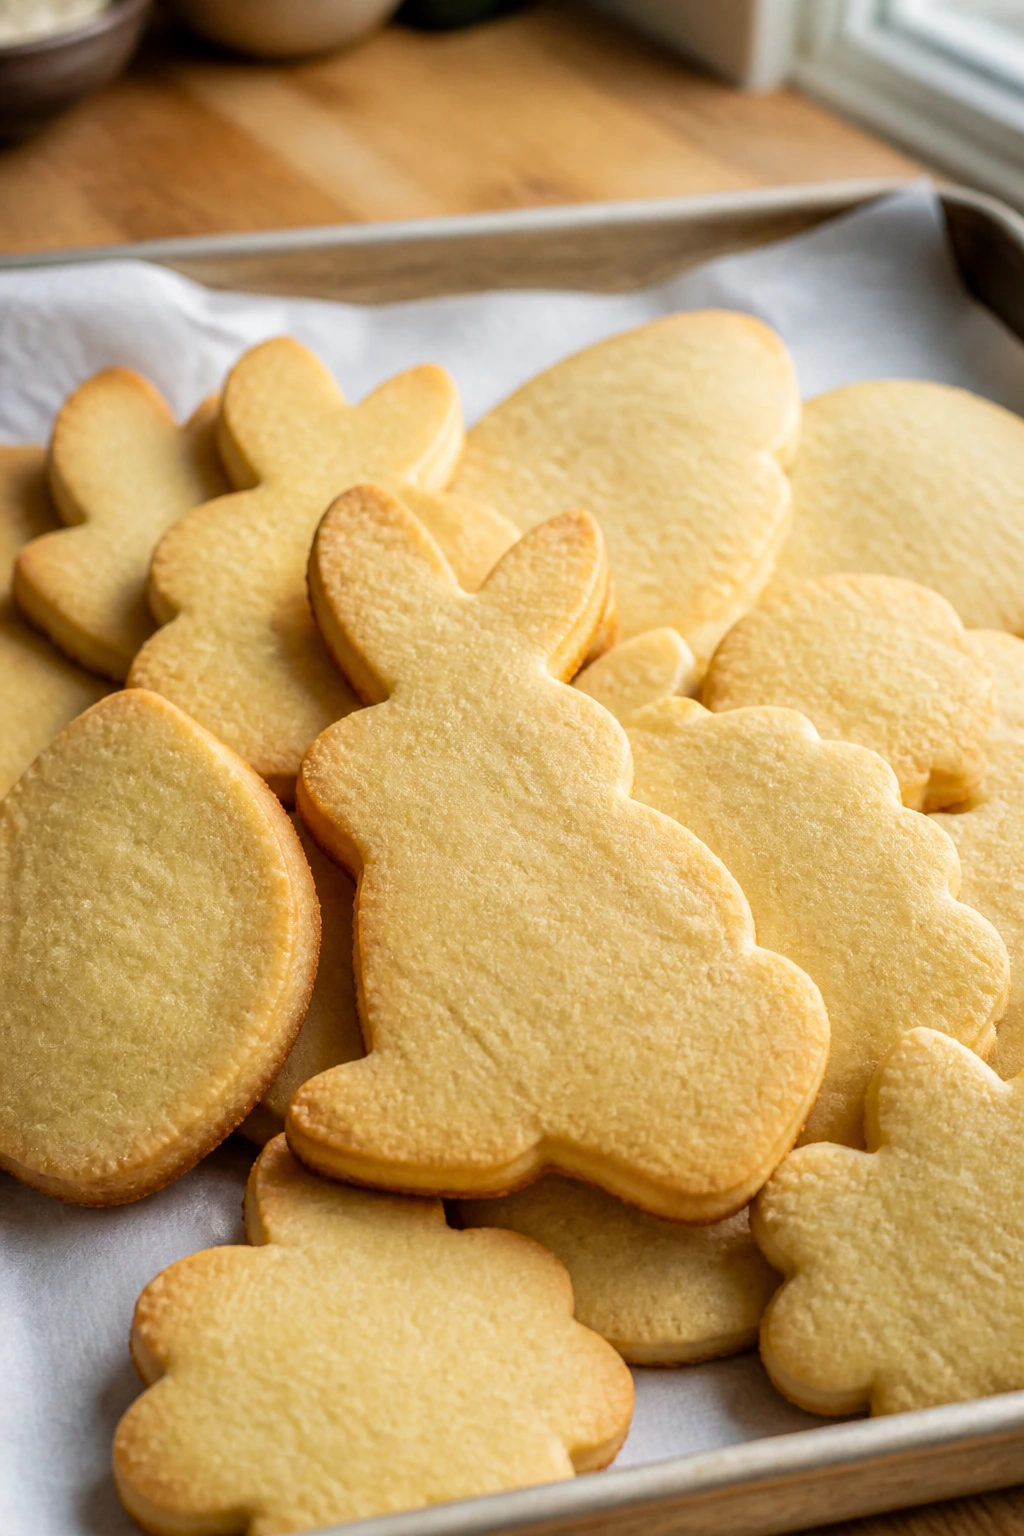
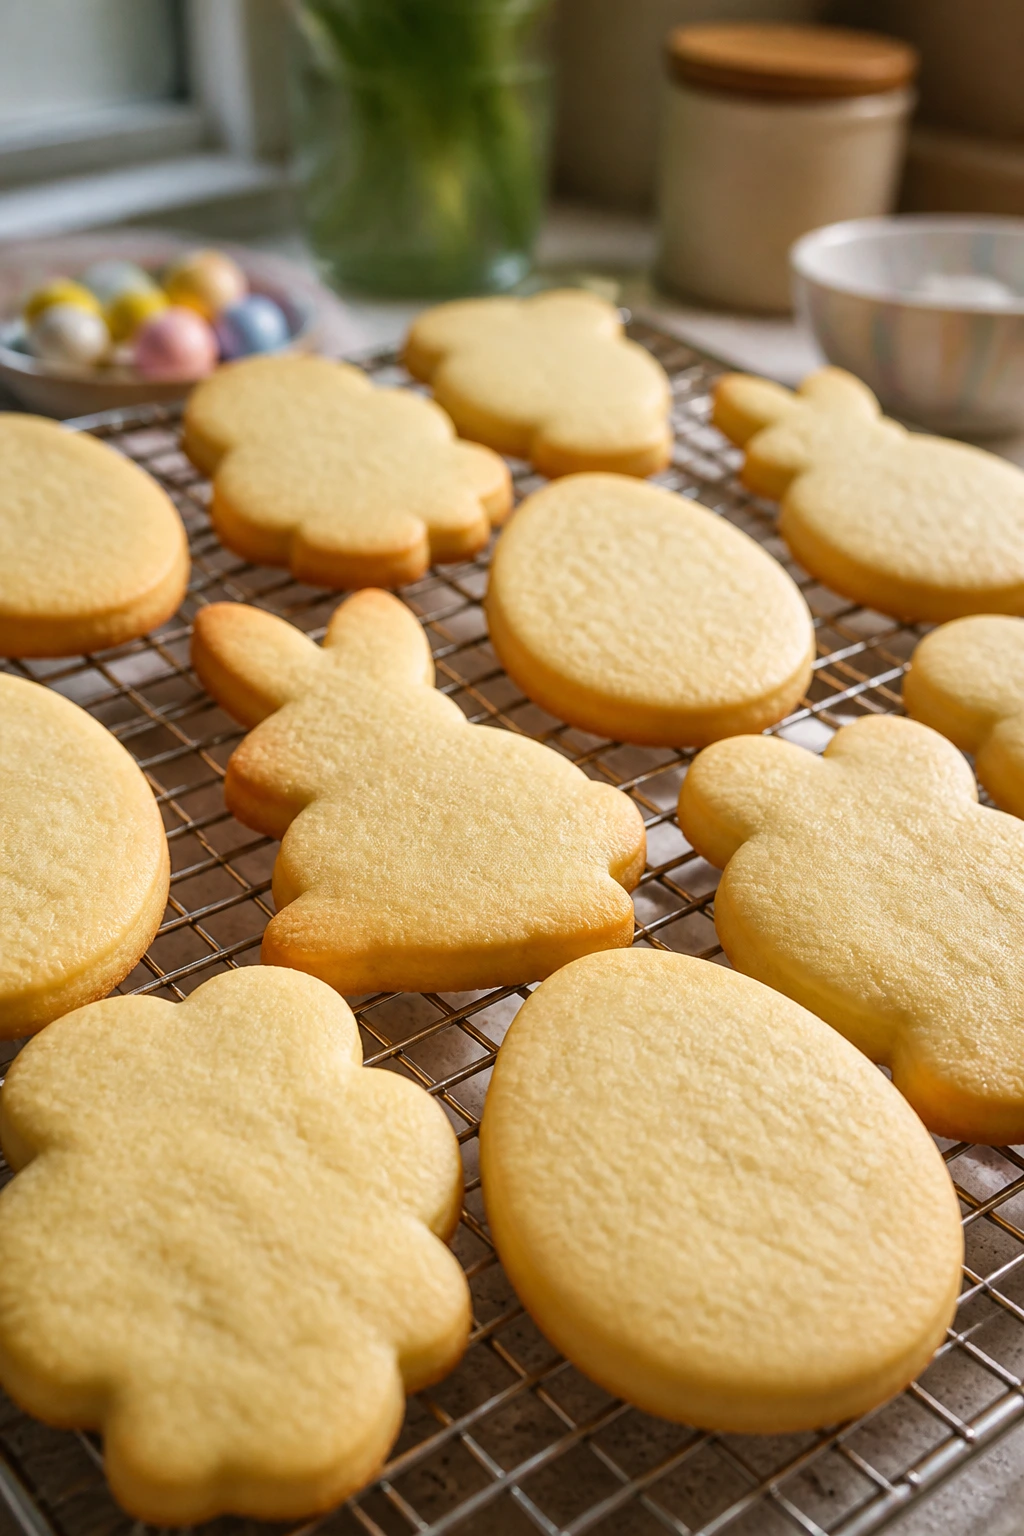
1. Soft Vanilla Cut-Out Easter Cookies
Intro: These are the cookies I’d hand a first-time baker without blinking. They bake up with clean edges, a tender middle, and a vanilla flavor that tastes like the good version of a bakery sugar cookie instead of the dry, dusty version people apologize for at parties.
Why It Works: The dough uses enough butter to stay rich, but not so much that it spreads into flat rounds. Chilling the dough for 45 minutes keeps the shapes crisp, and baking at 350°F lets the edges set before the centers overcolor. A simple glaze makes them look finished without asking you to master royal icing on your first try.
Key Ingredients:
- 2 3/4 cups all-purpose flour
- 1 teaspoon baking powder
- 1/2 teaspoon fine salt
- 1 cup unsalted butter, softened
- 1 cup granulated sugar
- 1 large egg, room temperature
- 2 teaspoons vanilla extract
- 1 tablespoon milk, if needed
- 1 1/2 cups powdered sugar, sifted
- 2 to 3 tablespoons milk for glaze
- 1/2 teaspoon vanilla extract for glaze
- Pastel sanding sugar, for finishing
Quick Steps:
- Whisk the flour, baking powder, and salt in a medium bowl.
- Beat the butter and sugar for 2 to 3 minutes until pale and fluffy.
- Mix in the egg and vanilla, then add the dry ingredients on low speed until the dough comes together. Add the milk only if the dough feels crumbly.
- Chill the dough for 45 minutes, then roll it to 1/4 inch thick and cut Easter shapes.
- Bake at 350°F for 8 to 10 minutes, until the edges look set but the centers still look a little soft.
- Cool completely, then drizzle or spread with glaze and finish with sanding sugar.
Equipment for This Recipe:
- Mixing bowls
- Hand mixer or stand mixer
- Rolling pin
- Easter cookie cutters
- Parchment-lined baking sheets
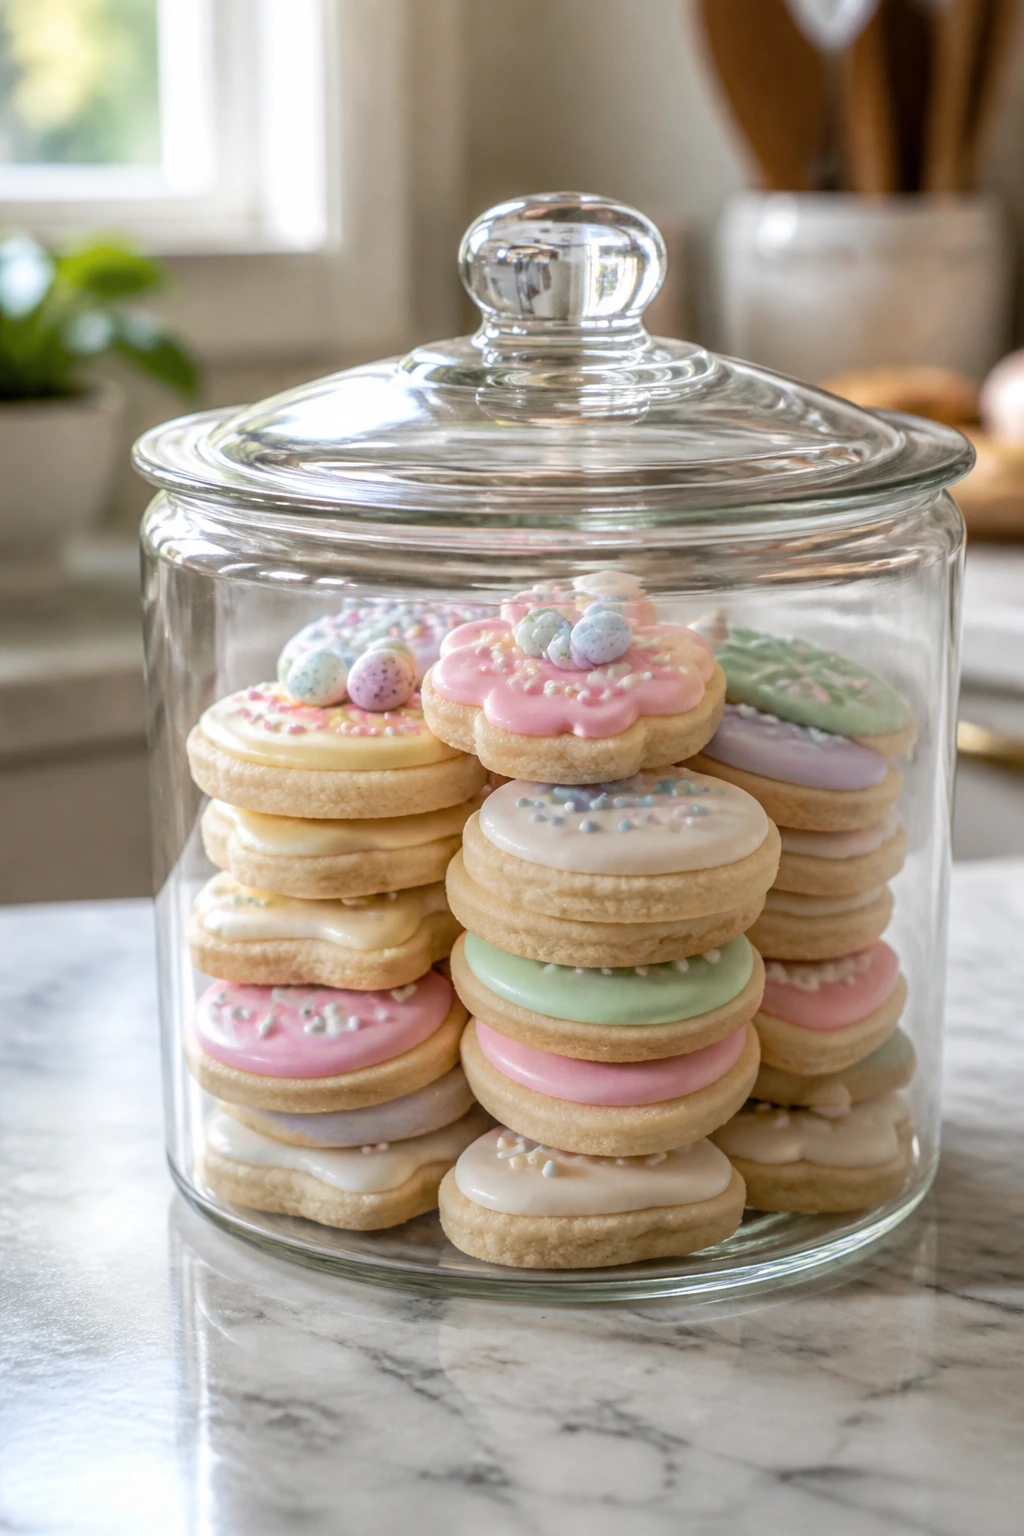
How to Serve This Dish: Stack these on a white platter so the pastel sugar shows up. They look best with a few plain cookies mixed in beside the decorated ones, because the contrast makes the whole tray feel more deliberate.
Pro Tips for This Recipe:
- Roll the dough between two sheets of parchment if your counter runs warm.
- Dip cookie cutters in flour only when the dough starts sticking; too much flour creates rough edges.
- Cool the cookies fully before glazing, or the glaze will slide off and puddle.
Variations on This Dish:
- Lemon-Vanilla Cut-Outs: Add 1 tablespoon lemon zest to the dough and swap half the glaze milk for lemon juice.
- Almond Bakery Style: Replace 1 teaspoon of the vanilla with almond extract for a softer, more classic bakery flavor.
- Sparkle Finish: Brush the tops with milk before baking and scatter sanding sugar over the raw dough.
Common Mistakes to Avoid with This Dish:
- Skipping the chill: Warm dough spreads, and bunny ears turn into blobs.
- Overbaking: If the cookies look golden all over, they’re already too dry; pull them when the centers still look pale.
- Using too much flour while rolling: Heavy dusting makes the cookies taste chalky and dulls the edges.
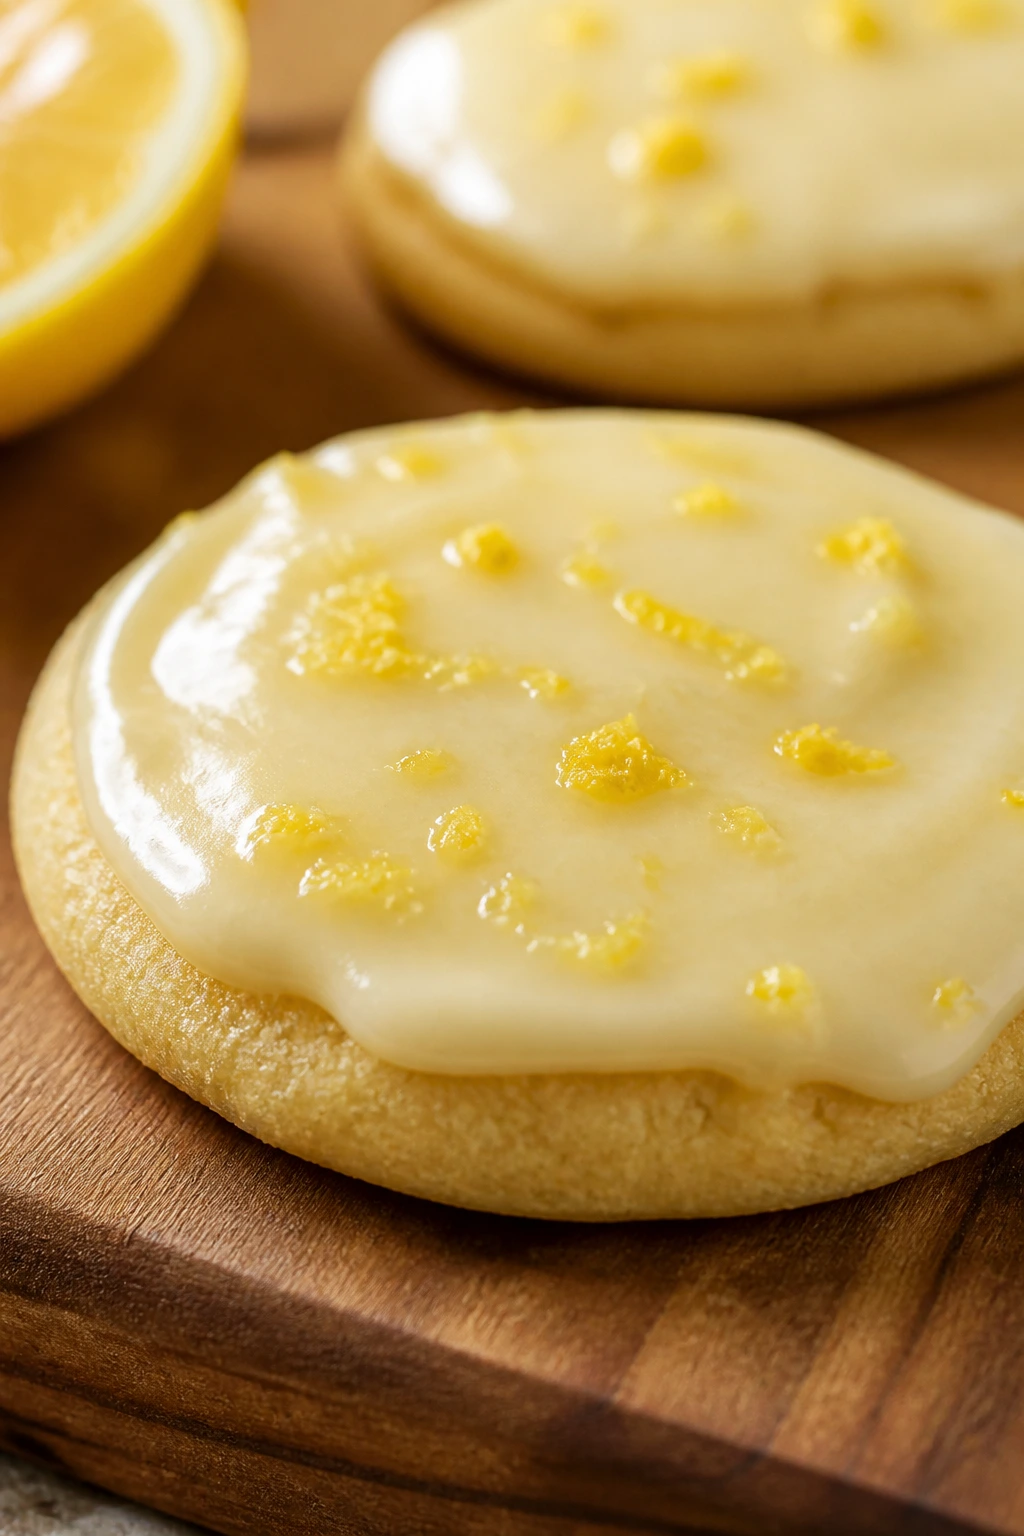
2. Lemon-Egg Glazed Sugar Cookies
Intro: Lemon wakes sugar cookies up in a way vanilla alone can’t. The dough smells bright when you zest the fruit into the sugar, and the finished cookie has a clean snap at the edge with a soft, buttery center under the glaze.
Why It Works: Lemon zest carries the most flavor here, so rubbing it into the sugar pulls the oils out before baking ever starts. The glaze is thin enough to settle into a smooth shell, but not so thin that it runs off the sides. That balance matters if you want cookies that look neat on a tray instead of wet and streaky.
Key Ingredients:
- 2 1/2 cups all-purpose flour
- 1 teaspoon baking powder
- 1/2 teaspoon fine salt
- 1 cup unsalted butter, softened
- 1 cup granulated sugar
- 1 tablespoon lemon zest
- 1 large egg
- 1 teaspoon vanilla extract
- 2 tablespoons lemon juice
- 1 1/2 cups powdered sugar
- 2 to 3 tablespoons lemon juice or milk
- Yellow sanding sugar, optional
Quick Steps:
- Rub the lemon zest into the sugar with your fingertips until the sugar smells bright and damp.
- Beat the butter and lemon sugar for 2 minutes, then mix in the egg, vanilla, and lemon juice.
- Add the flour, baking powder, and salt, mixing until a soft dough forms.
- Chill for 30 to 45 minutes, then roll and cut into eggs, bunnies, or flowers.
- Bake at 350°F for 8 to 9 minutes, just until the edges turn matte.
- Cool fully, then dip the tops in lemon glaze and sprinkle with sanding sugar.
Equipment for This Recipe:
- Microplane or fine grater
- Mixer
- Baking sheets
- Parchment paper
- Small bowl for glaze
How to Serve This Dish: These are the first cookies people reach for if they like citrus. Pair them with plain vanilla cookies on the same tray so the lemon stays bright instead of overwhelming the whole plate.
Pro Tips for This Recipe:
- Zest the lemons before juicing them; it’s faster and cleaner.
- Use fresh lemon juice, not bottled, or the glaze will taste flat.
- If the dough feels sticky after chilling, dust the rolling pin, not the whole counter.
Variations on This Dish:
- Lemon-Poppy Easter Cookies: Add 1 tablespoon poppy seeds for tiny specks and a subtle crunch.
- Honey Lemon Glaze: Swap 1 tablespoon of the powdered sugar in the glaze for honey.
- Extra-Zesty Batch: Add another teaspoon of zest if you want a sharper citrus hit.
Common Mistakes to Avoid with This Dish:
- Adding too much juice to the dough: The cookies spread and lose their shape.
- Skipping the zest rub: Lemon juice alone won’t give you the same aroma.
- Glazing warm cookies: The icing melts into a sticky film instead of setting cleanly.
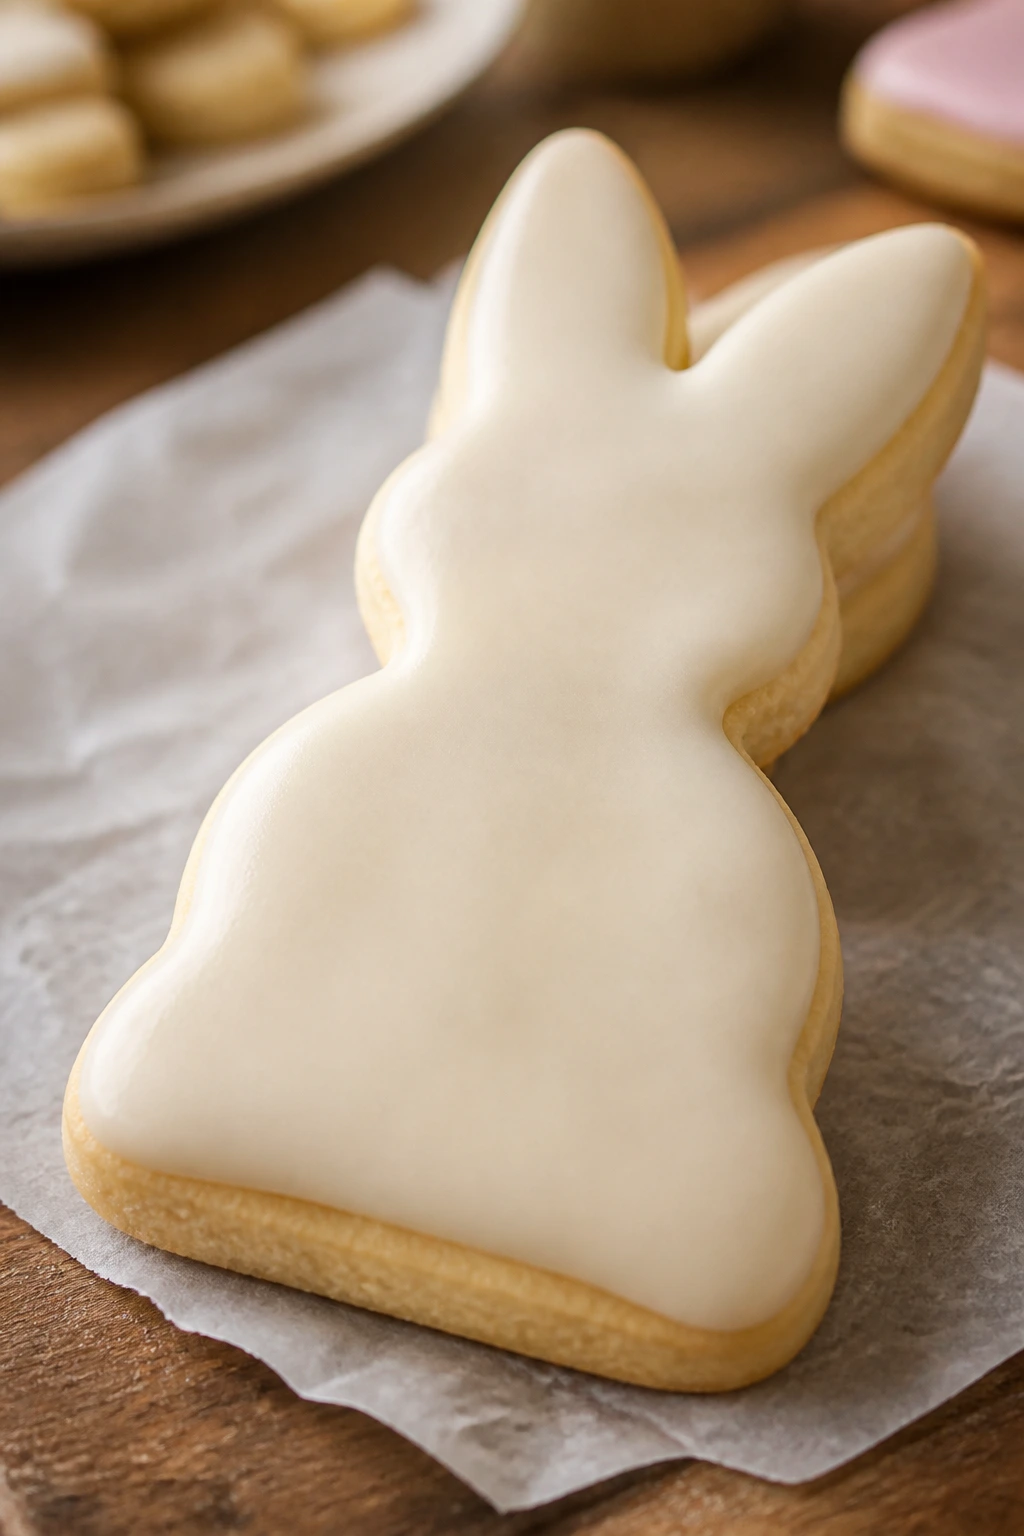
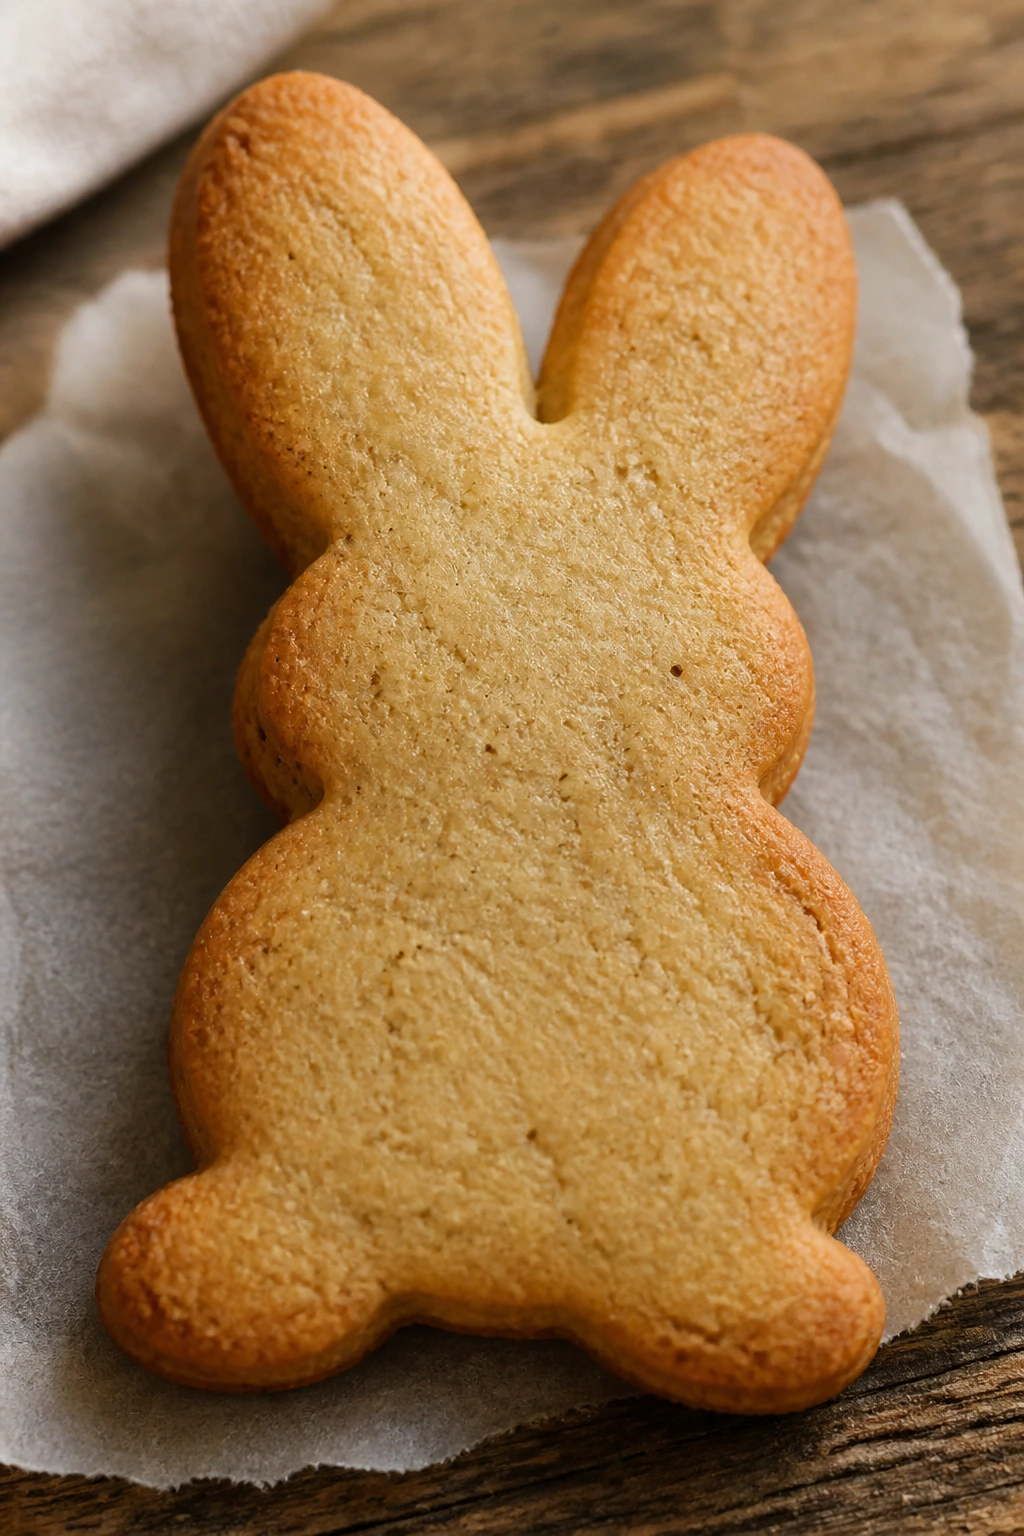
3. Brown Butter Bunny Cookies
Intro: Brown butter gives these cookies a toasted, almost nutty smell that feels a little richer than standard sugar cookies. The dough browns the way good cookie dough should: not dark, not heavy, just deeper and more interesting.
Why It Works: Browning the butter cooks off the water and leaves behind those caramel notes people usually think come from extra sugar. Because browned butter firms up again as it cools, you get a dough that cuts neatly once it chills. The result is a cookie with more flavor and less sweetness, which I prefer for a big dessert table.
Key Ingredients:
- 1 cup unsalted butter
- 2 3/4 cups all-purpose flour
- 1 teaspoon baking powder
- 1/2 teaspoon fine salt
- 3/4 cup granulated sugar
- 1/4 cup light brown sugar
- 1 large egg yolk
- 2 teaspoons vanilla extract
- 1 to 2 tablespoons milk, if needed
- 1 cup powdered sugar
- 2 tablespoons milk
- 1/2 teaspoon vanilla extract
Quick Steps:
- Cook the butter in a small saucepan over medium heat until the milk solids turn golden brown and smell like toasted nuts, then cool it until opaque but still soft.
- Beat the browned butter with the sugars for 1 minute, then mix in the egg yolk and vanilla.
- Add the flour, baking powder, and salt, mixing just until the dough comes together.
- Chill for 45 minutes, roll to 1/4 inch thick, and cut bunny shapes.
- Bake at 350°F for 8 to 10 minutes, until the edges are set and the centers still look pale.
- Cool, then drizzle with vanilla glaze and let it set before stacking.
Equipment for This Recipe:
- Small saucepan
- Heatproof bowl
- Mixer
- Rolling pin
- Bunny cookie cutter
How to Serve This Dish: These are excellent on a tray with very pale cookies because the browned butter flavor stands out. A light glaze is enough; the butter is doing most of the work here.
Pro Tips for This Recipe:
- Do not add the browned butter while it’s hot, or the sugar will melt and the dough will get greasy.
- Scrape the brown butter solids from the pan; that’s where the flavor lives.
- A single egg yolk keeps the crumb tender and adds body without making the dough cakey.
Variations on This Dish:
- Brown Butter-Maple Batch: Replace 1/4 cup of the sugar with maple sugar if you can find it.
- Salted Brown Butter: Finish the glaze with a pinch of flaky salt.
- Toffee Note: Add 2 tablespoons finely chopped toffee bits to the dough.
Common Mistakes to Avoid with This Dish:
- Letting the butter go too far: Black specks taste bitter, not nutty.
- Skipping the cooling step: Hot butter turns the dough shiny and sticky.
- Rolling before chilling: The cookies will slump at the edges in the oven.
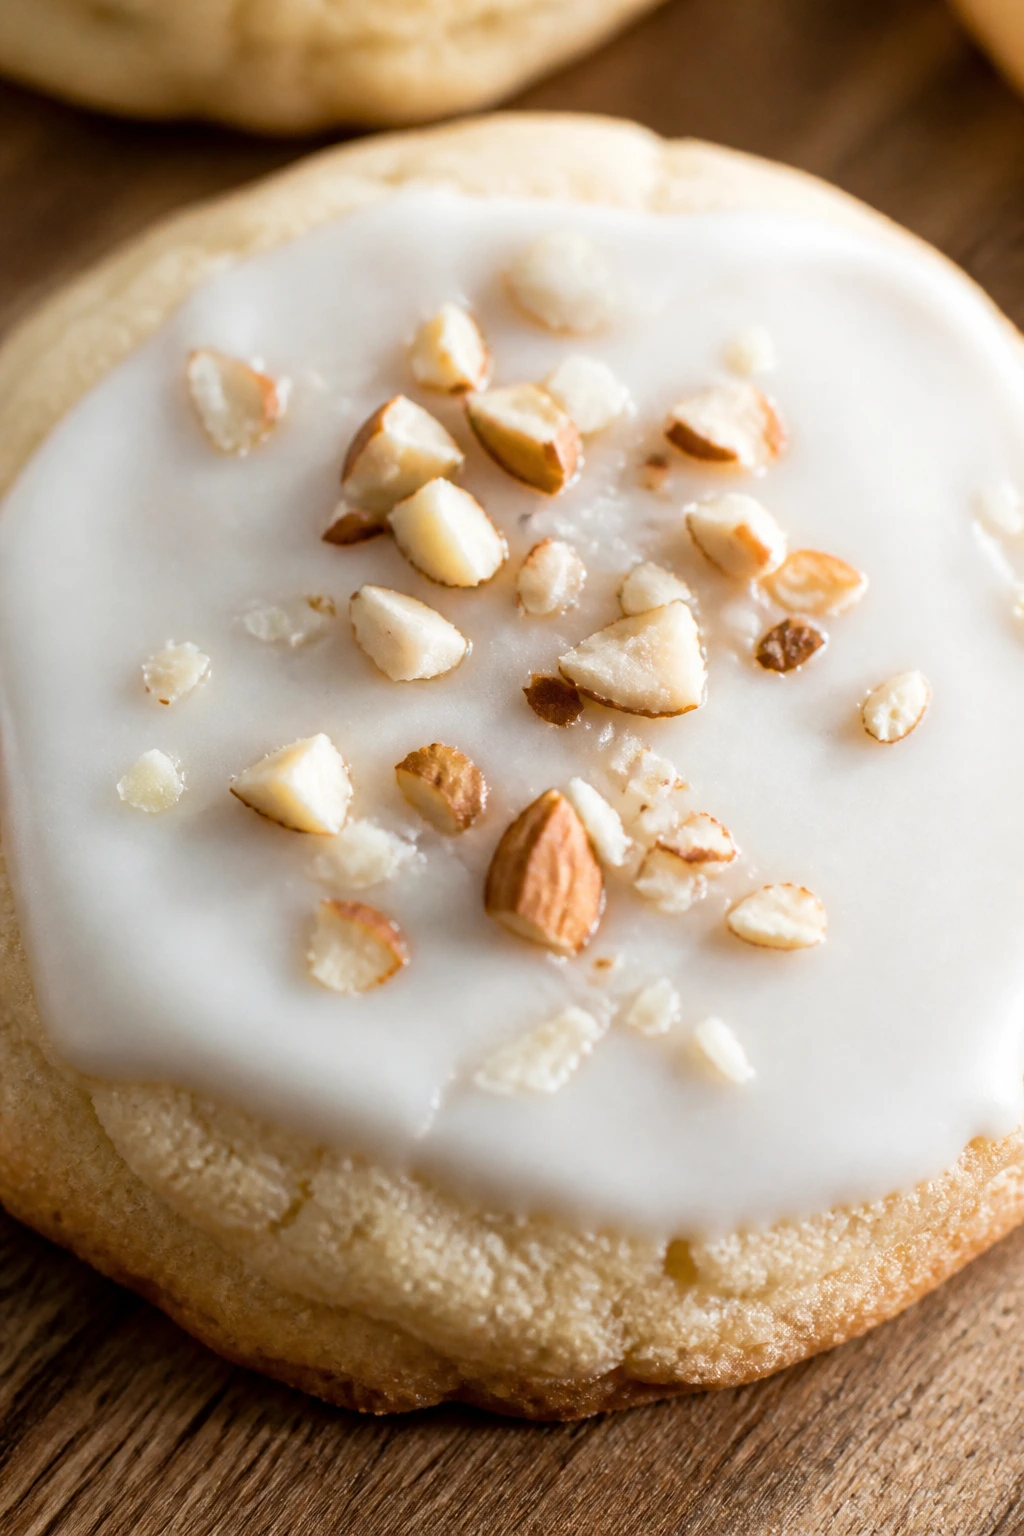
4. Almond Sugar Cookies with Vanilla Icing
Intro: Almond extract makes these taste like something from a real bakery case, the kind that disappears before the coffee gets cold. It’s a small flavor change, but it lands hard.
Why It Works: Almond extract is strong, so you only need a teaspoon to make the dough taste distinct without crossing into cherry-cough-drop territory. A vanilla icing on top reins the flavor back in and gives you a clean, sweet finish. These cookies bake up with a soft center and a slightly crisp rim, which is the texture I want every time.
Key Ingredients:
- 2 1/2 cups all-purpose flour
- 1 teaspoon baking powder
- 1/2 teaspoon salt
- 1 cup unsalted butter, softened
- 1 cup granulated sugar
- 1 large egg
- 1 teaspoon almond extract
- 1/2 teaspoon vanilla extract
- 1 1/2 cups powdered sugar
- 2 to 3 tablespoons milk
- 1/2 teaspoon vanilla extract
- Sliced almonds, optional
Quick Steps:
- Whisk the flour, baking powder, and salt.
- Cream the butter and sugar for 2 to 3 minutes, then mix in the egg, almond extract, and vanilla.
- Add the dry ingredients and mix just until the dough forms.
- Chill for 30 minutes, then roll, cut, and place on lined baking sheets.
- Bake at 350°F for 8 to 9 minutes until the bottoms are barely golden.
- Cool and spread with vanilla icing, then top with sliced almonds if you want a little crunch.
Equipment for This Recipe:
- Mixing bowl
- Hand mixer
- Baking sheet
- Offset spatula
- Small whisk for icing
How to Serve This Dish: These sit nicely beside lemon cookies because the almond note gives the tray depth. If you use sliced almonds, keep the icing thin so the cookie still tastes delicate.
Pro Tips for This Recipe:
- Almond extract varies in strength; taste the dough before chilling if you’re unsure.
- Use room-temperature butter so the cookies hold their shape better.
- If the icing thickens while you work, add milk 1 teaspoon at a time.
Variations on This Dish:
- Cherry Almond Version: Add a few chopped maraschino cherries to the dough and reduce the vanilla.
- Almond-Citrus Twist: Add 1 teaspoon orange zest for a brighter finish.
- Glazed Instead of Iced: Skip the spreadable icing and dip the tops in a thinner glaze.
Common Mistakes to Avoid with This Dish:
- Overusing almond extract: It takes over fast.
- Baking until deeply golden: These should stay pale.
- Adding too much milk to the icing: Thin icing runs into puddles instead of setting on top.
5. Cream Cheese Carrot Patch Cookies

Intro: These are the softest cookies in the bunch, with a little tang from cream cheese that keeps them from tasting one-note. Orange icing and green stems make them feel playful without becoming a decorating project that eats your afternoon.
Why It Works: Cream cheese in the dough adds moisture and a gentle tang, so the cookie stays tender for days. It also helps the dough roll without feeling greasy. The carrot shape is simple enough for beginners, and the orange-green finish gives you an Easter look with only two piping colors.
Key Ingredients:
- 2 1/4 cups all-purpose flour
- 1 teaspoon baking powder
- 1/2 teaspoon salt
- 1/2 cup unsalted butter, softened
- 4 ounces cream cheese, softened
- 3/4 cup granulated sugar
- 1 large egg
- 1 teaspoon vanilla extract
- 1 cup powdered sugar
- 2 to 3 tablespoons milk
- Orange gel food coloring
- Green gel food coloring
Quick Steps:
- Whisk the flour, baking powder, and salt.
- Beat the butter, cream cheese, and sugar until smooth, then mix in the egg and vanilla.
- Add the dry ingredients and mix until the dough forms.
- Chill for 45 minutes, roll to 1/4 inch thick, and cut carrot shapes or simple ovals.
- Bake at 350°F for 8 to 10 minutes until the edges are set.
- Cool, tint the icing orange and green, then pipe the carrot body and tiny tops.
Equipment for This Recipe:
- Mixer
- Piping bags or zip-top bags
- Baking sheets
- Parchment
- Carrot-shaped cutter, optional
How to Serve This Dish: Put these near a bowl of jelly beans or pastel candies and they read instantly as Easter. They’re soft enough to stack, but the icing needs a full set before you do that.
Pro Tips for This Recipe:
- Cream cheese should be soft, not warm, or the dough gets loose.
- Keep the green piping thin; tiny tops look cleaner than big leafy blobs.
- If you don’t have a carrot cutter, cut triangles and round the top corners with your fingers.
Variations on This Dish:
- Orange-Zest Carrots: Add 1 teaspoon orange zest to the dough.
- Plain Cream Cheese Hearts: Skip the carrot shape and use hearts or eggs for a calmer tray.
- Mildly Tangy Glaze: Replace half the milk in the icing with cream cheese whisked until smooth.
Common Mistakes to Avoid with This Dish:
- Letting the dough warm up too much: The cream cheese makes it sticky fast.
- Flooding the top with icing: A thin coat keeps the carrot shape visible.
- Overbaking: Cream cheese dough dries out faster than plain sugar dough if you leave it in too long.
6. Toasted Coconut Nest Cookies
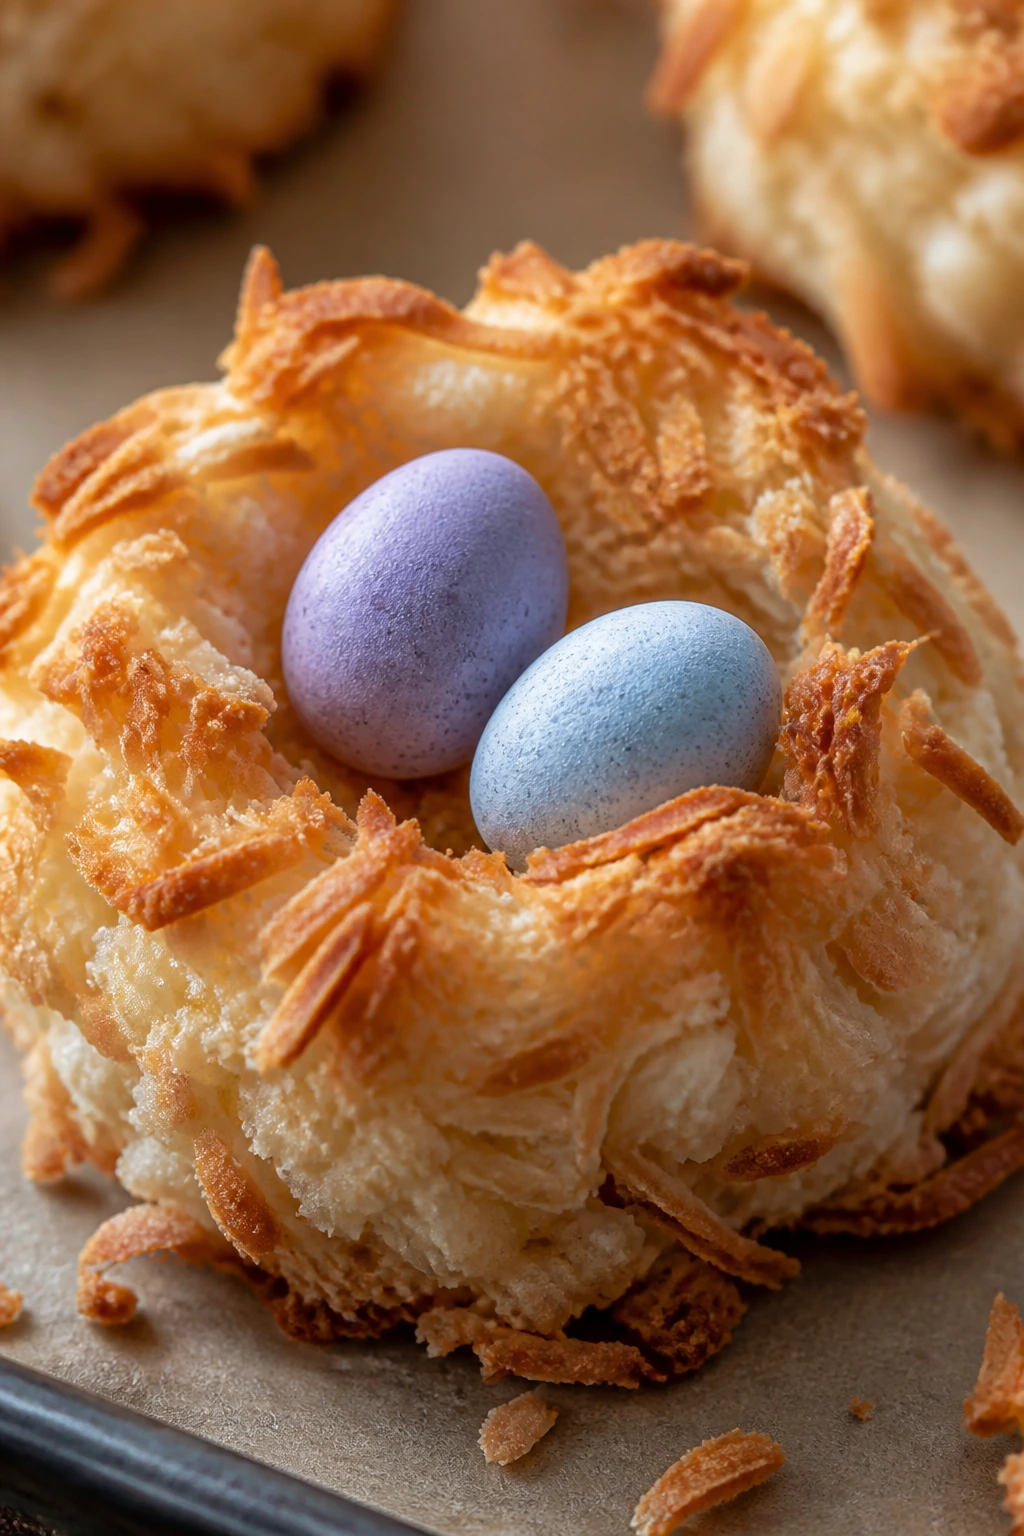
Intro: These taste like a coconut macaroon and a sugar cookie had a very sensible baby. Toasted coconut brings the smell, the texture, and the Easter nest look all at once.
Why It Works: Coconut gets flavor from browning, so toasting it first is not optional if you want the full effect. A little coconut in the dough and a little more on top gives you layers of texture instead of just sweetness. Mini chocolate eggs finish the look and make the cookie feel done with almost no piping.
Key Ingredients:
- 2 1/2 cups all-purpose flour
- 1 teaspoon baking powder
- 1/2 teaspoon salt
- 1 cup unsalted butter, softened
- 1 cup granulated sugar
- 1 large egg
- 1 teaspoon vanilla extract
- 1/2 teaspoon coconut extract
- 3/4 cup sweetened shredded coconut
- 1 cup sweetened shredded coconut, toasted for topping
- 1 cup powdered sugar
- 2 to 3 tablespoons milk
- Mini chocolate eggs
Quick Steps:
- Toast 1 cup of the coconut in a dry skillet or oven until golden, then cool it.
- Cream the butter and sugar, then mix in the egg, vanilla, and coconut extract.
- Stir in the flour, baking powder, salt, and the untoasted coconut.
- Chill the dough for 30 minutes, then shape into rounds and press a shallow dip in the center of each.
- Bake at 350°F for 9 to 10 minutes, until the edges are set.
- Cool, spread a little glaze in the center, press on toasted coconut, and top with mini chocolate eggs.
Equipment for This Recipe:
- Skillet or sheet pan for toasting coconut
- Mixing bowls
- Baking sheet
- Small spoon for shaping centers
How to Serve This Dish: These belong in the middle of the tray where people can see the nest effect. They’re a little richer than plain vanilla cookies, so one or two per person is enough after a big meal.
Pro Tips for This Recipe:
- Toast the coconut until it smells nutty, not just until it turns pale gold.
- Make the center dip while the cookies are still warm so it holds the nest shape.
- Add the chocolate eggs only after the glaze starts to set, or they’ll slide.
Variations on This Dish:
- Chocolate Coconut Nest: Add 2 tablespoons cocoa powder to the dough.
- Lemon Coconut Nest: Swap the coconut extract for lemon zest.
- Nutty Nest: Mix 2 tablespoons chopped toasted almonds into the topping.
Common Mistakes to Avoid with This Dish:
- Using raw coconut on top: It looks pale and tastes flat.
- Pressing the center too deep: The cookie can crack or bake unevenly.
- Adding eggs to a warm glaze too soon: They sink instead of sitting neatly on top.
7. Sprinkle Confetti Sugar Cookies
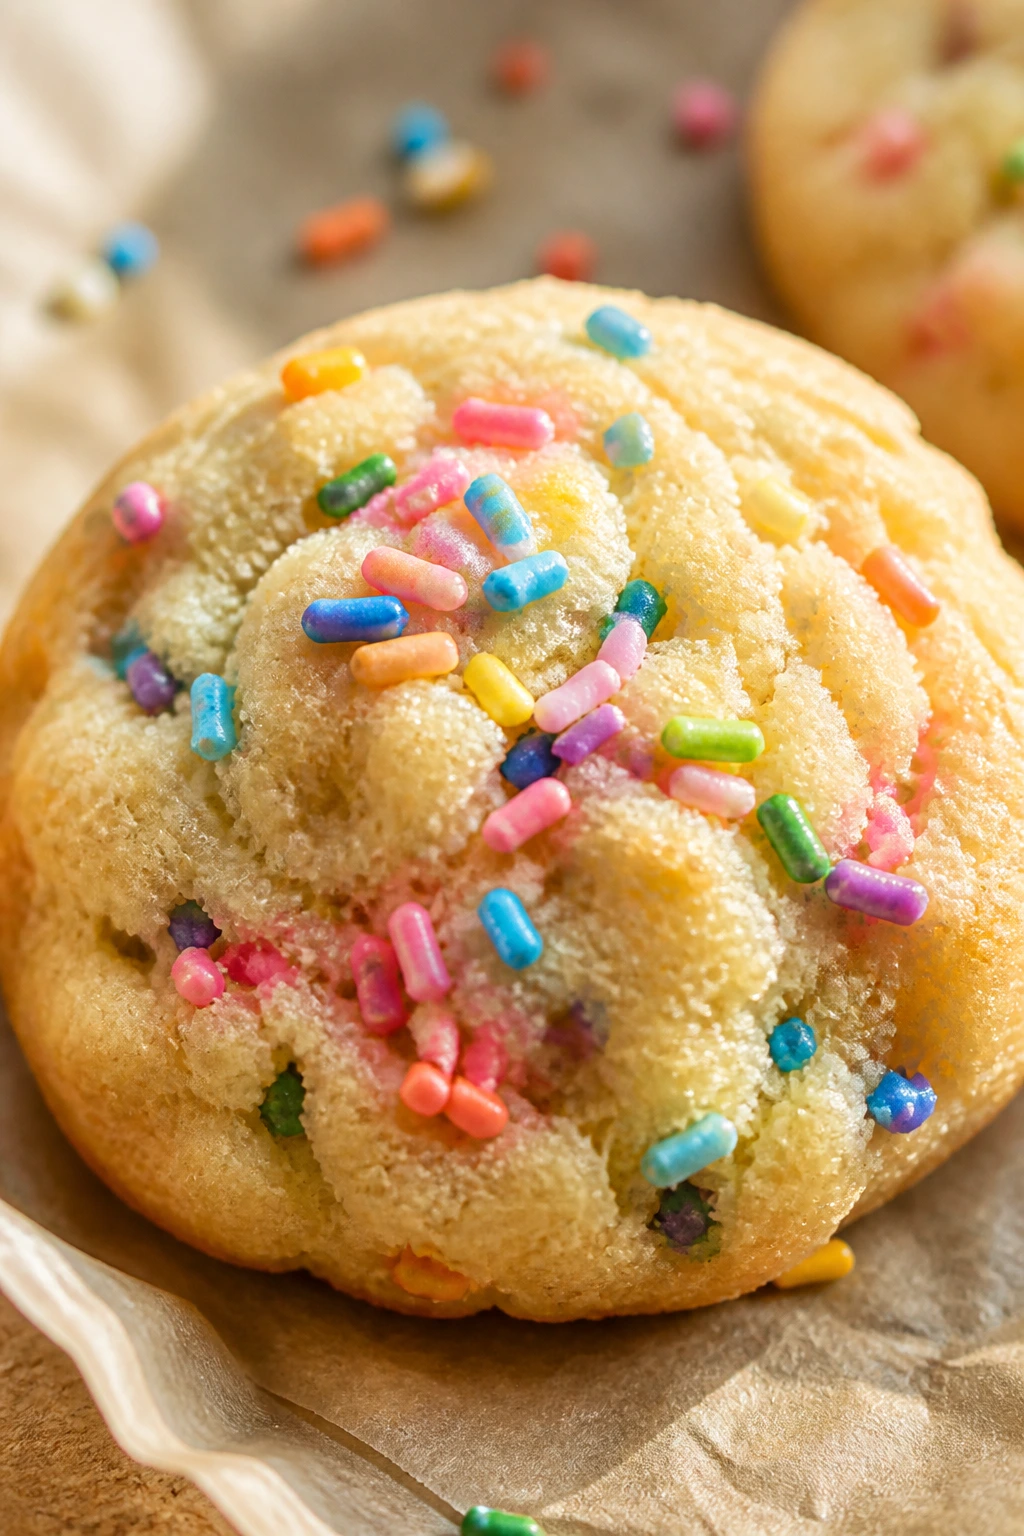
Intro: If you want a tray that makes kids stop talking for one full second, make these. The pastel sprinkles give the dough little bursts of color, and the baked cookie stays soft in the middle with crisp edges that hold up well to handling.
Why It Works: Jimmies work better than nonpareils here because they keep their shape and don’t bleed into gray streaks. A drop-cookie shape means you skip rolling, cutting, and decorating. That makes this one of the easiest Easter sugar cookies recipes on the table.
Key Ingredients:
- 2 1/2 cups all-purpose flour
- 1 teaspoon baking powder
- 1/2 teaspoon fine salt
- 1 cup unsalted butter, softened
- 1 cup granulated sugar
- 1 large egg
- 2 teaspoons vanilla extract
- 3/4 cup pastel sprinkles or jimmies
- 2 tablespoons milk, if needed
- 1/2 cup extra sprinkles for rolling, optional
Quick Steps:
- Whisk the flour, baking powder, and salt.
- Beat the butter and sugar until fluffy, then mix in the egg and vanilla.
- Stir in the dry ingredients, then fold in the sprinkles by hand so they don’t streak.
- Scoop the dough into 2-tablespoon mounds and place them 2 inches apart on lined baking sheets.
- Bake at 350°F for 9 to 11 minutes, until the edges are set and the tops look just dry.
- Cool for 5 minutes on the pan, then move to a rack.
Equipment for This Recipe:
- Cookie scoop
- Baking sheets
- Mixing bowl
- Spatula
- Wire rack
How to Serve This Dish: These are the least fussy cookies on this list, so put them where people can grab them easily. They work especially well on a mixed tray because the colors fill the gaps between the more decorated cookies.
Pro Tips for This Recipe:
- Fold sprinkles in at the very end to keep the colors from smearing.
- Chill the scooped dough for 15 minutes if your kitchen is warm.
- Use bright pastel jimmies, not hard candy sprinkles, so the texture stays soft.
Variations on This Dish:
- Chocolate Sprinkle Batch: Replace 1/4 cup flour with cocoa powder.
- Lemon Confetti: Add 1 teaspoon lemon zest to the dough.
- Extra-Soft Centers: Pull the cookies when the middle still looks slightly underdone.
Common Mistakes to Avoid with This Dish:
- Using nonpareils: They bleed and make the dough muddy.
- Overmixing after adding sprinkles: The colors streak into the dough.
- Baking too long: These should stay soft, not turn crunchy.
8. Maple Sugar Cookies with Salted Glaze
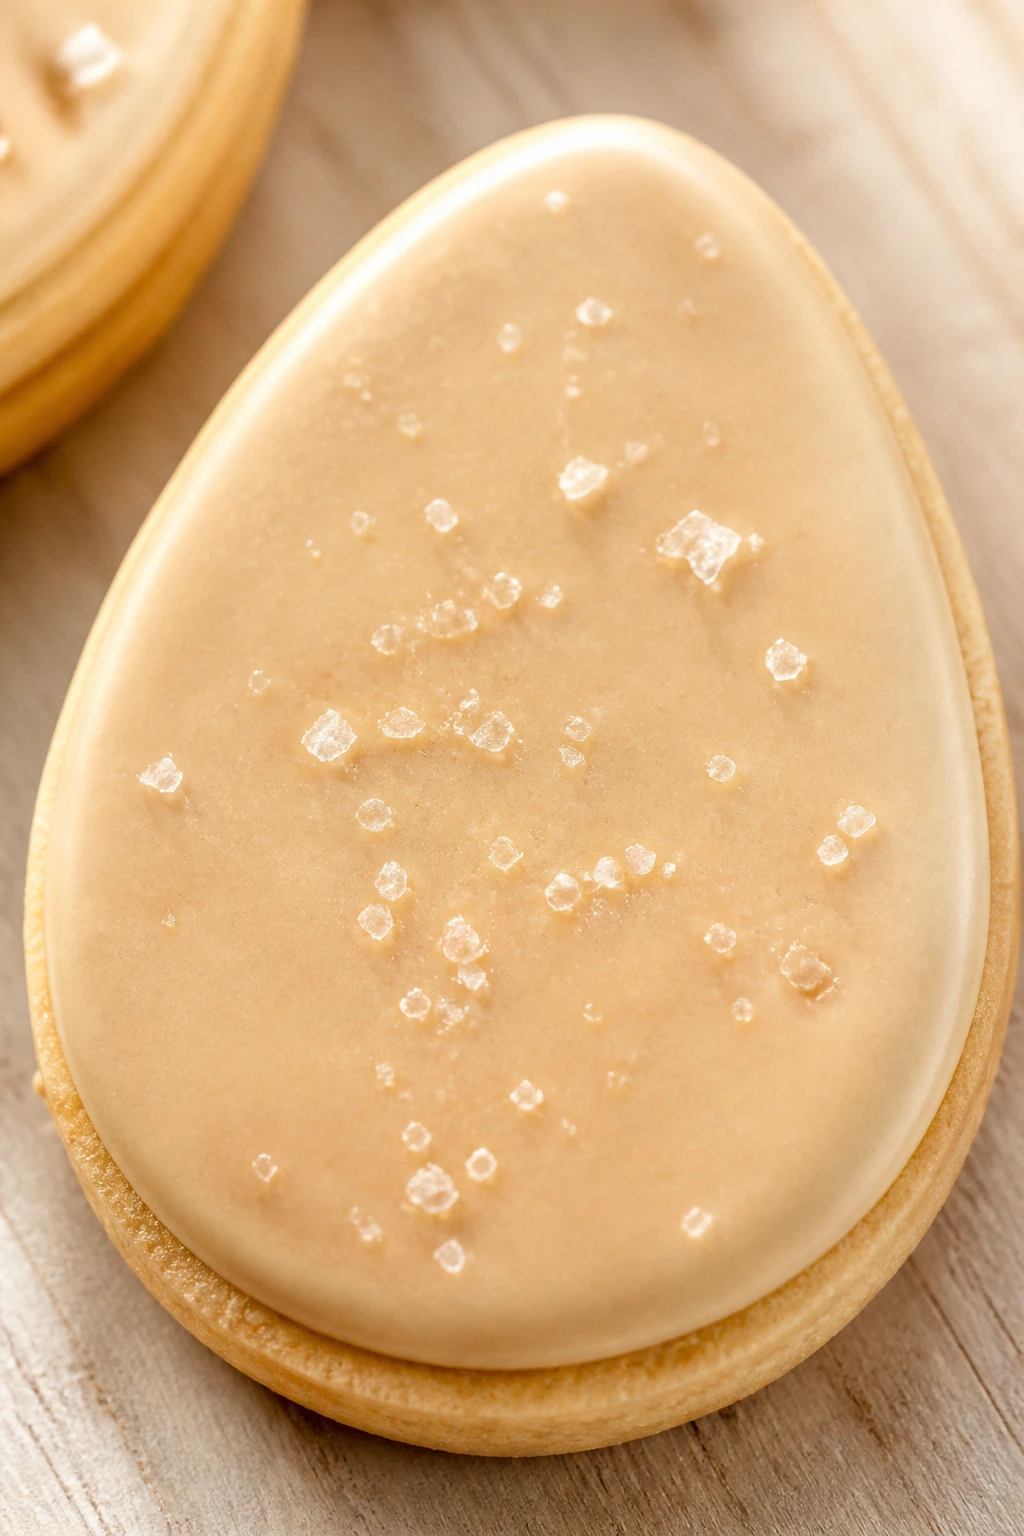
Intro: Maple gives sugar cookies a rounder sweetness than plain white sugar ever can. These taste like a late breakfast cookie, which is not a complaint in my book.
Why It Works: Maple syrup adds flavor and a little moisture, so the dough bakes with a softer middle. The salted glaze keeps the sweetness from drifting into syrupy territory. A touch of salt on top also gives the cookie a cleaner finish.
Key Ingredients:
- 2 1/2 cups all-purpose flour
- 1 teaspoon baking powder
- 1/2 teaspoon salt
- 1 cup unsalted butter, softened
- 3/4 cup granulated sugar
- 1/4 cup pure maple syrup
- 1 large egg
- 1 teaspoon vanilla extract
- 1 1/2 cups powdered sugar
- 2 to 3 tablespoons maple syrup or milk
- Pinch of flaky salt
Quick Steps:
- Whisk the flour, baking powder, and salt.
- Beat the butter and sugar, then mix in the maple syrup, egg, and vanilla.
- Add the dry ingredients and mix until just combined.
- Chill the dough for 30 minutes, then roll and cut into eggs or simple rounds.
- Bake at 350°F for 8 to 9 minutes until the edges set.
- Cool, then drizzle with maple glaze and finish with a pinch of flaky salt.
Equipment for This Recipe:
- Mixer
- Rolling pin
- Baking sheets
- Small saucepan, if you warm the maple slightly for the glaze
How to Serve This Dish: These are best on a tray with lemon or berry cookies, because the maple brings a deeper note that anchors the brighter flavors. A little salt on top makes them feel finished, not sugary.
Pro Tips for This Recipe:
- Use pure maple syrup, not pancake syrup, or the flavor gets thin and sticky.
- If the dough feels soft, chill it a full 45 minutes.
- Salt the glaze at the very end so you can taste it before adding more.
Variations on This Dish:
- Maple-Pecan Batch: Add 1/3 cup finely chopped pecans.
- Brown Sugar Maple: Replace 1/4 cup of the granulated sugar with light brown sugar.
- Maple Cream Glaze: Add 1 tablespoon cream to the glaze for a richer finish.
Common Mistakes to Avoid with This Dish:
- Using too much syrup: The dough gets sticky and spreads.
- Skipping the salt: The cookies taste flat and one-note.
- Glazing before cooling: The maple glaze slides right off.
9. Honey-Butter Flower Cookies
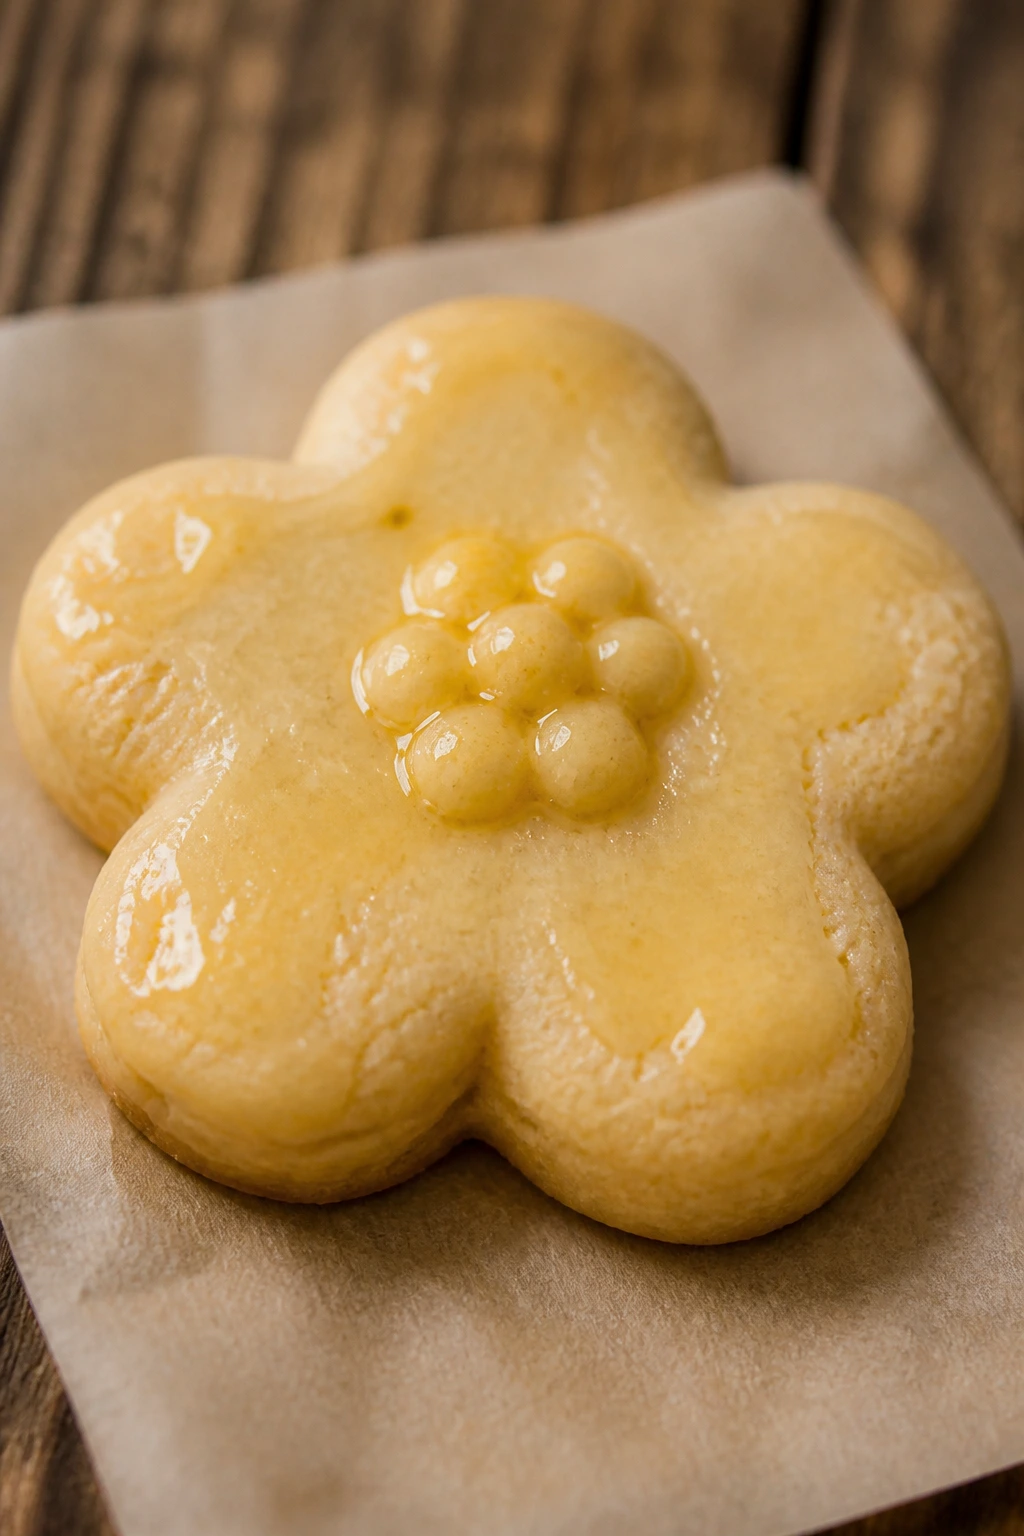
Intro: Honey changes the mood of a sugar cookie fast. The flavor feels softer and warmer, and the flower shapes make the whole batch look springlike without forcing you into complicated decoration.
Why It Works: Honey adds moisture and a faint floral note, which suits Easter desserts better than heavier spice. It also helps the cookies stay tender for an extra day or two. A thin honey glaze gives the tops a glossy finish that catches colored sugar well.
Key Ingredients:
- 2 1/2 cups all-purpose flour
- 1 teaspoon baking powder
- 1/2 teaspoon salt
- 1 cup unsalted butter, softened
- 3/4 cup granulated sugar
- 1/4 cup honey
- 1 large egg
- 1 teaspoon vanilla extract
- 1 1/2 cups powdered sugar
- 2 to 3 tablespoons milk
- 1 teaspoon honey for glaze
- Flower cookie cutters
Quick Steps:
- Whisk the flour, baking powder, and salt.
- Cream the butter, sugar, and honey until smooth, then mix in the egg and vanilla.
- Add the dry ingredients and mix until the dough forms.
- Chill for 30 to 45 minutes, then roll and cut flower shapes.
- Bake at 350°F for 8 to 9 minutes until the edges are just set.
- Cool and glaze with honey icing, then dust with a little sanding sugar if you like.
Equipment for This Recipe:
- Mixer
- Flower cutters
- Baking sheet
- Cooling rack
- Small brush for glaze, optional
How to Serve This Dish: These look especially good on a platter with a few edible flowers or extra sugar in soft colors. Keep the glaze thin so the cookie shape stays visible.
Pro Tips for This Recipe:
- Honey varies in strength; a mild clover honey keeps the flavor gentle.
- Dust the cutter with flour only if the dough sticks.
- Let the glaze set before packing these, or they’ll stick together.
Variations on This Dish:
- Lavender Honey Flowers: Add a tiny pinch of culinary lavender to the sugar.
- Orange Honey Batch: Add 1 teaspoon orange zest to the dough.
- No-Glaze Version: Roll the raw dough in sanding sugar and bake as-is.
Common Mistakes to Avoid with This Dish:
- Using too much honey: The dough becomes loose and sticky.
- Overbaking: Honey cookies darken fast at the edges.
- Stacking before the glaze dries: The surface smears and tears.
10. Orange Zest Easter Cookies
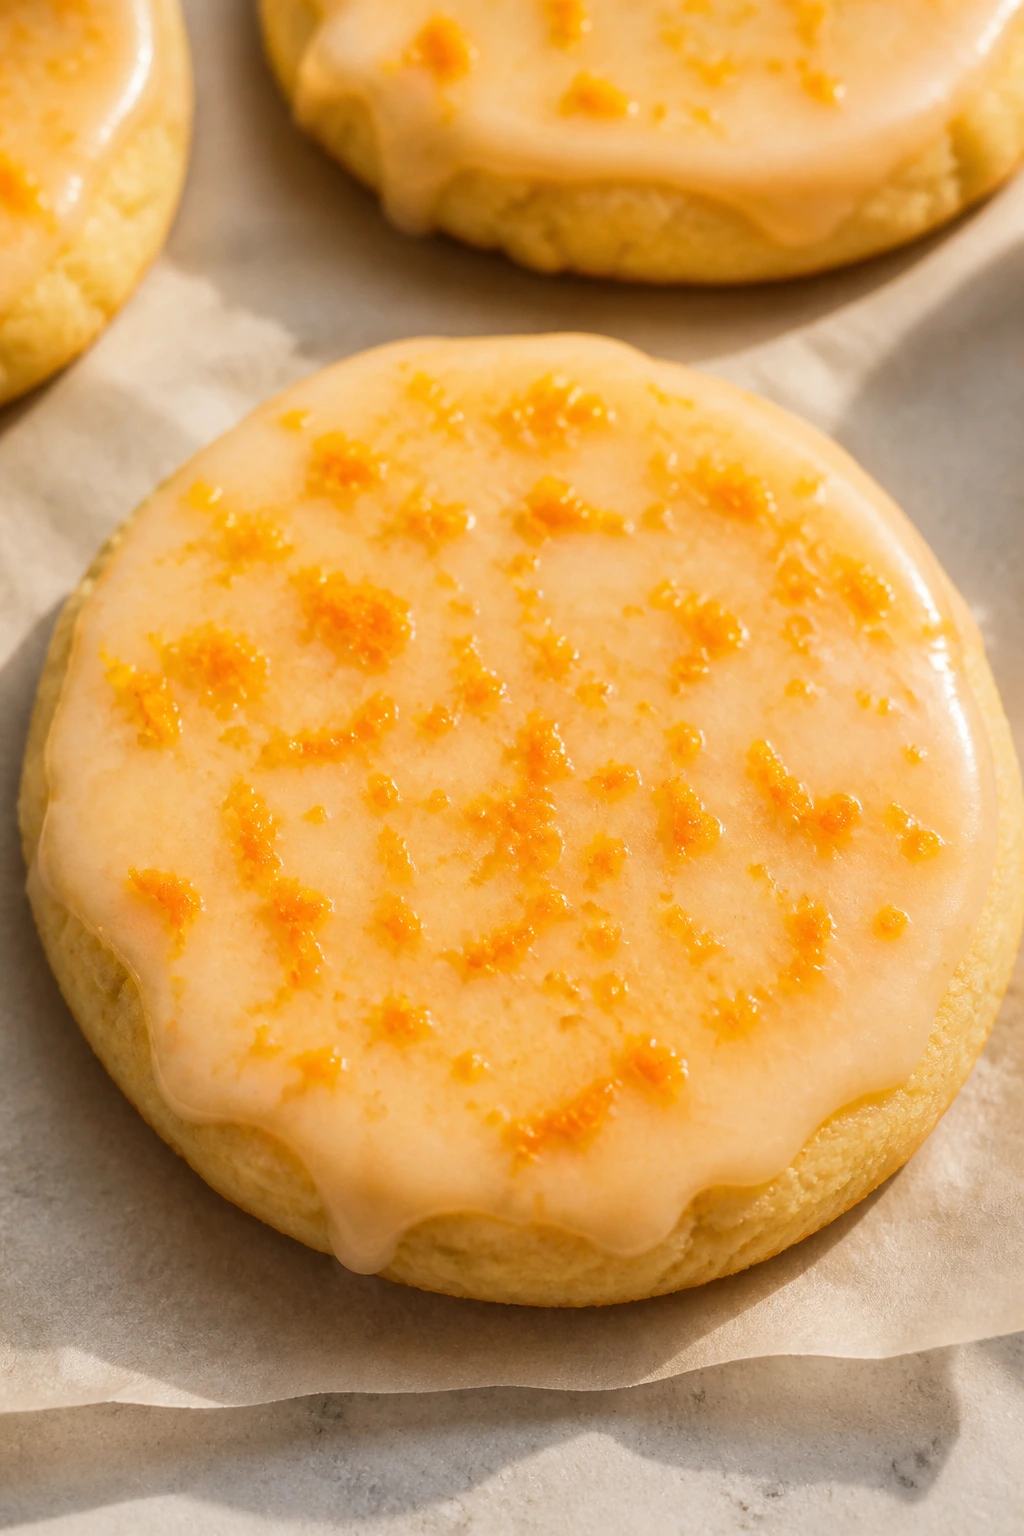
Intro: Orange gives sugar cookies a sunny flavor that feels right on a bright dessert table. It’s less sharp than lemon and a little rounder, which makes these easy to eat two or three at a time.
Why It Works: Zest carries the best orange flavor, and rubbing it into the sugar keeps the aroma in the cookie, not in the air. A light orange glaze finishes them with a citrusy shine without turning them into candy. The result is crisp at the edge, tender in the center, and pleasantly fragrant.
Key Ingredients:
- 2 1/2 cups all-purpose flour
- 1 teaspoon baking powder
- 1/2 teaspoon salt
- 1 cup unsalted butter, softened
- 1 cup granulated sugar
- 1 tablespoon orange zest
- 1 large egg
- 1 teaspoon vanilla extract
- 2 tablespoons orange juice
- 1 1/2 cups powdered sugar
- 2 to 3 tablespoons orange juice or milk
- Orange sanding sugar, optional
Quick Steps:
- Rub the orange zest into the sugar until fragrant.
- Cream the butter and orange sugar, then add the egg, vanilla, and orange juice.
- Mix in the flour, baking powder, and salt until a soft dough forms.
- Chill 30 minutes, then roll, cut, and place on lined baking sheets.
- Bake at 350°F for 8 to 10 minutes until the edges are set.
- Cool and glaze with orange icing, then finish with sanding sugar.
Equipment for This Recipe:
- Zester
- Mixer
- Rolling pin
- Cookie cutters
- Wire rack
How to Serve This Dish: These pair well with creamier cookies like almond or vanilla because the citrus cuts through the butter. If you’re setting up a platter, place them near the front; the color and smell do the work.
Pro Tips for This Recipe:
- Don’t grate the white pith; it tastes bitter.
- Fresh oranges beat bottled juice every time here.
- For a deeper color, add a tiny dot of orange gel color to the glaze.
Variations on This Dish:
- Orange-Vanilla Swirl: Add 1 extra teaspoon of vanilla extract.
- Orange Poppy Cookies: Stir in 1 tablespoon poppy seeds.
- Cranberry Orange: Add 1/3 cup finely chopped dried cranberries.
Common Mistakes to Avoid with This Dish:
- Ignoring the zest: Most of the orange flavor lives there.
- Too much juice in the glaze: It turns thin and runs off the cookie.
- Baking until brown: These should stay pale and sunny.
11. Raspberry Thumbprint Sugar Cookies
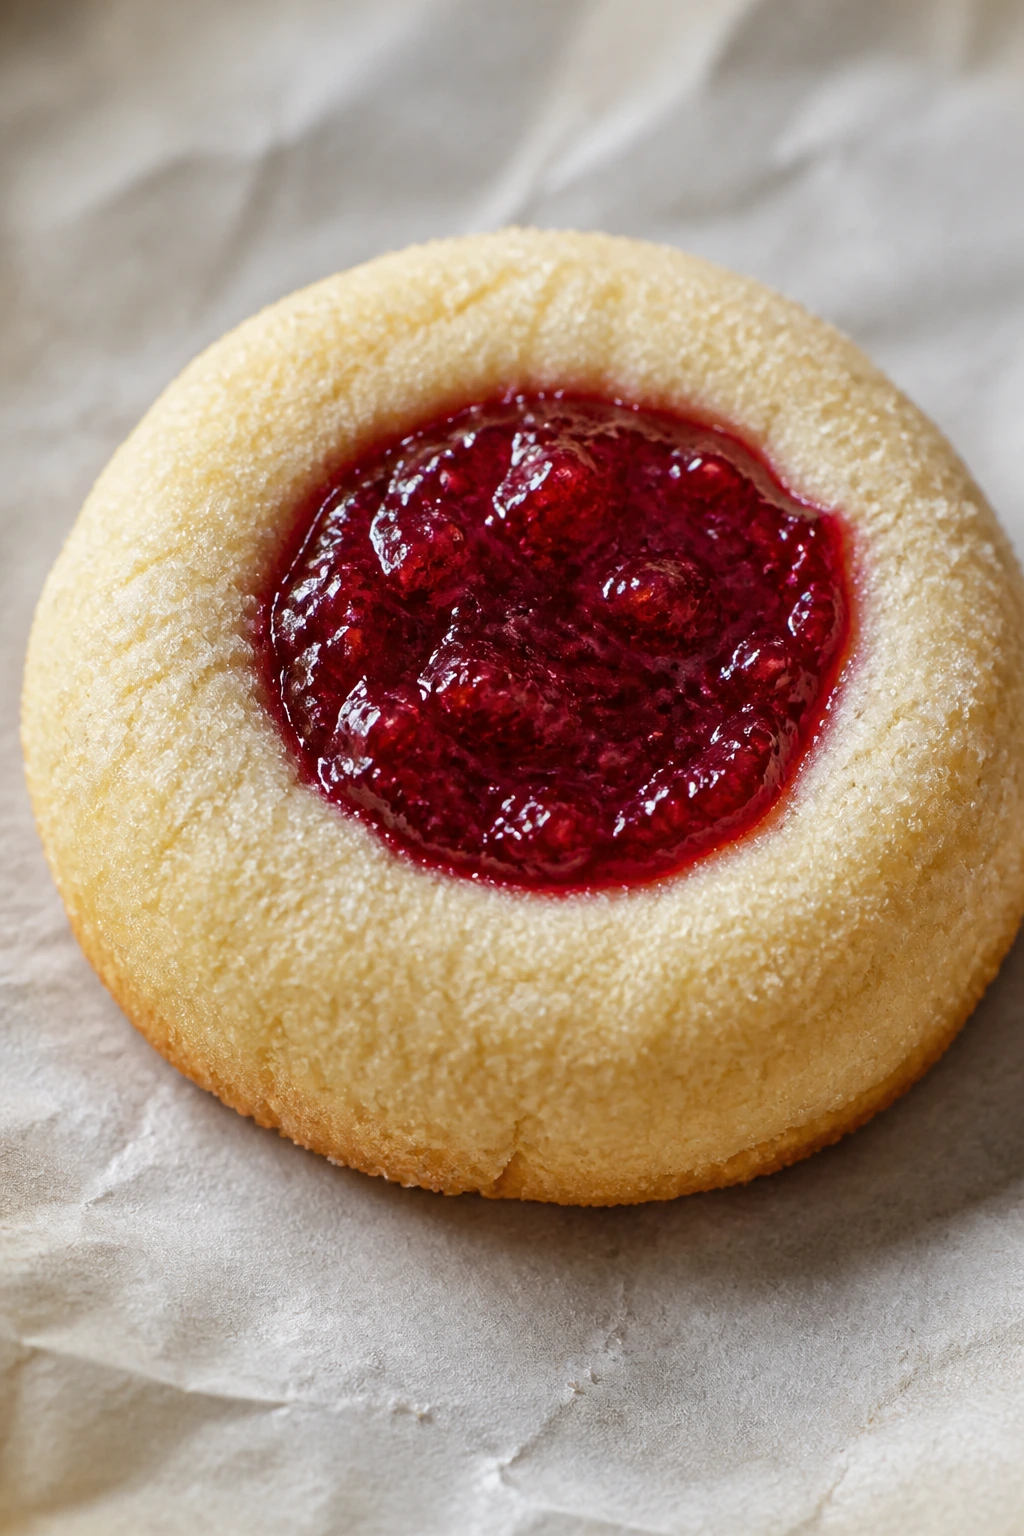
Intro: Thumbprints are the quiet overachievers of cookie trays. They look fancy, but the method is mostly rolling, pressing, filling, and baking.
Why It Works: The dough is sturdy enough to hold a well in the center without cracking apart, which is the whole trick. Raspberry jam bakes down into a shiny jewel right in the middle, and a touch of almond extract makes the fruit taste brighter. These are also a smart choice if you don’t want to ice anything.
Key Ingredients:
- 2 1/4 cups all-purpose flour
- 1/2 teaspoon baking powder
- 1/2 teaspoon salt
- 1 cup unsalted butter, softened
- 3/4 cup granulated sugar
- 1 large egg
- 1 teaspoon vanilla extract
- 1/2 teaspoon almond extract
- 1/2 cup seedless raspberry jam
- 1/2 cup powdered sugar, optional
- 1 teaspoon milk, optional
Quick Steps:
- Whisk the flour, baking powder, and salt.
- Cream the butter and sugar, then beat in the egg, vanilla, and almond extract.
- Mix in the dry ingredients until the dough holds together.
- Roll into 1-inch balls, set them on baking sheets, and press each one with your thumb or the back of a teaspoon.
- Fill each well with about 1/2 teaspoon jam and bake at 350°F for 10 to 11 minutes.
- Cool completely; dust lightly with powdered sugar if you want a softer finish.
Equipment for This Recipe:
- Baking sheets
- Small spoon
- Mixing bowl
- Cooling rack
How to Serve This Dish: Put these near the center of the tray because the jam catches the eye. They work well with plain sugar cookies so the fruit flavor doesn’t feel crowded.
Pro Tips for This Recipe:
- Press the wells before baking, not after, or the cookie can crack.
- Seedless jam keeps the tops neat.
- If the wells puff in the oven, press them gently with a spoon while still warm.
Variations on This Dish:
- Strawberry Thumbprints: Swap the raspberry jam for strawberry.
- Apricot Almond: Use apricot preserves and keep the almond extract.
- Lemon Curd Center: Fill the wells after baking instead of before.
Common Mistakes to Avoid with This Dish:
- Using jam that’s too runny: It spills over the edges.
- Making the wells too deep: The cookie weakens and breaks.
- Dusting with powdered sugar too early: It melts into the jam.
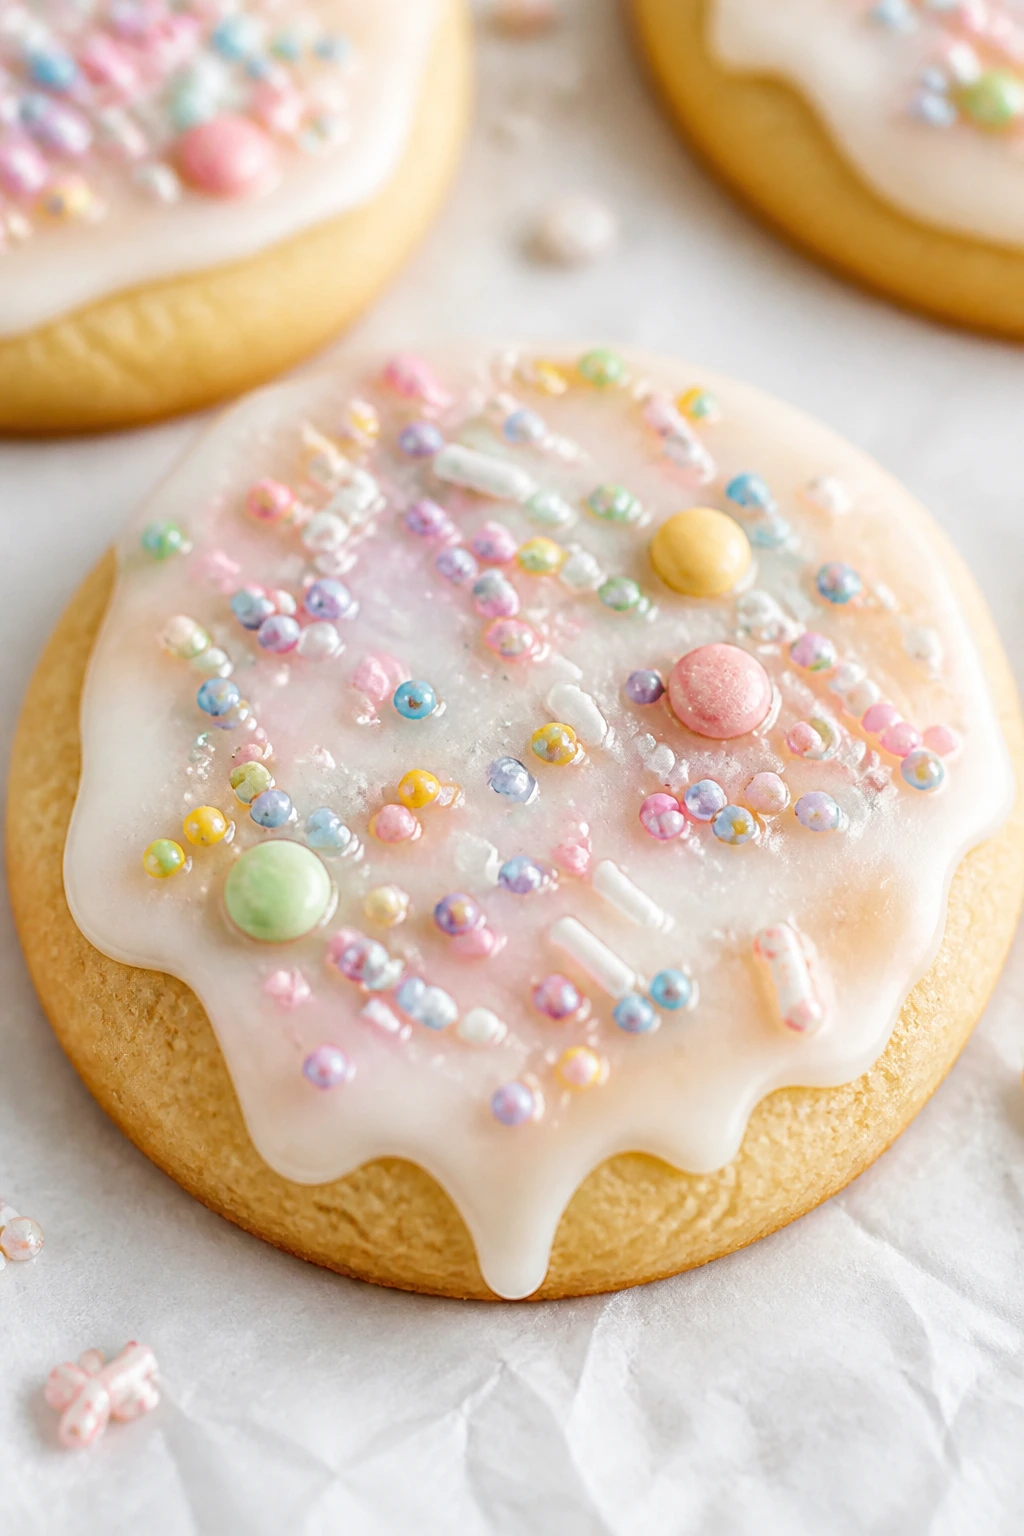
12. Pastel Swirl Iced Cut-Outs

Intro: These are the cookies that look more complicated than they are. One bowl of glaze divided into three colors, a spoon swirl, and suddenly the whole tray looks intentional.
Why It Works: A simple glaze is easier for beginners than royal icing because it stays forgiving for a few extra minutes. Swirling two or three pastel shades together gives you a marbled top without detailed piping. Since the dough itself is plain vanilla, the decoration gets all the attention.
Key Ingredients:
- 2 3/4 cups all-purpose flour
- 1 teaspoon baking powder
- 1/2 teaspoon fine salt
- 1 cup unsalted butter, softened
- 1 cup granulated sugar
- 1 large egg
- 2 teaspoons vanilla extract
- 2 tablespoons milk
- 2 cups powdered sugar
- 3 to 4 tablespoons milk
- Pink, blue, and yellow gel food coloring
Quick Steps:
- Make a basic vanilla dough by creaming the butter and sugar, then adding the egg, vanilla, flour, baking powder, salt, and milk.
- Chill for 45 minutes, roll to 1/4 inch thick, and cut eggs, bunnies, or flowers.
- Bake at 350°F for 8 to 10 minutes, then cool completely.
- Divide the glaze into three bowls and tint each one with a small amount of gel color.
- Spoon the colors over the cookies and swirl lightly with a toothpick.
- Let the glaze set for at least 1 hour before stacking.
Equipment for This Recipe:
- Three small bowls for glaze
- Toothpicks
- Mixer
- Cookie cutters
- Cooling rack
How to Serve This Dish: These belong on the showpiece plate because the swirls are part of the appeal. Keep the rest of the tray more restrained so these don’t get visually noisy.
Pro Tips for This Recipe:
- Use gel coloring, not liquid, or the glaze gets thin.
- Swirl lightly. If you overwork it, the colors turn muddy.
- Let the cookies cool all the way or the glaze won’t hold the pattern.
Variations on This Dish:
- Tie-Dye Version: Use four colors instead of three.
- Monochrome Pastels: Stay within one color family for a softer look.
- Speckled Finish: Add a tiny bit of edible gold or silver dust after swirling.
Common Mistakes to Avoid with This Dish:
- Using too much food coloring: The glaze tastes weird and can stain the mouth.
- Dragging the toothpick through too many times: The colors blend into one dull shade.
- Decorating warm cookies: The glaze slides and loses its pattern.
13. Cinnamon Sugar Bunny Cookies
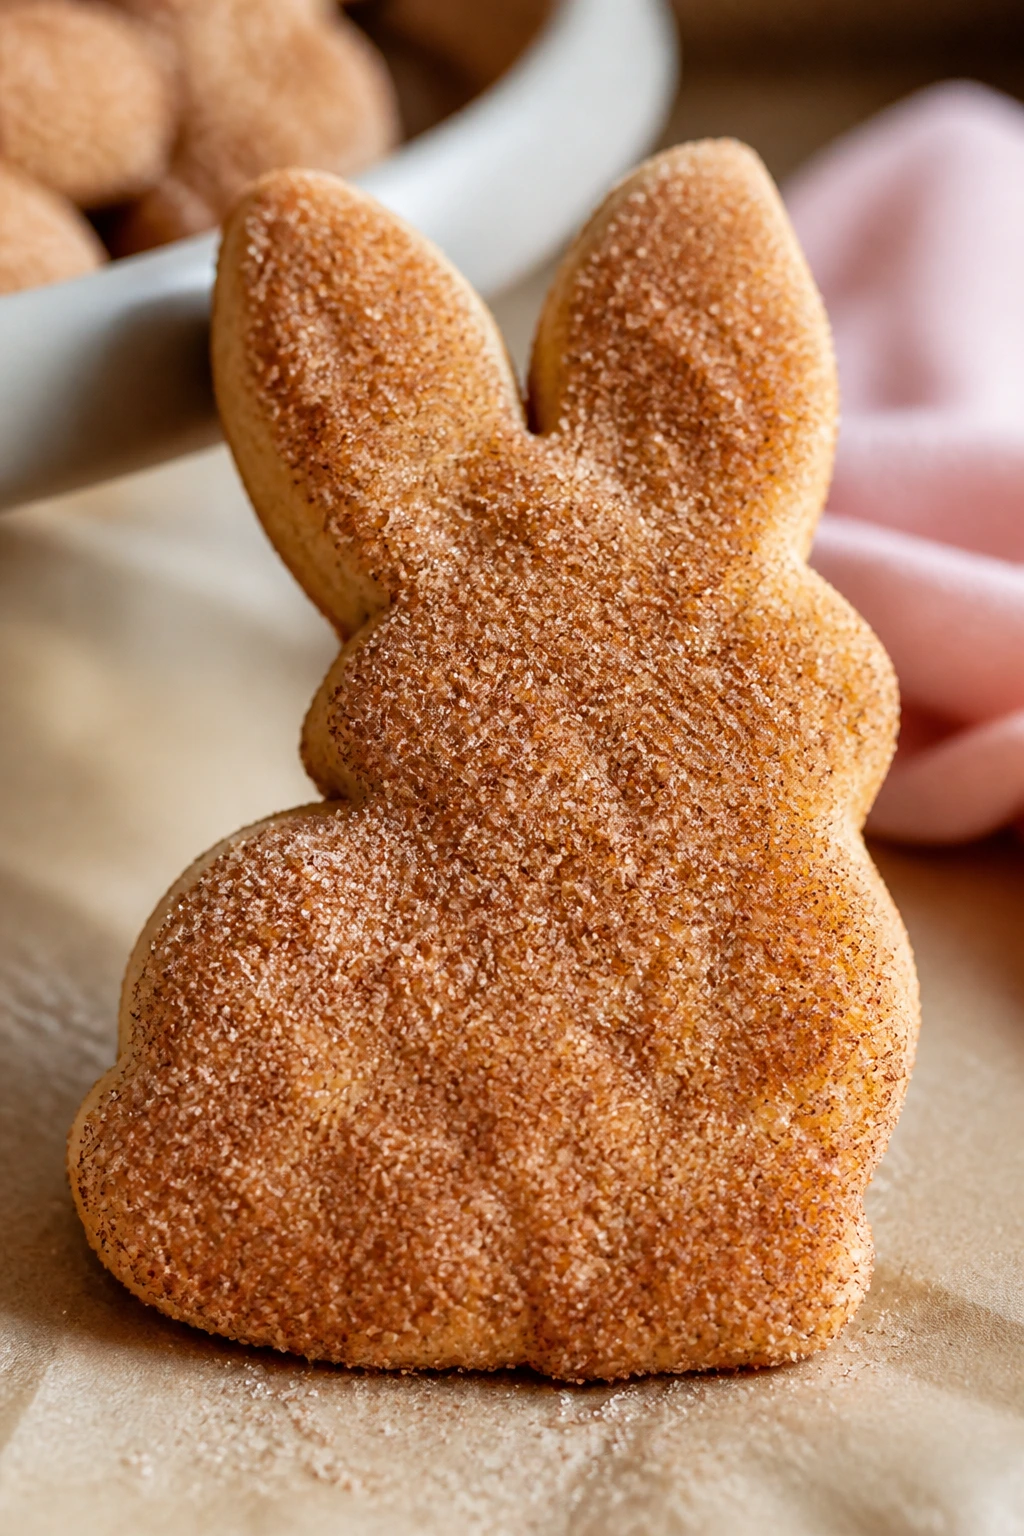
Intro: These are the warm-spice cookies in a lineup full of vanilla and citrus. They taste like a snickerdoodle decided to wear Easter ears.
Why It Works: A little cinnamon in the dough and a cinnamon-sugar coating on top gives each bite a dry, sparkly crust. That coating also helps hide tiny imperfections in the cut-out shape, which is honestly useful if you’re still learning how to roll dough evenly. The cookie stays soft underneath the sugar shell.
Key Ingredients:
- 2 1/2 cups all-purpose flour
- 1 teaspoon baking powder
- 1/2 teaspoon salt
- 1 teaspoon ground cinnamon
- 1 cup unsalted butter, softened
- 1 cup granulated sugar
- 1 large egg
- 2 teaspoons vanilla extract
- 1/4 cup granulated sugar, for coating
- 1 teaspoon cinnamon, for coating
Quick Steps:
- Whisk the flour, baking powder, salt, and cinnamon.
- Cream the butter and sugar, then mix in the egg and vanilla.
- Add the dry ingredients and mix until the dough just comes together.
- Chill for 30 minutes, roll to 1/4 inch, cut bunnies, and brush lightly with water or milk.
- Sprinkle with cinnamon sugar and bake at 350°F for 8 to 10 minutes.
- Cool on the pan for 5 minutes, then transfer to a rack.
Equipment for This Recipe:
- Mixing bowl
- Basting brush or clean pastry brush
- Baking sheet
- Bunny cutter
How to Serve This Dish: These are nicest when they’re still a little warm, with the cinnamon scent coming off the tray. If you’re serving them with other cookies, keep them near the center so the spice doesn’t overpower the gentler flavors.
Pro Tips for This Recipe:
- Brush the dough lightly, or the coating will clump.
- Use fine cinnamon sugar, not coarse, for the cleanest finish.
- Stop baking when the tops look matte and set.
Variations on This Dish:
- Cardamom Cinnamon: Add 1/4 teaspoon ground cardamom for a softer spice note.
- Brown Sugar Version: Swap 1/4 cup of the sugar for light brown sugar.
- Plain Sugar Top: Leave off the cinnamon coating and dust with regular sugar instead.
Common Mistakes to Avoid with This Dish:
- Using too much cinnamon: It can turn sharp and dry.
- Pressing too hard with the cutter: The edges crimp and bake unevenly.
- Overbaking the coating: Cinnamon sugar should smell warm, not burnt.
14. Chocolate-Dipped Vanilla Cookies
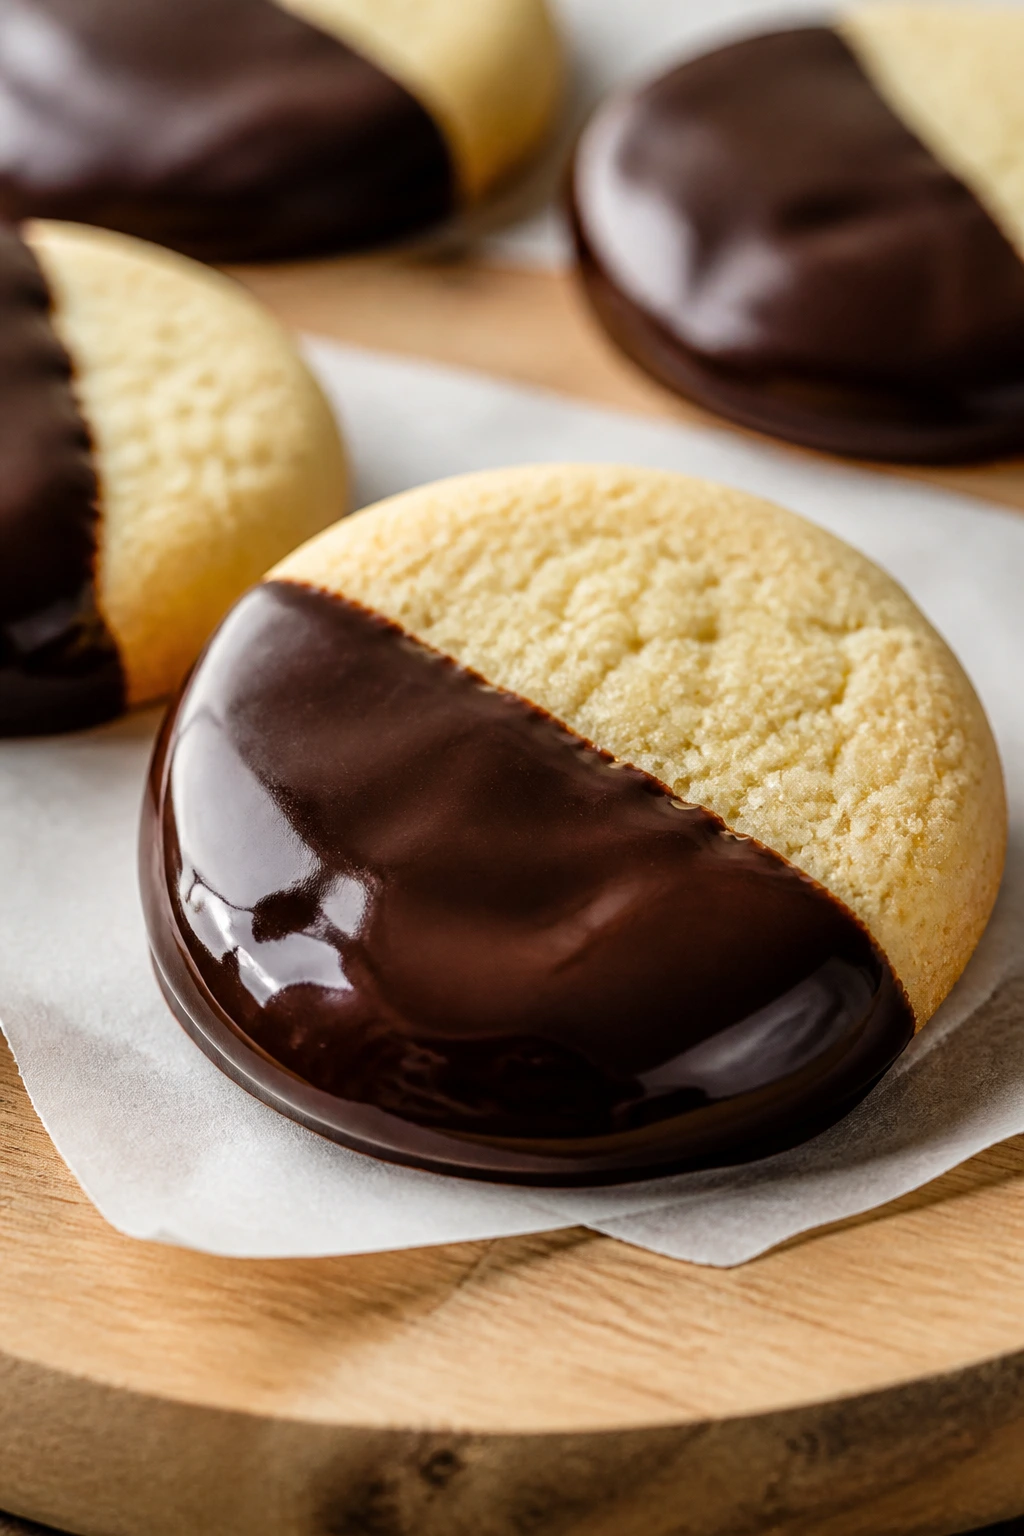
Intro: Some trays need a little dark chocolate to break up all the pastel. A clean dip on one edge gives these a neat finish without asking you to pipe anything.
Why It Works: Vanilla sugar cookies and dark chocolate are an easy pairing because the cookie is mild enough to let the chocolate stay in charge. A partial dip also helps the cookie feel special without doubling the work. If you want a tray that looks finished fast, this one does the job.
Key Ingredients:
- 2 3/4 cups all-purpose flour
- 1 teaspoon baking powder
- 1/2 teaspoon salt
- 1 cup unsalted butter, softened
- 1 cup granulated sugar
- 1 large egg
- 2 teaspoons vanilla extract
- 8 ounces semisweet chocolate, chopped
- 1 teaspoon coconut oil or neutral oil
- Pastel sprinkles, optional
Quick Steps:
- Make a vanilla cut-out dough and chill it for 45 minutes.
- Roll, cut, and bake at 350°F for 8 to 10 minutes.
- Cool completely.
- Melt the chocolate with the oil in short bursts, stirring until smooth.
- Dip half of each cookie in chocolate, let the excess drip off, and set on parchment.
- Add sprinkles before the chocolate sets, if using.
Equipment for This Recipe:
- Microwave-safe bowl or double boiler
- Offset spatula
- Parchment
- Cooling rack
How to Serve This Dish: These are the cookie you place near coffee or tea, because the chocolate makes them feel less sweet than the iced cookies. A neat dip line looks cleaner than a heavy coat.
Pro Tips for This Recipe:
- Cool the cookies fully or the chocolate won’t set properly.
- Use chopped chocolate instead of chips for smoother melting.
- Keep water away from the melted chocolate; even a drop can make it seize.
Variations on This Dish:
- White Chocolate Dip: Swap in white chocolate for a sweeter finish.
- Double-Dip Style: Add a second stripe of chocolate in the opposite direction after the first layer sets.
- Orange Chocolate: Stir 1/2 teaspoon orange zest into the melted chocolate.
Common Mistakes to Avoid with This Dish:
- Dipping warm cookies: The chocolate slides right off.
- Overheating the chocolate: It turns grainy and thick.
- Using too much oil: The coating gets soft and sticky.
15. Pistachio Short Sugar Cookies
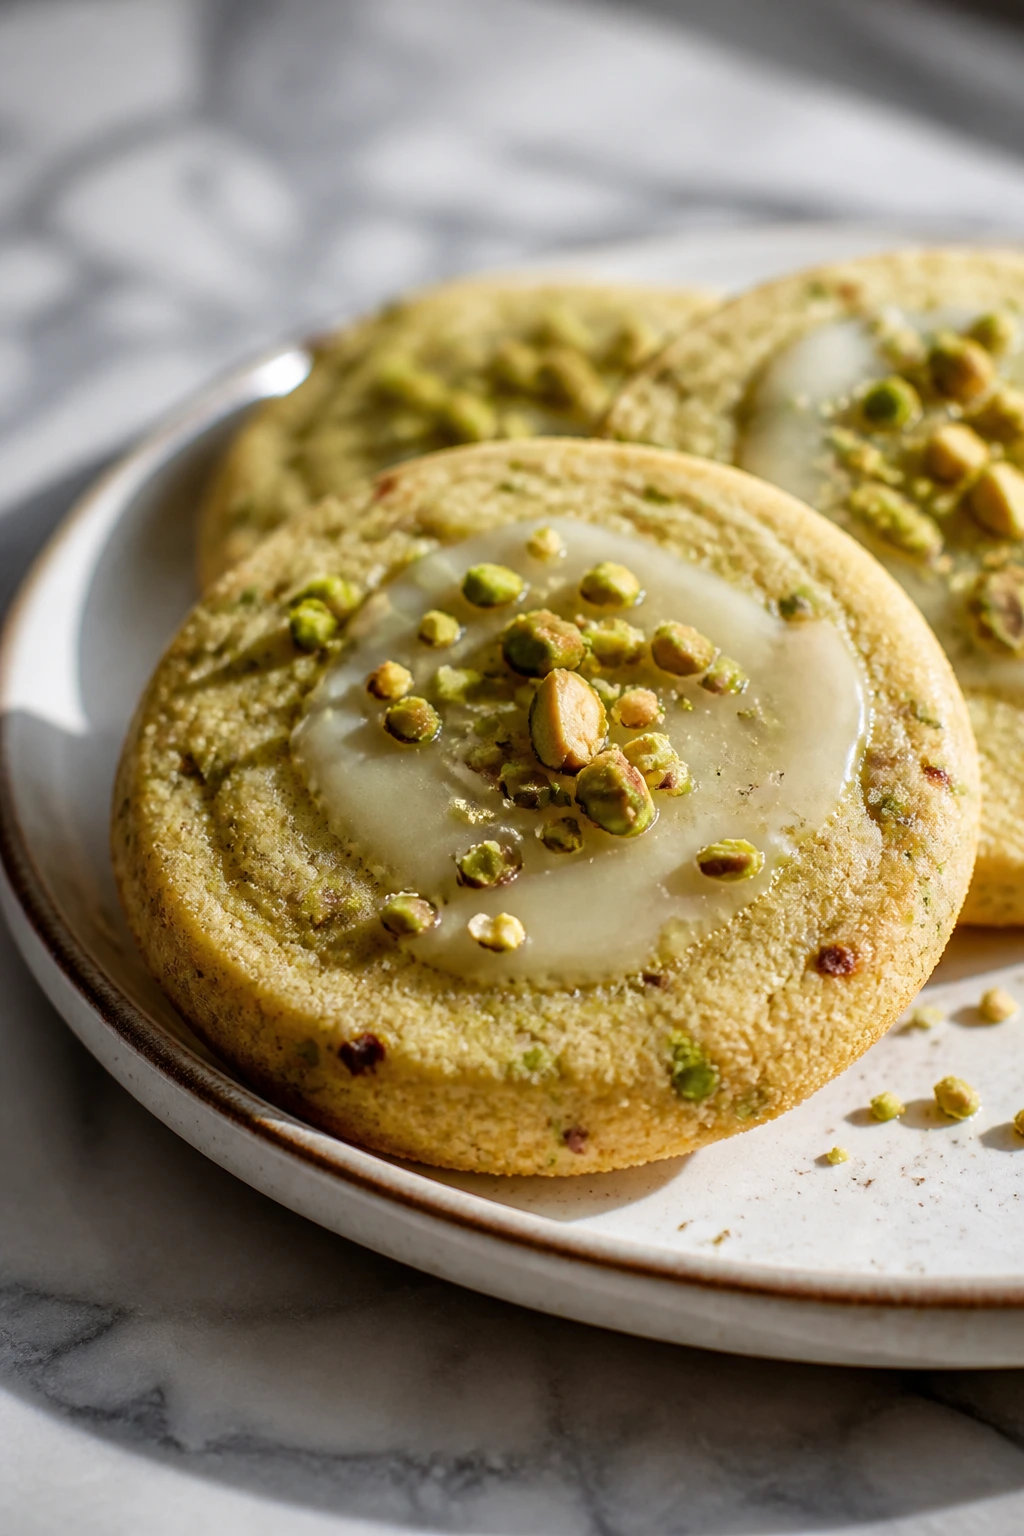
Intro: Pistachio gives sugar cookies a green tint and a flavor that feels a little more grown-up than vanilla. These are the cookies I make when I want something gentle but not boring.
Why It Works: Finely chopped pistachios or pistachio paste adds flavor without making the dough heavy. Since pistachios bring fat and a little crunch, the cookies bake with a tender crumb and a subtle nutty finish. A plain glaze keeps the texture front and center.
Key Ingredients:
- 2 1/4 cups all-purpose flour
- 1/2 cup finely ground pistachios
- 1 teaspoon baking powder
- 1/2 teaspoon salt
- 1 cup unsalted butter, softened
- 3/4 cup granulated sugar
- 1 large egg
- 1 teaspoon vanilla extract
- 1/2 teaspoon almond extract
- 1 1/2 cups powdered sugar
- 2 to 3 tablespoons milk
- Chopped pistachios, optional
Quick Steps:
- Whisk the flour, ground pistachios, baking powder, and salt.
- Cream the butter and sugar, then mix in the egg, vanilla, and almond extract.
- Add the dry ingredients and mix until the dough comes together.
- Chill for 30 minutes, then roll, cut, and bake at 350°F for 8 to 9 minutes.
- Cool, glaze lightly, and finish with chopped pistachios if you want extra crunch.
Equipment for This Recipe:
- Food processor or spice grinder, if grinding pistachios
- Mixer
- Baking sheet
- Fine sieve for glaze, optional
How to Serve This Dish: These are good in smaller stacks because the nut flavor is richer than plain sugar cookies. They look especially nice next to lemon cookies, where the green and yellow tones play off each other.
Pro Tips for This Recipe:
- Grind pistachios finely so the dough rolls smoothly.
- Buy unsalted pistachios; salted ones push the flavor in the wrong direction.
- If the dough feels dry, add 1 teaspoon milk, not a splash.
Variations on This Dish:
- Pistachio-Lemon: Add 1 teaspoon lemon zest.
- Pistachio Rose: Add a tiny drop of rose water if you like floral notes.
- Extra-Crunch Top: Press chopped pistachios into the glaze before it sets.
Common Mistakes to Avoid with This Dish:
- Leaving the pistachios coarse: The dough tears when you roll it.
- Using too much almond extract: It can drown out the pistachio.
- Skipping the chill: Nutty dough can spread faster than plain vanilla dough.
16. Lavender-Lemon Tea Cookies
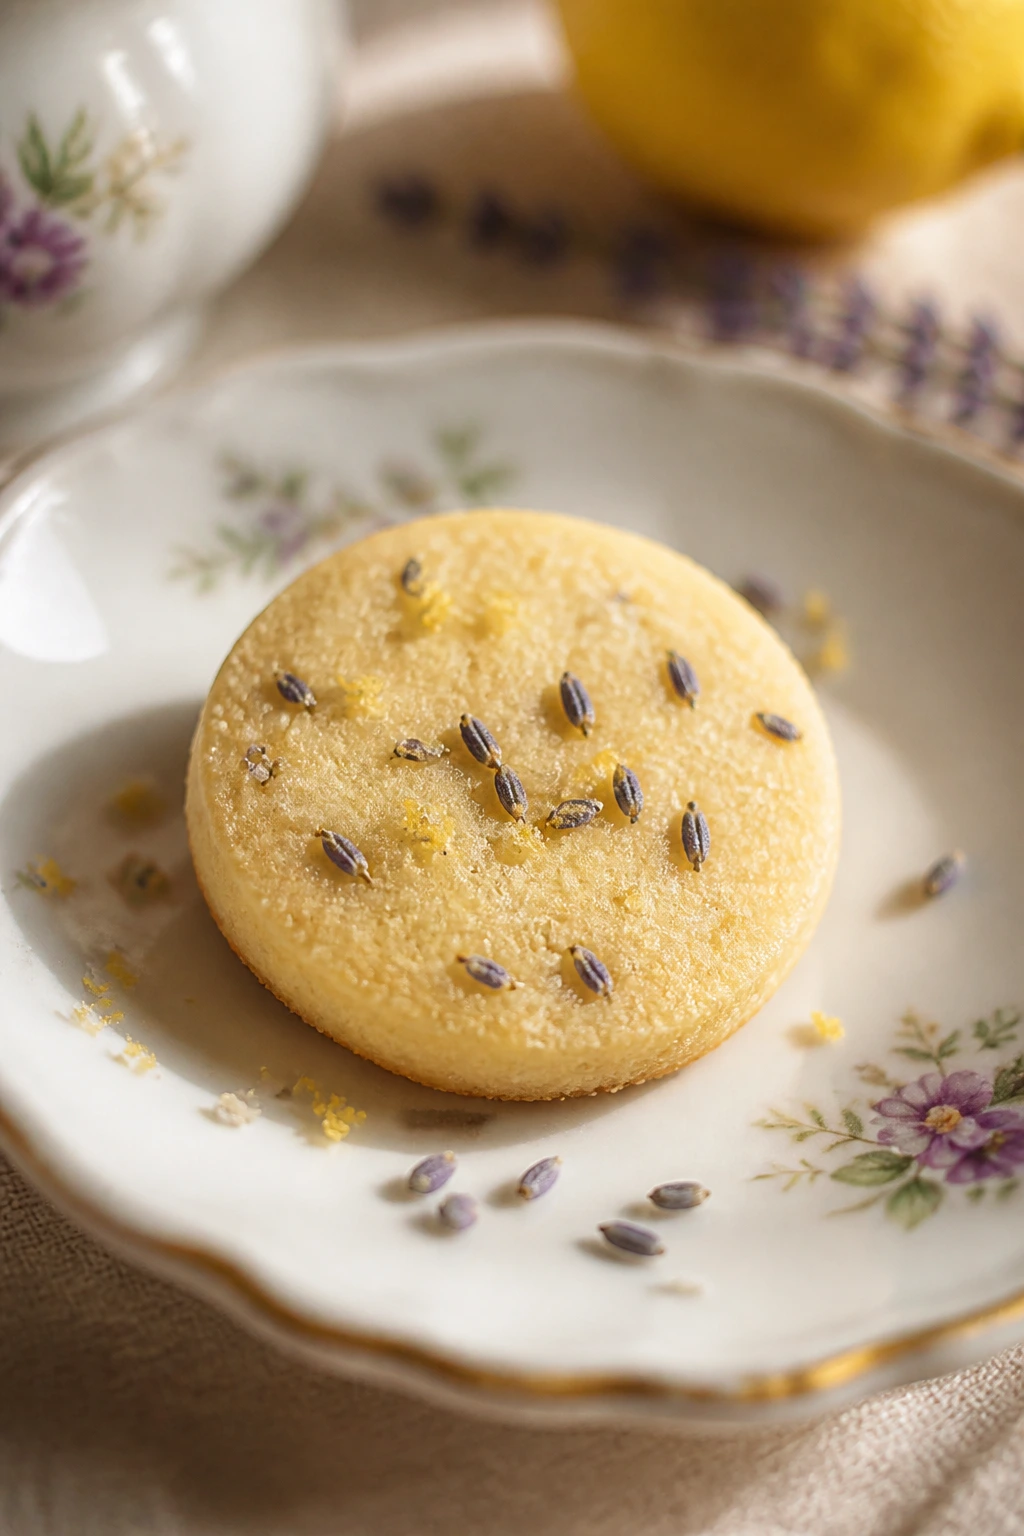
Intro: Lavender is easy to get wrong, and that’s exactly why this cookie keeps the amount tiny. Used well, it smells like spring air and tastes delicate, not perfumed.
Why It Works: A small amount of culinary lavender infuses the sugar before baking, which keeps the flavor even and controlled. Lemon brings the cookie back into familiar territory, so the floral note stays pleasant. These are tiny cookies, best baked a touch smaller than the others, which makes them perfect with tea or coffee.
Key Ingredients:
- 2 1/2 cups all-purpose flour
- 1 teaspoon baking powder
- 1/2 teaspoon salt
- 1 cup unsalted butter, softened
- 1 cup granulated sugar
- 1 teaspoon dried culinary lavender, finely crushed
- 1 large egg
- 1 teaspoon lemon zest
- 1 teaspoon vanilla extract
- 1 1/2 cups powdered sugar
- 2 to 3 tablespoons lemon juice
- Tiny lavender buds or sanding sugar, optional
Quick Steps:
- Rub the lavender into the sugar so the oils release.
- Cream the lavender sugar with the butter, then beat in the egg, lemon zest, and vanilla.
- Mix in the flour, baking powder, and salt.
- Chill the dough for 30 minutes, then roll and cut small shapes.
- Bake at 350°F for 7 to 9 minutes, just until the edges are set.
- Cool and drizzle with lemon glaze.
Equipment for This Recipe:
- Fine grinder or mortar and pestle
- Mixer
- Small cutters
- Parchment-lined sheets
How to Serve This Dish: These belong on a quieter part of the tray, because their flavor is more subtle. They’re lovely with a cup of black tea or a simple coffee after the meal.
Pro Tips for This Recipe:
- Use culinary lavender, not potpourri-grade lavender.
- Crush it finely so you don’t get sharp little bits in the dough.
- Keep the cookies small; the floral note feels sharper in large cookies.
Variations on This Dish:
- Lemon-Only Version: Leave out the lavender and double the zest.
- Lavender Honey Glaze: Replace part of the lemon juice with honey.
- Short Tea Cookie: Shape the dough into tiny rounds instead of cut-outs.
Common Mistakes to Avoid with This Dish:
- Using too much lavender: It turns soapy fast.
- Baking large cookies with floral dough: The flavor can feel heavy.
- Over-glazing: A thin drizzle is enough.
17. Vanilla Bean Sandwich Cookies
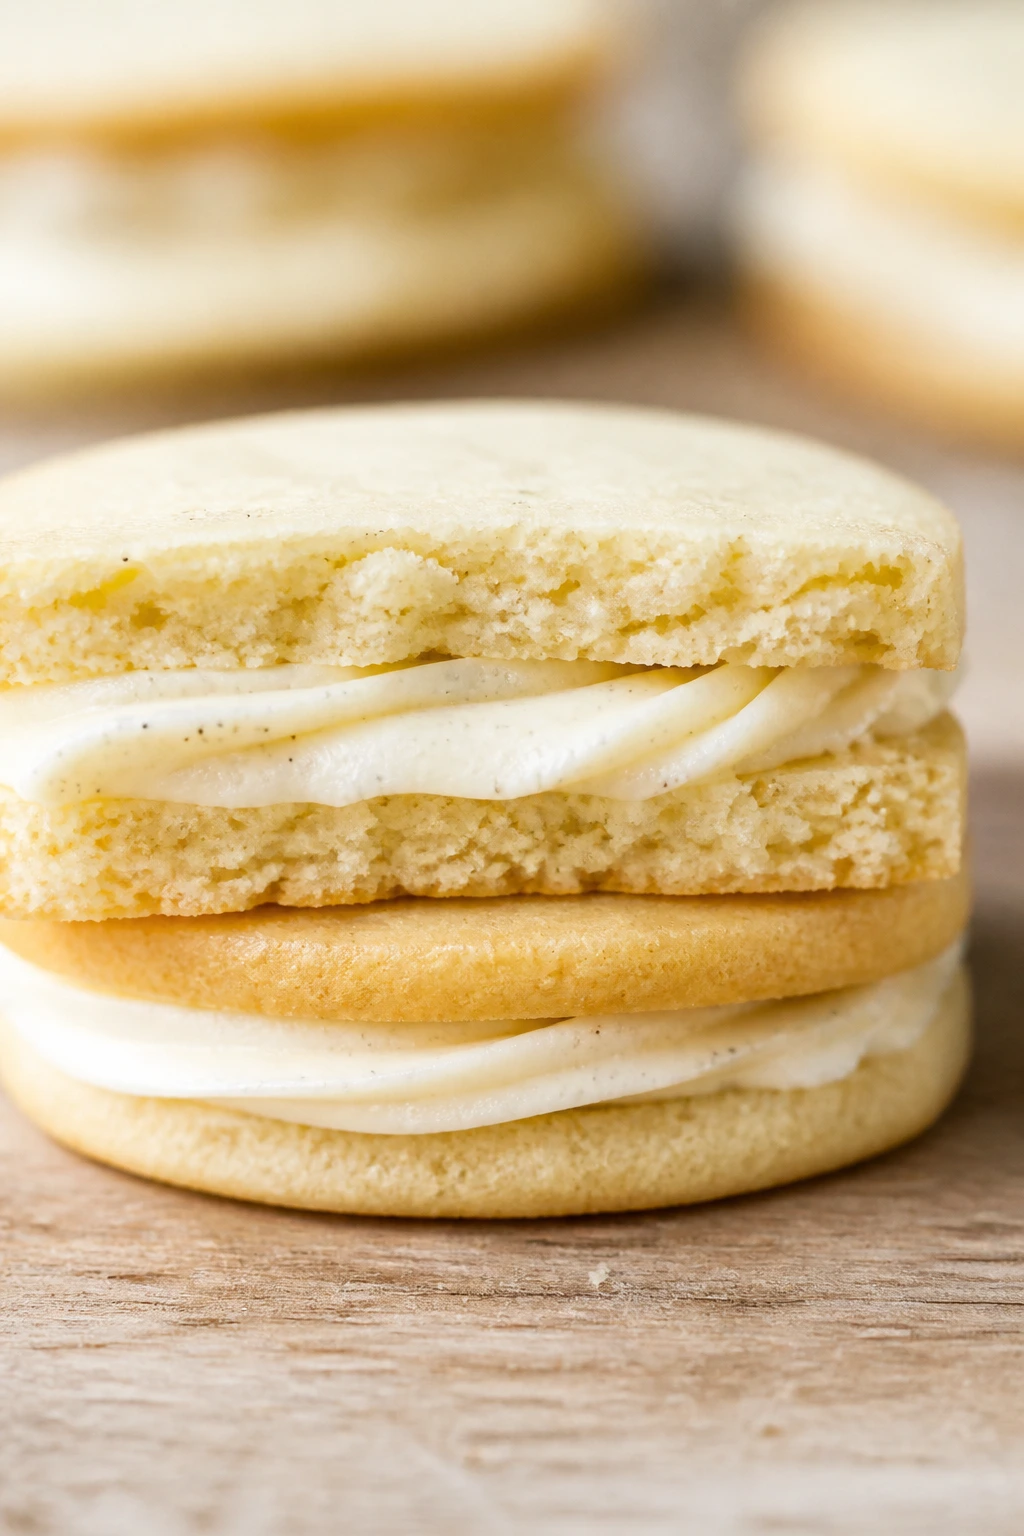
Intro: These are the cookies for when you want a little more structure and a little more buttercream. Two thin sugar cookies with a soft center filling feel like a proper treat, not just another decorated cookie.
Why It Works: Vanilla bean paste gives the dough those tiny black specks that make even a simple sandwich cookie look polished. The cookies are baked slightly thinner so they sandwich neatly without crumbling. A small amount of buttercream is enough; if you overfill them, the filling squishes out the sides when you bite in.
Key Ingredients:
- 2 1/2 cups all-purpose flour
- 1 teaspoon baking powder
- 1/2 teaspoon salt
- 1 cup unsalted butter, softened
- 1 cup granulated sugar
- 1 large egg
- 2 teaspoons vanilla bean paste
- 1 1/2 cups powdered sugar
- 1/2 cup unsalted butter, softened, for filling
- 1 teaspoon vanilla extract, for filling
- 1 to 2 tablespoons milk, for filling
Quick Steps:
- Make a vanilla bean dough and chill it for 45 minutes.
- Roll it to just under 1/4 inch thick and cut even shapes.
- Bake at 350°F for 7 to 9 minutes so the cookies stay pale.
- Cool completely.
- Beat the filling ingredients until fluffy, then spread a thin layer on one cookie and top with another.
- Press gently so the filling reaches the edges without squeezing out.
Equipment for This Recipe:
- Rolling pin
- Round or Easter cutters
- Mixer
- Offset spatula or butter knife
How to Serve This Dish: These feel right on a dessert plate after a big meal because they eat more like a filled cookie than a plain sugar cookie. Keep them away from very wet cookies so the filling stays intact.
Pro Tips for This Recipe:
- Bake the cookies flat and even; sandwich cookies show every tilt.
- Let the cookies cool fully before filling.
- Add the milk to the buttercream slowly so you don’t make it loose.
Variations on This Dish:
- Jam-Filled Sandwiches: Replace the buttercream with a thin layer of raspberry jam.
- Chocolate Filling: Add 1 tablespoon cocoa powder to the filling.
- Lemon Buttercream: Swap the vanilla extract for lemon zest.
Common Mistakes to Avoid with This Dish:
- Filling warm cookies: The buttercream melts and slides.
- Overfilling: The sides bulge out and the cookies skid apart.
- Rolling unevenly: Some cookies bake too hard while others stay soft.
18. Gluten-Free Almond Flour Sugar Cookies
Intro: Gluten-free cookies do not have to be fragile little disappointments. With the right mix of gluten-free flour and almond flour, these cut-outs hold their shape and taste like an actual cookie.
Why It Works: A gluten-free 1:1 flour blend brings structure, while almond flour adds tenderness and a faint nutty flavor. The dough benefits from a chill because gluten-free dough can feel softer before it sets. That extra rest makes rolling and cutting easier, which is the part beginner bakers worry about most.
Key Ingredients:
- 2 cups gluten-free 1:1 flour blend
- 1 cup finely blanched almond flour
- 1 teaspoon baking powder
- 1/2 teaspoon salt
- 1 cup unsalted butter, softened
- 3/4 cup granulated sugar
- 1 large egg
- 2 teaspoons vanilla extract
- 1 to 2 tablespoons milk, if needed
- Simple glaze or sanding sugar, optional
Quick Steps:
- Whisk the gluten-free flour, almond flour, baking powder, and salt.
- Cream the butter and sugar, then mix in the egg and vanilla.
- Add the dry ingredients and mix until the dough holds together. Add milk only if the dough looks crumbly.
- Chill for 45 minutes, then roll between parchment sheets and cut shapes.
- Bake at 350°F for 8 to 10 minutes, until the edges are set and the centers still look pale.
- Cool completely before glazing or dusting with sugar.
Equipment for This Recipe:
- Parchment paper
- Mixer
- Rolling pin
- Cookie cutters
- Cooling rack
How to Serve This Dish: These fit into any Easter tray without calling attention to themselves, which I mean in a good way. They’re sturdy enough to stack and decorate, and the almond flour gives them a little extra flavor.
Pro Tips for This Recipe:
- Let the dough rest longer if it feels sticky after mixing.
- Roll between parchment to avoid adding too much flour.
- Use a gentle hand with the cutter; gluten-free dough can fray at the edges.
Variations on This Dish:
- Orange Almond Gluten-Free: Add orange zest to the dough.
- Cinnamon GF Cookies: Add 1 teaspoon cinnamon.
- Drop Cookie Shortcut: Skip the rolling and scoop the dough into balls.
Common Mistakes to Avoid with This Dish:
- Using only almond flour: The cookies spread and crumble.
- Adding too much extra flour while rolling: The cookies turn dry.
- Picking up the dough too soon: It can break before it chills fully.
19. Vegan Easter Sugar Cookies
Intro: Vegan sugar cookies can be excellent if you don’t treat them like a second-rate substitute. Plant butter, a flax egg, and a calm hand in the mixing bowl give you a cookie that still rolls, cuts, and tastes like dessert.
Why It Works: Plant butter handles the fat, while the flax egg gives enough binding power to keep the dough together. A short chill helps the dough firm up because plant butter can soften quickly at room temperature. The glaze uses powdered sugar and plant milk, so you still get that Easter finish without dairy.
Key Ingredients:
- 2 1/2 cups all-purpose flour
- 1 teaspoon baking powder
- 1/2 teaspoon salt
- 1 cup plant butter, softened
- 1 cup granulated sugar
- 1 flax egg: 1 tablespoon ground flaxseed + 3 tablespoons water
- 2 teaspoons vanilla extract
- 1 to 2 tablespoons plant milk
- 1 1/2 cups powdered sugar
- 2 to 3 tablespoons plant milk
- Gel food coloring, optional
Quick Steps:
- Mix the flaxseed and water, then let it thicken for 5 minutes.
- Cream the plant butter and sugar, then add the flax egg and vanilla.
- Add the flour, baking powder, and salt, mixing until a soft dough forms. Add plant milk only if needed.
- Chill for 45 minutes, then roll, cut, and place on parchment-lined sheets.
- Bake at 350°F for 8 to 10 minutes until the edges are set.
- Cool completely, then glaze or color as you like.
Equipment for This Recipe:
- Mixer
- Small bowl for flax egg
- Baking sheets
- Rolling pin
- Parchment
How to Serve This Dish: These work well on mixed dessert trays because the flavor is familiar even without dairy. Keep the glaze simple and bright so the cookie stays the main event.
Pro Tips for This Recipe:
- Choose a plant butter that bakes well, not a tub spread that turns oily.
- Let the flax egg thicken fully before adding it.
- Chill the dough more if it feels soft after rolling.
Variations on This Dish:
- Lemon Vegan Batch: Add zest and a little lemon juice to the glaze.
- Chocolate Vegan Cookies: Replace 1/4 cup flour with cocoa powder.
- Sprinkle Top: Press pastel sprinkles onto the glaze before it sets.
Common Mistakes to Avoid with This Dish:
- Using runny plant butter: The cookies spread too much.
- Skipping the flax rest: The dough won’t bind as well.
- Adding too much plant milk: The dough turns loose and sticky.
20. No-Fuss Slice-and-Bake Pastel Cookies
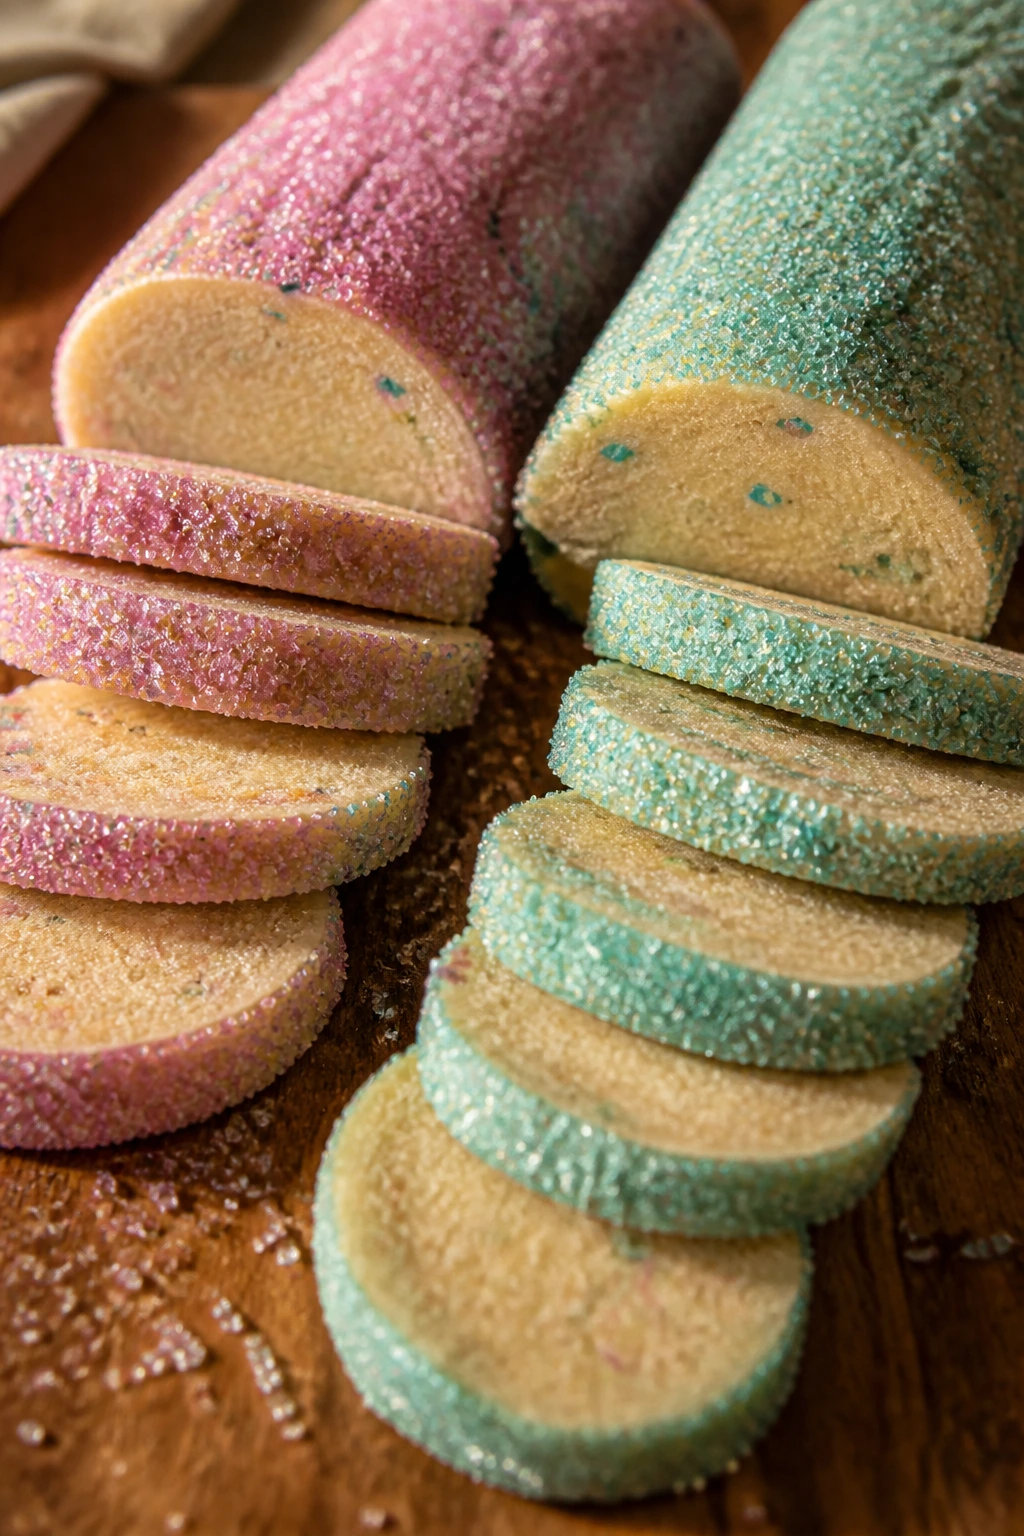
Intro: Slice-and-bake dough is one of the most underrated beginner moves in baking. You form the log once, chill it, and slice neat little rounds whenever you’re ready.
Why It Works: This style skips rolling and cutters entirely, which removes a few ways the dough can go wrong. Rolling the log in pastel sanding sugar gives you color on the outside without icing. It’s the fastest path to a cookie tray that still looks seasonal.
Key Ingredients:
- 2 1/2 cups all-purpose flour
- 1 teaspoon baking powder
- 1/2 teaspoon salt
- 1 cup unsalted butter, softened
- 3/4 cup granulated sugar
- 1 large egg
- 2 teaspoons vanilla extract
- 1/2 teaspoon almond extract, optional
- 1/2 cup pastel sanding sugar
- 1/4 cup pastel sprinkles, finely chopped, optional
Quick Steps:
- Cream the butter and sugar, then mix in the egg and vanilla.
- Add the flour, baking powder, salt, and almond extract if using.
- Shape the dough into two logs about 2 inches thick.
- Roll each log in sanding sugar, wrap tightly, and chill until firm.
- Slice into 1/4-inch rounds and bake at 350°F for 9 to 11 minutes.
- Cool on the pan for 5 minutes before moving to a rack.
Equipment for This Recipe:
- Plastic wrap or parchment
- Sharp knife
- Baking sheets
- Mixer
How to Serve This Dish: These are the plainest-looking cookies here, which makes them useful when the tray already has decorated pieces. They’re the ones people reach for when they want a cookie they can eat with one hand.
Pro Tips for This Recipe:
- Roll the log evenly so the slices bake at the same rate.
- Chill until very firm before cutting; soft logs flatten under the knife.
- Rotate the log a quarter turn after each slice if one side starts to squash.
Variations on This Dish:
- Citrus Slice-and-Bake: Add lemon or orange zest to the dough.
- Chocolate Chip Pastel Logs: Stir in mini chips before shaping the log.
- Two-Tone Log: Divide the dough and tint one half lightly pink.
Common Mistakes to Avoid with This Dish:
- Making the log uneven: Some slices overbake and some stay raw in the middle.
- Cutting before the dough is firm: The rounds lose their shape.
- Loading the dough with too many mix-ins: Slicing becomes messy and crumbly.
21. Lime Coconut Egg Cookies
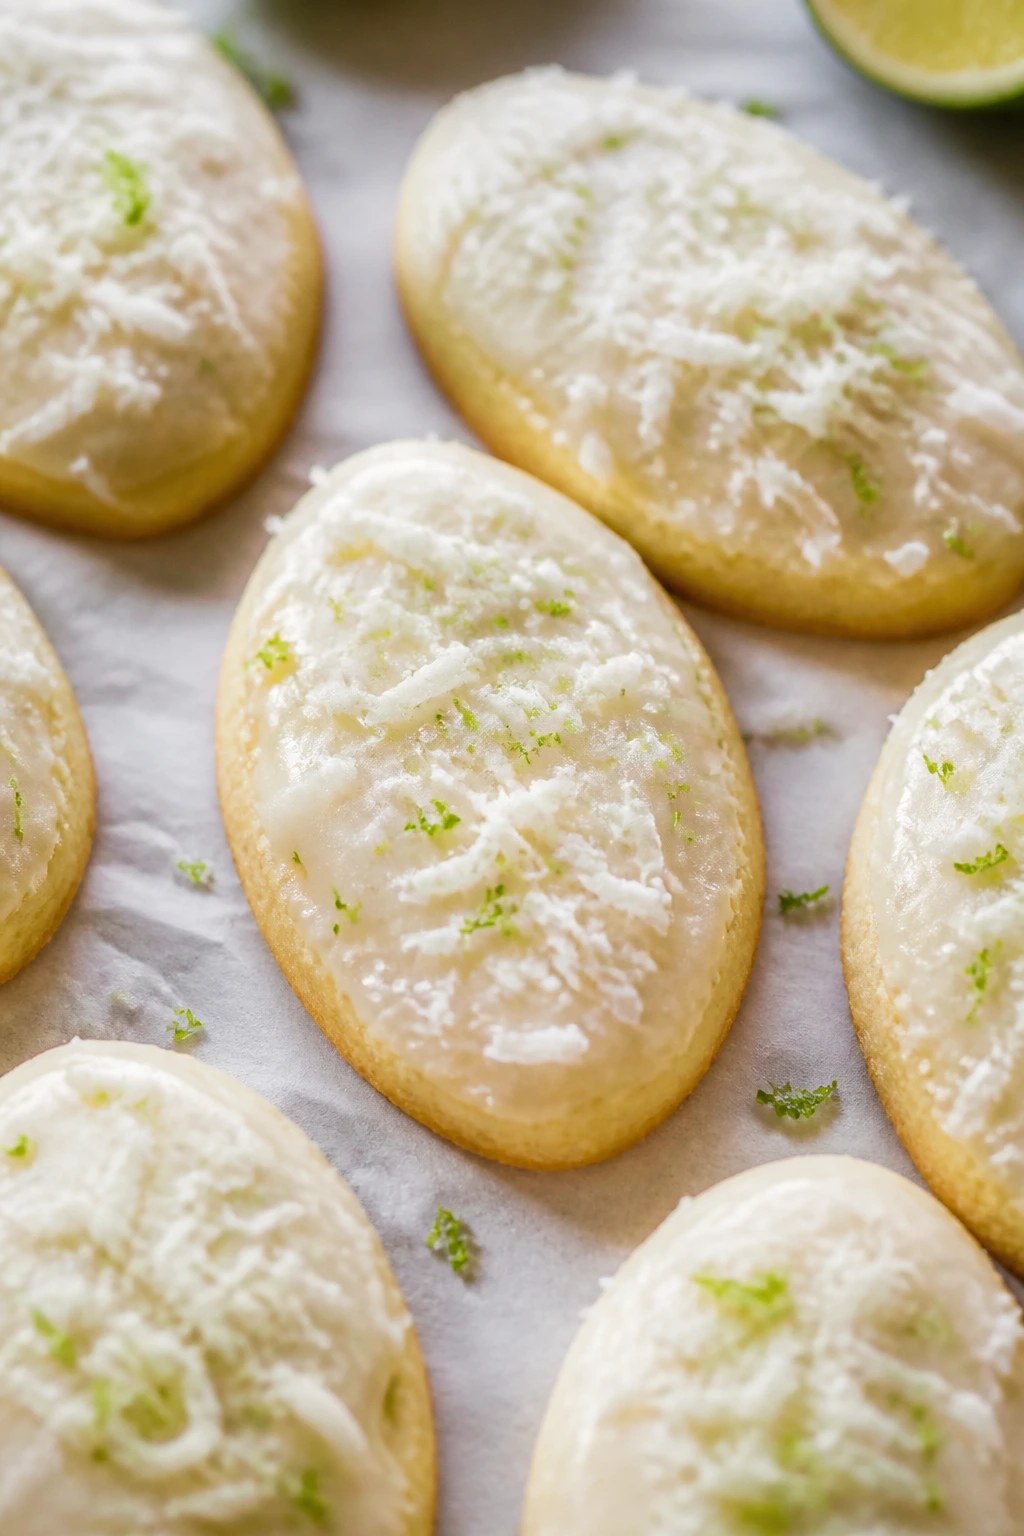
Intro: Lime and coconut taste fresher together than people expect. The lime keeps the coconut from going sweet and sleepy, and the egg shape makes the cookie look unmistakably Easter without much effort.
Why It Works: Coconut adds body and a soft chew, while lime zest gives the cookie lift. The flavor lands somewhere between bright and creamy, which is useful if you want a break from lemon. A simple lime glaze ties the whole thing together.
Key Ingredients:
- 2 1/2 cups all-purpose flour
- 1 teaspoon baking powder
- 1/2 teaspoon salt
- 1 cup unsalted butter, softened
- 1 cup granulated sugar
- 1 tablespoon lime zest
- 1 large egg
- 1 teaspoon vanilla extract
- 3/4 cup sweetened shredded coconut
- 1 1/2 cups powdered sugar
- 2 to 3 tablespoons lime juice
- Lime sanding sugar, optional
Quick Steps:
- Rub the lime zest into the sugar.
- Cream the butter and lime sugar, then add the egg and vanilla.
- Mix in the flour, baking powder, salt, and shredded coconut.
- Chill for 30 minutes, roll, and cut egg shapes.
- Bake at 350°F for 8 to 10 minutes until the edges are set.
- Cool, then glaze with lime icing and finish with sanding sugar if you want more sparkle.
Equipment for This Recipe:
- Zester
- Mixer
- Baking sheet
- Easter egg cutter
- Cooling rack
How to Serve This Dish: These are a nice bridge between the lemon cookies and the richer coconut cookies. They look sharp on a tray because the green-ish lime glaze stands out against pale icing and plain cookies.
Pro Tips for This Recipe:
- Use fine lime zest so you don’t get chewy bits.
- Toasting the coconut first gives the cookie more depth, but it’s optional.
- Keep the glaze slightly thick so it clings to the egg shape.
Variations on This Dish:
- Lime-Mint Batch: Add 1 teaspoon very finely chopped mint.
- Lime Coconut Sandwiches: Fill two small cookies with lime buttercream.
- Extra Coconut: Roll the raw dough in shredded coconut before baking.
Common Mistakes to Avoid with This Dish:
- Using too much juice in the dough: It weakens the shape.
- Skipping the zest: The lime flavor disappears.
- Baking until browned: Coconut can mask overbaking until it’s too late.
22. Chocolate Bird’s Nest Sugar Cookies
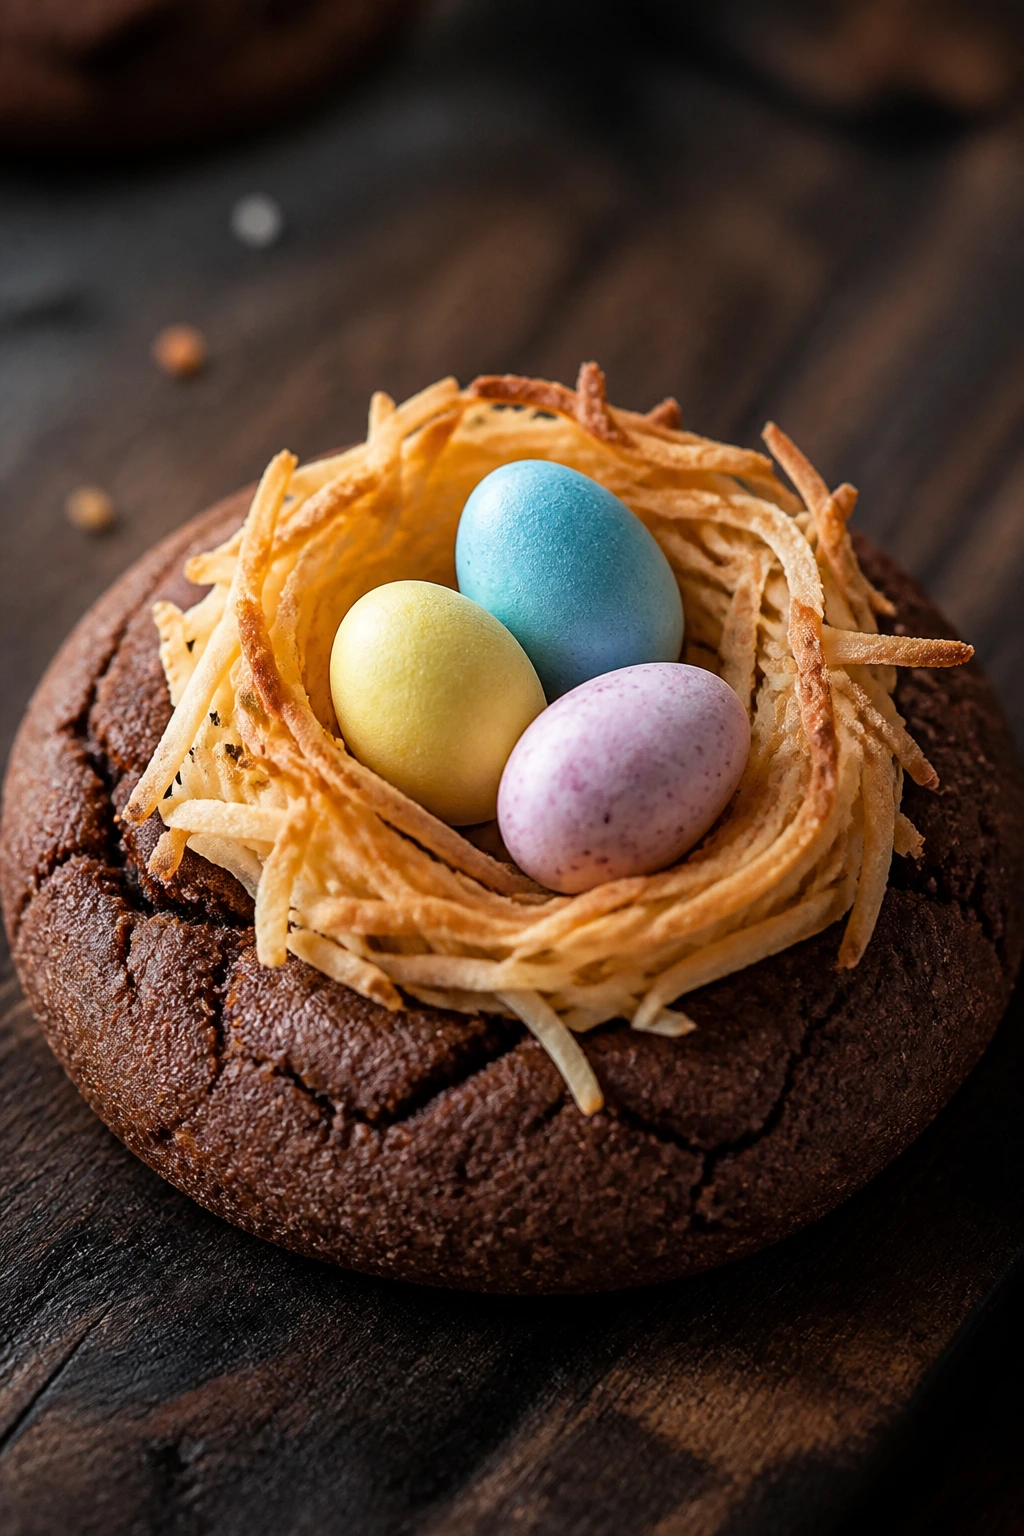
Intro: This is the tray closer. Cocoa in the dough, almond “nest” topping, and little candy eggs give you the darkest, richest cookie in the bunch without leaving sugar-cookie territory behind.
Why It Works: A small amount of cocoa powder turns a plain sugar cookie into something deeper and less sweet. Slivered almonds toast on top like twigs, which gives the nest look without using brittle or pretzel pieces. Mini candy eggs finish it in a way that looks deliberate even when you keep the rest of the decorating bare.
Key Ingredients:
- 2 1/4 cups all-purpose flour
- 1/4 cup unsweetened cocoa powder
- 1 teaspoon baking powder
- 1/2 teaspoon salt
- 1 cup unsalted butter, softened
- 3/4 cup granulated sugar
- 1 large egg
- 2 teaspoons vanilla extract
- 1 cup slivered almonds
- 1 cup powdered sugar
- 2 to 3 tablespoons milk
- Mini candy eggs
Quick Steps:
- Whisk the flour, cocoa powder, baking powder, and salt.
- Cream the butter and sugar, then mix in the egg and vanilla.
- Add the dry ingredients and mix until a soft dough forms.
- Chill for 30 minutes, then scoop into rounds and press a shallow center into each one.
- Bake at 350°F for 9 to 10 minutes, then press the centers again while warm if they puff.
- Cool, glaze lightly in the center, press on toasted slivered almonds, and top with candy eggs.
Equipment for This Recipe:
- Baking sheets
- Small spoon or measuring spoon
- Mixer
- Parchment paper
- Skillet or oven tray for toasting almonds
How to Serve This Dish: These are the richest cookies on the table, so they work best in smaller portions. Place them near the edge of the tray where the darker color can stand apart from the pastel cookies.
Pro Tips for This Recipe:
- Toast the almonds until fragrant, not dark, so they keep a pale nest look.
- Use just enough glaze to hold the almonds in place.
- Press the centers while the cookies are warm if they rise too much.
Variations on This Dish:
- White Chocolate Nest: Drizzle a little white chocolate over the almonds.
- Coconut-Almond Nest: Mix toasted coconut with the slivered almonds.
- Espresso Cocoa: Add 1/2 teaspoon espresso powder to the dough for a deeper chocolate note.
Common Mistakes to Avoid with This Dish:
- Adding too much cocoa: The dough turns dry and bitter.
- Letting the almonds overbrown: They taste harsh, not toasty.
- Putting the eggs on too early: They slide off the nest shape.
Why These Cookies Work So Well for Beginner Bakers
Sugar cookies are one of those rare bakes that reward patience more than talent. You do not need a complicated batter, a candy thermometer, or a schedule carved around a fussy rise time. What you need is a dough that behaves, a tray that bakes evenly, and the sense to pull the cookies before they color too deeply.
That is why Easter sugar cookies recipes make sense for beginners. The dough can be mixed ahead, the shapes can be cut in batches, and most of the decorating happens after the cookies are fully cool. That keeps the process calm. It also means you can stop after any stage — plain cookies, glazed cookies, or fully decorated ones — and still end up with something worth serving.
The trick is not chasing perfection. It’s matching the method to your energy level. If you want the easiest path, pick a drop cookie or slice-and-bake version. If you want the tray to look more polished, choose cut-outs with a simple glaze. Either way, the core method stays familiar enough that you’re never learning three things at once.
Essential Equipment for These Recipes
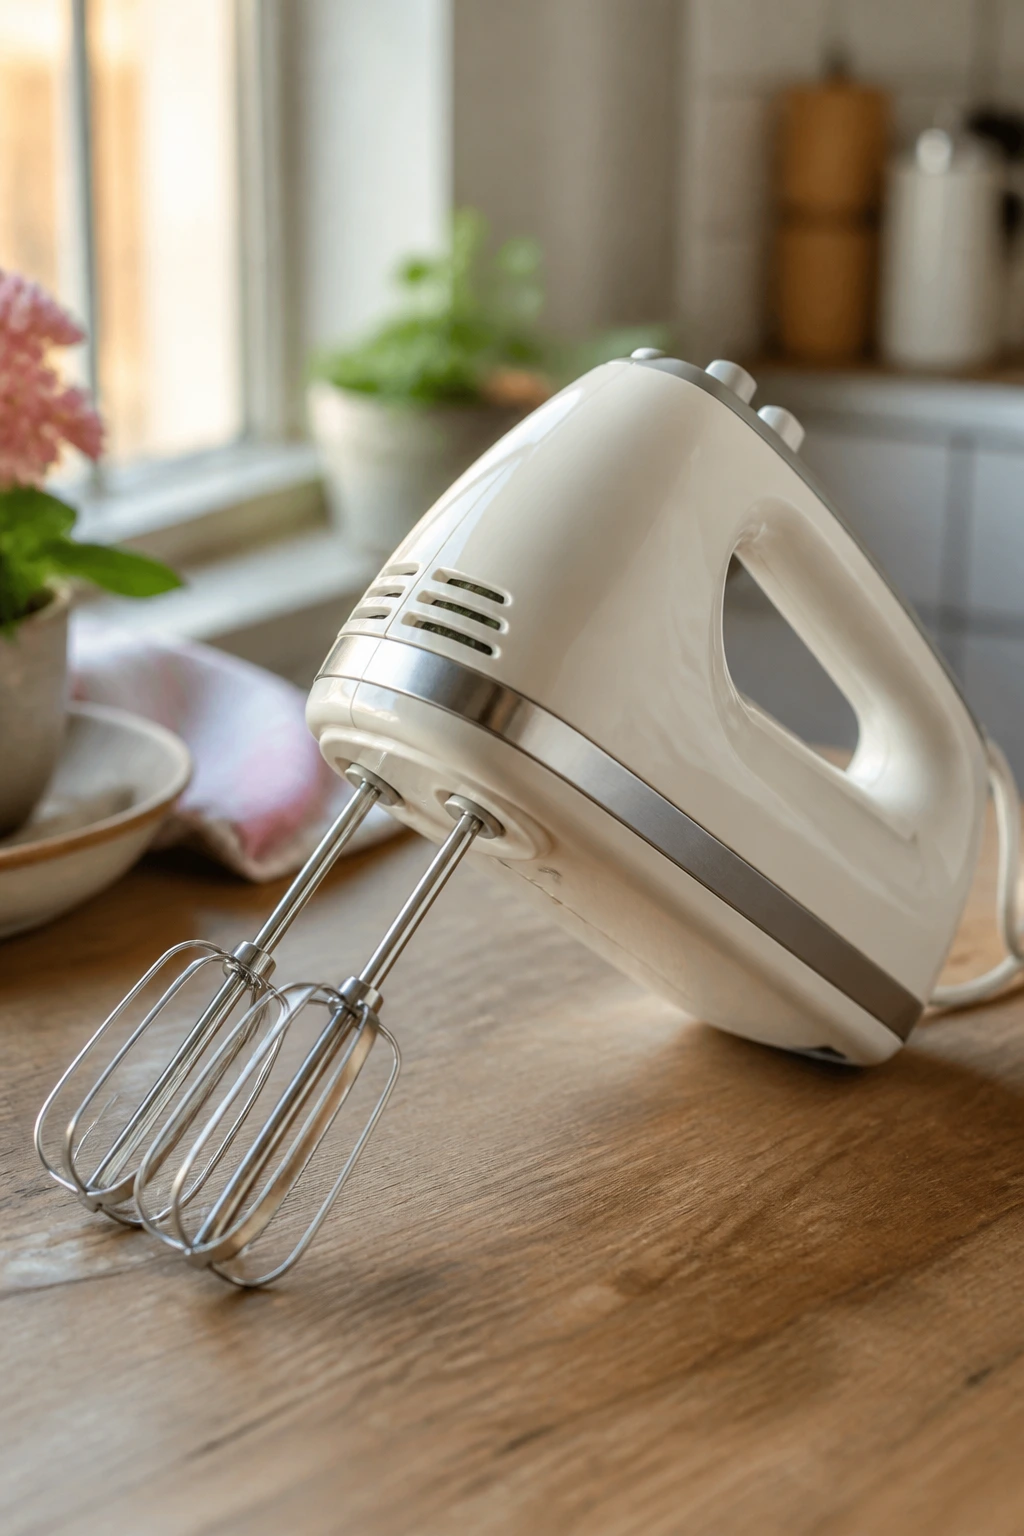
- Hand mixer or stand mixer: Either one will cream butter and sugar properly; the hand mixer is enough for every recipe here.
- Mixing bowls in two sizes: One for dry ingredients, one for dough, and a few small bowls for icing colors.
- Rolling pin: A plain wooden pin works fine, though a pin with guides helps when you’re learning to keep dough even.
- Parchment paper: This stops sticking, keeps the bottoms pale, and makes cleanup faster.
- Baking sheets: Rimmed half-sheet pans are the safest choice, especially if your oven runs hot.
- Cookie cutters: Eggs, bunnies, flowers, carrots, and circles cover most of the Easter shapes.
- Wire cooling racks: Cookies set better when air moves under them.
- Offset spatula or butter knife: Useful for icing, lifting delicate cookies, and moving warm rounds.
- Piping bags or zip-top bags: The zip-top bag trick is enough for beginner-level decorating.
- Microplane or fine grater: Handy for lemon, lime, and orange zest.
- Small whisk: Better than a fork for smooth glazes.
- Digital scale, optional: If you like weighing flour, 120 grams per cup keeps the dough consistent.
Smart Shopping and Ingredient Tips
Buy butter with the baking aisle in mind, not the spreadable tub in the refrigerator door. Softened unsalted butter gives you better control over both flavor and texture, and it creams properly instead of turning oily. If you only have salted butter, cut back the salt in the dough by about 1/4 teaspoon.
Flour matters more than most people think. Spoon it into the cup and level it off, or weigh it if you can. Packed flour is the fastest way to make sugar cookies dry and stubborn, especially once you start rolling the dough.
For the decorating side, use gel food coloring instead of liquid. Liquid coloring thins icing and can make the glaze runny, which turns neat pastel swirls into streaks on the parchment. Jimmies are the sprinkle of choice for dough because they keep their shape; nonpareils are better on top of icing, not inside the batter.
If you’re buying citrus, look for fruit with a heavy feel for its size and a fragrant peel. That usually means more juice and better zest. For the nut-based cookies, buy pistachios and almonds that smell fresh, not dusty or stale from the bottom of an old bag. A stale nut can ruin a whole batch faster than a slightly flat glaze ever will.
How to Serve These Recipes

Presentation: Mix plain cookies, glazed cookies, and a few heavily decorated ones on the same tray. That contrast does more for the table than trying to make every cookie compete for attention.
Accompaniments: Set these out with fresh berries, lemon bars, or a bowl of whipped cream if you’re building a dessert spread. For brunch, they also sit nicely beside fruit salad and soft coffee cake, because they bridge breakfast and dessert without feeling awkward.
Portions: Plan on 2 medium cookies per person if these are one part of a larger dessert table, or 3 small cookies if they’re the main sweet at the end of a meal. Cut-out cookies tend to be larger, so a single bunny or egg can be enough for a child.
Beverage Pairing: Plain milk is the safe answer, but coffee, Earl Grey tea, and sparkling lemonade all work well. The lemon, orange, and honey cookies especially like tea with a clean finish.
Additional Tips and Flavor Boosters
Flavor Enhancement: Rub citrus zest into the sugar before mixing anything else. It takes 20 seconds, and the sugar drinks up the oil so the flavor lands in the cookie instead of floating away in the bowl.
Customization: Keep a few bare cookies in every batch, even if you love decorating. A plain vanilla or brown butter cookie gives the tray a resting point, and it also helps you notice which flavors are carrying the whole spread.
Serving Suggestions: A little sanding sugar on top of glaze makes a cookie look finished without turning it into a project. For the richer recipes, a tiny pinch of flaky salt at the end sharpens the flavor more than another layer of icing ever will.
Make-It-Yours: If you’re baking for mixed diets, lean on the recipes that already fit naturally: gluten-free almond flour dough for one corner of the tray, vegan cookies for another, and plain vanilla or lemon cookies for everyone else. That way no one feels like an afterthought, which matters more than most people admit.
Make-Ahead, Storage, and Reheating Guidance
Most of these cookies keep well at room temperature for 3 to 5 days in an airtight container. Layer them with parchment so the glaze or chocolate does not smear. If you’re storing soft sandwich cookies or cream cheese dough cookies, keep a closer eye on them and aim for the earlier end of that range.
The dough is usually the best thing to make ahead. Cut-out doughs can chill in the refrigerator for up to 2 days, and most can be frozen for up to 2 months if wrapped tightly in plastic and sealed in a freezer bag. Slice-and-bake logs freeze especially well because you can slice them straight from the freezer with a sharp knife.
Baked cookies also freeze well, but wait until the decorations are fully set. Plain or lightly glazed cookies freeze for up to 2 months if stacked with parchment. Thaw them at room temperature without unwrapping the container right away; that helps prevent condensation from softening the glaze.
For reheating, stick with a very low oven, about 275°F, for 3 to 5 minutes on undecorated cookies if you want them to taste freshly baked. Do not microwave iced cookies unless you enjoy sticky puddles. If a cookie has buttercream, jam, or chocolate, let it thaw gently on the counter instead.
Variations and Adaptations to Try

Gluten-Free Tray Mix: Use the almond flour cookies and the gluten-free cut-outs together, then keep the decorating simple with glaze or sanding sugar. That gives you a tray with good texture instead of one gluten-free cookie trying to do everything at once.
Dairy-Free Easter Batch: The vegan cookies already cover the major swap. If you need more variety, use plant butter in the plain vanilla or sprinkle cookies and finish them with a simple powdered sugar glaze made with plant milk.
Lower-Sugar Pairing: Skip the glaze on a few batches and roll the dough in sanding sugar before baking. The cookies still feel finished, but you cut out the extra sweetness that can make a large dessert spread feel heavy.
Citrus-Forward Table: Combine lemon, orange, and lime cookies and let the darker flavors stay in the background. That works especially well if the rest of the meal is rich, because citrus keeps the tray from tasting flat.
Kid Decorating Station: Bake plain cut-outs, then set out bowls of colored glaze, sprinkles, and tiny candies. Kids do better with 3 or 4 choices than with a wall of options.
Nutty Spring Mix: Pair almond, pistachio, and coconut recipes on one board. The flavor family makes sense together, and the different textures keep the cookies from feeling repetitive.
Common Mistakes to Avoid
Too-Warm Butter: Soft butter is good; melted butter is not. If the butter looks glossy or oily, the cookies will spread and lose their shape in the oven. The fix is simple: chill the dough until it feels firm but still rollable.
Packed Flour: Scooping flour straight from the bag compresses it, and compressed flour makes dry, stiff dough. Spoon it in lightly or weigh it if you can, especially for cut-out cookies where texture matters.
Baking by Color Alone: Sugar cookies, especially pale ones, can look underdone even when they’re ready. Watch the edges instead of waiting for the tops to turn golden. If you wait that long, the centers will bake into chalk.
Decorating Too Early: A warm cookie melts glaze, chocolate, and buttercream on contact. Let the cookies cool completely, and if you’re impatient, cool them on a rack with room around each one.
Thin Icing: Runny glaze makes a mess of pastel designs and soaks into the cookie instead of sitting on top. Start thick, then thin it teaspoon by teaspoon until it drips slowly from a spoon.
Overcrowding the Pan: Even good dough needs space. If the cookies start too close together, the heat traps around them and the edges soften instead of setting cleanly.
Frequently Asked Questions
Can I make these Easter sugar cookies recipes without cookie cutters?
Yes. Drop-cookie recipes, slice-and-bake logs, thumbprints, and sandwich cookies all work without cutters. If you want shaped cookies and don’t own cutters, use a glass for rounds or cut simple shapes with a knife.
Which recipe is the easiest for a total beginner?
The sprinkle confetti cookies and the no-fuss slice-and-bake cookies are the least intimidating. They skip the rolling-pin learning curve and still look festive with almost no decorating.
How do I keep cut-out cookies from spreading?
Use butter that is softened but not greasy, chill the dough before baking, and avoid adding extra liquid. A cold tray and parchment also help keep the edges sharp.
Can I freeze the dough and bake later?
Absolutely. Most of the doughs here freeze well for up to 2 months if wrapped tightly. Cut-out dough can be frozen as a disc, and slice-and-bake dough can be frozen as logs.
What icing is easiest for beginner bakers?
A simple powdered sugar glaze is the most forgiving. It takes only milk, sugar, and flavoring, and it’s much easier to control than royal icing if you’re not piping every day.
Can I use salted butter instead of unsalted butter?
You can, but reduce the added salt in the recipe by about 1/4 teaspoon. That keeps the flavor balanced instead of making the cookies taste blunt.
Why did my glaze turn streaky or muddy?
Usually the food coloring was too liquid, or the colors were swirled too much. Use gel color, and stop swirling once you see the pattern you want.
What if my dough cracks when I roll it?
Let it sit for 5 to 10 minutes at room temperature, then knead it once or twice with your hands. If it still cracks, the dough is probably too dry, so add 1 teaspoon of milk and mix again.
A Tray Worth Repeating

The nicest thing about Easter sugar cookies is how little drama they need to feel special. A good dough, a clear shape, and one smart finish — glaze, sprinkles, chocolate, or jam — is enough. You do not need to make every cookie perfect. You need them to taste like butter, vanilla, citrus, or brown sugar when someone bites in.
That’s the real reason this collection works for beginner bakers. It gives you room to practice without forcing you into a single style, and it lets you choose the recipes that match your patience on a given day. Start with the plain vanilla cut-outs if you want the classic route, or grab the sprinkle cookies if you want the fastest win. Either way, the tray will look like spring walked through the kitchen and left something sweet behind.