
Red desserts have a little trick to them: they look fussy even when the batter comes together in one bowl. A strawberry sheet cake with a glossy glaze, a pan of cherry bars, or a batch of red velvet cupcakes can all come from the same beginner-friendly habits — measure carefully, stir only until the flour disappears, and let the oven do the heavy lifting.
That’s why this kind of baking is worth learning. Red color can come from cocoa and buttermilk, from berries, from cherries, or from a small spoonful of food coloring when you want that vivid bakery look. And the good news for a new baker is that the prettiest results often come from the least complicated methods: quick batters, simple fillings, fruit that bakes into jammy pockets, and frostings that forgive a slightly uneven swirl.
There’s also a practical angle people forget. A lot of red desserts slice neatly, pack well, and hold up after a night in the fridge, which means you are not racing against a melting frosting or a fragile custard. You can bake after work, chill overnight, and serve something that looks like you spent much more effort than you did.
Why These Red Desserts Belong in a Beginner Kitchen
-
Simple batters do the heavy lifting: Several of these recipes use one-bowl mixing or a quick whisk-and-fold method, so you spend less time wrestling with technique and more time getting the texture right.
-
Fruit carries the color and flavor: Strawberries, raspberries, cherries, and cranberries bring their own tartness and color, which makes the desserts taste fresher than anything that leans on frosting alone.
-
Red velvet is easier than it looks: The famous color comes from a mild cocoa base plus acid, not from magic, and that means you can make a tender cake without a complicated method.
-
Bars, crisps, and cobblers forgive mistakes: If your knife work is uneven or your crumble looks a little rustic, that’s part of the charm. These desserts still slice, scoop, and serve cleanly.
-
Most of these travel well: A covered pan of bars, cookies, or loaf cake is easier to bring to a potluck than a layered dessert with delicate piping.
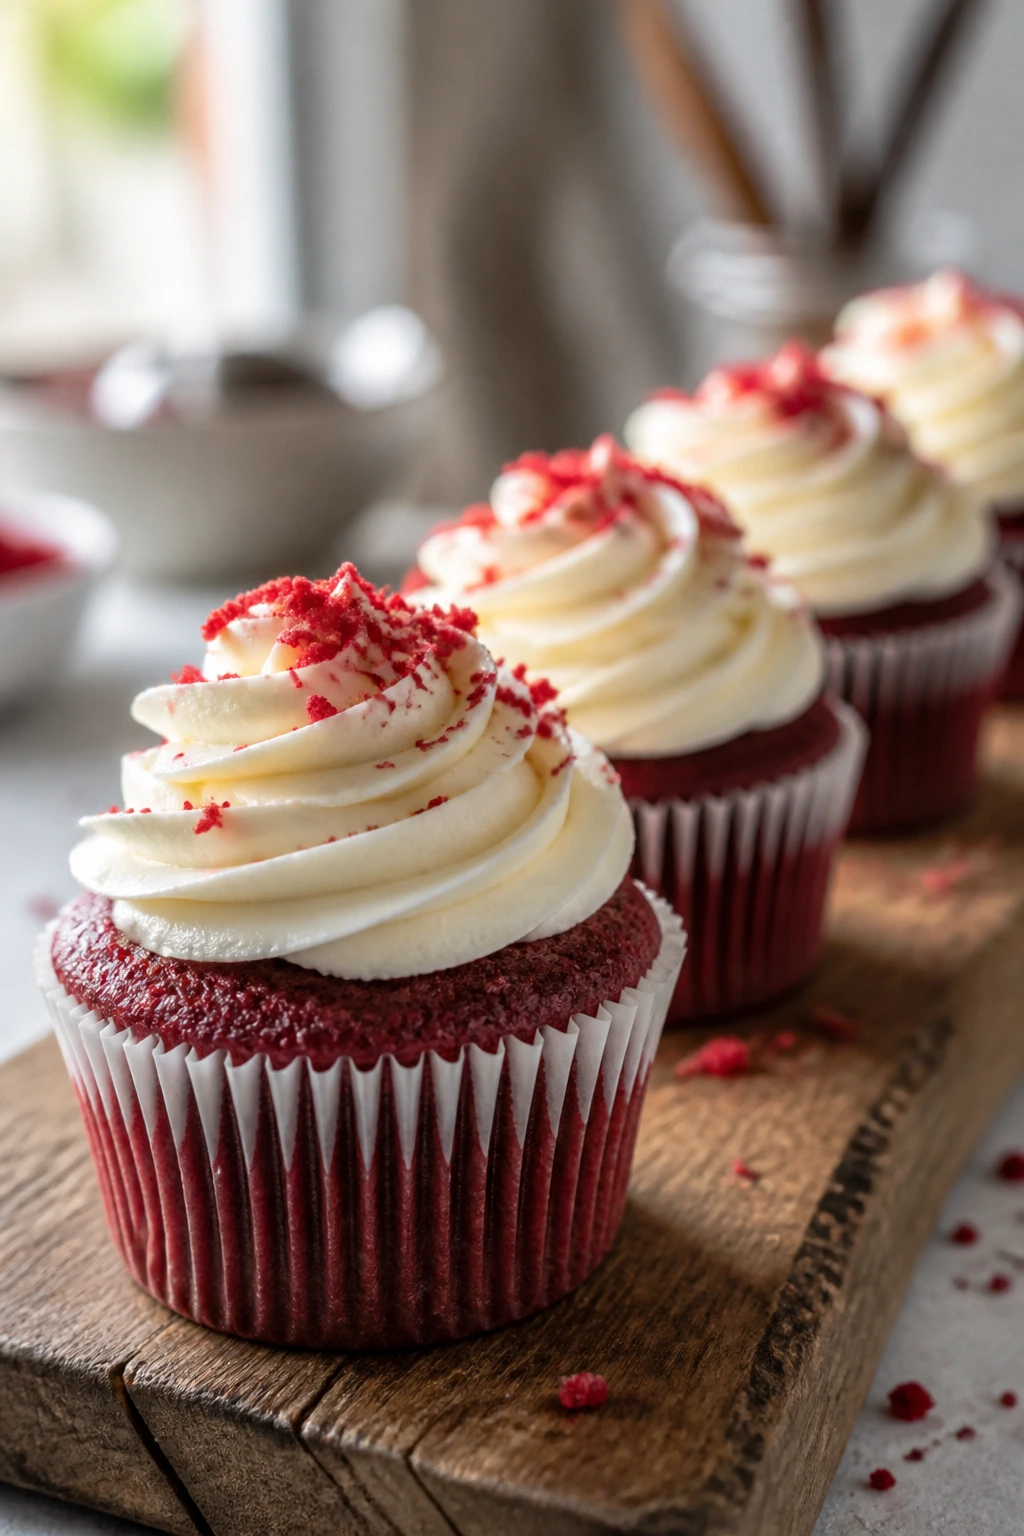
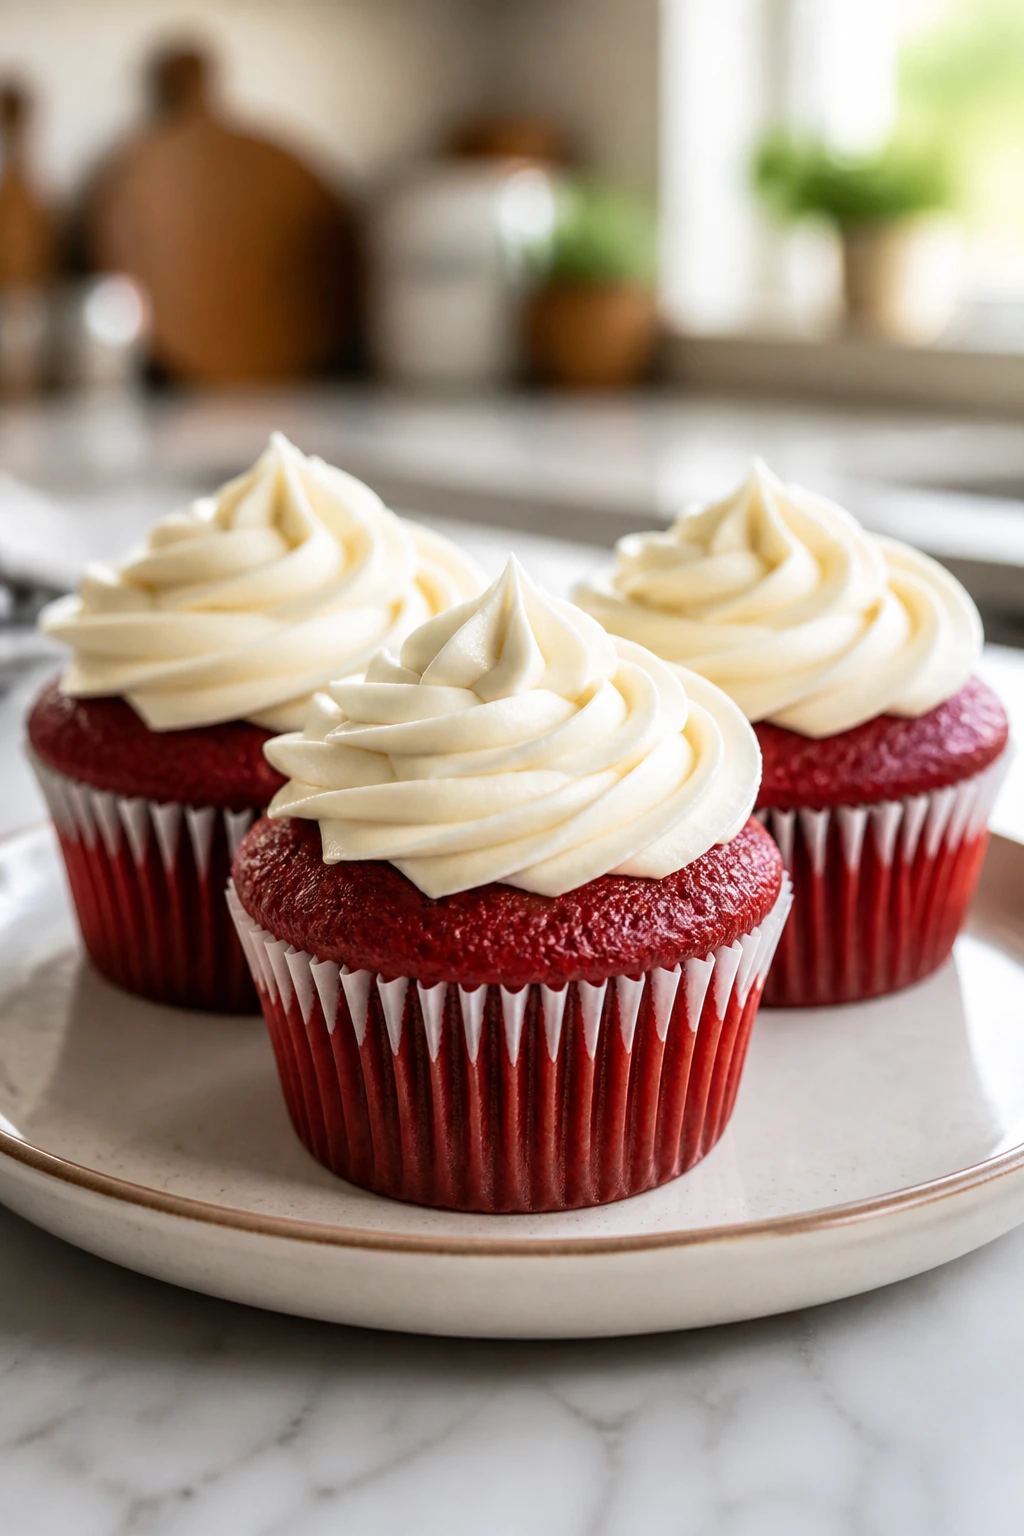
1. Classic Red Velvet Cupcakes
A good red velvet cupcake should taste like a soft cocoa cake with a little tang at the edges, not like sweet vanilla wearing red dye. The crumb is plush, the frosting is cool and creamy, and the whole thing looks tidy enough for a paper liner and a fork.
Why It Works: The buttermilk and vinegar wake up the cocoa and keep the crumb tender, while oil gives you a softer bite than butter alone. Cupcakes also bake faster and more evenly than a layer cake, which is a gift when you are still learning your oven’s hot spots.
Key Ingredients:
- 1 1/4 cups all-purpose flour
- 2 tablespoons unsweetened cocoa powder
- 3/4 cup granulated sugar
- 1/2 cup buttermilk
- 1/2 cup neutral oil
- 1 large egg
- 1 teaspoon vanilla extract
- 1 teaspoon white vinegar
- 1 tablespoon red food coloring
- 4 ounces cream cheese, softened
- 1 cup powdered sugar
Quick Steps:
- Preheat the oven to 350°F and line a 12-cup muffin tin.
- Whisk flour, cocoa, sugar, and salt in one bowl.
- Whisk buttermilk, oil, egg, vanilla, vinegar, and red coloring in another bowl, then fold into the dry mix until smooth.
- Divide into cups and bake 18 to 20 minutes, until the tops spring back.
- Cool fully, then beat cream cheese and powdered sugar into a thick frosting and swirl it on top.
Equipment for This Recipe:
- 12-cup muffin tin
- Paper liners
- Two mixing bowls
- Hand mixer or sturdy whisk
How to Serve This Dish: Stack them on a white plate so the red crumb and pale frosting show up. A few fresh raspberries on the side make the color even sharper.
Pro Tips for This Recipe:
- Don’t overmix once the flour goes in; a few streaks disappear in the oven.
- Use gel food coloring if you want a deeper red without thinning the batter.
- Chill the frosted cupcakes for 20 minutes before serving if the kitchen is warm.
Variations on This Dish:
- Berry Bright: Add 1 tablespoon raspberry powder to the frosting for a fruitier finish.
- Mini Party Cupcakes: Bake in mini liners for 11 to 13 minutes.
Common Mistakes to Avoid with This Dish:
- Dry cupcakes: Usually from overbaking. Pull them when the centers spring back.
- Pale color: Too little coloring or cocoa that is extra dark. Add a little more red gel next time.
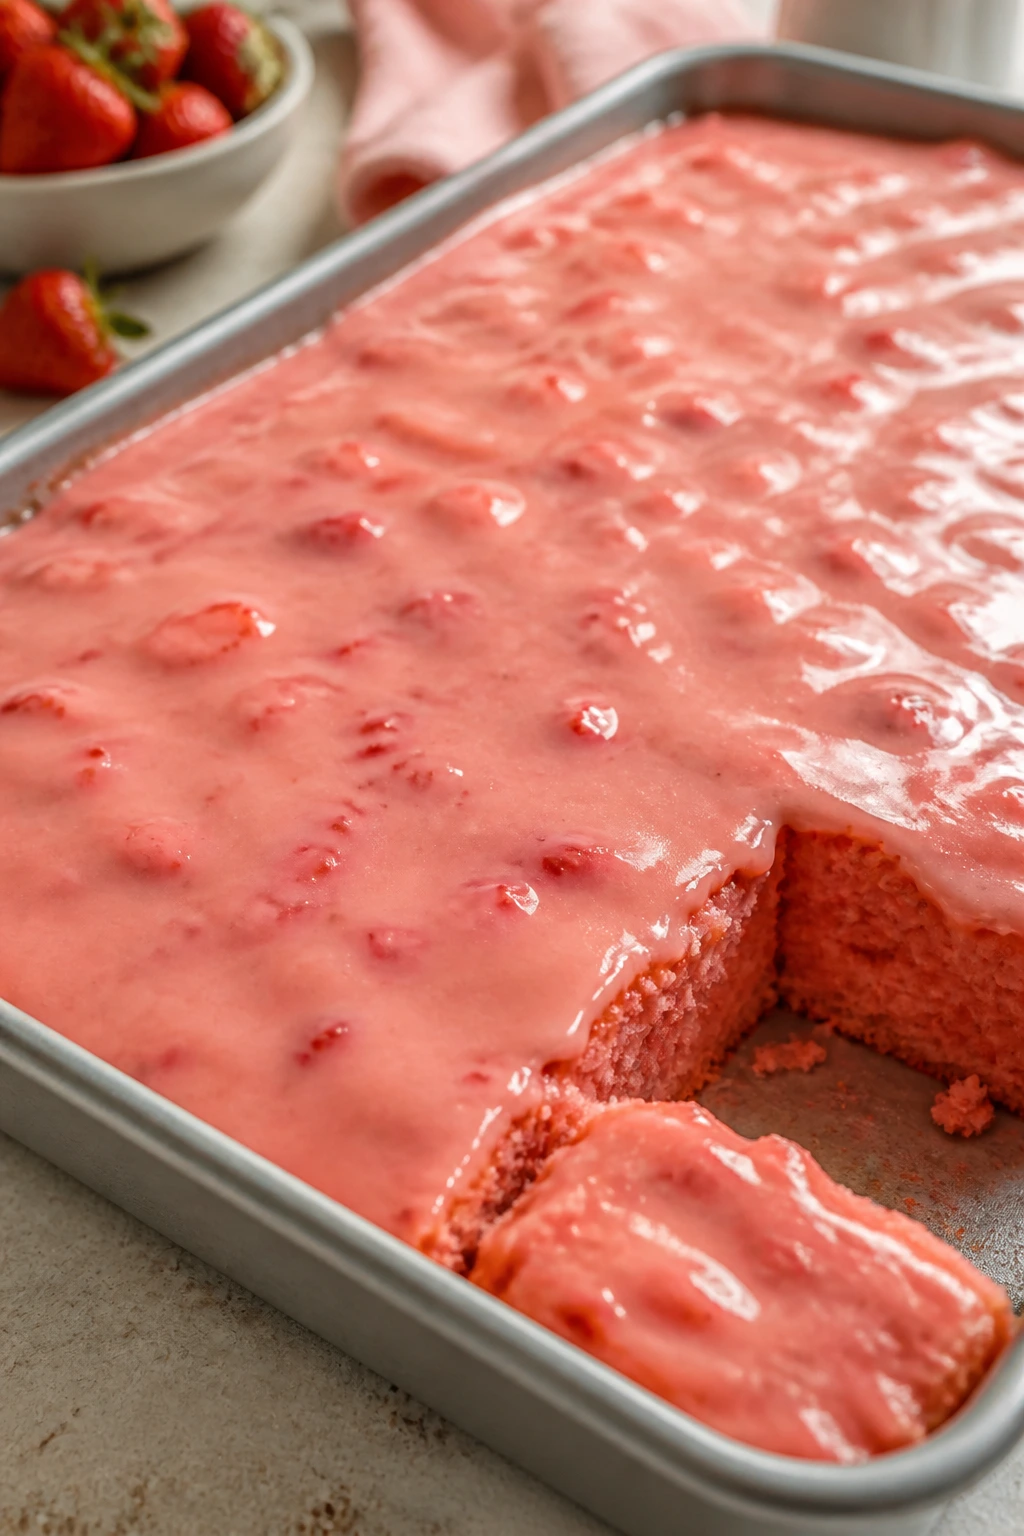
2. Strawberry Sheet Cake
This is the kind of cake that smells like jam the second it hits the oven. The crumb stays soft, the strawberry flavor shows up in both the cake and glaze, and the 9×13 pan means you are not leveling layers with a serrated knife.
Why It Works: Pureed strawberries add moisture and color, and a simple glaze gives you more fruit flavor without asking you to master buttercream. Sheet cakes bake evenly and are far less stressful than tall layer cakes.
Key Ingredients:
- 2 cups all-purpose flour
- 1 cup granulated sugar
- 1/2 cup unsalted butter, softened
- 2 large eggs
- 1 cup strawberry puree
- 1/2 cup whole milk
- 1 teaspoon vanilla extract
- 1 1/2 teaspoons baking powder
- 1/2 teaspoon salt
- 1 cup powdered sugar
- 2 to 3 tablespoons strawberry puree, for glaze
Quick Steps:
- Heat the oven to 350°F and grease a 9×13-inch pan.
- Beat butter and sugar until fluffy, then add eggs, vanilla, and strawberry puree.
- Stir in flour, baking powder, and salt with the milk until the batter looks smooth.
- Bake 28 to 32 minutes, until a toothpick comes out with a few moist crumbs.
- Mix powdered sugar with a little strawberry puree and drizzle over the cooled cake.
Equipment for This Recipe:
- 9×13-inch baking pan
- Hand mixer
- Rubber spatula
How to Serve This Dish: Cut it into squares and top each piece with sliced strawberries. A spoonful of lightly sweetened whipped cream keeps the cake from feeling too sugary.
Pro Tips for This Recipe:
- Reduce watery puree by simmering it for a few minutes if your berries are very ripe.
- Line the pan with parchment if you want clean lift-out squares.
- Let the glaze set before covering the cake.
Variations on This Dish:
- Lemon Strawberry Sheet Cake: Add 1 tablespoon lemon zest to the batter.
- Cream Cheese Swirl: Drop softened cream cheese in spoonfuls over the batter before baking.
Common Mistakes to Avoid with This Dish:
- Soggy center: The puree may have been too loose. Cook it down first.
- Bland flavor: Add a pinch more salt and a little vanilla; strawberry needs both.
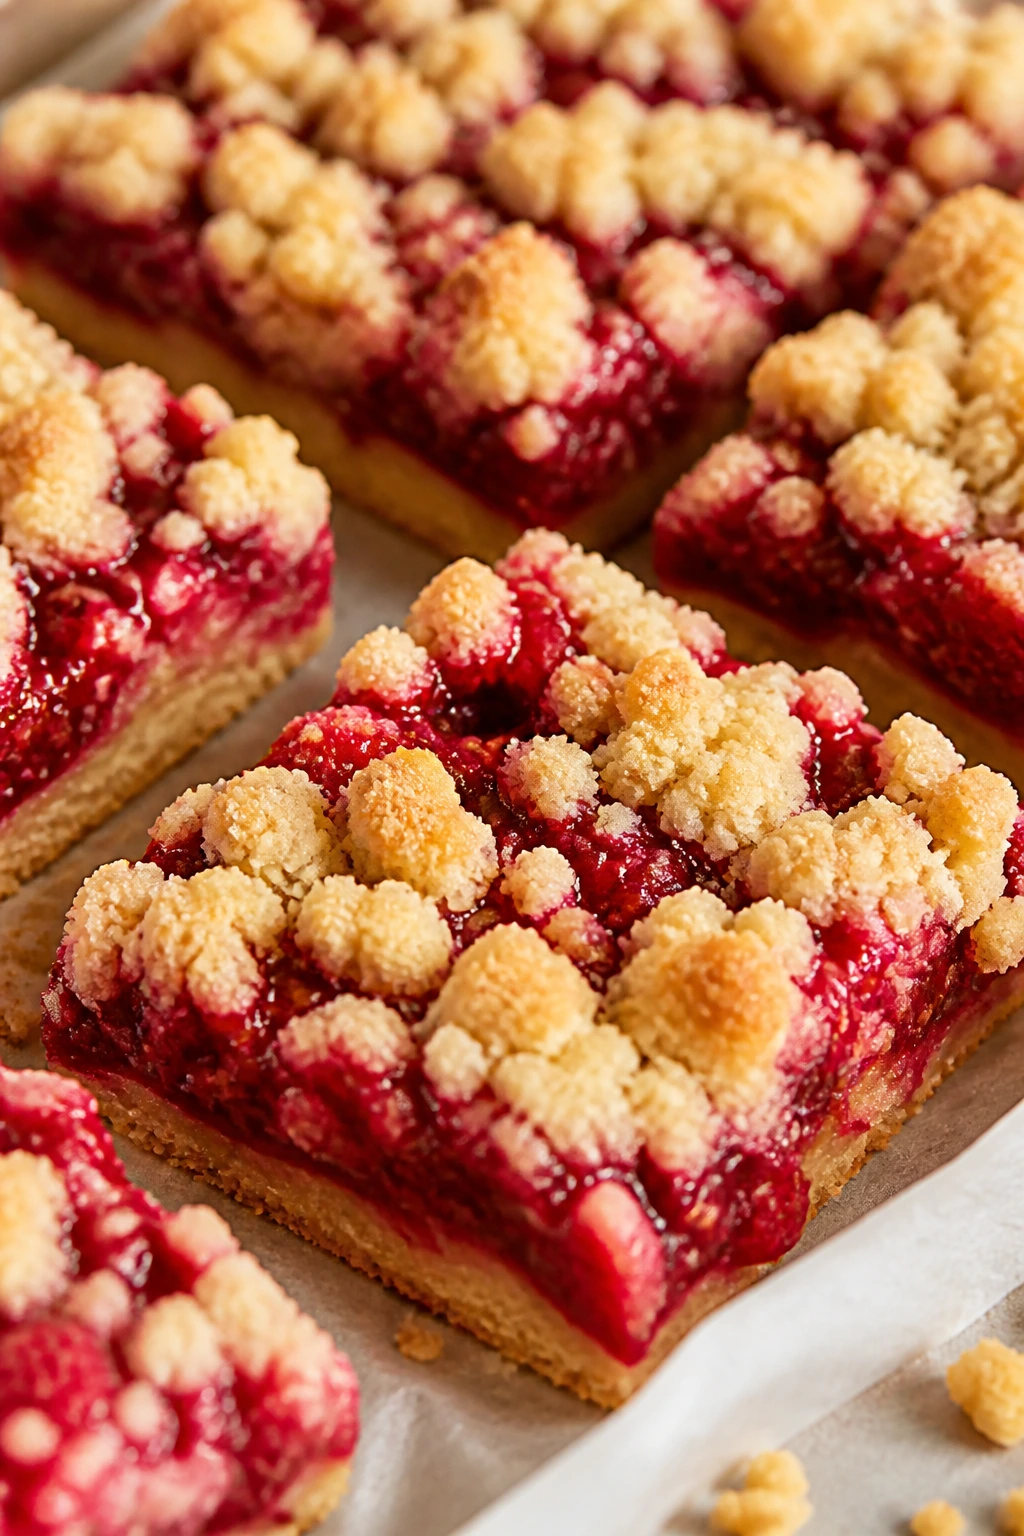
3. Raspberry Crumble Bars
These bars are all about contrast: buttery crust, sticky raspberry filling, and a crumbly top that breaks with a soft snap. They taste bright, not heavy, and they cut beautifully once chilled.
Why It Works: A shortbread-style base is simple to mix and sturdy enough to hold fruit without leaking everywhere. Frozen raspberries work here, which means you can bake these without waiting for perfect berries.
Key Ingredients:
- 2 cups all-purpose flour
- 1 cup old-fashioned oats
- 3/4 cup brown sugar
- 1 cup cold unsalted butter, cubed
- 2 cups raspberries, fresh or frozen
- 1/3 cup granulated sugar
- 2 teaspoons cornstarch
- 1 tablespoon lemon juice
Quick Steps:
- Preheat to 350°F and line an 8×8-inch pan with parchment.
- Mix flour, oats, brown sugar, salt, and butter until crumbly.
- Press two-thirds into the pan and bake 12 minutes.
- Stir raspberries, sugar, cornstarch, and lemon juice, then spread over the crust.
- Sprinkle the remaining crumbs on top and bake 28 to 32 minutes more.
Equipment for This Recipe:
- 8×8-inch baking pan
- Parchment paper
- Mixing bowl
How to Serve This Dish: Serve them cold for the cleanest slices. They’re good with a little vanilla ice cream if you want the raspberries to taste louder.
Pro Tips for This Recipe:
- Freeze the butter for 10 minutes before cutting it in.
- Let the bars cool all the way before slicing.
- If the berries are very tart, add another tablespoon of sugar to the filling.
Variations on This Dish:
- Almond Raspberry Bars: Add 1/2 teaspoon almond extract to the crust.
- Raspberry Jam Shortcut: Replace half the berries with thick jam for a faster filling.
Common Mistakes to Avoid with This Dish:
- Runny filling: The cornstarch needs heat to thicken. Bake until the center bubbles.
- Crumb topping sinking: Press the base firmly before adding fruit.
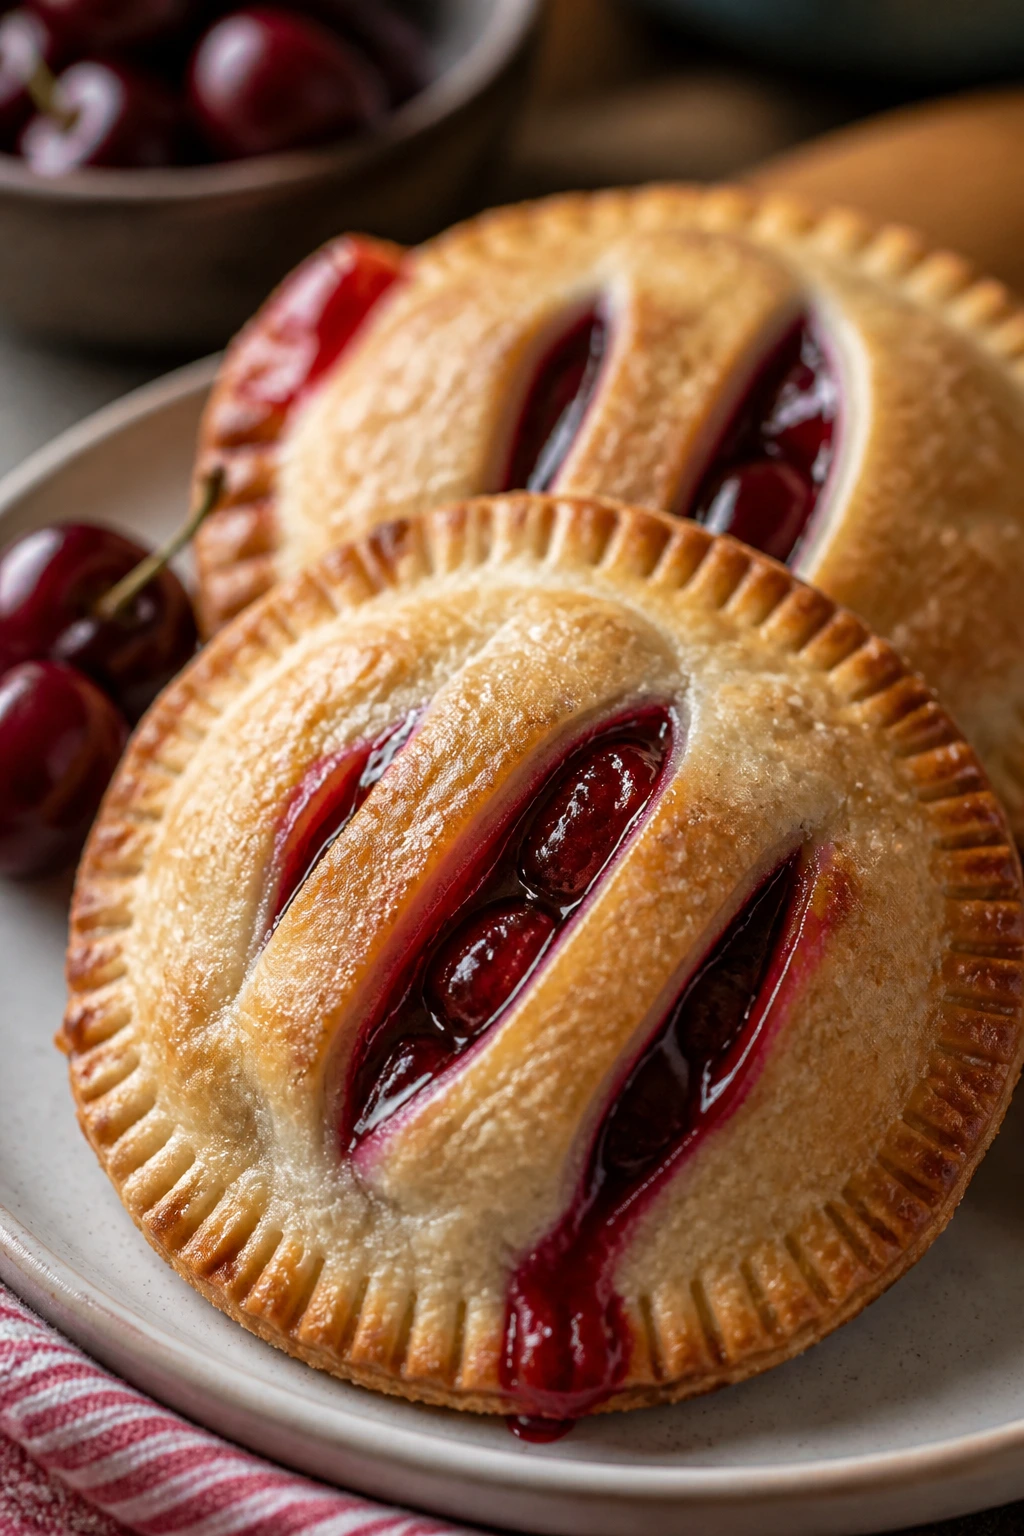
4. Cherry Hand Pies
A cherry hand pie gives you the best part of pie without the slicing drama. The filling is glossy and tart, the crust turns golden, and the little crimped edges make even a simple batch look polished.
Why It Works: Using store-bought pie dough keeps the process beginner-safe, and the small size means you can see quickly whether the filling is bubbling and the pastry is baked through. Cherry filling thickens well with cornstarch, so it stays put instead of running across the tray.
Key Ingredients:
- 2 sheets refrigerated pie dough
- 2 cups pitted cherries, fresh or frozen
- 1/3 cup sugar
- 2 teaspoons cornstarch
- 1 teaspoon lemon juice
- 1 egg, beaten
- 1 tablespoon coarse sugar
Quick Steps:
- Heat the oven to 400°F and line a sheet pan with parchment.
- Cook cherries, sugar, cornstarch, and lemon juice for 3 to 4 minutes until glossy.
- Cut pie dough into circles or rectangles, fill the centers, and seal edges with a fork.
- Brush with egg wash and sprinkle coarse sugar on top.
- Bake 18 to 22 minutes until deeply golden.
Equipment for This Recipe:
- Sheet pan
- Rolling pin
- Fork
- Small saucepan
How to Serve This Dish: Let them cool for at least 15 minutes so the filling doesn’t burn your mouth. They’re nice with coffee and even better split open with a scoop of vanilla ice cream.
Pro Tips for This Recipe:
- Chill the filled pies for 10 minutes before baking if the dough feels soft.
- Cut a small steam slit in the top of each pie.
- Use parchment, not bare metal, or the sugar can stick.
Variations on This Dish:
- Black Cherry Pie Hand Pies: Use dark sweet cherries for a deeper, almost winey filling.
- Cream Cheese Cherry Pies: Add a thin smear of sweetened cream cheese under the filling.
Common Mistakes to Avoid with This Dish:
- Leaking filling: Overfill less than you think. A tablespoon or two is enough.
- Pale crust: Brush with egg wash all the way to the edges.
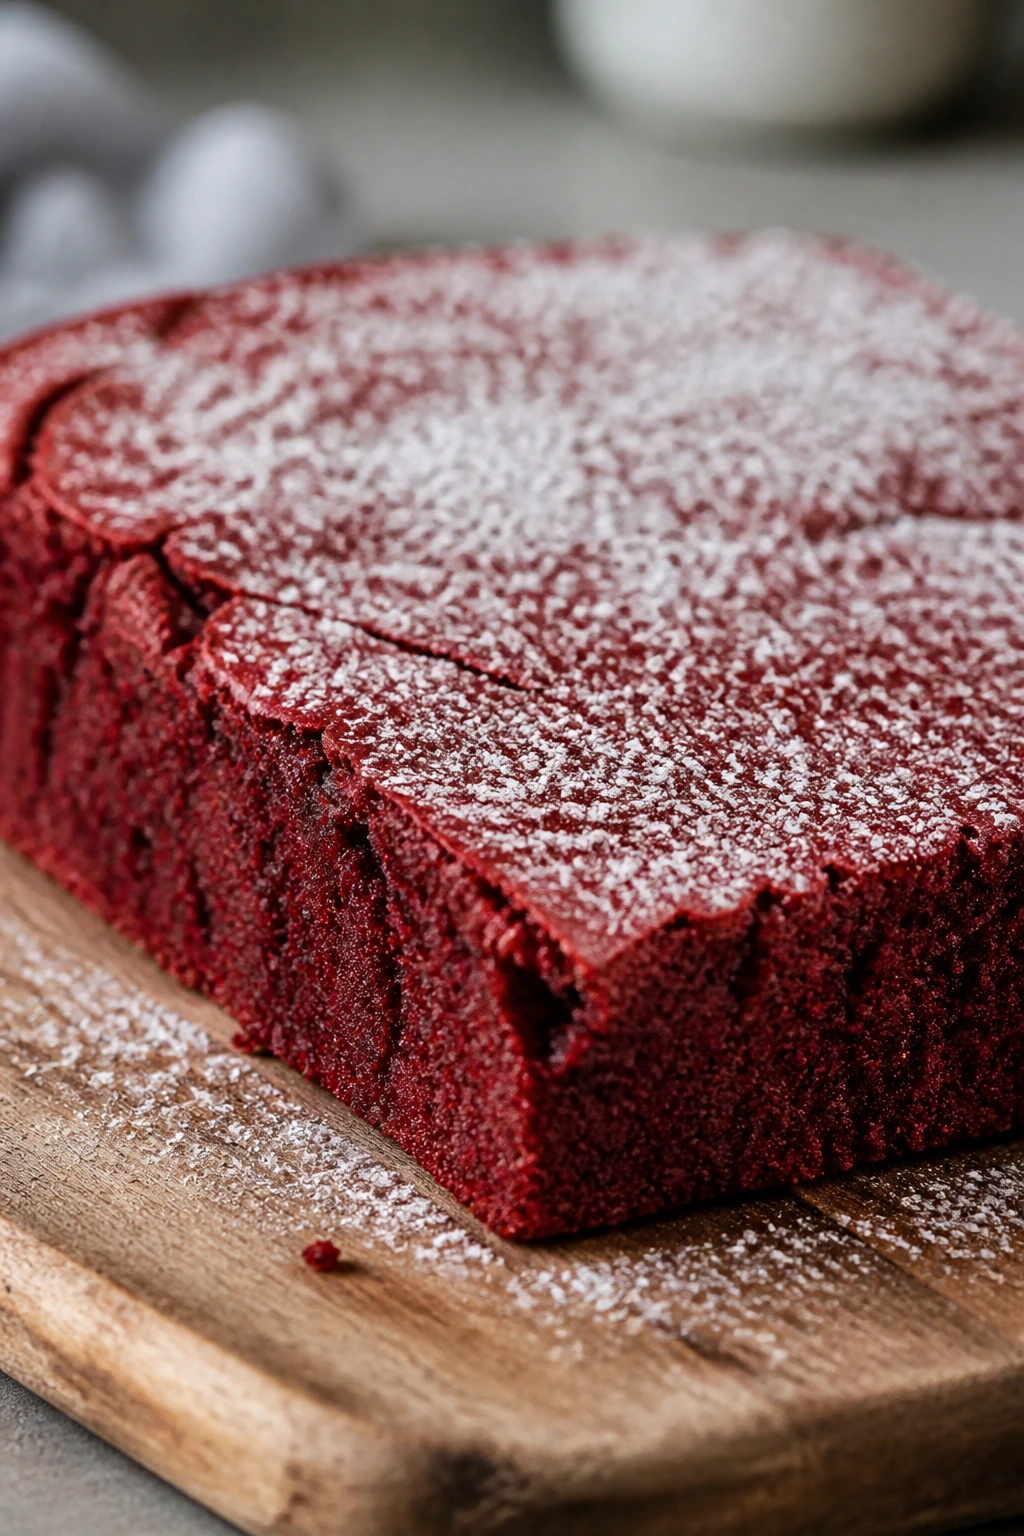
5. Red Velvet Brownies
These brownies sit between cake and fudge, with a dense bite and a sharp red crumb that feels a little theatrical in the best way. They are simpler than frosted layer cake and less fussy than true brownies that depend on crackly tops.
Why It Works: Melted butter keeps the batter easy, and cocoa plus vinegar gives the classic red velvet tang without a long ingredient list. A small pan makes the brownies thick enough to slice cleanly.
Key Ingredients:
- 1/2 cup unsalted butter
- 1 cup granulated sugar
- 1 large egg
- 1 tablespoon red food coloring
- 1 teaspoon vanilla extract
- 3/4 cup all-purpose flour
- 2 tablespoons cocoa powder
- 1 tablespoon white vinegar
- 4 ounces cream cheese
- 1/4 cup powdered sugar
Quick Steps:
- Heat oven to 350°F and line an 8×8-inch pan.
- Whisk melted butter and sugar, then add egg, vanilla, and coloring.
- Stir in flour, cocoa, salt, and vinegar just until combined.
- Spread into the pan and dollop with sweetened cream cheese if using.
- Bake 22 to 26 minutes until the center is set but still soft.
Equipment for This Recipe:
- 8×8-inch baking pan
- Mixing bowl
- Whisk or spatula
How to Serve This Dish: Cool completely before cutting into squares. A dusting of powdered sugar is enough; these do not need much help.
Pro Tips for This Recipe:
- Use a metal pan for more even edges.
- Pull them early if you want a fudgier center.
- Chill before slicing if you want very clean squares.
Variations on This Dish:
- White Chocolate Red Velvet Brownies: Fold in 1/2 cup chips.
- Swirl Brownies: Add sweetened cream cheese in ribbons before baking.
Common Mistakes to Avoid with This Dish:
- Overbaking: Brownies should look set at the edges, not dry in the middle.
- Bland chocolate flavor: Cocoa here is subtle; don’t expect a deep chocolate brownie.
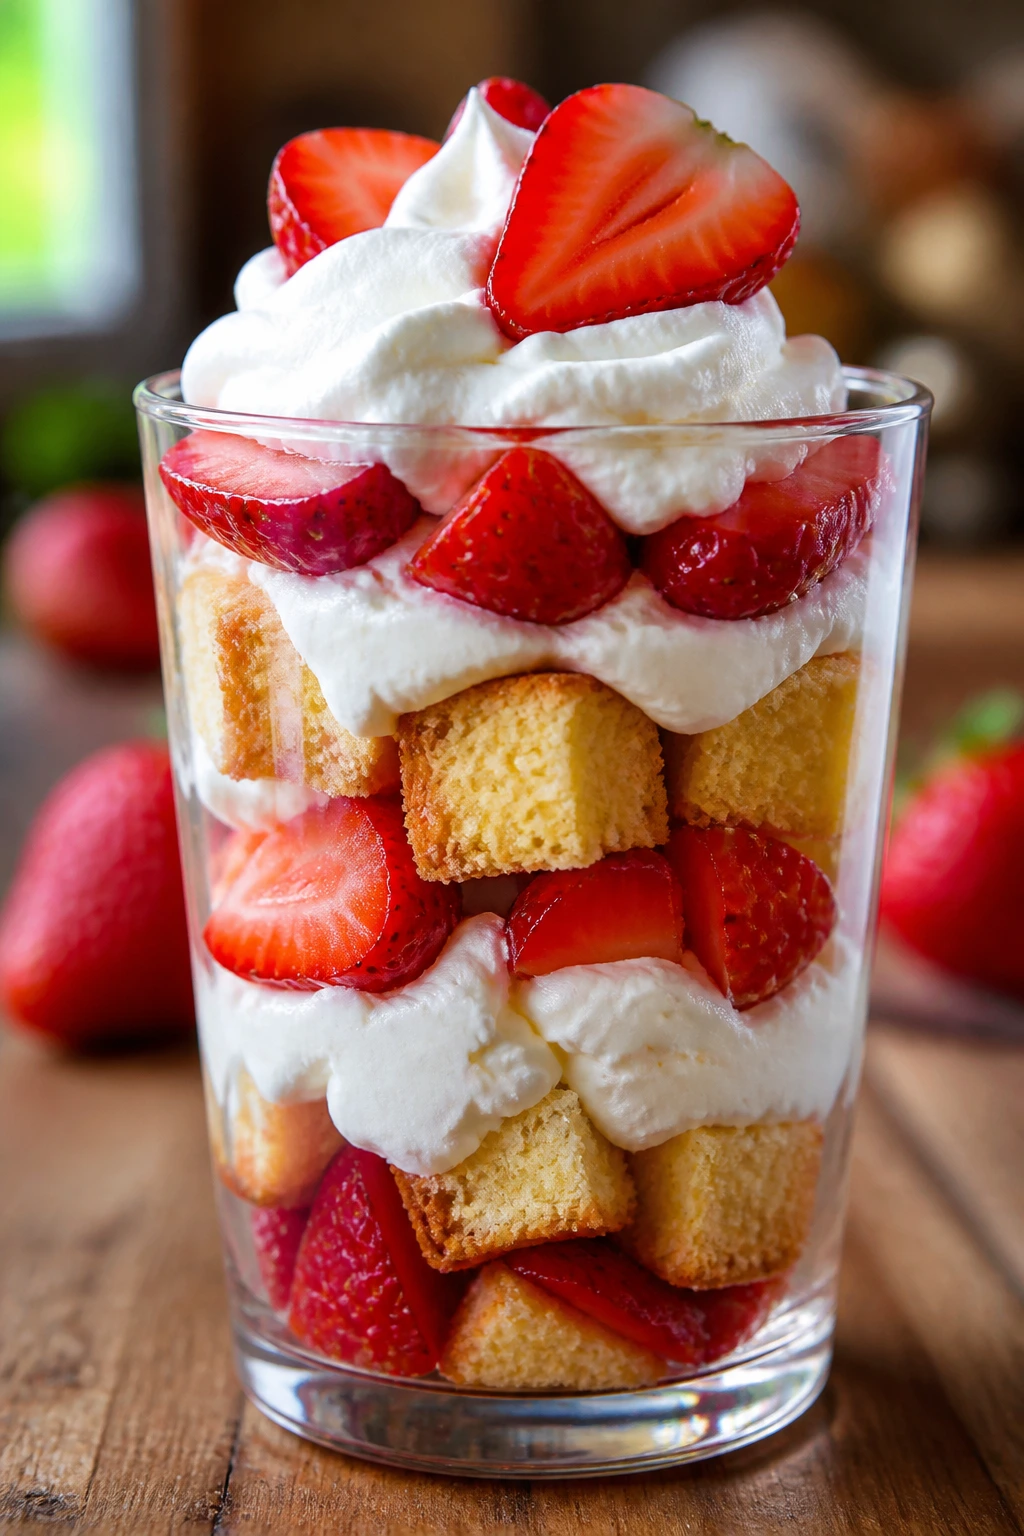
6. Strawberry Shortcake Parfaits
This is the dessert you make when you want something red, cold, and low-drama. Layers of berries, soft cake, and cream look neat in a glass and taste like summer without asking you to build a full cake.
Why It Works: The components can be made ahead, and the layering hides any uneven knife work. Using pound cake or sponge cake makes this a no-stress assembly job.
Key Ingredients:
- 2 cups sliced strawberries
- 2 tablespoons sugar
- 1 teaspoon lemon juice
- 2 cups whipped cream
- 4 cups cubed pound cake or sponge cake
- 1 teaspoon vanilla extract
Quick Steps:
- Toss strawberries with sugar and lemon juice; let them sit 10 minutes.
- Whip cream with vanilla until soft peaks form.
- Layer cake, berries, and cream in glasses.
- Repeat the layers and finish with a few strawberry slices.
Equipment for This Recipe:
- Mixing bowl
- Whisk or mixer
- Clear glasses or jars
How to Serve This Dish: Serve them chilled and don’t pack the layers too tight. The red fruit showing through the glass is half the appeal.
Pro Tips for This Recipe:
- Dry the strawberries a bit if they release a lot of juice.
- Cut cake cubes small so every spoonful gets some fruit.
- Assemble close to serving if you want the cake to stay springy.
Variations on This Dish:
- Angel Food Version: Use angel food cake for a lighter texture.
- Berry Mix Parfait: Add raspberries for a sharper fruit note.
Common Mistakes to Avoid with This Dish:
- Soggy layers: Assemble too early and the cake softens fast.
- Flat whipped cream: Chill the bowl and beaters first.
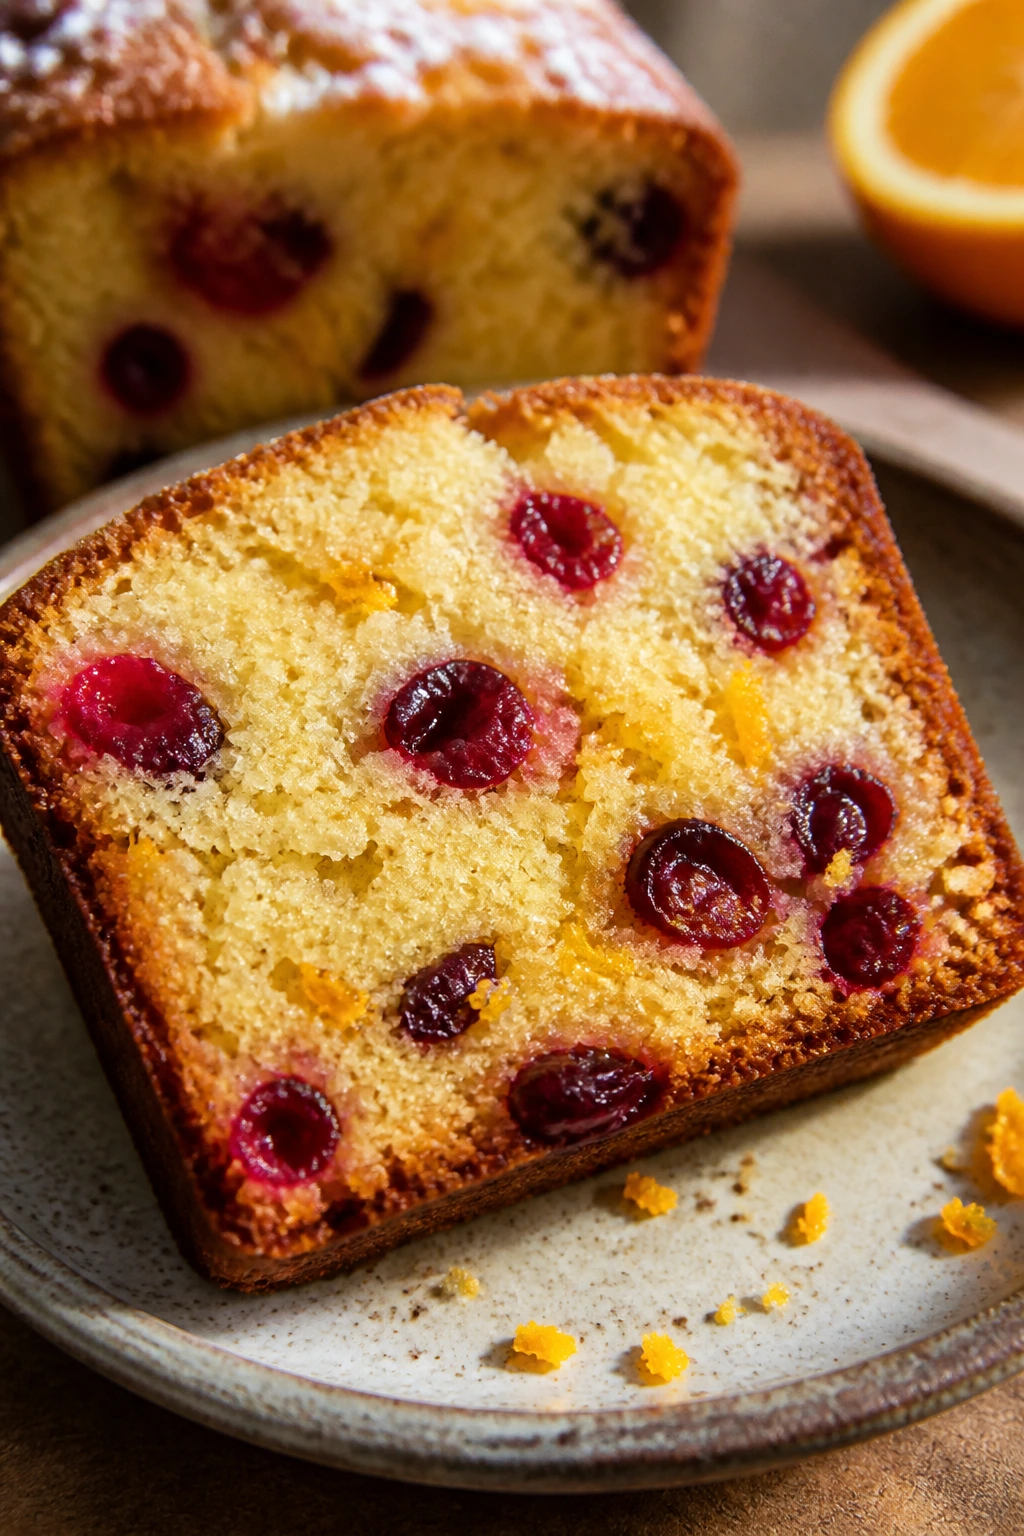
7. Cranberry Orange Loaf Cake
A loaf cake is the quiet workhorse of beginner baking, and this one brings bright cranberry pops against soft orange-scented crumb. It slices cleanly, toasts well, and makes your kitchen smell like citrus peel and warm sugar.
Why It Works: The loaf format is forgiving, and the tart cranberries keep each bite from tasting heavy. Orange zest does more than perfume the batter; it wakes up the fruit.
Key Ingredients:
- 1 3/4 cups all-purpose flour
- 1 cup sugar
- 1/2 cup unsalted butter, softened
- 2 large eggs
- 1/2 cup sour cream
- 1 tablespoon orange zest
- 1/4 cup orange juice
- 1 1/2 cups cranberries, fresh or frozen
Quick Steps:
- Heat oven to 350°F and line a loaf pan with parchment.
- Beat butter and sugar until pale, then mix in eggs, zest, juice, and sour cream.
- Fold in flour, baking powder, salt, and cranberries.
- Bake 50 to 60 minutes until a tester comes out clean.
Equipment for This Recipe:
- 9×5-inch loaf pan
- Hand mixer
- Cooling rack
How to Serve This Dish: Serve plain with tea or add a thin orange glaze. Thin slices are enough; this loaf is rich in a quiet way.
Pro Tips for This Recipe:
- Toss cranberries with a spoonful of flour so they don’t sink.
- Tent with foil if the top browns too fast.
- Let it cool before slicing or the crumb will tear.
Variations on This Dish:
- Cranberry Almond Loaf: Add 1/2 teaspoon almond extract.
- Glazed Version: Whisk powdered sugar with orange juice for a sticky finish.
Common Mistakes to Avoid with This Dish:
- Dense crumb: Overmixing after flour goes in.
- Bursting top and raw center: Oven too hot. Lower it slightly and bake longer.
8. Beet Red Velvet Layer Cake
Beets sound strange until you see the slice: deep red cake, plush crumb, and a cocoa note that stays in the background. The beet flavor fades into the batter, leaving color and moisture without a vegetable taste.
Why It Works: Roasted or steamed beets add natural pigment and keep the cake soft, which is handy when you’re nervous about overbaking. The cream cheese frosting balances the earthiness with tang and sugar.
Key Ingredients:
- 2 cups all-purpose flour
- 1 cup pureed cooked beets
- 1 cup sugar
- 1/2 cup butter, softened
- 2 eggs
- 1/2 cup buttermilk
- 2 tablespoons cocoa powder
- 1 teaspoon vinegar
- 8 ounces cream cheese
- 2 cups powdered sugar
Quick Steps:
- Heat oven to 350°F and grease two 8-inch cake pans.
- Beat butter and sugar, then mix in eggs, beet puree, and buttermilk.
- Fold in flour, cocoa, baking powder, salt, and vinegar.
- Bake 24 to 28 minutes, then cool and frost.
Equipment for This Recipe:
- Two 8-inch round pans
- Mixer
- Offset spatula
How to Serve This Dish: Keep the frosting thin so the beet color can still peek through at the edges. A few beet-red crumbs on the plate make the cake look intentional, not messy.
Pro Tips for This Recipe:
- Blend the beets smooth; chunks make the crumb spotty.
- Roast beets instead of boiling if you want a deeper color.
- Chill the layers before frosting.
Variations on This Dish:
- Chocolate Beet Cake: Increase cocoa to 1/4 cup for a darker profile.
- Sheet Cake Version: Bake in a 9×13 pan for easier serving.
Common Mistakes to Avoid with This Dish:
- Too much beet flavor: Use measured puree, not a heaping cup.
- Runny frosting: Cream cheese that is too warm.
9. Raspberry Cheesecake Thumbprint Cookies
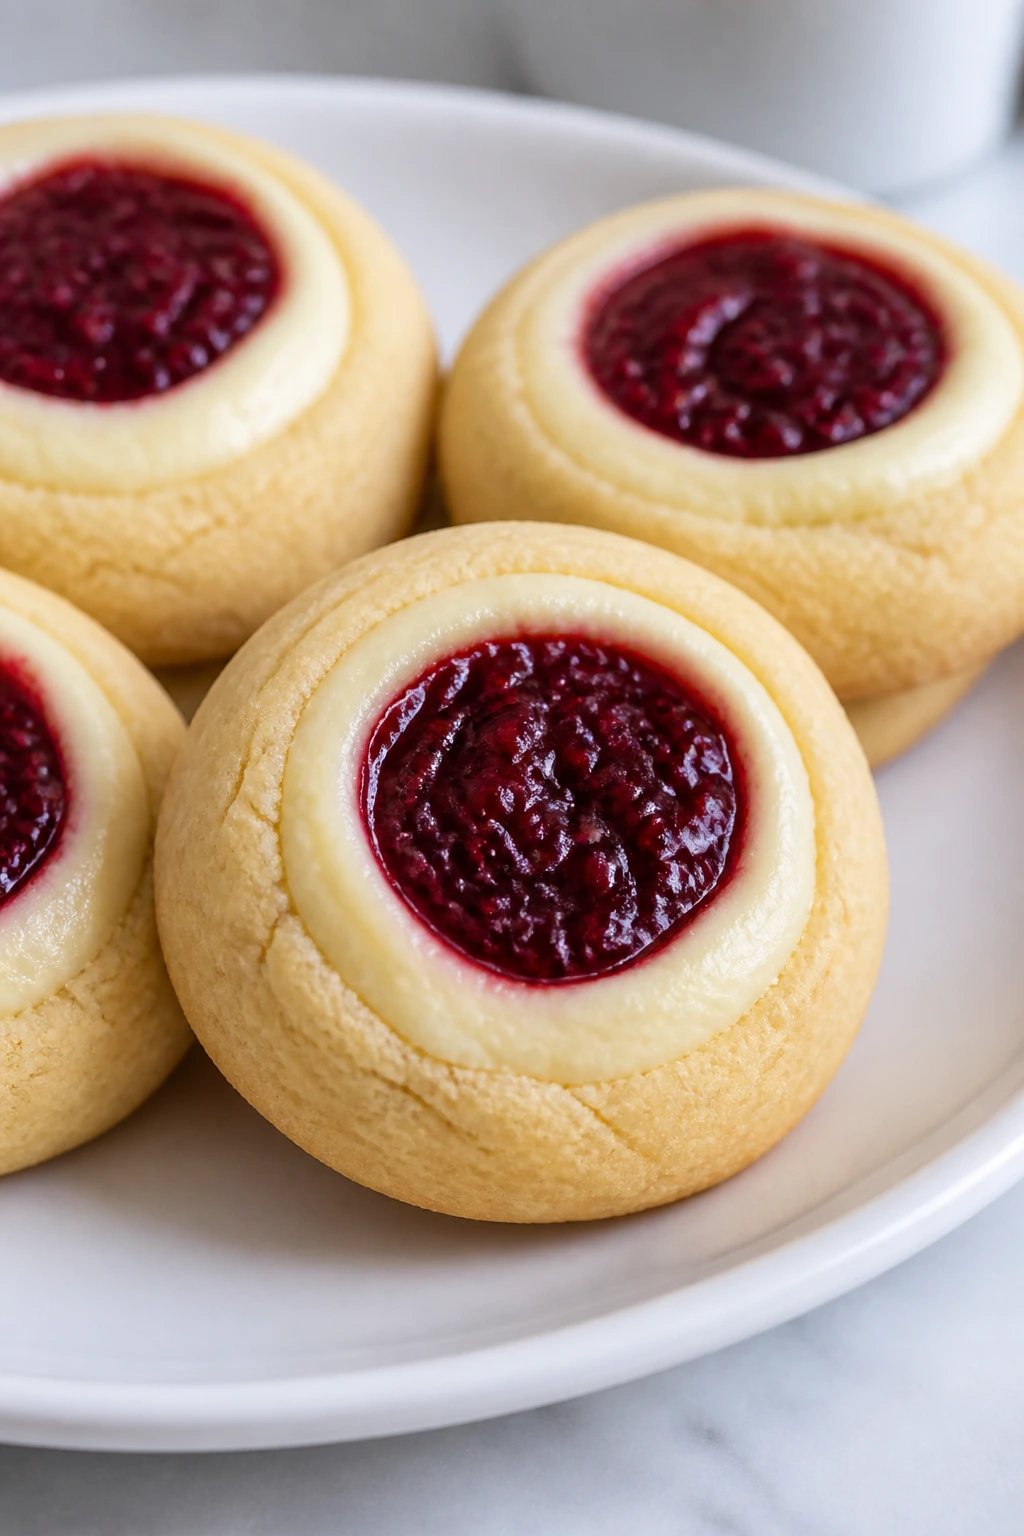
These cookies are small, soft, and a little fancy without becoming difficult. You get a tender sugar cookie base, a creamy center, and a bright raspberry spoonful that bakes into a jewel-colored puddle.
Why It Works: Thumbprints are forgiving because the filling sits in the center instead of needing perfect shaping. The cream cheese layer keeps the cookie from tasting plain, even if your dough balls are not identical.
Key Ingredients:
- 1 cup unsalted butter, softened
- 2/3 cup sugar
- 2 cups all-purpose flour
- 4 ounces cream cheese
- 1/4 cup powdered sugar
- 1/3 cup raspberry jam
Quick Steps:
- Heat oven to 350°F and line a sheet pan.
- Beat butter and sugar, then mix in flour and salt to form a soft dough.
- Roll into balls, press centers, and fill with a little cream cheese mixture and jam.
- Bake 12 to 14 minutes until the edges are pale gold.
Equipment for This Recipe:
- Sheet pan
- Parchment paper
- Small spoon or teaspoon
How to Serve This Dish: Let them cool fully or the centers will slide. They look nicest on a plate lined with a doily or a plain white napkin, because the red filling does the talking.
Pro Tips for This Recipe:
- Chill the dough for 15 minutes if it feels sticky.
- Use thick jam, not runny preserves.
- Repress the thumbprint gently halfway through baking if it puffs.
Variations on This Dish:
- Strawberry Thumbprints: Swap in strawberry jam.
- Lemon Cheesecake Thumbprints: Add lemon zest to the cream cheese filling.
Common Mistakes to Avoid with This Dish:
- Cracked cookies: Press the centers before baking, not after.
- Jam spilling out: Overfilling the wells.
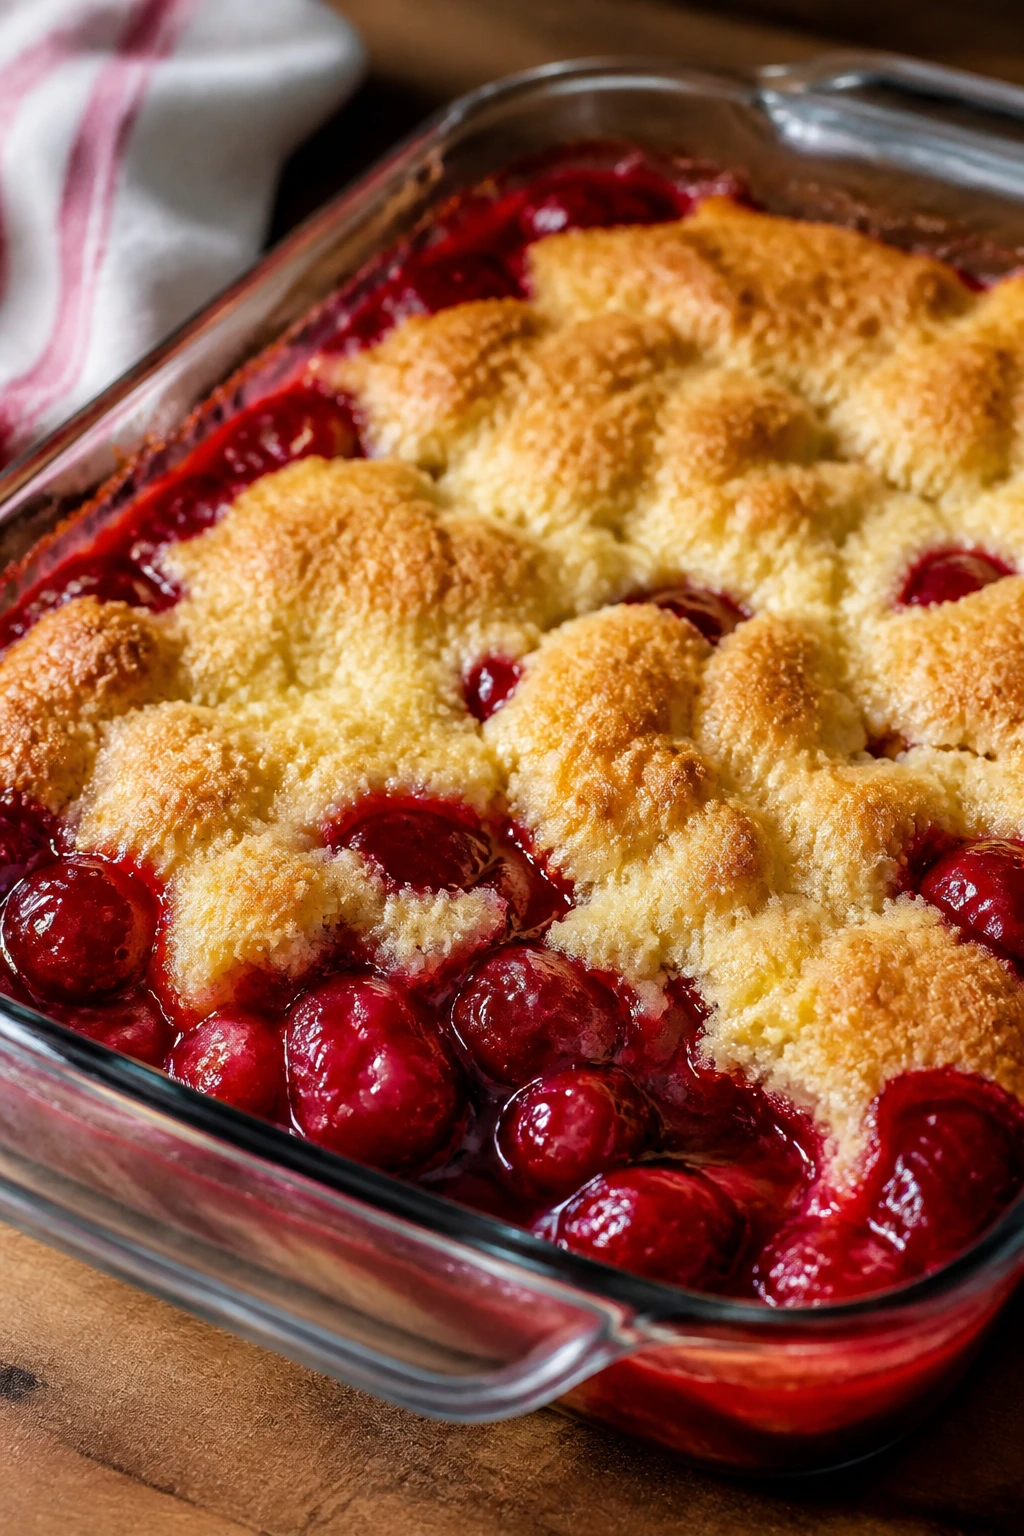
10. Cherry Cobbler
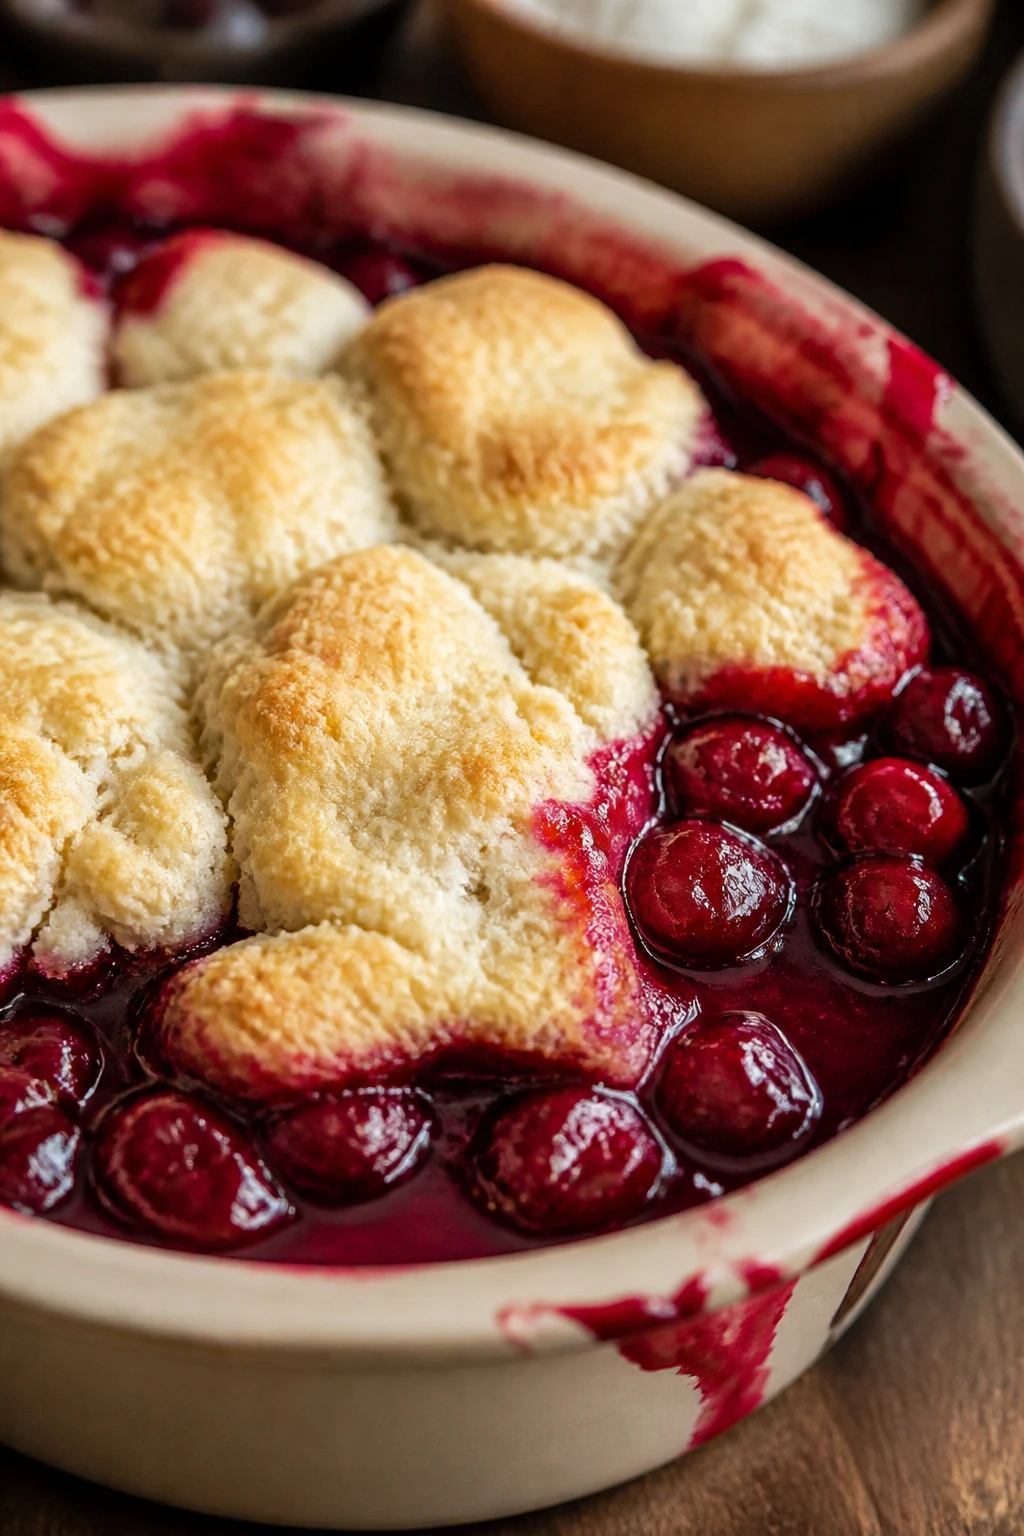
Cherry cobbler is the dessert version of a deep breath. The fruit gets hot and syrupy underneath, while the top bakes into pale-golden dumplings or biscuit patches that soak up just enough juice.
Why It Works: Cobbler is forgiving because a rustic topping looks right even when it is uneven. Frozen cherries work well, and the filling thickens as it bakes, so you do not need pastry skills.
Key Ingredients:
- 4 cups cherries, pitted
- 3/4 cup sugar
- 2 teaspoons cornstarch
- 1 tablespoon lemon juice
- 1 1/2 cups flour
- 2 teaspoons baking powder
- 1/2 cup cold butter
- 3/4 cup milk
Quick Steps:
- Heat oven to 375°F and butter a 9-inch baking dish.
- Toss cherries with sugar, cornstarch, lemon juice, and vanilla; spread in the dish.
- Make a simple biscuit topping with flour, baking powder, butter, and milk.
- Spoon topping over the fruit and bake 35 to 40 minutes.
Equipment for This Recipe:
- Baking dish
- Mixing bowl
- Pastry cutter or fork
How to Serve This Dish: Serve warm in shallow bowls with vanilla ice cream. The syrupy cherries should pool a little around the edges.
Pro Tips for This Recipe:
- Don’t smooth the topping completely; gaps let steam escape.
- Bake until the fruit is visibly bubbling.
- Let it rest 10 minutes so the syrup thickens.
Variations on This Dish:
- Cherry-Almond Cobbler: Add almond extract to the filling.
- Mixed Berry Cobbler: Blend cherries with raspberries for sharper flavor.
Common Mistakes to Avoid with This Dish:
- Watery filling: Skip extra liquid. Cherries release plenty.
- Tough topping: Overworked biscuit dough turns heavy.
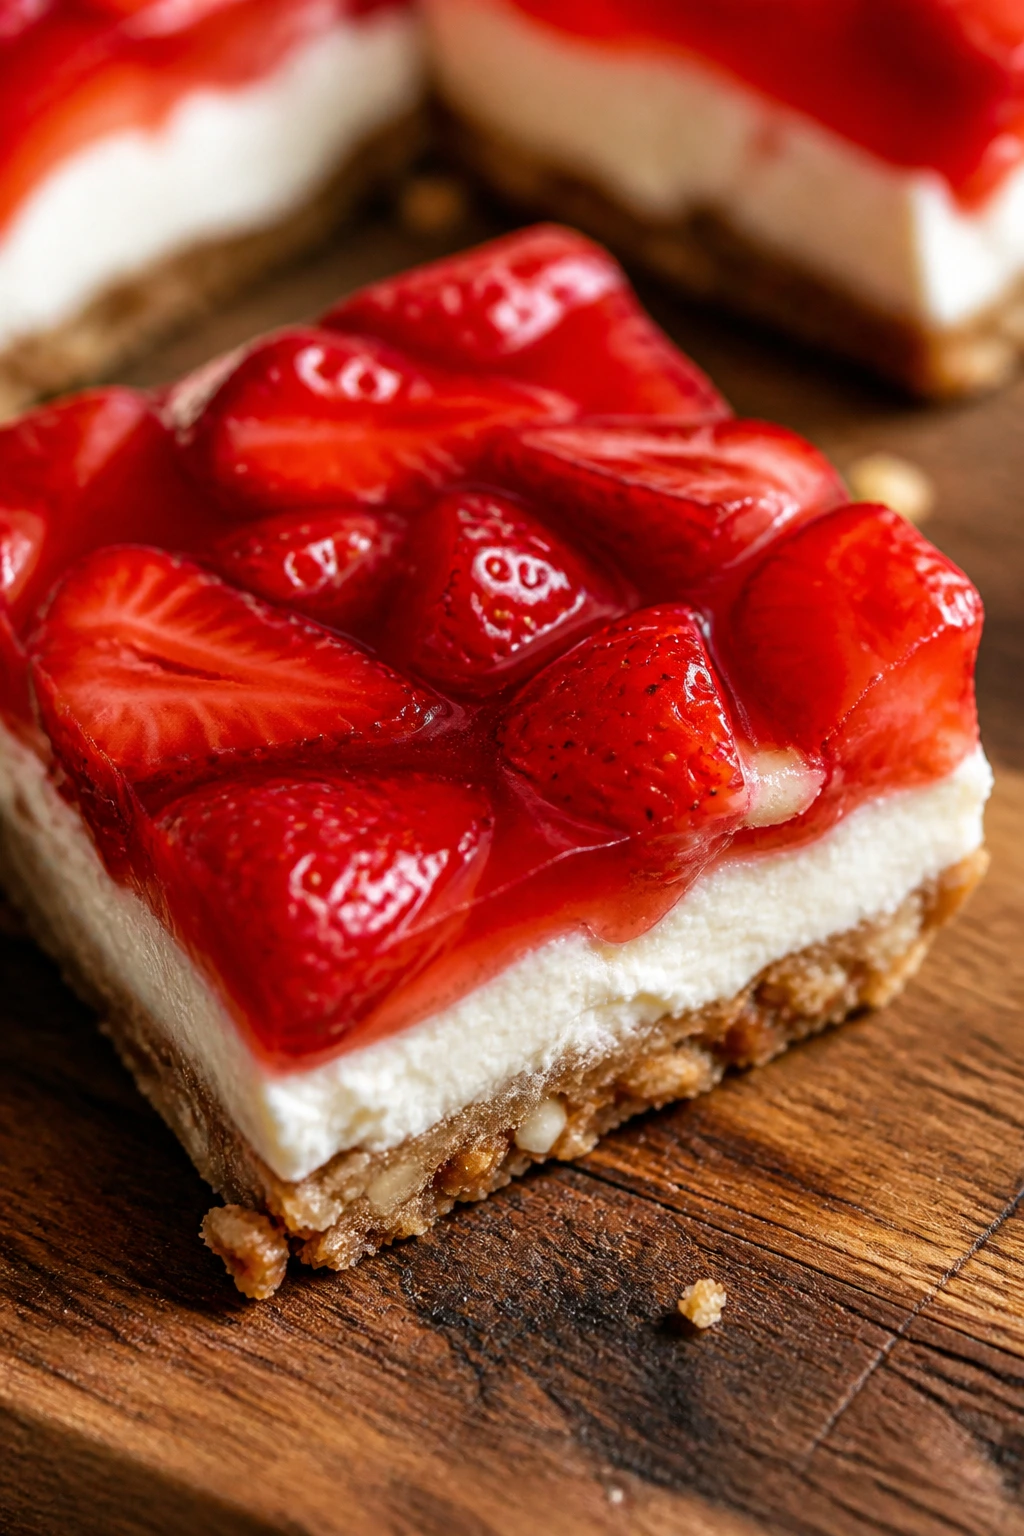
11. Strawberry Swirl Cheesecake Bars

Cheesecake bars give you the flavor of a bakery slice without the water bath and worry. The strawberry swirl brings color through the creamy filling, and the graham crust cuts neatly when chilled.
Why It Works: Bars are easier than a full cheesecake because the layer is thinner and sets faster. A fruit swirl also hides minor cracks, which is a nice benefit when you are still learning timing.
Key Ingredients:
- 1 1/2 cups graham cracker crumbs
- 5 tablespoons melted butter
- 16 ounces cream cheese
- 1/2 cup sugar
- 2 eggs
- 1/2 cup strawberry puree
Quick Steps:
- Heat oven to 325°F and line an 8×8 pan.
- Mix crumbs and butter, press into the pan, and bake 8 minutes.
- Beat cream cheese, sugar, eggs, and vanilla until smooth.
- Swirl strawberry puree over the filling and bake 28 to 32 minutes.
- Chill several hours before slicing.
Equipment for This Recipe:
- 8×8-inch pan
- Electric mixer
- Parchment
How to Serve This Dish: Serve cold with a thin spoonful of extra puree. A sharp knife wiped clean between cuts gives the neatest edges.
Pro Tips for This Recipe:
- Use room-temperature cream cheese so the filling stays smooth.
- Do not overbake; the center should still jiggle slightly.
- Chill overnight if you want the cleanest texture.
Variations on This Dish:
- Raspberry Swirl Bars: Use strained raspberry puree.
- Chocolate Crust Version: Mix cocoa into the crust crumbs.
Common Mistakes to Avoid with This Dish:
- Lumpy filling: Cold cream cheese does that.
- Cracked top: Baking until completely firm.
12. Red Velvet Cookies
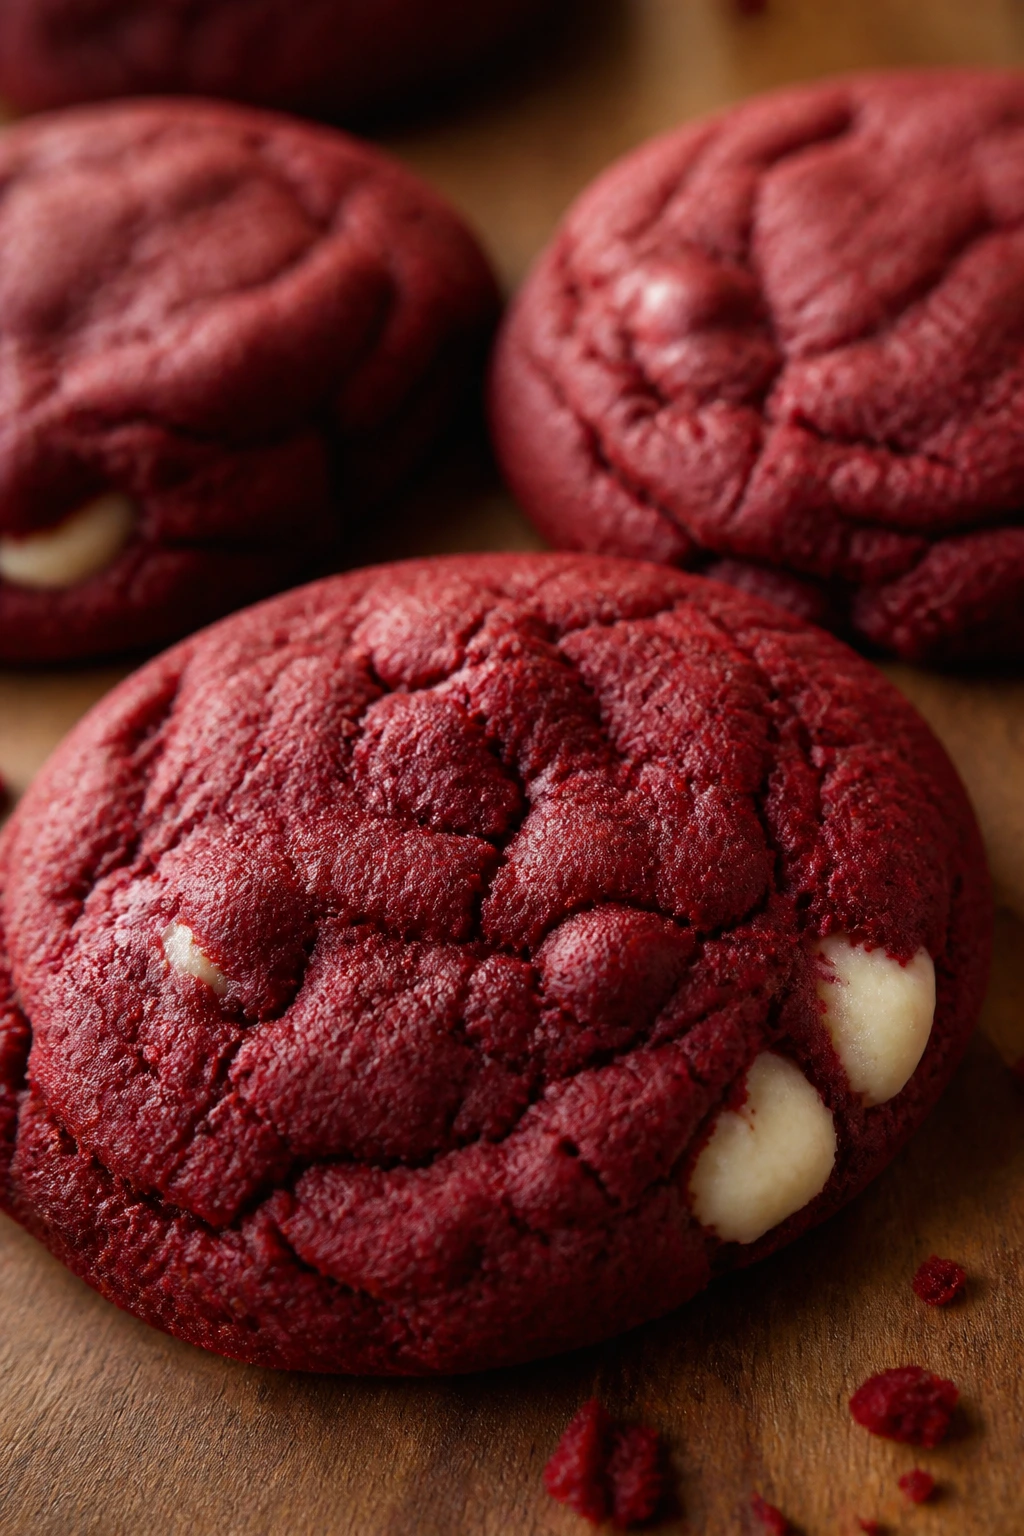
These cookies are chewy in the center, crisp at the edges, and red enough to feel festive without needing frosting swirls. They are a smart choice when you want the red velvet flavor but do not want to bake a whole cake.
Why It Works: The cookie dough uses the same cocoa-and-acid idea as cake, but the shape is easier to manage. They bake quickly, so there’s less room for panic about doneness.
Key Ingredients:
- 1/2 cup butter, softened
- 3/4 cup sugar
- 1 egg
- 1 tablespoon cocoa powder
- 1 tablespoon red food coloring
- 1 1/2 cups flour
- 1/2 teaspoon baking soda
- 4 ounces cream cheese, for filling or frosting
Quick Steps:
- Heat oven to 350°F and line a sheet pan.
- Cream butter and sugar, then beat in egg, vanilla, cocoa, and coloring.
- Stir in flour, baking soda, and salt.
- Scoop dough and bake 10 to 12 minutes.
- Cool and sandwich or frost if you want extra richness.
Equipment for This Recipe:
- Sheet pan
- Cookie scoop
- Mixing bowls
How to Serve This Dish: Serve them plain or with a thin cream cheese filling. They stack well in a tin, which makes them useful for gifts.
Pro Tips for This Recipe:
- Chill dough for 20 minutes if it spreads too much.
- Pull them early for a softer middle.
- A tiny pinch of espresso powder deepens the cocoa note.
Variations on This Dish:
- Crinkle Red Velvet Cookies: Roll the dough in powdered sugar before baking.
- Sandwich Cookies: Fill with cream cheese frosting.
Common Mistakes to Avoid with This Recipe:
- Flat cookies: Butter too soft. Chill the dough.
- Mud-brown color: Too much cocoa can mute the red.
13. Raspberry Lemon Poke Cake
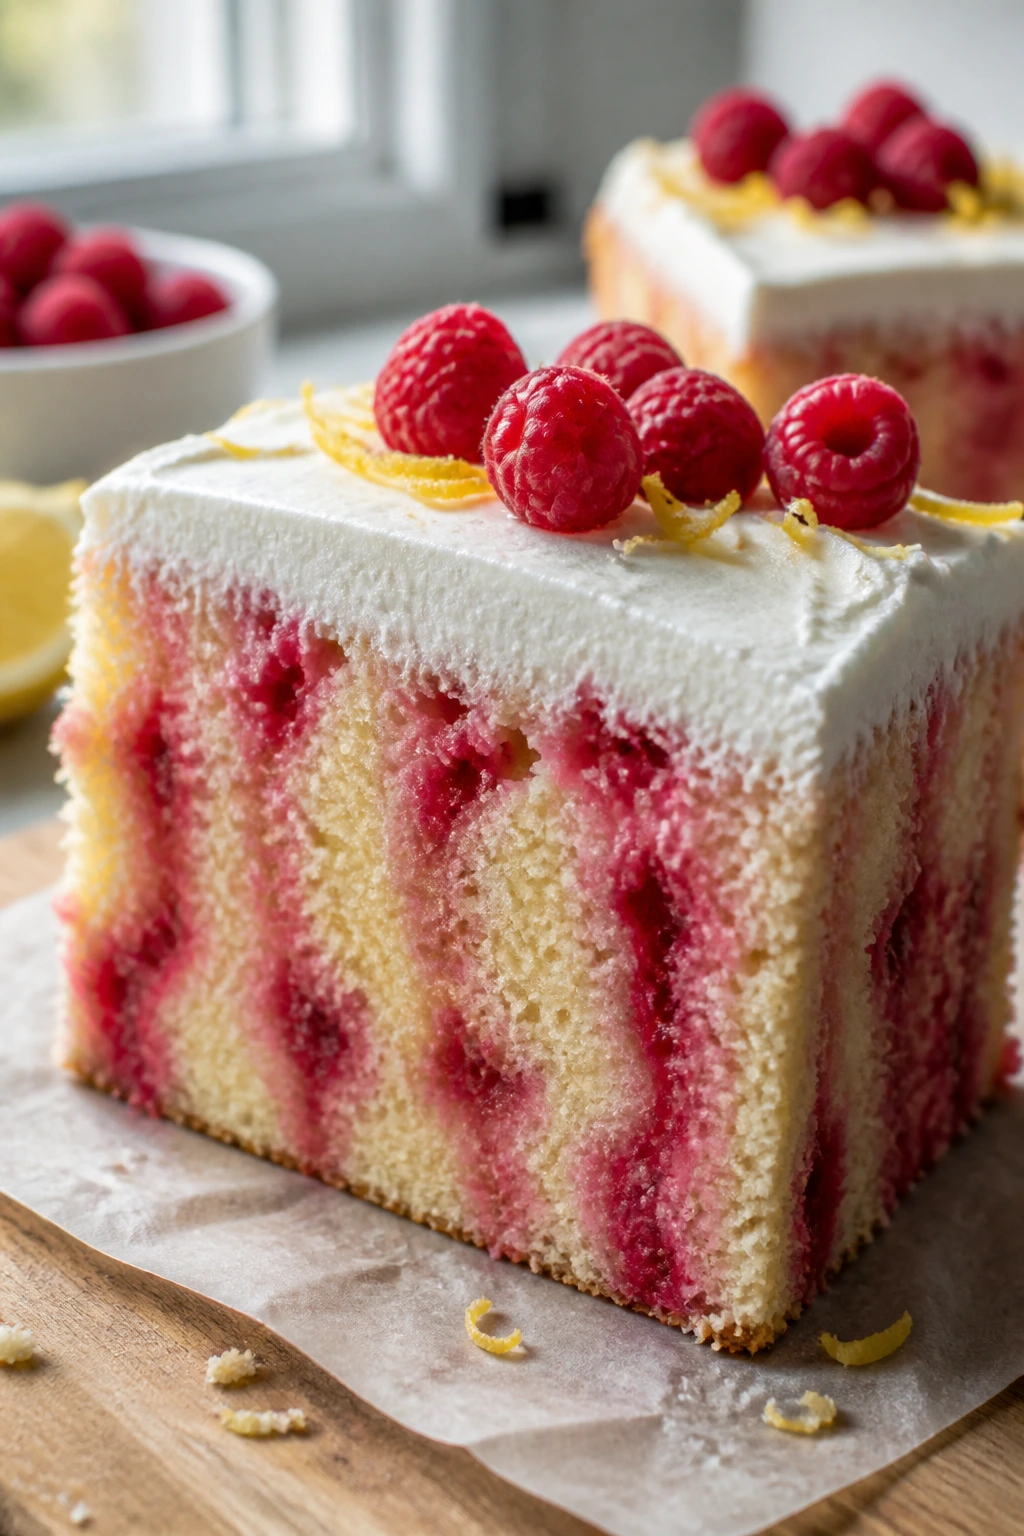
A poke cake looks playful because the sauce literally sinks into the sponge. In this version, lemon cake gets filled with raspberry gelatin or syrup, then topped with whipped cream so each slice shows pink stripes.
Why It Works: The holes let the raspberry flavor reach every bite, and the chilled topping makes the cake easy to serve from a pan. It is beginner-friendly because the cake base can be homemade or boxed.
Key Ingredients:
- 1 lemon cake mix or 2 cups lemon cake batter
- 1 package raspberry gelatin or 1 cup raspberry syrup
- 1 cup boiling water, if using gelatin
- 2 cups whipped topping or whipped cream
- Fresh raspberries for garnish
Quick Steps:
- Bake the cake in a 9×13 pan and cool 10 minutes.
- Poke holes all over the top with the handle of a spoon.
- Pour the raspberry mixture over the warm cake.
- Chill until set, then spread whipped topping over it.
- Garnish with berries before slicing.
Equipment for This Recipe:
- 9×13-inch pan
- Wooden spoon handle
- Offset spatula
How to Serve This Dish: Cut chilled squares and use a wide spatula to lift them out. The slices look best on a plain plate so the raspberry streaks stand out.
Pro Tips for This Recipe:
- Let the cake cool slightly before adding the filling, or it gets too wet.
- Chill at least 2 hours.
- Use fresh lemon zest if you want the citrus to pop more.
Variations on This Dish:
- Strawberry Lemon Poke Cake: Swap the raspberry layer for strawberry.
- Cream Cheese Topping: Fold a little powdered sugar into softened cream cheese.
Common Mistakes to Avoid with This Dish:
- Dry top layer: The filling was poured on too late.
- Runny topping: Frost before the cake is fully chilled.
14. Strawberry Pretzel Salad Bars
Sweet-salty dessert bars can sound odd until you bite into one. The pretzel crust is crisp and a little salty, the cream cheese layer is smooth, and the strawberry gelatin top cuts through the richness with a bright red finish.
Why It Works: The crust stays firm because it’s baked first, and the cream cheese layer acts like a barrier so the gelatin does not leak through. Bars are easier to portion than the classic layered dish.
Key Ingredients:
- 2 cups crushed pretzels
- 3/4 cup melted butter
- 1/4 cup sugar
- 8 ounces cream cheese
- 1 cup whipped topping
- 1 package strawberry gelatin
- 2 cups sliced strawberries
- 2 cups boiling water
Quick Steps:
- Bake pretzel crust at 350°F for 10 minutes in a lined 9×13 pan.
- Beat cream cheese with sugar and fold in whipped topping.
- Spread the creamy layer over the cooled crust.
- Dissolve gelatin in boiling water, stir in strawberries, cool slightly, then pour on top.
- Chill until fully set before cutting.
Equipment for This Recipe:
- 9×13-inch pan
- Mixing bowls
- Electric mixer
How to Serve This Dish: Serve cold, straight from the fridge. Use a sharp knife dipped in warm water for cleaner slices.
Pro Tips for This Recipe:
- Cool the crust fully before adding the cream layer.
- Let the gelatin cool a bit so it does not melt the filling.
- Pat the strawberries dry if they are very wet.
Variations on This Dish:
- Raspberry Pretzel Bars: Use raspberry gelatin and berries.
- Mini Cup Version: Make in muffin cups for parties.
Common Mistakes to Avoid with This Dish:
- Soggy crust: Warm filling on warm crust causes trouble.
- Leaking gelatin: Cream layer was spread too thin at the edges.
15. Cranberry White Chocolate Blondies
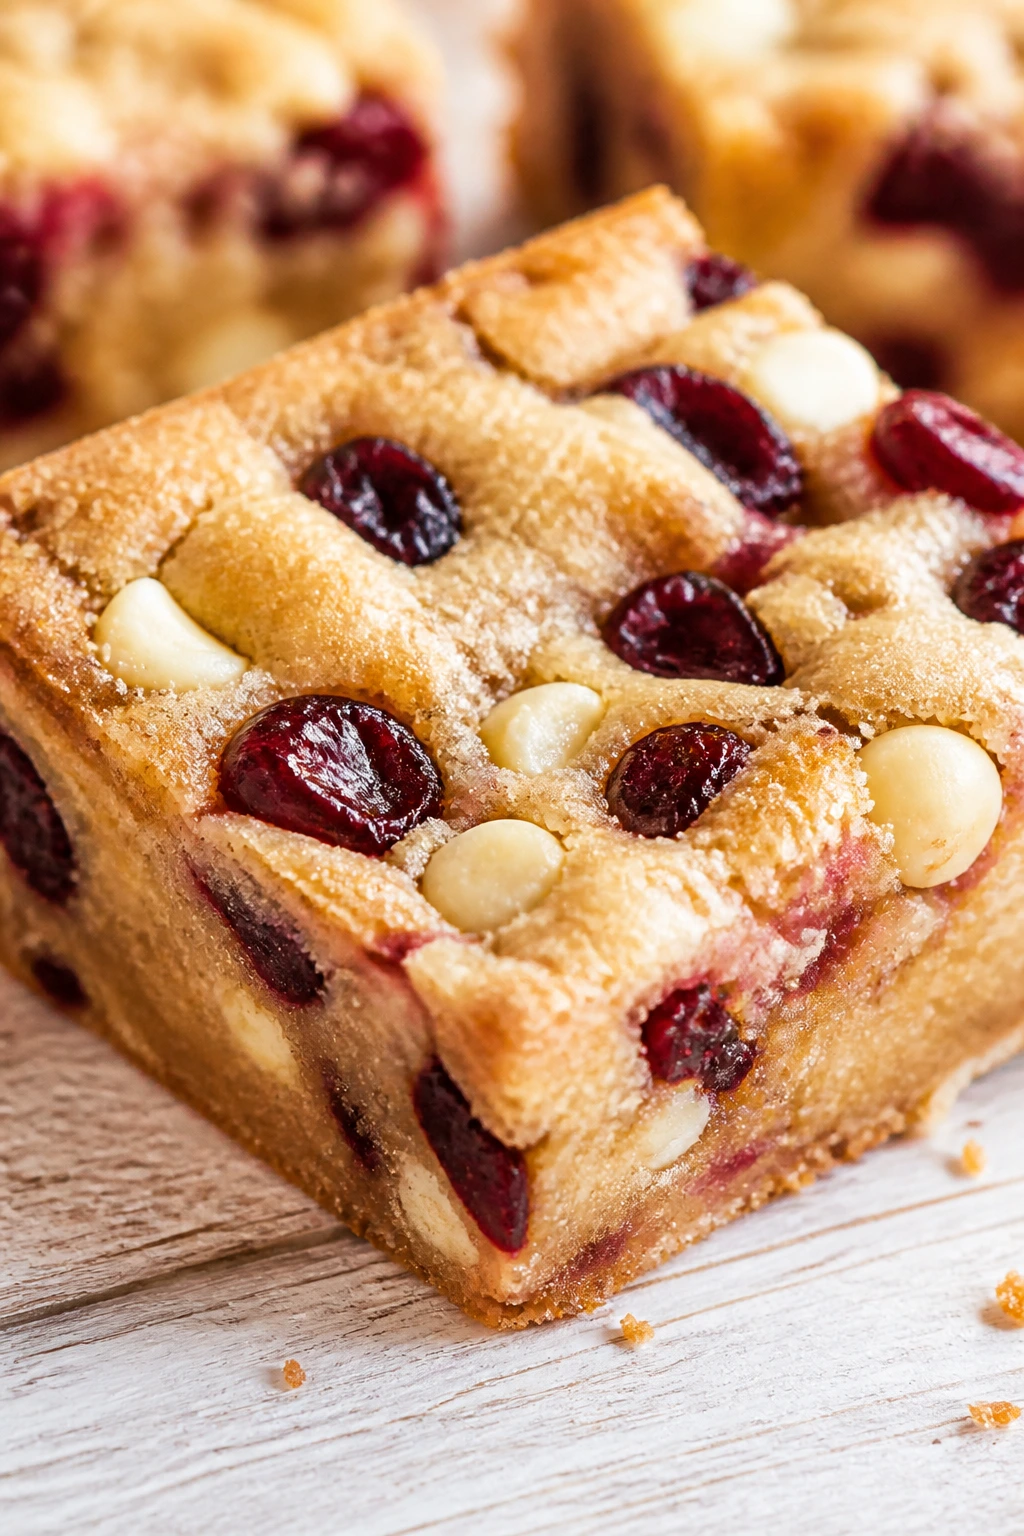
These blondies are chewy, buttery, and dotted with tart red cranberries that cut through the sweet white chocolate. They are a good beginner bake because the batter is stirred together, not creamed for ages.
Why It Works: Blondies don’t demand the precision of cake, and cranberries bring a pop of color plus a sharp bite. White chocolate softens the tartness and gives the bars a richer feel.
Key Ingredients:
- 1/2 cup butter, melted
- 1 cup brown sugar
- 1 egg
- 1 cup flour
- 3/4 cup dried cranberries
- 3/4 cup white chocolate chips
Quick Steps:
- Heat oven to 350°F and line an 8×8 pan.
- Stir melted butter and brown sugar, then add egg and vanilla.
- Fold in flour, salt, cranberries, and white chocolate.
- Spread into the pan and bake 22 to 25 minutes.
Equipment for This Recipe:
- 8×8-inch pan
- Mixing bowl
- Spatula
How to Serve This Dish: Cool fully and cut into small squares; these are rich. A cup of black tea balances the sweetness.
Pro Tips for This Recipe:
- Use dried cranberries for the easiest texture.
- Pull the pan when the center still looks a little soft.
- Chill before slicing for neat edges.
Variations on This Dish:
- Orange Cranberry Blondies: Add orange zest to the batter.
- Nutty Version: Fold in chopped pecans.
Common Mistakes to Avoid with This Dish:
- Dry bars: Overbaking by even 5 minutes matters here.
- Clumped mix-ins: Toss cranberries and chips in a little flour first.
16. Red Berry Pavlova
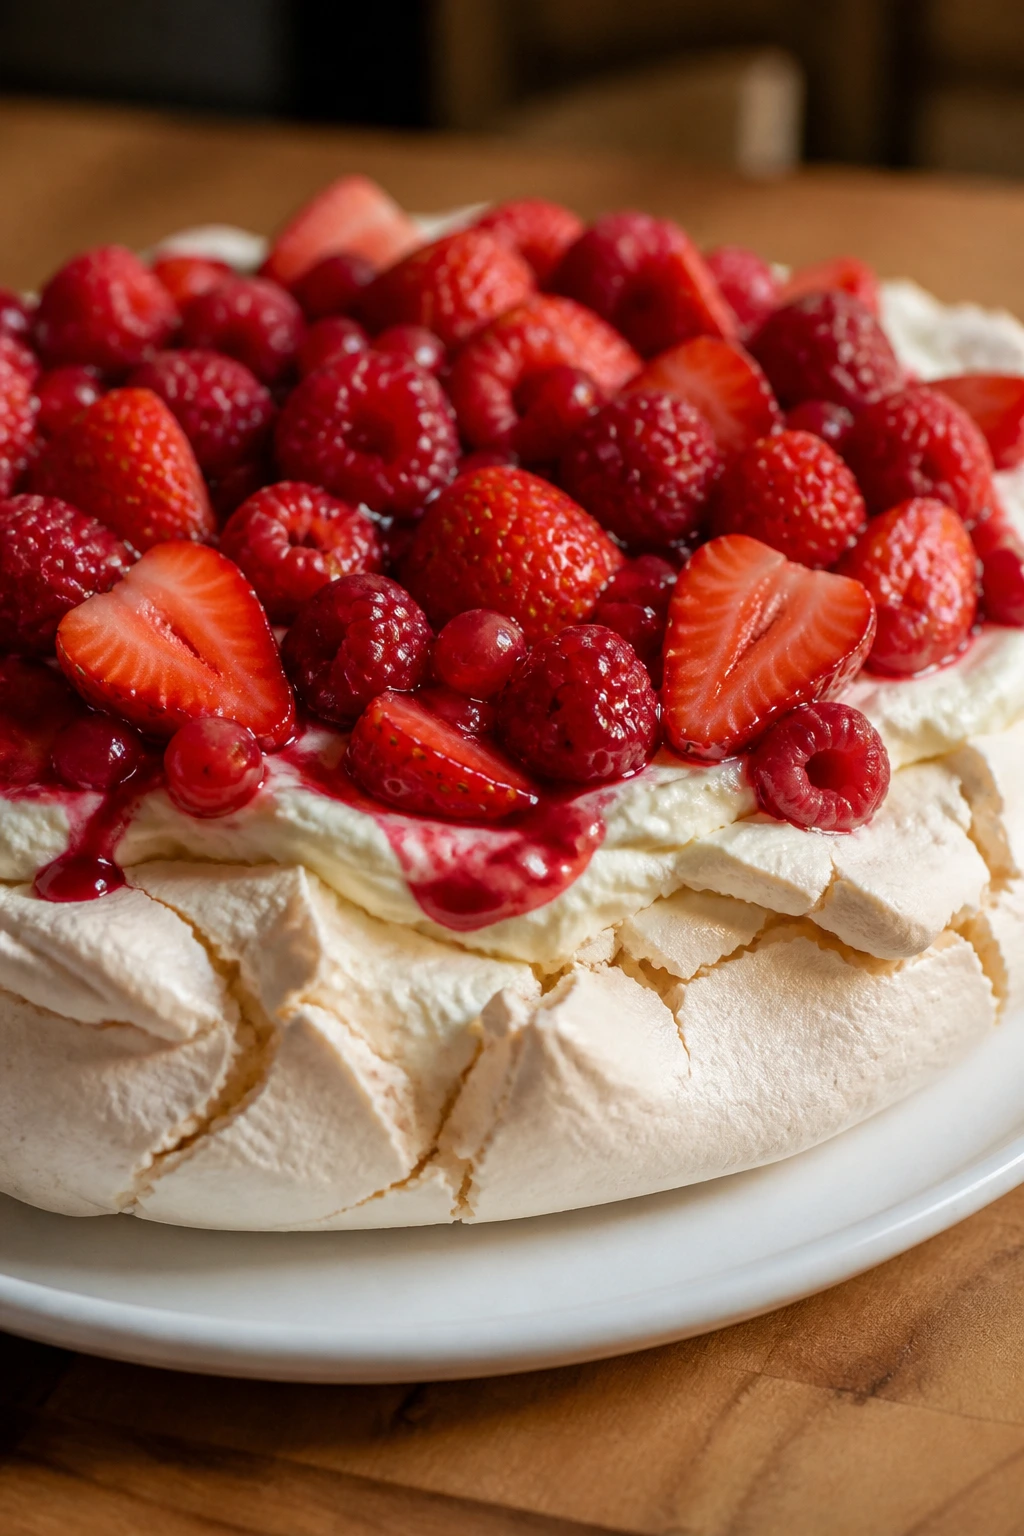
A pavlova is crisp on the outside, marshmallow-soft inside, and topped with a scatter of berries that look almost too bright to eat. It sounds fancy, but the actual process is mostly whipping and waiting.
Why It Works: Egg whites and sugar make a sturdy shell that bakes low and slow, and the fruit keeps the whole thing from feeling heavy. It’s also a good lesson in patience, which baking always asks for eventually.
Key Ingredients:
- 4 egg whites
- 1 cup sugar
- 1 teaspoon cornstarch
- 1 teaspoon vinegar
- 2 cups mixed red berries
- 1 cup whipped cream
Quick Steps:
- Heat oven to 250°F and line a sheet pan with parchment.
- Whip egg whites to soft peaks, then add sugar a spoonful at a time.
- Fold in cornstarch and vinegar, then shape into a disk.
- Bake 1 hour, then let it cool in the oven.
- Top with whipped cream and berries.
Equipment for This Recipe:
- Mixer
- Sheet pan
- Parchment paper
How to Serve This Dish: Assemble it close to serving time so the shell stays crisp. Use a cake stand if you want a dramatic center-of-table look.
Pro Tips for This Recipe:
- Make sure the bowl is grease-free.
- Don’t open the oven early.
- Add berries at the last minute.
Variations on This Dish:
- Strawberry Pavlova: Use only strawberries for a cleaner color.
- Raspberry-Rose Version: Add a drop of rosewater to the cream.
Common Mistakes to Avoid with This Dish:
- Collapsed shell: Sugar not fully whipped in.
- Weeping cream: Assemble too early.
17. Cherry Clafoutis
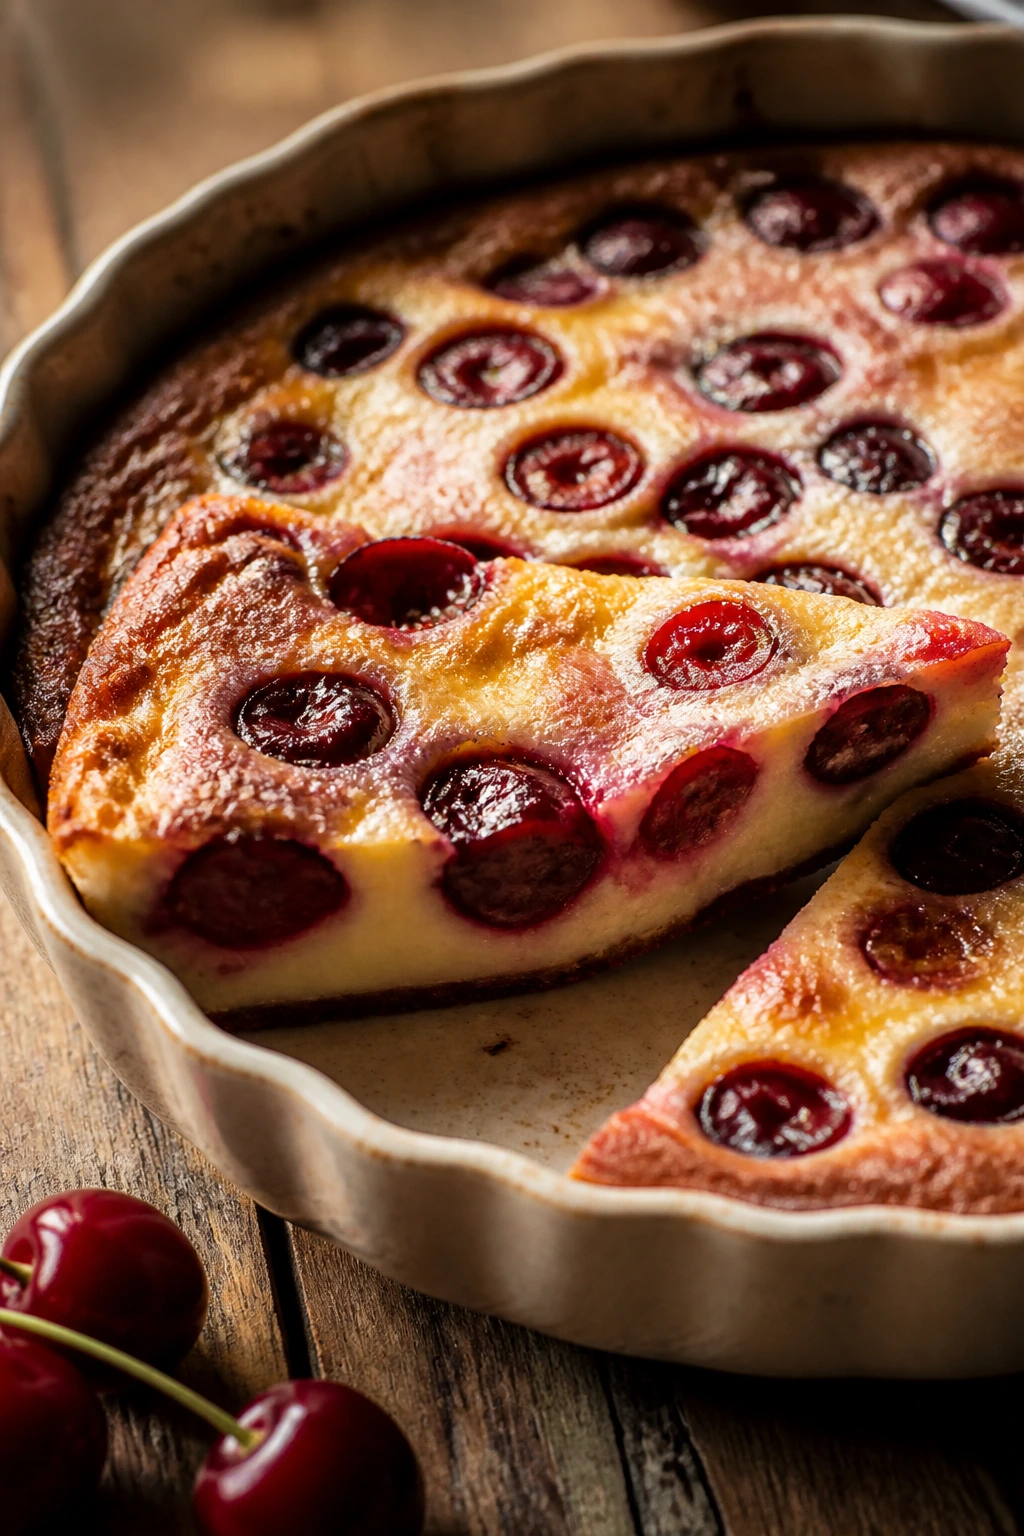
Clafoutis sits between custard and cake, which is part of its charm. The batter is thin, the cherries sink a little, and the finished dessert slices like a soft baked pancake with red fruit in every wedge.
Why It Works: You mix everything in one bowl, pour it over fruit, and bake. That’s it. The eggs set the custard, and the fruit keeps the center juicy instead of dry.
Key Ingredients:
- 2 cups pitted cherries
- 3 eggs
- 1/2 cup sugar
- 1 cup milk
- 1/2 cup flour
- 1 teaspoon vanilla
- Powdered sugar for dusting
Quick Steps:
- Heat oven to 350°F and butter a pie dish.
- Spread cherries in the dish.
- Whisk eggs, sugar, milk, flour, vanilla, and salt until smooth.
- Pour over the cherries and bake 35 to 40 minutes.
- Dust with powdered sugar.
Equipment for This Recipe:
- Pie dish
- Whisk
- Mixing bowl
How to Serve This Dish: Serve warm or room temperature, not scorching hot. A spoonful of crème fraîche is excellent if you want a little tang.
Pro Tips for This Recipe:
- Pit the cherries first, obviously; biting a pit is not part of the plan.
- Do not overmix once the batter is smooth.
- Let it cool 10 minutes before cutting.
Variations on This Dish:
- Berry Clafoutis: Swap in raspberries or mixed berries.
- Almond Cherry Clafoutis: Add a drop of almond extract.
Common Mistakes to Avoid with This Dish:
- Rubbery texture: Overbaking.
- Fruit floating unevenly: Pour batter slowly around the cherries.
18. Strawberry Crisp
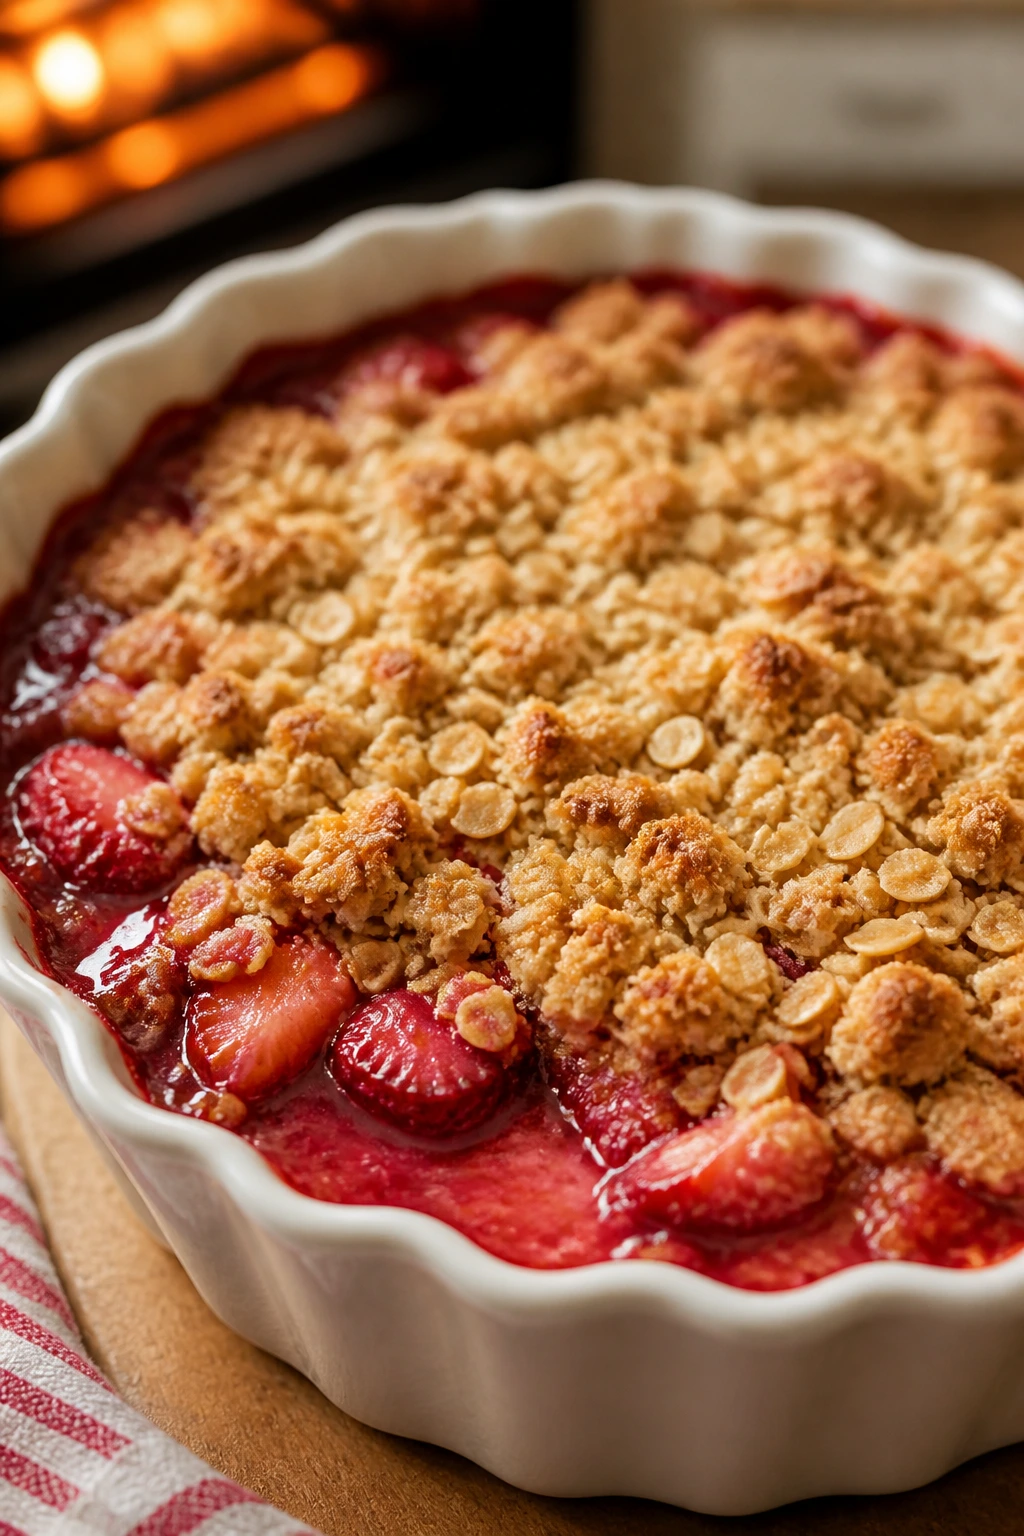
A crisp is what you make when you want dessert without rolling dough or layering frosting. The strawberry filling bubbles under a crunchy oat topping, and the whole dish smells like fruit jam and toasted butter.
Why It Works: Strawberries break down quickly in the oven, so the filling becomes spoonable without much help. The topping is mostly oats, flour, sugar, and butter, which is about as beginner-proof as baking gets.
Key Ingredients:
- 6 cups sliced strawberries
- 1/3 cup sugar
- 2 tablespoons cornstarch
- 1 cup oats
- 3/4 cup flour
- 1/2 cup brown sugar
- 1/2 cup cold butter
Quick Steps:
- Heat oven to 375°F and grease an 8-inch dish.
- Toss strawberries with sugar and cornstarch, then spread in the dish.
- Mix oats, flour, brown sugar, salt, and butter into crumbs.
- Sprinkle on top and bake 35 to 40 minutes.
Equipment for This Recipe:
- Baking dish
- Mixing bowl
- Fork or pastry cutter
How to Serve This Dish: Serve hot with vanilla ice cream. The colder the ice cream, the better the temperature contrast.
Pro Tips for This Recipe:
- Add lemon zest if the berries taste flat.
- Bake until the filling bubbles at the edges.
- Cool slightly before scooping or it runs everywhere.
Variations on This Dish:
- Strawberry Rhubarb Crisp: Use half rhubarb for more tang.
- Nutty Crisp: Add chopped pecans to the topping.
Common Mistakes to Avoid with This Dish:
- Watery fruit: Too much fruit packed into the dish.
- Dry topping: Not enough butter rubbed in.
19. Strawberry Icebox Cake
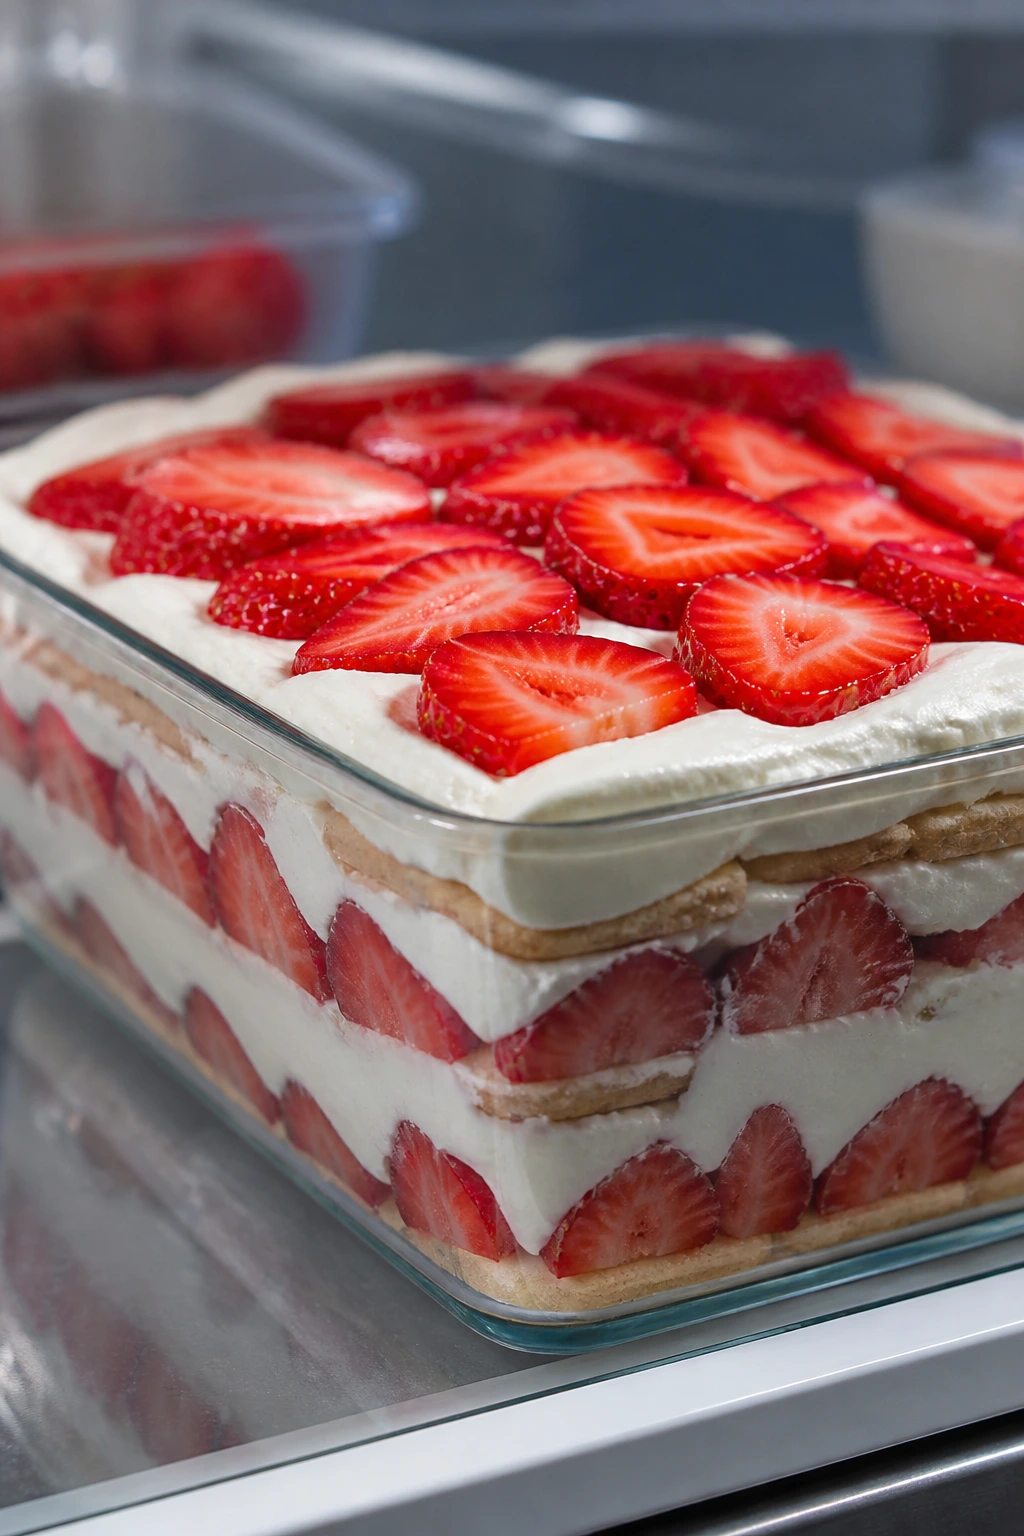
No-bake desserts belong in a beginner list, and this one is a very good excuse to keep the oven off. Layers of cookies, whipped cream, and strawberries soften in the fridge until they taste like a chilled cake slice.
Why It Works: The cookies absorb moisture from the cream, so the whole dessert firms into clean layers without baking. It’s also forgiving if your layers are a little crooked; the fridge does the smoothing for you.
Key Ingredients:
- 2 sleeves vanilla wafers or graham crackers
- 3 cups whipped cream
- 3 cups sliced strawberries
- 2 tablespoons sugar
- 1 teaspoon vanilla
Quick Steps:
- Whip cream with sugar and vanilla.
- Layer cookies, cream, and strawberries in a dish.
- Repeat until the dish is full.
- Chill at least 6 hours or overnight.
Equipment for This Recipe:
- 9×9 or loaf pan
- Mixing bowl
- Spatula
How to Serve This Dish: Slice it cold with a sharp knife. It looks nicest when the strawberry layer is visible at the edge of each piece.
Pro Tips for This Recipe:
- Use firm strawberries so they do not go mushy.
- Chill overnight if you want cleaner layers.
- Don’t drown the cookies; a little cream goes farther than you think.
Variations on This Dish:
- Chocolate Wafer Version: Use chocolate cookies for a strawberry-and-cream vibe.
- Lemon Icebox Cake: Add lemon zest to the whipped cream.
Common Mistakes to Avoid with This Dish:
- Soupy slices: Not enough chill time.
- Dry cookies: You layered too little cream.
20. Cherry Dump Cake
Dump cake is not a flattering name, but it is honest. Fruit, cake mix, butter, oven. That’s the whole game, and the result is a bubbling red dessert with a crisp, buttery top and jammy cherries underneath.
Why It Works: The cake mix soaks up juice from the fruit as it bakes, while the butter melts through the top and creates a crust. It is hard to mess up, which is why beginners tend to like it once they stop judging the name.
Key Ingredients:
- 2 cans cherry pie filling
- 1 box yellow or white cake mix
- 1/2 cup unsalted butter, melted or sliced
- 1/2 teaspoon almond extract, optional
Quick Steps:
- Heat oven to 350°F and grease a 9×13 dish.
- Spread cherry filling in the dish.
- Sprinkle cake mix evenly over the top.
- Drizzle with butter and bake 40 to 45 minutes.
Equipment for This Recipe:
- 9×13-inch baking dish
- Spoon
- Measuring cup
How to Serve This Dish: Serve it warm in bowls with ice cream. The contrast between crisp top and soft fruit is the whole point.
Pro Tips for This Recipe:
- Cover any dry patches of cake mix with a bit more butter.
- Add almond extract if you like cherry-almond flavor.
- Let it rest 10 minutes before serving.
Variations on This Dish:
- Berry Dump Cake: Use cherry and raspberry together.
- Chocolate Cherry Version: Swap in chocolate cake mix.
Common Mistakes to Avoid with This Dish:
- Powdery top: Dry cake mix wasn’t fully moistened.
- Burned edges: Use a lighter hand with butter near the corners.
21. Red Velvet Donuts
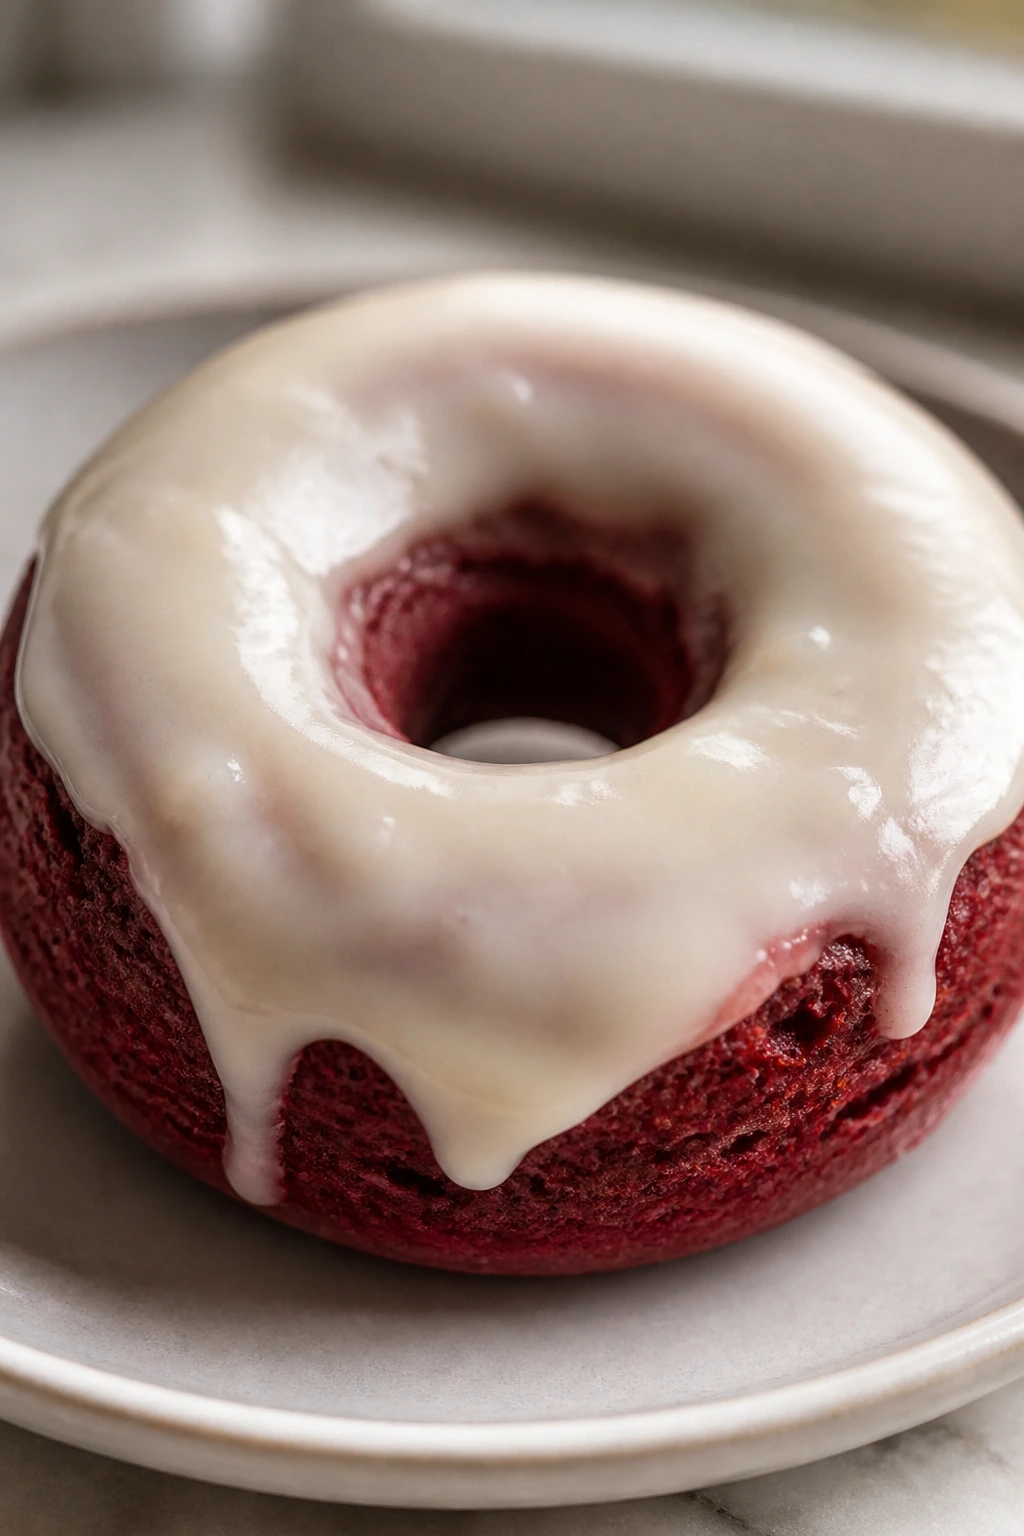
Baked donuts give you the red velvet look without needing a fryer. They are tender, lightly cocoa-flavored, and easy to glaze, which makes them a smart weekday bake.
Why It Works: A donut pan shapes the batter for you, so there’s no shaping or proofing stress. Baking also keeps the crumb soft while avoiding oil splatter.
Key Ingredients:
- 1 1/2 cups flour
- 1/4 cup cocoa powder
- 3/4 cup sugar
- 1 egg
- 1/2 cup buttermilk
- 1/4 cup oil
- 1 teaspoon vinegar
- Red food coloring
- 1 cup powdered sugar
- 2 tablespoons milk, for glaze
Quick Steps:
- Heat oven to 350°F and grease a donut pan.
- Whisk dry ingredients, then add wet ingredients until smooth.
- Pipe or spoon batter into the pan.
- Bake 10 to 12 minutes, then cool.
- Dip in glaze.
Equipment for This Recipe:
- Donut pan
- Piping bag or zip-top bag
- Mixing bowls
How to Serve This Dish: Serve them once the glaze sets into a thin shell. They’re best the day they’re made, still soft in the middle.
Pro Tips for This Recipe:
- Do not overfill the pan; they puff.
- Use a zip-top bag with the corner snipped if you do not own a piping bag.
- Add a little vanilla to the glaze.
Variations on This Dish:
- Cream Cheese Glaze: Swap half the milk for softened cream cheese.
- Chocolate Glaze: Add cocoa to the icing.
Common Mistakes to Avoid with This Dish:
- Misshapen donuts: Overfilled pan.
- Tough texture: Overbaked by even a couple minutes.
22. Strawberry Jam Scones
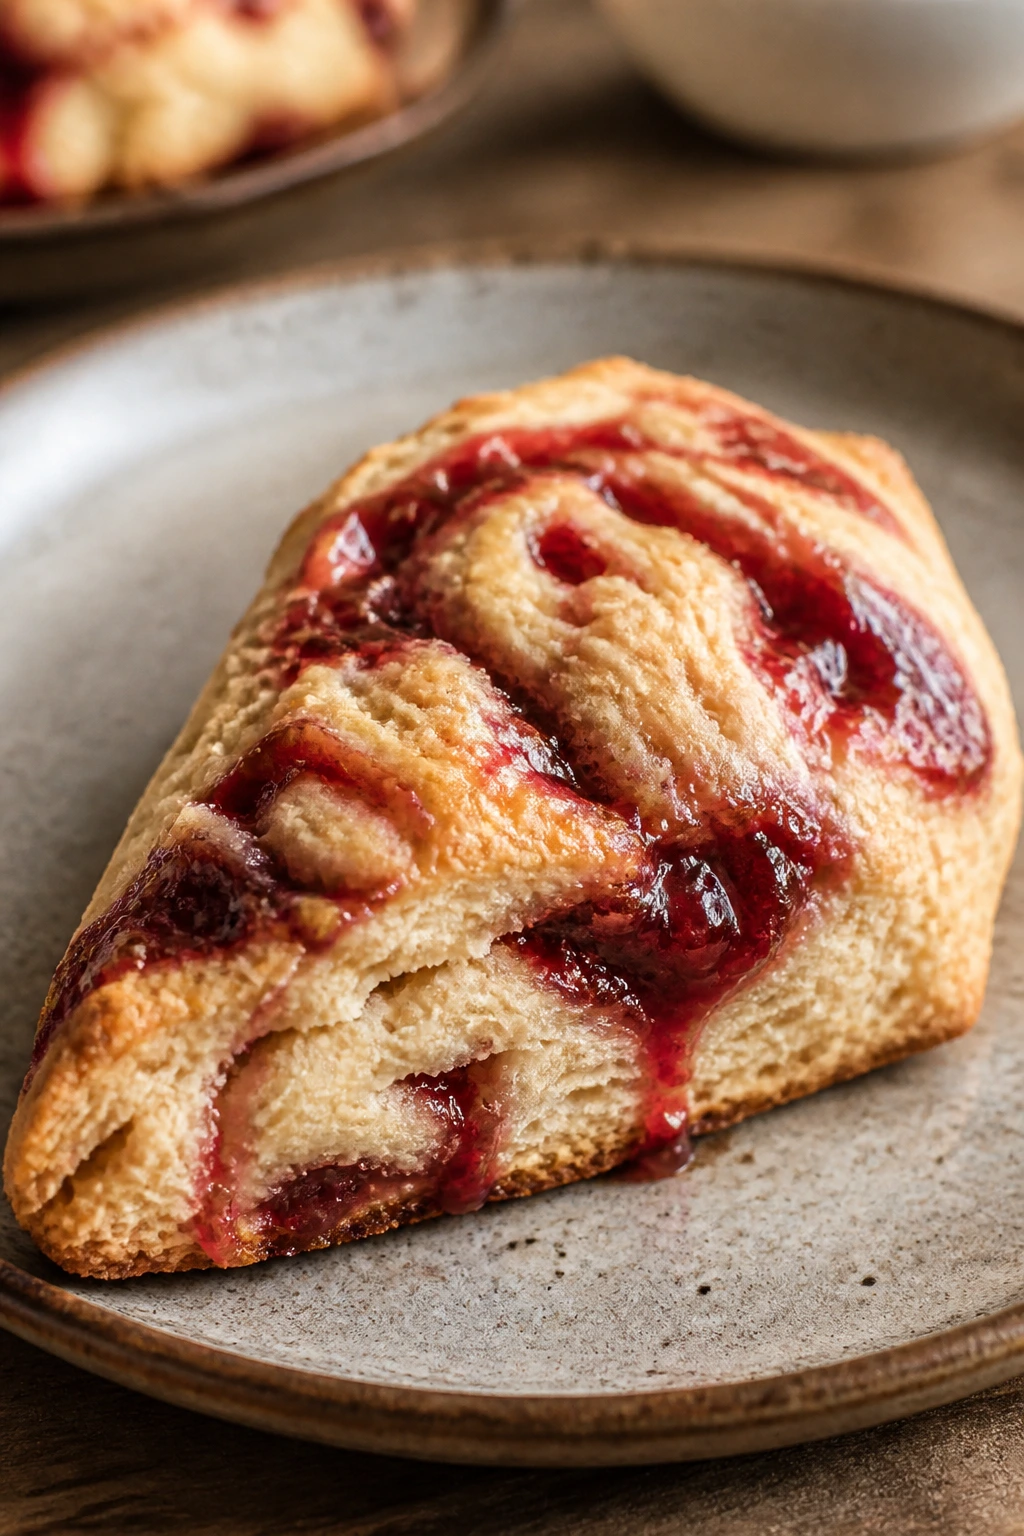
Scones can feel intimidating until you make a batch and realize they are mostly cold butter and a light hand. Strawberry jam gives these a rosy streak and a sweet berry note that works well with tea or coffee.
Why It Works: Jam spreads flavor without needing fresh fruit, which keeps the dough simple. The cold butter creates flaky pockets, and that texture is what makes a scone worth eating.
Key Ingredients:
- 2 cups flour
- 1/3 cup sugar
- 1 tablespoon baking powder
- 1/2 cup cold butter
- 2/3 cup cream or milk
- 1/3 cup strawberry jam
- 1 egg, for wash
Quick Steps:
- Heat oven to 400°F and line a sheet pan.
- Cut butter into the dry ingredients until pea-sized.
- Stir in cream, then gently swirl in jam.
- Pat into a circle, cut wedges, brush with egg wash, and bake 15 to 18 minutes.
Equipment for This Recipe:
- Sheet pan
- Pastry cutter or fork
- Bench scraper or knife
How to Serve This Dish: Split them warm and add butter if you like. A little extra jam on the side makes sense here.
Pro Tips for This Recipe:
- Keep the butter cold from start to finish.
- Handle the dough only until it comes together.
- Chill the wedges 10 minutes before baking if the kitchen is warm.
Variations on This Dish:
- Cream Cheese Jam Scones: Dot the dough with cream cheese chunks.
- Lemon Strawberry Scones: Add lemon zest to the flour.
Common Mistakes to Avoid with This Dish:
- Dense scones: Too much kneading.
- Jam bleeding everywhere: Swirl, don’t stir aggressively.
23. Raspberry Fool
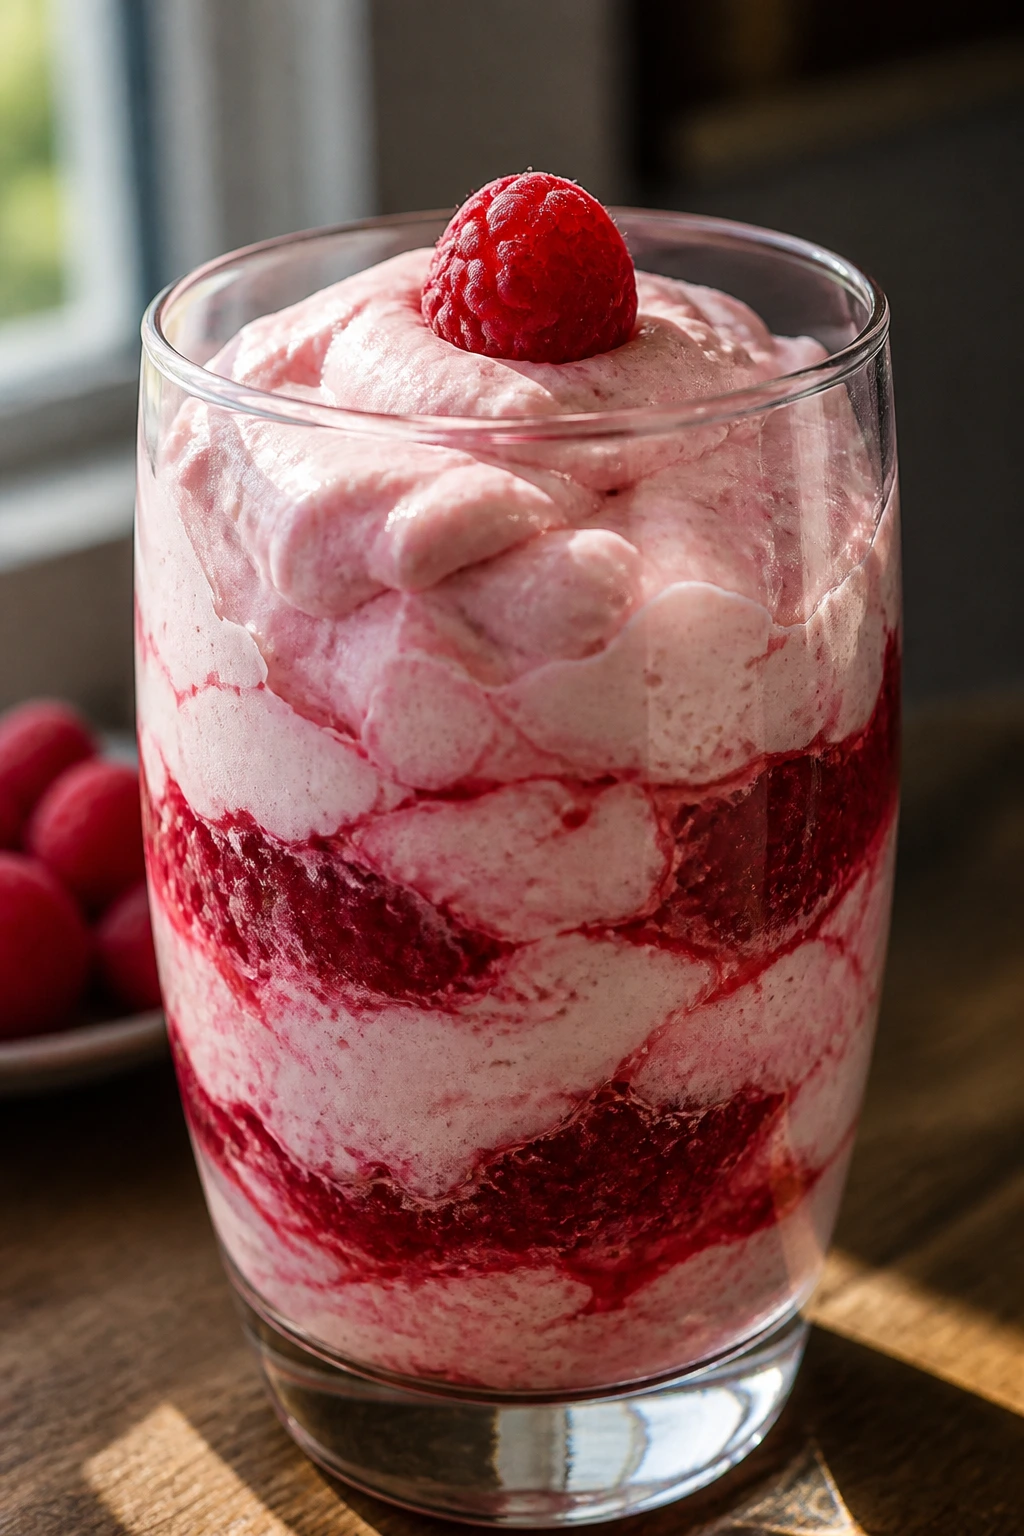
A fool is an old-fashioned dessert with a very modern upside: it takes almost no effort. Whipped cream and fruit puree fold into a soft, pink spoon dessert that feels lighter than pie but still tastes like a treat.
Why It Works: The air in the cream gives the dessert body, and raspberry puree brings acidity that keeps the cream from tasting flat. It is one of the easiest red desserts to chill and serve in glasses.
Key Ingredients:
- 2 cups raspberries
- 2 tablespoons sugar
- 1 teaspoon lemon juice
- 2 cups heavy cream
- 1 teaspoon vanilla
Quick Steps:
- Cook raspberries, sugar, and lemon juice briefly until juicy.
- Cool the puree.
- Whip cream with vanilla to soft peaks.
- Fold the puree into the cream in streaks and spoon into glasses.
Equipment for This Recipe:
- Saucepan
- Mixer or whisk
- Serving glasses
How to Serve This Dish: Serve cold with a few whole raspberries on top. It is the kind of dessert that looks good in small glasses or even jars.
Pro Tips for This Recipe:
- Leave some streaks; do not mix until fully pink.
- Chill the bowls first if your kitchen is warm.
- Sweeten lightly so the raspberries stay sharp.
Variations on This Dish:
- Strawberry Fool: Swap in strawberry puree.
- Mixed Berry Fool: Use half raspberry, half strawberry.
Common Mistakes to Avoid with This Dish:
- Runny cream: Whip to soft peaks, not soup.
- Over-sweet puree: Fruit should still taste bright.
24. Cherry Cheesecake Dip
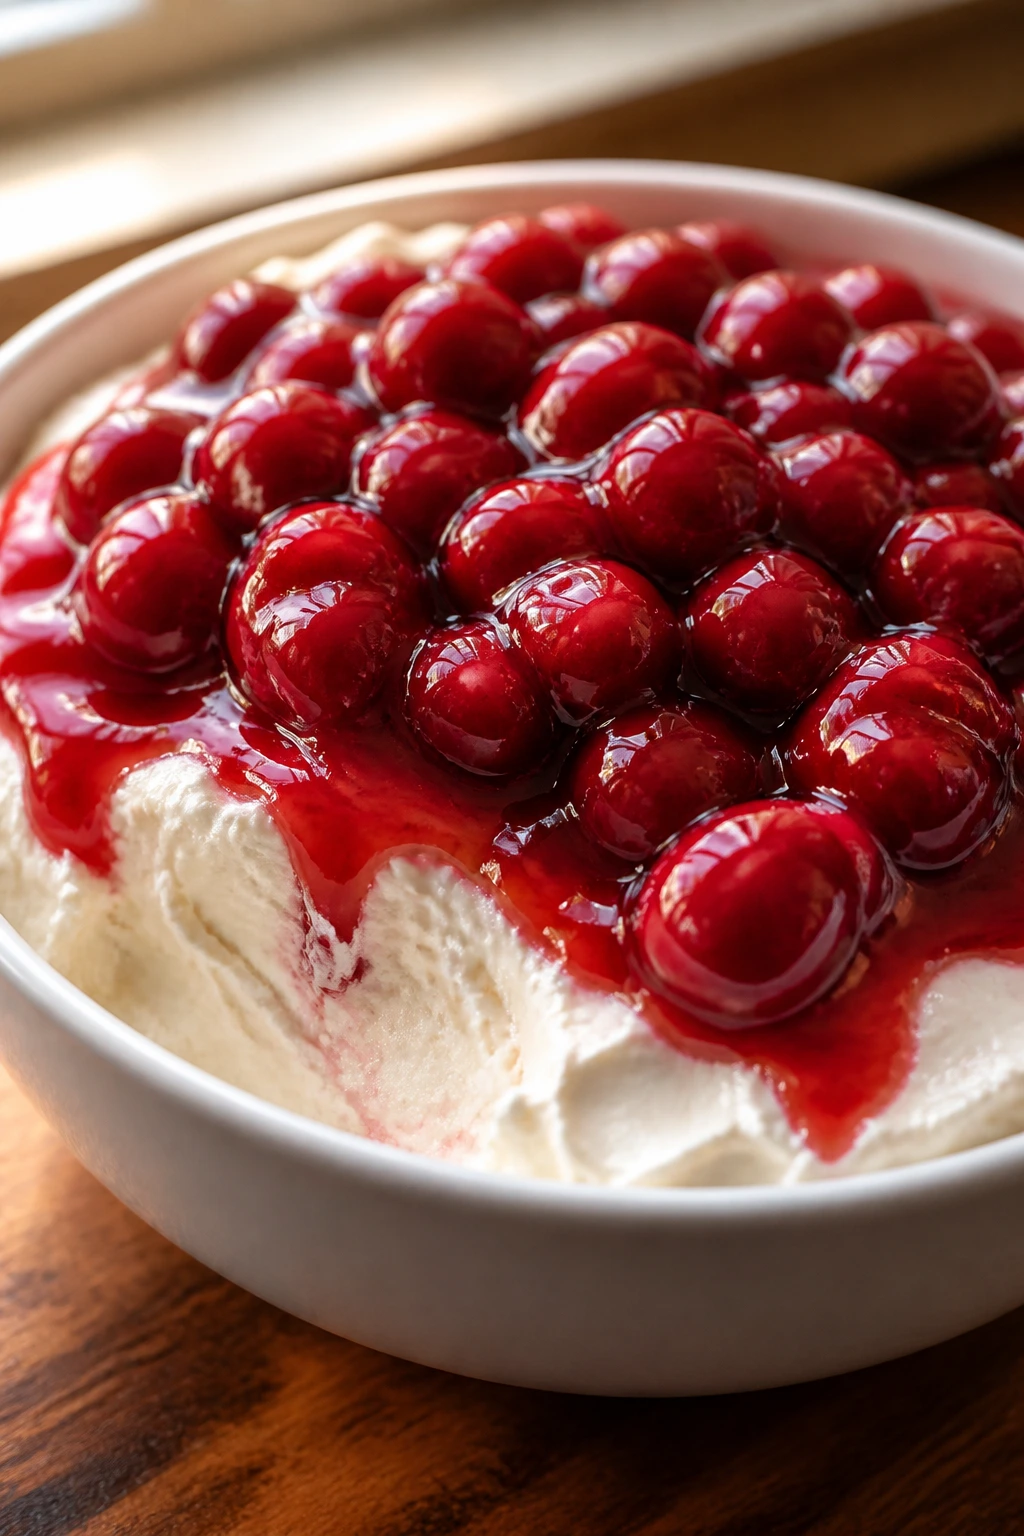
This is the dessert you put out when you want a red sweet and do not want to turn on the oven again. Thick cheesecake dip topped with glossy cherry filling scoops up with crackers, cookies, or sliced fruit.
Why It Works: The cream cheese base is stable and fast, and the cherry topping gives you color with almost no technical work. It’s a party dessert disguised as a snack.
Key Ingredients:
- 8 ounces cream cheese, softened
- 1/2 cup powdered sugar
- 1 teaspoon vanilla
- 1 cup whipped topping
- 1 can cherry pie filling
- Graham crackers for serving
Quick Steps:
- Beat cream cheese, sugar, and vanilla until smooth.
- Fold in whipped topping.
- Spread in a bowl or shallow dish.
- Spoon cherry filling over the top and chill.
Equipment for This Recipe:
- Mixing bowl
- Hand mixer
- Serving bowl
How to Serve This Dish: Serve it cold with graham crackers, vanilla wafers, or apple slices. A shallow bowl makes the cherry layer easier to reach.
Pro Tips for This Recipe:
- Soften cream cheese fully or the base turns lumpy.
- Chill 30 minutes for a firmer dip.
- Add a little lemon zest if you want more tang.
Variations on This Dish:
- Strawberry Cheesecake Dip: Use strawberry topping.
- Chocolate Base Dip: Stir cocoa into the cream cheese layer.
Common Mistakes to Avoid with This Dish:
- Lumpy base: Cream cheese not soft enough.
- Watery topping: Use thick pie filling, not syrupy compote.
25. Cranberry Oatmeal Cookies
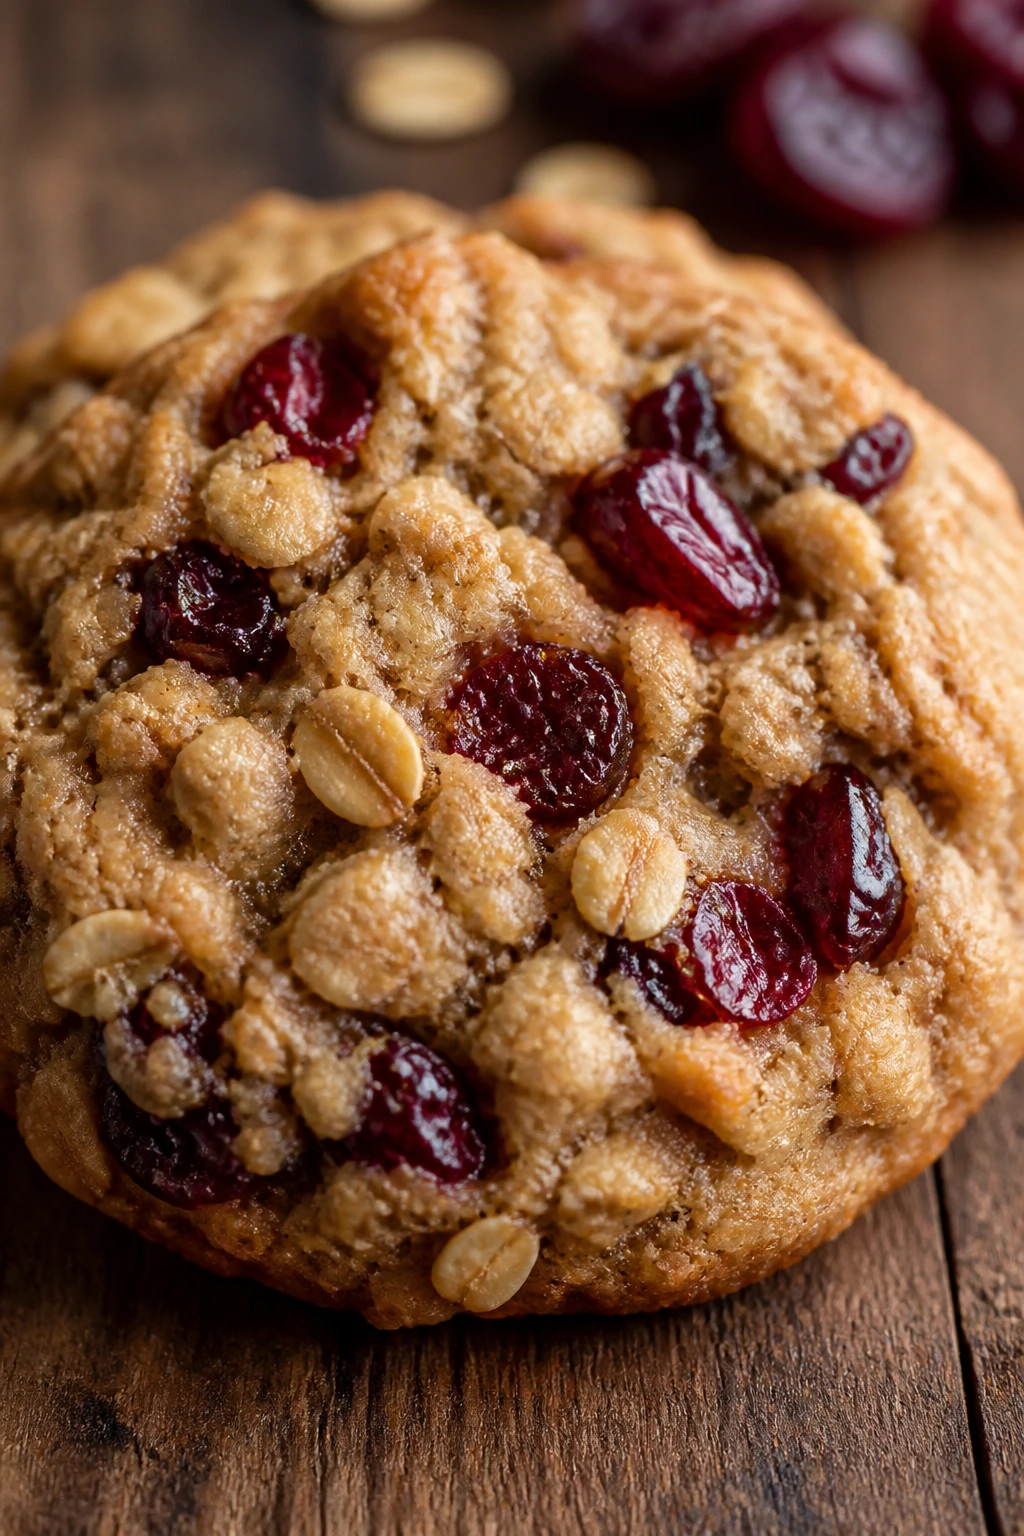
These cookies are chewy in the center, a little crisp at the edge, and full of tart cranberries that keep the sweetness in check. They are dependable, which is exactly what beginner bakers need from a cookie recipe.
Why It Works: Oats give the dough structure, and dried cranberries hold their shape better than fresh fruit. You get a fruit-forward cookie without worrying about leakage.
Key Ingredients:
- 1 cup butter, softened
- 3/4 cup brown sugar
- 1/2 cup sugar
- 2 eggs
- 1 1/2 cups flour
- 2 cups oats
- 1 cup dried cranberries
Quick Steps:
- Heat oven to 350°F and line sheet pans.
- Cream butter and sugars, then add eggs and vanilla.
- Stir in flour, baking soda, salt, oats, and cranberries.
- Scoop and bake 10 to 12 minutes.
Equipment for This Recipe:
- Sheet pans
- Cookie scoop
- Mixer
How to Serve This Dish: Let them cool on the tray for a few minutes before moving them. A glass of milk or strong tea works well here.
Pro Tips for This Recipe:
- If the dough feels loose, chill it 20 minutes.
- Use dried cranberries, not fresh, for the easiest bake.
- Pull the cookies while the centers still look a touch soft.
Variations on This Dish:
- Orange Cranberry Cookies: Add orange zest.
- White Chocolate Cranberry Cookies: Fold in chips.
Common Mistakes to Avoid with This Dish:
- Flat cookies: Butter too warm or dough too wet.
- Dry texture: Too much flour packed into the cup.
26. Strawberry Mug Cake
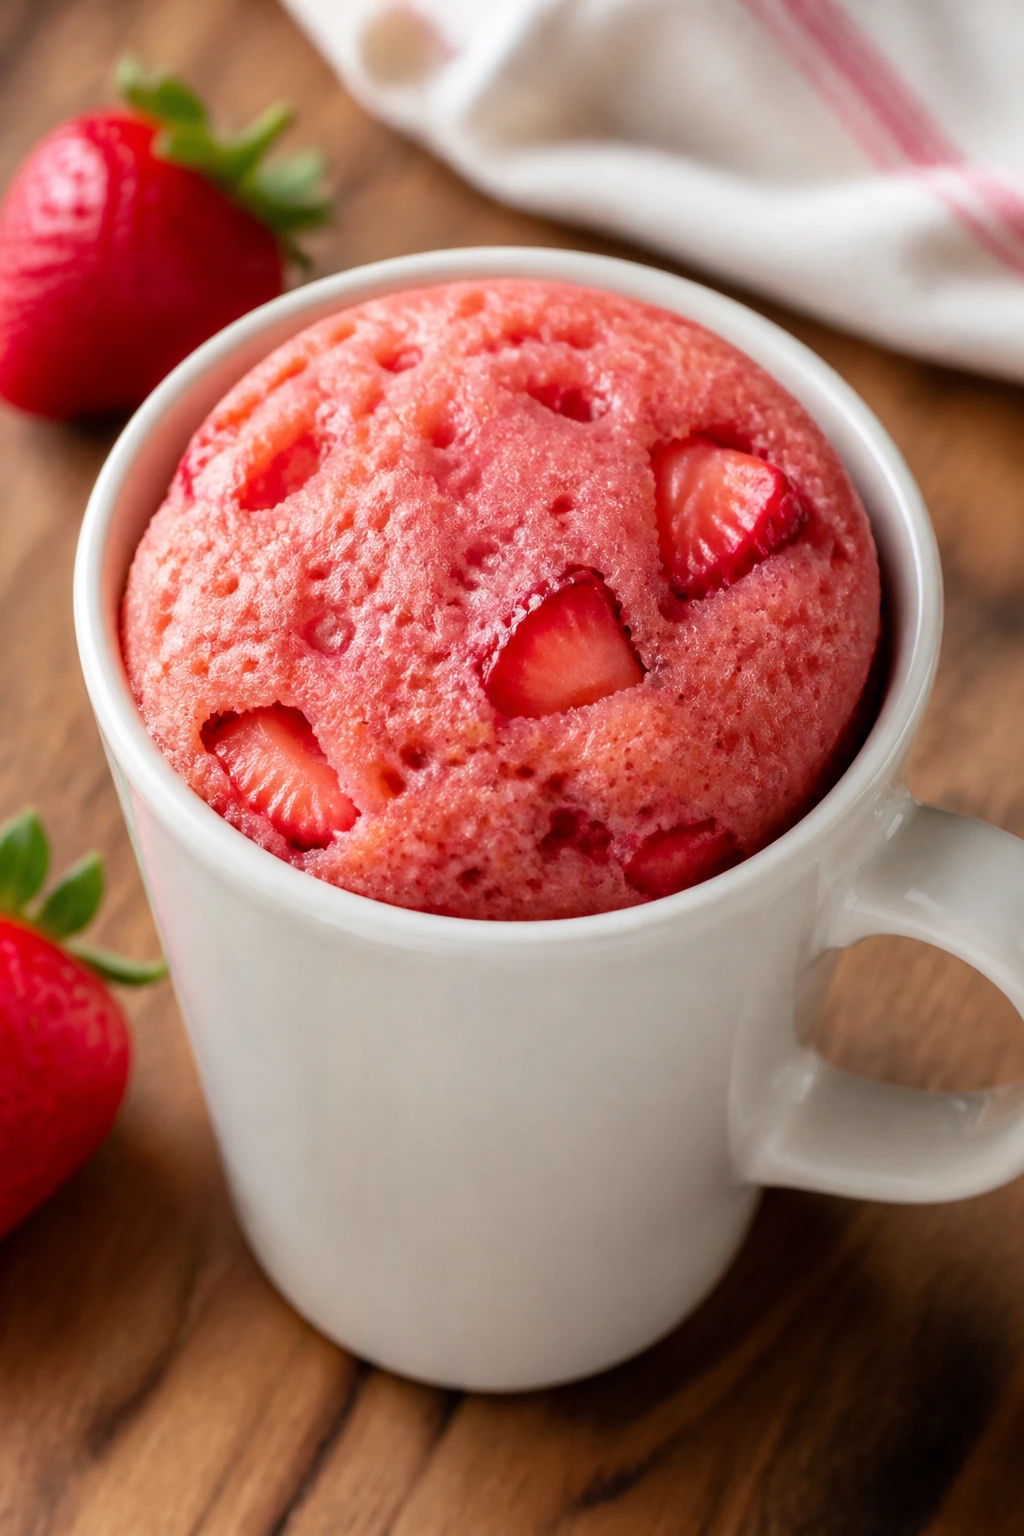
A mug cake is the fastest way to get a red dessert when you are baking for one. This version is soft, strawberry-scented, and fast enough to make before the kettle whistles.
Why It Works: The small portion cooks in under two minutes, so there’s little room for error. Using chopped strawberries or a spoonful of jam keeps the flavor obvious.
Key Ingredients:
- 4 tablespoons flour
- 2 tablespoons sugar
- 1/4 teaspoon baking powder
- 3 tablespoons milk
- 2 tablespoons oil
- 1 tablespoon strawberry jam or chopped strawberries
- 1 teaspoon vanilla
Quick Steps:
- Stir dry ingredients in a large mug.
- Add milk, oil, vanilla, and strawberry jam.
- Mix until smooth.
- Microwave 60 to 90 seconds, until the top looks set.
Equipment for This Recipe:
- Microwave-safe mug
- Spoon
- Small measuring spoons
How to Serve This Dish: Eat it warm from the mug with a spoonful of whipped cream. A dusting of powdered sugar makes it look a little less rushed.
Pro Tips for This Recipe:
- Use a large mug so the batter doesn’t spill over.
- Stop microwaving as soon as the top is set.
- Jam gives more flavor than fresh fruit if you want speed.
Variations on This Dish:
- Chocolate Strawberry Mug Cake: Add 1 teaspoon cocoa.
- Berry Mix Mug Cake: Swap in raspberry jam.
Common Mistakes to Avoid with This Dish:
- Rubbery cake: Overmicrowaving.
- Overflow: Mug too small.
27. Raspberry Almond Cake
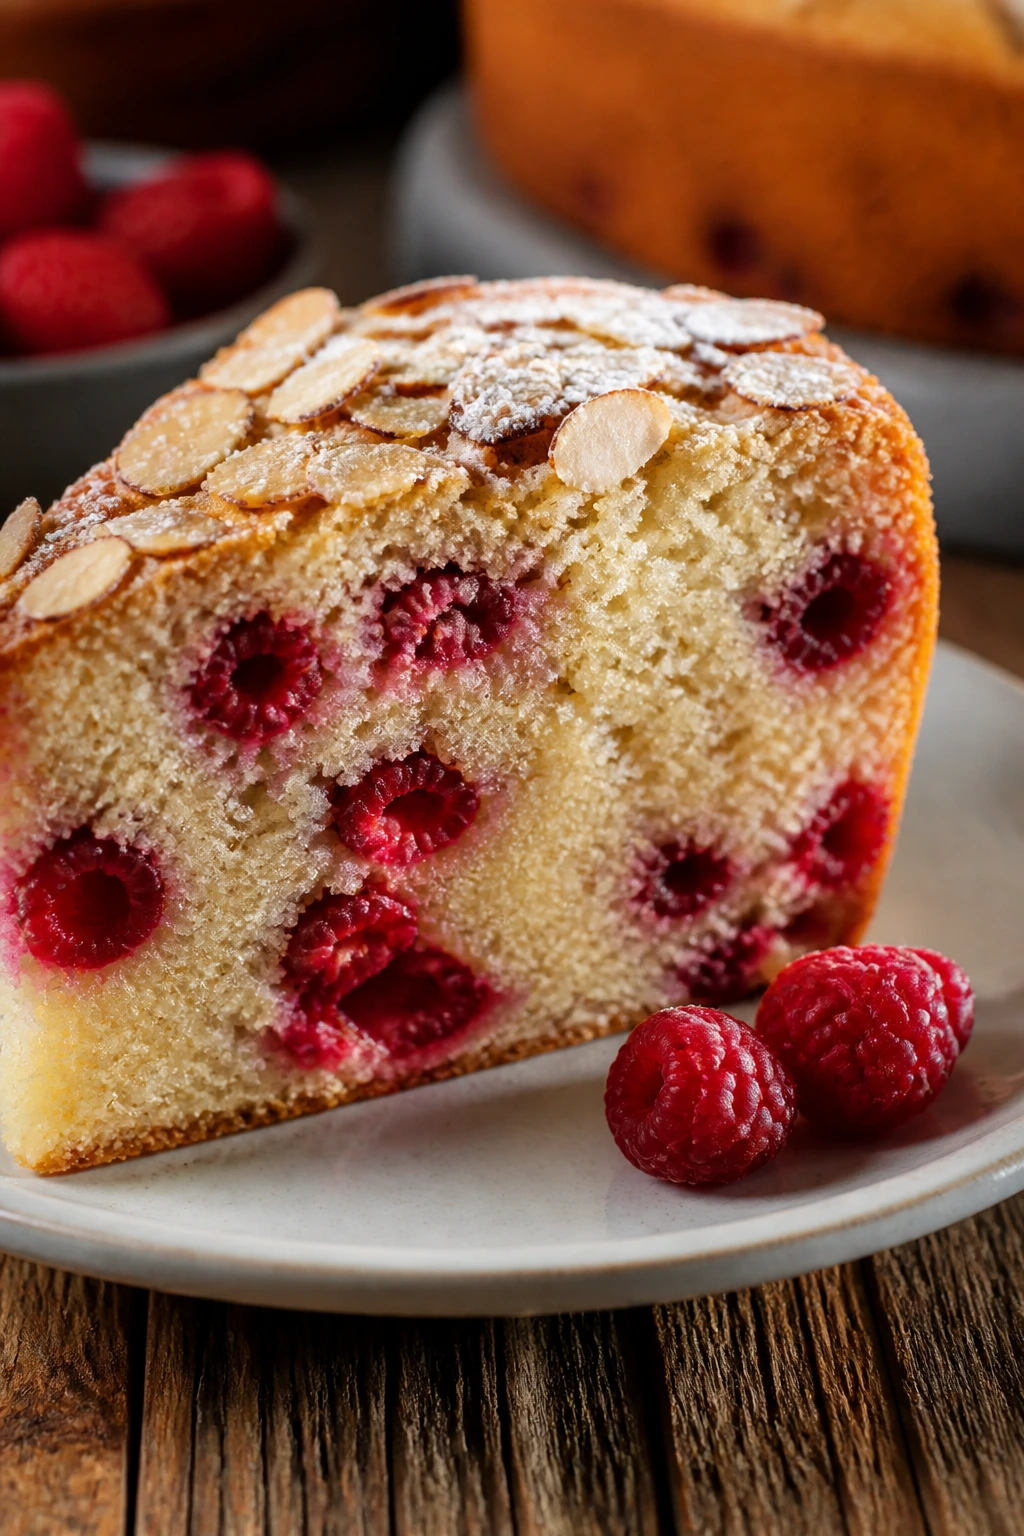
This cake is soft, slightly nutty, and dotted with raspberries that sink into the crumb like little bursts of jam. Almond and raspberry are one of those pairings that tastes more deliberate than the effort required.
Why It Works: Almond extract gives a strong flavor signal with very little measuring, and raspberries keep the cake from tasting one-note. A simple loaf or round pan keeps the recipe approachable.
Key Ingredients:
- 1 1/2 cups flour
- 1 cup sugar
- 1/2 cup butter, softened
- 2 eggs
- 1/2 cup sour cream
- 1 teaspoon almond extract
- 1 1/2 cups raspberries
- Sliced almonds for the top
Quick Steps:
- Heat oven to 350°F and grease an 8-inch pan.
- Beat butter and sugar, then add eggs, sour cream, and almond extract.
- Fold in flour, baking powder, salt, and raspberries.
- Top with almonds and bake 35 to 40 minutes.
Equipment for This Recipe:
- 8-inch round pan or loaf pan
- Mixer
- Spatula
How to Serve This Dish: Serve in thick slices with tea. A little whipped cream makes the raspberry edges feel even softer.
Pro Tips for This Recipe:
- Toss berries with a spoonful of flour before folding in.
- Don’t overmix once the raspberries go in.
- Toast the sliced almonds first if you want more crunch.
Variations on This Dish:
- Lemon Raspberry Almond Cake: Add lemon zest.
- Glazed Almond Cake: Brush with a simple almond glaze.
Common Mistakes to Avoid with This Dish:
- Berry sinkage: Too many wet berries at once.
- Dry crumb: Baking too long.
28. Cherry Turnovers
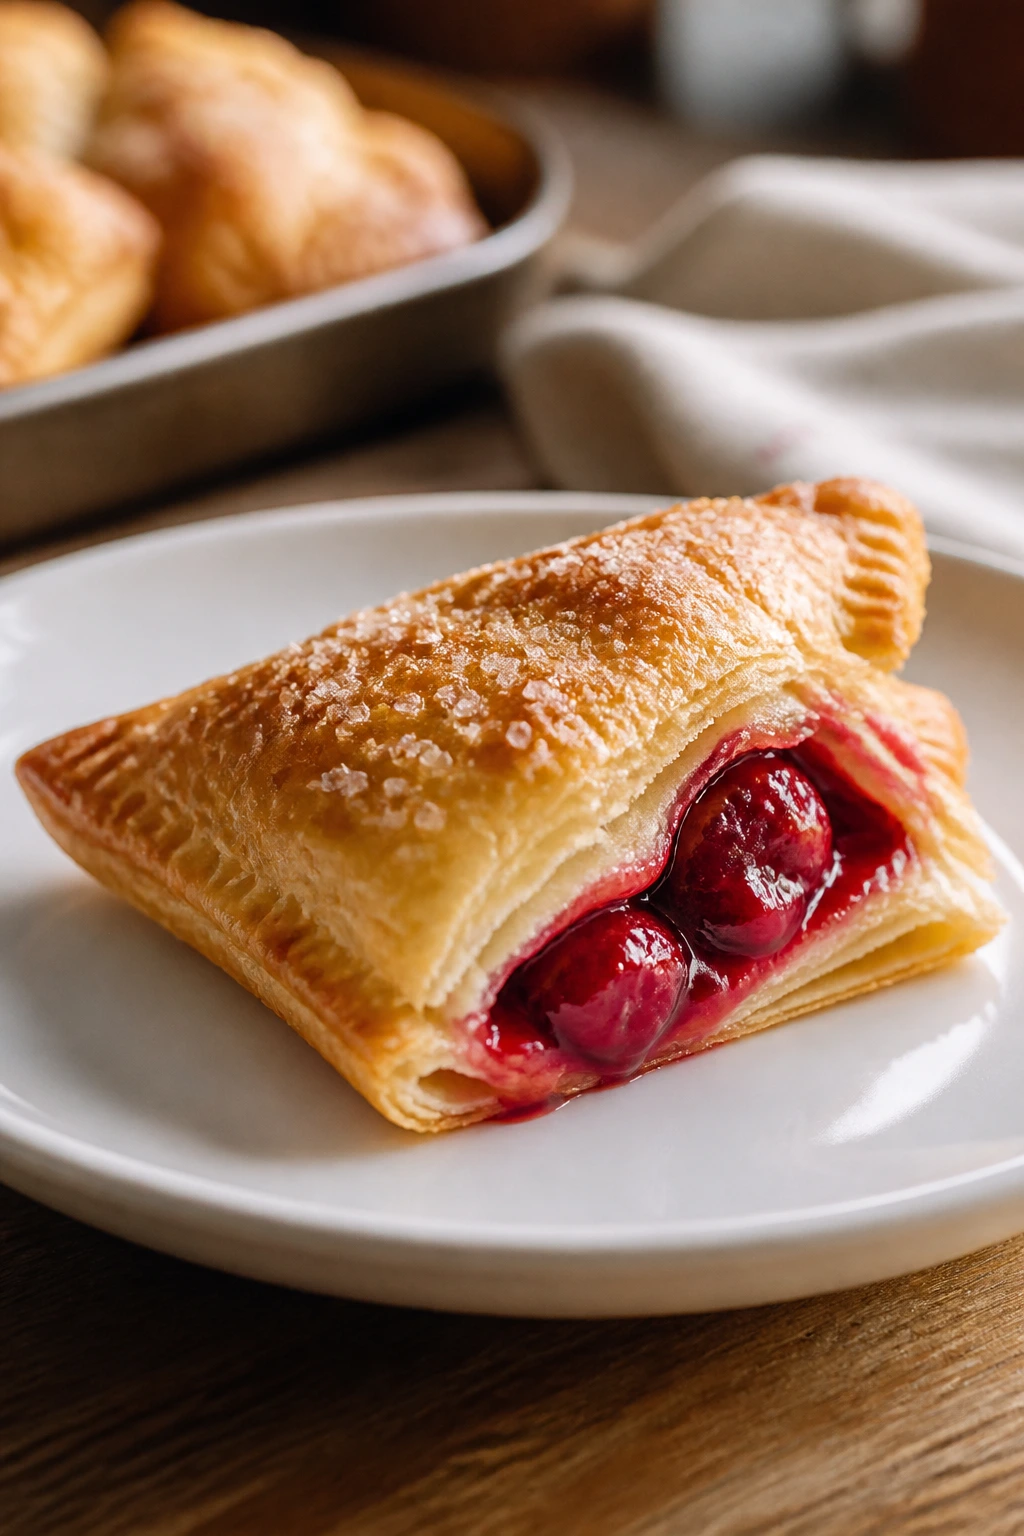
Turnovers give you pie flavor without pie anxiety. The fruit filling stays tucked in a folded pastry pocket, and the flaky layers puff around it like they know exactly what they are doing.
Why It Works: Puff pastry or ready-made dough gives you a crisp shell without having to make pastry from scratch. Cherry filling thickens during baking, so the turnover seals neatly instead of leaking.
Key Ingredients:
- 1 package puff pastry, thawed
- 2 cups cherries, pitted
- 1/4 cup sugar
- 2 teaspoons cornstarch
- 1 egg, beaten
- 1 tablespoon coarse sugar
Quick Steps:
- Heat oven to 400°F and line a sheet pan.
- Cook cherries, sugar, cornstarch, and vanilla until thick.
- Cut pastry squares, fill, fold, and crimp.
- Brush with egg wash, sprinkle sugar, and bake 18 to 22 minutes.
Equipment for This Recipe:
- Sheet pan
- Rolling pin
- Fork
How to Serve This Dish: Serve warm or room temperature. A thin drizzle of vanilla glaze is enough if you want a bakery finish.
Pro Tips for This Recipe:
- Keep puff pastry cold until the last minute.
- Cut steam vents so the filling doesn’t burst the seams.
- Chill before baking if the pastry softens while you work.
Variations on This Dish:
- Apple Cherry Turnovers: Mix apples with the cherries.
- Cream Cheese Turnovers: Add a small spoonful of cream cheese before sealing.
Common Mistakes to Avoid with This Dish:
- Leaking pastry: Overfilled pockets.
- Flat layers: Warm dough.
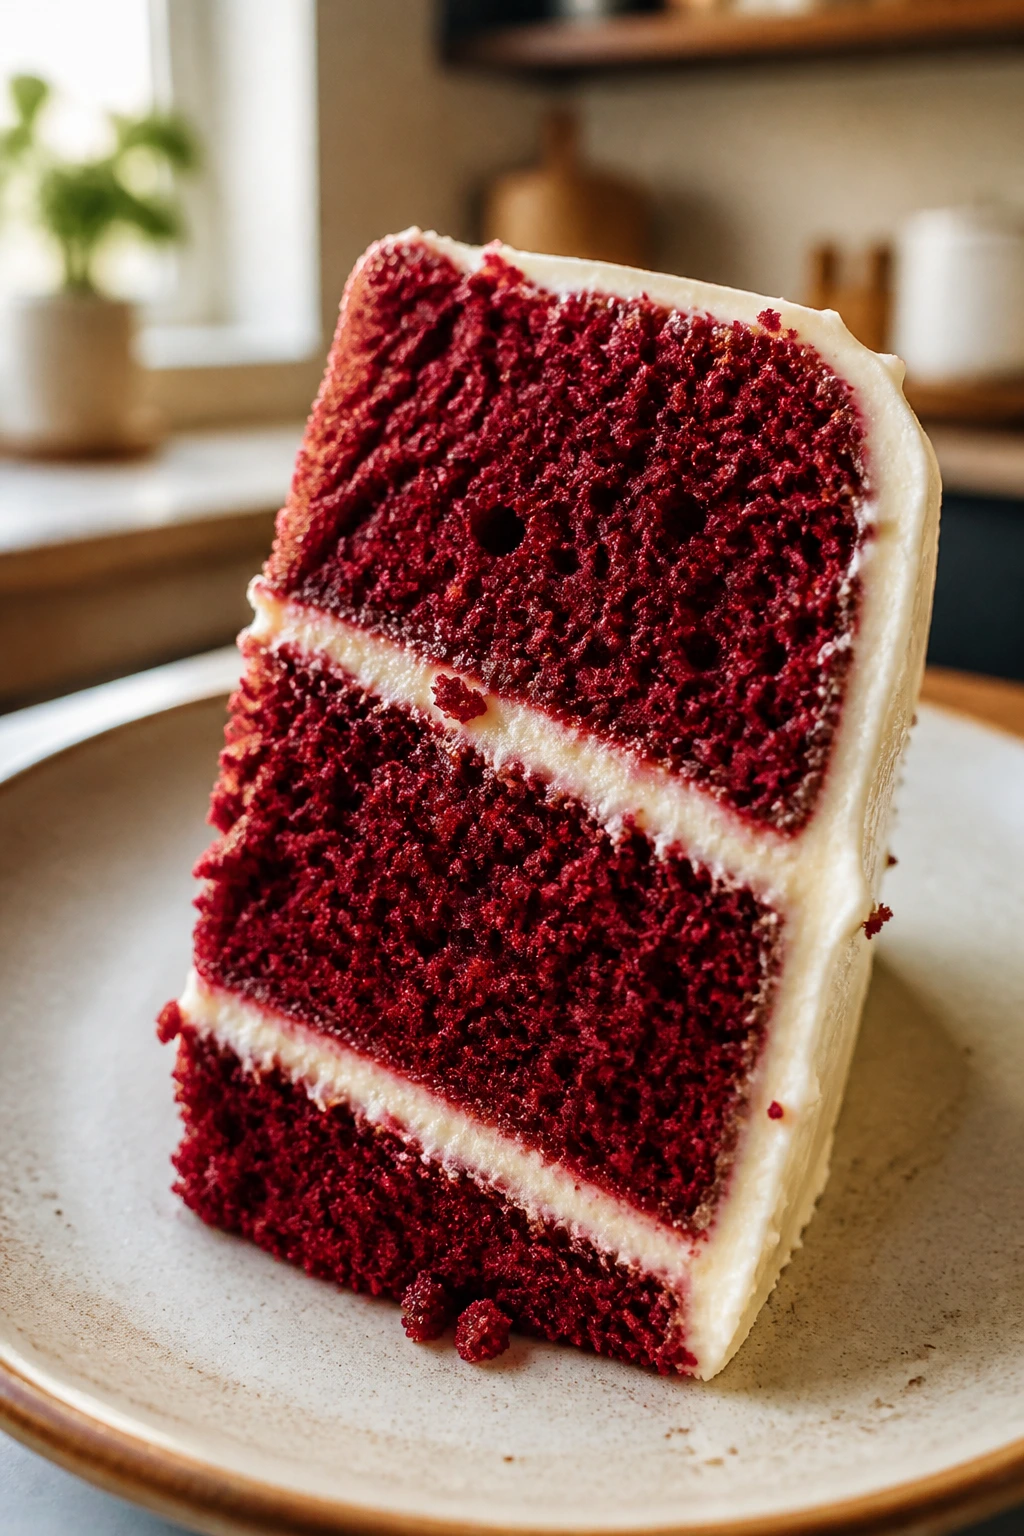
29. Red Velvet Trifles
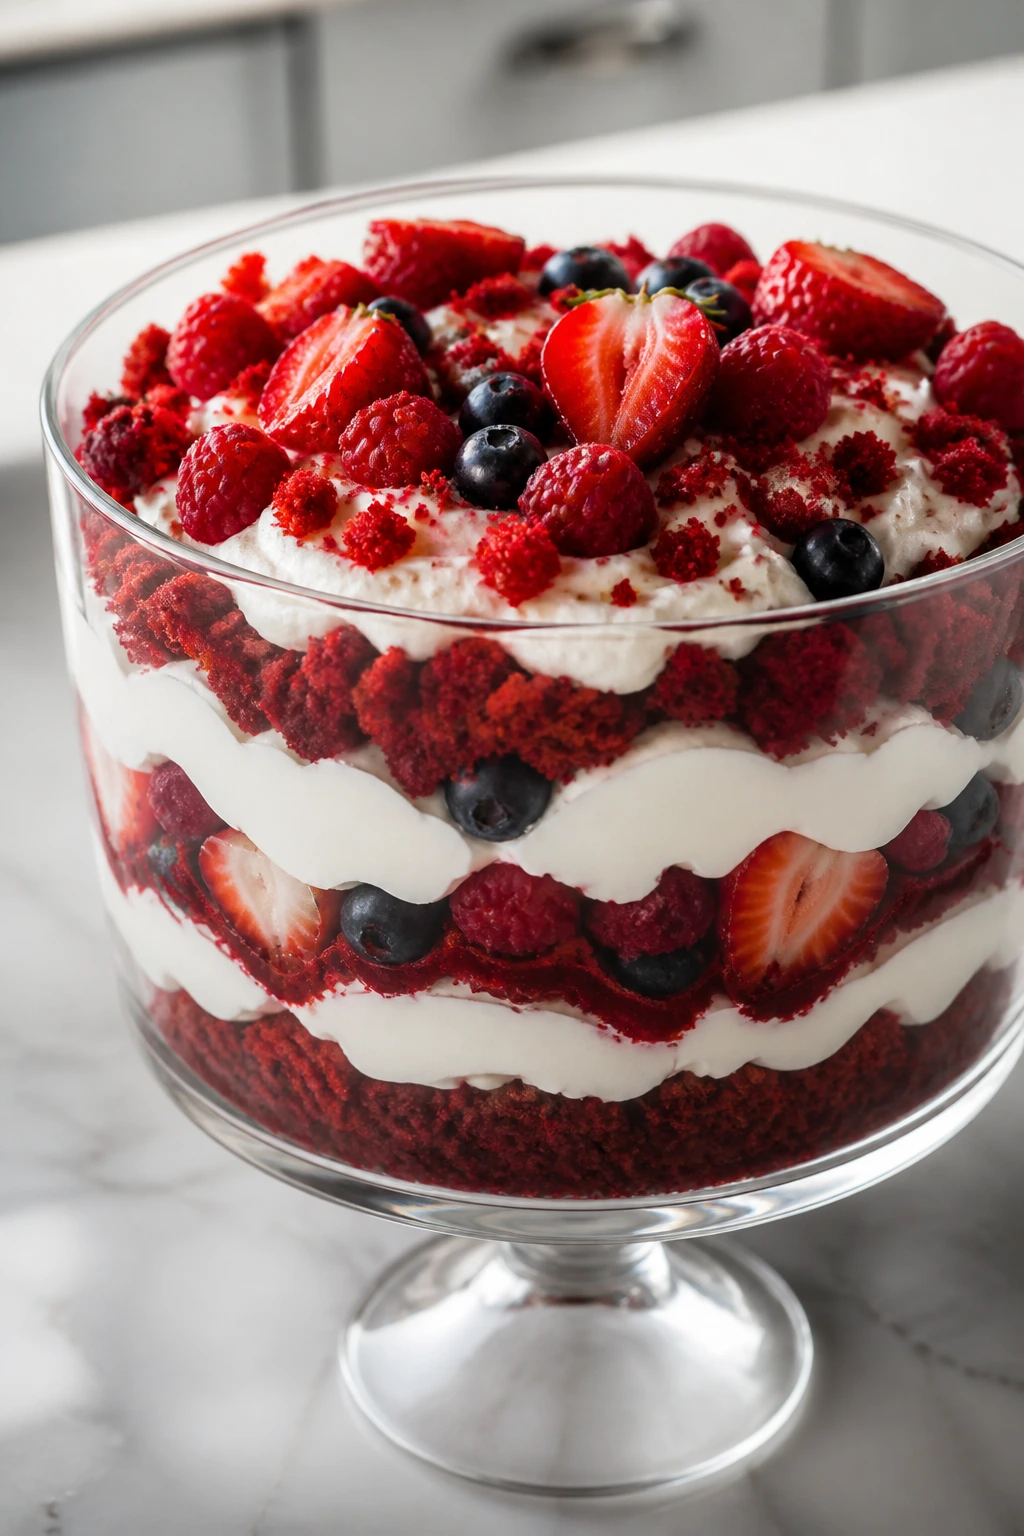
Trifles are mostly assembly, which is why they deserve a place here. You layer cubes of red velvet cake with cream and berries, and the result looks like a dessert that knows how to entertain.
Why It Works: Everything can be made ahead, and the clear dish shows off the color. Because the layers are separate, even a slightly dry cake can be saved by cream and fruit.
Key Ingredients:
- 1 baked red velvet cake or cupcakes, cubed
- 2 cups whipped cream
- 1 cup cream cheese frosting
- 2 cups strawberries or raspberries
Quick Steps:
- Bake and cool the cake, then cube it.
- Whip the cream and loosen the frosting if needed.
- Layer cake, cream, and berries in a trifle bowl.
- Repeat and chill before serving.
Equipment for This Recipe:
- Trifle bowl or large glass bowl
- Mixer
- Serving spoon
How to Serve This Dish: Chill at least 1 hour before serving. The top layer should end with a few berries and a little cream so it looks finished.
Pro Tips for This Recipe:
- Dry the cake cubes slightly if they are very soft.
- Use a clear bowl so the red layers show.
- Assemble close to serving for best texture.
Variations on This Dish:
- Chocolate Berry Trifle: Add chocolate shavings between layers.
- Mini Jar Trifles: Use small jars for single servings.
Common Mistakes to Avoid with This Dish:
- Collapsed layers: Too much cream in one spot.
- Mushy cake: Assembled too far ahead.
30. Cranberry Apple Crisp
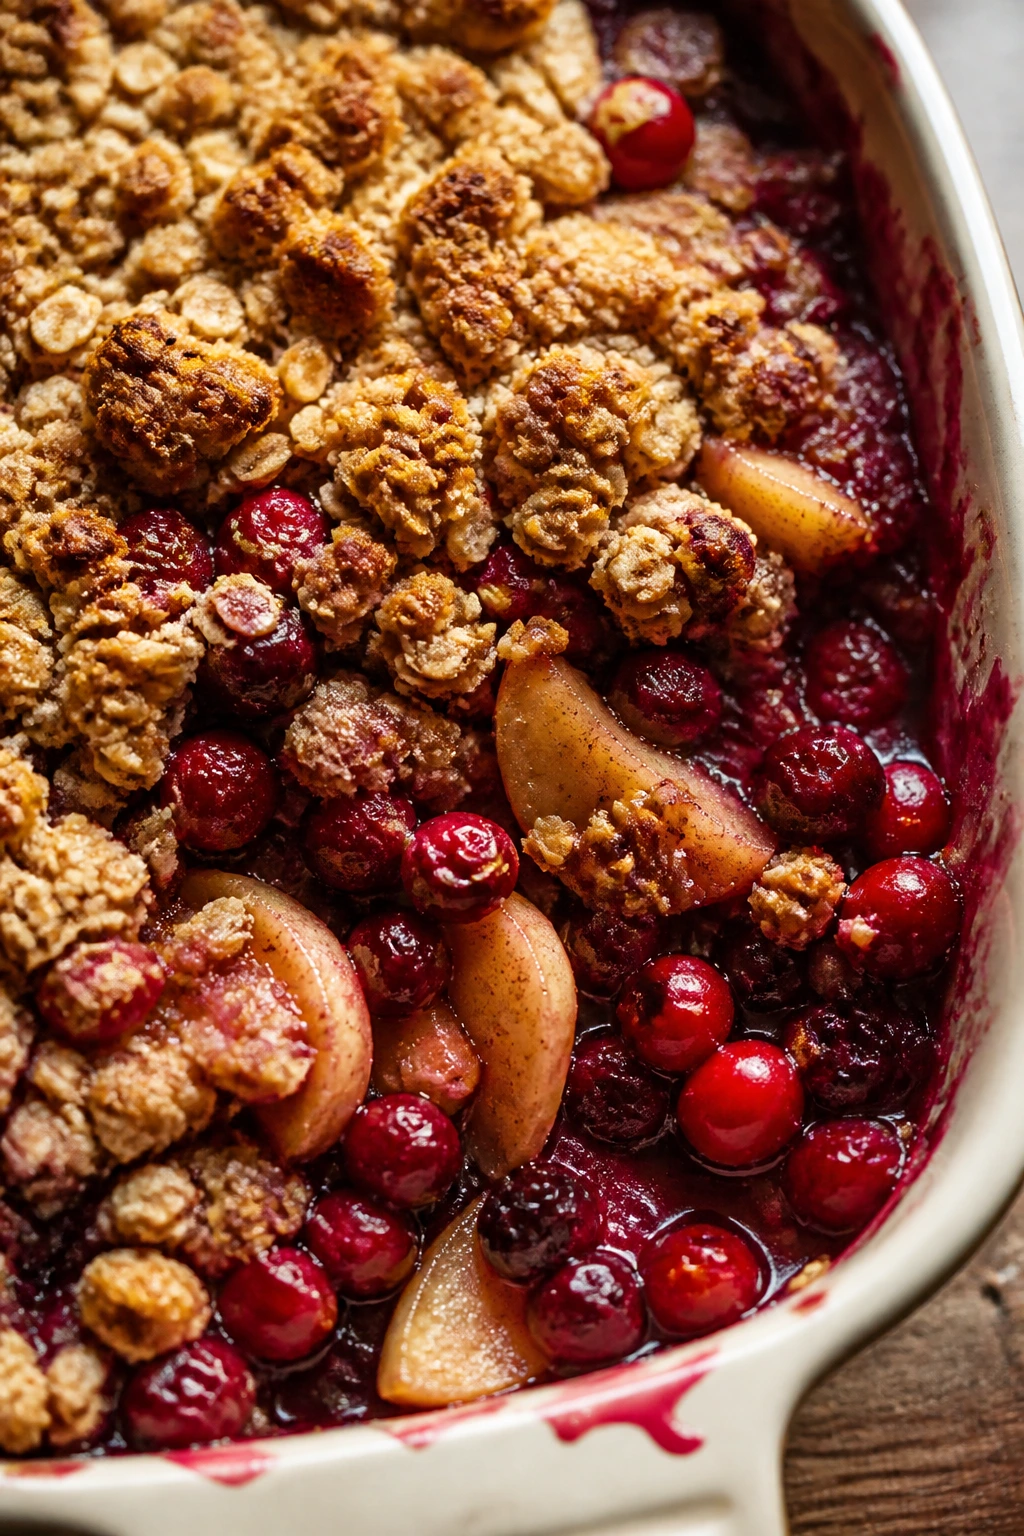
This crisp leans tart, which makes it a nice change from desserts that only chase sweetness. Apples soften under the cranberries, and the oat topping turns golden and crunchy at the edges.
Why It Works: Apples give the base some body, while cranberries add color and sharpness. Crisp toppings are nearly impossible to ruin if you keep the butter cold and the fruit well-spread.
Key Ingredients:
- 4 apples, peeled and sliced
- 1 1/2 cups cranberries
- 1/3 cup sugar
- 1 cup oats
- 3/4 cup flour
- 1/2 cup brown sugar
- 1/2 cup cold butter
Quick Steps:
- Heat oven to 375°F and butter a baking dish.
- Toss apples and cranberries with sugar and cinnamon.
- Mix oats, flour, brown sugar, salt, and butter into crumbs.
- Scatter over fruit and bake 35 to 45 minutes.
Equipment for This Recipe:
- Baking dish
- Mixing bowl
- Fork or pastry cutter
How to Serve This Dish: Serve warm with vanilla ice cream. The tart cranberries keep the dessert from tasting one-dimensional.
Pro Tips for This Recipe:
- Slice the apples evenly so they cook at the same speed.
- Bake until the fruit juices bubble.
- Let it rest a few minutes before serving.
Variations on This Dish:
- Pear Cranberry Crisp: Swap in pears for a softer filling.
- Nut Topping: Add chopped walnuts to the crumble.
Common Mistakes to Avoid with This Dish:
- Crunchy apples: Slice too thick and they won’t soften.
- Burnt topping: Cover loosely with foil if needed.
31. Baked Raspberry Donut Holes
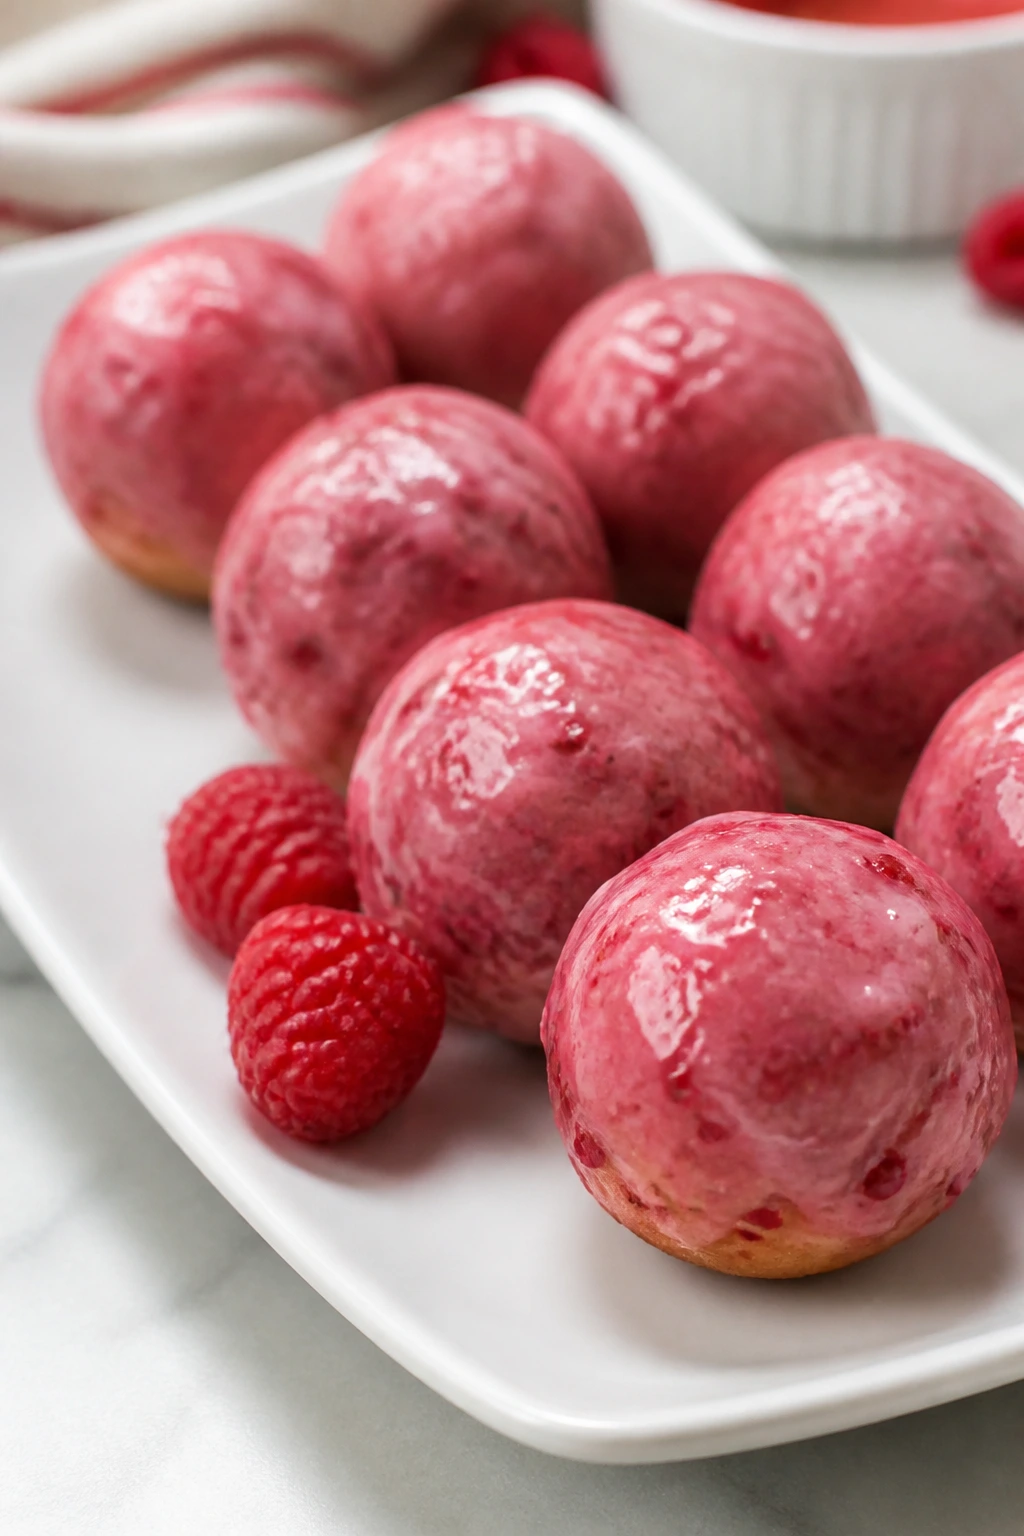
These little bites feel playful and stay simple because they bake in a mini muffin pan instead of needing special dough handling. The raspberry flavor is bright, the crumb is tender, and the glaze makes them look finished fast.
Why It Works: Small portions bake quickly and evenly, which lowers the odds of dry edges and raw middles. A little jam in the batter gives you color without fuss.
Key Ingredients:
- 1 1/2 cups flour
- 1/2 cup sugar
- 1 teaspoon baking powder
- 1 egg
- 1/2 cup milk
- 1/4 cup melted butter
- 1/4 cup raspberry jam
- 1 cup powdered sugar for glaze
Quick Steps:
- Heat oven to 350°F and grease a mini muffin pan.
- Mix dry ingredients in one bowl and wet in another.
- Stir together, then spoon into the cups.
- Bake 10 to 12 minutes and glaze while warm.
Equipment for This Recipe:
- Mini muffin pan
- Two bowls
- Small whisk
How to Serve This Dish: Serve them warm on a platter while the glaze is still shiny. A napkin underneath helps with sticky fingers.
Pro Tips for This Recipe:
- Fill cups only about two-thirds full.
- Use thick jam so the batter doesn’t get watery.
- Glaze while warm for the best shine.
Variations on This Dish:
- Strawberry Donut Holes: Swap the jam.
- Lemon-Raspberry Glaze: Add lemon juice to the icing.
Common Mistakes to Avoid with This Dish:
- Dry bites: Overbaking by a minute or two.
- Flat tops: Not enough leavening.
32. Cherry Upside-Down Cake
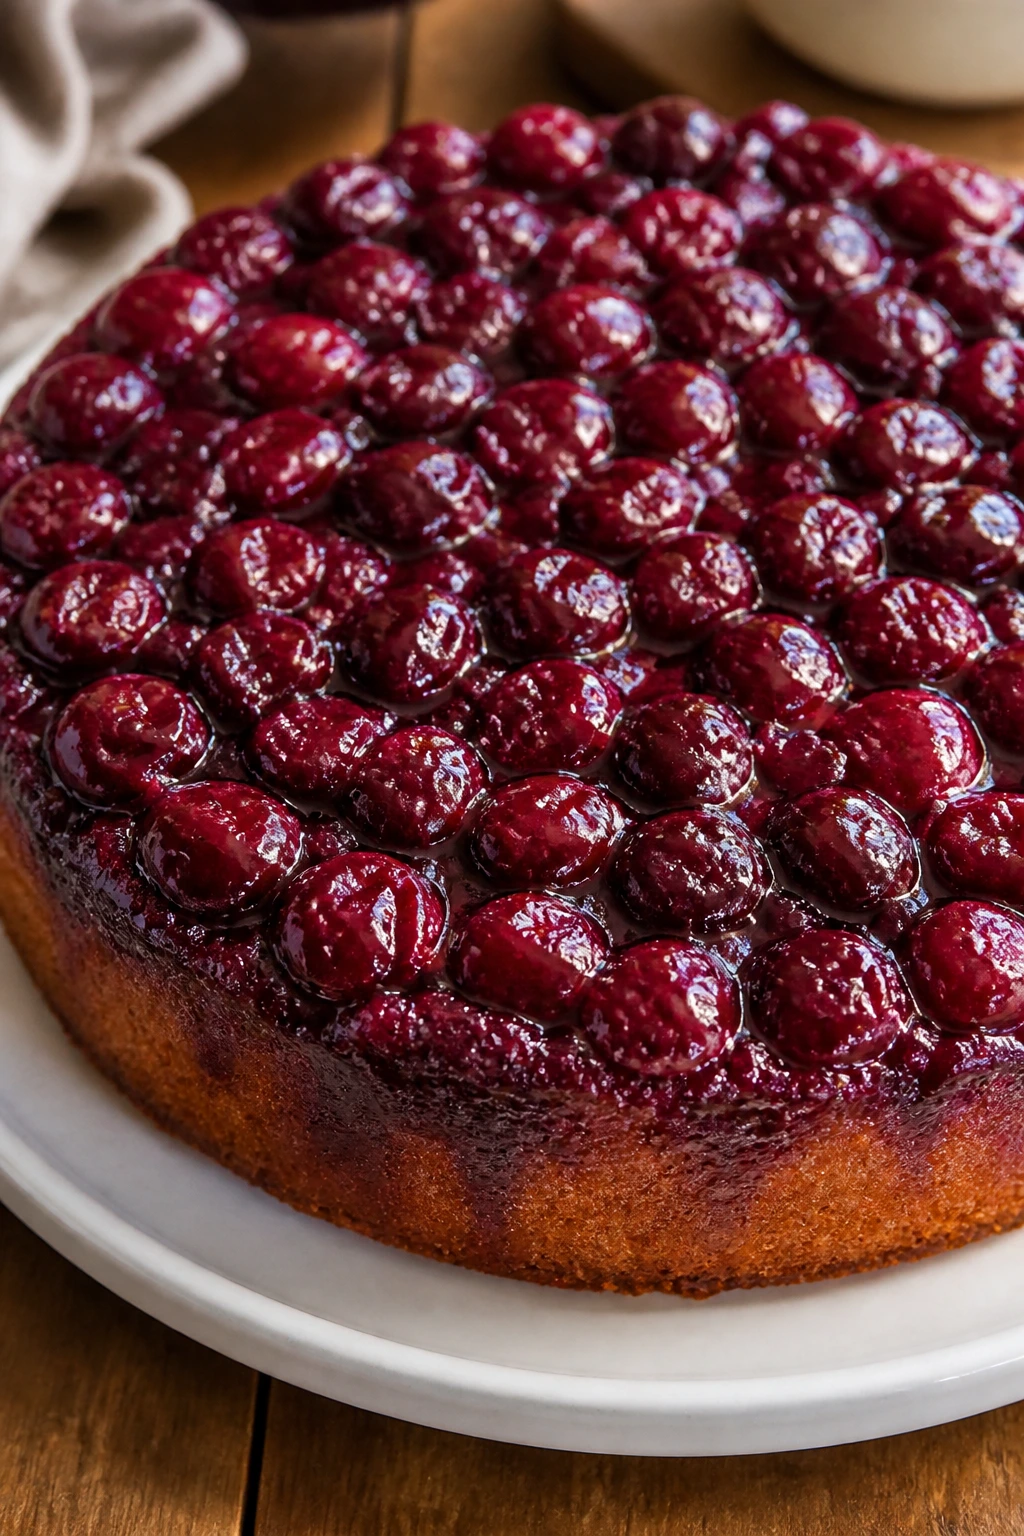
Upside-down cake gives you a glossy fruit top without any piping or decoration. The cherries caramelize under the cake and become the part everyone points to first when you flip the pan.
Why It Works: Butter and sugar at the bottom turn syrupy and hold the fruit in place, so the cake unmolds with a clean top once it cools a bit. The method looks dramatic but is really straightforward.
Key Ingredients:
- 1/4 cup butter
- 1/2 cup brown sugar
- 2 cups cherries, pitted
- 1 1/2 cups flour
- 3/4 cup sugar
- 1/2 cup milk
- 2 eggs
Quick Steps:
- Heat oven to 350°F and melt butter in a cake pan.
- Sprinkle brown sugar over the butter and add cherries.
- Mix cake batter separately and pour over the fruit.
- Bake 35 to 40 minutes, cool 10 minutes, then invert.
Equipment for This Recipe:
- 9-inch cake pan
- Mixing bowl
- Cooling rack
How to Serve This Dish: Turn it out while still warm so the fruit releases cleanly. A spoonful of whipped cream is enough to finish it.
Pro Tips for This Recipe:
- Do not invert too early or the cake may break.
- Line the bottom with parchment if your pan is old or sticky.
- Use similar-size cherry halves so the top looks even.
Variations on This Dish:
- Pineapple-Style Cherry Cake: Add a few rings of peach or pineapple for mixed fruit.
- Almond Cherry Cake: Add almond extract to the batter.
Common Mistakes to Avoid with This Dish:
- Cake sticking to the pan: Cool only 10 minutes, not 30.
- Burned sugar layer: Watch the butter-brown sugar base carefully.
33. Cranberry Mini Pies
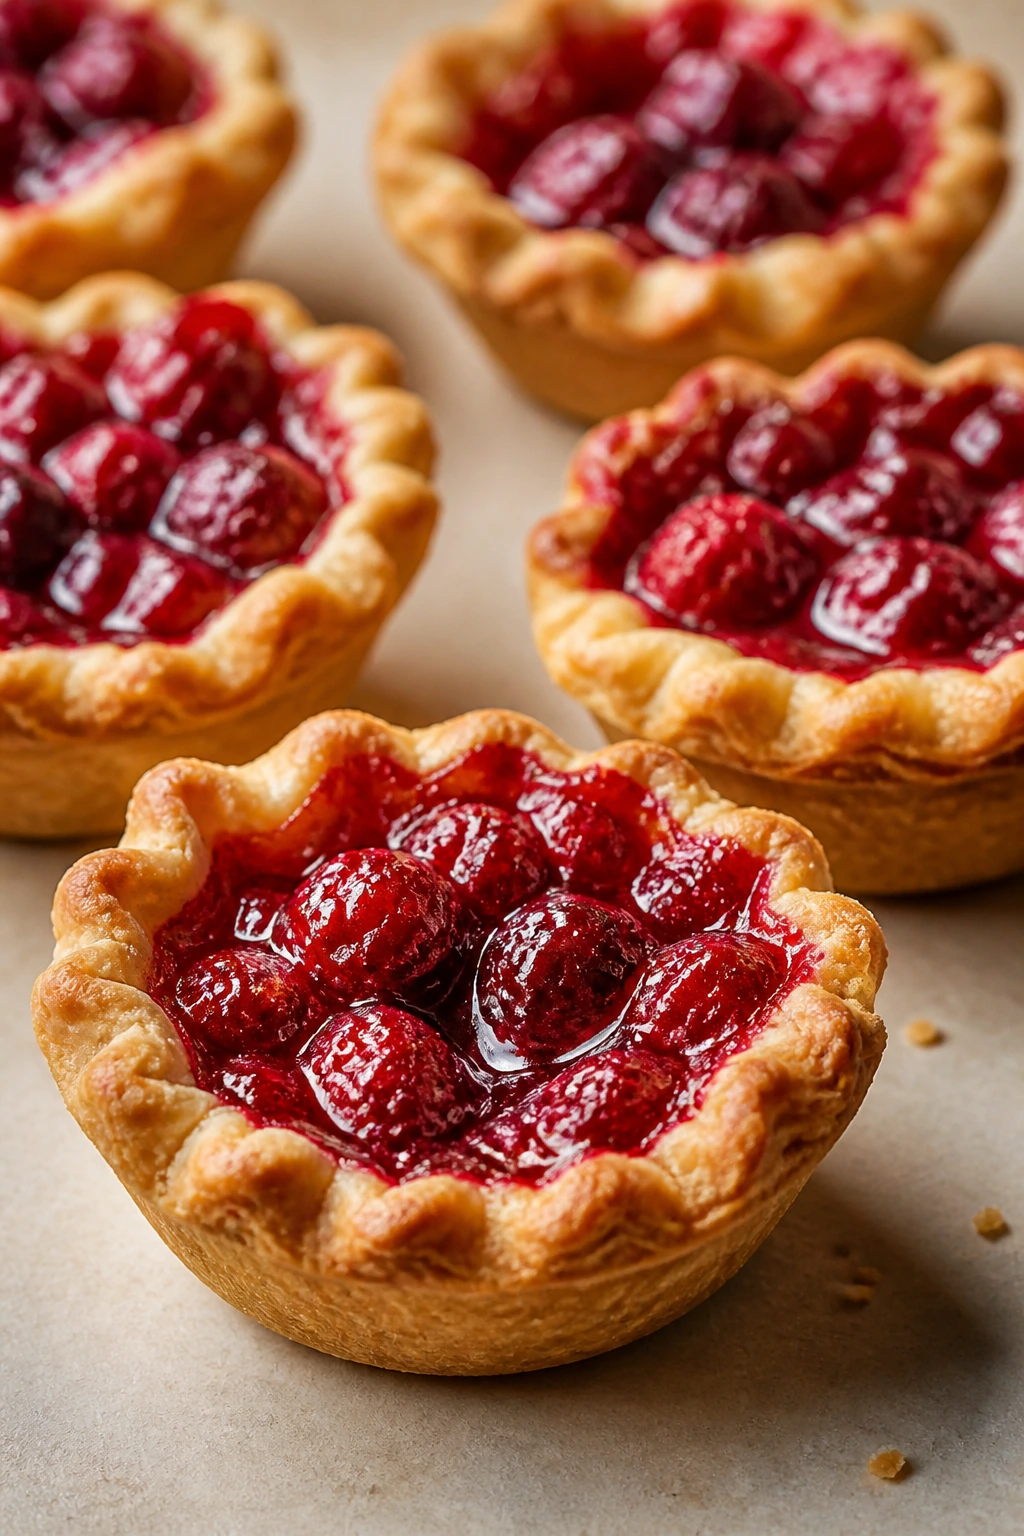
Mini pies are useful because they give you the pie experience without the pressure of a flawless big crust. The tart filling and small size make them easy to handle, and they look adorable on a tray.
Why It Works: Smaller pies bake faster and more evenly, which helps beginners avoid raw bottoms. Cranberries stay bright and punchy instead of disappearing into sweetness.
Key Ingredients:
- 2 sheets pie dough
- 2 cups cranberries
- 3/4 cup sugar
- 2 teaspoons cornstarch
- 1 teaspoon orange zest
- 1 egg, for wash
Quick Steps:
- Heat oven to 400°F and grease a muffin tin.
- Cut dough rounds and press into the cups.
- Stir cranberries with sugar, cornstarch, and zest.
- Fill, top with dough scraps or a lattice, brush with egg wash, and bake 20 to 24 minutes.
Equipment for This Recipe:
- Muffin tin
- Rolling pin
- Small cutter or glass
How to Serve This Dish: Cool fully before removing from the tin. They’re nice as a plated dessert with a spoon of whipped cream.
Pro Tips for This Recipe:
- Chill the dough if it gets soft while you fill the cups.
- Make a small vent in each top.
- Don’t overpack the filling.
Variations on This Dish:
- Cranberry-Apple Mini Pies: Add small apple cubes.
- Orange Cream Mini Pies: Serve with a cream cheese dollop.
Common Mistakes to Avoid with This Dish:
- Bottoms staying pale: Bake on the lower-middle rack.
- Filling bubbling over: Use a little less filling.
34. Raspberry Yogurt Bark
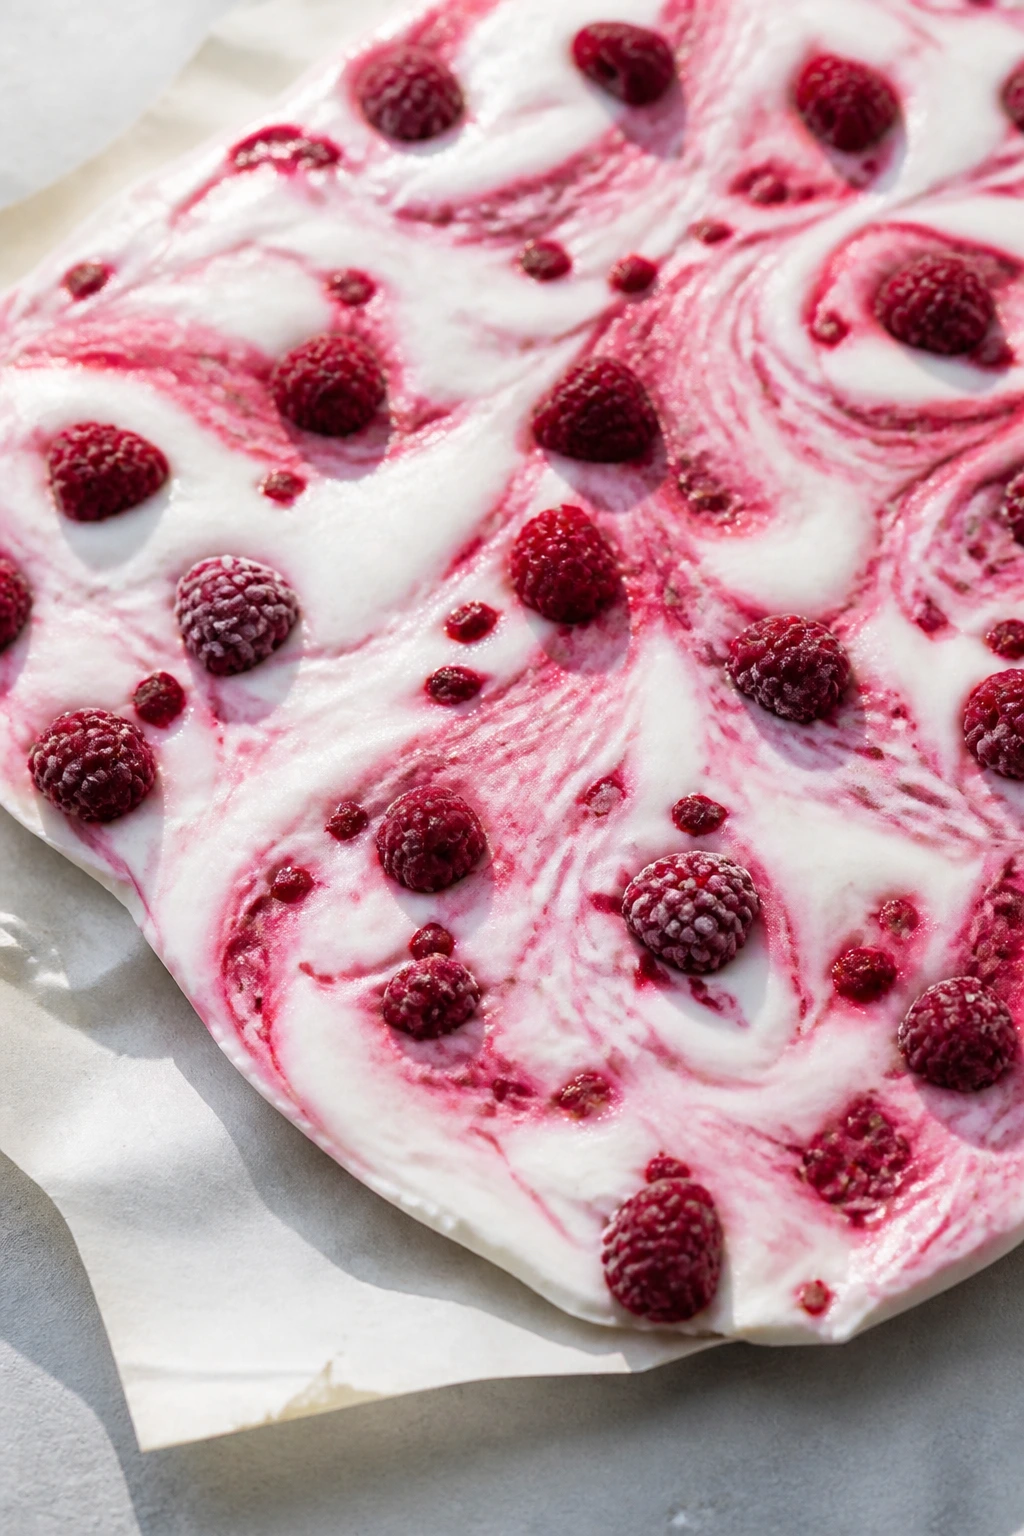
Not every red dessert needs a cake pan. This bark freezes into a cold, snappy treat with creamy yogurt, tart raspberry swirls, and a few crunchy toppings if you want them.
Why It Works: Greek yogurt gives you a firm base, and frozen bark is easy to portion. It is one of the simplest ways to make something sweet-looking with almost no baking at all.
Key Ingredients:
- 2 cups Greek yogurt
- 2 tablespoons honey
- 1 cup raspberries
- 2 tablespoons sliced almonds or granola
Quick Steps:
- Line a baking sheet with parchment.
- Stir yogurt and honey together.
- Spread into a thin layer and swirl in mashed raspberries.
- Sprinkle toppings and freeze until firm, about 3 hours.
Equipment for This Recipe:
- Baking sheet
- Parchment paper
- Spoon
How to Serve This Dish: Break into shards and serve straight from the freezer. Work quickly, because it softens fast.
Pro Tips for This Recipe:
- Keep the layer thin or it is hard to bite.
- Use parchment so the bark lifts cleanly.
- Eat it frozen; melted bark is a puddle.
Variations on This Dish:
- Strawberry Yogurt Bark: Swap the fruit.
- Chocolate Raspberry Bark: Drizzle with melted chocolate before freezing.
Common Mistakes to Avoid with This Dish:
- Bark sticking to the paper: Spread it thicker than a paper-thin smear.
- Icy texture: Use thick Greek yogurt.
35. Red Berry Galette
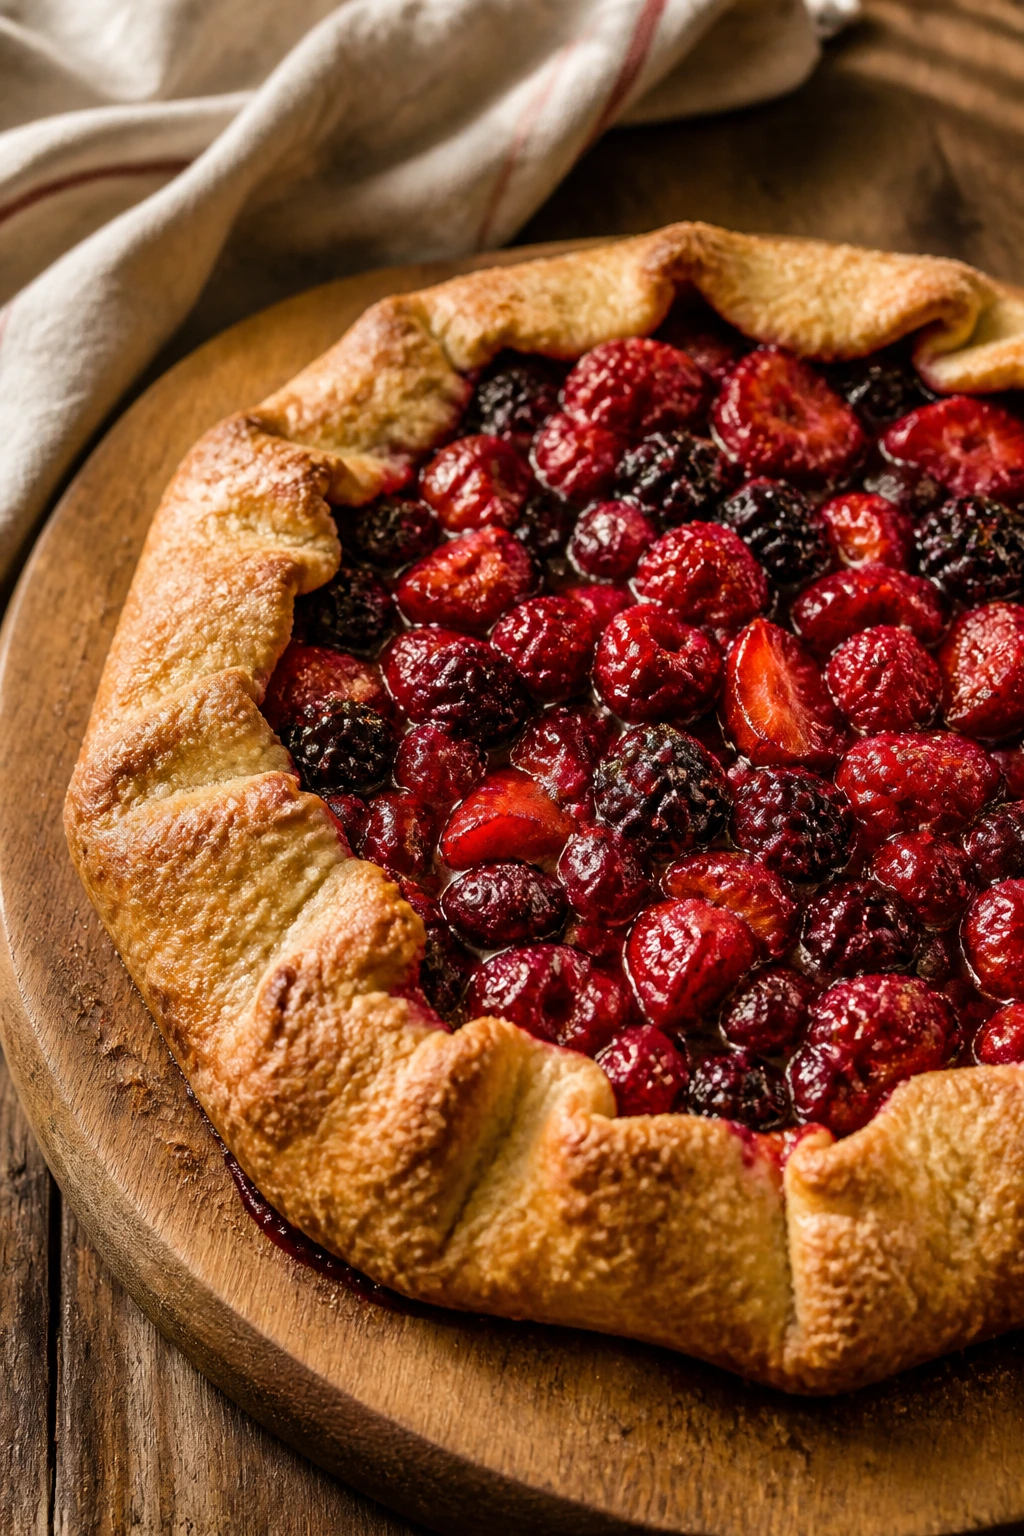
A galette is pie for people who do not want pie stress. You roll out one crust, pile fruit in the middle, fold the edges over, and let the oven make the whole thing look rustic on purpose.
Why It Works: The open shape means steam escapes, so the fruit filling thickens without turning the crust soggy. Mixed red berries keep the flavor balanced between sweet and tart.
Key Ingredients:
- 1 pie dough round
- 3 cups mixed red berries
- 1/3 cup sugar
- 2 teaspoons cornstarch
- 1 tablespoon lemon juice
- 1 egg, for wash
- 1 tablespoon coarse sugar
Quick Steps:
- Heat oven to 400°F and line a sheet pan.
- Toss berries with sugar, cornstarch, and lemon juice.
- Spoon into the center of the dough, leaving a border.
- Fold the edges over, brush with egg wash, sprinkle sugar, and bake 30 to 35 minutes.
Equipment for This Recipe:
- Sheet pan
- Rolling pin
- Parchment paper
How to Serve This Dish: Let it cool at least 20 minutes so the fruit settles. A slice with vanilla ice cream or plain yogurt is enough to make it feel finished.
Pro Tips for This Recipe:
- Keep the dough cold right up until baking.
- Use parchment so any leaking juices do not glue the galette down.
- If the berries are very juicy, add another teaspoon of cornstarch.
Variations on This Dish:
- Strawberry-Rhubarb Galette: Swap in rhubarb for more tartness.
- Cherry Raspberry Galette: Use half cherries and half raspberries.
Common Mistakes to Avoid with This Dish:
- Leaky edges: Leave enough border to fold.
- Soggy center: Too much filling or too little cornstarch.
Why Red Desserts Work So Well in a Beginner Kitchen
Red desserts have a practical advantage that gets overlooked in all the pretty photos: the color often tells you when the flavor is where it should be. Berry purees should smell bright and a little tart. Red velvet batter should smell faintly cocoa-heavy, not like a chocolate cake trying too hard. Cherry fillings should bubble thickly at the edges, not sit in a thin pink puddle.
They also give you built-in contrast. A cream cheese frosting on red velvet looks sharper than the same frosting on plain vanilla. A crumb topping over strawberries shows texture better than a smooth iced cake. Even a simple glaze over a loaf cake can make the whole thing feel finished, and finished matters when you are still learning.
The easiest wins are the desserts that use one smart shortcut and one honest homemade piece. Boxed cake mix with fresh strawberries. Puff pastry with cherry filling. Graham crumbs with whipped cream and fruit. That mix of shortcut and from-scratch flavor is where a beginner baker starts to feel steady.
The Pans, Bowls, and Basic Tools That Matter
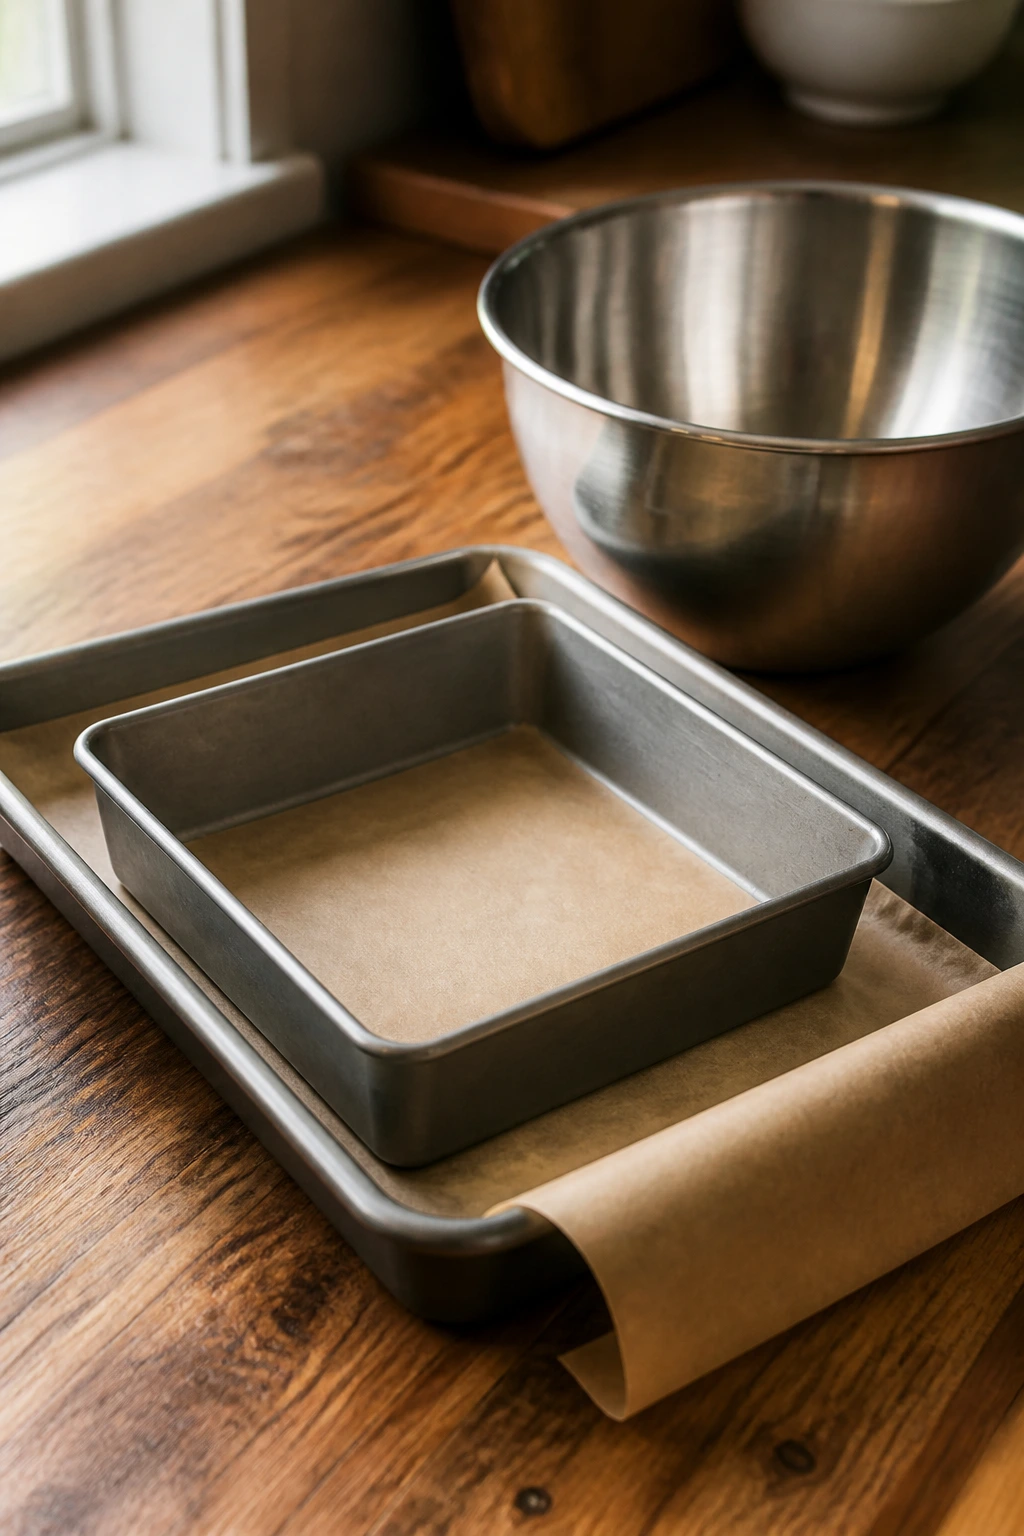
- 9×13-inch baking pan: This is the workhorse for sheet cakes, poke cakes, dump cakes, and bars; line it with parchment when you want easy lifting.
- 8×8-inch pan: Useful for brownies, blondies, and small batches that should bake a little thicker.
- Muffin tin: Handles cupcakes, mini pies, donut holes, and other small-format bakes that are hard to ruin.
- Mixing bowls in two sizes: One for dry ingredients, one for wet; that simple split keeps you from overworking the batter.
- Hand mixer: Helpful for cream cheese fillings, whipped cream, and butter-based cakes, though a whisk works for many no-bake desserts.
- Sheet pans: Needed for cookies, hand pies, turnovers, and galettes; a rimmed pan is worth keeping nearby.
- Parchment paper: Saves sticky fruit desserts and makes it easier to lift bars out cleanly.
- Cooling rack: Stops cakes and cookies from steaming on the bottom.
- Offset spatula or butter knife: Good for spreading batter and frosting without tearing soft crumbs.
- Fine sieve or sifter: Optional, but handy for powdered sugar dusting and lump-free dry ingredients.
Smart Shopping for Fruit, Cocoa, and Color
Fresh berries look gorgeous, but they are not always the smartest buy for every dessert. For baked bars, crisps, cobblers, and pies, frozen berries often do better because they are picked ripe and keep their shape once they hit heat. If you use frozen strawberries or raspberries in a filling, do not thaw them first unless the recipe says so; thawed fruit leaks more juice and can water down the crust.
For strawberries, look for berries that smell sweet at the stem end and feel firm, not woolly or hollow. If the berries are pale inside, the flavor will be faint no matter how pretty they look. Raspberries should be dry and intact, because crushed ones are best saved for puree or sauce. Cherries need taut skin and a deep color; if they wrinkle, the flesh inside is usually starting to soften.
Cranberries are easier. Fresh cranberries should bounce a little if you drop one, and frozen cranberries work in many bakes without any drama. Dried cranberries are useful for cookies and blondies because they stay chewy and do not dump extra water into the batter.
With red velvet, do not get lost in the color obsession and forget the cocoa. A small amount of unsweetened cocoa gives the cake its flavor backbone, but too much can push the batter toward brown. Gel coloring works better than the watery kind when you want a true red and not a pinkish brick shade. And if you are using cream cheese, buy the block style for frosting and fillings; tub cream cheese tends to be softer and can slide around.
How to Serve These Recipes
Presentation: Red desserts look best on simple plates with a clean edge. White platters make berries, glazes, and frosting stand out, while glass jars or clear bowls are smart for trifles, icebox cake, and parfaits because the layers do half the work for you. A small garnish — a berry, a mint leaf, a dusting of powdered sugar — is enough.
Accompaniments: Vanilla ice cream sits well next to cobblers, crisps, and warm pies because it melts into the fruit instead of fighting it. Whipped cream is the safest match for sheet cakes, brownies, and loaf cakes. For the richer bakes, a tart side like plain Greek yogurt or a spoonful of crème fraîche cuts the sweetness nicely.
Portions: Bars and blondies usually cut best into 9 or 16 pieces from an 8×8 or 9×13 pan. Cupcakes, cookies, and donut holes are easy to scale up or down because they portion themselves. For richer desserts like cheesecake bars or trifle, smaller servings make more sense; people tend to go back for a second spoonful anyway.
Beverage Pairing: Coffee, black tea, and cold milk work across almost all of these. For fruit-heavy desserts, a tart hibiscus tea or sparkling lemonade keeps the flavor bright. If you want something a little more grown-up for a dinner party, a lightly sweet sparkling wine matches cherry, raspberry, and strawberry desserts without getting in the way.
Flavor Boosters and Small Fixes That Help
Flavor Enhancement: A little lemon zest wakes up strawberry, raspberry, and cherry desserts faster than more sugar does. Use it in batters, fillings, and whipped cream.
Customization: Almond extract belongs with cherries. Vanilla belongs almost everywhere. Cocoa belongs in red velvet, and a spoonful of freeze-dried strawberry powder can sharpen strawberry flavor in frostings without adding extra liquid.
Serving Suggestions: A drizzle of warmed jam thinned with a teaspoon of water makes a fast glaze for plain cakes and loafs. Toasted sliced almonds, crushed pretzels, or a small handful of white chocolate chips can change the texture without changing the whole recipe.
Make-It-Yours: If you need a dairy-free version, use coconut cream for whipped toppings and a plant butter that behaves well in baking. For a gluten-free version, choose a one-to-one flour blend for bars, cookies, and simple cakes, but expect a slightly softer crumb. For lower sugar, lean on tart fruit and reduce the added sugar by about 1/4 cup in fruit fillings rather than cutting the batter sugar all the way down.
Make-Ahead, Storage, and Reheating Guidance
Most of the baked items here keep well for 3 to 4 days at room temperature if they are unfrosted or lightly glazed and stored in an airtight container. Cream cheese frosting, cheesecake bars, trifles, and anything with whipped cream should go in the refrigerator after about 2 hours out on the counter, or sooner if the kitchen is warm. Bars and loaf cakes often taste better on day two because the flavor settles and the crumb firms slightly.
For the freezer, plain cake layers, brownies, blondies, cookies, hand pies, and galette dough can usually be frozen for up to 2 months if wrapped well. Slice bars first, then freeze them in a single layer before stacking with parchment between layers. That keeps the squares from welding together into one sugar block. Fruit crisps and cobblers freeze best before baking, while pavlova, icebox cake, and yogurt bark do not freeze gracefully once assembled.
Reheating depends on the dessert. Warm cobblers, crisps, dump cakes, and hand pies in a 300°F oven for 10 to 15 minutes so the pastry or crumble stays crisp. Avoid microwaving those unless you do not care about texture. Microwave only the mug cake and, if you must, a single slice of plain cake for a few seconds. Refrigerated cheesecake bars, trifles, and parfaits are best served cold straight from the fridge. If you are making ahead, bake cakes and bars a day early, cool them completely, and frost or glaze the next day; that extra pause prevents sweaty tops and sliding icing.
Variations and Adaptations to Try
Gluten-Free Pantry Swap: Use a one-to-one gluten-free flour blend in cookies, blondies, sheet cakes, and crisps. The texture may be a touch more tender, so let the bars cool fully before cutting.
Dairy-Free Velvet Fix: Swap in plant milk with 1 teaspoon vinegar for buttermilk, use dairy-free butter, and choose coconut cream for whipped toppings. This works best in red velvet cupcakes, cookies, and simple cakes.
Frozen Fruit Shortcut: Frozen strawberries, raspberries, and cherries are excellent in crisps, cobblers, bars, and fillings. Keep them frozen until the last minute so they do not dump too much juice into the pan.
Lower-Sugar Berry Bakes: Reduce sugar in fruit fillings by 2 to 4 tablespoons and add a little lemon juice to keep the fruit bright. Do not slash sugar in the cake batter too hard; that changes texture, not just sweetness.
Chocolate-Cherry Turn: Add cocoa to red velvet batter, cherry filling, or brownie batter if you want a deeper, darker dessert with the same red accents. Chocolate and cherry work especially well together because the tart fruit cuts the richness.
Kid-Friendly Finish: Use sprinkles, mini chips, or a simple powdered sugar glaze instead of complicated frosting. Kids usually care more about color and finger-friendly shape than about a perfect swirl.
Common Mistakes That Show Up Again and Again
Overmixing the batter: The most common slip is stirring until the bowl looks perfectly smooth. That usually gives you a tougher cake or cookie. Stop as soon as the flour disappears, especially in cupcakes, loaf cakes, and red velvet bakes.
Using fruit that is too wet: Fresh berries can leak more juice than expected, and thawed berries leak even more. If a recipe calls for puree, thick jam, or drained fruit, follow that cue. Otherwise, you risk a soggy bottom or a filling that never sets.
Pulling bakes too late: Beginner bakers often wait for the top to look completely dry. That’s how cakes turn dusty and brownies lose their soft center. Look for the visual cue the recipe gives you: springy tops, bubbling edges, or a tester with a few moist crumbs.
Skipping parchment or grease: Fruit desserts stick. Bars stick. Cheesecake bars stick. Use parchment with an overhang when the recipe says so, because that little strip saves you from digging into a pan with a spatula.
Frosting or slicing too soon: Warm cakes tear, warm brownies smear, and warm cheesecake bars slump. Give them time. Cooling is not dead time; it is part of the recipe.
Using the wrong pan size: A pan that is too small makes the middle underbaked while the edges dry out. A pan that is too large spreads the batter thin and shortens bake time too much. Read the pan size and stick to it.
Frequently Asked Questions
Can I use frozen berries in most of these red desserts?
Yes, especially in crisps, cobblers, bars, and fillings. Keep them frozen until you add them, and if the mixture looks very watery, add a little extra cornstarch or give it a few more minutes in the oven.
Do I need red food coloring for red velvet recipes?
Not always, but if you want that classic deep red look, a small amount helps. The cocoa, buttermilk, and vinegar create the flavor and texture; the coloring mostly handles appearance.
Why did my strawberry cake turn out pale instead of pink?
That usually happens when the berry flavor is there but the color is weak. Use thicker puree, reduce watery fruit sauce slightly, or add a spoonful of strawberry powder or food coloring if you want a stronger shade.
Can I make these desserts ahead of time?
Most bars, cookies, loaf cakes, and frosted cupcakes are fine made a day ahead. Assembled trifles, icebox cake, and pavlova are better close to serving because the texture changes fast once cream and fruit are layered.
What’s the best dessert here for a total beginner?
Cherry dump cake, strawberry mug cake, raspberry fool, and strawberry yogurt bark are the easiest starts. They have very few steps, and the mistakes are hard to make fatal.
How do I keep fruit fillings from getting runny?
Use cornstarch, do not overfill the pan, and bake until the filling bubbles. Cooling also matters; fruit thickens as it rests, so a hot filling often looks looser than it will once sliced.
Can I swap cream cheese frosting for whipped cream?
Usually, yes. Whipped cream is lighter and works well on sheet cake, cupcakes, trifles, and parfaits, but it is less stable than cream cheese frosting on warm days.
What if my cake cracks on top?
A small crack is normal in loaf cakes and some sheet cakes. If the crack is deep and the center is dry, the oven may have been too hot or the pan may have been too small.
A Sweet Red Tray
A good red dessert does not need a lot of drama. It needs a batter that behaves, fruit that tastes like fruit, and a finish that makes the whole thing look intentional even if your piping bag was a zip-top bag with the corner snipped off.
That is the pleasant surprise with beginner baking: once you learn a few sturdy habits, you can move between cupcakes, cobblers, bars, and cakes without starting from zero every time. The color changes, the pans change, but the rhythm stays familiar. Measure, stir lightly, bake until set, cool properly.
Pick one recipe that fits your mood and your pantry. Then bake it, slice it, and keep the best-looking square for yourself.