
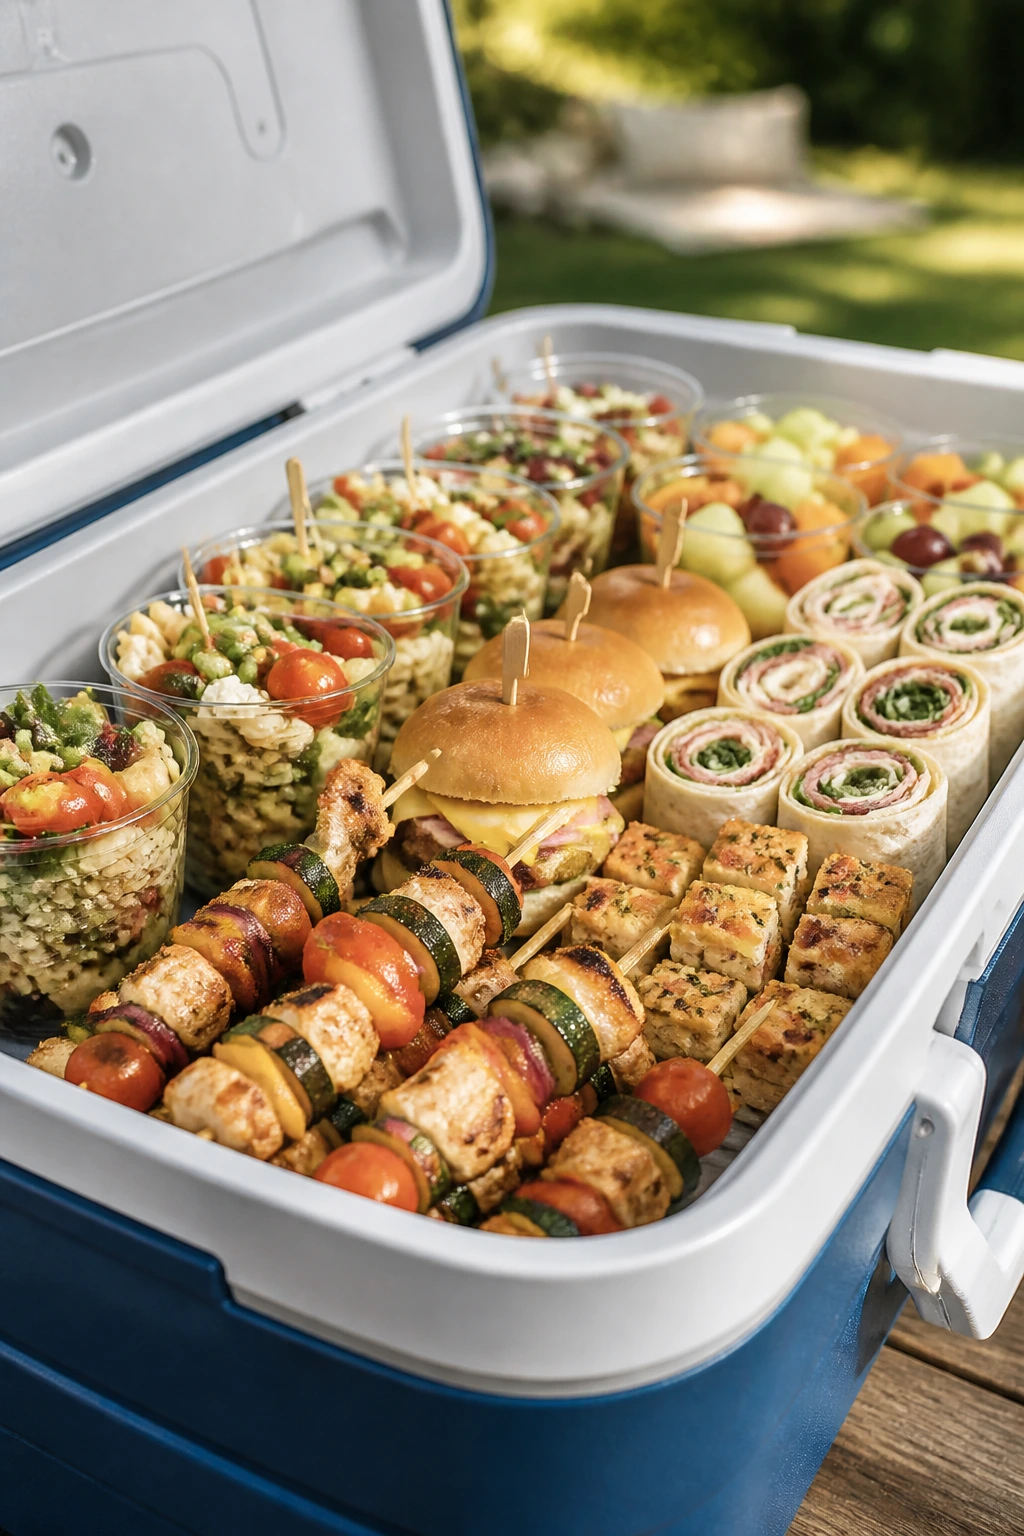
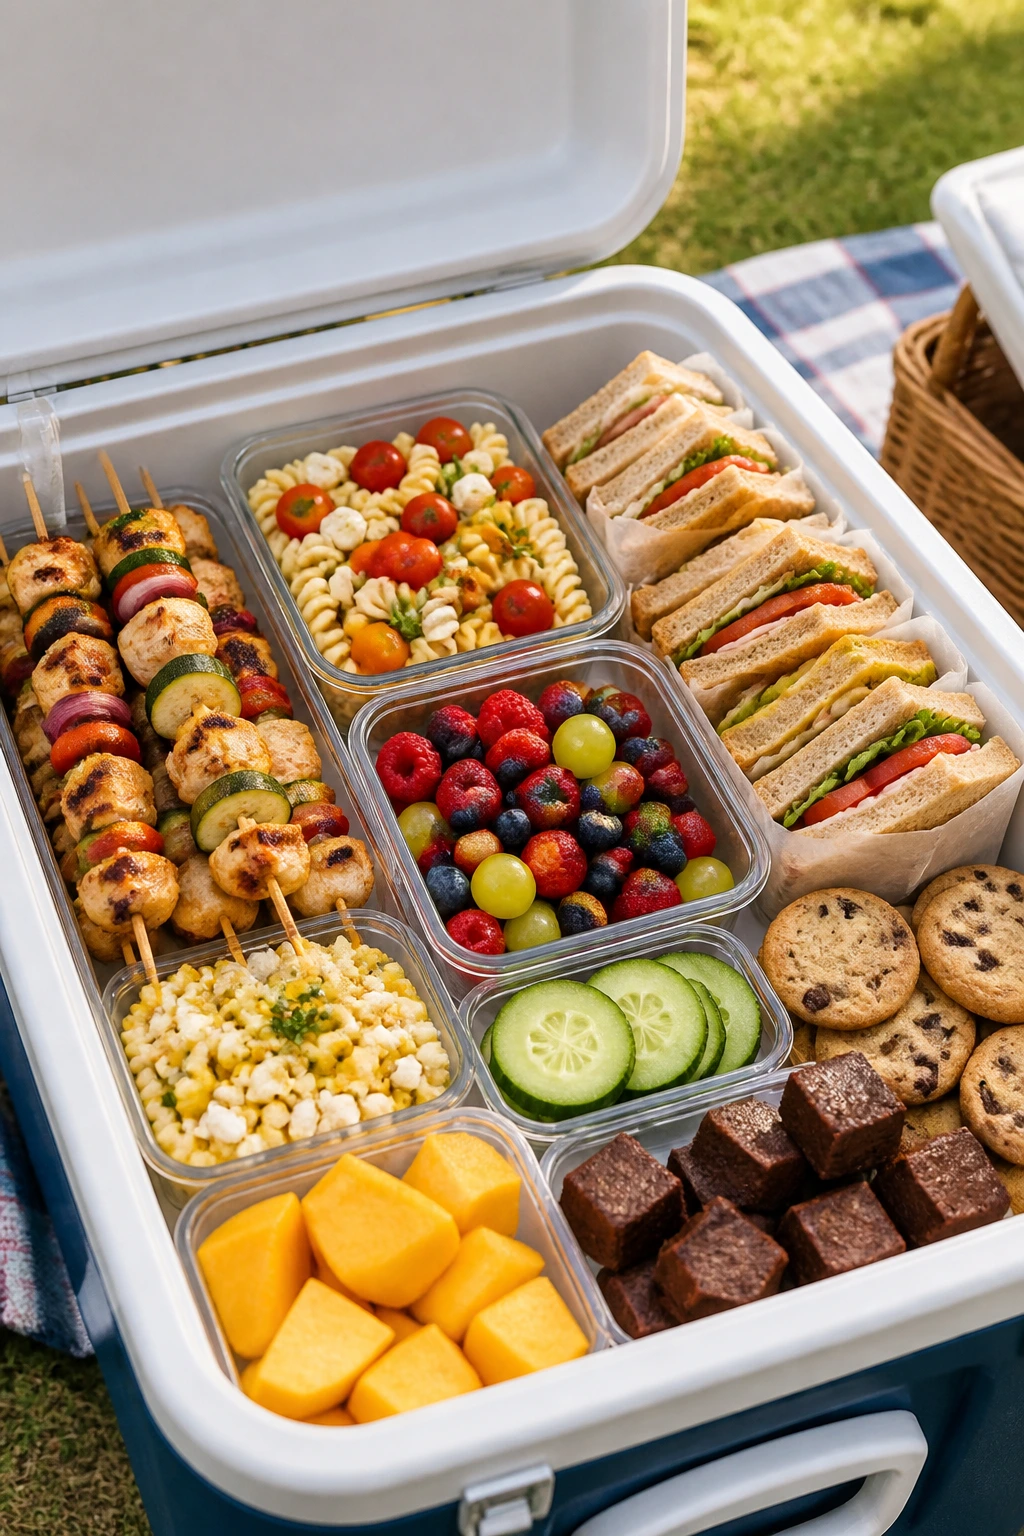
A picnic falls apart fast when the food can’t survive a little heat, a little handling, and a little time on a blanket. Picnic party food ideas need a different kind of logic than a plated dinner: sturdier textures, brighter seasoning, and shapes that travel without sulking. Nobody wants a soggy sandwich, a salad that turns watery, or a fried thing that arrives limp and sad.
The best picnic spread does a few things at once. It gives you salt beside a cold drink, acid beside rich cheese or fried chicken, and enough crunch to keep the whole table awake. I like food that can be eaten with one hand while the other is pulling a cold can out of the cooler. That’s the real test.
So this is a list for the blanket, the tailgate table, the shady patch under a tree, and the back seat of a car that’s already half full of ice packs. Some of these are grill-friendly, some are no-cook, and some are the kind of thing that tastes even better after a short chill. All of them earn their place next to a sweating bottle, a can of seltzer, or a paper cup full of iced tea.
Why These Picnic Dishes Earn Space in the Cooler
-
Built for room temperature: Every recipe here can sit out long enough to get eaten without turning to mush, which is half the battle on a picnic table.
-
Cold drinks actually make sense with them: Salt, smoke, herbs, vinegar, and creamy fillings keep these foods from feeling flat next to beer, iced tea, lemonade, or sparkling water.
-
Handheld shapes do the heavy lifting: Skewers, sliders, cups, pinwheels, and squares are easier to pack than anything that needs a fork and a prayer.
-
Make-ahead is part of the design: Most of these can be cooked, chilled, and packed before people start asking where the napkins went.
-
You get texture, not just volume: Crisp, creamy, juicy, and chewy all show up here. A picnic spread needs that kind of contrast or it starts tasting like one long beige note.
-
The mix covers the whole table: There are grill items, salads, dips, bread, and dessert, so you can build a spread that feels finished instead of random.
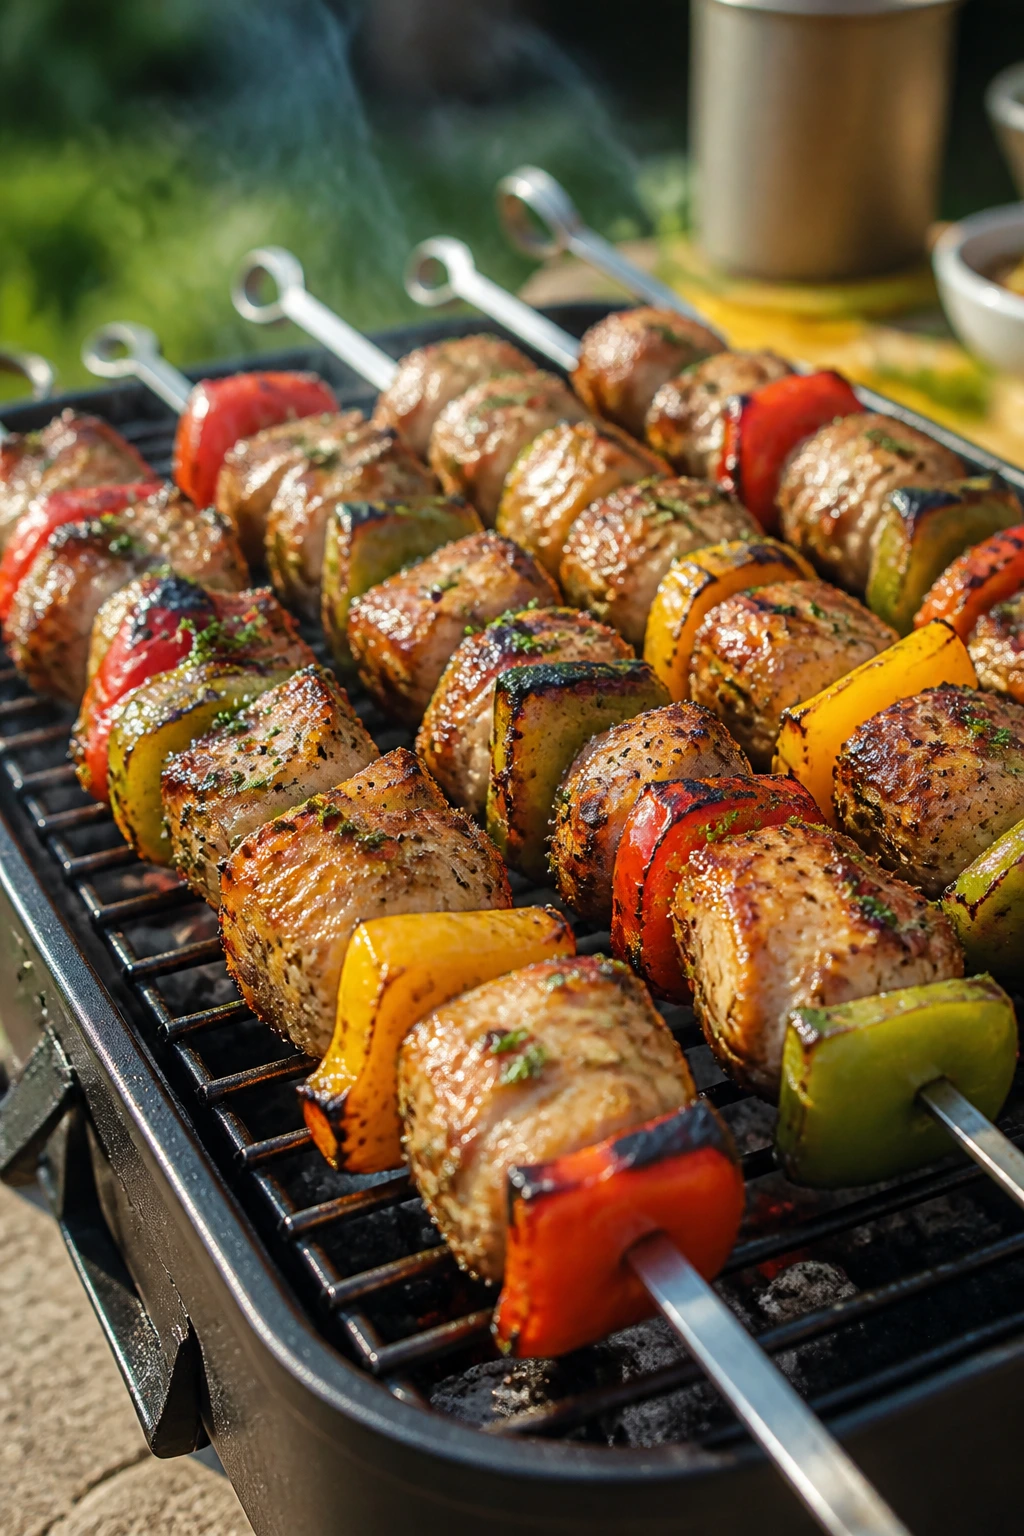
1. Lemon-Garlic Chicken Skewers
Juicy chicken thighs, charred edges, and a lemon-garlic smell that hangs in the air before the first bite—that’s why I keep coming back to skewers for picnic food. They pack cleanly, eat easily, and don’t care if you’re standing up with a drink in your other hand.
Why It Works: Chicken thighs stay tender even after a short rest, which matters more than people admit at a picnic. Lemon and garlic give the meat enough bite to stand up to a cold pilsner or a tall glass of sparkling lemonade, and the red onion softens into sweet little edges on the grill.
Key Ingredients:
- 1 1/2 lb boneless, skinless chicken thighs, cut into 1 1/2-inch pieces
- 2 tablespoons olive oil
- Zest and juice of 2 lemons
- 3 garlic cloves, finely grated
- 1 teaspoon dried oregano
- 1 teaspoon kosher salt
- 1/2 teaspoon black pepper
- 1 red bell pepper, cut into chunks
- 1 small red onion, cut into wedges
Quick Steps:
- Whisk the olive oil, lemon zest and juice, garlic, oregano, salt, and pepper in a bowl.
- Toss the chicken in the marinade and chill for 30 minutes to 4 hours.
- Thread chicken, pepper, and onion onto skewers.
- Grill over medium-high heat for 10 to 12 minutes, turning once or twice, until the chicken reaches 165°F and the edges are lightly charred.
- Rest for 5 minutes before serving.
Equipment for This Recipe:
- Grill or grill pan
- Metal or soaked wooden skewers
- Mixing bowl
- Tongs
How to Serve This Dish: Pile the skewers on a tray with lemon wedges and a small bowl of yogurt or tzatziki. They work especially well with a cold, bitter drink that can cut through the char.
Pro Tips for This Recipe:
- Cut the chicken into even pieces so it cooks at the same pace.
- Soak wooden skewers for at least 30 minutes or they’ll scorch.
- Don’t marinate much longer than 4 hours; the lemon starts tightening the outside of the meat.
- Pull the chicken when the juices run clear, not when it looks dry.
Variations on This Dish:
- Smoky Paprika Version: Add 1 teaspoon smoked paprika for a deeper grill flavor.
- Halloumi Swap: Use halloumi cubes and extra vegetables for a meatless skewer.
- Broiler Backup: Broil on a sheet pan 4 to 5 minutes per side if the grill is off duty.
Common Mistakes to Avoid with This Dish:
- Crowding the skewers: Leave a little space so the heat can reach all sides.
- Using chicken breast chunks too small: They dry out fast; thighs forgive more mistakes.
- Grilling over a roaring flame: You want char, not a black shell with raw centers.
2. Pimento Cheese Ham Sliders
These are salty, soft, a little messy, and exactly the kind of thing people reach for twice when the cooler lid comes off. The pimento cheese melts into the ham and buns just enough to make the whole tray feel warm, even if you’re eating it outdoors.
Why It Works: The filling gets creamy without needing a long cook time, and the slider size keeps the bread-to-filling ratio in check. A cold glass of sweet tea or a beer with a clean finish keeps the richness from taking over.
Key Ingredients:
- 12 sweet Hawaiian slider rolls
- 8 oz cream cheese, softened
- 1 cup shredded sharp cheddar
- 1/2 cup chopped pimentos, drained
- 2 tablespoons mayonnaise
- 1 teaspoon hot sauce
- 12 thin slices deli ham
- 2 tablespoons melted butter
- 1 teaspoon Dijon mustard
- 1/2 teaspoon garlic powder
Quick Steps:
- Mix the cream cheese, cheddar, pimentos, mayo, and hot sauce until smooth.
- Slice the rolls in half horizontally and set the bottoms in a 9×13-inch pan.
- Spread the pimento cheese mixture over the rolls, then layer on the ham.
- Replace the tops, brush with melted butter mixed with Dijon and garlic powder, and bake at 350°F for 12 to 15 minutes until the tops are glossy and lightly browned.
- Rest for 5 minutes, then cut and serve warm or at room temperature.
Equipment for This Recipe:
- 9×13-inch baking dish
- Mixing bowl
- Butter brush
- Serrated knife
How to Serve This Dish: Serve the sliders in tight rows so they stay together when people pull them apart. Dill pickles on the side make sense here; so does a cold drink with some fizz.
Pro Tips for This Recipe:
- Soften the cream cheese fully or the filling stays lumpy.
- Use thin ham slices so the sliders don’t get bulky and slide apart.
- Brush the tops right before baking for the best color.
- Let the pan sit a few minutes before cutting so the cheese settles.
Variations on This Dish:
- Jalapeño Kick: Add chopped pickled jalapeños for a sharper bite.
- Turkey Version: Swap ham for smoked turkey if you want a lighter finish.
- No-Bake Picnic Stack: Skip the oven and serve the filling as a dip with crackers.
Common Mistakes to Avoid with This Dish:
- Overfilling the rolls: They won’t hold and you’ll lose the neat slider shape.
- Baking too long: The buns dry out fast once the butter starts browning hard.
- Using cold filling: It spreads badly and tears the bread.
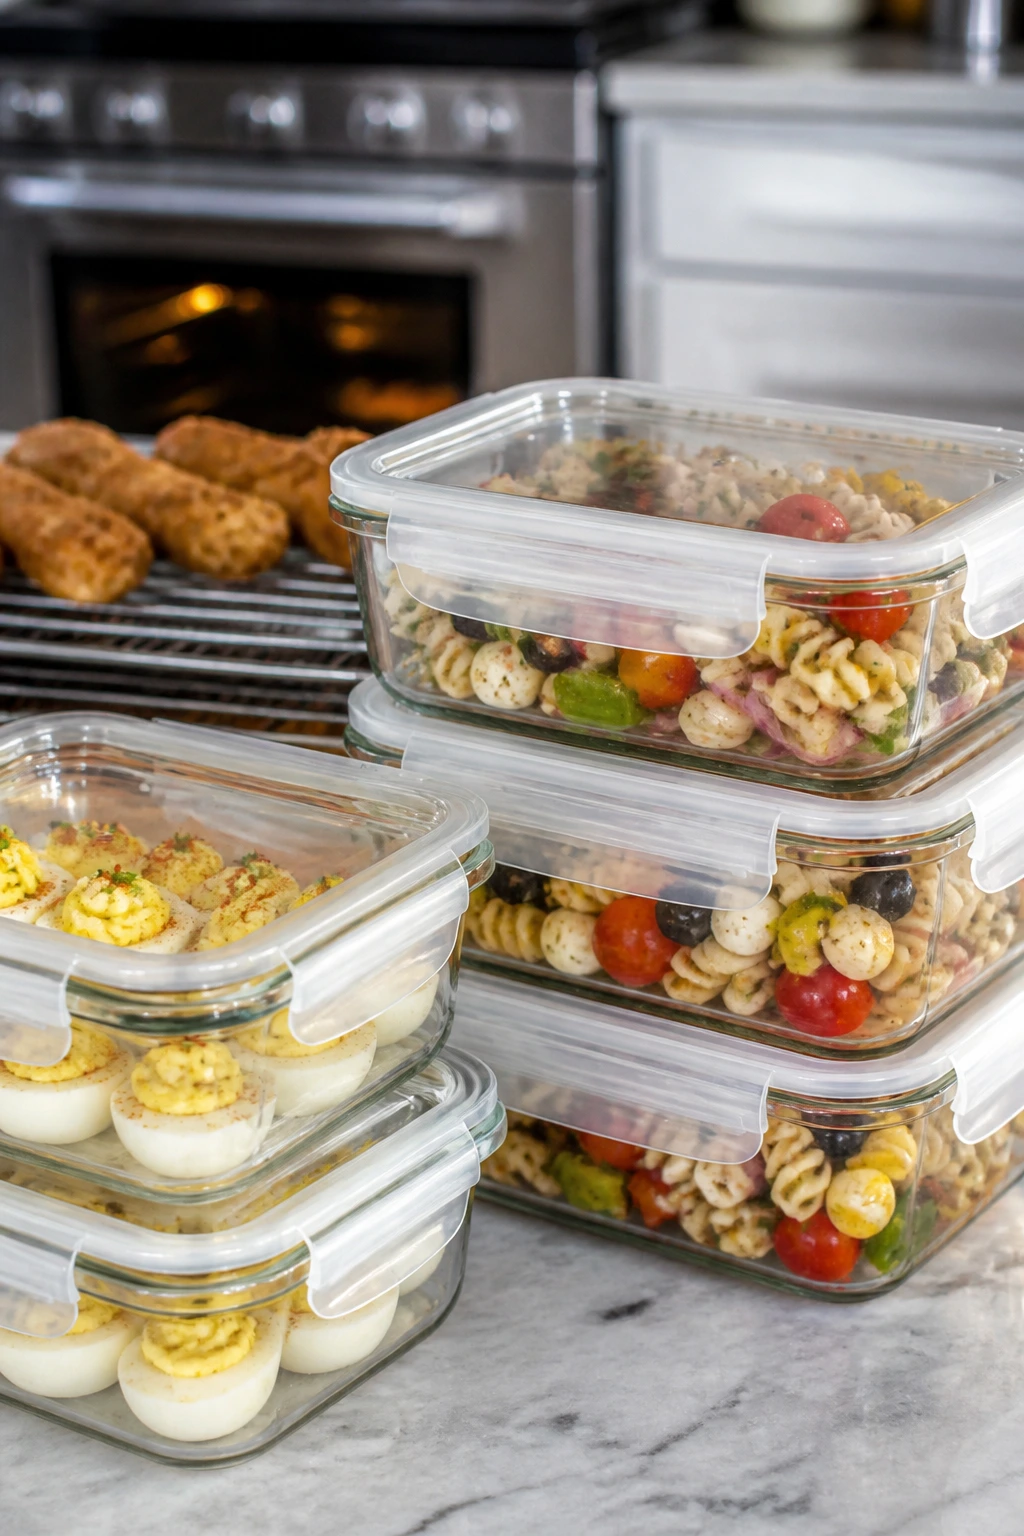
3. Caprese Pasta Salad Cups
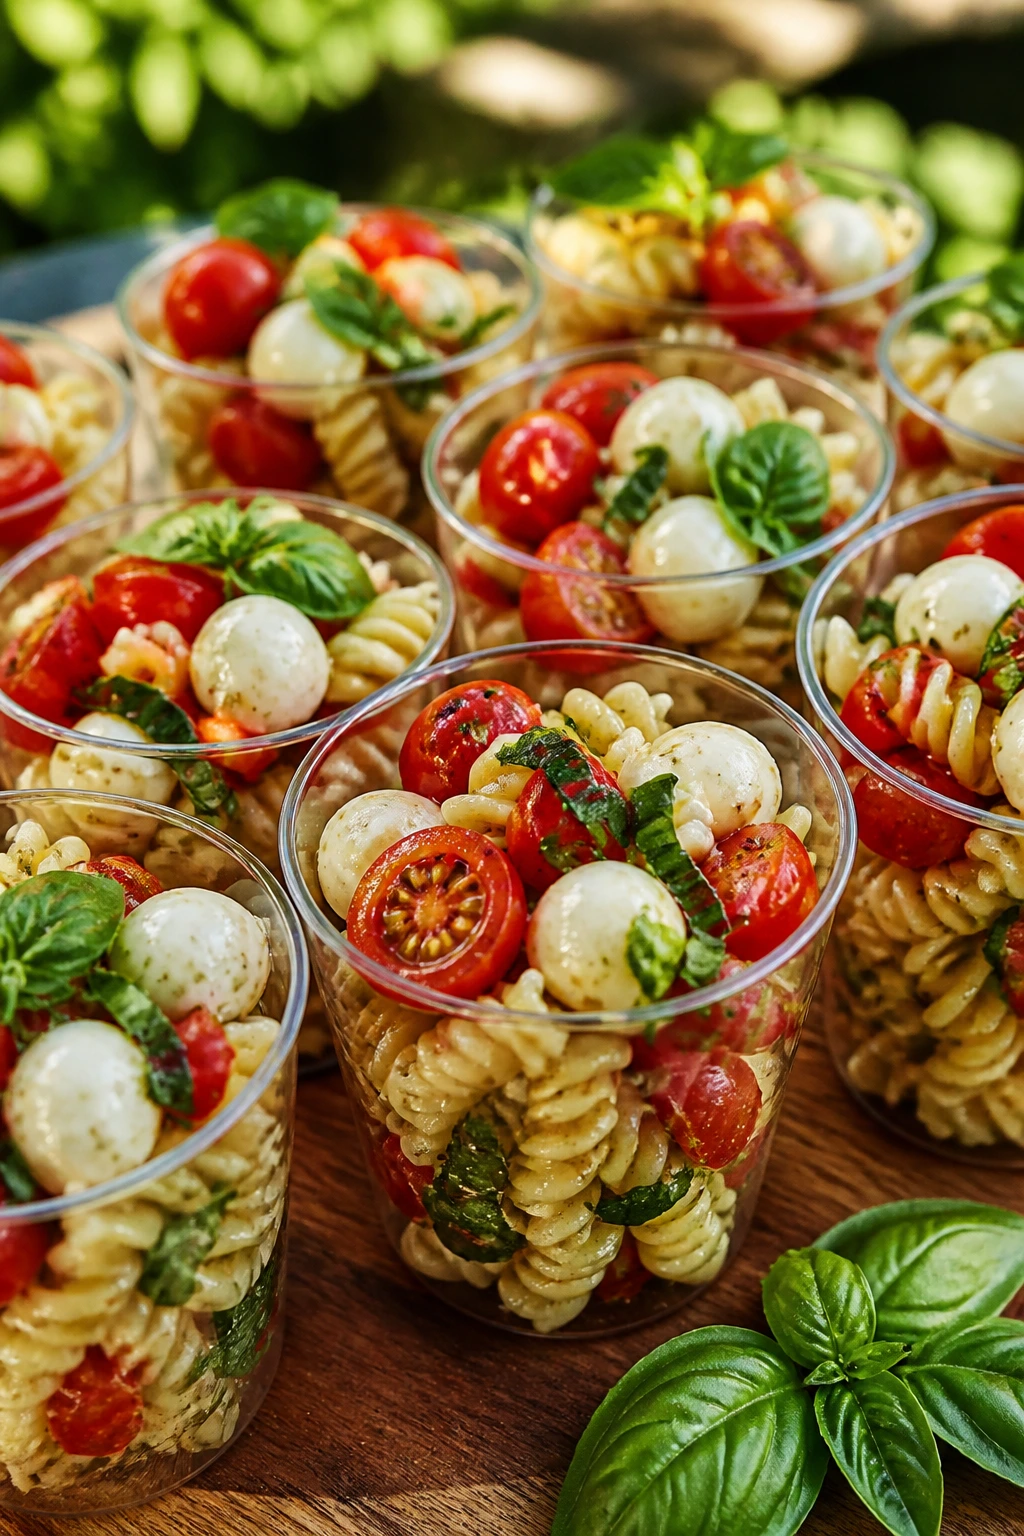
This is the kind of picnic dish that looks cheerful before anyone touches it. Cherry tomatoes, mozzarella pearls, basil, and balsamic cling to the pasta in a way that stays fresh at room temperature, especially when you scoop it into little cups instead of hauling out one big bowl.
Why It Works: Short pasta catches the dressing in its ridges, and the individual cups keep people from poking through a communal bowl with a serving spoon that’s seen too much. It pairs well with sparkling lemonade or a cold white wine because the tomatoes and basil stay bright.
Key Ingredients:
- 12 oz rotini or fusilli
- 1 pint cherry tomatoes, halved
- 8 oz mozzarella pearls, drained
- 1/2 cup fresh basil leaves, torn
- 1/4 cup olive oil
- 2 tablespoons balsamic vinegar
- 1 garlic clove, finely grated
- 1 teaspoon kosher salt
Quick Steps:
- Cook the pasta in salted water until just al dente, then drain and cool under cold water.
- Whisk the olive oil, balsamic, garlic, salt, and a few grinds of pepper.
- Toss the cooled pasta with the tomatoes, mozzarella, basil, and dressing.
- Spoon into small cups or jars and chill for at least 20 minutes before serving.
Equipment for This Recipe:
- Large pot
- Colander
- Mixing bowl
- Small cups or jars
How to Serve This Dish: Hand out the cups with small forks or sturdy picks. They sit nicely beside grilled meats, fried chicken, or anything salty enough to make the balsamic taste louder.
Pro Tips for This Recipe:
- Dress the pasta while it’s still a little warm so it soaks up flavor.
- Tear basil by hand; a knife bruises it and leaves dark edges.
- Add a tiny splash more oil right before serving if the salad looks tight.
- Halve the tomatoes so they don’t roll out of the cup in one awkward spill.
Variations on This Dish:
- Pesto Caprese: Replace half the balsamic with basil pesto for a greener, louder flavor.
- Grilled Veg Version: Add grilled zucchini or peppers for more smoke.
- Gluten-Free Bowl: Use a sturdy gluten-free pasta shape that holds up after chilling.
Common Mistakes to Avoid with This Dish:
- Using overcooked pasta: It turns soft once it sits in the dressing.
- Chopping basil too early: It darkens and gets limp.
- Serving it ice-cold from the fridge: Let it sit 15 minutes so the tomato flavor wakes up.
4. Buttermilk Fried Chicken Thighs
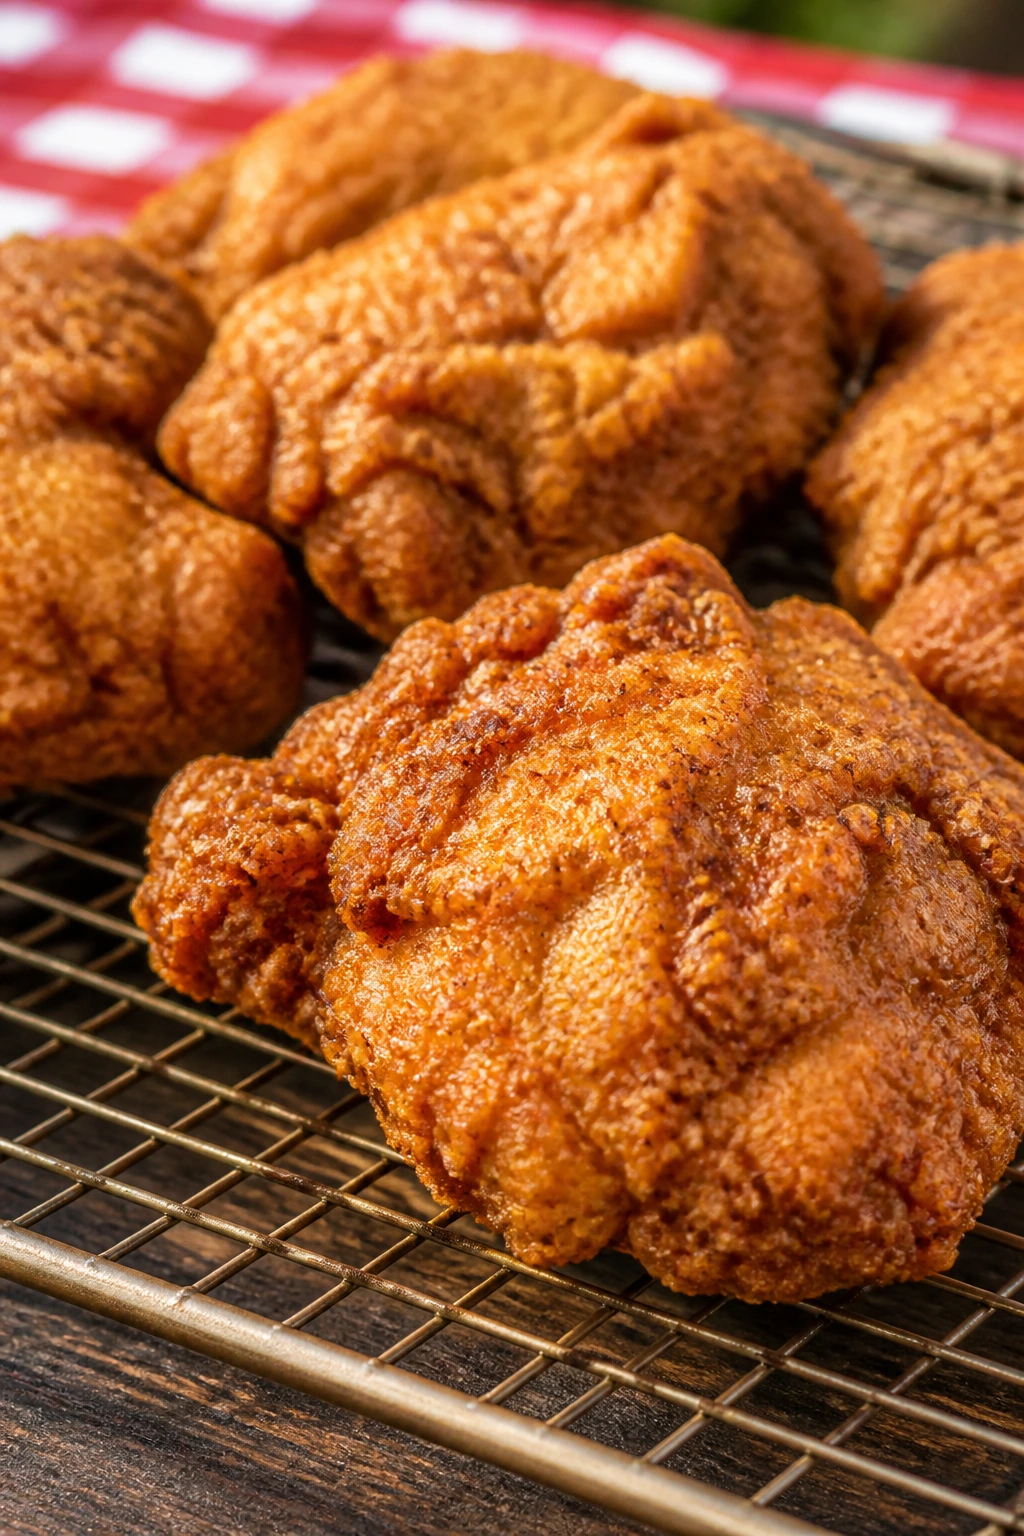
A cold piece of fried chicken on a picnic table is one of those things I will happily defend. The skin stays craggy, the meat stays juicy, and the whole tray tastes even better after a short rest because the seasoning settles into the crust.
Why It Works: Thighs handle the drying effect of frying better than breasts, and the buttermilk brine keeps the meat tender. Salt, paprika, and a little hot sauce make the crust strong enough to stand up to cola, beer, or sweet tea.
Key Ingredients:
- 2 lb boneless or bone-in chicken thighs
- 2 cups buttermilk
- 1 tablespoon hot sauce
- 2 cups all-purpose flour
- 1/2 cup cornstarch
- 2 teaspoons paprika
- 1 teaspoon garlic powder
- 1 1/2 teaspoons kosher salt
- 1/2 teaspoon black pepper
- Neutral oil for frying
Quick Steps:
- Mix the buttermilk and hot sauce, then soak the chicken for at least 4 hours or overnight.
- Combine the flour, cornstarch, paprika, garlic powder, salt, and pepper.
- Dredge the chicken well, pressing the coating into every side, then rest it 10 minutes.
- Fry at 340°F to 350°F for 14 to 16 minutes, turning once, until deeply golden and the chicken reaches 165°F.
- Drain on a wire rack and cool until just warm or room temperature.
Equipment for This Recipe:
- Heavy Dutch oven or deep skillet
- Wire rack
- Instant-read thermometer
- Tongs
How to Serve This Dish: Pack the chicken in a single layer with parchment between pieces so the crust doesn’t steam itself soft. Dill pickles and a cold beer are the obvious partners, and they’re obvious for a reason.
Pro Tips for This Recipe:
- Keep the oil temperature steady; if it drops, the crust gets greasy.
- Don’t crowd the pot or the pieces start steaming instead of frying.
- Use a rack, not paper towels, for draining.
- Salt the chicken a little more than feels normal; cold fried chicken eats flatter than hot.
Variations on This Dish:
- Cayenne Heat: Add 1/2 teaspoon cayenne to the dredge.
- Oven-Fried Version: Bake on a rack at 425°F until crisp and cooked through.
- Boneless Party Strips: Cut thighs into strips for easier picnic eating.
Common Mistakes to Avoid with This Dish:
- Frying at high heat: The crust burns before the chicken cooks.
- Skipping the rest after dredging: The coating falls off in the oil.
- Packing it in a sealed container while hot: The steam ruins the crunch.
5. Greek Orzo Salad with Feta
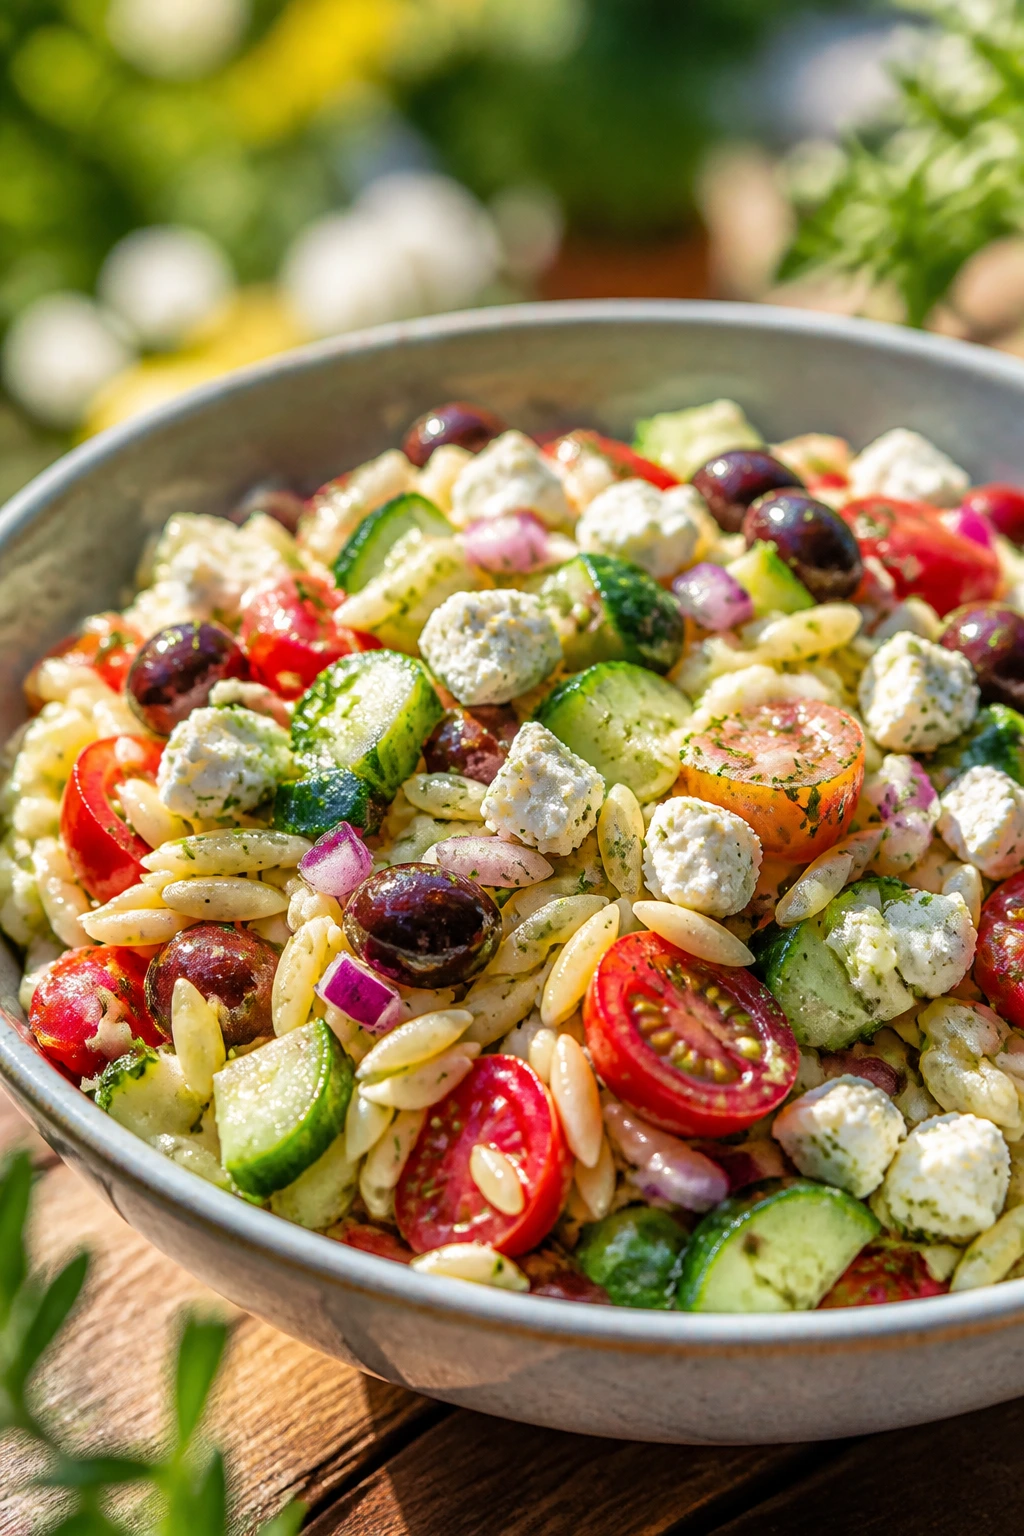
This is the picnic bowl I trust when I want something bright that won’t collapse after an hour in the shade. Orzo feels almost like rice, but it grabs the lemon dressing better, and the feta gives each forkful a salty snap.
Why It Works: The small pasta shape cools quickly, which makes it easy to chill and pack. Cucumber, tomato, olives, and feta keep the salad sharp, and the lemon-oregano dressing is exactly what you want beside sparkling water or a dry white wine.
Key Ingredients:
- 1 lb orzo
- 1 English cucumber, diced
- 1 pint cherry tomatoes, halved
- 1 cup crumbled feta
- 1/2 cup kalamata olives, sliced
- 1/4 cup red onion, minced
- 1/3 cup olive oil
- 3 tablespoons lemon juice
- 1 teaspoon dried oregano
- Salt and black pepper
Quick Steps:
- Cook the orzo in salted water until al dente, then drain and cool.
- Whisk the olive oil, lemon juice, oregano, salt, and pepper.
- Toss the orzo with cucumber, tomatoes, olives, red onion, and feta.
- Chill for 30 minutes, then taste and add more lemon or salt if needed.
Equipment for This Recipe:
- Pot
- Colander
- Large mixing bowl
- Serving spoon
How to Serve This Dish: Spoon it into a wide bowl and keep a little feta and oregano on top so it doesn’t look flattened by the cooler. It plays well with grilled meat, pita, or a cold drink with bubbles.
Pro Tips for This Recipe:
- Salt the pasta water well or the salad tastes dull.
- Chill the onion in cold water for 5 minutes if you want less bite.
- Crumble some feta on top at the end for texture.
- If it looks dry after chilling, add a tablespoon of olive oil before serving.
Variations on This Dish:
- Chickpea Meal Salad: Add 1 can drained chickpeas for extra heft.
- Shrimp Orzo: Fold in chilled cooked shrimp for a fuller main dish.
- Dairy-Free Bowl: Skip the feta and add chopped avocado at the last minute.
Common Mistakes to Avoid with This Dish:
- Overcooking the orzo: It gets mushy once it sits in dressing.
- Adding the tomatoes too early if they’re watery: They can thin the bowl.
- Serving it straight from the fridge: Give it a short rest so the lemon shows up again.
6. BLT Tortilla Pinwheels
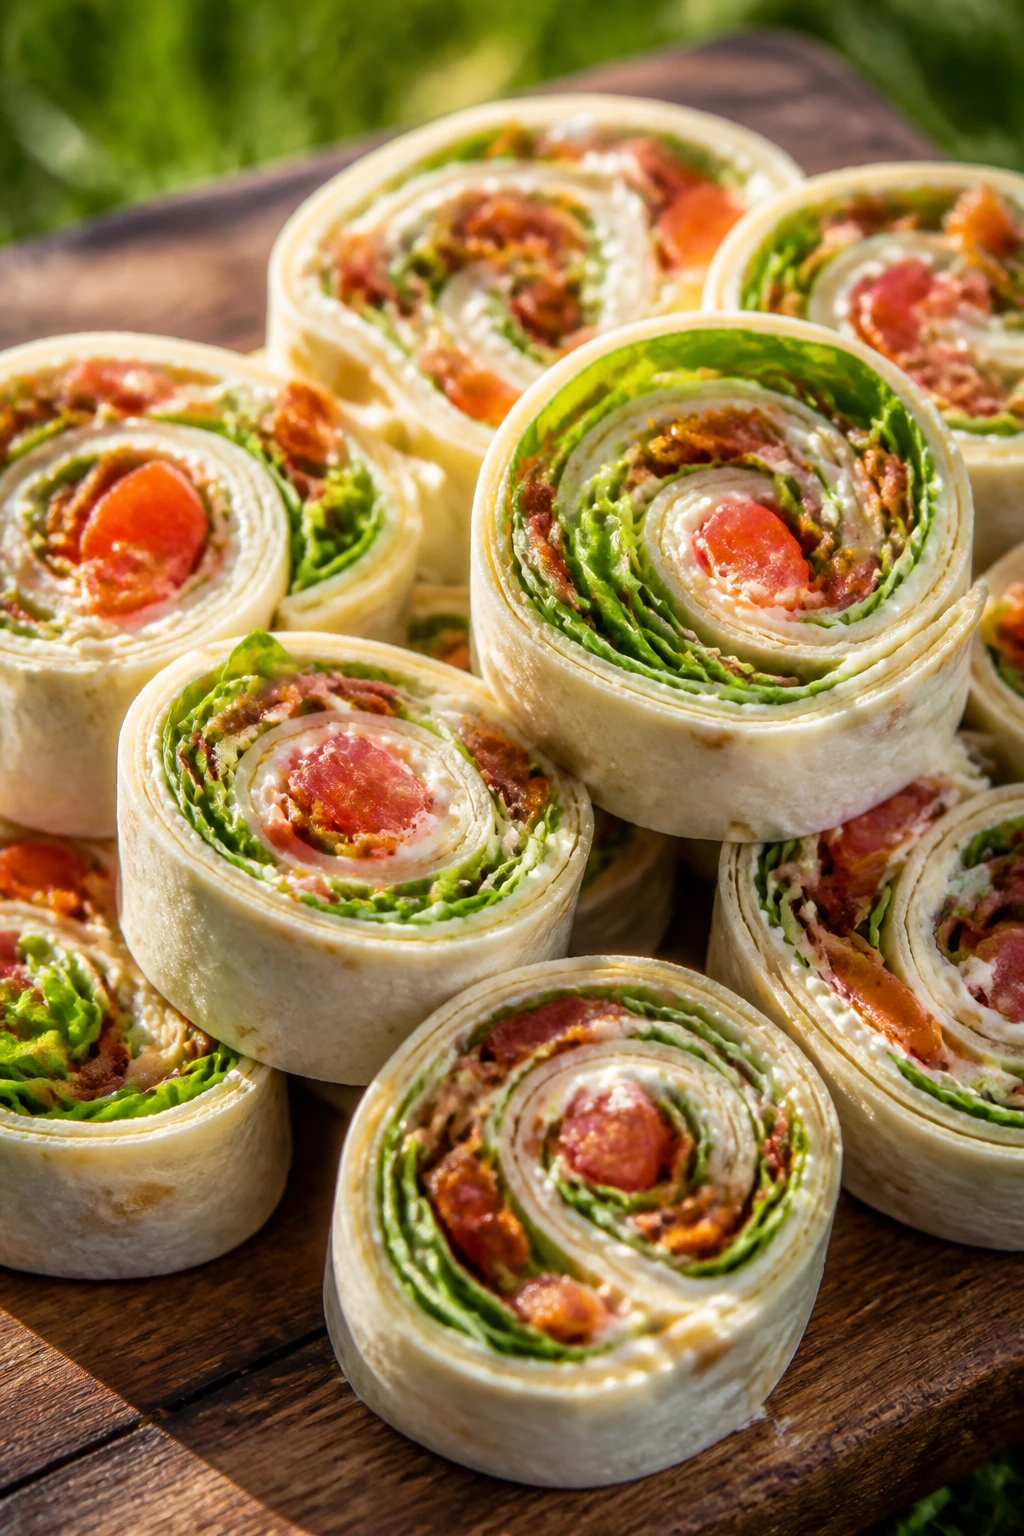
BLT pinwheels are less glamorous than a grilled platter, and that’s part of the charm. They taste like a sandwich that learned how to behave at a picnic: tighter, neater, easier to grab, and much less likely to leak tomato water into your paper basket.
Why It Works: Cream cheese holds the roll together and keeps the bacon from sliding out, while the lettuce gives the bite a crisp edge. A cold cola or sweet tea cuts through the salt and fat without fighting the sandwich.
Key Ingredients:
- 4 large flour tortillas
- 6 oz cream cheese, softened
- 2 tablespoons mayonnaise
- 1 cup cooked bacon, chopped
- 1 cup romaine lettuce, finely shredded
- 1 medium tomato, seeded and diced
- 2 tablespoons chopped scallions
- Salt and black pepper
Quick Steps:
- Mix the cream cheese, mayo, scallions, salt, and pepper.
- Pat the tomato dry with paper towels so it doesn’t soak the tortillas.
- Spread the filling over each tortilla, then layer on bacon, lettuce, and tomato.
- Roll tightly, wrap in plastic, and chill for at least 1 hour.
- Slice into 1-inch pinwheels with a serrated knife.
Equipment for This Recipe:
- Cutting board
- Mixing bowl
- Plastic wrap
- Serrated knife
How to Serve This Dish: Arrange the slices cut-side up so people can see the bacon rings and green lettuce. They fit beside chips, fruit, or a cold drink with a little sugar in it.
Pro Tips for This Recipe:
- Use large burrito-size tortillas; small ones unroll too easily.
- Dry the lettuce and tomato well or the pinwheels turn slick.
- Chill the roll before slicing or the filling squishes out.
- Wipe the knife between cuts for cleaner rounds.
Variations on This Dish:
- Ranch BLT: Stir 1 teaspoon ranch seasoning into the cream cheese.
- Turkey BLT: Use sliced turkey instead of bacon for a lighter version.
- Vegetarian Crunch Roll: Swap bacon for smoky tempeh strips.
Common Mistakes to Avoid with This Dish:
- Overfilling the tortilla: The seam won’t stay closed.
- Skipping the chill time: The slices fall apart when you cut them.
- Using watery tomatoes: They make the tortilla soggy fast.
7. Charred Corn and Black Bean Salad
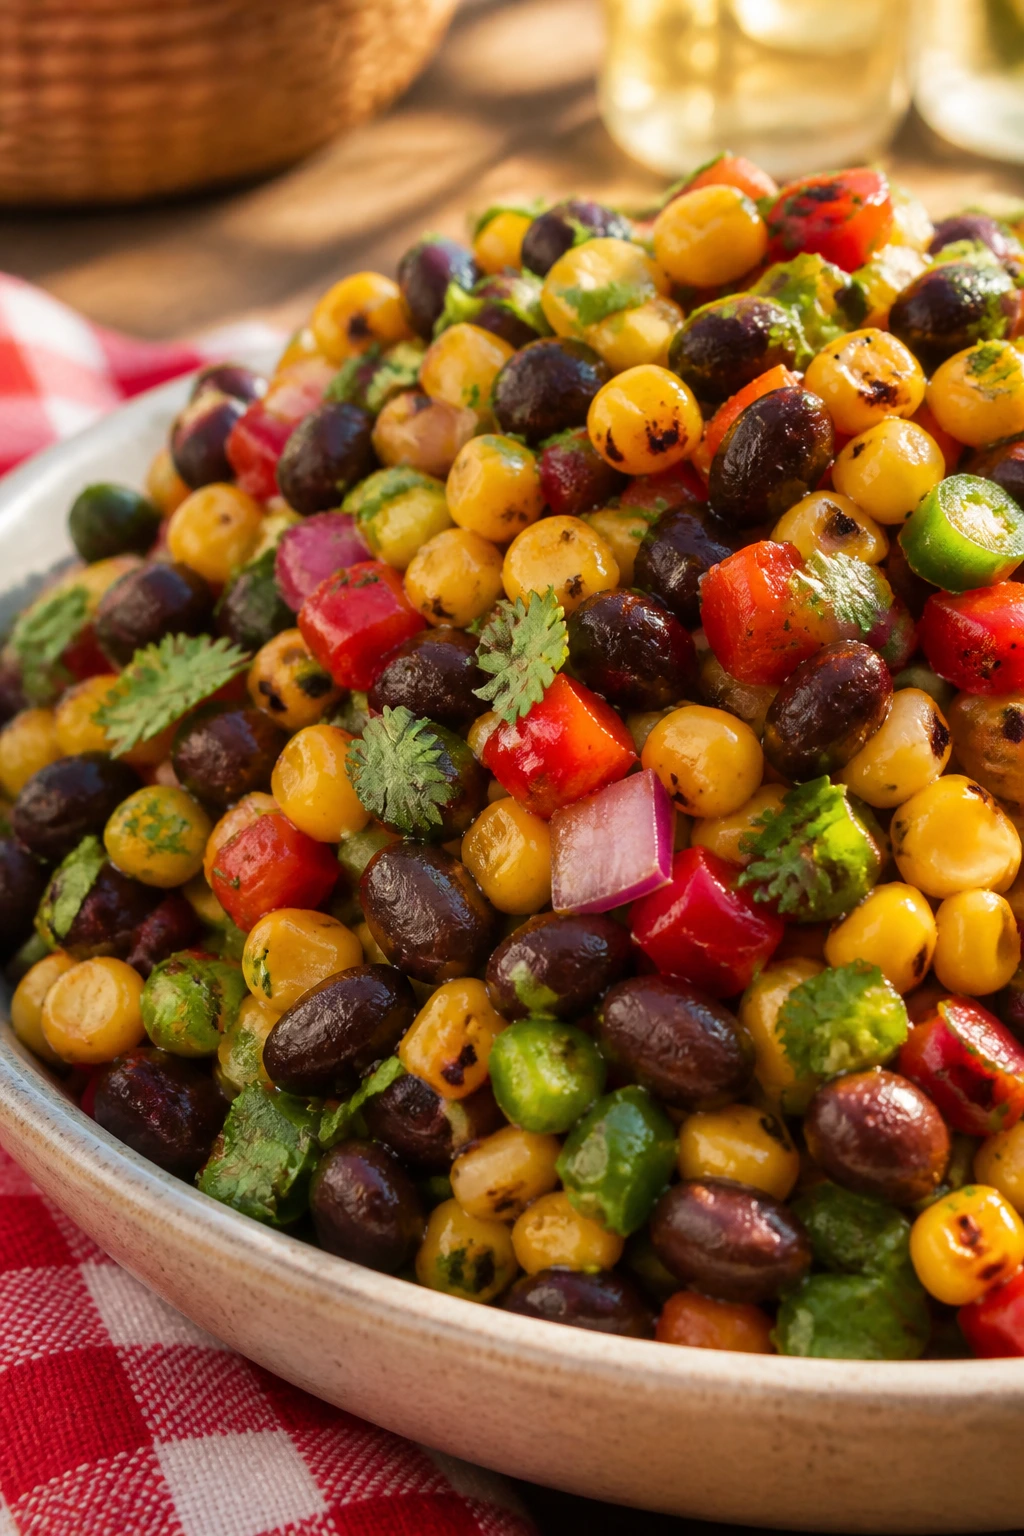
This salad tastes like summer heat without the commitment of standing over a grill all afternoon. Charred corn brings a little smoke, black beans bring body, and lime wakes everything up the second it hits the bowl.
Why It Works: The corn gets sweeter when it chars, and the beans make the salad substantial enough to eat with chips or a fork. Lime, cilantro, and jalapeño keep it lively beside a cold michelada, lime soda, or sparkling water.
Key Ingredients:
- 4 ears corn, kernels cut off the cob
- 1 can black beans, rinsed and drained
- 1 red bell pepper, diced
- 1 jalapeño, seeded and minced
- 1/4 cup red onion, minced
- 1/3 cup cilantro, chopped
- 2 tablespoons olive oil
- Juice of 2 limes
- 1/2 teaspoon ground cumin
- Salt
Quick Steps:
- Char the corn in a dry skillet or on the grill until lightly blackened in spots.
- Cool the corn for a few minutes, then cut it from the cob if needed.
- Toss the corn with black beans, bell pepper, jalapeño, onion, and cilantro.
- Whisk the olive oil, lime juice, cumin, and salt, then pour over the salad.
- Chill for 20 minutes and taste again before serving.
Equipment for This Recipe:
- Grill or skillet
- Cutting board
- Large bowl
- Lime juicer
How to Serve This Dish: Serve it in a shallow bowl with tortilla chips around the edge or spooned into lettuce cups. It sits nicely next to grilled meat or anything creamy.
Pro Tips for This Recipe:
- Get real char on the corn; pale kernels taste thin.
- Rinse the beans well so the dressing stays clean, not starchy.
- Add avocado only right before serving if you want it in the mix.
- Taste after chilling; cold food needs more salt than warm food.
Variations on This Dish:
- Street-Corn Style: Add mayo, cotija, and chili powder.
- Quinoa Bowl: Fold in 1 cup cooked quinoa for a more filling side.
- Peach-Corn Swap: Use diced ripe peaches for a sweeter version.
Common Mistakes to Avoid with This Dish:
- Skipping the char: Plain corn makes the whole bowl flatter.
- Using too much onion: It can overpower the beans and lime.
- Serving it warm and watery: Let it cool first so the flavors hold together.
8. Deviled Eggs with Pickle Relish
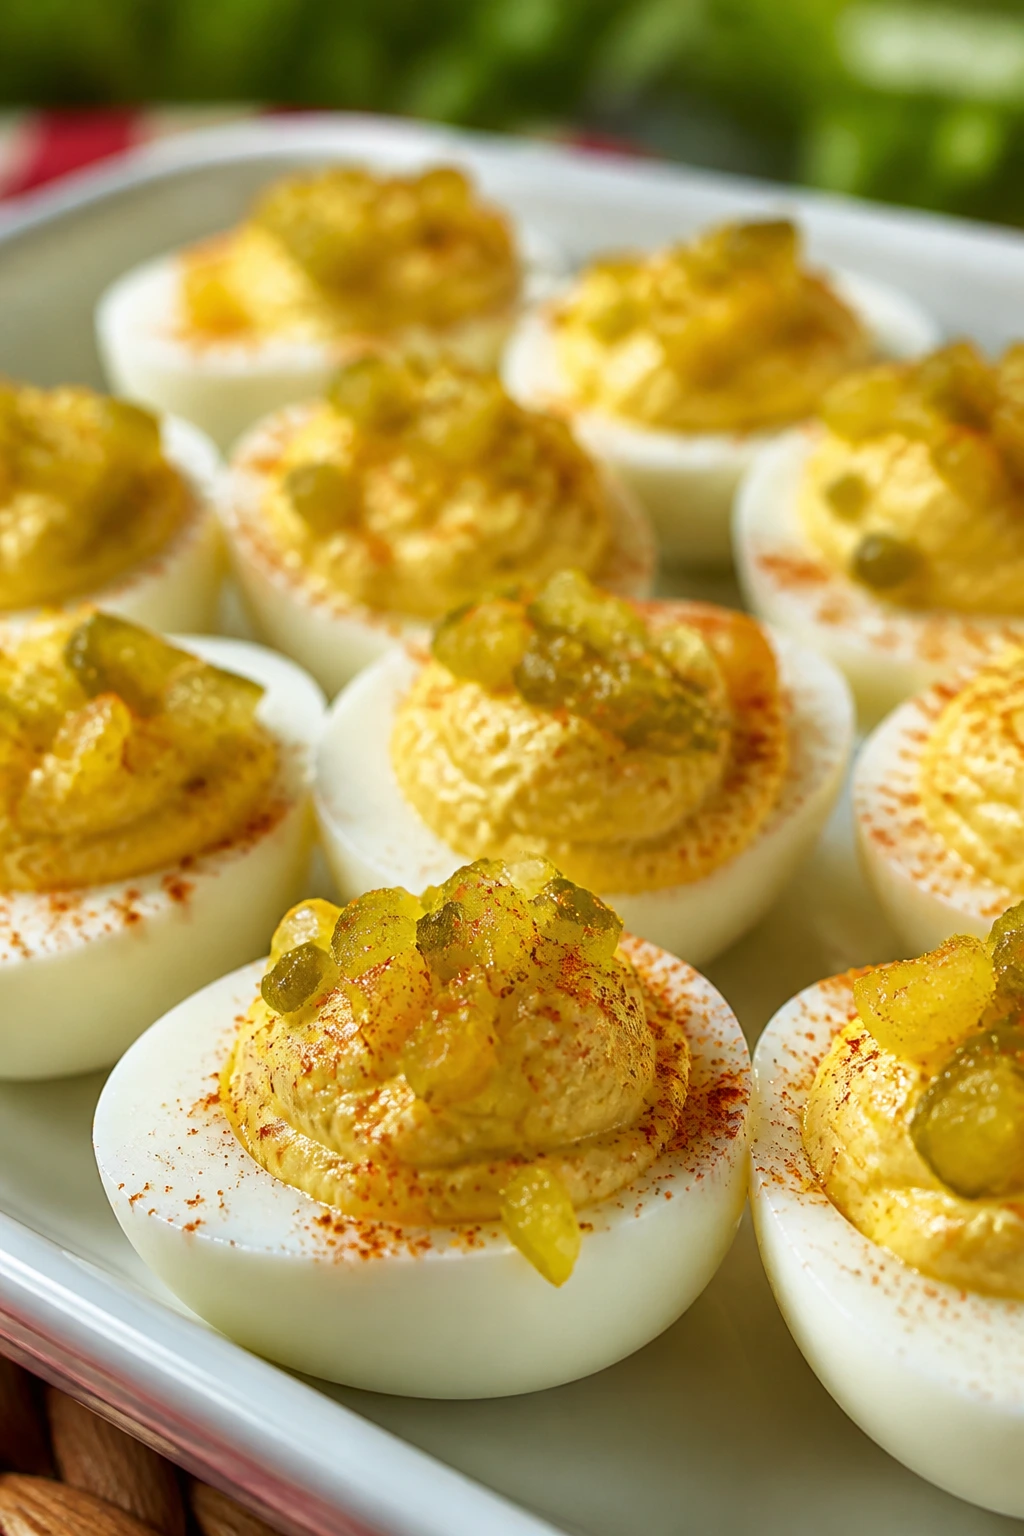
Deviled eggs disappear quickly at a picnic because they hit that sweet spot between rich and sharp. The pickle relish gives the filling a little snap, and paprika on top keeps the tray from looking too neat to eat.
Why It Works: Egg yolks hold mayo and mustard well, so the filling stays smooth even after chilling. A cold beer or crisp cider works because the vinegar in the relish keeps the eggs from feeling heavy.
Key Ingredients:
- 12 large eggs
- 1/4 cup mayonnaise
- 1 tablespoon Dijon mustard
- 1 tablespoon pickle relish, drained
- 1 teaspoon white vinegar
- 1/4 teaspoon kosher salt
- 1/4 teaspoon black pepper
- Paprika and chopped chives for topping
Quick Steps:
- Hard-boil the eggs, then chill them in ice water until cool.
- Peel and halve the eggs lengthwise.
- Scoop out the yolks and mash them with mayo, mustard, relish, vinegar, salt, and pepper.
- Pipe or spoon the filling back into the whites.
- Dust with paprika and chives, then chill until serving.
Equipment for This Recipe:
- Saucepan
- Mixing bowl
- Piping bag or spoon
- Egg tray or small container
How to Serve This Dish: Nest the eggs on a chilled tray so they don’t slide around in the cooler. They’re strong beside salty chips, cured meat, or a cold drink with a little bitter bite.
Pro Tips for This Recipe:
- Use eggs that are a few days old if you can; they peel more easily.
- Mash the yolks until they’re smooth or the filling feels grainy.
- Drain the relish well so the filling doesn’t loosen.
- Chill the filled eggs before packing so they hold their shape.
Variations on This Dish:
- Curry Version: Add 1/2 teaspoon curry powder for a warm note.
- Bacon Topper: Sprinkle crisp bacon over the finished eggs.
- Avocado Filling: Swap half the mayo for avocado if you want a greener filling.
Common Mistakes to Avoid with This Dish:
- Overcooking the eggs: Gray yolks and rubbery whites are hard to forgive.
- Leaving them warm too long: The filling softens and the texture gets messy.
- Using relish straight from the jar without draining: The mixture turns watery.
9. Ham and Swiss Pinwheels
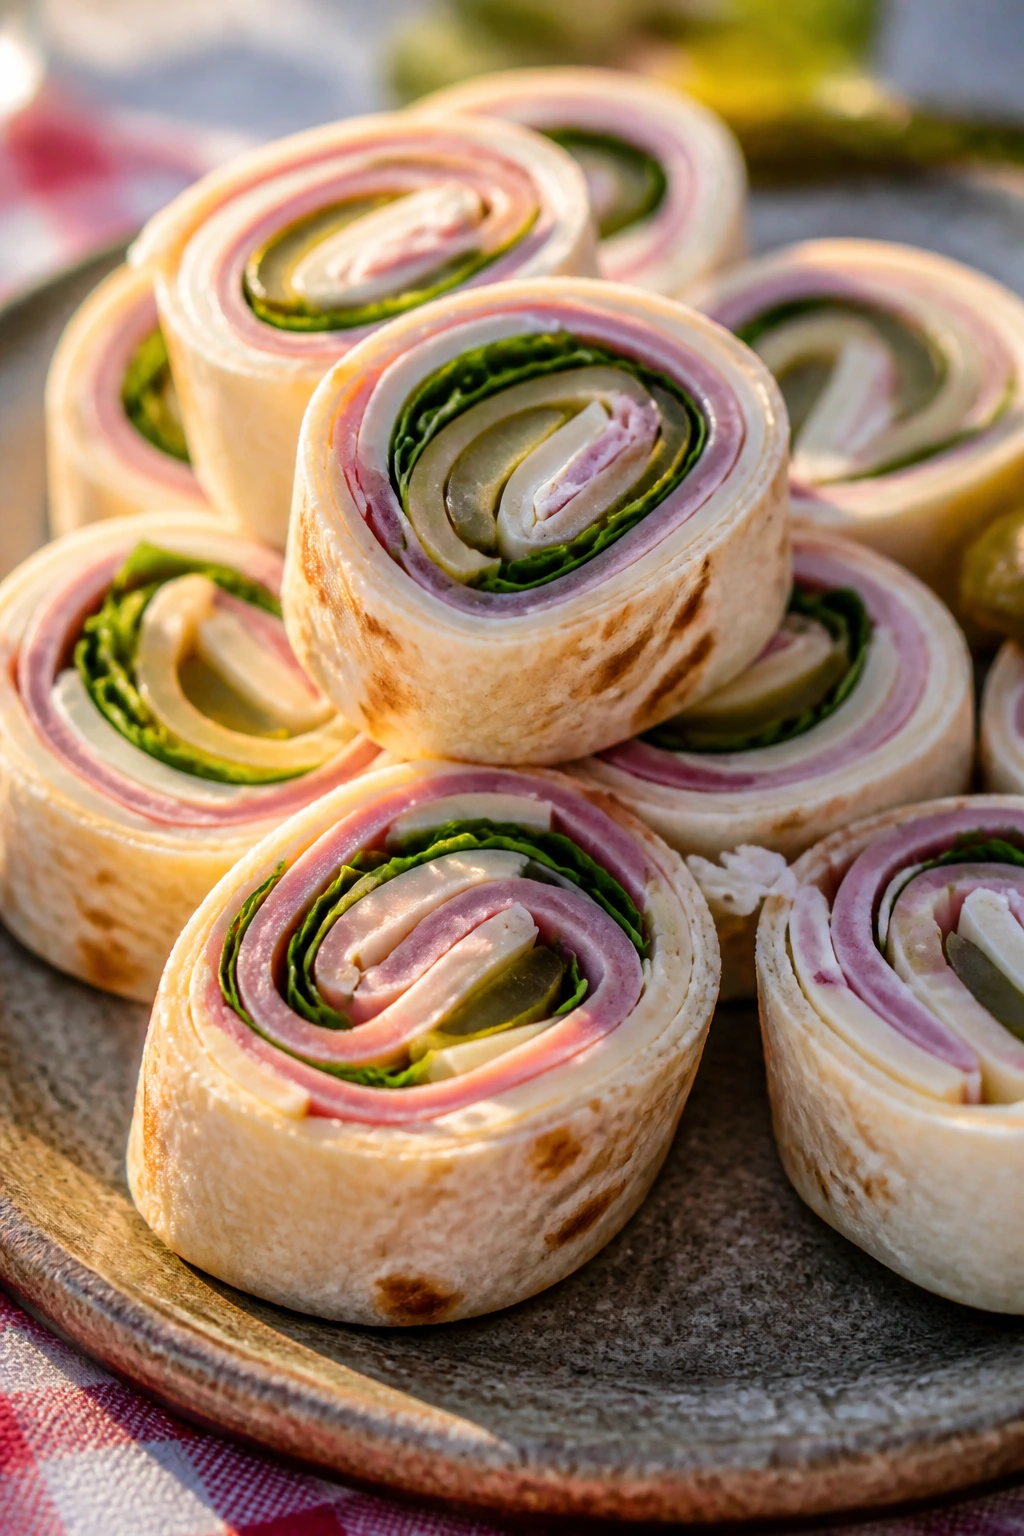
Ham and Swiss pinwheels are sturdy, salty, and easy to stack in a container without them becoming a pile of regret. The mustard, cream cheese, and pickles give the filling enough bite to stay interesting after a short chill.
Why It Works: Tortillas keep the shape neat, while Swiss cheese brings a mellow, nutty note that doesn’t fight the ham. A cold ginger ale or lager works because the pickles and mustard already bring enough sharpness.
Key Ingredients:
- 4 large flour tortillas
- 6 oz cream cheese, softened
- 1 tablespoon Dijon mustard
- 1 teaspoon honey
- 8 oz thin-sliced ham
- 6 oz Swiss cheese, thinly sliced
- 1 cup baby spinach, packed
- 1/4 cup sliced pickles, patted dry
Quick Steps:
- Mix the cream cheese, Dijon, and honey.
- Spread the mixture over each tortilla.
- Layer on ham, Swiss, spinach, and pickles.
- Roll tightly, wrap, and chill for 1 hour.
- Slice into 1-inch rounds.
Equipment for This Recipe:
- Cutting board
- Mixing bowl
- Plastic wrap
- Sharp serrated knife
How to Serve This Dish: Serve the rounds cut side up and keep extra pickles on the side. They fit into a picnic box better than a full sandwich and pair nicely with a cold drink that has a little snap.
Pro Tips for This Recipe:
- Pat the pickles dry or the tortilla gets slick.
- Use thin cheese slices so the roll stays tight.
- Chill seam-side down if you’re short on time.
- Trim the ends before slicing; the clean center pieces look better.
Variations on This Dish:
- Roast Beef Swap: Use roast beef and horseradish cream instead of ham.
- Turkey and Cranberry: Swap in turkey and a thin layer of cranberry relish.
- Vegetarian Roll-Up: Use roasted peppers and sliced provolone.
Common Mistakes to Avoid with This Dish:
- Rolling too loosely: The pinwheels open when sliced.
- Using wet spinach: It makes the filling slide.
- Cutting before chilling: The spiral smears instead of staying clean.
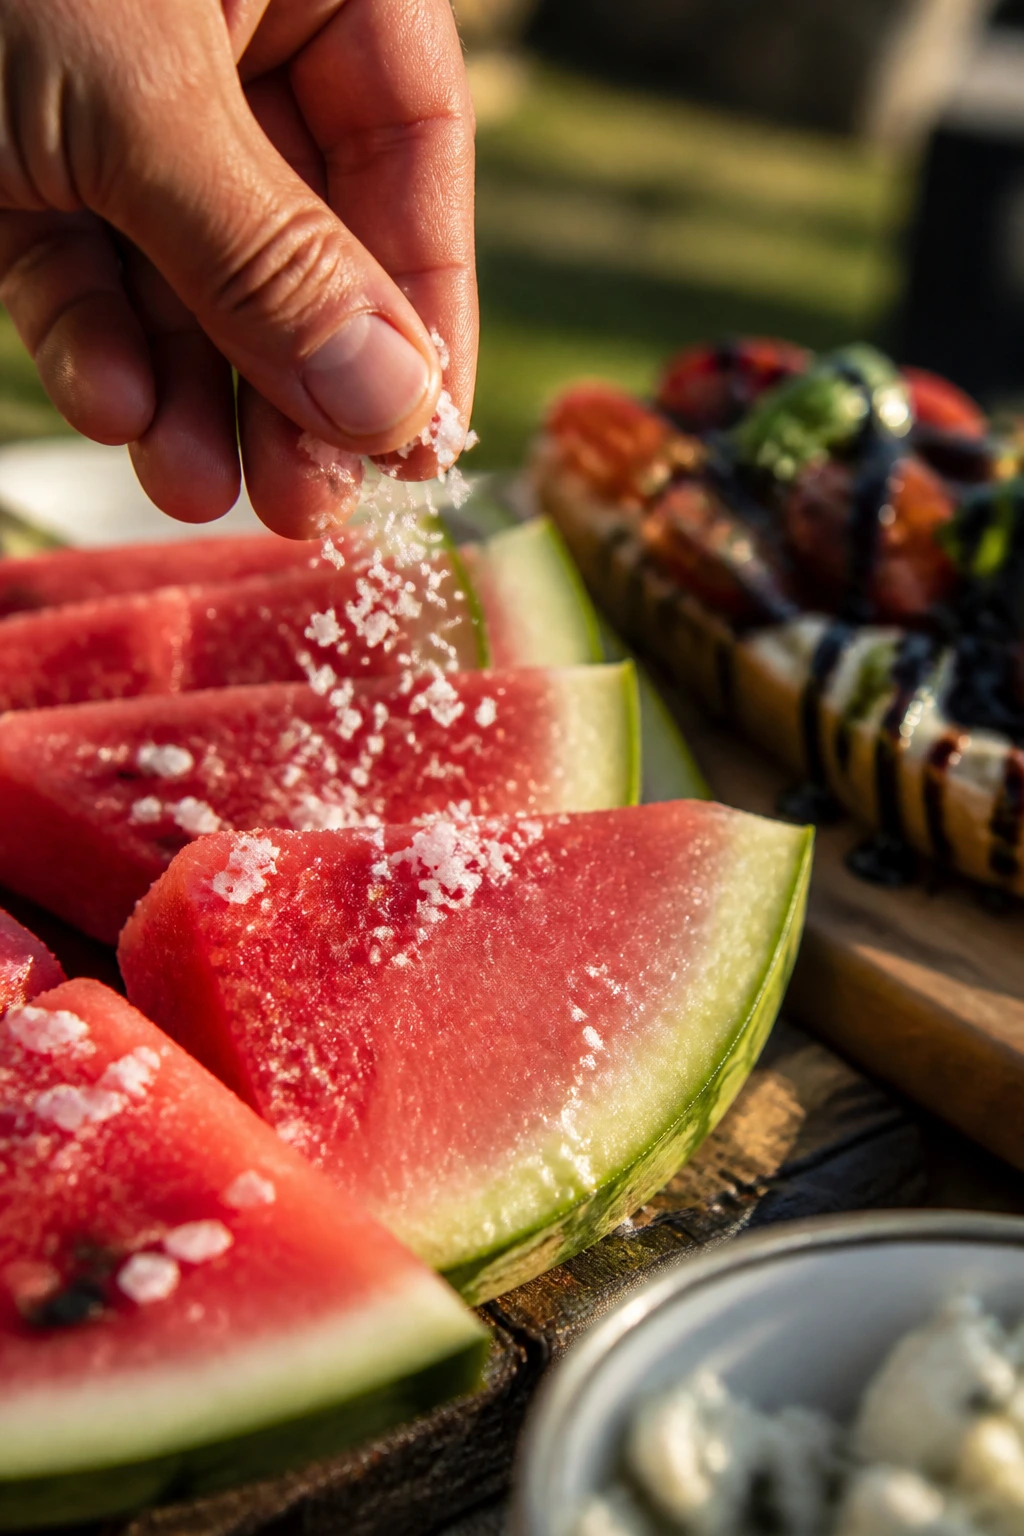
10. Watermelon, Feta, and Mint Salad
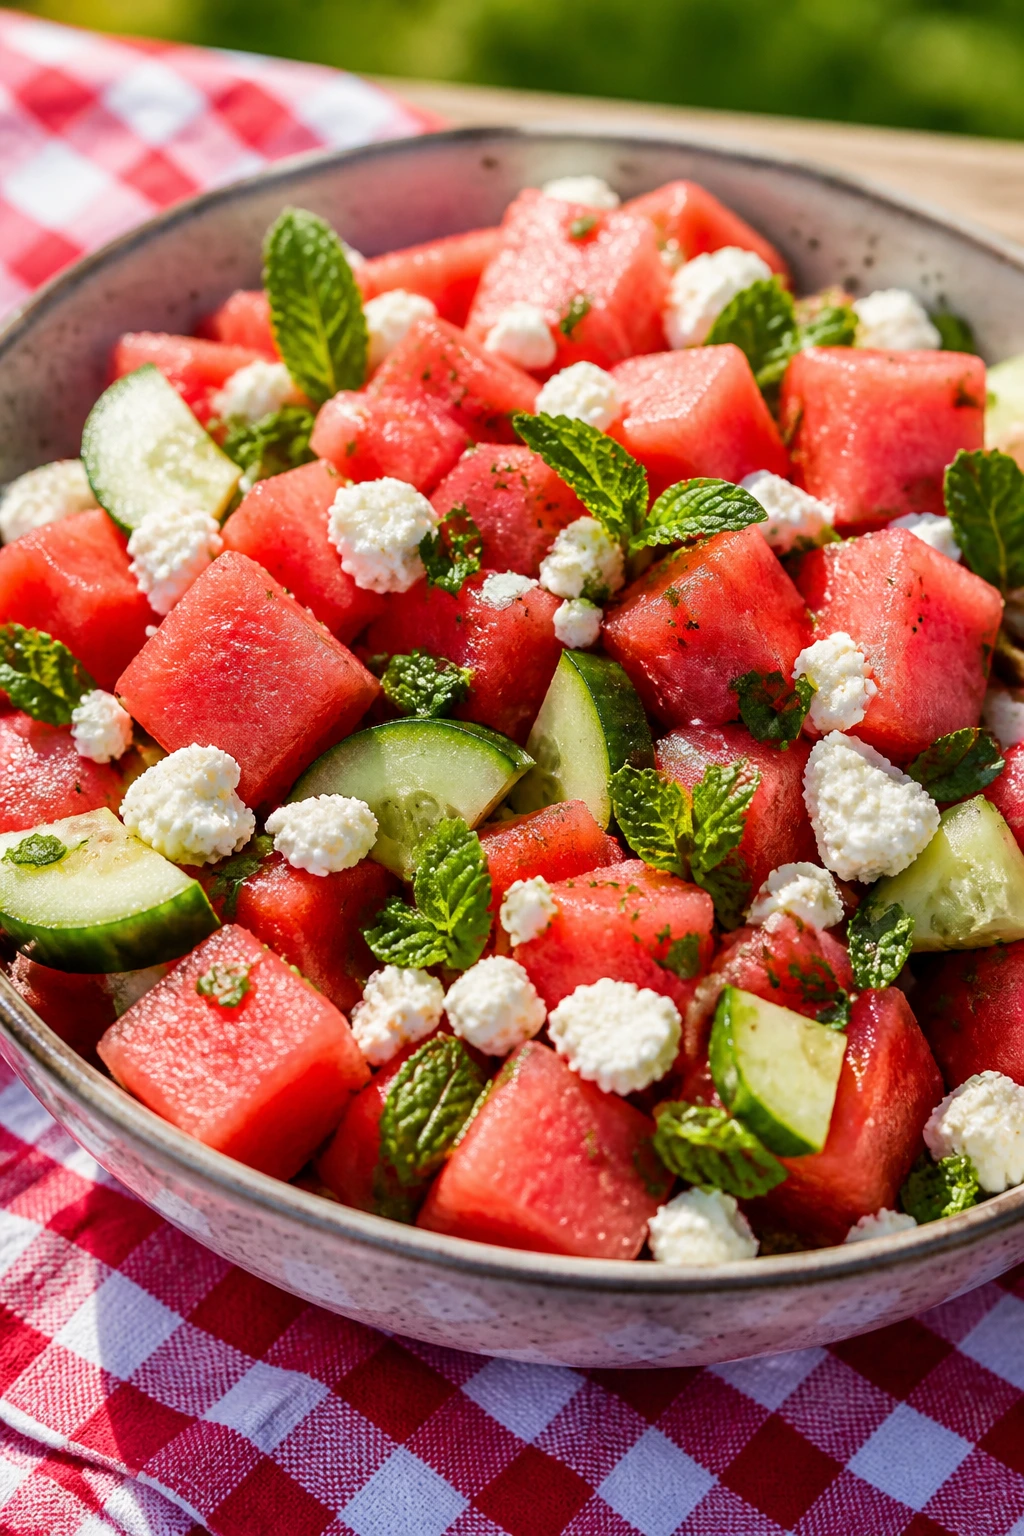
Cold watermelon on a hot day already feels like relief, and feta turns it into something more interesting than a fruit bowl. Mint keeps the whole thing from going soft, and a little salt makes the sweetness taste sharper.
Why It Works: Watermelon carries a lot of water, so it needs salty, creamy, and herbaceous elements to stay balanced. Sparkling water or a light spritz works because the salad is clean and refreshing rather than heavy.
Key Ingredients:
- 6 cups watermelon, cubed and chilled
- 1 cup feta, crumbled
- 1/4 cup fresh mint leaves, torn
- 1/2 cucumber, thinly sliced
- Juice of 1 lime
- 1 tablespoon olive oil
- Flaky salt
- Black pepper
Quick Steps:
- Cut the watermelon and chill it well.
- Combine the watermelon, cucumber, and mint in a large bowl.
- Drizzle with lime juice and olive oil.
- Add feta last and toss very gently.
- Finish with flaky salt and a pinch of black pepper.
Equipment for This Recipe:
- Sharp knife
- Large bowl
- Citrus juicer
- Serving spoon
How to Serve This Dish: Serve it cold in a shallow bowl so the feta stays on top and doesn’t sink. It’s a nice break between richer dishes and a crisp drink.
Pro Tips for This Recipe:
- Use watermelon that tastes sweet on its own; no amount of salt fixes a bland one.
- Add the feta at the last moment to keep the chunks intact.
- Keep the cucumber thin so it doesn’t dominate.
- Don’t overdo the lime or the salad starts tasting thin.
Variations on This Dish:
- Peach Swap: Use ripe peaches in place of half the watermelon.
- Basil Version: Replace mint with basil for a greener, softer note.
- Chili-Lime Finish: Add a pinch of chili flakes for heat.
Common Mistakes to Avoid with This Dish:
- Mixing it too early: The watermelon sheds juice and the bowl gets watery.
- Over-salting: Feta already brings salt.
- Using soft, mealy melon: The texture matters here more than in most fruit salads.
11. BBQ Meatball Sliders
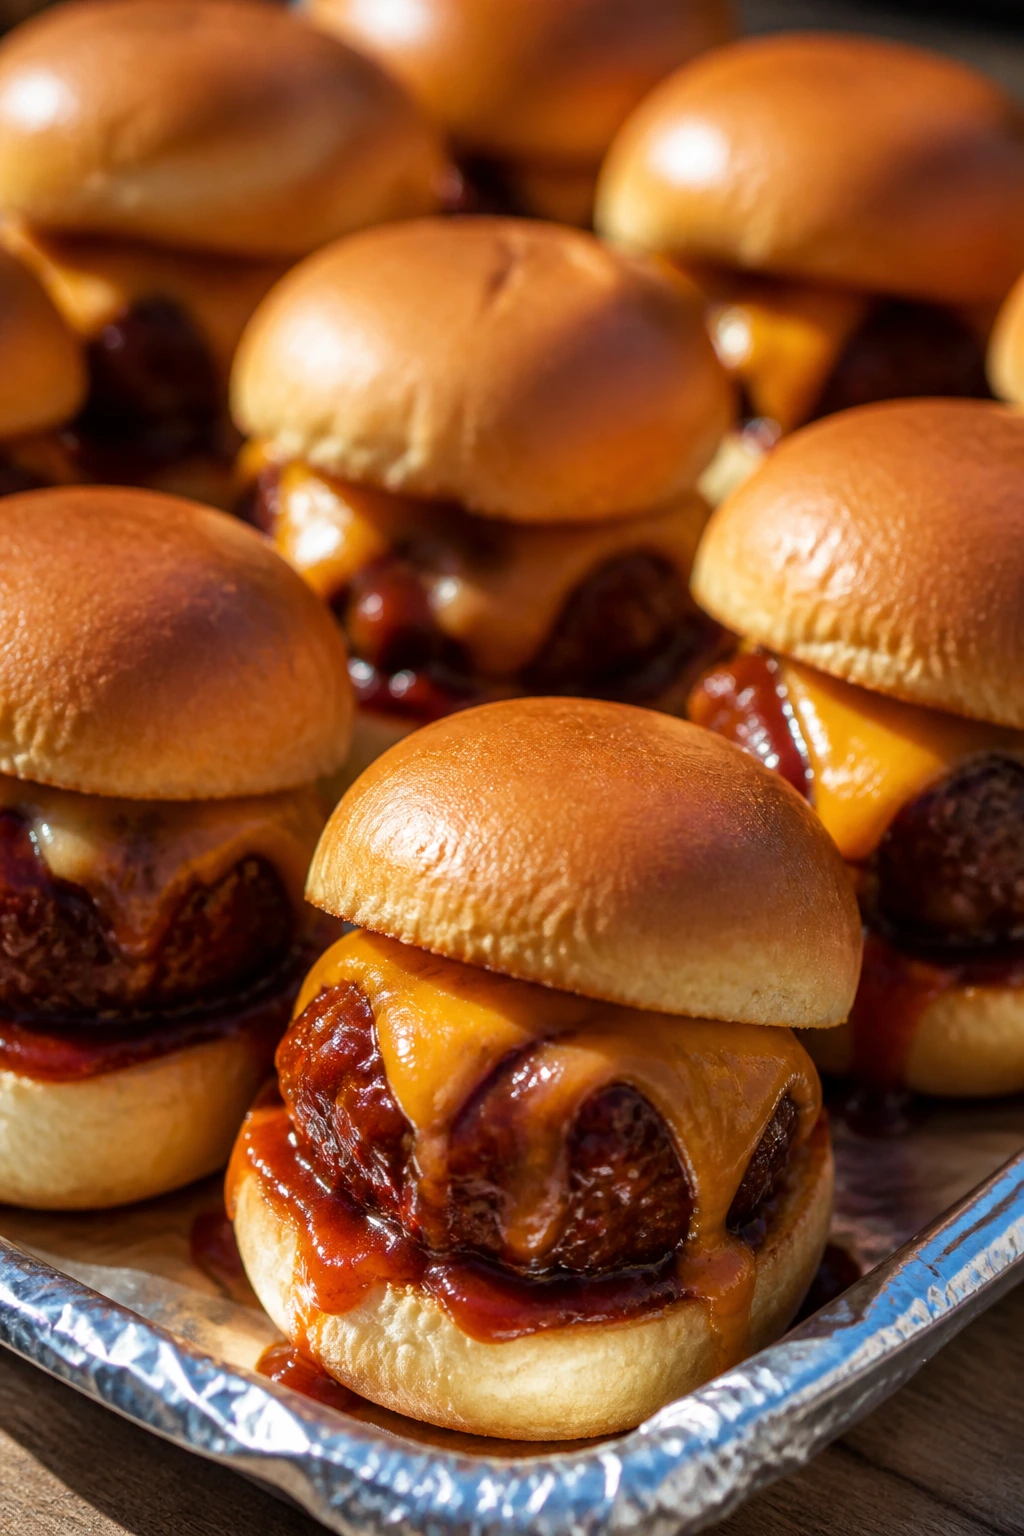
These are the kind of sliders that make people hover near the tray and pretend they’re “just passing by.” The meatballs soak up barbecue sauce, the rolls catch the drips, and the whole thing tastes like a cookout in miniature.
Why It Works: Meatballs hold their shape better than loose barbecue filling, so they travel cleanly. The sauce gives enough sweetness to work with root beer or cola, and a little cheddar on top keeps the slider from feeling one-note.
Key Ingredients:
- 1 lb ground beef
- 1/2 lb ground pork
- 1/2 cup breadcrumbs
- 1 egg
- 1 small onion, grated
- 1 teaspoon kosher salt
- 1/2 teaspoon black pepper
- 1 cup barbecue sauce
- 12 slider buns
- 1 cup shredded cheddar
Quick Steps:
- Mix the beef, pork, breadcrumbs, egg, onion, salt, and pepper until just combined.
- Form into 1-inch meatballs and bake at 400°F for 12 to 14 minutes.
- Toss the meatballs in barbecue sauce while they’re hot.
- Split the buns, add cheese and meatballs, then warm at 350°F for 5 minutes.
- Keep them wrapped until serving so they stay soft.
Equipment for This Recipe:
- Rimmed baking sheet
- Mixing bowl
- Small scoop or spoon
- Foil
How to Serve This Dish: Pack the sliders in foil and let people grab two if they want them. They go well beside crunchy slaw or pickles, and a cold soda is the obvious drink here.
Pro Tips for This Recipe:
- Mix the meat only until it holds; overworking makes the meatballs dense.
- Make the meatballs the same size so they bake evenly.
- Sauce them while hot so the glaze clings instead of sliding off.
- Keep a little extra sauce for brushing on the buns.
Variations on This Dish:
- Chipotle BBQ: Stir chipotle into the sauce for a smoky kick.
- Turkey Meatballs: Use ground turkey and add a splash of olive oil for moisture.
- Vegetarian Version: Use lentil or mushroom meatballs with the same sauce.
Common Mistakes to Avoid with This Dish:
- Making giant meatballs: They’re hard to eat in slider form.
- Using dry buns: They crack when you bite into them.
- Letting the sliders sit uncovered: The tops go stale fast.
12. Sausage and Peppers Hoagie Bites
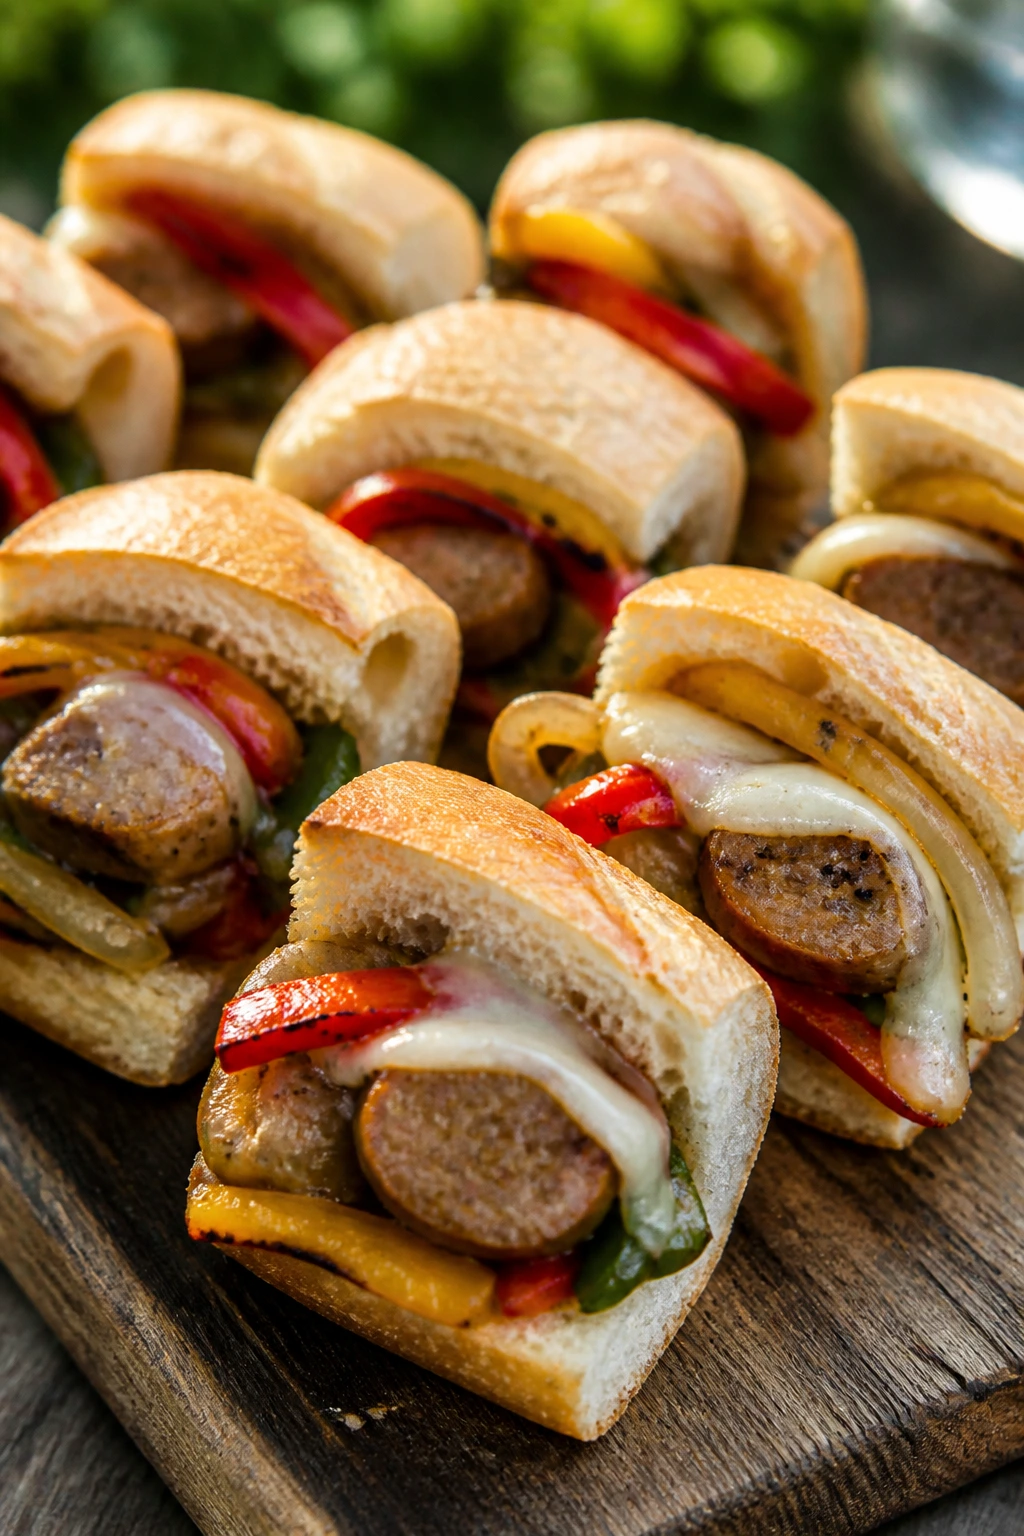
Sausage and peppers is already picnic-friendly in spirit, but mini hoagie bites make it easier to handle with one hand and a drink in the other. The peppers bring sweetness, the sausage brings salt and fat, and the rolls catch every bit of the juices.
Why It Works: The filling is sturdy, reheats well, and still tastes good warm or room temperature. A cold lager or ginger beer works because it cuts through the richness without flattening the pepper flavor.
Key Ingredients:
- 1 lb Italian sausage links
- 2 bell peppers, sliced
- 1 large onion, sliced
- 2 tablespoons olive oil
- 2 garlic cloves, minced
- 1 teaspoon Italian seasoning
- 12 mini hoagie rolls
- 6 slices provolone
Quick Steps:
- Brown the sausage in a skillet until cooked through, then slice it.
- Sauté the peppers and onion in olive oil until soft and lightly browned.
- Add garlic and Italian seasoning, then toss the sausage back in.
- Split the rolls, fill with sausage and peppers, top with provolone, and warm under the broiler for 1 to 2 minutes.
- Wrap loosely for transport.
Equipment for This Recipe:
- Large skillet
- Sheet pan
- Tongs
- Knife
How to Serve This Dish: Serve the bites on a tray with napkins stacked nearby because these are juicy. They fit well with chips, potato salad, and a cold drink that can stand up to sausage grease.
Pro Tips for This Recipe:
- Slice the peppers thin so they soften at the same pace as the sausage.
- Drain extra fat from the skillet before filling the rolls.
- Use crusty mini rolls if you want them to hold longer.
- Don’t broil too long or the cheese goes from melted to leathery.
Variations on This Dish:
- Hot Sausage Version: Use spicy sausage and add red pepper flakes.
- Chicken Sausage Swap: Lighter, still sturdy, still picnic-ready.
- Mushroom Pepper Version: Swap sausage for thick sliced mushrooms and extra provolone.
Common Mistakes to Avoid with This Dish:
- Using soggy rolls: They collapse under the filling.
- Skipping the browning step: You lose the good sausage flavor.
- Packing them while steaming hot: The bread softens too much.
13. Shrimp Cocktail Skewers
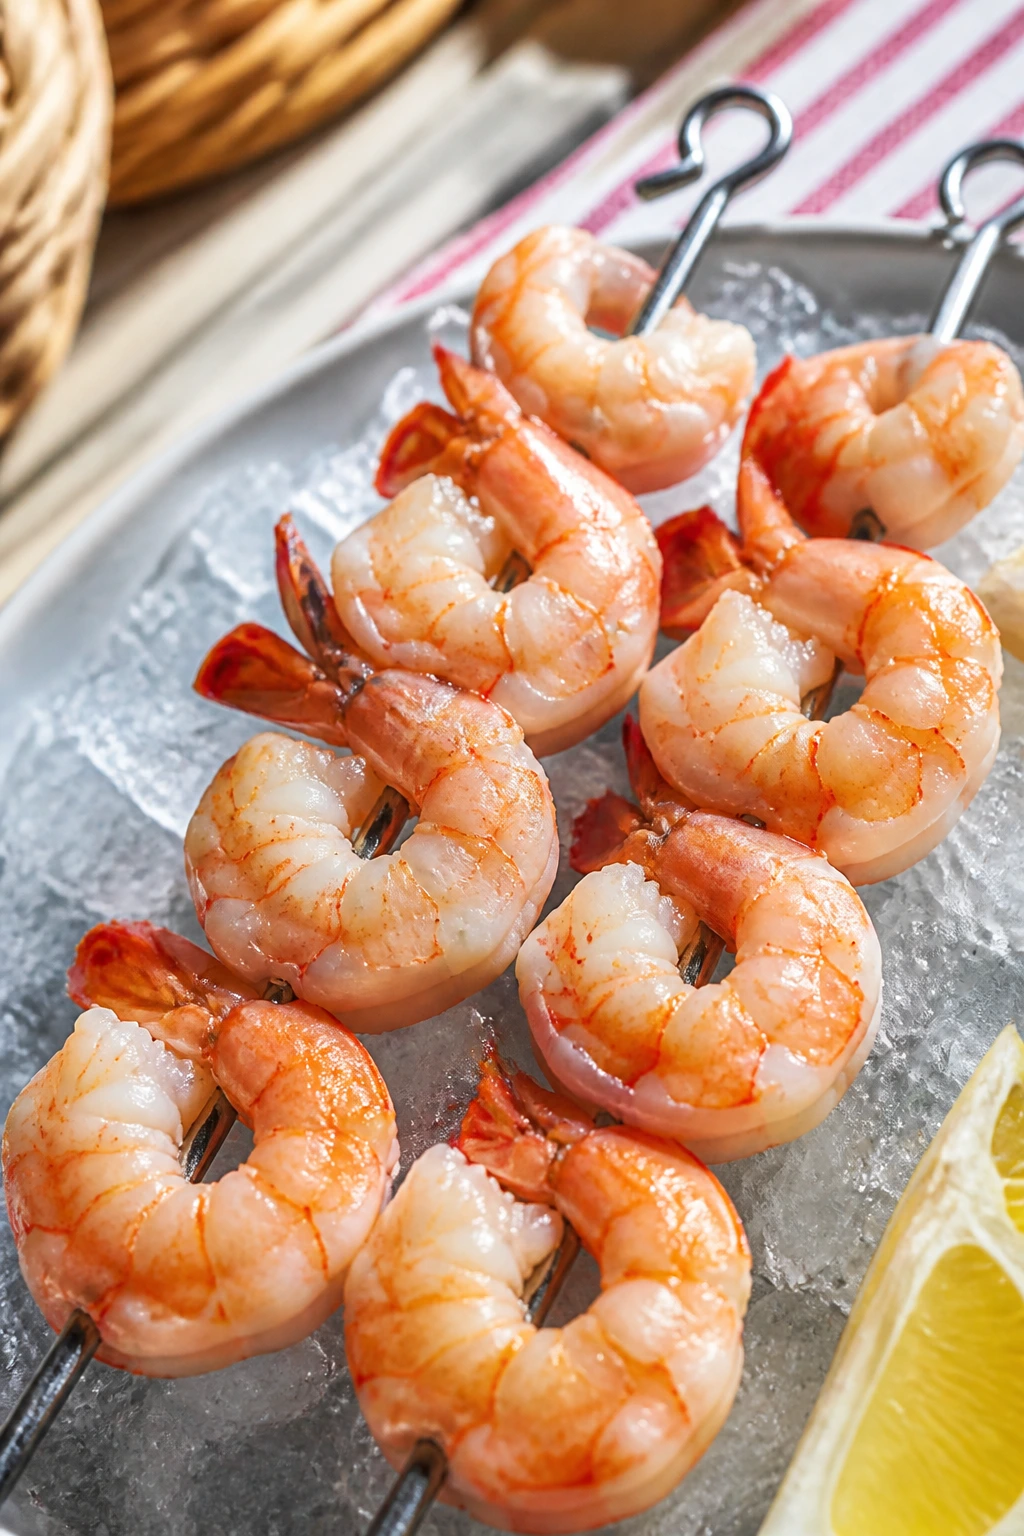
Shrimp cocktail feels fancier than picnic food on paper, but on a skewer it’s easy, tidy, and meant for standing around with a cold drink. The cold sauce, lemon, and firm shrimp give you a sharp bite that cuts through a warm afternoon.
Why It Works: Shrimp cooks fast, chills fast, and doesn’t need a long list of ingredients. The clean, briny flavor works well with dry cider, sparkling water, or even a light pilsner.
Key Ingredients:
- 1 1/2 lb large shrimp, peeled and deveined
- 1 tablespoon olive oil
- 1 teaspoon kosher salt
- 1/2 teaspoon paprika
- 1 lemon, cut into wedges
- 1 cup cocktail sauce
- Chopped parsley
- Wooden or metal skewers
Quick Steps:
- Toss the shrimp with olive oil, salt, and paprika.
- Thread 4 to 5 shrimp onto each skewer.
- Grill or broil for 2 to 3 minutes per side, just until pink and curled.
- Chill on a tray, then serve with cocktail sauce and lemon.
- Keep the sauce cold until the last minute.
Equipment for This Recipe:
- Grill or broiler
- Skewers
- Tray
- Tongs
How to Serve This Dish: Arrange the skewers over ice or on a chilled platter if the picnic is running long. They pair well with something fizzy and citrusy.
Pro Tips for This Recipe:
- Use large shrimp so they don’t overcook in a blink.
- Pull them as soon as they turn opaque; rubbery shrimp are hard to rescue.
- Keep the cocktail sauce cold.
- A little paprika adds color without making the shrimp taste smoky.
Variations on This Dish:
- Old Bay Shrimp: Swap paprika for Old Bay seasoning.
- Spicy Sauce: Stir horseradish or hot sauce into the cocktail sauce.
- Garlic-Lime Version: Finish with lime zest and minced garlic.
Common Mistakes to Avoid with This Dish:
- Overcooking the shrimp: They tighten and go chalky.
- Using tiny shrimp: They dry out before the outside gets any color.
- Leaving the sauce warm: Cocktail sauce tastes sharper when it’s cold.
14. Whipped Feta Dip with Crackers

Whipped feta is the kind of dip that disappears because it tastes sharper than it looks. The cream cheese smooths the saltiness, the lemon keeps it bright, and the whole thing becomes a very useful reason to keep crackers nearby.
Why It Works: Feta alone can be grainy, but whipping it with cream cheese or yogurt gives you a spread that travels well and tastes good chilled. It’s a smart partner for pale ale, sparkling water, or a cucumber-heavy drink.
Key Ingredients:
- 8 oz block feta
- 4 oz cream cheese, softened
- 1/4 cup Greek yogurt
- 1 tablespoon olive oil
- 1 teaspoon lemon juice
- 1 small garlic clove
- 1 tablespoon chopped dill
- Crackers, cucumber rounds, and bell pepper strips
Quick Steps:
- Blend the feta, cream cheese, yogurt, olive oil, lemon juice, and garlic until smooth.
- Spoon into a bowl and swirl the top with a spoon.
- Finish with dill and a drizzle of olive oil.
- Chill for 20 minutes if you want it firmer.
Equipment for This Recipe:
- Food processor or mixer
- Bowl
- Spoon
- Serving knife or cracker tray
How to Serve This Dish: Put the dip in the middle of a tray and surround it with crackers and vegetables so it looks like a small spread, not just a dip. It’s a good pause between fried food and richer sandwiches.
Pro Tips for This Recipe:
- Use block feta, not crumbles, for a smoother texture.
- Let the cheese warm a little before whipping.
- Balance the salt with lemon; don’t skip it.
- Add a drizzle of honey if you want a sweet edge.
Variations on This Dish:
- Roasted Red Pepper Topper: Spoon chopped roasted peppers over the dip.
- Herb Garden Version: Add parsley, mint, and chives.
- Dairy-Free Swap: Use a cashew-based cheese spread with lemon and salt.
Common Mistakes to Avoid with This Dish:
- Starting with cold cheese: It stays gritty.
- Serving it without enough acid: Feta needs lemon or vinegar.
- Pairing it only with soft bread: You want crunch to balance the texture.
15. Tuna Salad Cucumber Boats
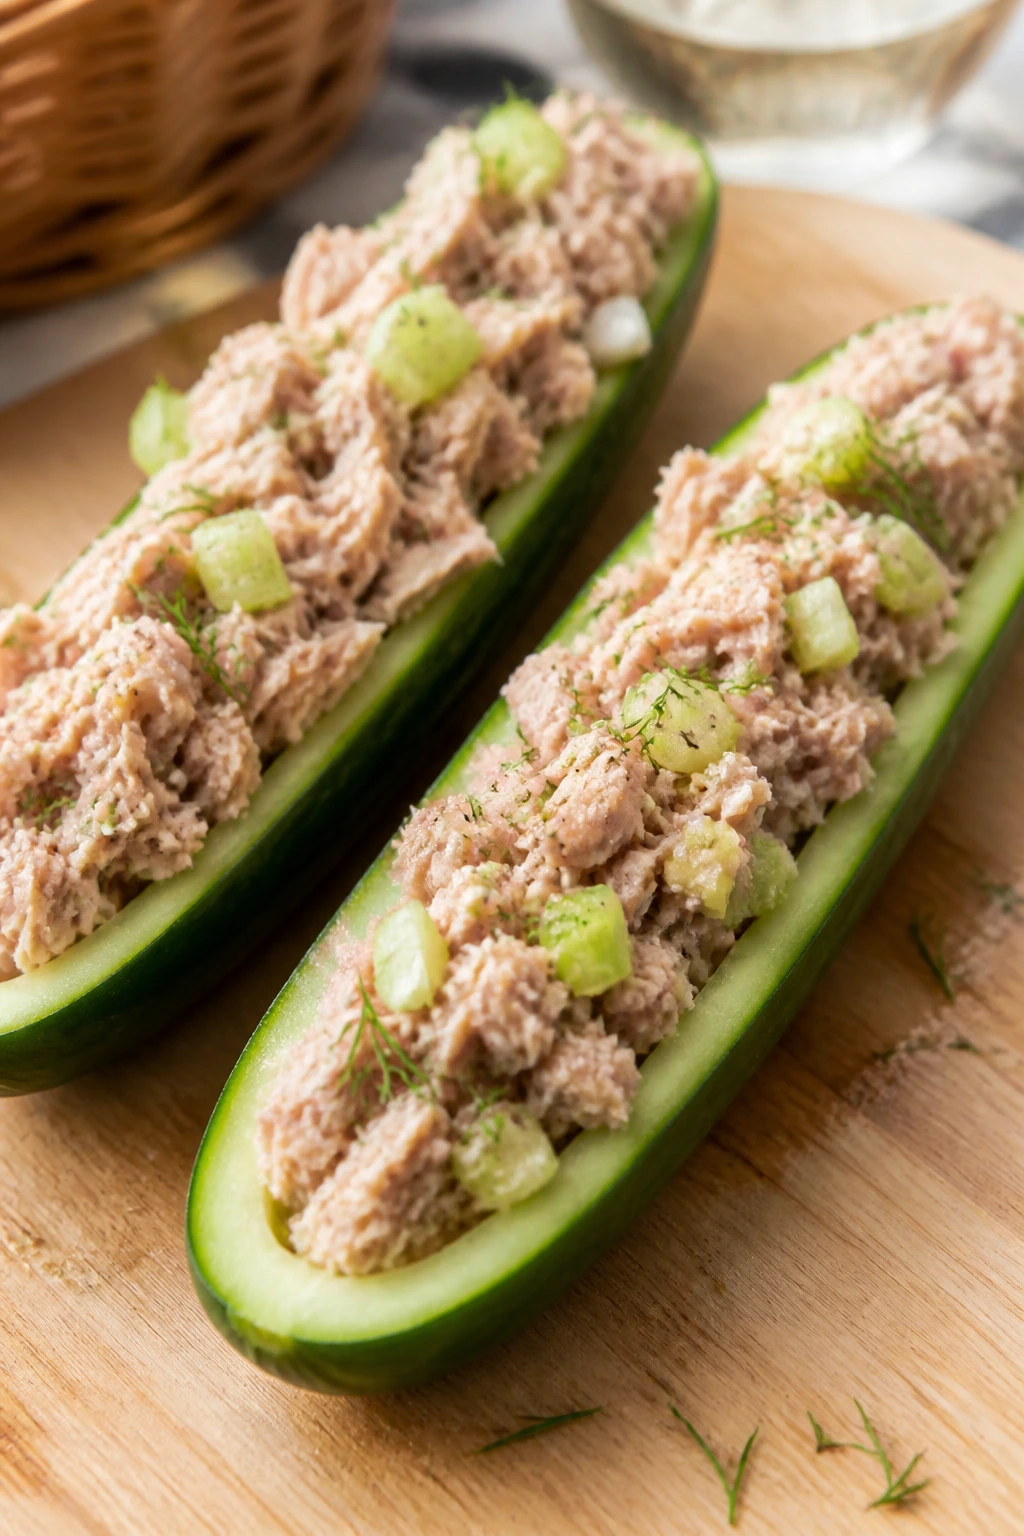
Tuna salad gets a better life when it leaves the sandwich behind. Cucumber boats keep it cold, crisp, and easy to eat, and they’re especially useful when you want something that feels light without being flimsy.
Why It Works: Cucumber gives you a built-in container, and the tuna salad stays cool enough to pack ahead. It pairs nicely with sparkling water, lemonade, or any cold drink that doesn’t compete with the dill and lemon.
Key Ingredients:
- 2 cans tuna, drained well
- 1/4 cup mayonnaise
- 1 tablespoon Dijon mustard
- 1 celery stalk, finely diced
- 1 tablespoon chopped dill
- 1 teaspoon lemon juice
- 2 English cucumbers, halved lengthwise and seeded
- Salt and black pepper
- Optional capers
Quick Steps:
- Mix the tuna, mayo, mustard, celery, dill, lemon juice, salt, and pepper.
- Halve the cucumbers and scoop out the seeds with a spoon.
- Fill the cucumber boats with the tuna salad.
- Chill until ready to serve.
Equipment for This Recipe:
- Mixing bowl
- Spoon
- Knife
- Cutting board
How to Serve This Dish: Cut the boats into shorter sections if you want them to act like finger food. They’re a useful break from bread-heavy picnic plates.
Pro Tips for This Recipe:
- Drain the tuna very well or the filling loosens.
- Use English cucumbers because the skin is thin and the seeds are smaller.
- Make the filling a little more seasoned than you would for a sandwich; cold food dulls salt.
- Add capers if you want extra brine.
Variations on This Dish:
- Avocado Tuna: Replace half the mayo with mashed avocado.
- Yogurt Dill Version: Swap mayo for Greek yogurt.
- Chickpea “Tuna”: Mash chickpeas for a vegetarian filling.
Common Mistakes to Avoid with This Dish:
- Leaving the seeds in the cucumber: The boats get watery.
- Over-mixing the tuna: It turns paste-like.
- Packing too far in advance without chilling: The filling softens fast in warm air.
16. Tomato Pie Squares
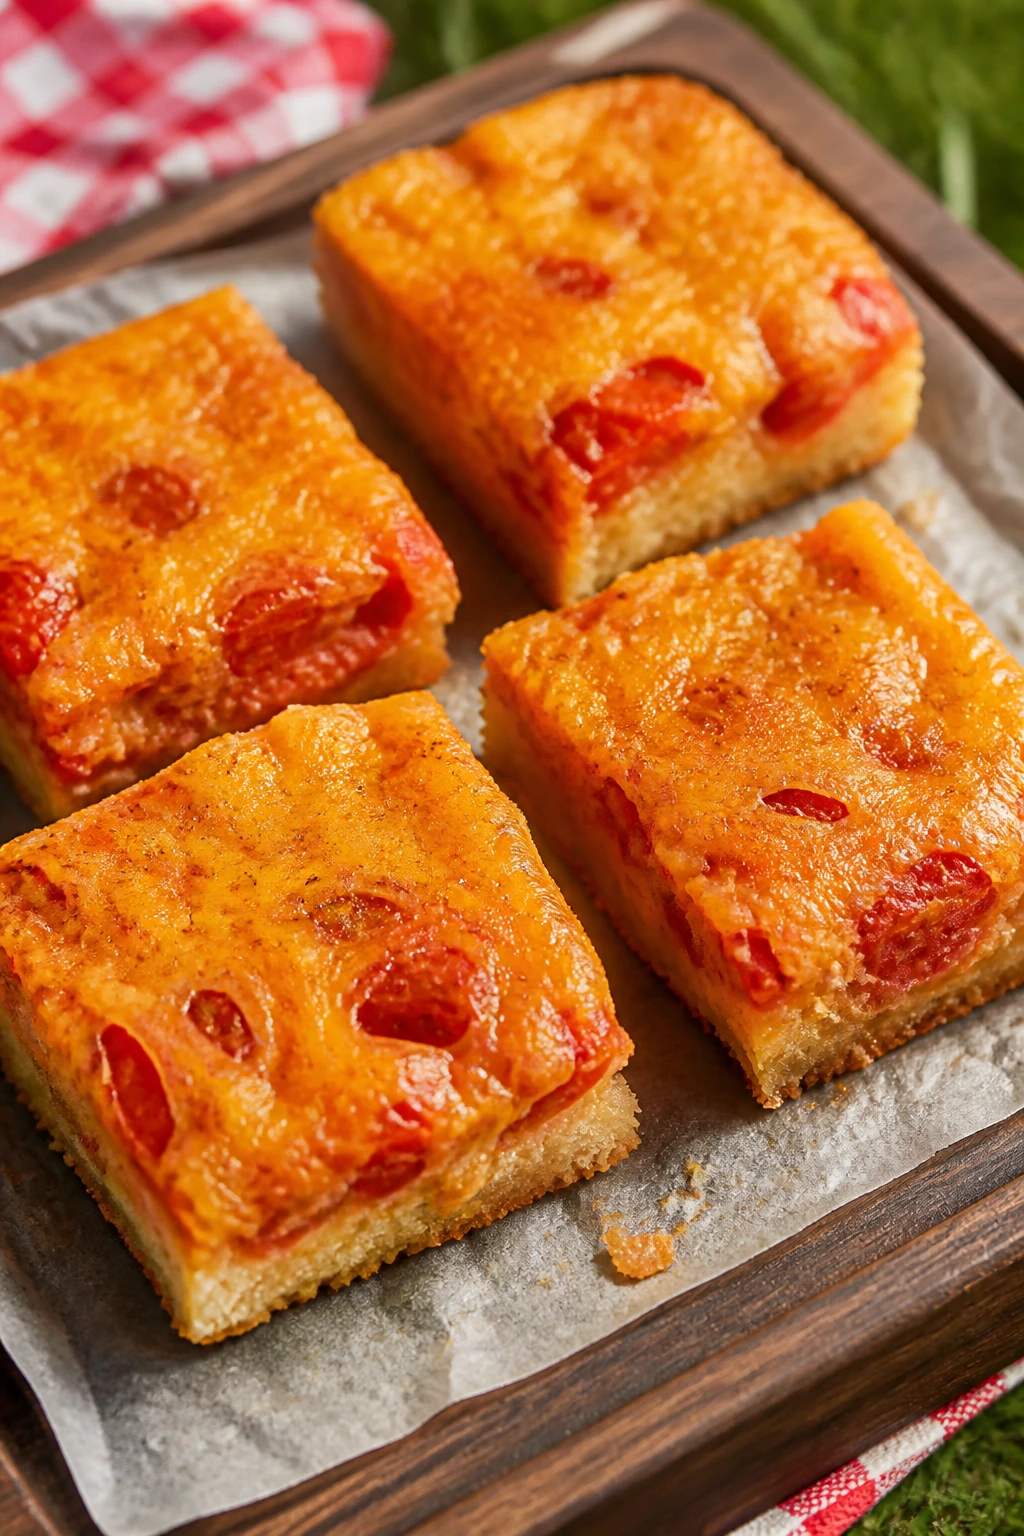
Tomato pie is the sort of picnic food that makes people pause before the first bite. The tomatoes stay juicy, the cheese melts into the mayo layer, and the crust turns each square into something that feels more deliberate than a simple slice of pie.
Why It Works: Salted, drained tomatoes keep the crust from going soggy, and the squares travel better than loose wedges. Lemonade or iced tea works with the sweet tomato flavor and the rich cheese layer.
Key Ingredients:
- 1 sheet pie dough or 1 refrigerated pie crust, pressed into a 9×13-inch pan
- 3 medium tomatoes, sliced
- 1 teaspoon salt
- 1/2 cup mayonnaise
- 1 cup shredded cheddar
- 1/4 cup grated onion
- 1/4 cup chopped basil
- Black pepper
Quick Steps:
- Blind bake the crust at 375°F until lightly golden.
- Salt the tomato slices and let them drain on paper towels for 20 minutes.
- Mix the mayo, cheddar, onion, basil, and pepper.
- Layer the tomatoes in the crust and spread the cheese mixture over the top.
- Bake 20 to 25 minutes more until bubbly and browned at the edges.
- Cool completely, then cut into squares.
Equipment for This Recipe:
- 9×13-inch pan
- Baking sheet or pie weights
- Mixing bowl
- Sharp knife
How to Serve This Dish: Cut the pie into squares instead of wedges so it packs in a box and doesn’t fall apart on a plate. It sits nicely beside a crisp drink and a simple green salad.
Pro Tips for This Recipe:
- Drain the tomatoes well; this is the whole game.
- Let the pie cool before slicing or the filling runs.
- Use sharp cheddar so the flavor doesn’t get buried.
- A pinch of black pepper on top helps the tomatoes taste brighter.
Variations on This Dish:
- Corn and Tomato Pie: Add 1/2 cup cooked corn.
- Mozzarella Swap: Use mozzarella and a little parmesan instead of cheddar.
- Gluten-Free Crust: Use a GF pie crust that browns firmly.
Common Mistakes to Avoid with This Dish:
- Skipping the tomato drain: You’ll get a soggy crust.
- Cutting while hot: The squares collapse.
- Using bland tomatoes: The filling depends on good tomato flavor.
17. Bacon Cheddar Biscuits

These biscuits smell like somebody made a wise decision. Bacon, cheddar, butter, and chives give you a savory bite that can sit in a basket beside cold brew, sweet tea, or lemonade without feeling out of place.
Why It Works: The biscuit holds together better than a soft roll, which makes it useful for picnics where food gets passed around. The sharp cheddar and crisp bacon give enough salt to play nicely with a cold drink that has a little sweetness.
Key Ingredients:
- 2 cups all-purpose flour
- 1 tablespoon baking powder
- 1/2 teaspoon baking soda
- 1 teaspoon kosher salt
- 6 tablespoons cold butter, cubed
- 1 cup shredded cheddar
- 1/2 cup cooked bacon, chopped
- 2 tablespoons chopped chives
- 3/4 cup buttermilk
Quick Steps:
- Whisk the flour, baking powder, baking soda, and salt.
- Cut in the cold butter until the mixture looks like coarse crumbs.
- Fold in cheddar, bacon, and chives.
- Stir in the buttermilk just until combined.
- Scoop onto a baking sheet and bake at 425°F for 15 to 18 minutes until browned on top.
Equipment for This Recipe:
- Mixing bowl
- Baking sheet
- Spoon or scoop
- Pastry cutter or fork
How to Serve This Dish: Serve them warm if you can, but they’re sturdy enough at room temperature. Split them and tuck in a little butter if the table has room.
Pro Tips for This Recipe:
- Keep the butter cold so the biscuits stay flaky.
- Don’t overmix; a rough dough gives a better biscuit.
- Crisp the bacon well so it doesn’t soften the crumb.
- Bake close together for softer sides, farther apart for more crust.
Variations on This Dish:
- Jalapeño Cheddar: Add chopped jalapeños for heat.
- Sausage Biscuit Version: Swap bacon for cooked breakfast sausage.
- Scallion Drop Biscuit: Skip shaping and spoon the dough in mounds.
Common Mistakes to Avoid with This Recipe:
- Using warm butter: The biscuits bake up dense.
- Adding too much liquid: The dough spreads instead of rising.
- Opening the oven too early: The tops need steady heat to puff.
18. Cold Sesame Noodle Salad
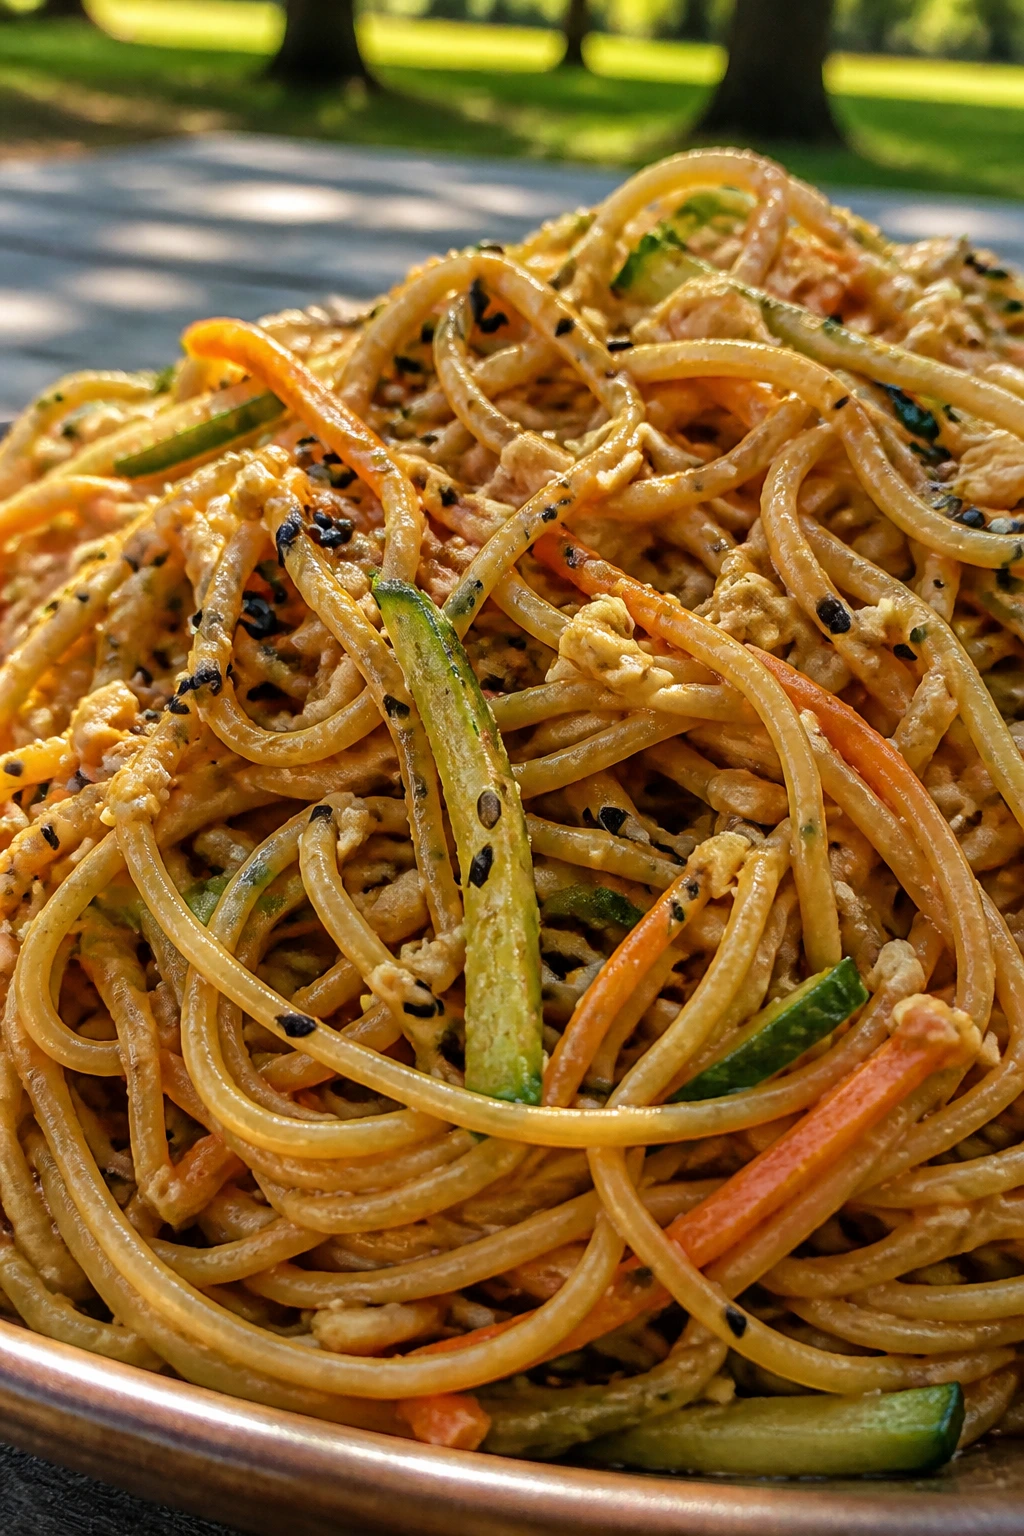
Cold sesame noodles are the picnic dish for people who like something slurpy but still neat enough to pack. The sauce clings to the noodles, the cucumber keeps it crisp, and the peanut-sesame mix tastes even better after a short chill.
Why It Works: The sauce hits sweet, salty, nutty, and tangy at once, which means it holds attention even after sitting in a cooler. I like it with iced green tea because the drink resets your mouth between bites.
Key Ingredients:
- 12 oz spaghetti or soba noodles
- 1/4 cup peanut butter
- 2 tablespoons soy sauce
- 1 tablespoon sesame oil
- 2 tablespoons rice vinegar
- 1 tablespoon honey
- 1 small cucumber, julienned
- 1 carrot, julienned
- 2 scallions, sliced
- Sesame seeds
Quick Steps:
- Cook the noodles until just tender, then rinse under cold water.
- Whisk the peanut butter, soy sauce, sesame oil, rice vinegar, honey, and a splash of water until smooth.
- Toss the noodles with the sauce.
- Fold in cucumber, carrot, and scallions.
- Chill for at least 30 minutes and sprinkle with sesame seeds before serving.
Equipment for This Recipe:
- Pot
- Colander
- Large bowl
- Whisk
How to Serve This Dish: Twirl it into small portions with tongs and serve in shallow cups or bowls. It’s a smart side for grilled meat or fried things because the cold noodles cool everything down.
Pro Tips for This Recipe:
- Thin the sauce with hot noodle water if it feels stiff.
- Rinse the noodles well so they don’t clump.
- Add cucumber near the end so it stays crisp.
- Taste after chilling; cold noodles need another pinch of salt sometimes.
Variations on This Dish:
- Chili Crisp Version: Add chili crisp for heat and crunch.
- Tahini Swap: Use tahini instead of peanut butter.
- Chicken Noodle Salad: Fold in shredded cooked chicken.
Common Mistakes to Avoid with This Recipe:
- Overcooking the noodles: They go soft after chilling.
- Leaving the sauce too thick: It won’t coat evenly.
- Adding vegetables too early if they’re wet: The bowl turns slippery.
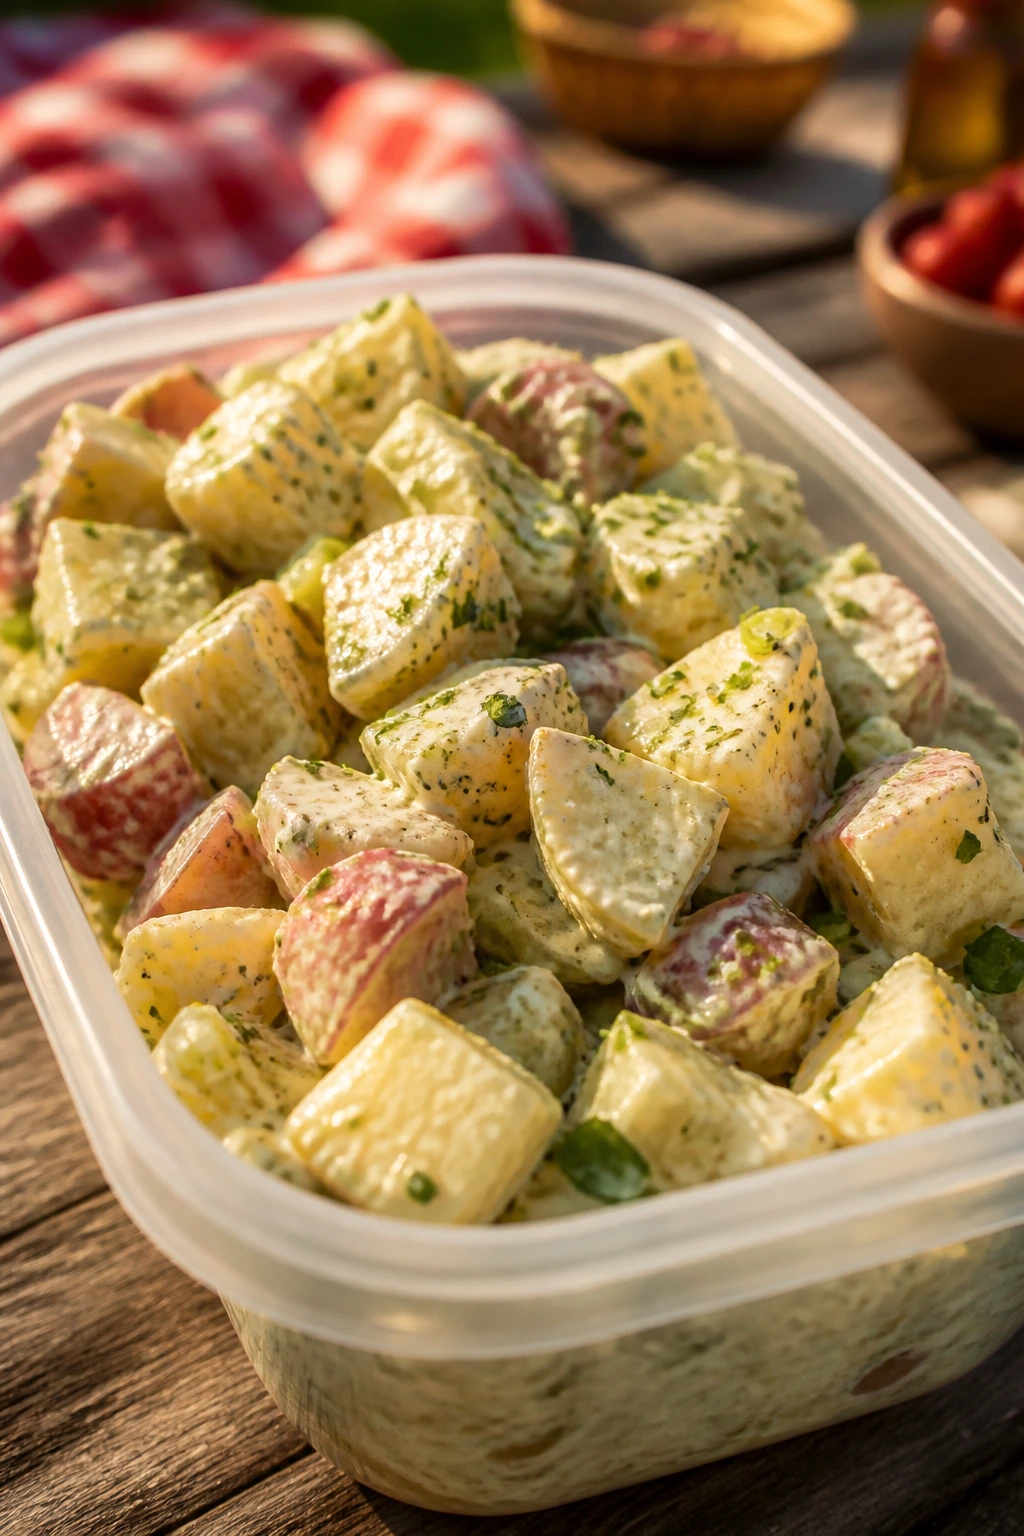
19. Dill Mustard Potato Salad
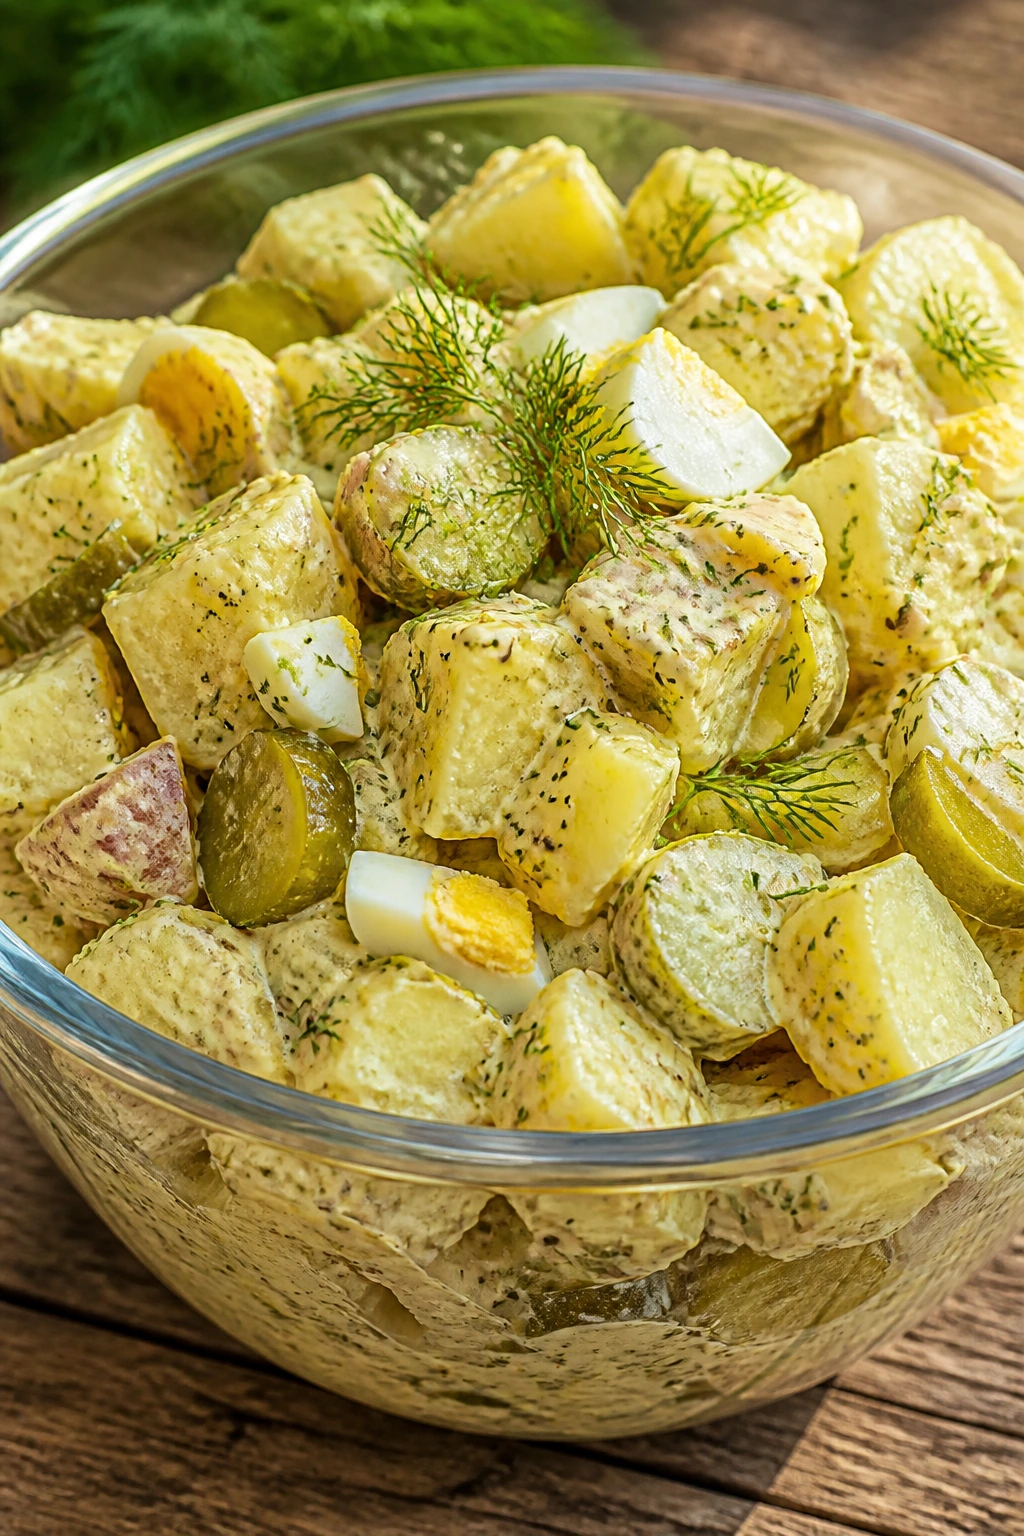
This is the potato salad I reach for when I want something with more bite than the default picnic bowl. Dill, mustard, and pickles keep it sharp, and the potatoes stay tender without turning to paste if you choose the right kind.
Why It Works: Waxy potatoes hold their shape after boiling, which is the difference between a salad and mashed potatoes pretending to travel. The mustard and pickle brine keep it lively beside a cold beer or lemonade.
Key Ingredients:
- 2 lb baby yellow potatoes
- 3 hard-boiled eggs, chopped
- 1/2 cup mayonnaise
- 2 tablespoons Dijon mustard
- 1 tablespoon whole grain mustard
- 1/4 cup chopped dill pickles
- 1/4 cup diced celery
- 2 tablespoons minced red onion
- 2 tablespoons chopped fresh dill
- Salt and black pepper
Quick Steps:
- Boil the potatoes until fork-tender, then drain and cool slightly.
- Cut the potatoes into bite-size pieces while still warm.
- Stir together the mayo, Dijon, whole grain mustard, pickles, celery, onion, dill, salt, and pepper.
- Fold in the potatoes and eggs.
- Chill at least 1 hour before serving.
Equipment for This Recipe:
- Pot
- Colander
- Large bowl
- Potato masher or spoon
How to Serve This Dish: Serve it in a chilled bowl with extra dill on top. It belongs near grilled meat, fried chicken, or anything salty enough to need a cool side.
Pro Tips for This Recipe:
- Salt the boiling water well so the potatoes are seasoned inside.
- Dress the potatoes while they’re still warm; they absorb more flavor.
- Use pickles with crunch, not soft ones.
- Add more mustard after chilling if the flavor quiets down.
Variations on This Dish:
- German-Style: Add crisp bacon and swap some mayo for vinegar.
- Herb Version: Use chives and parsley instead of dill.
- Lighter Bowl: Replace half the mayo with Greek yogurt.
Common Mistakes to Avoid with This Dish:
- Using starchy potatoes like russets: They break apart too easily.
- Over-mixing: The salad turns gluey.
- Serving it warm from the pot: The dressing won’t settle properly.
20. Hummus Veggie Pita Rounds
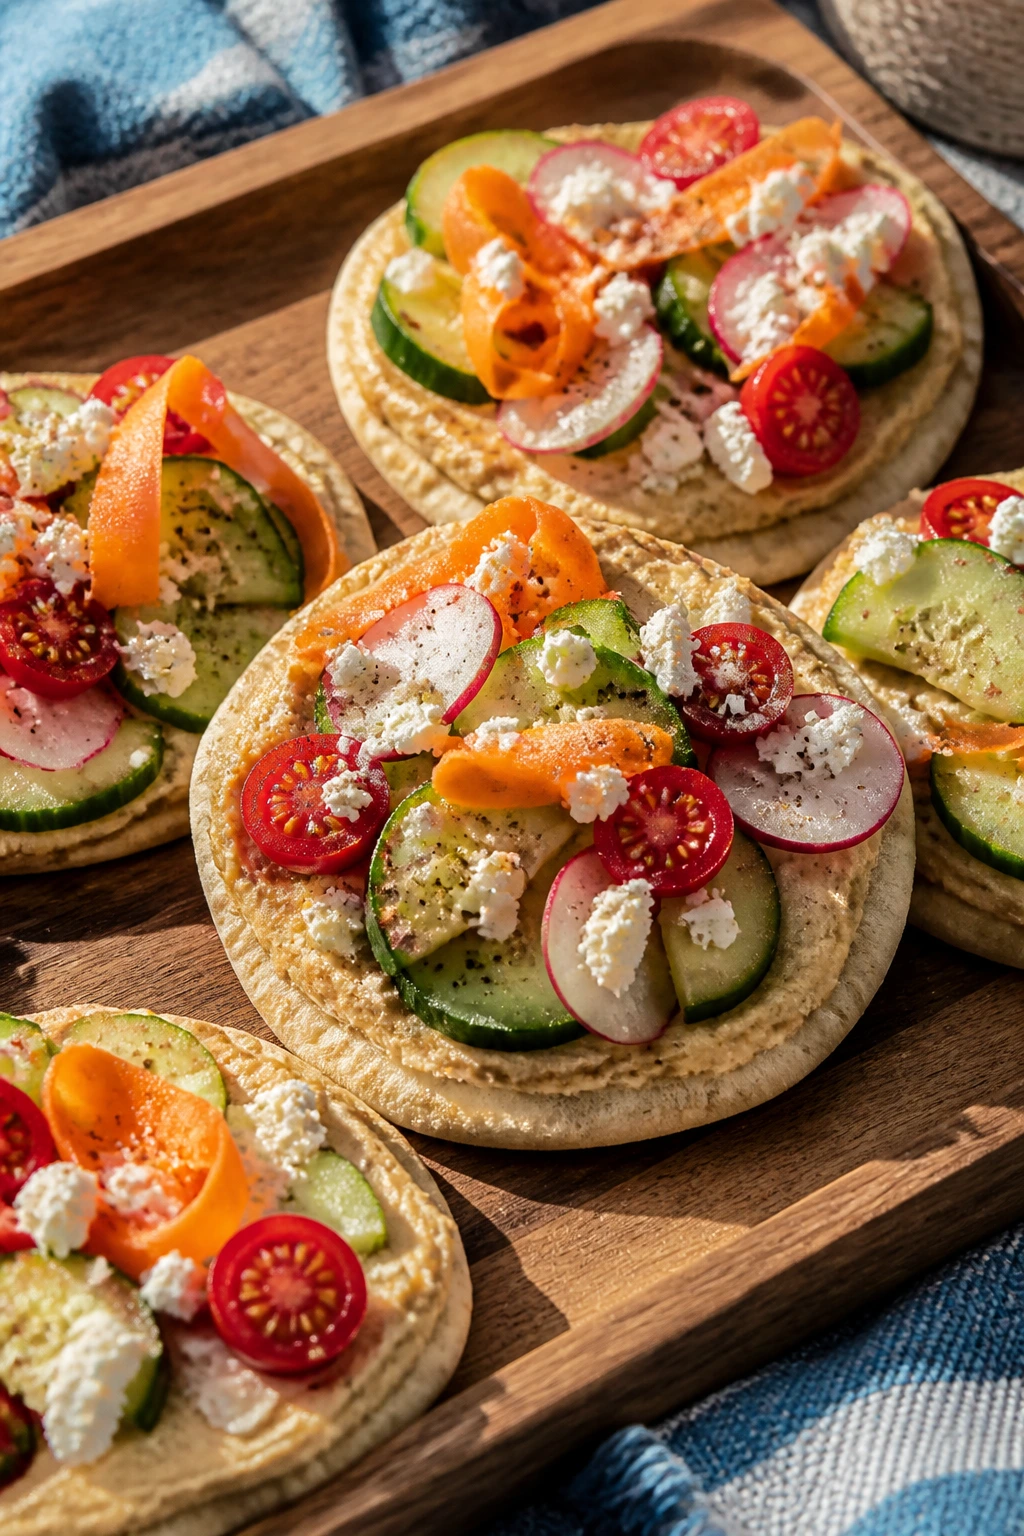
These are the kind of bites that make a picnic feel balanced without becoming a lecture. Creamy hummus, cool vegetables, and soft pita give you something fresh that still has enough substance to hold its place next to richer dishes.
Why It Works: Hummus carries flavor well and acts like edible glue, which is useful when you’re packing food into rounds instead of a bowl. A mint iced tea or sparkling water keeps the whole thing feeling crisp.
Key Ingredients:
- 2 cups hummus
- 4 pita breads
- 1 cucumber, thinly sliced
- 1 cup cherry tomatoes, halved
- 2 radishes, thinly sliced
- 1 carrot, shaved into ribbons
- 1/4 cup feta
- 1 tablespoon olive oil
- 1 teaspoon za’atar
Quick Steps:
- Warm the pita briefly if you want it softer, then cut into wedges or rounds.
- Spread hummus over each piece.
- Top with cucumber, tomatoes, radish, carrot, and feta.
- Drizzle with olive oil and sprinkle with za’atar.
- Pack just before serving so the pita stays firm.
Equipment for This Recipe:
- Knife
- Cutting board
- Spoon
- Tray or container
How to Serve This Dish: Lay the rounds in a single layer if you can. They work well as a starter before meatier dishes and give the cooler a vegetarian anchor.
Pro Tips for This Recipe:
- Dry the vegetables with a towel so the pita doesn’t go soggy.
- Cut and assemble close to serving time.
- Use thick hummus, not a runny one.
- A squeeze of lemon wakes up the whole tray.
Variations on This Dish:
- Roasted Veg Version: Add roasted peppers or zucchini.
- Olive Tapenade: Swap feta for chopped olives if you want more brine.
- No-Dairy Build: Leave off the feta and finish with herbs.
Common Mistakes to Avoid with This Recipe:
- Using thin pita that tears: The toppings slide right through.
- Assembling too early: The bread softens fast.
- Skipping seasoning on the vegetables: The hummus can’t do all the work.
21. Peach Burrata Bruschetta
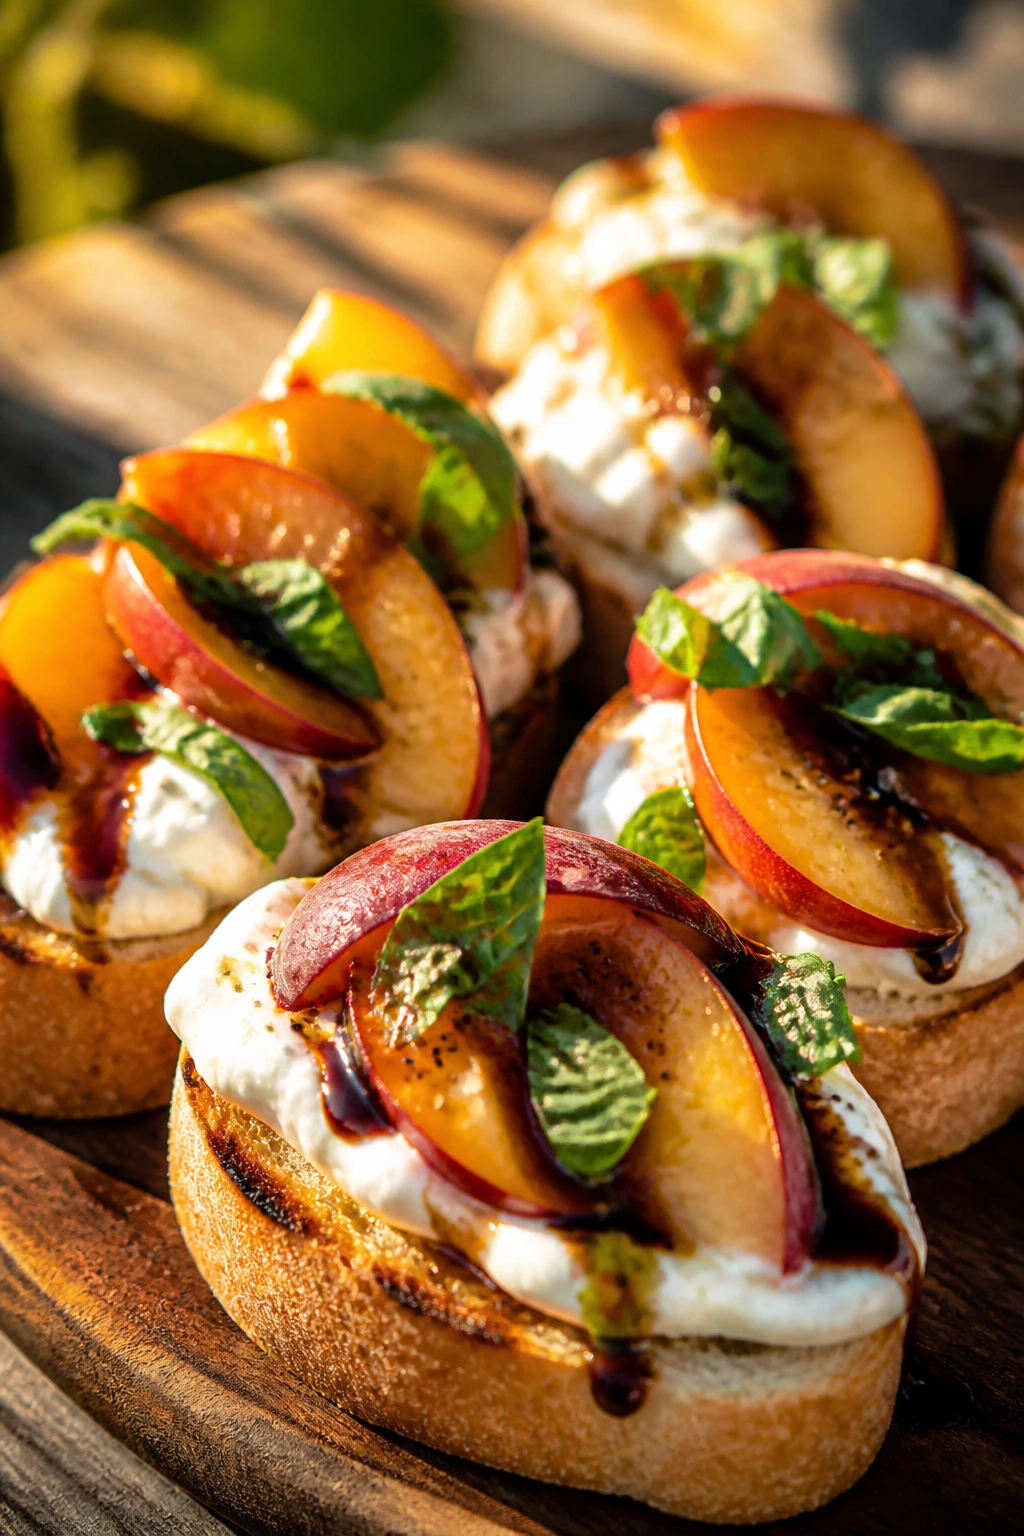
Peach burrata bruschetta is what happens when you want a picnic snack to feel a little more polished without becoming fussy. Toasted bread, ripe peaches, creamy burrata, and basil make a sweet-savory bite that disappears fast beside a cold spritz or peach tea.
Why It Works: The bread gives you crunch, the burrata gives you a creamy center, and the peaches keep the whole thing bright. A splash of balsamic glaze adds enough tang to stop the sweetness from drifting away.
Key Ingredients:
- 1 baguette, sliced
- 1 tablespoon olive oil
- 2 ripe peaches, sliced
- 8 oz burrata
- 1/4 cup fresh basil leaves
- 1 tablespoon balsamic glaze
- Flaky salt
- Black pepper
Quick Steps:
- Brush the baguette slices with olive oil and toast until golden.
- Slice the peaches thinly.
- Tear the burrata and spread it over the toast.
- Top with peach slices, basil, balsamic glaze, salt, and pepper.
- Assemble close to serving time so the bread stays crisp.
Equipment for This Recipe:
- Baking sheet or grill
- Knife
- Cutting board
- Serving platter
How to Serve This Dish: Arrange the bruschetta on a flat platter and keep the toppings at room temperature, not cold, so the burrata stays soft. It’s a natural match for something sparkling and slightly sweet.
Pro Tips for This Recipe:
- Use peaches that yield a little when pressed but still slice cleanly.
- Toast the bread well enough to resist the cheese.
- Add the balsamic glaze in thin lines, not a heavy pour.
- A pinch of flaky salt on the peaches matters more than people think.
Variations on This Dish:
- Grilled Peach Version: Grill the peach slices for extra char.
- Tomato-Peach Mix: Add a few cherry tomato halves for more acid.
- Ricotta Swap: Use whipped ricotta if burrata isn’t around.
Common Mistakes to Avoid with This Dish:
- Using mushy peaches: They smear instead of slice.
- Assembling too far ahead: The toast softens.
- Drowning it in glaze: The peaches stop tasting like peaches.
22. Salted Lemon Bars
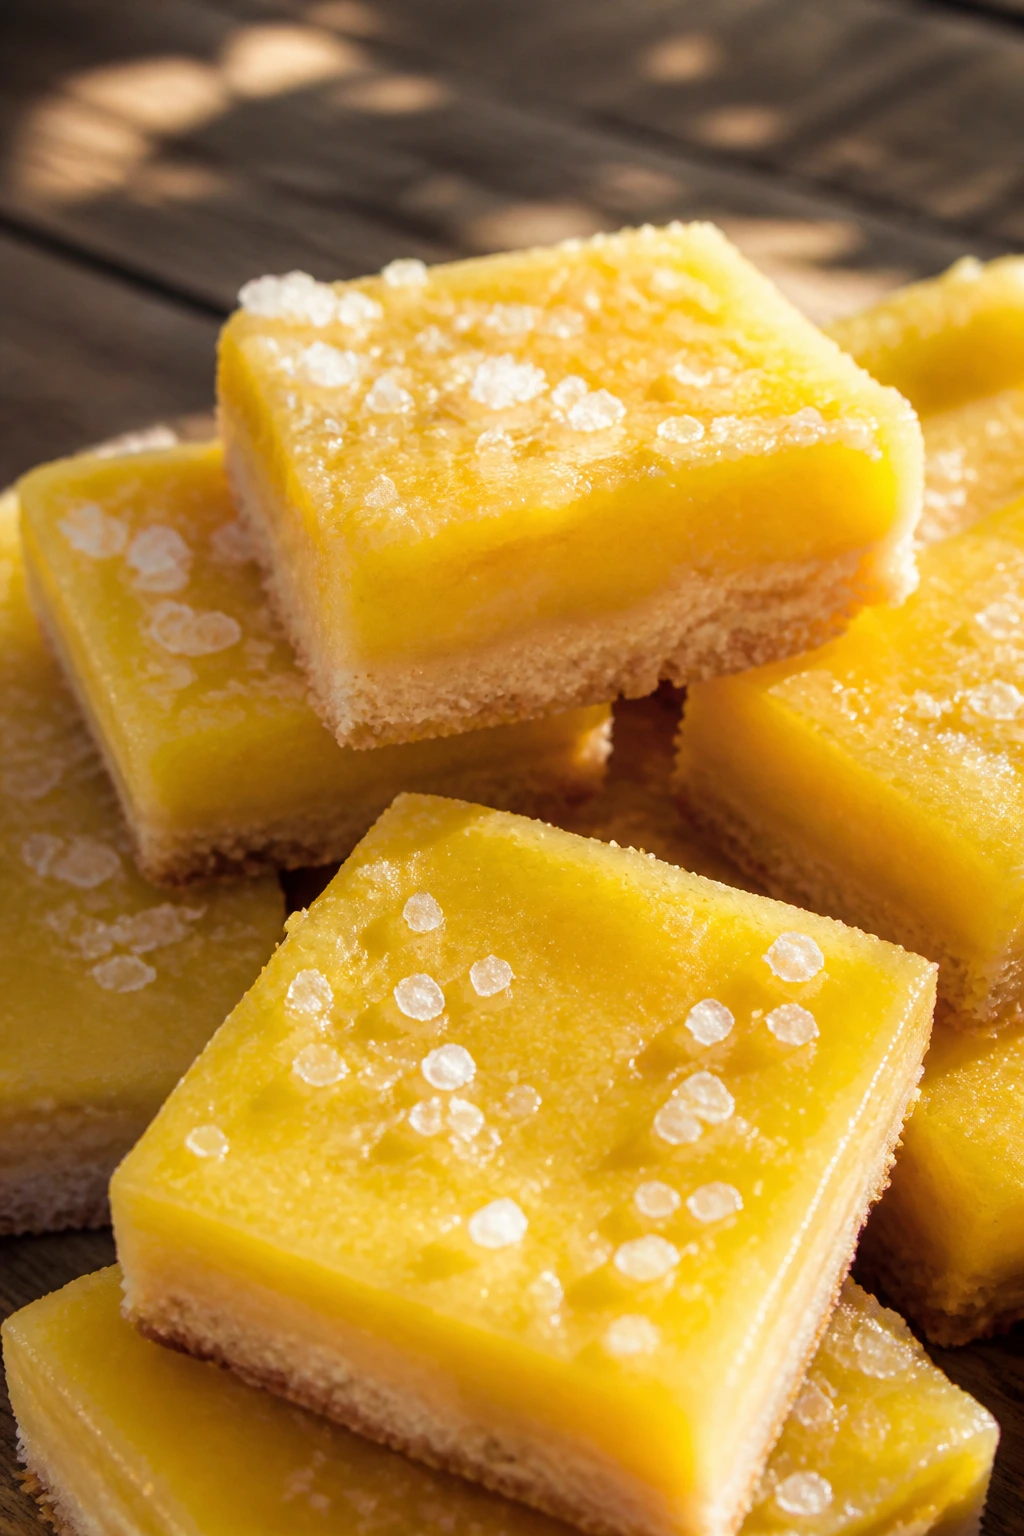
A good lemon bar is bright enough to wake up a whole picnic table. The shortbread base keeps its snap, the lemon layer cuts through the sweetness, and the salted edge keeps the dessert from tasting like one-note sugar.
Why It Works: The crust gives you structure, which matters when dessert has to survive a cooler and a paper plate. Lemon bars also pair well with iced tea or cold coffee because the tart filling likes a drink that doesn’t add more sugar.
Key Ingredients:
- 1 cup all-purpose flour
- 1/2 cup powdered sugar
- 1/2 cup cold butter, cubed
- 1/4 teaspoon salt
- 3 large eggs
- 1 cup granulated sugar
- 1/3 cup fresh lemon juice
- 1 tablespoon lemon zest
- 2 tablespoons flour
- Extra powdered sugar for dusting
Quick Steps:
- Mix the flour, powdered sugar, butter, and salt until crumbly, then press into a lined 8×8-inch pan.
- Bake the crust at 350°F for 15 to 18 minutes until lightly golden.
- Whisk the eggs, granulated sugar, lemon juice, zest, and flour.
- Pour over the hot crust and bake 20 to 25 minutes more until the center is set with a slight wobble.
- Cool completely, chill, and dust with powdered sugar before cutting.
Equipment for This Recipe:
- 8×8-inch baking pan
- Parchment paper
- Mixing bowls
- Whisk
How to Serve This Dish: Cut the bars into clean squares and stack them in a shallow container with parchment between layers. They’re the cleanest sweet finish after salty sandwiches and fried food.
Pro Tips for This Recipe:
- Line the pan with parchment so you can lift the bars out cleanly.
- Chill before cutting if you want neat edges.
- Use fresh lemon juice; bottled juice tastes flat here.
- Add a tiny pinch of flaky salt on top if you want the citrus to pop harder.
Variations on This Dish:
- Meyer Lemon Bars: Use Meyer lemons for a softer, floral flavor.
- Lime Bars: Swap the juice and zest for lime.
- Rosemary Shortbread: Add finely chopped rosemary to the crust for a savory edge.
Common Mistakes to Avoid with This Recipe:
- Cutting before the bars cool: The filling runs.
- Undercooking the center: It stays loose after chilling.
- Skipping the salt in the crust: The dessert tastes flatter than it should.
Why Picnic Food That Lasts Matters
A picnic doesn’t fail because the food is fancy or plain. It fails when one thing goes limp, another leaks, and the best item on the blanket turns into a wet wrapper before anyone has eaten enough to feel happy. That’s why the best picnic food ideas are built around structure first and decoration second.
Salt, acid, smoke, and crunch do the heavy lifting here. They make fried chicken taste alive after it’s cooled. They keep a pasta salad from tasting like cold starch. They give a sandwich enough lift to survive the ride from kitchen counter to park bench.
There’s also the cold-drink part, which people sometimes treat as an afterthought. It isn’t. A crisp beer, a lemonade with enough tartness, or a glass of iced tea with real body can change how a whole plate tastes. Rich food gets lighter. Sharp food gets brighter. Bread stops feeling bland.
Picnic food should be forgiving. It should travel well, sit on a table for a while, and still taste like someone thought about it. That’s the sweet spot.
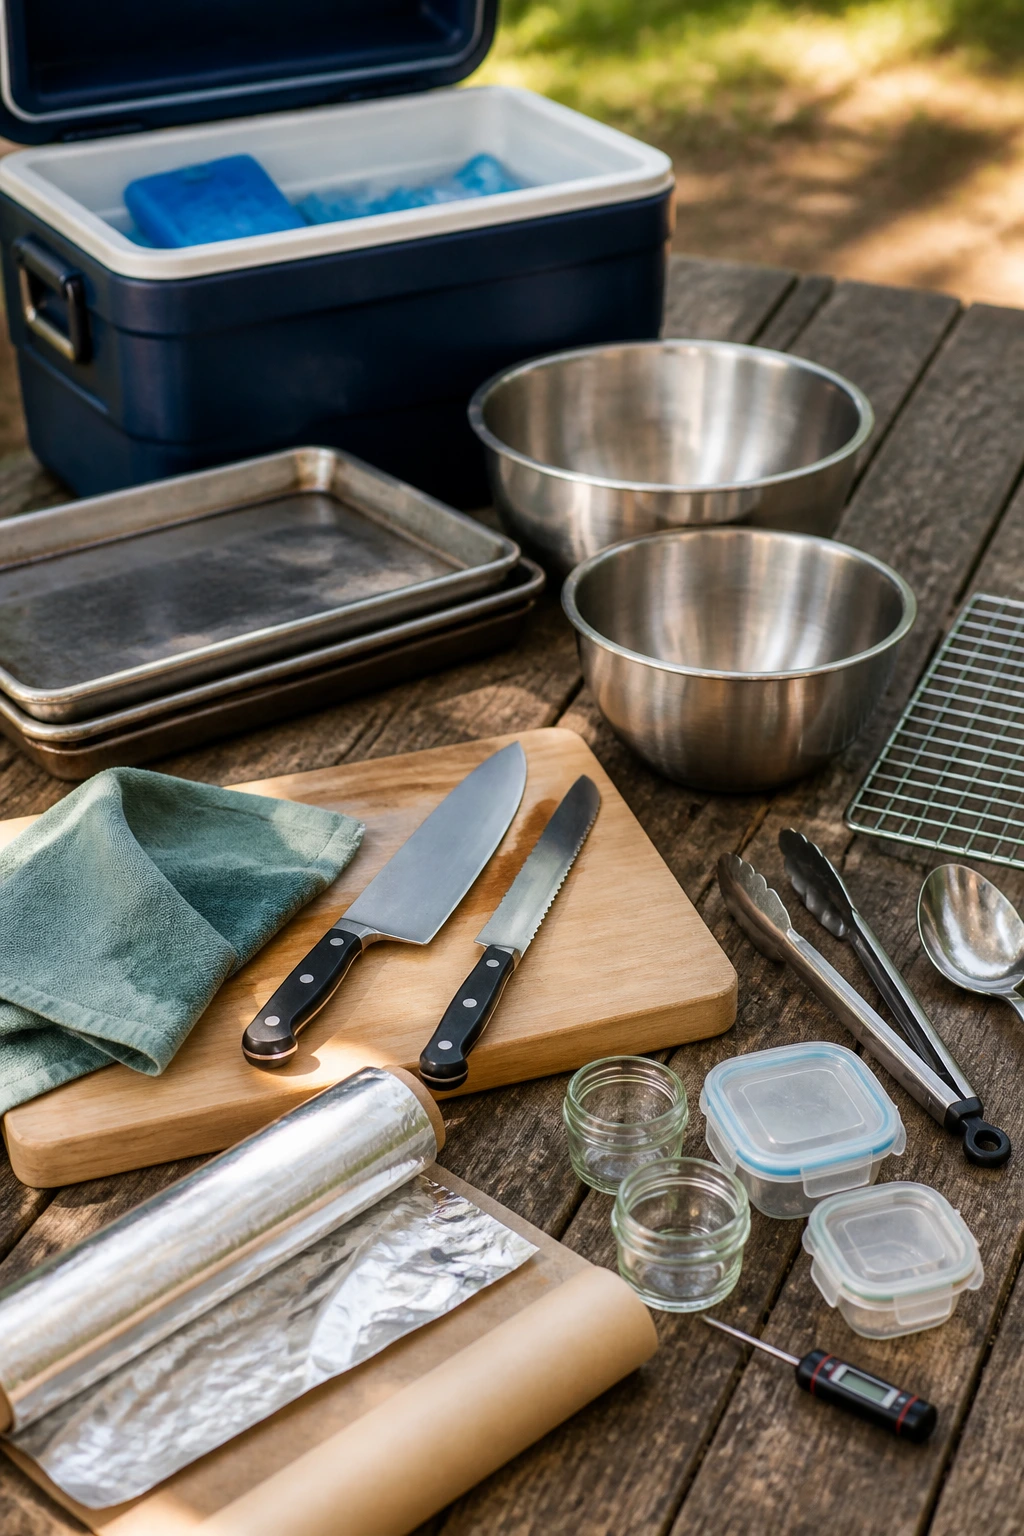
Essential Equipment for These Recipes
-
Cooler with ice packs: Keeps mayo, cheese, seafood, and cut fruit at a safe temperature while you’re getting set up.
-
Sheet pans: Useful for cooling fried chicken, baking sliders, toasting bread, and moving food in and out of the oven without a mess.
-
Mixing bowls in at least two sizes: One for dressing, one for assembly. You’ll use both faster than you expect.
-
Sharp chef’s knife and serrated knife: The chef’s knife handles produce and herbs; the serrated knife keeps bread and pinwheels from getting crushed.
-
Cutting board with a damp towel underneath: Stops sliding when you’re slicing tomatoes, cucumbers, or bread.
-
Tongs and a sturdy spoon: Good for grilled food, tossed salads, and anything too hot or too slippery for fingers.
-
Wire rack: Helps fried chicken and biscuits cool without trapping steam underneath.
-
Aluminum foil and parchment paper: Foil keeps sliders and hoagie bites warm; parchment keeps sticky food from fusing to the container.
-
Small containers or deli cups: Best for pasta salad, dips, fruit, and sauces when you want neat portions.
-
Food thermometer: Handy for chicken, sausage, and meatballs so you’re not guessing.
Smart Shopping and Ingredient Tips
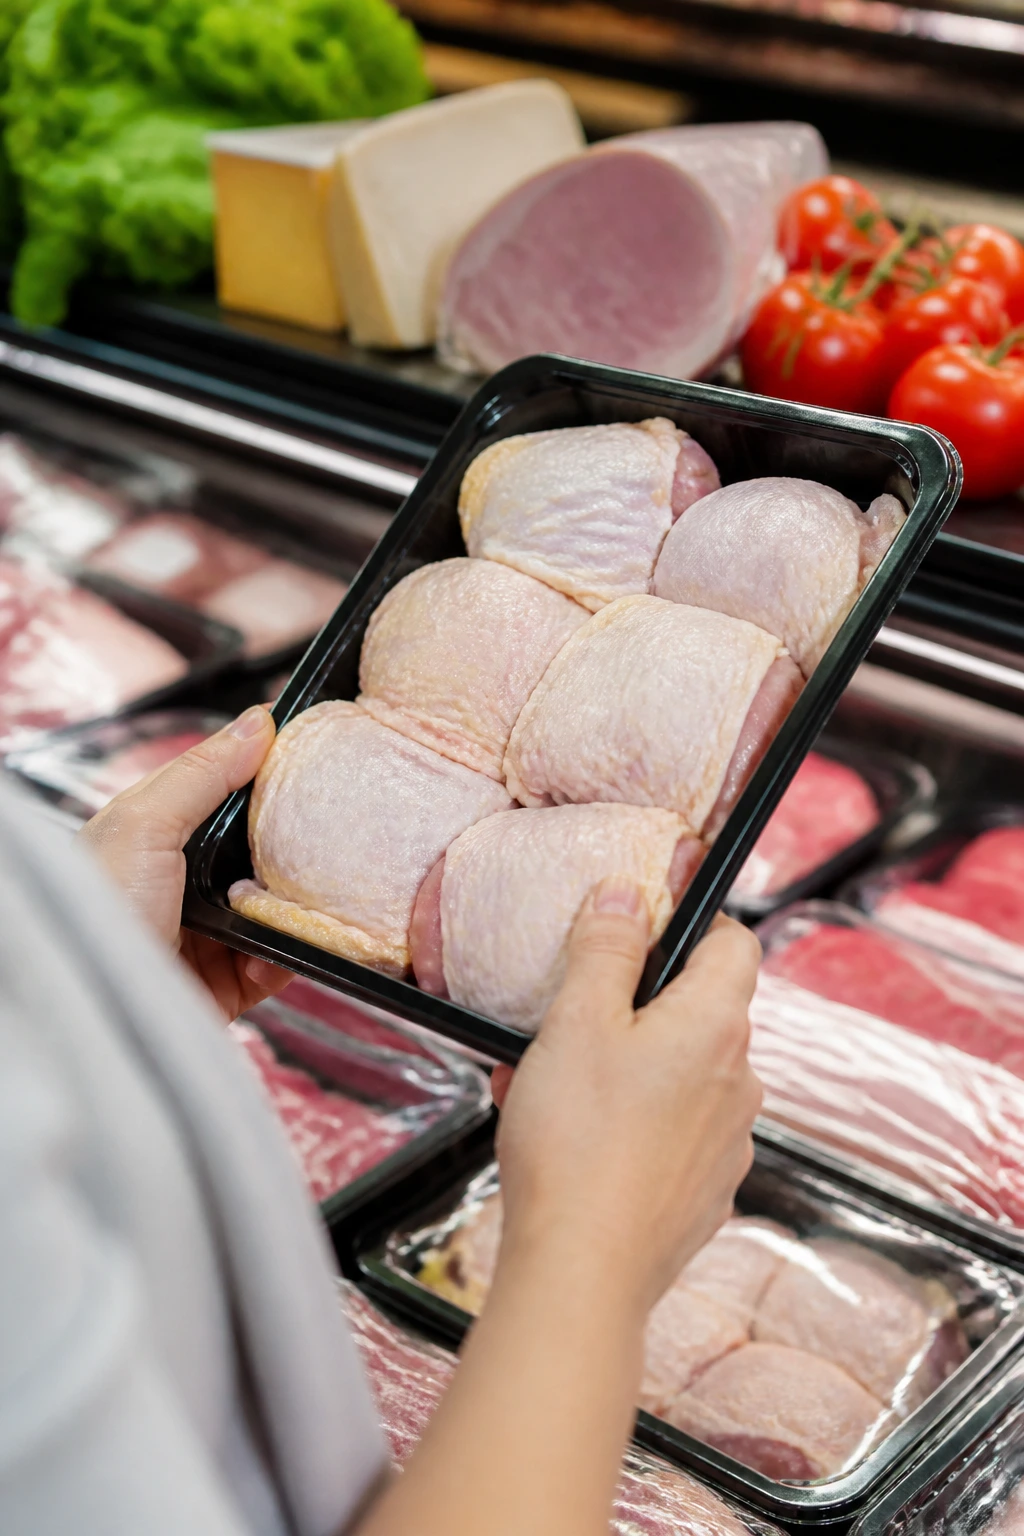
Start with the ingredients that decide texture, not the shiny extras. For chicken skewers and fried chicken, thighs are the safer buy because they stay juicy after a rest. For sliders and pinwheels, buy ham or turkey sliced thin at the deli counter instead of grabbing thicker pre-packaged slices; the thinner cuts fold and stack better.
Cheese matters more than people think in picnic food. A block of cheddar or feta usually tastes sharper and behaves better than the pre-shredded or crumbly version, especially in dips, biscuits, and sliders. Mozzarella pearls are convenient for pasta salad, but if you can only find a block, cube it small and keep it cold.
For tomatoes and fruit, choose firm, ripe pieces that still hold their shape. Tomato pie, caprese cups, and bruschetta all fail when the tomato is mealy or overripe. Watermelon should smell sweet at the stem end, and peaches for bruschetta should give just a little under your thumb without turning soft.
Pick waxy potatoes for potato salad, and choose sturdy cucumbers like English or Persian for boats and rounds. Their skins are thinner, the seeds are smaller, and they don’t flood the bowl as fast. For picnic bread, buy rolls and baguettes that feel a little firm at the crust; soft bread goes stale in weird ways, then collapses under filling.
How to Serve These Recipes
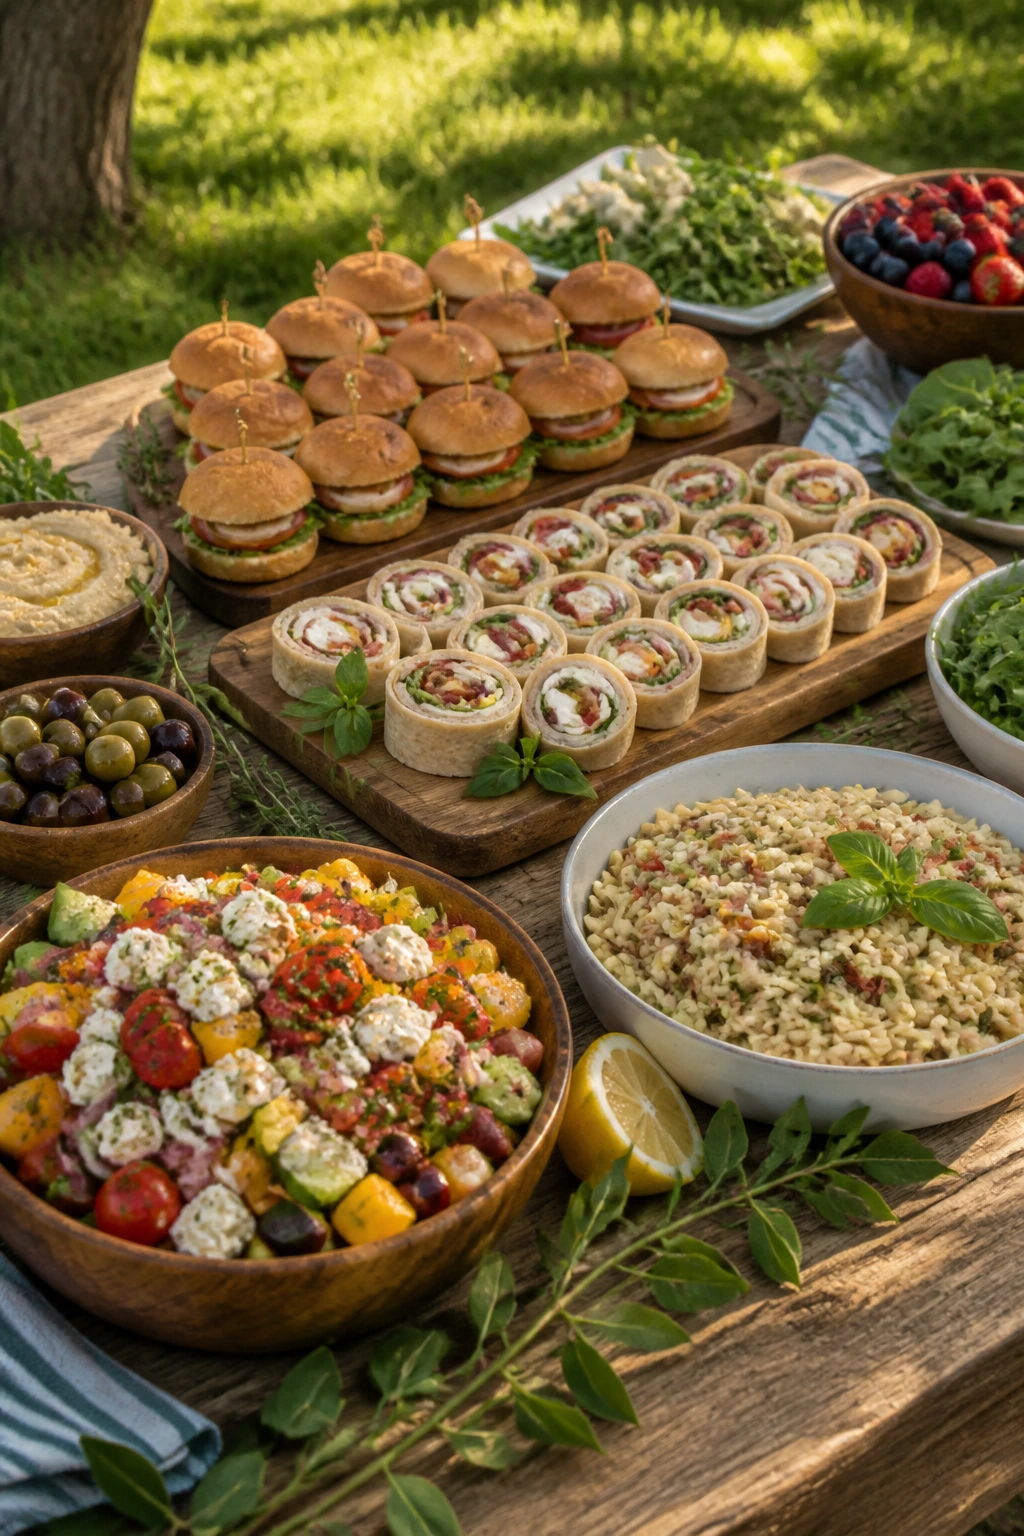
Presentation: Build the table in sections instead of one giant pile. Put cold dishes in shallow bowls, line up the sliders and pinwheels in tight rows, and scatter herbs or lemon wedges over the trays so the food looks fresh without being fussed over.
Accompaniments: Chips, pickles, sliced cucumbers, watermelon wedges, and simple green salads are the easy support crew here. For the richer dishes, I like something sharp and crunchy on the side—pickled onions, dill pickles, or a plain slaw with vinegar in it.
Portions: Plan on 2 to 3 savory items per person if the picnic is snack-heavy, or 1 main plus 2 sides if it’s a full meal. The sliders, skewers, and pinwheels scale upward easily; the salads and dips can be doubled without changing much.
Beverage Pairing: Cold beer works with the smoky and fried dishes, iced tea works with the sandwiches and biscuits, and sparkling lemonade is the easy fix when the table has a lot of creamy food. If you want one drink that fits almost everything here, go with something fizzy and not too sweet.
Additional Tips and Flavor Boosters
Flavor Enhancement: A small finishing hit changes a picnic tray more than another spoonful of sauce. Flaky salt on watermelon, lemon zest over pasta salad, and a tiny drizzle of balsamic on bruschetta all make the food taste more alive after it’s chilled.
Customization: If you’re cooking for mixed tastes, keep the heat on the side instead of building it into everything. Hot sauce, chili crisp, sliced jalapeños, and pepper flakes can sit in little bowls without forcing the whole spread in one direction.
Serving Suggestions: Bring a few crunchy things that don’t look important until you need them. Pickles, kettle chips, celery, radishes, and crisp lettuce leaves save a picnic from feeling too soft and too sweet.
Make-It-Yours: For dairy-free guests, choose the chicken skewers, corn salad, hummus rounds, tuna cucumber boats, and watermelon salad, then skip the cheese-heavy finishers. For gluten-free eaters, the skewers, salads, deviled eggs, shrimp, fruit salad, and dip are easy wins without swapping half the menu.
Make-Ahead, Storage, and Reheating Guidance
A lot of these dishes are happier when they’ve had a little time to chill. The pasta salads, pinwheels, potato salad, deviled eggs, tuna cucumber boats, hummus rounds, and whipped feta can all be made up to 1 day ahead and kept covered in the refrigerator. Fried chicken, chicken skewers, meatballs, sausage and peppers, biscuits, and tomato pie hold well for 3 to 4 days refrigerated when packed in airtight containers.
Most of the creamy or mayo-based dishes do not freeze well. That includes deviled eggs, potato salad, tuna salad, hummus if it has a lot of fresh garnish, and the cheese-heavy spreads. Meatballs, chicken, biscuits, and some baked items can be frozen up to 2 months, then thawed in the refrigerator before reheating.
For reheating, use a 350°F oven for sliders, biscuits, tomato pie, chicken, and sausage filling until warmed through. Fried chicken and biscuits come back best on a wire rack so the bottoms don’t steam. Skillet reheating works well for meatballs and sausage with a splash of sauce or oil, while the cold dishes should stay cold and be refreshed with a little lemon, vinegar, or olive oil right before serving.
For food safety, keep cold items chilled at 40°F or below until you’re ready to eat. Once the picnic starts, don’t leave dairy, seafood, egg dishes, or mayo-based salads sitting out longer than 2 hours—and trim that to 1 hour if the air is hot and the cooler is losing the fight. Use ice packs under and over containers if you can; the top layer warms faster than people think.
Variations and Adaptations to Try
The Gluten-Free Basket: Use corn tortillas or lettuce leaves for pinwheel-style fillings, skip the breaded biscuit tray, and lean harder on skewers, salads, shrimp, and deviled eggs. For the baked items, choose gluten-free pasta, GF crusts, or almond-flour dessert bars if that’s easier to source.
The Dairy-Light Spread: Keep the feta, burrata, and whipped cheese in a smaller role and bring in more vinegar-based salads, hummus, fruit, and grilled meat. Lemon, mustard, herbs, and olive oil do a lot of the work here when you don’t want cheese carrying the flavor.
The Heat-Seeker’s Tray: Stir chili crisp into the noodles, add jalapeños to the sliders and pinwheels, and finish the corn salad with chili powder or cayenne. Keep one cooling dish on the table—watermelon salad or cucumber boats—so the heat has somewhere to land.
The Kid-Friendly Version: Cut pinwheels smaller, keep the heat out of the deviled eggs and dips, and choose familiar shapes like sliders, biscuits, fruit, and lemon bars. Kids tend to do well with anything that can be eaten without peeling, splicing, or hunting for the good part.
The Grill-Forward Menu: Build around chicken skewers, sausage and peppers, shrimp, charred corn, and grilled peaches. That’s the version I’d pack when the grill is already hot and I want the table to smell like smoke before anybody sits down.
The No-Cook Shortcut: Rely on caprese cups, deviled eggs, tuna cucumber boats, hummus rounds, watermelon salad, whipped feta, and lemon bars. That spread still feels complete, and it keeps you out of the oven when the day is already warm.
Common Mistakes to Avoid

Packing warm food into sealed containers: That traps steam and softens crusts, bread, and fried coatings. Let hot food cool on a rack before you close the lid, even if that feels slow.
Under-seasoning chilled dishes: Cold food tastes quieter than warm food, so a pasta salad or potato salad that seems fine in the kitchen can feel flat at the picnic. Taste again after chilling and add salt, lemon, or vinegar if needed.
Choosing bread that’s too soft: Soft sandwich bread and flimsy rolls collapse once they meet juicy fillings. Pick sturdier rolls, toast the bread, or keep wet ingredients separate until serving time.
Overdressing salads too early: Pasta, noodles, and potato salad often soak up sauce as they sit, which sounds fine until the bowl turns dry and heavy. Hold back a little dressing and add it right before serving.
Ignoring food size: Big chunks are harder to eat outdoors and tend to fall apart while people are standing. Cut skewers, squares, slices, and boats into portions that work with one hand.
Letting cold food warm up too long: Creamy dips, eggs, seafood, and dairy-filled items need the cooler, not just a shaded table. Keep them nested in ice packs and put out smaller refills instead of one giant platter.
Frequently Asked Questions

How far ahead can I make picnic party food ideas like these?
Most of the sturdy items—sliders, salads, biscuits, meatballs, and chicken—can be made the day before and chilled overnight. Dishes with soft bread, tomatoes, avocado, burrata, or cucumber are better assembled closer to serving time.
Which recipes hold up best without a cooler?
The lemon bars, bacon cheddar biscuits, chicken skewers, sausage and peppers, tomato pie squares, and fried chicken are the most forgiving. Anything with mayo, seafood, or whipped dairy should stay cold until the last minute.
What’s the best way to keep sandwiches from getting soggy?
Put dry ingredients next to the bread and wet ingredients in the middle, then keep tomatoes, pickles, and sauces well drained. Toasting or lightly grilling the bread also helps, especially for bruschetta and sliders.
Can I swap mayonnaise for something lighter in these recipes?
Yes. Greek yogurt works in tuna salad, potato salad, and some dips, though the flavor will be tangier and a little thinner. If you make the switch, add salt and lemon slowly so the filling doesn’t get sharp too fast.
How do I pack food for a picnic in hot weather?
Use shallow containers, more than one ice pack, and a cooler that’s already cold before you load it. Put the most perishable items on the bottom and keep the lid closed as much as you can; every warm peek shortens your cold time.
What should I do if my bread gets soft before serving?
Move the filling away from the bread and serve it as an open-faced bite, a dip, or a forked salad. That salvage move works especially well for pinwheels, sliders, and bruschetta if the picnic runs long.
Can I serve these at room temperature?
Many of them, yes, and some are better that way. Fried chicken, biscuits, sliders, and tomato pie all taste fine after a short rest, but egg, seafood, dairy, and mayo-based dishes should stay chilled until you’re ready to eat.
What cold drink pairs best across the whole spread?
Something fizzy and lightly tart covers the most ground. Sparkling lemonade, dry cider, or a crisp seltzer with citrus can handle fried food, cheese, herbs, and fruit without crowding anything out.
A Cooler Full of Better Choices
A picnic gets easier when the food is built to hold its shape, keep its flavor, and survive a little handling without becoming a mess. That’s the difference between a spread people pick at and one they keep circling back to while the ice melts and the drinks sweat.
The best part is that none of this needs to be precious. A tray of skewers, a bowl of chilled salad, a stack of pinwheels, and a dessert that cuts cleanly can feel generous without being fussy. That’s the whole charm of good picnic food: it does its job, stays readable on a paper plate, and leaves room for one more cold drink.