
The first ten minutes after the alarm are where breakfast either works or falls apart. A backpack is missing one shoe, someone forgot gym day, the dog is barking at the toaster, and a hot meal starts looking like a lovely idea from another planet. That is exactly why simple family meals for busy school mornings matter: they turn a chaotic half-hour into something edible, portable, and calm enough that nobody has to eat a granola bar in the car.
I’ve always had a soft spot for breakfast that can be stretched, reheated, or assembled with one eye open. A sheet pan of pancakes cut into squares. Egg muffins that pop out of the tin with those browned edges intact. Oats that sit in the fridge overnight and somehow taste better by morning because the cinnamon has had time to bloom. These are the kinds of meals that keep a house moving.
What works here is not glamour. It’s repetition, timing, and a little practical swagger. If the pan can go in the oven while shoes are found, if the blender can make breakfast in 60 seconds, if the leftovers still taste decent after the second school bell, it earns a place in the rotation. And that’s where we’re headed.
Why These School-Morning Meals Work

- Fast hands-on time: Most of these recipes take 10 to 15 minutes of actual work, which is the difference between breakfast and “we’ll eat later.”
- Kid-friendly texture: Soft eggs, tender oats, warm toast, and hand-held sandwiches are easier for younger eaters than fiddly, fork-heavy plates.
- Make-ahead friendly: Several of these can be cooked the night before and reheated in under 2 minutes, which matters when the bus is already outside.
- Flexible ingredients: Spinach can become kale, cheddar can become mozzarella, berries can become diced apple, and the meal still holds together.
- Travel well: A good school-morning meal should survive a lunchbox, a thermos, or the passenger seat without turning to mush.
- Less waste: Breakfast recipes that use half a bag of spinach, the last two bananas, or yesterday’s rice save groceries from drifting into the compost bin.
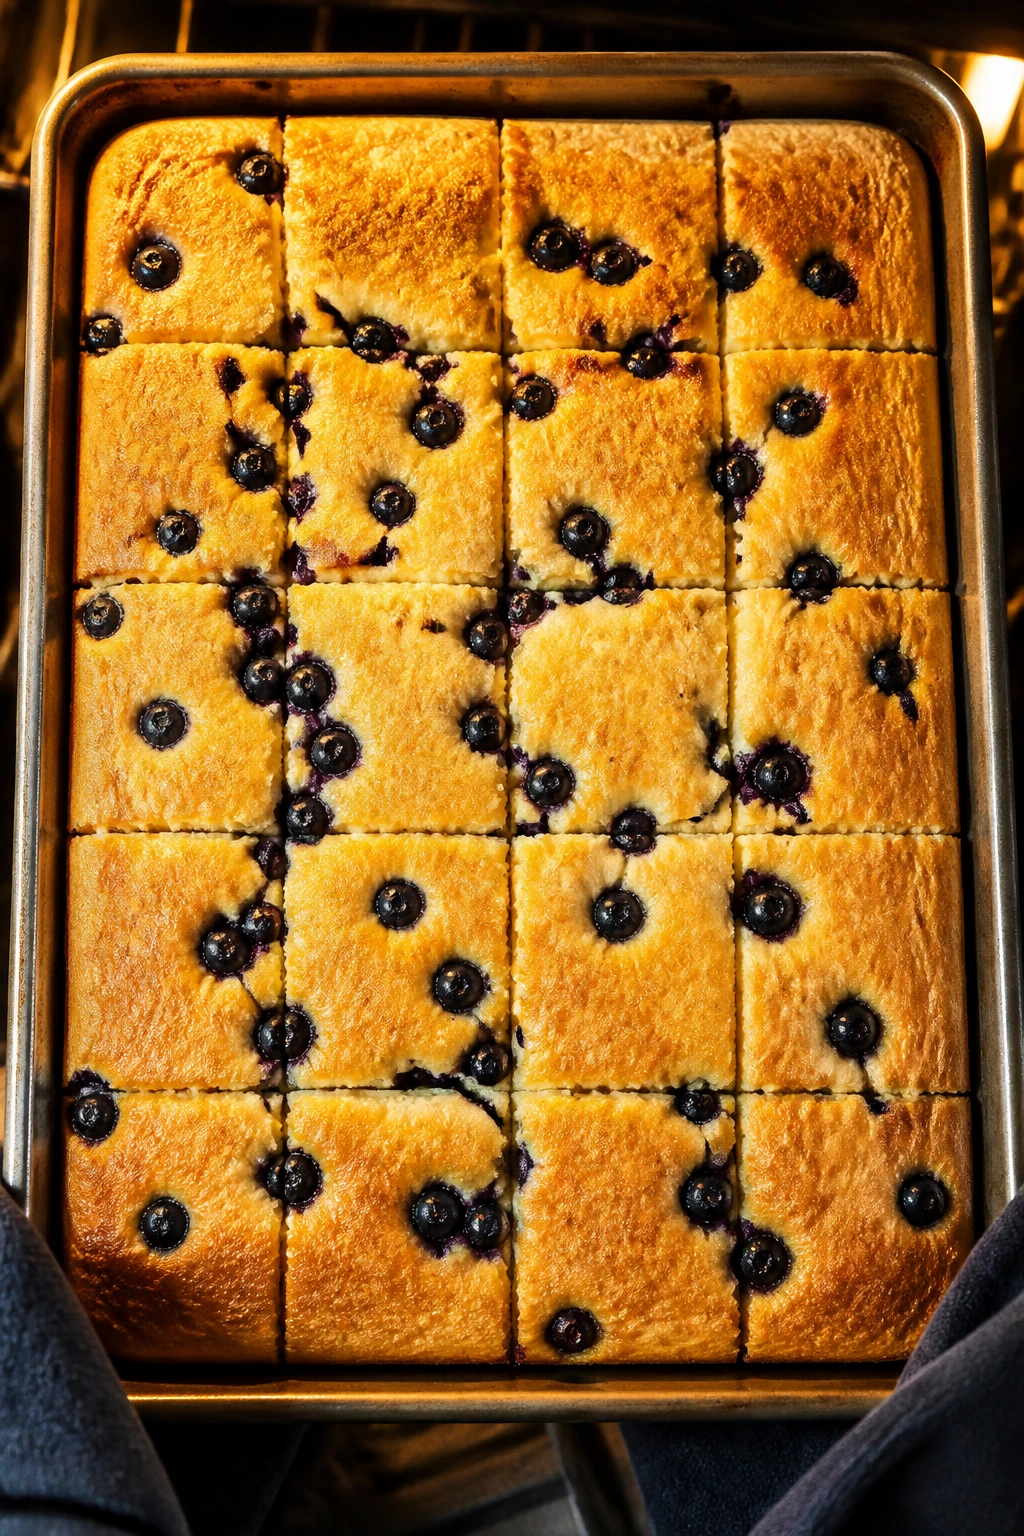
1. Sheet-Pan Pancake Squares
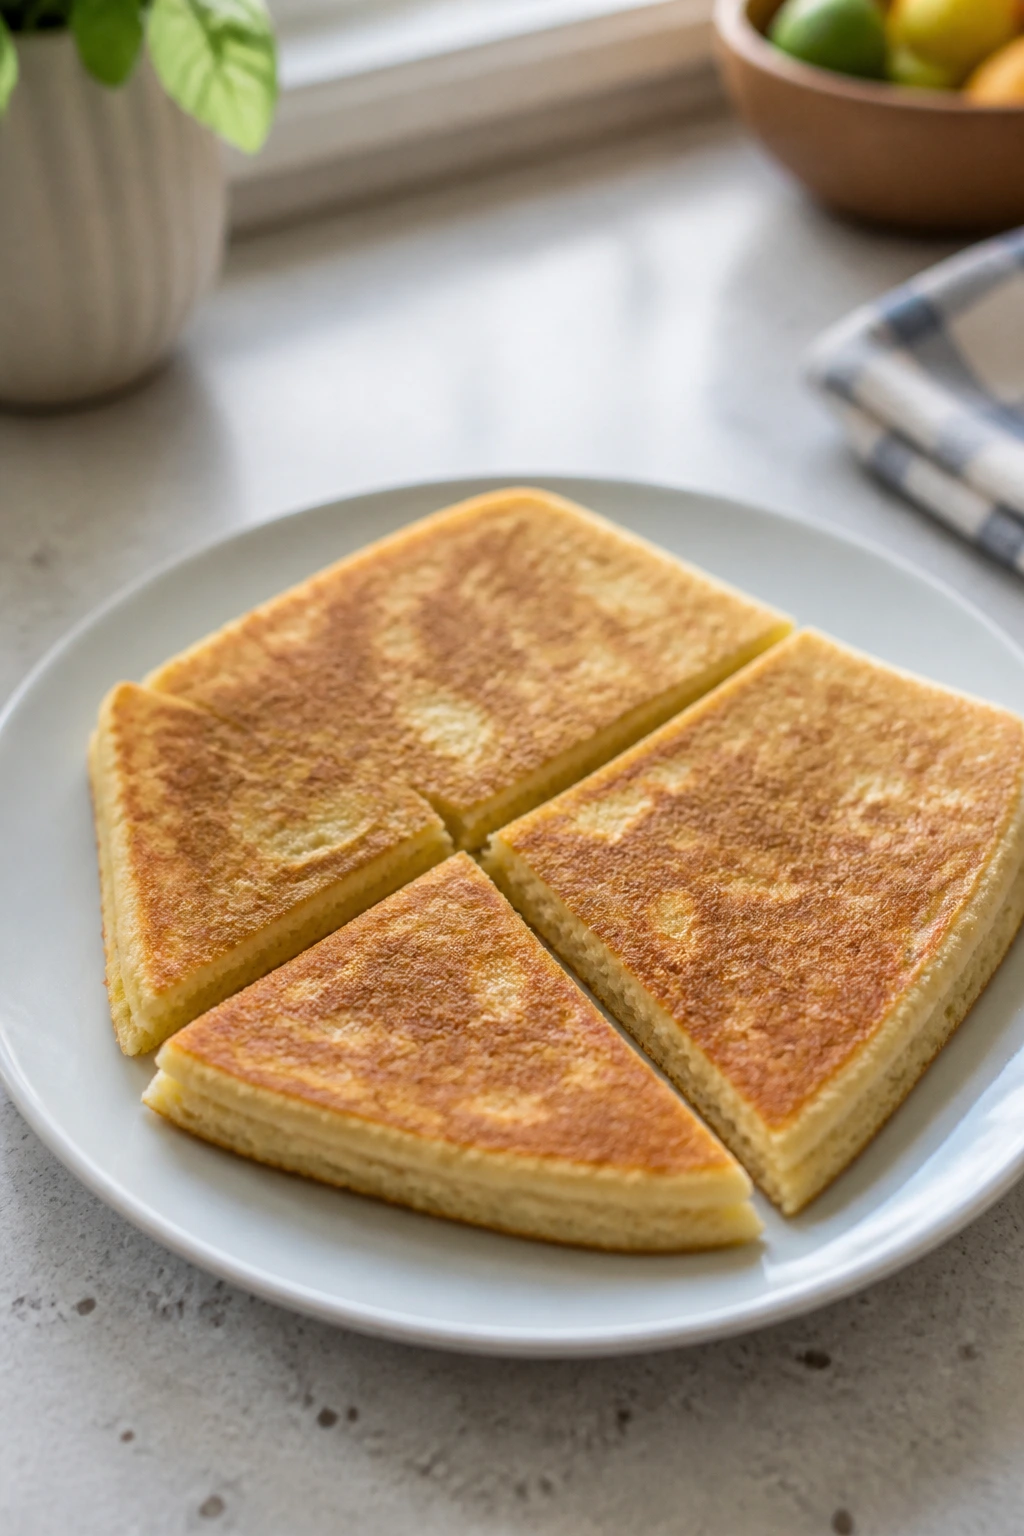
Intro: These are the pancakes I make when I do not want to stand over a griddle flipping little rounds for twenty minutes. The batter bakes into one soft slab with golden edges, and when you cut it into squares, you get all the best parts of pancakes without the morning traffic jam at the stove.
Why It Works: A sheet-pan pancake bakes evenly at 400°F, so the center sets before the edges dry out. It also reheats well, which means you can make it once and feed people twice. The square shape is a gift for school mornings because it stacks into containers without smearing syrup across everything.
Key Ingredients:
- 2 cups all-purpose flour
- 2 tablespoons granulated sugar
- 1 tablespoon baking powder
- 1/2 teaspoon fine salt
- 2 large eggs
- 2 cups whole milk
- 4 tablespoons unsalted butter, melted
- 1 teaspoon vanilla extract
- 1 cup blueberries or chocolate chips, optional
Quick Steps:
- Preheat the oven to 400°F and grease an 18×13-inch rimmed sheet pan.
- Whisk the flour, sugar, baking powder, and salt in a large bowl.
- Whisk the eggs, milk, melted butter, and vanilla in a second bowl.
- Stir the wet ingredients into the dry just until the flour disappears; a few lumps are fine.
- Spread the batter into the pan, scatter berries or chips on top, and bake for 15 to 18 minutes until puffed and lightly golden.
- Cool for 5 minutes, cut into squares, and serve warm.
Equipment for This Recipe:
- 18×13-inch rimmed sheet pan
- Large mixing bowl
- Whisk
- Rubber spatula
- Offset spatula or flat knife for spreading
How to Serve This Dish: Stack two or three squares on a plate and add a small bowl of berries or yogurt. They also pack well with a smear of peanut butter between squares, which sounds odd until you try it.
Pro Tips for This Recipe:
- Let the melted butter cool for a minute before mixing or you can scramble the eggs.
- Do not overmix the batter; it should look a little rough.
- If your oven runs hot, check the pan at 14 minutes so the edges do not dry out.
- Freeze the squares in a single layer, then bag them once solid.
Variations on This Dish:
- Cinnamon Apple Squares: Fold in 1 cup finely diced apple and 1 teaspoon cinnamon.
- Lemon Poppy Squares: Add 1 tablespoon poppy seeds and the zest of 1 lemon.
- Chocolate Chip Birthday Morning: Use mini chips and a spoonful of vanilla yogurt on the side.
Common Mistakes to Avoid with This Dish:
- Batter too thick: If it spreads like dough instead of pouring, add 2 tablespoons milk at a time until it loosens.
- Overbaking: Dry, bready pancakes mean the pan stayed in too long; pull it when the center springs back lightly.
- Skipping the pan grease: Sheet-pan pancakes stick along the edges first, and that is the part everyone fights over.
2. Spinach Cheddar Egg Muffins
Intro: Egg muffins look small, but they carry a lot of breakfast weight. They’re soft in the middle, browned at the top, and easy to grab with one hand while a kid laces a sneaker with the other. I like these because they taste like a tiny frittata, not like compromise.
Why It Works: Eggs set fast in a muffin tin, and the little portions cool quickly enough to eat without much waiting. Spinach adds color and moisture, while cheddar gives the edges a salty, savory bite that kids tend to trust faster than “vegetable breakfast” on its own.
Key Ingredients:
- 8 large eggs
- 1/4 cup whole milk
- 1 cup shredded sharp cheddar cheese
- 1 cup chopped fresh spinach
- 1/4 cup finely diced onion
- 1/4 teaspoon black pepper
- 1/2 teaspoon fine salt
- 1 tablespoon butter or oil for the tin
Quick Steps:
- Preheat the oven to 375°F and grease a 12-cup muffin tin well.
- Whisk the eggs, milk, salt, and pepper until the mixture looks smooth and pale.
- Stir in the spinach, onion, and half the cheese.
- Divide the mixture among the muffin cups and top with the remaining cheese.
- Bake for 18 to 20 minutes until the centers are set and the tops are lightly puffed.
- Cool for 5 minutes, then loosen with a butter knife and lift out.
Equipment for This Recipe:
- Standard 12-cup muffin tin
- Mixing bowl
- Whisk
- Measuring cups
- Small spoon or ladle
How to Serve This Dish: Pair two muffins with toast or fruit, or tuck one into a split English muffin. If you want a fuller plate, add sliced tomatoes with a pinch of salt.
Pro Tips for This Recipe:
- Squeeze the spinach dry if it’s wet; extra moisture makes the muffins spongy.
- Fill the cups only about three-quarters full so the eggs do not overflow.
- Let them cool before storing or they collect steam and go rubbery.
- A little hot sauce in the egg mix wakes up the flavor without changing the kid factor much.
Variations on This Dish:
- Ham and Cheddar Muffins: Add 3/4 cup diced ham for a more filling version.
- Pepper Jack Kick: Swap the cheddar for pepper jack and add minced jalapeño.
- Dairy-Free Eggs: Skip the milk and use olive oil with a dairy-free shredded cheese.
Common Mistakes to Avoid with This Dish:
- Using a dry muffin tin: Even a “nonstick” tin needs grease, or the edges tear on removal.
- Overbaking: When egg muffins puff dramatically and then sink hard, they went too far.
- Adding too much cheese: Heavy cheese settles at the bottom and leaves the tops bland.
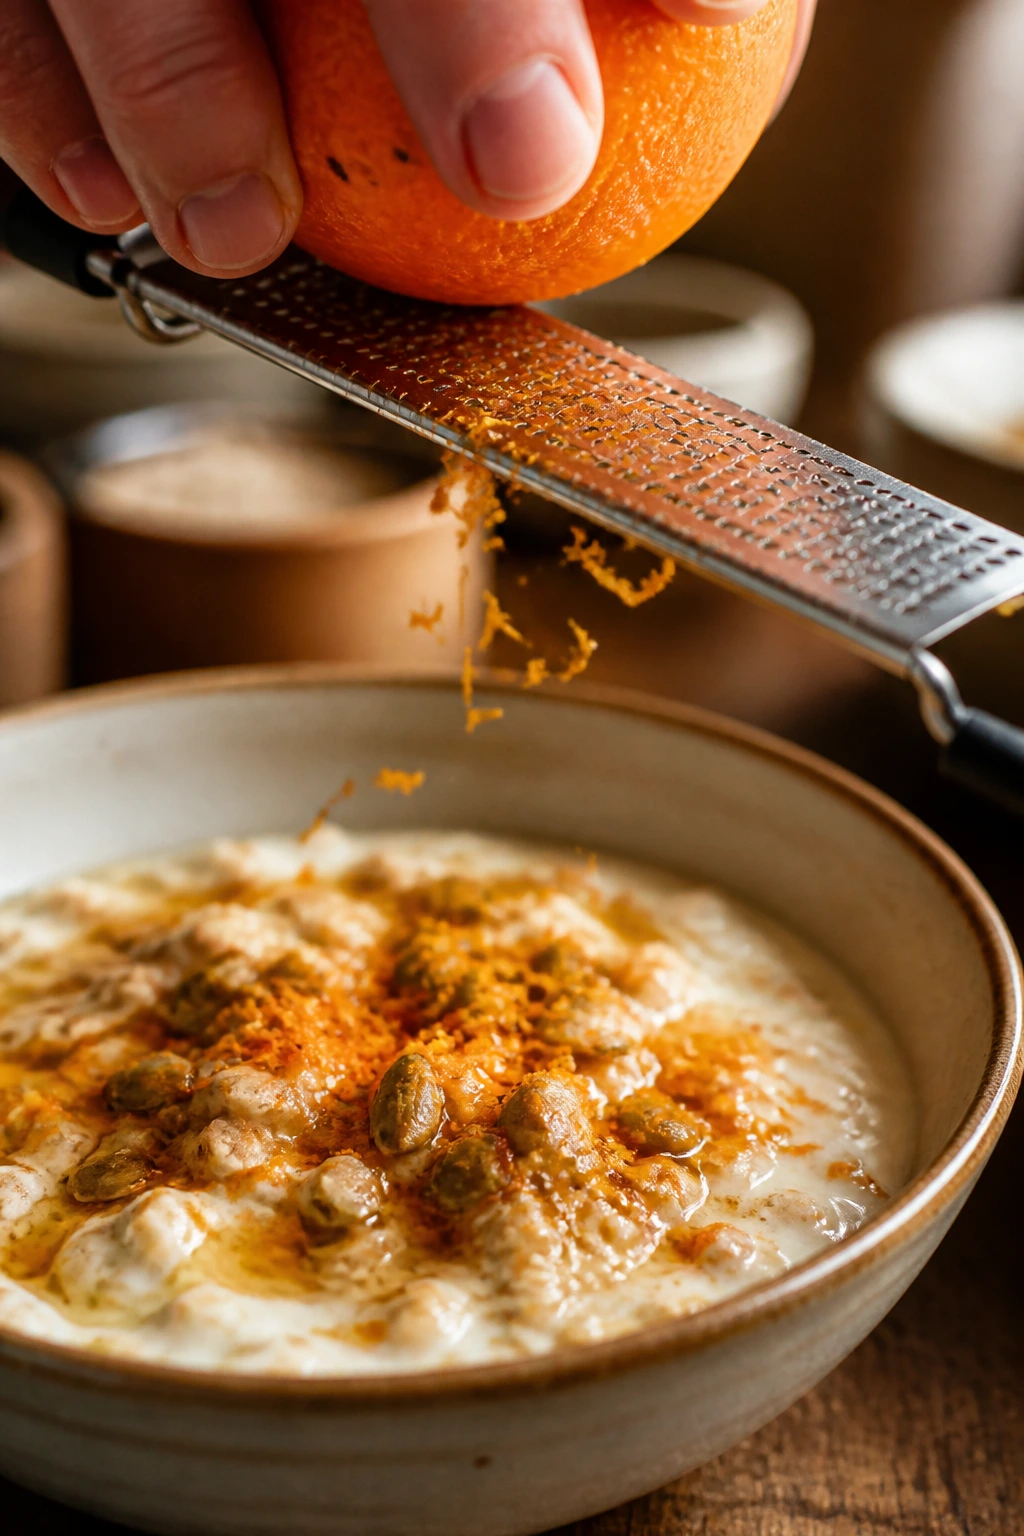
3. Cinnamon Apple Overnight Oats
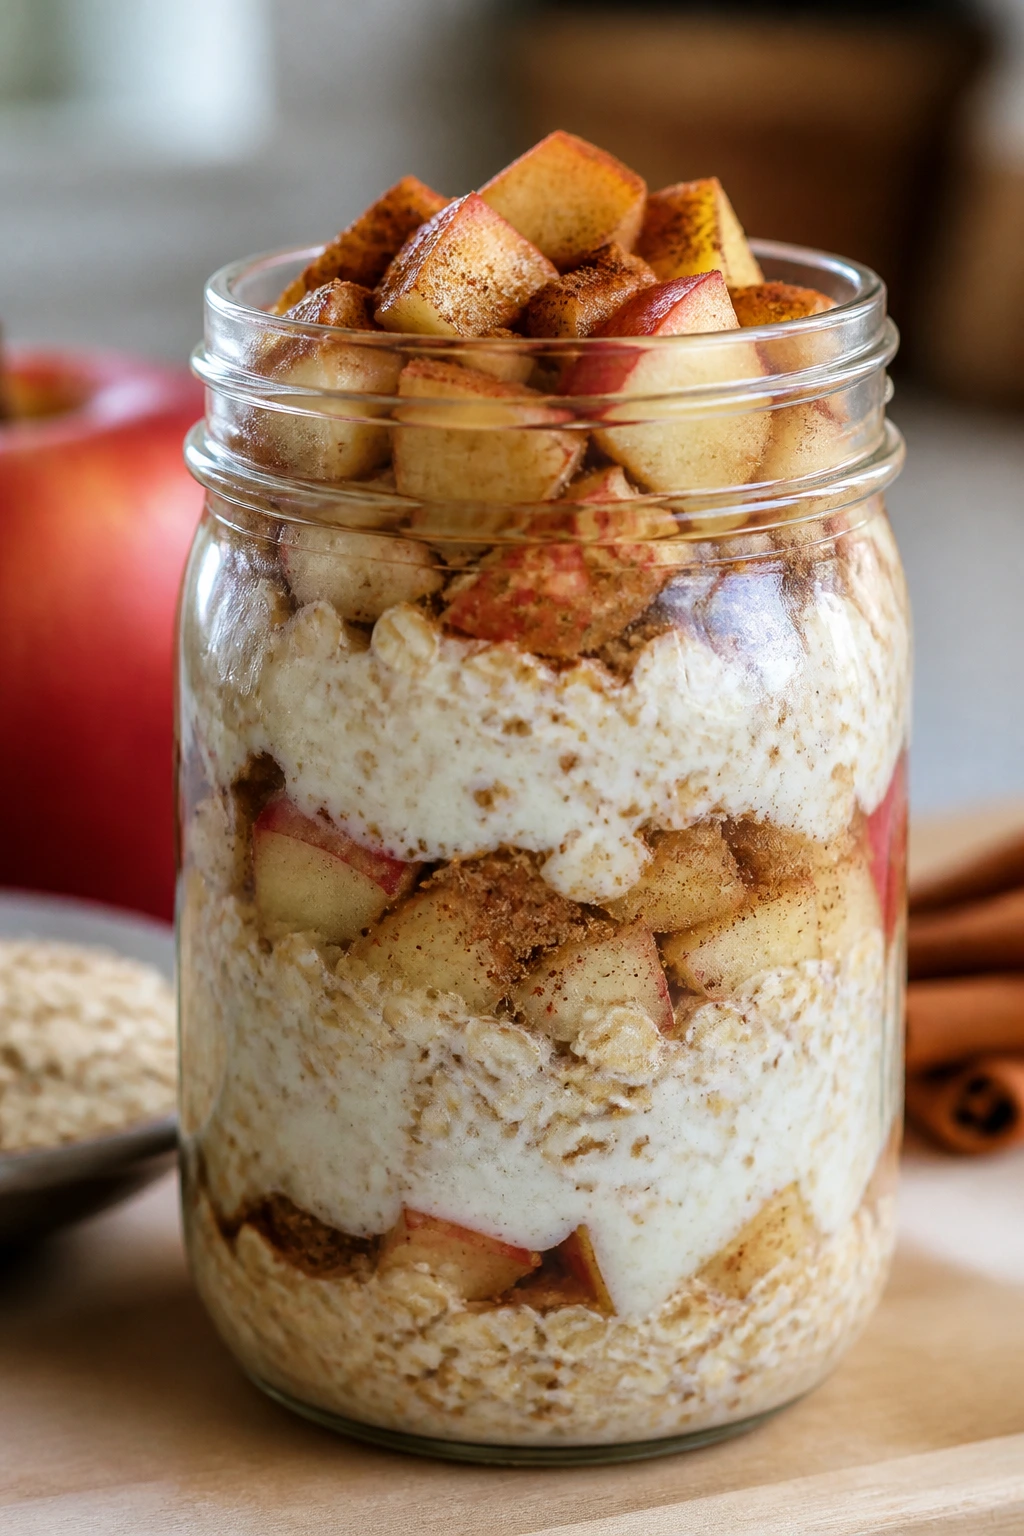
Intro: Overnight oats are one of those breakfast ideas that sounds trendy until you actually make them and realize they’re just practical. The oats soften in milk and yogurt, the apples stay crisp enough to give some bite, and the cinnamon turns the whole jar into something that smells like a warm kitchen, even when it’s cold from the fridge.
Why It Works: Rolled oats absorb liquid overnight without turning gluey the way quick oats can. Chia seeds help the mixture thicken, and a little Greek yogurt adds body so the bowl feels like a meal instead of a snack. The apple pieces keep it from feeling heavy.
Key Ingredients:
- 2 cups old-fashioned rolled oats
- 2 cups milk
- 1 cup plain Greek yogurt
- 2 tablespoons chia seeds
- 2 tablespoons maple syrup
- 1 teaspoon ground cinnamon
- 1/4 teaspoon fine salt
- 1 1/2 cups diced apple
- 1/4 cup chopped walnuts, optional
Quick Steps:
- Stir the oats, milk, yogurt, chia seeds, maple syrup, cinnamon, and salt in a large bowl or jar.
- Fold in the diced apple, saving a few pieces for the top.
- Cover and refrigerate for at least 6 hours, or overnight.
- Stir in a splash of milk in the morning if the oats look too thick.
- Spoon into bowls or jars and top with walnuts if using.
Equipment for This Recipe:
- Mixing bowl or large jar
- Spoon
- Measuring cups and spoons
- Airtight lids or containers
How to Serve This Dish: Serve cold from a jar or warm it for 30 to 45 seconds in the microwave if your crew prefers breakfast that is less chilly. A spoonful of peanut butter on top makes it feel more substantial.
Pro Tips for This Recipe:
- Use crisp apples like Honeycrisp or Pink Lady so the texture stays lively.
- If you want sweeter oats, add the maple syrup after chilling and taste first.
- Make three or four jars at once; the texture stays good for several days.
- A pinch of extra cinnamon right before serving wakes up the flavor.
Variations on This Dish:
- Peanut Butter Apple Pie: Stir in 2 tablespoons peanut butter and a pinch of nutmeg.
- Berry Morning Jar: Swap the apple for 1 cup chopped strawberries or blueberries.
- Dairy-Free Version: Use almond milk and coconut yogurt.
Common Mistakes to Avoid with This Dish:
- Too much liquid: Soupy oats happen fast; start with the written amount and loosen later if needed.
- Using instant oats: They can turn pasty by morning.
- Forgetting the salt: A tiny pinch keeps the oats from tasting flat and sleepy.
4. Breakfast Burritos with Eggs and Black Beans
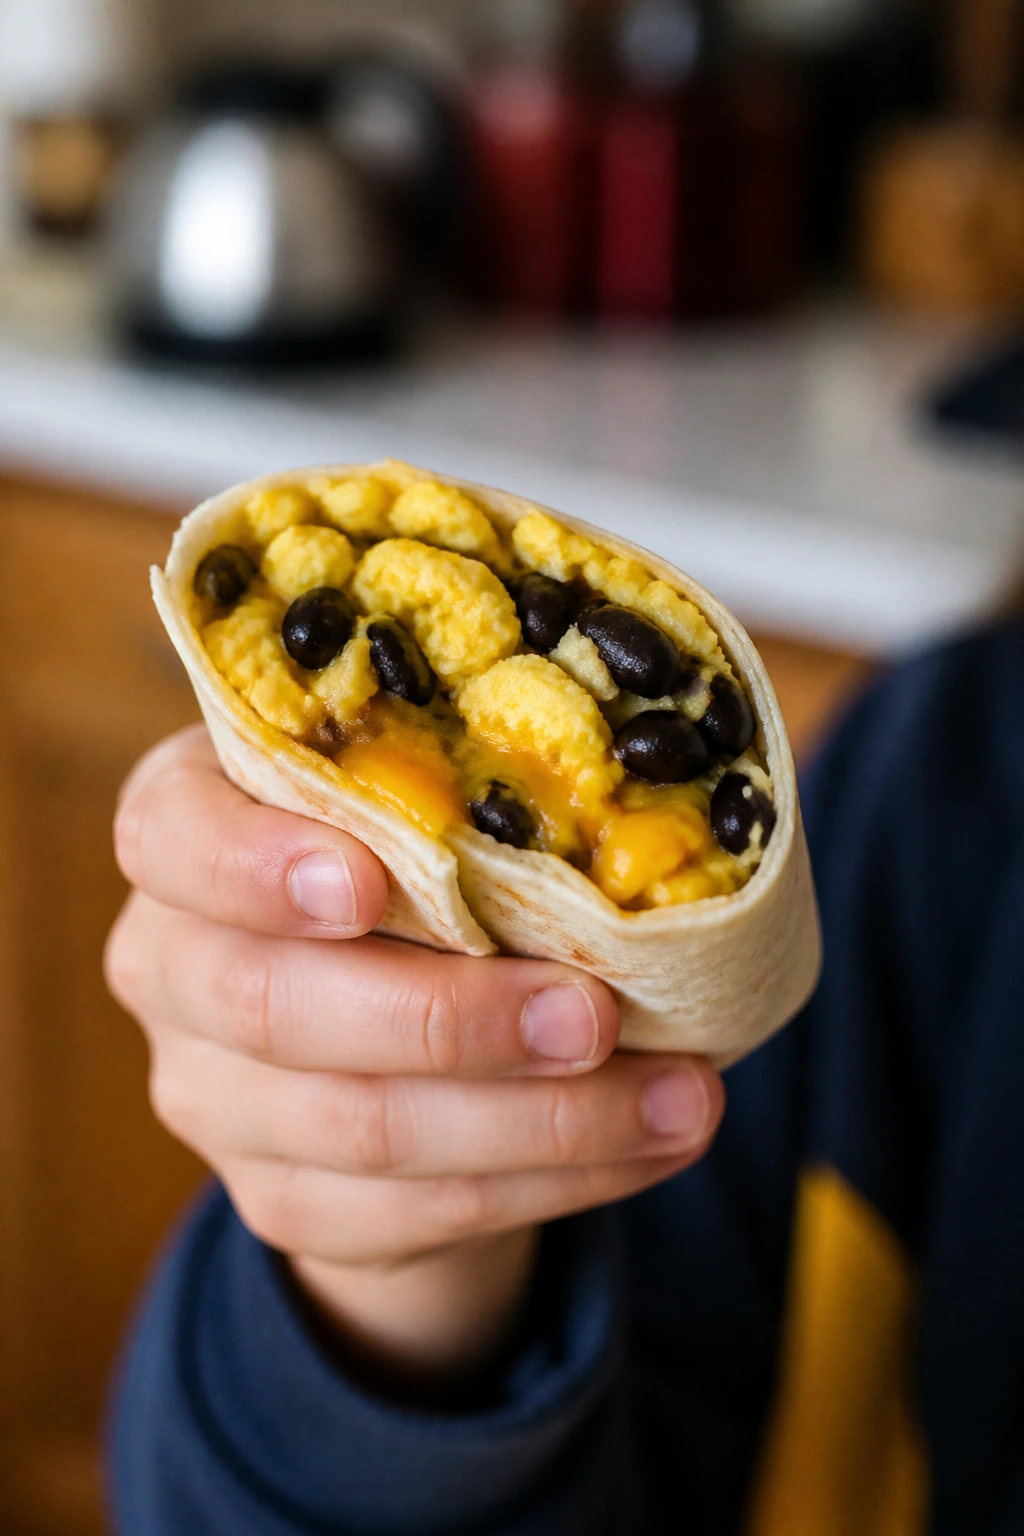
Intro: A breakfast burrito is a pocket of order in a messy morning. It is warm, filling, and easy to eat with one hand if someone is checking homework at the same time. The black beans give these burritos a little heft, and the salsa keeps the eggs from tasting dry.
Why It Works: Scrambled eggs set quickly, black beans add protein and fiber, and tortillas hold heat well enough for a short car ride or the first bell. These burritos also freeze beautifully, which is half the point when mornings feel rushed before the coffee even finishes dripping.
Key Ingredients:
- 8 large eggs
- 1 cup canned black beans, drained and rinsed
- 1 cup shredded cheddar or Monterey Jack
- 1/4 cup milk
- 1/2 teaspoon salt
- 1/4 teaspoon black pepper
- 1 tablespoon butter
- 6 large flour tortillas
- 1/2 cup salsa
Quick Steps:
- Whisk the eggs, milk, salt, and pepper in a bowl.
- Warm the butter in a skillet over medium heat and scramble the eggs softly.
- Stir in the black beans for the last minute, just to warm them through.
- Warm the tortillas for 20 seconds in a dry skillet or microwave so they bend without tearing.
- Fill each tortilla with eggs, cheese, and salsa, then roll tightly.
- Serve right away or wrap for later.
Equipment for This Recipe:
- Large nonstick skillet
- Mixing bowl
- Spatula
- Plate or cutting board for assembly
- Foil or parchment for wrapping
How to Serve This Dish: Cut burritos in half for smaller hands and serve with extra salsa for dipping. If you’re packing them, wrap each one in parchment and then foil so they stay warm a little longer.
Pro Tips for This Recipe:
- Scramble the eggs softly; dry eggs make the burrito feel heavy.
- Drain the beans well so the tortillas do not get soggy.
- Warm tortillas before rolling or they crack down the seam.
- Add salsa inside sparingly and serve more on the side.
Variations on This Dish:
- Sausage Burrito: Add 1 cup cooked breakfast sausage.
- Veggie Burrito: Use sautéed peppers and onions instead of beans.
- Freezer-Friendly Wrap: Skip fresh salsa inside and use it for serving after reheating.
Common Mistakes to Avoid with This Dish:
- Overfilling: Burritos split open when people try to stuff in one more spoonful.
- Cold tortillas: A cold tortilla tears and wastes the filling.
- Wet fillings: Pat beans dry and keep salsa on the side if you want a clean wrap.
5. Greek Yogurt Parfait Jars
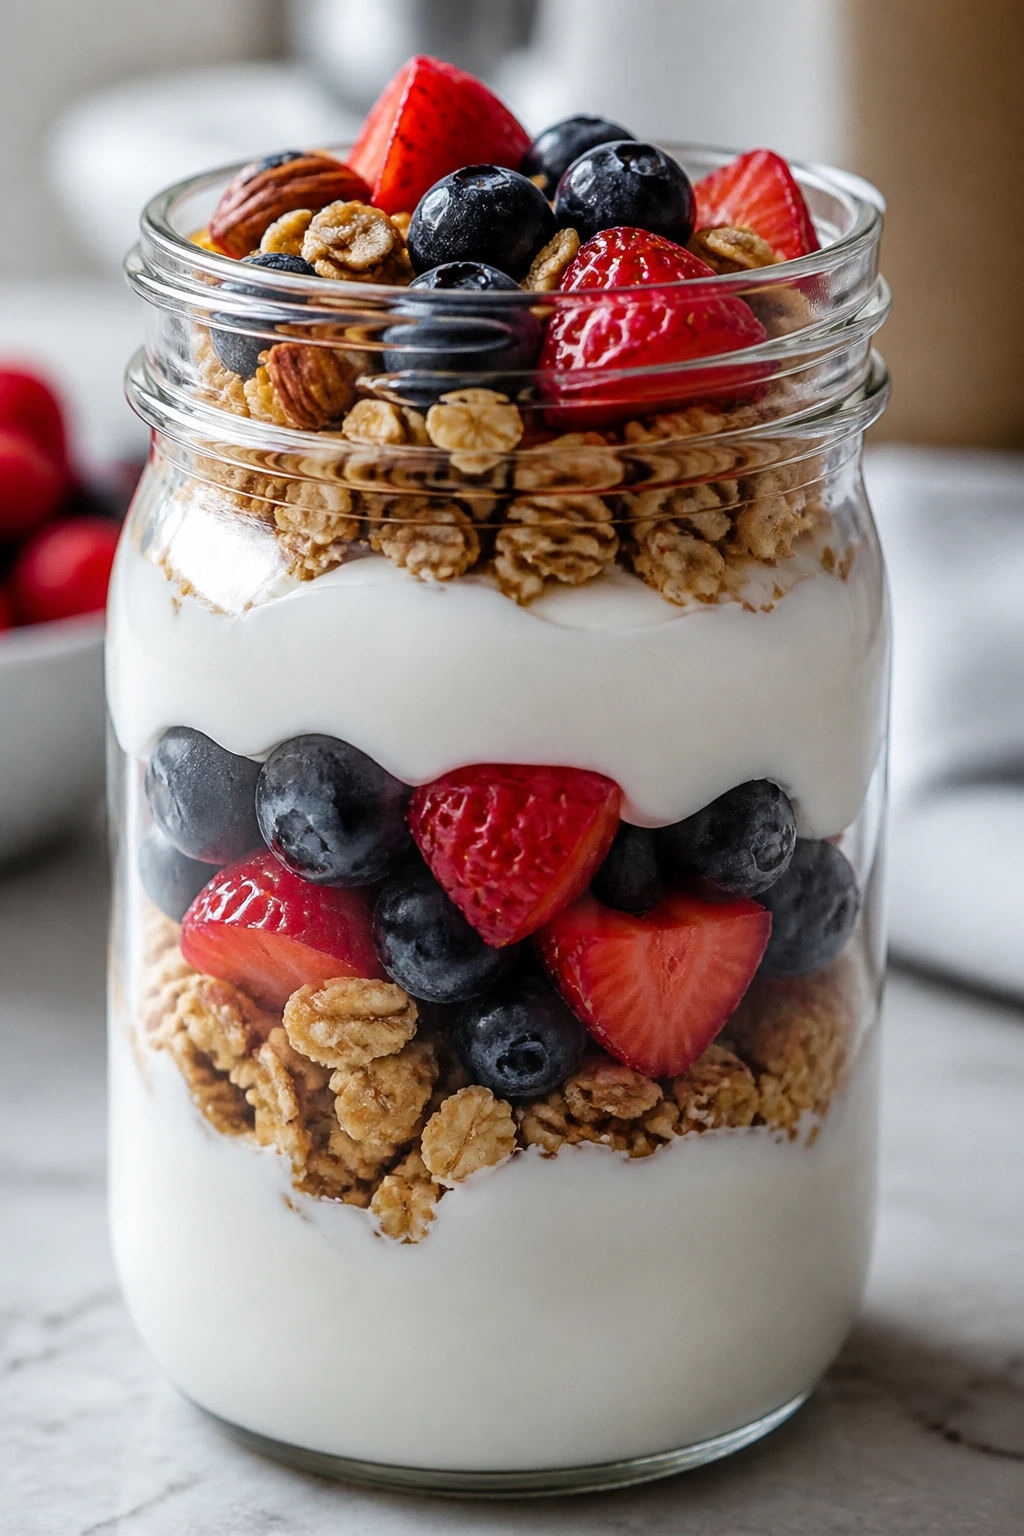
Intro: Parfait jars look fancy for about twelve seconds, then they become the easiest breakfast in the house. Layers of thick yogurt, crunchy granola, and berries give you cold creaminess against something crisp, and that contrast is what makes the jar feel like more than assembled leftovers.
Why It Works: Greek yogurt gives a lot of protein for the volume, and the granola brings crunch so the texture doesn’t go flat. If you build the jar in layers and keep the granola separate until eating, the whole thing stays better for school-morning pace.
Key Ingredients:
- 4 cups plain Greek yogurt
- 2 cups granola
- 2 cups mixed berries
- 2 tablespoons honey
- 1 tablespoon chia seeds
- 1 teaspoon vanilla extract
- 1/2 cup sliced almonds, optional
Quick Steps:
- Stir the yogurt with honey, vanilla, and chia seeds.
- Spoon yogurt into four jars.
- Add a layer of berries, then more yogurt.
- Top with granola just before serving, or keep it in a separate bag.
- Add almonds if using.
Equipment for This Recipe:
- 4 small jars or containers
- Spoon
- Measuring cups
- Small bowl for mixing
How to Serve This Dish: Hand out the jars cold, or pour them into bowls if that is easier for younger kids. A sliced banana on the side works when the berries are not enough to carry the whole meal.
Pro Tips for This Recipe:
- Use thick yogurt so the layers stay put.
- Keep granola dry until the last minute.
- Frozen berries work, but thaw and drain them first if you want neat layers.
- A drizzle of extra honey on top makes the yogurt taste less tart.
Variations on This Dish:
- Peach and Almond Jar: Use sliced peaches and slivered almonds.
- Chocolate Crunch Jar: Add cocoa granola and a few mini chocolate chips.
- Dairy-Free Parfait: Use coconut yogurt and dairy-free granola.
Common Mistakes to Avoid with This Dish:
- Adding granola too early: It softens fast and loses the whole point.
- Thin yogurt: Runny yogurt slides and turns the jar into soup.
- Over-sweetening: The berries and granola already bring some sweetness.
6. Peanut Butter Banana Toast with Chia
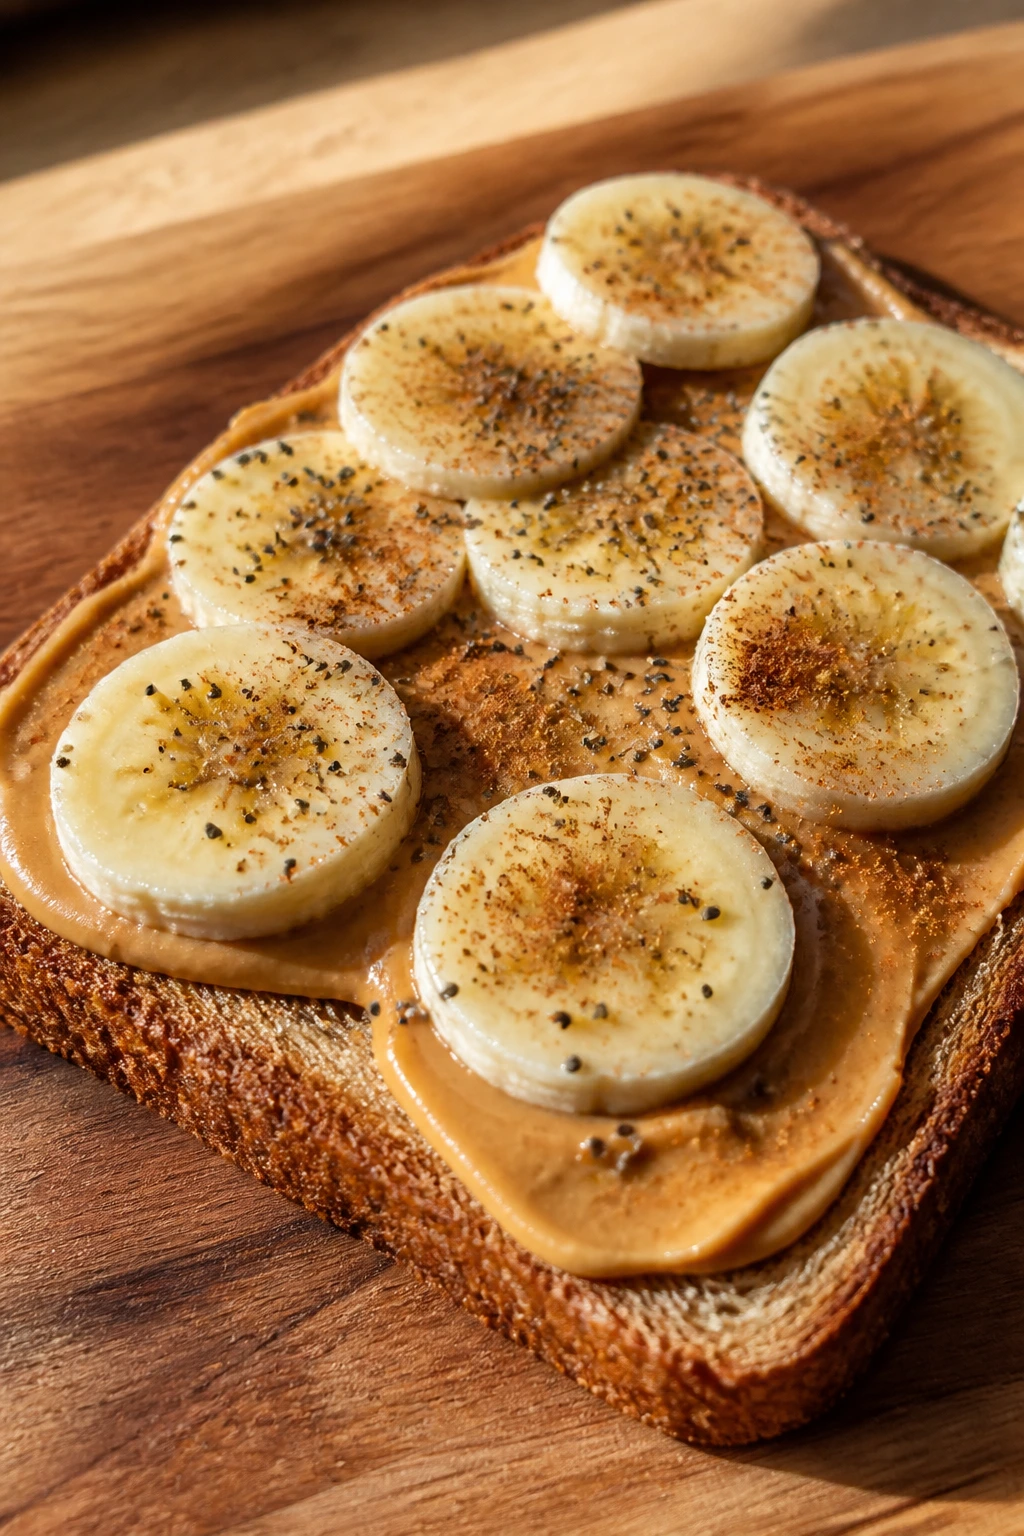
Intro: This is the sort of breakfast that saves a morning without pretending to be something else. Toast, peanut butter, banana, a little cinnamon, and a scatter of chia seeds. Done. It is fast, filling enough to quiet the first round of complaints, and cheap enough to make repeatedly without anyone flinching.
Why It Works: Peanut butter brings fat and protein, banana adds quick energy and softness, and the toast gives structure so the topping does not slide around. Chia seeds add a bit of crunch and make the whole thing feel more finished than plain banana toast.
Key Ingredients:
- 8 slices whole wheat bread
- 1 cup creamy peanut butter
- 4 ripe bananas, sliced
- 2 teaspoons chia seeds
- 1 teaspoon ground cinnamon
- 2 teaspoons honey, optional
- Pinch of flaky salt, optional
Quick Steps:
- Toast the bread until golden and firm.
- Spread peanut butter edge to edge while the toast is still warm.
- Layer banana slices on top in a single layer.
- Sprinkle with cinnamon, chia seeds, and a pinch of salt.
- Drizzle with honey if you want extra sweetness.
Equipment for This Recipe:
- Toaster or toaster oven
- Butter knife
- Cutting board
- Small spoon for chia seeds
How to Serve This Dish: Serve open-faced for a fast breakfast or cut each slice into triangles for smaller kids. If you need more staying power, add a glass of milk or a hard-boiled egg.
Pro Tips for This Recipe:
- Use bananas with brown speckles; green bananas taste starchy here.
- Toast the bread well so it holds the weight of the topping.
- Natural peanut butter works fine, but stir it first so the oil is mixed in.
- A tiny pinch of flaky salt makes the banana taste sweeter.
Variations on This Dish:
- Apple Butter Twist: Swap banana for thin apple slices and a smear of apple butter.
- Chocolate Peanut Toast: Add a few cocoa nibs or mini chips.
- Sunflower Seed Version: Use sunflower butter for a nut-free option.
Common Mistakes to Avoid with This Dish:
- Soft bread: Thin sandwich bread bends under the topping; use sturdy slices.
- Too much banana: Thick piles slide off the toast.
- Skipping the toast step: Warm bread helps the peanut butter melt slightly and cling better.
7. Blueberry Baked Oatmeal Cups
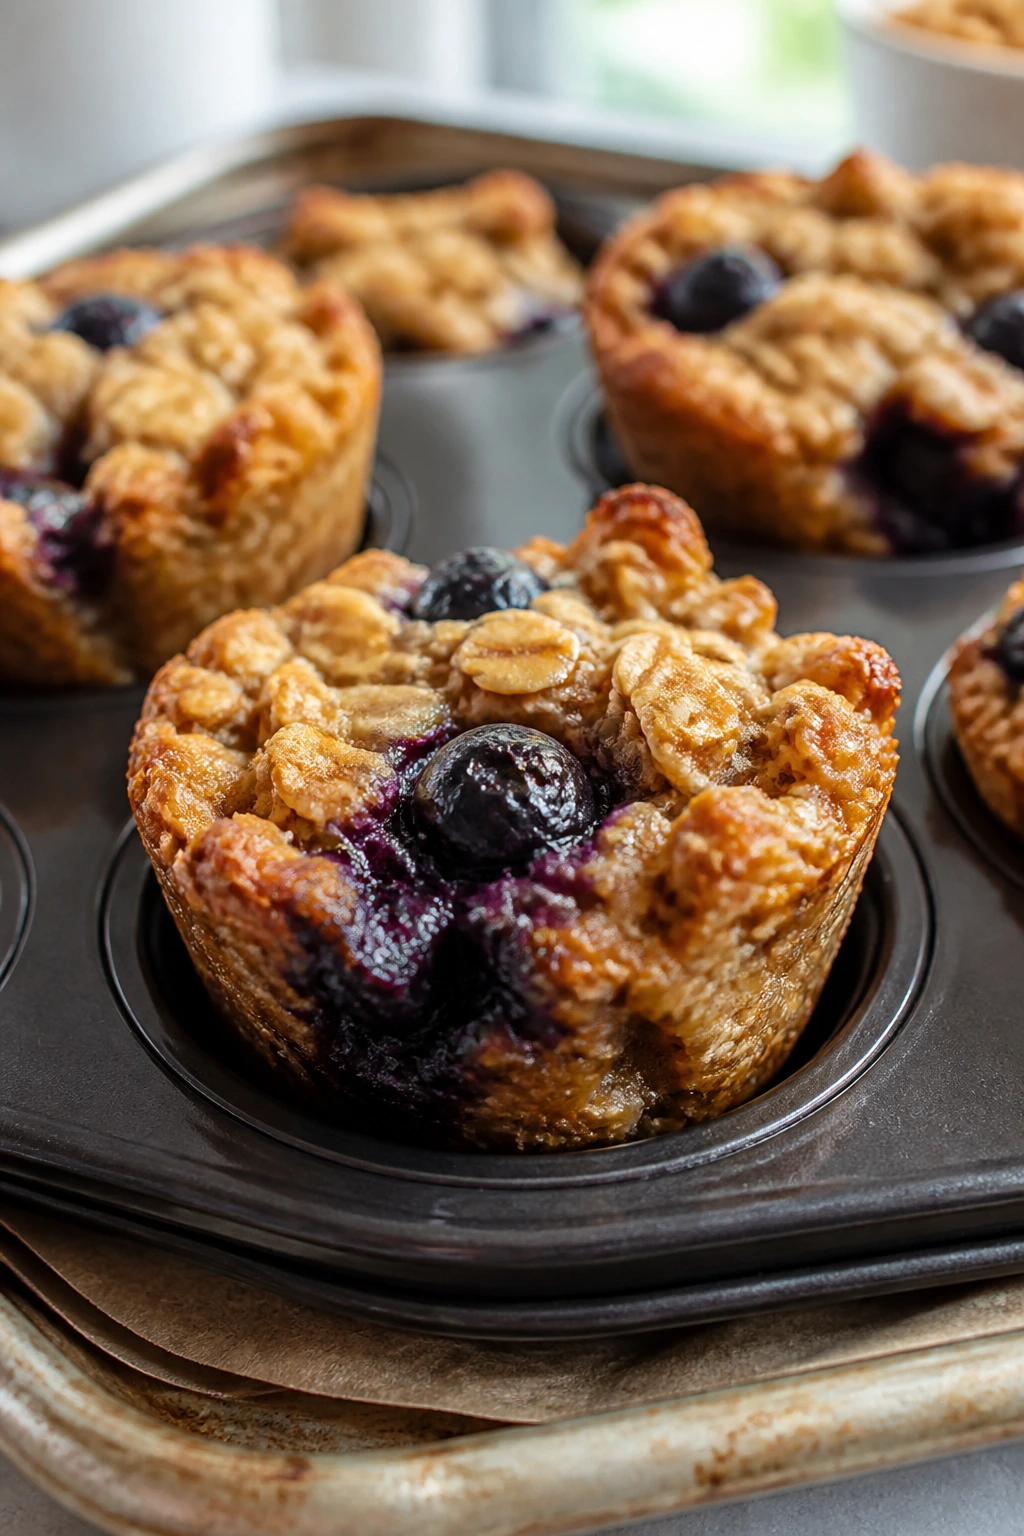
Intro: These baked oatmeal cups sit somewhere between a muffin and a bowl of porridge, which makes them a useful middle ground for kids who are picky about texture. The edges bake up lightly crisp, the centers stay tender, and the blueberries burst just enough to stain the oats purple in the best way.
Why It Works: Oats, eggs, and milk bake into a sliceable, handheld breakfast that reheats cleanly. The blueberry pockets keep each cup moist, and because the oats are bound with eggs, they do not crumble apart the moment somebody grabs one in a hurry.
Key Ingredients:
- 2 cups old-fashioned rolled oats
- 2 large eggs
- 2 cups milk
- 1/3 cup maple syrup
- 1 teaspoon baking powder
- 1 teaspoon cinnamon
- 1/2 teaspoon fine salt
- 1 1/2 cups blueberries
- 2 tablespoons melted butter
Quick Steps:
- Preheat the oven to 350°F and grease a 12-cup muffin tin.
- Whisk the eggs, milk, maple syrup, melted butter, cinnamon, baking powder, and salt.
- Stir in the oats and let the mixture sit for 5 minutes.
- Fold in the blueberries and divide the batter among the muffin cups.
- Bake for 25 to 28 minutes until set and golden around the edges.
- Cool for 10 minutes before removing.
Equipment for This Recipe:
- Muffin tin
- Mixing bowl
- Whisk
- Measuring cups
- Small scoop or spoon
How to Serve This Dish: Serve with yogurt or a few extra berries on the side. They are especially good packed in a container with a smear of almond butter on the lid.
Pro Tips for This Recipe:
- Let the oats sit for 5 minutes so they soak up liquid before baking.
- Toss frozen blueberries in a spoonful of oats before folding them in.
- Do not overbake or the cups get dry in the center.
- These freeze well, and they thaw fast on the counter.
Variations on This Dish:
- Banana Nut Cups: Swap the blueberries for sliced banana and chopped walnuts.
- Apple Cinnamon Cups: Use diced apple and a little nutmeg.
- Lemon Berry Cups: Add lemon zest for a brighter finish.
Common Mistakes to Avoid with This Dish:
- Using instant oats: They make the cups gummy instead of tender.
- Skipping the rest time: The oats need those 5 minutes to hydrate.
- Packing too many berries: The cups can collapse in the center if overloaded.
8. Ham and Cheese Breakfast Sliders

Intro: These sliders bring school-cafeteria energy in the best way. Soft rolls, smoky ham, melted cheese, and a buttery top that bakes into a shiny crust. They’re the kind of breakfast that disappears from the pan before anyone has time to ask for “just half.”
Why It Works: The rolls bake as one slab, which means you can assemble the whole tray fast and cut it afterward. Ham and cheese hold heat well, and a brushed butter topping keeps the rolls from going dry when reheated.
Key Ingredients:
- 12 Hawaiian rolls
- 12 slices deli ham
- 8 slices cheddar or Swiss cheese
- 4 tablespoons butter, melted
- 1 teaspoon Dijon mustard
- 1 teaspoon poppy seeds
- 1/2 teaspoon garlic powder
Quick Steps:
- Preheat the oven to 350°F.
- Slice the rolls in half horizontally without separating them.
- Layer ham and cheese on the bottom half, then replace the tops.
- Mix the melted butter, mustard, poppy seeds, and garlic powder.
- Brush the mixture over the rolls and bake for 12 to 15 minutes until the cheese melts and the tops turn golden.
- Slice into individual sliders and serve warm.
Equipment for This Recipe:
- 9×13-inch baking dish
- Serrated knife
- Pastry brush
- Small bowl
- Foil, optional for covering
How to Serve This Dish: Serve two sliders per person with fruit on the side. If you’re feeding a bigger crowd, keep the tray covered loosely with foil for a few minutes so everything stays soft.
Pro Tips for This Recipe:
- Keep the rolls connected while slicing; it makes assembly easier.
- Use thin ham slices so the sliders do not become bulky.
- Cover with foil for the first 8 minutes if the tops brown too fast.
- A little Dijon in the butter adds sharpness without making them “grown-up” tasting.
Variations on This Dish:
- Turkey and Cheddar: Swap ham for turkey and add a thin layer of cranberry sauce.
- Egg Breakfast Sliders: Add scrambled eggs under the cheese.
- Everything Bagel Sliders: Use everything bagel seasoning instead of poppy seeds.
Common Mistakes to Avoid with This Dish:
- Cutting the rolls apart too early: The whole slab is easier to handle.
- Too much butter on top: The rolls can get soggy instead of glossy.
- Baking uncovered the whole time: The tops can brown before the cheese melts.
9. Oven French Toast Sticks
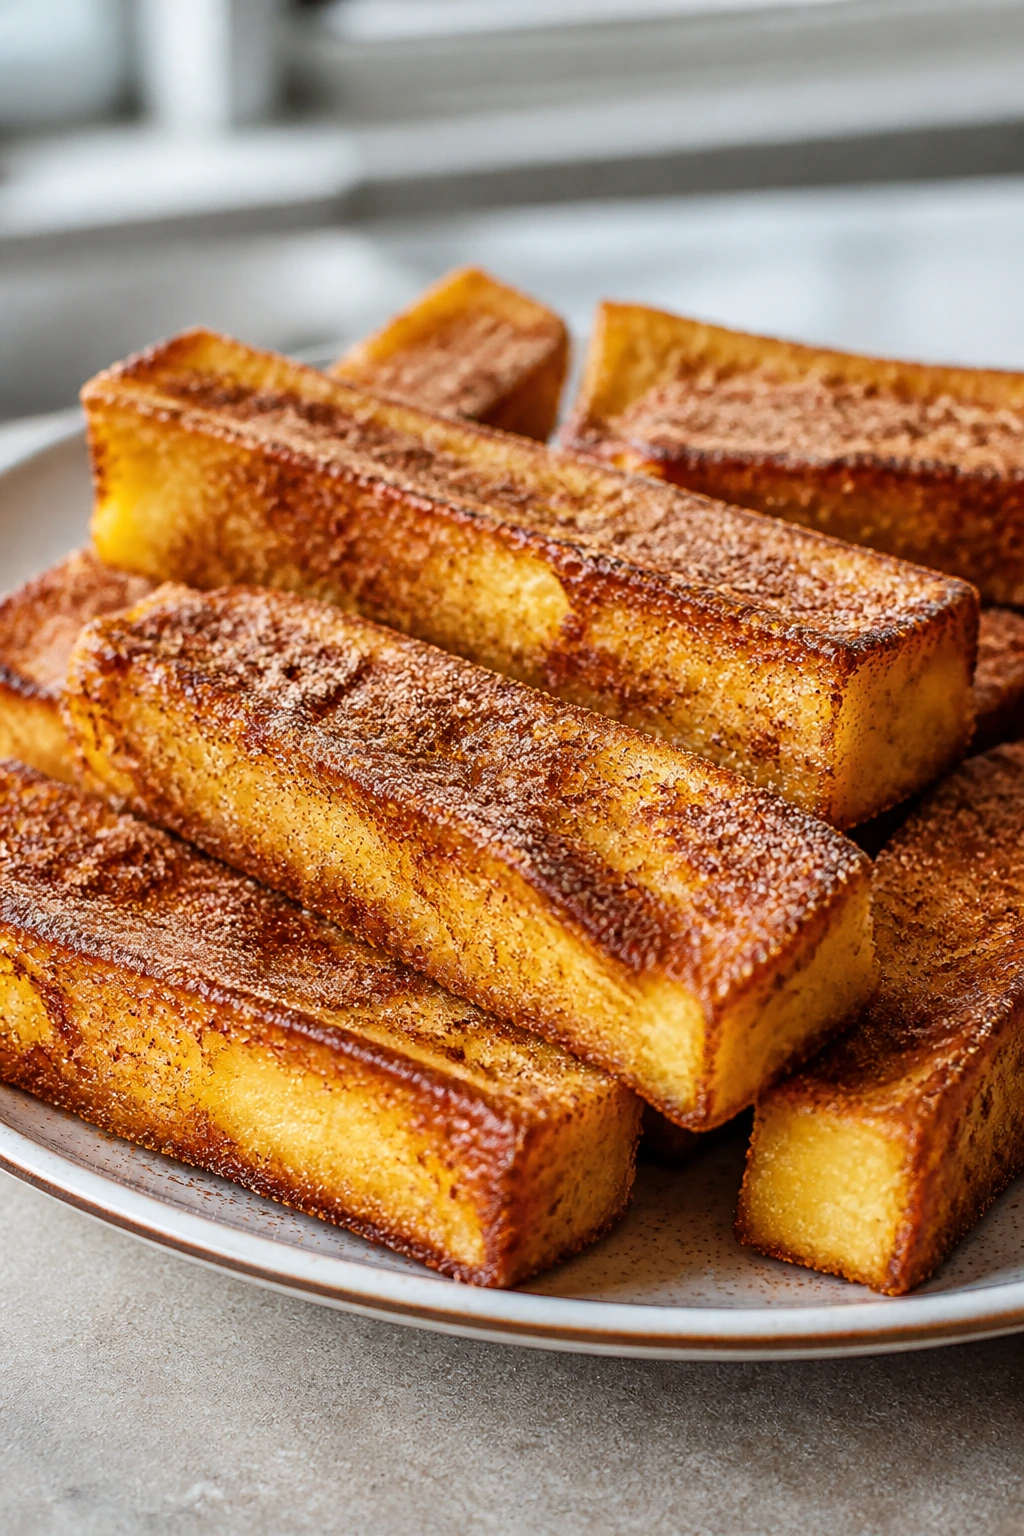
Intro: French toast sticks are the kind of breakfast that makes kids believe you tried harder than you did. They bake on a sheet pan, crisp at the edges, and still keep that custardy middle people expect from French toast. Bonus: dipping them in syrup feels like a game, which helps on groggy mornings.
Why It Works: Cutting the bread into sticks increases surface area, so you get more browned edges per bite. Baking them instead of frying means you can make a full tray at once and keep the stove free for coffee or eggs.
Key Ingredients:
- 8 thick slices brioche or challah
- 4 large eggs
- 1 cup milk
- 1 tablespoon sugar
- 1 teaspoon vanilla extract
- 1 teaspoon ground cinnamon
- 2 tablespoons butter, melted
- Maple syrup, for serving
Quick Steps:
- Preheat the oven to 425°F and line a baking sheet with parchment.
- Cut the bread into thick sticks.
- Whisk the eggs, milk, sugar, vanilla, and cinnamon in a shallow dish.
- Dip each stick briefly, then set on the pan and brush with melted butter.
- Bake for 12 to 14 minutes, flipping once halfway, until golden and set.
- Serve warm with syrup.
Equipment for This Recipe:
- Rimmed baking sheet
- Parchment paper
- Shallow dish
- Whisk
- Tongs or fingers for flipping
How to Serve This Dish: Pile the sticks on a platter with syrup in a small cup for dipping. A bowl of strawberries on the side makes the plate look fuller without adding much work.
Pro Tips for This Recipe:
- Use thick bread so the sticks stay custardy in the middle.
- Dip quickly; soaked bread turns mushy in the oven.
- Bake on parchment, not foil, so the bottoms release better.
- A little powdered sugar at the end gives them a more finished look.
Variations on This Dish:
- Pumpkin Spice Sticks: Add 1/2 teaspoon pumpkin spice to the egg mix.
- Coconut French Toast: Use coconut milk and shredded coconut.
- Savory Parmesan Sticks: Skip sugar and cinnamon, then add parmesan and chives.
Common Mistakes to Avoid with This Dish:
- Thin bread: It falls apart once soaked.
- Too much custard: The sticks stay wet in the center.
- Skipping the flip: Both sides need browning for the texture to work.
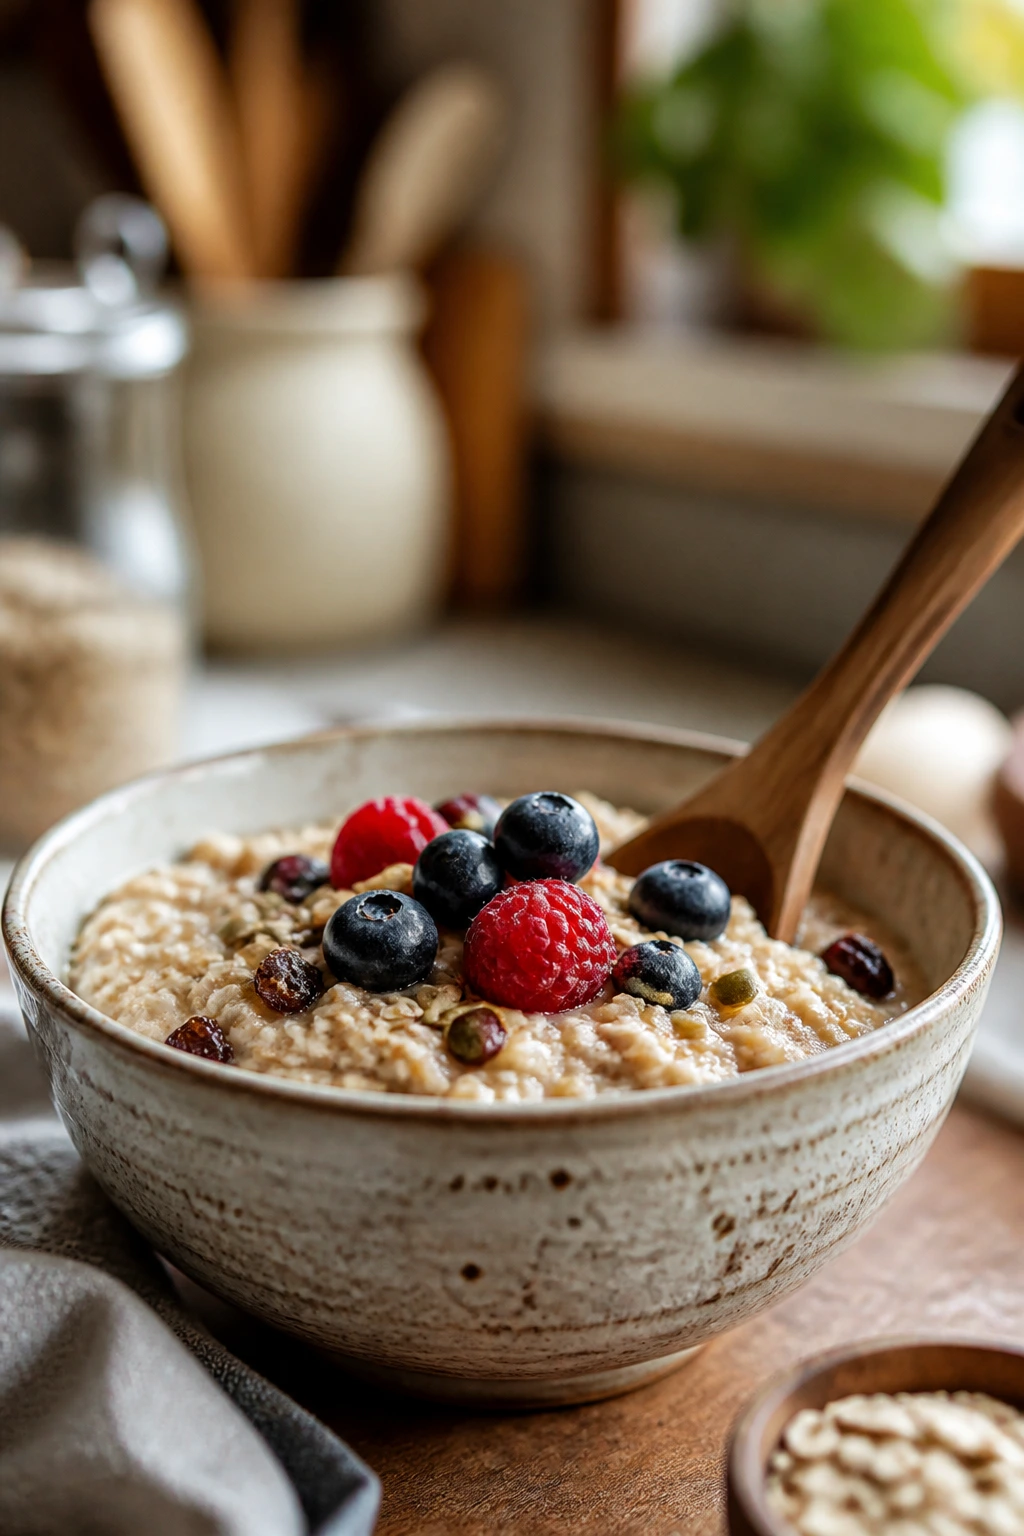
10. Slow Cooker Apple Cinnamon Oatmeal
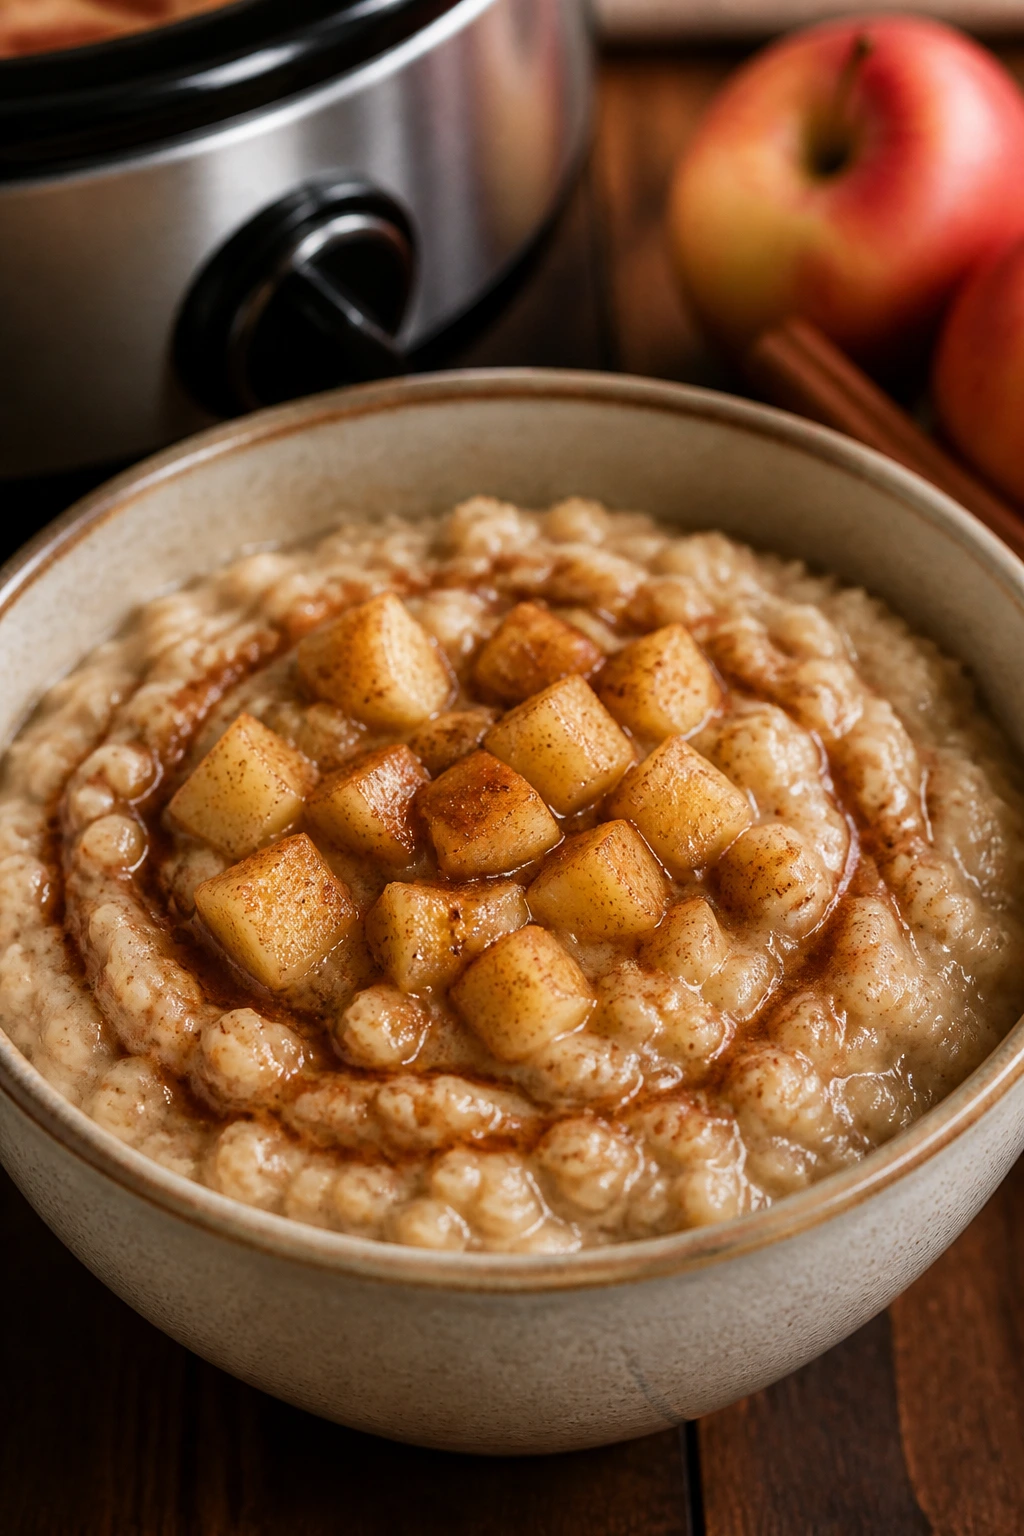
Intro: Slow cooker oatmeal is for the mornings when the stove should not be part of the conversation. You wake up to warm cinnamon, soft apples, and oats that have turned creamy without babysitting. It is not flashy. It is steady, and that’s the charm.
Why It Works: The low, slow heat softens the oats and apples together, giving the bowl a cooked-down flavor that feels more deliberate than quick stovetop oatmeal. Steel-cut oats hold up especially well here, but old-fashioned oats can work if you shorten the cook time.
Key Ingredients:
- 2 cups steel-cut oats
- 6 cups water
- 2 cups milk
- 2 apples, peeled and diced
- 1/4 cup brown sugar
- 2 teaspoons ground cinnamon
- 1/2 teaspoon fine salt
- 2 tablespoons butter
Quick Steps:
- Grease the slow cooker insert lightly.
- Add the oats, water, milk, apples, brown sugar, cinnamon, salt, and butter.
- Stir once, cover, and cook on low for 7 to 8 hours.
- Stir well in the morning; add a splash of milk if needed.
- Spoon into bowls and top as you like.
Equipment for This Recipe:
- Slow cooker
- Measuring cups
- Wooden spoon
- Ladle
- Airtight containers for leftovers
How to Serve This Dish: Serve in bowls with extra milk, chopped nuts, or a spoonful of yogurt. If people eat at different times, keep the oatmeal on warm and stir before each ladle.
Pro Tips for This Recipe:
- Grease the insert so the edges do not glue themselves on.
- Dice the apples small so they soften evenly.
- Stir well before serving because the bottom can thicken first.
- This base takes well to raisins, chopped pears, or a few spoonfuls of jam.
Variations on This Dish:
- Maple Pecan Version: Swap the brown sugar for maple syrup and add pecans at serving.
- Pear and Ginger Oatmeal: Use diced pear and 1/4 teaspoon ground ginger.
- Protein Bowl: Stir in Greek yogurt after cooking for extra body.
Common Mistakes to Avoid with This Dish:
- Using quick oats for a long cook: They break down too far.
- Too little liquid: The oatmeal can dry at the edges.
- Lifting the lid too often: Steam loss changes the texture.
11. Sausage and Egg Breakfast Casserole
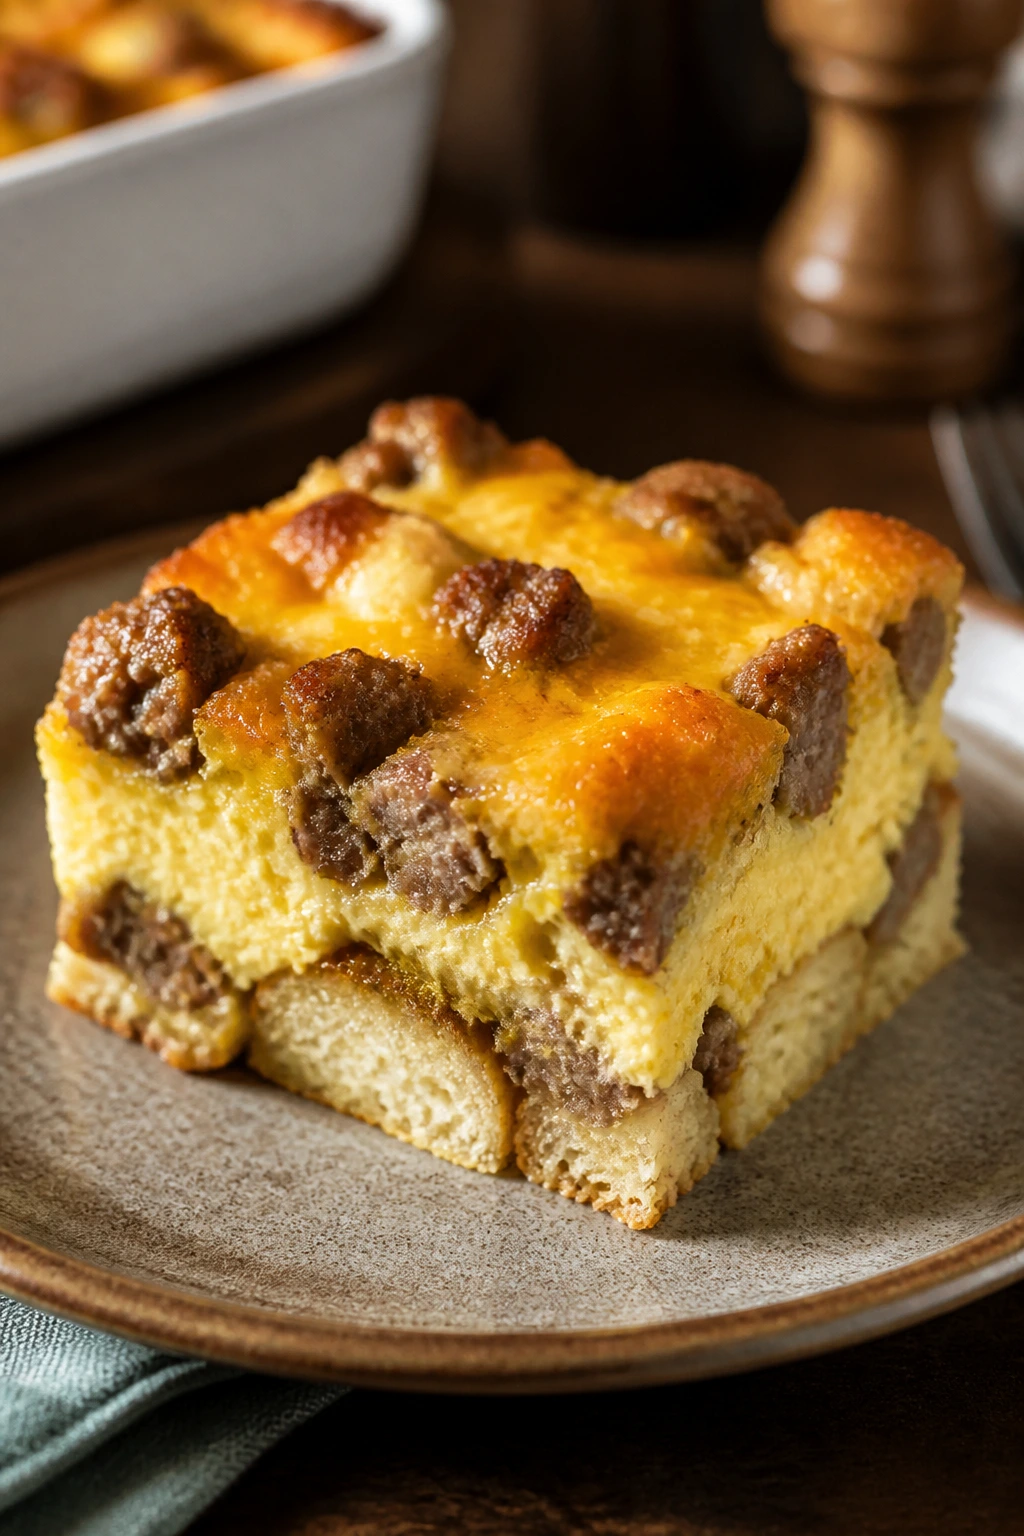
Intro: A good breakfast casserole smells like the oven did something wise while you were getting dressed. Sausage, eggs, bread, and cheese bake together into a sliceable square that feeds a table without each person demanding a separate pan. That alone makes it worth keeping in the back pocket.
Why It Works: Cubed bread soaks up the egg mixture and turns tender instead of soggy when baked long enough. Sausage adds enough salt and fat that the casserole tastes finished even before anything hits the plate.
Key Ingredients:
- 1 pound breakfast sausage
- 8 large eggs
- 2 cups milk
- 6 cups cubed day-old bread
- 2 cups shredded cheddar cheese
- 1/2 cup diced onion
- 1/2 teaspoon salt
- 1/2 teaspoon black pepper
Quick Steps:
- Preheat the oven to 375°F and grease a 9×13-inch baking dish.
- Brown the sausage and onion in a skillet, then drain excess fat.
- Whisk the eggs, milk, salt, and pepper.
- Layer the bread, sausage, and cheese in the dish, then pour the egg mixture over the top.
- Press the bread down gently so it absorbs the liquid, then bake for 35 to 40 minutes until set and golden.
- Rest for 10 minutes before slicing.
Equipment for This Recipe:
- 9×13-inch baking dish
- Large skillet
- Mixing bowl
- Whisk
- Spatula
How to Serve This Dish: Cut into squares and serve with fruit or a spoonful of salsa. The casserole holds its shape better after a short rest, so give it those 10 minutes even if the crowd is hungry.
Pro Tips for This Recipe:
- Day-old bread works better than fresh because it drinks up the custard without collapsing.
- Drain the sausage well so the casserole does not turn greasy.
- Press the bread lightly after pouring in the eggs to help the top finish evenly.
- You can assemble it the night before and bake it in the morning.
Variations on This Dish:
- Veggie Casserole: Use spinach, peppers, and mushrooms instead of sausage.
- Hash Brown Base: Swap cubed bread for thawed hash browns.
- Southwest Style: Add jalapeños, pepper jack, and a spoonful of salsa in the egg mix.
Common Mistakes to Avoid with This Dish:
- Using fresh soft bread: It can turn into mush.
- Underbaking: The center should not wobble when you move the pan.
- Cutting too soon: Hot casseroles fall apart if sliced immediately.
12. Breakfast Quesadillas with Eggs and Cheese

Intro: Breakfast quesadillas are what happen when eggs need to become more portable. The tortilla crisps in the skillet, the cheese melts into the eggs, and the whole thing slices into wedges that even sleepy people can manage. They are fast enough for weekdays and forgiving enough for imperfect mornings.
Why It Works: A hot skillet gives the tortilla a brown, crisp shell in just a few minutes, while the filling stays soft inside. Eggs and cheese create a natural glue, so the wedges hold together better than a loose scramble on a plate.
Key Ingredients:
- 4 large flour tortillas
- 6 large eggs
- 1/4 cup milk
- 1 cup shredded Monterey Jack
- 1/2 cup cooked crumbled bacon or sausage
- 1/4 cup diced bell pepper
- 1 tablespoon butter
- Salt and pepper to taste
Quick Steps:
- Whisk the eggs, milk, salt, and pepper, then scramble them softly.
- Warm a skillet over medium heat and melt a little butter.
- Lay one tortilla in the skillet, add cheese, eggs, bacon, and peppers, then more cheese.
- Top with a second tortilla or fold one tortilla in half, depending on size.
- Cook until browned on both sides and the cheese melts, about 2 to 3 minutes per side.
- Cut into wedges and serve.
Equipment for This Recipe:
- Large skillet
- Spatula
- Mixing bowl
- Whisk
- Sharp knife or pizza cutter
How to Serve This Dish: Serve with salsa or sour cream for dipping and a few orange slices on the side. If the quesadillas are for grab-and-go, wrap the wedges in parchment so they stay cleaner to hold.
Pro Tips for This Recipe:
- Keep the heat at medium so the tortilla browns before the cheese burns.
- Use shredded cheese that melts well; it helps lock the wedges together.
- Don’t overload the filling or the quesadilla tears when flipped.
- A thin smear of refried beans under the eggs adds body and stops slipping.
Variations on This Dish:
- Bean and Cheese Version: Use black beans and skip the meat.
- Spinach and Feta: Swap the bacon for spinach and feta.
- Mild Taco Quesadilla: Add a pinch of cumin and a little salsa inside.
Common Mistakes to Avoid with This Dish:
- High heat: The tortilla burns before the middle is hot.
- Too much filling: The quesadilla breaks open in the pan.
- Skipping the rest: Let it sit for a minute before slicing so the cheese settles.
13. Mango Chia Pudding
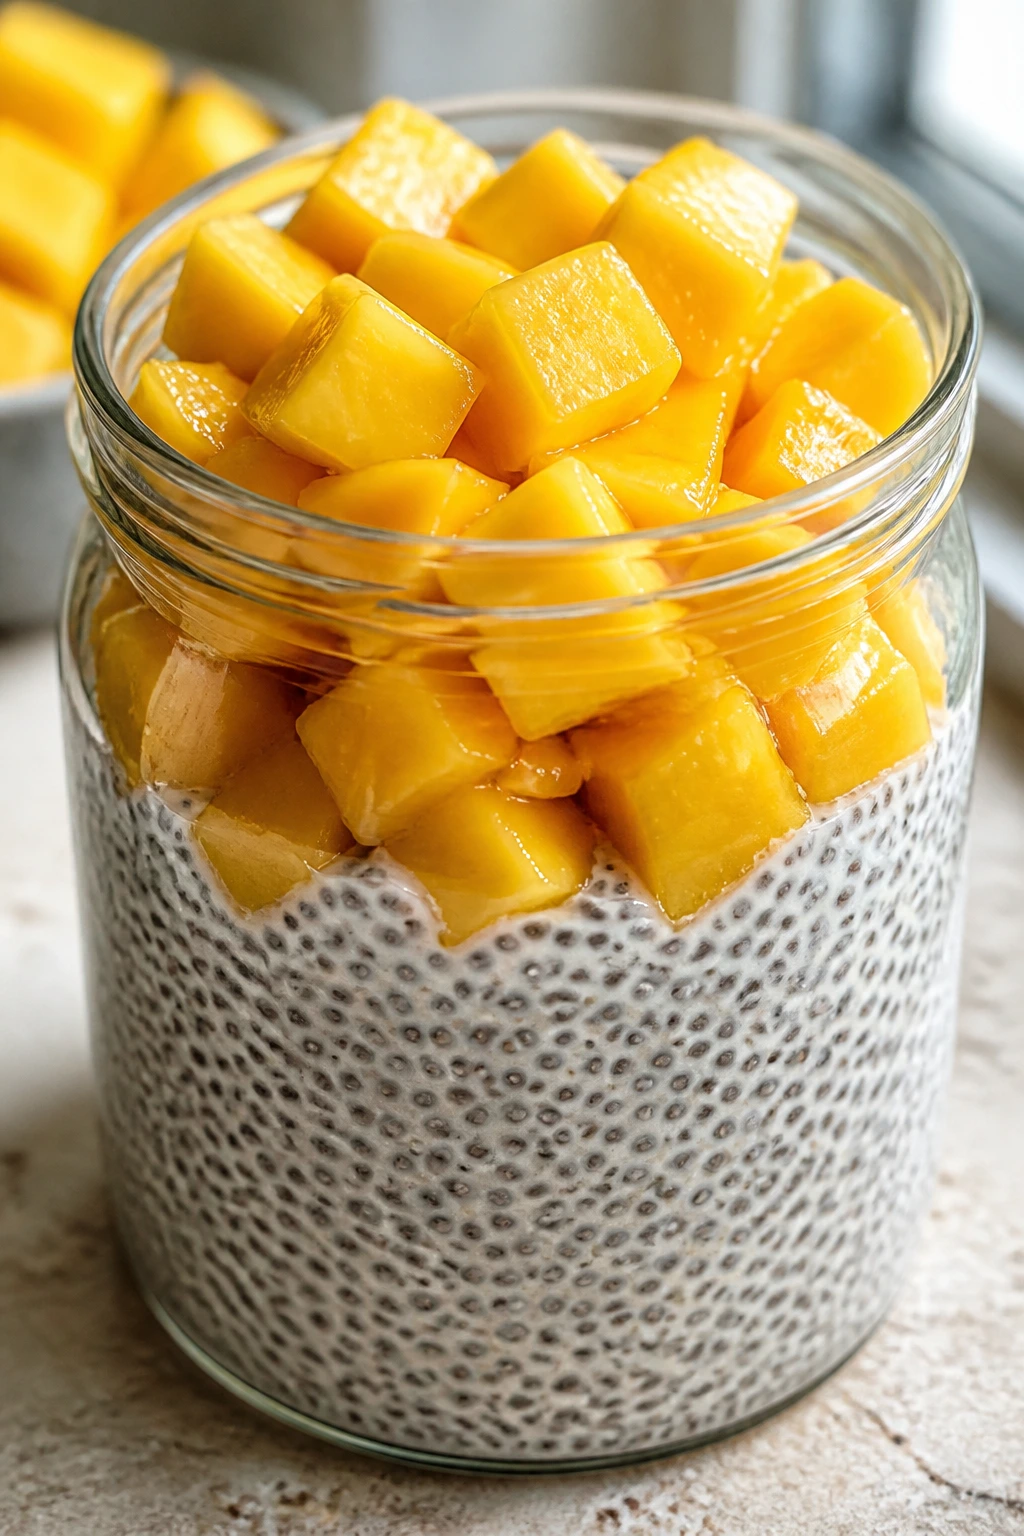
Intro: Chia pudding has the texture of tiny seeds doing a surprising amount of work. After a few hours in the fridge, the mixture turns thick and spoonable, with mango on top making it feel brighter and less “health food store.” It’s cold, clean, and easy to portion out before the day starts.
Why It Works: Chia seeds absorb liquid and form a gel, which gives the pudding body without cooking. Coconut milk or regular milk both work, and mango adds sweetness so you do not need much sugar at all.
Key Ingredients:
- 1/2 cup chia seeds
- 2 cups milk or coconut milk
- 1/2 cup plain yogurt
- 2 tablespoons honey or maple syrup
- 1 teaspoon vanilla extract
- 1 1/2 cups diced mango
- 1/4 cup shredded coconut, optional
Quick Steps:
- Whisk the milk, yogurt, sweetener, and vanilla in a bowl.
- Stir in the chia seeds and mix well so they do not clump.
- Chill for 20 minutes, stir again, then chill for at least 3 hours or overnight.
- Spoon into jars and top with mango and coconut.
- Serve cold.
Equipment for This Recipe:
- Mixing bowl
- Whisk or spoon
- Jars or small containers
- Measuring cups
How to Serve This Dish: Serve in small jars with fruit on top, or layer it with yogurt for extra body. A sprinkle of toasted coconut gives it a little crunch if the kids like texture.
Pro Tips for This Recipe:
- Stir twice in the first 20 minutes so the seeds do not clump.
- Use ripe mango or frozen mango that has thawed and drained.
- If the pudding seems thin in the morning, give it another hour in the fridge.
- A squeeze of lime on the mango sharpens the flavor.
Variations on This Dish:
- Berry Chia Cups: Use berries instead of mango.
- Chocolate Chia Pudding: Add 1 tablespoon cocoa powder.
- Tropical Cream Version: Use coconut milk and top with pineapple.
Common Mistakes to Avoid with This Dish:
- Not stirring twice: Clumps form fast.
- Too little liquid: The pudding turns stiff and paste-like.
- Serving too soon: Chia needs time to gel properly.
14. English Muffin Breakfast Pizzas

Intro: Breakfast pizzas on English muffins feel a little playful, which helps on mornings when morale is low. The muffins toast at the edges, the eggs and cheese melt into the little nooks, and the whole thing bakes in a short window. It is breakfast, but with enough shape to make kids perk up.
Why It Works: English muffins are sturdy, so they hold toppings without collapsing. A quick bake melts the cheese and warms the eggs, and because each piece is small, there is less drama about who got the biggest slice.
Key Ingredients:
- 6 English muffins, split
- 6 large eggs, scrambled
- 1 cup shredded mozzarella
- 1/2 cup cooked crumbled sausage
- 1/2 cup diced bell pepper
- 2 tablespoons butter
- 1/4 teaspoon garlic powder
- Salt and pepper to taste
Quick Steps:
- Preheat the oven to 375°F.
- Toast the split muffins lightly so they do not get soggy.
- Scramble the eggs softly.
- Spread a little butter on each muffin half, then top with eggs, sausage, peppers, and cheese.
- Bake for 8 to 10 minutes until the cheese melts and the edges are crisp.
- Serve warm.
Equipment for This Recipe:
- Rimmed baking sheet
- Skillet
- Spatula
- Knife
- Small spoon
How to Serve This Dish: Serve two muffin halves per person with fruit or sliced cucumbers. They are also easy to wrap in foil if someone needs to eat on the way out the door.
Pro Tips for This Recipe:
- Toast the muffins first or they soften under the toppings.
- Keep the egg layer thin so the pizzas do not slide.
- A little garlic powder in the butter gives the muffins more flavor.
- Watch them near the end; cheese can go from melted to browned fast.
Variations on This Dish:
- Pepperoni Morning Pizza: Add a few slices of pepperoni and use mozzarella only.
- Veggie Pizza: Use spinach, mushrooms, and tomatoes.
- Breakfast BLT Style: Add chopped cooked bacon and a little shredded lettuce after baking.
Common Mistakes to Avoid with This Dish:
- Skipping the pre-toast: Soft muffins get floppy.
- Wet toppings: Tomatoes need to be drained or they make the bread soggy.
- Too much cheese: It slides off when the pizzas bake and cool.
15. Cottage Cheese Toast with Tomato and Everything Spice
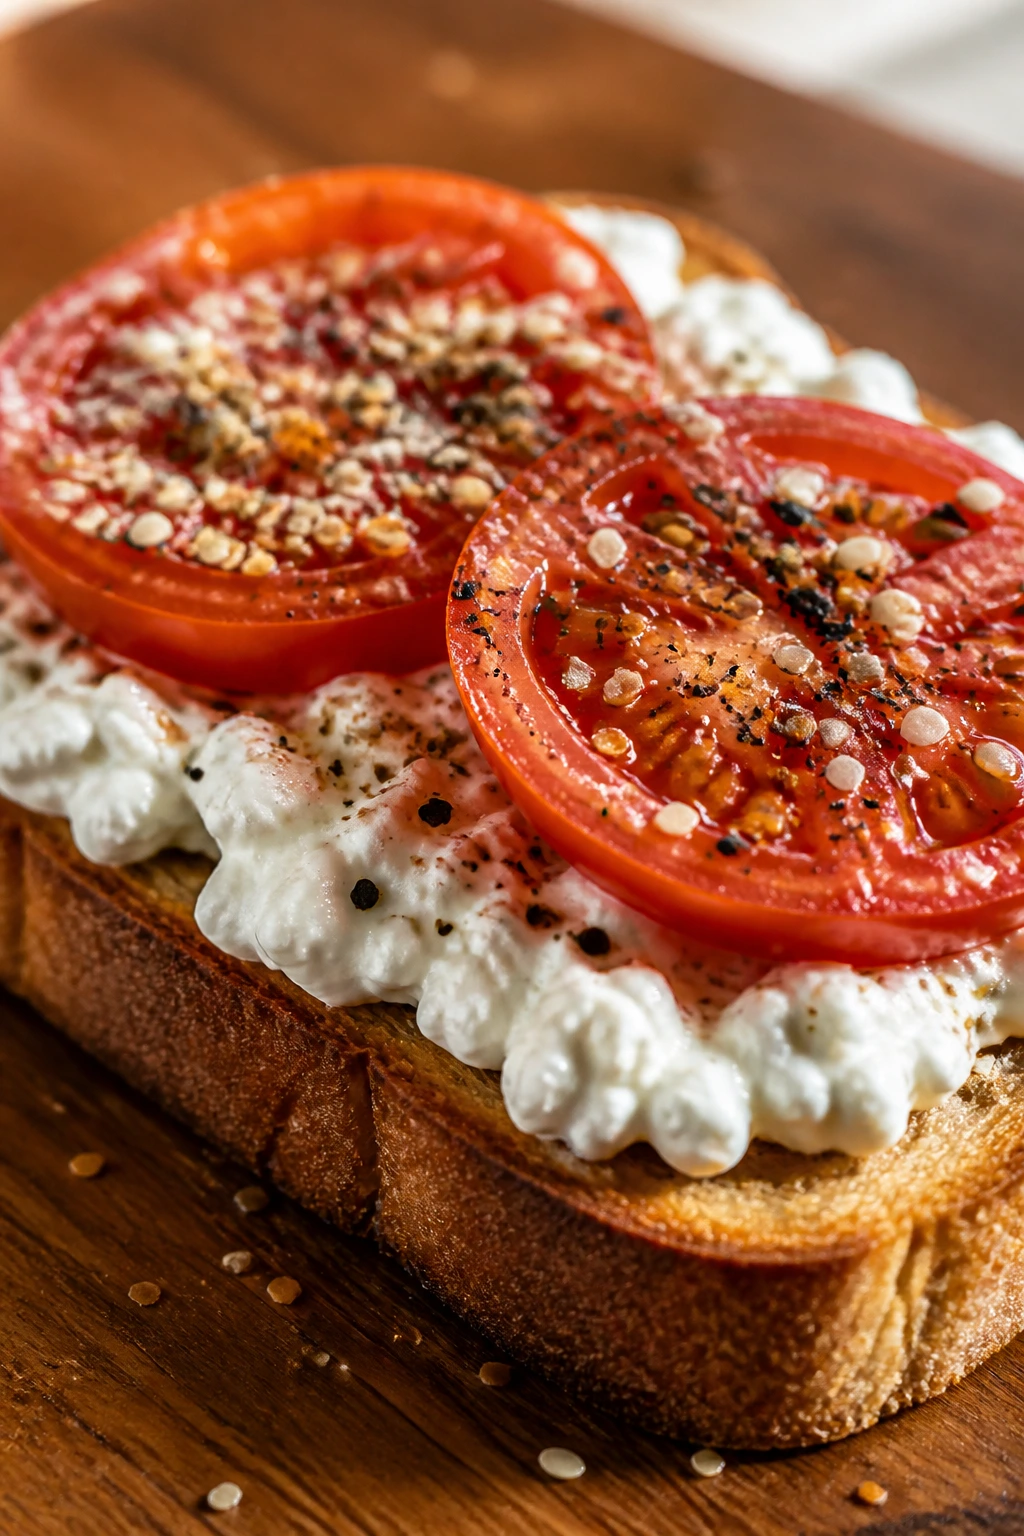
Intro: Cottage cheese toast is one of those meals that sounds plain until you eat it with good bread and a ripe tomato. The curds give you creamy, cool saltiness; the tomato brings juice and acidity; the everything spice does the heavy lifting on flavor. It is quick, but it doesn’t taste rushed.
Why It Works: Cottage cheese gives protein without needing any cooking, and sturdy toast keeps the whole thing from feeling flimsy. The tomato adds freshness, which keeps the breakfast from leaning too heavy if the rest of the day is already packed.
Key Ingredients:
- 8 slices sturdy bread
- 2 cups cottage cheese
- 2 large tomatoes, sliced
- 2 tablespoons everything bagel seasoning
- 1 tablespoon olive oil
- 1/2 teaspoon black pepper
- Optional fresh chives for topping
Quick Steps:
- Toast the bread until deeply golden.
- Spread cottage cheese over each slice.
- Top with tomato slices and drizzle with olive oil.
- Sprinkle with everything seasoning and black pepper.
- Add chives if using and serve right away.
Equipment for This Recipe:
- Toaster
- Butter knife or spreader
- Cutting board
- Knife
How to Serve This Dish: Serve open-faced with fruit or a boiled egg if you want more staying power. It’s best eaten right after assembly while the toast still has some crunch.
Pro Tips for This Recipe:
- Use thick bread so the toast can handle the moisture.
- Salt the tomato lightly if it tastes dull.
- If your cottage cheese is loose, drain it for a few minutes first.
- Whole-grain bread gives this more chew and keeps it from feeling too soft.
Variations on This Dish:
- Avocado-Tomato Toast: Add mashed avocado under the cottage cheese.
- Cucumber Herb Toast: Swap tomato for cucumber and dill.
- Sweet-Savory Version: Use peach slices and a drizzle of honey.
Common Mistakes to Avoid with This Dish:
- Watery tomatoes: They soak the toast if sliced too early.
- Thin bread: It buckles under the weight.
- Underseasoning: Cottage cheese needs salt or spice to wake it up.
16. Smoothie Freezer Packs
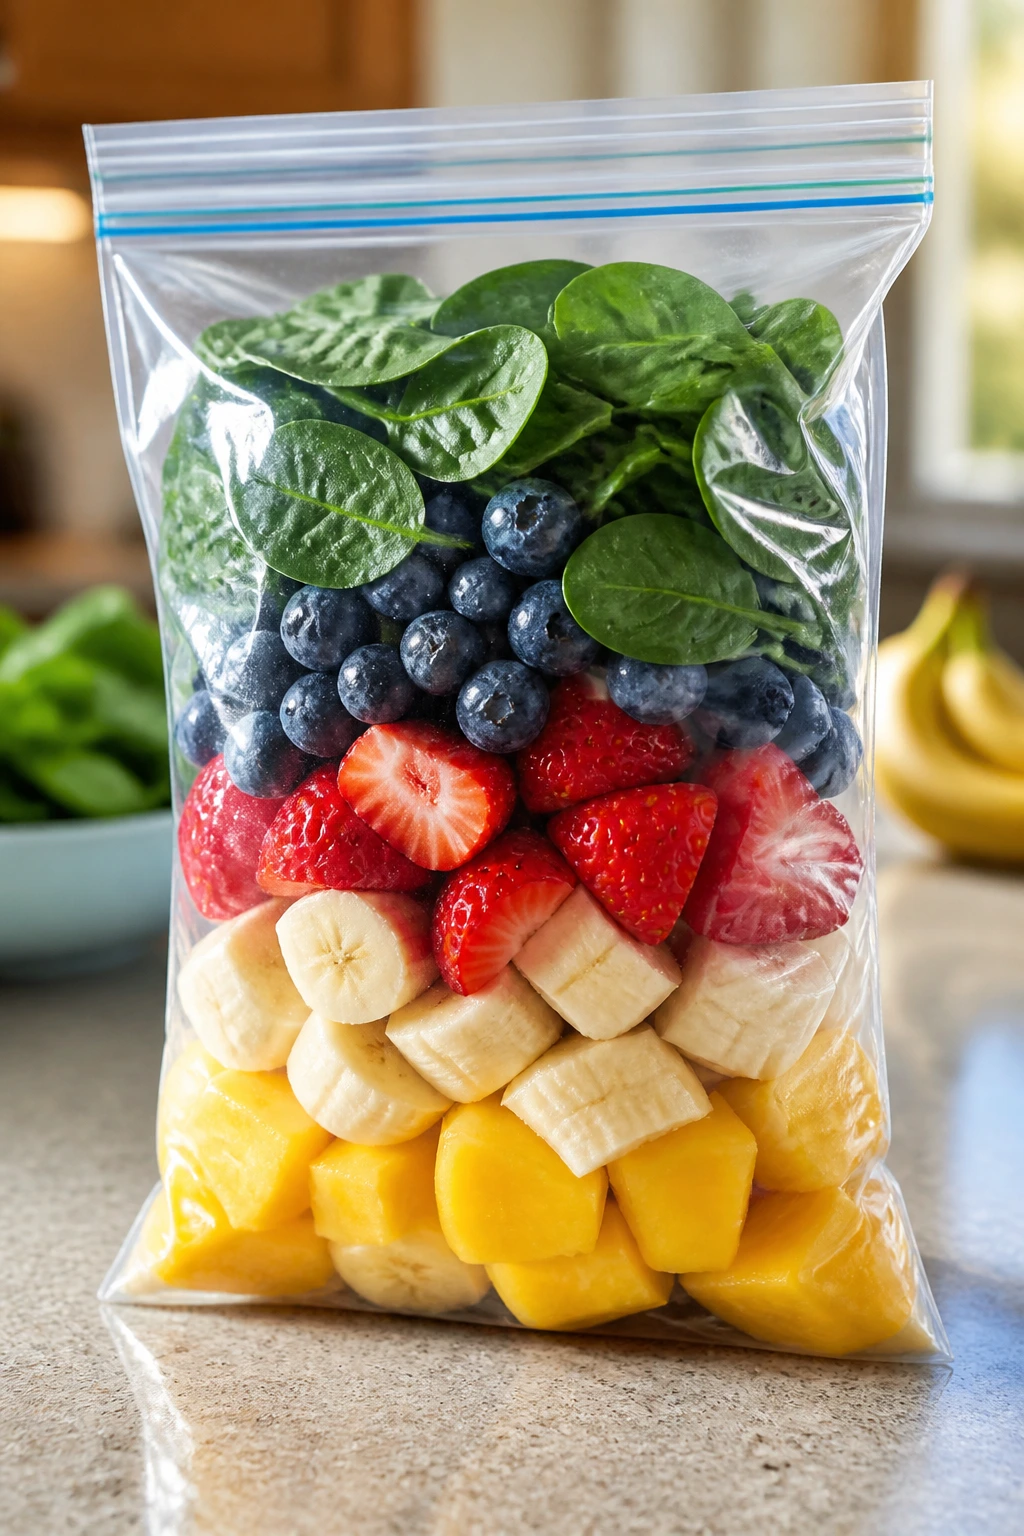
Intro: Smoothies are easiest when the chopping is already done. That is the whole trick. A freezer pack with fruit and spinach means breakfast only needs a blender and a liquid, which feels like cheating in a good way. The result is cold, fast, and easy to hand off to someone still half asleep.
Why It Works: Freezing the fruit in portions gives you consistent texture, and spinach disappears into the mix without changing the flavor much. A banana or yogurt gives body, so the smoothie feels like breakfast and not colored water.
Key Ingredients:
- 4 freezer packs worth of fruit: 2 cups berries, 2 bananas, 1 cup mango chunks
- 2 cups baby spinach
- 1/2 cup plain Greek yogurt per smoothie
- 1 to 1 1/2 cups milk or juice per smoothie
- 1 tablespoon nut butter, optional
- 1 tablespoon chia seeds, optional
Quick Steps:
- Divide fruit and spinach into freezer bags or containers.
- Freeze until solid.
- When ready to blend, dump one pack into a blender.
- Add yogurt, liquid, and any extras.
- Blend until smooth and pour into cups or insulated tumblers.
Equipment for This Recipe:
- Blender
- Freezer bags or containers
- Measuring cups
- Spatula for scraping
How to Serve This Dish: Pour into travel cups with lids for the car ride or serve in a bowl topped with granola. If the smoothie is thick, a straw spoon works better than a thin straw.
Pro Tips for This Recipe:
- Freeze banana slices separately so they do not clump into one lump.
- Start with less liquid; you can add more, but you cannot fix a runny smoothie.
- Greek yogurt makes the smoothie thicker than plain yogurt.
- Label the freezer packs so nobody has to guess what’s inside.
Variations on This Recipe:
- Strawberry Banana Classic: Use only strawberries and bananas.
- Green Power Pack: Add spinach, mango, and pineapple.
- Chocolate PB Smoothie: Add cocoa powder and peanut butter.
Common Mistakes to Avoid with This Recipe:
- Too much liquid: Thin smoothies feel like a drink, not breakfast.
- Overloading the blender: Blend in batches if the blades get stuck.
- Skipping the protein: Fruit alone fades fast by mid-morning.
17. Mini Breakfast Frittatas
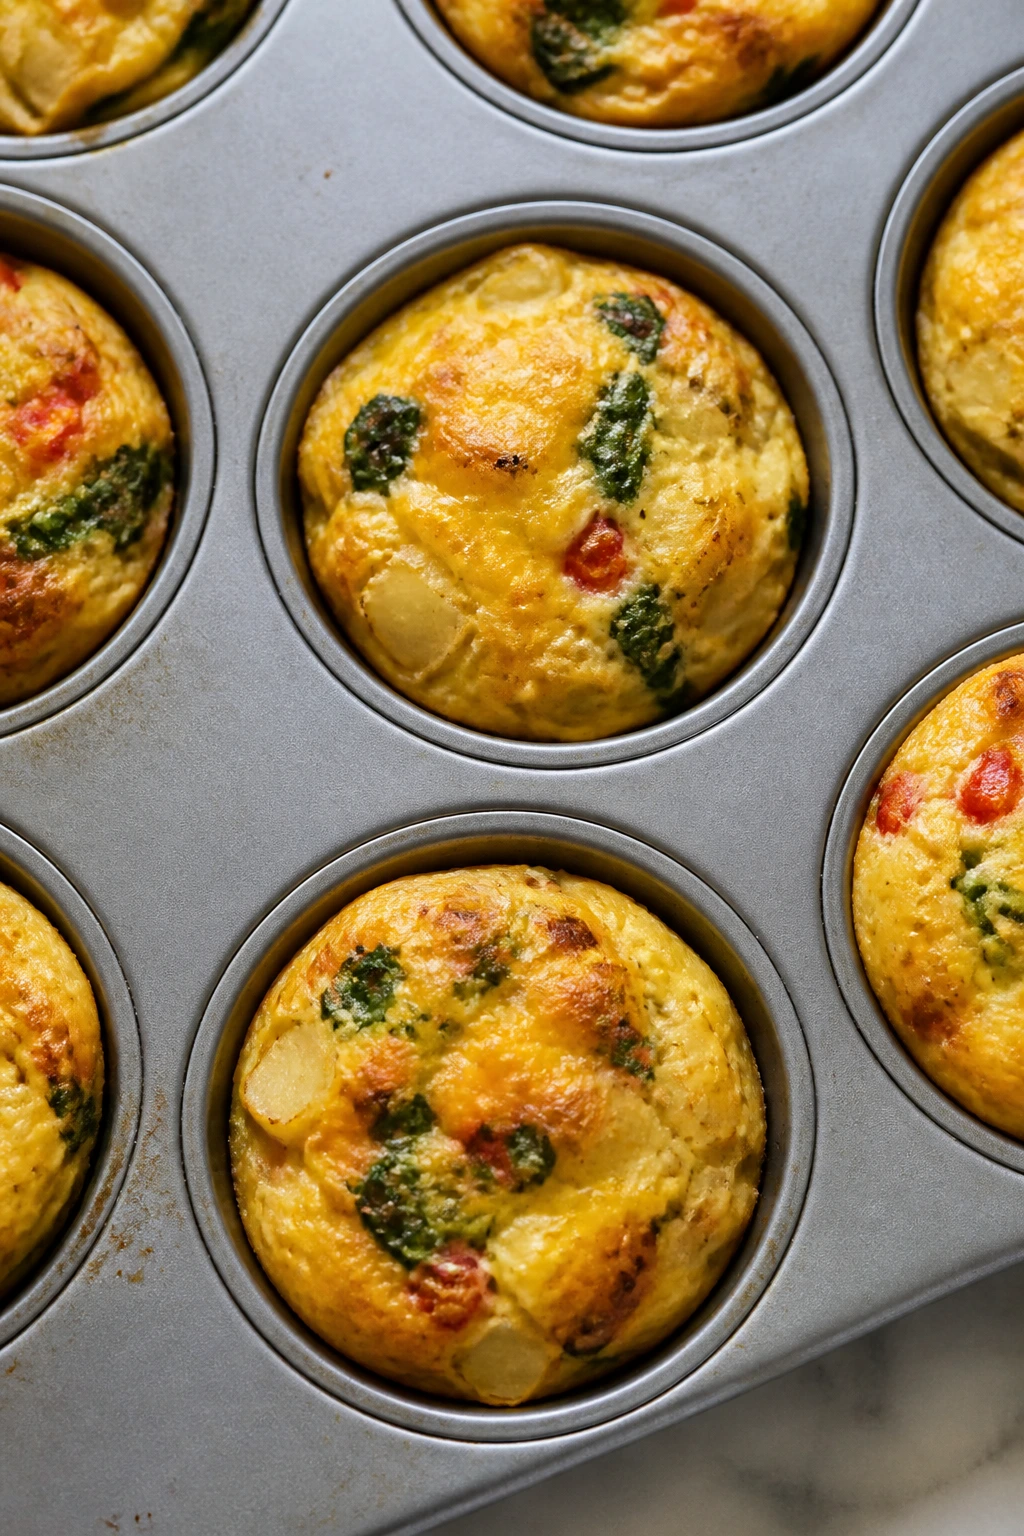
Intro: Mini frittatas are the grown-up cousin of egg muffins, though kids usually do not care about the distinction. They’re a little more tender, a little more substantial, and smart when you want eggs with vegetables but do not want to stand over a skillet. The potato gives them a hearty base that feels earned.
Why It Works: Using a little cooked potato in the bottom of each cup gives the frittatas body and keeps them from feeling all egg. The eggs bake around the vegetables, and the cheese on top browns into a thin crust that tastes far better than it sounds on paper.
Key Ingredients:
- 8 large eggs
- 1/3 cup milk
- 1 cup diced cooked potato
- 1/2 cup diced bell pepper
- 1/4 cup diced onion
- 1 cup shredded cheddar
- 1/2 teaspoon salt
- 1/4 teaspoon black pepper
Quick Steps:
- Preheat the oven to 375°F and grease a muffin tin.
- Divide the potato, pepper, and onion among the cups.
- Whisk the eggs, milk, salt, and pepper.
- Pour the egg mixture over the vegetables and top with cheese.
- Bake for 20 to 22 minutes until set and lightly golden.
- Cool briefly, then remove from the tin.
Equipment for This Recipe:
- Muffin tin
- Skillet for pre-cooking vegetables if needed
- Whisk
- Mixing bowl
- Spoon
How to Serve This Dish: Serve two mini frittatas with toast or a small fruit salad. They hold well enough to become part of a sit-down breakfast or a quick carry-out meal.
Pro Tips for This Recipe:
- Cook the vegetables first if they’re watery; raw peppers are fine, mushrooms are not.
- Dice the potato small so the cups slice cleanly.
- Let them rest before lifting so the bottoms do not tear.
- A pinch of smoked paprika adds depth without making them spicy.
Variations on This Dish:
- Mushroom and Swiss: Use sautéed mushrooms and Swiss cheese.
- Spinach and Feta: Add chopped spinach and crumbled feta.
- Southwest Cups: Add black beans and a little salsa.
Common Mistakes to Avoid with This Recipe:
- Overfilling the cups: They puff and spill over.
- Using wet vegetables: Extra moisture makes the center loose.
- Pulling them too early: They need a minute to set after baking.
18. Freezer Breakfast Sandwiches
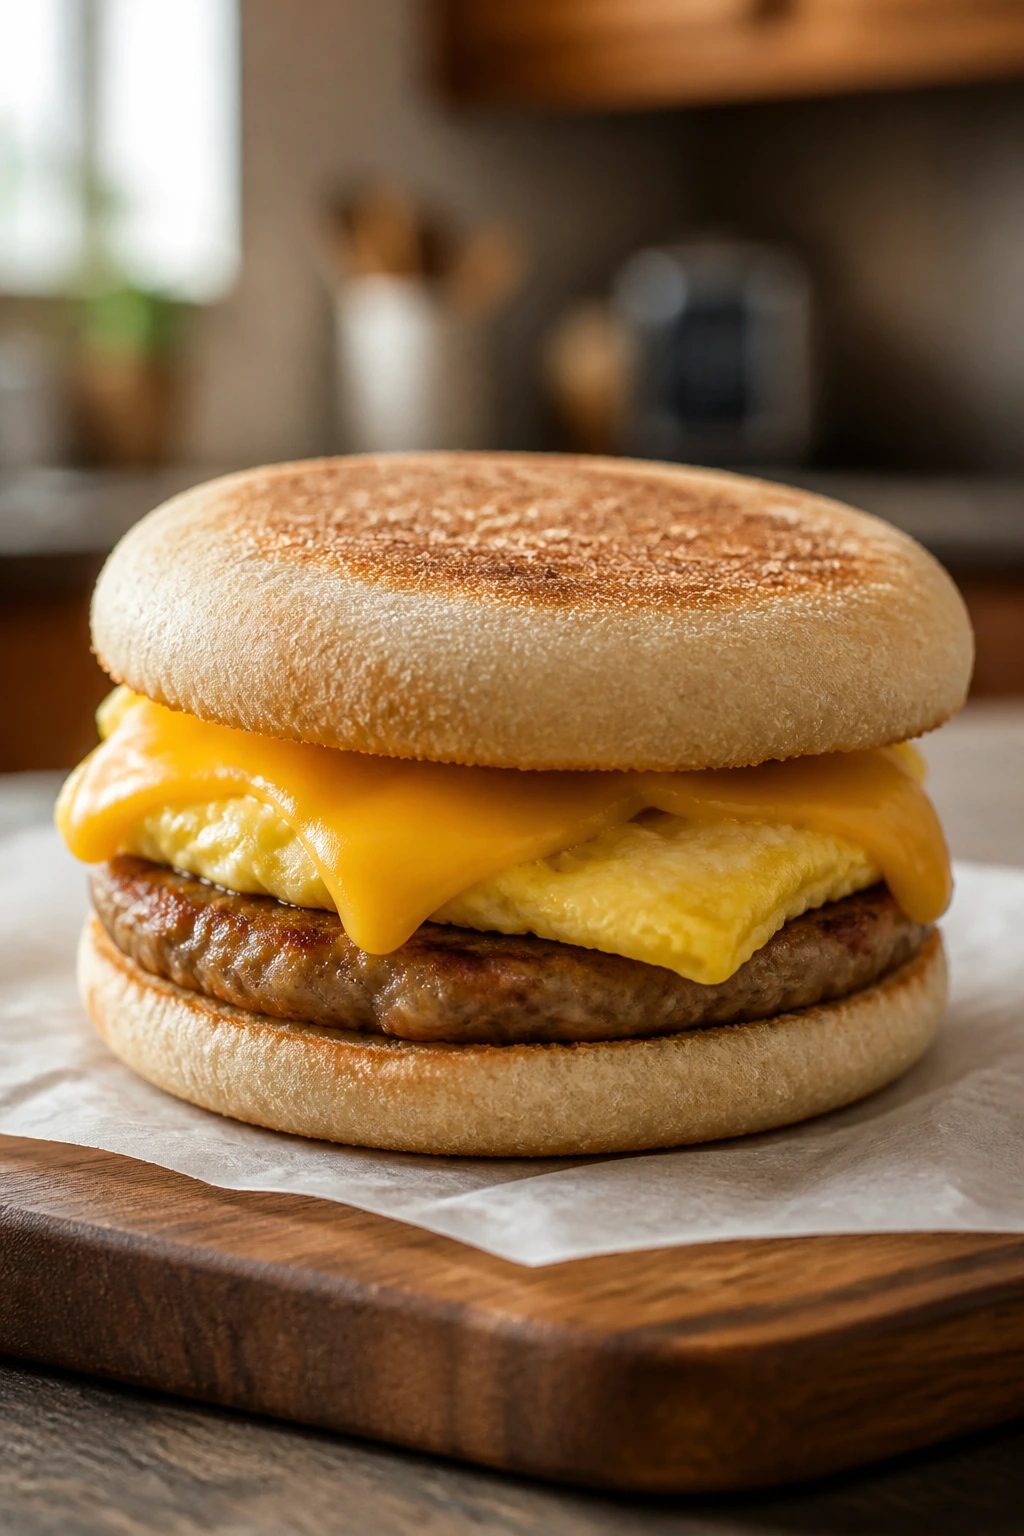
Intro: A breakfast sandwich from the freezer can feel suspicious until you make it once and realize how practical it is. Eggs, cheese, and sausage on an English muffin or biscuit heat up well, and if you wrap them right, they come out warm instead of soggy. That alone earns them a place in the rotation.
Why It Works: Individual sandwiches freeze in tidy portions, and the bread protects the filling during reheating. A little moisture control goes a long way here, which is why these reward a few careful minutes during assembly.
Key Ingredients:
- 6 English muffins or biscuits, split
- 6 large eggs
- 6 breakfast sausage patties
- 6 slices cheddar cheese
- 1 tablespoon butter
- Salt and pepper to taste
Quick Steps:
- Cook the sausage patties and set aside.
- Scramble or fry the eggs into six neat rounds.
- Toast the bread lightly and assemble each sandwich with egg, sausage, and cheese.
- Cool completely, then wrap each sandwich in parchment and foil.
- Freeze for up to 2 months.
- Reheat from frozen in the microwave and finish in a toaster oven if you want the bread crisp.
Equipment for This Recipe:
- Skillet
- Spatula
- Baking sheet for cooling
- Parchment paper
- Foil
How to Serve This Dish: Serve with fruit or a few carrot sticks if breakfast needs to be eaten on the move. A little mustard or hot sauce on the side gives the sandwich some edge.
Pro Tips for This Recipe:
- Cool everything before wrapping so trapped steam does not soften the bread.
- Wrap tightly to limit freezer burn.
- Reheat on low power first; blasting the sandwich dries the egg.
- Choose bread that is sturdy enough to hold its shape after freezing.
Variations on This Recipe:
- Bacon and Swiss: Swap the sausage and use a biscuit base.
- Veggie Breakfast Sandwich: Use a spinach egg round and cheddar.
- Ham and Pepper Jack: Add thin ham slices and a little heat.
Common Mistakes to Avoid with This Recipe:
- Wrapping while hot: Steam ruins the texture.
- Skipping the toast step: Bare bread goes mushy after freezing.
- Microwaving too long: The egg turns rubbery fast.
19. Ricotta Berry Toast
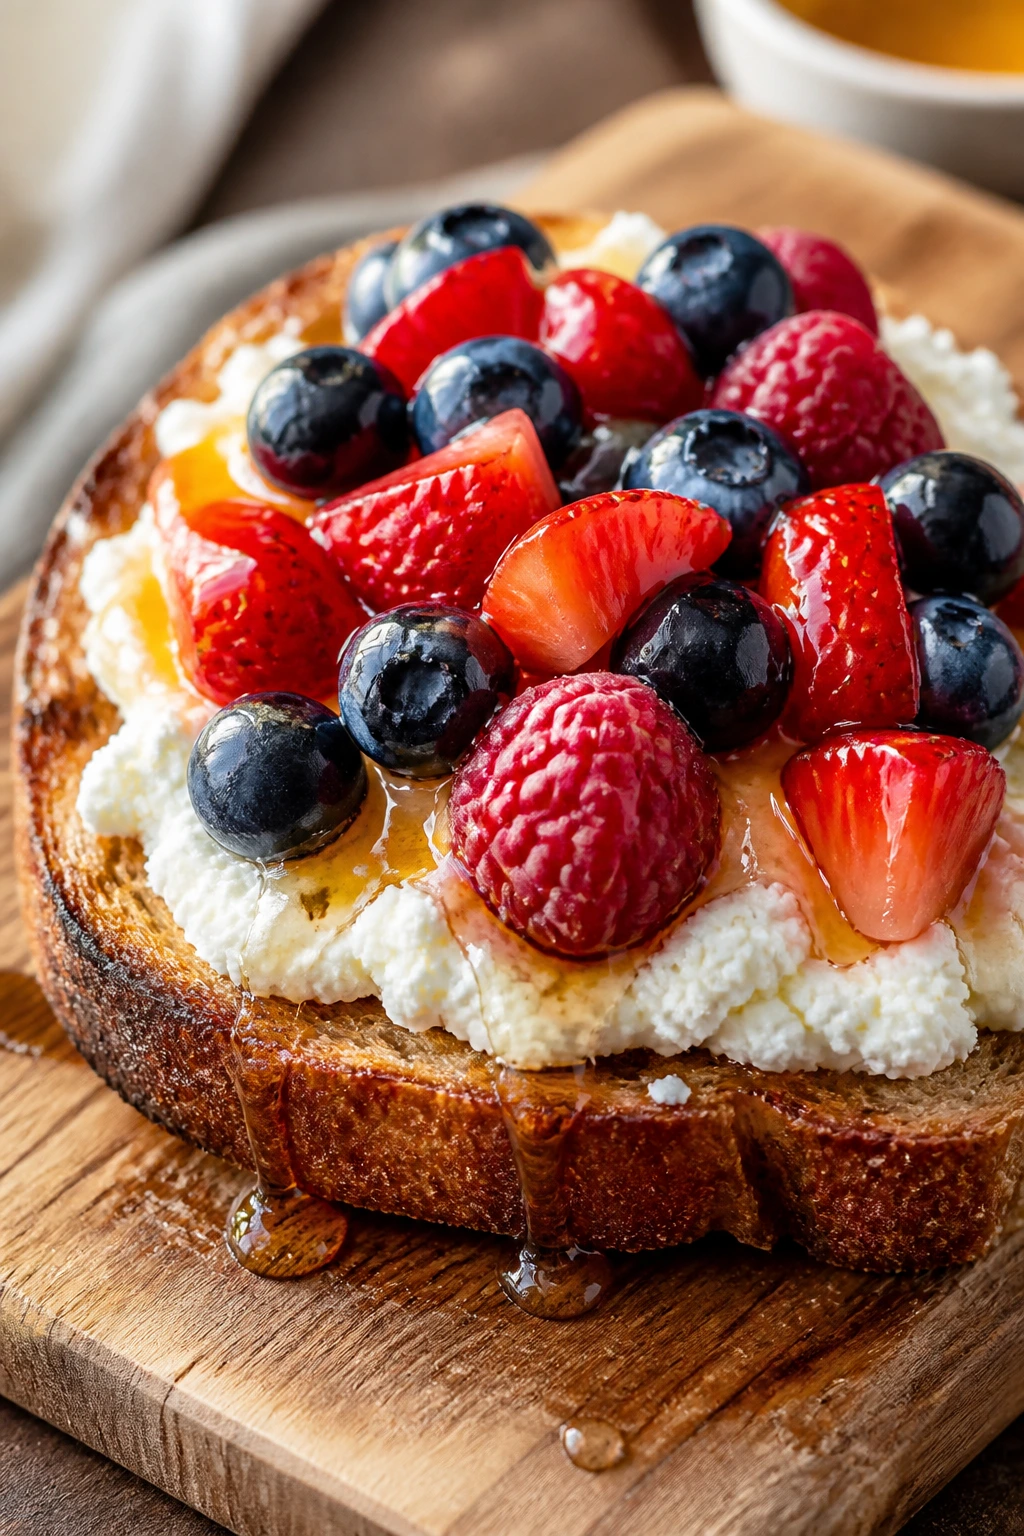
Intro: Ricotta toast has a softer personality than peanut butter toast. It is creamy, lightly sweet, and feels a bit more like a sit-down breakfast even if you eat it standing by the counter. The berries keep it bright, and a little lemon zest makes the whole slice taste awake.
Why It Works: Ricotta is mild and spreadable, so it layers cleanly on toast without the heaviness of cream cheese. Fresh berries add juice and acidity, which keeps the toast from tasting flat. It is a small meal, but it eats like a complete one when the bread is good.
Key Ingredients:
- 8 slices crusty bread
- 2 cups ricotta cheese
- 2 cups mixed berries
- 2 tablespoons honey
- 1 teaspoon lemon zest
- 2 tablespoons chopped pistachios
- Pinch of salt
Quick Steps:
- Toast the bread until crisp.
- Stir the ricotta with a pinch of salt and lemon zest.
- Spread ricotta over each slice.
- Top with berries and a drizzle of honey.
- Sprinkle with pistachios and serve.
Equipment for This Recipe:
- Toaster or skillet
- Bowl
- Spoon
- Knife
How to Serve This Dish: Serve open-faced with coffee for adults and milk for kids. It works as a quick breakfast or a light after-school snack if one slice is not enough in the morning.
Pro Tips for This Recipe:
- Buy ricotta that looks thick, not watery.
- Warm toast makes the ricotta melt slightly at the edges.
- Slice berries if they’re large so the toast doesn’t get top-heavy.
- A tiny pinch of salt matters here more than you’d expect.
Variations on This Recipe:
- Honey Walnut Toast: Swap pistachios for walnuts.
- Peach Ricotta Toast: Use sliced peaches instead of berries.
- Savory Herb Toast: Skip the honey and add chopped chives and black pepper.
Common Mistakes to Avoid with This Recipe:
- Thin ricotta: It slides off the bread.
- Bread that is too soft: The toast becomes soggy under the fruit.
- Too much topping: The slice should still be pick-up-able.
20. Breakfast Fried Rice
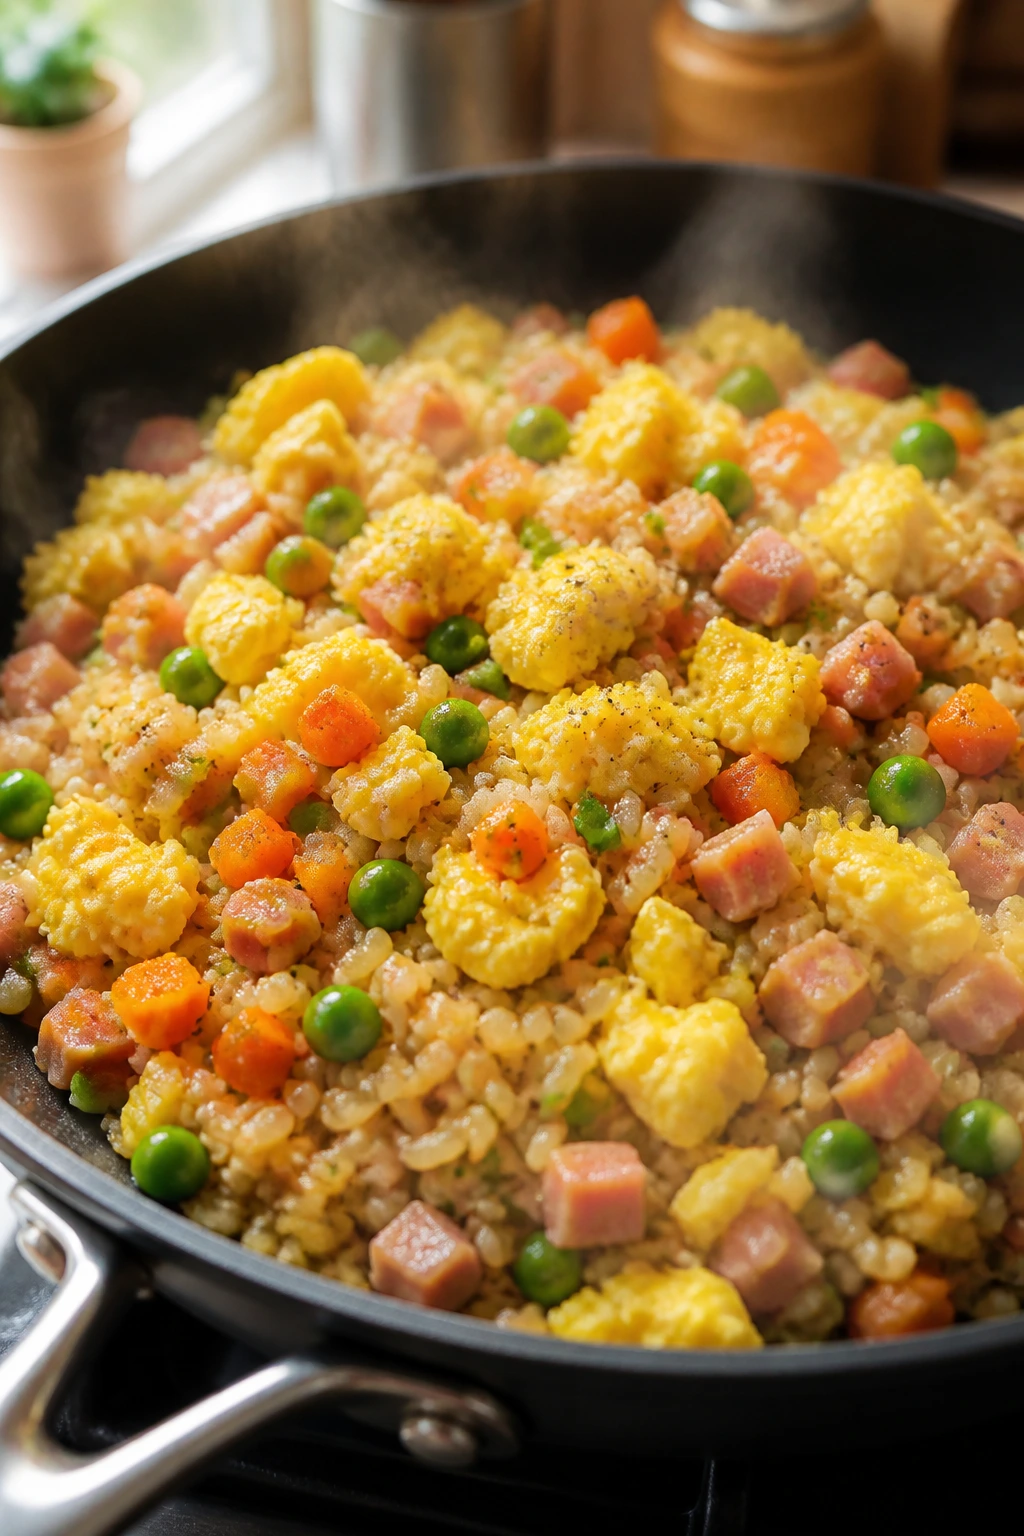
Intro: Breakfast fried rice sounds like a move from a different meal, but it works because it solves an old problem: leftover rice is too good to waste, and eggs plus vegetables turn it into something fast. The grains stay separate, the egg coats everything, and the whole pan comes together in under 15 minutes if you move quickly.
Why It Works: Cold rice fries better than fresh rice because the grains are drier. Eggs, peas, and carrots give the skillet enough color and texture to feel complete, while soy sauce and sesame oil push the flavor toward savory rather than merely salty.
Key Ingredients:
- 4 cups cooked chilled rice
- 4 large eggs
- 1 cup frozen peas and carrots
- 2 scallions, sliced
- 2 tablespoons soy sauce
- 1 tablespoon sesame oil
- 1 tablespoon neutral oil
- 1 cup diced ham or cooked bacon, optional
Quick Steps:
- Heat the neutral oil in a large skillet over medium-high heat.
- Scramble the eggs quickly and set aside.
- Add the rice, peas, carrots, and ham if using; stir-fry until hot.
- Add soy sauce and sesame oil.
- Stir in the eggs and scallions, then cook for 1 minute more.
- Serve immediately.
Equipment for This Recipe:
- Large skillet or wok
- Spatula
- Bowl for the eggs
- Measuring spoons
How to Serve This Dish: Serve in bowls with a few cucumber slices or orange wedges on the side. A drizzle of sriracha is good for older kids and adults, though I would keep it off the table for younger ones.
Pro Tips for This Recipe:
- Use chilled rice, not hot rice, or the pan turns sticky.
- Keep the heat high enough to fry, not steam.
- Add soy sauce at the edges of the pan so it sizzles a bit.
- Leftover rice from the night before is ideal.
Variations on This Recipe:
- Pineapple Ham Fried Rice: Add a few pineapple chunks for sweetness.
- Vegetable-Only Bowl: Leave out the meat and add mushrooms.
- Tamago Style: Finish with a soft fried egg on top.
Common Mistakes to Avoid with This Recipe:
- Fresh rice: It clumps and steams.
- Low heat: The rice turns limp instead of toasty.
- Too much soy sauce: The dish gets wet and overly salty.
21. Banana Oat Blender Muffins
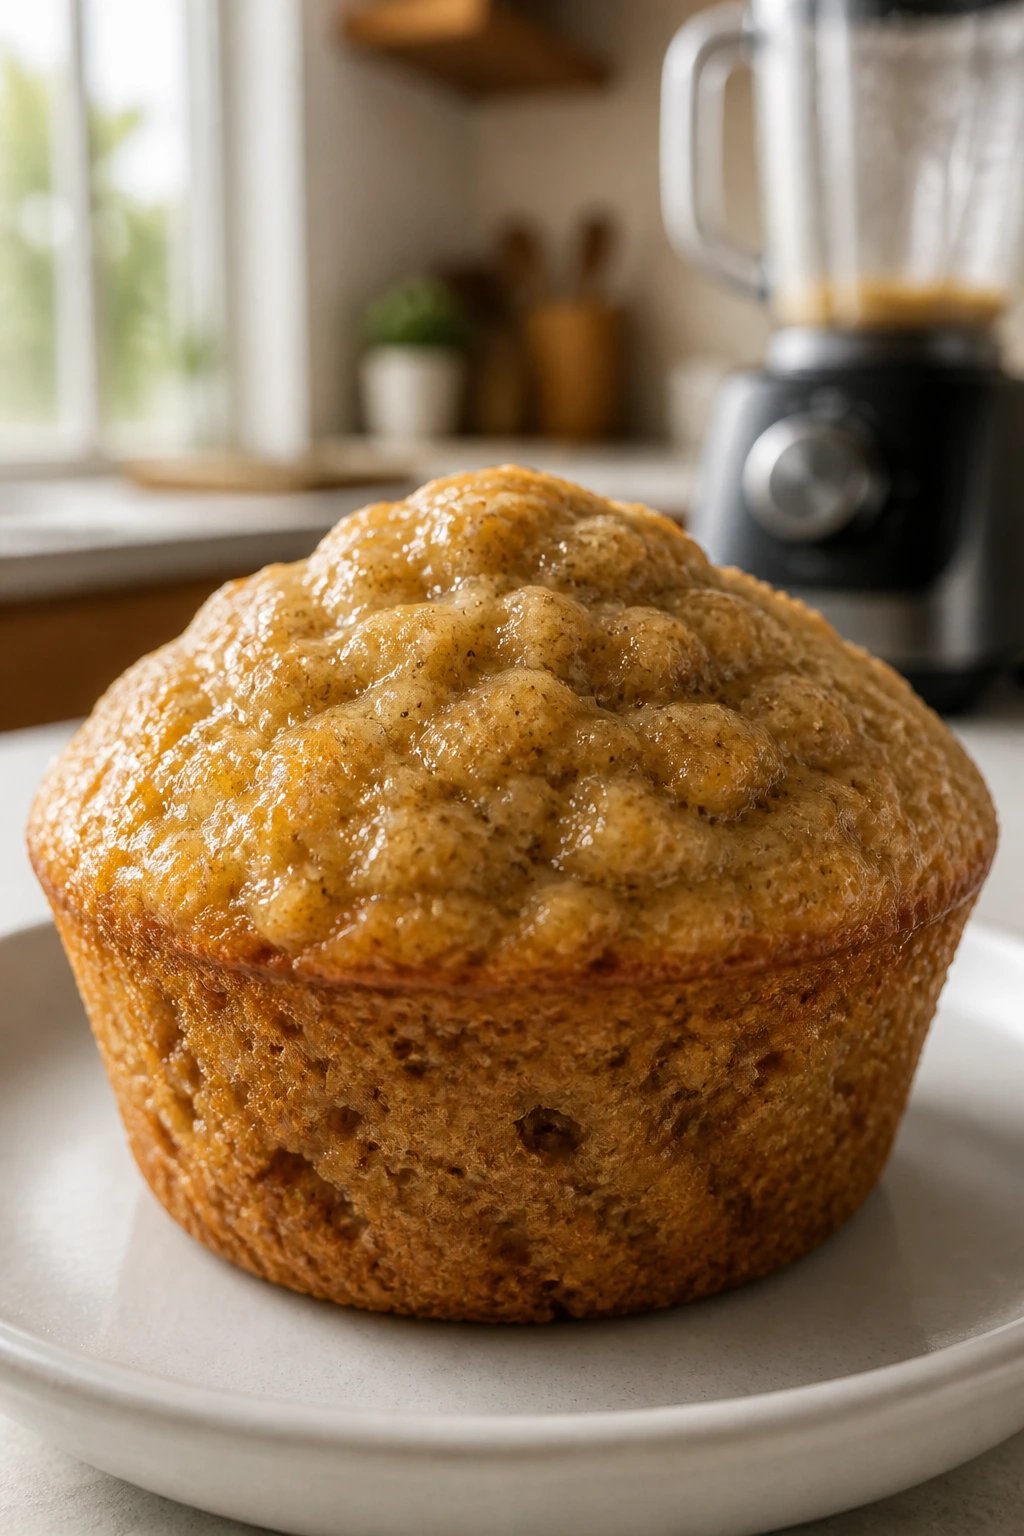
Intro: Blender muffins are for mornings when you want muffins but do not want the bowl parade. Bananas, oats, eggs, and yogurt go straight into the blender, and the batter comes out thick and familiar, almost like pancake batter with a little more backbone. They smell like banana bread, which never hurts.
Why It Works: Oats give the muffins structure without needing a flour-heavy mix, and bananas bring sweetness and moisture. The blender makes the batter smooth enough that the oats break down, so the finished muffins feel soft and uniform rather than rustic in a rough way.
Key Ingredients:
- 2 ripe bananas
- 2 cups rolled oats
- 2 large eggs
- 1/2 cup plain yogurt
- 1/4 cup maple syrup
- 1 teaspoon baking powder
- 1 teaspoon cinnamon
- 1/4 teaspoon salt
- 1/2 cup mini chocolate chips, optional
Quick Steps:
- Preheat the oven to 350°F and line a muffin tin.
- Blend the bananas, oats, eggs, yogurt, maple syrup, baking powder, cinnamon, and salt until smooth.
- Stir in chocolate chips if using.
- Divide the batter among the muffin cups.
- Bake for 18 to 20 minutes until set and lightly browned.
- Cool before removing.
Equipment for This Recipe:
- Blender
- Muffin tin
- Paper liners or grease
- Measuring cups
- Spoon or scoop
How to Serve This Dish: Serve two muffins with milk or sliced fruit. They also pack well in lunchboxes, which makes them useful when breakfast becomes a mid-morning snack instead.
Pro Tips for This Recipe:
- Use very ripe bananas or the muffins taste flat.
- Do not overblend once everything is smooth.
- Let them cool fully before freezing.
- A spoonful of nut butter on the side makes them more filling.
Variations on This Recipe:
- Blueberry Blender Muffins: Fold in blueberries after blending.
- Nutty Banana Muffins: Add chopped walnuts or pecans.
- Pumpkin Spice Version: Swap 1 banana for 1/2 cup pumpkin puree.
Common Mistakes to Avoid with This Recipe:
- Under-blending: You want a smooth batter, not oat chunks.
- Too much sweetener: The bananas already carry a lot of sweetness.
- Opening the oven too early: The centers need time to set.
22. Mini Bagel Breakfast Pizzas

Intro: Mini bagel breakfast pizzas are the kind of thing that makes breakfast feel a little less like a chore. The bagel gives a chewy base, the eggs and cheese melt into the surface, and the size is friendly for small hands. They’re playful, yes, but they also reheat well, which keeps them from being all costume and no substance.
Why It Works: Bagels are sturdy enough to handle toppings without collapsing, and pre-toasting helps them stay crisp. Eggs, cheese, and a bit of turkey bacon or sausage make the pizzas hearty enough for school-morning hunger without needing a knife and fork.
Key Ingredients:
- 6 mini bagels, split
- 4 large eggs, scrambled
- 1 cup shredded mozzarella
- 1/2 cup cooked crumbled turkey bacon or sausage
- 1/4 cup diced bell pepper
- 2 tablespoons softened cream cheese or butter
- 1/4 teaspoon garlic powder
- Salt and pepper to taste
Quick Steps:
- Preheat the oven to 375°F.
- Toast the bagel halves lightly.
- Spread a little cream cheese or butter on each half.
- Top with eggs, meat, peppers, and cheese.
- Bake for 8 to 10 minutes until the cheese melts and the edges brown.
- Serve warm.
Equipment for This Recipe:
- Rimmed baking sheet
- Skillet
- Spatula
- Knife
- Small bowl for the eggs
How to Serve This Dish: Serve with apple slices or grapes for a simple plate. These also work well in a lunchbox if wrapped while still slightly warm and then cooled before packing.
Pro Tips for This Recipe:
- Toast the bagels first so they do not go soft under the toppings.
- Keep the egg layer thin; a thick scramble slips off.
- Use mini bagels for little kids and full-size bagels for bigger appetites.
- A little garlic powder in the cream cheese or butter gives the base more flavor.
Variations on This Recipe:
- Pizza Margherita Bagels: Use tomato slices, mozzarella, and basil.
- Sausage and Cheddar: Swap mozzarella for cheddar and use breakfast sausage.
- Veggie Bagels: Add spinach and mushrooms, pre-cooked and well drained.
Common Mistakes to Avoid with This Recipe:
- Wet toppings: Tomato or mushrooms need draining or they make the bagel soggy.
- Too much cheese: It runs off the sides in a puddle.
- Skipping the toast: Plain bagels soften too fast under the toppings.
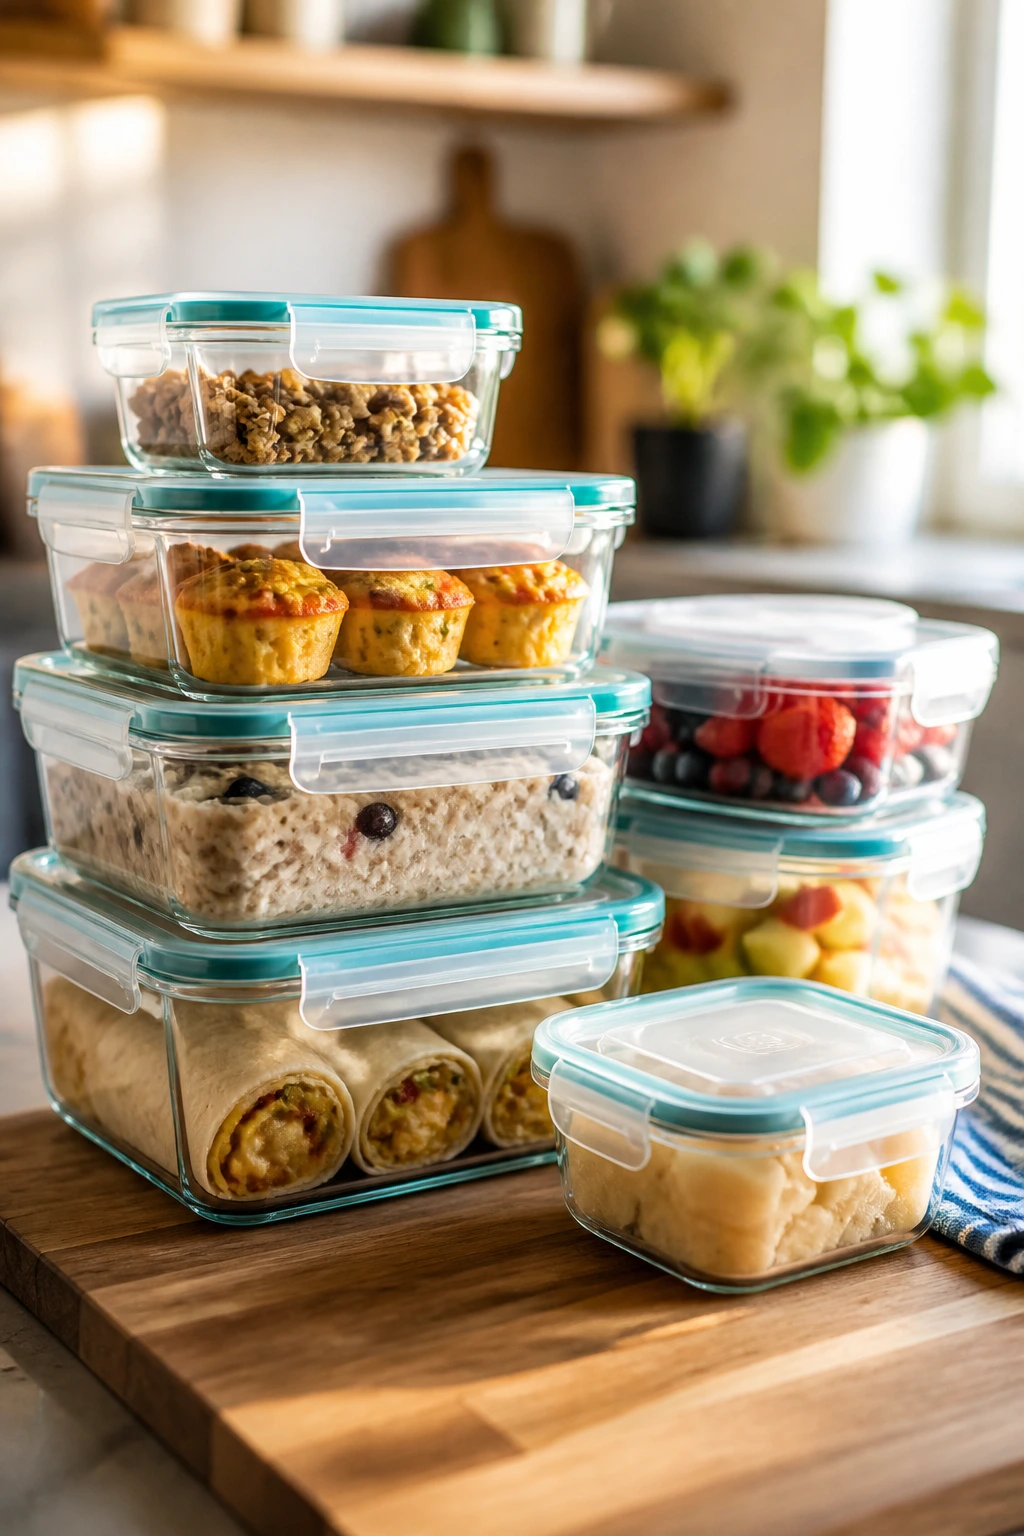
Why a Make-Ahead Breakfast Plan Saves the Morning
A school morning usually does not need more cooking. It needs less decision-making. That is the piece people miss when they talk about breakfast “routine” as if the only issue is what to eat. The bigger problem is the gap between waking up and serving food while everyone is moving in different directions.
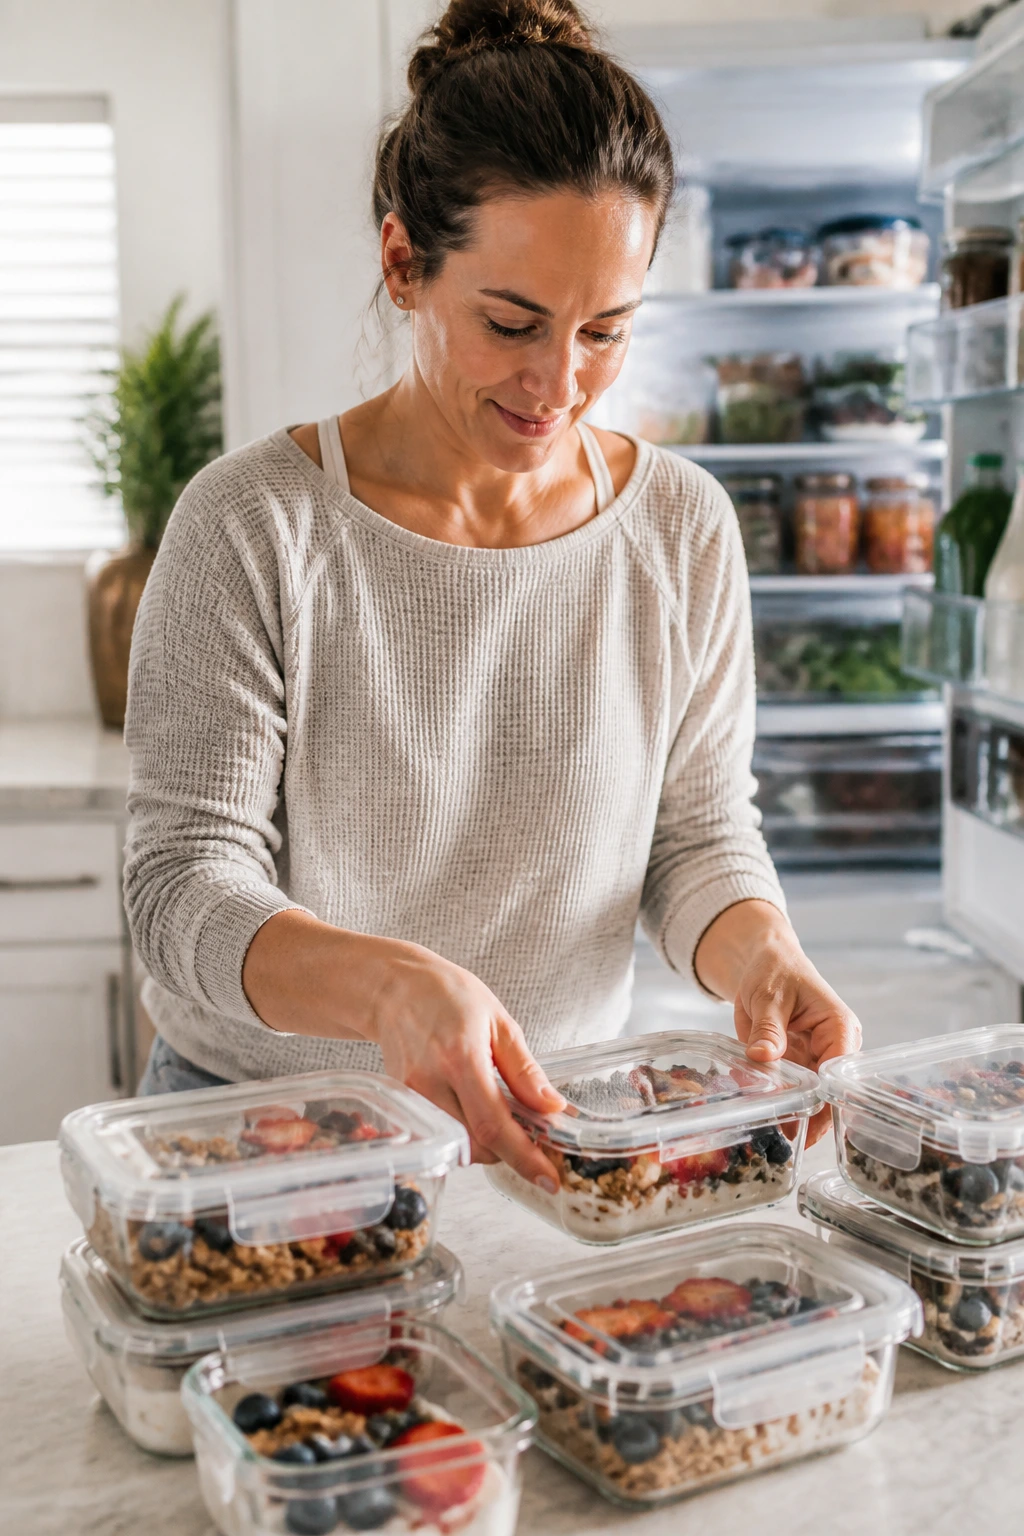
Make-ahead breakfasts solve that gap in layers. A casserole buys you a family meal that can be sliced from one pan. Muffins, egg cups, and breakfast sandwiches turn into grab-and-go portions. Overnight oats and chia pudding trade fridge time for morning calm. A meal does not have to be elaborate to be useful; it has to meet the moment without asking for ten extra minutes you do not have.
I also like the fact that these dishes share ingredients. Eggs show up in several forms. Oats turn into cups, jars, and slow-cooker bowls. Bread becomes toast, sliders, and casseroles. That overlap means one grocery run can cover several mornings, which is a lot more realistic than chasing a different breakfast idea every day.
Essential Equipment for These Recipes
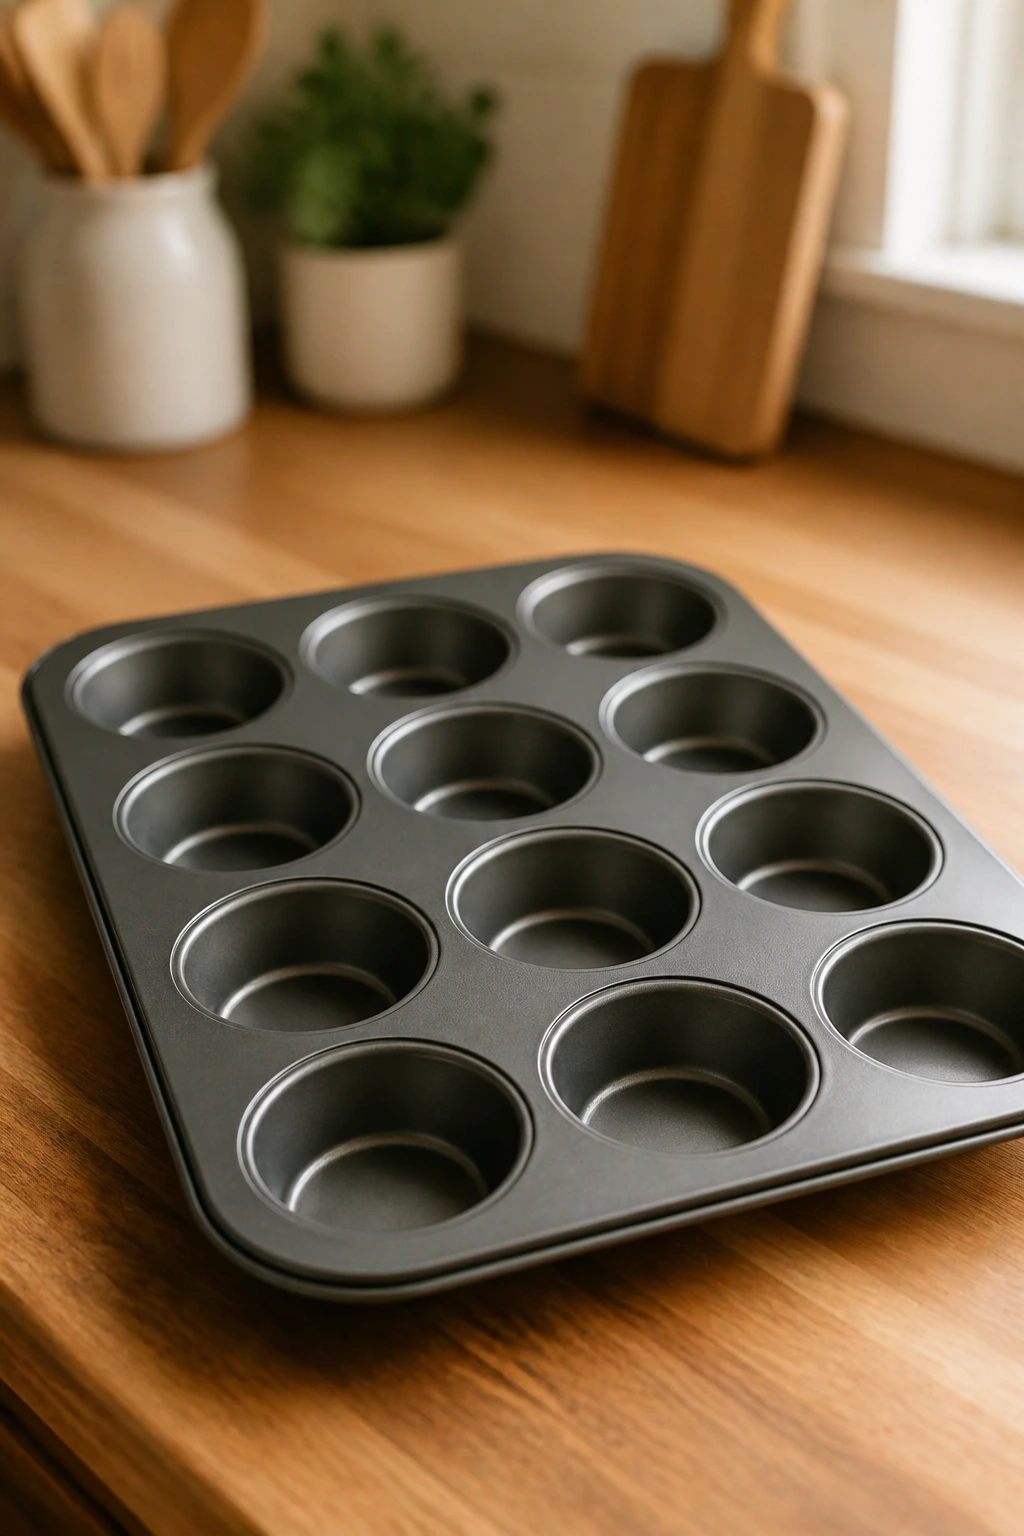
- 12-cup muffin tin: Good for egg muffins, mini frittatas, and baked oatmeal cups.
- 18×13-inch rimmed sheet pan: Useful for sheet-pan pancakes and oven French toast sticks.
- 9×13-inch baking dish: The right size for casseroles and sliders.
- Large nonstick skillet: Helps with scrambled eggs, quesadillas, fried rice, and breakfast pizza toppings.
- Mixing bowls in two sizes: One for wet ingredients, one for dry, and you will stop scrambling for space.
- Whisk: Better than a fork for eggs and oat batters because it breaks up lumps faster.
- Toaster or toaster oven: Essential for toast-based breakfasts and reheating with a little crunch left.
- Blender: Needed for smoothie packs and banana oat muffins.
- Slow cooker: Only needed if you want the oatmeal to cook while the house is still dark.
- Airtight containers and freezer bags: These are the quiet heroes of make-ahead breakfasts.
Smart Shopping and Ingredient Tips
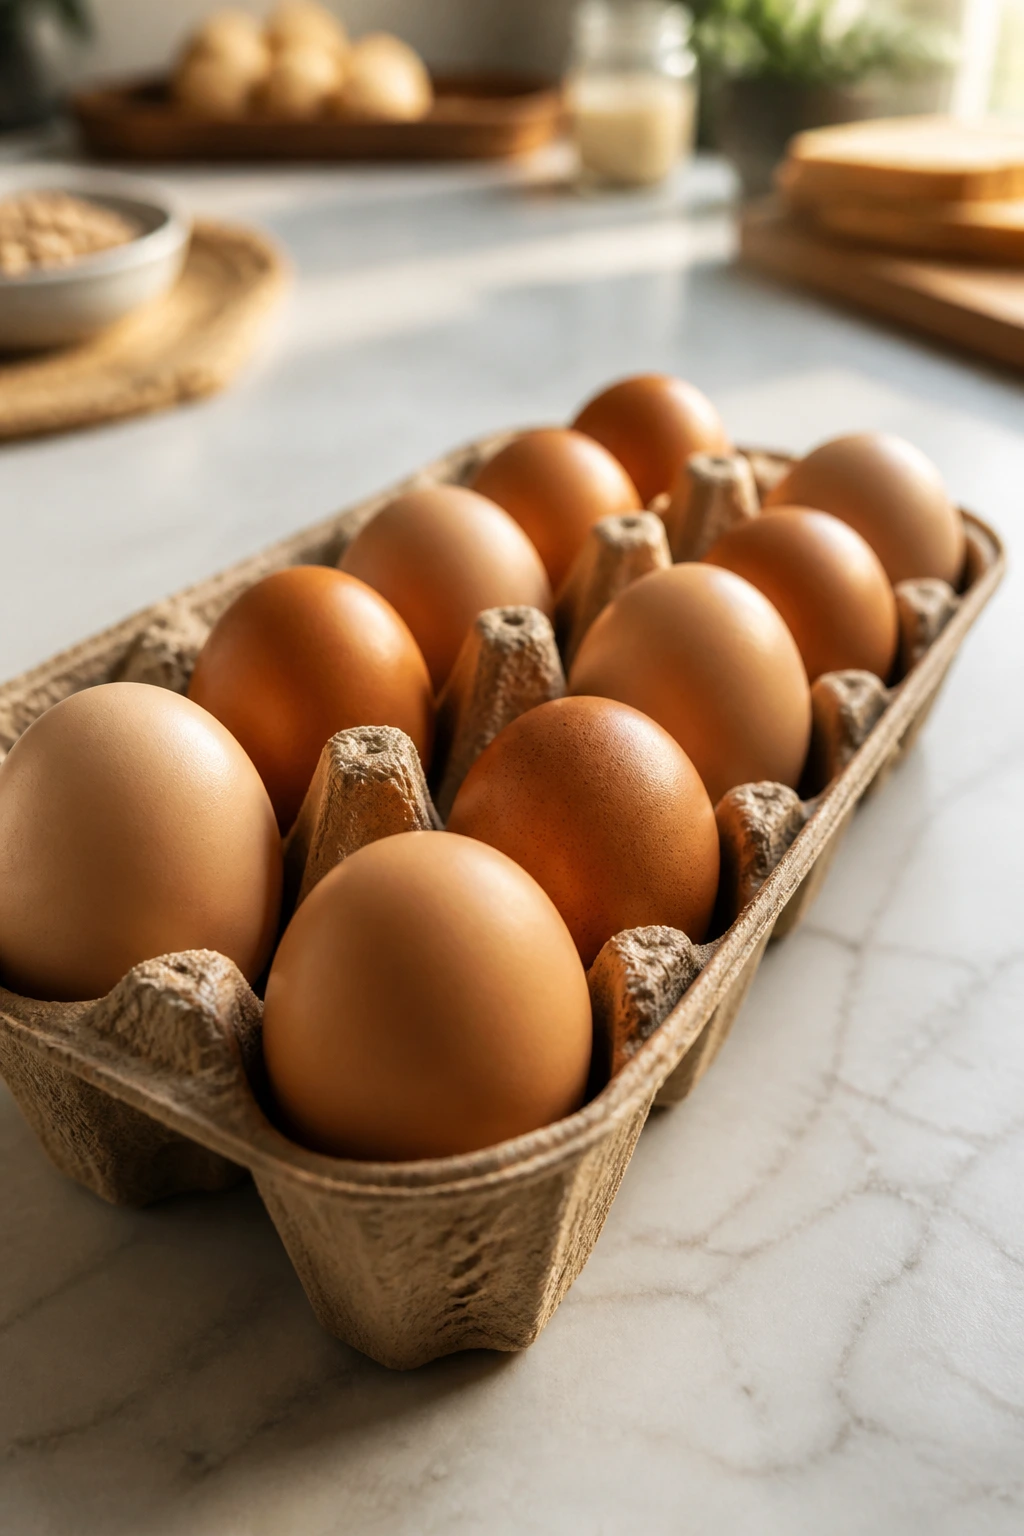
Eggs deserve a better reputation than the bargain-bin shrug they sometimes get. If you’re making several of these breakfasts in one week, buy a large carton and check the dates so you’re not caught short when you want to batch cook. For egg-heavy recipes, fresher eggs tend to hold their shape a little better in the pan and in the muffin tin.
Bread matters more than people think. Thick sandwich bread, brioche, challah, English muffins, mini bagels, and sturdy whole-grain loaves all behave differently once they’re toasted, soaked, or frozen. For French toast sticks and sheet-pan pancakes, choose bread that can carry moisture without turning slack. For toast recipes, buy a loaf with some structure. Flimsy bread turns breakfast into a cleanup job.
Rolled oats are the safest pantry buy for this kind of cooking. Quick oats can work in a pinch, but they soften too far in baked recipes and can go gluey in overnight jars. Steel-cut oats belong in the slow cooker or on the stovetop; they keep their chew and taste better in long-cooked bowls. If you only want one oat in the cupboard, buy old-fashioned rolled oats and keep it simple.
Frozen fruit is worth keeping around. It’s often picked at a decent point of ripeness, and it saves you from the “berries that went soft in the crisper drawer” problem. In smoothies and baked oatmeal, frozen berries and mango work almost as well as fresh. Let them thaw and drain if you want clean layers in parfaits or chia jars.
Cheese should be chosen by how it melts. Cheddar gives stronger flavor and a sharper edge. Monterey Jack and mozzarella melt smoother and make egg dishes feel softer. For school mornings, I’d rather have a cheese that melts well than one that sounds impressive on a label. That’s where flavor actually happens.
How to Serve These Recipes
Presentation: Keep the plate simple and make the main food easy to reach. Square pancakes, egg muffins, burrito halves, toast triangles, and breakfast sliders all look better when they are cut cleanly and grouped in odd numbers instead of spread flat across the plate.
Accompaniments: Fruit is the easiest partner across the whole collection: berries, banana slices, orange wedges, apple slices, or grapes. Yogurt, a hard-boiled egg, or a little cup of salsa can round out the heartier meals without adding much effort. If the main dish is sweet, lean on savory sides. If it’s savory, fruit keeps the plate from feeling heavy.
Portions: For younger kids, one egg muffin, one or two toast slices, or half a burrito may be enough with fruit beside it. Older kids and adults often need two egg cups, a full burrito, or two breakfast sandwiches. The smartest move is to make the base meal a little larger than you think and let people stop when they’re full.
Beverage Pairing: Milk and coffee cover most of these breakfasts without a fuss. For sweeter options like pancakes, French toast, or baked oatmeal, black coffee or hot tea keeps the meal from leaning too sweet. For savory options, cold milk, orange juice, or even sparkling water with lemon does the job.
Additional Tips and Flavor Boosters
Flavor Enhancement: A finishing pinch of flaky salt or a few drops of hot sauce changes a lot of these breakfasts from “fine” to “I’d make that again.” On sweet recipes, a tiny bit of citrus zest does the same thing. Lemon on ricotta toast and orange zest in oats are small moves with a real payoff.
Customization: Use what the fridge gives you. Spinach can become chopped kale. Black beans can become refried beans. Blueberries can become diced pears. If you keep the structure of the dish the same, the ingredients can bend a little without breaking the recipe.
Serving Suggestions: Put dips and toppings on the side when possible. Salsa, maple syrup, honey, yogurt, and hot sauce all give people a way to adjust the meal without making the base soggy. It also helps kids feel like they’re getting a say in breakfast, which is not nothing before 8 a.m.
Make-It-Yours: Nut-free households can lean on sunflower seed butter, dairy-free yogurt, and seeds instead of nuts. Gluten-free eaters can use certified gluten-free oats, corn tortillas, or gluten-free bread. For higher protein, add eggs, yogurt, cottage cheese, or beans before you start adding extra sweeteners.
Make-Ahead, Storage, and Reheating Guidance
The best make-ahead breakfasts are the ones that stay useful after they cool down. Egg muffins, frittatas, casseroles, breakfast sandwiches, baked oatmeal cups, and sheet-pan pancakes all keep well in the refrigerator for 3 to 4 days. Store them in airtight containers once they’re fully cool. If you stack warm food in a sealed box, you trap steam and lose the texture you worked for.
Freezer life is longer for the sturdier items: breakfast sandwiches, burritos, sheet-pan pancakes, baked oatmeal cups, banana oat muffins, and egg muffins can usually stay frozen for up to 2 months with good wrapping. Wrap individual portions in parchment or foil, then place them in a freezer bag so they do not pick up freezer smells. Label the bag. Nobody remembers what “mystery breakfast 3” was.
Reheating depends on the food. Egg-based dishes do best in the microwave at medium power in short bursts, 30 to 45 seconds at a time, so they stay tender instead of becoming rubbery. Casseroles and baked oatmeal can go back into a 325°F oven, covered loosely with foil, until warm through. Toast-based breakfasts are better in a toaster oven or dry skillet if you want the edges crisp again. Burritos and sandwiches can be microwaved first, then finished in a toaster oven or skillet for a firmer outside.
Overnight oats, chia pudding, parfait jars, and smoothie packs are best made 1 to 2 days ahead, though the components can last longer if kept separate. The texture is usually best within the first 48 hours. French toast sticks and sheet-pan pancakes can be cooked ahead, cooled on a rack, and frozen in a single layer before bagging. That simple cooling step is the difference between a neat freezer stash and one giant frozen brick.
Variations and Adaptations to Try
Gluten-Free Morning Basket: Use certified gluten-free oats, corn tortillas, and gluten-free bread where needed. The egg muffins, chia pudding, and smoothie packs already fit this path without much trouble. For casseroles, swap the bread for diced roasted potatoes or hash browns.
Dairy-Free Switch-Up: Almond milk, oat milk, coconut yogurt, and dairy-free cheese work in many of these recipes. The trick is choosing a milk with enough body for oats and custards. Thin watery substitutes can make baked dishes taste flat, so pick one with some weight.
Lower-Sugar Weekday Rotation: Lean on savory breakfasts like egg muffins, quesadillas, cottage cheese toast, fried rice, and breakfast pizzas. For sweet dishes, cut the sweetener by a third and let ripe fruit do more of the work. Cinnamon, vanilla, and citrus zest carry a lot more flavor than people give them credit for.
Protein-Heavy Upgrade: Add eggs, Greek yogurt, cottage cheese, beans, sausage, or nut butter to the breakfasts that need staying power. This is especially useful for kids with long school days or sports after school. A breakfast that keeps you full until lunch is a lot more useful than one that disappears by 9:30.
Kid-Mild, Adult-Strong: Make the base recipe mild and set out the sharper things at the table: hot sauce, jalapeños, salsa, black pepper, everything seasoning, or chopped herbs. That keeps one batch useful for the whole family without making anyone negotiate spice levels at sunrise.
Regional Pantry Twist: Swap the flavor direction depending on what your kitchen already likes. Use salsa and beans for a Southwestern tone, ricotta and berries for a softer café-style breakfast, or sausage and cheese for a classic diner feel. The structure stays the same, which makes the plan easier to repeat.
Common Mistakes to Avoid
The first mistake is trying to make every breakfast from scratch while everybody is already awake. That sounds noble and usually ends in cold toast and impatience. The fix is to do one small part the night before: whisk the eggs, chop the fruit, assemble the burritos, soak the oats, or portion the smoothie packs. Ten minutes of prep at night buys a quieter morning.
Another common problem is using ingredients that are too wet. Soggy tomatoes, undrained beans, watery yogurt, and thawed fruit that still has a pool of ice water can ruin texture fast. Drain what needs draining. Pat things dry. Pack wet toppings separately when you can. That little step saves more breakfasts than any fancy technique.
People also forget that reheating needs a method. Microwaving everything on high until it is steaming hot is how you get rubbery eggs, limp toast, and sad sandwiches. Lower power, shorter bursts, and a finishing crisp in the toaster oven or skillet make a noticeable difference. I would rather take one extra minute than eat a breakfast that feels exhausted.
Skipping seasoning is another one. Eggs need salt. Oats need salt. Cottage cheese toast needs salt or spice. If a breakfast tastes flat, it is usually not because it needs more sugar; it needs a pinch of salt or a sharper topping. That tiny adjustment matters more than most people want to admit.
Finally, there’s the portion trap. Too little food leads to a second round of snack hunting ten minutes later. Too much food leads to waste. The sweet spot is a breakfast with one clear main item and one easy side, usually fruit or yogurt. Keep the options visible. Let people take what they’ll eat.
Frequently Asked Questions

Can I make several of these breakfasts on one weekend and freeze them?
Yes, and that’s one of the smartest ways to use this collection. Egg muffins, breakfast sandwiches, burritos, sheet-pan pancakes, and banana oat muffins all freeze well when wrapped tightly and cooled first. Store them in labeled freezer bags so you can pull out exactly what you need.
What breakfasts hold up best in the car or on the way to school?
Breakfast burritos, sliders, sandwiches, toast squares, and French toast sticks travel best because they can be wrapped and eaten by hand. Anything with loose fruit or a lot of sauce is messier. If you want a cleaner ride, keep syrup, salsa, and yogurt on the side.
How can I make these more filling for older kids and adults?
Add protein and fat where it makes sense. Pair toast with eggs, put beans in burritos, use Greek yogurt in parfaits, or add sausage to casseroles and sliders. A breakfast that includes protein plus something with fiber tends to keep people going longer than a bowl of plain cereal.
Are these good for picky eaters?
Some are easier than others. Sheet-pan pancakes, French toast sticks, smoothie packs, banana muffins, and egg muffins usually do well because the textures are familiar. For picky eaters, keep mix-ins separate and let them build their own plate where possible.
What if my family eats at different times?
Choose breakfasts that hold in the fridge or freezer, then reheat portions as needed. Egg muffins, casseroles, baked oatmeal cups, and sandwiches are especially good for this. Parfaits and smoothie packs work too, as long as you keep crunchy toppings separate until serving.
Can I make these without dairy?
Most can be adapted. Use oat milk or almond milk in oats and custards, dairy-free yogurt in parfaits and chia pudding, and a meltable plant-based cheese in baked egg dishes. The flavor may shift a little, but the structure usually stays intact.
How do I stop toast-based breakfasts from getting soggy?
Toast the bread well before adding toppings, and keep wet ingredients drained. Tomatoes, berries, and yogurt need special attention. If you’re packing the breakfast, let hot toppings cool for a minute before sealing the container.
Which recipes are best for using leftovers?
Breakfast fried rice is the obvious leftover champion, but casseroles, burritos, and frittatas are good places for leftover vegetables, cooked sausage, or bits of cheese. Day-old bread also becomes useful in French toast sticks and breakfast casseroles. Leftovers only feel random until you give them a job.
Do any of these work for a grab-and-go breakfast without a plate?
Yes. Burritos, breakfast sandwiches, sliders, muffins, baked oatmeal cups, pancakes squares, and French toast sticks all work without a fork. The main thing is cooling them enough that they hold together and wrapping them so they stay tidy.
A Calmer Table Before the Bell
The best school-morning breakfasts do one quiet thing well: they remove friction. No one is standing at the counter wondering what to make. No one is waiting for a second pan. No one is eating a dry cracker in the back seat because breakfast got complicated again.
A small rotation of make-ahead eggs, oat-based breakfasts, toast builds, and freezer-friendly sandwiches can change the tone of the whole morning. Not every day. That would be too neat. But enough of them that the kitchen feels useful instead of combative. Start with three or four of these, learn which ones disappear fastest, and let those become the regulars.