
Pastel candy has a funny way of taking over the kitchen. One bowl on the counter turns into three, then you find a stray foil wrapper in the sugar canister, and somehow the chocolate bunnies are already missing ears. Easter candy recipes are the cleanest fix I know: chop the leftovers, fold them into butter-rich batters, and bake them into bars, cookies, brownies, and cakes that taste far better than the candy bowl ever did on its own.
The sweet spot here is texture. Mini eggs bring that brittle shell and milky chocolate crunch. Peeps melt into sticky pockets that go soft at the edges and almost marshmallow-fudge in the middle. Jelly beans are trickier, and I’ll say it plainly: they’re better as a topping or garnish than as a baked-in ingredient, because their colors bleed and the flavor gets muddy if they sit in the oven too long.
The best holiday baking doesn’t hide the candy. It uses it with a little strategy. A salty pretzel base reins in the sugar. Brown sugar gives cookies a little chew. Cream cheese gives candy-heavy bars enough tang to stay interesting after the third bite. That’s the part most people miss, and it’s why some Easter desserts vanish from the tray while others sit there looking cheerful and untouched.
Why These Easter Candy Recipes Earn a Spot on the Table
- Leftover candy gets used fast: Chopped mini eggs, pastel chocolates, and marshmallow treats all land well in batters that need a little crunch or color.
- Most of these recipes travel well: Bars, brownies, and cookie squares pack into pans and boxes without losing shape, which matters when the dessert table is already crowded.
- You get real flavor contrast: Salted pretzels, cream cheese, cocoa, citrus, and peanut butter keep the candy from tasting flat and sugary.
- They’re flexible with what’s in the bowl: If you’ve got one bag of candy left and a few random chocolate eggs, you can still pull off something worth serving.
- Kids can help without wrecking the recipe: Sprinkling, pressing candies into dough, and breaking bark are jobs that do not require much finesse.
- The sweets hold up after baking: The best versions keep a little texture instead of melting into one big pastel blur.
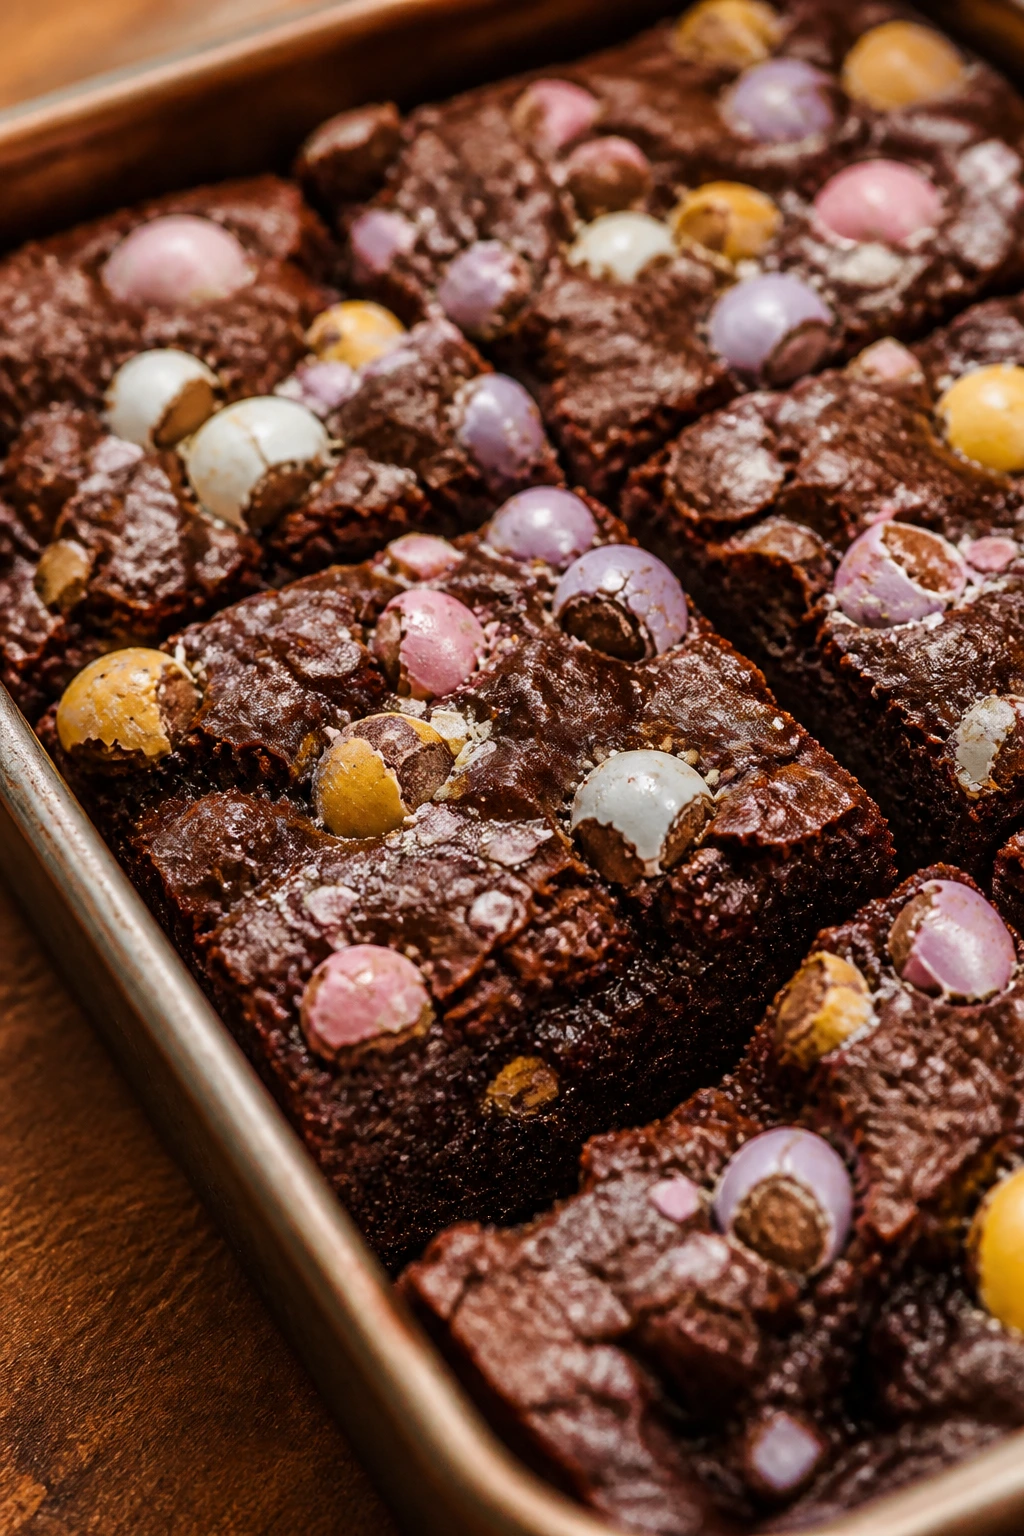
1. Cadbury Mini Egg Brownies
These are the brownies people remember first because the Mini Eggs do two jobs at once: they add crunch, and they leave tiny caramelized pockets where the candy shell softens in the oven. The batter itself is dark, fudgy, and not too sweet, which matters because Mini Eggs bring plenty of sugar on their own. When they cool, you get a crackly top and a dense middle with those little candy shards scattered through it.
Why It Works:
Mini Eggs stay sturdy long enough to bake into brownies without disappearing. The cocoa base keeps the chocolate flavor deep instead of sugary, and the chopped candy gives each square a different texture. I like this version in a 9×13 pan because the brownies stay thick enough to feel rich without turning cakey.
Key Ingredients:
- 1 cup unsalted butter, cut into pieces
- 8 ounces semisweet chocolate, chopped
- 1¾ cups granulated sugar
- 3 large eggs
- 1 teaspoon vanilla extract
- 1 cup all-purpose flour
- ½ cup unsweetened cocoa powder
- ½ teaspoon fine salt
- 1 cup Cadbury Mini Eggs, roughly chopped
Quick Steps:
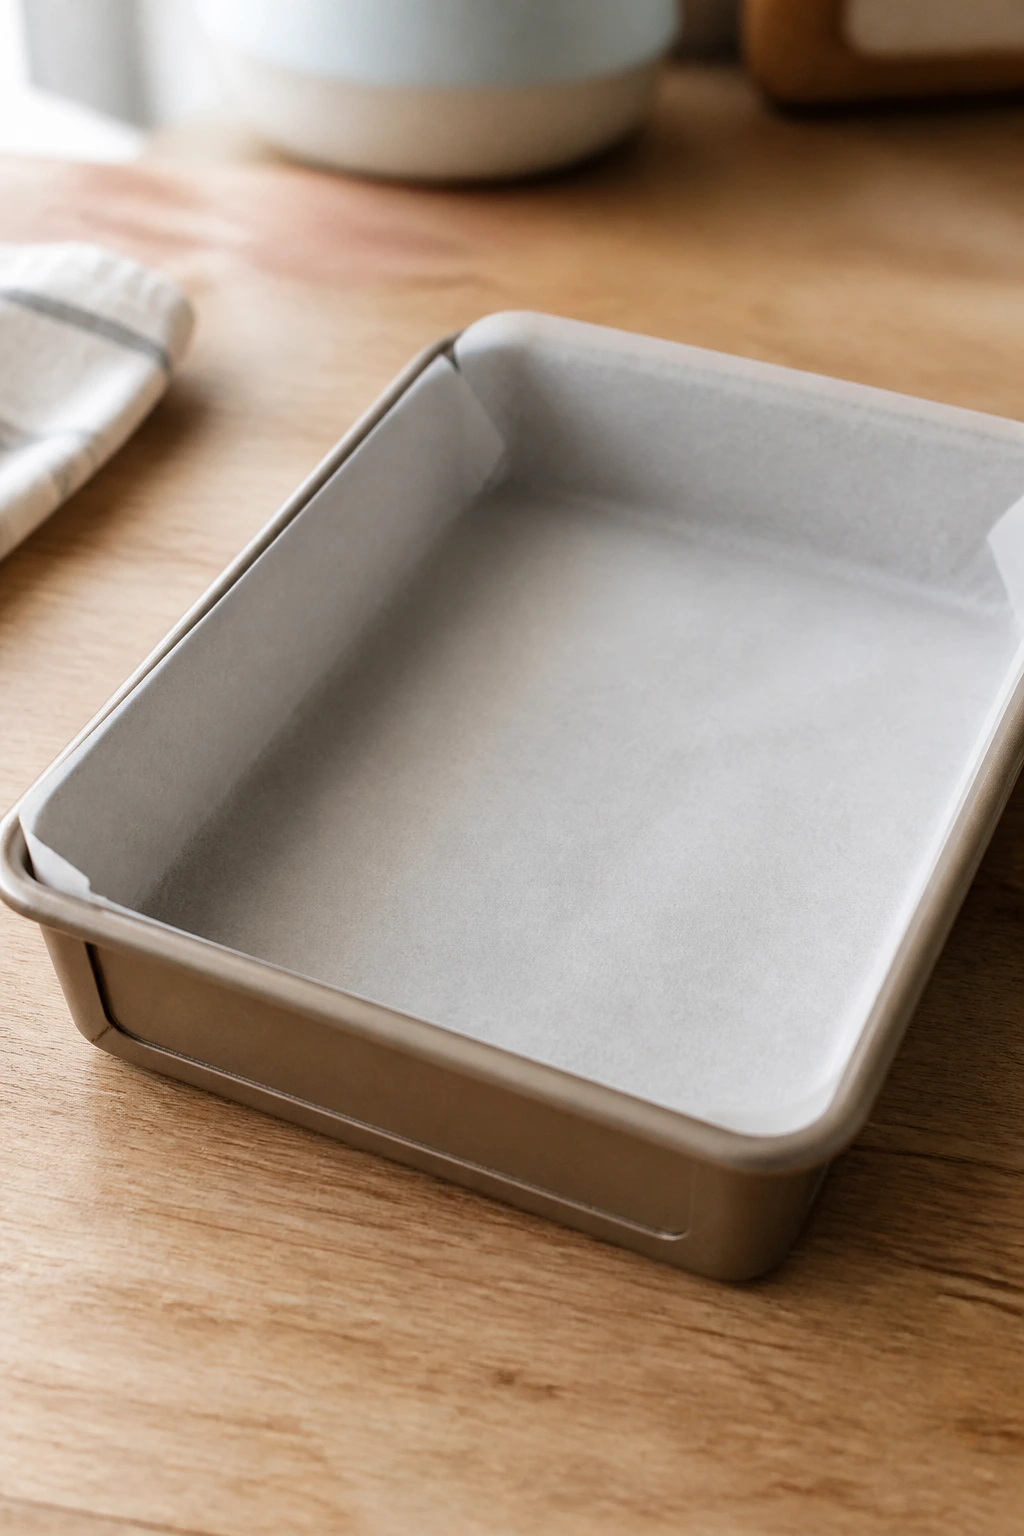
- Preheat the oven to 350°F and line a 9×13-inch pan with parchment, leaving a little overhang.
- Melt the butter and chocolate together over low heat until smooth and glossy, then let it cool for 5 minutes.
- Whisk in the sugar, eggs, and vanilla until the mixture looks thick and shiny.
- Fold in the flour, cocoa, and salt just until no dry streaks remain, then stir in the chopped Mini Eggs.
- Spread into the pan and bake for 28 to 32 minutes, until the center is set but still slightly soft when pressed. Cool completely before slicing.
Equipment for This Recipe:
- 9×13-inch baking pan
- Parchment paper
- Medium saucepan
- Whisk and rubber spatula
How to Serve This Dish:
Cut them into neat squares and pile them on a white plate so the candy bits show. A small scoop of vanilla ice cream is worth the extra effort if you’re serving them warm.
Pro Tips for This Recipe:
- Chill the chopped Mini Eggs for 10 minutes before folding them in; they hold their shape better.
- Pull the brownies when the middle still has a slight jiggle. Dry brownies bury the candy.
- Sprinkle a pinch of flaky salt on top right after baking if you want the chocolate flavor to pop harder.
Variations on This Dish: - White Chocolate Swirl: Drop spoonfuls of melted white chocolate across the top before baking.
- Peppermint Crunch Swap: Use crushed candy-coated chocolate mints instead of Mini Eggs for a colder, sharper flavor.
Common Mistakes to Avoid with This Dish: - Don’t overbake them. The edges may look done before the center is ready, and that gives you crumbly brownies instead of fudgy ones.
- Don’t use whole Mini Eggs without chopping. They make awkward hard spots that fight the knife when you cut the pan.
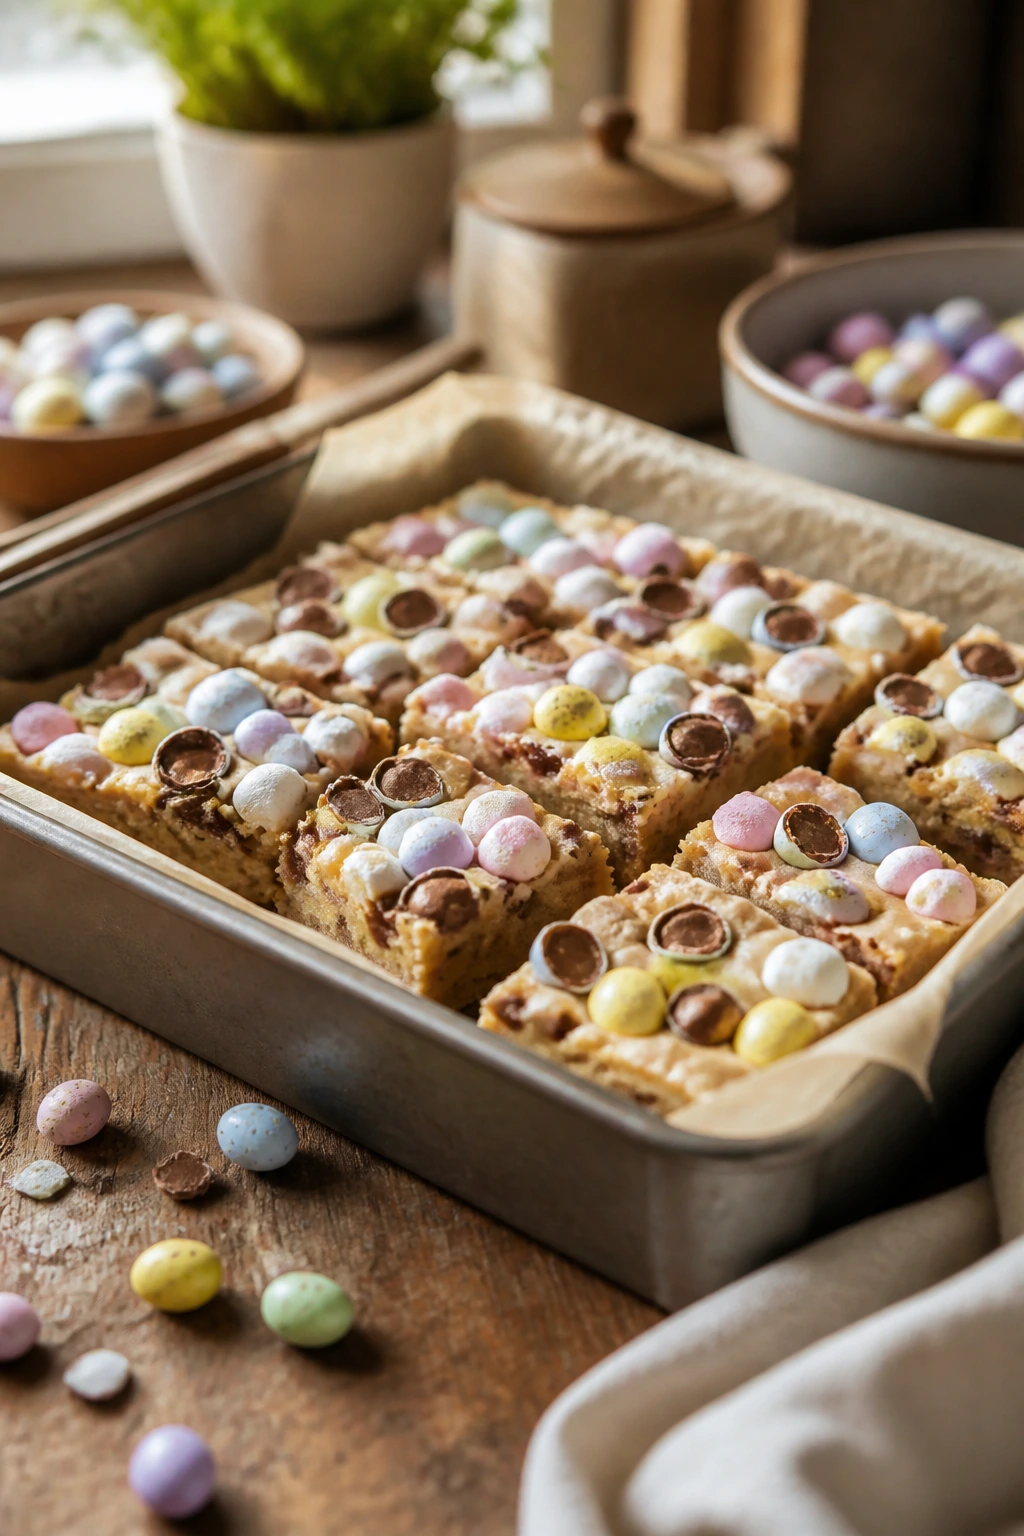
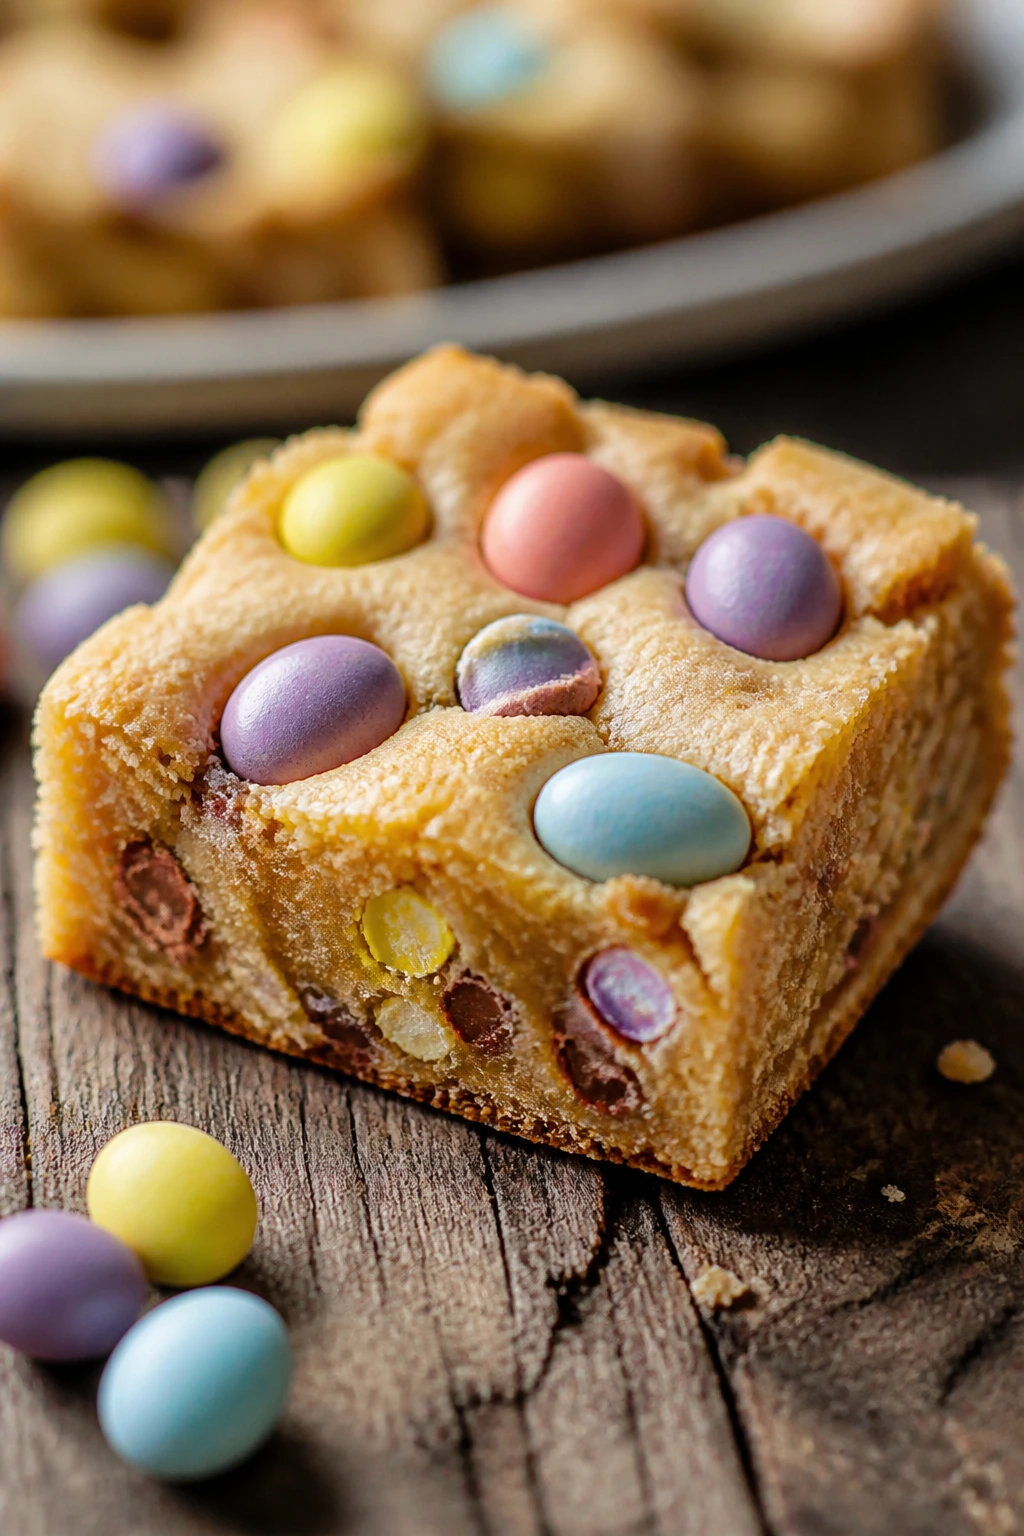
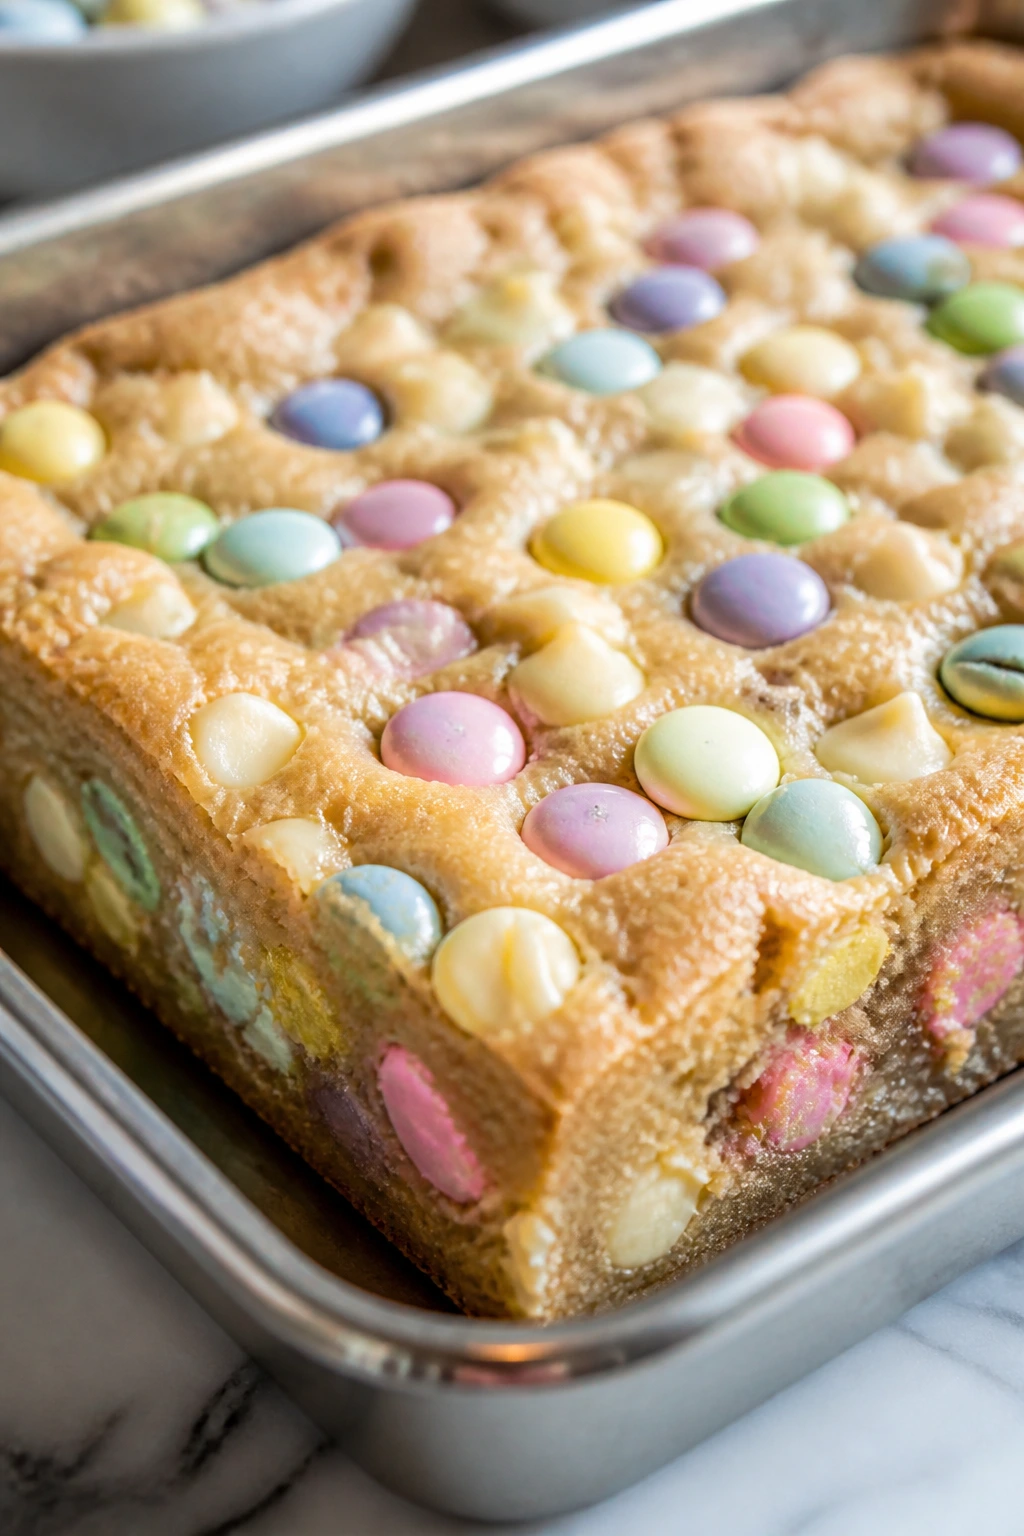
2. Easter M&M Cookie Bars
These cookie bars are what I make when I want the look of decorated sugar cookies without the rolling pin mess. The dough bakes into a soft, thick slab with crisp edges, and the pastel M&Ms sit on top like confetti. White chocolate chips add a creamy sweetness that melts into the dough and keeps the bars from feeling dry.
Why It Works:
A cookie-bar base lets the candy stay visible and evenly spread. Brown sugar gives the bars chew, while the extra butter keeps the crumb tender enough to cut cleanly once cool. The whole pan tastes like a bakery cookie scaled up for a crowd, which is exactly what holiday baking should feel like.
Key Ingredients:
- 1 cup unsalted butter, softened
- 1 cup packed light brown sugar
- ½ cup granulated sugar
- 2 large eggs
- 2 teaspoons vanilla extract
- 2½ cups all-purpose flour
- 1 teaspoon baking soda
- ½ teaspoon fine salt
- 1½ cups pastel M&Ms
- ¾ cup white chocolate chips
Quick Steps:
- Heat the oven to 350°F and line a 9×13-inch pan with parchment.
- Beat the butter, brown sugar, and granulated sugar until pale and fluffy, about 2 minutes.
- Mix in the eggs and vanilla, then add the flour, baking soda, and salt on low speed.
- Fold in most of the M&Ms and white chocolate chips, then press the dough into the pan and scatter the remaining candy over the top.
- Bake for 24 to 28 minutes, until the edges are golden and the center looks set but soft. Cool fully before slicing.
Equipment for This Recipe:
- 9×13-inch baking pan
- Electric mixer
- Offset spatula or the back of a spoon
- Cooling rack
How to Serve This Dish:
Serve them in tidy rectangles or small squares if the dessert table is already busy. They work well beside tea, coffee, or a cold glass of milk.
Pro Tips for This Recipe:
- Save a handful of M&Ms for the top so the bars look bright after baking.
- If your kitchen runs warm, chill the dough for 20 minutes before pressing it into the pan.
- Line the pan generously with parchment; these bars lift out far cleaner that way.
Variations on This Dish: - Peanut Butter Pop: Add ½ cup peanut butter chips for a more savory finish.
- Lemon Candy Bars: Swap the white chocolate chips for lemon chips if you want a sharper, citrus edge.
Common Mistakes to Avoid with This Dish: - Don’t bake until the middle is firm. It sets as it cools, and waiting too long gives you a hard slab.
- Don’t stir the candy in so hard that the shells break apart. A few broken candies are fine; purple batter is not.
3. Peanut Butter Egg Blondies

If a peanut butter egg disappears in two bites, it’s because the candy is already halfway to blondie perfection. The batter is brown-sugar rich and faintly salty, and the chopped peanut butter eggs melt just enough to make little streaks through the crumb. I like these better than straight candy, honestly. They feel more finished, more like a dessert someone planned instead of a snack someone dropped into a bowl.
Why It Works:
Blondies have the right kind of density for candy mix-ins. They hold chunky pieces without collapsing, and peanut butter adds just enough fat to keep the squares soft for days. The salt sharpens the sweetness and keeps the flavor from flattening out.
Key Ingredients:
- ½ cup unsalted butter, melted
- 1 cup packed light brown sugar
- ½ cup creamy peanut butter
- 2 large eggs
- 2 teaspoons vanilla extract
- 1½ cups all-purpose flour
- 1 teaspoon baking powder
- ½ teaspoon fine salt
- 1 cup chopped peanut butter eggs
Quick Steps:
- Preheat the oven to 350°F and line an 8×8-inch pan with parchment.
- Whisk the melted butter, brown sugar, and peanut butter until smooth, then beat in the eggs and vanilla.
- Stir in the flour, baking powder, and salt just until combined.
- Fold in the chopped peanut butter eggs and spread the batter into the pan.
- Bake for 22 to 26 minutes, until the top is set and the center no longer looks wet. Cool before cutting.
Equipment for This Recipe:
- 8×8-inch baking pan
- Mixing bowl and whisk
- Rubber spatula
- Sharp knife for slicing
How to Serve This Dish:
These are good at room temperature with a cold glass of milk, but I also like them slightly warm because the peanut butter flavor comes forward more. A dusting of powdered sugar is enough if you want them to look polished.
Pro Tips for This Recipe:
- Chop the candy eggs into uneven pieces so some melt and some stay chunky.
- Don’t skip the parchment sling; peanut butter blondies cling to the pan.
- Let them cool for at least 45 minutes, or the center will seem underbaked when it’s not.
Variations on This Dish: - Chocolate Drizzle Blondies: Finish with a thin zigzag of melted chocolate.
- Pretzel Crunch Version: Fold in ½ cup crushed pretzels for a salty snap.
Common Mistakes to Avoid with This Dish: - Don’t use natural peanut butter here unless you stir it very well. The extra oil can make the bars greasy.
- Don’t cut them while hot. They’ll tear and smear instead of slicing cleanly.
4. Peeps Marshmallow Blondies
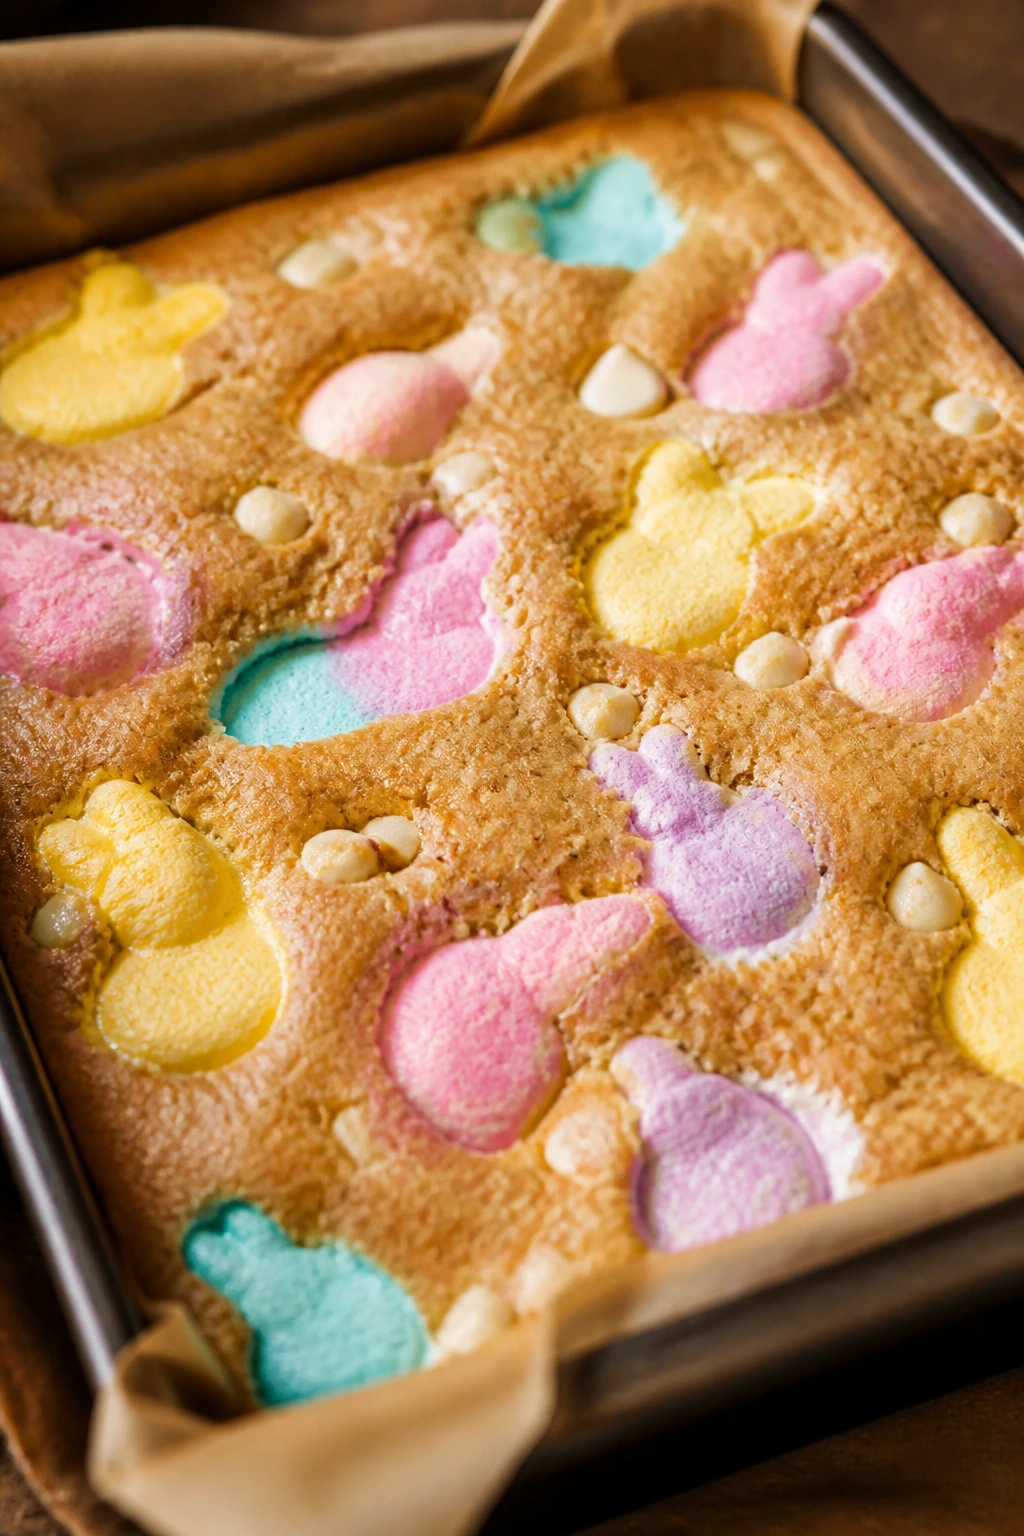
Peeps are awkward candy until you bake them into something that wants marshmallow pockets. Blondies are a good landing spot. The top bakes into a thin crust, the center stays chewy, and the Peeps soften into sticky, pastel streaks that taste more like toasted marshmallow than candy aisle fluff. White chocolate chips keep the whole pan from feeling one-note.
Why It Works:
Peeps melt fast, so the batter needs enough structure to hold them in place. Blondies give you that. The brown sugar base adds depth, and the marshmallow candy turns into little sweet pockets instead of hard chunks. It’s a better use for Peeps than trying to eat them straight out of the sleeve.
Key Ingredients:
- ½ cup unsalted butter, melted
- 1 cup packed light brown sugar
- ¼ cup granulated sugar
- 2 large eggs
- 2 teaspoons vanilla extract
- 1¾ cups all-purpose flour
- ½ teaspoon baking powder
- ½ teaspoon fine salt
- 6 Peeps, cut into small pieces
- 1 cup white chocolate chips
Quick Steps:
- Heat the oven to 350°F and line an 8×8-inch pan with parchment.
- Whisk the melted butter, brown sugar, and granulated sugar until smooth, then whisk in the eggs and vanilla.
- Stir in the flour, baking powder, and salt.
- Fold in the Peeps and white chocolate chips, then spread the dough into the pan.
- Bake for 23 to 27 minutes, until the edges are golden and the top looks set with a few pale marshmallow spots. Cool fully before slicing.
Equipment for This Recipe:
- 8×8-inch baking pan
- Mixing bowl
- Sharp knife or kitchen scissors for cutting Peeps
- Parchment paper
How to Serve This Dish:
These are best on the same day they’re baked, while the marshmallow centers still feel soft. Serve them in small squares; they’re sweet enough that a little goes a long way.
Pro Tips for This Recipe:
- Snip the Peeps with lightly oiled scissors so they don’t stick so badly.
- Keep the pieces small; big chunks can melt into empty pockets.
- A pinch of flaky salt on top after baking helps a lot.
Variations on This Dish: - Chocolate Peeps Blondies: Add ½ cup mini chocolate chips for a deeper flavor.
- Lemon Marshmallow Bars: Use lemon Peeps and add 1 teaspoon lemon zest to the batter.
Common Mistakes to Avoid with This Dish: - Don’t overbake. Peeps dry out fast and lose that soft center if you leave them too long.
- Don’t cut the bars while the candy is still hot and stretchy. Wait until they’re completely cool.
5. Easter Candy Bark
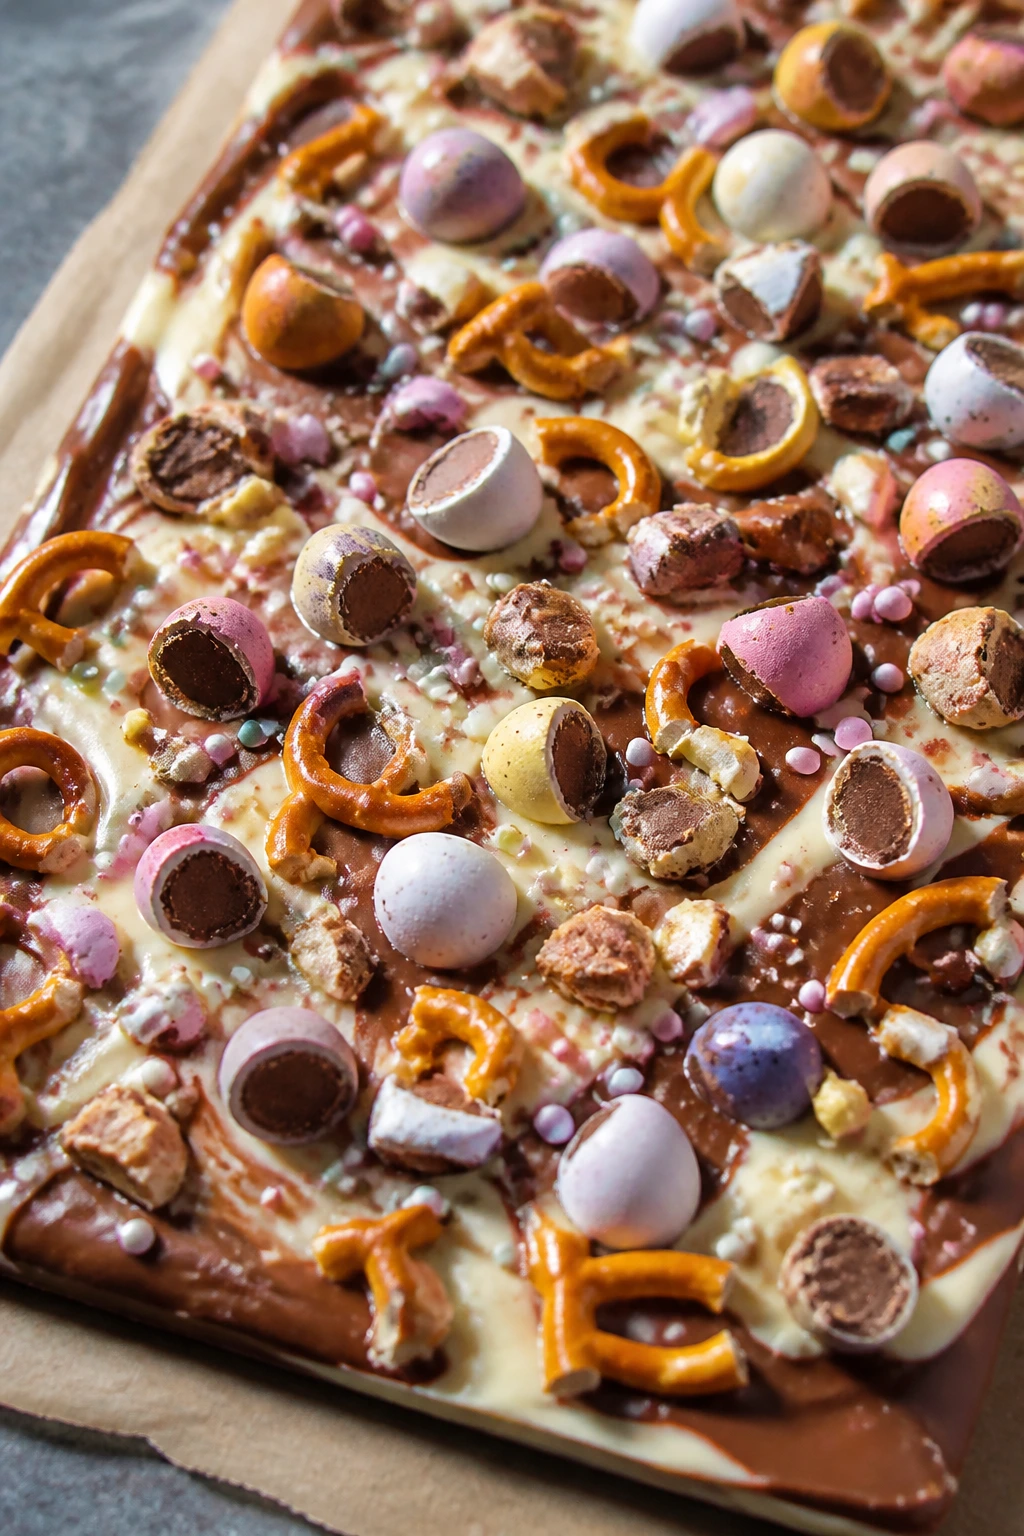
Bark is the easiest place to use up bits and pieces of candy without pretending they belong together. Melted chocolate forms the base, then the toppings do the work: chopped mini eggs, pretzel shards, sprinkles, and a few stray candy bits for color. It looks casual on purpose. That’s the charm.
Why It Works:
Chocolate bark is all about contrast. You want something smooth underneath and something loud on top. Mini Eggs bring crunch, pretzels bring salt, and the sprinkles give it that bright holiday look without needing a piping bag or a steady hand. Once chilled, it breaks into glossy shards that travel well.
Key Ingredients:
- 12 ounces white chocolate, chopped
- 8 ounces milk chocolate, chopped
- 1 teaspoon coconut oil, optional, for smoother melting
- 1 cup chopped Cadbury Mini Eggs
- ½ cup crushed pretzels
- ¼ cup pastel sprinkles
- ¼ cup chopped peanut butter eggs or pastel candies
Quick Steps:
- Line a rimmed baking sheet with parchment.
- Melt the white chocolate and milk chocolate in separate bowls, stirring until smooth; add coconut oil if needed for a thinner finish.
- Spread the white chocolate in a rough rectangle, then dollop the milk chocolate over it and swirl lightly with a skewer.
- Sprinkle the chopped candies, pretzels, and sprinkles over the top while the chocolate is still soft.
- Chill for 20 minutes, then break into pieces once firm.
Equipment for This Recipe:
- Rimmed baking sheet
- Parchment paper
- Two microwave-safe bowls or a double boiler
- Offset spatula or spoon
How to Serve This Dish:
Pile bark in a shallow bowl or tuck it into paper cones for gifting. It’s the kind of treat people pick at between bites of cake and coffee.
Pro Tips for This Recipe:
- Keep the candy pieces small so the bark breaks cleanly.
- Let the chocolate cool slightly before topping or the pieces will sink.
- A little flaky salt over the top sharpens the sweetness fast.
Variations on This Dish: - Dark Chocolate Garden Bark: Swap in 70% dark chocolate for a less sweet version.
- Cookie Crunch Bark: Add crushed shortbread cookies for extra texture.
Common Mistakes to Avoid with This Dish: - Don’t over-swirl the chocolates. If you mix too much, the pattern disappears and the bark looks muddy.
- Don’t refrigerate uncovered. Bark picks up fridge smells faster than people expect.
6. Mini Egg Chocolate Chip Cookies
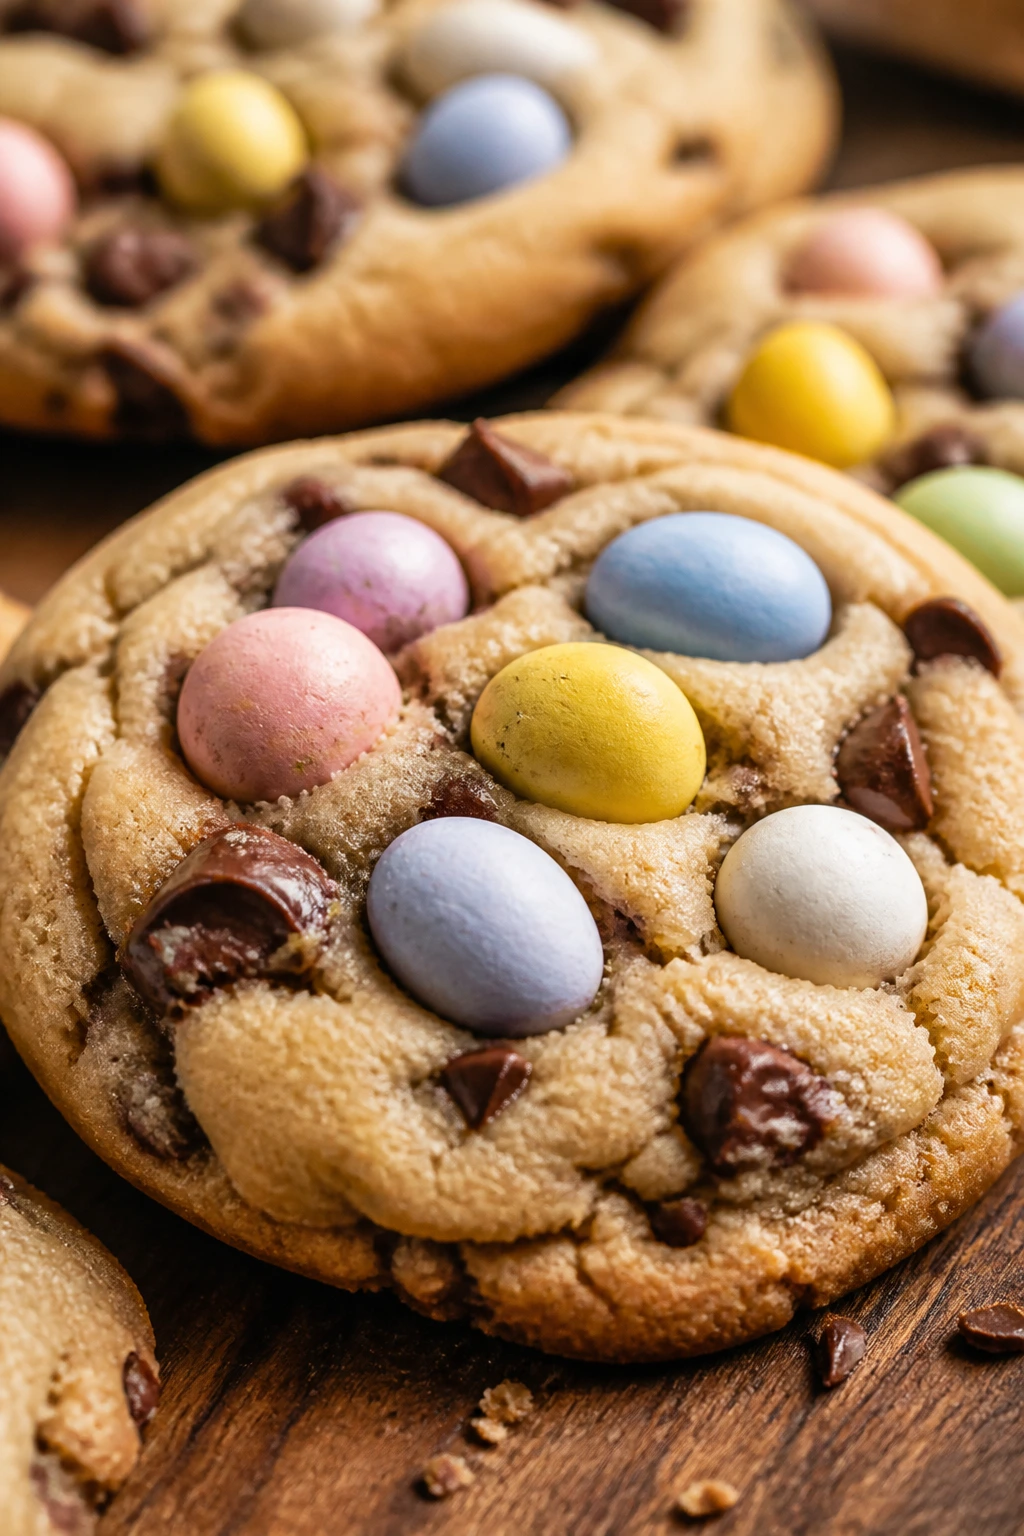
These are the cookies I reach for when I want the familiar taste of chocolate chip dough with a little pastel chaos in it. The Mini Eggs bring a candy-shell crunch that’s different from chocolate chips, and that contrast matters. One bite is soft and buttery; the next has a hard snap from the candy shell. That’s the whole reason to bake them.
Why It Works:
A chilled cookie dough keeps the candy from bleeding too much and helps the cookies hold thick centers. Brown sugar brings chew, while the chopped Mini Eggs create those scattered bright spots that make the tray look cheerful without frosting. These cookies also keep their texture for a couple of days, which is not something every candy cookie can say.
Key Ingredients:
- 1 cup unsalted butter, softened
- ¾ cup packed light brown sugar
- ½ cup granulated sugar
- 2 large eggs
- 2 teaspoons vanilla extract
- 2¾ cups all-purpose flour
- 1 teaspoon baking soda
- 1 teaspoon fine salt
- 1 cup semisweet chocolate chips
- 1 cup chopped Cadbury Mini Eggs
Quick Steps:
- Whisk the flour, baking soda, and salt together in a bowl.
- Beat the butter and both sugars until fluffy, then add the eggs and vanilla.
- Mix in the dry ingredients, then fold in the chocolate chips and Mini Eggs.
- Chill the dough for 30 minutes, then scoop onto a parchment-lined sheet.
- Bake at 350°F for 10 to 12 minutes, until the edges are set and the centers still look slightly underdone. Cool on the pan for 5 minutes.
Equipment for This Recipe:
- Mixing bowls
- Hand mixer or stand mixer
- Sheet pan
- Cookie scoop
How to Serve This Dish:
Serve these slightly warm if you want the chocolate chips soft, or let them cool for a firmer bite. They’re good on a snack plate with fruit, though the candy usually gets all the attention.
Pro Tips for This Recipe:
- Chop the Mini Eggs unevenly so you get both tiny bits and larger candy pieces.
- Don’t skip the chill; warm dough spreads too much and buries the candy.
- Pull them before the centers look fully done. They finish on the pan.
Variations on This Dish: - White Chocolate Easter Cookies: Swap semisweet chips for white chocolate chips.
- Orange Zest Version: Add 1 teaspoon orange zest to the dough for a bright finish.
Common Mistakes to Avoid with This Dish: - Don’t overmix after the flour goes in. Tough cookies bury the candy flavor.
- Don’t bake them until they look dry in the oven. That’s already too late.
7. Jelly Bean Sugar Cookie Bars
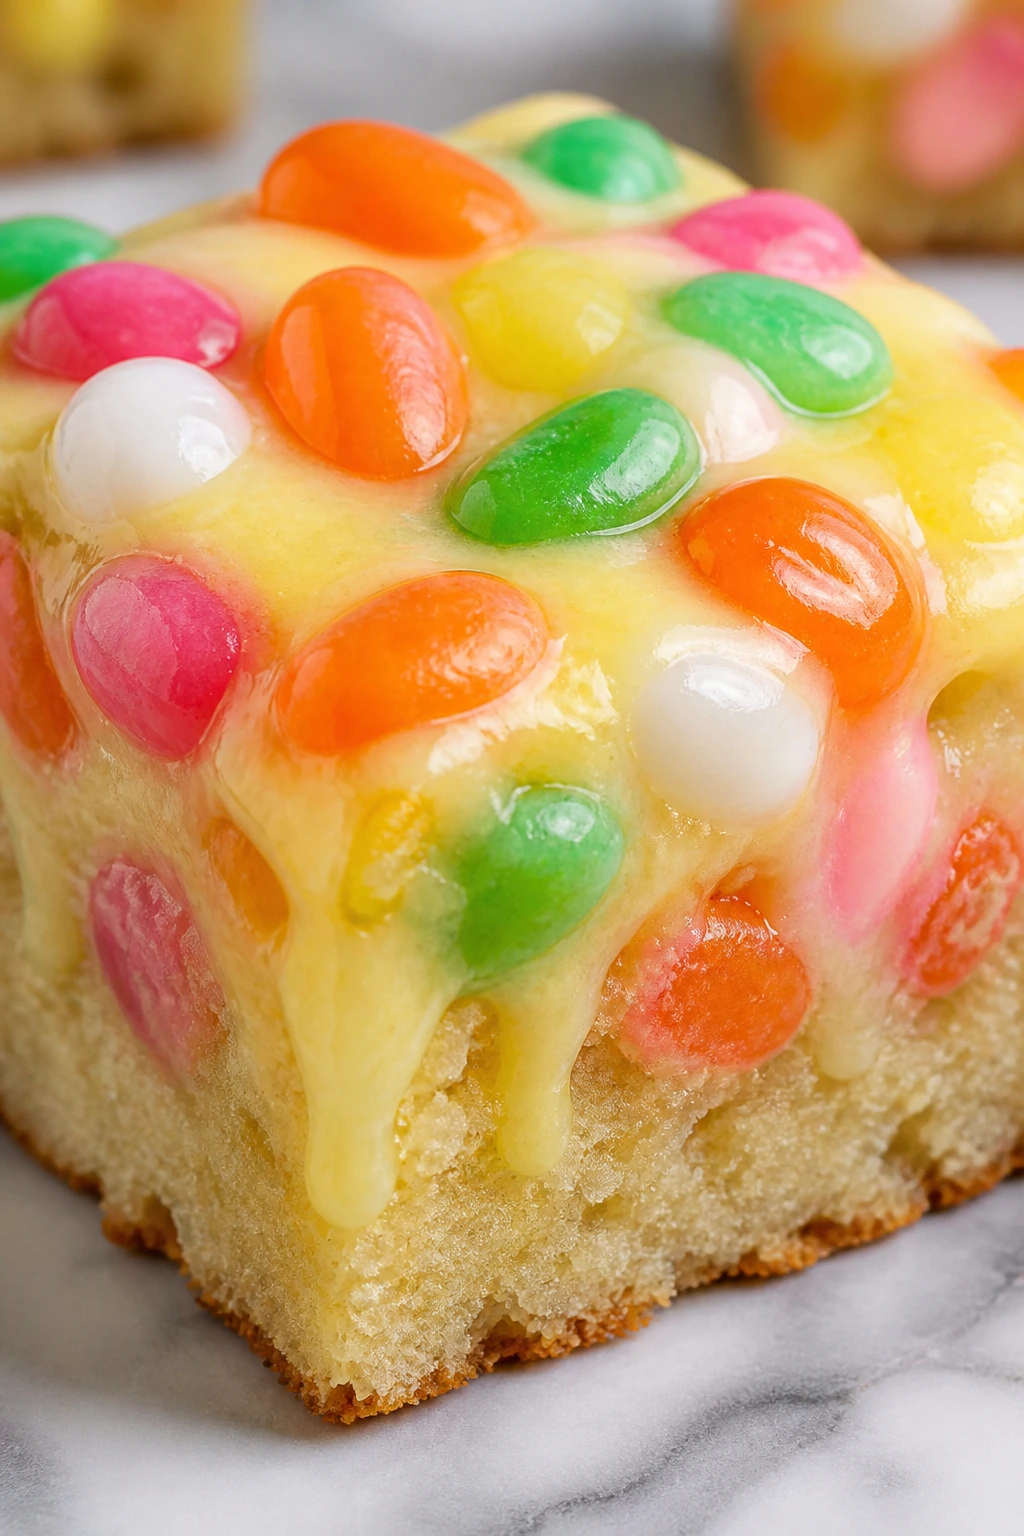
Jelly beans are best here as a bright top layer, not a hidden surprise in the dough. The bars bake up soft and pale, almost like a sugar cookie thickened into a traybake, then the glaze and candy give you the Easter look without that muddy, overbaked jelly bean flavor. I like a lemon glaze on these because it gives the sugar a sharper edge.
Why It Works:
Sugar cookie bars are sturdy enough to hold a glaze and decorative candy. The dough bakes evenly in a pan, which means you don’t have to chill, roll, or cut dozens of individual cookies. Jelly beans stay cheerful when added after baking, and the glaze helps them cling without sinking.
Key Ingredients:
- 1 cup unsalted butter, softened
- 1¼ cups granulated sugar
- 1 large egg
- 1 teaspoon vanilla extract
- ½ teaspoon almond extract
- 2½ cups all-purpose flour
- 1 teaspoon baking powder
- ½ teaspoon fine salt
- 1 cup powdered sugar
- 2 tablespoons milk
- 1 teaspoon lemon juice
- 1 cup jelly beans, halved or whole for topping
Quick Steps:
- Heat the oven to 350°F and line a 9×13-inch pan with parchment.
- Beat the butter and sugar until pale, then mix in the egg, vanilla, and almond extract.
- Add the flour, baking powder, and salt and press the dough evenly into the pan.
- Bake for 18 to 22 minutes, until the top is just golden at the edges. Cool completely.
- Whisk the powdered sugar, milk, and lemon juice into a glaze, spread it over the bars, and press jelly beans on top before it sets.
Equipment for This Recipe:
- 9×13-inch baking pan
- Electric mixer
- Small bowl for glaze
- Offset spatula
How to Serve This Dish:
Cut them into slim bars if you’re serving a crowd; they’re sweet, so smaller is smarter. They look best on a platter lined with parchment or a pastel napkin so the colors stay bright.
Pro Tips for This Recipe:
- Add the jelly beans after glazing, not before baking.
- Use half jelly beans on top if you want easier slicing.
- A little lemon in the glaze keeps the sweetness from feeling flat.
Variations on This Dish: - Vanilla Bean Swap: Use vanilla bean paste instead of almond extract for a softer flavor.
- Orange Glaze Bars: Replace the lemon juice with orange juice and zest.
Common Mistakes to Avoid with This Dish: - Don’t bake the jelly beans into the bars. They’ll melt in strange ways and stain the dough.
- Don’t glaze while warm. The topping will slide right off.
8. Robin Egg Fudge
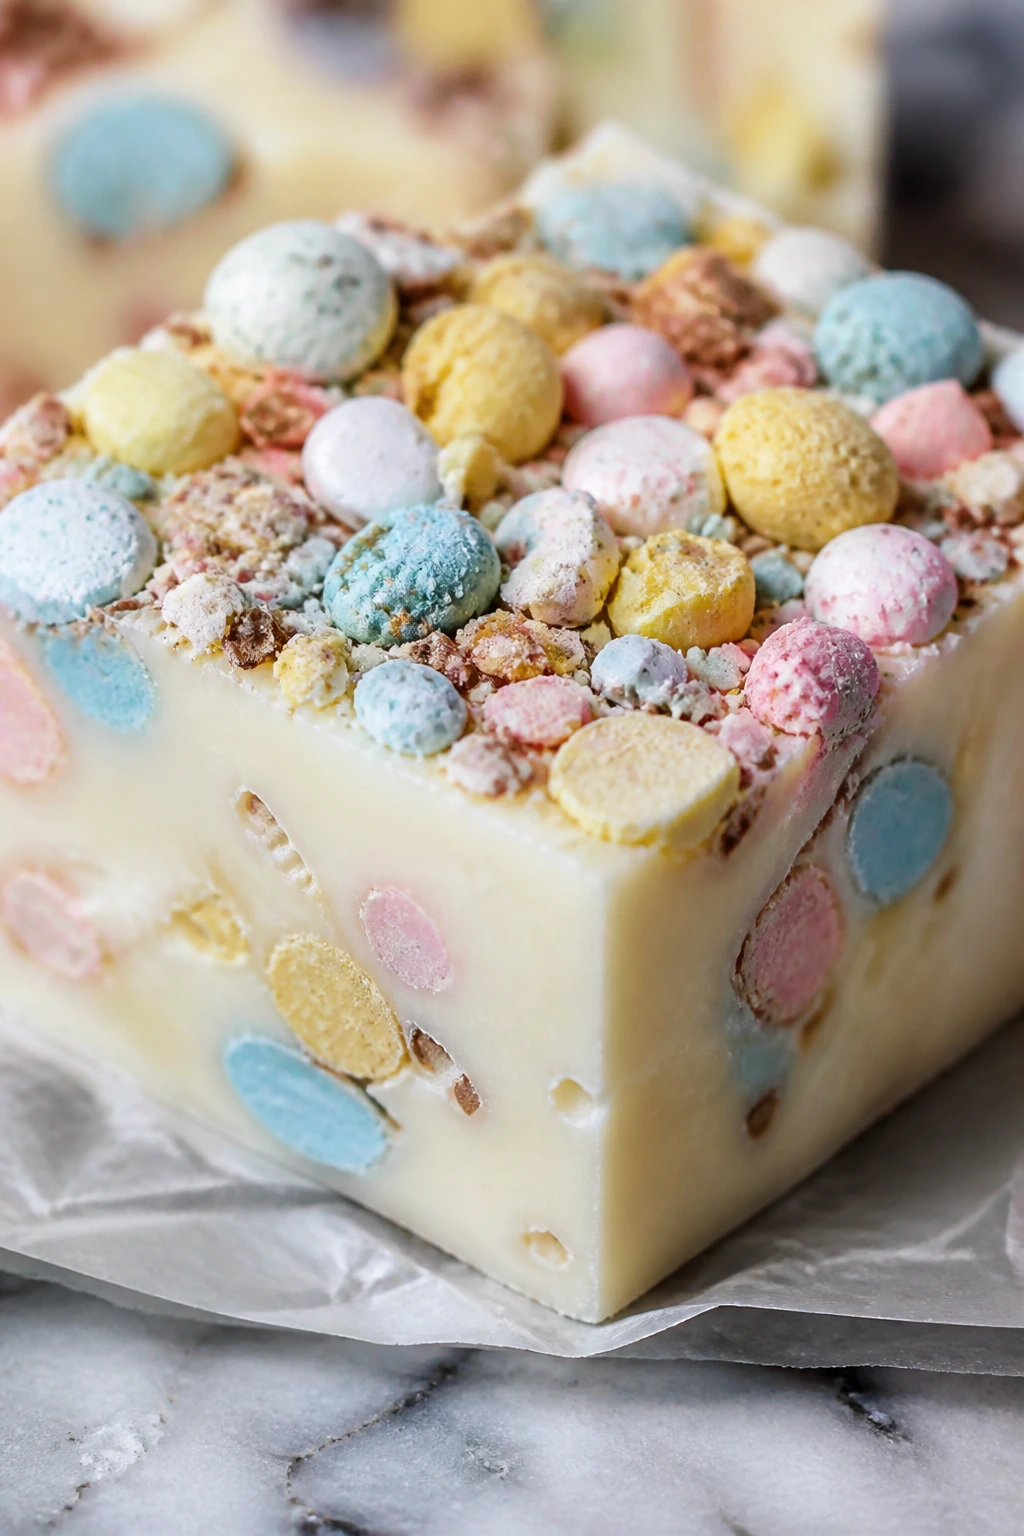
Fudge is a neat place to park malted milk eggs because the texture already leans creamy and dense. White chocolate gives this version a sweet, milky base, and the crushed Robin Eggs bring that malted center and candy shell crunch. It sets into clean squares with a glossy top and a little bit of chew from the candy.
Why It Works:
Fudge doesn’t need flour or eggs, so it lets the candy flavor stay front and center. Sweetened condensed milk makes the texture smooth and stable, while the chopped eggs add a crunchy middle that breaks up the richness. It’s one of the easiest treats here to make ahead and stash in the fridge.
Key Ingredients:
- 3 cups white chocolate chips
- 1 can (14 ounces) sweetened condensed milk
- 2 tablespoons unsalted butter
- 1 teaspoon vanilla extract
- ½ teaspoon fine salt
- 1 cup chopped Robin Eggs or malted milk eggs
Quick Steps:
- Line an 8×8-inch pan with parchment.
- Melt the white chocolate chips, condensed milk, and butter together over low heat, stirring until smooth.
- Stir in the vanilla, salt, and chopped candy eggs.
- Spread the mixture into the pan and tap it once on the counter to level it.
- Chill for at least 2 hours, then lift out and cut into small squares.
Equipment for This Recipe:
- 8×8-inch pan
- Parchment paper
- Heavy saucepan
- Rubber spatula
How to Serve This Dish:
Serve fudge in tiny pieces. It’s rich enough that a 1-inch square feels generous. A small candy box or wax-paper liner makes it easy to gift.
Pro Tips for This Recipe:
- Chop the candy eggs coarsely so some pieces stay crunchy.
- Keep the heat low; white chocolate scorches fast.
- Let the fudge sit at room temperature for 10 minutes before cutting for cleaner edges.
Variations on This Dish: - Milk Chocolate Fudge: Replace half the white chocolate chips with milk chocolate.
- Pretzel Fudge: Add ½ cup crushed pretzels for salt and snap.
Common Mistakes to Avoid with This Dish: - Don’t boil the mixture. Fudge gets grainy when it cooks too hard.
- Don’t cut it straight from the fridge if it’s rock hard; the knife will crack the top.
9. Chocolate Bunny Cheesecake Brownies

This one is for the people who like a little contrast on their plate. The brownie layer is dark and fudgy, the cheesecake layer is tangy and smooth, and the chopped chocolate bunny pieces melt into soft pockets across the top. It looks fancier than it is. That’s useful during holiday baking, when the table is already busy and you need one dessert that reads as deliberate.
Why It Works:
Cheesecake cuts the sweetness of the brownie base and gives the whole pan a softer finish. The chocolate bunny pieces break into chunks that hold their shape better than plain chips. If you swirl the layers lightly, you get a marbled top that slices clean once chilled.
Key Ingredients:
- ½ cup unsalted butter
- 4 ounces semisweet chocolate, chopped
- 1 cup granulated sugar
- 2 large eggs
- ¾ cup all-purpose flour
- ¼ cup cocoa powder
- ¼ teaspoon salt
- 8 ounces cream cheese, softened
- ⅓ cup sugar
- 1 large egg
- 1 teaspoon vanilla extract
- 1 cup chopped chocolate bunny pieces
Quick Steps:
- Heat the oven to 350°F and line an 8×8-inch pan with parchment.
- Melt the butter and semisweet chocolate, then whisk in the sugar and eggs.
- Stir in the flour, cocoa, and salt, then spread the brownie batter into the pan.
- Beat the cream cheese, sugar, egg, and vanilla until smooth, spoon over the brownie layer, and scatter the chocolate bunny pieces on top.
- Swirl lightly with a knife and bake for 30 to 34 minutes, until the center is set with a slight wobble. Chill before slicing.
Equipment for This Recipe:
- 8×8-inch baking pan
- Electric mixer
- Mixing bowls
- Butter knife for swirling
How to Serve This Dish:
These slice best when fully cold, so I like them after a few hours in the fridge. A thin dusting of cocoa powder makes the top look tidy if you’re bringing them to a brunch table.
Pro Tips for This Recipe:
- Use room-temperature cream cheese so the layer mixes smooth.
- Don’t over-swirl; you want layers, not one brown mud.
- Chill thoroughly before slicing or the cheesecake layer will drag.
Variations on This Dish: - Orange Cheesecake Brownies: Add 1 teaspoon orange zest to the cheesecake layer.
- Mini Egg Topper: Swap the chocolate bunny pieces for chopped Mini Eggs if you want more crunch.
Common Mistakes to Avoid with This Dish: - Don’t bake until the cheesecake layer is firm in the oven. It should still quiver a little.
- Don’t skip the chill. Warm slices collapse into a messy square.
10. Carrot Cake Cupcakes with Candy Nests

This is the dessert that belongs on an Easter table whether or not anyone asked for one. The carrot cake crumb is moist and spiced, the cream cheese frosting is tangy, and the toasted coconut nest on top gives you a little chew before the candy eggs crack under your teeth. It’s festive without being fussy.
Why It Works:
Carrot cake naturally likes warm spices and cream cheese, so the candy topper doesn’t feel random. The cupcake format gives you crisp edges on the outside and a soft center inside, and the coconut nest turns each cupcake into a tidy individual portion. It’s a smart move when you need a dessert that looks decorated without requiring a full cake finish.
Key Ingredients:
- 1¾ cups all-purpose flour
- 1 teaspoon baking powder
- 1 teaspoon baking soda
- 1½ teaspoons cinnamon
- ¼ teaspoon nutmeg
- ½ teaspoon fine salt
- ¾ cup neutral oil
- 1 cup packed brown sugar
- 2 large eggs
- 1 teaspoon vanilla extract
- 1½ cups finely grated carrots
- ½ cup chopped walnuts, optional
- 8 ounces cream cheese, softened
- 4 tablespoons unsalted butter, softened
- 2 cups powdered sugar
- ½ cup toasted shredded coconut
- 1 cup small candy eggs
Quick Steps:
- Heat the oven to 350°F and line a 12-cup muffin tin with liners.
- Whisk the dry ingredients together.
- In another bowl, whisk the oil, brown sugar, eggs, and vanilla, then fold in the carrots and walnuts.
- Stir in the dry ingredients just until combined, divide into the cups, and bake for 18 to 22 minutes. Cool completely.
- Beat the cream cheese, butter, and powdered sugar into frosting, pipe or spread it over the cupcakes, then press a ring of toasted coconut and candy eggs on top.
Equipment for This Recipe:
- 12-cup muffin tin
- Cupcake liners
- Mixer
- Piping bag or spoon
How to Serve This Dish:
Serve them on a low cake stand so the nests are easy to see. They’re sweet enough to stand alone, though a bowl of berries cuts the richness nicely.
Pro Tips for This Recipe:
- Grate the carrots finely so the crumb stays smooth.
- Toast the coconut in a dry skillet until just golden; it tastes nuttier.
- Frost only when the cupcakes are fully cool or the topping slides.
Variations on This Dish: - Pineapple Carrot Cupcakes: Fold in ¼ cup well-drained crushed pineapple.
- Mini Egg Center: Press one candy egg into the batter before baking for a hidden center.
Common Mistakes to Avoid with This Dish: - Don’t overfill the liners. They need room to rise.
- Don’t frost warm cupcakes. The cream cheese layer softens too fast.
11. Coconut Macaroon Nests
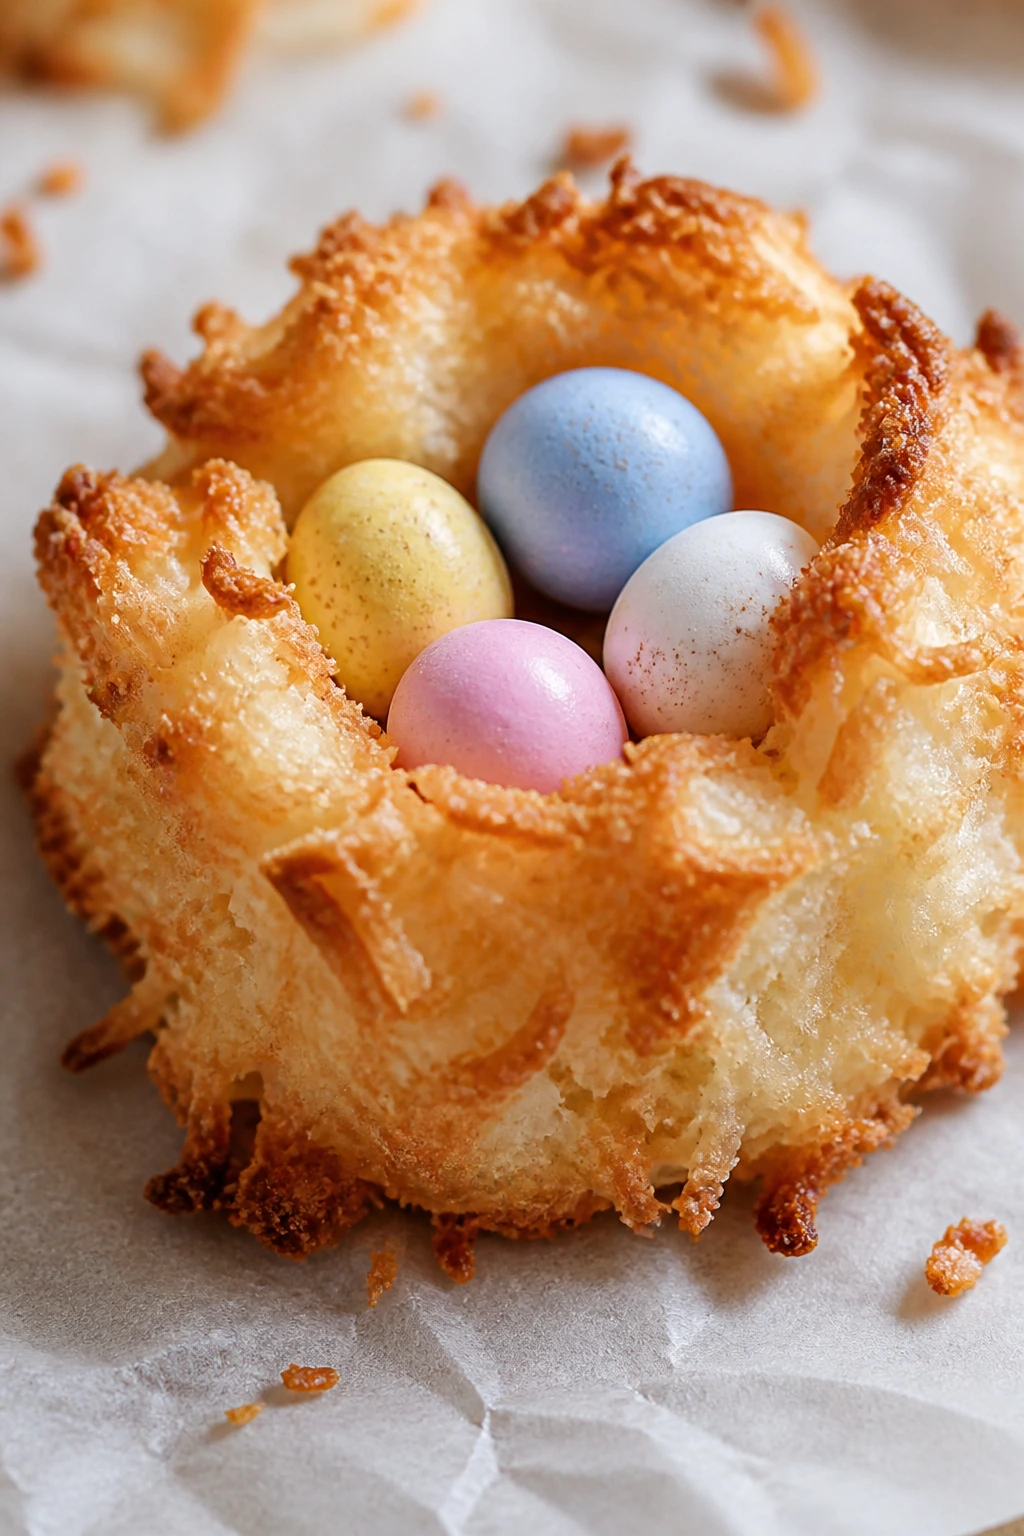
These little nests feel delicate, but they’re sturdier than they look. The outside bakes into a toasted coconut shell, while the middle stays chewy and sweet. A few candy eggs tucked into each one make them look like they came from a bakery that owns a better spring plate than mine ever does.
Why It Works:
Macaroons already rely on coconut for structure, so shaping them into nests is a small leap, not a stunt. Egg whites bind everything together, and the candy eggs go on after baking so they stay clean and bright. They’re also naturally gluten-free, which helps when you need one dessert that fits a wide table.
Key Ingredients:
- 3 cups sweetened shredded coconut
- ½ cup granulated sugar
- 2 large egg whites
- 1 teaspoon vanilla extract
- ¼ teaspoon fine salt
- 1 tablespoon all-purpose flour, optional but helpful
- ½ cup semisweet chocolate chips, melted
- 1 cup candy eggs
Quick Steps:
- Heat the oven to 325°F and line a baking sheet with parchment.
- Stir the coconut, sugar, egg whites, vanilla, salt, and flour until sticky.
- Scoop mounds onto the sheet and press the centers gently with your thumb to make a nest shape.
- Bake for 16 to 18 minutes, until the edges are golden brown.
- Cool completely, drizzle with melted chocolate if you like, and nestle candy eggs in the centers.
Equipment for This Recipe:
- Rimmed baking sheet
- Parchment paper
- Mixing bowl
- Small scoop or spoon
How to Serve This Dish:
They work well as a small dessert after a bigger meal because each one is compact and tidy. Put them on a platter with paper liners so the chocolate doesn’t stick.
Pro Tips for This Recipe:
- Wet your fingers slightly if the coconut mixture sticks when shaping.
- Keep the nests small; oversized ones spread more than you want.
- Add the candy eggs after the macaroons cool so the shells stay bright.
Variations on This Dish: - Chocolate Coconut Nests: Mix ¼ cup cocoa powder into the coconut mixture.
- Lime Nests: Add 1 teaspoon lime zest for a sharper finish.
Common Mistakes to Avoid with This Recipe: - Don’t bake at too high a temperature. Coconut burns fast.
- Don’t use egg yolks; the mixture gets heavy and won’t hold its shape.
12. Peeps Rice Krispie Treat Squares
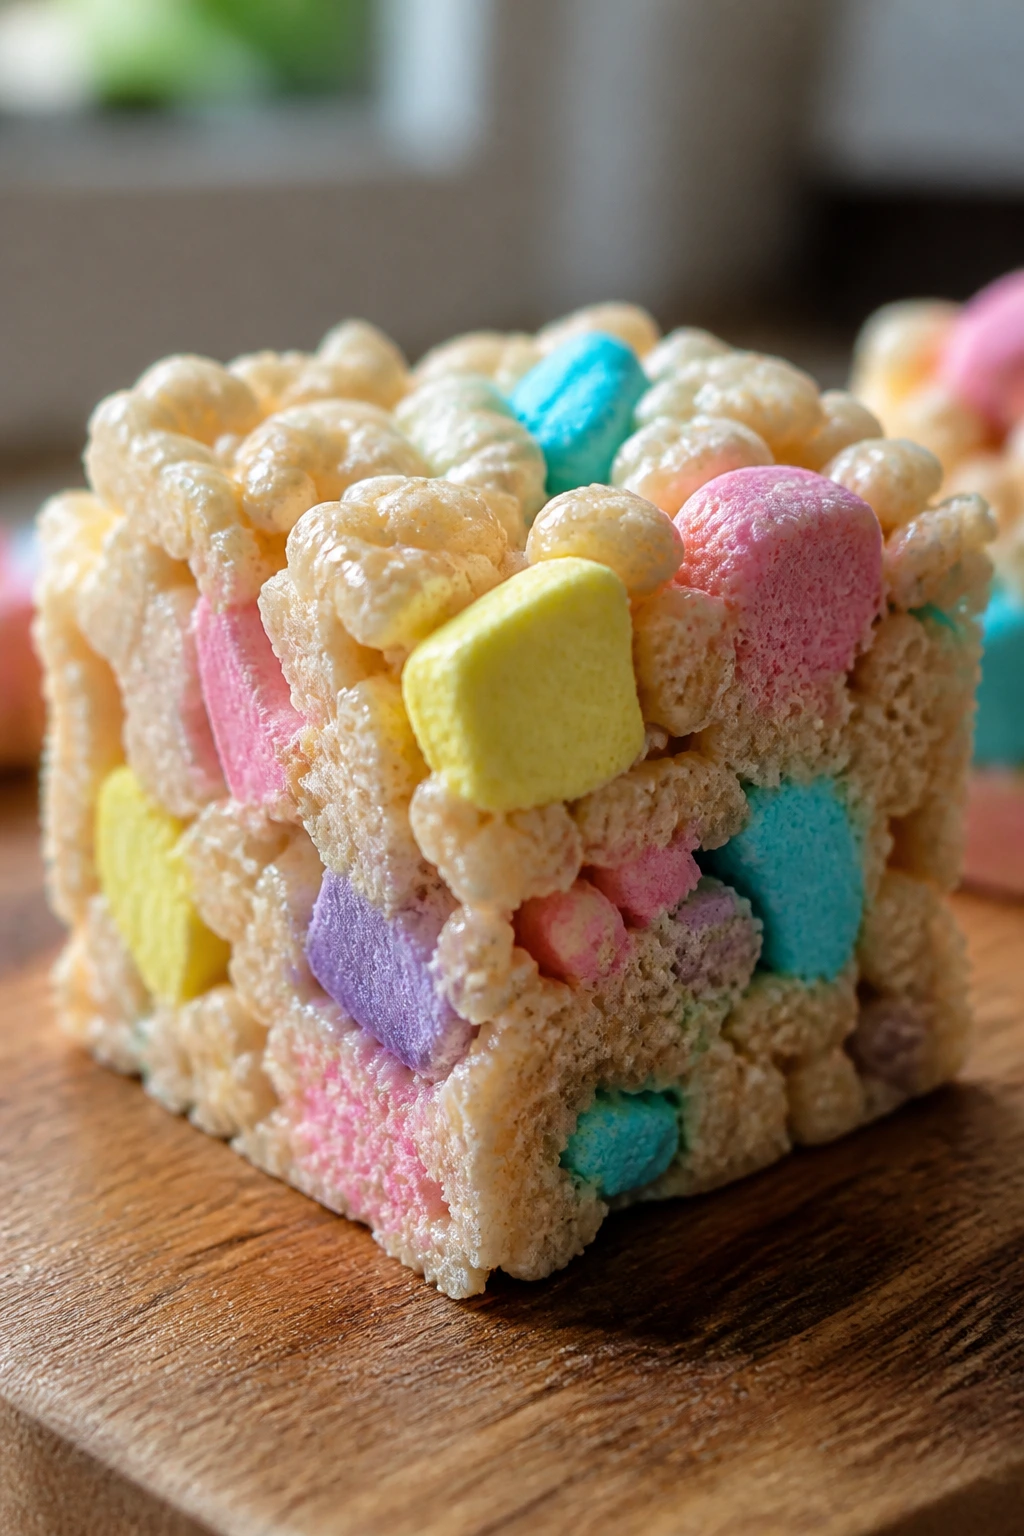
Rice Krispie treats are already marshmallow-heavy, so Peeps fit in here like they were meant for the job. The marshmallow flavor gets deeper, the color stays bright, and the squares hold a chewy stretch that plain cereal treats sometimes miss. I like these cut small, because people always grab a second square before they’re done talking.
Why It Works:
The melted Peeps blend with butter and mini marshmallows, which gives you a smoother melt than using Peeps alone. A little salt keeps the sweetness from landing flat, and the cereal gives a crisp snap under the marshmallow pull. These are fast enough for a same-day dessert, which makes them useful when the rest of the table is still baking.
Key Ingredients:
- 4 tablespoons unsalted butter
- 3 cups mini marshmallows
- 6 Peeps, cut into pieces
- 6 cups crisp rice cereal
- ½ teaspoon vanilla extract
- ¼ teaspoon fine salt
- 2 tablespoons pastel sprinkles, optional
Quick Steps:
- Grease a 9×13-inch pan lightly with butter.
- Melt the butter, mini marshmallows, and Peeps together over low heat, stirring until smooth.
- Stir in the vanilla and salt, then fold in the cereal and sprinkles.
- Press into the pan with a buttered spatula or wax paper, keeping the top even but not packed hard.
- Cool for 30 minutes, then cut into squares.
Equipment for This Recipe:
- 9×13-inch pan
- Large saucepan
- Rubber spatula
- Buttered parchment or wax paper
How to Serve This Dish:
Serve them on the same day for the best chew. They’re easy to stack on a tray, and they look cheerful with a few extra sprinkles scattered around the plate.
Pro Tips for This Recipe:
- Keep the heat low so the marshmallows don’t scorch.
- Don’t press too hard into the pan or the squares turn dense.
- If the mixture sticks, butter your spatula instead of adding more cereal.
Variations on This Dish: - Chocolate Cereal Treats: Add ½ cup mini chocolate chips after the mixture cools slightly.
- Pretzel Marshmallow Squares: Fold in 1 cup broken pretzel sticks for salt and crunch.
Common Mistakes to Avoid with This Recipe: - Don’t leave the marshmallow mix on the stove while you prep the cereal. It stiffens fast.
- Don’t refrigerate if you want a soft bite; the treats get hard and brittle.
13. Easter Egg Cheesecake Bars
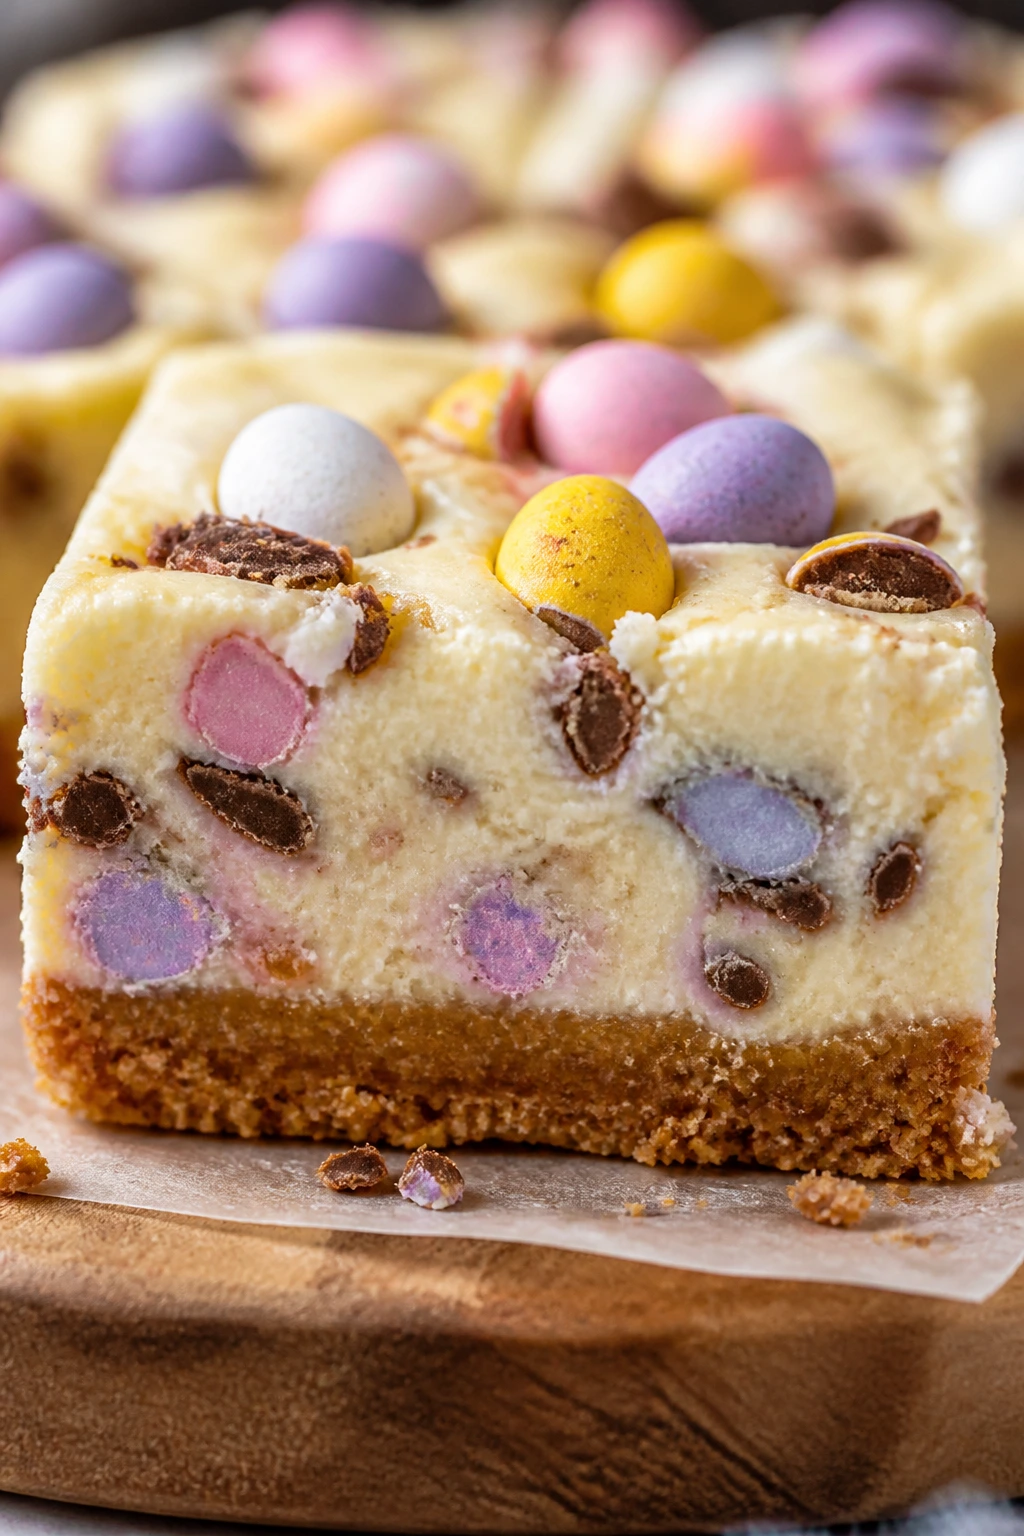
Cheesecake bars are a good excuse to put chopped candy eggs into something tangy and cold. The graham crust gives you a toasty base, the filling bakes into a smooth layer with a little wobble, and the candy pieces stay tucked through the middle like hidden color. They slice cleanly and look tidy, which is a blessing after a pan full of sugar.
Why It Works:
Cheesecake cuts through the sweetness of Easter candy better than almost any other dessert base. A graham crust adds a dry, crumbly bottom that stops the filling from feeling heavy, and the candy eggs bring crunch without taking over. These bars also improve after chilling overnight, so they’re a smart make-ahead option.
Key Ingredients:
- 1½ cups graham cracker crumbs
- 5 tablespoons unsalted butter, melted
- 2 tablespoons sugar
- 16 ounces cream cheese, softened
- ½ cup granulated sugar
- 2 large eggs
- 1 teaspoon vanilla extract
- ¼ cup sour cream
- 1 cup chopped candy eggs
Quick Steps:
- Heat the oven to 325°F and line an 8×8-inch pan with parchment.
- Mix the crumbs, melted butter, and sugar, then press into the pan and bake for 8 minutes.
- Beat the cream cheese and sugar until smooth, then mix in the eggs, vanilla, and sour cream.
- Fold in the chopped candy eggs and pour over the crust.
- Bake for 28 to 32 minutes, until the center trembles slightly. Chill for at least 3 hours before cutting.
Equipment for This Recipe:
- 8×8-inch baking pan
- Hand mixer
- Mixing bowls
- Parchment paper
How to Serve This Dish:
Serve them cold, cut into neat squares, with the top left plain or dusted with a little powdered sugar. A berry garnish works well if you want to pull the plate away from pure candy territory.
Pro Tips for This Recipe:
- Make sure the cream cheese is fully softened or the filling turns lumpy.
- Cool completely before chilling, or condensation will wet the top.
- Slice with a hot, wiped knife for the cleanest edges.
Variations on This Dish: - Chocolate Crust Version: Use chocolate cookie crumbs instead of graham crumbs.
- Lemon Cheesecake Bars: Add 1 tablespoon lemon zest to the filling.
Common Mistakes to Avoid with This Dish: - Don’t overbake until the center is firm. Cheesecake bars should still have a slight wobble.
- Don’t skip the chill. Warm bars don’t slice well.
14. Confetti Easter Cupcakes
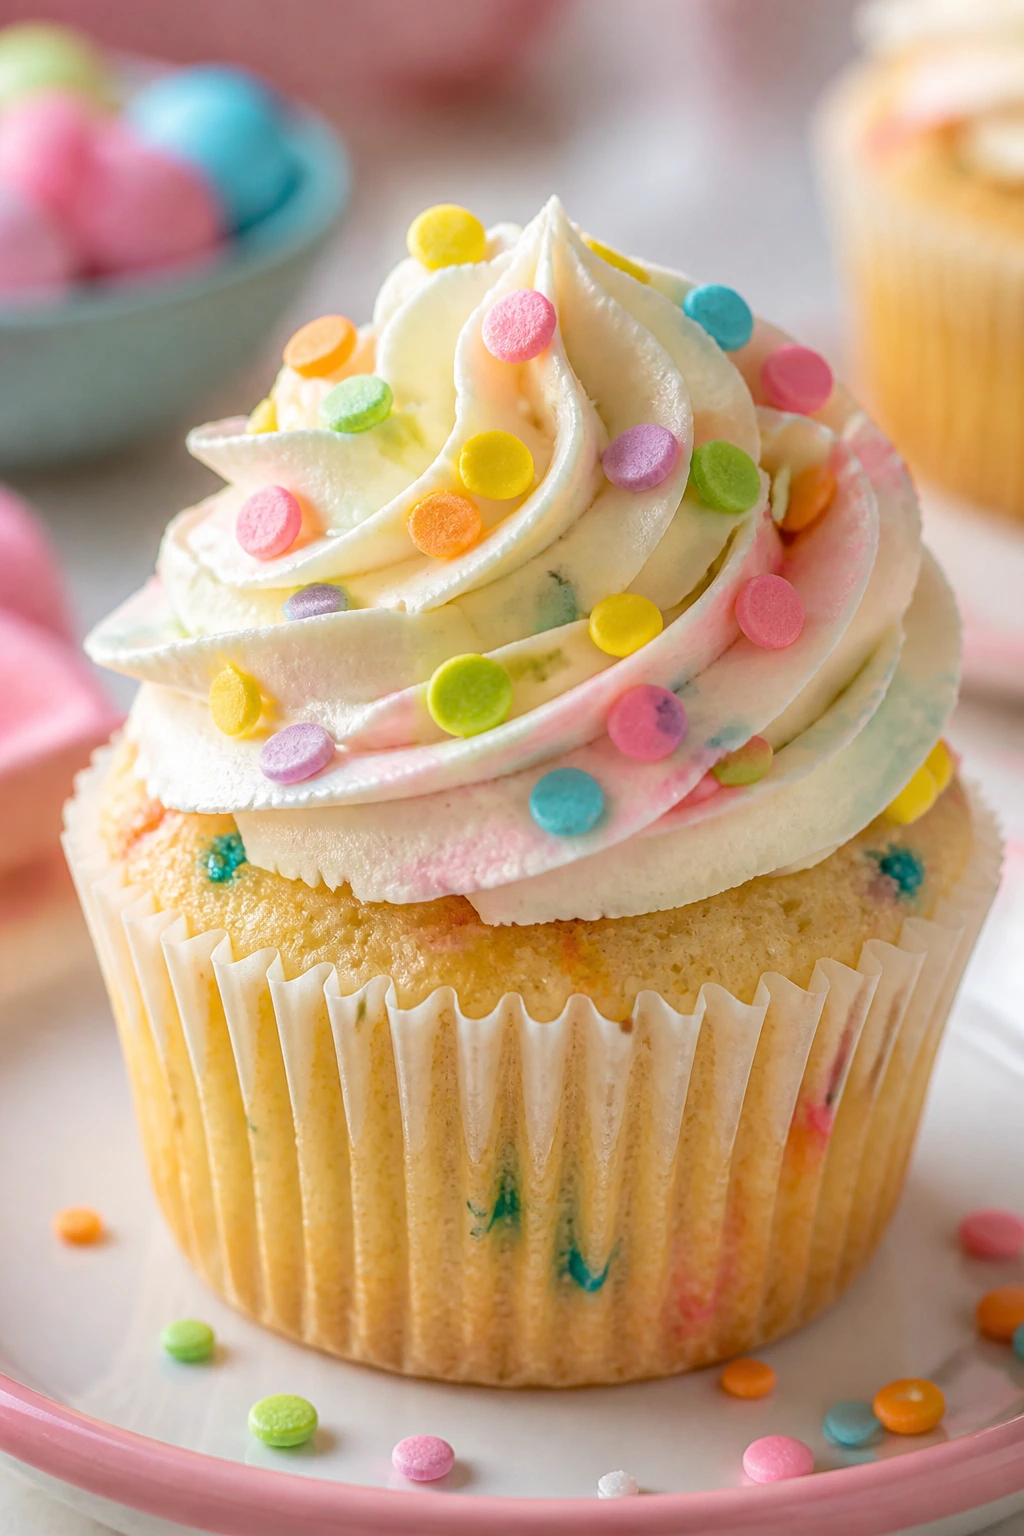
These are simple vanilla cupcakes with candy folded into the batter and a frosting finish that looks like the holiday itself. The cake is soft and plain in the best way, which gives the candy room to show off. If you want one dessert that reads instantly as Easter without needing a long explanation, this is it.
Why It Works:
A clean vanilla base lets the candy colors stay bright and readable. The cupcakes bake quickly, so the candy bits don’t have time to melt into nothing, and the frosting acts like a soft landing pad for extra sprinkles or chopped eggs on top. They’re also easy to box and carry.
Key Ingredients:
- 2 cups all-purpose flour
- 1½ teaspoons baking powder
- ½ teaspoon fine salt
- ½ cup unsalted butter, softened
- 1 cup granulated sugar
- 2 large eggs
- 1 teaspoon vanilla extract
- ¾ cup whole milk
- 1 cup chopped pastel candy eggs or candy-coated chocolates
- 1 batch vanilla buttercream, for frosting
Quick Steps:
- Heat the oven to 350°F and line a 12-cup muffin tin with liners.
- Whisk the flour, baking powder, and salt together.
- Beat the butter and sugar until fluffy, then add the eggs and vanilla.
- Mix in the dry ingredients alternately with the milk, then fold in the chopped candy.
- Divide into the cups and bake for 18 to 20 minutes, until the tops spring back. Cool fully before frosting.
Equipment for This Recipe:
- Muffin tin
- Cupcake liners
- Mixer
- Cooling rack
How to Serve This Dish:
Frost them with a short swirl and top each one with a single candy egg or a small sprinkle mix. They look good lined up in a bakery box or on a long tray with paper doilies underneath.
Pro Tips for This Recipe:
- Chop the candy small so it stays suspended in the batter.
- Don’t overfill the liners; two-thirds full is enough.
- Frost only when the cupcakes are cold or the buttercream slides.
Variations on This Dish: - Lemon Cupcakes: Add 1 tablespoon lemon zest to the batter.
- Chocolate Swirl Cupcakes: Replace ¼ cup of flour with cocoa powder.
Common Mistakes to Avoid with This Dish: - Don’t use big candy chunks; they sink.
- Don’t frost while warm, or the cake will tear.
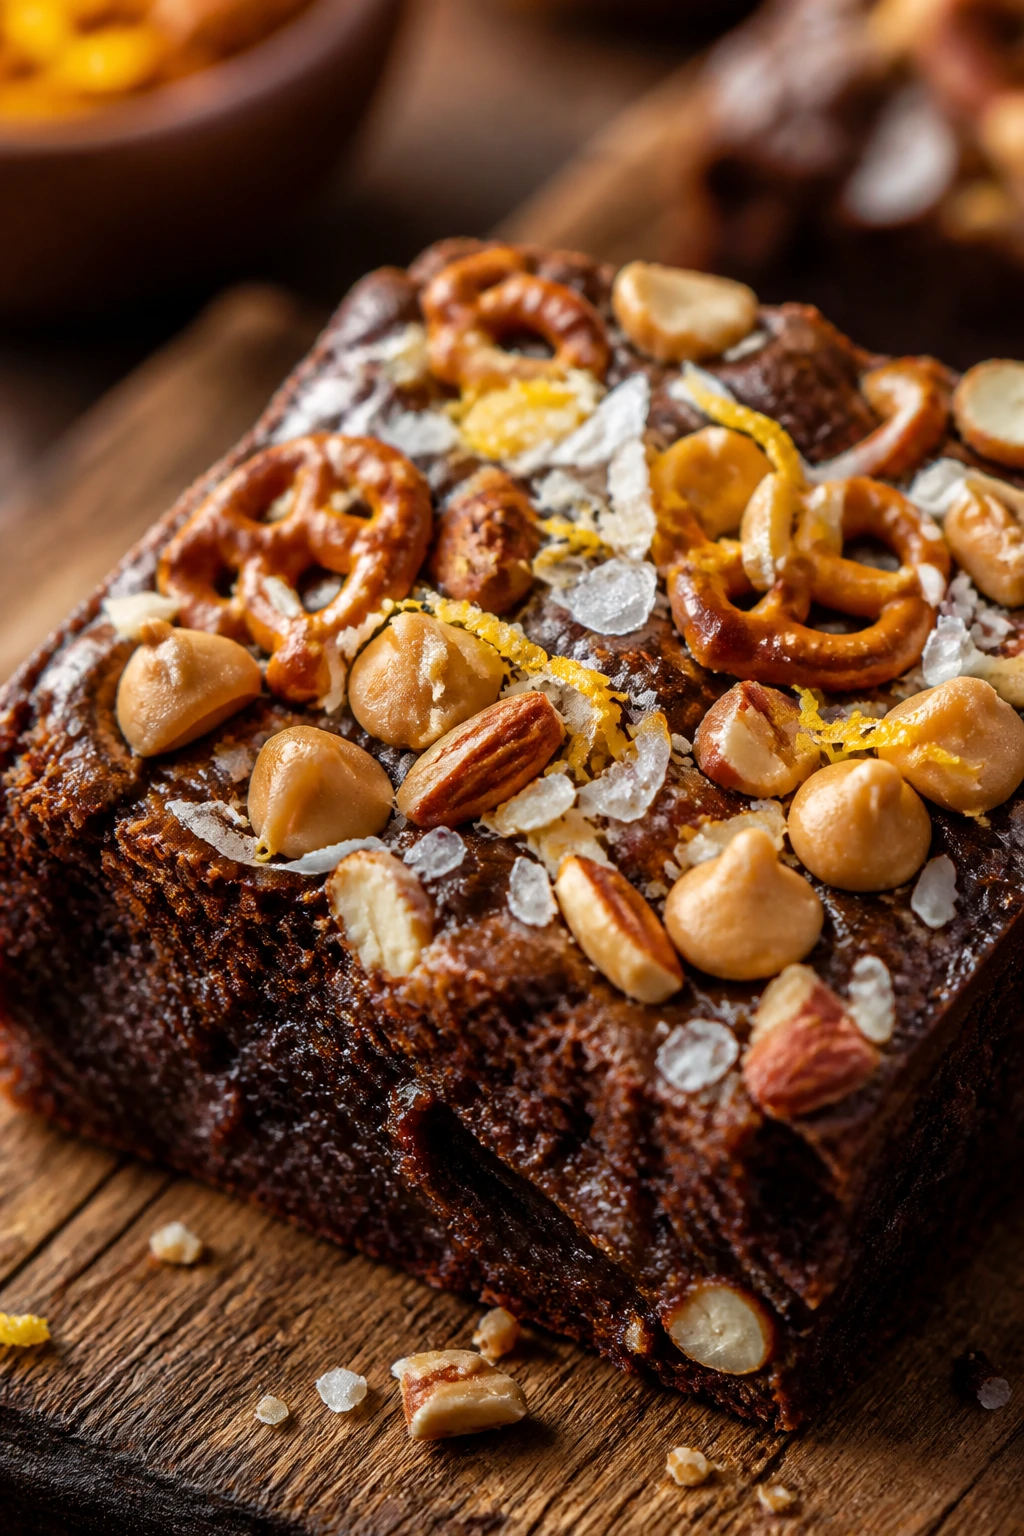
15. Salted Pretzel Blondies
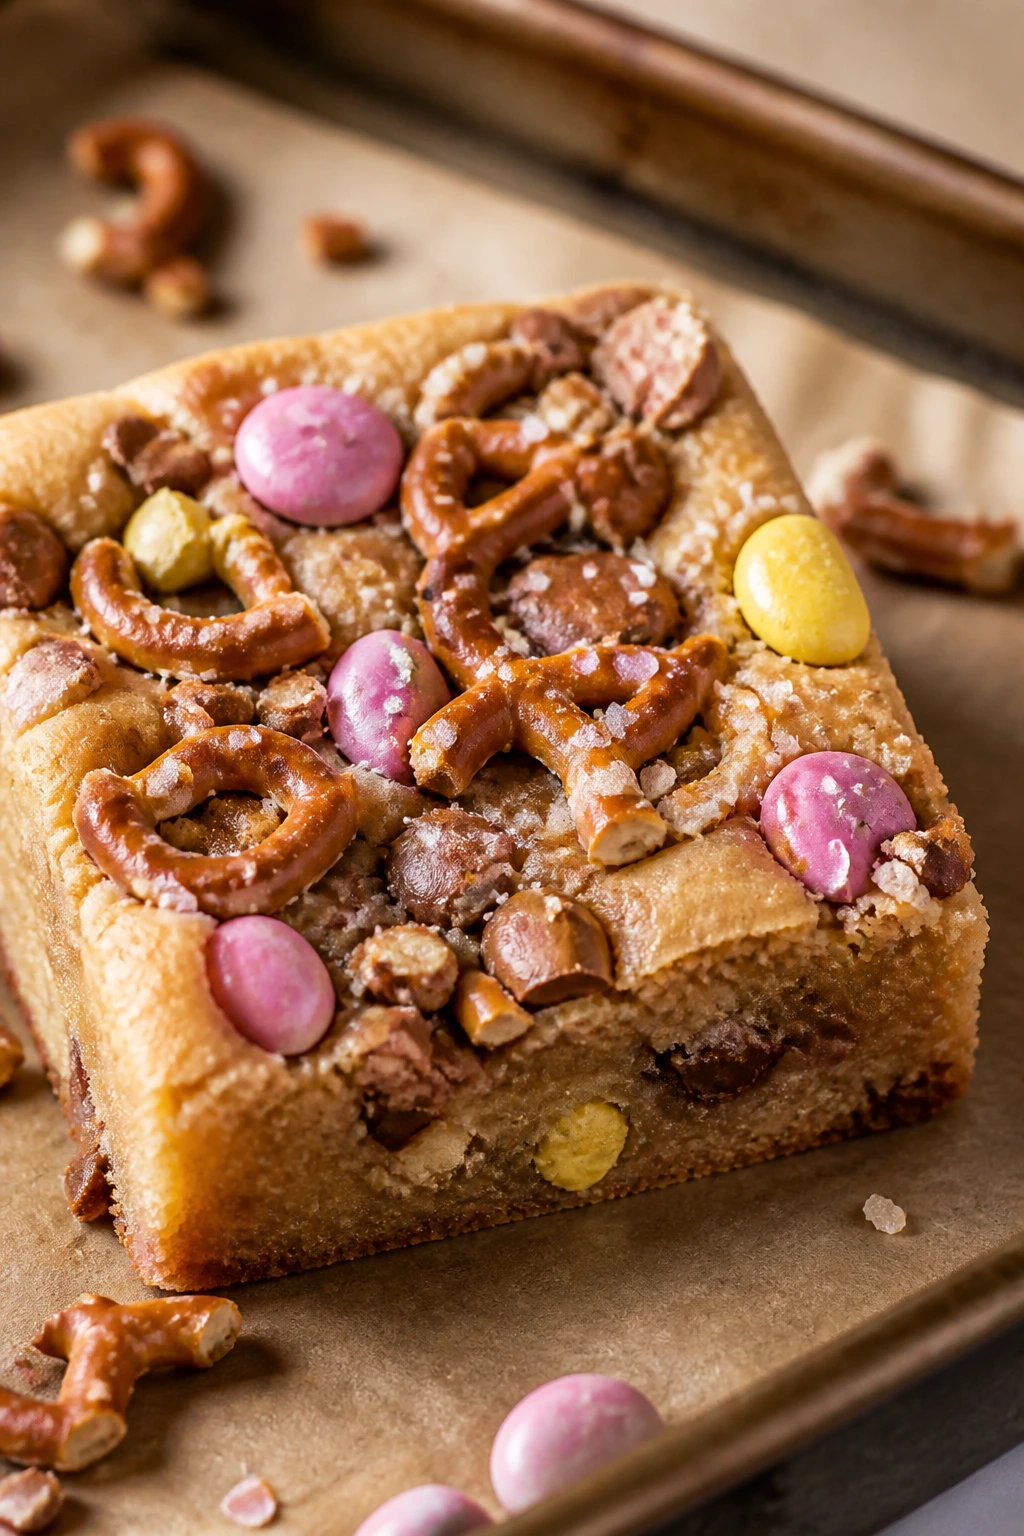
Pretzels belong in candy desserts because they keep the sugar from running away with the whole pan. These blondies are buttery and chewy, with crunchy pretzel pieces and scattered candy bits that make every square taste a little different. I especially like the way the salt hits at the end. It keeps you reaching for one more piece.
Why It Works:
Blondies have enough density to carry both pretzels and candy without falling apart. The salted crunch breaks the sweetness, while brown sugar gives the bars a soft center. If you’ve got a tray of pastel candy and a bag of pretzels, this is one of the best ways to use both.
Key Ingredients:
- ½ cup unsalted butter, melted
- 1 cup packed light brown sugar
- 1 large egg
- 1 teaspoon vanilla extract
- 1¼ cups all-purpose flour
- ½ teaspoon baking powder
- ½ teaspoon fine salt
- 1 cup crushed pretzels
- ¾ cup chopped candy eggs
- ½ cup semisweet chocolate chips
Quick Steps:
- Preheat the oven to 350°F and line an 8×8-inch pan with parchment.
- Stir the melted butter and brown sugar together, then whisk in the egg and vanilla.
- Fold in the flour, baking powder, and salt, then stir in the pretzels, candy eggs, and chocolate chips.
- Spread into the pan and sprinkle a few extra pretzel pieces on top.
- Bake for 22 to 25 minutes, until the edges are golden and the center is just set. Cool before cutting.
Equipment for This Recipe:
- 8×8-inch pan
- Mixing bowl
- Rubber spatula
- Parchment paper
How to Serve This Dish:
Cut them into small squares and serve with coffee or milk. The salty edge means they work well next to sweeter desserts rather than replacing them.
Pro Tips for This Recipe:
- Crush the pretzels by hand so you get chunks, not powder.
- Save some pretzels for the top for texture.
- Let the pan cool fully or the candy pieces smear under the knife.
Variations on This Dish: - Peanut Butter Pretzel Blondies: Add ¼ cup peanut butter chips.
- Dark Chocolate Version: Swap the semisweet chips for chopped dark chocolate.
Common Mistakes to Avoid with This Dish: - Don’t use too many pretzels or the bars dry out.
- Don’t bake until the middle is hard; blondies set as they cool.
16. Mini Egg Snickerdoodles
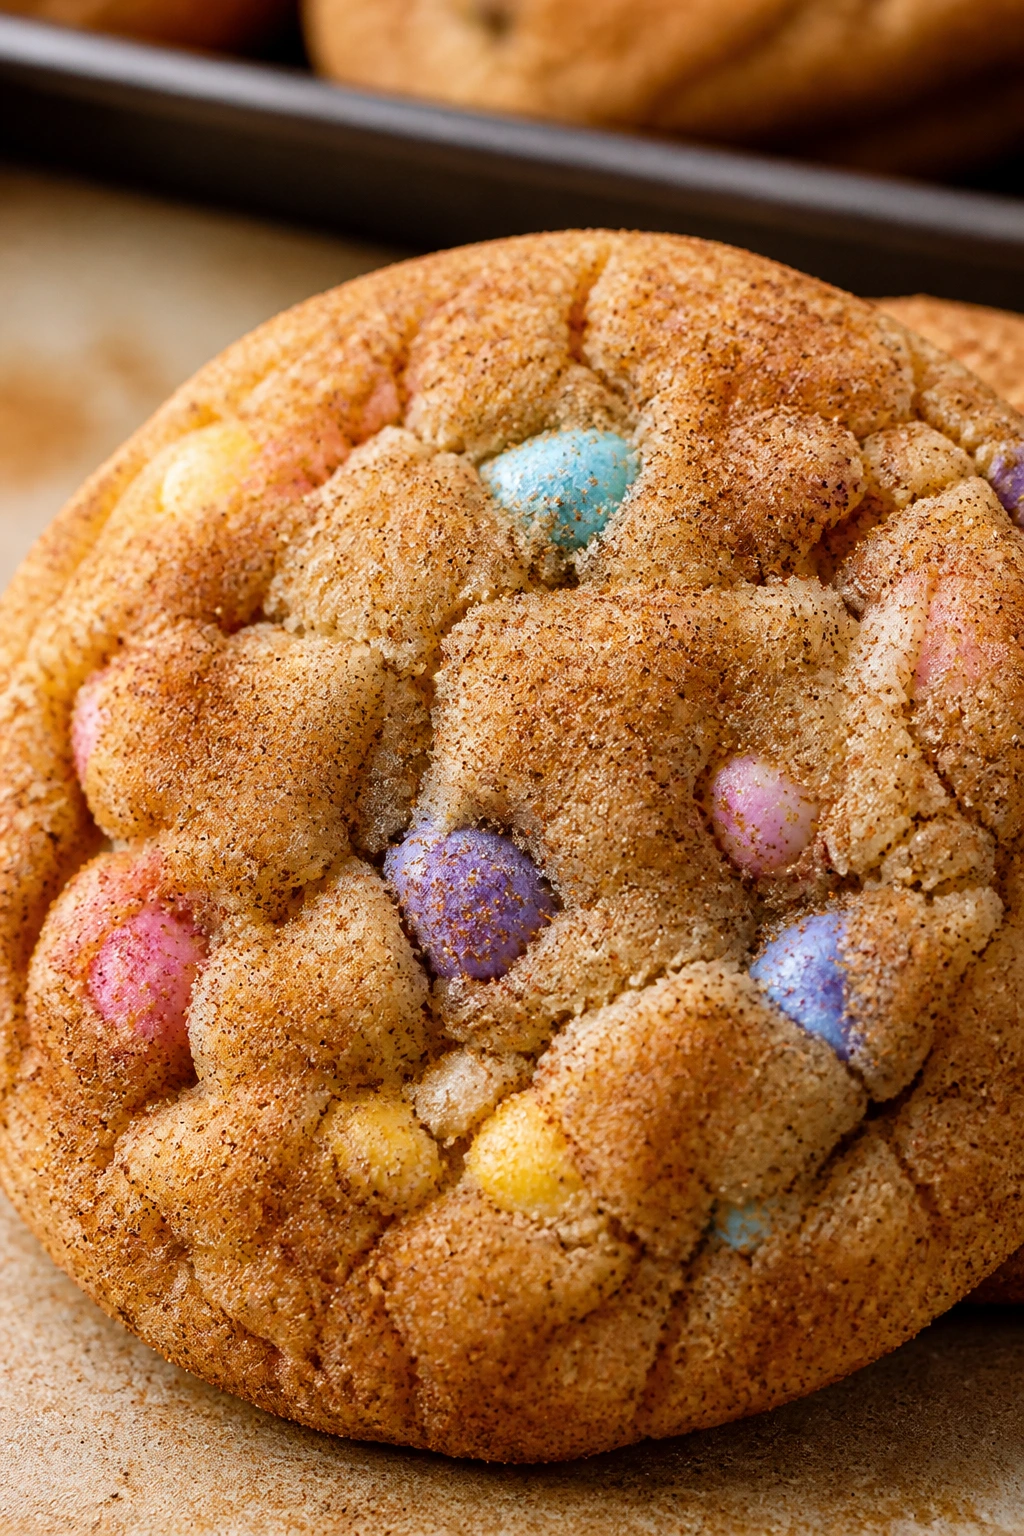
Snickerdoodles already have that soft, cinnamon sugar pull, so Mini Eggs fit in like a sharp little surprise. The cookie stays tender and puffy, with the candy adding color and a brittle shell against the cinnamon coating. It’s a strange combination on paper and a very good one once you bite in.
Why It Works:
Cream of tartar gives snickerdoodles their tangy lift, and the cinnamon sugar coating balances the sweetness of the candy. Mini Eggs break up the soft crumb with a clean crunch, which keeps the cookie from feeling too uniform. If you like a cookie that tastes like dessert and snack time at once, this one lands well.
Key Ingredients:
- 1 cup unsalted butter, softened
- 1½ cups granulated sugar
- 2 large eggs
- 2 teaspoons vanilla extract
- 2¾ cups all-purpose flour
- 2 teaspoons cream of tartar
- 1 teaspoon baking soda
- ½ teaspoon fine salt
- 1 cup chopped Mini Eggs
- ¼ cup granulated sugar mixed with 2 teaspoons cinnamon, for rolling
Quick Steps:
- Heat the oven to 375°F and line two baking sheets with parchment.
- Beat the butter and sugar until fluffy, then mix in the eggs and vanilla.
- Stir in the flour, cream of tartar, baking soda, and salt, then fold in the chopped Mini Eggs.
- Scoop the dough, roll each ball in cinnamon sugar, and set on the sheets.
- Bake for 9 to 11 minutes, until the edges are set and the centers still look slightly soft. Cool for 5 minutes before moving.
Equipment for This Recipe:
- Baking sheets
- Parchment paper
- Cookie scoop
- Small bowl for cinnamon sugar
How to Serve This Dish:
Serve them stacked on a plate while they’re still slightly warm if you want the centers extra soft. They also make a good lunchbox cookie the next day because the candy shells stay crisp.
Pro Tips for This Recipe:
- Chill the dough if it feels sticky; that keeps the cookies thicker.
- Roll generously in cinnamon sugar for the classic crackly surface.
- Chop the Mini Eggs small enough that the dough can still roll cleanly.
Variations on This Dish: - Orange Snickerdoodles: Add 1 teaspoon orange zest to the dough.
- White Chocolate Snickerdoodles: Fold in ½ cup white chocolate chips alongside the candy.
Common Mistakes to Avoid with This Dish: - Don’t overbake them into hard discs. Snickerdoodles should still be soft in the center.
- Don’t use whole Mini Eggs; they’re too large for a good cookie shape.
17. Chocolate Chip Cookie Cups with Peanut Butter Egg Centers
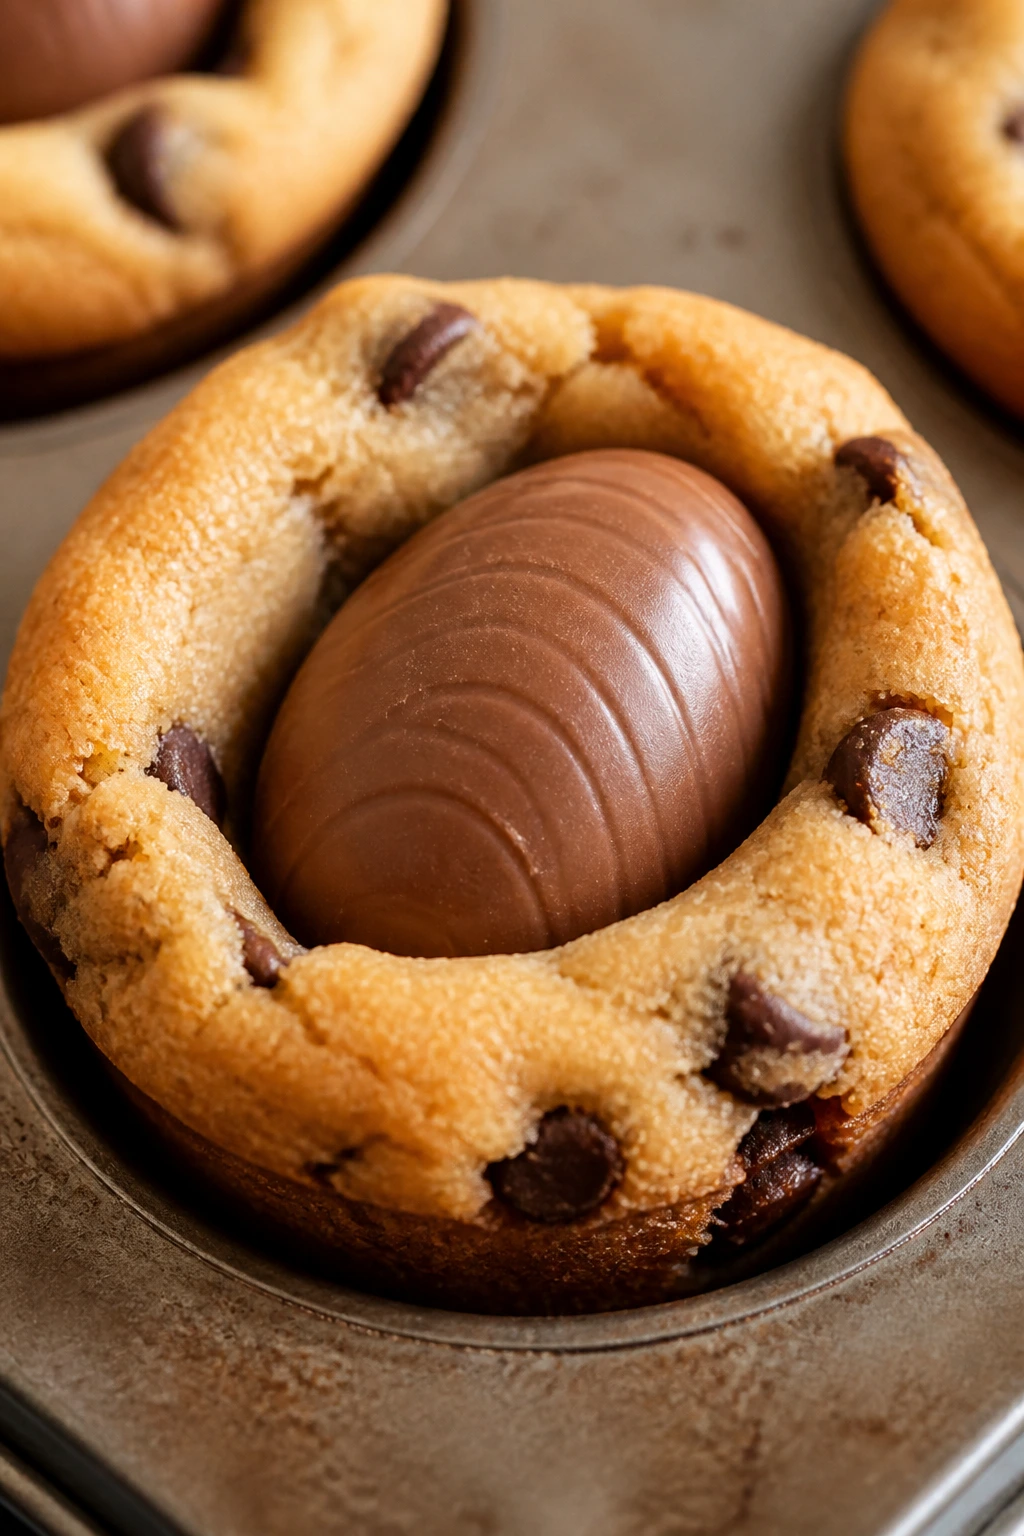
These cookie cups solve a problem people don’t talk about enough: how to keep a candy egg from rolling off the plate. The answer is to bake it into a sturdy cookie cup with crisp edges and a soft center. Add a peanut butter egg in the middle, and you get a little nest of chocolate, peanut butter, and cookie in one bite.
Why It Works:
A muffin tin gives the cookie dough walls to climb, which means the center stays open for the candy. The dough bakes more evenly than a flat cookie, and the peanut butter egg sits in the center like a tidy surprise. They’re especially useful when you want something hand-held that still feels like a dessert.
Key Ingredients:
- 1 cup unsalted butter, softened
- ¾ cup brown sugar
- ½ cup granulated sugar
- 2 large eggs
- 2 teaspoons vanilla extract
- 2¾ cups all-purpose flour
- 1 teaspoon baking soda
- 1 teaspoon fine salt
- 1 cup chocolate chips
- 12 mini peanut butter eggs
Quick Steps:
- Heat the oven to 350°F and grease a 12-cup muffin tin.
- Beat the butter and sugars until fluffy, then add the eggs and vanilla.
- Mix in the flour, baking soda, salt, and chocolate chips.
- Press a spoonful of dough into each muffin cup and bake for 10 minutes.
- Press one peanut butter egg into the center of each cup, then bake for 2 to 3 minutes more. Cool before removing.
Equipment for This Recipe:
- 12-cup muffin tin
- Mixer
- Cookie scoop or spoon
- Butter knife for loosening edges
How to Serve This Dish:
Serve them as individual treats on small saucers or cupcake liners. They’re rich enough that one cup is a full dessert, not a side note.
Pro Tips for This Recipe:
- Don’t overfill the muffin cups or the centers close over.
- Press the candy in near the end so it softens without disappearing.
- Let them cool in the tin for 10 minutes before lifting out.
Variations on This Dish: - Caramel Center Cups: Swap the peanut butter eggs for caramel eggs.
- Mini Egg Version: Use chopped Mini Eggs on top instead of peanut butter eggs.
Common Mistakes to Avoid with This Dish: - Don’t try to remove them too soon. Warm cookie cups fall apart easily.
- Don’t bake the candy in from the start or it melts into the dough.
18. Lemon Poppy Seed Loaf Cake with Mini Egg Crunch
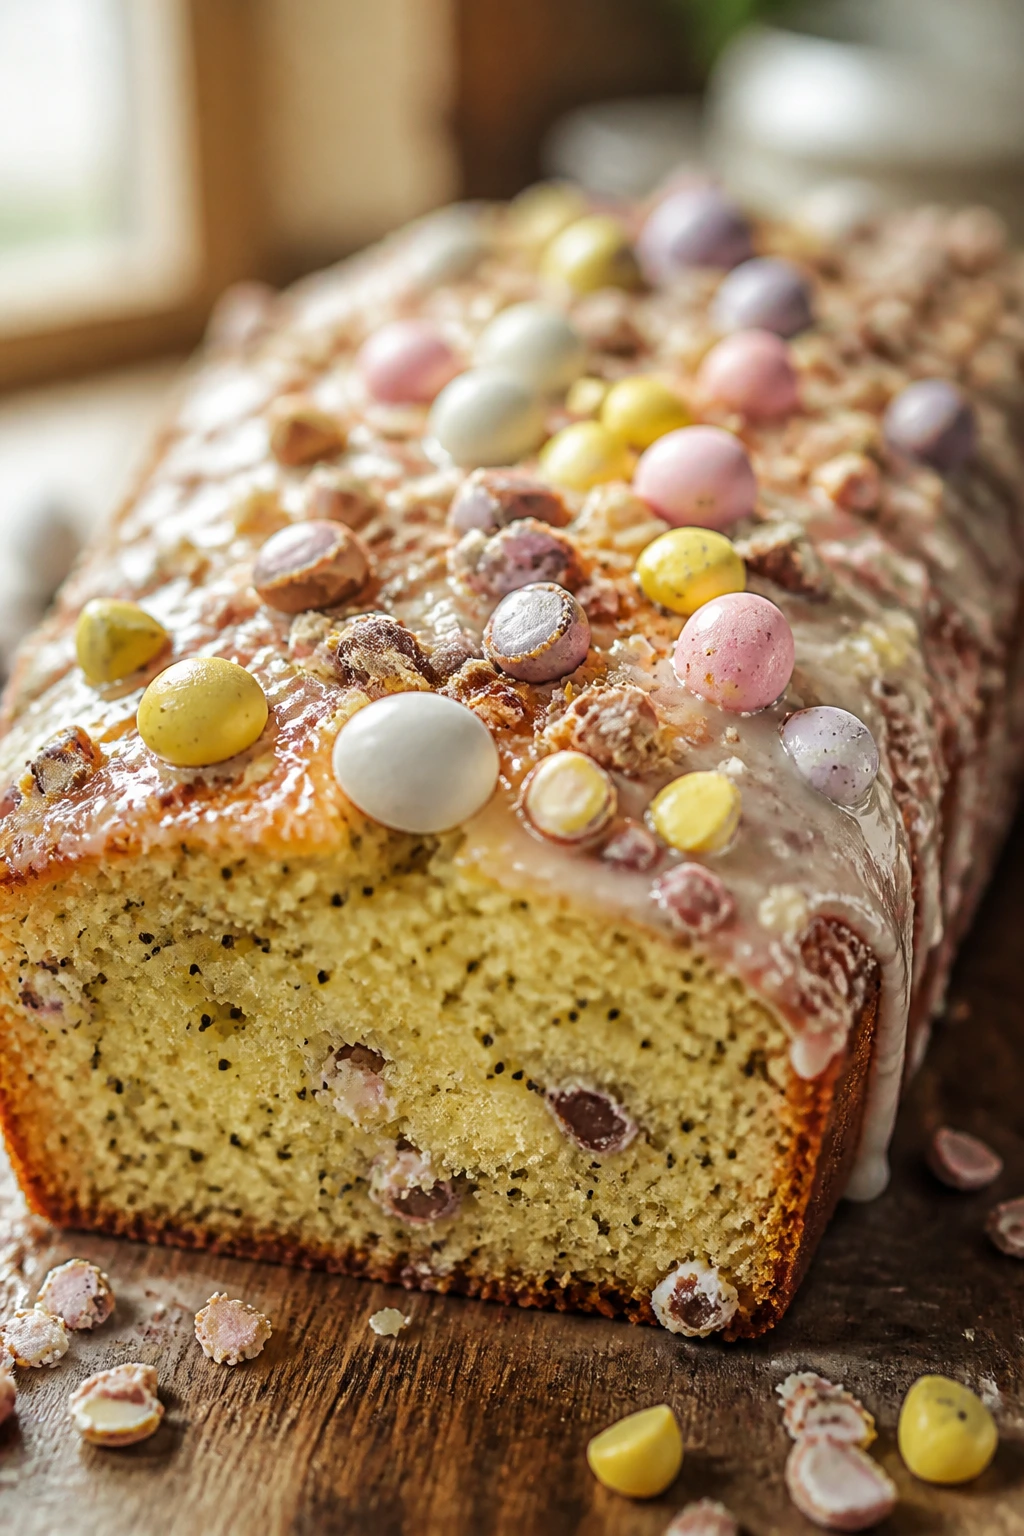
This loaf cake pulls Easter candy out of the cookie-and-brownie lane and gives it some citrus. The cake is bright with lemon zest, tender from butter, and dotted with poppy seeds for a little bite. Mini Eggs on top add a crackly shell and make the glaze look more festive than a plain loaf has any right to be.
Why It Works:
Lemon cuts through sweetness better than most flavors, which makes it a smart base for candy. A loaf pan gives you a tall slice with a soft crumb, and the glaze helps the candy pieces stick without falling off at the first cut. It’s the dessert I’d bring if I wanted something less heavy than brownies but still clearly in holiday mode.
Key Ingredients:
- 1¾ cups all-purpose flour
- 1½ teaspoons baking powder
- ½ teaspoon fine salt
- ½ cup unsalted butter, softened
- 1 cup granulated sugar
- 2 large eggs
- 2 tablespoons lemon zest
- ¼ cup lemon juice
- ½ cup milk
- 1 tablespoon poppy seeds
- 1 cup chopped Mini Eggs, for topping
- 1 cup powdered sugar, for glaze
Quick Steps:
- Heat the oven to 350°F and line a loaf pan with parchment.
- Whisk the flour, baking powder, salt, and poppy seeds.
- Beat the butter and sugar until light, then add the eggs, lemon zest, and lemon juice.
- Mix in the dry ingredients alternately with the milk, pour into the pan, and bake for 45 to 55 minutes.
- Cool, glaze with powdered sugar and a little lemon juice, then press chopped Mini Eggs over the top.
Equipment for This Recipe:
- 9×5-inch loaf pan
- Mixer
- Zester
- Cooling rack
How to Serve This Dish:
Slice it thick for breakfast-style serving or thinner for dessert. A little extra glaze over each slice makes the candy pieces stay put and shine.
Pro Tips for This Recipe:
- Zest the lemons before juicing them. That sounds obvious until you forget.
- Don’t add the Mini Eggs before baking; they look better and taste cleaner on top.
- If the top browns early, tent loosely with foil for the last 15 minutes.
Variations on This Dish: - Orange Poppy Seed Loaf: Use orange zest and juice instead of lemon.
- Glazed Almond Version: Add ½ teaspoon almond extract to the batter.
Common Mistakes to Avoid with This Dish: - Don’t underbake the center; loaf cakes can look done on the outside while the middle stays wet.
- Don’t skip the cooling time before glazing or the icing runs off.
19. Peanut Butter Blossom Cookies with Mini Eggs

Classic peanut butter blossom cookies already have a strong identity, but Easter gives them a better topper than the usual chocolate kiss. A Mini Egg or two pressed into the center gives you peanut butter, chocolate, and candy shell in one bite. The cookie itself stays soft and sandy around the edges, which is the whole appeal.
Why It Works:
Peanut butter dough handles candy well because it’s sturdy without being dry. The cookies bake just long enough to set the edges, then the Mini Eggs press in while the dough is still warm. That keeps the candy anchored and gives you a cookie that looks decorated without frosting.
Key Ingredients:
- ½ cup unsalted butter, softened
- ¾ cup creamy peanut butter
- ½ cup granulated sugar, plus more for rolling
- ½ cup packed brown sugar
- 1 large egg
- 1 teaspoon vanilla extract
- 1¾ cups all-purpose flour
- 1 teaspoon baking soda
- ½ teaspoon fine salt
- 24 mini candy eggs
Quick Steps:
- Heat the oven to 350°F and line a baking sheet with parchment.
- Beat the butter, peanut butter, and sugars until smooth, then add the egg and vanilla.
- Mix in the flour, baking soda, and salt.
- Scoop, roll in sugar, and bake for 9 to 10 minutes.
- Press one or two Mini Eggs into the center of each cookie as soon as they come out of the oven, then cool on the pan.
Equipment for This Recipe:
- Baking sheet
- Parchment paper
- Cookie scoop
- Small bowl for rolling sugar
How to Serve This Dish:
Stack them in a low tin or arrange them in a circle around a bowl of fruit. They’re sweet enough that a batch goes farther than you think.
Pro Tips for This Recipe:
- Press the candy in while the cookies are hot so it sticks cleanly.
- Don’t flatten the dough balls before baking; they spread on their own.
- Use smooth peanut butter for the most even crumb.
Variations on This Dish: - Chocolate PB Blossoms: Roll the dough in cocoa sugar before baking.
- Mini Egg Cluster Top: Use three small candy pieces instead of one larger candy.
Common Mistakes to Avoid with This Dish: - Don’t wait until the cookies are cool to add the candy. It won’t hold.
- Don’t overbake or the peanut butter flavor turns dry and dusty.
20. Toffee Shortbread Bars
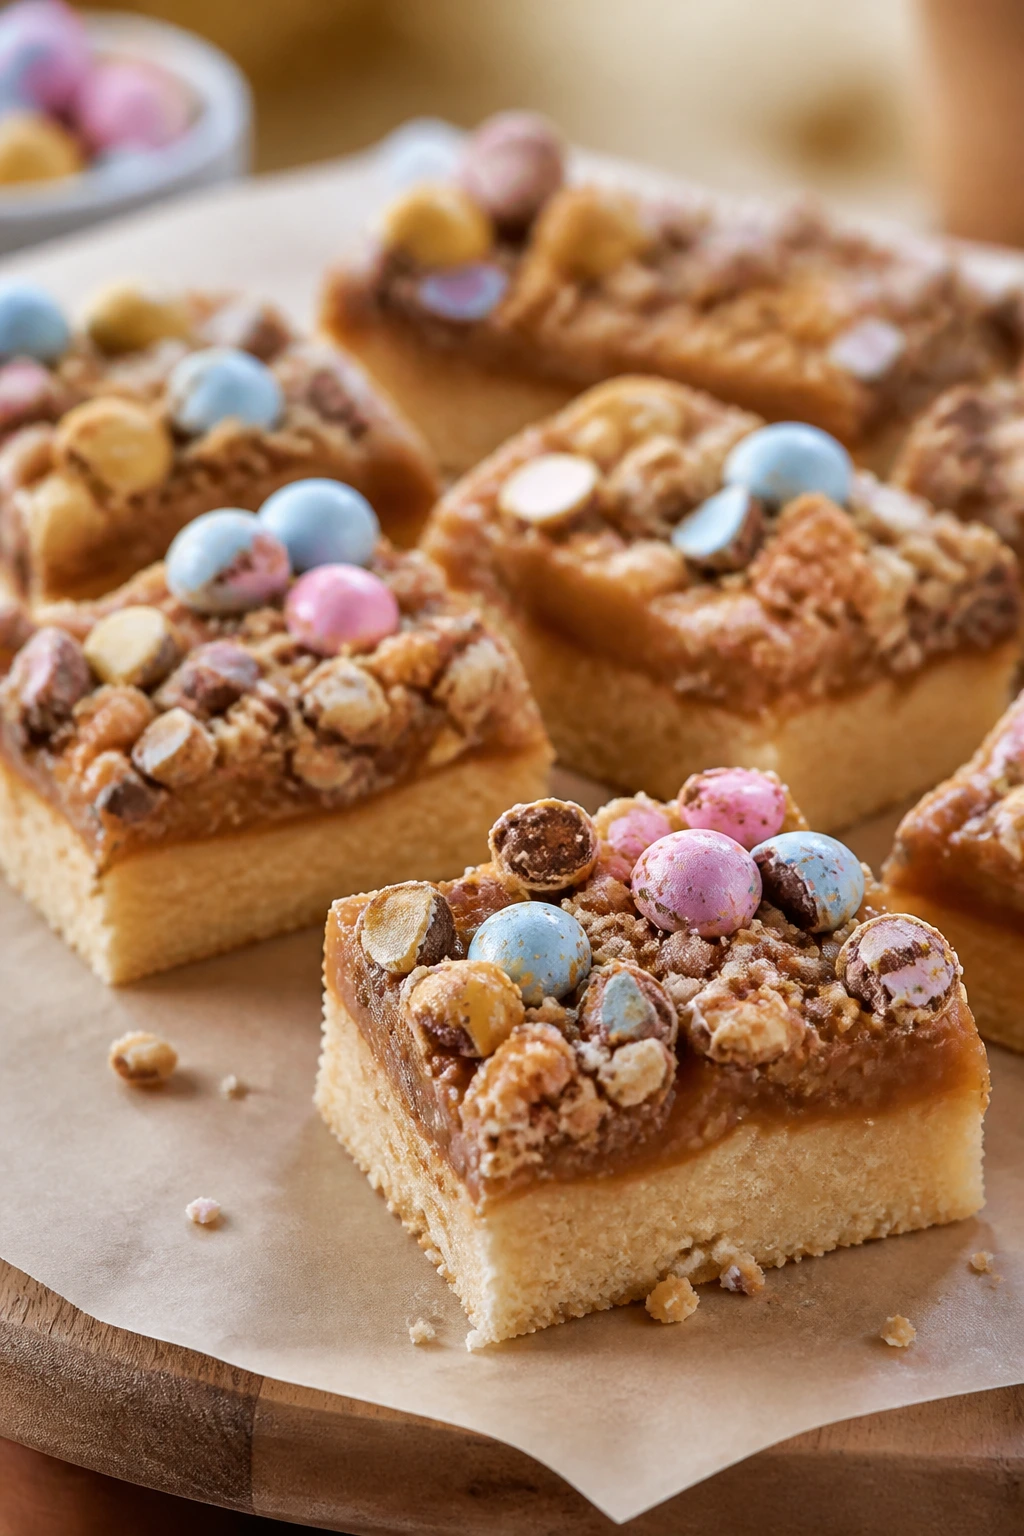
Shortbread can handle candy in a way sugar cookies often can’t: it stays crisp and buttery while the toppings do the talking. These bars are plain in the base and louder on top, with toffee bits, chopped candy eggs, and a chocolate drizzle. They taste cleaner than the name suggests. That’s a good thing.
Why It Works:
Shortbread is built from butter, flour, and sugar, so it gives you a sturdy, not-too-sweet foundation. Toffee adds caramel notes, while candy eggs add color and a little crunch. The bars cool into neat slices, which makes them useful when you need a tray dessert that doesn’t melt into the serving platter.
Key Ingredients:
- 1 cup unsalted butter, softened
- ½ cup granulated sugar
- 2 cups all-purpose flour
- ¼ teaspoon fine salt
- ½ teaspoon vanilla extract
- ¾ cup toffee bits
- ¾ cup chopped candy eggs
- ½ cup semisweet chocolate chips, melted
Quick Steps:
- Heat the oven to 350°F and line an 8×8-inch pan with parchment.
- Beat the butter and sugar, then mix in the flour, salt, and vanilla until a crumbly dough forms.
- Press the dough firmly into the pan and sprinkle with toffee bits.
- Bake for 20 to 24 minutes, until the edges are lightly golden.
- Cool completely, top with chopped candy eggs, and drizzle with melted chocolate.
Equipment for This Recipe:
- 8×8-inch pan
- Mixer or sturdy spoon
- Parchment paper
- Small piping bag or spoon for drizzle
How to Serve This Dish:
Cut them into slender bars because they’re richer than they look. They pair nicely with coffee after dinner or as part of a dessert tray with fruit and berries.
Pro Tips for This Recipe:
- Press the dough hard into the pan so it bakes into clean layers.
- Wait until the shortbread is cold before topping with candy.
- A tiny pinch of flaky salt over the drizzle makes the toffee taste louder.
Variations on This Dish: - Almond Shortbread: Add ½ teaspoon almond extract to the dough.
- Dark Chocolate Drizzle: Use dark chocolate instead of semisweet for a sharper finish.
Common Mistakes to Avoid with This Dish: - Don’t underbake the shortbread or it turns sandy and fragile.
- Don’t add candy while the bars are hot; the colors and shells smear.
21. S’mores Brownies with Peeps
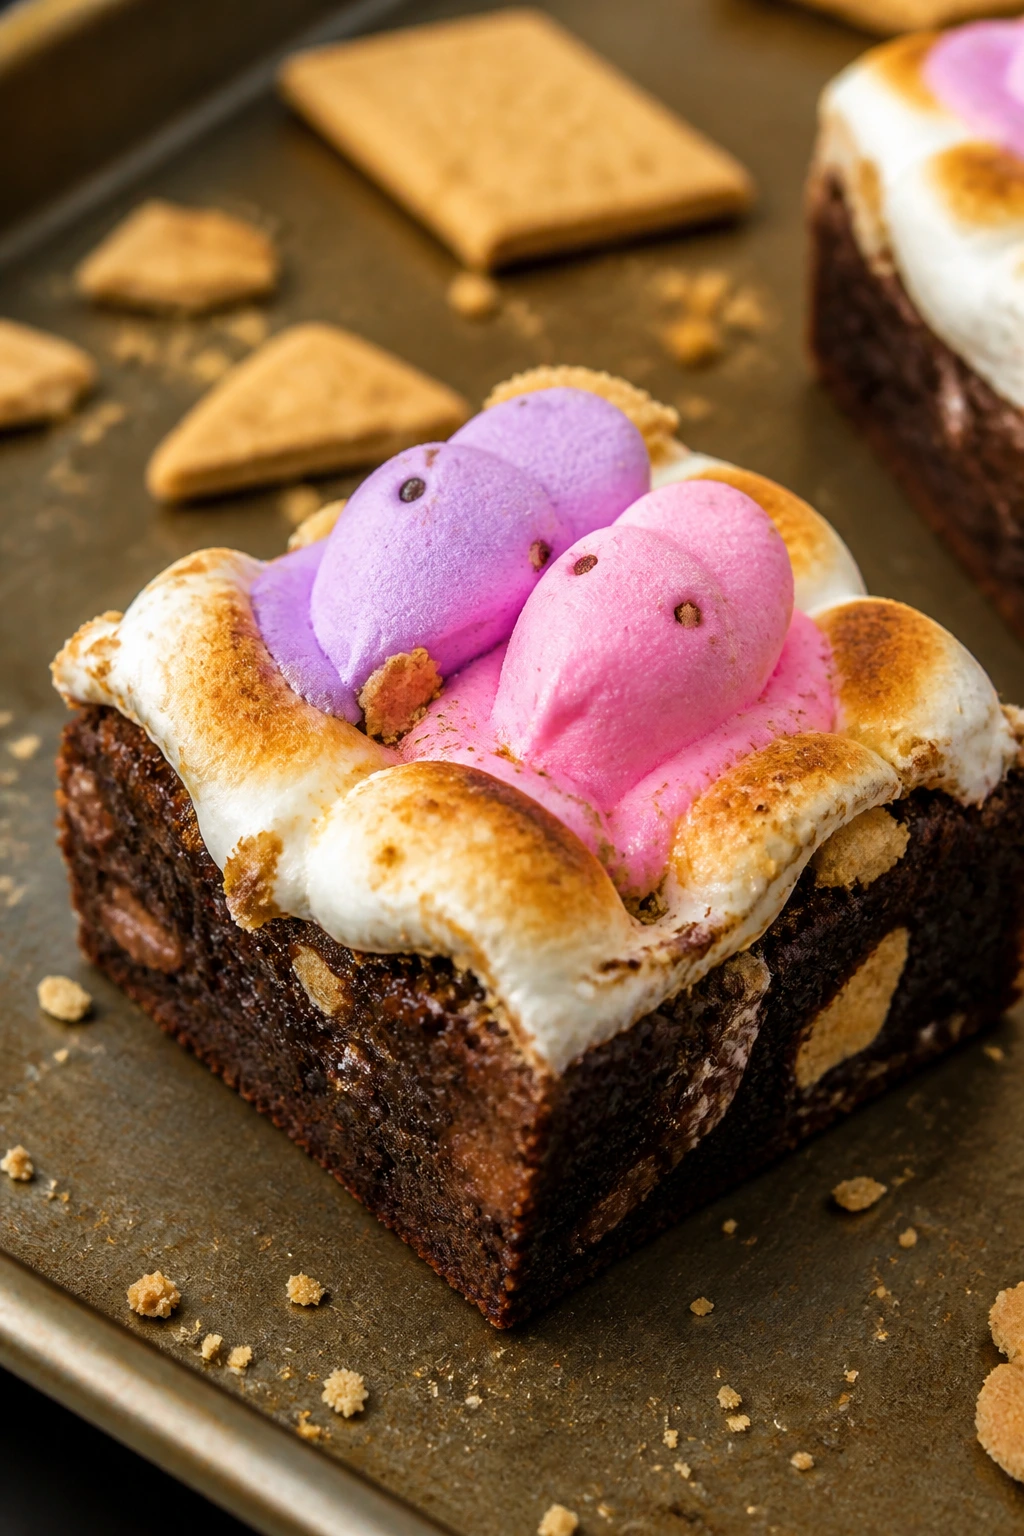
This is the chaotic-good dessert on the list. Brownies, graham crackers, chocolate, and toasted Peeps all show up in one pan, which sounds excessive until you taste the first square. The marshmallow top goes sticky and browned, the graham layer softens, and the brownie underneath keeps it from collapsing into a sugar bomb.
Why It Works:
S’mores flavor already thrives on contrast: crumb, melt, and chocolate. Peeps act like a fast marshmallow cap, while graham crackers add structure and keep the texture from getting too dense. Brownies anchor the whole thing and stop it from becoming a melted pile at the cut line.
Key Ingredients:
- ½ cup unsalted butter
- 4 ounces semisweet chocolate, chopped
- 1 cup granulated sugar
- 2 large eggs
- ¾ cup all-purpose flour
- ¼ cup cocoa powder
- ¼ teaspoon salt
- 6 graham crackers, broken into pieces
- 6 Peeps
- ½ cup chocolate chunks
Quick Steps:
- Heat the oven to 350°F and line an 8×8-inch pan with parchment.
- Make the brownie batter by melting the butter and chocolate, then whisking in sugar and eggs before folding in flour, cocoa, and salt.
- Spread half the batter in the pan and scatter half the graham pieces and chocolate chunks over it.
- Add the remaining batter, top with the rest of the graham pieces, and arrange the Peeps on top.
- Bake for 28 to 32 minutes, until the brownie layer is set and the Peeps are toasted at the edges.
Equipment for This Recipe:
- 8×8-inch pan
- Parchment paper
- Saucepan
- Spatula
How to Serve This Dish:
Serve these in small squares, because they’re rich and sticky. A glass of cold milk takes the edge off the marshmallow sweetness.
Pro Tips for This Recipe:
- Put the Peeps on top only for the last part of baking if your oven browns fast.
- Use sturdy graham pieces so they don’t dissolve into dust.
- Let the pan cool fully before slicing or the marshmallow will drag.
Variations on This Dish: - Peanut Butter S’mores: Swirl ¼ cup peanut butter through the batter.
- Salted Caramel Version: Drizzle caramel between the brownie layers before baking.
Common Mistakes to Avoid with This Recipe: - Don’t overload the pan with marshmallow candy or the top burns before the brownie sets.
- Don’t try to slice while hot. It’s a sticky mess.
22. Bunny Cake Pops
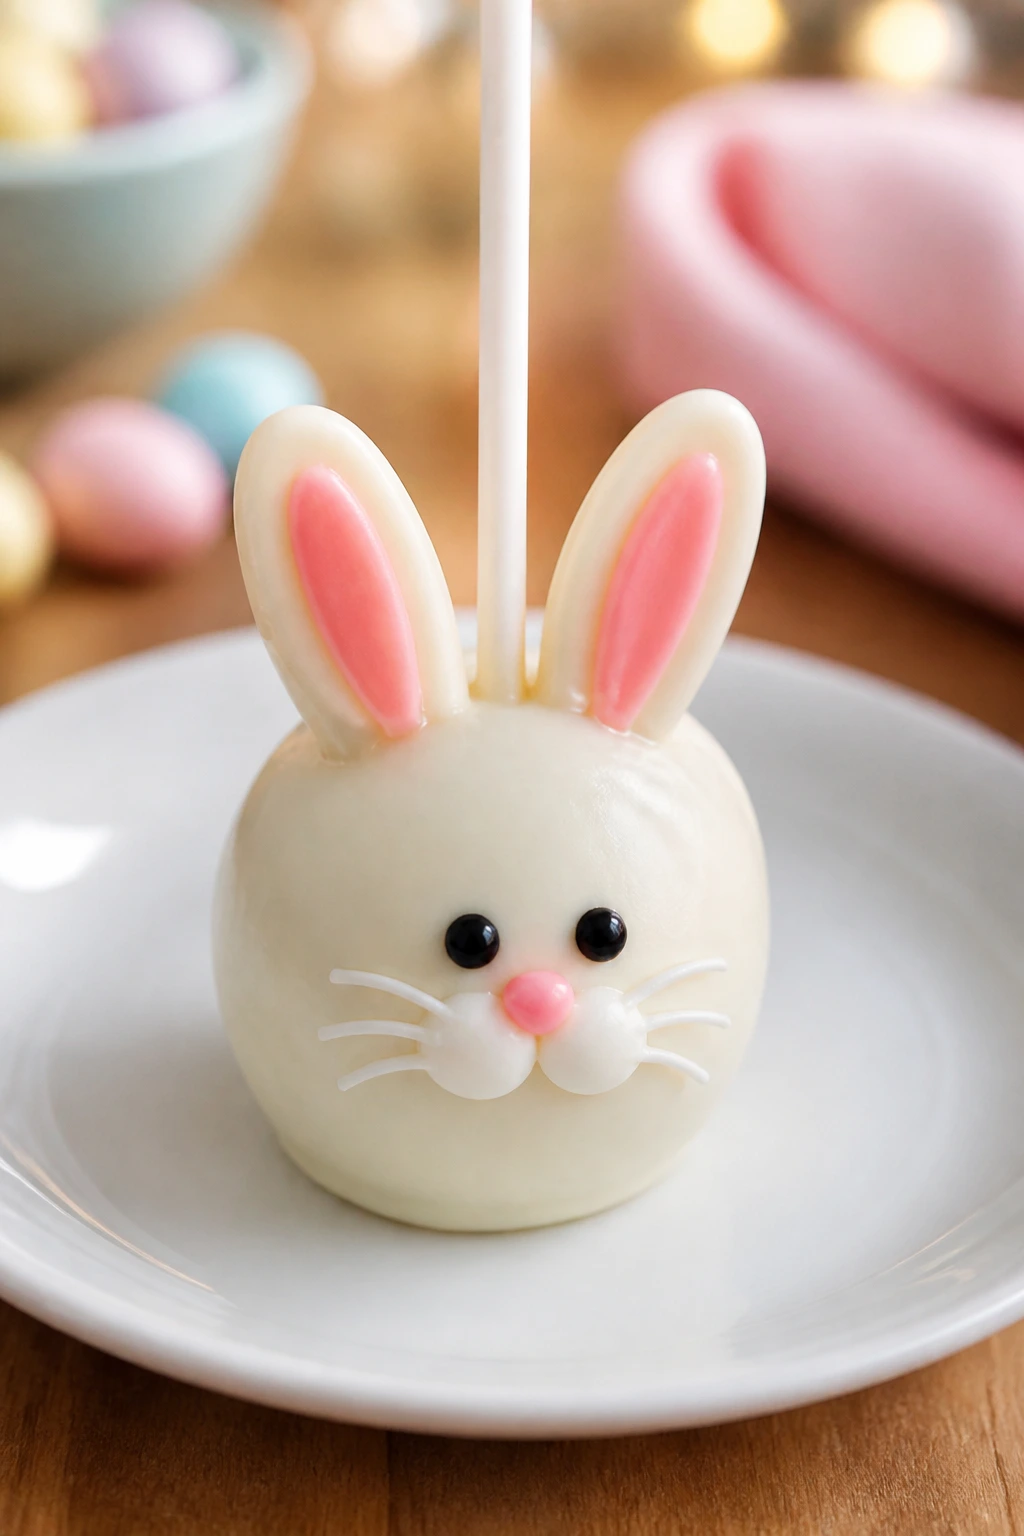
Cake pops are fiddly, yes, but they earn their keep when you want a cute dessert that travels well. These bunny versions use crumbled cake and frosting shaped into rounds, then dipped in candy coating and finished with tiny ears or candy details. They’re more assembly than baking, but they still belong in holiday baking because the base cake can be homemade and the result disappears fast.
Why It Works:
Cake crumbs mixed with frosting create a dough that holds shape without tasting dense. Candy coating sets hard, which makes the pops easy to stand up, wrap, or tuck into a basket. If you keep the centers small, you get a clean bite instead of a frosting-heavy lump.
Key Ingredients:
- 1 baked 9×13-inch vanilla cake, cooled
- ½ cup vanilla frosting
- 12 ounces white candy melts
- 2 tablespoons vegetable shortening, optional
- Pink and black decorating gel
- 12 lollipop sticks
- 24 small candy eggs or candy ears for decoration
Quick Steps:
- Crumble the cooled cake into a bowl and mix in the frosting until the mixture holds together when squeezed.
- Roll into small balls and chill for 30 minutes.
- Melt the candy coating with shortening if needed, then dip the tip of each stick and insert it into a cake ball.
- Dip each pop fully in coating, let excess drip off, and decorate with candy details while the coating is still soft.
- Stand upright to set.
Equipment for This Recipe:
- Baking sheet
- Parchment paper
- Mixing bowl
- Lollipop sticks
- Tall glass or cup for dipping
How to Serve This Dish:
Stand them upright in a mug filled with sugar or foam so they look like little bakery lollipops. They’re especially useful for parties because nobody needs a fork.
Pro Tips for This Recipe:
- Chill the balls before dipping or they’ll slide off the stick.
- Keep the coating warm, not hot, for the smoothest finish.
- Don’t make the centers too large or they’ll fall over.
Variations on This Dish: - Chocolate Bunny Pops: Use chocolate cake and chocolate coating.
- Lemon Bunny Pops: Use lemon cake and white coating with yellow accents.
Common Mistakes to Avoid with This Recipe: - Don’t add too much frosting to the cake crumbs. The mixture turns greasy and soft.
- Don’t rush the chilling stage; that’s what keeps the pop on the stick.
23. No-Bake Easter Candy Pie
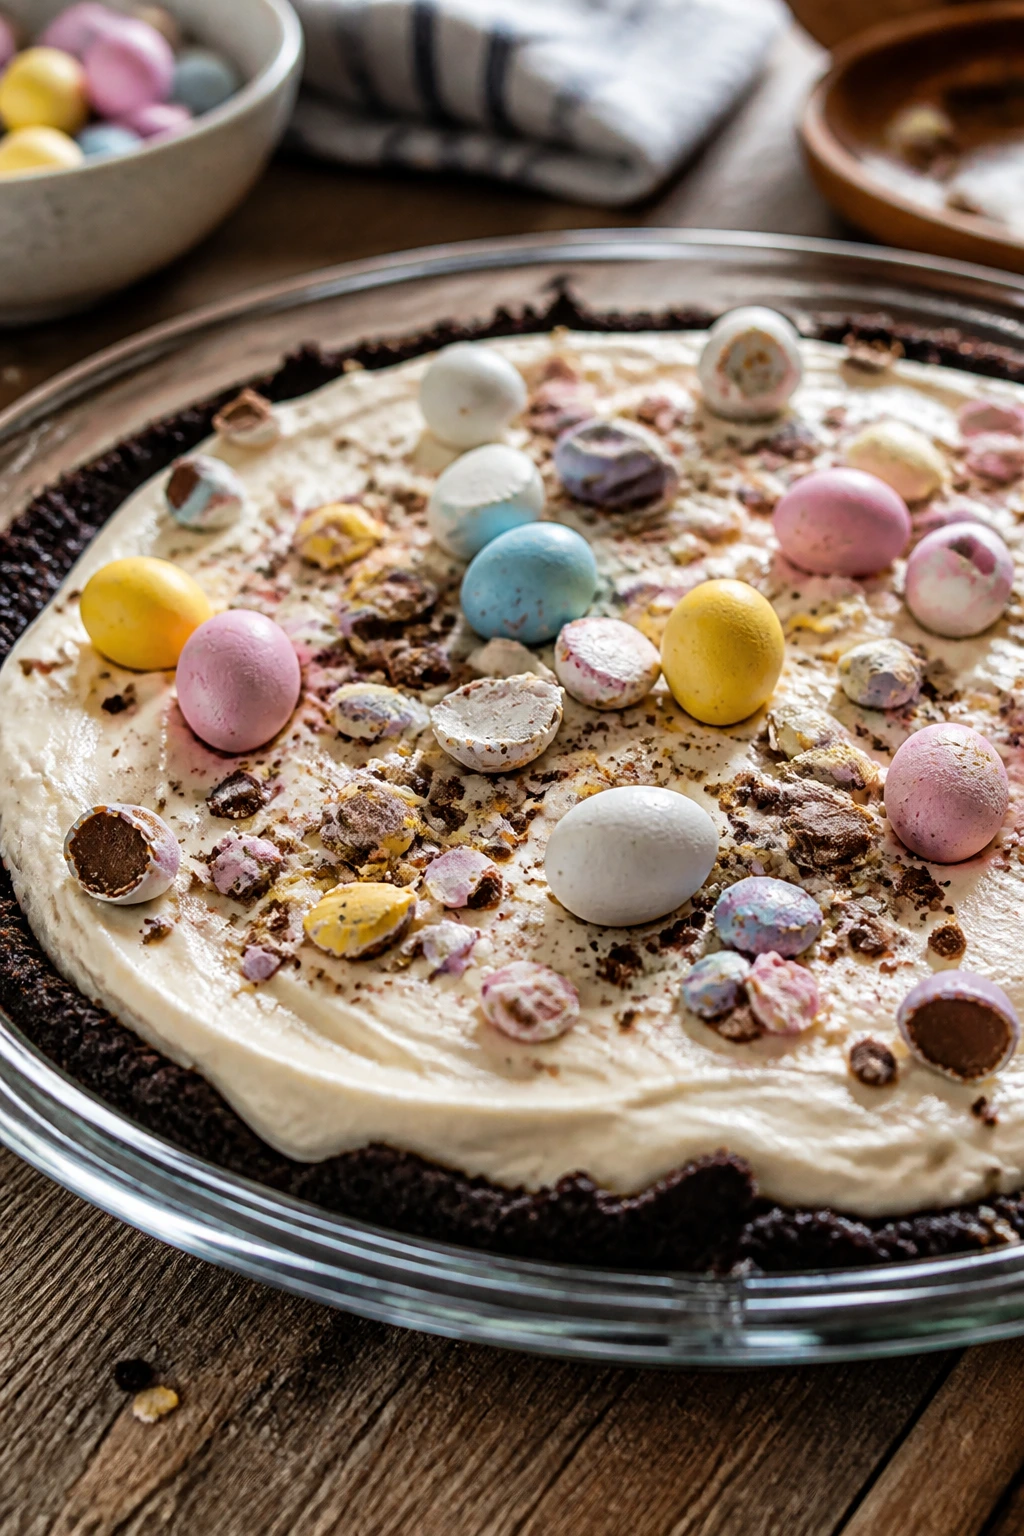
This pie is the creamier, lazier cousin of everything else on the list. The Oreo crust gives it crunch, the filling tastes like chilled cheesecake whipped into clouds, and the chopped candy eggs add texture without making you turn on the oven. It’s the kind of dessert that takes a little fridge space and saves a lot of time.
Why It Works:
A no-bake pie can handle candy because the filling stays soft enough to hold mix-ins without seizing. Cream cheese gives the dessert some backbone, whipped topping adds lift, and the crust stops the whole thing from feeling mushy. It’s a good make-ahead choice for a table that already has three baked pans competing for attention.
Key Ingredients:
- 1 prepared 9-inch Oreo crust
- 8 ounces cream cheese, softened
- ½ cup powdered sugar
- 1 teaspoon vanilla extract
- 2 cups whipped topping
- 1 cup chopped candy eggs
- ¼ cup chocolate sauce, optional
Quick Steps:
- Beat the cream cheese, powdered sugar, and vanilla until smooth.
- Fold in the whipped topping until the mixture is light and even.
- Stir in most of the chopped candy eggs, saving some for the top.
- Spoon into the crust and smooth the surface.
- Chill for at least 4 hours, then top with the remaining candy eggs and a drizzle of chocolate sauce if you want it.
Equipment for This Recipe:
- 9-inch pie dish
- Mixing bowl
- Hand mixer
- Rubber spatula
How to Serve This Dish:
Serve it cold from the fridge, with a sharp knife dipped in hot water for clean slices. A few berries on the side keep it from feeling too heavy.
Pro Tips for This Recipe:
- Fold gently so the filling keeps some air.
- Save candy for the top if you want brighter color after chilling.
- Let the pie sit 5 minutes before slicing so the crust cuts neatly.
Variations on This Dish: - Peanut Butter Pie: Add ¼ cup peanut butter to the filling.
- Lemon Cream Pie: Add 1 tablespoon lemon juice and 1 teaspoon zest.
Common Mistakes to Avoid with This Dish: - Don’t use low-fat cream cheese if you want the filling to hold well.
- Don’t serve before it chills fully or it will slump in the slice.
24. Caramel Pretzel Crack
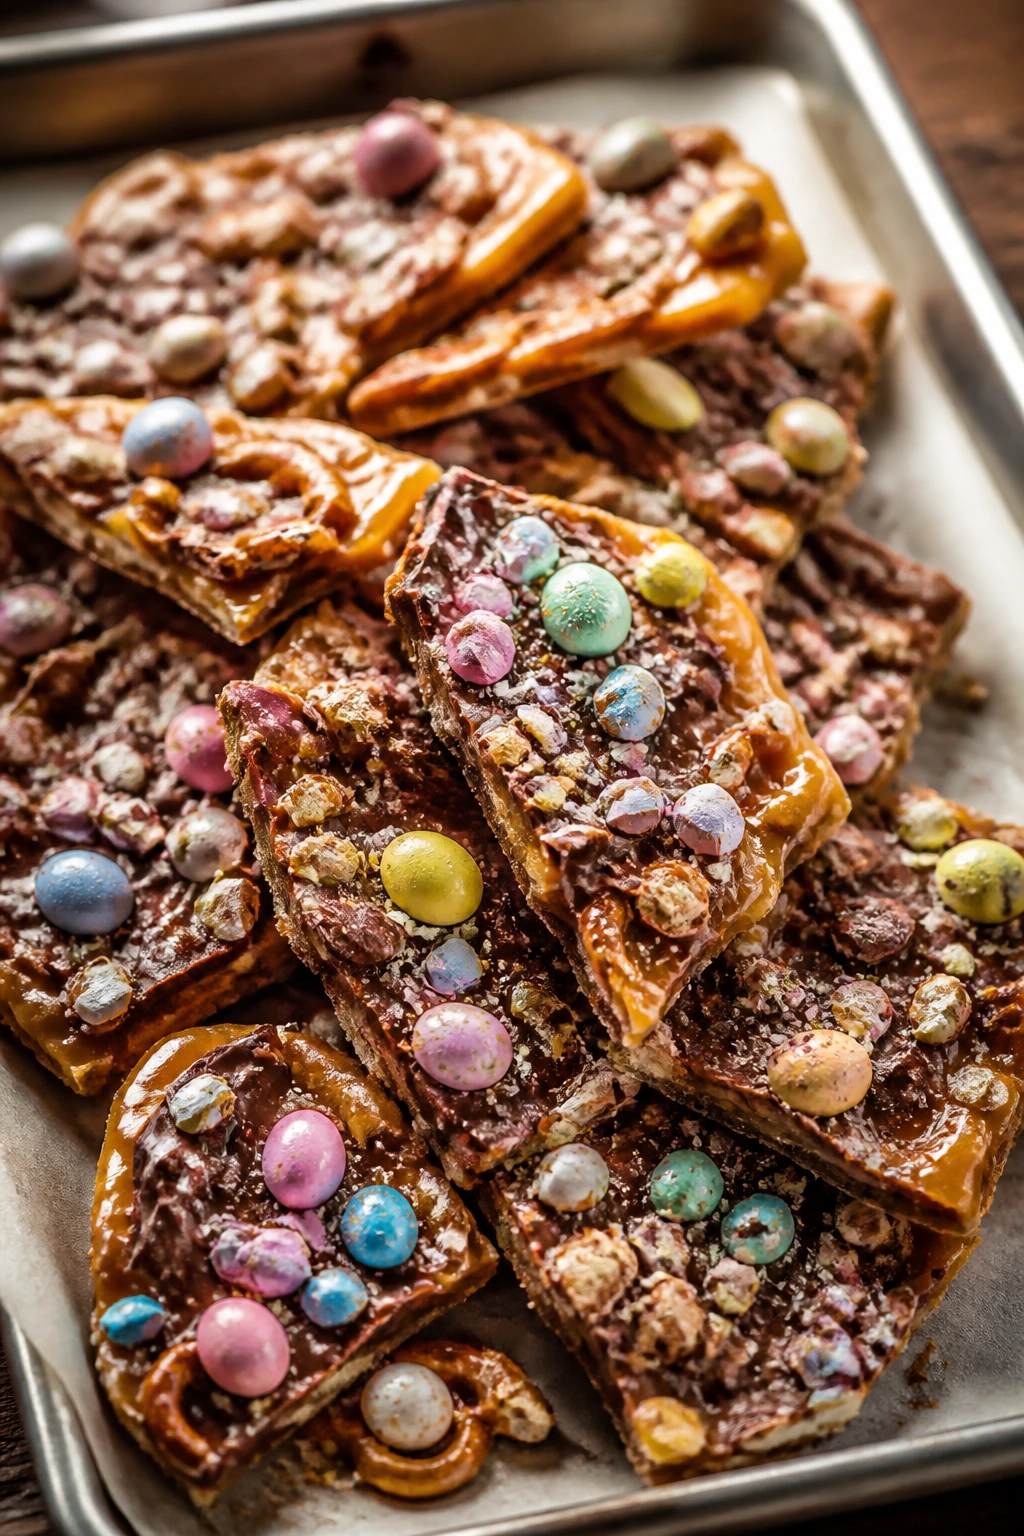
The name is goofy; the texture is not. This is one of the fastest ways to turn candy into something people hover over at a dessert table. Salted pretzels get covered in caramel and chocolate, then topped with chopped Easter candy for color and crunch. It breaks into jagged pieces that are easy to grab and impossible to eat neatly.
Why It Works:
The salty base keeps the candy from tasting too sugary, and the caramel binds everything into brittle sheets once cooled. Chocolate smooths the top and gives the candies a surface to stick to. It’s a strong option when you need a treat that looks homemade without asking for much time.
Key Ingredients:
- 4 cups mini pretzels or pretzel snaps
- 1 cup unsalted butter
- 1 cup packed light brown sugar
- 1 teaspoon vanilla extract
- 2 cups semisweet chocolate chips
- 1 cup chopped candy eggs
- ¼ teaspoon flaky salt
Quick Steps:
- Heat the oven to 350°F and line a rimmed baking sheet with parchment.
- Spread the pretzels across the sheet.
- Boil the butter and brown sugar together for 3 minutes, stir in vanilla, and pour over the pretzels.
- Bake for 8 to 10 minutes, then sprinkle the chocolate chips over the top and let them melt for 3 minutes before spreading smooth.
- Scatter chopped candy eggs and flaky salt over the chocolate, chill until firm, then break into pieces.
Equipment for This Recipe:
- Rimmed baking sheet
- Parchment paper
- Saucepan
- Offset spatula
How to Serve This Dish:
Serve it in a wide bowl or broken into chunks for gifting bags. It’s best alongside coffee or tea because the salt keeps you wanting another bite.
Pro Tips for This Recipe:
- Use a rimmed pan or the caramel will wander.
- Don’t skip the parchment; this gets sticky fast.
- Add the candy after the chocolate has softened but before it hardens.
Variations on This Dish: - White Chocolate Crack: Swap semisweet chips for white chocolate.
- Nutty Version: Add ½ cup chopped toasted almonds with the candy.
Common Mistakes to Avoid with This Dish: - Don’t underboil the caramel or it stays sticky.
- Don’t pour the chocolate onto scorching-hot caramel; it can separate.
25. Almond Magic Bars with Pastel Candy
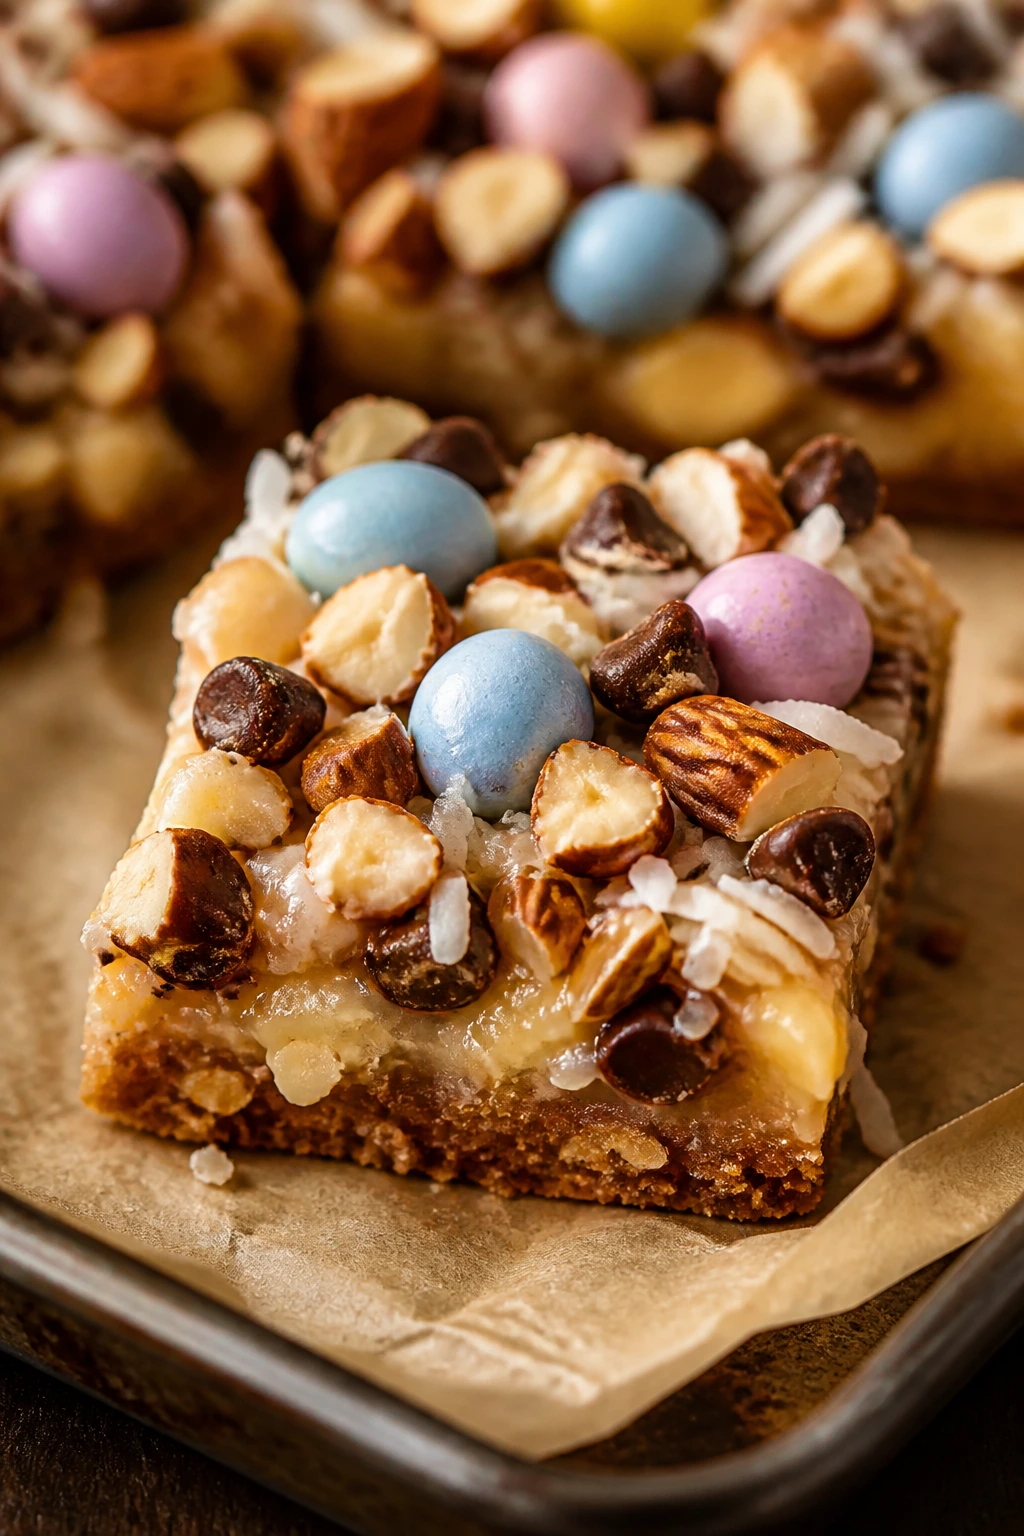
Magic bars are already a little bit of a collage, which makes them ideal for Easter candy. You get a crumbly crust, gooey condensed milk, coconut, chocolate, almonds, and chopped candy eggs all packed into one square. The bars cut clean after chilling and taste like five desserts trying to share one pan in a good way.
Why It Works:
These bars are built on layers, so the candy can sit on top without sinking out of view. Sweetened condensed milk ties the whole pan together and keeps the coconut chewy. Almonds add a toasted note that keeps the candy from tasting flat, and the crust gives each bite a firm bottom.
Key Ingredients:
- 1½ cups graham cracker crumbs
- 6 tablespoons unsalted butter, melted
- 2 tablespoons sugar
- 1 can (14 ounces) sweetened condensed milk
- 1 cup sweetened shredded coconut
- 1 cup semisweet chocolate chips
- ¾ cup sliced almonds
- 1 cup chopped candy eggs
Quick Steps:
- Heat the oven to 350°F and line a 9×13-inch pan with parchment.
- Mix the crumbs, butter, and sugar, then press into the pan and bake for 8 minutes.
- Pour the condensed milk over the crust and spread it evenly.
- Sprinkle on the coconut, chocolate chips, almonds, and chopped candy eggs.
- Bake for 22 to 25 minutes, until the edges are golden and the top looks set. Cool completely before slicing.
Equipment for This Recipe:
- 9×13-inch baking pan
- Parchment paper
- Mixing bowl
- Spatula
How to Serve This Dish:
Cut them into small squares and serve them chilled or at cool room temperature. They’re rich enough that a tiny piece goes farther than it looks like it should.
Pro Tips for This Recipe:
- Toast the almonds first if you want a deeper flavor.
- Press the topping down lightly so it bonds with the condensed milk.
- Chill before cutting for the cleanest squares.
Variations on This Dish: - Cashew Magic Bars: Swap almonds for chopped salted cashews.
- Coconut-Free Version: Replace the coconut with extra crushed graham crumbs and a handful of oats.
Common Mistakes to Avoid with This Dish: - Don’t cut before the bars are fully cool or the layers slide.
- Don’t overload the topping so much that the condensed milk can’t hold it together.
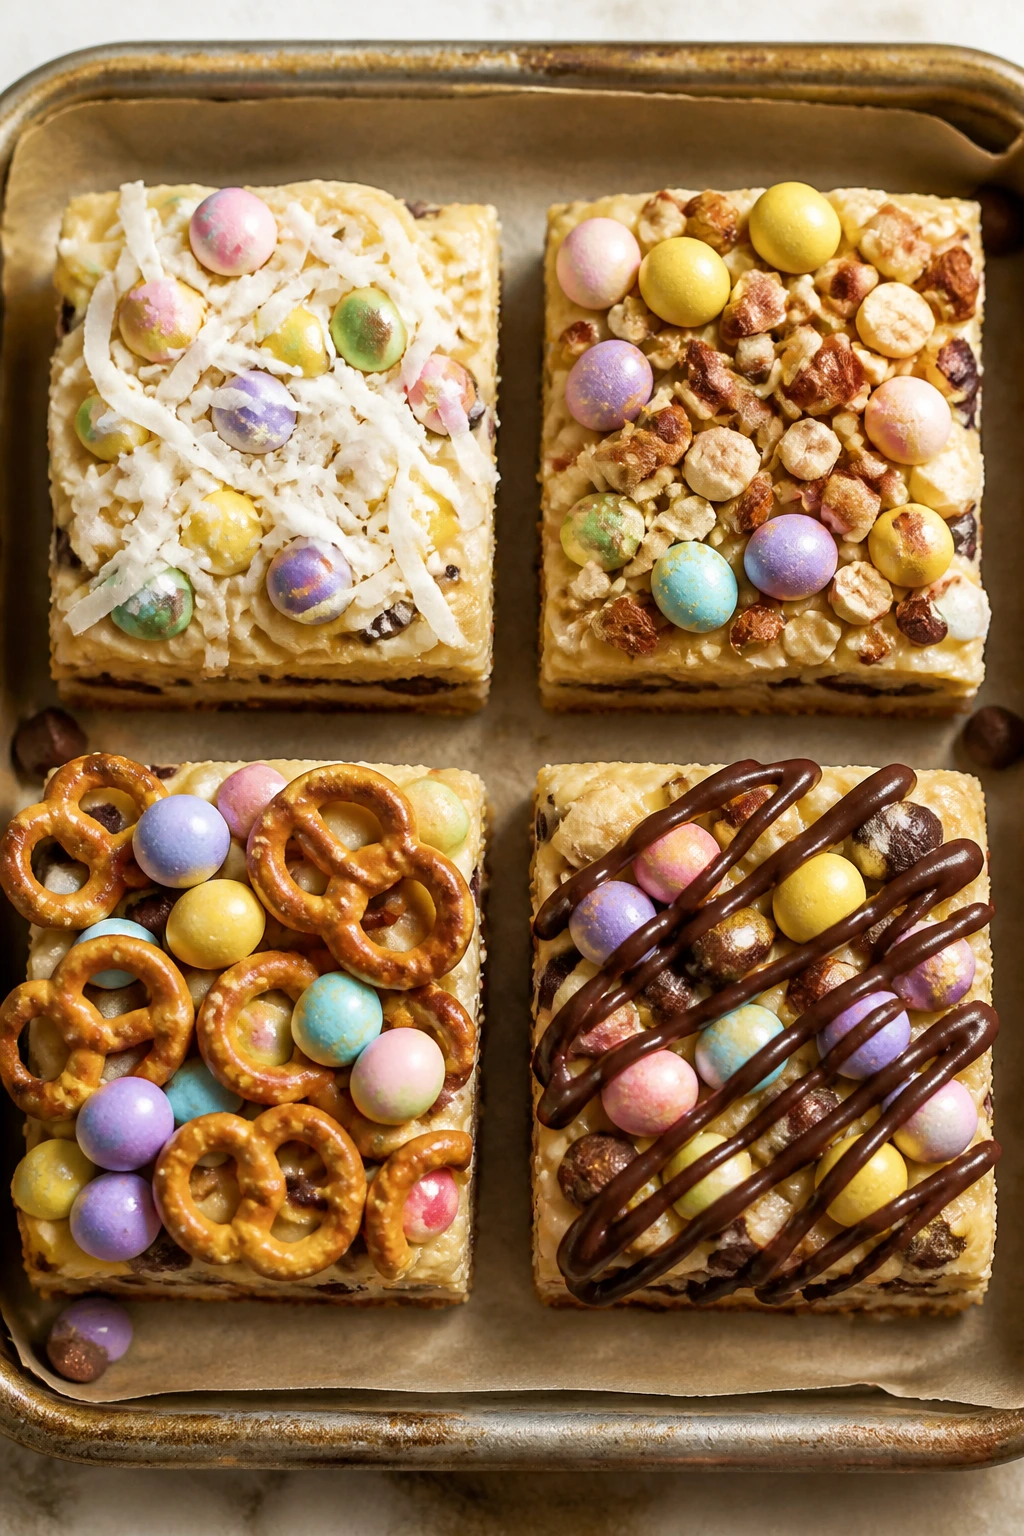
What Makes Easter Candy Work So Well in Baked Desserts
The best Easter candy recipes are not really about the candy at all. They’re about balance. Candy brings color, crunch, and sugar, but baking needs structure, fat, salt, and sometimes a bit of acid to keep all that sweetness from turning sticky and loud. That’s why brownies, blondies, cheesecake bars, and shortbread squares show up so often here: they give the candy a place to land.
Mini eggs and candy-coated chocolates are the easiest to work with because they hold their shape long enough to survive the oven. Peeps are messier, but in a blondie or cereal treat they melt into marshmallow ribbons that taste better than they look in the package. Jelly beans are the most temperamental, which is why I keep putting them on top after baking instead of hiding them inside batter.
A quick rule that saves trouble: if a candy is coated, hard, or chocolate-based, it usually goes into the dough. If it’s soft, sticky, or wildly colored, it usually works better as a topping. That one choice changes the whole texture of the dessert.
Essential Equipment for These Recipes
- 9×13-inch baking pan: The workhorse for bars, brownies, and traybakes.
- 8×8-inch pan: Best for denser brownies, fudge, and smaller batches.
- Muffin tin: Useful for cookie cups and individual servings.
- Rimmed baking sheet: Needed for bark, crack, and anything that spreads.
- Mixing bowls: Have at least two so wet and dry ingredients stay separate.
- Electric mixer: Helps with cream cheese, butter, and fluffy cake batters.
- Rubber spatula: The best tool for folding candy pieces without smashing them.
- Parchment paper: Saves the edges of bars and helps with lifting and slicing.
- Cooling rack: Keeps brownies, cookies, and cakes from steaming underneath.
- Sharp chef’s knife: For chopping candy and slicing bars cleanly.
- Cookie scoop: Makes cookies and cake pops the same size.
- Offset spatula: Handy for smoothing frosting and chocolate bark.
Smart Shopping and Ingredient Tips
Chopped Easter candy behaves better than whole pieces in most baked recipes. Mini eggs, chocolate bunnies, and candy-coated chocolates should be slightly chilled before chopping so the shell cracks instead of smearing. If you don’t want a dusting of candy crumbs everywhere, put them in a zip-top bag and tap gently with a rolling pin.
White chocolate is worth buying in chips or bars that actually melt smoothly. Some bargain versions seize into a waxy lump, and you’ll feel that immediately when making bark or fudge. For brownies and blondies, semisweet chocolate keeps the final dessert from tasting like pure sugar. That salt-and-dark edge matters more than people think.
Peeps are better in recipes where they get melted or baked into a soft base. They’re not the candy to hide in a firm cookie dough and expect clean results. Jelly beans are best as decoration or a top layer, not as a baked-in mix-in, because their color can bleed and their centers get rubbery in the oven.
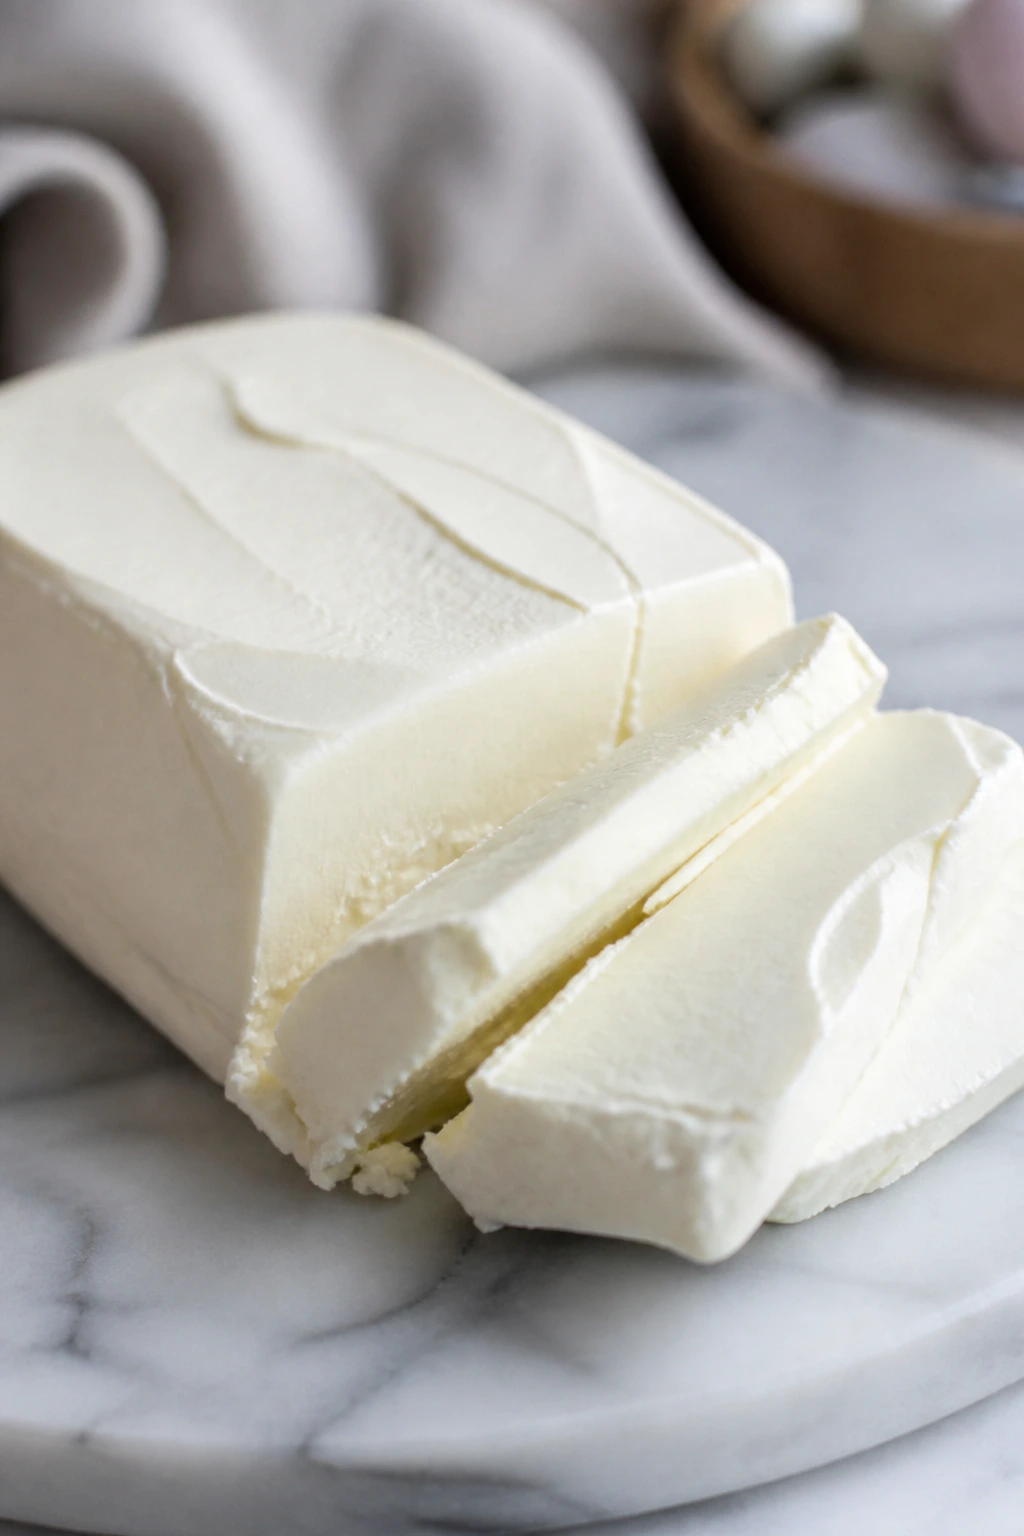
For cream cheese recipes, buy the block-style version, not the whipped tub. The block holds up in cheesecake bars and frosting without turning thin. And if you’re choosing pretzels, pick sturdy twists or snaps rather than delicate sticks; the stronger shape keeps your bars from collapsing into crumbs.
How to Serve These Recipes
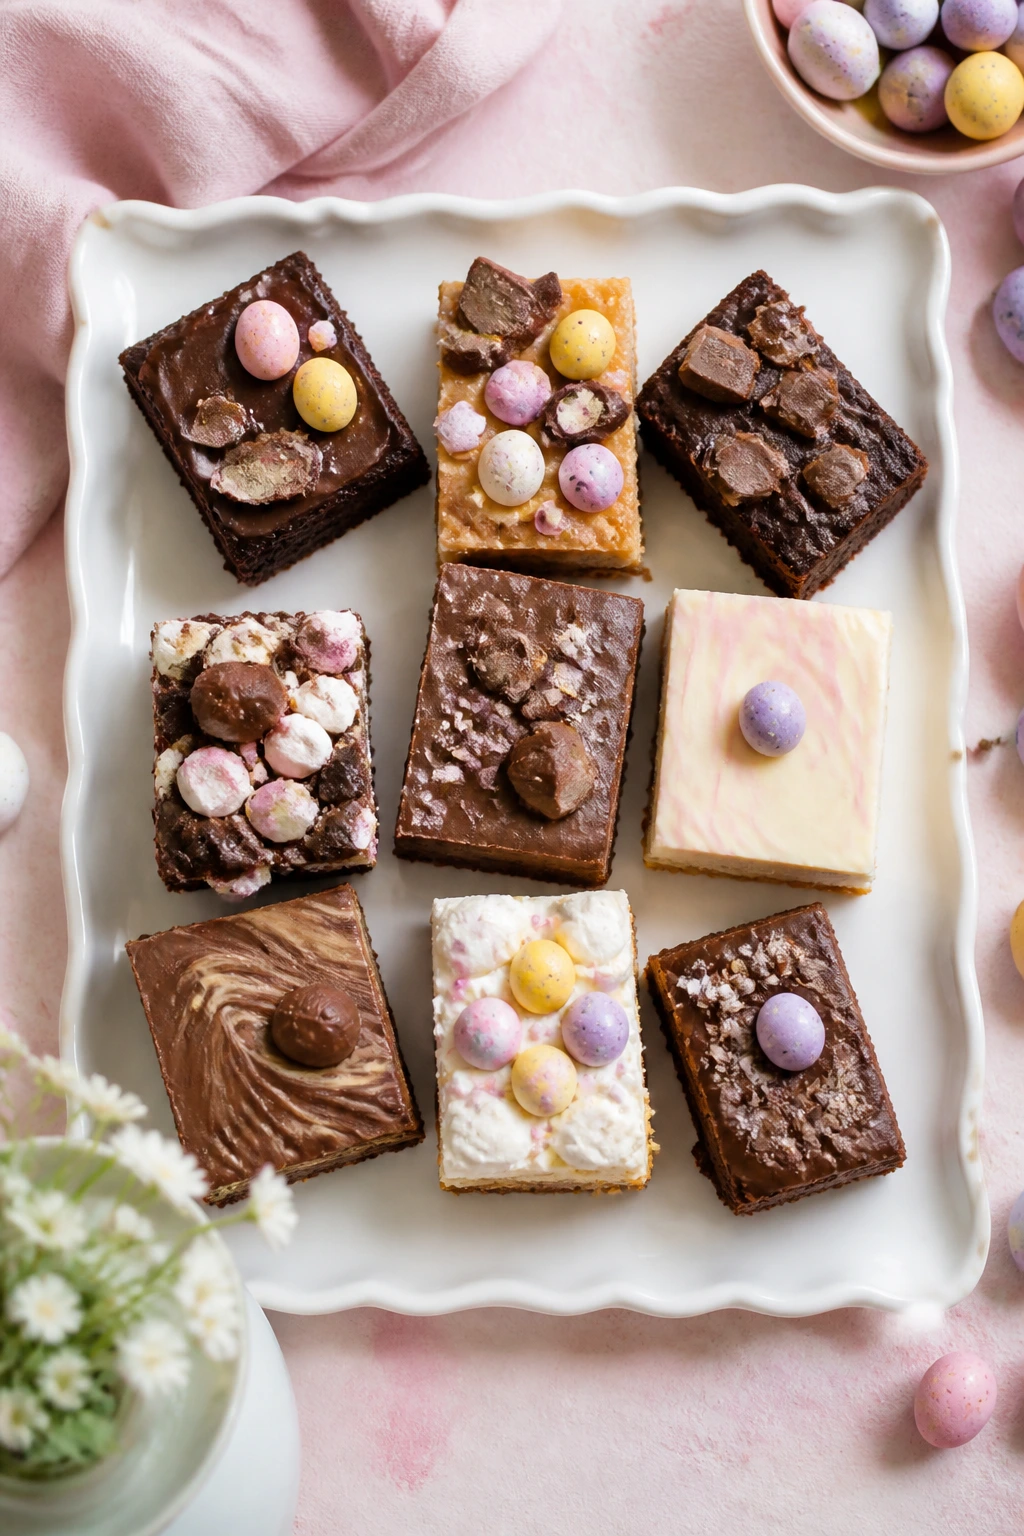
Presentation:
Put brownies, bars, and fudge on a simple white platter or a pastel tray so the candy colors can do the talking. Cake pops, nests, and cupcakes look best when grouped in odd numbers, not lined up like soldiers.
Accompaniments:
Milk is the obvious match for the sweeter recipes, but coffee, black tea, and even a spoonful of berry compote work well with the richer bars. For a fuller dessert spread, serve a salty element too: pretzels, roasted nuts, or plain shortbread.
Portions:
Most of these desserts are richer than they look. Cut brownies and bars into 1½-inch squares for a crowd, and lean smaller if the tray includes several sweets. Cupcakes, cake pops, and cookie cups are single portions already, so they can be placed in a dessert box or wrapped for gifting without much fuss.
Beverage Pairing:
A strong cup of coffee cuts through the candy-heavy recipes fast. For kid-friendly tables, cold milk or chocolate milk does the job. If you want something lighter beside the citrus cakes and cheesecake bars, a glass of unsweetened iced tea is a smart reset.
Additional Tips and Flavor Boosters
Flavor Enhancement:
A pinch of flaky salt on brownies, bark, or caramel crack pulls the chocolate forward and makes the candy taste less flat. Citrus zest also helps more than people expect, especially in sugar cookies, loaf cakes, and cheesecake bars.
Customization:
Crushed pretzels, toasted coconut, chopped almonds, or peanut butter chips are the easiest way to change the mood of these recipes without rewriting the whole pan. If your candy mix leans very sweet, swap in darker chocolate somewhere in the recipe to bring it back into balance.
Serving Suggestions:
Dust bars with powdered sugar, drizzle with melted chocolate, or add a few extra chopped candy pieces right before serving for a cleaner look. For cupcakes and cake pops, keep a few whole candies on top and let the rest stay inside the batter or filling.
Make-It-Yours:
Gluten-free bakers can use a 1:1 flour blend in the cookie and bar recipes that call for wheat flour. For dairy-free versions, choose plant-based butter and dairy-free chocolate where the recipe allows it, then keep an eye on baking times because those substitutes sometimes brown a little faster.
Make-Ahead, Storage, and Reheating Guidance
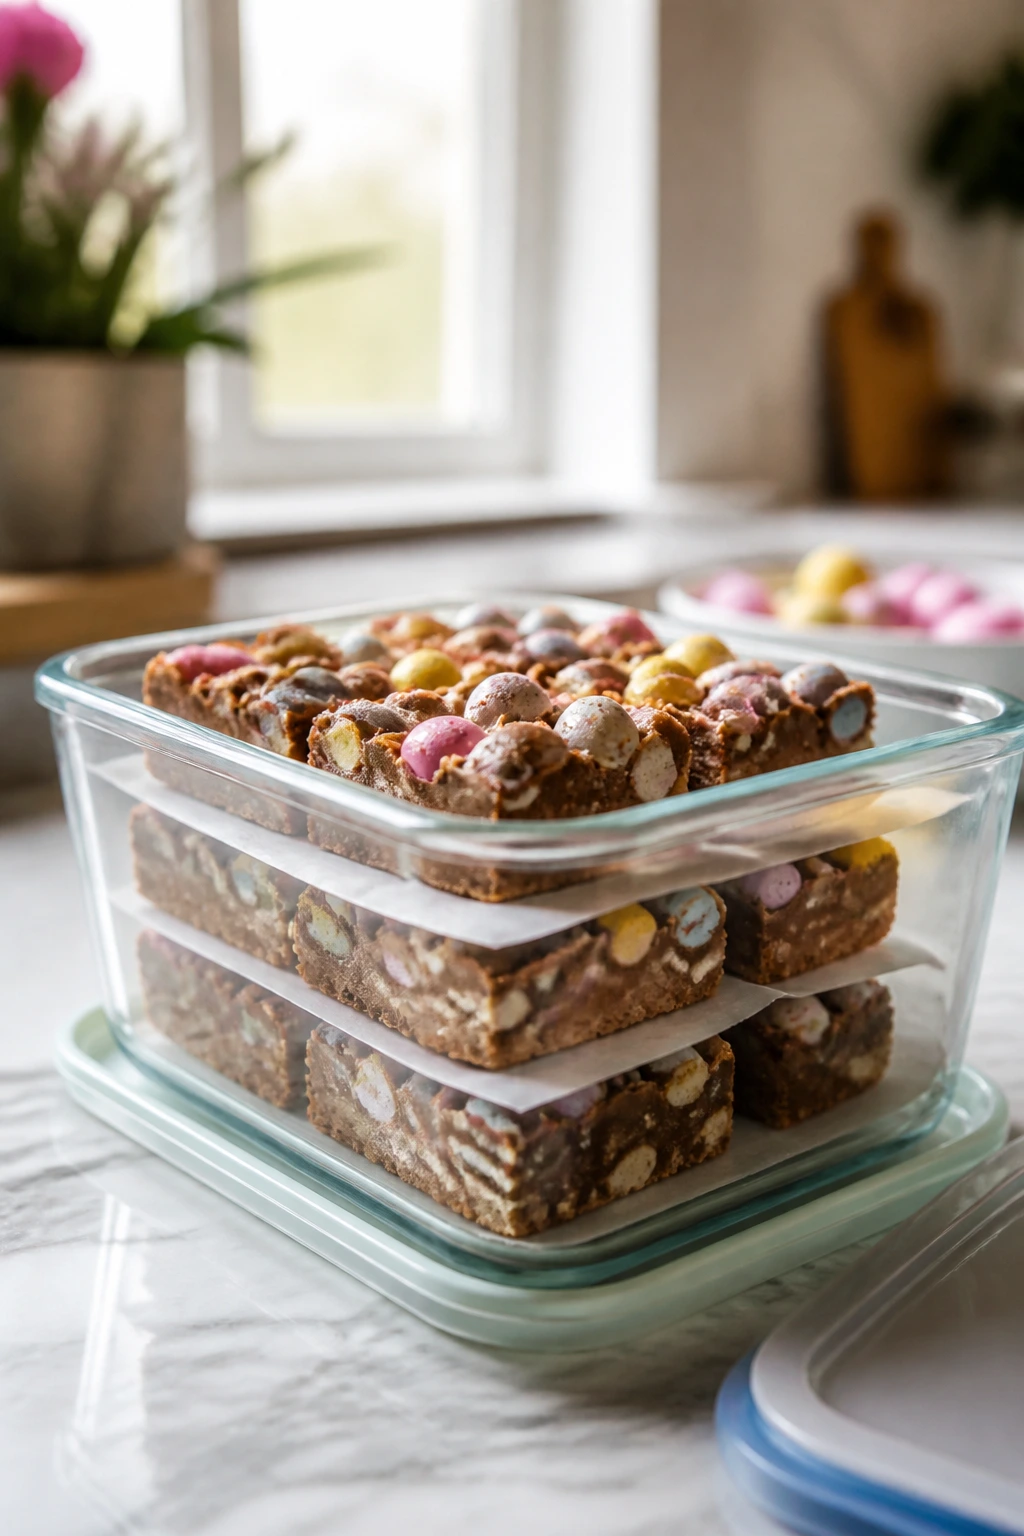
Bars, brownies, cheesecake squares, and fudge are the easiest desserts to make ahead. Most of them keep 3 to 4 days at room temperature in an airtight container if they do not contain a lot of dairy frosting, and up to 1 week in the fridge if they do. Fudge, bark, and crack often last a little longer in a cool pantry or fridge, but they taste best when kept dry and wrapped well so the candy doesn’t soften.
For freezing, most baked bars and cookies hold for up to 2 months if wrapped tightly in parchment and then sealed in a freezer bag or container. Freeze them in single layers with parchment between layers so the candy shells do not rub off. Cookie dough balls can also be frozen first, then baked straight from frozen with 1 to 2 extra minutes in the oven.
Reheating is only worth it for the recipes where warmth improves the texture: brownies, blondies, cookie cups, and s’mores bars. A 300°F oven for 5 to 8 minutes is enough to warm a square without drying it out. The microwave works in a pinch, but use 10 to 15 seconds only, or the candy melts into a sticky patch and the edges turn rubbery.
Cupcakes, cake pops, and cheesecake bars are better cold or cool than hot. Frosted desserts should be stored in the fridge if they sit more than a day, and I’d let them rest at room temperature for 20 to 30 minutes before serving so the butter in the frosting softens.
If you’re making a few of these for a party, stagger them. Bake the bars one day, chill the fudge overnight, and keep the bark and crack in airtight containers until the last minute. That keeps the kitchen from feeling like a candy warehouse.
Variations and Adaptations to Try
Gluten-Free Traybake Mix:
Use a 1:1 gluten-free baking flour in brownies, blondies, and cookie bars. The texture stays close if the recipe already has enough butter or chocolate to keep things moist. Skip recipes that rely on shortbread-style crumb unless you know your flour blend bakes well in a firm base.
Dairy-Free Candy Swap:
Choose plant-based butter, dairy-free chocolate chips, and a non-dairy cream cheese substitute where the recipe calls for them. Brownies, bark, crack, and cookies are the easiest fits. Fudge and cheesecake bars take more testing, so keep the filling simple if you need a reliable result.
Less-Sweet Balance:
If the candy bowl leans heavy on sugar, use dark chocolate, add flaky salt, or tuck in pretzels and nuts. That keeps the desserts from feeling one-note and makes the candy taste more like an accent than a sugar rush.
Nut-Free School Version:
Skip peanut butter eggs, peanut butter chips, and almond toppings, then lean into Mini Eggs, white chocolate, coconut, and pretzels only if your setting allows them. For truly nut-free classrooms, read the package on the candy carefully because cross-contact matters more than people think.
Citrus-and-Candy Spring Version:
Fold lemon or orange zest into sugar cookie bars, loaf cakes, and cheesecake bars. Citrus gives all that Easter candy a brighter frame and helps the dessert taste fresher after a big meal.
Mini Bite Party Version:
Turn brownies, bars, and cookie dough into smaller cuts or mini cups if you want a dessert tray that encourages grazing. Smaller portions look more polished, and they make it easier for people to sample three or four different sweets without overdoing it.
Common Mistakes to Avoid
The biggest problem people make with Easter candy is treating it like a normal mix-in. It isn’t. Candy shells, marshmallow centers, and sugar coatings all react differently in heat, so you need to place them with some care. If you toss everything into a batter and hope for the best, you’ll get bleeding colors, sticky pockets, or hard clumps that fight the crumb.
Another common slip is overbaking. Candy-heavy desserts often look underdone before they’re actually done, especially brownies, blondies, and cheesecake bars. Pull them when the center still has a little give. They finish setting as they cool, and that last bit of rest is what keeps the texture soft instead of dry.
Melting chocolate too hard is another easy way to ruin bark, fudge, and candy coating. Gentle heat wins every time. If the chocolate gets grainy or seized, it has usually been rushed or overheated, and the fix is prevention, not heroics.
People also forget how much sweetness they’re stacking. Candy, frosting, condensed milk, and milk chocolate can all land in the same pan if you’re not careful. Salt, citrus, cocoa, and pretzels are not decorative extras here. They are the reason the desserts still taste like something you want a second bite of.
Finally, don’t ignore cooling time. Candy desserts get messy when cut too soon. Brownies crumble, cheesecake bars smear, bark bends, and cookie cups collapse. Put the pan down, walk away, and give the dessert time to settle. It’s boring advice. It works.
Frequently Asked Questions
Can I use leftover Halloween or Christmas candy in these recipes?
Yes, if the candy has a similar texture. Chocolate-coated pieces, peanut butter cups, toffee bits, and soft caramels can usually replace Easter candy in brownies, bars, and cookie recipes. Save brightly colored jelly candies for toppings, not baking.
What’s the best candy for baking?
Mini eggs, candy-coated chocolates, peanut butter eggs, and chopped chocolate bunnies are the easiest to bake with because they hold shape or melt in a useful way. Peeps and jelly beans are more temperamental, so they work better in specific recipes rather than everywhere.
How do I keep candy from sinking in cake or cupcake batter?
Chop it small, toss it lightly with flour, and use a thicker batter. Candy sinks when the batter is too loose or the mix-ins are too heavy. If you can see the candy riding the surface before baking, you’re in a better place than if it’s all hiding at the bottom.
Can I make these recipes a day ahead?
Absolutely. Brownies, bars, fudge, bark, and cheesecake squares often taste better after a rest. Cookies can be baked a day ahead too, though they’re best if you stop just shy of overbaking so they stay soft.
What if my Peeps melt into a mess?
That usually means the pieces were too large or the recipe didn’t have enough structure. Chop them smaller, keep the oven temperature moderate, and use them in blondies, cereal treats, or brownie toppings where the batter can support them.
Can I freeze Easter candy desserts?
Yes. Most bars, brownies, cookie dough, and plain cookies freeze well for up to 2 months. Keep frosted cakes, cheesecake bars, and marshmallow-heavy treats in the fridge instead, because the texture changes faster in the freezer.
Do I need to chop Mini Eggs before baking?
Usually, yes. Whole Mini Eggs can be a little too hard in cookies and brownies, and chopping them spreads the crunch more evenly through the dessert. Leave a few larger pieces for the top if you want the finished pan to look brighter.
How do I stop caramel or chocolate from getting grainy?
Use low heat and stop as soon as everything melts. Stir gently, don’t boil unless the recipe specifically says to, and keep any moisture away from the chocolate. A dry bowl and a patient hand matter more than fancy equipment.
Which recipes travel best for a potluck?
Bars, brownies, bark, crack, and fudge win here. They slice cleanly, stack well, and do not depend on frosting staying perfect. If you need one tray that survives a car ride and a crowded dessert table, those are the safest bets.
A Better Way to Use the Candy Bowl
Easter candy is at its best when it stops being a snack and starts acting like an ingredient. The shell cracks, the marshmallow softens, the chocolate melts into the batter, and suddenly the whole thing feels deliberate instead of leftover. That’s the part I keep coming back to: a little candy can do a lot more work in a pan than it ever does in a bowl.
Pick one brownie recipe, one cookie bar, and one no-bake tray to cover the whole holiday spread. That gives you texture, color, and enough variety that nobody has to fight over the same square twice. And if the candy bowl is still somehow full after that, well, you already know what to do with it.