
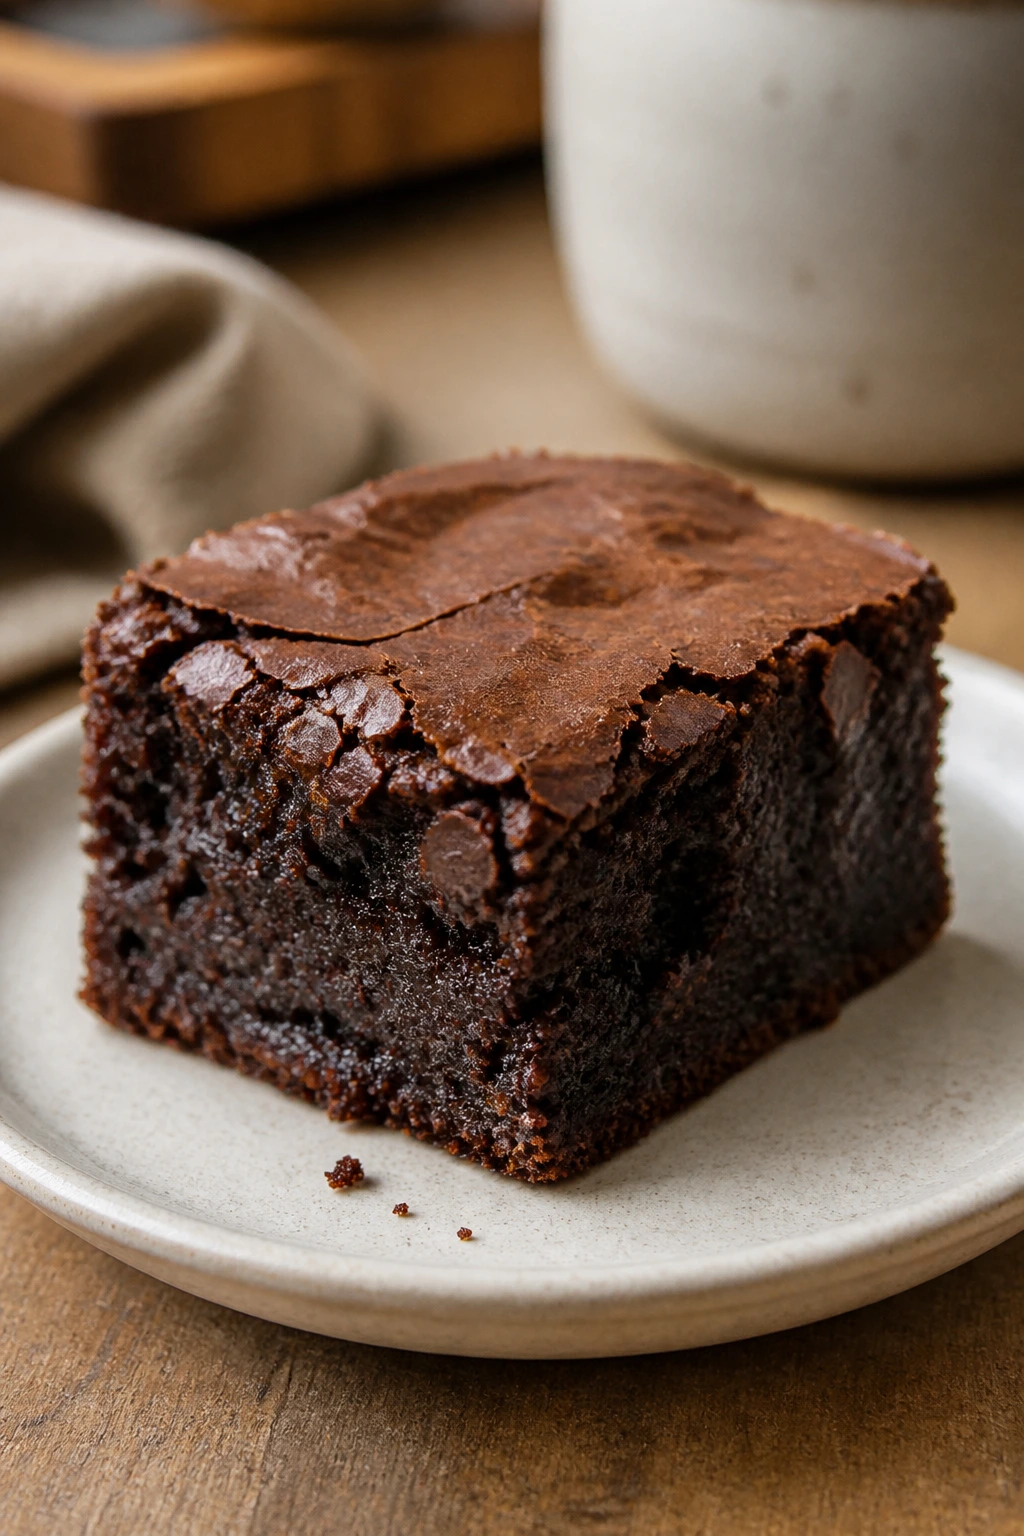
A tray of festive brownies has a particular kind of swagger. The glossy top crackles when you cut it, the crumbs cling to the knife, and the decorations do half the work before anyone takes a bite. Peppermint shards. Shiny ganache. A clean swirl of cream cheese. A dusting of cocoa so dark it almost looks velvet. This is the rare dessert category where “pretty” and “deeply chocolatey” can sit on the same plate without arguing.
I’ve always liked brownies that wear one bold detail and stop there. Too many toppings, and they start looking busy. Get the balance right, though, and you get something that feels generous enough for a party but still unmistakably homemade. That’s the sweet spot here: festive brownies that look like you spent all afternoon fussing, even when the actual work is mostly melting, swirling, drizzling, and cutting with a sharp knife.
The charm of brownies also lies in their range. A single pan can lean peppermint, citrus, spice, coffee, cherry, caramel, or cheesecake, and the base stays sturdy enough to hold the show. That matters. A lot of decorated desserts collapse under their own ambition. Brownies don’t. They take a drizzle, a layer of frosting, or a scatter of candy and somehow get better at standing in front of a crowd.
Why These Brownies Steal the Dessert Table

- Visual payoff: Each brownie here gets one or two strong finishes, so the pan looks intentional instead of crowded.
- Easy slicing: A chilled brownie with a clean topping cuts into neat squares, which matters when you want tidy edges on a platter.
- Make-ahead friendly: Most of these recipes hold well for a day or two, and a few taste better after they’ve rested overnight.
- Flavor contrast: The best festive brownies need more than sugar; they need something sharp, minty, salty, fruity, or spiced to keep the chocolate from flattening out.
- Giftable by the square: These pack well in parchment-lined boxes and survive a short trip without turning into crumbs.
- Flexible for different crowds: You can keep some fully chocolate, push others into cheesecake territory, or add fruit and spice without changing the whole dessert table mood.
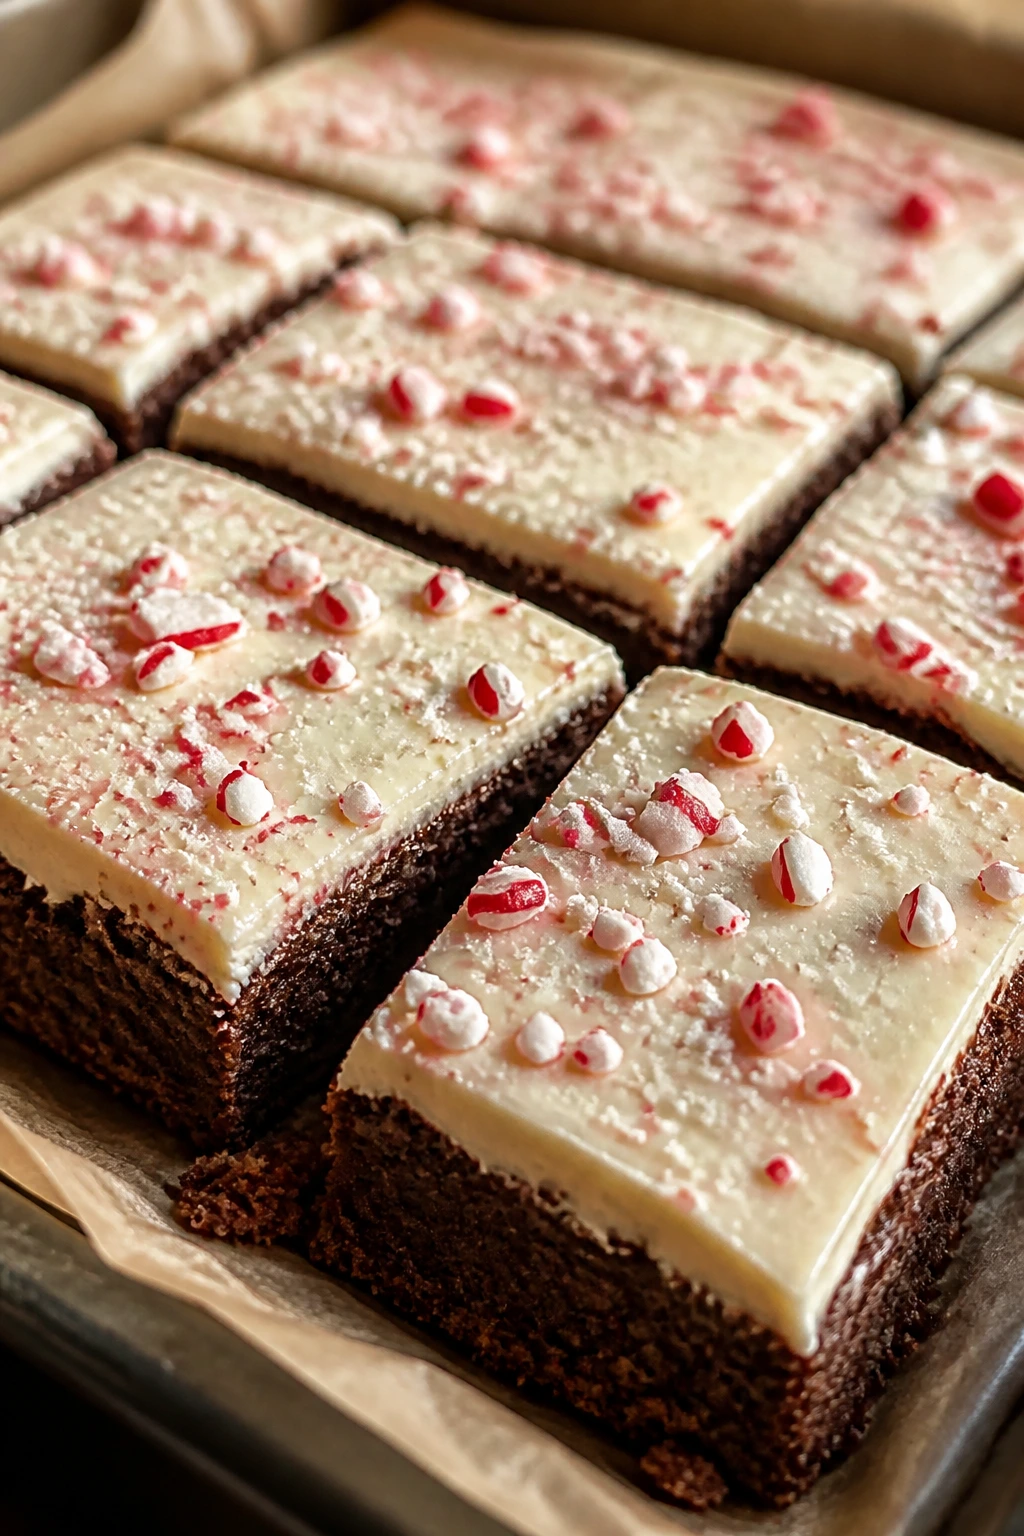
1. Peppermint Bark Brownies
Intro:
These are the brownies I make when I want the pan to look like winter without going full candy-store chaos. The base is dense and fudgy, the white chocolate sits in a glossy sheet on top, and the crushed peppermint gives you that sharp snap that cuts through all the richness. They look polished. They also disappear fast.
Why It Works:
Peppermint bark works because it gives the brownies a cold, clean finish against the warm chocolate base. The white chocolate layer sets quickly and makes a bright canvas for the candy cane pieces, which keeps the top visually crisp. A little peppermint extract in the batter goes a long way; too much and the whole pan tastes like toothpaste. Keep it subtle.
Key Ingredients:
- 1 cup unsalted butter, cut into pieces
- 8 ounces semisweet chocolate, chopped
- 1 3/4 cups granulated sugar
- 3 large eggs
- 2 teaspoons vanilla extract
- 1 cup all-purpose flour
- 1/2 cup unsweetened cocoa powder
- 1/2 teaspoon fine salt
- 1 cup white chocolate chips or chopped white chocolate
- 1/2 cup crushed candy canes
Quick Steps:
- Preheat the oven to 350°F (175°C). Line a 9×13-inch pan with parchment, leaving overhang on two sides.
- Melt the butter and semisweet chocolate together over low heat or in short microwave bursts until smooth.
- Whisk in the sugar, then the eggs and vanilla, until the mixture looks glossy and slightly thick.
- Fold in the flour, cocoa powder, and salt just until no dry streaks remain.
- Spread the batter in the pan and bake for 22 to 26 minutes, until the center is set but still soft.
- Cool completely, melt the white chocolate, spread it over the top, and scatter the crushed candy canes before the chocolate sets.
Equipment for This Recipe:
- 9×13-inch metal baking pan
- Parchment paper
- Medium saucepan or microwave-safe bowl
- Rubber spatula
- Offset spatula for the white chocolate
How to Serve This Dish:
Cut these into small squares; the peppermint topping is rich enough that a little piece goes far. They look especially sharp on a white platter with a few whole candy canes tucked around the edges.
Pro Tips for This Recipe:
- Crush the candy canes in a zip-top bag with a rolling pin, but stop before they turn to powder.
- Let the brownies cool all the way before adding the white chocolate, or the top will slide.
- A pinch of espresso powder in the batter deepens the chocolate without tasting like coffee.
Variations on This Dish:
- Dark Chocolate Mint: Use dark chocolate instead of semisweet for a more bitter base.
- Peppermint Crumble Top: Swap the candy canes for peppermint sandwich cookie crumbs if you want a softer crunch.
Common Mistakes to Avoid with This Dish:
- Spreading the topping too soon: Warm brownies melt the white chocolate and make the peppermint sink.
- Using peppermint extract like vanilla: More than 1/4 teaspoon in the batter can overpower the chocolate fast.
- Overbaking: The edges should be set, but the middle should still feel a little soft when you pull the pan.
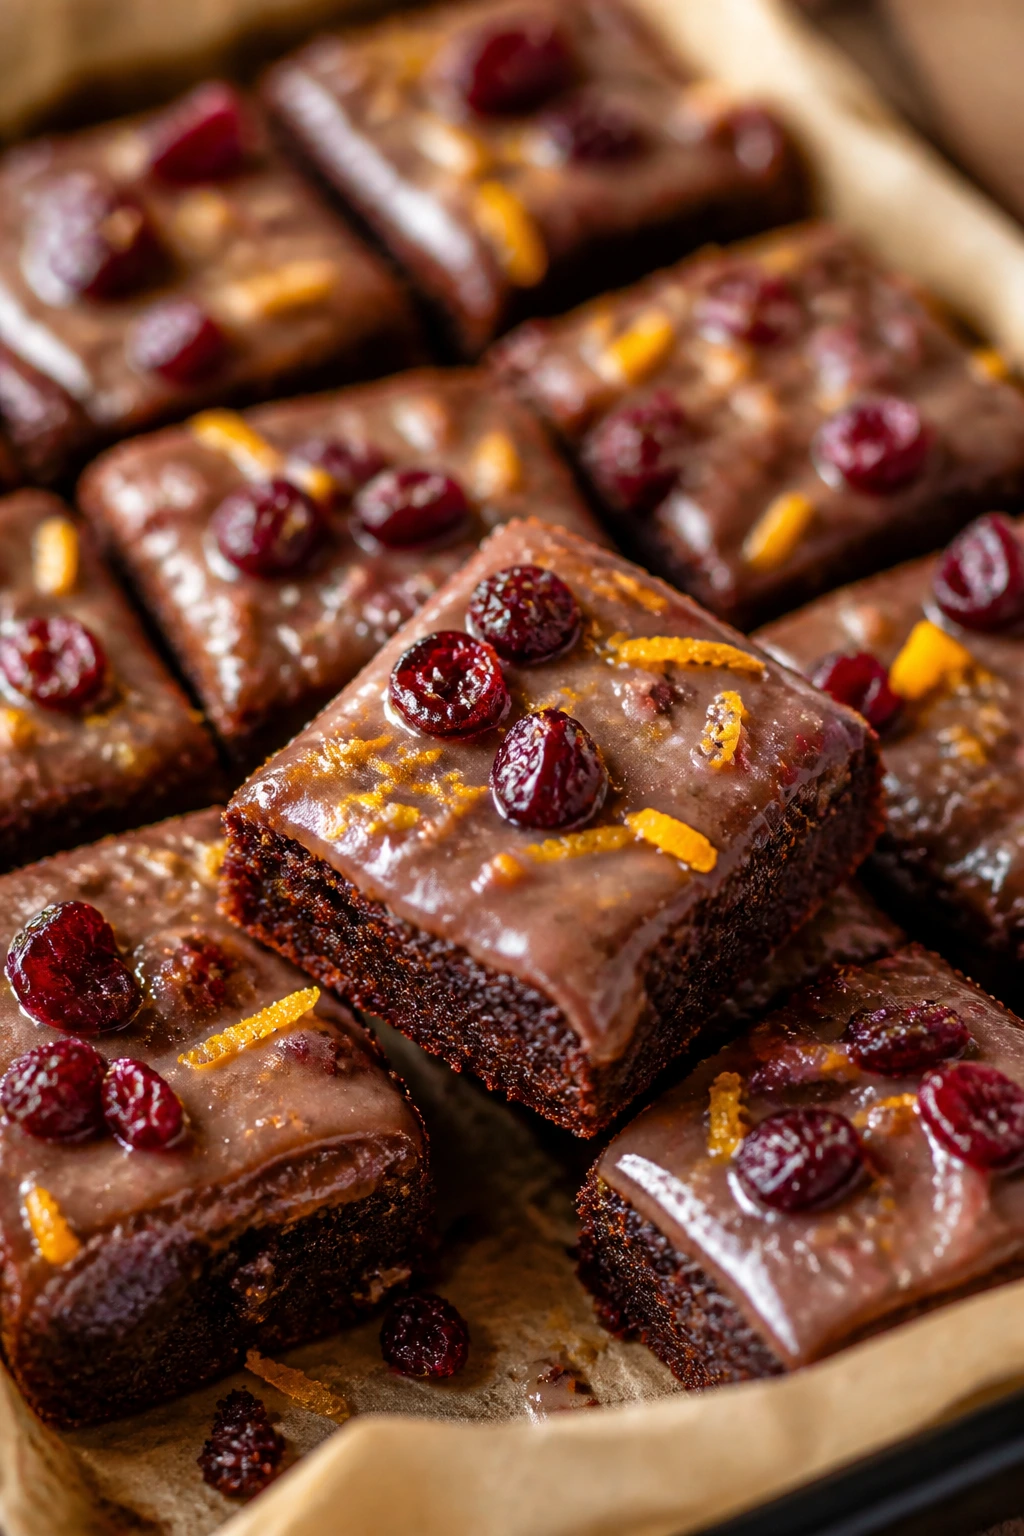
2. Cranberry-Orange Brownies
Intro:
Chocolate and orange have been flirting for decades, and this brownie proves the pairing still works. The orange zest lifts the batter, the dried cranberries add a chewy red streak, and a thin citrus glaze gives the finished pan a bright, almost jewel-like surface. These are the brownies I reach for when I want something that feels a little lighter on the palate but still very much a brownie.
Why It Works:
Orange zest wakes up cocoa the same way salt wakes up caramel. It doesn’t make the brownies taste like orange cake; it makes the chocolate taste deeper and less blunt. Dried cranberries are better than fresh here because they stay chewy instead of bleeding juice into the crumb. That little bit of tug under your teeth matters.
Key Ingredients:
- 1 cup unsalted butter
- 8 ounces semisweet chocolate
- 1 1/2 cups granulated sugar
- 3 large eggs
- 2 teaspoons orange zest
- 1 teaspoon vanilla extract
- 1 cup all-purpose flour
- 1/2 cup unsweetened cocoa powder
- 3/4 cup dried cranberries
- 1 cup powdered sugar
- 2 to 3 tablespoons fresh orange juice
Quick Steps:
- Heat the oven to 350°F (175°C) and line a 9×13-inch pan with parchment.
- Melt the butter and chocolate together, then whisk in sugar, eggs, orange zest, and vanilla until smooth.
- Fold in flour, cocoa powder, and dried cranberries just until combined.
- Bake for 23 to 27 minutes, until the top is shiny and the center no longer jiggles.
- Cool completely, stir the powdered sugar with orange juice to make a pourable glaze, then drizzle it over the brownies in thin lines.
Equipment for This Recipe:
- 9×13-inch baking pan
- Citrus zester
- Mixing bowls
- Whisk
- Small spoon or piping bag for the glaze
How to Serve This Dish:
These slice cleanest after the glaze has set for about 20 minutes. I like them with a few extra curls of orange zest on top and strong coffee on the side.
Pro Tips for This Recipe:
- Zest the orange before juicing it; trying to do it the other way around is annoying and messy.
- If your cranberries are very dry, chop them once or pulse them briefly so they spread through the batter more evenly.
- Use a metal pan if you can; glass tends to bake the edges a little too slowly for this style of brownie.
Variations on This Dish:
- Cranberry-White Chocolate: Add 3/4 cup white chocolate chunks for a sweeter, softer finish.
- Sugared Citrus Top: Toss a few strips of orange peel in sugar and scatter them over the glaze.
Common Mistakes to Avoid with This Dish:
- Using too much juice in the glaze: A runny glaze disappears into the crust instead of sitting on top.
- Adding cranberries without chopping them: Big pieces drag the batter and make uneven slices.
- Skipping the cooling time: Warm brownies will absorb the glaze and look dull.
3. Gingerbread Brownies
Intro:
This is what happens when gingerbread gets a chocolate backbone. Molasses gives the brownies a dark, almost sticky depth, while ginger, cinnamon, and cloves keep the flavor sharp enough to stay lively. They smell incredible in the oven — warm, dark, and a little spicy.
Why It Works:
Gingerbread spices can flatten out if the base is too sweet, so the bitterness of cocoa matters here. Molasses does two things at once: it deepens the color and keeps the crumb moist for days. A light cream cheese glaze or a dusting of powdered sugar helps the top look finished without burying the spice.
Key Ingredients:
- 1 cup unsalted butter
- 6 ounces bittersweet chocolate, chopped
- 1 1/4 cups granulated sugar
- 1/2 cup unsulfured molasses
- 3 large eggs
- 1 teaspoon vanilla extract
- 1 cup all-purpose flour
- 1/2 cup unsweetened cocoa powder
- 2 teaspoons ground ginger
- 1 teaspoon ground cinnamon
- 1/4 teaspoon ground cloves
- 1/2 teaspoon fine salt
- 4 ounces cream cheese, softened
- 1 cup powdered sugar
- 2 tablespoons milk
Quick Steps:
- Preheat the oven to 350°F (175°C) and line a 9×13-inch pan.
- Melt the butter and bittersweet chocolate, then whisk in sugar and molasses until smooth.
- Beat in the eggs and vanilla one at a time.
- Fold in flour, cocoa powder, ginger, cinnamon, cloves, and salt.
- Bake for 24 to 28 minutes, until the center looks set but still soft in the very middle.
- Beat the cream cheese, powdered sugar, and milk into a thick glaze, then drizzle it over the cooled brownies.
Equipment for This Recipe:
- 9×13-inch pan
- Hand mixer for the glaze
- Saucepan or microwave-safe bowl
- Rubber spatula
- Parchment paper
How to Serve This Dish:
These are strong-flavored brownies, so cut them into neat 2-inch squares and let the glaze do the decorating. They sit well beside hot tea or black coffee.
Pro Tips for This Recipe:
- Use unsulfured molasses, not blackstrap; blackstrap tastes harsher than you want here.
- Let the brownies cool fully before glazing, or the glaze turns thin and patchy.
- A small pinch of black pepper can sharpen the spice if you like a little more bite.
Variations on This Dish:
- Extra-Spiced Pan: Add 1/4 teaspoon nutmeg and 1/4 teaspoon allspice for a fuller gingerbread profile.
- Plain Powdered Finish: Skip the glaze and dust the top lightly with powdered sugar right before serving.
Common Mistakes to Avoid with This Dish:
- Overloading the spice mix: Too much clove can take over the pan fast.
- Using blackstrap molasses by habit: It makes the brownies taste bitter and muddy.
- Cutting before the glaze sets: You’ll drag the frosting across the top and lose the clean look.
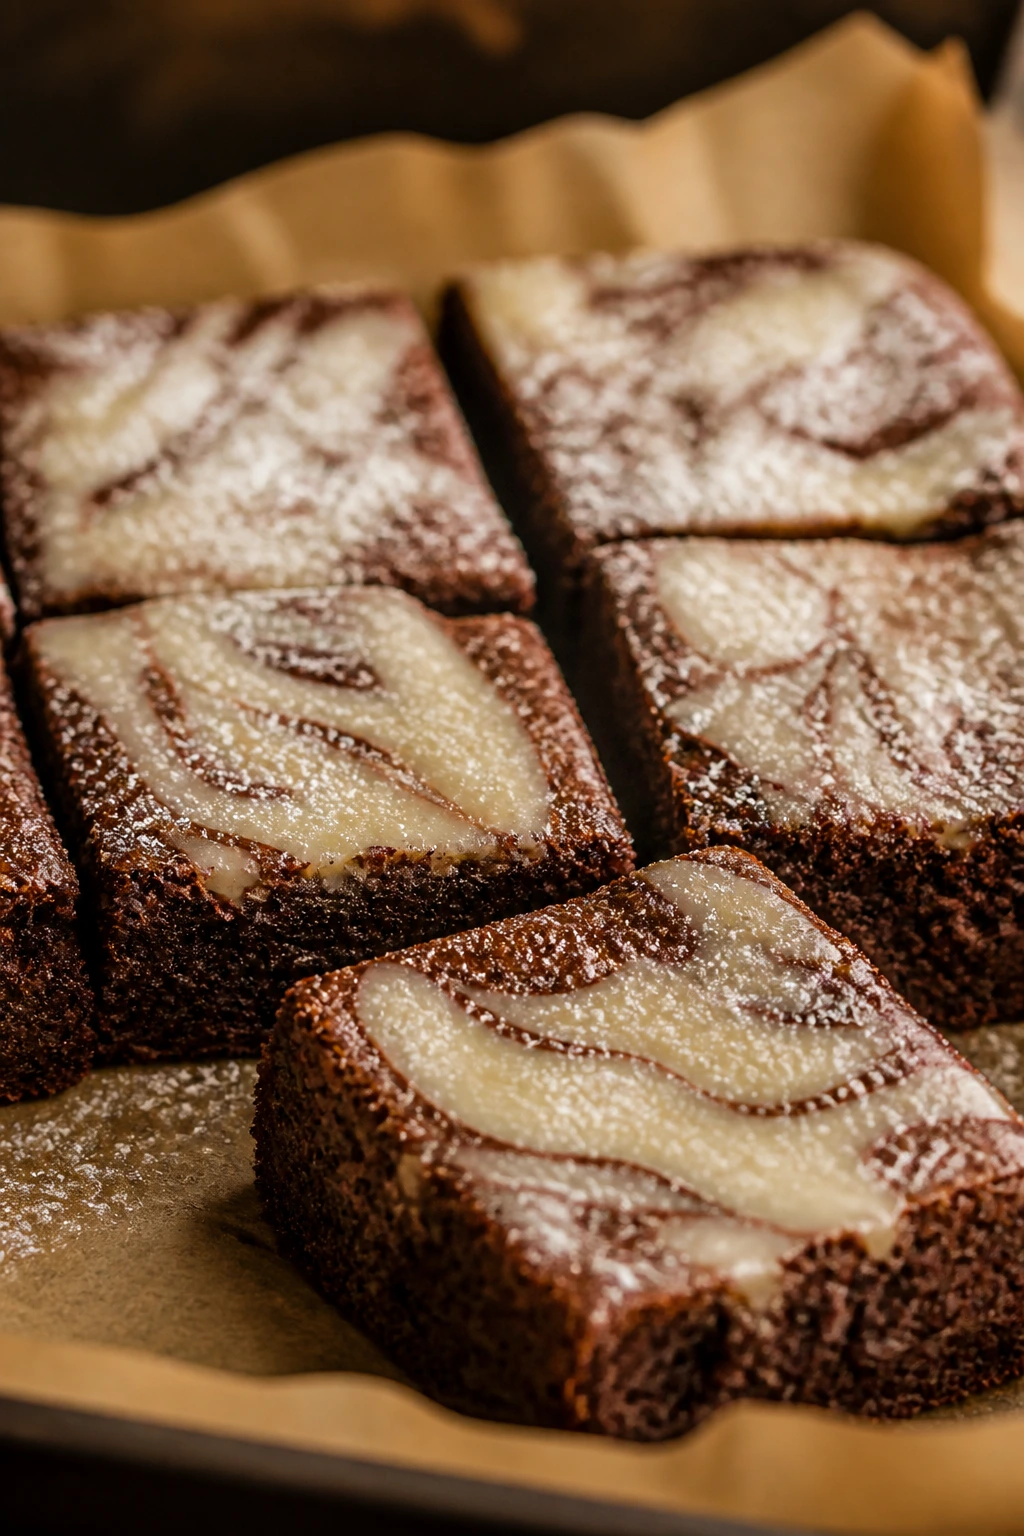
4. Eggnog Swirl Brownies
Intro:
Eggnog in brownie form sounds a little flashy until you taste it. Then it makes perfect sense. The chocolate base stays rich and dense, while the eggnog swirl bakes into a pale, custardy ribbon with nutmeg on top. Visually, it’s one of the prettiest pans in the whole collection.
Why It Works:
Eggnog already carries vanilla, nutmeg, and a creamy finish, so it behaves like a built-in flavor layer. Swirling it into brownie batter gives you contrast without a second pan of frosting. The key is keeping the swirl thick enough to stay distinct; if it’s too loose, it vanishes into the chocolate and the whole point is gone.
Key Ingredients:
- 1 cup unsalted butter
- 8 ounces semisweet chocolate
- 1 3/4 cups granulated sugar
- 3 large eggs
- 1 teaspoon vanilla extract
- 1 cup all-purpose flour
- 1/2 cup cocoa powder
- 1/2 teaspoon salt
- 4 ounces cream cheese, softened
- 1/3 cup eggnog
- 1/4 cup powdered sugar
- 1/2 teaspoon nutmeg, plus more for dusting
Quick Steps:
- Heat the oven to 350°F (175°C) and line a 9×13-inch pan with parchment.
- Melt the butter and chocolate, then whisk in sugar, eggs, and vanilla.
- Fold in flour, cocoa powder, and salt until just combined.
- Beat cream cheese, eggnog, powdered sugar, and nutmeg until smooth.
- Spread the brownie batter in the pan, dollop the eggnog mixture over the top, and swirl gently with a knife.
- Bake for 25 to 29 minutes, then cool and dust with a little nutmeg before slicing.
Equipment for This Recipe:
- 9×13-inch pan
- Mixing bowls
- Electric mixer or sturdy whisk
- Butter knife for swirling
- Fine sieve for nutmeg
How to Serve This Dish:
Serve these cold or at cool room temperature so the swirl stays clean. They look best on a dark plate, where the pale ribbon stands out.
Pro Tips for This Recipe:
- Use full-fat eggnog; thin versions make the swirl watery.
- Don’t swirl more than 5 or 6 passes with the knife, or the top turns muddy.
- Chill the pan for 20 minutes before cutting if you want the cleanest edges.
Variations on This Dish:
- Rum-Style Eggnog Brownies: Add 1 teaspoon rum extract to the swirl for a deeper holiday flavor.
- Nutmeg-Free Version: Skip the nutmeg and use vanilla bean paste for a softer profile.
Common Mistakes to Avoid with This Dish:
- Making the swirl too thin: It sinks into the batter and disappears.
- Over-mixing the top: That’s how you lose the marbled look.
- Cutting while warm: The swirl needs to firm up or it smears.
5. Hot Chocolate Marshmallow Brownies
Intro:
These taste like the drink you want after a cold walk, only in square form. The brownie itself is cocoa-heavy and soft, the top gets a layer of marshmallows, and a quick broil gives them those toasted brown peaks that look straight out of a bakery case. Messy in the best way.
Why It Works:
Hot chocolate works as a brownie theme because it has three things brownies already love: cocoa, milk chocolate, and marshmallow. The marshmallow layer is more than decoration. It gives the top a stretchy, toasted cap that changes the texture completely. One bite is fudgy, the next is airy and caramelized.
Key Ingredients:
- 1 cup unsalted butter
- 1 cup dark chocolate chips
- 1 1/2 cups granulated sugar
- 3 large eggs
- 2 tablespoons hot cocoa mix
- 1 cup all-purpose flour
- 1/2 cup cocoa powder
- 1/2 teaspoon salt
- 1 cup mini marshmallows
- 1/2 cup milk chocolate chips
- 1/4 cup chocolate sauce or ganache
Quick Steps:
- Preheat the oven to 350°F (175°C) and line a 9×13-inch pan.
- Melt the butter and dark chocolate together, then whisk in the sugar and eggs.
- Stir in hot cocoa mix, flour, cocoa powder, and salt until the batter is smooth.
- Fold in the milk chocolate chips and spread the batter in the pan.
- Bake for 22 to 25 minutes, then scatter mini marshmallows on top and broil for 20 to 40 seconds until puffed and toasted.
- Cool briefly, drizzle with chocolate sauce, and cut once the topping has set enough to hold.
Equipment for This Recipe:
- 9×13-inch pan
- Broiler-safe oven
- Offset spatula
- Mixing bowls
- Parchment paper
How to Serve This Dish:
Serve these while the marshmallow top is still a little sticky. A cold glass of milk is the obvious partner, and honestly, it works.
Pro Tips for This Recipe:
- Watch the broiler like a hawk; marshmallows go from golden to burned fast.
- If your broiler runs hot, toast the marshmallows with the oven door cracked open for less than 30 seconds.
- A few crushed graham crackers on top make the pan look more finished.
Variations on This Dish:
- Peppermint Cocoa Brownies: Add 1/4 teaspoon peppermint extract to the batter and a few crushed candy canes on top.
- Mocha Marshmallow: Add 1 teaspoon espresso powder for a darker, deeper chocolate note.
Common Mistakes to Avoid with This Dish:
- Using too many marshmallows: The top can turn gummy instead of toasty.
- Broiling for too long: Burned marshmallows taste bitter and look patchy.
- Cutting too soon after broiling: Let the marshmallow layer settle for a few minutes first.
6. Red Velvet Cheesecake Brownies
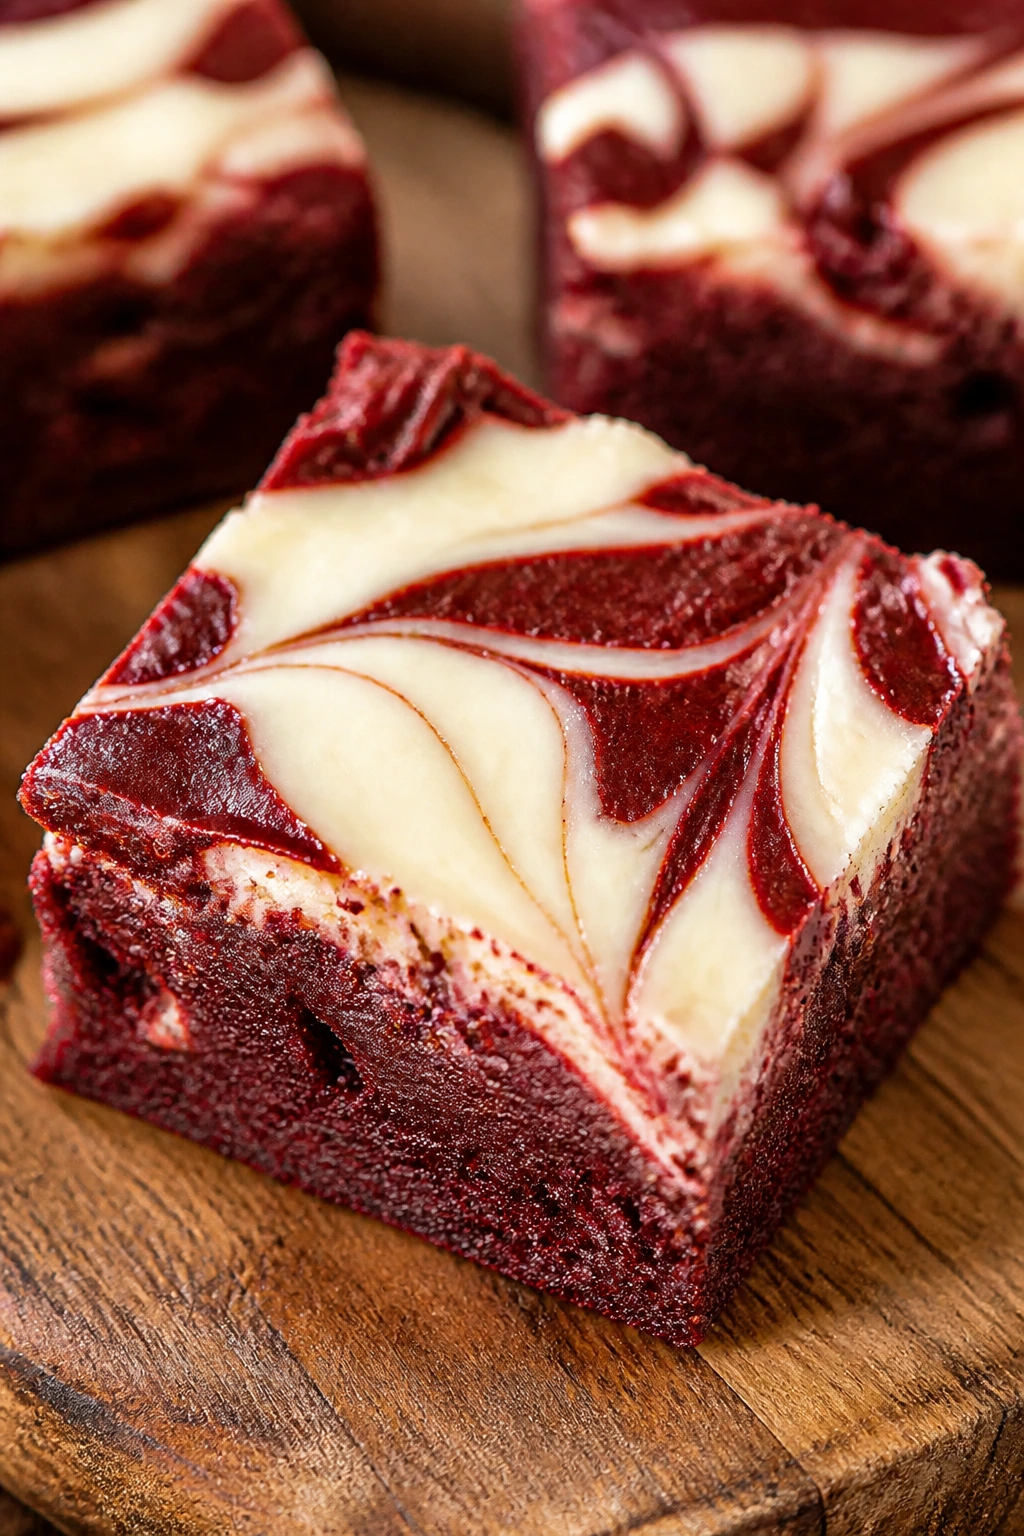
Intro:
Red velvet brownies are the ones that get people leaning over the platter before dessert is even announced. The chocolate base is tinted red, the cheesecake swirl cuts through it in bright white ribbons, and every square looks like it took some effort. It did. Not too much, though.
Why It Works:
Red velvet needs just enough cocoa to taste like chocolate and just enough acid or creaminess to stay plush. In brownie form, it gets even more forgiving. The cheesecake swirl gives you a creamy bite that makes the red color pop harder, and the contrast is strongest if you keep the swirl thick and broad rather than over-marbling everything into pink.
Key Ingredients:
- 1 cup unsalted butter
- 8 ounces semisweet chocolate
- 1 3/4 cups granulated sugar
- 3 large eggs
- 2 teaspoons red gel food coloring
- 1 tablespoon cocoa powder
- 1 cup all-purpose flour
- 1/2 teaspoon salt
- 8 ounces cream cheese, softened
- 1/3 cup granulated sugar
- 1 large egg
- 1 teaspoon vanilla extract
Quick Steps:
- Preheat the oven to 350°F (175°C) and line a 9×13-inch pan with parchment.
- Melt the butter and chocolate, then whisk in the sugar, eggs, food coloring, and cocoa powder.
- Fold in the flour and salt until no dry streaks remain.
- Beat the cream cheese, sugar, egg, and vanilla until smooth.
- Spread the red brownie batter in the pan, dollop the cheesecake mixture across the top, and drag a knife through it in wide S-shapes.
- Bake for 26 to 30 minutes, then cool completely before slicing.
Equipment for This Recipe:
- 9×13-inch pan
- Electric mixer
- Mixing bowls
- Knife for swirling
- Parchment paper
How to Serve This Dish:
These look best cut into exact squares with a damp, warm knife wiped clean between slices. Serve them plain; the color contrast does all the talking.
Pro Tips for This Recipe:
- Use gel food coloring, not liquid, or the batter gets too loose.
- Keep the cheesecake swirl thick enough to sit on top in ribbons.
- Chill the brownies before slicing if you want sharp edges on the red and white pattern.
Variations on This Dish:
- Cocoa-Forward Version: Add another tablespoon of cocoa if you want the chocolate flavor a little darker.
- Cream Cheese Only Top: Skip the red tint and keep the batter classic if you want the marbling to stand out more.
Common Mistakes to Avoid with This Dish:
- Using too much food coloring: The batter can get thin and bake oddly.
- Over-swirling: Pink mud is not the goal.
- Slicing warm: The cheesecake layer will smear and stick to the knife.
7. Cookie Butter Brownies
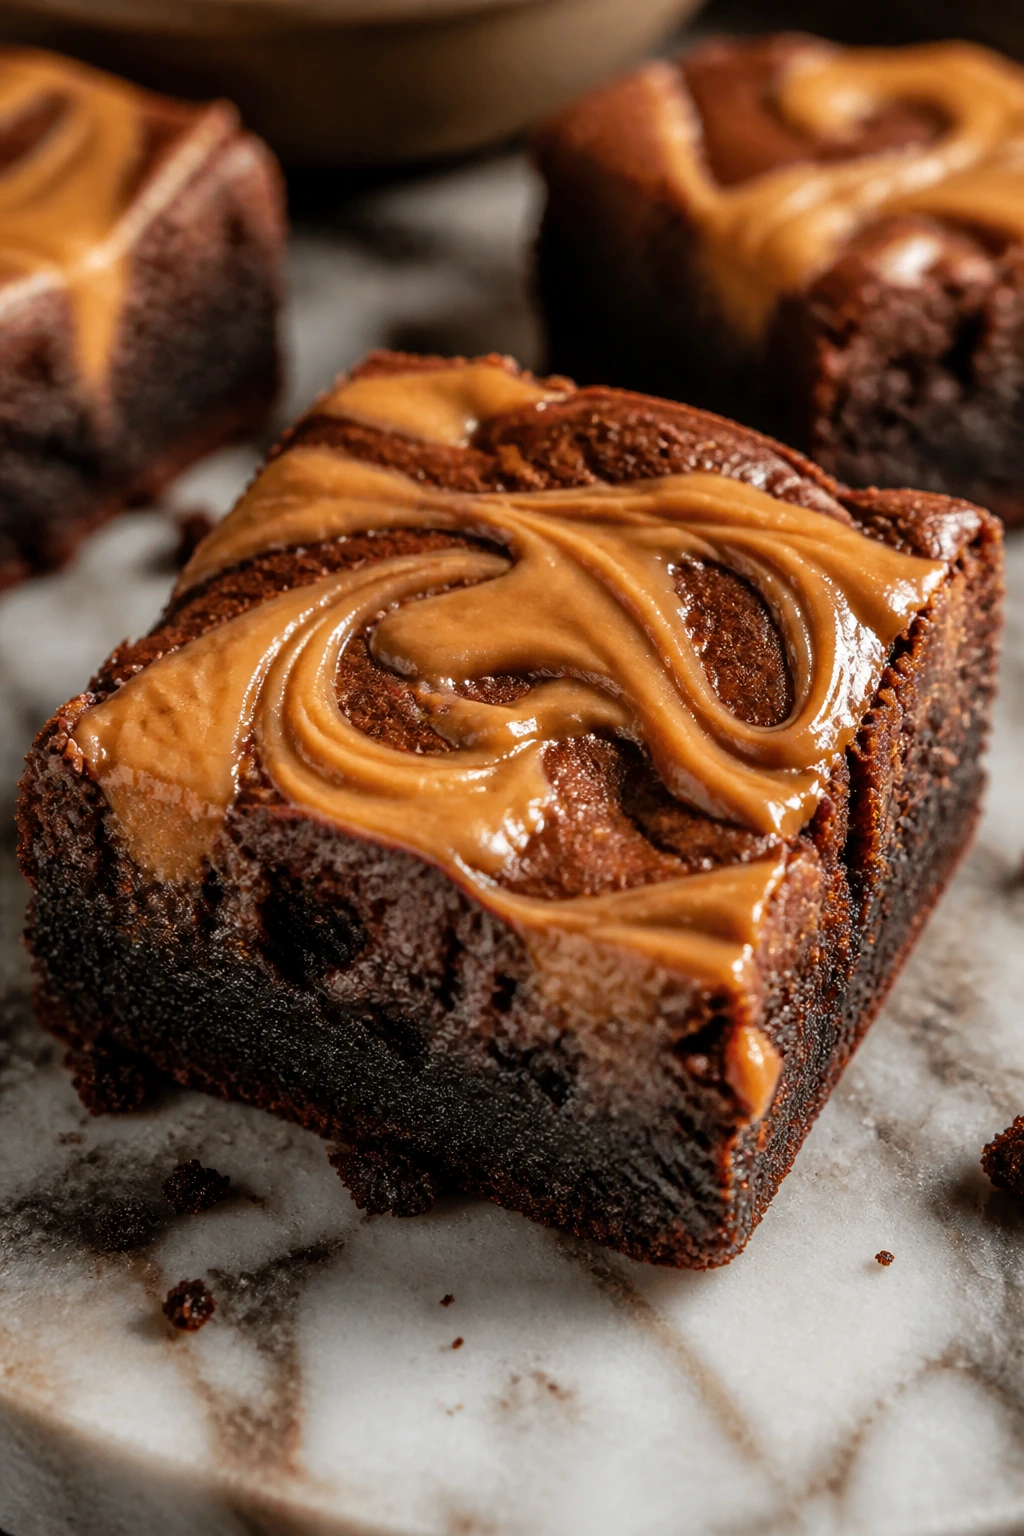
Intro:
Cookie butter brownies taste like somebody spread a spiced biscuit across a chocolate pan and had excellent judgment. The brownie base is rich and dense, the cookie butter swirls into caramel-colored ribbons, and the top gets a scatter of crushed speculoos cookies that bake into little crunchy edges. They’re a little dangerous. That’s part of the charm.
Why It Works:
Cookie butter brings cinnamon, brown sugar, and a dry-cookie flavor that plays well with dark chocolate. It also makes the top look marbled without needing a fussy frosting job. A warm spoonful of cookie butter swirled into the pan gives you those streaks people always think are harder to make than they are.
Key Ingredients:
- 1 cup unsalted butter
- 8 ounces semisweet chocolate
- 1 1/2 cups granulated sugar
- 3 large eggs
- 1 teaspoon vanilla extract
- 1 cup all-purpose flour
- 1/2 cup cocoa powder
- 1/2 teaspoon salt
- 3/4 cup cookie butter, warmed slightly
- 8 to 10 speculoos cookies, crushed
Quick Steps:
- Preheat the oven to 350°F (175°C) and line a 9×13-inch pan.
- Melt the butter and chocolate, then whisk in sugar, eggs, and vanilla.
- Fold in flour, cocoa powder, and salt until the batter is smooth.
- Spread the batter in the pan, drizzle the warmed cookie butter over the top, and swirl it lightly with a knife.
- Sprinkle crushed cookies across the surface and bake for 24 to 28 minutes.
- Cool fully before slicing so the swirls hold their shape.
Equipment for This Recipe:
- 9×13-inch baking pan
- Small saucepan or microwave-safe bowl for warming cookie butter
- Knife or skewer for swirling
- Parchment paper
- Offset spatula
How to Serve This Dish:
Serve these in small squares; the cookie butter richness builds fast. A scoop of vanilla ice cream turns them into a proper plate dessert without much effort.
Pro Tips for This Recipe:
- Warm the cookie butter just enough to drizzle; if it’s hot, it melts right into the batter.
- Use a light hand with the swirl so the top stays marbled, not blended.
- Save a few cookie crumbs for after baking if you want extra crunch on top.
Variations on This Dish:
- White Chocolate Cookie Butter: Add 1/2 cup white chocolate chips for a sweeter, creamier bite.
- Extra Crunch Top: Press whole speculoos cookies halfway into the batter before baking.
Common Mistakes to Avoid with This Dish:
- Using cold cookie butter: It won’t swirl; it will tear the batter.
- Overdoing the cookie crumbs: Too much on top can block the brownie from setting evenly.
- Baking too long: Cookie butter brownies dry out faster than plain ones if you push the time.
8. Salted Caramel Pretzel Brownies
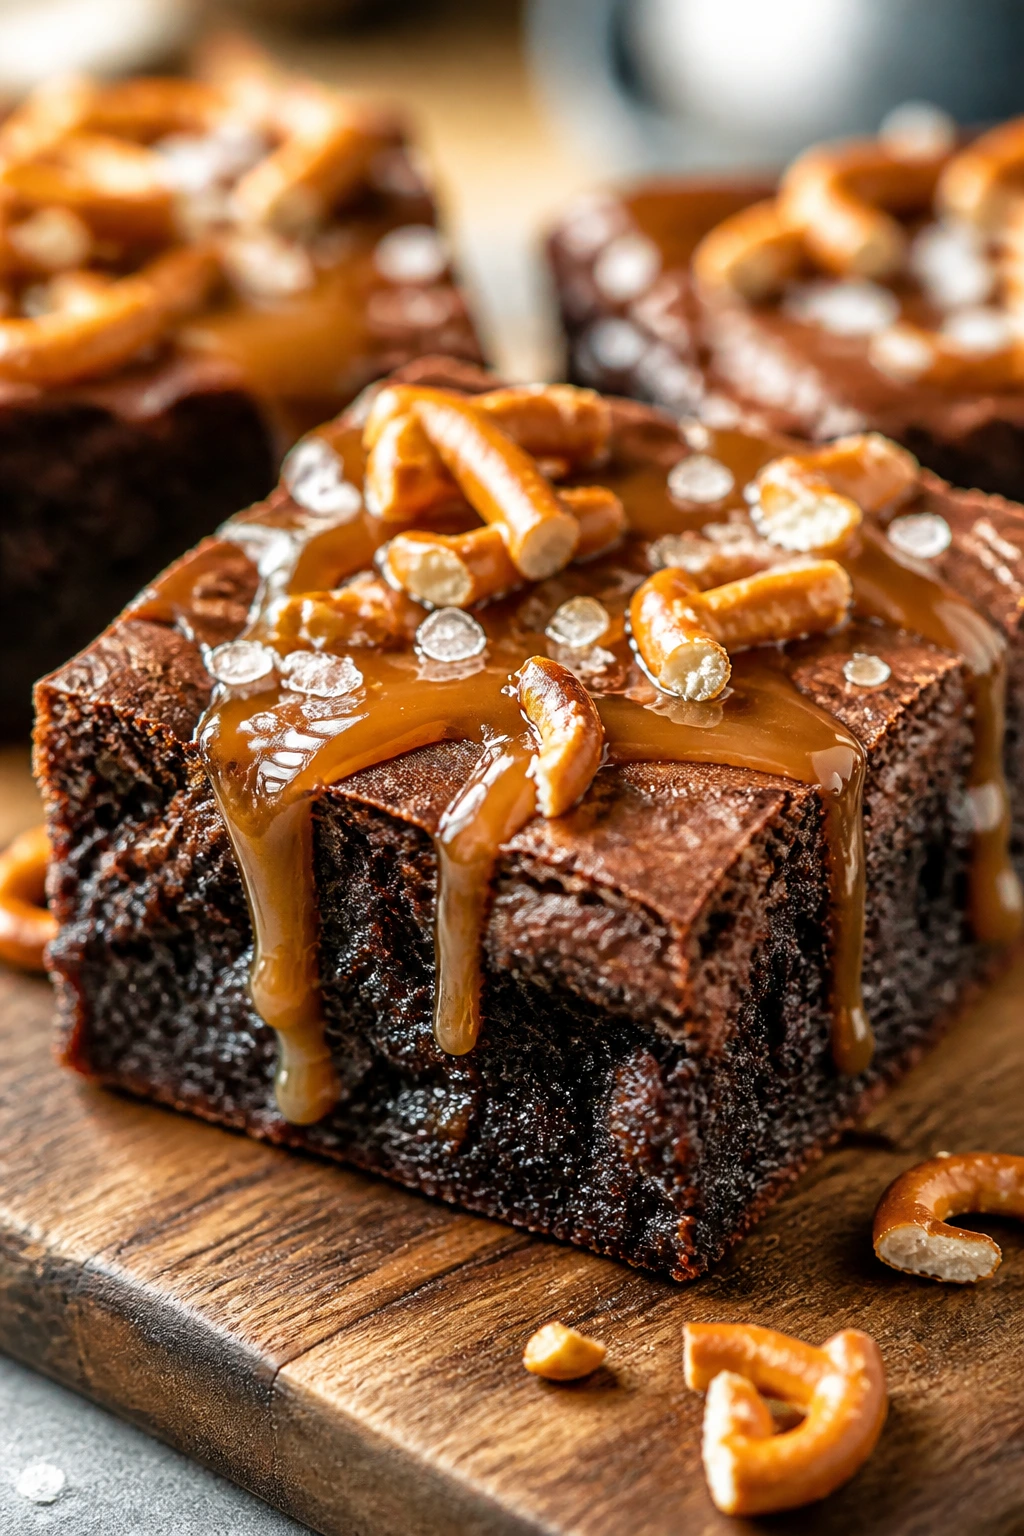
Intro:
This is the brownie for people who want sweet, salty, crunchy, and fudgy in the same bite. Pretzels line the top like little rails, caramel drips into the cracks, and a few flakes of salt keep the whole thing from tipping into candy-bar territory. The contrast is the point.
Why It Works:
Chocolate and caramel are already a strong pair, but pretzels add texture that keeps every bite from feeling soft and samey. The salt matters more than people think; it sharpens the caramel and stops the brownie from reading as one-note sweet. A brownie like this should look slightly unruly, with glossy caramel pooling between pretzel pieces.
Key Ingredients:
- 1 cup unsalted butter
- 8 ounces bittersweet chocolate
- 1 3/4 cups granulated sugar
- 3 large eggs
- 1 cup all-purpose flour
- 1/2 cup cocoa powder
- 1/2 teaspoon salt
- 1 cup mini pretzels, lightly crushed
- 1/2 cup soft caramel sauce
- 1 teaspoon flaky sea salt
Quick Steps:
- Heat the oven to 350°F (175°C) and line a 9×13-inch pan.
- Melt the butter and chocolate together, then whisk in sugar and eggs until glossy.
- Fold in flour, cocoa powder, salt, and half the pretzels.
- Spread the batter in the pan, then scatter the remaining pretzels over the top.
- Bake for 23 to 27 minutes, cool for 15 minutes, then drizzle with caramel and finish with flaky sea salt.
- Let the caramel set before cutting.
Equipment for This Recipe:
- 9×13-inch pan
- Mixing bowl
- Rubber spatula
- Spoon for caramel
- Parchment paper
How to Serve This Dish:
These look best served on a plain tray where the caramel and salt can stand out. Cut them into modest squares; they’re richer than they first appear.
Pro Tips for This Recipe:
- Crush the pretzels by hand so you get both shards and chunks.
- Add the caramel after the brownies have cooled a bit, or it will slide off.
- Use flaky salt, not fine salt, for the finish; you want visible crystals.
Variations on This Dish:
- Chocolate-Only Base: Skip the caramel drizzle and use dark chocolate chunks for a cleaner look.
- Peanut Butter Pretzel: Swirl in 1/3 cup peanut butter with the caramel if your crowd likes a sweeter, saltier finish.
Common Mistakes to Avoid with This Dish:
- Adding too much caramel: The top turns slippery and hard to slice.
- Using soft pretzels: They go stale and chewy in the wrong way.
- Forgetting the salt: Without it, the caramel can taste flat.
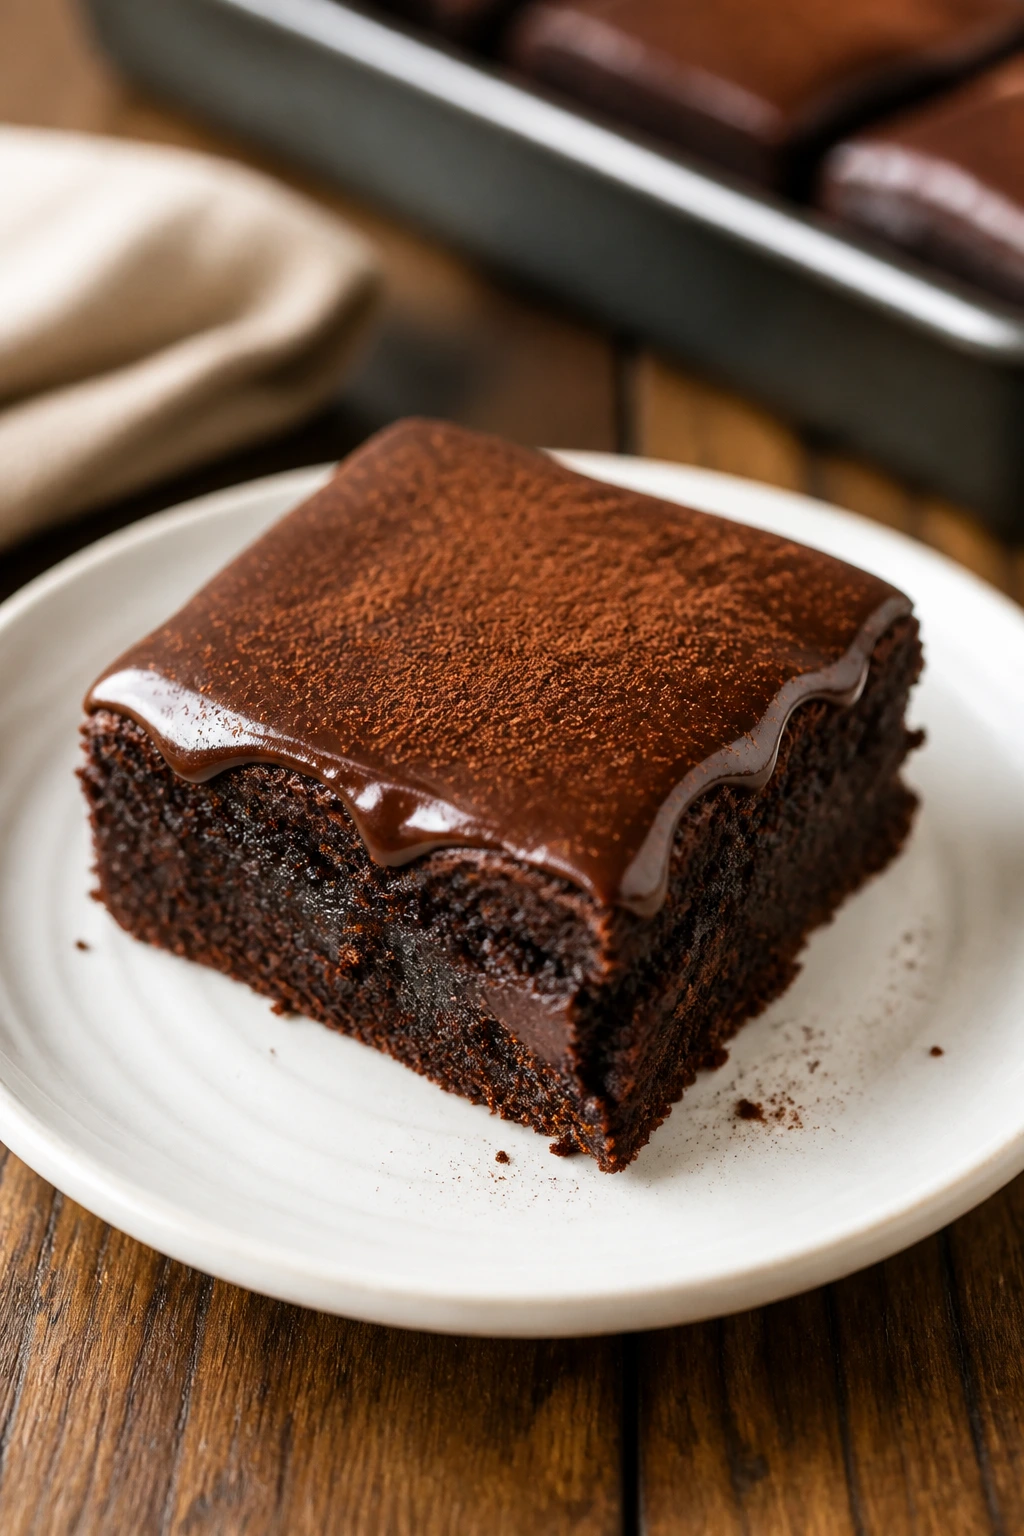
9. Tiramisu Brownies
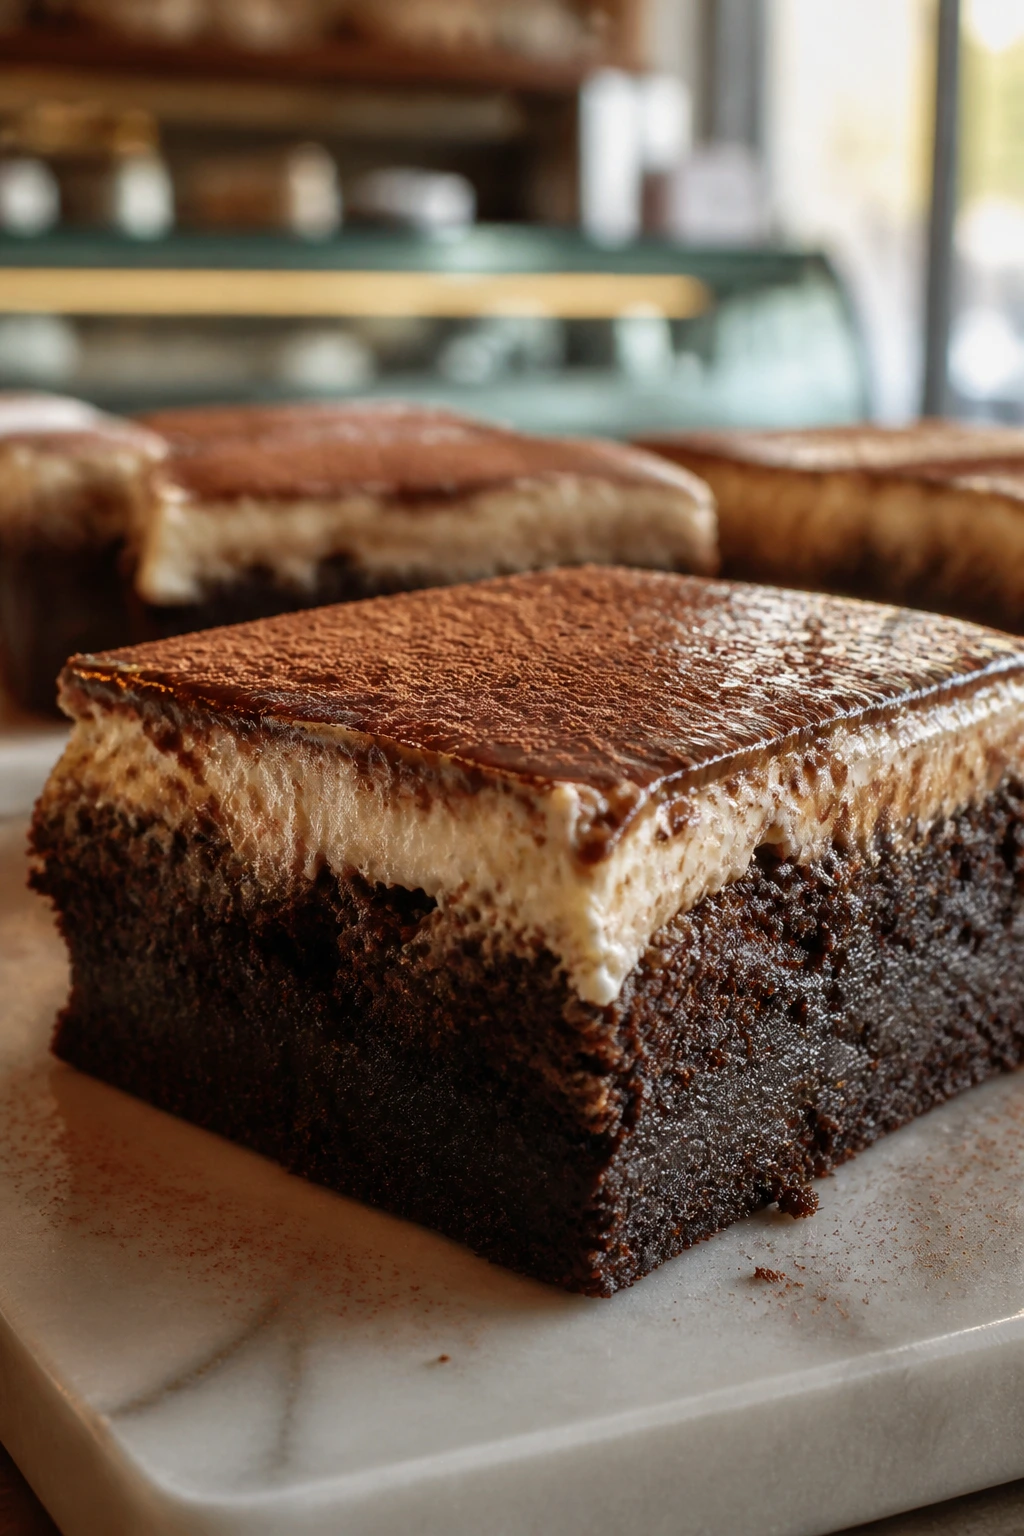
Intro:
Tiramisu brownies are the most elegant thing in this collection, and I mean that in the least fussy way possible. Coffee deepens the chocolate, mascarpone cream gets piped or spread on top, and cocoa dust gives you that familiar finish. They look fancy. They taste like a dessert you’d order after dinner and then regret not ordering a second slice of.
Why It Works:
Tiramisu is built on contrast: bitter coffee, creamy dairy, and dusted cocoa. Brownies already carry the cocoa part, so the recipe only needs to lean into espresso and mascarpone to make the connection obvious. Chilling matters here because the cream layer firms up and slices cleanly instead of squishing out the sides.
Key Ingredients:
- 1 cup unsalted butter
- 8 ounces semisweet chocolate
- 1 1/2 cups granulated sugar
- 3 large eggs
- 2 teaspoons espresso powder
- 1 cup all-purpose flour
- 1/2 cup cocoa powder
- 1/2 teaspoon salt
- 8 ounces mascarpone cheese, softened
- 1/2 cup heavy cream
- 1/2 cup powdered sugar
- 1 teaspoon vanilla extract
- Cocoa powder for dusting
Quick Steps:
- Preheat the oven to 350°F (175°C) and line a 9×13-inch pan.
- Melt the butter and chocolate, then whisk in sugar, eggs, and espresso powder.
- Fold in flour, cocoa powder, and salt until just combined, then bake for 24 to 28 minutes.
- Cool the brownies completely.
- Whip the mascarpone, heavy cream, powdered sugar, and vanilla until thick and spreadable.
- Spread or pipe the cream over the brownies and dust the top with cocoa powder before chilling for at least 1 hour.
Equipment for This Recipe:
- 9×13-inch pan
- Stand mixer or hand mixer
- Offset spatula
- Fine-mesh sieve for cocoa
- Parchment paper
How to Serve This Dish:
Serve these chilled, cut with a hot knife wiped dry between slices. They sit especially well on a long platter with a few chocolate-covered espresso beans scattered nearby.
Pro Tips for This Recipe:
- Use mascarpone that’s softened but still cool; if it’s too warm, the cream gets loose.
- Dust the cocoa right before serving so it stays deep brown instead of damp.
- A little more espresso powder is fine if you want a stronger coffee note, but keep it under 1 tablespoon total.
Variations on This Dish:
- Amaretto Style: Add 1 teaspoon almond extract to the cream for a softer, nutty finish.
- Individual Squares: Pipe the mascarpone in rosettes if you want each brownie to look plated.
Common Mistakes to Avoid with This Dish:
- Spreading warm brownies with mascarpone: The topping melts and slides.
- Using grainy cocoa on top: Sift it. Always.
- Skipping the chill time: The cream layer needs that hour to set.
10. Pistachio Rose Brownies
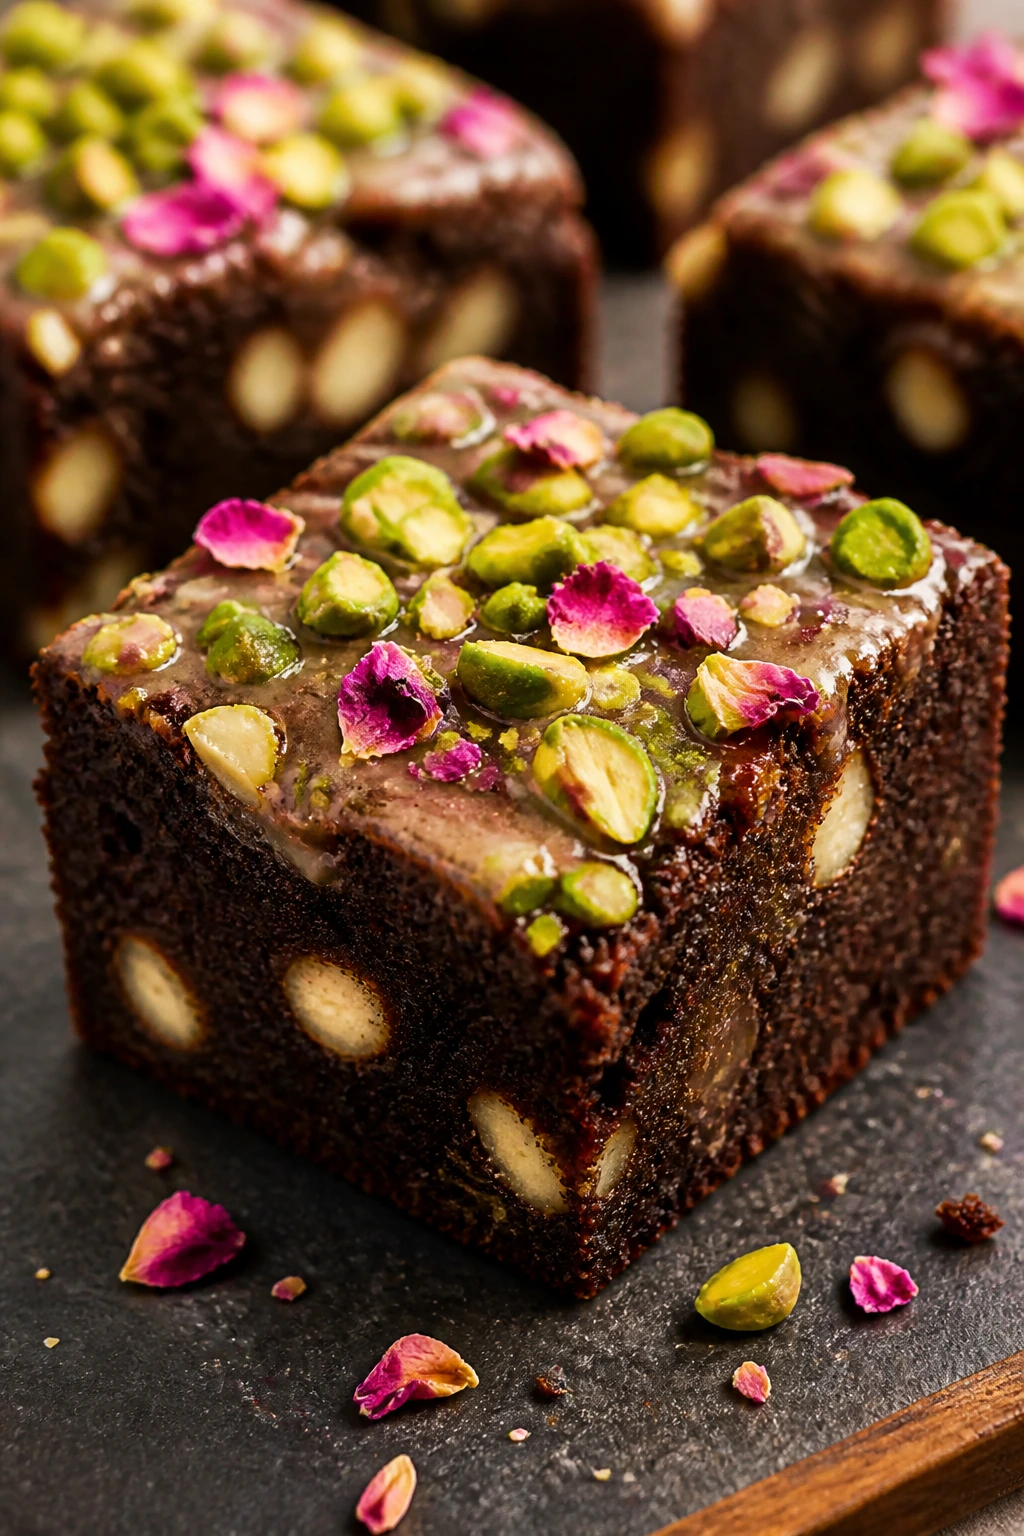
Intro:
If you want brownies that look unusual in a good way, this is the pan. Pistachios bring color and crunch, white chocolate softens the edges, and a trace of rosewater in the glaze gives the whole thing a floral note that reads as festive rather than perfume-y. Done carefully, it’s lovely.
Why It Works:
Pistachios give you color that chocolate can’t provide on its own, and the green against dark brown looks striking on a dessert tray. Rosewater is potent, so the trick is restraint; a few drops create fragrance without taking over the bite. White chocolate helps bridge the gap between the earthy nuts and the flower note.
Key Ingredients:
- 1 cup unsalted butter
- 8 ounces semisweet chocolate
- 1 1/2 cups granulated sugar
- 3 large eggs
- 1 cup all-purpose flour
- 1/2 cup cocoa powder
- 1/2 teaspoon salt
- 3/4 cup chopped pistachios, plus more for topping
- 1/2 cup white chocolate chips
- 1 cup powdered sugar
- 1 to 2 teaspoons milk
- 1/4 teaspoon rosewater
Quick Steps:
- Preheat the oven to 350°F (175°C) and line a 9×13-inch pan.
- Melt the butter and semisweet chocolate, then whisk in sugar and eggs until smooth.
- Fold in flour, cocoa powder, salt, pistachios, and white chocolate chips.
- Bake for 24 to 27 minutes, then cool completely.
- Stir powdered sugar, milk, and rosewater into a thick glaze and drizzle it over the brownies.
- Finish with chopped pistachios before the glaze sets.
Equipment for This Recipe:
- 9×13-inch pan
- Mixing bowls
- Whisk
- Spoon for drizzling
- Parchment paper
How to Serve This Dish:
These look best cut into small rectangles or diamonds, where the pistachios read as a border. They’re strong enough to stand alone, no ice cream needed.
Pro Tips for This Recipe:
- Measure rosewater carefully; even an extra half teaspoon can dominate the pan.
- Chop the pistachios unevenly so the top looks textured instead of sandy.
- Use unsalted pistachios so the glaze doesn’t taste noisy.
Variations on This Dish:
- Cardamom Pistachio: Add 1/2 teaspoon ground cardamom for a warmer spice note.
- Orange-Rose Version: Add 1 teaspoon orange zest to the batter if you want the floral note to feel brighter.
Common Mistakes to Avoid with This Dish:
- Using too much rosewater: The flavor turns sharp and soap-like.
- Adding pistachios after baking only: A few in the batter help the color spread through the slice.
- Cutting before fully cool: The glaze will drag and tear.
11. Raspberry White Chocolate Brownies
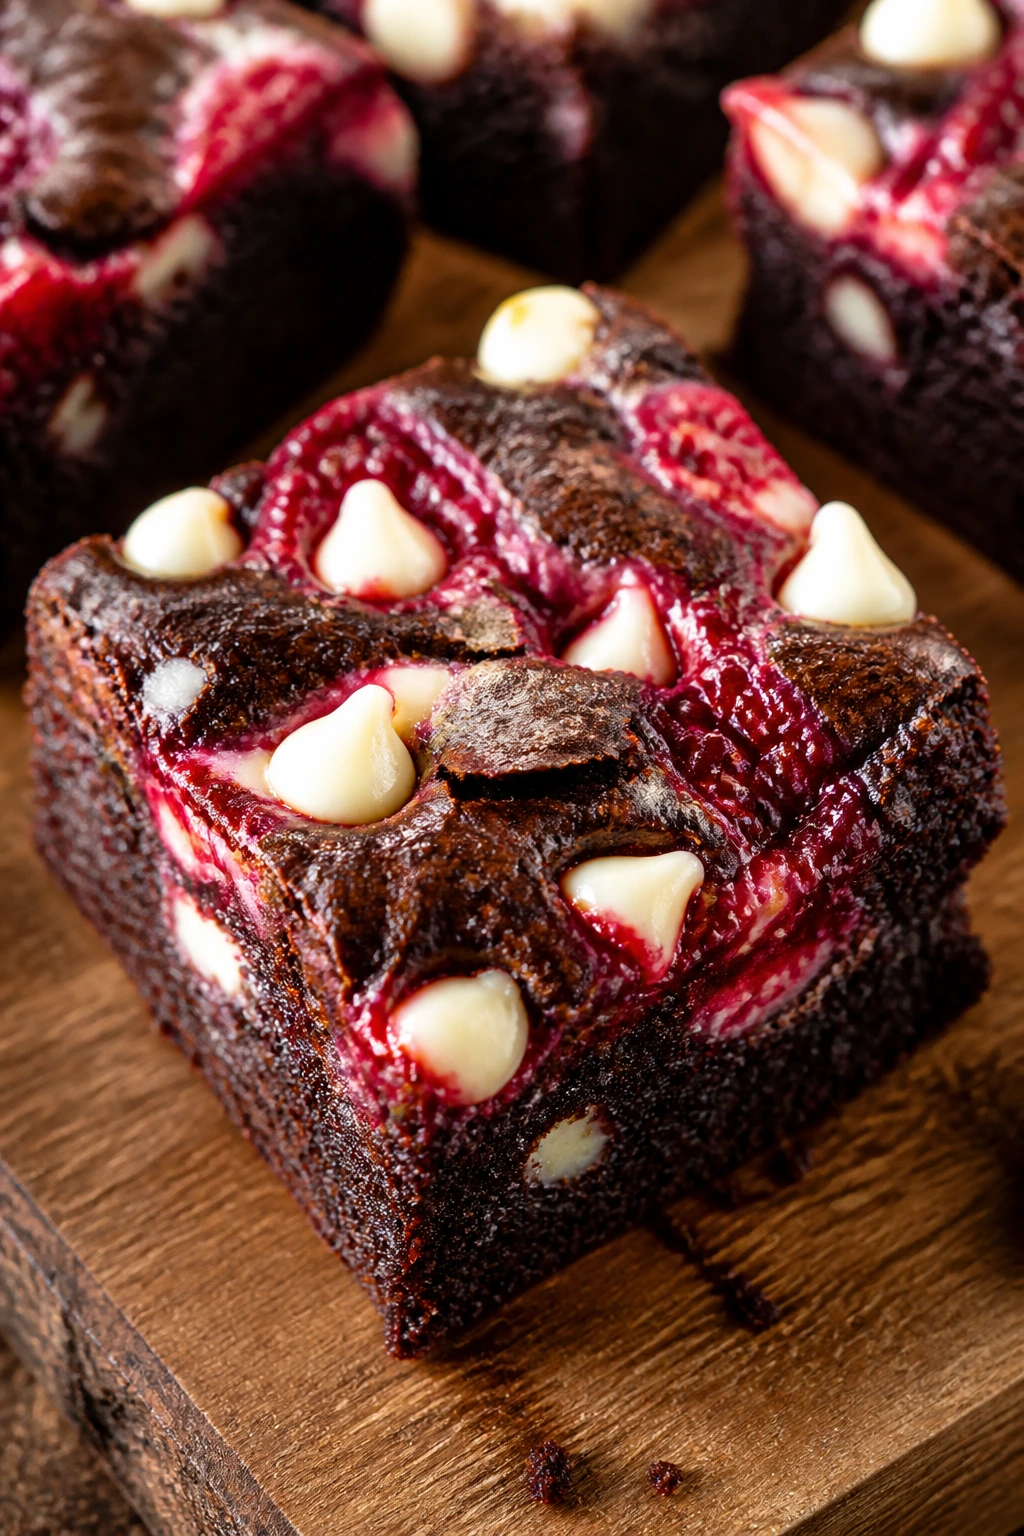
Intro:
These brownies look like someone took a sharp red paintbrush to a chocolate canvas. Raspberries streak the top in ruby bursts, white chocolate gives the pan little flashes of cream, and the fruit’s tartness keeps the dessert from drifting into pure sugar. They’re pretty in a way that still feels casual.
Why It Works:
Raspberry and chocolate is one of those pairings that never really gets old because the fruit cuts the fat and the cocoa rounds off the acid. White chocolate adds a softer sweetness and makes the red fruit stand out harder. Fresh raspberries work best when you want bright, defined pockets rather than a fully jammy top.
Key Ingredients:
- 1 cup unsalted butter
- 8 ounces semisweet chocolate
- 1 3/4 cups granulated sugar
- 3 large eggs
- 1 cup all-purpose flour
- 1/2 cup cocoa powder
- 1/2 teaspoon salt
- 1 cup fresh raspberries
- 3/4 cup white chocolate chips
- 2 tablespoons raspberry jam
Quick Steps:
- Preheat the oven to 350°F (175°C) and line a 9×13-inch pan.
- Melt the butter and chocolate, then whisk in sugar and eggs until glossy.
- Fold in flour, cocoa powder, salt, and white chocolate chips.
- Spread the batter in the pan, dot the surface with raspberry jam, and press the raspberries lightly into the top.
- Bake for 23 to 26 minutes, until the edges are set.
- Cool completely before slicing so the berries don’t tear the surface.
Equipment for This Recipe:
- 9×13-inch pan
- Mixing bowls
- Rubber spatula
- Small spoon for jam
- Parchment paper
How to Serve This Dish:
Serve these at room temperature so the chocolate stays soft and the berries keep their shine. A few extra raspberries around the platter make the whole pan look more deliberate.
Pro Tips for This Recipe:
- Pat the raspberries dry if they’ve just come from the fridge.
- Don’t bury the berries; they need to sit on top to keep the surface pretty.
- A light dusting of powdered sugar right before serving makes the top look finished.
Variations on This Dish:
- Black Raspberry Twist: Use black raspberries if you want a deeper color and a slightly earthier flavor.
- Raspberry Ganache Finish: Replace the jam with a thin layer of chocolate ganache swirled with raspberry purée.
Common Mistakes to Avoid with This Dish:
- Using too many berries: The brownies can turn wet and sink in the middle.
- Mixing the jam into the batter: You lose the visual streaks.
- Cutting warm: Fresh raspberries will smear all over the knife.
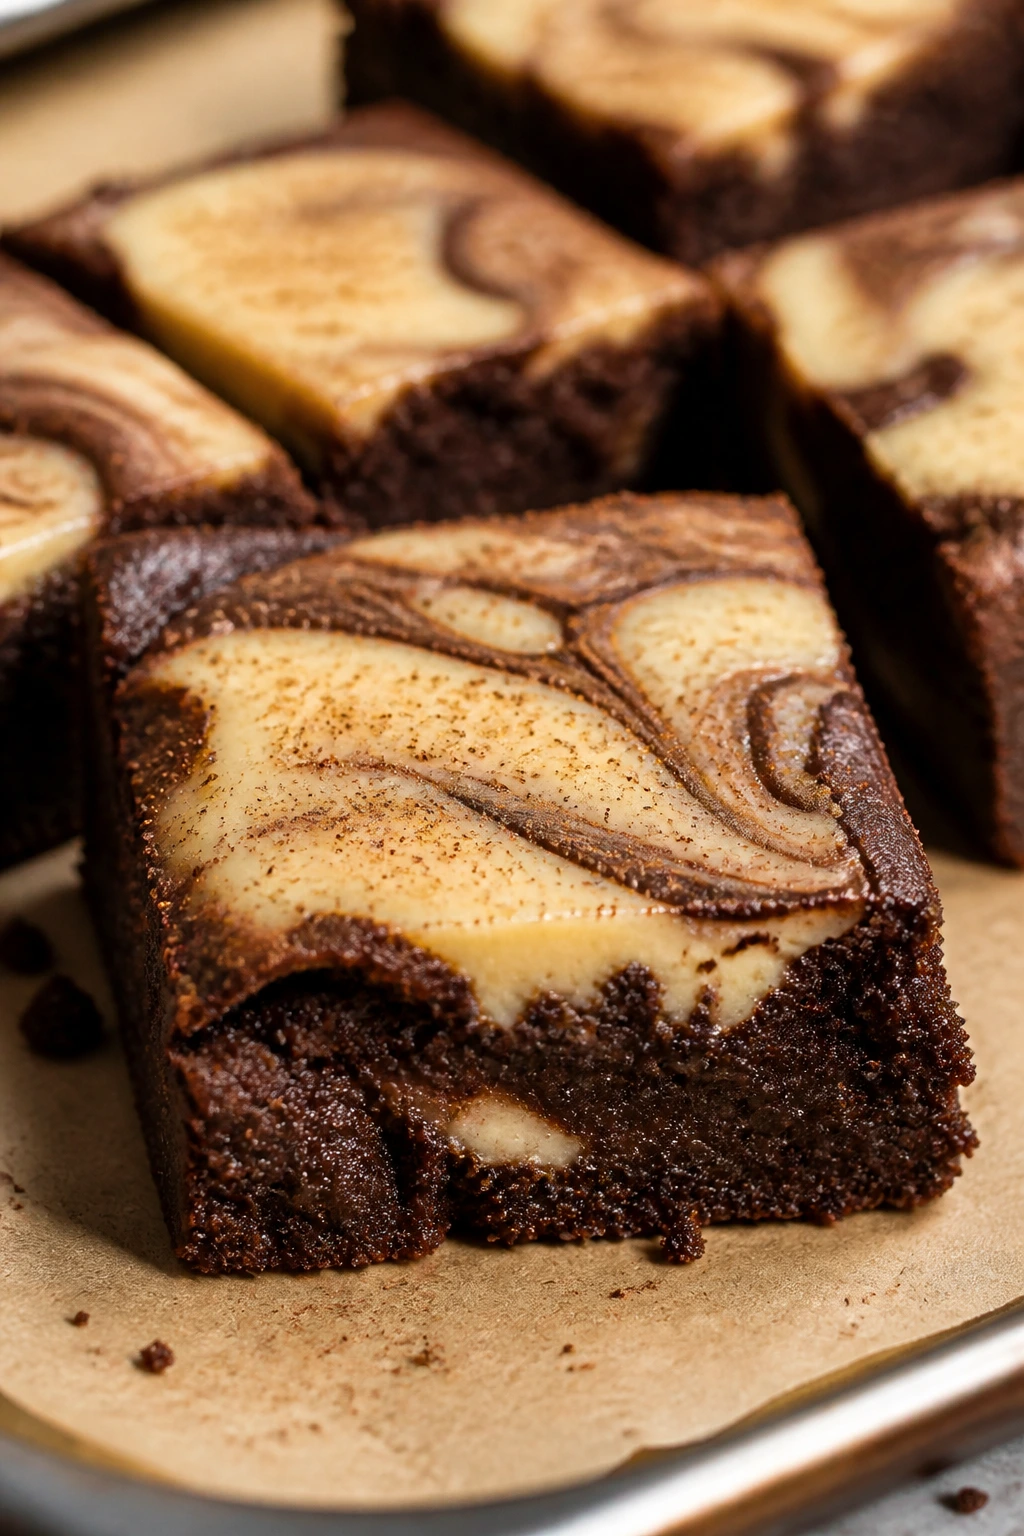
12. Pumpkin Cheesecake Brownies

Intro:
Pumpkin brownies are what happen when fall dessert energy meets a chocolate pan and decides to stay awhile. The brownie layer is rich and dark, the pumpkin cheesecake ribbon is pale and spiced, and the top ends up with those dramatic marbled lines that look far more difficult than they are. They’re one of the easiest ways to make a tray feel seasonal without leaning on frosting mountains.
Why It Works:
Pumpkin puree adds moisture and a soft earthiness, but it can flatten a batter if you use too much. That’s why it belongs in the cheesecake swirl rather than the brownie base. The swirl keeps the pumpkin separate, so you get visible contrast and a cleaner texture in each bite.
Key Ingredients:
- 1 cup unsalted butter
- 8 ounces semisweet chocolate
- 1 3/4 cups granulated sugar
- 3 large eggs
- 1 cup all-purpose flour
- 1/2 cup cocoa powder
- 1/2 teaspoon salt
- 8 ounces cream cheese, softened
- 1/2 cup pumpkin puree
- 1/4 cup granulated sugar
- 1 large egg
- 1 teaspoon vanilla extract
- 1 teaspoon pumpkin pie spice
Quick Steps:
- Preheat the oven to 350°F (175°C) and line a 9×13-inch pan.
- Melt the butter and chocolate, then whisk in sugar and eggs until smooth.
- Fold in flour, cocoa powder, and salt, then spread the batter in the pan.
- Beat the cream cheese, pumpkin puree, sugar, egg, vanilla, and pumpkin pie spice until silky.
- Spoon the pumpkin mixture over the brownie batter and swirl it gently with a knife.
- Bake for 26 to 30 minutes, then cool completely and chill before slicing.
Equipment for This Recipe:
- 9×13-inch baking pan
- Mixer
- Mixing bowls
- Knife for swirling
- Parchment paper
How to Serve This Dish:
These look best chilled and cut into squares, where the marbling stays crisp. A few toasted pepitas on top add a nice bit of crunch.
Pro Tips for This Recipe:
- Use canned pumpkin puree, not pumpkin pie filling.
- Keep the pumpkin layer thick enough to sit on top in ribbons.
- Chill before cutting so the cheesecake swirl doesn’t squish out.
Variations on This Dish:
- Maple Pumpkin: Replace 2 tablespoons of the sugar in the swirl with maple syrup for a softer sweetness.
- Extra-Spice Top: Add a pinch of extra cinnamon to the brownie batter if you want a stronger spice note.
Common Mistakes to Avoid with This Dish:
- Using too much pumpkin: The swirl becomes watery and loses its shape.
- Underbaking the center: The cheesecake layer needs time to set.
- Cutting warm: The marbled top will tear instead of slice cleanly.
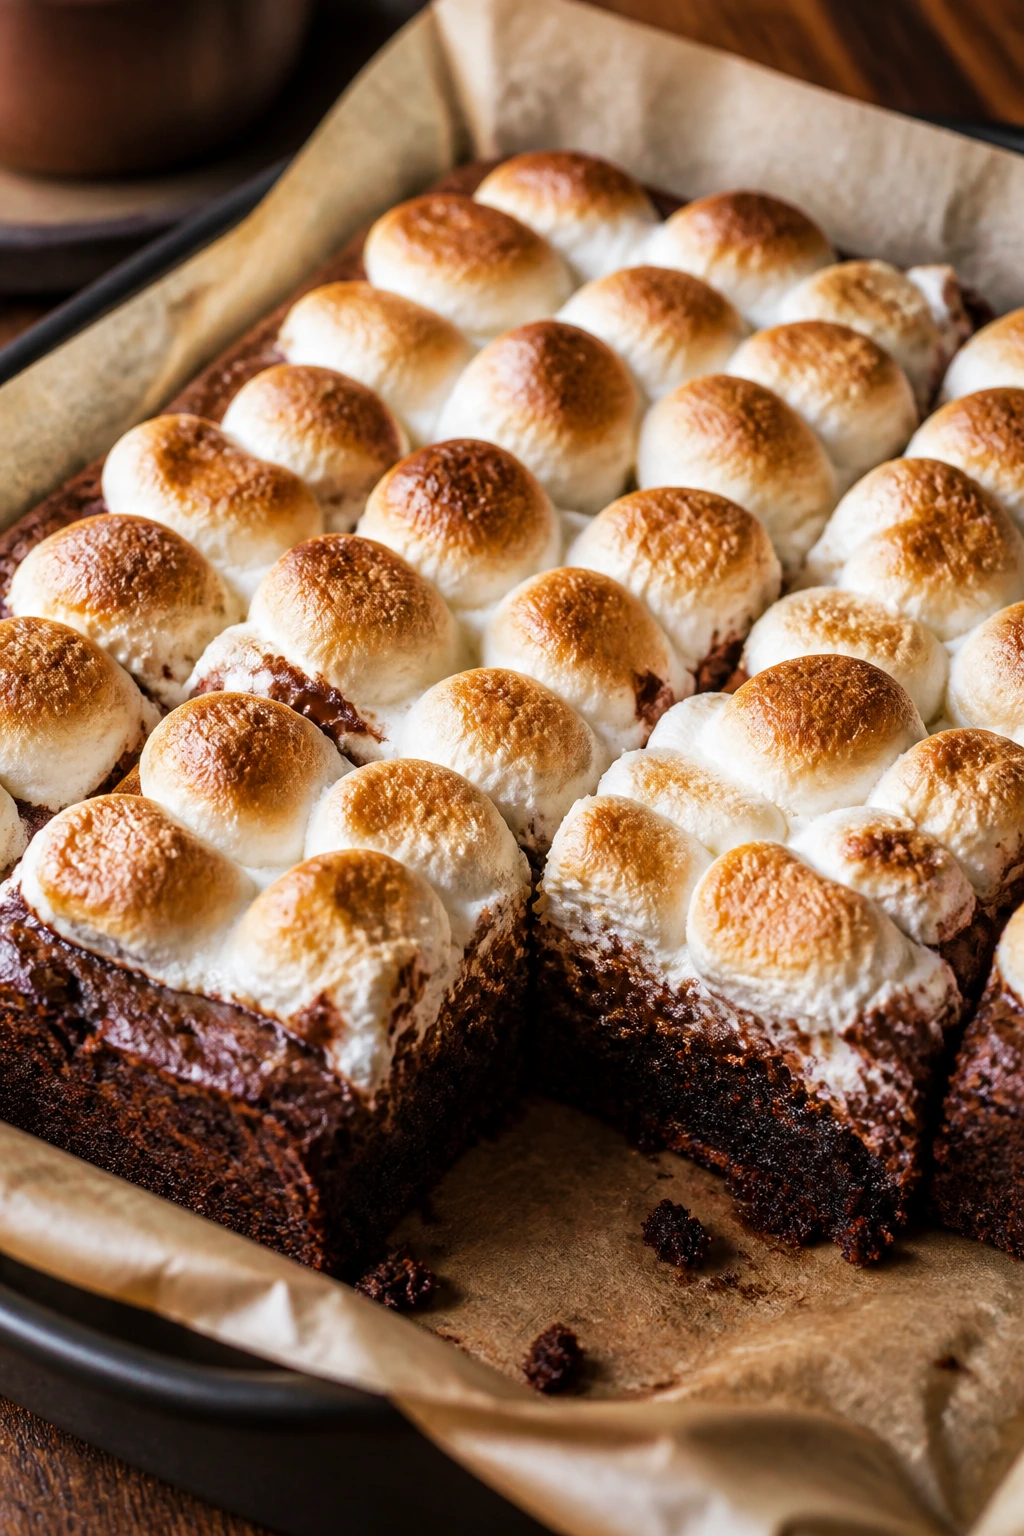
13. S’mores Brownies

Intro:
S’mores brownies are unapologetically nostalgic. Graham crackers form the base, the chocolate layer goes thick and fudgy, and toasted marshmallows finish the top with those browned, sticky edges that make you reach for a second square immediately. They’re messy. That’s the appeal.
Why It Works:
The graham crust gives structure and crunch, which keeps the brownie from feeling overly dense. Marshmallows on top bring sweetness and a little char, and the chocolate layer carries the whole thing so it doesn’t collapse into a cookie bar with a brownie on top. It’s more balanced than it sounds.
Key Ingredients:
- 1 1/2 cups graham cracker crumbs
- 1/2 cup unsalted butter, melted
- 2 tablespoons granulated sugar
- 1 cup unsalted butter
- 8 ounces semisweet chocolate
- 1 1/2 cups granulated sugar
- 3 large eggs
- 1 cup all-purpose flour
- 1/2 cup cocoa powder
- 1/2 teaspoon salt
- 2 cups mini marshmallows
- 2 Hershey-style chocolate bars, broken into pieces
Quick Steps:
- Heat the oven to 350°F (175°C) and line a 9×13-inch pan.
- Mix the graham crumbs, melted butter, and sugar, then press into the bottom of the pan.
- Melt the butter and semisweet chocolate, then whisk in sugar and eggs.
- Fold in flour, cocoa powder, and salt, then spread the batter over the crust.
- Bake for 23 to 27 minutes, add the mini marshmallows and chocolate pieces, then broil for 20 to 30 seconds until toasted.
- Cool before slicing so the marshmallow layer sets enough to cut.
Equipment for This Recipe:
- 9×13-inch pan
- Mixing bowls
- Flat-bottom glass or measuring cup for pressing the crust
- Broiler
- Parchment paper
How to Serve This Dish:
Serve these in smaller squares because the crust and topping make them richer than plain brownies. They look best on a rustic board with a few broken graham crackers nearby.
Pro Tips for This Recipe:
- Press the crust firmly so it doesn’t crumble when sliced.
- Don’t walk away from the broiler; marshmallows can burn in seconds.
- Use a sharp knife wiped clean between cuts to keep the layers neat.
Variations on This Dish:
- Peanut Butter S’mores: Swirl in a few spoonfuls of peanut butter before baking.
- Dark Chocolate Campfire: Swap in dark chocolate bars on top for a less sweet finish.
Common Mistakes to Avoid with This Dish:
- Making the crust too thick: It can take over the brownie.
- Broiling too long: Burnt marshmallows taste harsh.
- Cutting before cooling: The graham layer will crumble apart.
14. Chai Spice Brownies
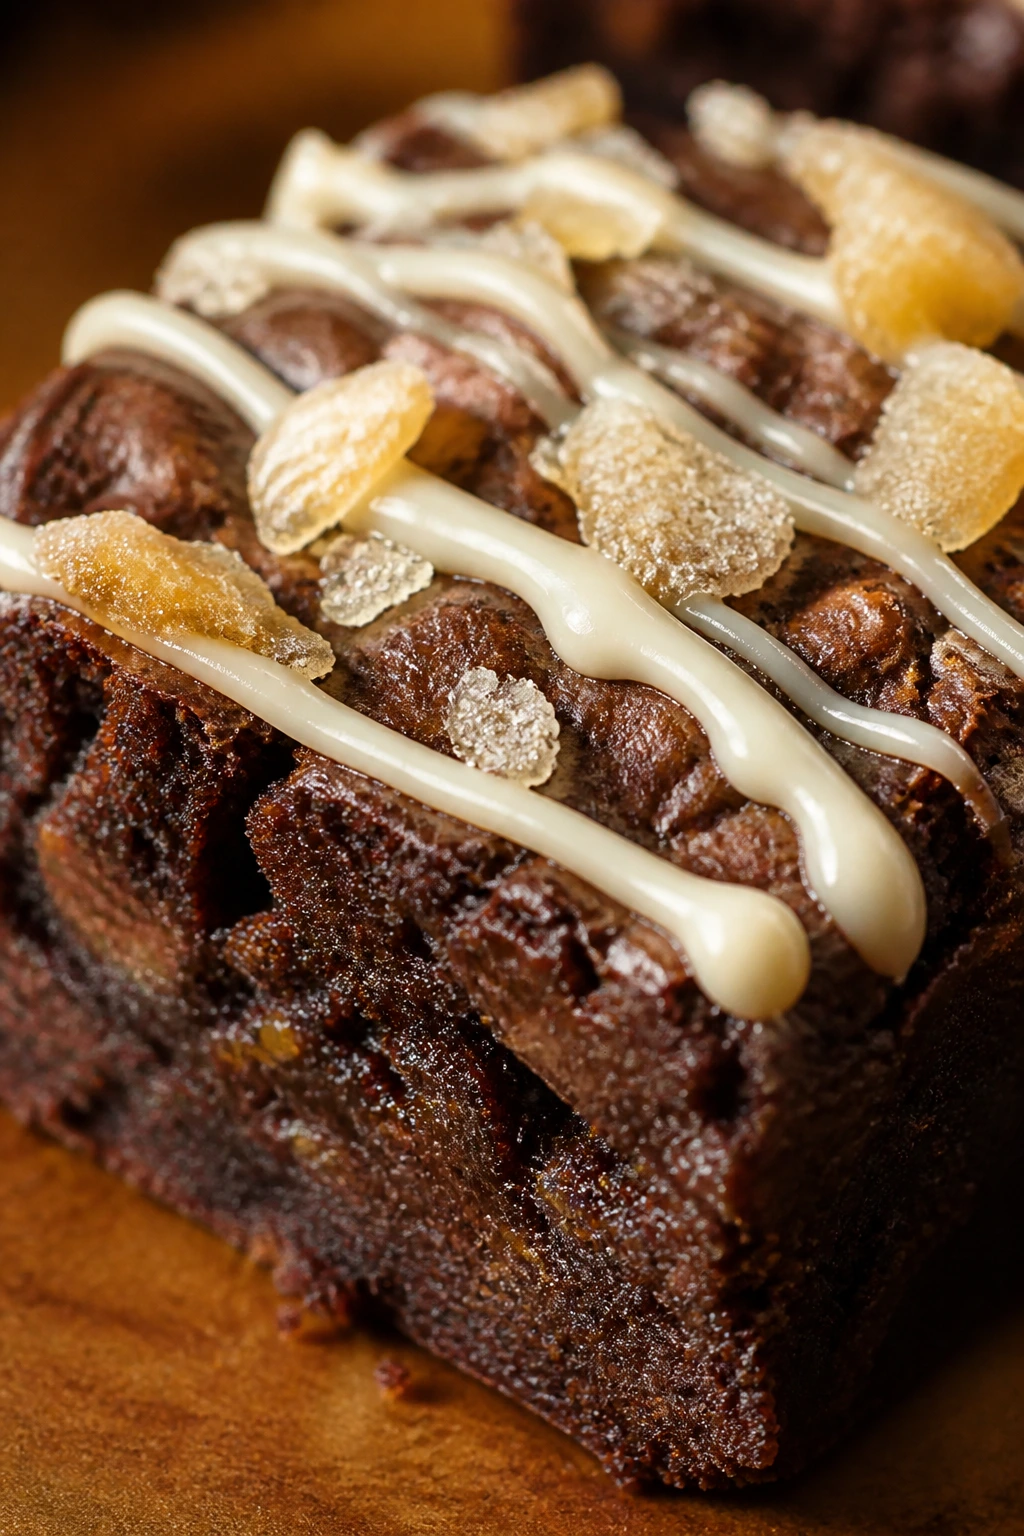
Intro:
Chai spice brownies are what I make when I want warmth without reaching for pumpkin again. Cinnamon, cardamom, ginger, and cloves lean into the chocolate in a way that feels aromatic and clean. A white chocolate drizzle or a few candied ginger pieces on top makes the pan look polished without much work.
Why It Works:
Chai spices bring a dry, fragrant heat that keeps the brownies from tasting flat. Cardamom does a lot of the heavy lifting here; it’s floral enough to feel special and earthy enough not to disappear. A light drizzle on top helps the spices look as good as they taste.
Key Ingredients:
- 1 cup unsalted butter
- 8 ounces semisweet chocolate
- 1 3/4 cups granulated sugar
- 3 large eggs
- 1 cup all-purpose flour
- 1/2 cup cocoa powder
- 1 teaspoon ground cinnamon
- 1/2 teaspoon ground cardamom
- 1/4 teaspoon ground ginger
- 1/8 teaspoon ground cloves
- 1/2 teaspoon salt
- 1/2 cup white chocolate chips
- 1 teaspoon coconut oil or neutral oil
Quick Steps:
- Preheat the oven to 350°F (175°C) and line a 9×13-inch pan.
- Melt the butter and chocolate, then whisk in sugar and eggs until glossy.
- Fold in flour, cocoa powder, spices, and salt.
- Bake for 24 to 27 minutes, then cool completely.
- Melt the white chocolate with the oil and drizzle it over the brownies in thin zigzags.
- Let the drizzle set before slicing.
Equipment for This Recipe:
- 9×13-inch pan
- Small saucepan or microwave-safe bowl
- Whisk
- Spoon or piping bag for the drizzle
- Parchment paper
How to Serve This Dish:
These taste best at room temperature, where the spice comes through more clearly. They’re especially good with black tea or coffee.
Pro Tips for This Recipe:
- Cardamom loses its punch if it’s old, so check the jar before you start.
- Keep the spice amounts modest; chocolate should still be the first thing you taste.
- A few chopped candied ginger bits on top add a sharp, chewy finish.
Variations on This Dish:
- Masala Chai Version: Add a pinch of black pepper for more heat.
- Milk Chocolate Drizzle: Use milk chocolate instead of white if you want a softer look.
Common Mistakes to Avoid with This Dish:
- Using too much clove: It can take over the whole pan.
- Skipping the white drizzle: The brownies taste fine without it, but the top looks less finished.
- Baking past set: Chai spices taste harsher in dry brownies.
15. Confetti Celebration Brownies
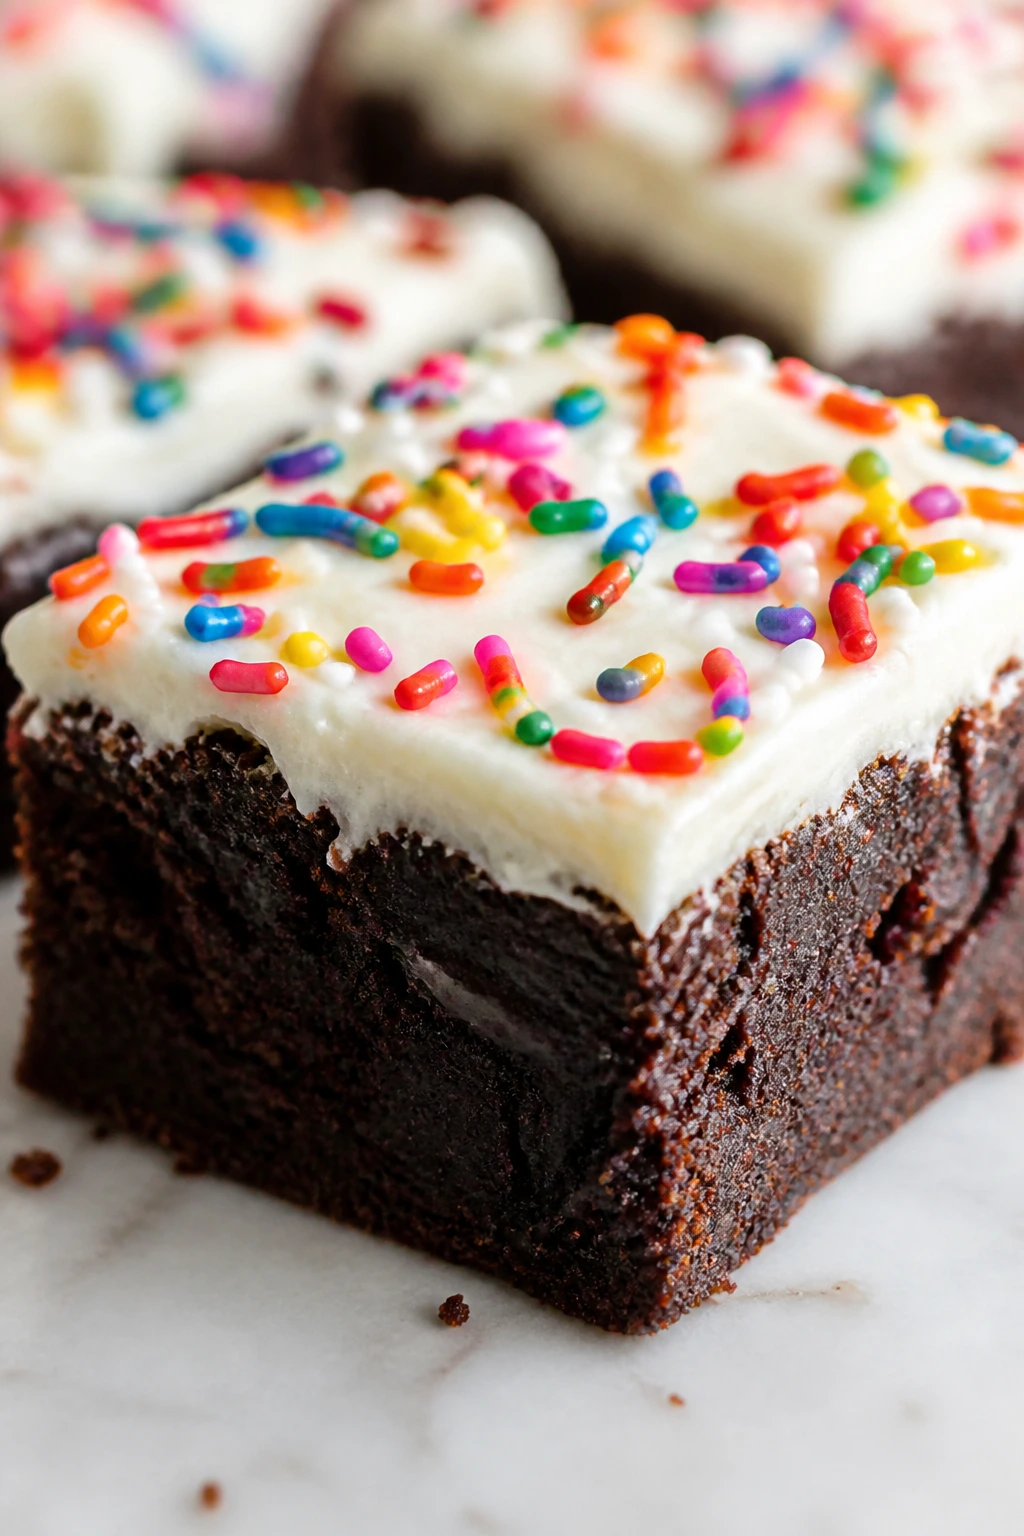
Intro:
These are the party brownies. Chocolate base, thin cream cheese frosting, and a scatter of rainbow sprinkles that read like confetti instead of clutter. They’re cheerful, clean-looking, and easy to cut into neat squares. No one mistakes them for a serious dessert, which is exactly why they work at a celebration.
Why It Works:
Brownies need contrast if you want them to feel festive, and the frosting gives you both color and a softer bite. Sprinkles work best on a smooth surface, so a thin layer of frosting is enough; pile it too high and the brownies turn sugary instead of fun. Keep the sprinkles in the jimmies family, because nonpareils bleed.
Key Ingredients:
- 1 cup unsalted butter
- 8 ounces semisweet chocolate
- 1 1/2 cups granulated sugar
- 3 large eggs
- 1 cup all-purpose flour
- 1/2 cup cocoa powder
- 1/2 teaspoon salt
- 4 ounces cream cheese, softened
- 1/4 cup unsalted butter, softened
- 1 cup powdered sugar
- 1 teaspoon vanilla extract
- 1/4 cup rainbow jimmies sprinkles
Quick Steps:
- Preheat the oven to 350°F (175°C) and line a 9×13-inch pan.
- Melt the butter and chocolate, then whisk in sugar and eggs until glossy.
- Fold in flour, cocoa powder, and salt, then bake for 23 to 27 minutes.
- Cool the brownies completely.
- Beat the cream cheese, butter, powdered sugar, and vanilla until smooth, then spread a thin layer over the top.
- Scatter the sprinkles on immediately and chill briefly before slicing.
Equipment for This Recipe:
- 9×13-inch pan
- Electric mixer
- Offset spatula
- Parchment paper
- Small bowl for sprinkles
How to Serve This Dish:
Serve these in clean squares with the frosting layer facing up. They look especially good on a silver tray or a bright cake stand.
Pro Tips for This Recipe:
- Use jimmies rather than nonpareils so the color stays sharp.
- Spread the frosting thinly; the sprinkles should decorate, not bury, the brownie.
- Chill for 15 to 20 minutes before cutting for the neatest slices.
Variations on This Dish:
- Pastel Party Brownies: Use pastel jimmies if you want a softer look.
- Chocolate Frosting Confetti: Replace the cream cheese frosting with a cocoa buttercream for a deeper flavor.
Common Mistakes to Avoid with This Dish:
- Using wet frosting on warm brownies: The topping melts and slides off.
- Choosing the wrong sprinkles: Nonpareils can bleed and streak the frosting.
- Making the frosting too thick: It covers the brownies instead of finishing them.
16. Black Forest Brownies
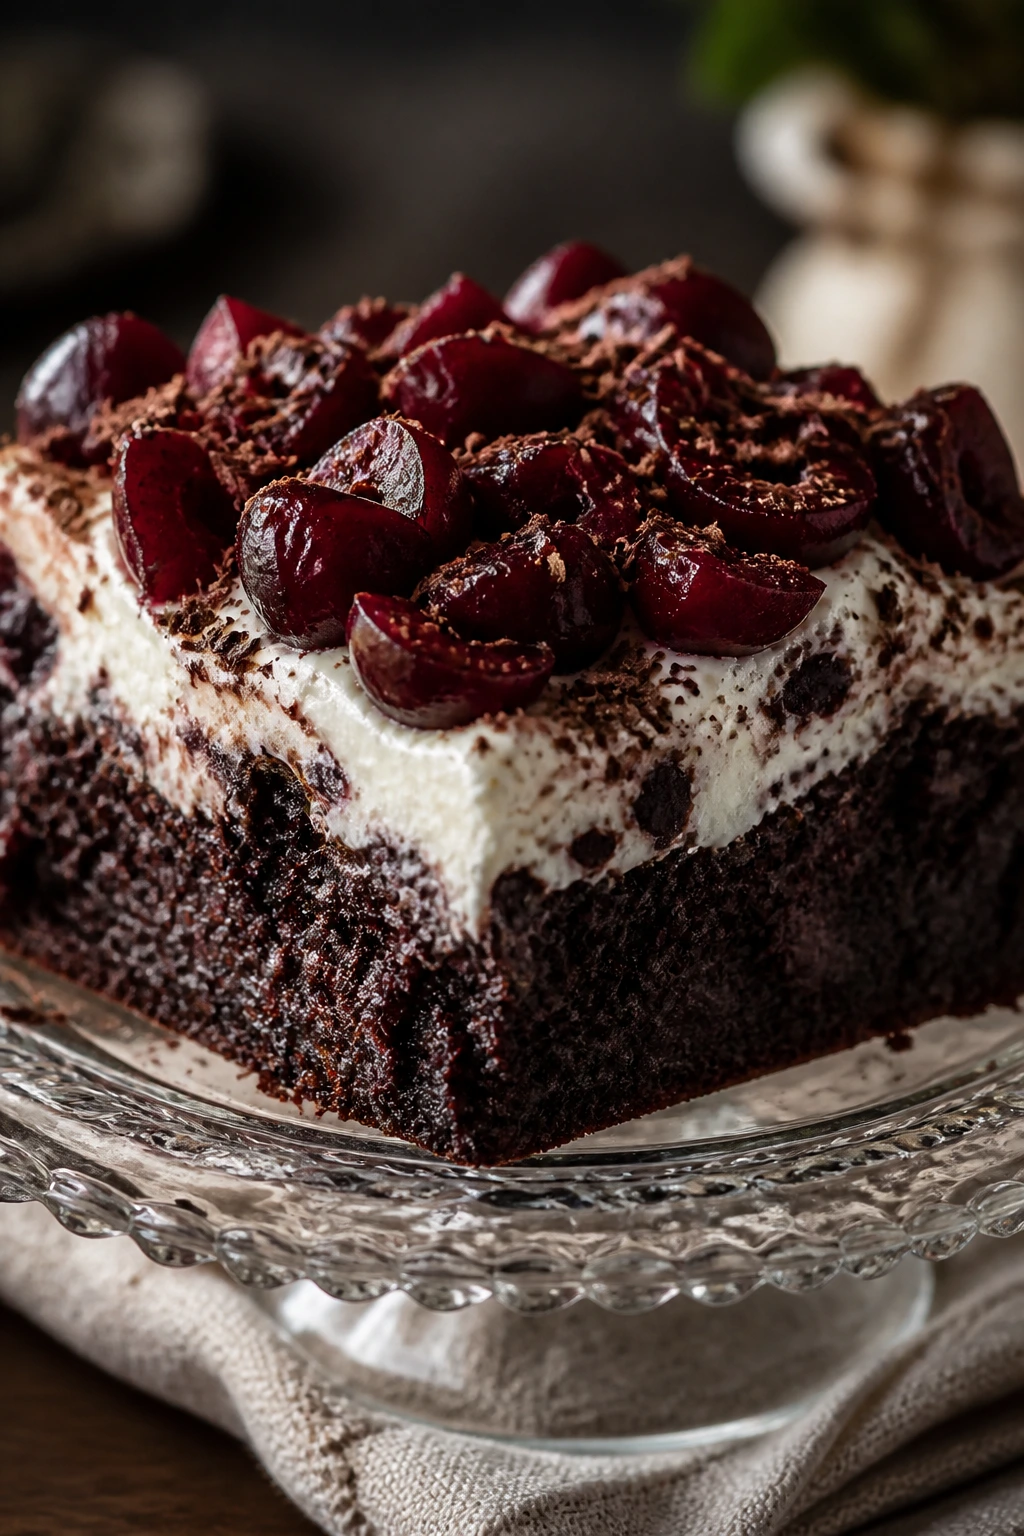
Intro:
Black Forest brownies are dramatic in the best possible way. Dark chocolate, tart cherries, and a soft whipped topping create a dessert that looks like it belongs on a glass cake stand with a linen napkin underneath it. The color contrast is the draw, but the flavor is what keeps people coming back for “just one more corner piece.”
Why It Works:
The classic Black Forest combination works because cherries bring acid and fruit, while chocolate carries the richness. A whipped mascarpone or cream topping softens the edges and gives the top a snowy finish without hiding the dark base. If you want a brownie that looks dressed up but still cuts easily, this is the one.
Key Ingredients:
- 1 cup unsalted butter
- 8 ounces bittersweet chocolate
- 1 3/4 cups granulated sugar
- 3 large eggs
- 1 cup all-purpose flour
- 1/2 cup cocoa powder
- 1/2 teaspoon salt
- 1 cup cherry pie filling, well drained and chopped slightly
- 1 teaspoon almond extract
- 1 cup heavy cream
- 1/2 cup mascarpone or softened cream cheese
- 1/3 cup powdered sugar
- Chocolate curls or grated chocolate for topping
Quick Steps:
- Preheat the oven to 350°F (175°C) and line a 9×13-inch pan.
- Melt the butter and bittersweet chocolate, then whisk in sugar, eggs, and almond extract.
- Fold in flour, cocoa powder, and salt, then spread half the batter in the pan.
- Spoon the cherry filling over the batter, cover with the remaining batter, and swirl the top lightly.
- Bake for 26 to 30 minutes, then cool completely.
- Whip the cream, mascarpone, and powdered sugar to soft peaks, spread or pipe on top, and finish with chocolate curls before serving.
Equipment for This Recipe:
- 9×13-inch pan
- Mixer
- Offset spatula
- Vegetable peeler for chocolate curls
- Parchment paper
How to Serve This Dish:
Serve these chilled or slightly cool so the topping holds its shape. A few fresh cherries on the platter make the whole dessert look more purposeful.
Pro Tips for This Recipe:
- Drain the cherry filling a bit so the brownie layer doesn’t get watery.
- Use almond extract sparingly; it should read as cherry’s partner, not the loudest note.
- Make the chocolate curls over a cold bowl so they hold their shape better.
Variations on This Dish:
- Dark Cherry Ganache: Skip the cream topping and finish with a thin chocolate ganache instead.
- Fresh Cherry Version: Use pitted cherries cooked briefly with sugar if you want a less jammy texture.
Common Mistakes to Avoid with This Dish:
- Using too much cherry filling: It floods the pan and makes slicing messy.
- Whipping the topping too hard: It turns grainy and harder to spread.
- Serving straight from the fridge with no rest: Let them sit 10 minutes so the flavors open up.
Why Festive Brownies Work Better Than a Complicated Cake

Brownies win this category because they give you built-in structure. A cake can be lovely, but it asks more of you: leveling, layering, frosting, maybe chilling, maybe trimming. Brownies just need a pan, parchment, and a little discipline about when to stop baking. That leaves room for the part that matters most here — the top.
The top is where these brownies become festive. A sharp glaze. A cream cheese swirl. Crushed peppermint. Cocoa dust. Bright cherries. You do not need to turn the whole dessert into a sculpture. One clean visual idea is enough, and brownies are sturdy enough to carry it without cracking under the weight.
There’s also a practical reason I keep coming back to brownies for decorated desserts: they travel well. The crumb is tight, the cuts hold, and the leftovers don’t dry out as fast as cake slices with exposed sides. If you’ve ever carried a frosted cake across town, you already know why that matters.
Essential Equipment for These Recipes
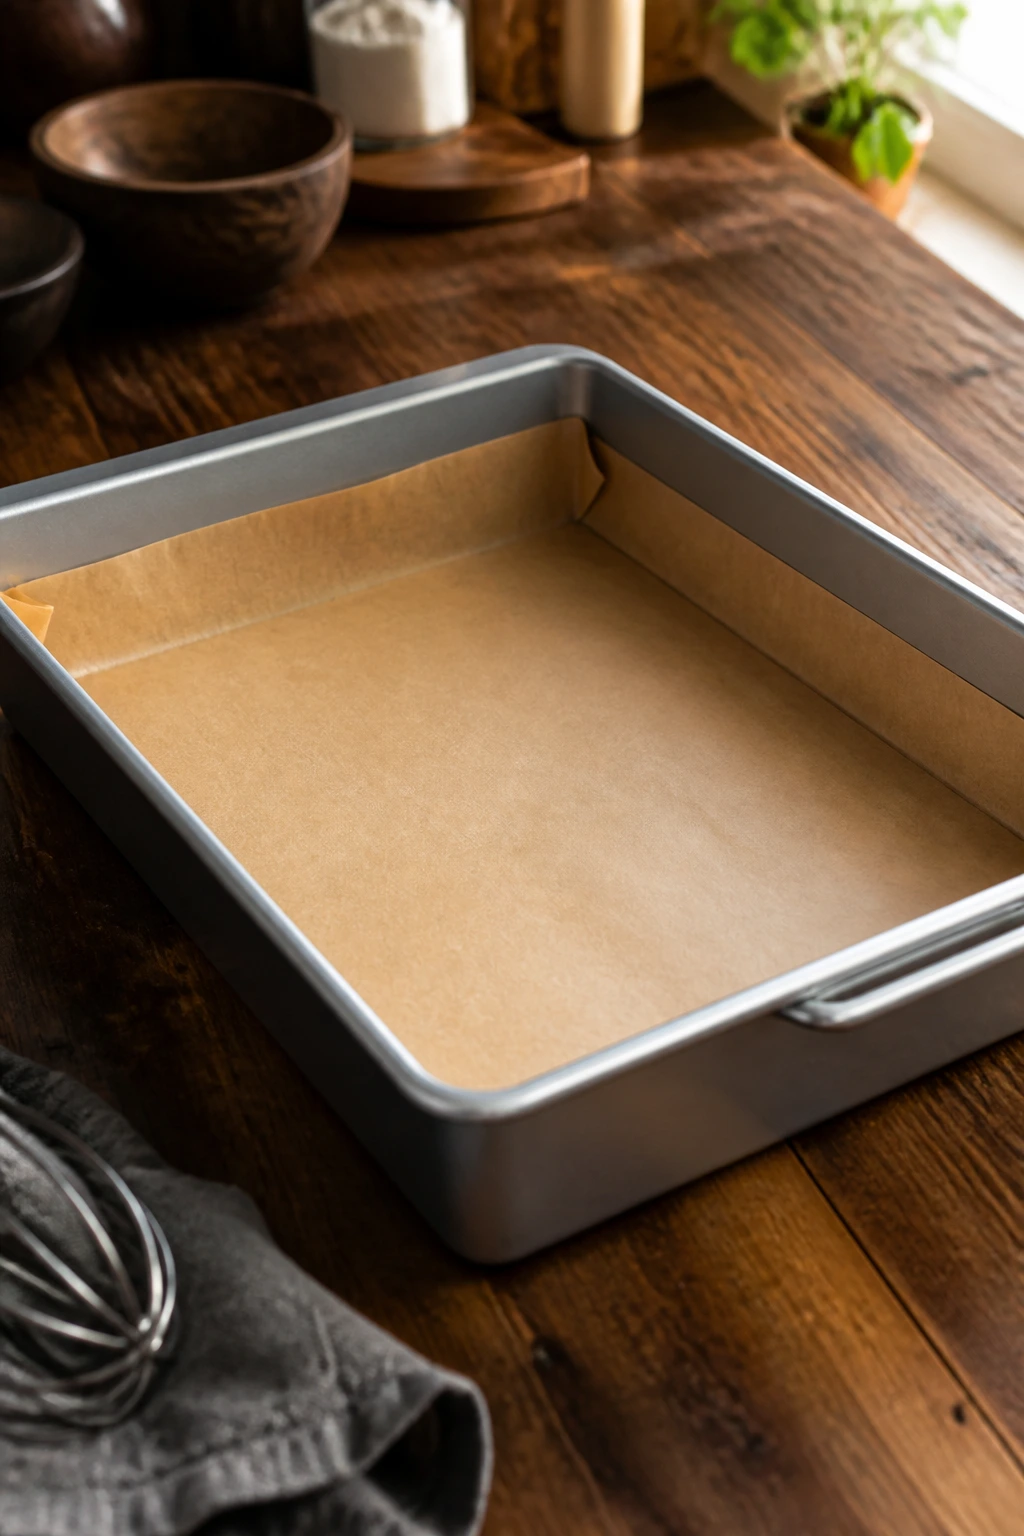
- 9×13-inch metal baking pan: Metal heats evenly and gives you better edges; glass often bakes slower and softer.
- Parchment paper: Leave an overhang on two sides so you can lift the whole slab out cleanly.
- Mixing bowls: One for the brownie batter and one or two more for swirls, glazes, or frostings.
- Rubber spatula: Better than a spoon for folding flour without overmixing.
- Whisk: Useful for the sugar-and-egg stage, where you want the batter to look glossy.
- Offset spatula: Handy for smoothing thin frostings and ganache.
- Fine-mesh sieve: Worth owning if you’re dusting cocoa or powdered sugar on top.
- Sharp chef’s knife: A dull blade tears toppings and smears clean swirls.
- Small saucepan or microwave-safe bowl: For melting chocolate, butter, or caramel.
- Electric mixer: Not essential for every recipe, but it makes cheesecake and whipped toppings much easier.
Smart Shopping and Ingredient Tips
Chocolate matters more than branding hype. Buy semisweet or bittersweet chocolate that actually tastes like chocolate, not just sugar and wax. Bars tend to melt more smoothly than chips, though chips are fine when you need convenience. If a recipe leans heavily on a topping like peppermint or cherry, a slightly darker chocolate base keeps the whole pan from going sweet and flat.
Butter should be unsalted unless the recipe tells you otherwise. That gives you control, especially in brownies with caramel, pretzels, cookie butter, or crushed candy on top. The same goes for salt: use fine salt in the batter, flaky salt on the finish. Those are not the same job.
For add-ins, buy the thing that still looks like the thing. Candy canes should be bright and crisp, not sticky. Dried cranberries should be soft enough to chew, not leathery and hard. White chocolate should be actual cocoa butter-based chocolate if you want a clean melt; cheap coatings can seize or look dull. Fresh raspberries need to be dry, and cream cheese needs to be softened before you mix it, or your swirl will carry tiny lumps all over the pan.
One last shopping note: use a metal 9×13 pan if you can get one. It doesn’t sound glamorous, but it gives you the brownie edges people fight over. And yes, this is one of those places where the boring tool wins.
How to Serve These Recipes
Presentation:
Brownies look best when the cuts are deliberate. Wipe the knife between slices, stack them slightly offset on a platter, and use one finishing element per pan — a glaze, a dusting, a drizzle, or a topping. A white plate makes red fruit, green pistachios, and dark chocolate look sharper.
Accompaniments:
Serve the peppermint, gingerbread, chai, and hot chocolate brownies with coffee or tea. The berry and citrus versions like a scoop of vanilla ice cream or a spoonful of lightly sweetened whipped cream. Salted caramel pretzel brownies want cold milk, and tiramisu brownies sit well beside espresso.
Portions:
Rich brownies should be cut smaller than people expect. A 9×13 pan usually gives 16 larger squares or 24 smaller ones, and the frosted or cheesecake-topped recipes often go farther than the plain ones because each piece is heavier. If you’re serving a crowd, cut one pan into 24 neat rectangles and let people come back for seconds.
Beverage Pairing:
For dark chocolate and spice, serve strong coffee or black tea. For fruit or peppermint, a glass of cold milk or even sparkling water keeps the palate fresh between bites. If you want one drink that works across the board, coffee wins by a mile.
Additional Tips and Flavor Boosters
Flavor Enhancement: A half teaspoon of espresso powder in almost any chocolate brownie batter deepens the cocoa without turning the pan into mocha. It’s one of the easiest upgrades in the collection.
Customization: Swap white chocolate for milk chocolate when you want a softer visual contrast, or add chopped nuts to the base if your crowd likes crunch. Walnuts work in the cranberry and black forest pans; pistachios work anywhere you want color.
Serving Suggestions: A thin drizzle is usually prettier than a thick one. For the peppermint, cookie butter, and tiramisu brownies, a little controlled mess looks intentional. For the fruit-topped versions, keep the garnish simple — a few extra berries or curls of chocolate is enough.
Make-It-Yours: If you need a nut-free tray, skip pistachios and walnuts and lean on fruit, mint, or cheesecake swirls instead. For a dairy-free version, use a good plant butter and a dark chocolate that doesn’t contain milk solids; just keep an eye on the bake time, because some dairy-free fats behave a little differently in the oven.
Make-Ahead, Storage, and Reheating Guidance
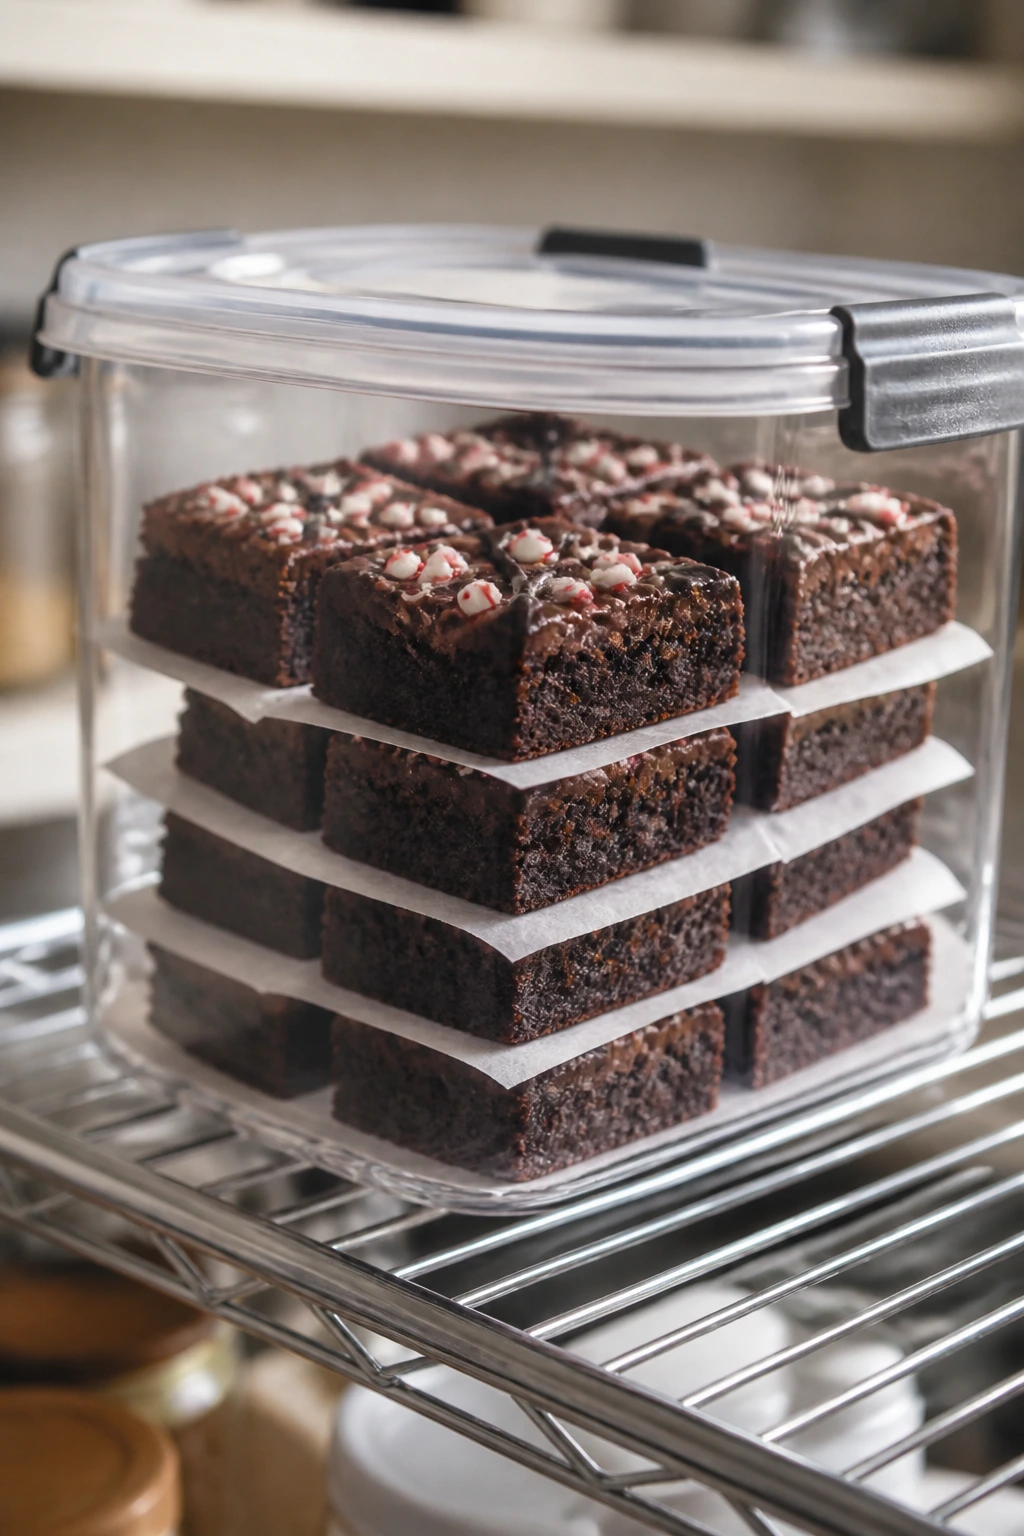
Plain brownies keep at room temperature for 2 to 3 days when stored in an airtight container with parchment between layers. Once you add cream cheese, mascarpone, or whipped topping, move them to the refrigerator and plan on 4 to 5 days, though the texture is best in the first 2 or 3. Fruit-topped brownies also do better chilled.
For freezing, wrap individual squares tightly in plastic wrap, then tuck them into a freezer bag or container for up to 2 months. Freeze plain brownies for the cleanest thaw. Frosted brownies can be frozen too, but set them on a tray first so the topping firms before packing.
Reheating depends on the style. Plain brownies can warm in the microwave for 8 to 12 seconds, which makes the chocolate soft again without turning them mushy. Cheesecake, mascarpone, and whipped cream tops should stay chilled or only come to room temperature briefly before serving. Peppermint bark brownies and salted caramel brownies can sit out for a little while, but if your kitchen is warm, keep them cool until the last minute.
Make-ahead wise, most of these brownies improve after an overnight rest. The flavors settle, the crumb firms up, and the cuts look cleaner. The only caution is with marshmallow and candy-cane toppings, which are prettiest the day they’re made.
Variations and Adaptations to Try
Gluten-Free Traybake:
Use a 1:1 gluten-free flour blend in place of all-purpose flour for any of the pan brownies. The texture may be a touch more delicate, so cool the pan fully before cutting. Brownies with cheesecake or ganache on top tend to hide the swap best.
Dairy-Free Squares:
Replace butter with a good plant-based baking butter and use dairy-free chocolate. Skip mascarpone, cream cheese, and whipped cream toppings, then lean on glazes, fruit, or candy instead. The peppermint, cranberry-orange, and chai versions adapt especially well.
Nut-Free Party Pan:
Skip pistachios, walnuts, and almond extract, then build the garnish from fruit, mint, chocolate curls, or sprinkles. This version matters more than people think because a lot of “festive” brownies quietly rely on nuts. The collection doesn’t need them.
Lower-Sugar Finish:
Use a darker chocolate base, trim the frosting by a third, and choose tart fruit toppings over candy-heavy ones. The raspberry, black forest, and cranberry-orange brownies already have enough brightness to feel balanced without extra sugar on top.
Mini Brownie Bites:
Bake any of the batters in a mini muffin pan or cut the cooled slab into 1-inch squares for bite-sized trays. The bake time drops fast, so start checking early. This approach works well for parties where people want to sample more than one flavor.
Common Mistakes to Avoid
The biggest mistake with decorated brownies is overbaking. Brownies keep setting after they come out of the oven, so if the center looks completely firm in the pan, they’ll be dry once cooled. Pull them when the middle still has a slight softness and the edges are set. That one decision changes everything.
The second mistake is adding toppings before the brownie base cools. White chocolate will melt, whipped cream will slide, marshmallows will weep, and swirls will blur. Patience is not optional here. A warm pan is the enemy of neat lines.
Another one: too much topping. Brownies look festive when the decoration clarifies the pan. They start looking clumsy when the frosting, candy, glaze, and drizzle all compete for space. Pick one primary finish and one supporting accent, then stop.
Cutting with the wrong knife causes more damage than people expect. Use a long, sharp blade, and clean it with hot water between cuts for the cleanest squares. If the topping is sticky, chill the pan first; if the topping is crumbly, let it rest a few minutes at room temperature before slicing.
Finally, don’t ignore pan size. A batter written for a 9×13-inch pan won’t behave the same in an 8×8. Thicker brownies need more time, thinner brownies need less, and if you guess, the edges will tell on you.
Frequently Asked Questions
Can I use a boxed brownie mix for these festive brownies?
Yes, and sometimes that’s the smartest move if you want to focus on the toppings. Boxed mix works especially well for peppermint bark, s’mores, and cookie butter brownies, where the decoration carries most of the visual weight. Just bake the brownies until they’re barely set, then cool them fully before decorating.
Which brownies travel the best?
Peppermint bark, cranberry-orange, salted caramel pretzel, and black forest brownies all travel well if you cut them after chilling. The frosted ones need a sturdier container and a cold pack if you’re taking them far. Anything with whipped cream or mascarpone should stay cold until serving.
How do I get clean swirls on top?
Use a thick topping and swirl only a few times with a butter knife or skewer. If you keep dragging through the batter, the colors mix into mud. A chilled pan also helps the design stay sharp when you cut it.
Can I make these brownies ahead of time?
Absolutely. Most of them are better after a night in the fridge or on the counter because the crumb settles and the flavors deepen. Just keep fruit, marshmallow, and whipped toppings in mind; those are best made closer to serving.
What if my brownies sink in the middle?
A small dip is fine, especially for fudgy brownies with swirls or toppings. A big collapse usually means the pan was underbaked, the oven ran cool, or the batter was overmixed. Use the toothpick test as a guide, but look for set edges and a center that’s still slightly soft.
Can I freeze decorated brownies?
Yes, though plain or lightly glazed brownies freeze best. Wrap each square tightly and freeze them flat before stacking. Brownies with whipped cream or mascarpone are better frozen without the topping and finished after thawing.
What’s the easiest brownie in the collection for a beginner?
Peppermint bark, salted caramel pretzel, and confetti celebration brownies are the most forgiving. They rely on a simple base and a straightforward finish, so there’s less risk of over-swirling or curdling a cream layer. If you want a first try, start there.
Can I bake these in a smaller pan?
You can, but you’ll need to adjust the time. A smaller, deeper pan makes thicker brownies that take longer to bake, and the swirl toppings may sink more if the batter is very loose. If you change pans, keep the visual topping simple and start checking early.
A Tray Worth Setting Out
The best festive brownies don’t shout. They catch the eye because the contrast is clean, the topping makes sense, and the chocolate underneath still tastes like chocolate instead of a sugar delivery system. That’s the standard I like most: pretty enough to set on the center of the table, sturdy enough to cut into squares, and rich enough that one piece feels like enough — at least for five minutes.
If you keep the base fudgy, the topping deliberate, and the knife sharp, any of these pans can carry a party. Pick one that matches the mood of the room, or bake two and let people argue over the last corner piece.