
Teriyaki recipes that use pantry staples are the kind of dinners I trust when the fridge is giving me attitude. A bottle of soy sauce, a little brown sugar, garlic, ginger, and cornstarch can turn chicken thighs, tofu, canned tuna, frozen broccoli, or leftover rice into something glossy and clingy enough to feel planned.
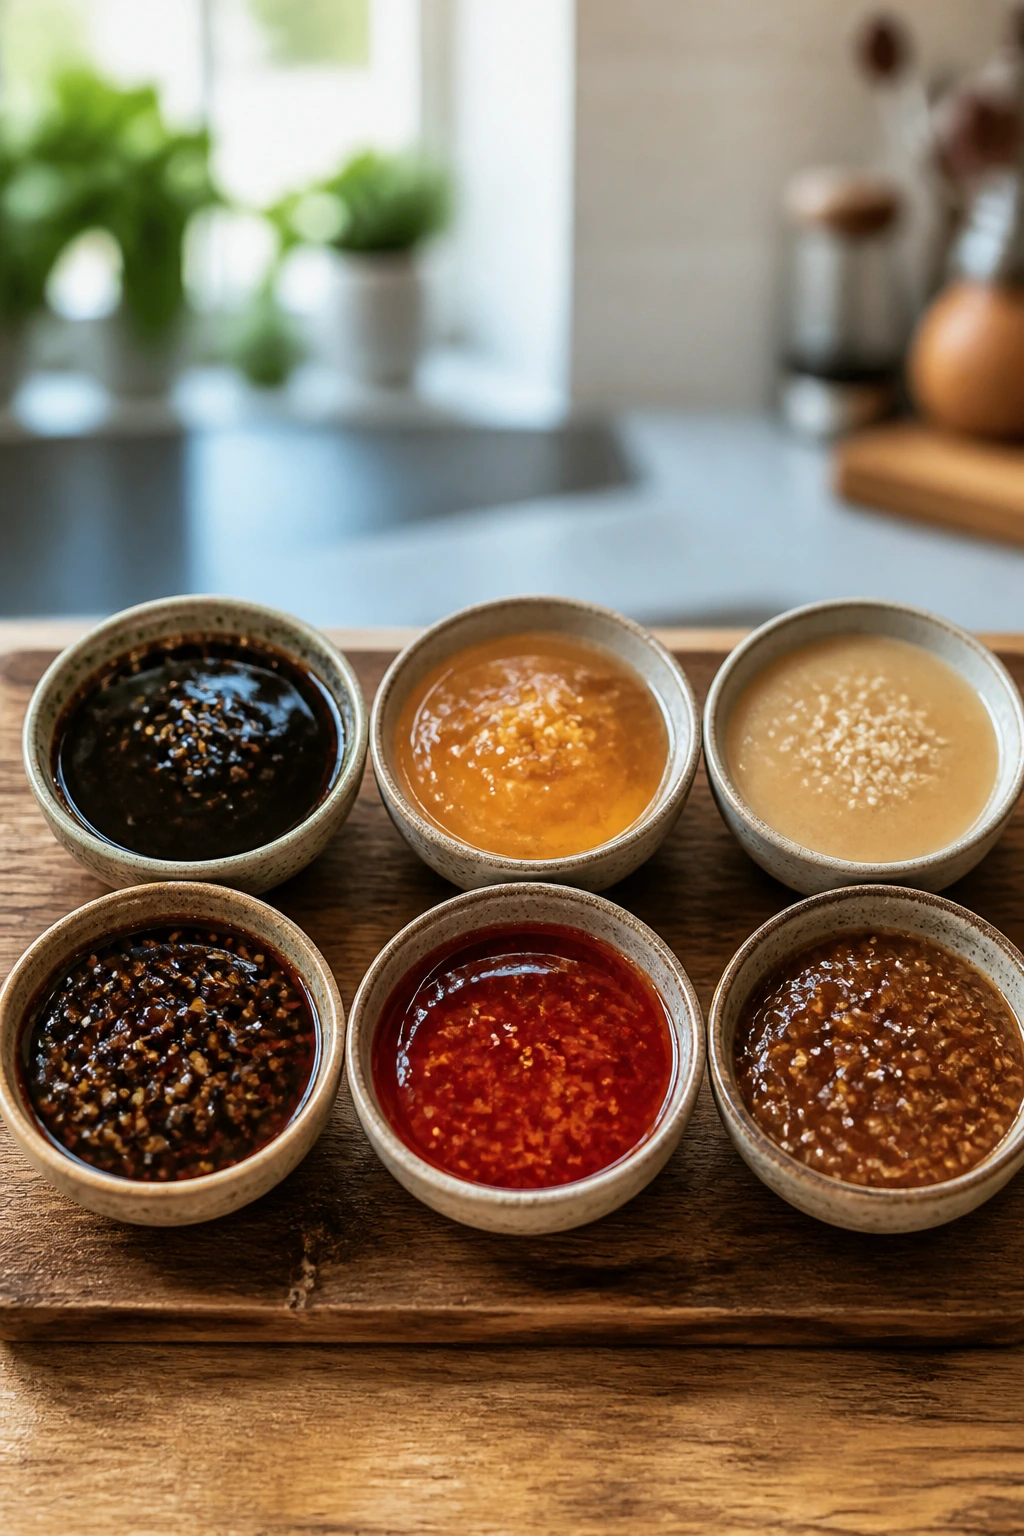
That sticky-sweet glaze is more formula than mystery. Salt from the soy, sweetness from sugar or honey, a little acid to keep it from tasting flat, and heat to thicken the sauce until it trails off the spoon in a thin ribbon. Get those parts right and teriyaki stops being a takeout-only flavor and starts acting like a cupboard strategy.
The recipes here stay close to the shelf on purpose. You’ll find skillet dinners, sheet-pan meals, rice bowls, noodle bowls, lettuce cups, skewers, meatballs, baked drumsticks, and a few slightly oddball ideas that work because the sauce does the heavy lifting. It’s the sort of collection that makes a can of chickpeas look less like a backup plan and more like dinner.
Why This Pantry-First Teriyaki Set Works
- A short ingredient list does the job: Soy sauce, brown sugar, garlic, and ginger already bring the loudest parts of the flavor, so you do not need a long shopping list to get a deep glaze.
- Frozen and canned foods fit right in: Broccoli florets, peas, shrimp, tuna, chickpeas, and potstickers all hold up well under teriyaki sauce and help you build dinner fast.
- The sauce works across proteins: Chicken, salmon, tofu, beef, pork, and meatballs all take the same sweet-salty treatment without needing a separate marinade for each one.
- Leftovers stay useful: Rice, noodles, and roasted vegetables soak up extra glaze overnight instead of drying out, which is rare and useful.
- Most of these meals cook in one pan or one sheet: Less cleanup matters when the sauce is sticky, because that sugar likes to weld itself to the pan if you leave it sitting around.
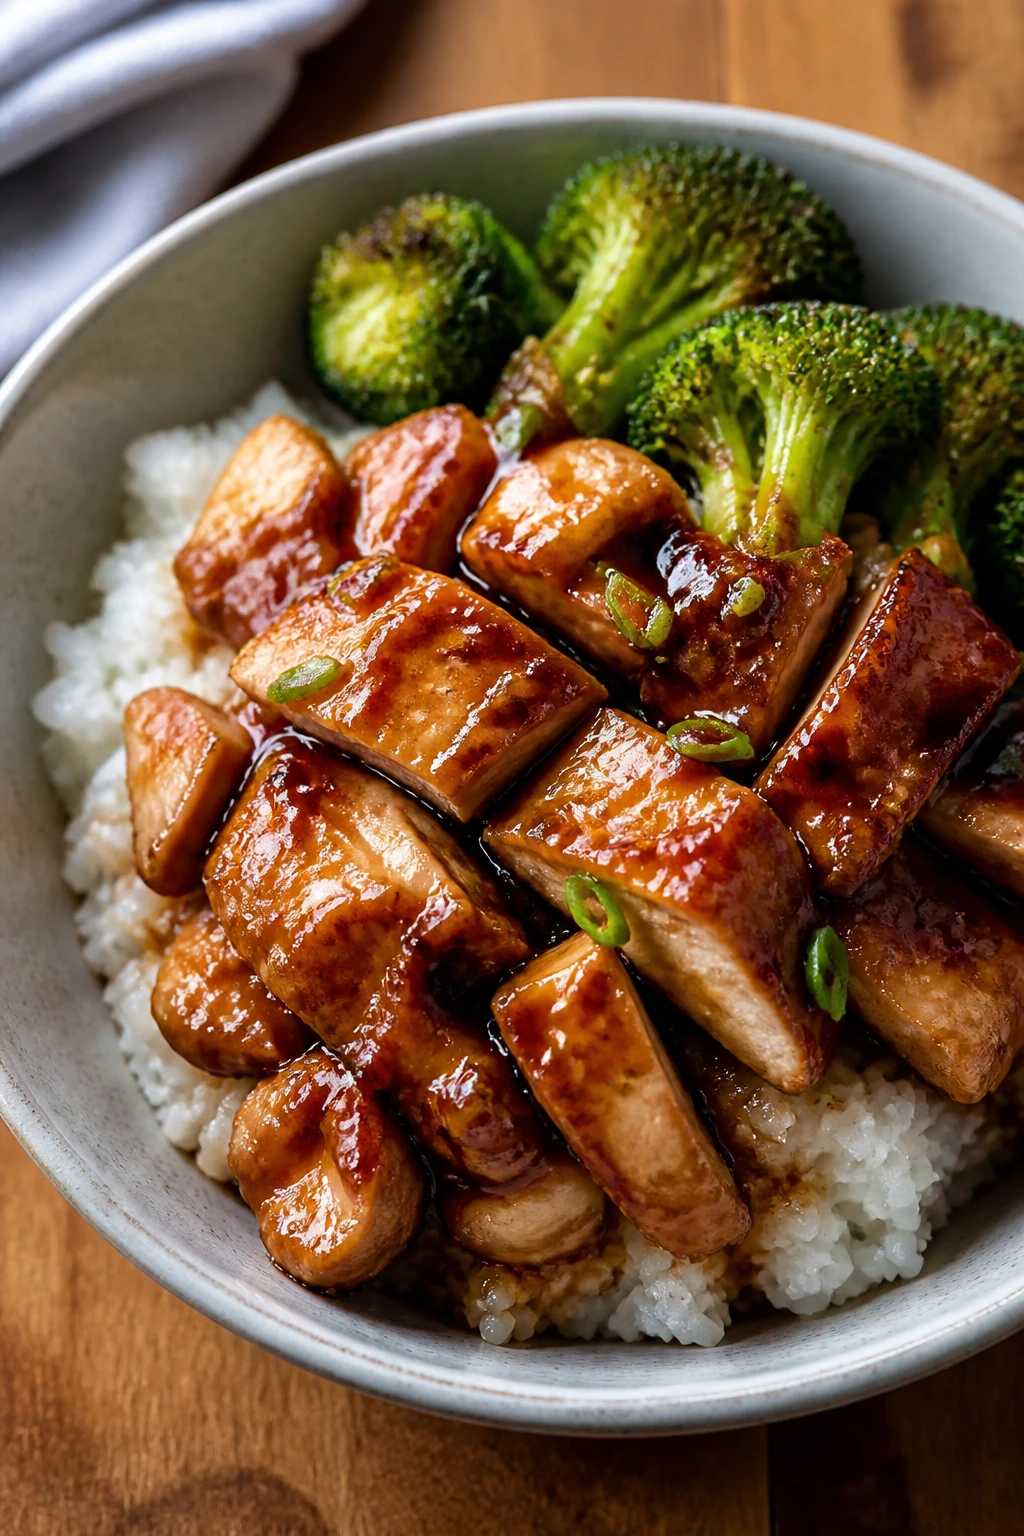
1. Weeknight Chicken Teriyaki Rice Bowls
Chicken thighs are the smart move here. They stay juicy, take a hard sear, and hold onto the glaze without turning stringy the way lean breast meat sometimes does.
Why It Works:
The sauce is built in the same skillet, so the browned chicken drippings fold right into the teriyaki base. That means more depth with no extra work. A quick cornstarch slurry turns the sauce glossy in under a minute.
Key Ingredients:
- 1 1/2 pounds boneless, skinless chicken thighs, cut into 1-inch pieces
- 1/4 cup soy sauce
- 3 tablespoons brown sugar
- 2 tablespoons water
- 2 cloves garlic, minced
- 1 teaspoon grated fresh ginger or 1/2 teaspoon ground ginger
- 1 tablespoon cornstarch mixed with 2 tablespoons cold water
- 3 cups cooked white rice
- 2 cups broccoli florets, steamed or microwaved
- 1 tablespoon sesame seeds and 2 sliced scallions for topping
Quick Steps:
- Whisk the soy sauce, brown sugar, water, garlic, and ginger in a small bowl.
- Heat 1 tablespoon oil in a large skillet over medium-high heat. Add the chicken and cook for 6 to 8 minutes, stirring until browned and cooked through to 165°F.
- Pour in the sauce and let it bubble for 30 seconds.
- Stir in the cornstarch slurry and cook 1 minute, until the sauce turns shiny and thick enough to coat the chicken.
- Spoon the rice into bowls, add broccoli and chicken, then finish with sesame seeds and scallions.
Equipment for This Recipe:
- Large skillet
- Small mixing bowl
- Whisk
- Wooden spoon or spatula
How to Serve This Dish:
Pile the chicken over hot rice so the glaze runs into the grains. Broccoli on the side keeps the bowl from feeling heavy, and the sesame seeds give you that little nutty crack on top.
Pro Tips for This Recipe:
- Dry the chicken first: Moist chicken steams; dry chicken browns.
- Use brown sugar, not white: Brown sugar gives the glaze a deeper, less sharp finish.
- Don’t overcook the glaze: Once it turns glossy, pull the pan off the heat.
Variations on This Dish:
- Spicy Chili Chicken: Add 1 to 2 teaspoons chili garlic sauce to the sauce bowl for heat that stays with the sweetness.
- Pineapple Chicken Bowls: Stir in 1/3 cup drained canned pineapple at the end for a brighter, fruitier finish.
Common Mistakes to Avoid with This Dish:
- Crowding the skillet: The chicken will pale and steam instead of sear. Cook in two batches if the pan looks cramped.
- Dumping in the slurry too fast: If the sauce is not bubbling, the cornstarch can clump. Let it simmer first.
- Adding rice too soon: Hot rice underneath is the point; cold rice dulls the glaze and makes the bowl feel flat.
2. Sheet-Pan Teriyaki Salmon with Broccoli
Salmon and teriyaki are a natural pair because the fish brings fat, and the glaze brings the sharp edge that cuts through it. Broccoli picks up the sauce in the pan and goes crisp at the tips.
Why It Works:
A hot sheet pan lets the broccoli roast while the salmon finishes gently. The glaze only needs a few minutes of heat to turn from thin and salty into something lacquered.
Key Ingredients:
- 4 salmon fillets, about 5 to 6 ounces each
- 4 cups broccoli florets
- 2 tablespoons oil
- 1/4 cup soy sauce
- 2 tablespoons honey or brown sugar
- 1 tablespoon rice vinegar
- 2 cloves garlic, minced
- 1 teaspoon grated ginger
- 1 tablespoon cornstarch mixed with 1 tablespoon water
Quick Steps:
- Heat the oven to 425°F and line a sheet pan with foil or parchment.
- Toss the broccoli with oil and half of the sauce mixture, then roast for 10 minutes.
- Push the broccoli to the sides, set the salmon in the center, and brush it with the remaining sauce.
- Bake 8 to 10 minutes, until the salmon flakes and reaches 125°F to 130°F in the thickest part.
- Drizzle any pan juices over the fish and serve right away.
Equipment for This Recipe:
- Rimmed sheet pan
- Parchment paper or foil
- Small saucepan or microwave-safe bowl
- Pastry brush
How to Serve This Dish:
Serve the salmon over rice or soba noodles with the broccoli tucked beside it. A squeeze of lime at the table works better than people expect; it wakes up the soy without making the dish taste citrusy.
Pro Tips for This Recipe:
- Use a hot pan: Broccoli gets better color when the tray is already hot from the oven.
- Don’t glaze too early: Sugar burns if it sits under high heat for too long.
- Watch the fish, not the clock: Thick fillets need a minute or two more than thin ones.
Variations on This Dish:
- Sesame Salmon: Add 1 teaspoon toasted sesame oil to the glaze for a deeper nutty note.
- Orange Pantry Salmon: Swap 2 tablespoons of the water for orange juice from a carton or bottle.
Common Mistakes to Avoid with This Dish:
- Overbaking the salmon: It turns dry fast. Pull it when the center still looks slightly translucent.
- Wet broccoli on the tray: Water blocks browning. Pat it dry if you rinsed it recently.
- Using a too-small pan: The broccoli needs breathing room or it steams into softness.
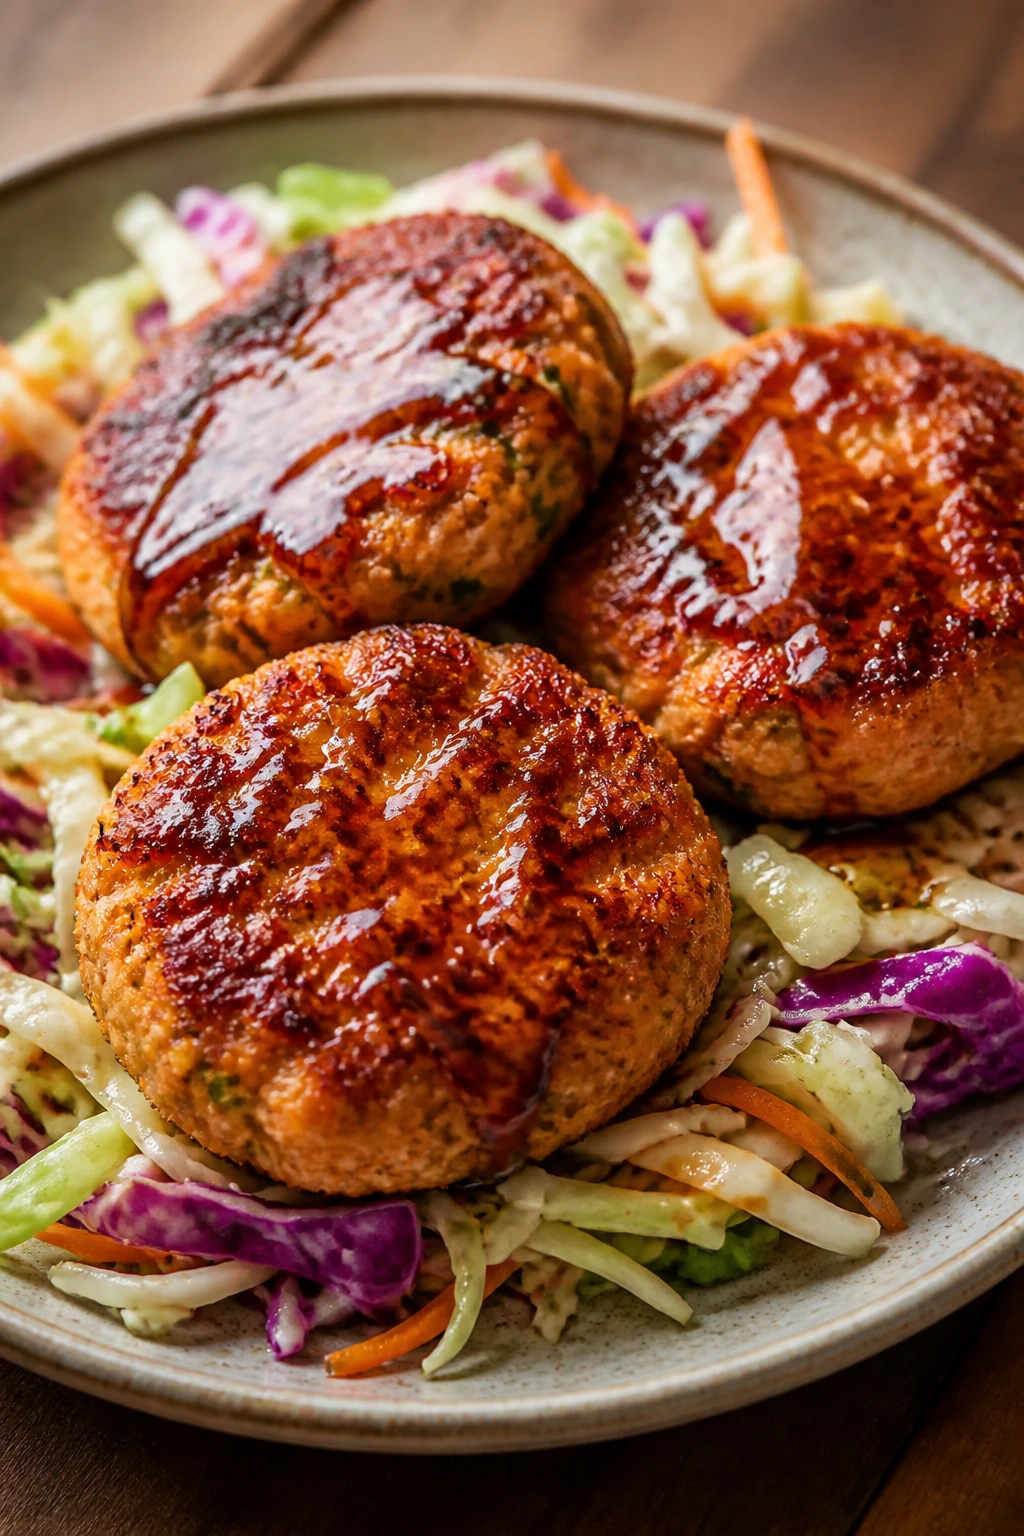
3. Sticky Teriyaki Meatballs
These are the meatballs you make when you want teriyaki without hovering over a skillet for half an hour. The sauce clings to the browned edges and makes them look more fussy than they are.
Why It Works:
Ground pork or turkey gives you a soft, tender base that handles a fast bake. Once the meatballs are cooked, the sauce only needs a short simmer to become thick enough to glaze every crevice.
Key Ingredients:
- 1 pound ground pork or ground turkey
- 1 large egg
- 1/2 cup panko breadcrumbs
- 2 tablespoons soy sauce
- 1 teaspoon garlic powder
- 1 teaspoon onion powder
- 1/4 cup soy sauce
- 3 tablespoons brown sugar
- 1 tablespoon rice vinegar
- 1 teaspoon cornstarch mixed with 1 tablespoon water
Quick Steps:
- Heat the oven to 400°F and line a baking sheet.
- Mix the meat, egg, panko, soy sauce, garlic powder, and onion powder just until combined.
- Roll into 1 1/2-inch balls and bake for 14 to 16 minutes, until the center reaches 165°F.
- Simmer the teriyaki sauce ingredients in a small pan for 2 to 3 minutes, then whisk in the slurry.
- Toss the meatballs in the sauce and serve warm.
Equipment for This Recipe:
- Rimmed baking sheet
- Parchment paper
- Large bowl
- Small saucepan
How to Serve This Dish:
Serve them over rice, noodles, or toothpicks with a bowl of extra sauce on the side. They also hold up well in a lunch box, which is saying something because most sauced meatballs get soggy by noon.
Pro Tips for This Recipe:
- Mix gently: Overworked meatballs turn dense.
- Use parchment: The glaze can stick if you bake them on bare metal.
- Toss while hot: Warm meatballs grab sauce better than cooled ones.
Variations on This Dish:
- Pineapple Party Meatballs: Stir 1/3 cup crushed pineapple into the sauce for a sweeter, rounder glaze.
- Turkey-Only Version: Use ground turkey and add 1 tablespoon oil to the mix so the meatballs stay moist.
Common Mistakes to Avoid with This Dish:
- Packing the meatballs tight: They will bake up hard. Roll them loosely.
- Skipping the slurry: Thin sauce slides off. The cornstarch makes it cling.
- Letting them sit before saucing: Dry surfaces repel glaze, and you lose that sticky finish.
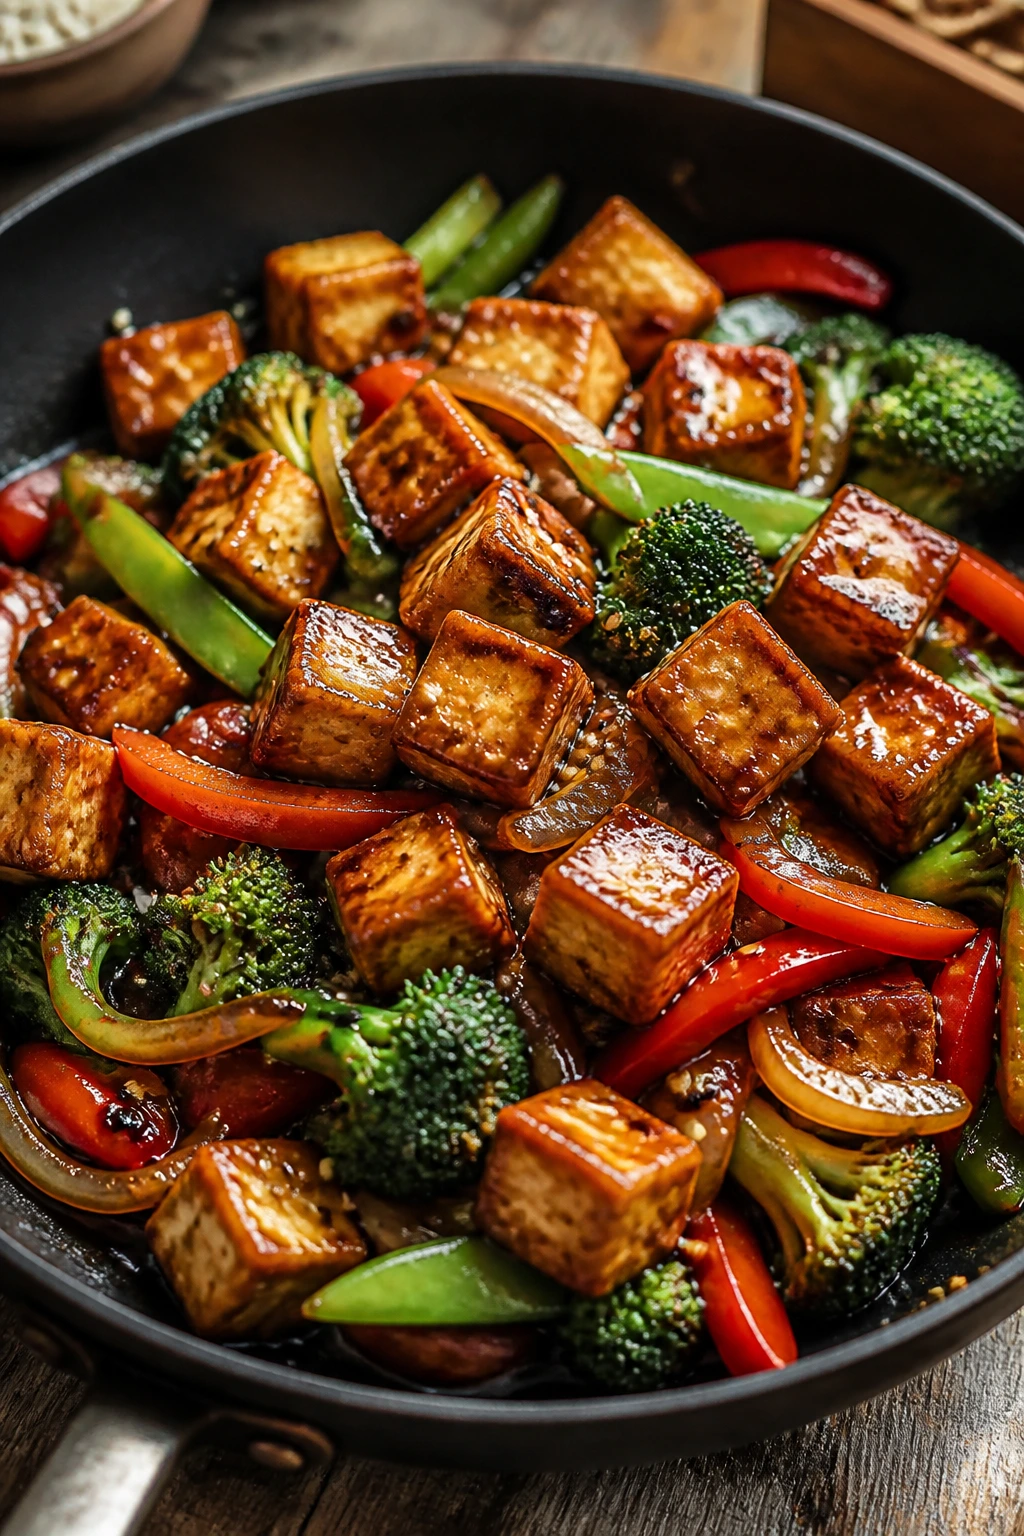
4. Crispy Tofu Teriyaki Stir-Fry
If tofu has ever let you down, this version fixes the problem by pressing it, coating it, and leaving it alone long enough to brown. The result is crisp at the corners and soft in the middle, which is the whole point.
Why It Works:
Cornstarch forms a thin shell on the tofu, so it browns instead of sticking. Once the sauce hits the pan, the crispy edges catch some glaze while the center stays tender.
Key Ingredients:
- 1 block extra-firm tofu, 14 to 16 ounces, drained
- 2 tablespoons cornstarch
- 2 tablespoons oil
- 2 cups frozen stir-fry vegetables
- 1/4 cup soy sauce
- 2 tablespoons brown sugar
- 1 tablespoon rice vinegar
- 2 cloves garlic, minced
- 1 teaspoon grated ginger
Quick Steps:
- Press the tofu for 15 minutes, then cut it into 1-inch cubes.
- Toss the cubes with cornstarch until lightly coated.
- Heat oil in a skillet over medium-high heat and brown the tofu on all sides, about 8 minutes total.
- Add the vegetables and cook 3 to 4 minutes until hot.
- Stir in the sauce ingredients and simmer 1 minute until glossy.
Equipment for This Recipe:
- Heavy skillet or wok
- Tofu press or paper towels and a plate
- Spatula
- Small bowl
How to Serve This Dish:
Serve it over rice, noodles, or even instant ramen with the seasoning packet held back. The sauce is strong enough to carry a bowl of plain grains, which is handy when the pantry is sparse.
Pro Tips for This Recipe:
- Press tofu longer than you think: Fifteen minutes is the bare minimum.
- Leave space in the pan: Tofu gets crisp only if it touches the hot surface.
- Use frozen vegetables straight from the bag: Thawing them first makes them watery.
Variations on This Dish:
- Sesame Mushroom Tofu: Add sliced mushrooms with the vegetables for a deeper, earthier bite.
- Chili Crisp Tofu: Spoon a little chili crisp over the bowl at the end for heat and crunch.
Common Mistakes to Avoid with This Dish:
- Not pressing the tofu: Wet tofu splutters and browns badly.
- Stirring too often: Let the cubes sit long enough to form a crust.
- Adding sauce before the vegetables are hot: The glaze goes dull if the pan temperature drops too much.
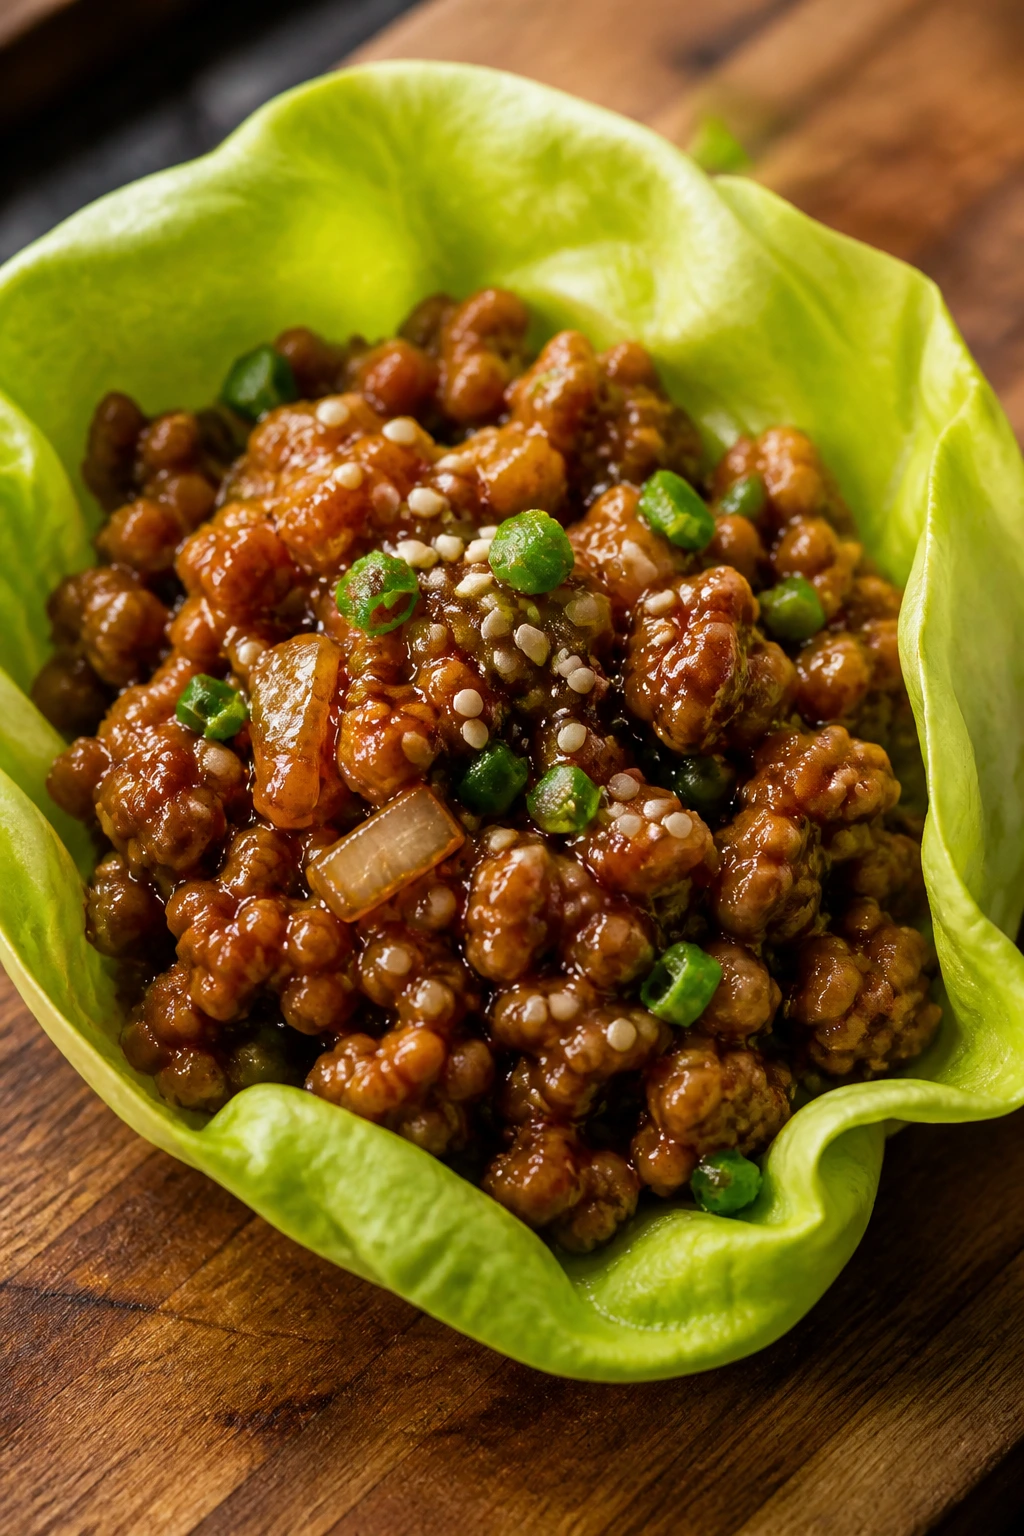
5. Ground Turkey Teriyaki Lettuce Wraps
These wraps are light in the sense that they eat fast, not in the sense that they taste skimpy. The filling is saucy and warm, and the lettuce gives you a cold, crisp edge against it.
Why It Works:
Ground turkey takes on the teriyaki sauce quickly, so you get flavor in minutes. A little carrot gives texture, and the lettuce keeps the dish from feeling like another bowl of rice.
Key Ingredients:
- 1 pound ground turkey
- 1 small onion, finely diced
- 1 cup shredded carrot
- 1/4 cup soy sauce
- 2 tablespoons brown sugar
- 1 tablespoon rice vinegar
- 2 cloves garlic, minced
- 1 teaspoon grated ginger
- 1 tablespoon cornstarch mixed with 1 tablespoon water
- 1 head butter lettuce, leaves separated
Quick Steps:
- Brown the turkey and onion in a skillet over medium-high heat for 6 to 7 minutes.
- Stir in the carrot, garlic, and ginger, and cook 1 minute.
- Add the soy sauce, brown sugar, and vinegar, then simmer 2 minutes.
- Stir in the slurry and cook until the filling looks glossy and lightly thickened.
- Spoon into lettuce leaves and serve right away.
Equipment for This Recipe:
- Large skillet
- Wooden spoon
- Sharp knife
- Small bowl
How to Serve This Dish:
Set the filling in a bowl and the lettuce leaves on a platter so everyone can build their own. A handful of chopped peanuts or scallions on top gives the wraps a little crunch if you want it.
Pro Tips for This Recipe:
- Use cold lettuce leaves: They snap better and hold the filling without collapsing.
- Dice the onion small: Big pieces distract from the texture of the filling.
- Drain off excess fat only if needed: A little stays behind and helps the sauce coat the meat.
Variations on This Dish:
- Chicken Lettuce Wraps: Ground chicken works the same way and has a slightly softer texture.
- Spicy Wraps: Add 1 teaspoon sriracha or chili paste to the sauce.
Common Mistakes to Avoid with This Dish:
- Overfilling the leaves: They tear fast. A few spoonfuls is enough.
- Using dry iceberg wedges with no bend: Butter lettuce folds better and eats cleaner.
- Letting the filling cool too much: Warm filling makes the sauce taste fuller.
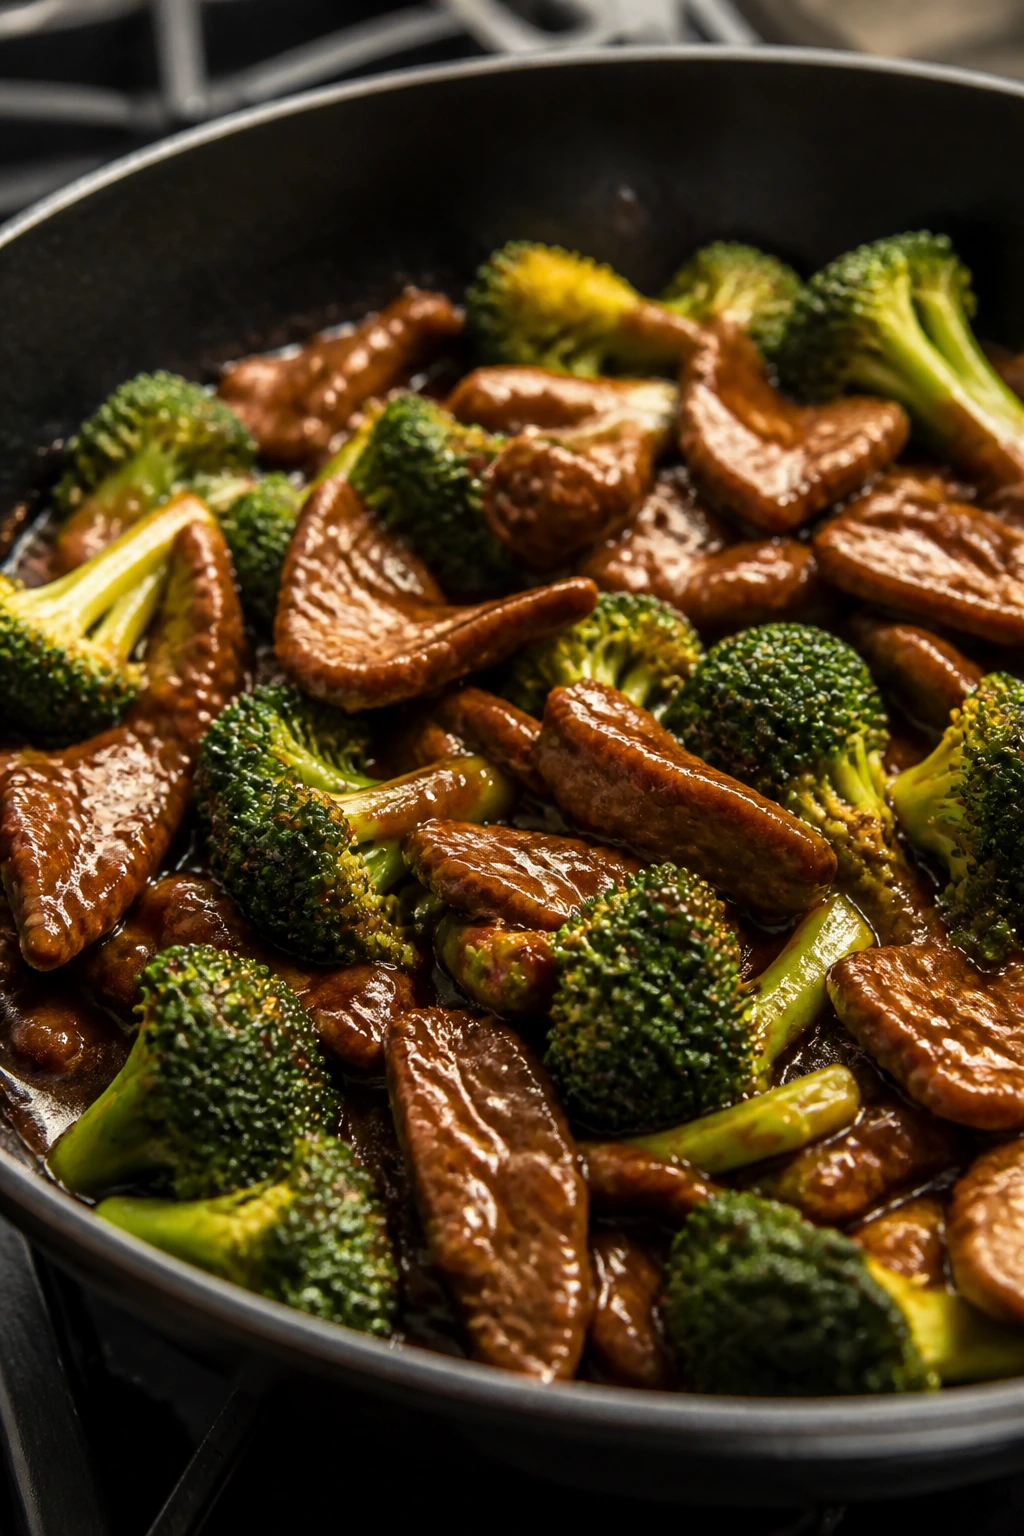
6. Beef and Broccoli Teriyaki Skillet
This is the kind of skillet dinner that makes the stove look more capable than it really is. Thin beef, quick broccoli, sticky sauce. That’s the whole story, and it’s a good one.
Why It Works:
Slicing the beef thin gives it a fast sear and keeps it tender. Broccoli cooks just enough to stay green and firm, then the teriyaki glaze pulls everything together in the last minute.
Key Ingredients:
- 1 pound flank steak, sliced very thin against the grain
- 4 cups broccoli florets
- 2 tablespoons oil
- 1/4 cup soy sauce
- 2 tablespoons brown sugar
- 2 tablespoons water
- 2 cloves garlic, minced
- 1 teaspoon grated ginger
- 1 tablespoon cornstarch mixed with 1 tablespoon water
Quick Steps:
- Toss the sliced beef with 1 teaspoon of the soy sauce and let it sit 10 minutes.
- Heat oil in a skillet and sear the beef for 2 to 3 minutes, then remove it.
- Add the broccoli with a splash of water and cover for 2 minutes to steam.
- Stir in the sauce ingredients and simmer 1 minute.
- Return the beef, add the slurry, and toss until the sauce looks thick and shiny.
Equipment for This Recipe:
- Large skillet or wok
- Sharp knife
- Cutting board
- Lid or sheet pan to cover the skillet
How to Serve This Dish:
Serve it over plain rice so the sauce has somewhere to go. If you want a little more heft, add a fried egg on top and let the yolk run into the glaze.
Pro Tips for This Recipe:
- Freeze the steak for 15 minutes first: It slices cleaner.
- Steam the broccoli briefly: Raw florets stay too hard; overcooked ones go swampy.
- Pull the beef early: It finishes fast once it goes back into the sauce.
Variations on This Dish:
- Mushroom Broccoli Beef: Add sliced mushrooms with the broccoli for a deeper pan flavor.
- Garlic-Heavy Version: Add a third clove of garlic if you want the sauce sharper.
Common Mistakes to Avoid with This Dish:
- Slicing with the grain: The beef gets chewy. Cut across the lines.
- Cooking the beef too long on the first pass: It will toughen when it goes back into the sauce.
- Skipping the water steam on the broccoli: That short covered step keeps the florets from staying raw in the center.
7. Teriyaki Shrimp Noodle Stir-Fry
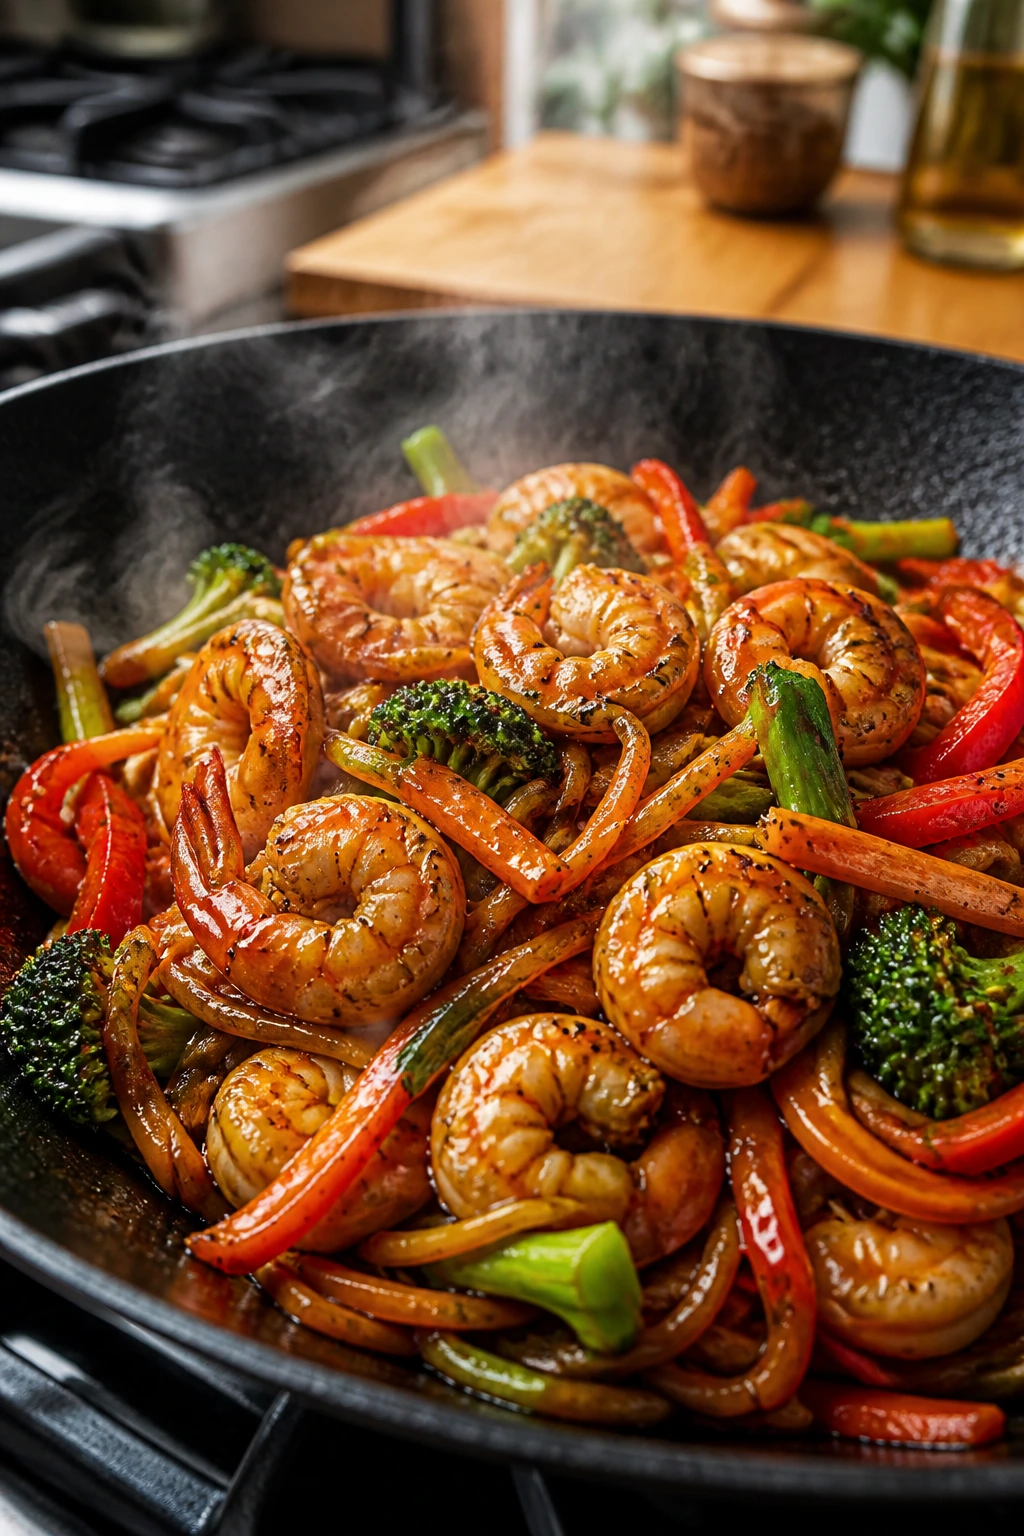
Shrimp asks for almost nothing, which is part of the charm. A hot pan, a few vegetables, a handful of noodles, and the teriyaki glaze does the rest.
Why It Works:
Shrimp cooks in minutes, so the whole meal moves fast without getting fussy. The noodles catch the sauce better than rice does, especially if you loosen the pan with a spoonful of noodle water.
Key Ingredients:
- 1 pound large shrimp, peeled and deveined
- 8 ounces spaghetti, ramen, or lo mein noodles
- 2 tablespoons oil
- 2 cups frozen mixed vegetables
- 1/4 cup soy sauce
- 2 tablespoons brown sugar
- 1 tablespoon rice vinegar
- 2 cloves garlic, minced
- 1 teaspoon grated ginger
Quick Steps:
- Cook the noodles until just tender, then drain and save 1/4 cup of the water.
- Stir-fry the shrimp in oil over medium-high heat for 2 minutes per side, then remove them.
- Cook the frozen vegetables for 3 minutes in the same pan.
- Add the sauce ingredients and 2 tablespoons of noodle water, then simmer 1 minute.
- Toss in the noodles and shrimp, and cook 30 seconds more until coated.
Equipment for This Recipe:
- Large skillet or wok
- Pot for noodles
- Colander
- Tongs
How to Serve This Dish:
Twirl the noodles into bowls first, then spoon the shrimp and vegetables over the top. A scatter of scallions or sesame seeds gives the dish a little lift, but it does not need much.
Pro Tips for This Recipe:
- Don’t overcook the shrimp: They turn rubbery fast and keep cooking once they go back in.
- Use leftover noodles if you have them: Day-old noodles cling better than freshly drained ones.
- Keep the heat high enough for a quick toss: Low heat makes the sauce watery.
Variations on This Dish:
- Spicy Noodle Bowl: Add chili flakes or chili oil to the sauce.
- Peanut Noodle Angle: Stir 1 tablespoon peanut butter into the sauce for a thicker, richer bowl.
Common Mistakes to Avoid with This Dish:
- Boiling the shrimp too long: They should be opaque and curled, not tight little commas.
- Skipping the reserved water: A splash helps the sauce cling instead of clumping.
- Letting the noodles sit in the colander: Toss them while warm so they do not stick together.
8. Teriyaki Fried Rice with Eggs and Peas
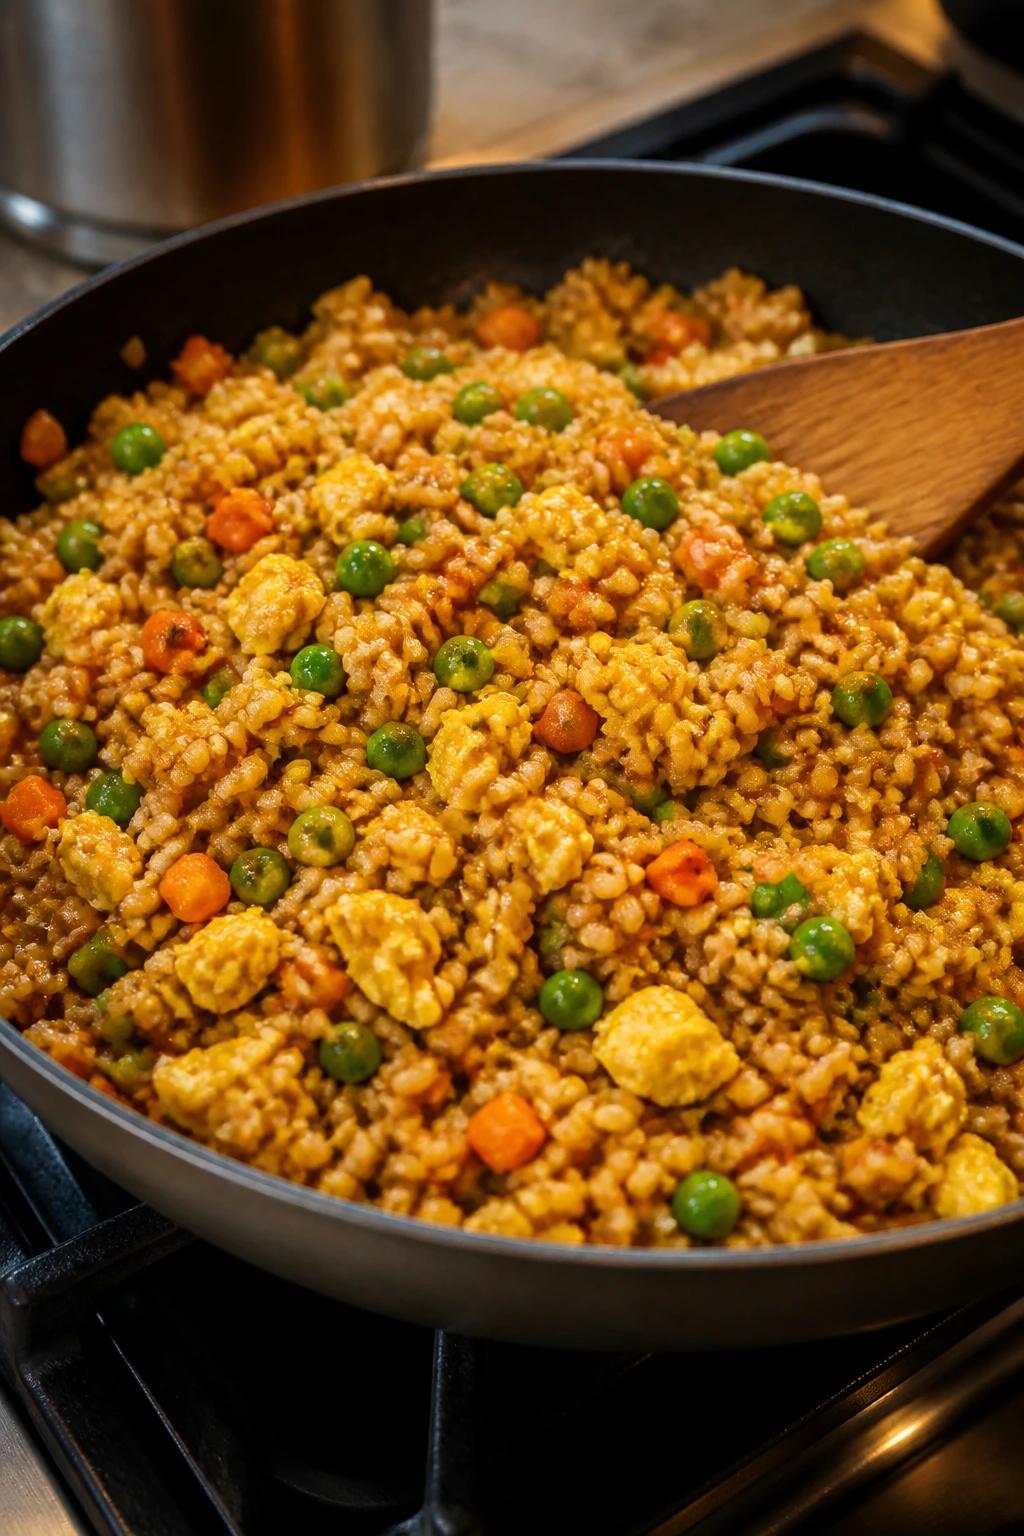
Fried rice is where pantry staples stop looking like leftovers and start looking like a plan. Cold rice, a few eggs, frozen peas, and teriyaki sauce make a skillet that tastes far more organized than the ingredient list suggests.
Why It Works:
Cold rice dries out a little in the fridge, and that helps the grains fry instead of mush. The teriyaki sauce seasons the rice without drowning it, which is the biggest mistake people make with fried rice.
Key Ingredients:
- 4 cups cold cooked rice
- 3 large eggs
- 1 cup frozen peas and carrots
- 2 tablespoons oil
- 3 tablespoons soy sauce
- 1 tablespoon brown sugar
- 1 clove garlic, minced
- 1 teaspoon sesame oil
- 2 sliced scallions
Quick Steps:
- Scramble the eggs in 1 teaspoon oil, then transfer them to a plate.
- Cook the frozen vegetables in the remaining oil for 2 minutes.
- Add the rice and break it up with a spatula.
- Stir in the soy sauce, brown sugar, garlic, and sesame oil, then fry 3 to 4 minutes.
- Fold the eggs back in and finish with scallions.
Equipment for This Recipe:
- Large skillet or wok
- Spatula
- Small bowl
- Fork or chopsticks for breaking up rice
How to Serve This Dish:
Serve it as a main or next to grilled chicken, salmon, or tofu. A fried egg on top is not required, but I never argue against one.
Pro Tips for This Recipe:
- Use rice that has chilled overnight: Fresh rice goes soft and sticky.
- Scrape the pan often: Rice likes to sit and scorch in one spot.
- Keep the sauce modest: Too much soy makes fried rice heavy and dark.
Variations on This Dish:
- Spam Fried Rice: Dice a few slices of pantry spam and crisp them with the vegetables.
- Vegetable-Heavy Bowl: Add cabbage or chopped broccoli stems to stretch the dish further.
Common Mistakes to Avoid with This Dish:
- Using hot rice: It clumps and steams.
- Pouring in a lot of sauce at once: The pan turns wet, and the fried part disappears.
- Skipping the egg scramble step: Eggs mixed in too early disappear into the rice instead of staying in soft pieces.
9. Pork Tenderloin Teriyaki with Green Beans
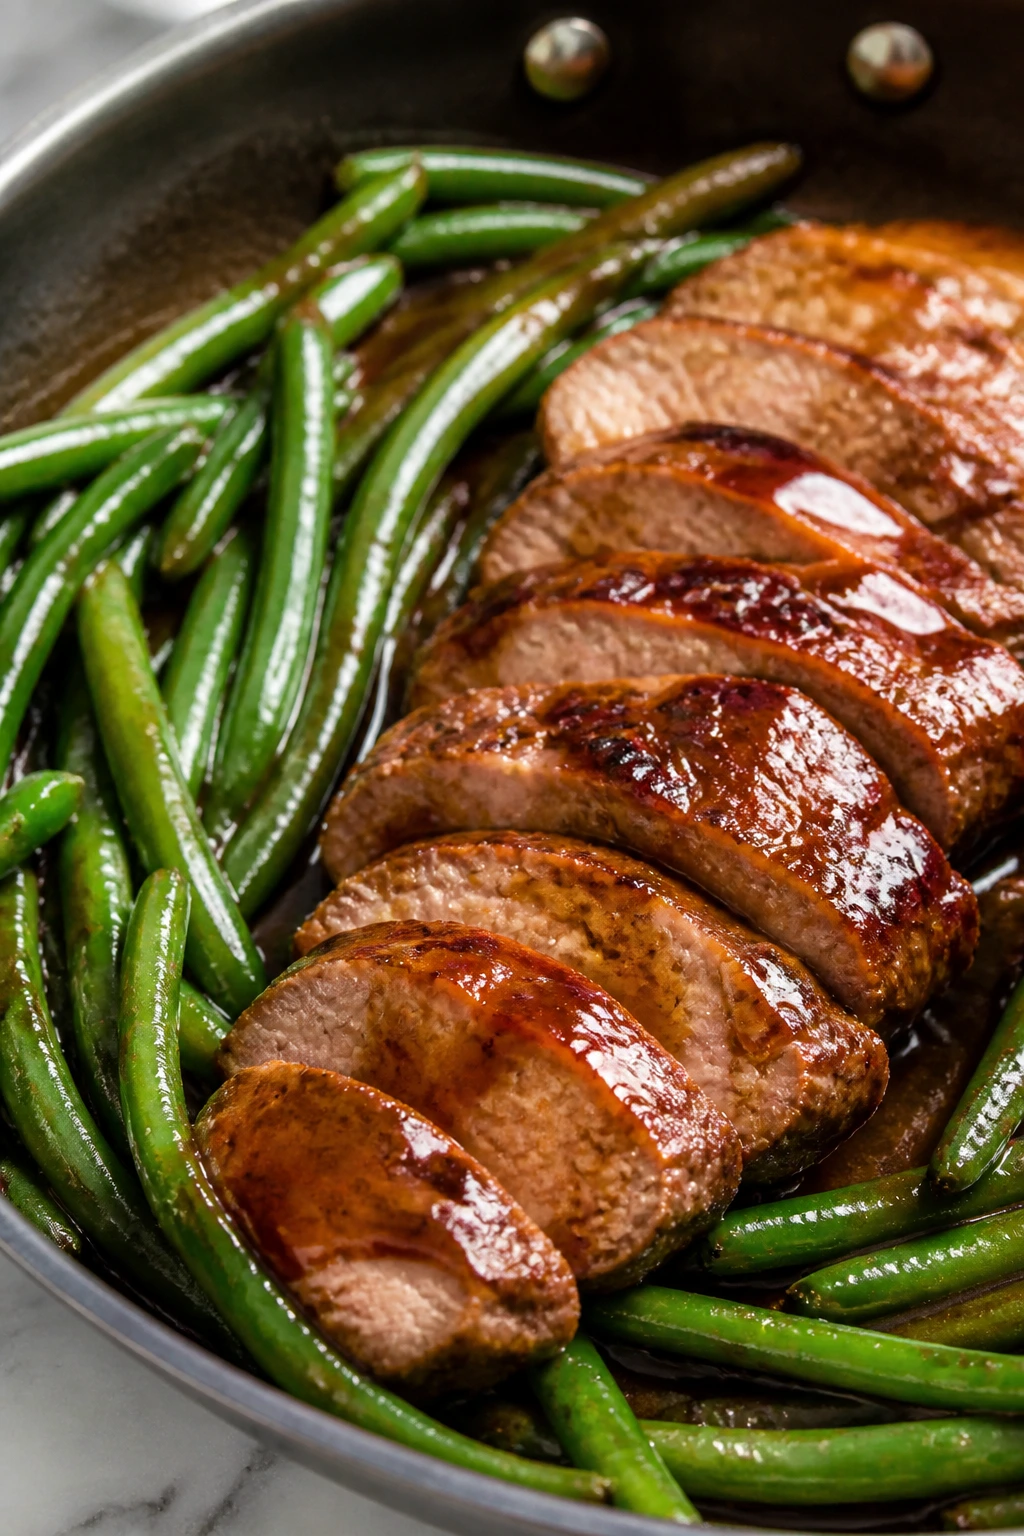
Pork tenderloin is mild enough to pick up the glaze and lean enough to benefit from it. Once it’s seared, roasted, and sliced, the pan juices turn into a sauce that tastes like it took more than 20 minutes.
Why It Works:
Tenderloin cooks fast, so the teriyaki glaze only needs the last part of the roast to avoid burning. Green beans can roast in the same pan and catch the caramelized edges from the sauce.
Key Ingredients:
- 1 1/2 pounds pork tenderloin
- 3 cups green beans, trimmed
- 2 tablespoons oil
- 1/4 cup soy sauce
- 2 tablespoons brown sugar
- 1 tablespoon rice vinegar
- 2 cloves garlic, minced
- 1 teaspoon grated ginger
- 1 tablespoon cornstarch mixed with 1 tablespoon water
Quick Steps:
- Heat the oven to 425°F.
- Sear the pork in oil over medium-high heat for 2 minutes per side.
- Whisk the sauce ingredients and brush half over the pork.
- Roast the pork and green beans for 12 to 15 minutes, until the pork reaches 145°F.
- Rest the pork for 5 minutes, slice, and spoon the pan sauce over it.
Equipment for This Recipe:
- Oven-safe skillet or sheet pan
- Instant-read thermometer
- Small bowl
- Knife for slicing
How to Serve This Dish:
Slice the pork thin and fan it over rice or mashed potatoes if you want a softer plate. The green beans bring enough bite that you do not need a second vegetable.
Pro Tips for This Recipe:
- Rest the pork: Five minutes keeps the juices from running out onto the cutting board.
- Use the thermometer: Tenderloin goes from juicy to dry in a short window.
- Cut the beans evenly: Smaller beans roast faster and more evenly.
Variations on This Dish:
- Garlic-Forward Pork: Add an extra clove of garlic and let it simmer in the glaze.
- Pineapple Pork Roast: Add a few pineapple chunks to the pan during the last 5 minutes.
Common Mistakes to Avoid with This Dish:
- Overcooking tenderloin: It dries out fast. Pull it at 145°F.
- Glazing too early: Sugar can scorch in a hot oven.
- Skipping the rest time: Slicing right away sends the juices everywhere except the plate.
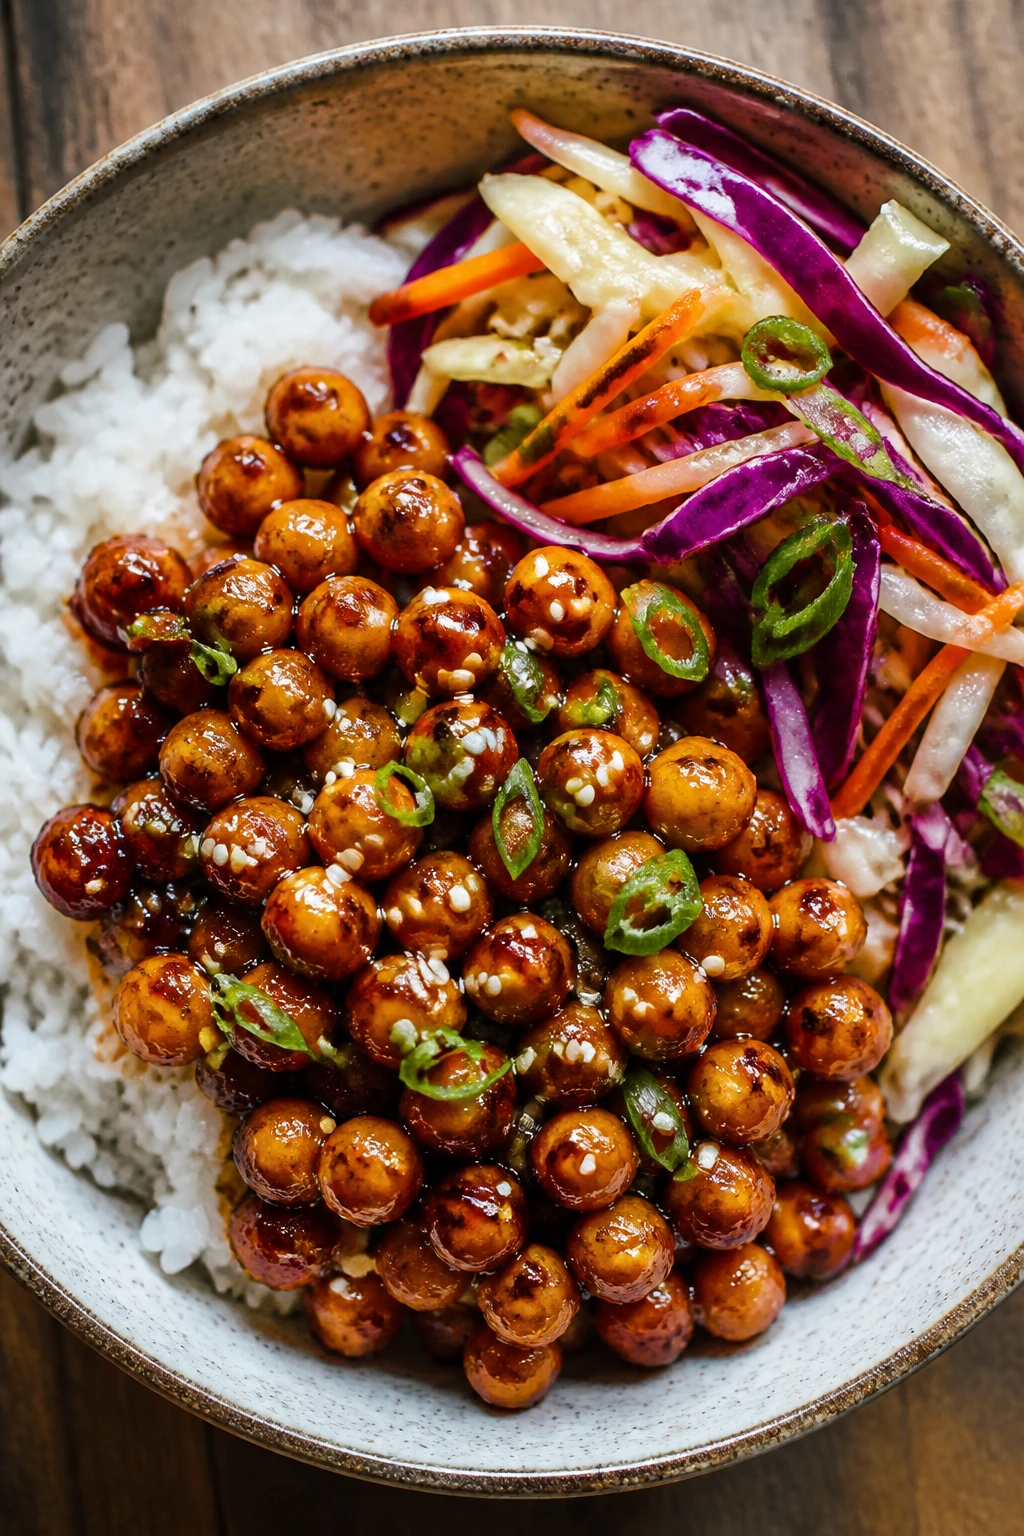
10. Roasted Cauliflower and Chickpea Teriyaki Bowls
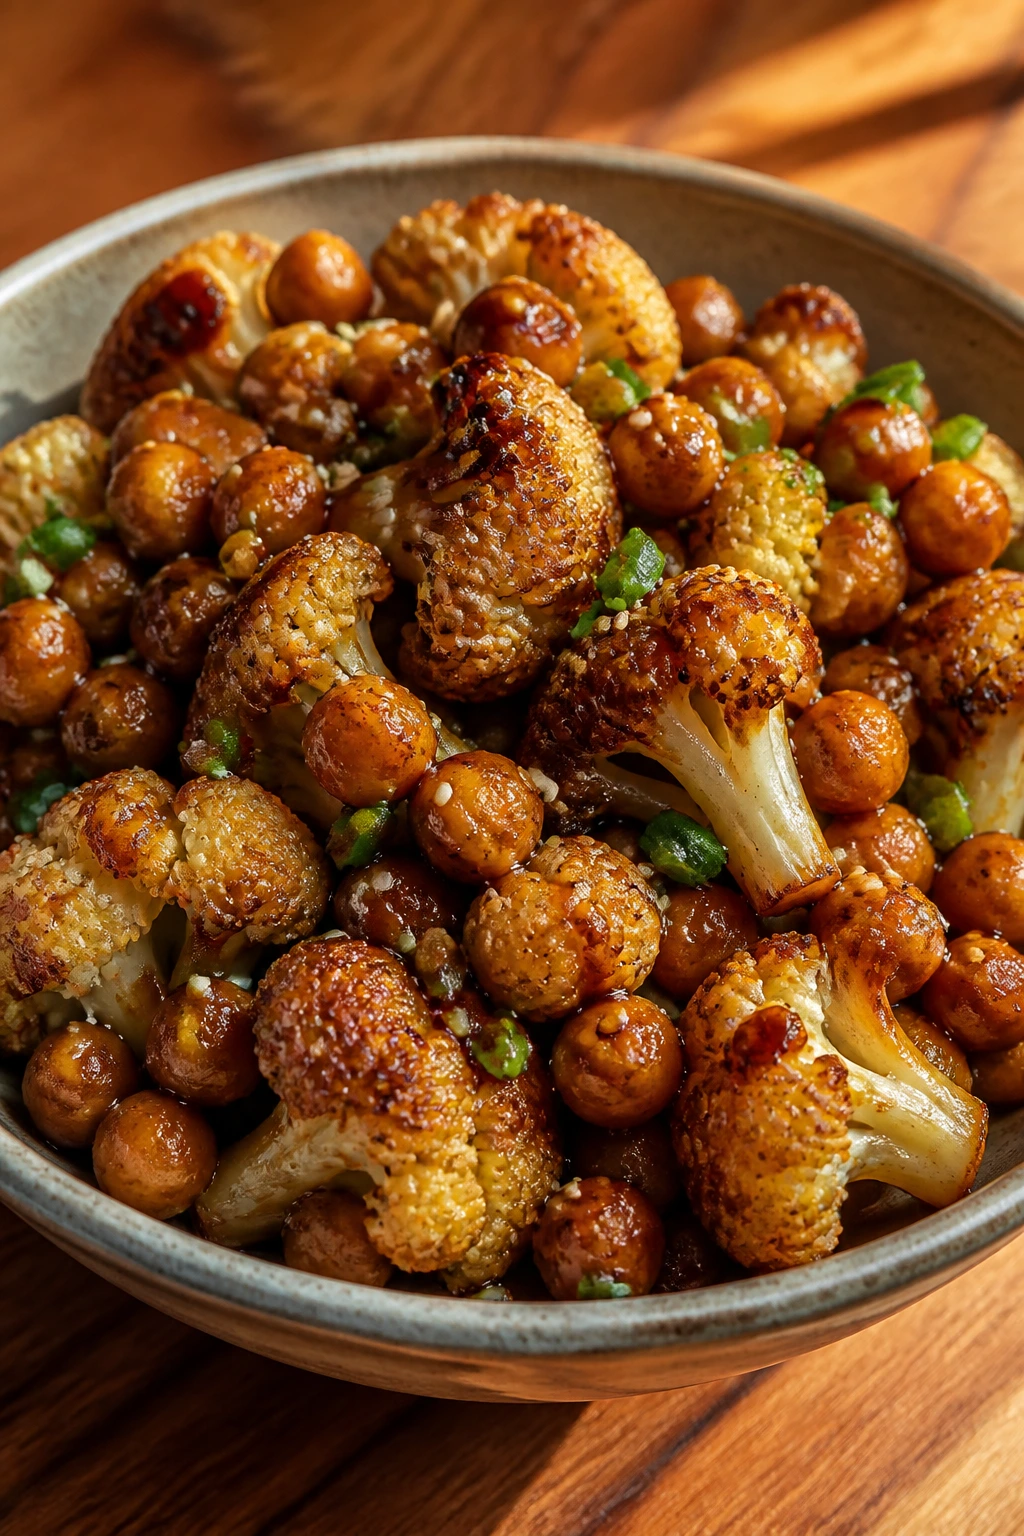
This is the pantry bowl that gets respect from people who usually ask where the meat is. Roasted cauliflower picks up browned edges, chickpeas add heft, and the sauce fills in the gaps.
Why It Works:
Cauliflower and chickpeas roast well at the same temperature, so you can cook them together without babysitting. The teriyaki glaze lands after roasting, which keeps the chickpeas from going soggy.
Key Ingredients:
- 1 medium head cauliflower, cut into florets
- 1 can chickpeas, drained and rinsed
- 2 tablespoons oil
- 1/4 cup soy sauce
- 2 tablespoons brown sugar
- 1 tablespoon rice vinegar
- 2 cloves garlic, minced
- 1 teaspoon grated ginger
- 3 cups cooked rice
Quick Steps:
- Heat the oven to 425°F and spread the cauliflower and chickpeas on a sheet pan.
- Toss with oil and roast for 20 minutes, stirring once.
- Simmer the sauce ingredients in a small pan for 2 to 3 minutes until it looks syrupy.
- Toss the roasted vegetables with the sauce.
- Spoon over rice and finish with sesame seeds if you have them.
Equipment for This Recipe:
- Sheet pan
- Small saucepan
- Mixing bowl
- Spatula
How to Serve This Dish:
Serve the bowl warm with rice underneath so the glaze collects at the bottom. A handful of sliced cucumber on the side cools the sweet-salty sauce without changing the flavor.
Pro Tips for This Recipe:
- Dry the chickpeas well: Wet chickpeas roast less evenly.
- Roast until the cauliflower shows real color: Pale cauliflower tastes flat.
- Use parchment if your pan runs sticky: Sugar in the glaze can grab the metal fast.
Variations on This Dish:
- Sweet Potato Swap: Replace half the cauliflower with cubes of sweet potato and roast 5 minutes longer.
- Spicy Pantry Bowl: Stir chili paste into the sauce for heat that sits under the sweetness.
Common Mistakes to Avoid with This Dish:
- Saucing before roasting: The vegetables soften and steam instead of browning.
- Under-roasting the cauliflower: You want edges that look toasted, not just warmed.
- Skipping the rice: Without a base, the bowl feels too sharp and too saucy.
11. Grilled Teriyaki Chicken Skewers

Skewers always make people act like there was more effort involved than there really was. A quick teriyaki marinade, a hot grill or broiler, and the edges turn sticky in the best possible way.
Why It Works:
Small pieces cook fast and pick up more glaze than a whole piece of chicken would. The sugar in the sauce helps the edges char lightly, which gives you that lacquered finish people chase.
Key Ingredients:
- 1 1/2 pounds boneless chicken thighs, cut into 1 1/2-inch pieces
- 1/4 cup soy sauce
- 2 tablespoons brown sugar
- 1 tablespoon rice vinegar
- 2 cloves garlic, minced
- 1 teaspoon grated ginger
- 1 tablespoon oil
- Wooden or metal skewers
- 1 small onion, cut into chunks
Quick Steps:
- Marinate the chicken with the sauce ingredients for 15 to 30 minutes.
- Thread chicken and onion onto skewers.
- Grill or broil over high heat for 10 to 12 minutes, turning once.
- Brush with extra sauce during the last 2 minutes.
- Cook until the chicken reaches 165°F and the edges look caramelized.
Equipment for This Recipe:
- Grill, grill pan, or broiler
- Skewers
- Mixing bowl
- Tongs
How to Serve This Dish:
Serve the skewers with rice or over a cabbage slaw if you want something fresher. They also work well straight from the pan with a bowl of extra sauce for dipping.
Pro Tips for This Recipe:
- Soak wooden skewers for 20 minutes: They burn less.
- Keep the pieces the same size: Uneven chunks cook unevenly.
- Brush near the end: Early glazing can blacken before the chicken cooks through.
Variations on This Dish:
- Pineapple Skewers: Add canned pineapple chunks between the chicken pieces.
- Veggie Mix Skewers: Alternate chicken with bell pepper and onion if you want more color.
Common Mistakes to Avoid with This Dish:
- Marinating too long with a sugary sauce: The surface can get sticky before it cooks.
- Crowding the skewers: Tight packing keeps the centers from cooking evenly.
- Walking away from the broiler: Sugar burns fast under high heat.
12. Salmon and Rice Noodle Teriyaki Bowls
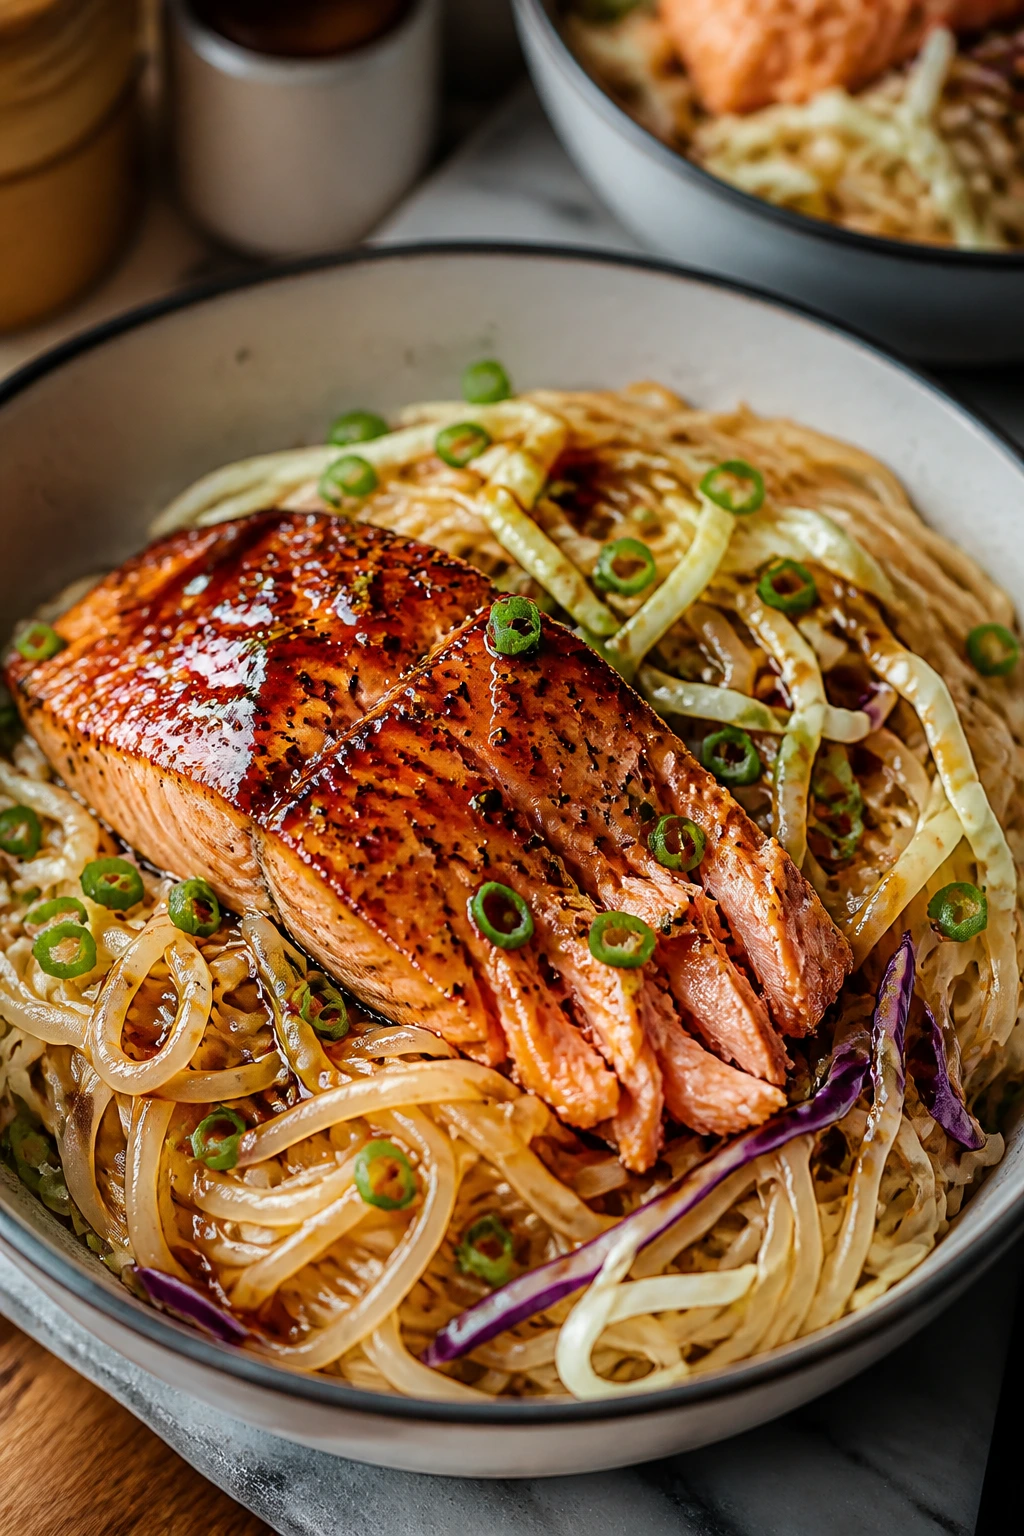
Rice noodles make this bowl feel lighter and a little silkier than a rice version. The salmon flakes into the noodles, and the teriyaki sauce catches in the curls like it was waiting for them.
Why It Works:
Rice noodles take on sauce fast, which is useful because salmon does not need a long cooking time. The whole bowl comes together in separate pieces, then gets pulled together at the end instead of being overmixed.
Key Ingredients:
- 4 salmon fillets, about 5 ounces each
- 8 ounces rice noodles
- 2 cups shredded cabbage or spinach
- 1/4 cup soy sauce
- 2 tablespoons brown sugar
- 1 tablespoon rice vinegar
- 2 cloves garlic, minced
- 1 teaspoon grated ginger
- 1 tablespoon sesame oil
Quick Steps:
- Cook the rice noodles according to the package directions, then rinse briefly and drain.
- Bake or pan-sear the salmon until it flakes easily and reaches 125°F to 130°F.
- Simmer the sauce ingredients in a small pan for 2 minutes.
- Toss the noodles with cabbage, sesame oil, and half the sauce.
- Top with salmon and drizzle the remaining sauce over the bowl.
Equipment for This Recipe:
- Pot for noodles
- Skillet or baking sheet
- Small saucepan
- Tongs
How to Serve This Dish:
Serve the noodles in shallow bowls so the salmon sits on top instead of disappearing into the pile. A few scallions or sesame seeds are enough to finish it.
Pro Tips for This Recipe:
- Rinse the noodles briefly: It stops them from sticking into a brick.
- Cook salmon gently: High heat dries the edges before the center is done.
- Toss, then top: Keep the fish on top so it stays in visible pieces.
Variations on This Dish:
- Cold Noodle Version: Chill the noodles and serve the salmon warm over them.
- Cabbage-Heavy Bowl: Use mostly cabbage and only a handful of noodles for a crunchier plate.
Common Mistakes to Avoid with This Dish:
- Overcooking the noodles: They go limp and lose their bounce.
- Mixing too aggressively: The salmon breaks apart and disappears.
- Using too much sesame oil: It can take over the bowl if you pour with a heavy hand.
13. Veggie Udon in Teriyaki Sauce
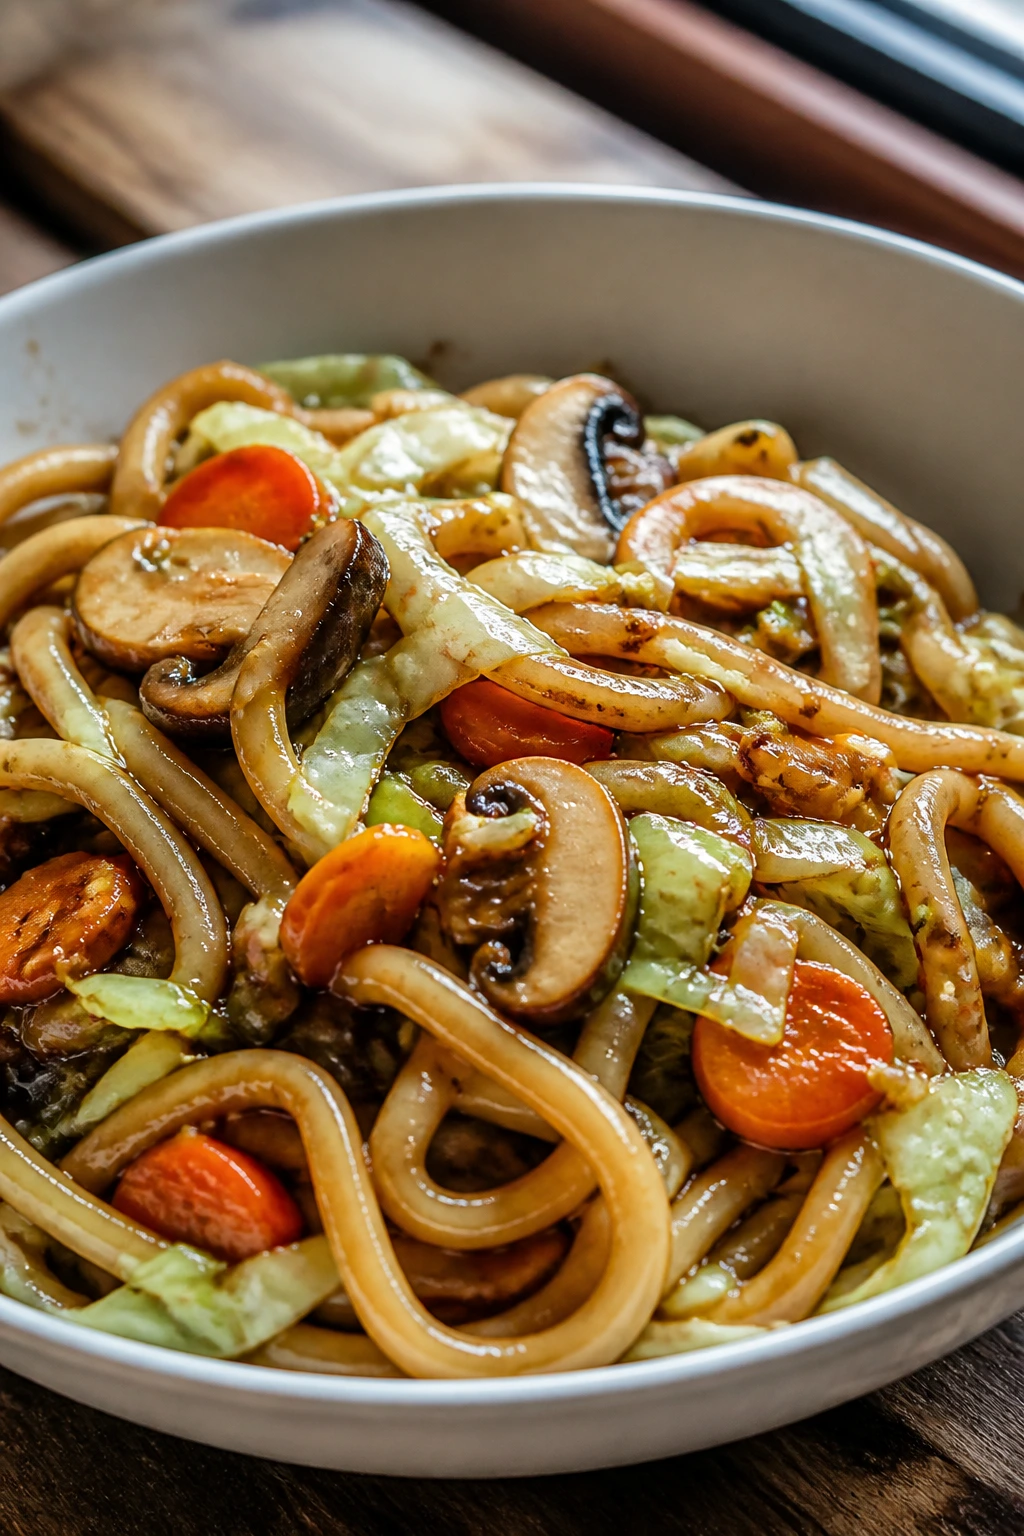
This is the one that smells like dinner before the noodles even hit the bowl. Mushrooms, cabbage, and a glossy teriyaki sauce make a skillet that feels richer than it looks on paper.
Why It Works:
Udon has enough chew to stand up to sauce without turning soft. The vegetables cook fast, but they still keep some bite, which matters when you want the sauce to be the loud part.
Key Ingredients:
- 14 ounces shelf-stable or frozen udon noodles
- 8 ounces mushrooms, sliced
- 3 cups shredded cabbage
- 1 cup sliced carrots
- 2 tablespoons oil
- 1/4 cup soy sauce
- 2 tablespoons brown sugar
- 2 cloves garlic, minced
- 1 teaspoon grated ginger
Quick Steps:
- Cook the udon noodles and drain them.
- Stir-fry the mushrooms in oil over medium-high heat until browned, about 4 minutes.
- Add cabbage and carrots and cook 2 more minutes.
- Stir in the sauce ingredients and let them bubble for 1 minute.
- Toss in the noodles and stir until everything is coated.
Equipment for This Recipe:
- Large skillet or wok
- Pot for noodles
- Spatula
- Colander
How to Serve This Dish:
Serve it in wide bowls with chopsticks or forks, whichever feels less annoying that day. A soft-boiled egg on top is a good move if you want more richness.
Pro Tips for This Recipe:
- Brown the mushrooms first: They need that first hot minute to stop tasting wet.
- Use shredded cabbage, not huge chunks: It should soften in the time the noodles warm.
- Keep a splash of noodle water nearby: It helps if the sauce tightens too much.
Variations on This Dish:
- Ginger Mushroom Udon: Add an extra half teaspoon of ginger for a sharper finish.
- Tofu Noodle Version: Add crisp tofu cubes from Recipe 4 if you want protein in the bowl.
Common Mistakes to Avoid with This Dish:
- Overcrowding the pan: The vegetables steam and lose their edges.
- Skipping the noodle drain: Excess water makes the sauce thin and dull.
- Letting the sauce reduce too far: Udon needs some gloss, not a dry coating.
14. Teriyaki Burger Sliders
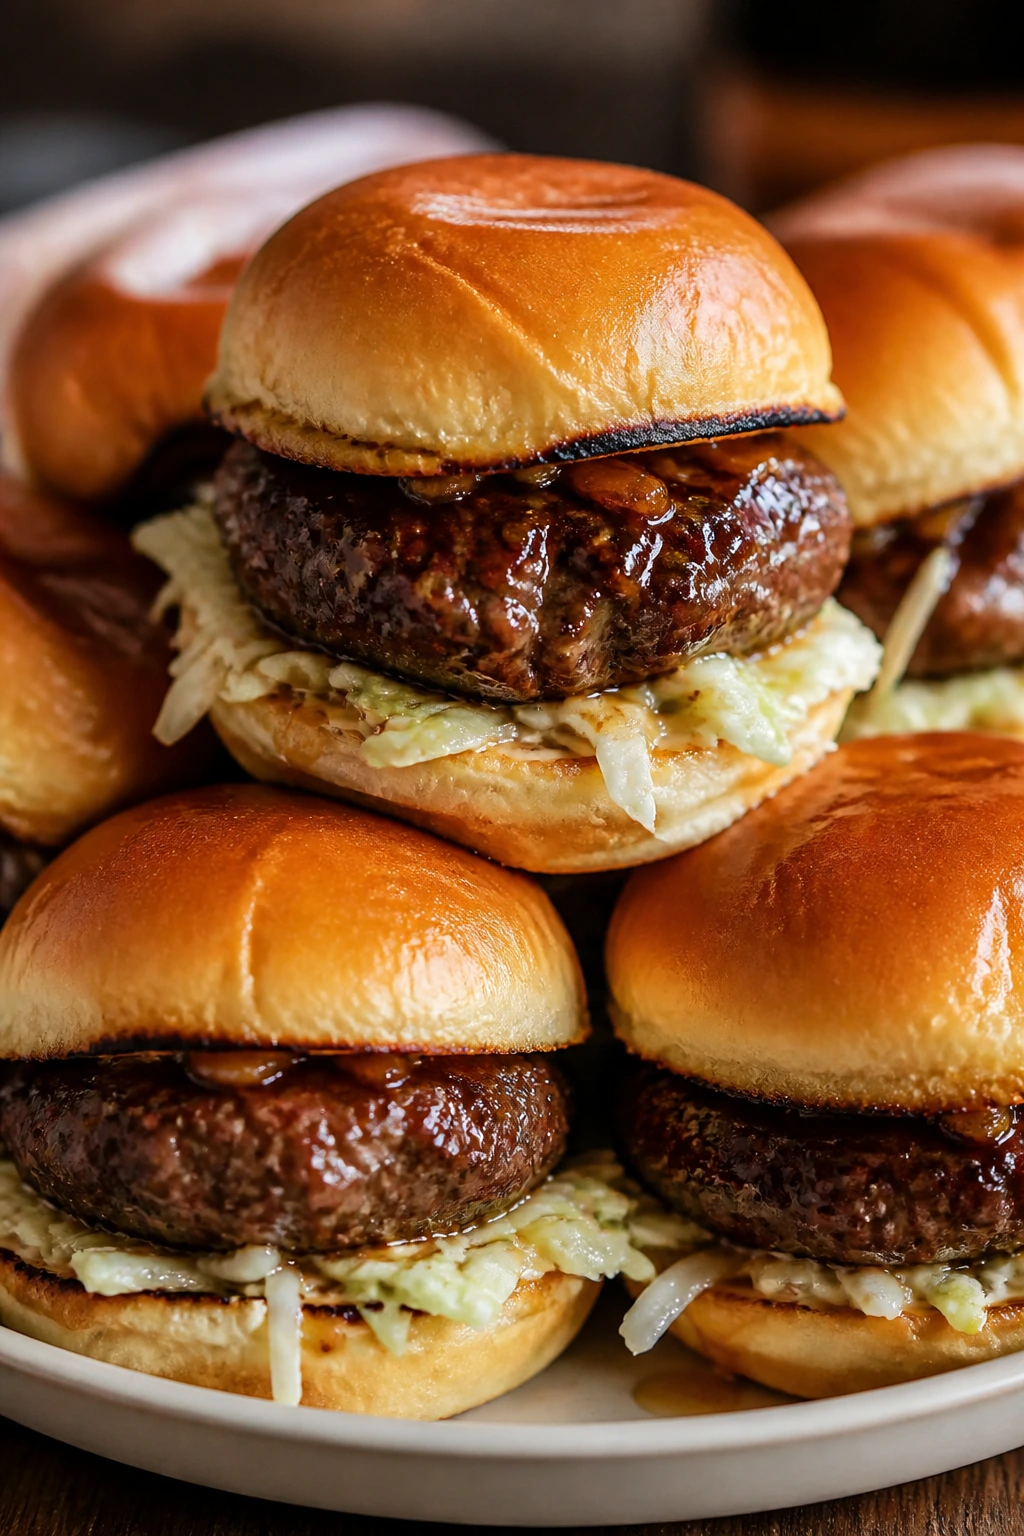
These are a little strange in the best way. The beef gets a teriyaki gloss, the buns soften just enough, and the whole thing eats like a backyard burger that took a detour through a stir-fry.
Why It Works:
A small amount of soy sauce in the patties gives the beef a deeper savory note without making the burgers taste like soup. The glaze goes on at the end, so the sugar doesn’t scorch in the pan.
Key Ingredients:
- 1 pound ground beef
- 1 tablespoon soy sauce
- 1 teaspoon garlic powder
- 1 teaspoon onion powder
- 1 tablespoon oil
- 1/4 cup soy sauce
- 2 tablespoons brown sugar
- 1 tablespoon rice vinegar
- 8 slider buns
- 1 cup shredded cabbage or coleslaw mix
Quick Steps:
- Mix the ground beef with 1 tablespoon soy sauce, garlic powder, and onion powder.
- Shape into 8 small patties.
- Sear in oil over medium-high heat for 3 minutes per side, until cooked through.
- Simmer the glaze ingredients for 2 minutes, then brush on the patties.
- Build the sliders with cabbage on the buns and serve warm.
Equipment for This Recipe:
- Skillet
- Mixing bowl
- Spatula
- Small saucepan
How to Serve This Dish:
Serve the sliders hot, with the cabbage tucked under the patty so the bun does not go soggy right away. A few pickles on the side help cut the sweetness, which I prefer.
Pro Tips for This Recipe:
- Keep the patties thin: Sliders should be quick, not thick and awkward.
- Brush the sauce after cooking: The sugar stays glossy instead of burning.
- Toast the buns lightly: It gives them a little protection from the glaze.
Variations on This Dish:
- Cheddar Slider Version: Add a thin slice of cheddar if you want a more familiar burger feel.
- Turkey Slider Version: Ground turkey works well, but add a teaspoon of oil to the mix.
Common Mistakes to Avoid with This Dish:
- Overmixing the meat: The patties get dense.
- Making the glaze too thick: It should brush on, not clump.
- Skipping the cabbage: The crunch keeps the slider from eating like a soft blob.
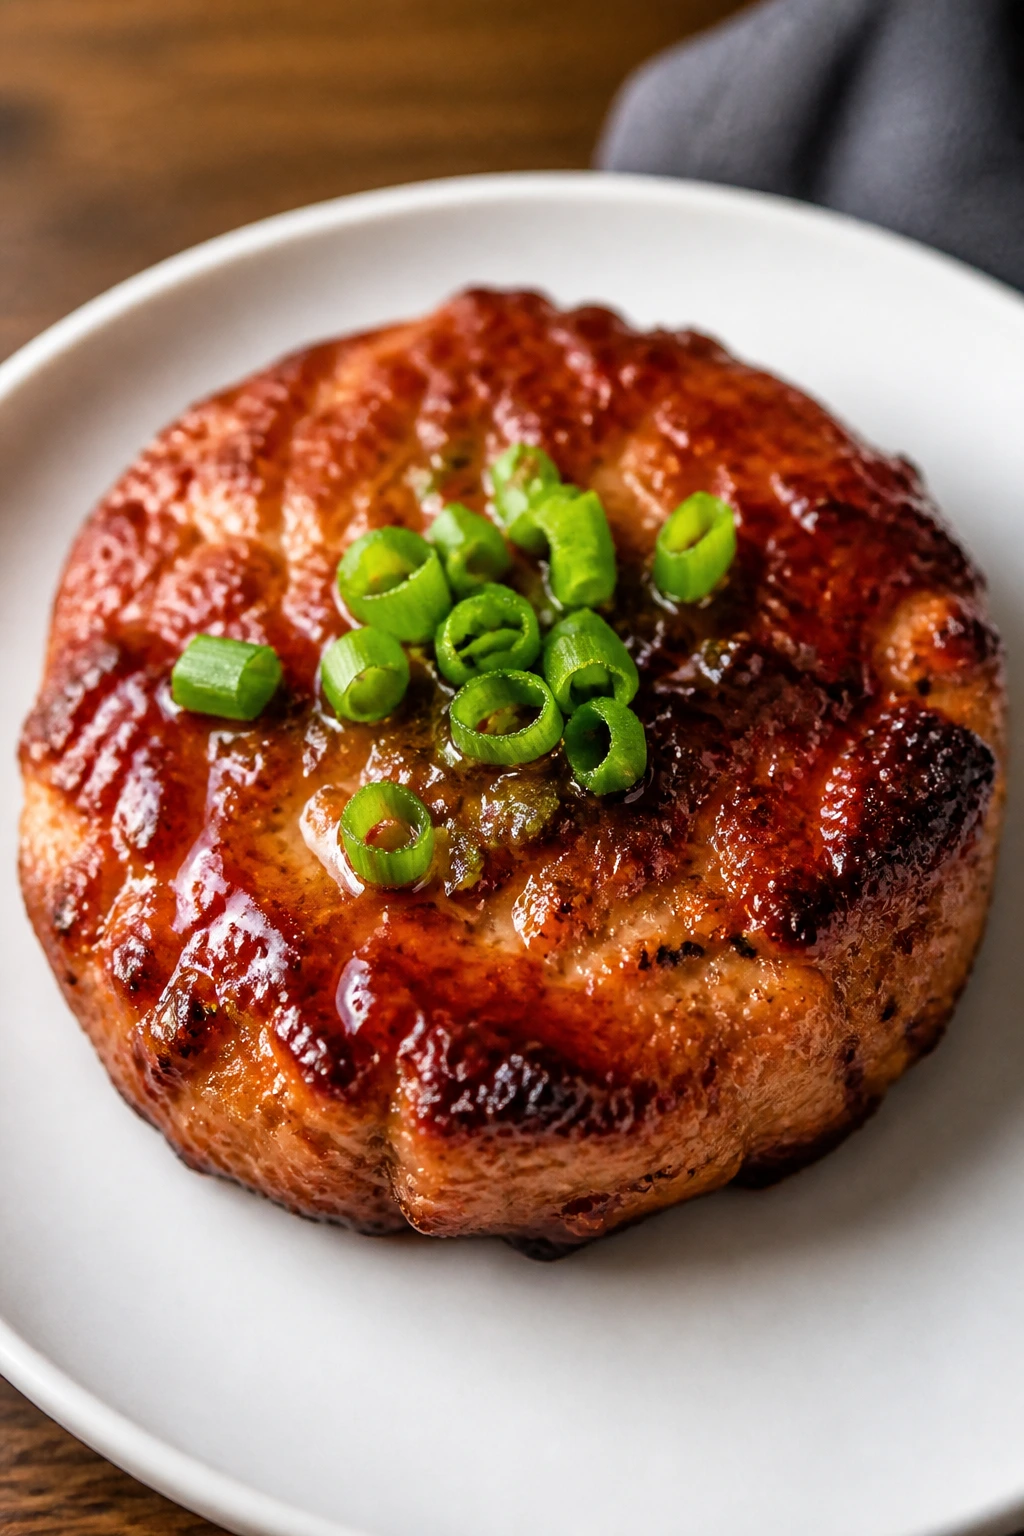
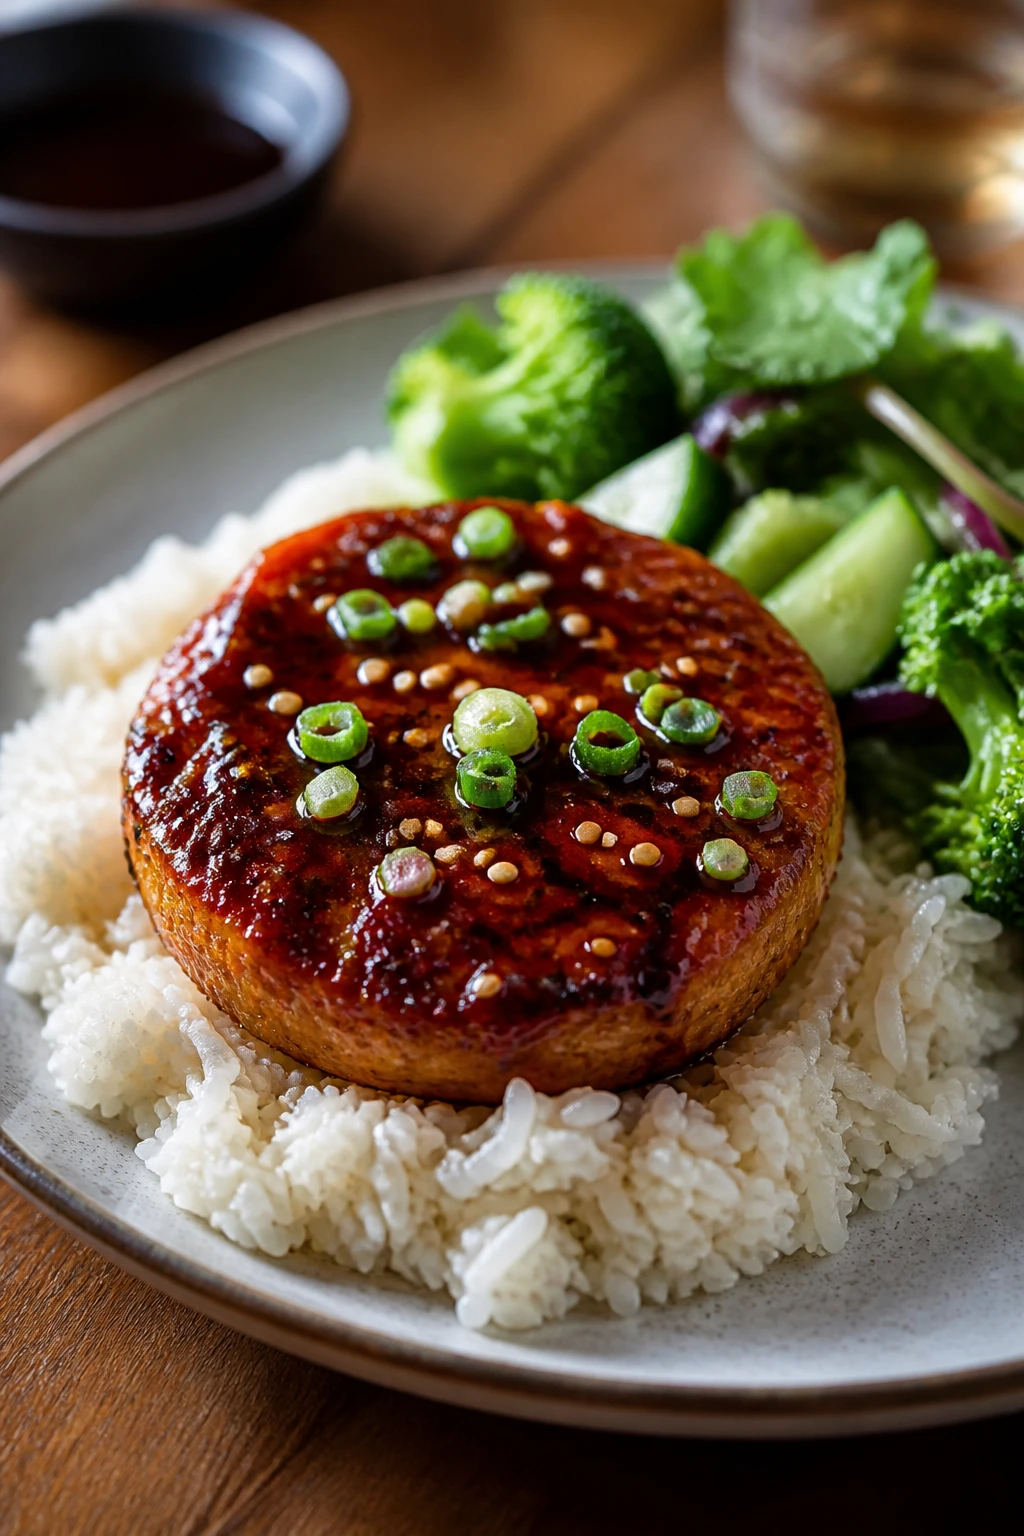
15. Chicken Teriyaki Meatloaf
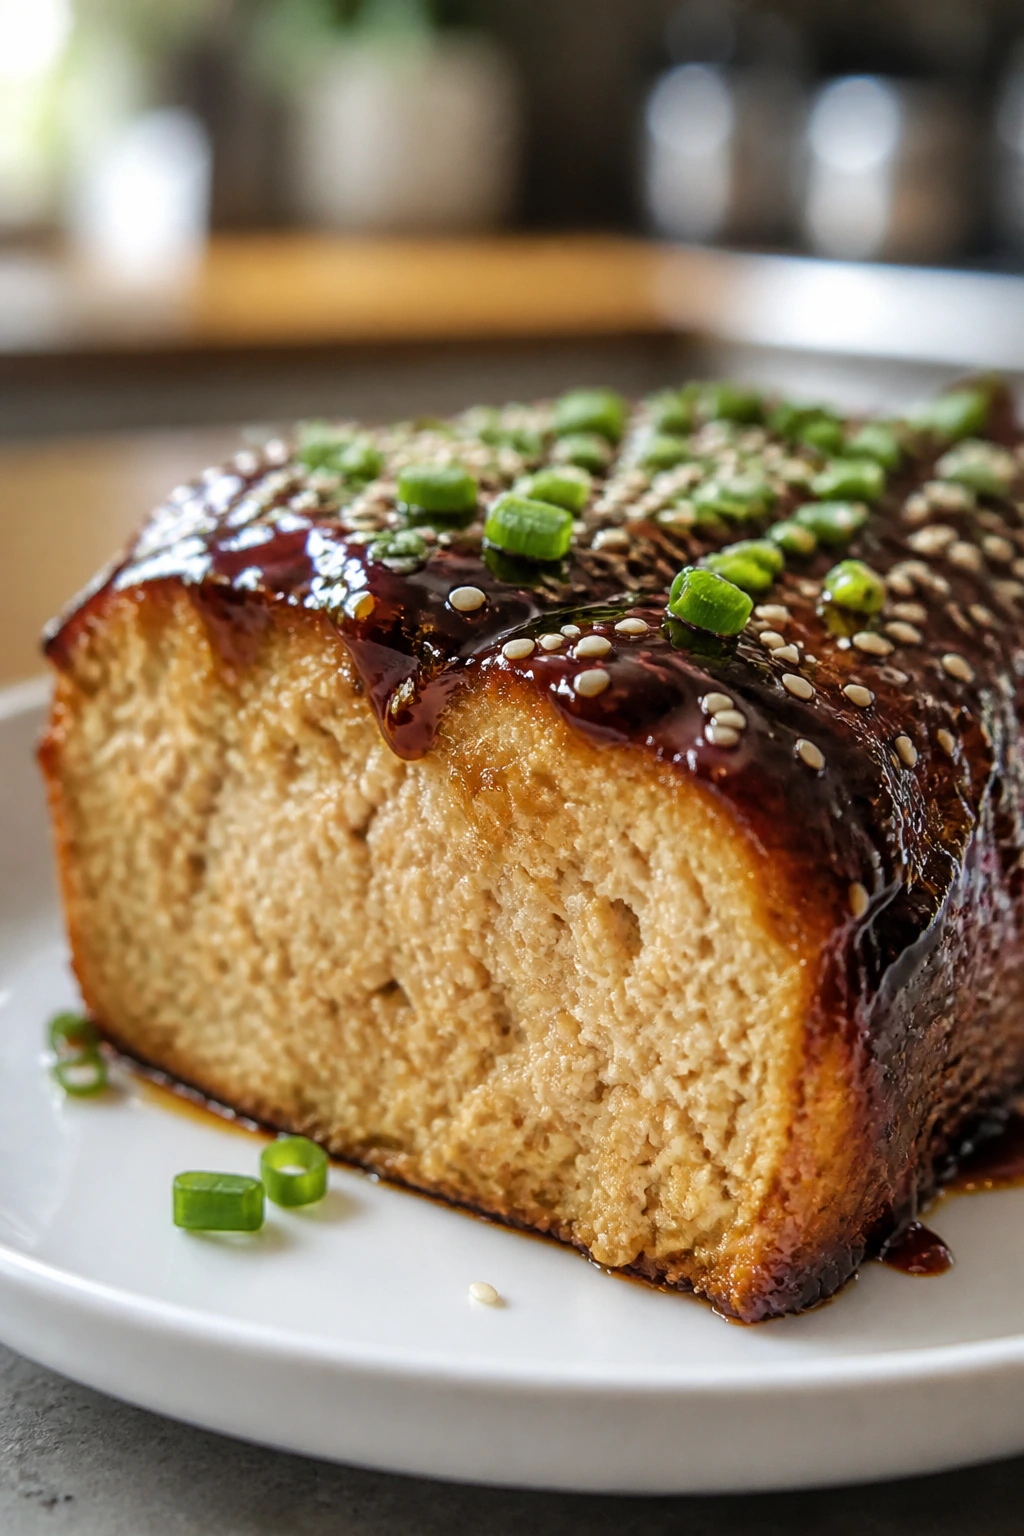
Meatloaf is not usually where people look for teriyaki, which is precisely why this version works. The glaze on top turns dark and sticky in the oven, while the loaf itself stays soft and sliceable.
Why It Works:
Ground chicken needs help to stay moist, so the egg and panko do real work here. The glaze gets brushed on in layers, which keeps the top from drying out before the center cooks through.
Key Ingredients:
- 1 1/2 pounds ground chicken
- 1 large egg
- 3/4 cup panko breadcrumbs
- 2 tablespoons soy sauce
- 1 small onion, finely grated or minced
- 1 teaspoon garlic powder
- 1/4 cup soy sauce
- 3 tablespoons brown sugar
- 1 tablespoon rice vinegar
- 1 tablespoon cornstarch mixed with 1 tablespoon water
Quick Steps:
- Heat the oven to 375°F and line a loaf pan or sheet pan.
- Mix the meatloaf ingredients just until combined.
- Shape into a loaf and bake for 30 minutes.
- Simmer the glaze ingredients, then brush half over the loaf.
- Bake 15 to 20 minutes more, brush with the rest of the glaze, and cook to 165°F.
Equipment for This Recipe:
- Loaf pan or rimmed sheet pan
- Large bowl
- Small saucepan
- Pastry brush
How to Serve This Dish:
Slice it thick and serve with rice, roasted broccoli, or mashed potatoes if you want a softer plate. Cold leftovers make a shockingly good sandwich the next day.
Pro Tips for This Recipe:
- Use grated onion: It keeps the meatloaf moist and disappears into the loaf.
- Bake before glazing: A raw glaze burns too quickly in the oven.
- Let it rest 10 minutes: The slices hold together better.
Variations on This Dish:
- Pineapple Glazed Loaf: Add 2 tablespoons pineapple juice to the glaze.
- Turkey Meatloaf Version: Ground turkey works the same way if you prefer it.
Common Mistakes to Avoid with This Dish:
- Packing the loaf too tightly: It gets bouncy and dense.
- Using too little binder: The slices will crumble.
- Slicing too soon: The juices need a short rest to settle.
16. Chickpea Teriyaki Rice Bowls
This bowl earns its keep with almost no drama. Chickpeas, rice, and a sticky teriyaki glaze make a dinner that lands somewhere between comforting and efficient.
Why It Works:
Crisping chickpeas in a hot skillet gives them a better texture than just warming them through. The glaze coats the outside and settles into the rice underneath, which is exactly what you want from a bowl meal.
Key Ingredients:
- 2 cans chickpeas, drained and rinsed
- 2 tablespoons oil
- 1/4 cup soy sauce
- 2 tablespoons brown sugar
- 1 tablespoon rice vinegar
- 2 cloves garlic, minced
- 1 teaspoon grated ginger
- 3 cups cooked rice
- 1 cup shredded carrots or cabbage
Quick Steps:
- Pat the chickpeas dry.
- Cook them in oil over medium-high heat for 6 to 8 minutes until lightly crisp.
- Stir in the garlic and ginger for 30 seconds.
- Add the sauce ingredients and simmer 1 to 2 minutes.
- Spoon over rice with carrots or cabbage on the side.
Equipment for This Recipe:
- Skillet
- Colander
- Wooden spoon
- Bowl
How to Serve This Dish:
Serve the chickpeas over rice with a handful of fresh crunchy vegetables on top. If you have scallions, use them; they lift the bowl in a way that plain rice never can.
Pro Tips for This Recipe:
- Dry the chickpeas well: Wet cans turn out soft.
- Use a wide skillet: More surface area means more browning.
- Add the sauce after crisping: If it goes in too early, the chickpeas go mushy.
Variations on This Dish:
- Broccoli Bowl: Add steamed broccoli for a more vegetable-heavy plate.
- Spicy Chickpea Version: Stir in chili flakes or chili crisp at the end.
Common Mistakes to Avoid with This Dish:
- Skipping the crisping step: Warm chickpeas are fine; crisp chickpeas are better.
- Overloading with sauce: The bowl should be glossy, not soupy.
- Using cold rice straight from the fridge: Warm it first so it absorbs the glaze.
17. Skillet Potstickers with Teriyaki Glaze
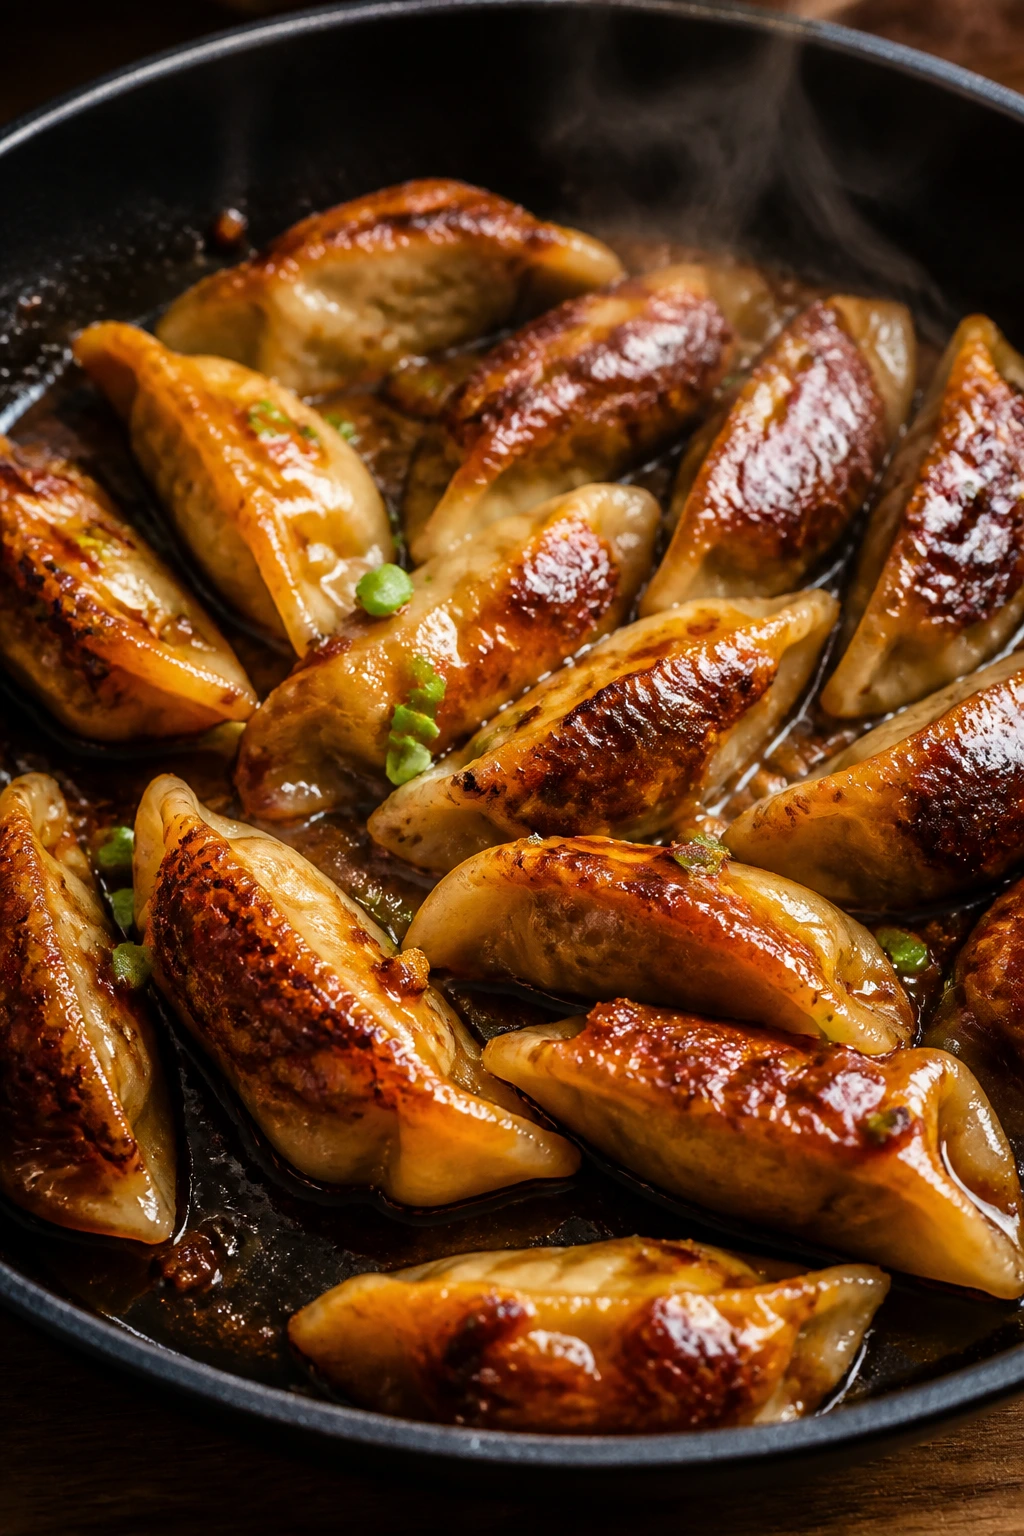
Frozen potstickers are one of the better emergency foods ever invented, and teriyaki turns them into a meal instead of a snack. The sauce sticks to the browned bottoms and gives you a fast, messy, good dinner.
Why It Works:
The skillet method gives you crisp bottoms and steamed tops, which is the whole potsticker texture in one pan. The teriyaki glaze goes in late, so the dumpling wrappers stay intact and do not dissolve into the sauce.
Key Ingredients:
- 1 pound frozen potstickers
- 2 tablespoons oil
- 1/4 cup soy sauce
- 2 tablespoons brown sugar
- 1 tablespoon rice vinegar
- 2 cloves garlic, minced
- 1 teaspoon grated ginger
- 1/4 cup water
- 1 teaspoon sesame oil
Quick Steps:
- Heat oil in a large skillet over medium heat.
- Add the potstickers in a single layer and cook 2 minutes until the bottoms brown.
- Pour in the water, cover, and steam 5 to 6 minutes.
- Uncover and let the water cook off.
- Stir in the sauce ingredients and toss until the potstickers are glazed.
Equipment for This Recipe:
- Large nonstick or well-seasoned skillet
- Tight-fitting lid
- Spatula
- Small bowl
How to Serve This Dish:
Serve them on a platter with the browned sides facing up so people can see the crisp part. A bowl of steamed cabbage or quick cucumber slices beside them makes the plate feel more complete.
Pro Tips for This Recipe:
- Keep the potstickers in a single layer: Crowding kills the crisp bottom.
- Use a lid that seals well: Steaming works better that way.
- Glaze after the water is gone: Sauce plus steam just makes everything soft.
Variations on This Dish:
- Sesame Finish: Add a few toasted sesame seeds on top right before serving.
- Spicy Potstickers: A little chili oil in the glaze gives them more bite.
Common Mistakes to Avoid with This Dish:
- Overcrowding the skillet: The bottoms never crisp.
- Adding the sauce too early: It loosens the wrappers before they finish cooking.
- Skipping the final uncovered minute: That step removes excess moisture and keeps the texture right.
18. Teriyaki Tuna Patties
Canned tuna does not usually get a glamorous life. These patties fix that by turning it into something crisp-edged, saucy, and very much dinner.
Why It Works:
Egg and breadcrumbs hold the tuna together, while the teriyaki glaze gives the patties a salty-sweet finish that hides the “canned” part in the best possible way. They cook fast enough to make sense on a tired night.
Key Ingredients:
- 2 cans tuna, drained well
- 1 large egg
- 1/2 cup breadcrumbs
- 2 scallions, finely sliced
- 1 tablespoon soy sauce
- 2 tablespoons oil
- 1/4 cup soy sauce
- 2 tablespoons brown sugar
- 1 tablespoon rice vinegar
Quick Steps:
- Mix the tuna, egg, breadcrumbs, scallions, and 1 tablespoon soy sauce.
- Shape into 4 patties.
- Pan-fry in oil over medium heat for 3 to 4 minutes per side.
- Simmer the glaze ingredients for 2 minutes.
- Brush the patties with sauce and serve hot.
Equipment for This Recipe:
- Skillet
- Mixing bowl
- Spatula
- Small saucepan
How to Serve This Dish:
Put the patties over rice or tuck them into buns like a fish sandwich with a slightly sweeter edge. A cabbage slaw on the side gives the plate some crunch and keeps the patties from feeling too soft.
Pro Tips for This Recipe:
- Drain the tuna well: Extra liquid makes the patties fall apart.
- Let the patties chill 10 minutes if they seem loose: That helps them hold shape.
- Brush rather than drown: A light glaze keeps the crust crisp.
Variations on This Dish:
- Spicy Tuna Cakes: Add a little chili paste to the mixture.
- Rice Bowl Version: Serve the patties over rice and break them up with a fork.
Common Mistakes to Avoid with This Dish:
- Using wet tuna: The mixture gets sloppy and weak.
- Flipping too early: Wait for a firm crust.
- Over-saucing the patties: The crust softens fast if you pour on too much glaze.
19. Steak Lettuce Cups with Teriyaki Drizzle
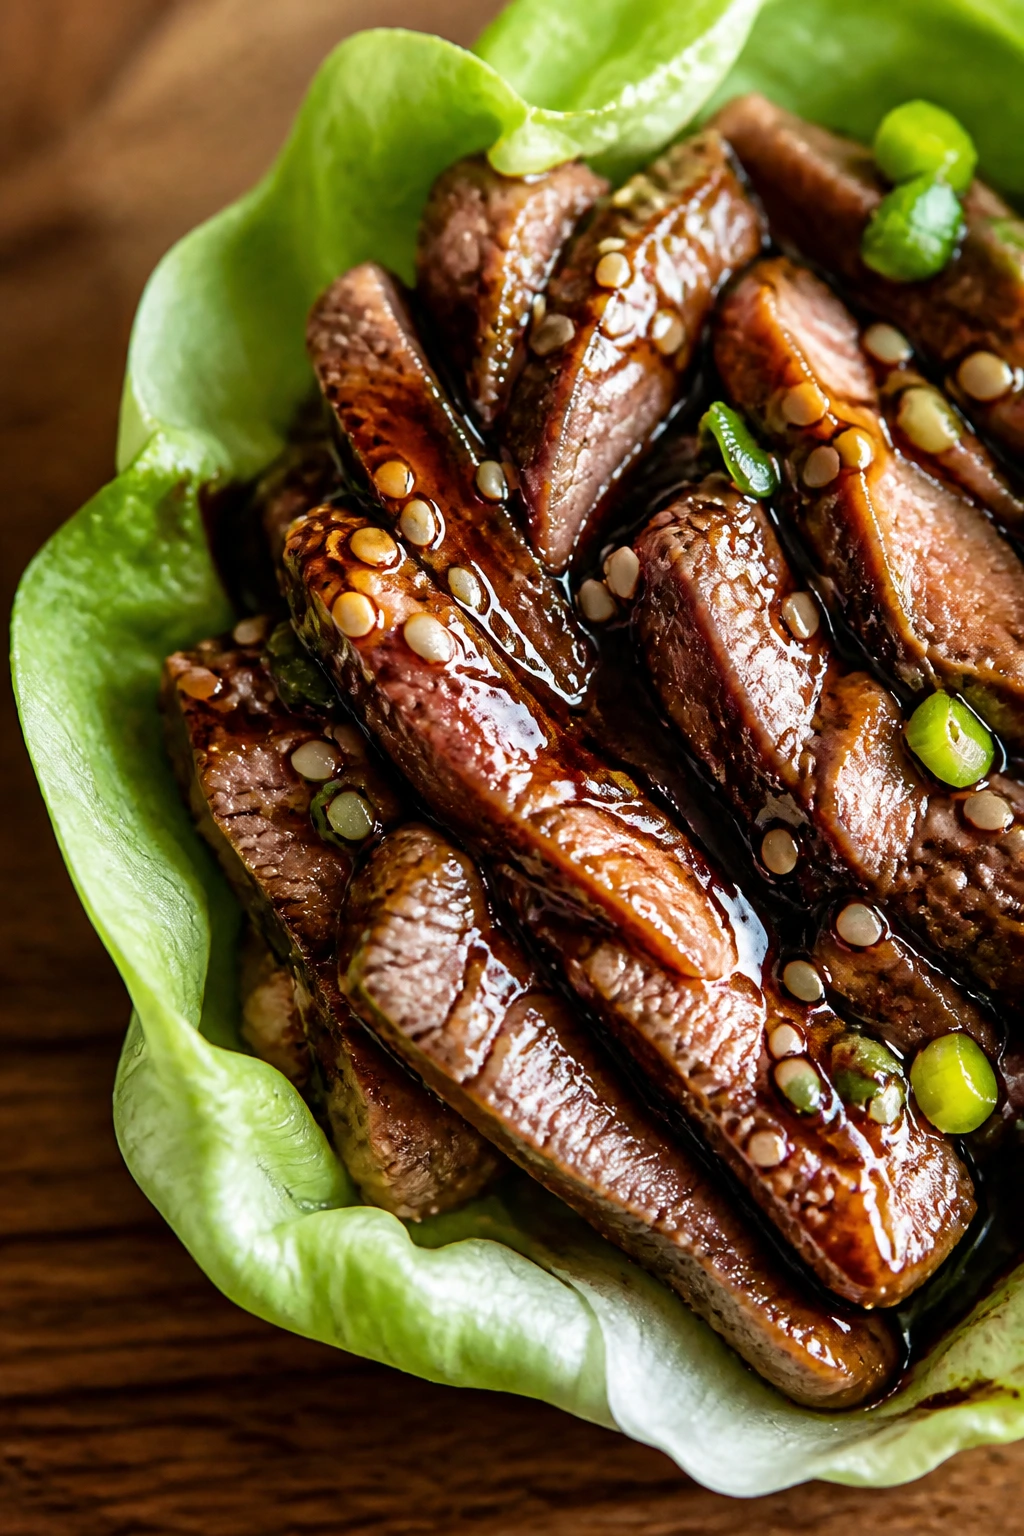
Steak in lettuce cups is one of those meals that sounds light and eats like a proper dinner. The teriyaki drizzle keeps the beef from feeling plain, and the lettuce gives each bite a cold snap.
Why It Works:
Quick searing keeps the steak juicy, and thin slicing means every bite gets sauce. The cup format makes the whole plate feel fresher than a rice bowl without asking for much extra work.
Key Ingredients:
- 1 pound skirt steak or sirloin, thinly sliced
- 1 tablespoon oil
- 1/4 cup soy sauce
- 2 tablespoons brown sugar
- 1 tablespoon rice vinegar
- 2 cloves garlic, minced
- 1 teaspoon grated ginger
- 1 head butter lettuce, leaves separated
- 1 cup shredded cabbage
Quick Steps:
- Sear the steak in oil over high heat for 2 to 3 minutes, then rest it.
- Simmer the sauce ingredients for 2 minutes.
- Slice the steak across the grain if it is not already sliced.
- Toss the steak lightly with the sauce.
- Spoon into lettuce leaves with cabbage underneath.
Equipment for This Recipe:
- Cast-iron skillet or heavy pan
- Tongs
- Knife
- Small saucepan
How to Serve This Dish:
Arrange the lettuce leaves on a platter and pile the steak in the middle so people can build their own cups. A little chopped scallion on top is enough garnish to make it look finished.
Pro Tips for This Recipe:
- Slice against the grain: That is the difference between tender and chewy.
- Use butter lettuce: It folds more easily than rigid greens.
- Keep the steak warm, not hot: Very hot steak wilts the lettuce too fast.
Variations on This Dish:
- Rice Cup Version: Put the steak over rice instead of lettuce if you want a fuller meal.
- Mushroom Steak Cups: Add sautéed mushrooms to stretch the beef.
Common Mistakes to Avoid with This Dish:
- Overcooking the steak: Thin slices dry out fast.
- Using hard lettuce leaves: They crack when you fold them.
- Putting sauce on too early: Let the steak rest first so the juices stay inside.
20. Cabbage Noodle Teriyaki Stir-Fry

This is the kind of stir-fry that cleans out the vegetable drawer without tasting like a cleanup project. Cabbage becomes silky, the noodles grab the glaze, and the whole pan moves with a good rhythm.
Why It Works:
Cabbage holds its shape longer than most quick vegetables, so it survives a hot skillet. The noodles pull in the teriyaki sauce and keep the dish from needing much else.
Key Ingredients:
- 8 ounces noodles, cooked according to package directions
- 4 cups shredded cabbage
- 1 cup shredded carrots
- 2 tablespoons oil
- 1/4 cup soy sauce
- 2 tablespoons brown sugar
- 2 cloves garlic, minced
- 1 teaspoon grated ginger
- 1 teaspoon sesame oil
Quick Steps:
- Cook the noodles and drain them.
- Stir-fry the cabbage and carrots in oil over medium-high heat for 4 to 5 minutes.
- Add garlic and ginger for 30 seconds.
- Stir in the sauce ingredients and sesame oil.
- Toss with the noodles until coated and glossy.
Equipment for This Recipe:
- Large skillet or wok
- Pot for noodles
- Tongs or spatula
- Colander
How to Serve This Dish:
Serve it straight from the skillet while the cabbage still has a little bite. A fried egg or a few slices of chicken on top can turn it from side dish into a bigger plate without much fuss.
Pro Tips for This Recipe:
- Use high heat: Cabbage needs a hot pan to taste sweet instead of limp.
- Do not overcook the noodles before they hit the pan: They finish in the sauce.
- Add sesame oil last: It keeps its aroma better that way.
Variations on This Dish:
- Egg Noodle Version: Use dried egg noodles for a softer, richer bowl.
- Bean Sprout Finish: Add bean sprouts in the last 30 seconds for extra crunch.
Common Mistakes to Avoid with This Dish:
- Too much liquid in the pan: The stir-fry turns watery.
- Cutting cabbage too thick: It stays tough and awkward.
- Overloading with sauce: You want shine, not a puddle.
21. Baked Teriyaki Drumsticks
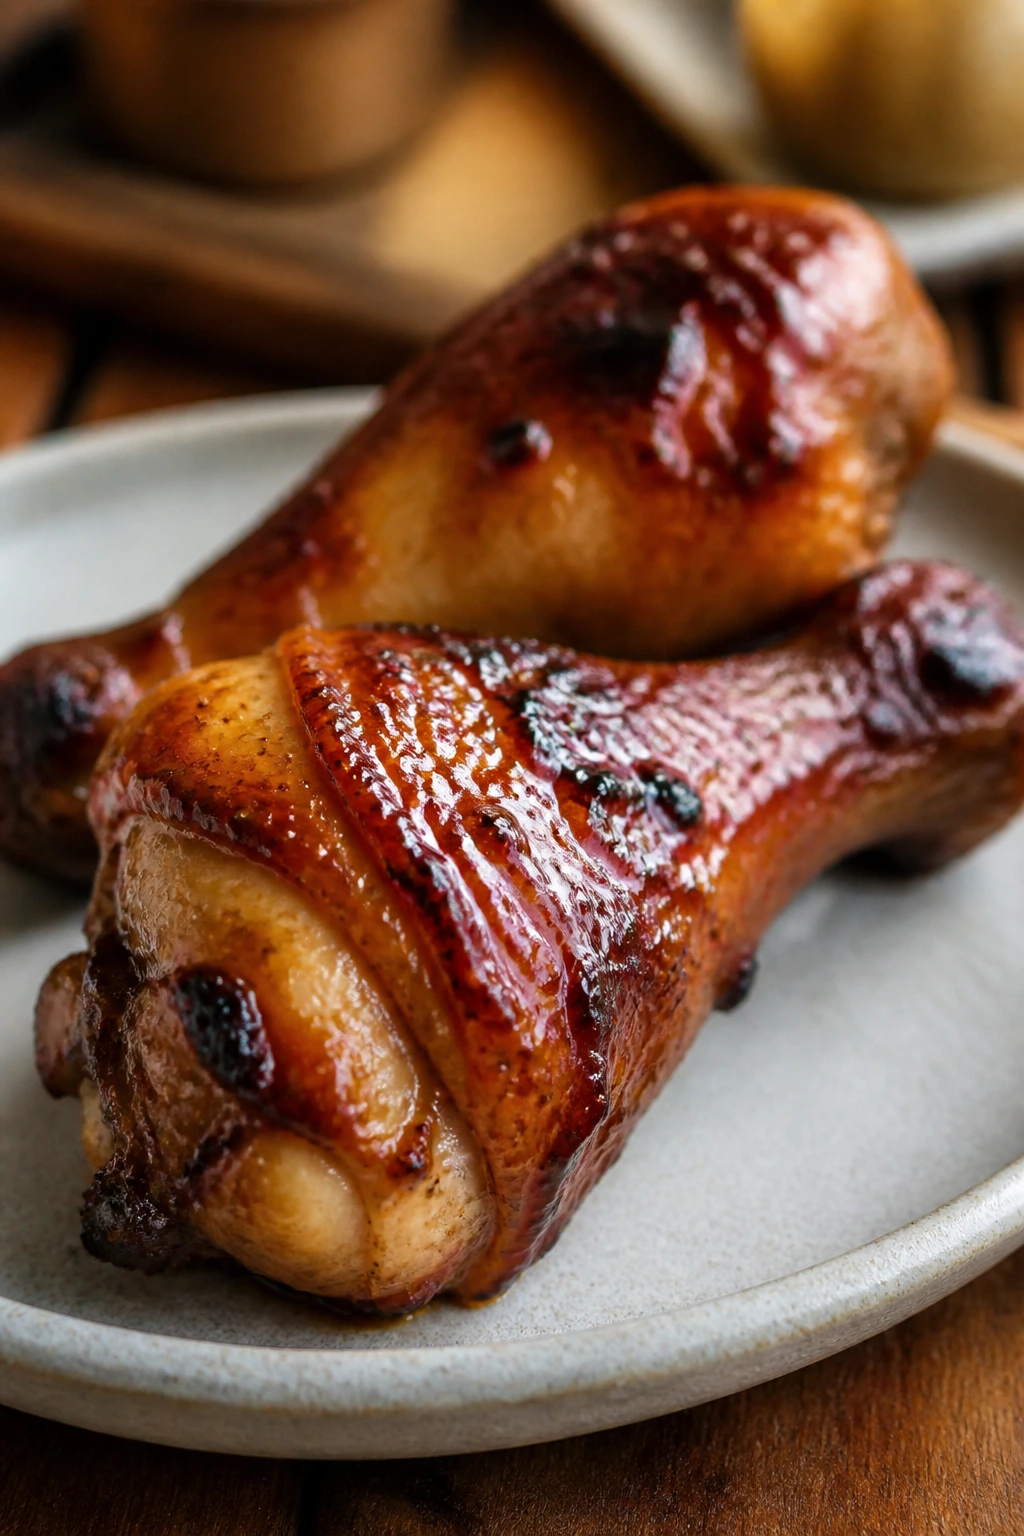
Drumsticks are the budget cut that rewards patience. The skin crisps, the glaze turns sticky, and the meat stays juicy enough to eat with your hands without apology.
Why It Works:
The oven handles most of the work, and a final brush of sauce keeps the sugar from burning. Drumsticks also forgive a little unevenness, which makes them easier than many chicken recipes.
Key Ingredients:
- 2 pounds chicken drumsticks
- 2 tablespoons oil
- 1/4 cup soy sauce
- 3 tablespoons brown sugar
- 1 tablespoon rice vinegar
- 2 cloves garlic, minced
- 1 teaspoon grated ginger
- 1 tablespoon cornstarch mixed with 1 tablespoon water
Quick Steps:
- Heat the oven to 400°F and line a sheet pan.
- Pat the drumsticks dry and rub with oil.
- Bake for 25 minutes.
- Simmer the sauce ingredients for 2 to 3 minutes and brush half over the chicken.
- Bake 10 to 15 minutes more, brush on the rest, and cook until 165°F.
Equipment for This Recipe:
- Sheet pan
- Parchment paper or foil
- Small saucepan
- Pastry brush
How to Serve This Dish:
Serve the drumsticks with rice and a simple vegetable side like broccoli or green beans. They also work well with a cold cucumber salad if you want a sharper plate.
Pro Tips for This Recipe:
- Dry the skin well: It helps the skin crisp before the glaze goes on.
- Use two glaze layers: One for flavor, one for shine.
- Watch the broiler: A minute under high heat finishes the skin fast, but it can burn just as fast.
Variations on This Dish:
- Garlic-Hot Drumsticks: Add extra garlic and a pinch of chili flakes.
- Honey Drumsticks: Swap some of the brown sugar for honey if you want a softer sweetness.
Common Mistakes to Avoid with This Dish:
- Glazing too early: The sugar can scorch.
- Skipping the dry skin step: Wet chicken steams instead of crisping.
- Pulling before the meat reaches 165°F: Drumsticks need the full cook time.
22. Mushroom Teriyaki Rice Skillet
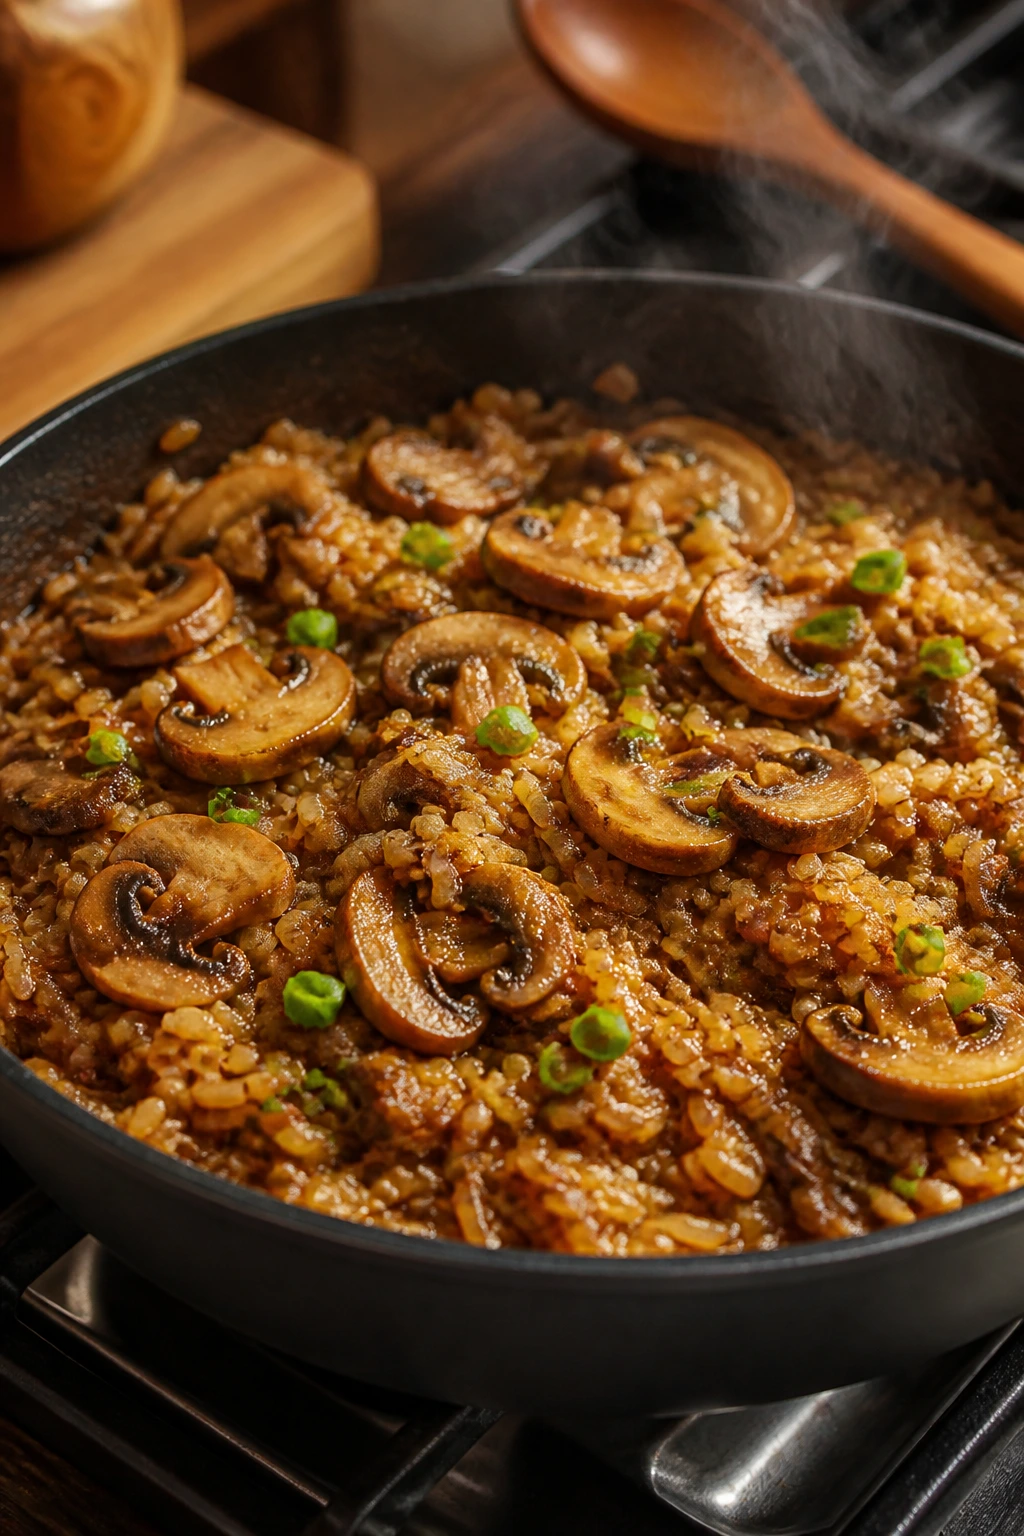
This skillet is rich in the quiet way mushrooms can be rich. The rice drinks in the sauce, the mushrooms go glossy, and the whole pan smells like dinner even before it finishes.
Why It Works:
Mushrooms brown best when they get space and heat, and rice gives the skillet enough body to feel like a complete meal. A little teriyaki ties the earthy bits and the grains together without making the pan heavy.
Key Ingredients:
- 8 ounces mushrooms, sliced
- 1 small onion, diced
- 1 cup uncooked long-grain rice
- 2 cups broth or water
- 1/4 cup soy sauce
- 2 tablespoons brown sugar
- 2 cloves garlic, minced
- 1 teaspoon grated ginger
- 1 cup frozen peas
Quick Steps:
- Sauté the onion and mushrooms in oil until browned, about 6 minutes.
- Stir in garlic and ginger for 30 seconds.
- Add the rice, broth, soy sauce, and brown sugar.
- Cover and simmer on low for 18 to 20 minutes until the rice is tender.
- Fold in the peas and let them warm through.
Equipment for This Recipe:
- Deep skillet with a lid
- Wooden spoon
- Measuring cups
- Small knife
How to Serve This Dish:
Serve it as a one-pan dinner with nothing else if that is the mood. If you want more contrast, top it with a fried egg or a few scallions so the bowl feels brighter.
Pro Tips for This Recipe:
- Brown the mushrooms well: Pale mushrooms make a flat skillet.
- Keep the lid on once the rice goes in: Steam is doing the work.
- Let the skillet rest a few minutes before serving: The grains settle and separate a bit more.
Variations on This Dish:
- Spinach Finish: Stir in a few handfuls of spinach at the end.
- Chicken Mushroom Version: Add diced cooked chicken if you want more protein.
Common Mistakes to Avoid with This Dish:
- Too much liquid: The rice turns porridge-like.
- Lifting the lid too often: That releases steam and slows cooking.
- Under-browning the mushrooms: The pan loses a lot of flavor if you rush this part.
23. Teriyaki Mushroom Toasts
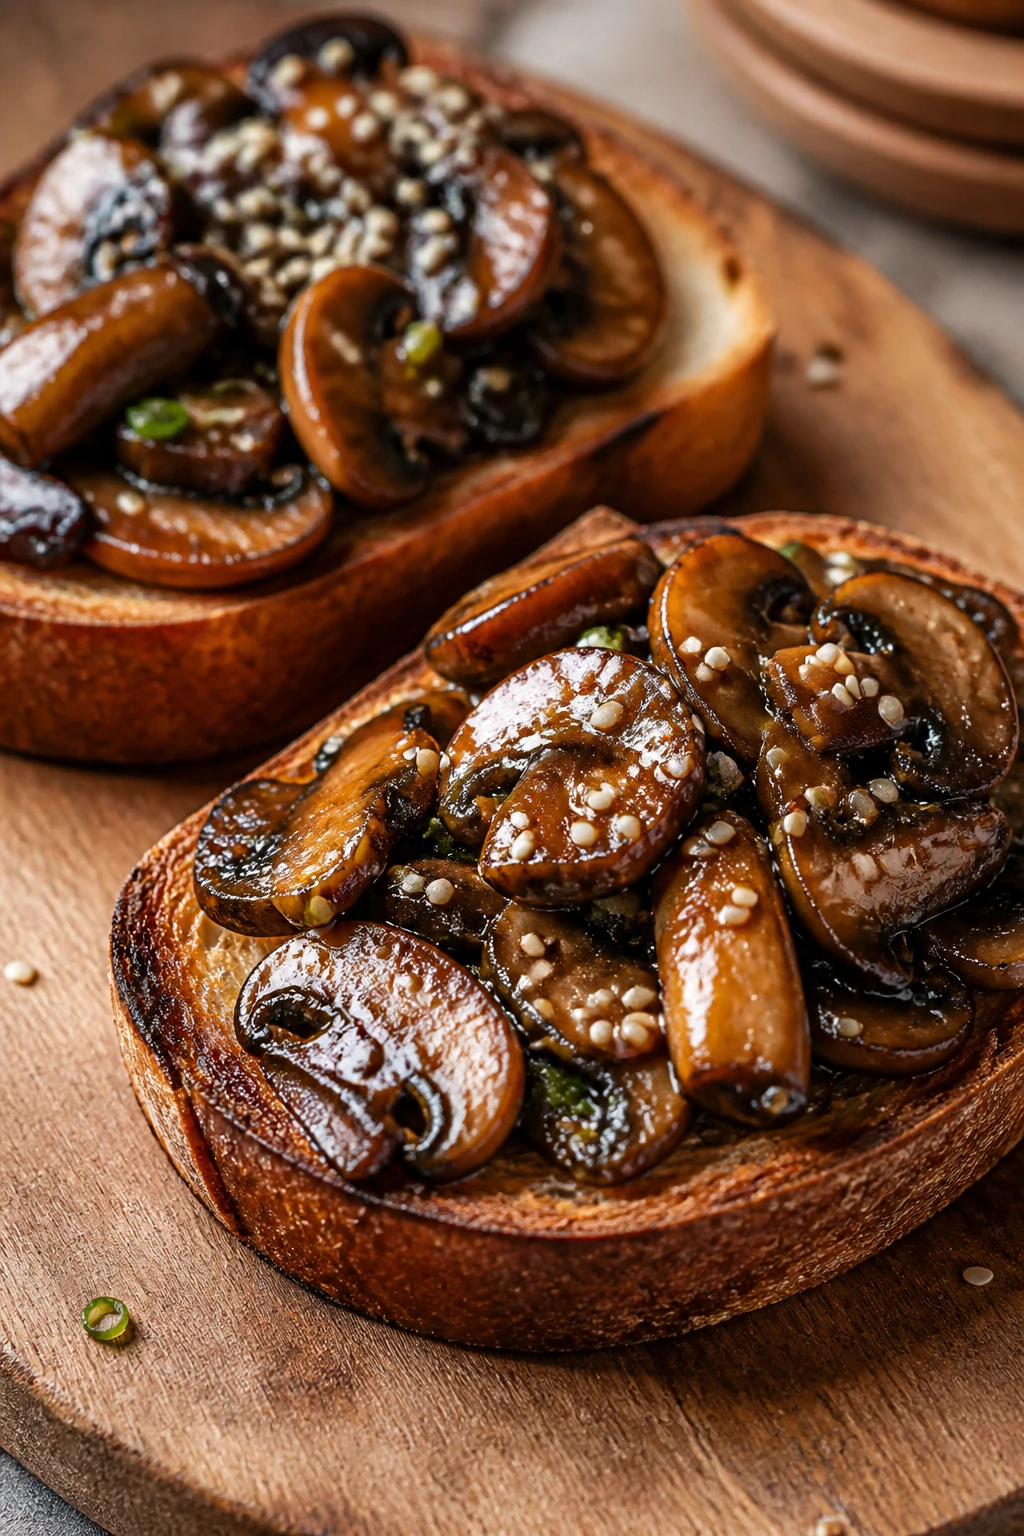
This is the snacky, late-night, pantry-friendly recipe nobody expects to be this useful. Toast, mushrooms, and glaze come together fast, and the edges stay crisp if you move quickly.
Why It Works:
Toasted bread gives you a sturdy base for saucy mushrooms. The teriyaki reduction sticks to the vegetables instead of soaking into the toast immediately, which is the difference between a good toast and a soggy one.
Key Ingredients:
- 8 ounces mushrooms, sliced
- 2 tablespoons butter or oil
- 1/4 cup soy sauce
- 2 tablespoons brown sugar
- 1 tablespoon rice vinegar
- 1 clove garlic, minced
- 4 slices sturdy bread
- 1 teaspoon sesame seeds
- 1 sliced scallion
Quick Steps:
- Toast the bread until deeply golden.
- Sauté the mushrooms in butter or oil until browned, about 5 minutes.
- Add garlic, soy sauce, brown sugar, and vinegar, then cook 1 to 2 minutes until sticky.
- Spoon the mushrooms onto the toast.
- Finish with sesame seeds and scallions.
Equipment for This Recipe:
- Skillet
- Toaster or oven
- Spatula
- Knife
How to Serve This Dish:
Serve the toasts right away while the bread still has some crunch. A fried egg on top turns it into breakfast, lunch, or the kind of dinner you make when the cupboards are thin.
Pro Tips for This Recipe:
- Use sturdy bread: Soft sandwich bread collapses under the mushrooms.
- Cook the mushrooms until their liquid evaporates: That gives the topping more flavor.
- Assemble at the last second: Toast waits for no sauce.
Variations on This Dish:
- Egg Toast Version: Top each slice with a fried or poached egg.
- Creamy Version: Spread a thin layer of mayo or cream cheese before the mushrooms.
Common Mistakes to Avoid with This Dish:
- Using soggy bread: It falls apart fast.
- Adding mushrooms too early: The toast loses its crunch.
- Stopping before the glaze thickens: The topping should look shiny, not watery.
24. Roasted Eggplant Teriyaki Bowls
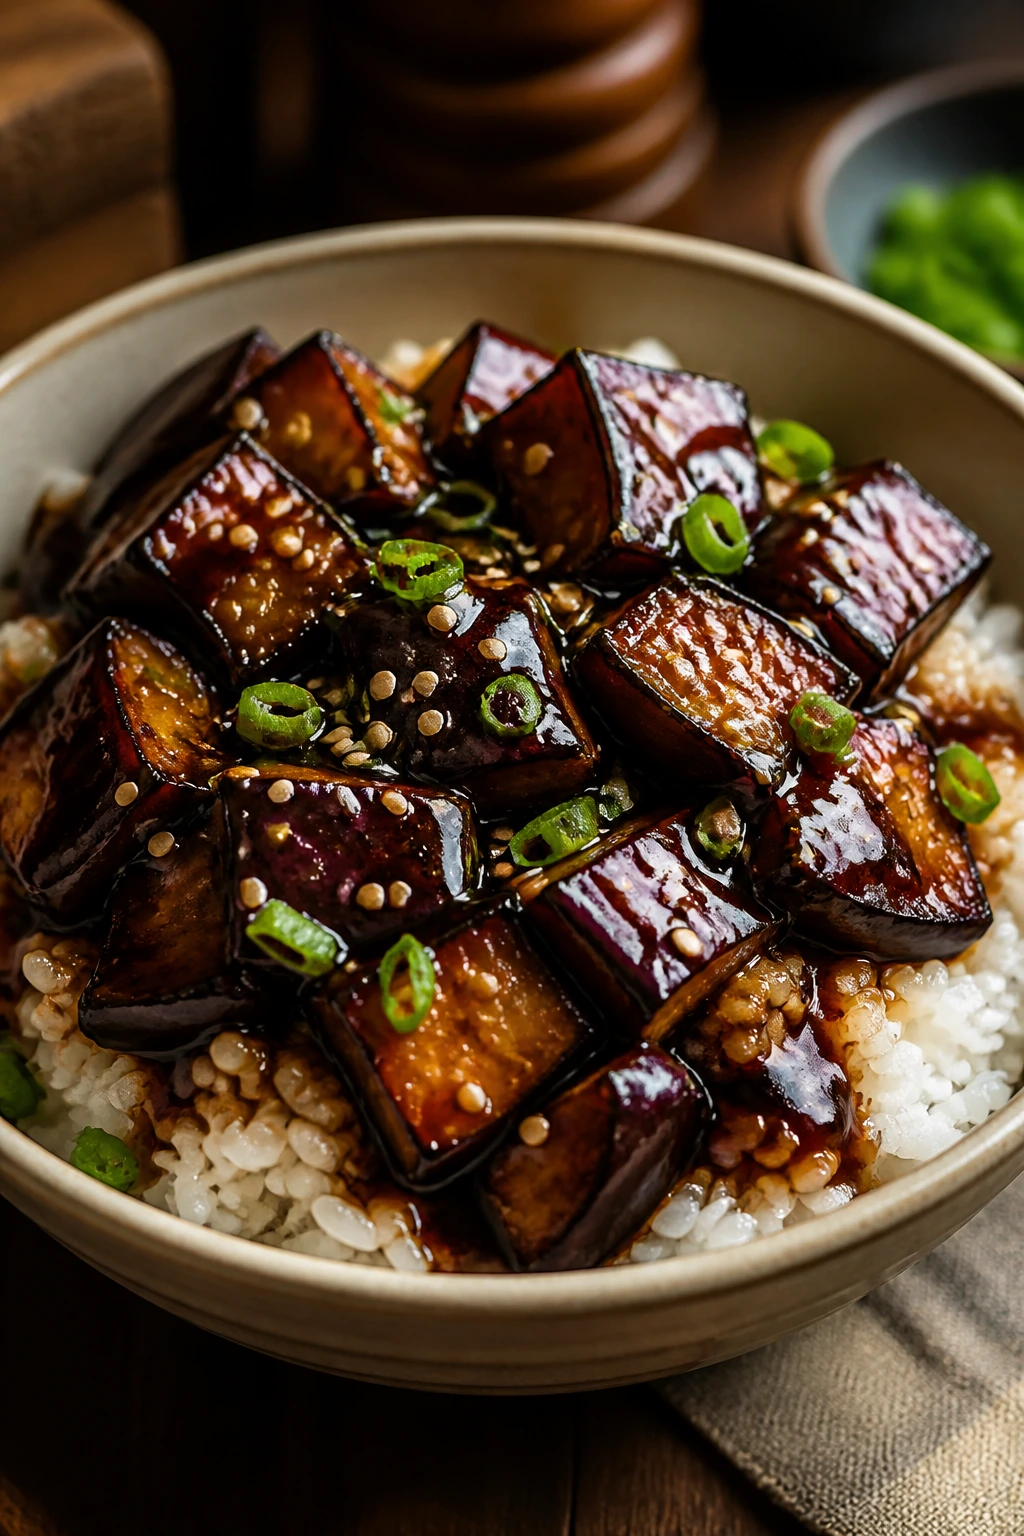
Eggplant turns plush and almost silky when it roasts long enough. In teriyaki, that texture is a gift, because the sauce sinks into the flesh instead of sitting on top.
Why It Works:
Eggplant needs heat and a little oil to stop tasting bland and spongey. Once it browns, the teriyaki glaze gives you a sweet-salty finish that makes the bowl feel fuller than it is.
Key Ingredients:
- 2 medium eggplants, cut into 1-inch cubes
- 3 tablespoons oil
- 1/4 cup soy sauce
- 2 tablespoons brown sugar
- 1 tablespoon rice vinegar
- 2 cloves garlic, minced
- 1 teaspoon grated ginger
- 3 cups cooked rice
Quick Steps:
- Heat the oven to 425°F.
- Toss the eggplant with oil and roast for 20 to 25 minutes, stirring once.
- Simmer the sauce ingredients for 2 minutes.
- Toss the roasted eggplant with the sauce.
- Serve over rice with scallions or sesame seeds if you have them.
Equipment for This Recipe:
- Sheet pan
- Mixing bowl
- Small saucepan
- Spatula
How to Serve This Dish:
Set the eggplant over rice and let the glaze seep into the grains. If you want a brighter plate, add cucumber or a quick vinegar pickle on the side.
Pro Tips for This Recipe:
- Do not skimp on oil: Eggplant drinks it up.
- Roast until browned, not pale: The color is where the flavor lives.
- Toss while hot: Warm eggplant soaks up the glaze better.
Variations on This Dish:
- Chickpea Eggplant Bowl: Add canned chickpeas for more heft.
- Spicy Eggplant: Stir in chili paste for a deeper, warmer finish.
Common Mistakes to Avoid with This Dish:
- Under-oiling the eggplant: It turns leathery and dry.
- Pulling it too soon: Eggplant needs time to get soft inside.
- Adding sauce before roasting: It interferes with browning.
25. Teriyaki Salmon Cakes with Quick Slaw
Canned salmon deserves a better life than “salad ingredient,” and these cakes give it one. Crisp on the outside, soft inside, and topped with a quick slaw, they eat like a full dinner without much ceremony.
Why It Works:
The cakes are held together with egg and breadcrumbs, then finished with a teriyaki drizzle instead of a heavy sauce. The slaw brings crunch and keeps the plate from feeling one-note.
Key Ingredients:
- 2 cans salmon, drained and flaked
- 1 large egg
- 1/2 cup breadcrumbs
- 2 scallions, sliced
- 2 tablespoons oil
- 1/4 cup soy sauce
- 2 tablespoons brown sugar
- 1 tablespoon rice vinegar
- 2 cups shredded cabbage
Quick Steps:
- Mix the salmon, egg, breadcrumbs, and scallions.
- Shape into 4 to 6 cakes and chill 10 minutes if they seem loose.
- Pan-fry in oil over medium heat for 3 to 4 minutes per side.
- Simmer the sauce ingredients for 2 minutes.
- Toss the cabbage with a spoonful of the sauce and serve the cakes on top.
Equipment for This Recipe:
- Skillet
- Mixing bowl
- Spatula
- Small saucepan
How to Serve This Dish:
Serve the cakes over the slaw so the warm salmon can soften the cabbage just a little. Rice is optional; the cakes already carry enough body for a full plate.
Pro Tips for This Recipe:
- Drain the salmon well: Too much moisture makes the cakes fragile.
- Chill the patties if needed: Ten minutes can save a soft mixture.
- Keep the slaw light: It should crunch, not drown the cakes.
Variations on This Dish:
- Rice Bowl Version: Break the cakes over rice and drizzle with extra sauce.
- Spicy Slaw Version: Add a little chili paste to the cabbage dressing.
Common Mistakes to Avoid with This Dish:
- Turning the cakes too early: They need a crust before flipping.
- Making the slaw too wet: The cabbage softens and loses its bite.
- Over-saucing the fish: A light drizzle keeps the cakes crisp.
Why Teriyaki and Pantry Staples Belong in the Same Skillet

Teriyaki is one of those flavors that sounds more specific than it really is. Strip it down and you’ve got a base of soy sauce, sugar, garlic, ginger, and a little thickener, which is why it plays so nicely with pantry staples. You do not need a refrigerator full of specialty bottles to make dinner feel finished.
What matters most is heat control. Sugar needs enough heat to reduce and gloss, but not so much that it scorches into bitterness. That sweet spot is usually a brisk simmer or a short stint in a hot oven, and once you learn how your own stove behaves, the whole style gets easier fast.
I also like how forgiving these meals are. Rice can be fresh or cold, vegetables can be frozen, and the protein can be chicken, tofu, shrimp, salmon, or canned fish if that’s what you have. Teriyaki doesn’t ask you to be exact in a fussy way; it asks you to keep the sauce balanced and not wander off while the sugar is on the heat.
Essential Equipment for These Recipes
- Large skillet or wok: The workhorse for stir-fries, glazed proteins, and fast noodle dishes.
- Rimmed sheet pan: Best for salmon, drumsticks, cauliflower, and anything that needs oven browning.
- Small saucepan: Useful for reducing teriyaki sauce before it hits the food.
- Mixing bowls: You’ll want at least two, one for the sauce and one for the main mix.
- Whisk: Helps cornstarch disappear into the sauce without clumps.
- Tongs: Handy for turning chicken, shrimp, skewers, and noodles without shredding them.
- Instant-read thermometer: Very useful for chicken, pork, and salmon so you stop guessing.
- Sharp knife and cutting board: Thin slicing matters in teriyaki cooking more than people think.
- Parchment paper or foil: Makes cleanup easier when the glaze gets sticky.
- Storage containers with tight lids: Leftovers keep better when the sauce stays contained.
Smart Shopping and Ingredient Tips
Soy sauce is the backbone here, and I’d rather you buy a bottle you’ll actually use than chase a fancy label. Low-sodium soy sauce is the easiest choice if you want more control, because teriyaki gets salty fast once it reduces. If you only keep regular soy sauce on hand, use a lighter hand with the spoonfuls.
Brown sugar is the most dependable sweetener for these recipes because it melts into the sauce without any effort. Honey works too, and so does maple syrup, but both bring their own flavor, so use them when you want a different edge. Cornstarch matters more than people expect; it turns a thin soy mixture into a glaze that clings instead of pooling.
Fresh ginger is worth buying if you cook this style often, but ground ginger does the job in a pinch. Garlic can be fresh, jarred, or even granulated in some of the faster recipes. For vegetables, frozen broccoli, peas, stir-fry mixes, and shelled edamame are solid because they hold texture under heat and save you from chopping when you would rather not.
Protein choice is mostly about texture and timing. Chicken thighs stay forgiving, tofu likes pressing, salmon needs a gentler hand, and shrimp cooks faster than almost everything else on the list. Canned chickpeas, tuna, and salmon are useful when the fridge is thin because they carry sauce well and do not need long cooking to taste like something real.
How to Serve These Recipes
Presentation:
Teriyaki looks best when the glossy part sits on top instead of disappearing into the starch. Bowls work well for rice, noodles, chickpeas, and fried rice; platters fit skewers, drumsticks, and sliders; lettuce cups want a shallow plate with the filling in a bowl beside them so the leaves stay crisp.
Accompaniments:
Plain rice is the obvious partner, but soba, udon, rice noodles, and even toasted bread all fit the same theme. For a sharper plate, add cucumber slices, shredded cabbage, steamed broccoli, or a quick vinegar pickle. The side should bring crunch or coolness, because teriyaki already handles the sweet-salty part.
Portions:
Most of these recipes feed 4, though the bowl-style dishes stretch farther if you load them with rice or vegetables. Chicken thighs, tofu, chickpeas, and fried rice are easy to scale up for lunch leftovers; salmon, shrimp, and lettuce cups are better when cooked closer to serving time.
Beverage Pairing:
Cold green tea fits the soy-sugar balance without fighting it. If you want something with more edge, a dry sparkling water with lime or a light lager keeps the glaze from feeling too heavy.
Additional Tips and Flavor Boosters

Flavor Enhancement: A few drops of toasted sesame oil at the very end change the smell of the whole dish, but use it like perfume, not cooking oil. It’s the finish, not the base.
Customization: If you like sharper teriyaki, add a splash of rice vinegar or a squeeze of lime after cooking. If you like it sweeter, stir in a teaspoon more brown sugar, but do that in the sauce bowl before the heat, not after.
Serving Suggestions: Scallions, sesame seeds, and sliced chilies are the easy wins. A fried egg on bowls and noodle dishes adds richness without changing the flavor profile too much.
Make-It-Yours: For gluten-free plates, swap tamari for soy sauce. For dairy-free cooking, there’s nothing to change in most of these recipes, which is part of the charm. For lower-sugar versions, cut the brown sugar by a third and let the sauce reduce a little longer so it still clings.
Make-Ahead, Storage, and Reheating Guidance

Most cooked teriyaki dishes keep well in the fridge for 3 to 4 days in airtight containers. Rice bowls, fried rice, meatballs, chicken, pork, tofu, and mushroom-based dishes reheat cleanly, especially if you add a spoonful of water before warming them. Salmon and shrimp are the delicate ones; they’re best within 1 to 2 days because they dry out faster.
The freezer is useful for some of these recipes, but not all of them. Meatballs, chicken teriyaki, pork, drumsticks, and meatloaf freeze well for up to 2 months if you cool them first and pack the sauce separately when you can. Lettuce cups, toasted bread, and crispy tofu do not hold up well after freezing, so I would skip that idea and make those fresh.
For reheating, a covered skillet over low heat is better than the microwave for anything sauced. Add a tablespoon or two of water, cover, and warm until the steam loosens the glaze again. Rice and noodles can also go in the microwave with a damp paper towel over the top; that stops them from turning dry and stiff. If you’re reheating something with crisp skin or a browned crust, use a 350°F oven for a few minutes instead of blasting it in the microwave.
Make-ahead works best when you split the components. Cook the rice, chop the vegetables, mix the sauce, and refrigerate them separately, then cook the protein the day you plan to eat it. That one small habit keeps teriyaki from turning muddy.
Variations and Adaptations to Try
Tamari Pantry Swap
Replace soy sauce with tamari in any of these recipes if you need a gluten-free version. The flavor stays close, though tamari usually tastes a touch rounder and less sharp. I reach for it when I want the sauce to read clean rather than loud.
Honey-First Glaze
Swap half the brown sugar for honey when you want a softer, warmer sweetness. It works especially well on chicken, salmon, and drumsticks, where the glaze can take on a slightly deeper color in the oven.
Low-Sugar Weeknight Version
Cut the sugar by a third and add an extra teaspoon of rice vinegar. The sauce will be less sticky-sweet and a little brighter, which I like on bowls and stir-fries where the rice already brings its own softness.
Chili-Sesame Finish
Add chili crisp, chili flakes, or a tiny spoonful of chili paste to the finished dish. This is the easiest way to wake up chicken, tofu, noodles, and mushrooms without changing the base recipe.
Freezer Veg Shortcut
Use frozen broccoli, peas, mixed stir-fry vegetables, or edamame anywhere the recipe calls for fresh vegetables. They usually work best when cooked straight from the freezer, because thawing them first leaves too much water behind.
Rice-Free Plate
Serve the saucier recipes over shredded cabbage, lettuce, or cauliflower rice if you want a lighter base. The glaze still has somewhere to go, but the plate feels cleaner and a little sharper.
Common Mistakes to Avoid
Burning the sugar: Teriyaki can go from glossy to bitter if the heat is too high for too long. Keep the sauce at a lively simmer, not a hard boil, and pull it once it looks shiny and thick.
Using too much sauce too early: If you add the glaze before the protein or vegetables are cooked, the sugars can stick to the pan instead of the food. Finish the main cooking first, then glaze.
Crowding the pan: This is the fastest way to ruin browning. Chicken, tofu, mushrooms, and beef all need space, or they steam and turn pale.
Skipping the slurry when a thick sauce is the goal: A thin teriyaki sauce tastes fine but slides right off the food. A small cornstarch slurry gives you the cling people expect.
Overcooking seafood: Salmon and shrimp do not forgive extra minutes. Watch for flaking salmon and opaque shrimp, then stop.
Letting leftovers sit uncovered: The glaze dries into a sticky shell if the food is left out in the open. Get it into a container once it cools a bit.
Frequently Asked Questions
Can I make teriyaki sauce without cornstarch?
Yes, but you’ll need to simmer it longer until it reduces and thickens on its own. That works fine for small batches, though cornstarch gives you more control and keeps the sauce from getting too salty before it turns glossy.
What’s the best soy sauce to use for these recipes?
Low-sodium soy sauce is the easiest all-purpose choice because it gives you room to adjust the sweetness and acidity. Regular soy sauce works too, but it’s easier to overshoot the salt once the sauce reduces.
Can I use bottled teriyaki sauce instead of making my own?
You can, especially in the faster recipes, but homemade sauce gives you more control over sweetness and thickness. Bottled sauce often tastes thinner and sweeter than the pan version, so I use it when speed matters more than fine-tuning.
How do I keep chicken teriyaki from drying out?
Use thighs if you can, and pull the chicken as soon as it reaches 165°F. If you use breasts, cut them into even pieces and do not let them sit in a hot pan after the sauce thickens.
Which recipes in this collection freeze best?
The meatballs, meatloaf, drumsticks, chicken bowls, pork, and rice skillet hold up well in the freezer. Lettuce wraps, tostadas, salmon cakes, and crispy tofu are better fresh because their texture changes too much after freezing.
Can I make these recipes with brown rice or cauliflower rice?
Absolutely. Brown rice brings a nuttier bite and holds up well under sauce, while cauliflower rice works best with bowls and stir-fries that already have a lot of flavor on top. Just keep cauliflower rice dry in the pan so it does not turn watery.
What if my sauce turns out too thin?
Simmer it for another minute or whisk in a little more cornstarch slurry. Add the slurry slowly; a teaspoon or two at a time is usually enough, and it thickens fast.
What if the sauce tastes too salty?
Stir in a little water and a pinch more brown sugar, then simmer for 30 seconds. A tiny splash of rice vinegar can help too, because acidity makes the salt taste less blunt.
Can I make these recipes ahead for lunches?
Yes, especially the rice bowls, meatballs, fried rice, and chicken dishes. Keep crunchy toppings separate and reheat the base gently so the glaze stays smooth instead of drying into a crust.
Keep the Soy Sauce Handy
Teriyaki works because it never asks for a grand grocery run. It wants a few shelf-stable things, a hot pan, and enough attention to pull the sauce off the heat before the sugar gets mean.
That’s why this style stays in regular rotation for me. It turns broccoli into dinner, rescues canned fish, and gives leftover rice a second life without making you clean three pans to get there. A bottle of soy sauce goes a long way when you know how to treat it.