
A good vegan BBQ recipe has to do three things at once: smell like smoke, hold onto sauce, and give people enough chew or crunch that nobody starts muttering about what’s missing. That last part matters more than it sounds. If the texture is right, the rest of the conversation gets a lot quieter.
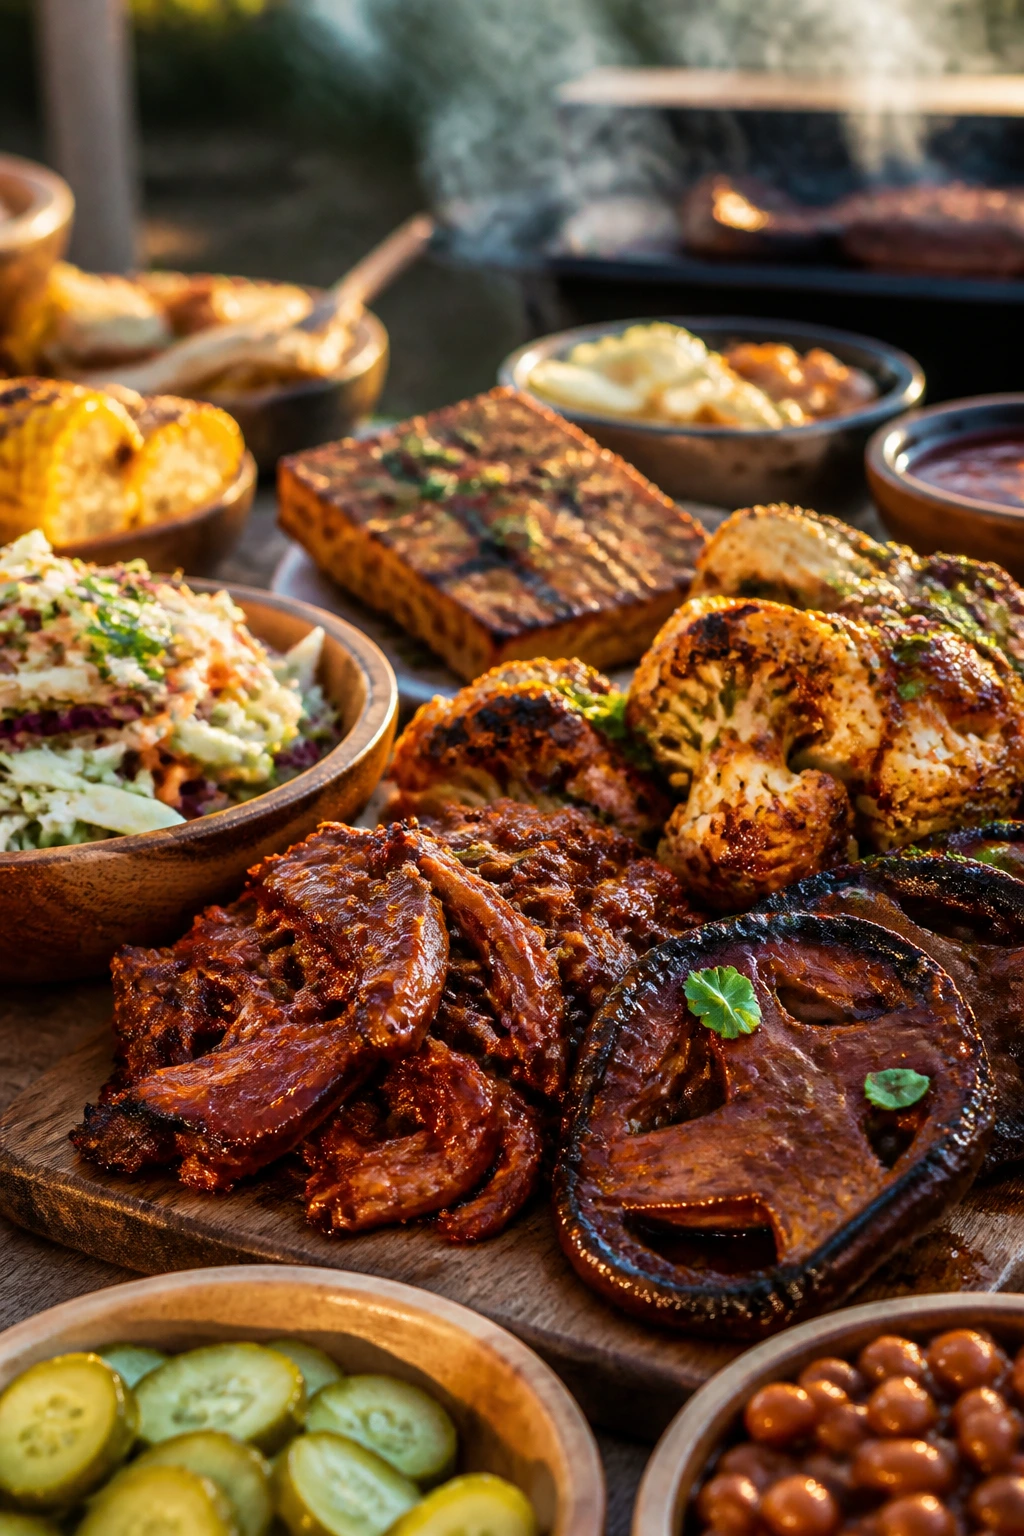
These vegan BBQ recipes are built around that idea. Some use jackfruit and seitan for pull and bite. Some lean on cauliflower, eggplant, mushrooms, or tofu and let char, salt, and a sticky glaze do the heavy lifting. And some are side dishes that belong on the same plate as the main event because they bring the acid, crunch, or cool contrast that barbecue food actually needs.
What I like most is that the menu doesn’t try to fake a steakhouse. It cooks like a cookout. There’s smoke, sugar, vinegar, heat, and a little mess. That’s the point.
Why This Cookout Spread Wins Over Skeptics
-
Smoke does the heavy lifting: A hot grill, a broiler, or even a screaming cast-iron pan gives these recipes the browned edges that make barbecue taste like barbecue.
-
Texture is the real test: Jackfruit shreds, tofu crisps, portobellos stay juicy, and cauliflower turns tender at the stem while keeping a little bite at the edge.
-
Acid keeps the plate awake: Pickles, vinegar, lime, mustard, and cider vinegar stop all that sauce from turning heavy and flat.
-
The sauces are doing real work: A good BBQ sauce, a miso glaze, or a chipotle drizzle isn’t decoration here; it’s what ties the dish together.
-
The sides matter as much as the mains: Coleslaw, potato salad, baked beans, cornbread, and fresh salad are not filler. They’re the part that keeps a cookout from turning mushy.
-
You can mix grill and oven cooking without apology: A charred top from the broiler and a sticky finish from the oven still count. Nobody at the table is grading your heat source.
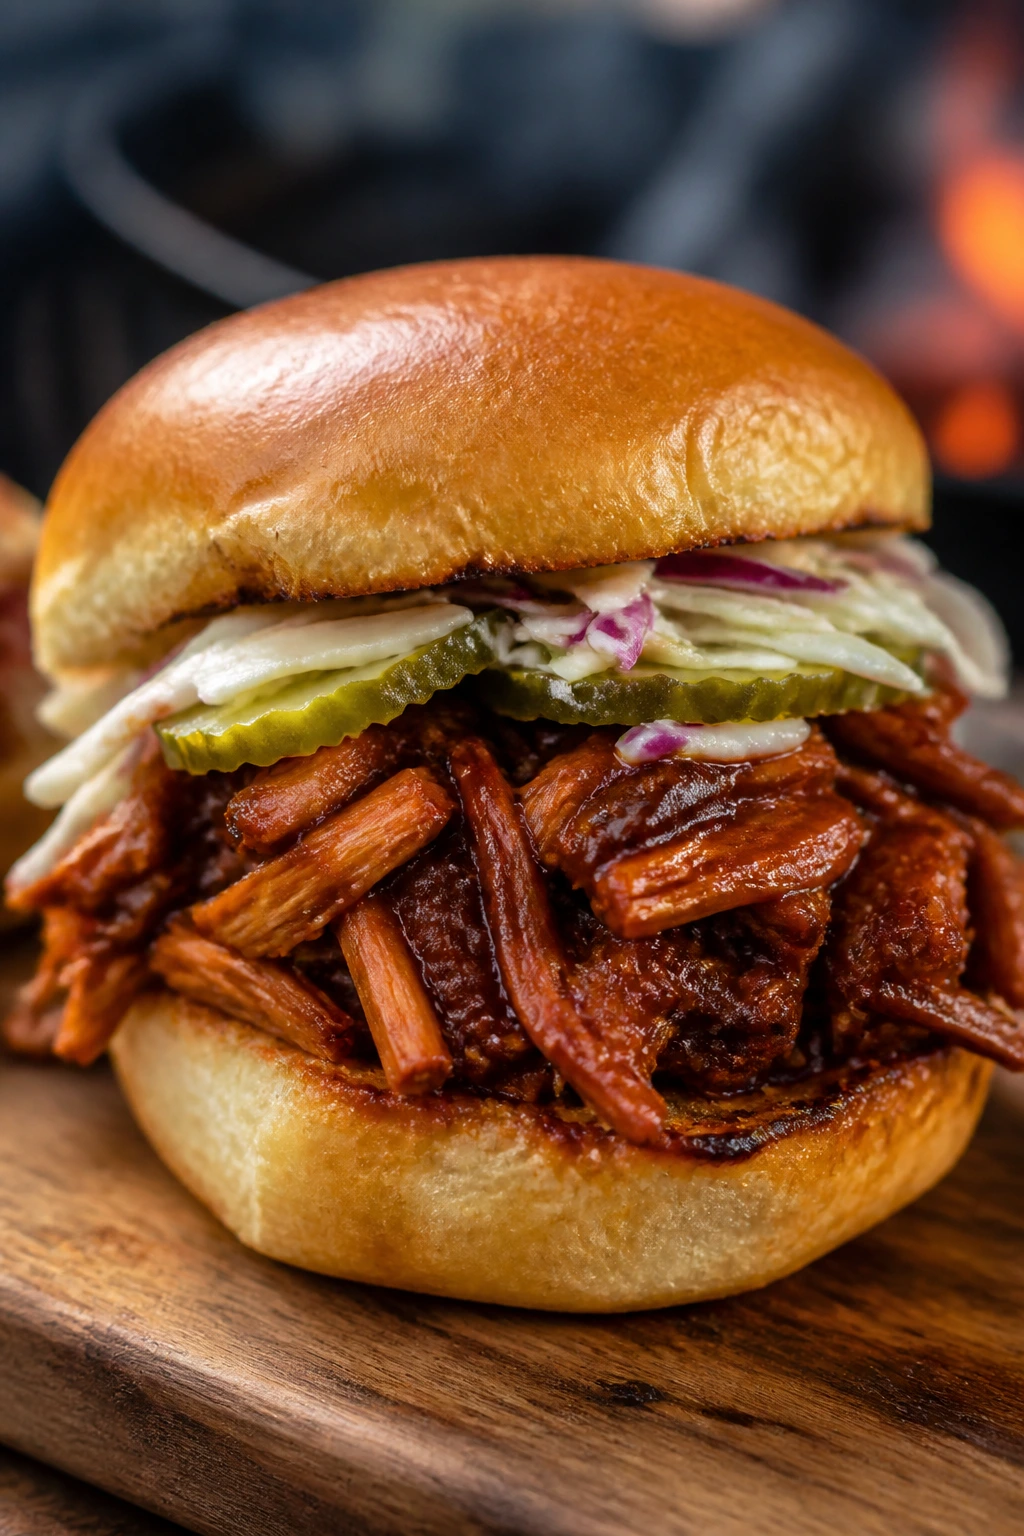
1. Smoky Jackfruit Sliders
Jackfruit is the old trick that still works when it’s handled with a little care. The shreds take on sauce fast, the edges catch on the skillet, and the inside stays soft enough to eat like pulled meat without pretending to be meat. Add pickles and slaw, and the whole thing gets that sharp-salty snap barbecue sandwiches need.
Why It Works: Young jackfruit in brine has a neutral, almost blank flavor, which is exactly what you want here. A short simmer with onion, garlic, and broth gives it enough moisture to shred cleanly, and a last toss in BBQ sauce turns the pieces sticky instead of wet. The sweet spot is letting some bits crisp in the pan while others stay saucy.
Key Ingredients:
- 2 cans young green jackfruit in brine, drained and rinsed — use brined jackfruit, not the kind packed in syrup.
- 1 tablespoon olive oil — for softening the onion and helping the jackfruit brown.
- 1 yellow onion, thinly sliced — builds sweetness under the sauce.
- 3 garlic cloves, minced — keep it fresh, not powdery.
- 1 cup BBQ sauce — choose one with smoke and vinegar, not just sugar.
- 1/2 cup vegetable broth — keeps the jackfruit from drying out while it shreds.
- 1 tablespoon apple cider vinegar — sharpens the finish.
- 1 teaspoon smoked paprika — gives the filling its grilled edge.
- 12 slider buns — potato buns work well because they stay soft.
- Dill pickles or coleslaw — both cut the sweetness.
Quick Steps:
- Heat the oil in a large skillet over medium heat and cook the onion for 5 to 6 minutes, until soft and just starting to brown at the edges.
- Add the garlic and cook for 30 seconds, until it smells sweet.
- Stir in the jackfruit, broth, vinegar, smoked paprika, and a pinch of salt. Simmer for 10 to 12 minutes.
- Use two forks to shred the jackfruit in the pan. Cook 5 minutes more, stirring now and then, until the liquid is mostly gone.
- Add the BBQ sauce and cook 3 to 4 minutes, until the filling looks glossy and clings to the jackfruit.
- Spoon onto toasted slider buns and top with pickles or slaw.
Equipment for This Recipe:
- Large skillet — a 12-inch skillet gives the jackfruit room to spread out.
- Two forks — the easiest way to shred the softened pieces.
- Measuring cups and spoons — the sauce ratio matters here.
- Toaster or dry skillet — for buns that don’t go limp.
How to Serve This Dish: Pile the filling high on toasted buns and tuck a few pickle chips on top. If you’re feeding a crowd, set out slaw separately so people can build their own. These sliders hold best when they’re warm, saucy, and a little messy.
Pro Tips for This Recipe:
- If the jackfruit still feels stringy in big chunks, keep cooking it another 5 minutes with the lid off.
- A spoonful of pickle brine in the filling works if your BBQ sauce runs sweet.
- Toast the buns. Skip that step and they’ll collapse under the sauce.
Variations on This Dish:
- Carolina-Style Tang: Swap half the BBQ sauce for cider vinegar and add a pinch of cayenne.
- Spicy Pepper Sliders: Stir in chopped jalapeños with the onion and finish with peppery slaw.
Common Mistakes to Avoid with This Dish:
- Don’t use jackfruit in syrup. It tastes wrong and turns the filling sticky in the bad way.
- Don’t drown the pan in sauce too early. The jackfruit needs time to dry out a little before it gets glossy.
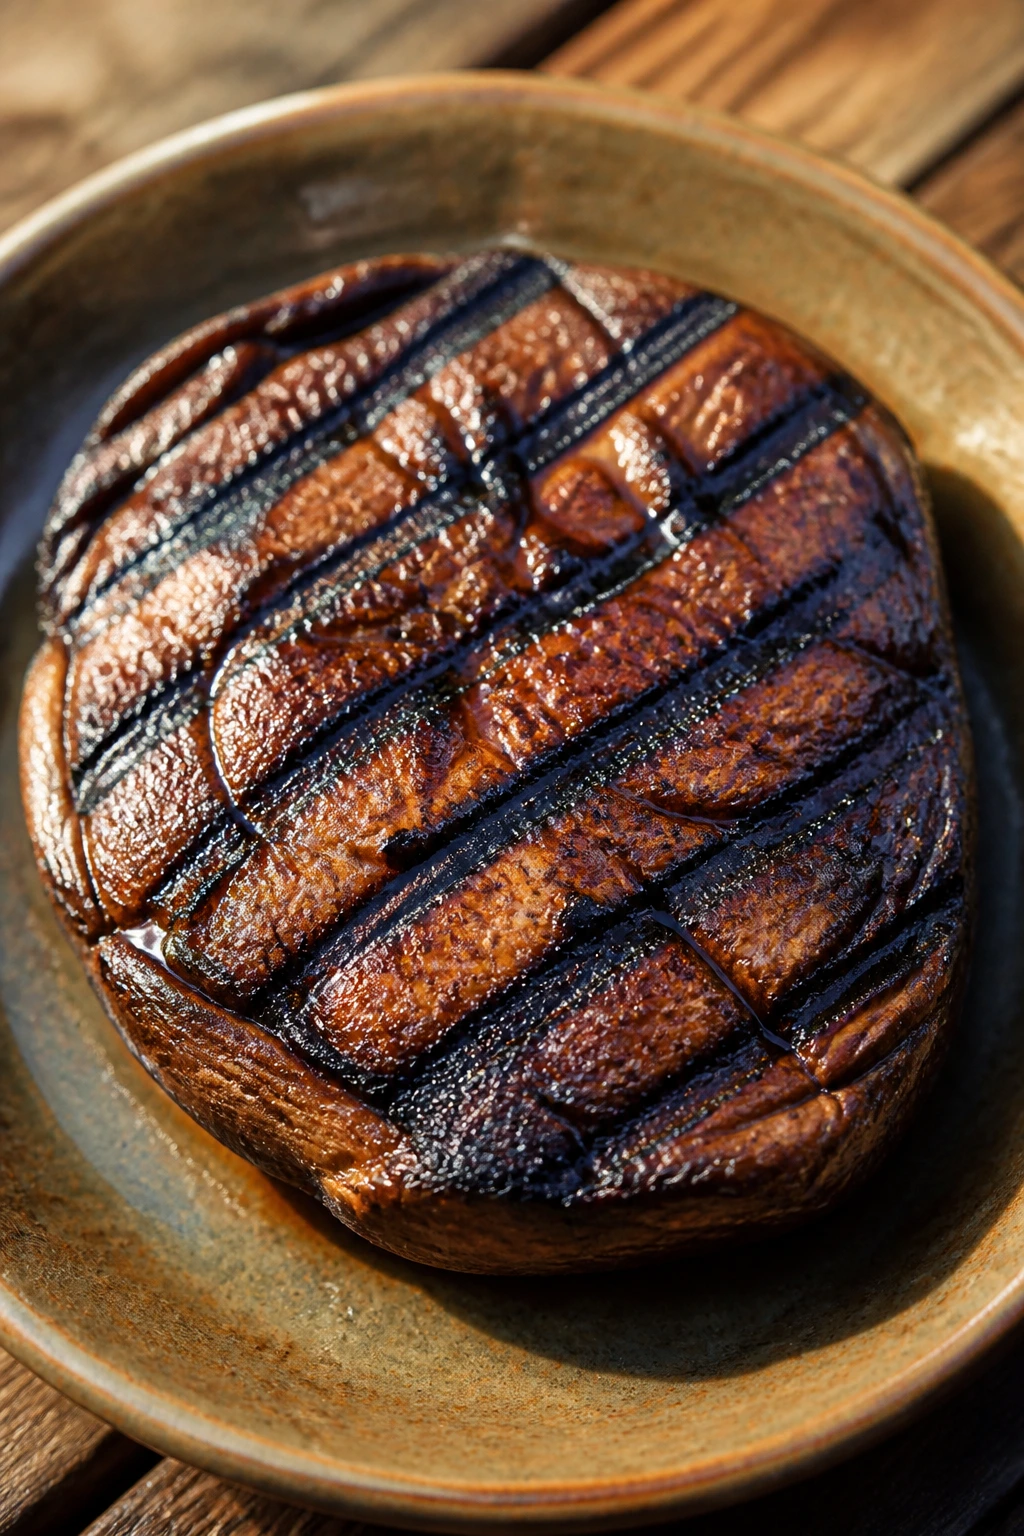
2. Grilled Portobello Steaks
Portobellos are the easiest way to get a meaty bite without fake meat, and I mean that in the best way. When the caps hit a hot grill, the edges darken, the centers soften, and the mushrooms soak up a salty-sweet marinade like they were made for it. Slice one open and you get a juicy, dense bite that belongs on a bun or beside grilled corn.
Why It Works: Portobello caps have enough surface area to take on smoke and enough flesh to stay intact over high heat. A marinade built from soy sauce, balsamic, maple, and smoked paprika gives the caps a dark, savory sheen. Grill them long enough to mark them, but not so long that they turn floppy and soggy.
Key Ingredients:
- 6 large portobello caps — choose firm caps with dry tops.
- 3 tablespoons olive oil — helps the marinade cling.
- 2 tablespoons soy sauce — brings salt and umami.
- 2 tablespoons balsamic vinegar — adds a dark, tangy note.
- 1 tablespoon maple syrup — balances the acidity.
- 2 teaspoons smoked paprika — pushes the grill flavor.
- 2 garlic cloves, minced — for a sharp, savory base.
- 1 tablespoon lemon juice — brightens the finish.
- 1/4 cup chopped parsley — for a fresh top note.
Quick Steps:
- Whisk the olive oil, soy sauce, balsamic, maple, paprika, garlic, and lemon juice in a shallow dish.
- Brush the mushrooms on both sides and let them sit for 15 minutes.
- Heat a grill or grill pan over medium-high heat.
- Cook the mushrooms for 4 to 5 minutes per side, until they’re browned and tender but still hold their shape.
- Spoon over the parsley and any extra marinade that’s been brought to a boil for 1 minute.
- Serve on buns, over polenta, or with grilled vegetables.
Equipment for This Recipe:
- Grill or grill pan — the char marks are part of the point.
- Shallow dish — makes marinating easy.
- Tongs — so you don’t tear the caps.
- Small bowl — for the parsley finish.
How to Serve This Dish: Stack a portobello cap on a toasted bun with arugula, tomato, and red onion, or serve two caps over creamy polenta. If you want the plate to feel more like a barbecue dinner, add slaw on the side and let the mushrooms carry the smoky note.
Pro Tips for This Recipe:
- Scrape out the dark gills if you want a cleaner look on the plate; leave them in if you like a deeper mushroom flavor.
- Don’t salt heavily before grilling. Soy sauce already brings plenty.
- If the caps curl, press them lightly with a spatula for the first minute.
Variations on This Dish:
- Garlic-Herb Portobellos: Add chopped thyme and rosemary to the marinade.
- Sandwich-Ready Caps: Slice the mushrooms after grilling and tuck them into rolls with pickles.
Common Mistakes to Avoid with This Dish:
- Don’t soak the mushrooms in marinade for hours. They’ll go watery instead of savory.
- Don’t crowd the pan. Portobellos need room to brown instead of steaming.
3. BBQ Cauliflower Steaks
Cauliflower steaks can be bland if you treat them like a joke, and they can be excellent if you actually cook them. Roast them hard, brush them with sauce late, and the edges go crisp while the center turns tender and almost buttery. The trick is making the cauliflower taste like it had somewhere to be.
Why It Works: Thick cauliflower slices hold together better than florets and give you a broad surface for browning. A little cornstarch mixed with oil helps the edges blister, while BBQ sauce goes on near the end so it sticks instead of burning. High heat is the difference between a soft vegetable and a real centerpiece.
Key Ingredients:
- 2 large cauliflower heads — choose tight, heavy heads.
- 3 tablespoons olive oil — for browning.
- 2 tablespoons cornstarch — helps the surface crisp.
- 1 teaspoon smoked paprika — gives the cauliflower a dry-rub feel.
- 1 teaspoon garlic powder — easy flavor that sticks.
- 1 cup BBQ sauce — use one with a tangy edge.
- 1 tablespoon maple syrup — optional if the sauce runs sharp.
- Salt and black pepper — season the cauliflower itself.
Quick Steps:
- Heat the oven to 425°F and line a sheet pan with parchment.
- Slice each cauliflower head into 1-inch steaks, keeping the core attached so they stay together.
- Brush both sides with olive oil, then dust lightly with cornstarch, paprika, garlic powder, salt, and pepper.
- Roast for 20 minutes, until the bottoms are browned.
- Flip carefully, brush with BBQ sauce, and roast 10 to 12 minutes more.
- Serve hot with extra sauce on the side.
Equipment for This Recipe:
- Rimmed sheet pan — catches any sauce drips.
- Sharp chef’s knife — for clean steaks.
- Pastry brush — makes sauce application easy.
- Parchment paper — keeps the cauliflower from sticking.
How to Serve This Dish: Put the steaks on a platter and spoon a little extra sauce over the top. They work beside baked beans, coleslaw, or potato salad, and they also do fine as the main event with a chopped salad and cornbread.
Pro Tips for This Recipe:
- Keep the steaks thick. Thin slices fall apart before they brown.
- Save the small cauliflower pieces for another roast; don’t force them into steaks.
- Brush sauce on late so it stays shiny instead of sticky and scorched.
Variations on This Dish:
- Chipotle Heat: Stir chipotle powder into the oil mix.
- Garlic-Parmesan Style, Vegan Version: Finish with nutritional yeast and minced parsley.
Common Mistakes to Avoid with This Dish:
- Don’t use florets for this version. They cook too fast and won’t give you the same steak-like texture.
- Don’t sauce from the start. Sugar burns before the cauliflower finishes.
4. Lentil-Walnut Burgers
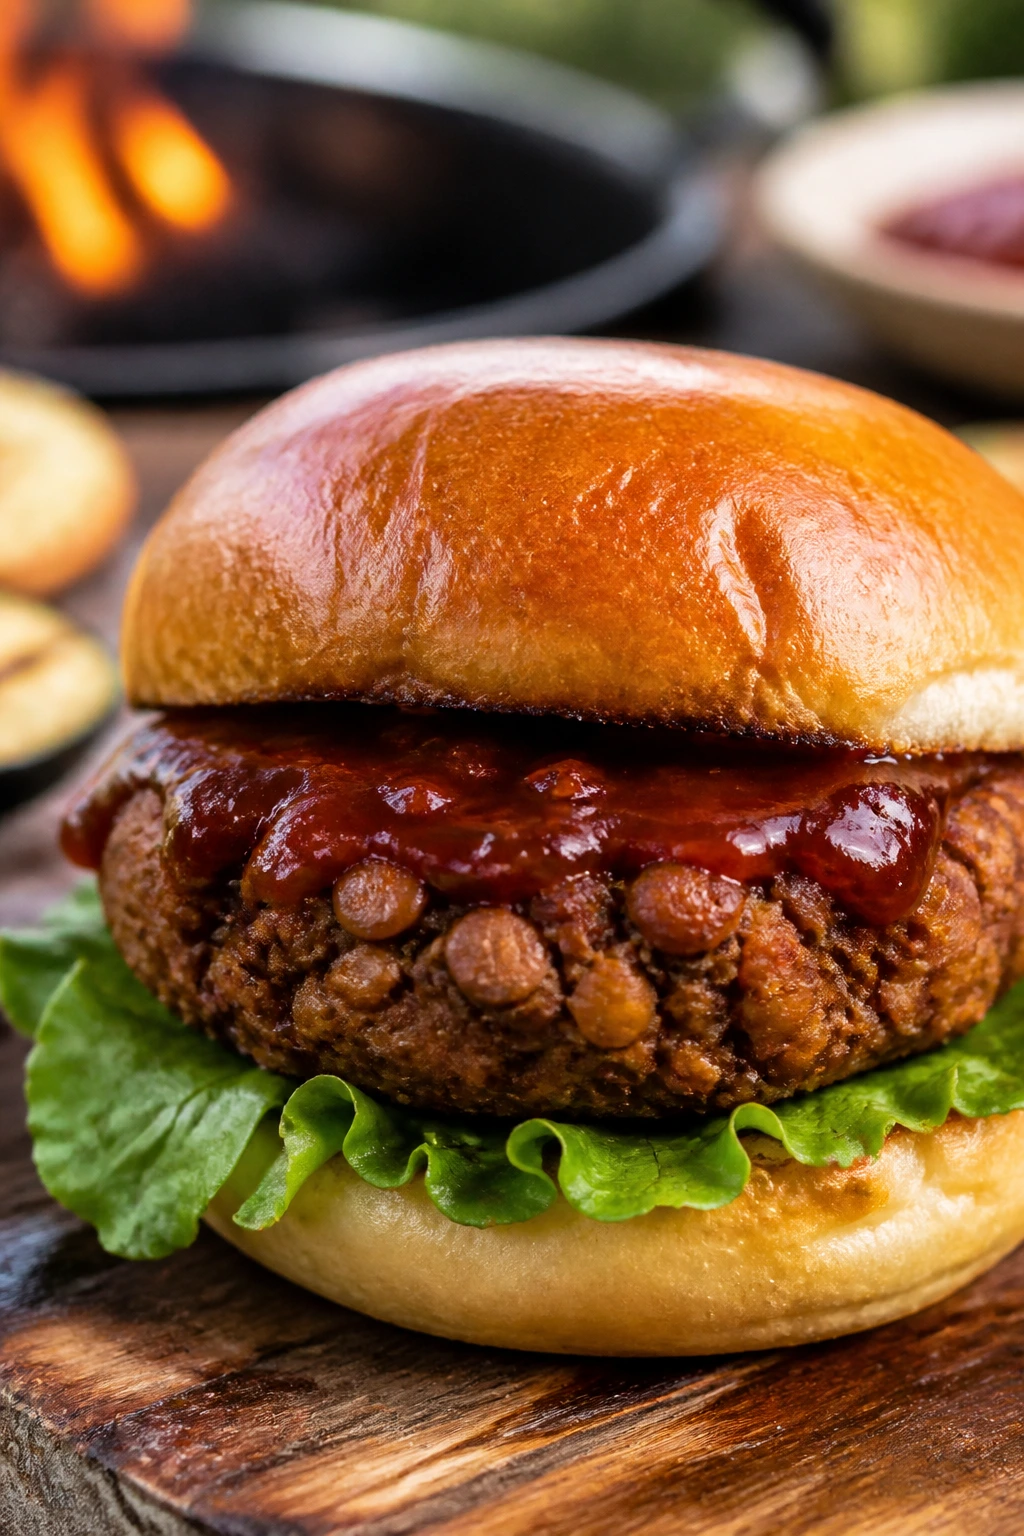
This is the burger for people who want heft, not just a soft bean patty. Lentils bring the base, walnuts bring the bite, and oats keep the whole thing from crumbling when it hits the bun. Toast one, stack it with pickles and onion, and even a skeptical guest usually stops asking questions.
Why It Works: Cooked brown lentils mash into a dense but not pasty base, while toasted walnuts add a rough, meaty chew. Oats absorb moisture and help the patties hold together in the pan. The flavor lands in the right place because tomato paste, smoked paprika, and soy sauce bring the savory, grilled taste people expect from barbecue-adjacent food.
Key Ingredients:
- 1 cup cooked brown lentils, cooled — too-wet lentils make mush.
- 1 cup walnuts, toasted and chopped — for bite.
- 1/2 cup rolled oats — acts as the binder.
- 1/2 cup finely diced onion — keeps the patties from tasting dry.
- 2 tablespoons tomato paste — adds depth.
- 1 flax egg — 1 tablespoon ground flax plus 3 tablespoons water.
- 1 teaspoon smoked paprika — gives grill flavor.
- 1 teaspoon soy sauce — sharpens the savory note.
- 4 burger buns — brioche-style vegan buns work well.
- Lettuce, tomato, pickles, and BBQ sauce — for topping.
Quick Steps:
- Heat the oven to 400°F if baking, or warm a skillet over medium heat.
- Pulse the lentils, walnuts, and oats in a food processor until the mixture looks coarse, not smooth.
- Stir in the onion, tomato paste, flax egg, paprika, soy sauce, salt, and pepper.
- Form 4 patties and chill them for 15 minutes so they firm up.
- Pan-sear for 4 minutes per side, or bake for 20 minutes, flipping once.
- Stack on buns with BBQ sauce and toppings.
Equipment for This Recipe:
- Food processor — gives the patties the right texture fast.
- Mixing bowl — for finishing the dough.
- Skillet or sheet pan — both cooking methods work.
- Spatula — for flipping without breaking them.
How to Serve This Dish: Serve the burgers on toasted buns with lettuce, tomato, pickles, and a smear of BBQ sauce. If you want a barbecue plate instead of a pure burger night, add slaw and corn on the cob and let the patty be the sturdy center.
Pro Tips for This Recipe:
- If the mix feels wet, add 1 to 2 tablespoons more oats.
- Let the patties chill before cooking; it keeps the edges from cracking.
- A little char on the bun makes the burger taste fuller.
Variations on This Dish:
- Black Bean Swap: Replace half the lentils with mashed black beans for a softer center.
- Smoky Mushroom Boost: Sauté 1 cup chopped mushrooms and mix them in for extra depth.
Common Mistakes to Avoid with This Dish:
- Don’t puree the mix into paste. You want texture.
- Don’t flip too early. Let the first side set or the patty will smear in the pan.
5. Sticky Tempeh Skewers
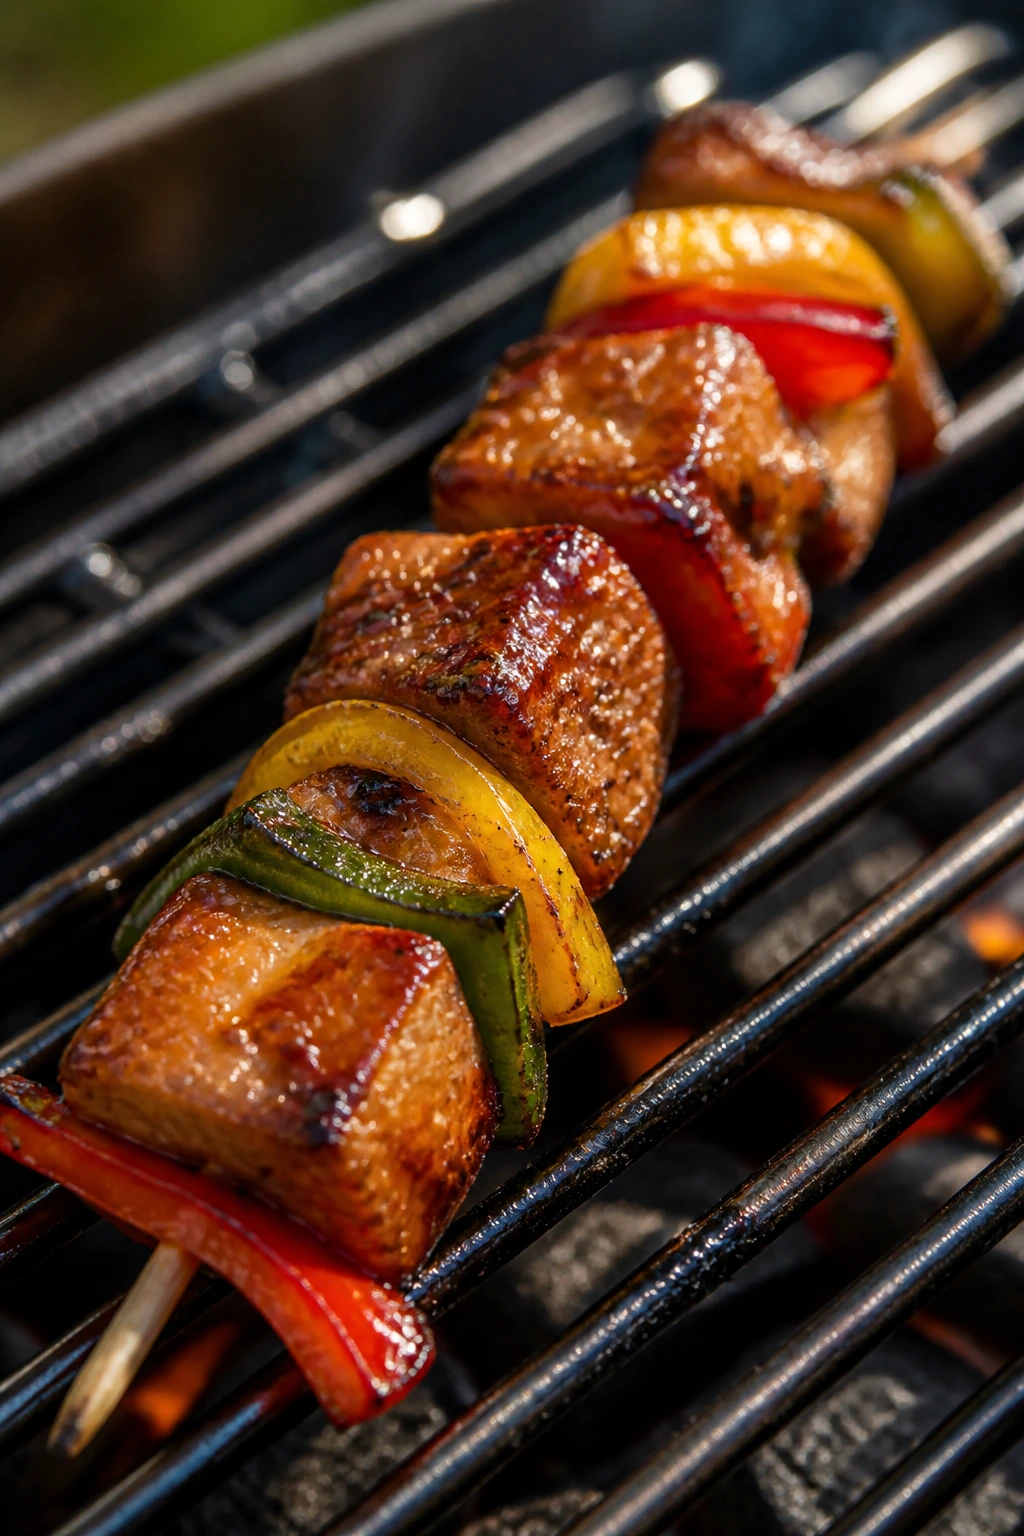
Tempeh is one of those ingredients people mistrust until it hits heat and sauce. Steam it first and the bitterness mellows out; then the marinade clings, the edges caramelize, and the whole skewer turns glossy. Pineapple and peppers make it taste like a cookout instead of a nutrition lecture.
Why It Works: Tempeh has a firm, nutty structure that holds up better than tofu on skewers. Steaming for 10 minutes opens it up so the marinade can soak in instead of sitting on the surface. A mix of soy sauce, maple, BBQ sauce, and rice vinegar gives you that sticky, sweet-tangy coating that turns tacky on the grill.
Key Ingredients:
- 16 ounces tempeh, cut into cubes — steam it first.
- 1 red bell pepper, cut into chunks — adds sweetness.
- 1 yellow bell pepper, cut into chunks — for color and balance.
- 1 red onion, cut into wedges — grills nicely.
- 3 tablespoons soy sauce — salt and umami.
- 2 tablespoons maple syrup — helps the glaze caramelize.
- 2 tablespoons BBQ sauce — ties it to the theme.
- 1 tablespoon rice vinegar — keeps it bright.
- 1 tablespoon olive oil — helps with grilling.
- 1 teaspoon garlic powder — easy flavor that sticks.
Quick Steps:
- Steam the tempeh for 10 minutes, then let it cool slightly.
- Whisk the soy sauce, maple, BBQ sauce, vinegar, oil, and garlic powder.
- Toss the tempeh and vegetables in the marinade for 15 to 20 minutes.
- Thread onto skewers, alternating tempeh and vegetables.
- Grill over medium heat for 2 to 3 minutes per side, brushing with extra marinade as they cook.
- Pull them off when the edges are browned and the glaze looks shiny.
Equipment for This Recipe:
- Steamer basket or pot with insert — for taking the edge off the tempeh.
- Skewers — metal or soaked wooden sticks.
- Grill or grill pan — medium heat is enough.
- Basting brush — for the last layer of glaze.
How to Serve This Dish: Serve the skewers over rice, with a cucumber salad, or tucked into warm flatbread. They also work well as part of a cookout platter next to coleslaw and grilled corn, where the sticky glaze can play against something cold and crisp.
Pro Tips for This Recipe:
- Don’t skip the steaming step unless you like tempeh’s raw edge.
- Cut the vegetables roughly the same size so they finish together.
- Brush on the final bit of glaze in the last minute, not earlier.
Variations on This Dish:
- Pineapple-Heavy Version: Add pineapple chunks to the skewers for more caramelized juice.
- Gochujang Heat: Swap half the BBQ sauce for gochujang for a deeper, spicier glaze.
Common Mistakes to Avoid with This Dish:
- Don’t soak wooden skewers dry. They burn fast.
- Don’t cook tempeh over ripping-hot heat. The glaze scorches before the center gets warm.
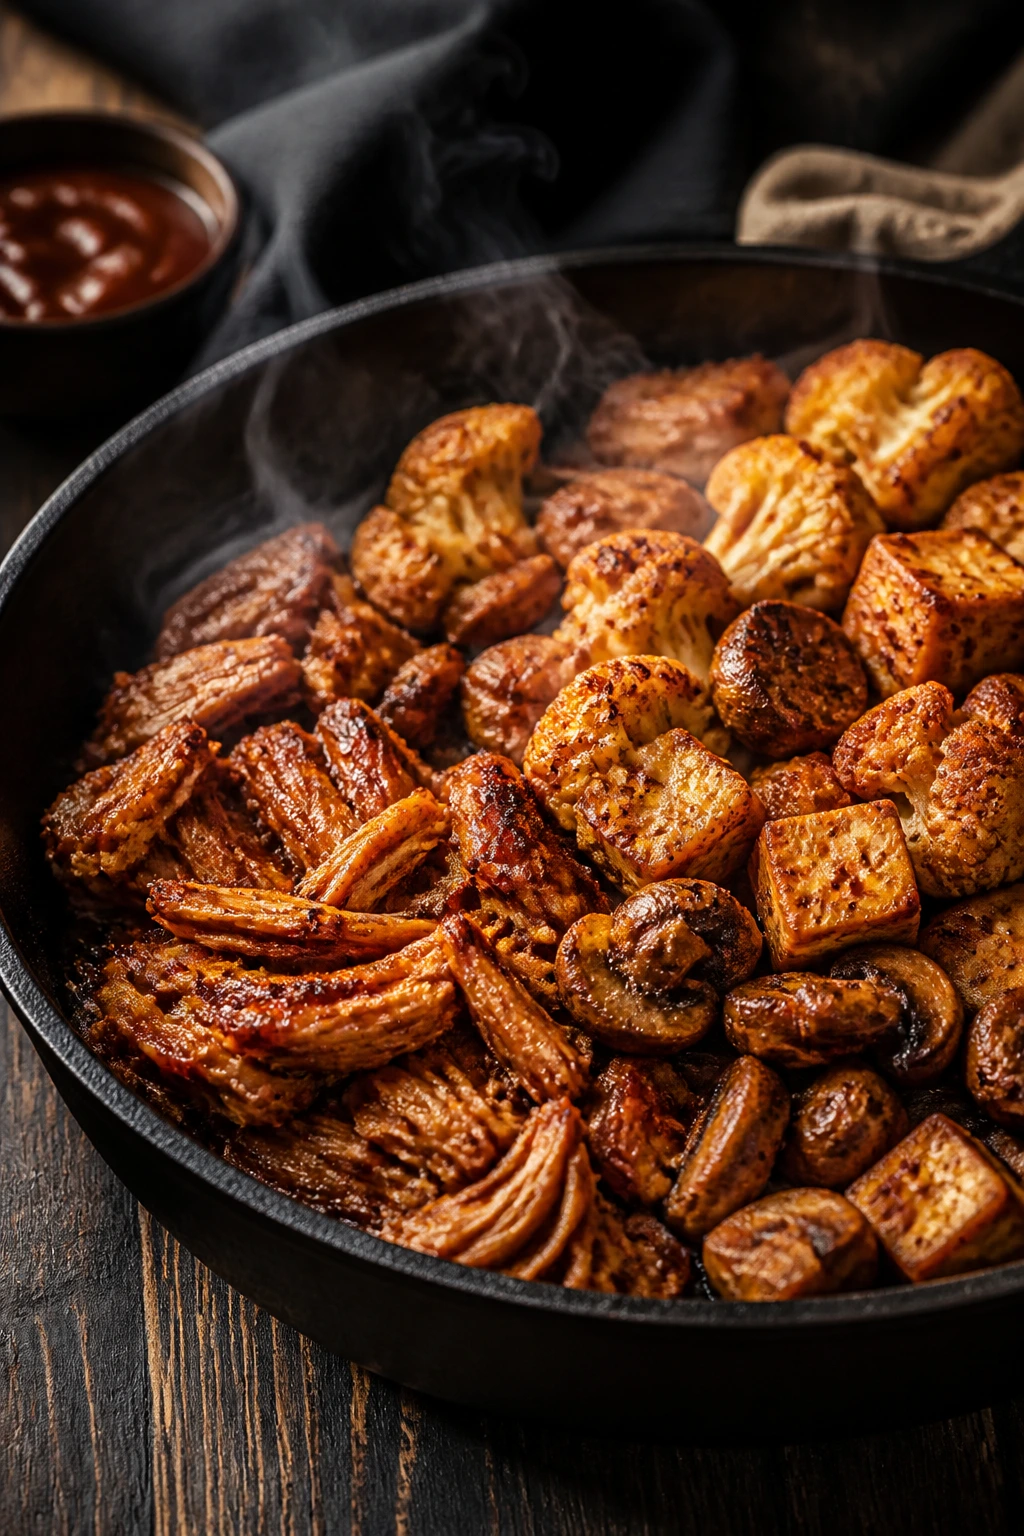
6. Tofu Burnt Ends
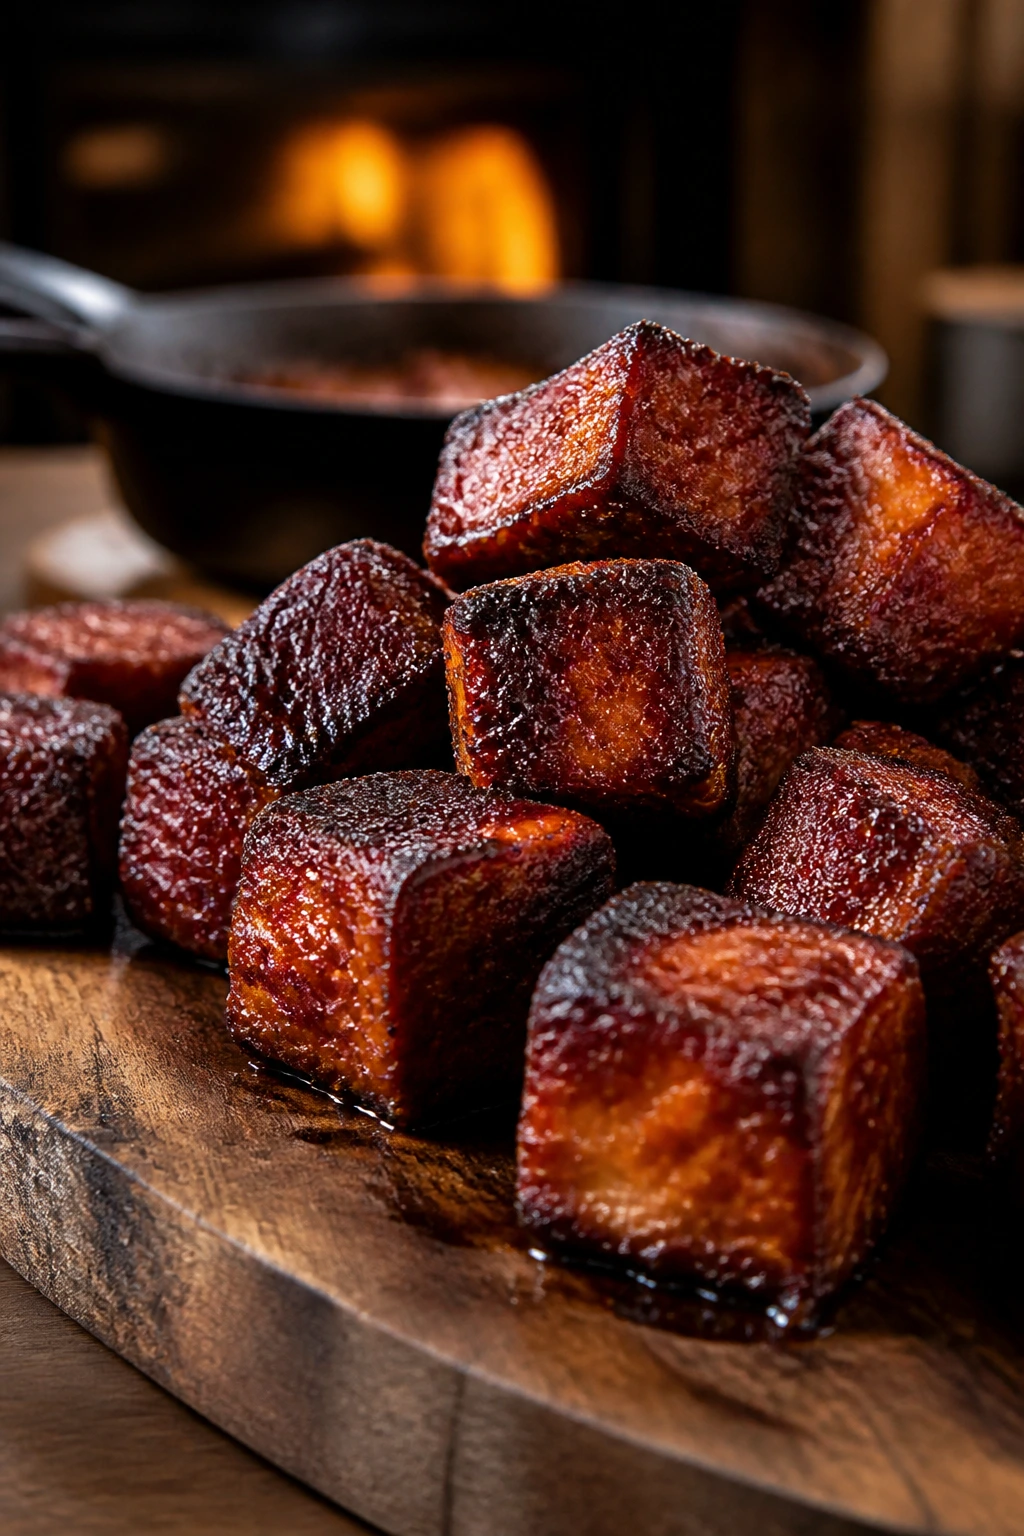
This is the dish that wins people over when they say tofu is boring. Press it well, cube it, coat it, and bake it until the corners go crisp. Then the sauce goes on, and the cubes turn sticky, dark, and a little outrageous in the best way.
Why It Works: Extra-firm tofu has enough structure to mimic the chewy outside of burnt ends once the moisture is pressed out. Cornstarch builds a thin crust that crisps in the oven, and a second bake after saucing gives you the lacquered surface people expect from barbecue. The trick is not rushing the drying step.
Key Ingredients:
- 2 blocks extra-firm tofu, 14 ounces each, pressed and cubed — moisture is the enemy here.
- 2 tablespoons neutral oil — helps the coating brown.
- 2 tablespoons cornstarch — creates the crust.
- 1 teaspoon smoked paprika — gives the cubes barbecue color.
- 1 teaspoon garlic powder — rounds out the rub.
- 1/2 teaspoon black pepper — keeps the flavor sharp.
- 3/4 cup BBQ sauce — thick sauce works best.
- 1 tablespoon maple syrup — boosts the sticky finish.
- 1 tablespoon soy sauce — deepens the glaze.
Quick Steps:
- Heat the oven to 425°F and line a sheet pan.
- Press the tofu for at least 15 minutes, then cut it into 1-inch cubes.
- Toss the cubes with oil, cornstarch, paprika, garlic powder, pepper, and a pinch of salt.
- Bake for 25 minutes, turning once, until the edges are crisp and golden.
- Mix the BBQ sauce, maple syrup, and soy sauce, then toss the tofu in it.
- Bake 10 minutes more, until the glaze looks sticky and dark.
Equipment for This Recipe:
- Tofu press or clean towels and a heavy pan — either works.
- Sheet pan — line it so the glaze doesn’t weld itself on.
- Large bowl — for tossing the cubes.
- Spatula — for turning without breaking the crust.
How to Serve This Dish: Pile the tofu burnt ends into a bowl with pickles, or tuck them into buns with slaw. They’re also good with potato salad and grilled corn, because the sticky coating needs something cool and crunchy beside it.
Pro Tips for This Recipe:
- Press the tofu longer than you think. Wet tofu steams.
- If the glaze feels thin, simmer it for a minute before tossing.
- Broil for 1 to 2 minutes at the end if you want darker edges.
Variations on This Dish:
- Smokier Burnt Ends: Add a few drops of liquid smoke to the sauce.
- Soy-Free Version: Use coconut aminos and a little extra salt.
Common Mistakes to Avoid with This Dish:
- Don’t skip the cornstarch. It’s what gives the cubes that dry-edged bite.
- Don’t toss them in sauce before the first bake or you’ll lose the crust.
7. Loaded BBQ Sweet Potato Wedges
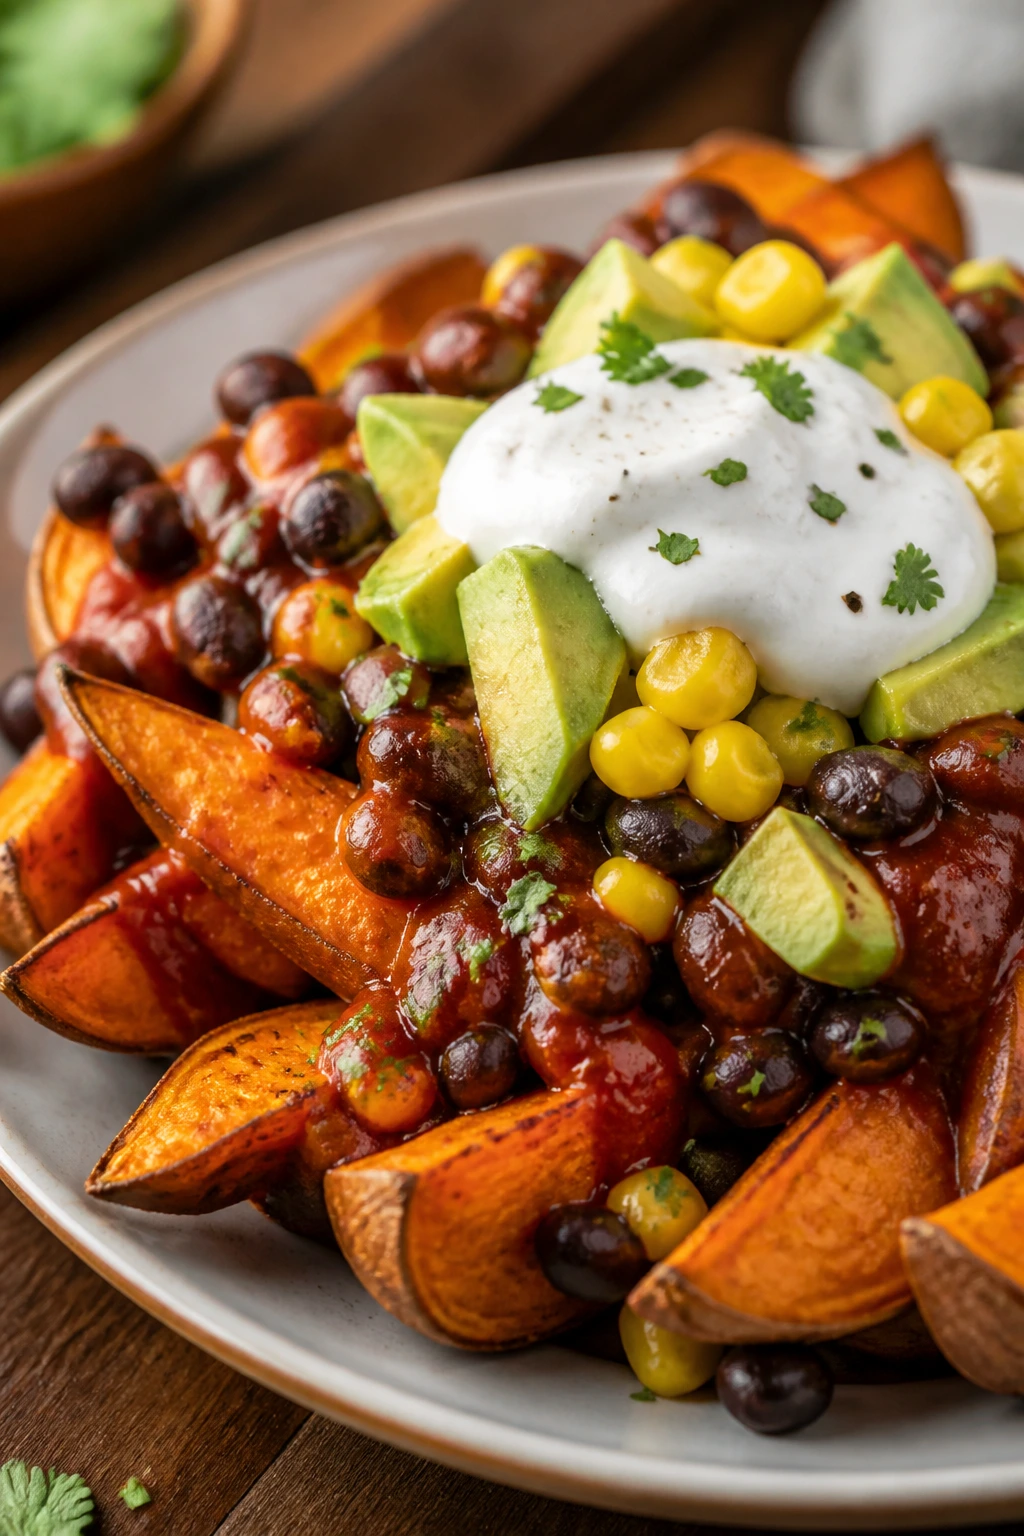
Sweet potatoes can go mushy if you baby them, but they get wonderful when you roast them hard and let the edges go bronze. Add black beans, corn, and a little vegan sour cream, and you’ve got a plate that eats like dinner instead of a side dish. The sweet-smoky contrast is the whole game.
Why It Works: The wedges get enough surface area to crisp, especially if you dust them lightly with cornstarch. BBQ sauce on the beans brings the sticky, savory side while the sweet potato gives you softness underneath. This is the kind of recipe that feels generous without needing any animal protein at all.
Key Ingredients:
- 3 large sweet potatoes, scrubbed and cut into wedges — leave the skins on.
- 2 tablespoons olive oil — for roasting.
- 1 teaspoon smoked paprika — keeps the flavor on theme.
- 1 teaspoon salt — sweet potatoes need more seasoning than people think.
- 1 can black beans, drained and rinsed — for heft.
- 1 cup corn kernels — fresh, frozen, or thawed.
- 1/2 cup BBQ sauce — tosses the beans and corn.
- 1 avocado, sliced — for creaminess.
- 1/4 cup vegan sour cream — cool finish.
- Chopped cilantro — for freshness.
Quick Steps:
- Heat the oven to 425°F and line a sheet pan.
- Toss the sweet potato wedges with oil, paprika, salt, and a light dusting of cornstarch if you want extra crisp edges.
- Roast for 25 to 30 minutes, flipping once, until browned at the corners.
- Warm the black beans and corn in a small pan with the BBQ sauce.
- Spoon the bean mixture over the wedges.
- Top with avocado, vegan sour cream, and cilantro.
Equipment for This Recipe:
- Sheet pan — use a roomy one so the wedges roast, not steam.
- Small saucepan — for the bean topping.
- Mixing bowl — for coating the potatoes.
- Sharp knife — for even wedges.
How to Serve This Dish: Serve the wedges on a big platter and let the toppings fall where they may. They work as a main dish with slaw or as a side dish beside grilled mushrooms or tofu. Add lime wedges if you want the plate to feel sharper.
Pro Tips for This Recipe:
- Don’t cut the wedges too thin or they’ll collapse.
- Spread them out on the pan. Tight packing means soft potatoes.
- If your BBQ sauce is sweet, add a squeeze of lime to the beans.
Variations on This Dish:
- Loaded Nacho Style: Add jalapeños and vegan cheese shreds.
- Maple Chipotle Version: Mix a little chipotle paste into the bean topping.
Common Mistakes to Avoid with This Dish:
- Don’t roast the potatoes at a low temperature. They’ll get soft before they brown.
- Don’t drown them in sour cream before serving. Add it at the end so the wedges stay crisp.
8. Vegan Coleslaw with Apple and Dill

Coleslaw is often treated like a filler side, and that’s a waste. When the cabbage is sliced thin and the dressing hits the right balance of tang and creaminess, it becomes the sharp, cold thing that makes barbecue taste better. The apple gives it crunch that lasts a little longer than plain cabbage.
Why It Works: Two kinds of cabbage give the slaw color and texture, while apple adds a sweet snap that stands up to smoky main dishes. Apple cider vinegar and Dijon cut through vegan mayo so the dressing tastes bright instead of heavy. A short rest in the fridge softens the cabbage just enough without making it limp.
Key Ingredients:
- 6 cups shredded green cabbage — thin ribbons work best.
- 2 cups shredded purple cabbage — adds color and crunch.
- 1 large apple, julienned — use a tart one if you like sharper slaw.
- 1/2 cup vegan mayo — the creamy base.
- 2 tablespoons apple cider vinegar — for tang.
- 1 tablespoon Dijon mustard — keeps the dressing lively.
- 1 teaspoon maple syrup — just enough sweetness.
- 2 tablespoons chopped dill — gives it a fresh finish.
- Salt and pepper — season at the end.
Quick Steps:
- Whisk the vegan mayo, vinegar, Dijon, maple syrup, dill, salt, and pepper in a large bowl.
- Add the cabbage and apple.
- Toss until everything is coated but not soggy.
- Chill for 10 to 20 minutes.
- Toss once more before serving.
Equipment for This Recipe:
- Large mixing bowl — for easy tossing.
- Sharp knife or mandoline — thin cabbage matters here.
- Box grater or julienne peeler — for the apple.
- Measuring spoons — for a dressing that stays balanced.
How to Serve This Dish: Heap the slaw in a bowl beside sliders, seitan ribs, or grilled portobellos. It also works piled into sandwiches, where it gives each bite a cool crunch and keeps the bread from feeling too rich.
Pro Tips for This Recipe:
- Dress the slaw just before serving if you like it extra crisp.
- Add the apple last so it doesn’t brown while you prep the rest.
- Taste again after chilling; cold slaw needs a touch more salt.
Variations on This Dish:
- Creamier Picnic Slaw: Add another tablespoon of vegan mayo.
- Mustard-Forward Version: Increase the Dijon and skip the maple syrup.
Common Mistakes to Avoid with This Dish:
- Don’t overdress it. Wet slaw turns swampy fast.
- Don’t skip the acid. Without vinegar, it tastes flat next to barbecue.
9. Smoky Chickpea Salad Wraps
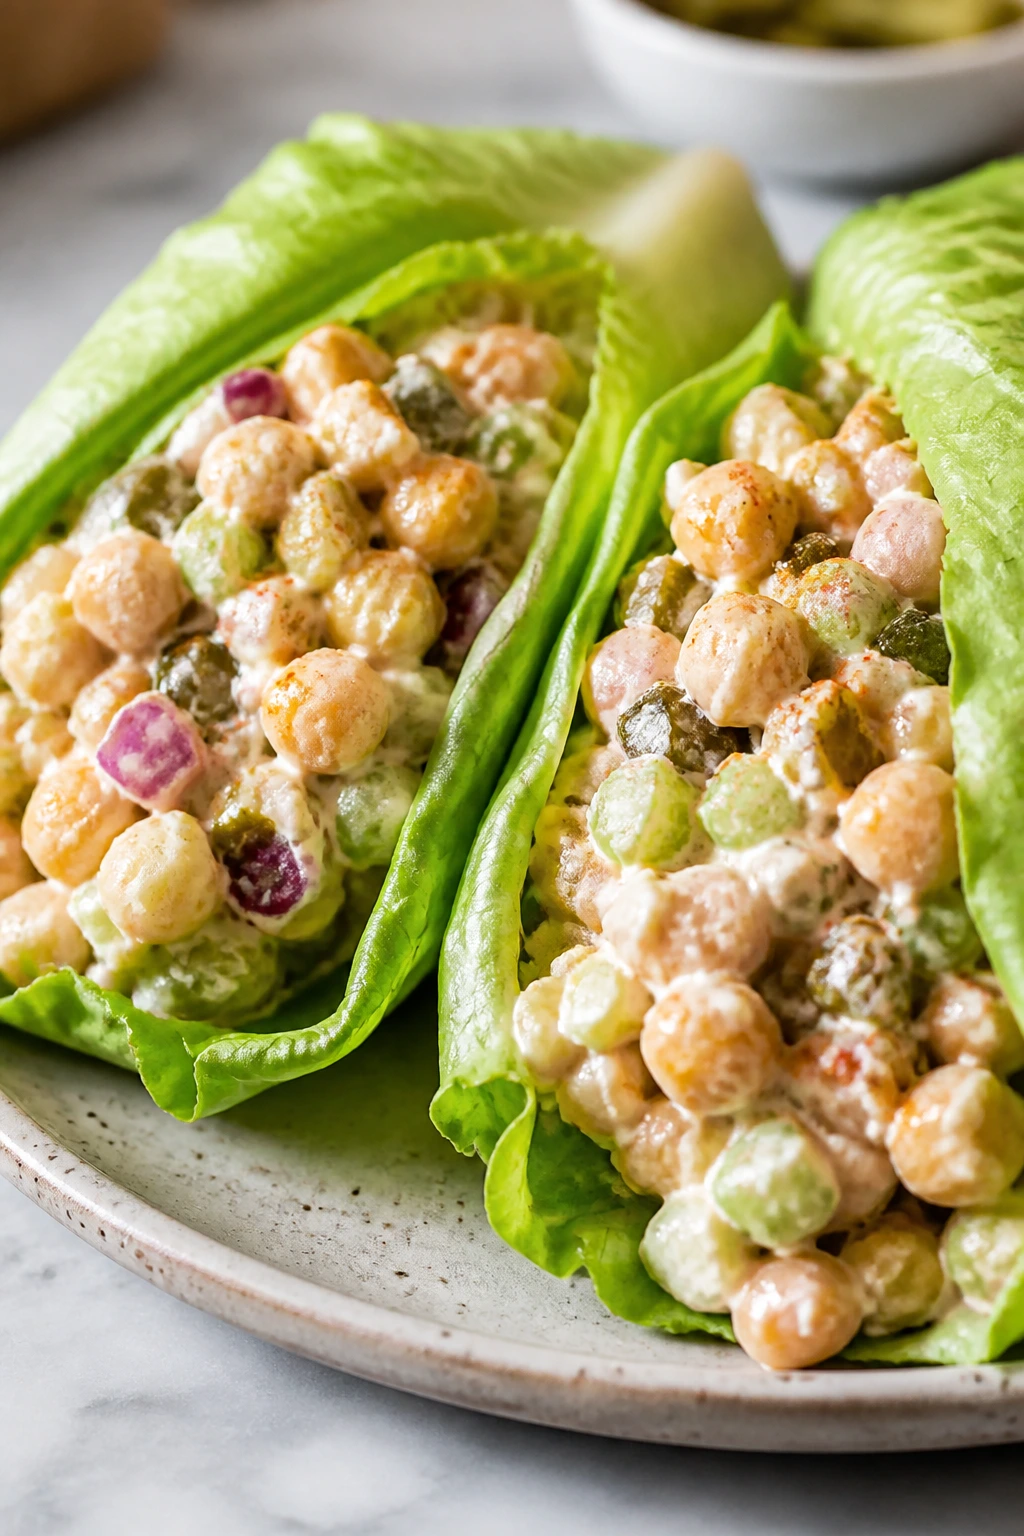
This is not a sad desk lunch pretending to be barbecue. Chickpeas, celery, onion, and pickle relish give the filling a punchy, almost deli-style personality, and the smoked paprika keeps it in the cookout family. Stuff it in lettuce or a tortilla and it disappears faster than you expect.
Why It Works: Chickpeas mash just enough to bind while still leaving texture, which is what keeps the filling from feeling like paste. Vegan mayo brings creaminess, while Dijon and relish cut the fat with sharpness and crunch. The smoked paprika matters here because it makes the whole salad taste like it was built next to the grill.
Key Ingredients:
- 2 cans chickpeas, drained and rinsed — pat them dry first.
- 1/2 cup vegan mayo — for binding.
- 1 celery stalk, finely diced — adds crispness.
- 1/4 red onion, minced — keep the pieces tiny.
- 1 tablespoon Dijon mustard — sharpens the flavor.
- 1 tablespoon pickle relish — gives it sweetness and tang.
- 1 teaspoon smoked paprika — the barbecue cue.
- 8 lettuce leaves or 4 large tortillas — choose your wrap.
- 1 avocado, sliced — optional but good.
Quick Steps:
- Mash the chickpeas with a fork until about half of them break down.
- Stir in the mayo, celery, onion, Dijon, relish, paprika, salt, and pepper.
- Taste and adjust the salt or mustard.
- Spoon into lettuce leaves or tortillas.
- Add avocado if you want a richer filling.
Equipment for This Recipe:
- Mixing bowl — for the filling.
- Fork or potato masher — keeps the texture uneven.
- Knife and cutting board — the celery and onion need to be fine.
- Spoon — for clean wrap filling.
How to Serve This Dish: Serve the wraps with potato chips, pickles, or a pile of slaw. They’re best when the filling is cold and the wrapper is crisp, so assemble them close to eating time.
Pro Tips for This Recipe:
- Dry the chickpeas well or the filling gets loose.
- Chop the onion small so it doesn’t overpower every bite.
- A squeeze of lemon makes the whole mix taste fresher.
Variations on This Dish:
- Curried Chickpea Wraps: Add curry powder and chopped raisins.
- Smashed Avocado Version: Replace half the mayo with avocado.
Common Mistakes to Avoid with This Dish:
- Don’t turn the chickpeas into hummus. Texture matters.
- Don’t let the wraps sit too long after assembling or they’ll go soft.
10. Chipotle-Lime Grilled Corn with Cashew Drizzle
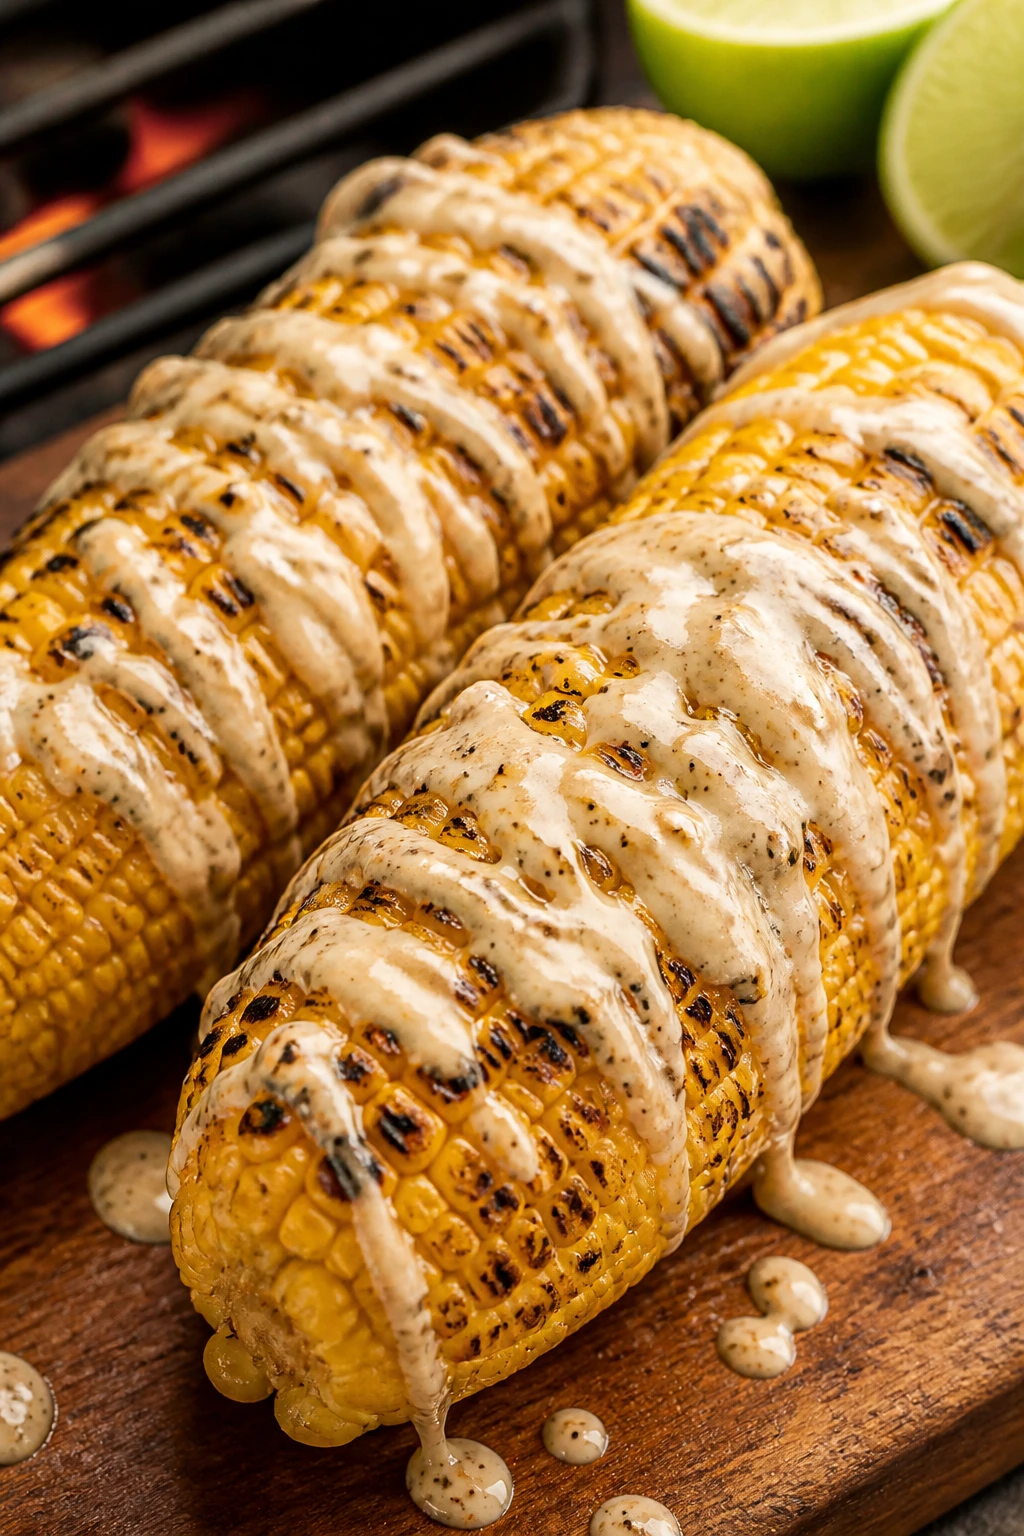
Corn on the cob can feel old-school in the nicest way when it comes off the grill with a little char. The cashew drizzle gives it the creaminess that butter usually would, but with chipotle and lime instead of dairy. It’s messy, bright, and impossible to keep on the plate for long.
Why It Works: Grilling corn in the husk or directly on the grates gives you sweet kernels with browned spots, which is where the flavor lives. Cashews blend into a smooth, neutral sauce that carries chipotle heat without fighting the corn. Lime and cilantro keep the whole thing from feeling heavy.
Key Ingredients:
- 6 ears corn, husked — choose ears with tight kernels.
- 1 cup raw cashews, soaked for 20 minutes — softens fast in the blender.
- 1 lime, juiced — gives the drizzle its lift.
- 1 chipotle pepper in adobo plus 1 teaspoon adobo sauce — adjust if you want less heat.
- 1 garlic clove — a small amount is enough.
- 1/2 cup water — blends the sauce smoothly.
- 2 tablespoons nutritional yeast — adds a savory note.
- 2 tablespoons chopped cilantro — for serving.
- Salt — to taste.
Quick Steps:
- Blend the cashews, lime juice, chipotle, adobo sauce, garlic, water, nutritional yeast, and salt until smooth.
- Grill the corn over medium-high heat for 8 to 10 minutes, turning often, until browned in spots.
- Brush the corn with a little of the cashew sauce.
- Sprinkle with cilantro and serve with extra sauce on the side.
Equipment for This Recipe:
- Grill or grill pan — for the char.
- Blender — the sauce should be silky.
- Tongs — for turning the corn.
- Small bowl — for serving the drizzle.
How to Serve This Dish: Serve the corn as a side with sliders, ribs, or tofu burnt ends. If you want it to behave like street corn, cut the kernels off the cob after grilling and toss them with extra sauce and cilantro in a bowl.
Pro Tips for This Recipe:
- Soak the cashews long enough for a smooth sauce.
- Don’t overheat the chipotle sauce if you like a gentler finish.
- Grill the corn until you see real browning, not just heat marks.
Variations on This Dish:
- Garlic-Lime Version: Skip the chipotle and add another garlic clove.
- Smoked Paprika Finish: Dust the corn after saucing for a deeper red color.
Common Mistakes to Avoid with This Dish:
- Don’t blend the cashews dry. You want a pourable sauce.
- Don’t stop grilling too soon. Pale corn tastes boiled.
11. Sticky Seitan Ribs
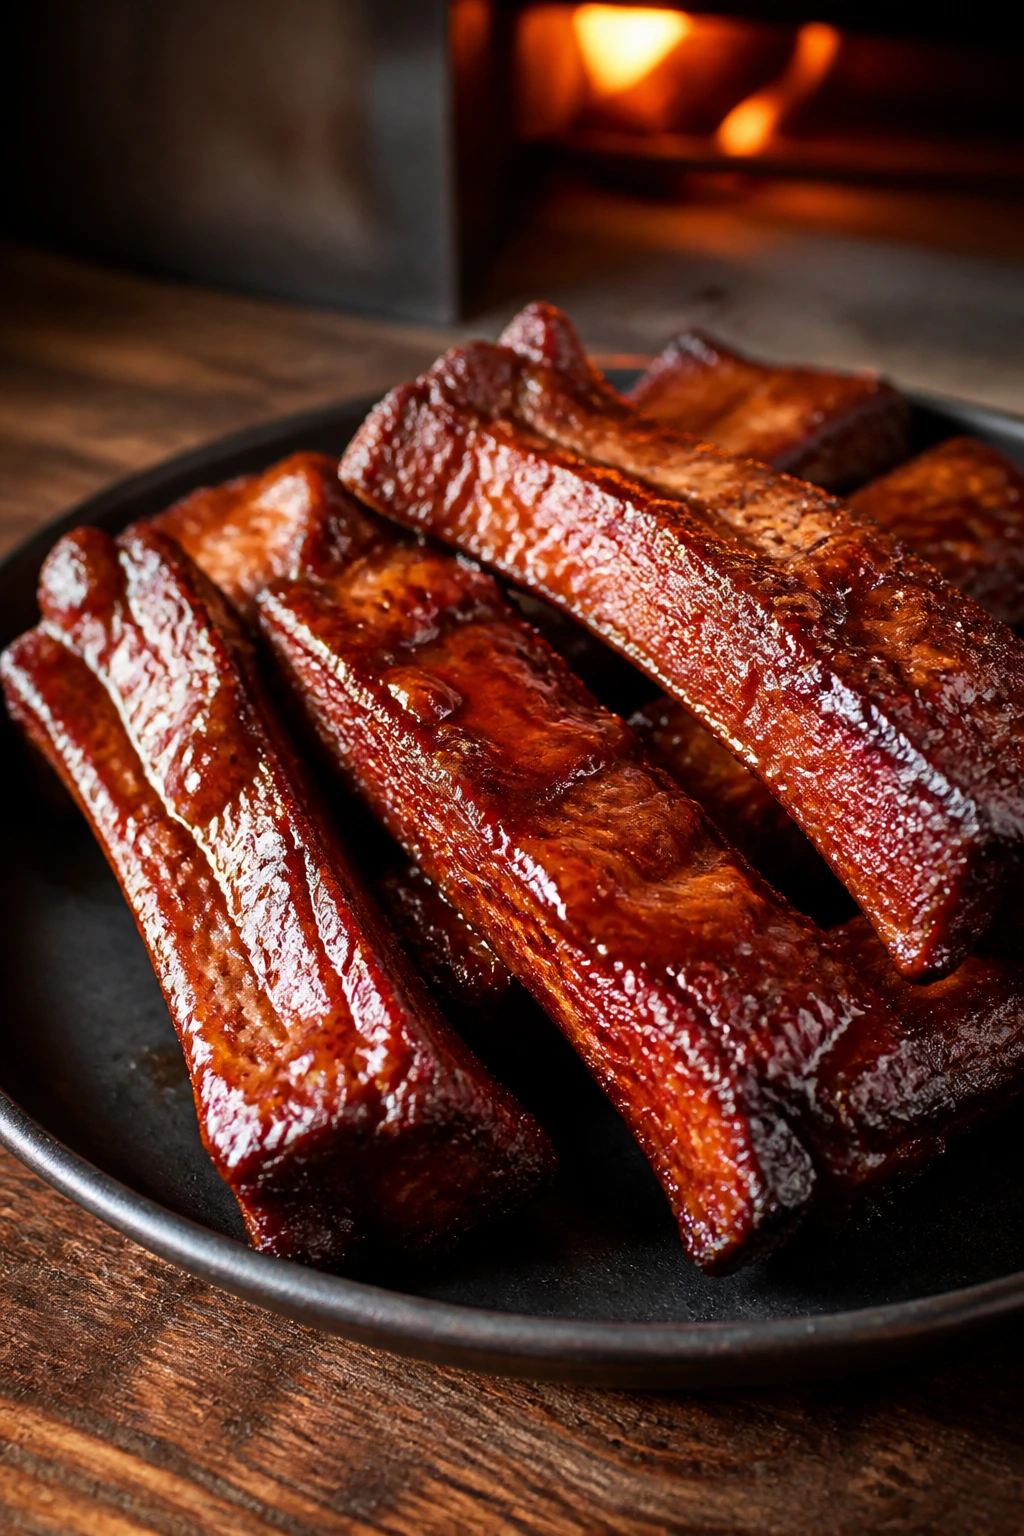
Seitan is what you make when you want chew, bend, and a little drama. Cut into rib-like slabs, coated in sauce, and hit with a hot oven, it gets the same sticky edges people love on real ribs. The trick is letting the sauce darken without letting it dry out.
Why It Works: Seitan already has a dense, elastic texture that stands up to high heat, which makes it one of the best plant-based barbecue proteins. A maple-BBQ glaze sticks to the surface and turns tacky when baked in layers. A final broil gives you those dark, sticky spots that make the tray look finished.
Key Ingredients:
- 2 packages seitan strips, about 16 ounces total — or a seitan slab cut into rib shapes.
- 1 tablespoon oil — keeps the edges from drying.
- 1/2 cup BBQ sauce — choose a thick one.
- 2 tablespoons maple syrup — for the lacquer.
- 1 tablespoon soy sauce — sharpens the glaze.
- 1 teaspoon smoked paprika — boosts the barbecue flavor.
- 1 teaspoon garlic powder — rounds the sauce.
- 1 teaspoon liquid smoke, optional — use lightly.
- Salt and pepper — only if your seitan needs it.
Quick Steps:
- Heat the oven to 400°F and line a sheet pan.
- Toss the seitan with oil, paprika, garlic powder, and pepper.
- Mix the BBQ sauce, maple syrup, soy sauce, and liquid smoke.
- Brush the seitan with half the glaze and bake for 15 minutes.
- Brush again with the rest of the glaze and bake 10 minutes more.
- Broil for 1 to 2 minutes until the surface looks sticky and dark.
Equipment for This Recipe:
- Sheet pan — line it so the glaze doesn’t burn on.
- Pastry brush — makes the layers even.
- Mixing bowl — for the glaze.
- Tongs — for moving the hot strips.
How to Serve This Dish: Serve the seitan ribs with slaw and baked beans, or slice them and tuck them into rolls. They also work well on a platter with corn and potato salad if you’re building a full cookout spread.
Pro Tips for This Recipe:
- Use a thick BBQ sauce or the glaze will run off.
- Keep a close eye on the broiler. Seitan goes from sticky to scorched fast.
- Let the ribs rest for 5 minutes so the glaze settles.
Variations on This Dish:
- Carolina Vinegar Ribs: Mix cider vinegar into the glaze for a sharper finish.
- Peppery Dry-Rub Ribs: Use more smoked paprika and less sauce.
Common Mistakes to Avoid with This Dish:
- Don’t leave the glaze thin. It should cling to the spoon.
- Don’t overbroil. The sugar in the sauce burns fast.
12. Miso BBQ Eggplant Halves
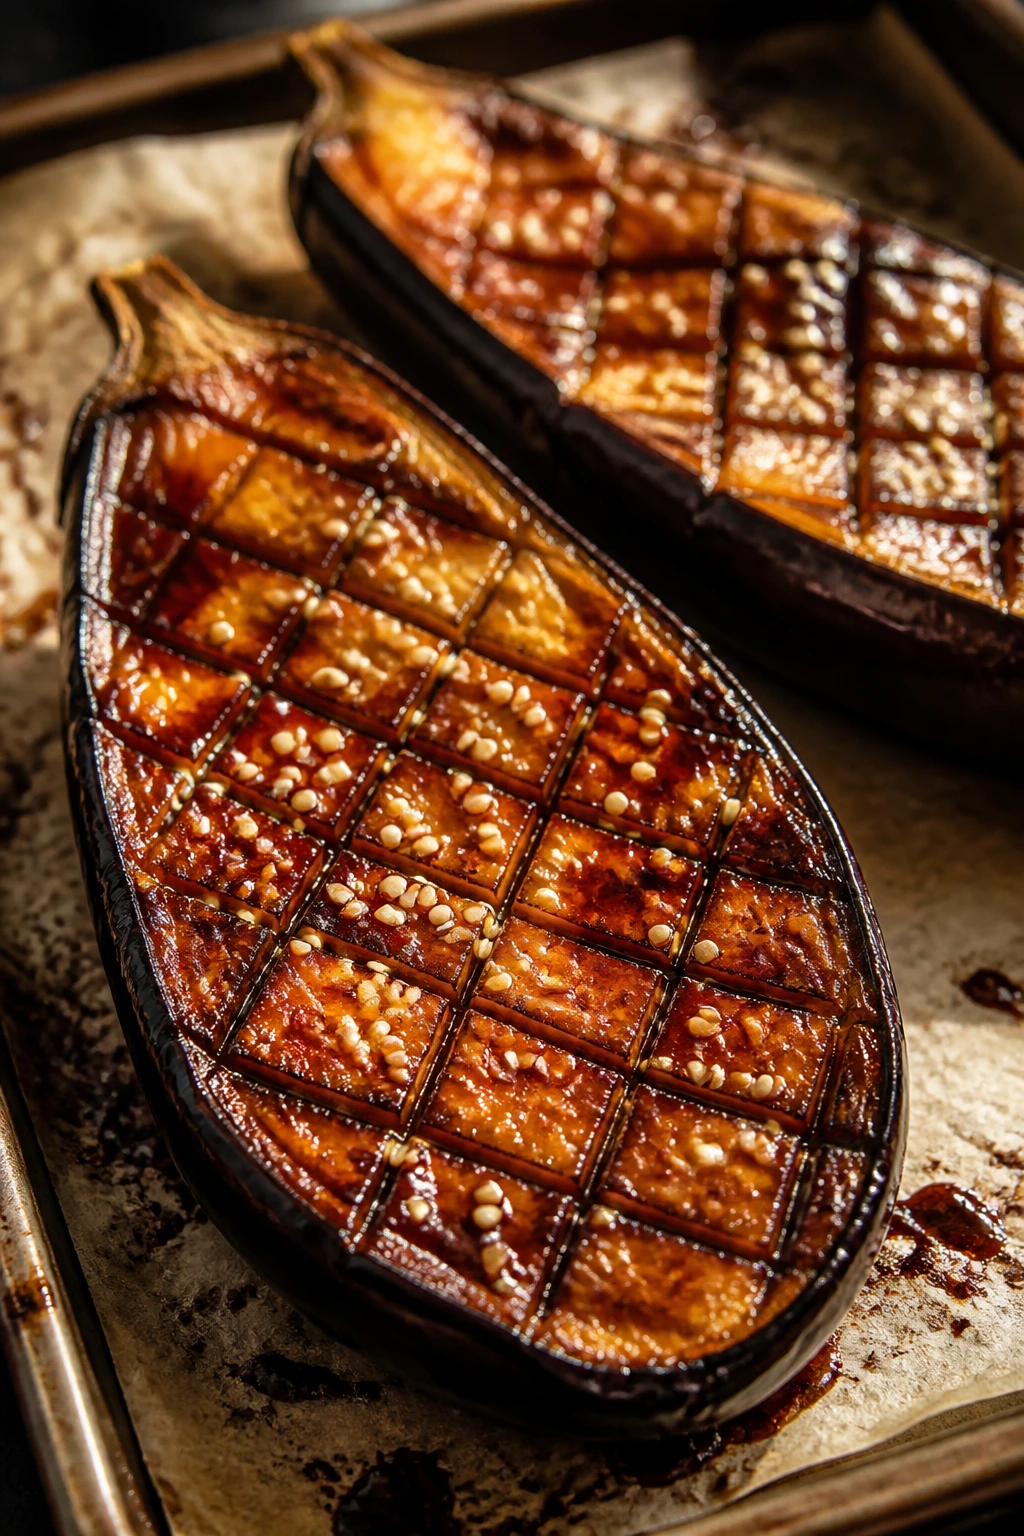
Eggplant gets a bad rap from people who’ve only had it undercooked or drowned in oil. Halved and scored, it turns silky in the center and smoky at the edges, which is a much better deal. A miso-BBQ glaze gives the flesh a salty-sweet shine that tastes richer than the ingredient list looks.
Why It Works: Eggplant acts like a sponge, but scoring it first helps the glaze sink in instead of pooling on top. White miso adds deep savoriness without adding meat, and a touch of maple syrup helps the surface caramelize in the oven. A final sesame finish keeps the flavor from going flat.
Key Ingredients:
- 2 large eggplants, halved lengthwise — pick ones with tight, glossy skin.
- 3 tablespoons olive oil — helps the glaze spread.
- 2 tablespoons white miso — for savory depth.
- 2 tablespoons BBQ sauce — keeps the theme on track.
- 1 tablespoon maple syrup — for caramelization.
- 1 tablespoon rice vinegar — balances the sweetness.
- 1 teaspoon sesame oil — a little goes a long way.
- 1 teaspoon sesame seeds — for finishing.
- 2 scallions, sliced — for freshness.
Quick Steps:
- Heat the oven to 425°F and line a sheet pan.
- Score the cut sides of the eggplant in a crosshatch pattern without cutting through the skin.
- Whisk the olive oil, miso, BBQ sauce, maple syrup, vinegar, and sesame oil.
- Brush the glaze onto the eggplant and roast for 30 to 35 minutes, until soft and browned at the edges.
- Broil for 2 minutes if you want deeper color.
- Finish with sesame seeds and scallions.
Equipment for This Recipe:
- Sharp knife — for scoring the flesh.
- Sheet pan — a large one helps the eggplant roast instead of crowd.
- Small whisk or fork — the glaze should be smooth.
- Pastry brush — for coating the halves.
How to Serve This Dish: Serve the eggplant halves whole on a platter or slice them and spoon over rice. They’re also good beside grilled tofu or tempeh, where the soft center and salty glaze balance a firmer main.
Pro Tips for This Recipe:
- Give the eggplant enough space so moisture can evaporate.
- If the glaze is very salty, cut the miso back a little.
- Let the eggplant cool for 5 minutes before serving; the flesh firms slightly.
Variations on This Dish:
- Spicy Miso Version: Add chili paste to the glaze.
- Tahini Finish: Drizzle tahini over the roasted eggplant for a creamier plate.
Common Mistakes to Avoid with This Dish:
- Don’t slice too shallow when scoring. The glaze needs channels.
- Don’t under-roast it. Eggplant should go silky, not firm.
13. Smoky Pinto Baked Beans
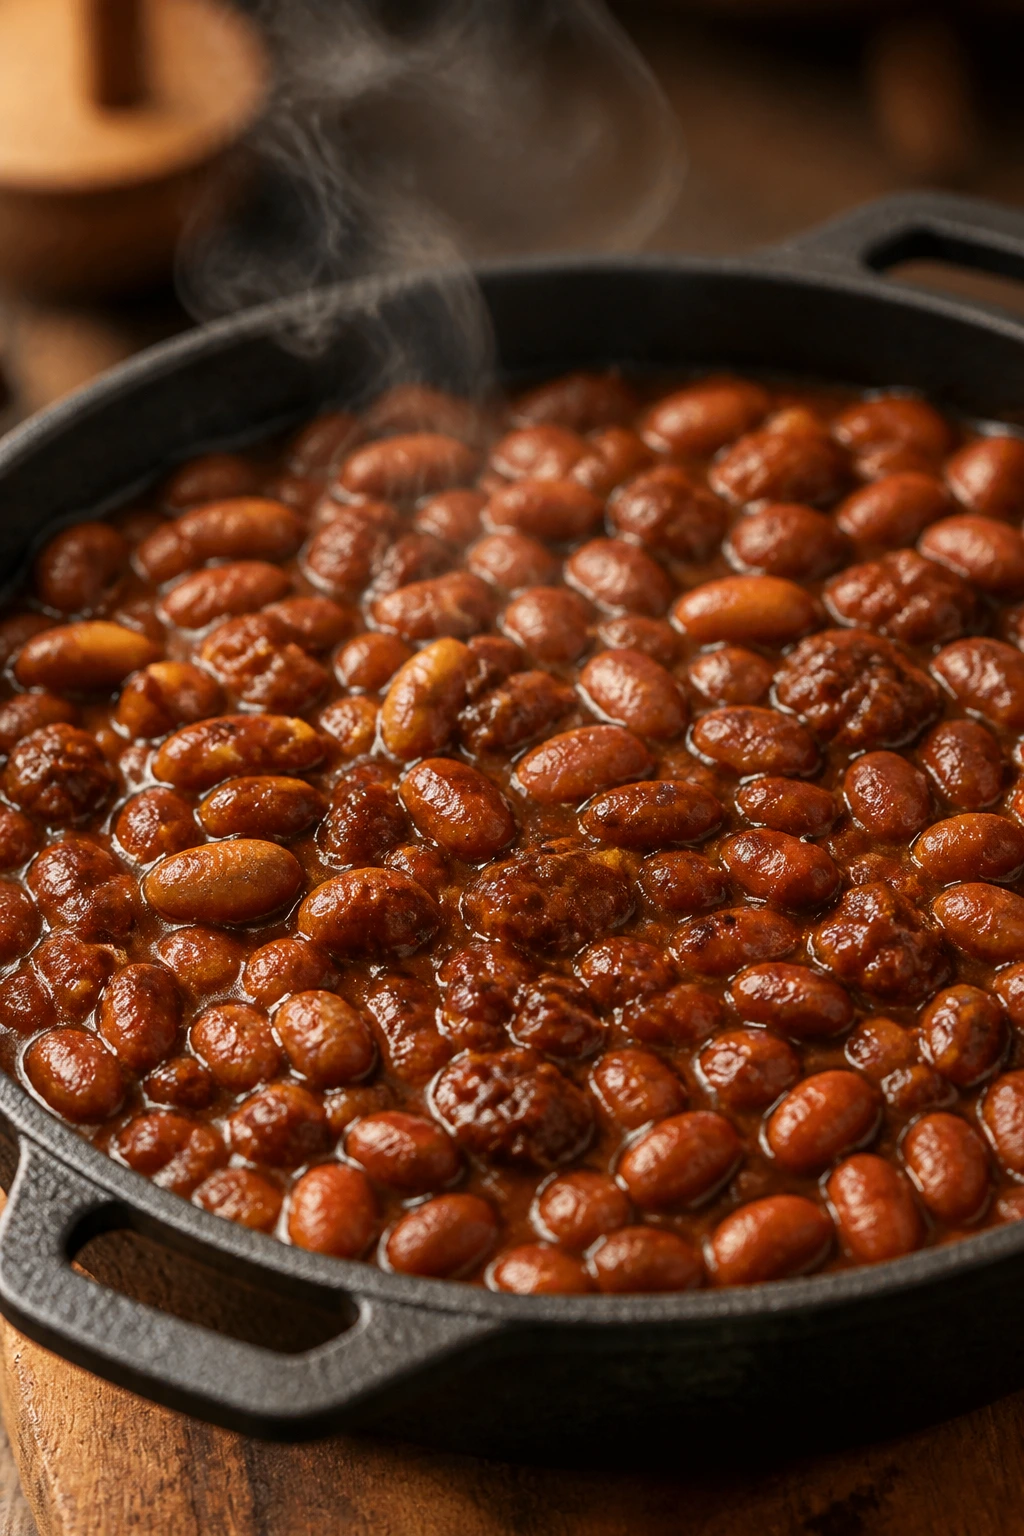
Baked beans can be boring or excellent, and the difference usually comes down to seasoning and time. Pinto beans soaked in a tomato-molasses base turn thick, glossy, and just sweet enough to sit next to smoky mains without stealing the show. They’re the side dish people go back for with a spoon.
Why It Works: Pinto beans hold their shape better than softer beans, so they stay intact after the oven time. Tomato paste, molasses, and BBQ sauce build a thick sauce that clings instead of swimming. A little vinegar at the end keeps the beans from tasting like dessert.
Key Ingredients:
- 2 cans pinto beans, drained and rinsed — low-sodium is best.
- 1 onion, diced — cooks down into the sauce.
- 1 bell pepper, diced — adds sweetness.
- 2 tablespoons tomato paste — concentrates the base.
- 1/4 cup molasses — gives the classic baked-bean depth.
- 1/4 cup BBQ sauce — ties it to the cookout.
- 1 tablespoon apple cider vinegar — for balance.
- 1 teaspoon smoked paprika — adds a dry smoky note.
- 1 teaspoon mustard powder or 1 tablespoon Dijon — sharpens the sauce.
- 1 cup water — loosens the mixture before baking.
Quick Steps:
- Heat the oven to 375°F.
- Cook the onion and bell pepper in a skillet for 5 minutes, until soft.
- Stir in the tomato paste, molasses, BBQ sauce, vinegar, paprika, mustard, water, and beans.
- Transfer to a baking dish and bake for 40 to 45 minutes, stirring once, until thick and bubbling.
- Let rest 10 minutes before serving.
Equipment for This Recipe:
- Skillet — for building the sauce.
- Baking dish — a medium casserole dish works well.
- Wooden spoon — for gentle stirring.
- Measuring cups — the molasses should be exact.
How to Serve This Dish: Serve the beans warm in a bowl with cornbread, slaw, or grilled vegetables. They also sit nicely under tofu burnt ends or seitan ribs, where they catch every drippy bit of sauce.
Pro Tips for This Recipe:
- Taste before baking; some BBQ sauces are already very sweet.
- If the beans look thin after baking, give them another 10 minutes uncovered.
- A spoonful of pickle juice can wake up a flat batch.
Variations on This Dish:
- Smoked Jalapeño Beans: Add chopped jalapeños with the onion.
- Brown Sugar Version: Replace half the molasses with brown sugar for a lighter sweetness.
Common Mistakes to Avoid with This Dish:
- Don’t serve them too soon. The sauce thickens as it rests.
- Don’t forget the vinegar. Without it, the beans taste heavy.
14. Jalapeño Cornbread Muffins

Cornbread is one of those things people think they know until they taste a batch with real cornmeal and a little heat. These muffins come out tender in the center, golden on top, and just savory enough to hold up beside beans or ribs. The jalapeño keeps them from tasting like cake.
Why It Works: Cornmeal gives the muffins their gritty, sunny texture, while flour keeps them from falling apart. Soy milk and apple cider vinegar make a quick vegan buttermilk that softens the crumb. Corn kernels and jalapeño add enough texture that each bite feels like it belongs at a barbecue table.
Key Ingredients:
- 1 cup cornmeal — medium grind gives the best texture.
- 1 cup all-purpose flour — for structure.
- 1/4 cup sugar or maple syrup — enough to round the flavor.
- 1 tablespoon baking powder — for lift.
- 1/2 teaspoon salt — cornbread needs it.
- 1 cup unsweetened soy milk — works well with the vinegar.
- 1 tablespoon apple cider vinegar — curdles the soy milk into a buttermilk stand-in.
- 1/3 cup neutral oil — keeps the muffins tender.
- 1 flax egg — 1 tablespoon ground flax plus 3 tablespoons water.
- 1 jalapeño, diced — remove the seeds if you want less heat.
- 1/2 cup corn kernels — fresh or frozen.
Quick Steps:
- Heat the oven to 400°F and grease a 12-cup muffin tin.
- Mix the soy milk and vinegar and let it sit for 5 minutes.
- Whisk the dry ingredients in a bowl.
- Stir in the milk mixture, oil, flax egg, jalapeño, and corn until just combined.
- Divide into the muffin tin and bake for 18 to 20 minutes, until the tops spring back.
- Cool for 10 minutes before pulling them out.
Equipment for This Recipe:
- Muffin tin — standard size works best.
- Mixing bowl — one large bowl is enough.
- Whisk and spatula — gentle mixing keeps the crumb light.
- Cooling rack — stops the bottoms from steaming.
How to Serve This Dish: Serve warm with vegan butter, or split them and use them to mop up baked beans. They also make a strong side for anything saucy because the crumb soaks up glaze without falling apart.
Pro Tips for This Recipe:
- Don’t overmix or you’ll get a tough muffin.
- If you want more savory depth, add a pinch of smoked paprika.
- Eat them warm if you can; cornbread always feels better that way.
Variations on This Dish:
- Maple Cornbread: Use maple syrup and skip the jalapeño.
- Green Onion Version: Swap the jalapeño for sliced scallions.
Common Mistakes to Avoid with This Dish:
- Don’t leave the batter sitting too long before baking.
- Don’t overbake. Dry cornbread is a waste of good cornmeal.
15. BBQ Mushroom Nachos

Mushrooms are one of the few vegetables that can stand in for shredded meat without turning into a gimmick. Cook them down hard, toss them with BBQ sauce, pile them over chips, and they become the kind of nachos that disappear before the second tray is out. The beans and melty vegan cheese keep the whole thing from feeling thin.
Why It Works: Cremini mushrooms release moisture quickly, so you want to cook them until the pan goes dry and the edges start to brown. That concentrated flavor stands up to BBQ sauce, and the sauce helps the mushrooms cling to the chips instead of sliding off. Black beans and pickled onion add enough structure and acidity to keep every bite interesting.
Key Ingredients:
- 12 ounces cremini mushrooms, finely chopped — the smaller pieces act more like filling.
- 1 tablespoon oil — for browning.
- 1/2 onion, diced — adds sweetness.
- 1/2 cup BBQ sauce — use a thick one.
- 1 can black beans, drained and rinsed — for body.
- 8 ounces tortilla chips — sturdy chips hold the toppings better.
- 1 cup vegan cheese shreds — optional, but useful.
- Pickled red onions, jalapeños, and cilantro — for the top.
- Salt and pepper — season the mushrooms well.
Quick Steps:
- Cook the onion in oil over medium heat for 3 minutes.
- Add the mushrooms and cook 8 to 10 minutes, until the liquid has evaporated and the pan looks nearly dry.
- Stir in the BBQ sauce and black beans and cook 2 minutes more.
- Spread chips on a sheet pan, add the mushroom mixture and vegan cheese, then broil for 2 to 3 minutes.
- Top with pickled onions, jalapeños, and cilantro.
Equipment for This Recipe:
- Skillet — for cooking the mushroom filling.
- Sheet pan — for broiling the nachos.
- Spatula — helps spread the topping evenly.
- Grater or pre-shredded vegan cheese — either works.
How to Serve This Dish: Serve these straight from the tray while the chips still crunch. They’re best as a shared snack at the table with cold drinks nearby, but they also work as a casual dinner if you add avocado and a green salad.
Pro Tips for This Recipe:
- Chop the mushrooms small so they sit on the chips better.
- Don’t add the sauce before the mushrooms cook down or they’ll go soupy.
- Keep the broiler time short. You want melted, not scorched.
Variations on This Dish:
- Loaded Bean Version: Add corn and diced bell pepper.
- Spicy Green Version: Use jalapeño BBQ sauce and extra pickles.
Common Mistakes to Avoid with This Dish:
- Don’t use flimsy chips. They break under wet toppings.
- Don’t overload the tray. A single layer eats better than a mountain.
16. Stuffed Grilled Zucchini Boats
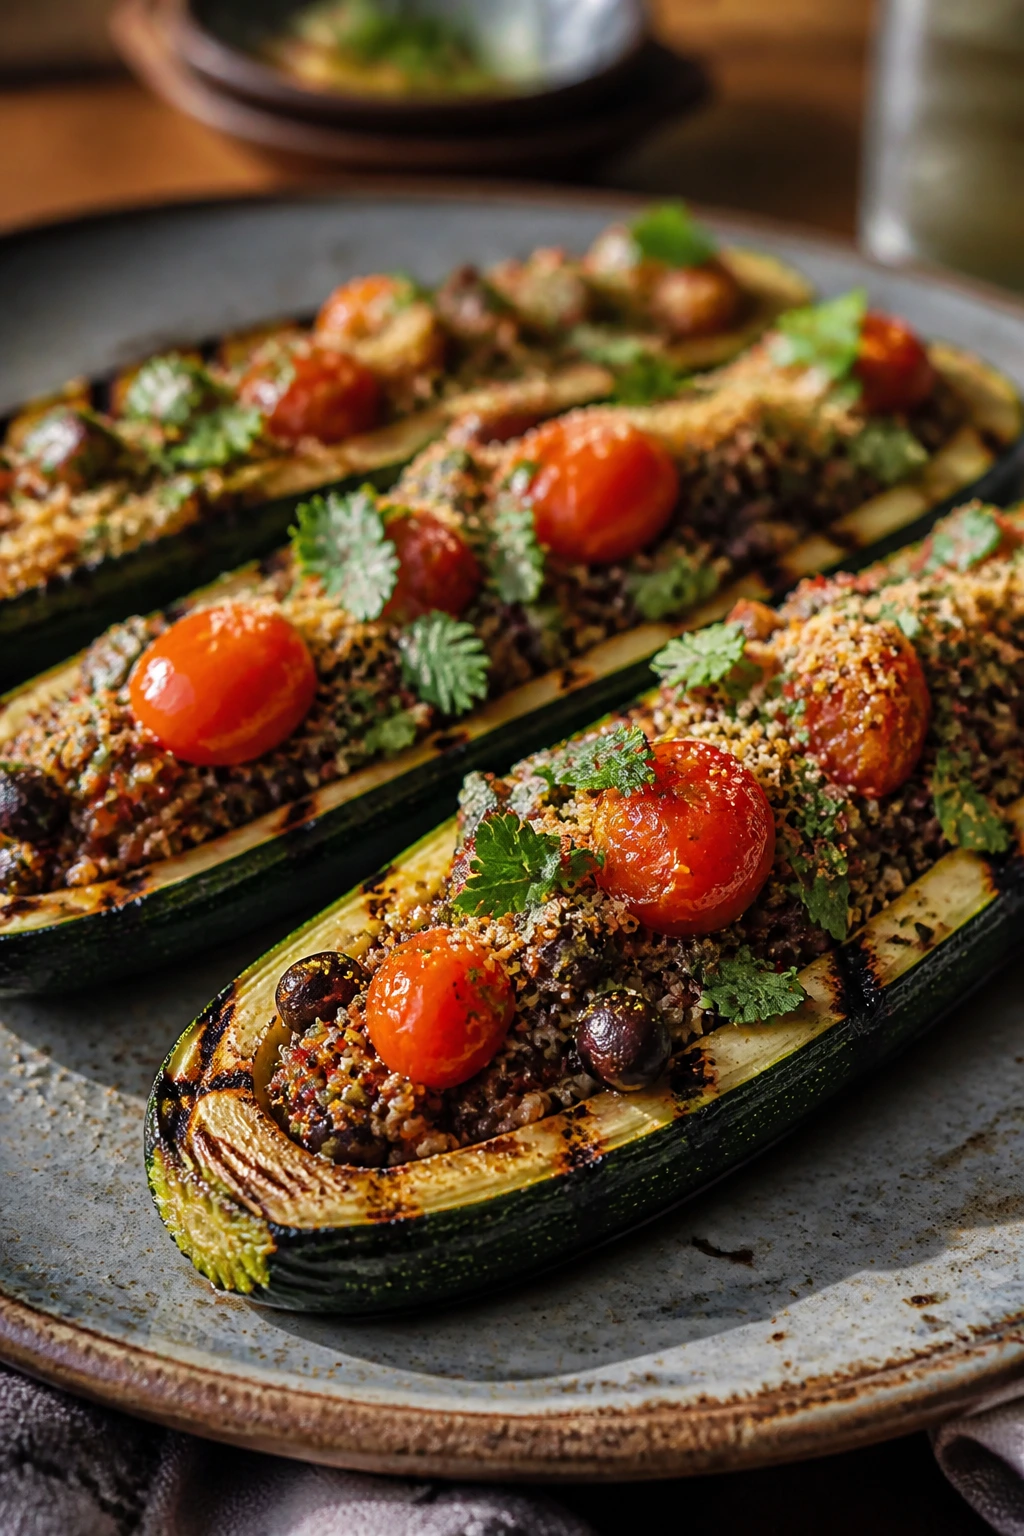
Zucchini can feel forgettable until you give it a filling with enough flavor to matter. Halved and grilled, it turns tender with smoky edges, and the quinoa-bean stuffing makes it sturdy enough for dinner. The boat shape does half the work for you.
Why It Works: Zucchini softens quickly on heat, so grilling or roasting first gives it flavor before it turns floppy. Quinoa gives the filling a grainy base, white beans add creaminess, and tomatoes keep the stuffing from tasting dry. Breadcrumbs on top help it finish with a little crust.
Key Ingredients:
- 4 medium zucchini, halved lengthwise — scoop out a shallow channel.
- 1 cup cooked quinoa — cooled so it doesn’t go mushy.
- 1 can white beans, drained and rinsed — lightly mashed.
- 1 cup cherry tomatoes, chopped — for juiciness.
- 2 tablespoons olive oil — for the boats and the filling.
- 2 garlic cloves, minced — adds backbone.
- 1/4 cup breadcrumbs — for the top.
- 1 tablespoon lemon juice — keeps the filling bright.
- 2 tablespoons chopped basil — for freshness.
- Salt and pepper — season well.
Quick Steps:
- Heat the oven to 425°F or warm a grill to medium heat.
- Brush the zucchini with olive oil and season with salt and pepper.
- Grill or roast for 8 to 10 minutes, until just starting to soften.
- Mix the quinoa, beans, tomatoes, garlic, lemon juice, basil, salt, and pepper.
- Spoon into the zucchini, top with breadcrumbs, and cook 10 minutes more.
- Serve warm, with the edges lightly browned.
Equipment for This Recipe:
- Baking sheet or grill — either works.
- Spoon — for scooping the center of the zucchini.
- Mixing bowl — for the filling.
- Knife — for halving the squash cleanly.
How to Serve This Dish: Serve two boats per person as a light main or one boat beside grilled tempeh or seitan. A cold slaw or potato salad on the side makes the plate feel complete without adding more heat.
Pro Tips for This Recipe:
- Don’t hollow the zucchini too deeply or they’ll collapse.
- If the filling seems dry, add another spoonful of olive oil.
- A little extra lemon at the end wakes up the beans.
Variations on This Dish:
- Mediterranean Version: Add olives and oregano.
- BBQ Bean Version: Stir a spoonful of BBQ sauce into the filling.
Common Mistakes to Avoid with This Dish:
- Don’t overcook the zucchini before stuffing.
- Don’t skip seasoning the squash itself. The filling alone won’t save it.
17. BBQ Tofu Tacos with Pineapple Salsa
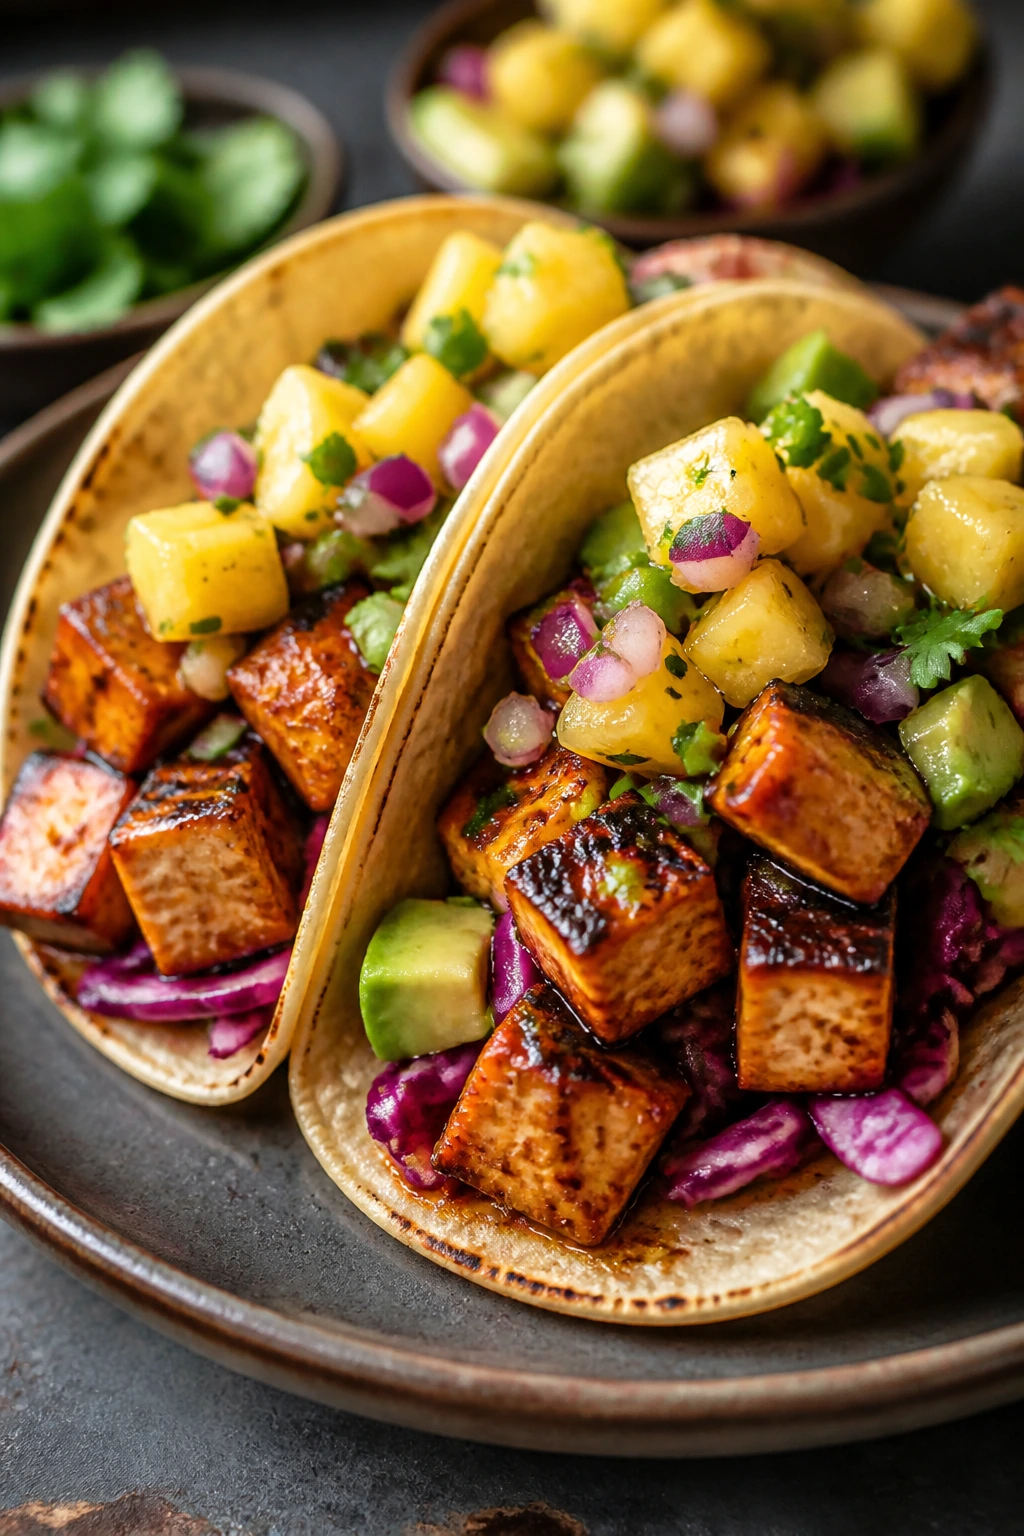
Tofu tacos only work when the tofu has texture, and these do. A spiced sear gives the cubes a crust, the BBQ glaze turns sticky, and the pineapple salsa brings enough brightness to keep the tacos from feeling heavy. They eat like something off a food truck, which is exactly the mood.
Why It Works: Extra-firm tofu soaks up seasoning after pressing, then browns nicely in a hot skillet. The BBQ sauce coats the cubes without soaking them, and the pineapple salsa cuts through the richness with juice, lime, and a little heat. Soft tortillas carry everything without fighting the filling.
Key Ingredients:
- 2 blocks extra-firm tofu, pressed and cubed — dry tofu browns better.
- 2 tablespoons oil — for searing.
- 1 teaspoon cumin — gives a taco edge.
- 1 teaspoon smoked paprika — keeps the barbecue note.
- 1/2 cup BBQ sauce — thick and tangy.
- 8 corn tortillas — warm them before serving.
- 1 cup pineapple, diced — for the salsa.
- 1/2 red onion, finely chopped — sharp and crunchy.
- 1 jalapeño, minced — optional heat.
- 1 cup shredded cabbage — for crunch.
- 1 avocado, sliced — for creaminess.
- Lime juice and cilantro — to finish the salsa.
Quick Steps:
- Press the tofu for at least 15 minutes, then cube it.
- Cook the tofu in oil over medium-high heat for 8 to 10 minutes, until the sides are golden.
- Stir in cumin, paprika, salt, pepper, and BBQ sauce; cook 2 minutes until sticky.
- Mix pineapple, red onion, jalapeño, lime juice, and cilantro for the salsa.
- Warm the tortillas in a dry skillet.
- Fill with tofu, cabbage, salsa, and avocado.
Equipment for This Recipe:
- Skillet — for crisping the tofu.
- Tofu press or towels — moisture control matters.
- Small bowl — for the salsa.
- Tortilla warmer or skillet — to soften the tortillas.
How to Serve This Dish: Serve the tacos immediately with extra lime wedges and hot sauce. A side of black beans or grilled corn makes the plate feel more like a cookout meal than a quick weeknight taco.
Pro Tips for This Recipe:
- Don’t stir the tofu too soon or you’ll lose the browning.
- Let the salsa sit 10 minutes so the onion softens.
- A little cabbage under the tofu keeps the tortillas from getting soggy.
Variations on This Dish:
- Smoky Mango Salsa: Swap pineapple for mango.
- Chipotle Tacos: Add chipotle powder to the tofu before searing.
Common Mistakes to Avoid with This Dish:
- Don’t use silken tofu. It will fall apart.
- Don’t skip warming the tortillas. Cold tortillas crack and leak.
18. Dill Pickle Potato Salad
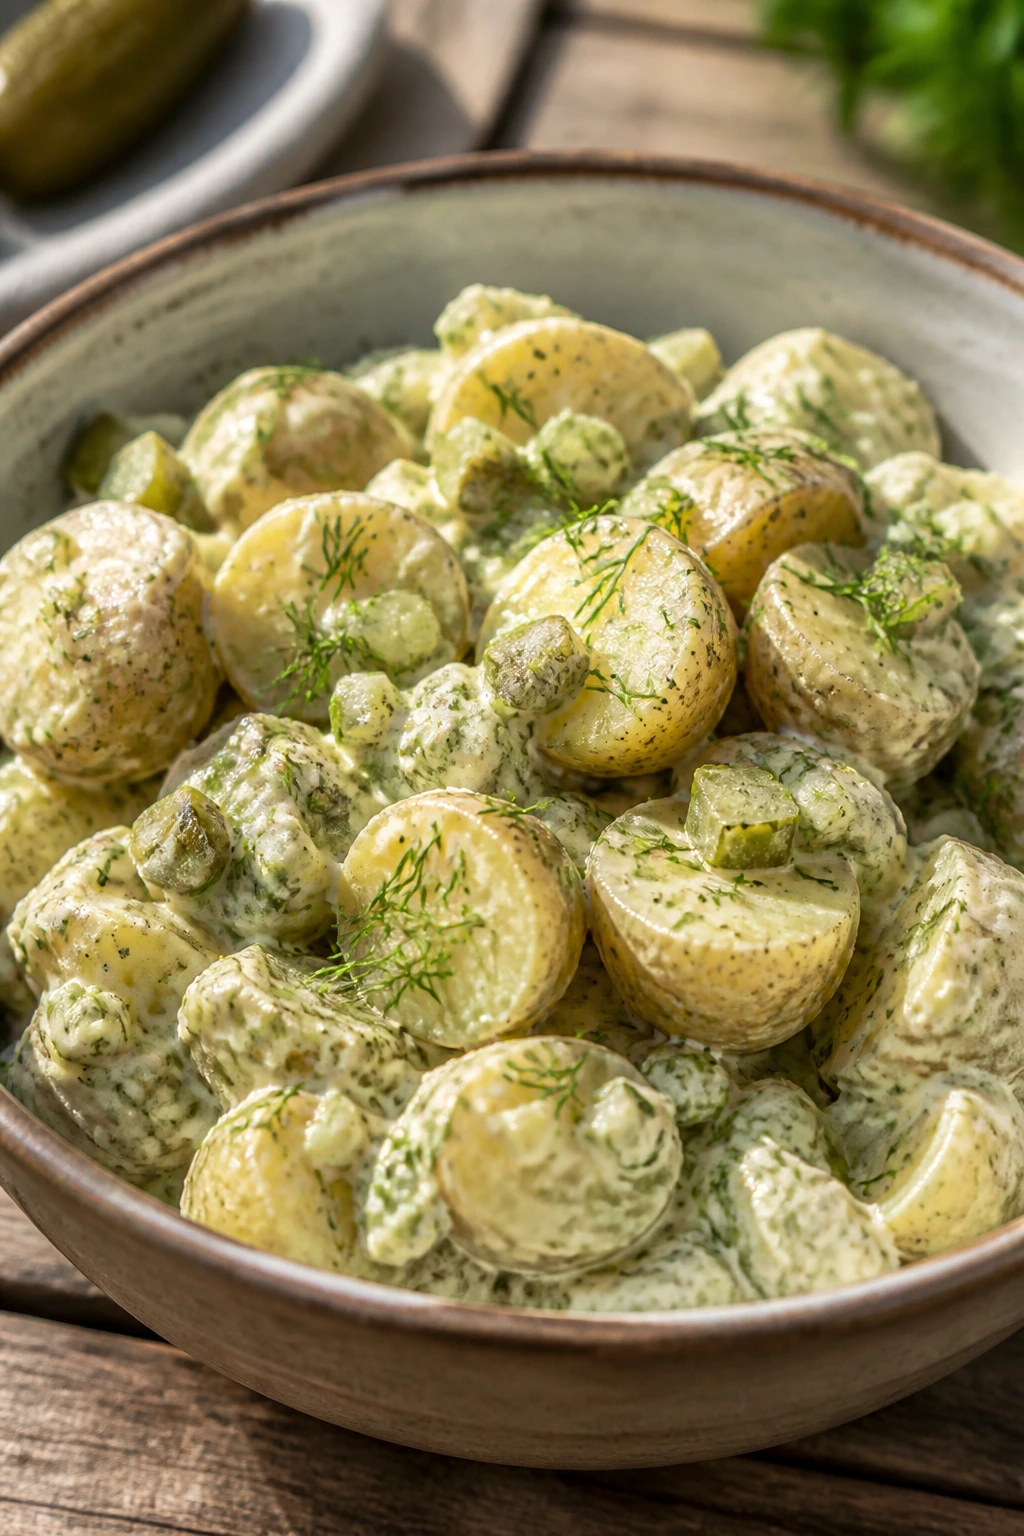
This is the potato salad that knows what it’s for. It’s creamy, but not sleepy; sharp, but not punishing. Dill pickle juice gives the dressing real bite, and the potatoes soak it up as they cool, which makes the whole bowl taste better an hour later.
Why It Works: Baby potatoes hold their shape and take on dressing without falling apart. Vegan mayo gives body, but pickle juice and Dijon keep the salad from tasting flat. Fresh dill is not optional here; it makes the whole thing smell like a cookout table instead of a deli case.
Key Ingredients:
- 2 pounds baby potatoes — cut larger ones in half.
- 1/2 cup vegan mayo — the base.
- 2 tablespoons Dijon mustard — sharpens the dressing.
- 3 tablespoons pickle juice — the best part.
- 1/2 cup chopped dill pickles — for crunch.
- 1 celery stalk, diced — gives snap.
- 1/4 red onion, minced — use a small amount.
- 2 tablespoons fresh dill, chopped — don’t skip it.
- Salt, pepper, and paprika — to finish.
Quick Steps:
- Boil the potatoes in salted water for 12 to 15 minutes, until tender but not falling apart.
- Drain and let them cool slightly.
- Whisk the mayo, mustard, pickle juice, salt, pepper, and paprika.
- Toss the potatoes with the dressing, pickles, celery, onion, and dill.
- Chill for 30 minutes before serving if you want the flavor to settle.
Equipment for This Recipe:
- Large pot — for boiling.
- Mixing bowl — for the dressing.
- Colander — to drain the potatoes.
- Spoon or spatula — for folding without smashing.
How to Serve This Dish: Serve it cold or cool, in a shallow bowl with extra dill on top. It works with just about every recipe in this collection, but it especially loves smoky mains like ribs, tofu, or portobellos.
Pro Tips for This Recipe:
- Salt the boiling water properly or the potatoes taste dull.
- Dress the potatoes while they’re still slightly warm so they absorb more flavor.
- Add a splash more pickle juice before serving if it tastes too rich.
Variations on This Dish:
- Herby Version: Add parsley and chives with the dill.
- Mustard Potato Salad: Cut the mayo back and use more Dijon.
Common Mistakes to Avoid with This Dish:
- Don’t overboil the potatoes.
- Don’t add all the dressing at once if the potatoes are very hot.
19. Grilled Asparagus with Almond Romesco
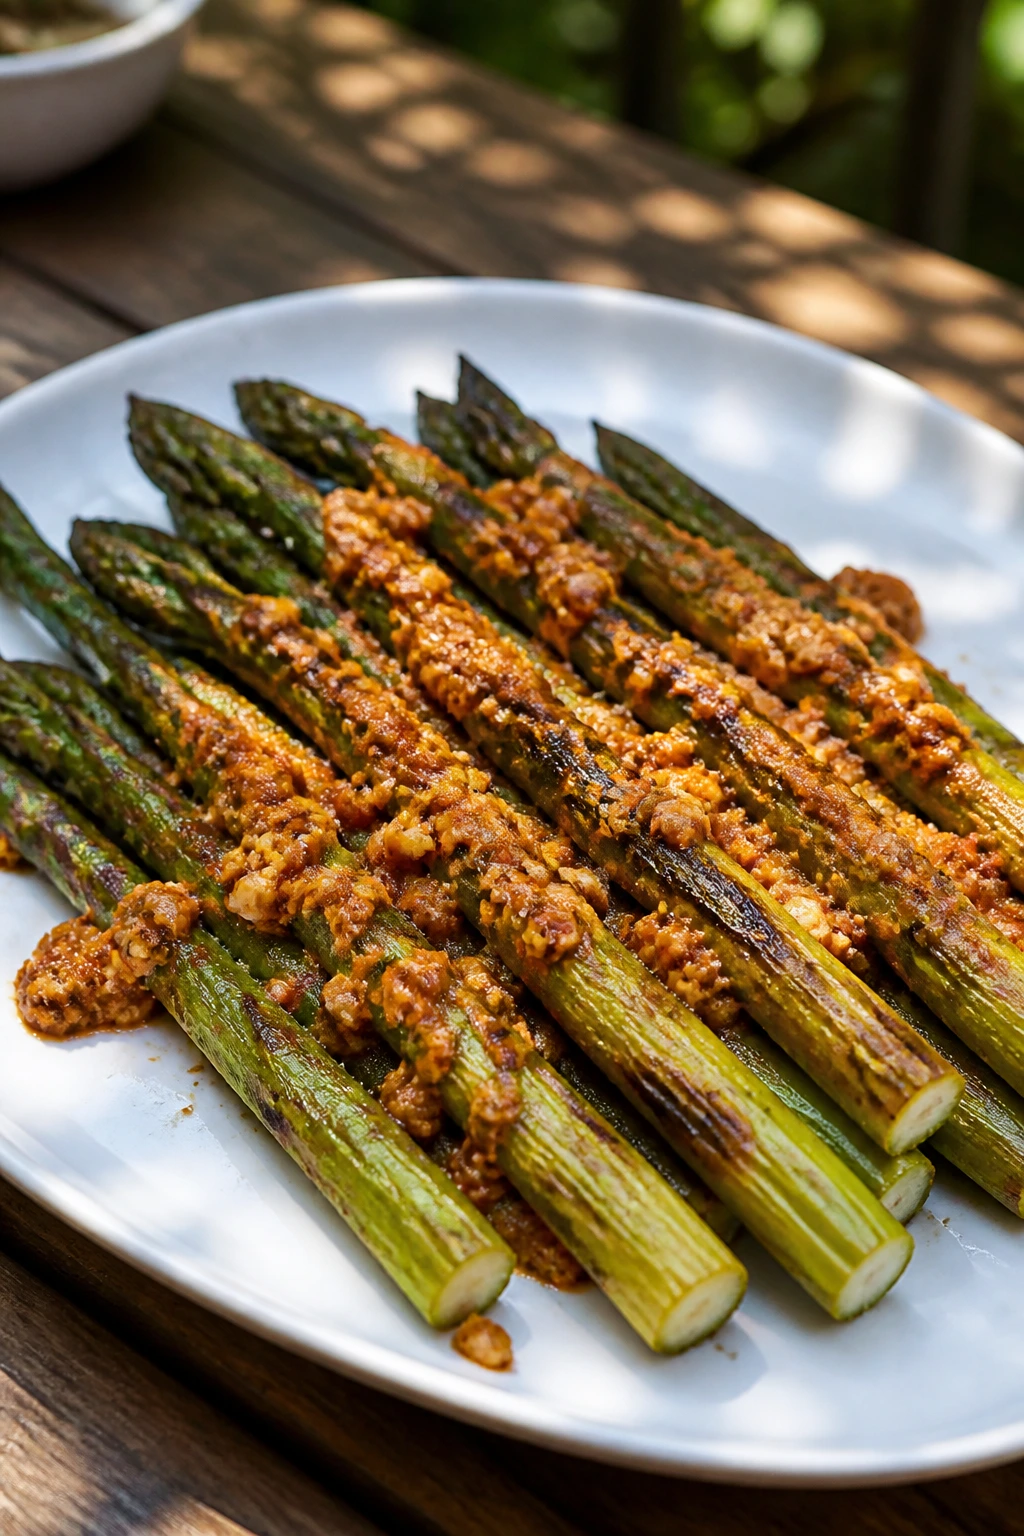
Asparagus needs almost no help, which is why people often undercook it or bury it in butter. Grill it fast, keep the stalks crisp-tender, and spoon over romesco for a smoky, nutty finish that tastes far more complicated than it is. It’s a side with actual personality.
Why It Works: Asparagus cooks quickly, so a hot grill gives you char before the stalks go limp. Romesco brings body from almonds and sweetness from roasted red peppers, which makes it rich enough to hold its own next to barbecue food. A little sherry vinegar keeps the sauce from feeling heavy.
Key Ingredients:
- 2 bunches asparagus, trimmed — choose medium-thick stalks.
- 1 tablespoon olive oil — for grilling.
- Salt and pepper — season the asparagus first.
- 1 cup roasted red peppers — jarred works fine.
- 1/3 cup almonds — toasted if you have time.
- 1 garlic clove — raw but not aggressive.
- 1 tablespoon sherry vinegar — or red wine vinegar.
- 1 tablespoon olive oil — for the romesco.
- 1 teaspoon smoked paprika — adds a grill-like note.
- 1 slice bread or 1/4 cup breadcrumbs — thickens the sauce.
Quick Steps:
- Blend the roasted red peppers, almonds, garlic, vinegar, olive oil, smoked paprika, and bread until mostly smooth.
- Heat the grill to medium-high.
- Toss the asparagus with olive oil, salt, and pepper.
- Grill for 4 to 6 minutes, turning once, until bright green with browned spots.
- Spoon romesco onto a plate and lay the asparagus over it.
Equipment for This Recipe:
- Grill or grill pan — for the char.
- Blender or food processor — for the sauce.
- Tongs — asparagus turns easily.
- Cutting board — for trimming the ends.
How to Serve This Dish: Serve the asparagus warm with the romesco under or alongside it. It works as a polished side for a cookout plate, but it also handles a simple dinner with bread and beans if you want something lighter.
Pro Tips for This Recipe:
- Keep the asparagus in a single layer on the grill.
- If the romesco tastes flat, add more vinegar before serving.
- Thin stalks need less time; watch them closely.
Variations on This Dish:
- Walnut Romesco: Swap almonds for walnuts.
- Charred Lemon Finish: Add lemon zest over the top.
Common Mistakes to Avoid with This Dish:
- Don’t overcook the asparagus. Limp stalks lose the point.
- Don’t make the romesco too smooth unless that’s your preference.
20. Crispy BBQ Cauliflower Wings
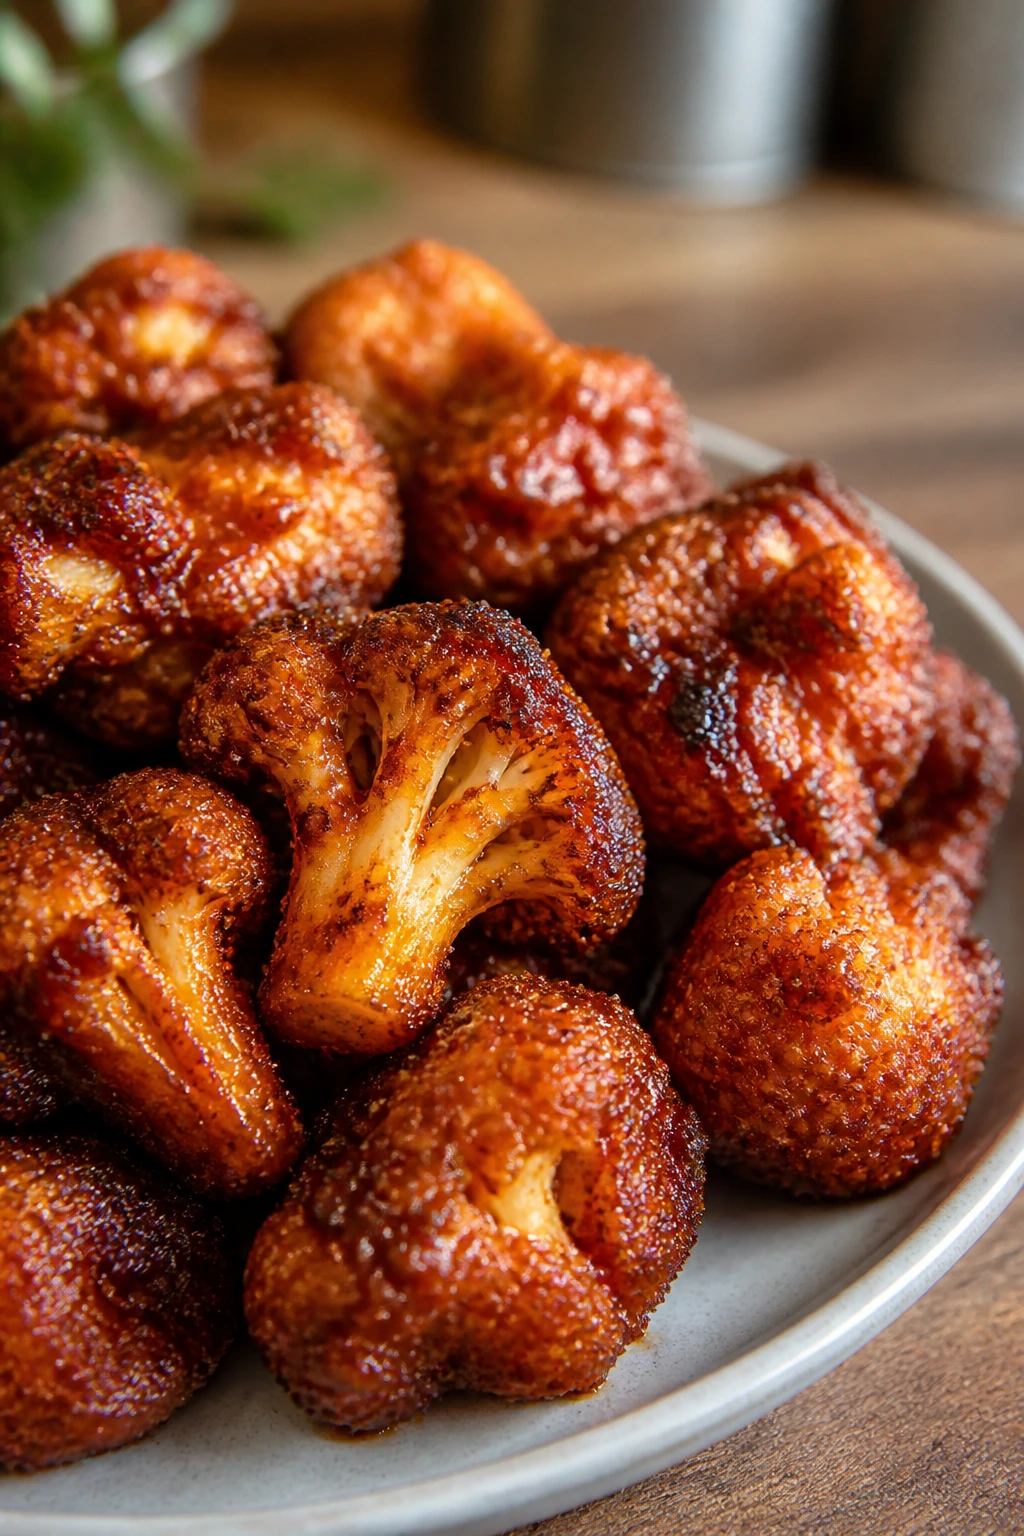
These are not pretending to be chicken wings, and that’s part of why they work. A light batter, a crunchy coating, and a sticky BBQ finish give you the hand-held, sauce-covered bite people want at a cookout or game-day table. They’re messy in the right way.
Why It Works: Cauliflower florets have enough surface for batter and crumbs to grab onto, which creates a crisp shell in the oven. Tossing them in BBQ sauce after the first bake keeps the coating from going soggy too early. The second bake locks the sauce in place and gives you those sticky edges.
Key Ingredients:
- 1 large head cauliflower, cut into florets — keep them similar in size.
- 1 cup all-purpose flour — for the batter.
- 1 cup unsweetened plant milk — soy or oat both work.
- 1 teaspoon garlic powder — in the batter.
- 1 teaspoon smoked paprika — keeps the flavor smoky.
- 1/2 teaspoon salt — season the batter.
- 1 cup panko breadcrumbs — for crunch.
- 1 cup BBQ sauce — thick sauce sticks best.
- 1 tablespoon oil — helps the crumbs brown.
Quick Steps:
- Heat the oven to 450°F and line a baking sheet.
- Whisk the flour, plant milk, garlic powder, paprika, and salt into a smooth batter.
- Dip each floret in batter, then in panko mixed with oil.
- Bake for 20 minutes, until the coating is starting to turn golden.
- Brush or toss with BBQ sauce and bake 8 to 10 minutes more.
- Serve hot, with extra sauce or ranch-style dip.
Equipment for This Recipe:
- Baking sheet — line it well.
- Mixing bowls — one for batter, one for crumbs.
- Tongs or forks — to keep the coating on.
- Pastry brush — for saucing without breaking the crust.
How to Serve This Dish: Serve the wings with celery sticks, pickles, or a cool dip. They’re perfect as a tray snack, but they also work beside potato salad and corn if you want them to play the role of the main attraction.
Pro Tips for This Recipe:
- Keep the florets dry before battering.
- Don’t drown them in sauce; a light coat is enough.
- If you want extra crunch, add a little more panko after saucing.
Variations on This Dish:
- Buffalo BBQ Mix: Add hot sauce to half the glaze.
- Gluten-Free Version: Use a gluten-free flour blend and GF crumbs.
Common Mistakes to Avoid with This Dish:
- Don’t crowd the pan. They need air to crisp.
- Don’t sauce them before the first bake or the coating will collapse.
21. Grilled Romaine Caesar with Smoky Chickpea Croutons
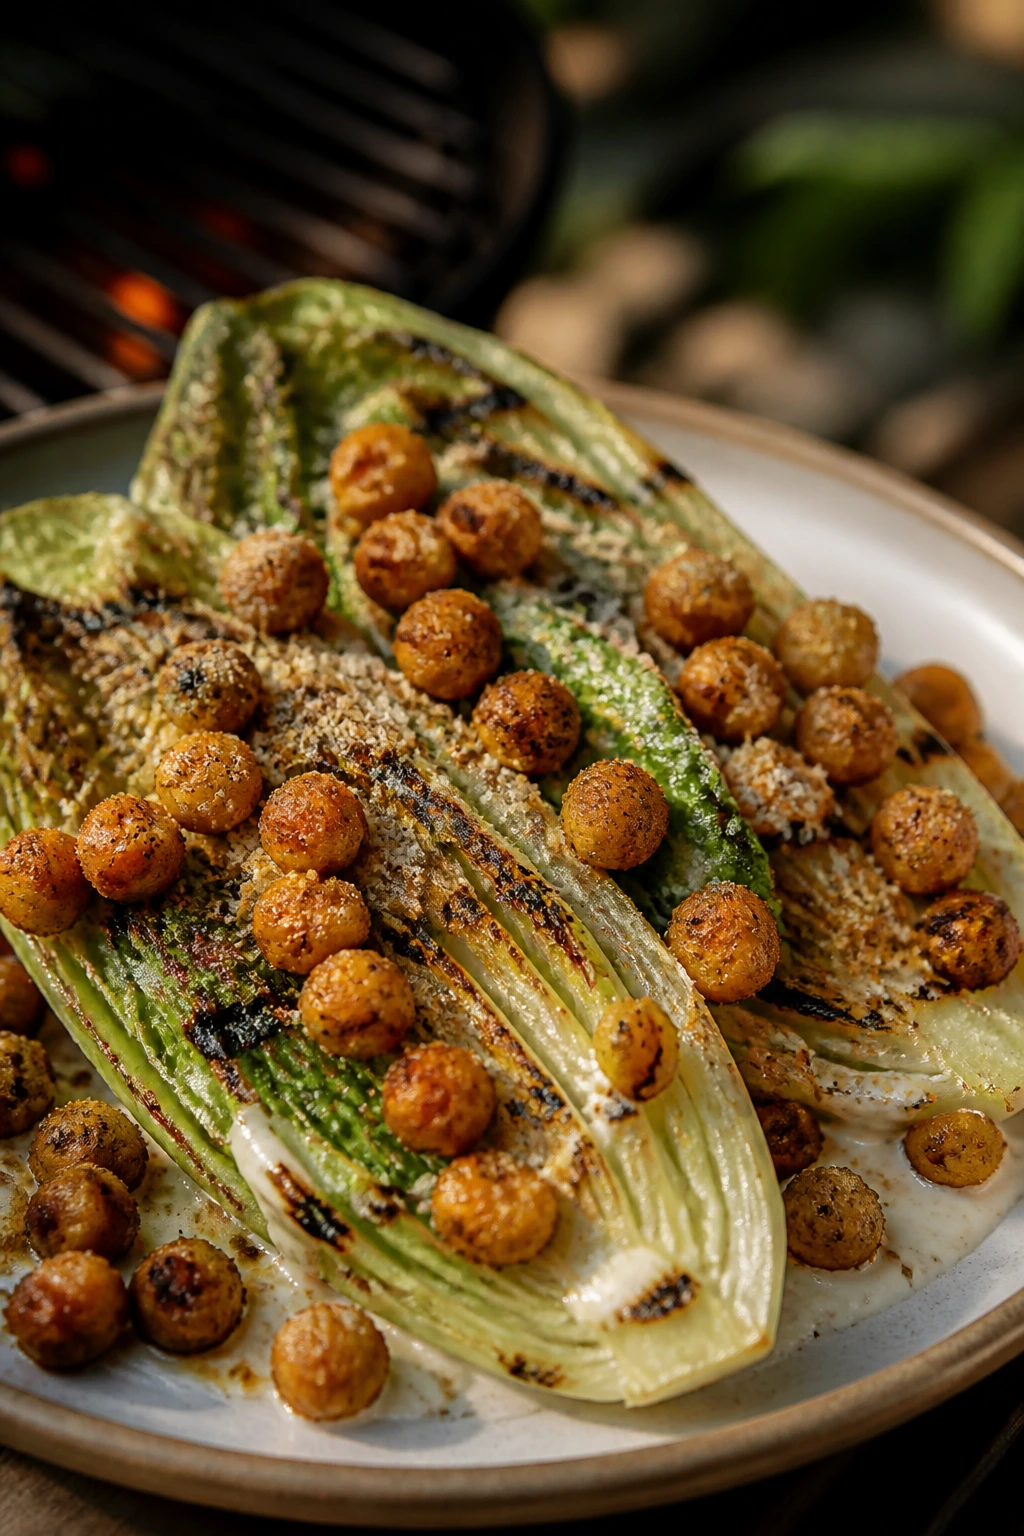
This salad tastes like somebody finally got serious about grilled greens. Romaine takes on a little char without wilting into mush, and the smoky chickpeas give you the crunch and protein that croutons usually try to provide. The Caesar-style dressing is creamy, lemony, and sharp enough to stand beside barbecue food.
Why It Works: Grilling romaine only takes a minute or two, which is enough to get smoke on the leaves without turning them limp. Chickpeas roasted with paprika and oil become crisp and snacky, so they can stand in for croutons and hold up in the dressing. Tahini and nutritional yeast give the dressing the salty, creamy profile Caesar needs.
Key Ingredients:
- 2 romaine hearts, halved lengthwise — keep the core attached.
- 1 tablespoon olive oil — for the lettuce.
- 1 can chickpeas, drained and dried — for the croutons.
- 1 tablespoon olive oil — for roasting the chickpeas.
- 1 teaspoon smoked paprika — for the chickpeas.
- 1/2 teaspoon garlic powder — for the chickpeas.
- 1/4 cup tahini — the base of the dressing.
- 2 tablespoons lemon juice — for brightness.
- 1 tablespoon nutritional yeast — savory depth.
- 1 teaspoon Dijon mustard — sharpens the dressing.
- Water, salt, and pepper — to thin and season.
Quick Steps:
- Roast the chickpeas at 400°F with oil, paprika, garlic powder, salt, and pepper for 25 to 30 minutes, until crisp.
- Whisk the tahini, lemon juice, nutritional yeast, Dijon, water, salt, and pepper into a pourable dressing.
- Brush the romaine lightly with olive oil.
- Grill cut-side down for 1 to 2 minutes, just until charred.
- Drizzle with dressing and scatter the chickpeas over the top.
Equipment for This Recipe:
- Grill or grill pan — quick char only.
- Sheet pan — for the chickpeas.
- Whisk — for the dressing.
- Bowl — for tossing the chickpeas.
How to Serve This Dish: Serve the romaine on a platter, cut sides up, so the dressing pools in the leaves. It’s a good cold-warm contrast next to rich barbecue dishes, and it adds the green part of the plate without feeling like an afterthought.
Pro Tips for This Recipe:
- Dry the chickpeas well before roasting or they’ll never crisp.
- Grill the lettuce briefly; a long cook turns it floppy.
- Dress right before serving so the leaves keep their shape.
Variations on This Dish:
- Avocado Caesar: Blend avocado into the dressing.
- Lemon-Garlic Version: Add extra lemon and a grated garlic clove.
Common Mistakes to Avoid with This Dish:
- Don’t leave the romaine on the heat too long.
- Don’t roast the chickpeas on a crowded pan.
22. Charred Cabbage Steaks with Tahini Lemon Drizzle
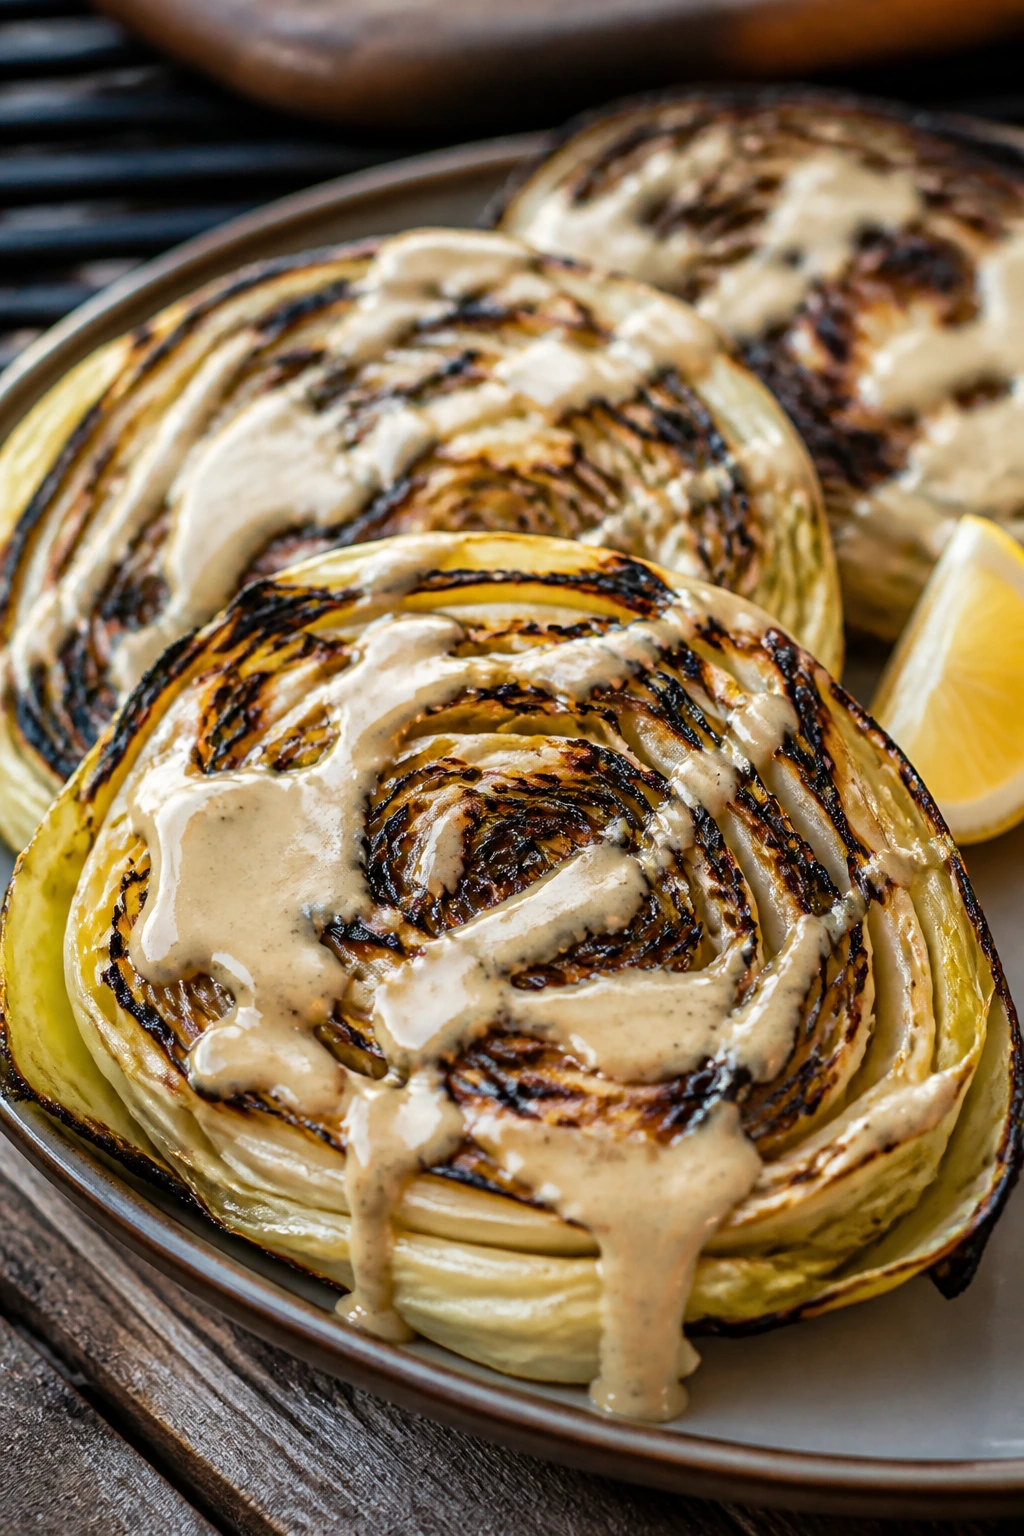
Cabbage can be a sleepy vegetable until it gets direct heat. Then the outer leaves go dark and sweet, the center stays tender, and the whole slice behaves like a proper main or side. Tahini and lemon are the right kind of loud here: creamy, sharp, and perfectly happy next to smoke.
Why It Works: Thick cabbage slices hold together under heat better than shredded cabbage, which means you get char on the outside and softness in the middle. Tahini makes a rich drizzle that doesn’t need dairy, and lemon keeps it from feeling thick. Smoked paprika brings the whole plate back to the grill.
Key Ingredients:
- 1 large green cabbage, cut into 1-inch steaks — keep the core attached.
- 3 tablespoons olive oil — for brushing.
- 1 teaspoon smoked paprika — for the cabbage.
- Salt and pepper — season both sides.
- 1/4 cup tahini — for the drizzle.
- 2 tablespoons lemon juice — balances the richness.
- 1 garlic clove, grated — a little goes far.
- 2 to 3 tablespoons water — to thin the sauce.
- 1 tablespoon maple syrup — optional if you want a softer edge.
Quick Steps:
- Heat the oven to 425°F or a grill to medium-high.
- Brush the cabbage with oil, paprika, salt, and pepper.
- Roast for 25 to 30 minutes, or grill for 8 to 10 minutes total, until browned and tender.
- Whisk the tahini, lemon juice, garlic, water, and maple syrup until smooth.
- Drizzle over the hot cabbage and serve.
Equipment for This Recipe:
- Sharp knife — for cutting clean steaks.
- Sheet pan or grill — either works.
- Small whisk — for the drizzle.
- Pastry brush — for the oil.
How to Serve This Dish: Serve the cabbage steaks whole, then cut at the table so people can see the charred layers. They make a sturdy side beside ribs, burgers, or tofu, and they also work as a lighter centerpiece with beans and cornbread.
Pro Tips for This Recipe:
- Keep the cabbage steaks thick or they’ll fall apart.
- If the tahini seizes, add water slowly and whisk hard.
- Salt the cabbage before cooking, not after only.
Variations on This Dish:
- Sesame-Chili Version: Add chili oil to the drizzle.
- Herb Finish: Scatter dill or parsley over the top.
Common Mistakes to Avoid with This Dish:
- Don’t slice the cabbage too thin.
- Don’t skip the drizzle; plain charred cabbage needs acid.
23. Watermelon Tomato Salad with Mint and Lime
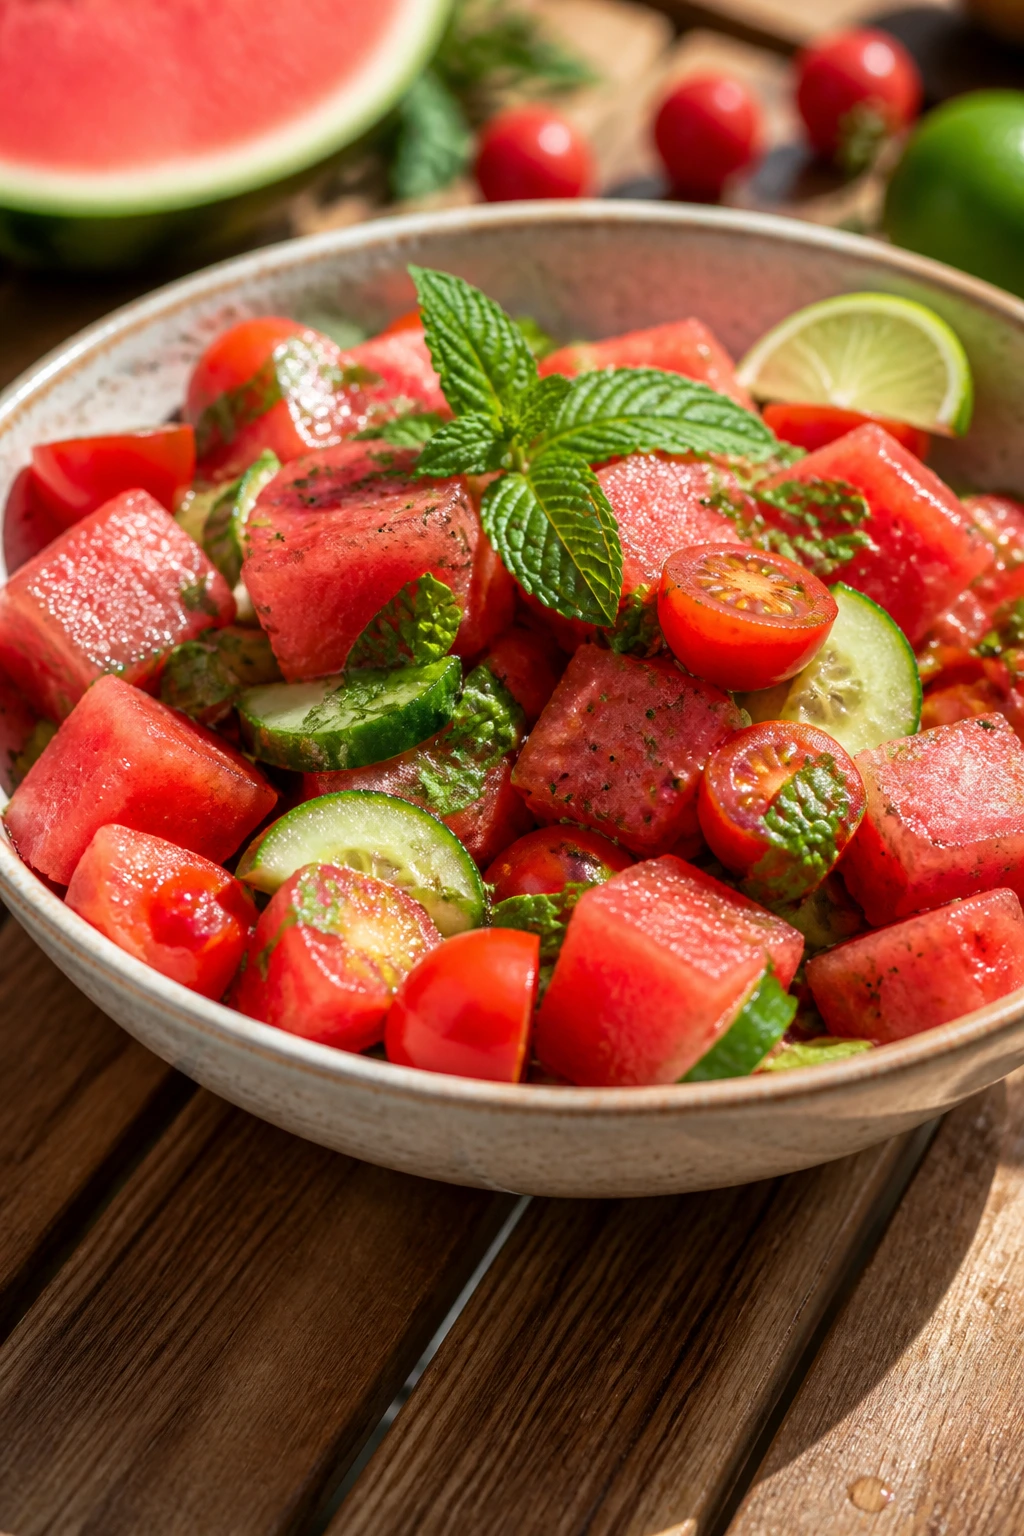
Cold watermelon and ripe tomatoes make a strange-sounding pair that tastes like summer should. Add cucumber, mint, lime, and a little salt, and the salad turns into the refreshing break every smoky cookout needs. It’s simple, but not flimsy.
Why It Works: Watermelon brings sweetness and a lot of juice, while tomatoes bring acidity and a savory edge. Cucumber adds crunch, lime sharpens everything, and mint keeps the whole bowl from feeling too sweet. A little flaky salt is the piece that makes the flavors click.
Key Ingredients:
- 4 cups cubed watermelon — chilled if possible.
- 2 cups cherry tomatoes, halved — ripe but firm.
- 1 cucumber, sliced — remove the watery center if it’s very seedy.
- 1/4 red onion, thinly sliced — optional, but useful.
- 1/4 cup fresh mint, torn — not chopped too fine.
- 2 limes, juiced — the acid matters.
- 2 tablespoons olive oil — adds body.
- Flaky salt — for finishing.
- Optional vegan feta — if you want a salty edge.
Quick Steps:
- Combine the watermelon, tomatoes, cucumber, onion, and mint in a large bowl.
- Add lime juice, olive oil, and a pinch of flaky salt.
- Toss gently so the watermelon doesn’t break apart.
- Add vegan feta if using.
- Serve cold.
Equipment for This Recipe:
- Large bowl — enough room to toss gently.
- Sharp knife — for clean cubes and slices.
- Citrus juicer — helpful, not required.
- Spoon — use it lightly so the fruit stays intact.
How to Serve This Dish: Serve the salad in a shallow bowl so the juices stay visible and useful. It belongs next to sticky, smoky dishes where its cold sweetness can reset the palate between bites.
Pro Tips for This Recipe:
- Chill the fruit before mixing if you can.
- Add salt right before serving so the watermelon doesn’t weep too much.
- Tear the mint by hand; it keeps the aroma fresher.
Variations on This Dish:
- Cucumber-Heavy Version: Increase the cucumber for more crunch.
- Chili-Lime Version: Add a pinch of chili flakes.
Common Mistakes to Avoid with This Dish:
- Don’t cut the fruit too small or it turns mushy.
- Don’t dress it too early. The salad should taste bright, not watery.
24. Skillet Peach Cobbler
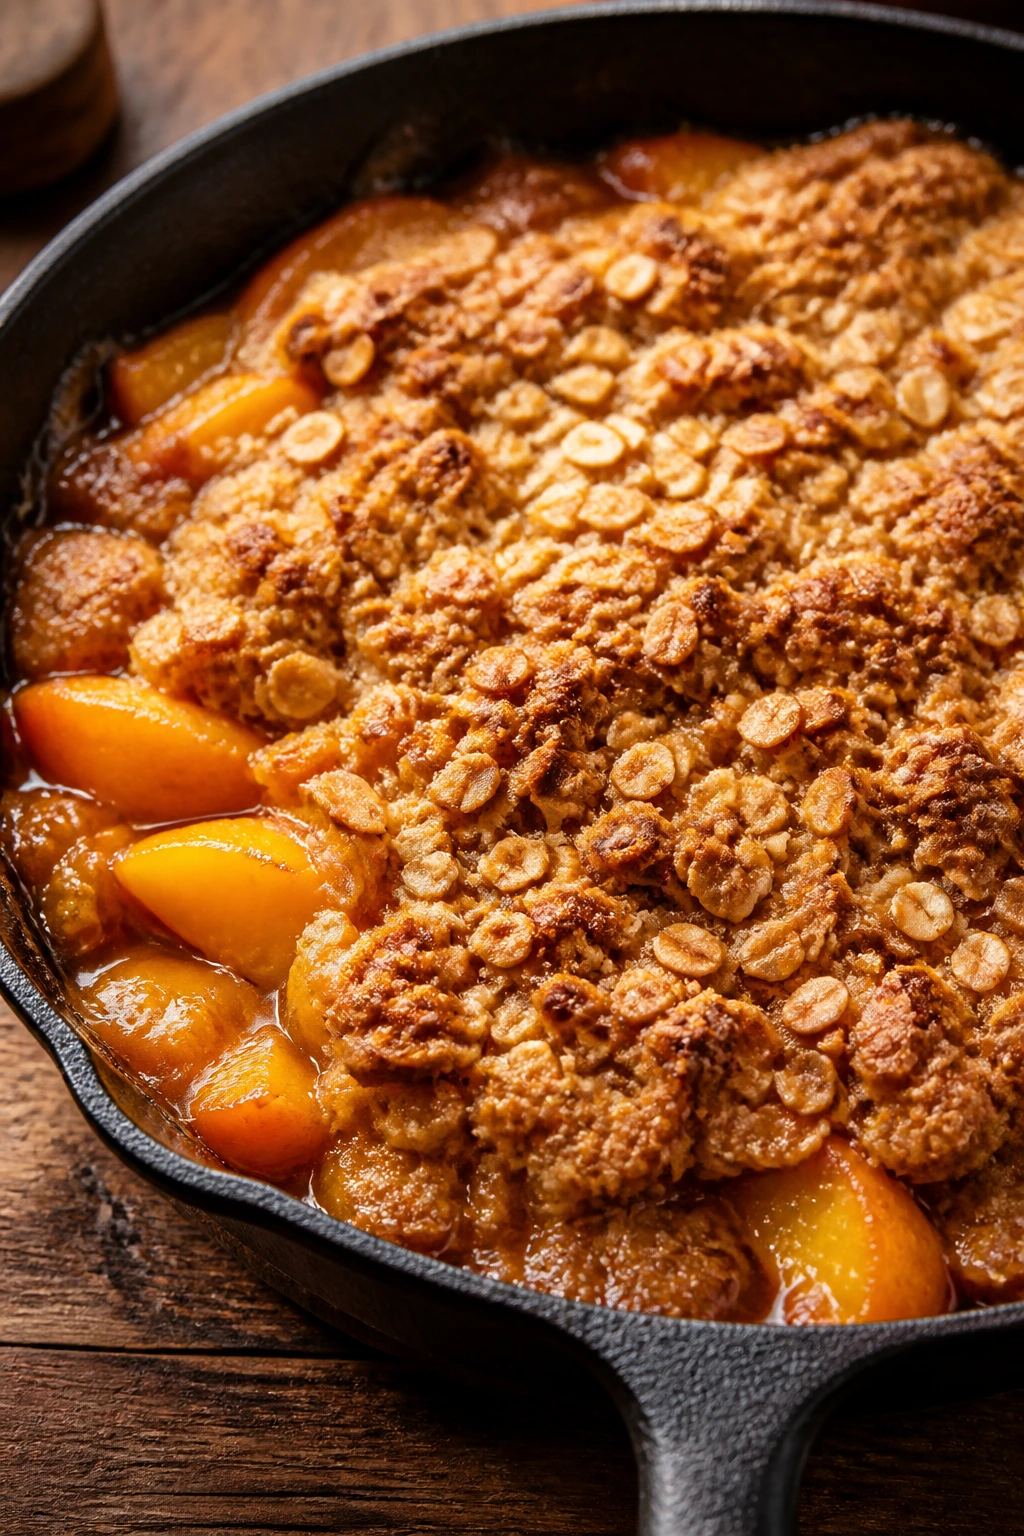
A barbecue spread gets better when dessert smells like the grill area too. This skillet cobbler bakes up with bubbling peaches underneath and a tender, browned topping on top. The oats give the crust a little roughness, which is exactly what keeps it from feeling too sweet.
Why It Works: Ripe peaches break down into a syrupy filling fast, especially with a little sugar and lemon. The oat-flecked topping browns well in a hot oven and gives you a softer, biscuit-like layer instead of a cake that falls flat. A cast-iron skillet helps the edges caramelize first, which is the best part.
Key Ingredients:
- 6 peaches, sliced — peel only if the skins are thick.
- 1/4 cup sugar — for the filling.
- 1 tablespoon lemon juice — keeps the fruit bright.
- 1 cup all-purpose flour — for the topping.
- 1/2 cup rolled oats — gives the top texture.
- 1/3 cup brown sugar — for depth.
- 1 teaspoon baking powder — for lift.
- 1/2 teaspoon cinnamon — enough to notice, not enough to overwhelm.
- 1/2 teaspoon salt — keeps the sweetness in check.
- 1/2 cup vegan butter, cold and cubed — for the topping.
- 1/2 cup plant milk — to bring the dough together.
Quick Steps:
- Heat the oven to 375°F and grease a cast-iron skillet.
- Toss the peaches with sugar and lemon juice and spread them in the skillet.
- Mix the flour, oats, brown sugar, baking powder, cinnamon, and salt.
- Cut in the vegan butter until the mixture looks crumbly, then stir in the plant milk.
- Drop the topping over the peaches in rough spoonfuls.
- Bake for 30 to 35 minutes, until the peaches bubble at the edges and the top is golden.
Equipment for This Recipe:
- Cast-iron skillet — the best vessel for edge browning.
- Mixing bowl — for the topping.
- Pastry cutter or fork — to cut in the butter.
- Spoon — for dropping the topping.
How to Serve This Dish: Serve it warm with vegan vanilla ice cream or a spoonful of coconut whipped cream. It’s best eaten in the skillet while the filling is still bubbling a little and the top is crisp at the edges.
Pro Tips for This Recipe:
- Use ripe peaches, not hard ones.
- Let the cobbler sit 10 minutes before serving so the filling thickens.
- If your peaches are very sweet, reduce the sugar slightly.
Variations on This Dish:
- Berry-Peach Version: Add a cup of berries to the filling.
- Ginger Peach Cobbler: Add grated ginger to the fruit.
Common Mistakes to Avoid with This Dish:
- Don’t underbake the topping.
- Don’t slice the peaches too thin or the filling turns watery.
25. Grilled Peaches with Coconut Yogurt and Granola
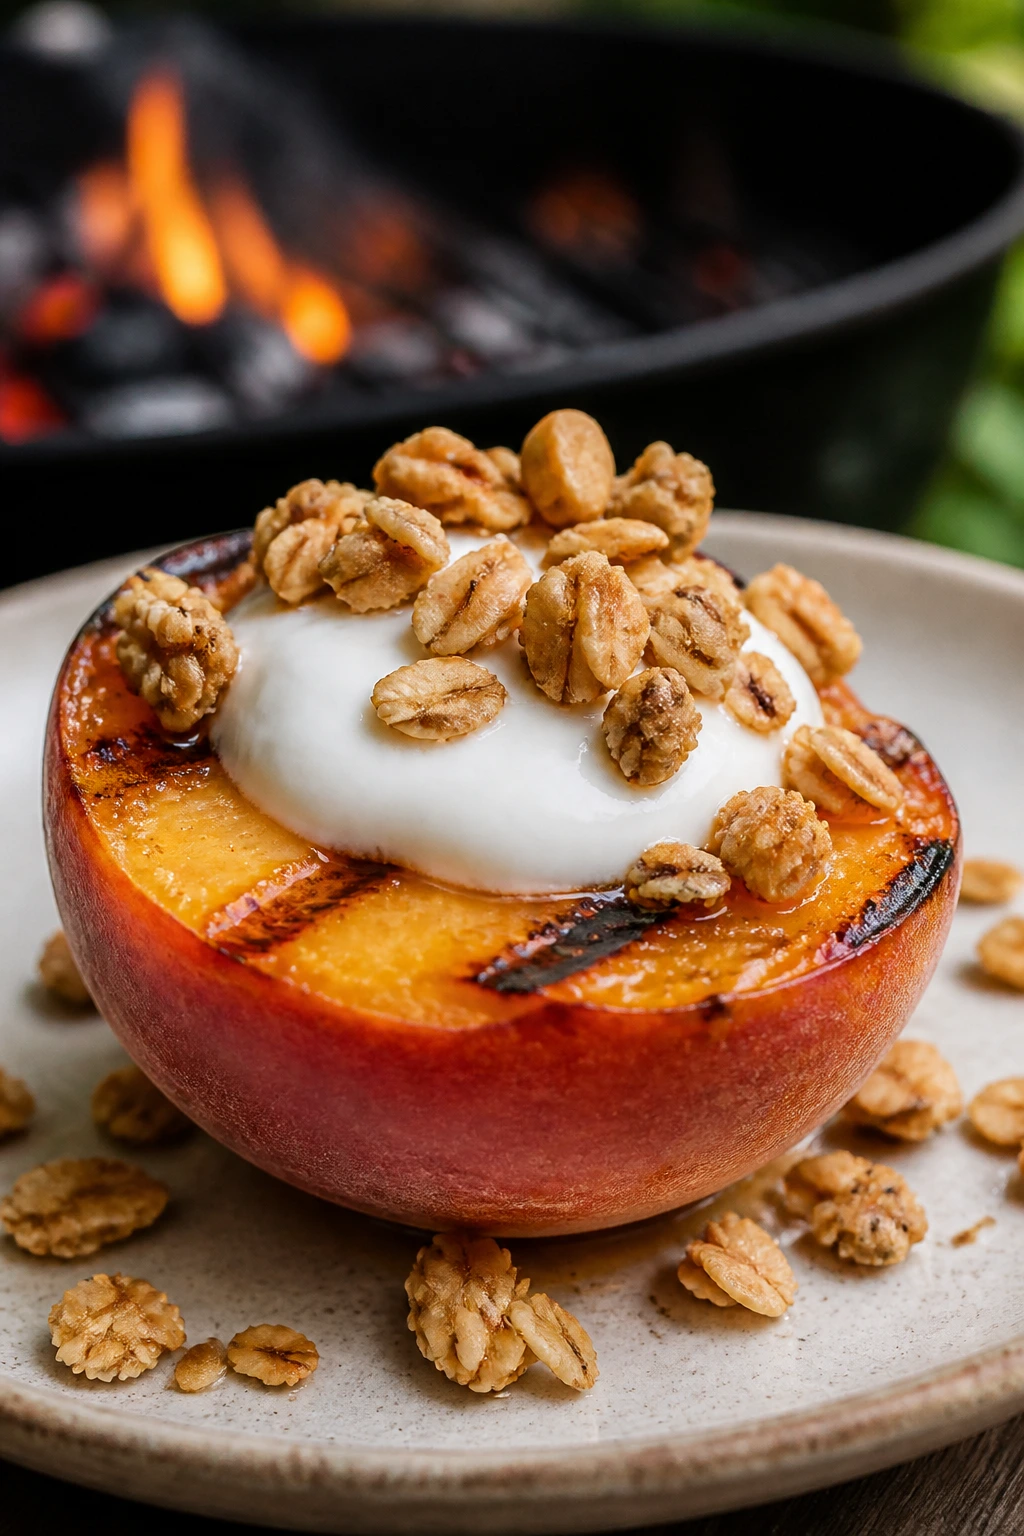
Sometimes the best dessert is the one that takes almost no time and still tastes like you planned it. Grilled peaches get soft, caramelized, and a little smoky, and the coconut yogurt and granola turn them into something halfway between dessert and breakfast. That’s not a complaint.
Why It Works: Heat pulls the sugars to the surface of the peaches, which gives you those browned grill marks and a softer center. Coconut yogurt brings coolness and fat, while granola adds crunch so the whole plate doesn’t feel like fruit salad. A little maple or lime keeps the flavors from drifting too sweet.
Key Ingredients:
- 4 ripe peaches, halved and pitted — firm-ripe works best.
- 1 tablespoon neutral oil — for the cut sides.
- 1 tablespoon maple syrup — optional, for a sweeter finish.
- 1 cup coconut yogurt — chilled.
- 1 cup granola — choose one with nuts and seeds.
- Lime zest — for brightness.
- Fresh mint — for garnish.
Quick Steps:
- Heat the grill or grill pan to medium-high.
- Brush the cut sides of the peaches with oil.
- Grill cut-side down for 2 to 3 minutes, until marked and slightly softened.
- Flip and grill 1 minute more if needed.
- Spoon coconut yogurt into bowls, add the peaches, and top with granola, maple syrup, lime zest, and mint.
Equipment for This Recipe:
- Grill or grill pan — a hot surface matters.
- Tongs — move the peaches carefully.
- Small bowl — for the yogurt.
- Microplane or zester — for the lime.
How to Serve This Dish: Serve the peaches warm, with cold yogurt melting around the edges. If you want a more dessert-like plate, add a drizzle of maple and a few extra spoonfuls of granola right before serving.
Pro Tips for This Recipe:
- Pick peaches that yield slightly when pressed, not hard ones.
- Don’t move them too early on the grill or the marks won’t set.
- Add granola at the last second so it stays crisp.
Variations on This Dish:
- Vanilla Version: Stir vanilla into the yogurt.
- Berry Crunch Bowl: Add fresh berries beside the peaches.
Common Mistakes to Avoid with This Dish:
- Don’t use peaches that are too soft or they’ll collapse.
- Don’t add the granola too early unless you like it soggy.
Why These Vegan BBQ Recipes Taste Like a Full Cookout
The common thread here is not imitation. It’s heat, salt, acid, and texture. Jackfruit gives you shreds, tofu gives you crisp edges, cauliflower gives you char, and mushrooms bring a deep savory note that doesn’t need fake smoke to work. That’s why these dishes hold up when the crowd is half vegan and half “I’ll try one bite.”
Most cookout food falls apart when it’s all one note. These recipes don’t. The sticky ones get cut with pickles or vinegar. The rich ones get cooled by slaw or lime. The soft ones get crunch from breadcrumbs, cornmeal, nuts, or raw vegetables, and that detail is what makes the plate feel finished instead of merely vegetarian.
A grill is useful, sure. It is not the whole story. The broiler, the oven, a cast-iron skillet, and a little patience can get you to the same place if you know what browning looks like and you respect the last minute of cooking.
Essential Equipment for These Recipes
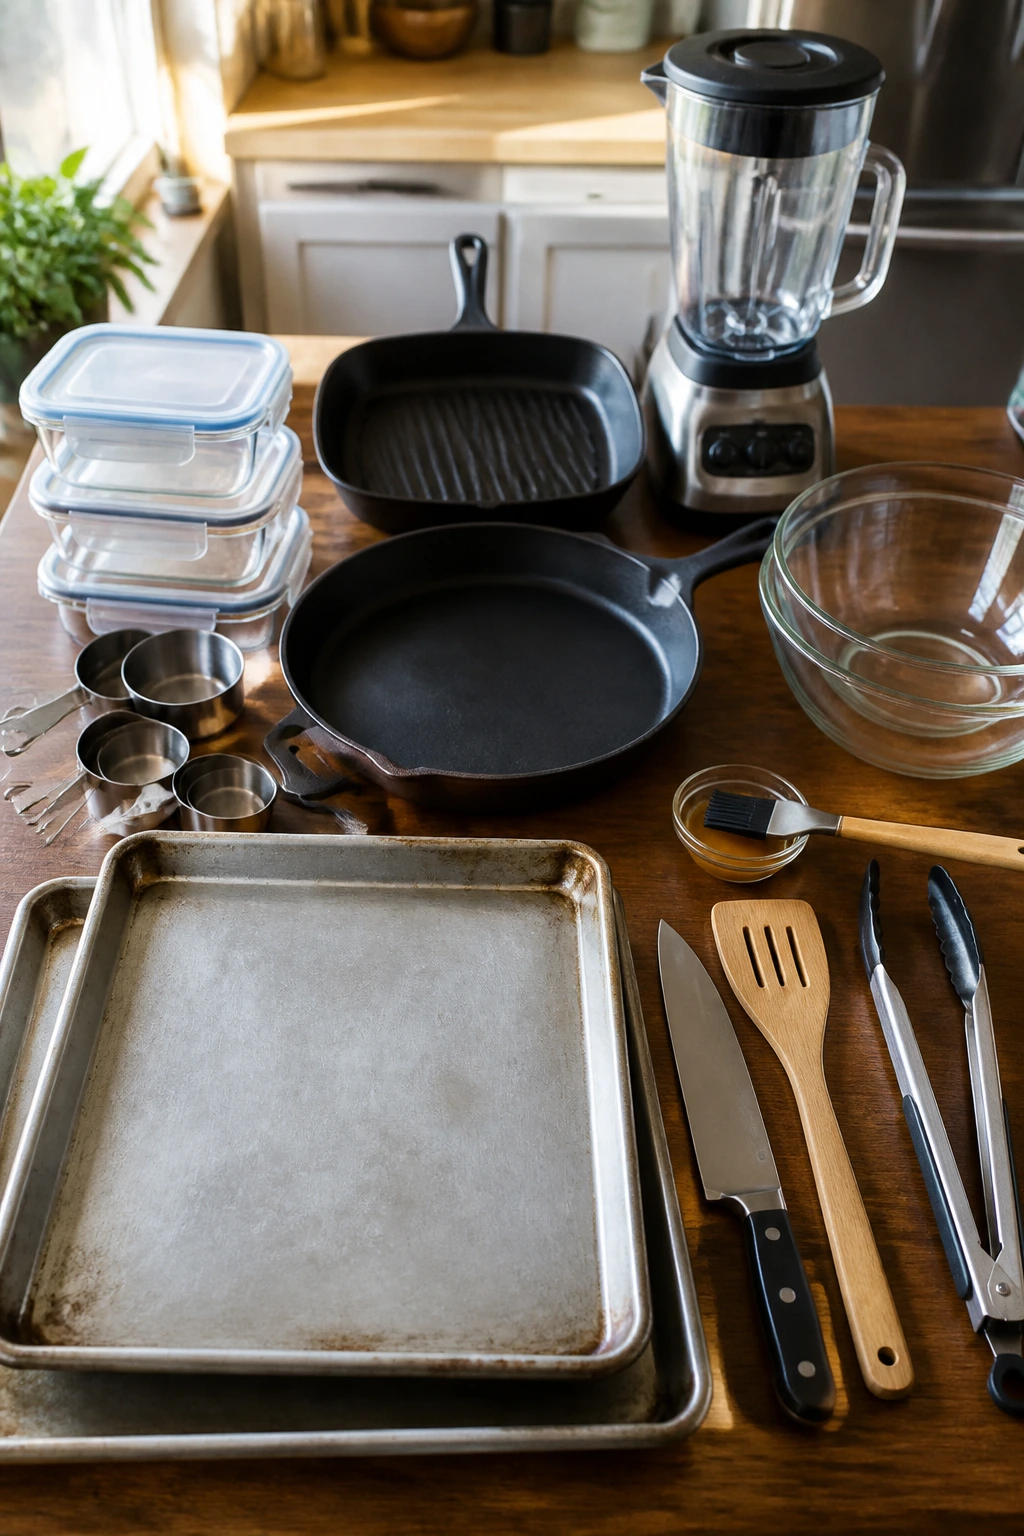
- Large rimmed sheet pans: You’ll use them for tofu, cauliflower, beans, peaches, and anything that needs room to brown.
- Cast-iron skillet: Best for cobbler, mushrooms, searing tofu, and anything that benefits from steady heat.
- Grill or grill pan: Not mandatory for every recipe, but very helpful for corn, asparagus, romaine, peaches, and portobellos.
- Food processor or blender: Useful for burger mix, cashew drizzle, and romesco.
- Mixing bowls in at least two sizes: You’ll want one for wet mixes and one for dry coatings.
- Tongs and a sturdy spatula: Grilled vegetables, seitan, and tofu are easier to handle with both.
- Sharp chef’s knife: Cabbage, mushrooms, tofu, jackfruit, and onions all go better with a clean cut.
- Measuring cups and spoons: BBQ cooking is forgiving, but the sauce balance isn’t magic.
- Basting brush: Keeps glazes on the food instead of pooled on the pan.
- Airtight storage containers: Especially useful for slaw, potato salad, sauces, and leftovers.
Smart Shopping for Vegan BBQ Recipes
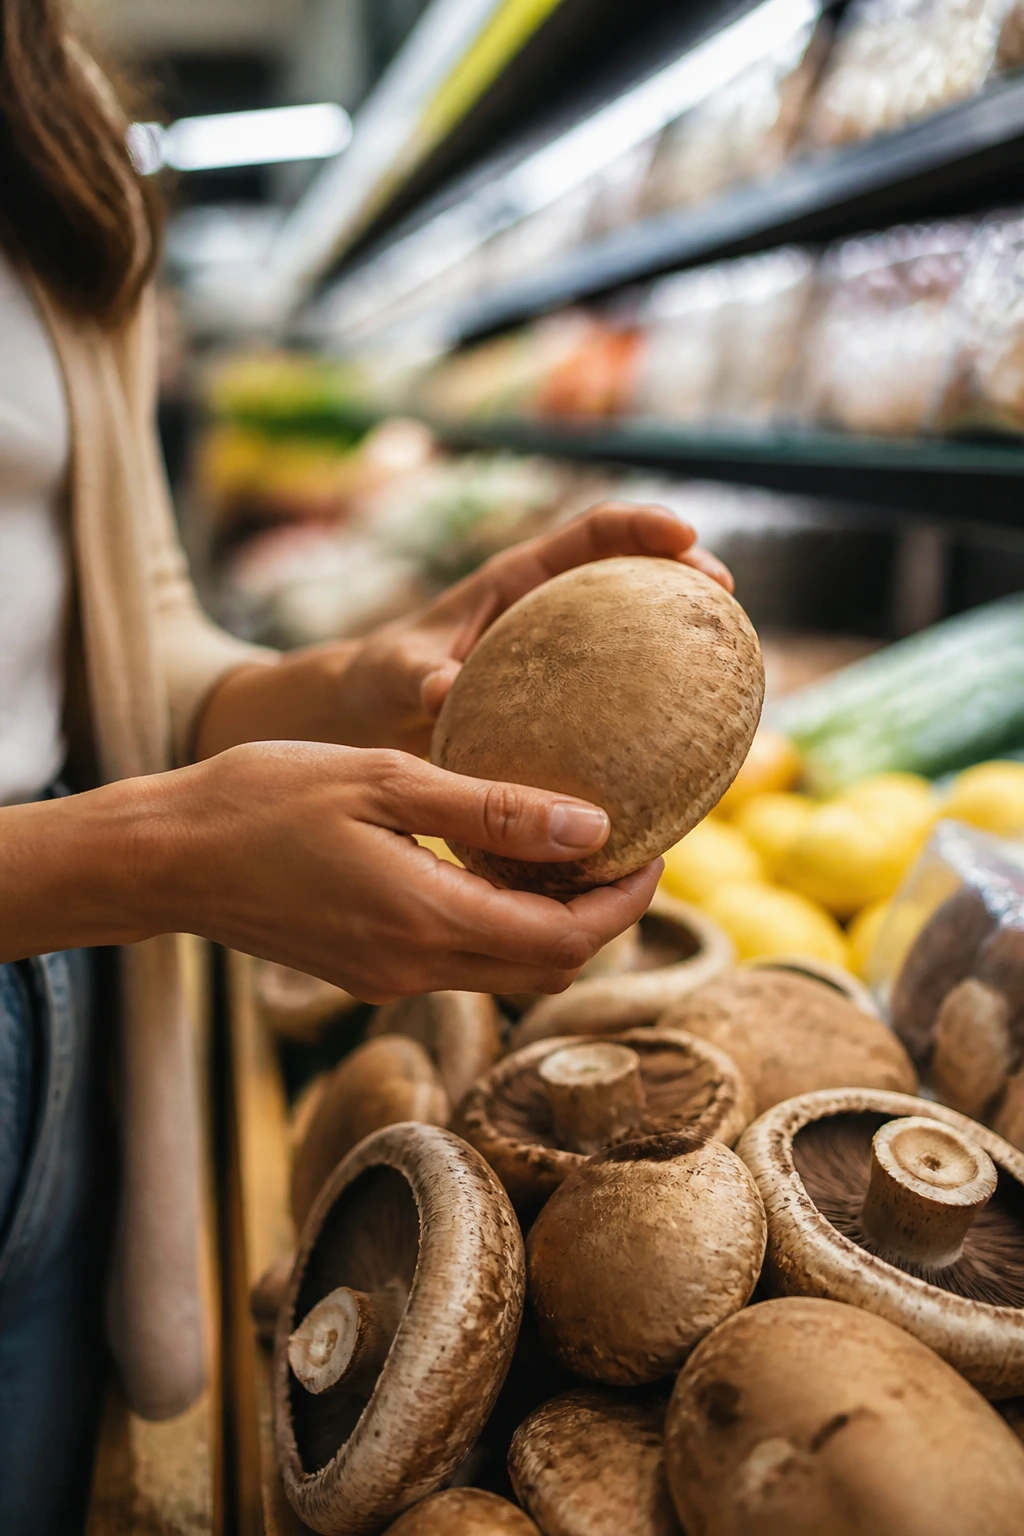
The first shopping rule is boring, but it matters: buy the right version of the ingredient. Young green jackfruit belongs in brine or water, not syrup. Extra-firm tofu should feel dense in the package, not wobbly. Tempeh should smell nutty and clean, not sour. These little choices decide whether the recipe behaves or fights you.
BBQ sauce is worth a real look. Some bottles are just sugar with a red color; others bring vinegar, smoke, and enough salt to taste like they belong near a grill. Read the label if you care about strict vegan cooking, because some sauces hide honey or anchovy-style ingredients in odd places. A tangy sauce with a short ingredient list is often better than a flashy one.
For vegetables, buy firmness and freshness, not size. Portobello caps should be dry and heavy. Cauliflower should have tight florets and no wet spots. Cabbage should feel dense for its size. Peaches need perfume and slight give, but not mush. Corn should still look bright at the husk ends, and asparagus stalks should snap instead of bend.
Beans and grains are your quiet helpers. Low-sodium canned beans give you control, while brown lentils, quinoa, oats, and panko all bring texture to dishes that need more structure. If you’re making a mixed cookout menu, stock one tangy sauce, one creamy sauce, one crunchy side, and one fresh salad. That’s the backbone.
How to Serve These Vegan BBQ Recipes

Presentation: Start with contrast. A sticky main looks better on a pale platter, while bright slaw or herb salad looks better next to dark seitan ribs or jackfruit. Stack a few things high, leave some sauce visible, and don’t bury every dish under garnish. People eat with their eyes first, and barbecue food should look generous, not arranged like a museum piece.
Accompaniments: The cleanest pairings are the old standbys: coleslaw, potato salad, baked beans, cornbread, grilled corn, cucumber salad, and a simple green salad. For a fuller spread, give each plate one smoky main, one cold crunchy side, and one starchy thing. That mix matters more than having six different dishes.
Portions: For mains, figure on one solid serving of jackfruit, tofu, tempeh, seitan, or burgers per adult, then add a side or two. For sides like slaw, beans, and potato salad, a generous scoop per person is enough if there are other dishes on the table. Desserts like cobbler and grilled peaches are easy to scale up because people always come back for a second spoonful.
Beverage Pairing: Cold sparkling lemonade, iced tea with lemon, or a dry cider all work well with the smoke-and-sweet profile of barbecue. If you want something nonalcoholic but less sweet, try ginger beer with lime or plain soda water with a wedge of citrus.
Additional Tips and Flavor Boosters
Flavor Enhancement: Finish smoky dishes with something sharp. Pickled onions, cider vinegar, lime juice, or a spoon of mustard right at the end can make a sticky sauce taste twice as alive. It’s a small move, but barbecue food leans hard on the sweet side, so the acid matters.
Customization: If you like heat, build it in with chipotle, cayenne, jalapeño, or hot sauce rather than dumping it on at the table. If you want a gentler plate, lean on smoked paprika, maple, and garlic instead. The same recipe can land in a dozen places depending on how much bite you want.
Serving Suggestions: Fresh herbs fix a lot. Parsley, dill, mint, cilantro, and scallions all cut through the richness of vegan mayo, BBQ glaze, or roasted vegetables. Toasted sesame seeds, crushed peanuts, or even a few crispy onion bits add crunch when a dish needs one last layer.
Make-It-Yours: For gluten-free plates, use gluten-free buns, panko, and tamari. For nut-free cooking, skip cashews and almonds and use tahini, seed butter, or a simple herb oil instead. For lower-sugar meals, choose a tangier BBQ sauce and cut the maple or molasses back by a spoonful.
Make-Ahead, Storage, and Reheating Guidance
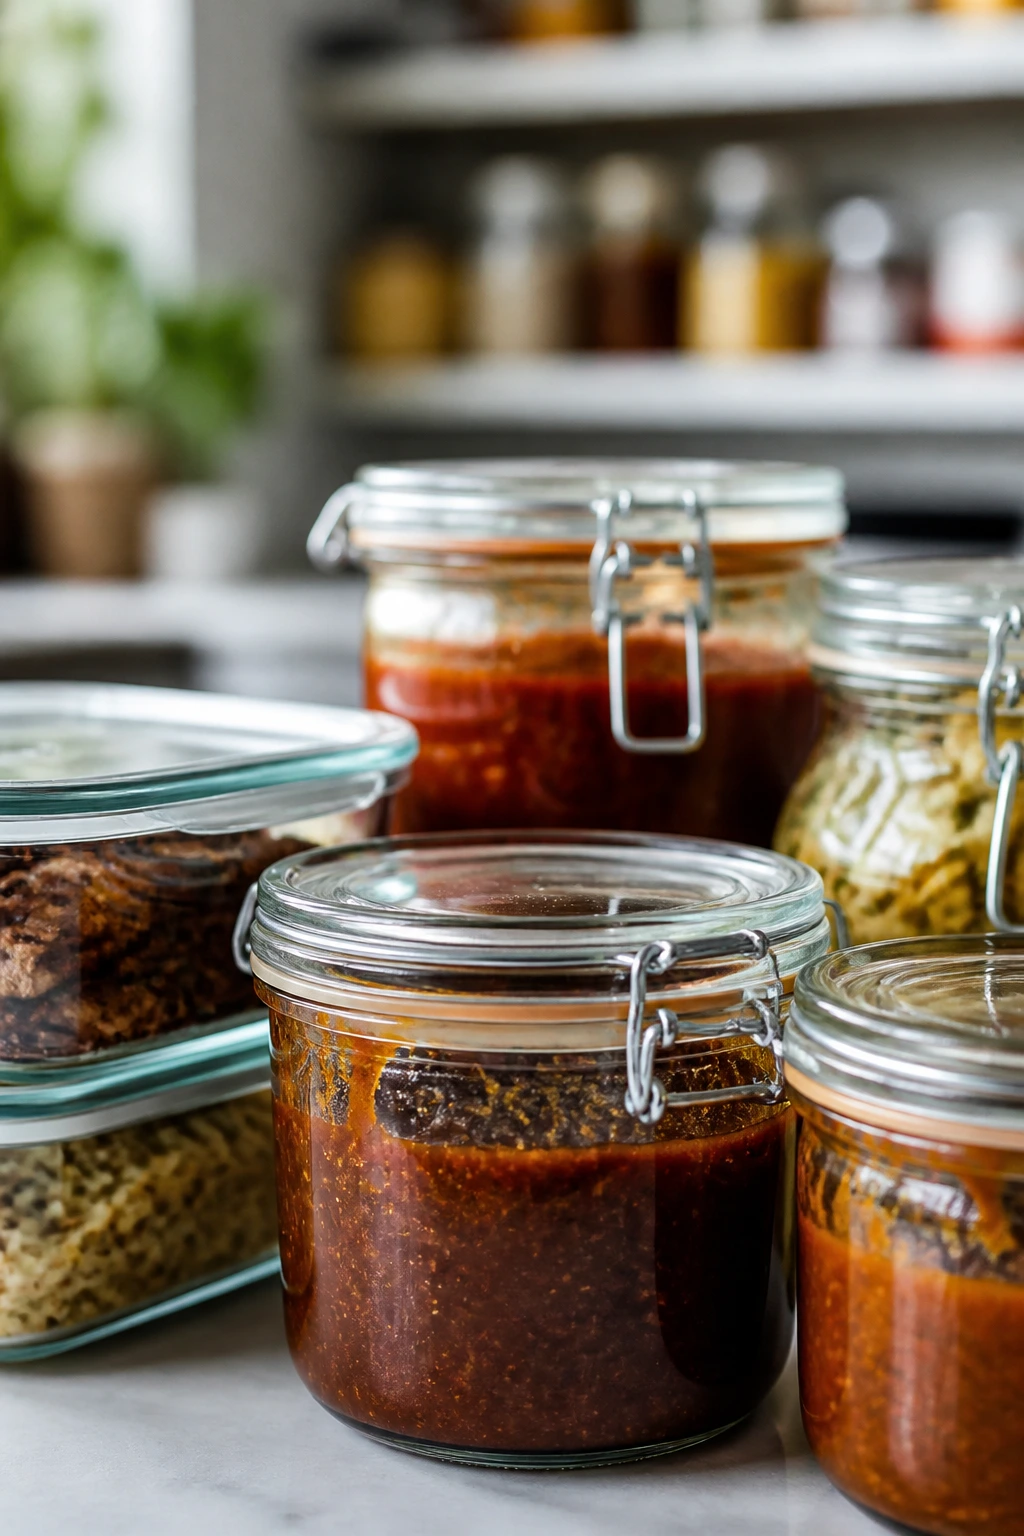
Saucy items hold up best. Jackfruit sliders without the buns, tofu burnt ends, seitan ribs, baked beans, and BBQ mushroom fillings keep well in the fridge for 3 to 4 days in airtight containers. They also freeze well for up to 2 months, though anything with a lot of water — like mushrooms or jackfruit — should be cooled completely before freezing so the texture doesn’t get weird.
Grilled vegetables and mains like cauliflower steaks, portobellos, cabbage steaks, and tofu reheat best in a 350°F oven for 10 to 15 minutes, or in a skillet over medium heat until hot through. The oven keeps the edges from turning rubbery. Microwaves are fine for beans or jackfruit in a hurry, but they’re not kind to crisp coatings.
Cold sides are a different story. Coleslaw, potato salad, and chickpea salad are best within 2 to 3 days, kept cold and covered. Do not freeze them. The mayo separates and the vegetables collapse. If you need to prep ahead, mix the dressing a day early and keep the chopped vegetables separate until the last minute.
Burgers, tofu cubes, and tempeh skewers can all be prepped in advance. Shape the burgers and freeze them raw between parchment for up to 3 months. Marinate tofu or tempeh the night before, then cook it fresh. Cornbread muffins keep for 2 days at room temperature or 4 days in the fridge, and they reheat best wrapped loosely in foil at 325°F for about 10 minutes.
Variations and Adaptations to Try
Gluten-Free Cookout: Use tamari instead of soy sauce, gluten-free buns for sliders and burgers, and certified gluten-free breadcrumbs or panko for cauliflower wings. The trick is to keep the sauce bold so the swap doesn’t feel like a downgrade.
Low-Sugar BBQ Plate: Choose a tangier BBQ sauce, cut the maple syrup in half, and lean harder on vinegar, mustard, citrus, and smoked paprika. The food will taste cleaner and a little sharper, which some people prefer with grilled vegetables.
Nut-Free Spread: Skip the cashew drizzle and almond romesco, then use tahini, sunflower seed butter, or a simple lemon-herb oil where a creamy finish is needed. The flavor shifts a little, but the plates still hold together.
Mild Family Version: Pull back the chipotle, jalapeño, cayenne, and liquid smoke, then let the sweetness come from roasted vegetables, corn, and a decent BBQ sauce. Add hot sauce at the table for people who want it.
Extra-Smoke Variation: Add smoked paprika to almost everything, finish with a few drops of liquid smoke where it fits, and make sure the grill or broiler is hot enough to brown fast. Too much liquid smoke turns fake fast, so keep the hand light.
Picnic-Ready Menu: Lean on slaw, potato salad, cornbread, grilled corn, and sandwiches instead of saucy trays that need immediate eating. These dishes travel better, stay tasty at room temperature for a while, and don’t require a full kitchen at the other end.
Common Mistakes to Avoid
Using the wrong sauce too early: Sweet BBQ sauce burns before vegetables or tofu are done, which leaves you with a bitter edge and black patches. Put most sauces on near the end, then finish under heat only long enough to set the glaze.
Skipping texture prep: Wet tofu, unpressed jackfruit, overcrowded mushrooms, and floppy cauliflower all lead to limp food. Dry the ingredients, spread them out, and give them real heat. That’s not fussiness; that’s the difference between browned and steamed.
Underseasoning the vegetables: People often season meat out of habit and forget that vegetables need salt, acid, and enough spice to carry their own flavor. Taste the dressing, rub, or glaze before it goes on the food, not after the whole dish is assembled.
Crowding the grill or pan: When the pan is packed, everything sweats. You want contact, not steam. Cook in batches if you have to, because char is what makes these recipes feel like barbecue instead of a warm salad bar.
Letting cold sides sit in the sun too long: Coleslaw, potato salad, and chickpea salad can all slide into dangerous territory if they’re left out. Keep them chilled until serving and return leftovers to the fridge within 2 hours.
Ignoring acid at the finish: The food can be technically cooked and still taste heavy. Pickles, lime, vinegar, mustard, or even a small squeeze of lemon are what keep the plate bright.
Frequently Asked Questions
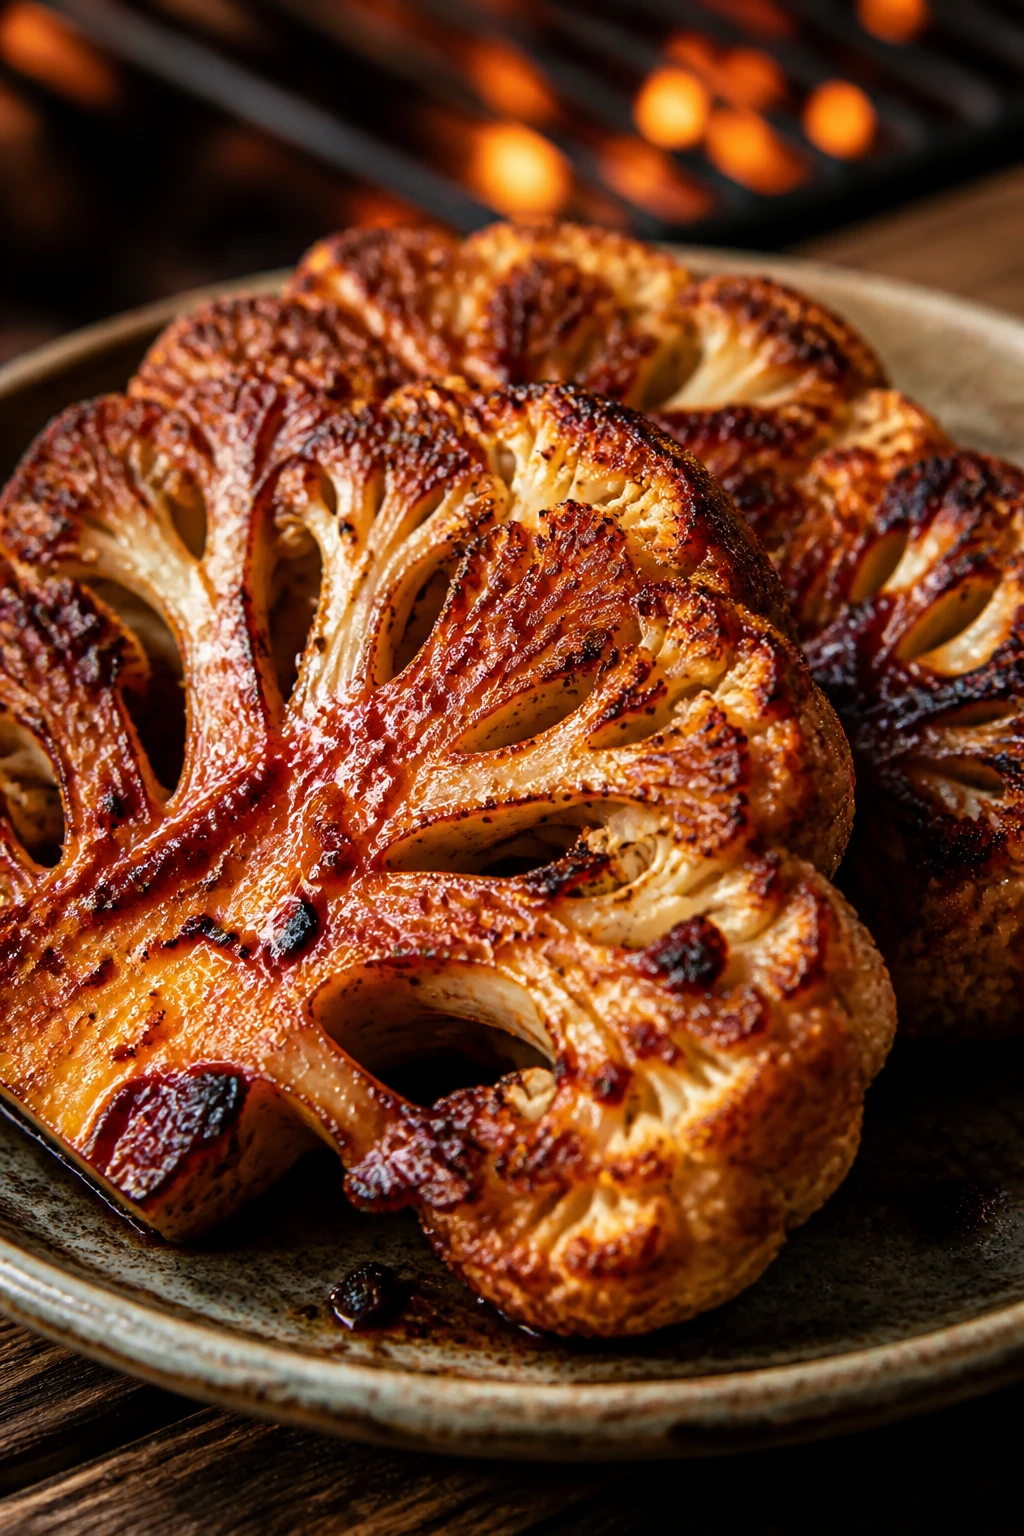
Can I make these vegan BBQ recipes without an outdoor grill?
Yes. A hot oven, broiler, cast-iron skillet, or grill pan can handle most of them. Portobellos, cauliflower, cabbage, tofu, peaches, and asparagus all brown well indoors if the heat is high enough.
Which recipe here is most likely to win over a meat eater first?
Jackfruit sliders, seitan ribs, tofu burnt ends, and lentil-walnut burgers usually get the strongest reaction because they bring chew, sauce, and a familiar barbecue shape. Portobello steaks also do well because they eat like a real main dish instead of a side.
What’s the best vegan protein for barbecue flavor?
Depends on the texture you want. Tofu gets crisp, tempeh gets nutty and firm, seitan gets chewy, and jackfruit shreds like pulled meat. If you want the closest thing to a rib or sandwich filling, seitan and jackfruit usually sit at the top of the list.
How do I keep tofu from tasting bland?
Press it well, salt it, and cook it hot enough to brown before saucing. Tofu is a sponge, which is a gift if you season it early and a problem if you don’t. A marinade or dry rub with smoked paprika, garlic, soy sauce, and a little acid makes a huge difference.
Can I prep these recipes the day before?
Absolutely. Coleslaw dressing, burger patties, bean mixtures, BBQ sauces, and chopped vegetables can all be prepped ahead. For the best texture, keep wet and crunchy parts separate until just before serving.
What if my BBQ sauce is too sweet?
Add vinegar, mustard, lime, or pickle juice. A sweet sauce can work if the recipe has enough acid around it, but if it tastes sticky and flat on its own, it needs sharpness before it touches the food.
Are these recipes good for meal prep?
Many of them are. Jackfruit filling, tofu burnt ends, seitan ribs, beans, burgers, and roasted vegetables reheat well. Slaws and fresh salads are the exception; they’re better mixed close to serving time.
How do I make a full cookout menu from these recipes?
Pick one main, two sides, one fresh salad, and one dessert. A strong combination is jackfruit sliders, coleslaw, grilled corn, baked beans, and grilled peaches. That gives you smoke, crunch, creaminess, and a cold finish without overcomplicating the table.
Smoke, Sauce, and Second Helpings
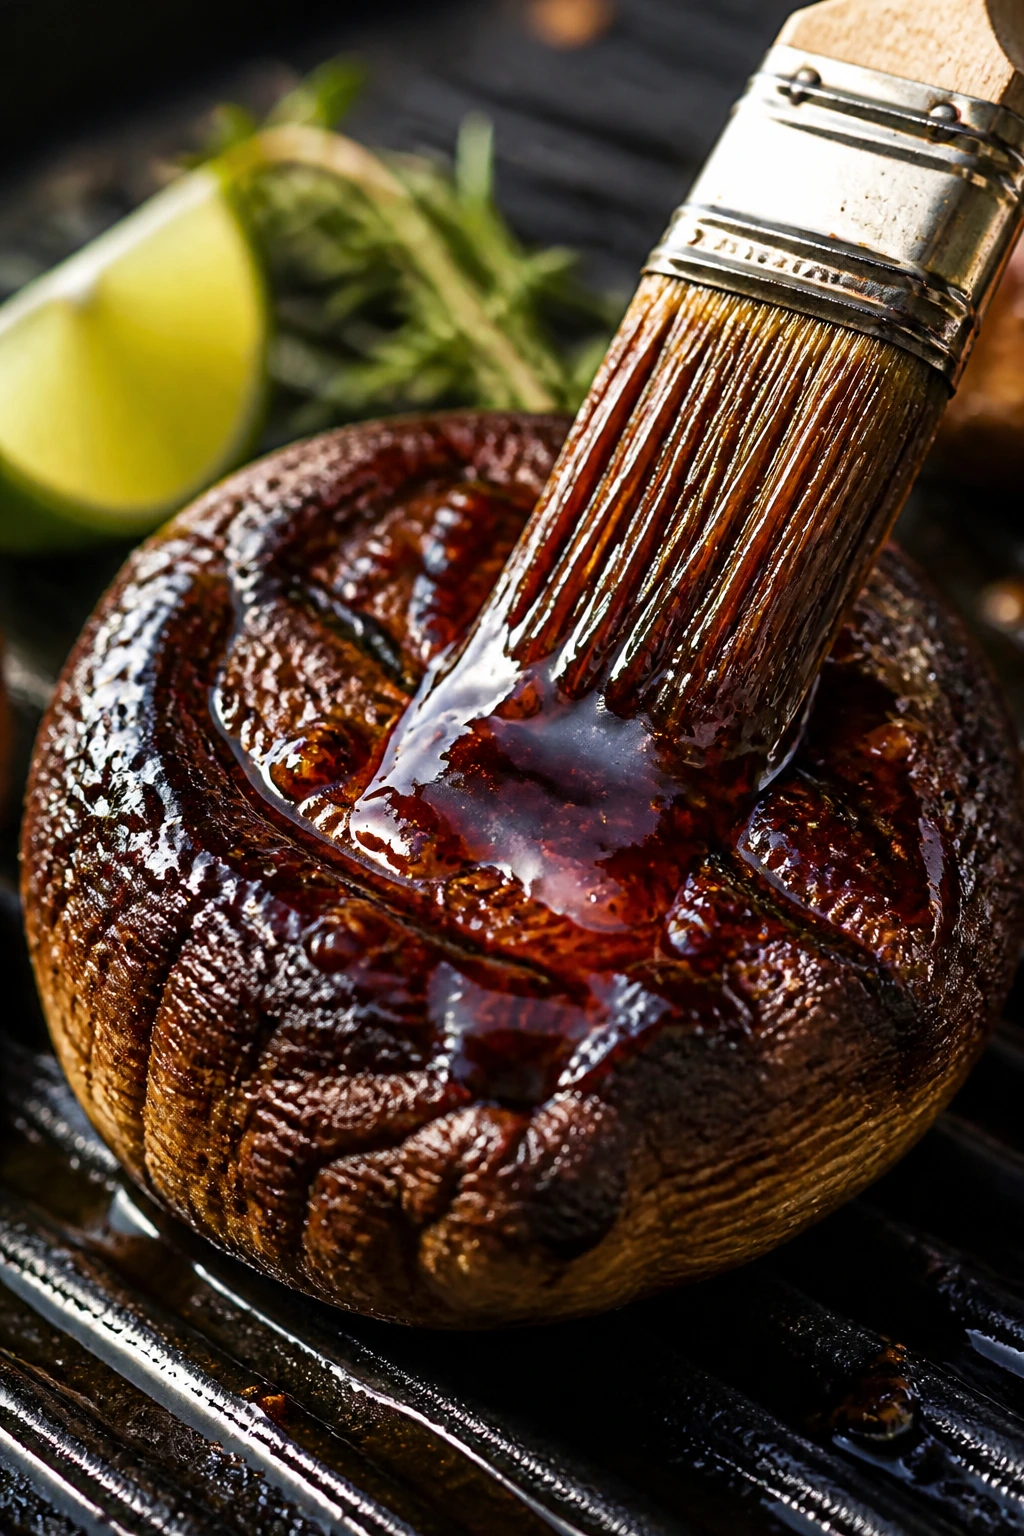
The best vegan cookout food doesn’t ask anyone to lower their standards. It just cooks harder, seasons smarter, and pays attention to texture. That’s why jackfruit, tofu, tempeh, mushrooms, cauliflower, and even cabbage can land on the same table as ribs and burgers without feeling like substitutes.
What matters most is the finish. A charred edge, a sticky glaze, a sharp pickle, a cold slaw, a bright squeeze of lime — that’s the stuff people remember after the plates are cleared. If you build the menu with those pieces in mind, the vegan dishes don’t sit beside the barbecue. They become part of it.