
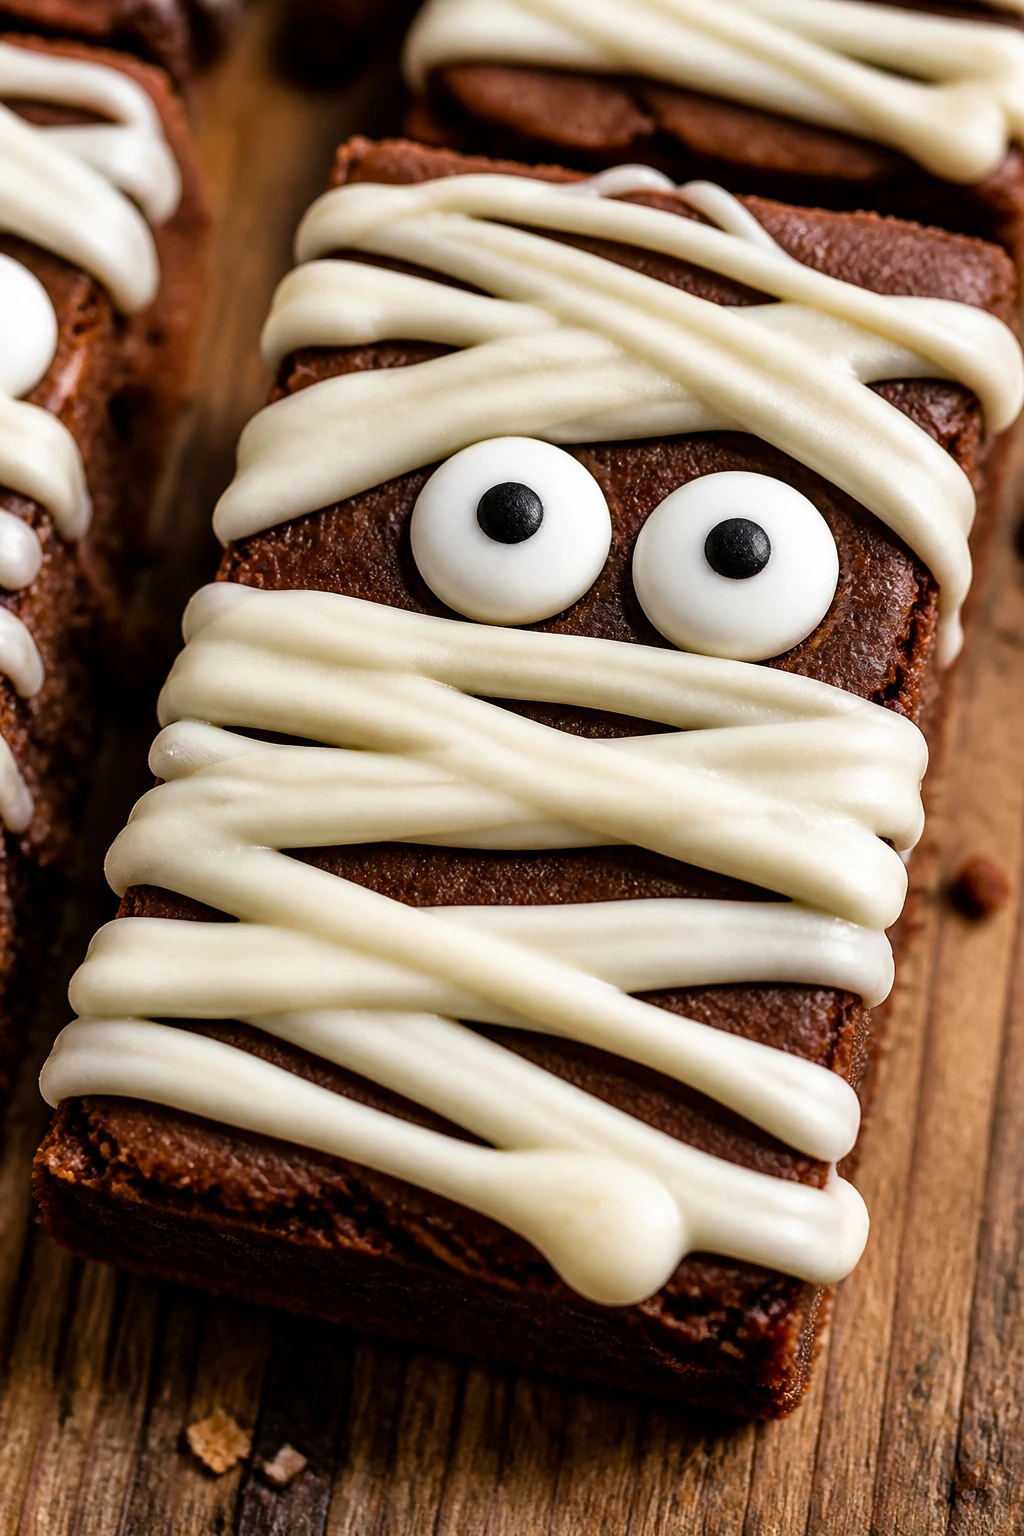
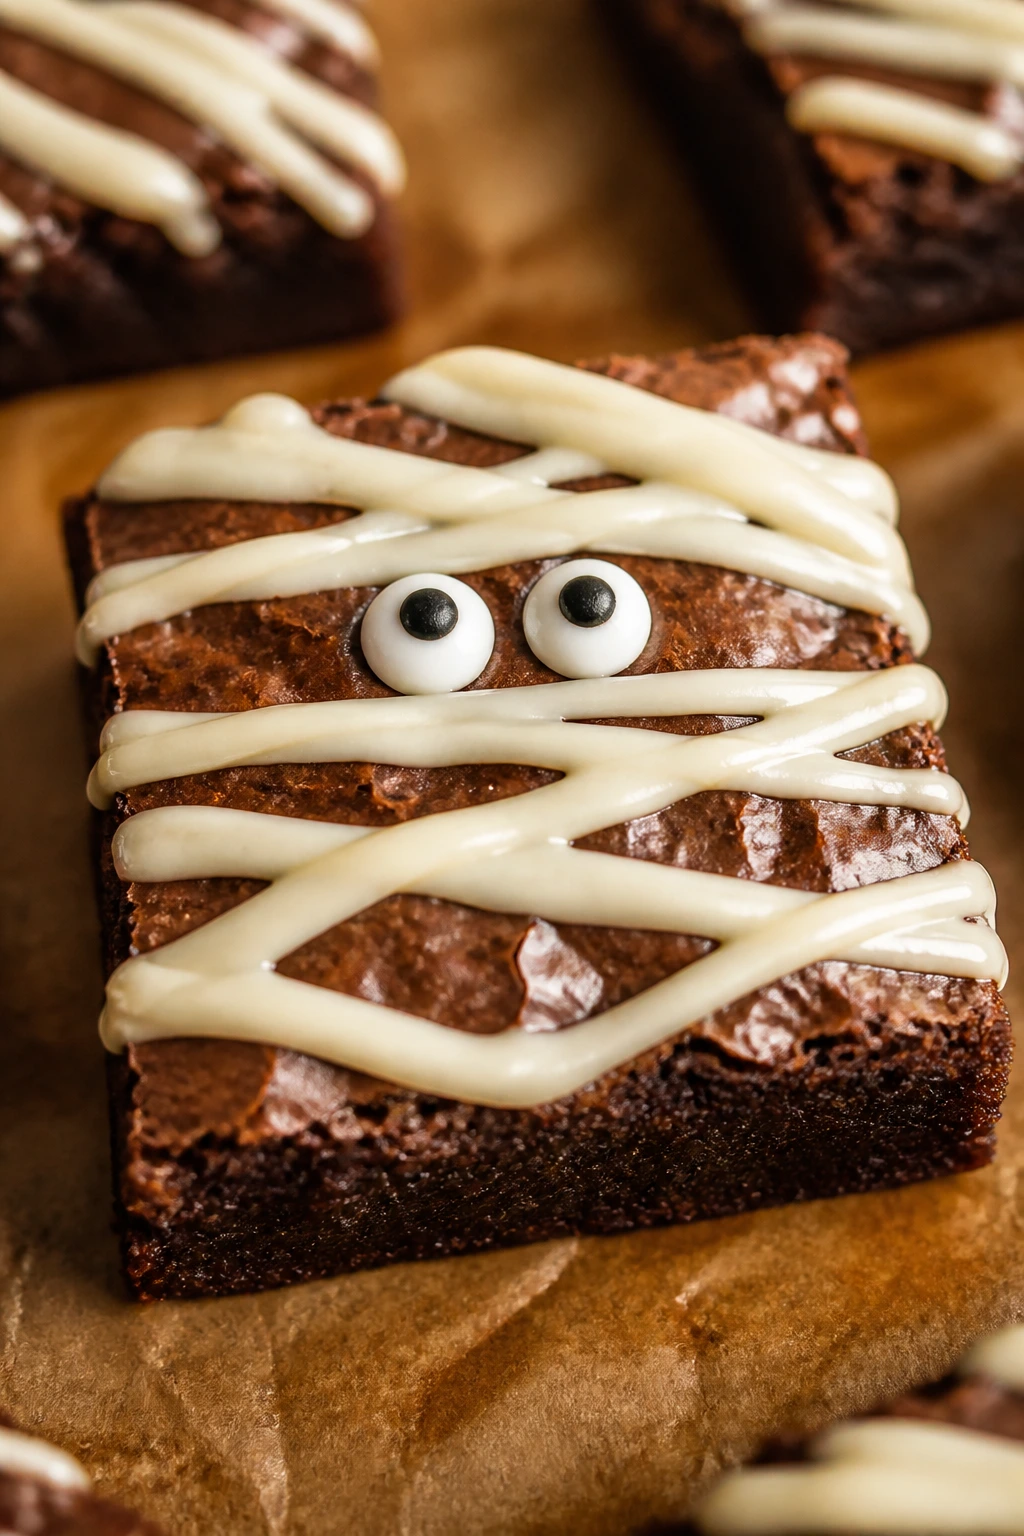
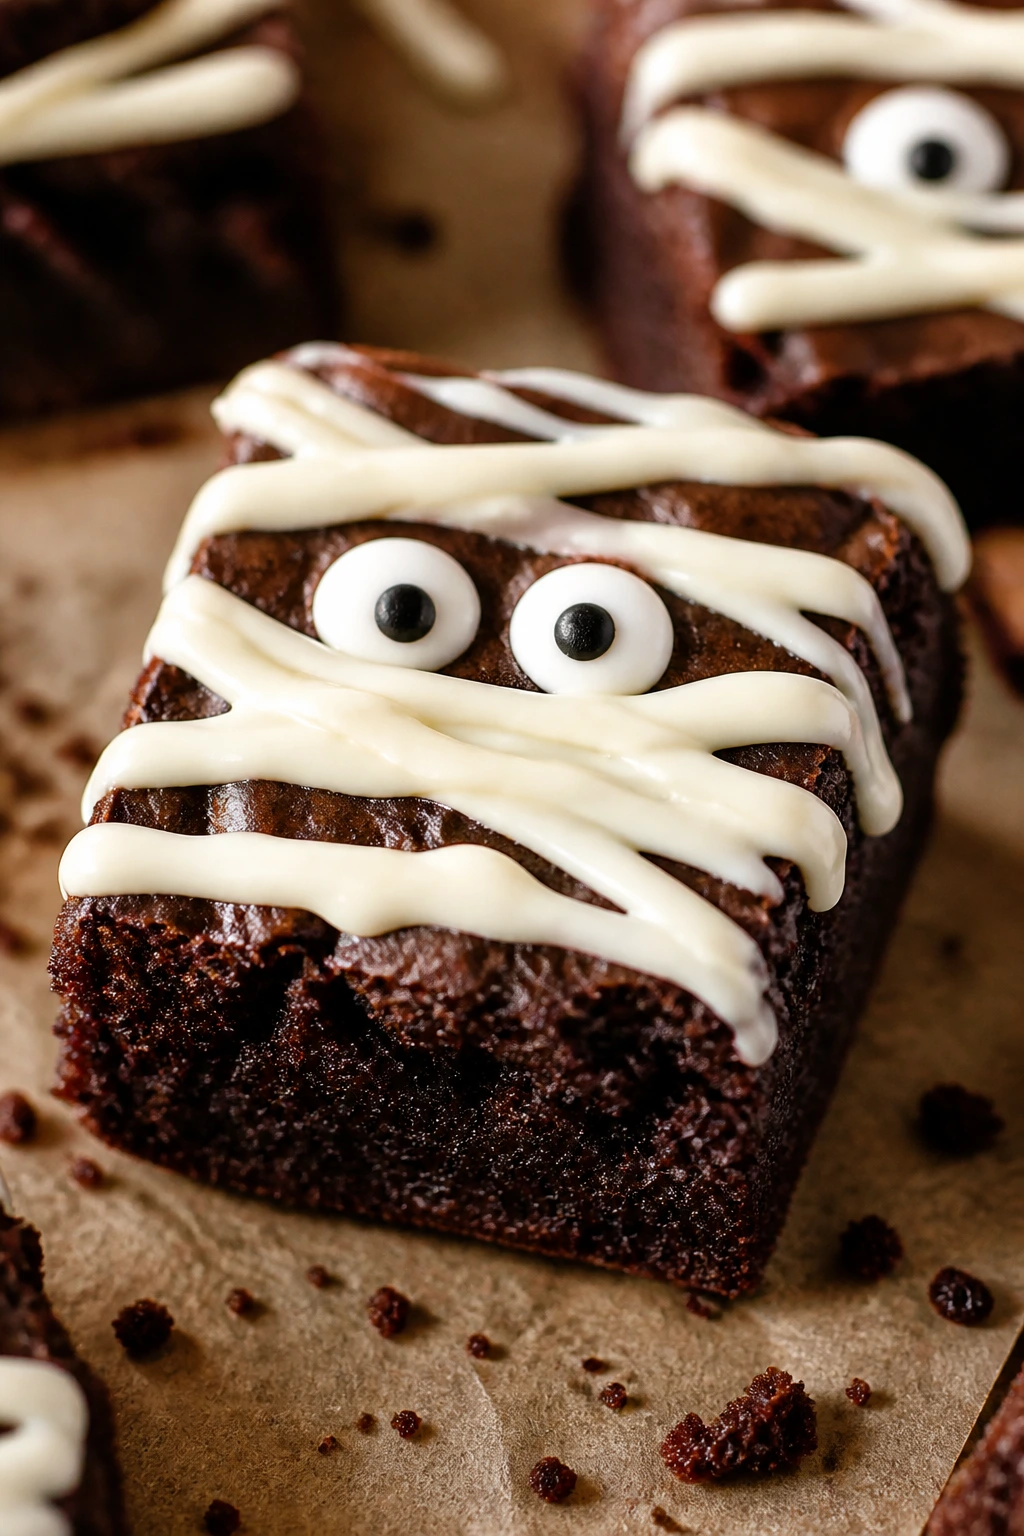
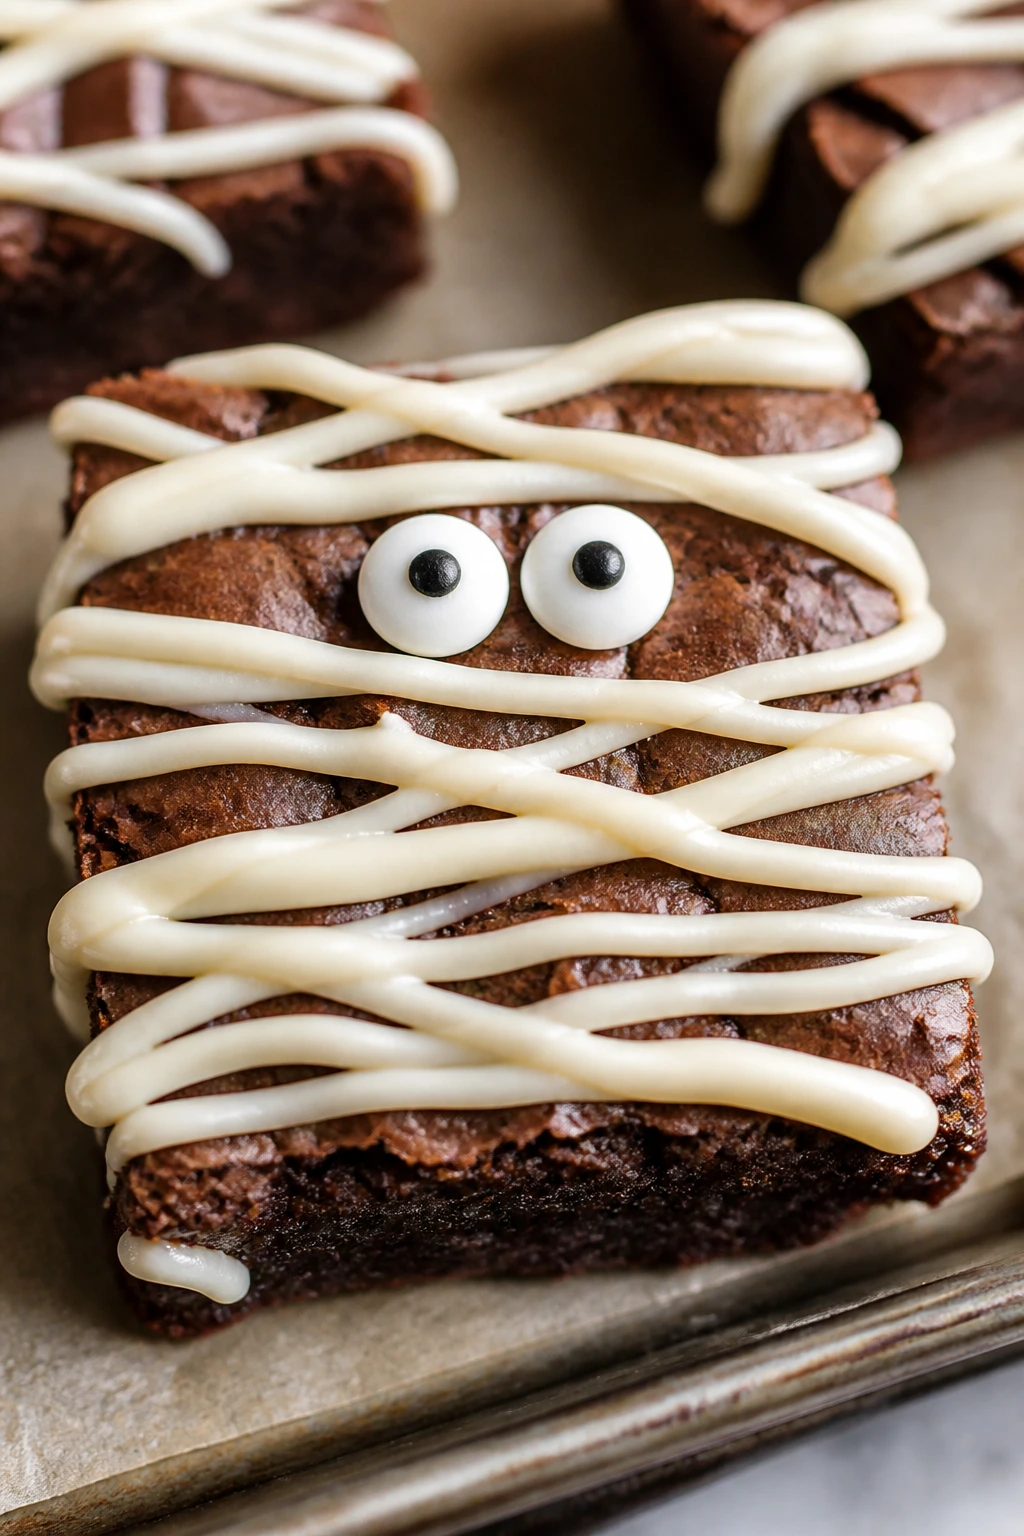
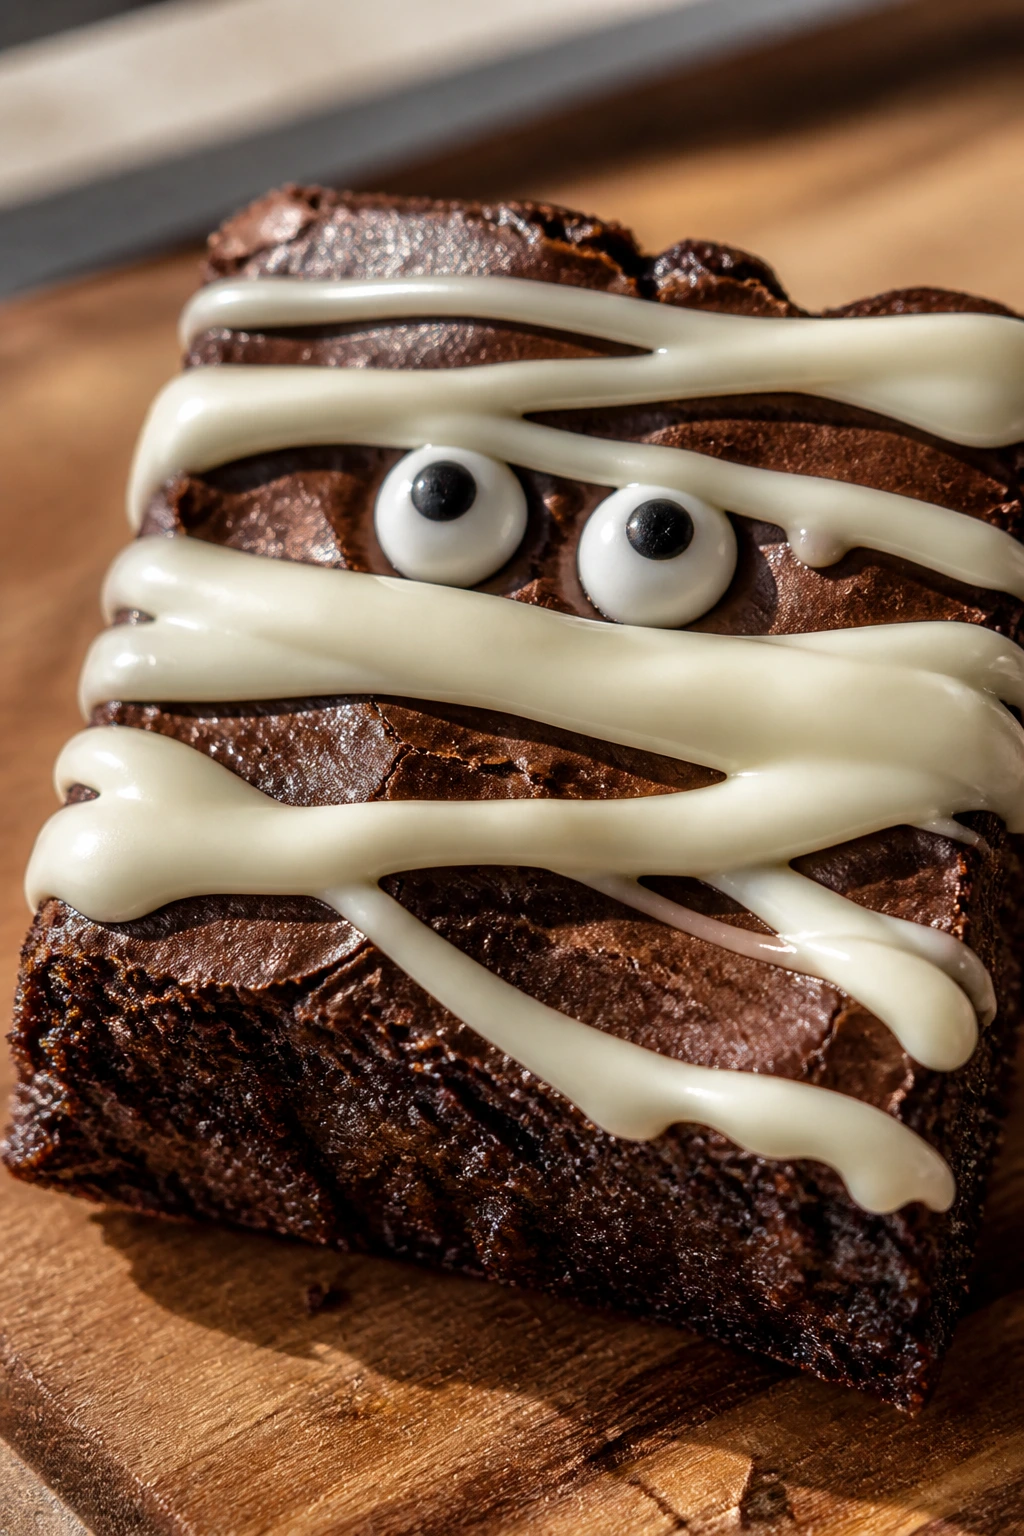
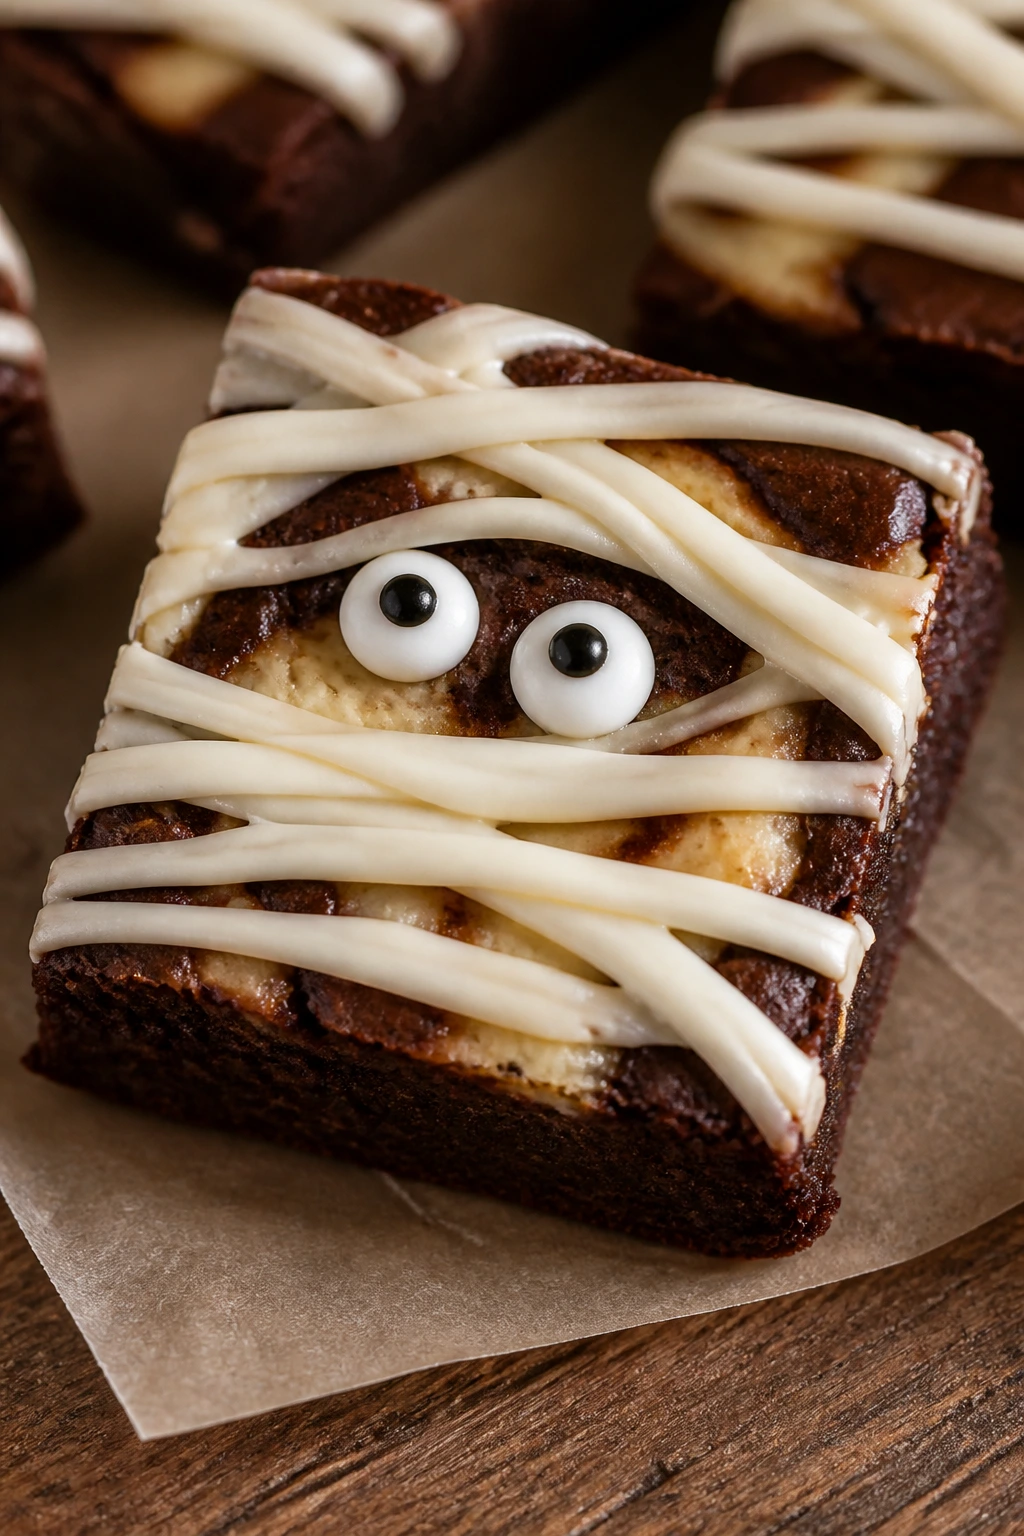
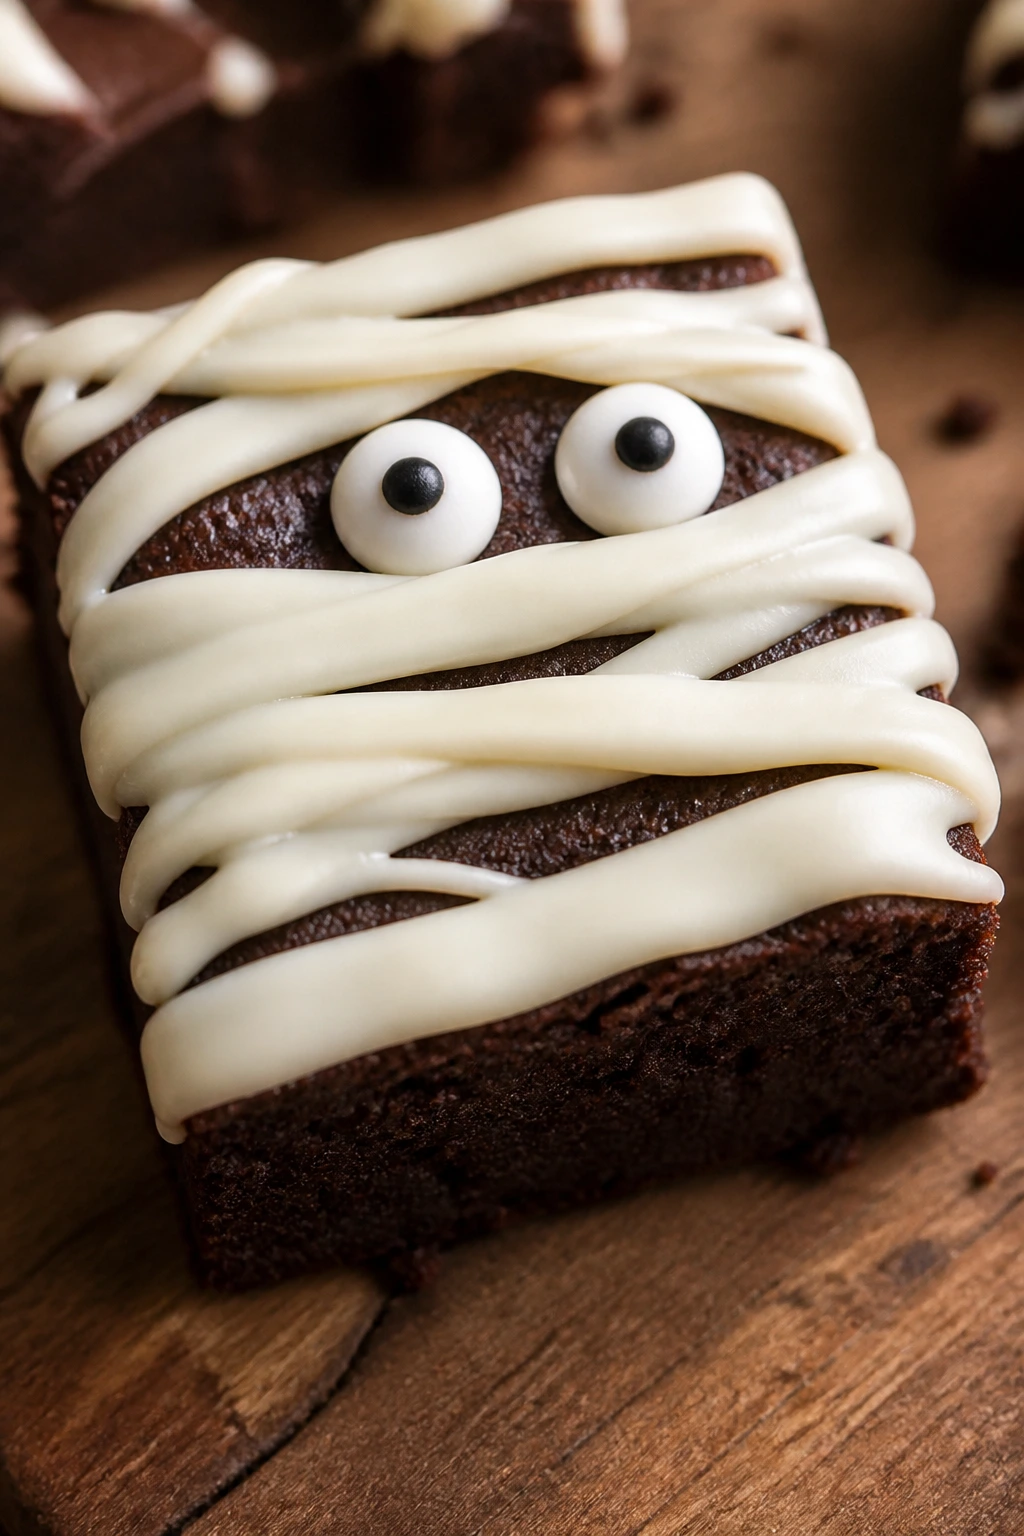
Mummy brownies are the rare Halloween bake that actually forgives shaky hands. A white-chocolate bandage can lean a little crooked, an eyeball can sit a touch low, and the tray still looks intentional once the brownies cool and the drizzle sets. That’s why beginner bakers keep coming back to them: the decoration hides the messy bits instead of advertising them.
The brownie itself does some heavy lifting. A fudgy square has enough structure to cut cleanly, but the top still keeps those shiny cracks that give the “bandages” something to cling to. Skip cupcakes, skip frosting, skip anything that asks for perfect piping. Brownies are calmer. They ask for a pan, a bowl, a whisk, and a little patience while they cool.
Different flavors change the mood fast. Peanut butter mummies taste like a candy-bar shortcut; mint versions go cool and sharp; cheesecake-swirl bars feel richer and more bakery-style than the phrase “beginner baker” usually suggests. The decorating method stays the same, which means you can pick the flavor you like without learning a new technique every time. That’s the whole charm here.
Why These Mummy Brownies Are So Easy to Pull Off
- Forgiving decoration: A drizzle that wobbles a little looks like mummy gauze, so there’s no pressure to pipe straight lines.
- Simple pantry base: Most versions start with brownie mix or a one-bowl batter, which keeps the mixing short and the cleanup light.
- Fast visual payoff: One tray, a handful of candy eyes, and a piping bag turn into a dessert that looks far more involved than it is.
- Flavor swaps stay simple: Peanut butter, caramel, mint, cherries, coconut, and espresso all fit the same brownie structure without changing the method much.
- Party-friendly slicing: Brownies cut into squares or rectangles travel better than frosted cakes, and the bandages hold up well if you chill them briefly before serving.
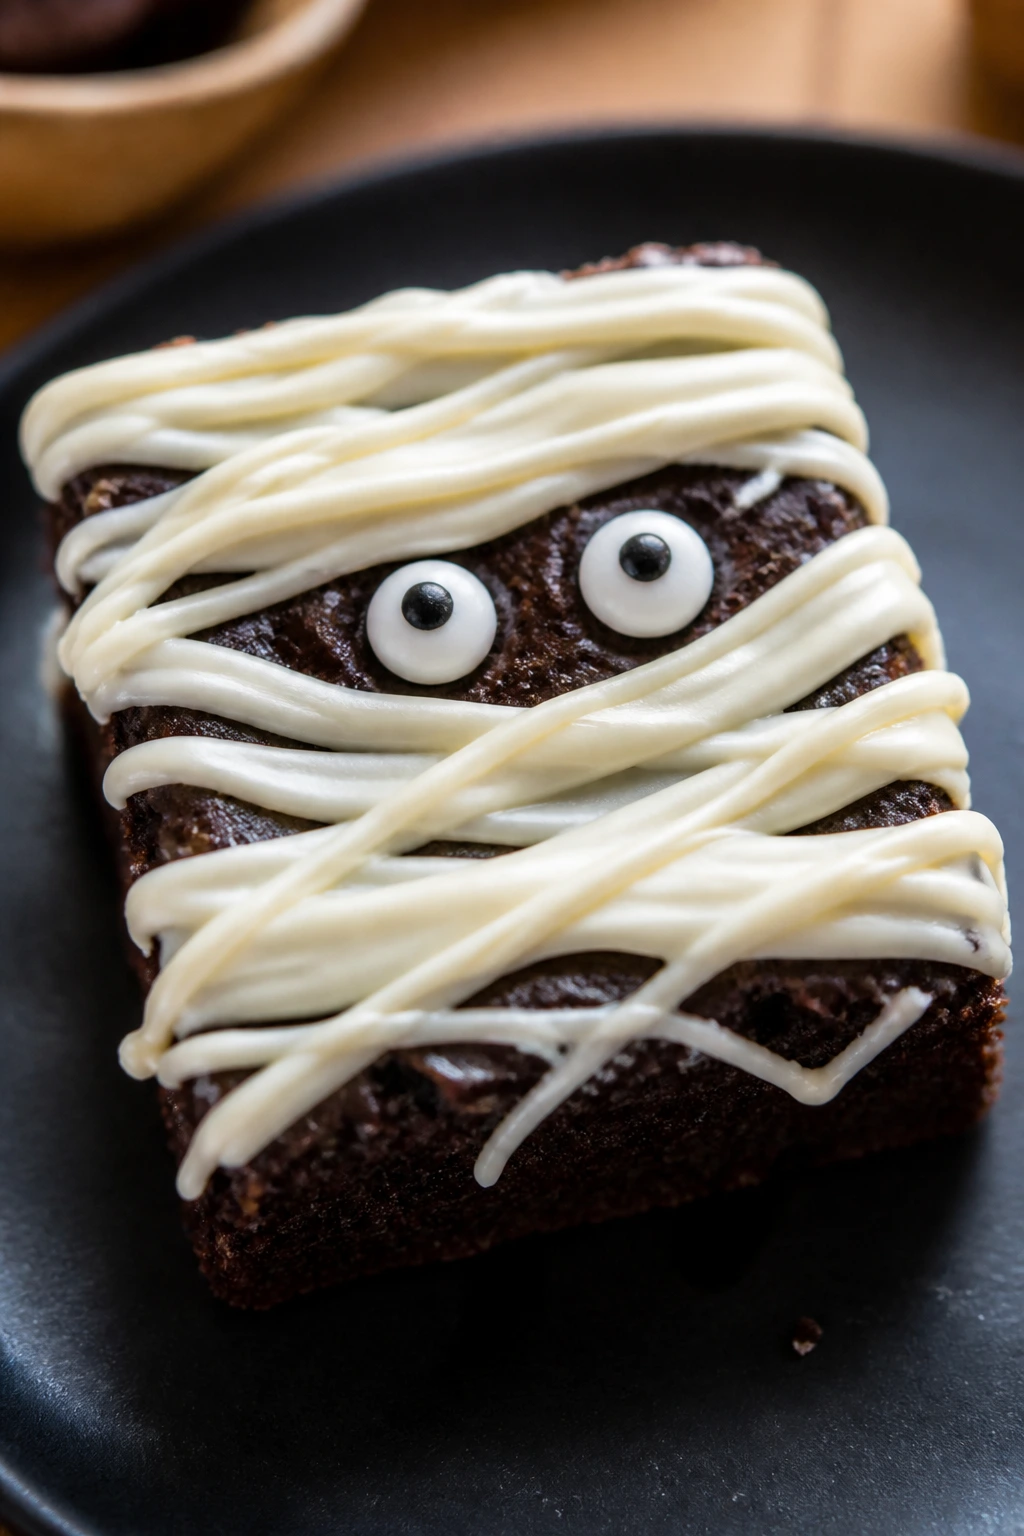
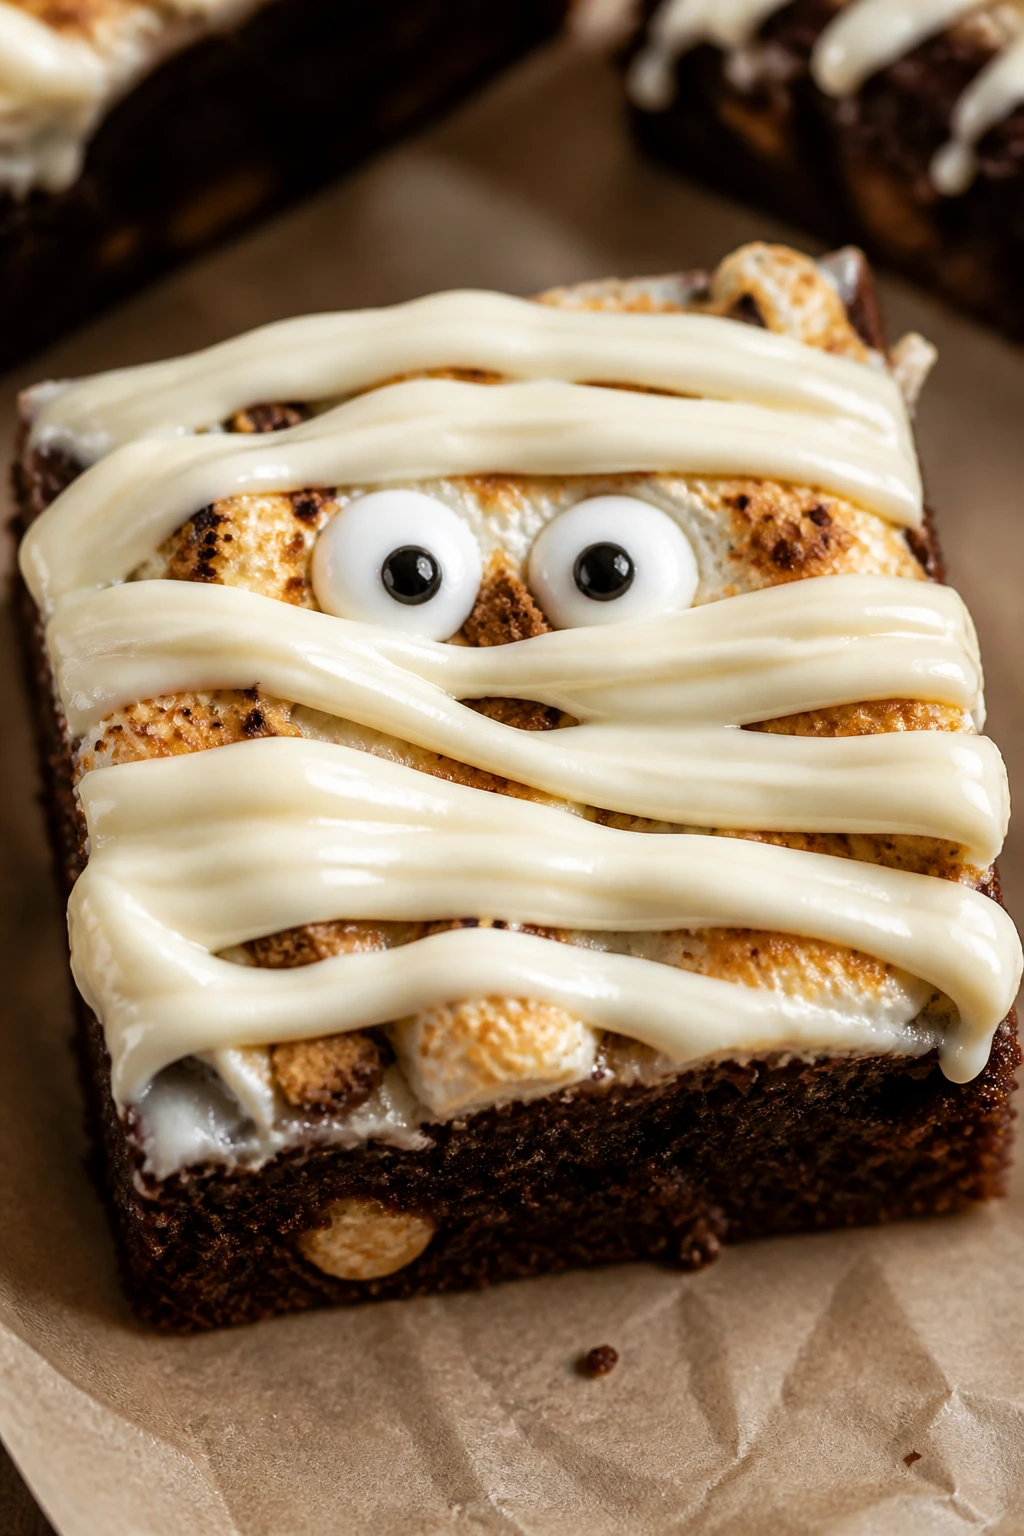
1. Classic Boxed-Mix Mummy Brownies
A boxed mix is the easiest place to start, and I’m not going to pretend otherwise. The brownies bake up dense enough to hold the drizzle, the top gets that cracked surface that helps the bandages cling, and the whole thing comes together with almost no drama. If you want one tray that looks festive fast, this is it.
Why It Works:
The mix gives you a reliable chocolate base without making you measure flour, cocoa, and leavening. Using an 8×8 or 9×9 pan keeps the brownies thick, which matters because thin brownies tear when you try to lift them. The white chocolate drizzle sets in about 10 to 15 minutes at room temperature, so the candy eyes stay put instead of sliding around.
Key Ingredients:
- 1 box fudgy brownie mix, 18 to 19 ounces
- 2 large eggs
- 1/2 cup vegetable oil
- 1/4 cup water
- 2 tablespoons unsweetened cocoa powder
- 1/2 cup semi-sweet chocolate chips
- 1 cup white chocolate chips
- 2 teaspoons coconut oil
- 24 candy eyeballs
Quick Steps:
- Prep the pan and oven. Heat the oven to 350°F and line a 9×9-inch baking pan with parchment, leaving overhang on two sides.
- Mix the batter. Stir the brownie mix, eggs, oil, water, and cocoa powder in a bowl until no dry streaks remain.
- Add the chips. Fold in the semi-sweet chocolate chips so the batter has small melty pockets.
- Bake. Spread the batter in the pan and bake for 26 to 30 minutes, until the center has moist crumbs on a toothpick.
- Cool and decorate. Melt the white chocolate chips with coconut oil in 20-second bursts, then drizzle in loose horizontal lines. Press on candy eyes while the drizzle is still soft.
Equipment for This Recipe:
- 9×9-inch baking pan
- Parchment paper
- Medium mixing bowl
- Rubber spatula
- Microwave-safe bowl or small saucepan
How to Serve This Dish:
Cut the brownies into 9 or 12 squares, depending on how big you want the faces. They look especially good on a dark plate or a sheet of parchment with the edges folded underneath.
Pro Tips for This Recipe:
- Don’t rush the cooling. Warm brownies turn the drizzle into a greasy smear.
- Use thick brownie mix. Fudge-style mixes hold the mummy lines better than cake-style mixes.
- Warm the chocolate gently. White chocolate scorches fast, so stop microwaving while a few chips still look lumpy.
- Add the eyes fast. They stick best when the drizzle is still shiny.
Variations on This Dish:
- Candy-Bar Mummies: Fold in 1/2 cup chopped peanut butter cups for a sweeter, richer square.
- Frosted Mummies: Swap the white chocolate drizzle for thick vanilla frosting thinned with 1 teaspoon milk.
- Dark-Chocolate Mummies: Use dark chocolate chips in the batter and leave the drizzle white for a sharper contrast.
Common Mistakes to Avoid with This Dish:
- Decorating warm brownies: The white drizzle slides into the crumb and turns muddy.
- Overbaking the pan: Dry edges make neat cutting harder, and the texture gets crumbly.
- Using watery icing: Thin icing runs off the surface instead of staying in bandage lines.
2. One-Bowl Fudgy Mummy Brownies
This is the scratch version I reach for when I want deeper chocolate flavor without making the process fussy. Everything goes into one bowl, the batter comes together fast, and the finished brownies stay dense enough for a clean mummy face. They’re a little richer than the boxed version, and that matters.
Why It Works:
Melted butter gives you a chewier crumb, while brown sugar brings a soft, almost caramel note that plays well with white chocolate. A modest amount of flour keeps the center fudgy instead of cake-like. The top should bake to a glossy crust with a few cracks; those cracks catch the drizzle and make the bandages look more natural.
Key Ingredients:
- 1/2 cup unsalted butter, melted
- 1 cup granulated sugar
- 1/2 cup packed light brown sugar
- 2 large eggs
- 1 teaspoon vanilla extract
- 2/3 cup all-purpose flour
- 1/2 cup unsweetened cocoa powder
- 1/4 teaspoon fine salt
- 1/4 teaspoon baking powder
- 1 cup white chocolate chips
- 2 teaspoons neutral oil
- 24 candy eyeballs
Quick Steps:
- Heat the oven. Set it to 350°F and line a 9×9-inch pan with parchment.
- Build the batter. Whisk melted butter, sugars, eggs, and vanilla until the mixture looks glossy.
- Add the dry ingredients. Stir in flour, cocoa powder, salt, and baking powder until the batter just comes together.
- Bake. Spread into the pan and bake for 22 to 26 minutes, until the edges are set and the center still looks a little soft.
- Cool, then finish. Melt the white chocolate chips with oil, drizzle over the cooled brownies, and press on the candy eyes before the drizzle firms up.
Equipment for This Recipe:
- 9×9-inch pan
- Parchment paper
- Large mixing bowl
- Whisk
- Small microwave-safe bowl
How to Serve This Dish:
Serve them slightly cool, not chilled. That’s when the chocolate flavor opens up and the center stays soft under the bandages.
Pro Tips for This Recipe:
- Stop mixing early. Once the flour disappears, put the whisk down.
- Watch the bake time. One or two extra minutes can take these from fudgy to dry at the edges.
- Use oil in the drizzle. It keeps the white chocolate from setting into brittle flakes.
Variations on This Dish:
- Brown Butter Version: Brown the butter first for a toasted, nutty note.
- Sea-Salt Finish: Sprinkle flaky salt over the brownies after the drizzle sets.
- Mini Pan Cut: Bake in a square metal pan and cut narrow rectangles for skinnier mummies.
Common Mistakes to Avoid with This Dish:
- Overbeating the eggs: Too much air pushes the texture toward cake.
- Skipping parchment: You’ll regret it when the first square tears in the pan.
- Cutting while warm: The crumb needs time to set before slicing.
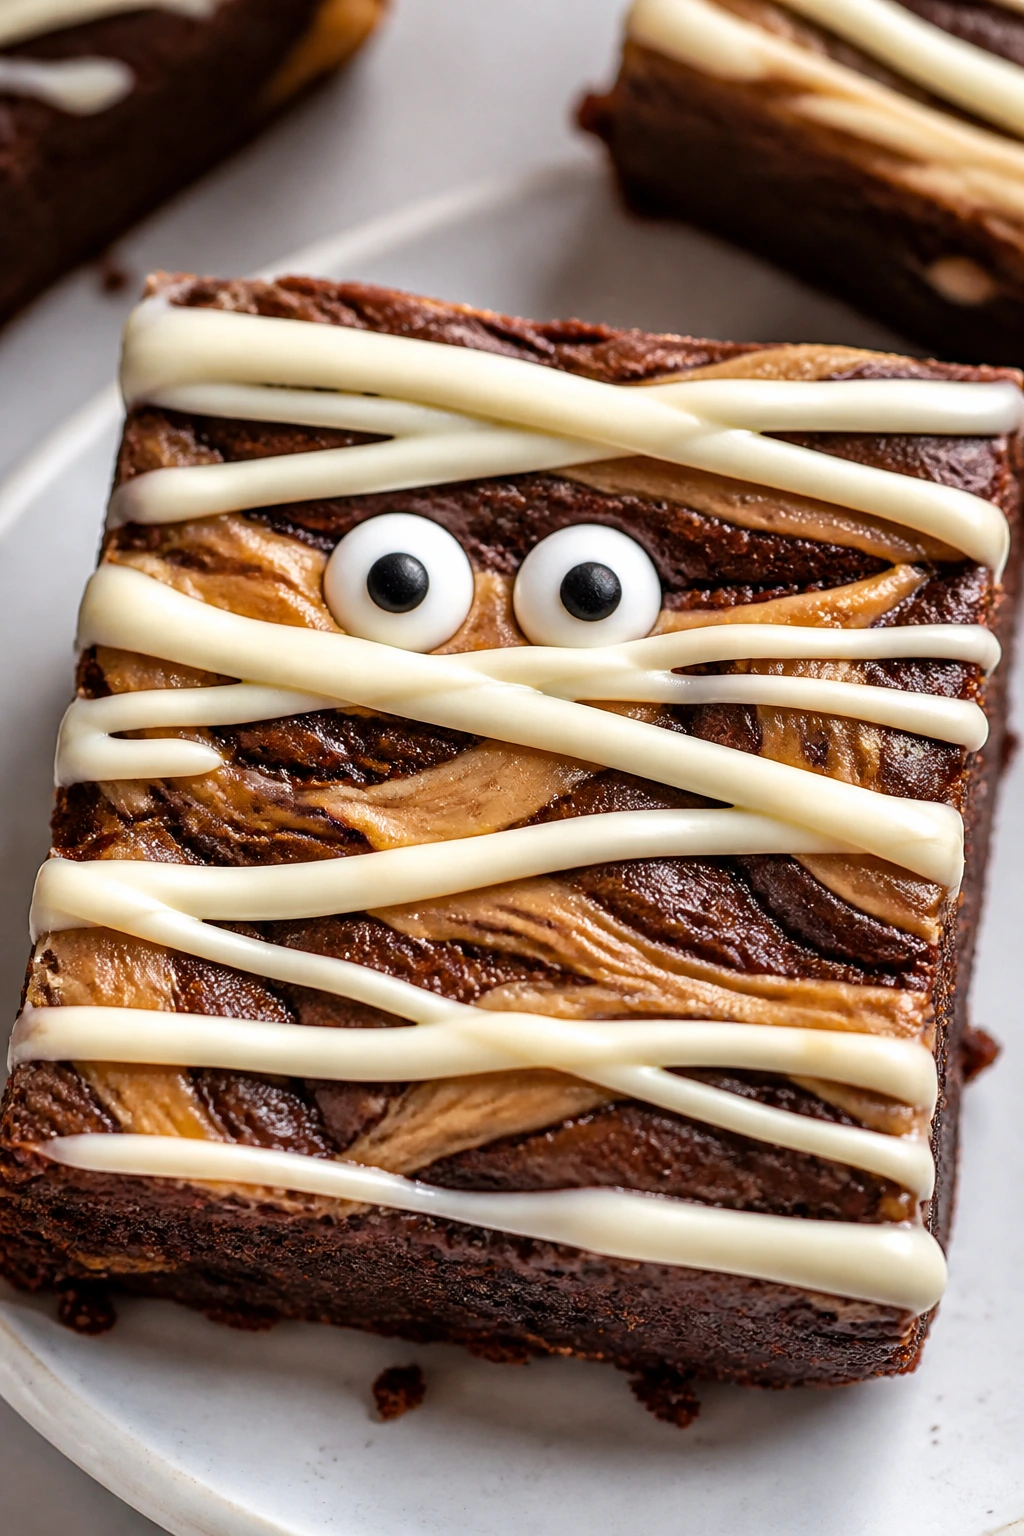
3. Peanut Butter Swirl Mummy Brownies
Peanut butter and chocolate do that thing they always do: they make the brownie taste a little more like a candy bar. The swirl gives the top a marbled look before the mummy bandages even go on, so the finished pan has a lot going on in the best way. It’s still beginner-friendly. It just looks more dressed up.
Why It Works:
Peanut butter brings salt, fat, and a soft nutty flavor that cuts through the dense chocolate base. A quick swirl on top keeps the peanut butter from sinking, and because it bakes right on the surface, the pattern stays visible under the white drizzle. The contrast between the dark brownie, pale swirl, and white bandages is strong enough that you do not need perfect lines.
Key Ingredients:
- 1/2 cup unsalted butter, melted
- 1 cup granulated sugar
- 1/2 cup packed brown sugar
- 2 large eggs
- 1 teaspoon vanilla extract
- 2/3 cup all-purpose flour
- 1/2 cup unsweetened cocoa powder
- 1/4 teaspoon salt
- 1/2 cup creamy peanut butter
- 2 tablespoons powdered sugar
- 1/4 cup peanut butter chips
- 1 cup white chocolate chips
- 24 candy eyeballs
Quick Steps:
- Heat the oven and pan. Set the oven to 350°F and line a 9×9-inch pan.
- Mix the brownie batter. Whisk butter, sugars, eggs, and vanilla, then stir in flour, cocoa, and salt.
- Make the swirl. Stir peanut butter with powdered sugar so it loosens slightly and sits in ribbons.
- Bake with the swirl. Spread batter in the pan, dollop the peanut butter mixture over the top, and drag a knife through it a few times. Bake for 24 to 28 minutes.
- Cool and decorate. Add peanut butter chips if you want extra texture, then finish with white chocolate bandages and candy eyes after cooling.
Equipment for This Recipe:
- 9×9-inch baking pan
- Parchment paper
- Mixing bowl
- Butter knife or skewer
- Microwave-safe bowl
How to Serve This Dish:
These are rich, so small squares work better than oversized ones. I like them with cold milk or a cup of black coffee, which keeps the peanut butter from feeling too sweet.
Pro Tips for This Recipe:
- Warm the peanut butter slightly. It swirls more cleanly when it’s loose.
- Don’t overdo the knife strokes. Too much swirling muddies the pattern.
- Cool before cutting. Peanut butter on the surface can drag if you rush it.
Variations on This Dish:
- Crunchy Peanut Version: Use crunchy peanut butter and skip the chips.
- Reese’s Version: Fold in 1/2 cup chopped peanut butter cups for bigger pockets of peanut flavor.
- Pretzel Finish: Scatter a small handful of crushed pretzels over the top before baking for extra salt.
Common Mistakes to Avoid with This Dish:
- Using natural peanut butter with heavy separation: It can turn oily and thin in the oven.
- Making the swirl too thick: Thick blobs sink unevenly.
- Adding the drizzle before the pan cools: The bandages lose shape fast on warm brownies.
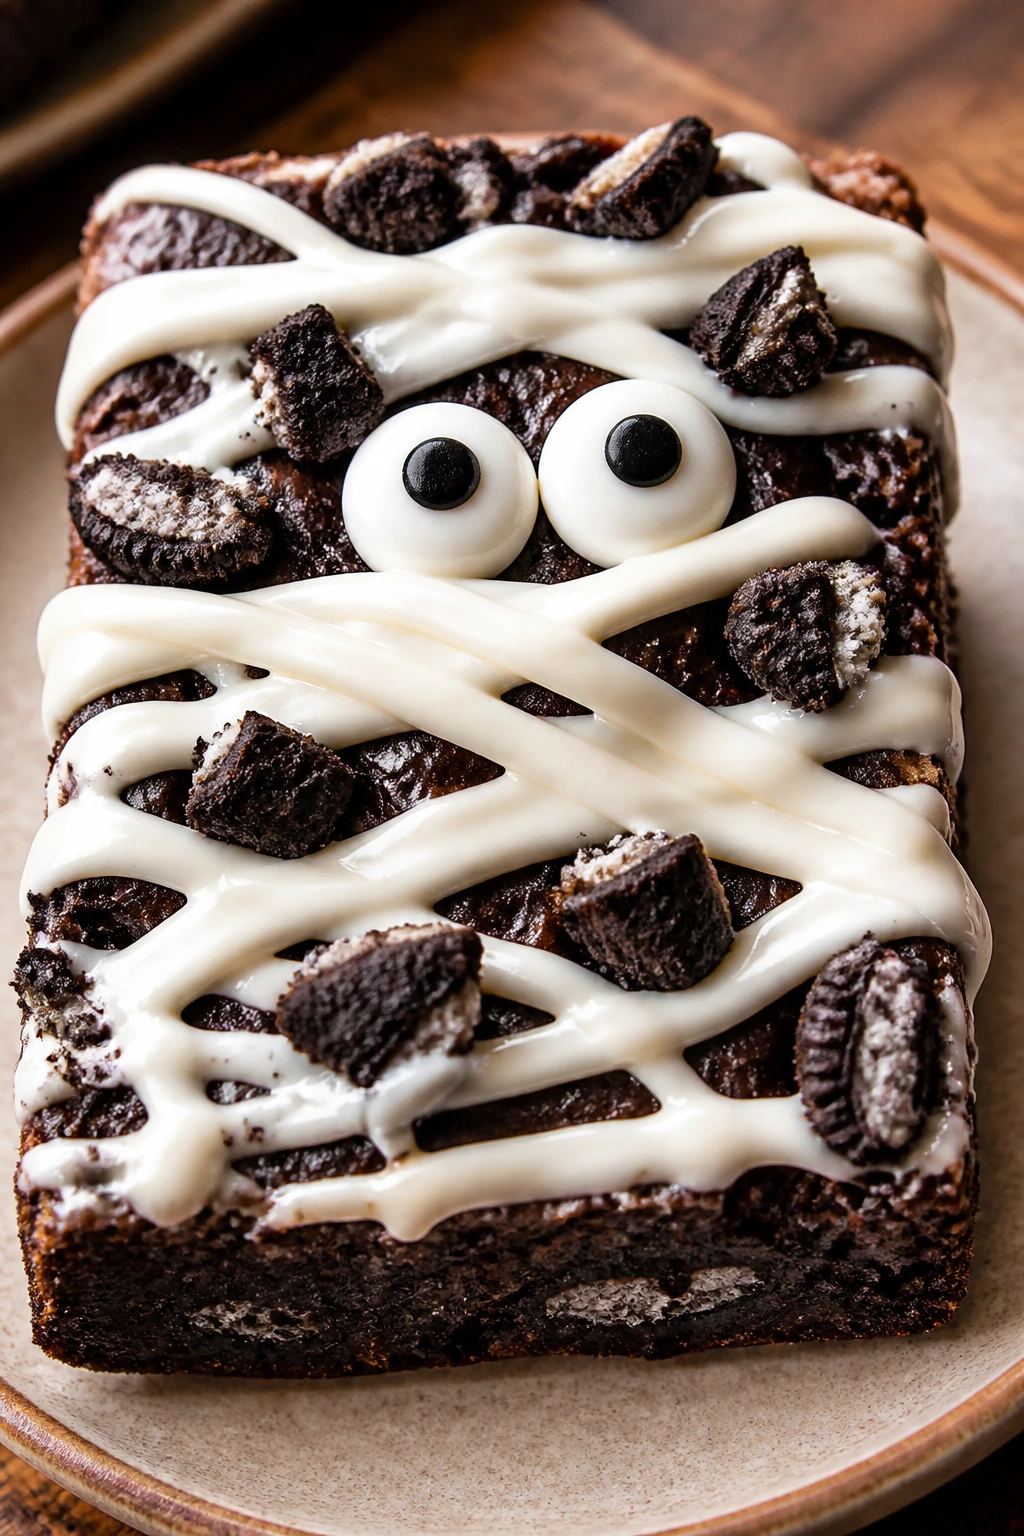
4. Oreo Crunch Mummy Brownies
If you want a brownie with a little snap in every bite, Oreo crumbs do the job. The cookies soften in the oven but still leave those dark chocolate bits that make the brownie feel more textured. It’s a simple trick, and it reads well on the plate.
Why It Works:
Oreos bring both cocoa flavor and a built-in crunchy filler. Crushed cookies folded into the batter disappear just enough to deepen the chocolate taste, while a few larger pieces on top stay visible after baking. The contrast is useful when the mummy drizzle is a little messy, because the cookie pieces break up the surface in a natural way.
Key Ingredients:
- 1/2 cup unsalted butter, melted
- 1 cup granulated sugar
- 2 large eggs
- 1 teaspoon vanilla extract
- 2/3 cup all-purpose flour
- 1/2 cup unsweetened cocoa powder
- 1/4 teaspoon salt
- 12 Oreo cookies, crushed
- 6 Oreo cookies, chopped
- 1/2 cup semi-sweet chocolate chips
- 1 cup white chocolate chips
- 24 candy eyeballs
Quick Steps:
- Prep the pan. Heat the oven to 350°F and line a 9×9-inch pan.
- Mix the base. Stir butter, sugar, eggs, and vanilla until smooth, then add flour, cocoa, and salt.
- Fold in the cookies. Add crushed Oreos and chocolate chips, keeping a few chunks for the top.
- Bake. Spread the batter in the pan, scatter the chopped Oreos over the top, and bake for 23 to 27 minutes.
- Finish the faces. Cool completely, melt the white chocolate, drizzle the bandages, and press in the eyes.
Equipment for This Recipe:
- 9×9-inch pan
- Parchment paper
- Mixing bowl
- Rubber spatula
- Zip-top bag or piping bag
How to Serve This Dish:
These taste best with a scoop of vanilla ice cream if you’re serving them right away. The cold cream melts into the cookie bits and softens the whole thing in a good way.
Pro Tips for This Recipe:
- Crush some Oreos finely, keep some chunky. The mix of textures matters.
- Press the top cookies in gently. Hard pressing can create a sunken center.
- Use a hot knife for clean slices. Wipe between cuts so the cookie crumbs don’t drag.
Variations on This Dish:
- Golden Oreo Version: Use golden sandwich cookies and white chocolate drizzle for a sweeter, lighter flavor.
- Mint Oreo Version: Swap in mint Oreos for a sharper, cooler finish.
- Double Cookie Version: Add 1/4 cup mini chocolate chips for a denser bite.
Common Mistakes to Avoid with This Dish:
- Using too many Oreos: The batter loses structure if the pan is overloaded.
- Skipping the cool-down: Warm brownies make the cookies sink and muddy the top.
- Drizzling while the surface is still greasy: The bandages won’t grip well.
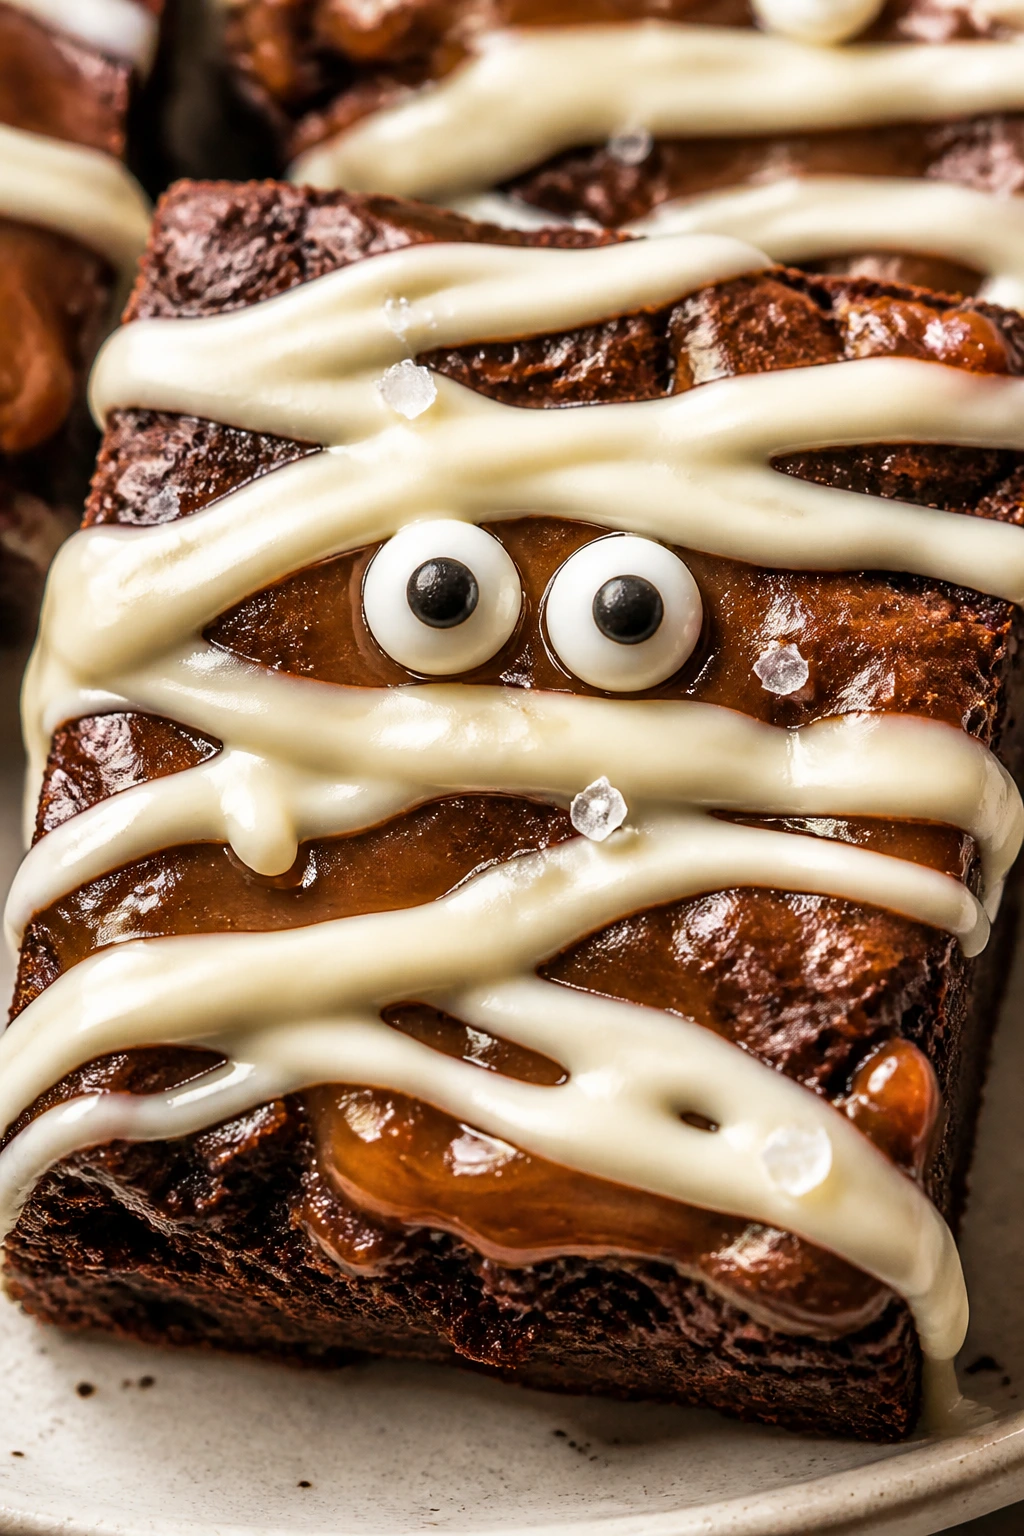
5. Salted Caramel Mummy Brownies
Caramel gives these brownies a soft, sticky center and a little shine on the top. Add a pinch of salt, and the whole tray tastes more layered than the ingredient list suggests. The mummy drizzle sits over the caramel like wrapping paper over a gift that happens to be chocolate.
Why It Works:
A thick caramel sauce stays in place better than a thin one, so it creates gooey pockets instead of running into the corners of the pan. The salt keeps the sweetness from flattening out, which is especially useful once the white drizzle goes on. You get chocolate, caramel, and a little edge all in the same square.
Key Ingredients:
- 1/2 cup unsalted butter, melted
- 1 cup granulated sugar
- 1/2 cup brown sugar
- 2 large eggs
- 2/3 cup all-purpose flour
- 1/2 cup unsweetened cocoa powder
- 1/4 teaspoon salt
- 1/2 cup thick caramel sauce
- 1/2 cup toffee bits
- 1/4 teaspoon flaky salt
- 1 cup white chocolate chips
- 24 candy eyeballs
Quick Steps:
- Prepare the pan. Heat the oven to 350°F and line a 9×9-inch pan.
- Mix the batter. Combine butter, sugars, eggs, flour, cocoa, and salt.
- Add caramel and toffee. Spread half the batter in the pan, spoon caramel over it in small streaks, add the rest of the batter, and scatter toffee bits on top.
- Bake. Bake for 25 to 29 minutes, until the center is set but still soft.
- Decorate. Cool fully, add a few flaky salt crystals, then finish with white chocolate bandages and eyes.
Equipment for This Recipe:
- 9×9-inch baking pan
- Parchment paper
- Mixing bowl
- Small spoon
- Microwave-safe bowl
How to Serve This Dish:
Serve these in smaller squares than usual; caramel makes them feel richer. A plain mug of coffee or strong tea is the right companion here.
Pro Tips for This Recipe:
- Use thick caramel. Thin sauce tends to sink and disappear.
- Salt at the end. Flaky salt keeps its texture better than fine salt.
- Let the caramel cool before cutting. Hot caramel smears all over the knife.
Variations on This Dish:
- Dark Caramel Version: Use bittersweet chips in the batter for a less sweet square.
- Pecan Caramel Version: Add 1/2 cup chopped pecans for crunch.
- Sea-Salt Swirl: Swirl the caramel more aggressively for visible ribbons instead of pockets.
Common Mistakes to Avoid with This Dish:
- Adding too much caramel: The center turns slippery and hard to cut.
- Baking until the top looks dry: Caramel brownies need a little softness in the middle.
- Using table salt on top: It dissolves fast and loses the crisp bite.
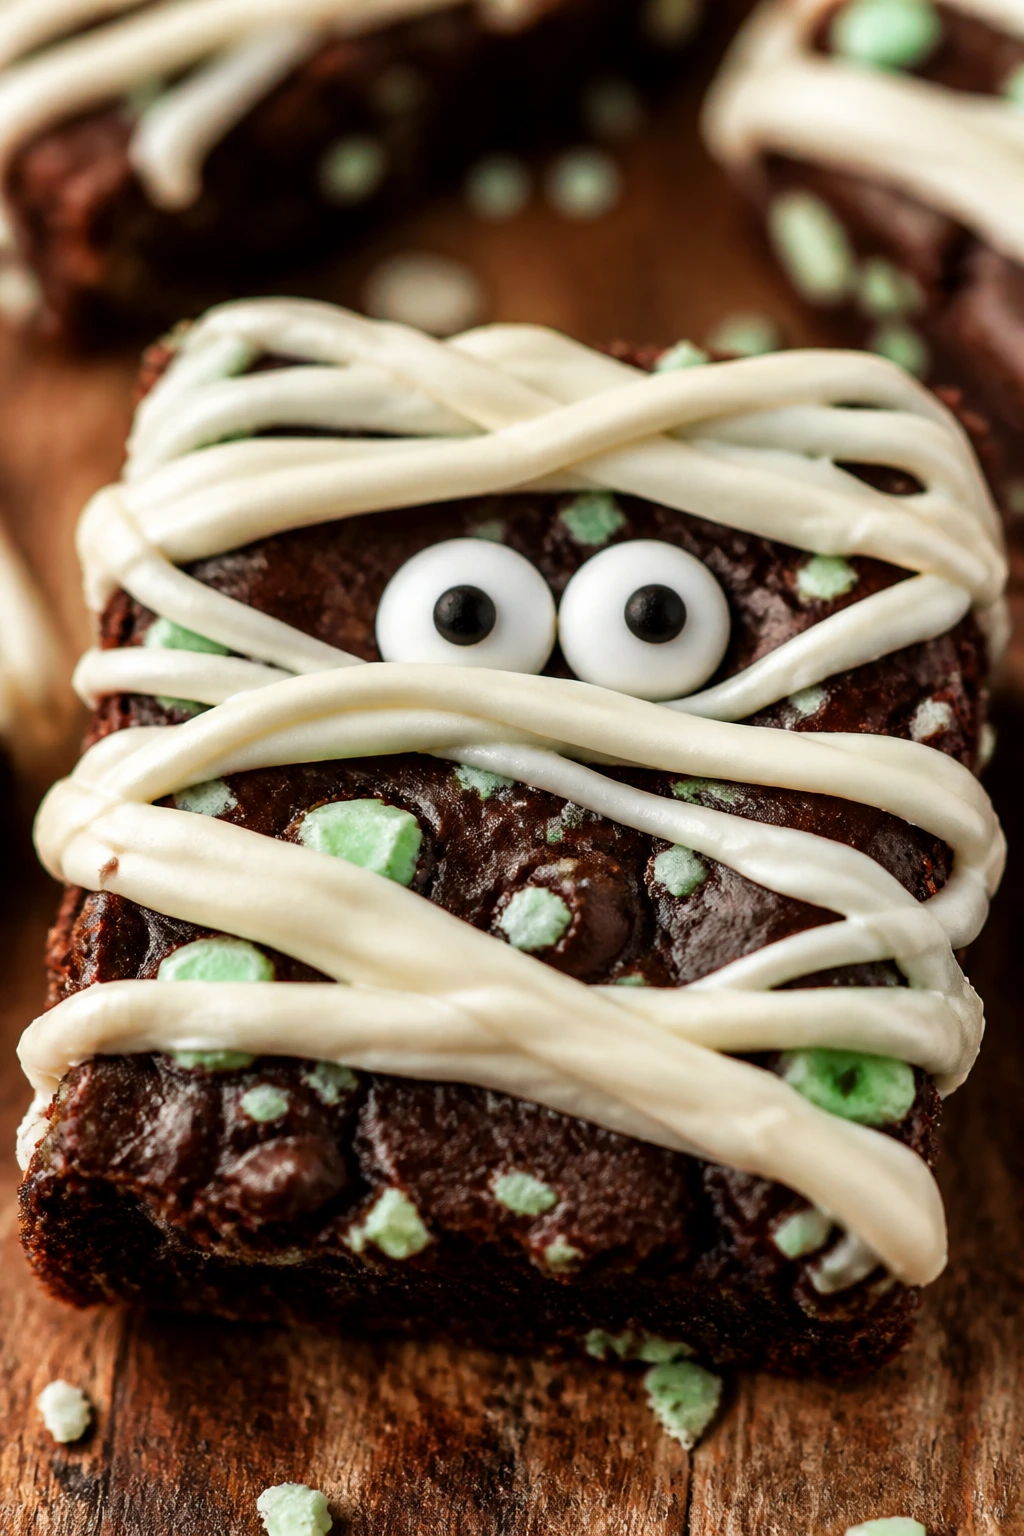
6. Mint Chocolate Mummy Brownies
Mint brownies bring that cool, sharp note that wakes up the whole tray. The flavor is classic, but it still feels a little unexpected once the white bandages and candy eyes go on. I like these when I want the brownies to taste as playful as they look.
Why It Works:
Peppermint extract gives the chocolate base a clean finish, and a small amount goes a long way. Too much turns toothpaste-y fast, so the recipe keeps the mint restrained. The crushed mint candies or mint chips add tiny bright bits that show through the crumb, which helps the brownies stand out even before decorating.
Key Ingredients:
- 1/2 cup unsalted butter, melted
- 1 cup granulated sugar
- 1/2 cup brown sugar
- 2 large eggs
- 1 teaspoon vanilla extract
- 1 teaspoon peppermint extract
- 2/3 cup all-purpose flour
- 1/2 cup unsweetened cocoa powder
- 1/4 teaspoon salt
- 1/2 cup chopped mint candies or mint chips
- 1 cup white chocolate chips
- 24 candy eyeballs
Quick Steps:
- Heat the oven. Set it to 350°F and line a 9×9-inch pan.
- Build the batter. Whisk butter, sugars, eggs, vanilla, and peppermint extract.
- Finish the base. Stir in flour, cocoa, salt, and mint candies.
- Bake. Spread in the pan and bake for 23 to 27 minutes.
- Cool and decorate. Melt the white chocolate, drizzle it in bandage-like lines, and add the eyes once the drizzle is tacky.
Equipment for This Recipe:
- 9×9-inch pan
- Parchment paper
- Mixing bowl
- Rubber spatula
- Spoon or piping bag
How to Serve This Dish:
Serve these after they’ve sat 20 to 30 minutes so the mint flavor settles a bit. They’re good with coffee, but I think cold milk shows off the mint better.
Pro Tips for This Recipe:
- Use peppermint, not spearmint. Peppermint tastes cleaner in chocolate.
- Measure the extract carefully. A heavy hand can take over the whole pan.
- Crush candies into mixed sizes. Tiny shards and a few bigger bits give the best texture.
Variations on This Dish:
- Andes Mint Version: Use chopped Andes mints for a creamier mint note.
- Dark Mint Version: Swap in dark cocoa for a deeper color and stronger chocolate hit.
- Peppermint Bark Version: Add crushed candy canes on top after the drizzle sets.
Common Mistakes to Avoid with This Dish:
- Overdoing the mint extract: The flavor stops tasting like dessert.
- Adding candy too early on top: It can melt into sticky patches.
- Using thin white frosting for bandages: It won’t hold the shape as neatly as melted chocolate.
7. Cheesecake Swirl Mummy Brownies
These are the brownies that look like you put in twice as much effort as you actually did. The cream cheese swirl gives the surface pale streaks that play nicely with the mummy bandages, and the tang of the cheesecake filling keeps the chocolate from feeling heavy. It’s a good one when you want a tray that tastes a little more bakery-case than bake-sale.
Why It Works:
Cream cheese adds acidity and a soft, almost velvety texture that cuts through a dense brownie base. Keeping the swirl on the surface gives the pan a marbled top, which makes the mummy drizzle look layered instead of flat. It also means the decoration has something irregular to cling to, which helps if your piping hand wobbles.
Key Ingredients:
- 1/2 cup unsalted butter, melted
- 1 cup granulated sugar
- 2 large eggs
- 1 teaspoon vanilla extract
- 2/3 cup all-purpose flour
- 1/2 cup unsweetened cocoa powder
- 1/4 teaspoon salt
- 8 ounces cream cheese, softened
- 1/4 cup granulated sugar
- 1 egg yolk
- 1/2 teaspoon vanilla extract
- 1 cup white chocolate chips
- 24 candy eyeballs
Quick Steps:
- Prep the pan. Heat the oven to 350°F and line a 9×9-inch pan with parchment.
- Make the brownie batter. Stir butter, sugar, eggs, vanilla, flour, cocoa, and salt until smooth.
- Mix the cheesecake swirl. Beat cream cheese, sugar, egg yolk, and vanilla until creamy.
- Layer and swirl. Spread the brownie batter in the pan, dollop the cheesecake mixture on top, and drag a knife through it in wide figure-eights.
- Bake and decorate. Bake for 28 to 32 minutes, cool fully, then add the white chocolate bandages and eyes.
Equipment for This Recipe:
- 9×9-inch pan
- Parchment paper
- Two mixing bowls
- Hand mixer or whisk
- Knife or skewer
How to Serve This Dish:
Cut these into neat squares, wipe the knife between slices, and let the marbled top show off. They’re strong with coffee and even better after an hour in the fridge.
Pro Tips for This Recipe:
- Soften the cream cheese fully. Lumps don’t swirl well.
- Don’t over-swirl. Too much mixing turns the top muddy.
- Cool before chilling. The center needs to set before the fridge tightens it up.
Variations on This Dish:
- Orange Cheesecake Version: Add 1 teaspoon orange zest to the filling.
- Chocolate Chip Version: Fold 1/4 cup mini chips into the brownie batter.
- Berry Swirl Version: Replace part of the cheesecake swirl with 2 tablespoons raspberry jam.
Common Mistakes to Avoid with This Dish:
- Using cold cream cheese: It leaves little white lumps in the swirl.
- Baking until the filling looks dry: Cheesecake sets as it cools.
- Cutting too soon: The swirl can smear if the pan is still warm.
8. Espresso Mummy Brownies
Espresso doesn’t make these taste like coffee; it makes the chocolate taste deeper. That’s the part people miss. The brownies stay square and familiar, but the flavor has a darker edge that keeps them from tasting flat after the first bite.
Why It Works:
Instant espresso powder melts right into the batter, so you get the flavor without a grainy texture. A small amount sharpens the cocoa and makes the brownie taste more intense without adding any extra liquid. That matters because too much liquid can make the mummy bandages look soft and slumped.
Key Ingredients:
- 1/2 cup unsalted butter, melted
- 1 cup granulated sugar
- 1/2 cup brown sugar
- 2 large eggs
- 1 teaspoon vanilla extract
- 1 tablespoon instant espresso powder
- 2/3 cup all-purpose flour
- 1/2 cup unsweetened cocoa powder
- 1/4 teaspoon salt
- 1/2 cup dark chocolate chips
- 1 cup white chocolate chips
- 24 candy eyeballs
Quick Steps:
- Preheat the oven. Set it to 350°F and line a 9×9-inch pan.
- Whisk the wet ingredients. Stir butter, sugars, eggs, vanilla, and espresso powder until the mixture looks glossy.
- Add the dry ingredients. Mix in flour, cocoa, and salt, then fold in the dark chocolate chips.
- Bake. Spread in the pan and bake for 23 to 27 minutes.
- Cool and finish. Drizzle the white chocolate bandages over the cooled brownies and add the eyes once the drizzle starts to set.
Equipment for This Recipe:
- 9×9-inch pan
- Parchment paper
- Mixing bowl
- Whisk
- Small piping bag or spoon
How to Serve This Dish:
These are my pick with coffee or an espresso drink, naturally, but they also work after dinner when you want the chocolate to taste less sweet. Cut them into slim rectangles for a sharper look.
Pro Tips for This Recipe:
- Dissolve the espresso fully. Any dry granules left in the batter can taste bitter.
- Choose dark chips. They keep the coffee note grounded.
- Let the drizzle thicken slightly before piping. Thin chocolate runs too fast on the surface.
Variations on This Dish:
- Mocha Version: Add 1/2 teaspoon cinnamon for a rounder flavor.
- Double Espresso Version: Use 2 teaspoons espresso powder if you want the coffee note louder.
- Chocolate Truffle Version: Fold in 1/2 cup chopped truffles for a softer bite.
Common Mistakes to Avoid with This Dish:
- Using too much espresso powder: It can turn the brownies bitter.
- Baking until the center is dry: Espresso makes the chocolate seem stronger; dry brownies feel harsher.
- Skipping the cool-down: Warm brownies flatten the white drizzle fast.
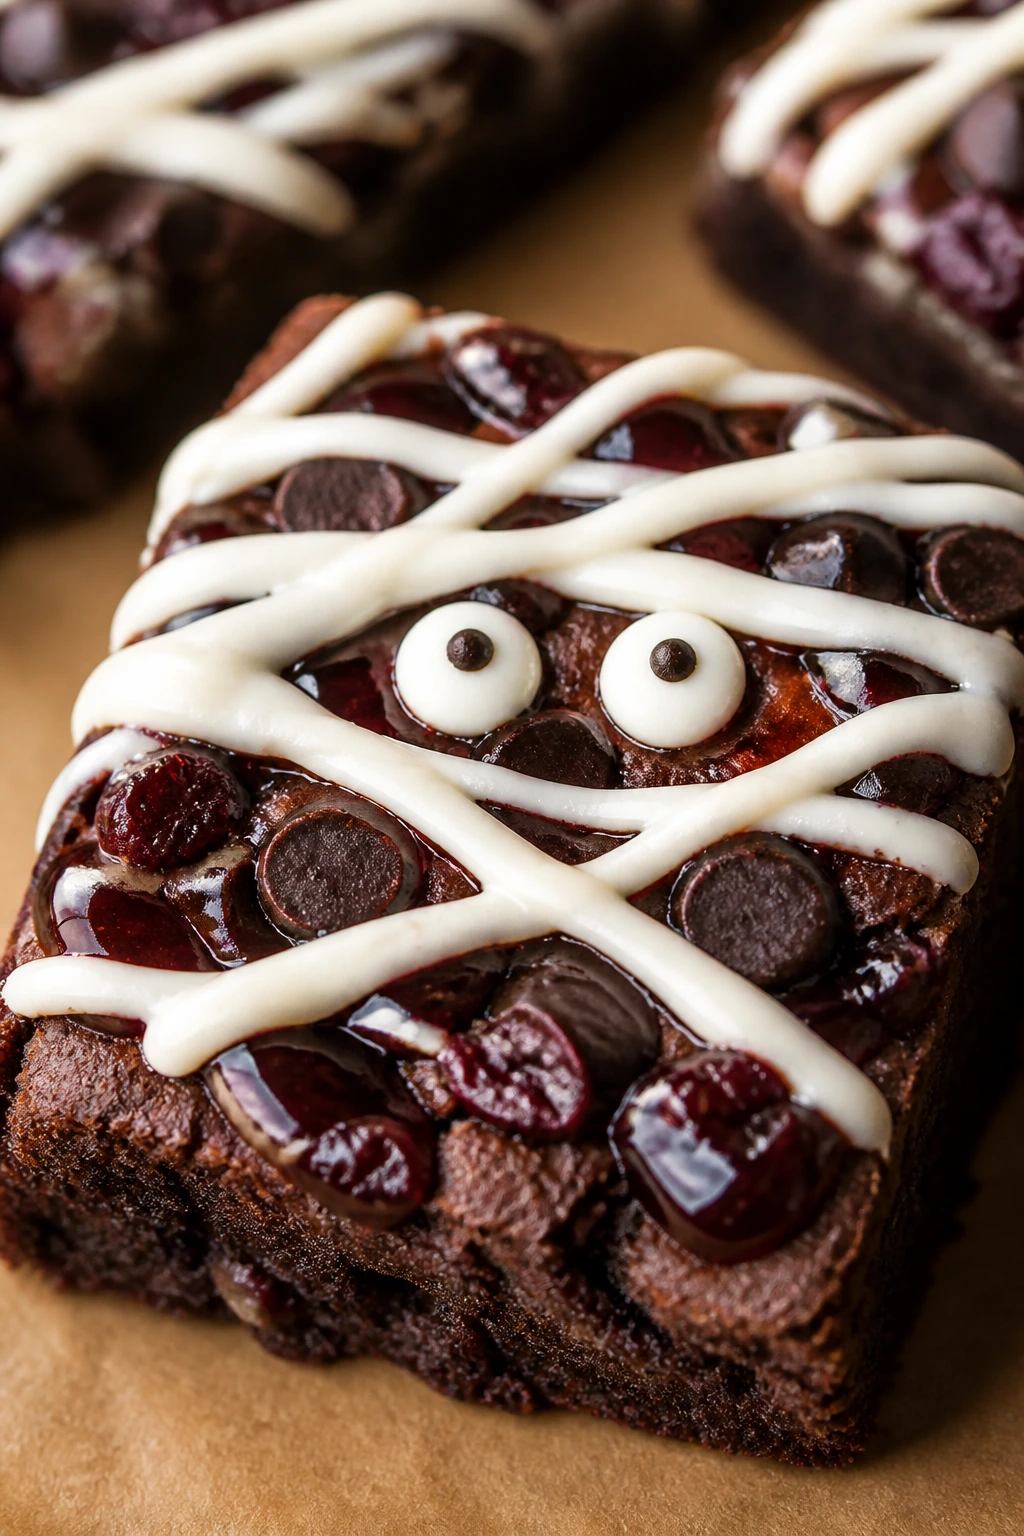
9. Raspberry Jam Mummy Brownies
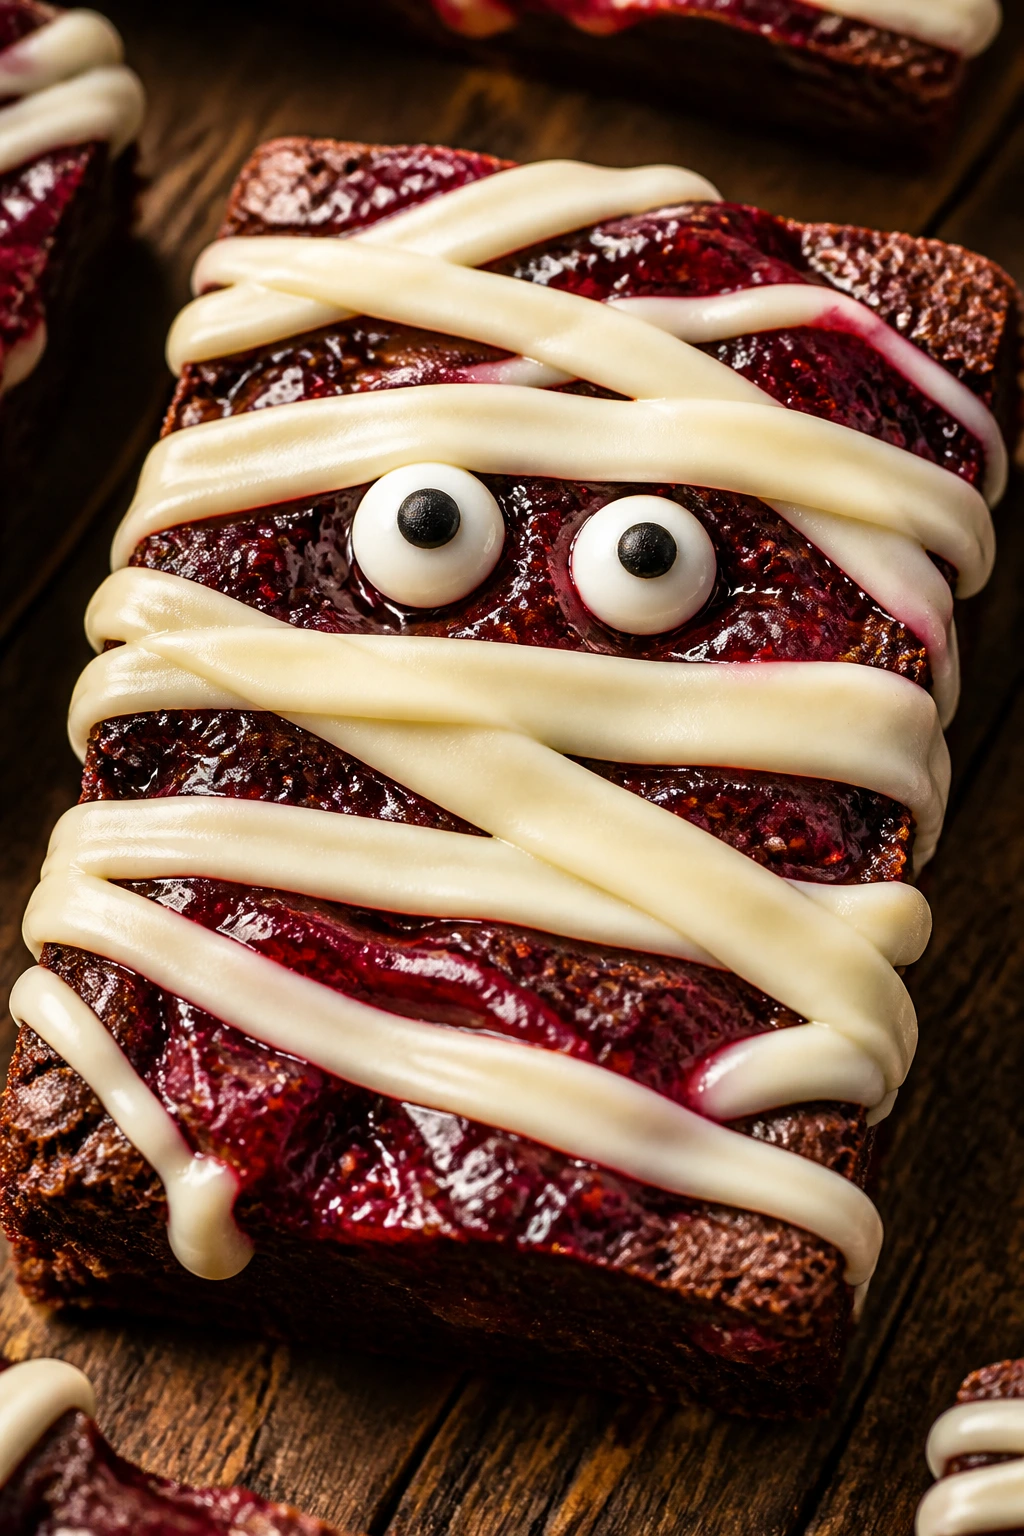
Raspberry and chocolate bring out each other’s edges, and that little bit of fruit acidity keeps the brownies from tasting too heavy. The jam gives you ruby streaks in the batter, which look especially good once the mummy bandages go on. It’s a sweet-and-tart variation that still behaves like a brownie.
Why It Works:
Seedless jam swirls more cleanly than fresh berries, which means you get fruit flavor without extra liquid pooling in the pan. The chocolate stays fudgy while the raspberry adds brightness. If you spread the jam in thin ribbons instead of stirring it in completely, the top stays marbled and the decoration looks more deliberate.
Key Ingredients:
- 1/2 cup unsalted butter, melted
- 1 cup granulated sugar
- 2 large eggs
- 1 teaspoon vanilla extract
- 2/3 cup all-purpose flour
- 1/2 cup unsweetened cocoa powder
- 1/4 teaspoon salt
- 1/3 cup seedless raspberry jam
- 1/4 cup freeze-dried raspberries, crushed
- 1/2 cup semi-sweet chocolate chips
- 1 cup white chocolate chips
- 24 candy eyeballs
Quick Steps:
- Heat the oven. Set it to 350°F and line a 9×9-inch pan.
- Make the chocolate base. Whisk butter, sugar, eggs, vanilla, flour, cocoa, and salt.
- Add the fruit. Fold in chocolate chips, then dollop the raspberry jam over the batter and swirl it gently.
- Bake. Bake for 24 to 28 minutes, until the center is just set.
- Cool and decorate. Sprinkle crushed freeze-dried raspberries on cooled brownies, then pipe the white chocolate bandages and add the eyes.
Equipment for This Recipe:
- 9×9-inch pan
- Parchment paper
- Mixing bowl
- Knife or skewer
- Small bowl for jam
How to Serve This Dish:
These look sharp on a white platter because the raspberry streaks pop. If you want the flavor to read as less sweet, serve them with plain Greek yogurt on the side.
Pro Tips for This Recipe:
- Use seedless jam. It swirls better and cuts cleaner.
- Keep the swirl light. Too much stirring blends the fruit away.
- Add freeze-dried raspberries at the end. They stay crisp and bright.
Variations on This Dish:
- Mixed-Berry Version: Swap half the jam for blackberry preserves.
- Raspberry-Cheesecake Version: Add a few cream cheese dollops before baking.
- Tart Cherry Version: Use cherry preserves if raspberry feels too sharp.
Common Mistakes to Avoid with This Dish:
- Using runny jam: Thin jam sinks and disappears.
- Overbaking: Fruit brownies dry out faster than plain chocolate ones.
- Decorating before fully cool: The drizzle softens and loses shape.
10. Pumpkin Spice Mummy Brownies
Pumpkin spice brownies are softer and a little more cake-like, which is not a flaw if you know what you’re making. They taste like a cross between chocolate cake and a spiced loaf, then the mummy bandages pull them back into Halloween territory. The result is friendly, familiar, and easy to cut.
Why It Works:
Pumpkin puree adds moisture and a mellow earthiness that blends with cocoa instead of fighting it. Pumpkin pie spice gives the batter a warm edge without requiring a long spice list. Because pumpkin carries extra water, blotting it first keeps the brownies from turning gummy in the middle.
Key Ingredients:
- 1/2 cup unsalted butter, melted
- 3/4 cup granulated sugar
- 1/2 cup brown sugar
- 2 large eggs
- 1 teaspoon vanilla extract
- 1/2 cup pumpkin puree, blotted dry
- 3/4 cup all-purpose flour
- 1/3 cup unsweetened cocoa powder
- 1 teaspoon pumpkin pie spice
- 1/4 teaspoon salt
- 1 cup white chocolate chips
- 24 candy eyeballs
Quick Steps:
- Dry the pumpkin. Pat the puree between paper towels for a minute so it isn’t watery.
- Prep the pan. Heat the oven to 350°F and line a 9×9-inch pan.
- Mix the batter. Whisk butter, sugars, eggs, vanilla, and pumpkin, then stir in flour, cocoa, spice, and salt.
- Bake. Spread the batter in the pan and bake for 26 to 31 minutes.
- Finish. Cool completely, then add the white chocolate bandages and eyes.
Equipment for This Recipe:
- 9×9-inch baking pan
- Parchment paper
- Mixing bowl
- Whisk
- Paper towels
How to Serve This Dish:
These are nice with whipped cream or plain vanilla ice cream, because the spice note gets softer with something cold. I like them cut into rectangles instead of squares; it makes the mummy lines feel more like wrapping strips.
Pro Tips for This Recipe:
- Blot the pumpkin well. Wet puree is the difference between fudgy and soggy.
- Expect a lighter crumb. Pumpkin changes the texture, so don’t chase the dense brownie look too hard.
- Cool completely before drizzling. The surface needs to be dry enough for the bandages to stay sharp.
Variations on This Dish:
- Maple Pumpkin Version: Replace 1/4 cup sugar with maple syrup and add 1 extra tablespoon flour.
- Pumpkin Chocolate Chip Version: Fold in 1/2 cup chips for a richer bite.
- Spiced Glaze Version: Swap the white chocolate drizzle for vanilla glaze with a pinch of cinnamon.
Common Mistakes to Avoid with This Dish:
- Leaving the pumpkin wet: It makes the center tacky.
- Cutting while warm: Pumpkin brownies need extra time to firm up.
- Overspicing: Too much spice hides the chocolate flavor.
11. Turtle Mummy Brownies
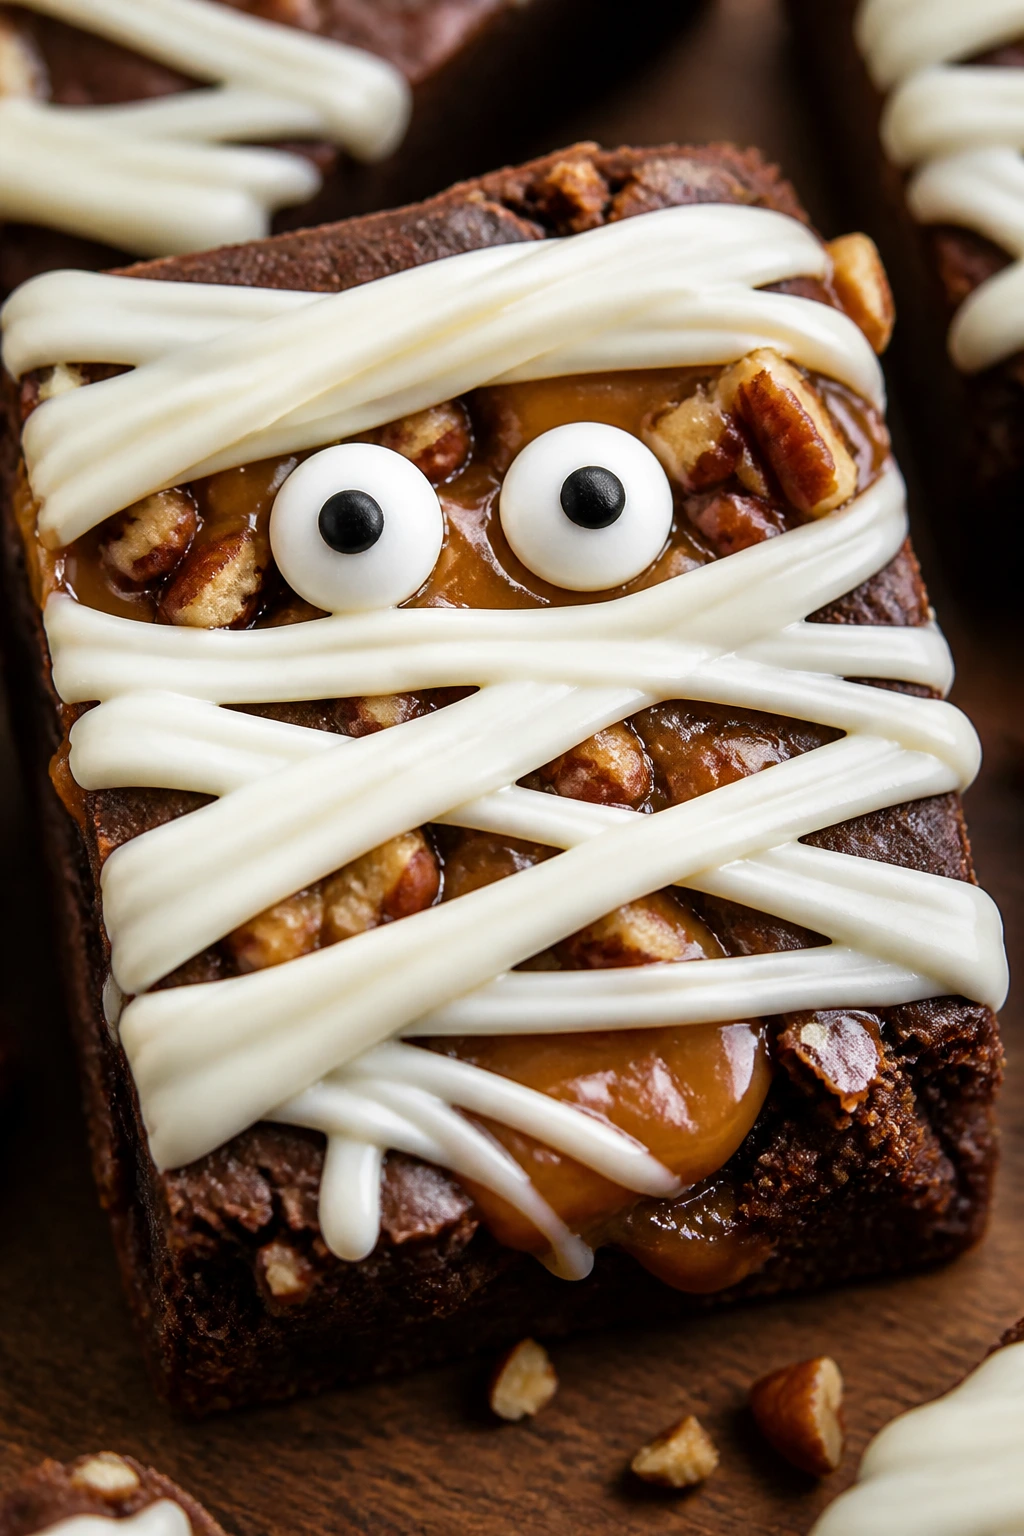
Turtle brownies bring pecans into the party, and that gives each bite a little snap against the chocolate and caramel. They’re richer than they look, so small pieces go a long way. The mummy bandages make the whole tray look playful instead of heavy.
Why It Works:
Pecans give texture and a toasted flavor that stands up to caramel. The caramel pockets keep the brownies soft in the middle, while the chopped nuts on top stay visible after baking. The white drizzle cuts through the dark top and keeps the whole pan from looking too brown, which is a real problem with turtle flavors.
Key Ingredients:
- 1/2 cup unsalted butter, melted
- 1 cup granulated sugar
- 1/2 cup brown sugar
- 2 large eggs
- 2/3 cup all-purpose flour
- 1/2 cup unsweetened cocoa powder
- 1/4 teaspoon salt
- 1/2 cup thick caramel sauce
- 1/2 cup chopped pecans
- 1/2 cup semi-sweet chocolate chips
- 1 cup white chocolate chips
- 24 candy eyeballs
Quick Steps:
- Prepare the pan. Heat the oven to 350°F and line a 9×9-inch pan.
- Mix the base. Stir butter, sugars, eggs, flour, cocoa, and salt.
- Add the turtle layers. Fold in chocolate chips, spread half the batter in the pan, add caramel in small spoonfuls, sprinkle pecans, then top with the rest of the batter.
- Bake. Bake for 25 to 30 minutes.
- Cool and decorate. Once cool, add the white chocolate bandages and the candy eyes.
Equipment for This Recipe:
- 9×9-inch pan
- Parchment paper
- Mixing bowl
- Spoon
- Knife for slicing
How to Serve This Dish:
Serve these with coffee or a small scoop of vanilla ice cream. The pecans make them feel a little more polished than a basic brownie square.
Pro Tips for This Recipe:
- Toast the pecans if you have time. Five to seven minutes in a dry skillet deepens the flavor.
- Use thick caramel. Thin sauce can leak into the crumb.
- Cool before cutting. The caramel needs time to settle or the slices will smear.
Variations on This Dish:
- Pretzel Turtle Version: Add 1/4 cup crushed pretzels for a saltier crunch.
- Dark Turtle Version: Use dark chocolate chips and dark caramel for a less sweet result.
- Mini Pecan Version: Replace chopped pecans with pecan halves for a more dramatic top.
Common Mistakes to Avoid with This Dish:
- Too much caramel in one spot: It can make a soggy pocket.
- Skipping the nuts on top: The turtle flavor needs that texture.
- Rushing the slice: Caramel brownies cut cleaner after they rest.
12. S’mores Mummy Brownies
S’mores brownies are messy in the best possible way. Graham crackers soften into the chocolate, marshmallows puff and toast on top, and the whole pan tastes like a campfire dessert with the edge taken off. The mummy bandages turn that chaos into something neat enough to serve on a tray.
Why It Works:
Graham crackers give the brownie a little sandy crunch without making it brittle. Mini marshmallows melt and blister in the oven if you time them right, which adds a toasty layer that plays well with the white drizzle. You get the s’mores flavor without needing a fire pit or any actual skewer work.
Key Ingredients:
- 1/2 cup unsalted butter, melted
- 1 cup granulated sugar
- 2 large eggs
- 1 teaspoon vanilla extract
- 2/3 cup all-purpose flour
- 1/2 cup unsweetened cocoa powder
- 1/4 teaspoon salt
- 1 cup crushed graham crackers
- 1/2 cup milk chocolate chips
- 1 cup mini marshmallows
- 1 cup white chocolate chips
- 24 candy eyeballs
Quick Steps:
- Heat the oven. Set it to 350°F and line a 9×9-inch pan.
- Mix the batter. Combine butter, sugar, eggs, vanilla, flour, cocoa, salt, and half the graham crackers.
- Bake the brownies. Spread the batter in the pan and bake for 18 minutes.
- Add the marshmallows. Sprinkle the marshmallows, milk chocolate chips, and remaining graham crackers over the top, then bake 4 to 6 minutes more.
- Cool and decorate. Let the pan cool fully before adding the white chocolate bandages and eyes.
Equipment for This Recipe:
- 9×9-inch pan
- Parchment paper
- Mixing bowl
- Rubber spatula
- Small bowl for toppings
How to Serve This Dish:
These taste best the day they’re made, when the marshmallows still have a little chew. A mug of hot cocoa sounds obvious, but it really does fit.
Pro Tips for This Recipe:
- Bake in two stages. That keeps the marshmallows from disappearing completely.
- Break the graham crackers by hand. Fine crumbs turn dusty; bigger bits give better texture.
- Cool before decorating. Marshmallows stay soft for a while, so don’t rush the drizzle.
Variations on This Dish:
- Peanut S’mores Version: Add 1/4 cup peanut butter chips for a salty edge.
- Dark S’mores Version: Use dark chocolate chips and less marshmallow for a deeper flavor.
- Graham Crust Version: Press half the graham mixture into the pan before adding batter for a firmer base.
Common Mistakes to Avoid with This Dish:
- Adding marshmallows too early: They can melt away into sticky patches.
- Using giant marshmallows: Mini marshmallows spread more evenly.
- Cutting while warm: The sticky top drags and tears.
13. Cookie Dough Mummy Brownies

Cookie dough on brownies sounds extra, and it is. That’s the point. The brownie base stays chocolate-heavy while little spoonfuls of edible dough add a soft, sweet contrast after baking. The mummy bandages calm the whole thing down visually.
Why It Works:
Heat-treated flour and no eggs make the cookie dough safe to eat as a topping. The dough is added after the brownies bake, which keeps the texture soft instead of turning it into a second layer of cake. This is one of those desserts where the topping does the work of making the whole tray feel generous.
Key Ingredients:
- 1/2 cup unsalted butter, melted
- 1 cup granulated sugar
- 2 large eggs
- 1 teaspoon vanilla extract
- 2/3 cup all-purpose flour
- 1/2 cup unsweetened cocoa powder
- 1/4 teaspoon salt
- 3 tablespoons unsalted butter, softened
- 1/4 cup packed brown sugar
- 2 tablespoons milk
- 1/2 teaspoon vanilla extract
- 1/2 cup heat-treated flour
- 1/4 cup mini chocolate chips
- 1 cup white chocolate chips
- 24 candy eyeballs
Quick Steps:
- Make the brownies. Prep a 9×9-inch pan and bake the chocolate base at 350°F for 24 to 28 minutes.
- Cool fully. The surface needs to be firm before the cookie dough goes on.
- Mix the dough. Beat softened butter, brown sugar, milk, vanilla, heat-treated flour, and mini chips until it forms a soft dough.
- Dollop and flatten. Pinch small pieces of dough and press them lightly onto the cooled brownies.
- Decorate. Drizzle white chocolate around the cookie dough bits and add the eyes where the bandages leave room.
Equipment for This Recipe:
- 9×9-inch pan
- Parchment paper
- Two mixing bowls
- Hand mixer or spoon
- Microwave-safe bowl
How to Serve This Dish:
This is a dessert that likes small squares. The cookie dough makes each bite richer, so I’d keep the portions modest and let people come back for seconds if they want them.
Pro Tips for This Recipe:
- Heat-treat the flour. Bake it at 350°F for 5 minutes or microwave it until it reaches 165°F.
- Keep the dough cool. Soft but not sticky is the goal.
- Add the topping after cutting if needed. You can place the dough on individual squares for cleaner edges.
Variations on This Dish:
- Chocolate Chip Cookie Dough: Use dark chips in the dough for more contrast.
- Birthday Cake Version: Swap the mini chips for sprinkles.
- Peanut Butter Dough Version: Replace 2 tablespoons butter with peanut butter in the topping.
Common Mistakes to Avoid with This Dish:
- Using raw flour: It needs heat treatment first.
- Adding wet dough to warm brownies: The topping melts and smears.
- Making the dough too sweet: A little salt keeps it from tasting flat.
14. Black Forest Mummy Brownies
Black Forest flavors give the brownies a cherry note that feels darker and a little more grown-up. The fruit cuts through the chocolate, and the white bandages brighten the whole tray. It’s a good one if you want something beyond plain chocolate but still easy to bake.
Why It Works:
Cherry preserves bring flavor without adding too much water, and chopped dried cherries add texture without making the crumb soggy. Dark chocolate chips push the brownie toward a deeper cocoa profile, which fits the fruit well. The tart-sweet balance is what keeps this tray from feeling one-note.
Key Ingredients:
- 1/2 cup unsalted butter, melted
- 1 cup granulated sugar
- 2 large eggs
- 1 teaspoon vanilla extract
- 2/3 cup all-purpose flour
- 1/2 cup unsweetened cocoa powder
- 1/4 teaspoon salt
- 1/3 cup cherry preserves
- 1/4 cup chopped dried cherries
- 1/2 cup dark chocolate chips
- 1 cup white chocolate chips
- 24 candy eyeballs
Quick Steps:
- Prep the pan. Heat the oven to 350°F and line a 9×9-inch pan.
- Mix the brownie base. Stir butter, sugar, eggs, vanilla, flour, cocoa, and salt.
- Add cherry flavor. Fold in dark chips and dried cherries, then dollop cherry preserves over the batter and swirl lightly.
- Bake. Bake for 24 to 28 minutes until the center is set.
- Decorate. Cool fully, then add the white chocolate bandages and eyes.
Equipment for This Recipe:
- 9×9-inch pan
- Parchment paper
- Mixing bowl
- Knife or skewer
- Small spoon
How to Serve This Dish:
A few fresh cherries on the plate make these look sharp, but they’re good without any extra fuss. Pair them with coffee or sparkling water if you want to keep the chocolate from feeling too dense.
Pro Tips for This Recipe:
- Use preserves, not jam that’s too loose. The thicker texture stays put.
- Don’t overload the cherries. Too much fruit softens the crumb.
- Cool completely before slicing. The fruit swirls need time to settle.
Variations on This Dish:
- Cherry-Almond Version: Add 1/4 teaspoon almond extract.
- Dark Forest Version: Use extra dark cocoa and bittersweet chips.
- Boozy-Syrup Version: Brush the cooled brownies with a little cherry syrup if you want a deeper fruit note.
Common Mistakes to Avoid with This Dish:
- Using too much fruit filling: The brownies can turn wet.
- Over-swirling: The cherry streaks disappear.
- Cutting while warm: Fruit brownies always need a longer rest.
15. Almond Joy Mummy Brownies
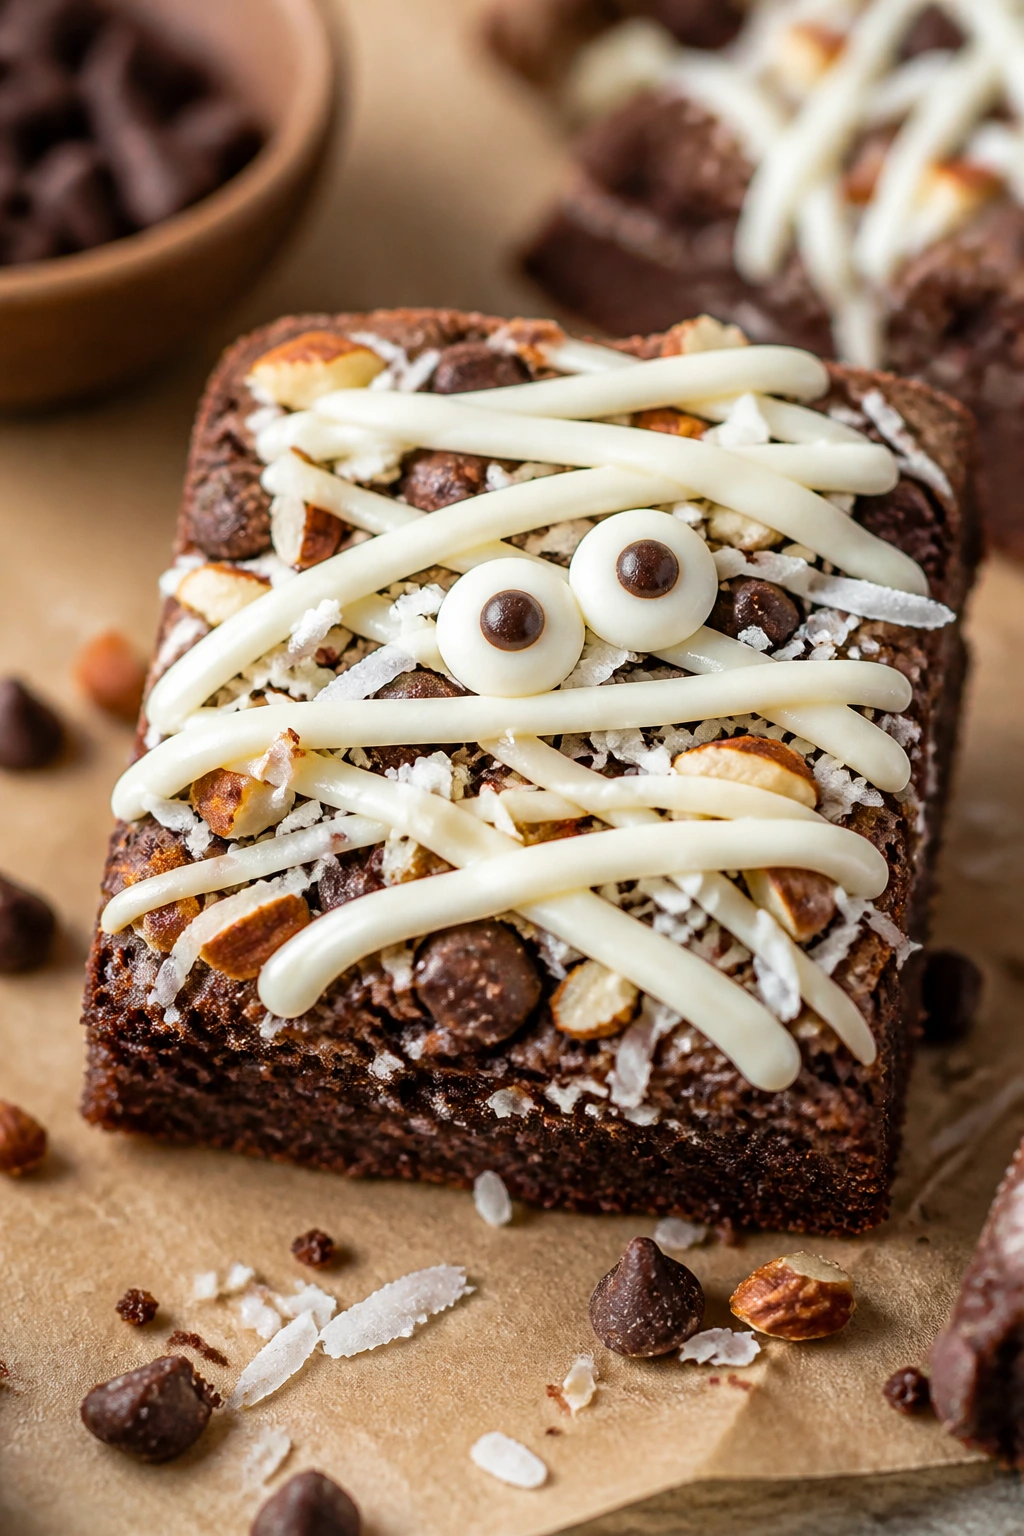
Coconut, almonds, and chocolate do what they always do here: they taste like a candy bar with a little more depth. The coconut keeps the crumb moist, the almonds add crunch, and the white mummy drizzle ties it all together. It’s sweet, but it has texture.
Why It Works:
Shredded coconut holds onto moisture, which helps the brownie stay tender even after a day in the container. Almonds bring a toasted flavor and a firm bite that contrasts with the soft crumb. The chocolate base gives the candy-bar flavors a home instead of letting them taste scattered.
Key Ingredients:
- 1/2 cup unsalted butter, melted
- 1 cup granulated sugar
- 1/2 cup brown sugar
- 2 large eggs
- 1 teaspoon vanilla extract
- 2/3 cup all-purpose flour
- 1/2 cup unsweetened cocoa powder
- 1/4 teaspoon salt
- 1/2 cup sweetened shredded coconut
- 1/2 cup chopped almonds
- 1/2 cup milk chocolate chips
- 1 cup white chocolate chips
- 24 candy eyeballs
Quick Steps:
- Heat the oven. Set it to 350°F and line a 9×9-inch pan.
- Mix the batter. Whisk butter, sugars, eggs, vanilla, flour, cocoa, and salt.
- Fold in the extras. Add coconut, almonds, and chocolate chips.
- Bake. Spread in the pan and bake for 24 to 28 minutes.
- Cool and decorate. Add the white chocolate bandages and candy eyes after the brownies cool fully.
Equipment for This Recipe:
- 9×9-inch pan
- Parchment paper
- Mixing bowl
- Spatula
- Knife for slicing
How to Serve This Dish:
These work well on a platter with a few extra coconut flakes scattered around the edges. The almond crunch makes them feel sturdy enough for a lunchbox or party tray.
Pro Tips for This Recipe:
- Toast the almonds. A quick toast gives the flavor more lift.
- Don’t use too much coconut. The brownie can turn dry if the mix gets overloaded.
- Cool before cutting. Coconut strands can tug at a warm knife.
Variations on This Dish:
- Dark Almond Version: Use bittersweet chips and unsweetened coconut.
- Nut-Free Coconut Version: Skip the almonds and add sunflower seeds.
- Chocolate-Almond Version: Add 1/2 teaspoon almond extract for a louder nut flavor.
Common Mistakes to Avoid with This Dish:
- Using stale coconut: It tastes flat and dusty.
- Skipping the almonds on top: The crunch matters here.
- Decorating too early: Coconut brownies need time to firm up.
16. Brown Butter Mummy Brownies
Brown butter gives these brownies a toasted, almost nutty edge that makes the whole pan taste deeper. It’s a small step, but it changes the flavor enough that people notice. The mummy decoration stays simple, which is smart, because the base already has personality.
Why It Works:
Brown butter cooks off some water and leaves behind milk solids that taste like toasted nuts and caramel. That extra flavor makes the chocolate seem richer without adding more sugar. Because the base is still a standard brownie method, it stays beginner-accessible even with the extra step.
Key Ingredients:
- 1/2 cup unsalted butter
- 3/4 cup granulated sugar
- 1/4 cup packed brown sugar
- 2 large eggs
- 1 teaspoon vanilla extract
- 2/3 cup all-purpose flour
- 1/2 cup unsweetened cocoa powder
- 1/4 teaspoon salt
- 1/2 cup chopped dark chocolate
- 1 cup white chocolate chips
- 24 candy eyeballs
Quick Steps:
- Brown the butter. Cook the butter in a light saucepan over medium heat until it smells nutty and the milk solids turn amber, about 4 to 6 minutes.
- Cool briefly. Let it sit 5 minutes so it doesn’t scramble the eggs.
- Mix the batter. Whisk in sugars, eggs, vanilla, flour, cocoa, and salt.
- Bake. Fold in dark chocolate, spread in a lined 9×9-inch pan, and bake for 22 to 26 minutes.
- Finish. Cool, drizzle with white chocolate, and add the eyes.
Equipment for This Recipe:
- Small saucepan
- 9×9-inch pan
- Parchment paper
- Mixing bowl
- Whisk
How to Serve This Dish:
These taste best at room temperature, when the toasted butter notes are easiest to taste. A plain glass of milk works, but I prefer coffee here because it echoes the brown butter.
Pro Tips for This Recipe:
- Watch the butter closely. Brown butter goes from nutty to burnt fast.
- Cool it before mixing. Hot butter can ruin the eggs.
- Use chopped dark chocolate. Chips hold shape; chopped chocolate melts in better pockets.
Variations on This Dish:
- Walnut Brown Butter Version: Add 1/3 cup chopped walnuts for extra crunch.
- Salted Brown Butter Version: Finish with flaky salt.
- Orange Brown Butter Version: Add 1 teaspoon orange zest to the batter.
Common Mistakes to Avoid with This Dish:
- Burning the butter solids: That taste sticks around.
- Skipping the cool-down step: It can make the batter greasy.
- Overbaking: Brown butter brownies dry out a touch faster than plain ones.
17. Gluten-Free Mummy Brownies
Gluten-free brownies can be just as dense and fudgy as the regular kind if the flour blend is good. The trick is using a 1:1 blend that already contains starches and gums, then not overbaking the pan. The mummy finish hides any small surface imperfections, which is handy.
Why It Works:
A good 1:1 gluten-free flour blend behaves a lot like all-purpose flour once it’s mixed with fat and sugar. The cocoa and chocolate chips provide enough structure that you don’t need any complicated extra binders. Letting the batter sit for 10 minutes before baking gives the flour time to hydrate, which helps the texture settle.
Key Ingredients:
- 1/2 cup unsalted butter, melted
- 1 cup granulated sugar
- 1/2 cup brown sugar
- 2 large eggs
- 1 teaspoon vanilla extract
- 1 cup 1:1 gluten-free flour blend
- 1/2 cup unsweetened cocoa powder
- 1/4 teaspoon salt
- 1/2 teaspoon baking powder
- 1/2 cup chocolate chips
- 1 cup white chocolate chips
- 24 candy eyeballs
Quick Steps:
- Preheat and line. Heat the oven to 350°F and line a 9×9-inch pan with parchment.
- Mix the batter. Stir melted butter, sugars, eggs, vanilla, flour blend, cocoa, salt, and baking powder.
- Let it rest. Sit the batter for 10 minutes so the flour can absorb moisture.
- Bake. Fold in chocolate chips, spread the batter in the pan, and bake for 24 to 28 minutes.
- Decorate. Cool fully, then drizzle on the white chocolate and add the eyes.
Equipment for This Recipe:
- 9×9-inch pan
- Parchment paper
- Mixing bowl
- Whisk
- Timer
How to Serve This Dish:
These are best sliced when fully cool because gluten-free crumb can be delicate. If you’re serving a mixed crowd, nobody needs to know these are gluten-free unless they ask.
Pro Tips for This Recipe:
- Choose a blend with xanthan gum. If your flour blend doesn’t have it, the brownies can crumble.
- Don’t skip the rest. Ten minutes helps the batter behave.
- Cool before slicing. Gluten-free brownies need a firmer set.
Variations on This Dish:
- Nutty GF Version: Add 1/3 cup chopped pecans.
- Cocoa-Heavy Version: Swap in Dutch-process cocoa for a darker color.
- Chewy GF Version: Use an extra egg yolk for more richness.
Common Mistakes to Avoid with This Dish:
- Using a single-ingredient flour substitute: It won’t behave like a blend.
- Cutting too soon: The crumb needs time to settle.
- Baking until the top looks dry: That usually means the middle is already past done.
18. Dairy-Free Mummy Brownies
Dairy-free brownies are a lot less fussy than people expect. A neutral oil gives you a soft crumb, the cocoa still carries the flavor, and dairy-free chocolate chips keep the whole tray in the same lane. The mummy drizzle just needs a little careful melting.
Why It Works:
Oil stays soft at room temperature, which helps the brownies feel tender even after chilling. Dairy-free chocolate chips melt the same way as regular chips if you use low heat and stop before they get grainy. The texture stays close to a standard brownie, so you’re not sacrificing much to skip the dairy.
Key Ingredients:
- 1/2 cup neutral oil
- 1 cup granulated sugar
- 1/2 cup brown sugar
- 2 large eggs
- 1 teaspoon vanilla extract
- 2/3 cup all-purpose flour
- 1/2 cup unsweetened cocoa powder
- 1/4 teaspoon salt
- 1/2 cup dairy-free chocolate chips
- 1 cup dairy-free white chocolate chips or vanilla baking chips
- 2 teaspoons coconut oil
- 24 candy eyeballs
Quick Steps:
- Heat the oven. Set it to 350°F and line a 9×9-inch pan.
- Mix the batter. Whisk oil, sugars, eggs, and vanilla, then stir in flour, cocoa, salt, and chocolate chips.
- Bake. Spread in the pan and bake for 23 to 27 minutes.
- Cool. Let the brownies reach room temperature so the topping won’t melt.
- Finish. Melt the dairy-free white chips with coconut oil, drizzle the bandages, and add the eyes.
Equipment for This Recipe:
- 9×9-inch pan
- Parchment paper
- Mixing bowl
- Whisk
- Microwave-safe bowl
How to Serve This Dish:
Serve these like any other brownie tray, but keep them out of a warm kitchen for long stretches so the drizzle doesn’t soften. A cold oat milk latte is a nice match.
Pro Tips for This Recipe:
- Use chips that list cocoa butter if possible. They melt more smoothly.
- Don’t overheat the drizzle. Dairy-free chips can seize if pushed too far.
- Let the brownies cool fully. Oil-based brownies stay tender, which is great, but it also means the drizzle needs a stable base.
Variations on This Dish:
- Vegan Version: Replace the eggs with 2 flax eggs and bake 2 to 3 minutes longer.
- Coconut Version: Use coconut oil instead of neutral oil for a faint tropical note.
- Dark Dairy-Free Version: Use dark cocoa and bittersweet dairy-free chips.
Common Mistakes to Avoid with This Dish:
- Using chocolate chips with milk solids: They’re not fully dairy-free.
- Melting the drizzle too fast: Grainy chips are hard to fix.
- Slicing too soon after decorating: The topping needs time to set.
19. Mini Mummy Brownie Bites
Mini brownie bites are the easiest option when you want more mummies and less knife work. They bake faster, cool faster, and the tiny size makes the eyes look extra cute. They’re also the most forgiving if your decorating hand is new.
Why It Works:
A mini muffin pan creates little domed brownies with more surface area for the drizzle. That means every bite gets a decent amount of white chocolate bandage and a candy eye or two. Since they bake fast, the edges get a bit more chew, which is exactly what you want in a one-bite brownie.
Key Ingredients:
- 1 box brownie mix, 18 to 19 ounces
- 2 large eggs
- 1/2 cup vegetable oil
- 1/4 cup water
- Nonstick spray or mini muffin liners
- 3/4 cup white chocolate chips
- 2 teaspoons coconut oil
- 48 candy eyeballs
Quick Steps:
- Prep the pan. Heat the oven to 350°F and grease a mini muffin pan or line it with mini liners.
- Mix the batter. Stir the brownie mix with eggs, oil, and water until smooth.
- Fill the wells. Spoon the batter into each cup, filling about 3/4 full.
- Bake. Bake for 12 to 15 minutes, until the centers spring back lightly.
- Decorate. Cool the bites, drizzle the melted white chocolate across the tops, and add two eyes to each one.
Equipment for This Recipe:
- Mini muffin pan
- Mini muffin liners or nonstick spray
- Mixing bowl
- Small spoon
- Microwave-safe bowl
How to Serve This Dish:
Pile them on a platter so the eyes face different directions. They vanish fast at parties, and the small size makes them easier to grab than a full brownie square.
Pro Tips for This Recipe:
- Don’t overfill the wells. They puff and spill if you do.
- Use two eyes per bite. One-eye mummies look accidental, not spooky.
- Cool in the pan for 5 minutes only. Then move them to a rack so they don’t steam.
Variations on This Dish:
- Nutella Bite Version: Add a tiny dab of Nutella on top before the drizzle.
- Peanut Butter Bite Version: Stir 1/4 cup peanut butter chips into the batter.
- Crispy Top Version: Let them bake an extra minute for firmer edges.
Common Mistakes to Avoid with This Dish:
- Baking too long: Mini muffins dry out faster than full brownies.
- Decorating while steaming hot: The drizzle slips off the domes.
- Using only one eye per bite: The mummy faces read more like blobs than characters.
20. Red Velvet Mummy Brownies
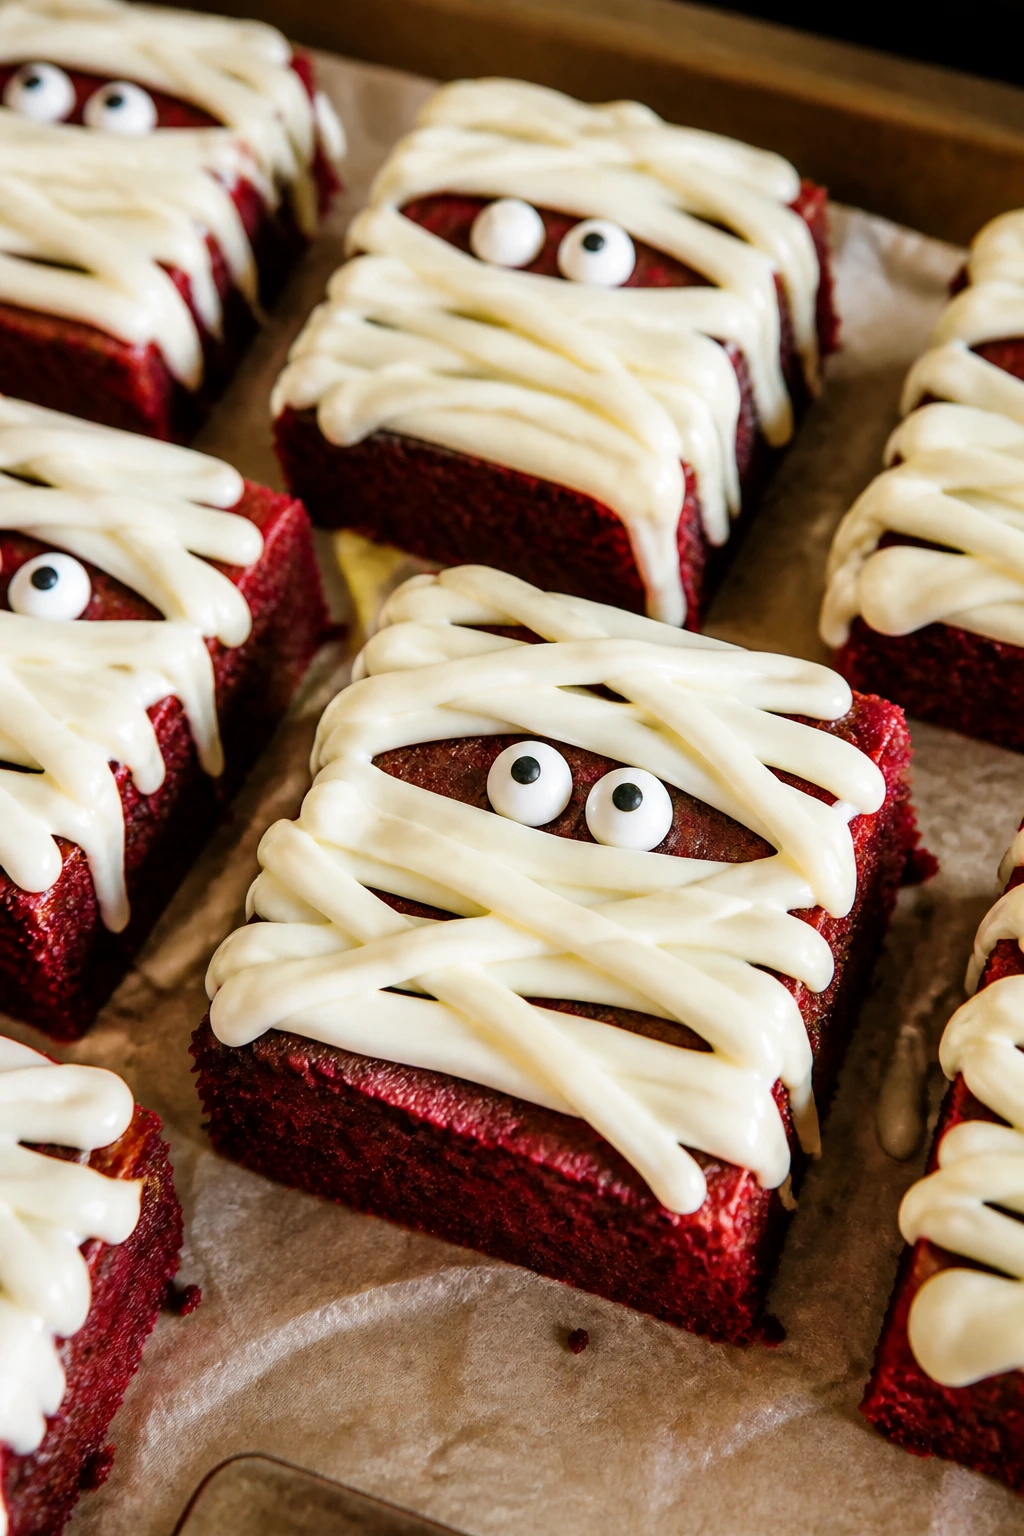
Red velvet brownies lean cake-like, but the color makes them worth it. The cocoa stays in the background, the red crumb gives the tray a bold look, and the white bandages stand out in a way that plain chocolate can’t match. If you want the most dramatic pan in the bunch, this is the one.
Why It Works:
A small amount of cocoa keeps the flavor grounded in chocolate while red food coloring gives the batter its deep color. A little vinegar sharpens the red velvet note and helps the texture stay tender. Because the crumb is lighter than a classic fudgy brownie, the mummy drizzle needs to be a bit thicker so it sits on top instead of sinking in.
Key Ingredients:
- 1/2 cup unsalted butter, melted
- 1 cup granulated sugar
- 2 large eggs
- 1 teaspoon vanilla extract
- 1 tablespoon red gel food coloring
- 1 teaspoon white vinegar
- 2/3 cup all-purpose flour
- 1/4 cup unsweetened cocoa powder
- 1/4 teaspoon salt
- 1/2 cup chocolate chips
- 1 cup white chocolate chips
- 24 candy eyeballs
Quick Steps:
- Heat the oven. Set it to 350°F and line a 9×9-inch pan with parchment.
- Mix the wet ingredients. Whisk butter, sugar, eggs, vanilla, food coloring, and vinegar until the color looks even.
- Add the dry ingredients. Stir in flour, cocoa, salt, and chocolate chips just until combined.
- Bake. Spread the batter in the pan and bake for 22 to 26 minutes.
- Cool and decorate. Let the brownies cool fully, then add the white chocolate bandages and candy eyes.
Equipment for This Recipe:
- 9×9-inch pan
- Parchment paper
- Mixing bowl
- Whisk
- Small piping bag or zip-top bag
How to Serve This Dish:
These look best on a white platter or parchment-lined tray so the red color stands out. A scoop of vanilla ice cream makes the flavor feel less cake-like and more brownie-like.
Pro Tips for This Recipe:
- Use gel coloring. Liquid dye can thin the batter.
- Don’t overbake. Red velvet dries out fast once it goes past done.
- Make the drizzle thicker. That pale bandage layer should sit on top with confidence.
Variations on This Dish:
- Black Velvet Version: Use dark cocoa for a nearly black brownie with white bandages.
- Cream Cheese Finish: Add a few cream cheese dollops before baking.
- Chocolate Chip Version: Fold in extra chips if you want a richer bite.
Common Mistakes to Avoid with This Dish:
- Using too much food coloring: The batter can taste oddly sharp.
- Expecting the same fudgy texture as classic brownies: Red velvet bakes softer.
- Decorating before the top cools: The white drizzle can blur into the crumb.
Why Brownies Beat Frosting for Mummy Faces
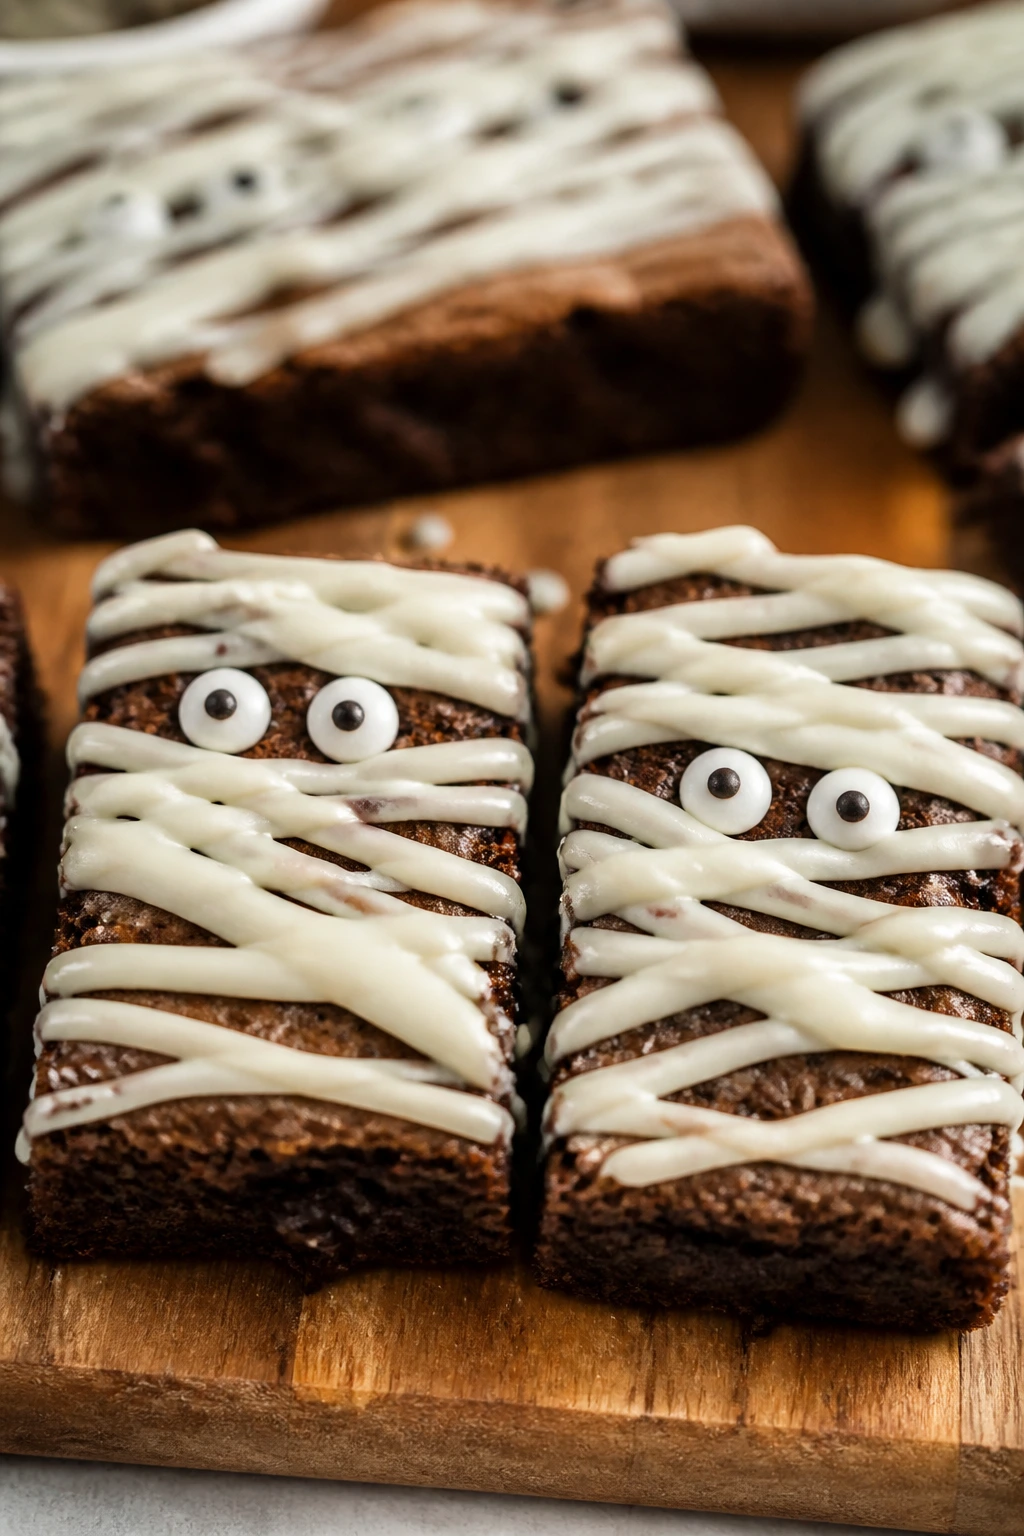
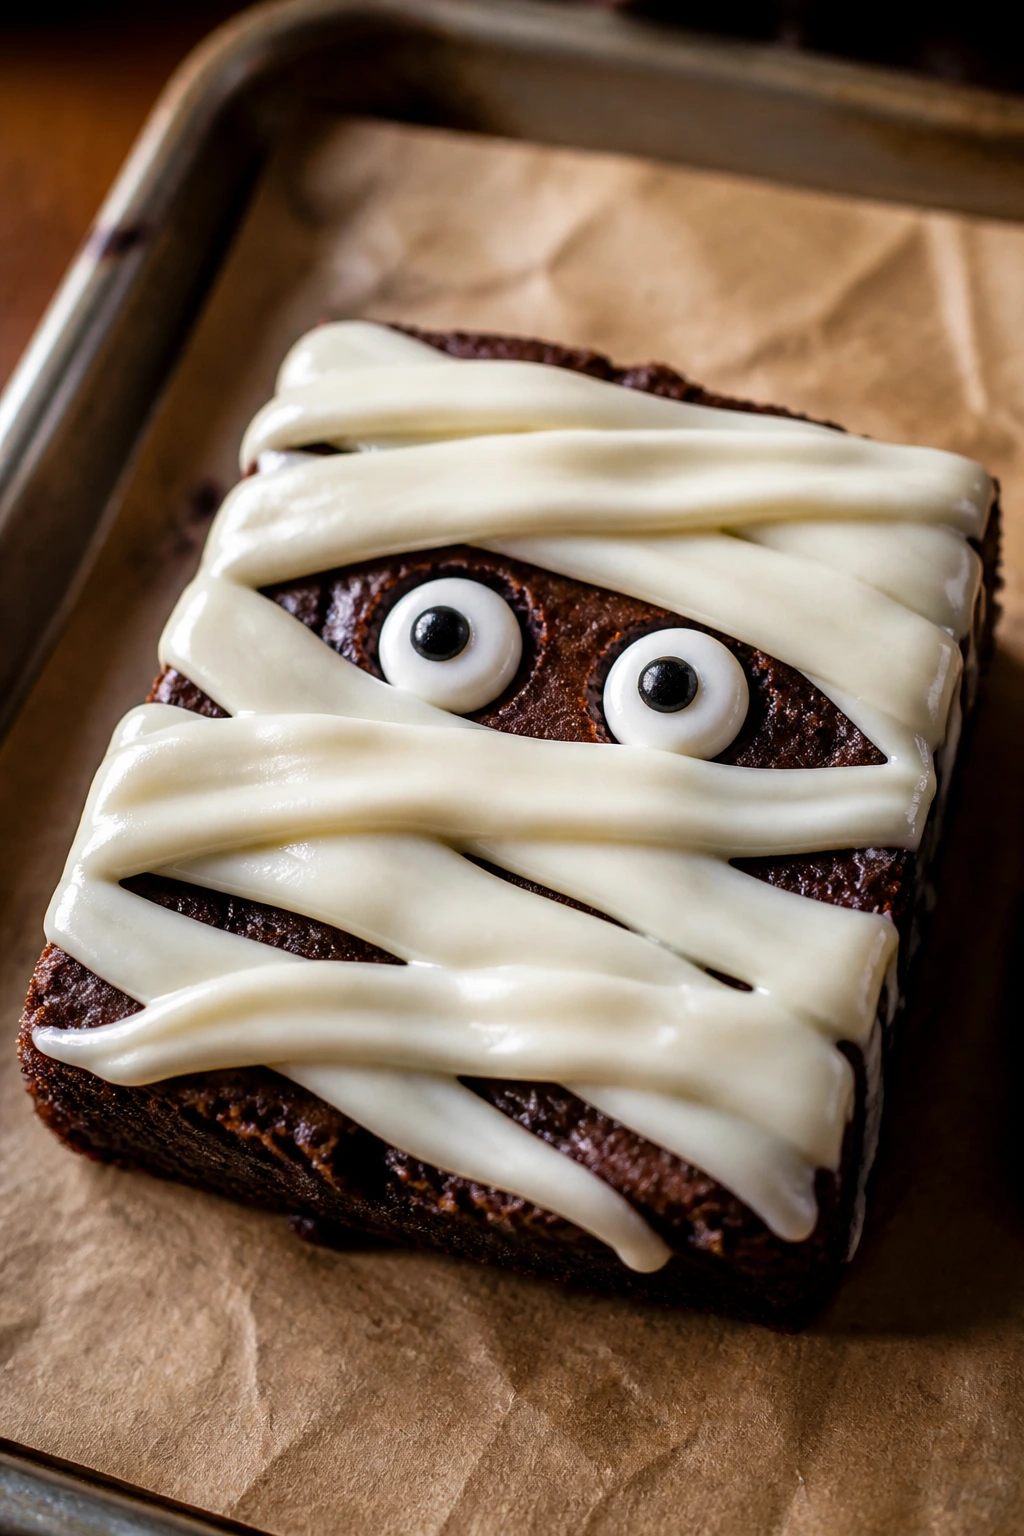
Brownies are a smart base for mummy decorating because they give you a sturdy, slightly rough surface without asking for perfection. A frosted cake needs smoothness; brownies want a cracked top, and that crackled surface is exactly where the white chocolate lines grab. The dessert ends up looking hand-made in a good way, not sloppy.
That matters more than people think. If the drizzle is a little uneven, no one reads it as a mistake. They read it as gauze. The same trick would look clumsy on a polished vanilla cake, but on brownies it makes sense.
Cooling is the quiet part that decides everything. A warm brownie melts the bandages, a barely warm brownie softens the candy eyes, and a fully cooled brownie lets the decoration sit on top instead of disappearing into the crumb. Give the tray time. Seriously. It’s the difference between a neat mummy face and a sticky brown blur.
Essential Equipment for These Recipes
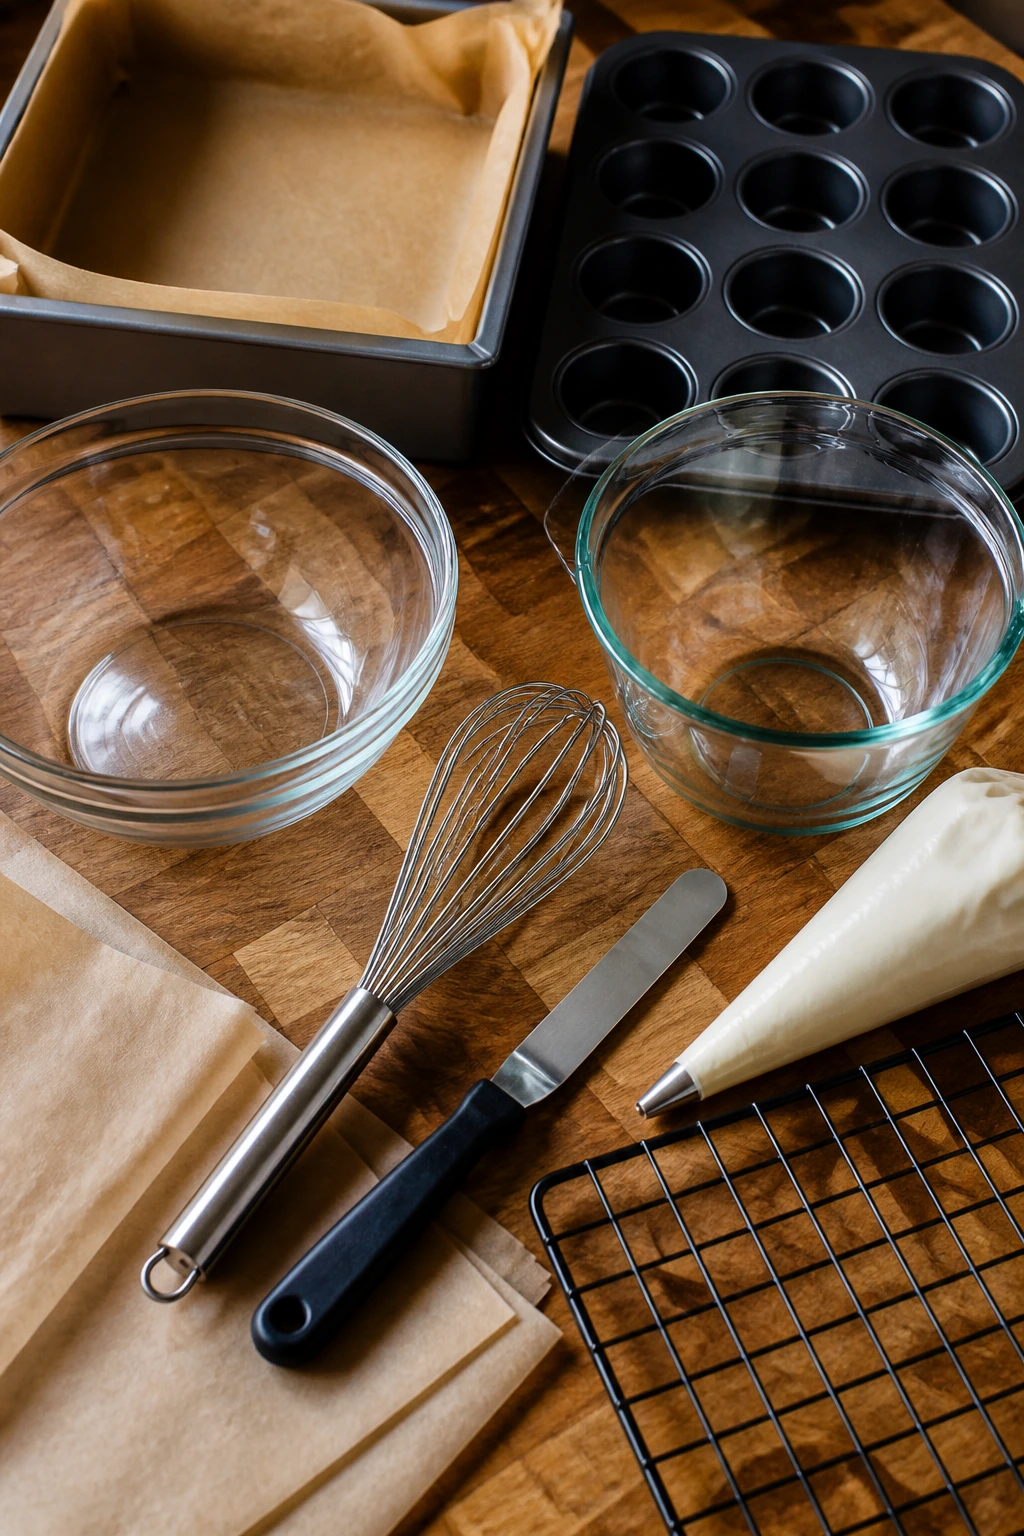
- 9×9-inch baking pan: The best size for thick brownie squares that hold their shape after decorating.
- Mini muffin pan: Needed for the brownie bites version, and useful if you want smaller party servings.
- Parchment paper: Makes it easy to lift the brownies out cleanly, which matters when you’re drizzling and slicing.
- Mixing bowls: Keep one large bowl for batter and a smaller one for melted chocolate or frosting.
- Whisk and rubber spatula: A whisk blends the batter fast; the spatula scrapes the bowl without wasting batter.
- Microwave-safe bowl: White chocolate and candy melts need gentle heat, and short bursts work better than a hot pan.
- Small piping bag or zip-top bag: Snip a tiny corner for the mummy bandages.
- Cooling rack: Lets the brownies cool evenly so the bottoms don’t steam.
- Offset spatula or butter knife: Useful for swirling caramel, jam, or cream cheese filling.
- Toothpicks or skewers: Handy for swirling and for checking doneness without shredding the crumb.
Smart Shopping and Ingredient Tips
Brownie mix matters more than people assume. If you’re buying boxed mix, look for a fudgy style, not a cake mix, because the denser crumb gives the mummy drizzle a better landing spot. For scratch recipes, use good cocoa powder; Dutch-process cocoa gives a darker, smoother flavor, while natural cocoa tastes a little sharper and lighter.
White chocolate is where a lot of beginner bakers get tripped up. Chips that contain more cocoa butter melt more smoothly than bargain chips that are full of stabilizers. If the bag looks stubborn in the microwave, add 1 to 2 teaspoons of coconut oil or neutral oil and stop heating as soon as the chips are mostly melted. Stirring does the rest.
Candy eyeballs are usually sold in the baking aisle, and they’re worth buying if you can find them. Mini chocolate chips can stand in, but eyeballs make the faces read instantly. If you’re making these for a school tray, skip nuts in the base unless you know the crowd can handle them. The same goes for caramel and peanut butter if allergy concerns are on the table.
Jam, caramel, and marshmallows each need a different kind of attention. Thick preserves hold their shape better than runny jam. Caramel sauce should be thick enough to spoon, not pour like syrup. Mini marshmallows toast better than large ones and spread more evenly over the top. Small choices. Big difference.
How to Serve These Recipes
Presentation:
Line the brownies up on a dark platter, a sheet of parchment, or a slate board if you have one. The white bandages stand out best against a dark surface, and the candy eyes look more mischievous when the tray isn’t crowded with other colors.
Accompaniments:
Cold milk is the safest pairing, but black coffee, hot chocolate, vanilla ice cream, and whipped cream all work. For richer brownies like caramel, turtle, or brownie-cookie dough, keep the side simple so the plate doesn’t turn cloying. A few apple slices on the side can be a nice contrast, especially with mint or pumpkin spice versions.
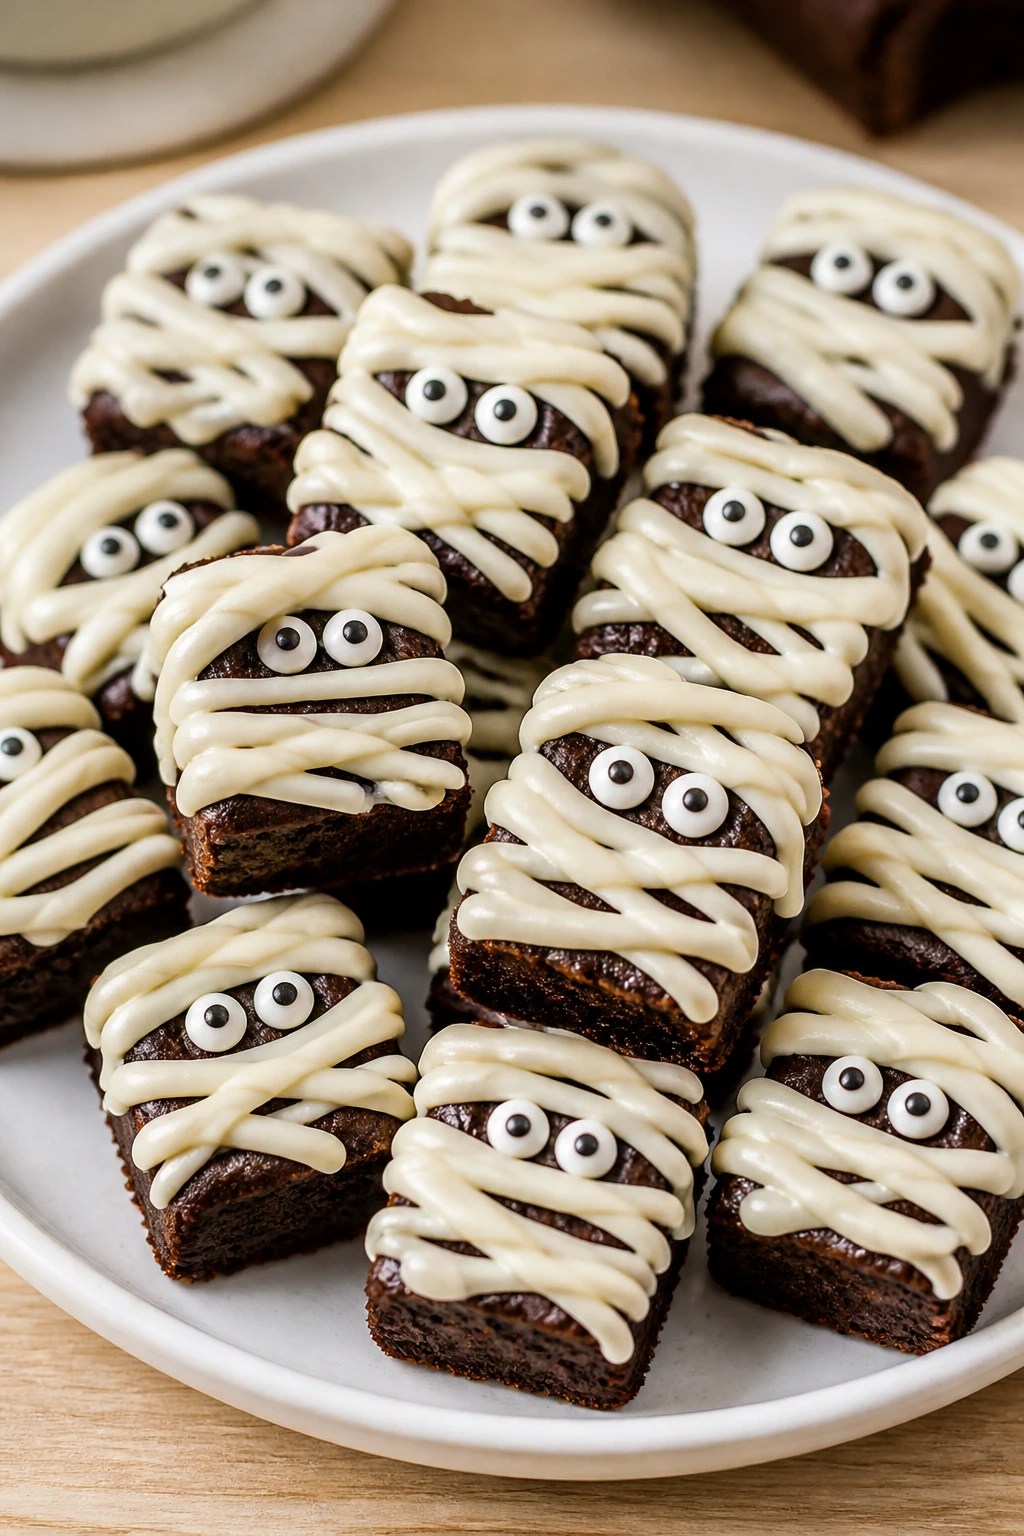
Portions:
A 9×9 pan usually makes 9 large squares or 12 to 16 smaller ones. For parties, cut them into rectangles instead of squares so each mummy face has more surface area for the drizzle. Mini bites are ideal when you want people to try more than one flavor without committing to a big square.
Beverage Pairing:
Coffee goes with espresso, brown butter, and black forest versions. Milk or oat milk fits the sweeter trays like cookie dough, peanut butter, and s’mores. If you want something colder and lighter, sparkling water with a squeeze of orange or plain seltzer keeps the dessert from feeling too heavy.
Additional Tips and Flavor Boosters
Flavor Enhancement: Add a pinch of instant espresso powder to any chocolate batter, even the plain boxed-mix version. It won’t make the brownies taste like coffee; it just makes the chocolate taste fuller and a little darker.
Customization: Swap white chocolate bandages for vanilla candy melts when you want a smoother drizzle that sets a little faster. They’re especially useful if you’re piping with kids or you need the tray to sit out for a party table.
Serving Suggestions: A tiny pinch of flaky salt over caramel, brownie, or brown butter versions makes the chocolate taste sharper. For the fruit versions, a few freeze-dried raspberry or cherry crumbs around the plate add color without making the brownies soggy.
Make-It-Yours: Use mini marshmallow dots for eyes if candy eyeballs are hard to find, or make two dark chocolate dots with the tip of a skewer. For nut-free trays, leave out peanut butter, pecans, almonds, and nut toppings, then lean on chips, jam, coconut, or cookie crumbs for texture instead.
Make-Ahead, Storage, and Reheating Guidance
Brownies store well, which is part of their charm. Plain or undecorated brownies keep at room temperature for 3 to 4 days in an airtight container, layered between sheets of parchment. Once the white chocolate bandages are on, the tray still holds for 2 to 3 days at room temperature if your kitchen is cool and dry.
The fridge is fine for 4 to 5 days, but it changes the texture a little. Brownies get firmer and the drizzle can lose some shine. If you want the best of both worlds, chill them just long enough to set the eyes and decoration, then move them back to room temperature before serving.
For freezing, freeze the brownie base without decoration for up to 2 months. Wrap the slab tightly in plastic, then foil, then place it in a freezer bag. Thaw overnight in the fridge or for a few hours at room temperature, then decorate once the surface is fully dry. That keeps the bandages neat and the eyes from sweating.
Reheating is only for plain brownies or undecorated squares. A 10- to 12-second microwave burst softens a square without melting it into a puddle. In a 300°F oven, 5 minutes is enough to warm a tray slice. Decorated brownies are best served as-is, because the whole mummy effect depends on the topping staying put.
Variations and Adaptations to Try
Nut-Free School Tray:
Leave out peanut butter, pecans, almonds, and any nut-based chips. Use chocolate chips, caramel, jam, or cookie crumbs instead. This keeps the flavors broad and the tray safer for mixed groups.
Gluten-Free Swap:
Use a 1:1 gluten-free flour blend in any scratch version and let the batter rest for 10 minutes before baking. That short pause helps the flour hydrate and gives you a less gritty crumb.
Dairy-Free Line-Up:
Choose dairy-free butter or oil-based brownies and top them with dairy-free white chips or vanilla baking chips. Melt them slowly and keep the drizzle a little thicker than usual so it sets cleanly.
Less-Sweet Dark Chocolate Version:
Use Dutch-process cocoa, dark chocolate chips, and a touch more salt. This works especially well for espresso, black forest, and brown butter brownies, where the chocolate can carry a darker note.
Party-Size Sheet Pan:
Bake the batter in a 9×13-inch pan, then cut long rectangles instead of squares. That gives you more mummy surface per piece and makes the faces look stretchier and a little more dramatic.
No-Candy-Eye Shortcut:
Pipe tiny white dots of chocolate or vanilla icing for the eyes, then add a dark chocolate dot in the center. It’s a fine workaround when the baking aisle is bare.
Common Mistakes to Avoid
Decorating brownies before they’re fully cool:
The white drizzle melts, the eyes slide, and the whole face starts to blur. Give the pan time on a rack until the center feels cool to the touch.
Using a drizzle that’s too thin:
Runny white chocolate, frosting, or icing spreads instead of staying in bandage lines. Thicken it with a little more melted chocolate or use candy melts, which set firmer.
Overbaking the brownies:
A dry brownie surface cracks in the wrong way and turns crumbly at the edges. Pull the pan when a toothpick comes out with a few moist crumbs, not a clean stick.
Cutting too soon after decorating:
The bandages need time to set, and warm brownies smear under the knife. A brief chill helps, then let the pan sit out for a few minutes before slicing if you want the best texture.
Overloading the batter with extras:
Too many cookies, nuts, marshmallows, or jam pockets make the brownies fragile. Keep the add-ins measured so the base still behaves like a brownie and not a tray of filling with crumbs stuck to it.
Frequently Asked Questions
Can I use boxed brownie mix for every version here?
Yes, if you want to keep things simple. Boxed mix works especially well for the classic, mini bites, and dairy-free versions, while scratch batters give you a little more control over flavor in the specialty recipes.
What’s the best white chocolate for mummy bandages?
Use white chocolate chips or white candy melts that melt smoothly and set firmly. If the chips seem stubborn, add 1 to 2 teaspoons of coconut oil and stir well after microwaving.
Can I make these the day before a party?
Definitely. Bake the brownies one day ahead, cool them fully, and store them wrapped or in an airtight container. Decorate the next day if you want the bandages to stay extra crisp.
How do I keep the candy eyes from falling off?
Press them onto the drizzle while it’s still shiny and tacky. If the drizzle has already set, add a tiny dot of fresh melted chocolate under each eye and set them back on top.
What if I don’t have candy eyeballs?
Use mini chocolate chips, white chocolate dots with dark centers, or even tiny pieces of marshmallow with a dot of melted chocolate. The face still reads as a mummy if the eyes are round and clearly placed.
Can I freeze decorated mummy brownies?
You can, but the decoration looks best if you freeze the brownie base first and decorate after thawing. Frozen and thawed candy eyes can look damp, and the white drizzle can lose some shine.
How do I get clean cuts through the drizzle?
Use a sharp knife dipped in hot water, then wiped dry before each cut. Chill the brownies for 10 to 15 minutes first so the bandages firm up, but don’t freeze them hard or the top can crack oddly.
Are these okay for younger kids to help make?
Yes, especially the boxed-mix brownies and mini bites. Kids can stir the batter, add eyes, and place the drizzle, while an adult handles the oven, hot pans, and melted chocolate.
Can I make them in a 9×13-inch pan instead of a square pan?
Yes, and it’s a good choice if you want thinner brownie mummies with more bandage surface. Start checking a few minutes earlier than the recipe suggests, since thinner batter bakes faster.
Spooky Little Wins
Mummy brownies work because they don’t demand perfection. A crooked eye, a thick bandage, a drizzle that leans to one side — all of it still reads as the design. That’s a rare thing in baking, and it’s why this dessert is such a good fit for beginner bakers.
Pick the flavor that sounds best, keep the brownies fully cooled, and let the decoration be a little messy on purpose. That’s where the charm lives. Once you make one pan, the whole idea starts to feel less like a Halloween project and more like a very reliable little trick you can pull out whenever you want chocolate with a costume.