
A tray of Easter cookies can look almost unfair in person. The pastel icing catches your eye first, then the faint shimmer of sanding sugar, then the little details you only notice when you lean in — a piped bunny ear, a jam center that looks like stained glass, a coconut nest piled high with candy eggs. These are the cookies people hover over before they eat them.
What makes Easter cookies fun is that they don’t need to be fussy to look polished. A good dough, a clean cut, a smart glaze, and one or two simple decorating tricks will carry a lot of visual weight. I’d take a well-baked lemon crinkle or a neat thumbprint over a cookie overloaded with sprinkles and chaos any day. The flavor has to earn the pretty, and these recipes do.
You also don’t need one single style to fill a spring cookie box. Cutouts, drop cookies, sandwich cookies, no-bake nests, sandwich cookies, and sugar-dusted crinkles each bring a different texture to the plate, which is what keeps a dessert table from feeling flat. That mix matters more than people think. A tray with six different shapes and only two doughs can still feel lively if the finishing details are handled with care.
Why This Collection Feels Special

-
Pretty Without Fuss: Every cookie here uses one or two simple decorating moves — icing, glaze, jam, coconut, or a dusting of sugar — so you get a polished look without a full afternoon of piping.
-
Spring Flavors That Make Sense: Lemon, strawberry, coconut, almond, and vanilla all show up in ways that actually taste like spring, not just pastel-colored sugar.
-
Mix-and-Match Friendly: You can set these out together on one platter because the textures vary so much: crisp, chewy, crumbly, soft, and melt-in-your-mouth all in one spread.
-
Kid Help Fits Naturally: Sprinkling, glazing, sandwiching, and adding candy eggs are easy jobs for small hands, and they don’t wreck the recipe if the decoration gets a little uneven.
-
Bake-Ahead Friendly: Several of these cookies hold up well for a day or two, and a few — especially the shortbread, thumbprints, and sandwich cookies — taste even better after they rest.
-
No Single Style Monopoly: If you hate rolling dough, there are drop cookies. If you love neat edges, there are cutouts. If you want no oven time at all, one of the nest cookies takes care of that.
1. Pastel Iced Bunny Cutout Cookies
A good cutout cookie should hold its shape, stay tender at the center, and give you a clean canvas for icing. These vanilla cookies do all three. They smell like butter and a little almond extract when they come out of the oven, and the pastel royal icing dries to a smooth shell that looks almost too neat to bite into.
Why It Works:
The dough is sturdy enough for bunnies, eggs, and flowers, but not so dry that it turns chalky. Chilling it for 30 minutes keeps the edges sharp, which matters more than fancy cutters do. A thin layer of icing dries with that glossy finish people always think took more effort than it did.
Key Ingredients:
- 2¾ cups all-purpose flour, spooned and leveled
- 1 teaspoon baking powder
- ½ teaspoon fine salt
- 1 cup unsalted butter, softened
- 1 cup granulated sugar
- 1 large egg
- 1 teaspoon vanilla extract
- ½ teaspoon almond extract
- 2 tablespoons milk, if needed for softness
- 2 cups powdered sugar, 2 to 3 tablespoons milk, and gel food coloring for icing
Quick Steps:
- Beat the butter and sugar until pale and fluffy, about 2 minutes.
- Mix in the egg, vanilla, and almond extract.
- Add the flour, baking powder, and salt; mix until the dough comes together. Chill 30 minutes.
- Roll to ¼ inch thick, cut shapes, and bake at 350°F for 8 to 10 minutes, until the edges are just set.
- Cool completely before flooding or piping with icing. Let the icing dry for at least 1 hour.
Equipment for This Recipe:
- Rolling pin
- Bunny, egg, or flower cookie cutters
- Parchment-lined baking sheets
- Piping bags or zip-top bags for icing
How to Serve This Dish:
Pile them high on a white platter so the icing colors pop. A few mint leaves or fresh edible flowers around the edges make the tray look finished without stealing the show.
Pro Tips for This Recipe:
- Chill the cut shapes for 10 minutes before baking if the kitchen is warm.
- Use gel coloring, not liquid food dye, or the icing gets thin and streaky.
- Bake one sheet at a time for the cleanest edges.
Variations on This Dish:
- Lemon Bunny Cookies: Swap the almond extract for lemon zest and 1 teaspoon lemon extract.
- Pastel Sprinkle Cutouts: Press sanding sugar into the tops before baking instead of icing.
- Chocolate-Dipped Ears: Dip cooled cookies halfway in melted white chocolate and add pastel nonpareils.
Common Mistakes to Avoid with This Dish:
- Skipping the chill: Warm dough spreads and turns your bunnies into blobs.
- Icing too soon: Warm cookies make royal icing slide right off.
- Rolling too thin: Anything under ¼ inch tends to bake up brittle instead of tender.
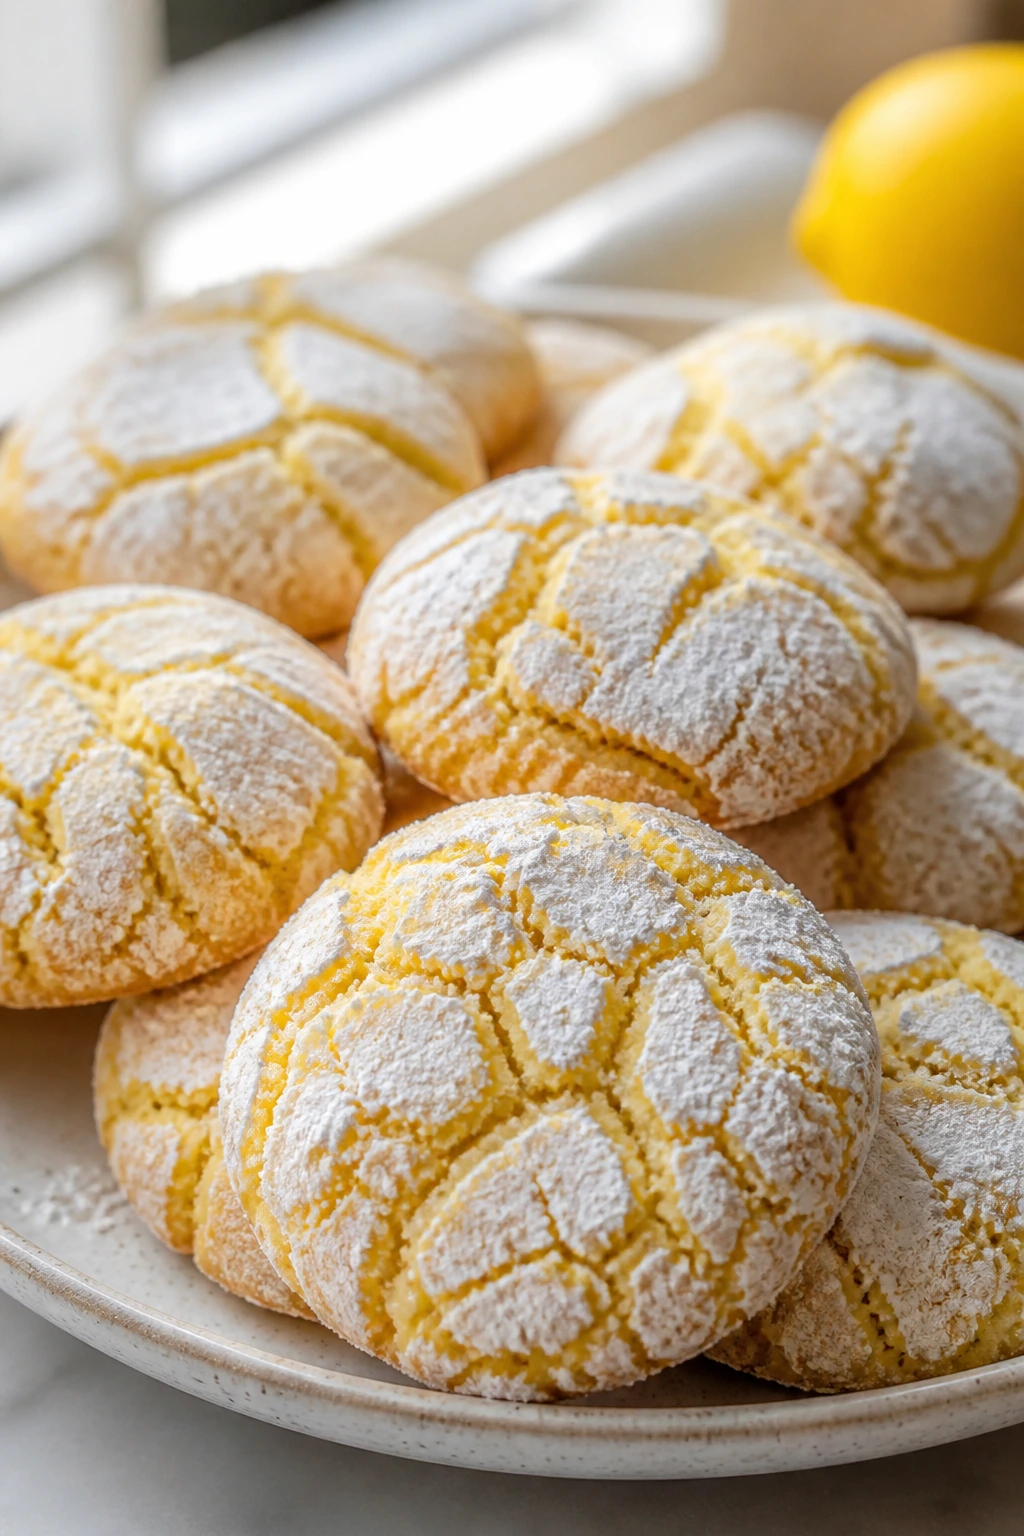
2. Lemon Crinkle Cookies
Lemon crinkles always look like someone dusted them with spring sunlight. The outside turns snowy with powdered sugar, while the center stays soft and bright, almost like lemon bars in cookie form. I like them with a lot of zest; that yellow oil in the peel carries the flavor better than juice alone.
Why It Works:
Crinkle cookies depend on a wet, sticky dough and a heavy powdered sugar coating. As the dough expands in the oven, the cracks open up and leave those dramatic white ridges. The lemon zest keeps the cookie from tasting flat, and a short bake gives you a soft middle instead of a dry cake crumb.
Key Ingredients:
- 2 cups all-purpose flour
- 1 teaspoon baking powder
- ¼ teaspoon baking soda
- ½ teaspoon salt
- 1 cup granulated sugar
- ½ cup unsalted butter, softened
- 2 large eggs
- 2 tablespoons lemon zest
- 2 tablespoons fresh lemon juice
- 1 teaspoon vanilla extract
- 1 cup powdered sugar for rolling
Quick Steps:
- Whisk the flour, baking powder, baking soda, and salt.
- Cream the butter and sugar until fluffy, then mix in the eggs, zest, juice, and vanilla.
- Add the dry ingredients and chill the dough for 30 minutes.
- Scoop tablespoon-size balls, roll in powdered sugar twice, and bake at 350°F for 10 to 12 minutes.
- Cool on the sheet for 5 minutes before moving them.
Equipment for This Recipe:
- Mixing bowls
- Cookie scoop
- Wire rack
- Baking sheets with parchment
How to Serve This Dish:
These look best piled in a shallow bowl where the cracks show. They sit nicely beside berries or a small bowl of lemon curd for dipping.
Pro Tips for This Recipe:
- Roll the dough in sugar, then roll again right before baking.
- Use fresh lemons; bottled juice tastes thin here.
- Pull them when the centers still look slightly soft.
Variations on This Dish:
- Lemon-Poppy Crinkles: Add 1 tablespoon poppy seeds for a little texture.
- Lavender Lemon Crinkles: Use a tiny pinch of culinary lavender, crushed fine.
- Pink Lemon Crinkles: Add a drop of pink gel coloring for a softer pastel look.
Common Mistakes to Avoid with This Dish:
- Skipping the chill: The dough gets too sticky to scoop cleanly.
- Under-coating with sugar: Thin sugar coverage won’t create those dramatic cracks.
- Overbaking: They should look set, not browned.
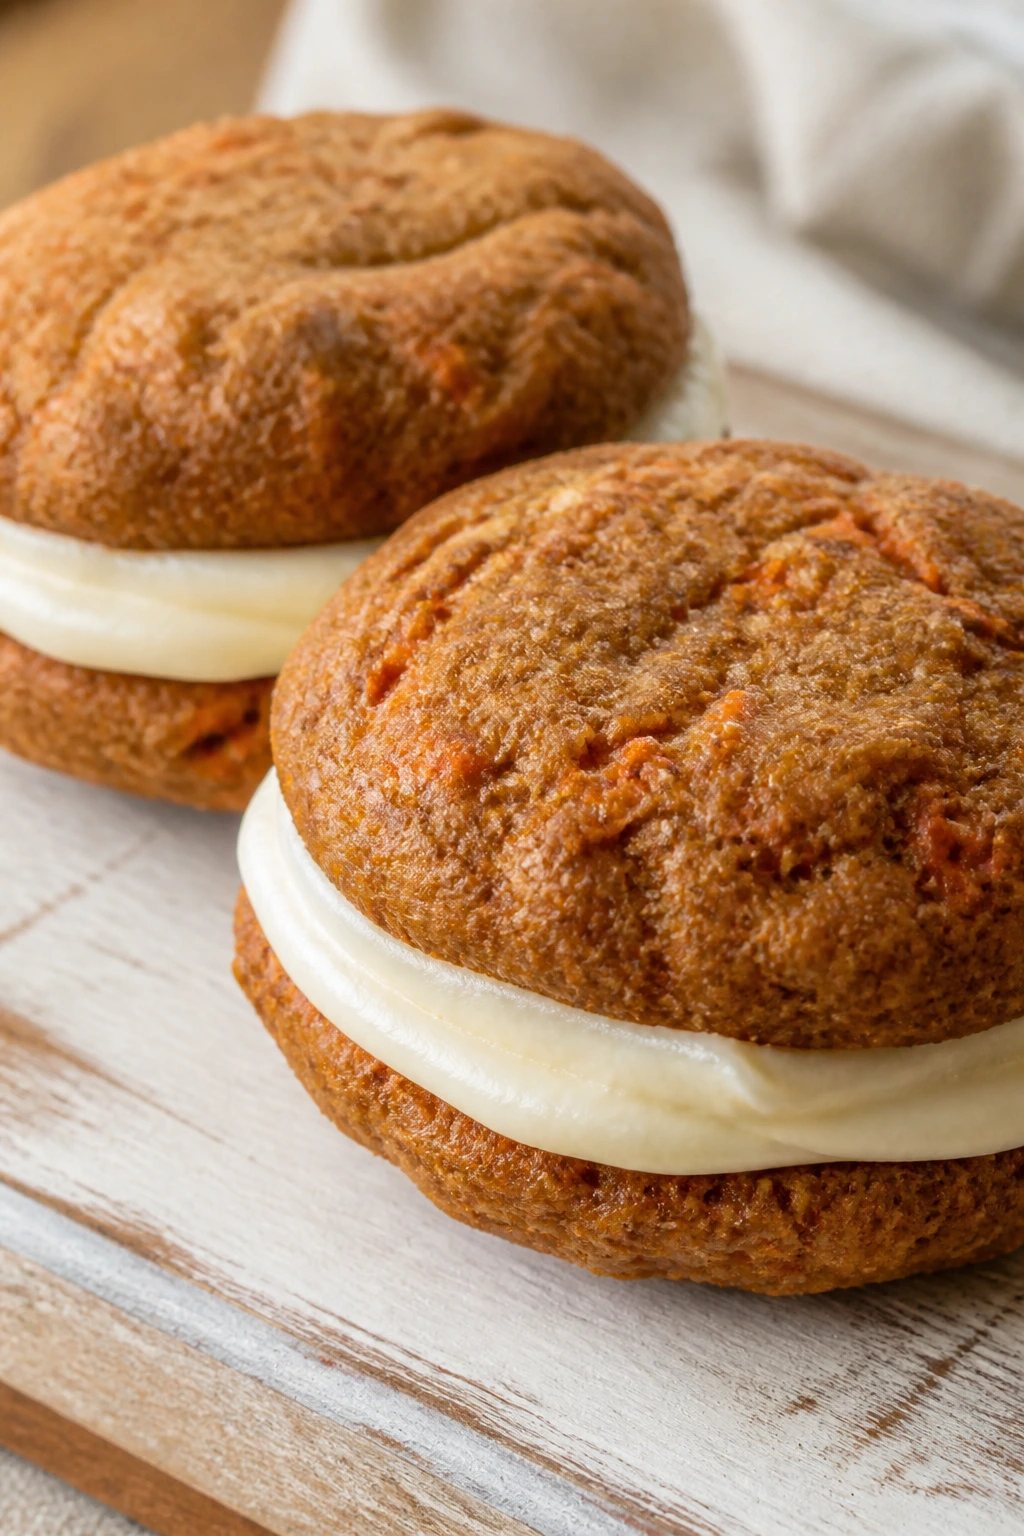
3. Carrot Cake Sandwich Cookies
These taste like the best part of carrot cake, minus the knife and fork. The cookies are soft, warmly spiced, and a little chewy around the edges, while the cream cheese filling gives you that cool, tangy middle that makes people reach for a second one before they’ve finished the first.
Why It Works:
Grated carrot adds moisture and a faint sweetness, but the cookie still needs oats and flour to keep its shape. Cinnamon, nutmeg, and a pinch of ginger make the dough smell like a bakery case in the best possible way. The filling firms up in the fridge, so the sandwiches slice clean instead of squishing out.
Key Ingredients:
- 1½ cups all-purpose flour
- 1 cup old-fashioned oats
- 1 teaspoon baking soda
- 1 teaspoon cinnamon
- ¼ teaspoon nutmeg
- ¼ teaspoon ginger
- ½ teaspoon salt
- ¾ cup brown sugar
- ½ cup unsalted butter, softened
- 1 large egg
- 1 cup finely grated carrot
- 4 ounces cream cheese, softened
- 1 cup powdered sugar
- 1 teaspoon vanilla extract
Quick Steps:
- Mix the dry ingredients in one bowl.
- Beat the butter and brown sugar, then add the egg and carrot.
- Fold in the dry mix and scoop into small mounds.
- Bake at 350°F for 10 to 12 minutes until set at the edges.
- Beat the filling ingredients, spread between cooled cookies, and chill 20 minutes.
Equipment for This Recipe:
- Box grater or fine grater
- Hand mixer
- Parchment-lined sheets
- Offset spatula for filling
How to Serve This Dish:
Cut one sandwich in half so the cream cheese layer shows. A dusting of cinnamon on the plate makes them look bakery-made.
Pro Tips for This Recipe:
- Grate the carrot fine; big shreds make the cookie fall apart.
- Cool the cookies fully before filling.
- A pinch of salt in the filling keeps it from tasting sugary.
Variations on This Dish:
- Orange Carrot Sandwiches: Add orange zest to the filling.
- Walnut Version: Stir ½ cup finely chopped walnuts into the dough.
- Dairy-Free Filling: Use dairy-free cream cheese and a little extra powdered sugar.
Common Mistakes to Avoid with This Dish:
- Too much carrot: Wet batter makes flat cookies.
- Warm filling: It slides out when you press the sandwiches together.
- Overbaking: Dry carrot cookies turn crumbly fast.
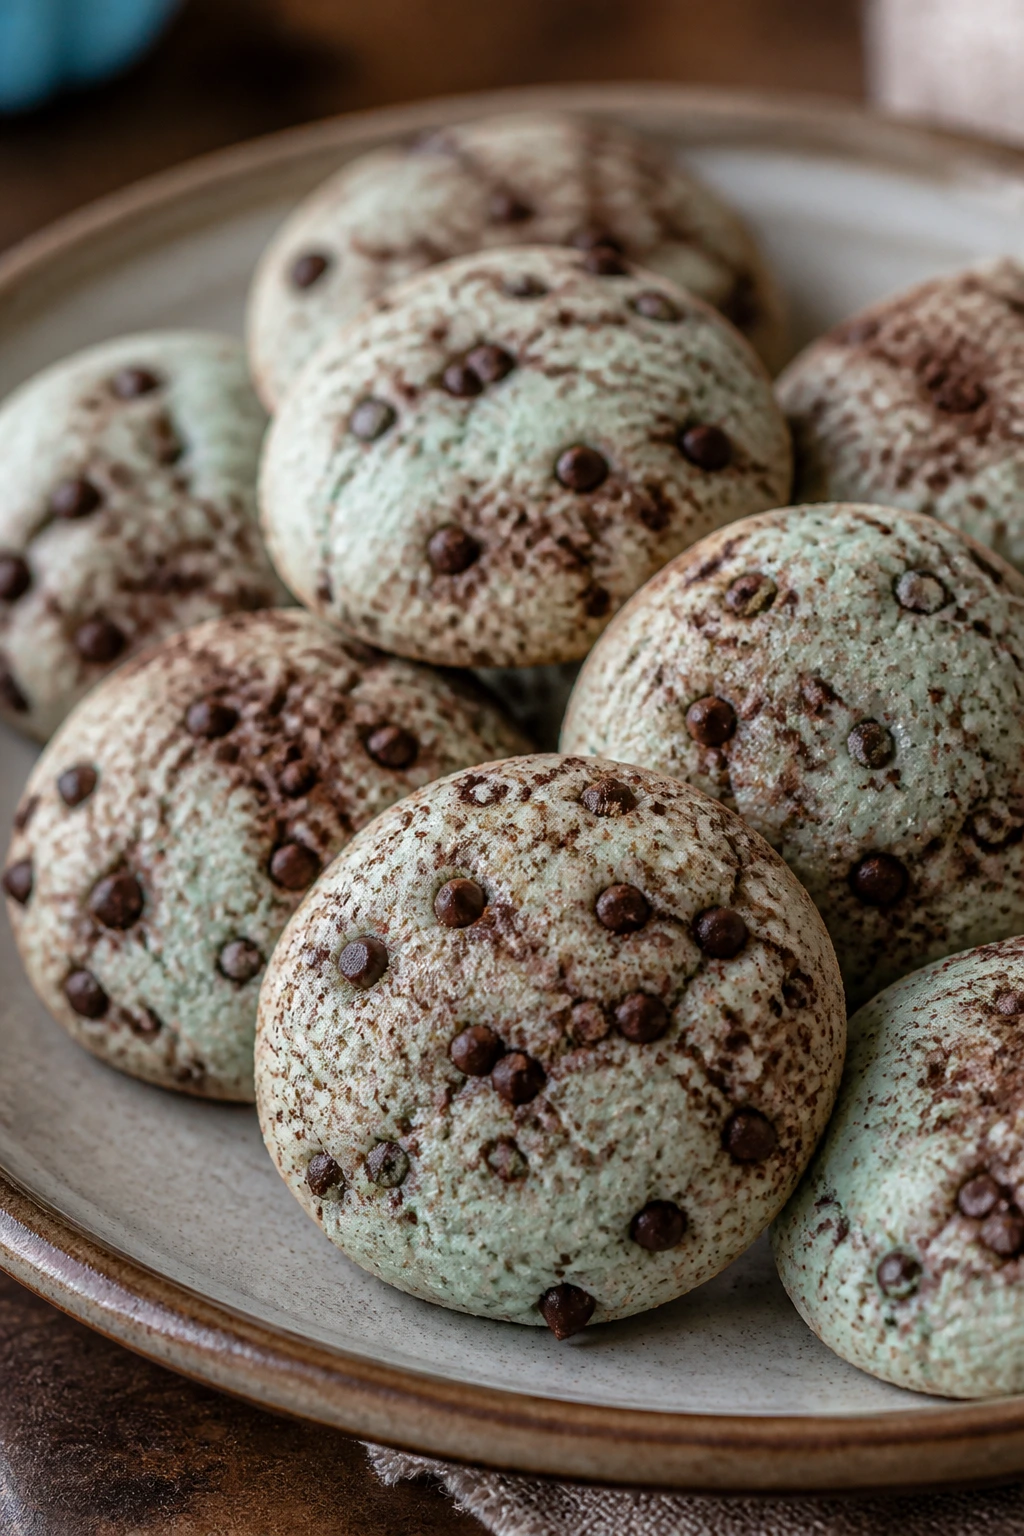
4. Robin’s Egg Chocolate Chip Cookies
These are the cookies that make a dessert tray look intentional in five seconds flat. Brown sugar gives them a chewy middle, mini chocolate chips melt into little pockets, and the speckled cocoa finish turns each one into a tiny Easter egg. Cute. Slightly smug. I like that.
Why It Works:
The cookie dough is familiar enough that nobody has to decode it, which is a relief when you’re juggling ten dessert jobs at once. Mini chips distribute better than regular chips, so every bite gets chocolate. The speckled finish is just cocoa and a little milk flicked from a brush or spoon — messy in the best way.
Key Ingredients:
- 2¼ cups all-purpose flour
- 1 teaspoon baking soda
- 1 teaspoon salt
- 1 cup unsalted butter, softened
- ¾ cup brown sugar
- ½ cup granulated sugar
- 2 large eggs
- 2 teaspoons vanilla extract
- 1½ cups mini chocolate chips
- 1 cup powdered sugar
- 2 tablespoons cocoa powder
- 1 to 2 teaspoons milk for speckling
Quick Steps:
- Whisk the flour, baking soda, and salt.
- Cream butter and sugars, then beat in the eggs and vanilla.
- Stir in the dry ingredients and mini chips.
- Scoop, bake at 350°F for 9 to 11 minutes, and cool completely.
- Mix powdered sugar, cocoa, and milk into a thin speckle glaze, then flick it over the cookies.
Equipment for This Recipe:
- Stand mixer or hand mixer
- Cookie scoop
- Cooling rack
- Small pastry brush or spoon for speckling
How to Serve This Dish:
Stack them on parchment so the speckles stay crisp. They look nicest with a few pastel candy eggs tucked around the platter.
Pro Tips for This Recipe:
- Chill the dough 20 minutes if your butter was very soft.
- Use mini chips; regular chips make the cookies lumpy.
- Speckle only after the glaze has thickened slightly.
Variations on This Dish:
- White Chocolate Robin’s Eggs: Swap the chips for white chocolate and use blue candy melts for speckling.
- Almond Brown Butter Version: Brown the butter and add ½ teaspoon almond extract.
- Extra-Chewy Centers: Replace 2 tablespoons of flour with cornstarch.
Common Mistakes to Avoid with This Dish:
- Overmixing the dough: That makes the cookies tough.
- Glaze too thin: It runs instead of speckling.
- Skipping the cool-down: Warm cookies soak up the glaze and lose the finish.
5. Coconut Macaroon Nests
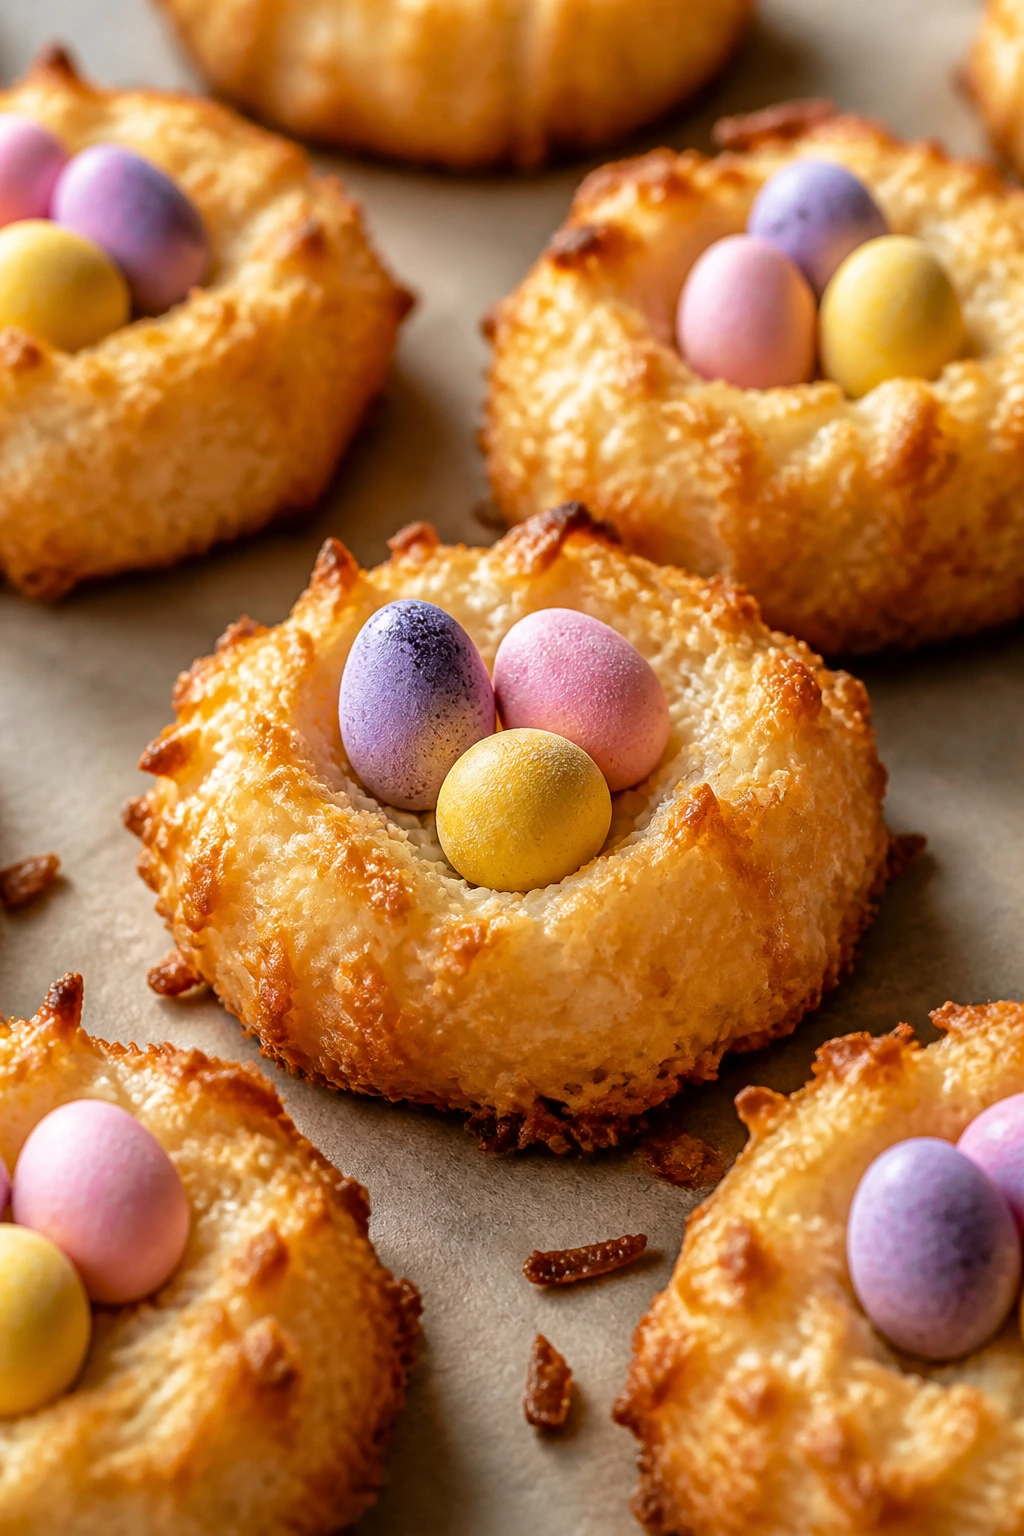
If Easter had a texture, it might be a coconut nest. These are crisp at the edges, chewy in the middle, and a little golden on top, with chocolate eggs settled into the center like they belong there. They look fancy. They’re not. That’s the beauty of them.
Why It Works:
Macaroons need almost no flour, which keeps them naturally chewy. Sweetened shredded coconut holds together with egg whites and condensed milk, so the shape is easy to scoop and even easier to nest. A quick toast in the oven gives the edges that caramel color people usually mistake for extra effort.
Key Ingredients:
- 4 cups sweetened shredded coconut
- 2 large egg whites
- ⅓ cup granulated sugar
- ¼ teaspoon salt
- 1 teaspoon vanilla extract
- ⅓ cup sweetened condensed milk
- ½ cup mini chocolate eggs or jelly beans
- 2 ounces melted chocolate for drizzling, optional
Quick Steps:
- Stir the coconut, egg whites, sugar, salt, vanilla, and condensed milk together.
- Scoop into mounds on a parchment-lined sheet and press the center lightly with your thumb.
- Bake at 325°F for 15 to 18 minutes until the edges are golden.
- Cool completely, then fill the centers with candy eggs.
- Drizzle with melted chocolate if you want a little contrast.
Equipment for This Recipe:
- Mixing bowl
- Cookie scoop
- Parchment paper
- Small spoon for shaping nests
How to Serve This Dish:
Arrange them in cupcake liners so the nest shape stays tidy. A little shredded coconut scattered on the serving plate makes the whole tray feel springlike.
Pro Tips for This Recipe:
- Pack the coconut mixture firmly in the scoop.
- Let them cool before adding candy, or the chocolate eggs soften.
- Toasted coconut flakes can replace part of the shredded coconut for more crunch.
Variations on This Dish:
- Chocolate Nest Macaroons: Fold in 2 tablespoons cocoa powder.
- Lemon Coconut Nests: Add lemon zest and swap the chocolate eggs for yellow jelly candies.
- Almond Nest Cookies: Stir in ½ teaspoon almond extract for a warmer flavor.
Common Mistakes to Avoid with This Dish:
- Loose scooping: Unpacked nests spread too much.
- Too much liquid: The cookies collapse instead of holding shape.
- Adding candy too early: Warm nests can melt the filling.
6. Strawberry Thumbprint Cookies
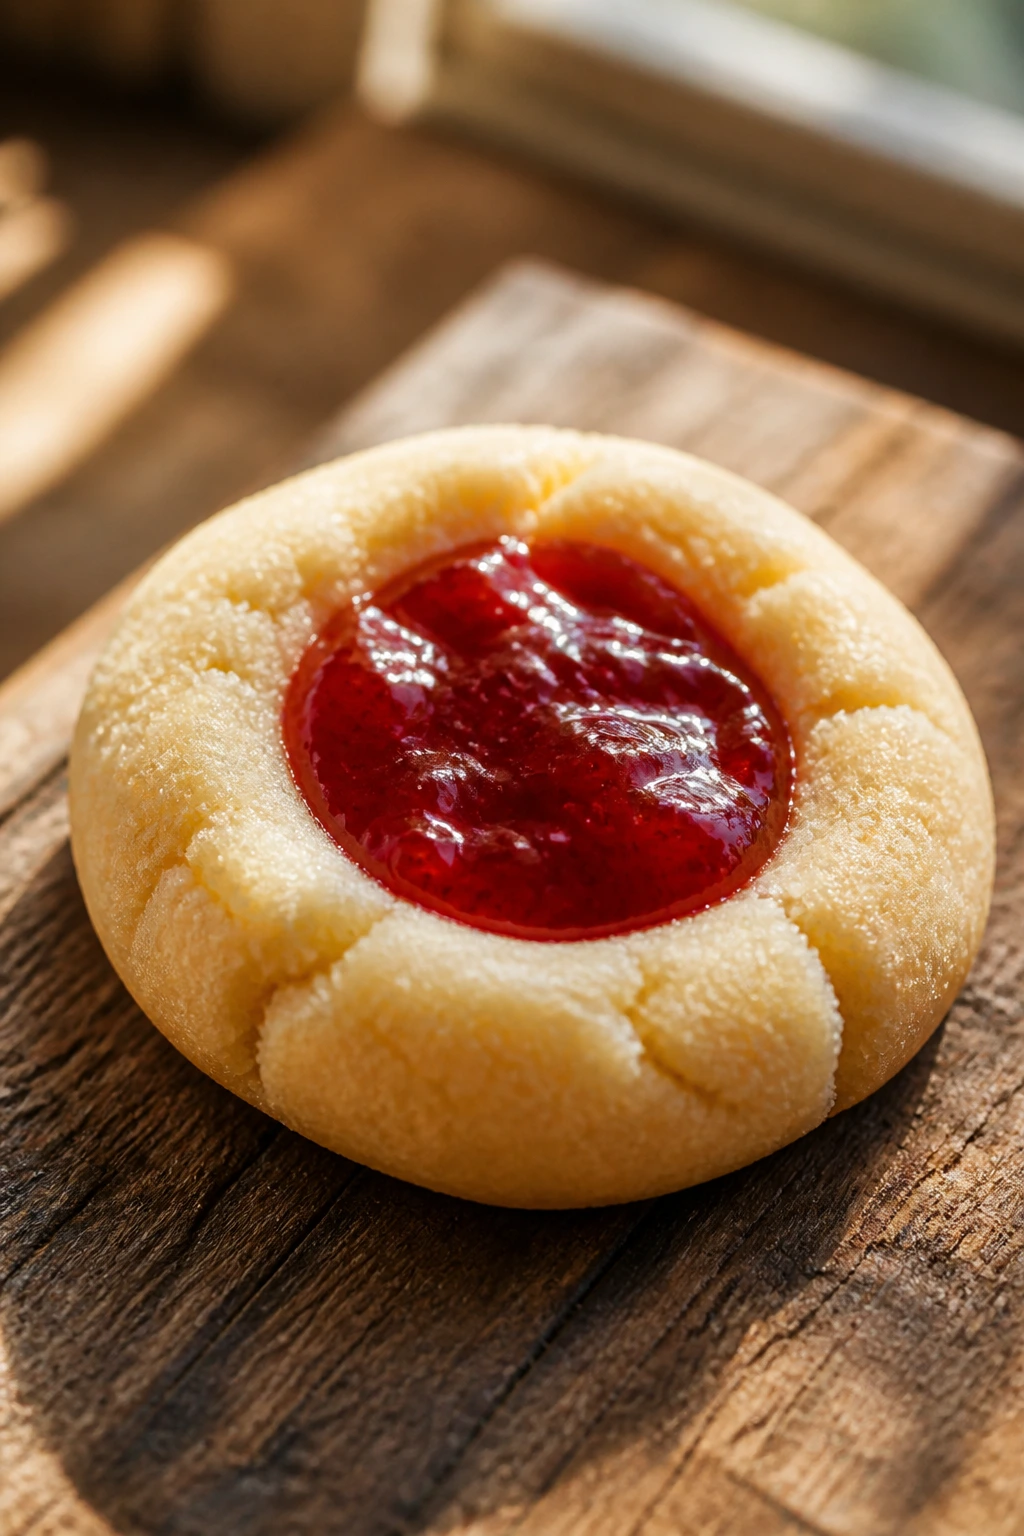
Thumbprints have a way of looking hand-made in a good way. These start with a buttery, tender dough and finish with a glossy strawberry center that glows against the pale cookie. I like using a thicker jam here; thin jam tends to run into the edges and lose the shape.
Why It Works:
The dough is rich enough to stay tender but firm enough to hold a thumbprint without cracking all the way through. Strawberry jam tastes especially good with vanilla and almond. A quick re-press halfway through baking keeps the center open, which is the small detail that makes these look neat instead of slumped.
Key Ingredients:
- 2 cups all-purpose flour
- ½ teaspoon salt
- 1 cup unsalted butter, softened
- ¾ cup powdered sugar
- 1 large egg yolk
- 1 teaspoon vanilla extract
- ¼ teaspoon almond extract
- ½ cup thick strawberry jam
- 2 tablespoons finely chopped freeze-dried strawberries, optional
Quick Steps:
- Cream the butter and powdered sugar until smooth.
- Mix in the egg yolk and extracts, then add flour and salt.
- Roll into balls, press the centers, and chill 15 minutes.
- Fill with jam and bake at 350°F for 12 to 14 minutes.
- Cool, then dust with freeze-dried strawberry powder if using.
Equipment for This Recipe:
- Baking sheets
- Small measuring spoon or thumb for the indent
- Wire rack
- Small spoon or piping bag for jam
How to Serve This Dish:
These look lovely beside shortbread and lemon cookies because the red centers break up a pale tray. Serve them at room temperature so the jam stays glossy, not stiff.
Pro Tips for This Recipe:
- Chill the shaped dough before baking so the indent stays open.
- Use jam, not jelly, for a fuller berry flavor.
- Repress the centers at the 6-minute mark if they puff up.
Variations on This Dish:
- Raspberry Thumbprints: Swap in seedless raspberry jam.
- Apricot Almond Version: Use apricot preserves and extra almond extract.
- Chocolate Thumbprints: Add 2 tablespoons cocoa to the dough.
Common Mistakes to Avoid with This Dish:
- Overfilling the center: Jam bubbles over and burns.
- Using thin jam: It leaks into the cookie.
- Skipping the chill: The cookies spread and lose their round shape.
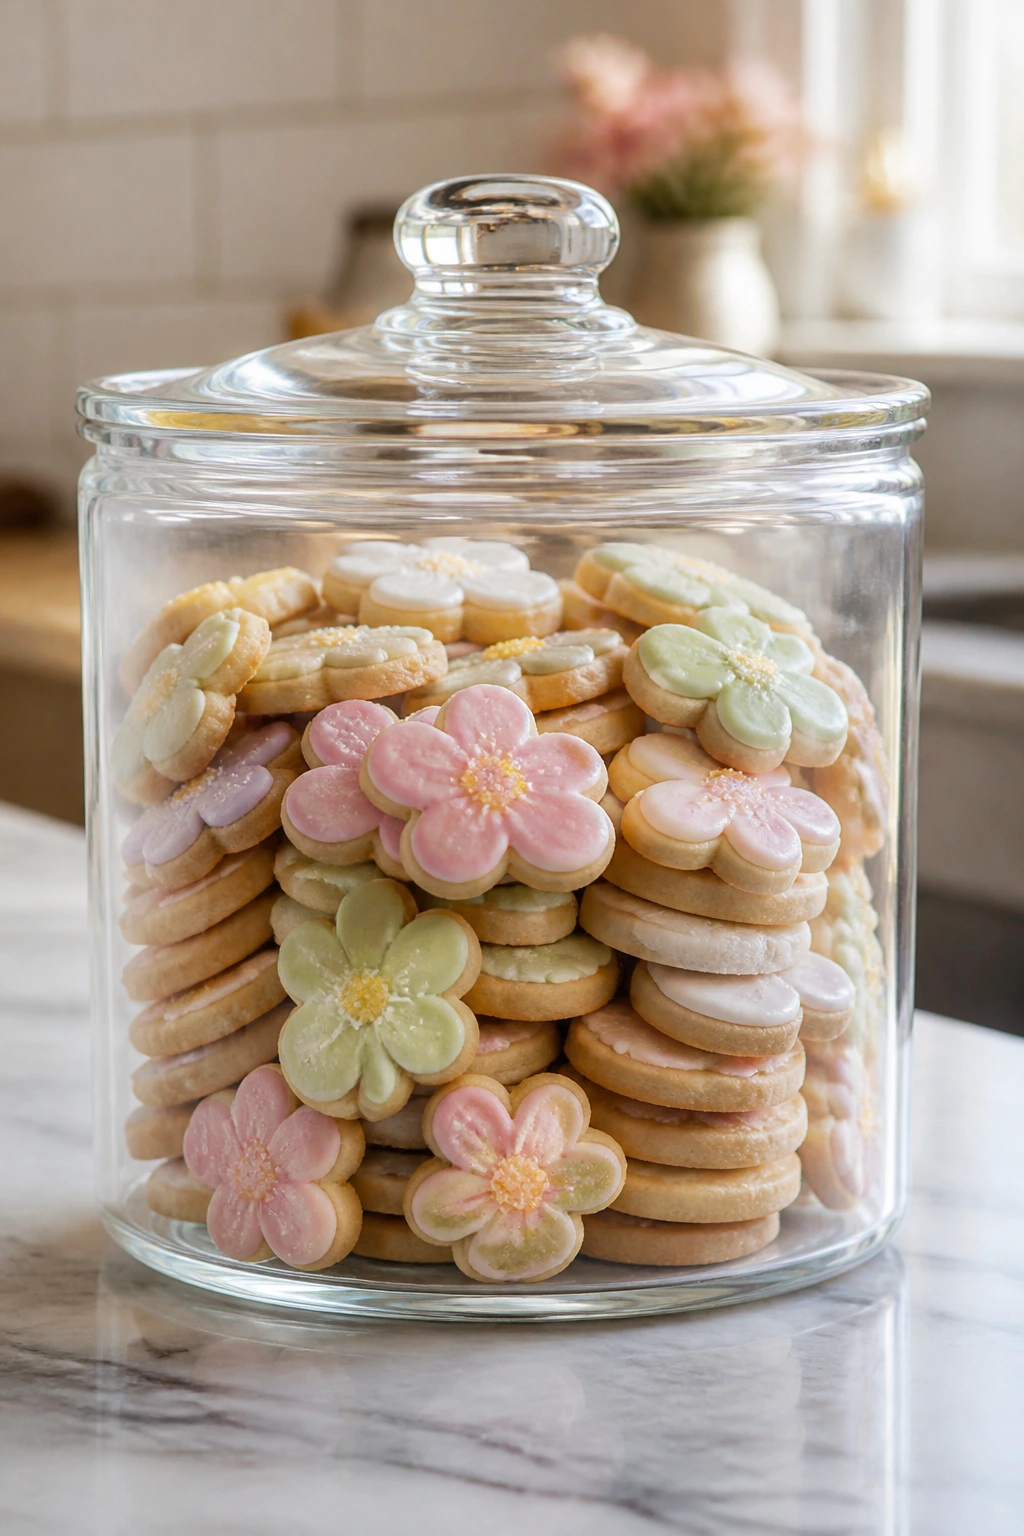
7. Easter Sprinkle Butter Cookies
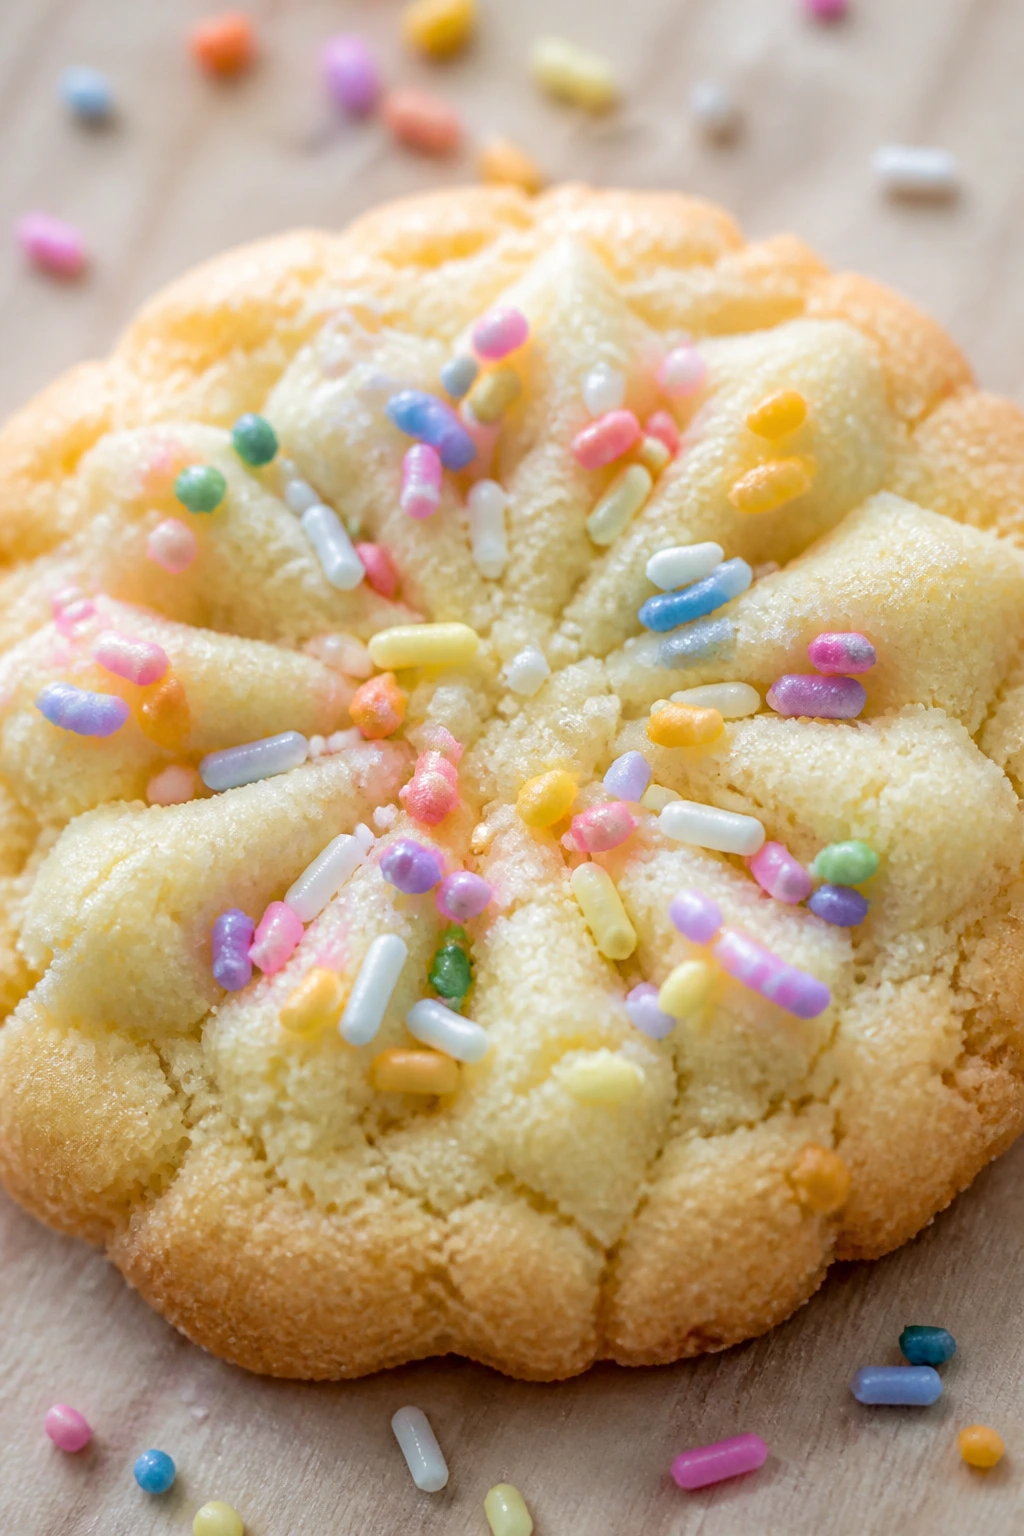
There’s something charmingly old-fashioned about a butter cookie with pastel sprinkles pressed into the top. These are crisp at the edges, tender in the middle, and they smell like vanilla and warm butter. They’re also one of the easiest ways to make a cookie platter look festive without touching icing.
Why It Works:
Butter cookies depend on a simple ratio: enough butter for flavor, enough flour for structure, and enough sugar to keep them delicate. Rolling the logs or scooping them in neat mounds keeps the shapes clean. Sprinkles on top bake into the surface instead of falling off later, which is nicer than trying to glue them on after the fact.
Key Ingredients:
- 2½ cups all-purpose flour
- ½ teaspoon baking powder
- ½ teaspoon salt
- 1 cup unsalted butter, softened
- 1 cup granulated sugar
- 1 large egg
- 2 teaspoons vanilla extract
- ½ teaspoon almond extract
- ½ cup pastel sprinkles
Quick Steps:
- Whisk flour, baking powder, and salt.
- Cream butter and sugar, then beat in the egg and extracts.
- Mix in the dry ingredients until a soft dough forms.
- Scoop or roll into 1½-inch balls, flatten slightly, and press sprinkles on top.
- Bake at 350°F for 10 to 12 minutes until the bottoms are lightly golden.
Equipment for This Recipe:
- Mixing bowls
- Cookie scoop
- Parchment-lined sheets
- Cooling rack
How to Serve This Dish:
These belong on the tray between more decorated cookies because they give the eye a break. A shallow bowl works better than a high stack; the sprinkles stay intact.
Pro Tips for This Recipe:
- Press the sprinkles in before baking, not after.
- Chill the dough 10 minutes if it feels sticky.
- Pull them before the tops brown; butter cookies keep setting as they cool.
Variations on This Dish:
- Citrus Butter Cookies: Add lemon or orange zest.
- Chocolate Sprinkle Cookies: Replace ¼ cup flour with cocoa powder.
- Glazed Butter Cookies: Brush cooled cookies with a thin powdered sugar glaze.
Common Mistakes to Avoid with This Dish:
- Too much sprinkles: The tops can get crunchy and rough.
- Overbaking: They should stay pale.
- Skipping the almond extract: Vanilla alone tastes flatter here.
8. Lemon Blueberry Shortbread Bites
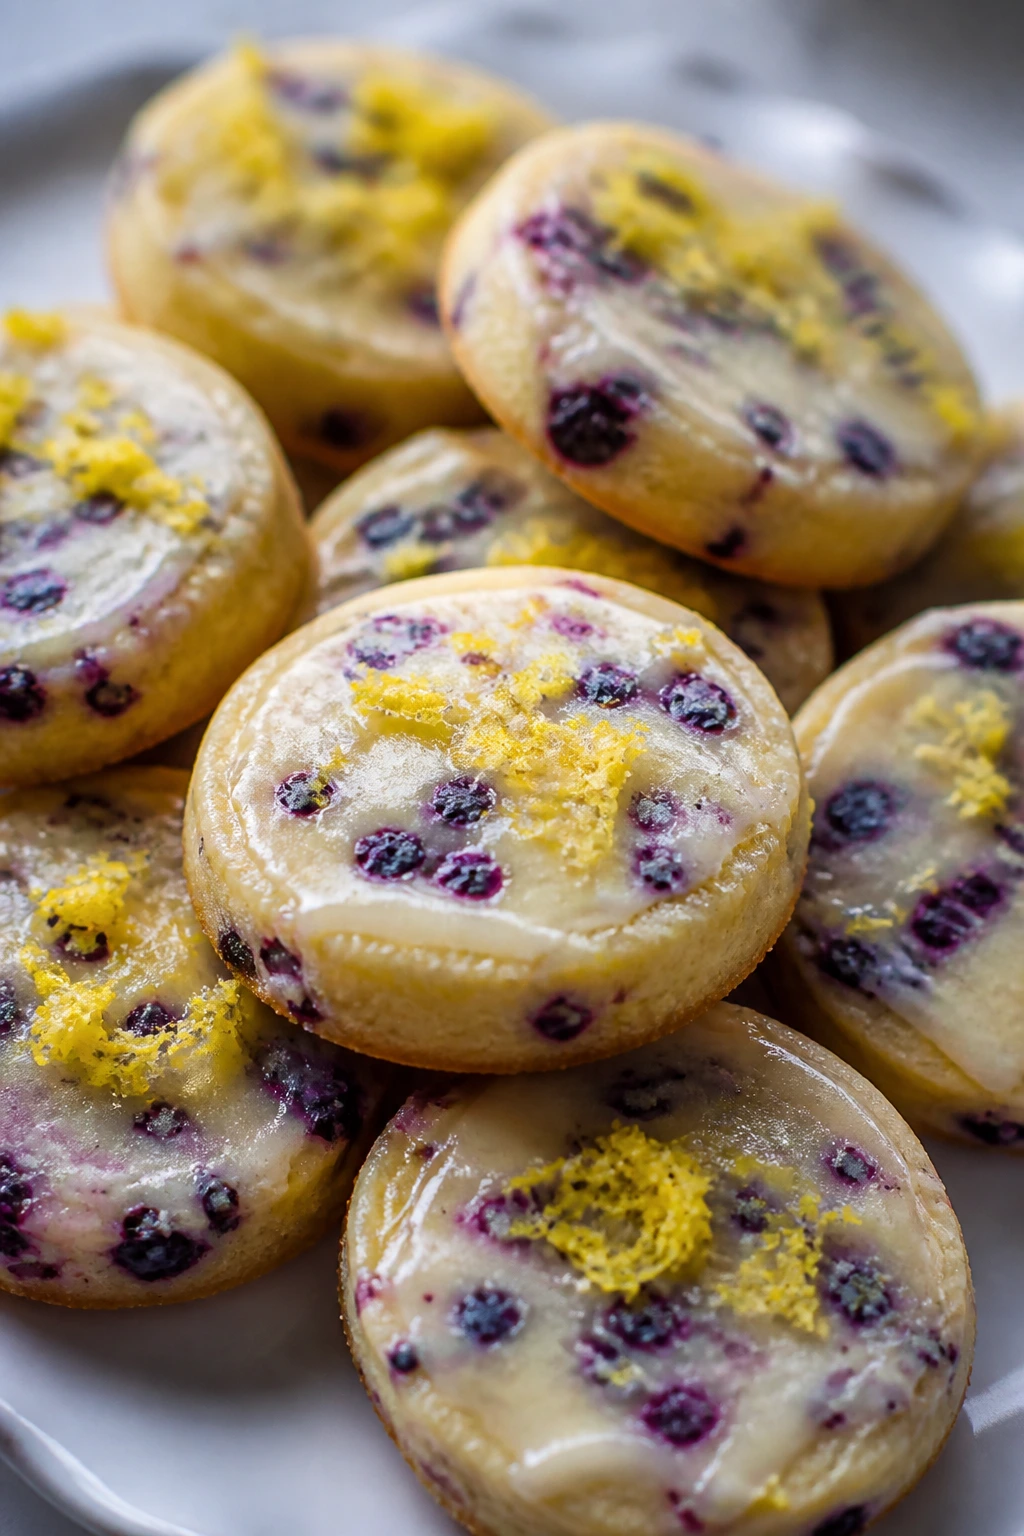
Shortbread with blueberries sounds delicate, and these are. The cookies are buttery and crumbly, with little purple-blue specks from freeze-dried berries and a lemon glaze that sets in a thin, shiny shell. They’re the kind of cookie that looks fancy on a napkin and disappears in two bites.
Why It Works:
Shortbread doesn’t need eggs, which gives it that sandy, melt-away texture. Freeze-dried blueberries are the trick — fresh berries would dump water into the dough and turn the texture muddy. Lemon glaze wakes up the butter, and a small cookie cutter keeps them neat.
Key Ingredients:
- 2 cups all-purpose flour
- ½ cup powdered sugar
- ¼ teaspoon salt
- 1 cup unsalted butter, cold and cubed
- 1 tablespoon lemon zest
- ⅓ cup finely crushed freeze-dried blueberries
- 1 cup powdered sugar for glaze
- 2 to 3 tablespoons lemon juice
Quick Steps:
- Pulse or rub the flour, sugar, salt, butter, zest, and blueberries together until crumbly.
- Press into a dough, chill 20 minutes, then roll to ½ inch thick.
- Cut into small rounds or squares.
- Bake at 325°F for 14 to 16 minutes until the edges barely color.
- Drizzle with lemon glaze once cool.
Equipment for This Recipe:
- Food processor or pastry cutter
- Rolling pin
- Small cookie cutter
- Wire rack
How to Serve This Dish:
Serve these next to tea or coffee in small stacks. Their pale color looks especially nice on a dark plate.
Pro Tips for This Recipe:
- Keep the butter cold for a cleaner crumb.
- Crush the blueberries fine so the dough doesn’t tear.
- Slice or cut them before baking if the dough gets too soft.
Variations on This Dish:
- Raspberry-Lemon Shortbread: Replace blueberries with freeze-dried raspberries.
- Lavender Shortbread: Add a tiny pinch of culinary lavender.
- Almond Shortbread Bites: Swap ½ teaspoon almond extract for part of the zest.
Common Mistakes to Avoid with This Dish:
- Warm butter: The cookies spread and lose their crisp edges.
- Fresh blueberries: They leak and stain the dough wet.
- Overmixing: Shortbread should look crumbly before it comes together.
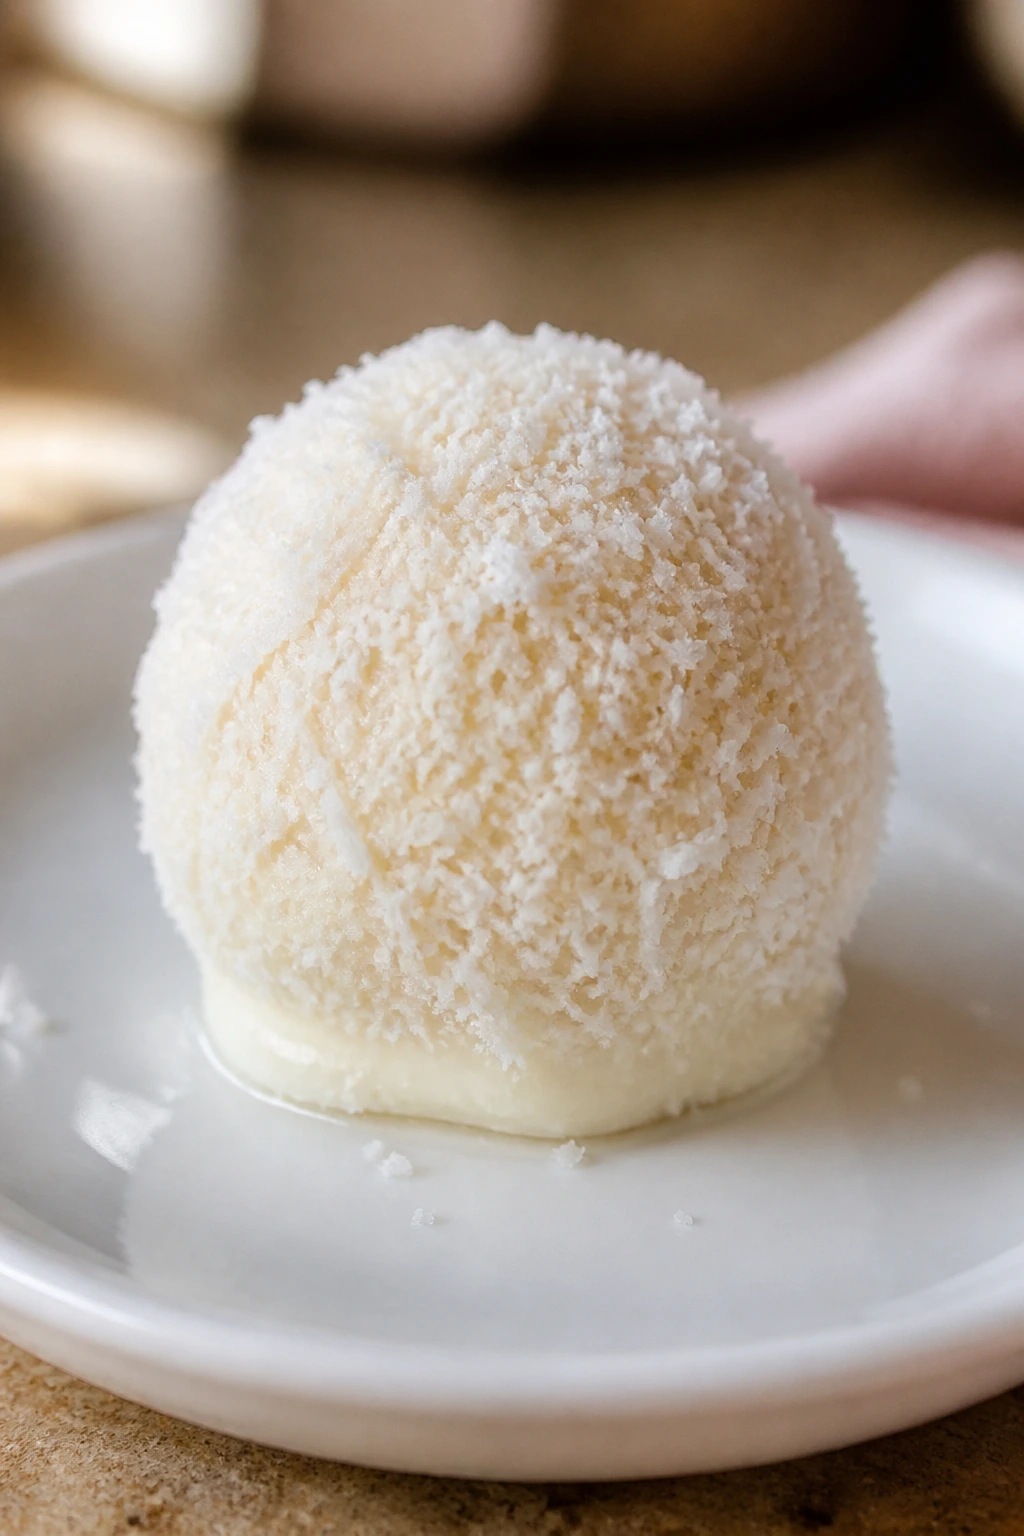
9. Almond Snowball Cookies
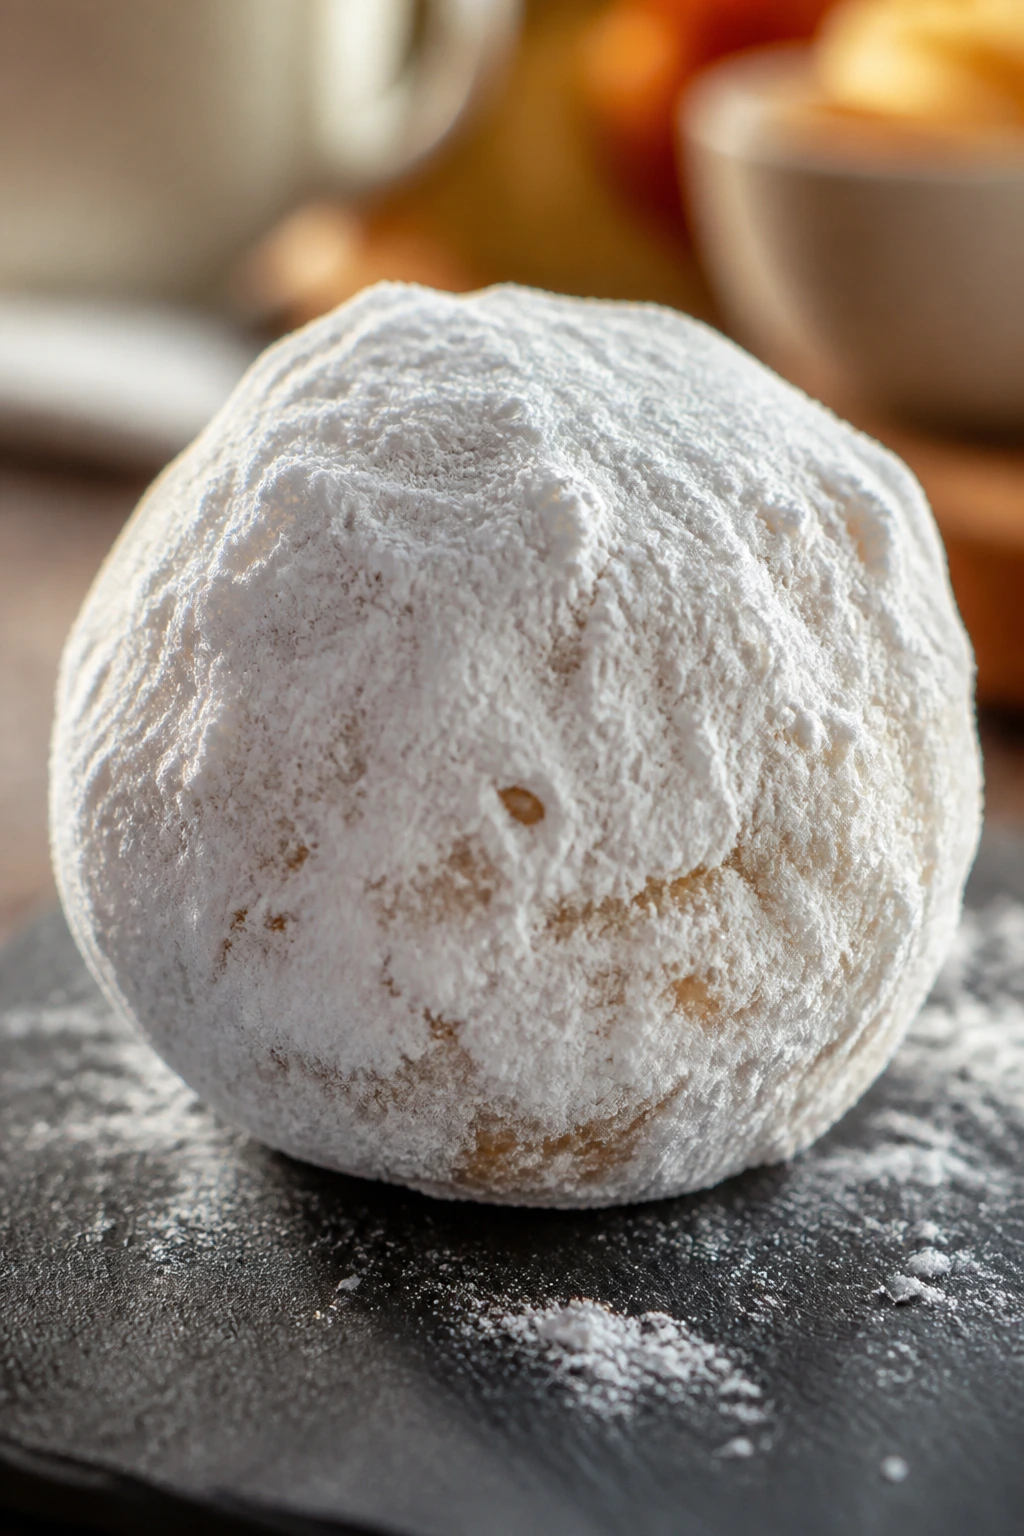
Snowball cookies are one of the easiest ways to get that soft, sugared look everyone loves. These are rich, nutty, and covered in a blanket of powdered sugar that melts slightly onto the warm cookie. They look like little Easter truffles, only less fussy and more forgiving.
Why It Works:
The high butter-to-flour ratio gives snowballs their tender crumble. Almond flour or finely chopped almonds deepen the flavor and make the texture feel a little more special than the classic walnut version. Rolling them in powdered sugar twice creates that snowy finish that holds even after they cool.
Key Ingredients:
- 1 cup unsalted butter, softened
- ½ cup powdered sugar, plus more for rolling
- 1 teaspoon vanilla extract
- 1 teaspoon almond extract
- 2 cups all-purpose flour
- 1 cup finely ground almonds or almond flour
- ¼ teaspoon salt
Quick Steps:
- Cream butter and powdered sugar.
- Beat in the extracts.
- Stir in flour, ground almonds, and salt until a soft dough forms.
- Roll into 1-inch balls and bake at 325°F for 14 to 16 minutes.
- Roll warm cookies in powdered sugar, cool, then roll again.
Equipment for This Recipe:
- Mixing bowl
- Small scoop or spoon
- Parchment-lined baking sheet
- Bowl for rolling sugar
How to Serve This Dish:
These make a clean contrast on a tray full of colored cookies. I like them in paper candy cups because the sugar coating stays neat.
Pro Tips for This Recipe:
- Roll them while warm so the sugar clings.
- Don’t brown them much; they should stay pale.
- Almond flour makes a softer cookie, while ground almonds give more texture.
Variations on This Dish:
- Pistachio Snowballs: Swap in finely ground pistachios.
- Coconut Snowballs: Replace ½ cup almonds with shredded coconut.
- Chocolate Snowballs: Add 2 tablespoons cocoa powder and use extra powdered sugar for rolling.
Common Mistakes to Avoid with This Dish:
- Overbrowning: They should not look toasted.
- Skipping the second sugar coat: The finish looks thin without it.
- Using chopped nuts too large: The cookies fall apart when rolled.
10. Easter Basket Linzer Cookies
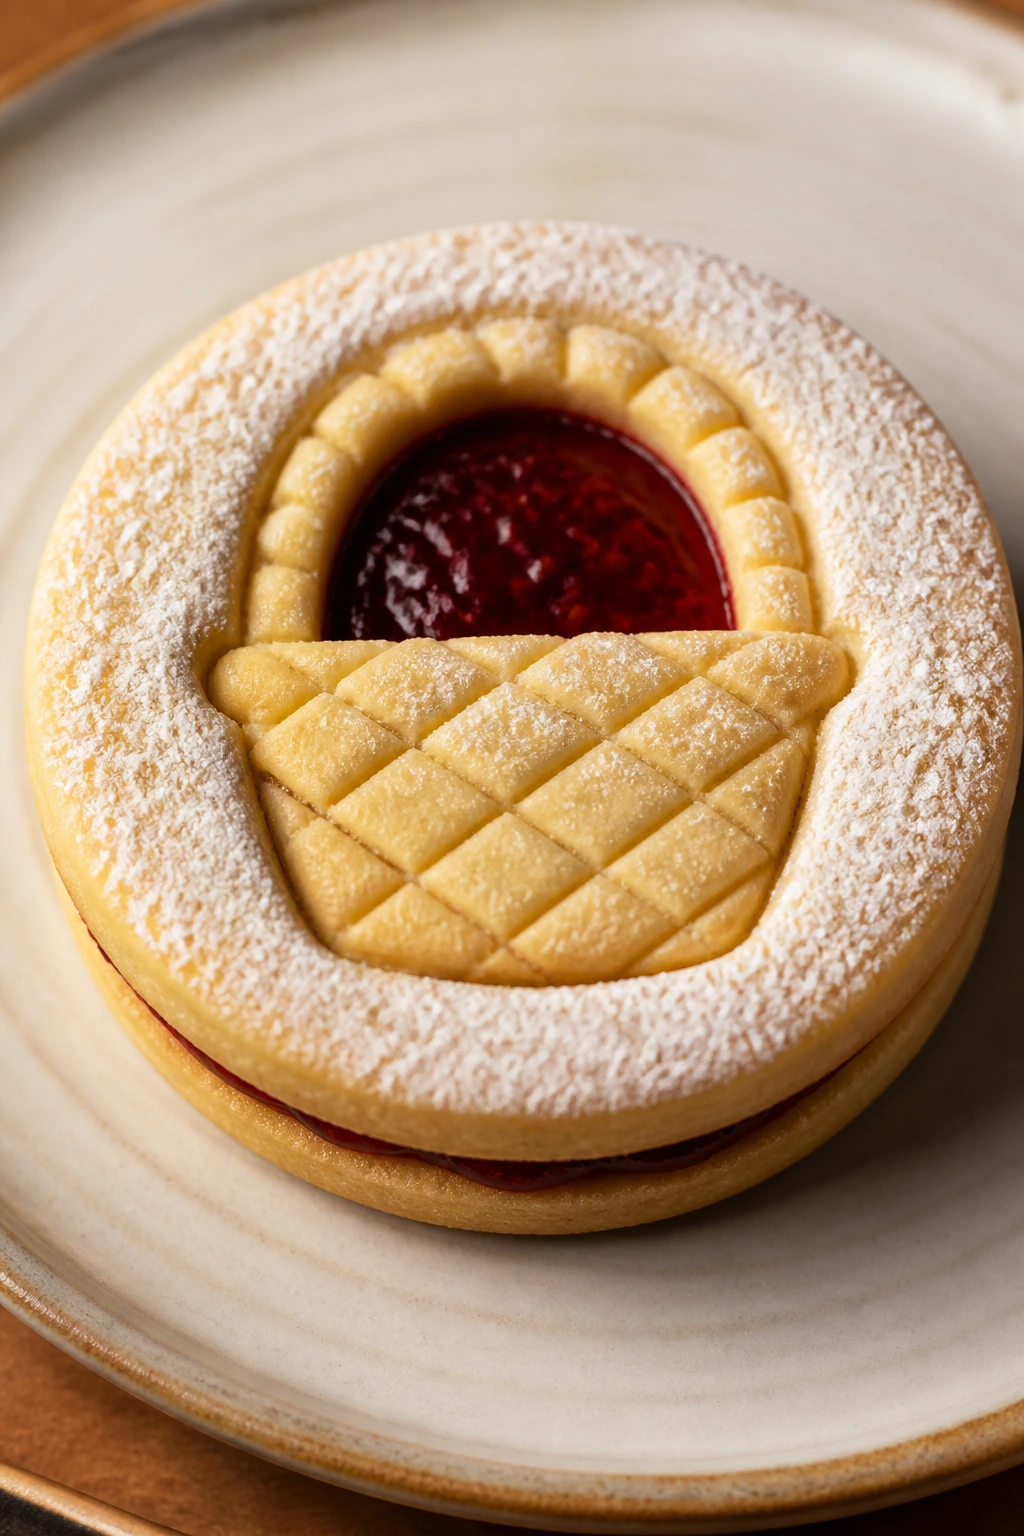
These are the cookies that make a platter look deliberately styled. Two buttery almond cookies sandwich a bright jam center, and a small cutout on top turns the whole thing into a tiny basket or egg window. They’re crisp, neat, and a little elegant without being precious.
Why It Works:
Linzers need a firm dough so the top and bottom cookies line up cleanly after baking. Almond flour keeps the texture tender, while raspberry jam gives the red center that shows through the cutout. A light dusting of powdered sugar on the top cookie makes the design pop.
Key Ingredients:
- 1½ cups all-purpose flour
- 1 cup almond flour
- ½ teaspoon cinnamon
- ¼ teaspoon salt
- 1 cup unsalted butter, softened
- ¾ cup powdered sugar
- 1 large egg yolk
- 1 teaspoon vanilla extract
- ½ cup raspberry jam
- Powdered sugar for dusting
Quick Steps:
- Mix dry ingredients, then cream butter and sugar.
- Beat in egg yolk and vanilla, then add the dry mix. Chill 30 minutes.
- Roll to ¼ inch, cut rounds, and cut small shapes from half the rounds.
- Bake at 350°F for 9 to 11 minutes until set.
- Sandwich with jam and dust the tops lightly with powdered sugar.
Equipment for This Recipe:
- Round cookie cutters
- Small cutter for the center shape
- Baking sheets
- Sifter for powdered sugar
How to Serve This Dish:
These belong near the middle of the platter because they look like little jewels. A plate with a few whole berries beside them helps the jam color feel intentional.
Pro Tips for This Recipe:
- Chill the cut shapes before baking so they keep the window cutout.
- Spread jam thin; too much squeezes out.
- Assemble the day you plan to serve them for the neatest edges.
Variations on This Dish:
- Apricot Basket Linzers: Use apricot preserves and a star cutout.
- Chocolate Linzers: Add 2 tablespoons cocoa to the dough.
- Orange Almond Linzers: Swap raspberry jam for orange marmalade.
Common Mistakes to Avoid with This Dish:
- Rushing the chill: Soft dough distorts the shapes.
- Thick jam layer: It oozes when you bite into it.
- Overbaking: The cookies turn dry and crumbly.
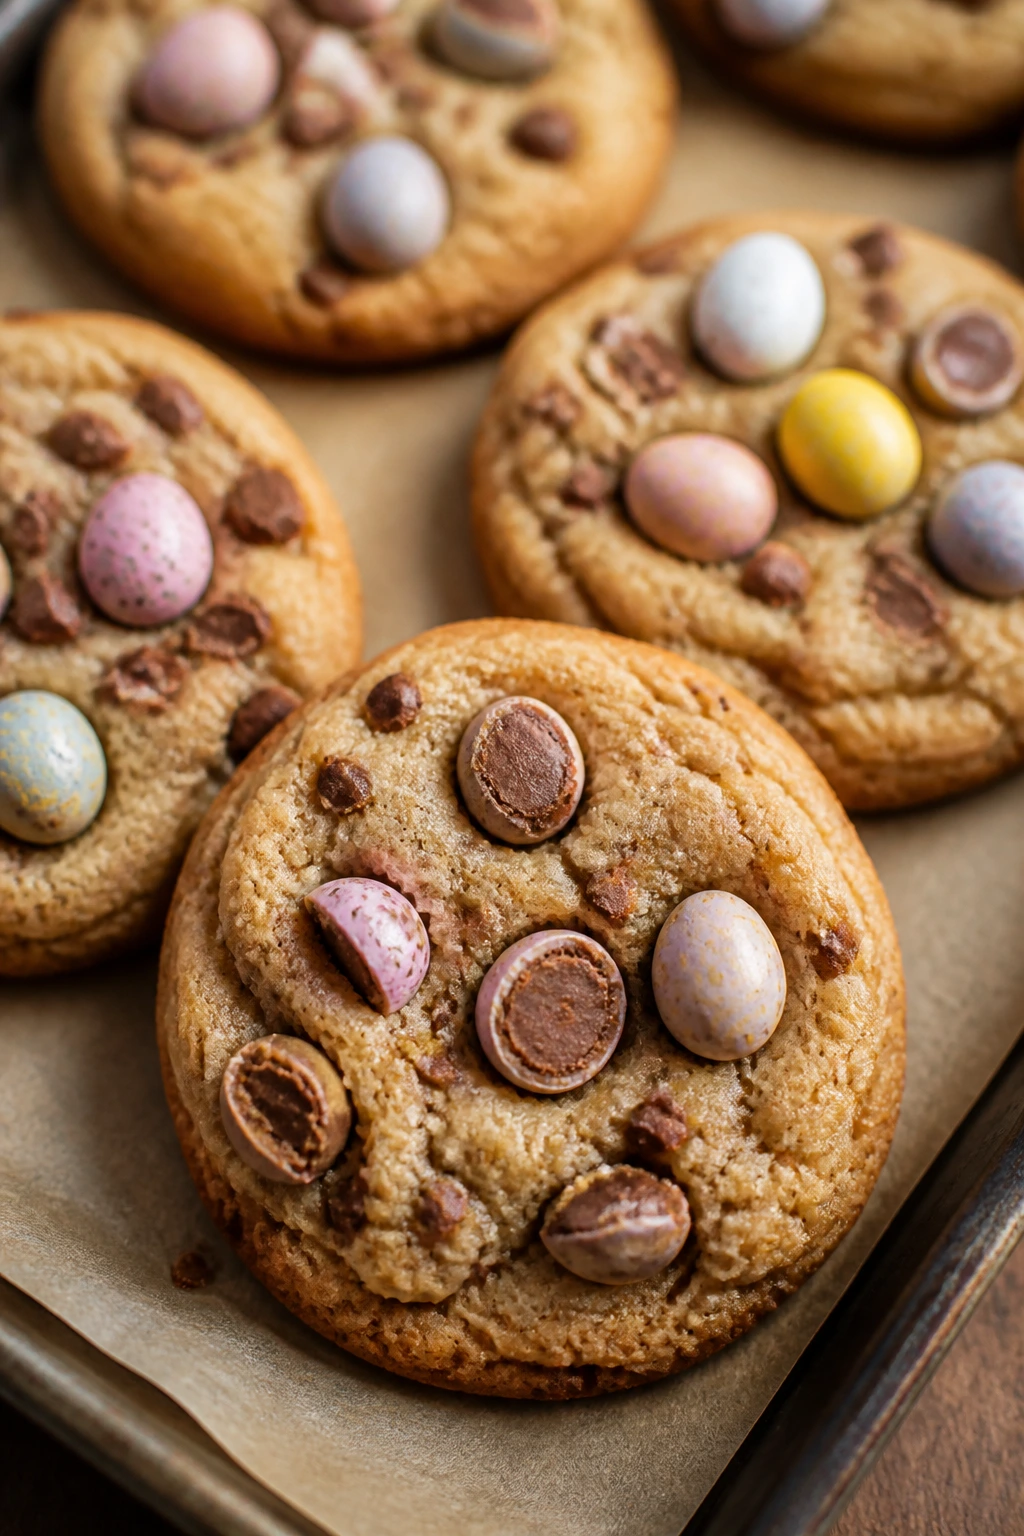
11. Peanut Butter Blossom Cookies with Mini Eggs
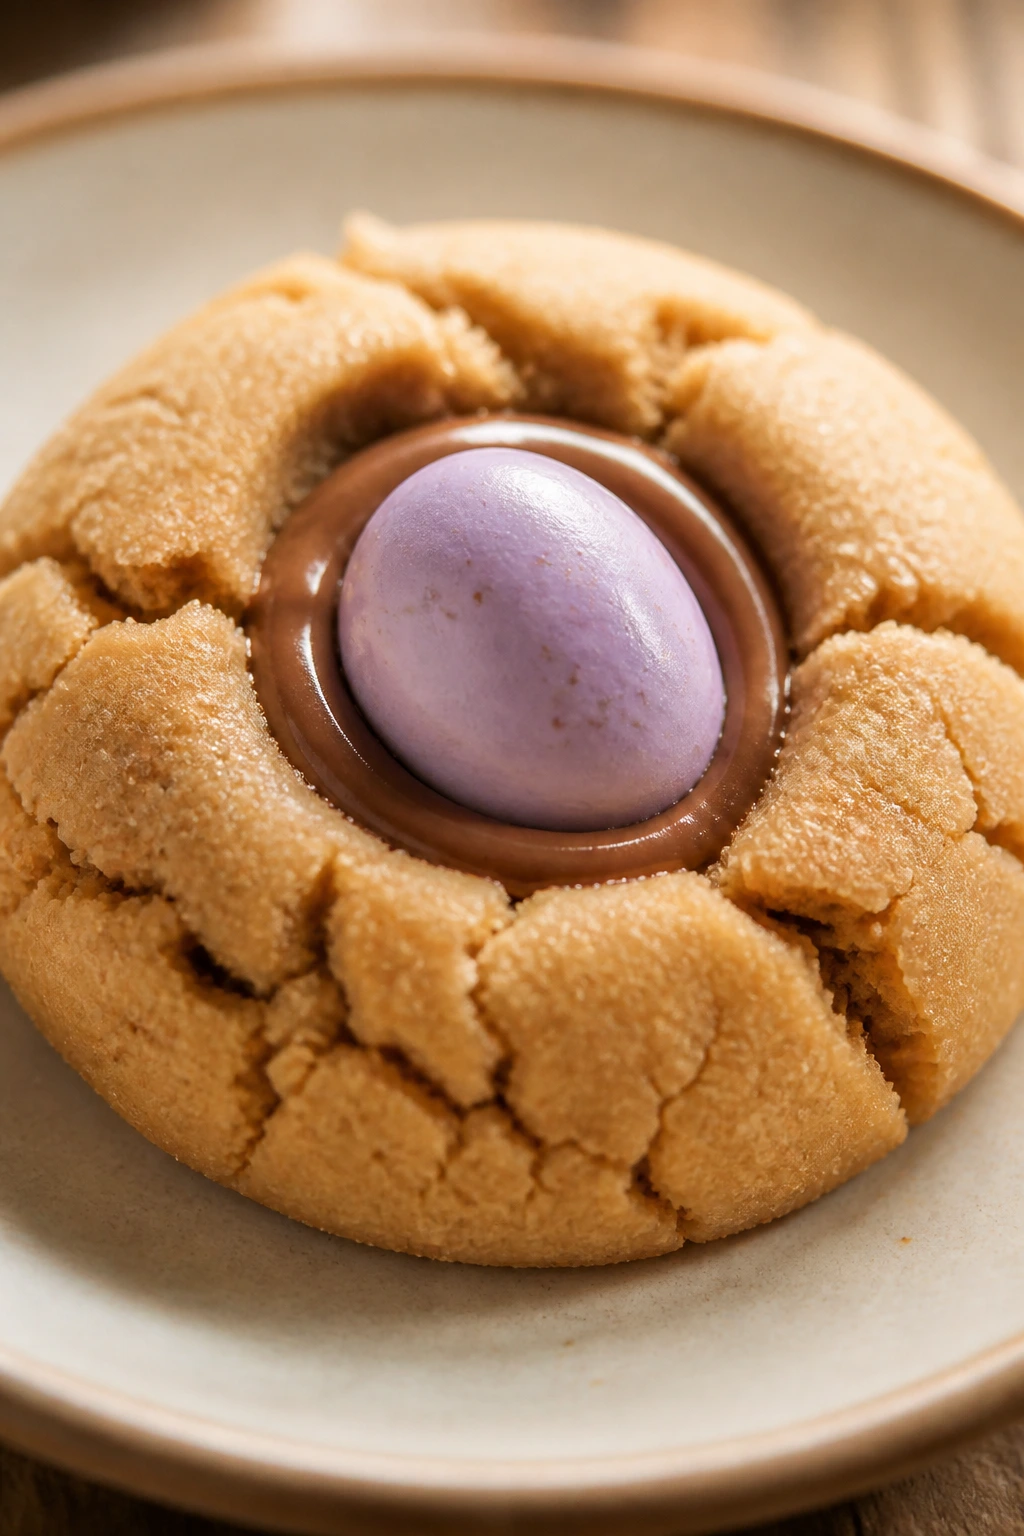
Peanut butter blossoms are classic for a reason, and the mini egg swap makes them feel right at home on an Easter table. You get that familiar soft peanut butter cookie with a candy center that cracks a little when you press it in. The contrast is part of the charm.
Why It Works:
Peanut butter gives the dough structure and a dense, tender crumb. The sugar coating helps the cookies spread in a controlled way, while the candy in the center melts just enough to anchor the look without turning sticky. Mini eggs are prettier than chocolate kisses here because the shell keeps its color.
Key Ingredients:
- 1½ cups all-purpose flour
- 1 teaspoon baking soda
- ½ teaspoon salt
- ½ cup unsalted butter, softened
- ½ cup creamy peanut butter
- ½ cup brown sugar
- ½ cup granulated sugar, plus more for rolling
- 1 large egg
- 1 teaspoon vanilla extract
- 24 mini chocolate eggs or candy-coated eggs
Quick Steps:
- Whisk dry ingredients.
- Cream butter, peanut butter, and sugars, then add the egg and vanilla.
- Mix in the dry ingredients and chill 20 minutes.
- Roll into balls, coat in sugar, and bake at 350°F for 9 to 11 minutes.
- Press one mini egg into each cookie right after baking.
Equipment for This Recipe:
- Hand mixer
- Small scoop
- Baking sheets
- Cooling rack
How to Serve This Dish:
These are strongest in a mixed cookie box because they bring a salty note. Set them near chocolate cookies so the peanut butter flavor gets noticed.
Pro Tips for This Recipe:
- Press the candy in while the cookies are still hot.
- Use creamy peanut butter for a smoother dough.
- Chill the dough if it feels greasy.
Variations on This Dish:
- Almond Blossom Cookies: Swap peanut butter for almond butter.
- Chocolate Peanut Butter Blossoms: Add 2 tablespoons cocoa to the dough.
- Pretzel Blossom Version: Press a small pretzel in the center instead of candy.
Common Mistakes to Avoid with This Dish:
- Waiting too long to add the candy: It won’t sink in cleanly.
- Skipping the sugar roll: The crust looks flat without it.
- Overbaking: These firm up as they cool.
12. Vanilla Bean Slice-and-Bake Pinwheels
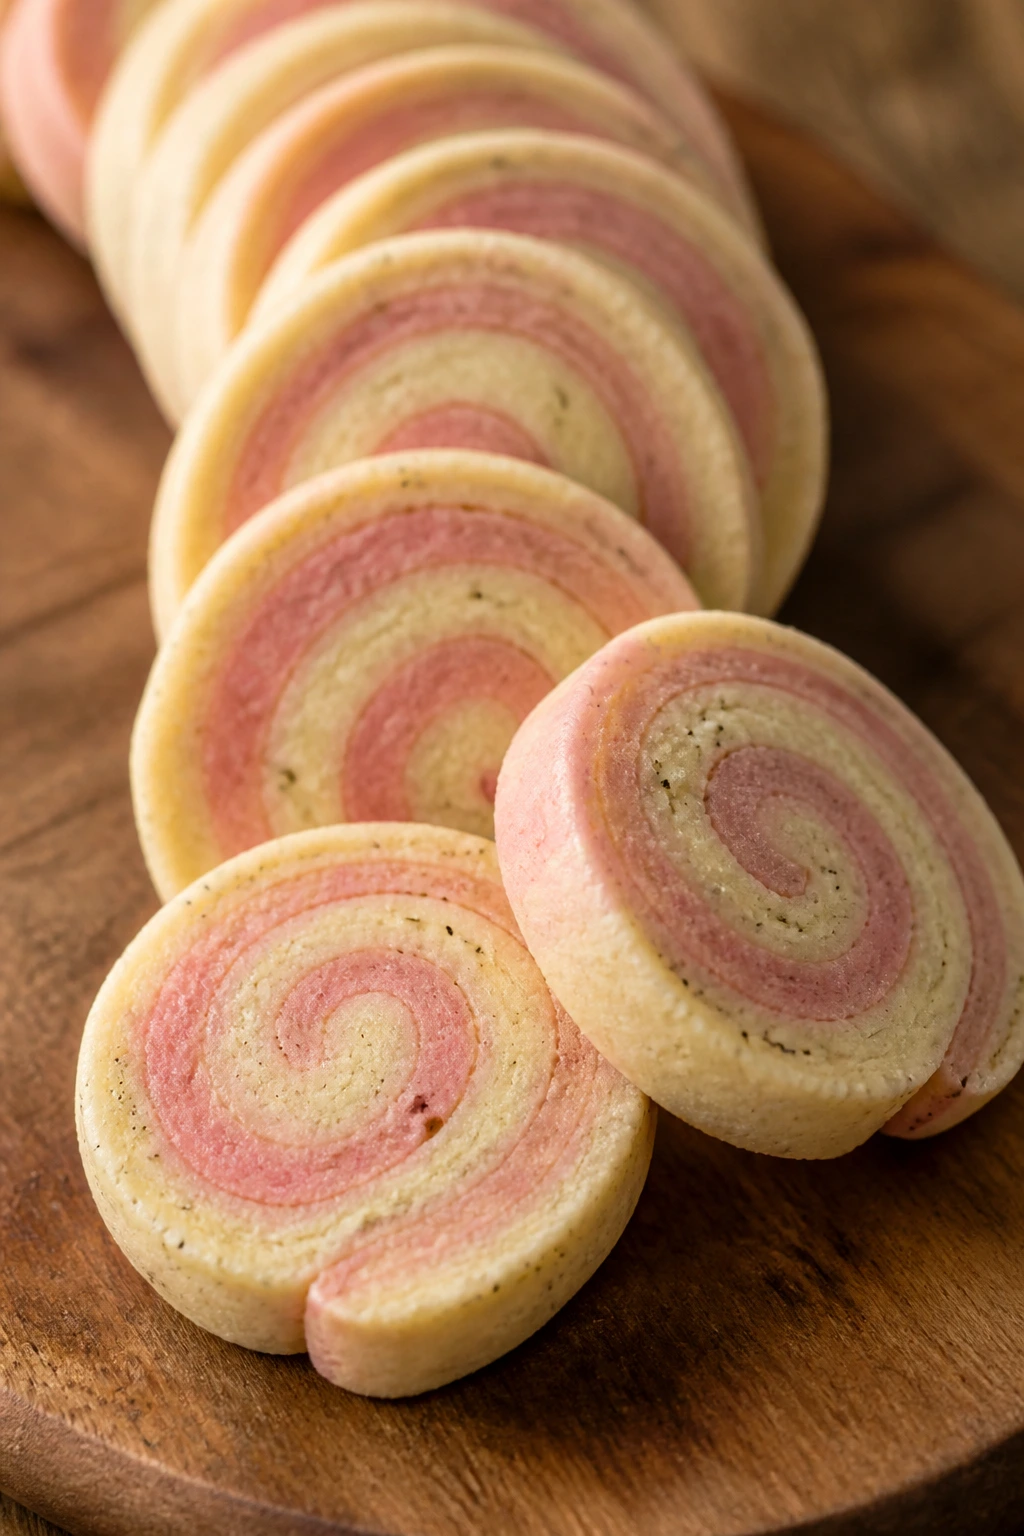
Slice-and-bake cookies are a gift when you want a clean, graphic look without decorating each piece by hand. These vanilla pinwheels use two dough colors — one plain, one lightly tinted pastel — and the spiral gives you a tidy, bakery-style cookie with almost no effort once the log is rolled.
Why It Works:
The dough stays flexible enough to roll but firm enough to slice cleanly after chilling. A little vanilla bean paste gives the pale dough those tiny black flecks that look expensive even when the ingredient list is modest. The contrast between the two colors makes the design do most of the work.
Key Ingredients:
- 2¾ cups all-purpose flour
- ½ teaspoon salt
- 1 cup unsalted butter, softened
- 1 cup powdered sugar
- 1 large egg
- 2 teaspoons vanilla bean paste
- Gel food coloring in pink or yellow
- 1 to 2 tablespoons milk, if needed
Quick Steps:
- Make a simple sugar-cookie dough and divide it in half.
- Flavor one half with vanilla bean paste and tint the other half pale pink or yellow.
- Roll both halves into rectangles, stack, and roll into a tight log.
- Chill at least 1 hour, then slice and bake at 350°F for 9 to 11 minutes.
- Cool on the sheet so the spirals set.
Equipment for This Recipe:
- Rolling pin
- Plastic wrap
- Sharp knife
- Baking sheets
How to Serve This Dish:
Line these up in rows; pinwheels look best when you can see the spiral from the side. They’re especially nice in small paper bags for gifting.
Pro Tips for This Recipe:
- Keep the colors soft; neon tones look harsh here.
- Chill the log until it feels firm all the way through.
- Use a sharp knife and wipe it between cuts.
Variations on This Dish:
- Chocolate Vanilla Pinwheels: Swap one dough for cocoa dough.
- Lemon Pinwheels: Add lemon zest to the pale dough.
- Pastel Trio Pinwheels: Make three thin dough layers instead of two.
Common Mistakes to Avoid with This Dish:
- Rolling the log loose: The spirals drift apart.
- Slicing too soon: Soft dough smears instead of cutting.
- Using too much coloring: The dough gets sticky.
13. Lemon-Lavender Pecan Sandies
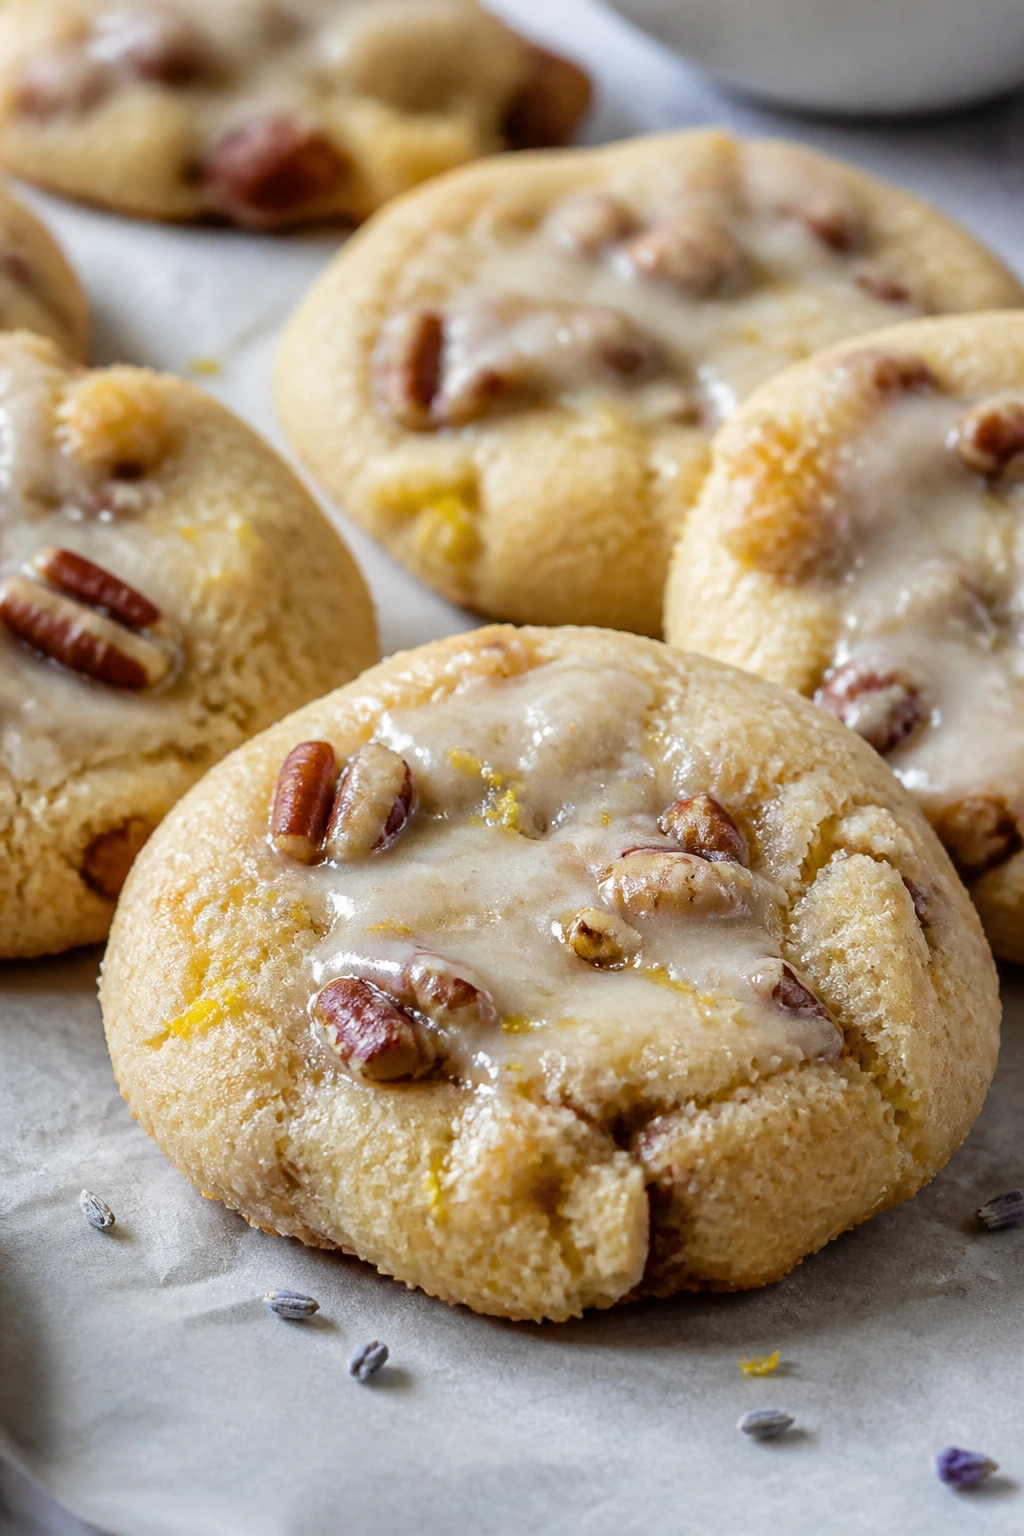
These are the cookies you set out when you want people to stop mid-conversation and notice the tray. They’re buttery, crumbly, lightly floral, and finished with a pale lemon glaze that keeps the lavender from getting dusty. The pecans bring a warm, toasty note underneath everything.
Why It Works:
Pecan sandies rely on a delicate crumb, so a small amount of flour and a generous amount of butter work in your favor. Lemon zest keeps the floral lavender from tasting old-fashioned in the wrong way. The glaze is thin enough to set quickly but thick enough to show against the cookie.
Key Ingredients:
- 1 cup unsalted butter, softened
- ½ cup powdered sugar
- 2 cups all-purpose flour
- ½ cup finely chopped pecans
- 1 tablespoon lemon zest
- ½ teaspoon culinary lavender, crushed fine
- ¼ teaspoon salt
- 1 cup powdered sugar for glaze
- 2 tablespoons lemon juice
Quick Steps:
- Cream butter and powdered sugar.
- Mix in flour, pecans, zest, lavender, and salt.
- Roll into a log or flatten into a slab, then chill 30 minutes.
- Slice and bake at 325°F for 14 to 16 minutes.
- Drizzle with lemon glaze when cool.
Equipment for This Recipe:
- Mixing bowl
- Sharp knife
- Parchment-lined sheet
- Small whisk for glaze
How to Serve This Dish:
Serve these with tea or coffee after lunch. A little lavender sprig nearby looks nice, but keep it separate from the cookies so the scent doesn’t overpower them.
Pro Tips for This Recipe:
- Use culinary lavender sparingly; a little goes far.
- Chop the pecans finely so the dough slices cleanly.
- Glaze only after the cookies are fully cool.
Variations on This Dish:
- Orange Pecan Sandies: Swap lemon for orange zest.
- Rosemary-Lemon Sandies: Use a tiny pinch of finely chopped rosemary.
- Chocolate-Dipped Sandies: Dip half the cookie in white chocolate.
Common Mistakes to Avoid with This Dish:
- Too much lavender: The cookies taste like soap.
- Slicing warm dough: The edges crumble.
- Skipping the glaze: The cookies can taste a little plain without the lemon finish.
14. Pastel Meringue Kisses
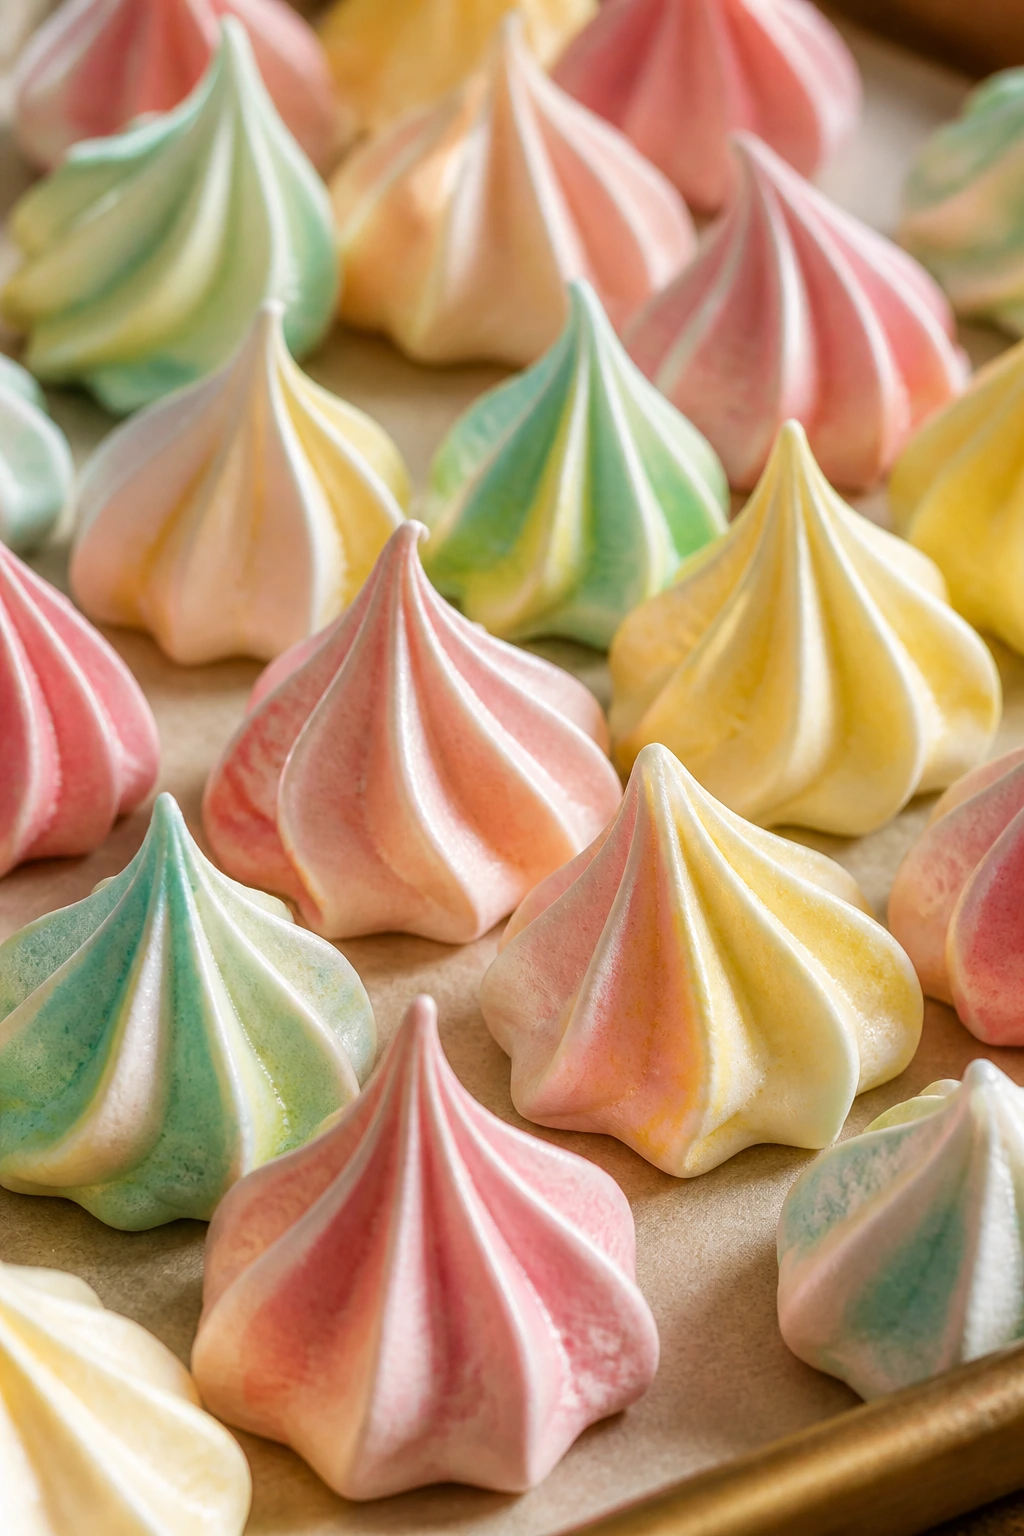
Meringues are all about drama with almost no ingredients. These little kisses bake dry and crisp, then melt away the second they hit your tongue. Swirled pink, yellow, and mint, they look like candy clouds and weigh about as much as one too.
Why It Works:
Egg whites and sugar make the structure, but a slow bake is what gives you the crisp shell and dry center. Cream of tartar helps stabilize the foam so the meringues hold the swirls instead of slumping. A low oven keeps the color pale, which is half the charm.
Key Ingredients:
- 4 large egg whites, room temperature
- 1 cup granulated sugar
- ¼ teaspoon cream of tartar
- 1 teaspoon vanilla extract
- Gel food coloring in pastel shades
- Pinch of salt
Quick Steps:
- Beat egg whites, cream of tartar, and salt until foamy.
- Add sugar slowly and whip to stiff, glossy peaks.
- Fold in vanilla and divide into tinted bowls.
- Pipe kisses onto parchment and bake at 200°F for 1 hour to 1 hour 15 minutes.
- Leave them in the oven with the door shut until cool.
Equipment for This Recipe:
- Stand mixer or hand mixer
- Piping bag with star tip
- Parchment paper
- Baking sheet
How to Serve This Dish:
These look beautiful piled in a glass bowl because the light passes through them. They’re also lovely tucked around a cake or a fruit tart.
Pro Tips for This Recipe:
- Make sure the bowl is grease-free.
- Add sugar slowly; dumping it in wrecks the structure.
- Don’t bake on a humid day if you can avoid it.
Variations on This Dish:
- Coconut Meringue Kisses: Fold in finely shredded coconut.
- Berry Meringues: Swirl in a tiny bit of freeze-dried berry powder.
- Chocolate-Swirl Kisses: Drizzle with melted chocolate after cooling.
Common Mistakes to Avoid with This Dish:
- Grease in the bowl: The whites won’t whip properly.
- Opening the oven early: The meringues can crack.
- Baking too hot: They brown and lose that clean white look.
15. Orange Creamsicle Cookies
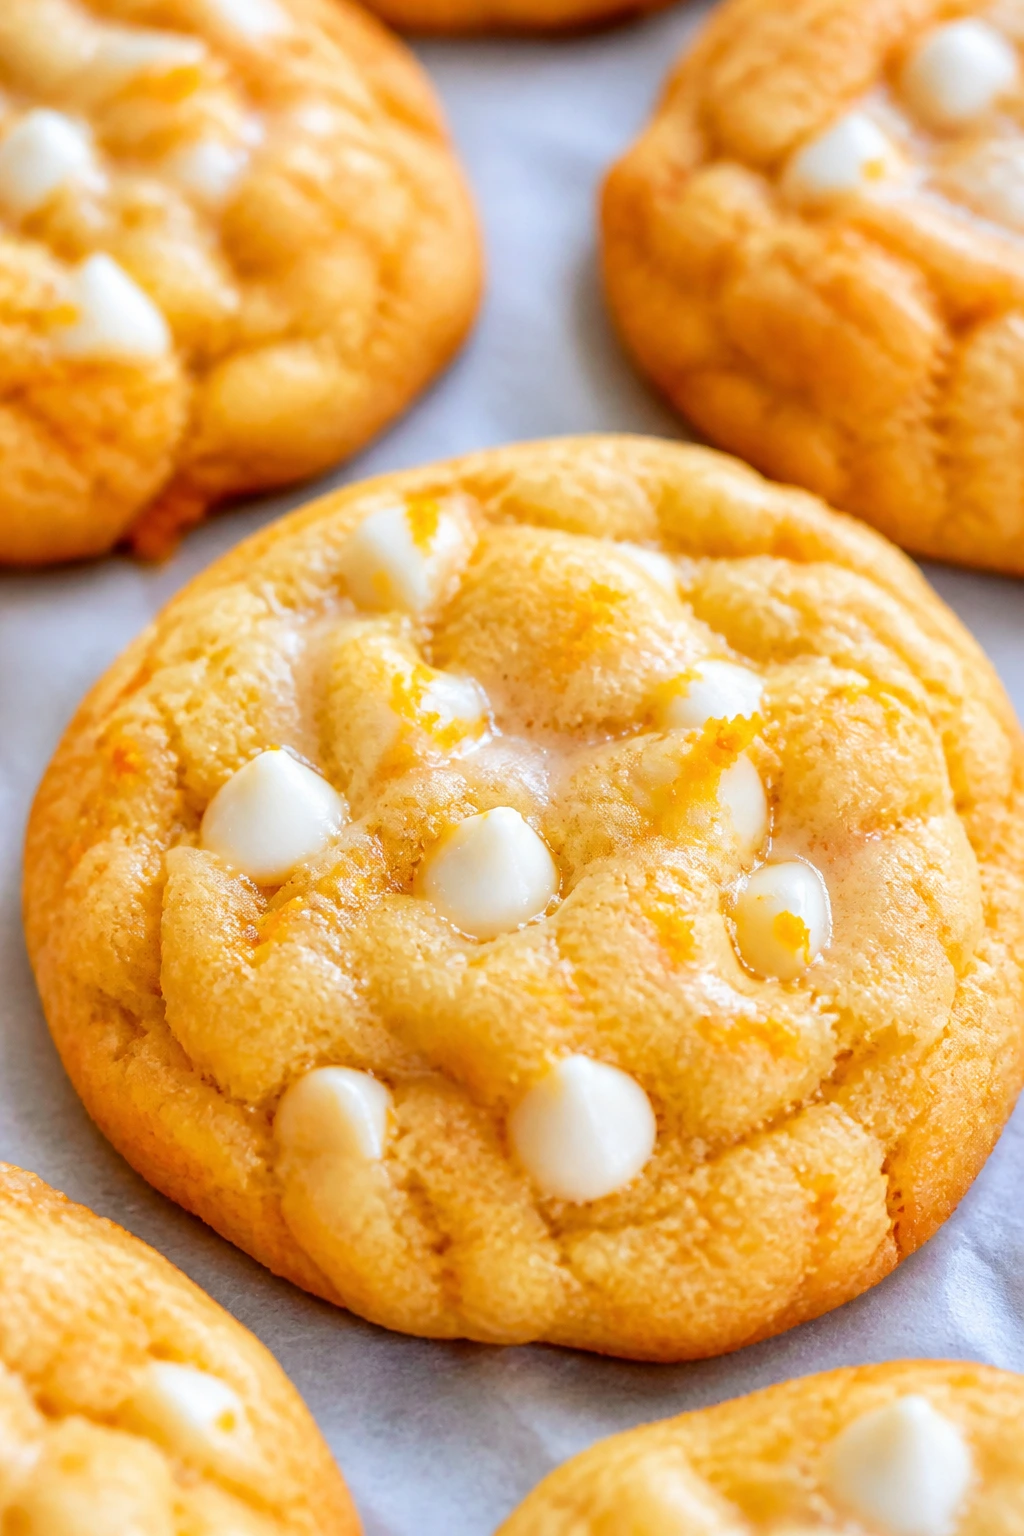
These taste like the childhood treat in cookie form — bright orange on the front, creamy vanilla on the finish. They’re soft and slightly cakey, with white chocolate chips or a drizzle that keeps the citrus from feeling sharp. If you want a cookie that reads spring without looking like a craft project, this is one.
Why It Works:
Orange zest does the heavy lifting here. The sugar and butter base keeps the cookie tender, while sour cream or yogurt gives it that plush texture people notice on the first bite. White chocolate softens the citrus and makes the flavor feel rounded instead of sour.
Key Ingredients:
- 2 cups all-purpose flour
- ½ teaspoon baking soda
- ½ teaspoon salt
- ½ cup unsalted butter, softened
- 1 cup granulated sugar
- 1 large egg
- ½ cup sour cream or plain Greek yogurt
- 2 tablespoons orange zest
- 1 teaspoon vanilla extract
- 1 cup white chocolate chips
Quick Steps:
- Whisk flour, baking soda, and salt.
- Cream butter and sugar, then add the egg, sour cream, zest, and vanilla.
- Mix in dry ingredients and white chips.
- Scoop onto baking sheets and bake at 350°F for 10 to 12 minutes.
- Cool, then drizzle with a little melted white chocolate if you want more contrast.
Equipment for This Recipe:
- Hand mixer
- Cookie scoop
- Zester or microplane
- Wire rack
How to Serve This Dish:
These sit nicely beside lemon cookies because the orange flavor tastes fuller by comparison. A few thin orange zest curls on top make the platter look intentional.
Pro Tips for This Recipe:
- Use fresh zest; orange extract alone tastes hollow.
- Don’t overbake or the cookies lose their soft center.
- Let the dough rest 10 minutes so the flour hydrates.
Variations on This Dish:
- Orange Cranberry Cookies: Add ½ cup dried cranberries.
- Creamsicle Crinkles: Roll the dough in sugar and powdered sugar before baking.
- Chocolate Orange Version: Add a handful of mini chocolate chips.
Common Mistakes to Avoid with This Dish:
- Too much zest pith: It turns bitter.
- Overmixing: The cookies become dense.
- Baking until browned: These should stay pale and soft.
16. Mini Egg Brown Butter Cookies
Brown butter changes everything here. The cookies get deeper, nutty, and a little toffee-like, while chopped mini eggs add color and crunch in little candy pockets. They look casual, but the flavor is the kind of thing people remember after the platter is empty.
Why It Works:
Brown butter brings toasted milk solids, which make the dough taste richer than a plain chocolate chip cookie. The mini eggs hold their shape better than many candies, so you get crisp shell pieces without losing the candy look. A short chill helps the brown butter firm back up.
Key Ingredients:
- 1 cup unsalted butter
- 2¼ cups all-purpose flour
- 1 teaspoon baking soda
- ½ teaspoon salt
- ¾ cup brown sugar
- ½ cup granulated sugar
- 1 large egg
- 1 teaspoon vanilla extract
- 1½ cups chopped mini chocolate eggs
- ½ cup white chocolate chunks, optional
Quick Steps:
- Brown the butter in a saucepan until nutty and amber, then cool 10 minutes.
- Whisk flour, baking soda, and salt.
- Beat the butter with sugars, then mix in the egg and vanilla.
- Stir in dry ingredients and chopped eggs. Chill 20 minutes.
- Scoop and bake at 350°F for 9 to 11 minutes.
Equipment for This Recipe:
- Saucepan
- Mixing bowl
- Cookie scoop
- Parchment-lined sheets
How to Serve This Dish:
These look best stacked loosely so the candy pieces show. A little flaky salt on top right after baking gives the tray a polished finish.
Pro Tips for This Recipe:
- Cool the brown butter enough that it’s warm, not hot.
- Chop the mini eggs with a sharp knife, not a food processor, or the pieces get dusty.
- Pull them early; the centers finish setting on the pan.
Variations on This Dish:
- White Chocolate Mini Egg Cookies: Use white chocolate chunks instead of chips.
- Nutty Brown Butter Version: Add ½ cup chopped pecans.
- Oatmeal Mini Egg Cookies: Replace ½ cup flour with rolled oats.
Common Mistakes to Avoid with This Dish:
- Brown butter too dark: It turns bitter.
- Skipping the chill: The cookies spread too much.
- Overloading with candy: The dough can’t hold together.
17. Pistachio Cranberry Shortbread Rounds
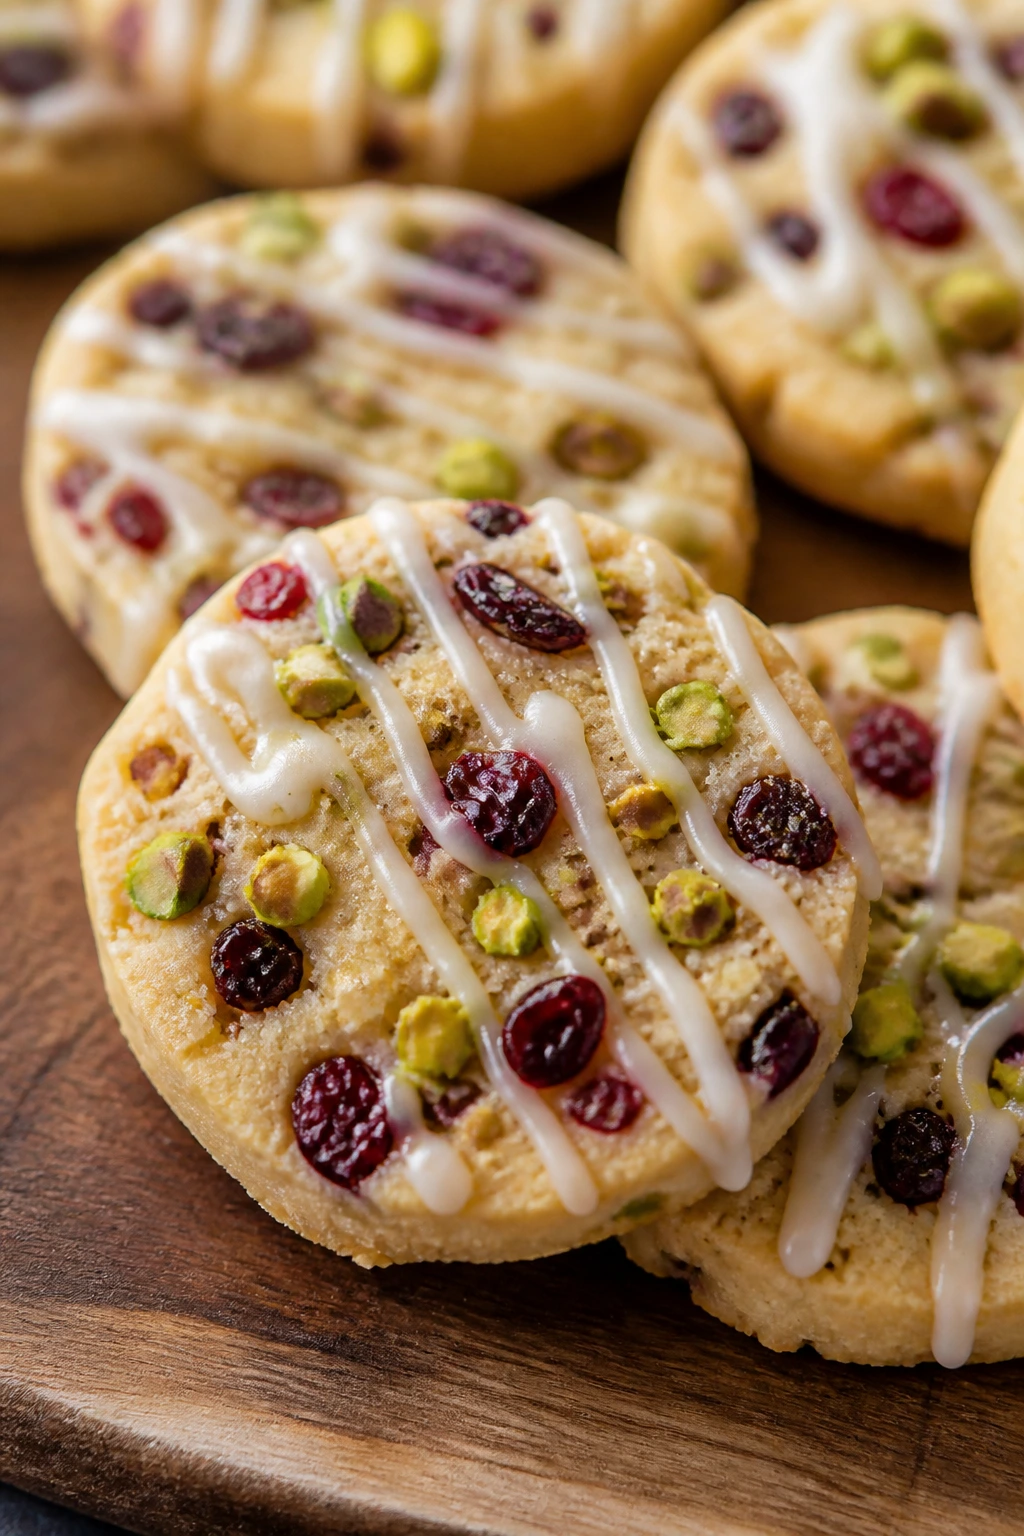
These are the cookies I reach for when I want color without frosting. Green pistachios and ruby cranberries give the rounds a natural Easter look, and the shortbread base keeps everything crisp and clean. A white drizzle on top is enough; these don’t need a lot of help.
Why It Works:
Pistachios bring color and a delicate nuttiness that feels lighter than walnuts or pecans. Dried cranberries add chew and a tart note that cuts through all that butter. Because shortbread has such a plain base, the mix-ins become the whole show, which is exactly what you want here.
Key Ingredients:
- 2 cups all-purpose flour
- ½ cup powdered sugar
- ¼ teaspoon salt
- 1 cup unsalted butter, cold and cubed
- ½ cup shelled pistachios, chopped
- ⅓ cup dried cranberries, chopped
- 1 teaspoon vanilla extract
- ½ cup powdered sugar and 1 to 2 tablespoons milk for drizzle
Quick Steps:
- Combine flour, sugar, and salt with the butter until sandy.
- Mix in pistachios, cranberries, and vanilla.
- Shape into a log, chill 30 minutes, and slice.
- Bake at 325°F for 14 to 16 minutes.
- Cool and drizzle with thin icing.
Equipment for This Recipe:
- Food processor or bowl
- Plastic wrap
- Sharp knife
- Piping bag or spoon for drizzle
How to Serve This Dish:
These are easy to place between brighter cookies because their colors are natural and calm. They also pack neatly into gift boxes without crumbling much.
Pro Tips for This Recipe:
- Chop the nuts and fruit small so the slices stay tidy.
- Chill the log until firm all the way through.
- A little orange zest in the dough works well if you want more spring flavor.
Variations on This Dish:
- Pistachio-Orange Shortbread: Add orange zest and skip the drizzle.
- Chocolate Chip Version: Replace cranberries with mini white chips.
- Rose Pistachio Rounds: Add a tiny splash of rosewater.
Common Mistakes to Avoid with This Dish:
- Fruit chunks too large: The cookie slices break.
- Warm dough: The rounds flatten on the sheet.
- Too much drizzle: It hides the color contrast.
18. Raspberry Jam Sandwich Cookies
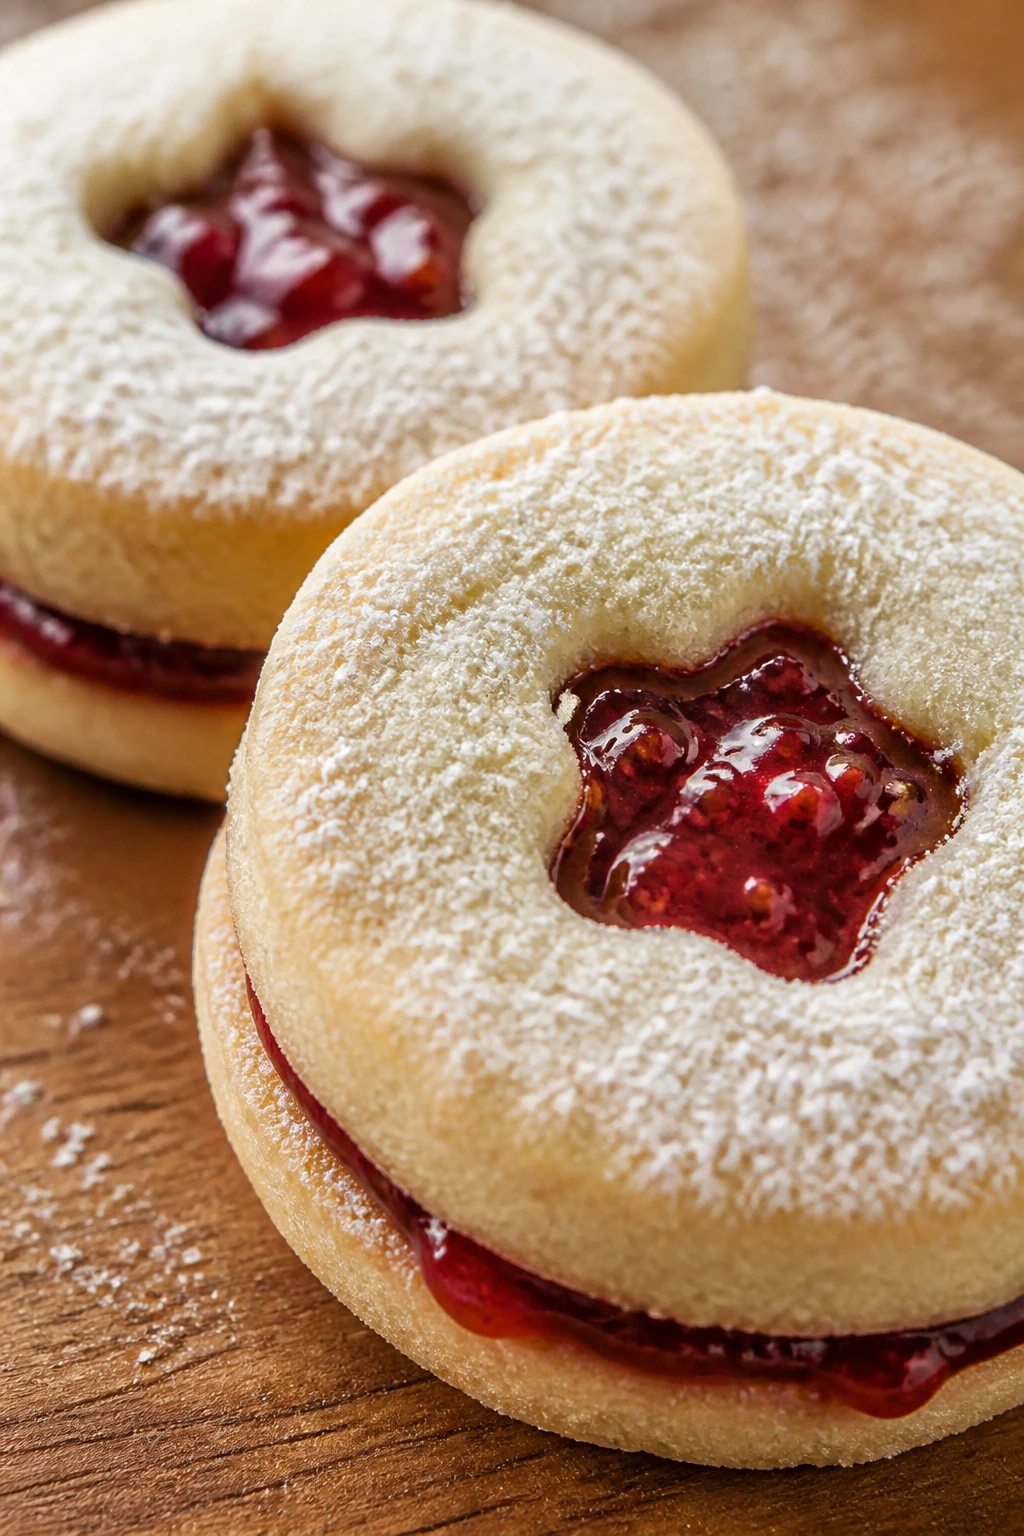
These are cheerful in the old-school way — buttery rounds, a bright jam center, and a little powdered sugar dusting on top. The raspberry filling gives a clean red pop that works beautifully against the pale cookie. They look like they came from a bakery case, which is useful when you have thirty minutes and no patience for complicated decorating.
Why It Works:
The dough is basically a tender butter cookie, so it slices and stacks without losing shape. Raspberry jam has enough color and acidity to keep the sandwich from tasting heavy. A small center cutout on the top cookie gives the filling a frame, which makes the whole cookie look more deliberate.
Key Ingredients:
- 2 cups all-purpose flour
- ½ teaspoon salt
- 1 cup unsalted butter, softened
- ¾ cup powdered sugar
- 1 egg yolk
- 1 teaspoon vanilla extract
- ½ cup seedless raspberry jam
- Powdered sugar for dusting
Quick Steps:
- Cream butter and sugar, then beat in yolk and vanilla.
- Add flour and salt, chill 30 minutes, and roll to ¼ inch thick.
- Cut rounds and cut small centers from half of them.
- Bake at 350°F for 8 to 10 minutes.
- Fill with jam and dust the tops with powdered sugar.
Equipment for This Recipe:
- Rolling pin
- Round cutter
- Small cutter for the top windows
- Cooling rack
How to Serve This Dish:
These are best in neat stacks so the jam windows stay visible. Set them on parchment, not directly on a wet platter, or the sugar dusting can disappear.
Pro Tips for This Recipe:
- Use seedless jam for a cleaner bite.
- Don’t overfill the center.
- Assemble after the cookies cool fully, or the jam softens the edges.
Variations on This Dish:
- Apricot Sandwich Cookies: Swap in apricot preserves.
- Chocolate Raspberry Sandwiches: Add cocoa to the dough.
- Lemon Raspberry Version: Add lemon zest to the cookie base.
Common Mistakes to Avoid with This Dish:
- Thin jam: It leaks out of the sides.
- Warm cookies: The filling melts and smears.
- Baking until dark: You lose the tender texture.
19. White Chocolate Cranberry Oat Cookies
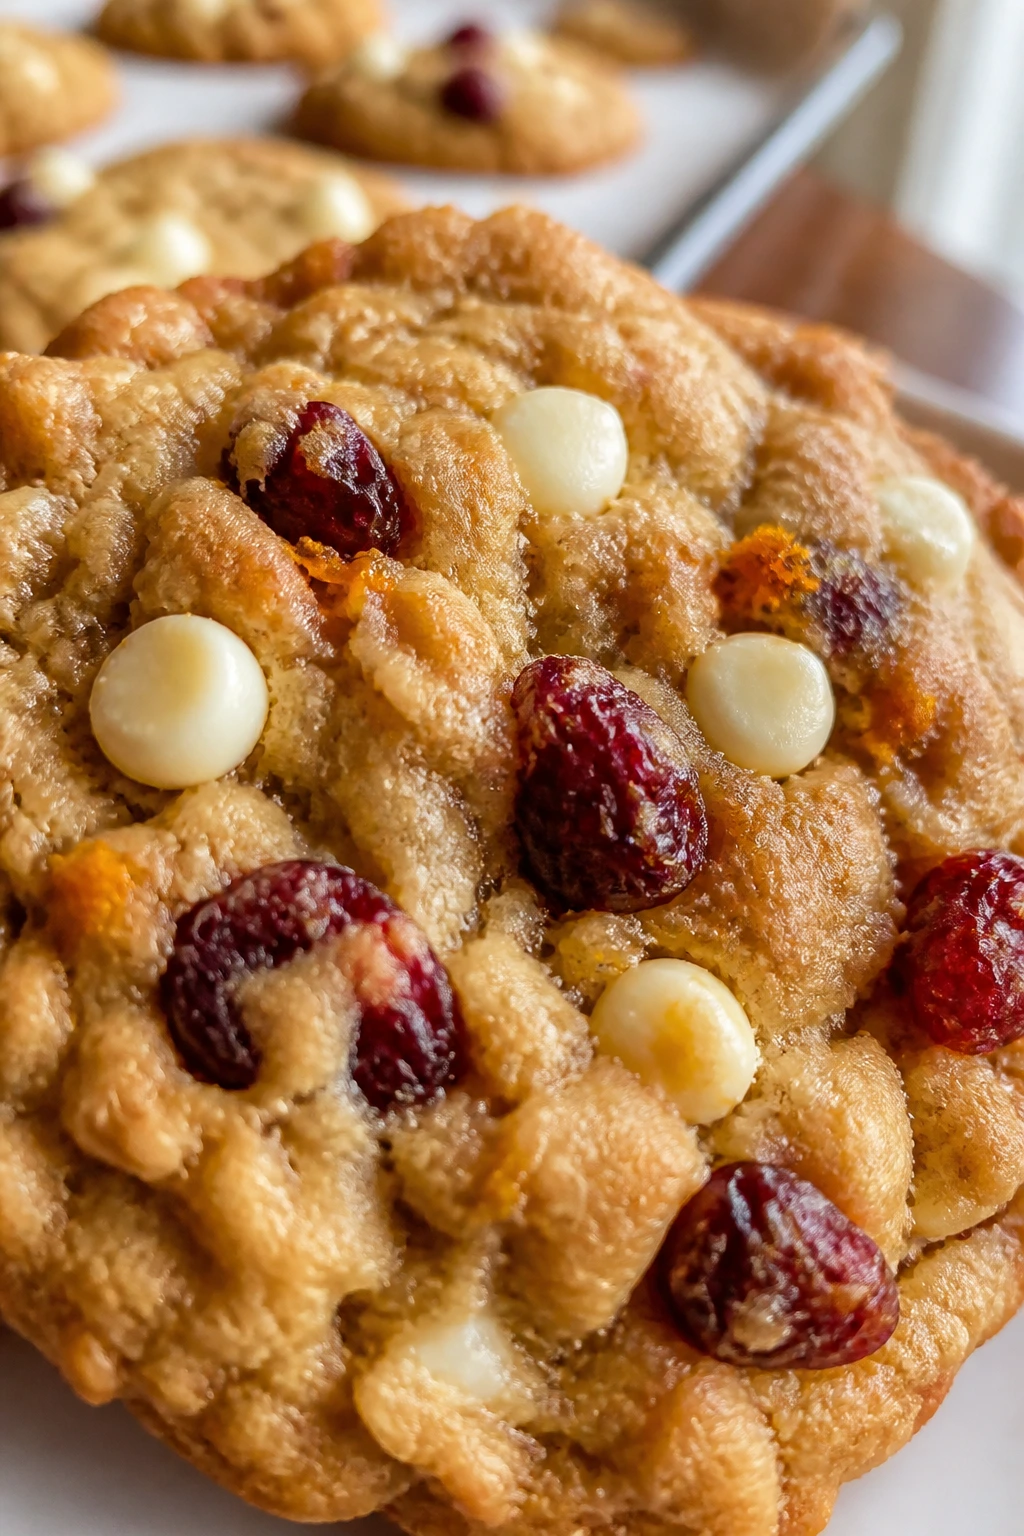
These are one of those cookies that look casual but land better than the fancier stuff. Oats give them a chewy, hearty bite, dried cranberries add little tart sparks, and white chocolate keeps the color scheme soft enough for an Easter tray. They’re not dainty. They are useful. And useful cookies deserve more respect than they get.
Why It Works:
Old-fashioned oats give texture without making the cookies dry. White chocolate is creamy and pale, which keeps the cranberry bits from looking too harsh against the dough. A touch of orange zest makes the whole thing smell brighter when the cookies are warm.
Key Ingredients:
- 1½ cups all-purpose flour
- 1 teaspoon baking soda
- 1 teaspoon cinnamon
- ½ teaspoon salt
- ¾ cup unsalted butter, softened
- ¾ cup brown sugar
- ½ cup granulated sugar
- 1 large egg
- 1½ cups old-fashioned oats
- ¾ cup dried cranberries
- ¾ cup white chocolate chips
- 1 tablespoon orange zest
Quick Steps:
- Whisk dry ingredients.
- Cream butter and sugars, then add egg and zest.
- Stir in flour mix, oats, cranberries, and white chips.
- Scoop and bake at 350°F for 10 to 12 minutes.
- Cool on the pan for 5 minutes before moving.
Equipment for This Recipe:
- Mixing bowls
- Cookie scoop
- Parchment-lined baking sheet
- Cooling rack
How to Serve This Dish:
These do well as the “heavier” cookie on the tray, especially next to lighter shortbread or meringues. A little extra white chocolate drizzle makes them look more finished if you want that.
Pro Tips for This Recipe:
- Let the dough rest 10 minutes so the oats hydrate.
- Chop the cranberries if they’re large and sticky.
- Pull them before the centers look dry.
Variations on This Dish:
- Cherry White Chocolate Oat Cookies: Swap cranberries for dried cherries.
- Pistachio Cranberry Oat Cookies: Add ½ cup pistachios.
- Gluten-Free Version: Use a good 1:1 baking flour and certified GF oats.
Common Mistakes to Avoid with This Dish:
- Too much flour: The cookies turn dry.
- Skipping the rest: The oats stay a little tough.
- Overbaking: The edges should set before the centers go hard.
20. Chocolate Crinkle Cookies with Speckled Egg Dusting
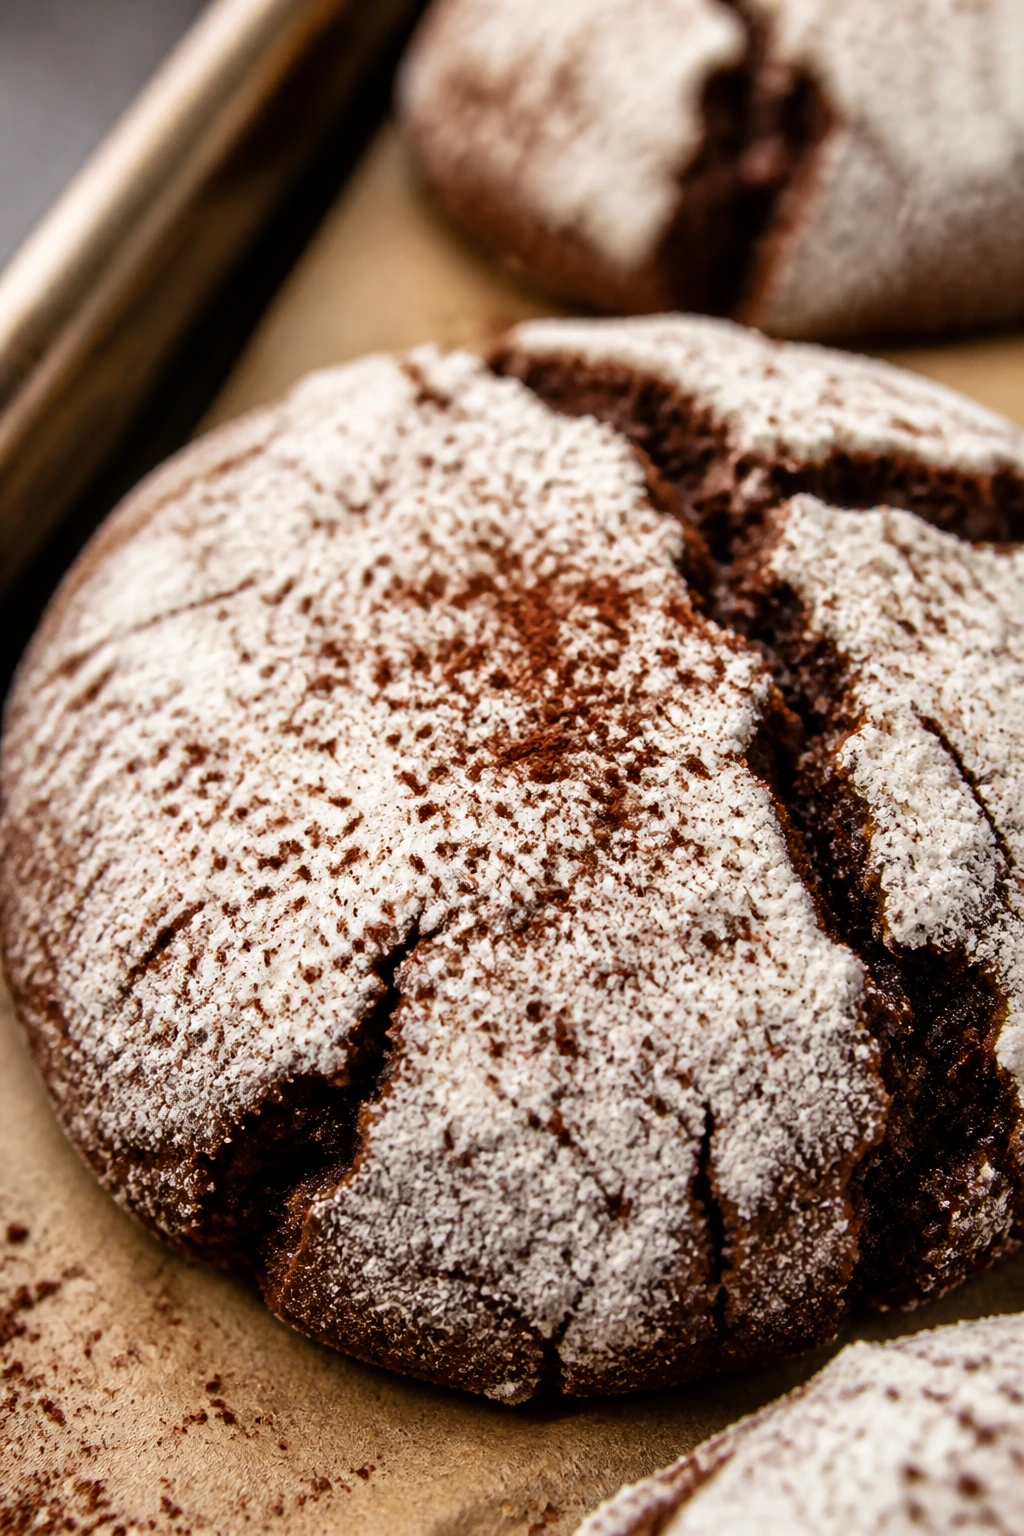
Chocolate crinkles already look dramatic, so giving them a speckled finish turns the effect up just enough for Easter. The outside cracks into a powdered sugar shell, while the inside stays fudgy and dense. Then the cocoa speckles give the cookies that robin’s egg look without any complicated decorating.
Why It Works:
Crinkles need a dough that’s rich and sticky. Cocoa powder gives the chocolate depth, and a long chill lets the dough firm up so the cracks are pronounced. The speckled finish is a thin cocoa wash flicked over the white sugar coating after baking, which is messy but fast.
Key Ingredients:
- 1 cup all-purpose flour
- ½ cup unsweetened cocoa powder
- 1 teaspoon baking powder
- ½ teaspoon salt
- 1 cup granulated sugar
- ¼ cup vegetable oil
- 2 large eggs
- 1 teaspoon vanilla extract
- 1 cup powdered sugar
- 1 teaspoon cocoa powder and 1 teaspoon milk for speckles
Quick Steps:
- Mix flour, cocoa, baking powder, and salt.
- Whisk sugar, oil, eggs, and vanilla, then stir in the dry mix.
- Chill at least 1 hour.
- Scoop, roll in powdered sugar, and bake at 350°F for 10 to 12 minutes.
- Flick the cocoa wash over cooled cookies.
Equipment for This Recipe:
- Two mixing bowls
- Cookie scoop
- Parchment-lined sheets
- Small brush or spoon for speckling
How to Serve This Dish:
These are strong enough to stand alone on the tray, especially beside lemon cookies. A matte platter shows off the crackled tops better than anything shiny.
Pro Tips for This Recipe:
- Chill longer if the dough still feels soft.
- Roll in powdered sugar right before baking.
- Add the speckles after the cookies cool completely.
Variations on This Dish:
- Mint Chocolate Crinkles: Add peppermint extract, very lightly.
- Orange Chocolate Crinkles: Add orange zest to the dough.
- Extra-Fudgy Version: Add 2 tablespoons melted chocolate.
Common Mistakes to Avoid with This Dish:
- Not chilling enough: The cookies spread too much.
- Weak powdered sugar coat: The cracks don’t show as well.
- Overbaking: The fudgy center disappears.
21. Honey Ricotta Cookies with Lemon Glaze
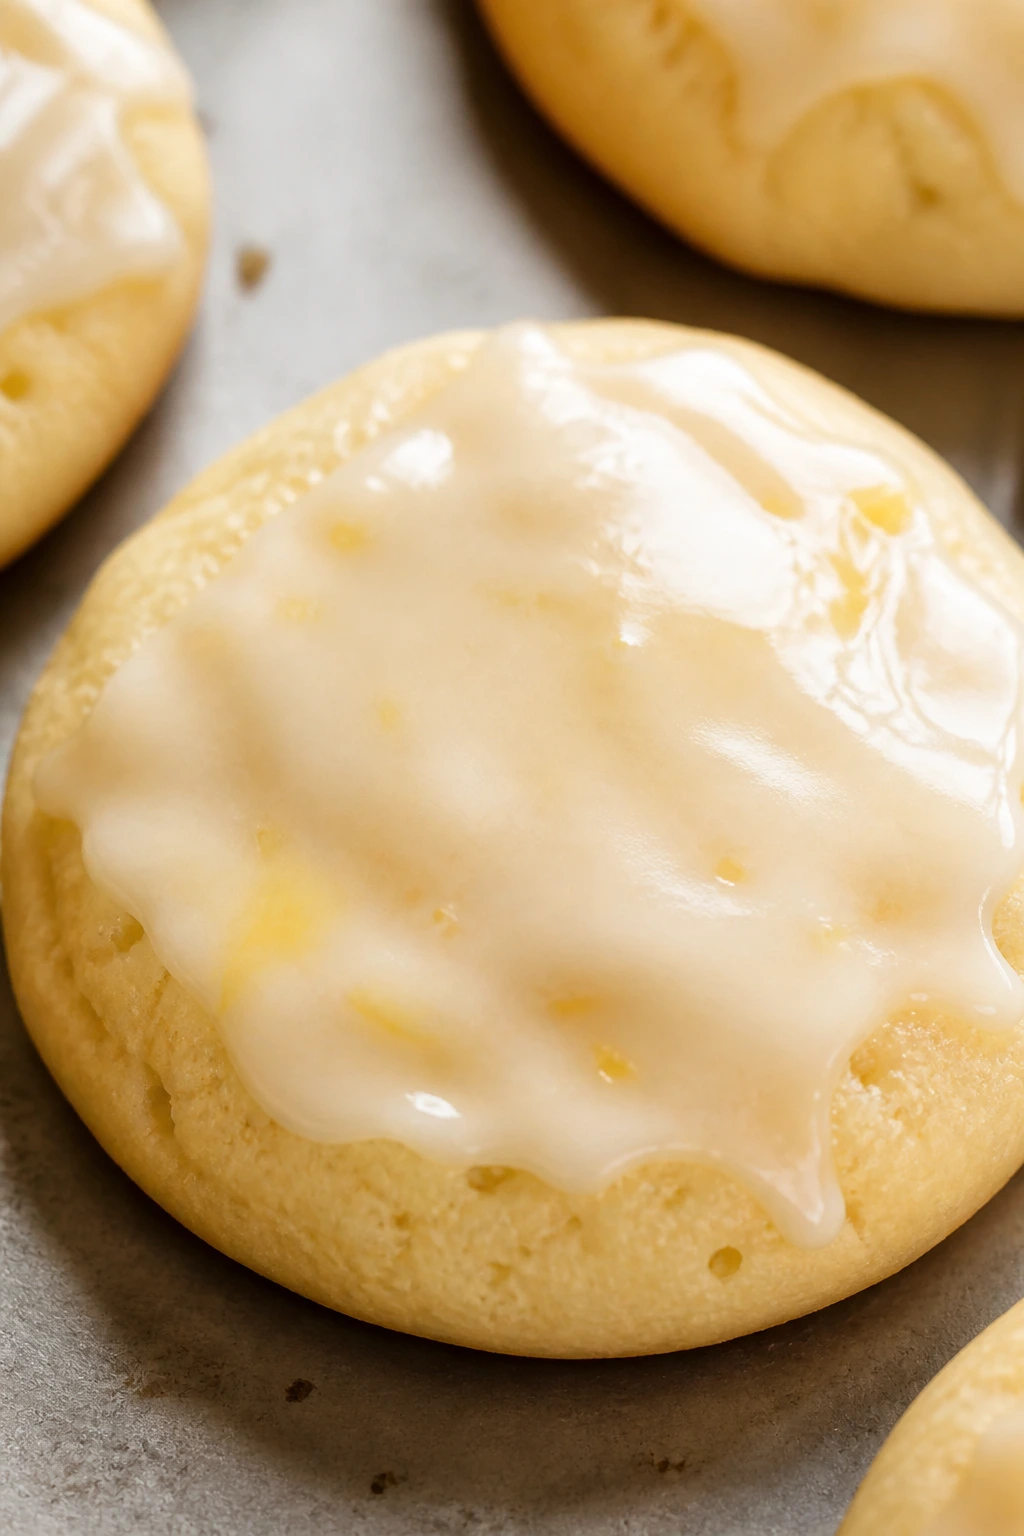
These are soft, pale, and almost cake-like, with a clean lemon glaze that dries to a thin shell. Ricotta gives them a plush texture that feels lighter than a standard sugar cookie, and honey adds a gentle sweetness that makes the whole thing taste soft around the edges, if that makes sense.
Why It Works:
Ricotta brings moisture without making the dough runny, which is why these stay tender for days. Honey adds flavor that granulated sugar can’t fake. A simple lemon glaze wakes up the whole cookie and gives you enough shine to make the tray look polished.
Key Ingredients:
- 2 cups all-purpose flour
- 1 teaspoon baking powder
- ½ teaspoon salt
- ½ cup unsalted butter, softened
- ¾ cup granulated sugar
- 1 large egg
- 1 cup whole-milk ricotta
- 2 tablespoons honey
- 1 teaspoon vanilla extract
- 1 cup powdered sugar and 2 tablespoons lemon juice for glaze
Quick Steps:
- Whisk flour, baking powder, and salt.
- Cream butter and sugar, then beat in egg, ricotta, honey, and vanilla.
- Mix in dry ingredients and scoop onto a sheet.
- Bake at 350°F for 12 to 14 minutes until the bottoms are lightly golden.
- Cool and glaze.
Equipment for This Recipe:
- Hand mixer
- Cookie scoop
- Baking sheet
- Small whisk for glaze
How to Serve This Dish:
Serve these with fruit because the gentle sweetness plays well with berries. They look especially good with a few lemon curls or a light dusting of zest.
Pro Tips for This Recipe:
- Drain very wet ricotta for 10 minutes if needed.
- Don’t expect much spread; they bake up puffy.
- Glaze after they’ve cooled so it stays on top.
Variations on This Dish:
- Orange Ricotta Cookies: Swap lemon for orange in the glaze.
- Almond Ricotta Cookies: Add ½ teaspoon almond extract.
- Pistachio Ricotta Version: Sprinkle chopped pistachios on top of the glaze.
Common Mistakes to Avoid with This Dish:
- Loose ricotta: The batter gets too wet.
- Overbaking: The cookies should stay pale.
- Heavy glaze: It hides the soft texture.
22. Coconut Lime Drop Cookies
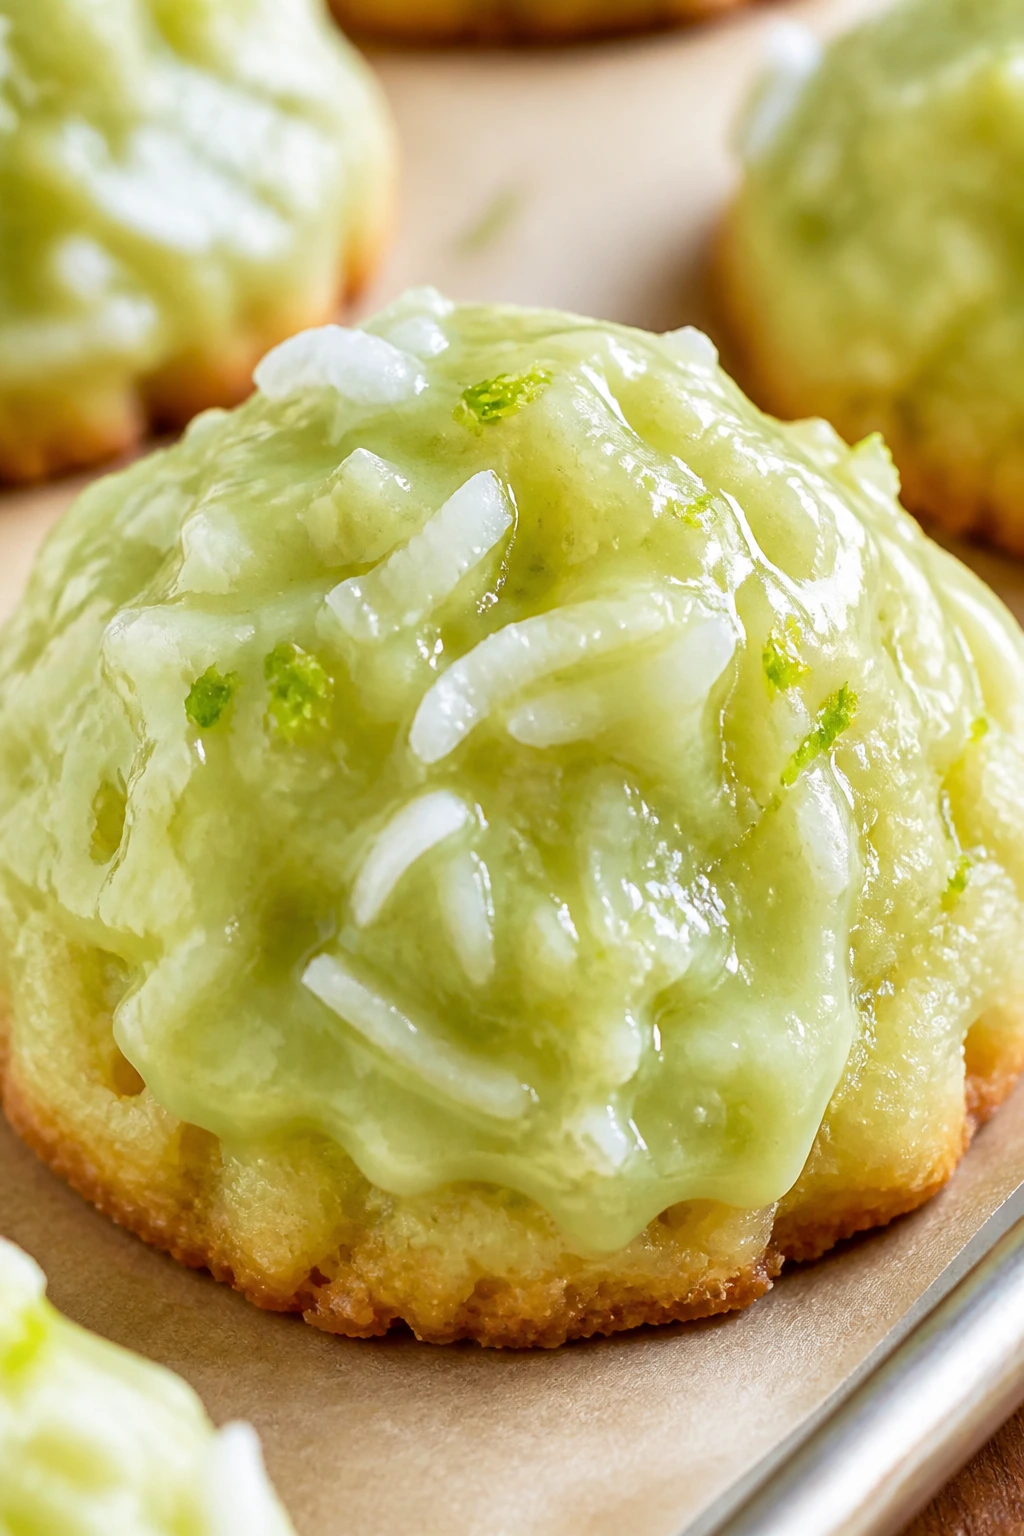
These are bright and chewy, with shredded coconut giving a little bite and lime zest bringing the sharp, fresh note that keeps them from tasting heavy. They’re the sort of cookie that makes sense when spring feels warm enough for an open window and a cold drink nearby.
Why It Works:
Coconut adds texture and sweetness, while lime zest cuts through it with acid and aroma. Drop cookies are faster than cutouts, which is nice when you want the tray to look pretty without rolling dough. A pale lime glaze turns the tops glossy and catches the light.
Key Ingredients:
- 2 cups all-purpose flour
- 1 teaspoon baking powder
- ½ teaspoon salt
- ¾ cup unsalted butter, softened
- 1 cup granulated sugar
- 1 large egg
- 2 tablespoons lime zest
- 2 tablespoons lime juice
- 1 cup shredded sweetened coconut
- 1 cup powdered sugar for glaze
Quick Steps:
- Whisk flour, baking powder, and salt.
- Cream butter and sugar, then add egg, zest, and juice.
- Stir in dry ingredients and coconut.
- Scoop and bake at 350°F for 10 to 12 minutes.
- Cool and glaze with a thin lime icing.
Equipment for This Recipe:
- Mixing bowls
- Cookie scoop
- Parchment-lined sheet
- Zester or microplane
How to Serve This Dish:
These work well with a slice of fresh fruit nearby because the lime wakes up everything else on the plate. A little extra coconut sprinkled over the glaze makes them look finished.
Pro Tips for This Recipe:
- Zest the limes before juicing them.
- Don’t overbake; coconut can toast fast.
- If the dough feels loose, chill 15 minutes.
Variations on This Dish:
- Lemon Coconut Cookies: Use lemon instead of lime.
- Key Lime Version: Add a touch more zest and a slightly thicker glaze.
- Toasted Coconut Cookies: Toast half the coconut before mixing.
Common Mistakes to Avoid with This Dish:
- Too much juice: The dough gets soft.
- Overbrowning: The cookies lose their pale, spring look.
- Skipping the zest: The lime flavor falls flat.
23. Funfetti Sugar Cookie Drops
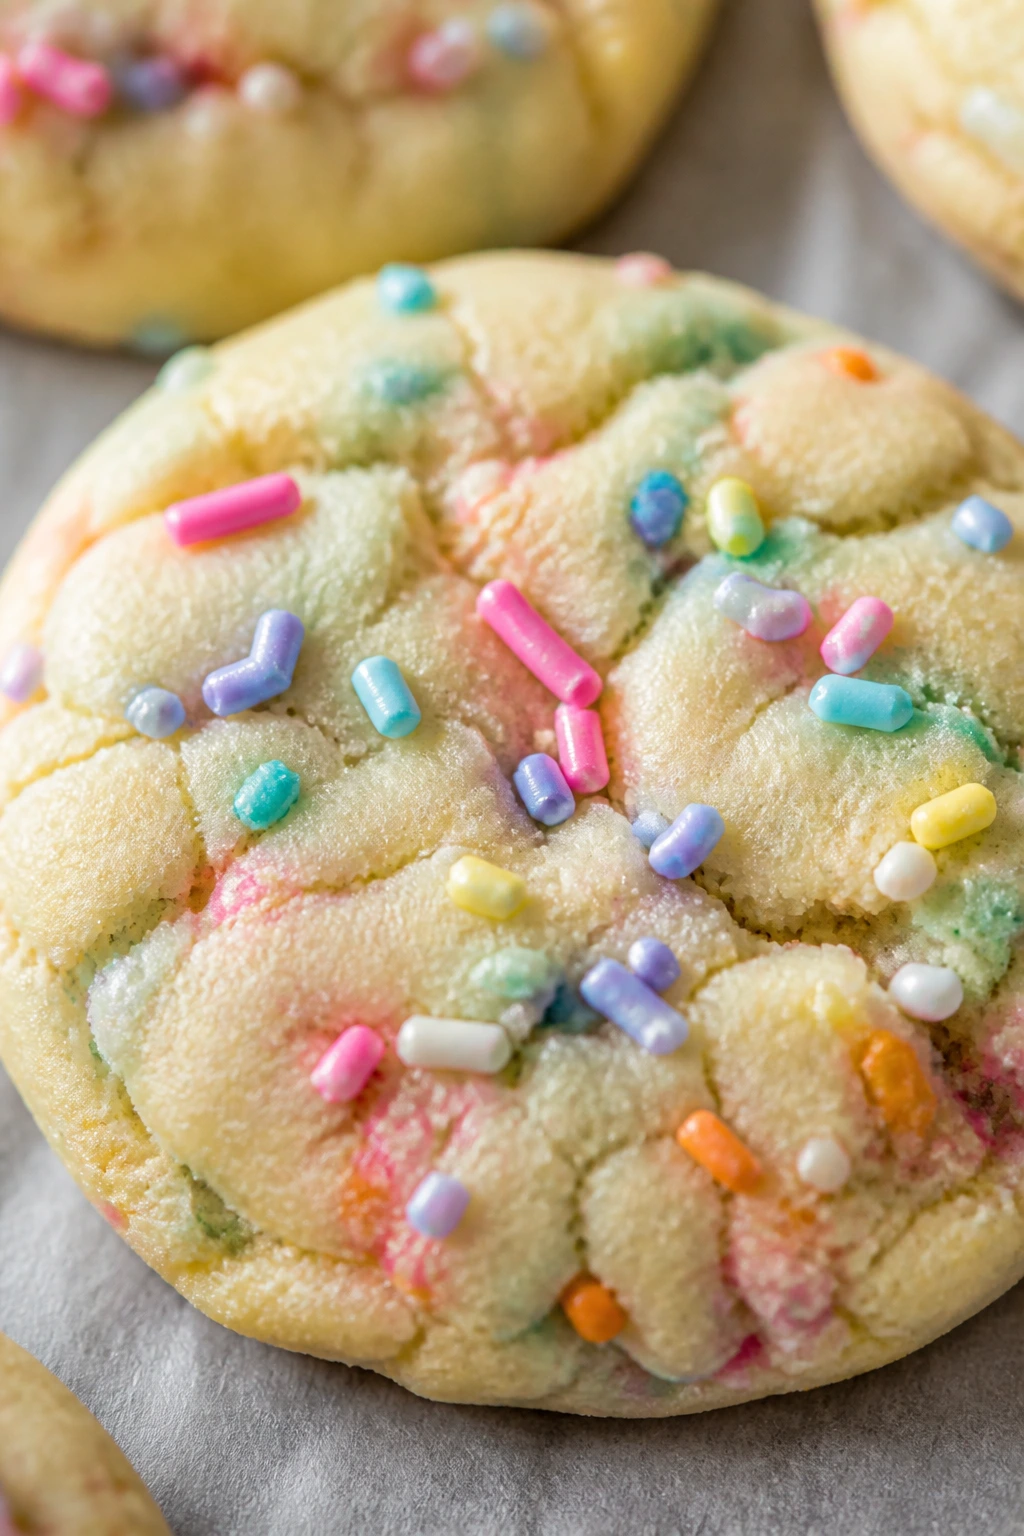
These are the cheerful middle child of the cookie tray: soft, sweet, and dotted with pastel sprinkles all the way through. They don’t need shaping, cutting, or piping, which makes them useful when the rest of the spread is already demanding enough. A thin glaze or icing stripe is enough to turn them into something festive.
Why It Works:
Drop cookies are forgiving because the dough lands where it wants and bakes into easy mounds. Sprinkles inside the dough distribute color without extra decoration, and a little sour cream keeps the centers soft. They’re the kind of cookie that makes a tray feel abundant without looking messy.
Key Ingredients:
- 2¼ cups all-purpose flour
- 1 teaspoon baking powder
- ½ teaspoon salt
- ¾ cup unsalted butter, softened
- 1 cup sugar
- 1 large egg
- 1 teaspoon vanilla extract
- ¼ cup sour cream
- ½ cup pastel sprinkles
Quick Steps:
- Whisk the flour, baking powder, and salt.
- Cream butter and sugar, then beat in egg, vanilla, and sour cream.
- Stir in dry ingredients and sprinkles.
- Scoop onto a sheet and bake at 350°F for 9 to 11 minutes.
- Cool and drizzle with white glaze if you want more shine.
Equipment for This Recipe:
- Hand mixer
- Cookie scoop
- Baking sheets
- Cooling rack
How to Serve This Dish:
These fill out gaps on a platter because their color is built in. Pair them with plainer cookies so the sprinkles don’t compete with stronger designs.
Pro Tips for This Recipe:
- Use jimmies, not round nonpareils, or the color bleeds.
- Chill the dough if the butter is very soft.
- Pull them before the edges darken.
Variations on This Dish:
- Lemon Funfetti Cookies: Add lemon zest and lemon glaze.
- Chocolate Funfetti Cookies: Replace ¼ cup flour with cocoa.
- Birthday-Easter Hybrid: Use more pastel sprinkles and a vanilla glaze.
Common Mistakes to Avoid with This Dish:
- Wrong sprinkles: Nonpareils can melt into gray streaks.
- Overmixing: The dough gets tough.
- Baking too long: They should stay soft in the center.
24. Espresso Chocolate Chip Cookies with White Drizzle
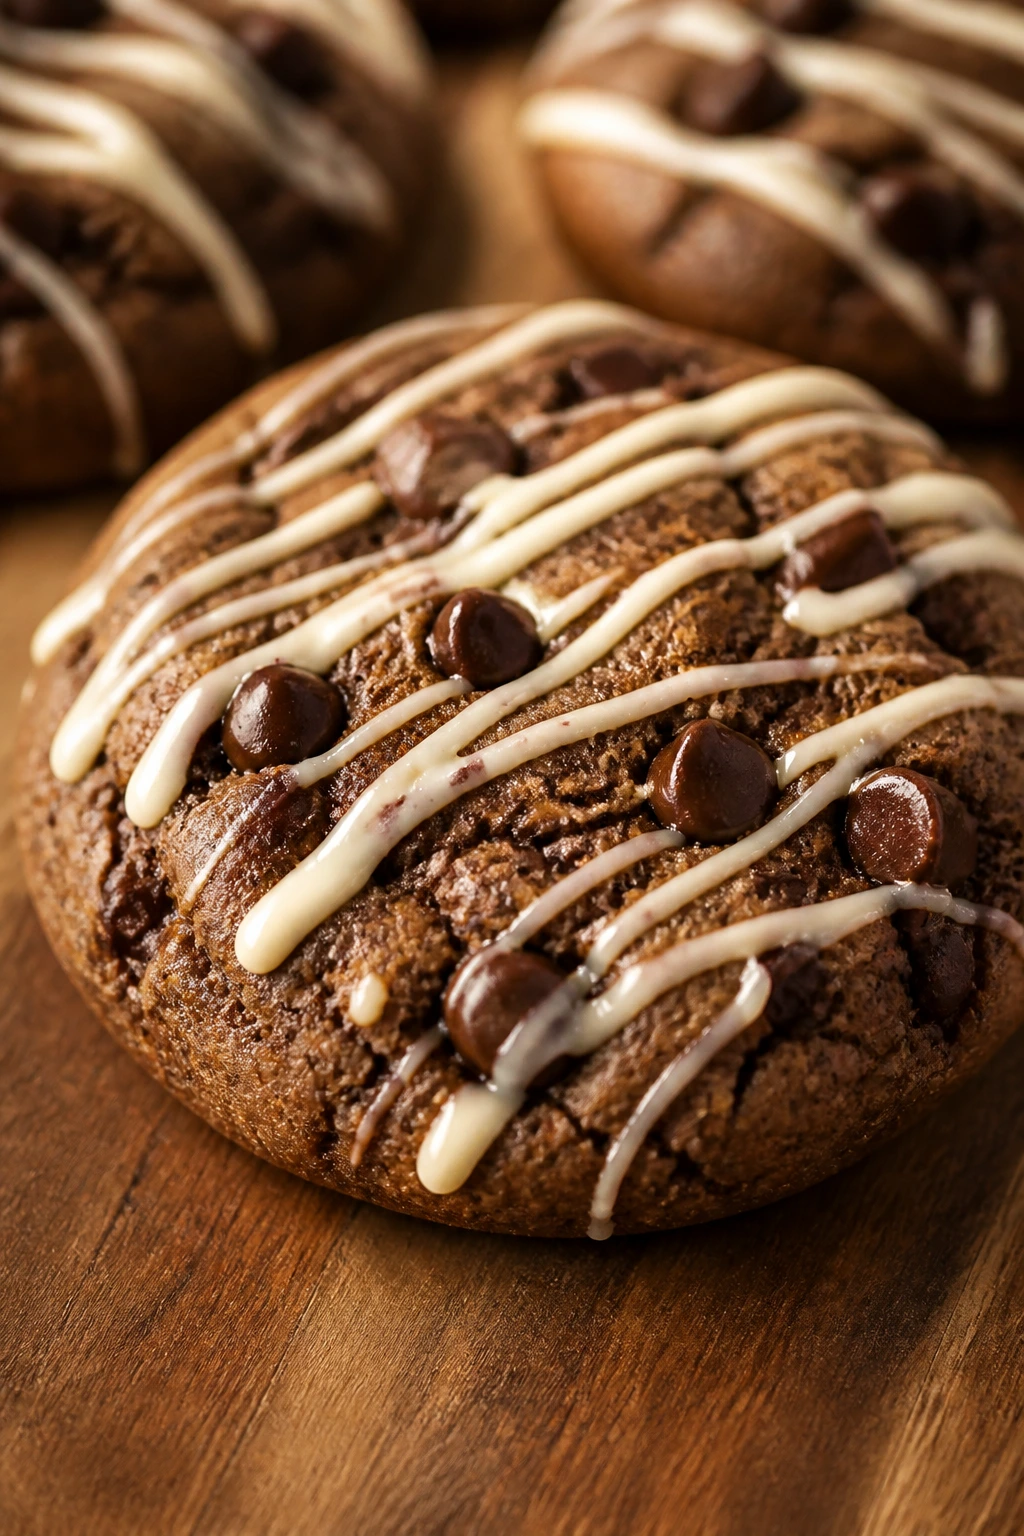
These are for the adults who want something a little darker on the tray. Espresso deepens the chocolate flavor without making the cookies taste like coffee alone, and the white drizzle gives them a clean finish that feels spring-ready. They’re less pastel, more polished.
Why It Works:
A little espresso powder makes chocolate taste fuller and less sweet. Brown sugar keeps the centers chewy, and white chocolate drizzle gives the cookie a visual break so it doesn’t read as too heavy beside lighter treats. I like these most when the drizzle is thin and slightly messy — not uniform, just deliberate.
Key Ingredients:
- 2 cups all-purpose flour
- 2 tablespoons unsweetened cocoa powder
- 1 tablespoon espresso powder
- 1 teaspoon baking soda
- ½ teaspoon salt
- 1 cup unsalted butter, softened
- ¾ cup brown sugar
- ½ cup granulated sugar
- 1 large egg
- 1 teaspoon vanilla extract
- 1 cup chocolate chips
- ½ cup melted white chocolate for drizzle
Quick Steps:
- Whisk flour, cocoa, espresso, baking soda, and salt.
- Cream butter and sugars, then add egg and vanilla.
- Mix in dry ingredients and chocolate chips.
- Scoop and bake at 350°F for 10 to 12 minutes.
- Cool, then drizzle with melted white chocolate.
Equipment for This Recipe:
- Mixing bowl
- Cookie scoop
- Parchment-lined baking sheet
- Spoon for drizzle
How to Serve This Dish:
Set these near the back of the tray or beside coffee. Their dark color anchors the rest of the lighter cookies.
Pro Tips for This Recipe:
- Use espresso powder, not brewed coffee, or the dough gets wet.
- Add the drizzle only once the cookies are fully cool.
- A pinch of flaky salt on top makes the chocolate pop.
Variations on This Dish:
- Mocha White Chip Cookies: Swap chips for white chocolate pieces.
- Mint Espresso Cookies: Add a tiny amount of peppermint extract.
- Hazelnut Version: Mix in chopped hazelnuts.
Common Mistakes to Avoid with This Dish:
- Too much espresso: The flavor turns harsh.
- Warm drizzle: It disappears into the cookie.
- Overbaking: The centers should stay chewy.
25. Bunny Tail Coconut Snowballs
These are the cleanest little Easter cookies on the table. They’re buttery, soft, and rolled in coconut so they look like tiny bunny tails or snowballs depending on how you feel about them. A little melted white chocolate on the bottom helps the coconut cling and gives the cookie a neater finish.
Why It Works:
A shortbread-style dough gives these a tender crumb that holds together after rolling. Coconut on the outside makes them look festive without the need for any icing. Because the texture is delicate, they melt fast in the mouth and don’t feel heavy after a big meal.
Key Ingredients:
- 1 cup unsalted butter, softened
- ½ cup powdered sugar
- 2 cups all-purpose flour
- 1 teaspoon vanilla extract
- ¼ teaspoon salt
- 2 cups finely shredded sweetened coconut
- ½ cup melted white chocolate, optional
Quick Steps:
- Cream butter and powdered sugar.
- Add vanilla, flour, and salt to make a soft dough.
- Roll into small balls and bake at 325°F for 14 to 16 minutes.
- Brush lightly with melted white chocolate if using, then roll in coconut.
- Cool on a rack.
Equipment for This Recipe:
- Mixing bowl
- Small scoop
- Baking sheet
- Shallow bowl for coconut
How to Serve This Dish:
Group these in little clusters on the platter; that’s where the bunny-tail idea works best. They also look nice in mini cupcake liners.
Pro Tips for This Recipe:
- Keep the cookie size small so the coconut coating stays even.
- Roll them while they’re warm, but not hot enough to fall apart.
- Finely shredded coconut adheres better than large flakes.
Variations on This Dish:
- Lemon Coconut Tails: Add lemon zest to the dough.
- Chocolate Coconut Tails: Dip half the cookie in melted chocolate.
- Almond Tails: Add almond extract and a few chopped almonds.
Common Mistakes to Avoid with This Dish:
- Big cookies: They crack when rolled.
- Waiting too long to coat: The coconut won’t stick.
- Using coarse coconut: The finish looks patchy.
26. Strawberry Lemonade Crinkle Cookies
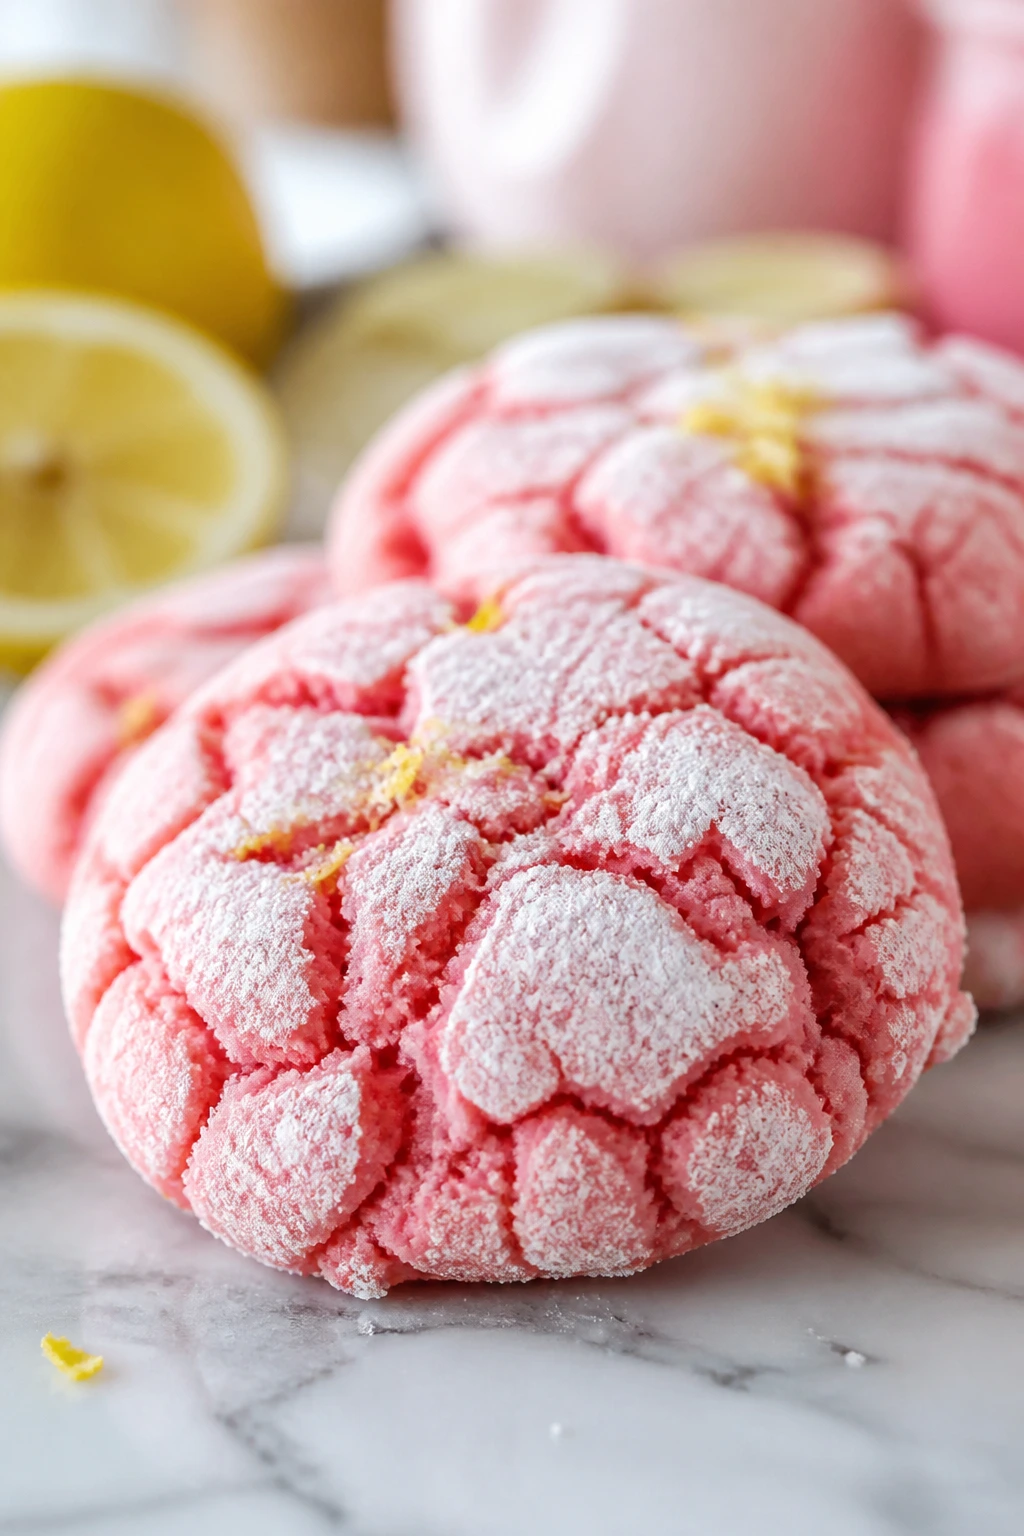
These taste like a bright, pink lemonade stand got turned into a cookie. Strawberry and lemon work together in a way that stays sunny instead of sugary, and the powdered sugar shell gives the cookies that pretty, cracked surface everyone expects from a crinkle. The color alone sells half the tray.
Why It Works:
Freeze-dried strawberries bring real berry flavor without extra liquid, which is why the cookies can still crack properly. Lemon zest keeps the sweetness in check. A thick dough and a good chill give the surface enough tension to split open in the oven.
Key Ingredients:
- 2 cups all-purpose flour
- 1 teaspoon baking powder
- ½ teaspoon salt
- ¾ cup granulated sugar
- ½ cup unsalted butter, softened
- 2 large eggs
- 1 teaspoon vanilla extract
- ½ cup finely ground freeze-dried strawberries
- 1 tablespoon lemon zest
- 1 cup powdered sugar for rolling
Quick Steps:
- Whisk flour, baking powder, and salt.
- Cream butter and sugar, then add eggs, vanilla, strawberries, and zest.
- Mix in dry ingredients and chill 45 minutes.
- Roll balls in powdered sugar and bake at 350°F for 10 to 12 minutes.
- Cool on the pan before moving.
Equipment for This Recipe:
- Mixing bowls
- Cookie scoop
- Baking sheets
- Food processor or zip-top bag for crushing strawberries
How to Serve This Dish:
These belong near the front of the tray because the pink color grabs attention fast. A few sliced strawberries around them make the flavor read instantly.
Pro Tips for This Recipe:
- Crush the freeze-dried strawberries to a fine powder.
- Roll heavily in powdered sugar.
- Bake from chilled dough for sharper cracks.
Variations on This Dish:
- Raspberry Lemonade Crinkles: Replace strawberry powder with raspberry powder.
- Lemon-Only Crinkles: Skip the berry and add more zest.
- Pink and White Swirl Crinkles: Fold in a second, lightly colored dough.
Common Mistakes to Avoid with This Dish:
- Fresh strawberries: They make the dough wet.
- Not enough chill time: The cookies flatten.
- Weak sugar coating: The crackle look gets lost.
27. Maple Oatmeal Cookies with Pastel Icing
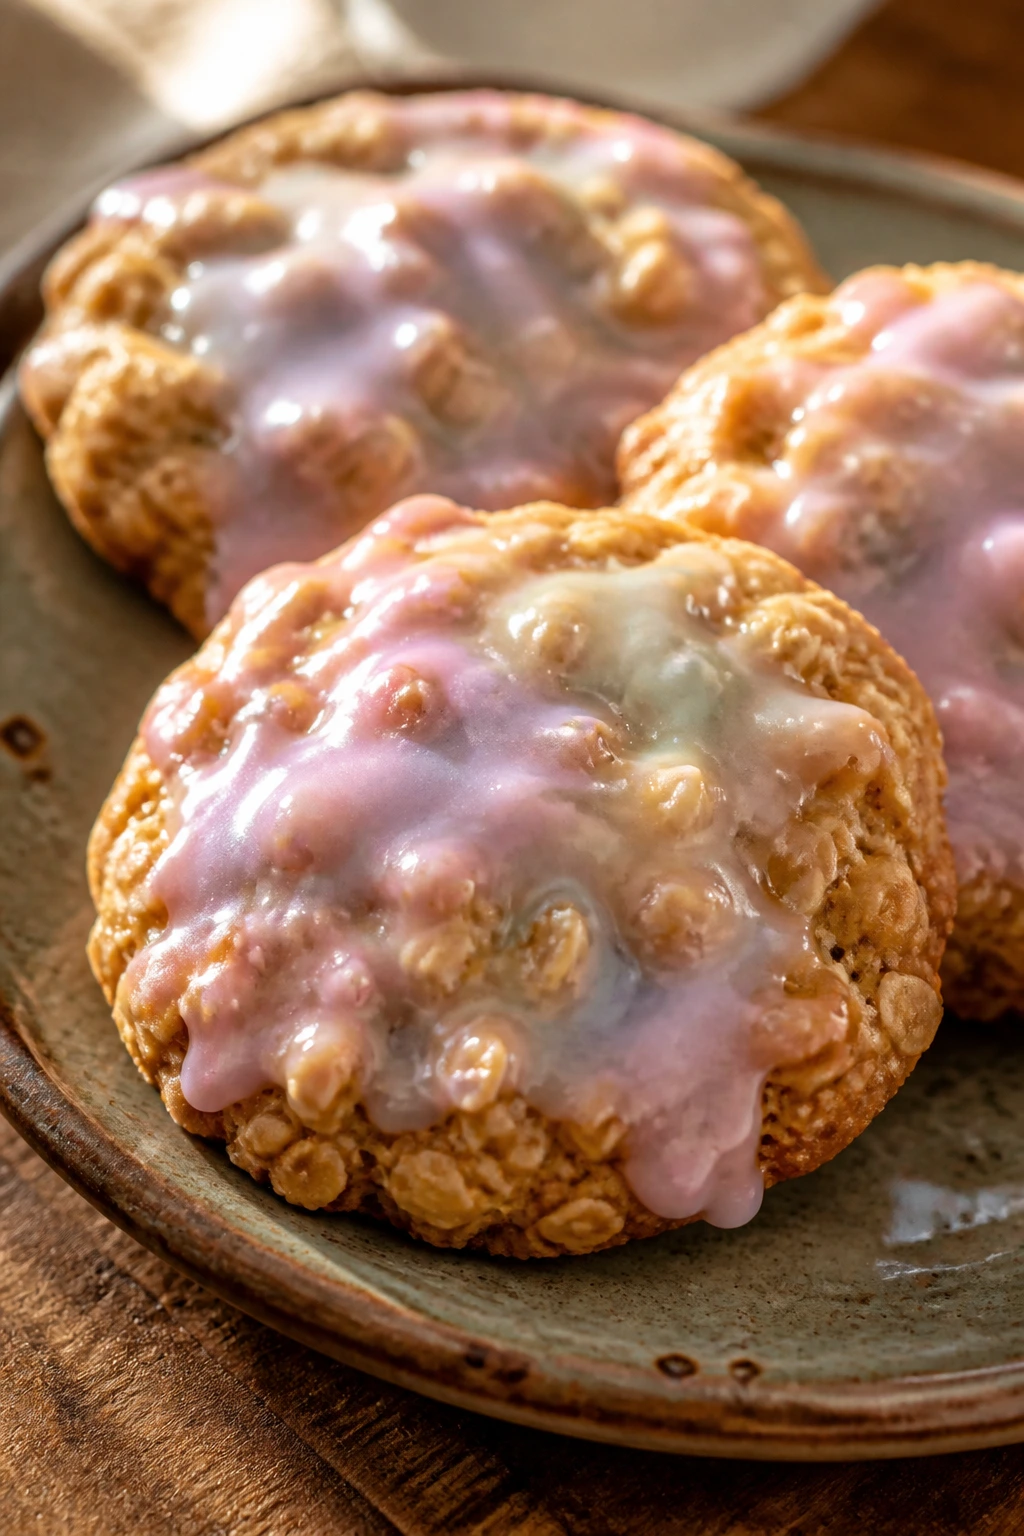
These are the softer, more homey cookies on the tray, but the pastel icing keeps them from feeling plain. Maple gives them a warm depth that works better than white sugar alone, and the oats make them chewy in the middle with crisp edges if you bake them right. They’re the cookie people grab after the decorated ones, which says plenty.
Why It Works:
Maple syrup adds flavor and moisture, so the cookies stay tender without needing a lot of butter. Oats give structure and a little chew, and a thin pastel glaze adds color without covering the whole surface. These are practical cookies with a pretty coat, which is a combination I always trust.
Key Ingredients:
- 1½ cups all-purpose flour
- 1 teaspoon cinnamon
- ½ teaspoon baking soda
- ½ teaspoon salt
- 1 cup old-fashioned oats
- ½ cup unsalted butter, softened
- ½ cup brown sugar
- ¼ cup pure maple syrup
- 1 large egg
- 1 cup powdered sugar and 2 tablespoons milk for icing
Quick Steps:
- Whisk flour, cinnamon, baking soda, salt, and oats.
- Cream butter and brown sugar, then add maple syrup and egg.
- Stir in dry ingredients and scoop onto a sheet.
- Bake at 350°F for 10 to 12 minutes.
- Cool and drizzle with pastel icing.
Equipment for This Recipe:
- Hand mixer
- Cookie scoop
- Parchment-lined sheet
- Small bowl for icing
How to Serve This Dish:
These help balance the sweeter cookies on the tray. A light icing stripe or zigzag keeps them pretty without hiding the oat texture.
Pro Tips for This Recipe:
- Use real maple syrup, not pancake syrup.
- Chill the dough if the maple makes it loose.
- Let the icing set before stacking.
Variations on This Dish:
- Raisin Maple Oatmeal Cookies: Add ½ cup raisins.
- Pecan Maple Oatmeal Cookies: Add chopped pecans.
- Lemon Iced Version: Swap cinnamon for lemon zest and use lemon glaze.
Common Mistakes to Avoid with This Dish:
- Too much syrup: The cookies spread too much.
- Baking too long: The oats dry out fast.
- Stacking before icing sets: The glaze smears.
28. Pink Velvet Whoopie Cookies
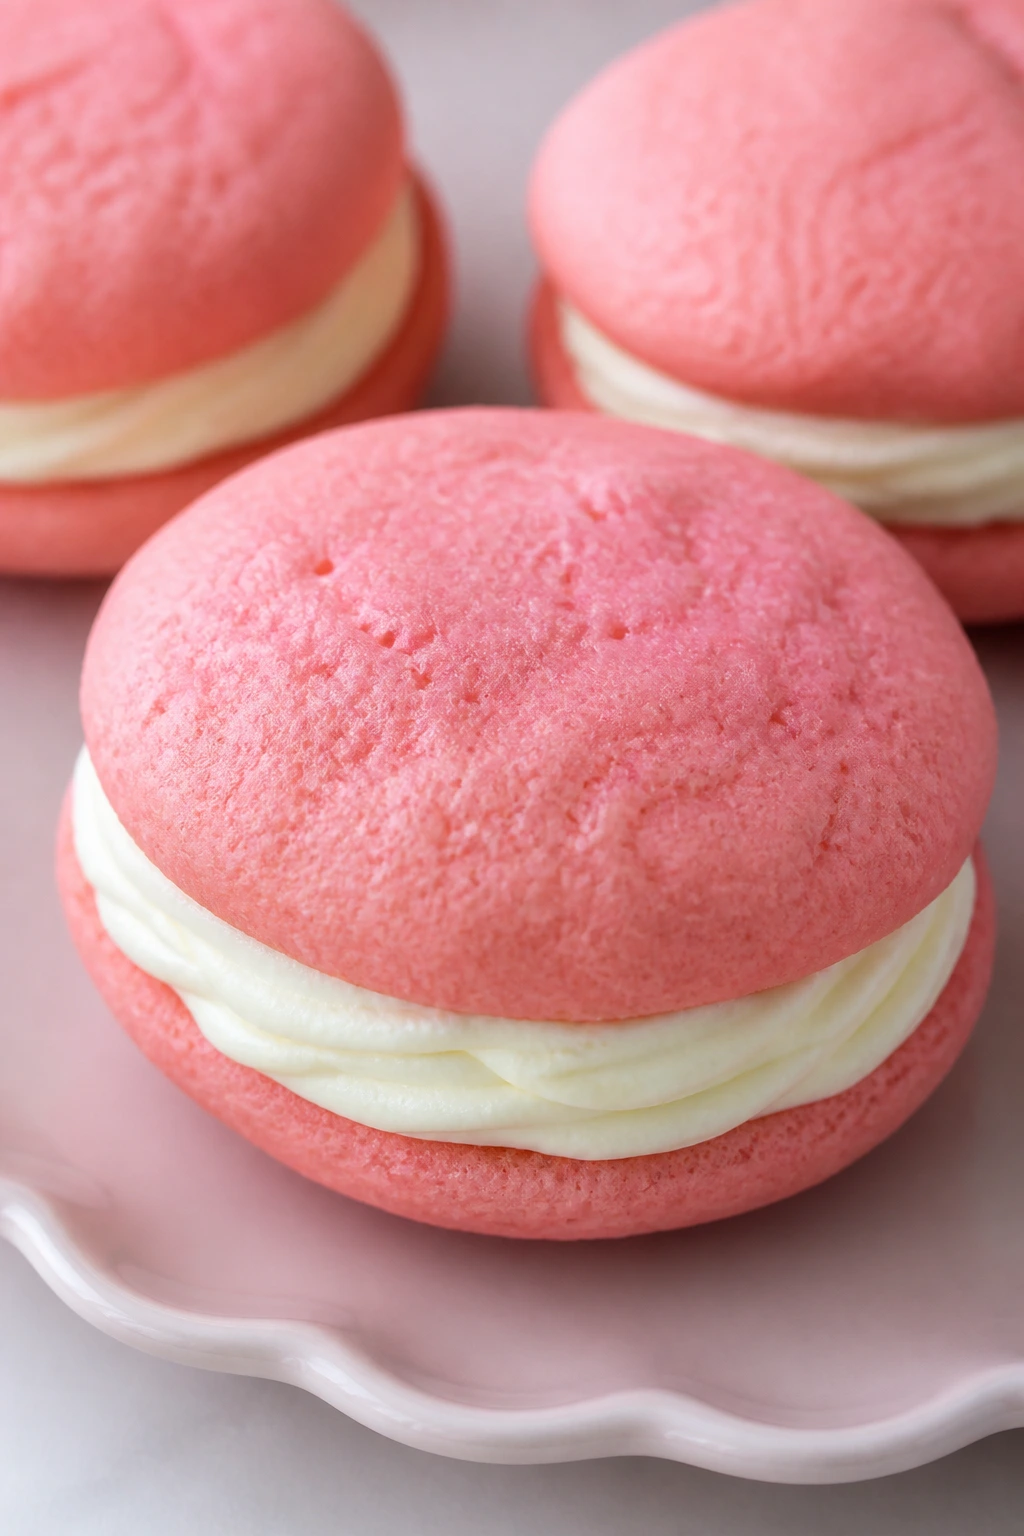
These are the plush, bakery-style cookies that sit somewhere between a cake and a sandwich cookie. The pastel pink shells are soft and tender, while the cream filling gives you a clean white stripe in the middle. They’re a little playful, a little retro, and they look right at home on an Easter table.
Why It Works:
Whoopie cookies are made for soft texture, which is why they feel so different from crisper cookies on the same tray. A touch of cocoa gives the pink batter depth without darkening it too much. Cream cheese filling adds structure and keeps the sandwiches from feeling cloying.
Key Ingredients:
- 2 cups all-purpose flour
- ¼ cup unsweetened cocoa powder
- 1 teaspoon baking soda
- ½ teaspoon salt
- ½ cup unsalted butter, softened
- 1 cup brown sugar
- 1 large egg
- 1 cup buttermilk
- 1 teaspoon vanilla extract
- Pink gel food coloring
- For the Filling: 4 ounces cream cheese, ¼ cup butter, 1½ cups powdered sugar, 1 teaspoon vanilla
Quick Steps:
- Whisk flour, cocoa, baking soda, and salt.
- Beat butter and sugar, then add egg, buttermilk, vanilla, and coloring.
- Mix in dry ingredients and scoop small rounds.
- Bake at 350°F for 10 to 12 minutes, then cool fully.
- Beat the filling, sandwich the cookies, and chill 15 minutes.
Equipment for This Recipe:
- Hand mixer
- Cookie scoop
- Parchment-lined baking sheets
- Offset spatula for filling
How to Serve This Dish:
Set these on a separate plate or cake stand so the filling stays neat. They look especially good cut in half, where the pink and white layers show off.
Pro Tips for This Recipe:
- Use gel coloring, not liquid, to keep the batter balanced.
- Pipe the filling for a cleaner middle layer.
- Chill after assembling so the sandwiches firm up.
Variations on This Dish:
- Chocolate Whoopie Version: Increase the cocoa slightly and skip the pink coloring.
- Vanilla Raspberry Filling: Add raspberry jam to the cream filling.
- Lemon Whoopies: Replace cocoa with lemon zest and a little lemon extract.
Common Mistakes to Avoid with This Dish:
- Overfilling: The cream squeezes out at the sides.
- Warm assembly: The filling slides around.
- Baking too long: They should stay soft and cakey.
Why These Cookies Work So Well on an Easter Tray

A good Easter tray needs contrast more than it needs quantity. That’s the part people miss when they try to make every cookie look equally decorated. A tray that mixes cutouts, crinkles, sandies, sandwich cookies, and a couple of coconut or meringue pieces feels generous because the textures keep changing as you move across it.
Color matters, but not in the cheesy way people usually talk about it. Pastels work because they let the actual cookie colors do some work too — pale vanilla, lemon yellow, jam red, coconut white, pistachio green, chocolate brown. If everything is tinted the same shade, the tray turns flat fast. A little natural color goes a long way.
I also like that these cookies cover different levels of effort. Some are one-bowl drop cookies. Some ask for a short chill. A few need a glaze or filling. That mix means you can build a spread without spending the whole day glued to the counter, and that matters when there are other dishes, side plates, and probably one noisy person wandering into the kitchen asking when dessert will be ready.
Essential Equipment for These Recipes

-
Hand mixer or stand mixer: Creaming butter, whipping meringues, and making fillings all go faster with one.
-
Mixing bowls in at least two sizes: One for dry ingredients, one for wet, and one spare because cookie dough always seems to wander.
-
Parchment paper or silicone baking mats: These keep bottoms from scorching and help delicate cookies lift cleanly.
-
Cookie scoops in two sizes: A small scoop keeps thumbprints and snowballs uniform; a medium scoop works for most drop cookies.
-
Rolling pin: Useful for cutouts, shortbread, and linzer dough.
-
Cookie cutters: Eggs, bunnies, flowers, and round cutters cover most of the prettiest shapes.
-
Wire cooling racks: Needed for icing, glazing, and any cookie that should not sit in steam.
-
Small offset spatula: Handy for sandwich filling and moving soft cookies.
-
Piping bags or zip-top bags: Good for drizzling icing, filling thumbprints, and speckling cookies.
-
Microplane or fine zester: Lemon, lime, and orange zest need a fine grate to release oil without bitter pith.
Smart Shopping and Ingredient Tips

Butter is worth paying attention to here. Use real unsalted butter and keep it cool for shortbread, sandies, and slice-and-bake doughs; soften it for butter cookies, sandwich cookies, and whoopies. When a recipe depends on shape, cold butter helps. When it depends on softness, room-temperature butter gives a smoother crumb.
Citrus should smell bright before you even cut it open. Thin, heavy lemons and oranges usually mean more juice, but for these cookies, zest matters more than juice. I buy fruit with firm, glossy skin and use the colored outer layer only — the white pith beneath it tastes bitter and muddies the flavor.
For decorations, gel coloring beats liquid every time. Liquid dye thins icing, brightens dough unevenly, and makes royal icing act weird. Gel colors stay concentrated, so you need less of them and the cookie texture stays put.
Jam and preserves need some body. Thick strawberry, raspberry, or apricot preserves stay in the center instead of leaking out the sides. If the jar looks watery when you stir it, simmer it for a minute or two before using. Same with condensed milk, white chocolate chips, and mini eggs: buy good enough that you actually want to eat the leftovers. That sounds fussy. It isn’t.
Freeze-dried fruit deserves a special mention. It’s one of the easiest ways to get berry flavor into dough without adding liquid. You can crush it in a bag with a rolling pin, or pulse it once or twice in a processor. Fresh berries often work against you here.
How to Serve These Recipes

Presentation:
Build the tray in layers instead of lining everything up like soldiers. Put the tallest pieces — whoopie cookies, meringues, coconut nests — toward the back, then fill the middle with cutouts, linzers, and sandwich cookies, and use the smallest cookies as spacing around the edges. A few edible flowers, a little parchment, or a plain linen napkin does more than another layer of sprinkles ever will.
Accompaniments:
Lemon cookies like berries. Chocolate cookies want coffee or hot chocolate nearby. Sandies, shortbread, and meringues pair well with tea. If you’re serving brunch, set the cookies beside fruit salad, a tart citrus dish, or a bowl of lightly sweetened whipped cream so the tray doesn’t feel one-note.
Portions:
Plan on 2 to 3 cookies per person if there are other desserts, or 4 to 5 if the cookie tray is the main sweet. Smaller pieces like snowballs and meringues can be counted more generously; rich sandwich cookies and whoopie cookies should be treated like larger servings.
Beverage Pairing:
Coffee works with almost everything here, but especially the chocolate, peanut butter, and brown butter cookies. For a softer pairing, serve black tea with citrus cookies or a vanilla latte with coconut and almond cookies. Cold milk still wins with the classics. Some things don’t need reinvention.
Additional Tips and Flavor Boosters
Flavor Enhancement:
A tiny pinch of salt on top of chocolate cookies, peanut butter blossoms, or brown butter dough makes the flavor land faster. Citrus zest in the glaze, not just the dough, gives you a brighter first bite.
Customization:
If you want a more spring-forward tray, lean on pastel colors, jam centers, and pale glazes. If you want a richer tray, shift toward brown butter, chocolate drizzle, and nutty shortbread. You can make the same basic spread feel lighter or deeper just by changing the finishing layer.
Serving Suggestions:
Use white platters, parchment-lined boards, or shallow baskets with paper liners. Bright cookies need room around them. Cramming them together makes the colors blur.
Make-It-Yours:
For dairy-free cookies, swap in plant butter and a non-dairy milk where the recipe needs it. For gluten-free versions, use a strong 1:1 baking blend on cutouts and drop cookies, but keep an eye on chilling time because some blends hydrate faster. For less sweet trays, reduce glaze and lean on toasted nuts, citrus zest, and powdered sugar instead of heavy icing.
Make-Ahead, Storage, and Reheating Guidance
Most of these cookies keep well at room temperature for 2 to 4 days in an airtight container, though decorated cutouts and sandwich cookies are best layered between sheets of parchment. Crisp cookies like shortbread, sandies, and snowballs usually hold their texture longest. Soft cookies, especially whoopies and ricotta cookies, are better in a single layer or a shallow stack.
The freezer is useful here. Plain baked cookies freeze well for up to 2 months if you wrap them tightly and then place them in a freezer bag. Cutout dough, shortbread logs, and slice-and-bake dough can usually be frozen before baking for up to 2 months too. I’m a fan of freezing dough in logs because it saves you from mixing from scratch on a busy day.
Royal icing, buttercream, and cream cheese filling do not all behave the same, which is where people get tripped up. Decorated sugar cookies can be frozen after the icing has dried, but the surface should be fully set first. Sandwich cookies and whoopie cookies freeze best unfilled or filled with a sturdier cream filling; jam can loosen after thawing. Meringues are their own animal. Keep them dry, sealed, and away from the freezer if you can. Humidity is the enemy there.
There’s no real reheating needed for most of these, but a very quick 3-minute warm-up in a low oven can revive shortbread or butter cookies if they’ve softened a little. Don’t use the microwave unless you want limp edges and melted icing.
Variations and Adaptations to Try

Gluten-Free Easter Tray:
Use a 1:1 gluten-free baking flour for drop cookies, thumbprints, and cutouts, but chill the dough a little longer because the texture often starts softer. Shortbread and snowballs adapt well too, especially if you use almond flour in part of the mix.
Dairy-Free Cookie Box:
Plant butter works in sugar cookies, crinkles, and oat cookies, while coconut cream can stand in for some fillings. Choose recipes with glaze or jam if you want to avoid fiddly dairy-free frostings.
Low-Sugar Finish:
Skip thick icing on a few cookies and rely on powdered sugar dusting, citrus zest, toasted coconut, or a thin chocolate drizzle. This keeps the tray pretty without pushing every cookie into dessert overload.
Kid-Decorating Batch:
Bake plain cutouts, butter cookies, and sugar drops, then set out bowls of sprinkles, sanding sugar, colored glaze, and mini eggs. Kids do best with pieces that can survive a crooked sprinkle pattern. That’s not a flaw. That’s the whole point.
Bright Citrus Mix:
Build a tray around lemon, lime, and orange cookies for a sharper, cleaner flavor story. That keeps the platter from leaning too heavily on vanilla and chocolate.
Chocolate-Lover’s Corner:
Make one corner of the tray richer with brown butter cookies, chocolate crinkles, espresso cookies, and peanut butter blossoms. Not every Easter cookie has to whisper. A few can absolutely show up louder.
Common Mistakes to Avoid
Treating every dough the same:
Cutouts, shortbread, crinkles, and meringues all want different handling. If you roll a crinkle dough like a sugar cookie dough, or whip meringue like buttercream, the recipe will punish you fast.
Decorating before the cookies are cool:
Warm cookies melt icing, smear glaze, and soften chocolate in a hurry. If a finish is supposed to set, give the cookies time. That patience pays off in cleaner edges and fewer ruined trays.
Using wet ingredients where dry ones belong:
Fresh strawberries, loose jam, and overly juicy citrus can wreck texture if you don’t account for them. Freeze-dried fruit, thick preserves, and zest are usually the smarter call for pretty cookies.
Overbaking pale cookies:
Shortbread, sandies, ricotta cookies, and snowballs should not look deeply browned. A few extra minutes can turn them from tender to sandy in the wrong way.
Forgetting to chill when the dough asks for it:
Cutouts, linzers, pinwheels, and crinkles need chill time to hold their shape. If you skip it, the edges spread and the design disappears. It’s that plain.
Stacking the wrong cookies together:
Powdered sugar, royal icing, jam, and meringues each have their own storage needs. Put them all in one container and they’ll start borrowing texture from each other. Bad trade.
Frequently Asked Questions
Can I make these Easter cookies ahead of time?
Yes. Shortbread, snowballs, crinkles, and butter cookies can be baked 2 to 3 days ahead and stored airtight. Cutout dough, slice-and-bake dough, and linzer dough also freeze well if you want to spread the work across more than one day.
How do I keep cutout cookies from spreading?
Chill the dough before rolling, chill the cut shapes again before baking, and don’t overload the dough with extra butter or liquid. A ¼-inch thickness usually gives you the cleanest shape without turning them fragile.
What’s the best cookie for decorating with kids?
Sugar cutouts, butter cookies, and plain drop cookies are the easiest. They can handle sprinkles, simple icing, candy eggs, and a few uneven edges without looking ruined. Honestly, a slightly crooked cookie usually looks more charming.
Can I use store-bought dough for any of these?
You can, especially for cutouts or basic sugar cookies, but the decorating still matters. Store-bought dough tends to spread more, so chill it well and keep the finishing touches simple. Jam, glaze, and sprinkles help more than trying to force it into something complicated.
How do I stop royal icing from getting too runny?
Add powdered sugar a little at a time until the icing thickens enough to hold a line for a few seconds before smoothing out. If it starts thin, it usually means the liquid was added too quickly. Gel coloring helps because it doesn’t thin the mix.
Can I freeze decorated cookies?
Yes, if the icing or glaze is fully dry first. Stack them with parchment between layers and seal them tightly. Meringues are the exception; they dislike moisture and should be stored dry instead of frozen.
What if my crinkles don’t crack enough?
The dough was probably too warm or the sugar coating too thin. Chill it longer, coat generously in powdered sugar, and bake from cold dough. That surface tension is what gives you the crackled look.
How far in advance can I make sandwich cookies?
Filled sandwich cookies are best within 1 to 2 days, though the cookies themselves can be baked earlier and filled closer to serving time. Jam-filled versions soften a little as they sit, which some people love. I do, if I’m being honest.
Which cookies travel best for gifting?
Shortbread, snowballs, sandies, and butter cookies hold up the cleanest in a box. Anything with jam, cream filling, or soft icing should get its own layer or a parchment divider so it doesn’t smear.
Can I make a more grown-up tray without losing the Easter feel?
Absolutely. Lean on lemon, brown butter, espresso, pistachio, almond, and berry flavors, then keep the colors soft. You don’t need cartoon bunnies everywhere for the tray to feel seasonal.
A Tray Worth Sharing

The nicest thing about Easter cookies is that they let you choose your kind of pretty. Some are neat and glossy. Some are soft and snowy. Some carry color in the dough, and some earn it from one careful line of icing or a spoonful of jam in the middle.
That’s the real trick: don’t try to make every cookie do everything. Pick a few shapes, a few flavors, and a few finishes that play well together, and let the tray breathe. When the butter is good, the citrus is fresh, and the decoration is kept simple, the cookies take care of the rest.