
Quick lunches that use pantry staples have a certain charm: they don’t ask you to shop, they don’t ask you to think too hard, and they usually don’t leave you with a sink full of regret. A can of beans, a box of pasta, a jar of mustard, a sleeve of crackers, half a bag of rice — that’s enough to build something hot, crisp, briny, creamy, or all four at once if you’re paying attention. The best ones feel improvised in the right way, like you pulled together a lunch from the back of the cupboard and somehow landed on something you’d make again on purpose.
What matters most here is speed with actual flavor. Not “speed” in the sad desk-lunch sense. Real speed. The kind that comes from knowing which pantry ingredients already bring salt, acid, fat, and texture to the table. Canned tuna wants lemon and celery. Chickpeas want mustard, curry, or pickles. Pasta wants garlic, olive oil, and something sharp to keep it awake. Once you start thinking in those building blocks, lunch gets easier fast.
And yes, pantry cooking has its own little rules. Drain the bean liquid. Bloom your spices for 30 seconds in oil. Toast the breadcrumbs. Salt canned tomatoes more aggressively than feels polite. Those tiny moves are what turn shelf-stable ingredients into lunch that tastes assembled, not resigned.
Why These Lunches Belong in Your Regular Rotation
- No special shopping list: Most of these lunches start with canned beans, pasta, rice, noodles, tortillas, or tuna, so you can make them from what’s already there.
- Fast without shortcuts that taste like shortcuts: A 10-minute lunch can still have crisp edges, tangy dressing, or a hot pan finish that makes the whole thing feel finished.
- Flexible by design: If you’ve got no celery, use cucumber. No pita? Crackers, toast, or rice work. The recipes bend without falling apart.
- Budget-friendly in a real way: A few pantry staples can stretch across several lunches, which is a lot better than buying one-off ingredients for a single meal.
- Good hot or cold: Some of these hold up on a desk, in a lunch box, or reheated in a microwave that’s seen better days.
- Built around actual flavor balance: Salt, acid, fat, crunch, and a little heat show up over and over, because that’s what keeps pantry food from tasting flat.
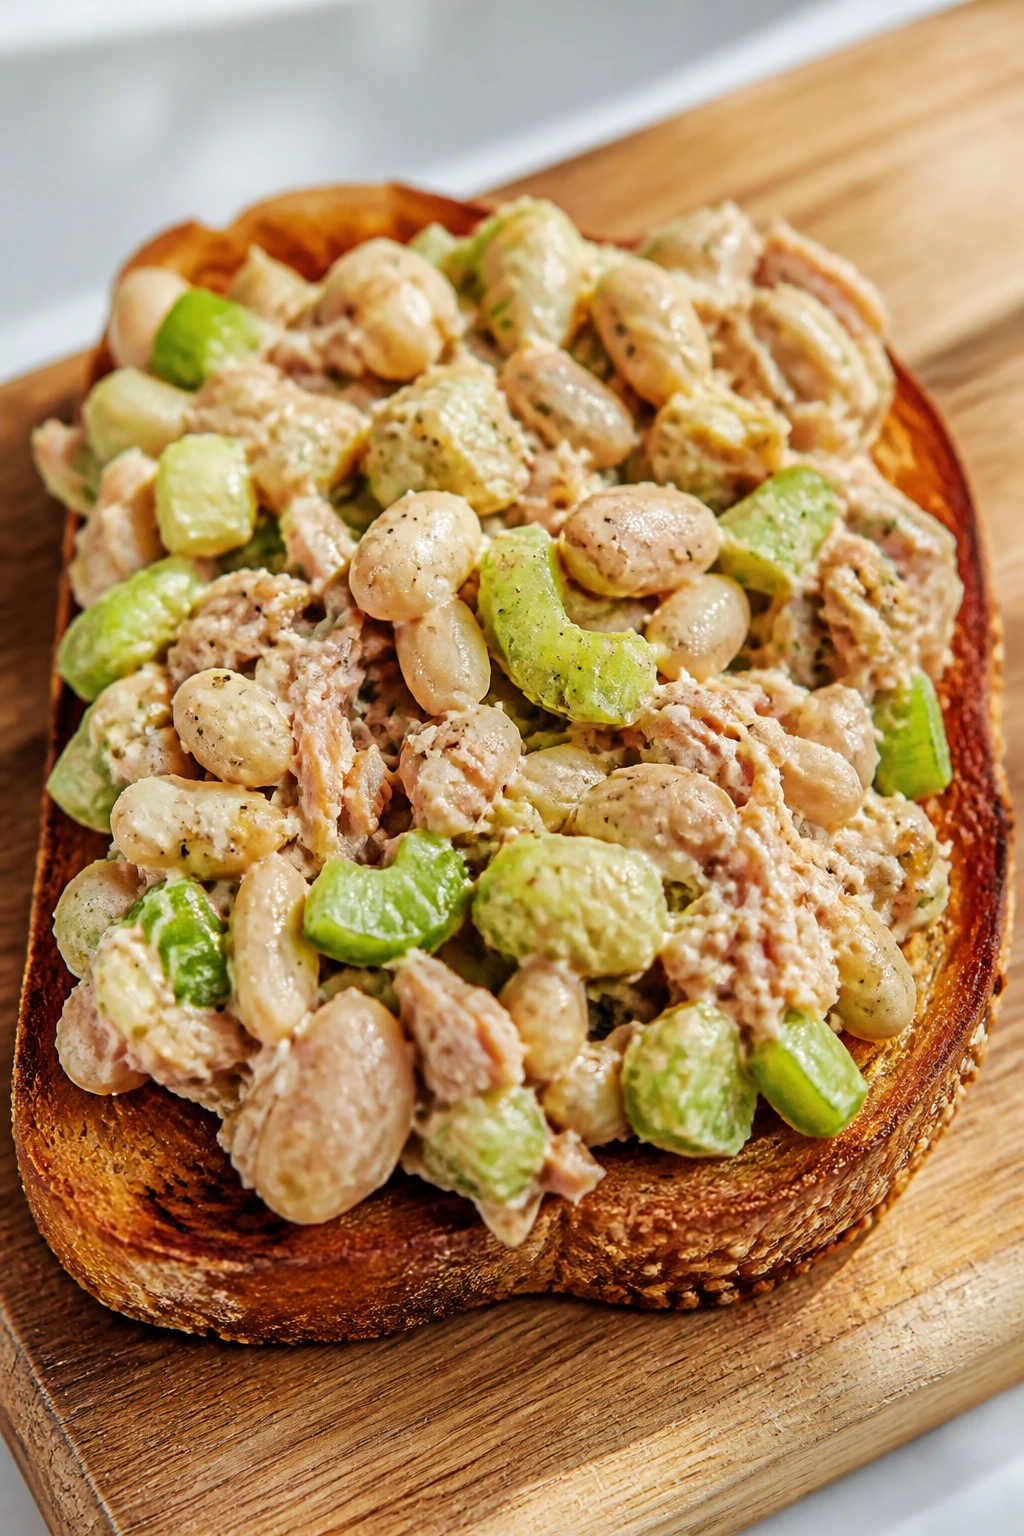
1. Tuna, White Bean, and Celery Salad Toast
Cold tuna salad can go chalky fast, but white beans fix that. They bring a soft, creamy texture that makes the whole thing feel fuller, and the celery gives it the snap that canned fish always needs.
Why It Works:
The beans stretch one can of tuna into a lunch that eats like something bigger than a toast topper. A spoonful of Dijon and lemon keeps it bright, while parsley or dill gives it that clean, fresh finish canned fish often needs. If your bread is sturdy enough, the whole thing holds together without sliding off the plate.
Key Ingredients:
- 1 can (5 oz) tuna in water, drained well
- 1 cup canned cannellini beans, rinsed and drained
- 1 celery stalk, finely diced
- 2 tablespoons mayonnaise
- 1 teaspoon Dijon mustard
- 1 tablespoon lemon juice
- 1 tablespoon chopped parsley
- Salt and black pepper, to taste
- 2 slices sturdy bread, toasted
Quick Steps:
- Mash half the beans with a fork in a bowl.
- Add tuna, celery, mayo, Dijon, lemon, and parsley.
- Stir until chunky but spreadable.
- Season with salt and pepper.
- Spoon onto toast and serve right away.
Equipment for This Recipe:
- Medium mixing bowl
- Fork
- Cutting board and knife
- Toaster or skillet
How to Serve This Dish:
Pile the salad high on sourdough, rye, or seeded sandwich bread. A few potato chips on the side make sense here. So does a dill pickle spear.
Pro Tips for This Recipe:
- Drain the tuna hard: Wet tuna makes the toast soggy in minutes.
- Mash only half the beans: Leave some whole for texture.
- Add lemon at the end: It wakes everything up.
Variations on This Dish:
- Capers and Pepper: Add 1 tablespoon capers and extra black pepper.
- Spicy Lunch Toast: Stir in 1 teaspoon hot sauce or a pinch of chili flakes.
- No-Mayo Version: Use 2 tablespoons olive oil plus a little extra lemon.
Common Mistakes to Avoid with This Dish:
- Using soft bread: It collapses under the salad; toast it well.
- Overmixing the tuna: You want chunks, not paste.
- Skipping acid: Without lemon, the whole thing tastes heavy.
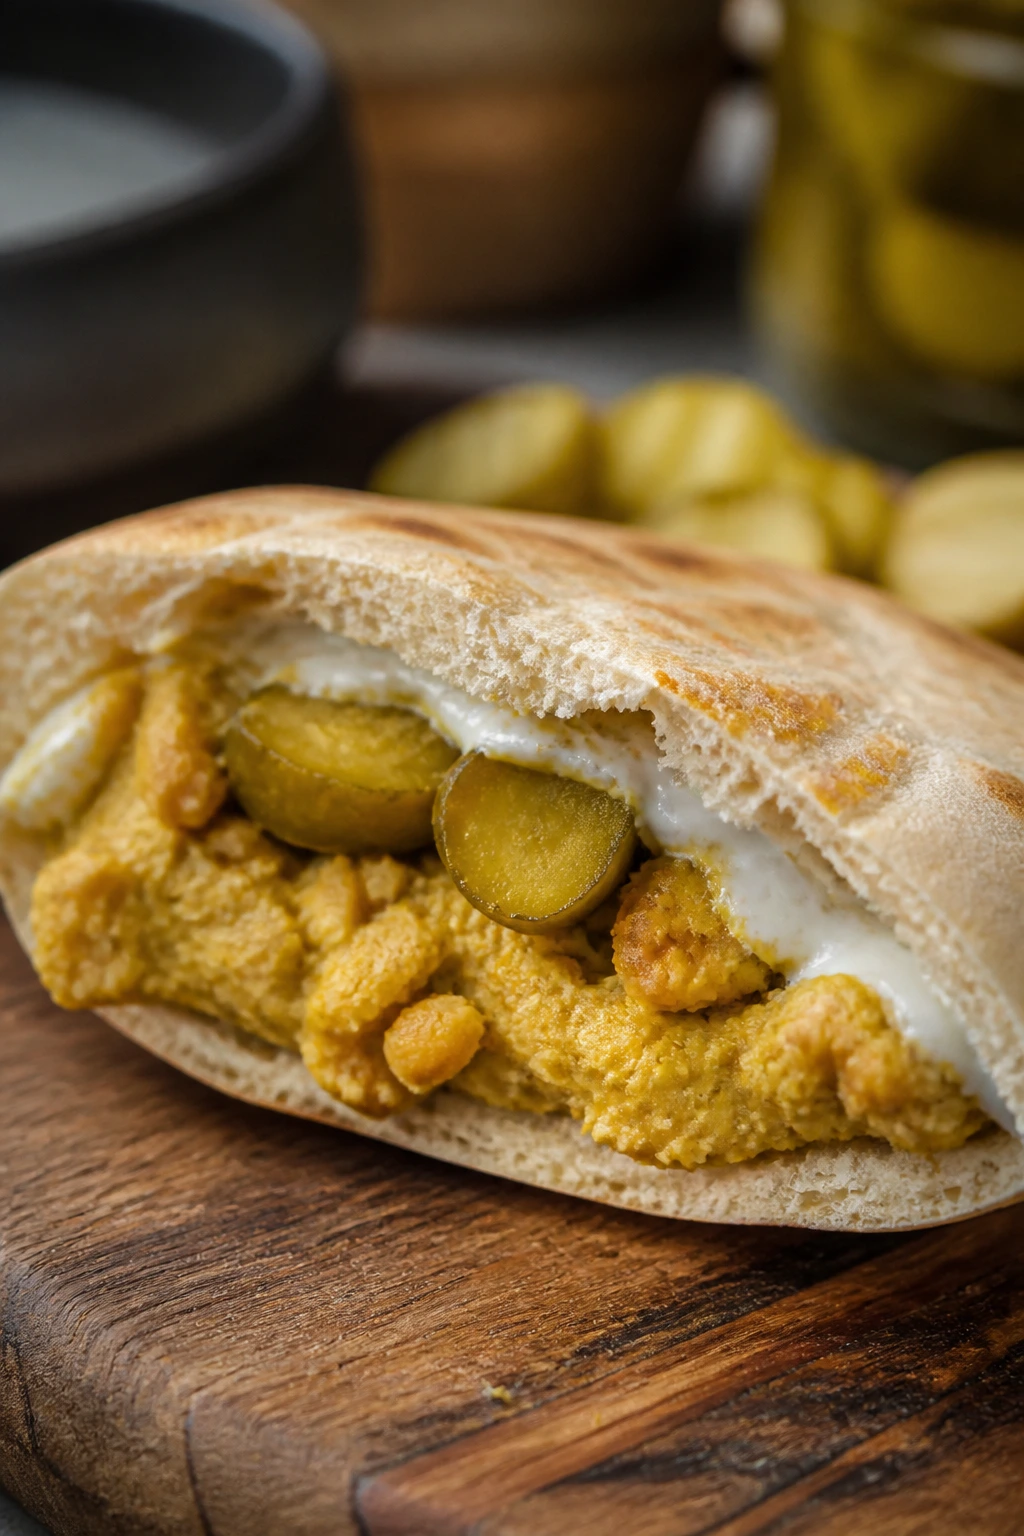
2. Chickpea Smash Pita with Curry and Pickles
This is the lunch I make when the fridge is empty but the pantry is not. Chickpeas, a little curry powder, chopped pickles, and a smear of yogurt or mayo turn into a filling pita that tastes sharper and more alive than it has any business tasting.
Why It Works:
Chickpeas are sturdy enough to mash into a spread, but they still keep some texture. Pickles bring the salt and acid; curry powder adds warm, dusty spice without requiring a long ingredient list. Stuff it into pita and the pockets do the rest.
Key Ingredients:
- 1 can (15 oz) chickpeas, rinsed and drained
- 2 tablespoons mayonnaise or plain yogurt
- 1 teaspoon curry powder
- 2 tablespoons chopped dill pickles
- 1 tablespoon pickle brine
- 1 tablespoon chopped red onion
- Salt and pepper, to taste
- 2 pita breads, split open
Quick Steps:
- Mash the chickpeas in a bowl until about half are broken.
- Stir in mayo, curry powder, pickles, brine, and onion.
- Taste and season with salt and pepper.
- Stuff into pita pockets.
- Cut in half and eat immediately.
Equipment for This Recipe:
- Mixing bowl
- Fork or potato masher
- Knife
- Spoon
How to Serve This Dish:
Serve with carrot sticks, cucumber slices, or a handful of salted chips. If you like a cooler lunch, tuck in shredded lettuce for crunch.
Pro Tips for This Recipe:
- Use pickle brine sparingly: A teaspoon too much and it turns sharp fast.
- Leave some chickpeas whole: The texture matters.
- Warm the pita: Ten seconds in the microwave keeps it pliable.
Variations on This Dish:
- Curried Apple Crunch: Add 2 tablespoons diced apple for sweetness and snap.
- Tahini Chickpea Pita: Swap mayo for tahini plus a splash of water.
- No-Pita Bowl: Serve over rice or chopped lettuce.
Common Mistakes to Avoid with This Dish:
- Mashing into paste: The filling should still look rough.
- Overfilling the pita: It tears, then lunch becomes cleanup.
- Using dry curry powder past its prime: Stale spice tastes like dust, not flavor.
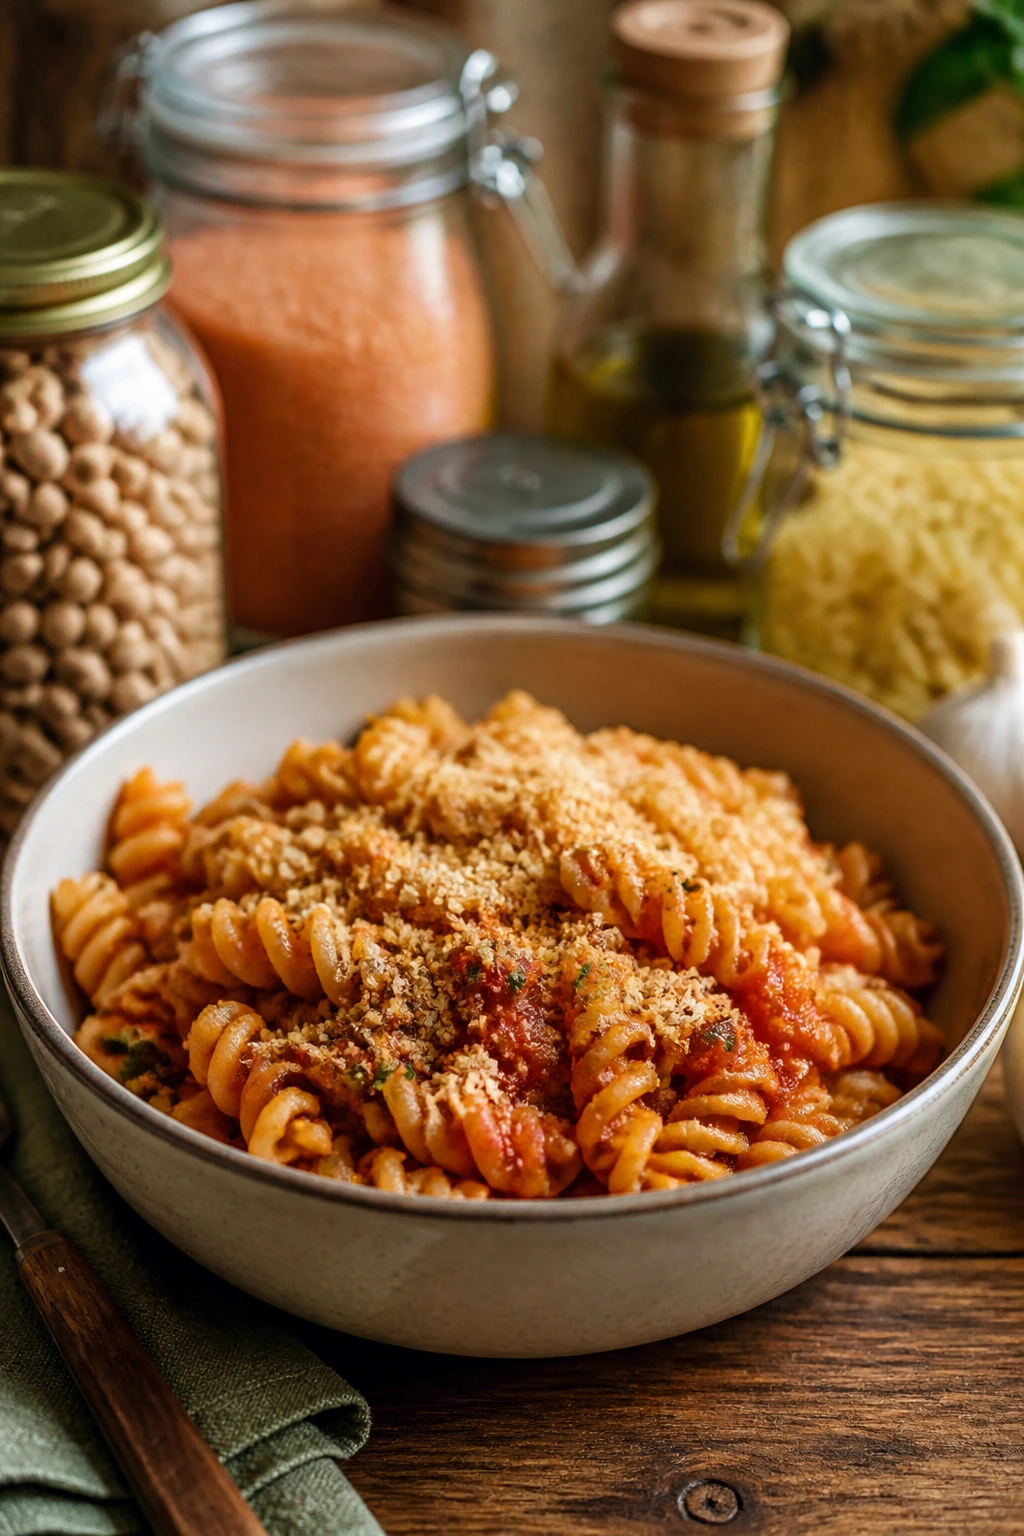
3. Tomato-Butter Garlic Pasta
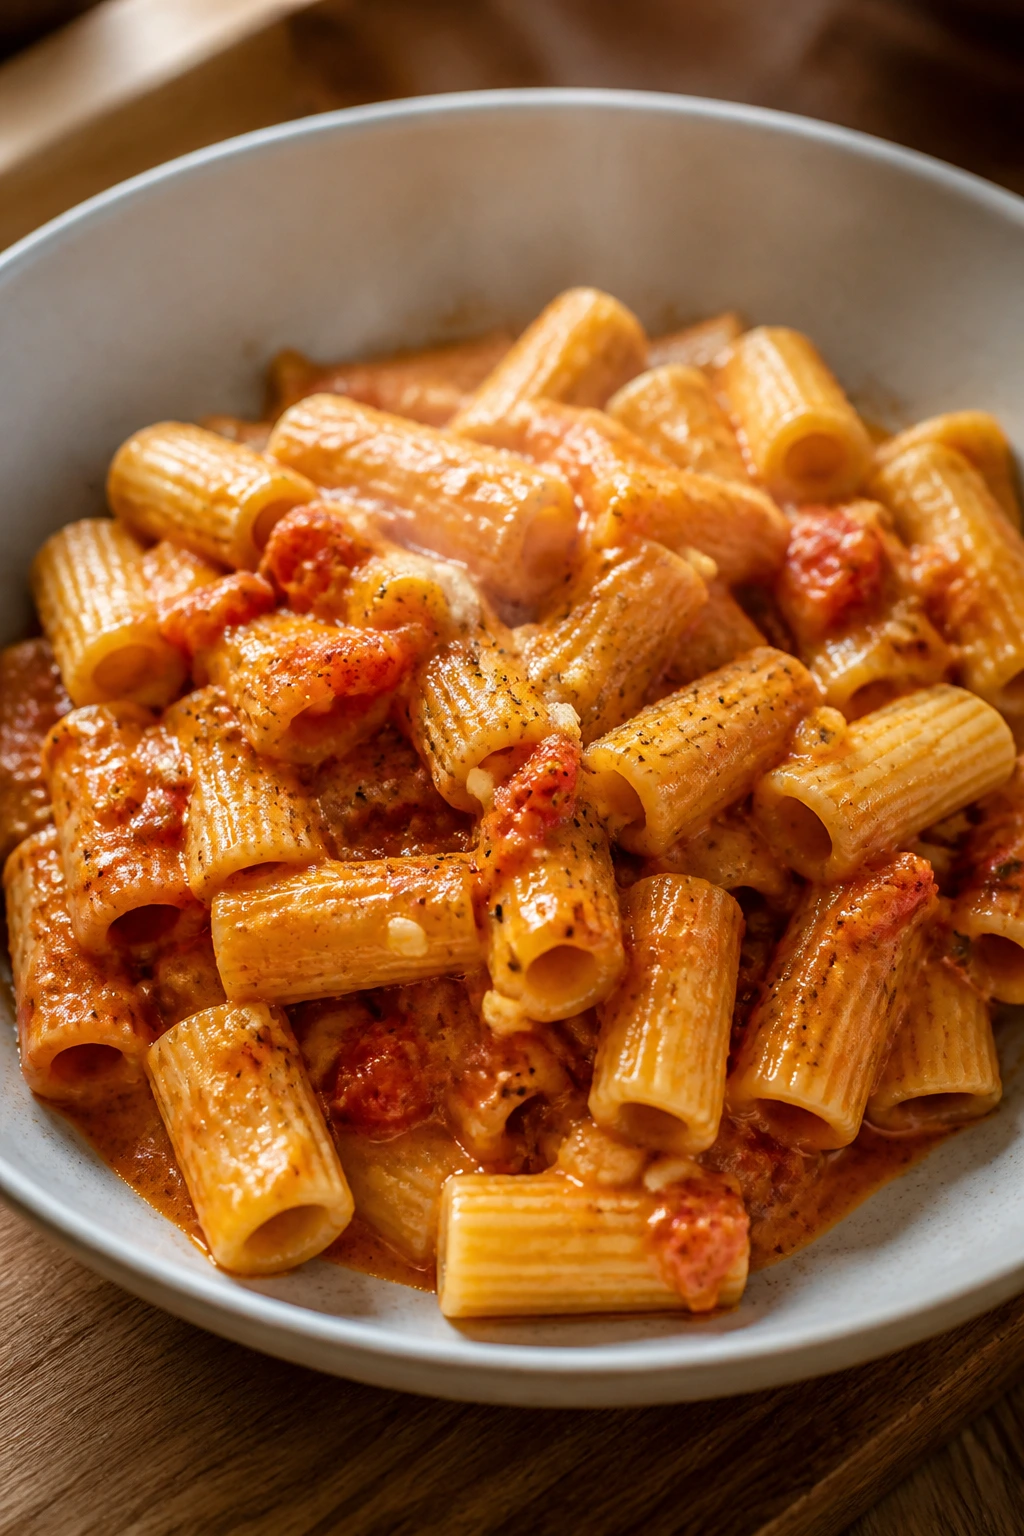
There’s a reason this kind of pasta keeps showing up in home kitchens. Butter, garlic, and canned tomatoes create a sauce that tastes like it took longer than it did, and the whole thing comes together while the pasta water boils.
Why It Works:
Tomato paste or crushed tomatoes give body; butter rounds off the edges. Garlic should go fragrant, not brown. That line matters. Brown garlic turns bitter, while properly cooked garlic melts into the sauce and makes the whole bowl taste deeper.
Key Ingredients:
- 8 oz spaghetti or linguine
- 2 tablespoons butter
- 3 garlic cloves, minced
- 1 tablespoon tomato paste
- 1 can (14.5 oz) crushed tomatoes
- 1/4 teaspoon red pepper flakes
- 1/2 teaspoon salt, plus more for pasta water
- 1/4 teaspoon black pepper
- 2 tablespoons grated Parmesan, optional
Quick Steps:
- Boil salted water and cook pasta until al dente.
- Melt butter in a skillet over medium heat.
- Add garlic and tomato paste; stir for 30 seconds.
- Pour in crushed tomatoes, pepper flakes, salt, and pepper.
- Simmer 5 to 7 minutes, then toss with pasta and a splash of cooking water.
Equipment for This Recipe:
- Medium pot
- Large skillet
- Wooden spoon
- Colander
How to Serve This Dish:
Twirl it into a shallow bowl and finish with Parmesan if you have it. A piece of toast or a simple green salad makes the plate feel complete.
Pro Tips for This Recipe:
- Save pasta water: A few tablespoons help the sauce cling.
- Don’t skip the tomato paste: It adds depth in a small amount.
- Butter at the end helps: Stir in another teaspoon if the sauce tastes sharp.
Variations on This Dish:
- Anchovy Garlic Pasta: Melt 1 anchovy fillet with the garlic.
- Creamy Pantry Pasta: Stir in 2 tablespoons cream cheese.
- Herb Finish: Add dried oregano or basil at the end.
Common Mistakes to Avoid with This Dish:
- Overcooking the pasta: It keeps cooking in the skillet.
- Burning the garlic: Medium heat only.
- Using the sauce too thin: Let it simmer until it coats a spoon.
4. Peanut Soba Noodles with Cabbage
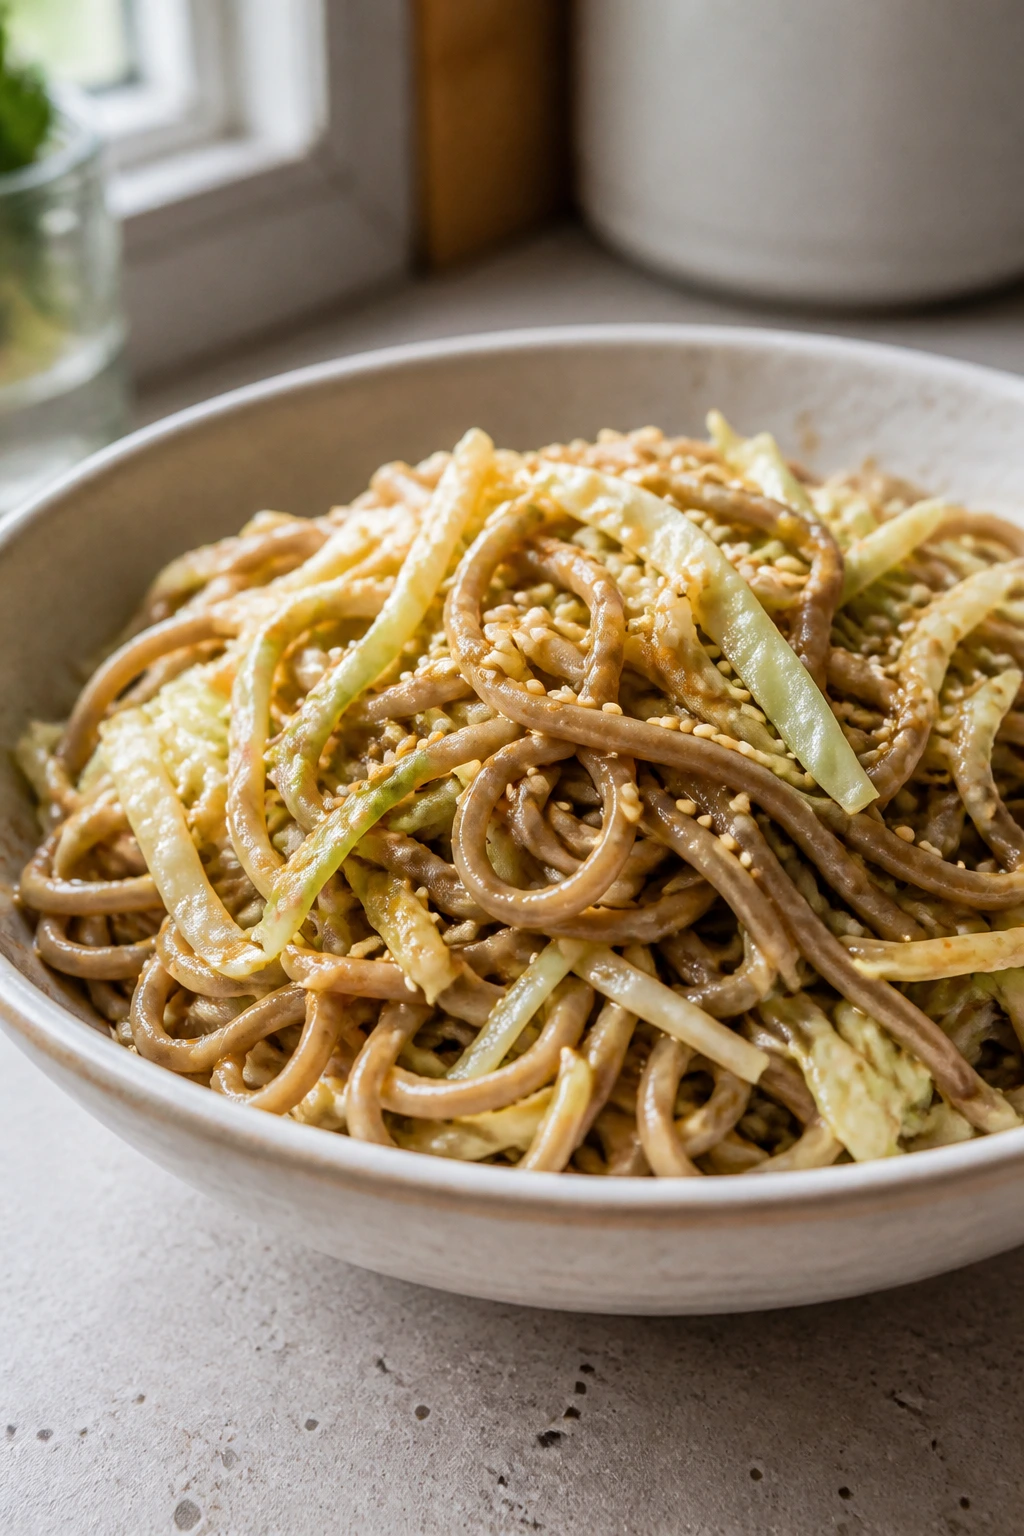
This one eats cold or warm, which is part of why I keep it around. The peanut sauce is salty, nutty, and a little sweet; the cabbage gives it crunch that holds up even after a few hours in the fridge.
Why It Works:
Soba noodles are fast, and peanut butter makes an instant sauce when loosened with soy sauce and hot water. Cabbage is the useful part here — it doesn’t slump the way lettuce does, so the lunch stays crisp instead of soggy.
Key Ingredients:
- 6 oz soba noodles
- 3 tablespoons peanut butter
- 1 tablespoon soy sauce
- 1 tablespoon rice vinegar
- 1 teaspoon honey or sugar
- 2 tablespoons hot water
- 1 cup shredded cabbage
- 2 tablespoons sliced scallions
- 1 teaspoon sesame oil
- 1 tablespoon sesame seeds
Quick Steps:
- Cook soba noodles and rinse under cool water.
- Whisk peanut butter, soy, vinegar, honey, and hot water into a smooth sauce.
- Toss noodles with sesame oil.
- Add cabbage, scallions, and sauce.
- Finish with sesame seeds.
Equipment for This Recipe:
- Pot
- Mixing bowl
- Whisk or fork
- Colander
How to Serve This Dish:
Serve in a chilled bowl if you’re eating it cold. If you want more heft, add leftover chicken, tofu, or a soft-boiled egg.
Pro Tips for This Recipe:
- Rinse the noodles well: It stops them from clumping.
- Thin the sauce slowly: Peanut butter can seize if you dump in too little water.
- Toss cabbage last: It keeps the crunch.
Variations on This Dish:
- Chili Crisp Version: Add 1 teaspoon chili crisp on top.
- Lime Peanut Noodles: Swap vinegar for lime juice.
- Sesame Cucumber Bowl: Add sliced cucumber for extra coolness.
Common Mistakes to Avoid with This Dish:
- Over-thick sauce: It should coat, not glue.
- Skipping salt in the noodle water: Bland noodles drag the whole bowl down.
- Serving immediately after rinsing too wet: Shake off excess water first.
5. Black Bean and Corn Quesadillas
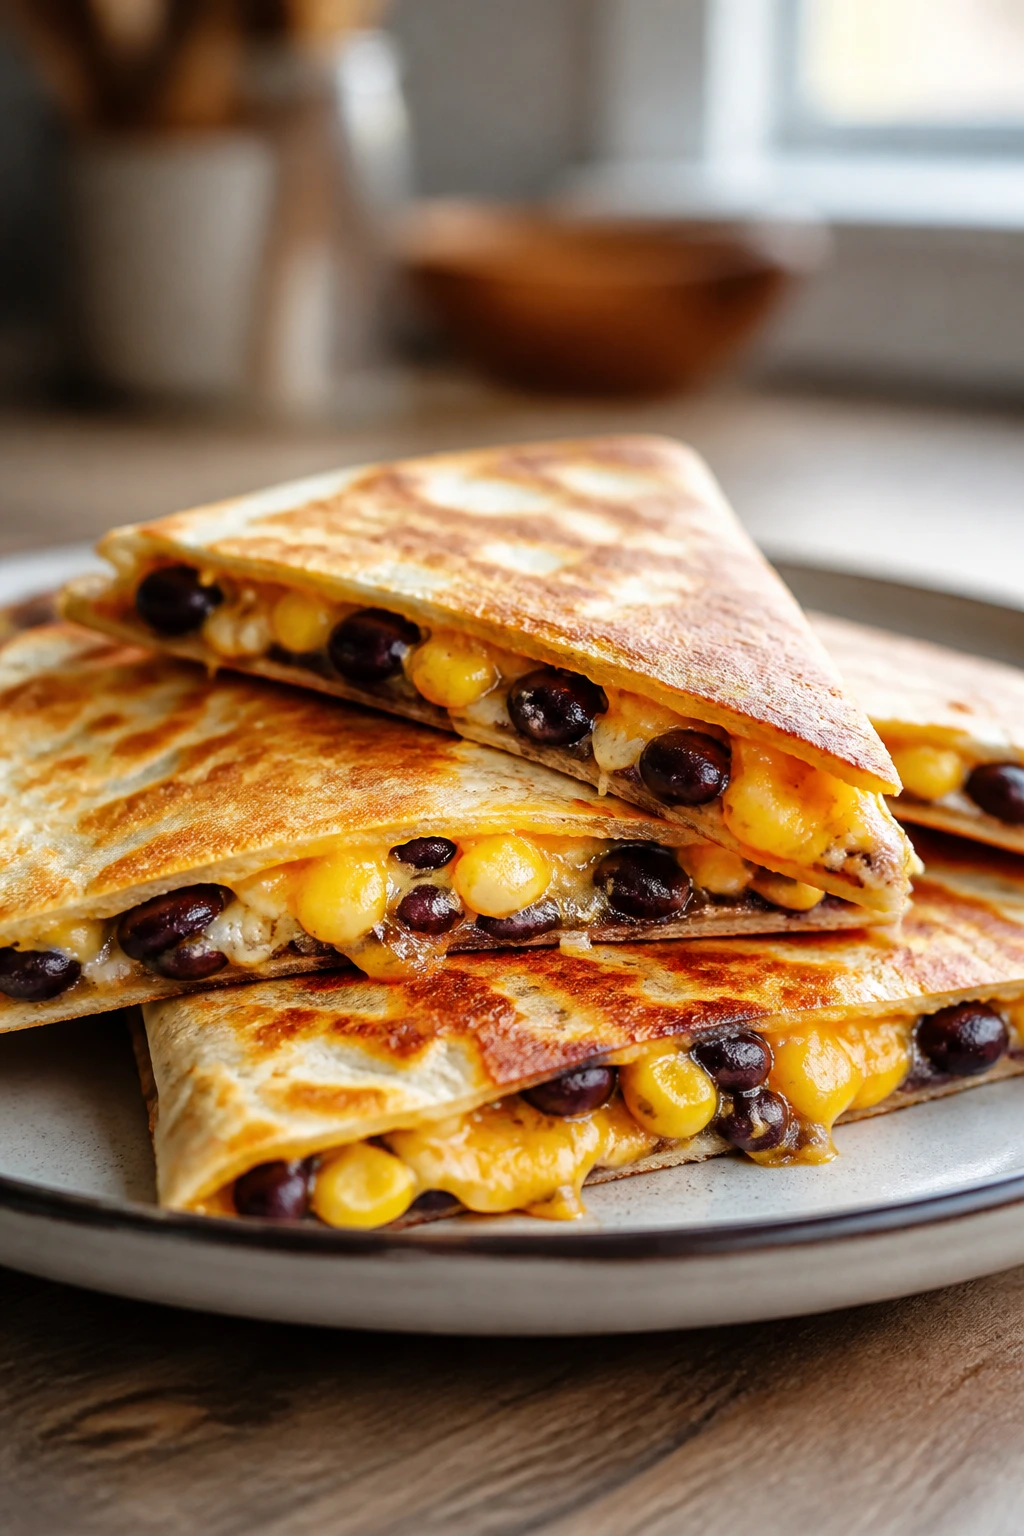
A good quesadilla is about restraint. Too much filling, and the tortilla tears before the cheese melts. The sweet corn, smoky beans, and sharp cheese here stay on the right side of tidy if you don’t overstuff them.
Why It Works:
Canned black beans mash into a spread that keeps the filling from falling out. Corn adds sweetness, and a little cumin gives the whole thing a roasted smell that feels bigger than the ingredient list.
Key Ingredients:
- 1 can (15 oz) black beans, rinsed and drained
- 1/2 cup canned corn, drained
- 1/2 teaspoon cumin
- 1/4 teaspoon chili powder
- 1 cup shredded cheddar or Monterey Jack
- 4 flour tortillas
- 1 tablespoon oil or butter
- Salt, to taste
Quick Steps:
- Mash half the beans in a bowl.
- Stir in corn, cumin, chili powder, and salt.
- Spread mixture on two tortillas and top with cheese.
- Fold and cook in a skillet 2 to 3 minutes per side.
- Slice into wedges and serve hot.
Equipment for This Recipe:
- Skillet
- Spatula
- Bowl
- Knife or pizza cutter
How to Serve This Dish:
Serve with salsa, sour cream, or hot sauce. A side of sliced tomatoes or a quick cabbage slaw keeps the plate from feeling too heavy.
Pro Tips for This Recipe:
- Use medium heat: High heat burns the tortilla before the cheese melts.
- Grate your own cheese if possible: It melts more evenly.
- Press gently with the spatula: Just enough to help the filling bind.
Variations on This Dish:
- Green Chile Quesadilla: Add chopped canned green chiles.
- Bean-Only Version: Skip corn and use extra beans.
- Spicy Cheese Fold: Add jalapeños or pickled peppers.
Common Mistakes to Avoid with This Dish:
- Too much filling: The tortilla splits.
- Cooking too fast: You get brown spots and cold cheese.
- Using wet beans: Drain them well or the tortilla softens.
6. Lentil and Tomato Soup
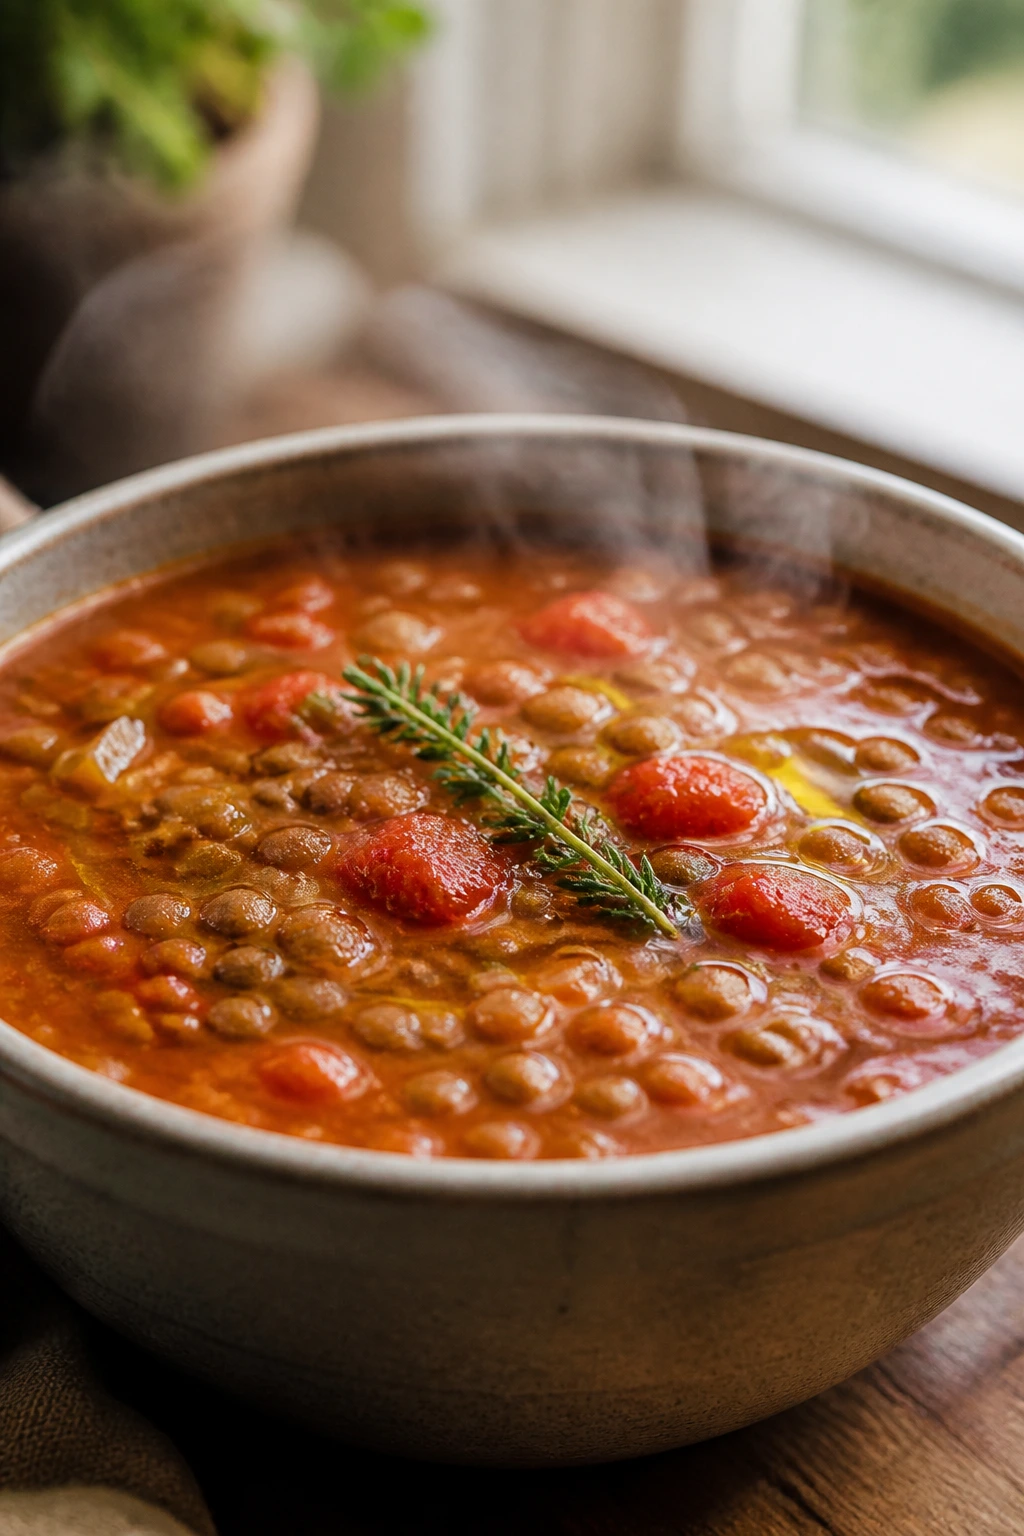
This is the sort of lunch that makes a can of tomatoes and a bag of lentils look smarter than they are. It’s hearty, cheap, and forgiving, which is a nice combination when you want something hot without a lot of ceremony.
Why It Works:
Lentils cook quickly compared with most dried beans, and canned tomatoes bring both acid and body. A little onion and garlic do the basic work; a pinch of thyme or bay leaf makes the pot smell like you tried harder than you did.
Key Ingredients:
- 1 cup brown or green lentils, rinsed
- 1 tablespoon olive oil
- 1 small onion, diced
- 2 garlic cloves, minced
- 1 can (14.5 oz) diced tomatoes
- 4 cups vegetable broth or water
- 1/2 teaspoon dried thyme
- 1/2 teaspoon salt
- Black pepper, to taste
Quick Steps:
- Cook onion in oil over medium heat until soft.
- Add garlic and thyme for 30 seconds.
- Stir in lentils, tomatoes, broth, salt, and pepper.
- Simmer 20 to 25 minutes until lentils are tender.
- Taste and adjust seasoning.
Equipment for This Recipe:
- Medium pot
- Wooden spoon
- Knife and cutting board
- Ladle
How to Serve This Dish:
Ladle it into a bowl with toast, crackers, or a spoonful of yogurt on top. A drizzle of olive oil makes the surface look and taste richer.
Pro Tips for This Recipe:
- Rinse lentils well: It removes dust and grit.
- Salt near the end if using salty broth: Broth varies a lot.
- Let it sit 10 minutes: The broth thickens as it rests.
Variations on This Dish:
- Smoky Lentil Soup: Add smoked paprika.
- Lemon Lentil Finish: Stir in lemon juice at the end.
- Chunkier Version: Add canned carrots or potatoes.
Common Mistakes to Avoid with This Dish:
- Boiling too hard: Lentils break apart.
- Adding acidic tomatoes too early in huge amounts without enough liquid: Keep the simmer gentle.
- Underseasoning: Lentils need more salt than you think.
7. Sardine, Caper, and Mustard Crackers
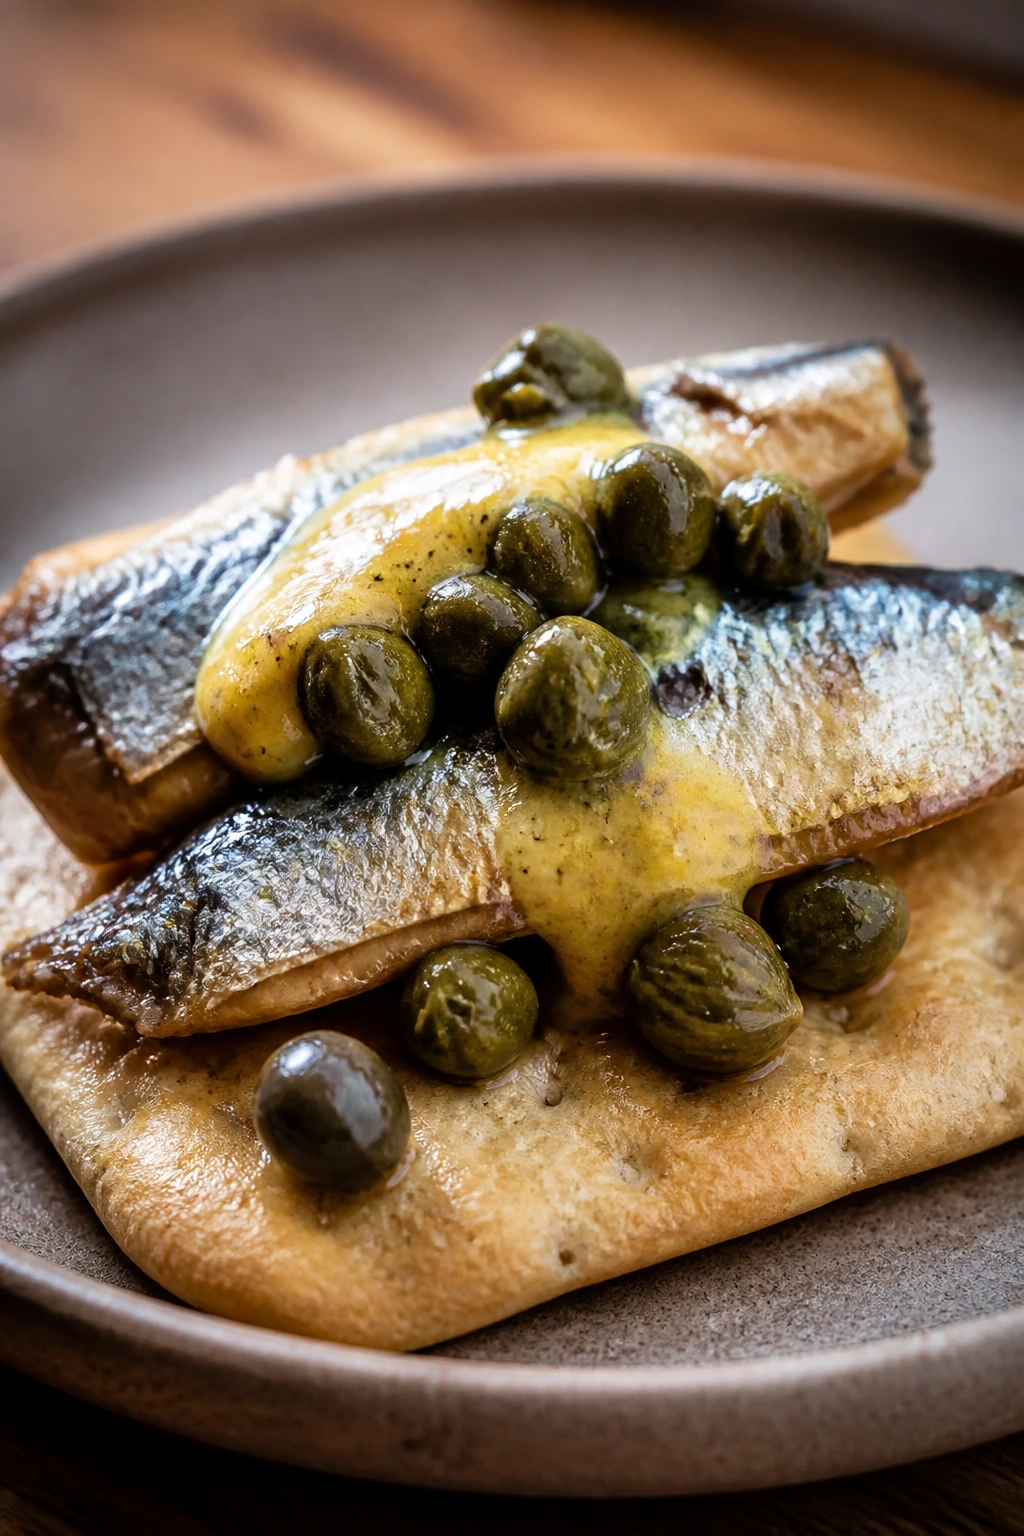
People get weird about sardines until they taste them with enough acid and crunch. On crackers, with mustard and capers, they’re salty in a useful way, and the whole lunch comes together in about five minutes flat.
Why It Works:
Sardines bring fat and a mineral, oceanic flavor that stands up to mustard and brine. Capers sharpen everything. Crackers give you the crunch that turns an otherwise soft ingredient into a proper lunch.
Key Ingredients:
- 1 tin sardines in olive oil, drained slightly
- 12 sturdy crackers
- 1 tablespoon whole-grain mustard
- 1 tablespoon capers, drained
- 1 tablespoon chopped parsley or dill
- 1 teaspoon lemon juice
- Black pepper, to taste
Quick Steps:
- Lay crackers on a plate.
- Spread each with a little mustard.
- Top with sardines, breaking them if needed.
- Scatter capers, herbs, lemon juice, and pepper over the top.
- Eat immediately.
Equipment for This Recipe:
- Small plate or board
- Fork
- Knife
- Lemon juicer, optional
How to Serve This Dish:
Serve with sliced cucumber, olives, or a few cherry tomatoes if you have them. I’d also put this beside plain potato chips if you want a louder crunch.
Pro Tips for This Recipe:
- Choose sardines packed in olive oil: They taste rounder and less dry.
- Use sturdy crackers: Thin ones snap under the fish.
- Don’t skip lemon: It cuts the richness.
Variations on This Dish:
- Tomato Sardine Crackers: Add sliced canned or fresh tomato.
- Spicy Sardine Board: Finish with chili flakes.
- Cream Cheese Base: Spread a thin layer under the mustard.
Common Mistakes to Avoid with This Dish:
- Using wet crackers from a soft pantry box: They crumble.
- Overloading the topping: One sardine per cracker is enough.
- Skipping pepper: It wakes up the oil.
8. Rice and Beans with Salsa Verde
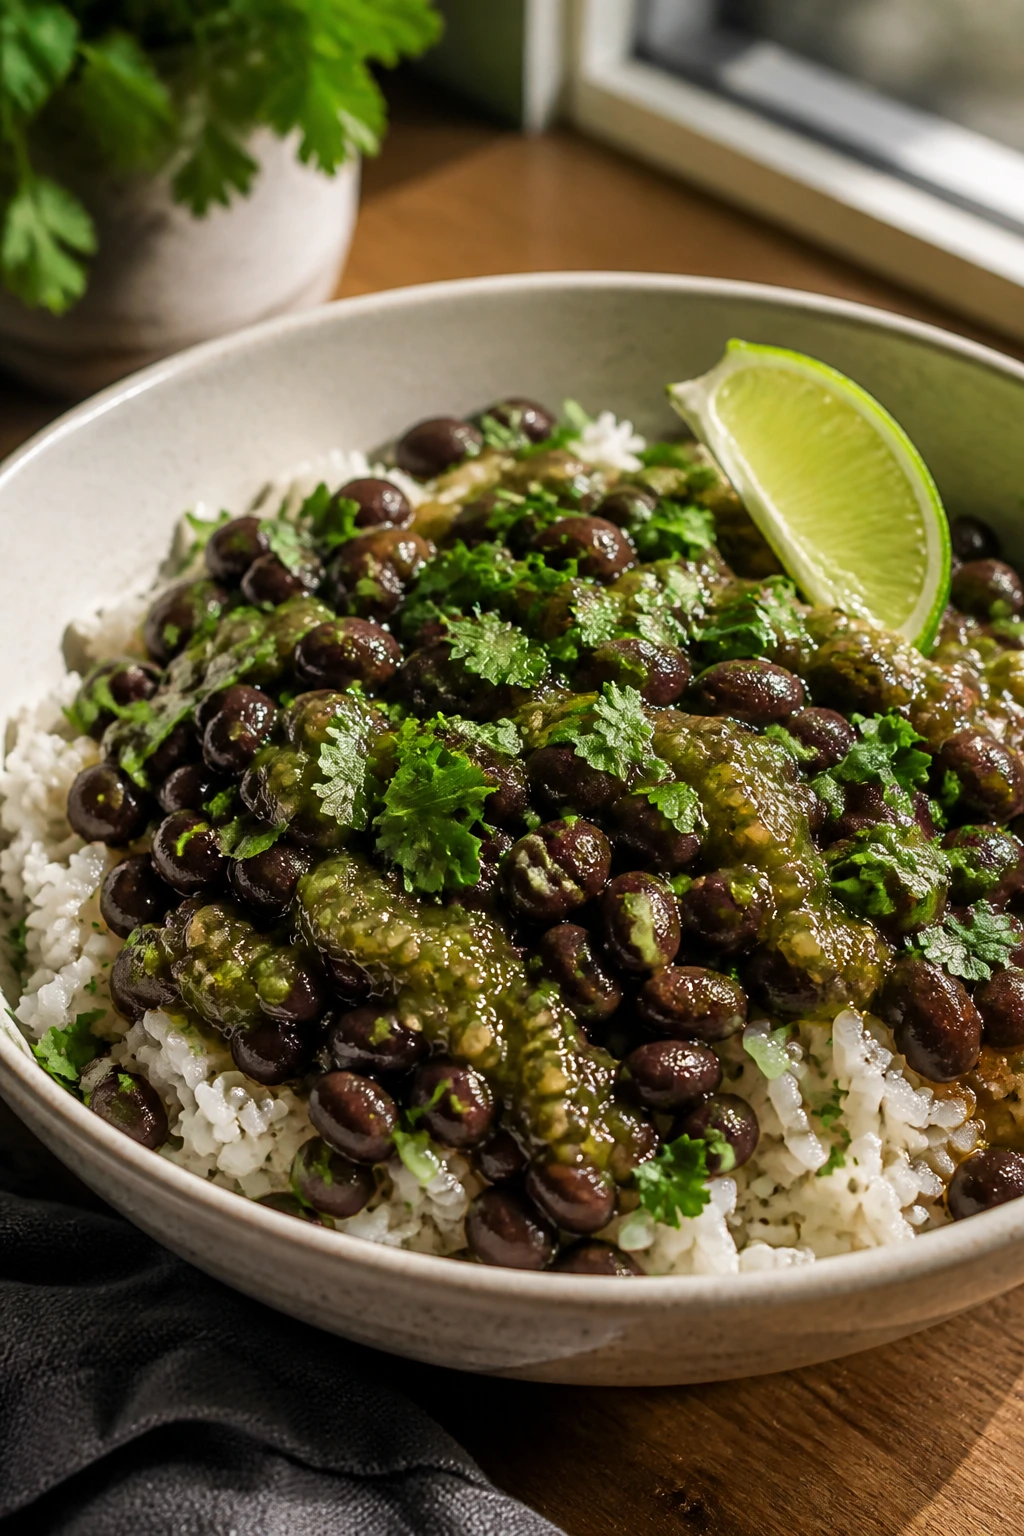
Rice and beans sound simple because they are simple. But simple doesn’t mean dull. Add a good salsa, a squeeze of lime, and a little cumin, and you’ve got a lunch that holds heat, texture, and enough salt to keep every bite interesting.
Why It Works:
Rice is the base, beans bring protein and creaminess, and salsa verde keeps the whole bowl lively. This works best when the beans are warm and the rice is fluffy, not packed down like leftovers from a sad container.
Key Ingredients:
- 1 cup cooked rice
- 1 can (15 oz) black or pinto beans, rinsed and drained
- 1/2 cup salsa verde
- 1 teaspoon olive oil
- 1/4 teaspoon cumin
- 1 tablespoon lime juice
- 2 tablespoons chopped cilantro
- Salt, to taste
Quick Steps:
- Warm the beans in a small saucepan with cumin and oil.
- Heat the rice until steamy.
- Stir salsa verde into the beans.
- Spoon over rice and finish with lime and cilantro.
- Season and serve.
Equipment for This Recipe:
- Small saucepan
- Microwave-safe bowl or skillet
- Fork
- Serving bowl
How to Serve This Dish:
Top with crushed tortilla chips for crunch. If you have avocado, use it, but the bowl still works without it.
Pro Tips for This Recipe:
- Use day-old rice if you have it: It reheats better and stays fluffier.
- Warm the beans before serving: Cold beans make the bowl feel flat.
- Taste the salsa first: Some jars are salty enough on their own.
Variations on This Dish:
- Chipotle Rice and Beans: Stir in chipotle in adobo.
- Breakfast-ish Bowl: Add a fried egg if you want.
- Corny Version: Mix in canned corn.
Common Mistakes to Avoid with This Dish:
- Piling cold beans onto cold rice: The whole bowl tastes muted.
- Using watery salsa: Drain off a little liquid if needed.
- Forgetting acid: Lime keeps it from tasting heavy.
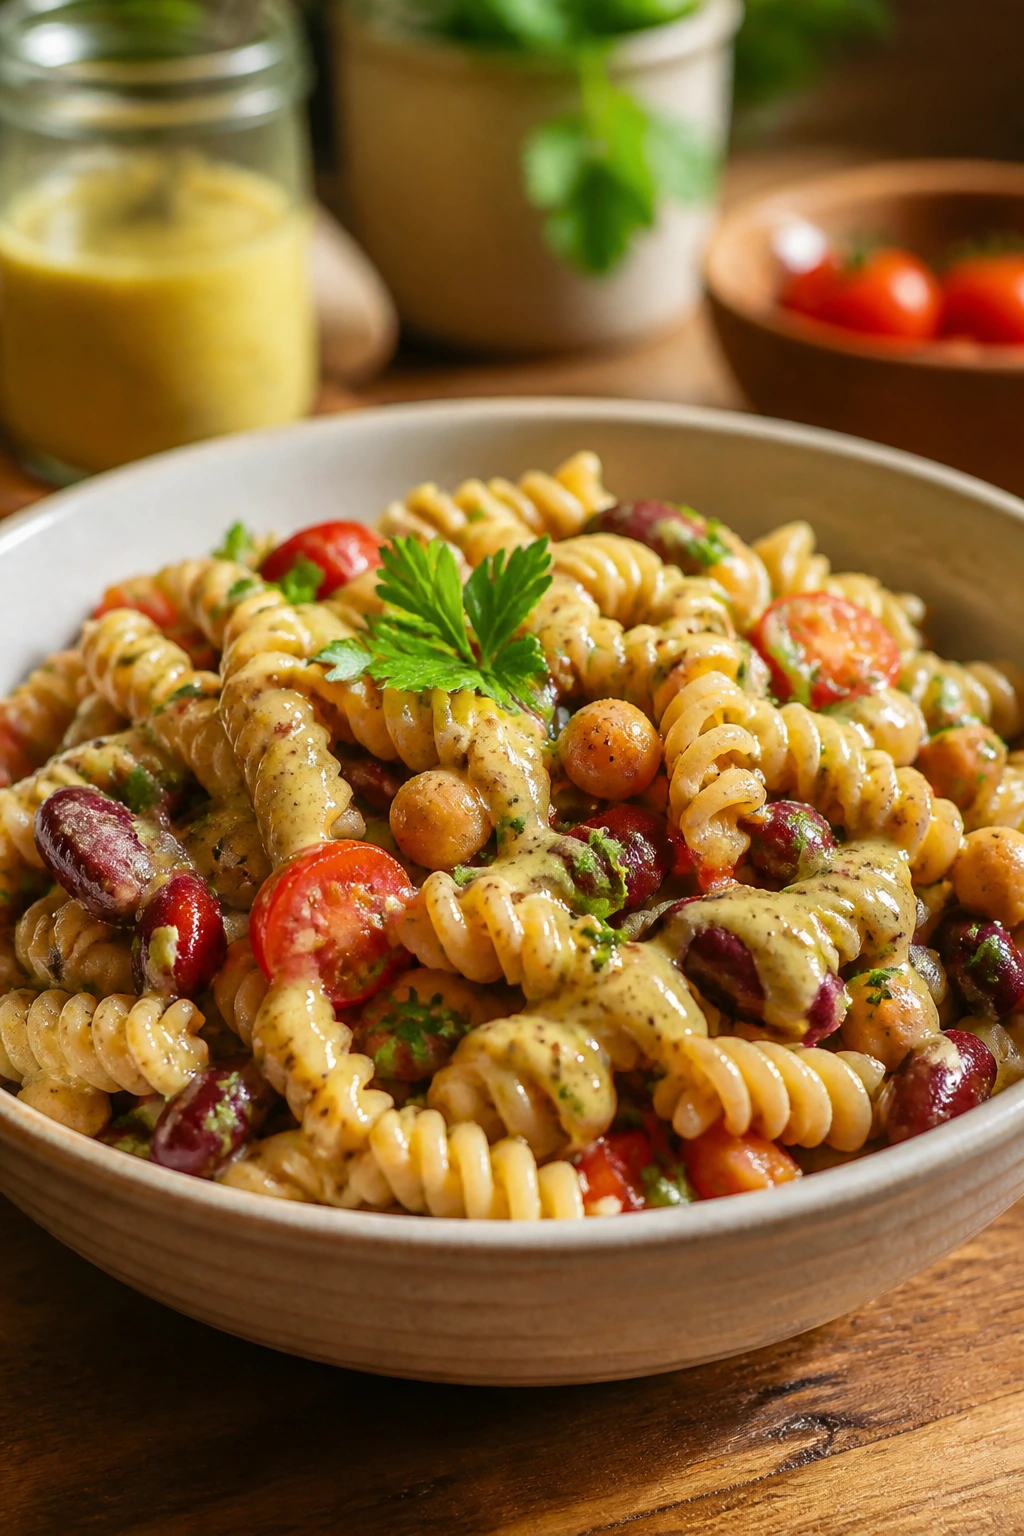
9. Pasta e Ceci
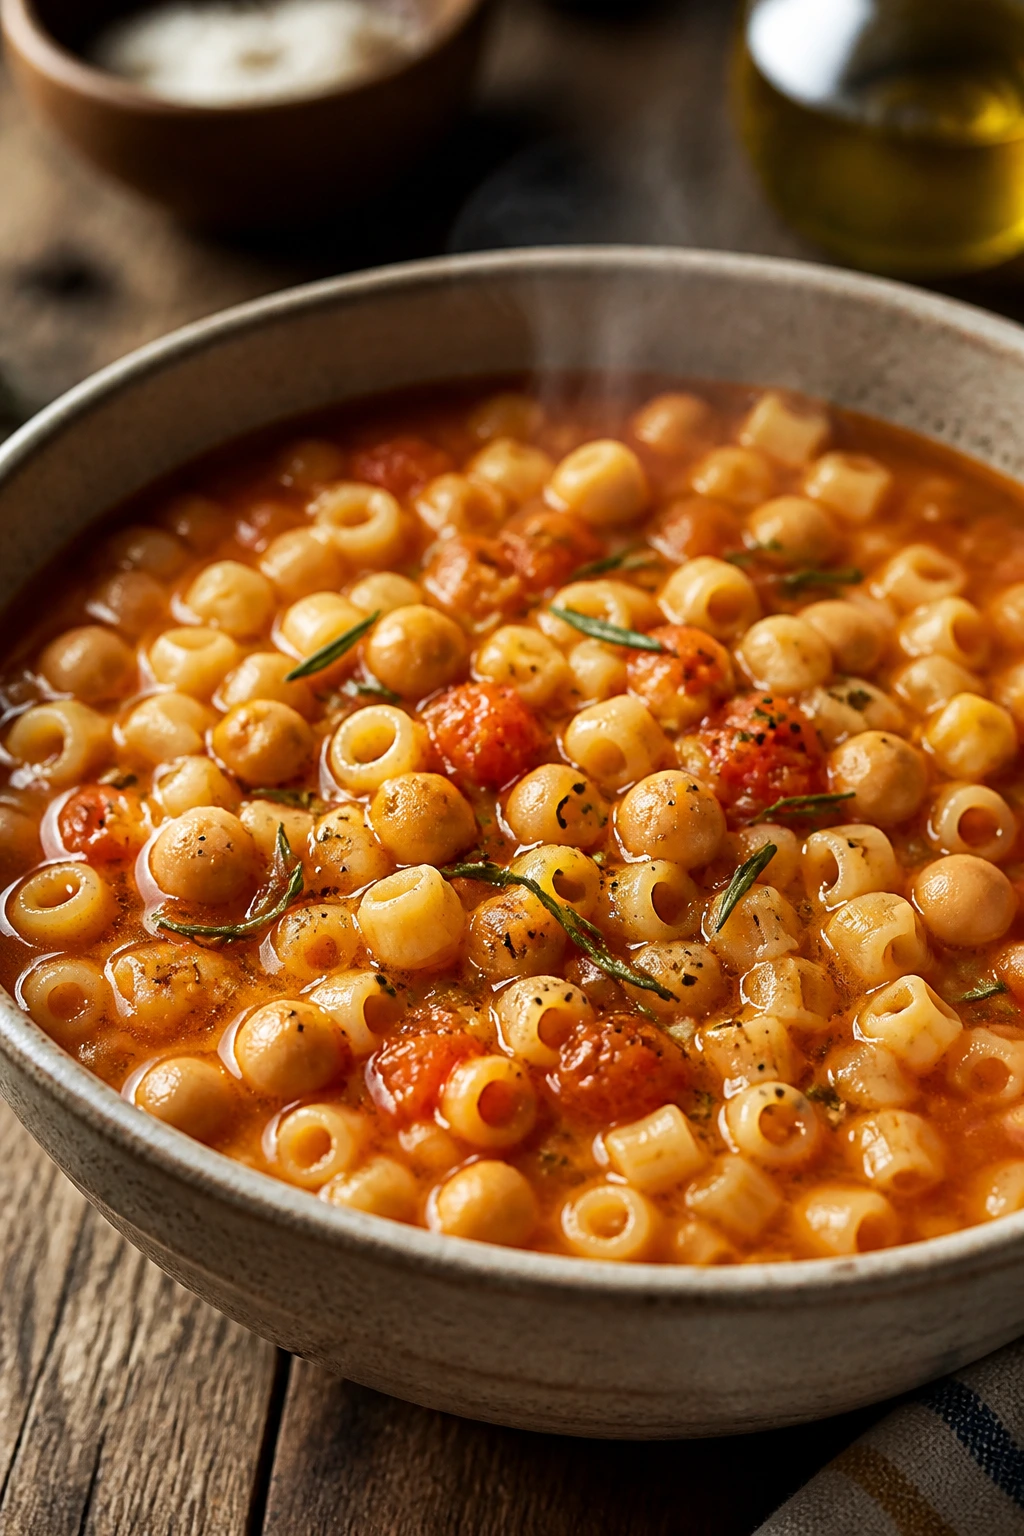
This Italian-style chickpea pasta is one of those pantry meals that feels older than the cupboard itself. The pasta thickens the broth, the chickpeas make it substantial, and the tomato base gives it enough sweetness to keep the garlic and rosemary in line.
Why It Works:
Small pasta shapes like ditalini or elbow macaroni release starch as they cook, which turns the broth silky without needing cream. Chickpeas hold their shape, so every spoonful has something soft and something chewy.
Key Ingredients:
- 8 oz small pasta
- 1 can (15 oz) chickpeas, rinsed and drained
- 1 tablespoon olive oil
- 2 garlic cloves, minced
- 1 teaspoon chopped rosemary or 1/2 teaspoon dried
- 1 can (14.5 oz) crushed tomatoes
- 3 cups broth or water
- 1/2 teaspoon salt
- Parmesan, optional
Quick Steps:
- Cook garlic and rosemary in oil for 30 seconds.
- Add tomatoes, chickpeas, broth, and salt.
- Bring to a simmer.
- Stir in pasta and cook until tender.
- Let it sit 2 minutes before serving.
Equipment for This Recipe:
- Medium pot
- Wooden spoon
- Ladle
- Measuring cup
How to Serve This Dish:
Spoon it into a deep bowl and finish with olive oil or Parmesan. A chunk of bread on the side is not optional in my kitchen.
Pro Tips for This Recipe:
- Cook pasta in the soup: The starch is part of the magic.
- Add water if it gets too thick: Pasta keeps absorbing broth.
- Let it rest briefly: The texture evens out.
Variations on This Dish:
- Lemony Pasta e Ceci: Finish with lemon zest.
- Spicy Version: Add red pepper flakes.
- Greens Added: Stir in spinach at the end.
Common Mistakes to Avoid with This Dish:
- Overcooking the pasta: It can go mushy fast.
- Using too much broth: The soup should be thick enough to eat with a spoon and a fork.
- Skipping the rest time: The broth needs a minute to settle.
10. Curried Chickpea Salad Wraps

This one lands somewhere between lunch and a tiny picnic. Curried chickpeas, a little mayo, raisins or chopped apple if you like that sort of thing, and a soft wrap give you a sweet-salty mix that never feels heavy.
Why It Works:
Curry powder brings warmth, mayo binds the chickpeas, and a little sweet note keeps the filling from tasting flat. Wrapped in a tortilla or flatbread, it holds together better than most cold salads.
Key Ingredients:
- 1 can (15 oz) chickpeas, rinsed and drained
- 2 tablespoons mayonnaise
- 1 teaspoon curry powder
- 1 tablespoon chopped celery
- 1 tablespoon raisins or chopped apple
- 1 teaspoon lemon juice
- Salt and pepper, to taste
- 2 flour tortillas or wraps
- Lettuce, optional
Quick Steps:
- Mash chickpeas lightly in a bowl.
- Stir in mayo, curry powder, celery, raisins, lemon, salt, and pepper.
- Lay filling on tortillas with lettuce if using.
- Roll tightly.
- Slice in half.
Equipment for This Recipe:
- Bowl
- Fork
- Knife
- Cutting board
How to Serve This Dish:
Serve with grapes, carrot sticks, or a handful of pretzels. If you want extra structure, wrap it in parchment before slicing.
Pro Tips for This Recipe:
- Chop celery finely: Big pieces make wrapping awkward.
- Use soft tortillas: Cold, stiff wraps crack.
- Balance the curry: Taste before adding more; curry powder can take over.
Variations on This Dish:
- No-Raisin Version: Swap in diced cucumber.
- Tahini Curry Wraps: Use tahini instead of mayo.
- Smoky Chickpea Wraps: Add smoked paprika.
Common Mistakes to Avoid with This Dish:
- Overfilling the wrap: It tears at the seam.
- Skipping salt: Chickpeas need it.
- Using a wet filling: Drain the chickpeas well.
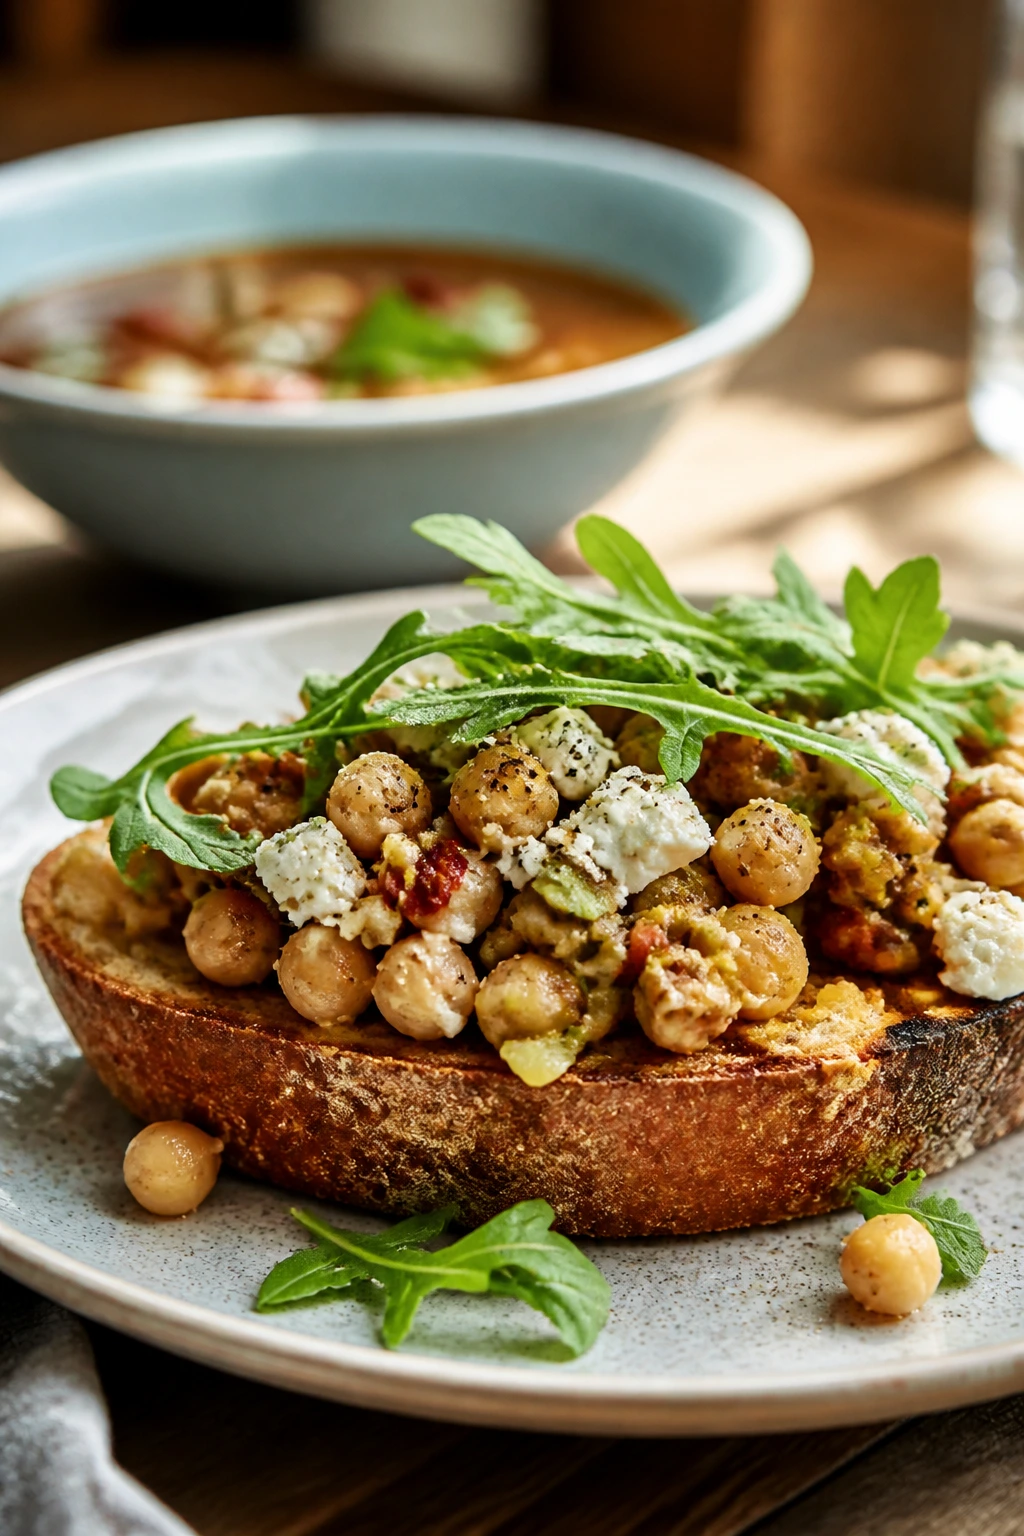
11. Smoky Chickpea Toast with Lemon
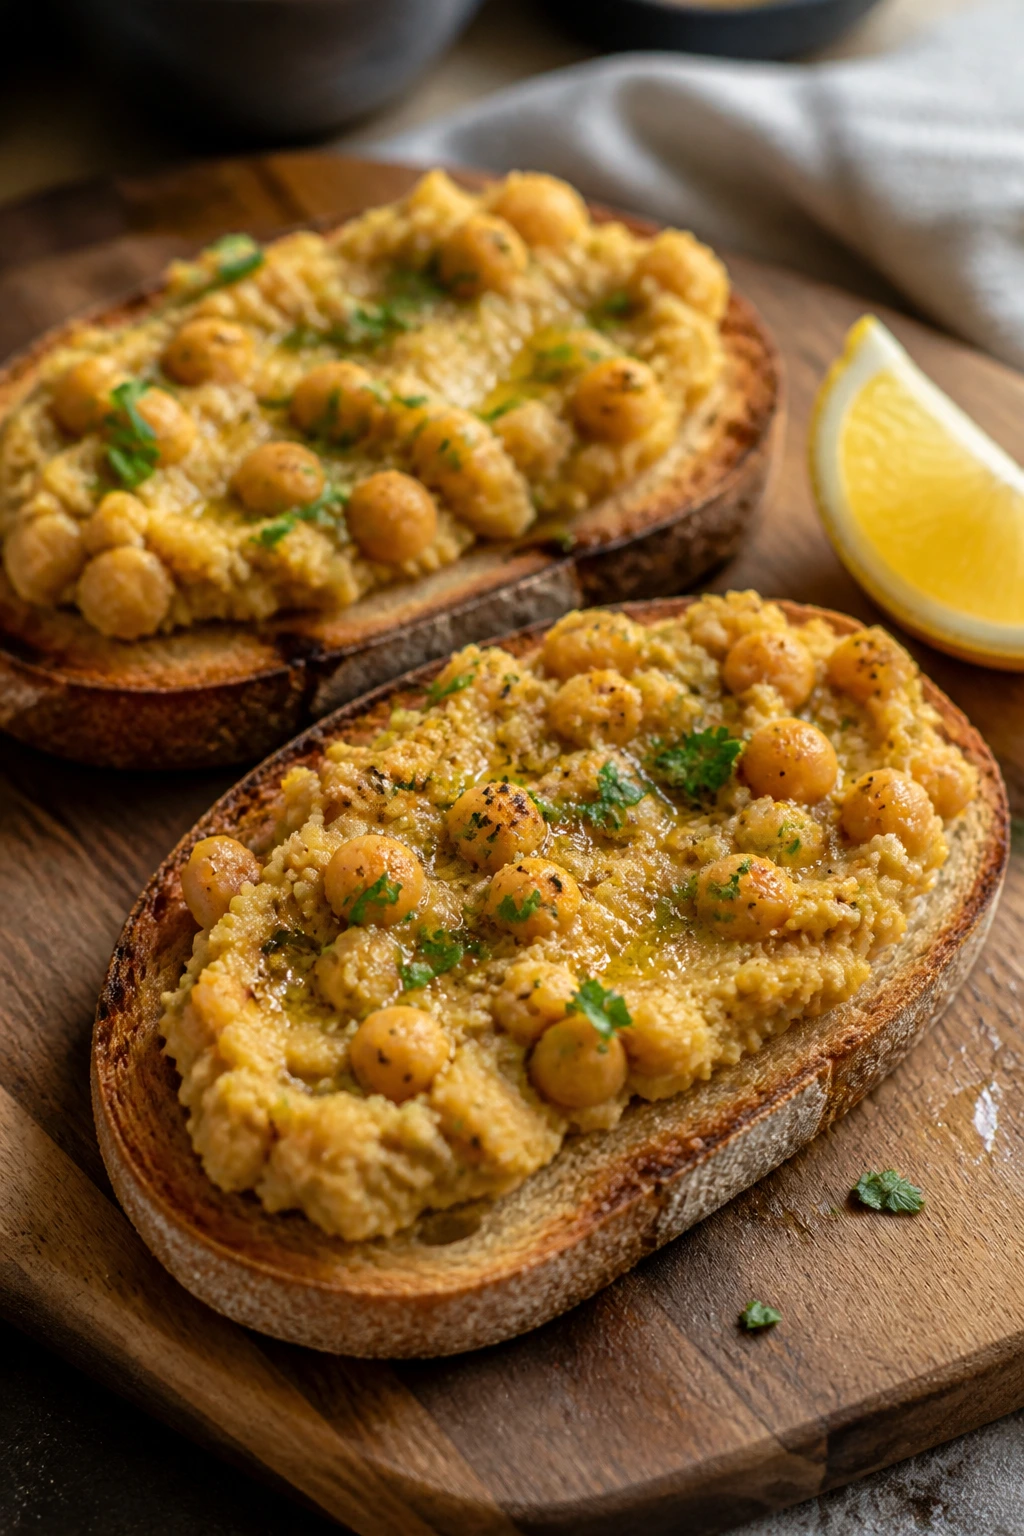
This is a bare-bones lunch in the best sense. Smash chickpeas with garlic, smoked paprika, and lemon, pile them onto toast, and you get something that tastes deeper than its ingredient list suggests.
Why It Works:
Smoked paprika gives canned chickpeas a grilled flavor without needing a grill. Lemon cuts through the starch, and olive oil adds the finish that keeps the mash from feeling dry.
Key Ingredients:
- 1 can (15 oz) chickpeas, drained
- 1 tablespoon olive oil
- 1 small garlic clove, grated
- 1/2 teaspoon smoked paprika
- 1 tablespoon lemon juice
- 2 slices toast
- Salt and pepper, to taste
- Chopped parsley, optional
Quick Steps:
- Mash chickpeas in a bowl.
- Stir in oil, garlic, paprika, lemon, salt, and pepper.
- Toast bread until crisp.
- Spoon chickpea mixture over toast.
- Finish with parsley if using.
Equipment for This Recipe:
- Bowl
- Fork
- Toaster or skillet
- Knife
How to Serve This Dish:
Serve with sliced tomato or a few olives if you want a side. A fried egg on top is fine too, though the toast stands on its own.
Pro Tips for This Recipe:
- Grate the garlic finely: Nobody wants raw chunks.
- Use smoked paprika, not plain: That’s the whole point.
- Toast the bread well: Soft bread gets overwhelmed.
Variations on This Dish:
- Tahini Chickpea Toast: Add 1 tablespoon tahini.
- Pepperoncini Version: Top with sliced peppers.
- Herby Version: Mix in dill or parsley.
Common Mistakes to Avoid with This Dish:
- Leaving the chickpeas too whole: Lightly mash for spreadability.
- Overdoing the lemon: It should brighten, not sour.
- Using flimsy bread: It goes limp fast.
12. Ramen Noodle Stir-Fry with Peanut Sauce

Cheap ramen becomes lunch when you stop treating it like a soup packet and start treating it like noodles. Tossed with peanut sauce, cabbage, and a little soy, it tastes like a far more deliberate meal.
Why It Works:
Instant noodles cook in minutes, which is the obvious part. The useful part is that they absorb sauce quickly, so every strand gets coated. Peanut butter, soy, and vinegar give you the classic salty-sweet balance with almost no effort.
Key Ingredients:
- 2 ramen noodle blocks, seasoning packets discarded or saved
- 2 tablespoons peanut butter
- 1 tablespoon soy sauce
- 1 teaspoon rice vinegar
- 1 teaspoon brown sugar
- 2 tablespoons hot water
- 1 cup shredded cabbage
- 1 tablespoon oil
- 1 tablespoon chopped scallions
Quick Steps:
- Cook ramen until just tender and drain.
- Whisk peanut butter, soy, vinegar, sugar, and hot water.
- Heat oil in a skillet and toss cabbage for 1 minute.
- Add noodles and sauce.
- Stir until coated and top with scallions.
Equipment for This Recipe:
- Small pot
- Skillet
- Whisk or fork
- Tongs
How to Serve This Dish:
Serve in a bowl with sesame seeds or chili crisp on top. If you’ve got leftover vegetables, throw them in. This recipe is forgiving.
Pro Tips for This Recipe:
- Drain noodles well: Extra water dilutes the sauce.
- Keep the skillet hot: That helps the sauce cling.
- Add the seasoning packet carefully: It’s salty; you may not need it.
Variations on This Dish:
- Sesame Ramen: Add sesame oil.
- Spicy Ramen Stir-Fry: Add chili paste.
- Crunchy Peanut Ramen: Top with crushed peanuts.
Common Mistakes to Avoid with This Dish:
- Overcooking the noodles: They get soft fast.
- Using too much sauce water: The sauce should be thick.
- Skipping a vegetable: Even a handful of cabbage matters.
13. White Bean and Rosemary Soup
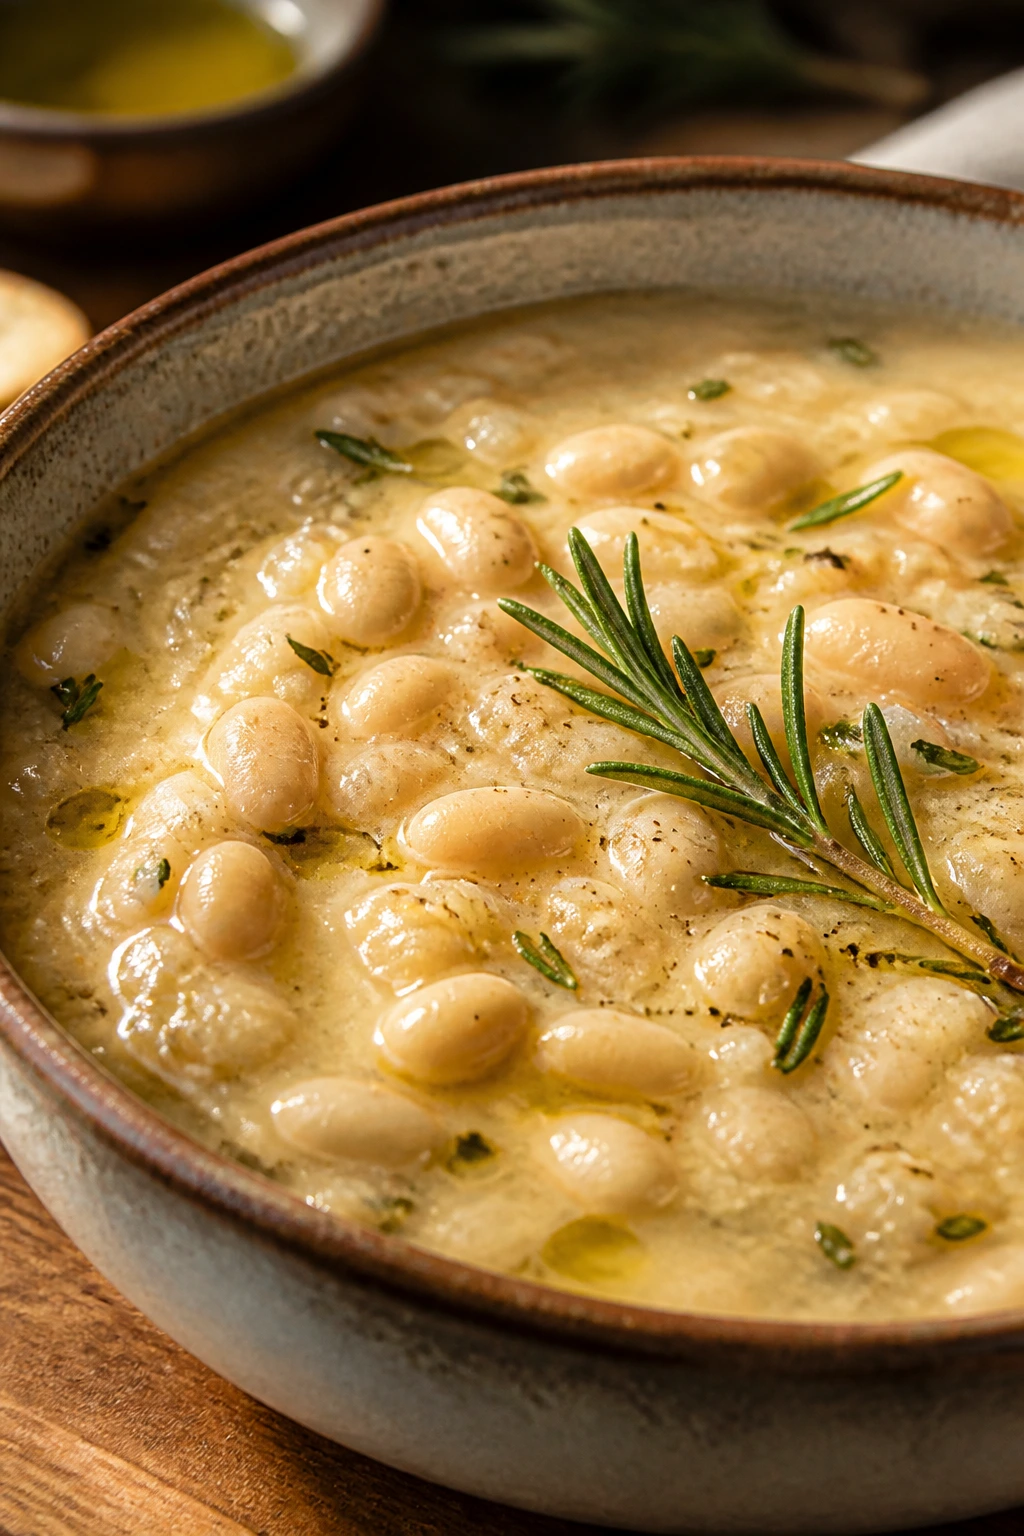
This soup is calm in the best way. White beans, garlic, rosemary, and broth make a lunch that tastes like it simmered longer than it did, especially if you mash a few beans at the end for body.
Why It Works:
Cannellini beans are soft enough to blend into the broth without disappearing completely. Rosemary gives a piney, savory edge, and lemon or vinegar at the end keeps the soup from going dull.
Key Ingredients:
- 2 cans (15 oz each) white beans, rinsed and drained
- 1 tablespoon olive oil
- 1 small onion, diced
- 2 garlic cloves, minced
- 1 teaspoon chopped rosemary or 1/2 teaspoon dried
- 4 cups vegetable broth
- 1/2 teaspoon salt
- Black pepper, to taste
- 1 teaspoon lemon juice
Quick Steps:
- Cook onion in oil until soft.
- Add garlic and rosemary for 30 seconds.
- Stir in beans, broth, salt, and pepper.
- Simmer 10 minutes, then mash some beans against the pot.
- Finish with lemon juice.
Equipment for This Recipe:
- Pot
- Wooden spoon
- Potato masher or fork
- Ladle
How to Serve This Dish:
Serve with toast rubbed with garlic or plain crackers. A drizzle of olive oil on top looks plain, but it matters.
Pro Tips for This Recipe:
- Mash only part of the pot: That gives you thickness without glue.
- Use good broth if you have it: The bean flavor gets carried by the liquid.
- Add lemon at the end: Rosemary can taste heavy without it.
Variations on This Dish:
- Tomato Bean Soup: Add a handful of canned tomatoes.
- Greens Version: Stir in spinach or kale.
- Spicy Bean Soup: Use red pepper flakes.
Common Mistakes to Avoid with This Dish:
- Boiling too hard: The beans can break apart too much.
- Not mashing enough: The soup stays thin.
- Forgetting acid: It needs a bright finish.
14. Tuna Melt Quesadillas
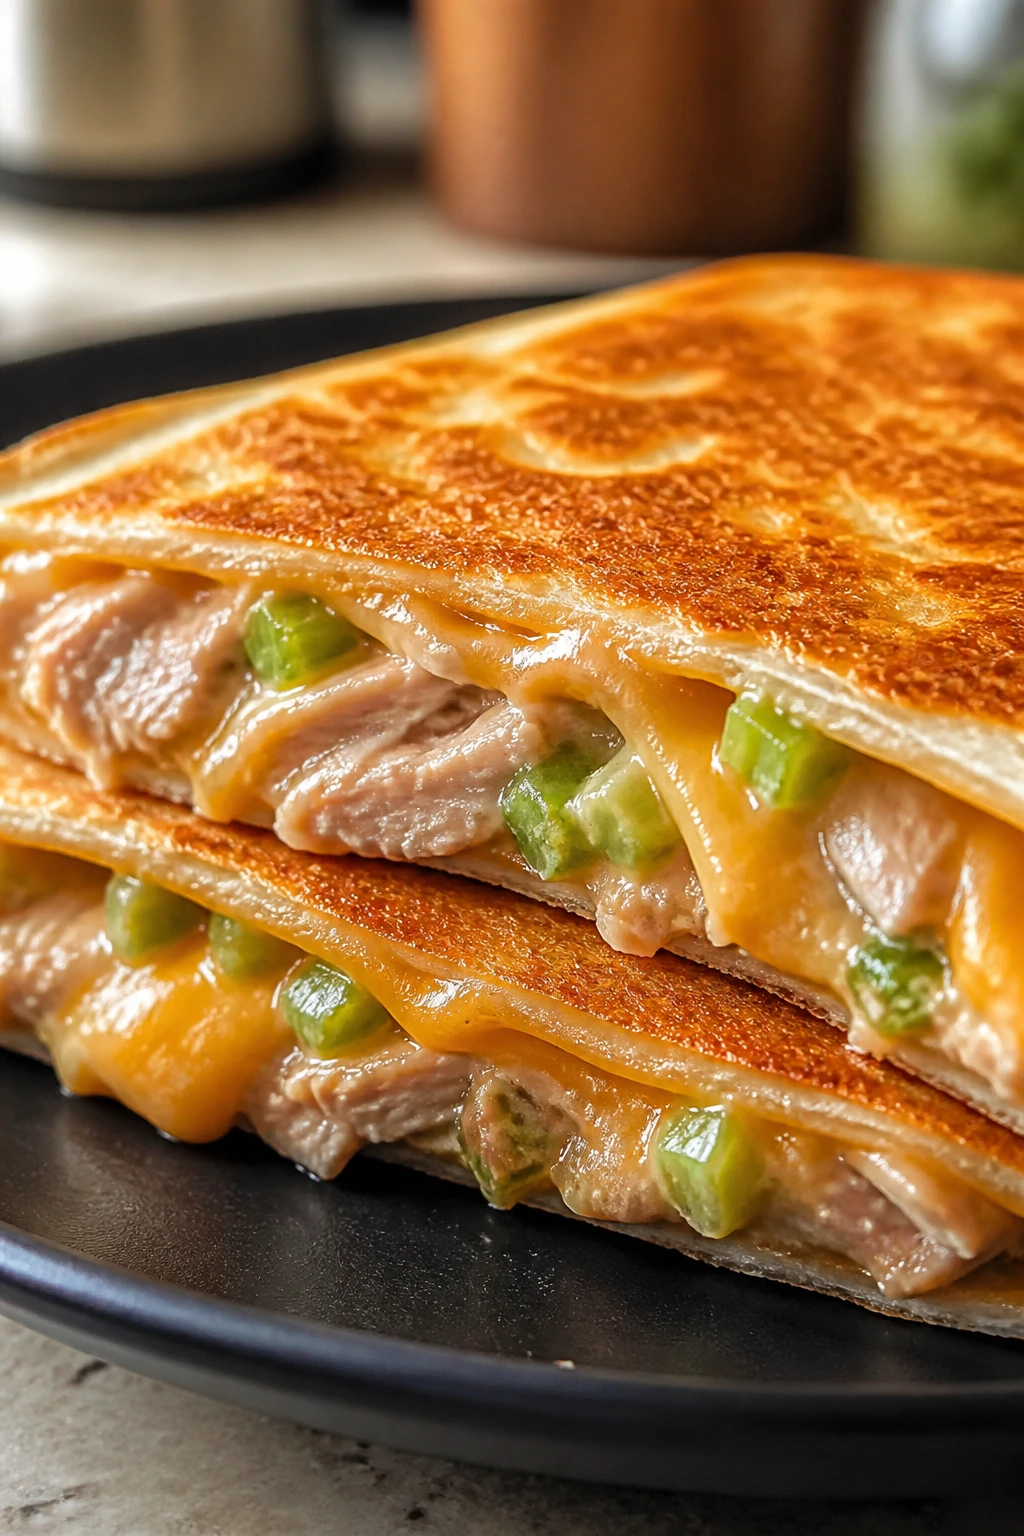
This is what happens when tuna melt energy meets the skillet. The cheese does the binding, the tuna brings salt and heft, and the tortilla gives you a crisp shell that browns faster than bread.
Why It Works:
Tuna and cheddar are old friends, but the tortilla makes the whole thing faster and less fussy than a sandwich. A little mustard keeps the filling from tasting flat, and the skillet creates those crunchy edges people usually pretend not to care about.
Key Ingredients:
- 1 can (5 oz) tuna, drained
- 1 tablespoon mayonnaise
- 1 teaspoon mustard
- 1/4 cup diced celery or onion
- 1 cup shredded cheddar
- 2 large flour tortillas
- 1 tablespoon butter or oil
- Black pepper, to taste
Quick Steps:
- Mix tuna, mayo, mustard, celery, and pepper.
- Spread on one tortilla and add cheese.
- Top with the second tortilla.
- Cook in buttered skillet 2 to 3 minutes per side.
- Slice and serve.
Equipment for This Recipe:
- Skillet
- Bowl
- Spatula
- Knife
How to Serve This Dish:
Serve with pickles, tomato soup, or a pile of chips. It’s rich enough that a tart side helps.
Pro Tips for This Recipe:
- Keep the heat moderate: Cheese needs time to melt.
- Drain tuna thoroughly: No one wants a wet center.
- Use sharp cheddar: It stands up to the tuna.
Variations on This Dish:
- Spicy Tuna Melt: Add hot sauce or jalapeños.
- No-Mayo Version: Use a little olive oil and mustard.
- Rye-Style Flavor: Add caraway seeds if you like that deli note.
Common Mistakes to Avoid with This Dish:
- Overstuffing the quesadilla: It won’t seal.
- Cooking on high heat: The tortilla burns before the middle melts.
- Skipping pepper: It needs a little bite.
15. Couscous Bowl with Chickpeas and Raisins
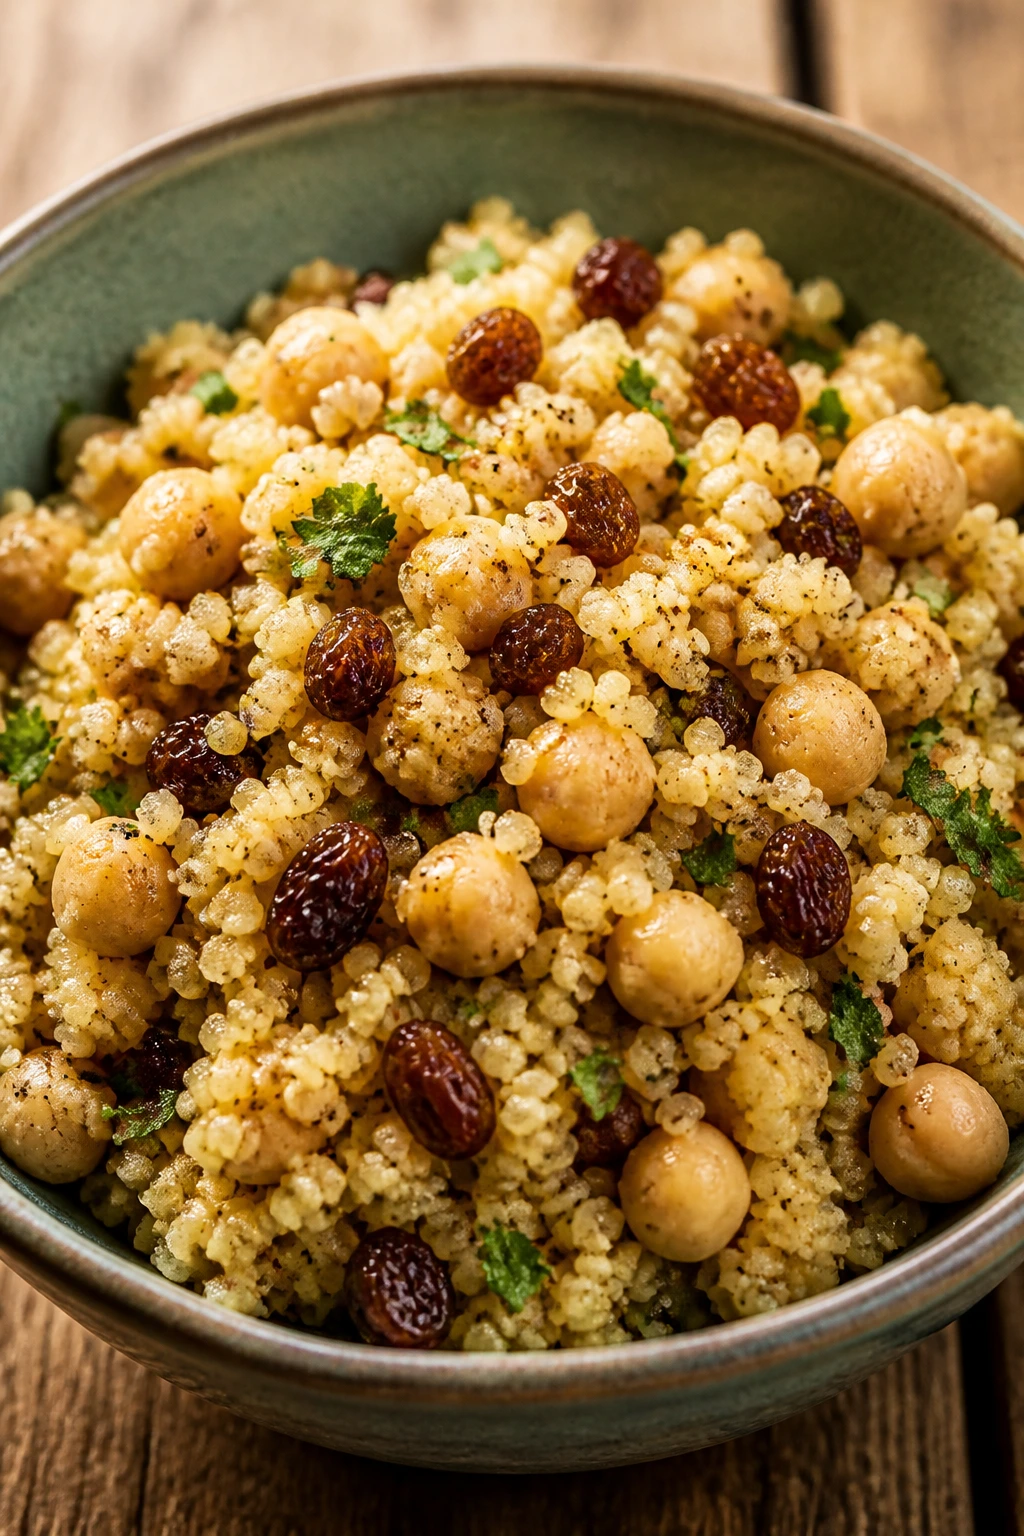
Couscous is one of the few pantry grains that behaves like it’s in a hurry. Pour over hot water, wait five minutes, fluff, and you’ve got the base for a lunch bowl that can swing savory or sweet depending on what you add.
Why It Works:
Couscous soaks up flavor fast. Chickpeas bring bulk, raisins bring little bursts of sweetness, and cumin or cinnamon can steer the whole bowl toward warm, lunchable comfort without making it feel heavy.
Key Ingredients:
- 1 cup couscous
- 1 cup boiling water or broth
- 1 can (15 oz) chickpeas, rinsed and drained
- 2 tablespoons raisins
- 1 tablespoon olive oil
- 1/2 teaspoon cumin
- 1 tablespoon lemon juice
- Salt and pepper, to taste
- Chopped parsley, optional
Quick Steps:
- Put couscous in a bowl and pour over boiling water or broth.
- Cover for 5 minutes, then fluff with a fork.
- Stir in chickpeas, raisins, oil, cumin, lemon, salt, and pepper.
- Top with parsley.
- Serve warm or at room temperature.
Equipment for This Recipe:
- Heatproof bowl
- Fork
- Kettle or small pot
- Spoon
How to Serve This Dish:
Serve it as a bowl or stuff it into lettuce cups if you want something lighter. A spoonful of yogurt on top also works well.
Pro Tips for This Recipe:
- Use broth instead of water when you can: It gives couscous more body.
- Fluff gently: You want separate grains, not paste.
- Taste after it sits: Couscous can absorb more salt than expected.
Variations on This Dish:
- North African Style: Add cinnamon and chopped almonds.
- Savory Herb Bowl: Use dill and parsley instead of raisins.
- Tomato Couscous: Stir in chopped canned tomatoes.
Common Mistakes to Avoid with This Dish:
- Using too much water: Couscous turns mushy.
- Skipping the fork fluff: It clumps if left untouched.
- Underseasoning: The grains need salt to wake up.
16. Polenta with Marinara and Parmesan
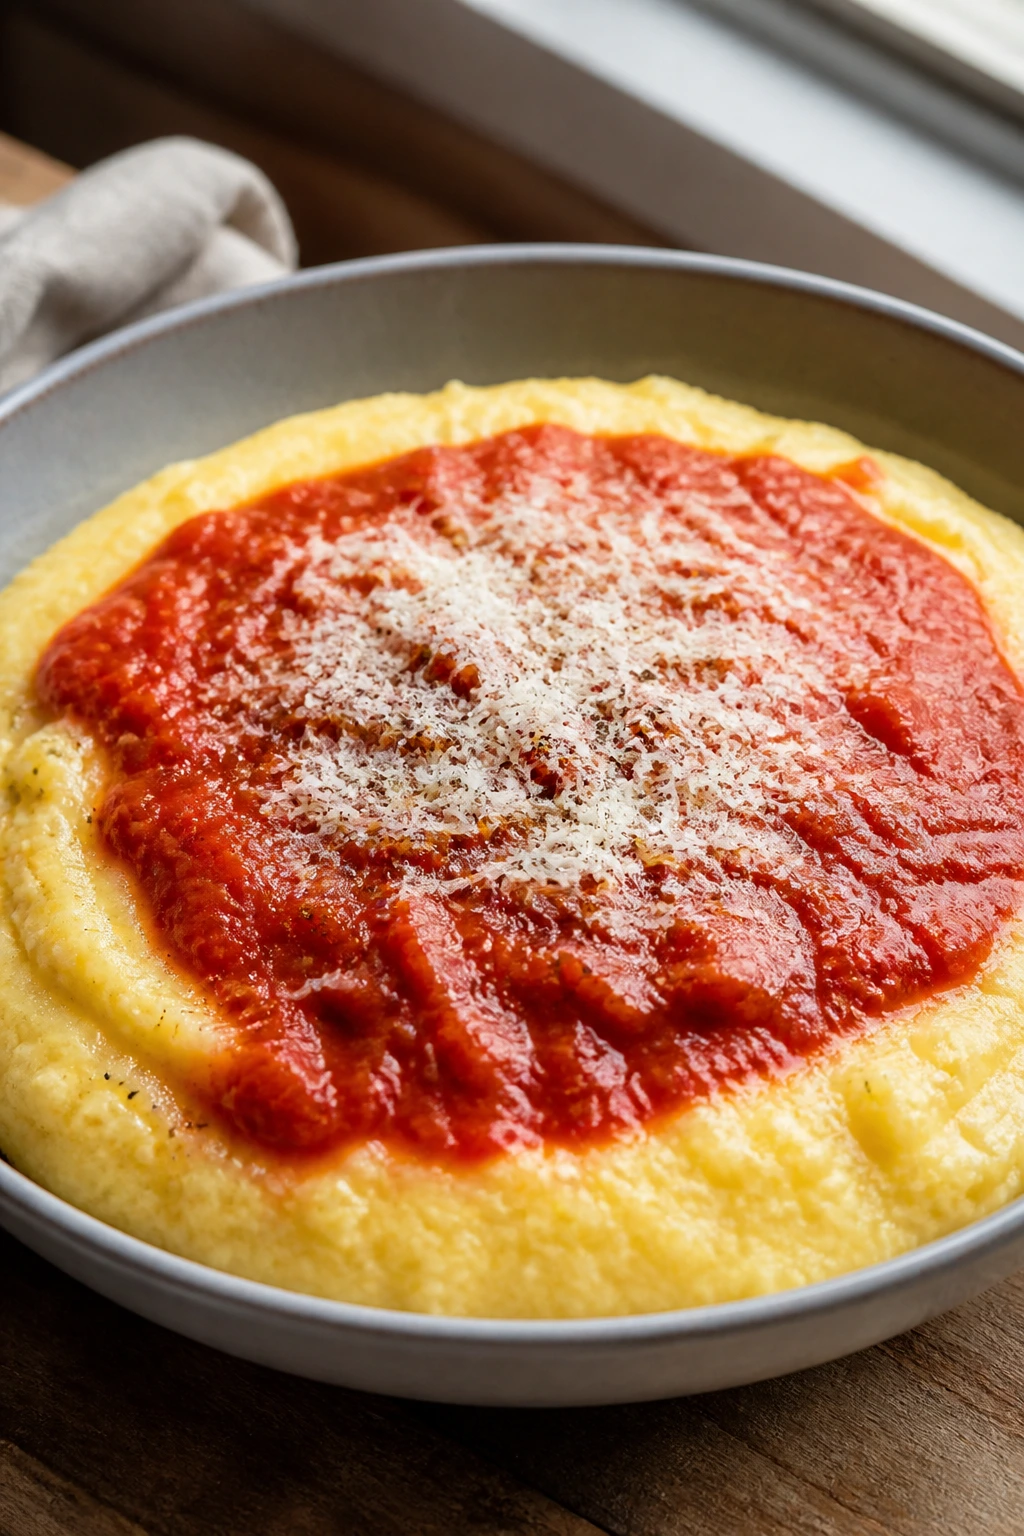
Polenta is the pantry move people forget about. It cooks into a creamy, spoonable base that can carry jarred or canned marinara with almost no fuss, and it feels warmer and more substantial than a bowl of plain pasta.
Why It Works:
Cornmeal thickens fast, so lunch comes together quickly. Marinara brings acid and sweetness, while Parmesan gives you that salty finish that turns a basic bowl into something you’d gladly eat with a spoon and then scrape the pot for.
Key Ingredients:
- 1 cup quick-cooking polenta
- 4 cups water or broth
- 1/2 teaspoon salt
- 1 tablespoon butter
- 1 cup marinara sauce
- 2 tablespoons grated Parmesan
- Black pepper, to taste
- Dried oregano, optional
Quick Steps:
- Bring water or broth to a boil with salt.
- Whisk in polenta slowly.
- Cook 5 to 7 minutes, stirring until thick.
- Stir in butter and spoon into bowls.
- Top with warm marinara, Parmesan, and pepper.
Equipment for This Recipe:
- Saucepan
- Whisk
- Wooden spoon
- Bowls
How to Serve This Dish:
Serve hot and loose, not stiff. A little extra Parmesan and a few dried herbs make the bowl look finished.
Pro Tips for This Recipe:
- Whisk while adding polenta: It prevents lumps.
- Keep it loose: Add a splash of water if it tightens too much.
- Warm the sauce separately: Cold marinara cools the polenta too fast.
Variations on This Dish:
- Garlic Polenta: Add garlic powder or minced garlic.
- Spicy Marinara Bowl: Stir red pepper flakes into the sauce.
- Bean-Topped Polenta: Add white beans for more heft.
Common Mistakes to Avoid with This Dish:
- Dumping polenta in all at once: It clumps.
- Letting it sit too long before serving: It firms up fast.
- Using bland sauce: The marinara matters here.
17. Bean and Cheese Nachos
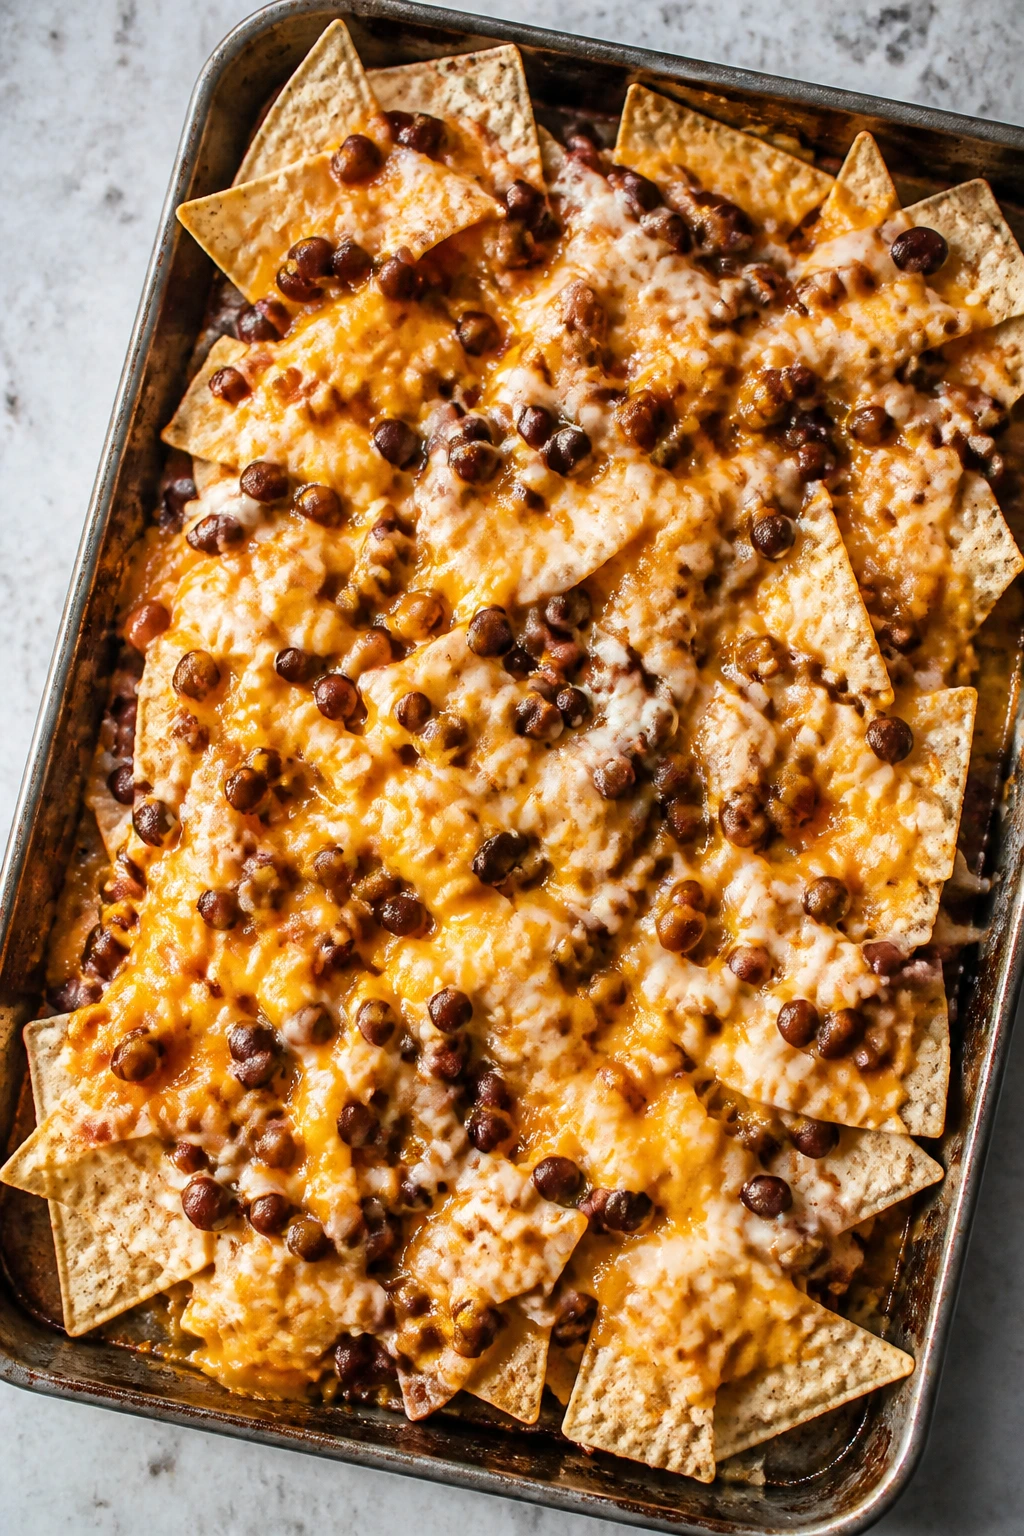
Lunch can be a tray of nachos if the toppings are balanced. Beans add heft, cheese does the melting, and salsa keeps the whole thing from tasting like snacks pretending to be a meal.
Why It Works:
Tortilla chips bring crunch that survives heat, and beans stop the dish from being all surface and no center. A quick bake melts the cheese just enough to hold everything together without turning the chips into mush.
Key Ingredients:
- 3 cups tortilla chips
- 1 can (15 oz) refried beans or black beans, warmed
- 1 1/2 cups shredded cheese
- 1/2 cup salsa
- 2 tablespoons sliced jalapeños, optional
- 2 tablespoons chopped scallions
- Sour cream, optional
- Hot sauce, optional
Quick Steps:
- Spread chips on a sheet pan.
- Spoon beans over the chips.
- Add cheese and jalapeños.
- Bake at 400°F for 5 to 7 minutes.
- Top with salsa and scallions.
Equipment for This Recipe:
- Sheet pan
- Spoon
- Oven mitts
- Small bowls for toppings
How to Serve This Dish:
Serve straight from the pan or pile onto plates if you want to keep the chips crisper. Sour cream on the side helps with the heat.
Pro Tips for This Recipe:
- Warm the beans first: Cold beans cool the cheese too fast.
- Use a thin layer of toppings: Heavy piles collapse chips.
- Add wet toppings after baking: That keeps the crunch alive.
Variations on This Dish:
- Chicken-Free Supreme: Add olives, corn, and avocado.
- Breakfast Nachos: Use salsa and a fried egg on top.
- Pepper Jack Version: Swap the cheese for more heat.
Common Mistakes to Avoid with This Dish:
- Overbaking: Chips go from crisp to stale fast.
- Using too much salsa before baking: Sog city.
- Choosing thin chips: They break under the beans.
18. Mediterranean Orzo Salad
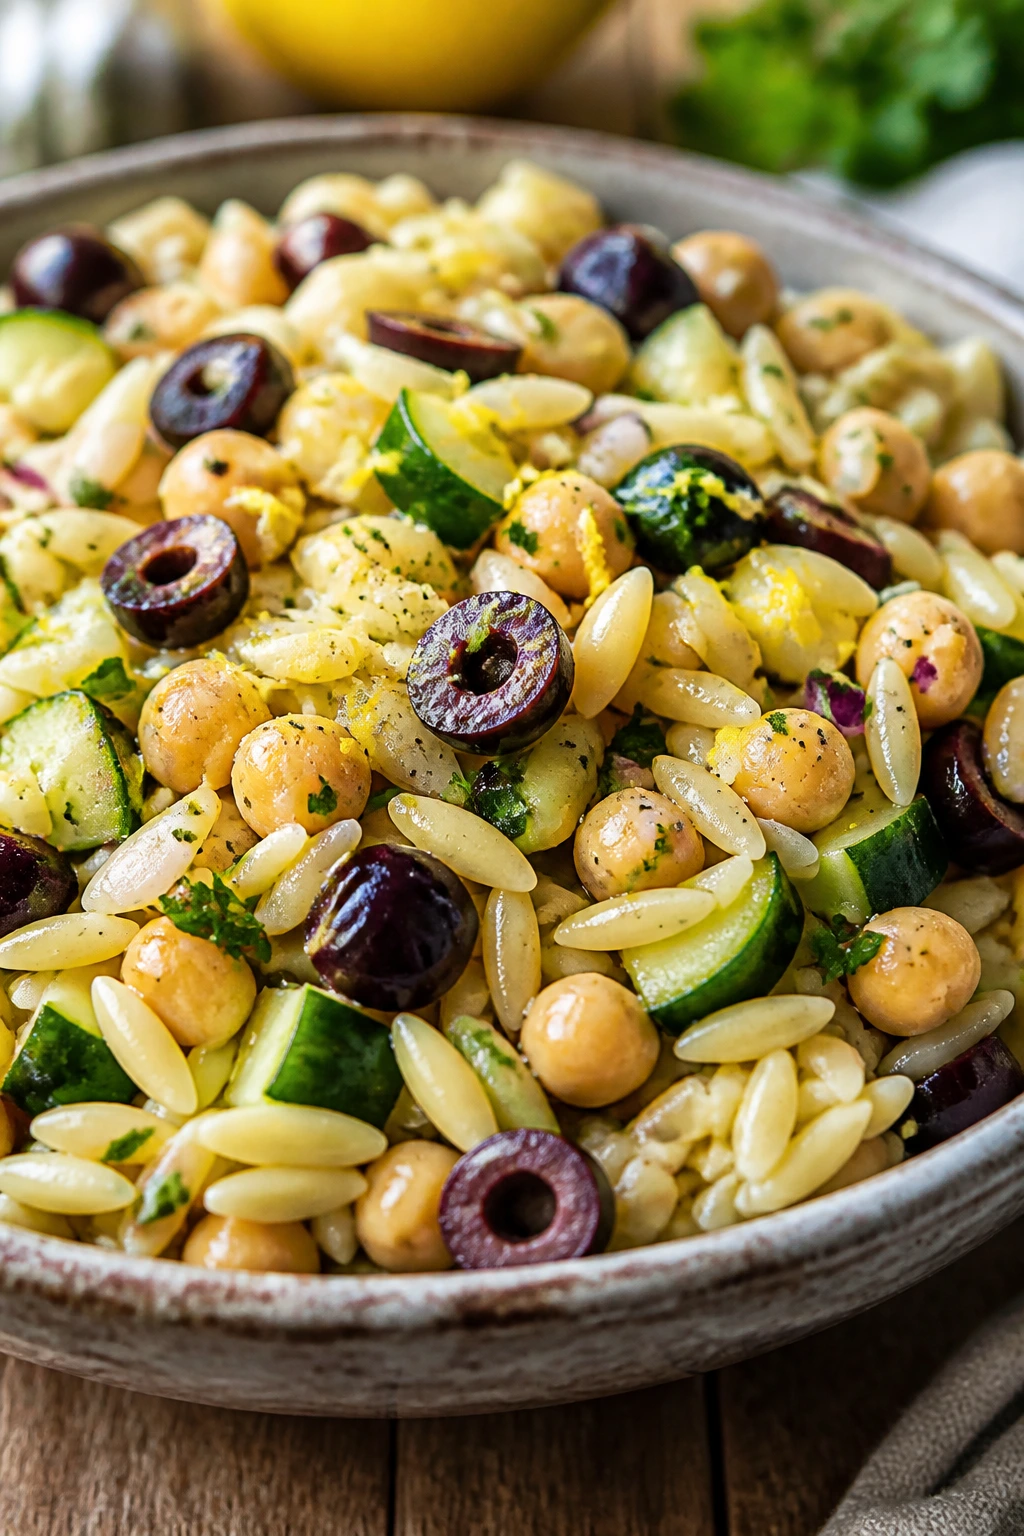
Orzo salads can be too polite if you’re not careful. This one keeps its edge with olives, lemon, and chickpeas, which means it eats like lunch instead of side dish filler.
Why It Works:
Orzo cooks quickly and chills well. Chickpeas keep it from being all pasta, while olives and lemon bring the briny, sharp notes that make cold lunch salads taste awake.
Key Ingredients:
- 1 cup orzo
- 1 can (15 oz) chickpeas, rinsed and drained
- 1/3 cup chopped olives
- 1/4 cup diced cucumber or celery
- 2 tablespoons olive oil
- 1 tablespoon lemon juice
- 1 teaspoon dried oregano
- Salt and pepper, to taste
Quick Steps:
- Cook orzo until al dente and drain.
- Rinse under cool water.
- Toss with chickpeas, olives, cucumber, oil, lemon, oregano, salt, and pepper.
- Chill 10 minutes if you have time.
- Serve cold or cool.
Equipment for This Recipe:
- Pot
- Colander
- Mixing bowl
- Spoon
How to Serve This Dish:
Serve in a lunch box, a shallow bowl, or beside toast. It’s also one of the better make-ahead options in this list.
Pro Tips for This Recipe:
- Salt the orzo water well: Cold pasta needs help.
- Chop everything small: That keeps each bite balanced.
- Let it sit briefly: The dressing settles into the pasta.
Variations on This Dish:
- Feta Version: Add crumbled feta if you keep it around.
- Tuna Orzo Salad: Mix in a drained can of tuna.
- Roasted Red Pepper Salad: Add chopped jarred peppers.
Common Mistakes to Avoid with This Dish:
- Rinsing too long: You wash off all the starch and flavor.
- Skipping lemon: The salad flattens out.
- Using oversized cucumber chunks: They water down the bowl.
19. Red Lentil Dal with Rice
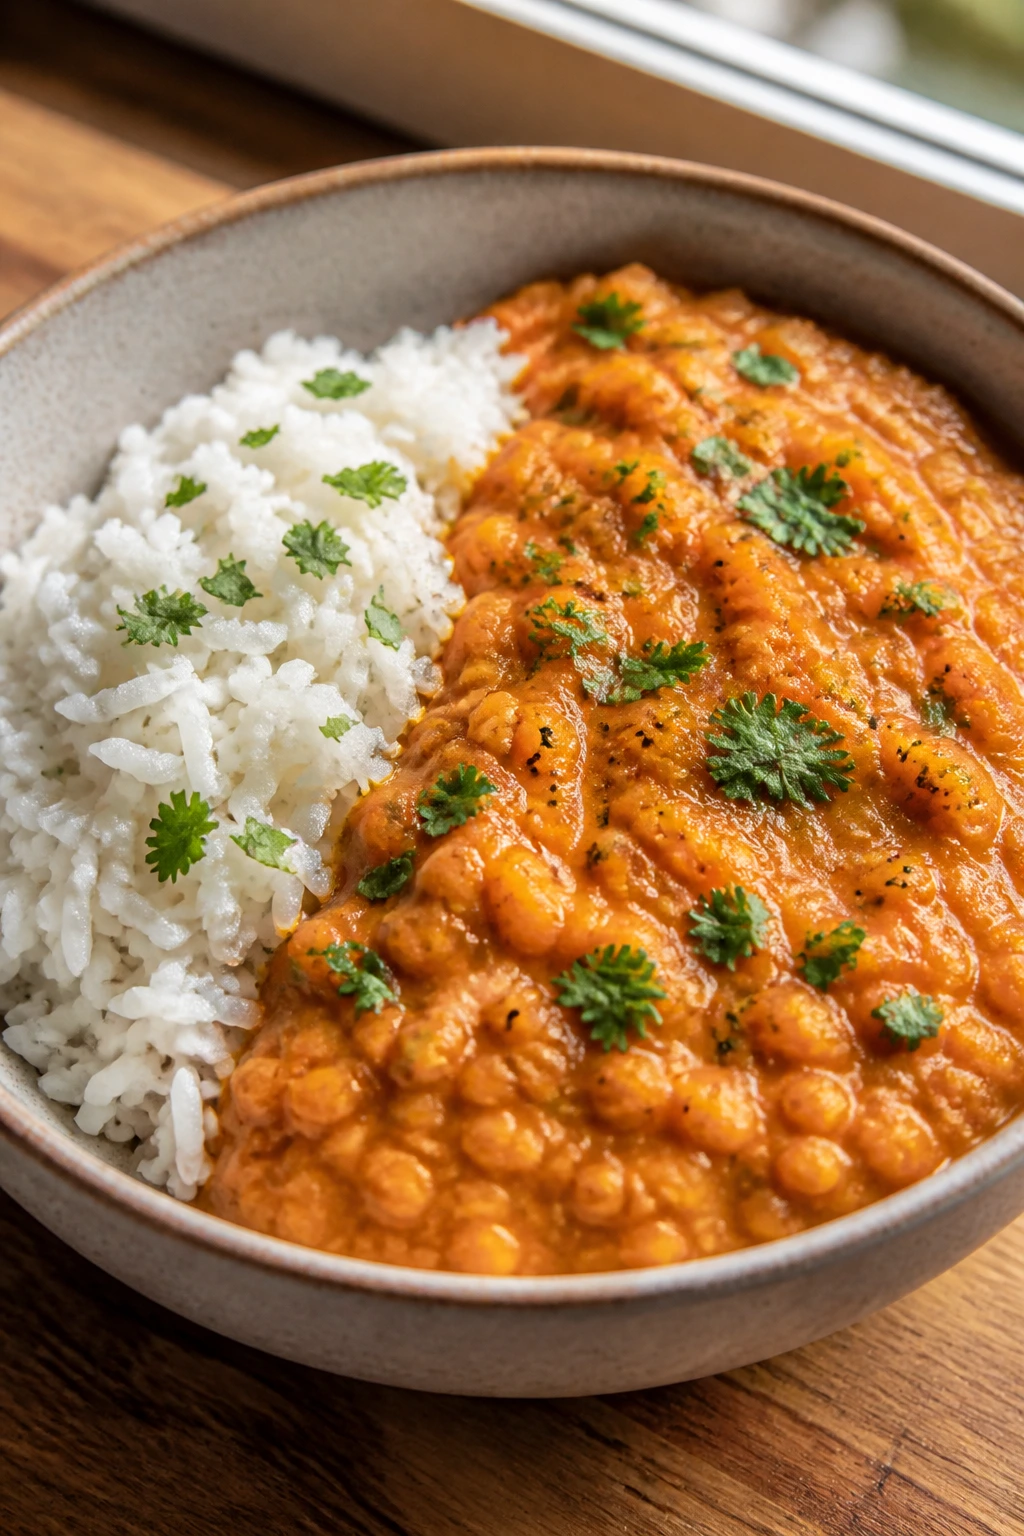
Red lentils are pantry gold. They break down fast, turn creamy on their own, and soak up spices with almost no argument, which is why this dal makes such a good fast lunch.
Why It Works:
Red lentils cook in about the time it takes rice to warm through. Tomato, garlic, cumin, and turmeric give the pot warmth and color, while the lentils melt enough to make a thick stew without cream.
Key Ingredients:
- 1 cup red lentils, rinsed
- 1 tablespoon oil
- 1 small onion, diced
- 2 garlic cloves, minced
- 1 teaspoon ground cumin
- 1/2 teaspoon turmeric
- 1 can (14.5 oz) diced tomatoes
- 2 1/2 cups water or broth
- Salt, to taste
- 1 cup cooked rice, for serving
Quick Steps:
- Cook onion in oil until soft.
- Add garlic, cumin, and turmeric for 30 seconds.
- Stir in lentils, tomatoes, water, and salt.
- Simmer 15 to 18 minutes until creamy.
- Serve over rice.
Equipment for This Recipe:
- Medium pot
- Wooden spoon
- Measuring spoons
- Bowl for serving
How to Serve This Dish:
Spoon the dal over rice and finish with black pepper or yogurt if you want richness. A squeeze of lime sharpens it nicely.
Pro Tips for This Recipe:
- Rinse lentils well: They can foam a little.
- Stir often near the end: Red lentils stick.
- Add water if it thickens too fast: They absorb a lot.
Variations on This Dish:
- Coconut Dal: Swap some water for coconut milk.
- Spicier Dal: Add chili flakes or cayenne.
- Leafy Version: Stir in spinach at the end.
Common Mistakes to Avoid with This Dish:
- Walking away from the pot: Red lentils can scorch.
- Adding too much salt too early: Broth and tomatoes may already carry plenty.
- Serving it too thin: Let it thicken a little.
20. Canned Salmon Cakes with Dijon Mayo

Salmon cakes are one of the smartest ways to turn a can into lunch. Crisp outside, soft inside, and sturdy enough to pack into a lunchbox, they eat like something you planned.
Why It Works:
Canned salmon already brings salt and richness, so the job is mostly binding and browning. Breadcrumbs and mustard hold the cakes together, while a quick pan-fry gives you the crust that canned fish usually lacks.
Key Ingredients:
- 1 can (14.75 oz) salmon, drained and flaked
- 1 egg
- 1/3 cup breadcrumbs
- 1 tablespoon Dijon mustard
- 1 tablespoon mayonnaise
- 2 tablespoons chopped scallions
- 1 tablespoon oil
- Lemon wedges, for serving
Quick Steps:
- Mix salmon, egg, breadcrumbs, mustard, mayo, and scallions.
- Shape into 4 small cakes.
- Heat oil in a skillet over medium heat.
- Cook 3 to 4 minutes per side until browned.
- Serve with lemon.
Equipment for This Recipe:
- Mixing bowl
- Skillet
- Spatula
- Plate
How to Serve This Dish:
Serve with salad greens, crackers, or inside a bun if you want it bigger. Dijon mayo on the side makes sense.
Pro Tips for This Recipe:
- Drain the salmon well: Extra moisture makes the cakes fragile.
- Chill the mix if it feels loose: Ten minutes helps.
- Use medium heat: Too hot and the outside burns before the center sets.
Variations on This Dish:
- Old Bay Version: Add a pinch of Old Bay seasoning.
- Herb Cakes: Mix in dill or parsley.
- Tuna Cake Swap: Use tuna in place of salmon.
Common Mistakes to Avoid with This Dish:
- Making the cakes too big: They break when flipped.
- Skipping the egg: The cakes won’t bind.
- Frying in a dry pan: You need enough oil for a crust.
21. Garlic Oil Pasta with Breadcrumbs
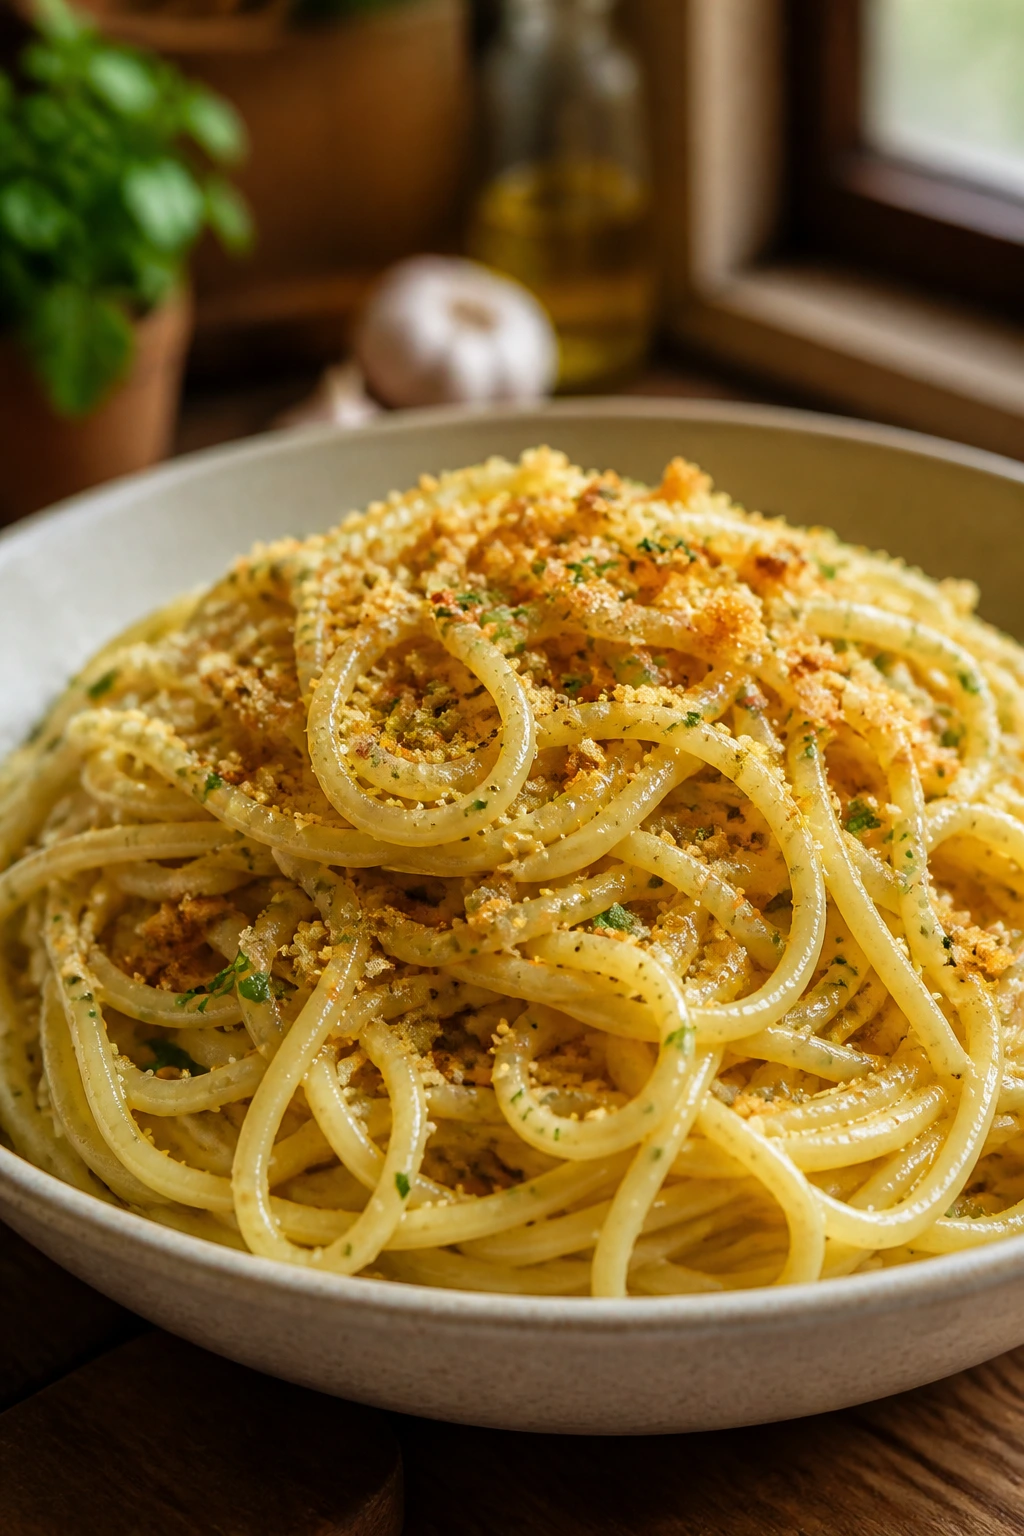
This is the pantry lunch for people who like crunch. Garlic cooks in olive oil, breadcrumbs toast in the same pan, and pasta catches everything. It’s modest, and that’s part of the appeal.
Why It Works:
Aglio e olio style pasta depends on technique more than ingredients. Garlic infuses the oil, chili flakes add heat, and breadcrumbs bring texture where a sauce would normally live. If you cook it right, it tastes lean but not empty.
Key Ingredients:
- 8 oz spaghetti
- 3 tablespoons olive oil
- 3 garlic cloves, thinly sliced
- 1/4 teaspoon red pepper flakes
- 1/2 cup breadcrumbs
- 1/4 cup grated Parmesan, optional
- Salt, for pasta water
- Parsley, optional
Quick Steps:
- Cook spaghetti in salted water until al dente.
- Toast breadcrumbs in 1 tablespoon oil until golden.
- Warm remaining oil and cook garlic slowly.
- Add chili flakes and drained pasta with a splash of water.
- Top with breadcrumbs and Parmesan.
Equipment for This Recipe:
- Pot
- Skillet
- Tongs
- Spoon
How to Serve This Dish:
Serve immediately while the breadcrumbs are still crisp. A side salad or a few olives is enough.
Pro Tips for This Recipe:
- Slice garlic thinly: It perfumes the oil better.
- Watch the breadcrumbs closely: They go from golden to burnt in a blink.
- Use pasta water: It helps the oil cling.
Variations on This Dish:
- Anchovy Breadcrumb Pasta: Add one anchovy to the oil.
- Lemon Garlic Pasta: Finish with zest.
- Tomato Breadcrumb Pasta: Add a spoonful of tomato paste.
Common Mistakes to Avoid with This Dish:
- Burning the garlic: It turns bitter fast.
- Using stale breadcrumbs with no toast: They taste dusty.
- Skipping salt in the water: The pasta needs seasoning from within.
22. Tomato Rice Soup
Tomato rice soup is what I make when I want something that feels soothing but not sleepy. It’s thin enough to sip and hearty enough to count as lunch, especially with a little butter or Parmesan on top.
Why It Works:
Rice gives the soup body without needing flour or cream. Tomato paste and canned tomatoes build a strong base, and the rice soaks up the broth so each spoonful gets thicker as you go.
Key Ingredients:
- 1 tablespoon olive oil
- 1 small onion, diced
- 2 tablespoons tomato paste
- 1 can (14.5 oz) diced tomatoes
- 4 cups broth or water
- 1/2 cup cooked rice
- 1/2 teaspoon salt
- Black pepper, to taste
- Parmesan, optional
Quick Steps:
- Cook onion in oil until soft.
- Stir in tomato paste for 30 seconds.
- Add tomatoes, broth, salt, and pepper.
- Simmer 10 minutes.
- Stir in rice and heat through.
Equipment for This Recipe:
- Soup pot
- Wooden spoon
- Ladle
- Bowl
How to Serve This Dish:
Serve with grilled cheese, crackers, or plain toast. Parmesan on top gives it a salty edge that works well.
Pro Tips for This Recipe:
- Use leftover rice if you have it: It saves time.
- Add rice near the end: It can soak up too much broth.
- Taste after simmering: Tomato soup needs enough salt to wake up.
Variations on This Dish:
- Creamy Tomato Rice Soup: Stir in a splash of milk.
- Herbed Soup: Add basil or oregano.
- Garlicky Version: Cook an extra garlic clove with the onion.
Common Mistakes to Avoid with This Recipe:
- Adding rice too early: It goes mushy.
- Not enough tomato paste: The soup tastes thin.
- Serving without salt adjustment: Tomato soup can be deceptively flat.
23. Savory Oatmeal with Mushrooms and Soy
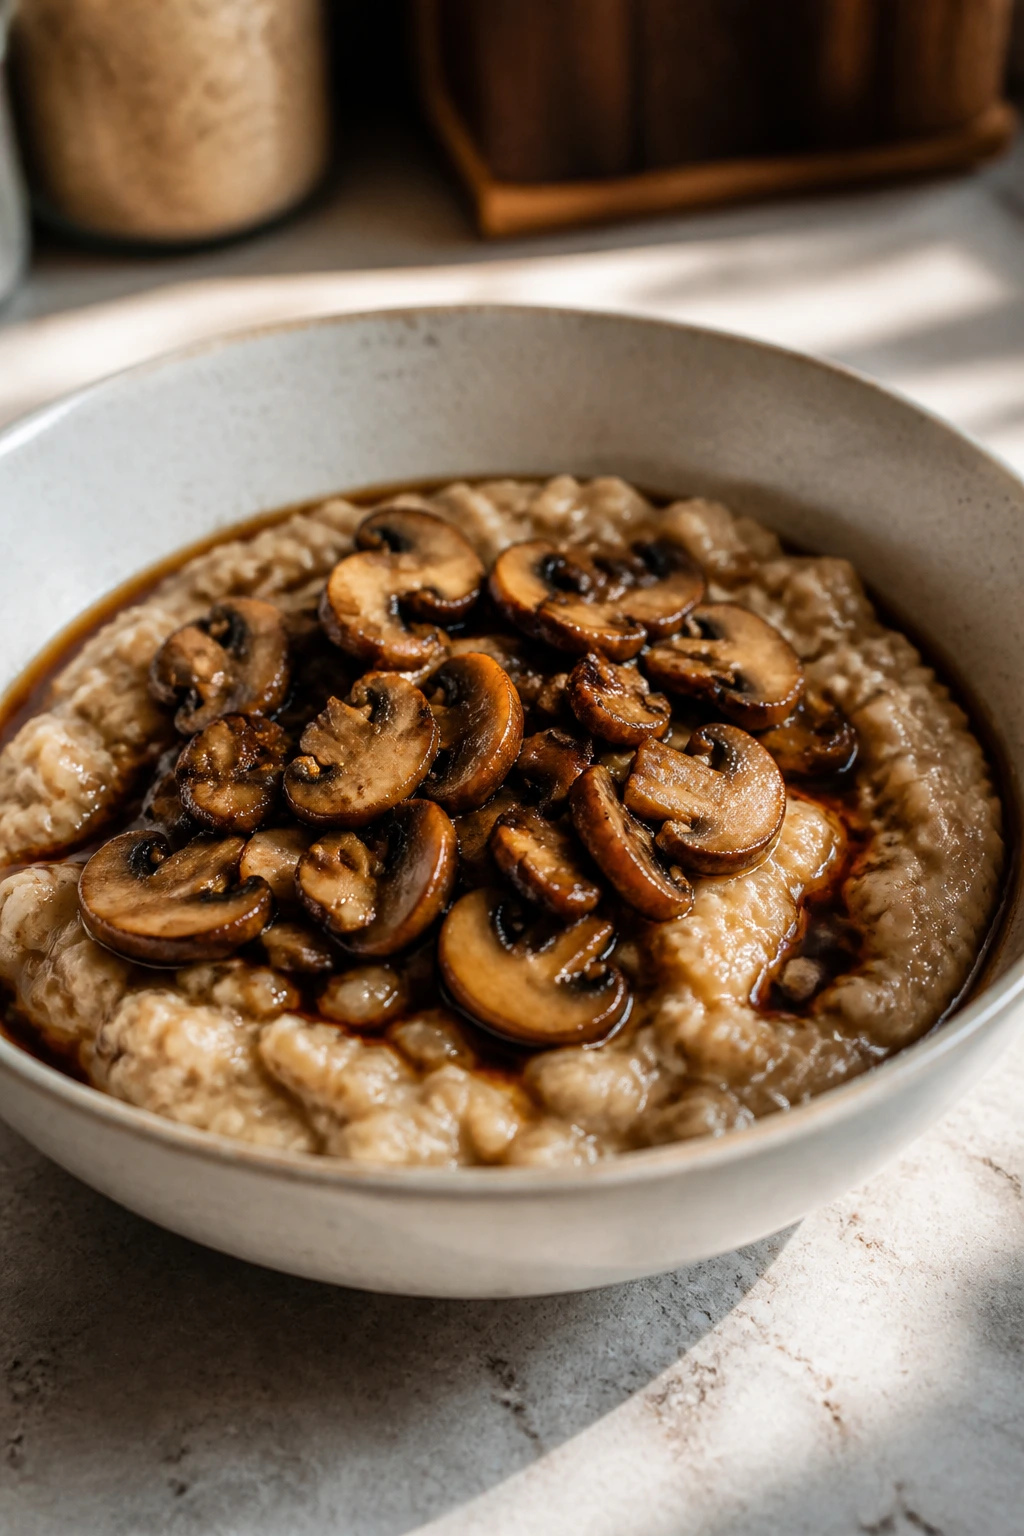
Savory oatmeal sounds odd until you eat it. Then it just seems obvious. Oats make a soft, warm base, and soy sauce, mushrooms, and scallions push it firmly into lunch territory instead of breakfast.
Why It Works:
Oats thicken quickly and carry salty toppings well. Mushrooms add chew and an earthy note, while soy sauce gives the bowl enough depth that you don’t miss cream or cheese.
Key Ingredients:
- 1/2 cup rolled oats
- 1 cup water or broth
- 1 cup sliced mushrooms
- 1 teaspoon oil
- 1 tablespoon soy sauce
- 1 scallion, sliced
- Black pepper, to taste
- Sesame seeds, optional
Quick Steps:
- Cook mushrooms in oil until browned.
- Bring water or broth to a simmer.
- Stir in oats and cook 3 to 5 minutes.
- Add soy sauce and black pepper.
- Top with mushrooms, scallions, and sesame seeds.
Equipment for This Recipe:
- Small saucepan
- Skillet
- Spoon
- Bowl
How to Serve This Dish:
Serve hot in a bowl with chili crisp if you like heat. A soft egg works too, but the oats don’t need it.
Pro Tips for This Recipe:
- Brown the mushrooms first: That’s where the flavor lives.
- Use broth if possible: It gives the oats more body.
- Season after cooking: Soy sauce can get too sharp if boiled hard.
Variations on This Dish:
- Miso Oatmeal: Stir in 1 teaspoon miso off heat.
- Garlic Mushroom Oats: Add minced garlic to the pan.
- Sesame Chili Oats: Finish with sesame oil and chili flakes.
Common Mistakes to Avoid with This Dish:
- Using instant oats if you want texture: They go too soft.
- Skipping the mushroom browning step: The bowl tastes flatter.
- Over-salting before soy is added: Soy brings plenty.
24. Corn Fritters with Scallions
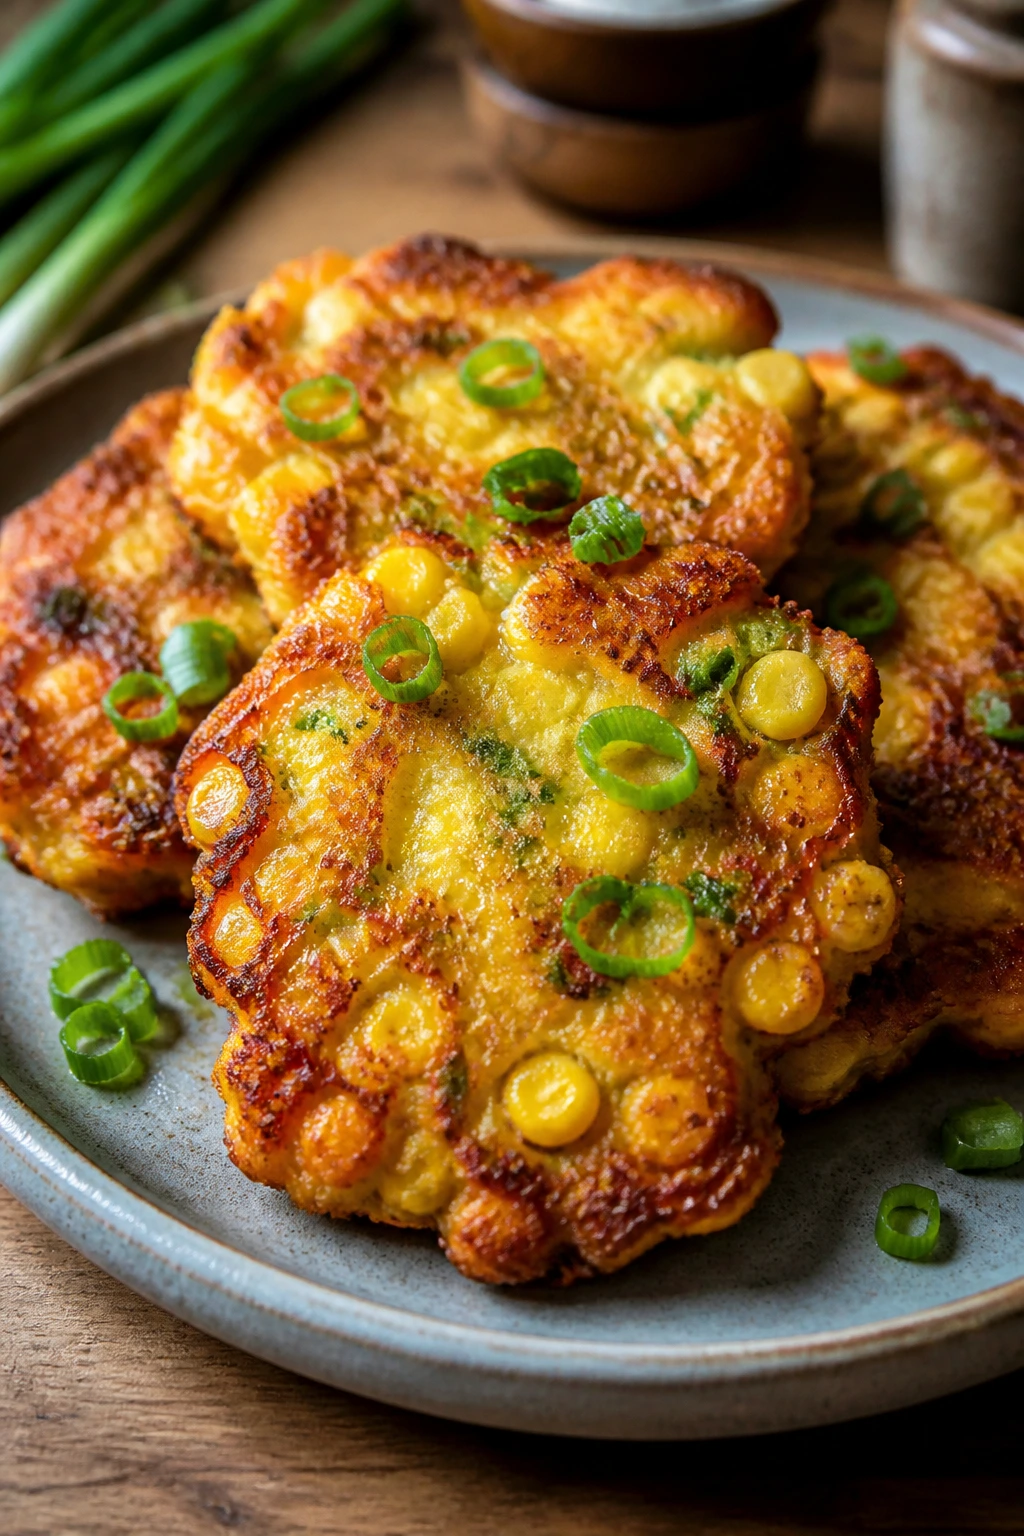
These are crunchy little lunch cakes, and they’re a good use for a can of corn that’s been sitting around too long. They cook fast, hold together well, and taste better than the ingredient list suggests.
Why It Works:
Corn adds sweetness and little pops of texture, while a small batter binds everything into something you can fry in a shallow layer of oil. Scallions keep the fritters from tasting one-note.
Key Ingredients:
- 1 can (15 oz) corn, drained
- 1/2 cup flour
- 1 egg
- 1/4 cup milk or water
- 2 scallions, sliced
- 1/2 teaspoon baking powder
- 1/2 teaspoon salt
- Oil for frying
Quick Steps:
- Stir flour, baking powder, and salt together.
- Add egg and milk or water to make a thick batter.
- Fold in corn and scallions.
- Fry spoonfuls in oil over medium heat until golden.
- Drain and serve warm.
Equipment for This Recipe:
- Mixing bowl
- Skillet
- Spatula
- Paper towels
How to Serve This Dish:
Serve with hot sauce, sour cream, or a quick salsa. They also work beside a salad if you want a more lunch-y plate.
Pro Tips for This Recipe:
- Keep the batter thick: Thin batter spreads and fries greasy.
- Don’t crowd the pan: They need room to brown.
- Drain the corn well: Extra liquid makes the fritters loose.
Variations on This Dish:
- Cheesy Corn Fritters: Add shredded cheddar.
- Spicy Corn Cakes: Add jalapeño or chili flakes.
- Herb Version: Mix in cilantro or parsley.
Common Mistakes to Avoid with This Dish:
- Frying too hot: The outside burns before the middle cooks.
- Using too much batter per fritter: They’re hard to flip.
- Serving them late: They’re best while the edges are crisp.
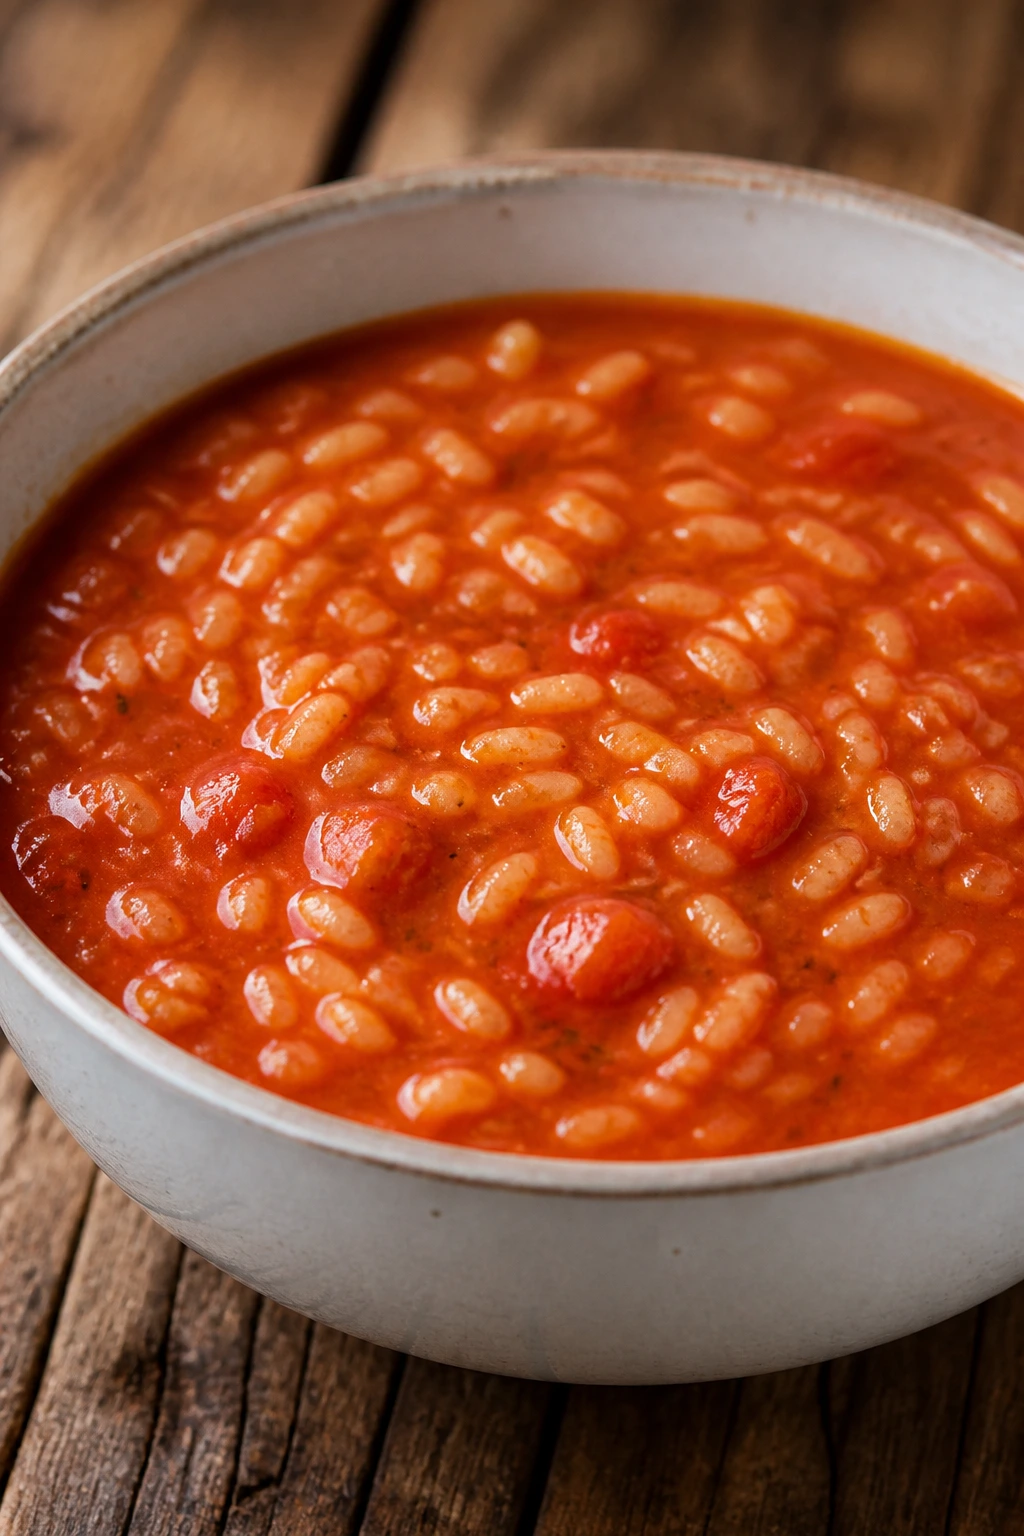
25. Bean Chili Over Tortilla Chips
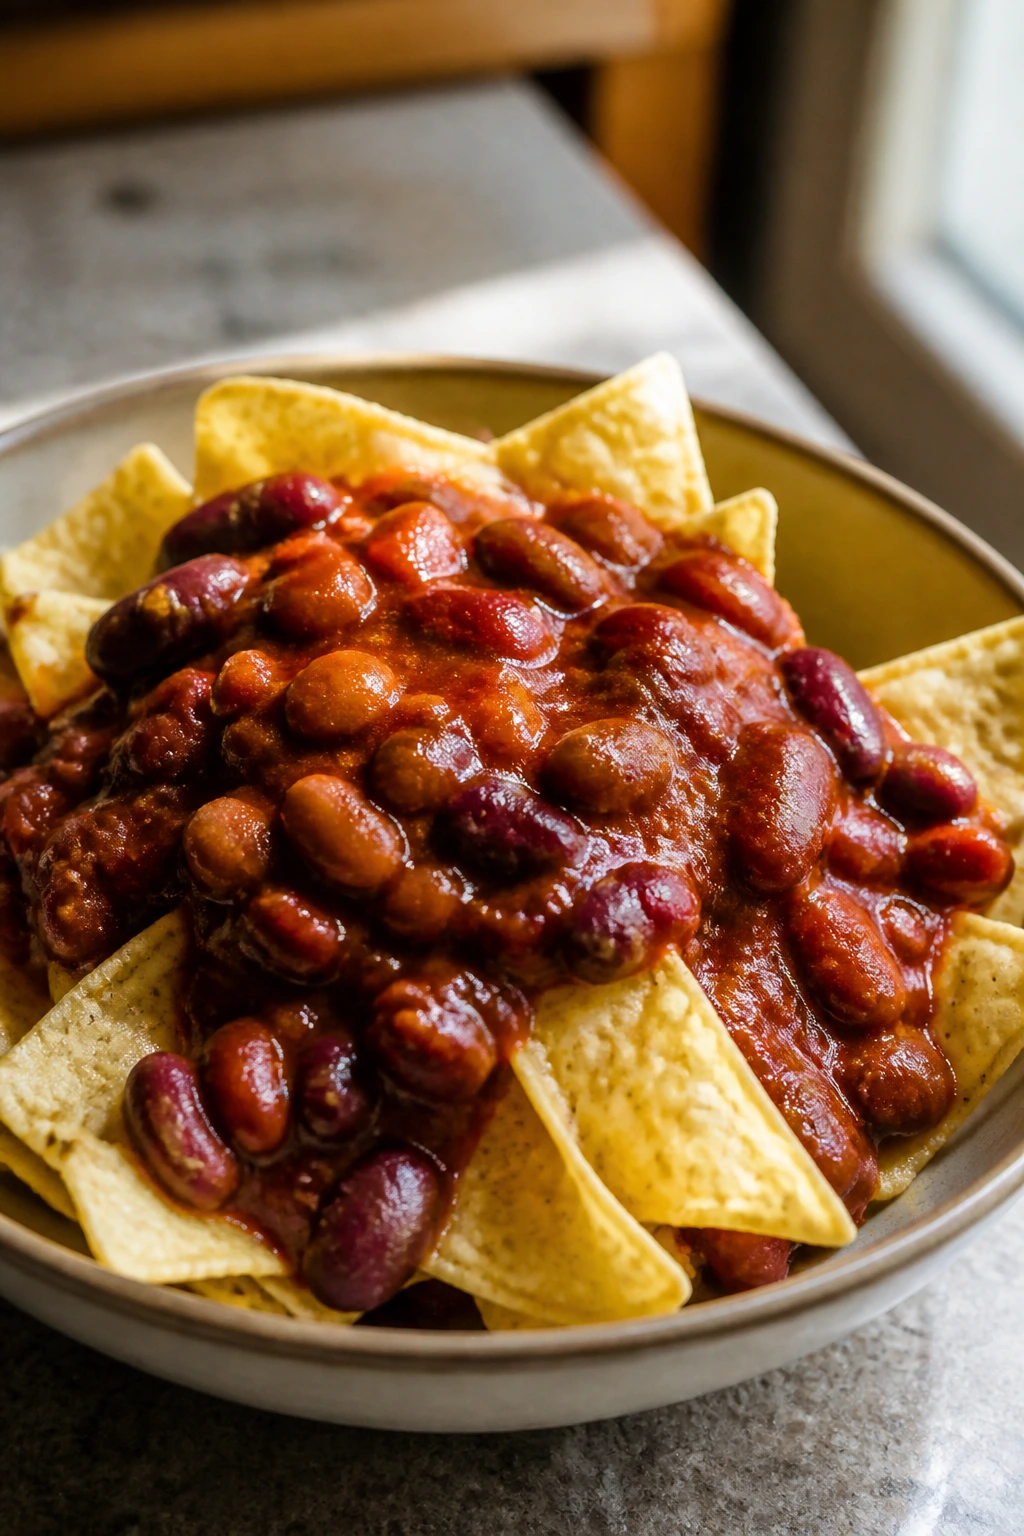
This is the lunch version of nachos with better manners. A quick bean chili over chips gives you heat, crunch, and enough heft to carry you through the afternoon without feeling like a brick.
Why It Works:
Canned beans, tomatoes, and chili powder make a fast chili base. The chips stay crunchy if you spoon the chili on top at the last second, which is the whole trick.
Key Ingredients:
- 1 tablespoon oil
- 1 small onion, diced
- 1 can (15 oz) beans, rinsed and drained
- 1 can (14.5 oz) diced tomatoes
- 1 tablespoon chili powder
- 1/2 teaspoon cumin
- Salt, to taste
- Tortilla chips
- Shredded cheese, optional
Quick Steps:
- Cook onion in oil until soft.
- Stir in chili powder and cumin for 30 seconds.
- Add beans, tomatoes, and salt.
- Simmer 10 minutes.
- Spoon over chips and add cheese if using.
Equipment for This Recipe:
- Small pot
- Spoon
- Bowl or plate
- Ladle
How to Serve This Dish:
Serve immediately so the chips keep their crunch. Sour cream, scallions, or sliced jalapeños all fit here.
Pro Tips for This Recipe:
- Simmer until slightly thickened: Thin chili makes soggy chips.
- Taste before serving: Beans vary in saltiness.
- Add toppings at the end: Wet ingredients go on last.
Variations on This Dish:
- Smoky Bean Chili: Add smoked paprika.
- Lime Chili Chips: Finish with lime juice.
- Cheese-Layer Version: Put chips, cheese, chili, cheese.
Common Mistakes to Avoid with This Recipe:
- Using too much liquid: The chips go limp.
- Skipping the onion: The chili tastes flat.
- Waiting too long to serve: Crunch disappears fast.
26. Peanut Noodle Salad with Cabbage
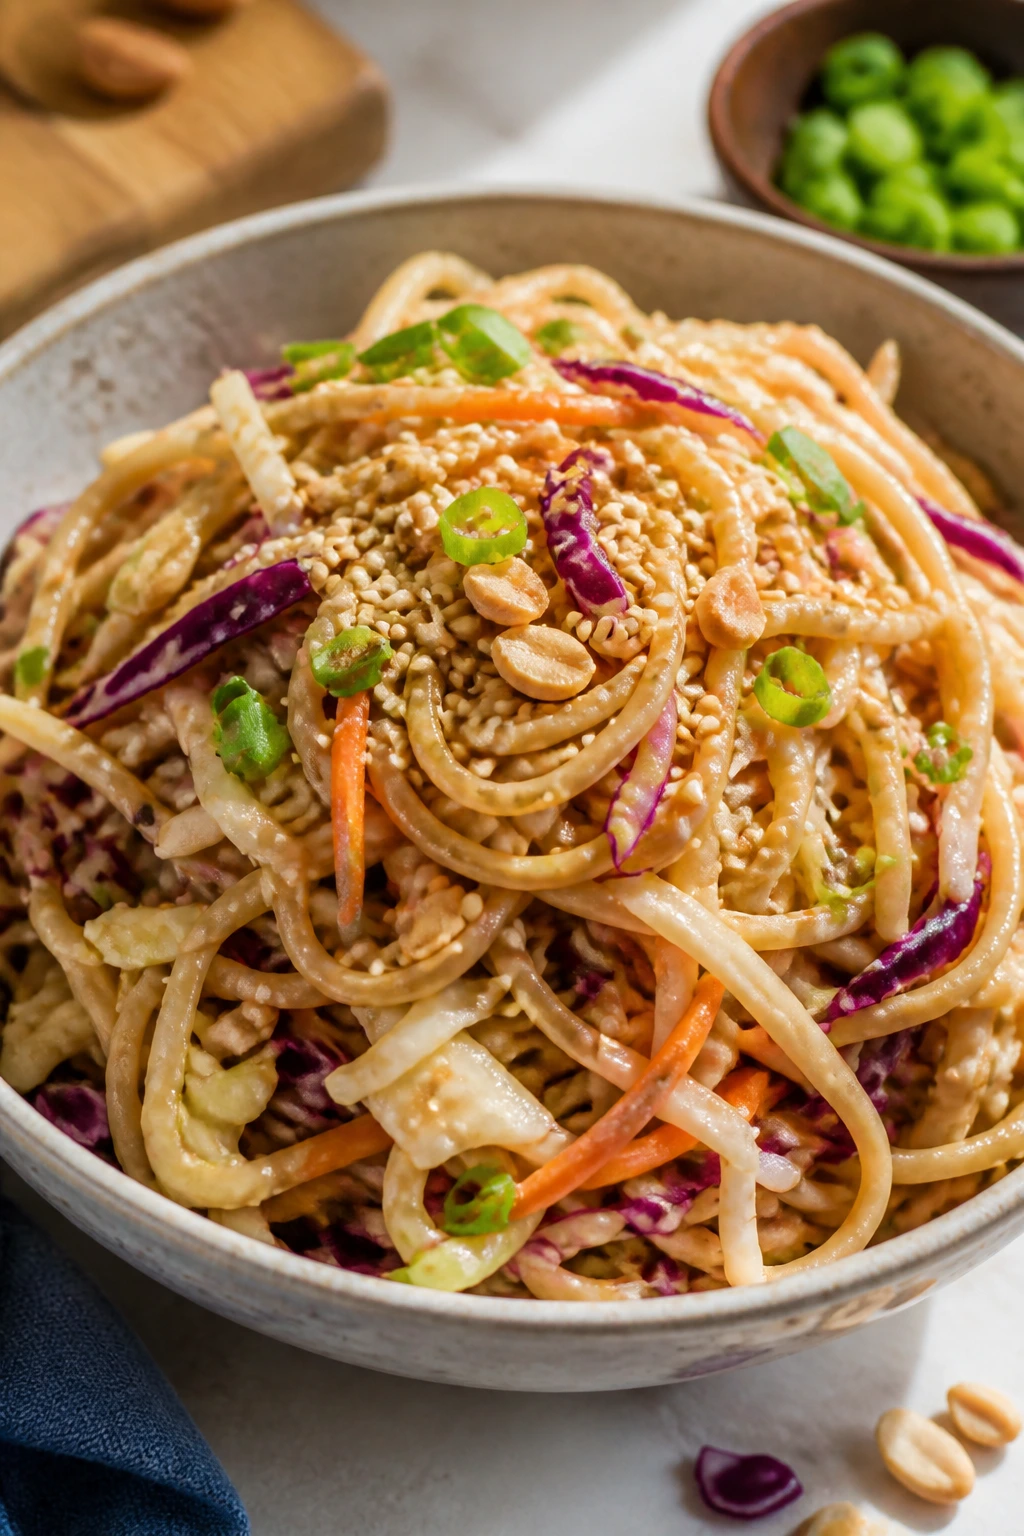
This is the cooler, crisper cousin of peanut stir-fry noodles. It works cold, which makes it one of the better lunchbox choices in the stack, and cabbage gives it staying power all day.
Why It Works:
Peanut butter and soy make a sauce that sticks to noodles without needing mayo or cream. Cabbage, carrots, or scallions add crunch that doesn’t wilt the way lettuce does.
Key Ingredients:
- 6 oz noodles or spaghetti
- 2 tablespoons peanut butter
- 1 tablespoon soy sauce
- 1 tablespoon rice vinegar
- 1 teaspoon honey
- 2 tablespoons hot water
- 1 cup shredded cabbage
- 1/4 cup shredded carrot
- 1 tablespoon sesame seeds
Quick Steps:
- Cook noodles and rinse cold.
- Whisk peanut butter, soy, vinegar, honey, and hot water.
- Toss noodles with cabbage and carrot.
- Add sauce and mix well.
- Finish with sesame seeds.
Equipment for This Recipe:
- Pot
- Mixing bowl
- Whisk or fork
- Colander
How to Serve This Dish:
Serve cold or room temperature. If you want more substance, add chickpeas, tofu, or a leftover chicken breast.
Pro Tips for This Recipe:
- Rinse noodles well: It keeps them from clumping.
- Add sauce gradually: You may not need all of it.
- Use cabbage instead of lettuce: It holds up much longer.
Variations on This Dish:
- Spicy Peanut Salad: Add chili oil.
- Lime Sesame Noodles: Swap vinegar for lime.
- Crunchy Version: Top with peanuts.
Common Mistakes to Avoid with This Dish:
- Sauce too thick: Thin it with water, one spoonful at a time.
- Using soggy greens: Cabbage is the better choice.
- Underseasoning cold noodles: They need more salt than you expect.
27. Stuffed Sweet Potato with Black Beans
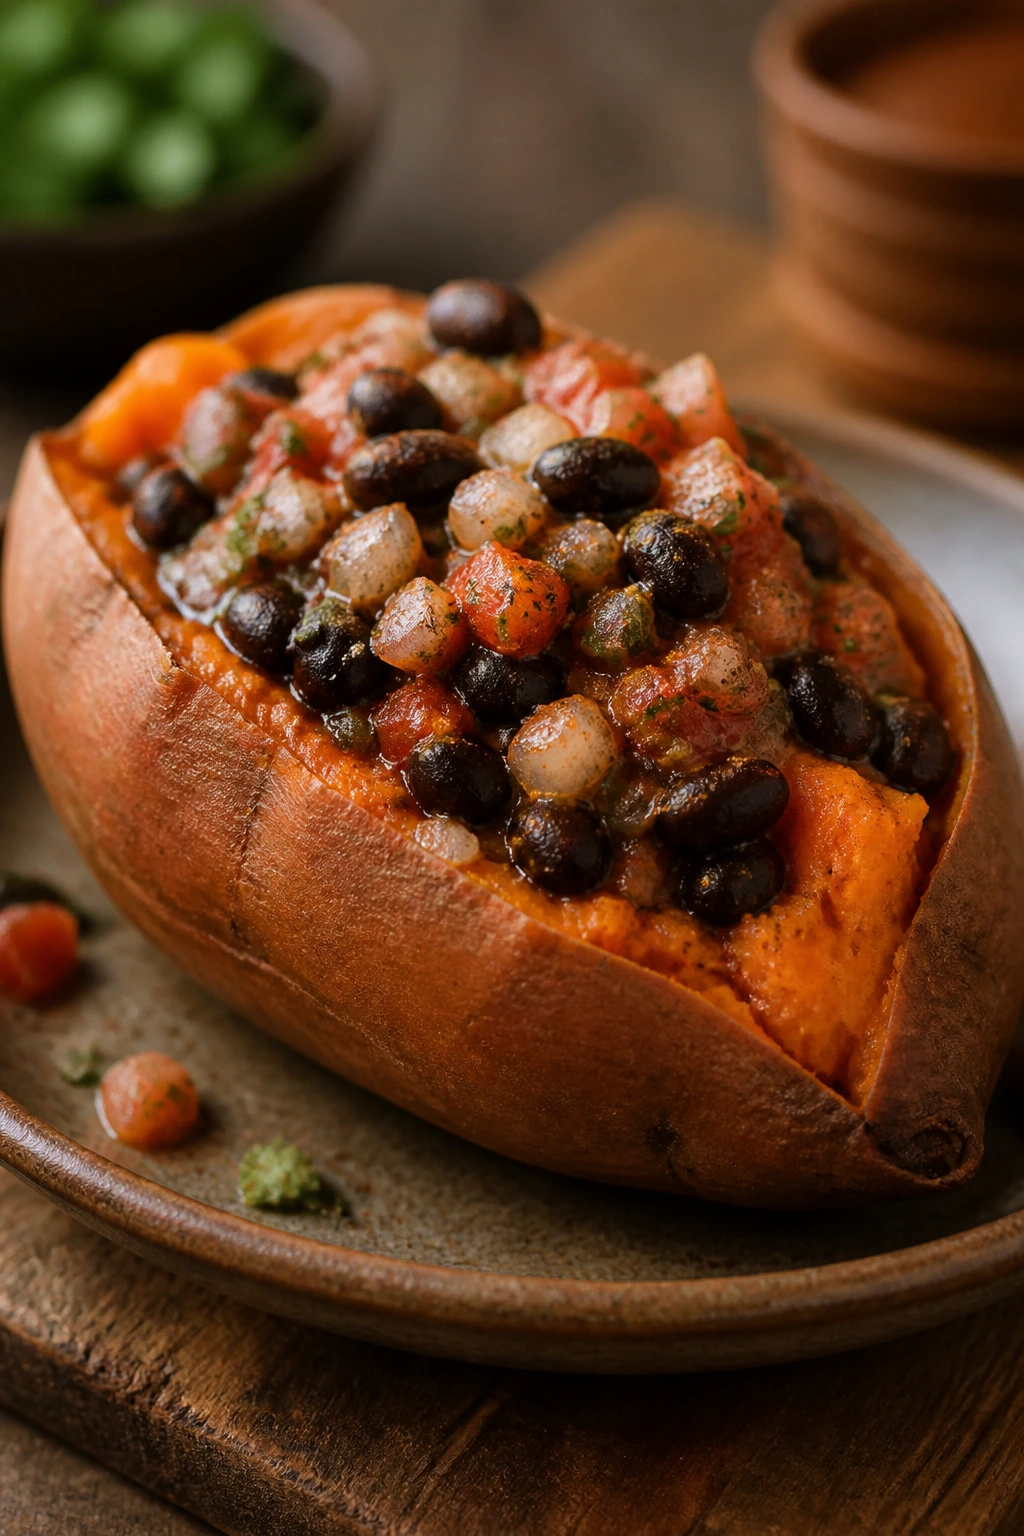
A baked sweet potato from the pantry-and-fridge crossover zone can still count here, and it makes a very forgiving lunch. The sweet flesh, salty beans, and smoky spices are a clean fit.
Why It Works:
Sweet potatoes bring their own soft texture and natural sweetness, so the black beans don’t need much help. A little cumin and salsa keep the whole thing from tasting one-note.
Key Ingredients:
- 1 large sweet potato
- 1 can (15 oz) black beans, rinsed and drained
- 1/2 teaspoon cumin
- 1/4 teaspoon chili powder
- 2 tablespoons salsa
- 1 tablespoon olive oil or butter
- Salt, to taste
- Sour cream or yogurt, optional
Quick Steps:
- Pierce sweet potato and bake at 400°F until tender, about 40 minutes, or microwave until soft.
- Warm black beans with cumin, chili powder, and salt.
- Split the potato open.
- Fill with beans and salsa.
- Top with sour cream or yogurt if using.
Equipment for This Recipe:
- Baking sheet or microwave-safe plate
- Fork
- Small saucepan
- Knife
How to Serve This Dish:
Serve straight from the skin with a fork. A simple green salad or some sliced cucumbers keeps it from feeling too soft overall.
Pro Tips for This Recipe:
- Cook the potato until truly soft: A firm center ruins the texture.
- Warm the beans before filling: It makes the whole dish better.
- Salt the potato flesh lightly: Sweet potatoes need seasoning.
Variations on This Dish:
- Mediterranean Version: Use chickpeas and tahini.
- Loaded Version: Add cheese and scallions.
- Spicy Salsa Potato: Use a hotter salsa.
Common Mistakes to Avoid with This Recipe:
- Underbaking the potato: It should yield easily to a fork.
- Using cold beans: They dull the heat and texture.
- Skipping seasoning: The filling needs salt to balance the sweetness.
28. Olive, Anchovy, and Tomato Toast
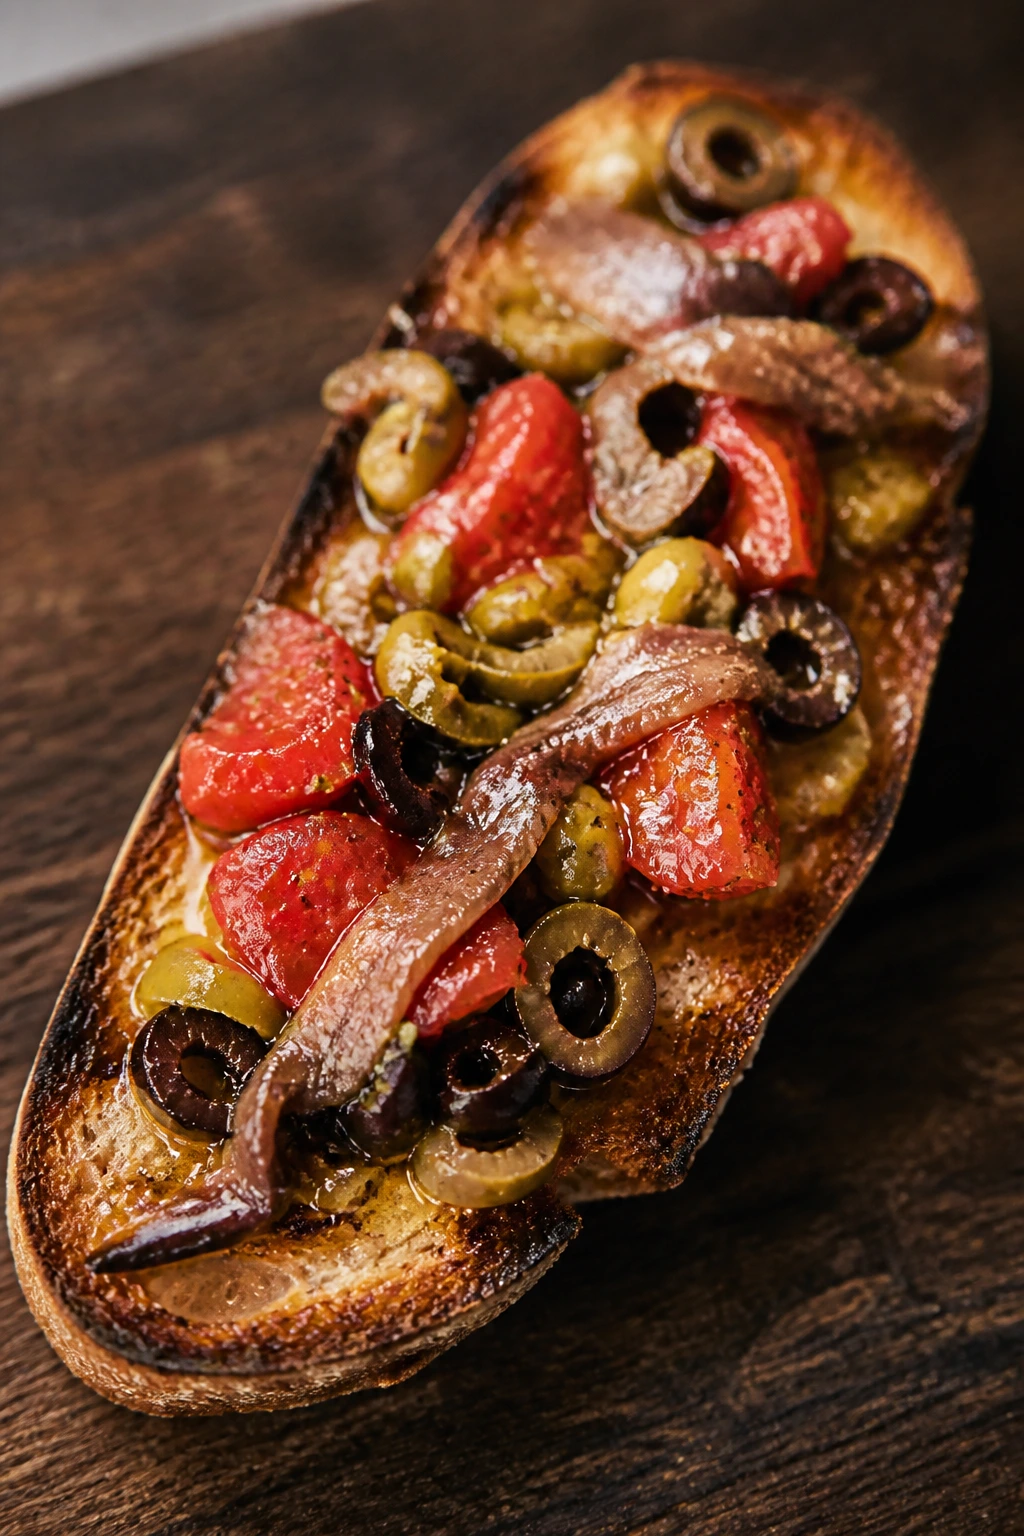
This is the boldest toast in the bunch, and I say that as a compliment. Anchovies melt into the olive oil, olives add brine, tomatoes bring freshness, and the whole thing tastes far more layered than a 10-minute lunch usually does.
Why It Works:
Anchovies don’t taste fishy here; they dissolve and become savory base notes. Olives and tomatoes add contrast, and toasted bread keeps the toppings from turning the lunch into a wet mess.
Key Ingredients:
- 2 slices sturdy bread
- 1 tablespoon olive oil
- 2 anchovy fillets
- 1 small tomato, chopped
- 2 tablespoons chopped olives
- 1 teaspoon lemon juice
- Black pepper, to taste
- Parsley, optional
Quick Steps:
- Toast the bread until crisp.
- Warm olive oil in a small pan and melt anchovies into it.
- Spoon oil onto toast.
- Top with tomato, olives, lemon, and pepper.
- Finish with parsley.
Equipment for This Recipe:
- Small skillet
- Toaster or oven
- Knife
- Spoon
How to Serve This Dish:
Serve open-faced with a salad or a bowl of soup. It’s assertive enough that a plain side works best.
Pro Tips for This Recipe:
- Let the anchovies melt fully: They should disappear into the oil.
- Salt lightly: Olives and anchovies already carry plenty.
- Use good bread: It has to hold the topping and stay crisp.
Variations on This Dish:
- Caper Toast: Swap some olives for capers.
- Garlic Tomato Toast: Rub the bread with raw garlic.
- No-Anchovy Version: Add a little miso to the oil.
Common Mistakes to Avoid with This Dish:
- Using soft sandwich bread: It goes limp fast.
- Too much tomato juice: Drain a little off first.
- Forgetting lemon: The topping needs brightness.
Why Pantry Lunches Work So Well on Busy Days
The best thing about pantry lunches is not that they’re cheap, though they are. It’s that they lower the decision load. You don’t have to build a meal from scratch every time hunger shows up. You just need a few reliable parts: something starchy, something salty, something acidic, and, if you can swing it, something crunchy.
That’s why canned beans and tuna show up so often here. They’re not glamorous. They’re useful. Beans bring bulk, tuna and sardines bring fast protein, pasta and rice act like blank canvases, and pantry sauces — mustard, soy, curry powder, salsa, tomato paste, peanut butter — do the heavy lifting. You end up cooking by contrast, which is a much better way to make lunch than hoping one lonely ingredient can carry the whole thing.
I also think pantry food gets better when you stop waiting for it to become something else. It does not need to impersonate a restaurant meal. A bowl of lentil soup with toast, a chickpea pita with pickles, or a tomato pasta with breadcrumbs is enough. Really. The little upgrades — toasting, mashing, simmering, squeezing lemon over the top — are what make the difference between “I guess this will do” and “I’d make that again.”
Essential Equipment for These Recipes
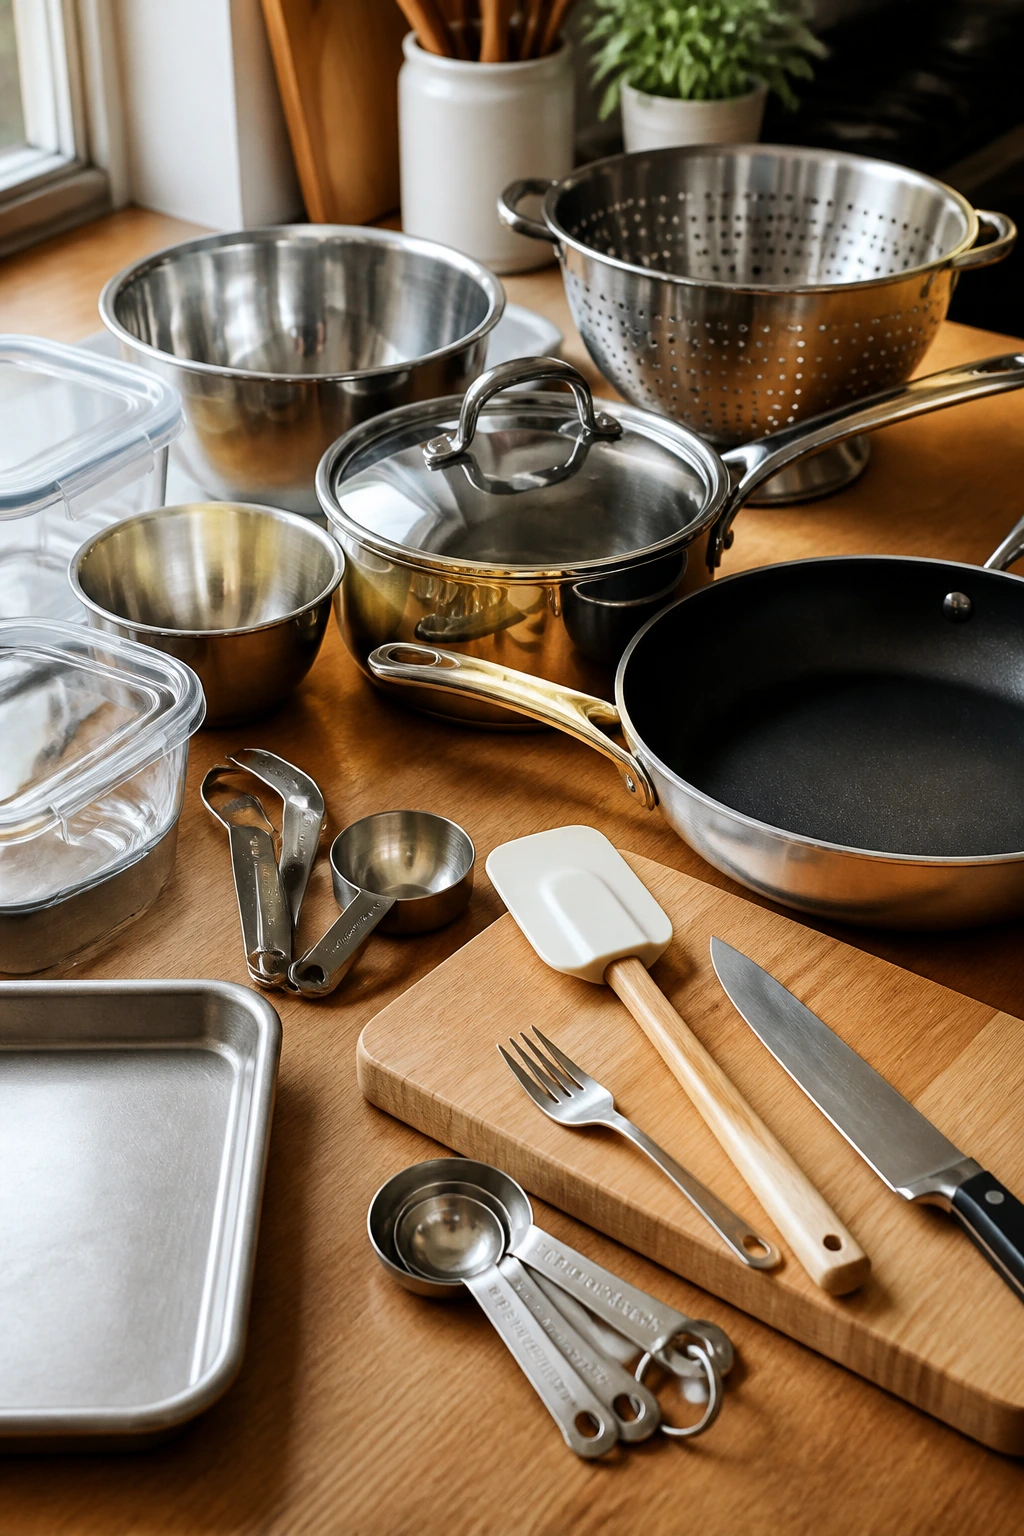
- Medium saucepan: Good for pasta, soups, rice, dal, and quick sauces.
- Large skillet: Useful for quesadillas, toast toppings, fritters, and salmon cakes.
- Mixing bowls: You’ll want at least two; one for wet ingredients and one for assembly.
- Fork or potato masher: Handy for chickpea smash, white bean soup, and tuna mixtures.
- Colander: Essential for draining beans, noodles, and pasta.
- Sheet pan: Needed for nachos, roasting, and toasting bread in batches.
- Spatula: A thin one helps flip quesadillas, fritters, and fish cakes cleanly.
- Knife and cutting board: Scallions, onions, celery, tomatoes, and herbs all depend on them.
- Measuring spoons and cups: Pantry recipes lean on small amounts of acid, spice, and salt.
- Airtight containers: Good for making extra rice, noodles, salad, or soup ahead of time.
Smart Shopping and Ingredient Tips
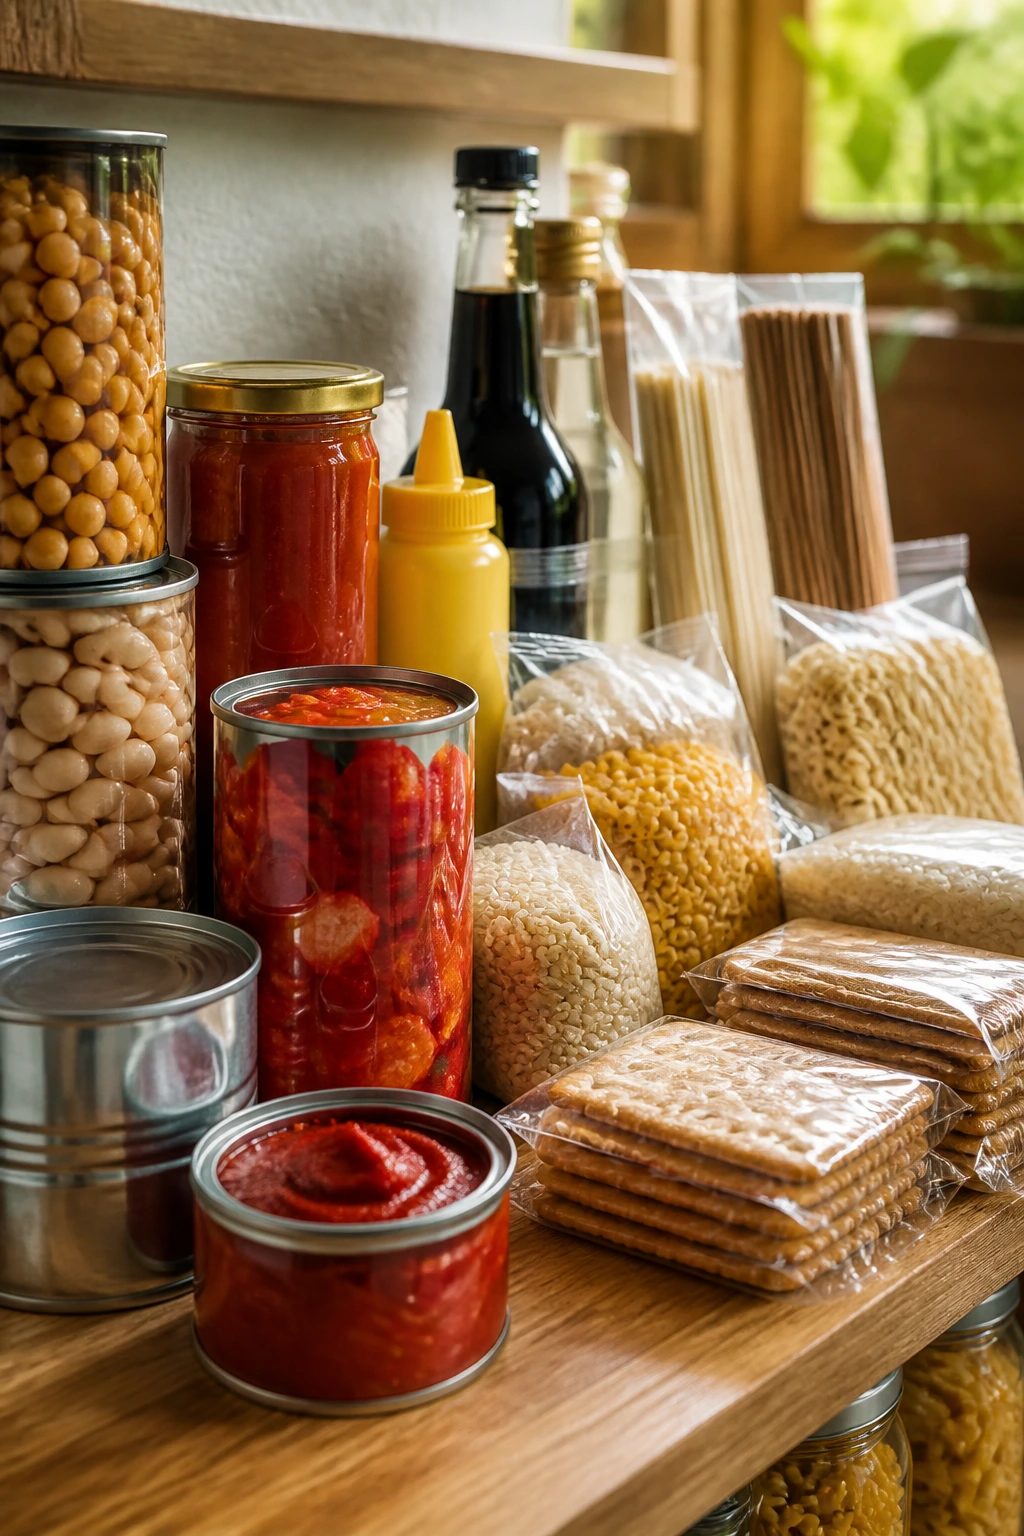
A pantry lunch lives or dies by a few shelf-stable ingredients you’ll actually keep buying. Beans are the obvious workhorse, and I’d keep both chickpeas and white beans around because they behave differently. Chickpeas stay firm and toothsome, while cannellini beans turn soft and creamy, which makes them better for soup or mash.
Canned tomatoes are another place where quality matters more than people admit. Crushed tomatoes are best for pasta and soup when you want a smoother sauce. Diced tomatoes are better when you want visible pieces. Tomato paste belongs in the cart too; a small spoonful deepens nearly every savory lunch here. Same with mustard, soy sauce, and vinegar. They are tiny bottles, but they carry a lot of the flavor load.
For grains, buy what cooks fast. Couscous, quick polenta, small pasta shapes, and rice you’ve already cooked or frozen are all more lunch-friendly than something that takes 45 minutes on the stove. Ramen and soba are useful because they’re fast and adaptable. If you keep tortilla chips, crackers, and a decent loaf of bread on hand, you’ve got crunch covered. That matters more than people think.
How to Serve These Recipes
Presentation:
Pile toast toppings high enough to look intentional, not slathered. For soups and stews, use shallow bowls so the toppings stay visible. Quesadillas and fritters want a clean cut; slice them once and fan them out so the browned edges show.
Accompaniments:
Pickles, olives, chips, sliced cucumbers, tomatoes, cabbage slaw, and simple greens are the easiest side players here. Bread goes with soups and beans. Crackers go with salads and sardines. If a lunch already has a lot of softness, give it something crisp beside it.
Portions:
Most of these recipes make 1 to 2 lunch portions, and that’s on purpose. If you’re scaling up, soups, dal, rice bowls, and pasta all expand cleanly. Toasts, quesadillas, and fritters are better cooked fresh in smaller batches so they keep their texture.
Beverage Pairing:
Sparkling water with lemon works beside almost all of them. I also like iced tea with the sharper lunches — tuna, sardines, tomato pasta — because it cuts through salt and oil without fighting the food.
Additional Tips and Flavor Boosters

Flavor Enhancement:
Keep a few finishers around: lemon juice, vinegar, chili flakes, olive oil, and grated Parmesan. A teaspoon of any one of them at the end can change a lunch more than another spice ever will.
Customization:
If you want more protein, add extra beans, canned fish, tofu, or a soft egg where it fits. For more crunch, top with toasted breadcrumbs, seeds, or crushed chips. For extra freshness, use parsley, scallions, dill, or chopped cucumber.
Serving Suggestions:
A small garnish goes a long way here. Lemon zest on pasta. Scallions on rice bowls. A drizzle of olive oil on soup. A handful of herbs on toast. None of that is fancy. It just makes the lunch look cared for.
Make-It-Yours:
Gluten-free? Use rice, potatoes, polenta, or corn tortillas. Dairy-free? Use olive oil, tahini, or mayo instead of cheese and butter where you can. Lower-sodium? Rinse beans well, choose no-salt-added tomatoes, and lean harder on acid and herbs.
Make-Ahead, Storage, and Reheating Guidance
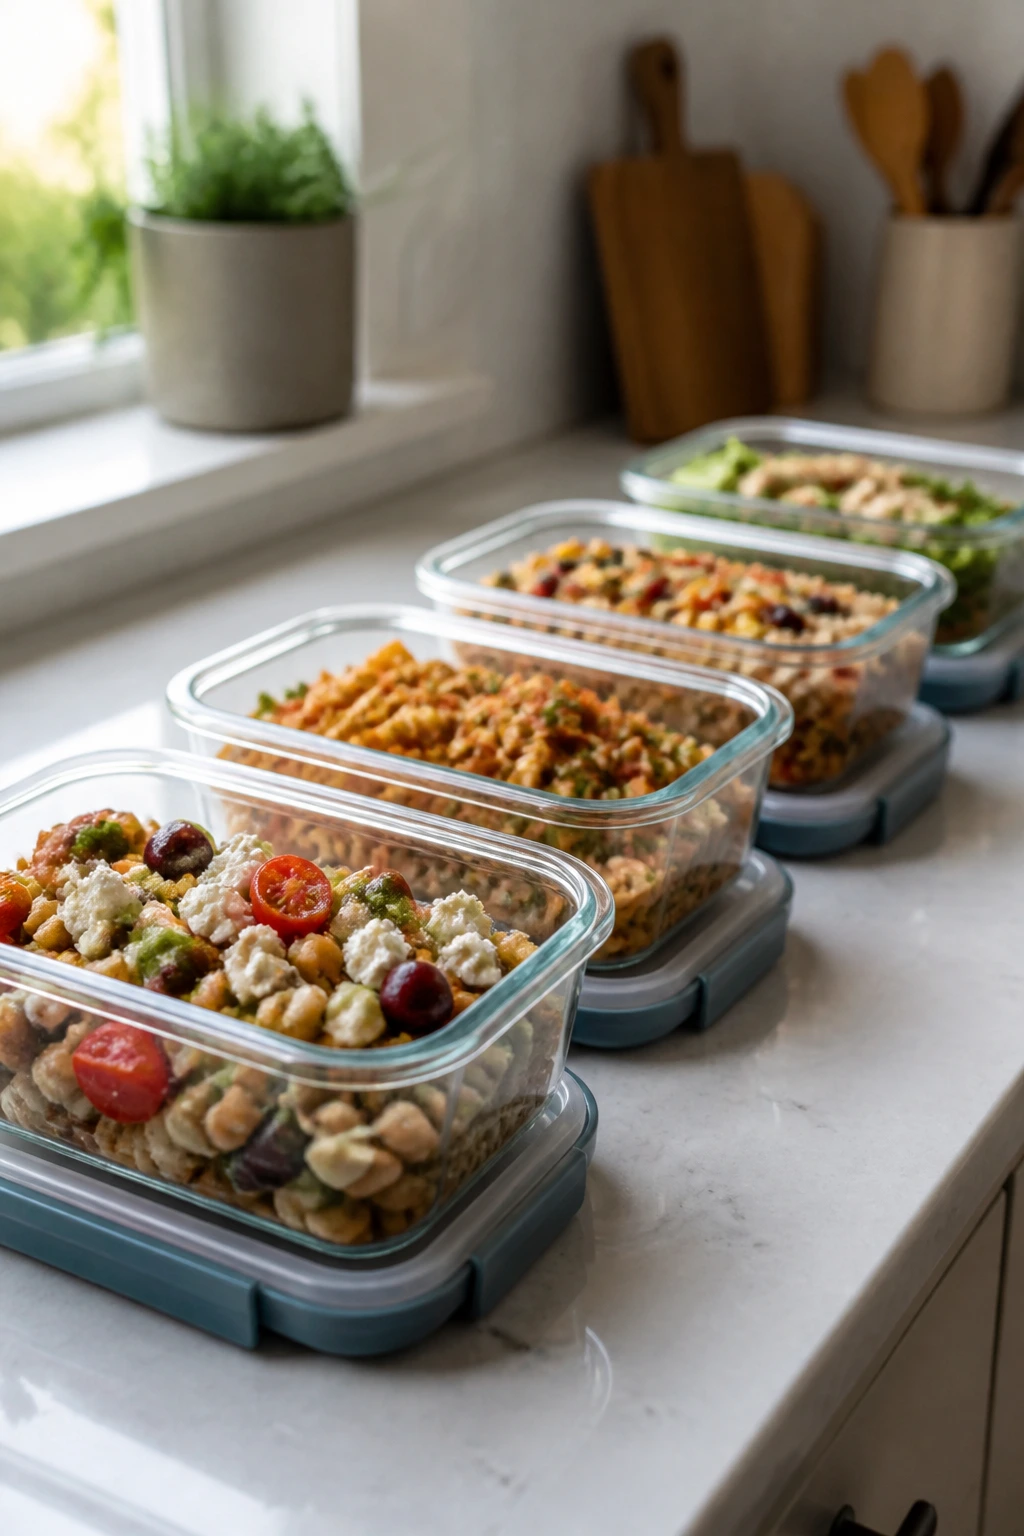
A few of these lunches are best made fresh, but many hold up well if you know what to store separately. Bean salads, couscous bowls, orzo salad, rice and beans, dal, soup, and tomato rice soup all keep in the fridge for 3 to 4 days in airtight containers. Pasta with sauce usually keeps for 3 days, though the texture is best within the first two. Salmon cakes keep 3 days refrigerated and freeze for up to 2 months if wrapped well.
For reheating, soups and dal do best on the stove over medium-low heat with a splash of water or broth. Rice bowls and pasta can go in the microwave, but cover them and add a teaspoon or two of water so they don’t dry out. Quesadillas, fritters, and salmon cakes re-crisp best in a skillet or toaster oven rather than a microwave. That’s not me being fussy. The microwave softens the crust, and the crust is part of the point.
Cold lunches need a little help before serving. Toss noodle salads and couscous bowls after they’ve sat, since grains and noodles absorb dressing over time. Toast and crackers should be assembled at the last second. If you’re packing lunch ahead, store wet and dry components separately and combine them right before eating whenever possible.
Variations and Adaptations to Try
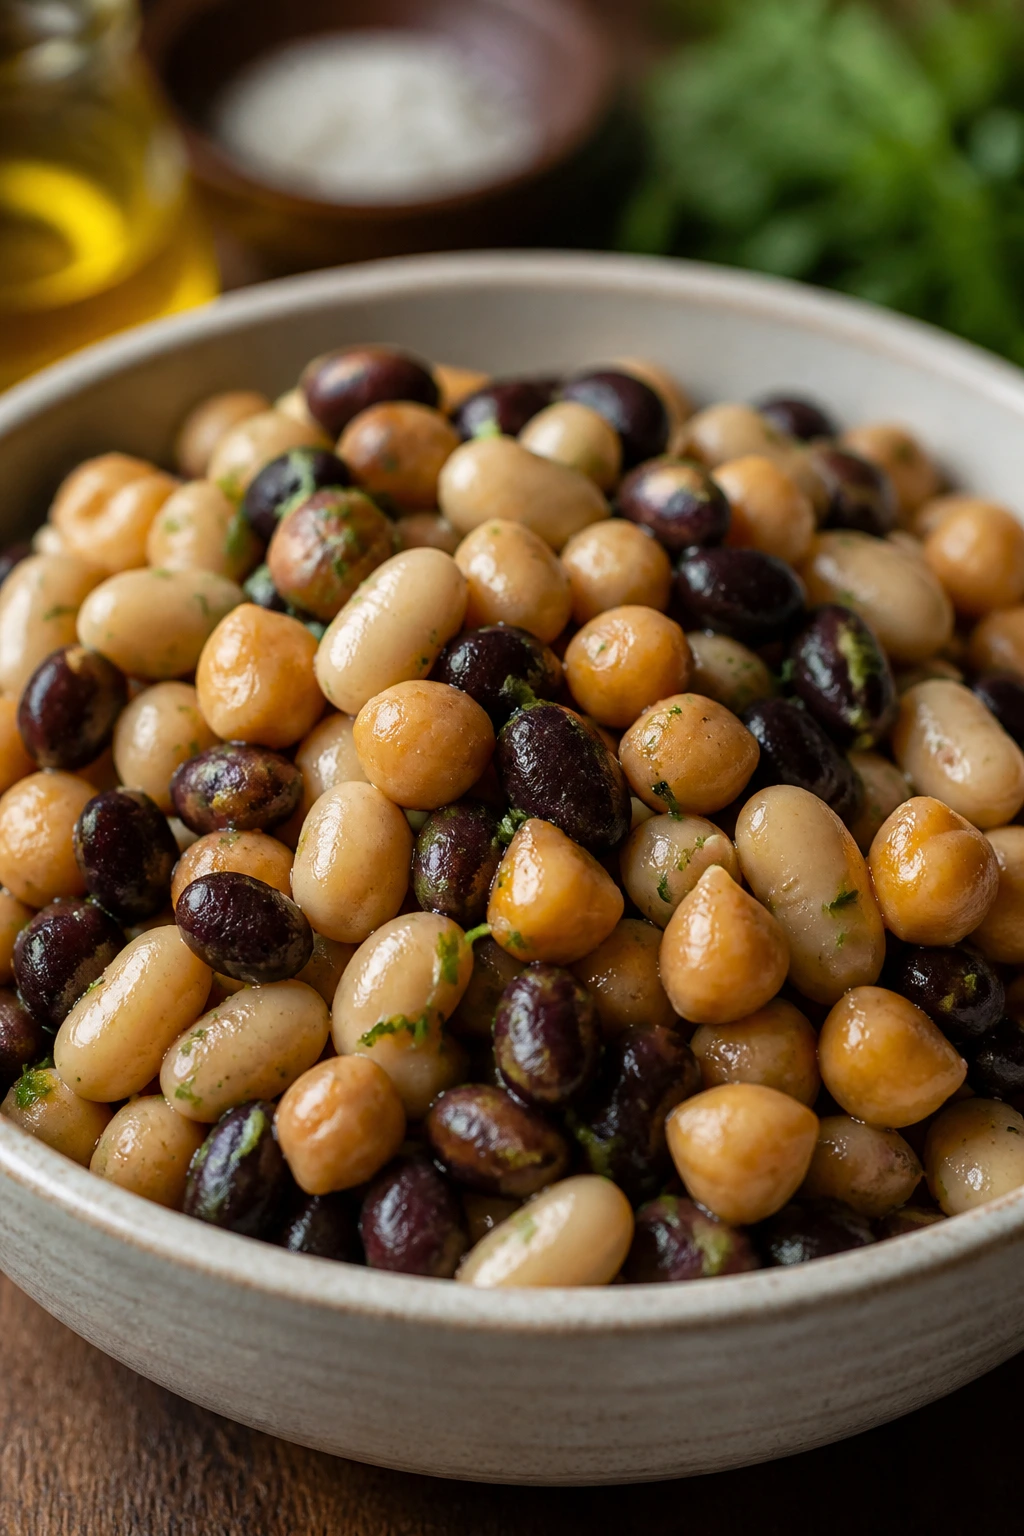
The Bean Swap:
Most bean-based lunches here work with chickpeas, black beans, white beans, or pinto beans. Swap based on what you have, but keep the texture in mind. Chickpeas stay firm. White beans get soft. Black beans bring a darker, earthier taste.
The No-Cook Day:
Tuna salad toast, sardine crackers, curried chickpea wraps, orzo salad, and peanut noodle salad all work without turning on the stove for long. Use leftover rice or pre-cooked noodles if you’ve got them, and keep the assembly parts cold and crisp.
The Hot Lunch Fix:
If you want everything warm, lean into soup, dal, polenta, pasta, or skillet quesadillas. Heat changes the mood fast. A hot bowl makes canned ingredients taste more layered, especially when the seasoning is modest but deliberate.
The Crunch Upgrade:
Breadcrumbs, chips, toasted nuts, sesame seeds, and crackers can save a lunch from becoming too soft. Add crunch right before serving. If you add it early, it loses the point.
The Mild Kid Version:
Skip the chili flakes, reduce the garlic, and lean on cheese, butter, or a little mayo. Kids often care more about texture than spice. Crisp edges, dippable pieces, and small portions matter more than fancy flavor.
The Pantry-plus-Fresh Version:
Add one fresh ingredient to a pantry base: lemon, scallions, herbs, cucumber, celery, or cabbage. That single addition can make a lunch feel brighter without turning it into a grocery-store project.
Common Mistakes to Avoid
The first mistake is not draining ingredients well enough. Wet beans, tuna, tomatoes, or noodles can wreck texture fast. If your salad looks a little too loose before it hits the bread or tortilla, it will be worse five minutes later. Let the colander do its job.
The second is underseasoning canned food. Canned ingredients are practical, not magically flavorful. They need salt, acid, herbs, or spice to come alive. Taste beans after rinsing. Taste tomato sauce after simmering. Taste the chickpea mash before stuffing the pita. A bland pantry lunch usually needs another pinch of salt, a squeeze of lemon, or a little mustard.
The third is overcomplicating the lunch with too many ingredients that all do the same thing. Three soft things together are still soft. Two acidic things together can taste harsh. What usually works better is one base, one main protein or bean, one sharp element, and one texture change. That’s enough.
The fourth is skipping the final heat check. Quesadillas, fritters, salmon cakes, and toasted bread all depend on controlled browning. Too hot, and the outside burns while the middle stays cold. Too low, and you get pale food with no personality. Medium heat is boring advice because it works.
The fifth is treating make-ahead food the same way you’d treat fresh food. Some lunches improve after a rest. Others collapse. Noodle salads, soups, rice bowls, and bean salads can sit. Toast, chips, and cracker toppings cannot. Keep the crunchy parts separate and everyone’s happier.
Frequently Asked Questions
Can I use dried beans instead of canned beans?
Yes, if you already have cooked beans on hand. For lunch, though, canned beans are faster and more predictable. If you use dried beans, cook a batch ahead and portion them into containers so the actual lunch stays quick.
What pantry ingredients give the most flavor for the least money?
Mustard, soy sauce, tomato paste, vinegar, curry powder, chili flakes, and canned tomatoes pull a lot of weight. They’re small, cheap additions that change the whole dish. If you keep just a few of them around, your lunches stop tasting repetitive.
How do I keep toast, chips, or crackers from getting soggy?
Assemble at the last second. Store wet fillings separately and spoon them on right before eating. If you’re packing lunch, put the toast or chips in one container and the topping in another. That simple split saves the texture.
Can these lunches be made vegetarian or vegan?
Most of them already are, or can be with very small swaps. Use olive oil instead of butter, tahini or mayo substitutes where needed, and skip fish or cheese when the recipe allows it. Beans, lentils, rice, pasta, and noodles carry a lot of these lunches on their own.
What if my pantry lunch tastes flat?
Add salt first, then acid. Lemon juice, vinegar, pickle brine, or a spoonful of mustard usually fixes a flat bowl faster than more spice does. If it still tastes dull, the issue is often texture, so add something crisp or toasted.
Are these good for packed lunches?
Many of them are. Bean salads, couscous bowls, orzo salad, peanut noodles, lentil soup, and rice dishes travel well. Keep bread, chips, and crackers separate until you’re ready to eat, or they’ll lose their edge.
Can I make larger batches and eat them over a few days?
Absolutely, especially for soups, dal, rice bowls, and pasta salads. Quesadillas, fritters, and toast toppings are best cooked in smaller batches, but the fillings can often be made ahead. Store them in airtight containers and reheat gently.
What’s the fastest lunch on the list?
Tuna toast, sardine crackers, and chickpea smash pitas are probably the quickest because they need almost no cooking. If you already have cooked rice or pasta, the bowls and salads move fast too. Speed depends more on what’s prepped than on the recipe itself.
A Better Pantry Shelf
The nicest thing about pantry lunch cooking is that it makes your shelves feel useful instead of decorative. A can of beans, a jar of mustard, a box of noodles, a tin of fish, a bag of rice — none of that looks glamorous on its own. Together, they turn into lunch that’s fast, cheap, and not remotely boring.
Once you get used to building meals from what you already have, lunch stops being a daily puzzle. It becomes a small, repeatable habit. And that’s the real win: fewer last-minute grocery runs, fewer limp sandwiches, and a lot more meals that taste like someone paid attention.