
Some weeknights, the stove can stay cold.
That’s not a cop-out. It’s a relief. When you’ve got homework spread across the table, a work call running late, and one tired brain that does not want to babysit a skillet, no-cook meals are the move. A good rotisserie chicken, a sharp knife, a jar of mustard, a bag of greens, and one decent loaf or cracker box can build dinner faster than any recipe that asks you to preheat anything.
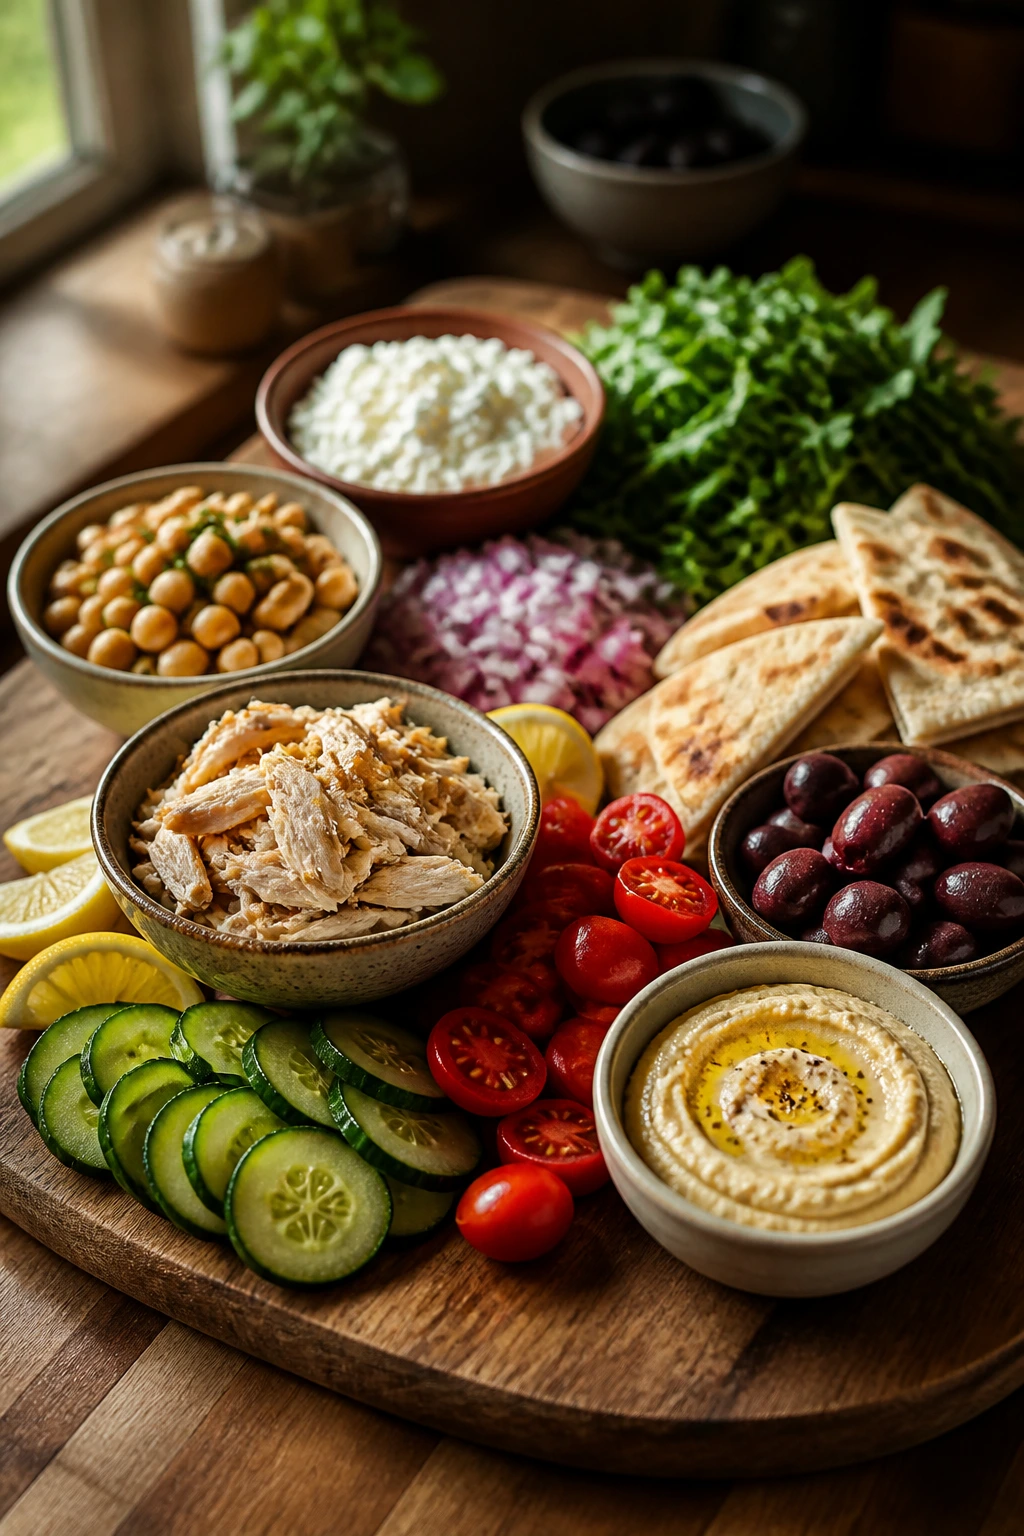
I’ve always liked these dinners for a simple reason: they’re honest. They don’t pretend to be fussy. They are built out of cold shrimp, canned beans, deli meat, hummus, cheese, herbs, and the stuff hiding in the back of the fridge that still has a job left in it. If you shop with a little care, you can keep them cheap, filling, and varied enough that nobody starts staring at the same wrap for the third night in a row.
So when the evening goes sideways, you still eat well. You just do it with less heat, less mess, and less drama.
Why These No-Cook Dinners Earn Their Keep
-
Fast assembly: Most of these land in 10 to 15 minutes, and the hardest part is usually slicing cucumbers without making them skate across the cutting board.
-
Budget control: A few staples — canned tuna, chickpeas, deli turkey, hummus, and bagged slaw — stretch farther than a takeout order and let you spend the money where it matters.
-
Low cleanup: Several meals here use one knife, one bowl, and one plate. That matters when the sink already looks full.
-
Flexible protein: Rotisserie chicken, beans, tuna, shrimp, and cheese all work in different combinations, so you can build around what’s already in the fridge.
-
Cold food, full dinner: These aren’t sad desk lunches dressed up as supper. When you balance crunch, salt, acid, and protein, a cold plate eats like a real meal.
-
Easy to scale: Make one wrap for one person or lay out a board for four. The math is simple, which is half the joy.
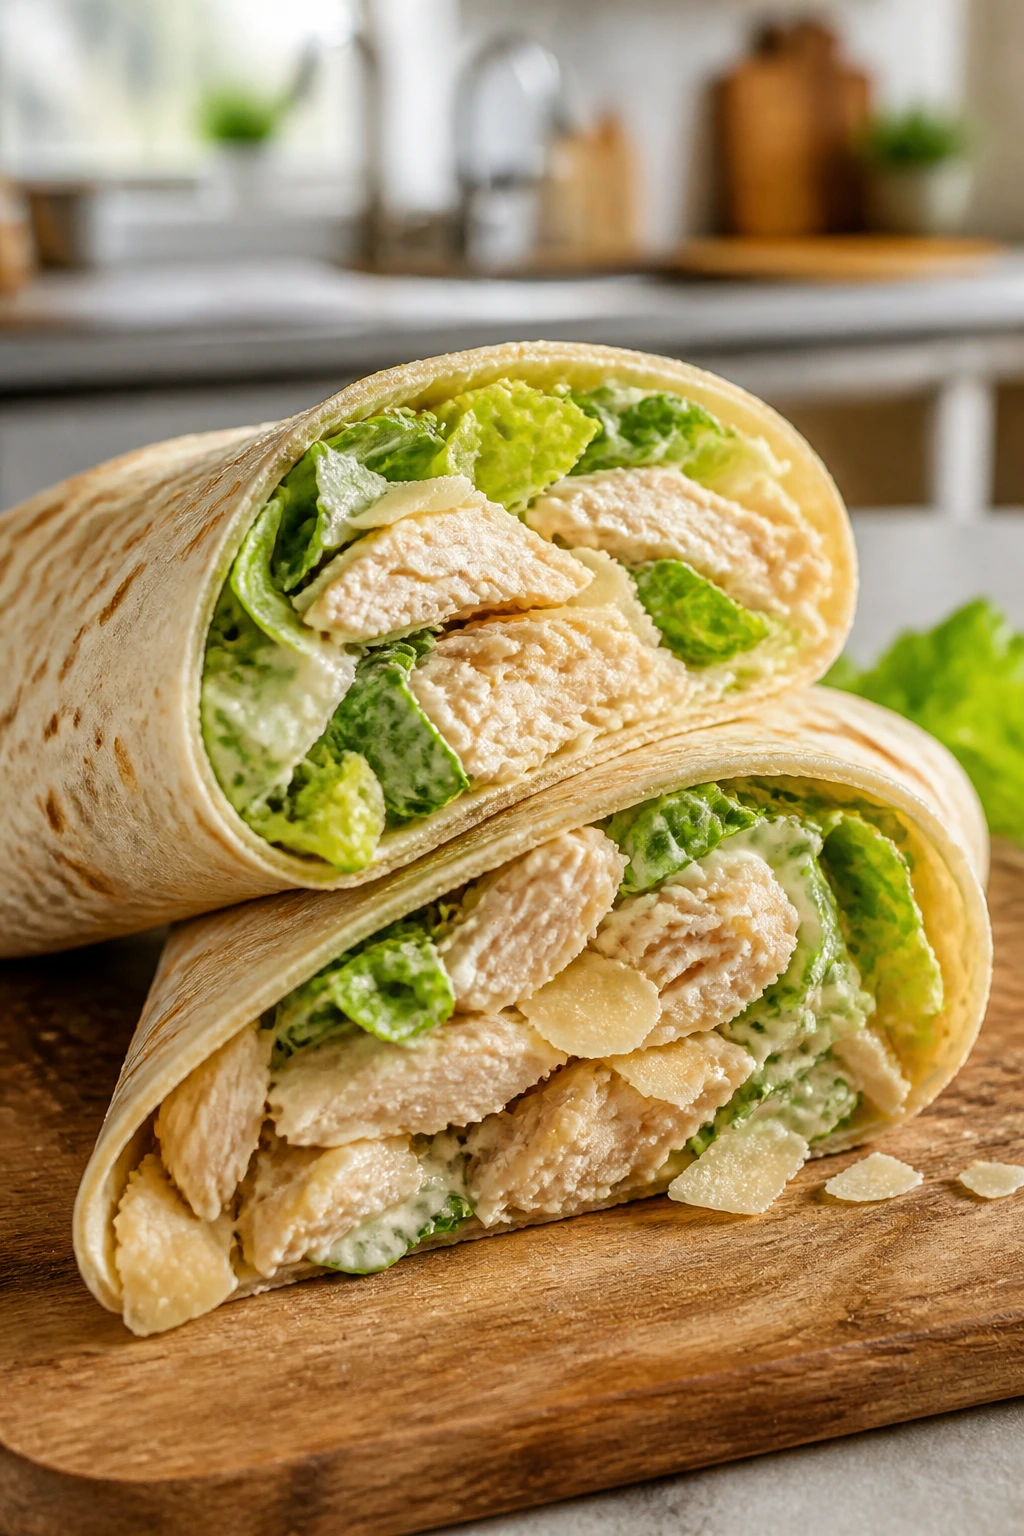
1. Rotisserie Chicken Caesar Wraps
Intro:
This is the kind of wrap that saves you when the clock is loud and the fridge is almost empty. Shredded chicken, crisp romaine, shaved Parmesan, and Caesar dressing make a salty, cool filling that tastes much better than the effort suggests.
Why It Works:
Rotisserie chicken brings built-in seasoning, so you do not have to start from scratch. The Caesar dressing coats the lettuce just enough to cling without turning it limp, and the Parmesan gives every bite a sharp little bite at the end. Use a sturdy tortilla so the filling doesn’t leak at the seam.
Key Ingredients:
- 2 cups shredded rotisserie chicken
- 2 cups chopped romaine lettuce
- 3 tablespoons Caesar dressing
- 1/4 cup shaved Parmesan
- 2 large flour tortillas, 10-inch
Quick Steps:
- Lay the tortillas flat and spread 1 1/2 tablespoons Caesar dressing over each one.
- Toss the chicken, romaine, and Parmesan in a bowl until lightly coated.
- Divide the filling between the tortillas and keep it in a loose line across the center.
- Fold in the sides, roll tightly, and slice on a sharp diagonal.
- Serve right away so the tortillas stay flexible and the lettuce stays crisp.
Equipment for This Recipe:
- Cutting board
- Sharp chef’s knife
- Medium mixing bowl
How to Serve This Dish:
Cut the wraps into halves and stack them with a handful of kettle chips or grape tomatoes. A cold pickle on the side works better than it should.
Pro Tips for This Recipe:
- Use the thickest part of the rotisserie chicken breast for the cleanest shredding.
- If your dressing is very thick, loosen it with 1 teaspoon lemon juice.
- Keep the filling drier than you think; wet wraps split fast.
Variations on This Dish:
- Spicy Caesar Wrap: Add a spoonful of hot sauce to the dressing and a pinch of black pepper.
- Bacon-Style Upgrade: Stir in 2 tablespoons chopped ready-to-eat bacon bits for a smoky edge.
Common Mistakes to Avoid with This Dish:
- Overstuffing: The wrap tears at the seam. Fix it by using less filling and rolling tighter.
- Too much dressing: The lettuce goes soggy. Start with less and add only if the filling looks dry.
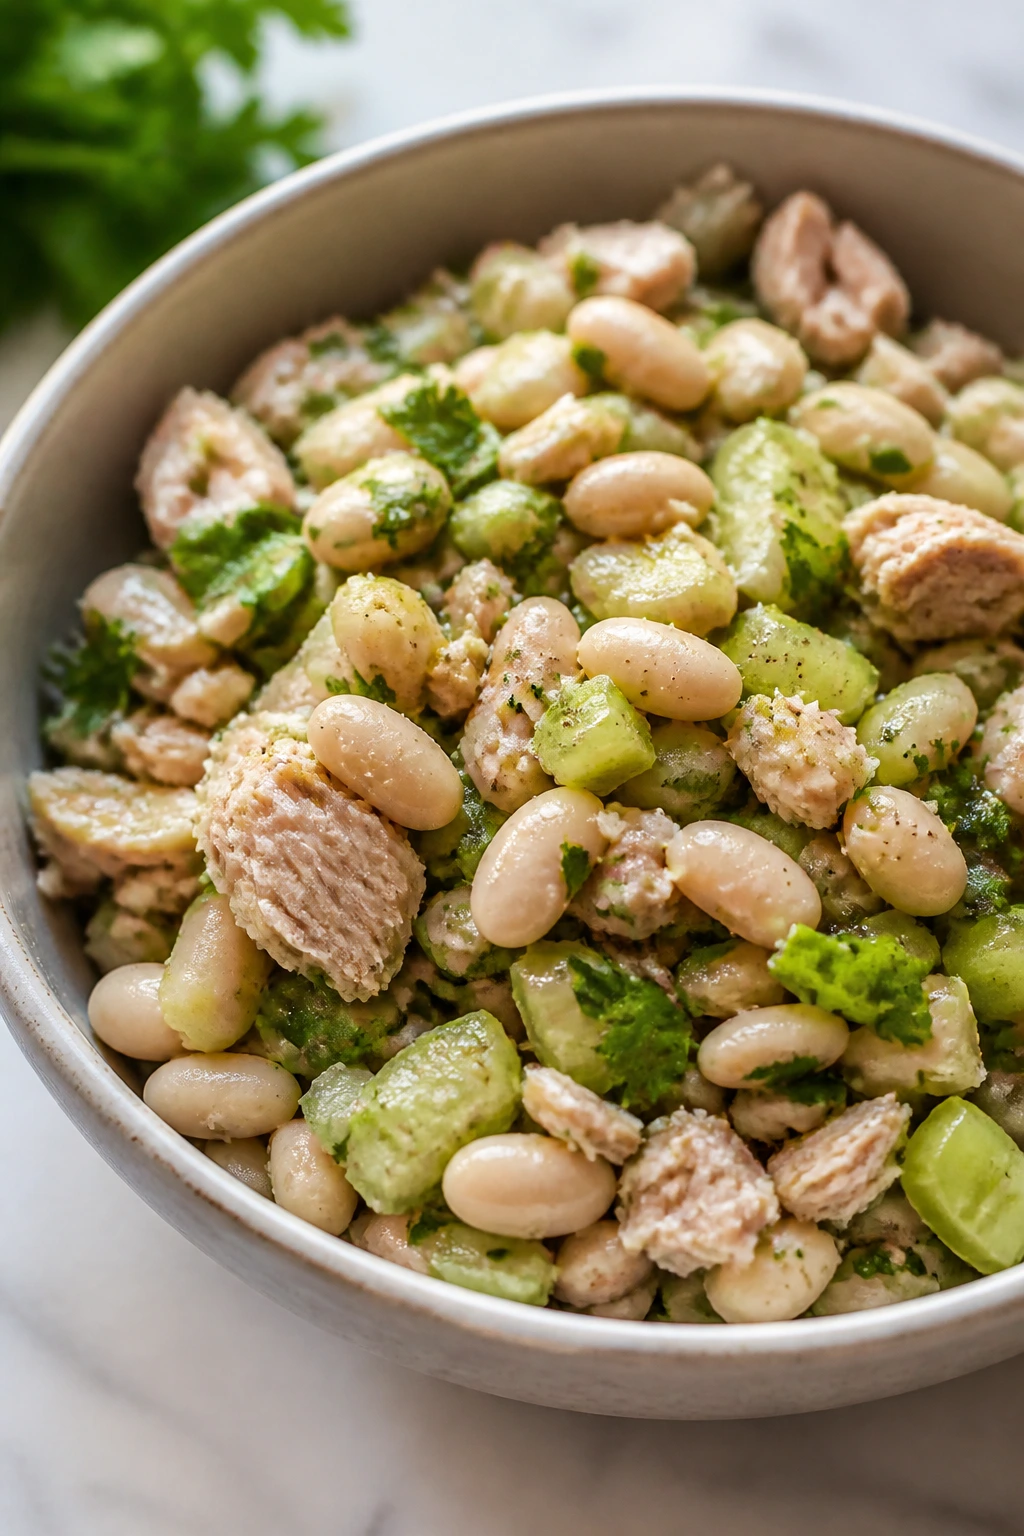
2. Tuna White Bean Salad Bowls
Intro:
Tuna and white beans make a cold dinner that eats bigger than it looks. The beans bring body, the tuna brings salt and protein, and a splash of lemon wakes the whole bowl up.
Why It Works:
Canned white beans give you a soft, creamy base without any cooking, and tuna adds that briny edge that makes the bowl feel complete. Because both ingredients are shelf-stable, this is a strong pantry meal when the produce drawer is looking thin. The celery and herbs keep it from turning heavy.
Key Ingredients:
- 2 cans tuna in water, drained
- 1 can cannellini beans, rinsed and drained
- 1 celery stalk, finely chopped
- 2 tablespoons chopped parsley
- 2 tablespoons olive oil
- 1 tablespoon lemon juice
Quick Steps:
- Drain the tuna well so the bowl does not get watery.
- In a medium bowl, combine tuna, beans, celery, parsley, olive oil, and lemon juice.
- Season with salt and black pepper, then mash a few beans lightly with a fork.
- Spoon into bowls and chill for 5 minutes if you want a firmer texture.
- Serve with crackers, cucumber rounds, or butter lettuce leaves.
Equipment for This Recipe:
- Mixing bowl
- Fork
- Can opener
How to Serve This Dish:
Pile it into shallow bowls and top with extra parsley and cracked pepper. Crackers or cucumber slices turn it from salad into dinner.
Pro Tips for This Recipe:
- Rinse the beans until the water runs clear; it keeps the flavor clean.
- A spoon of capers gives the bowl a bright, salty punch.
- If the tuna is dry, add another teaspoon of olive oil instead of more lemon.
Variations on This Dish:
- Mediterranean Tuna Bowl: Add chopped olives and diced cucumber.
- Creamier Version: Stir in 2 tablespoons plain Greek yogurt for a softer texture.
Common Mistakes to Avoid with This Dish:
- Skipping the bean mash: The salad can feel loose. Mash a few beans to help it cling.
- Using tuna that is still wet: The bowl turns dull and watery. Drain it properly first.
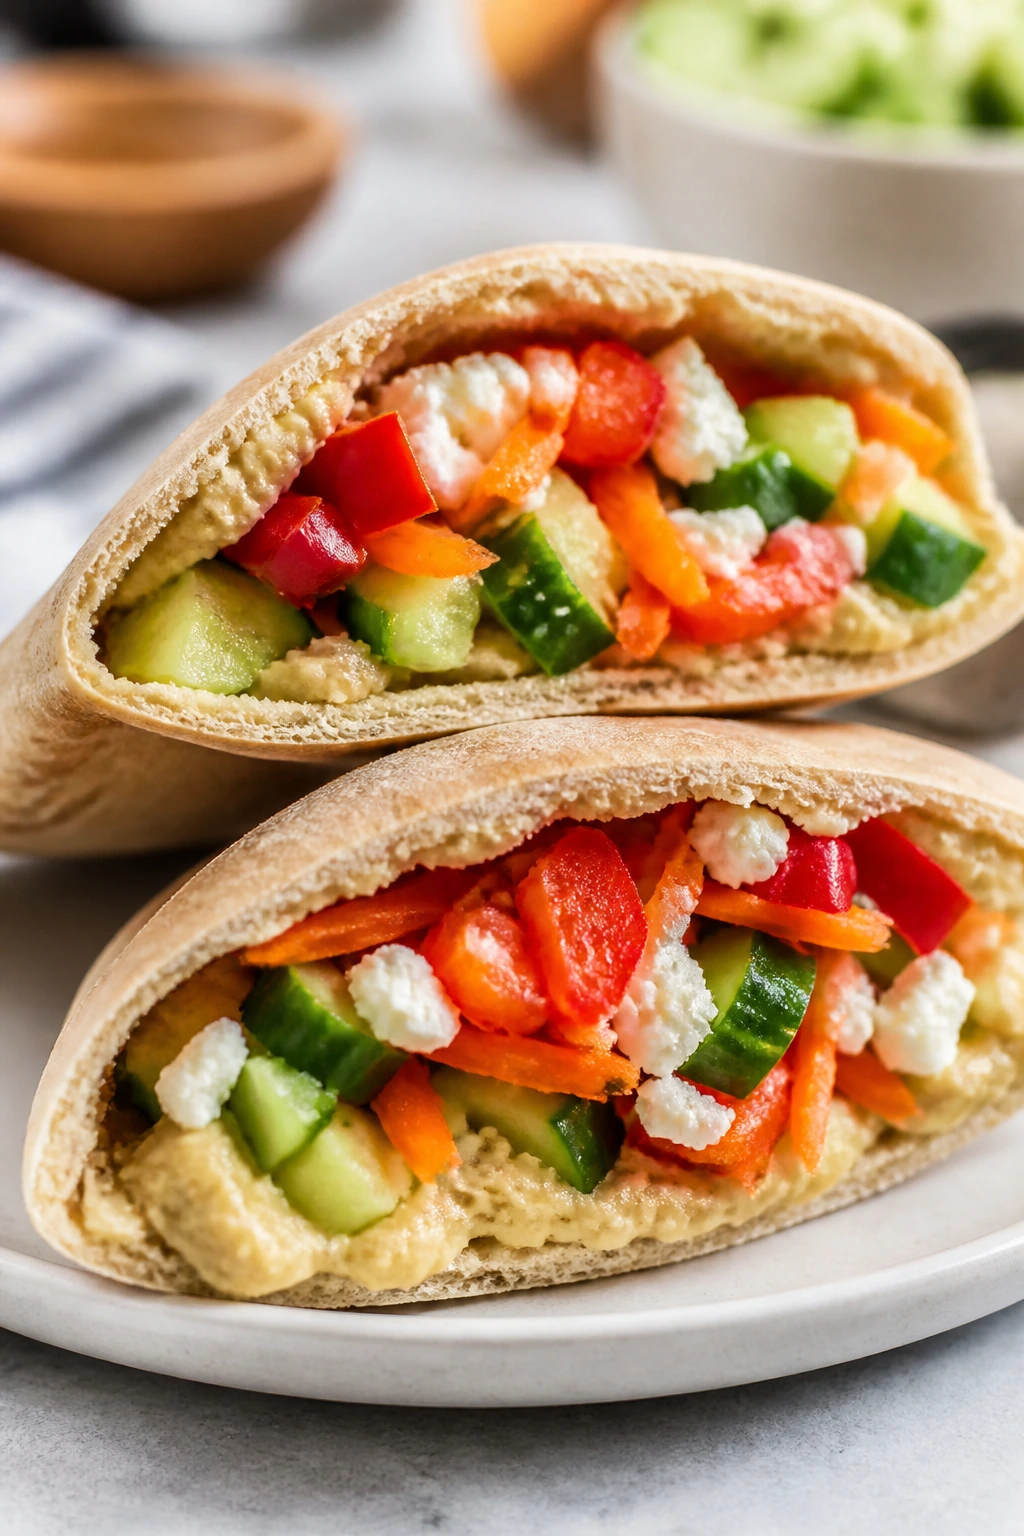
3. Hummus Veggie Pita Pockets
Intro:
Here’s the meal I make when I want something crisp, creamy, and fast enough to finish before the dishwasher hums again. Hummus does the heavy lifting, and the vegetables bring the snap.
Why It Works:
Hummus sticks to the pita and keeps the fillings from sliding to the bottom. Crunchy vegetables like cucumber, shredded carrot, and bell pepper give the pocket structure, so every bite feels built, not piled. It also holds up well if you need to pack it for later.
Key Ingredients:
- 2 whole pita rounds
- 1/2 cup hummus
- 1/2 cup shredded carrot
- 1/2 cup sliced cucumber
- 1/2 cup sliced bell pepper
- 2 tablespoons crumbled feta
Quick Steps:
- Cut each pita in half to create pockets.
- Spread 1/4 cup hummus inside each pita half.
- Fill with carrot, cucumber, bell pepper, and feta.
- Press the fillings gently so they settle into the pocket.
- Serve immediately or wrap tightly for a short carry-along meal.
Equipment for This Recipe:
- Knife
- Cutting board
- Small spoon
How to Serve This Dish:
Set the pita halves on a plate with olives and a few cherry tomatoes. A handful of kettle chips on the side makes this feel like a full dinner.
Pro Tips for This Recipe:
- Pat the cucumber dry so the pita doesn’t soften too quickly.
- Use thicker hummus if you want the fillings to stay put.
- Warm the pita only if you want to, but it is not required.
Variations on This Dish:
- Greek Market Pita: Add chopped tomato and a little oregano.
- Tahini Version: Swap hummus for tahini-lemon spread and add chickpeas.
Common Mistakes to Avoid with This Dish:
- Overfilling the pita: It splits at the bottom. Keep the layers thin.
- Wet vegetables: They turn the bread soggy. Dry them before assembling.
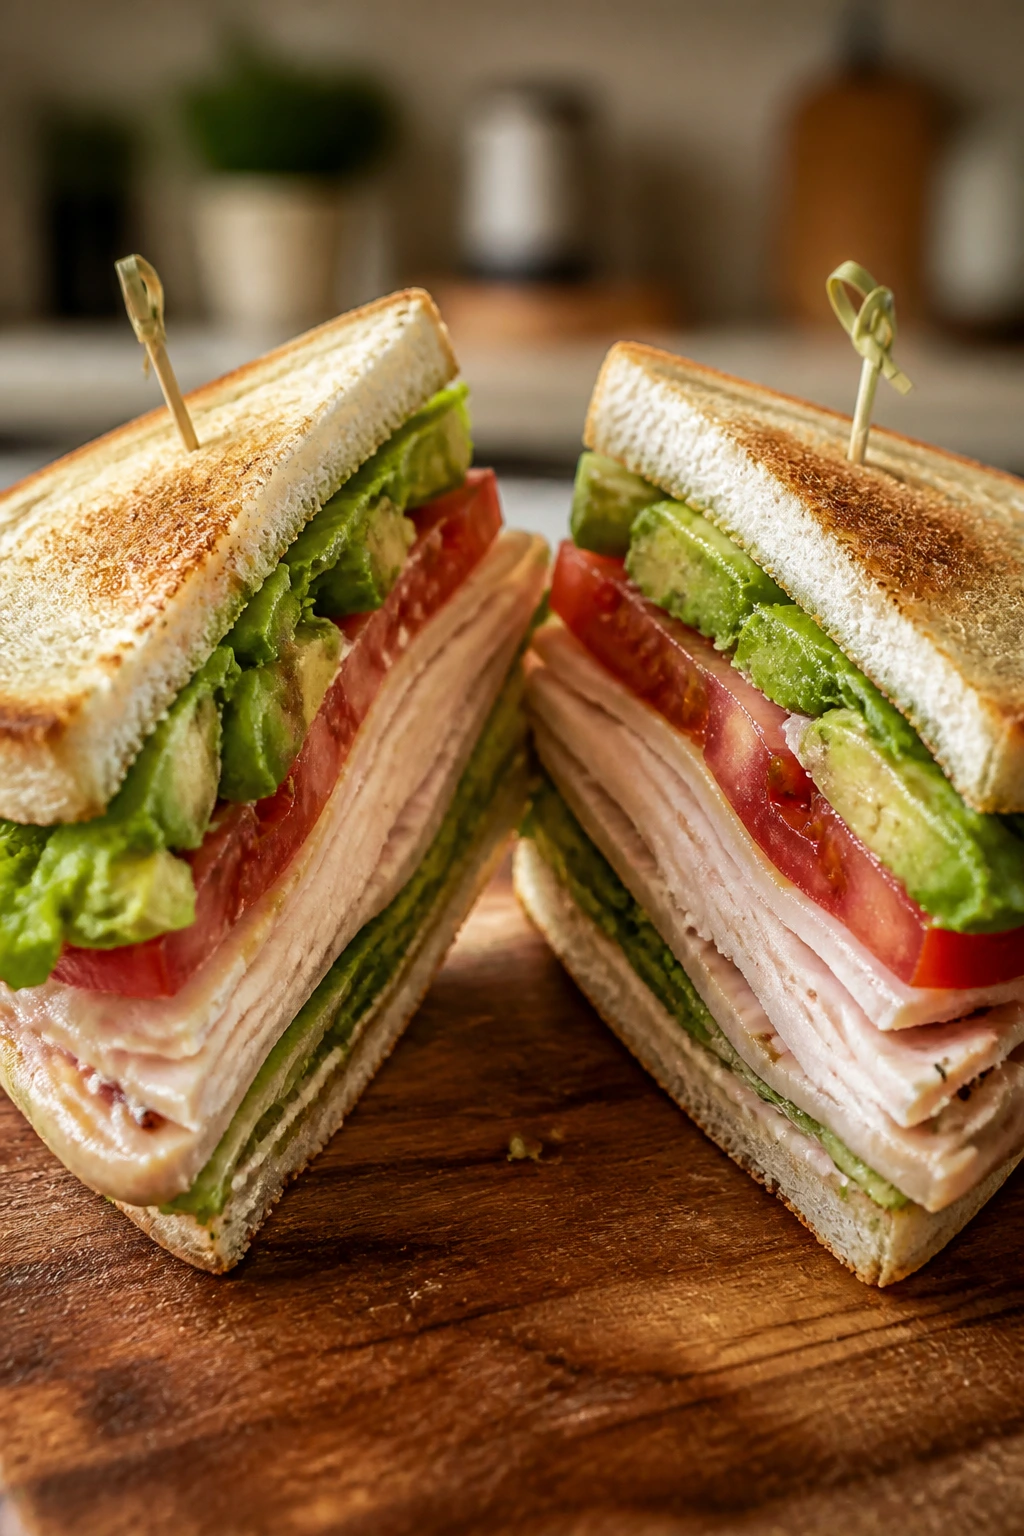
4. Turkey Avocado Club Sandwiches
Intro:
This is the sandwich that tastes like effort even when you did almost nothing. Turkey, avocado, tomato, and crisp lettuce give you the classic club feel without a single pan in sight.
Why It Works:
Turkey brings lean protein, avocado adds richness, and tomato keeps the sandwich from tasting flat. A little mayo or mustard on the bread keeps the slices from drying out, and that matters more than people admit. Thick sandwich bread holds the filling better than flimsy sandwich thins.
Key Ingredients:
- 6 slices sandwich bread
- 8 ounces deli turkey
- 1 ripe avocado, sliced
- 1 tomato, sliced
- 3 lettuce leaves
- 2 tablespoons mayo or mustard
Quick Steps:
- Spread mayo or mustard on all bread slices.
- Layer turkey, avocado, tomato, and lettuce on 3 slices.
- Top with the remaining bread slices and press gently.
- Slice each sandwich in half or quarters.
- Serve right away before the avocado starts to brown.
Equipment for This Recipe:
- Knife
- Cutting board
- Toothpicks, optional for stacking
How to Serve This Dish:
Serve with chips, pickles, or a small bowl of fruit. Quartered triangles on a plate make this look like lunch from a place that cares.
Pro Tips for This Recipe:
- Choose turkey slices that are folded, not paper-thin; they give more bite.
- Sprinkle a little salt on the tomato if it tastes dull.
- If the avocado is soft, slice it last so it stays neat.
Variations on This Dish:
- Bacon Club Shortcut: Add ready-to-eat bacon strips for a saltier version.
- Open-Face Style: Serve on toast if you want fewer carbs and a more casual plate.
Common Mistakes to Avoid with This Dish:
- Using dry bread: The sandwich tastes stale fast. Use bread that still feels soft.
- Adding avocado too early: It browns and softens. Slice it just before assembly.
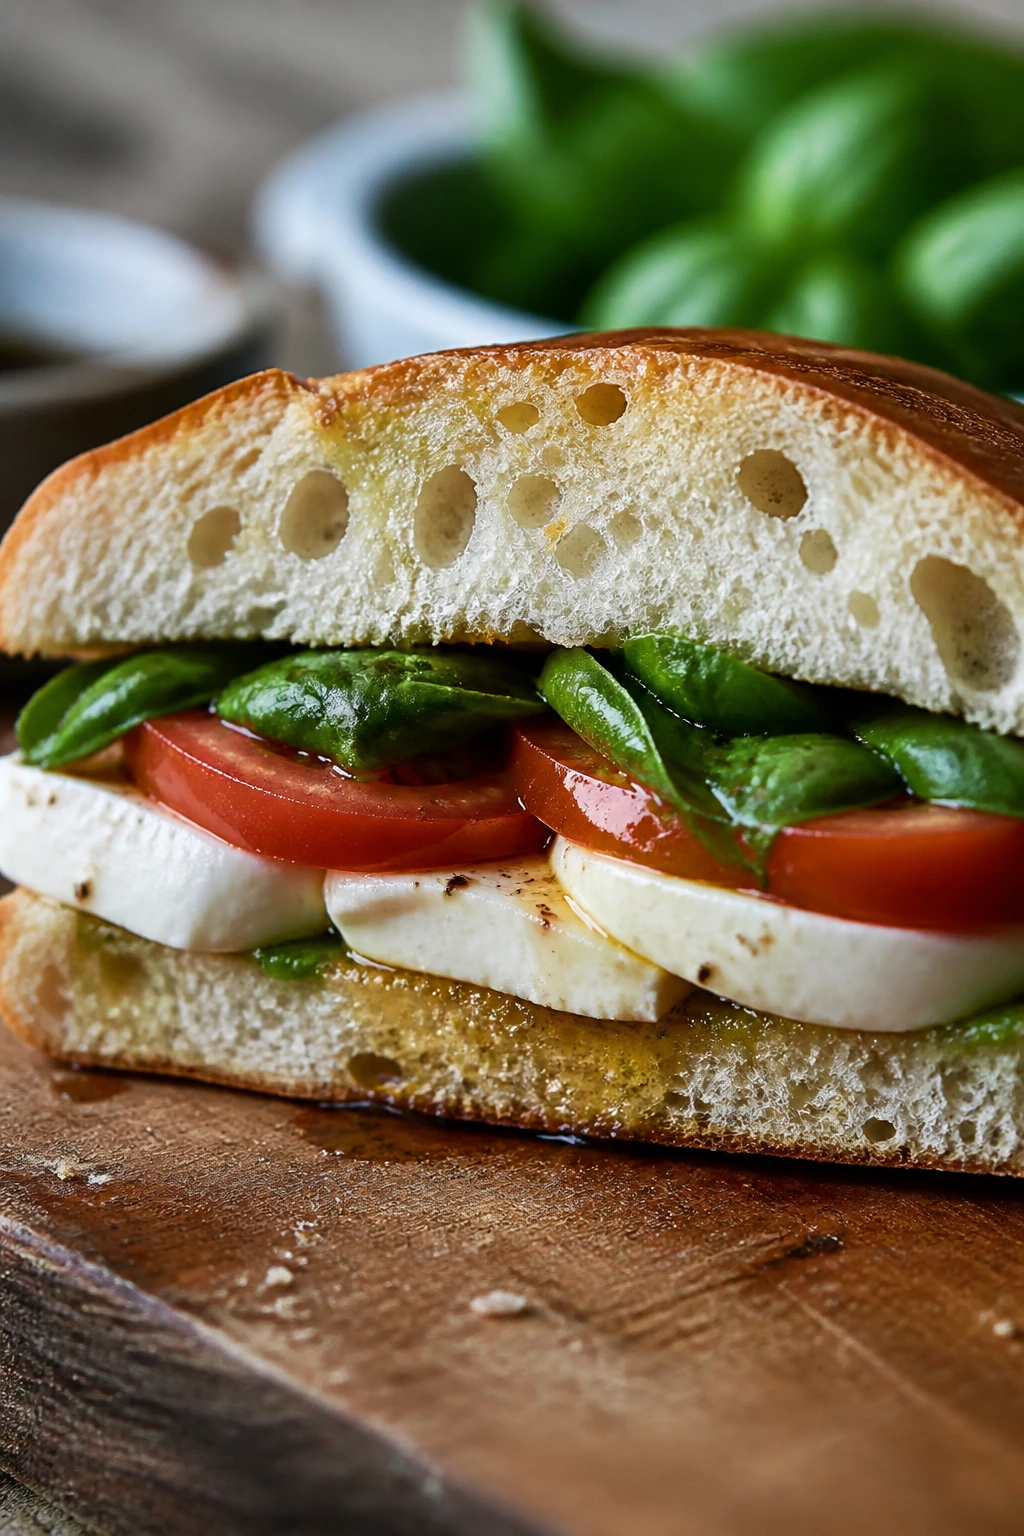
5. Caprese Mozzarella Sandwiches
Intro:
A good Caprese sandwich should taste like summer without trying too hard. Fresh mozzarella, tomato, basil, and a little balsamic do the work here, and the trick is keeping the bread from getting soggy.
Why It Works:
Mozzarella gives a clean, milky bite, while tomato and basil bring brightness and a little perfume. The balsamic cuts through the cheese so the sandwich doesn’t eat like a cold blob. If you use sturdy ciabatta or focaccia, the structure holds better than soft white bread.
Key Ingredients:
- 1 ciabatta roll, split
- 4 ounces fresh mozzarella, sliced
- 1 tomato, sliced
- 6 basil leaves
- 1 tablespoon balsamic glaze
- 1 tablespoon olive oil
Quick Steps:
- Split the bread and drizzle the cut sides with olive oil.
- Layer mozzarella, tomato, and basil on the bottom half.
- Drizzle balsamic glaze over the filling.
- Close the sandwich and press lightly.
- Slice and serve before the tomato juices spread too far.
Equipment for This Recipe:
- Serrated knife
- Cutting board
- Small spoon or squeeze bottle for the glaze
How to Serve This Dish:
Pair it with olives or a simple bagged salad. I like cutting it into thick slabs so the cheese shows at the edge.
Pro Tips for This Recipe:
- Salt the tomato slices lightly and let them sit 2 minutes, then blot.
- Use basil leaves whole; tearing them bruises the edges fast.
- Buy the glaze, or simmer balsamic until syrupy if you have it already on hand.
Variations on This Dish:
- Pesto Caprese: Swap the olive oil for a thin layer of pesto.
- Protein Boost: Add sliced turkey or prosciutto for a fuller dinner.
Common Mistakes to Avoid with This Dish:
- Too much tomato juice: The bread gets wet. Blot the slices first.
- Weak bread: Soft rolls collapse. Use a sturdy loaf.
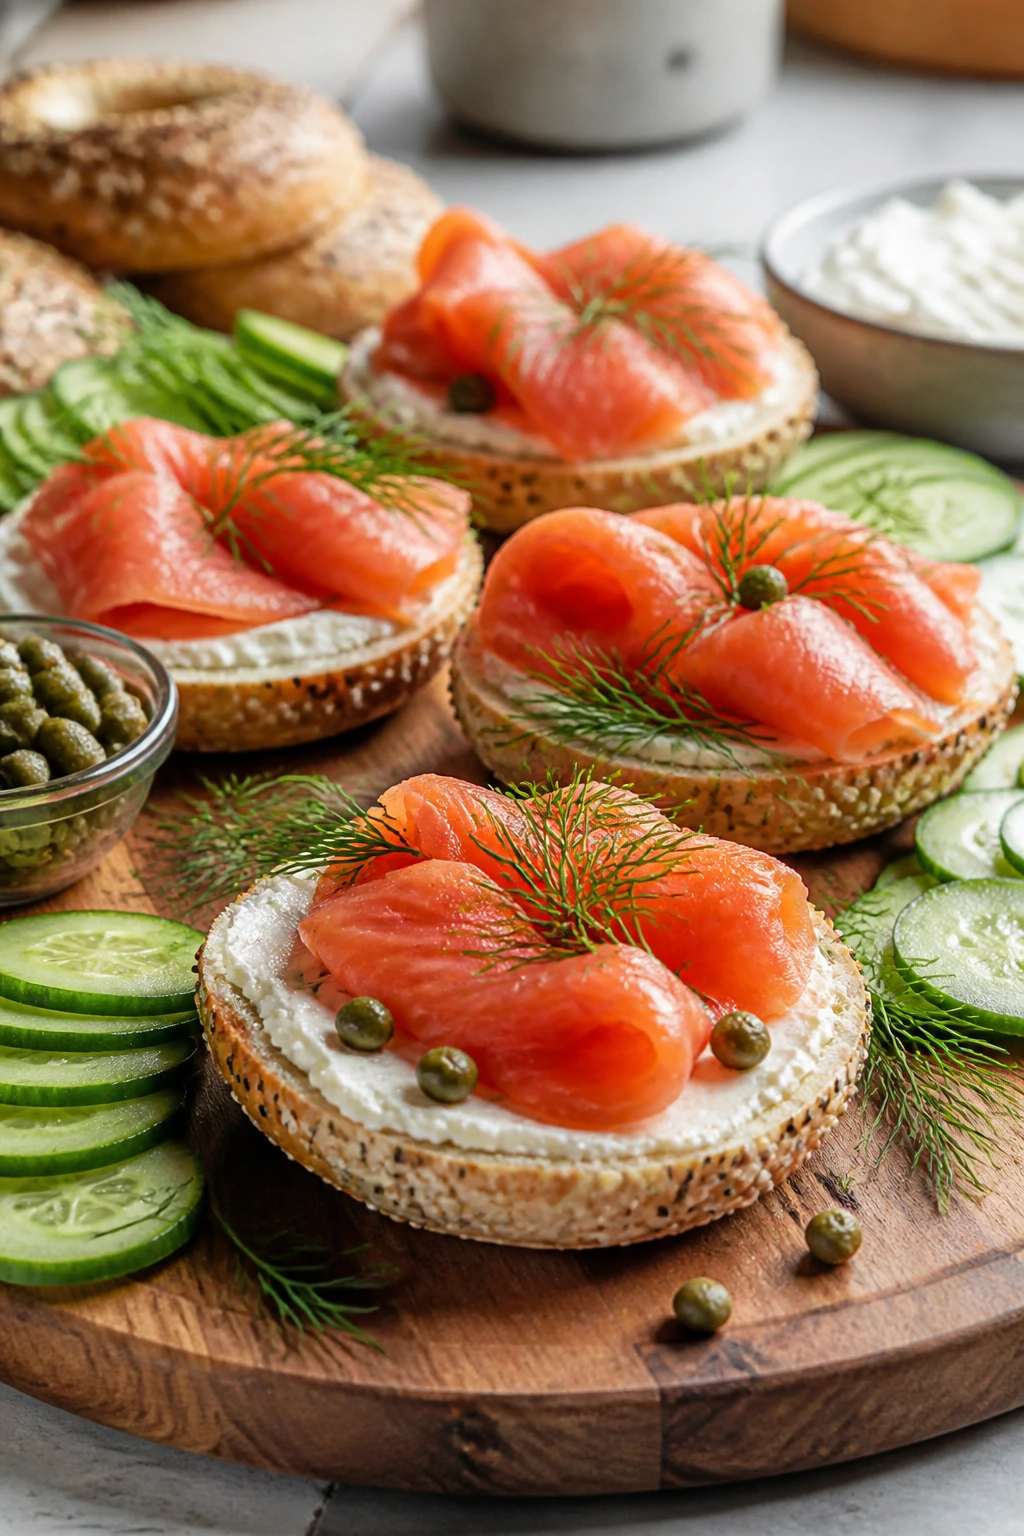
6. Smoked Salmon Bagel Boards
Intro:
This one feels fancier than it is, which is part of its charm. Smoked salmon, cream cheese, cucumber, capers, and bagel halves make a cold plate that people tend to hover over.
Why It Works:
Smoked salmon already brings smoke, salt, and a silky texture, so the rest of the board only has to sharpen and freshen it. Cream cheese gives the rich base, while cucumber and capers keep each bite bright. Bagels or crackers turn the whole thing into a proper meal instead of a snack tray.
Key Ingredients:
- 2 bagels, split
- 4 ounces cream cheese
- 4 ounces smoked salmon
- 1/2 cucumber, sliced
- 1 tablespoon capers
- 1 tablespoon chopped dill
Quick Steps:
- Split the bagels and spread cream cheese over the cut sides.
- Fold the smoked salmon into loose ribbons.
- Arrange salmon, cucumber, capers, and dill over the bagels or on a board.
- Add extra bagel halves or crackers on the side.
- Serve cold so the salmon stays supple.
Equipment for This Recipe:
- Knife
- Cutting board
- Serving platter or board
How to Serve This Dish:
Lay everything out board-style and let people build their own bites. Add red onion slices or lemon wedges if you want a sharper edge.
Pro Tips for This Recipe:
- Thin cucumber slices work better than thick coins.
- If the cream cheese is stiff, let it sit out 10 minutes before spreading.
- Lemon zest is better than more lemon juice here; it gives flavor without making the bagel wet.
Variations on This Dish:
- Everything Bagel Board: Use everything-seasoned bagels or sprinkle seasoning over the cream cheese.
- Dill-Free Version: Swap dill for chopped chives if you want a milder finish.
Common Mistakes to Avoid with This Dish:
- Overloading the bagel: It slides apart. Keep the topping layer thin.
- Serving salmon too warm: It turns greasy. Keep it chilled until plating.
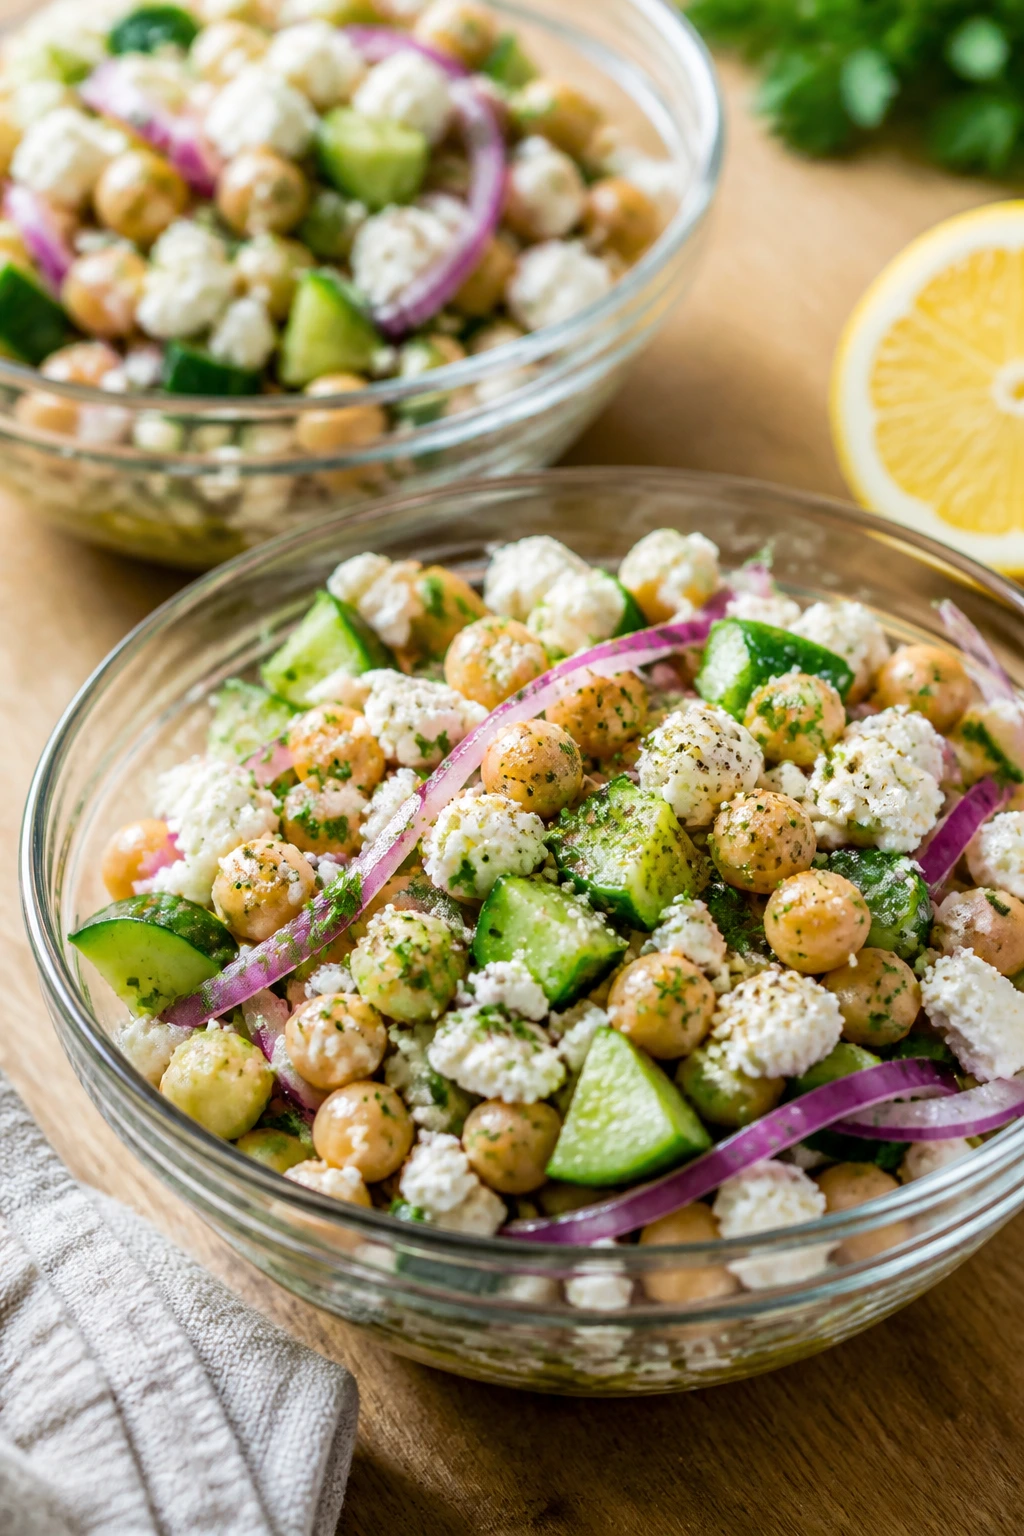
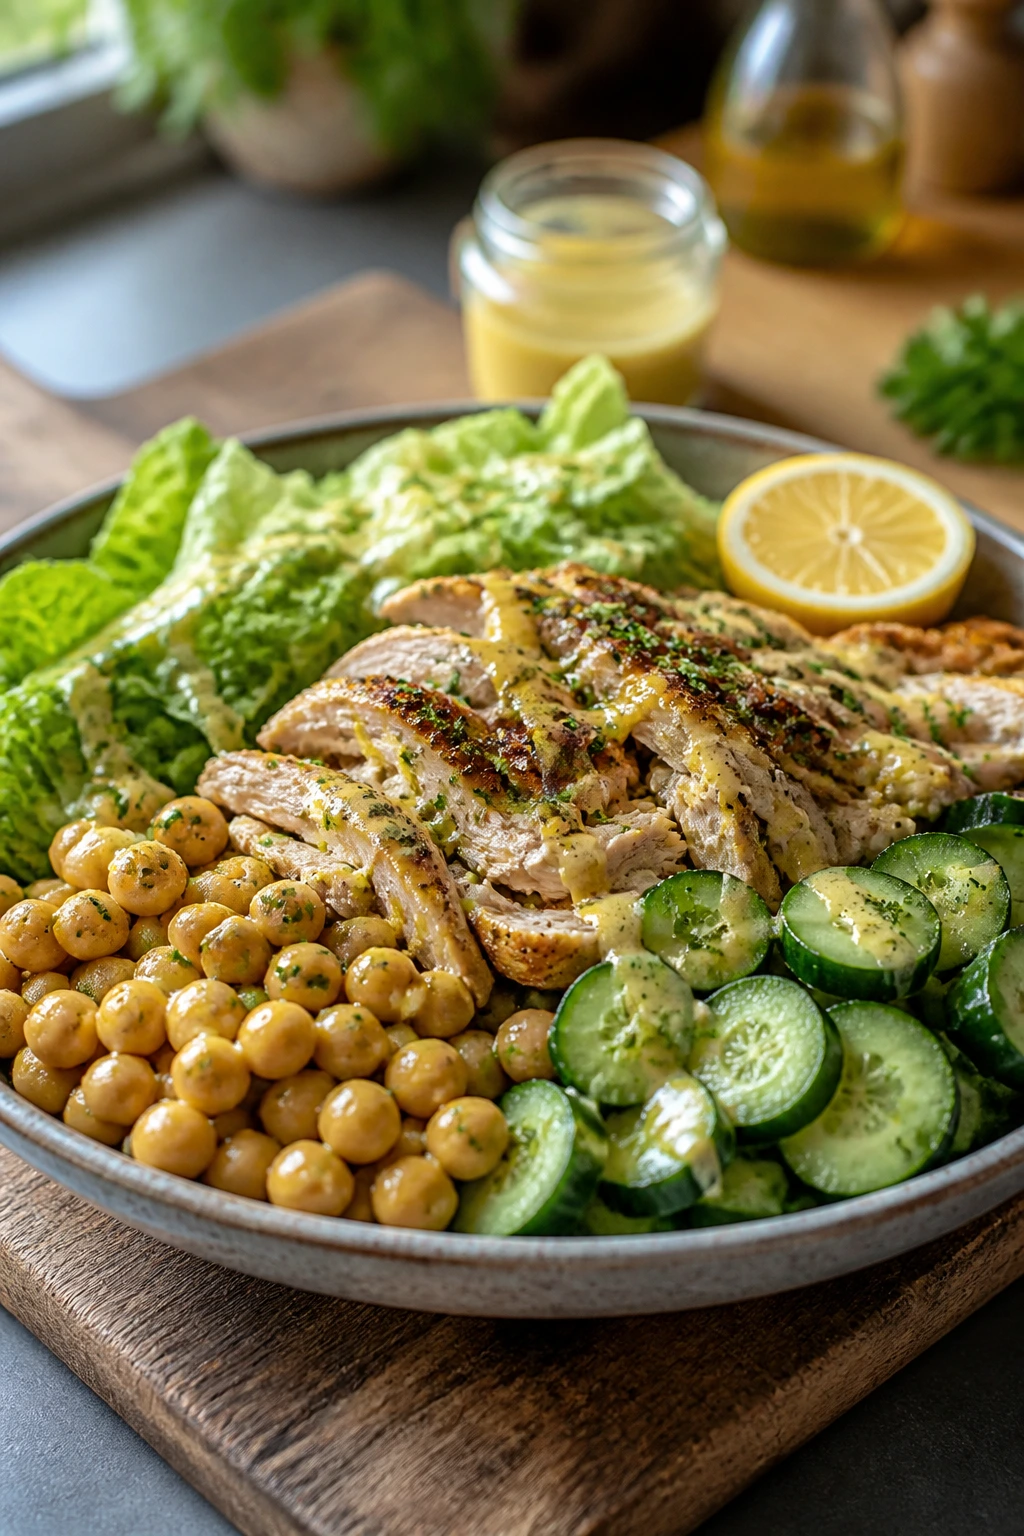
7. Greek Chickpea Cucumber Bowls
Intro:
Cold chickpeas, cucumber, feta, and a lemony dressing make a bowl that feels crisp from the first forkful. It’s the sort of meal that looks plain for about three seconds, then disappears.
Why It Works:
Chickpeas bring bulk and fiber, feta adds salt, and cucumber keeps every bite cool and light. Olive oil and lemon give the bowl enough shine to taste finished. The red onion matters too, because a little bite keeps the whole thing from leaning soft.
Key Ingredients:
- 1 can chickpeas, rinsed and drained
- 1 cucumber, diced
- 1/4 red onion, thinly sliced
- 1/3 cup crumbled feta
- 2 tablespoons olive oil
- 1 tablespoon lemon juice
Quick Steps:
- Rinse the chickpeas and drain them well.
- Toss chickpeas, cucumber, onion, feta, olive oil, and lemon juice in a bowl.
- Season with salt, pepper, and a pinch of oregano.
- Let it sit 5 minutes so the chickpeas absorb some dressing.
- Spoon into bowls and serve cold.
Equipment for This Recipe:
- Mixing bowl
- Knife
- Cutting board
How to Serve This Dish:
Serve it with pita chips or a chunk of crusty bread. A few olives on top make the bowl feel more complete.
Pro Tips for This Recipe:
- Soak the sliced onion in cold water for 5 minutes if you want it less sharp.
- Add a spoonful of hummus if you want a creamier bowl.
- Dry the cucumber after chopping so the dressing doesn’t thin out.
Variations on This Dish:
- Tomato-Happy Version: Add halved cherry tomatoes for more sweetness.
- No-Dairy Bowl: Leave out feta and add chopped olives instead.
Common Mistakes to Avoid with This Dish:
- Under-seasoning the chickpeas: They taste flat. Salt them after draining.
- Skipping acid: Without lemon, the bowl feels heavy. Use it.
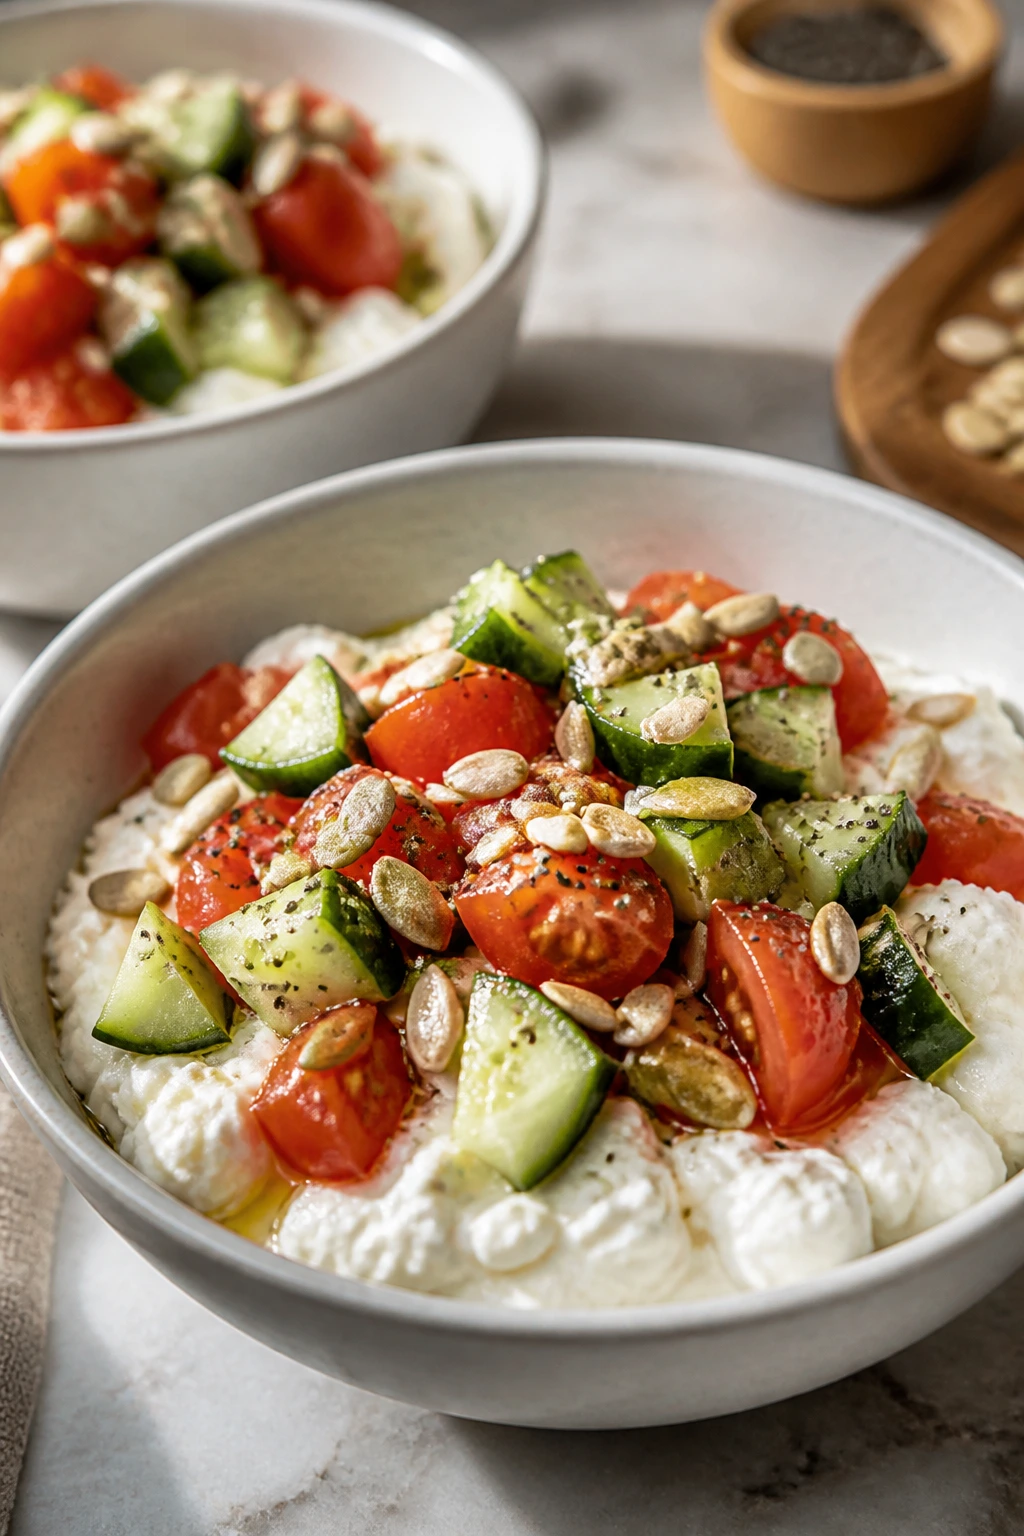
8. Cottage Cheese Tomato Crunch Bowls
Intro:
Cottage cheese gets knocked around a lot, but it’s excellent when you stop pretending it wants to be fancy. Pair it with ripe tomatoes, cucumber, and a handful of seeds, and you’ve got a cold meal with a clean, savory edge.
Why It Works:
The cottage cheese gives you protein and a creamy base with almost no prep. Tomatoes bring juice and sweetness, cucumber gives crunch, and seeds or everything seasoning add a salty finish. This is one of the easiest no-cook meals to make feel substantial without much money.
Key Ingredients:
- 2 cups cottage cheese
- 1 tomato, chopped
- 1/2 cucumber, chopped
- 2 tablespoons pumpkin seeds or sunflower seeds
- 1 teaspoon everything seasoning
Quick Steps:
- Spoon the cottage cheese into two bowls.
- Top with tomato and cucumber.
- Sprinkle with seeds and everything seasoning.
- Add black pepper and a tiny drizzle of olive oil if you want more richness.
- Eat right away while the vegetables still have a cold snap to them.
Equipment for This Recipe:
- Bowl
- Knife
- Cutting board
How to Serve This Dish:
Serve with crackers, rye crisps, or sliced bell pepper for scooping. It eats like a lunch bowl but works fine as dinner when paired with bread.
Pro Tips for This Recipe:
- Use full-fat cottage cheese if you want a smoother, less watery bowl.
- Salt the tomato lightly and blot it if it’s extra juicy.
- A few chopped chives make this feel more finished.
Variations on This Dish:
- Savory Herb Bowl: Add dill, parsley, and a little lemon zest.
- Spicy Bowl: Stir in a teaspoon of chili crisp right before serving.
Common Mistakes to Avoid with This Dish:
- Using soupy tomatoes: The bowl gets watery. Seed them if needed.
- Skipping seasoning: Cottage cheese needs help. Everything seasoning or salt changes it fast.
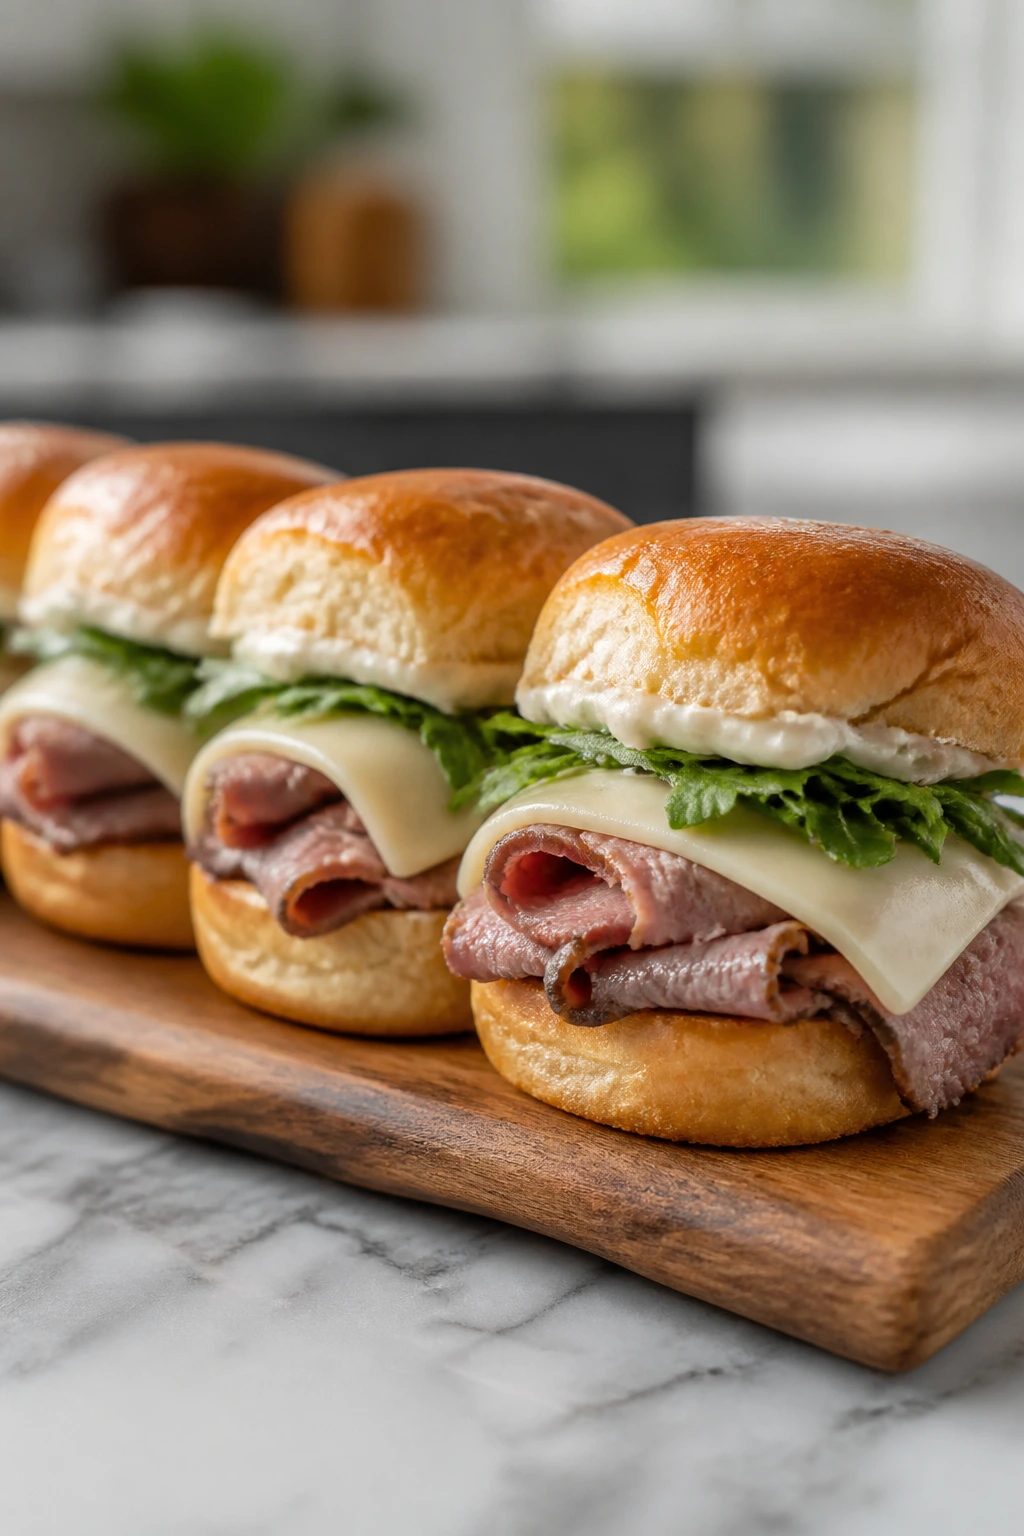
9. Roast Beef Horseradish Sliders
Intro:
Cold roast beef with horseradish is one of those combinations that never needs much explaining. It has bite, it has salt, and it feels more grown-up than the average deli sandwich.
Why It Works:
Roast beef brings deep savory flavor, while horseradish cuts through the richness with a sharp, clean burn. A soft roll keeps the meat from feeling dry, and a little arugula gives the slider a peppery finish. If you keep the bread sturdy, the whole thing stays neat.
Key Ingredients:
- 4 small slider rolls
- 8 ounces deli roast beef
- 2 tablespoons horseradish sauce
- 1 cup arugula
- 4 thin slices provolone
Quick Steps:
- Split the rolls and spread horseradish sauce on the bottom halves.
- Layer roast beef, provolone, and arugula.
- Close the sliders and press lightly.
- Slice in half if you want smaller portions.
- Serve cold or at room temperature.
Equipment for This Recipe:
- Knife
- Cutting board
- Small spoon
How to Serve This Dish:
Set the sliders beside pickles and chips. A simple mustard on the table helps if someone wants extra sharpness.
Pro Tips for This Recipe:
- Buy roast beef sliced a little thicker so it doesn’t disappear into the bread.
- If the horseradish sauce is strong, mix it with mayo first.
- Add tomato only if you plan to eat the sliders immediately.
Variations on This Dish:
- French Dip Style: Serve with a side of warmed broth for dipping if you want a hot-cold contrast.
- Cheddar Swap: Use sharp cheddar instead of provolone for more bite.
Common Mistakes to Avoid with This Dish:
- Too much sauce: The rolls go soft. Use a thin layer.
- Very thin meat slices: The sandwich loses texture. Ask for thicker deli cuts.
10. Chicken Salad Stuffed Bell Peppers

Intro:
This is the kind of lunch-dinner crossover that earns a place in the fridge. Sweet bell peppers hold creamy chicken salad like little edible bowls, and the crunch changes the whole mood of the meal.
Why It Works:
The pepper adds structure, which means you get a built-in serving vessel and less bread dependency. Chicken salad brings protein and richness, while celery or grapes add texture and a little lift. Because the filling is already chilled, this is ideal when nobody wants to heat the kitchen.
Key Ingredients:
- 2 large bell peppers, halved and seeded
- 2 cups chicken salad
- 2 tablespoons chopped celery
- 1 tablespoon chopped parsley
- 1 tablespoon chopped grapes or diced apple, optional
Quick Steps:
- Halve the peppers and remove the seeds and white ribs.
- Spoon chicken salad into each pepper half.
- Top with celery, parsley, or fruit if you want extra crunch.
- Chill 10 minutes if you have time.
- Serve with crackers or a side salad.
Equipment for This Recipe:
- Knife
- Cutting board
- Spoon
How to Serve This Dish:
Plate the peppers on a wide dish so they do not tip over. Crackers or pretzels turn it into a more filling dinner.
Pro Tips for This Recipe:
- Choose peppers that can sit flat without wobbling.
- If your chicken salad is wet, stir in a spoonful of chopped nuts.
- Green peppers taste sharper; red peppers taste sweeter.
Variations on This Dish:
- Curry Chicken Version: Stir curry powder into the chicken salad for warmth.
- Dairy-Free Chicken Salad: Use olive-oil mayo or avocado mayo instead.
Common Mistakes to Avoid with This Dish:
- Peppers with thin walls: They collapse. Pick firm, thick peppers.
- Too much filling: It spills out. Pack it lightly.
11. Chickpea Tzatziki Wraps
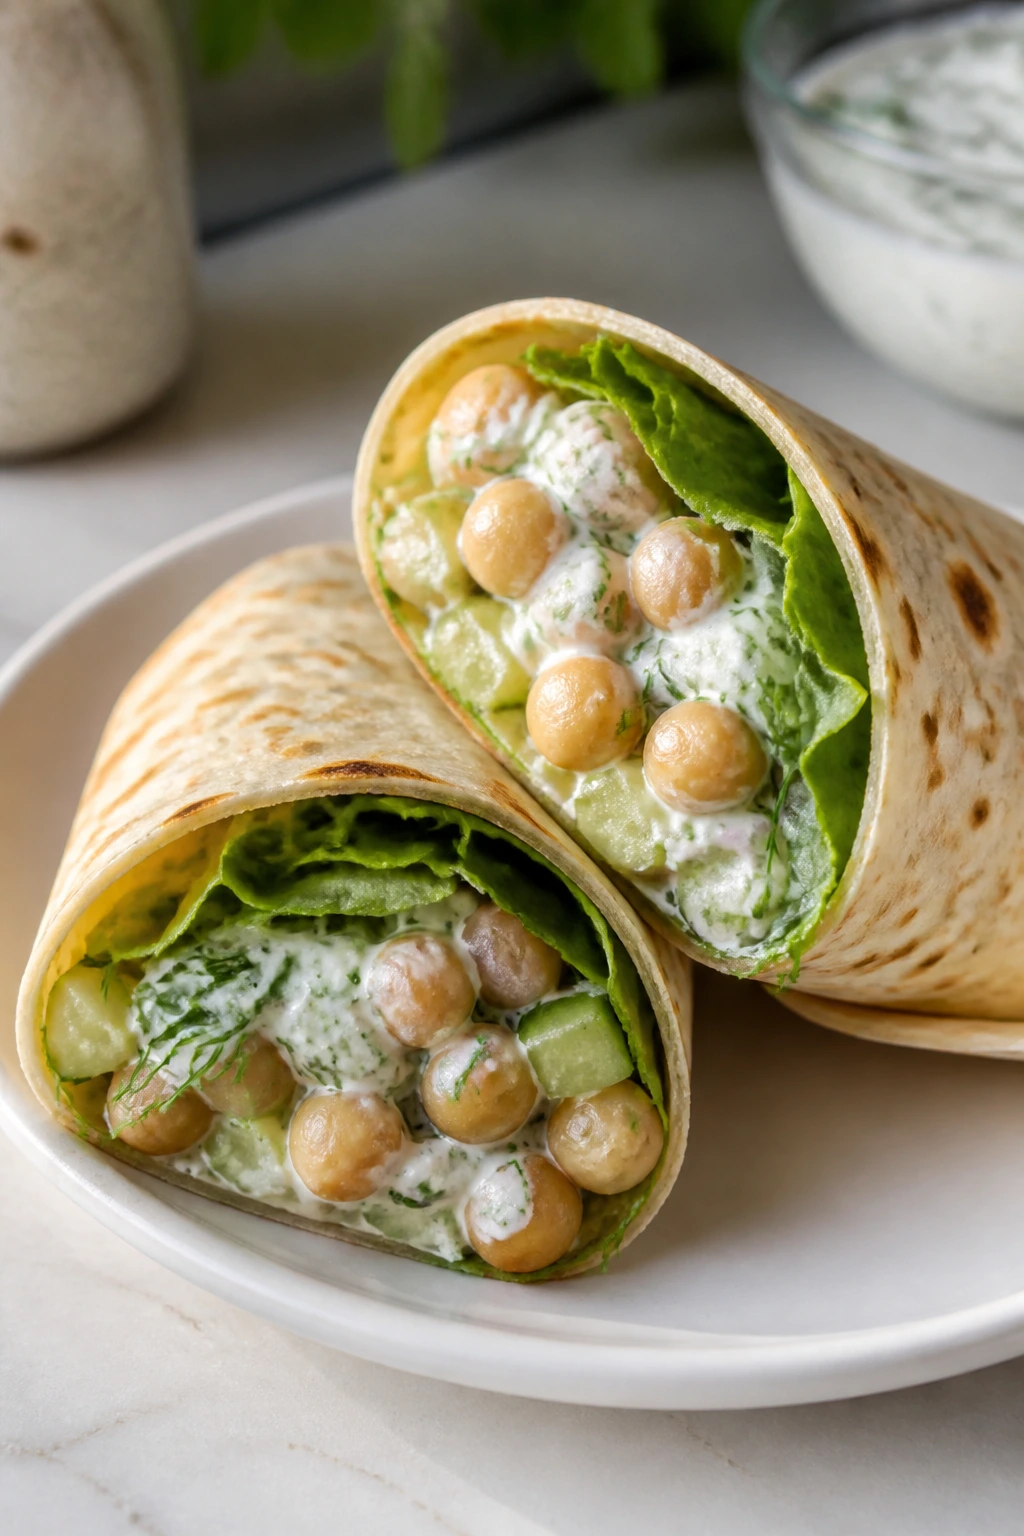
Intro:
If you want a wrap that leans cool and tangy instead of heavy, this is a strong pick. Chickpeas bring substance, tzatziki brings garlic and cucumber, and fresh greens keep the whole thing awake.
Why It Works:
Chickpeas are sturdy enough to hold up against a creamy sauce without turning mushy. Tzatziki already has yogurt, cucumber, and dill built in, so you don’t need much else beyond lettuce and a wrap. The flavor feels fresher than mayo-based fillings, which is useful when the week is dragging.
Key Ingredients:
- 1 can chickpeas, rinsed and lightly mashed
- 1/2 cup tzatziki
- 1 cup shredded lettuce
- 2 large tortillas
- 2 tablespoons chopped cucumber
Quick Steps:
- Mash the chickpeas lightly so some stay whole and some break down.
- Stir in tzatziki and chopped cucumber.
- Divide the mixture between the tortillas and add shredded lettuce.
- Roll tightly and slice in half.
- Serve cold or wrap for later.
Equipment for This Recipe:
- Bowl
- Fork
- Knife
How to Serve This Dish:
Serve with olives or sliced tomatoes. It also works well with pita chips if you want extra crunch.
Pro Tips for This Recipe:
- Drain the chickpeas well so the filling stays thick.
- Add a pinch of dill or mint if your tzatziki needs more lift.
- Keep the lettuce on the dry side.
Variations on This Dish:
- Feta Finish: Add crumbled feta for a saltier wrap.
- Spicy Chickpea Wrap: Stir in a little chili flakes or hot sauce.
Common Mistakes to Avoid with This Dish:
- Over-mashing the chickpeas: The filling turns paste-like. Leave some texture.
- Wet lettuce: The wrap softens fast. Dry it first.
12. Italian Antipasto Subs
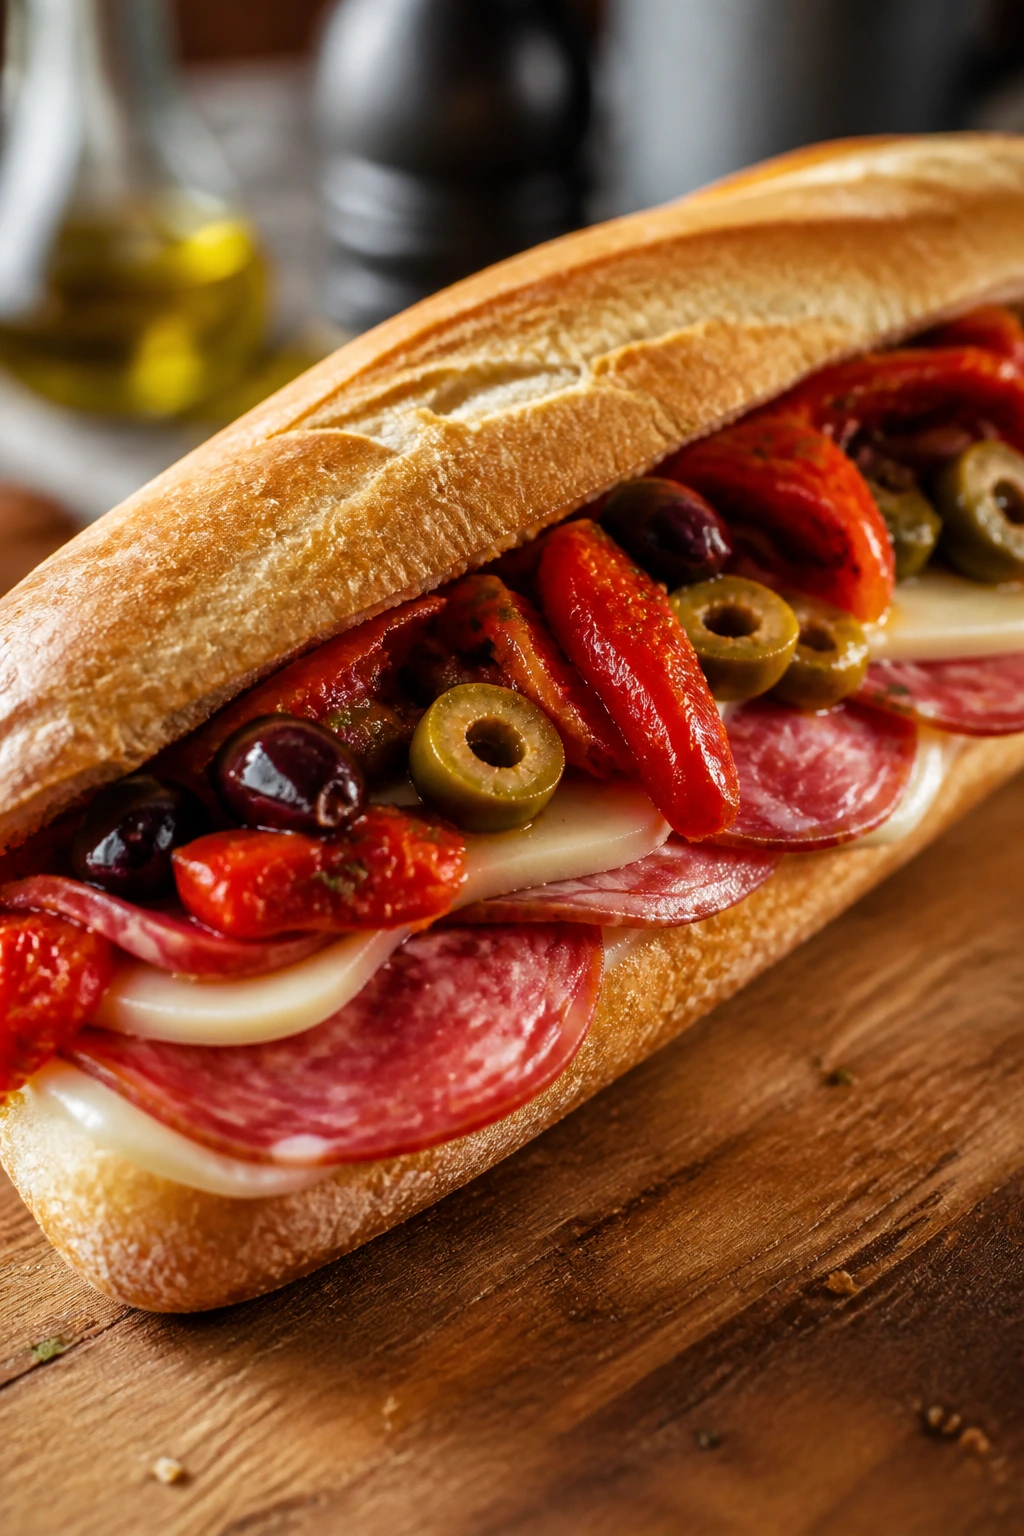
Intro:
This is deli-counter energy without the line. Salami, provolone, roasted peppers, olives, and a little vinaigrette make a sub that tastes like you planned dinner on purpose.
Why It Works:
Antipasto ingredients are already bold, so a light hand is all you need. The vinegar in the dressing cuts through the salami and cheese, while the peppers and olives keep the sandwich bright. A crusty roll or hoagie bun keeps the fillings from slipping out.
Key Ingredients:
- 2 hoagie rolls
- 4 ounces salami, sliced
- 4 ounces provolone, sliced
- 1/4 cup roasted red peppers
- 2 tablespoons sliced olives
- 1 tablespoon Italian dressing
Quick Steps:
- Split the rolls and drizzle the inside with Italian dressing.
- Layer salami, provolone, peppers, and olives.
- Press the sandwich closed and slice if desired.
- Let it sit 2 minutes so the flavors settle.
- Serve with chips or a few pickles.
Equipment for This Recipe:
- Knife
- Cutting board
- Spoon or squeeze bottle
How to Serve This Dish:
Cut the subs into smaller sections if you are feeding more than one person. A side of pepperoncini makes the plate pop.
Pro Tips for This Recipe:
- Blot the peppers so they do not soak the bread.
- Fold the meat loosely; it eats better than flat slices.
- If you want more acid, add a splash of red wine vinegar.
Variations on This Dish:
- Turkey Antipasto Sub: Swap salami for turkey to lighten it up.
- Vegetarian Antipasto: Use extra cheese, marinated artichokes, and more olives instead of meat.
Common Mistakes to Avoid with This Dish:
- Too much dressing: It leaks through the roll. Use less than you think.
- Too many wet ingredients: The bread goes limp. Pat them dry first.
13. Salmon Salad Lettuce Cups
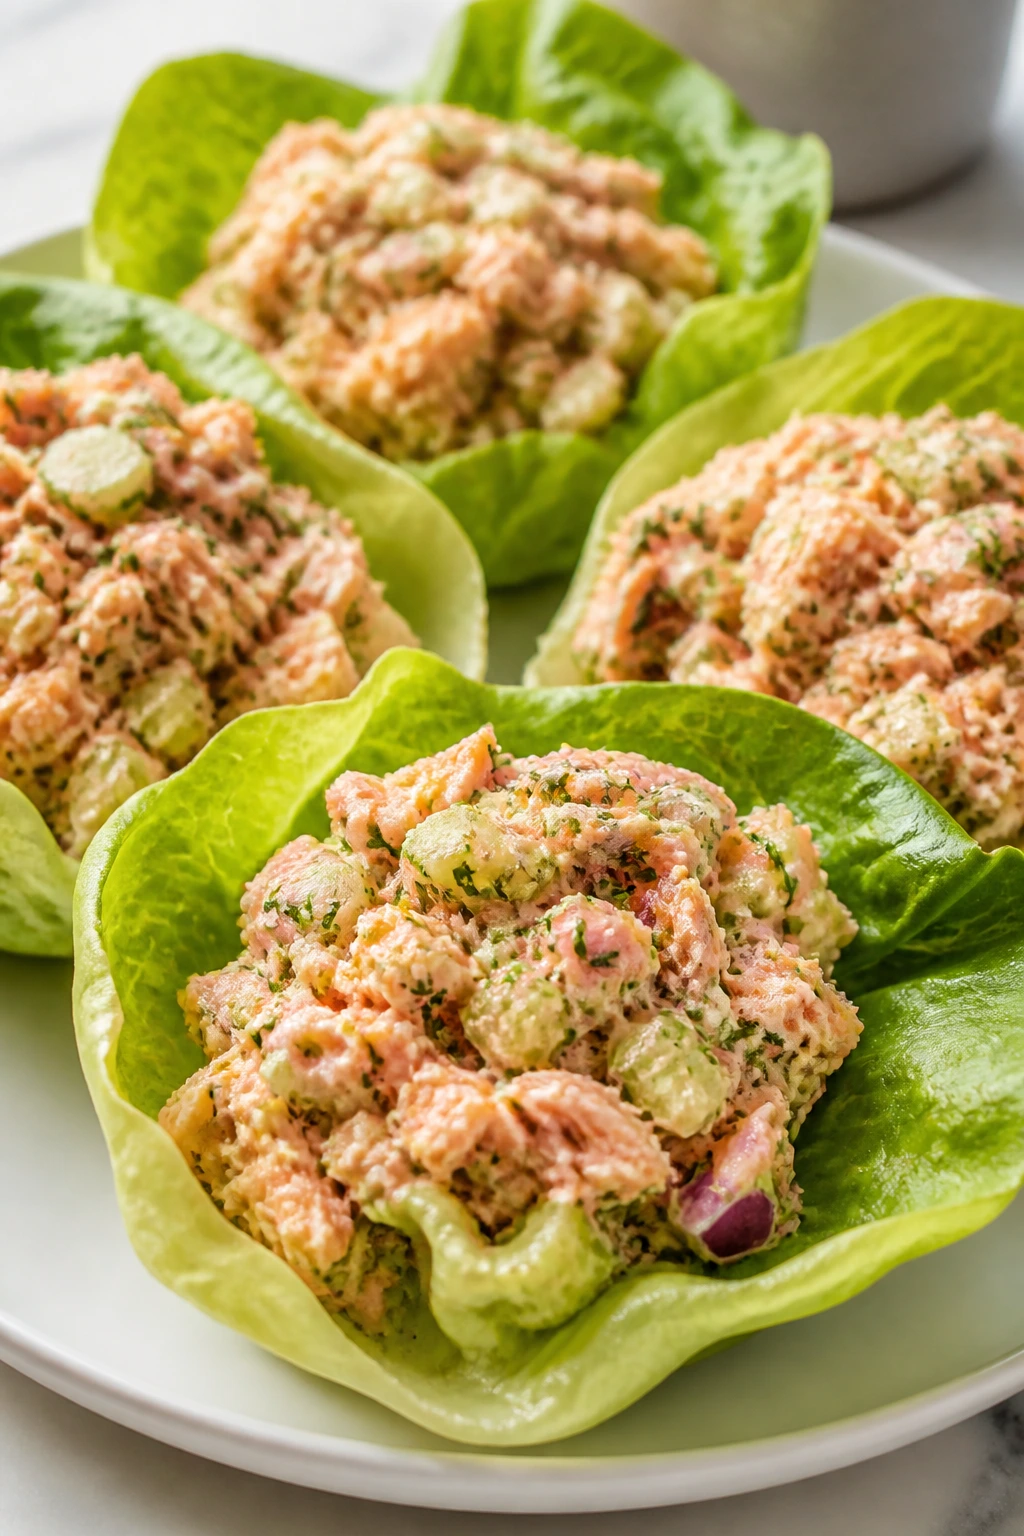
Intro:
Salmon salad in lettuce cups is clean, cool, and a little bit crisp around the edges. It’s the kind of dinner that feels light without being flimsy.
Why It Works:
Canned salmon gives you protein, healthy fat, and a stronger flavor than tuna. The lettuce cups keep things tidy, and celery or dill adds the crunch and freshness the salmon wants. A squeeze of lemon wakes the whole plate up without making it heavy.
Key Ingredients:
- 2 cans salmon, drained
- 2 tablespoons mayo or Greek yogurt
- 1 celery stalk, minced
- 1 tablespoon chopped dill
- 8 butter lettuce leaves
Quick Steps:
- Break the salmon into chunks and remove any obvious bones if needed.
- Stir in mayo, celery, and dill.
- Season with lemon juice, salt, and pepper.
- Spoon into lettuce leaves.
- Serve cold with crackers or sliced cucumber.
Equipment for This Recipe:
- Fork
- Mixing bowl
- Spoon
How to Serve This Dish:
Arrange the cups on a plate and scatter dill over the top. Crackers on the side make it more dinner-like.
Pro Tips for This Recipe:
- Use butter lettuce; romaine tends to crack.
- Lemon zest adds more brightness than extra lemon juice.
- If the salad feels too soft, add chopped celery or minced onion.
Variations on This Dish:
- Dijon Salmon Salad: Add 1 teaspoon Dijon mustard.
- Avocado Salmon Cups: Fold in small avocado chunks right before serving.
Common Mistakes to Avoid with This Dish:
- Overmixing the salmon: It turns mushy. Keep some flakes intact.
- Lettuce cups that are too small: They collapse. Pick wide leaves.
14. Egg Salad Lettuce Boats
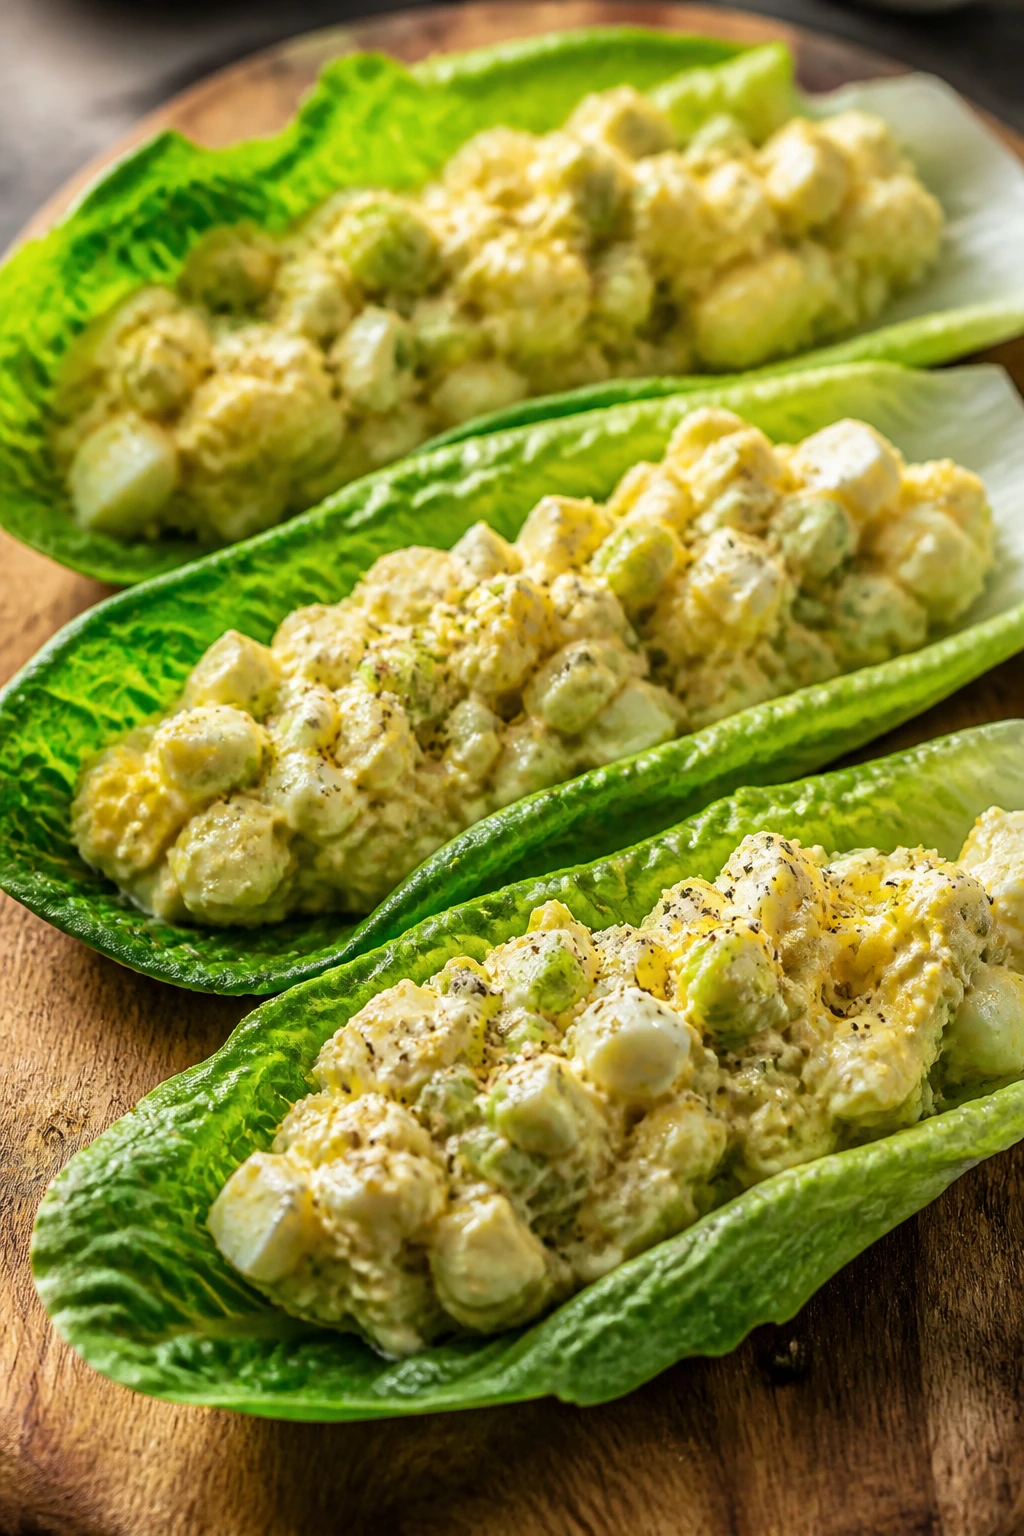
Intro:
Egg salad can be plain, or it can be very good. The trick is enough seasoning, enough crunch, and a lettuce leaf sturdy enough to hold the whole thing without folding in half.
Why It Works:
Store-bought hard-boiled eggs make this a true no-cook meal. Mayo binds the filling, mustard sharpens it, and celery gives the salad structure so it doesn’t become gluey. Lettuce boats keep the carbs low and the texture crisp.
Key Ingredients:
- 6 hard-boiled eggs, chopped
- 3 tablespoons mayo
- 1 teaspoon Dijon mustard
- 1 celery stalk, finely chopped
- 8 romaine or butter lettuce leaves
Quick Steps:
- Chop the eggs into medium pieces, not crumbs.
- Stir in mayo, mustard, and celery.
- Taste and add salt and black pepper.
- Spoon into lettuce leaves.
- Serve cold with tomatoes or crackers.
Equipment for This Recipe:
- Bowl
- Fork
- Knife
How to Serve This Dish:
Pile the filling into romaine leaves for a firmer boat or butter lettuce for a softer one. Pickles on the side help more than they should.
Pro Tips for This Recipe:
- Chop the eggs while they are cold for cleaner pieces.
- A tiny pinch of paprika gives the salad a better finish.
- Don’t drown it in mayo; eggs need structure.
Variations on This Dish:
- Curried Egg Salad: Add curry powder and chopped raisins.
- Dill Egg Salad: Mix in fresh dill and extra mustard.
Common Mistakes to Avoid with This Dish:
- Eggs chopped too finely: The salad gets dense. Leave some chunk.
- Too much mayo: It turns slick. Start small.
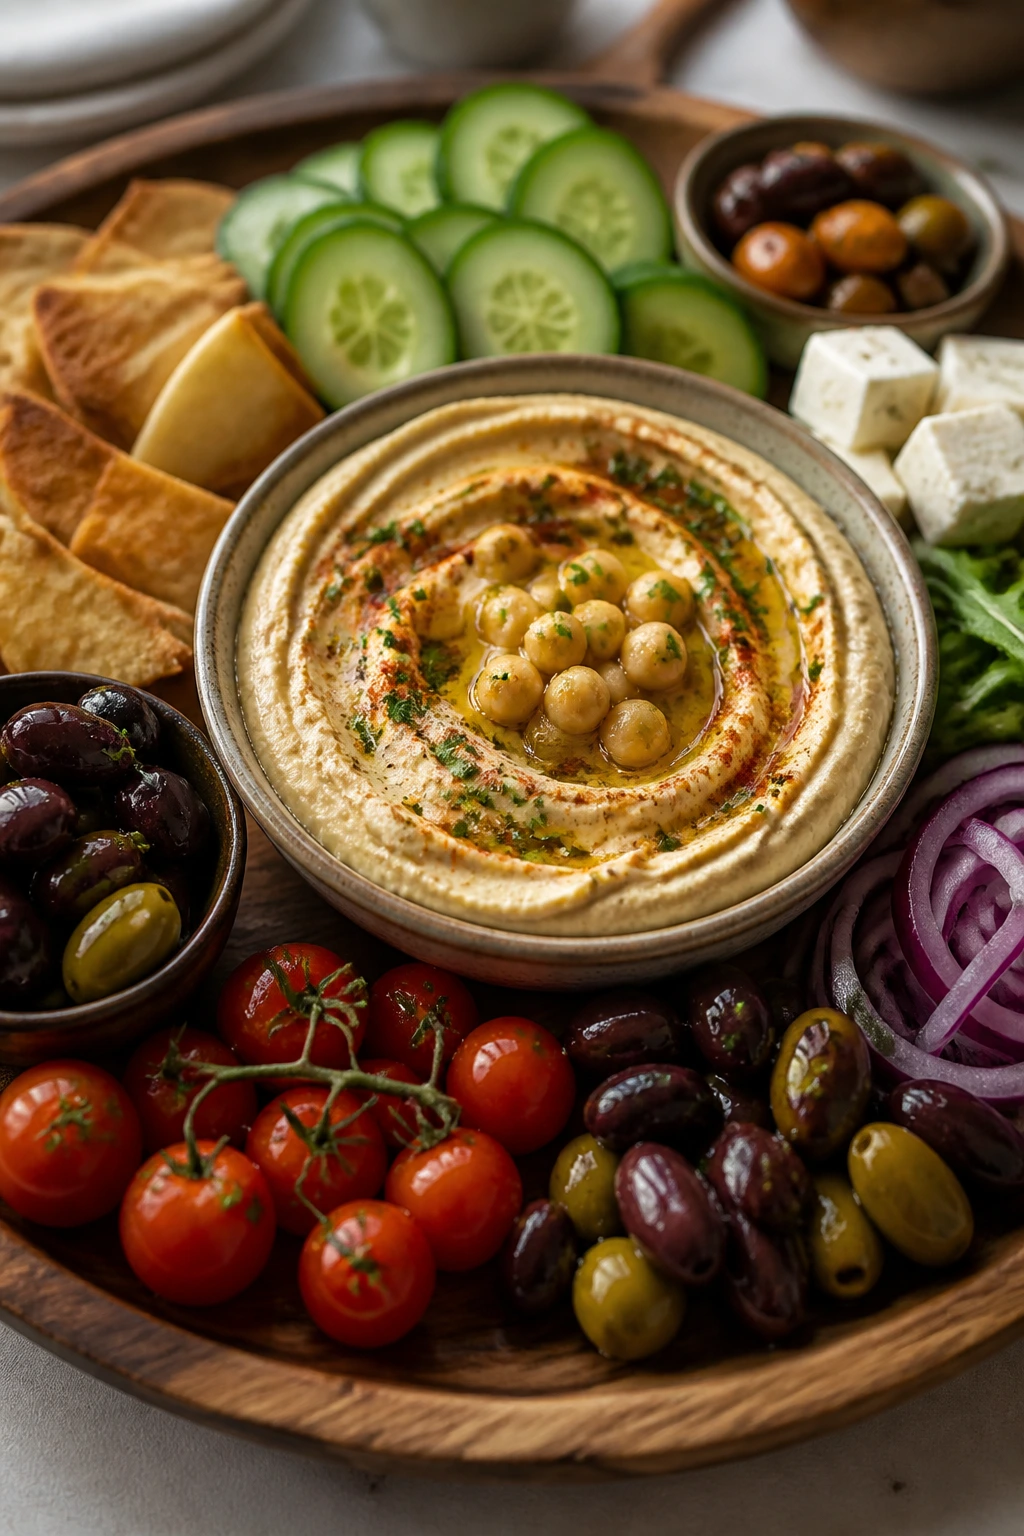
15. Mediterranean Mezze Plates
Intro:
This is dinner by assembly, and that is not a bad thing. Hummus, olives, cucumber, cheese, tomatoes, and pita chips create a plate that invites grazing in the best way.
Why It Works:
Mezze works because the flavors are modular: creamy hummus, salty olives, cool cucumber, tangy feta, and something crunchy for contrast. You can buy almost all of it ready to eat. If one thing runs out, the plate still feels complete.
Key Ingredients:
- 1 cup hummus
- 1 cucumber, sliced
- 1 cup cherry tomatoes
- 1/2 cup olives
- 4 ounces feta
- Pita chips or crackers
Quick Steps:
- Spoon hummus into a shallow bowl or leave it in the center of the board.
- Arrange cucumber, tomatoes, olives, and feta around it.
- Add pita chips or crackers in open spaces.
- Drizzle hummus with olive oil if you want more richness.
- Serve immediately.
Equipment for This Recipe:
- Serving board or large plate
- Knife
- Small bowl
How to Serve This Dish:
Put it out family-style and let people build bites. It works well with a few grapes or sliced pears if you want something sweet nearby.
Pro Tips for This Recipe:
- Use a shallow board so the colors stay visible.
- Add roasted red peppers if you want more sweetness.
- Keep salty items in small clusters so one bite doesn’t overpower the rest.
Variations on This Dish:
- Protein Mezze: Add chickpeas or sliced turkey.
- Herby Mezze: Stir chopped parsley and mint into the hummus.
Common Mistakes to Avoid with This Dish:
- Only soft foods: The plate feels flat. Add crunch.
- Serving too little dip: Hummus runs out first. Put out more than you think.
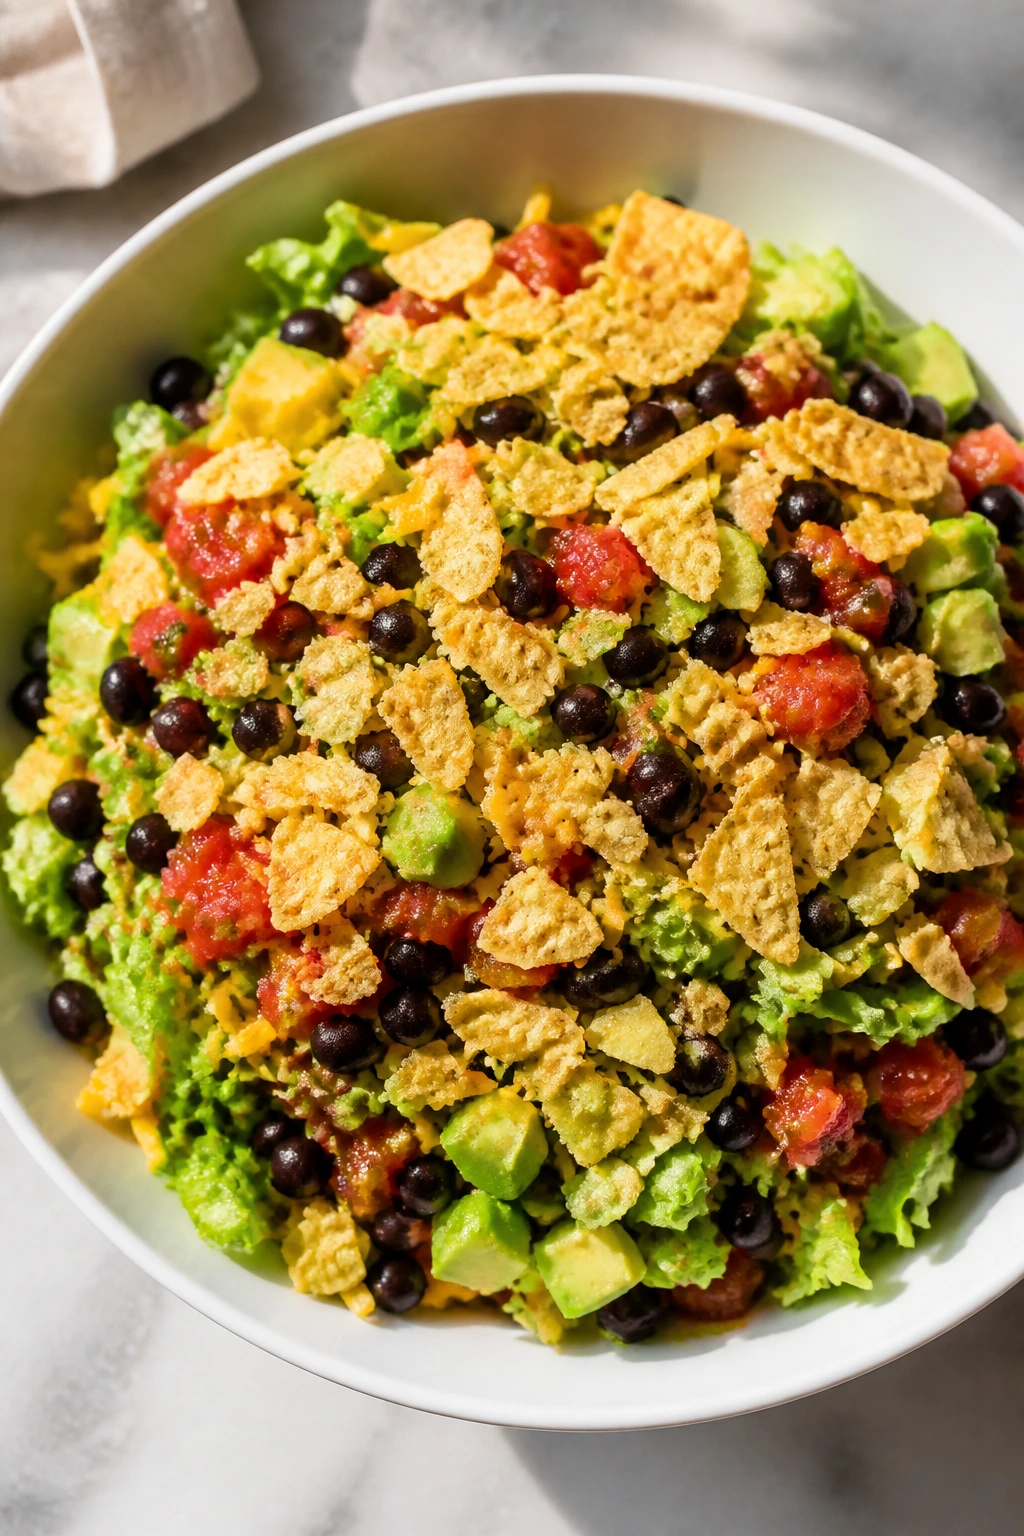
16. Black Bean Salsa Taco Salad
Intro:
When you want taco night without the skillet, black beans and salsa carry the weight. Add lettuce, cheese, and chips, and you’ve got a cold salad that still scratches the taco itch.
Why It Works:
Black beans bring protein and body, salsa brings seasoning and moisture, and shredded lettuce keeps the bowl from feeling dense. The chips matter because they give the salad a crunch that changes every few bites. It is cheap, fast, and hard to mess up.
Key Ingredients:
- 1 can black beans, rinsed and drained
- 1 cup salsa
- 2 cups shredded lettuce
- 1/2 cup shredded cheese
- 1 cup tortilla chips
Quick Steps:
- Rinse and drain the black beans well.
- Toss beans with salsa.
- Build bowls with lettuce, the bean mixture, and cheese.
- Crush a few chips over the top.
- Serve right away so the chips stay crisp.
Equipment for This Recipe:
- Bowl
- Spoon
- Knife for any add-ins
How to Serve This Dish:
Top with avocado, sour cream, or sliced jalapeños if you have them. It eats well in shallow bowls so the chips don’t get buried.
Pro Tips for This Recipe:
- Use thick salsa so the salad does not flood.
- Add corn if you want more sweetness and crunch.
- Keep chips separate until the last minute.
Variations on This Dish:
- Turkey Taco Salad: Add deli turkey strips for more protein.
- Dairy-Free Bowl: Skip the cheese and add extra avocado.
Common Mistakes to Avoid with This Dish:
- Too much salsa: The lettuce wilts fast. Start with less.
- Adding chips too early: They soften. Add them last.
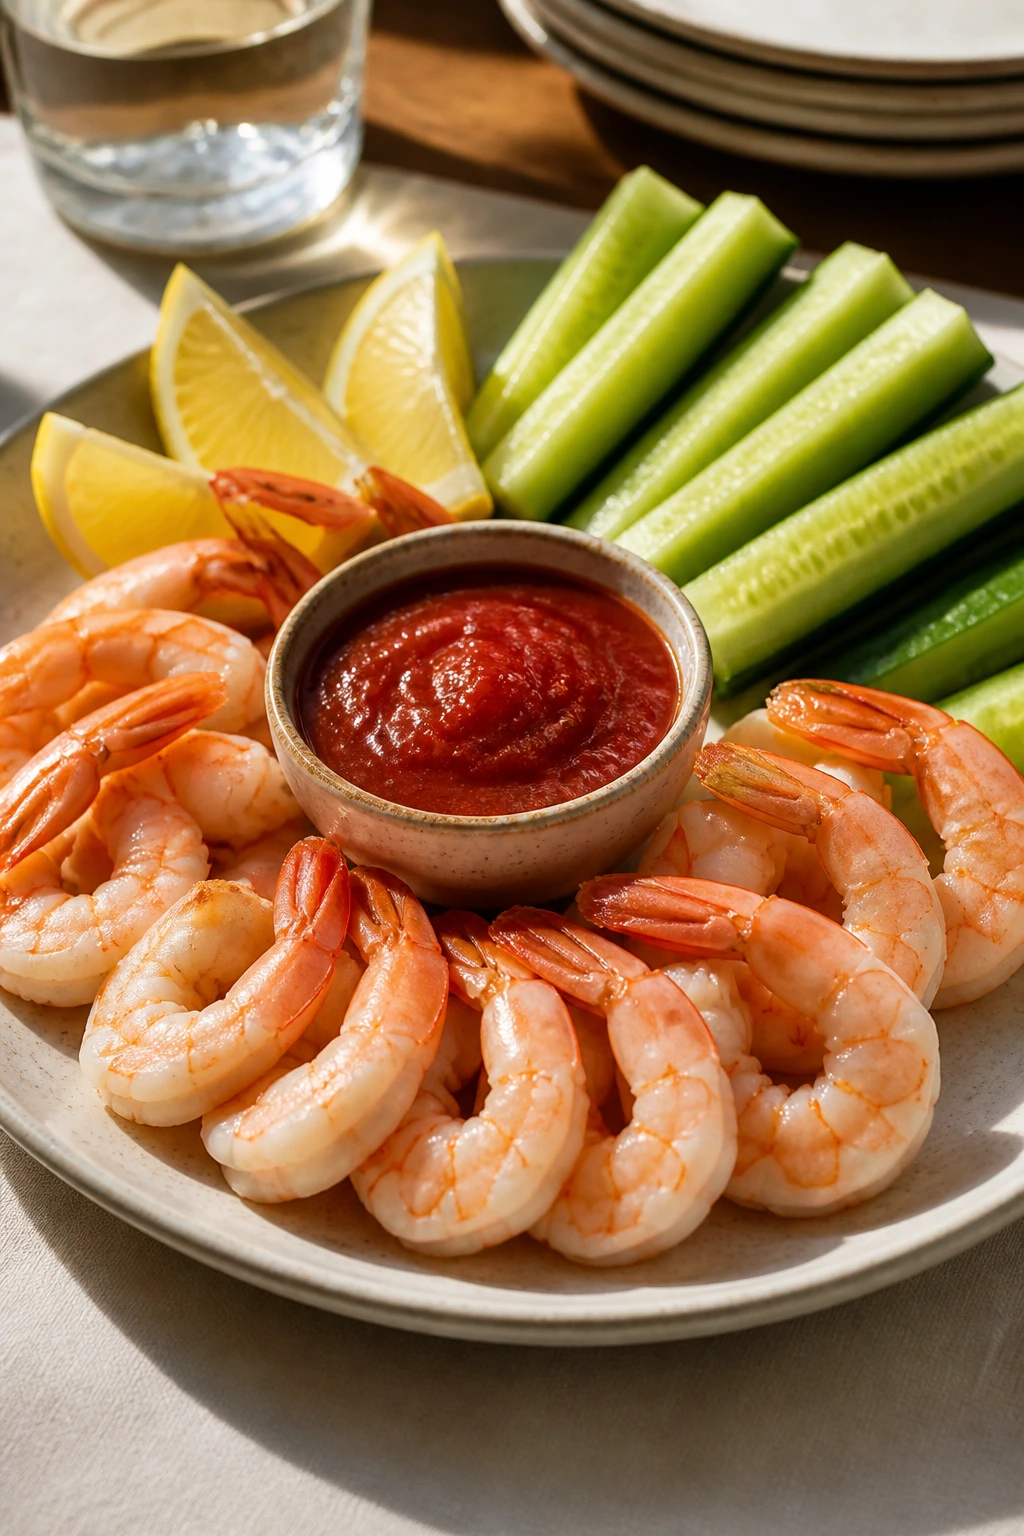
17. Shrimp Cocktail Dinner Plates
Intro:
Cold shrimp cocktail is one of the few dinners that feels a little celebratory without asking for effort. Pair it with crisp vegetables and a good sauce, and the plate lands clean and sharp.
Why It Works:
Pre-cooked shrimp bring briny sweetness and a firm bite. Cocktail sauce adds heat and acid, while cucumber or celery gives you something fresh between bites. Because shrimp are already cooked, the whole plate comes together in minutes.
Key Ingredients:
- 1 pound cooked shrimp, peeled and deveined
- 1/2 cup cocktail sauce
- 1 cucumber, sliced
- 2 celery stalks, cut into sticks
- Lemon wedges
Quick Steps:
- Pat the shrimp dry with paper towels.
- Arrange shrimp on a chilled plate with cucumber and celery.
- Spoon cocktail sauce into a small bowl.
- Add lemon wedges around the edges.
- Serve cold and keep the plate chilled if possible.
Equipment for This Recipe:
- Platter
- Paper towels
- Small bowl
How to Serve This Dish:
Serve with crackers or a simple green salad if you want a bigger dinner. A chilled plate helps the shrimp stay firm longer.
Pro Tips for This Recipe:
- Dry shrimp before plating so the sauce clings better.
- Buy medium or large shrimp; tiny shrimp feel skimpy.
- Add a little horseradish to bottled cocktail sauce if you want more bite.
Variations on This Dish:
- Spicy Shrimp Plate: Stir hot sauce into the cocktail sauce.
- Shrimp and Avocado Plate: Add sliced avocado for a richer version.
Common Mistakes to Avoid with This Dish:
- Using shrimp that smell too fishy: Skip them. Fresh shrimp should smell clean.
- Serving warm shrimp: They lose their snap. Keep them cold.
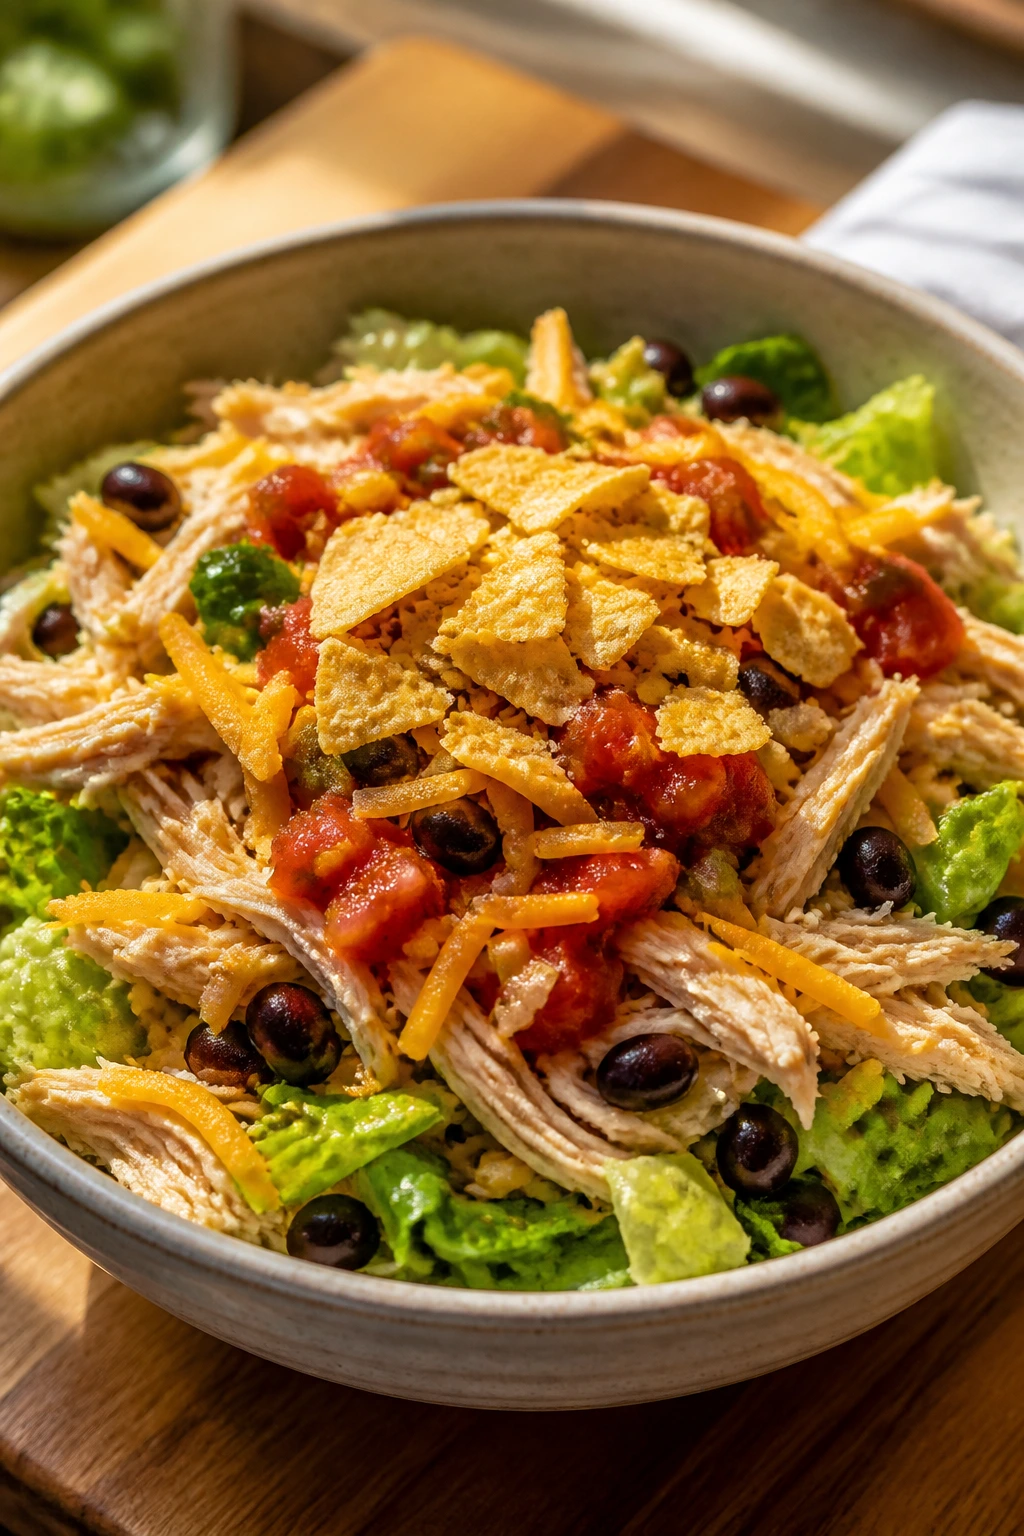
18. Rotisserie Chicken Taco Salads
Intro:
This is what happens when taco night meets a rotisserie chicken and a bag of lettuce. You get a dinner that’s crunchy, savory, and fast enough to put together before anyone asks what’s for dinner again.
Why It Works:
The chicken brings seasoned protein without cooking, and the taco toppings do the rest. Lettuce keeps the salad light, black beans add bulk, and salsa gives the whole bowl a finished taste. Chips or crushed tortilla strips are nonnegotiable if you want texture.
Key Ingredients:
- 2 cups shredded rotisserie chicken
- 3 cups shredded lettuce
- 1/2 cup black beans
- 1/2 cup salsa
- 1/2 cup shredded cheese
- Tortilla chips, optional
Quick Steps:
- Put the lettuce in a large bowl.
- Add chicken, beans, salsa, and cheese.
- Toss lightly, or keep toppings separate for a layered look.
- Finish with crushed chips.
- Serve immediately.
Equipment for This Recipe:
- Large bowl
- Spoon
- Cutting board for chicken shredding
How to Serve This Dish:
Serve it in shallow bowls with lime wedges and sour cream. If you want a fuller plate, add fruit on the side.
Pro Tips for This Recipe:
- Shred the chicken into bite-size pieces, not long strings.
- Keep chips out of the bowl until the last second.
- A spoonful of guacamole makes it feel richer fast.
Variations on This Dish:
- Southwest Version: Add corn and diced peppers.
- Creamy Taco Salad: Use a cilantro-lime dressing instead of salsa alone.
Common Mistakes to Avoid with This Dish:
- Too much wet salsa: The lettuce collapses. Use a thick salsa.
- Over-tossing: The salad gets messy. Fold gently or layer it.
19. Turkey Hummus Crunch Wraps
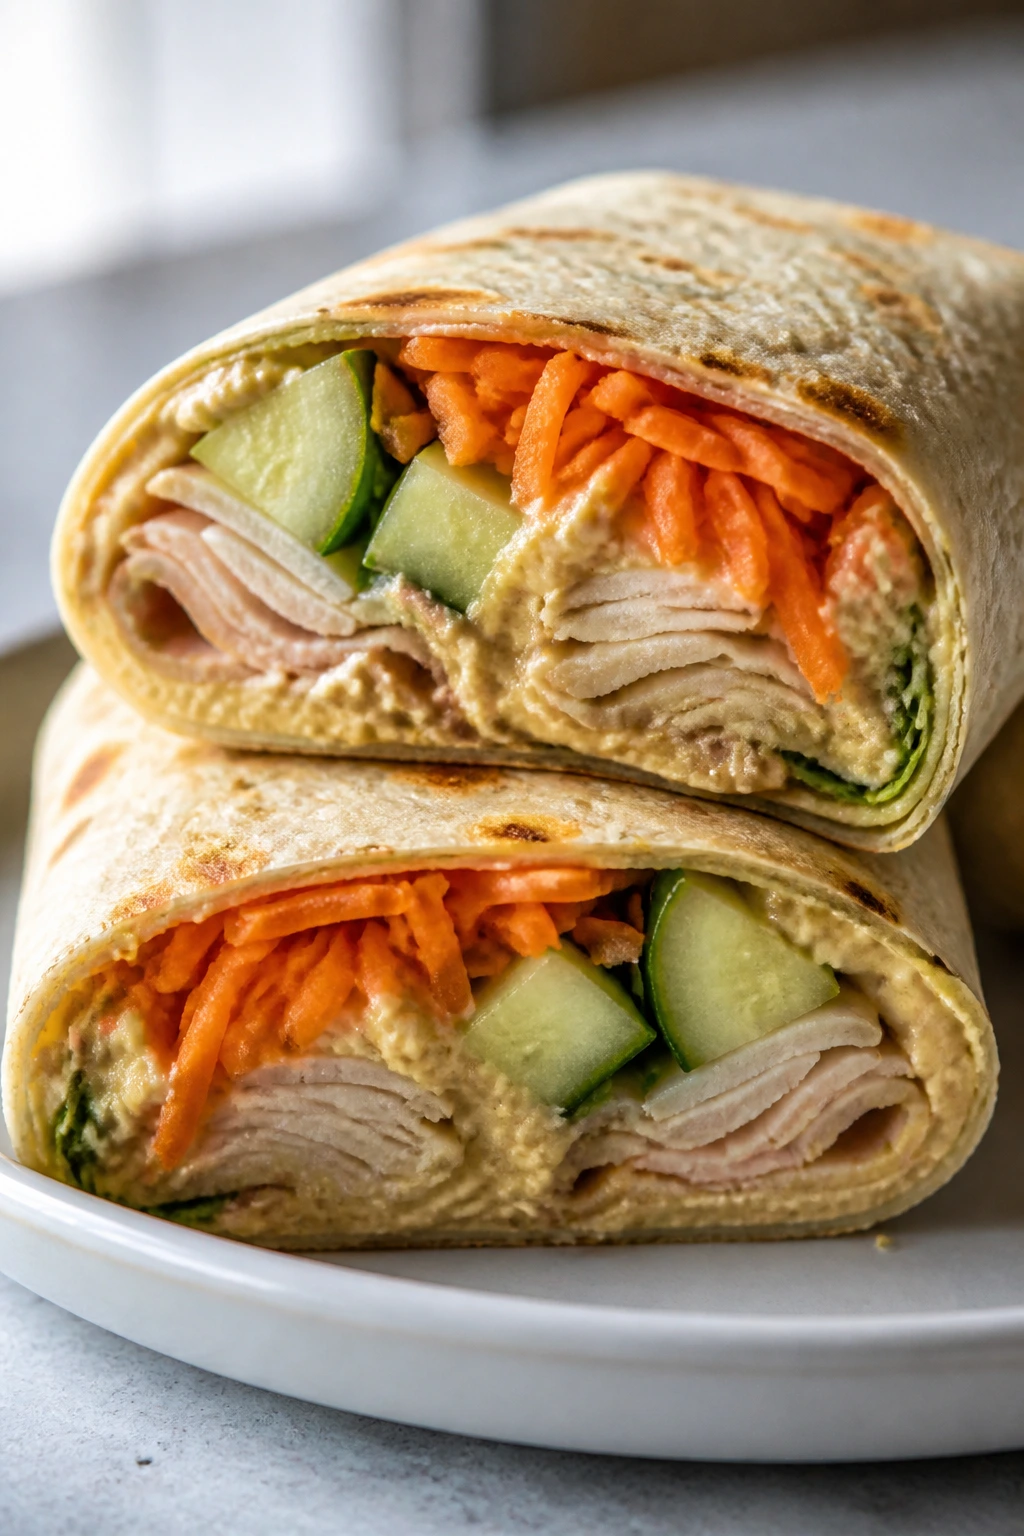
Intro:
Turkey and hummus make a wrap that stays neat, and the crunch comes from cucumber, carrots, or cabbage. It is a better cold lunch than it has any right to be.
Why It Works:
Hummus acts like glue, holding the wrap together without the slickness of mayo. Turkey adds lean protein, and crisp vegetables bring enough texture to keep each bite moving. The tortillas also hold well if you roll them tightly and keep the filling centered.
Key Ingredients:
- 2 large tortillas
- 1/2 cup hummus
- 8 ounces deli turkey
- 1/2 cup shredded carrots
- 1/2 cup sliced cucumber
Quick Steps:
- Spread hummus over each tortilla, leaving a border around the edge.
- Layer turkey, carrots, and cucumber down the middle.
- Fold in the sides and roll tightly.
- Slice in half on a sharp diagonal.
- Serve right away or wrap tightly for later.
Equipment for This Recipe:
- Knife
- Cutting board
- Spoon
How to Serve This Dish:
Pack it with fruit or chips for a full meal. It also works well cut into pinwheel-style slices for a platter.
Pro Tips for This Recipe:
- Pat the cucumber dry so the wrap doesn’t slip.
- Use thin turkey slices; thick ones can make rolling awkward.
- Add a little mustard if the hummus tastes too mellow.
Variations on This Dish:
- Roasted Pepper Wrap: Add jarred roasted peppers for sweetness.
- Herb Wrap: Stir chopped dill or parsley into the hummus.
Common Mistakes to Avoid with This Dish:
- Filling too close to the edge: The wrap tears. Keep a border.
- Wet vegetables: They make the tortilla slide. Dry them first.
20. Deli Meat Pinwheels
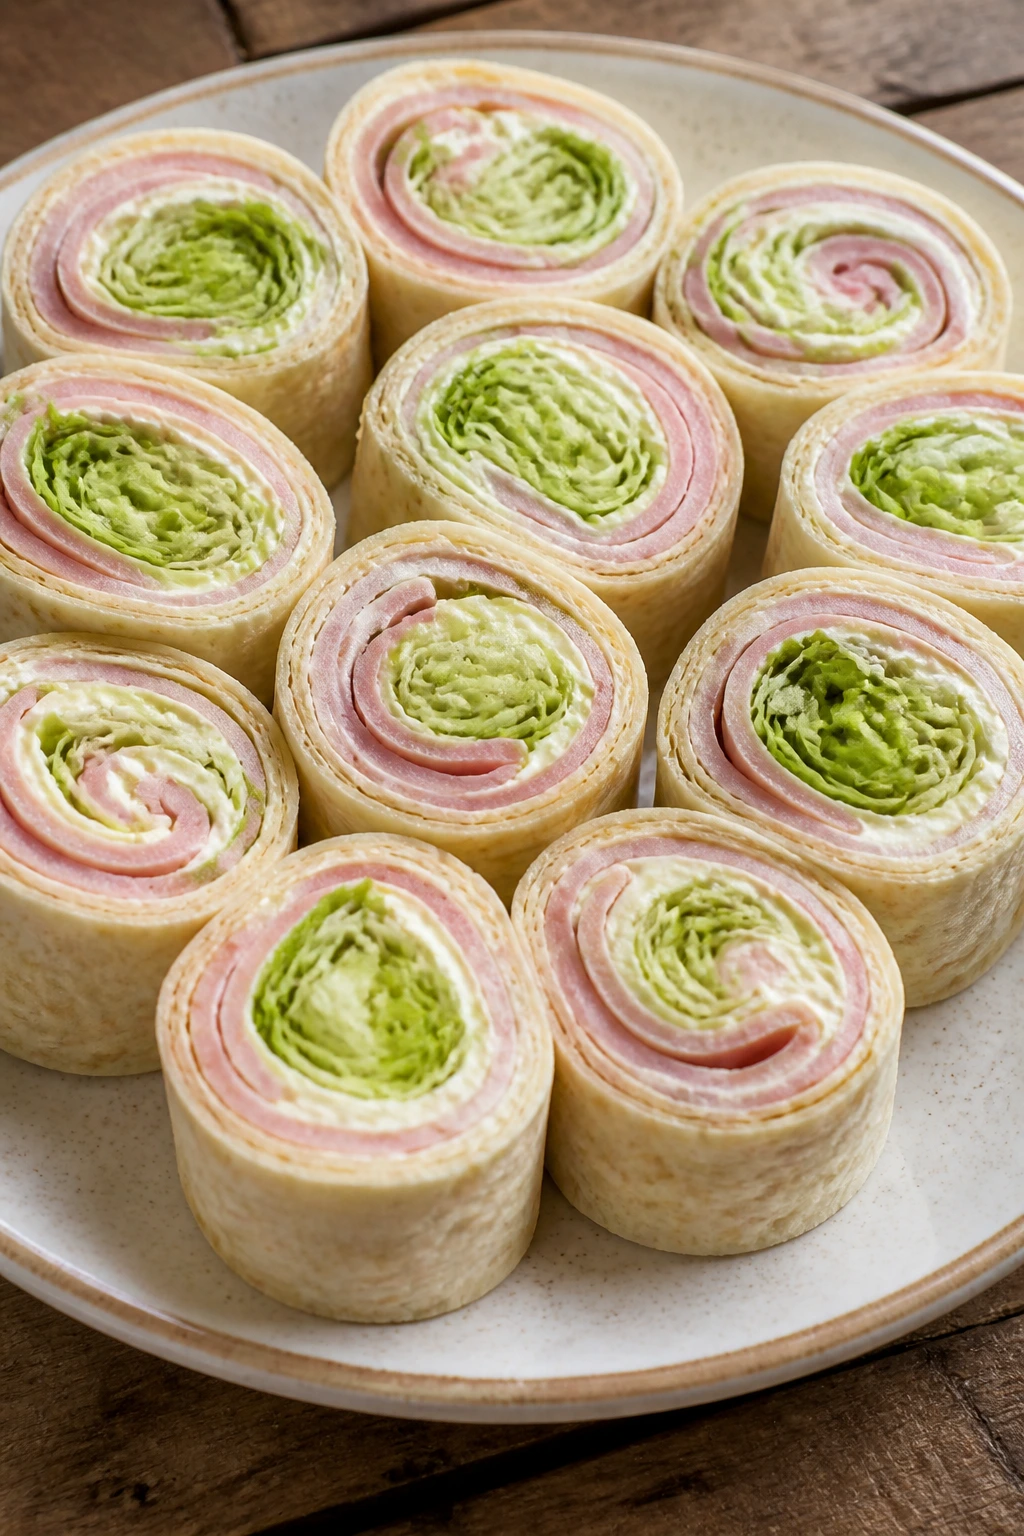
Intro:
These are small, but they disappear quickly, which tells you most of what you need to know. Tortillas, cream cheese, deli meat, and a little crunch make them tidy, snacky, and useful for a no-cook dinner.
Why It Works:
Cream cheese helps everything stick, and deli meat gives enough salt to carry the wrap. A thin layer of shredded lettuce or pickle strips adds texture without making the roll fall apart. Pinwheels are also easier for kids and grazers than a full sandwich.
Key Ingredients:
- 2 large tortillas
- 4 ounces cream cheese, softened
- 8 ounces deli ham or turkey
- 1/2 cup shredded lettuce
- 2 tablespoons chopped pickles, optional
Quick Steps:
- Spread cream cheese evenly over each tortilla.
- Layer deli meat, lettuce, and pickles.
- Roll each tortilla tightly into a log.
- Chill 5 minutes if you want cleaner slices.
- Cut into 1-inch pinwheels and serve.
Equipment for This Recipe:
- Knife
- Cutting board
- Spoon or spatula
How to Serve This Dish:
Put the pinwheels on a plate with grapes, chips, or baby carrots. They work as a main meal when paired with a big salad.
Pro Tips for This Recipe:
- Let the cream cheese soften so it spreads without tearing the tortilla.
- Use a very sharp knife for clean slices.
- Do not overfill; pinwheels need restraint.
Variations on This Dish:
- Italian Pinwheels: Use salami, mozzarella, and a little pesto.
- Ranch Pinwheels: Mix ranch seasoning into the cream cheese.
Common Mistakes to Avoid with This Dish:
- Rolling loosely: The pinwheels unravel. Tight rolls slice better.
- Slicing too soon: They smear. Chill first if you can.
21. Loaded Greek Salad with Feta and Chickpeas
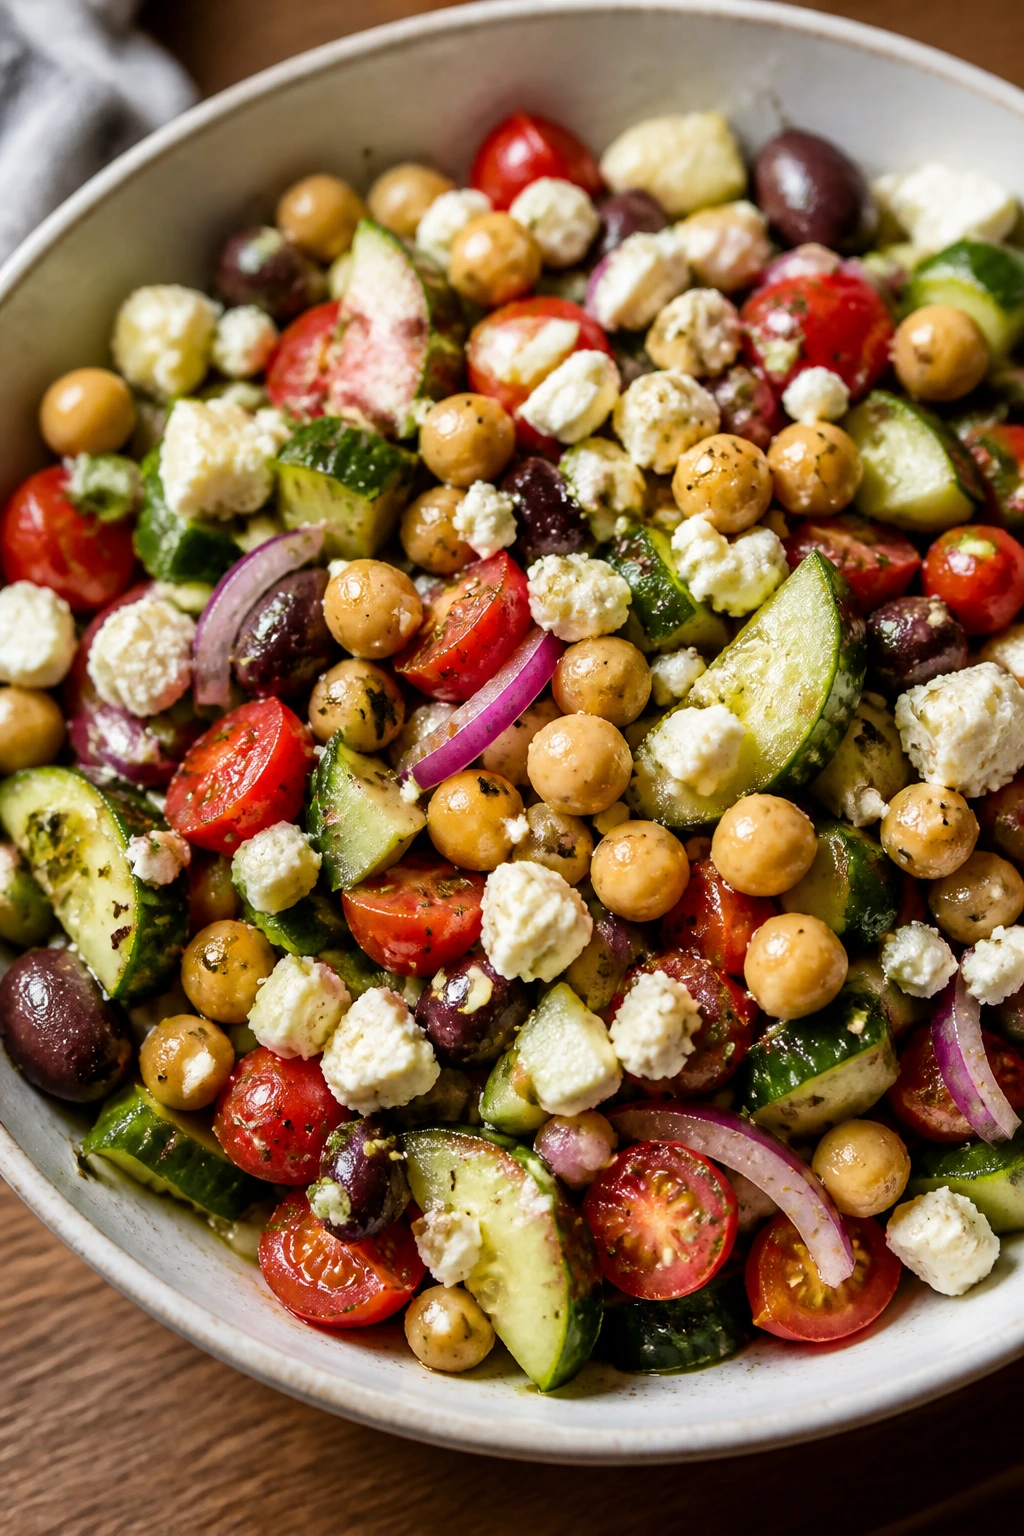
Intro:
A Greek salad gets much better when you stop treating it like a side dish. Add chickpeas and feta in proper amounts, and it becomes a dinner that actually fills the plate.
Why It Works:
The chickpeas give the salad muscle, the feta adds salt, and cucumbers and tomatoes keep it cool and sharp. Red onion and olives bring the classic Greek flavor that keeps the bowl from tasting like plain chopped vegetables. A simple olive oil and lemon dressing ties it together.
Key Ingredients:
- 1 can chickpeas, rinsed and drained
- 2 cups chopped cucumber
- 1 cup cherry tomatoes, halved
- 1/2 cup crumbled feta
- 1/4 cup olives
- 2 tablespoons olive oil
Quick Steps:
- Combine chickpeas, cucumber, tomatoes, olives, and feta in a bowl.
- Drizzle with olive oil and lemon juice.
- Season with salt, pepper, and oregano.
- Toss gently so the feta stays in soft chunks.
- Serve chilled or at room temperature.
Equipment for This Recipe:
- Bowl
- Knife
- Cutting board
How to Serve This Dish:
Serve with pita wedges or crackers if you want more heft. It’s also good alongside hummus if you want dinner to feel more spread out.
Pro Tips for This Recipe:
- Use cherry tomatoes if you want less juice pooling at the bottom.
- Soak red onion slices briefly in cold water to soften them.
- Don’t over-toss; the salad is better when the feta stays visible.
Variations on This Dish:
- No-Olive Version: Skip the olives and add capers.
- Protein-Heavy Version: Add sliced turkey or more chickpeas.
Common Mistakes to Avoid with This Dish:
- Too much dressing: The salad turns slick. Use a light hand.
- Chopped vegetables too small: The bowl loses texture. Keep pieces chunky.
22. Prosciutto Melon and Burrata Plate
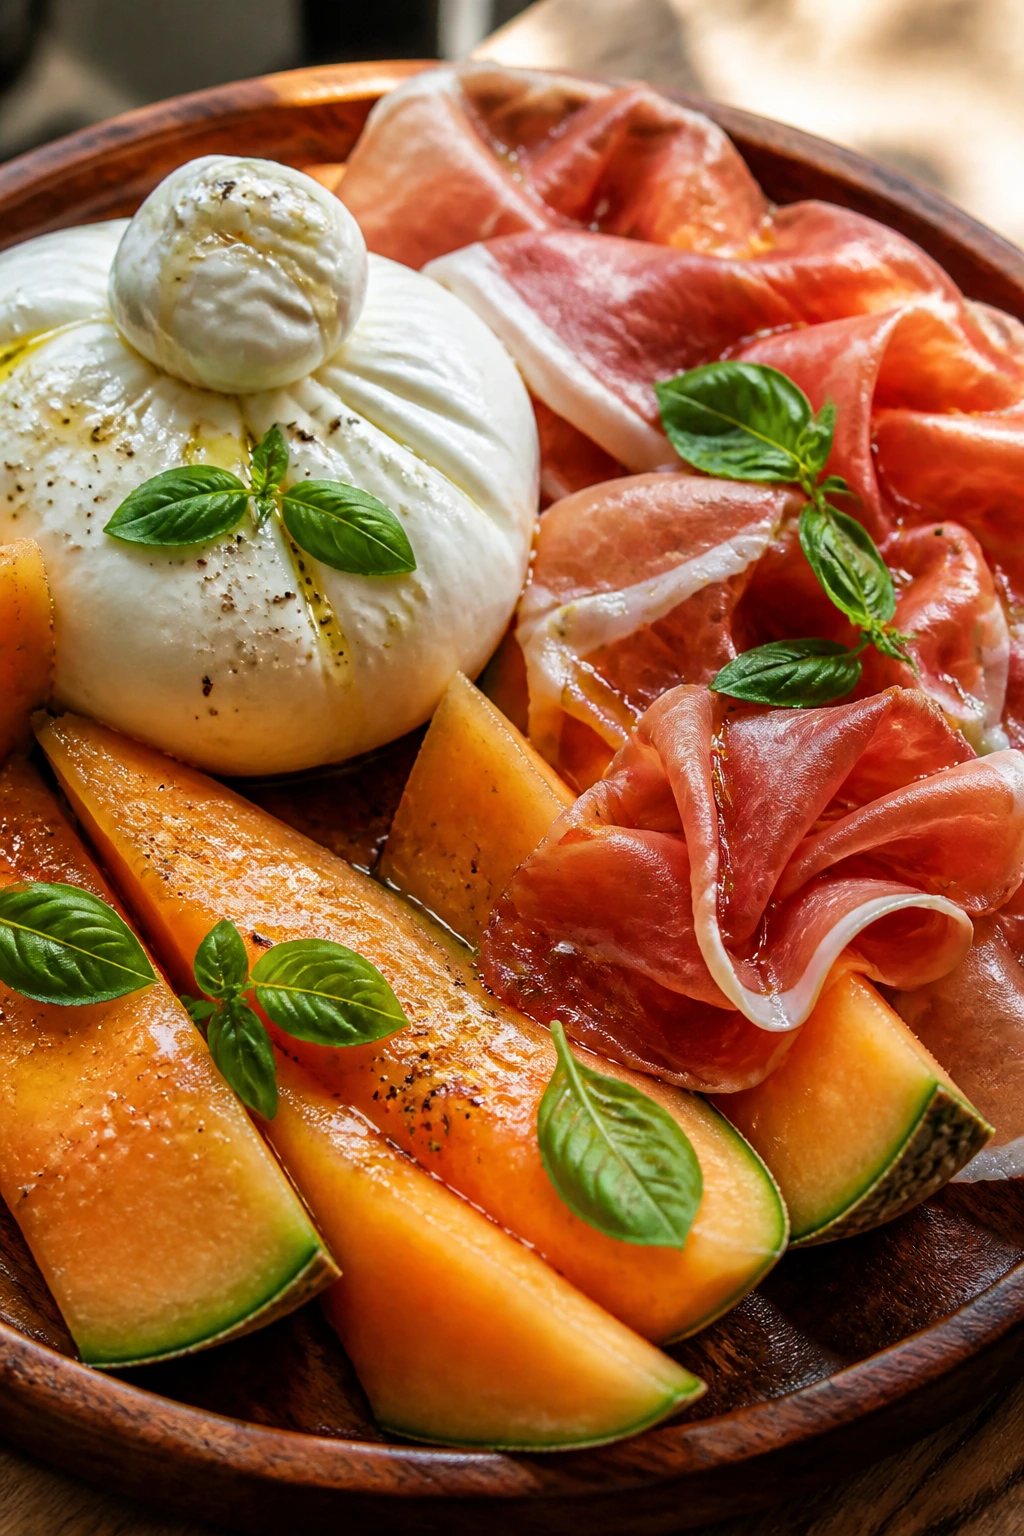
Intro:
Sweet melon, salty prosciutto, and soft burrata make a plate that feels calm and a little lavish. No stove needed. Just a knife and a good platter.
Why It Works:
This combination works because it leans on contrast: sweet, salty, creamy, and cool. Burrata gives you richness without heaviness, and prosciutto provides enough salt that you barely need extra seasoning. A few basil leaves and a drizzle of olive oil finish it cleanly.
Key Ingredients:
- 1 small melon, sliced
- 4 ounces prosciutto
- 1 ball burrata
- 6 basil leaves
- 1 tablespoon olive oil
Quick Steps:
- Slice the melon into wedges or bite-size pieces.
- Tear the prosciutto into loose ribbons.
- Place the burrata in the center of a plate.
- Arrange melon and prosciutto around it.
- Drizzle with olive oil and scatter basil over the top.
Equipment for This Recipe:
- Sharp knife
- Cutting board
- Serving platter
How to Serve This Dish:
Serve with crackers or thin breadsticks if you want something crunchy nearby. A little black pepper on the burrata helps.
Pro Tips for This Recipe:
- Chill the melon before slicing for the best texture.
- Let the burrata sit 10 minutes so it softens.
- Tear the prosciutto instead of folding it flat; it looks and eats better.
Variations on This Dish:
- Peach Season Swap: Use sliced peaches instead of melon.
- Balsamic Finish: Add a few drops of balsamic glaze if you want sweetness and acidity.
Common Mistakes to Avoid with This Dish:
- Serving warm melon: It loses its snap. Keep it cold.
- Too much oil: It blurs the flavors. Use a drizzle, not a pour.
23. Crab Salad Sandwiches
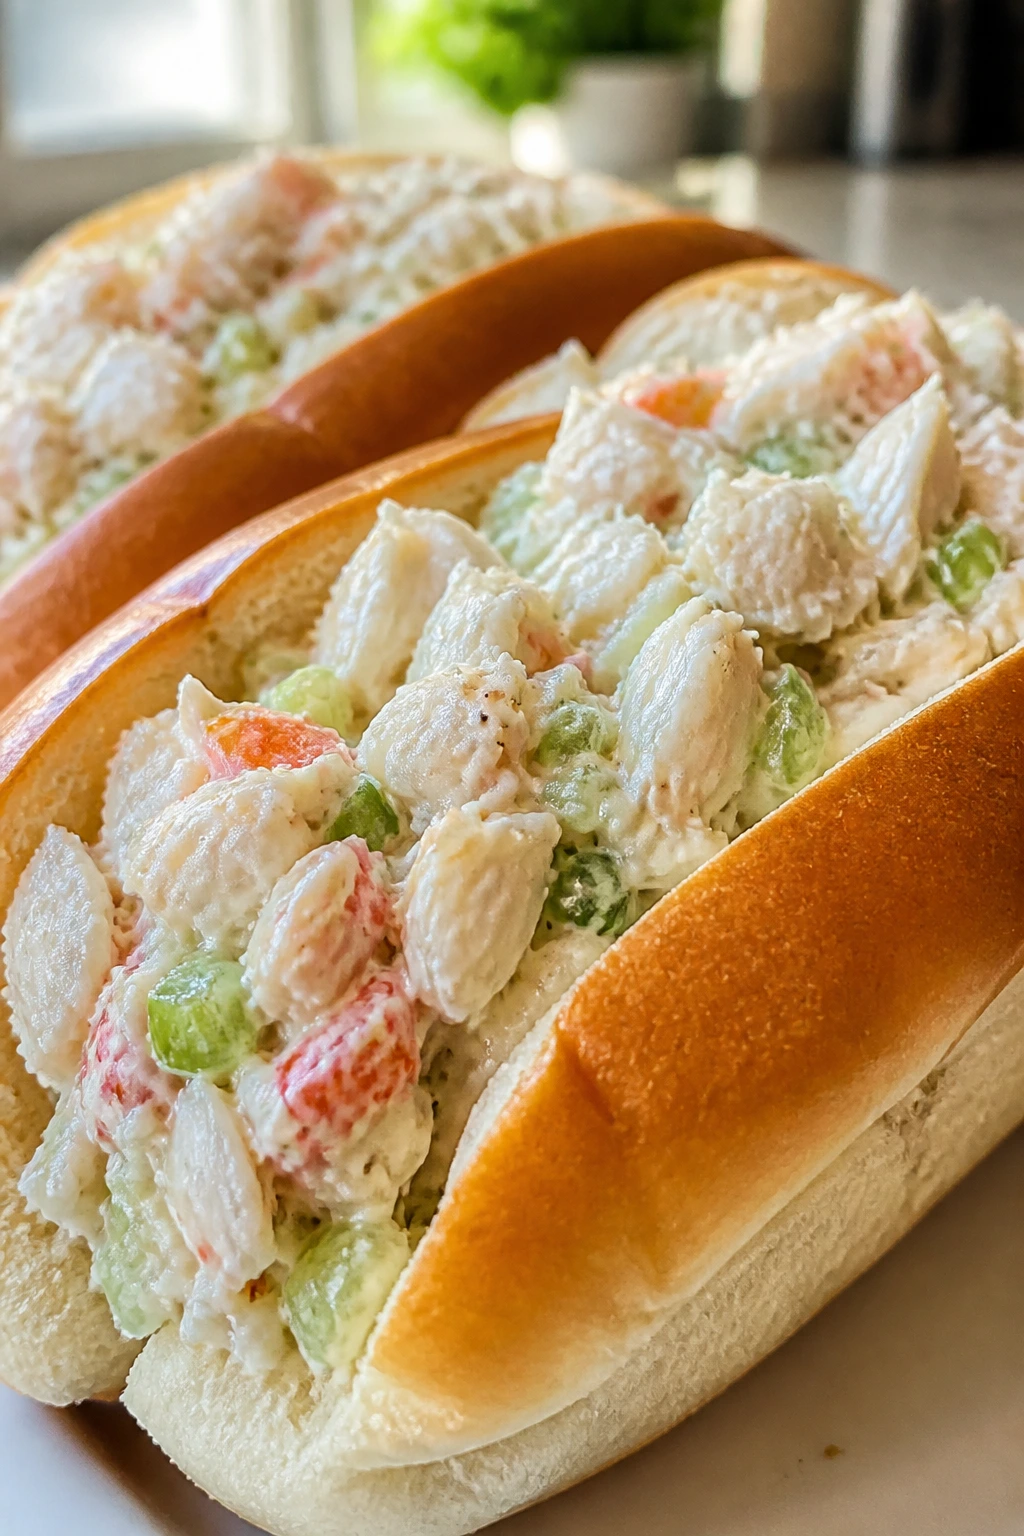
Intro:
Crab salad has a clean, almost sweet flavor that feels right on a busy night when you want something a little different. Mix it gently, pile it into rolls, and stop there.
Why It Works:
Crab or good imitation crab both pair well with a light mayo dressing, celery, and lemon. The bread should be soft enough to bite but sturdy enough not to split under the filling. Because the crab flavor is delicate, you want just enough seasoning to wake it up, not bury it.
Key Ingredients:
- 8 ounces crab meat or imitation crab, chopped
- 2 tablespoons mayo
- 1 celery stalk, finely chopped
- 1 teaspoon lemon juice
- 2 sandwich rolls
Quick Steps:
- Gently mix crab, mayo, celery, and lemon juice.
- Season with salt, pepper, and a pinch of paprika.
- Spoon into split rolls.
- Press the tops down lightly.
- Serve cold with chips or cucumber slices.
Equipment for This Recipe:
- Bowl
- Spoon
- Knife
How to Serve This Dish:
Serve the sandwiches with dill pickles or a simple slaw. A lemon wedge on the plate makes the whole thing taste fresher.
Pro Tips for This Recipe:
- Fold the crab gently so it stays chunky.
- Add a little mustard if you want more edge.
- Drain any excess liquid before mixing.
Variations on This Dish:
- Spicy Crab Roll: Add hot sauce or a pinch of cayenne.
- Avocado Crab Sandwich: Add avocado slices right before serving.
Common Mistakes to Avoid with This Dish:
- Mashing the crab: You lose the texture. Fold, don’t stir hard.
- Too much mayo: It tastes heavy. Start small.
24. Buffalo Chicken Lettuce Wraps
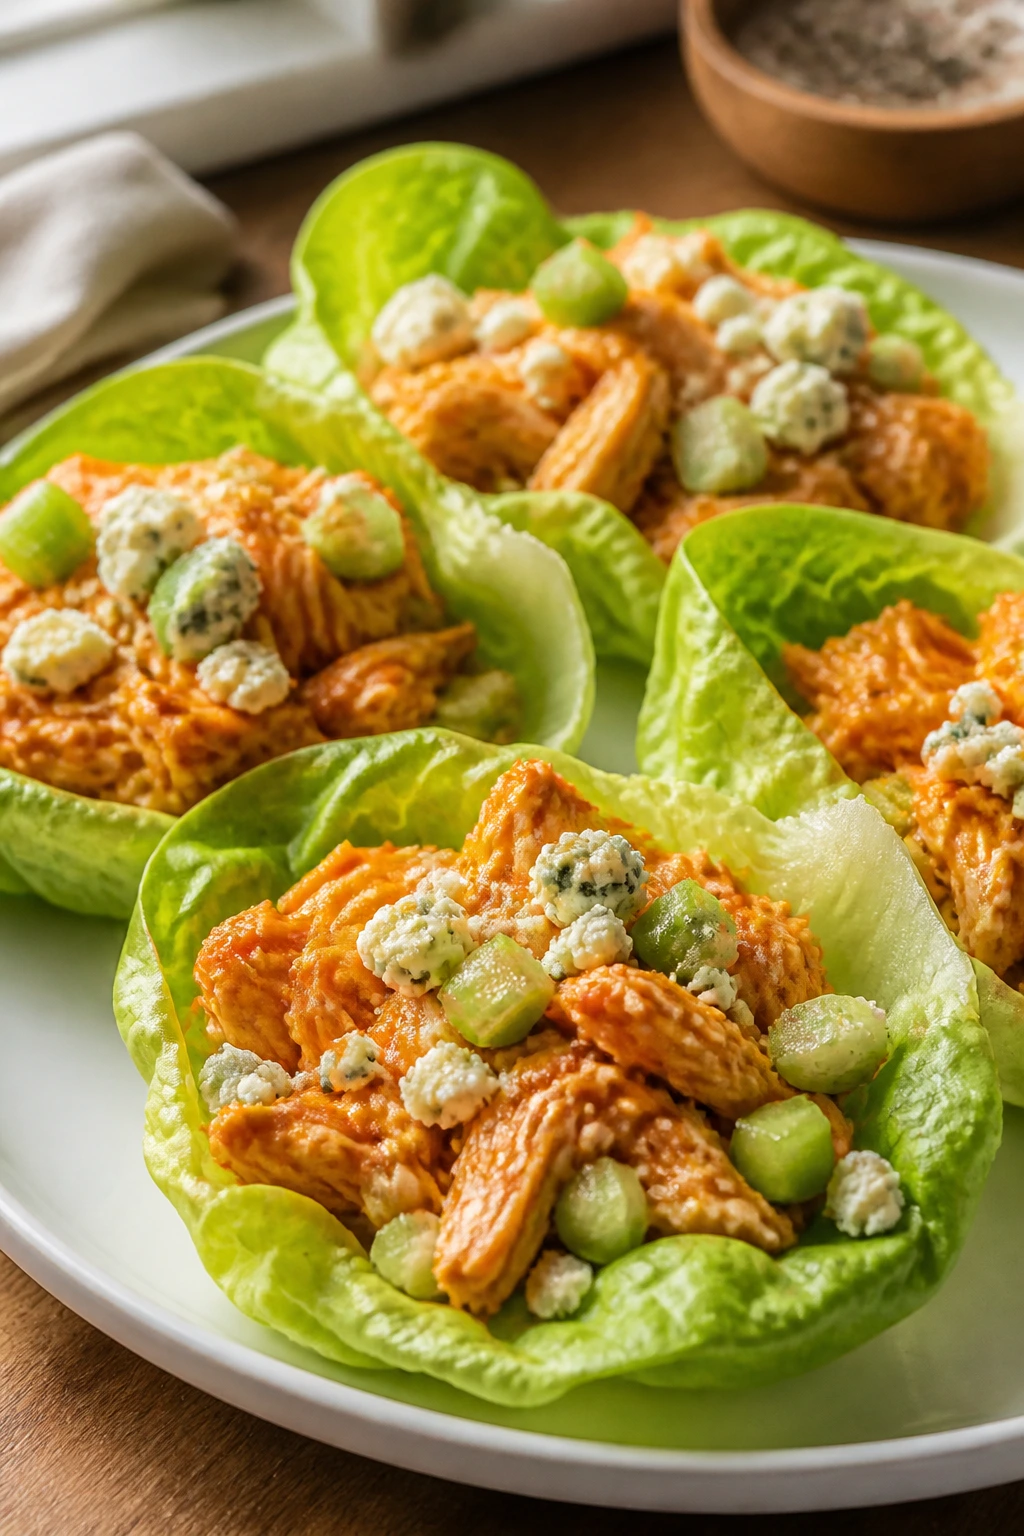
Intro:
Buffalo chicken in lettuce cups is a tidy way to get that hot-wing flavor without wings, frying, or regret. Use shredded cooked chicken and go easy on the sauce if you want the lettuce to stay whole.
Why It Works:
The chicken takes the sauce well, and lettuce provides the cool crunch that balances the heat. Celery and blue cheese or ranch are not optional if you want the flavor to read as buffalo instead of just spicy chicken. This is one of the stronger low-carb no-cook dinners on the list.
Key Ingredients:
- 2 cups shredded cooked chicken
- 3 tablespoons buffalo sauce
- 8 butter lettuce leaves
- 1/2 cup chopped celery
- 2 tablespoons blue cheese or ranch
Quick Steps:
- Toss the chicken with buffalo sauce.
- Spoon the mixture into lettuce leaves.
- Top with celery and blue cheese or ranch.
- Fold the leaves gently over the filling.
- Serve immediately with extra sauce on the side.
Equipment for This Recipe:
- Bowl
- Spoon
- Knife
How to Serve This Dish:
Set the wraps on a chilled plate with carrot sticks. If you want more body, add crackers or a few celery sticks to the plate.
Pro Tips for This Recipe:
- Use less sauce than you think at first, then add more.
- Butter lettuce bends better than romaine.
- Celery gives the wrap the crunch it needs, so don’t skip it.
Variations on This Dish:
- Ranch Buffalo Wrap: Swap blue cheese for ranch.
- Mild Version: Mix the buffalo sauce with mayo to soften the heat.
Common Mistakes to Avoid with This Dish:
- Sauce overload: The lettuce breaks. Add gradually.
- Using wilted lettuce: The wraps fall apart. Pick fresh leaves.
25. Store-Bought Sushi Dinner Plates
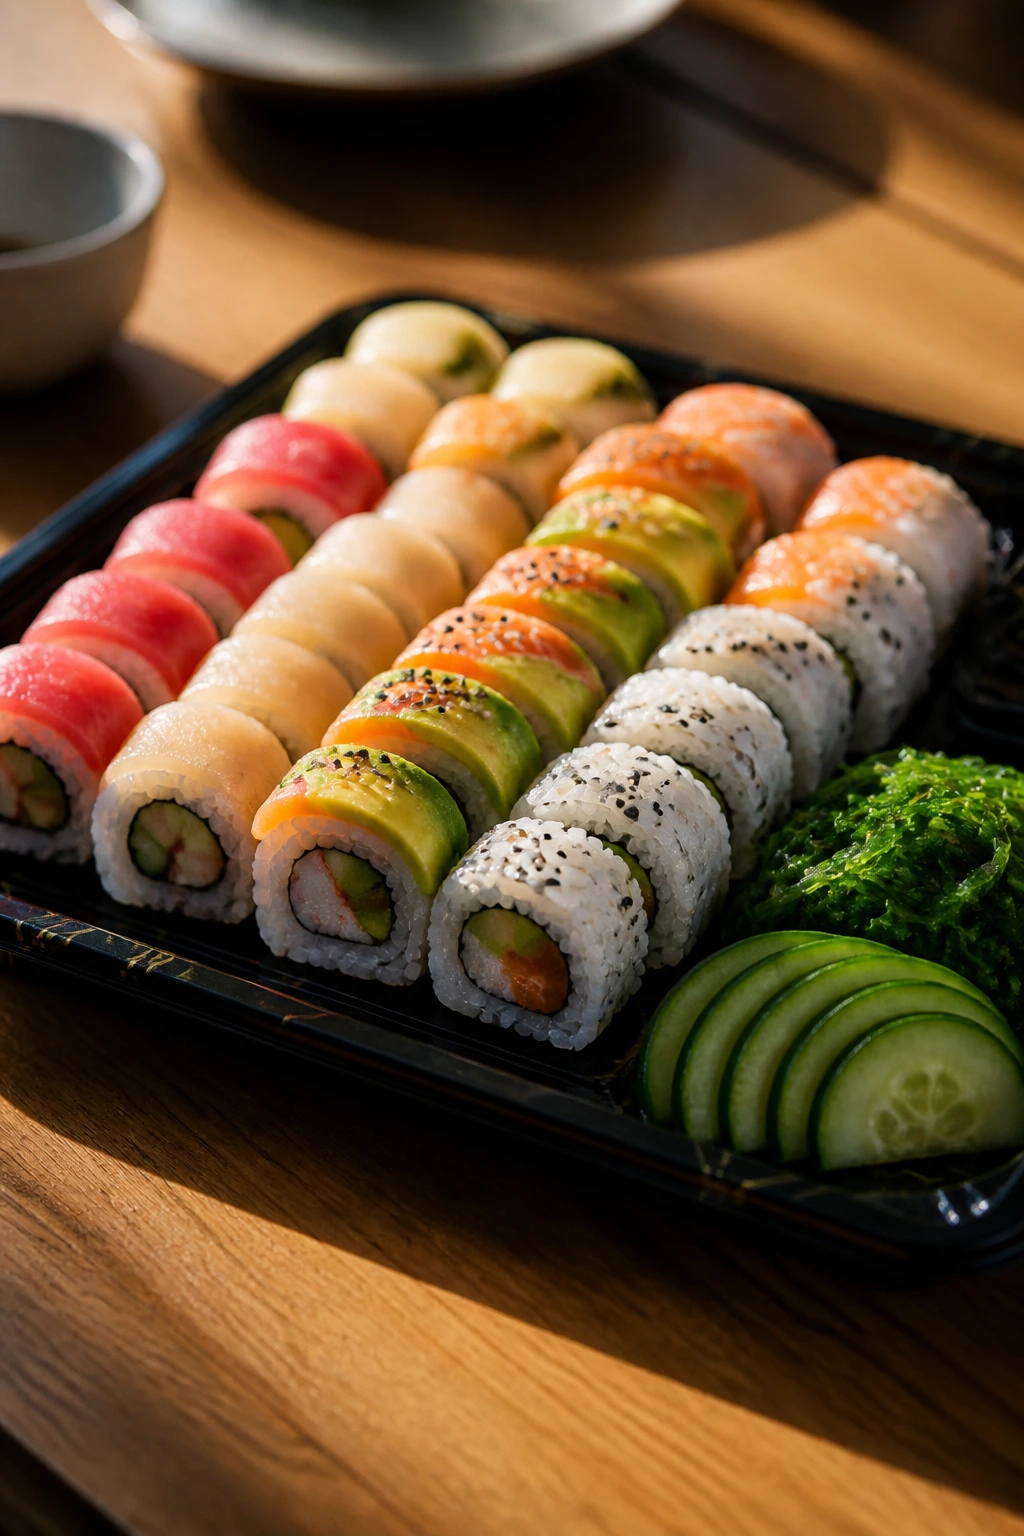
Intro:
Sometimes the smartest no-cook dinner is the one someone else already rolled. A store-bought sushi plate, plus a few simple sides, makes a respectable meal when the night is running away.
Why It Works:
Sushi gives you rice, protein, and vegetables in one package, and you don’t have to assemble any of it yourself. The side dishes matter here: sliced cucumber, edamame, or seaweed salad make the plate feel more complete. Freshness is the main thing to check.
Key Ingredients:
- 1 store-bought sushi tray
- 1 cucumber, sliced
- 1 small container seaweed salad
- Soy sauce, optional
- Pickled ginger, optional
Quick Steps:
- Check the sushi for freshness and keep it chilled until serving.
- Arrange the rolls on a plate with cucumber and seaweed salad.
- Add soy sauce and ginger in small dishes.
- Let it sit only a few minutes before eating.
- Eat promptly for the best texture.
Equipment for This Recipe:
- Plate or tray
- Small bowls
- Chopsticks, optional
How to Serve This Dish:
Serve the sushi with miso soup if you happen to have it, or just a crisp salad. It feels more like dinner when you plate it rather than eating from the plastic tray.
Pro Tips for This Recipe:
- Buy sushi from a place with fast turnover.
- Keep it cold until the last minute.
- Do not drown it in soy sauce; a little goes far.
Variations on This Dish:
- Spicy Roll Night: Choose spicy tuna or spicy salmon rolls.
- Vegetarian Plate: Pair avocado or cucumber rolls with extra seaweed salad.
Common Mistakes to Avoid with This Dish:
- Letting sushi sit out: Texture drops fast. Serve it cold.
- Too much soy sauce: It overpowers the rice. Use sparingly.
26. BLT Salad Bowls
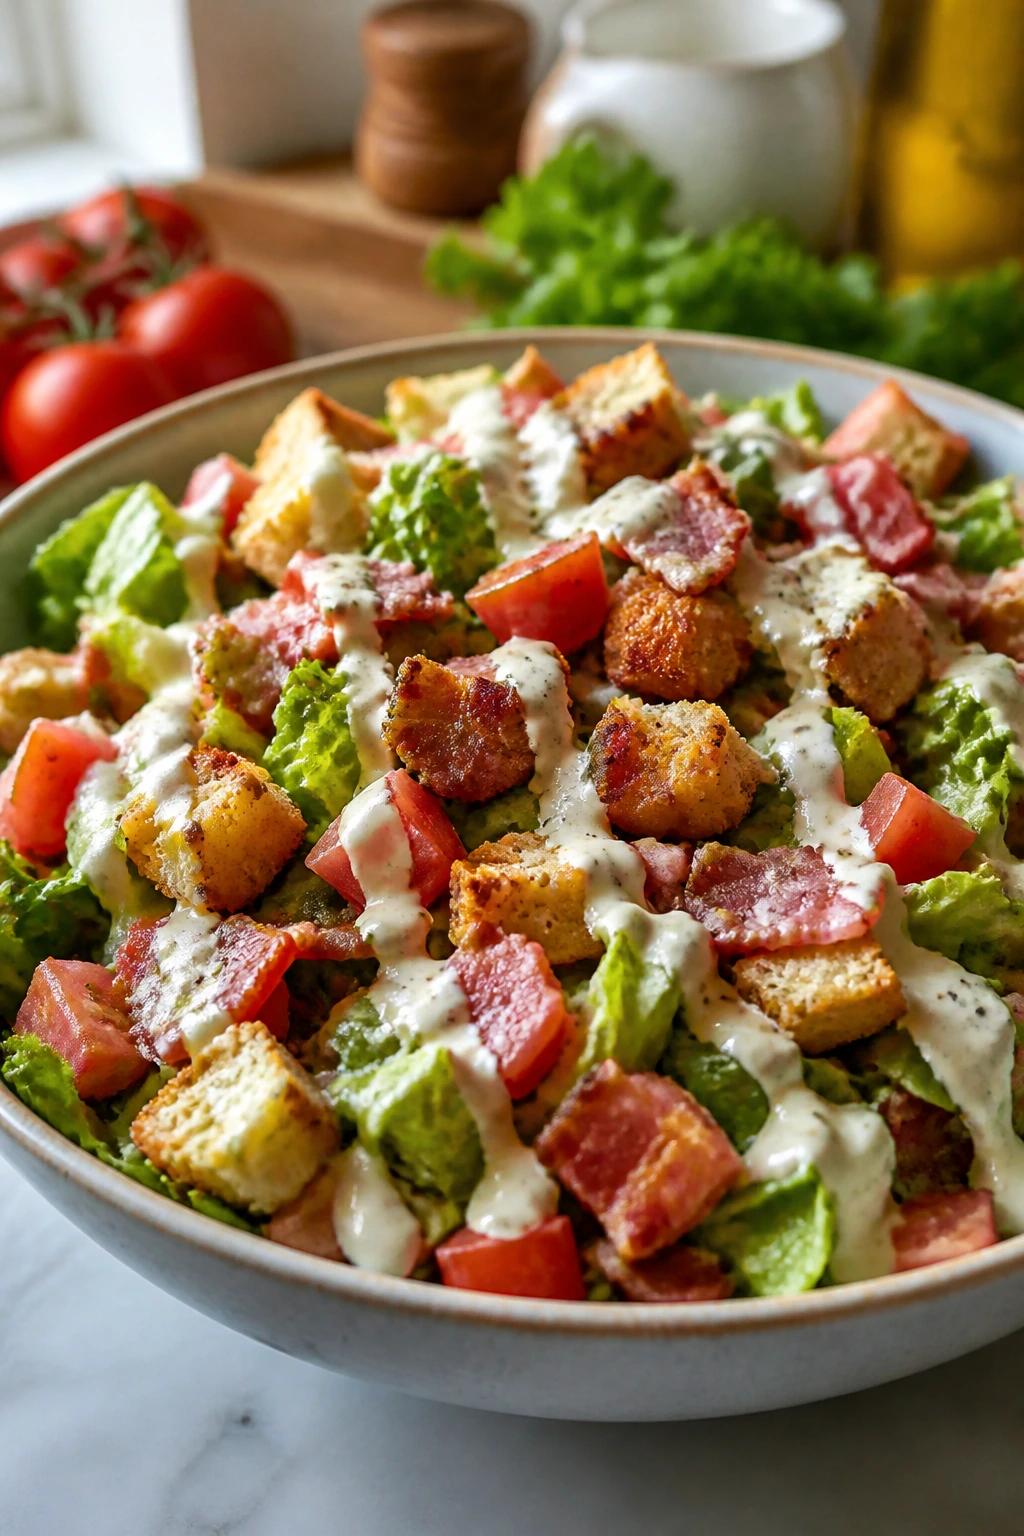
Intro:
A BLT in bowl form solves the only real problem with the sandwich: the bread. You get bacon flavor, tomato, lettuce, and a creamy dressing, but with more room for crunch.
Why It Works:
Using ready-to-eat bacon or leftover bacon keeps this meal within no-cook territory. The lettuce carries the bowl, tomatoes add juiciness, and a little mayo-based dressing ties it back to the sandwich it came from. Croutons or crackers can still show up if you want crunch.
Key Ingredients:
- 3 cups chopped lettuce
- 1 tomato, chopped
- 1/2 cup ready-to-eat bacon pieces
- 2 tablespoons mayo
- 1 cup croutons or crackers
Quick Steps:
- Put the lettuce in a wide bowl.
- Add tomato and bacon pieces.
- Drizzle with mayo or a thin mayo-dressing mix.
- Top with croutons just before serving.
- Toss lightly at the table or eat in layers.
Equipment for This Recipe:
- Large bowl
- Knife
- Spoon
How to Serve This Dish:
Serve with a few extra tomato wedges and pickles. It’s also good with a slice of crusty bread if you want to nudge it toward dinner.
Pro Tips for This Recipe:
- Use ripe but firm tomatoes so the bowl doesn’t go watery.
- Keep croutons separate until the end.
- A touch of black pepper makes the bacon pop.
Variations on This Dish:
- Avocado BLT Bowl: Add avocado cubes for more richness.
- Ranch BLT Bowl: Use ranch dressing instead of mayo.
Common Mistakes to Avoid with This Dish:
- Soggy lettuce: Dress lightly. You can always add more.
- Warm bacon pieces: They make the greens wilt. Cool them first.
27. Mediterranean Tuna Stuffed Tomatoes
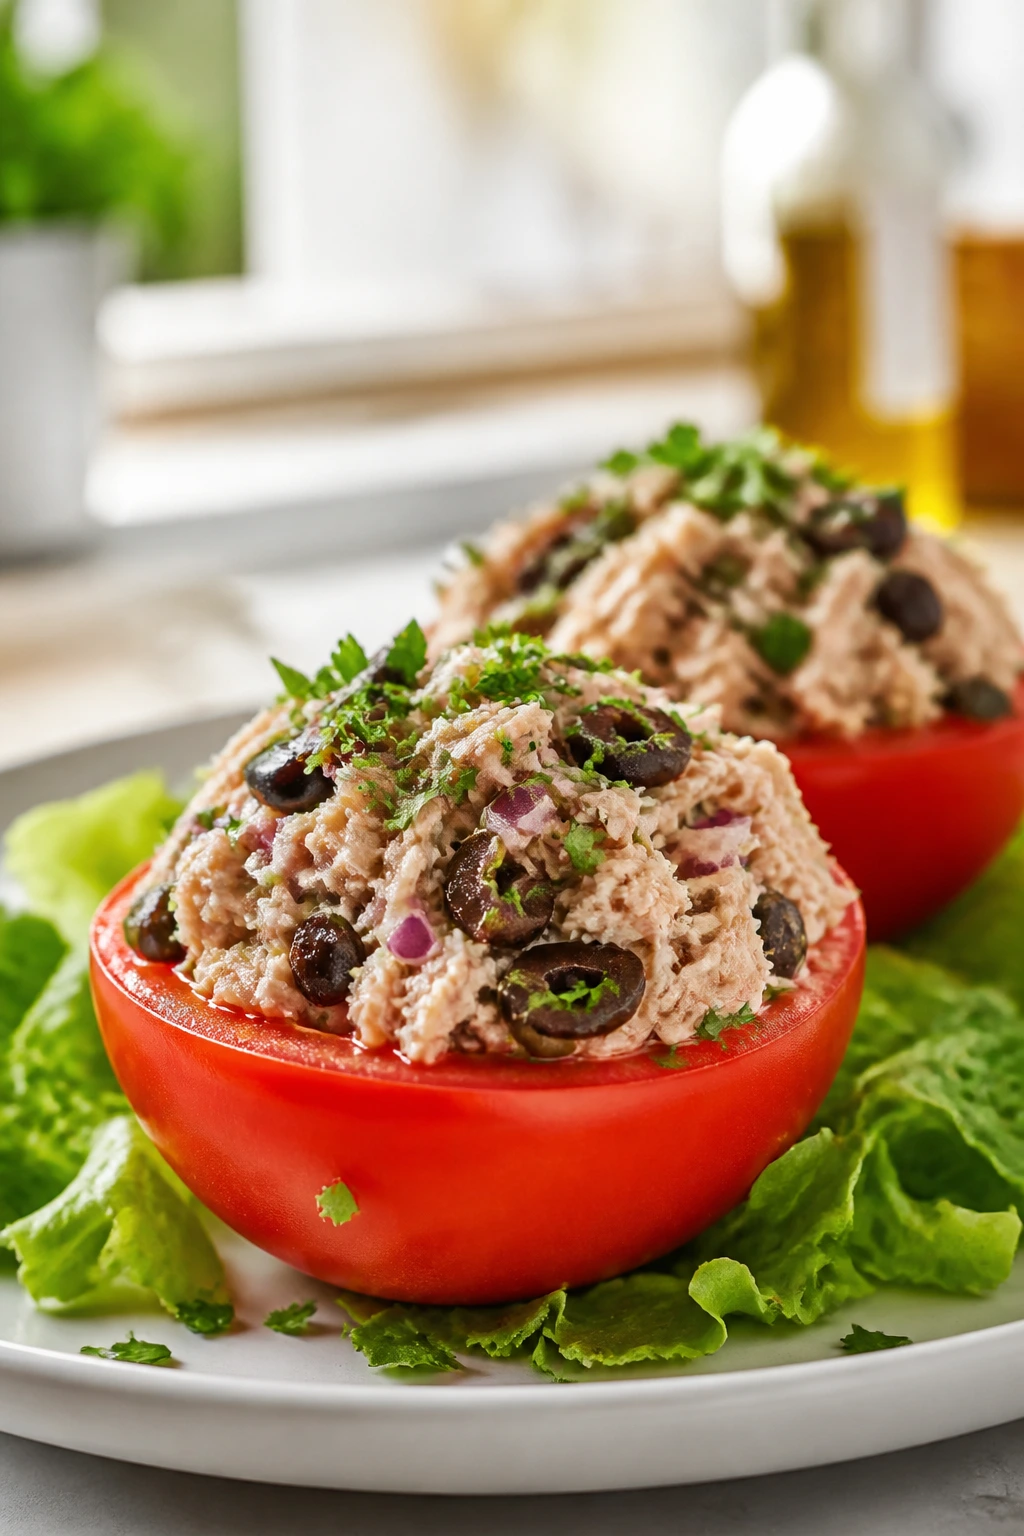
Intro:
Stuffing tomatoes turns a simple tuna salad into something that looks like it tried harder. The tomato gives you juice and shape, while the filling stays cold and savory.
Why It Works:
The tomato shell adds freshness and a bit of sweetness that tuna salad likes. Olives, herbs, and a little lemon keep the filling bright, and the format makes portioning easy. This is a strong option when you want a no-cook meal that feels neat on the plate.
Key Ingredients:
- 4 large tomatoes
- 2 cans tuna, drained
- 2 tablespoons mayo or Greek yogurt
- 2 tablespoons chopped olives
- 1 tablespoon chopped parsley
Quick Steps:
- Cut the tops off the tomatoes and scoop out some seeds.
- Mix tuna, mayo, olives, and parsley.
- Spoon the filling into the tomatoes.
- Chill briefly if you want them firmer.
- Serve on a bed of lettuce.
Equipment for This Recipe:
- Knife
- Spoon
- Bowl
How to Serve This Dish:
Serve two stuffed tomatoes per person with crackers on the side. A green salad makes the plate feel more substantial if needed.
Pro Tips for This Recipe:
- Hollow the tomatoes enough to hold the filling, but don’t shred the walls.
- Drain the tuna thoroughly.
- A pinch of oregano gives the filling a Mediterranean edge.
Variations on This Dish:
- Capers and Dill: Swap parsley for dill and add capers.
- Creamy Version: Add a spoonful of Greek yogurt for a lighter dressing.
Common Mistakes to Avoid with This Dish:
- Tomatoes too soft: They collapse. Pick firm ones.
- Loose filling: Drain wet ingredients first.
28. Smashed Chickpea Sandwiches
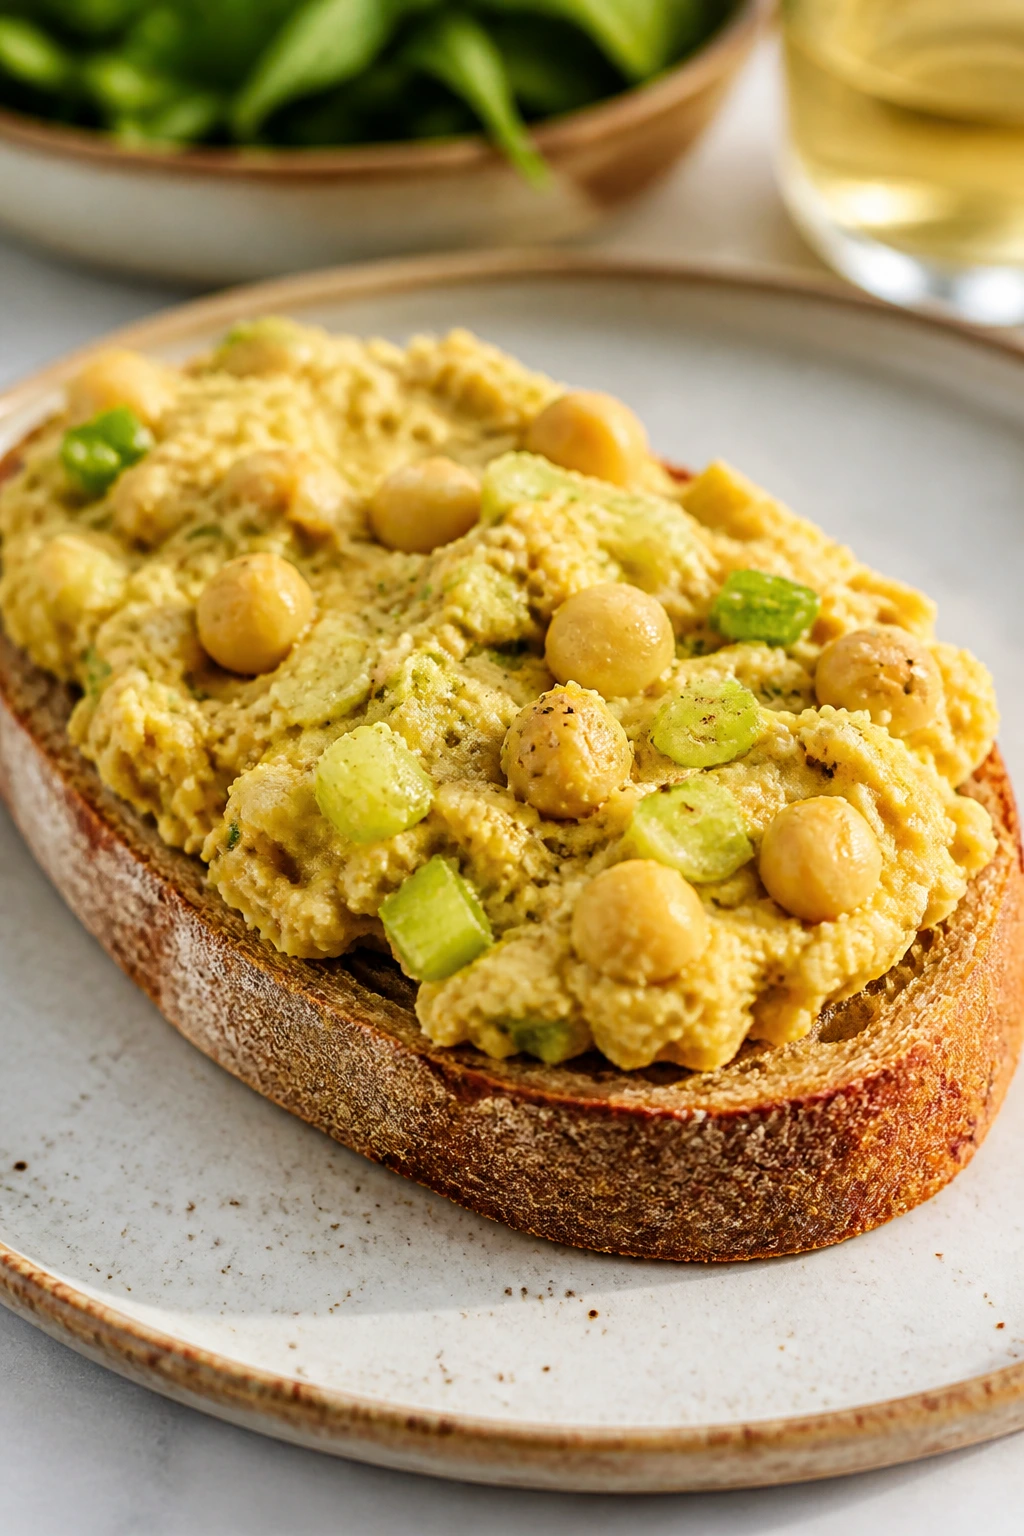
Intro:
This is the no-cook sandwich I reach for when I want the shape of tuna salad and the flavor of something greener. Chickpeas, mustard, mayo, and celery make a filling that holds together better than it should.
Why It Works:
Smashed chickpeas have enough texture to mimic a soft sandwich filling without cooking anything. The mustard keeps the flavor sharp, celery adds crunch, and bread gives the whole thing enough weight for dinner. It’s cheap, too, which never hurts.
Key Ingredients:
- 1 can chickpeas, rinsed and drained
- 2 tablespoons mayo
- 1 teaspoon Dijon mustard
- 1 celery stalk, chopped
- 4 slices bread
Quick Steps:
- Mash the chickpeas with a fork until mostly broken.
- Stir in mayo, mustard, and celery.
- Season with salt and pepper.
- Spread the mixture onto bread and top with lettuce if you want it.
- Cut and serve.
Equipment for This Recipe:
- Bowl
- Fork
- Knife
How to Serve This Dish:
Serve with pickles or carrot sticks. It also works on crackers if you want a faster, lighter plate.
Pro Tips for This Recipe:
- Leave some chickpeas whole for texture.
- Add chopped dill if you want more freshness.
- Toast is fine if already made, but the sandwich does not need it.
Variations on This Dish:
- Curried Chickpea Sandwich: Add curry powder and raisins.
- Avocado Chickpea Mash: Fold in avocado right before serving.
Common Mistakes to Avoid with This Dish:
- Too fine a mash: It gets gluey. Keep some chunks.
- Not seasoning enough: Chickpeas need salt and acid.
29. Deli Turkey Antipasto Roll-Ups
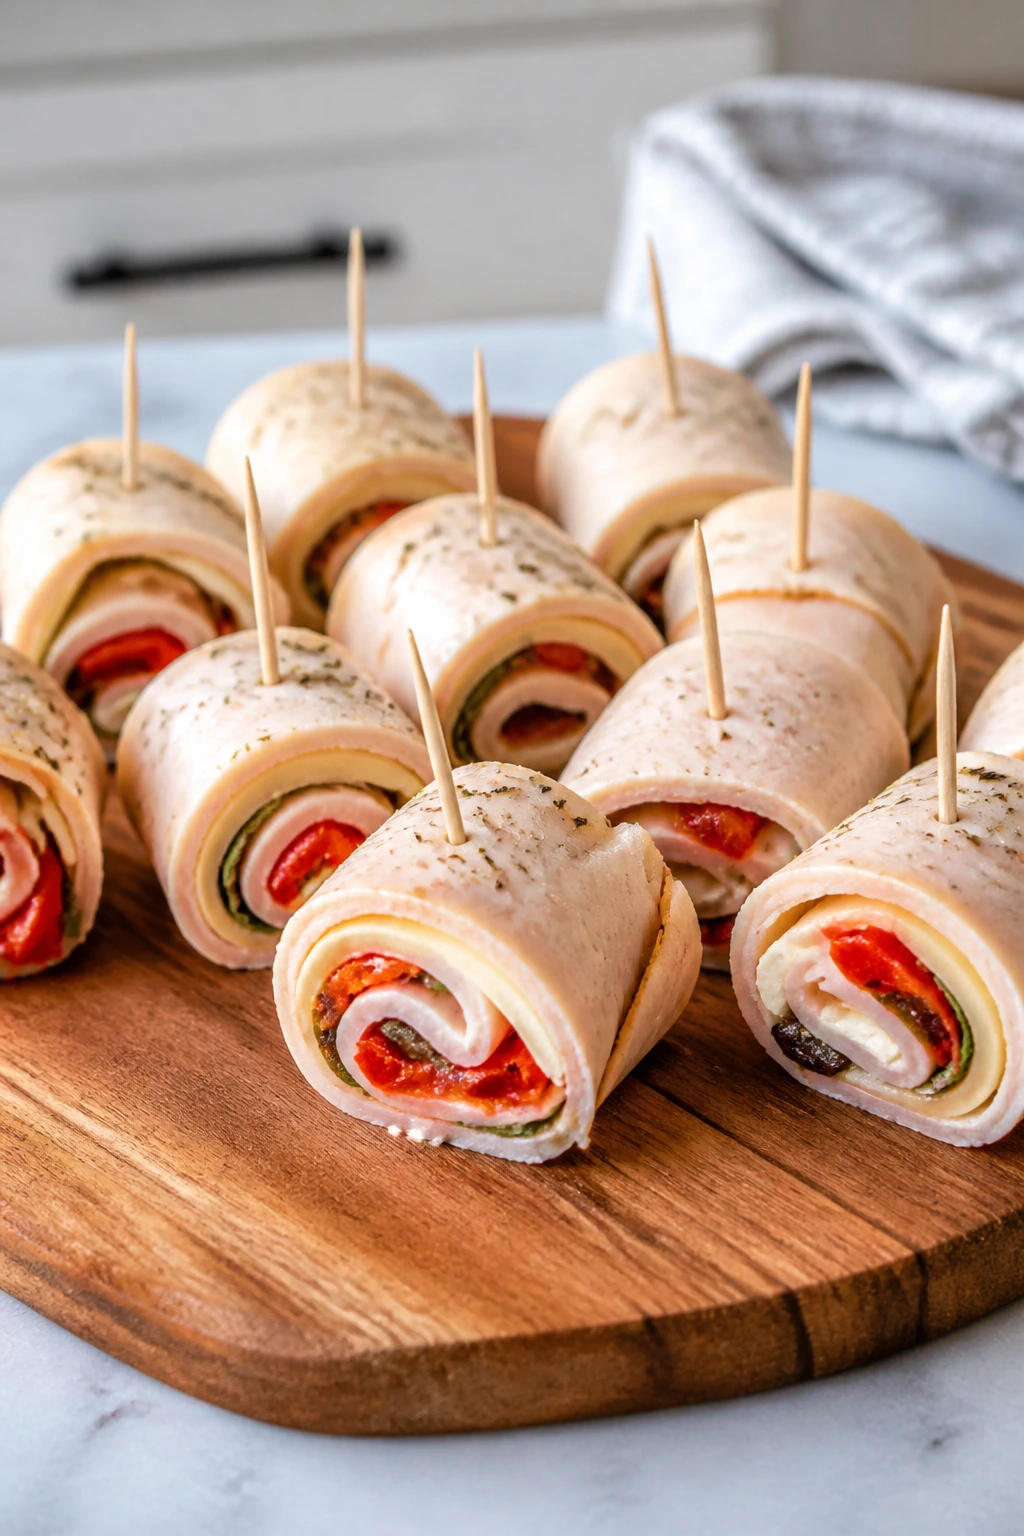
Intro:
Roll-ups are what you make when you want a cold meal that behaves itself. Turkey, cheese, peppers, and a little mustard or pesto create neat little bundles with no bread in the way.
Why It Works:
The deli turkey acts like a wrapper, which means you can layer in strong flavors without making the whole thing heavy. Roasted peppers, cheese, and mustard or pesto give enough salt and acid to keep each bite interesting. They travel well, too.
Key Ingredients:
- 8 slices deli turkey
- 4 slices provolone or mozzarella
- 1/4 cup roasted red peppers
- 2 tablespoons mustard or pesto
- Toothpicks, optional
Quick Steps:
- Lay the turkey slices flat.
- Spread a thin line of mustard or pesto on each slice.
- Add cheese and a strip of roasted pepper.
- Roll each one tightly and secure if needed.
- Serve as-is or slice into bite-size pieces.
Equipment for This Recipe:
- Cutting board
- Knife
- Toothpicks, optional
How to Serve This Dish:
Set them on a platter with olives and grapes. If you want more dinner energy, add a handful of crackers or a side salad.
Pro Tips for This Recipe:
- Dry the roasted peppers first.
- Use thin but not fragile turkey slices.
- Slice the roll-ups into coins only if you want a party-style plate.
Variations on This Dish:
- Pesto Roll-Ups: Use basil pesto for a greener flavor.
- Spicy Roll-Ups: Add sliced pepperoncini or a little hot mustard.
Common Mistakes to Avoid with This Dish:
- Wet fillings: They slide out. Pat peppers dry.
- Rolled too loosely: They unravel. Roll them tight.
30. Smoked Trout Rye Open-Face Plates

Intro:
Smoked trout does not get enough attention, and that’s a shame. It has a richer, softer flavor than tuna and feels tailor-made for cold bread or crisp crackers.
Why It Works:
The smoky fish pairs well with cucumber, dill, and a little yogurt or cream cheese. Rye bread or crackers gives the plate structure, and lemon keeps the fish from tasting heavy. This is a good one when you want something adult and quick.
Key Ingredients:
- 4 slices rye bread or rye crackers
- 4 ounces smoked trout
- 2 tablespoons cream cheese or yogurt
- 1/2 cucumber, sliced
- 1 tablespoon chopped dill
Quick Steps:
- Spread cream cheese or yogurt over the bread or crackers.
- Layer smoked trout and cucumber on top.
- Scatter dill over the plate.
- Add lemon zest or lemon juice if you want brightness.
- Serve immediately.
Equipment for This Recipe:
- Knife
- Cutting board
- Spoon
How to Serve This Dish:
Serve open-faced so the fish stays visible and the rye stays crisp. A few capers make a sharp sidekick.
Pro Tips for This Recipe:
- Use thin cucumber slices so the bread stays balanced.
- Keep the trout chilled until serving.
- Rye crackers hold up longer than soft rye slices.
Variations on This Dish:
- Caper Trout Plate: Add capers and chopped red onion.
- Herb Cream Version: Mix dill into the cream cheese first.
Common Mistakes to Avoid with This Dish:
- Too much spread: It masks the fish. Use a thin layer.
- Warm fish: It tastes flabby. Keep it cold.
31. Cottage Cheese Power Bowls
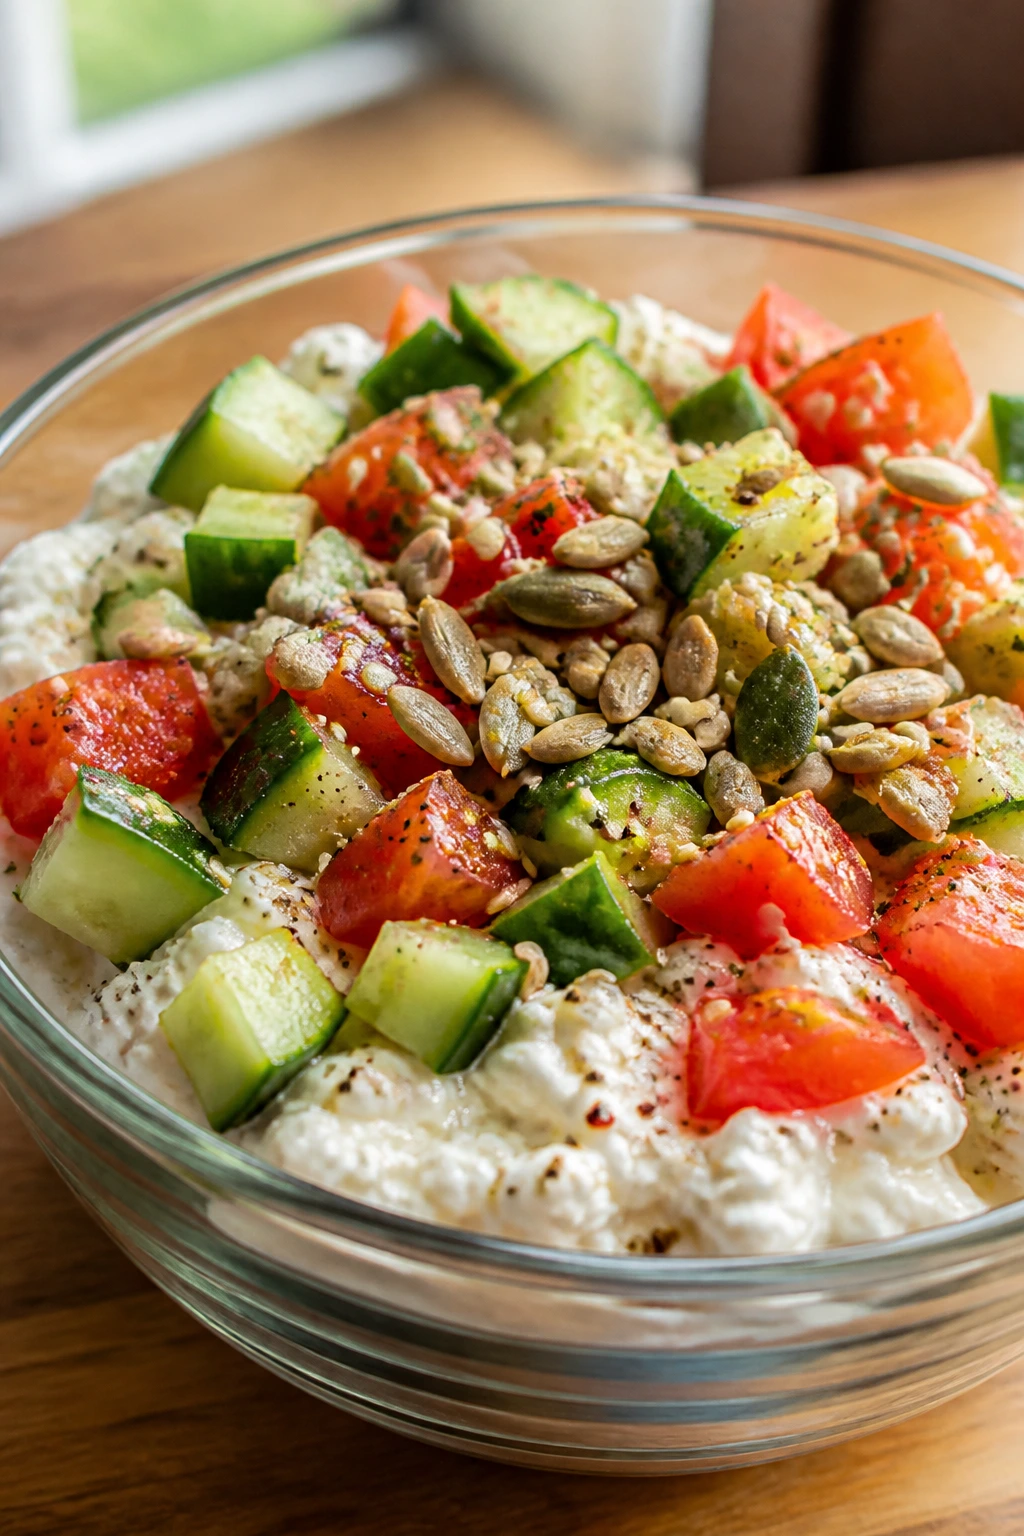
Intro:
Cottage cheese becomes dinner when you stop trying to hide it. Add cucumbers, tomatoes, seeds, and herbs, and you get a bowl with enough protein and crunch to earn a spot at the table.
Why It Works:
The creamy base is fast, cheap, and filling. Tomatoes and cucumbers keep it fresh, and seeds or nuts give the bowl a bit of bite so it doesn’t eat like a snack cup. It’s especially good when you want something cold that still feels balanced.
Key Ingredients:
- 2 cups cottage cheese
- 1 cucumber, chopped
- 1 tomato, chopped
- 2 tablespoons seeds or chopped nuts
- 1 teaspoon chopped chives or dill
Quick Steps:
- Spoon cottage cheese into bowls.
- Add cucumber and tomato.
- Scatter seeds and herbs over the top.
- Season with pepper and a little salt.
- Eat immediately.
Equipment for This Recipe:
- Bowl
- Knife
- Cutting board
How to Serve This Dish:
Serve with crackers, rye crisps, or sliced peppers. A drizzle of olive oil makes it feel more finished if you want richer flavor.
Pro Tips for This Recipe:
- Use a thick cottage cheese if possible.
- Salt the tomatoes separately if they taste bland.
- Herbs make this bowl taste intentional, not improvised.
Variations on This Dish:
- Everything Bagel Bowl: Add everything seasoning and scallions.
- Spicy Bowl: Add chili crisp or hot honey.
Common Mistakes to Avoid with This Dish:
- Watery vegetables: The bowl thins out. Dry them first.
- No seasoning: Cottage cheese needs salt and herbs.
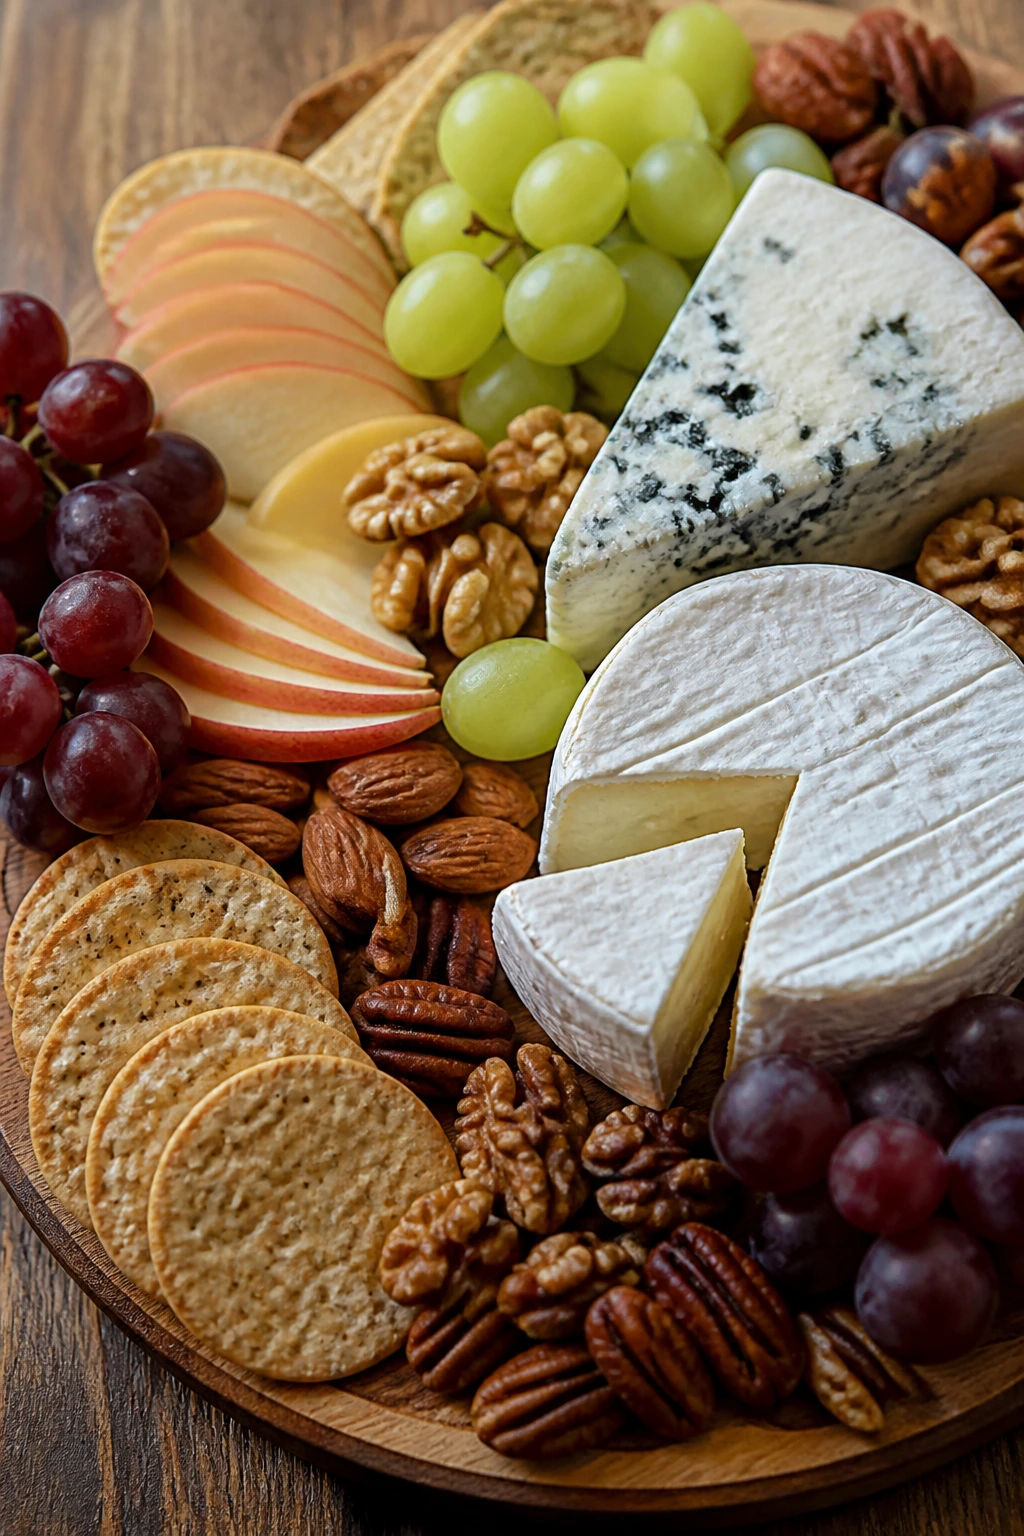
32. Cheese, Fruit, and Nut Dinner Boards
Intro:
A dinner board can feel lazy if you do it badly. If you do it with some care — a few cheeses, a fruit with crunch, a nut, a cracker, and something sharp — it lands just fine.
Why It Works:
This kind of plate works because every bite can change: salty cheese, sweet fruit, crunchy nuts, and a cracker or slice of bread to pull it together. It is also one of the easiest ways to use leftovers from the fridge without making a separate meal for each person. Good balance matters here more than quantity.
Key Ingredients:
- 2 cheeses, about 6 ounces total
- 1 apple or bunch of grapes
- 1/2 cup nuts
- Crackers or bread
- Pickles or olives, optional
Quick Steps:
- Slice the cheese into bite-size pieces.
- Wash and cut the fruit.
- Scatter nuts and crackers over a board or plate.
- Add pickles or olives if you want more salt.
- Build small bites as you eat.
Equipment for This Recipe:
- Board or large plate
- Knife
- Small bowls, optional
How to Serve This Dish:
Use a board wide enough that nothing piles up in the middle. It works best when you leave space between items so the plate doesn’t look cluttered.
Pro Tips for This Recipe:
- Use one soft cheese and one firm cheese.
- Choose fruit with crunch, not only soft fruit.
- Add mustard or jam if you want a flavor bridge.
Variations on This Dish:
- Savory Board: Add salami or turkey slices.
- Sweet-Salty Board: Add dried fruit and dark chocolate.
Common Mistakes to Avoid with This Dish:
- Only one texture: The board feels flat. Add crunch.
- Too much cheese, not enough fruit: It gets heavy fast. Balance it.
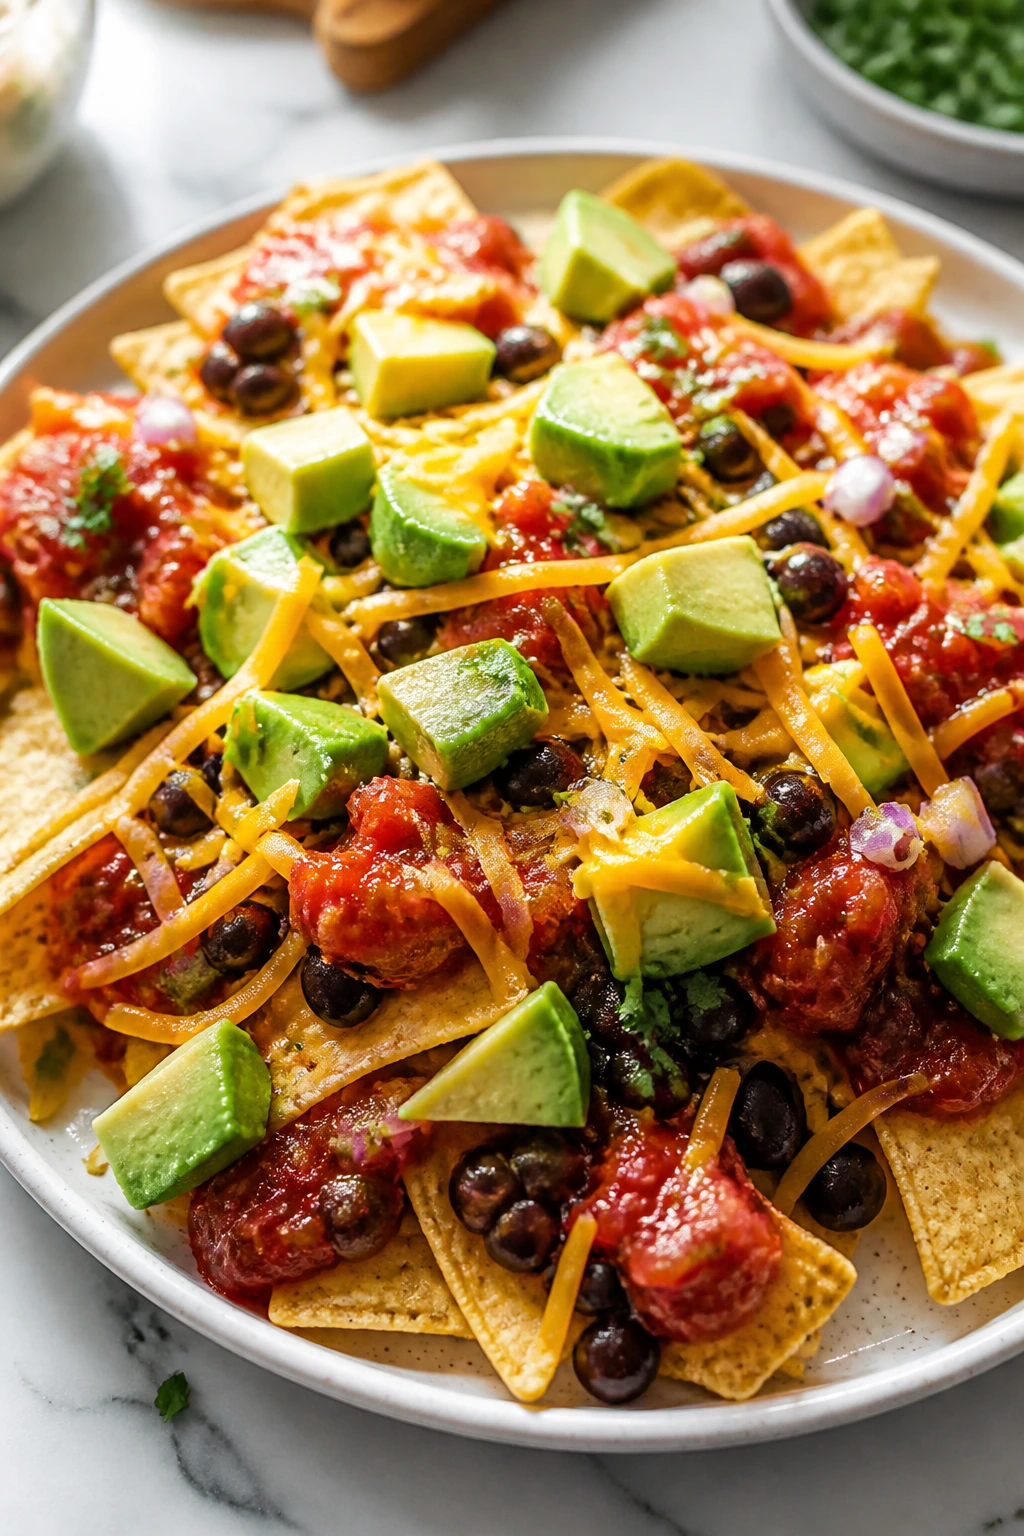
33. Salsa Bean Nacho Plates
Intro:
Nachos do not need an oven to be dinner. Tortilla chips, beans, salsa, cheese, avocado, and a little sour cream make a plate that eats fast and disappears faster.
Why It Works:
The beans make the chips feel less like a snack and more like a meal, while salsa gives everything seasoning and moisture. Cheese and avocado add richness, and because nothing needs to be baked, the texture stays crisp. It is noisy food. That’s part of the fun.
Key Ingredients:
- 1 large handful tortilla chips
- 1 can black beans, rinsed and drained
- 1/2 cup salsa
- 1/2 cup shredded cheese
- 1 avocado, sliced
- Sour cream, optional
Quick Steps:
- Spread chips over a wide plate.
- Spoon beans and salsa over the chips.
- Add cheese and avocado.
- Finish with sour cream if using.
- Serve immediately before the chips soften.
Equipment for This Recipe:
- Large plate
- Spoon
- Knife
How to Serve This Dish:
Serve it family-style or on individual plates if you want cleaner portions. A side of cucumbers or grapes balances the salt nicely.
Pro Tips for This Recipe:
- Use sturdy chips so they don’t collapse.
- Keep avocado sliced at the last second.
- Thick salsa works better than watery salsa.
Variations on This Dish:
- Chicken Nacho Plate: Add shredded rotisserie chicken.
- Bean-Free Plate: Use refried beans spread thinly if you want a smoother base.
Common Mistakes to Avoid with This Dish:
- Too much salsa: The chips go limp. Keep it moderate.
- Pile too high: The plate gets hard to eat. Spread it out.
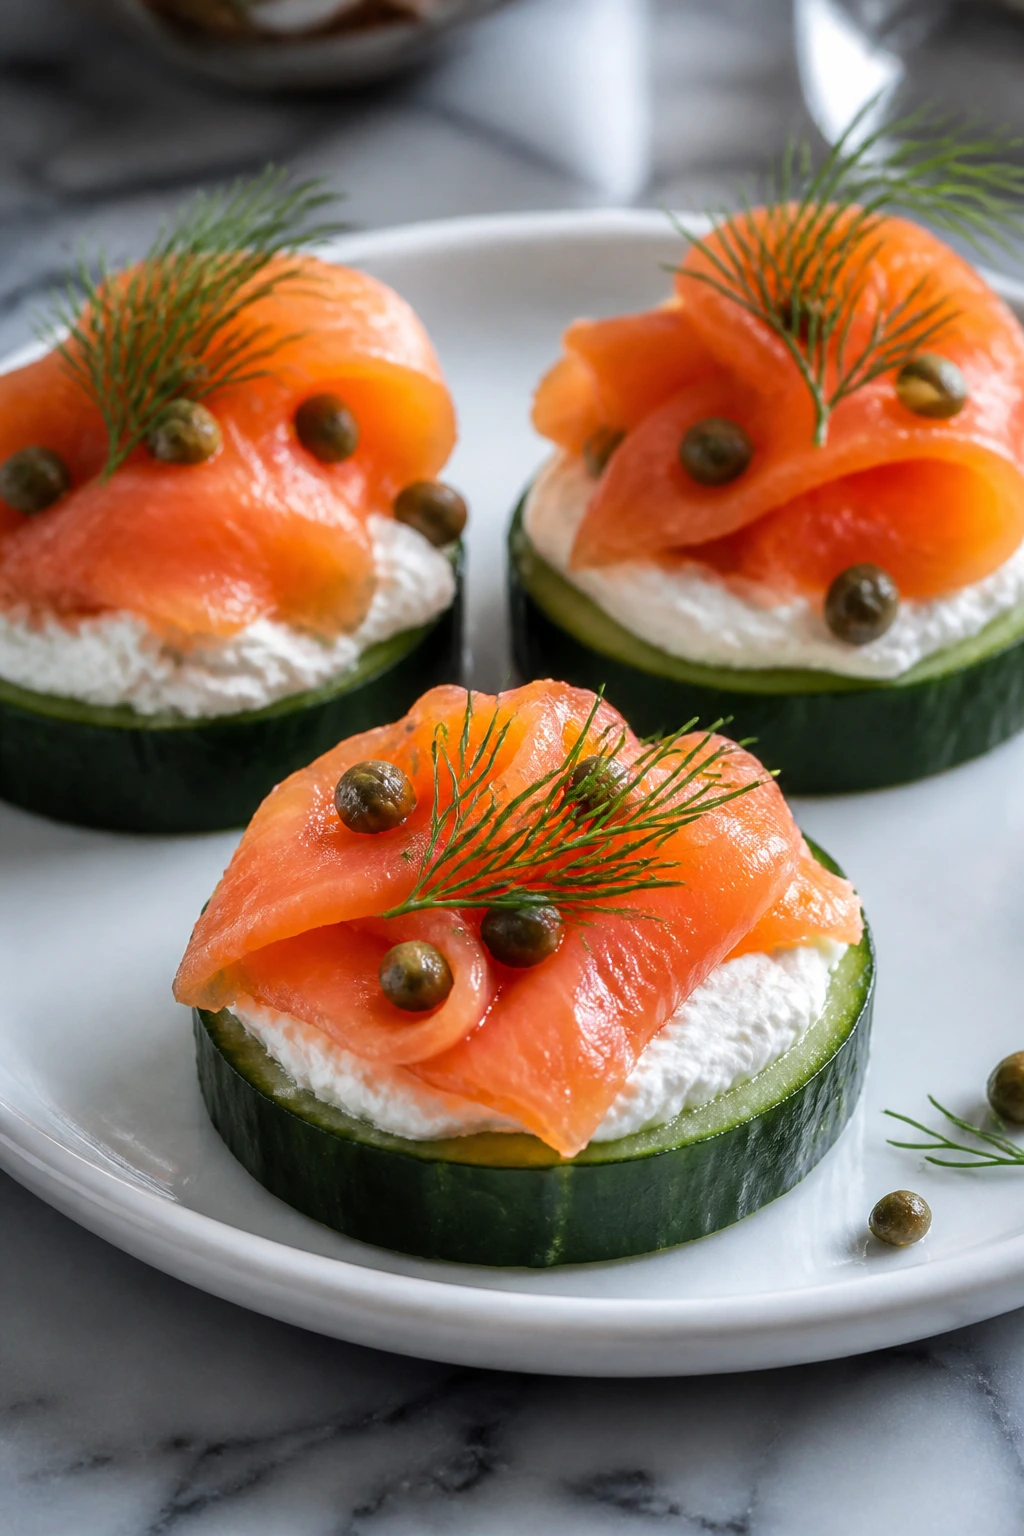
34. Smoked Salmon Cucumber Stackers
Intro:
Think of these as the neat little cousins of a bagel board. Cucumber slices, cream cheese, smoked salmon, and dill make a cold bite that is crisp, salty, and easy to eat standing up.
Why It Works:
The cucumber gives a fresh, watery crunch that offsets the cream cheese and salmon. Because the base is firm, each stacker stays tidy. Capers or lemon add enough sharpness to keep the flavor from going flat.
Key Ingredients:
- 1 cucumber, sliced into thick rounds
- 4 ounces cream cheese
- 4 ounces smoked salmon
- 1 tablespoon capers
- 1 tablespoon chopped dill
Quick Steps:
- Slice the cucumber into thick rounds.
- Spread or pipe cream cheese onto each round.
- Top with folded smoked salmon.
- Add capers and dill.
- Serve cold within a few minutes of assembling.
Equipment for This Recipe:
- Knife
- Cutting board
- Spoon or small spatula
How to Serve This Dish:
Arrange them on a platter with lemon wedges. They work well alongside crackers or a small salad when you want more volume.
Pro Tips for This Recipe:
- Pat the cucumber slices dry so the cream cheese sticks.
- Use thick cucumber rounds or they’ll bend.
- Fold the salmon instead of laying it flat for a better look and bite.
Variations on This Dish:
- Everything Seasoning Stackers: Dust the top with seasoning before serving.
- Herby Version: Swap dill for chives.
Common Mistakes to Avoid with This Dish:
- Thin cucumber slices: They flop. Cut them thicker.
- Cream cheese too cold: It won’t spread well. Soften it first.
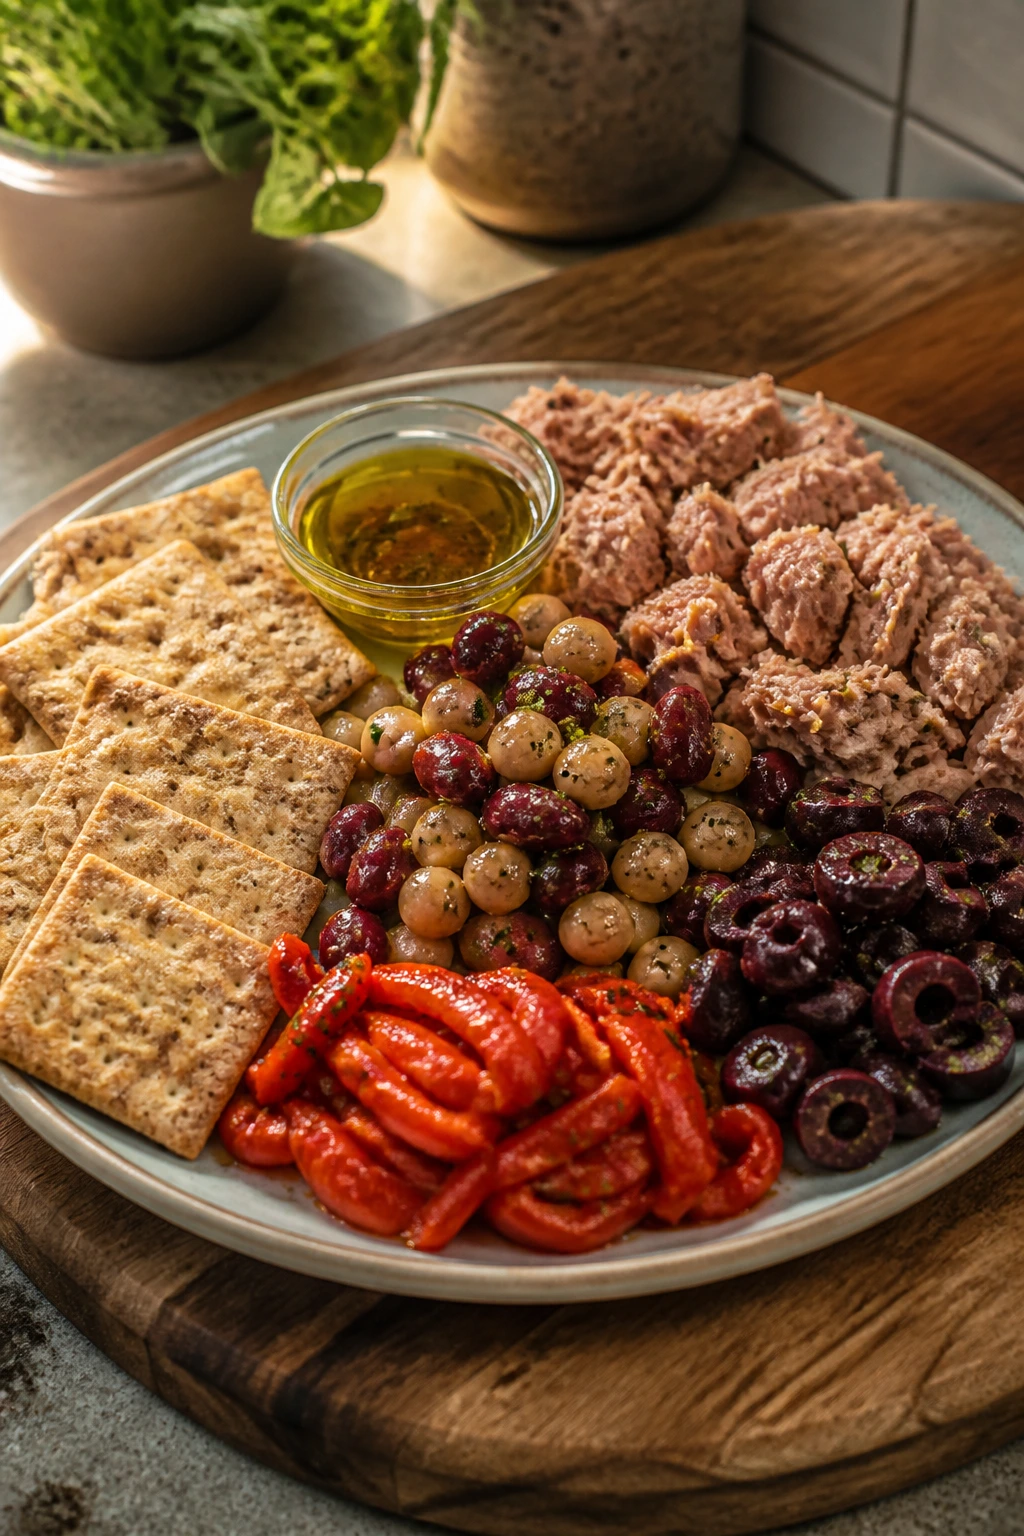
35. Sardine Cracker Platters

Intro:
Sardines are a sharp, salty, budget-friendly answer to the “what is actually for dinner?” question. Put them on crackers with lemon, cucumber, or a little mustard, and they turn into a fast plate that tastes intentional.
Why It Works:
Sardines bring protein, calcium, and a deep savory flavor that pairs well with acidic or crunchy ingredients. Crackers provide the base, cucumber cools the fish, and lemon wakes everything up. If someone in your house is skeptical, keep the toppings simple and let the sardines do the talking.
Key Ingredients:
- 1 tin sardines, drained
- Crackers
- 1/2 cucumber, sliced
- Lemon wedges
- Dijon mustard, optional
Quick Steps:
- Drain the sardines gently so they stay intact.
- Arrange crackers on a plate.
- Top each cracker with sardines and cucumber.
- Add a tiny dab of mustard or a squeeze of lemon.
- Serve immediately.
Equipment for This Recipe:
- Small plate
- Fork
- Knife
How to Serve This Dish:
Serve with sliced tomatoes or pickles if you want a little extra brightness. This is one of those meals that benefits from a cold drink and a plate you can finish quickly.
Pro Tips for This Recipe:
- Choose sardines packed in olive oil if you want a softer texture.
- Lemon changes the whole tin, so don’t skip it.
- Add chopped parsley if you want the plate to look less bare.
Variations on This Dish:
- Mustard Sardines: Add Dijon and capers.
- Spicy Sardine Plate: Use chili crisp or hot sauce for heat.
Common Mistakes to Avoid with This Dish:
- Overloading the crackers: They break. Keep the layer thin.
- Skipping acid: Sardines can feel heavy without lemon.
Why the No-Cook Route Works on Busy Nights
No-cook dinners work because they shift the effort from heat to assembly. That sounds small, but it changes the whole evening. You are not waiting for water to boil, checking whether a pan is hot enough, or cleaning grease splatter off the backsplash. You are opening, chopping, dressing, and plating. That’s it.
The best versions lean on contrast: creamy and crunchy, salty and fresh, soft and sharp. A bag of lettuce becomes dinner once it gets paired with beans or chicken and a bright dressing. A cold plate of shrimp or deli meat stops feeling perfunctory once you add lemon, pickles, capers, herbs, or a solid cracker. Temperature matters, but texture matters more.
There is also the budget piece, which people sometimes skip over too fast. A store-bought rotisserie chicken can turn into three different dinners. A can of beans can become salad, wrap filling, or taco bowl. One jar of hummus can rescue pita pockets, cucumber boards, and turkey wraps. That’s where no-cook meals start saving real money: not from magic, just from reuse.
And if you’re feeding different appetites, cold meals are kinder than they look. Someone can build a bigger plate, someone else can eat lighter, and nobody has to stand over the stove asking when it will be ready. Small mercy. Big difference.
Essential Equipment for These Meals
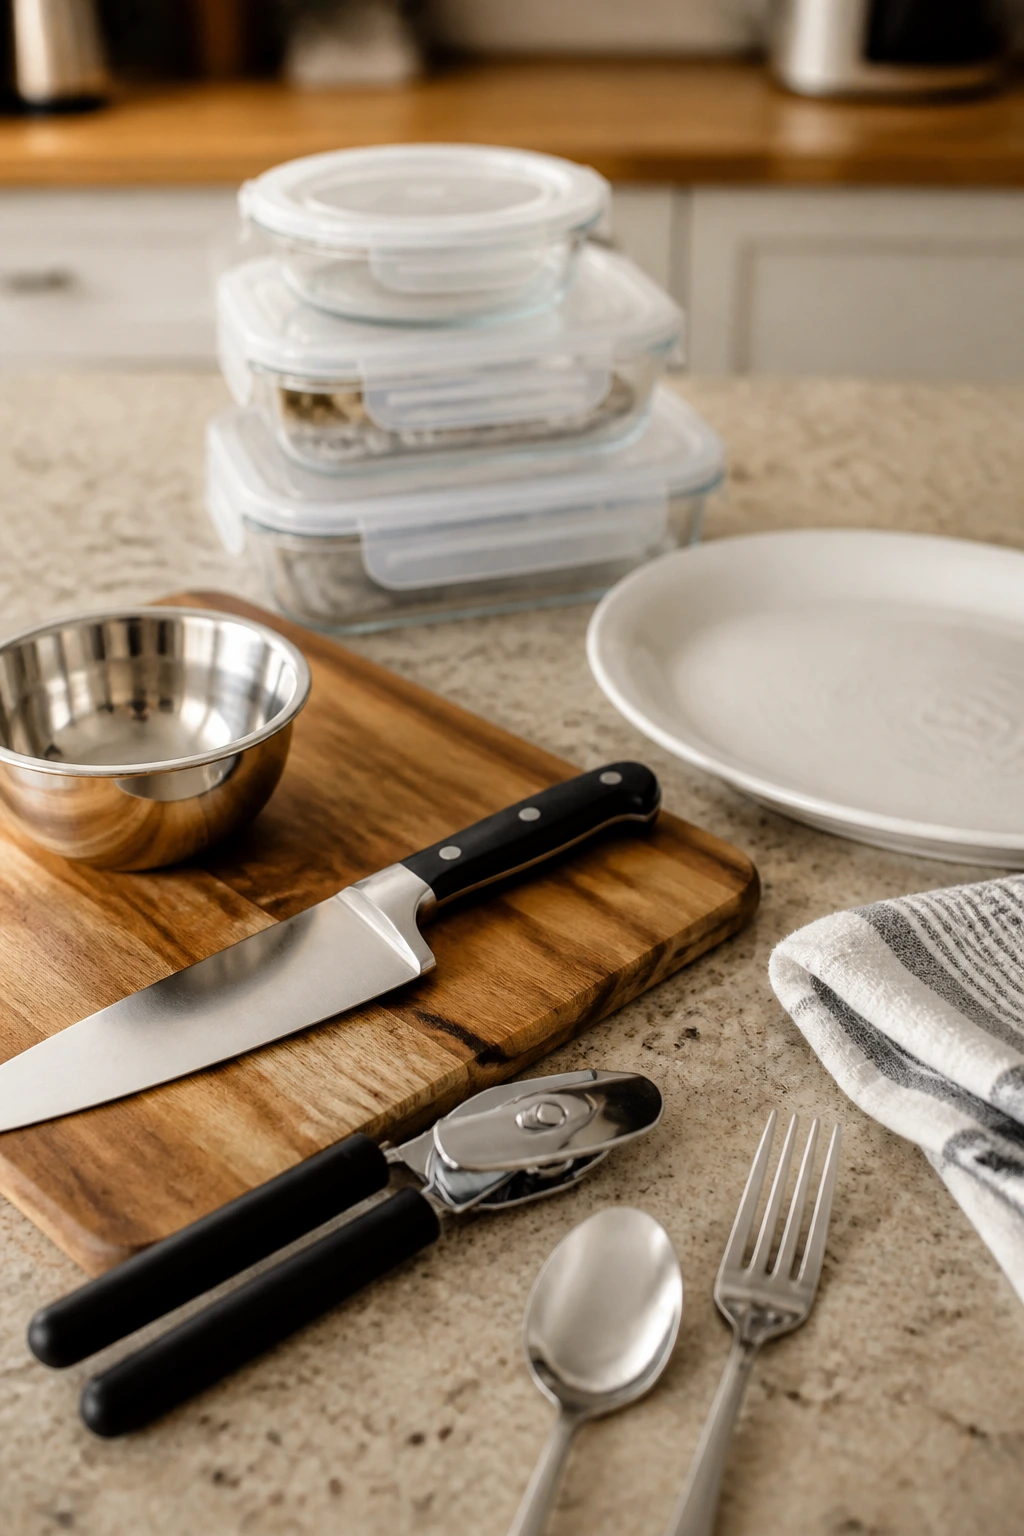
-
Sharp chef’s knife: Most of the work is chopping tomatoes, cucumbers, onions, and herbs cleanly.
-
Cutting board: Use a stable board with a damp towel under it if your counter slides around.
-
Mixing bowls in two sizes: One small bowl for dressing and one medium bowl for salads or fillings keeps the work tidy.
-
Can opener: Chickpeas, tuna, beans, and salmon show up a lot in no-cook meals.
-
Spoon and fork: These handle mixing, mashing, and scooping without much fuss.
-
Serving platter or board: A wider surface makes wrap fillings, boards, and platters look like dinner instead of leftovers.
-
Airtight storage containers: Cold meals need containers that seal well so chopped vegetables and dressed fillings stay fresh.
-
Paper towels or a clean kitchen towel: Dry cucumbers, tomatoes, and greens before assembly so the whole meal holds together.
Smart Shopping for Fast Cold Meals
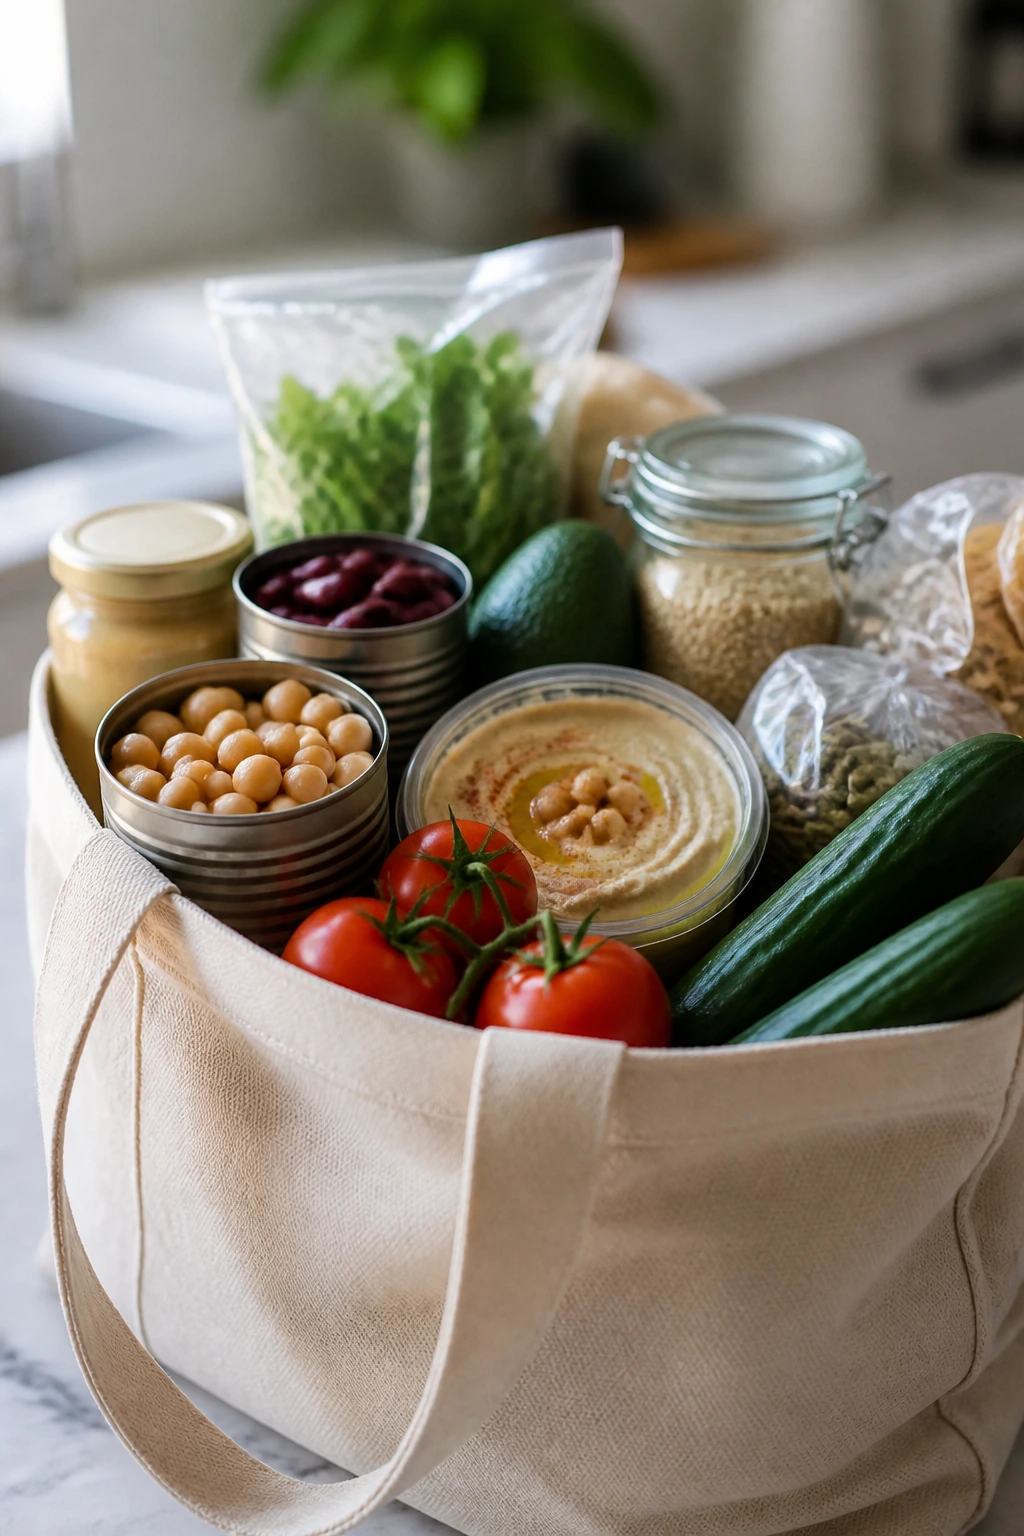
The smartest no-cook shopping starts with one or two protein anchors. Rotisserie chicken, deli turkey, tuna, canned salmon, chickpeas, cottage cheese, canned beans, and pre-cooked shrimp all give you a base you can build on. If your fridge already has one of those, you are halfway to dinner. If it doesn’t, buy one and let the rest of the meal be cheap.
Then look for ingredients that do more than one job. Hummus spreads, dresses, and thickens. Cream cheese holds pinwheels together. Feta adds salt and a creamy crumble. Olive oil and lemon juice wake up beans, tomatoes, cucumbers, and chicken salad without needing a separate sauce. Those little multipurpose pieces are what keep a cold plate from feeling random.
Pay attention to produce that stays crisp. Cucumbers, bell peppers, romaine, butter lettuce, celery, and cherry tomatoes hold up better than delicate greens or soft sliced tomatoes in a lunchbox-style setting. Buy ripe avocados only when you plan to use them that day. And if your budget is tight, choose one “fresh” item and lean harder on pantry staples; a bag of lettuce plus a can of beans often does more than an overstuffed cart of fragile produce.
Store brands are often fine for crackers, hummus, mustard, canned beans, tuna, and dressing. Spend a little more on the one thing that carries the meal — maybe the rotisserie chicken, the smoked salmon, or the bread. The rest can be plain and still work.
How to Serve No-Cook Meals Without Making Dinner Feel Thin
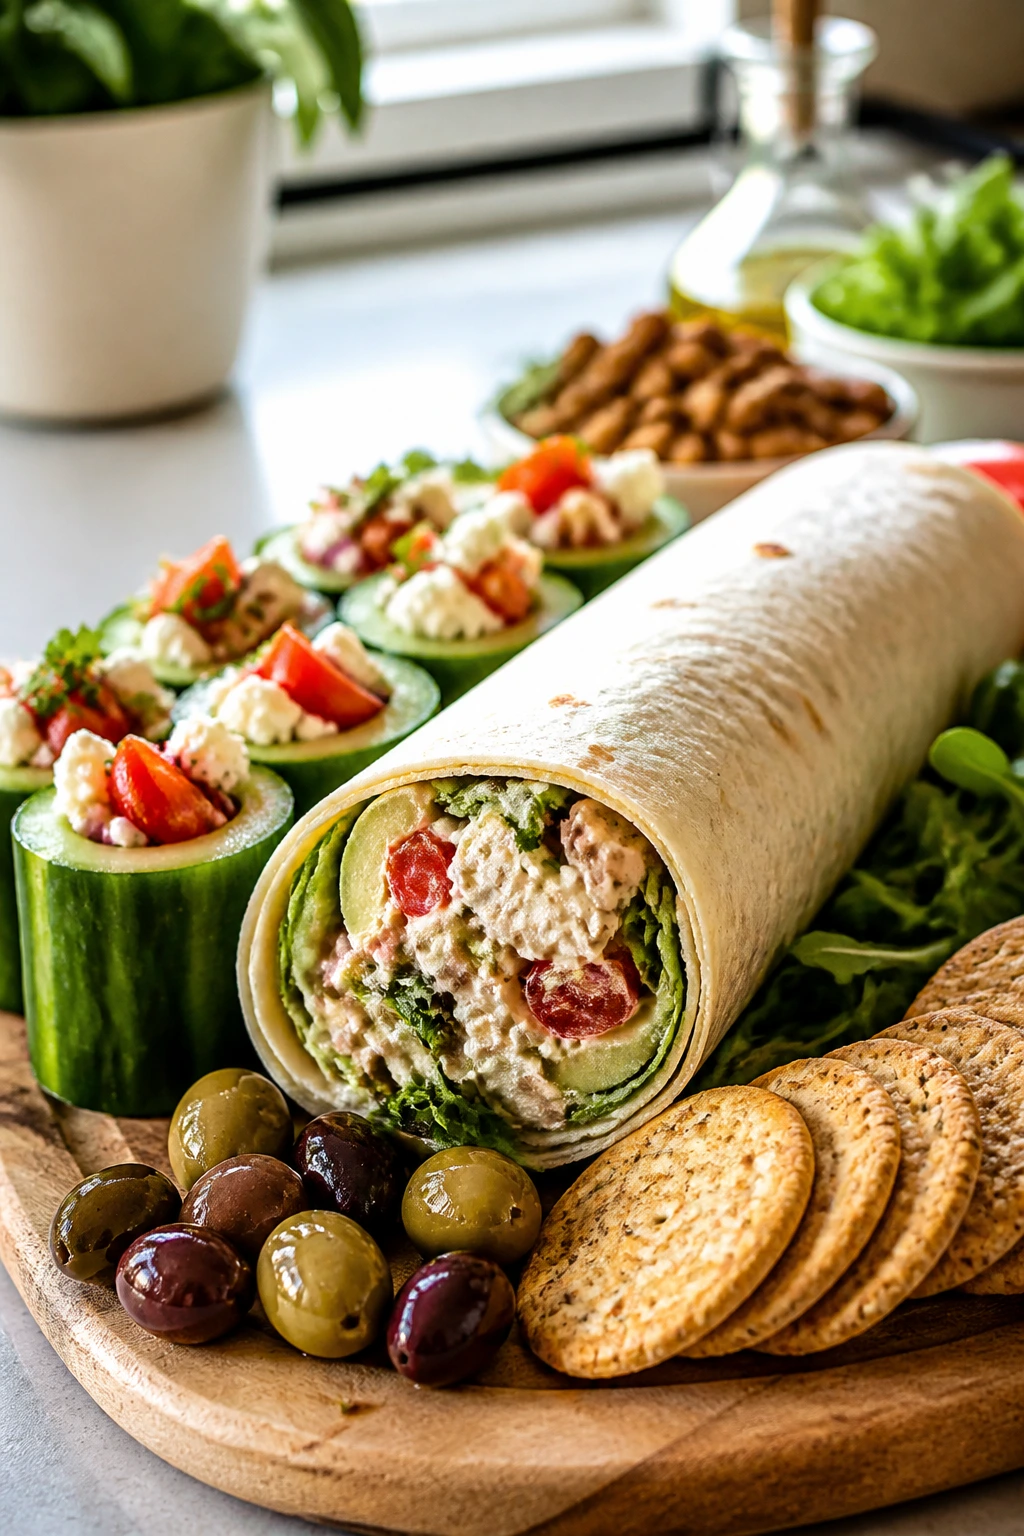
Presentation:
Cold meals need a little visual order. Use shallow bowls for salads, lay wraps on the diagonal, and keep boards spread out instead of piling everything into the center. If you’re using lettuce cups or cucumber stackers, line them up with space around each piece so they look deliberate.
Accompaniments:
Crackers, pita chips, olives, pickles, grape tomatoes, apple slices, and a handful of fruit can all fill out the plate fast. A cold soup from the store or a little bagged salad works when you need more volume. Keep one crunchy thing on the plate; it keeps the meal from feeling soft all the way through.
Portions:
For a standard dinner, think in terms of one large wrap, two stuffed peppers, two stuffed tomatoes, or a bowl with about 2 cups of protein-and-veg mixture plus a side of bread or chips. If you have bigger appetites at the table, double the protein before you double the bread. That usually stretches the meal better.
Beverage Pairing:
Sparkling water with lemon, unsweet iced tea, or cucumber water all suit cold meals because they keep the whole plate feeling fresh. For an adult dinner, a crisp white wine or a light lager works nicely with salty cheese, deli meat, or seafood. Heavy drinks can make these meals feel muddled.
Small Upgrades That Make Cold Meals Taste Intentional
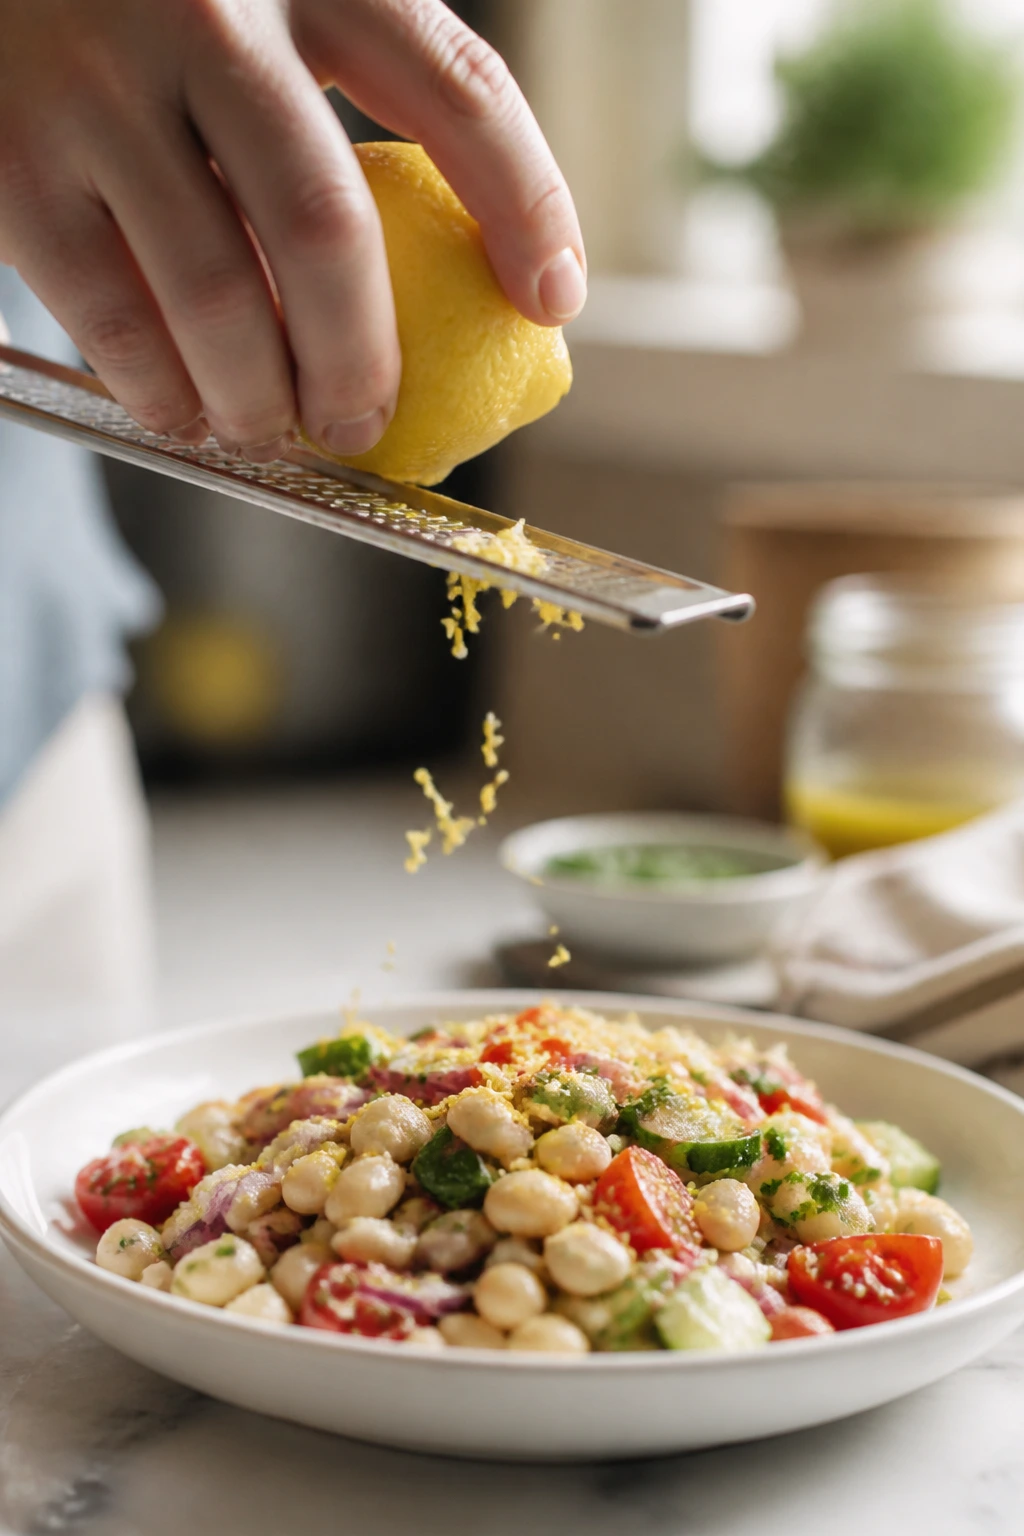
Flavor Enhancement:
A little acid changes everything. Lemon juice, red wine vinegar, pickle brine, capers, or a spoon of mustard can pull a cold meal together in a way plain mayo never will. I reach for citrus first. It sharpens the edges without making the meal louder.
Customization:
If a meal feels too soft, add crunch: cucumbers, celery, peppers, radishes, shredded carrots, sunflower seeds, or crushed chips. If it feels too dry, add a creamy element: hummus, yogurt, cream cheese, avocado, or a little olive oil. Those are the two dials I adjust most often, and they fix more than half the problems.
Serving Suggestions:
Finish with chopped herbs, black pepper, scallions, or everything seasoning. A few herbs make a cold plate look and taste fresher in a way that people notice immediately, even if they cannot say why. Lemon zest is another one I use constantly because it gives a bright edge without adding moisture.
Make-It-Yours:
For dairy-free meals, lean on hummus, olive oil, mustard, salsa, or avocado. For higher protein, double the chicken, tuna, shrimp, or beans instead of loading up on bread. For lower-carb versions, use lettuce cups, cucumber rounds, or pepper halves as the base. Small swap. Different dinner.
Make-Ahead, Storage, and the Rare Time to Reheat
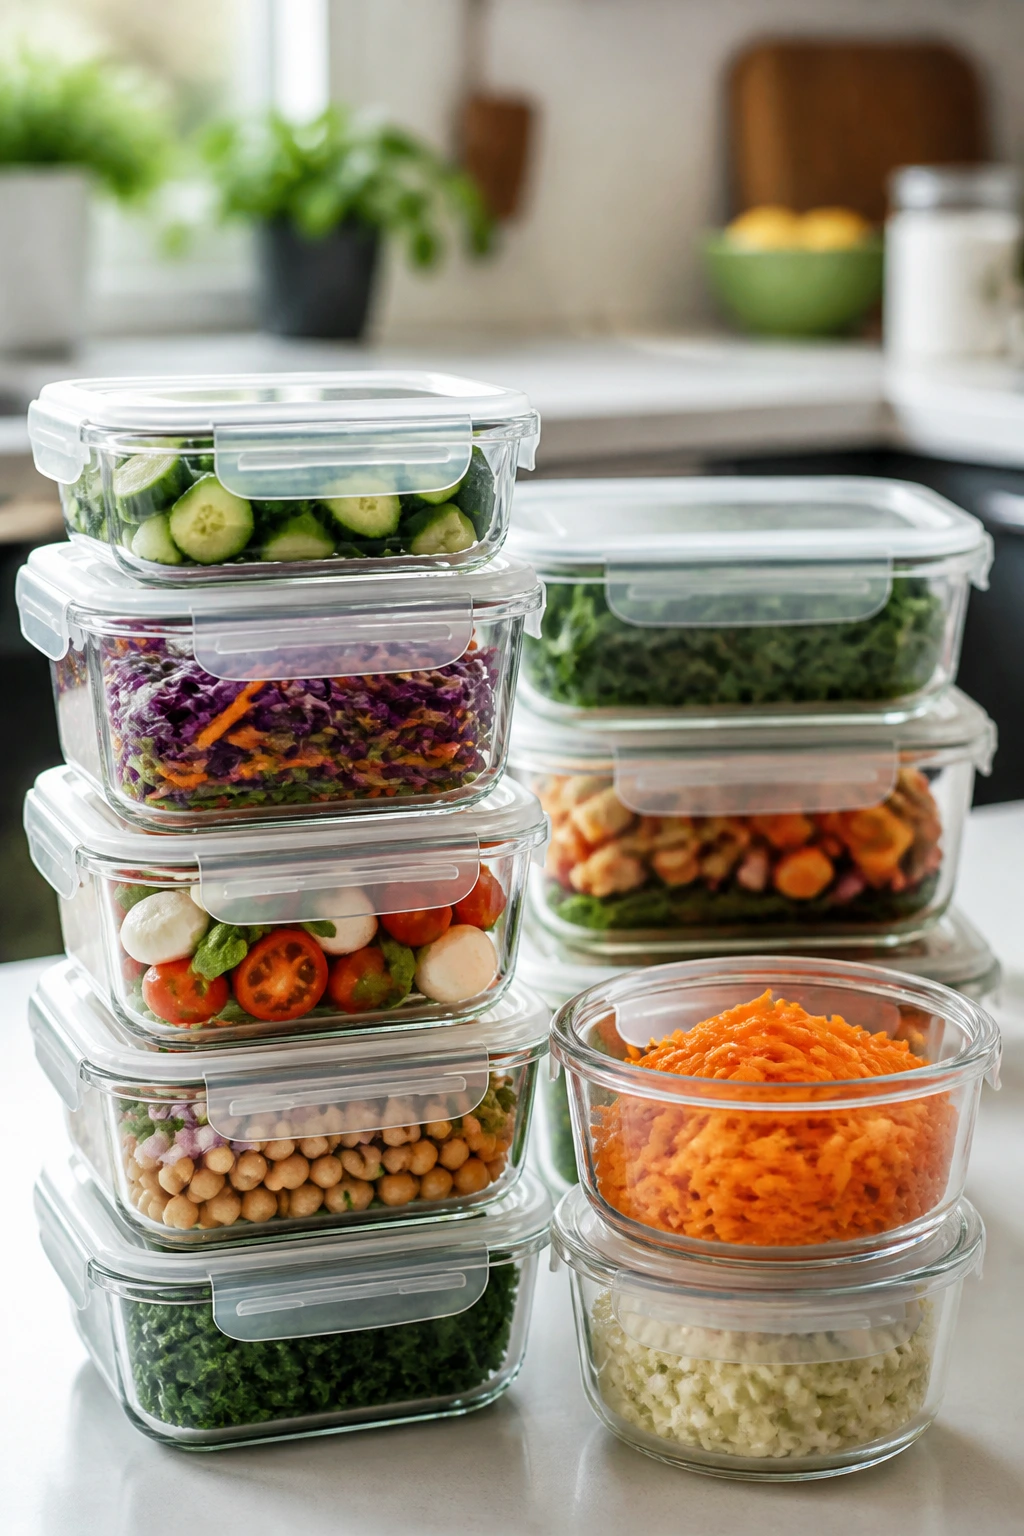
Most no-cook meals are at their best when the wet and dry parts stay separate until the last minute. Chopped vegetables keep well for about 3 days in airtight containers if you dry them first and tuck a paper towel inside. Tuna salad, chicken salad, egg salad, and chickpea salad usually hold for 3 to 4 days in the fridge, though the texture is best in the first 2 days. Wraps and sandwiches are happiest on the day you make them; after that, the bread softens and the fillings start to slide.
Boards and platters are a different animal. Assemble them right before serving if you can, because cut fruit, sliced cheese, and cured meat start looking tired once they sit out too long. The USDA’s general food-safety advice is simple and worth following: perishable foods should not sit at room temperature for more than 2 hours, and less if the room is hot. If a meal includes shrimp, chicken salad, or mayo-based fillings, get it back into the fridge promptly.
Freezing is useful for only a few of these ingredients, not the finished meals. Plain cooked chicken freezes well, as do some breads and tortillas. But dressed salads, avocado, cucumber, and mayo-heavy fillings turn watery or grainy after thawing. If you want to prep ahead, freeze the protein separately and build the meal later.
Reheating is rarely needed, but if you want a warm component, heat only the protein or bread, not the whole plate. A few seconds in the microwave is enough for chicken; keep it covered and stop before it dries out. Warm bread or pita separately, then assemble. The cold ingredients should stay cold. That contrast is part of the point.
Smart Swaps and Adaptations for Different Eaters
The Pantry-Only Night:
Build dinner from canned tuna, beans, crackers, jarred peppers, olives, and any dressing you already have. This version is about flexibility, not beauty. It’s the one I make when the fridge has gone mysterious.
The Higher-Protein Plate:
Double the rotisserie chicken, add extra tuna, use Greek yogurt in place of some mayo, or build in cottage cheese and chickpeas. These meals get more filling fast when protein gets priority over bread. Good for hungry households.
The Dairy-Free Reset:
Lean on hummus, olive oil, mustard, salsa, avocado, and beans instead of cheese-heavy fillings. You can still get creaminess without dairy. A squeeze of lemon helps carry the flavor.
The Kid-Friendly Mild Version:
Keep spicy sauces, onion, capers, and pepperoncini on the side instead of mixed in. Mild cheese, turkey, chicken, crackers, and fruit tend to get eaten first anyway. The trick is letting kids build their own plate.
The Low-Carb Lettuce Build:
Swap tortillas, rolls, and crackers for butter lettuce cups, cucumber rounds, and bell pepper halves. This works especially well with chicken salad, tuna salad, crab salad, and buffalo chicken. It changes the shape of the meal without changing the flavor logic.
Common Mistakes That Make No-Cook Meals Feel Sad
The first mistake is too much moisture. Wet cucumbers, watery tomatoes, undrained tuna, and sloppy dressing turn wraps and salads limp fast. Dry the produce, drain the canned goods, and add dressing gradually. That one habit fixes a surprising number of bad cold meals.
The second mistake is forgetting texture. If every ingredient is soft — think chicken salad, avocado, mayo, and soft bread — the plate eats heavy and dull. Add one crisp element: lettuce, celery, chips, cucumbers, peppers, or seeds. You need contrast.
The third mistake is building too early. Assembled wraps, stuffed peppers, and bread-based meals get soggy if they sit too long. If you know dinner will be delayed, keep the fillings and bases separate until the end. It takes the same amount of time and tastes better.
The fourth mistake is under-seasoning pantry food. Beans, chickpeas, tuna, and cottage cheese are useful, but they need salt, acid, herbs, or mustard to taste finished. Taste before you serve. A teaspoon of lemon juice or a pinch of salt can change a cold bowl more than a second helping ever will.
The last mistake is making the plate too small. A no-cook meal can look skimpy if you cram it onto one tiny plate. Use a bigger bowl, a wider platter, or a second side dish. Cold food already has a quiet personality; give it room.
Frequently Asked Questions
What actually counts as a no-cook meal?
A true no-cook meal is built without simmering, baking, frying, or boiling. If you use pre-cooked ingredients like rotisserie chicken, canned beans, or store-bought shrimp, that still counts because you are only assembling.
How do I make no-cook meals filling enough for dinner?
Start with protein, then add fiber and fat. Chickpeas, tuna, chicken, cheese, hummus, avocado, and beans keep the meal from feeling like a snack tray, especially when you add bread, crackers, or chips on the side.
Can I prep these ahead for the week?
Yes, but keep wet and dry ingredients separate. Chop vegetables, drain beans, and mix sauces ahead of time, then assemble wraps and salads the day you plan to eat them. That keeps everything from going soft.
What is the best protein for budget no-cook meals?
Canned beans, chickpeas, tuna, and rotisserie chicken usually give you the best mix of cost and convenience. Deli meat and smoked fish cost more, so I use those when I want variety, not every night.
How do I keep wraps from getting soggy?
Use a thin layer of spread, dry your vegetables, and keep juicy ingredients like tomato or cucumber away from the tortilla until the last minute. A hummus base or cream cheese layer helps block moisture better than mayo alone.
Are store-bought salads worth it?
Sometimes, yes. Bagged greens, chopped slaw, and pre-washed vegetables save a real amount of time, and they are often cheaper than takeout. The key is to buy the ones you will actually finish in a day or two.
What if my family wants something warm?
Heat only one part of the meal, not the whole thing. Warm the chicken, bread, or tortillas separately and keep the rest cold. That gives you a little comfort without turning dinner into a project.
Can I make these meals vegetarian without losing the point?
Absolutely. Chickpeas, white beans, hummus, cottage cheese, feta, eggs, and cheese all step in easily. The important thing is keeping a mix of protein and crunch so the meal still feels complete.
How long can these meals sit out?
Perishable foods should go back into the fridge within 2 hours, and sooner if the room is warm. That matters most for shrimp, chicken salad, egg salad, mayo-based spreads, and cut fruit.
Cold Plates, Fast Relief
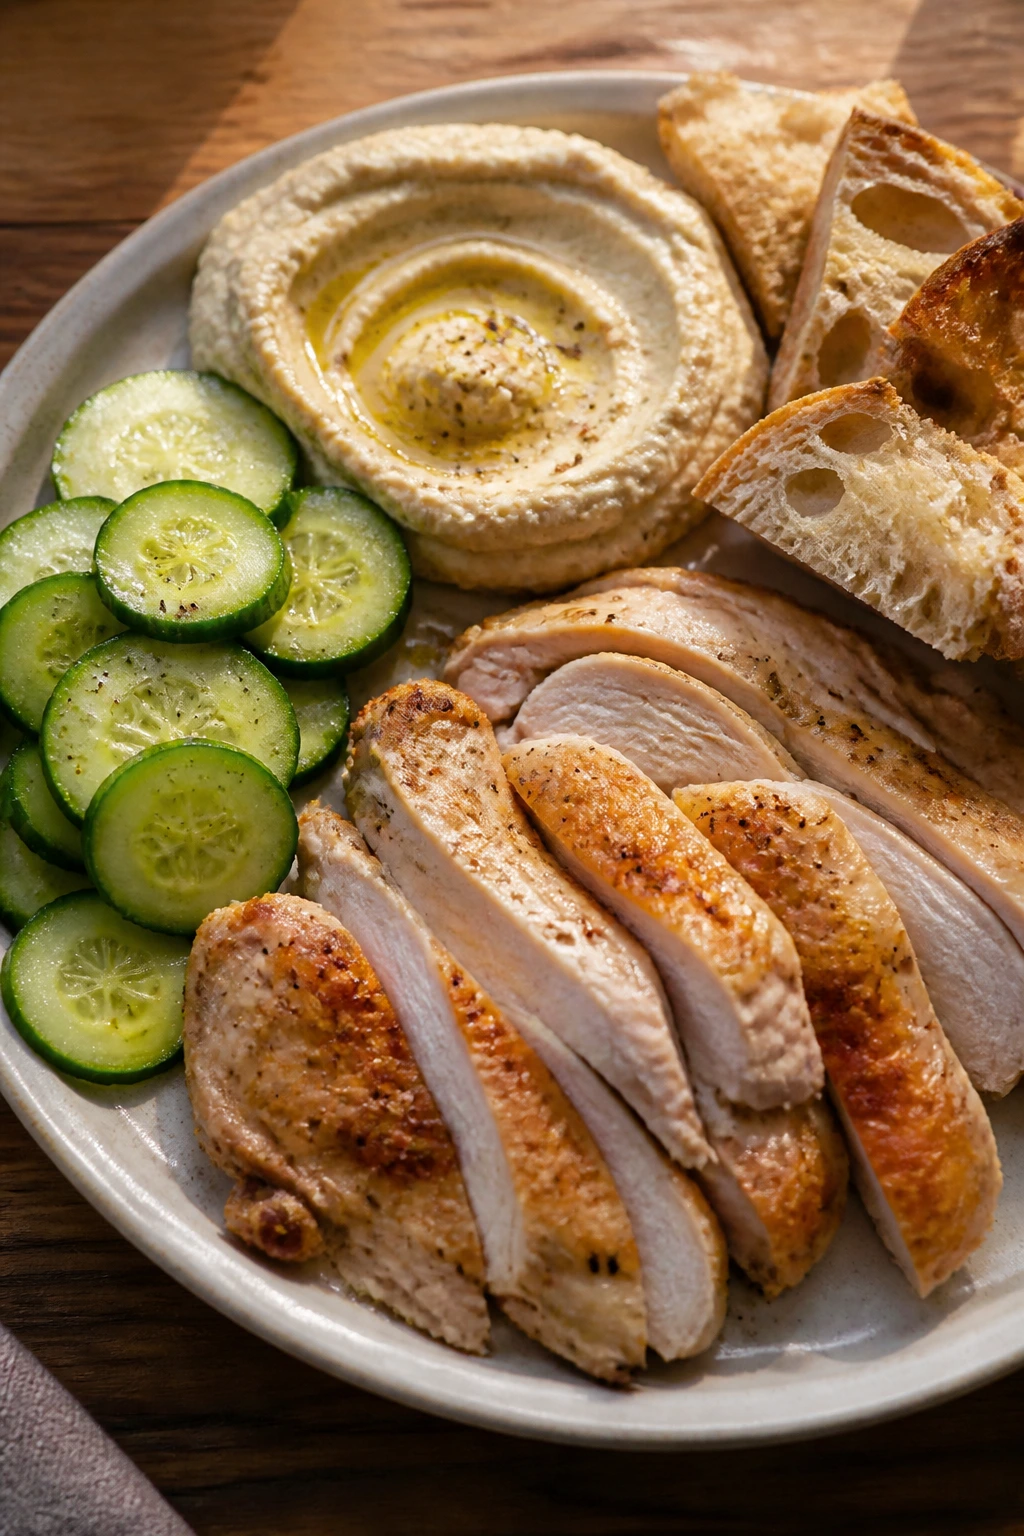
The best thing about no-cook meals is that they don’t ask for a better mood than the one you have. Bad day? Fine. Empty fridge? Manageable. Late meeting, hungry kids, and exactly zero energy to light a burner? Still manageable. A few good cold meals in your pocket change the whole feel of weeknight cooking.
Keep one protein, one crunchy vegetable, one creamy spread, and one sturdy bread or cracker around, and you can build dinner without thinking too hard. That’s the real trick. Not perfection. Just a fridge that can answer back when the evening gets pushy.