
The best easy sugar cookies do not ask for a special grocery run. They ask for butter, sugar, flour, an egg, and enough attention to pull them from the oven before they go from pale gold to plain dry. That is the charm of pantry-staple baking: the dough looks humble, but the cookies can turn soft, chewy, crisp, or glossy with only one smart change.
I keep coming back to sugar cookies because they’re one of the few desserts that can wear almost any flavor without losing their shape. A spoonful of cocoa makes them deeper. A pinch of cardamom makes them smell expensive. Brown sugar turns them chewier, while a little cornstarch nudges them toward that tender, almost melt-away middle people usually think comes from some secret ingredient. It does not. It comes from knowing which knob to turn.
And yes, pantry staples matter here. Not in a vague, “use what you have” kind of way. I mean the exact stuff most kitchens already hold onto: all-purpose flour, granulated sugar, brown sugar, butter, eggs, baking powder, baking soda, vanilla, cinnamon, cocoa, jam, peanut butter, oats, citrus, honey. Once those are in play, sugar cookies stop being a single recipe and start behaving like a whole cabinet of good ideas.
Why These Pantry-Staple Sugar Cookies Earn a Spot in the Tin
-
They start with familiar ingredients: Most of these cookies lean on flour, butter, sugar, and eggs, then pick up their personality from one pantry add-in like cinnamon, jam, or cocoa.
-
The texture changes fast: One extra egg yolk, a spoon of cornstarch, or a cooler oven can move a cookie from crisp to soft without rewriting the whole dough.
-
The doughs are forgiving: Several of these can be scooped, rolled, chilled, or frozen, which means you can bake half now and save the rest for later.
-
They play well with what’s already on hand: If you have vanilla, brown sugar, peanut butter, oats, or even instant espresso, you’re already halfway to a different cookie.
-
They cover more than one mood: Some are plain and buttery, some are soft and thick, some are decorated, and a few are the kind you set out with coffee and watch disappear before you sit down.
-
They reward small choices: A dusting of sugar, a different extract, or a quick glaze can make the same base recipe feel like a different cookie entirely.
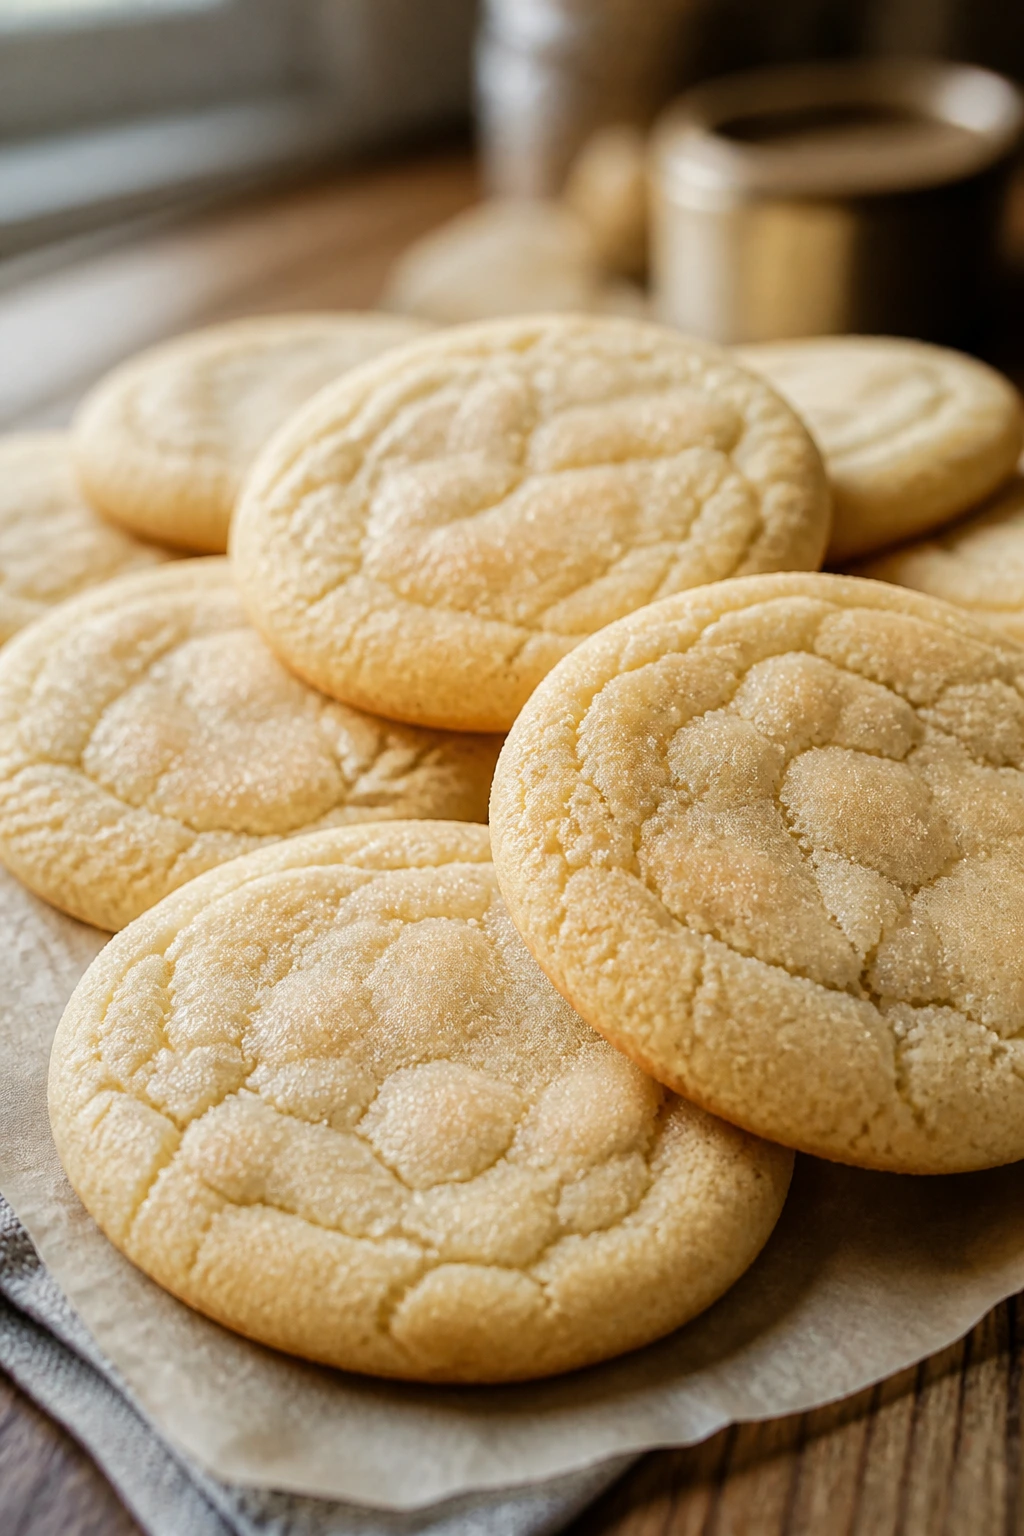
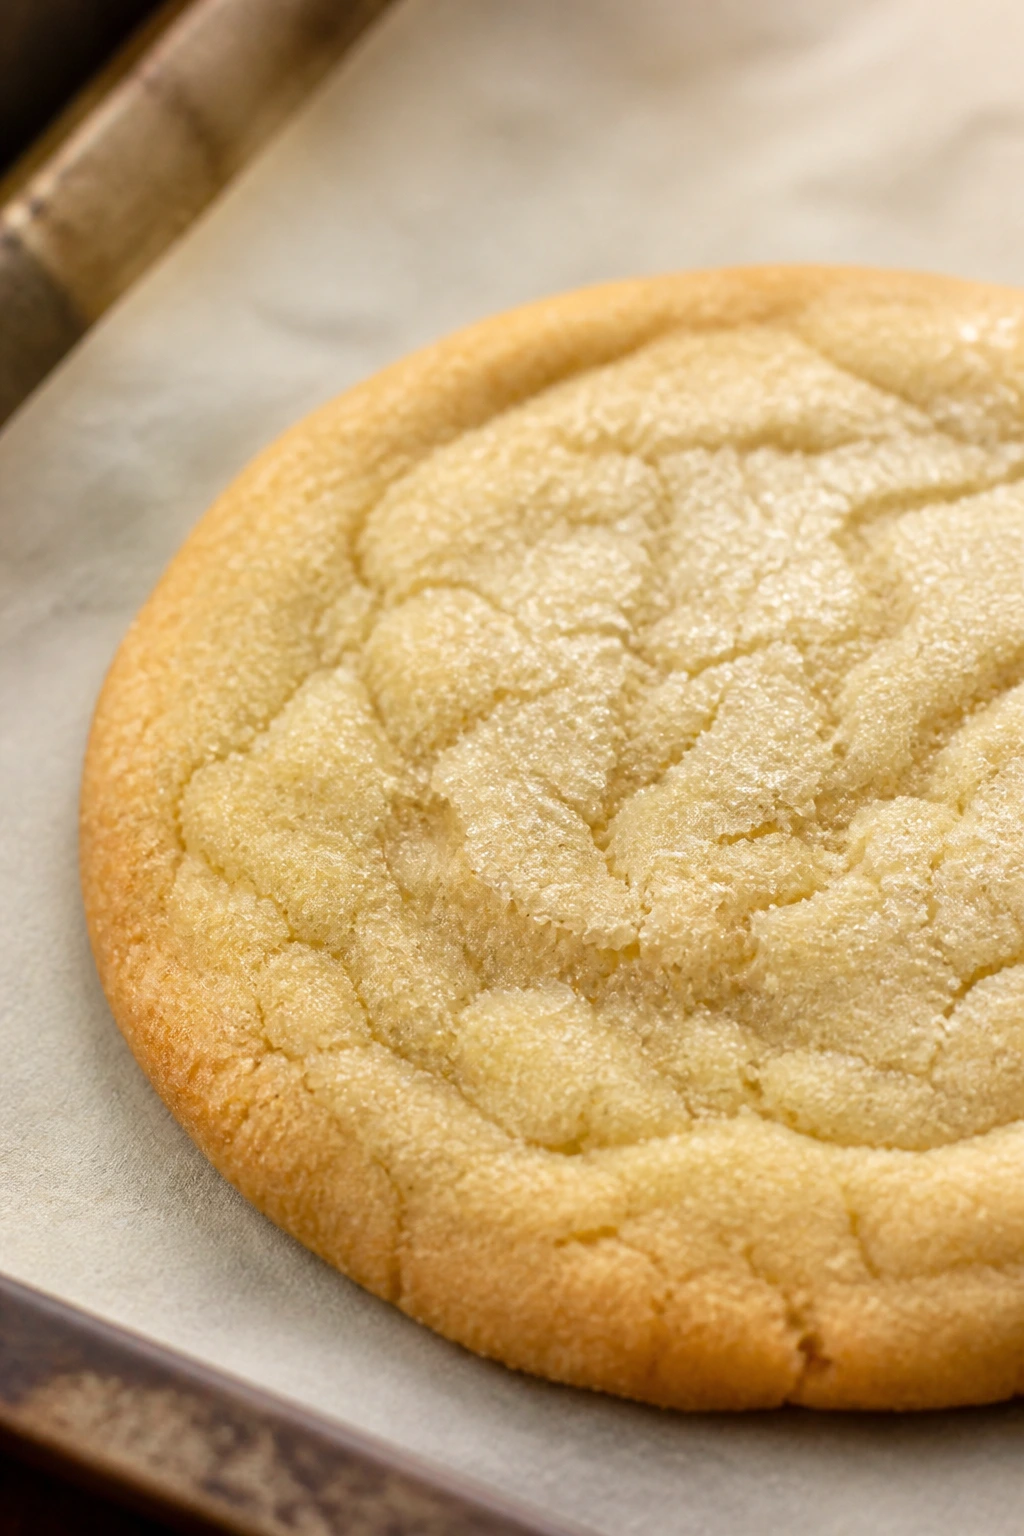
1. Classic Vanilla Drop Sugar Cookies
These are the cookies I make when I want the house to smell like butter and vanilla within ten minutes. They bake into pale, round little domes with lightly crisp edges and a center that stays soft if you pull them on time. No drama. No strange ingredients. Just the kind of sugar cookie that reminds you why the plain version still matters.
Why It Works:
The dough uses enough butter to spread a little, but not so much that it turns floppy on the tray. A single egg gives the cookies structure, and the baking powder keeps them from baking flat and sad. Pull them when the edges are set and the tops still look a shade underdone; they finish on the hot pan.
Key Ingredients:
- 1/2 cup unsalted butter, softened to room temperature — Soft butter creams smoothly and traps air.
- 3/4 cup granulated sugar — This gives the cookies their clean sweetness and light crunch at the edge.
- 1 large egg — The binder that holds the dough together.
- 1 teaspoon pure vanilla extract — Use the good stuff if you have it; it’s the whole point here.
- 1 1/2 cups all-purpose flour — Spoon and level it so the dough doesn’t get dry.
- 1/2 teaspoon baking powder — Gives a little lift without turning them cakey.
- 1/4 teaspoon fine salt — Cuts the sweetness so the vanilla can come through.
Quick Steps:
- Preheat and prep: Heat the oven to 350°F and line two baking sheets with parchment paper.
- Cream the base: Beat the butter and sugar for 2 to 3 minutes, until the mixture looks pale and fluffy.
- Add the egg and vanilla: Mix in the egg and vanilla until the dough looks smooth and a little glossy.
- Fold in the dry ingredients: Stir in the flour, baking powder, and salt just until no dry streaks remain. Do not overmix.
- Scoop and bake: Portion the dough into 1 1/2-tablespoon mounds and bake for 9 to 11 minutes, until the edges set and the centers still look soft.
- Cool on the pan: Leave the cookies on the sheet for 5 minutes, then move them to a rack.
Equipment for This Recipe:
- Medium mixing bowl — Big enough for creaming without flour spilling everywhere.
- Hand mixer or stand mixer — Makes the butter-sugar base light.
- Rimmed baking sheets — Keeps the dough mounds from sliding.
- Parchment paper — Helps the cookies release cleanly.
- Cookie scoop — Useful if you want even sizes.
How to Serve This Dish:
Pile these on a small plate with cold milk or coffee. They look nicest when you don’t crowd them; three cookies with a little space between them reads as intentional, while a heap just looks like you stopped caring halfway through. If you want dessert-dessert energy, sandwich them with vanilla ice cream.
Pro Tips for This Recipe:
- Use butter that gives slightly when pressed, not butter that has turned oily on the counter.
- If your kitchen runs warm, chill the scooped dough for 15 minutes so the cookies do not spread too much.
- Sprinkle the tops with a little coarse sugar before baking if you want a gentle crunch.
- Pull them a minute early. Pale cookies taste better than dry ones.
Variations on This Dish:
- Lemon-Vanilla Drift: Add 1 teaspoon lemon zest and swap 1/2 teaspoon of the vanilla for lemon extract.
- Cinnamon Sugar Top: Roll each dough ball in 2 tablespoons sugar mixed with 1 teaspoon cinnamon before baking.
- Soft Sandwich Style: Bake them a touch larger, then fill two cooled cookies with buttercream or jam.
Common Mistakes to Avoid with This Dish:
- Using melted butter: The dough spreads fast and bakes greasy. Soft butter is the target, not liquid butter.
- Waiting for heavy browning: Sugar cookies are done before they look “done.” Brown edges mean you missed the window.
- Packing in flour: Too much flour makes the cookies dry and thick. Spoon it into the cup or weigh it if you can.
2. Brown Butter Sugar Cookies
Brown butter gives sugar cookies a nutty, toasted smell that plain butter just cannot match. These bake up a little deeper in color, with a flavor that lands somewhere between caramel and toasted hazelnut, even though there are no nuts in the dough. They taste richer than the ingredient list suggests, which is exactly why I like them.
Why It Works:
Browning the butter cooks off some moisture and concentrates the milk solids, so the cookie flavor turns warmer and more complex. I like using an extra egg yolk here because it keeps the crumb tender after the butter loses a bit of water in the browning process. Let the butter cool until it is thick but still soft before mixing, or the sugar will never cream properly.
Key Ingredients:
- 1/2 cup unsalted butter — Browned and cooled until opaque and soft.
- 3/4 cup granulated sugar — Helps the cookie edge turn lightly crisp.
- 1 large egg — Gives the dough structure.
- 1 large egg yolk — Adds chew and richness.
- 1 teaspoon vanilla extract — Keeps the flavor round instead of flat.
- 1 1/2 cups all-purpose flour — Enough to hold the browned butter without becoming cakey.
- 1/2 teaspoon baking powder — Just enough lift.
- 1/4 teaspoon salt — Necessary, because browned butter tastes better with salt.
Quick Steps:
- Brown the butter: Cook the butter in a small saucepan over medium heat, stirring often, until the foam subsides and the milk solids turn deep golden and smell nutty.
- Cool it down: Pour the butter into a bowl and let it cool for 10 to 15 minutes, until it thickens but is still spoonable.
- Mix the dough: Beat the browned butter with sugar, then add the egg, yolk, and vanilla.
- Add the dry ingredients: Stir in flour, baking powder, and salt until the dough comes together. Stop as soon as the flour disappears.
- Bake: Scoop 1 1/2-tablespoon portions and bake at 350°F for 9 to 11 minutes.
- Rest on the pan: Let them sit 5 minutes before moving to a rack so they finish setting.
Equipment for This Recipe:
- Small saucepan — Needed for browning the butter.
- Mixing bowl — For cooling and mixing the dough.
- Whisk or hand mixer — Either works here.
- Baking sheets lined with parchment — Keeps the browned butter cookies from sticking.
- Cookie scoop — Helps keep the portions even.
How to Serve This Dish:
These are lovely on their own, but a small dusting of flaky salt makes them even better. Serve them with black tea, espresso, or a scoop of vanilla ice cream if you want the toasted butter note to stand out. They’re also the cookie I’d set beside a dark roast coffee without thinking twice.
Pro Tips for This Recipe:
- Watch the pan closely at the end of browning; the jump from golden to burnt is short.
- If the browned butter is too warm, the dough turns loose and spreads.
- A chill of 20 to 30 minutes helps these bake up thicker.
- If you want a stronger toasted flavor, brown the butter a little darker than you think you should, but do not let it go bitter.
Variations on This Dish:
- Brown Sugar Swap: Replace 1/4 cup of the granulated sugar with brown sugar for a deeper caramel note.
- Toasted Almond Edge: Add 1/2 teaspoon almond extract and roll the dough balls in sliced almonds.
- Cinnamon Toast Finish: Mix 1 teaspoon cinnamon into the flour for a warm, bakery-style finish.
Common Mistakes to Avoid with This Dish:
- Skipping the cooling step: Hot browned butter melts the sugar and gives you flat cookies.
- Burning the milk solids: If the butter smells harsh or looks black instead of amber, start over.
- Overbaking for “golden” color: Brown butter dough already looks darker. Pull it early.
3. Sour Cream Soft-Batch Sugar Cookies
These are the soft ones. The kind that feel almost cake-like in the middle, with a tender crumb that gives under your teeth instead of snapping. Sour cream does the heavy lifting here, and it brings a faint tang that keeps the sweetness from turning one-note.
Why It Works:
Sour cream adds moisture and a little acid, which softens the crumb and keeps the cookies plush after they cool. A touch of baking soda works with that acid, giving just enough lift to keep the dough from baking dense. I prefer these as a scoop-and-bake cookie because rolling them out would defeat the whole point.
Key Ingredients:
- 1/2 cup unsalted butter, softened — The fat base for tenderness.
- 3/4 cup granulated sugar — Sweetens without making the dough too heavy.
- 1 large egg — Holds the dough together.
- 1 teaspoon vanilla extract — Keeps the flavor familiar.
- 1/4 cup sour cream — The ingredient that makes the crumb soft and slightly tangy.
- 1 3/4 cups all-purpose flour — Slightly more flour to balance the extra moisture.
- 1/2 teaspoon baking powder — Adds lift.
- 1/4 teaspoon baking soda — Works with the sour cream.
- 1/4 teaspoon salt — Keeps the sweetness in line.
Quick Steps:
- Heat the oven: Set it to 350°F and line a baking sheet with parchment.
- Cream butter and sugar: Beat until fluffy and a little lighter in color.
- Add the wet ingredients: Mix in the egg, vanilla, and sour cream until smooth.
- Fold in the dry ingredients: Stir in the flour, baking powder, baking soda, and salt just until combined. The dough should be soft but not runny.
- Portion and bake: Scoop generous tablespoons of dough and bake for 10 to 12 minutes, until the tops look set and the bottoms are barely golden.
- Cool gently: Let them sit on the sheet for 5 minutes before moving them.
Equipment for This Recipe:
- Large bowl — Needed because this dough is soft.
- Hand mixer — Best for getting the butter and sugar airy.
- Cookie scoop — Helps keep the soft dough manageable.
- Parchment-lined baking sheet — Makes cleanup easy.
- Cooling rack — Keeps the bottoms from steaming.
How to Serve This Dish:
These are the cookies I’d stack next to a bowl of berries or a glass of milk. They stay soft enough that you can eat them plain, but a thin vanilla glaze or a dusting of powdered sugar turns them into something you’d serve after supper without fuss. Warm is best, though they hold their softness into the next day.
Pro Tips for This Recipe:
- Full-fat sour cream gives the best texture; thin sour cream can make the dough loose.
- If the dough feels sticky, chill it for 15 minutes before scooping.
- Pull them when the tops look matte, not glossy.
- Store them with a slice of bread if you want to keep them soft a little longer.
Variations on This Dish:
- Orange Cream Batch: Add 1 teaspoon orange zest and swap the vanilla for orange extract.
- Cinnamon Cloud Cookies: Mix 1 teaspoon cinnamon into the dry ingredients.
- Frosted Bakery Style: Top cooled cookies with a thin vanilla glaze and let it set before stacking.
Common Mistakes to Avoid with This Dish:
- Using low-fat sour cream: The dough gets thinner and the cookies bake drier.
- Overbaking for color: These should stay pale. Brown tops mean they’ve gone too far.
- Trying to roll the dough: It is too soft for that; scoop it instead.
4. Lemon Zest Sugar Cookies
If a cookie could wake up, this would be the one. Lemon zest gives the dough a bright, clean smell before it ever hits the oven, and the finished cookies taste like butter first, lemon second, which is the correct order. I’m not interested in lemon cookies that taste like floor cleaner. Zest fixes that.
Why It Works:
Lemon zest carries the oils, which means you get actual citrus flavor without watering down the dough. A little juice sharpens the finish, but the zest is what does the real work. A simple glaze made with powdered sugar and lemon juice seals the deal and keeps the cookie from feeling flat.
Key Ingredients:
- 1/2 cup unsalted butter, softened — Creates the cookie’s tender base.
- 3/4 cup granulated sugar — Sweetens and helps the edges set.
- 1 large egg — Gives the cookies structure.
- 2 teaspoons finely grated lemon zest — Use only the yellow skin.
- 1 tablespoon lemon juice — Brightens the dough.
- 1 teaspoon vanilla extract — Rounds out the citrus.
- 1 1/2 cups all-purpose flour — Keeps the dough manageable.
- 1/2 teaspoon baking powder — Helps the cookies lift slightly.
- 1/4 teaspoon salt — Keeps the lemon from tasting thin.
- 1 cup powdered sugar, for the glaze — Makes the finish glossy.
- 1 to 2 tablespoons lemon juice, for the glaze — Thin it to a drizzly consistency.
Quick Steps:
- Preheat the oven: Set it to 350°F and line two sheets with parchment.
- Rub in the zest: Cream the butter, sugar, and lemon zest together so the sugar picks up the citrus oils.
- Add the egg and flavoring: Mix in the egg, lemon juice, and vanilla until smooth.
- Finish the dough: Stir in the flour, baking powder, and salt until just combined.
- Bake: Scoop the dough and bake for 9 to 10 minutes, until the edges are set and the centers look soft.
- Glaze after cooling: Mix the glaze and drizzle it over completely cooled cookies.
Equipment for This Recipe:
- Mixing bowl — For the dough and glaze.
- Microplane or fine grater — Best for zesting the lemon.
- Baking sheets — Line them for easy release.
- Spoon or small whisk — For the glaze.
- Cooling rack — Needed before glazing.
How to Serve This Dish:
Serve these with tea, especially Earl Grey or plain black tea, because the citrus cuts right through the tannin. They also sit nicely beside fresh berries on a dessert plate. If you want a sharper look, let the glaze set and add a few curls of zest on top.
Pro Tips for This Recipe:
- Zest the lemon before you juice it; that’s just easier.
- Use a light hand with the juice so the dough does not turn wet.
- A thin glaze is prettier and easier to bite through than a thick one.
- If you want more citrus punch, add another teaspoon of zest rather than more juice.
Variations on This Dish:
- Lemon-Poppy Drift: Add 1 tablespoon poppy seeds for a little crunch.
- Orange-Lemon Blend: Swap half the lemon zest for orange zest.
- Sugar Crust Finish: Roll the dough balls in granulated sugar before baking.
Common Mistakes to Avoid with This Dish:
- Using the white pith: It tastes bitter and dulls the lemon flavor. Stick to the bright yellow skin.
- Over-thinning the glaze: If it runs off the cookie, it needs a little more powdered sugar.
- Baking until deeply golden: Lemon cookies should look light and sunny, not browned.
5. Cinnamon-Sugar Snickerdoodle Cookies
Snickerdoodles sit in the sugar-cookie family, but they bring a little more attitude. The cinnamon sugar coating cracks and caramelizes in the oven, and the inside stays soft with that faint tang from cream of tartar. They smell like a warm kitchen should smell. That alone would sell me.
Why It Works:
Cream of tartar keeps the cookies chewy and gives them that classic snickerdoodle bite. The cinnamon-sugar coating melts into a thin shell as the cookies spread, so you get a sandy, crackly edge instead of plain sweet dough. A hotter oven helps the centers puff before the edges dry out.
Key Ingredients:
- 1/2 cup unsalted butter, softened — For a soft, spreadable dough.
- 3/4 cup granulated sugar — Sweetens the dough and helps it spread.
- 1 large egg — Binds the cookie.
- 1 teaspoon vanilla extract — Rounds out the cinnamon.
- 1 1/2 cups all-purpose flour — Keeps the structure in check.
- 1 teaspoon cream of tartar — The snickerdoodle signature.
- 1/2 teaspoon baking soda — Works with the cream of tartar.
- 1/4 teaspoon salt — Keeps the cookies from tasting flat.
- 2 tablespoons granulated sugar, for rolling — Helps the coating cling.
- 1 teaspoon cinnamon, for rolling — The warm top layer.
Quick Steps:
- Preheat to 375°F: Line your baking sheets with parchment.
- Make the dough: Cream the butter and sugar until fluffy, then mix in the egg and vanilla.
- Add the dry ingredients: Stir in flour, cream of tartar, baking soda, and salt until the dough is smooth.
- Roll the balls: Combine the rolling sugar and cinnamon, then coat the dough balls well.
- Bake: Set them on the sheet and bake for 8 to 10 minutes, until puffed and set around the edges.
- Cool briefly: Let the centers settle for 5 minutes before moving them.
Equipment for This Recipe:
- Large mixing bowl — For easy rolling and mixing.
- Baking sheets — A must for even spread.
- Parchment paper — Keeps the cinnamon sugar from sticking.
- Small bowl — For the coating.
- Cookie scoop — Helps the dough stay uniform.
How to Serve This Dish:
These are the ones I’d serve with coffee, especially if the coffee is a little bitter. They also do well on a dessert tray because they look plain at first glance and then disappear fast. A drizzle of simple vanilla glaze is optional, but I usually skip it; the cinnamon coat does enough.
Pro Tips for This Recipe:
- Do not skip the cream of tartar if you want that classic snickerdoodle chew.
- Roll the dough generously in the cinnamon sugar so the coating shows up after baking.
- Pull them while the centers still look slightly soft.
- If the dough is sticky, chill it for 20 minutes before rolling.
Variations on This Dish:
- Pumpkin Snickerdoodle: Add 1/4 cup pumpkin puree and 1/2 teaspoon extra cinnamon.
- Espresso Spice: Mix 1 teaspoon instant espresso powder into the dough.
- Brown Sugar Coat: Replace half the rolling sugar with light brown sugar.
Common Mistakes to Avoid with This Dish:
- Using baking powder instead of cream of tartar and baking soda: The texture changes and the tang disappears.
- Undersetting the coating: A light dusting won’t give you the crackly cinnamon shell.
- Baking too long: These should stay soft in the center, not turn crunchy all the way through.
6. Almond Glaze Cutout Cookies
These are the cookies that look more complicated than they are. The dough rolls cleanly, cuts neatly, and bakes into tidy shapes with a faint almond perfume that feels a little old-fashioned in the best way. The glaze gives them a glossy finish, but it’s the almond extract that keeps them interesting.
Why It Works:
A slightly sturdier dough helps the cutouts hold their shape. Almond extract has a strong flavor, so you only need a small amount to make the cookie taste distinct without veering into perfume territory. The glaze dries thin and hard, which means the cookies stack well.
Key Ingredients:
- 1/2 cup unsalted butter, softened — For a smooth dough.
- 3/4 cup granulated sugar — Provides sweetness and spread.
- 1 large egg — Binds the dough.
- 1/2 teaspoon almond extract — The main flavor.
- 1/2 teaspoon vanilla extract — Softens the almond.
- 1 1/2 cups all-purpose flour — Enough to roll without cracking.
- 1/2 teaspoon baking powder — Keeps the cookies from baking dense.
- 1/4 teaspoon salt — Balances the sugar.
- 1 cup powdered sugar, for the glaze — Makes a smooth finish.
- 2 tablespoons milk, for the glaze — Thin enough to drizzle.
- 1/4 teaspoon almond extract, for the glaze — Echoes the cookie flavor.
Quick Steps:
- Mix the dough: Cream butter and sugar, then beat in the egg, almond extract, and vanilla.
- Finish and chill: Add flour, baking powder, and salt, then chill the dough for 30 minutes.
- Roll and cut: Roll to 1/4-inch thickness and cut into shapes on a lightly floured surface.
- Bake: Bake at 350°F for 8 to 10 minutes, until the edges are just set.
- Cool and glaze: Let the cookies cool completely before drizzling with almond glaze.
Equipment for This Recipe:
- Rolling pin — For even thickness.
- Cookie cutters — Shapes matter here.
- Baking sheets with parchment — Prevent sticking.
- Small whisk — Handy for glaze.
- Cooling rack — Glaze only after the cookies are cool.
How to Serve This Dish:
These belong on a platter where the shapes can show off a little. I like them with tea because the almond flavor feels delicate next to something hot and plain. If you’re making them for a cookie tray, let the glaze fully set before stacking or they’ll smear.
Pro Tips for This Recipe:
- Chill the dough before rolling so the shapes stay sharp.
- Use a light dusting of flour; too much makes the cookies tough.
- If the dough cracks when rolled, let it sit for 5 minutes at room temperature.
- Keep the glaze thin enough to flow but not so thin that it disappears.
Variations on This Dish:
- Citrus Almond: Add 1 teaspoon orange zest to the dough.
- Toasted Sugar Top: Sprinkle the cutouts with coarse sugar before baking.
- Blackberry Drizzle: Swap the glaze for a thin blackberry jam glaze if you want a fruitier finish.
Common Mistakes to Avoid with This Dish:
- Skipping the chill: Warm dough spreads and loses the cut shape.
- Using too much almond extract: A heavy hand makes the cookies taste harsh.
- Glazing while warm: The icing slides off and never sets cleanly.
7. Brown Sugar Chewy Sugar Cookies
These taste like the corner piece of a cookie bar got all the attention. Brown sugar makes them chewy in the middle with a deeper caramel note, and a little cornstarch keeps the texture tender instead of dense. They’re the batch I reach for when crisp cookies feel a little too neat.
Why It Works:
Brown sugar brings molasses, which holds moisture and gives the cookies a softer bite. The extra egg yolk adds richness, and cornstarch softens the crumb. Bake them just until the tops lose their raw shine; that’s the difference between chewy and heavy.
Key Ingredients:
- 1/2 cup unsalted butter, softened — The fat that keeps the centers tender.
- 1 cup packed light brown sugar — The chew and caramel flavor.
- 1 large egg — Helps the cookies hold together.
- 1 large egg yolk — Adds richness and chew.
- 1 teaspoon vanilla extract — Completes the brown sugar flavor.
- 1 tablespoon cornstarch — Softens the crumb.
- 1 1/2 cups all-purpose flour — The main structure.
- 1/2 teaspoon baking soda — Encourages spread and browning.
- 1/2 teaspoon salt — Brown sugar likes salt.
- 1/4 cup granulated sugar, for rolling — Optional, but it gives a little sparkle.
Quick Steps:
- Preheat to 350°F: Line a baking sheet with parchment paper.
- Cream the butter and sugar: Beat until the mixture looks fluffy and a little lighter in color.
- Add the egg, yolk, and vanilla: Mix until smooth and glossy.
- Stir in the dry ingredients: Add cornstarch, flour, baking soda, and salt and mix just until combined.
- Bake: Scoop the dough and bake for 9 to 10 minutes, until the edges are set and the centers still look soft.
- Cool on the sheet: Give them 5 minutes before moving them to a rack.
Equipment for This Recipe:
- Mixing bowl — Deep enough for easy creaming.
- Hand mixer — Helps brown sugar break down.
- Baking sheet — Use parchment.
- Cookie scoop — Keeps the cookies evenly sized.
- Wire rack — Prevents soggy bottoms.
How to Serve This Dish:
These taste best with plain milk or a dark cup of coffee. They’re sturdy enough for lunchbox treats, but I like them stacked on a plate with one lightly crumbled over vanilla ice cream. The caramel note makes that pairing work harder than it should.
Pro Tips for This Recipe:
- Pack the brown sugar firmly so the measure is accurate.
- Do not overbake in search of color; the edges should just turn deeper brown.
- If the dough feels oily, chill it for 20 minutes.
- A tiny pinch of cinnamon can deepen the flavor without turning them into spice cookies.
Variations on This Dish:
- Toffee Brown Sugar: Fold in 1/2 cup toffee bits.
- Salted Caramel Finish: Sprinkle the warm cookies with a few flakes of salt.
- Cinnamon Chew: Add 1 teaspoon cinnamon to the dry mix.
Common Mistakes to Avoid with This Dish:
- Using too much flour: The chew disappears and the cookie turns dry.
- Pulling them too late: Once they look browned all over, they’ve lost that soft middle.
- Skipping the extra yolk: The cookies still work, but the texture is less plush.
8. Crisp Roll-Out Sugar Cookies
These are the snappy, neat-edged cookies that feel made for a holiday tin or a stack of little rounds next to tea. They roll smoothly, cut cleanly, and bake into a drier, crisper bite than the drop versions. If you want a cookie that keeps its shape and gives a little crunch, this is the one.
Why It Works:
A slightly higher flour ratio and a longer chill make the dough rollable instead of sticky. Baking them a touch hotter encourages the edges to set before the cookies puff too much. I like these plain, but they’re also the best base if you want sanding sugar or a thin icing later.
Key Ingredients:
- 1 cup unsalted butter, softened — Rich enough to hold shape but still spread a bit.
- 1 cup granulated sugar — A little more sugar gives a cleaner snap.
- 1 large egg — For structure.
- 2 teaspoons vanilla extract — A little extra flavor helps the plain cookie.
- 2 1/4 cups all-purpose flour — The dough needs the extra flour to roll well.
- 1/2 teaspoon baking powder — Small lift, no fluff.
- 1/2 teaspoon fine salt — Important in a plain dough.
- 1 tablespoon milk, only if needed — Use it only if the dough is crumbly.
Quick Steps:
- Mix the dough: Cream butter and sugar until pale, then beat in the egg and vanilla.
- Add the dry ingredients: Mix in flour, baking powder, and salt until the dough forms.
- Chill: Wrap the dough and chill for 45 to 60 minutes.
- Roll and cut: Roll to 1/4-inch thickness and cut clean shapes.
- Bake: Bake at 375°F for 8 to 10 minutes, until the edges are set and lightly golden.
- Cool completely: These crisp up more as they cool.
Equipment for This Recipe:
- Rolling pin — The dough needs to be even.
- Cookie cutters — Best for shapes.
- Parchment-lined baking sheets — Makes removal easy.
- Bench scraper or spatula — Helps lift cutouts.
- Cooling rack — Keeps them crisp.
How to Serve This Dish:
Serve these on a flat plate or in a tin where people can hear the snap when they bite in. They’re good beside tea, coffee, or hot chocolate, and they hold up well if you pack them in paper between layers. A little lemon or vanilla glaze is optional, but plain works fine.
Pro Tips for This Recipe:
- Roll the dough between parchment sheets if your counter is warm.
- Re-chill cut shapes for 10 minutes before baking if they look soft.
- If you want a glossy surface, brush the tops with milk and dust with sugar.
- Do not overwork the scraps; rerolled dough gets tougher each time.
Variations on This Dish:
- Sanding Sugar Sparkle: Press colored sanding sugar into the tops before baking.
- Lemon Snap: Add 1 teaspoon lemon zest to the dough.
- Vanilla Bean Look: Scrape in a little vanilla bean paste if you have it.
Common Mistakes to Avoid with This Dish:
- Rolling too thick: The cookies stay soft instead of crisp.
- Skipping the chill: The cutouts blur and spread.
- Expecting them to be soft: These are meant to crack, not cushion.
9. Powdered Sugar Meltaway Cookies
These are the delicate ones. The dough feels soft and almost sandy before baking, and the cookies finish with a tender crumb that breaks apart with the lightest bite. Powdered sugar and cornstarch do the work here, which is why they taste so different from the standard granulated sugar version.
Why It Works:
Powdered sugar disperses more evenly than granulated sugar, so the dough bakes with a finer crumb. Cornstarch pushes the texture even farther toward meltaway territory. I like a lower oven temperature for these so they stay pale and delicate instead of browning into something harsher.
Key Ingredients:
- 1 cup unsalted butter, softened — The main source of tenderness.
- 3/4 cup powdered sugar — Gives the dough a fine, soft structure.
- 1 teaspoon vanilla extract — Keeps the flavor simple and clean.
- 1/4 teaspoon almond extract — Optional, but nice.
- 1 1/2 cups all-purpose flour — Enough to shape the dough.
- 1/4 cup cornstarch — The secret to the melt-in-your-mouth crumb.
- 1/4 teaspoon salt — Keeps the sweetness from flattening out.
Quick Steps:
- Preheat to 325°F: Line a baking sheet with parchment.
- Cream butter and sugar: Beat until smooth and fluffy.
- Add the flavoring: Mix in vanilla and almond extract.
- Stir in dry ingredients: Add flour, cornstarch, and salt until the dough just comes together.
- Bake: Scoop small balls and bake for 10 to 12 minutes, until the bottoms are just barely golden.
- Dust if you want: Roll warm cookies in powdered sugar once they can be handled.
Equipment for This Recipe:
- Mixing bowl — The dough is soft but manageable.
- Hand mixer — Best for the powdered sugar base.
- Parchment-lined sheet — These are delicate when hot.
- Cooling rack — Lets them set without steaming.
- Fine sieve — Handy for dusting with extra sugar.
How to Serve This Dish:
I like these with tea or coffee, but they’re also the cookie I’d set out on a plate beside fresh fruit because they feel light and crumbly. If you dust them with powdered sugar, do it right before serving so the coating stays pretty. They’re fragile, which is part of the charm.
Pro Tips for This Recipe:
- Measure the cornstarch carefully; too much makes the dough chalky.
- Bake until just set. They should not brown much at all.
- Chill the dough for 20 minutes if your kitchen is warm.
- A second dusting of powdered sugar after cooling looks nice, but do it gently.
Variations on This Dish:
- Coconut Dust: Roll the baked cookies in finely shredded coconut.
- Vanilla-Salt Finish: Add a pinch more salt to the dough and leave them plain.
- Orange Powdered Sugar: Add orange zest to the dough and a little zest to the sugar dust.
Common Mistakes to Avoid with This Dish:
- Overbaking for color: These should stay pale and tender.
- Skipping cornstarch: The texture becomes more ordinary and less delicate.
- Handling them too soon: Hot meltaways break if you try to move them early.
10. Peanut Butter Swirl Sugar Cookies

These are what I make when the cookie jar needs more backbone. Peanut butter gives the dough a savory edge and a dense, soft chew, while the sugar keeps it from tasting like straight spread from the jar. A fork crosshatch on top makes them look like you meant business.
Why It Works:
Peanut butter brings fat and flavor, which means you can use less butter and still get a cookie that feels rich. The dough is sturdy, so it handles shaping and baking without fuss. A little extra sugar on top can create that faint crackle I always want with peanut butter cookies.
Key Ingredients:
- 1/2 cup unsalted butter, softened — Keeps the dough from getting too dry.
- 1/2 cup creamy peanut butter — Smooth peanut butter works best here.
- 3/4 cup granulated sugar — Sweetens and helps spread.
- 1 large egg — Binds the dough.
- 1 teaspoon vanilla extract — Balances the peanut flavor.
- 1 1/2 cups all-purpose flour — Enough for structure.
- 1/2 teaspoon baking soda — Helps the cookies spread and brown.
- 1/2 teaspoon salt — Peanut butter needs it.
- 2 tablespoons granulated sugar, for topping — Optional sparkle.
Quick Steps:
- Preheat the oven: Set it to 350°F and line a sheet with parchment.
- Cream the fats and sugar: Beat butter, peanut butter, and sugar until fluffy.
- Add the egg and vanilla: Mix until the dough looks smooth.
- Add the dry ingredients: Stir in flour, baking soda, and salt until a soft dough forms.
- Shape and mark: Roll into balls, flatten slightly, and press with a fork in a crisscross pattern.
- Bake: Bake for 9 to 11 minutes, until the edges are lightly golden.
Equipment for This Recipe:
- Mixing bowl — The dough is easy to mix by hand or with a mixer.
- Fork — Needed for the classic pattern.
- Baking sheet — Line it with parchment.
- Cookie scoop — Helps keep the cookies even.
- Cooling rack — Sets the texture.
How to Serve This Dish:
These go with cold milk, obviously, but they also like black coffee because the peanut butter softens the bite of the roast. A small sprinkle of flaky salt on top is good if you want the sweet-salty thing to stand out. They’re sturdy enough for lunchboxes, which is not nothing.
Pro Tips for This Recipe:
- Use creamy peanut butter, not the oily natural kind, unless you are ready to chill the dough longer.
- Press the fork pattern lightly; if you flatten them too much, they bake thin.
- Pull them when the centers still look a touch soft.
- If the dough feels sticky, a 15-minute chill helps a lot.
Variations on This Dish:
- Chocolate Swirl: Add 2 tablespoons cocoa powder to half the dough for a marbled effect.
- Honey Peanut Batch: Swap 2 tablespoons of the sugar for honey.
- Chunky Peanut Top: Press chopped peanuts onto the tops before baking.
Common Mistakes to Avoid with This Dish:
- Using too much peanut butter: The cookies spread less predictably and can taste heavy.
- Overbaking: The edges should just set; dry peanut butter cookies are a waste.
- Skipping the salt: It matters more here than in plain sugar cookies.
11. Chocolate-Dipped Sugar Cookies

These are plain sugar cookies with a coat of melted chocolate, which is a better idea than it sounds because the vanilla cookie keeps the chocolate from taking over. The dip adds a snap at the edge and a little gloss on the plate. They look like you bought them from somewhere that charges too much.
Why It Works:
A simple vanilla sugar cookie gives the chocolate a sturdy base. Dipping only half keeps the cookie from turning messy and makes the texture more interesting in each bite. I use semi-sweet chocolate because milk chocolate can make the whole thing cloying.
Key Ingredients:
- 1/2 cup unsalted butter, softened — For the cookie base.
- 3/4 cup granulated sugar — Keeps the cookie sweet and crisp-tender.
- 1 large egg — Structure.
- 1 teaspoon vanilla extract — The main flavor in the cookie itself.
- 1 1/2 cups all-purpose flour — Standard cookie structure.
- 1/2 teaspoon baking powder — Light lift.
- 1/4 teaspoon salt — Balances the sweetness.
- 1 cup semi-sweet chocolate chips — For dipping.
- 1 teaspoon neutral oil or butter — Helps the chocolate melt smoothly.
Quick Steps:
- Bake the cookies: Make the dough, scoop it, and bake at 350°F for 9 to 11 minutes.
- Cool completely: The chocolate will not stick well to warm cookies.
- Melt the chocolate: Stir chocolate chips with the oil in short bursts until smooth.
- Dip the cookies: Half-dip each cookie and let the excess drip back into the bowl.
- Set on parchment: Leave them until the chocolate firms up.
- Finish if you want: Sprinkle with flaky salt or crushed nuts before the chocolate sets.
Equipment for This Recipe:
- Mixing bowl — For the dough.
- Baking sheet and parchment — For baking and setting the dipped cookies.
- Heatproof bowl — Needed for the chocolate.
- Spoon or offset spatula — For dipping.
- Cooling rack — Optional, but useful if you want to work fast.
How to Serve This Dish:
These belong on a dessert tray where the glossy chocolate can catch the eye without shouting. Serve them with coffee or milk, and keep them in a single layer until the chocolate is fully set or they’ll stick together. They make a good “fancy but not fussy” cookie for a mixed platter.
Pro Tips for This Recipe:
- Let the chocolate cool for a minute after melting so it clings instead of running.
- If you want a cleaner edge, scrape the underside of the dipped cookie against the bowl.
- A pinch of salt on the chocolate makes the flavor deeper.
- Store them in a single layer or with parchment between layers.
Variations on This Dish:
- White Chocolate Stripe: Drizzle white chocolate over the set dip.
- Orange-Chocolate Pairing: Add orange zest to the cookie dough.
- Toasted Nut Finish: Press finely chopped toasted nuts into the wet chocolate.
Common Mistakes to Avoid with This Dish:
- Dipping warm cookies: The chocolate melts and slides off.
- Using watery chocolate: Add a tiny bit of oil only if needed; too much makes it soft.
- Stacking too soon: The finish smears and becomes a mess.
12. Jam Thumbprint Sugar Cookies
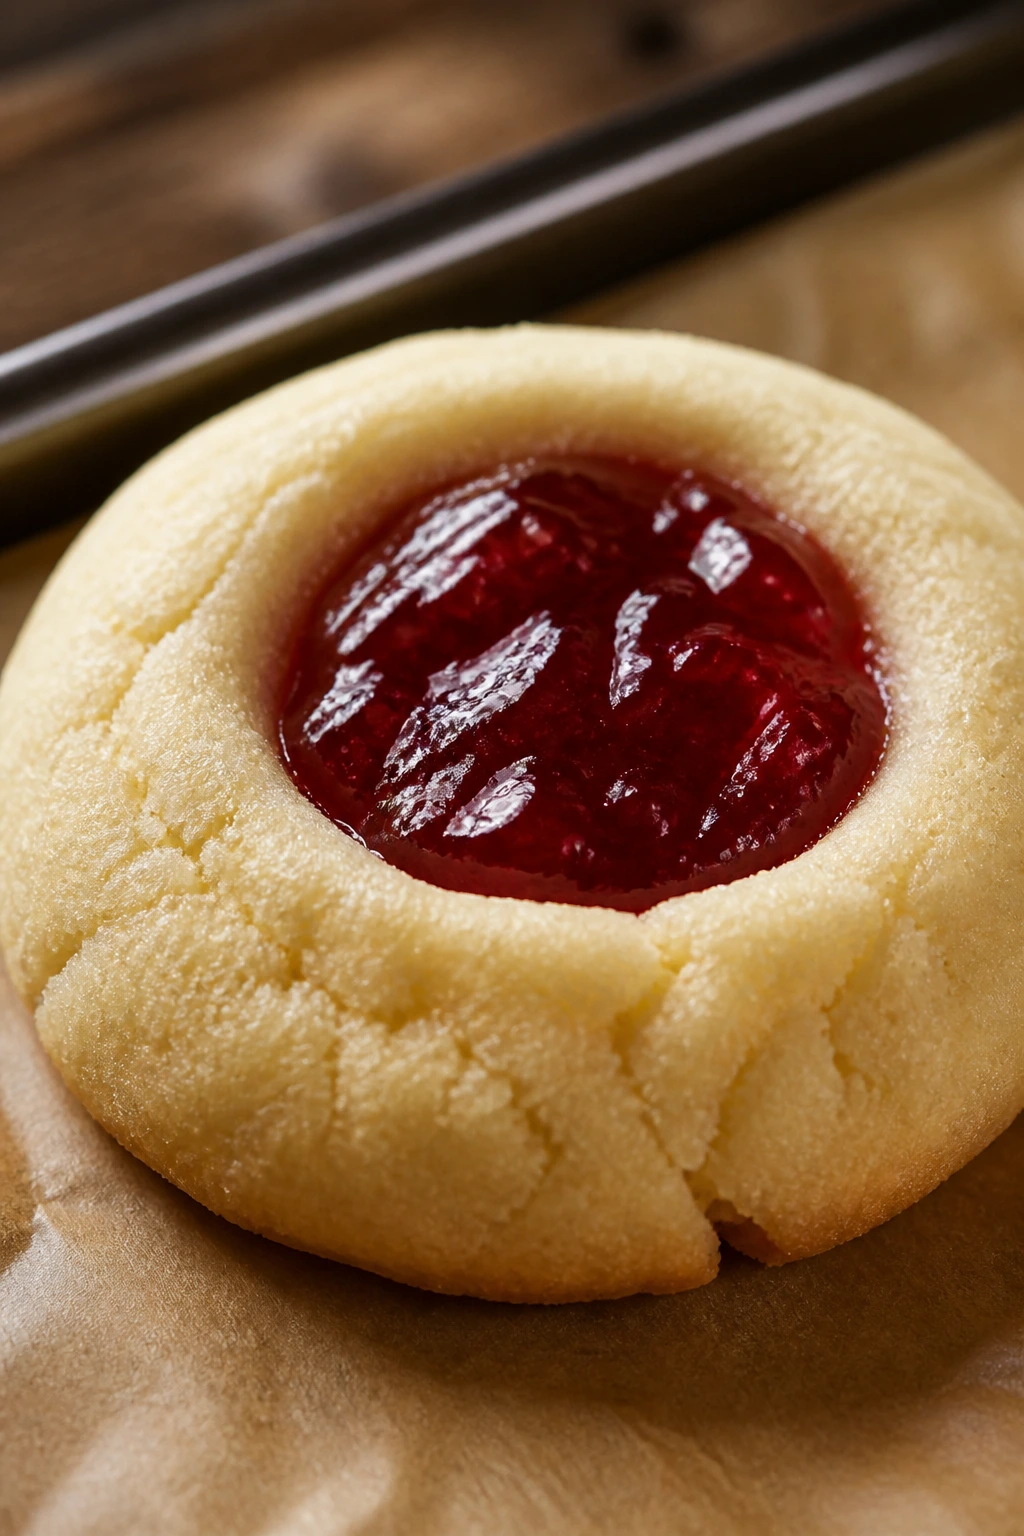
Thumbprints are the kind of cookie that look fiddly but are secretly simple. A little well in the center holds a spoonful of jam that bakes down into a jewel-like middle. I like these because the fruit cuts the sweetness and keeps the cookie from feeling one-dimensional.
Why It Works:
Using an egg yolk instead of a whole egg makes the dough richer and a little more tender. The thumbprint itself gives you a built-in place for the jam, so the flavor stays concentrated instead of running all over the tray. Slightly thicker jam works best; thin jam can leak out before it sets.
Key Ingredients:
- 1/2 cup unsalted butter, softened — For a tender dough.
- 1/2 cup granulated sugar — Keeps the cookies sweet but not heavy.
- 1 large egg yolk — Adds richness without too much lift.
- 1 teaspoon vanilla extract — Base flavor.
- 1 1/2 cups all-purpose flour — Holds the shape.
- 1/2 teaspoon baking powder — Lightens the bite.
- 1/4 teaspoon salt — Balances the filling.
- 1/2 cup thick jam or preserves — Raspberry, apricot, or strawberry all work.
Quick Steps:
- Preheat the oven: Set it to 350°F and line a baking sheet with parchment.
- Make the dough: Cream butter and sugar, then mix in the yolk and vanilla.
- Add the dry ingredients: Stir in flour, baking powder, and salt until the dough holds together.
- Shape the thumbprints: Roll into balls, set on the tray, and press a deep indentation into each one.
- Fill and bake: Spoon a little jam into each center and bake for 12 to 14 minutes, until the edges are just golden.
- Cool before moving: The jam needs time to set.
Equipment for This Recipe:
- Mixing bowl — For the dough.
- Baking sheet with parchment — Keeps the bottoms clean.
- Measuring spoon — Helpful for filling the wells.
- Thumb or small spoon handle — For making the indent.
- Cooling rack — Once the jam has settled.
How to Serve This Dish:
These look best on a flat plate or tiered tray where the jam centers can show. Serve them with tea, especially something plain enough to let the fruit speak. They are one of the few cookies that feel polished without needing a glaze, which is convenient.
Pro Tips for This Recipe:
- Use jam that is thick enough to sit in the center without sliding.
- Make the indent deep enough before baking; it will puff a little.
- If cracks form around the thumbprint, that’s fine. It looks homemade in a good way.
- Let them cool fully before stacking or the jam will smear.
Variations on This Dish:
- Apricot Almond: Use apricot preserves and add 1/4 teaspoon almond extract.
- Raspberry-Lemon: Add lemon zest to the dough and raspberry jam to the center.
- Chocolate Center: Swap jam for a small square of chocolate that melts into the well.
Common Mistakes to Avoid with This Dish:
- Using runny jam: It leaks and burns on the pan.
- Pressing the wells too shallow: The centers disappear during baking.
- Moving them too soon: The jam needs time to firm up or it tears the cookie.
13. Coconut Sugar Cookies
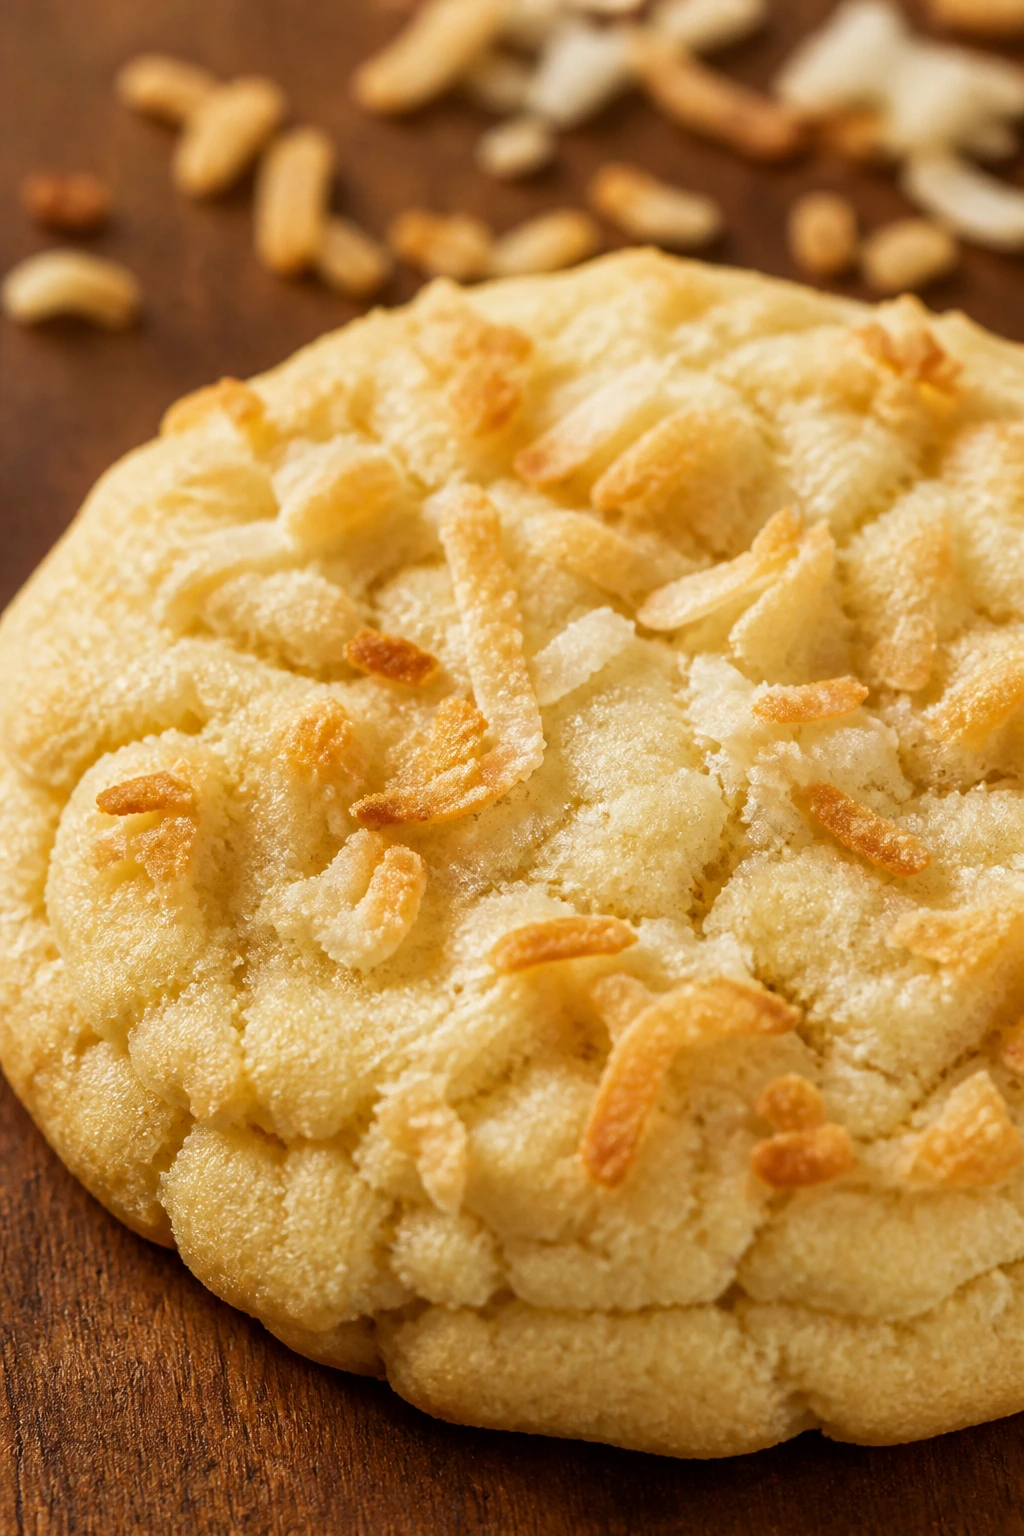
These are soft, sweet, and a little chewy at the edge, with coconut threaded through every bite. I like them because the coconut gives the cookie texture without demanding extra work. They taste like something you would expect from a better-than-average bakery case, except the dough is built from ordinary ingredients.
Why It Works:
Shredded coconut adds chew and a toasty finish once it hits the oven. The coconut also softens the butter-based dough just enough to give the cookie a more interesting bite than plain vanilla. If you toast a little extra coconut for the top, the flavor gets deeper and the look gets better, too.
Key Ingredients:
- 1/2 cup unsalted butter, softened — For structure and flavor.
- 3/4 cup granulated sugar — Sweetens the dough.
- 1 large egg — Binds the mixture.
- 1 teaspoon vanilla extract — Keeps the coconut flavor from tasting flat.
- 1 1/2 cups all-purpose flour — Standard cookie base.
- 1/2 teaspoon baking powder — Gives a little lift.
- 1/4 teaspoon salt — Helps the coconut flavor stand out.
- 1 cup sweetened shredded coconut — The main texture and flavor.
- 2 tablespoons extra coconut, for topping — Optional, but pretty.
Quick Steps:
- Preheat to 350°F: Line a baking sheet with parchment.
- Cream butter and sugar: Beat until the mixture looks pale and fluffy.
- Add egg and vanilla: Mix until smooth.
- Stir in dry ingredients and coconut: Add flour, baking powder, salt, and coconut until just combined.
- Scoop and bake: Bake for 9 to 11 minutes, until the edges turn lightly golden.
- Cool on the sheet: Coconut cookies need a few minutes to settle.
Equipment for This Recipe:
- Mixing bowl — Enough room for the coconut.
- Mixer — Makes the dough light.
- Baking sheet — Line it well.
- Cookie scoop — Keeps the size consistent.
- Rack — Useful once they are firm.
How to Serve This Dish:
I like these with iced coffee or a plain cup of tea because the coconut already brings plenty of personality. They also work with fresh pineapple or berries if you want to turn them into a little dessert plate. A light dusting of powdered sugar makes them look softer than they really are.
Pro Tips for This Recipe:
- If your coconut is very dry, give the dough an extra 1 teaspoon of vanilla or milk.
- Toast a tablespoon of the coconut before mixing it in for more flavor.
- Pull them before the edges go dark; coconut can brown fast.
- Chill the dough briefly if the coconut makes it too soft to scoop cleanly.
Variations on This Dish:
- Lime Coconut: Add lime zest and a tiny squeeze of juice.
- Chocolate Coconut: Fold in 1/3 cup mini chocolate chips.
- Toasted Coconut Top: Roll the dough balls in toasted coconut before baking.
Common Mistakes to Avoid with This Dish:
- Baking too dark: Coconut turns bitter when overbrowned.
- Using unsweetened coconut without adjusting: The cookies can taste dry and less lush.
- Skipping salt: Coconut needs that contrast.
14. Maple Sugar Cookies
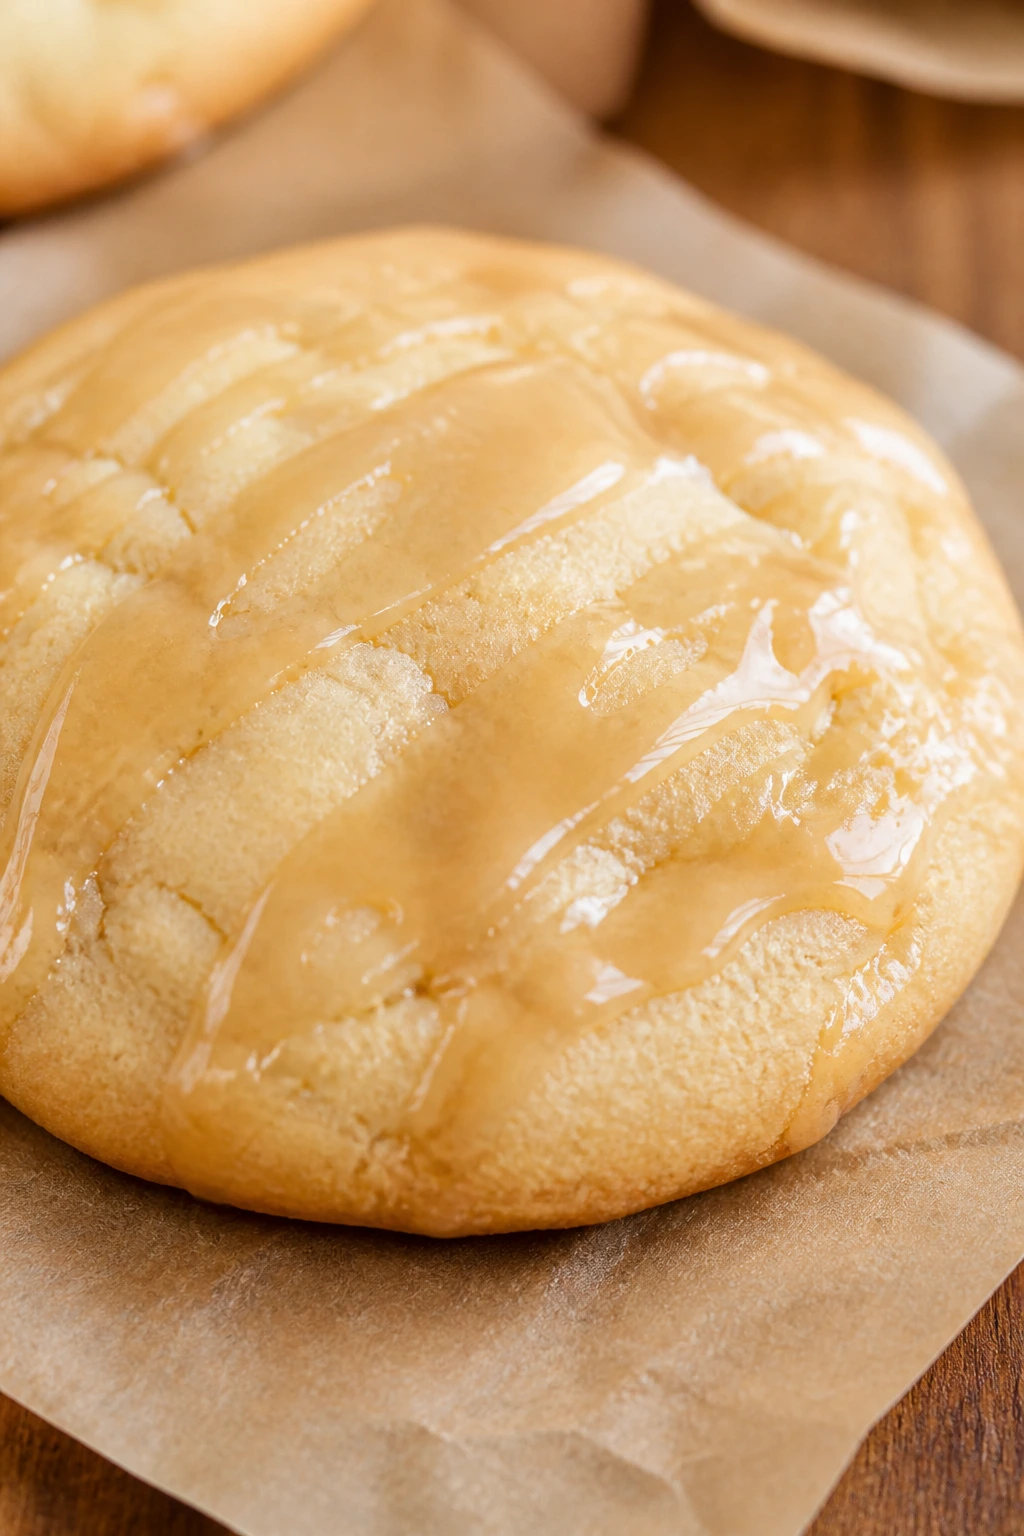
Maple changes the whole temperature of a sugar cookie. The dough smells like a pancake breakfast in the best way, and the baked cookies lean warm, mellow, and a little earthy. I prefer maple in cookies that stay soft rather than crisp; it suits them.
Why It Works:
Maple syrup adds both sweetness and moisture, so the dough bakes tender and fragrant. Brown sugar deepens the flavor without making the cookies too sticky. A simple maple glaze can push the flavor forward without turning the cookie into a frosting carrier.
Key Ingredients:
- 1/2 cup unsalted butter, softened — The base fat.
- 1/2 cup packed light brown sugar — Brings caramel notes.
- 1/4 cup maple syrup — Use real maple syrup if you can.
- 1 large egg — Holds the dough together.
- 1 teaspoon vanilla extract — Balances the maple.
- 1 3/4 cups all-purpose flour — Slightly more flour to handle the syrup.
- 1/2 teaspoon baking powder — Light lift.
- 1/4 teaspoon salt — Keeps the sweetness in check.
- 1/2 cup powdered sugar, optional for glaze — For a light maple finish.
- 1 tablespoon maple syrup, optional for glaze — Makes the topping taste like maple, not just sugar.
Quick Steps:
- Preheat to 350°F: Line your baking sheet.
- Cream butter and brown sugar: Beat until smooth and fluffy.
- Add the maple, egg, and vanilla: Mix until the batter looks glossy.
- Stir in the dry ingredients: Combine flour, baking powder, and salt just until the dough forms.
- Bake: Scoop and bake for 10 to 12 minutes, until the edges set and the tops look matte.
- Glaze if using: Drizzle cooled cookies with a thin maple glaze.
Equipment for This Recipe:
- Mixing bowl — The dough gets soft.
- Mixer — Helps the sugar dissolve.
- Parchment-lined sheet — Important for clean release.
- Small bowl — For glaze, if you make it.
- Cooling rack — For glazing and setting.
How to Serve This Dish:
These are good with coffee, hot tea, or a glass of cold milk if you want the maple to read like breakfast. They’re also nice with a few toasted pecans on the side, though you do not need nuts to make them feel complete. A thin glaze gives them a more finished look.
Pro Tips for This Recipe:
- Use real maple syrup, not pancake syrup, or the flavor gets flat.
- The dough may feel softer than a standard sugar cookie; that’s normal.
- Chill it for 15 to 20 minutes if your kitchen is warm.
- Add the glaze sparingly. Too much and the maple gets muddy.
Variations on This Dish:
- Maple-Pecan Batch: Fold in 1/2 cup chopped pecans.
- Maple-Cinnamon: Add 1 teaspoon cinnamon to the dry ingredients.
- Brown Butter Maple: Brown the butter first for a deeper flavor.
Common Mistakes to Avoid with This Dish:
- Too much syrup: The cookies spread and bake sticky.
- Overbaking for color: Maple darkens fast; stop when the edges are just set.
- Using fake maple flavor alone: It tastes thin and sharp compared with real syrup.
15. Espresso Sugar Cookies
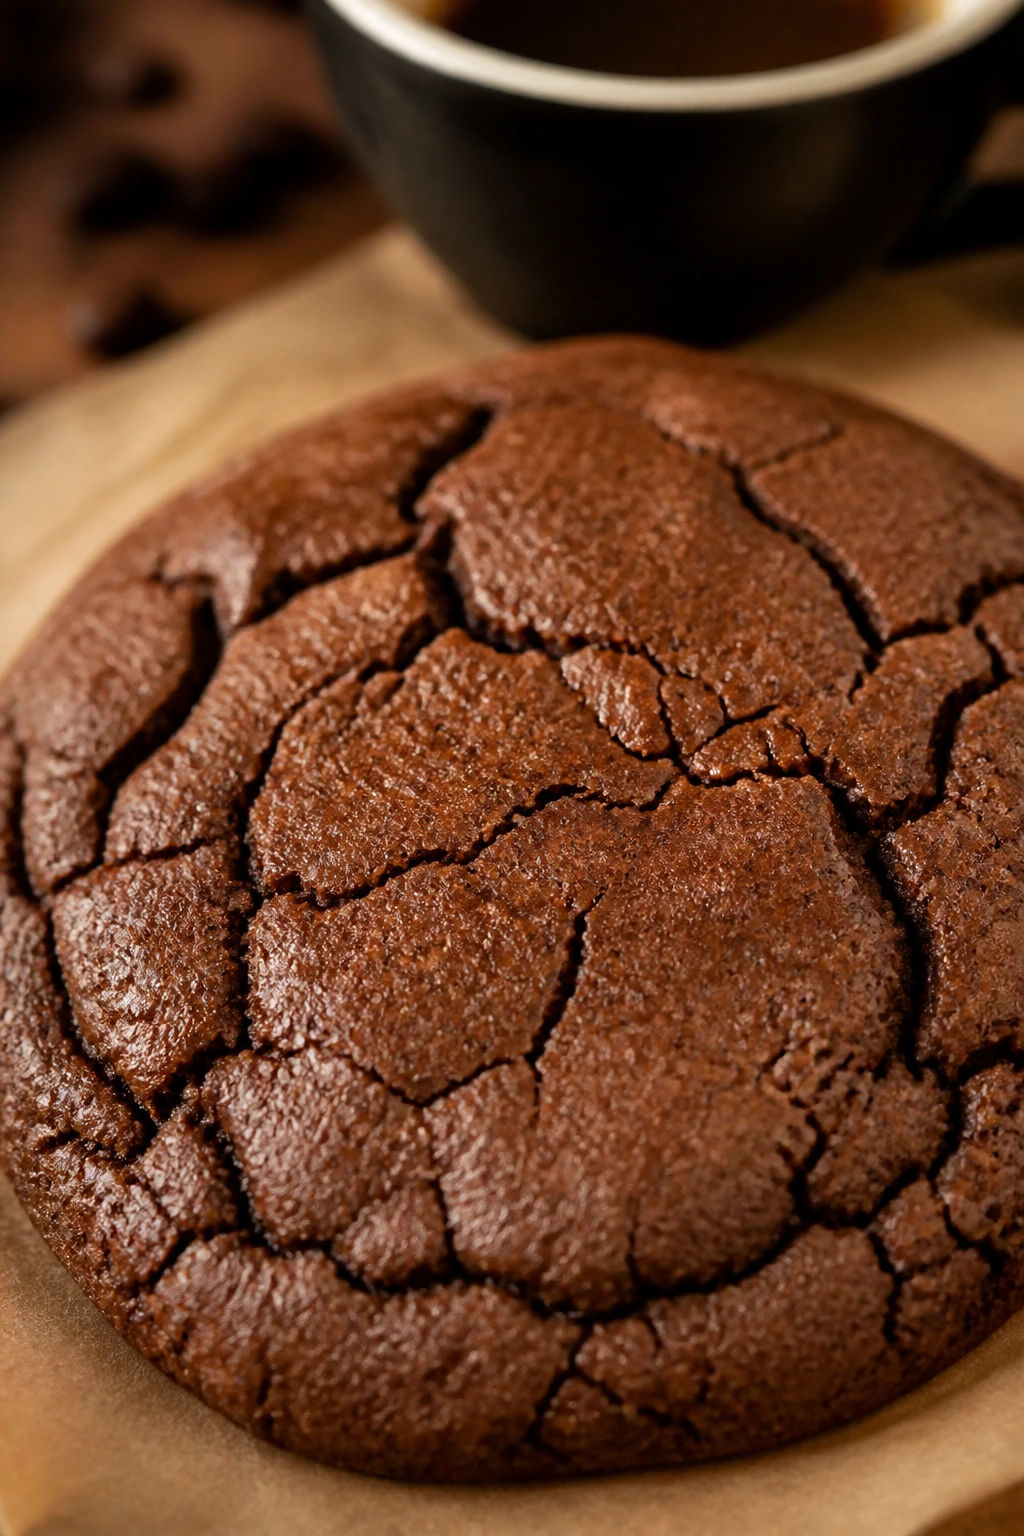
These are for coffee people who want their dessert to taste like coffee without turning into a brownie. Instant espresso powder is enough to give the cookies a bitter edge and a deep aroma, while the sugar and vanilla keep them squarely in cookie territory. They smell like a café kitchen in a good way.
Why It Works:
Espresso powder dissolves into the dough and spreads through every bite, which is better than brewed coffee, which can throw off the texture. The cocoa-like bitterness of coffee sharpens the sweetness and makes vanilla taste louder. A little chocolate drizzle on top is optional, but I usually think it earns its keep.
Key Ingredients:
- 1/2 cup unsalted butter, softened — The fat base.
- 3/4 cup granulated sugar — Sweetness against the coffee.
- 1 large egg — Structure.
- 1 teaspoon vanilla extract — Softens the coffee flavor.
- 1 1/2 cups all-purpose flour — Standard cookie base.
- 1 1/2 tablespoons instant espresso powder — Dissolved for even flavor.
- 1 tablespoon hot water — For the espresso powder.
- 1/2 teaspoon baking powder — A little lift.
- 1/4 teaspoon salt — Necessary with coffee.
- 1/4 cup mini chocolate chips, optional — Good if you want more café flavor.
Quick Steps:
- Dissolve the espresso: Stir espresso powder into hot water until smooth.
- Cream butter and sugar: Beat until fluffy.
- Add egg, vanilla, and espresso: Mix until the dough turns evenly tinted.
- Stir in the dry ingredients: Add flour, baking powder, salt, and mini chips if using.
- Bake: Scoop and bake at 350°F for 9 to 11 minutes.
- Cool fully: The coffee flavor settles as the cookies cool.
Equipment for This Recipe:
- Mixing bowl — For the dough.
- Small cup — For dissolving espresso.
- Hand mixer — Helps with creaming.
- Baking sheet — Lined with parchment.
- Cooling rack — Lets the aroma set.
How to Serve This Dish:
Serve these after dinner with espresso, black coffee, or a small scoop of vanilla ice cream. They also do well dipped halfway in melted chocolate if you want a sharper finish. I like them on a simple plate because the flavor is doing the talking.
Pro Tips for This Recipe:
- Dissolve the espresso powder first so you do not bite into dry bits.
- If you want a milder coffee flavor, cut the espresso powder to 1 tablespoon.
- Do not overbake; coffee cookies taste harsh if they dry out.
- A pinch of cinnamon can round off the bitter edge.
Variations on This Dish:
- Mocha Batch: Add 1 tablespoon cocoa powder.
- Café Vanilla Glaze: Drizzle with vanilla icing after cooling.
- Dark Roast Crunch: Roll the dough balls in coarse sugar before baking.
Common Mistakes to Avoid with This Dish:
- Using brewed coffee: It can throw off the dough’s texture.
- Overloading the espresso powder: The flavor turns sharp instead of rich.
- Baking until dark brown: Coffee cookies need a gentle hand.
16. Pumpkin Spice Sugar Cookies

Pumpkin sugar cookies are softer than most, with a warm spice smell that takes over the kitchen before they’re done. They do not taste like pie in cookie form, which is a good thing. The pumpkin adds moisture, the spices add depth, and the result lands somewhere between cake and cookie without leaning too far either way.
Why It Works:
Pumpkin puree brings moisture, so the dough needs a little more flour and a little more baking time to set properly. The spice mix carries the flavor because pumpkin itself is mild. I like these with a thin glaze because it keeps them from tasting dusty or flat.
Key Ingredients:
- 1/2 cup unsalted butter, softened — For the fat base.
- 1/2 cup granulated sugar — Sweetens the dough.
- 1/4 cup packed light brown sugar — Adds depth.
- 1 large egg — Binds the dough.
- 1/3 cup pumpkin puree, blotted dry if watery — Keeps the dough moist.
- 1 teaspoon vanilla extract — Rounds the spice.
- 1 3/4 cups all-purpose flour — Slightly more for the extra moisture.
- 1/2 teaspoon baking powder — Helps them rise gently.
- 1/4 teaspoon baking soda — Balances the pumpkin.
- 1/2 teaspoon fine salt — Keeps the flavor clean.
- 1 teaspoon cinnamon, 1/2 teaspoon ginger, 1/4 teaspoon nutmeg — The spice backbone.
Quick Steps:
- Preheat to 350°F: Line baking sheets with parchment.
- Cream the butter and sugars: Beat until light.
- Add the egg, pumpkin, and vanilla: Mix until smooth.
- Stir in the dry ingredients and spices: Combine just until the dough comes together.
- Bake: Scoop and bake for 11 to 13 minutes, until set and lightly golden at the edges.
- Cool before glazing: The cookies are soft when hot.
Equipment for This Recipe:
- Mixing bowl — For the soft dough.
- Mixer — Helps the butter and sugars blend.
- Parchment-lined baking sheet — Needed because the cookies are tender.
- Cookie scoop — Keeps the dough even.
- Cooling rack — For glazing later, if desired.
How to Serve This Dish:
These are good with coffee, chai, or milk, and they feel right on a dessert plate with a little powdered sugar or glaze. I like them slightly warm because the spices smell louder then. They also pair well with plain whipped cream if you’re turning them into a bigger dessert plate.
Pro Tips for This Recipe:
- Blot watery pumpkin with a paper towel so the dough does not turn loose.
- Pull them before the tops start to brown heavily.
- A glaze with a pinch of cinnamon makes them look finished without much work.
- Chill the dough for 20 minutes if it feels sticky.
Variations on This Dish:
- Maple Pumpkin: Replace 2 tablespoons of the sugar with maple syrup.
- Cream Cheese Drizzle: Top cooled cookies with a thin cream cheese glaze.
- Extra Spice Batch: Add a pinch of cloves or allspice.
Common Mistakes to Avoid with This Dish:
- Using too much pumpkin: The cookies become gummy instead of soft.
- Expecting crisp edges: These bake tender, not snappy.
- Skipping the extra flour: Pumpkin dough needs it or it collapses.
17. Molasses Spice Sugar Cookies
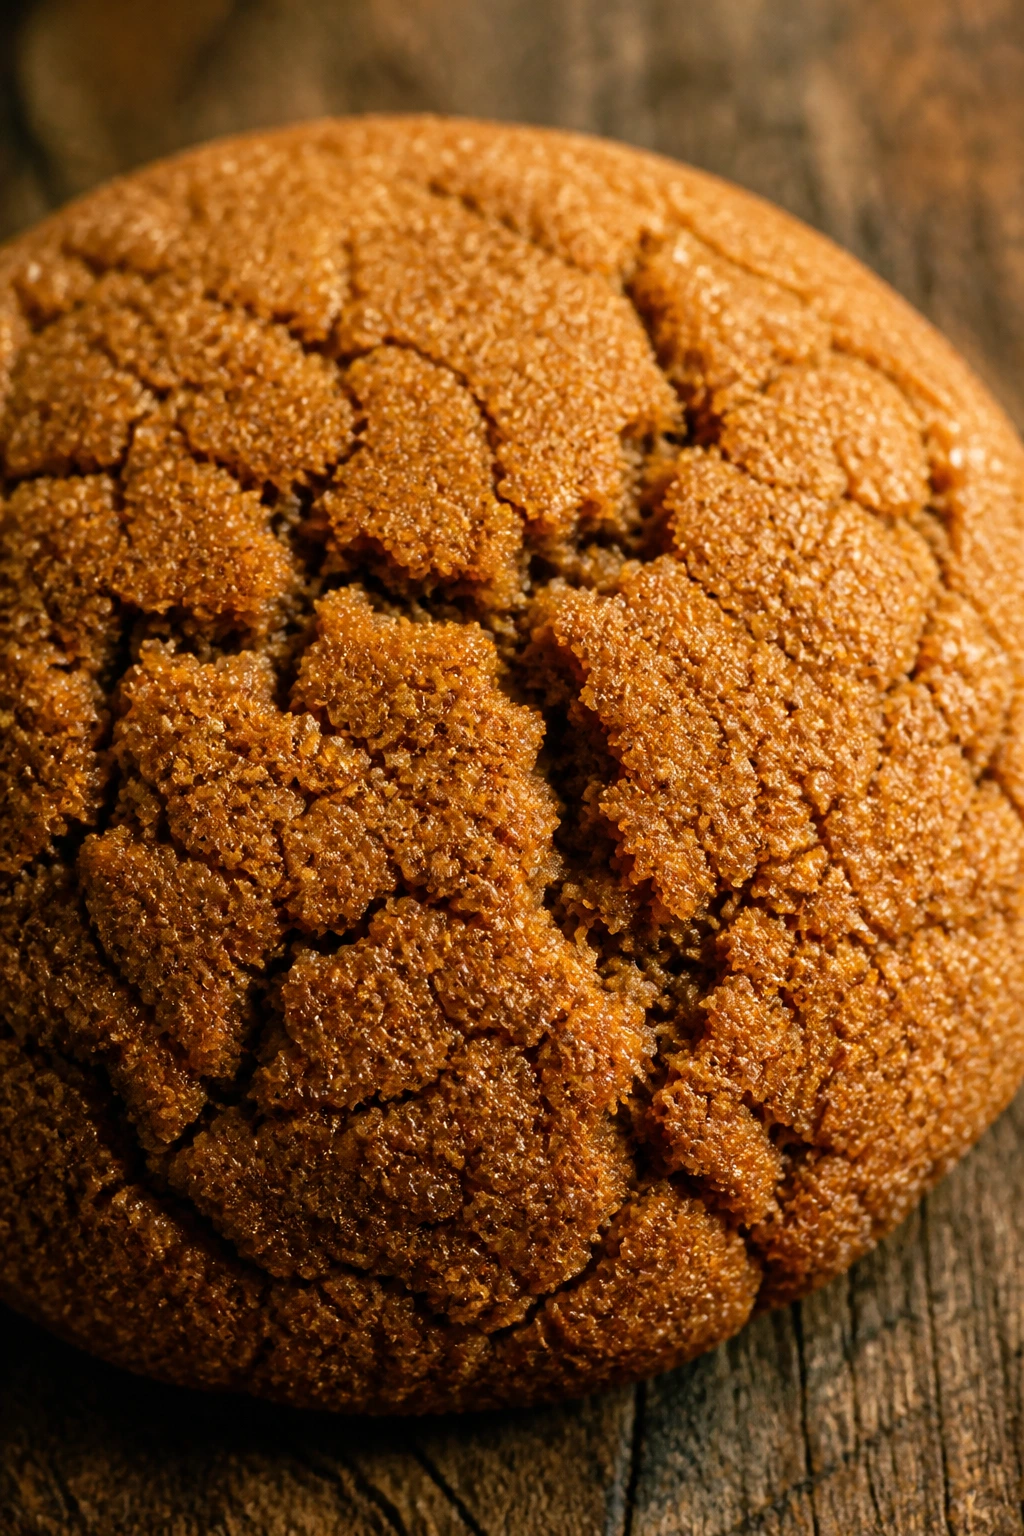
These are the deepest-colored cookies in the bunch, with a dark, warm flavor that tastes like molasses, ginger, and cinnamon all sharing the same room. They crack a little on top as they bake, which I like. It gives them a rougher, more honest look than the smooth vanilla batch.
Why It Works:
Molasses adds both moisture and a robust bitter-sweet note, which means you need enough spice to support it. Baking soda reacts with the molasses and helps the cookies spread and crack just a bit. If you like ginger cookies but want a softer center, this is the lane.
Key Ingredients:
- 1/2 cup unsalted butter, softened — For richness.
- 3/4 cup packed brown sugar — Keeps the cookies chewy.
- 1/4 cup molasses — The deep flavor.
- 1 large egg — Structure.
- 1 teaspoon vanilla extract — Softens the spice.
- 1 3/4 cups all-purpose flour — Helps hold the moisture.
- 1/2 teaspoon baking soda — Needed for spread and crackle.
- 1 teaspoon ground cinnamon — Warmth.
- 1/2 teaspoon ground ginger — The sharper spice.
- 1/4 teaspoon ground cloves — Strong, so use lightly.
- 1/4 teaspoon salt — Balances the molasses.
Quick Steps:
- Preheat to 350°F: Line a sheet with parchment.
- Cream the butter and sugar: Beat until fluffy.
- Add the molasses, egg, and vanilla: Mix until dark and smooth.
- Stir in the dry ingredients and spices: Add flour, baking soda, cinnamon, ginger, cloves, and salt.
- Bake: Scoop and bake for 10 to 12 minutes, until the tops look set and lightly cracked.
- Cool on the tray: These need a few minutes to firm up.
Equipment for This Recipe:
- Mixing bowl — The dough is sticky.
- Mixer — Helps the molasses blend.
- Baking sheet — Use parchment.
- Cookie scoop — Keeps the sticky dough manageable.
- Rack — Helpful after the initial rest.
How to Serve This Dish:
These cookies work well with tea, coffee, or cold milk, but I think they shine most next to plain vanilla ice cream because the spice is so bold. A dusting of coarse sugar before baking adds a little shine. They also make the best “one more cookie” cookie on a mixed tray.
Pro Tips for This Recipe:
- Molasses can be sticky; lightly grease your measuring spoon.
- If you want less spice heat, cut the ginger to 1/4 teaspoon.
- Do not overbake; they firm up after cooling.
- A small pinch of black pepper can make the ginger feel sharper, but use it sparingly.
Variations on This Dish:
- Ginger-Forward Batch: Increase the ginger to 1 teaspoon.
- Orange Molasses: Add orange zest to the dough.
- Ginger Snap Style: Roll the dough in sugar before baking for a crisper shell.
Common Mistakes to Avoid with This Dish:
- Using too much cloves: It takes over the whole cookie.
- Overbaking for firmness: They dry out fast.
- Skipping the resting time: The cookies are fragile when they first leave the oven.
18. Cream Cheese Sugar Cookies
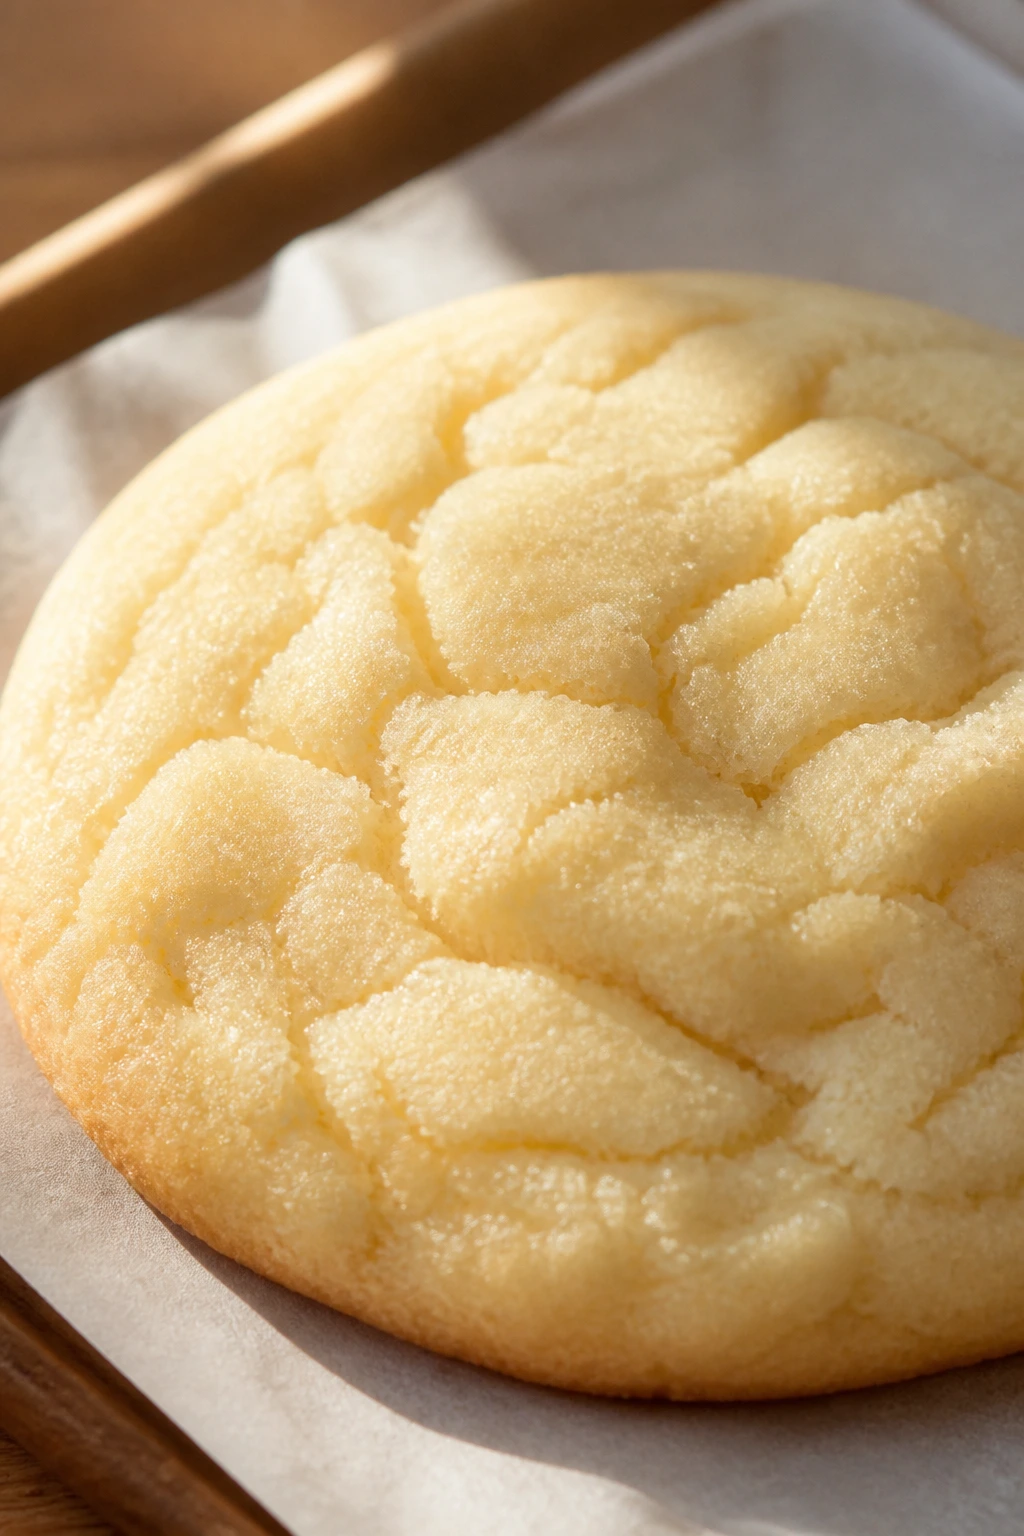
Cream cheese makes these cookies rich, tangy, and almost plush in the middle. The dough feels soft before it bakes, and the final cookie has that slightly richer, almost frosted taste even before you add any glaze. I like them because they give you softness without needing a pile of extra sugar.
Why It Works:
Cream cheese changes both flavor and texture. It adds a little acid for lift, a little fat for tenderness, and just enough tang to keep the sweetness from getting clumsy. These are especially good if you like a softer cookie that stays nice the next day.
Key Ingredients:
- 1/4 cup unsalted butter, softened — Enough fat for the base.
- 4 ounces cream cheese, softened — The texture and tang.
- 3/4 cup granulated sugar — Sweetens the richer dough.
- 1 large egg — Holds the dough together.
- 1 teaspoon vanilla extract — Keeps the flavor grounded.
- 1 3/4 cups all-purpose flour — Balances the soft dairy.
- 1/2 teaspoon baking powder — A little lift.
- 1/4 teaspoon salt — Makes the tang pop.
Quick Steps:
- Preheat the oven: Set it to 350°F and line a baking sheet.
- Cream the dairy and sugar: Beat the butter, cream cheese, and sugar until smooth and fluffy.
- Add the egg and vanilla: Mix until the dough looks glossy.
- Stir in the dry ingredients: Add flour, baking powder, and salt just until combined.
- Bake: Scoop and bake for 10 to 12 minutes, until the tops look set but not browned.
- Cool before serving: The texture improves as they settle.
Equipment for This Recipe:
- Mixing bowl — The dough is soft.
- Hand mixer — Strongly recommended.
- Baking sheet with parchment — For clean release.
- Cookie scoop — Keeps portions neat.
- Cooling rack — Helps them set.
How to Serve This Dish:
Serve these plain or with a thin glaze if you want a little extra sweetness. They’re good with coffee, tea, or fruit because the tang makes them feel less heavy than they are. If you frost them, keep the topping thin so the cream cheese flavor still comes through.
Pro Tips for This Recipe:
- Make sure the cream cheese is fully softened or the dough will stay lumpy.
- Chill the dough for 20 minutes if it feels too loose.
- Pull them when the tops are just set; browning is not the goal.
- If you glaze them, wait until they are fully cool.
Variations on This Dish:
- Lemon Cream Cheese: Add 1 teaspoon lemon zest.
- Cinnamon Cream Batch: Mix 1 teaspoon cinnamon into the dough.
- Simple Frosted Top: Add a light vanilla icing after cooling.
Common Mistakes to Avoid with This Dish:
- Using cold cream cheese: The dough won’t come together smoothly.
- Overmixing after the flour goes in: The cookies get tough.
- Baking until golden: They should stay pale and soft.
19. Oatmeal Sugar Cookies
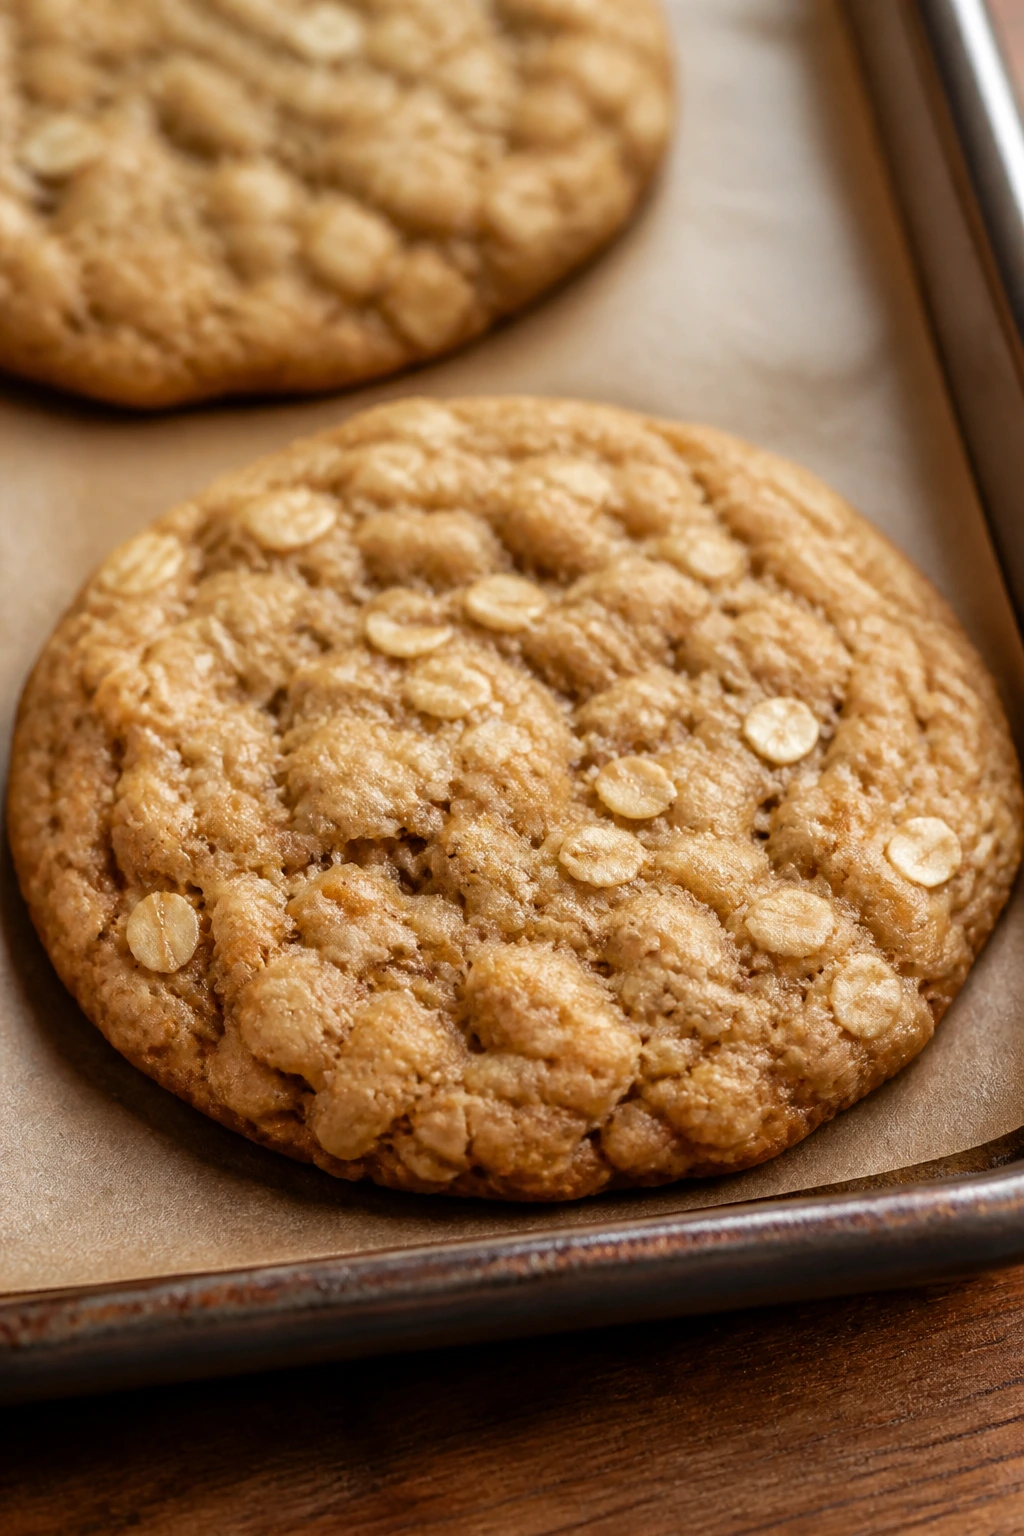
These are the rustic ones. Oats bring chew and a little texture, but the cookie still reads as sugar-cookie territory rather than oatmeal-raisin territory. The flavor is mild, buttery, and grounded, with enough structure to feel substantial without becoming heavy.
Why It Works:
Rolled oats give the dough a heartier bite and a little bite back against the sugar. They also hold moisture well, so the cookies stay softer longer. I like a little cinnamon in the dough because oats can taste flat without some warmth behind them.
Key Ingredients:
- 1/2 cup unsalted butter, softened — The softening fat.
- 3/4 cup granulated sugar — Keeps the cookies sweet.
- 1 large egg — Binds the dough.
- 1 teaspoon vanilla extract — Flavor base.
- 1 1/4 cups all-purpose flour — Less than a standard cookie because oats bring bulk.
- 1 cup old-fashioned rolled oats — The main texture.
- 1/2 teaspoon baking powder — Helps the cookies puff a little.
- 1/2 teaspoon cinnamon — Works well with oats.
- 1/4 teaspoon salt — Necessary.
Quick Steps:
- Preheat to 350°F: Line a baking sheet with parchment.
- Cream butter and sugar: Beat until light.
- Add egg and vanilla: Mix until smooth.
- Stir in the dry ingredients and oats: Combine just until no flour remains.
- Bake: Scoop and bake for 9 to 11 minutes, until the edges are lightly golden.
- Cool on the sheet: Oats need a moment to settle.
Equipment for This Recipe:
- Mixing bowl — For a fairly thick dough.
- Mixer — Makes creaming easier.
- Baking sheet — Use parchment.
- Cookie scoop — Helpful for uniform portions.
- Rack — Keeps the bottoms from softening.
How to Serve This Dish:
These are good with coffee or milk, and they do a nice job next to fruit because the oat flavor feels a little breakfast-adjacent. If you want a prettier finish, press a few extra oats on top before baking. They are not flashy. That is part of their appeal.
Pro Tips for This Recipe:
- Use rolled oats, not instant oats, or the texture gets mushy.
- If the dough seems dry, let it sit for 5 minutes; the oats absorb moisture.
- A handful of raisins or chopped dried fruit can work, but don’t overdo it.
- Pull them while they still look soft in the center.
Variations on This Dish:
- Raisin Oat Batch: Add 1/2 cup raisins.
- Honey Oat Cookie: Replace 2 tablespoons of sugar with honey.
- Nutty Oat: Add 1/3 cup chopped walnuts or pecans.
Common Mistakes to Avoid with This Dish:
- Using instant oats: The texture turns pasty.
- Adding too much flour: The cookies lose their chew.
- Letting them overbrown: Oats can taste bitter if pushed too far.
20. Tahini Sesame Sugar Cookies
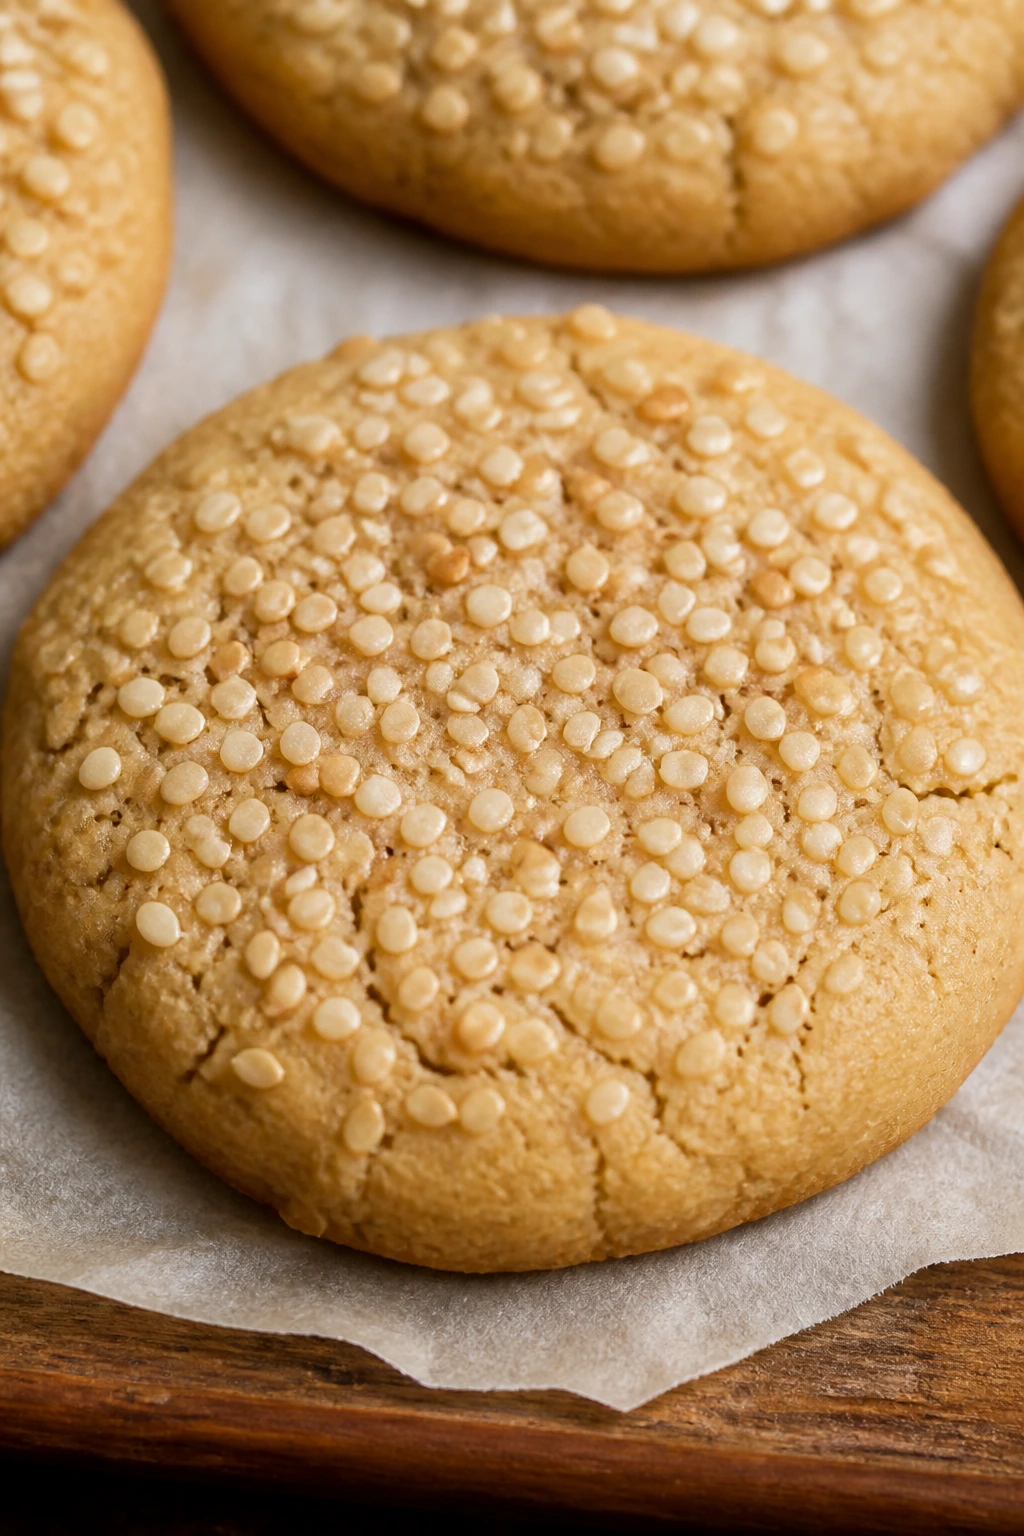
Tahini gives sugar cookies a nutty, almost savory depth that makes people pause after the first bite. These are not shy cookies. The sesame flavor hangs around, the crumb stays tender, and a sprinkle of sesame seeds on top makes them look intentional rather than improvised.
Why It Works:
Tahini replaces some of the butter with a paste that carries flavor and fat at the same time. That means the cookies stay rich without feeling heavy. The sesame seeds on top echo the tahini and give you a little crackle when you bite in.
Key Ingredients:
- 1/4 cup unsalted butter, softened — For balance.
- 1/4 cup tahini — Smooth, well-stirred tahini works best.
- 3/4 cup granulated sugar — Sweetens the dough.
- 1 large egg — Holds everything together.
- 1 teaspoon vanilla extract — Softens the sesame flavor.
- 1 1/2 cups all-purpose flour — The structure.
- 1/2 teaspoon baking powder — Small lift.
- 1/4 teaspoon salt — Important in a tahini dough.
- 2 tablespoons sesame seeds — For the tops.
Quick Steps:
- Preheat the oven: Set it to 350°F and line a sheet with parchment.
- Cream butter, tahini, and sugar: Beat until smooth.
- Add the egg and vanilla: Mix until glossy.
- Add the dry ingredients: Stir in flour, baking powder, and salt until just combined.
- Shape and top: Scoop the dough, press lightly, and sprinkle sesame seeds on top.
- Bake: Bake for 10 to 12 minutes, until the edges are set and lightly golden.
Equipment for This Recipe:
- Mixing bowl — Needed for the thick dough.
- Mixer — Helps tahini blend smoothly.
- Baking sheet — Line with parchment.
- Cookie scoop — Good for sticky dough.
- Small bowl — For sesame seeds.
How to Serve This Dish:
I like these with tea or coffee, but they also make sense on a savory-sweet dessert plate with dates or figs. They look best when the sesame seeds stay visible on top, so do not bury them. If you want a more dramatic finish, add a pinch of flaky salt after baking.
Pro Tips for This Recipe:
- Stir the tahini well before measuring so the oil and paste are even.
- Chill the dough if it feels too soft to scoop.
- Use a light hand with vanilla; too much muddies the sesame flavor.
- Pull them while still pale. Tahini browns faster than you’d expect.
Variations on This Dish:
- Honey Sesame: Swap 2 tablespoons of sugar for honey.
- Chocolate Tahini: Add 1 tablespoon cocoa powder for a deeper flavor.
- Citrus Sesame: Add orange zest to brighten the sesame.
Common Mistakes to Avoid with This Dish:
- Using separated tahini without stirring: The dough turns oily and uneven.
- Baking too dark: Sesame can taste bitter when pushed.
- Skipping salt: The flavor falls flat fast.
21. Classic Cutout Sugar Cookies with Icing
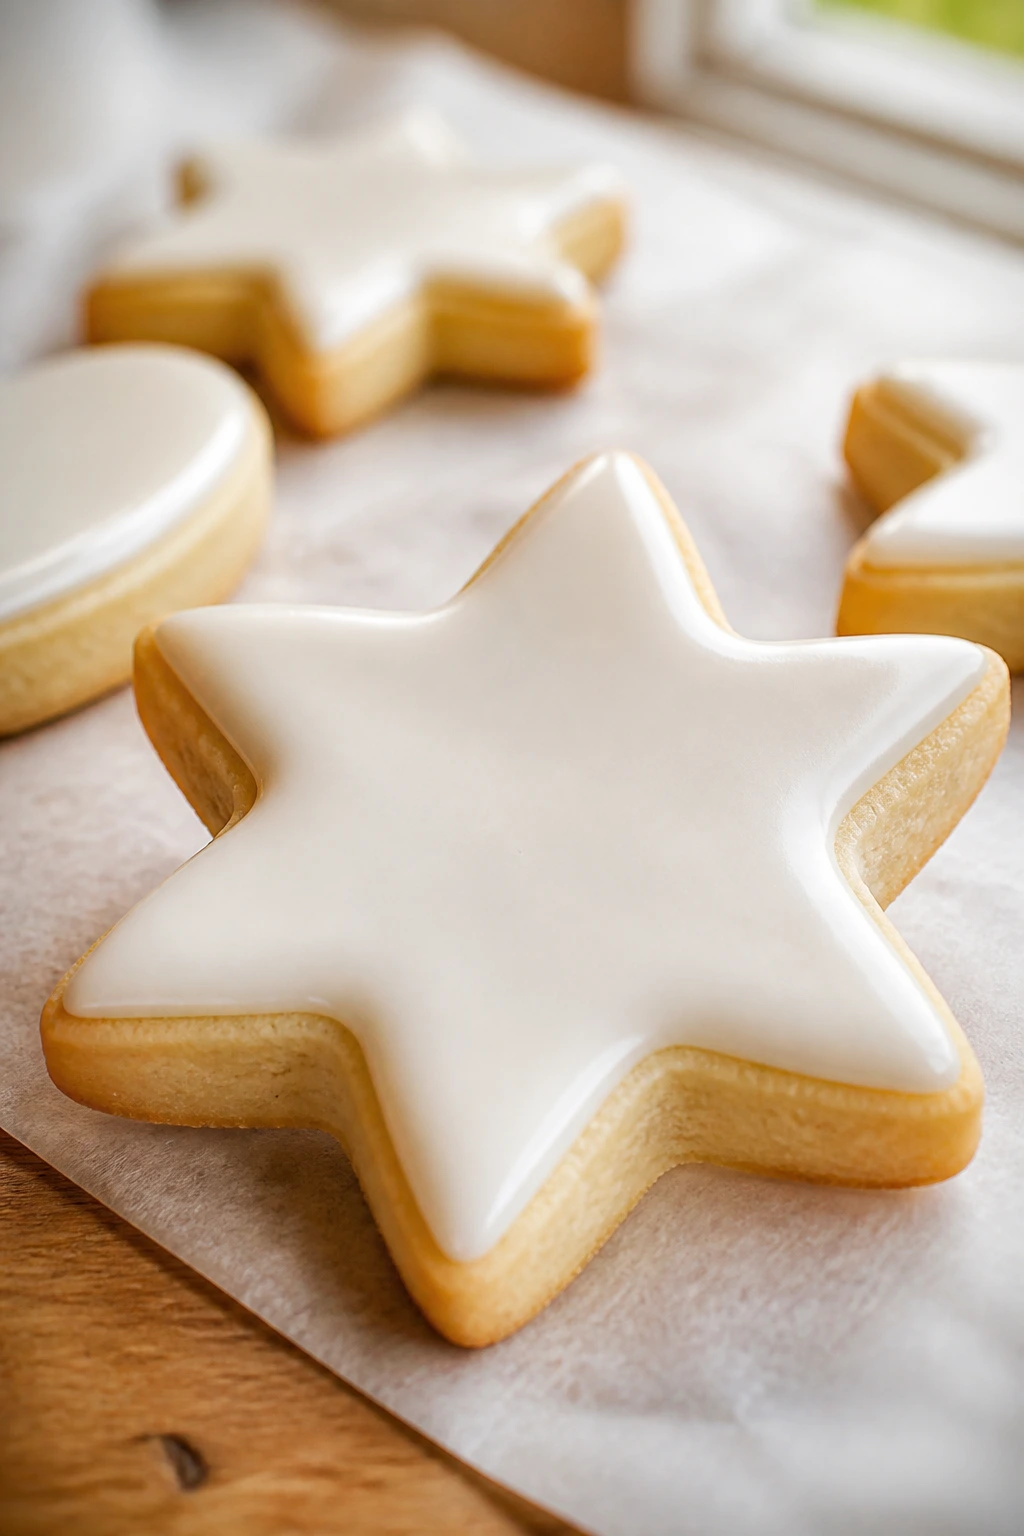
This is the cookie most people picture when they hear “sugar cookie,” and for good reason. The dough rolls cleanly, keeps its shape, and bakes into a tender base for a smooth icing that dries enough to stack. It’s a little more work than a drop cookie, but not much, and the result is worth the extra flour on the counter.
Why It Works:
A firmer dough with a bit more flour means the shapes hold after baking. Chilling the dough before rolling is what keeps the edges sharp, not some magical decorator trick. The icing is thin enough to set but thick enough to give you color and shine.
Key Ingredients:
- 3/4 cup unsalted butter, softened — More fat for a richer dough.
- 1 cup granulated sugar — Sweetens the cutout base.
- 1 large egg — Structure.
- 1 teaspoon vanilla extract — Familiar sugar-cookie flavor.
- 2 1/2 cups all-purpose flour — Strong enough to roll and cut.
- 1/2 teaspoon baking powder — A little lift.
- 1/2 teaspoon salt — Important for a plain cookie.
- 1 cup powdered sugar, for icing — The finish.
- 1 to 2 tablespoons milk, for icing — Thin to a spreadable glaze.
- 1/4 teaspoon vanilla, for icing — Optional, but nice.
Quick Steps:
- Make the dough: Cream butter and sugar, then add the egg and vanilla.
- Add the dry ingredients: Mix in flour, baking powder, and salt until a firm dough forms.
- Chill: Wrap and refrigerate for at least 1 hour.
- Roll and cut: Roll to 1/4-inch thickness and cut shapes on a lightly floured surface.
- Bake: Bake at 350°F for 8 to 10 minutes, until the edges are just set.
- Ice once cool: Stir the icing smooth and spread or pipe it on cooled cookies.
Equipment for This Recipe:
- Rolling pin — Essential for even thickness.
- Cookie cutters — Any shape you like.
- Parchment-lined sheets — Keeps shapes intact.
- Small whisk or spoon — For the icing.
- Cooling rack — Needed before decorating.
How to Serve This Dish:
These belong on a tray where people can actually see the icing colors and shapes. Serve them with milk, tea, or coffee, and let the icing set completely if you’re stacking them in a tin. They’re the nicest cookie here for gifting because they hold together well.
Pro Tips for This Recipe:
- Chill the dough long enough to make rolling easy.
- If the dough sticks, roll it between two sheets of parchment.
- Re-roll scraps only once or twice; too much handling toughens them.
- Let the icing set fully before packing the cookies.
Variations on This Dish:
- Lemon Icing Cutouts: Add lemon zest to the dough and lemon juice to the icing.
- Holiday Sprinkle Batch: Press sprinkles into the wet icing before it sets.
- Chocolate Icing Edge: Replace part of the icing with cocoa powder.
Common Mistakes to Avoid with This Dish:
- Skipping the chill: The shapes warp in the oven.
- Too much flour on the counter: The cookies bake dry.
- Decorating warm cookies: The icing slides off and never sets cleanly.
22. Sprinkle Drop Sugar Cookies
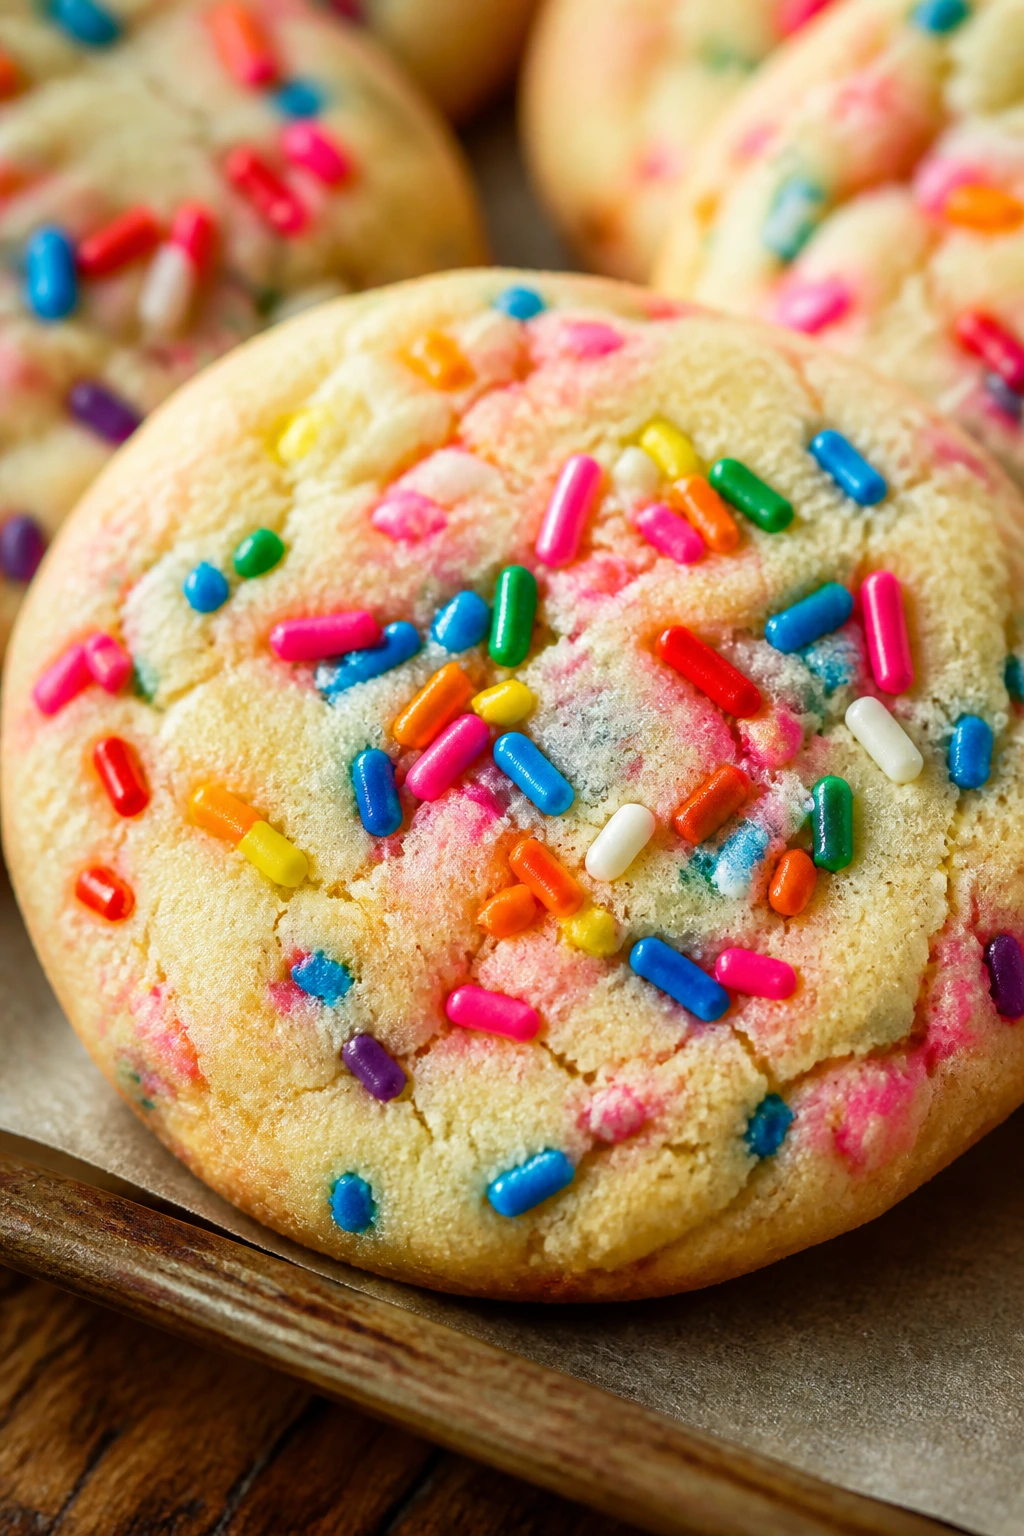
These are the cheerful ones. The dough is plain enough to stay pantry-friendly, but the sprinkles turn every cookie into a small celebration without requiring a decorating bag or a steady hand. I prefer jimmies here because they hold their color better than tiny round sprinkles, which can bleed.
Why It Works:
Sprinkles baked into the dough give you color in every bite, while a few pressed on top make the cookies look more finished. The base recipe stays soft and simple, which means the sprinkles are the personality instead of a costume. That’s the right balance here.
Key Ingredients:
- 1/2 cup unsalted butter, softened — For tenderness.
- 3/4 cup granulated sugar — Sweetens the dough.
- 1 large egg — Binds the ingredients.
- 1 teaspoon vanilla extract — Keeps the flavor classic.
- 1 1/2 cups all-purpose flour — Standard base.
- 1/2 teaspoon baking powder — A little lift.
- 1/4 teaspoon salt — Keeps the sweetness in check.
- 1/3 cup rainbow jimmies — Fold in gently.
- 2 tablespoons extra sprinkles — Optional topping.
Quick Steps:
- Preheat the oven: Set it to 350°F and line a baking sheet with parchment.
- Cream butter and sugar: Beat until fluffy.
- Add the egg and vanilla: Mix until smooth.
- Stir in the dry ingredients: Add flour, baking powder, and salt, then fold in the sprinkles last.
- Scoop and bake: Bake for 9 to 11 minutes, until the edges are set and the centers still look a little soft.
- Cool on the tray: The sprinkles settle as the cookies cool.
Equipment for This Recipe:
- Mixing bowl — The dough is simple.
- Mixer — Makes the base fluffy.
- Baking sheet — Line with parchment.
- Cookie scoop — Keeps the sprinkles distributed evenly.
- Cooling rack — Helps them finish without sticking.
How to Serve This Dish:
These are good for a birthday tray, a lunchbox, or any day when plain vanilla feels a bit too plain. They go with milk, obviously, but also with hot chocolate if you want to lean in. Serve them in a loose pile so the colors show.
Pro Tips for This Recipe:
- Use jimmies, not nonpareils, if you don’t want the colors to bleed.
- Fold the sprinkles in at the very end so they don’t streak the dough.
- Pull them before they brown much; darker cookies hide the sprinkle color.
- A little extra vanilla helps the dough taste as lively as the sprinkles look.
Variations on This Dish:
- Chocolate Sprinkle Batch: Add 1 tablespoon cocoa powder to the dough.
- Confetti Top: Press extra sprinkles on the dough balls before baking.
- Citrus Sprinkle: Add lemon or orange zest for a brighter base.
Common Mistakes to Avoid with This Dish:
- Using tiny nonpareils in the dough: They bleed and make the batter muddy.
- Overbaking: The color fades and the cookies dry out.
- Stirring too hard: You can crush the sprinkles into streaks.
23. Sheet Pan Sugar Cookie Bars
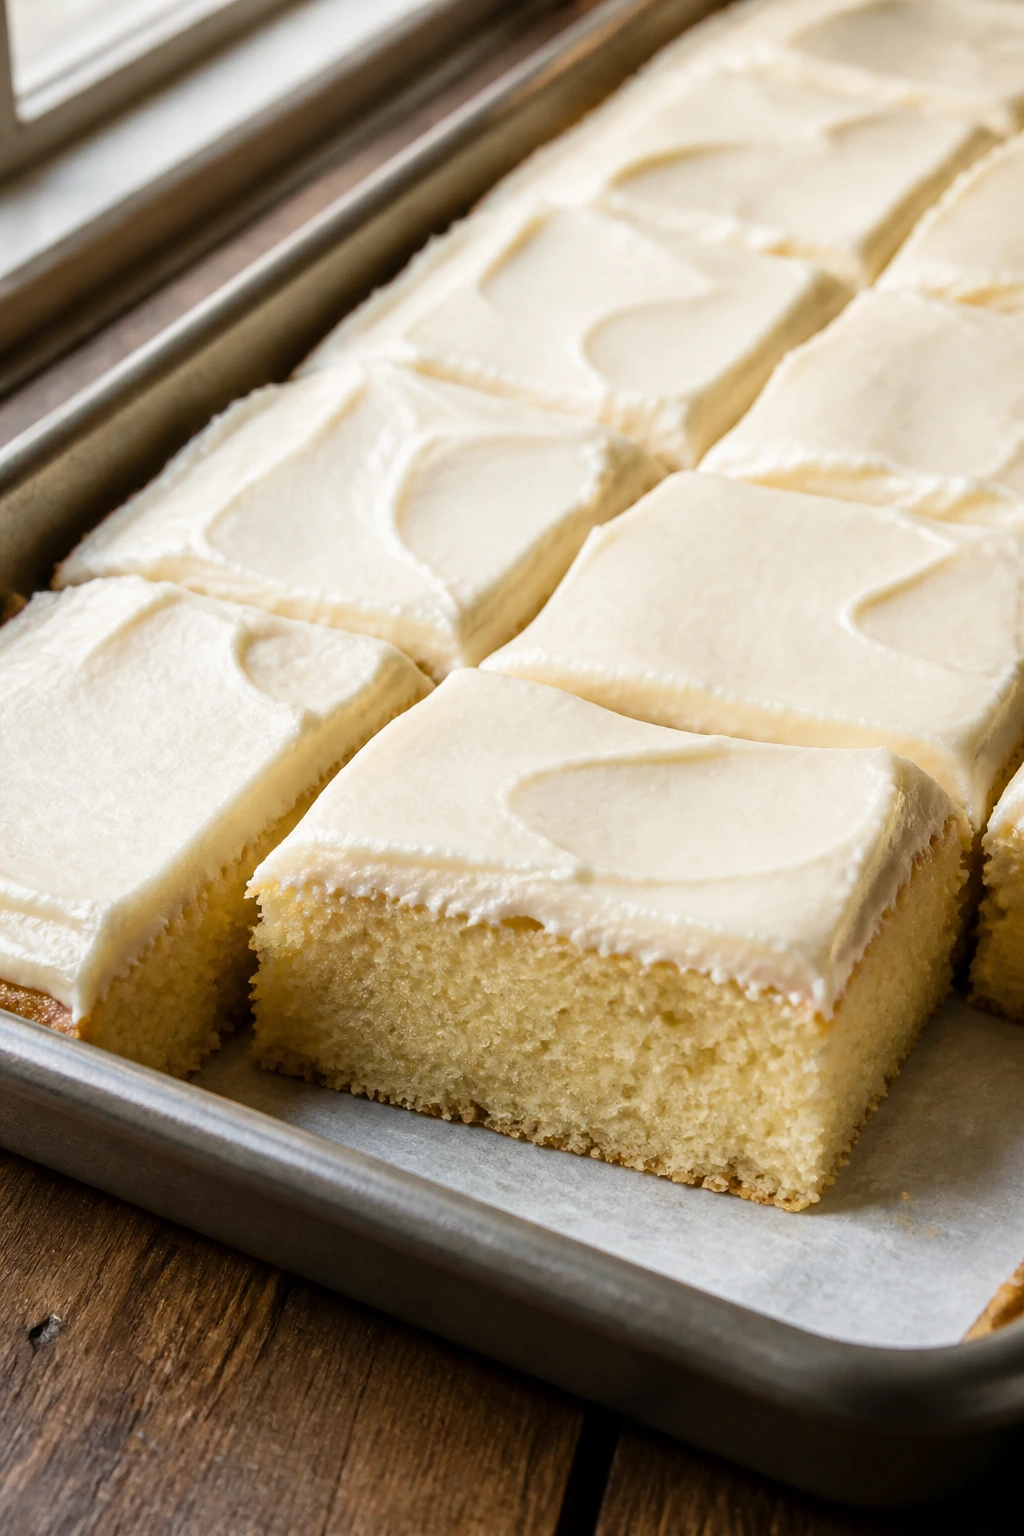
Cookie bars are the lazy answer that still tastes like you paid attention. The dough spreads into one pan, bakes evenly, and slices into tidy squares with a soft middle and lightly golden edges. If you need to feed people without standing at the oven all day, this is the batch I’d make.
Why It Works:
A larger dough mass in a pan holds moisture better than individual cookies, which makes the bars softer for longer. The frosting, if you use it, goes on cool and cuts cleanly. Bars are also more forgiving about exact portion size, which I appreciate when the room is full of people who do not count cookies the same way.
Key Ingredients:
- For the Bars:
- 1 cup unsalted butter, softened
- 1 1/2 cups granulated sugar
- 2 large eggs
- 2 teaspoons vanilla extract
- 3 cups all-purpose flour
- 1 teaspoon baking powder
- 1/2 teaspoon salt
- For the Frosting:
- 1/2 cup unsalted butter, softened
- 2 cups powdered sugar
- 2 to 3 tablespoons milk
- 1 teaspoon vanilla extract
- Pinch of salt
Quick Steps:
- Preheat the oven: Heat to 350°F and grease a 9×13-inch pan, then line it with parchment.
- Make the bar dough: Cream butter and sugar, then beat in eggs and vanilla.
- Add dry ingredients: Stir in flour, baking powder, and salt just until combined.
- Spread and bake: Press the dough evenly into the pan and bake for 18 to 22 minutes, until the top is set and the edges are lightly golden.
- Cool completely: Frosting on warm bars turns greasy.
- Make the frosting and slice: Beat the frosting ingredients until smooth, spread over the cooled bars, and cut into squares.
Equipment for This Recipe:
- 9×13-inch baking pan — The main vessel.
- Parchment paper — Makes lifting and cutting easier.
- Mixer — Helpful for the frosting.
- Offset spatula — Good for spreading frosting.
- Sharp knife — Needed for clean squares.
How to Serve This Dish:
These are the easiest thing here to plate for a crowd. Cut them into squares and stack them on a tray with parchment between layers if you need to travel with them. They pair well with milk, coffee, or any dessert spread that would benefit from a soft, sweet square instead of another round cookie.
Pro Tips for This Recipe:
- Press the dough evenly so the corners do not bake dry before the center sets.
- Cool the bars fully before frosting or the topping will slide.
- A pinch of salt in the frosting helps it taste less one-note.
- If you want cleaner slices, chill the frosted pan for 20 minutes before cutting.
Variations on This Dish:
- Lemon Frosted Bars: Add lemon zest to the dough and lemon juice to the frosting.
- Chocolate Swirl Bars: Swirl in a spoonful of cocoa frosting.
- Sprinkle Sheet Pan: Cover the frosting with sprinkles before it sets.
Common Mistakes to Avoid with This Dish:
- Baking too long: Bars dry out fast if you wait for heavy browning.
- Uneven pressing: The thin corners become hard while the center stays soft.
- Frosting while warm: The top turns slick and messy.
24. Olive Oil Sugar Cookies
These cookies taste cleaner and a little more grown-up than the butter versions. Olive oil gives them a tender crumb and a subtle fruity note that works especially well with citrus zest. If you’ve only ever used butter in sugar cookies, this one changes the conversation.
Why It Works:
Olive oil stays soft at room temperature, so the cookies bake with a pleasing tenderness and a slightly lighter bite. Because the oil mixes differently from butter, you don’t cream it in the same way; instead, you whisk it with sugar and build from there. That switch keeps the method quick and gives the cookies a slightly different texture that I actually like.
Key Ingredients:
- 1/2 cup extra-virgin olive oil — Use one you’d be happy to taste.
- 3/4 cup granulated sugar — Sweetens the dough.
- 1 large egg — Holds the cookie together.
- 1 teaspoon vanilla extract — Rounds out the oil.
- 1 teaspoon orange zest — Optional, but excellent.
- 1 3/4 cups all-purpose flour — Slightly more flour for the oil base.
- 1/2 teaspoon baking powder — Lightens the cookies.
- 1/2 teaspoon salt — Important for balancing the oil.
Quick Steps:
- Preheat to 350°F: Line a baking sheet with parchment.
- Whisk oil and sugar: Stir until the sugar looks coated and a little glossy.
- Add the egg, vanilla, and zest: Mix until smooth.
- Stir in the dry ingredients: Add flour, baking powder, and salt just until the dough forms.
- Scoop and bake: Bake for 10 to 12 minutes, until the edges are lightly golden.
- Cool before moving: They firm up as they sit.
Equipment for This Recipe:
- Mixing bowl — No mixer required if you whisk well.
- Whisk — Helpful for the oil-sugar base.
- Baking sheet — Line with parchment.
- Cookie scoop — Keeps the dough even.
- Cooling rack — For the finish.
How to Serve This Dish:
These are lovely with tea or coffee, and the orange zest makes them fit neatly next to fruit. I like them with a thin dusting of powdered sugar or a very light glaze because the oil-based dough already has a different texture and does not need much help. They’re a good cookie for people who like the edges a little crisp.
Pro Tips for This Recipe:
- Choose a mild olive oil; bitter oil will dominate the cookie.
- Add citrus zest if you want the flavor to feel brighter.
- If the dough feels too loose, let it rest 10 minutes before scooping.
- Bake just until the edges color. Oil cookies can go from tender to dry fast.
Variations on This Dish:
- Lemon Olive Oil: Replace orange zest with lemon zest.
- Rosemary Sugar: Add a tiny pinch of finely chopped rosemary for a savory edge.
- Honey Oil Cookies: Swap 2 tablespoons of sugar for honey.
Common Mistakes to Avoid with This Dish:
- Using a strong peppery oil: It can taste harsh in a sweet cookie.
- Overmixing the flour: The cookies get tougher than they should.
- Expecting them to taste like butter cookies: They’re different on purpose.
25. Buttermilk Sugar Cookies
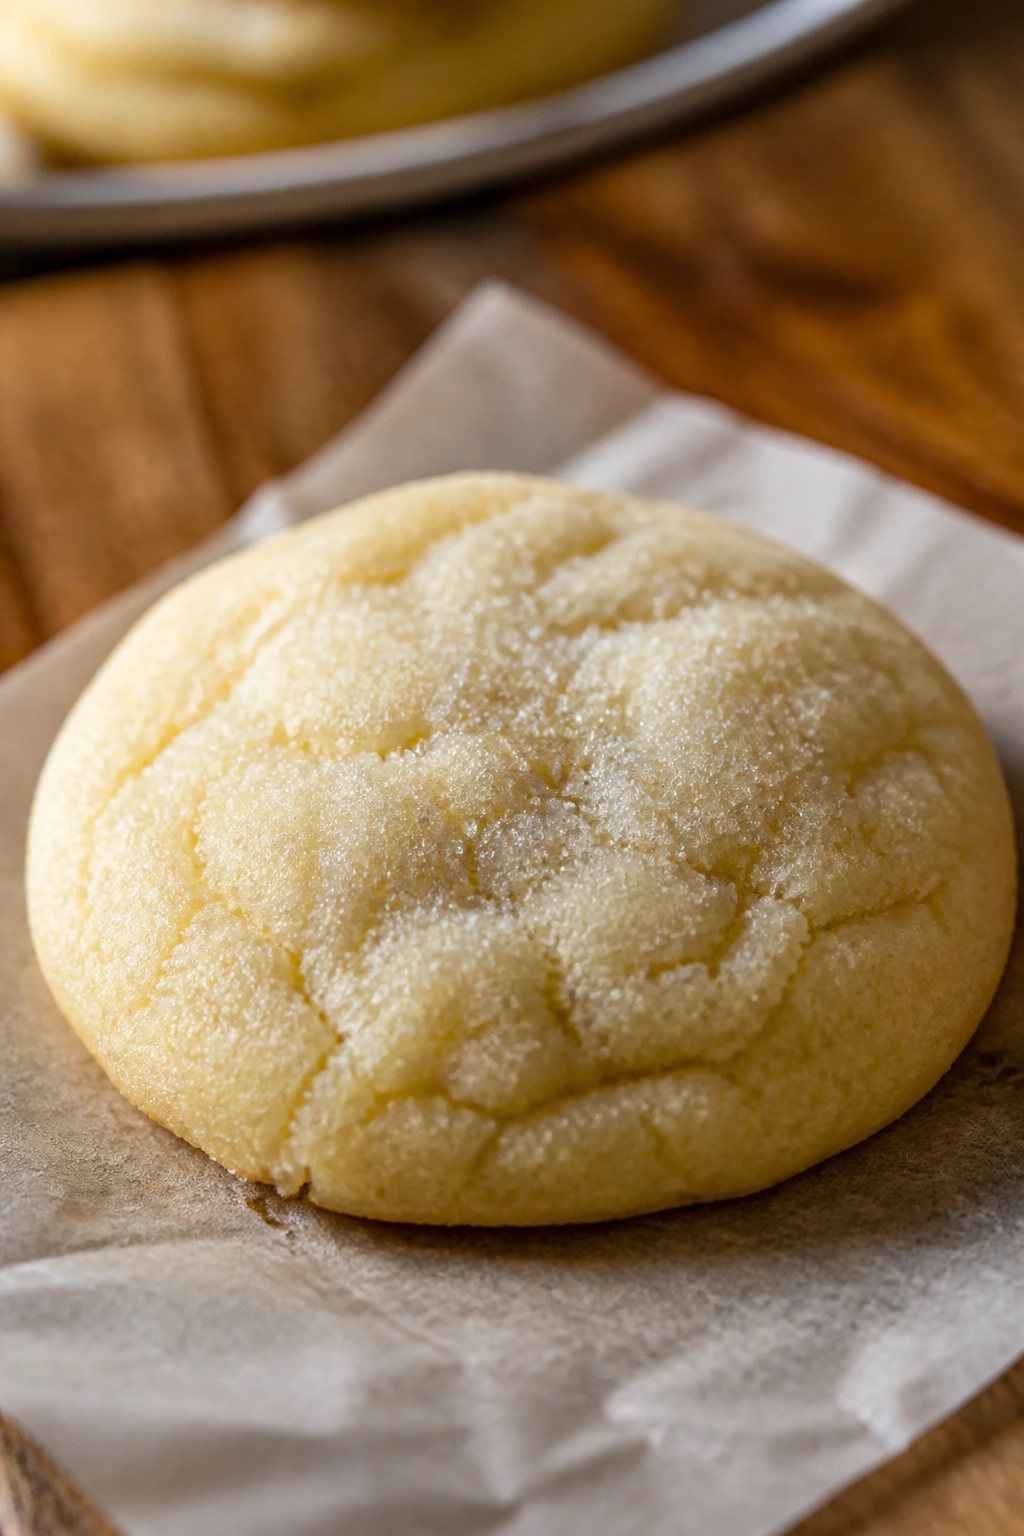
Buttermilk adds a soft tang and a tender crumb that makes these cookies feel old-fashioned in the best way. They’re not sharp or loud. They’re just soft, mellow, and a little richer than plain vanilla cookies, with enough lift to stay light instead of cake-dense.
Why It Works:
Buttermilk gives you acid and moisture in one ingredient, which helps the cookies stay tender while the baking soda does its part with lift. The dough is soft, but not fragile, so you can scoop it without trouble. I like a simple sugar coating on these because it gives a little crispness to the edge.
Key Ingredients:
- 1/2 cup unsalted butter, softened — The fat base.
- 3/4 cup granulated sugar — Sweetens and helps spread.
- 1 large egg — Binds the dough.
- 1/4 cup buttermilk — Adds tang and tenderness.
- 1 teaspoon vanilla extract — Keeps the flavor familiar.
- 1 3/4 cups all-purpose flour — Balances the liquid.
- 1/2 teaspoon baking powder — Small lift.
- 1/4 teaspoon baking soda — Reacts with the buttermilk.
- 1/4 teaspoon salt — Important.
Quick Steps:
- Preheat the oven: Set it to 350°F and line a baking sheet.
- Cream butter and sugar: Beat until light and fluffy.
- Add the egg, buttermilk, and vanilla: Mix until smooth.
- Stir in the dry ingredients: Add flour, baking powder, baking soda, and salt just until combined.
- Bake: Scoop and bake for 10 to 12 minutes, until the edges are set and the tops are no longer glossy.
- Cool slightly: Let them rest on the pan before moving.
Equipment for This Recipe:
- Mixing bowl — For the soft dough.
- Mixer — Helpful for creaming.
- Baking sheet with parchment — Keeps the cookies tidy.
- Cookie scoop — Good for soft dough.
- Cooling rack — Keeps the texture right.
How to Serve This Dish:
These are the cookies I’d set beside a bowl of fruit or a cup of tea because the buttermilk tang keeps them from feeling overly sweet. A light dusting of sugar or a thin vanilla glaze works, but I usually leave them plain. They’re nice exactly because they are modest.
Pro Tips for This Recipe:
- Use real buttermilk, not a thin milk substitute, if you can.
- If the dough looks loose, chill it for 15 minutes.
- Pull them before the tops turn brown.
- A little cinnamon on top gives the dough a warmer finish.
Variations on This Dish:
- Cinnamon Buttermilk: Add 1 teaspoon cinnamon to the dough.
- Lemon Buttermilk: Add lemon zest for a sharper edge.
- Glazed Buttermilk: Drizzle cooled cookies with vanilla glaze.
Common Mistakes to Avoid with This Dish:
- Too much baking soda: The flavor turns soapy.
- Using a milk substitute without adjusting: The texture changes and the tang disappears.
- Baking until dark: Buttermilk cookies should stay pale.
26. Orange Cardamom Sugar Cookies
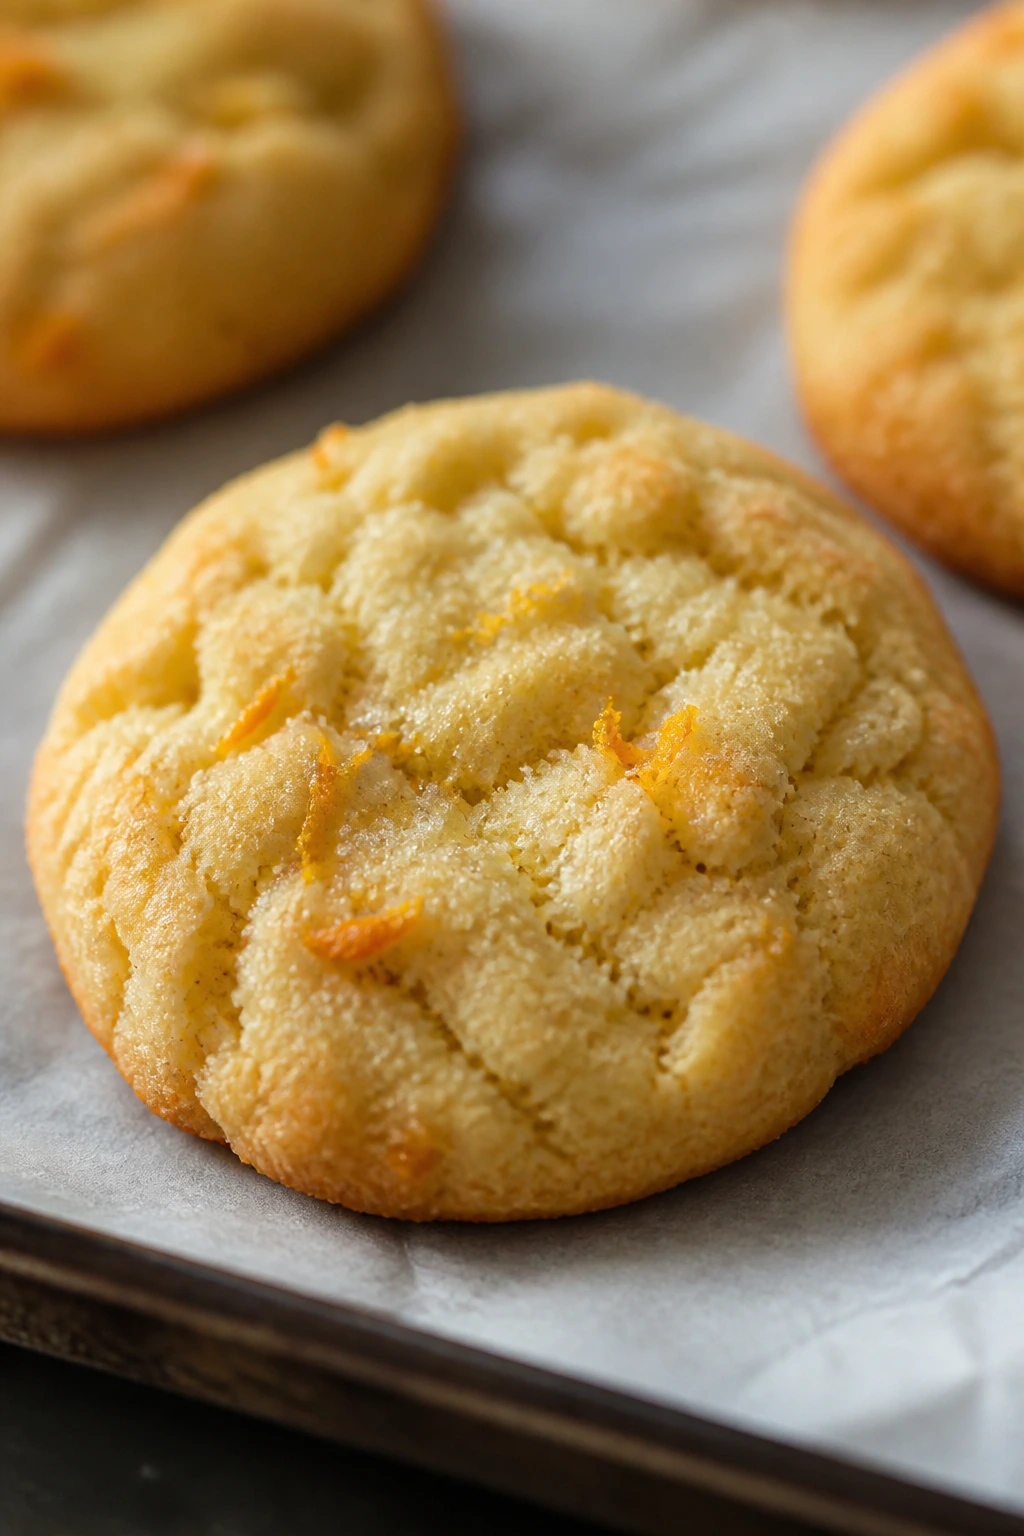
Orange and cardamom make a sugar cookie smell like someone opened the spice drawer on purpose. The citrus brightens the dough, and the cardamom adds a warm, floral note that lingers after the bite is gone. These are the cookies I make when vanilla starts feeling too familiar.
Why It Works:
Orange zest gives the sugar an aromatic edge, while cardamom brings a flavor that feels both sweet and slightly savory. The two work together because one lifts and one deepens. A light orange glaze is enough to make the whole cookie sing.
Key Ingredients:
- 1/2 cup unsalted butter, softened — The rich base.
- 3/4 cup granulated sugar — Sweetens and helps spread.
- 1 large egg — Structure.
- 1 tablespoon orange zest — The bright flavor.
- 1 teaspoon vanilla extract — Keeps the dough round.
- 1 1/2 cups all-purpose flour — Standard base.
- 1 teaspoon ground cardamom — The warm spice.
- 1/2 teaspoon baking powder — Small lift.
- 1/4 teaspoon salt — Balances the spice.
- 1 cup powdered sugar, for glaze — Optional finish.
- 1 to 2 tablespoons orange juice, for glaze — Thin the glaze.
Quick Steps:
- Preheat to 350°F: Line your sheet with parchment.
- Cream butter, sugar, and zest: Mix until the sugar smells orange-scented.
- Add egg and vanilla: Beat until smooth.
- Stir in dry ingredients and cardamom: Mix just until the dough forms.
- Bake: Scoop and bake for 9 to 11 minutes, until the edges are set.
- Glaze after cooling: Drizzle with a thin orange glaze if you want extra shine.
Equipment for This Recipe:
- Mixing bowl — For the dough and glaze.
- Microplane — Best for zesting.
- Baking sheet — Lined.
- Cooling rack — Needed before glazing.
- Small whisk — For the glaze.
How to Serve This Dish:
These feel right with tea, especially black tea or chai, because the spices echo each other instead of competing. They also work on a dessert plate with a few slices of orange if you want the citrus to look intentional. A thin glaze is enough. The cookie already has enough going on.
Pro Tips for This Recipe:
- Use freshly ground cardamom if you have it.
- Zest the orange directly into the sugar for better flavor.
- A little extra orange zest in the glaze makes the color and aroma brighter.
- Do not overload the dough with juice; zest is the real workhorse.
Variations on This Dish:
- Orange-Cardamom Thumbprint: Add a small jam center.
- Honey Orange Batch: Swap 2 tablespoons sugar for honey.
- Spice-Dusted Finish: Sprinkle the tops with a pinch of cardamom sugar.
Common Mistakes to Avoid with This Dish:
- Using stale cardamom: The flavor goes dusty.
- Too much juice: The dough turns wet and flat.
- Overbaking: The citrus flavor gets muted when the cookies dry out.
27. Cocoa Marble Sugar Cookies
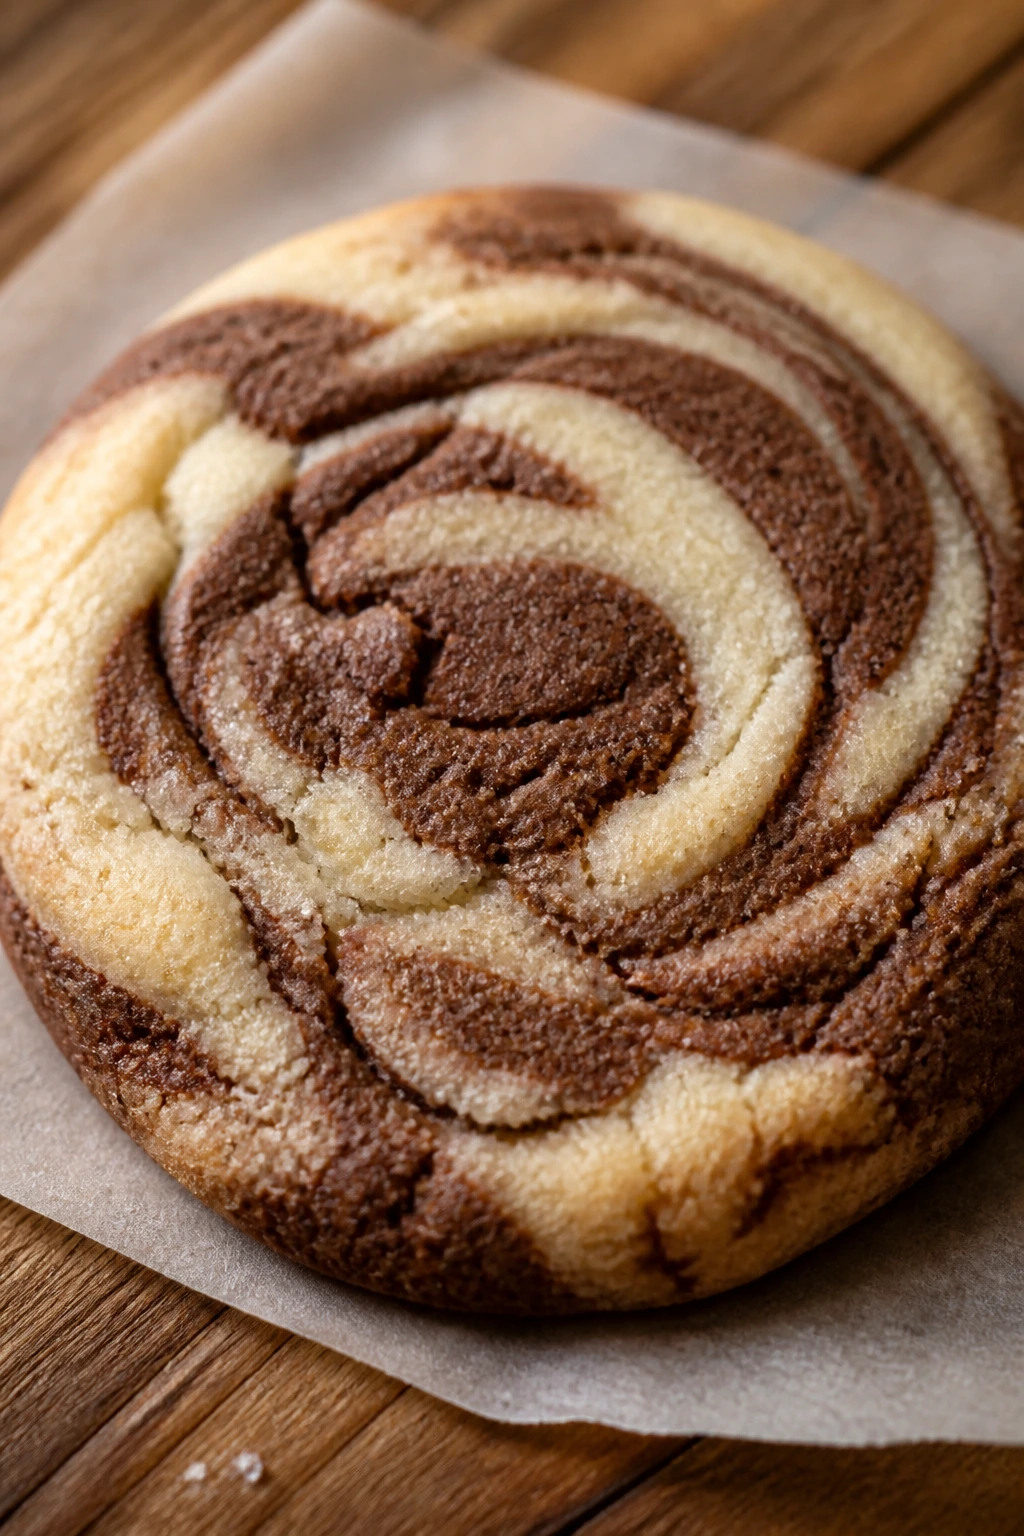
These are the cookies that look like you spent more time on them than you did. Half the dough stays vanilla, half gets cocoa, and the two get twisted together just enough to make streaks rather than a muddy brown blob. The flavor lands between sugar cookie and light chocolate shortbread.
Why It Works:
Splitting the dough after the base is mixed keeps the vanilla side clean and the cocoa side concentrated. Cocoa powder dries the chocolate portion slightly, so a small touch of extra vanilla in the plain half helps balance the whole cookie. The marble pattern works best when you don’t overmix the two doughs together.
Key Ingredients:
- 1/2 cup unsalted butter, softened — Base fat.
- 3/4 cup granulated sugar — Sweetness.
- 1 large egg — Structure.
- 1 teaspoon vanilla extract — For the base dough.
- 1 1/2 cups all-purpose flour — Split between both portions.
- 1/2 teaspoon baking powder — Light lift.
- 1/4 teaspoon salt — Balance.
- 2 tablespoons unsweetened cocoa powder — For the chocolate half.
- 1 teaspoon milk, only if needed — Helps the cocoa portion come together.
Quick Steps:
- Make the base dough: Cream butter and sugar, then add egg and vanilla before stirring in flour, baking powder, and salt.
- Divide the dough: Split it into two portions.
- Add cocoa to one portion: Knead or mix in the cocoa powder and a tiny splash of milk if needed.
- Twist together gently: Pinch small bits of each dough together and roll into rough balls without blending them fully.
- Bake: Bake at 350°F for 9 to 11 minutes.
- Cool on the tray: The pattern firms up as they rest.
Equipment for This Recipe:
- Mixing bowl — For the base dough.
- Small bowl — To color the cocoa portion.
- Baking sheet — Lined with parchment.
- Cookie scoop — Helpful for equal marbling.
- Rack — For cooling.
How to Serve This Dish:
These are nice on a mixed cookie tray because the pattern breaks up all the beige. They go with milk, coffee, or hot chocolate, and they’re one of the better cookies to serve if you want vanilla and chocolate together without baking two separate batches. A little dusting of powdered sugar can make the marbling look even sharper.
Pro Tips for This Recipe:
- Add the cocoa a little at a time so the dough doesn’t dry out.
- Do not fully blend the two doughs or you lose the marbled look.
- Chill briefly if the dough gets too soft while you twist it.
- Pull them while the vanilla parts are still pale.
Variations on This Dish:
- Double Cocoa Marble: Add a touch more cocoa for a darker twist.
- Peppermint Marble: Add a drop of peppermint extract to the chocolate half.
- Orange Cocoa Marble: Add orange zest to the vanilla dough.
Common Mistakes to Avoid with This Dish:
- Overmixing the marbling: You end up with plain brown cookies.
- Adding too much cocoa: The chocolate half turns dry.
- Baking too long: The contrast between the two doughs gets lost.
28. Cherry Almond Sugar Cookies

Dried cherries and almond extract bring out a sweeter, fruitier side of sugar cookies. The cherries give little chewy pops, while almond keeps the flavor from tasting flat. These cookies feel a touch fancier than the ingredient list deserves, which is always welcome.
Why It Works:
Dried cherries hold their shape in the oven, so the cookie gets bursts of tartness instead of running fruit juice. Almond extract pairs naturally with cherry and makes the whole dough feel more layered. A little extra vanilla keeps the almond from taking over.
Key Ingredients:
- 1/2 cup unsalted butter, softened — The base fat.
- 3/4 cup granulated sugar — Sweetens the dough.
- 1 large egg — Binds the mixture.
- 1/2 teaspoon almond extract — The key flavor.
- 1/2 teaspoon vanilla extract — Rounds out the almond.
- 1 1/2 cups all-purpose flour — Standard structure.
- 1/2 teaspoon baking powder — A little lift.
- 1/4 teaspoon salt — Balances the fruit.
- 1/2 cup dried cherries, chopped if large — The chewy fruit.
- 1 tablespoon flour, for tossing the cherries — Helps keep them distributed.
Quick Steps:
- Preheat to 350°F: Line your sheet with parchment.
- Cream butter and sugar: Beat until fluffy.
- Add egg, almond extract, and vanilla: Mix until smooth.
- Stir in the dry ingredients: Add flour, baking powder, and salt, then fold in the cherries.
- Bake: Scoop and bake for 10 to 12 minutes, until the edges set.
- Cool before moving: The cherries hold heat for a minute.
Equipment for This Recipe:
- Mixing bowl — For the dough.
- Mixer — Helps the sugar break down.
- Baking sheet — Line it.
- Cookie scoop — Useful with sticky fruit.
- Rack — For cooling.
How to Serve This Dish:
These look good on a dessert plate with a few extra cherries or almond slices nearby. They go well with tea and with coffee, especially if the drink is plain. If you want them to read even more polished, drizzle with a very thin almond glaze.
Pro Tips for This Recipe:
- Chop large dried cherries so the dough scoops evenly.
- Toss the cherries in a little flour before folding them in.
- Almond extract is strong; measure it carefully.
- A pinch of orange zest can brighten the fruit without making the cookie citrusy.
Variations on This Dish:
- Cherry-Vanilla Glaze: Add a cherry drizzle on top.
- Almond Short Stack: Press the tops with sliced almonds before baking.
- Dark Cherry Batch: Use tart cherries for a sharper bite.
Common Mistakes to Avoid with This Dish:
- Using too many cherries: The dough falls apart.
- Overdoing almond extract: It turns harsh fast.
- Baking until dark: The fruit can harden and taste stale.
29. Ginger Sugar Cookies
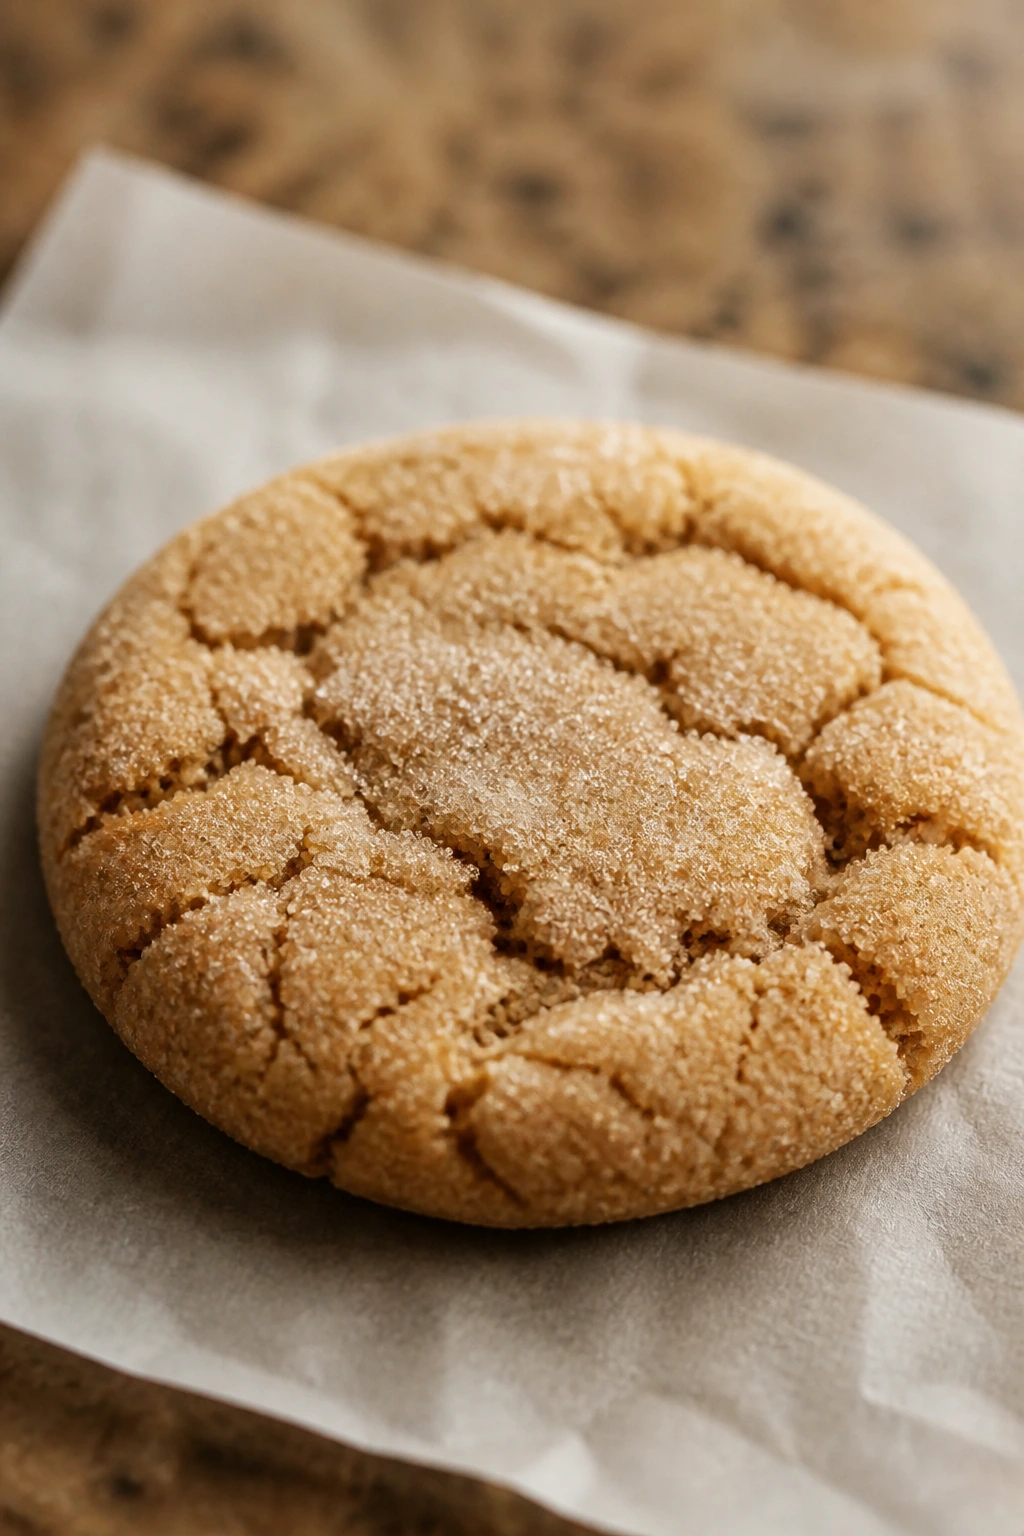
Ginger cookies bring heat, but in a softer, more rounded way than molasses cookies do. These are pale enough to still feel like sugar cookies, yet spiced enough to keep you reaching for a second one without thinking too hard. The little kick from ginger is what makes them memorable.
Why It Works:
Ground ginger gives sharpness, while a little molasses adds depth and helps the dough stay tender. The spice ratio matters here: too little and the cookie tastes blank, too much and it stops reading as sugar cookie altogether. A sugar coating on the outside gives the surface a dry sparkle and keeps the cookie from looking dull.
Key Ingredients:
- 1/2 cup unsalted butter, softened — For tenderness.
- 3/4 cup granulated sugar — Sweetness.
- 1 large egg — Structure.
- 1 tablespoon molasses — Adds moisture and depth.
- 1 teaspoon vanilla extract — Keeps the flavor balanced.
- 1 1/2 cups all-purpose flour — Main structure.
- 2 teaspoons ground ginger — The main spice.
- 1 teaspoon cinnamon — Adds warmth.
- 1/2 teaspoon baking soda — Helps spread.
- 1/4 teaspoon salt — Necessary.
- 2 tablespoons sugar, for rolling — Optional coating.
Quick Steps:
- Preheat the oven: Set it to 350°F and line a baking sheet.
- Cream butter and sugar: Beat until fluffy.
- Add egg, molasses, and vanilla: Mix until evenly blended.
- Stir in dry ingredients and spices: Add flour, ginger, cinnamon, baking soda, and salt.
- Roll and bake: Shape into balls, roll in sugar if using, and bake for 10 to 11 minutes.
- Cool briefly: Let them finish setting on the tray.
Equipment for This Recipe:
- Mixing bowl — For the thick dough.
- Hand mixer — Helps the molasses blend.
- Baking sheet — Lined with parchment.
- Small bowl — For sugar rolling.
- Cooling rack — Once they firm up.
How to Serve This Dish:
These cookies like tea, coffee, and milk, but they especially suit a dessert tray with plain cookies beside them so the ginger can shine. I’d also serve them warm if possible because the spice smells louder that way. A light dusting of sugar on top is enough decoration.
Pro Tips for This Recipe:
- Measure molasses carefully; too much can overpower the dough.
- Roll the dough balls evenly so they bake at the same rate.
- Pull them when the tops look set but still soft.
- If you want a stronger snap on the outside, chill the dough balls for 10 minutes before baking.
Variations on This Dish:
- Lemon-Ginger: Add lemon zest to the dough.
- Ginger Snap Style: Roll more heavily in sugar for a slightly crisper shell.
- Extra Warm Spice: Add a small pinch of cloves.
Common Mistakes to Avoid with This Dish:
- Too much molasses: The cookies lose their sugar-cookie identity.
- Overbaking: Ginger cookies dry out fast.
- Using stale ginger: The flavor turns dusty instead of bright.
30. Salted Honey Sugar Cookies
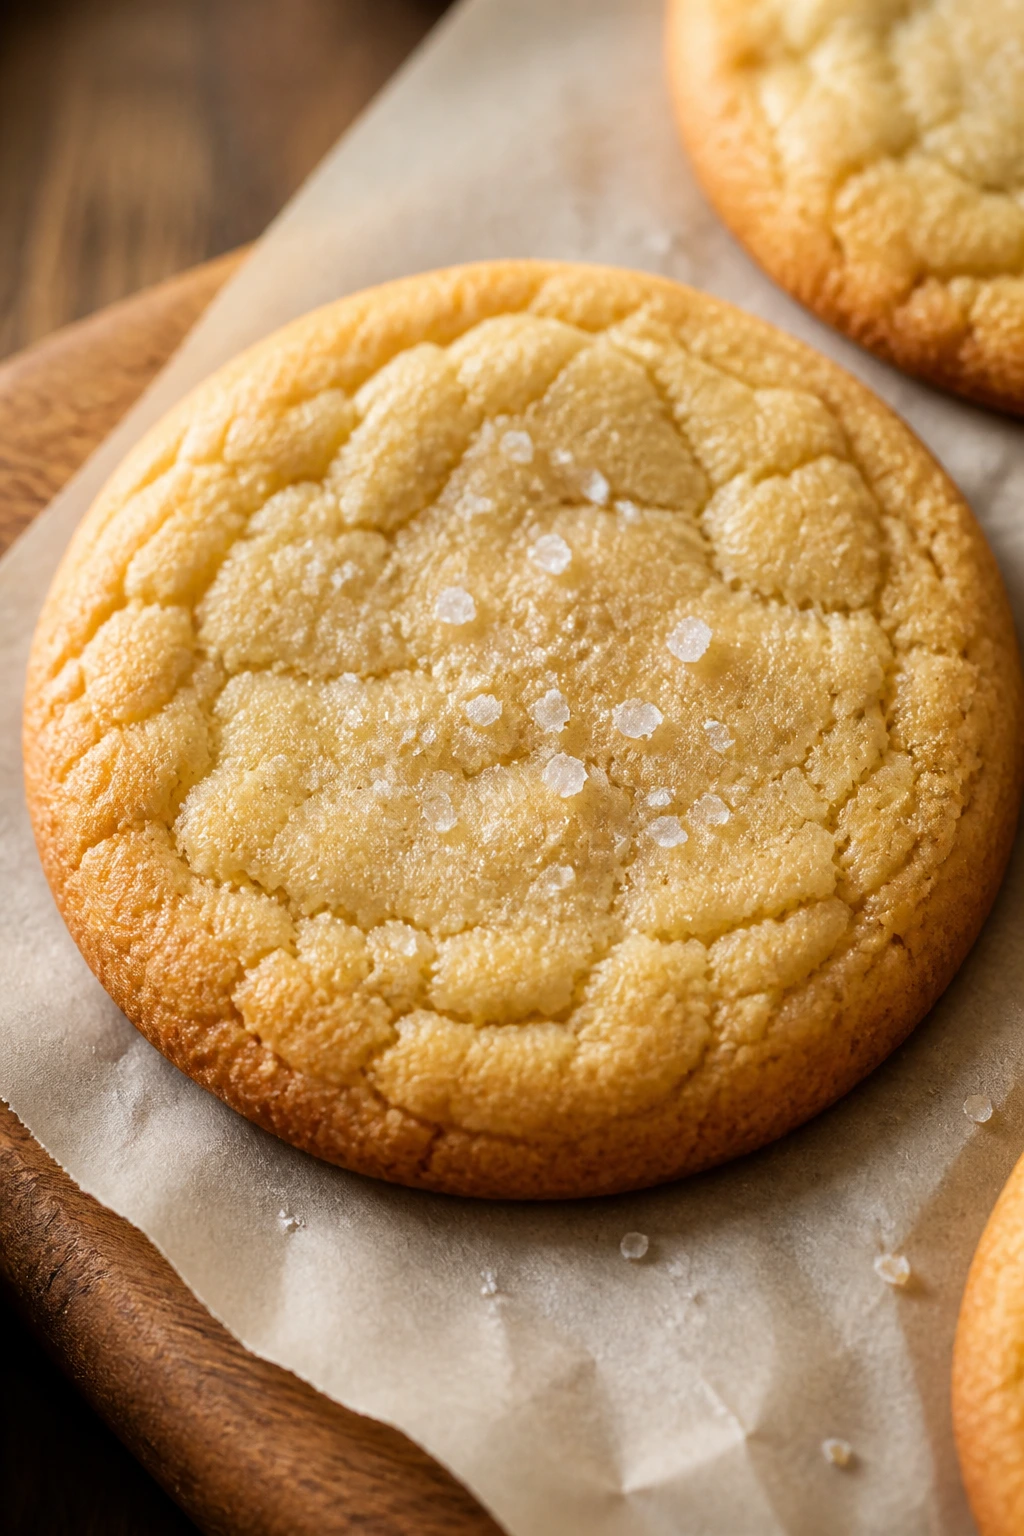
Honey makes sugar cookies feel softer and more rounded, while a little salt on top keeps the sweetness from getting sleepy. These cookies bake with a gentle bronze edge and a soft center, and they smell faintly floral when they come out of the oven. I like them because they are sweet without being cloying, which is a rare and useful thing.
Why It Works:
Honey adds moisture and a distinct flavor that sugar alone cannot give. Because honey browns faster than granulated sugar, the bake needs close watching; that’s the tradeoff. A little flaky salt at the end makes the sweetness clearer instead of heavier.
Key Ingredients:
- 1/2 cup unsalted butter, softened — For richness.
- 1/3 cup honey — The flavor and moisture.
- 1/3 cup granulated sugar — Keeps the structure.
- 1 large egg — Binds the dough.
- 1 teaspoon vanilla extract — Balances the honey.
- 1 3/4 cups all-purpose flour — Enough to handle the moisture.
- 1/2 teaspoon baking powder — Gentle lift.
- 1/2 teaspoon salt — Some in the dough, some on top.
- Flaky salt, for finishing — Optional but excellent.
Quick Steps:
- Preheat to 350°F: Line a baking sheet with parchment.
- Cream butter, honey, and sugar: Beat until smooth and a little glossy.
- Add the egg and vanilla: Mix until the dough looks even.
- Add the dry ingredients: Stir in flour, baking powder, and salt until the dough comes together.
- Bake: Scoop and bake for 10 to 12 minutes, until the edges are light gold and the centers are set.
- Finish with salt: Sprinkle a few flakes on warm cookies if you want the sweet-salty contrast.
Equipment for This Recipe:
- Mixing bowl — For the sticky dough.
- Mixer — Useful for blending the honey.
- Baking sheet — Line it.
- Cookie scoop — Helps with sticky dough.
- Rack — For cooling.
How to Serve This Dish:
These are lovely with tea, especially something plain like black tea, because the honey flavor stays in front. They also work with fresh fruit or a piece of sharp cheese if you want to turn dessert into something slightly odd and very good. A few flakes of salt on top make them look and taste finished.
Pro Tips for This Recipe:
- Grease your measuring spoon lightly before adding honey.
- Watch the oven closely; honey-baked cookies brown faster than plain ones.
- Chill the dough briefly if it feels too sticky.
- Add the flaky salt while the cookies are still warm so it sticks.
Variations on This Dish:
- Honey-Lemon: Add lemon zest for brightness.
- Honey-Oat: Fold in 1/2 cup oats for chew.
- Honey-Sesame: Sprinkle sesame seeds on top before baking.
Common Mistakes to Avoid with This Dish:
- Overbaking for color: Honey darkens quickly.
- Using too much honey: The cookies can spread too much.
- Skipping the salt finish: The sweetness lands flatter without it.
What Makes Sugar Cookies Work When the Pantry Is Bare
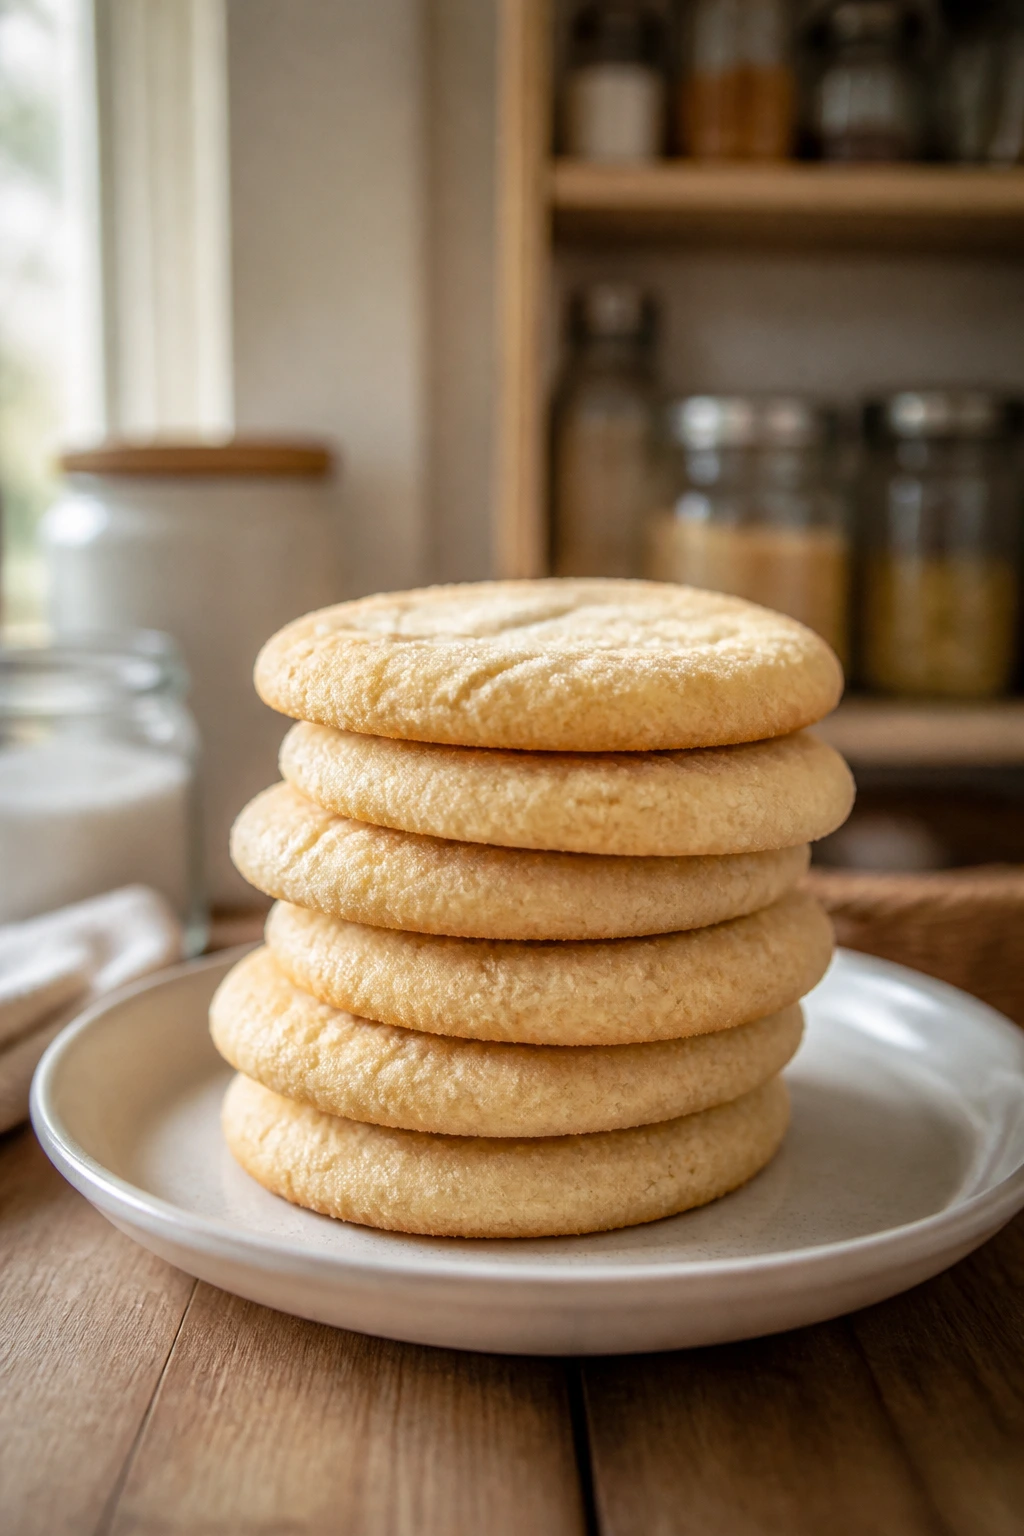
Sugar cookies are one of those rare bakes where the ingredients are ordinary but the results still feel specific. The trick is not magic. It’s balance. Butter gives flavor and spread. Sugar gives sweetness and crisp edges. Flour gives shape. Eggs bind the dough. Salt keeps the whole thing from tasting like sweet wallpaper paste.
A lot of the variation comes from one extra move, and that move does not have to be fancy. Brown the butter, and you get nuttiness. Add sour cream or buttermilk, and the crumb softens. Use brown sugar, and the center turns chewy. Add cornstarch, and the texture gets more delicate. That is why pantry-staple sugar cookies work so well: the ingredient list stays short, but the texture can still shift in useful ways.
Fat, Sugar, and Flour Are the Real Controls
When a cookie spreads too much, the butter was too warm or the flour was too light. When a cookie turns cakey, the flour went too high or the leavening was too eager. When it tastes flat, the salt was missing or the sugar type was wrong for the flavor you wanted. Most sugar cookie problems are ratio problems in disguise.
The good news is that sugar cookies are forgiving once you understand what those three ingredients are doing. You do not need a dozen add-ins to make them interesting. You need one or two controlled changes.
The Small Add-Ins That Change the Whole Batch
Citrus zest changes aroma fast. Cinnamon adds warmth. Cocoa deepens the flavor. Jam gives a tart hit. Peanut butter brings savoriness. Honey and maple push the sweetness in a different direction. Even a teaspoon of instant espresso can make a plain dough taste more finished than you’d expect.
I’m biased toward the cookies that taste like they started as a simple dough and got one smart twist, not a pile of extras. That is where the best pantry baking lives.
Soft, Crisp, or Chewy: Pick the Texture First
If you want soft cookies, add a little dairy like sour cream or buttermilk, and stop baking early. If you want crisp cookies, chill the dough longer, roll it thinner, and let the edges color a little more. If you want chewy cookies, lean on brown sugar or an extra yolk and keep the oven modest.
That choice matters more than the flavoring. A lemon cookie can be soft or crisp. A maple cookie can be chewy or snappy. The ingredient list stays humble; the texture does the heavy lifting.
Essential Equipment for These Recipes
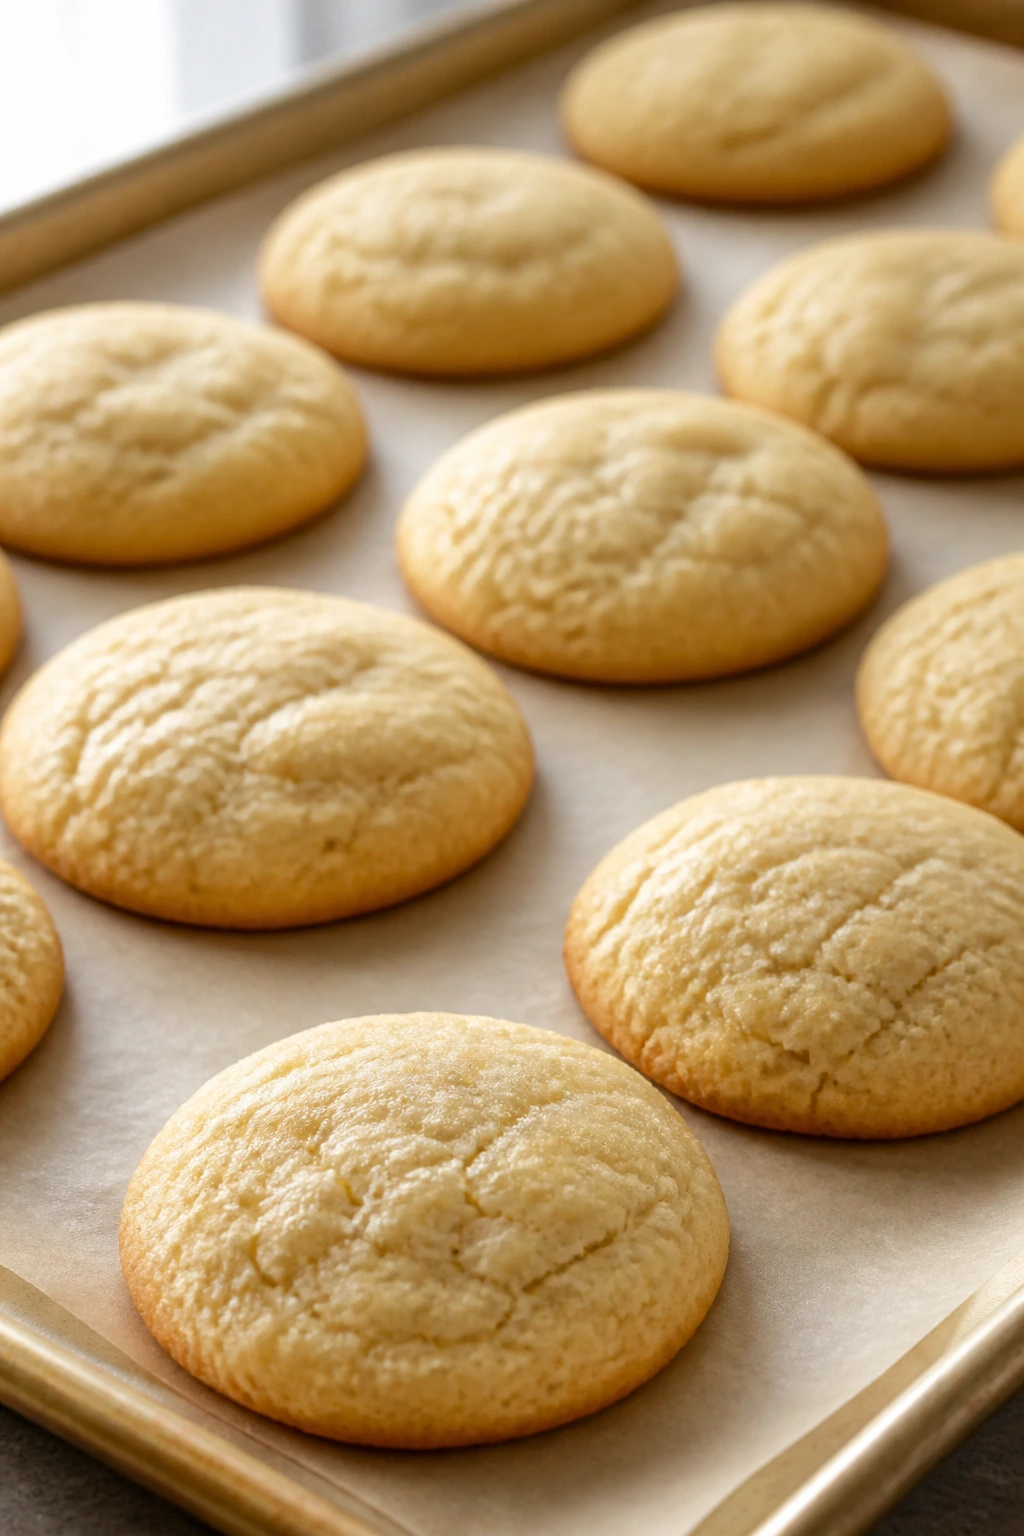
- Large mixing bowls — One for wet ingredients, one for dry, and one extra if you’re icing or glazing.
- Hand mixer or stand mixer — Helpful for creaming butter and sugar, especially in softer doughs.
- Measuring cups and spoons — Still useful, though a kitchen scale gives cleaner results.
- Digital kitchen scale — Best for flour-heavy recipes and cutout doughs that need consistency.
- Rimmed baking sheets — Keep dough mounds from sliding and catch any bubbling butter.
- Parchment paper — The easiest way to avoid sticking and scorching.
- Cookie scoop — Keeps drop cookies even and helps them bake at the same rate.
- Rolling pin — Essential for cutouts and crisp roll-out cookies.
- Cooling racks — Let the cookies set without steaming the bottoms.
- Small whisk or spoon — Handy for glazes, icing, and quick coatings.
- Microplane or fine grater — Worth owning if you use citrus zest often.
- Offset spatula — Optional, but very useful for frosting bars and lifting cutouts.
Smart Shopping and Ingredient Tips
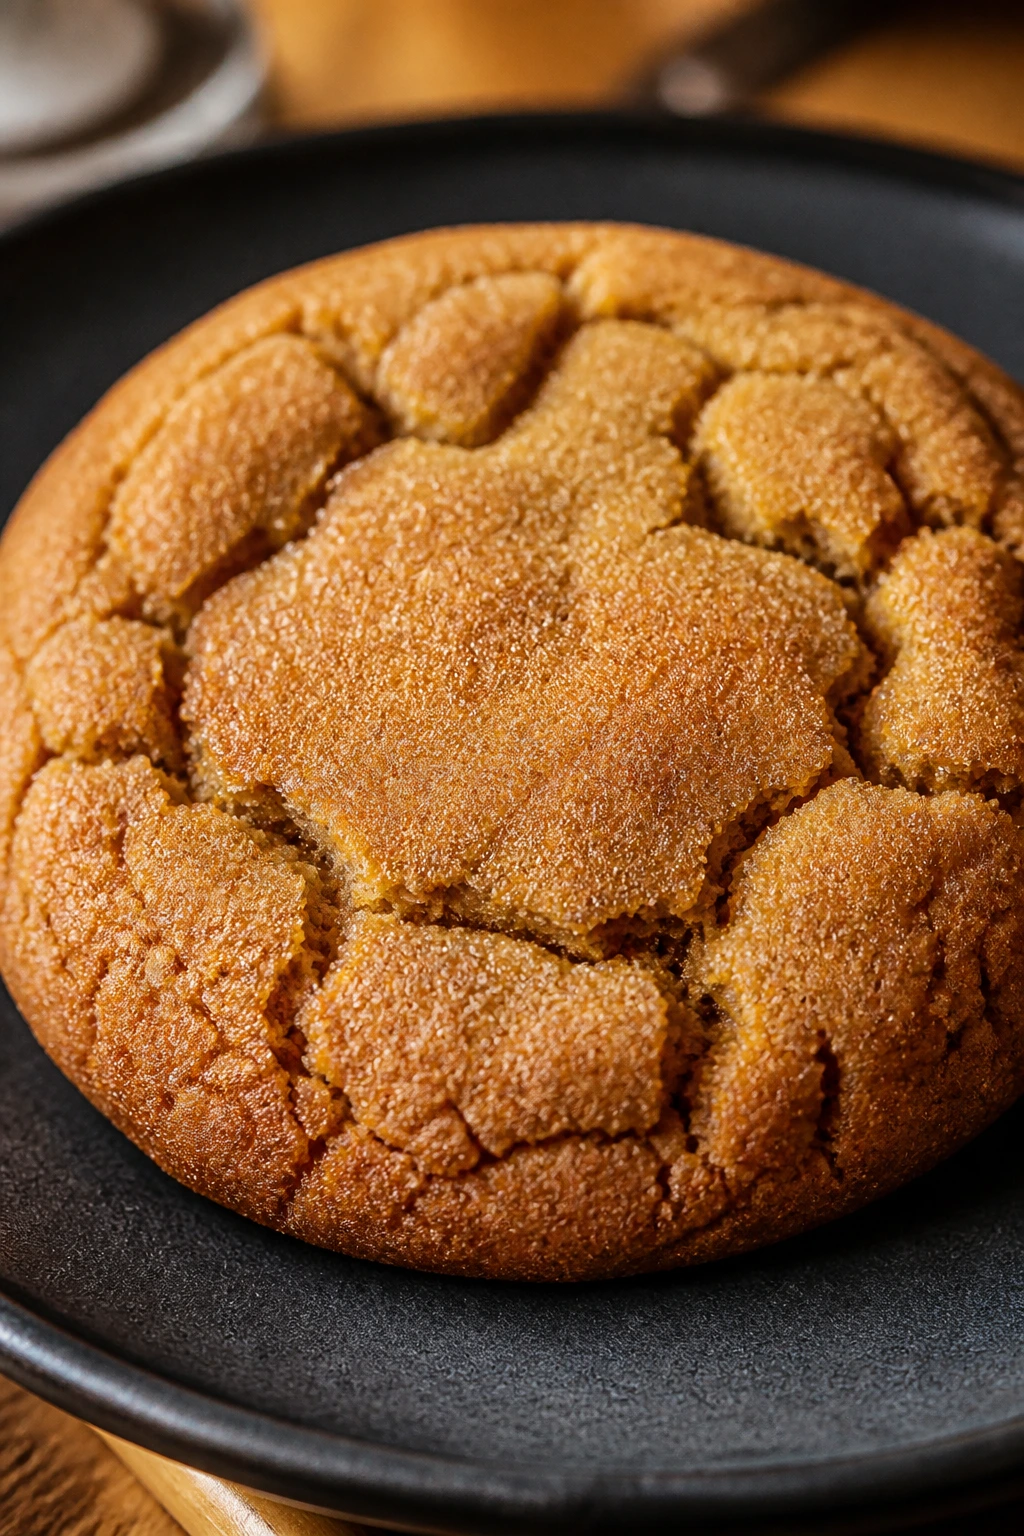
Buy unsalted butter if you can. Salted butter works in a pinch, but the salt level changes from brand to brand, and sugar cookies depend on balance more than people realize. If you want the cleanest flavor, choose butter that smells sweet and fresh, not waxy or faintly stale.
Use all-purpose flour for nearly all of these. I would not overthink bread flour or pastry flour here unless you’re deliberately changing texture. If you weigh flour, 120 to 125 grams per cup is a useful range for most standard all-purpose flour; if you scoop with a measuring cup, spoon it in and level it off. Packed flour is the fastest way to get a dry cookie.
Granulated sugar is the default for crisp edges and clean sweetness. Brown sugar brings chew and a darker flavor. Powdered sugar is for tender cookies and glazes. It’s worth keeping all three in the cupboard because they each change the dough in a different direction. One bag does not stand in for the others.
Fresh leavening matters more than people admit. Baking powder that has sat around forever can still look fine and perform badly. If you bake often, give the canister a sniff and a quick test with hot water or vinegar when you’re not sure. Flat cookies with good ingredients are still flat cookies.
For flavoring, think in layers. Vanilla is the base. Citrus zest lifts. Cinnamon and cardamom warm things up. Cocoa sharpens sweetness. Instant espresso deepens it. Honey and maple carry their own personality, so they need less help than plain sugar doughs. If you keep one jar of good vanilla, one container of cinnamon, one box of powdered sugar, and a couple of citrus fruits around, you can make half this list without a second store run.
How to Serve These Recipes
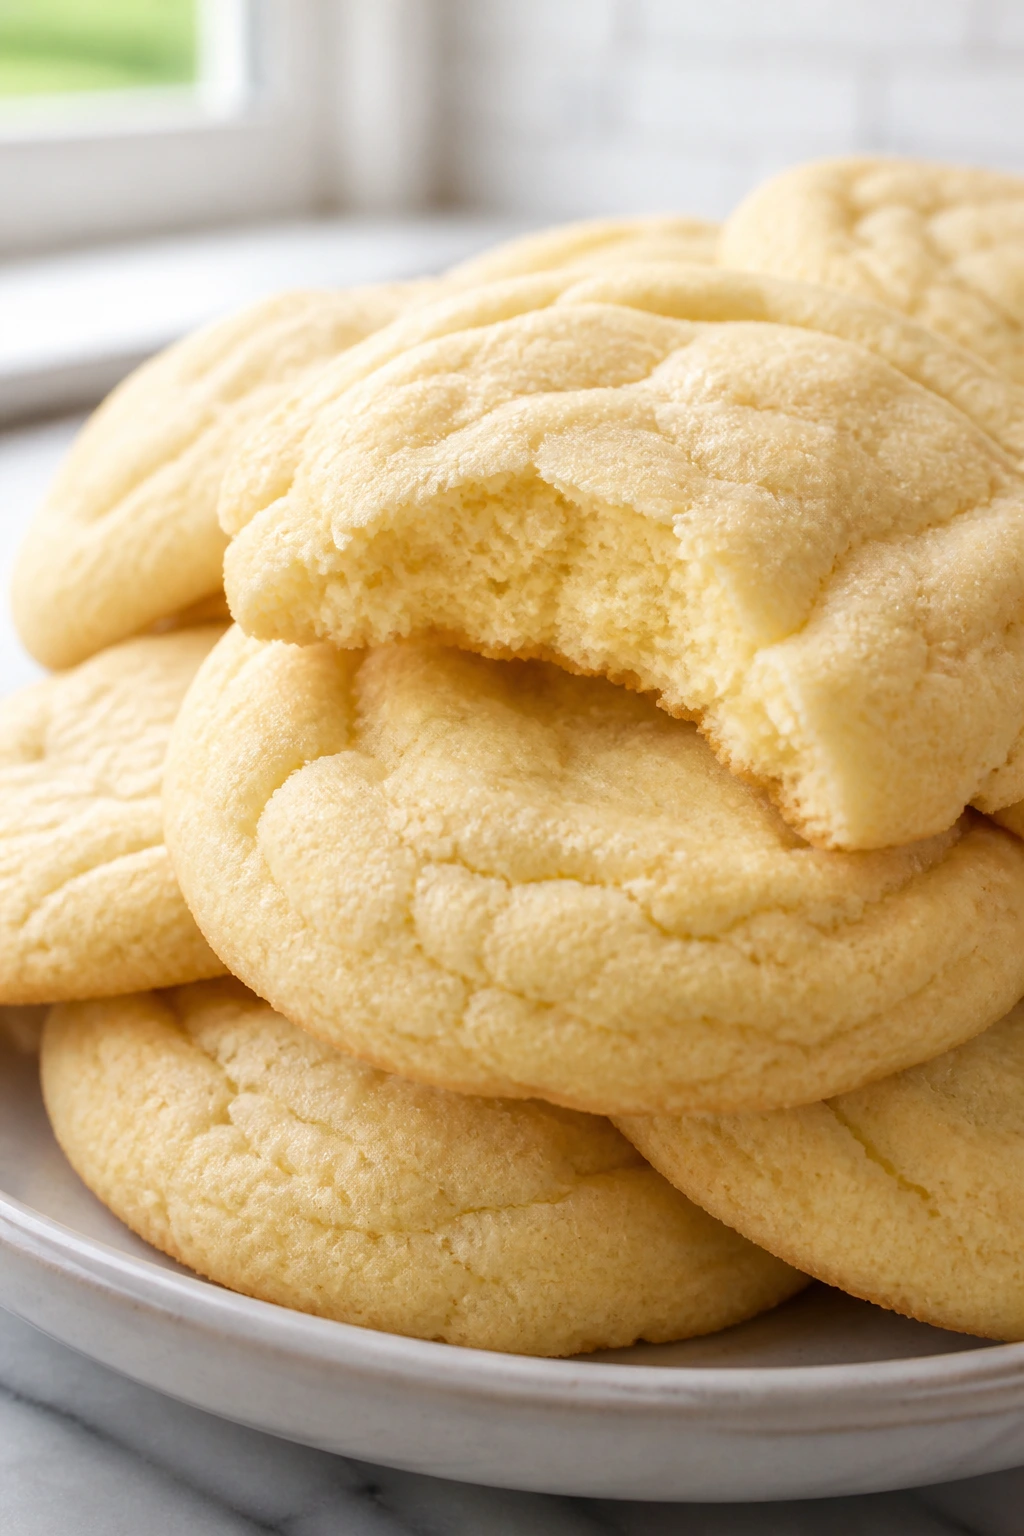
Presentation:
For a mixed cookie platter, alternate shapes and textures instead of piling everything in one mound. Put crisp roll-outs next to soft drop cookies, and let glazed or dipped cookies sit where the light can catch them. A small offset in height — one stack of three, one row of two, one loose cluster — looks better than a flat spread.
Accompaniments:
Cold milk still wins for plain vanilla and peanut butter cookies. Coffee suits brown butter, espresso, maple, and honey batches. Tea is the friend of citrus, almond, and orange-cardamom cookies. If you’re serving bars, add berries or a scoop of vanilla ice cream so the tray feels like dessert instead of just baked squares.
Portions:
Most of the drop cookies here are satisfying at 2 per person if the rest of the meal was decent, or 3 if the cookies are small. Cutout cookies and meltaways tend to run smaller, so 3 to 4 per person is a fair dessert portion. For bars, one thick square usually equals about two standard cookies in richness.
Beverage Pairing:
Plain milk handles the sweeter batches. Black coffee or espresso works with maple, brown butter, and chocolate-dipped cookies. Earl Grey, orange pekoe, or chai is better for citrus and spice because the tea gives the cookies a quieter backdrop. If you want one safe choice for almost every batch, make it cold milk and a strong cup of coffee on the side.
Additional Tips and Flavor Boosters
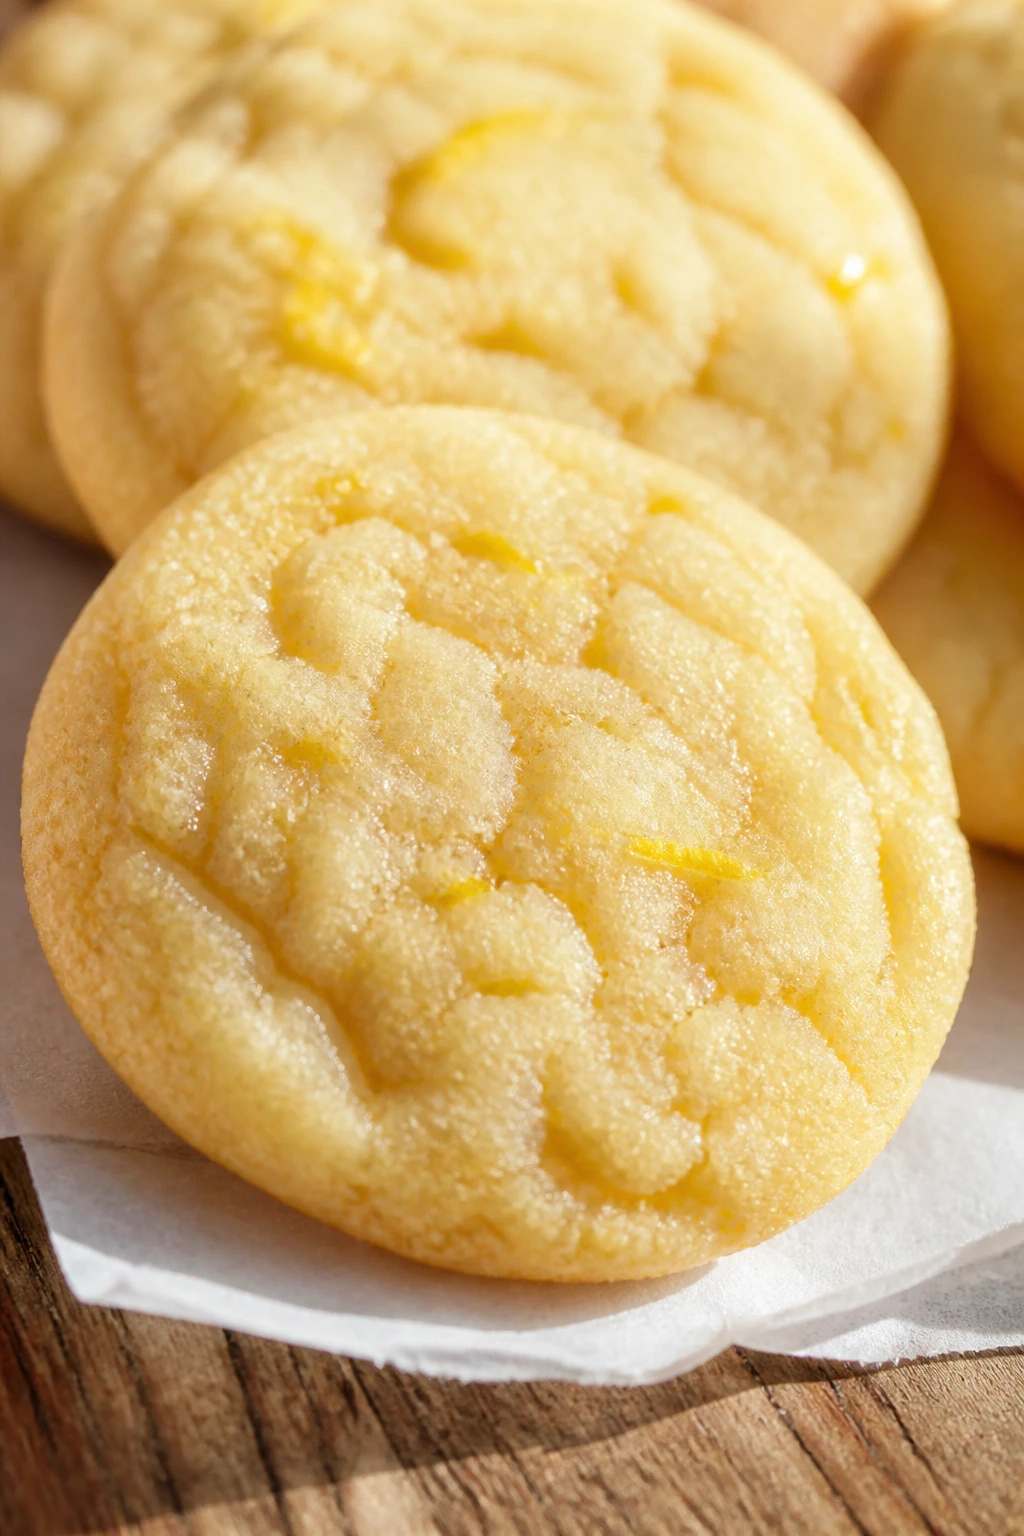
Flavor Enhancement:
Brown the butter for vanilla, maple, or almond doughs when you want a cookie that smells toasted instead of just sweet. Even a modest browning adds a rounder flavor without changing the ingredient list much. A pinch of flaky salt at the end does the same kind of work on the finish.
Customization:
Keep mix-ins restrained. Half a cup of chopped nuts, chips, coconut, or dried fruit is enough for most batches; more than that starts crowding the dough. If you want to change the flavor without changing the texture, swap extracts first. Vanilla to almond. Vanilla to orange. Vanilla to maple. That small move often gives you more payoff than dumping in more extras.
Serving Suggestions:
Dust meltaway cookies with powdered sugar right before serving. Brush cutouts with a thin glaze and top them with sprinkles before the icing sets. Press a few extra oats, sesame seeds, or coconut flakes onto the tops of cookies before they go into the oven so the finished batch looks deliberate.
Make-It-Yours:
For a gluten-free batch, use a 1:1 baking blend that already contains xanthan gum if possible. For dairy-free cookies, use block-style plant butter instead of spreadable tub butter; the latter can make the dough oily. For egg-free drop cookies and bars, a flax egg can work in a pinch, but I would not use it for precise cutout cookies where shape matters.
Make-Ahead, Storage, and Reheating Guidance
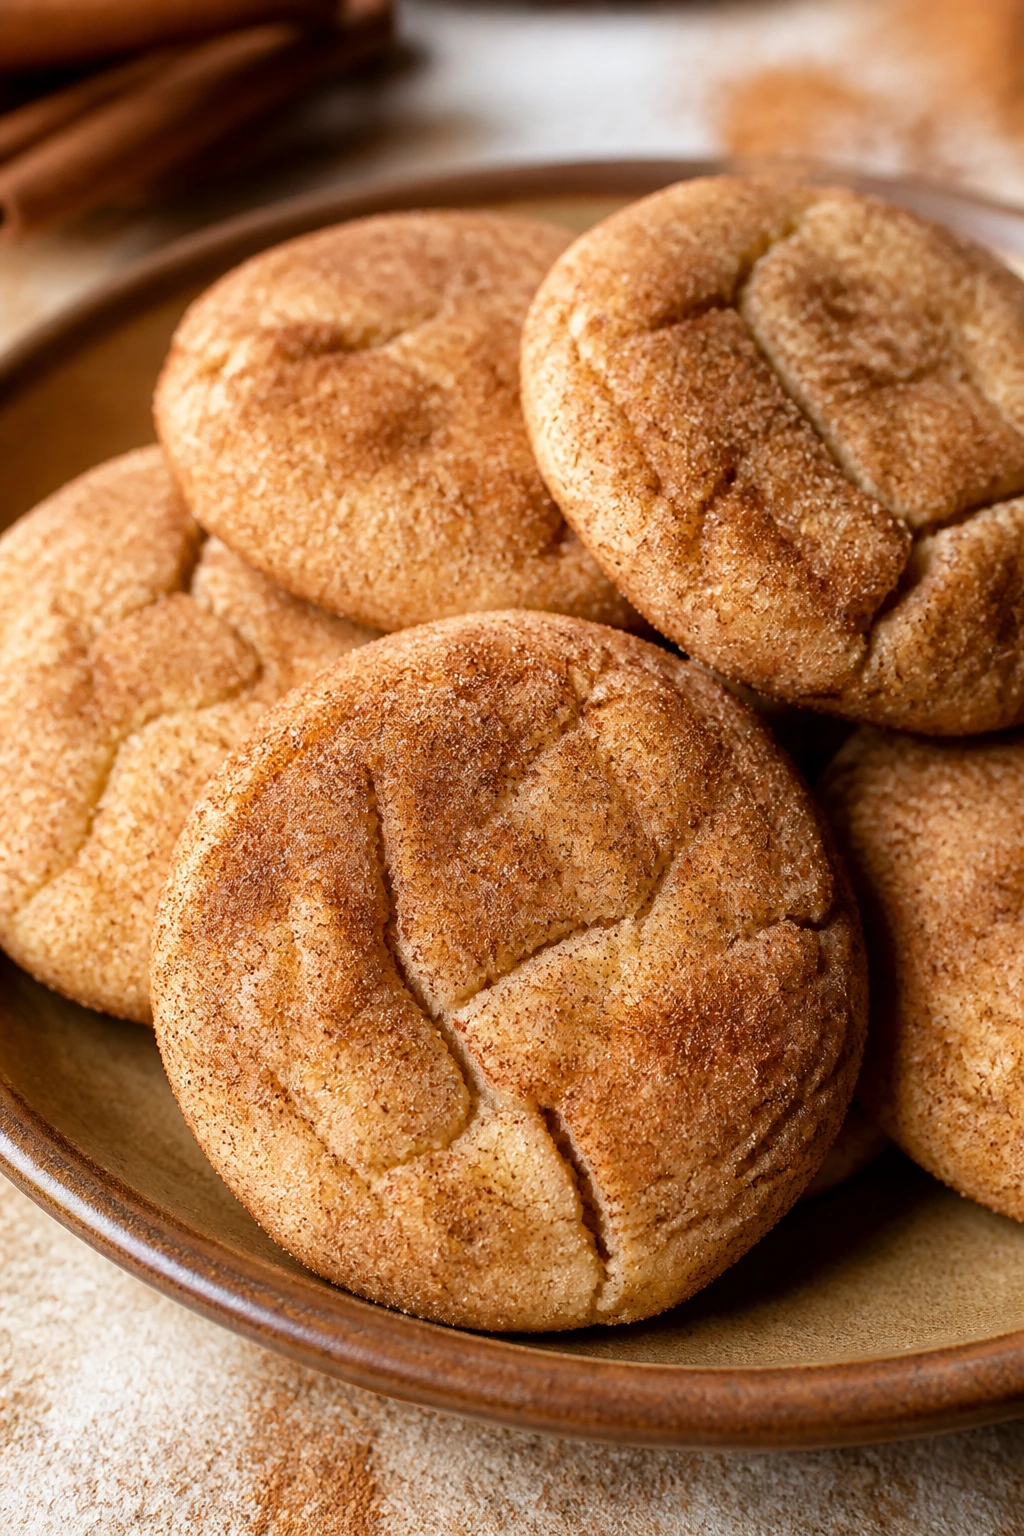
Most baked sugar cookies keep well in an airtight container at room temperature for 4 to 5 days. Softer cookies, especially sour cream, cream cheese, and buttermilk versions, are best within 3 to 4 days because the texture stays plush longer than the flavor does. Crisp roll-out cookies last a little better if you keep them in a tin with parchment between layers so they do not pick up moisture from softer cookies nearby.
Unbaked dough freezes well, and that is where these recipes become useful on a random Tuesday. Scoop drop-cookie dough into portions, freeze them on a tray until firm, then transfer them to a freezer bag for up to 2 months. Roll-out dough should be flattened into disks or wrapped in a thin slab, then thawed in the fridge overnight before rolling. Bar dough can also be chilled in the pan and baked later, though I’d bake bars within a day or two rather than leaving them too long.
Baked cookies freeze well too, especially plain vanilla, brown butter, peanut butter, and spice cookies. Wrap them tightly or layer them with parchment in a freezer container for up to 2 months. If they’re iced or glazed, freeze them in a single layer first so the topping has time to harden before stacking. Jam thumbprints are the fussiest of the bunch; they freeze fine, but the fruit filling can get sticky, so use parchment between layers.
For reheating, a 300°F oven for 3 to 5 minutes works better than the microwave for most of these. It wakes up the butter and softens the centers without turning them wet. If you want one warm cookie at midnight, 8 to 10 seconds in the microwave is enough — any more and you start making cookie sponge. Bars can be warmed the same way, though I usually let them sit at room temperature first. Some doughs, especially brown sugar and spice cookies, taste even better the next day because the flavor settles and the edges soften a bit.
Variations and Adaptations to Try
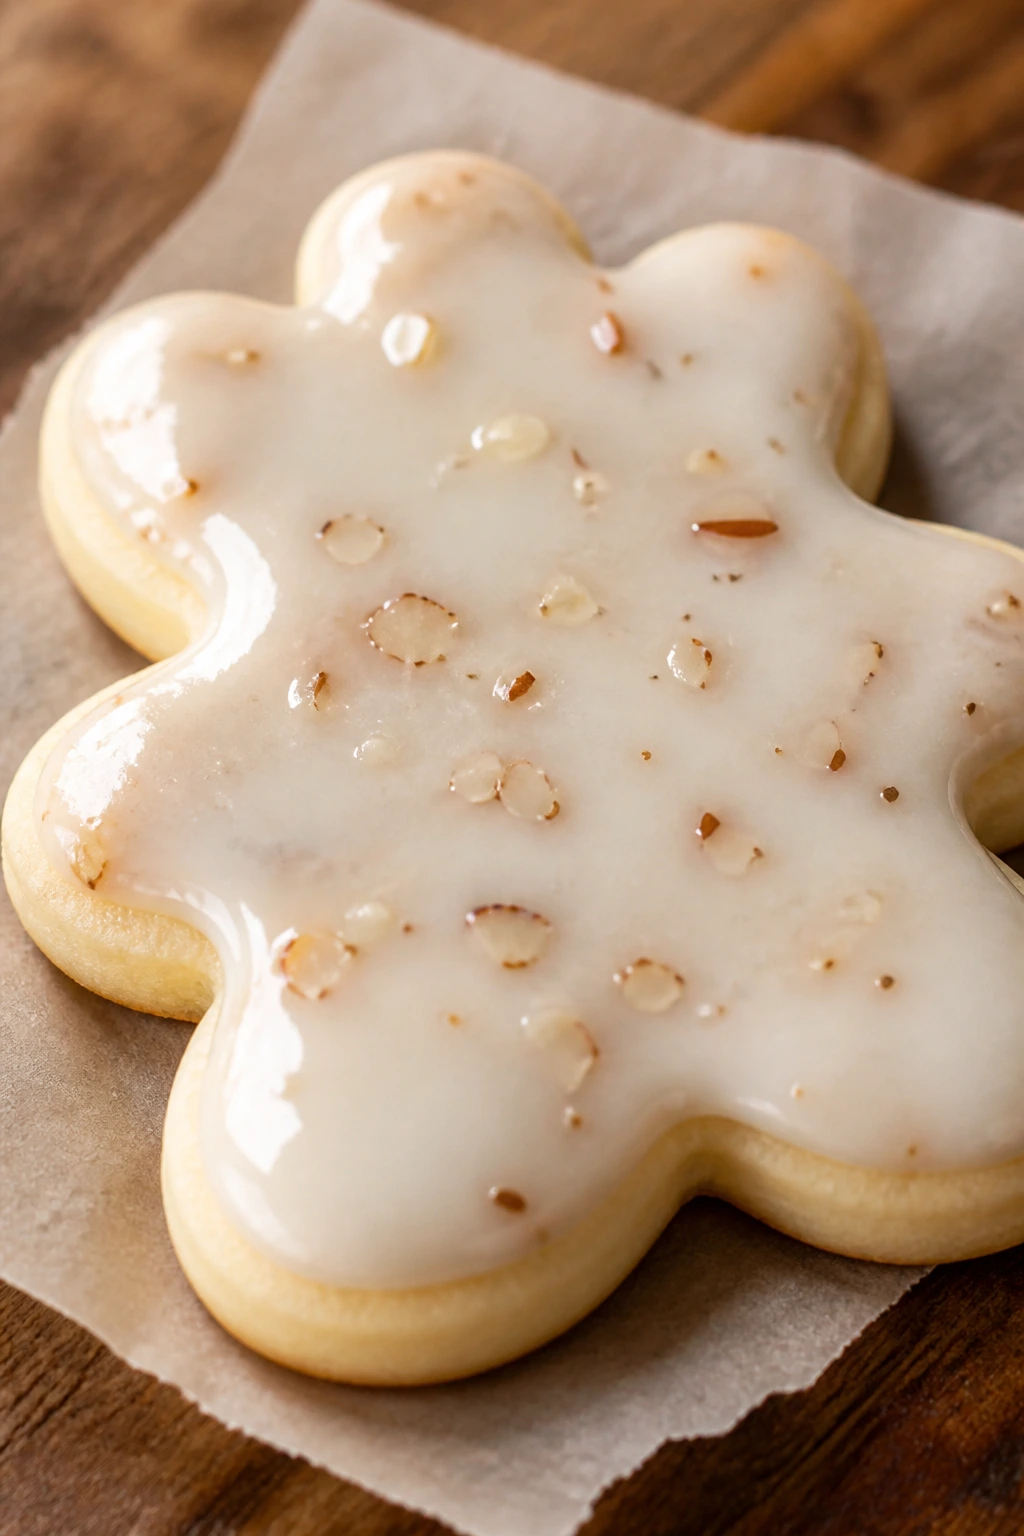
Gluten-Free Pantry Batch:
Use a 1:1 gluten-free baking flour blend in place of all-purpose flour. The dough may need a 10 to 15 minute chill to firm up, especially in drop cookies. Cutouts work best with blends that already include xanthan gum, because the shapes hold better during rolling and baking.
Dairy-Free Swap:
Replace butter with a block-style plant butter that behaves like stick butter when softened. Avoid soft tub spreads, which contain too much water and can make the dough spread or taste oily. This swap works especially well in vanilla drop cookies, bars, and chocolate-dipped cookies.
Less-Sweet Batch:
Cut the sugar by 2 tablespoons per standard batch and lean on spices, zest, or salt to keep the flavor interesting. This works best in brown butter, orange cardamom, and tahini cookies, where the flavor already has enough backbone. Do not cut sugar too aggressively in cutouts or the dough can lose its structure.
Kid-First Sprinkle Tray:
Use the classic drop cookie base and fold in rainbow jimmies or mini chips. Roll the dough balls in sanding sugar before baking for extra sparkle and a light crunch. This is the easiest branch of the whole collection for kids to help with because the dough forgives uneven scoops.
Spice-Cabinet Batch:
Take the vanilla base and add cinnamon, nutmeg, cardamom, or ginger in small amounts. A teaspoon of cinnamon and a half teaspoon of ginger can turn a plain batch into something that tastes deliberate rather than random. This route works best when you want a cookie that feels warm without needing citrus or chocolate.
Regional Cookie Tin Twist:
Use jam thumbprints, almond glaze cutouts, espresso cookies, and molasses spice cookies together as a mixed tin. The contrast matters more than a theme that repeats the same dough five times. A tray with soft, crisp, fruity, and spiced cookies gives people something to choose from without making the table feel chaotic.
Common Mistakes to Avoid

-
Packing in too much flour: Dry sugar cookies usually start here. Spoon the flour lightly into the cup or weigh it if you want repeatable results.
-
Baking until deeply browned: Sugar cookies finish setting after they leave the oven, so waiting for a dark edge usually means you missed the sweet spot.
-
Using butter that is too warm: Melted or greasy butter makes the dough spread like a puddle. Softened butter should bend under pressure, not shine.
-
Skipping the chill for rolled or cutout dough: Warm dough loses shape fast and sticks to everything. Even 20 to 30 minutes in the fridge makes a noticeable difference.
-
Mixing the dough too long after the flour goes in: The cookies get tougher and less tender. Stop as soon as the dry streaks disappear.
-
Ignoring the sugar type: Granulated sugar, brown sugar, and powdered sugar do different jobs. Swapping them casually changes texture, spread, and browning.
Frequently Asked Questions
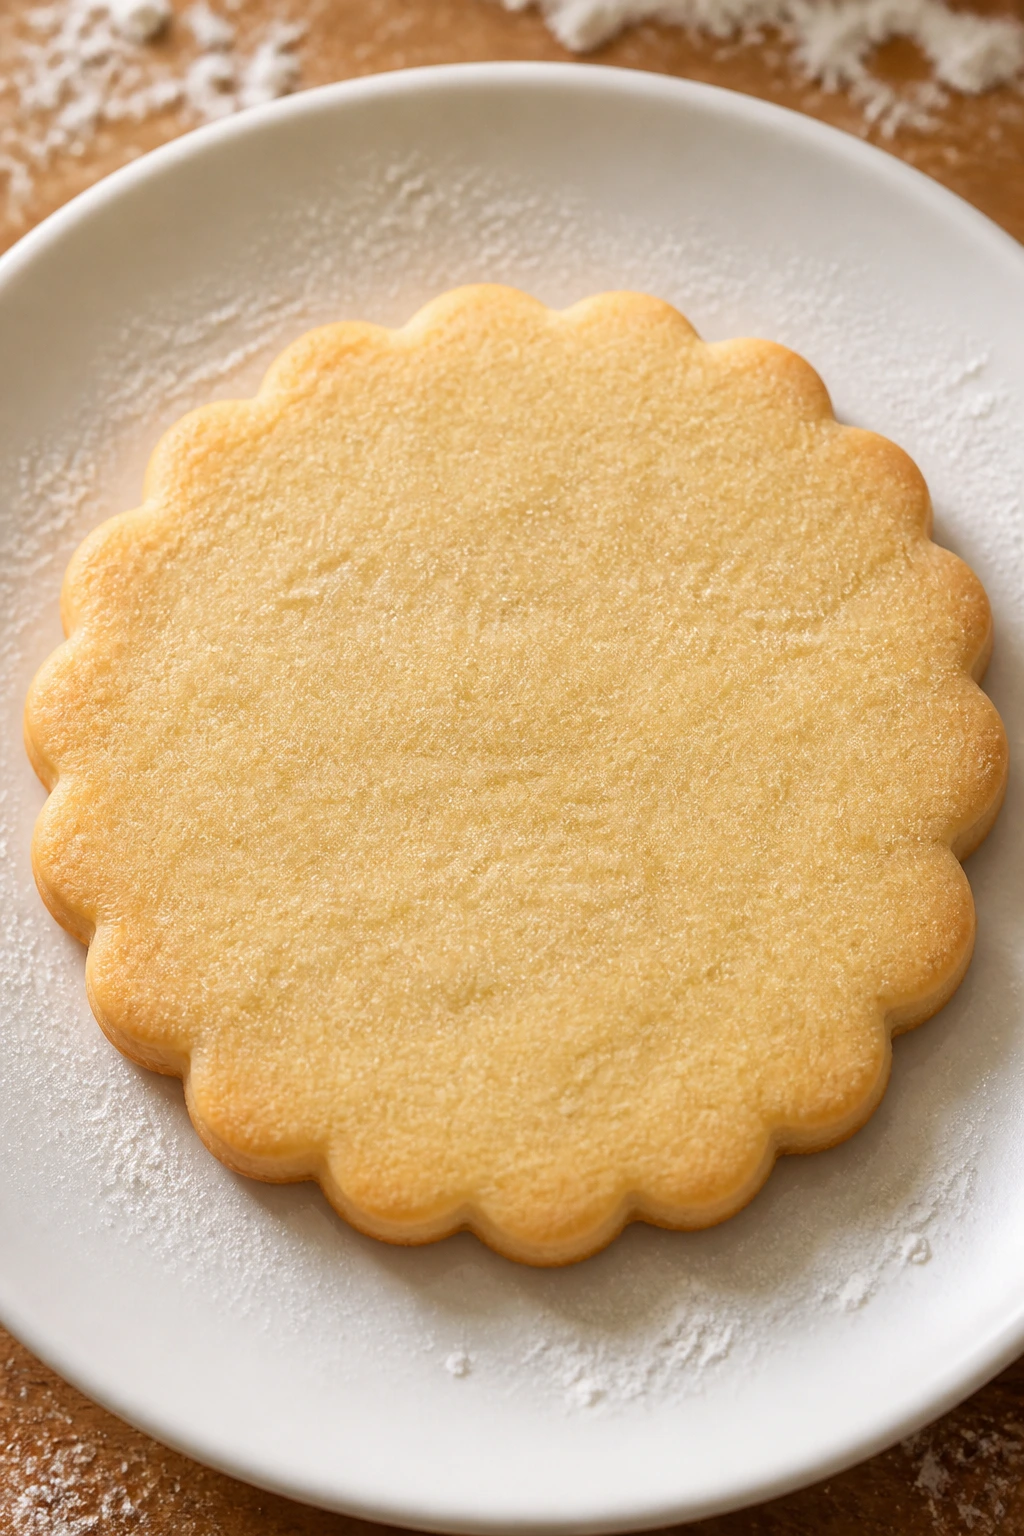
Can I make these cookies without a mixer?
Yes. Most of the drop-cookie doughs can be mixed with a sturdy spoon and a little patience, especially if the butter is softened correctly. The only ones that really benefit from a mixer are the softer doughs like cream cheese or sour cream cookies, where a smooth base matters.
Why do my sugar cookies spread too much?
Usually the butter was too warm, the flour was too light, or the dough skipped a chill when it needed one. If the tray looks flat after baking, the next fix is to chill the dough longer and check the flour measure before changing anything else.
Which cookies in this collection stay soft the longest?
Sour cream, cream cheese, buttermilk, maple, and brown sugar cookies stay soft longer than crisp cutouts or powdered sugar meltaways. Store them in an airtight container with parchment between layers, and they’ll hold that tender bite for several days.
Which recipes are best for cutouts?
The crisp roll-out cookies and the classic cutout cookies with icing are the strongest candidates. They have enough flour to hold shape, and chilling them before rolling makes a real difference. The soft-batch recipes are better scooped than cut.
Can I freeze the dough instead of baking everything at once?
Absolutely. Scoop drop-cookie dough into balls and freeze them solid, or wrap roll-out dough in a disk and freeze it flat. Both methods save time later, and the frozen dough often bakes well with only a minute or two added to the oven time.
What if my dough is too sticky to handle?
Chill it first. That solves a surprising number of cookie problems, especially with honey, maple, pumpkin, or sour cream doughs. If it’s still sticky after chilling, dust your hands lightly with flour instead of adding a lot more flour to the dough itself.
Can I use salted butter instead of unsalted butter?
You can, but reduce the added salt a little because different brands salt butter differently. It will still work, though the flavor is easier to control with unsalted butter. I reach for unsalted whenever I can because sugar cookies depend on balance.
Do these recipes need to rest overnight?
Not usually. A short chill is enough for most of them, especially if you’re baking drop cookies. Roll-out and cutout doughs benefit from a longer chill because it makes the shapes cleaner, but overnight rest is more of a convenience than a requirement.
A Tin Full of Options
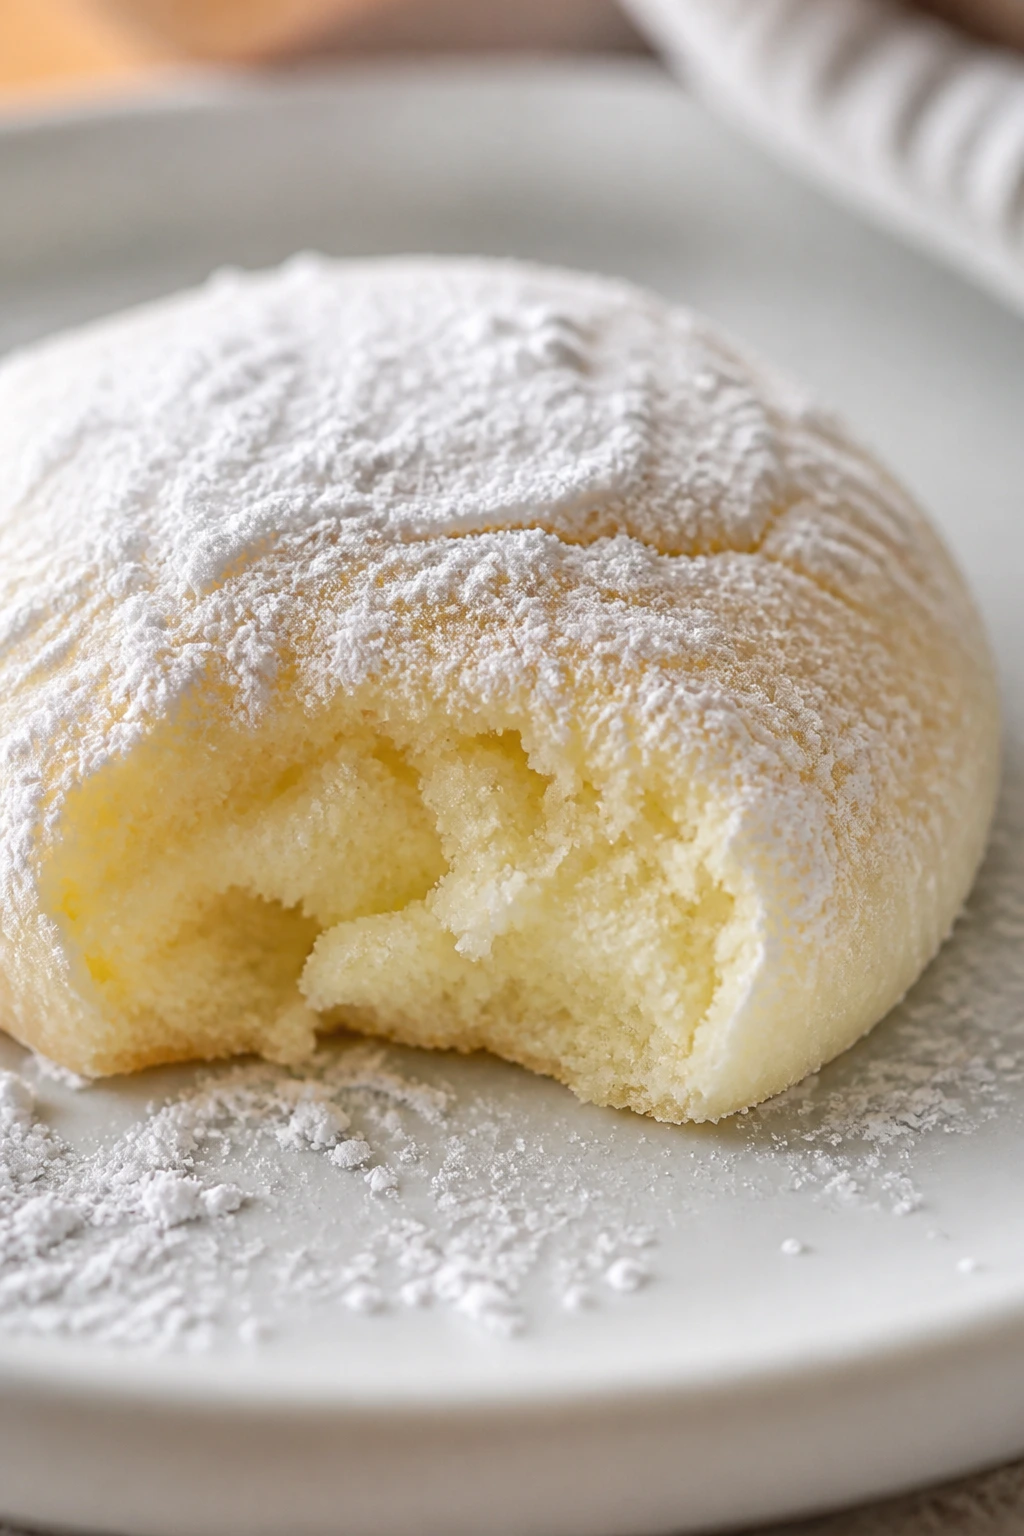
A good sugar cookie does not need to be complicated to be worth keeping around. Once you know how butter, sugar, flour, and a few pantry extras change the dough, you can steer a batch toward crisp, chewy, soft, spiced, glazed, or dipped without starting from scratch every time. That is the part I like most: the control is small, but the payoff is big.
Keep a bag of flour, a stick of butter, and a jar of vanilla in the house, and these cookies stop being a special project. They turn into a quiet fallback, the kind you can make when you want something warm from the oven without turning the kitchen upside down. And honestly, that is where sugar cookies are at their best.