
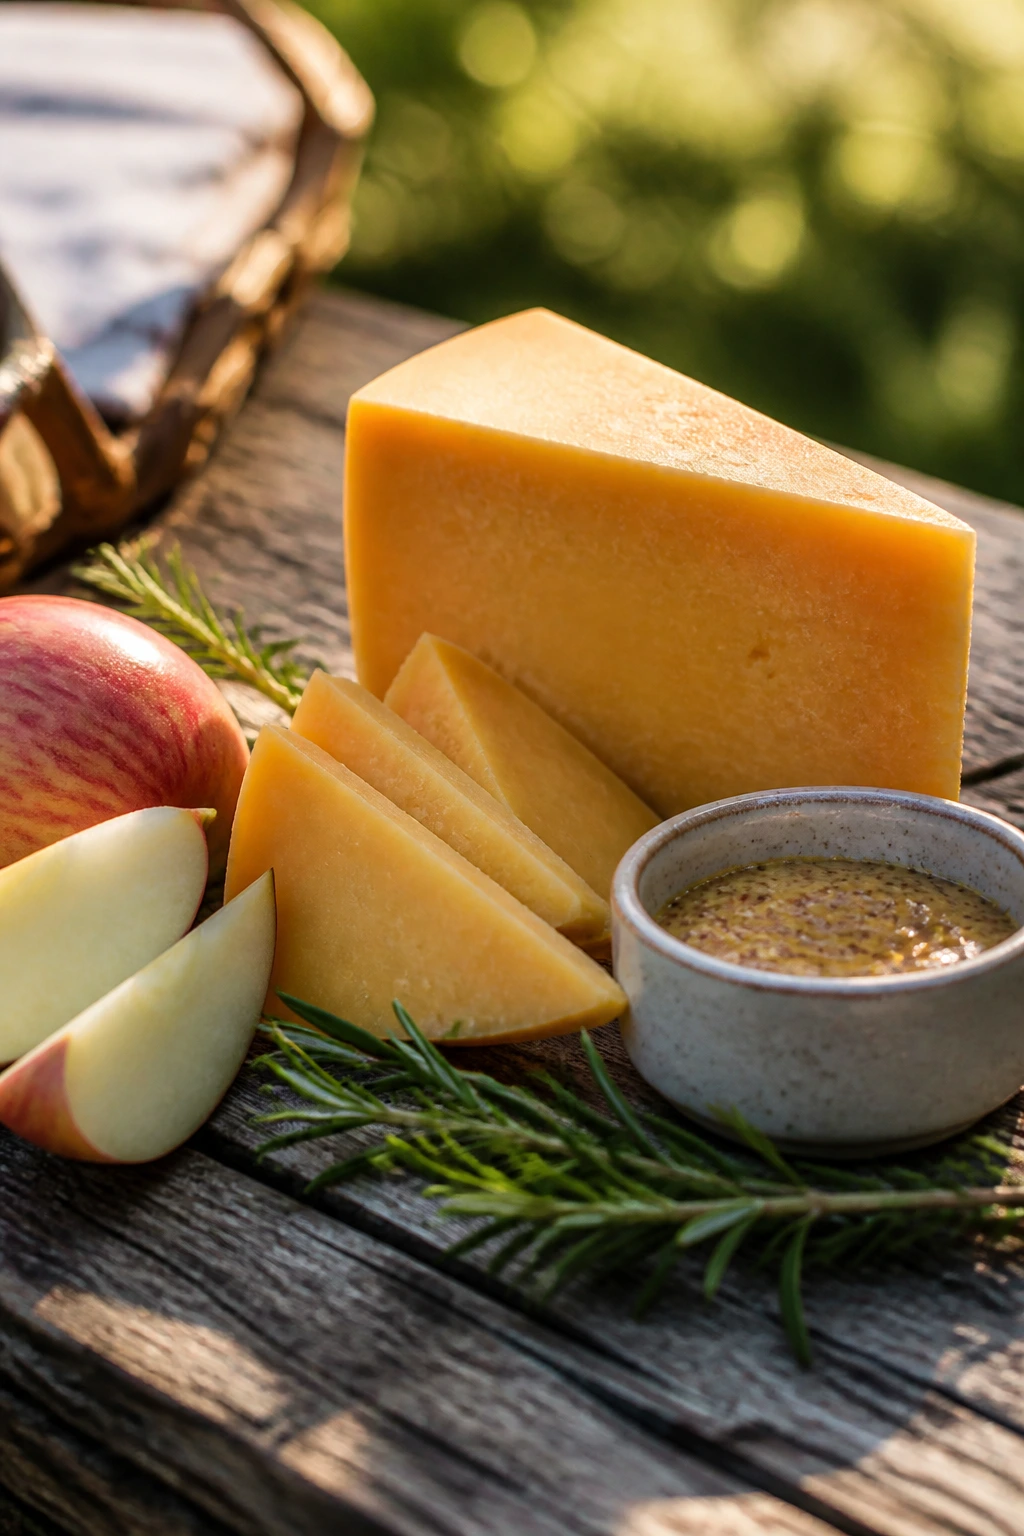
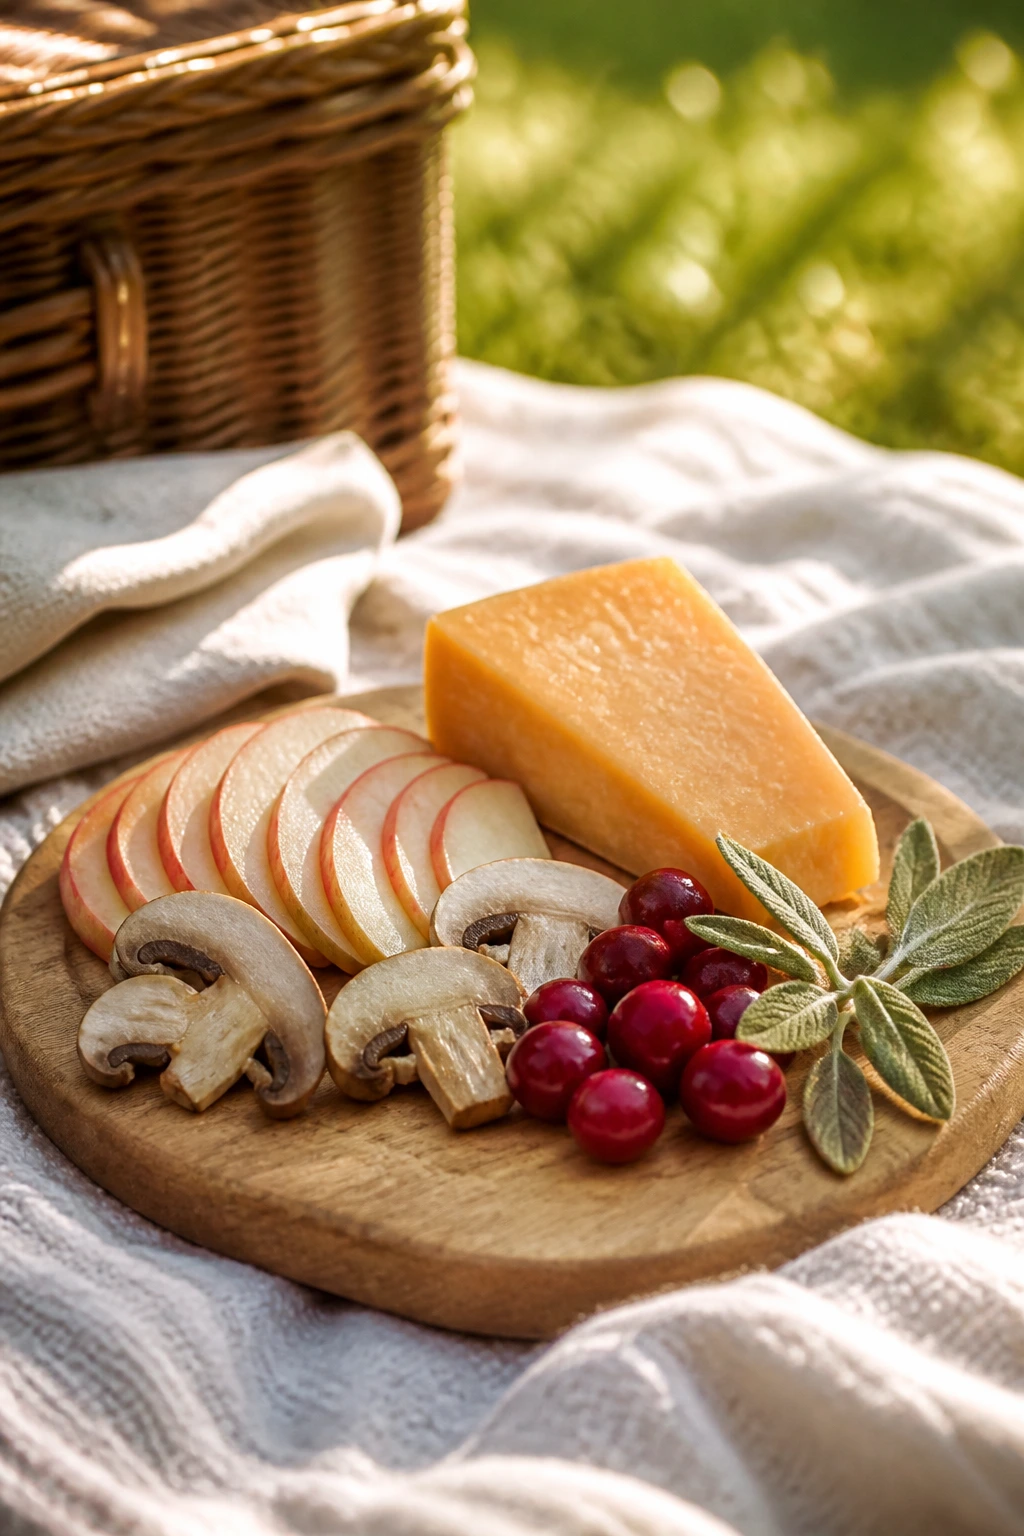
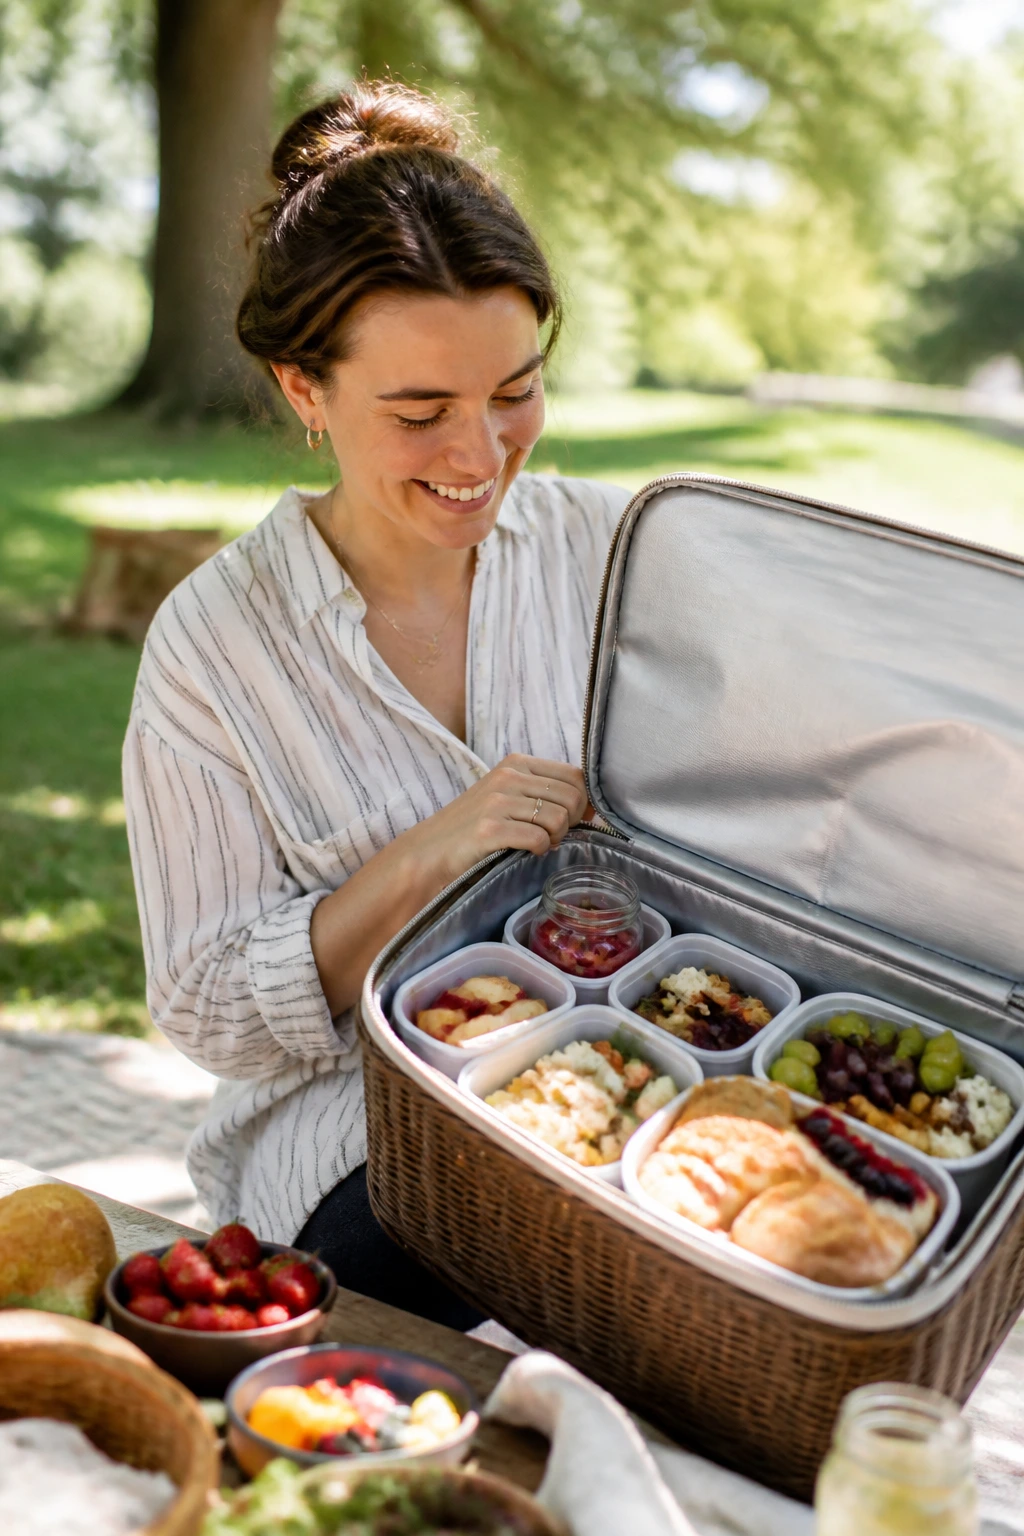
A picnic basket can carry more than tomato salad and watermelon wedges. If you like the deeper, cozier flavors of winter—roasted squash, sharp cheddar, mustard, mushrooms, cranberries, rye, apples—you can absolutely bring them to a summer picnic and have the spread taste lively instead of heavy. The trick is to pick dishes that hold their shape, stay good at room temperature for a while, and still feel bright once the sun hits the blanket.
That’s why these summer picnic food ideas lean into winter flavors without acting like a hot casserole dragged outside against its will. A pastry hand pie packed with chicken and peas. A cold chicken salad with cranberries and celery. Sliders with Dijon butter, salty ham, and a little melty Gruyère. These are sturdy, portable, and more interesting than the usual picnic fillers, which tend to wilt, sweat, or turn sad in the lid of a container.
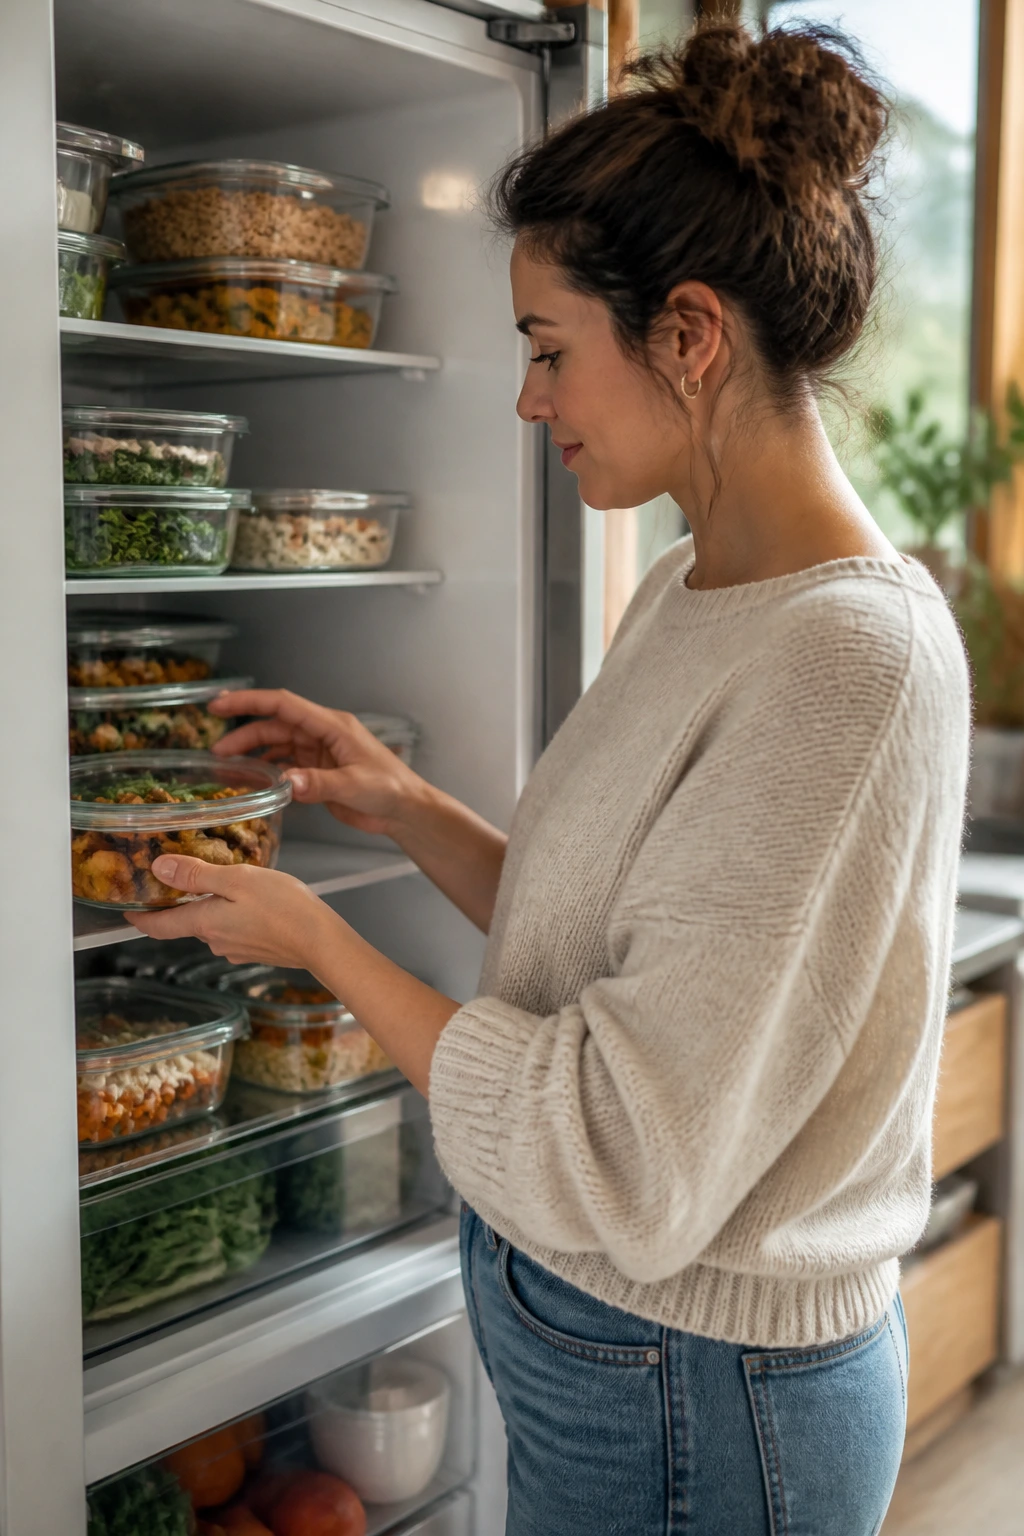
I also like that this kind of menu buys you flexibility. You can make most of it ahead, chill it properly, and pack it into insulated containers with less drama than you’d think. No one needs to eat a meal that has collapsed into a puddle by the time the blanket is smoothed out. Good picnic food has backbone. That’s the whole game.
Why These Picnic Foods Actually Work in Summer Heat
-
Room-temperature comfort: Each dish here stays appealing after a little time outside the fridge, which matters more than people admit when you’re passing a potato salad bowl around on a blanket.
-
Sturdy flavors: Mustard, cheddar, rosemary, cranberry, apple, mushroom, and smoked meat keep tasting clear even when the food is not piping hot.
-
Make-ahead friendly: Most of these can be baked, chilled, sliced, and packed the day before, which means less last-minute assembly and fewer wet cutting boards at the park.
-
Portable shapes: Hand pies, sliders, pinwheels, bites, and bars travel better than loose salads or anything that depends on a perfect plate.
-
Cooler-smart textures: These recipes were chosen with summer logistics in mind—ingredients that do not melt into slop, bread that won’t shred under damp fillings, and dressings that stay put.
-
Useful mix of savory and sweet: A basket with one rich item, one crunchy thing, one cold salad, and one dessert simply eats better than a pile of one-note snacks.
1. Mini Chicken Pot Pie Hand Pies
The first bite gives you everything people like about chicken pot pie without the bowl, spoon, or all-day commitment. Flaky pastry, creamy chicken filling, peas, carrots, thyme. They feel a little old-fashioned in the best way, like something packed into a tin box by someone who knows how to feed people well.
Why It Works:
Hand pies are picnic gold because the filling stays sealed inside its pastry shell. You get all the comfort of a creamy chicken filling, but it can cool down and still hold together. The pastry protects the interior from getting soggy, which is half the battle on a hot day.
Key Ingredients:
- 2 sheets puff pastry, thawed but still cold
- 2 cups cooked shredded chicken
- 1 cup frozen peas and diced carrots, thawed
- 1/2 cup diced yellow onion
- 2 tablespoons butter
- 2 tablespoons all-purpose flour
- 1 cup chicken broth
- 1/2 cup whole milk
- 1 teaspoon fresh thyme leaves
- 1 large egg, beaten for egg wash
Quick Steps:
- Cook the filling: Melt the butter in a skillet over medium heat, cook the onion for 4 minutes, stir in the flour, then whisk in the broth and milk until thick.
- Finish the filling: Stir in the chicken, peas, carrots, thyme, salt, and pepper. Cook 2 minutes, then cool completely. Do not fill warm pastry with hot filling.
- Assemble: Cut puff pastry into rectangles, spoon on filling, fold over, and crimp with a fork. Cut a small vent in the top.
- Bake: Brush with egg wash and bake at 400°F (205°C) for 20 to 24 minutes until deeply golden and crisp.
Equipment for This Recipe:
- Skillet
- Rimmed baking sheet
- Parchment paper
- Pastry brush
How to Serve This Dish:
Serve these slightly warm or fully cooled with a few dill pickles on the side. Two hand pies make a solid lunch portion; one is enough if the basket has several other dishes.
Pro Tips for This Recipe:
- Chill the filling until it feels thick and spoonable.
- Roll pastry lightly; don’t press all the air out.
- If the edges split, patch them with a scrap of dough and keep going.
Variations on This Dish:
- Turkey and Mushroom Swap: Use cooked turkey and sautéed mushrooms instead of chicken.
- Dairy-Free Version: Replace the milk with unsweetened oat milk and use olive oil in place of butter.
Common Mistakes to Avoid with This Dish:
- Overfilling the pockets: They burst in the oven. Use less filling than you think.
- Skipping the vent: Steam builds up and makes the pastry soft underneath.
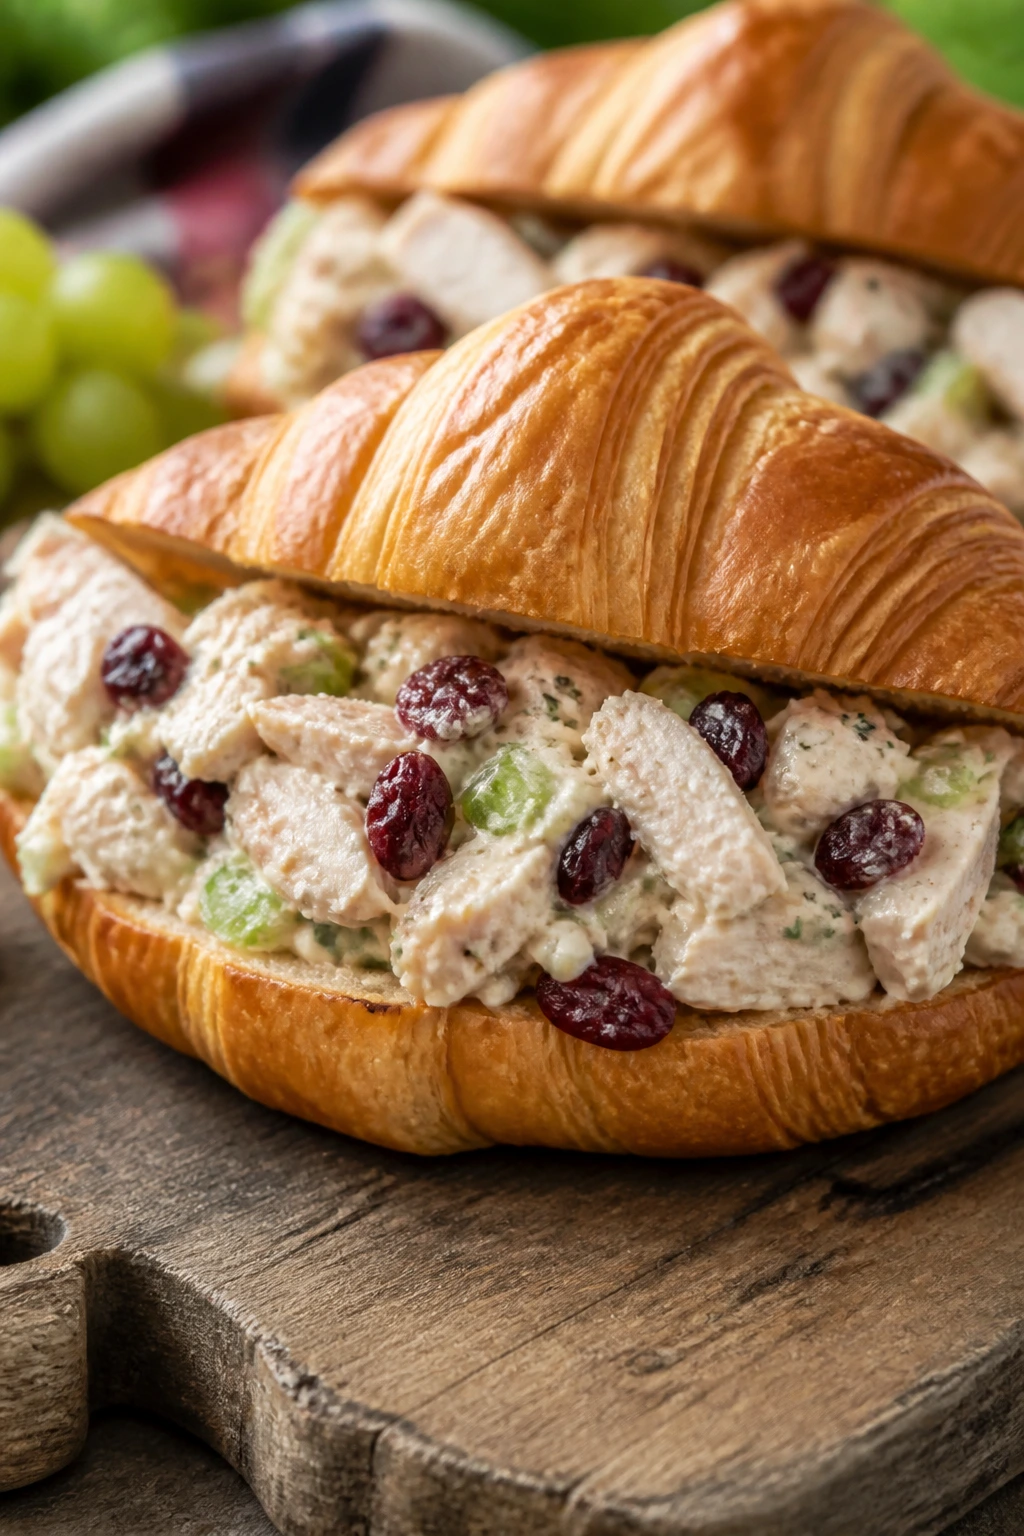
2. Cranberry Chicken Salad Croissants
This is the kind of chicken salad that knows how to behave at a picnic. It’s creamy but not sludgy, sweet from dried cranberries, crunchy from celery, and a little sharp from Dijon. Put it in a buttery croissant and the whole thing feels more polished than the effort it takes.
Why It Works:
Chicken salad packs cold, travels well, and tastes better after the flavors sit together for a few hours. The cranberries give the chicken some brightness, while the celery keeps the texture from going flat. A spoon of Greek yogurt keeps the dressing lighter without making it thin.
Key Ingredients:
- 3 cups cooked shredded chicken
- 1/2 cup mayonnaise
- 2 tablespoons plain Greek yogurt
- 1/3 cup dried cranberries
- 1/3 cup finely chopped celery
- 2 tablespoons chopped toasted pecans
- 1 tablespoon Dijon mustard
- 1 tablespoon lemon juice
- 4 large croissants, split
- Butter lettuce leaves
Quick Steps:
- Mix the salad: Stir together chicken, mayonnaise, yogurt, cranberries, celery, pecans, Dijon, lemon juice, salt, and pepper.
- Chill: Cover and refrigerate for at least 30 minutes so the dressing settles and the celery stays crisp.
- Assemble: Split the croissants and line them with lettuce.
- Fill and pack: Spoon the chicken salad inside just before serving so the croissants stay flaky.
Equipment for This Recipe:
- Mixing bowl
- Rubber spatula
- Sharp knife
- Airtight container
How to Serve This Dish:
Serve with kettle chips and grapes if you want a full picnic plate. Half a croissant per person works when the basket has several other foods.
Pro Tips for This Recipe:
- Pat the celery dry after chopping; extra moisture loosens the salad.
- Toast the pecans in a dry skillet for 4 minutes to wake them up.
- Pack the croissants separately if you’re traveling far.
Variations on This Dish:
- Apple-Walnut Version: Swap cranberries for diced apple and pecans for walnuts.
- Avocado-Mayo Version: Use avocado mayo if you want a softer, richer dressing.
Common Mistakes to Avoid with This Dish:
- Assembling too early: Croissants absorb moisture fast.
- Overloading the mayo: The salad should look coated, not soupy.
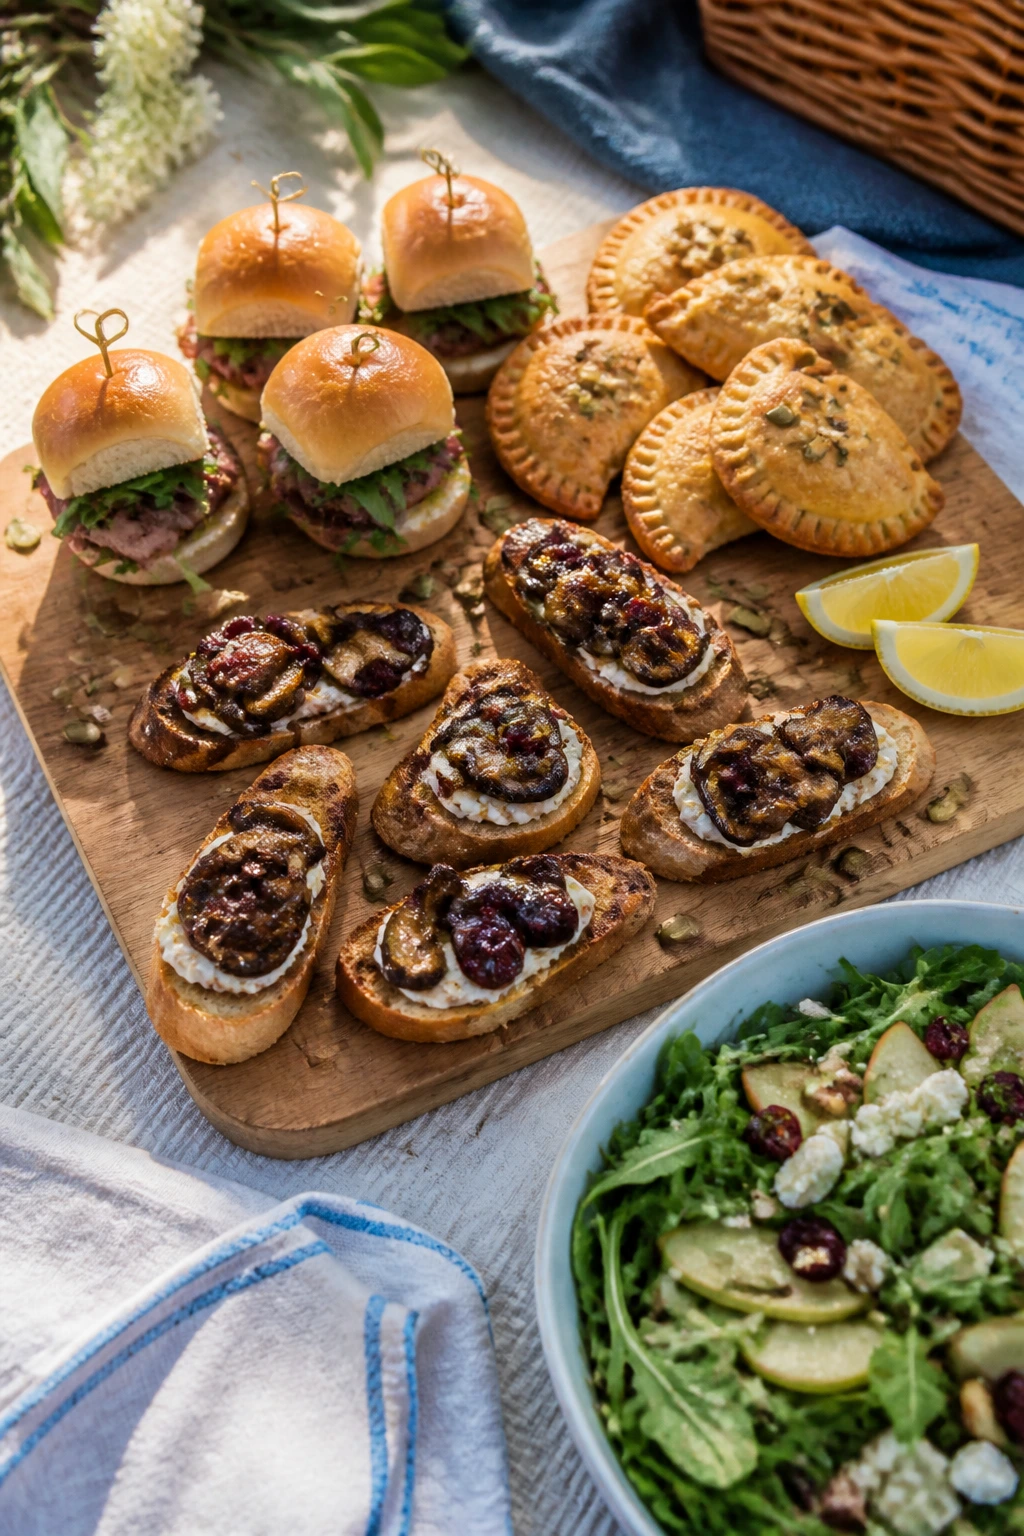
3. Ham and Gruyère Sliders with Dijon Butter
These disappear first when I make them. Salted ham, nutty Gruyère, soft buns, and a brushed-on Dijon butter that goes golden at the edges. They are rich, but not in a sleepy way; the mustard keeps the whole thing awake.
Why It Works:
Ham and Gruyère hold up better than many picnic sandwiches because the cheese adds structure and the ham brings enough salt to taste good even after chilling. Baking the sliders as a slab lets the flavors fuse together, then you slice them apart cleanly. The Dijon butter on top keeps the buns from tasting plain.
Key Ingredients:
- 12 slider buns
- 8 ounces thin-sliced ham
- 6 ounces Gruyère, sliced
- 1/4 cup Dijon mustard
- 4 tablespoons unsalted butter, melted
- 1 tablespoon honey
- 1 teaspoon Worcestershire sauce
- 1 teaspoon poppy seeds
- 1/2 teaspoon onion powder
Quick Steps:
- Preheat: Heat the oven to 350°F (175°C) and line a baking dish with parchment.
- Build the sliders: Split the buns, layer ham and Gruyère, then set the tops on.
- Brush: Mix butter, Dijon, honey, Worcestershire, poppy seeds, and onion powder, then brush over the buns.
- Bake: Cover with foil and bake 10 minutes, uncover, and bake 5 more minutes until the cheese melts and the tops are glossy.
Equipment for This Recipe:
- 9×13-inch baking dish
- Pastry brush
- Sharp serrated knife
- Foil
How to Serve This Dish:
These are best cut apart and packed after cooling for 10 minutes. Add pickle spears and a crunchy slaw beside them, and you’ve got a plate with enough contrast to keep every bite interesting.
Pro Tips for This Recipe:
- Use thin ham; thick slices make the sliders slide apart.
- Keep the foil on for the first part of baking so the buns soften instead of scorching.
- Let them rest before cutting so the cheese settles.
Variations on This Dish:
- Turkey Swiss Version: Swap in turkey and Swiss for a milder sandwich.
- Spicy Mustard Version: Add a spoonful of hot mustard to the butter for more bite.
Common Mistakes to Avoid with This Dish:
- Using too much Dijon: It can overpower the ham. A little goes a long way.
- Skipping the rest time: The filling will spill if you cut too soon.
4. Roasted Sweet Potato and Goat Cheese Tartlets
These little tartlets look like a bakery item and travel like a serious picnic snack. Sweet potato gives them that cozy winter-note flavor, while goat cheese brings a tang that keeps them from getting heavy. A drizzle of honey at the end makes the edges taste almost caramelized.
Why It Works:
Roasted sweet potato stays creamy after cooling, which makes it a smart filling for pastry. Goat cheese sets up firmly enough to slice cleanly, and thyme keeps the whole thing from tasting dessert-like. These are good at room temperature, which is the whole point.
Key Ingredients:
- 1 sheet puff pastry
- 1 large sweet potato, peeled and diced
- 4 ounces goat cheese
- 1/4 cup thinly sliced red onion
- 1 tablespoon olive oil
- 1 teaspoon fresh thyme leaves
- 1 tablespoon honey
- Salt and black pepper
Quick Steps:
- Roast: Toss sweet potato with olive oil, salt, and pepper, then roast at 425°F (220°C) for 20 to 25 minutes until tender.
- Shape: Cut puff pastry into small rounds or squares and place on a parchment-lined sheet pan.
- Top: Spread a little goat cheese on each piece, add sweet potato and onion, then sprinkle with thyme.
- Bake: Bake at 400°F (205°C) for 15 to 18 minutes until the pastry is puffed and deep golden. Drizzle with honey.
Equipment for This Recipe:
- Baking sheet
- Sharp knife
- Parchment paper
- Small spoon
How to Serve This Dish:
Serve these as a first bite or with a green salad. Two tartlets make a nice appetizer portion; three if they are the main thing you’re bringing.
Pro Tips for This Recipe:
- Roast the sweet potato until the edges brown a little; pale cubes taste flat.
- Crumble the goat cheese evenly so one bite isn’t all cheese and another all starch.
- Let the tartlets cool before boxing them up.
Variations on This Dish:
- Blue Cheese Version: Swap goat cheese for a little blue cheese if you like a sharper finish.
- Herb Garden Version: Add chopped rosemary or sage with the thyme.
Common Mistakes to Avoid with This Dish:
- Packing on wet toppings: Too much moisture softens the pastry.
- Under-roasting the sweet potato: Soft isn’t enough; you want caramelized edges.
5. Beef and Mushroom Empanadas

Empanadas solve a picnic problem neatly: they carry their own filling, don’t need utensils, and stay good once they cool. Beef and mushrooms give these a deep, savory smell that feels a little wintry in the best way. I like them with a sharp dipping sauce, though they hold up fine on their own.
Why It Works:
Mushrooms stretch the beef while adding a darker, earthier flavor that tastes richer after resting. A sealed pastry pocket means the juices stay inside instead of soaking your napkins. They can be eaten warm, room temp, or even cold if the picnic gets long.
Key Ingredients:
- 1 pound ground beef
- 8 ounces cremini mushrooms, finely chopped
- 1 small onion, diced
- 2 cloves garlic, minced
- 1 tablespoon tomato paste
- 1 teaspoon ground cumin
- 1 teaspoon smoked paprika
- 1 package empanada discs or pie dough
- 1 egg, beaten
- Salt and pepper
Quick Steps:
- Cook the filling: Brown beef with onion and mushrooms over medium-high heat until the moisture cooks off.
- Season: Stir in garlic, tomato paste, cumin, paprika, salt, and pepper. Cook 1 minute, then cool fully.
- Fill and seal: Spoon filling onto dough rounds, fold, and crimp the edges tightly with a fork.
- Bake: Brush with egg wash and bake at 400°F (205°C) for 20 to 22 minutes until bronze and crisp.
Equipment for This Recipe:
- Large skillet
- Baking sheet
- Fork
- Pastry brush
How to Serve This Dish:
Serve with chimichurri or a mustardy dipping sauce. Three small empanadas make a lunch portion; two work as part of a bigger spread.
Pro Tips for This Recipe:
- Cook off the mushroom liquid or the dough will go limp.
- Chill the filling before assembling.
- Cut a tiny steam vent if the empanadas are packed tight.
Variations on This Dish:
- Cheddar-Jalapeño Version: Add shredded cheddar and chopped jalapeño for heat.
- Chicken Version: Use shredded chicken and a little cream cheese for a softer filling.
Common Mistakes to Avoid with This Dish:
- Leaving the filling wet: Steam bursts the pastry.
- Sealing with floury edges: Wipe the edge clean before crimping.
6. Spinach, Apple, and Cheddar Pinwheels
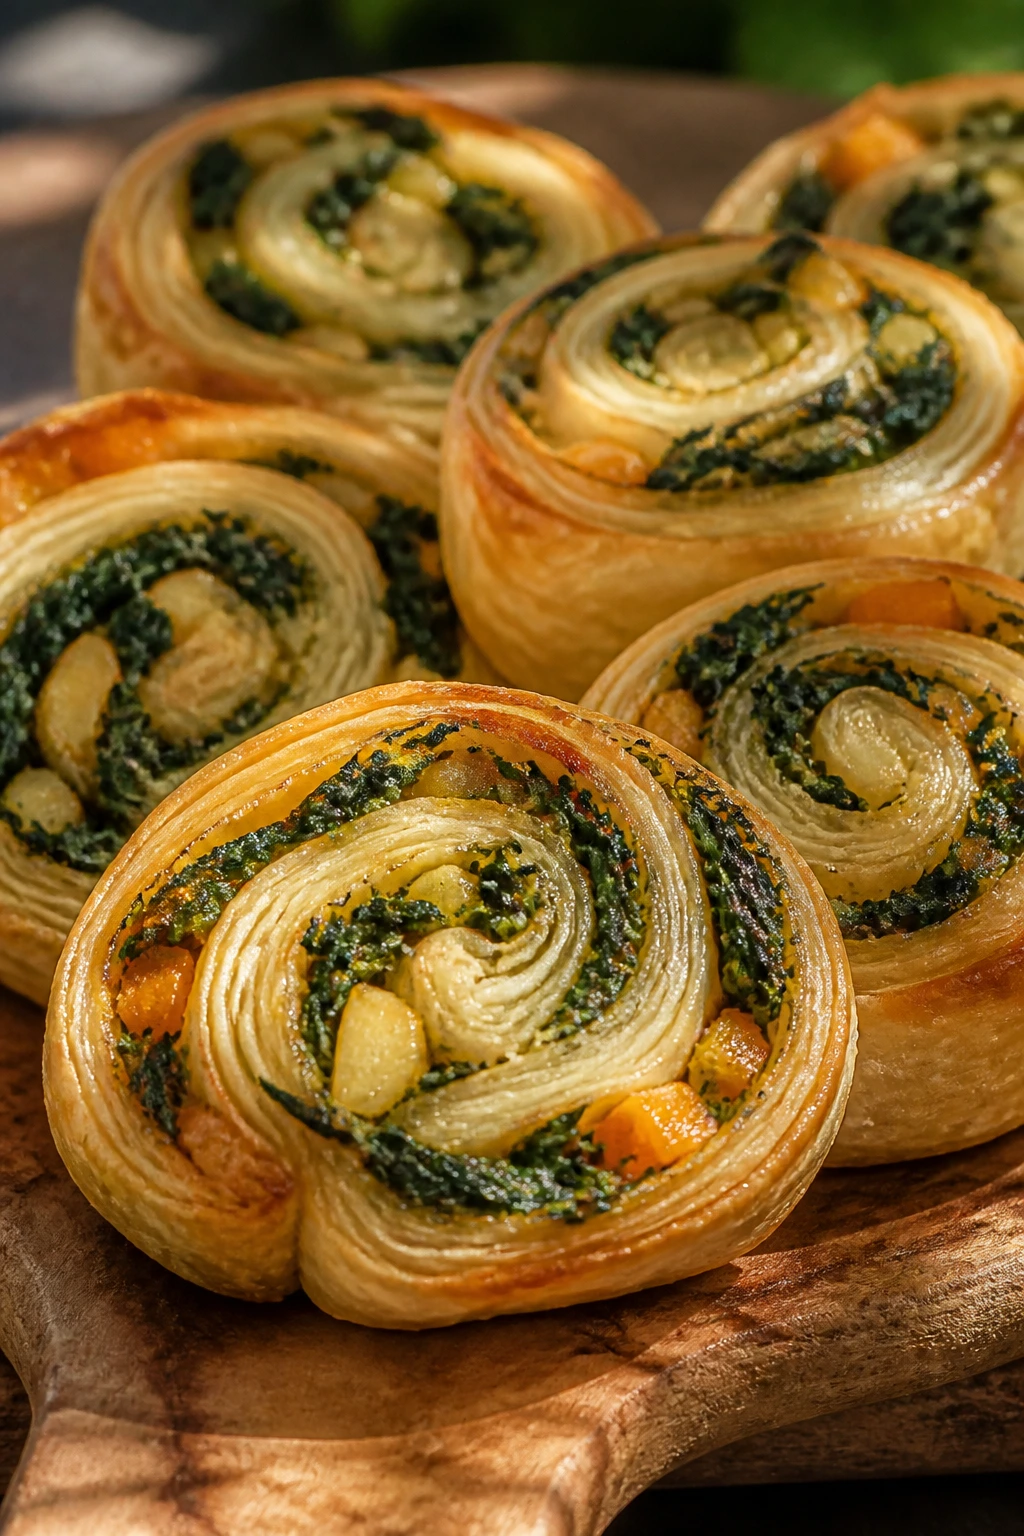
These are the kind of finger food that looks cheerful without being precious. The apple stays crisp, the cheddar adds salt, and the spinach gives the filling a little green backbone. Rolled in puff pastry, they bake into spirals that are neat enough to eat with one hand.
Why It Works:
The apple cuts through the richness of cheddar, which keeps these from feeling dense. Spinach wilts down small, so the pinwheels stay compact instead of bursting open. They’re also good at room temperature, which matters if you’re spreading a blanket in the shade and not rushing.
Key Ingredients:
- 1 sheet puff pastry
- 2 cups fresh spinach, chopped
- 1 medium firm apple, peeled and diced small
- 1 cup shredded sharp cheddar
- 1 teaspoon Dijon mustard
- 1 egg, beaten
- Salt and black pepper
Quick Steps:
- Wilt: Cook spinach in a skillet for 1 to 2 minutes until just collapsed, then cool and squeeze dry.
- Roll: Spread the puff pastry with Dijon, then top with spinach, apple, and cheddar.
- Shape: Roll into a log, chill 10 minutes, and slice into 1-inch rounds.
- Bake: Brush with egg wash and bake at 400°F (205°C) for 15 to 18 minutes until puffed and golden.
Equipment for This Recipe:
- Skillet
- Sharp knife
- Baking sheet
- Parchment paper
How to Serve This Dish:
Pile them on a platter with grapes or sliced pears. Four pinwheels make a decent snack portion; six becomes lunch if you add fruit and another salad.
Pro Tips for This Recipe:
- Use a firm apple like Honeycrisp or Pink Lady so the pieces hold their shape.
- Squeeze the spinach dry with real force. Water ruins the spiral.
- Chill the log before slicing for cleaner rounds.
Variations on This Dish:
- Feta Version: Swap cheddar for feta and add a little dill.
- Caramelized Onion Version: Replace apple with sweet onion if you want less sweetness.
Common Mistakes to Avoid with This Dish:
- Using soggy spinach: It will smear instead of layer.
- Cutting the log warm: The spirals squash flat.
7. Butternut Squash and Sage Arancini

Arancini bring a little ceremony to a picnic, which I enjoy more than I probably should. These are crisp on the outside, creamy in the middle, and full of roasted squash and sage. They feel wintery, yes, but they’re excellent at room temperature and easy to eat without a fork.
Why It Works:
Arancini are built from cooled rice, so they naturally firm up and travel well. Butternut squash adds sweetness and a soft orange color that looks good on a platter. Sage keeps the flavor savory instead of drifting into dessert territory.
Key Ingredients:
- 2 cups cooked risotto or very thick rice
- 1 cup mashed roasted butternut squash
- 1/2 cup grated Parmesan
- 1/2 cup shredded mozzarella
- 2 eggs
- 1 cup breadcrumbs
- 1/2 cup all-purpose flour
- 1 teaspoon chopped sage
- Salt and pepper
Quick Steps:
- Mix: Combine cooled rice, squash, Parmesan, sage, salt, and pepper.
- Form: Shape into golf-ball-sized rounds and tuck a little mozzarella in the center.
- Bread: Roll each ball in flour, egg, and breadcrumbs.
- Bake or fry: Bake at 425°F (220°C) for 20 to 25 minutes until crisp, or fry in 350°F (175°C) oil until deeply golden.
Equipment for This Recipe:
- Mixing bowl
- Sheet pan
- Shallow bowls for breading
- Slotted spoon if frying
How to Serve This Dish:
Serve with a small marinara cup or garlicky yogurt dip. Four to five arancini make a satisfying side dish, though they can easily be the thing everyone hovers around first.
Pro Tips for This Recipe:
- Use rice that’s cold and sticky enough to hold together.
- Keep the balls compact so they don’t split.
- If baking, mist them with oil for a darker crust.
Variations on This Dish:
- Spinach Mozzarella Version: Add chopped spinach and leave out the squash.
- Pumpkin Version: Use pumpkin purée, but keep it thick.
Common Mistakes to Avoid with This Dish:
- Wet filling: Too much squash loosens the rice.
- Skipping the chill time: Warm balls fall apart while breading.
8. Brussels Sprout Slaw with Bacon and Maple Dressing
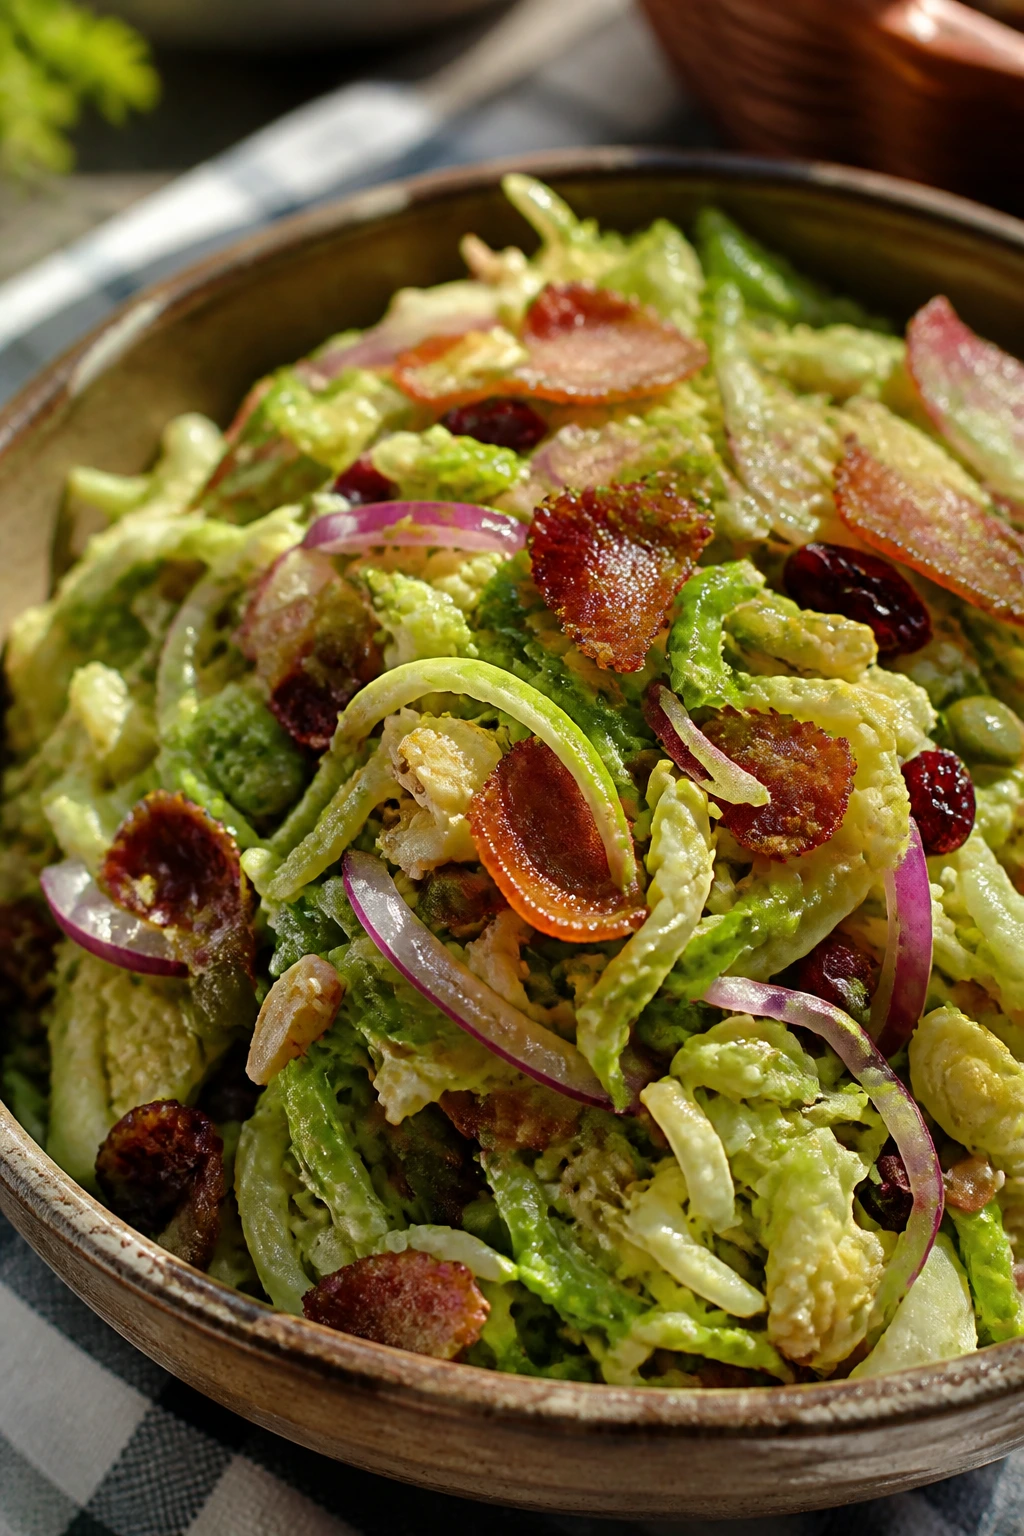
This slaw tastes like a cold-weather side that somehow knows how to behave in July. Shaved Brussels sprouts stay crunchy for hours, bacon adds salt, and the maple dressing gives the whole bowl a round, sweet edge. I like it because it doesn’t wilt into nothing.
Why It Works:
Brussels sprouts are sturdier than cabbage and hold dressing without turning limp fast. Bacon and maple create that familiar sweet-salty combination, but the vinegar keeps it from getting sticky. It’s one of the few picnic slaws that still has texture after sitting.
Key Ingredients:
- 1 pound Brussels sprouts, trimmed and shaved
- 4 slices bacon, cooked crisp and crumbled
- 1/2 cup shredded red cabbage
- 1/4 cup maple syrup
- 2 tablespoons apple cider vinegar
- 1 tablespoon Dijon mustard
- 3 tablespoons olive oil
- 1/4 cup pumpkin seeds
- Salt and pepper
Quick Steps:
- Cook bacon: Crisp the bacon, drain it, and crumble it.
- Whisk dressing: Stir maple syrup, vinegar, Dijon, olive oil, salt, and pepper together.
- Toss: Combine Brussels sprouts, cabbage, bacon, and pumpkin seeds.
- Dress and rest: Toss with the dressing and let sit 15 minutes before packing.
Equipment for This Recipe:
- Large bowl
- Sharp knife or mandoline
- Small jar or whisk
- Skillet
How to Serve This Dish:
Serve beside sliders or hand pies. A loose handful per person works as a side, but it’s sturdy enough to be part of the main plate.
Pro Tips for This Recipe:
- Shave the sprouts thin so they eat like slaw, not raw cabbage.
- Dress lightly if you’re making it far ahead.
- Add the bacon right before serving for more crunch.
Variations on This Dish:
- Apple Version: Toss in thin apple slices for more sweetness.
- Vegan Version: Skip the bacon and add smoked almonds.
Common Mistakes to Avoid with This Dish:
- Overdressing it: The sprouts should shine, not drown.
- Using thick-cut bacon: It gets chewy and clunky in the slaw.
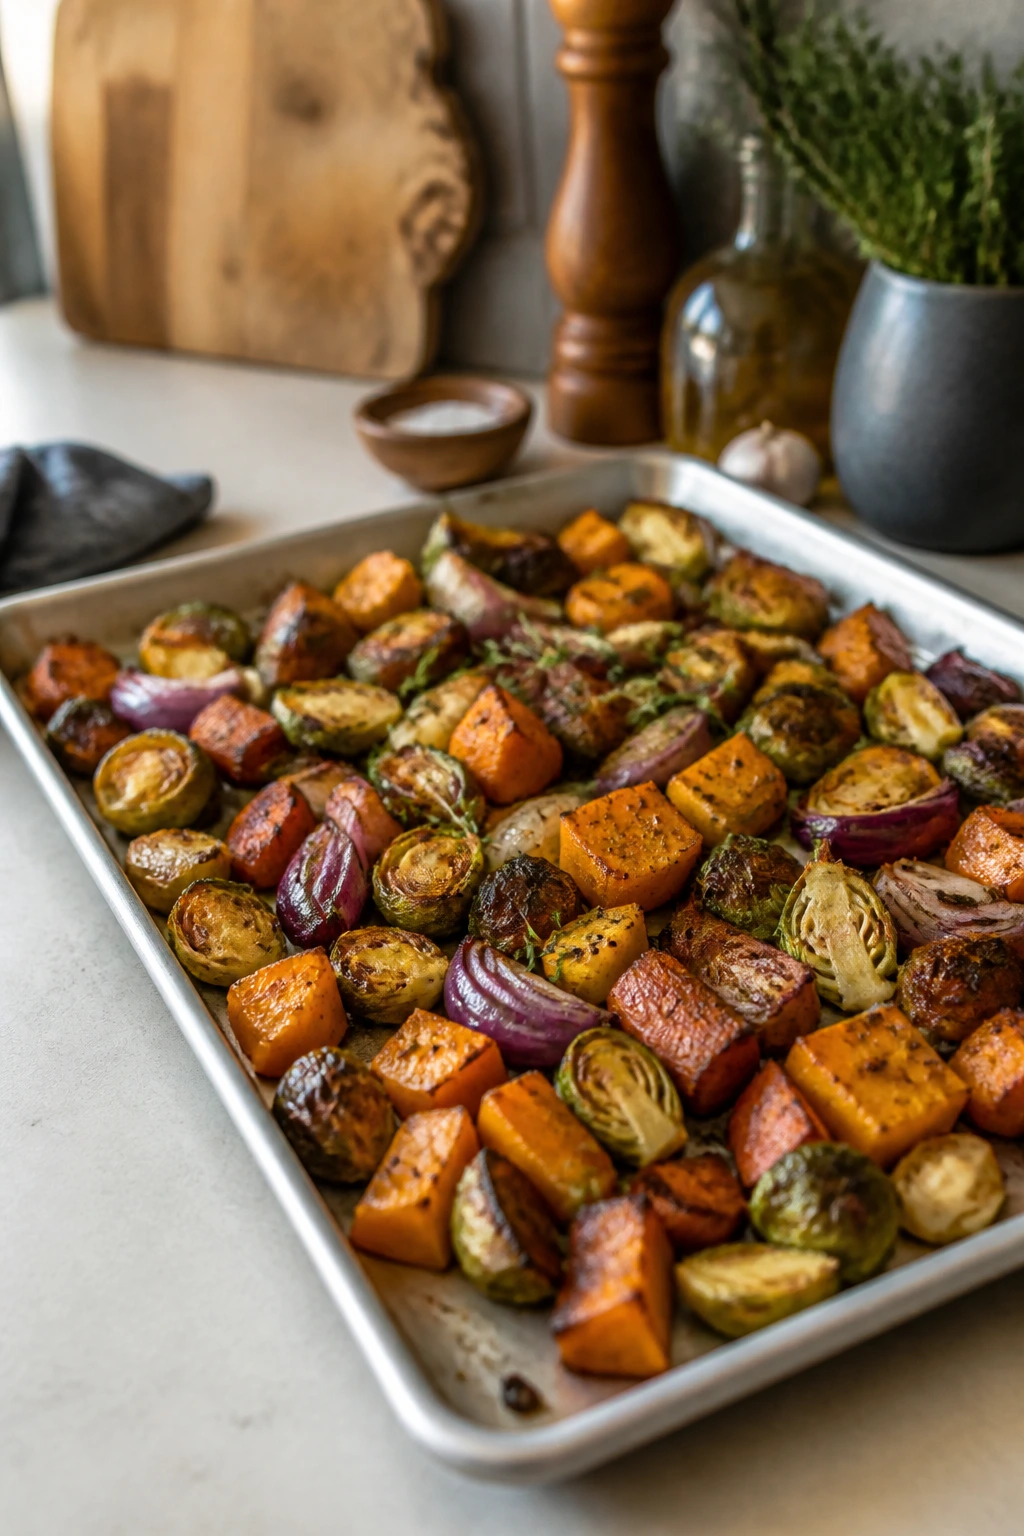
9. Winter Vegetable Couscous Salad
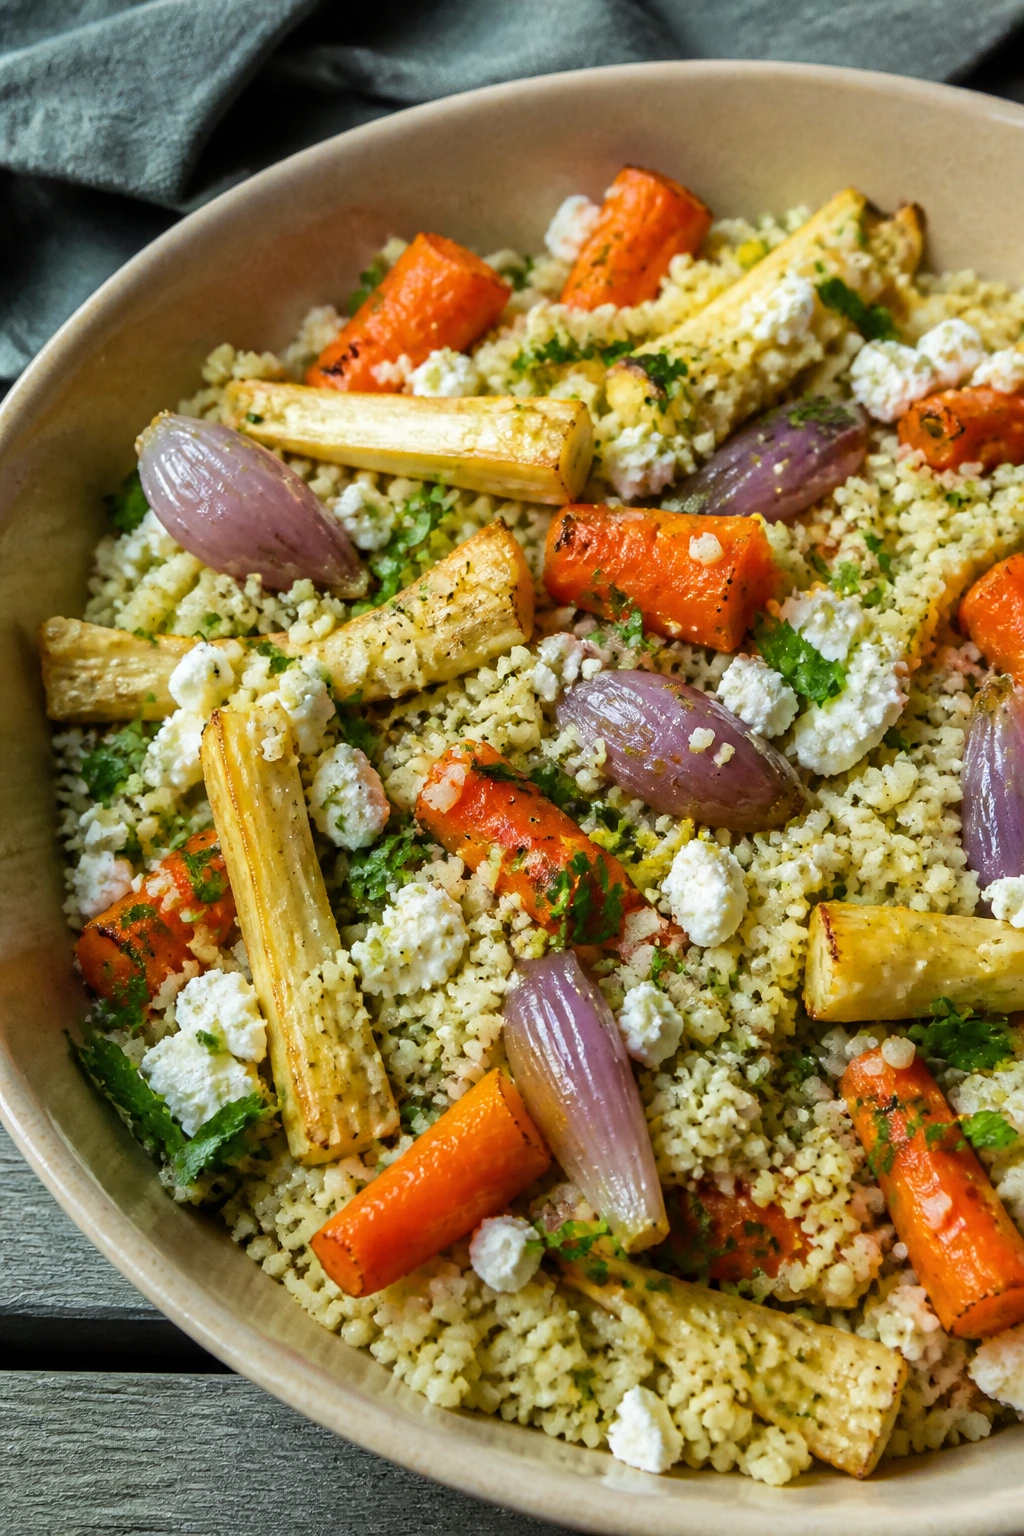
This is the sort of salad that proves “winter vegetables” don’t have to mean heavy or hot. Roasted carrots, parsnips, and shallots give the couscous a sweet, earthy base, while lemon and herbs keep every bite bright. It eats well cold, which is the whole point.
Why It Works:
Couscous absorbs flavor fast and packs tightly without falling apart. Roasted root vegetables bring depth, and because they’re cut small, they cool quickly and mingle neatly with the grains. A lemon vinaigrette keeps the bowl from tasting dense.
Key Ingredients:
- 1 1/2 cups couscous
- 2 carrots, diced
- 2 parsnips, diced
- 1 shallot, sliced
- 2 tablespoons olive oil
- 1/4 cup chopped parsley
- 1/4 cup crumbled feta
- 2 tablespoons lemon juice
- 1 tablespoon honey
- Salt and pepper
Quick Steps:
- Roast: Toss carrots, parsnips, and shallot with olive oil, salt, and pepper, then roast at 425°F (220°C) for 20 minutes.
- Cook couscous: Pour boiling salted water over couscous, cover, and fluff after 5 minutes.
- Mix: Whisk lemon juice, honey, olive oil, salt, and pepper, then toss with couscous and vegetables.
- Finish: Fold in parsley and feta, then cool fully before packing.
Equipment for This Recipe:
- Sheet pan
- Bowl with lid
- Fork
- Knife and cutting board
How to Serve This Dish:
Serve in a shallow bowl with extra herbs on top. It makes a solid side for grilled chicken or sliders, and it also works as a standalone lunch.
Pro Tips for This Recipe:
- Roast the vegetables until the edges brown a little.
- Cool the couscous spread out on a tray if you want it to stop steaming fast.
- Keep feta on the side if you want the salad less creamy.
Variations on This Dish:
- Apricot Version: Add chopped dried apricots for a sweeter note.
- Herby Version: Use dill and mint instead of parsley.
Common Mistakes to Avoid with This Dish:
- Overcooking couscous: It should stay separate, not mushy.
- Serving it hot: This salad tastes better after it cools.
10. Lentil, Feta, and Herb Picnic Salad
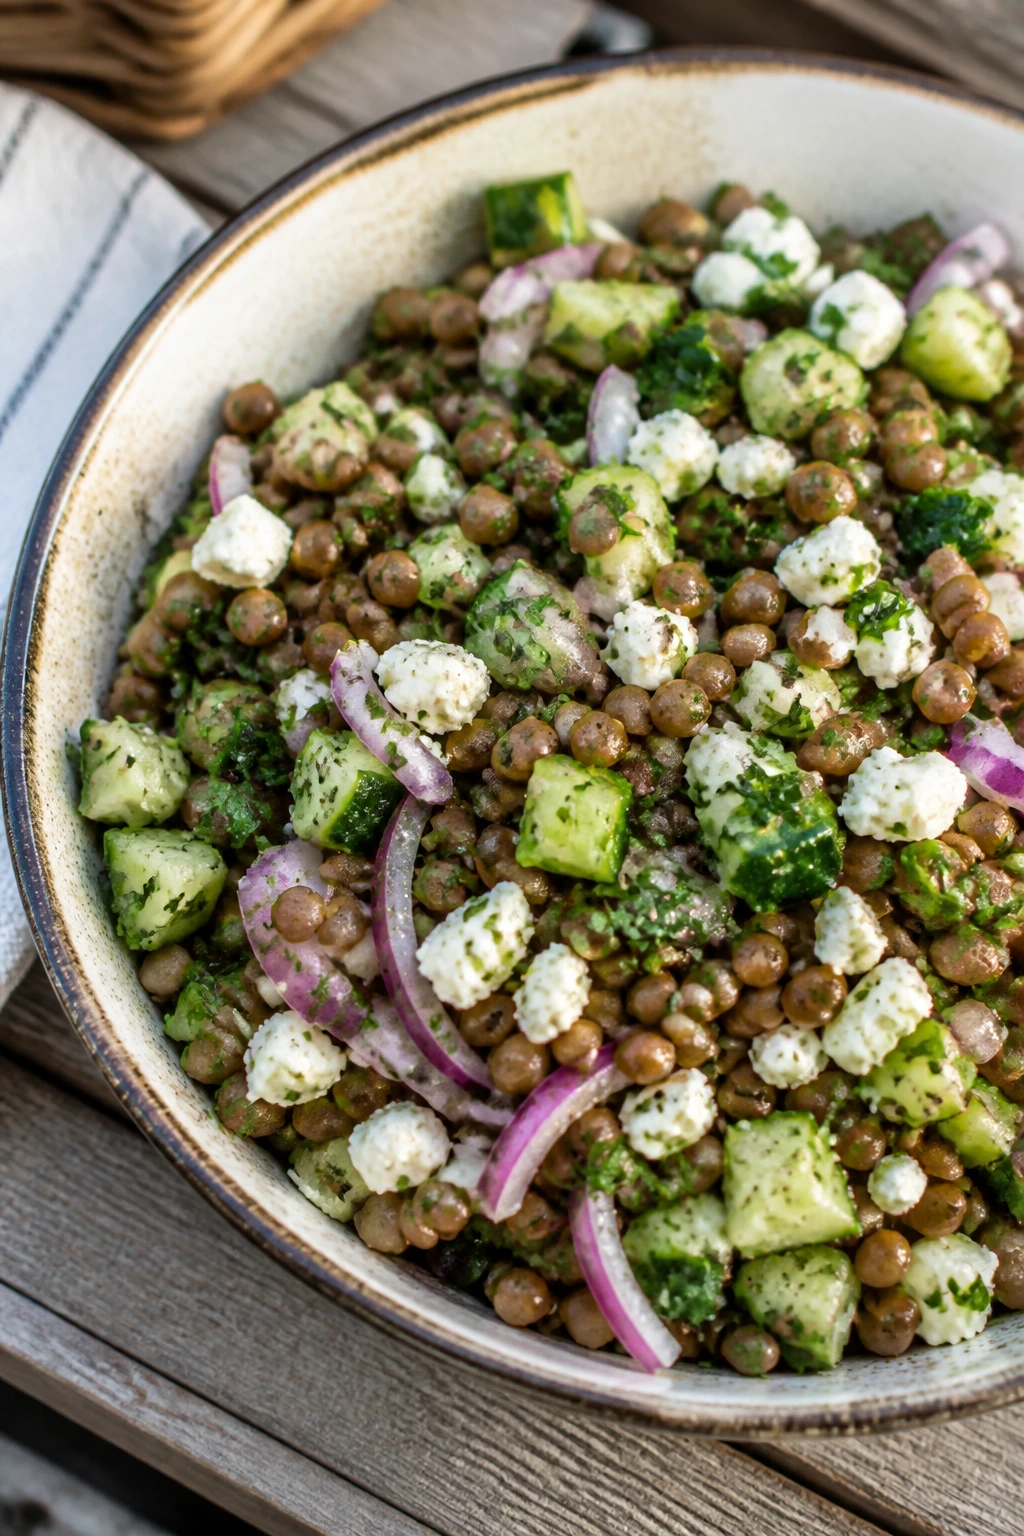
Lentils make one of my favorite picnic bases because they don’t collapse, leak, or get fussy. Add cucumber, red onion, lemon, and feta, and you get a salad that tastes clean but still substantial. It’s a good answer when you want one bowl to do real work.
Why It Works:
Lentils are sturdy enough to be dressed ahead without turning soft. Feta and herbs give the salad salt and freshness, while cucumber adds crunch. Unlike leafy greens, lentils can sit in a cooler for a bit and still taste like themselves.
Key Ingredients:
- 1 1/2 cups green or brown lentils
- 1 cucumber, diced
- 1/2 red onion, finely chopped
- 1/2 cup crumbled feta
- 1/4 cup chopped parsley
- 2 tablespoons chopped dill
- 3 tablespoons olive oil
- 2 tablespoons lemon juice
- 1 teaspoon Dijon mustard
- Salt and pepper
Quick Steps:
- Cook lentils: Simmer in salted water for 18 to 22 minutes until tender but still intact. Drain well.
- Cool: Spread them on a tray for 10 minutes so they stop steaming.
- Dress: Whisk olive oil, lemon juice, Dijon, salt, and pepper.
- Toss: Combine lentils with cucumber, onion, herbs, and feta, then fold in the dressing.
Equipment for This Recipe:
- Saucepan
- Fine-mesh strainer
- Large bowl
- Tray or baking sheet
How to Serve This Dish:
Spoon it into a bowl lined with lettuce or serve alongside grilled vegetables. One heaped cup per person is a sensible lunch portion.
Pro Tips for This Recipe:
- Salt the cooking water so the lentils taste seasoned all the way through.
- Chop the onion fine; big chunks can take over.
- Add feta last so it doesn’t smear.
Variations on This Dish:
- Tomato Version: Add chopped cherry tomatoes just before serving.
- Chickpea Version: Replace half the lentils with chickpeas for a firmer bite.
Common Mistakes to Avoid with This Dish:
- Overcooking the lentils: They should hold shape.
- Dressing while hot: Warm lentils drink up too much vinaigrette and go soft.
11. Sausage Rolls with Onion Marmalade

Sausage rolls are one of those foods that disappear in odd little waves—someone takes one, then three people suddenly want one too. Puff pastry, seasoned sausage, and a spoon of onion marmalade create a salty-sweet filling that stays tasty at room temperature. They’re a little rich, which is fine; picnics can handle that.
Why It Works:
Sausage filling stays cohesive and doesn’t weep the way some moist fillings do. Onion marmalade brings sweetness and acidity, so the rolls taste layered instead of just fatty. Puff pastry holds its shape and still flake apart cleanly when cool.
Key Ingredients:
- 1 sheet puff pastry
- 1 pound sausage meat or bulk breakfast sausage
- 1/3 cup onion marmalade
- 1 teaspoon thyme
- 1 teaspoon Dijon mustard
- 1 egg, beaten
- Salt and pepper
Quick Steps:
- Mix filling: Combine sausage, onion marmalade, thyme, Dijon, salt, and pepper.
- Roll pastry: Cut puff pastry into long strips.
- Fill and seal: Spoon the sausage mixture down the center, fold over, and crimp.
- Bake: Brush with egg and bake at 400°F (205°C) for 20 to 24 minutes until browned and cooked through.
Equipment for This Recipe:
- Sheet pan
- Parchment paper
- Pastry brush
- Sharp knife
How to Serve This Dish:
Serve with mustard or pickle relish on the side. Two rolls per person works if there are several other dishes; three if this is the main savory item.
Pro Tips for This Recipe:
- Use thin filling strips so the rolls bake evenly.
- Chill the shaped rolls before baking if the pastry feels soft.
- Cut vents so steam can leave.
Variations on This Dish:
- Apple-Sage Version: Add minced apple and sage to the sausage.
- Chicken Sausage Version: Use chicken sausage for a lighter filling.
Common Mistakes to Avoid with This Dish:
- Overstuffing: The pastry splits and the filling leaks.
- Baking on a warm tray: Cold pastry starts better on a cool sheet pan.
12. Pear, Brie, and Prosciutto Crostini
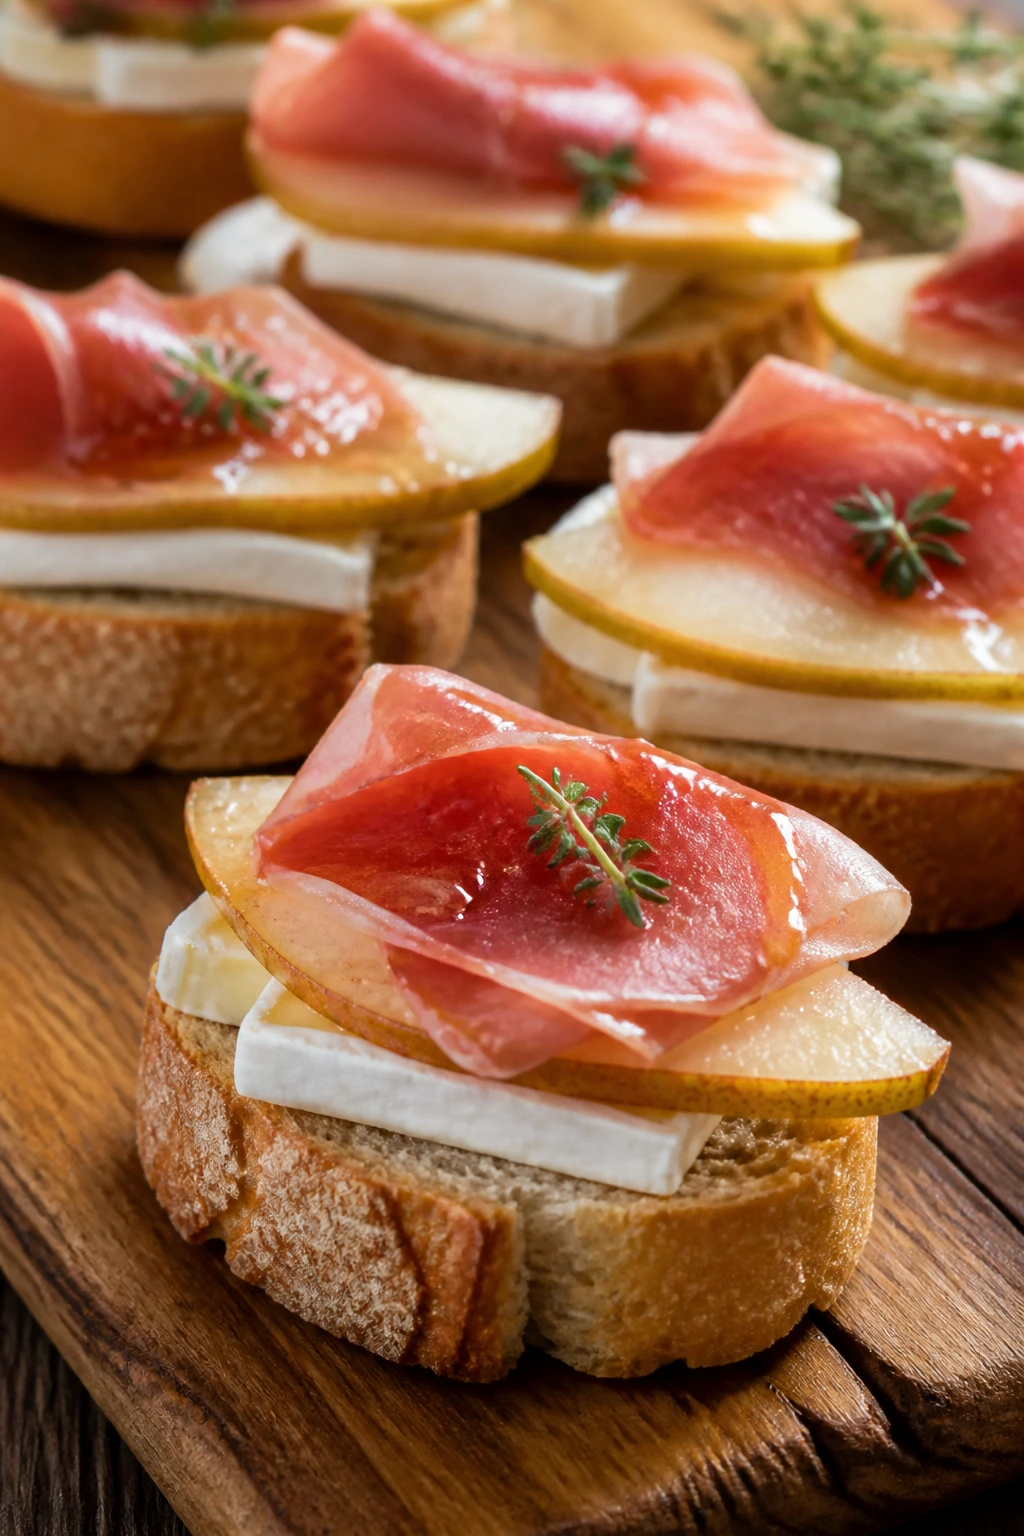
These are little open-faced bites with a clean, polished flavor: sweet pear, creamy brie, salty prosciutto, and a thread of honey. They’re easy to assemble, and they don’t demand the attention that a sandwich does. On a picnic, that matters.
Why It Works:
Crostini start with dry toast, so they resist soft fillings better than fresh bread. Brie and pear make a classic winter pairing, but when you cut them thin and keep the toppings modest, they feel light enough for warm weather. A little lemon on the pear keeps the whole thing bright.
Key Ingredients:
- 1 baguette, sliced
- 4 ounces brie, sliced
- 1 ripe but firm pear, thinly sliced
- 4 ounces prosciutto
- 1 tablespoon honey
- 1 teaspoon lemon juice
- Fresh thyme
- Olive oil
Quick Steps:
- Toast: Brush baguette slices with olive oil and toast at 375°F (190°C) for 8 to 10 minutes.
- Prep pears: Toss pear slices with lemon juice.
- Assemble: Top toast with brie, pear, and a small fold of prosciutto.
- Finish: Drizzle with honey and sprinkle thyme over the top.
Equipment for This Recipe:
- Baking sheet
- Sharp knife
- Small brush
- Serving platter
How to Serve This Dish:
Serve these on a chilled platter and eat them within a couple of hours. Two crostini per person is plenty if you’ve got other food on the blanket.
Pro Tips for This Recipe:
- Toast the bread first and cool it before topping.
- Use a pear that gives slightly at the stem, not a mushy one.
- Keep honey in a squeeze bottle if you want neat drizzles.
Variations on This Dish:
- Fig Version: Swap pear for sliced fresh fig when you want more sweetness.
- Blue Cheese Version: Replace brie with a milder blue cheese for more bite.
Common Mistakes to Avoid with This Dish:
- Assembling too early: The toast softens fast.
- Using overripe pears: They slide off and make the bites messy.
13. Shepherd’s Pie Muffins
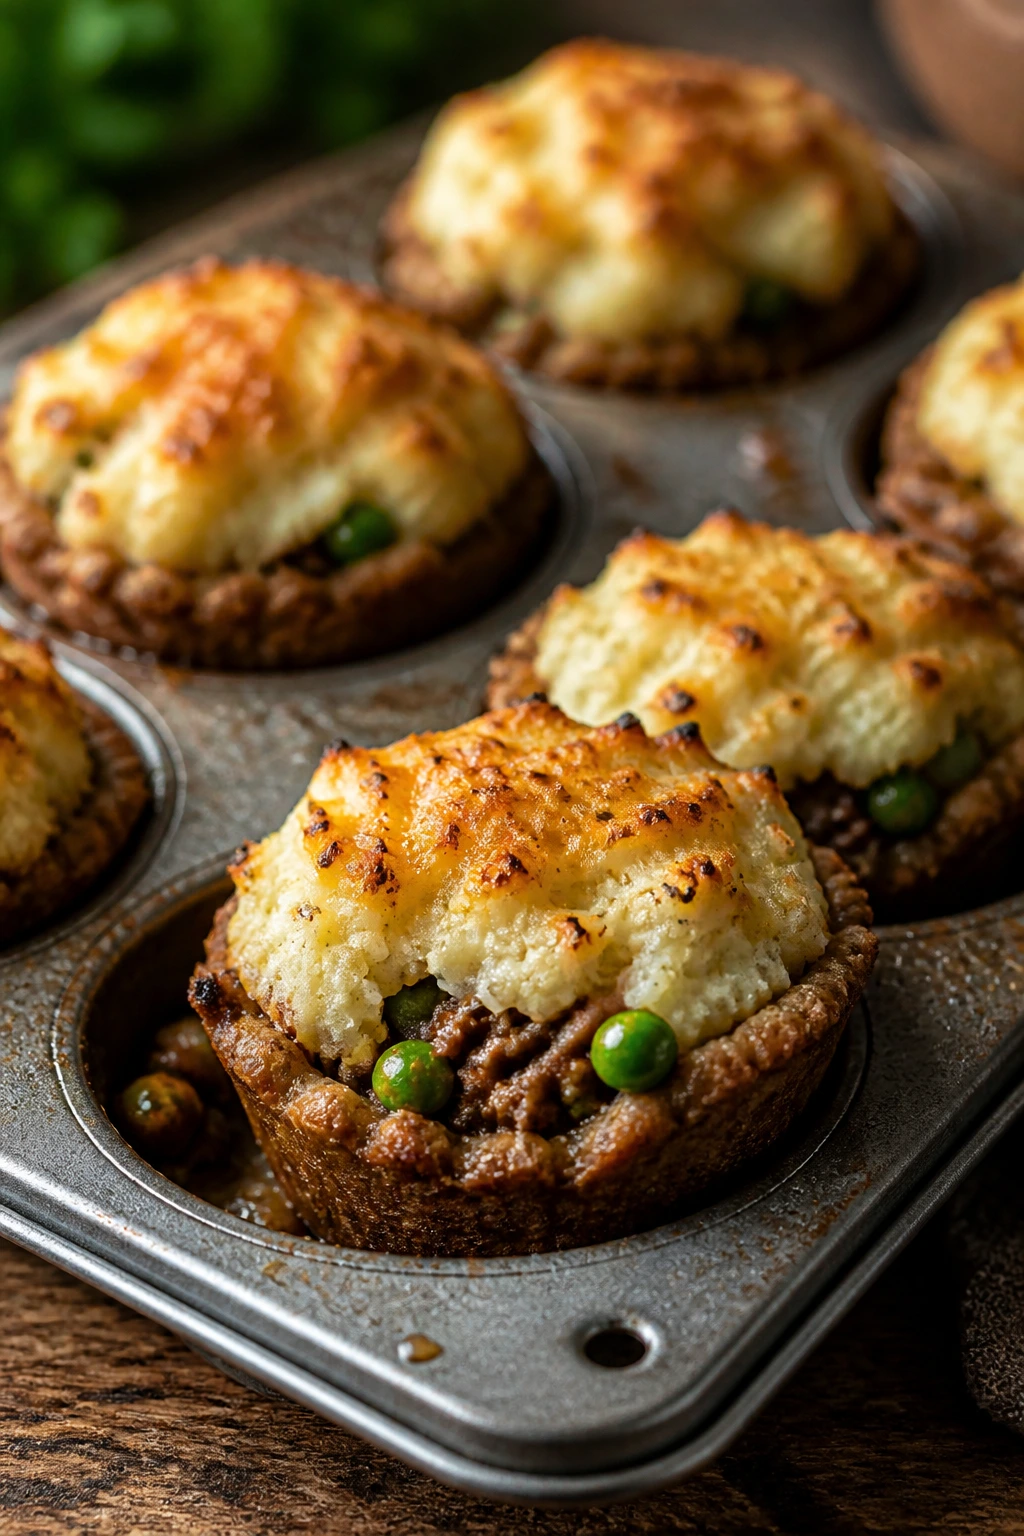
These are basically shepherd’s pie packed into a muffin tin, which means they turn into neat little portions instead of a bubbling dish that has to be scooped. Mashed potatoes on top, savory meat underneath, peas and carrots in the middle. They taste like a proper meal, just in a shape that behaves outside.
Why It Works:
The muffin format gives you built-in portion control and a firm edge to hold. The potato topping seals in moisture, while the filling stays compact and easy to eat once cooled. They’re a good pick when you want something that feels hearty without needing a fork and a full table setup.
Key Ingredients:
- 1 pound ground beef or lamb
- 1 small onion, diced
- 1 carrot, diced
- 1/2 cup peas
- 1 tablespoon Worcestershire sauce
- 2 cups mashed potatoes
- 1/2 cup shredded cheddar
- 1 tablespoon tomato paste
- Salt and pepper
Quick Steps:
- Cook filling: Brown meat with onion and carrot, then stir in tomato paste, Worcestershire, peas, salt, and pepper.
- Fill cups: Spoon the meat mixture into greased muffin cups.
- Top: Pipe or spoon mashed potatoes over each cup, then sprinkle cheddar on top.
- Bake: Bake at 400°F (205°C) for 15 to 18 minutes until the tops brown lightly.
Equipment for This Recipe:
- Muffin tin
- Skillet
- Potato masher
- Spoon or piping bag
How to Serve This Dish:
Serve warm or room temp with a sharp pickle and a little mustard. Two muffins make a lunch portion if the rest of the basket is light.
Pro Tips for This Recipe:
- Keep the filling thick; watery meat ruins the cups.
- Use cold mashed potatoes so they hold their shape.
- Let them cool in the tin for a few minutes before removing.
Variations on This Dish:
- Turkey Version: Use ground turkey and add extra seasoning.
- Sweet Potato Top: Swap mashed potatoes for sweet potato mash.
Common Mistakes to Avoid with This Dish:
- Loose filling: It won’t slice or unmold well.
- Overbrowning the cheese: A little color is good; dried-out tops are not.
14. Broccoli Cheddar Quiche Bites

Broccoli cheddar is one of those combinations that feels familiar even in a tiny form. These quiche bites are soft in the middle, set at the edges, and easy to pack in a container without sacrificing their shape. They taste just as good cold as they do warm.
Why It Works:
Eggs and cheddar make a stable filling that firms up nicely once cooled. Broccoli adds texture and a little green note, which keeps the bites from feeling too rich. The mini format means faster baking and cleaner handling at a picnic.
Key Ingredients:
- 1 pie crust or 2 sheets mini tart shells
- 4 large eggs
- 1/2 cup heavy cream or milk
- 1 1/2 cups chopped broccoli florets, lightly steamed
- 1 cup shredded sharp cheddar
- 1 tablespoon finely chopped onion
- Salt, pepper, and a pinch of nutmeg
Quick Steps:
- Prep crusts: Press crust into mini muffin cups or tart shells.
- Whisk filling: Beat eggs, cream, salt, pepper, and nutmeg.
- Add fillings: Divide broccoli, onion, and cheddar among the cups, then pour in the egg mixture.
- Bake: Bake at 375°F (190°C) for 18 to 22 minutes until set and lightly puffed.
Equipment for This Recipe:
- Mini muffin tin or tart pan
- Whisk
- Mixing bowl
- Measuring cup
How to Serve This Dish:
Serve with cherry tomatoes or a crisp salad. Two to three bites per person makes sense as part of a larger spread.
Pro Tips for This Recipe:
- Steam the broccoli first so it softens enough to bite cleanly.
- Don’t overfill the cups; eggs expand.
- Cool before removing so the bites don’t tear.
Variations on This Dish:
- Ham Version: Add small cubes of ham.
- Mushroom Version: Use sautéed mushrooms instead of broccoli.
Common Mistakes to Avoid with This Dish:
- Using raw broccoli: It stays too firm inside the custard.
- Pulling them too early: The centers should stop wobbling before you take them out.
15. Turkey Cranberry Pinwheels
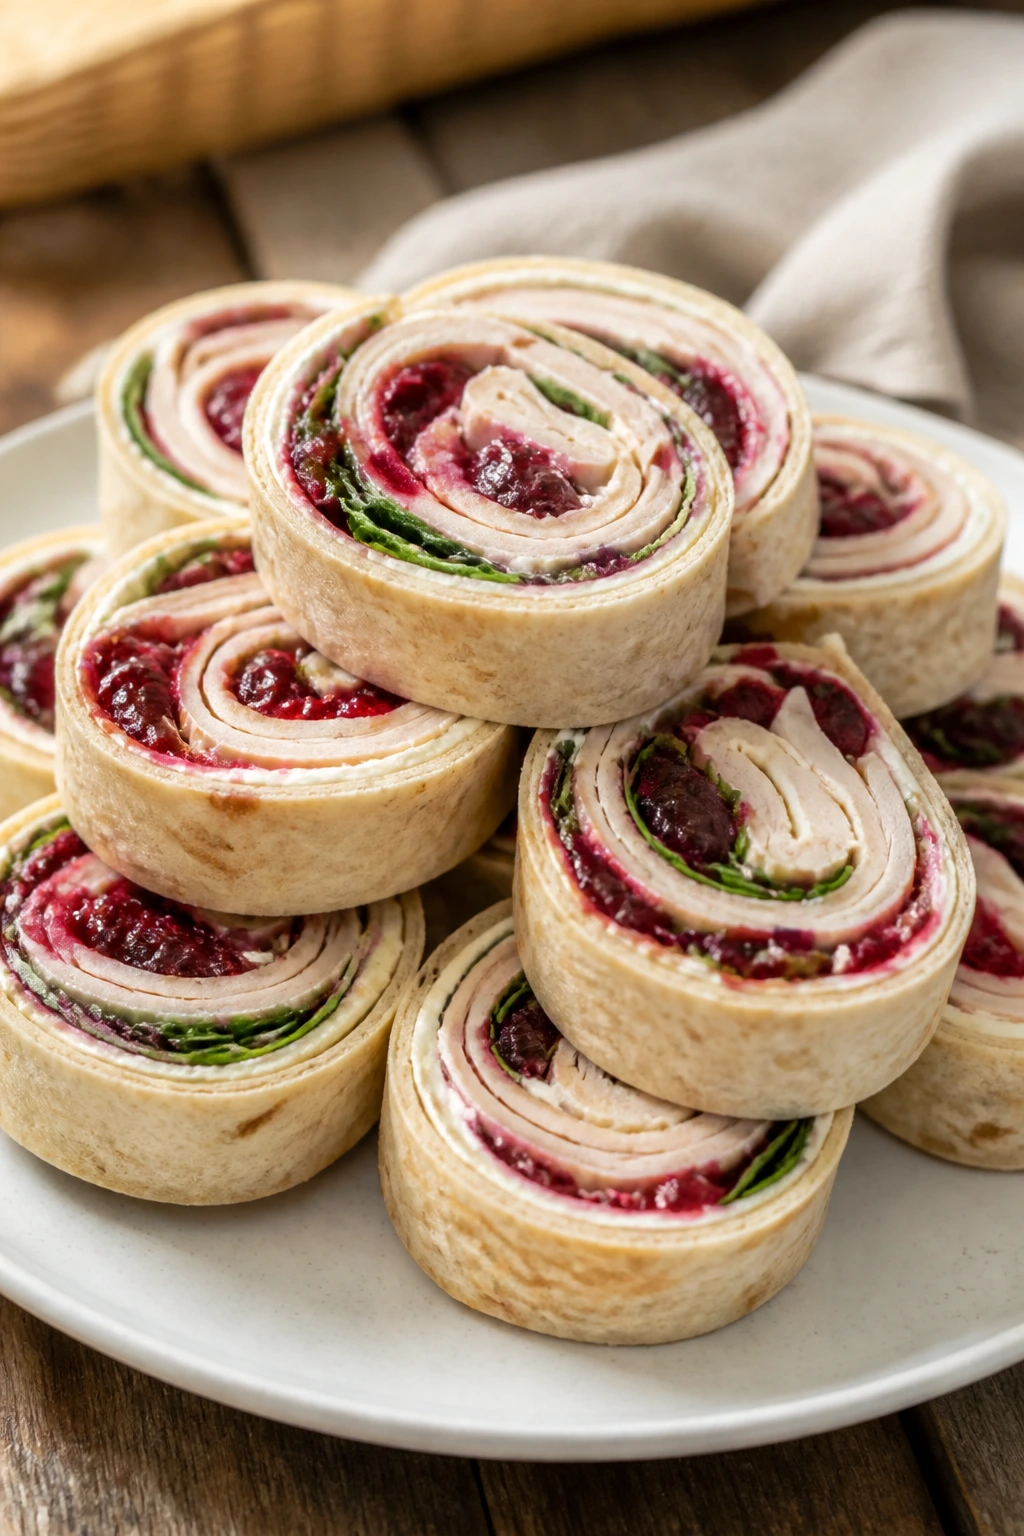
These taste like the best parts of a holiday sandwich, rolled up so they fit in a picnic container. Turkey, cranberry sauce, cream cheese, and spinach give you sweet, savory, creamy, and fresh in one bite. They’re especially useful when you want something cold and easy to stack.
Why It Works:
The cream cheese acts as glue, so the tortilla doesn’t unravel. Cranberry sauce gives the filling enough sweetness to make the turkey feel fuller. Spinach adds a little crunch and a clean finish.
Key Ingredients:
- 4 large flour tortillas
- 8 ounces cream cheese, softened
- 8 ounces sliced turkey
- 1/2 cup whole berry cranberry sauce
- 1 cup baby spinach
- 1/4 teaspoon black pepper
Quick Steps:
- Spread: Stir cream cheese with pepper, then spread it over each tortilla.
- Layer: Add turkey, cranberry sauce, and spinach in a thin, even layer.
- Roll: Roll tightly into logs and chill 20 minutes.
- Slice: Cut into 1-inch pinwheels with a sharp knife.
Equipment for This Recipe:
- Cutting board
- Sharp knife
- Plastic wrap or foil
- Spatula
How to Serve This Dish:
Serve them chilled with cucumber spears or chips. Six to eight pinwheels make a reasonable sandwich portion.
Pro Tips for This Recipe:
- Don’t overdo the cranberry sauce or the rolls get slippery.
- Chill before slicing for neat spirals.
- Use large tortillas so you can keep the layers thin.
Variations on This Dish:
- Herb Cream Cheese Version: Mix dill or chives into the cream cheese.
- Ham Version: Swap turkey for ham and keep the cranberry.
Common Mistakes to Avoid with This Dish:
- Stuffing too much filling inside: The rolls split.
- Using dry tortillas: Warm them briefly so they bend without cracking.
16. Smoked Salmon and Dill Tea Sandwiches
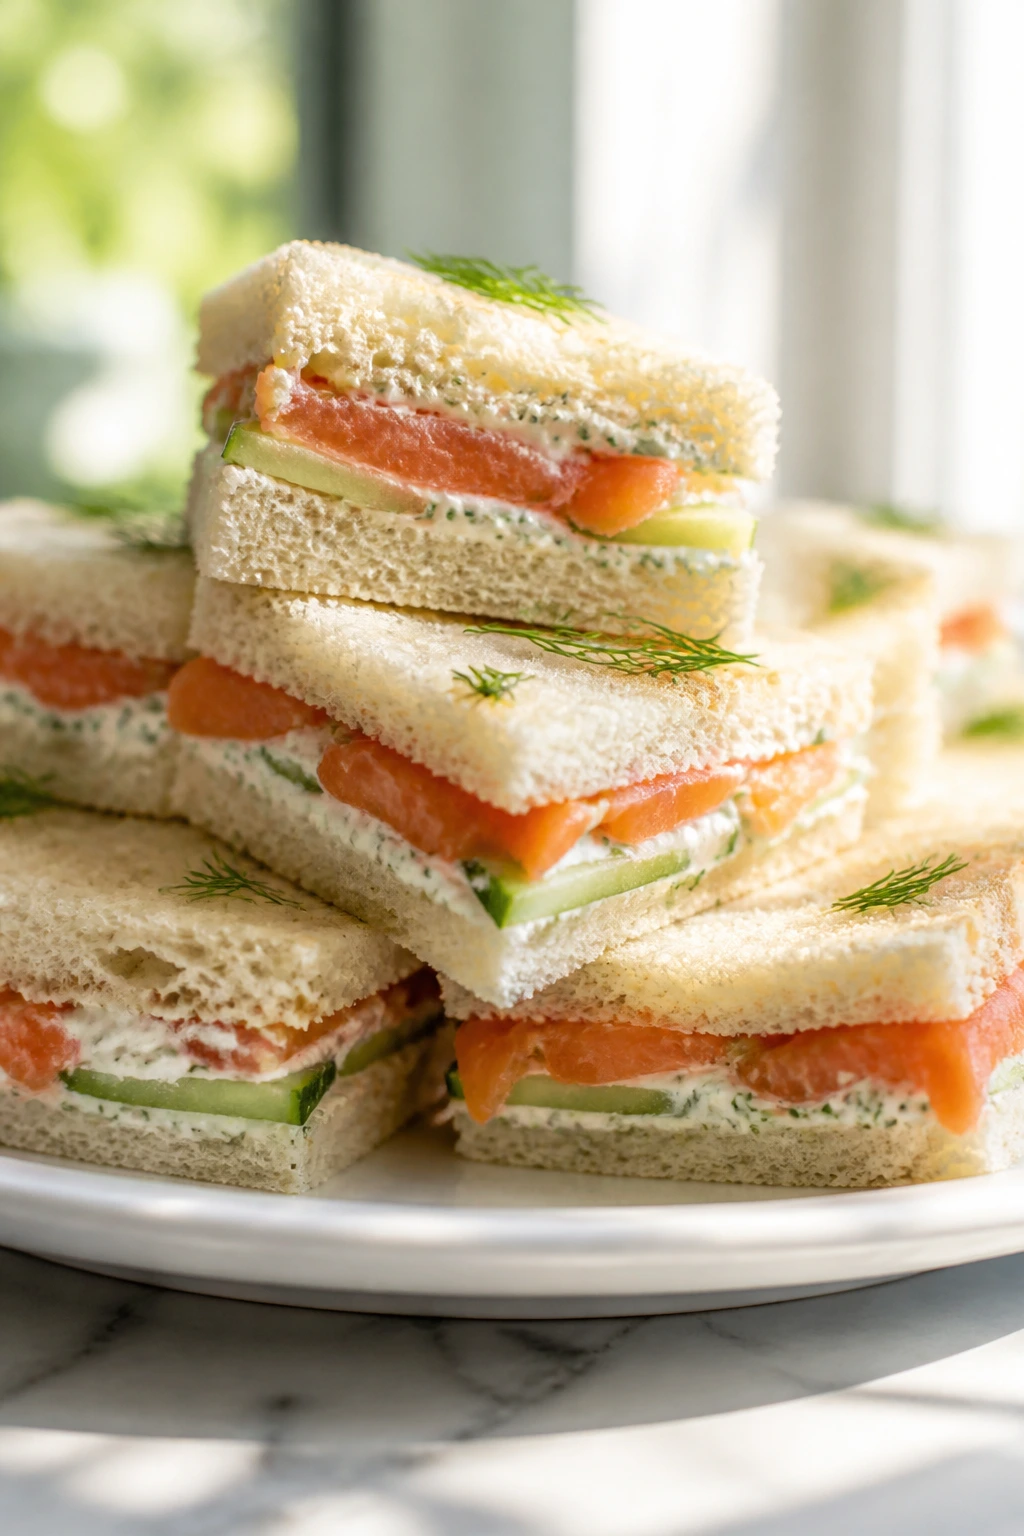
Tea sandwiches sound delicate, but they pack beautifully if you build them with enough restraint. Smoked salmon, dill cream cheese, and cucumber slices make a cold bite that feels clean and a little luxurious. The key is thin bread and a light hand.
Why It Works:
Smoked salmon is already seasoned and doesn’t need heat, which makes it picnic-friendly if kept chilled. Dill and lemon brighten the rich fish, while cucumber keeps the texture crisp. Trimmed crusts and sealed edges help the sandwiches stay neat.
Key Ingredients:
- 8 slices soft sandwich bread
- 4 ounces cream cheese
- 4 ounces smoked salmon
- 1/2 cucumber, very thinly sliced
- 1 tablespoon chopped dill
- 1 teaspoon lemon zest
- Salt and black pepper
- Butter, optional
Quick Steps:
- Mix filling: Stir cream cheese, dill, lemon zest, salt, and pepper together.
- Assemble: Spread the bread with a thin layer of butter if using, then add the cream cheese mixture, salmon, and cucumber.
- Close and trim: Top with bread, press gently, and trim crusts.
- Cut: Slice into fingers or triangles and chill until serving.
Equipment for This Recipe:
- Serrated knife
- Small bowl
- Sharp chef’s knife
- Cutting board
How to Serve This Dish:
Serve on a cold plate or wrapped in parchment squares. Four small fingers make one person a light lunch; fewer if the basket is packed with other foods.
Pro Tips for This Recipe:
- Slice cucumber paper-thin so the sandwiches don’t slide.
- Keep the salmon cold right up to assembly.
- Make these close to serving time if possible.
Variations on This Dish:
- Caper Version: Add chopped capers for more salt and tang.
- Radish Version: Swap cucumber for shaved radish for a peppery bite.
Common Mistakes to Avoid with This Dish:
- Using thick bread: It overwhelms the filling.
- Letting them sit warm: Smoked salmon wants a cooler.
17. Mini Cornbread and Chili Cups

These are messy in the good way, but not so messy that you need to give up and eat over a napkin. A little cornbread cup holds a thick chili filling, and the top gets a scatter of cheddar. They feel like winter food, just shrunk into a picnic-friendly form.
Why It Works:
Thick chili and sturdy cornbread create two separate layers, so the bottoms don’t dissolve. Baking the cornbread first gives you a base with enough backbone to support the filling. They’re satisfying at room temperature and easy to hold.
Key Ingredients:
- 1 batch cornbread batter, thick enough for muffins
- 2 cups thick chili
- 1 cup shredded cheddar
- 2 scallions, sliced
- Sour cream, optional
Quick Steps:
- Bake cornbread cups: Spoon batter into a greased muffin tin and bake at 375°F (190°C) for 15 to 18 minutes.
- Hollow slightly: Press a shallow well into each cup while warm.
- Fill: Spoon thick chili into each cup and top with cheddar.
- Warm again: Bake 5 minutes more until the cheese melts, then cool before packing.
Equipment for This Recipe:
- Muffin tin
- Spoon
- Baking sheet
- Small ladle
How to Serve This Dish:
Serve with scallions and a tiny spoonful of sour cream if you’re eating them soon. Two cups make a lunch portion, especially with a crunchy salad on the side.
Pro Tips for This Recipe:
- Use thick chili; watery chili soaks the bread.
- Bake the cornbread cups a little darker than usual.
- Let them set before moving them.
Variations on This Dish:
- Turkey Chili Version: Use turkey chili for a leaner filling.
- Black Bean Version: Replace meat chili with black bean chili.
Common Mistakes to Avoid with This Dish:
- Too much chili in the cup: It spills before you can eat it.
- Soft cornbread batter: It won’t hold the shape.
18. Apple Cider Pulled Pork Sliders
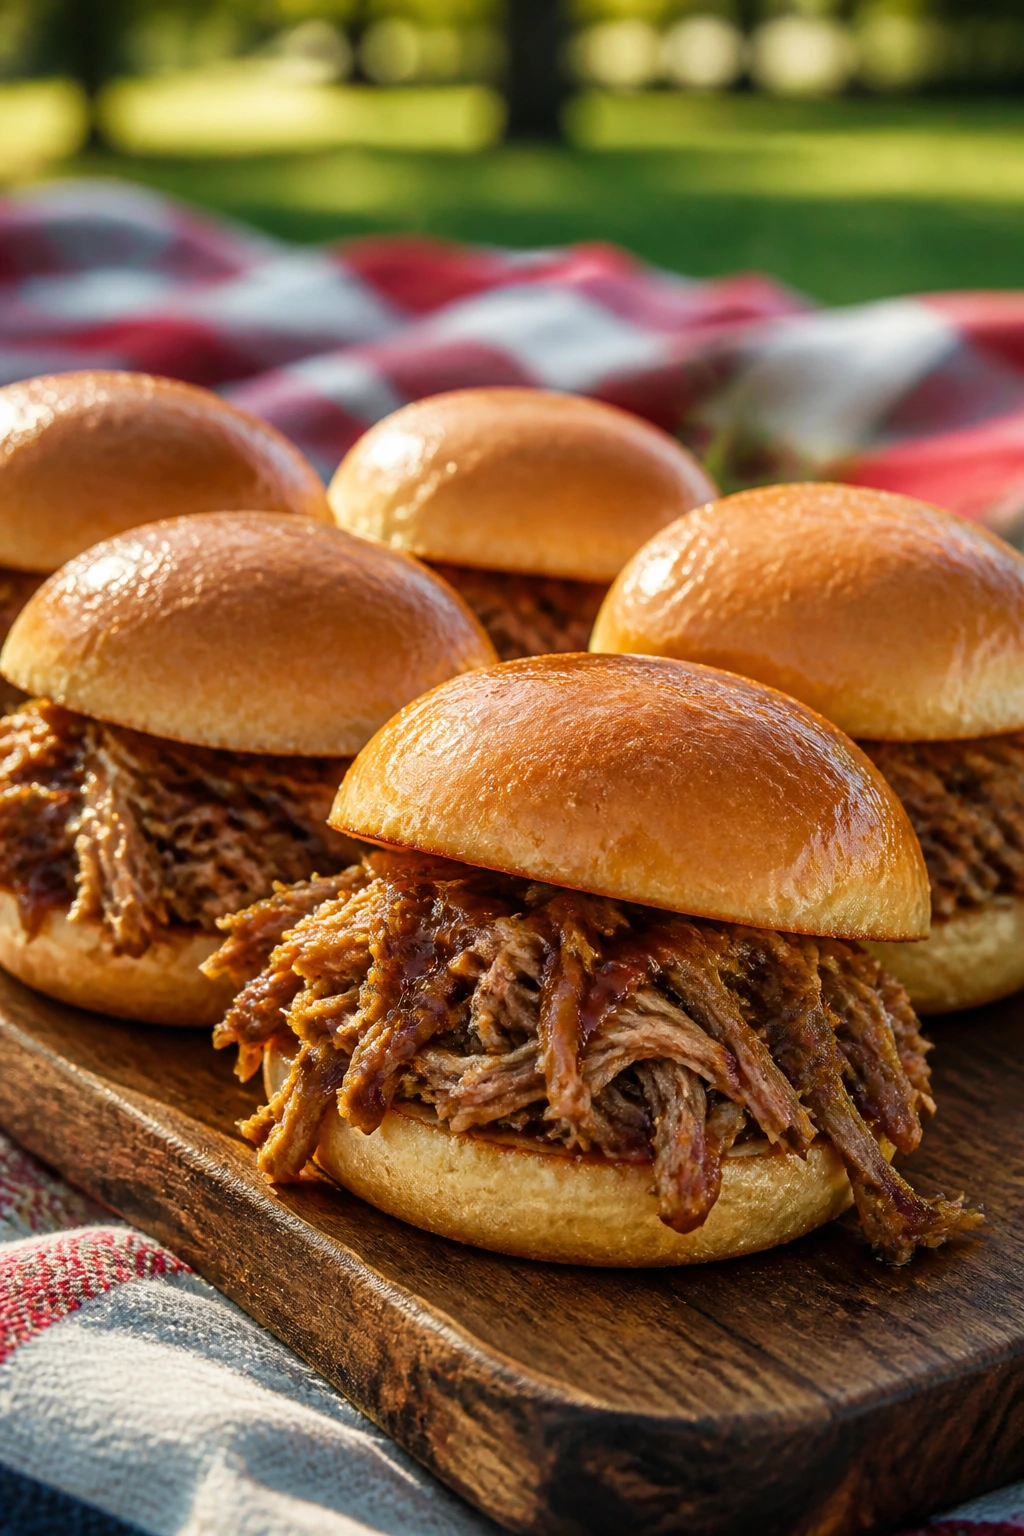
Apple cider gives pulled pork a mellow sweetness that still feels rooted in colder-weather cooking. Piled into small buns, the meat turns into a picnic sandwich that can be eaten with one hand and a stack of napkins. Add a little slaw and you get crunch too.
Why It Works:
Slow-cooked pork stays tender after cooling and reheats well if needed. Apple cider and onions give the meat a round flavor that doesn’t rely on barbecue sauce alone. The sliders hold together because the filling is shredded, not saucy.
Key Ingredients:
- 2 pounds pork shoulder
- 1 cup apple cider
- 1 onion, sliced
- 1 tablespoon apple cider vinegar
- 1 teaspoon smoked paprika
- 1 teaspoon salt
- 1/2 teaspoon black pepper
- 1/2 cup barbecue sauce
- 12 slider buns
Quick Steps:
- Cook pork: Place pork, cider, onion, vinegar, paprika, salt, and pepper in a covered pot or slow cooker and cook until shreddable.
- Shred: Pull the pork apart with forks and mix with barbecue sauce.
- Reduce if needed: Simmer the juices until they lightly coat a spoon.
- Assemble: Pile pork onto buns and pack tightly once cooled.
Equipment for This Recipe:
- Slow cooker or Dutch oven
- Two forks
- Tongs
- Serving platter
How to Serve This Dish:
Serve with a crunchy slaw and pickles. Two sliders make a lunch portion, though one and a half is about all a child usually wants.
Pro Tips for This Recipe:
- Keep the pork slightly saucy, not drowning.
- Toast the buns lightly so they don’t collapse.
- Add slaw right before eating, not before packing.
Variations on This Dish:
- Spicy Version: Add chipotle or hot sauce to the pork.
- Mustard Version: Use Carolina-style mustard sauce instead of barbecue.
Common Mistakes to Avoid with This Dish:
- Over-saucing the meat: The buns turn soggy.
- Using lean pork: It dries out and loses the good texture.
19. Potato Salad with Pickles and Herbs
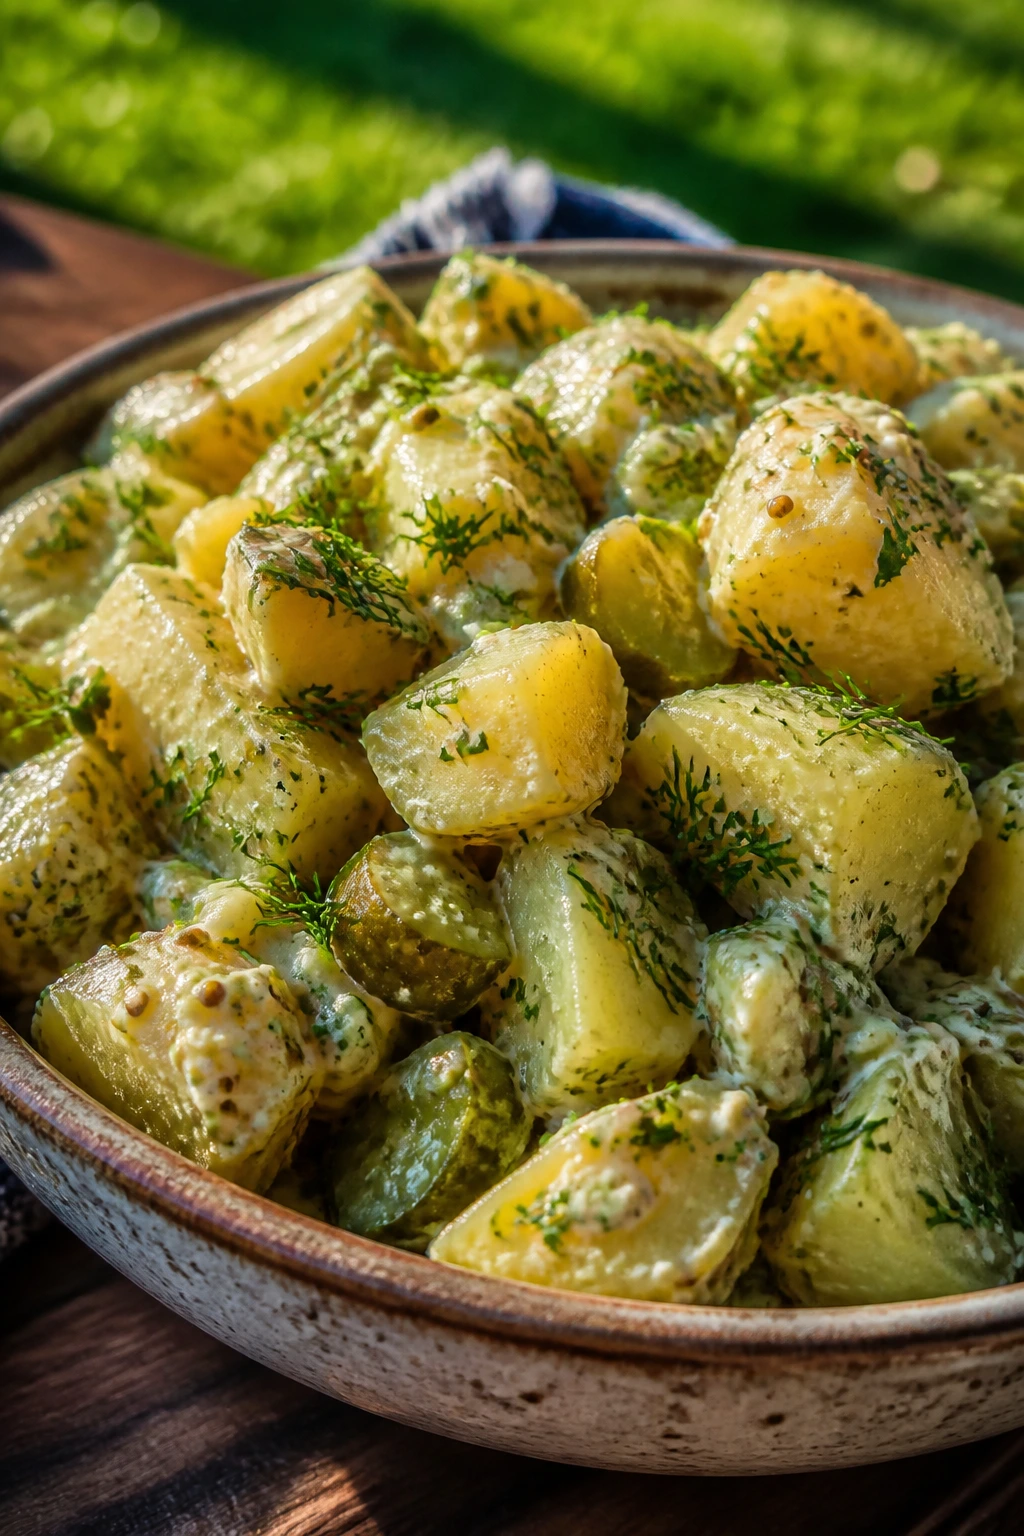
I have a soft spot for potato salad that actually tastes like something. Pickles, mustard, dill, and herbs make this one sharp and lively, not gluey or bland. It belongs at a picnic because it cools the mouth between richer bites.
Why It Works:
Waxy potatoes keep their shape after boiling, which is what you want in a picnic bowl. Pickles and mustard cut through mayonnaise so the salad doesn’t sit heavy. Fresh herbs keep the flavor from fading after chilling.
Key Ingredients:
- 2 pounds Yukon Gold potatoes, cut into chunks
- 1/2 cup mayonnaise
- 2 tablespoons Dijon mustard
- 1/3 cup chopped dill pickles
- 2 tablespoons pickle brine
- 2 tablespoons chopped dill
- 2 tablespoons chopped parsley
- 2 celery stalks, diced
- Salt and pepper
Quick Steps:
- Boil potatoes: Cook in salted water until just tender, about 12 to 15 minutes.
- Cool slightly: Drain and let steam off for 5 minutes.
- Mix dressing: Stir mayonnaise, Dijon, pickle brine, salt, and pepper.
- Combine: Fold potatoes with pickles, herbs, celery, and dressing, then chill.
Equipment for This Recipe:
- Large pot
- Colander
- Mixing bowl
- Rubber spatula
How to Serve This Dish:
Serve cold, topped with extra dill. A 1-cup scoop is standard for a side portion, though people tend to go back for more.
Pro Tips for This Recipe:
- Salt the cooking water well or the potatoes taste flat.
- Add the dressing while the potatoes are still a little warm so they absorb flavor.
- Keep a little pickle brine on hand for loosening the salad later.
Variations on This Dish:
- Egg Version: Add chopped hard-boiled eggs.
- Mustard-Only Version: Use more Dijon and less mayo for a sharper finish.
Common Mistakes to Avoid with This Dish:
- Overcooking potatoes: They go grainy and fall apart.
- Serving it icy cold: Let it sit 10 minutes so the flavor wakes up.
20. Pasta Salad with Artichoke Hearts, Salami, and Parmesan

This pasta salad keeps its shape, which gives it a serious advantage over softer, wetter picnic salads. Artichokes add tang, salami gives you bite, and Parmesan cuts in with salt. It tastes like a deli counter and a pantry had a useful conversation.
Why It Works:
Short pasta holds dressing in its curves instead of dropping it into the bowl. Salami and Parmesan bring enough salt and fat that the salad still tastes complete when cold. Artichoke hearts give the bowl some acid so it doesn’t feel stodgy.
Key Ingredients:
- 1 pound rotini or penne
- 1 cup marinated artichoke hearts, chopped
- 4 ounces salami, sliced into strips
- 1/2 cup shaved Parmesan
- 1/3 cup sliced olives
- 1/4 cup red onion, thinly sliced
- 1/4 cup olive oil
- 2 tablespoons red wine vinegar
- 1 teaspoon Italian seasoning
- Salt and pepper
Quick Steps:
- Cook pasta: Boil until just al dente, then rinse briefly and drain well.
- Whisk dressing: Combine olive oil, vinegar, Italian seasoning, salt, and pepper.
- Toss: Mix pasta with artichokes, salami, olives, onion, and dressing.
- Finish: Fold in Parmesan and chill at least 30 minutes.
Equipment for This Recipe:
- Large pot
- Colander
- Mixing bowl
- Wooden spoon
How to Serve This Dish:
Serve in a broad bowl so the toppings show. One generous cup makes a side; two cups works as a main if the picnic spread is light.
Pro Tips for This Recipe:
- Stop cooking the pasta while it still has a firm center.
- Dress the pasta while it’s warm so it soaks up flavor.
- Keep Parmesan from clumping by adding it at the end.
Variations on This Dish:
- Chicken Version: Replace salami with diced chicken.
- Pepperoncini Version: Add chopped pepperoncini for more tang.
Common Mistakes to Avoid with This Dish:
- Rinsing pasta too hard: It washes away the starch that helps the dressing cling.
- Using too much onion: The raw bite can take over.
21. Mushroom and Swiss Puff Pastry Twists
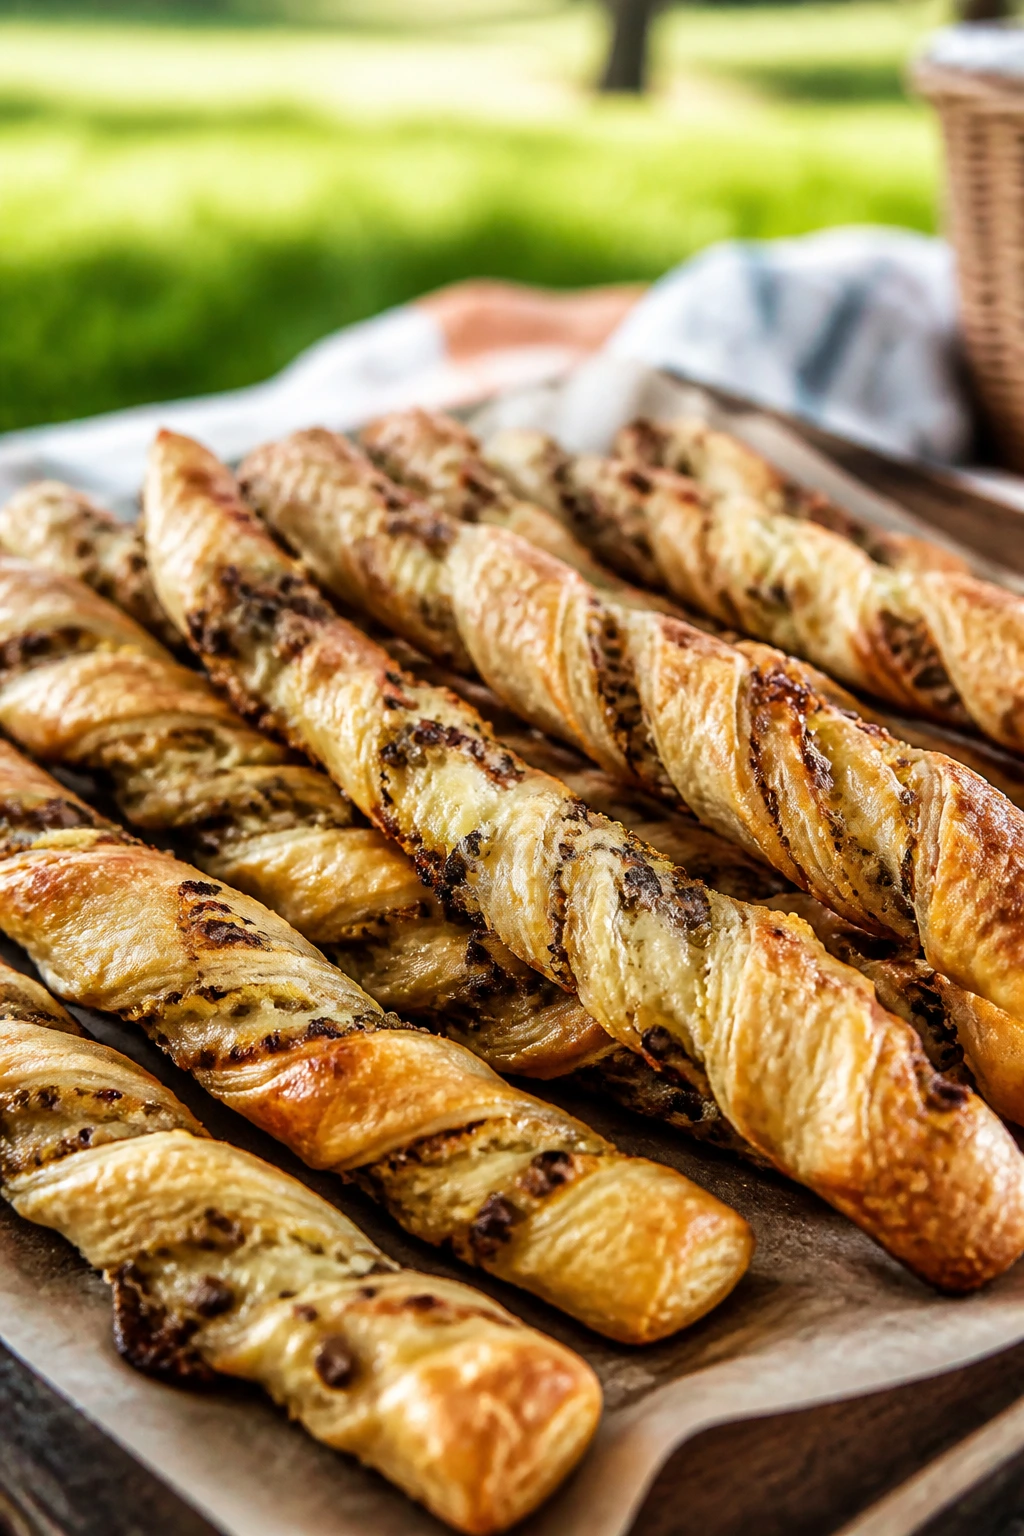
These are almost too easy for how good they smell while they bake. Mushroom duxelles, Swiss cheese, and a little mustard get twisted into pastry strips that puff and crackle. They’re tidy enough to stack and sturdy enough to survive a walk to the park.
Why It Works:
Mushrooms cook down to a concentrated filling, so the pastry doesn’t get wet. Swiss brings a nutty flavor that fits the mushroom, and puff pastry gives you a crisp shell that holds up even after it cools. They’re snacky, which makes them dangerous in the best way.
Key Ingredients:
- 1 sheet puff pastry
- 8 ounces mushrooms, finely chopped
- 1 tablespoon butter
- 1 teaspoon Dijon mustard
- 1 cup shredded Swiss cheese
- 1 teaspoon thyme
- 1 egg, beaten
- Salt and pepper
Quick Steps:
- Cook mushrooms: Sauté mushrooms in butter until all moisture cooks off.
- Season: Stir in Dijon, thyme, salt, and pepper, then cool.
- Assemble: Spread the mushroom mixture and Swiss over the pastry, fold, and cut into strips.
- Twist and bake: Twist each strip and bake at 400°F (205°C) for 15 to 18 minutes.
Equipment for This Recipe:
- Skillet
- Baking sheet
- Parchment paper
- Knife or pizza cutter
How to Serve This Dish:
Serve with a sharp mustard dip if you like, though they’re good plain. Three twists make a snack portion; five is lunch territory.
Pro Tips for This Recipe:
- Cook the mushrooms dry, not glossy-wet.
- Chill the pastry briefly before twisting if it softens too much.
- Cut the strips evenly so they bake at the same speed.
Variations on This Dish:
- Onion Version: Add caramelized onion to the mushroom filling.
- Gruyère Version: Swap Swiss for Gruyère if you want more depth.
Common Mistakes to Avoid with This Dish:
- Leaving mushroom liquid in the pan: It leaks into the pastry.
- Twisting before the dough firms up: The strips stretch and tear.
22. White Bean and Rosemary Dip with Toasted Pita
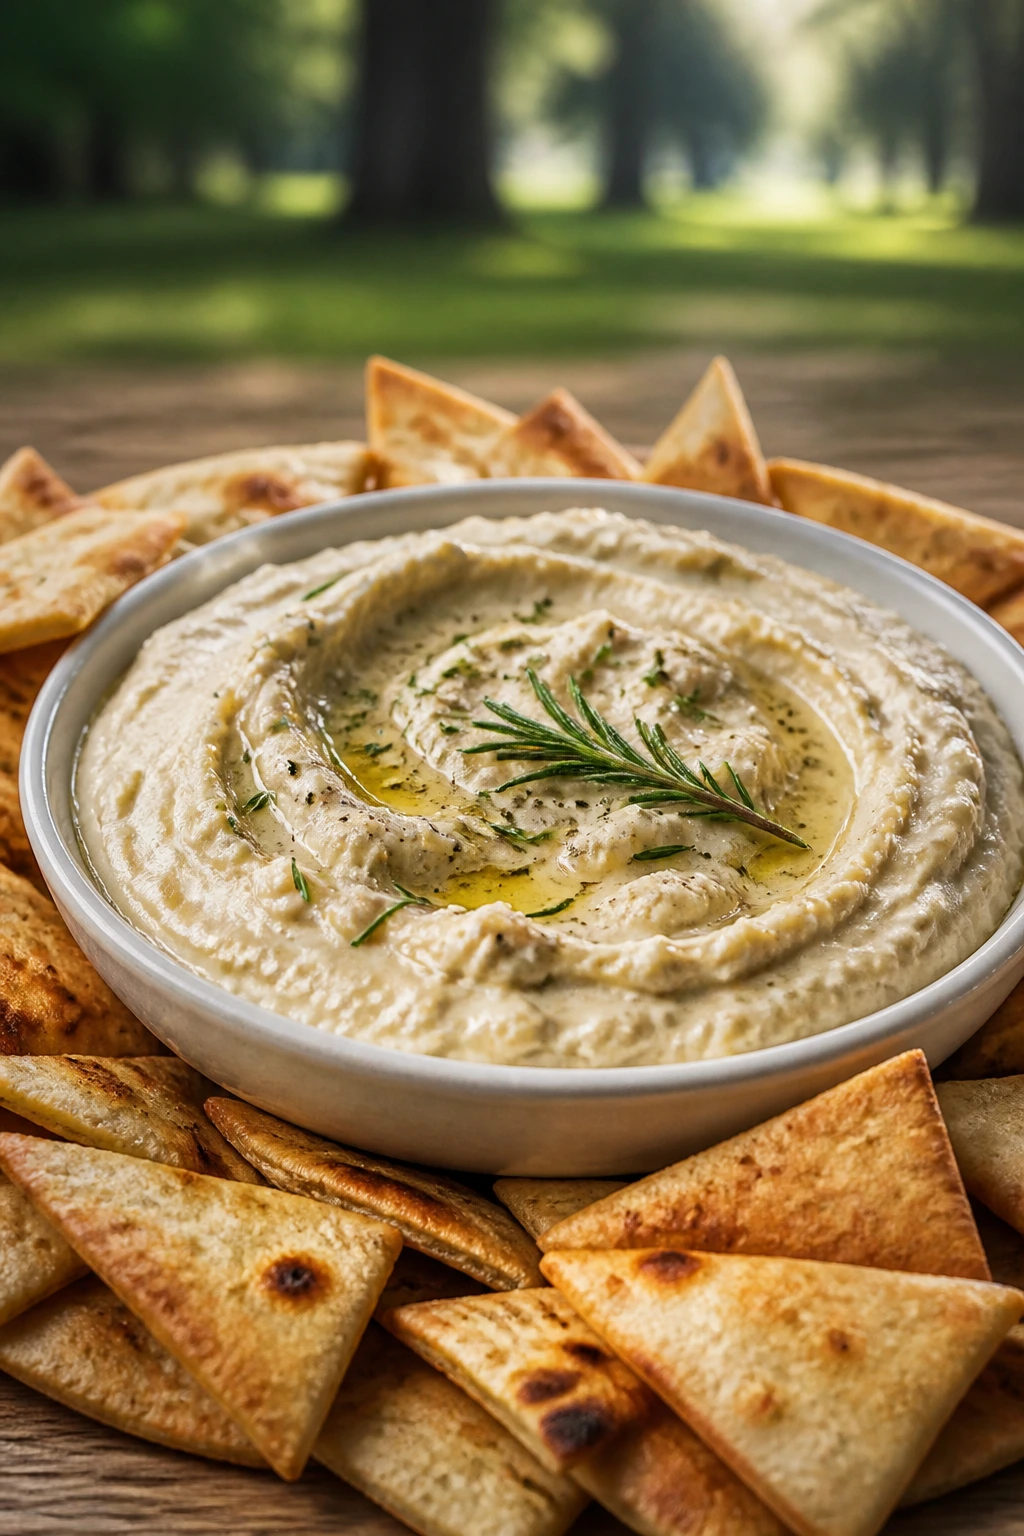
A good dip earns its place because it gives the rest of the basket something to lean on. This white bean version is creamy, garlicky, and scented with rosemary, so it feels richer than hummus without being fussy. It works cold, and that’s the real selling point.
Why It Works:
White beans puree into a smooth base that holds olive oil and lemon well. Rosemary brings a piney, winter note, while garlic keeps the dip from tasting soft or bland. Toasted pita chips make it practical for sharing.
Key Ingredients:
- 2 cans white beans, drained and rinsed
- 1 small garlic clove
- 2 tablespoons lemon juice
- 3 tablespoons olive oil, plus more for drizzling
- 1 teaspoon chopped rosemary
- 2 tablespoons water
- Salt and pepper
- 4 pita breads, cut into triangles
Quick Steps:
- Toast pita: Brush pita with olive oil and toast at 375°F (190°C) for 8 to 10 minutes.
- Blend dip: Combine beans, garlic, lemon juice, olive oil, rosemary, water, salt, and pepper until smooth.
- Adjust: Add a splash of water if you want it looser.
- Serve: Drizzle with olive oil and more rosemary before packing.
Equipment for This Recipe:
- Food processor
- Baking sheet
- Knife
- Spoon
How to Serve This Dish:
Serve the dip in a lidded container with the pita chips on the side so they stay crisp. It’s a useful bridge between the richer meats and the fresher salads.
Pro Tips for This Recipe:
- Rinse canned beans well or the dip tastes dull.
- Blend longer than you think for a silkier texture.
- Keep pita chips separate until the blanket is down.
Variations on This Dish:
- Lemon-Zest Version: Add extra zest for a brighter finish.
- Smoky Version: Stir in smoked paprika.
Common Mistakes to Avoid with This Dish:
- Packing chips with the dip: They soften fast.
- Under-seasoning beans: They need more salt than you expect.
23. Sweet Potato and Black Bean Quesadilla Triangles
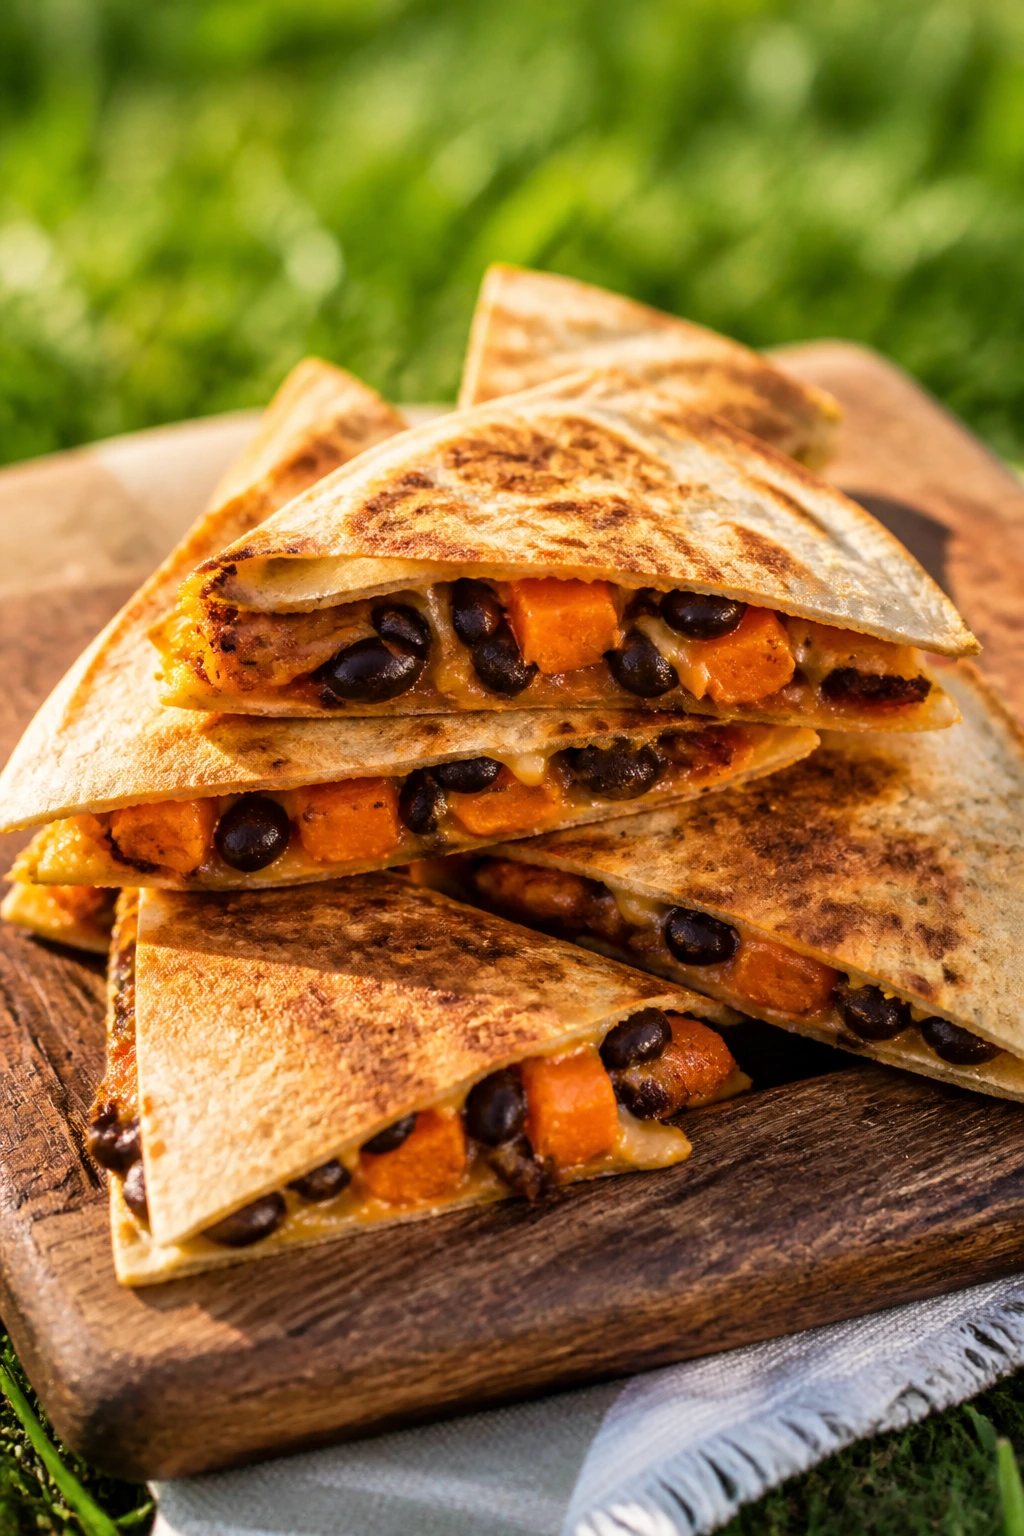
These are one of the easiest ways to bring a warm-sounding filling to a cold picnic. Sweet potato turns creamy, black beans give substance, and cheese keeps the filling together so the wedges don’t fall apart in your hand. They’re easy to eat without sauce, which helps a lot.
Why It Works:
Sweet potato and black bean make a filling that’s stable once cooled. A crisp tortilla shell keeps the inside from slumping, and the cumin-lime seasoning keeps the flavor awake even after refrigeration. Cut into triangles, they stack neatly in a container.
Key Ingredients:
- 2 medium sweet potatoes, roasted and mashed
- 1 can black beans, drained
- 1 cup shredded cheddar or Monterey Jack
- 4 large flour tortillas
- 1 teaspoon cumin
- 1 tablespoon lime juice
- Salt and pepper
- Olive oil for the pan
Quick Steps:
- Mix filling: Stir sweet potato, black beans, cheese, cumin, lime juice, salt, and pepper together.
- Fill tortillas: Spread over half each tortilla and fold over.
- Toast: Cook in a lightly oiled skillet over medium heat for 2 to 3 minutes per side until crisp.
- Slice: Cool slightly, then cut into triangles.
Equipment for This Recipe:
- Skillet
- Spatula
- Knife
- Mixing bowl
How to Serve This Dish:
Serve with salsa or guacamole in a separate container. Two folded quesadillas make a lunch portion; cut triangles are better for grazing.
Pro Tips for This Recipe:
- Don’t overfill the tortillas or they’ll split.
- Let them cool before cutting or the cheese will squish out.
- Use a dry skillet if you want a lighter finish.
Variations on This Dish:
- Pepper Jack Version: Swap in pepper jack for a little heat.
- Corn Version: Add a handful of corn kernels to the filling.
Common Mistakes to Avoid with This Dish:
- Wet sweet potato mash: It makes the tortillas soggy.
- Cooking over high heat: The tortilla browns before the cheese melts.
24. Reuben Sliders
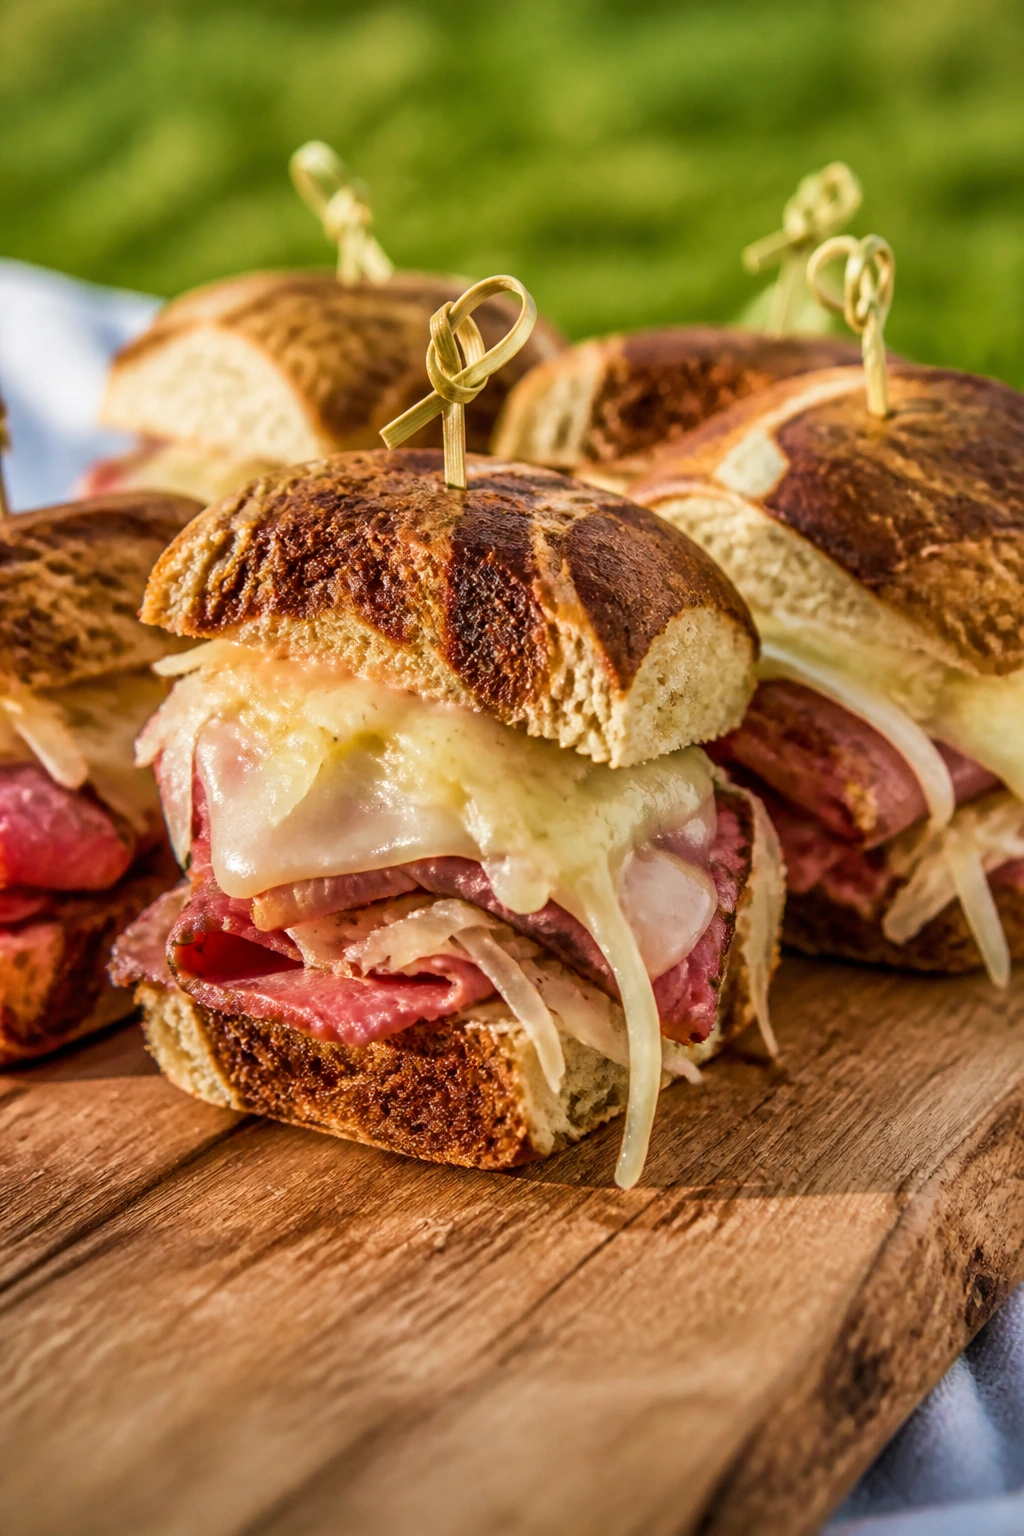
Reuben flavors can feel heavy indoors, but in slider form they become perfectly manageable. Rye rolls, corned beef, sauerkraut, Swiss, and a little dressing give you the salty, tangy profile people expect, just scaled down. They’re messy in a controlled way.
Why It Works:
The sauerkraut brings enough acidity to keep the sandwich from tasting dense. Swiss melts into the corned beef without taking over, and rye buns make the flavor feel intentional. Baking them together helps the layers settle into each other.
Key Ingredients:
- 12 slider buns or mini rye rolls
- 8 ounces sliced corned beef
- 1 cup sauerkraut, drained and squeezed dry
- 6 ounces Swiss cheese
- 1/4 cup Russian or Thousand Island dressing
- 3 tablespoons melted butter
- 1 teaspoon caraway seeds, optional
Quick Steps:
- Dry the kraut: Squeeze out as much liquid as possible.
- Assemble: Layer corned beef, kraut, Swiss, and dressing on the buns.
- Brush: Mix butter with caraway seeds and brush over the tops.
- Bake: Cover and bake at 350°F (175°C) for 10 minutes, then uncover for 5 minutes.
Equipment for This Recipe:
- Baking dish
- Foil
- Pastry brush
- Knife
How to Serve This Dish:
Serve with pickle chips or a crunchy dill salad. One slider is light; two is enough for most people when the rest of the picnic is generous.
Pro Tips for This Recipe:
- Drain the sauerkraut thoroughly.
- Keep the dressing thinly spread so it doesn’t flood the buns.
- Let them rest before cutting.
Variations on This Dish:
- Turkey Reuben Version: Swap corned beef for turkey.
- Spicy Version: Add horseradish to the dressing.
Common Mistakes to Avoid with This Dish:
- Wet sauerkraut: It turns the rolls soggy.
- Too much dressing: The sandwich loses its shape.
25. Bacon, Date, and Cheddar Scones

These scones are the kind of savory bake that makes people pause mid-conversation. Bacon and cheddar bring salt, dates add little pockets of sweetness, and the crumb is tender enough to eat without a knife. They’re sturdy picnic bread with a personality.
Why It Works:
Scones are built to be handled, packed, and eaten at room temperature. The dates keep each bite from tasting too salty, while the cheddar gives structure and a little chew. They’re good plain, which is rare and useful.
Key Ingredients:
- 2 cups all-purpose flour
- 1 tablespoon baking powder
- 1/2 teaspoon salt
- 1/2 cup cold butter, cubed
- 1 cup shredded cheddar
- 1/2 cup cooked bacon, chopped
- 1/2 cup chopped dates
- 3/4 cup heavy cream
- 1 egg
Quick Steps:
- Mix dry ingredients: Whisk flour, baking powder, and salt.
- Cut in butter: Work in the cold butter until the mix looks like coarse crumbs.
- Add fillings: Fold in cheddar, bacon, and dates, then stir in cream and egg just until combined.
- Bake: Pat into a round, cut into wedges, and bake at 400°F (205°C) for 18 to 22 minutes.
Equipment for This Recipe:
- Mixing bowl
- Pastry cutter or fingertips
- Baking sheet
- Bench scraper or knife
How to Serve This Dish:
Serve with butter or a thin swipe of honey. One scone is a snack; two can anchor a picnic lunch.
Pro Tips for This Recipe:
- Keep the butter cold for a flaky crumb.
- Don’t overmix or the scones get tough.
- Chill the shaped dough briefly before baking if the kitchen is warm.
Variations on This Dish:
- Apricot Version: Swap dates for chopped dried apricots.
- Herb Version: Add chives instead of dates for a more savory scone.
Common Mistakes to Avoid with This Dish:
- Warm butter: It melts into the flour and kills the lift.
- Overworking the dough: You’ll end up with dense scones.
26. Roasted Beet and Orange Salad Cups
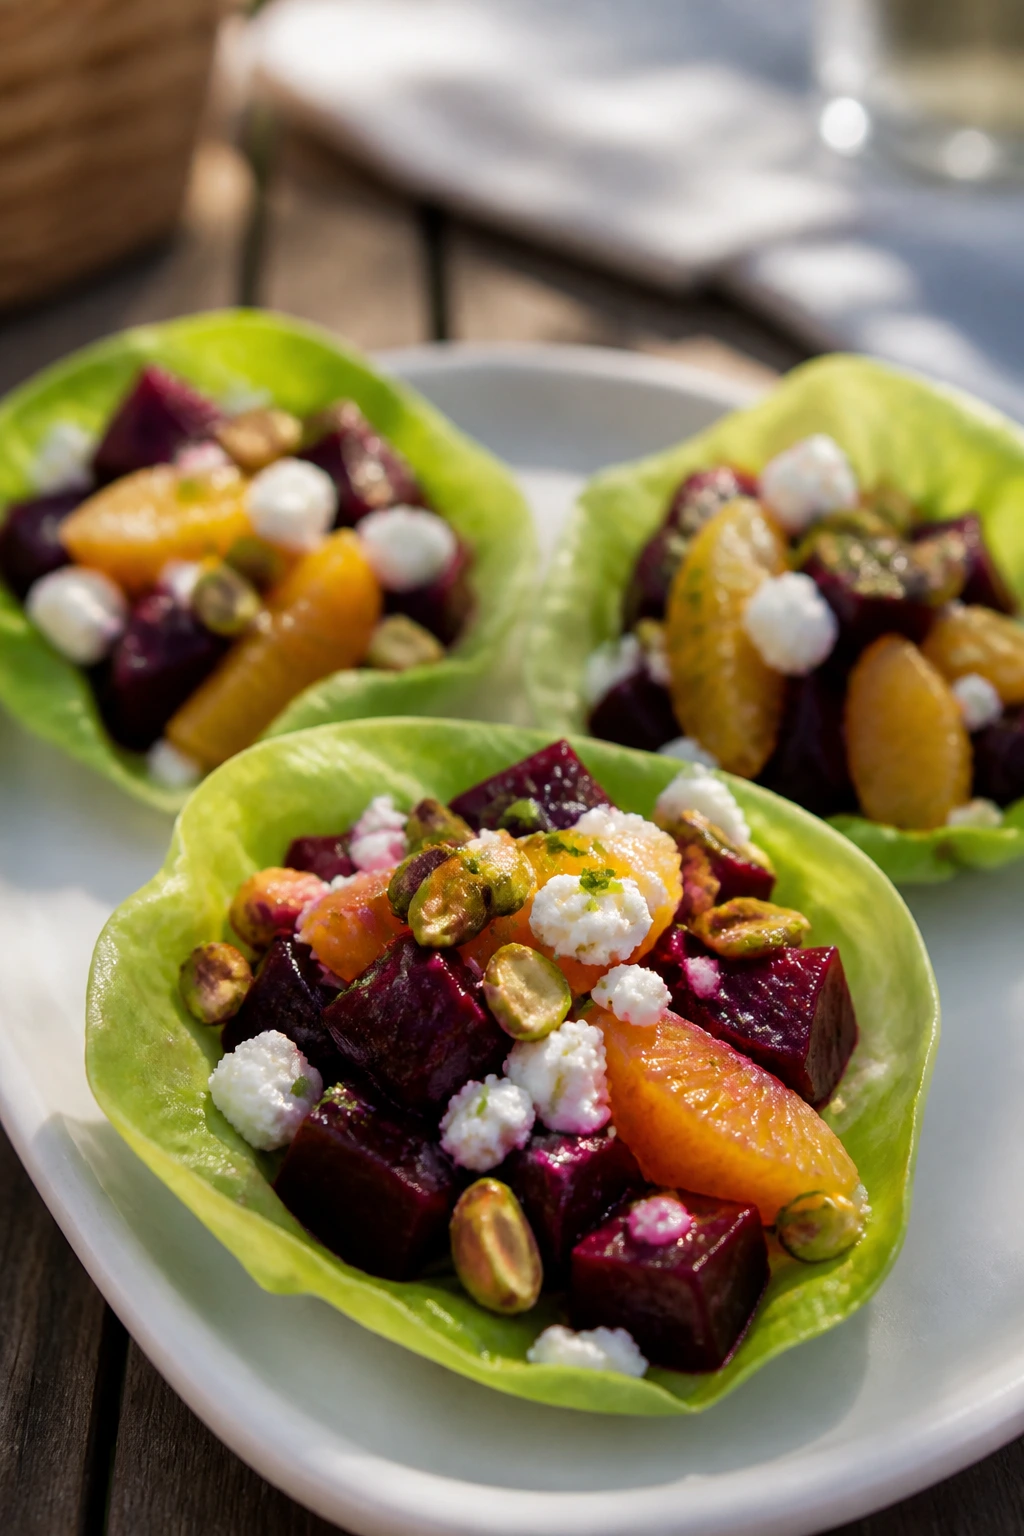
Beets and orange have that wintry color contrast that looks especially good on a picnic table. Pack them in lettuce cups or small jars, and the salad feels polished without trying too hard. Feta and pistachios give it salt and crunch, which keeps the sweetness in check.
Why It Works:
Roasted beets are sturdy enough to hold their shape in a chilled salad. Orange adds acid and juice, which brightens the earthy beet flavor. The salad stays good cold, and the lettuce cups keep it neat.
Key Ingredients:
- 3 medium beets, roasted and diced
- 2 oranges, segmented
- 1/2 cup crumbled feta
- 1/4 cup chopped pistachios
- 2 tablespoons olive oil
- 1 tablespoon orange juice
- 1 teaspoon red wine vinegar
- Butter lettuce leaves
- Salt and pepper
Quick Steps:
- Roast beets: Wrap and roast until tender, then cool and peel.
- Make dressing: Whisk olive oil, orange juice, vinegar, salt, and pepper.
- Toss: Combine beets with orange segments and dressing.
- Serve: Spoon into lettuce cups and top with feta and pistachios.
Equipment for This Recipe:
- Foil or baking dish
- Bowl
- Sharp knife
- Spoon
How to Serve This Dish:
Serve the cups cold on a shallow platter. Two to three cups make a side portion; four can become lunch if you add bread.
Pro Tips for This Recipe:
- Roast the beets until the centers are fully tender.
- Segment the oranges over a bowl to catch the juice.
- Add pistachios at the end so they stay crunchy.
Variations on This Dish:
- Goat Cheese Version: Swap feta for goat cheese.
- Arugula Version: Serve over baby arugula instead of lettuce cups.
Common Mistakes to Avoid with This Dish:
- Hot beets: They wilt the lettuce.
- Skipping acid: The salad tastes flat without it.
27. Cold Sesame Noodle Salad
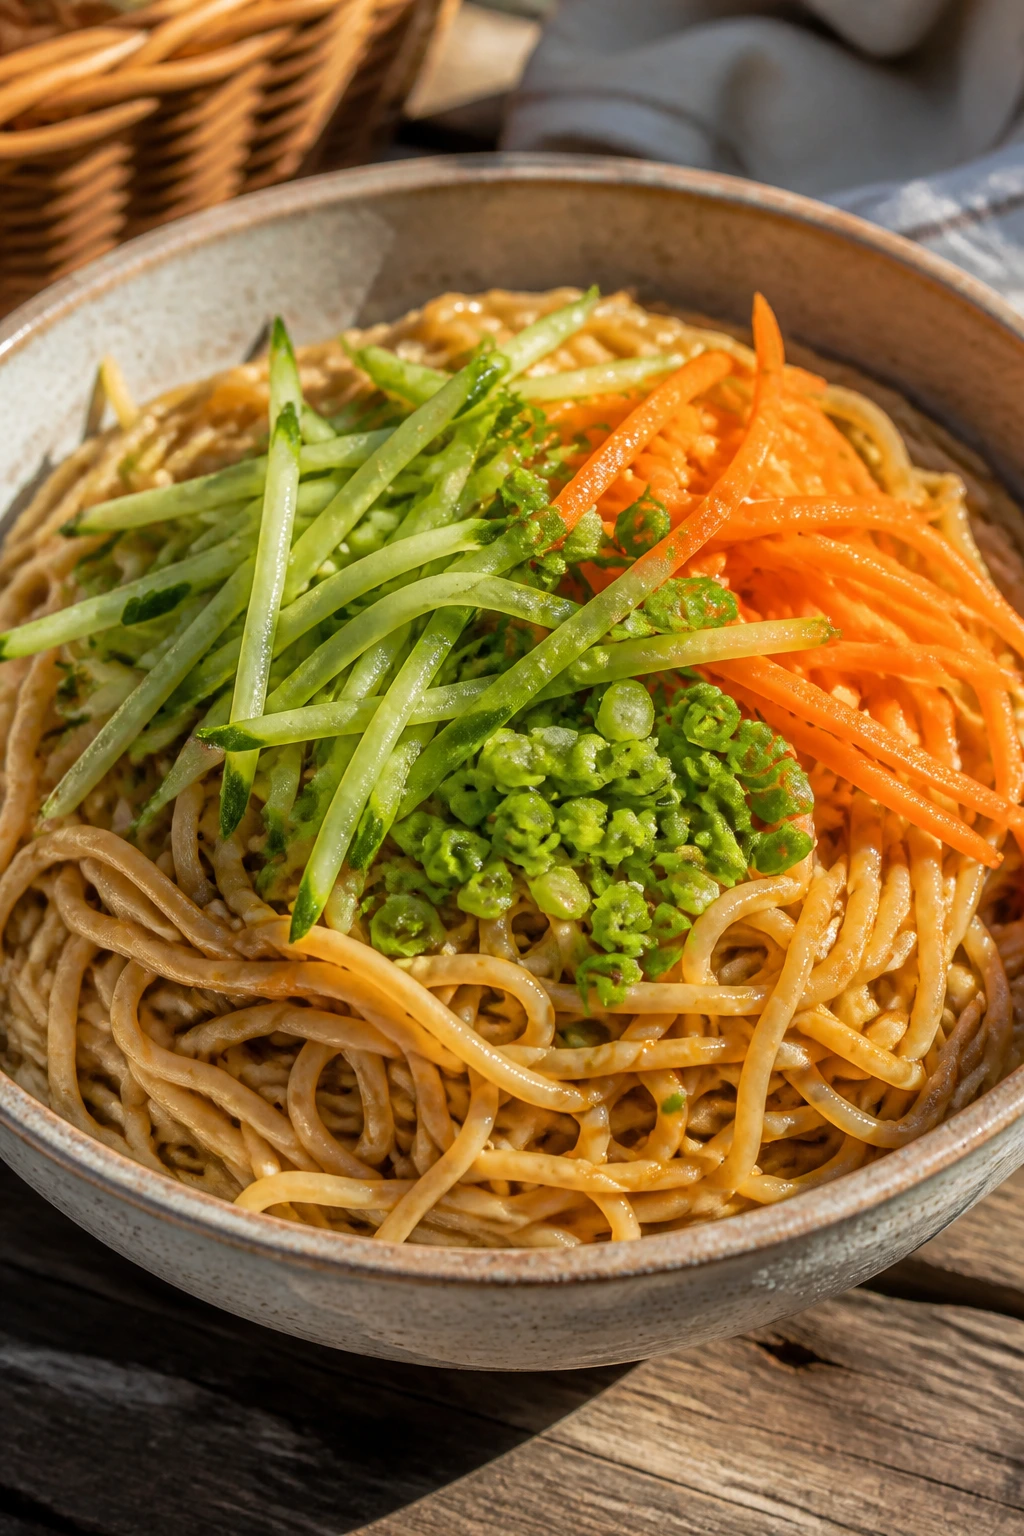
This one leans away from the winter side of the list and more toward the picnic practicality side, but it earns its keep. Cold noodles, sesame, cucumber, carrots, and a little peanut butter make a dish that holds well and tastes even better after the flavors settle. It’s the kind of bowl people keep returning to.
Why It Works:
Noodles absorb sauce without getting mushy if you cook them properly and cool them fast. Sesame and peanut butter make the dressing cling, while cucumber adds cool crunch. It is one of the easiest large-batch picnic salads to portion.
Key Ingredients:
- 12 ounces spaghetti or soba noodles
- 3 tablespoons peanut butter
- 2 tablespoons soy sauce
- 1 tablespoon sesame oil
- 1 tablespoon rice vinegar
- 1 teaspoon honey
- 1 cucumber, julienned
- 2 carrots, shredded
- 2 scallions, sliced
- Sesame seeds
Quick Steps:
- Cook noodles: Boil until al dente, rinse under cool water, and drain well.
- Whisk dressing: Stir peanut butter, soy sauce, sesame oil, vinegar, honey, and a splash of water until smooth.
- Toss: Mix noodles with cucumber, carrots, scallions, and dressing.
- Finish: Sprinkle sesame seeds on top and chill.
Equipment for This Recipe:
- Large pot
- Colander
- Mixing bowl
- Whisk
How to Serve This Dish:
Serve in small bowls or cups with chopsticks or forks. It works as a side or a main, depending on how much else you pack.
Pro Tips for This Recipe:
- Rinse the noodles well so they don’t clump.
- Thin the dressing with water if it feels too thick.
- Keep cucumber and carrots cut evenly for a cleaner bite.
Variations on This Dish:
- Spicy Version: Add chili oil or sriracha.
- Chicken Version: Fold in shredded chicken for a fuller meal.
Common Mistakes to Avoid with This Dish:
- Overcooked noodles: They turn limp fast.
- Too-thick dressing: It won’t spread evenly.
28. Maple Pecan Granola Bars
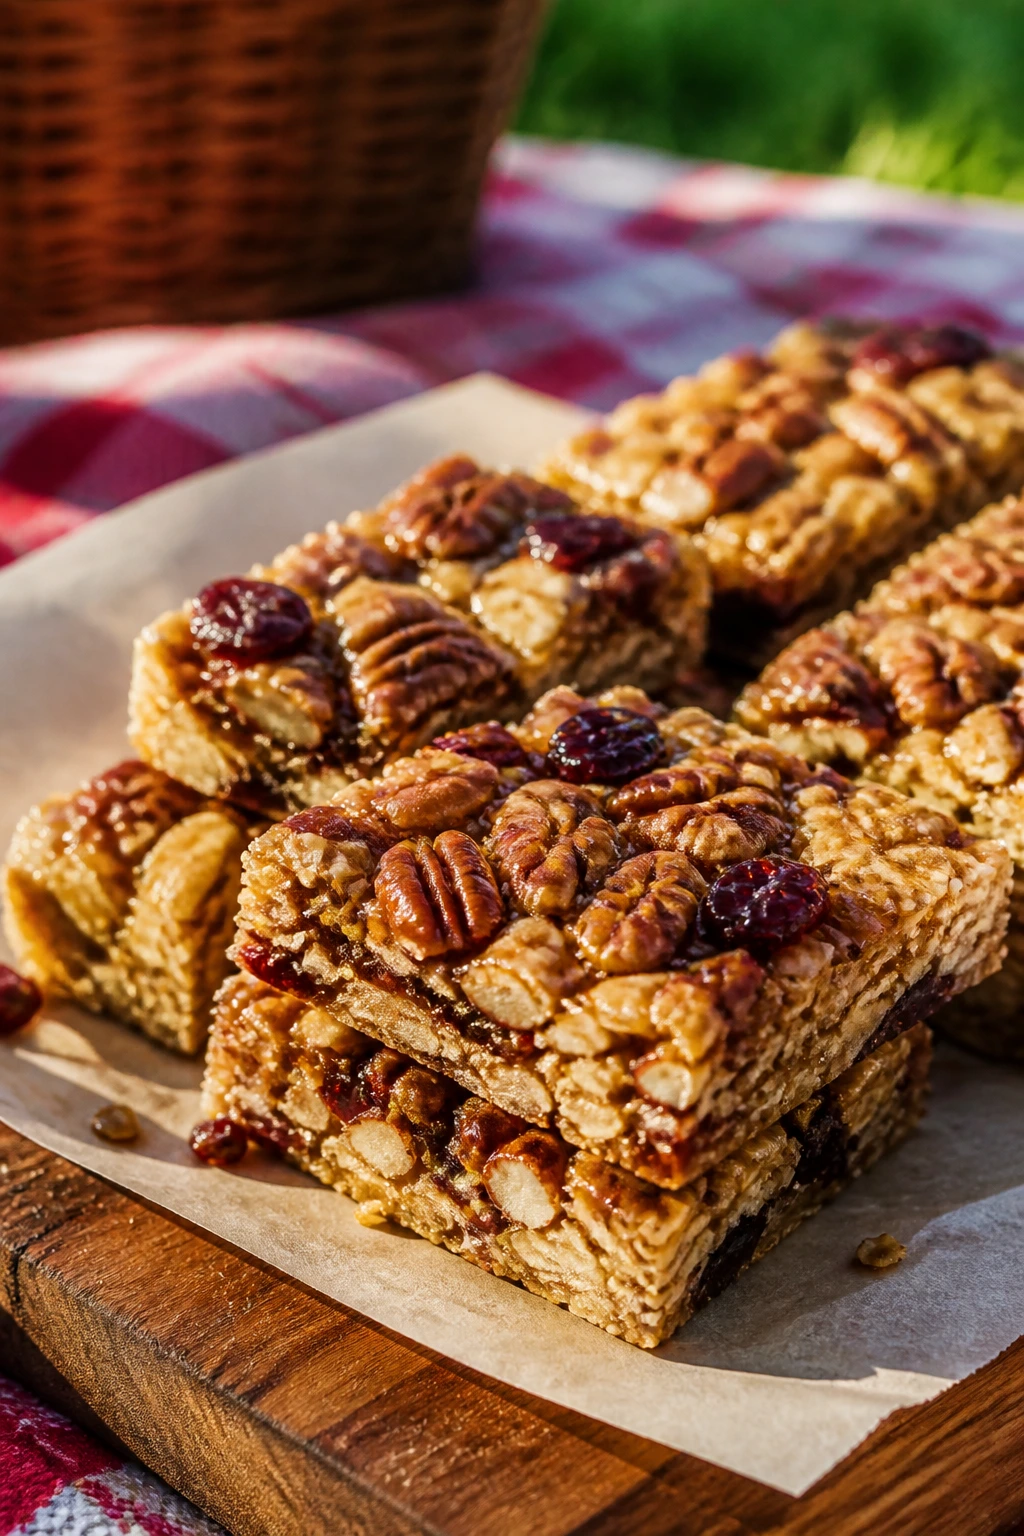
These are the dependable little bars you want after the savory food runs out. Maple, pecans, oats, and a handful of dried fruit give them a winter warmth that still feels right at a picnic. They pack cleanly and don’t need a cooler.
Why It Works:
Granola bars are one of the most practical picnic foods because they travel well and tolerate heat better than cream-filled desserts. Maple syrup binds the oats, pecans add crunch, and dried fruit gives chew without extra moisture. They’re easy to cut into neat squares.
Key Ingredients:
- 2 cups rolled oats
- 1 cup chopped pecans
- 1/2 cup dried cranberries
- 1/2 cup maple syrup
- 1/4 cup melted butter or coconut oil
- 1/4 cup brown sugar
- 1 teaspoon cinnamon
- 1/2 teaspoon salt
Quick Steps:
- Toast oats and pecans: Bake at 350°F (175°C) for 8 minutes until fragrant.
- Mix binder: Stir maple syrup, melted butter, brown sugar, cinnamon, and salt.
- Combine: Fold the oats, pecans, and cranberries into the binder.
- Bake: Press into a lined pan and bake 18 to 22 minutes until set, then cool fully before slicing.
Equipment for This Recipe:
- Baking pan
- Parchment paper
- Mixing bowl
- Spatula
How to Serve This Dish:
Serve as the sweet finish or an afternoon snack. One bar is enough if there’s a full picnic meal before it.
Pro Tips for This Recipe:
- Pack the mixture firmly or the bars crumble.
- Cool completely before cutting.
- Store with parchment between layers if stacking.
Variations on This Dish:
- Chocolate Chip Version: Add mini chocolate chips after the mixture cools slightly.
- Seed Version: Swap pecans for sunflower and pumpkin seeds.
Common Mistakes to Avoid with This Dish:
- Slicing warm bars: They fall apart.
- Too little binder: The oats won’t hold together.
29. Ginger Molasses Cookies
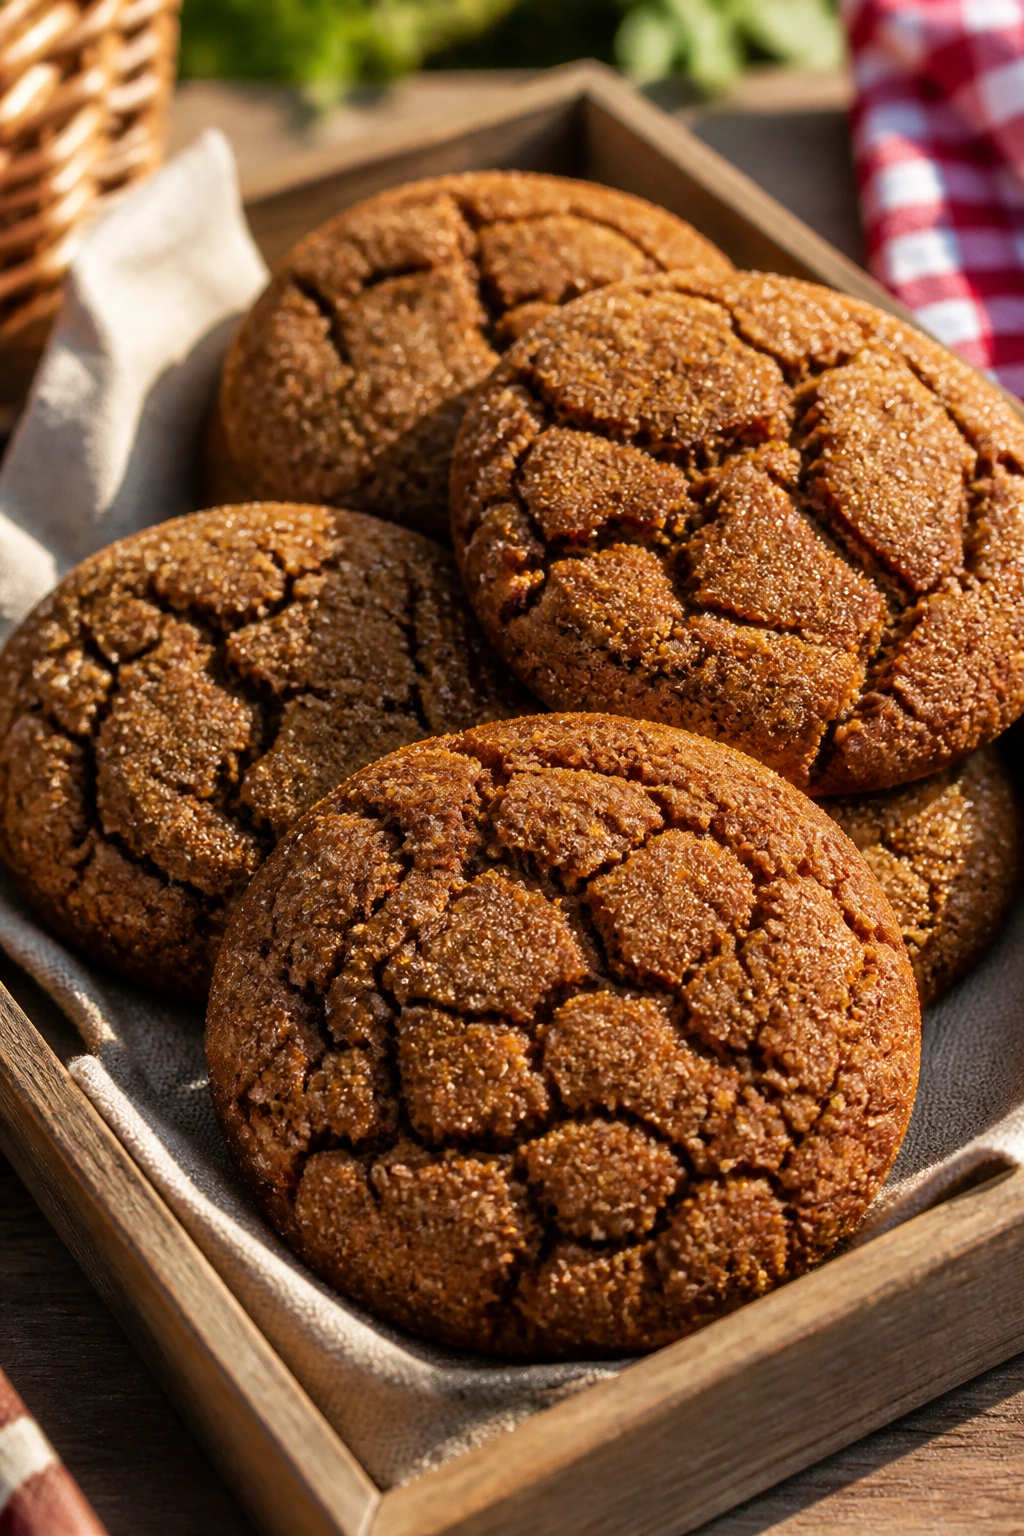
These cookies taste like winter in the best sense—spiced, dark, chewy, and a little sticky at the edges. They’re excellent for a picnic because they don’t need frosting, transport well, and stay pleasant even after sitting out. I like them with coffee, tea, or nothing at all.
Why It Works:
Molasses keeps the cookies soft and chewy after cooling, which is why they travel better than crisp cookies. Ginger, cinnamon, and clove give enough spice to make each bite feel complete. They stack cleanly in a tin, which is always a plus.
Key Ingredients:
- 2 1/4 cups all-purpose flour
- 2 teaspoons ground ginger
- 1 teaspoon cinnamon
- 1/4 teaspoon cloves
- 1 teaspoon baking soda
- 1/2 teaspoon salt
- 3/4 cup unsalted butter, softened
- 1 cup brown sugar
- 1/4 cup molasses
- 1 egg
- Granulated sugar for rolling
Quick Steps:
- Mix dry ingredients: Whisk flour, ginger, cinnamon, cloves, baking soda, and salt.
- Cream butter and sugar: Beat butter and brown sugar until fluffy, then add molasses and egg.
- Combine: Stir in dry ingredients until the dough just comes together.
- Bake: Roll into balls, coat in sugar, and bake at 350°F (175°C) for 10 to 12 minutes until cracked on top.
Equipment for This Recipe:
- Mixing bowls
- Hand mixer
- Baking sheet
- Cooling rack
How to Serve This Dish:
Serve with cold lemonade or tea. Two cookies is a sensible serving after a picnic meal; three if dessert is the reason you came.
Pro Tips for This Recipe:
- Chill the dough if the kitchen is warm; it helps the cookies spread less.
- Pull them when the centers still look a touch soft.
- Let them cool on the pan for a few minutes before moving.
Variations on This Dish:
- Orange Version: Add orange zest to the dough.
- Crystallized Ginger Version: Fold in chopped crystallized ginger for more bite.
Common Mistakes to Avoid with This Dish:
- Overbaking: They turn dry quickly.
- Skipping the sugar coating: You lose that crackly shell.
30. Carrot Cake Oat Bars
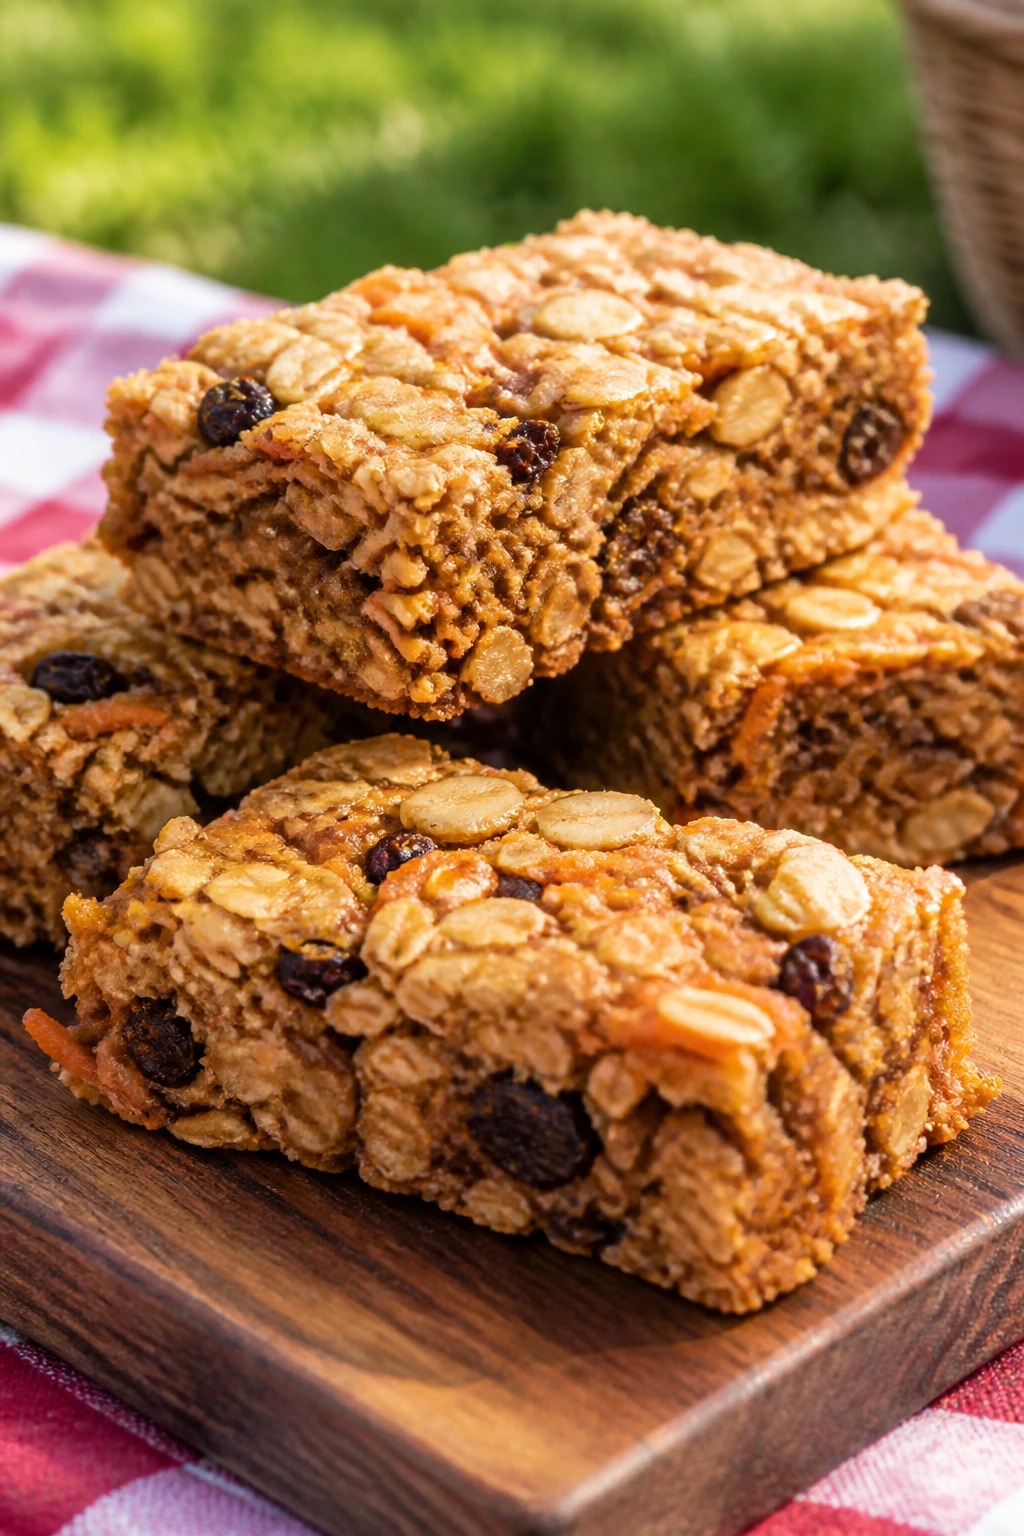
Carrot cake flavors show up here in a picnic-safe form that doesn’t require a fork or frosting drama. Oats, carrots, cinnamon, and walnuts bake into bars that are soft but structured, with enough spice to taste like a proper treat. They’re one of the easiest dessert items in the basket.
Why It Works:
Grated carrot adds moisture without making the bars fragile. Oats keep the texture chewy, while walnuts and raisins bring little bursts of crunch and sweetness. A light cream cheese drizzle is optional, which is good because the bars stand on their own.
Key Ingredients:
- 2 cups rolled oats
- 1 cup all-purpose flour
- 1 teaspoon cinnamon
- 1/2 teaspoon baking soda
- 1/2 teaspoon salt
- 1 cup finely grated carrot
- 2/3 cup brown sugar
- 1/2 cup melted butter or neutral oil
- 2 eggs
- 1/2 cup chopped walnuts
- 1/3 cup raisins
Quick Steps:
- Mix dry ingredients: Stir oats, flour, cinnamon, baking soda, and salt together.
- Mix wet ingredients: Whisk carrots, brown sugar, butter, and eggs until combined.
- Combine: Fold the wet mixture into the dry, then add walnuts and raisins.
- Bake: Spread into a lined pan and bake at 350°F (175°C) for 22 to 28 minutes until set and golden at the edges.
Equipment for This Recipe:
- Mixing bowls
- 8×8-inch pan or similar
- Parchment paper
- Grater
How to Serve This Dish:
Serve plain or with a thin cream cheese glaze after the bars cool. One square is enough for a sweet finish; two if the picnic skipped dessert earlier.
Pro Tips for This Recipe:
- Grate the carrot finely so it melts into the batter.
- Cool completely before slicing for clean edges.
- Use parchment so the bars lift out neatly.
Variations on This Recipe:
- Walnut-Free Version: Use sunflower seeds instead.
- Lemon Glaze Version: Replace cream cheese topping with a lemon glaze.
Common Mistakes to Avoid with This Dish:
- Too much grated carrot: The bars get wet and gummy.
- Cutting warm bars: They crumble instead of slicing cleanly.
Why Cozy Flavors Deserve a Place in a Picnic Basket
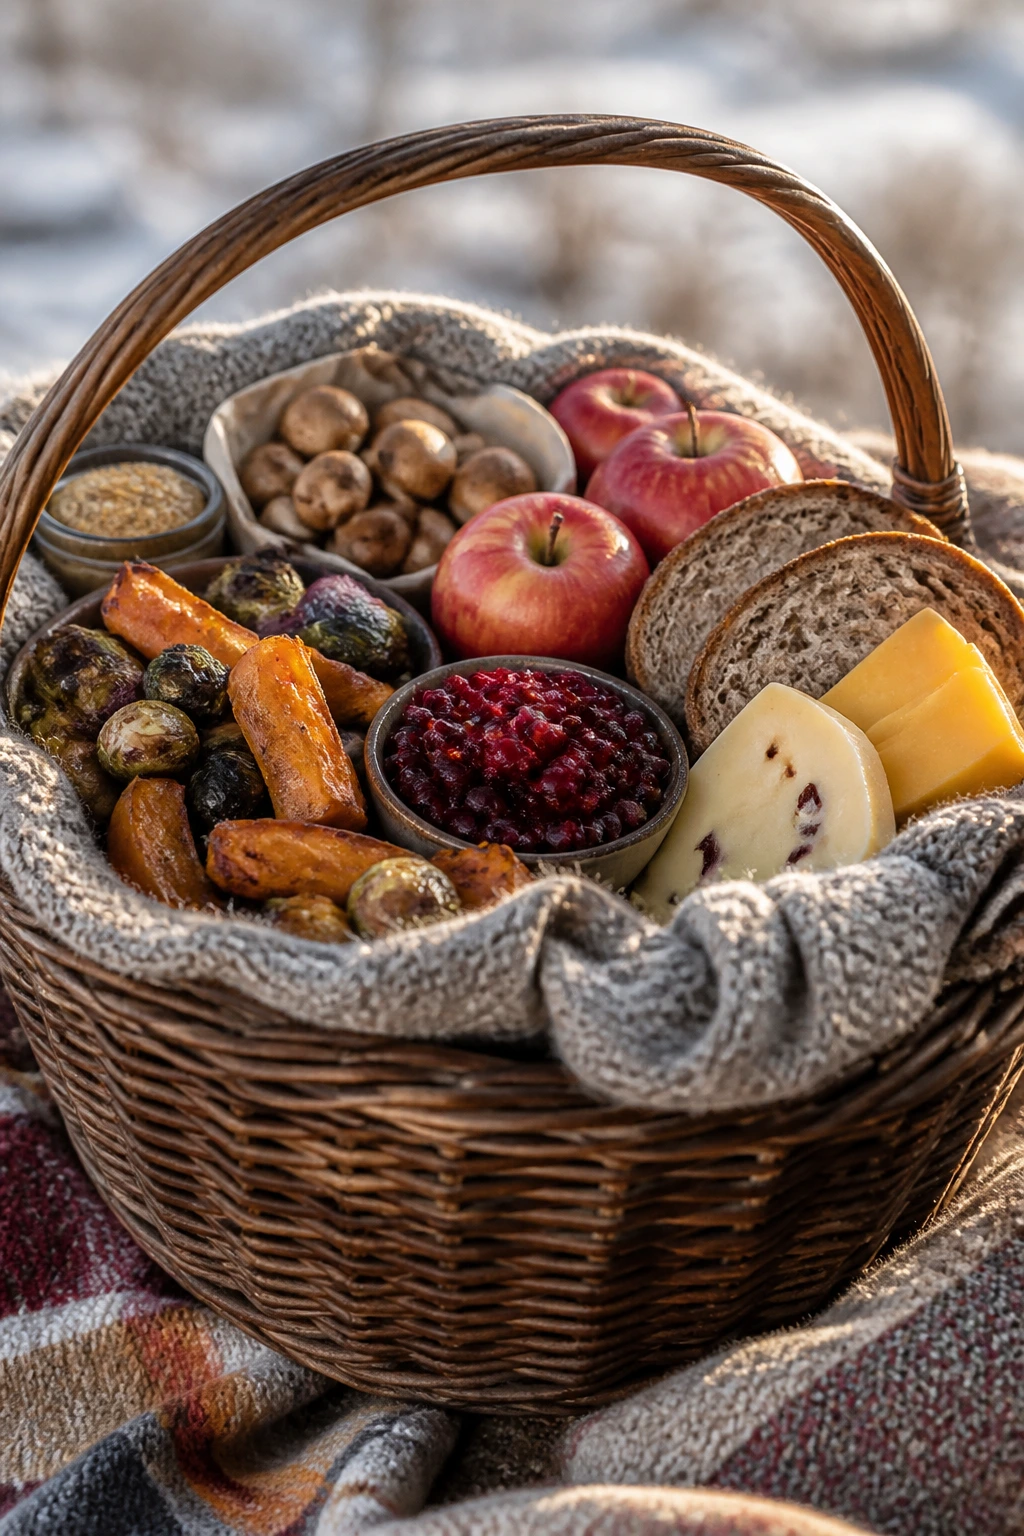
A hot-weather picnic does not need to taste bright and raw from end to end. That gets old fast. A little cheddar, mustard, mushroom, apple, sage, cranberry, or maple gives the basket depth, and depth matters when the meal has to sit in the shade for a while before anyone opens the lids.
The best part is that these flavors don’t fight summer if you pack them with common sense. Crisp bread, chilled fillings, and sensible portions keep the whole spread from turning heavy. I’ll take that over a soggy baguette and a bowl of watery tomato salad any day.
Essential Equipment for These Recipes
- Insulated cooler with ice packs: Keeps chicken salad, salmon sandwiches, dairy, and mayonnaise-based dishes safe until serving.
- Half-sheet pans: The workhorse for hand pies, pastries, sliders, and roasted vegetables.
- Muffin tins: Useful for quiche bites, shepherd’s pie muffins, and mini cornbread cups.
- Mixing bowls in two or three sizes: You’ll use them for fillings, dressings, and quick toss salads.
- Sharp chef’s knife and serrated knife: One for vegetables and one for bread, pastry, and croissants.
- Parchment paper: Keeps sticky fillings and pastry bottoms from clinging to the pan.
- Pastry brush: Needed for egg wash, butter topping, and neat finishing.
- Airtight containers with flat lids: Better than loose foil for transport because they stack in a cooler.
- Fine-mesh strainer or colander: Handy for draining potatoes, lentils, pasta, and sauerkraut thoroughly.
- Instant-read thermometer: Optional for meat dishes, but useful when you’re packing chicken, pork, or sausage rolls and want to be sure they’re done.
Smart Shopping and Ingredient Tips

If you want these picnic foods to taste good cold, buy ingredients that still have structure after chilling. That means firm apples, waxy potatoes, sturdy greens like spinach or Brussels sprouts, and breads with a little chew. Soft sandwich bread is fine for tea sandwiches, but it should be sliced fresh and packed carefully. Anything wetter than that turns into mush before the basket opens.
I’d spend a little extra on sharp cheddar, good mustard, and a decent loaf or bun before I worry about fancy add-ins. Those are the ingredients that keep showing up across the whole collection, and cheap versions can flatten faster than you’d expect. For meats, thin deli slices or fully cooked leftovers work better than thick slabs because they layer more evenly and don’t fight the bread.
Fresh herbs matter, but don’t buy them in giant bunches unless you’ll use them in two or three recipes. Dill, parsley, thyme, and rosemary show up here in small amounts; choose bright, unwilted sprigs and strip the leaves right before mixing. If you’re shopping for dairy, pick full-fat versions where you can. They hold their texture better in cold salads and fillings.
And one practical note: avoid watery produce when the recipe already has dressing. Extra-juicy tomatoes, overripe pears, and wet cucumbers can ruin a cold picnic salad. When in doubt, salt slices lightly, blot them, and keep delicate pieces separate until serving.
How to Serve These Recipes
Presentation:
Build the picnic spread in layers, not piles. Put the sturdier items—hand pies, sliders, empanadas, scones—on the outside of the platter or the bottom of the cooler, and use shallow bowls or lidded containers for salads and dips. A few herb sprigs, lemon wedges, or a scatter of seeds on top makes the food look intentional without turning it fussy.
Accompaniments:
These recipes pair well with kettle chips, grapes, crisp apples, cherry tomatoes, cornichons, and a simple green salad with a lemon vinaigrette. Bread-based items like crostini, sliders, and tea sandwiches like a crunchy side nearby, while the heavier bites—shepherd’s pie muffins, sausage rolls, pulled pork sliders—welcome something cold and sharp beside them.
Portions:
For a mixed picnic, plan on two savory bites, one side, and one sweet item per person if the meal is casual. If this is the main lunch, increase it to three savory items and a dessert. Small portions work better than giant sandwiches outdoors; people tend to sample across the basket rather than commit to one plate.
Beverage Pairing:
I like iced black tea with lemon, sparkling water with cucumber, or a dry cider with this kind of menu. The first two keep the meal clean and light, and cider works especially well with the ham, pork, cheddar, and apple-forward dishes.
Additional Tips and Flavor Boosters
Flavor Enhancement:
A small squeeze of lemon, a spoon of Dijon, or a sprinkle of flaky salt at the end can wake up half the recipes here. I especially like finishing roasted vegetable dishes with citrus zest and pastries with a brush of butter while they’re still warm.
Customization:
Want more heat? Add chopped pickled jalapeños to sliders, pinwheels, or quesadillas. Want a cleaner, fresher basket? Lean on dill, parsley, cucumber, and lemon. You can push the whole menu richer with cheddar, bacon, and mustard, or lighter with beans, vegetables, and herbs.
Serving Suggestions:
Pack condiments separately whenever you can. A small jar of mustard, a cup of dressing, or a spoonful of chutney keeps bread crisp and gives people room to adjust each bite. I also like finishing savory bakes with sliced scallions or extra herbs right before the basket leaves the kitchen.
Make-It-Yours:
For gluten-free eaters, use corn tortillas, gluten-free buns, rice noodles, or potato-based sides. For dairy-free versions, choose olive-oil mayo, bean dips, and vegetable fillings, then skip the cheeses that matter least to the structure of the dish. For vegetarian picnics, mushrooms, lentils, beans, and roasted squash carry most of the work without feeling like second-rate substitutions.
Make-Ahead, Storage, and Reheating Guidance
A lot of these recipes are stronger after a rest. Chicken salad, lentil salad, potato salad, pasta salad, and bean dip all benefit from a few hours in the fridge because the seasoning settles in. Most mayo-based or dairy-based salads keep 3 to 4 days refrigerated in sealed containers, though they’re best within the first 48 hours for texture. Anything with fresh bread or pastry should be assembled as late as possible unless you want it softened on purpose.
For baked items, think in categories. Hand pies, empanadas, sausage rolls, quiche bites, sliders, scones, granola bars, cookies, and oat bars usually keep 3 days at room temperature in a dry, covered container if they don’t include perishable fillings, but for picnic safety they’re better stored chilled and brought out in batches. They freeze well for up to 2 months if wrapped tightly and packed with parchment between layers.
Reheating depends on the texture you want. For pastry items, use a 350°F (175°C) oven for 10 to 15 minutes until the shell crisps back up. Sliders can be wrapped in foil and warmed at 300°F (150°C) for about 10 minutes if you’re serving them hot. Grain salads, noodle salads, and bean dips do not need reheating; just let them sit at room temperature for 10 to 15 minutes so the flavors open up. If a salad thickens in the fridge, loosen it with a spoonful of lemon juice, vinegar, or water instead of dumping in more dressing.
For summer picnics, the food safety piece matters. Keep chilled foods cold until serving, use ice packs, and don’t let mayo, dairy, fish, or meat sit out for more than 2 hours, or 1 hour if the day is hot and the food is in direct sun. That rule is not glamorous, but it saves the picnic.
Variations and Adaptations to Try
The Cooler-Only Basket:
Choose recipes that are served cold or room temp from the start: chicken salad, lentil salad, pasta salad, pinwheels, cookies, bars, and dips. This version is easiest if you’re packing light and don’t want to worry about reheating or timing.
The Gluten-Free Basket:
Swap puff pastry for GF pastry where available, use corn tortillas for quesadillas, rice noodles for the sesame salad, and potato or bean-based sides as anchors. The structure matters more than the bread itself, so keep fillings dry and compact.
The Dairy-Free Basket:
Lean on olive oil, mustard, beans, roasted vegetables, fruit, cured meats, and herb-heavy salads. Olive-oil mayo works in chicken salad if you want the same creamy texture without the dairy, and bean dips carry plenty of richness on their own.
The Vegetarian Basket:
Build around lentils, white beans, roasted vegetables, egg dishes, cheese, and pastry pockets with mushrooms or squash. You do not lose the winter flavor profile when the meat goes away; you just shift it toward herbs, onions, and roasted sweetness.
The Heat-Friendly Basket:
This one skips creamy fillings that soften fast and favors vinaigrettes, dry slaws, crusty breads, bars, and cookies. Pack condiments separately, choose hard cheeses over soft ones, and keep anything dressed with mayo on ice until the last minute.
Common Mistakes to Avoid

Packing everything in one pile:
A soft croissant next to a wet salad is a recipe for regret. Keep bread, fillings, and dressings separate until you’re ready to eat.
Ignoring texture after chilling:
Some foods taste better cold, others taste merely cold. If a recipe needs to be crisp, like pastries or crostini, cool it fully before sealing it in a container so trapped steam doesn’t erase the texture.
Using wet ingredients without draining them:
Sauerkraut, cucumbers, roasted vegetables, spinach, and mushrooms can all carry a surprising amount of water. Drain, blot, squeeze, or cool them properly or they’ll loosen the whole dish.
Under-seasoning cold food:
Cold dulls salt, acid, and spice. A salad or sandwich that tastes fine warm can seem flat after chilling, so season a little more boldly than you would for a dinner plate.
Forgetting the cooler plan:
Picnic food fails when the timing gets sloppy. Bring ice packs, keep containers shut until serving, and split the spread into batches if the picnic lasts a long time.
Frequently Asked Questions

Which of these recipes travel best without a cooler?
The driest, sturdiest options are granola bars, ginger molasses cookies, bacon-date-cheddar scones, and some pastry items that don’t use dairy-heavy fillings. Once you start bringing chicken salad, salmon, mayo-based potato salad, or anything with cream cheese, use a cooler.
Can I make most of this the night before?
Yes, and many of these improve after a night in the fridge. Salads, dips, bars, cookies, and baked hand-held items are ideal make-ahead food; just keep bread and filling separate when crispness matters.
What’s the safest way to pack mayo-based salads for a summer picnic?
Chill them hard before you leave, pack them in a sealed container, and nest that container on top of ice packs in the cooler. Open them only when you’re ready to eat, and keep them out of the sun.
How do I stop sandwiches from getting soggy?
Use a dry layer against the bread—lettuce, cheese, or butter—then keep juicy ingredients like tomatoes, pickles, and cranberry sauce in thin amounts. Assembly timing matters too; finish the sandwich as close to serving time as possible.
Can I freeze any of these?
Hand pies, empanadas, sausage rolls, sliders without fresh lettuce, scones, granola bars, cookies, and oat bars freeze well. Cold salads do not freeze well because the texture breaks when thawed.
What if I need a picnic spread for people with different diets?
Split the menu into categories: one meat option, one vegetarian salad, one bread or pastry item, and one sweet bake. That way nobody gets boxed into one plate, and you can cover most diets without making the basket feel scattered.
Which recipes work for kids without much fuss?
Mini sliders, pinwheels, hand pies, quiche bites, quesadilla triangles, and granola bars usually go over well because they’re easy to hold and not too messy. Keep mustard and pepper light if you know you’re feeding picky eaters.
How long can picnic food sit out in hot weather?
If the food contains dairy, mayo, meat, or fish, keep it out no longer than 2 hours, and aim for 1 hour when the temperature is high or the food sits in direct sun. Use smaller serving containers so only part of the picnic is out at a time.
A Basket Full of Cold-Weather Flavor
A picnic spread does not have to chase the same bright flavors every time. Sometimes the smarter move is to bring foods with a little more depth—roasted vegetables, mustard, cheddar, mushrooms, apples, rye, cranberries—then serve them cold, neat, and ready for a blanket.
That mix gives you a basket with range. Something crisp. Something creamy. Something salty. Something sweet at the end. If you pack it with a cooler and a little restraint, the whole thing feels like a thoughtful meal instead of a pile of random snacks, and that’s a better picnic to unpack.