
Simple sugar cookies can look like bakery-window pieces without turning into a production. The trick is not a fussy dough. It’s the quiet stuff: butter that’s soft but not greasy, a chill long enough to keep the edges sharp, and a finish that dries clean instead of sliding off in a sticky mess.
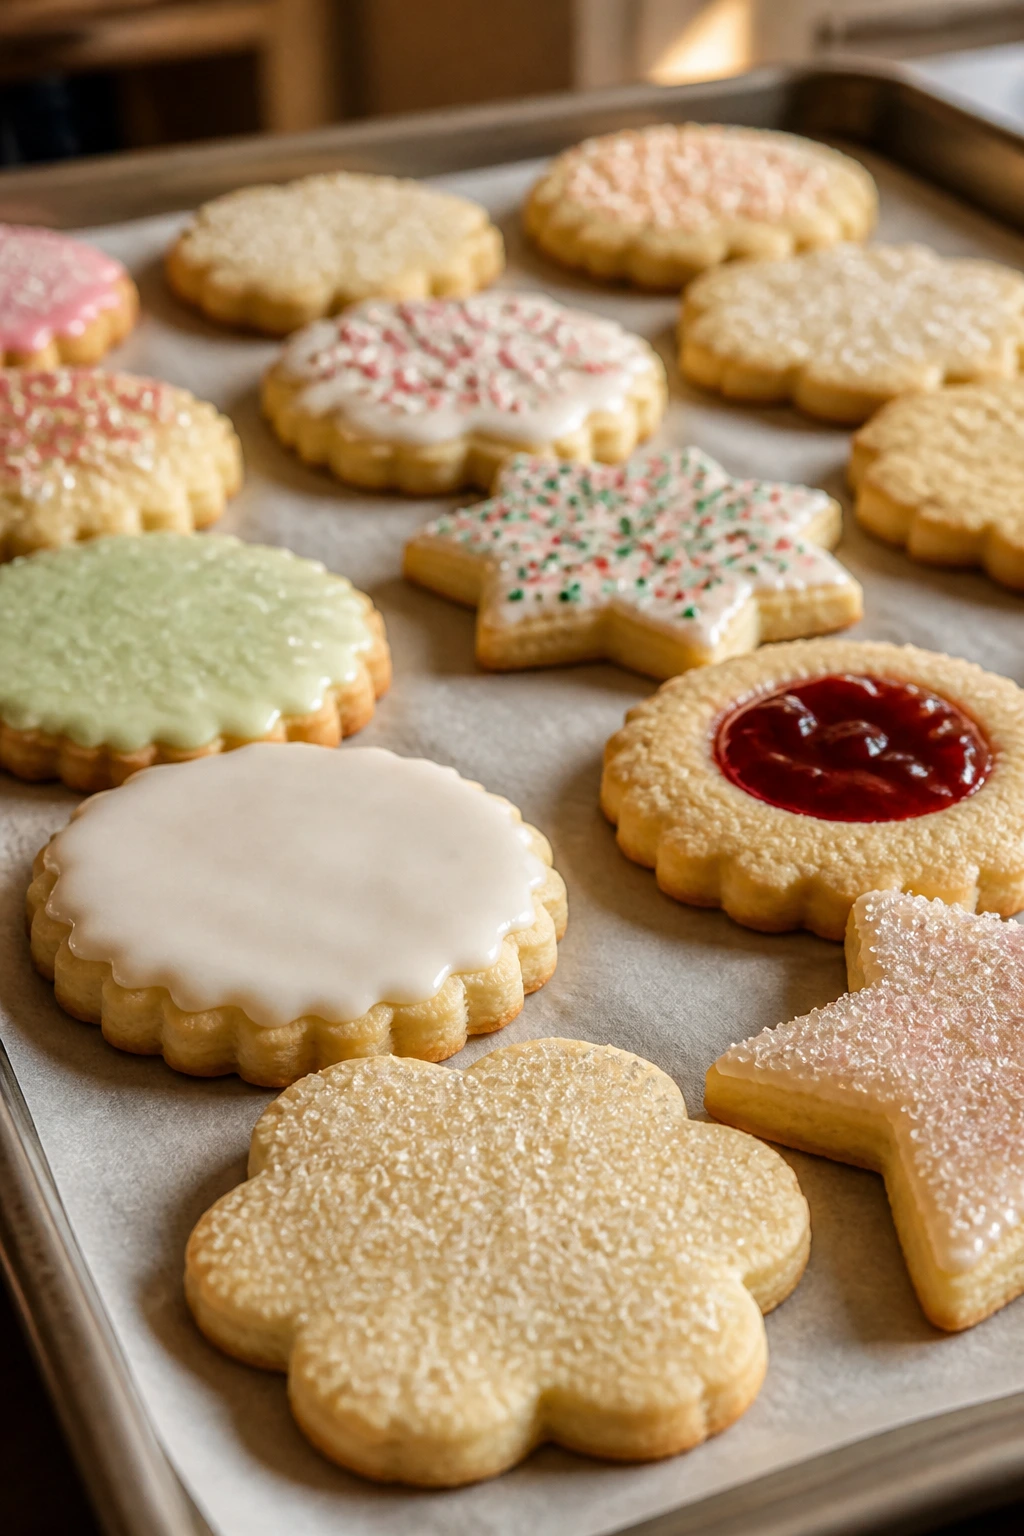
That’s why this kind of cookie is such a sweet spot for home baking. One base dough can turn into stars, hearts, blossoms, coins, wreaths, sandwich cookies, thumbprints, stained-glass pieces, and all the little polished extras that make a tray look hand-built instead of thrown together. You’re not fighting the dough. You’re steering it.
And yes, the details matter. If you’ve ever wondered why one sugar cookie spreads into a pale puddle while another holds a crisp cut line with tiny browned edges, the answer is usually hiding in the butter temperature, the flour ratio, or that last 15 minutes of chilling you were tempted to skip. That’s the difference between “fine” and the kind of cookie people lift carefully off the plate before it disappears.
Why These Cookies Keep Winning the Tray
- One Dough, Many Looks: A single butter-sugar base can be cut, stamped, sandwiched, dipped, drizzled, or filled, which means one shopping list can cover a whole dessert spread.
- Pantry Ingredients, Polished Finish: Flour, butter, sugar, egg, and one or two flavorings are enough to make cookies that look intentional once you add sanding sugar, glaze, or jam.
- Bake-and-Decorate Flexibility: Some of these are finished before baking, some after, and some with a quick dip or drizzle, so you can choose the level of effort that fits the day.
- Freezer-Friendly Dough: Most sugar cookie doughs chill well and freeze cleanly, which makes them a smart make-ahead option when you want pretty cookies without a last-minute scramble.
- Easy to Match the Mood: Lemon feels bright, almond feels old-school, chocolate makes things richer, and floral or spice notes give a tray a softer, more elegant look.
- They Travel Well: Once the icing sets, these cookies stack neatly and hold their shape better than softer frosted desserts that smear the second the lid closes.
The Dough Rules That Keep Sugar Cookies Clean and Pretty
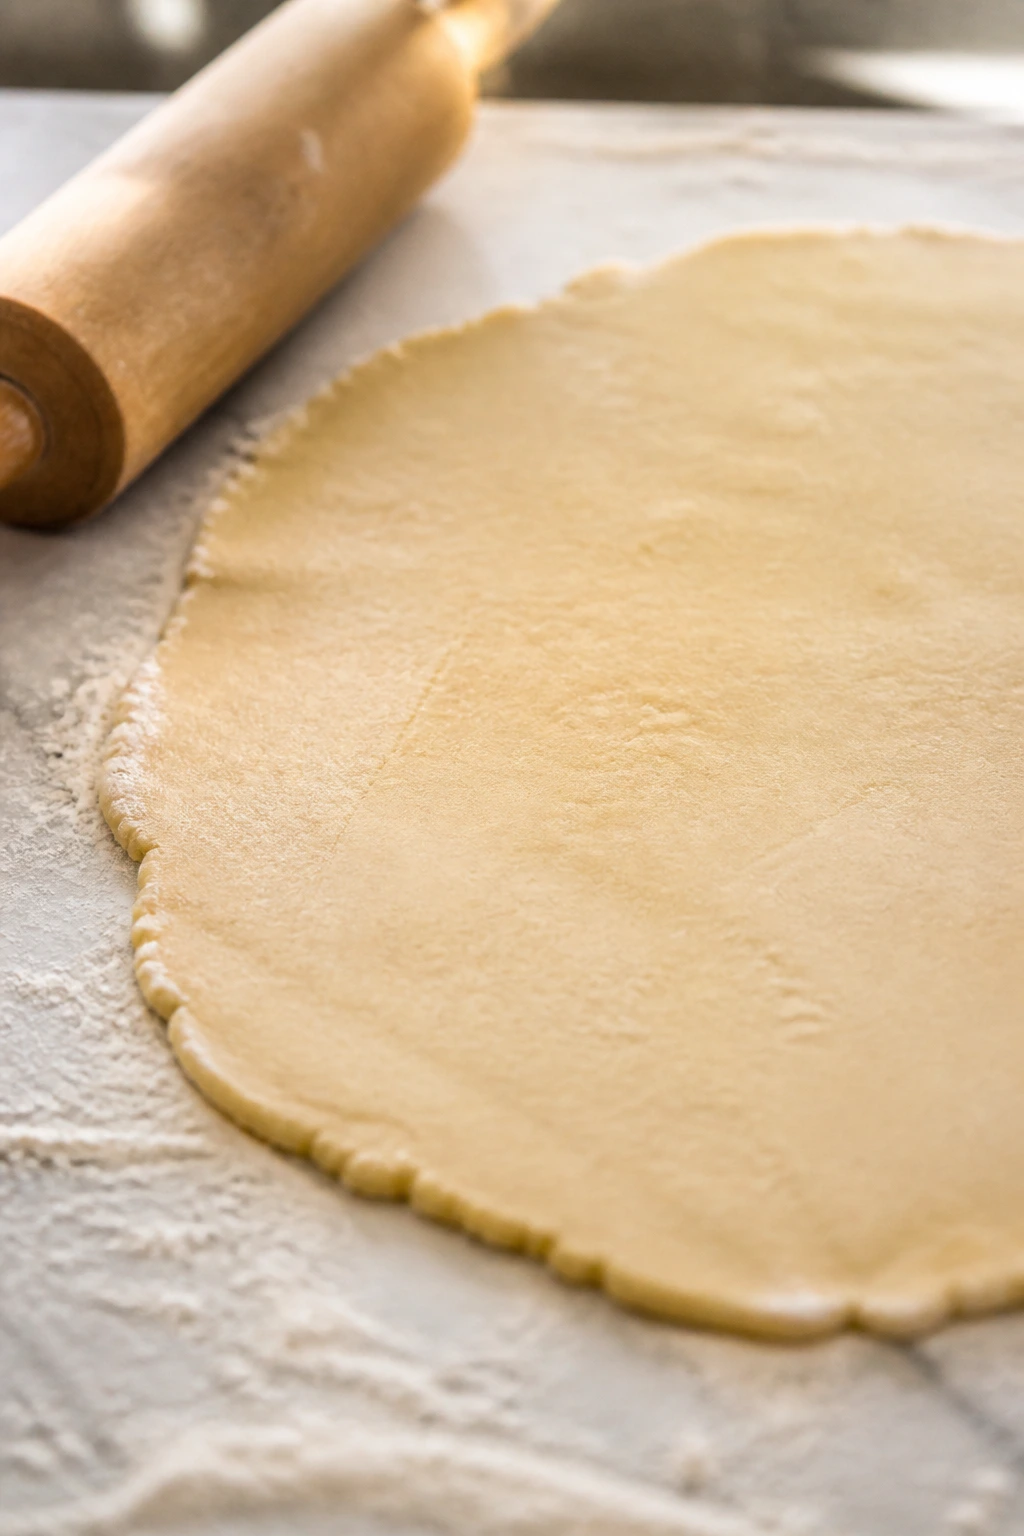
The best-looking sugar cookies usually start with a dough that’s a little boring in the bowl and very obedient on the tray. That’s the whole point. You want a dough that rolls without tearing, cuts without ragged edges, and bakes into a shape that still looks like the cutter you used.
Cold dough helps. So does measuring the flour with some care instead of packing it in like you’re stuffing a suitcase. Too much flour makes the cookies dry and heavy; too little makes them spread, and spread is the enemy of pretty lines. I like to think of sugar cookie dough as a small negotiation. Give it enough butter for tenderness, enough flour for structure, and enough chill time to stop the oven from turning it into a lopsided mess.
The other thing people miss is finish. Sparkling sugar, thin glaze, royal icing, sliced almonds, a jam center, even a single stripe of melted chocolate—each one changes the look in a way the dough alone cannot. Pretty cookies are rarely complicated. They’re usually just neatly handled.
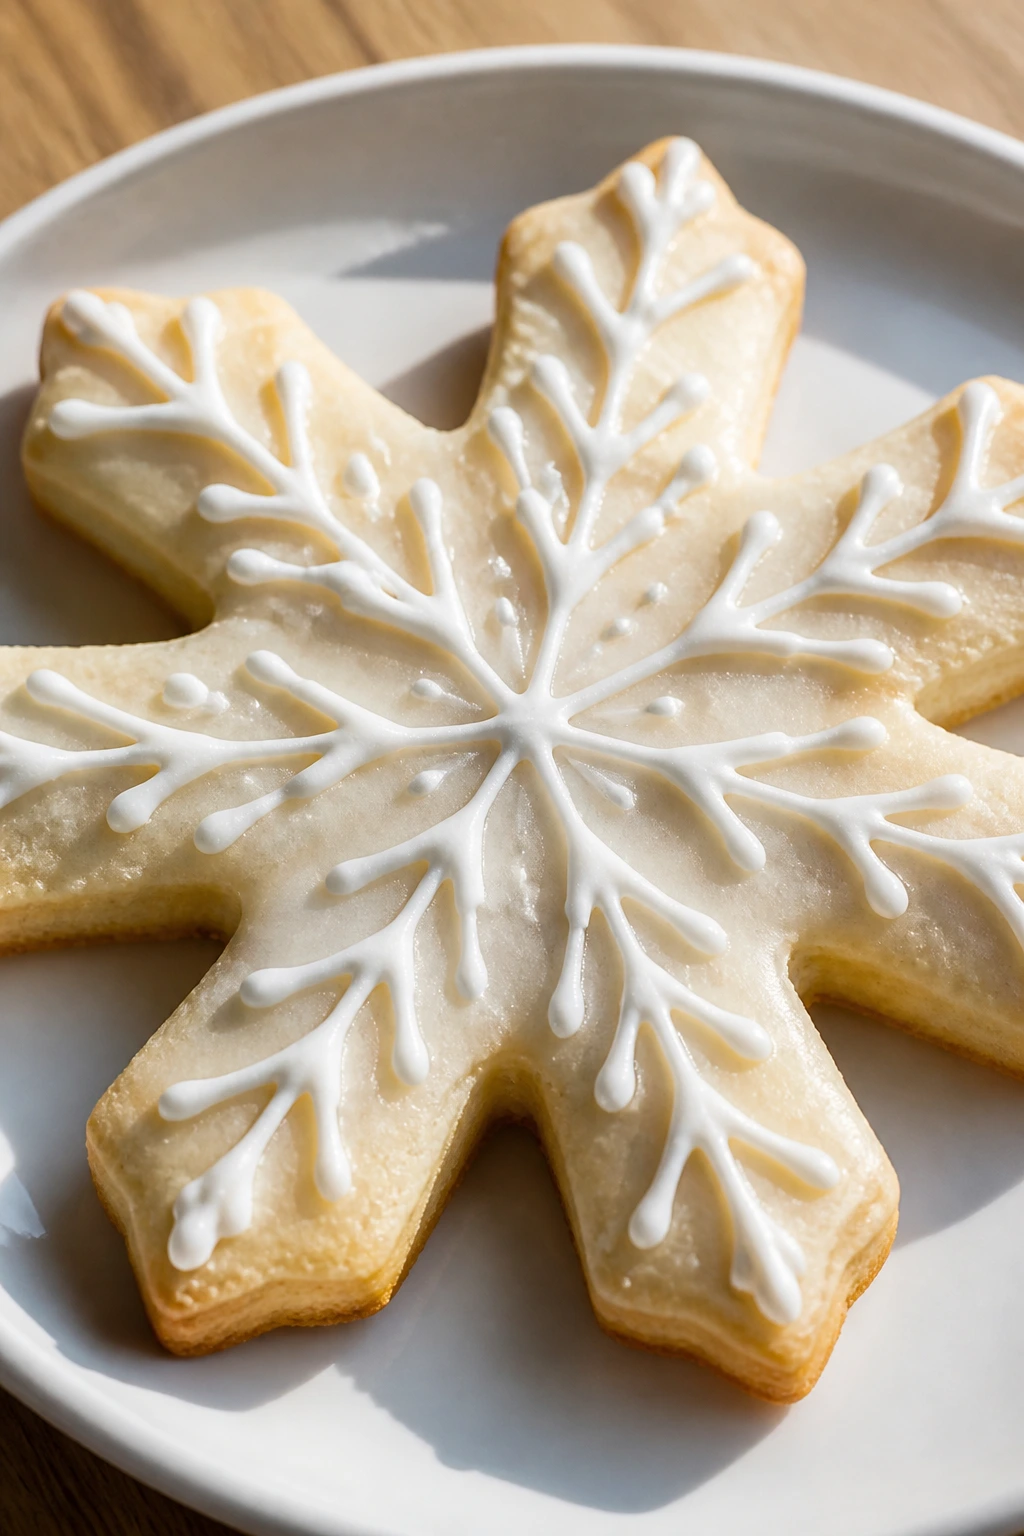
1. Vanilla Bean Snowflake Cutouts
These are the cookies I reach for when I want a tray that looks calm and clean instead of loud. The vanilla bean paste gives the dough tiny black flecks, and the white icing over the top makes those snowflake edges look crisp, almost etched.
Why It Works: The dough is sturdy enough for sharp cutters, but the vanilla bean keeps it from tasting flat. A short chill—30 to 45 minutes—is enough to keep the snowflakes from blurring in the oven.
Key Ingredients:
- 2 1/2 cups all-purpose flour
- 1/2 teaspoon baking powder
- 1/2 teaspoon fine salt
- 1 cup unsalted butter, softened
- 3/4 cup granulated sugar
- 1 large egg
- 2 teaspoons vanilla bean paste
- 2 tablespoons milk, if needed
- 1 cup powdered sugar
- 1 to 2 tablespoons milk or lemon juice for icing
Quick Steps:
- Whisk flour, baking powder, and salt in a bowl.
- Cream butter and sugar for 2 to 3 minutes, until pale and fluffy.
- Beat in the egg and vanilla bean paste.
- Mix in dry ingredients, chill 30 minutes, then roll to 1/4 inch thick.
- Cut snowflakes, bake at 350°F for 8 to 10 minutes, and cool fully before icing.
Equipment for This Recipe:
- Rolling pin
- Snowflake cookie cutter
- Parchment-lined baking sheet
- Cooling rack
How to Serve This Dish: Stack them on a white platter with a few extra flakes of sanding sugar scattered around the base. They’re good with black tea or a small glass of cold milk.
Pro Tips for This Recipe:
- Roll the dough between two sheets of parchment so you do not add extra flour.
- Bake one tray at a time for the most even color.
- Let the icing set for at least 20 minutes before stacking.
Variations on This Dish:
- Lemon Snowflakes: Swap in 1 tablespoon lemon zest and use lemon juice in the icing.
- Almond Snowflakes: Replace half the vanilla with 1 teaspoon almond extract.
- Sparkle Edge Version: Dip the cut edges in sanding sugar before baking.
Common Mistakes to Avoid with This Dish:
- Skipping the chill: Warm dough spreads and softens the snowflake points. Chill it until the surface feels firm.
- Overbaking the edges: Pull them when the bottoms are just barely golden, not deep brown.
- Icing too soon: Warm cookies melt thin icing into a puddle. Cool them completely first.
2. Lemon-Zest Ribbon Stars
These are the bright, sharp little cookies that wake up a tray. The lemon zest sits in the dough like tiny flecks of yellow citrus oil, and the ribbon of glaze across the top gives each star a clean finish without hiding the shape.
Why It Works: Lemon in both the dough and the glaze keeps the flavor from getting lost in the butter. A pinch of salt sharpens the citrus and keeps the cookie from tasting like sweet paste.
Key Ingredients:
- 2 1/2 cups all-purpose flour
- 1/2 teaspoon baking powder
- 1/2 teaspoon fine salt
- 1 cup unsalted butter, softened
- 3/4 cup granulated sugar
- 1 large egg
- 1 tablespoon lemon zest
- 1 tablespoon lemon juice
- 1 cup powdered sugar
- 1 to 2 tablespoons lemon juice for glaze
- Sanding sugar, for the tops
Quick Steps:
- Mix the flour, baking powder, and salt.
- Rub the lemon zest into the sugar with your fingers, then cream it with the butter.
- Add the egg and lemon juice, then stir in the dry ingredients.
- Chill 30 minutes, roll to 1/4 inch, cut stars, and bake at 350°F for 8 to 9 minutes.
- Drizzle with lemon glaze and finish with a pinch of sanding sugar.
Equipment for This Recipe:
- Mixing bowl
- Microplane or fine grater
- Star cutter
- Small spoon or piping bag for glaze
How to Serve This Dish: These look nicest in a loose fan on a pale blue plate, with the glaze set in thin lines. They go well with tea that has a little bergamot or plain yogurt on the side if you’re serving a dessert board.
Pro Tips for This Recipe:
- Zest the lemon straight into the sugar so the oil gets absorbed.
- Keep the glaze thin enough to ribbon, not blanket.
- If the dough feels sticky, chill it another 10 minutes instead of adding flour.
Variations on This Dish:
- Orange Star Cookies: Use orange zest and orange juice in the glaze.
- Lemon Poppy Version: Add 1 tablespoon poppy seeds to the dough.
- Double Citrus: Mix half lemon zest and half lime zest for a sharper edge.
Common Mistakes to Avoid with This Dish:
- Using bottled juice only: The zest is what gives the cookie its real lemon smell.
- Rolling too thin: Stars at 1/8 inch brown too fast and lose their shape.
- Glazing while warm: The icing runs off the edges instead of setting on top.
3. Almond Lace Hearts
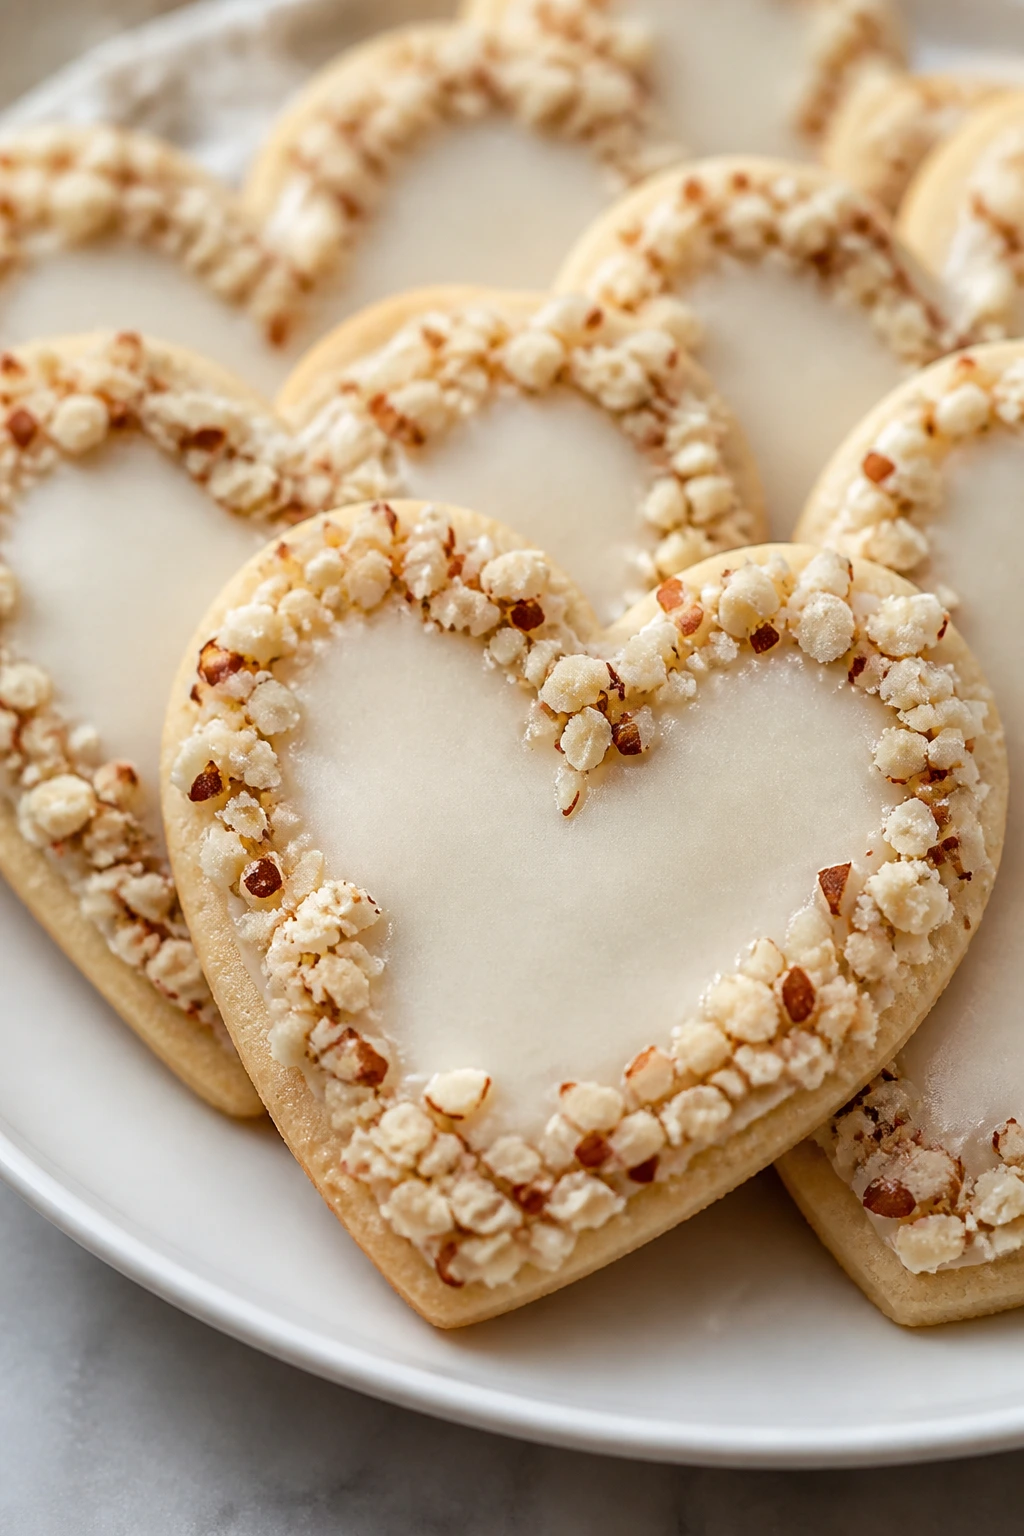
Almond extract has a way of making a cookie taste dressed up without much work. These hearts get a thin glaze and a scatter of finely chopped almonds around the edge, which gives them a delicate, frilly look once they bake.
Why It Works: Almond extract is strong, so you only need a little. That small amount is enough to make the buttery dough taste more grown-up and less like plain sugar bread.
Key Ingredients:
- 2 1/2 cups all-purpose flour
- 1/2 teaspoon baking powder
- 1/2 teaspoon fine salt
- 1 cup unsalted butter, softened
- 2/3 cup granulated sugar
- 1 large egg
- 1 1/2 teaspoons almond extract
- 1/2 cup sliced almonds, finely chopped
- 1 cup powdered sugar
- 1 to 2 tablespoons milk
- 1/4 teaspoon almond extract for glaze
Quick Steps:
- Whisk the dry ingredients together.
- Cream butter and sugar, then beat in the egg and almond extract.
- Stir in the dry ingredients and chill the dough 30 minutes.
- Roll to 1/4 inch, cut hearts, brush the edges lightly with milk, and press them into chopped almonds.
- Bake at 350°F for 9 minutes, cool, then drizzle with almond glaze.
Equipment for This Recipe:
- Heart cutter
- Baking sheet
- Small pastry brush
- Cooling rack
How to Serve This Dish: These are pretty on a cake stand with a few whole sliced almonds tucked around the base. They pair well with coffee, especially if you like a cookie that leans a little nutty and dry at the edges.
Pro Tips for This Recipe:
- Chop the almonds very fine so they cling to the dough.
- Use a gentle hand with almond extract; too much tastes sharp fast.
- Bake until the bottoms barely color so the hearts stay pale and tidy.
Variations on This Dish:
- Cherry Almond Hearts: Add a tiny spoon of cherry jam in the center after baking.
- Rose Almond Hearts: Swap half the almond extract for rosewater.
- Toasted Almond Version: Toast the chopped almonds first for deeper flavor.
Common Mistakes to Avoid with This Dish:
- Overdoing the extract: Almond extract can turn bitter if you pour with a heavy hand.
- Pressing too much topping on: A dense almond crust can make the edges crumble.
- Trying to move them hot: These are fragile until fully cooled.
4. Brown Butter Hearth Cookies
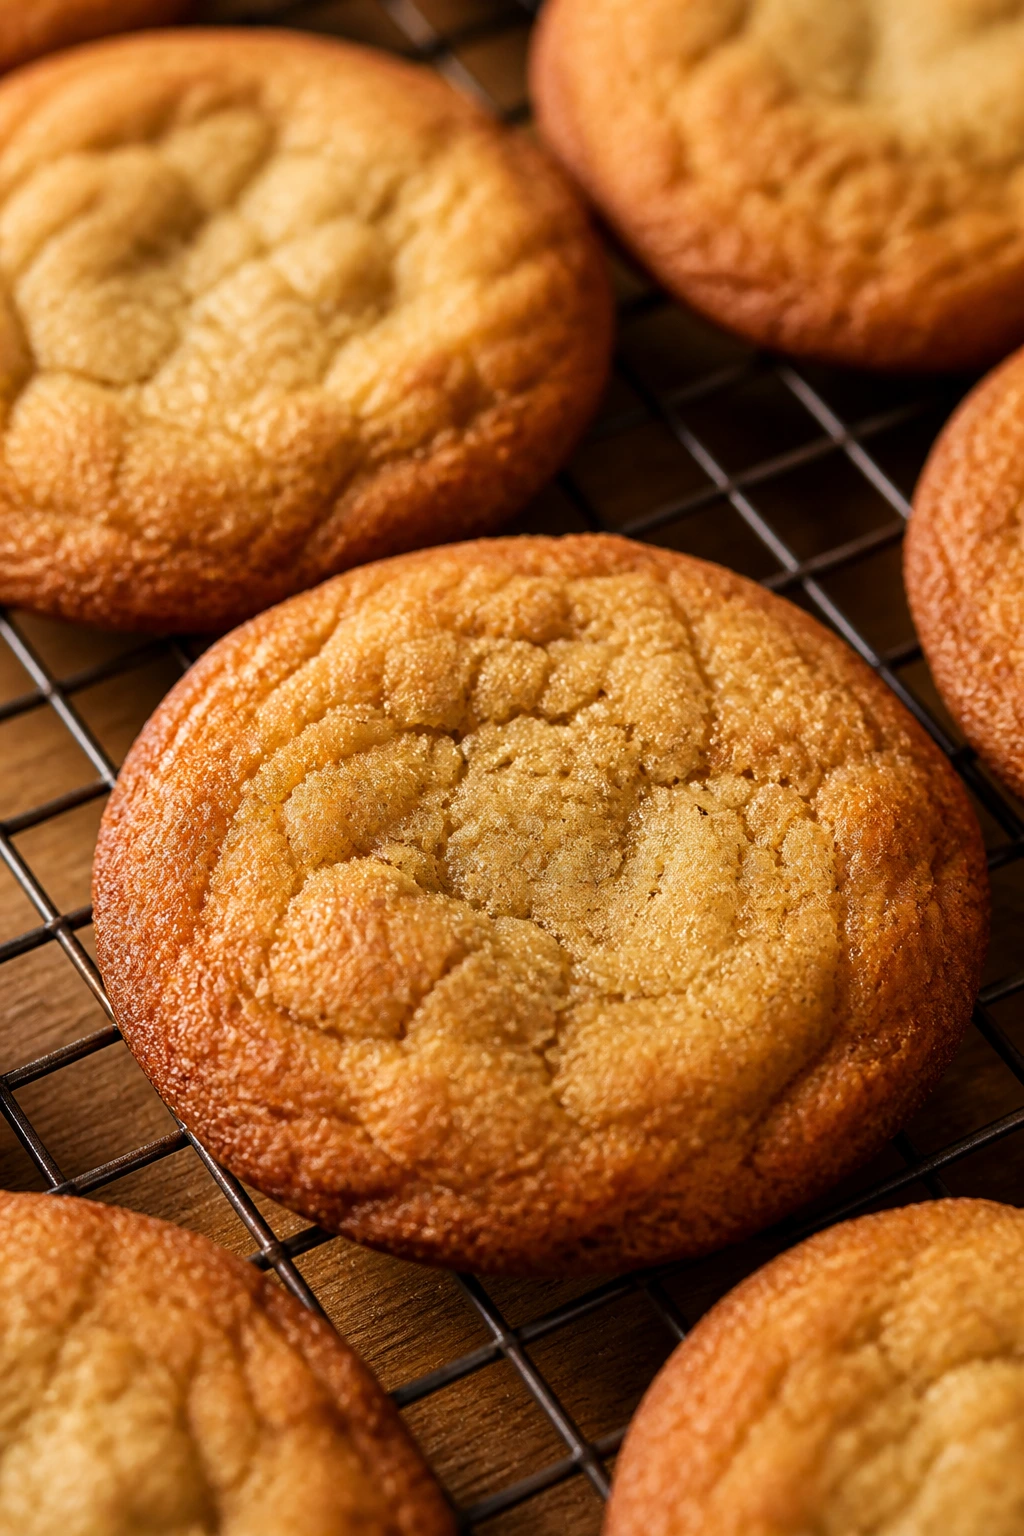
Brown butter gives you that nutty smell that fills the kitchen before the cookies even go in the oven. These are simple round cookies with a soft center and a slightly deeper color, the kind that look richer than they are because the butter did half the work.
Why It Works: Browning the butter pulls out toasted notes that plain sugar cookie dough doesn’t have. The flavor reads more caramel-like, and the cookie gets a faintly sandy edge that looks handsome without any icing at all.
Key Ingredients:
- 1 cup unsalted butter
- 2 1/2 cups all-purpose flour
- 1/2 teaspoon baking powder
- 1/2 teaspoon fine salt
- 3/4 cup granulated sugar
- 1 large egg
- 2 teaspoons vanilla extract
- 2 tablespoons brown sugar
- Flaky salt, for finishing
Quick Steps:
- Brown the butter in a saucepan until it smells nutty and the solids turn amber; cool for 10 minutes.
- Whisk flour, baking powder, and salt.
- Cream the browned butter with granulated sugar and brown sugar, then add the egg and vanilla.
- Mix in the dry ingredients, chill 45 minutes, and scoop 1 1/2-inch rounds.
- Bake at 350°F for 9 to 11 minutes and finish with a few flakes of salt.
Equipment for This Recipe:
- Small saucepan
- Cookie scoop
- Baking sheet
- Parchment paper
How to Serve This Dish: Put them on a dark plate so the browned edges show up. They’re best beside coffee, though a cold glass of milk works if you want the salt-and-butter thing to land harder.
Pro Tips for This Recipe:
- Cool the brown butter before mixing or the dough gets greasy.
- Chill until the dough feels scoopable and firm.
- Pull them when the centers still look a touch soft; they finish on the tray.
Variations on This Dish:
- Chocolate Chunk Brown Butter: Add 3/4 cup chopped dark chocolate.
- Hazelnut Brown Butter: Swap 1/4 cup flour for hazelnut flour.
- Cinnamon Hearth Cookies: Add 1 teaspoon cinnamon to the dry mix.
Common Mistakes to Avoid with This Dish:
- Burning the butter: You want brown and nutty, not black and bitter.
- Skipping the chill: Warm brown butter dough spreads fast.
- Overbaking for color: They darken a little after the tray comes out.
5. Cinnamon Sugar Diamond Cookies
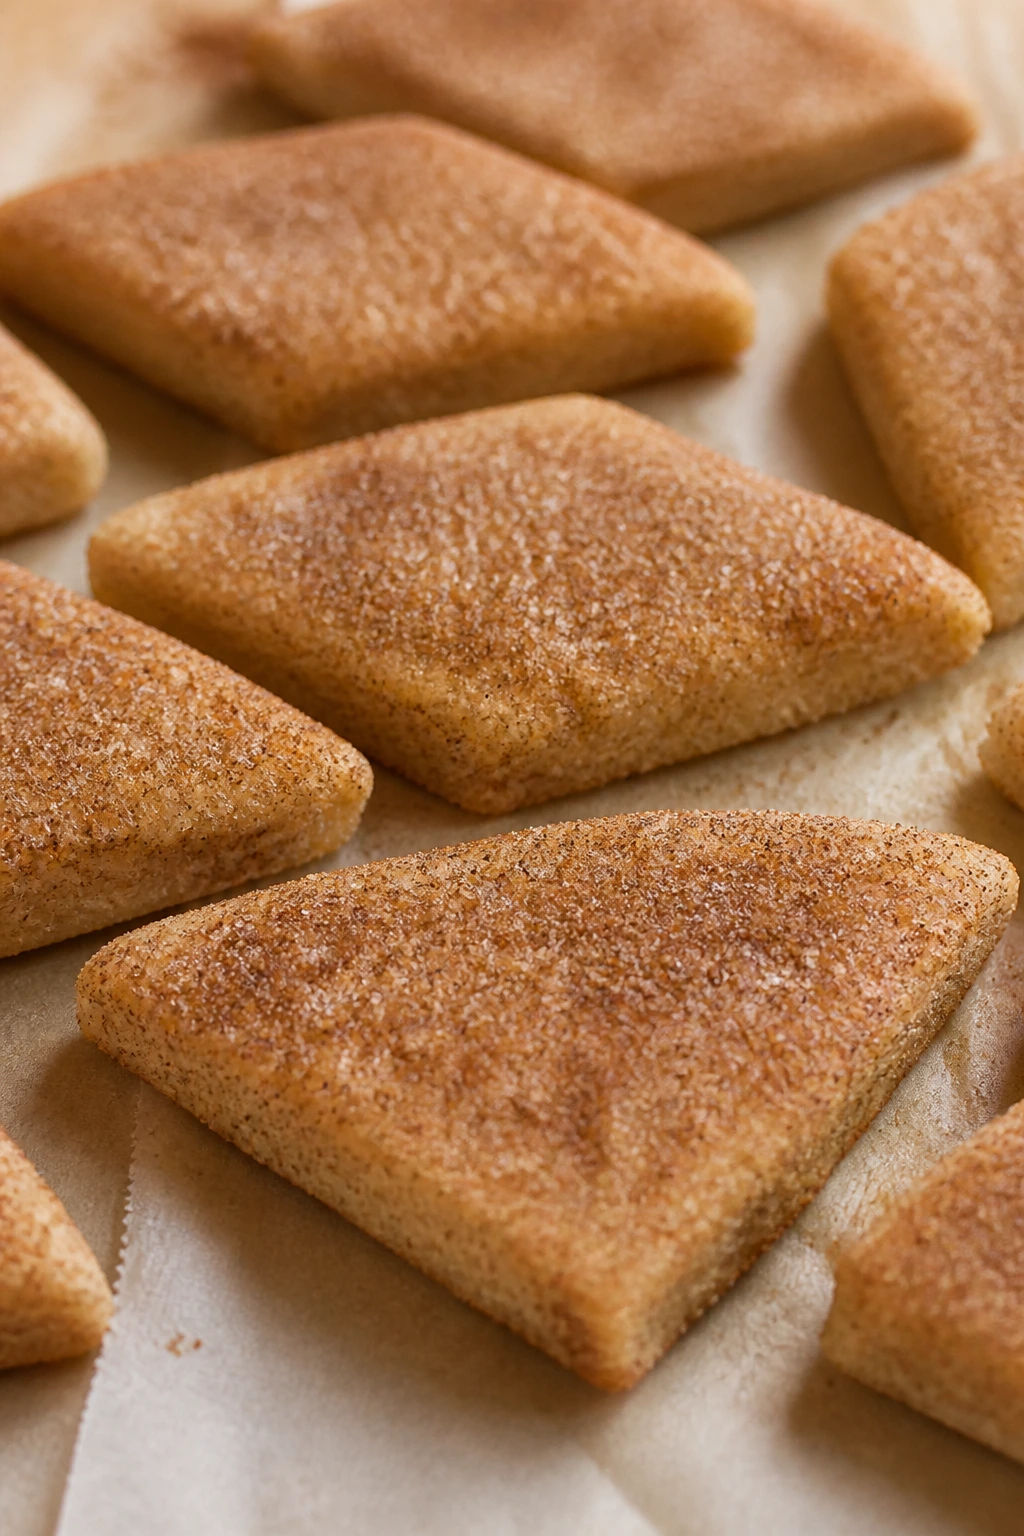
These are the cookies that smell like a bakery the second they hit the oven. Cut into diamonds or simple squares, then rolled in cinnamon sugar, they look plain in the best way: tidy, warm, and a little old-fashioned.
Why It Works: Cinnamon sugar on the outside gives you sparkle and crunch, while the dough stays tender underneath. The diamond shape makes them look more deliberate than a basic round drop cookie.
Key Ingredients:
- 2 1/2 cups all-purpose flour
- 1/2 teaspoon baking powder
- 1/2 teaspoon salt
- 1 cup unsalted butter, softened
- 3/4 cup granulated sugar
- 1 large egg
- 2 teaspoons vanilla extract
- 2 tablespoons cinnamon sugar for coating
- 1 tablespoon milk, if needed
Quick Steps:
- Whisk flour, baking powder, and salt.
- Cream butter and sugar, then beat in the egg and vanilla.
- Stir in dry ingredients, chill 30 minutes, and roll to 1/4 inch.
- Cut into diamonds or squares, brush lightly with milk, and coat with cinnamon sugar.
- Bake at 350°F for 8 to 10 minutes, until the edges just begin to turn golden.
Equipment for This Recipe:
- Rolling pin
- Sharp knife or pastry wheel
- Baking sheet
- Shallow bowl for coating
How to Serve This Dish: Pile them in a napkin-lined bowl or stack them in a little tower on a wooden board. They’re the cookie version of a sweater and work well with hot tea, cider, or plain coffee.
Pro Tips for This Recipe:
- Use fine cinnamon sugar so the coating sticks evenly.
- Cut the shapes after rolling, not after baking; they look cleaner that way.
- If the sugar won’t cling, a quick milk brush helps.
Variations on This Dish:
- Pumpkin Spice Diamonds: Add 1 1/2 teaspoons pumpkin pie spice to the dough.
- Cardamom Sugar Squares: Swap half the cinnamon for ground cardamom.
- Extra Crisp Version: Bake 1 minute longer for a crunchier edge.
Common Mistakes to Avoid with This Dish:
- Coating dough that’s too wet: The sugar slides off instead of sticking.
- Crowding the tray: These need a little space so the edges stay neat.
- Letting them cool on a hot pan too long: The bottoms can darken fast.
6. Rosewater Petal Cookies

Rosewater is one of those ingredients people either love or fear, and in a sugar cookie it has to be handled with a light hand. Here, the dough is pale and tender, the glaze is blush pink, and the whole cookie looks softer than it tastes.
Why It Works: A tiny bit of rosewater gives the cookie a floral note that reads elegant instead of perfumey. Paired with vanilla, it tastes like a pastry shop case, not a bottle of soap.
Key Ingredients:
- 2 1/2 cups all-purpose flour
- 1/2 teaspoon baking powder
- 1/2 teaspoon salt
- 1 cup unsalted butter, softened
- 3/4 cup granulated sugar
- 1 large egg
- 1 teaspoon vanilla extract
- 1/2 teaspoon rosewater
- 1 cup powdered sugar
- 1 to 2 tablespoons milk
- A drop of pink food coloring, optional
Quick Steps:
- Mix flour, baking powder, and salt.
- Cream butter and sugar, then beat in the egg, vanilla, and rosewater.
- Add the dry ingredients, chill 30 minutes, and roll to 1/4 inch.
- Cut petal or oval shapes and bake at 350°F for 8 to 9 minutes.
- Cool completely, then drizzle with pink glaze.
Equipment for This Recipe:
- Oval or petal cutter
- Mixing bowl
- Offset spatula for glaze
- Wire rack
How to Serve This Dish: These look lovely on a white platter with a few dried rose petals around the edge, if you have them. Serve with tea, preferably something plain enough not to argue with the floral note.
Pro Tips for This Recipe:
- Measure rosewater carefully; a little goes a long way.
- Keep the glaze thin so it dries glossy instead of thick.
- Chill the cut shapes on the tray for 10 minutes before baking if your kitchen is warm.
Variations on This Dish:
- Orange Blossom Version: Swap rosewater for orange blossom water.
- Strawberry Rose Cookies: Add a spoon of strawberry powder to the glaze.
- Pistachio Trim: Press finely chopped pistachios into the glaze edge.
Common Mistakes to Avoid with This Dish:
- Too much rosewater: The cookies can turn sharp and soapy.
- Overcoloring the glaze: Pale pink looks more elegant than neon.
- Baking until brown: These should stay pale with just a hint of color underneath.
7. Orange Cardamom Coins
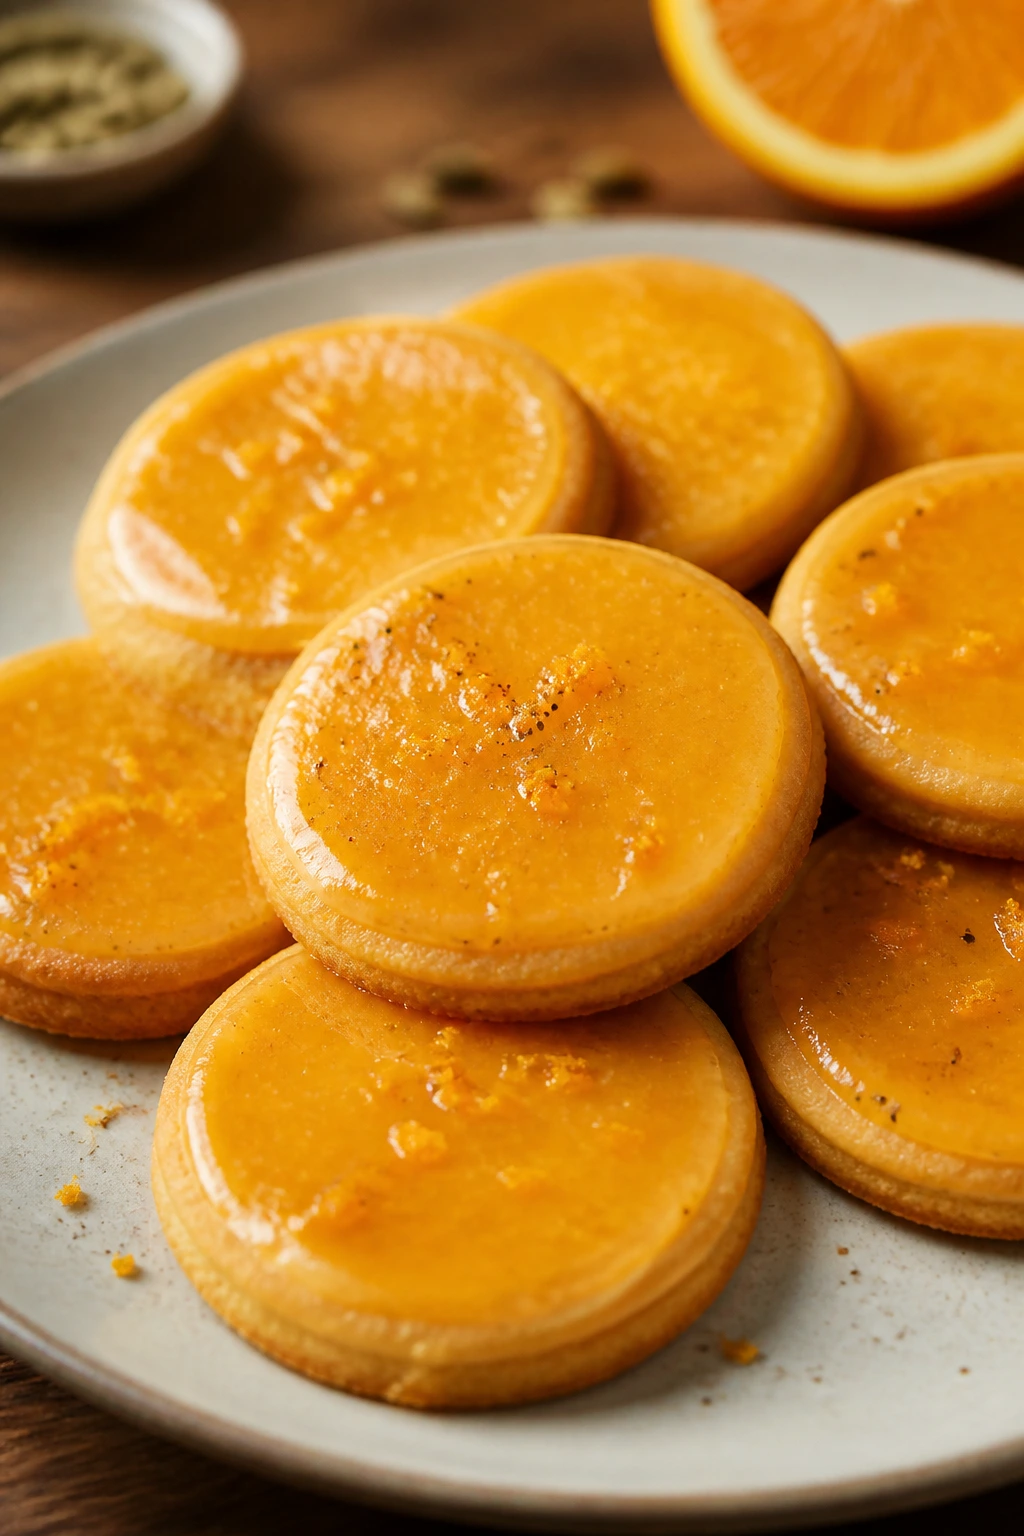
Orange and cardamom are one of those pairings that feels calm and expensive, even when the cookie itself is made from pantry basics. These coins bake flat and round, with a light glaze and a warm spice note that hangs around after the bite.
Why It Works: Orange zest brightens the dough, while cardamom keeps the flavor from turning one-note. Coin shapes make the finish neat, and a little glaze adds shine without hiding the cookie.
Key Ingredients:
- 2 1/2 cups all-purpose flour
- 1/2 teaspoon baking powder
- 1/2 teaspoon salt
- 1 cup unsalted butter, softened
- 3/4 cup granulated sugar
- 1 large egg
- 1 tablespoon orange zest
- 1 teaspoon ground cardamom
- 1 cup powdered sugar
- 1 to 2 tablespoons orange juice
Quick Steps:
- Whisk the flour, baking powder, salt, and cardamom.
- Cream butter, sugar, and orange zest together until fragrant.
- Beat in the egg, then stir in the dry ingredients and chill 30 minutes.
- Roll to 1/4 inch and cut 2-inch rounds.
- Bake at 350°F for 8 to 10 minutes, then cool and glaze with orange juice icing.
Equipment for This Recipe:
- Round cutter
- Microplane
- Baking sheet
- Small whisk for glaze
How to Serve This Dish: Stack them in a neat spiral on a simple plate; the orange glaze looks best against plain porcelain. They’re a good match for tea, coffee, or a dessert board with dried apricots.
Pro Tips for This Recipe:
- Use freshly grated orange zest for the strongest aroma.
- Crumble cardamom pods yourself if you want a cleaner spice flavor.
- Let the glaze set before packing them together.
Variations on This Dish:
- Lemon Cardamom Coins: Swap orange for lemon.
- Honey Orange Finish: Replace half the glaze liquid with warm honey.
- Seeded Edge Version: Roll the edges in sesame seeds before baking.
Common Mistakes to Avoid with This Dish:
- Using stale cardamom: The spice gets dusty fast.
- Rolling too thin: The cookies lose their tender middle.
- Glazing warm cookies: The finish slips right off.
8. Earl Grey Glazed Rounds
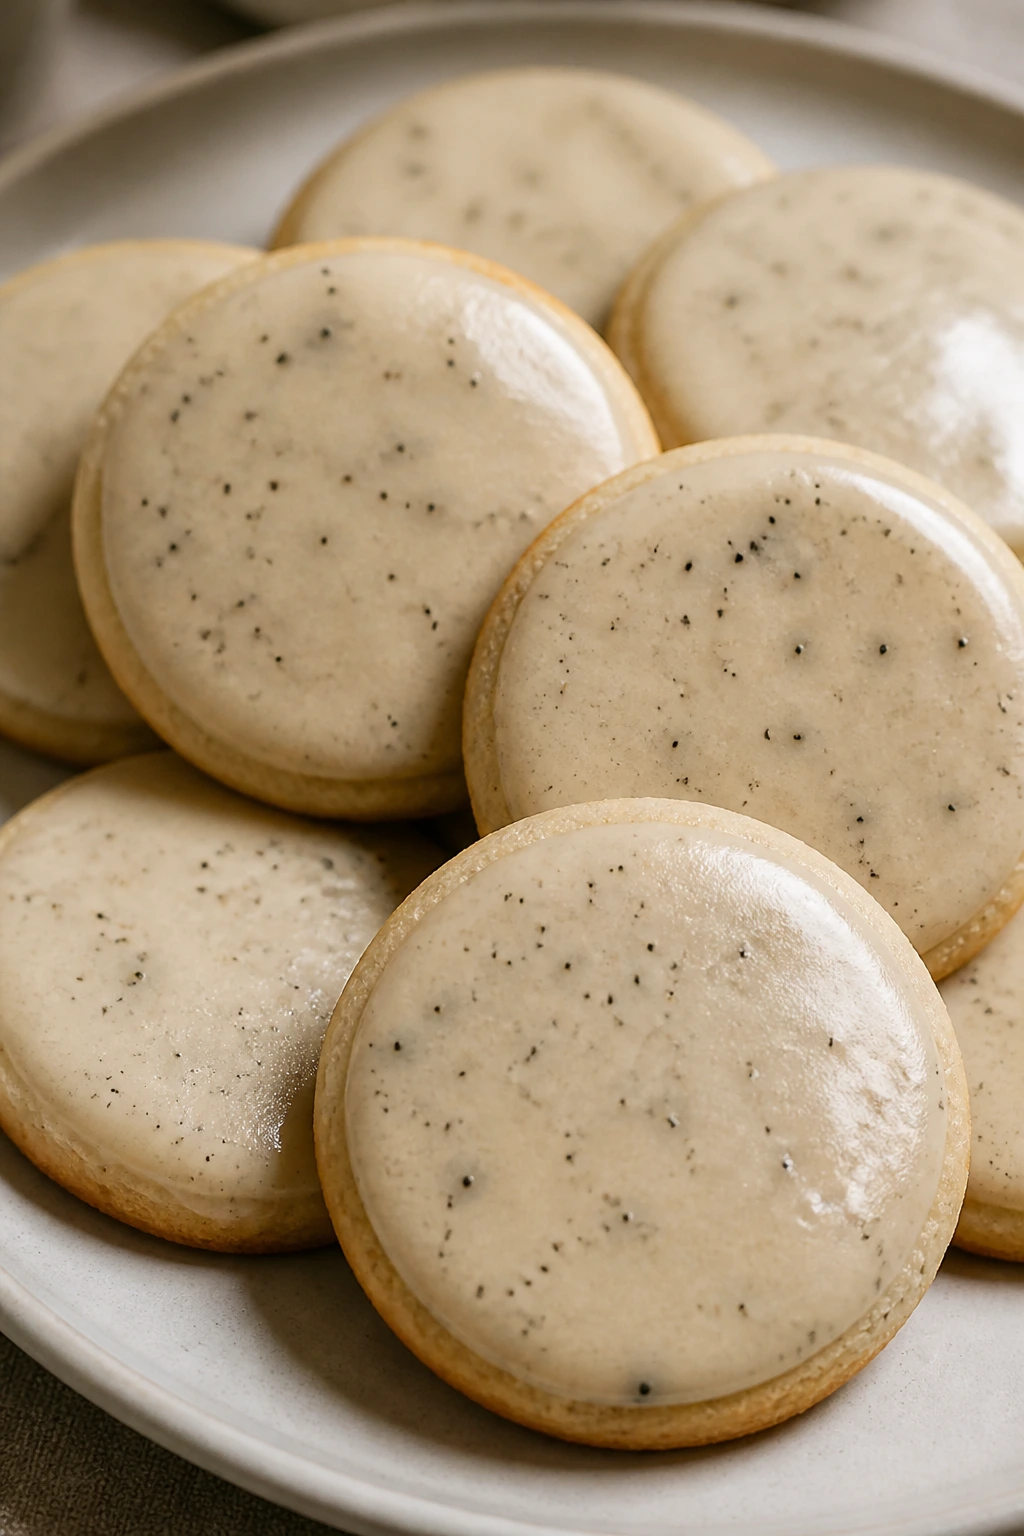
If you like tea-flavored desserts that taste like tea instead of perfume, these are the right kind. The dough carries a faint bergamot note, and the glaze gets steeped with Earl Grey, which gives the cookie a polished, almost porcelain look.
Why It Works: The tea works best when it’s grounded by butter and vanilla. Too much and it gets dusty; just enough and it tastes refined without turning fussy.
Key Ingredients:
- 2 1/2 cups all-purpose flour
- 1/2 teaspoon baking powder
- 1/2 teaspoon salt
- 1 cup unsalted butter, softened
- 3/4 cup granulated sugar
- 1 large egg
- 1 teaspoon vanilla extract
- 2 Earl Grey tea bags, finely crushed
- 1 cup powdered sugar
- 1 to 2 tablespoons brewed tea, cooled
Quick Steps:
- Mix flour, baking powder, salt, and crushed tea.
- Cream butter and sugar, then add the egg and vanilla.
- Stir in the dry ingredients, chill 30 minutes, and roll the dough to 1/4 inch.
- Cut rounds and bake at 350°F for 8 to 9 minutes.
- Cool fully and glaze with powdered sugar and cooled tea.
Equipment for This Recipe:
- Food-safe tea grinder or rolling pin
- Round cutter
- Baking sheet
- Small bowl for glaze
How to Serve This Dish: Serve them on a tray with a teacup nearby if you like the look of a proper tea break. They work especially well with milk tea or a straight black tea that echoes the bergamot.
Pro Tips for This Recipe:
- Crush the tea bags very fine so you don’t get crunchy bits.
- Keep the glaze thin; a thick one hides the tea flavor.
- Bake just until the bottoms color lightly.
Variations on This Dish:
- Lavender Earl Grey: Add 1/4 teaspoon culinary lavender.
- Vanilla Tea Cookies: Skip the glaze and dust with powdered sugar.
- Honey Tea Finish: Stir 1 teaspoon honey into the glaze.
Common Mistakes to Avoid with This Dish:
- Using coarse tea leaves: They can feel scratchy in the dough.
- Oversteeping the glaze liquid: Bitter tea can take over.
- Skipping the cool-down: Warm cookies soften the glaze too much.
9. Peppermint Stripe Sandwiches
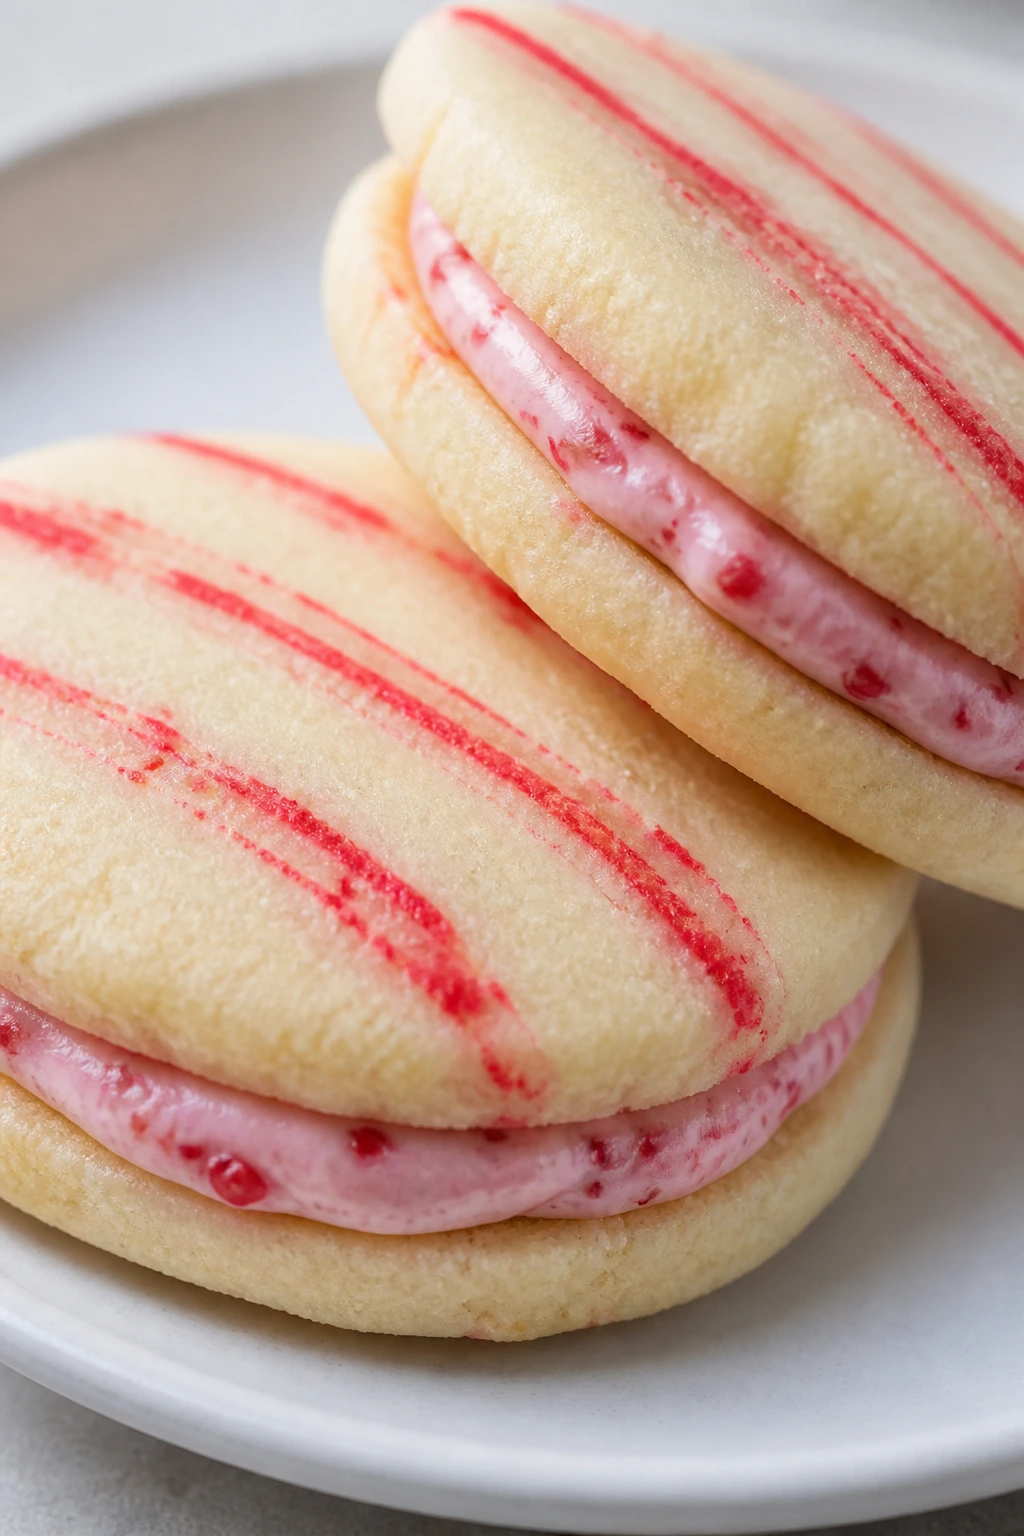
These are festive in a straightforward way: two crisp cookies, a pale peppermint filling, and a striped drizzle that makes the whole thing look much more complicated than it is. They’re the kind of cookie people pick up twice because they’re trying to figure out how you made them.
Why It Works: Sandwiching gives you contrast—snappy edges, soft center, cool mint. The striped top makes them look decorated without a lot of piping skill.
Key Ingredients:
- 2 1/2 cups all-purpose flour
- 1/2 teaspoon baking powder
- 1/2 teaspoon salt
- 1 cup unsalted butter, softened
- 3/4 cup granulated sugar
- 1 large egg
- 1 teaspoon vanilla extract
- 1/2 teaspoon peppermint extract
- 1 1/2 cups powdered sugar
- 3 tablespoons butter, softened, for filling
- Red food coloring, optional
Quick Steps:
- Make the dough and chill it 30 minutes.
- Roll to 1/4 inch, cut rounds, and bake at 350°F for 8 to 9 minutes.
- Beat powdered sugar, butter, and peppermint extract into a smooth filling.
- Sandwich cooled cookies with the filling.
- Drizzle with a little white icing and add thin red stripes if you want the candy-cane look.
Equipment for This Recipe:
- Round cutter
- Hand mixer
- Piping bag or zip-top bag
- Cooling rack
How to Serve This Dish: These belong on a low plate, slightly overlapping, so the striped tops show. A mug of hot chocolate is the obvious partner, though strong coffee keeps the peppermint from feeling too sweet.
Pro Tips for This Recipe:
- Make sure both cookie halves are fully cool before filling.
- Use a very small amount of peppermint extract in the filling; it gets loud fast.
- Chill the assembled sandwiches 10 minutes before drizzling.
Variations on This Dish:
- Chocolate Mint Sandwiches: Add 2 tablespoons cocoa to the filling.
- Vanilla Mint Version: Skip the red stripe and use plain white drizzle.
- Thin Wafer Style: Roll the dough slightly thinner for a snappier bite.
Common Mistakes to Avoid with This Dish:
- Overfilling the middle: Filling squeezes out when you press the halves together.
- Using hot cookies: The buttercream melts and slides.
- Too much peppermint: It can taste like toothpaste if you pour with confidence instead of care.
10. Chocolate-Dipped Short Rounds
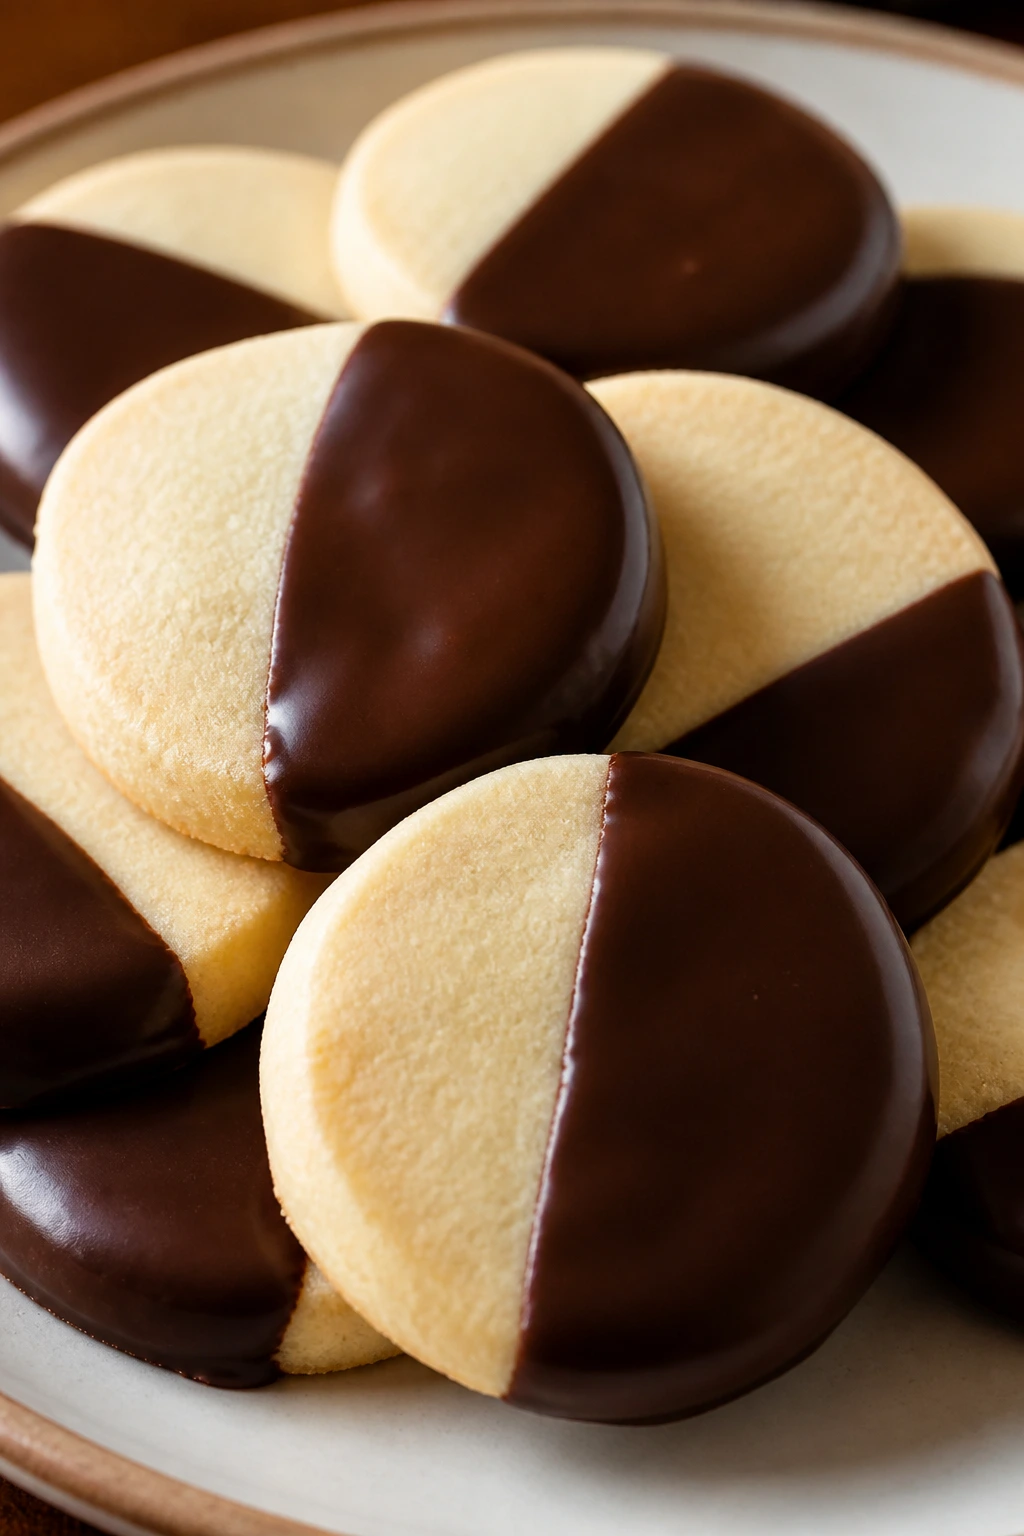
A plain buttery cookie gets surprisingly fancy the moment you dip half of it in dark chocolate. Add a little flaky salt or chopped pistachio and the whole tray looks like it came from a shop with a glass case and a very serious price tag.
Why It Works: The cookie itself stays simple, so the chocolate finishes the job. The dip adds shine, a little snap, and a darker color that makes the pale cookie shape stand out.
Key Ingredients:
- 2 1/2 cups all-purpose flour
- 1/2 teaspoon baking powder
- 1/2 teaspoon salt
- 1 cup unsalted butter, softened
- 3/4 cup granulated sugar
- 1 large egg
- 2 teaspoons vanilla extract
- 6 ounces dark chocolate, melted
- 2 tablespoons chopped pistachios or flaky salt
Quick Steps:
- Make the dough, chill it 30 minutes, and roll to 1/4 inch.
- Cut rounds and bake at 350°F for 8 to 10 minutes.
- Cool the cookies fully.
- Dip half of each cookie in melted chocolate.
- Sprinkle with pistachios or salt before the chocolate sets.
Equipment for This Recipe:
- Mixing bowl
- Baking sheet
- Heatproof bowl for chocolate
- Parchment paper
How to Serve This Dish: Arrange them in rows with the dipped side all facing the same way; it gives the plate a tidy, graphic look. They’re best with coffee or a very cold glass of milk.
Pro Tips for This Recipe:
- Let the chocolate cool slightly so it coats in a smooth layer.
- Dry the cookies well before dipping; crumbs ruin the finish.
- Choose a chocolate with at least 60% cocoa if you want contrast.
Variations on This Dish:
- White Chocolate Dip: Use white chocolate and a dusting of crushed freeze-dried raspberries.
- Orange Chocolate Rounds: Add orange zest to the dough.
- Toasted Coconut Edge: Press the dipped edge into toasted coconut.
Common Mistakes to Avoid with This Dish:
- Dipping warm cookies: The chocolate loses its shape and streaks.
- Using thin, cheap chocolate: It can set dull and chalky.
- Overloading the toppings: A thick crust makes them messy to bite.
11. Sprinkle-Rim Cutouts
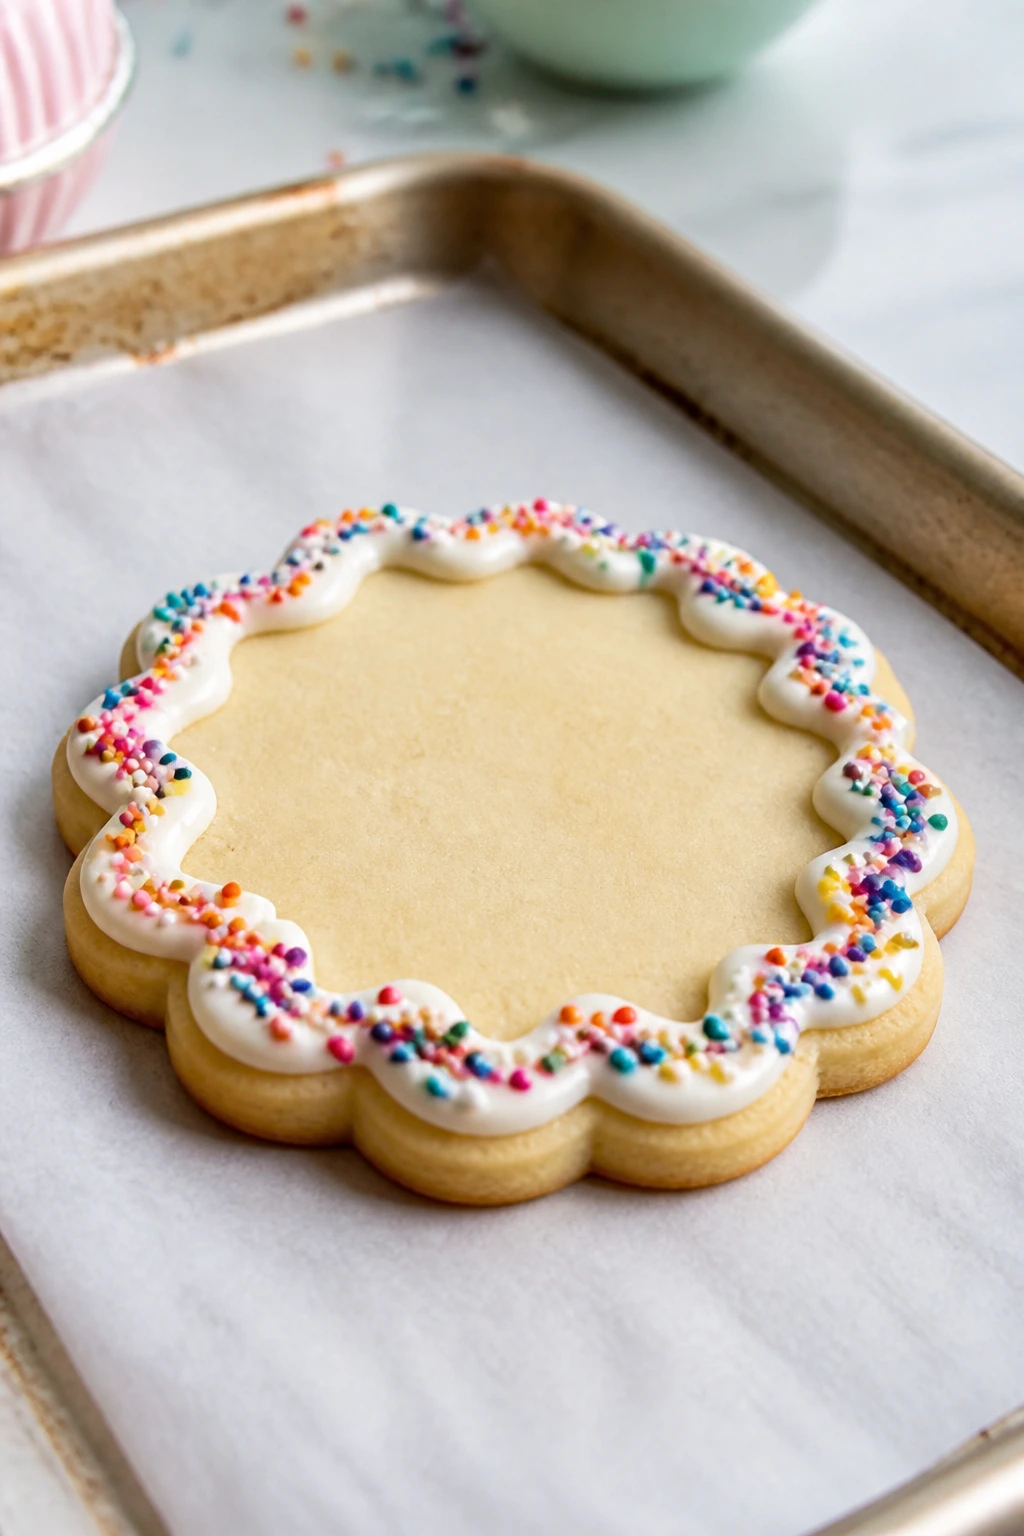
These are the birthday-party cookies that never look tired. The cookie itself is mild and buttery; the magic is the rim of icing and sprinkles around the edge, which turns a plain shape into something bright and playful.
Why It Works: Sprinkles need a wet edge to cling to, so the cookie gets an icing border while the center stays clean. That makes the shape look sharp and gives you color without drowning the design.
Key Ingredients:
- 2 1/2 cups all-purpose flour
- 1/2 teaspoon baking powder
- 1/2 teaspoon salt
- 1 cup unsalted butter, softened
- 3/4 cup granulated sugar
- 1 large egg
- 2 teaspoons vanilla extract
- 1 cup powdered sugar
- 1 to 2 tablespoons milk
- 1/2 cup sprinkles
Quick Steps:
- Make the dough and chill it 30 minutes.
- Roll to 1/4 inch and cut your chosen shapes.
- Bake at 350°F for 8 to 10 minutes and cool completely.
- Mix a thin icing and pipe or spread it around the edge.
- Press the iced rim into sprinkles while the icing is still wet.
Equipment for This Recipe:
- Cookie cutters
- Small bowl for sprinkles
- Piping bag or spoon
- Baking sheet
How to Serve This Dish: These look fun stacked on a cake stand or tucked into a clear jar. They’re a good fit for birthdays, brunch tables, or any tray that needs one loud color.
Pro Tips for This Recipe:
- Use nonpareils or jimmies that match the shape; tiny ones cling best.
- Keep the icing slightly thick so it holds the sprinkles.
- Work one cookie at a time before the icing crusts.
Variations on This Dish:
- Pastel Party Cutouts: Use soft pink, blue, and yellow sprinkles.
- Chocolate Rim Version: Dip the edge in melted chocolate first.
- Holiday Color Cutouts: Match the sprinkles to the season or event.
Common Mistakes to Avoid with This Dish:
- Icing the whole cookie too heavily: The sprinkles slide off and the cookie gets sticky.
- Waiting too long to add sprinkles: Dry icing won’t hold them.
- Using oversized sprinkles: They can fall off when the cookie is moved.
12. Jam Thumbprint Blossoms
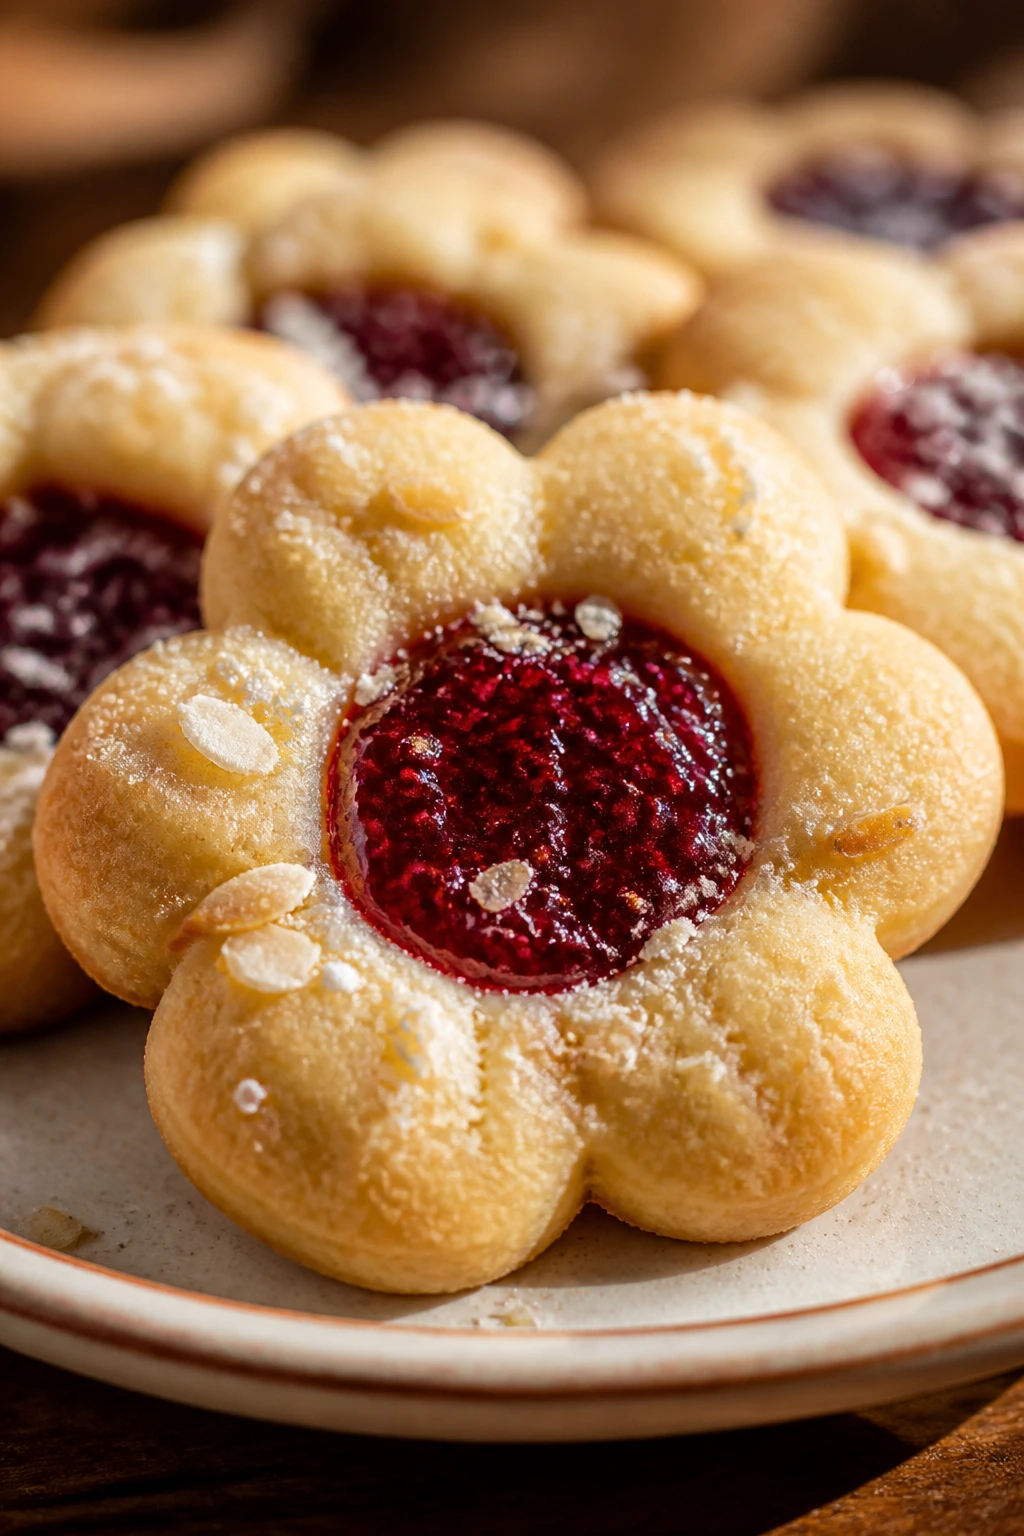
Thumbprint cookies are old-fashioned in a good way. The little well in the center catches jam like a jewel, and when you bake them into blossom shapes, the edges look softly petaled instead of flat.
Why It Works: The jam bakes into the cookie instead of sitting on top, which gives you a neat center and a bright spot of color. Raspberry or apricot both hold up well and don’t disappear into the dough.
Key Ingredients:
- 2 1/4 cups all-purpose flour
- 1/2 teaspoon salt
- 1 cup unsalted butter, softened
- 1/2 cup granulated sugar
- 1 large egg yolk
- 1 teaspoon vanilla extract
- 1/2 cup raspberry or apricot jam
- 1/4 cup finely chopped almonds, optional
Quick Steps:
- Cream butter and sugar, then beat in the egg yolk and vanilla.
- Add flour and salt, chill 30 minutes, and scoop 1-inch balls.
- Roll each ball in chopped almonds if using, then press a deep thumbprint into the center.
- Fill each well with 1/2 teaspoon jam.
- Bake at 350°F for 10 to 12 minutes, until the edges are just golden.
Equipment for This Recipe:
- Baking sheet
- Small scoop
- Measuring spoon
- Cooling rack
How to Serve This Dish: Put them in a shallow dish so the jam centers show from above. They look especially good beside a pot of tea or as part of a cookie plate with plainer butter cookies nearby.
Pro Tips for This Recipe:
- Make the indent before baking and gently reshape it halfway through if it puffs up.
- Warm thick jam with a spoonful of water if it’s too stiff to spoon cleanly.
- Let them cool on the pan for 5 minutes so the jam settles.
Variations on This Dish:
- Apricot Pistachio Blossoms: Use apricot jam and pistachio crumbs.
- Blueberry Lemon Blossoms: Add lemon zest to the dough.
- Chocolate Center Version: Fill the wells with chocolate ganache instead of jam.
Common Mistakes to Avoid with This Dish:
- Not making a deep enough well: The jam bakes out and runs.
- Overfilling the center: It bubbles over and sticks to the tray.
- Moving them too early: Soft jam tears the cookie apart.
13. Stained Glass Window Cookies
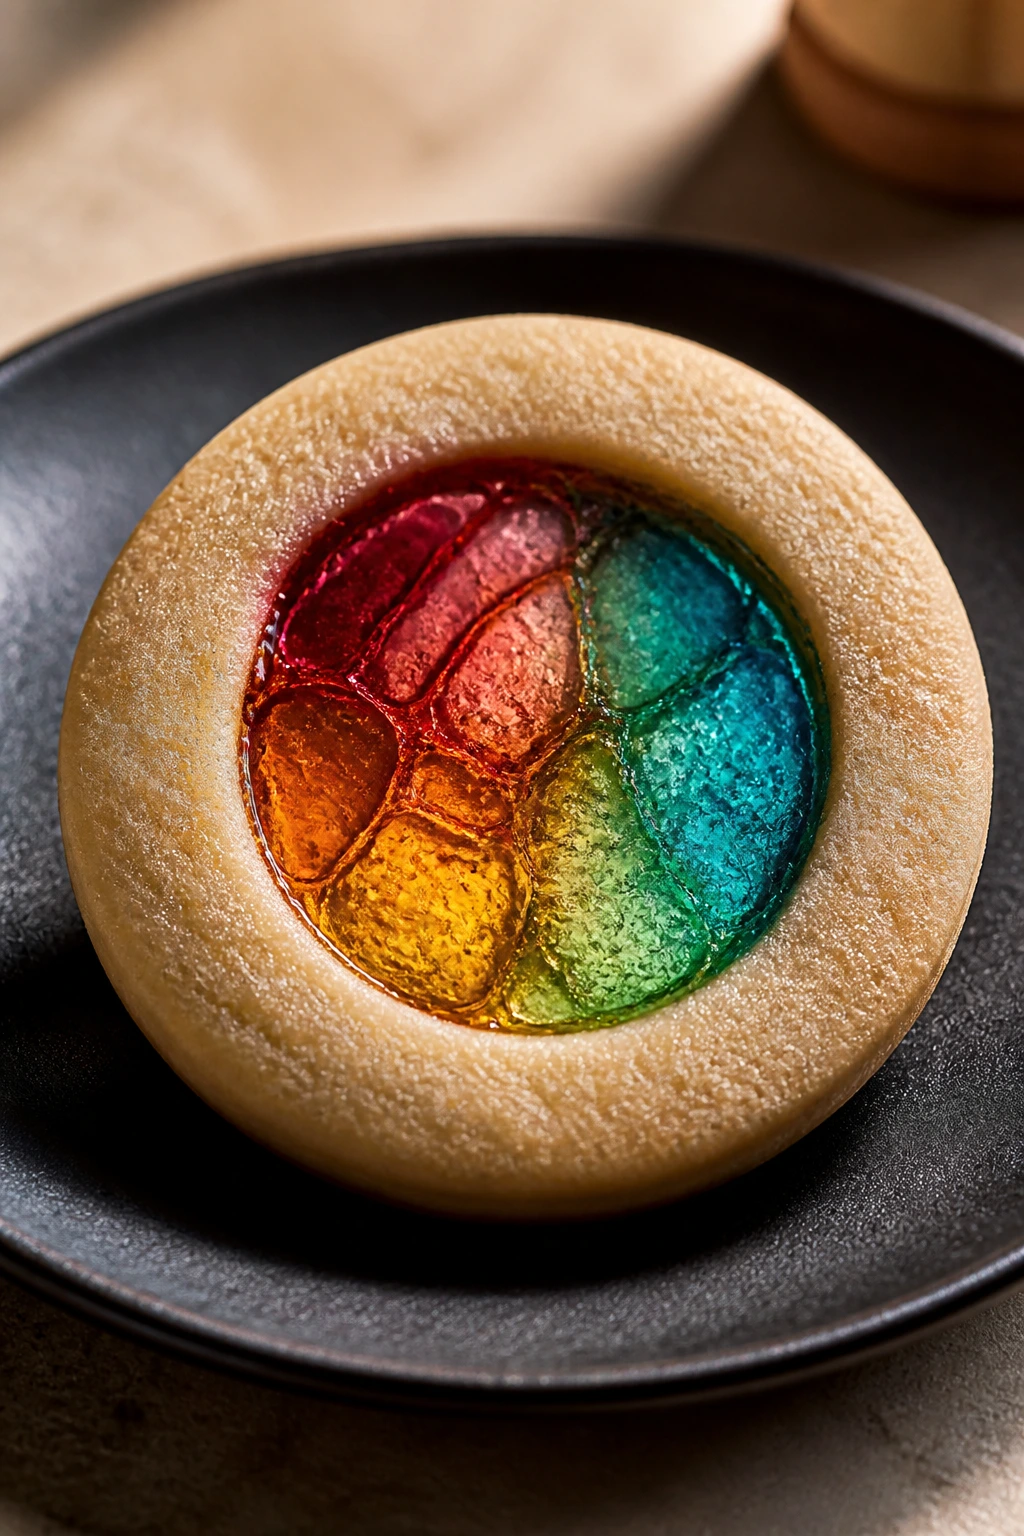
These are the show-offs in the group, and they earn it. A cutout ring of cookie surrounds a center of melted candy, so the middle turns glossy and jewel-like once it cools. They look fussy and somehow still feel simple.
Why It Works: Hard candy melts into a transparent center while the cookie holds the shape. You get color, shine, and shape in one bake, which is about as efficient as pretty gets.
Key Ingredients:
- 2 1/2 cups all-purpose flour
- 1/2 teaspoon baking powder
- 1/2 teaspoon salt
- 1 cup unsalted butter, softened
- 3/4 cup granulated sugar
- 1 large egg
- 2 teaspoons vanilla extract
- 1 cup crushed hard candies in mixed colors
- Powdered sugar for dusting, optional
Quick Steps:
- Make and chill the dough for 30 minutes.
- Roll to 1/4 inch and cut shapes; then cut a smaller shape from the center.
- Bake the outer cookies for 4 minutes at 350°F.
- Fill the center with crushed candy, then bake 4 to 5 minutes more until melted.
- Cool completely on the tray before moving.
Equipment for This Recipe:
- Two cookie cutters, one large and one small
- Baking sheet lined with parchment or foil
- Small zip-top bag for candy crushing
- Cooling rack
How to Serve This Dish: Set them on a dark plate or hang them on the rim of a dessert stand so the colored centers catch the eye. They’re more about the look than the bite, so serve them where people can notice the light passing through.
Pro Tips for This Recipe:
- Crush the candy into small pieces so it melts evenly.
- Use parchment, not bare pans, or the melted candy can stick hard.
- Let the cookies cool fully before touching the centers.
Variations on This Dish:
- Red and Gold Windows: Use red, orange, and amber candies for a warmer look.
- Starry Window Version: Cut a tiny star inside a larger round.
- Citrus Candy Centers: Use lemon or orange candies for a brighter flavor.
Common Mistakes to Avoid with This Dish:
- Using chewy candy: It will not melt into a clean glass center.
- Overfilling the opening: Candy spills over and fuses the whole cookie to the tray.
- Trying to lift them hot: The candy center is molten and fragile.
14. Piped Hydrangea Cookies
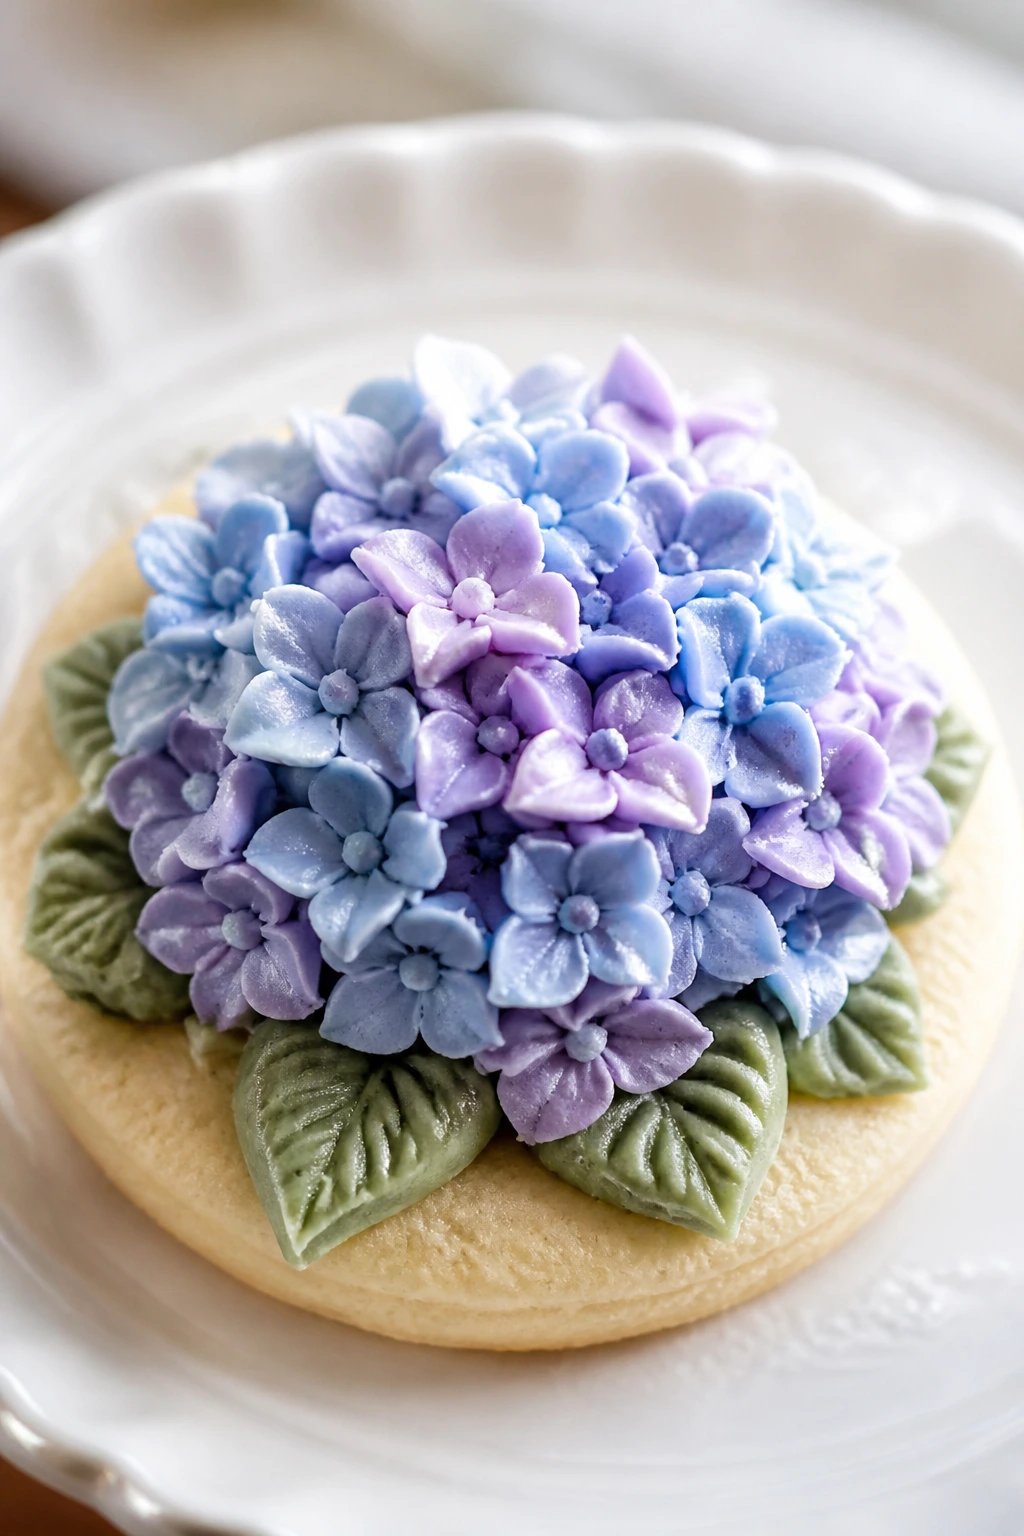
These are the cookies that look like a bouquet if you stack them right. A pale base cookie carries a swirl of blue, lavender, and soft green icing, piped in short little petals that build into a hydrangea effect without needing a flower press.
Why It Works: The flower shape comes from clusters of small icing dots or stars, so you do not need perfect piping. The cookie base stays plain and sturdy, which gives the frosting a good surface to sit on.
Key Ingredients:
- 2 1/2 cups all-purpose flour
- 1/2 teaspoon baking powder
- 1/2 teaspoon salt
- 1 cup unsalted butter, softened
- 3/4 cup granulated sugar
- 1 large egg
- 2 teaspoons vanilla extract
- 2 cups royal icing or stiff buttercream
- Blue, lavender, and green gel food coloring
Quick Steps:
- Make, chill, roll, cut, and bake round cookies at 350°F for 8 to 10 minutes.
- Cool completely.
- Tint the icing in 2 or 3 shades.
- Pipe small clustered petals from the outside in.
- Let the flowers dry until the surface feels set.
Equipment for This Recipe:
- Round cutter
- Piping bags with small star tips
- Gel food coloring
- Cooling rack
How to Serve This Dish: They’re best on a pale platter with a few whole blossoms or edible flowers nearby if you have them. Use them for showers, tea tables, or any spread that wants a soft floral note.
Pro Tips for This Recipe:
- Keep the icing stiff enough to hold petal shapes.
- Work in small clusters; crowded piping turns muddy.
- Let each color set a few minutes before adding the next.
Variations on This Dish:
- Peony Cookies: Use pink and cream icing in larger petal clusters.
- Single-Color Hydrangeas: Stick to one blue tone for a cleaner look.
- Mini Bouquet Cookies: Pipe flowers only on half the cookie and leave the rest plain.
Common Mistakes to Avoid with This Dish:
- Using icing that’s too soft: The petals collapse.
- Trying to pipe on warm cookies: The frosting slides.
- Overmixing the colors: The flower loses the layered look.
15. Coconut Snowballs
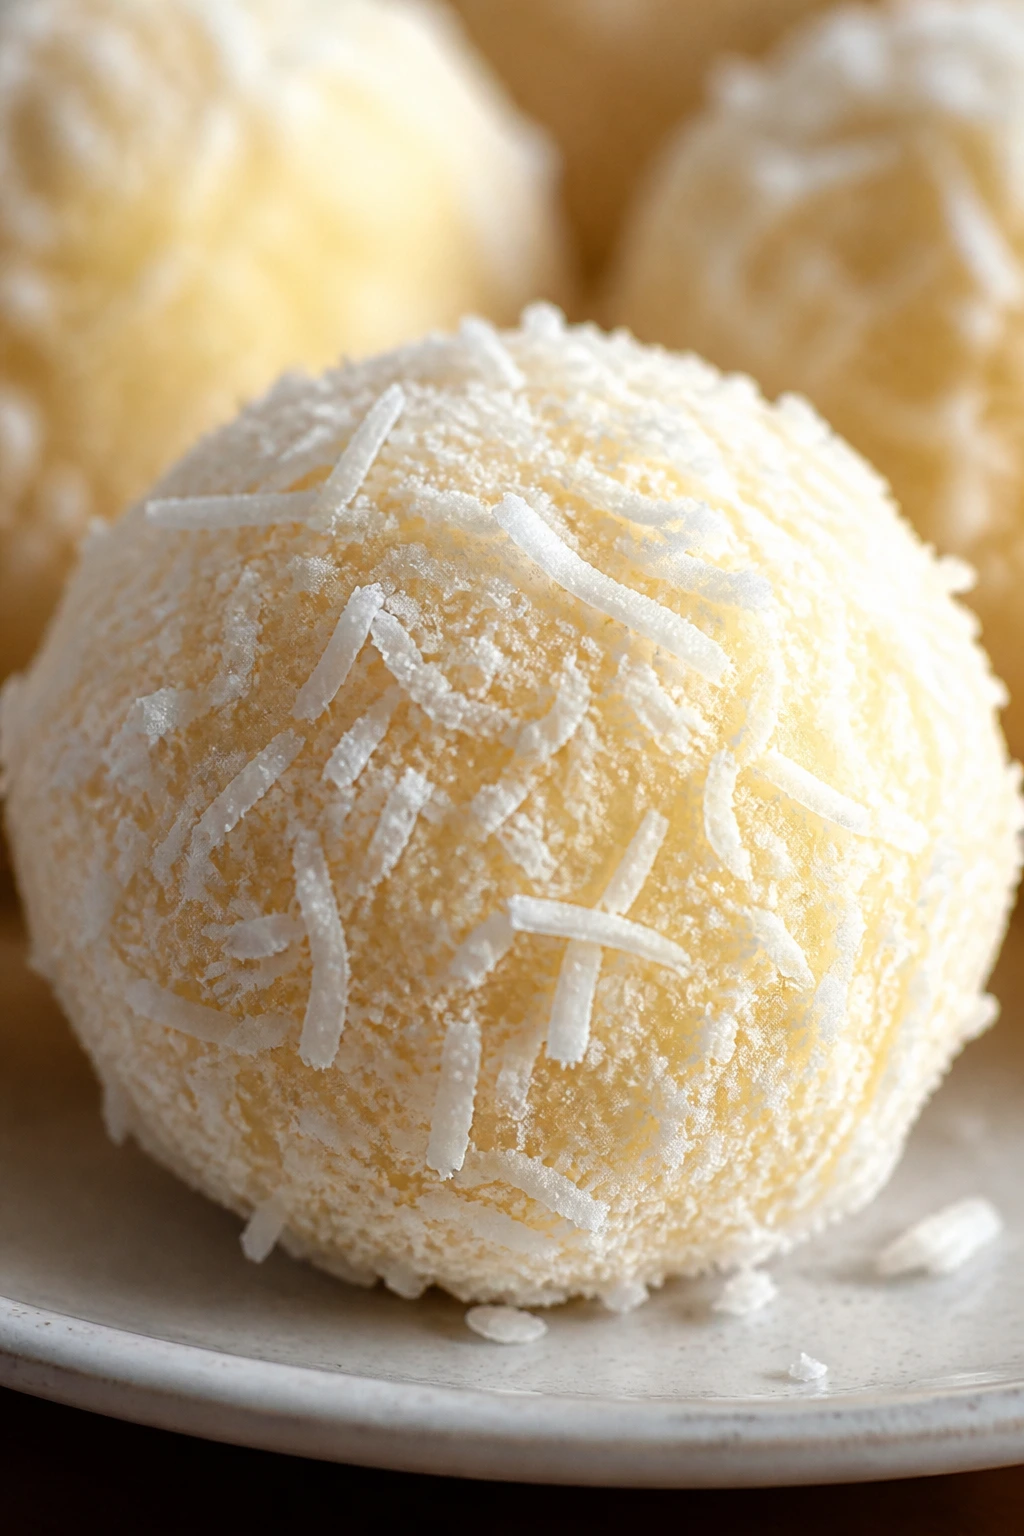
These are round, pale cookies rolled in coconut so they look like little drifted snowballs with a tender center. They’re sweet, soft, and a little chewy at the edges, which gives them a different texture from the crisp cutouts in the rest of the batch.
Why It Works: Coconut on the outside adds texture and a clean white finish. A slightly softer dough makes the center feel rich while the shredded coating keeps the outside interesting to bite into.
Key Ingredients:
- 2 1/4 cups all-purpose flour
- 1/2 teaspoon baking powder
- 1/2 teaspoon salt
- 1 cup unsalted butter, softened
- 3/4 cup granulated sugar
- 1 large egg
- 2 teaspoons vanilla extract
- 1 cup sweetened shredded coconut
- 1 tablespoon milk, if needed
Quick Steps:
- Mix the dough and chill 30 minutes.
- Scoop 1 1/2-inch balls and roll them in shredded coconut.
- Place on a parchment-lined sheet.
- Bake at 350°F for 10 to 11 minutes, until the bottoms are pale gold.
- Cool on the tray for 5 minutes, then move to a rack.
Equipment for This Recipe:
- Cookie scoop
- Baking sheet
- Shallow bowl for coconut
- Cooling rack
How to Serve This Dish: Pile them high in a bowl for a snowy, casual look. They work well with coffee, but they also make a good addition to a mixed cookie tin because they stand out from flatter shapes.
Pro Tips for This Recipe:
- Press the coconut gently so it sticks before baking.
- Use sweetened coconut for the best texture and finish.
- Chill the rolled balls again for 10 minutes if they flatten too quickly.
Variations on This Dish:
- Lime Coconut Snowballs: Add lime zest to the dough.
- Toasted Coconut Version: Toast half the coconut for a deeper color.
- Chocolate Coconut Centers: Add a chocolate chip in the middle before rolling.
Common Mistakes to Avoid with This Dish:
- Using too much flour: The cookie turns dry instead of tender.
- Baking until deeply golden: These should stay pale.
- Not coating evenly: Bare patches look blotchy, not snowy.
16. Pistachio Crescent Cutouts

Pistachio gives sugar cookies a soft green tint and a buttery, nutty finish that looks elegant without any extra decoration. Cut them into crescents and you get a cookie that feels old-world and a little delicate.
Why It Works: Ground pistachios flavor the dough without making it heavy. A crescent shape makes the color and texture show off in a way a round cookie sometimes doesn’t.
Key Ingredients:
- 2 1/4 cups all-purpose flour
- 1/2 cup finely ground pistachios
- 1/2 teaspoon baking powder
- 1/2 teaspoon salt
- 1 cup unsalted butter, softened
- 3/4 cup granulated sugar
- 1 large egg
- 1 teaspoon vanilla extract
- Powdered sugar, for dusting
Quick Steps:
- Mix flour, ground pistachios, baking powder, and salt.
- Cream butter and sugar, then add the egg and vanilla.
- Stir in the dry ingredients and chill 30 minutes.
- Roll to 1/4 inch, cut crescents, and bake at 350°F for 8 to 10 minutes.
- Cool and dust with powdered sugar.
Equipment for This Recipe:
- Nut grinder or food processor
- Crescent cutter
- Baking sheet
- Fine sieve for sugar
How to Serve This Dish: Dust them at the last second and serve them on a pale tray so the green tint stays visible. They’re especially nice with tea or a dessert plate that already has fruit on it.
Pro Tips for This Recipe:
- Grind pistachios finely so the dough rolls cleanly.
- Use unsalted nuts or reduce the dough salt a little.
- Dust after cooling so the sugar stays snowy, not damp.
Variations on This Dish:
- Rose Pistachio Crescents: Add a drop of rosewater.
- Chocolate Pistachio Version: Dip the tips in dark chocolate.
- Orange Pistachio Crescents: Add orange zest for brightness.
Common Mistakes to Avoid with This Dish:
- Using coarse pistachio crumbs: The dough tears when you roll it.
- Overbrowning: The green color dulls fast in the oven.
- Dusting while warm: The sugar melts and disappears.
17. Espresso Drizzle Stars
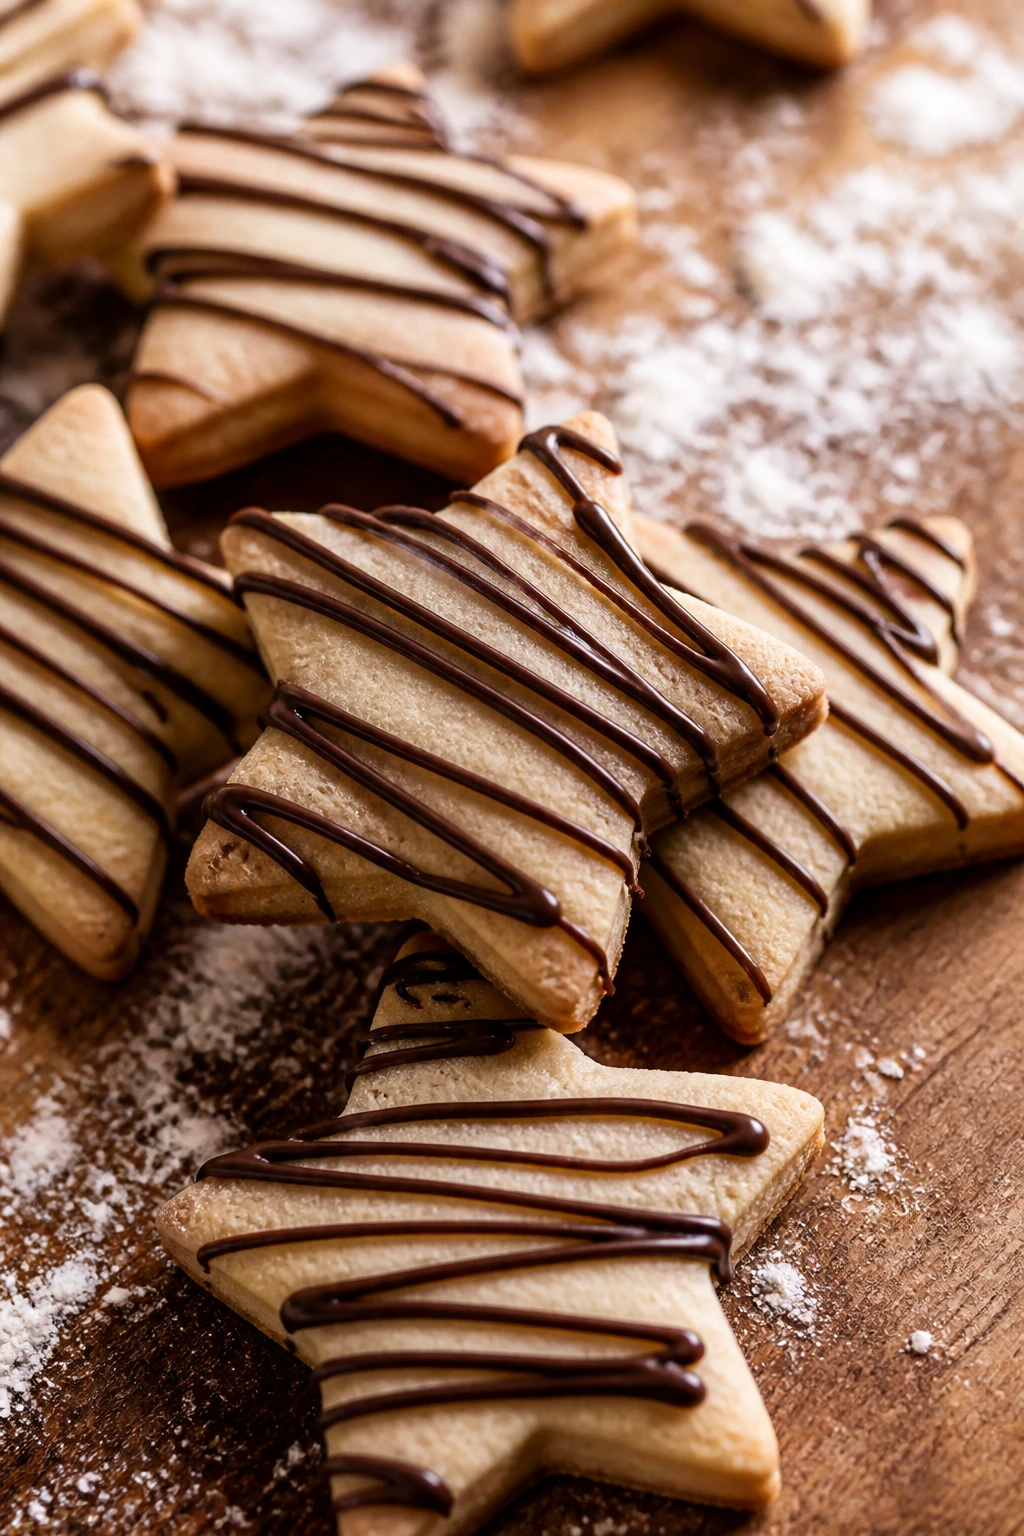
Coffee in cookie dough can go flat fast if you’re not careful, but espresso gives these stars a deep, dark edge that makes the vanilla base taste fuller. A thin drizzle of coffee glaze over the top pulls the whole thing together.
Why It Works: Instant espresso powder disappears into butter dough better than brewed coffee, which can make the dough too wet. The star shape gives the dark drizzle a clean path to sit on.
Key Ingredients:
- 2 1/2 cups all-purpose flour
- 1/2 teaspoon baking powder
- 1/2 teaspoon salt
- 1 cup unsalted butter, softened
- 3/4 cup granulated sugar
- 1 large egg
- 2 teaspoons vanilla extract
- 1 tablespoon instant espresso powder
- 1 cup powdered sugar
- 1 to 2 tablespoons milk or strong coffee
Quick Steps:
- Dissolve the espresso powder in the vanilla or mix it directly into the dry ingredients.
- Cream butter and sugar, then add the egg.
- Stir in dry ingredients, chill 30 minutes, and roll to 1/4 inch.
- Cut stars and bake at 350°F for 8 to 9 minutes.
- Cool and drizzle with coffee glaze.
Equipment for This Recipe:
- Star cutter
- Mixing bowl
- Small whisk
- Baking sheet
How to Serve This Dish: Put them beside coffee, obviously, but also with plain milk if you want the espresso note to feel smoother. They look sharp on a dark plate with the drizzle crossing the points.
Pro Tips for This Recipe:
- Use instant espresso, not grounds, or you’ll get grit.
- Keep the glaze thin so it draws clean lines.
- Bake just until the bottoms color; dark brown hides the coffee tone.
Variations on This Dish:
- Mocha Stars: Add 1 tablespoon cocoa to the dough.
- Vanilla Coffee Drizzle: Use plain vanilla dough and coffee glaze only.
- Hazelnut Espresso: Add finely chopped hazelnuts to the edges.
Common Mistakes to Avoid with This Dish:
- Adding brewed coffee to the dough: It softens the structure too much.
- Too much espresso powder: The flavor turns harsh.
- Icing before cooling: The glaze melts and runs.
18. Raspberry Linzer Hearts
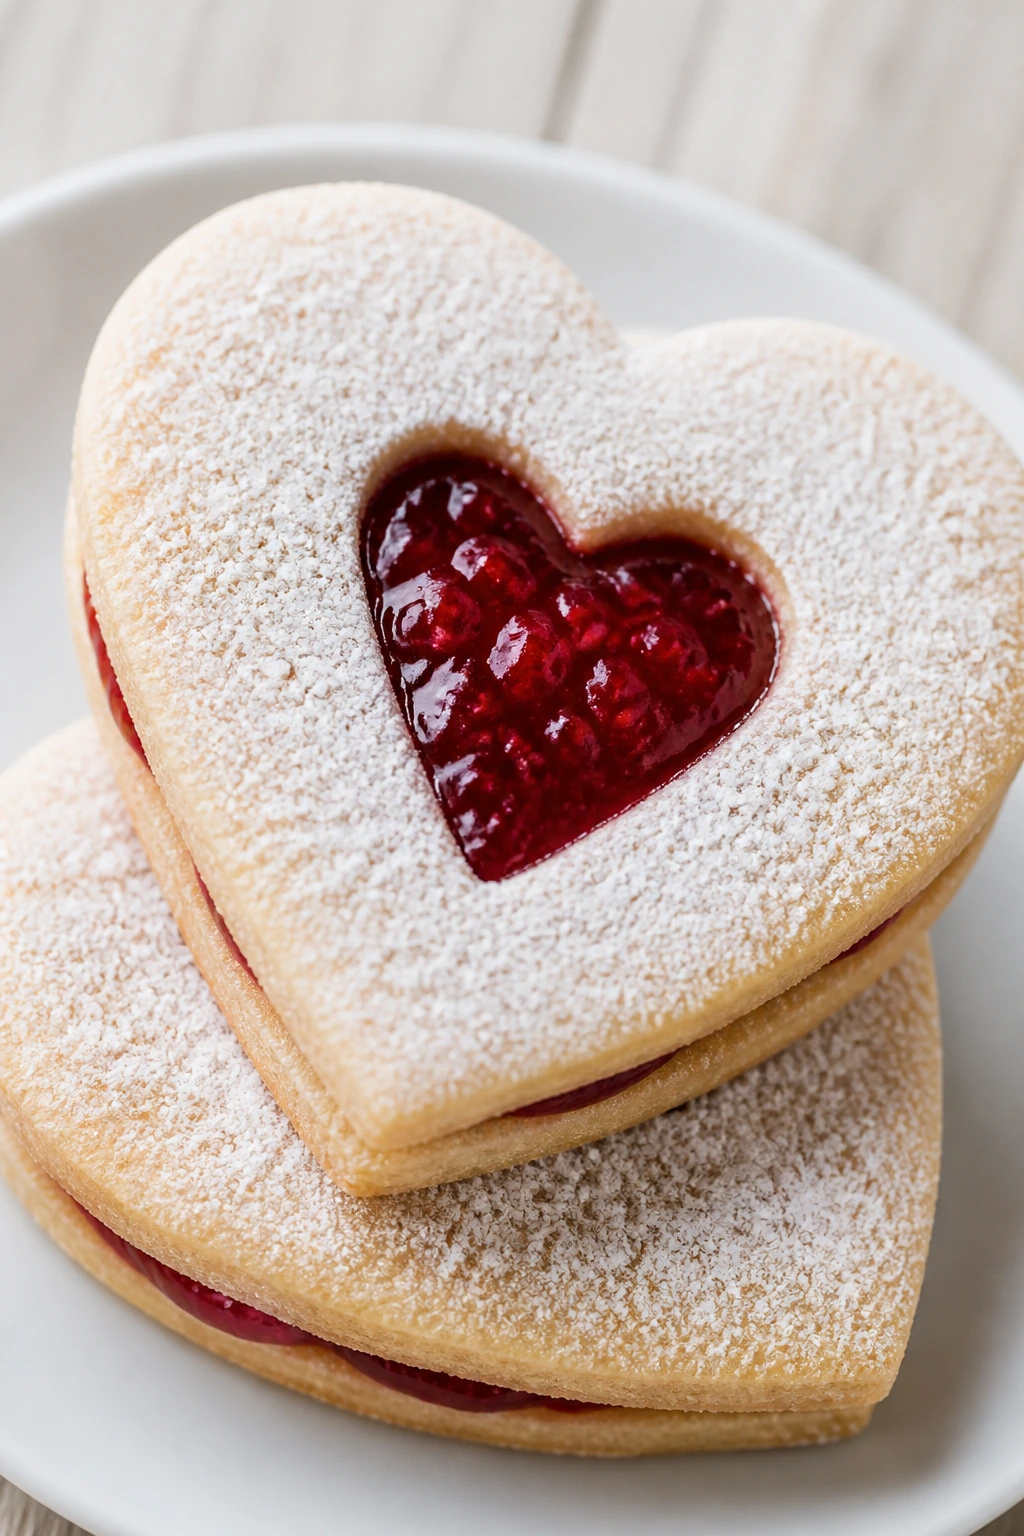
These look like jewel-box cookies once you sandwich them. The top cookie gets a little cutout in the center, the bottom holds raspberry jam, and the powdered sugar on top makes the whole thing look frosted and neat.
Why It Works: The jam shows through the center cutout, so you get color without extra decoration. Linzer-style sandwiches also give you a nice ratio of crisp cookie to soft filling in every bite.
Key Ingredients:
- 2 1/2 cups all-purpose flour
- 1/2 teaspoon salt
- 1 cup unsalted butter, softened
- 2/3 cup granulated sugar
- 1 large egg yolk
- 1 teaspoon vanilla extract
- 1/2 teaspoon almond extract
- 3/4 cup raspberry jam
- Powdered sugar, for dusting
Quick Steps:
- Make the dough, chill it 45 minutes, and roll it to 1/8 to 1/4 inch.
- Cut heart shapes, then cut a small window in half of them.
- Bake at 350°F for 8 to 10 minutes and cool completely.
- Spread jam on the solid hearts and top with the window cookies.
- Dust the tops with powdered sugar.
Equipment for This Recipe:
- Heart cutter with a mini center cutter
- Rolling pin
- Sifter for powdered sugar
- Baking sheet
How to Serve This Dish: These should be served on their own tier or in a neat stack so the cutout center stays visible. They’re one of the prettiest cookies for tea service, especially with raspberry jam peeking through the top.
Pro Tips for This Recipe:
- Roll the dough evenly so the sandwich layers line up.
- Warm the jam slightly if it’s too thick to spread.
- Dust only the top cookie, not the jam, or it can get sticky.
Variations on This Dish:
- Apricot Linzer Hearts: Swap in apricot jam for a lighter color.
- Chocolate Linzer Hearts: Add 2 tablespoons cocoa to the dough.
- Hazelnut Linzers: Replace 1/2 cup flour with ground hazelnuts.
Common Mistakes to Avoid with This Dish:
- Making the center cutout too big: The top cookie can crack.
- Overfilling with jam: It leaks at the edges.
- Stacking before cooling: The jam softens the cookie too soon.
19. Matcha Leaf Cookies
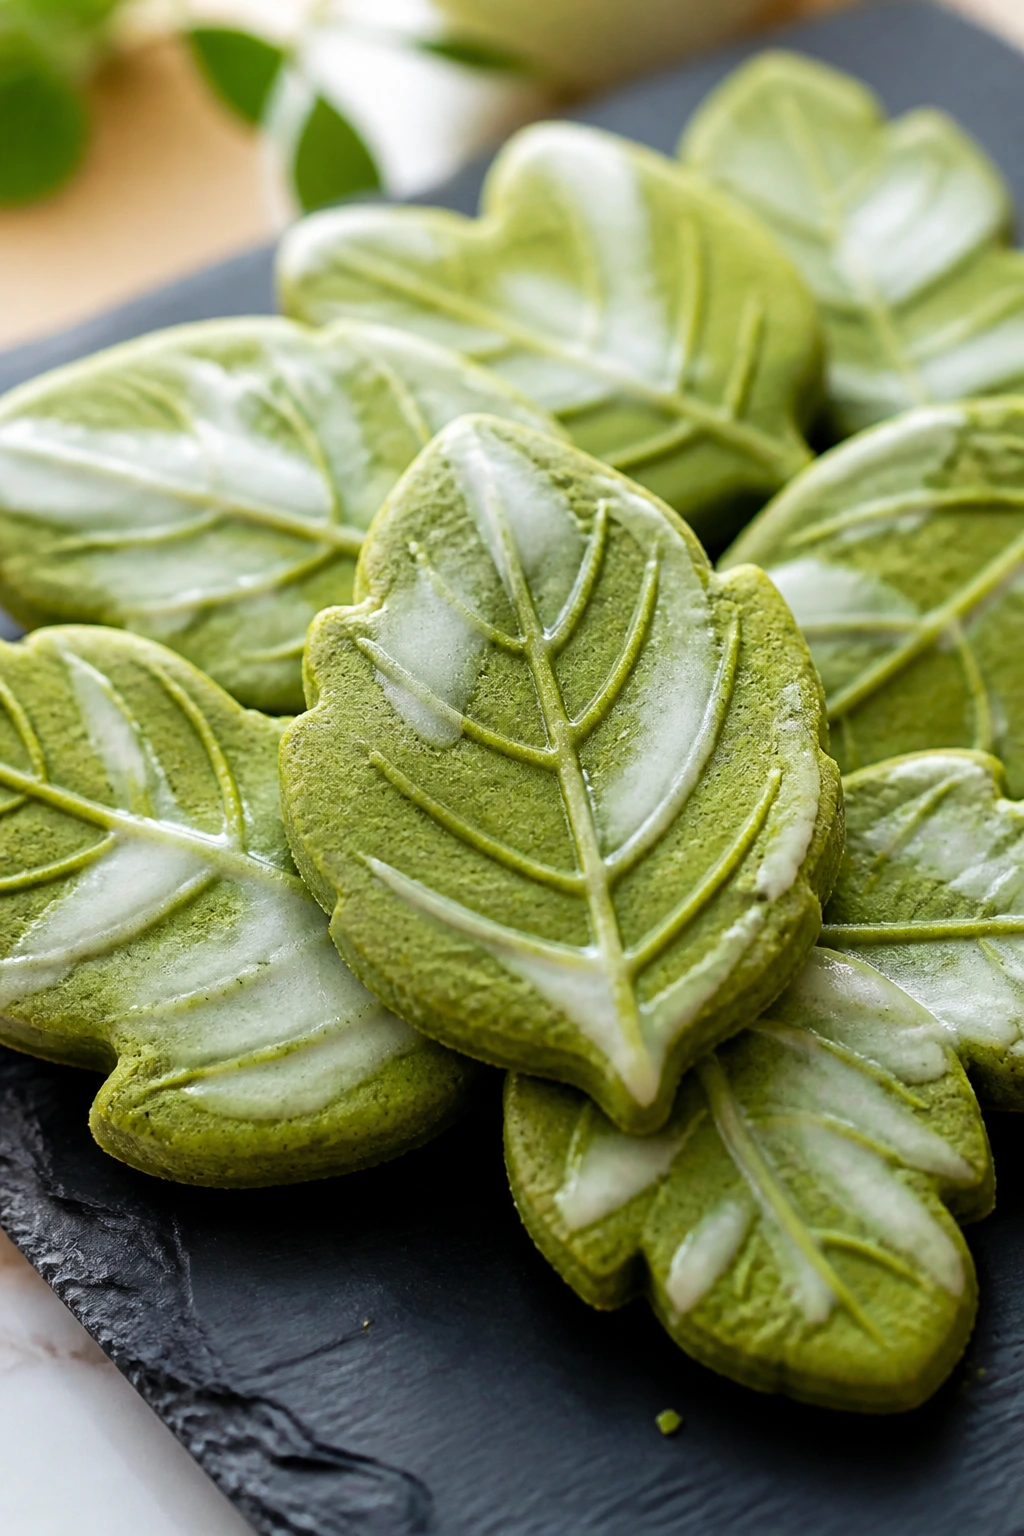
Matcha gives sugar cookies a soft green color that feels clean and modern, and a leaf cutter turns that color into the whole point of the cookie. A white glaze or thin dusting of sugar makes the green pop even harder.
Why It Works: Matcha tastes best when it’s balanced with butter and vanilla, not buried under too much sweetness. The leaf shape makes the color feel natural instead of forced.
Key Ingredients:
- 2 1/2 cups all-purpose flour
- 1 tablespoon matcha powder
- 1/2 teaspoon baking powder
- 1/2 teaspoon salt
- 1 cup unsalted butter, softened
- 3/4 cup granulated sugar
- 1 large egg
- 2 teaspoons vanilla extract
- 1 cup powdered sugar
- 1 to 2 tablespoons milk for glaze
Quick Steps:
- Whisk flour, matcha, baking powder, and salt.
- Cream butter and sugar, then beat in the egg and vanilla.
- Add the dry ingredients, chill 30 minutes, and roll to 1/4 inch.
- Cut leaf shapes and bake at 350°F for 8 to 9 minutes.
- Cool and glaze lightly.
Equipment for This Recipe:
- Leaf cutter
- Fine sieve for matcha
- Baking sheet
- Small whisk
How to Serve This Dish: Lay them on a pale plate or a slate board so the green color stands out. They’re good with jasmine tea or plain green tea, which keeps the flavor from feeling too sweet.
Pro Tips for This Recipe:
- Sift the matcha so you don’t get green specks.
- Keep the bake light; matcha turns dull when overdone.
- A thin glaze is enough. You do not need much more.
Variations on This Dish:
- White Chocolate Matcha: Drizzle with melted white chocolate.
- Sesame Matcha: Sprinkle toasted sesame on the glaze.
- Lemon Matcha Leaves: Add a little lemon zest for brightness.
Common Mistakes to Avoid with This Dish:
- Using too much matcha: The flavor gets chalky.
- Overbaking: The green fades to brownish olive.
- Heavy glaze: It hides the clean leaf lines.
20. Maple Pecan Leaves
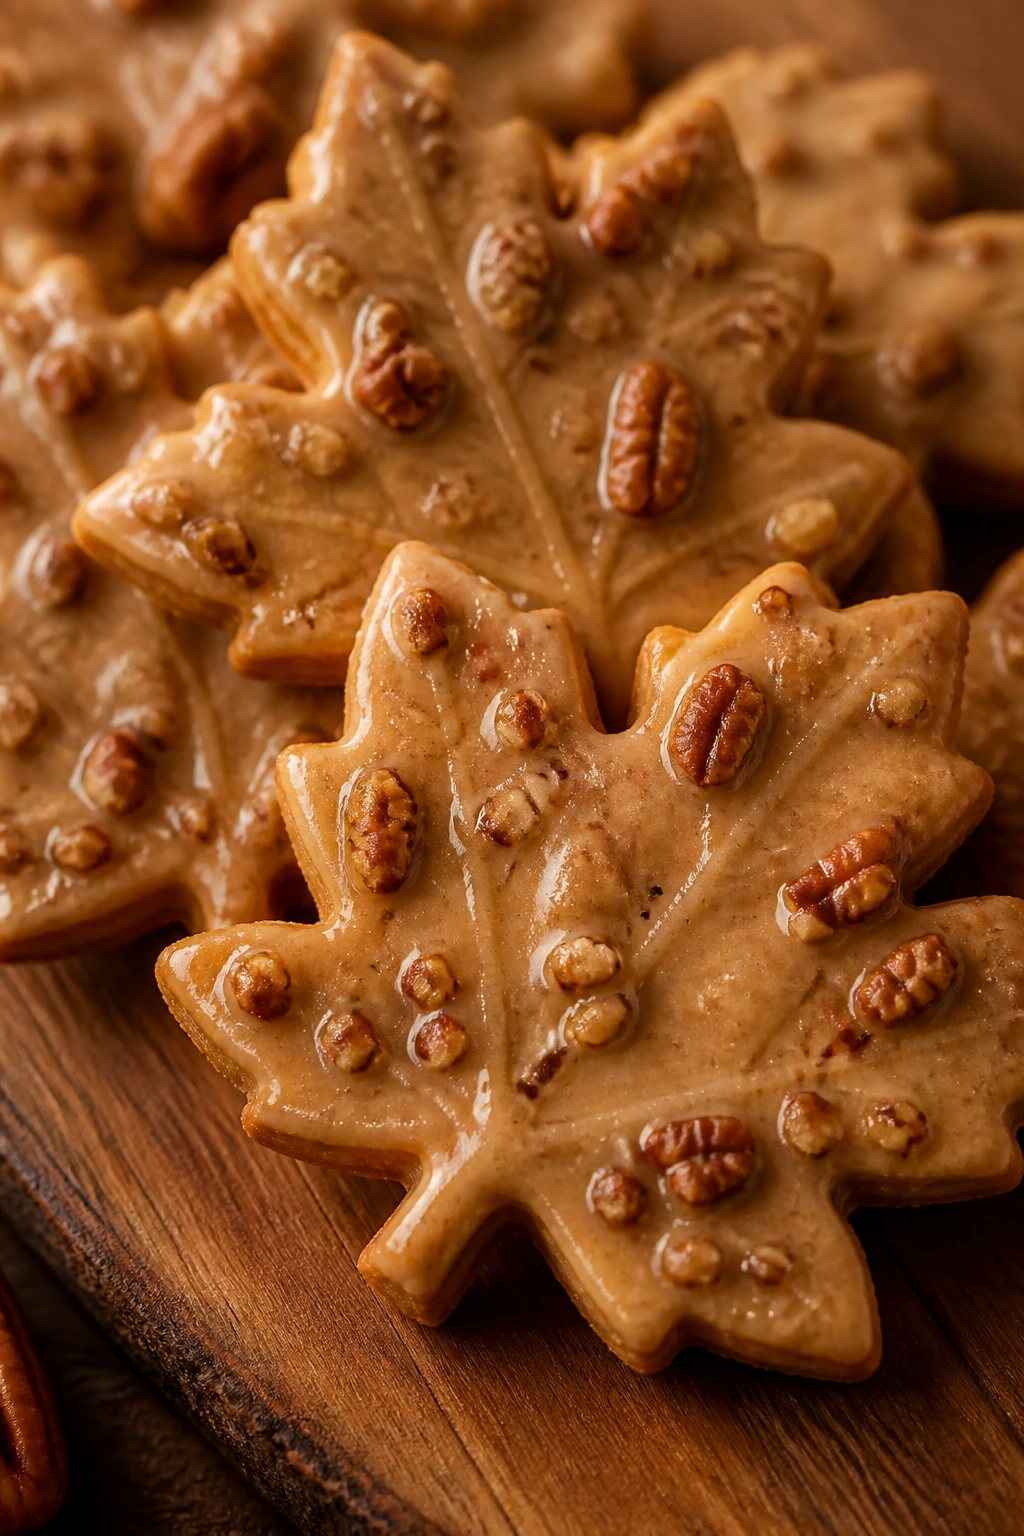
Maple and pecan give you the smell of toasted nuts and warm syrup without making the cookie taste heavy. Leaf cutters make them feel seasonal and tidy, and a little maple glaze gives the surface a soft shine.
Why It Works: Maple extract is strong, so you only need a small amount to get that familiar flavor. Chopped pecans add texture and keep the cookie from tasting flat.
Key Ingredients:
- 2 1/4 cups all-purpose flour
- 1/2 cup finely chopped pecans
- 1/2 teaspoon baking powder
- 1/2 teaspoon salt
- 1 cup unsalted butter, softened
- 3/4 cup brown sugar
- 1 large egg
- 1 teaspoon maple extract
- 1 cup powdered sugar
- 1 to 2 tablespoons milk or maple syrup
Quick Steps:
- Whisk flour, pecans, baking powder, and salt.
- Cream butter and brown sugar, then add the egg and maple extract.
- Stir in the dry ingredients and chill 30 minutes.
- Roll to 1/4 inch, cut leaves, and bake at 350°F for 9 minutes.
- Cool and glaze with maple icing.
Equipment for This Recipe:
- Leaf cutter
- Food processor, optional, for chopping nuts
- Baking sheet
- Cooling rack
How to Serve This Dish: These look best in a little fan shape, as if they’ve fallen onto the plate. They’re especially nice with coffee, chai, or a scoop of vanilla ice cream if you’re turning them into dessert.
Pro Tips for This Recipe:
- Chop the pecans finely so the dough rolls smoothly.
- Use brown sugar for a warmer flavor and slightly deeper color.
- Let the glaze dry before stacking.
Variations on This Dish:
- Bourbon Maple Leaves: Add a tiny splash of bourbon to the glaze.
- Cinnamon Pecan Leaves: Add 1 teaspoon cinnamon.
- Walnut Maple Version: Swap pecans for walnuts.
Common Mistakes to Avoid with This Dish:
- Using too much maple extract: It can taste artificial fast.
- Leaving nut pieces too large: They tear the dough.
- Cutting and moving too quickly: These cookies soften before baking if you handle them too much.
21. Honey Lavender Squares
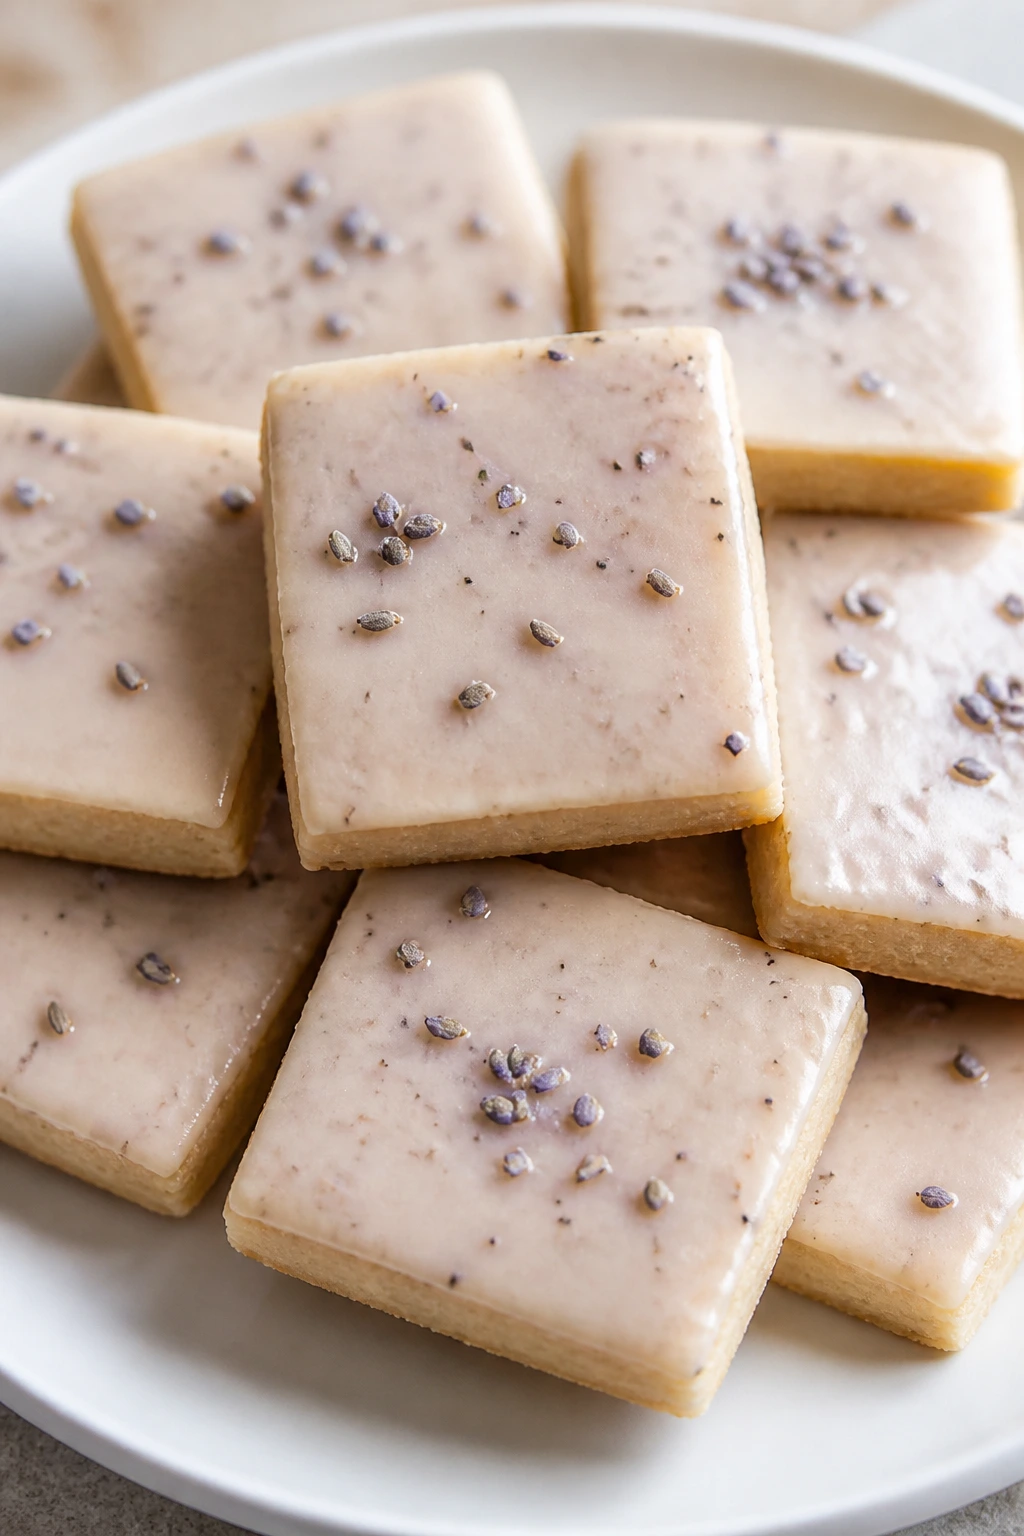
Honey softens the butter flavor here, and lavender gives the cookies a pale floral note that feels delicate rather than perfumed when you keep the dose low. Squares are a good shape for this flavor because they look neat and a little modern.
Why It Works: Honey adds moisture and a faint chew, which helps balance the dry edges you can get from floral cookies. Lavender needs restraint, and a square cookie leaves room for the glaze to do the finishing.
Key Ingredients:
- 2 1/2 cups all-purpose flour
- 1/2 teaspoon baking powder
- 1/2 teaspoon salt
- 1 cup unsalted butter, softened
- 1/2 cup granulated sugar
- 1/4 cup honey
- 1 large egg
- 1/2 teaspoon culinary lavender, finely crushed
- 1 cup powdered sugar
- 1 to 2 tablespoons milk or honey
Quick Steps:
- Mix the flour, baking powder, salt, and lavender.
- Cream butter, sugar, and honey, then beat in the egg.
- Add the dry ingredients and chill 30 to 45 minutes.
- Roll to 1/4 inch, cut squares, and bake at 350°F for 8 to 10 minutes.
- Cool and glaze lightly with honey icing.
Equipment for This Recipe:
- Square cutter or knife
- Mixing bowl
- Rolling pin
- Small whisk
How to Serve This Dish: These look especially nice on a white plate with a few tiny dried lavender buds nearby, though you do not need to overdo the decoration. Serve them with tea or plain lemonade.
Pro Tips for This Recipe:
- Crush the lavender very finely so the pieces don’t feel woody.
- Use culinary lavender only; garden lavender can be harsh.
- Keep the glaze thin so the floral flavor stays subtle.
Variations on This Dish:
- Rose Honey Squares: Swap lavender for rosewater.
- Lemon Honey Squares: Add lemon zest to brighten the honey.
- Sesame Honey Squares: Sprinkle the tops with toasted sesame seeds.
Common Mistakes to Avoid with This Dish:
- Using too much lavender: It can taste like soap in a hurry.
- Too much honey in the dough: The cookies spread more.
- Baking to deep gold: The delicate flavor gets lost under browning.
22. Strawberry Glaze Hearts

These hearts get their color from freeze-dried strawberries, which is a better move than drowning the dough in fresh puree. The result is a soft pink glaze and a cookie that tastes like strawberry instead of candy.
Why It Works: Freeze-dried strawberry powder brings flavor and color without extra water. That means the glaze stays smooth and the cookie shape stays clean.
Key Ingredients:
- 2 1/2 cups all-purpose flour
- 1/2 teaspoon baking powder
- 1/2 teaspoon salt
- 1 cup unsalted butter, softened
- 3/4 cup granulated sugar
- 1 large egg
- 1 teaspoon vanilla extract
- 1/4 cup freeze-dried strawberry powder
- 1 cup powdered sugar
- 1 to 2 tablespoons milk
Quick Steps:
- Whisk the dry ingredients, including strawberry powder.
- Cream butter and sugar, then beat in the egg and vanilla.
- Stir in the dry mix, chill 30 minutes, and roll to 1/4 inch.
- Cut hearts and bake at 350°F for 8 to 9 minutes.
- Cool and glaze with strawberry icing.
Equipment for This Recipe:
- Heart cutter
- Food processor or bag and rolling pin for strawberry powder
- Baking sheet
- Cooling rack
How to Serve This Dish: These are lovely on a pale pink or cream plate. A handful of fresh berries on the side makes the color feel even brighter without adding much work.
Pro Tips for This Recipe:
- Sift the strawberry powder if it clumps.
- Use just enough milk for a thin, even glaze.
- Cool the cookies fully or the glaze will soak in and dull the color.
Variations on This Dish:
- Strawberry Lemon Hearts: Add lemon zest to the dough.
- Chocolate Strawberry Hearts: Dip one edge in dark chocolate.
- Berry Swirl Version: Marble a little strawberry glaze into plain glaze.
Common Mistakes to Avoid with This Dish:
- Using fresh strawberry puree: It waters down the dough.
- Overloading the glaze: Thick pink icing hides the heart shape.
- Baking too long: The pale pink tone gets brownish fast.
23. Black Sesame Coins
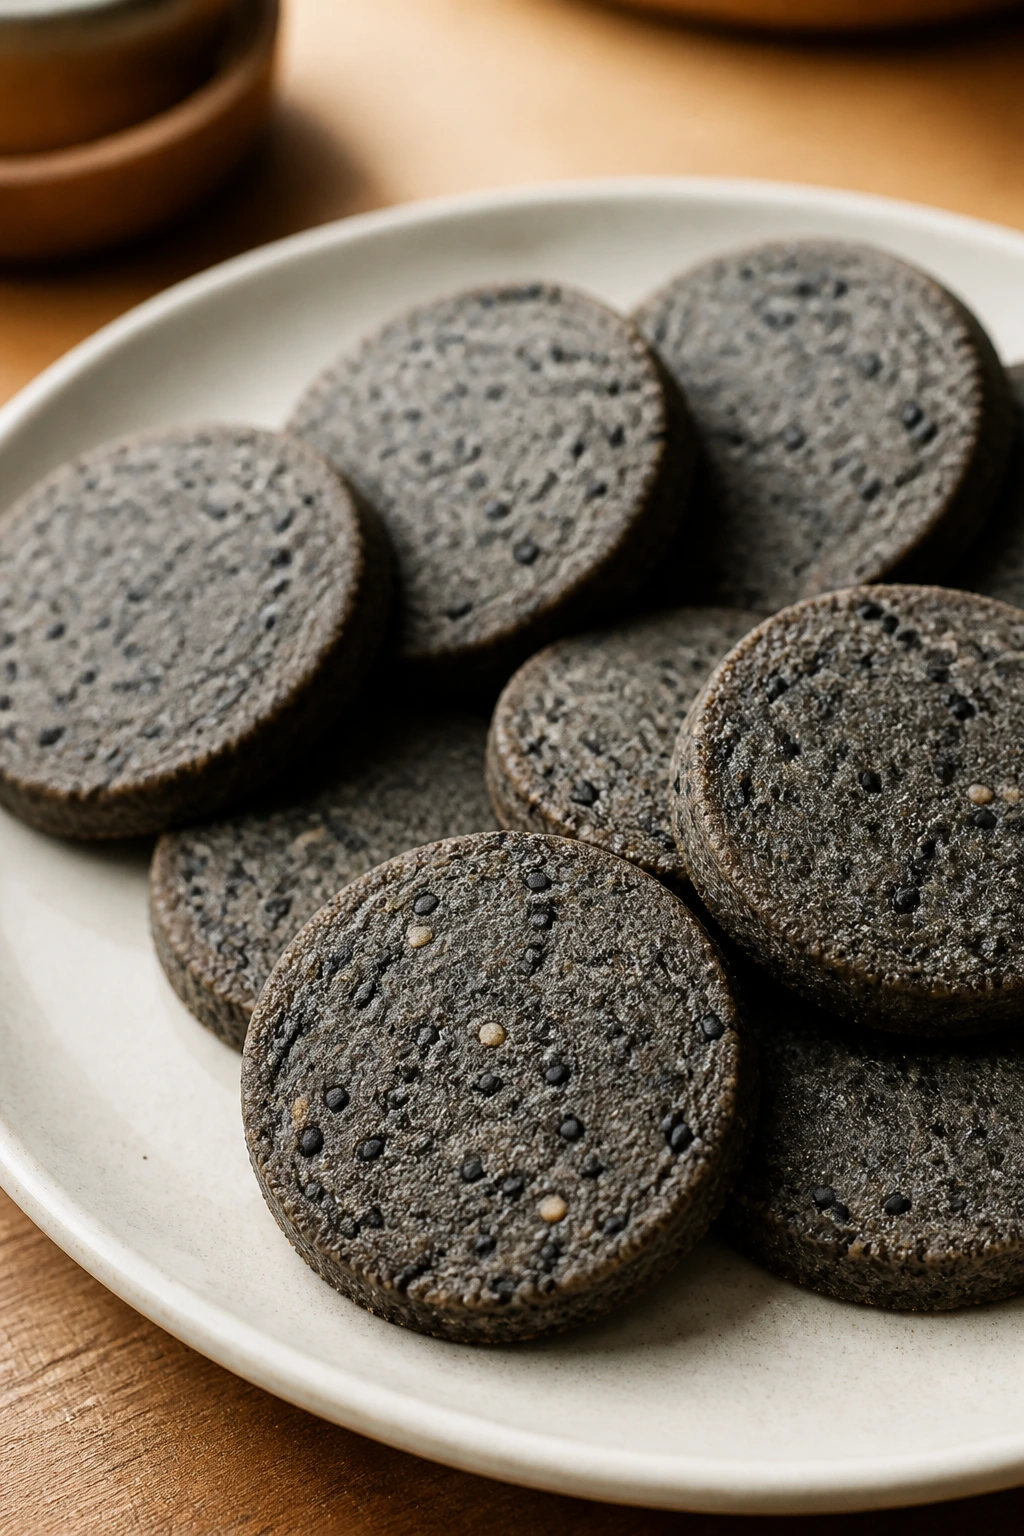
Black sesame gives these cookies a nutty, almost smoky flavor and a dramatic gray-black flecked look that stands out on a tray full of pale sweets. Coins keep the design simple, which is the right move when the flavor already has a little edge.
Why It Works: Ground black sesame adds color and aroma without needing food dye. The coin shape gives you a clean canvas and a tidy bite.
Key Ingredients:
- 2 1/4 cups all-purpose flour
- 1/2 cup finely ground black sesame seeds
- 1/2 teaspoon baking powder
- 1/2 teaspoon salt
- 1 cup unsalted butter, softened
- 3/4 cup granulated sugar
- 1 large egg
- 1 teaspoon vanilla extract
- 1 tablespoon toasted sesame seeds, for topping
Quick Steps:
- Mix flour, ground sesame, baking powder, and salt.
- Cream butter and sugar, then add the egg and vanilla.
- Stir in dry ingredients, chill 30 minutes, and roll to 1/4 inch.
- Cut coins and sprinkle with toasted sesame.
- Bake at 350°F for 8 to 10 minutes.
Equipment for This Recipe:
- Spice grinder or food processor
- Round cutter
- Baking sheet
- Cooling rack
How to Serve This Dish: These look striking on a white plate or with other pale cookies, because the color does the talking. They’re good with green tea or coffee, depending on whether you want the sesame to feel softer or more roasted.
Pro Tips for This Recipe:
- Grind the sesame fine or the dough can crack.
- Toast the topping lightly for more aroma.
- Keep the cookies pale; the black sesame color should be obvious.
Variations on This Dish:
- Tahini Sesame Coins: Add 2 tablespoons tahini for a softer sesame note.
- Honey Sesame Version: Brush with a thin honey glaze.
- Cocoa Sesame Coins: Add 1 tablespoon cocoa for a darker look.
Common Mistakes to Avoid with This Dish:
- Using coarse sesame meal: It can make the dough crumbly.
- Overbaking: The black color hides browning, so watch the bottoms.
- Skipping the salt: Sesame tastes flat without it.
24. Cranberry Orange Wreaths
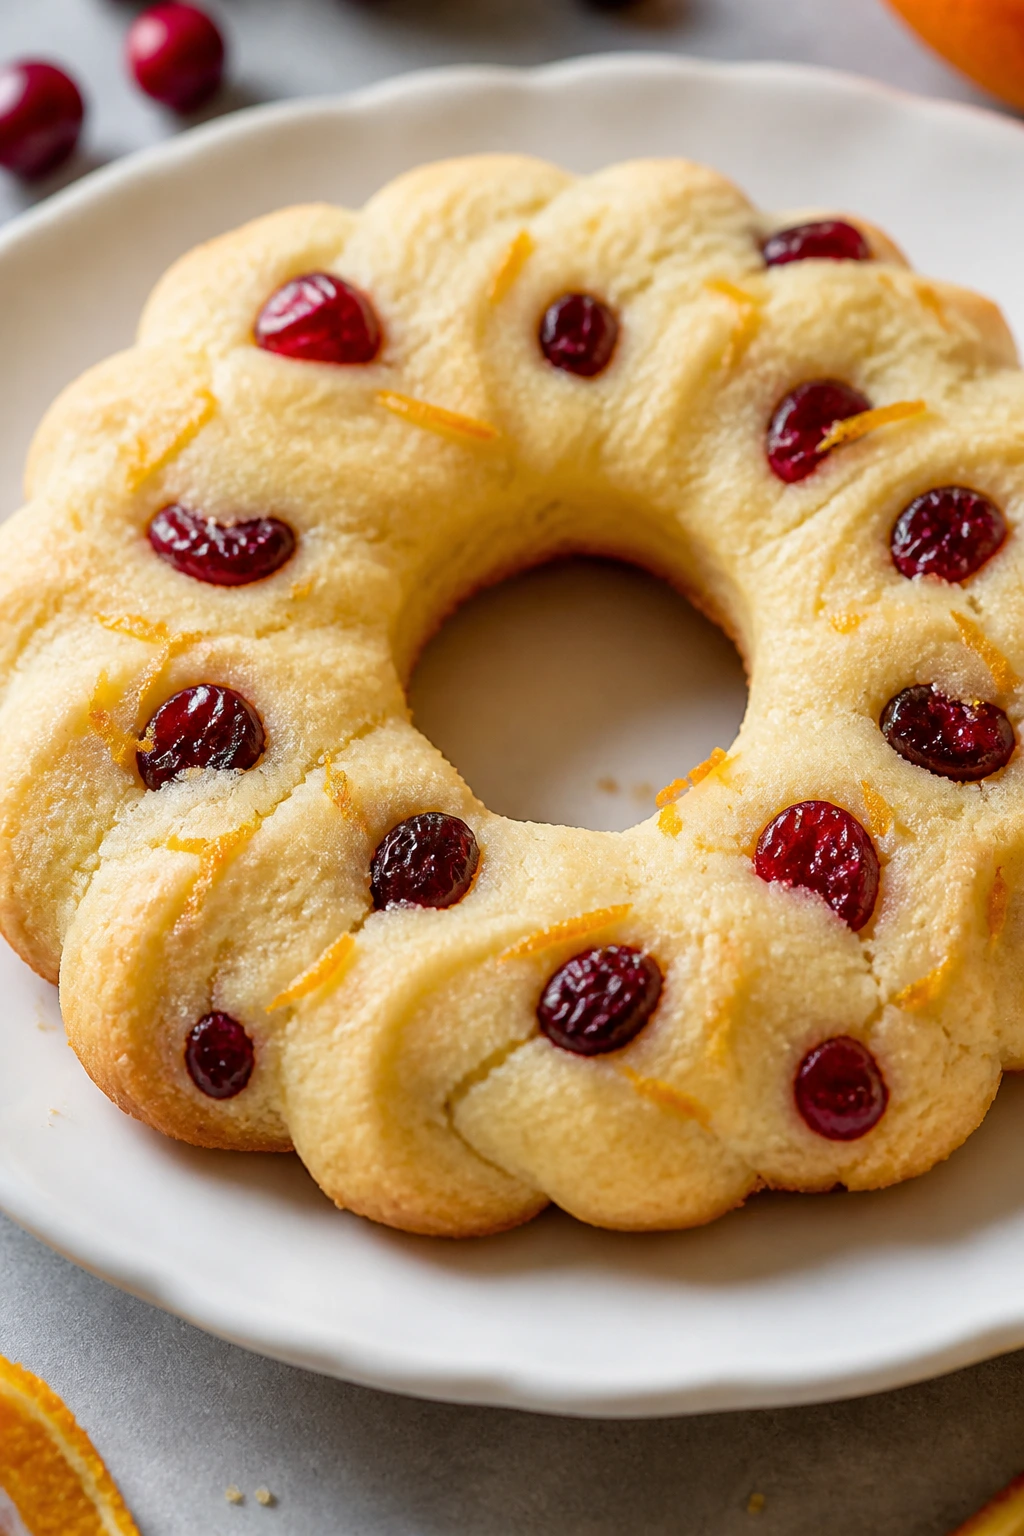
These wreath cookies have a little holiday energy even when you make them any time. Dried cranberries add red specks, orange zest brightens the dough, and the wreath shape makes the whole tray look finished before you even add icing.
Why It Works: Orange keeps the cookie lively while cranberries add chew and color. A wreath cutter or ring shape gives you something decorative without needing elaborate piping.
Key Ingredients:
- 2 1/2 cups all-purpose flour
- 1/2 teaspoon baking powder
- 1/2 teaspoon salt
- 1 cup unsalted butter, softened
- 3/4 cup granulated sugar
- 1 large egg
- 1 tablespoon orange zest
- 1/2 cup finely chopped dried cranberries
- 1 cup powdered sugar
- 1 to 2 tablespoons orange juice
Quick Steps:
- Cream butter, sugar, and orange zest.
- Beat in the egg, then add the dry ingredients and cranberries.
- Chill 30 minutes, roll to 1/4 inch, and cut wreath shapes.
- Bake at 350°F for 8 to 10 minutes.
- Cool and glaze with orange icing, then add a few extra cranberry bits.
Equipment for This Recipe:
- Ring or wreath cutter
- Sharp knife, if shaping by hand
- Baking sheet
- Small spoon for glaze
How to Serve This Dish: These are nice stacked in a circle on a round plate so the shape stays obvious. They pair well with tea, mulled cider, or a bowl of citrus fruit if you’re making a dessert spread.
Pro Tips for This Recipe:
- Chop the cranberries small so the dough rolls evenly.
- Keep the glaze thin to avoid hiding the wreath detail.
- Press any garnish in while the glaze is still wet.
Variations on This Dish:
- Pistachio Cranberry Wreaths: Add chopped pistachios to the dough.
- Lemon Orange Wreaths: Use half lemon, half orange zest.
- White Chocolate Wreaths: Drizzle the tops with white chocolate.
Common Mistakes to Avoid with This Dish:
- Big cranberry chunks: They tear the dough when you roll it.
- Too much glaze: The wreath shape gets lost.
- Baking until dark: The orange note turns dull when overdone.
25. Toffee Chip Rounds
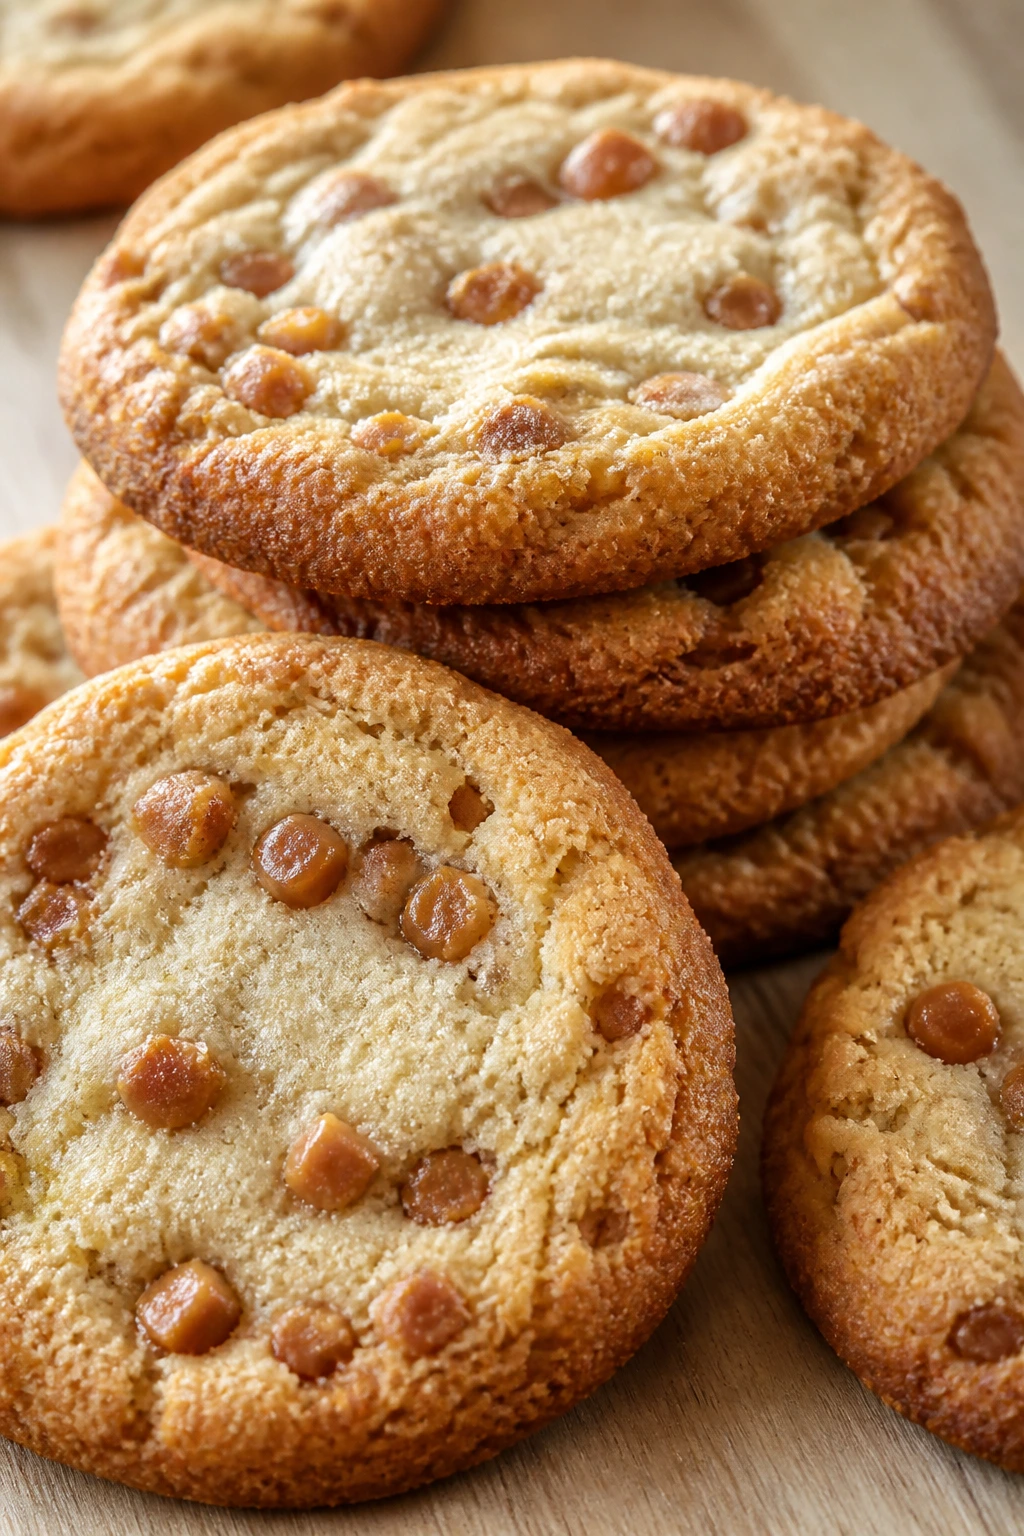
Toffee bits do one useful thing here: they give you little crunchy pockets that taste caramelized the second you bite into them. These round cookies are plain in shape and rich in texture, which is a smart trade.
Why It Works: Toffee melts slightly at the edges and leaves a buttery crunch in the middle. A round scoopable dough also means these are fast to portion, which makes them good when you want pretty without cutters.
Key Ingredients:
- 2 1/2 cups all-purpose flour
- 1/2 teaspoon baking soda
- 1/2 teaspoon salt
- 1 cup unsalted butter, softened
- 3/4 cup brown sugar
- 1/4 cup granulated sugar
- 1 large egg
- 2 teaspoons vanilla extract
- 1 cup toffee bits
- Flaky salt, optional
Quick Steps:
- Whisk the dry ingredients.
- Cream butter and sugars, then add the egg and vanilla.
- Stir in the dry ingredients and toffee bits, then chill 20 to 30 minutes.
- Scoop rounds and bake at 350°F for 9 to 11 minutes.
- Finish with a pinch of flaky salt if you like.
Equipment for This Recipe:
- Cookie scoop
- Baking sheet
- Parchment paper
- Cooling rack
How to Serve This Dish: Put them on a simple stack so the toffee flecks show through the crust. They’re especially good next to coffee because the caramel note gets a little deeper with bitterness.
Pro Tips for This Recipe:
- Use small toffee bits so the cookies hold together.
- Chill the dough just enough to stop the chips from sinking.
- Sprinkle salt while the tops are still warm so it sticks.
Variations on This Dish:
- Chocolate Toffee Rounds: Add 1/2 cup chopped chocolate.
- Pecan Toffee Rounds: Swap in chopped pecans for half the toffee.
- Coffee Toffee Rounds: Add 1 teaspoon espresso powder.
Common Mistakes to Avoid with This Dish:
- Too many toffee bits: The cookies can crumble apart.
- Baking too long: Toffee turns bitter when overbaked.
- Handling hot cookies too soon: The melted bits need a minute to set.
26. Sesame Lace Crackers
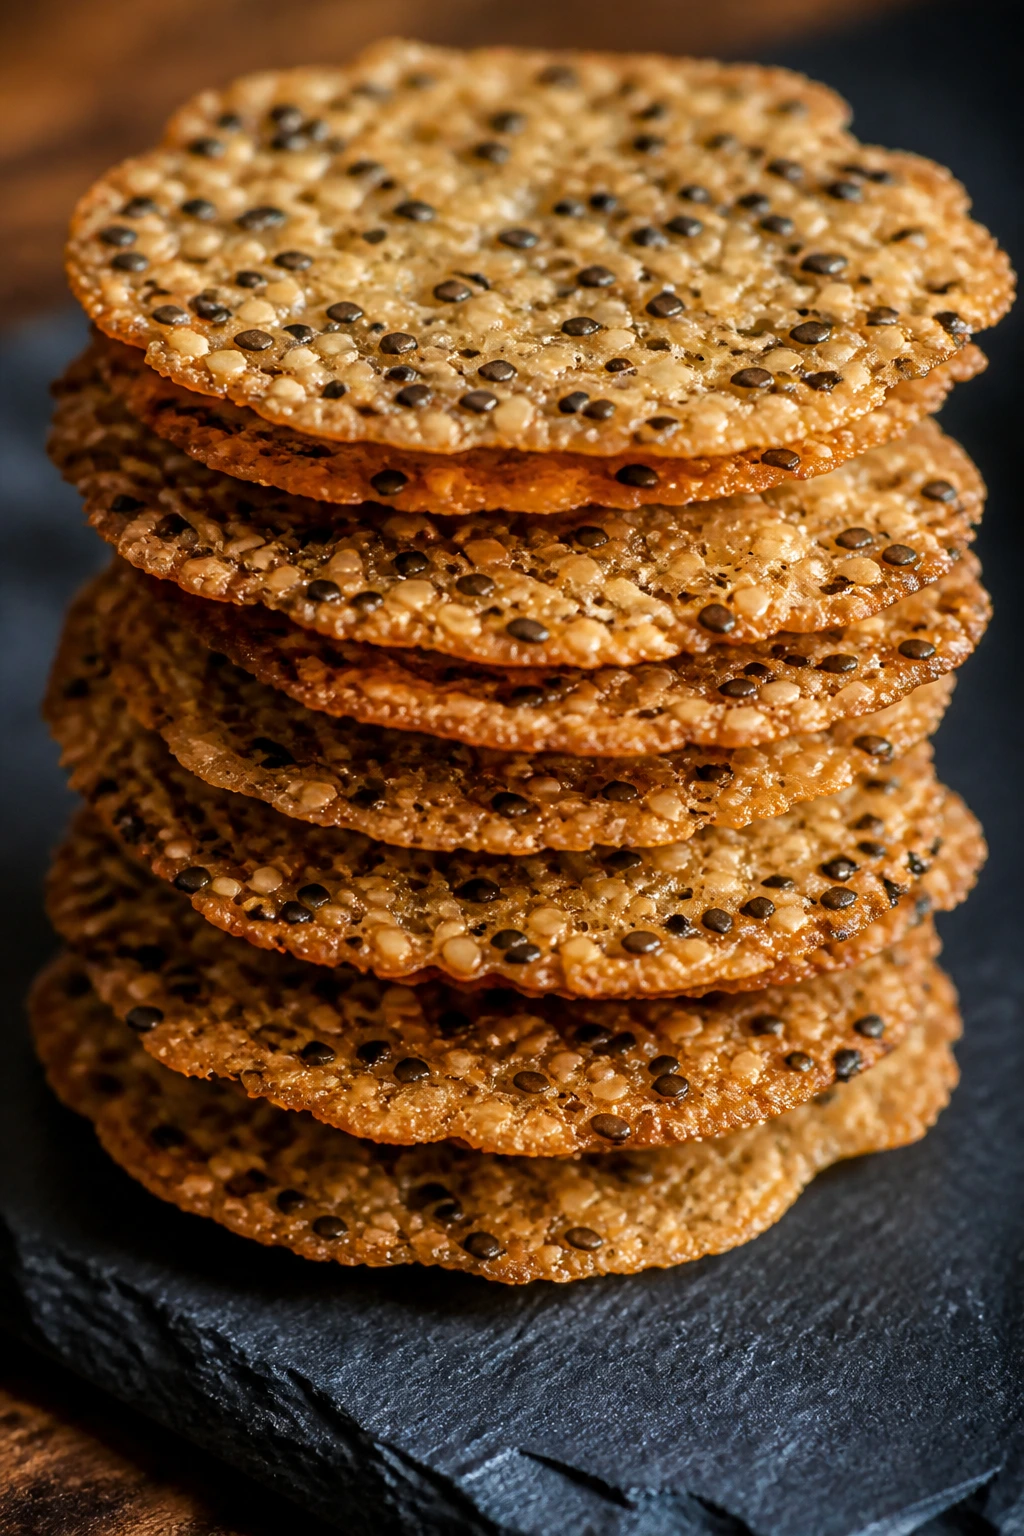
These are the thinnest cookies in the bunch, crisp enough to snap and pretty enough to look delicate in a stack. The sesame seeds give them tiny dark freckles, and the lace-like edges make them feel more like pastry than a standard cookie.
Why It Works: Thin dough bakes fast and keeps a clean shape if you watch it closely. Sesame seeds add texture and a savory note that keeps the sweetness from getting heavy.
Key Ingredients:
- 2 cups all-purpose flour
- 1/2 teaspoon baking powder
- 1/2 teaspoon salt
- 1 cup unsalted butter, softened
- 1/2 cup granulated sugar
- 1 large egg
- 1 teaspoon vanilla extract
- 1/2 cup sesame seeds
Quick Steps:
- Mix the dough and chill it 30 minutes.
- Roll very thin, about 1/8 inch.
- Cut small rounds or ovals, then press sesame seeds onto the tops.
- Bake at 350°F for 7 to 8 minutes, until the edges are gold.
- Cool fully for the crispest snap.
Equipment for This Recipe:
- Rolling pin
- Small cutter
- Baking sheet
- Thin spatula
How to Serve This Dish: Stack them in a narrow pile or fan them beside soft fruit. They’re good with cheese boards, tea, or as a crisp contrast to softer cookies in the same batch.
Pro Tips for This Recipe:
- Roll them evenly or the thin spots brown too fast.
- Press the sesame seeds in firmly so they don’t fall off.
- Cool on a rack so steam doesn’t soften the crisp edges.
Variations on This Dish:
- Black Sesame Lace: Use black sesame for a darker look.
- Poppy Seed Lace: Swap half the sesame for poppy seeds.
- Citrus Lace Crackers: Add lemon zest to the dough.
Common Mistakes to Avoid with This Dish:
- Rolling too thick: They become soft cookies instead of crisp ones.
- Not watching the oven: Thin cookies go from pale to too dark fast.
- Skipping the cooling rack: Trapped steam softens the snap.
27. Chocolate Marble Swirls
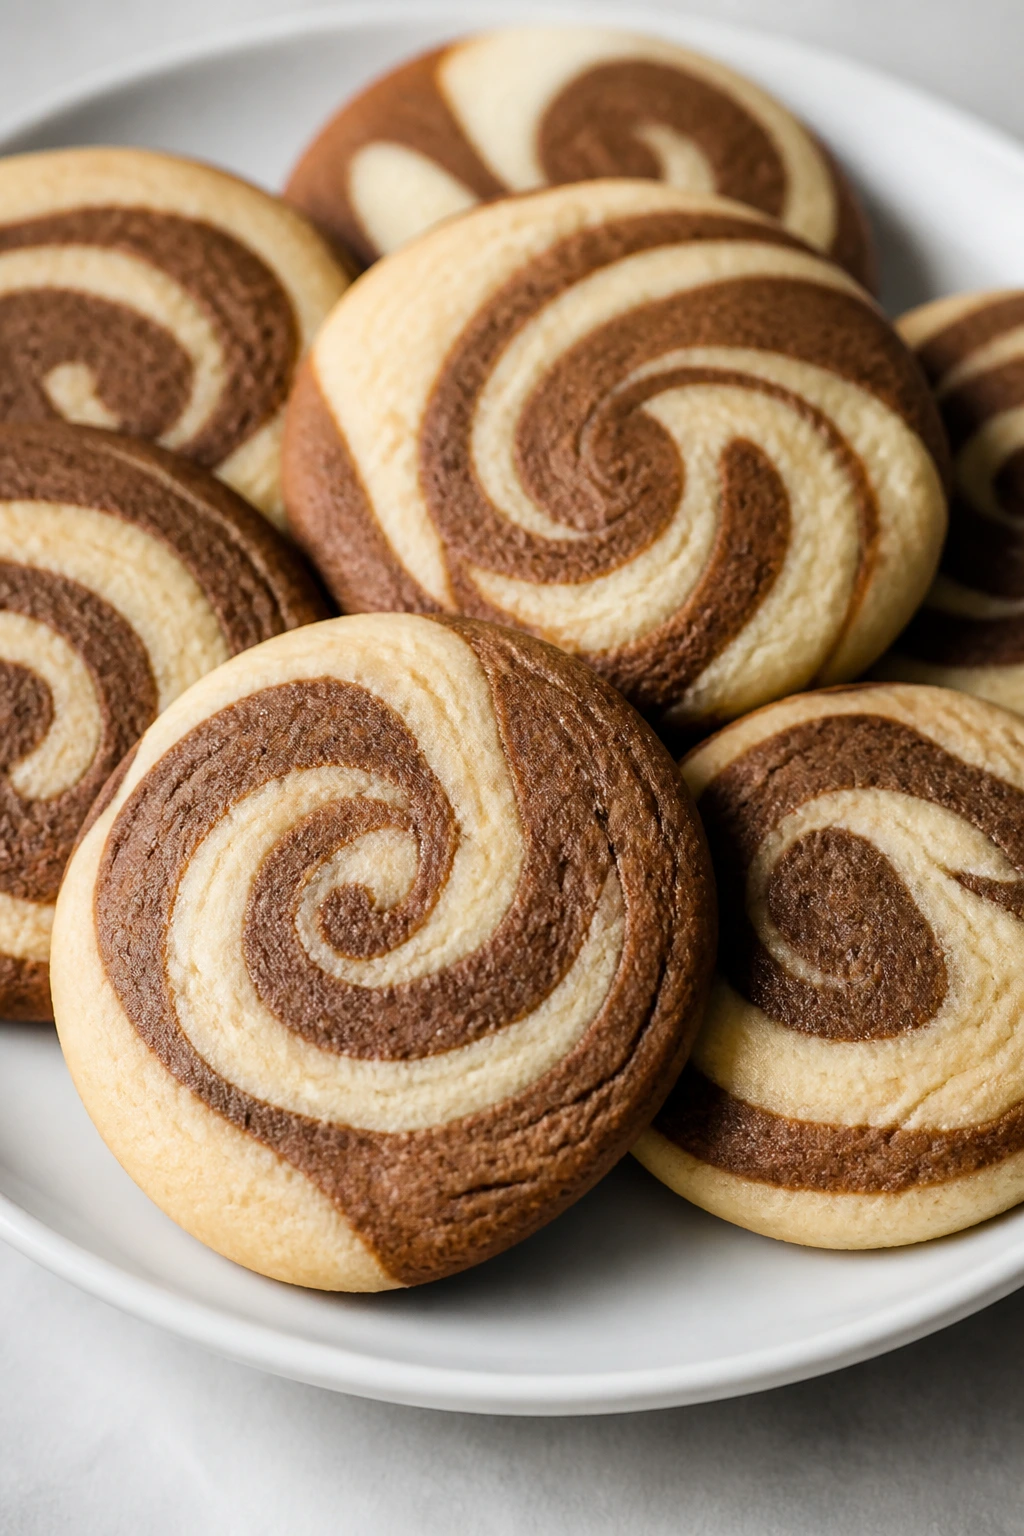
Marbled sugar cookies look far more complicated than they are, which is part of the appeal. Vanilla dough and cocoa dough twist together into pale and dark ribbons, and the cut cookies come out with a little homemade swirl in each one.
Why It Works: Two simple dough colors give you visual contrast with almost no decorating. The cocoa also adds a slight bitterness that keeps the cookie from tasting too sweet.
Key Ingredients:
- 2 1/2 cups all-purpose flour
- 1/2 teaspoon baking powder
- 1/2 teaspoon salt
- 1 cup unsalted butter, softened
- 3/4 cup granulated sugar
- 1 large egg
- 2 teaspoons vanilla extract
- 2 tablespoons cocoa powder
- 1 tablespoon milk, if needed
Quick Steps:
- Make one batch of dough, then divide it in half.
- Mix cocoa into one half and leave the other plain.
- Chill both halves 20 minutes, then pinch them together and roll into a log or slab.
- Cut rounds or slice-and-bake pieces and bake at 350°F for 9 to 11 minutes.
- Cool before moving so the swirl sets.
Equipment for This Recipe:
- Mixing bowl
- Parchment
- Sharp knife or log cutter
- Baking sheet
How to Serve This Dish: Arrange them so the swirl faces up; that’s the whole point. They look nice in a mixed cookie tin because the dark-and-light pattern breaks up a tray of pale cookies.
Pro Tips for This Recipe:
- Keep both doughs at the same temperature before marbling.
- Don’t overmix the cocoa or you’ll lose the streaks.
- Chill the shaped log before slicing for cleaner cuts.
Variations on This Dish:
- Orange Chocolate Swirl: Add orange zest to the vanilla dough.
- Mocha Marble: Add espresso powder to the cocoa half.
- White and Dark Marble: Use white cocoa butter drizzle after baking.
Common Mistakes to Avoid with This Dish:
- Mixing the colors too much: You lose the marble look.
- Soft dough when slicing: The pattern squashes.
- Trying to roll uneven pieces together too hard: The log cracks.
28. Caramel-Dipped Salted Stars
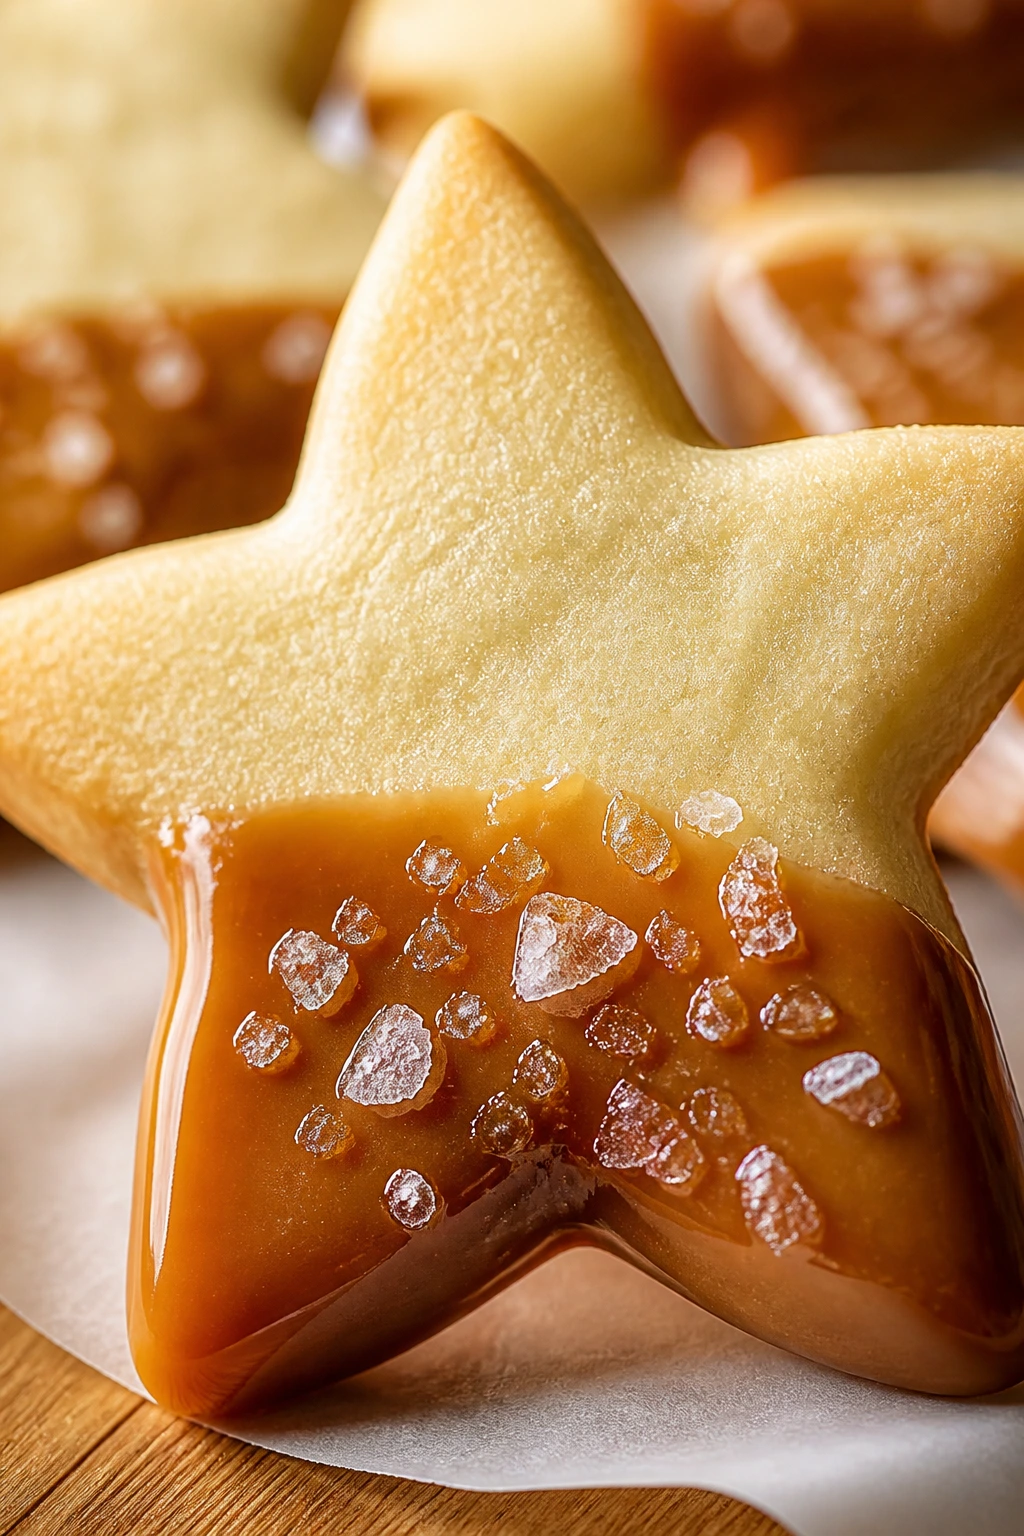
These stars look polished with almost no piping skill. A caramel dip around the bottom edge, a few flakes of salt, and you get that sweet-salty finish that makes people stop after the first bite instead of mindlessly reaching for the next.
Why It Works: Caramel adds gloss and depth, while the salt keeps the sweetness from tipping over. Stars are a good shape because the points stay clean even after dipping.
Key Ingredients:
- 2 1/2 cups all-purpose flour
- 1/2 teaspoon baking powder
- 1/2 teaspoon salt
- 1 cup unsalted butter, softened
- 3/4 cup granulated sugar
- 1 large egg
- 2 teaspoons vanilla extract
- 1/2 cup soft caramel sauce, thick but pourable
- Flaky salt, for finishing
Quick Steps:
- Make and chill the dough 30 minutes.
- Roll to 1/4 inch, cut stars, and bake at 350°F for 8 to 9 minutes.
- Cool completely.
- Dip the bottom third in caramel.
- Sprinkle with flaky salt and let set on parchment.
Equipment for This Recipe:
- Star cutter
- Small bowl for caramel
- Parchment paper
- Cooling rack
How to Serve This Dish: These look sharp arranged in a loose ring, with the dipped ends all facing inward. They’re especially good on a dessert board with fruit or nuts because the caramel adds a little contrast.
Pro Tips for This Recipe:
- Use thick caramel so it clings instead of running.
- Let the cookies cool all the way before dipping.
- Add salt sparingly; a few flakes are enough.
Variations on This Dish:
- Chocolate Caramel Stars: Dip in chocolate after the caramel sets.
- Toffee Salt Stars: Roll the caramel edge in toffee bits.
- Spiced Caramel Stars: Add cinnamon to the dough.
Common Mistakes to Avoid with This Dish:
- Hot cookies and caramel: The coating slides right off.
- Too much salt: It takes over the flavor.
- Thin caramel: It drips and makes a sticky mess.
29. Blueberry Lemon Blossoms
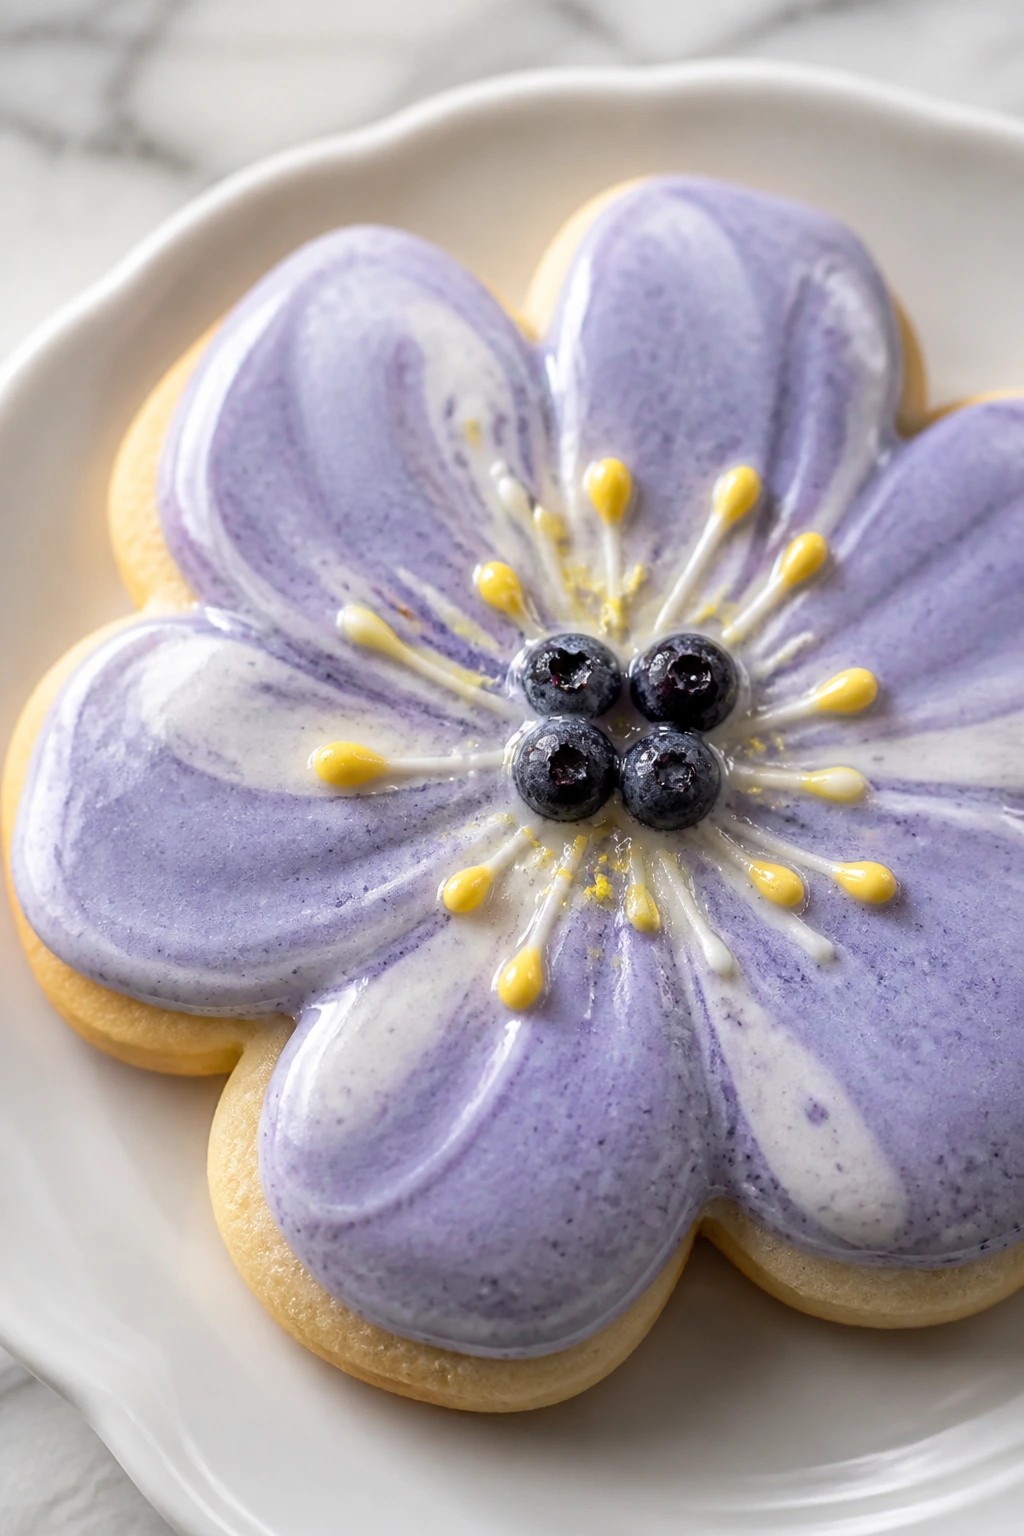
Blueberry and lemon is one of the easiest pretty-cookie pairings to pull off because the colors do half the work. These blossoms use freeze-dried blueberry powder in the glaze, which gives you a soft lavender-blue finish without making the dough wet.
Why It Works: Freeze-dried fruit keeps the glaze bright and punchy. Lemon in the cookie and blueberry in the finish give you two clear flavors that don’t fight.
Key Ingredients:
- 2 1/2 cups all-purpose flour
- 1/2 teaspoon baking powder
- 1/2 teaspoon salt
- 1 cup unsalted butter, softened
- 3/4 cup granulated sugar
- 1 large egg
- 1 tablespoon lemon zest
- 1 cup powdered sugar
- 1 to 2 tablespoons lemon juice
- 2 tablespoons freeze-dried blueberry powder
Quick Steps:
- Cream butter, sugar, and lemon zest.
- Beat in the egg, then add the dry ingredients.
- Chill the dough 30 minutes, roll to 1/4 inch, and cut blossoms or rounds.
- Bake at 350°F for 8 to 10 minutes.
- Cool and glaze with blueberry-lemon icing.
Equipment for This Recipe:
- Blossom or flower cutter
- Fine sieve
- Baking sheet
- Cooling rack
How to Serve This Dish: These are nice in a cluster on a white plate with a few extra lemon zest strands over the top. They feel light next to fresh berries or a fruit salad.
Pro Tips for This Recipe:
- Sift the blueberry powder to avoid lumps.
- Let the lemon zest sit in the sugar for a minute before creaming.
- Keep the glaze thin enough to show the cookie shape.
Variations on This Dish:
- Mixed Berry Blossoms: Use raspberry powder instead of blueberry.
- Blueberry Vanilla: Skip the lemon zest for a softer flavor.
- Blueberry Sandwiches: Put lemon buttercream between two thin cookies.
Common Mistakes to Avoid with This Dish:
- Using fresh blueberries in the glaze: They add too much liquid.
- Too much blueberry powder: The glaze can taste dusty.
- Baking too brown: The pastel look disappears fast.
30. Anise Snowflakes
Anise has that old pastry-case flavor some people grew up with and others need a second bite to appreciate. In snowflake form, the pale cookie and faint licorice note feel delicate instead of heavy, especially with a white glaze.
Why It Works: Anise is strong, so the cookie stays interesting without needing a long ingredient list. The snowflake shape keeps the look crisp and simple.
Key Ingredients:
- 2 1/2 cups all-purpose flour
- 1/2 teaspoon baking powder
- 1/2 teaspoon salt
- 1 cup unsalted butter, softened
- 3/4 cup granulated sugar
- 1 large egg
- 1 teaspoon vanilla extract
- 1/2 teaspoon anise extract
- 1 cup powdered sugar
- 1 to 2 tablespoons milk
Quick Steps:
- Mix dry ingredients and cream the butter with sugar.
- Add the egg, vanilla, and anise extract.
- Stir in the dry mix, chill 30 minutes, and roll to 1/4 inch.
- Cut snowflakes and bake at 350°F for 8 to 9 minutes.
- Cool and glaze lightly.
Equipment for This Recipe:
- Snowflake cutter
- Rolling pin
- Small whisk
- Baking sheet
How to Serve This Dish: These are best on a plain white platter because the shape and glaze are enough on their own. They pair well with coffee or tea and work nicely in a mixed cookie tin for contrast.
Pro Tips for This Recipe:
- Measure the anise carefully; it can jump out fast.
- Keep the glaze thin and pale.
- Bake only until the bottoms are light gold.
Variations on This Dish:
- Fennel Snowflakes: Use crushed fennel seed for a softer licorice note.
- Orange Anise Cookies: Add orange zest to the dough.
- Poppy Anise Version: Sprinkle poppy seeds on top.
Common Mistakes to Avoid with This Dish:
- Too much extract: The flavor turns sharp.
- Thick icing: It masks the shape.
- Overbaking: The delicate flavor gets buried under brown edges.
31. Chai-Spice Bells

Chai-spice cookies smell like a spice drawer in the best way. Cinnamon, ginger, cardamom, and a little clove make the dough warm and fragrant, and bell cutters turn them into something that looks cheerful before a single sprinkle goes on.
Why It Works: Chai spice blends are strong enough to flavor the cookie without any fancy technique. The bell shape keeps the presentation neat, and a light glaze gives the top a little shine.
Key Ingredients:
- 2 1/2 cups all-purpose flour
- 1/2 teaspoon baking powder
- 1/2 teaspoon salt
- 1 cup unsalted butter, softened
- 3/4 cup brown sugar
- 1 large egg
- 1 teaspoon cinnamon
- 1/2 teaspoon ginger
- 1/4 teaspoon cardamom
- 1/8 teaspoon clove
Quick Steps:
- Whisk the flour, baking powder, salt, and spices.
- Cream butter and brown sugar, then add the egg.
- Mix in the dry ingredients and chill 30 minutes.
- Roll to 1/4 inch, cut bells, and bake at 350°F for 8 to 10 minutes.
- Cool and glaze, if you want a little extra polish.
Equipment for This Recipe:
- Bell cutter
- Mixing bowl
- Cooling rack
- Parchment-lined tray
How to Serve This Dish: Set these in small stacks or in a loose ring with a dusting of cinnamon sugar nearby. They’re good with tea, coffee, or a little whipped cream if you’re serving dessert plates.
Pro Tips for This Recipe:
- Keep the clove low; it takes over easily.
- Brown sugar gives the dough a warmer color and flavor.
- Chill before cutting so the bell shapes stay clean.
Variations on This Dish:
- Vanilla Chai Bells: Add a little extra vanilla and skip the glaze.
- Cardamom Forward: Double the cardamom and cut back on clove.
- Iced Chai Bells: Drizzle with cinnamon glaze.
Common Mistakes to Avoid with This Dish:
- Heavy clove hand: The spice blend turns muddy.
- Rolling too thin: The bells brown too quickly.
- Skipping the chill: The details blur in the oven.
32. Citrus Checkerboards
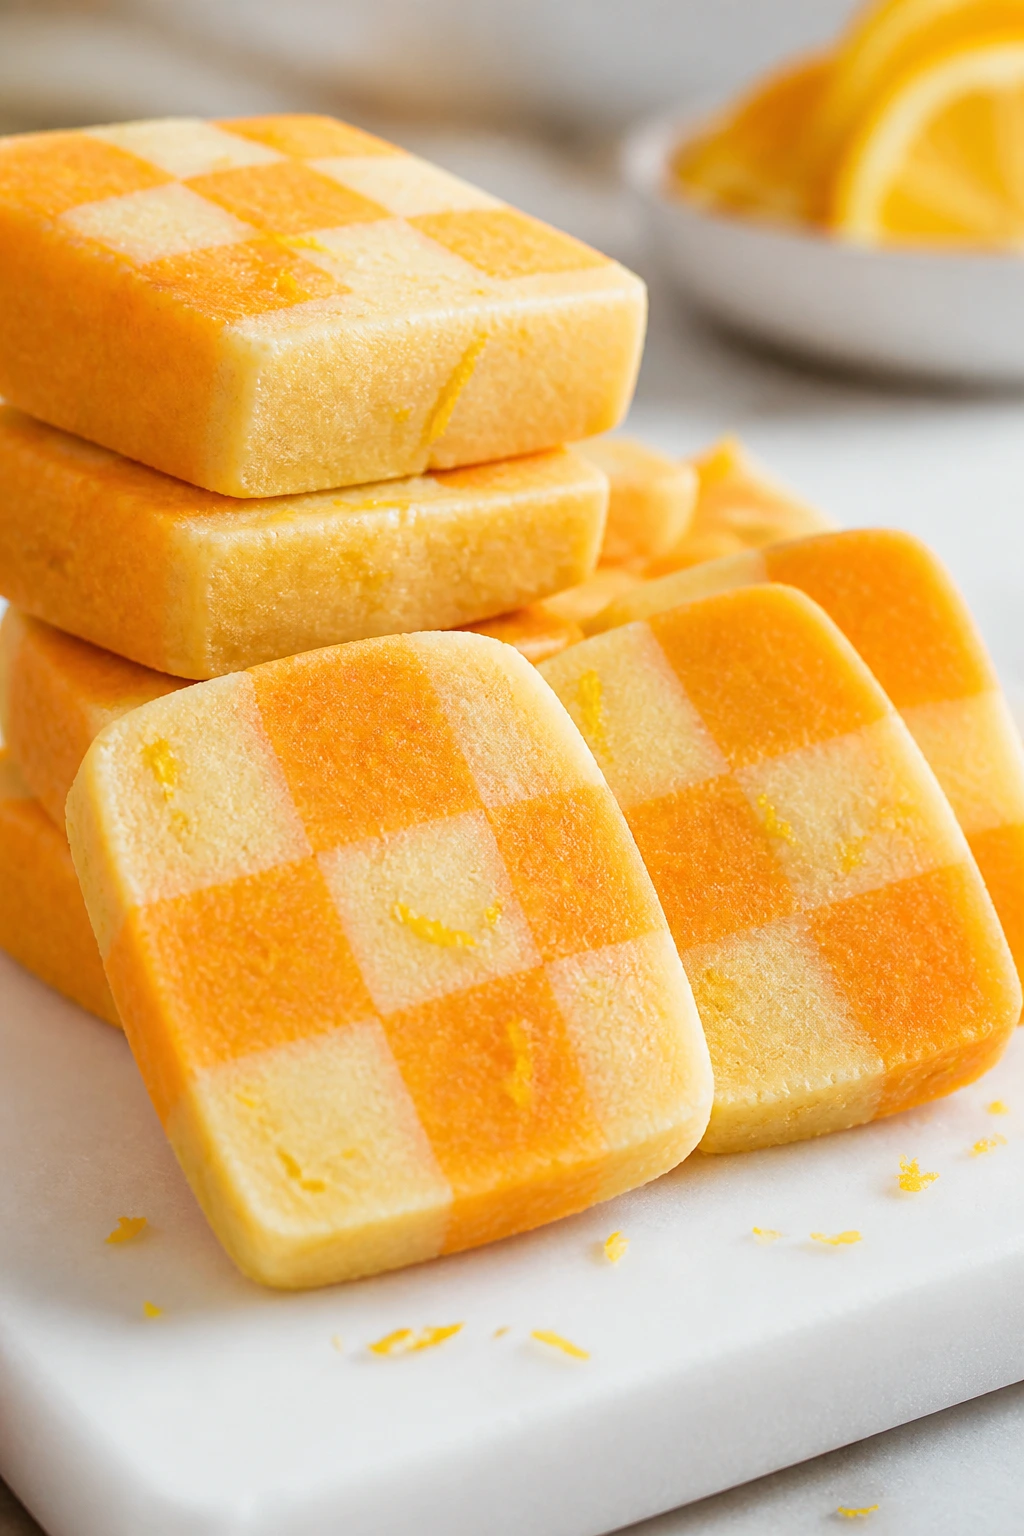
These are the cookies for when you want a tray that looks clever without being loud about it. Two doughs—one lemon, one orange—get stacked and sliced into checkerboard squares that show off the pattern in every bite.
Why It Works: Different citrus flavors keep the pattern from tasting like a trick. The square shape makes the checkerboard obvious and gives you a neat, graphic finish.
Key Ingredients:
- 5 cups all-purpose flour, divided
- 1 teaspoon baking powder
- 1 teaspoon salt
- 2 cups unsalted butter, softened, divided
- 1 1/2 cups granulated sugar, divided
- 2 large eggs, divided
- 1 tablespoon lemon zest
- 1 tablespoon orange zest
- 2 teaspoons vanilla extract, divided
Quick Steps:
- Make two doughs, one with lemon zest and one with orange zest.
- Chill both for 30 minutes.
- Roll each into equal slabs, stack and trim into a checkerboard log.
- Chill again, slice 1/4 inch thick, and bake at 350°F for 8 to 10 minutes.
- Cool fully so the pattern holds.
Equipment for This Recipe:
- Two mixing bowls
- Sharp knife
- Ruler or straight edge, helpful
- Baking sheet
How to Serve This Dish: These look best lined up in a straight row so the checkerboard pattern shows clearly. They’re a nice conversation cookie for tea service or a dessert plate with simple fruit.
Pro Tips for This Recipe:
- Keep both doughs the same thickness before stacking.
- Chill the assembled log until firm enough to slice cleanly.
- Trim the ends first so the pattern looks neat.
Variations on This Dish:
- Lime and Lemon Checkers: Use lime zest in one dough and lemon in the other.
- Chocolate Citrus Checkers: Add cocoa to one half instead of extra citrus.
- Pistachio Citrus Checkers: Work ground pistachios into one layer.
Common Mistakes to Avoid with This Dish:
- Uneven slab sizes: The checkerboard pattern drifts.
- Slicing while soft: The layers squish together.
- Too much zest in one dough: The flavors stop feeling balanced.
33. Red Velvet Sugar Stars
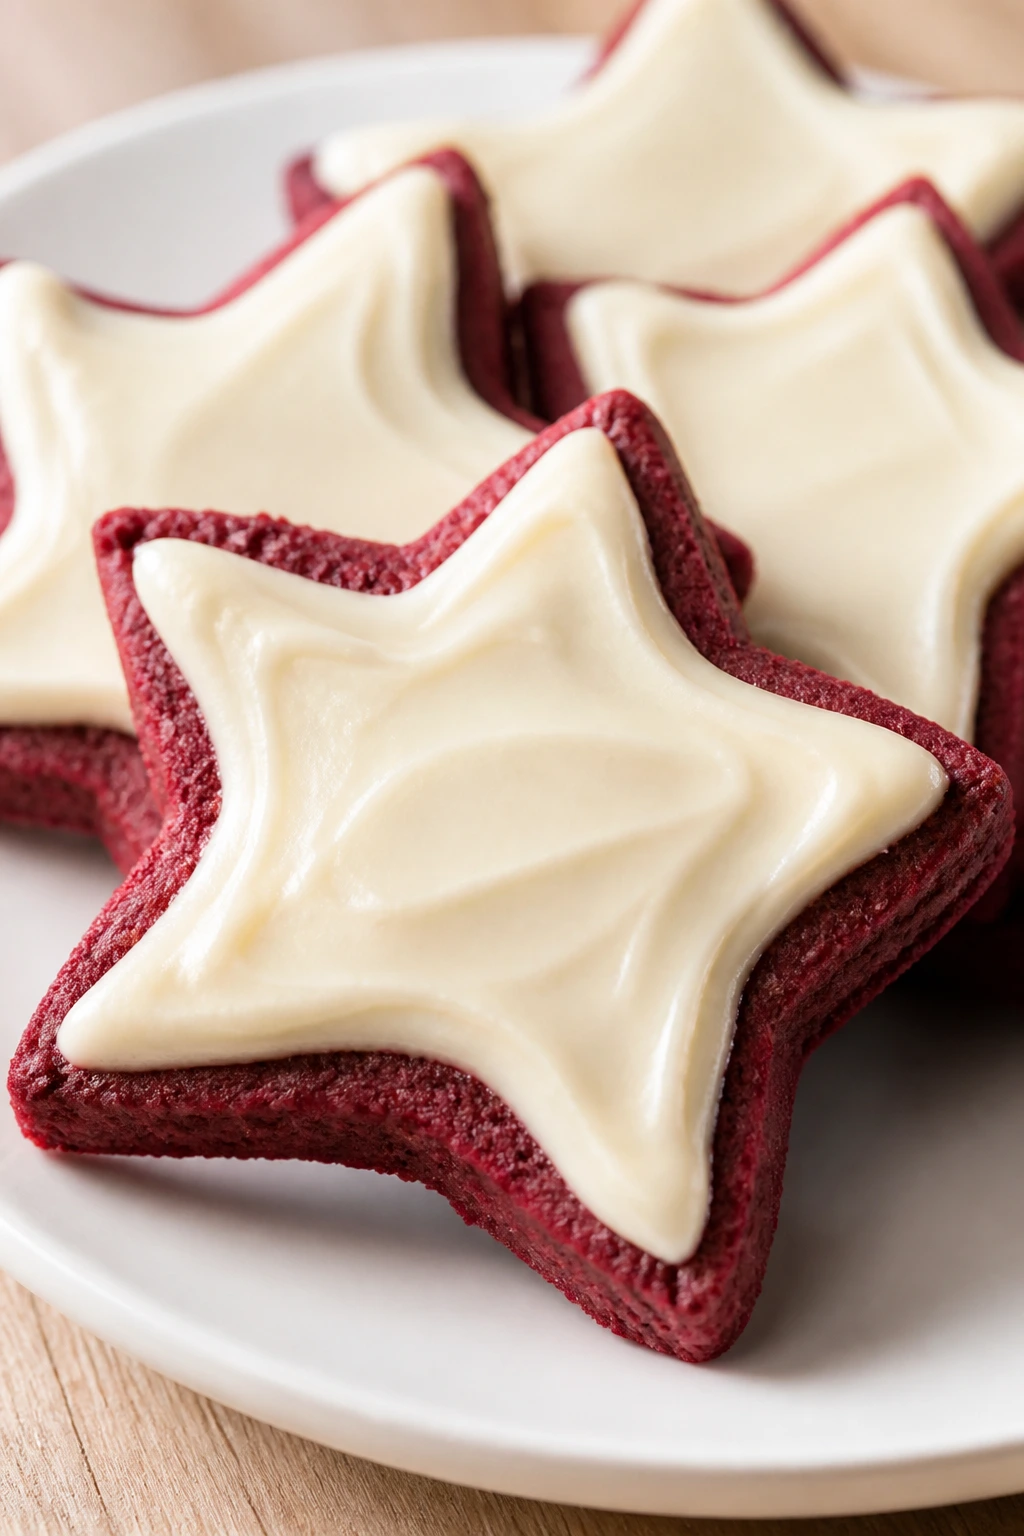
Red velvet in cookie form can go wrong fast if it becomes too sweet or too bright. Here, a little cocoa, a little red coloring, and a cream cheese glaze give you a star-shaped cookie that looks festive without tasting like cake batter on a platter.
Why It Works: Cocoa adds depth, while the cream cheese glaze echoes the classic red velvet pairing. Star shapes make the bold color feel intentional instead of flashy.
Key Ingredients:
- 2 1/2 cups all-purpose flour
- 2 tablespoons cocoa powder
- 1/2 teaspoon baking powder
- 1/2 teaspoon salt
- 1 cup unsalted butter, softened
- 3/4 cup granulated sugar
- 1 large egg
- 1 teaspoon vanilla extract
- Red gel food coloring, as needed
- 4 ounces cream cheese, softened
- 1 cup powdered sugar
Quick Steps:
- Mix flour, cocoa, baking powder, and salt.
- Cream butter and sugar, then add the egg, vanilla, and a small amount of red coloring.
- Add the dry ingredients, chill 30 minutes, and roll to 1/4 inch.
- Cut stars and bake at 350°F for 8 to 10 minutes.
- Cool and top with cream cheese glaze.
Equipment for This Recipe:
- Star cutter
- Mixing bowl
- Piping bag or spoon
- Cooling rack
How to Serve This Dish: These look good on a white plate or tucked into a holiday tin because the red color pops hard against anything pale. They go well with milk or coffee; the cream cheese glaze likes both.
Pro Tips for This Recipe:
- Use gel coloring so the dough doesn’t get watery.
- Keep the cocoa modest; you want red velvet, not chocolate cookies.
- Chill the cut stars before baking if the kitchen is warm.
Variations on This Dish:
- Red Velvet Sandwiches: Fill two thin cookies with cream cheese frosting.
- White Velvet Version: Skip the cocoa and use vanilla glaze.
- Chocolate Red Velvet: Add a few chocolate chips for texture.
Common Mistakes to Avoid with This Dish:
- Too much coloring: The dough can taste sharp and look unnatural.
- Heavy cocoa hand: It turns into a chocolate cookie fast.
- Glazing while warm: Cream cheese topping melts and loses shape.
34. Confetti Celebration Cutouts
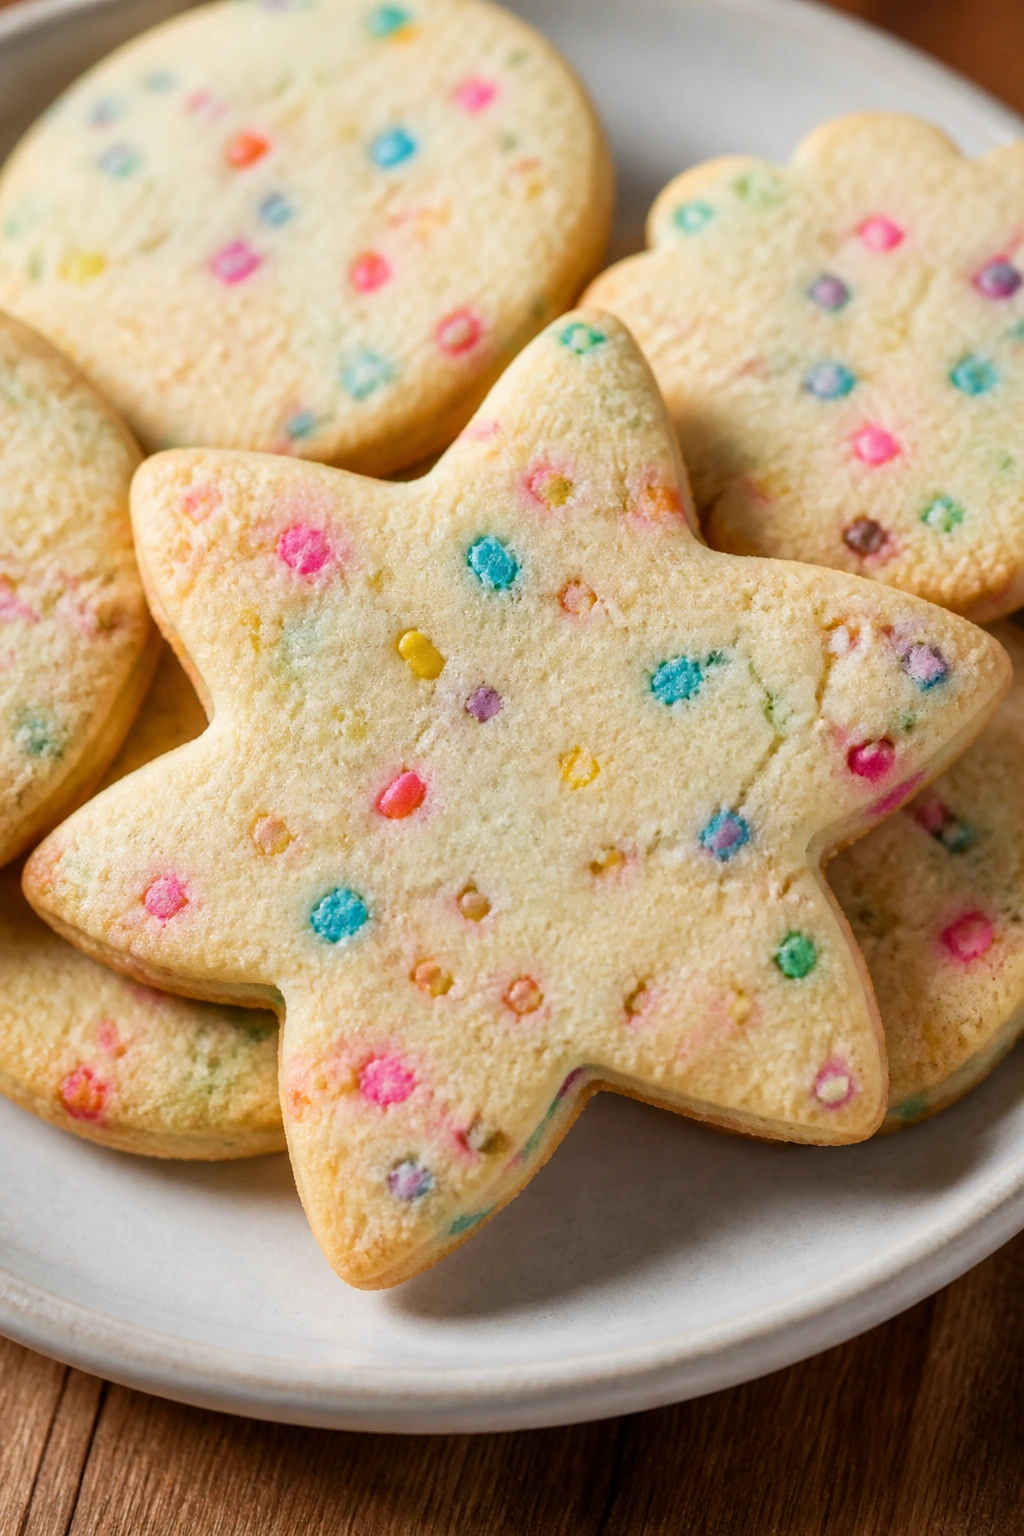
These are the fun ones—the cookies that look like somebody planned a party and remembered dessert at the end. Sprinkles inside the dough give you little bursts of color all the way through, and a simple glaze on top finishes the look without making them messy.
Why It Works: Sprinkles in the dough are better when they’re folded in late so the colors don’t bleed. A neutral vanilla base lets the confetti stay bright and visible.
Key Ingredients:
- 2 1/2 cups all-purpose flour
- 1/2 teaspoon baking powder
- 1/2 teaspoon salt
- 1 cup unsalted butter, softened
- 3/4 cup granulated sugar
- 1 large egg
- 2 teaspoons vanilla extract
- 1/2 cup jimmie sprinkles
- 1 cup powdered sugar
- 1 to 2 tablespoons milk
Quick Steps:
- Mix the dough, then fold in the sprinkles at the very end.
- Chill 30 minutes.
- Roll to 1/4 inch and cut shapes.
- Bake at 350°F for 8 to 9 minutes.
- Cool and glaze or dust lightly.
Equipment for This Recipe:
- Mixing bowl
- Rubber spatula
- Cookie cutters
- Baking sheet
How to Serve This Dish: These belong in a generous stack or tucked into a jar where the color flecks show through. They’re good for birthdays, school treats, or any tray that needs a little noise.
Pro Tips for This Recipe:
- Use jimmies, not nonpareils, or the colors bleed too much.
- Fold the sprinkles in gently so the dough stays streak-free.
- Chill before cutting so the confetti stays evenly scattered.
Variations on This Dish:
- Pastel Confetti: Use soft-colored sprinkles for a lighter look.
- Chocolate Confetti: Add a little cocoa to the dough.
- Glazed Confetti: Leave the tops plain and let the color do the work.
Common Mistakes to Avoid with This Dish:
- Using the wrong sprinkles: Tiny round sprinkles bleed into the dough.
- Overmixing after adding sprinkles: The dough turns gray.
- Rolling too warm: The dough smears and the shapes blur.
35. White Chocolate Ribbon Cookies
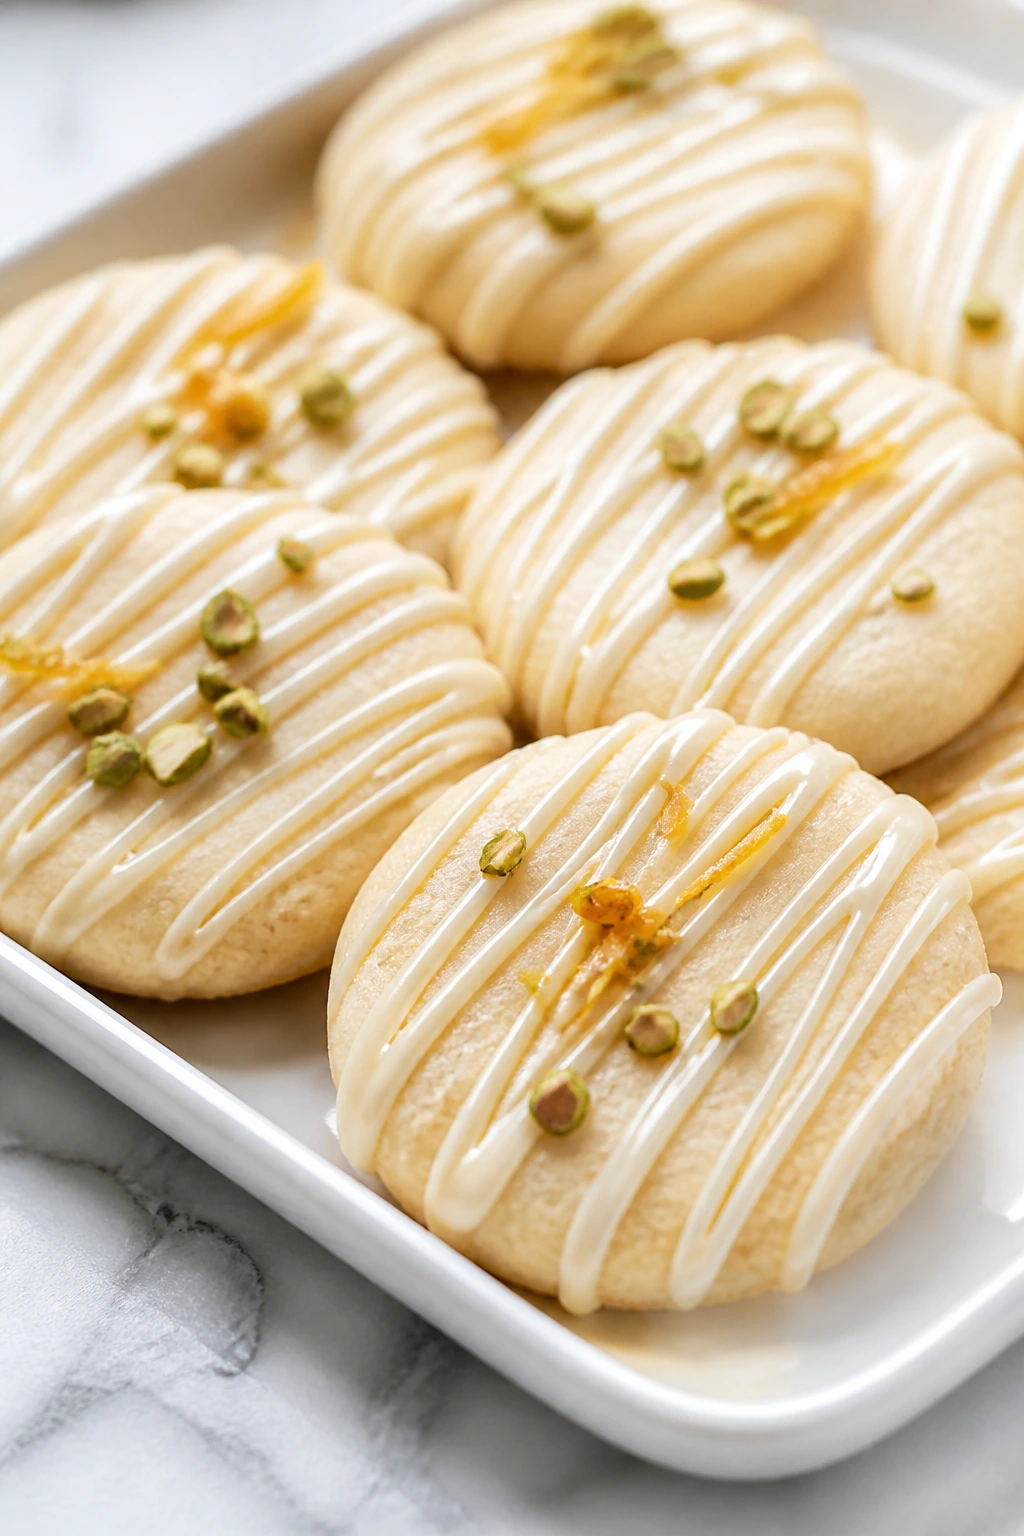
These are the final tray stunners: a simple round cookie with thin white chocolate ribbons over the top and maybe a few bits of candied citrus peel or chopped pistachio. They look crisp, clean, and a little luxurious without asking for much effort.
Why It Works: White chocolate gives you contrast on a pale cookie and sets with a glossy finish if you let it cool properly. The ribbon pattern keeps the decoration light, so the cookie still feels simple.
Key Ingredients:
- 2 1/2 cups all-purpose flour
- 1/2 teaspoon baking powder
- 1/2 teaspoon salt
- 1 cup unsalted butter, softened
- 3/4 cup granulated sugar
- 1 large egg
- 2 teaspoons vanilla extract
- 5 ounces white chocolate, melted
- 2 tablespoons chopped pistachios or candied citrus peel
Quick Steps:
- Make and chill the dough 30 minutes.
- Roll to 1/4 inch, cut rounds, and bake at 350°F for 8 to 10 minutes.
- Cool completely.
- Drizzle melted white chocolate in thin ribbons.
- Add pistachios or citrus peel before the chocolate sets.
Equipment for This Recipe:
- Round cutter
- Small spoon or piping bag
- Baking sheet
- Parchment paper
How to Serve This Dish: These look cleanest on a plain platter with the ribbons all going the same direction. They’re lovely with tea or champagne, but they’re also good in a mixed cookie box because they read as understated next to the brighter designs.
Pro Tips for This Recipe:
- Melt the white chocolate slowly so it stays smooth.
- Use a piping bag with a tiny snip for the thinnest ribbons.
- Let the drizzle set fully before stacking or shipping.
Variations on This Dish:
- Dark and White Ribbon Cookies: Add a second drizzle of dark chocolate.
- Citrus Ribbon Cookies: Add orange zest to the dough.
- Pistachio White Chocolate: Double the pistachio garnish for a greener look.
Common Mistakes to Avoid with This Dish:
- Overheating white chocolate: It seizes fast.
- Thick drizzles: They obscure the cookie shape.
- Stacking too early: The ribbons smear and stick.
Why Sugar Cookie Dough Is So Good at Playing Dress-Up
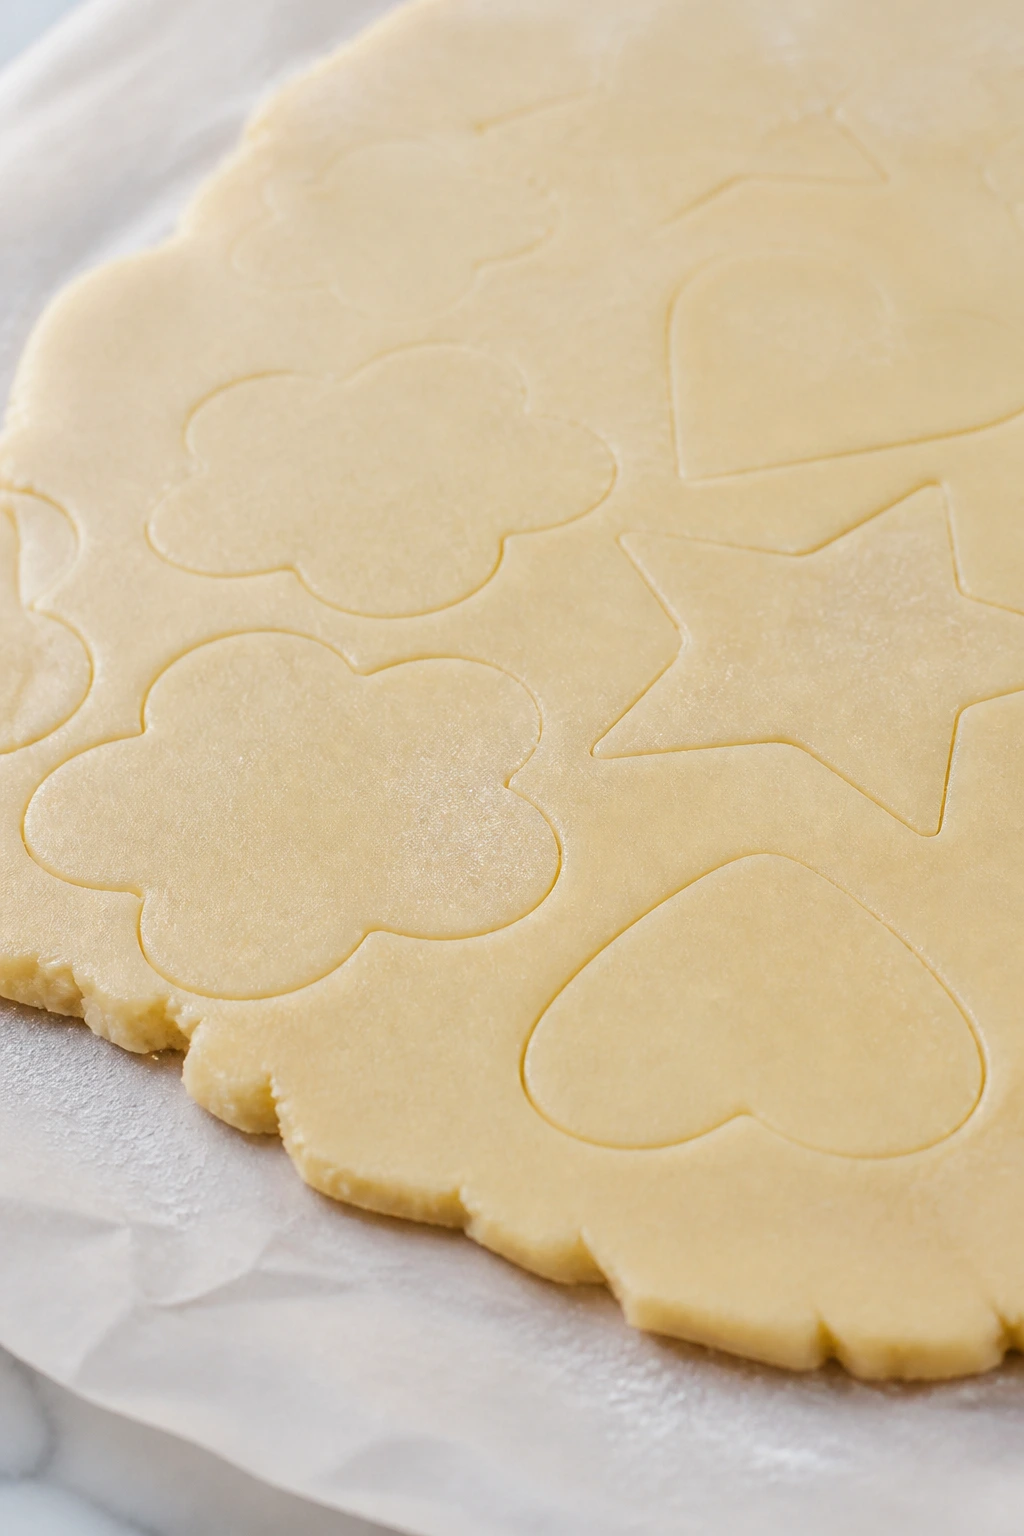
A good sugar cookie dough is one of the easiest things in baking to underestimate. It looks plain. It behaves plain. Then you realize it can do a dozen jobs without changing much at all. Roll it thin and it crisps up at the edges. Keep it a little thicker and the center stays tender. Add zest, spices, tea, nuts, chocolate, jam, or glaze, and the same base suddenly feels like a different cookie entirely.
The reason it works is balance. Butter gives the dough flavor and spread. Flour keeps the shape. Sugar helps with tenderness and browning. Egg binds the whole thing together so the cookie lifts cleanly from the tray instead of cracking apart. Once you get that formula right, you can nudge it in different directions with a single ingredient or a different finish.
I also like sugar cookies because they reward calm handling. You do not need fancy gear to get them right. You need a rolling pin, a sheet pan, and the patience to let the dough chill long enough to stop fighting back. That’s it. If you have that, you can make cutouts that stay sharp, sandwich cookies that hold together, and little glazed rounds that look like they came from a tray someone guarded with both hands.
Essential Equipment for These Recipes
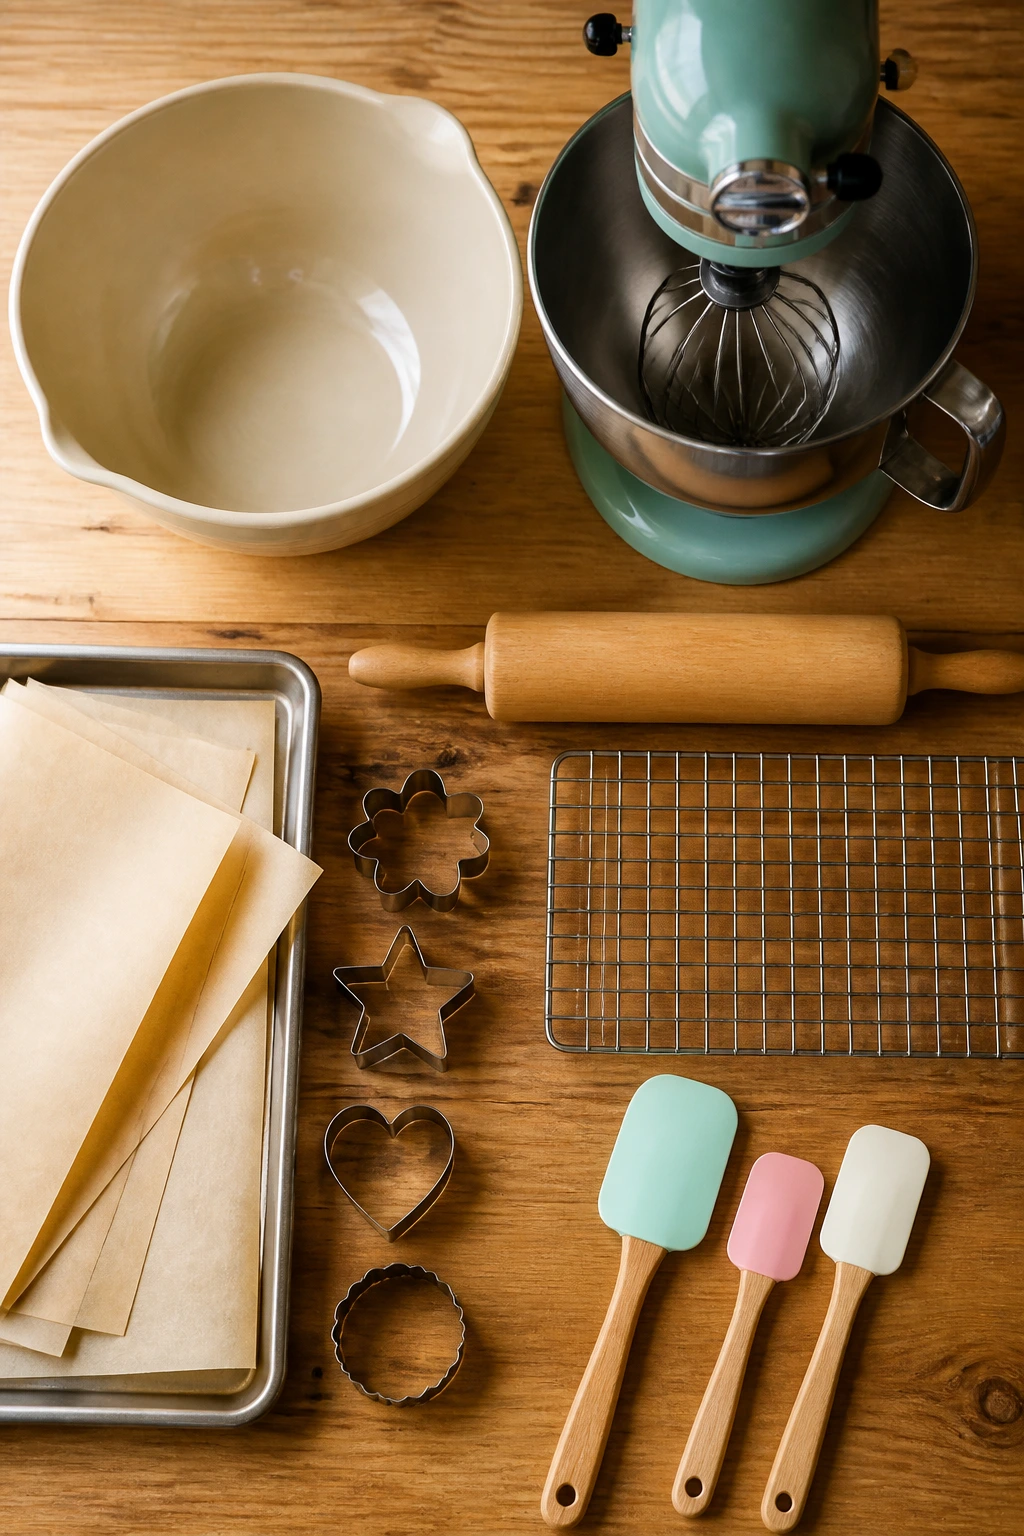
- Mixing bowls: One large bowl and one medium bowl cover most of the doughs, fillings, and glazes.
- Hand mixer or stand mixer: Butter and sugar cream more evenly with a mixer, and the dough gets smoother faster.
- Rolling pin: A straight, smooth rolling pin makes it easier to keep cutouts even.
- Parchment paper: This keeps cookie bottoms from sticking and helps delicate cookies lift cleanly.
- Cookie cutters: Stars, hearts, rounds, leaves, and flowers carry the pretty factor for most of these cookies.
- Cooling racks: Cookies finish setting as they cool, and racks keep the bottoms from going soft.
- Small whisk or fork: Handy for simple glazes and thin icing.
- Piping bags or zip-top bags: Useful for drizzle, stripes, and small decorative lines.
- Microplane or fine grater: Best for zesting lemons, oranges, and limes without tearing the peel.
- Cookie scoop: Helps with rounds, thumbprints, and any cookie that benefits from even size.
- Offset spatula: Good for lifting, glazing, and moving delicate shapes.
- Airtight storage tins or containers: They keep the cookies from drying out and protect decorated tops from chipping.
Smart Shopping and Ingredient Tips
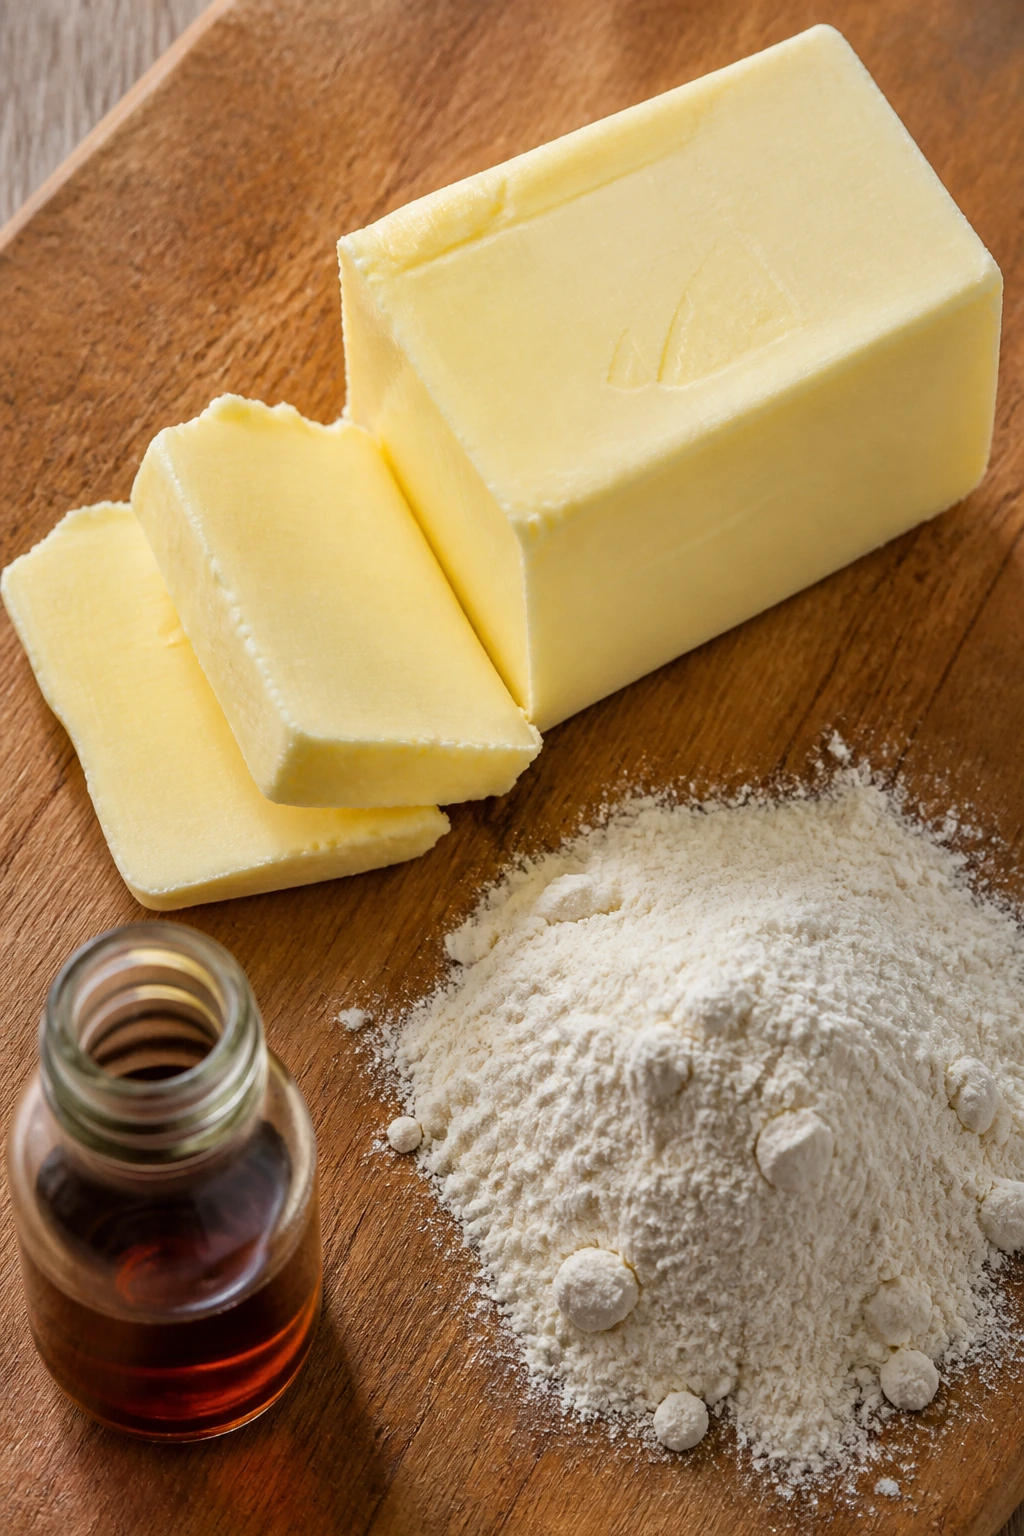
Butter is the ingredient worth paying attention to first. Use unsalted butter if you can, because it gives you control over the salt level, and let it soften on the counter until it bends under a finger but doesn’t look greasy or shiny. If it starts to look wet at the edges, it’s too warm for clean cookie dough.
Flour matters more than people think. Spoon it into the measuring cup and level it off rather than scooping straight from the bag, because a packed cup can give you a heavy dough that spreads less but eats dry. For the most delicate cookies—like windows, Linzers, or checkerboards—accurate flour measurement makes a real difference.
Choose extracts that smell clean when you open the bottle. Vanilla should smell warm, not thin. Almond should be used in small amounts. Rosewater, orange blossom water, and anise need a light hand, so buy small bottles unless you know you bake with them often. Spices should smell lively, not dusty. If the cinnamon smells like a cardboard drawer, it’s not doing your cookies any favors.
For colors and toppings, reach for gel food coloring, sanding sugar, freeze-dried fruit powder, good jam, and chocolate you’d actually want to eat plain. Those little choices show up on the cookie. Cheap sprinkles can bleed. Watery jam can slide. Thin chocolate can set chalky. You don’t need luxury ingredients. You do need ingredients with some life left in them.
How to Serve These Recipes
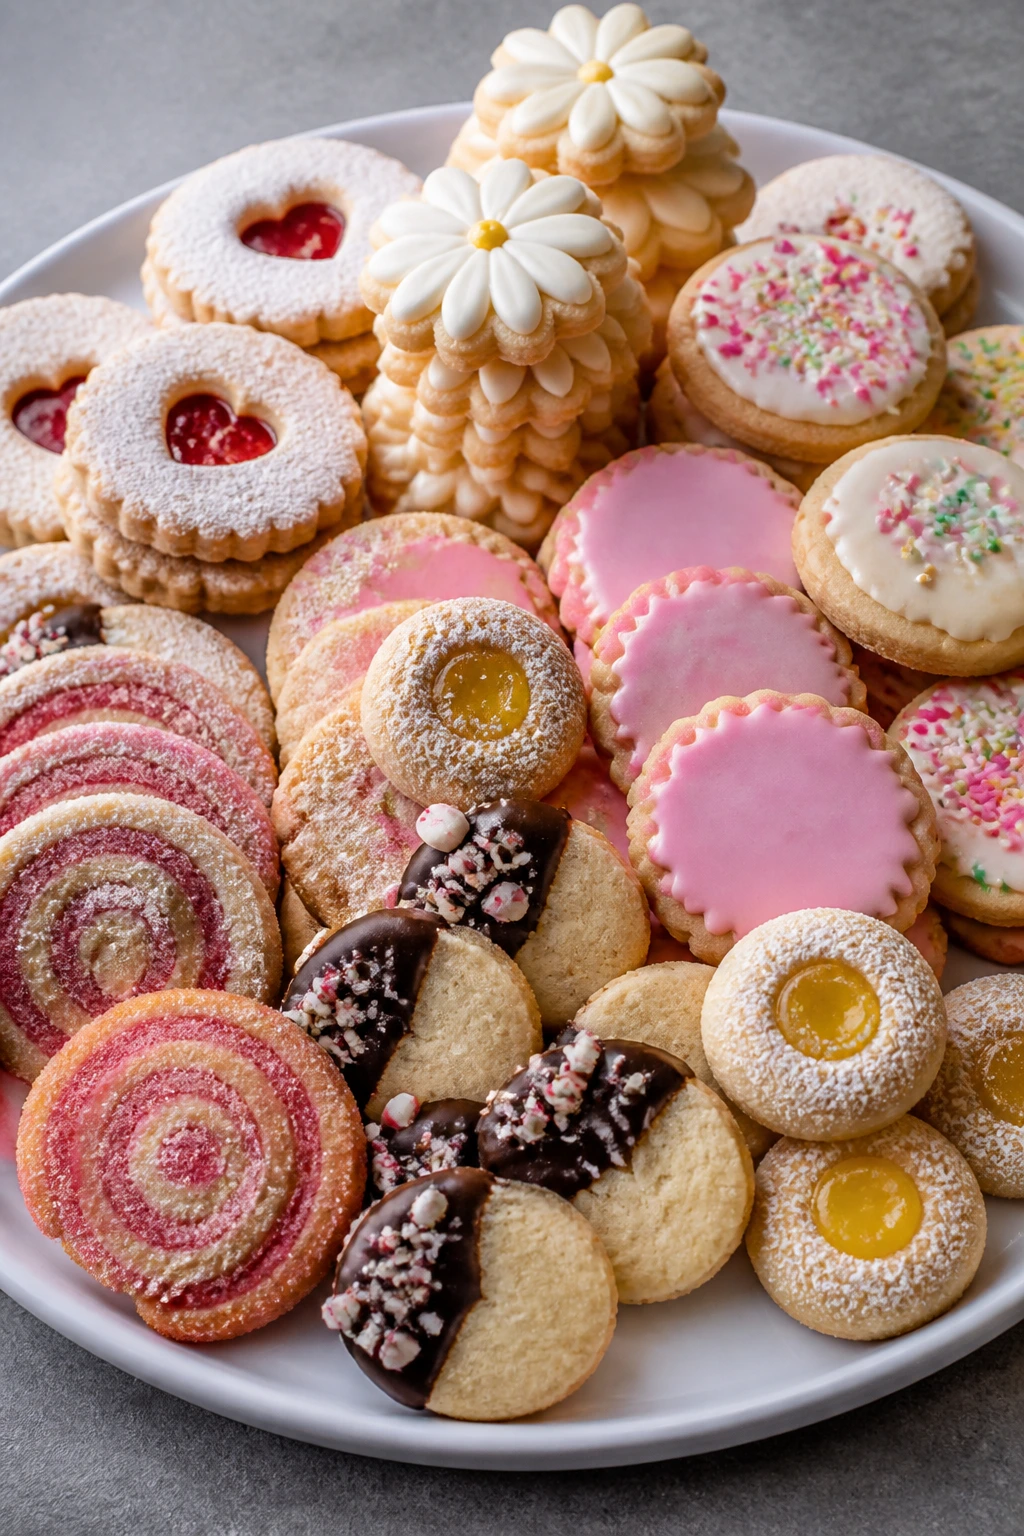
Presentation: Mix tall cookies, flat cookies, filled cookies, and dipped cookies together so the tray has height and texture. A plain white platter or a dark slate board makes the color work harder, especially for floral icing, jewel-toned jam centers, and glazed citrus cookies.
Accompaniments: Serve these with tea, coffee, milk, or a simple fruit bowl depending on the flavor. Lemon and orange cookies like black tea or citrus fruit. Chocolate-dipped rounds and espresso stars want coffee. Jam thumbprints and Linzers sit nicely beside berries or a small dish of whipped cream.
Portions: Plan on 2 to 3 cookies per person for a dessert plate, or 4 to 5 if you’re setting out a mixed cookie tray. For a party table, make a few of the more dramatic cookies—stained glass, piped flowers, checkerboards—and fill the gaps with easier rounds and thumbprints.
Beverage Pairing: A pot of Earl Grey, a dark roast coffee, and cold milk cover nearly every flavor in this collection. If you want one flexible pairing, tea with a little milk is the safest bet.
Additional Tips and Flavor Boosters
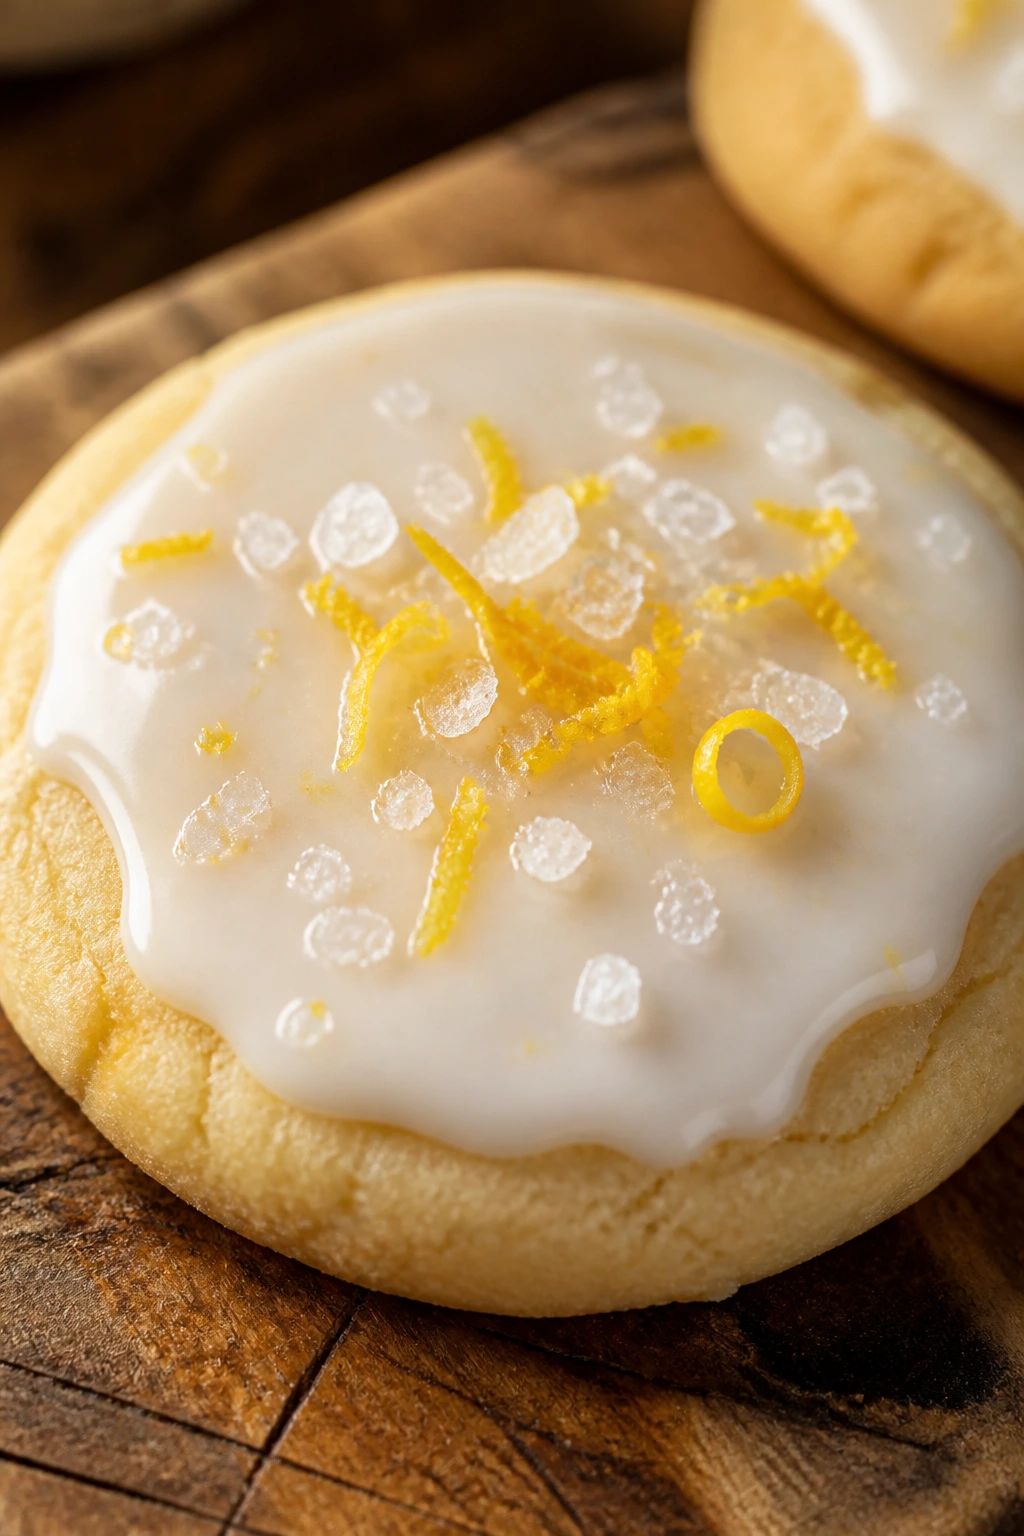
Flavor Enhancement: A tiny pinch of salt on the top of glazed cookies changes everything. It keeps lemon, caramel, and chocolate finishes from tasting sugary and flat. On plain cookies, a swipe of melted butter before a sugar sprinkle can make the crust taste richer without making the dough heavier.
Customization: If you like a softer cookie, pull them a minute earlier and let them finish on the hot tray. If you want more crunch, roll the dough a touch thinner and bake until the edges go faintly gold. You can also swap in a small amount of brown sugar for a deeper, more caramel-like base.
Serving Suggestions: Add one visual accent, not five. A lemon twist, a scatter of pistachios, a dusting of powdered sugar, or a thin chocolate ribbon is usually enough. Too many toppings crowd the shape, and shape is the whole game here.
Make-It-Yours: For dairy-free cookies, use a firm plant butter that behaves like real butter in baking. For gluten-free baking, use a one-to-one baking blend and chill the dough a little longer. For lower-sugar versions, reduce the granulated sugar by 2 to 3 tablespoons and lean more on spice, zest, or extract for flavor.
Make-Ahead, Storage, and Reheating Guidance
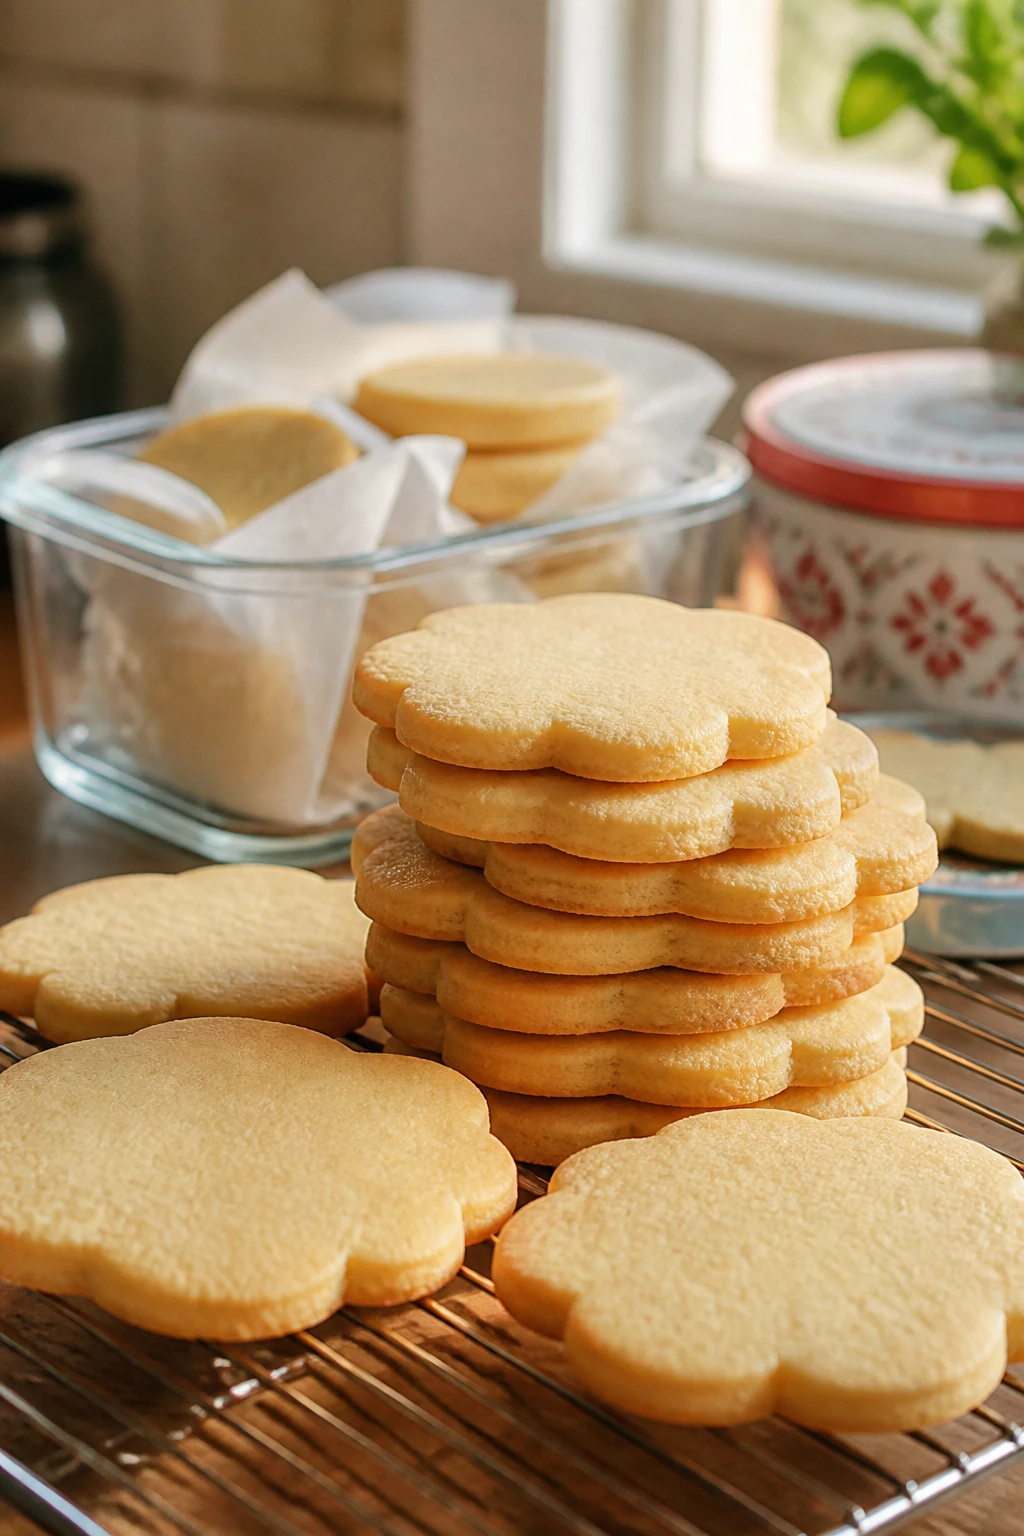
Most sugar cookie doughs can be made 1 to 2 days ahead and kept wrapped in the refrigerator. If you want to go further, flatten the dough into discs or logs, wrap tightly, and freeze for up to 2 months. Thaw in the refrigerator overnight before rolling or slicing so the texture stays manageable.
Baked sugar cookies keep well at room temperature for 3 to 5 days in an airtight tin, as long as the icing or glaze is fully set. Soft-frosted sandwich cookies and jam-filled cookies are a little more delicate; keep those chilled if your kitchen runs warm, and bring them back to room temperature before serving so the texture loosens up again.
For plain or lightly glazed cookies, there usually isn’t a real reheating step. A quick 3- to 4-minute warm-up in a low oven, around 300°F, can make them taste freshly baked, but only if they’re undecorated or topped with something heat-safe like chocolate. Icing and royal glaze do not like heat. If the finish matters, skip the oven and just let the cookie sit out 20 minutes before serving.
Decorated cookies also freeze well if you layer them between sheets of parchment once the finish is hard. That said, stained glass, thin lace cookies, and heavily piped cookies are fragile, so pack them in a single layer if you can. They travel better than people expect, but they still appreciate a little respect.
Variations and Adaptations to Try
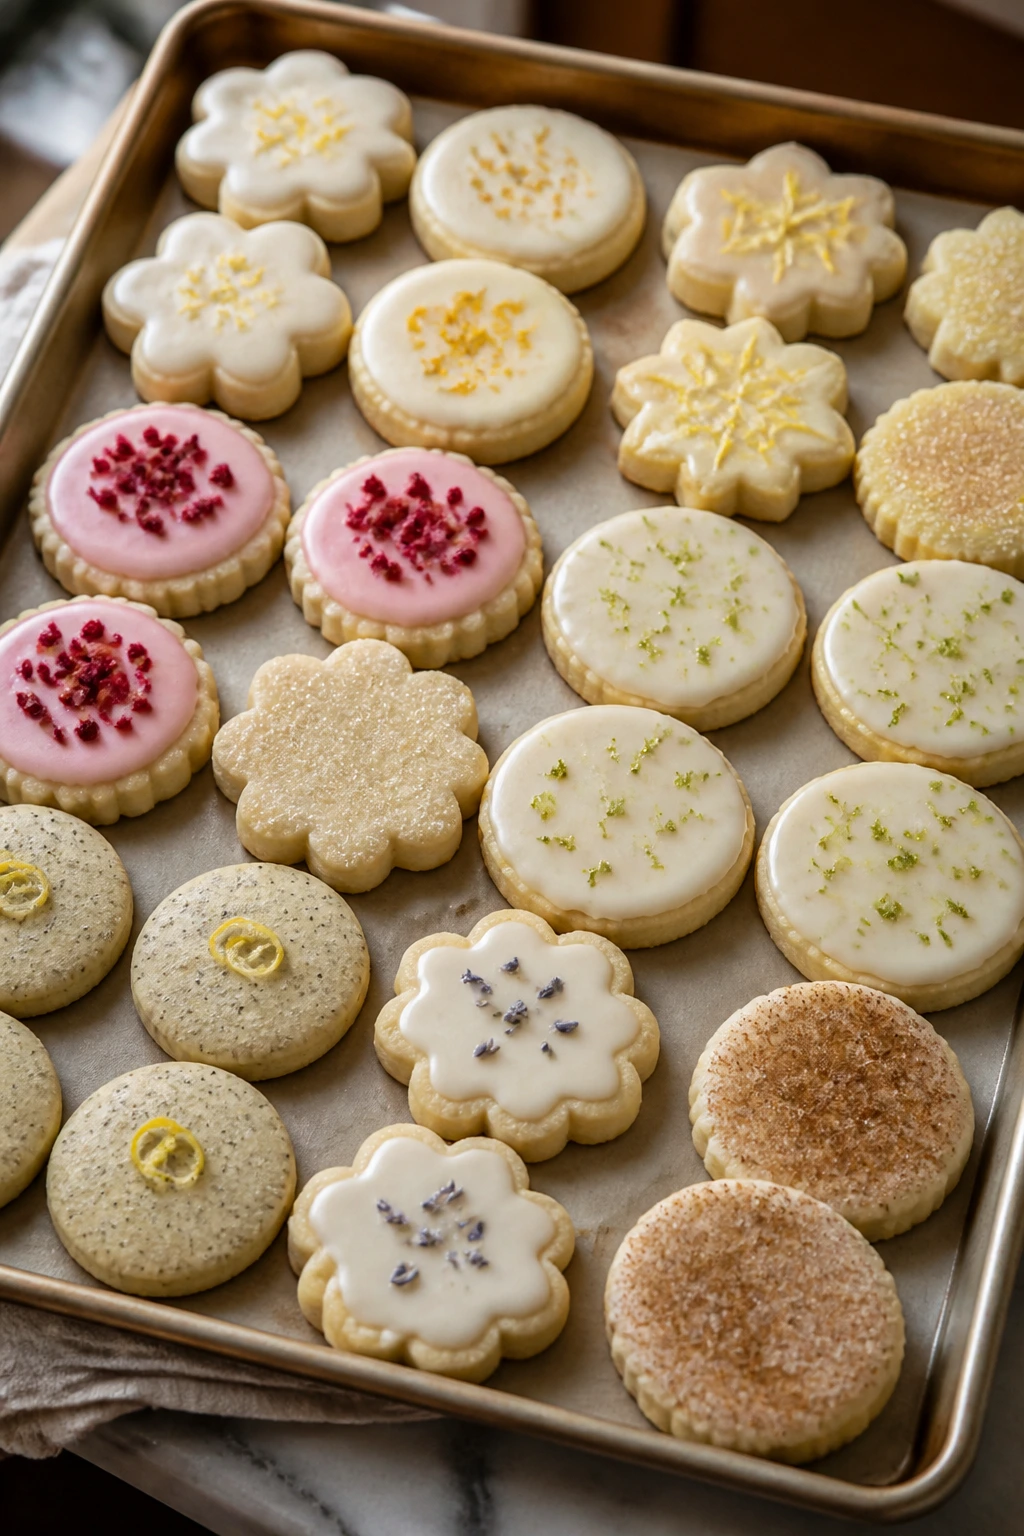
Gluten-Free Tray: Use a 1:1 gluten-free baking blend in place of all-purpose flour and chill the dough 15 minutes longer than usual. The extra rest gives the starches time to hydrate, which helps the cookies hold their shape.
Dairy-Free Batch: Swap in a firm plant butter and keep everything else the same. Doughs with brown butter or very rich fillings need a little more care, but plain cutouts, rounds, and glazed cookies adapt well.
Less-Sweet Finish: Skip the glaze on cookies that already have jam, chocolate, or candy centers. A light dusting of powdered sugar or a few sanding sugar crystals often does the job with less heaviness.
Kid-Friendly Box: Lean on sprinkle-rim cutouts, confetti cookies, white chocolate ribbons, and simple rounds with jam. Those are the designs that hold up to enthusiastic handling and still look cheerful after a few minutes on the table.
Citrus-All-The-Way Tray: Use lemon, orange, lime, and grapefruit zest across different cookies, then finish them with very thin glaze. That keeps the whole collection bright and readable without turning every cookie into the same flavor.
Spice-Forward Batch: Build around cinnamon, cardamom, chai spice, and a little ginger. The warm colors and warm flavors make the tray feel cohesive, especially if you keep the icing pale and simple.
Common Mistakes to Avoid
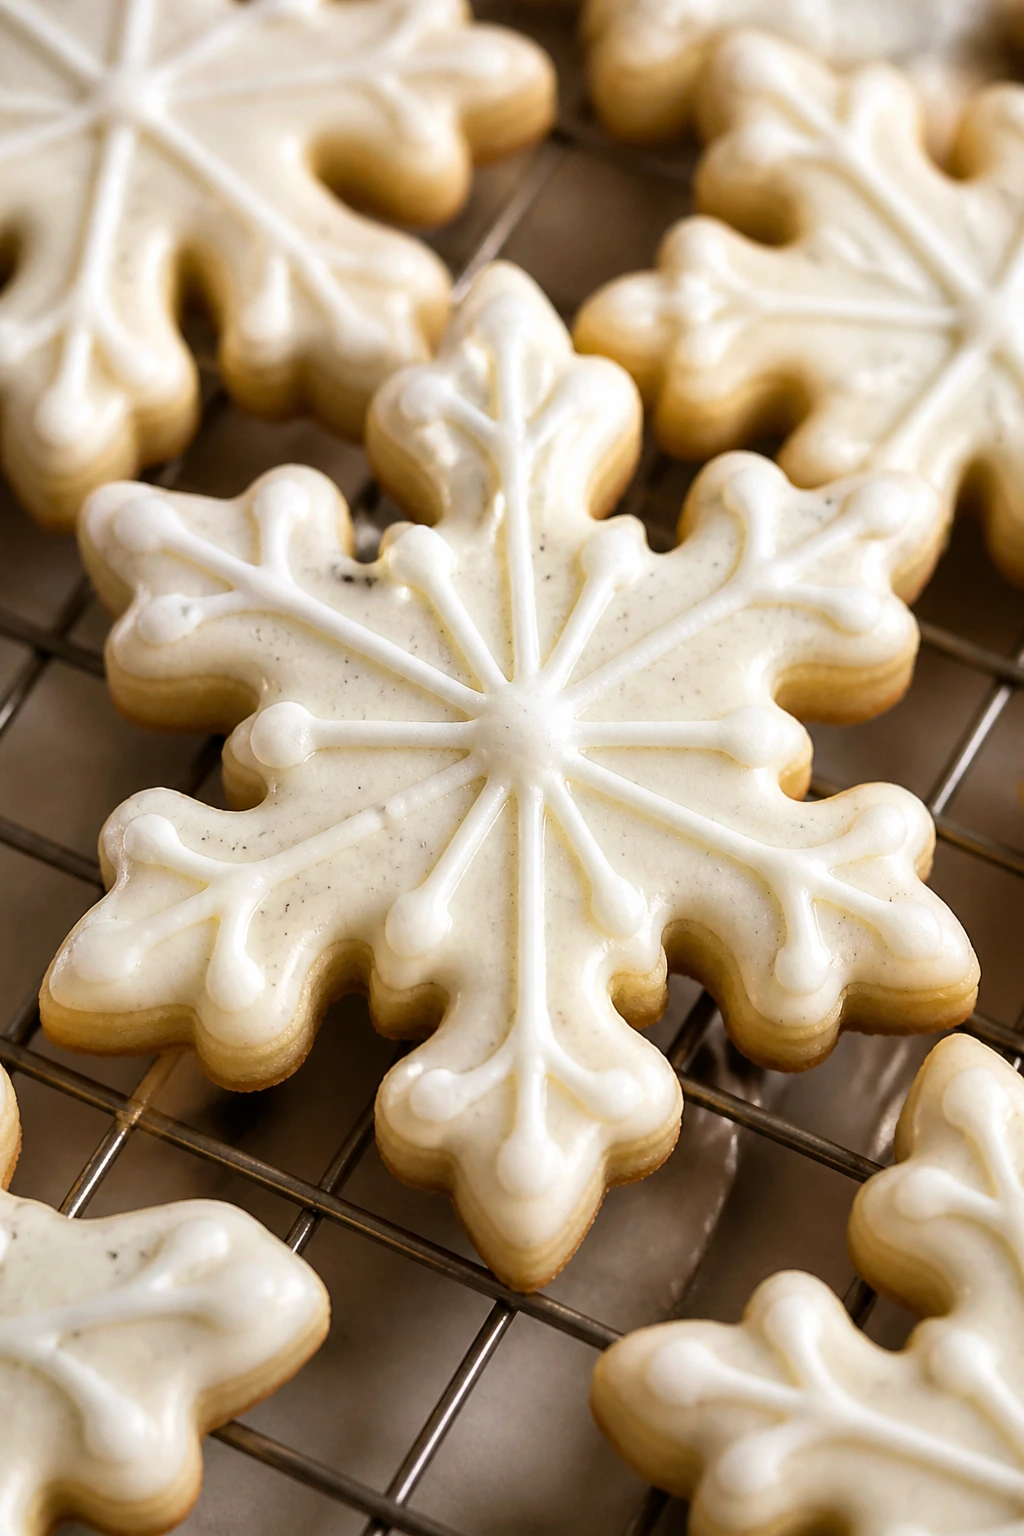
The first mistake is warm dough. If the butter gets too soft, the cookies spread, lose their edges, and go from tidy to vague fast. Chill the dough until it feels firm to the touch and gives only slightly when pressed. If the dough is still sticky after a short rest, put it back in the fridge.
Another common problem is overworking the flour. Once the dry ingredients go in, mix only until the streaks disappear. If you keep going, the dough gets tougher and the baked cookies turn bready instead of tender. That extra minute in the bowl matters more than it should.
People also rush the cooling step. A warm cookie will melt icing, soften chocolate, and turn jam centers loose. Let the tray cool completely before decorating or stacking. Seriously. The minute saved here often gets paid back with smeared glaze and broken edges.
Then there’s overbaking. Sugar cookies keep looking pale right until the moment they don’t. Pull them when the bottoms are just faintly golden and the centers look set but still soft. The pan keeps cooking them for a minute or two after they come out.
One more: using too much decoration. A cookie should look decorated, not buried. If the sprinkles, glaze, chocolate, and nuts all fight each other, the shape disappears. Pick one main finish and let the cookie stay the star.
Frequently Asked Questions
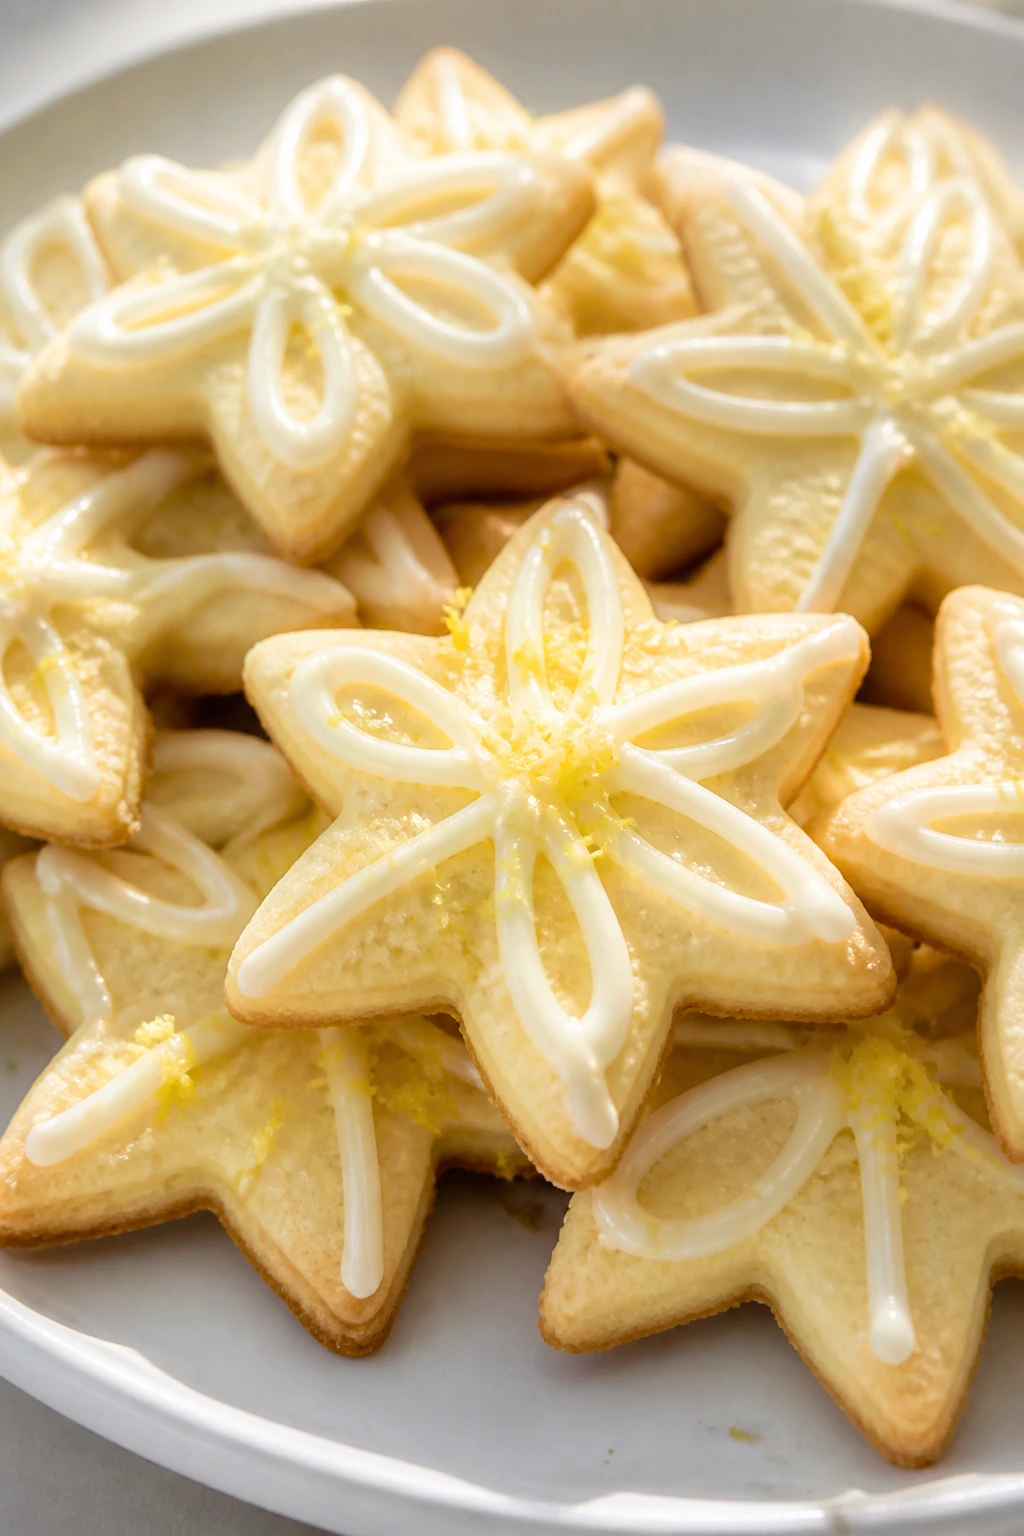
Can I make the dough ahead and bake later?
Yes. Most of these doughs hold well in the refrigerator for 1 to 2 days, and many freeze nicely for up to 2 months. If the dough feels stiff after chilling, let it sit at room temperature for 10 to 15 minutes so it rolls without cracking.
Why did my sugar cookies spread even after chilling?
Usually the butter was too warm, the flour was a little light, or the tray went into an oven that wasn’t fully hot. A chilled tray and a true 350°F oven help a lot. If your kitchen is warm, chill the cut shapes on the tray for 10 minutes before baking.
Do I need royal icing for pretty sugar cookies?
No. Royal icing gives you a clean, dry finish, but simple glaze, melted chocolate, jam, sanding sugar, and powdered sugar all work. If you want a softer, more homemade look, glaze and fruit are easier than royal icing.
Can I use cookie cutters with very small details?
You can, but the dough needs to be well chilled and rolled evenly, usually around 1/4 inch. The smaller the detail, the more likely it is to blur if the dough is too soft. A cutter with moderate detail usually bakes cleaner than one packed with tiny points.
How do I keep my cookies from tasting bland?
Salt, zest, and good vanilla do a lot of quiet work. If a dough tastes flat before baking, it will taste flatter after. A little extra citrus zest, a pinch more salt, or a stronger extract often fixes it better than adding more sugar.
What if my icing is too thin?
Add powdered sugar 1 tablespoon at a time until it ribbons instead of disappearing. If it’s meant for drizzling, a thinner glaze is fine, but if it’s meant to hold sprinkles or stay on the cookie edge, it needs more body.
Can I freeze decorated cookies?
Yes, if the icing is fully dry. Layer them with parchment paper in a sturdy container and freeze for up to 1 month for the best texture. Very delicate cookies—like stained glass or lace styles—need single-layer packing so they don’t snap.
Which cookies from this list travel the best?
Chocolate-dipped rounds, lemon stars, cinnamon sugar diamonds, and plain glazed cutouts are the most forgiving in a tin. Stained glass, piped flowers, and very thin lace cookies need more care because they break more easily.
How do I make the cookies more colorful without food coloring?
Use freeze-dried fruit powders, citrus zest, cocoa, matcha, black sesame, pistachios, or jam. Those ingredients give real color and flavor at the same time, which is better than coloring dough just for the look.
A Tray Worth Saving
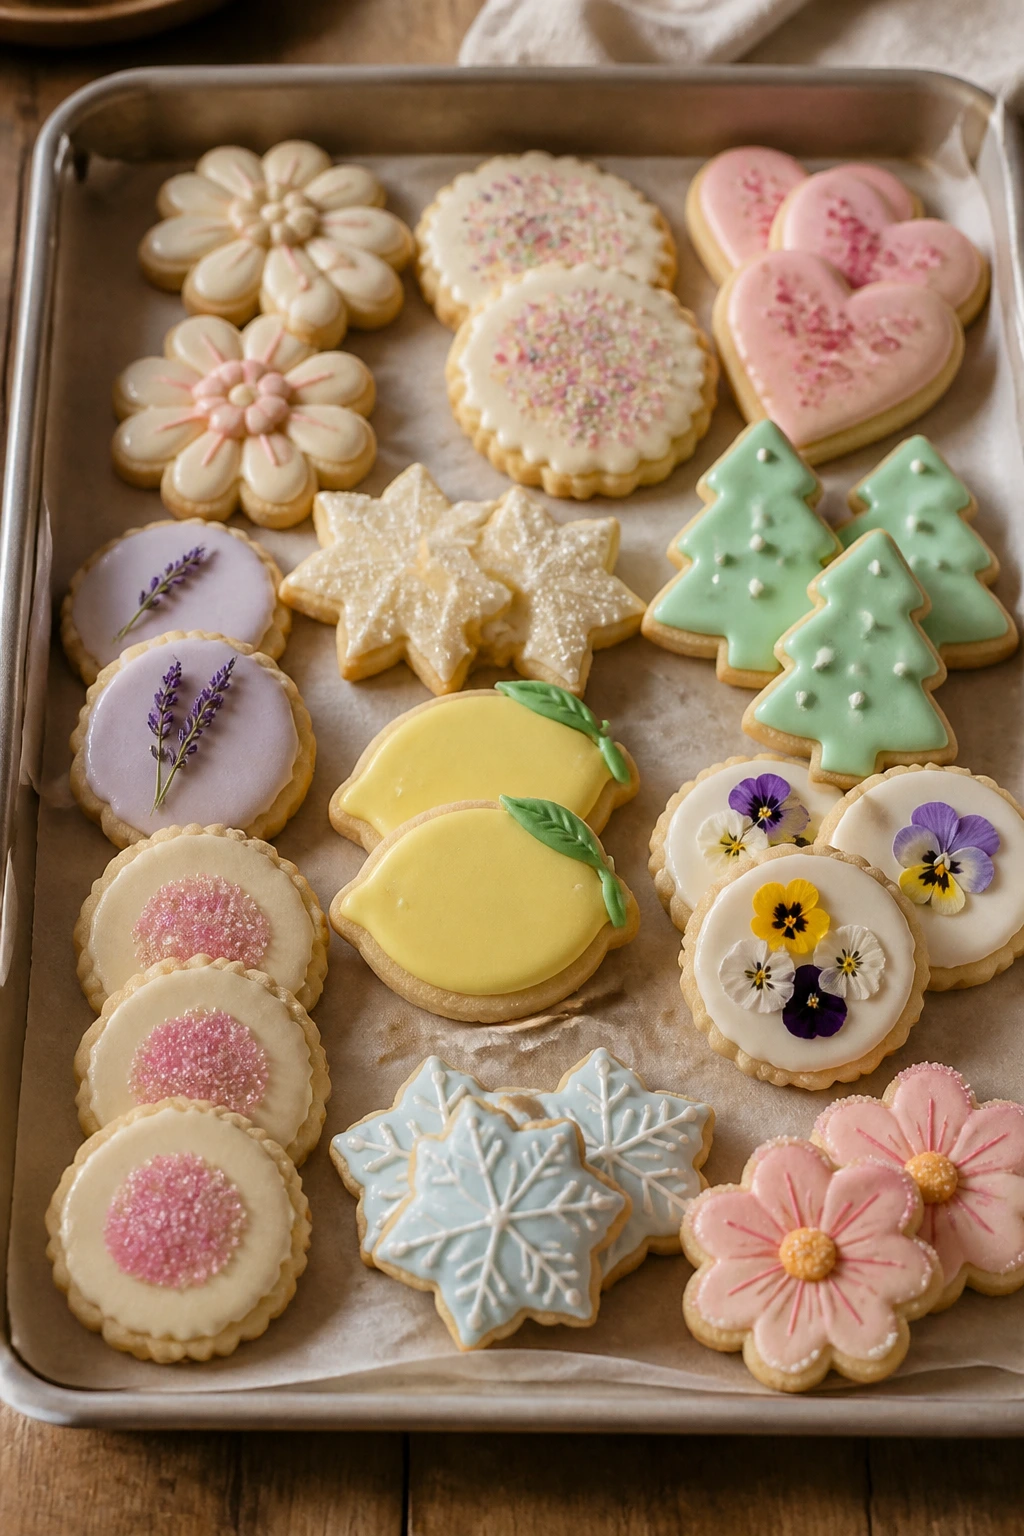
Pretty sugar cookies don’t need to be precious, and that’s the part I like best. A well-made dough, a thoughtful cut, and one clean finish can turn pantry ingredients into something that looks deliberate on the plate and still tastes like the cookie you wanted in the first place.
Start with the version that fits your kitchen mood. Maybe that’s a simple glazed star, maybe it’s a jam-filled heart, maybe it’s the stained-glass cookie you’re slightly nervous to try. Once you’ve made one tray, the rest start to feel less like projects and more like little variations on the same good habit.