
Smoke is either the whole story or the thing that ruins the shot. A smoky picnic Instagram setup works when the fire, the food, and the table all look like they belong together — not like three separate ideas that got shoved into one backyard because the light was nice.
That’s the part people miss. They chase the smoke plume and forget the picnic, or they lay out a perfect gingham spread and forget that grilled food needs space, heat, and a little grime to feel real. The best backyard cookout frames have a kind of easy friction to them: a cutting board with knife marks, corn with charred stripes, a glass sweating beside a folded napkin, a hand reaching in before the plate is even fully styled. Clean enough to read fast. Messy enough to feel true.
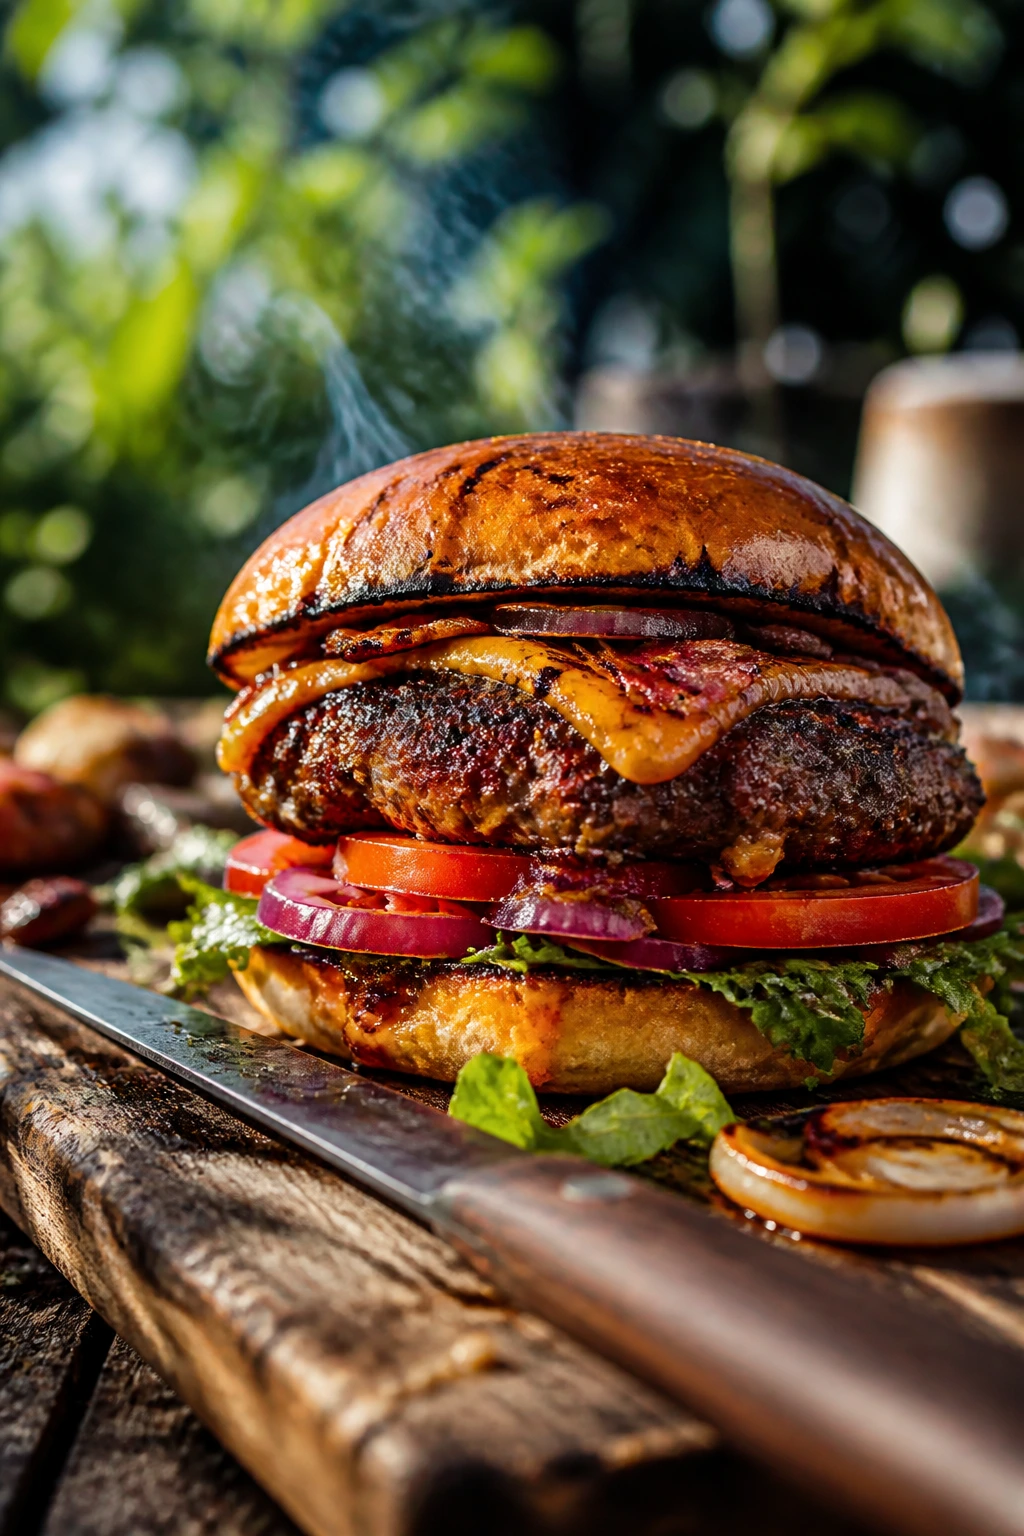
And yes, the smoke matters. Thin, pale smoke drifting through backlit air can make a burger look like it belongs on a summer table worth remembering. Thick white smoke, on the other hand, usually means your fire is sulking, your lens is getting hazy, and your food is taking on the visual energy of a tire fire. That’s not a mood. That’s a problem.
Why the Smoky Picnic Look Works on a Feed
Smoke gives the frame motion. A still plate can look flat, but a wisp of grill smoke rising behind ribs or corn gives the eye somewhere to go, and that tiny bit of movement keeps the image from feeling staged.
Picnic layers make the whole scene feel lived-in. A blanket, a board, a basket, a stack of paper napkins, and one cold drink with condensation do more than decorate; they create depth, which is what makes a photo look like a real gathering instead of a product shot.
Grilled food holds bold shapes. Char marks on zucchini, the craggy edges of a burger, and the cut face of a peach or steak give the camera something crisp to grab. Flat food disappears fast. Food with edges reads better.
The color palette does half the work. Charcoal, wood, red tomatoes, green herbs, mustard cloth, and the pale smoke from the grill all play well together. You do not need ten colors. Three or four good ones are enough.
It fits how people actually eat outside. Backyard cookouts are informal by nature, so an Instagram setup that leaves room for sauce smears, elbow room, and a half-folded towel feels more honest than a perfect table full of decorative objects nobody would touch.
It’s forgiving. A smoky picnic scene can hide a lot — a slightly wrinkled blanket, a board with wear, a table that isn’t fancy, a plate that picked up a little sauce on the rim. That’s part of the charm.
Set the Backyard Scene Before the Grill Catches
Start with the space, not the food. That sounds obvious, but a lot of cookout photos fail because the backyard wasn’t edited in advance. A hose, a stray toy, a folding chair that leans too far left, a bright recycling bin, and one ugly extension cord can drag the whole image down faster than bad lighting.
Pick one zone and clear it hard. I like a small triangle: grill, serving surface, and seating or blanket. If you can draw a line between those three points in your head, the photograph usually feels organized even before the food comes out. The eye likes a route. Give it one.
Shade matters more than props. A porch edge, a tree limb, a patio umbrella, or even a tall chair placed to block harsh sun can save the shot. Full midday light on a backyard cookout is brutal. It washes out smoke, makes lettuce glow lime-green in the worst way, and turns everyone’s forehead into a reflector.
Make the background do quiet work
Keep the background simple and repeatable: a fence, a hedge, a brick wall, a shed door, or a dark grill lid. Busy backgrounds compete with the food, and food almost always loses. If your yard has one good neutral surface, use it over and over and let the setting breathe around it.
Clear out the stuff that says “temporary”
Coolers, trash bags, paper towel rolls, and extra condiment bottles should disappear unless they are part of the story. Even useful things can look clumsy on camera if they’re scattered. Hide the cooler behind a chair or under the table edge. Put extra buns in a basket, not a grocery bag.
Create one obvious hero zone
The camera needs a main event. Maybe it’s the cutting board where the steak rests. Maybe it’s the picnic blanket with a platter of ribs in the center. Maybe it’s the grill lid open with smoke floating behind a tray of corn. Whatever the hero is, everything else should support it instead of shouting over it.
Choose Foods That Hold Their Shape Under Heat
Not every cookout food behaves on camera. Some dishes look tired before the photo is even taken. A delicate salad with limp lettuce and pale tomatoes is hard to make interesting. A ribeye with a good crust, a pile of grilled peaches, or skewers with visible char? That’s another story.
Foods that do the heavy lifting
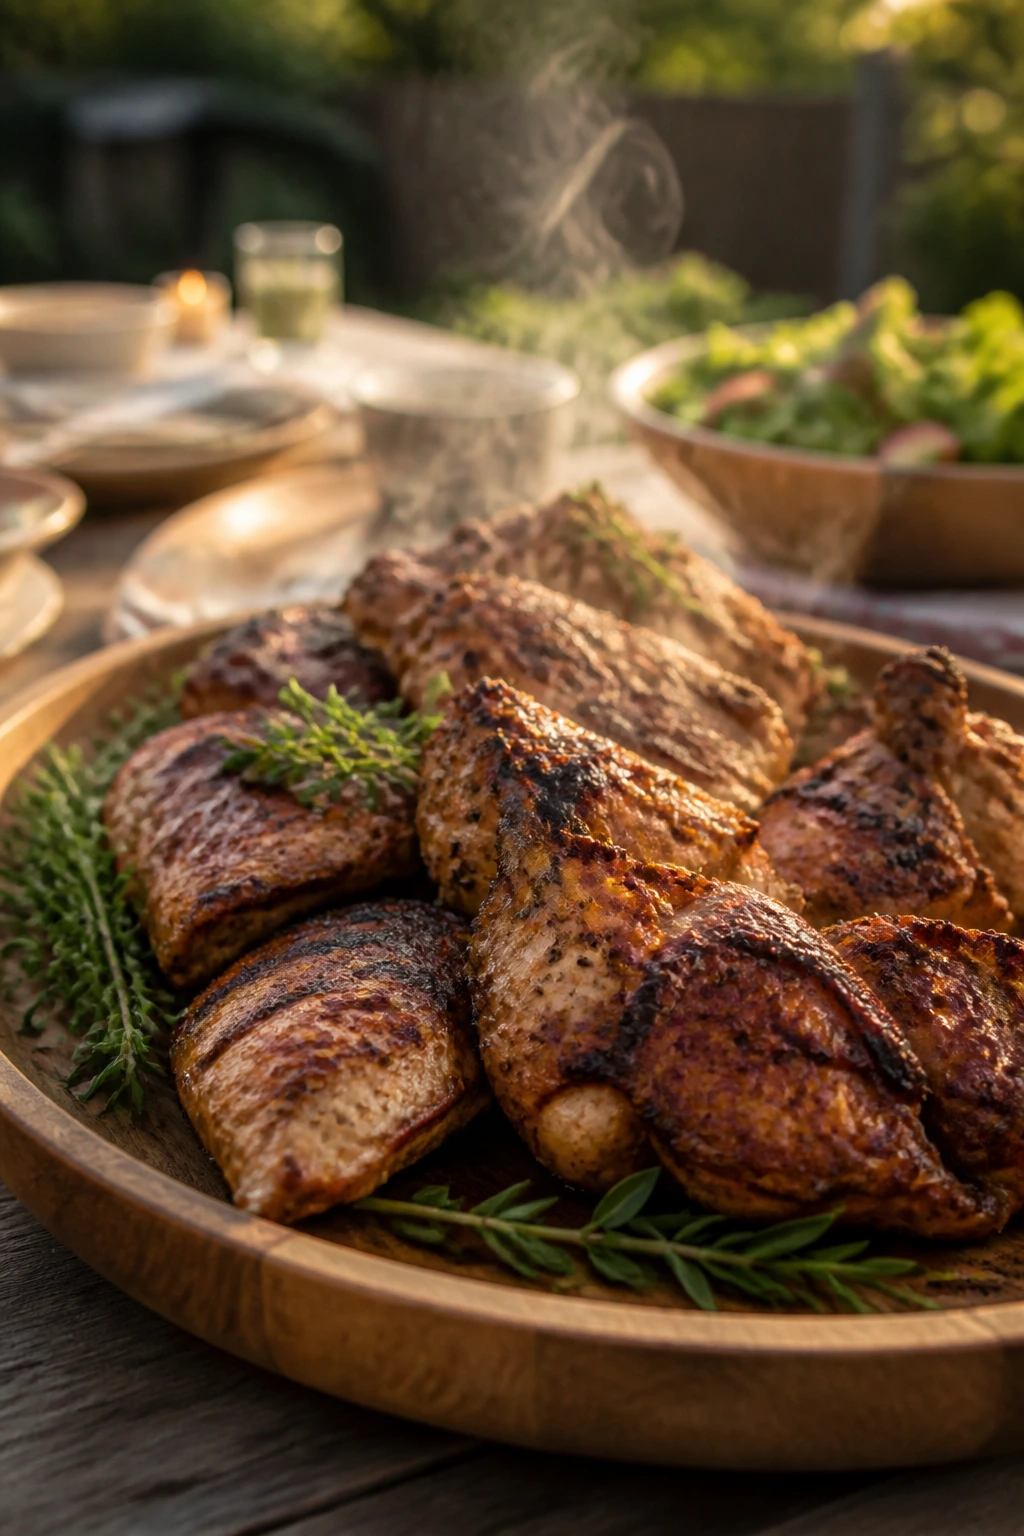
Think in textures. You want at least one food with a crisp edge, one with gloss, and one with color that survives heat. Burgers, bone-in chicken thighs, sausages, ribs, corn, halloumi, kebabs, flatbreads, and stone fruit all handle smoke well because their surfaces change in a visible way.
Thick slices are your friend. Thin slices dry out on the grate and disappear in photos. Thick burger patties, halved peaches, chunky zucchini planks, and generous slabs of watermelon or tomatoes hold their shape better. The camera loves a full edge.
Food that photographs and still tastes like dinner
A lot of cookout styling looks pretty and eats badly. I’d rather see a slightly messy rib platter than a stack of dry little bites nobody can serve without falling apart. If it’s hard to carry with tongs, hard to cut with a knife, or impossible to serve without a second plate, it’s usually harder to photograph well too.
That’s why I like food with built-in structure. Bone-in chicken thigh has a clear shape. Corn on the cob has lines that the eye can follow. Skewers create a visual rhythm. A grilled peach half with melted cheese or a dollop of yogurt has a hot-cold contrast the camera reads instantly.
Don’t ignore the sides
A good smoky picnic spread needs a couple of side dishes that keep their color. Think sliced cucumbers with dill, tomato wedges, charred scallions, pasta salad with herbs, or slaws with enough dressing to look glossy. Green stuff matters here, but it has to look crisp, not wet and sad.
One practical note: if you’re photographing a protein and a side at the same time, give the side a texture job. Let the corn show kernels. Let the slaw show ribbons. Let the tomatoes show seeds. Flat surfaces are where photos go to nap.
Get the Smoke Right: Thin, Pale, and Controlled
Good smoke is a line, not a cloud. If you want the smoky picnic Instagram look to feel rich instead of hazy, the smoke should drift in thin ribbons and vanish quickly. Heavy white smoke tends to flatten contrast and coat the lens with the visual equivalent of a bad kitchen window.
Charcoal gives you the easiest visual payoff, especially if you’re working with wood chunks or a small amount of hardwood chips. Once the coals are ashed over and the fire is steady, the smoke gets cleaner. That’s the sweet spot. A little drift. A little aroma. Enough to show up in the frame, not enough to choke it.
Gas grills can still work. They just need help. A smoker box or a foil packet with a few holes punched in it can add a controlled burst of smoke without making the whole yard look foggy. I’m not a fan of overdoing it. A little goes farther than people expect.
The smoke you want is visible, but not thick
If you can read the smoke, but the food still looks sharp, you’re in good shape. If the smoke starts erasing the shape of the grill lid or blurring the plate edges, it’s too much. Step back, open the lid for a few seconds, and let the fire settle.
Fat flare-ups are not your friend here
When fat hits flame, you get harsh smoke and a burnt smell that can overpower the scene. Keep one cool zone on the grill, move food around as needed, and trim excess fat from cuts that are prone to dripping. That also helps the food cook more evenly, which matters if you’re trying to cut into it for a shot.
Use smoke like seasoning
A burger with a clean sear and a little smoke trailing behind it looks more appetizing than one buried under a chimney of white haze. Treat smoke the way you’d treat salt: enough to notice, not enough to dominate. The best backyard frames still let the food do the talking.
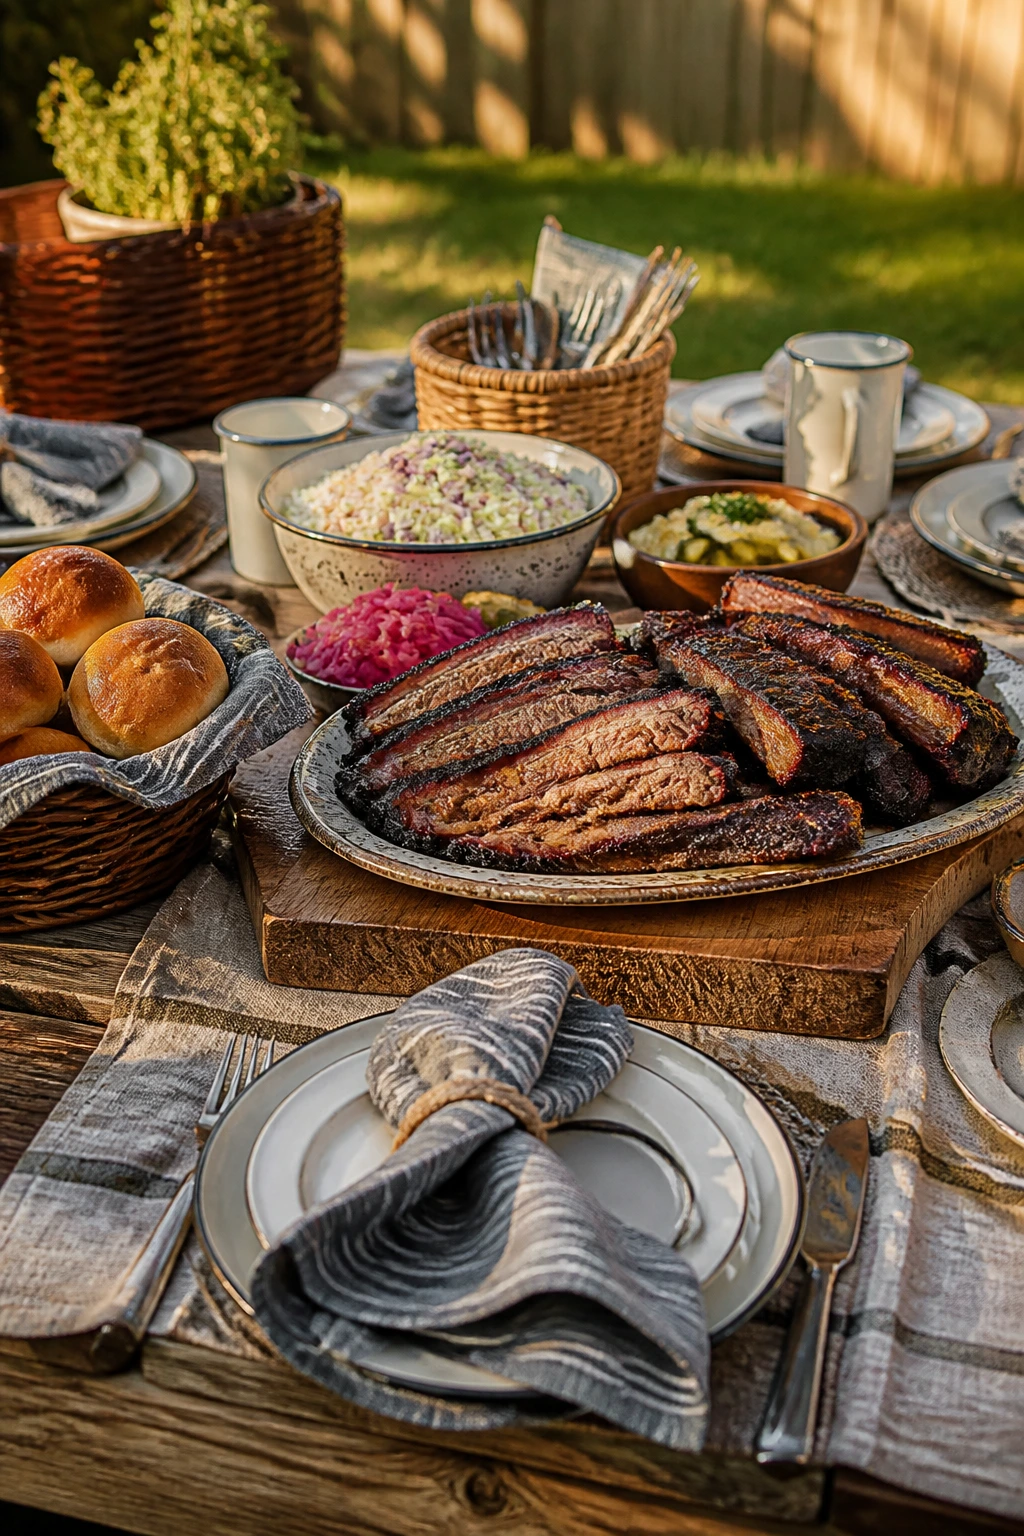
Build the Picnic Table Like a Real Meal Is About to Happen
A picnic table on camera should look useful before it looks pretty. That’s a better order. If the spread looks like someone could actually sit down and eat from it in the next five minutes, the whole image gets stronger.
Start with a grounded base: a cloth, butcher paper, a wooden table, or a checked blanket that doesn’t fight the food. Then add layers. A board under the platter. A napkin folded under a plate. A bowl lifted slightly on a crate or small box. Height changes make a flat table come alive.
I have a strong opinion here: avoid overmatching. A whole set of matching plates, matching napkins, matching cups, and matching serving boards looks polished in a way that can kill the cookout feeling. One or two coordinated colors are enough. Let the rest be mixed. A little mismatch makes the scene less precious.
Use texture to keep the frame from looking sterile
Woven baskets, linen napkins, enamel plates, wooden tongs, galvanized tubs, and rough boards all add texture without screaming for attention. They work because they are visual counterweights to shiny food. Smoke, grease, and shine need matte surfaces nearby or the photo starts to feel slippery.
Keep one thing a little imperfect
A crooked napkin. A sauce smudge near the edge of the platter. A knife left beside the cutting board. Small, honest imperfections give the setup a pulse. Too perfect, and the whole thing starts looking like a catalog spread pretending to be a picnic.
Build around the serving moment
The best picnic table photos show a story in motion. A plate of sliced chicken. A bowl of coleslaw with a serving spoon in it. A bun basket with one bun missing. That missing bun matters. It tells the viewer people are about to eat, not pose forever.
Shoot While the Food Still Has Shine and Steam
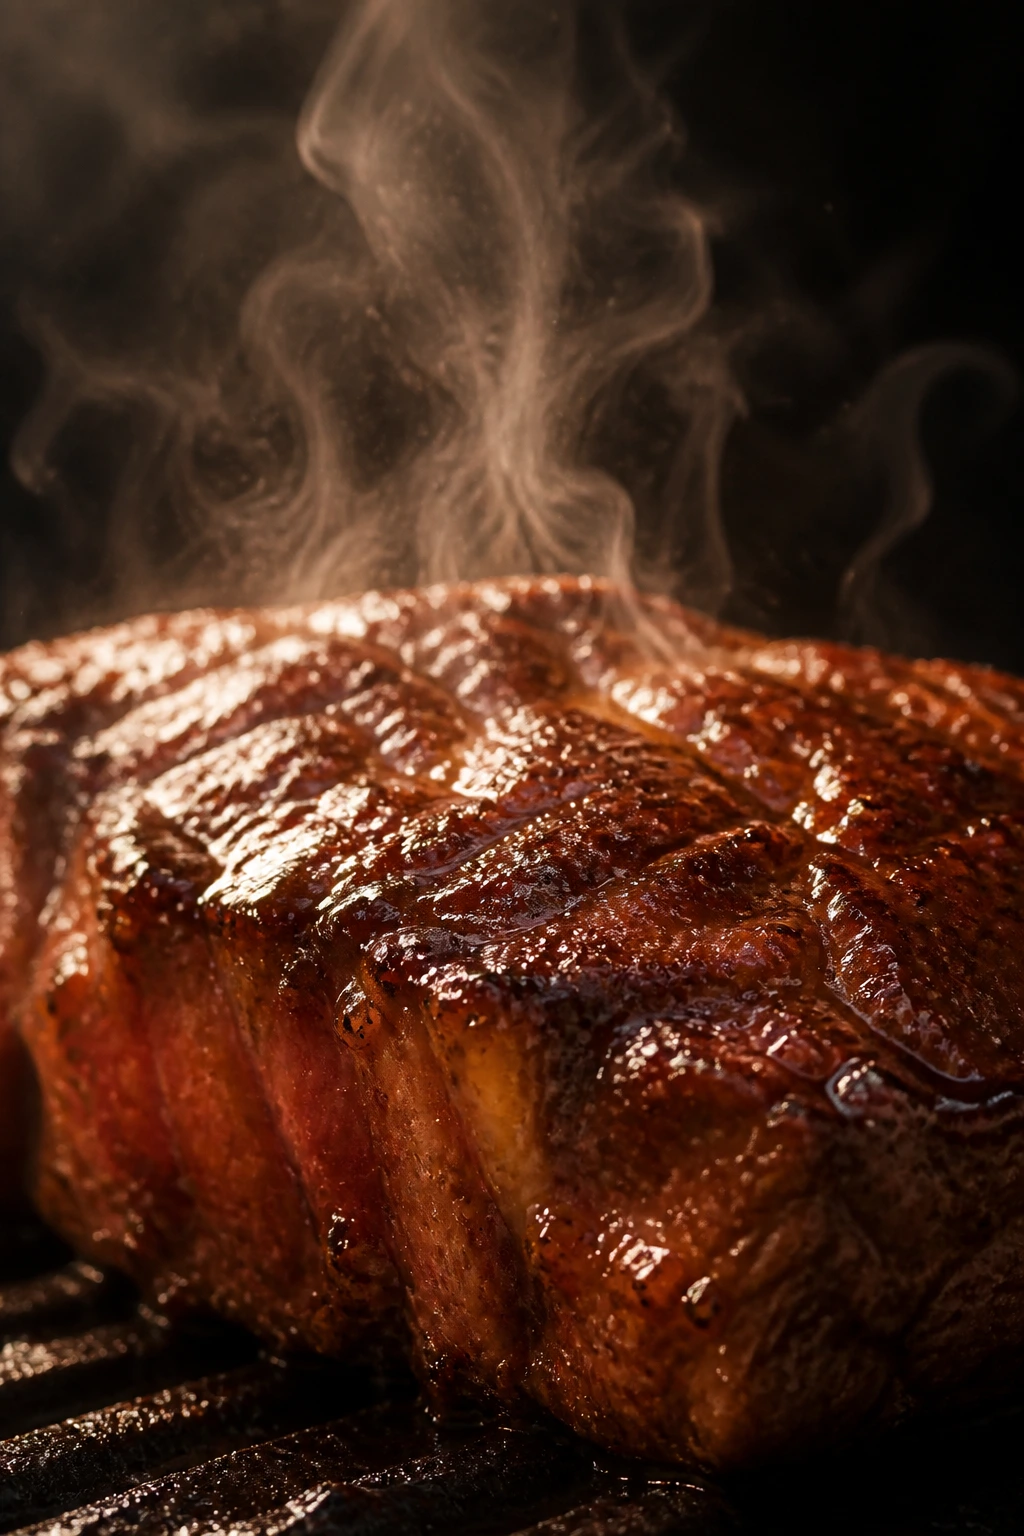
Timing can save a photo that styling could not. Grilled food has a narrow window where the surface still looks juicy, the smoke still curls in the air, and the crust has not dried out. Miss that window and the dish starts looking tired fast.
For proteins, I like to shoot soon after the rest period begins. That’s when juices settle, but the outside still has gloss. If you slice too early, the meat spills liquid everywhere. Wait too long, and the cut face dries and darkens. Five to ten minutes after the grill is often the sweet spot, depending on the cut.
Steam is a gift, but it’s a brief one. It shows up best against darker backgrounds and when the light comes from behind or slightly to the side. Shoot from low enough that the steam doesn’t vanish into the sky. If you’re using a phone, crouch. Seriously. The difference is huge.
Keep a tiny rescue kit nearby
A pastry brush with a little oil, a squeeze bottle of sauce, and a clean towel can rescue a plate that looks dull. A light brush of oil on grilled vegetables or a tiny swipe of sauce on sliced meat can bring back the shine the camera wants. Don’t soak it. Just wake it up.
Work in short bursts
Set the plate, get the shot, move the plate back out of the frame, and repeat. The food stays hot longer when it isn’t sitting under a lens while you fiddle with napkins for three minutes. Backyard cookout photos get stronger when the setup moves quickly. Slow styling on a hot plate is where good food goes limp.
Watch the cut face
If you’re slicing steak, chicken, or ribs for a photo, put the cut face toward the light. That’s the part that tells the story: the sear on the outside, the moisture inside, the little line where the knife went through. A polished crust matters, but the inside is where people start to taste the photo.
Use Angles That Make Grilled Food Feel Close Enough to Smell
A flat overhead shot can work for a picnic spread, but grilled food often wants a lower angle. The reason is simple: char has depth. Smoke has vertical movement. A low angle lets both show up.
For burgers, shoot from slightly below plate level or at a shallow angle so the bun, the fillings, and the grill marks stack toward the lens. If you shoot too high, the burger looks squashed. A burger is not a spreadsheet. It needs profile.
For ribs, I like a half-overhead angle. You want the bone line visible, but you also want the sauce and bark to catch the light. Lay the rack on a board, slice one section open, and let one bone angle toward the camera. It reads fast.
A few angles worth memorizing
- Overhead: Best for full picnic spreads, platters, and board layouts.
- 45-degree angle: Good for plated mains, stacked sandwiches, and anything with layers.
- Low side angle: Best for burgers, ribs, skewers, and smoke trails.
- Close crop: Use this for char, sauce, and texture when the whole dish is too busy.
Lead the eye with diagonals
Straight lines feel stiff. A knife placed at a diagonal, a row of skewers angled across a board, or a napkin pulled slightly off center keeps the frame moving. This is one of those small composition tricks people feel before they name it. The image just seems easier to look at.
Don’t be afraid to crop hard
You do not need the whole yard in the shot. In fact, you probably don’t want it. A tight crop on a burger, a board, and a hand with a drink often feels more immersive than a wide shot that includes every chair in the backyard. Close is good. Close with breathing room is better.
Edit for Warmth Without Turning Everything Orange
Editing a smoky picnic Instagram post is not about making the photo look like a sunset exploded on it. It’s about preserving warmth while keeping the food believable. That line matters. Cross it, and grilled chicken starts looking tangerine.
Begin with white balance. If the image looks cold, nudge it warmer in small steps. If the smoke starts turning yellow or the white napkins go beige, back off. The goal is a faint glow, not a filter that makes the whole meal look baked in bronze.
Then check contrast. Smoke needs some separation from the background, or it disappears. A little contrast helps the grill lid, the edge of the platter, and the curve of a tomato stand out. Too much contrast, though, makes char look harsh and sauce look black. Ease up before the image gets crunchy.
Three sliders that matter more than the rest
Warmth: Add enough to soften the scene, not enough to stain the whites.
Highlights: Pull them down if the grill lid or plates are blowing out in the sun.
Shadows: Lift them a little if the food disappears under the table edge or inside the blanket folds.
Keep greens honest
Grass and herbs go weird fast in heavy editing. Over-saturated green looks fake in a backyard shot, especially beside smoke and meat. If the parsley suddenly looks neon, you’ve gone too far. Lower the saturation a touch and keep the leaves closer to what they looked like in person.
Sharpen the food, not the smoke
Smoke should stay soft. Crisp it too much and it turns into ugly digital grain. Sharpen the edges of the bun, the crust, the board, or the kernels of corn instead. That gives the image structure without making the air look noisy.
Write Captions That Sound Like Someone at the Grill

A good caption for a backyard cookout doesn’t need a performance. It needs a voice. If the photo shows smoke, char, and a table full of food people would actually eat, the caption can be calmer than the image. That contrast works.
The strongest captions usually do three things: name the moment, mention one specific detail, and leave room for a response. “Last light, cedar smoke, and corn with too much butter” says more than ten generic praise words. So does “The ribs were done before the sky was.” Short. Specific. Real.
I’d skip the canned cheer. Nobody needs “good vibes only” under a platter of grilled sausages. Say what the smoke smelled like. Say which cut got the best char. Say who reached for the peach first. That’s the good stuff.
A simple caption shape that works
- Start with one sensory line.
- Add one concrete cookout detail.
- End with a quiet question or a small invitation.
Something like: Smoke, salt, and a plate that barely made it to the table. These corn husks spent 10 minutes over hot coals, and the edges came out sweet and blackened. What’s the first thing you’d grab?
That’s enough. No speech. No excess. The photo already does the heavy lifting.
Use alt text like a grown-up
If you’re posting with accessibility in mind, describe the key elements plainly: grilled chicken thighs on a wooden board, smoke rising from a charcoal grill, a red-and-white cloth on a picnic table, glasses of iced tea in the background. Clear alt text helps more people enjoy the post, and it also forces you to see what the photo is actually about.
Hashtags are seasoning, not the meal
A few relevant tags can help, but a pile of them looks desperate fast. Keep them specific to the scene: backyard cookout, grilled food, picnic styling, outdoor entertaining, charcoal grill, summer dinner. Enough to guide, not enough to clatter.
The Small Details That Make the Whole Frame Feel Lived-In
This is the part people skip, and it’s the difference between “nice picture” and “I want to sit there.” The little details are not really little. They tell the story your main dish can’t tell by itself.
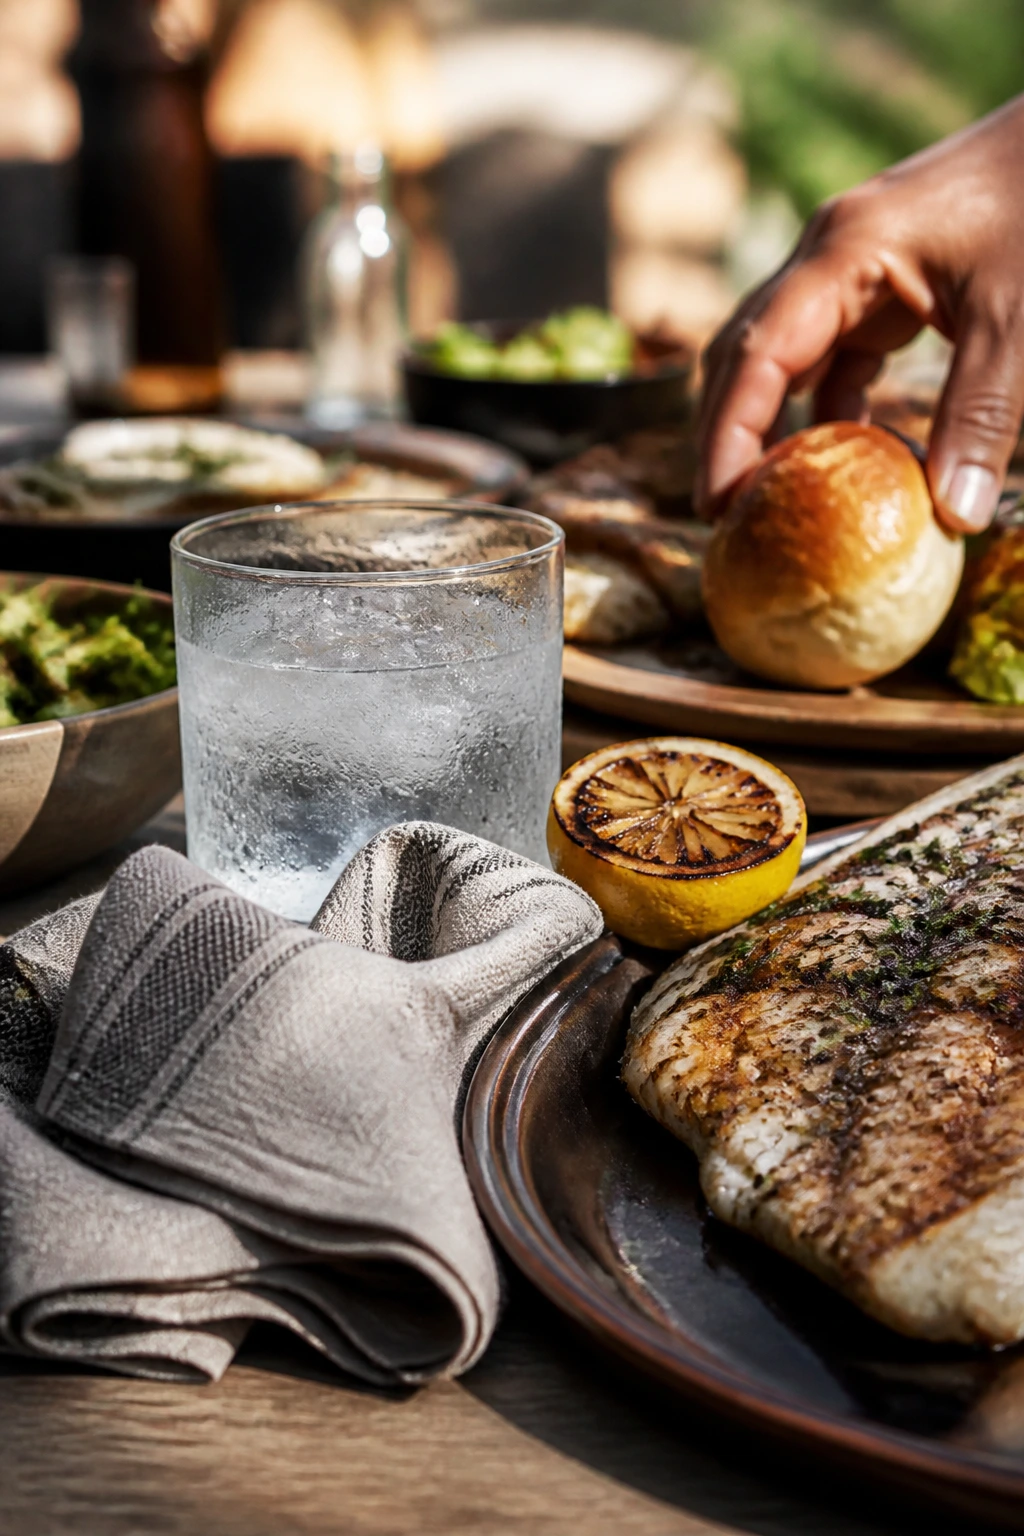
A folded cloth napkin beats a stack of paper towels in the frame, unless the paper towels are part of a deliberately casual setup. A glass with condensation says the drink is cold. A charred lemon half beside grilled fish or chicken gives the eye a finishing cue. A knife with a smear of sauce suggests the cutting started before the camera arrived, which is exactly the kind of honest mess that makes a cookout believable.
Hands matter too. Not every photo needs a face. A hand lifting a bun, passing a plate, or steadying a board brings scale and life into the shot. Empty scenes can work, but they often feel like display cases. Hands turn them back into meals.
A few details worth adding
- A small bowl of flaky salt near grilled tomatoes.
- One herb sprig lying loose beside the platter.
- A second plate with one missing bite.
- A drinking straw or spoon off to the side.
- A grill brush leaning against the table leg.
None of those items are mandatory. They’re just good at making the scene feel like it’s in motion.
Avoid the fake picnic look
Plastic grapes. Decorative signs. Random lanterns that don’t belong to anything. These things scream “photo setup” in a bad way. Real cookouts have real clutter, but it’s practical clutter — tongs, napkins, coolers, trays, and serving bowls. If the item wouldn’t naturally appear while food is being served, leave it out.
One strong detail beats five weak ones
A single bowl of slaw with cabbage ribbons and dill can carry more visual weight than a pile of meaningless props. That’s the rule I keep coming back to. Give the eye one honest thing to read, then let the rest of the frame support it.
Common Backyard Cookout Photo Mistakes and the Fix for Each
Too much smoke, not enough food. The grill plume looks dramatic for about two seconds, then it swallows the meal. The fix is to let the fire settle and shoot when the smoke is thin, pale, and backlit instead of thick and front-lit.
A table packed with random stuff. Three serving bowls, four cups, a basket, a sauce bottle, sunglasses, keys, and somebody’s phone can turn a cookout into clutter. Keep the frame on a diet. Pick one hero dish, two supporting items, and stop there.
Harsh midday light. This is the fastest way to flatten grilled food. The solution is shade, side light, or shooting later in the day when the sun is softer and the smoke is easier to see.
Overediting the color. Orange burgers are not a vibe. If the image starts looking like the food was grilled inside a traffic cone, pull back the warmth and saturation.
Letting food sit too long. Sides wilt, sauces thicken, and cut meat dries out while you fiddle with napkin folds. Prep the set first, keep the camera ready, and shoot in short bursts so the food stays alive.
Ignoring the background. A gorgeous platter can’t save a messy corner with hoses, bins, and bright packaging in view. Clean the background before the food comes out. It’s boring work. It matters.
Three Smoky Picnic Styles You Can Borrow

Charcoal-and-Gingham Classic
This is the look people picture first: red-and-white cloth, dark grill, deeply browned meat, and a few enamel pieces that feel old in the best way. It works when the food has bold color and the backyard itself is fairly plain. Keep the props simple and let the smoke do the mood-setting.
Modern Patio Smoke
Think muted linen, black plates, wooden boards, and a cleaner palette with more space around the food. This version suits a tighter frame and a more minimalist feed. The key is restraint; if you add too many rustic pieces, the scene loses its edge and starts looking half-themed.
Family-First Blanket Spread
This version leans casual. A picnic blanket, kids’ hands reaching in, paper-lined baskets, juice glasses, and food that gets passed around fast. It photographs best when it feels busy but not chaotic. A little movement in the frame — a lap, a hand, a turned plate — makes it feel alive.
Late-Light Ember Mood
If you can shoot near sunset or under porch lights after the fire cools a bit, this style gives you the deepest shadows and the richest smoke lines. Dark boards, warm drinks, and a single plated dish can look almost cinematic here. Keep the background dim and the highlights controlled.
Tools and Supplies That Earn Their Space
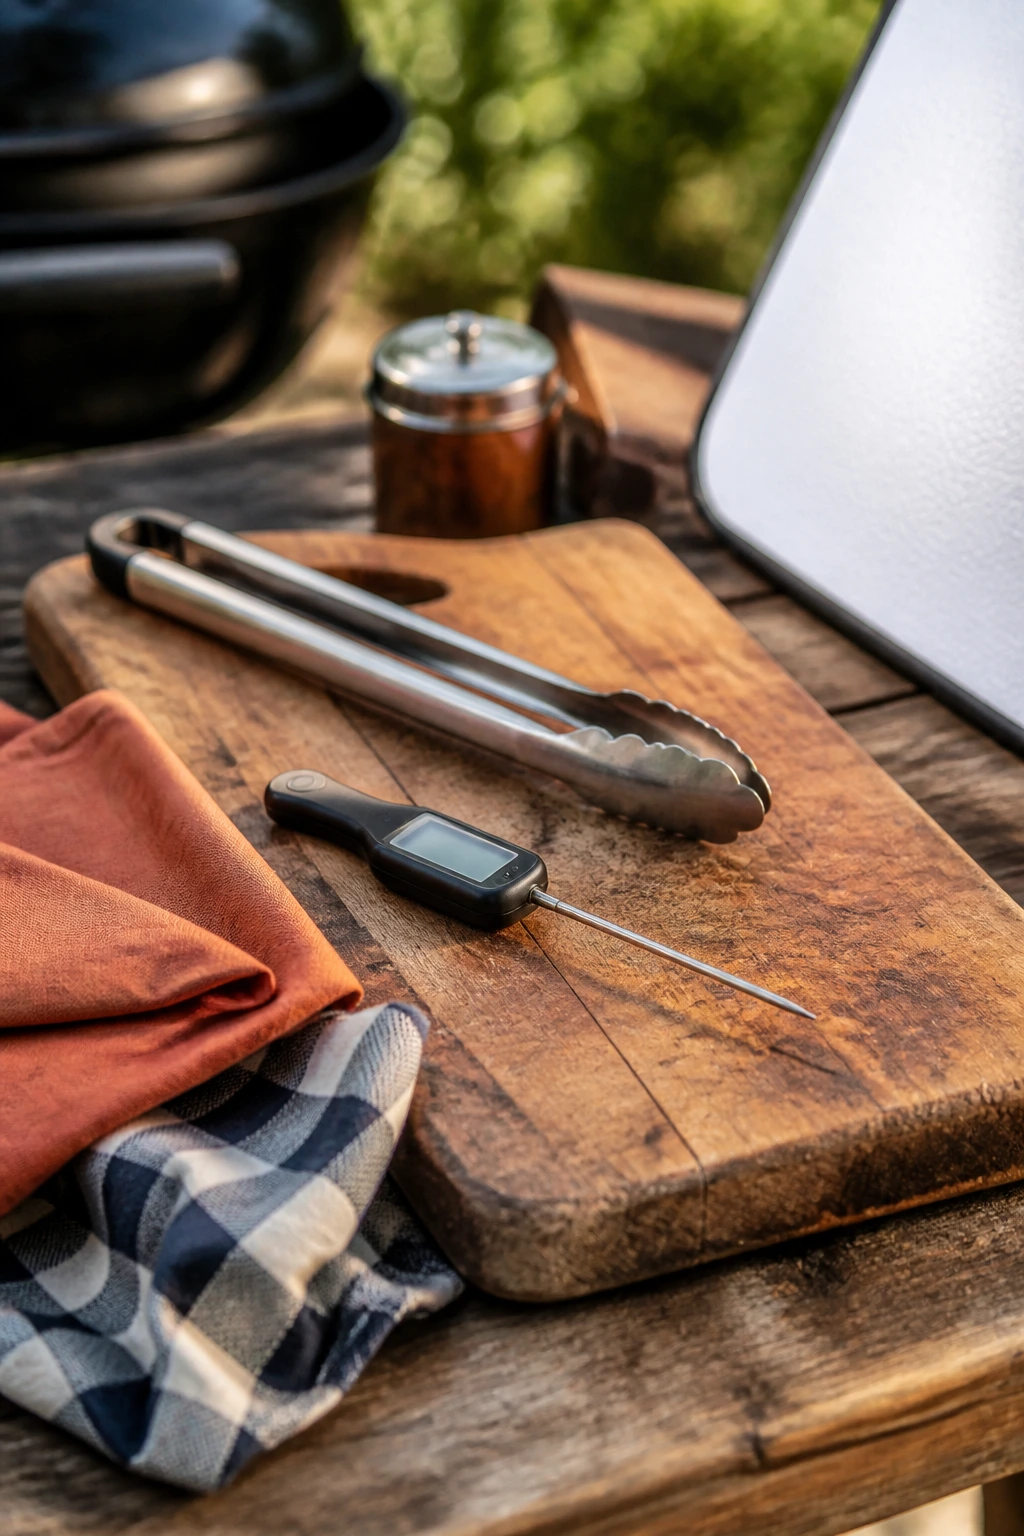
You do not need a truckload of gear for a strong backyard cookout photo. You need a few things that solve actual problems.
- Instant-read thermometer — Keeps grilled chicken, burgers, and pork safe and prevents guesswork; USDA guidance is exact for a reason.
- Long tongs — Let you move food cleanly without covering it in fingerprints or sauce streaks.
- Charcoal grill or gas grill with smoker box — Either works, but charcoal gives you the easiest smoke control for photos.
- Cutting board with character — A worn wooden board reads better than a shiny one in most cookout frames.
- Mix of cloth napkins — One solid color and one pattern are enough; use them to add texture and cover awkward plate edges.
- Small white foam board or reflector — Bounces light back into shadows and helps the food keep shape in the frame.
- Phone tripod or small camera stand — Useful for overhead shots and for keeping the composition stable when your hands are busy.
- Microfiber cloth — Wipes grease off plates, glasses, and the occasional lens smudge fast.
- Serving trays and shallow bowls — Make it easier to stage food without stacking everything too high.
- Cooler or insulated bag — Keeps cold drinks and cut fruit from wilting while you shoot.
A note on thermometers: if you’re grilling chicken, aim for 165°F. Whole cuts of beef, pork, and lamb are generally served at 145°F with a 3-minute rest, while ground meats need 160°F. A photo should never be the reason food gets cooked by feel alone.
Keeping Props, Leftovers, and Gear in Good Shape
A backyard cookout setup lives or dies on cleanup. If you take care of the gear, the whole scene is easier to repeat next time, and repeatability matters more than one lucky photo.
Wash cloth napkins and table linens soon after use. Smoke smell clings, especially to cotton. Cold water helps preserve the fabric, and line drying keeps the texture from getting too soft. If a napkin gets heavily stained with barbecue sauce, soak it before washing instead of tossing it in a hamper and hoping for the best. Hope is not a stain remover.
Wood boards need a different kind of care. Scrub them gently, dry them fast, and oil them lightly once they’re fully dry. Don’t soak them. Don’t leave them sitting in a sink. A warped board is no one’s friend, especially when you were counting on it for the next cookout shot.
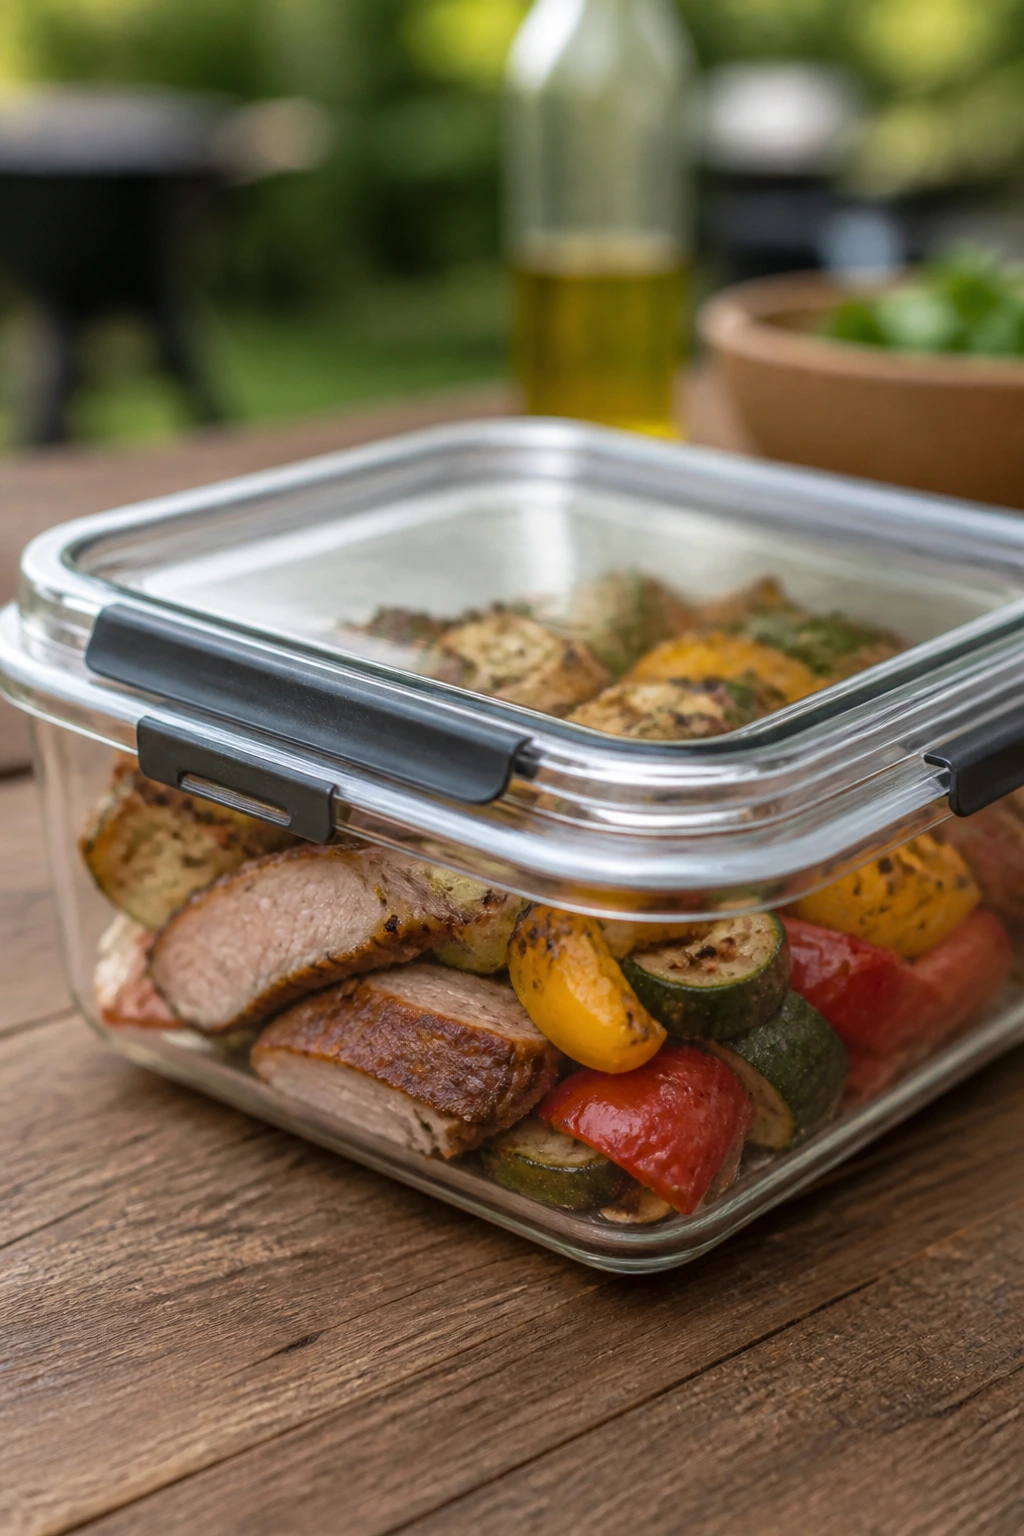
Leftovers need real handling, not photo handling
Put leftovers away within two hours, sooner if the weather is warm and the food is sitting in the open air. That matters for safety and for texture. Saucy foods keep better when the sauce is stored separately. Grilled meats and vegetables usually hold for 3 to 4 days in the fridge, and many of them freeze for up to 2 months if wrapped well.
Reheat on low heat when you can. A skillet with a splash of water, a covered oven dish at a moderate temperature, or a quick pass over the grill works better than blasting everything until the edges go leathery. If you’re trying to rescue smoked chicken or ribs, a little foil tent and a spoonful of juices can bring them back to life.
Keep your photo gear ready too
Recharge lights, wipe the tripod legs, empty the ash safely once the grill is dead cold, and store wood chips or chunks in a dry bin. Moisture wrecks good smoke fast. A dry fuel stash burns cleaner, and cleaner smoke usually looks better on camera.
Reset the space while you still remember it
If a picnic blanket was the hero, fold it the same way each time. If a particular board looked good, set it aside as your go-to. Repetition sounds boring until you realize it saves you time and makes your feed feel consistent. Consistency is not glamour. It is how a style becomes recognizable.
Questions People Ask Before They Start Shooting
How do I make the smoke show up without hiding the food?
Backlight it. Smoke reads best when the light comes from behind or slightly to the side, and when the smoke itself is thin rather than dense. If the food disappears, the fire is too hot or the plume is too heavy.
Can a gas grill still give me the smoky picnic look?
Yes, if you add smoke in a controlled way. A smoker box or a foil packet with hardwood chips can give you the aroma and the visual curl without overwhelming the frame. The trick is restraint. One small puff beats a whole cloud.
What time of day is best for backyard cookout photos?
Late afternoon and early evening usually give you the easiest light. The sun is softer, the shadows are less brutal, and smoke tends to show more clearly than it does under overhead glare. If you only have harsh light, move into shade and keep the frame tight.
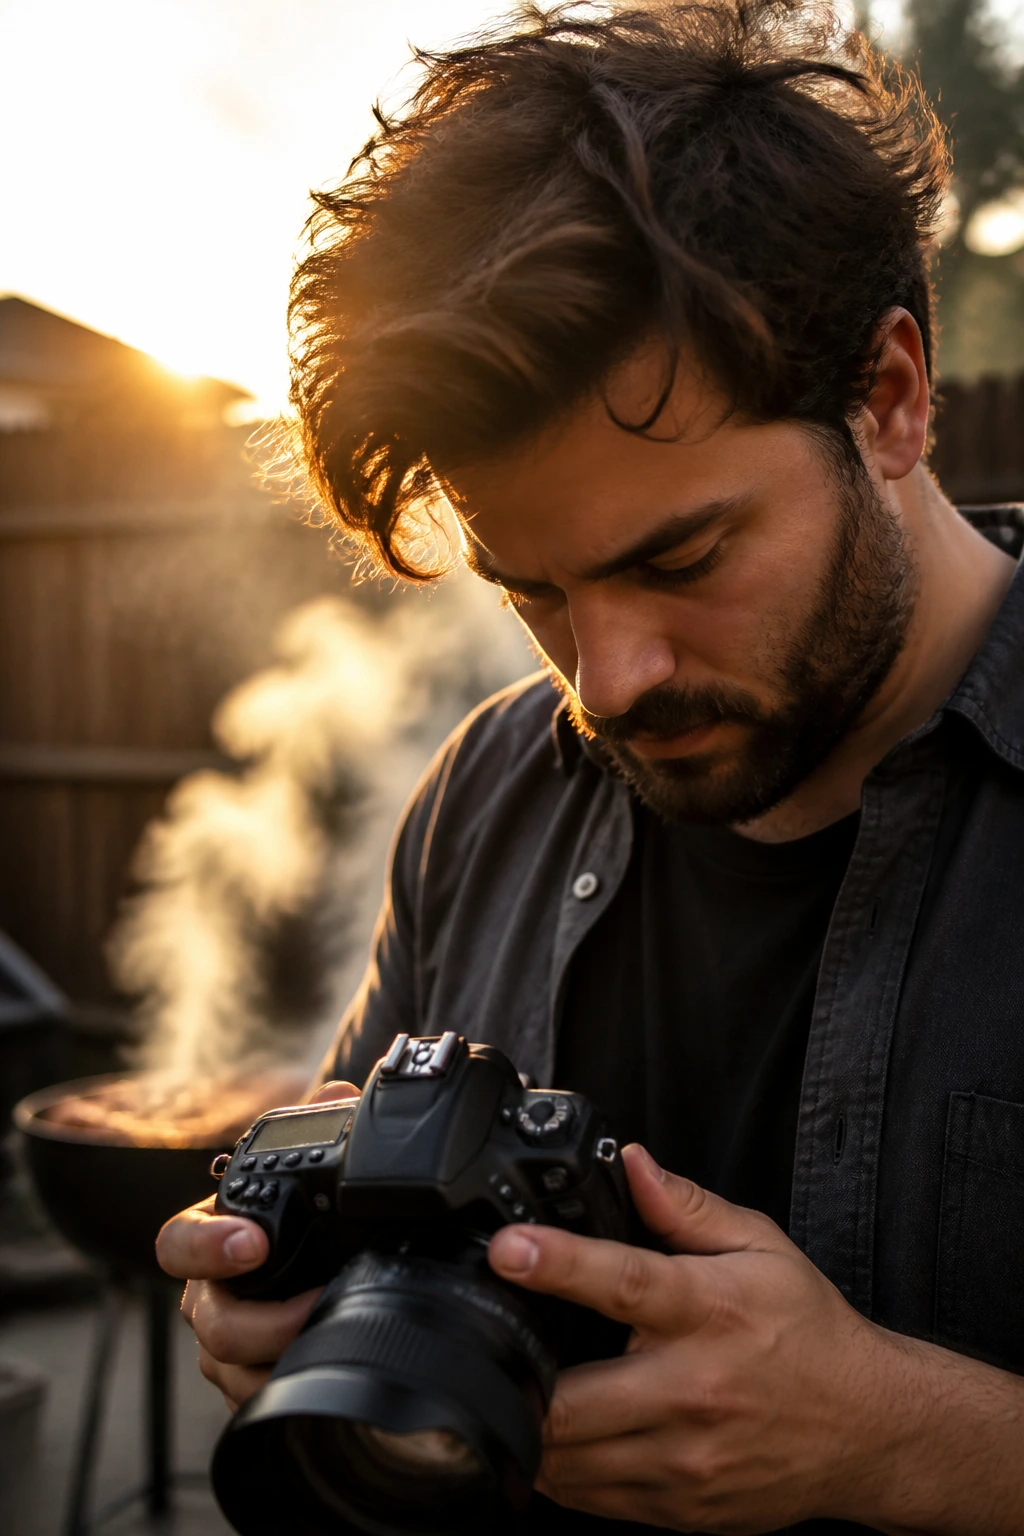
Do I need a fancy camera, or is a phone enough?
A phone is enough if you pay attention to light and composition. The camera itself matters less than where you stand, what you include, and how fast you shoot before the food cools. A clean lens and a steady hand go a long way.
What if my backyard is tiny?
Work closer. Use one chair, one board, one plate, and one patch of wall or hedge. Small spaces actually help because they force you to remove clutter. A tiny setting with good light can look cleaner than a big yard with too much going on.
How do I keep hot food looking good while I’m taking pictures?
Prep the scene first, then move fast once the food hits the board. Keep a warm oven, a covered tray, or a low-heat holding area nearby. If you’re photographing sliced meat or vegetables, do it right after resting so the texture stays fresh.
What foods are easiest to shoot for this style?
Burgers, ribs, chicken thighs, grilled corn, skewers, peaches, and flatbreads are all strong choices. They hold shape, show char, and give you surface detail the camera can read quickly. Delicate greens are better as accents than as stars.
How do I stop the setup from looking fake?
Use real serving pieces, not decorative clutter. Leave some sauce smears, a folded napkin, and a little space for hands to enter the frame. A believable cookout is always a little imperfect. That’s the point.
A Backyard Frame Worth Keeping

The best smoky picnic Instagram setup doesn’t try to look richer than it is. It leans into what backyard cookouts already give you: flame, smoke, shared plates, warm light, and the little disorder that shows people were actually there. Once you stop fighting that and start arranging around it, the whole feed gets stronger.
There’s a real pleasure in that kind of photo. Not glossy. Not fussy. Just a grill doing its job, a table with good leftovers on the way, and a frame that smells faintly of char even before anyone opens the picture. Keep the smoke thin, the table honest, and the light in your favor, and you’ll have a look worth repeating every time the grill comes out.