
A hot kitchen can ruin a summer evening faster than a mosquito in your ear. By the time the sun drops and the porch lights come on, nobody wants a dessert that asks for two pans, a long preheat, and a sink full of sticky bowls. The best summer treats are the ones that stay cool, lean on ripe fruit, and get out of the way before the night gets late.
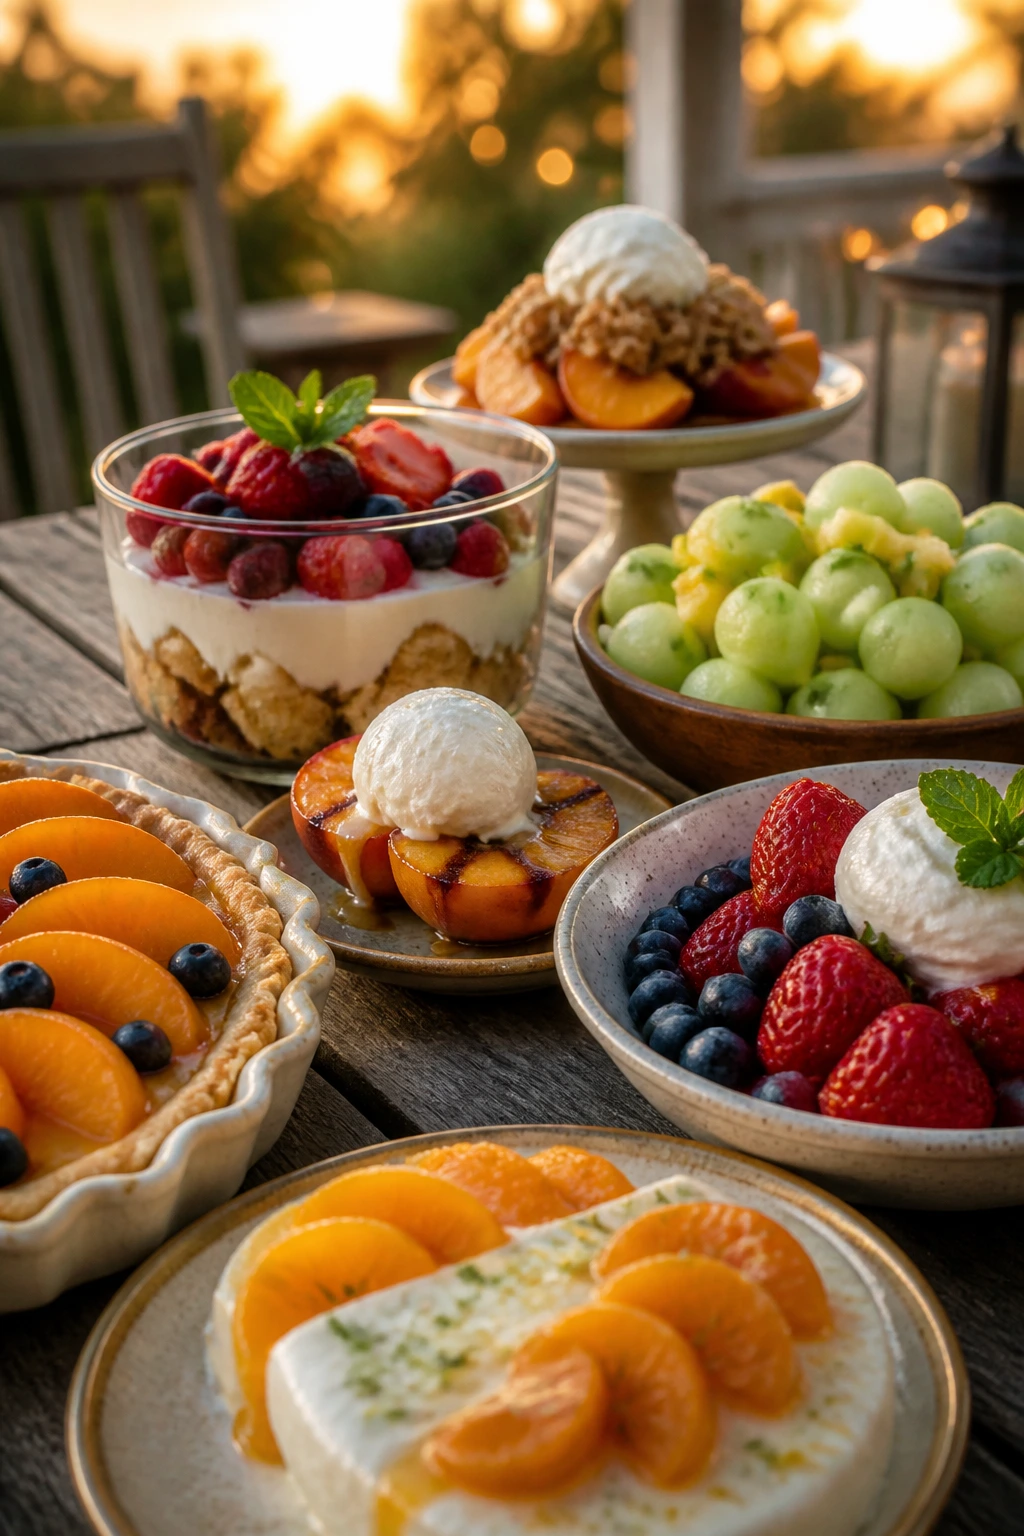
That’s the sweet spot here: grilled fruit with a little char, frozen desserts that set while you sit outside, chilled cups and bars you can make ahead, and a few warm treats that use the oven only once the grill is off and the air has cooled down a bit. You’ll see a lot of berries, peaches, citrus, coconut, and chocolate. Good. Those are the flavors that make sense when the peaches smell like peach and the strawberries stain your cutting board red.
Some of these are barely recipes. That’s the point. A bowl of fruit with lime and mint can be the right answer on a sticky night, and so can a skillet of s’mores if you want something a little messy and a little theatrical. Keep the freezer space clear. Keep the ice cream scoop nearby. The easiest summer nights usually end with something cold, drippy, and gone fast.
Why These Treats Earn a Spot in the Summer-Night Rotation
- Low Heat: Several of these never touch the oven, and the baked ones are short, hot jobs that don’t keep the kitchen miserable for an hour.
- Fruit-Forward: Peak peaches, berries, melon, pineapple, and citrus do most of the heavy lifting, which means less sugar and more actual flavor.
- Make-Ahead Friendly: A few can be chilled, frozen, or layered earlier in the day so dessert is waiting when the porch conversation starts.
- Flexible Ingredients: Store-bought pie crust, pound cake, whipped cream, or granola works fine in several spots here, and I’m happy to say it.
- Fast Cleanup: Many of these use one bowl, one pan, or one sheet tray. That matters when you’d rather be outside than scrubbing syrup off the stove.
- Crowd-Proof: These sweets scale cleanly for two people or a small backyard gathering without forcing you into complicated math.
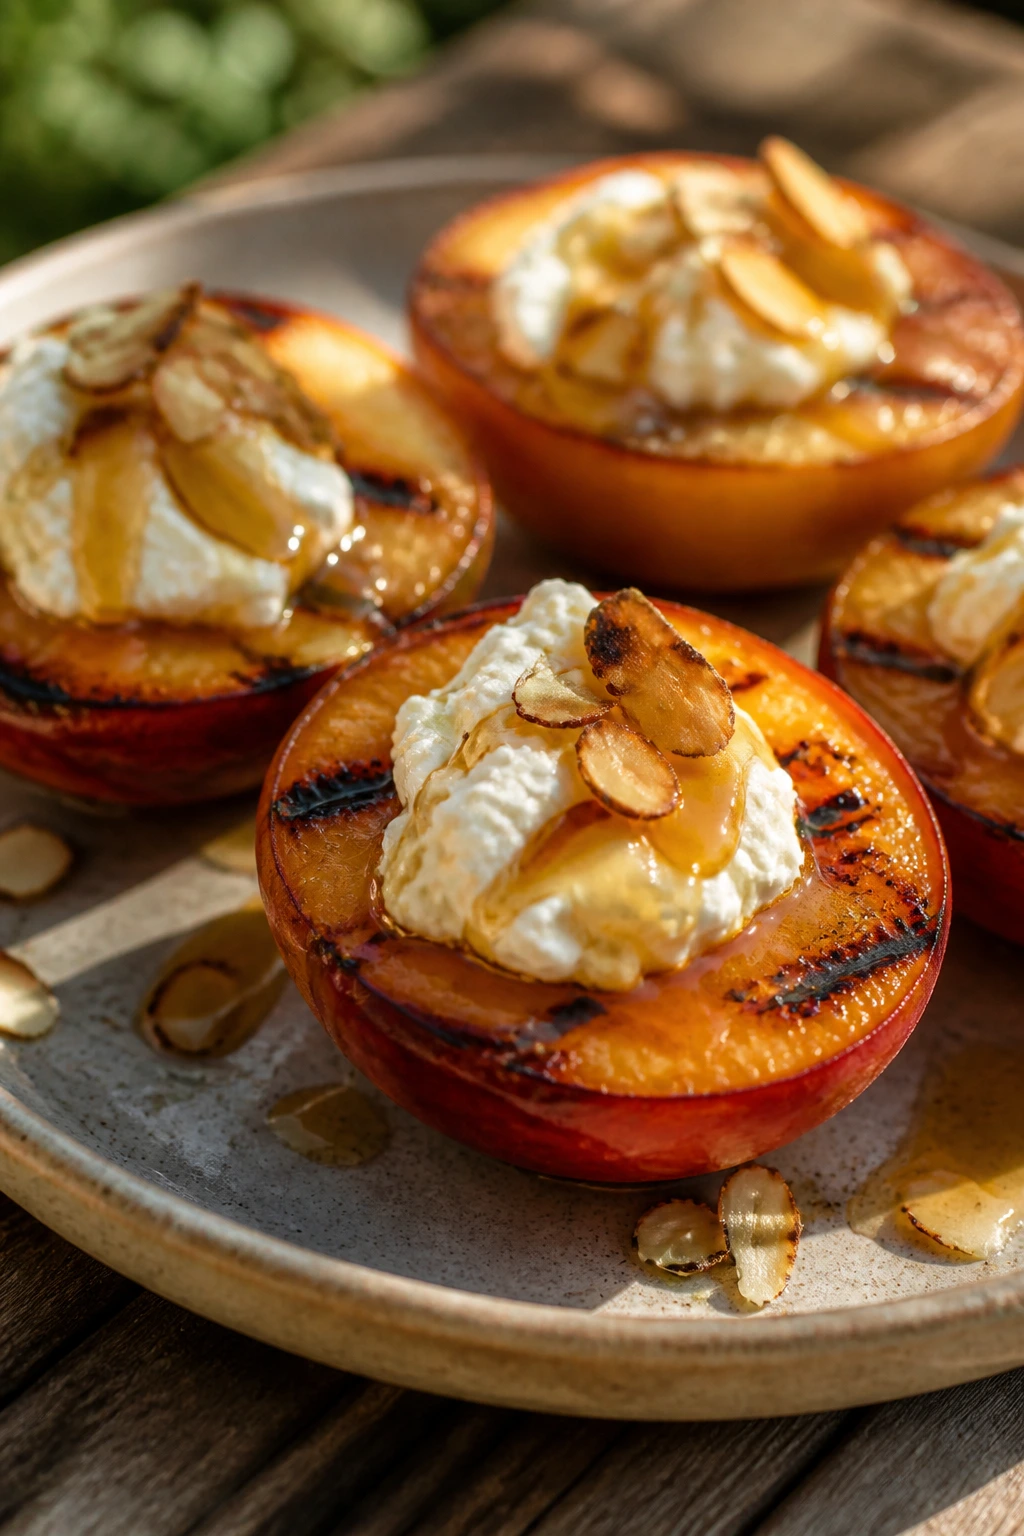
1. Grilled Peaches with Honey Yogurt
Soft peaches on a hot grate are one of summer’s best smells. The cut edges caramelize in a few minutes, and the fruit turns jammy without collapsing. Spoon them over cold yogurt and you get that sharp-hot, cool-creamy contrast that never gets old.
Why It Works:
The grill adds a smoky edge in about 3 to 4 minutes per side, which is enough to wake up peaches that are ripe but not mushy. Honey and yogurt keep the dish light, and the toasted nuts give you crunch so the whole thing doesn’t feel one-note. It’s dessert that looks like you tried harder than you did.
Key Ingredients:
- 4 ripe peaches, halved and pitted — choose fruit that gives slightly at the stem end.
- 1 tablespoon olive oil or melted butter — keeps the cut sides from sticking.
- 1 cup plain Greek yogurt — full-fat gives the best cold, thick texture.
- 2 tablespoons honey — drizzle over the top and a little on the fruit.
- 1/2 teaspoon vanilla extract — rounder flavor in the yogurt.
- Pinch of fine salt — makes the peaches taste brighter.
- 2 tablespoons toasted pistachios or almonds — for crunch.
Quick Steps:
- Preheat a grill to medium-high and oil the grates well.
- Brush the peach halves with oil or butter.
- Grill cut-side down for 3 to 4 minutes, then flip and grill 1 to 2 minutes more until softened and marked.
- Stir the yogurt with honey, vanilla, and salt. Spoon into bowls, top with peaches, and finish with nuts.
Equipment for This Recipe:
- Outdoor grill or grill pan
- Tongs
- Small bowl
- Spoon for serving
How to Serve This Dish:
Serve two peach halves over a thick swoop of yogurt. A mint leaf on top looks nice, but a spoonful of extra honey does more for the plate. This works as dessert or a late-night snack after grilled dinner.
Pro Tips for This Recipe:
- Grill peaches that are ripe but still hold shape; overripe ones slip through the grates.
- If your peaches are small, leave the halves intact at the stem end so they don’t fall apart.
- Toast the nuts in a dry skillet for 2 to 3 minutes first. That tiny step matters.
- A spoon of lemon zest in the yogurt sharpens the whole bowl.
Variations on This Dish:
- Cinnamon Peach Bowl: Add 1/4 teaspoon cinnamon to the yogurt for a warmer finish.
- Dairy-Free Version: Use thick coconut yogurt and toasted coconut instead of nuts.
- Bourbon Drizzle: Stir 1 teaspoon bourbon into the honey for an adults-only version.
Common Mistakes to Avoid with This Dish:
- Using hard peaches: They’ll stay chalky instead of turning soft and syrupy. Wait until they smell sweet and yield a little.
- Leaving the grill dry: Peaches stick fast on a bare grate. Oil the grates and the fruit.
- Overcooking the yogurt topping: Keep the yogurt cold; warm yogurt tastes flat and thin.
2. Strawberry Shortcake Parfaits
This is strawberry shortcake without the ceremony. Layers of syrupy berries, whipped cream, and torn cake look casual in a glass and taste like the first warm night of the season. The berries should leave pink juice on the spoon.
Why It Works:
Macering the strawberries with a little sugar for 10 minutes pulls out their juice and gives you a quick sauce. Using cake instead of biscuits makes the assembly faster, and the creamy layers keep each bite soft instead of crumbly. A chilled glass helps the whole thing stay tidy.
Key Ingredients:
- 2 cups sliced strawberries — cut them small enough to soak up sugar.
- 1 tablespoon granulated sugar — just enough to draw out juice.
- 1 teaspoon lemon juice — sharpens the berries.
- 1 cup heavy cream — whip until soft peaks form.
- 2 tablespoons powdered sugar — for the cream.
- 1 teaspoon vanilla extract — keeps the cream from tasting flat.
- 4 cups cubed pound cake or shortcake — store-bought is fine here.
Quick Steps:
- Toss the strawberries with sugar and lemon juice. Let them sit for 10 minutes.
- Whip the cream with powdered sugar and vanilla until soft peaks form.
- Layer cake, berries, and cream in glasses or small bowls.
- Repeat the layers and chill for 15 minutes before serving.
Equipment for This Recipe:
- Mixing bowl
- Hand mixer or whisk
- Parfait glasses or jars
- Sharp knife
How to Serve This Dish:
Use clear glasses so the layers show through. A spoonful of berry juice in the bottom of each glass makes the dessert look deliberate instead of thrown together. It’s a good end to burgers, grilled chicken, or a picnic meal.
Pro Tips for This Recipe:
- Dry the strawberries after washing or the syrup gets watery.
- Cube the cake the same size so the layers settle evenly.
- Whip the cream only to soft peaks; stiff cream can taste chalky.
- Add a few blueberries if you want more color and a little tart bite.
Variations on This Dish:
- Lemon Shortcake Parfait: Fold 1 teaspoon lemon zest into the cream.
- Angel Food Version: Swap pound cake for angel food cake to keep it lighter.
- Chocolate Stripe: Add a thin ribbon of chocolate sauce between layers.
Common Mistakes to Avoid with This Dish:
- Skipping the berry rest: Plain sliced strawberries taste flat. A short sugar rest gives you sauce.
- Overwhipping the cream: It turns grainy fast. Stop when the beater leaves soft trails.
- Building too early: Assemble close to serving time or the cake gets soggy.
3. No-Bake Lemon Icebox Pie Cups
These taste like lemon pie stripped down to the useful parts: cold cream, bright citrus, and a crumbly crust that doesn’t ask for rolling pins. Served in jars, they feel like dessert you can carry to the deck with one hand.
Why It Works:
Cream cheese and sweetened condensed milk give the filling body, while lemon juice cuts through the sweetness so it doesn’t clump on the tongue. The graham crust stays crisp enough for about a day in the fridge if you press it firmly. Individual cups chill faster than a pie.
Key Ingredients:
- 1 1/2 cups graham cracker crumbs — fine crumbs pack best.
- 4 tablespoons melted butter — binds the crust.
- 8 ounces cream cheese, softened — no cold lumps.
- 1 can sweetened condensed milk, 14 ounces — the sweet base.
- 1/3 cup fresh lemon juice — bottled works in a pinch, fresh tastes cleaner.
- 1 teaspoon lemon zest — for aroma.
- 1 cup whipped cream or whipped topping — folds in at the end.
Quick Steps:
- Mix crumbs and melted butter, then press into 6 small jars or cups.
- Beat cream cheese until smooth, then add condensed milk, lemon juice, and zest.
- Fold in whipped cream until the filling looks light and fluffy.
- Spoon into cups and chill at least 2 hours.
Equipment for This Recipe:
- Mixing bowl
- Hand mixer
- Small jars or ramekins
- Rubber spatula
How to Serve This Dish:
Top each cup with extra zest or one thin lemon slice. The jars travel well, which makes them a good picnic dessert. I’d serve them after anything grilled or smoky, since the lemon cuts through that flavor cleanly.
Pro Tips for This Recipe:
- Let the cream cheese soften fully or you’ll chase lumps forever.
- Use a spoon to pack the crust down tight along the bottom and sides.
- Chill the cups on a flat tray so they don’t tip.
- If you want a stronger lemon edge, add another teaspoon of zest, not more juice.
Variations on This Dish:
- Berry Swirl Cups: Swirl in 2 tablespoons raspberry jam before chilling.
- Key Lime Swap: Use lime juice and zest for a sharper finish.
- Gluten-Free Crust: Use crushed gluten-free cookies in place of graham crackers.
Common Mistakes to Avoid with This Dish:
- Adding too much juice: The filling can loosen and never set fully. Measure it.
- Using warm crust cups: They slide around and get greasy. Let them cool first.
- Serving too soon: Give the filling time to firm up or it will spread like pudding.
4. Watermelon Lime Granita
Granita is the easiest frozen treat on this list, and I mean that in the best possible way. It shaves into icy flakes that melt on contact, leaving behind watermelon and lime instead of sugar syrup. Cold, sharp, and gone in a hurry.
Why It Works:
Watermelon already carries a lot of water, so it freezes into a light, scrapeable texture without an ice cream machine. Lime juice keeps the flavor from going sleepy, and a little sugar protects the crystals from turning into a block of ice. The result is rough, fragile, and refreshing.
Key Ingredients:
- 6 cups cubed seedless watermelon — chilled if possible.
- 1/4 cup fresh lime juice — about 2 limes.
- 2 tablespoons sugar — adjust only a little if your melon is very sweet.
- Pinch of fine salt — wakes up the fruit.
- 4 mint leaves, torn — optional but useful.
Quick Steps:
- Blend watermelon, lime juice, sugar, salt, and mint until smooth.
- Pour into a shallow metal pan.
- Freeze for 30 minutes, then scrape the edges with a fork.
- Repeat scraping every 30 minutes for 2 to 3 hours until fluffy and icy.
Equipment for This Recipe:
- Blender
- Shallow metal baking pan
- Fork
- Freezer-safe bowl for serving
How to Serve This Dish:
Scoop the granita into chilled bowls or coupe glasses. A tiny mint leaf on top is enough garnish; it should look like ice, not a fruit salad. Serve it after a heavy grilled meal or anytime the evening feels muggy.
Pro Tips for This Recipe:
- Use a shallow metal pan because it freezes faster than glass.
- Taste the mix before freezing; watermelon sweetness varies a lot.
- Scrape often. Long stretches in the freezer make the crystals large and hard.
- If the granita freezes too firm, let it sit 5 minutes before scraping again.
Variations on This Dish:
- Strawberry Watermelon Granita: Blend in 1 cup strawberries for a deeper red color.
- Cucumber-Lime Version: Replace 1 cup watermelon with peeled cucumber for a cooler flavor.
- Tequila Night Scoop: Stir 1 to 2 tablespoons tequila into the blend for an adult batch.
Common Mistakes to Avoid with This Dish:
- Freezing it in a deep dish: It sets too slowly and freezes unevenly. Use a shallow pan.
- Skipping the scraping: You’ll get a watermelon ice block instead of flakes.
- Oversweetening: Watermelon doesn’t need much sugar. Taste first.
5. Skillet S’mores Dip
This is the campfire dessert that skipped the fire and went straight to the skillet. The chocolate melts into a pool, the marshmallows blister and sag, and everyone reaches in with a graham cracker before you’ve even sat down. Messy. Exactly.
Why It Works:
A hot cast-iron skillet holds heat long enough to keep the chocolate molten for several minutes. Broiling the marshmallows gives you toasted tops without drying out the chocolate beneath. It’s fast enough for late-night dessert and dramatic enough to make people hover around the pan.
Key Ingredients:
- 1 1/2 cups semisweet chocolate chips — chips melt smoothly and hold shape.
- 1 tablespoon butter — helps the chocolate stay glossy.
- 2 cups mini marshmallows — cover the surface tightly.
- 1/2 teaspoon vanilla extract — optional, but nice.
- 8 graham crackers, broken into squares — for dipping.
Quick Steps:
- Preheat the broiler and place a 10-inch cast-iron skillet on a sheet tray.
- Add chocolate chips, butter, and vanilla to the skillet.
- Top with marshmallows in an even layer.
- Broil for 1 to 2 minutes until the marshmallows are browned at the tips. Serve right away with graham crackers.
Equipment for This Recipe:
- 10-inch cast-iron skillet
- Broiler-safe sheet tray
- Oven mitts
- Graham cracker bowl
How to Serve This Dish:
Bring the skillet to the table on a trivet and let everyone dip. It pairs well with sliced strawberries or salty pretzels if you want something beside the crackers. Use small plates unless you enjoy sticky sleeves.
Pro Tips for This Recipe:
- Watch the broiler like a hawk; marshmallows go from toasted to scorched fast.
- Use a skillet that already holds heat well, not a thin pan.
- If your chocolate chips look stiff after broiling, leave the skillet in the warm oven for 1 minute.
- A pinch of flaky salt on top makes the chocolate taste deeper.
Variations on This Dish:
- Peanut Butter S’mores: Swirl 2 tablespoons peanut butter into the chocolate first.
- Mint Chocolate Version: Add 1/4 teaspoon peppermint extract.
- Cookie Dip: Swap graham crackers for vanilla wafers or shortbread.
Common Mistakes to Avoid with This Dish:
- Overbroiling: Burned marshmallows taste bitter. Keep the door cracked and stay close.
- Using a cold skillet: The chocolate won’t melt evenly. Preheat the pan lightly.
- Serving late: This dip waits for nobody. Set the table first.
6. Blueberry Skillet Cobbler
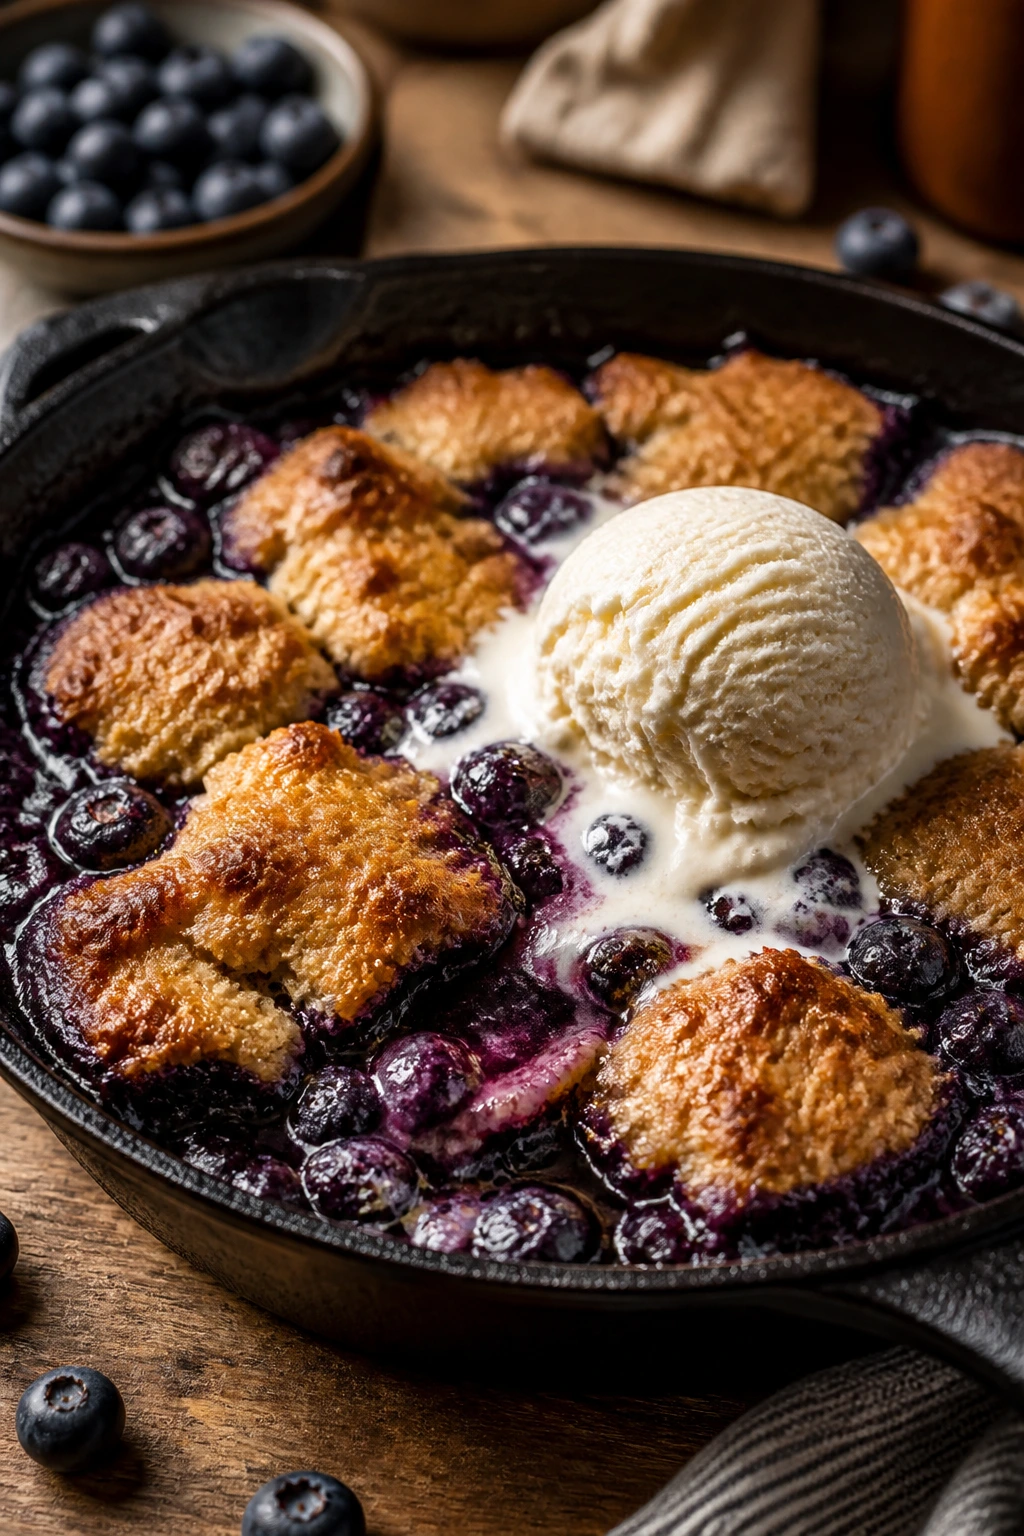
Cobbler belongs on summer nights. The fruit bubbles around the edges, the topping turns golden and a little craggy, and the pan smells like butter and jam. A scoop of vanilla ice cream melting into the hot fruit is half the appeal.
Why It Works:
Blueberries break down quickly and make their own sauce when tossed with a little cornstarch. The biscuit topping bakes in thick spoonfuls, which gives you pockets of tender dough and crisp edges. A skillet helps the bottom stay hot enough that the fruit doesn’t just sit there.
Key Ingredients:
- 4 cups blueberries — fresh or frozen, but frozen should not be thawed.
- 1/3 cup granulated sugar — more if the berries are tart.
- 1 tablespoon cornstarch — thickens the juices.
- 1 teaspoon lemon zest — brightens the fruit.
- 1 cup all-purpose flour — for the topping.
- 1/4 cup sugar — in the biscuit layer.
- 1 1/2 teaspoons baking powder — gives lift.
- 1/4 teaspoon fine salt — keeps the topping balanced.
- 6 tablespoons cold butter, cubed — rubbed into the flour.
- 1/2 cup milk — just enough to bring the dough together.
Quick Steps:
- Heat the oven to 375°F and butter a 10-inch oven-safe skillet.
- Toss blueberries with sugar, cornstarch, and zest; spread in the skillet.
- Mix flour, sugar, baking powder, salt, butter, and milk into a shaggy dough.
- Drop spoonfuls over the fruit and bake 30 to 35 minutes until bubbling and browned.
Equipment for This Recipe:
- 10-inch skillet
- Mixing bowls
- Measuring spoons
- Spoon for topping
How to Serve This Dish:
Serve it warm, not scalding, with ice cream or whipped cream. The pan makes a rustic centerpiece, which is useful because cobbler always looks more inviting when you don’t fuss with it. A spoon and a shallow bowl are enough.
Pro Tips for This Recipe:
- Keep the butter cold so the topping stays tender.
- If using frozen berries, add 5 extra minutes of bake time.
- Don’t spread the topping into a flat lid; rough spoonfuls bake better.
- A few raspberries mixed in add tartness and color.
Variations on This Dish:
- Lemon-Blueberry Cobbler: Add 1 tablespoon lemon juice to the fruit.
- Peach-Blueberry Mix: Swap 2 cups berries for sliced peaches.
- Oat Topping Version: Replace 1/2 cup flour with rolled oats for more texture.
Common Mistakes to Avoid with This Dish:
- Using too much topping liquid: The dough gets heavy. Add milk gradually.
- Leaving the fruit dry: If your berries are bland, increase sugar and add lemon zest.
- Underbaking the center: The topping should be browned and the fruit should bubble at the edges.
7. Chocolate-Dipped Frozen Bananas

Frozen bananas on a stick are the kind of treat that feels like a childhood memory with better chocolate. The banana softens into creamy ice cream territory once frozen, and the shell cracks with a neat snap if you dip it right. Simple, cheap, cold.
Why It Works:
Bananas freeze into a smooth, almost fudgy texture that pairs well with chocolate. Coconut oil thins the coating so it sets in a thin shell instead of a bulky shell. Add nuts or sprinkles and you’ve got a freezer treat that looks more involved than it is.
Key Ingredients:
- 4 bananas, peeled and halved — ripe but not overripe.
- 1 cup semisweet chocolate chips — good flavor and easy melting.
- 1 tablespoon coconut oil — loosens the chocolate.
- 1/4 cup chopped peanuts or almonds — optional crunch.
- 4 wooden sticks — for dipping and handling.
Quick Steps:
- Insert sticks into banana halves and freeze on a lined tray for 1 hour.
- Melt chocolate chips with coconut oil in short bursts until smooth.
- Dip each frozen banana, turning to coat quickly.
- Sprinkle with nuts before the shell sets, then freeze 20 minutes more.
Equipment for This Recipe:
- Sheet pan
- Parchment paper
- Microwave-safe bowl
- Wooden sticks
How to Serve This Dish:
Serve straight from the freezer on a cold plate. A little bowl of extra nuts or crushed cookies next to them gives people a place to roll the sticky edge. They’re best eaten over a napkin. That’s not a suggestion.
Pro Tips for This Recipe:
- Freeze the bananas before dipping or the coating slides right off.
- Work fast; chocolate starts setting the second it hits the cold fruit.
- If the chocolate thickens, warm it for 10 seconds and stir again.
- Use parchment, not wax paper, so the bananas peel off cleanly.
Variations on This Dish:
- Dark Chocolate Sea Salt: Finish with flaky salt while the coating is wet.
- Cookie Crumb Bananas: Roll in crushed graham crackers instead of nuts.
- Peanut Butter Stripe: Drizzle melted peanut butter over the frozen shell.
Common Mistakes to Avoid with This Dish:
- Using soft bananas: They bend and break on the stick. Slightly firm fruit holds better.
- Dipping before freezing: The coating slips and gets messy.
- Skipping the tray lining: You’ll chip the shell trying to pry them off.
8. Pineapple Coconut Pops
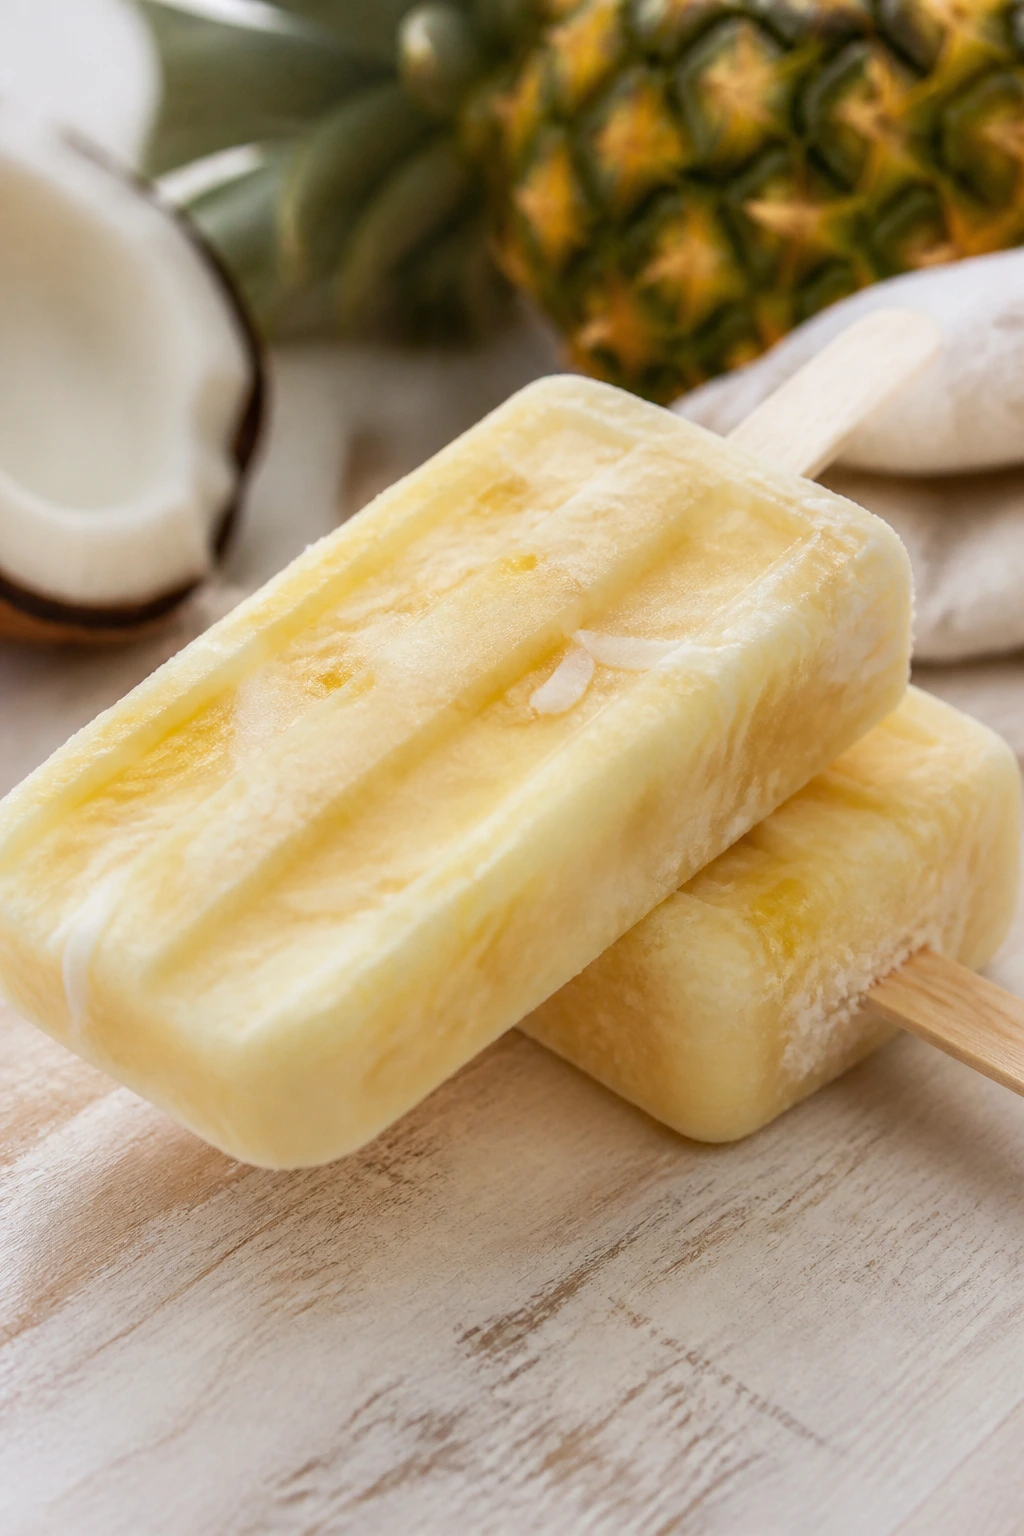
Pineapple and coconut is a combo that practically tastes like a porch swing. These pops freeze into a creamy-smooth treat with tropical flavor and a little tang from the fruit. They’re cold enough to quiet the whole table for a minute.
Why It Works:
Pineapple brings acidity, coconut milk brings body, and honey softens the edges without making the pops icy. Blending the fruit makes the texture smoother, so you don’t get hard chunks that bite back. A squeeze of lime keeps the flavor from going dull in the freezer.
Key Ingredients:
- 3 cups pineapple chunks — fresh or thawed frozen.
- 1 cup full-fat coconut milk — shake the can before measuring.
- 2 tablespoons honey — or maple syrup.
- 1 tablespoon lime juice — for brightness.
- Pinch of salt — tiny amount, big help.
Quick Steps:
- Blend pineapple, coconut milk, honey, lime juice, and salt until smooth.
- Pour into popsicle molds.
- Insert sticks and freeze for at least 6 hours.
- Run warm water over the molds for a few seconds to release.
Equipment for This Recipe:
- Blender
- Popsicle molds
- Small funnel or measuring cup
- Freezer-safe tray
How to Serve This Dish:
Serve them right from the mold or set them in a bowl of crushed ice if you’re taking them outdoors. A sprinkle of toasted coconut on the plate is enough garnish. They work as dessert after grilled shrimp, burgers, or anything salty.
Pro Tips for This Recipe:
- Blend long enough to fully break down the pineapple fibers.
- Don’t overfill the molds; the mixture expands a bit.
- If the pops freeze too hard, let them sit 2 minutes before unmolding.
- Toasted coconut on top gives the pops more texture.
Variations on This Dish:
- Mango Coconut Pops: Replace half the pineapple with mango.
- Piña Colada Style: Add 1 teaspoon vanilla and a splash of rum extract.
- Green Lime Version: Blend in a handful of spinach for color, not flavor.
Common Mistakes to Avoid with This Dish:
- Using watery coconut milk: Light coconut milk makes icy pops. Use full-fat.
- Skipping the salt: The flavor gets flat fast.
- Forgetting to freeze them long enough: Soft centers fall apart during unmolding.
9. Berry Yogurt Bark

Yogurt bark is a freezer snack that behaves like candy but takes almost no effort. The berries stay juicy, the yogurt freezes into a cool snap, and the granola adds a little crunch where your teeth expect it. It’s messy only in the way good frozen things are messy.
Why It Works:
Thick Greek yogurt holds its shape better than regular yogurt, which means the bark breaks into clean shards instead of sticky slabs. Honey sweetens the yogurt without making it icy, and the berries add pockets of tart juice. Thin layers freeze faster and break better.
Key Ingredients:
- 2 cups plain Greek yogurt — thick and tangy.
- 2 tablespoons honey — sweetens the base.
- 1 teaspoon vanilla extract — softens the tang.
- 1 cup mixed berries — sliced if large.
- 1/4 cup granola — for crunch.
- 2 tablespoons chopped almonds or seeds — optional.
Quick Steps:
- Mix yogurt, honey, and vanilla.
- Spread it on a parchment-lined sheet pan about 1/4 inch thick.
- Sprinkle berries, granola, and nuts over the top.
- Freeze 3 hours, then break into pieces.
Equipment for This Recipe:
- Sheet pan
- Parchment paper
- Spatula
- Sharp knife for slicing berries
How to Serve This Dish:
Serve the bark in a bowl straight from the freezer, or keep the shards in a zip-top bag for grab-and-go snacking. It’s best for nights when dessert needs to be cold, quick, and not fussy. A few mint leaves look nice if you’re serving it on a platter.
Pro Tips for This Recipe:
- Spread the yogurt evenly or the bark breaks unevenly.
- Pat very wet berries dry first so the bark doesn’t get icy spots.
- Don’t pile the granola too high; it can sink.
- Break the bark after it freezes fully so the pieces stay clean.
Variations on This Dish:
- Peach Almond Bark: Use diced peaches and sliced almonds.
- Chocolate Swirl Bark: Drizzle melted dark chocolate over the top before freezing.
- Nut-Free Version: Use pumpkin seeds or coconut flakes instead of nuts.
Common Mistakes to Avoid with This Dish:
- Using thin yogurt: It won’t freeze into a neat sheet.
- Leaving the bark out too long: It softens fast. Serve straight from the freezer.
- Adding too much fruit juice: Wet toppings make the bark icy and sticky.
10. Key Lime Cheesecake Bars
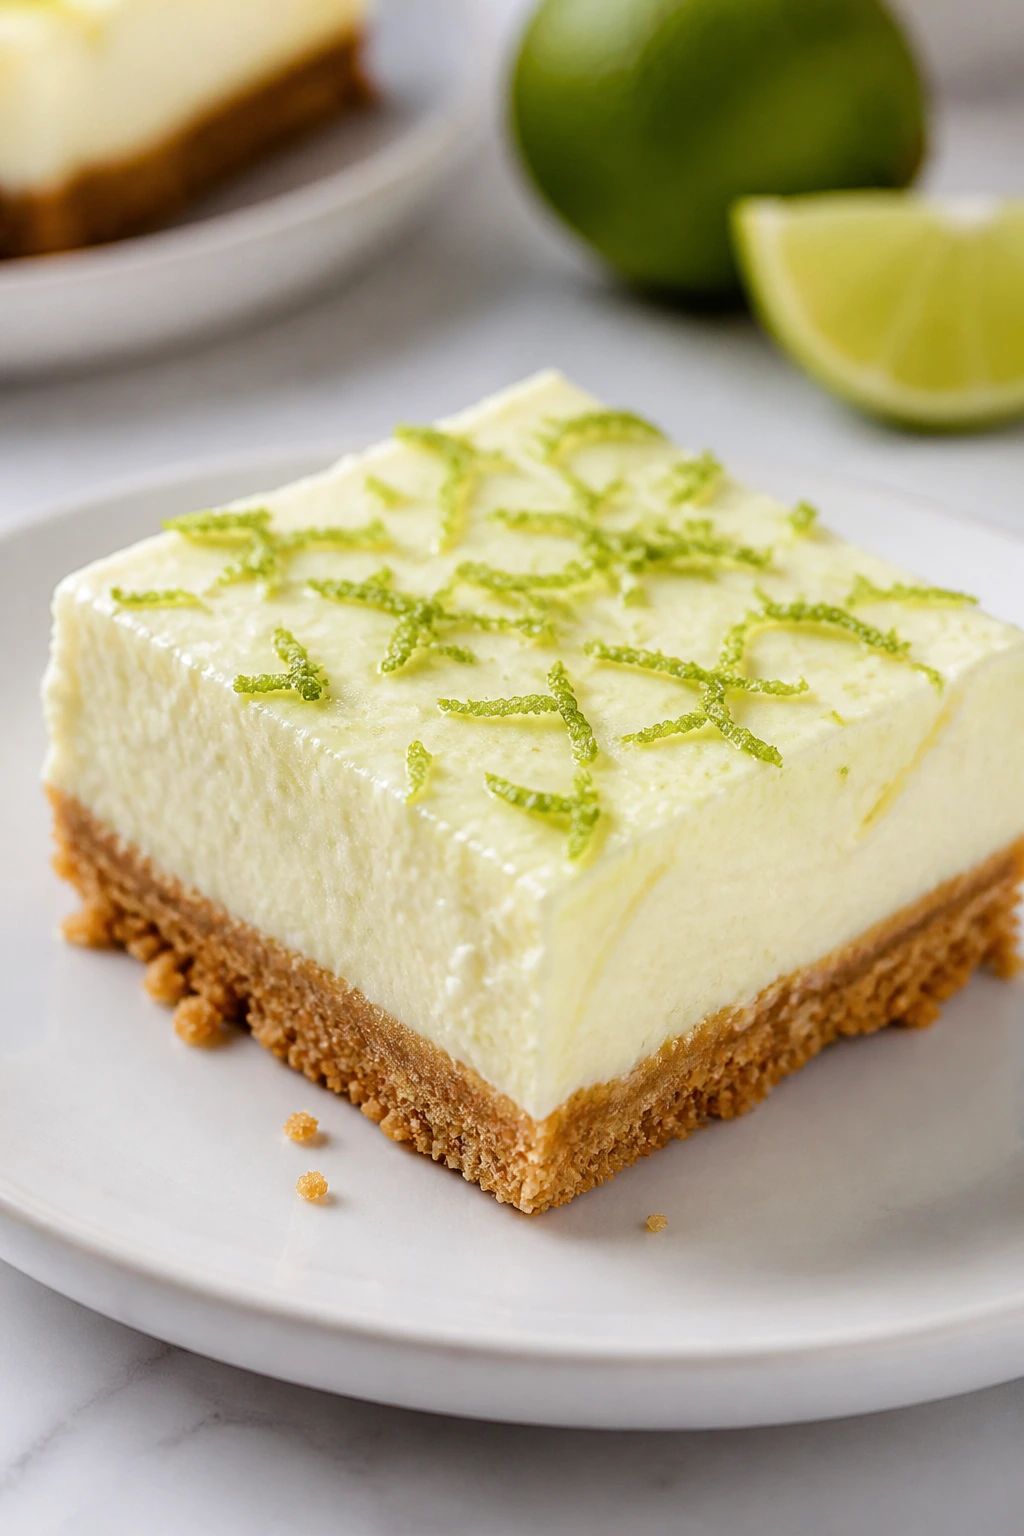
These bars hit that sharp, creamy key lime note that feels tailor-made for warm weather. The crust stays buttery and crumbly, while the filling bakes into a sliceable, chilled square that tastes colder than it is. They disappear fast when cut into small pieces.
Why It Works:
The cream cheese base gives the filling density, while key lime juice cuts through the richness. Baking the bars briefly sets the filling so it slices cleanly after chilling. The graham crust provides the right kind of sandy sweetness under the tart layer.
Key Ingredients:
- 1 1/2 cups graham cracker crumbs — for the crust.
- 6 tablespoons melted butter — binds the crust.
- 2 tablespoons sugar — adds a little sweetness.
- 16 ounces cream cheese, softened — for a smooth filling.
- 3/4 cup granulated sugar — balances the lime.
- 2 large eggs — set the filling.
- 1/2 cup key lime juice — fresh or bottled.
- 1 teaspoon lime zest — extra perfume.
Quick Steps:
- Heat the oven to 325°F and line an 8-inch square pan.
- Mix crust ingredients and press them into the pan; bake 8 minutes.
- Beat the filling ingredients until smooth and pour over the crust.
- Bake 20 to 24 minutes until the center just barely jiggles. Chill at least 4 hours before slicing.
Equipment for This Recipe:
- 8-inch square baking pan
- Parchment paper
- Mixer
- Offset spatula or spoon
How to Serve This Dish:
Cut the bars small; they’re rich enough that a little square goes far. A dusting of lime zest on top is cleaner than whipped cream if you want neat edges. Serve them cold, straight from the fridge.
Pro Tips for This Recipe:
- Don’t overbake; the center should wobble slightly when you shake the pan.
- Chill fully before cutting or the filling smears.
- Use parchment with overhang so the bars lift out cleanly.
- A pinch of salt in the filling keeps the sweetness from getting loud.
Variations on This Dish:
- No-Bake Lime Bars: Skip the eggs and use a chilled whipped filling.
- Orange-Citrus Bars: Replace half the lime juice with orange juice.
- Coconut Crust: Add shredded coconut to the crumb base.
Common Mistakes to Avoid with This Dish:
- Using cold cream cheese: Lumps never fully disappear.
- Cutting while warm: The bars will slump.
- Too much lime juice: The filling can become loose and sharp.
11. Grilled Pineapple Sundaes
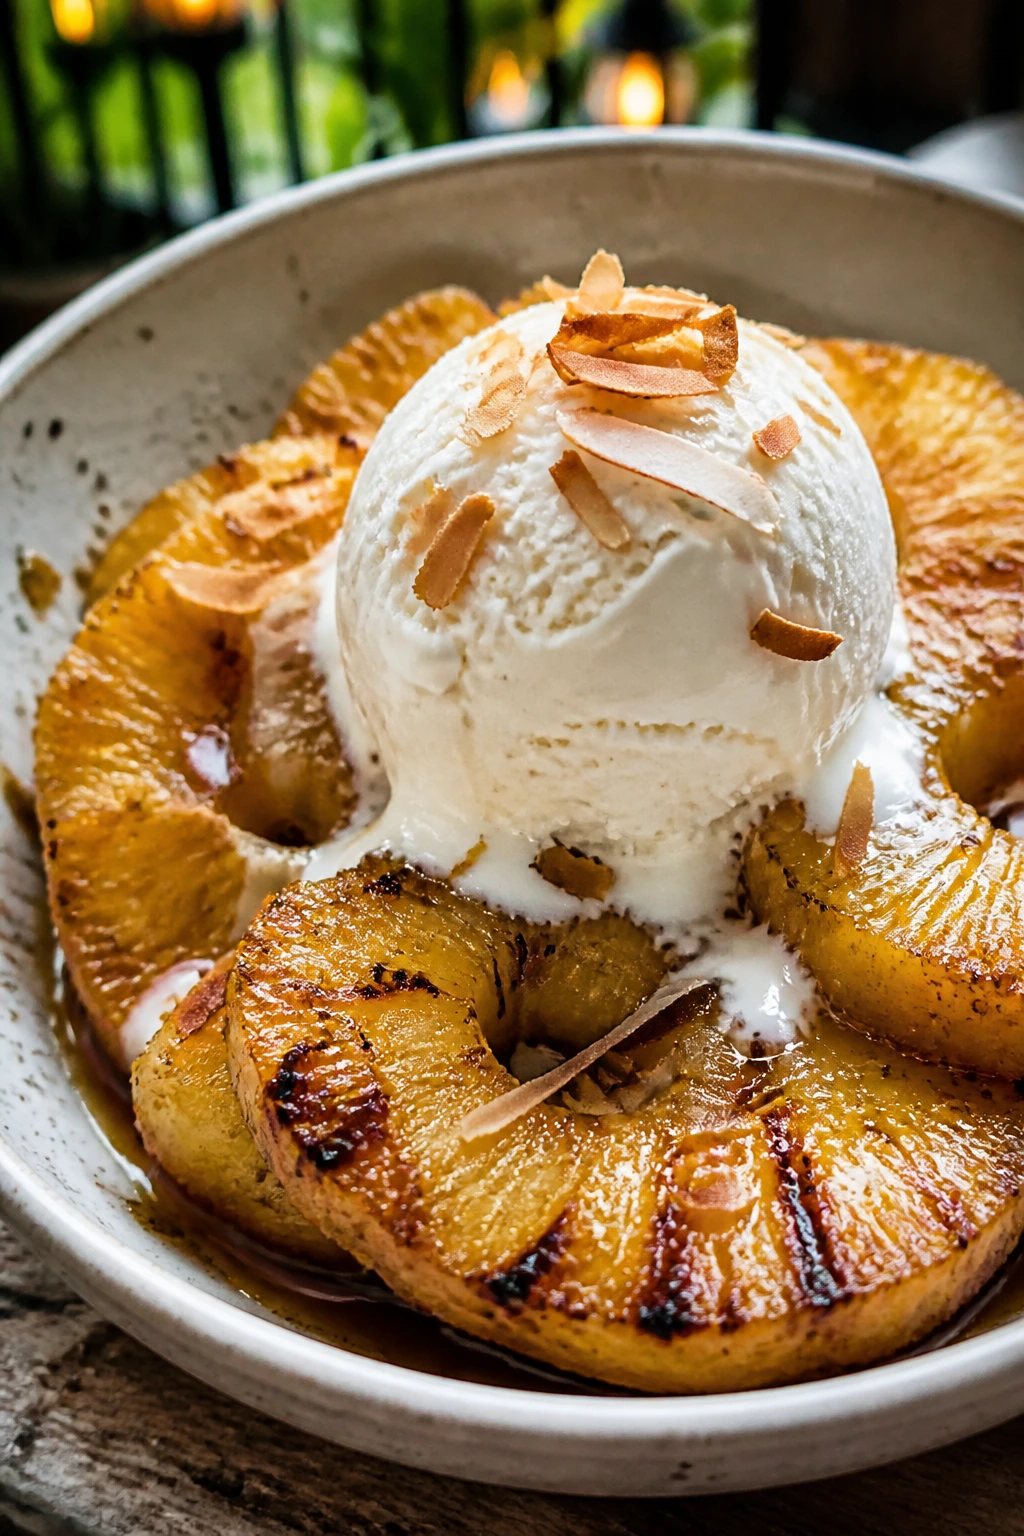
Pineapple gets meaner and better on the grill. The sugars darken, the edges turn sticky, and suddenly the fruit has enough depth to stand next to ice cream without getting lost. A sundae like this tastes like a backyard cookout that decided to end on a high note.
Why It Works:
A quick toss with brown sugar and lime juice pulls the pineapple toward caramel territory. The grill marks add smoke and a touch of bitterness, which keeps the sundae from tasting childish. Cold vanilla ice cream melts into the warm fruit in the first 30 seconds.
Key Ingredients:
- 1 pineapple, peeled and sliced into rings — cut the core out if it’s tough.
- 2 tablespoons brown sugar — for caramel notes.
- 1 tablespoon lime juice — keeps the fruit bright.
- 4 scoops vanilla ice cream — plain works best.
- 2 tablespoons toasted coconut — for texture.
- 2 maraschino cherries or fresh cherries — optional.
Quick Steps:
- Toss pineapple with brown sugar and lime juice.
- Grill over medium-high heat for 2 to 3 minutes per side.
- Place warm pineapple in bowls.
- Top with ice cream, coconut, and cherries.
Equipment for This Recipe:
- Grill or grill pan
- Tongs
- Serving bowls
- Small brush or spoon
How to Serve This Dish:
Serve immediately while the pineapple is still hot enough to soften the ice cream at the edges. A drizzle of the pan juices over the top makes the bowl look and taste richer. Keep napkins close.
Pro Tips for This Recipe:
- Cut thick rings so the fruit doesn’t collapse on the grill.
- Don’t let the sugar burn; grill over medium-high, not high.
- If your pineapple is very sweet, use less sugar and more lime.
- Toast the coconut in advance so you can finish the bowls fast.
Variations on This Dish:
- Coconut Sundae: Swap vanilla ice cream for coconut ice cream.
- Rum-Style Version: Add a splash of rum extract to the pineapple marinade.
- Spicy Pineapple: Dust the fruit with a tiny pinch of chili powder before grilling.
Common Mistakes to Avoid with This Recipe:
- Using underripe pineapple: It stays sharp and fibrous.
- Walking away from the grill: Sugar burns in a hurry.
- Serving with too many toppings: The pineapple should stay the main event.
12. Mango Chili Cups
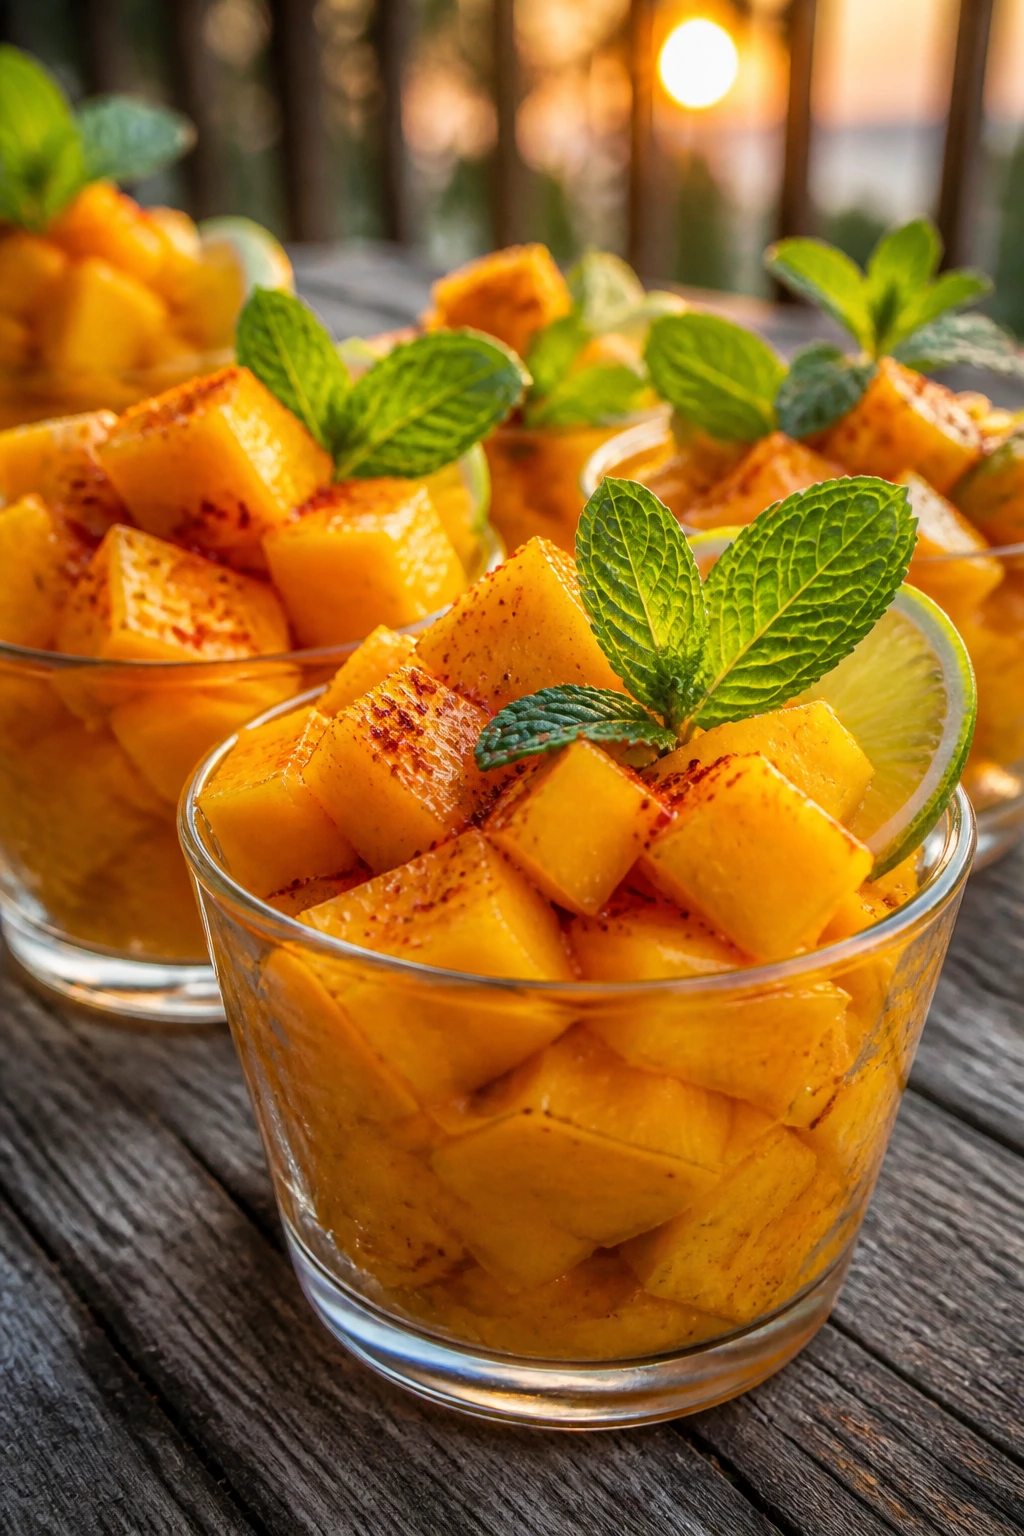
Sweet mango with a little heat is one of those combinations that sounds odd until you taste it. The fruit should be silky and cold, the lime bright, and the chili just enough to make you notice the second bite. That tiny spark matters.
Why It Works:
Ripe mango brings perfume and soft texture, while lime juice keeps the sweetness from flattening out. A pinch of chili powder adds contrast without turning the dish into a dare. It’s the kind of treat that cools you down and wakes up your mouth at the same time.
Key Ingredients:
- 3 ripe mangoes, peeled and diced — soft but not stringy.
- 1 tablespoon fresh lime juice — brightens the fruit.
- 1 tablespoon honey — optional, for extra sweetness.
- 1/4 teaspoon chili powder — or Tajín.
- Pinch of salt — sharpens the mango.
- 6 mint leaves, chopped — optional.
Quick Steps:
- Dice the mangoes into bite-size chunks.
- Toss with lime juice, honey, chili powder, and salt.
- Chill 15 minutes.
- Spoon into small cups and top with mint.
Equipment for This Recipe:
- Cutting board
- Sharp knife
- Mixing bowl
- Small cups or ramekins
How to Serve This Dish:
Serve the cups cold with a small spoon. They work well beside grilled food because they cut through smoke and salt. A dusting of extra chili powder on top is enough; don’t bury the fruit.
Pro Tips for This Recipe:
- Use mangoes that smell sweet at the stem.
- Cut the mango from the sides, not through the pit, so you get clean chunks.
- Chill the fruit before tossing if your kitchen runs warm.
- A squeeze of orange juice can soften the chili edge.
Variations on This Dish:
- Cucumber Mango Cups: Add diced cucumber for extra crunch.
- Chamoy Style: Drizzle lightly with chamoy for a more savory-sweet turn.
- Berry Mix: Fold in diced strawberries or pineapple.
Common Mistakes to Avoid with This Dish:
- Using fibrous mangoes: They chew stringy and tough. Pick ripe fruit.
- Overdoing the chili: You want a warm tickle, not a burn.
- Skipping the salt: The fruit tastes flatter without it.
13. No-Churn Vanilla Bean Ice Cream
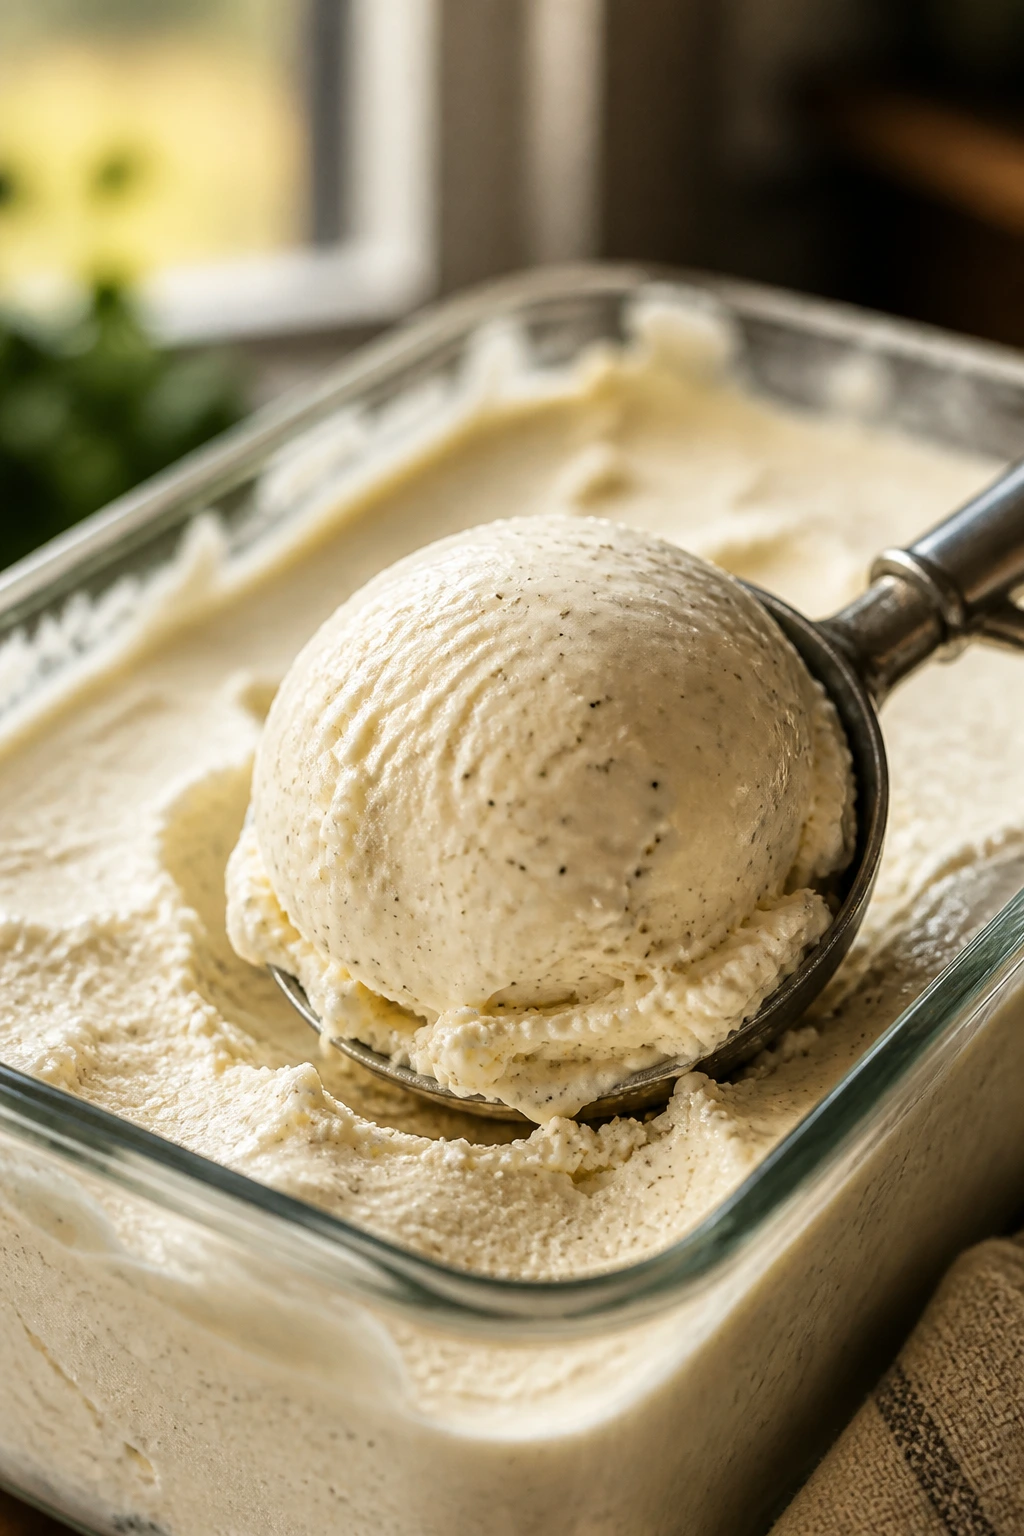
No-churn ice cream is the freezer shortcut I actually trust. It comes out dense, scoopable, and cleanly vanilla, without the icy streaks that lazy homemade versions can get. Put it next to grilled fruit or sandwich it between cookies.
Why It Works:
Whipped cream brings air, and sweetened condensed milk keeps the mixture smooth because sugar lowers the freezing point. Vanilla bean paste gives little dark flecks and a rounder flavor than plain extract. No machine, no custard, no drama.
Key Ingredients:
- 2 cups heavy cream — whipped to soft peaks.
- 1 can sweetened condensed milk, 14 ounces — the base.
- 1 tablespoon vanilla bean paste or extract — paste gives specks.
- 1/4 teaspoon fine salt — keeps it from tasting flat.
Quick Steps:
- Whip the cream to soft peaks.
- Fold in condensed milk, vanilla, and salt.
- Pour into a loaf pan and smooth the top.
- Freeze 6 hours or overnight until firm.
Equipment for This Recipe:
- Hand mixer or stand mixer
- Loaf pan
- Rubber spatula
- Freezer-safe container or lid
How to Serve This Dish:
Let the container sit out for 5 minutes before scooping. Serve in cones, bowls, or next to fruit crisps and pies. A drizzle of berry sauce makes it look like you planned the whole evening.
Pro Tips for This Recipe:
- Stop whipping the cream at soft peaks; overwhipped cream makes the texture heavy.
- Fold gently so you don’t knock out the air.
- Press parchment directly on the surface before freezing to reduce ice crystals.
- Stir in cookies, jam, or chocolate chips only after the base is mixed.
Variations on This Dish:
- Strawberry Ripple: Swirl in 1/2 cup strawberry jam.
- Chocolate Chip: Fold in 1/2 cup mini chips.
- Coffee Vanilla: Add 1 teaspoon instant espresso powder.
Common Mistakes to Avoid with This Dish:
- Using low-fat cream: It won’t whip the same way.
- Freezing in a shallow uncovered dish: Ice crystals creep in fast.
- Overmixing after folding: The ice cream loses its light texture.
14. Frozen Yogurt Chocolate Chip Bites
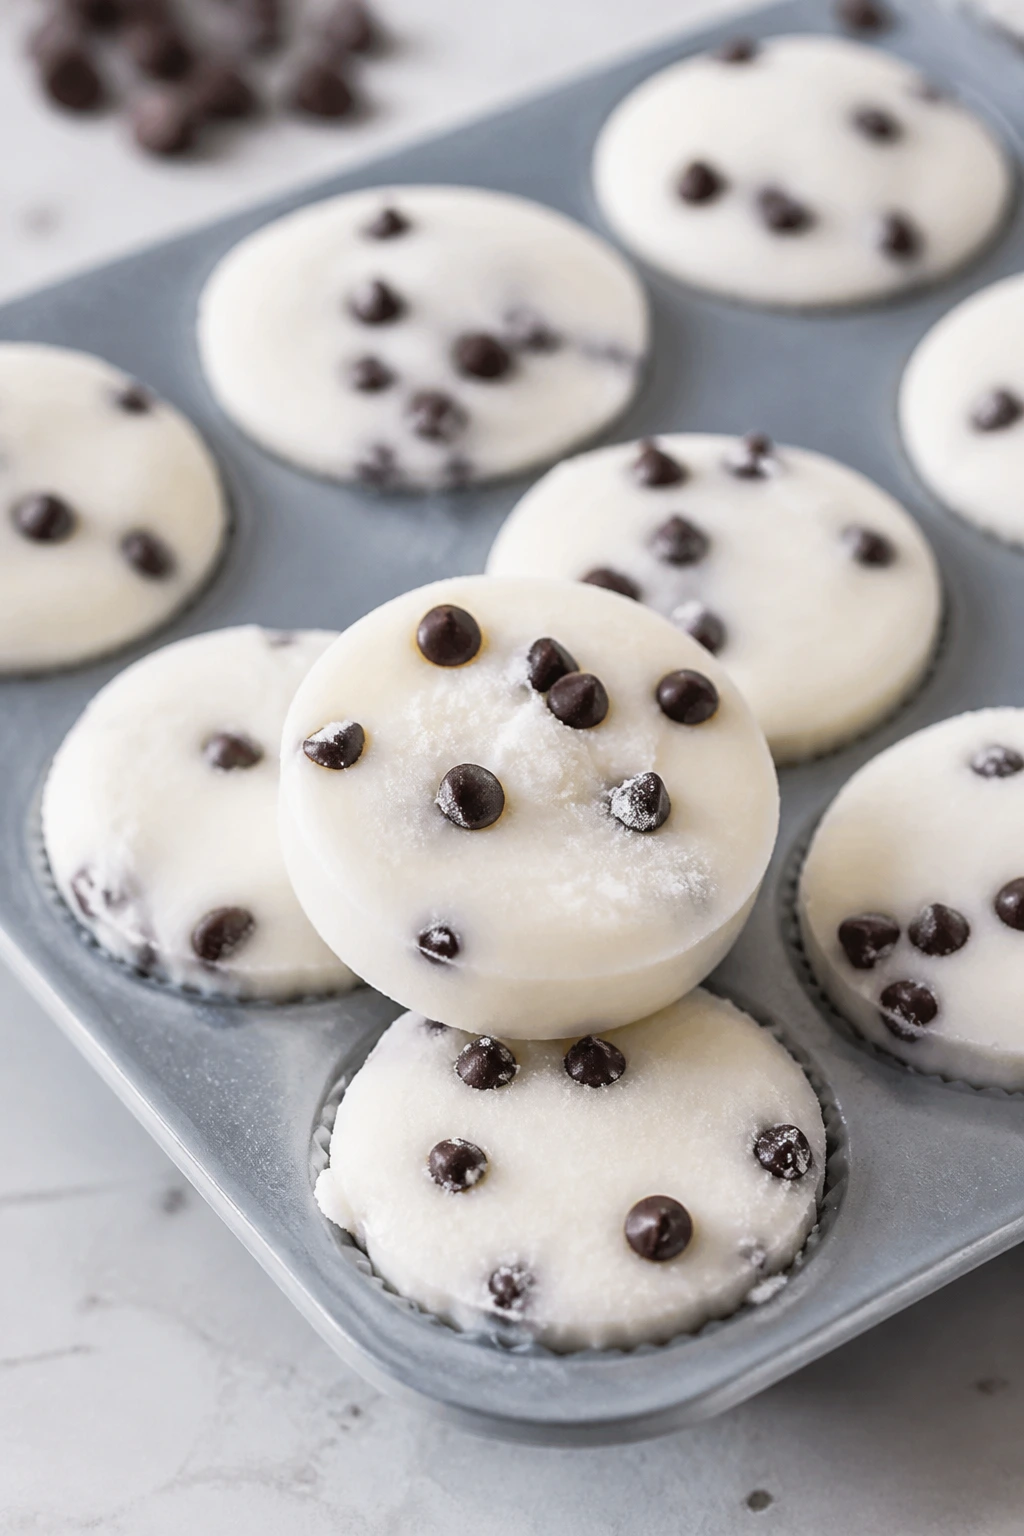
These little bites sit somewhere between snack and dessert, and that’s a nice place to be. The yogurt freezes into a creamy center while the chocolate chips stay firm enough to give each bite a small crunch. Keep them in the freezer and they disappear by handfuls.
Why It Works:
Greek yogurt freezes more cleanly than regular yogurt because it starts thicker. Honey keeps the bites from freezing into hard pebbles, and mini chocolate chips spread better than large ones. A mini muffin tin gives you neat portions without scooping.
Key Ingredients:
- 2 cups plain Greek yogurt — thick and strained.
- 2 tablespoons honey — for sweetness.
- 1/2 cup mini chocolate chips — small chips distribute evenly.
- 1 teaspoon vanilla extract — optional.
- 1/4 cup diced strawberries or raspberries — optional.
Quick Steps:
- Stir yogurt, honey, and vanilla together.
- Fold in chocolate chips and fruit.
- Spoon into mini muffin liners or silicone molds.
- Freeze 3 to 4 hours, then pop out and store cold.
Equipment for This Recipe:
- Mini muffin tin or silicone molds
- Spoon
- Mixing bowl
- Freezer-safe container
How to Serve This Dish:
Serve a few bites in a small bowl after dinner or with coffee on a warm evening. They’re tidy enough for kids and cold enough for adults who want something small. A few berries on the side keep the plate from looking empty.
Pro Tips for This Recipe:
- Silicone molds release the bites more easily than paper liners.
- Use mini chips, not regular ones, so each bite stays smooth.
- Freeze on a flat tray to keep the molds level.
- If the yogurt is loose, strain it in a fine sieve for 20 minutes first.
Variations on This Dish:
- Blueberry Almond: Use blueberries and a few sliced almonds.
- Peanut Butter Swirl: Add a teaspoon of peanut butter to each mold before freezing.
- Vanilla Coconut: Mix in shredded coconut and skip the fruit.
Common Mistakes to Avoid with This Dish:
- Using watery yogurt: The bites freeze icy and soft.
- Overstuffing the molds: They spill and freeze unevenly.
- Trying to unmold too soon: They need a full freeze to pop cleanly.
15. Lemon Berry Trifle
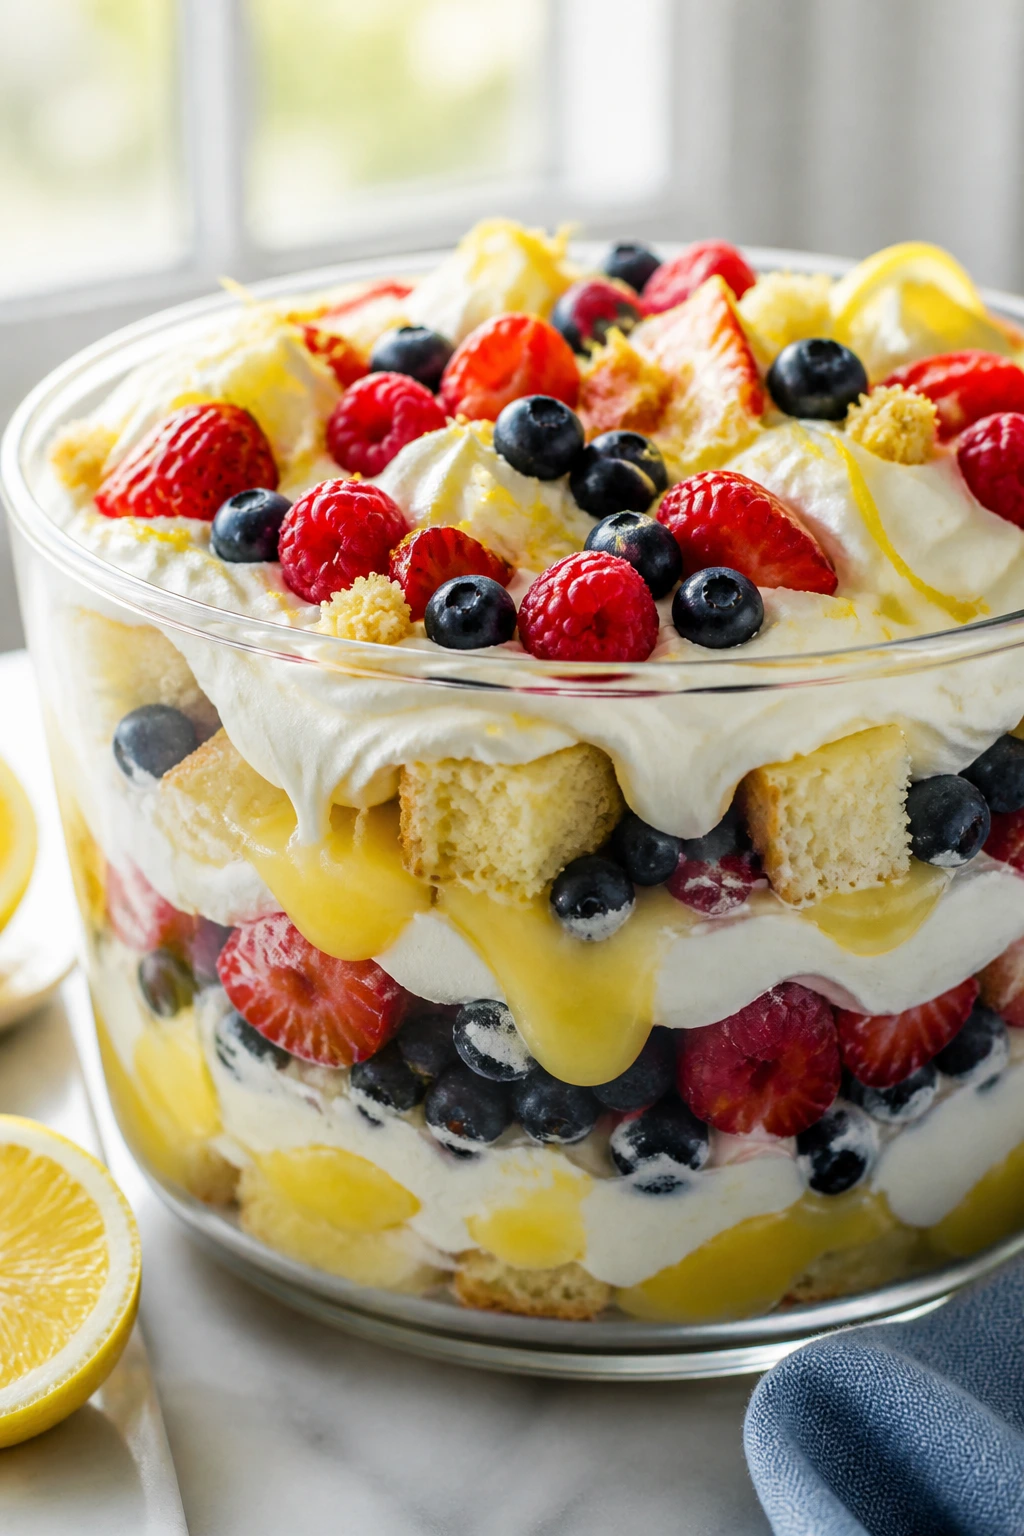
A trifle is what happens when cake, berries, and cream stop pretending to be separate jobs. In a glass bowl, the layers look bright and relaxed, and the lemon keeps the whole thing from tasting too sweet. It’s a dessert that likes being made ahead.
Why It Works:
Soft cake soaks up berry juice without collapsing immediately, and lemon curd gives the cream a sharper edge. The layers stay distinct in a chilled bowl, which matters because trifle should look like a stack, not soup. Use sturdy berries so the color stays strong.
Key Ingredients:
- 6 cups cubed pound cake — stale cake works fine here.
- 2 cups mixed berries — strawberries, blueberries, raspberries.
- 2 tablespoons sugar — for the berries if needed.
- 1 1/2 cups whipped cream — whipped to soft peaks.
- 1 cup lemon curd — store-bought is fine.
- 1 teaspoon lemon zest — for the top.
Quick Steps:
- Toss berries with sugar and let them sit 10 minutes.
- Layer cake, berries, lemon curd, and whipped cream in a bowl.
- Repeat the layers once more.
- Chill 1 hour before serving.
Equipment for This Recipe:
- Large glass bowl
- Mixing bowls
- Rubber spatula
- Knife for cubing cake
How to Serve This Dish:
Serve it with a big spoon so each portion gets all the layers. The glass bowl does the visual work, so don’t hide it with garnish overload. A few berries and a little zest on top are enough.
Pro Tips for This Recipe:
- Dry very juicy berries lightly so they don’t flood the layers.
- Cut the cake into even cubes so the bowl looks neat.
- Chill before serving; trifle tastes better after the flavors settle.
- If using store-bought lemon curd, loosen it with a spoonful of whipped cream.
Variations on This Dish:
- Chocolate-Berry Trifle: Swap lemon curd for chocolate pudding.
- Angel Food Light Version: Use angel food cake for a fluffier base.
- Peach Lemon Trifle: Replace half the berries with sliced peaches.
Common Mistakes to Avoid with This Dish:
- Using too much whipped cream: It buries the fruit and makes the bowl heavy.
- Assembling too far ahead: The cake can turn mushy.
- Skimping on acid: Without lemon, the whole bowl tastes sugary and flat.
16. Cherry Almond Galette

A galette is the laid-back cousin of pie, and cherries suit that mood. The filling bubbles inside a fold-over crust, almond gives the fruit a soft marzipan note, and the whole thing slices without asking for a pie dish. Rustic is the right word here, not sloppy.
Why It Works:
Cherries release a lot of juice, so cornstarch keeps the center from running everywhere. Almond extract makes the cherry flavor taste deeper, not sweeter. A single crust bakes faster than a full pie, which is why this one feels summer-friendly.
Key Ingredients:
- 1 sheet pie dough, chilled — store-bought or homemade.
- 4 cups pitted cherries — sweet or tart.
- 1/3 cup sugar — adjust for cherry sweetness.
- 2 tablespoons cornstarch — thickens the filling.
- 1 teaspoon almond extract — small amount, big payoff.
- 1 egg, beaten — for brushing the crust.
- 1 tablespoon turbinado sugar — for the crust edge.
Quick Steps:
- Heat the oven to 400°F and line a baking sheet.
- Toss cherries with sugar, cornstarch, and almond extract.
- Place filling in the center of the dough, leaving a 2-inch border, then fold the edges over.
- Brush with egg, sprinkle with turbinado sugar, and bake 30 to 35 minutes until browned and bubbling.
Equipment for This Recipe:
- Baking sheet
- Parchment paper
- Rolling pin if needed
- Pastry brush
How to Serve This Dish:
Let the galette cool for at least 20 minutes so the filling sets a bit. Serve wedges with vanilla ice cream or plain whipped cream. The crust should shatter at the edge and stay juicy inside.
Pro Tips for This Recipe:
- Pit the cherries over a bowl to catch the juice.
- Keep the dough cold so it folds without tearing.
- If the filling looks very wet, add another teaspoon of cornstarch.
- Rotate the pan once during baking if your oven browns unevenly.
Variations on This Dish:
- Peach Cherry Galette: Replace 1 1/2 cups cherries with peaches.
- Lemon Cherry Version: Add lemon zest to the filling.
- Thyme Finish: Sprinkle a few thyme leaves over the fruit before baking.
Common Mistakes to Avoid with This Dish:
- Too much filling juice: The crust can turn wet. Measure the cornstarch.
- Warm dough: It tears and won’t hold the folds.
- Cutting too soon: The fruit needs time to settle.
17. Mini Pavlovas with Mixed Berries
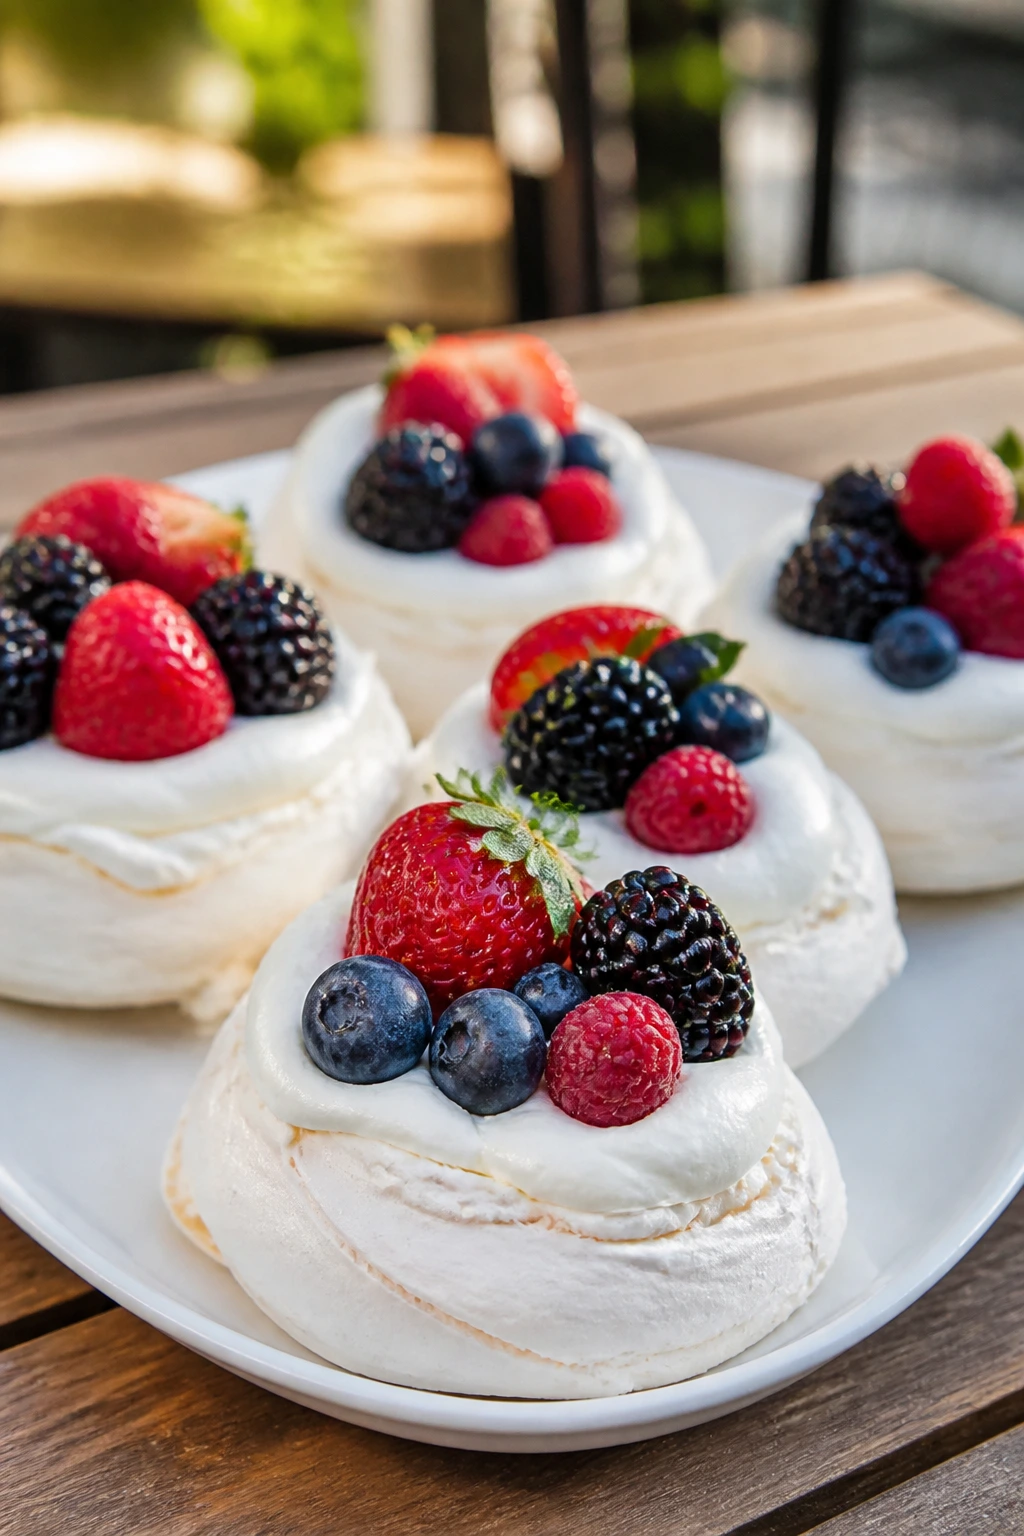
Mini pavlovas bring a crisp shell and a marshmallow-soft center, which is a sneaky good texture combo for warm weather. They look fancier than they are. The trick is the contrast: cold cream, tart berries, and a shell that cracks the second your spoon touches it.
Why It Works:
Egg whites whipped with sugar and a little cornstarch bake into a crisp outer shell while staying soft inside. A touch of vinegar steadies the foam, which helps the meringues hold their shape. Since they’re small, they dry faster and are less likely to collapse.
Key Ingredients:
- 4 egg whites — room temperature whip better.
- 1 cup sugar — added gradually.
- 1 teaspoon cornstarch — helps the center stay marshmallowy.
- 1 teaspoon white vinegar — stabilizes the meringue.
- 1 teaspoon vanilla extract — for flavor.
- 2 cups whipped cream — for topping.
- 2 cups mixed berries — sliced if needed.
Quick Steps:
- Heat oven to 225°F and line a baking sheet.
- Whip the egg whites until soft peaks form, then add sugar slowly until glossy.
- Fold in cornstarch, vinegar, and vanilla; dollop into 6 to 8 rounds.
- Bake 1 hour, then cool in the oven with the door cracked. Top with cream and berries.
Equipment for This Recipe:
- Stand mixer or hand mixer
- Parchment-lined baking sheet
- Spoon or piping bag
- Cooling rack
How to Serve This Dish:
Top pavlovas right before serving so the shells stay crisp. A few berries and a spoonful of cream on each one is enough. They belong on a platter because people always reach for a second.
Pro Tips for This Recipe:
- Make sure the bowl and beaters are grease-free.
- Add sugar slowly or the meringue feels grainy.
- Cool in the oven to avoid sudden cracking.
- Assemble at the last minute to protect the shell.
Variations on This Dish:
- Peach Cream Pavlovas: Use sliced peaches instead of berries.
- Lime Berry Version: Add lime zest to the cream.
- Chocolate Pavlovas: Fold 1 tablespoon cocoa into the whipped cream.
Common Mistakes to Avoid with This Recipe:
- Humidity overload: Pavlovas soften in damp air. Bake them on a dry day if you can.
- Sugar dump: Pouring sugar in too fast weakens the foam.
- Topping too early: The shells start to soften almost at once.
18. Cantaloupe Mint Salad with Honey
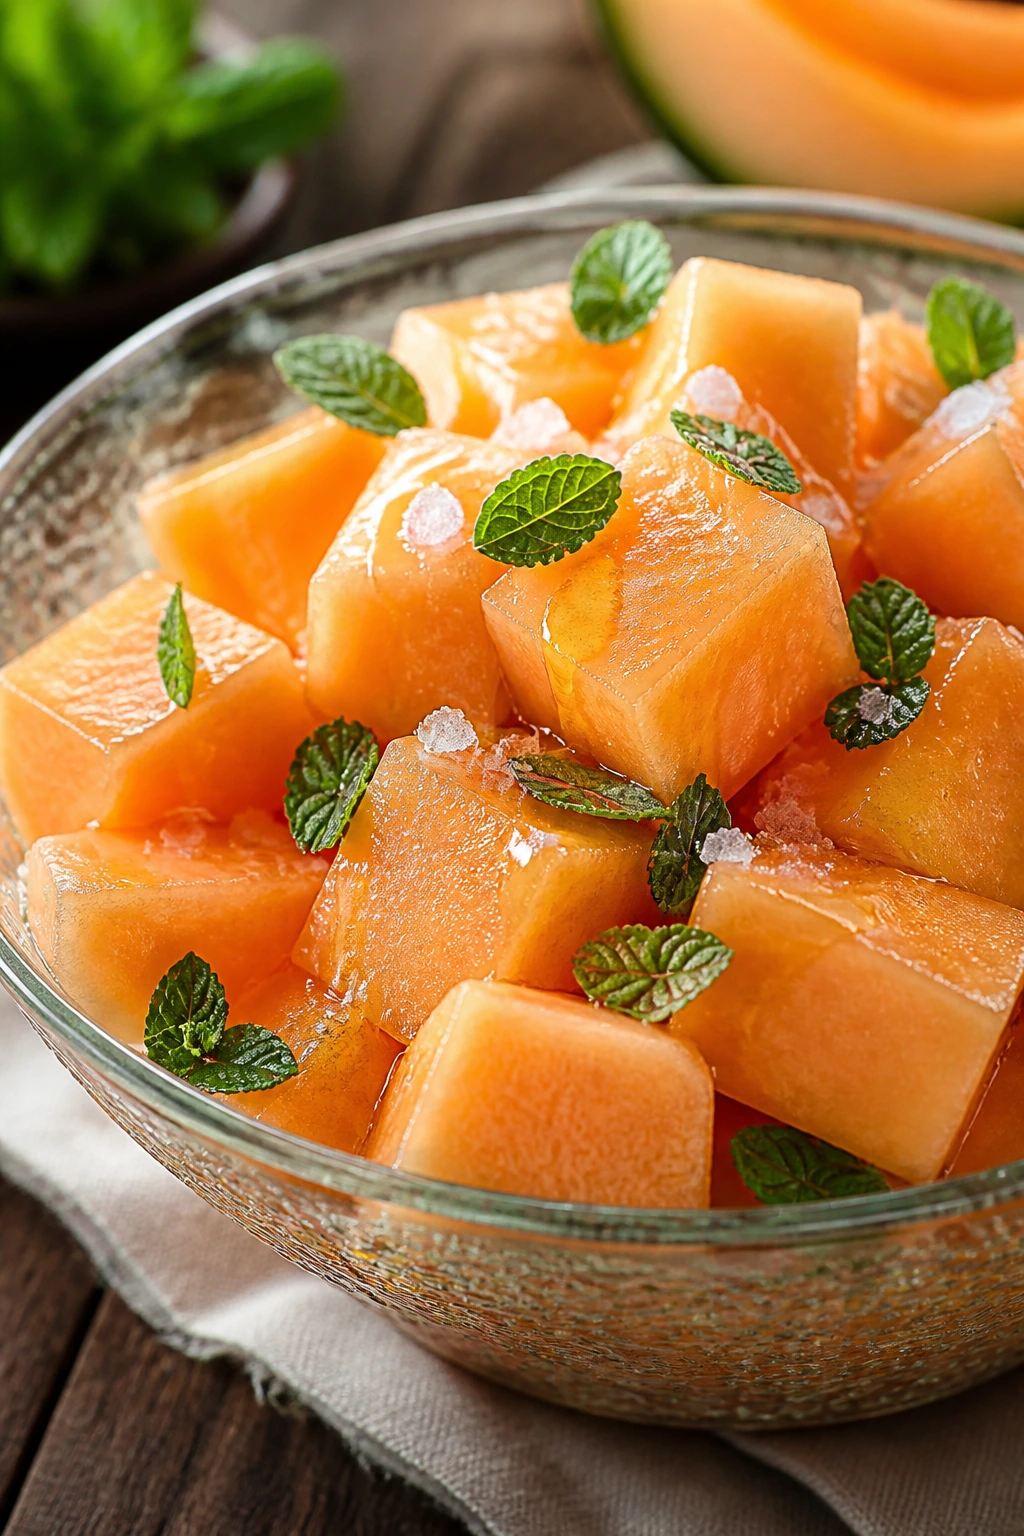
Sometimes the right summer treat is a bowl of cold melon with a little honey and mint. That’s not a consolation prize. Ripe cantaloupe tastes floral and clean, and the salt and lime make it taste even more like itself. This is what you want after a long, warm day.
Why It Works:
Cantaloupe has enough natural sweetness to carry a light dressing, so you don’t need much honey. Mint brings a cool note without turning the bowl into toothpaste. A pinch of salt sharpens the fruit and keeps it from reading as watery.
Key Ingredients:
- 1 ripe cantaloupe, peeled and cubed — cold from the fridge if possible.
- 1 cup strawberries, halved — optional but welcome.
- 1 tablespoon honey — drizzle lightly.
- 1 tablespoon lime juice — brightens the melon.
- 8 mint leaves, sliced — don’t chop them into mush.
- Pinch of flaky salt — last minute.
Quick Steps:
- Cube the cantaloupe and halve the strawberries.
- Toss with lime juice and honey.
- Fold in mint just before serving.
- Finish with flaky salt and chill 10 minutes if needed.
Equipment for This Recipe:
- Cutting board
- Sharp knife
- Large bowl
- Serving spoon
How to Serve This Dish:
Serve it in a shallow bowl so the fruit stays visible. It works as a dessert, a side, or the thing you eat while waiting for the grill to cool. A spoonful of yogurt on the side turns it into a fuller treat.
Pro Tips for This Recipe:
- Chill the melon first; warm cantaloupe loses its clean flavor.
- Slice mint, don’t mince it, or it bruises.
- Add the salt at the end so it doesn’t pull water from the fruit too early.
- A few cucumber cubes make the bowl even cooler tasting.
Variations on This Dish:
- Berry Melon Bowl: Use blueberries and raspberries instead of strawberries.
- Feta-Mint Twist: Add a little feta if you like sweet-salty contrast.
- Orange Honey Version: Swap lime juice for orange juice.
Common Mistakes to Avoid with This Dish:
- Using underripe melon: It tastes starchy and flat.
- Overdressing the bowl: Too much honey hides the fruit.
- Cutting mint too early: It wilts and loses its bright smell.
19. Frozen S’mores Sandwiches
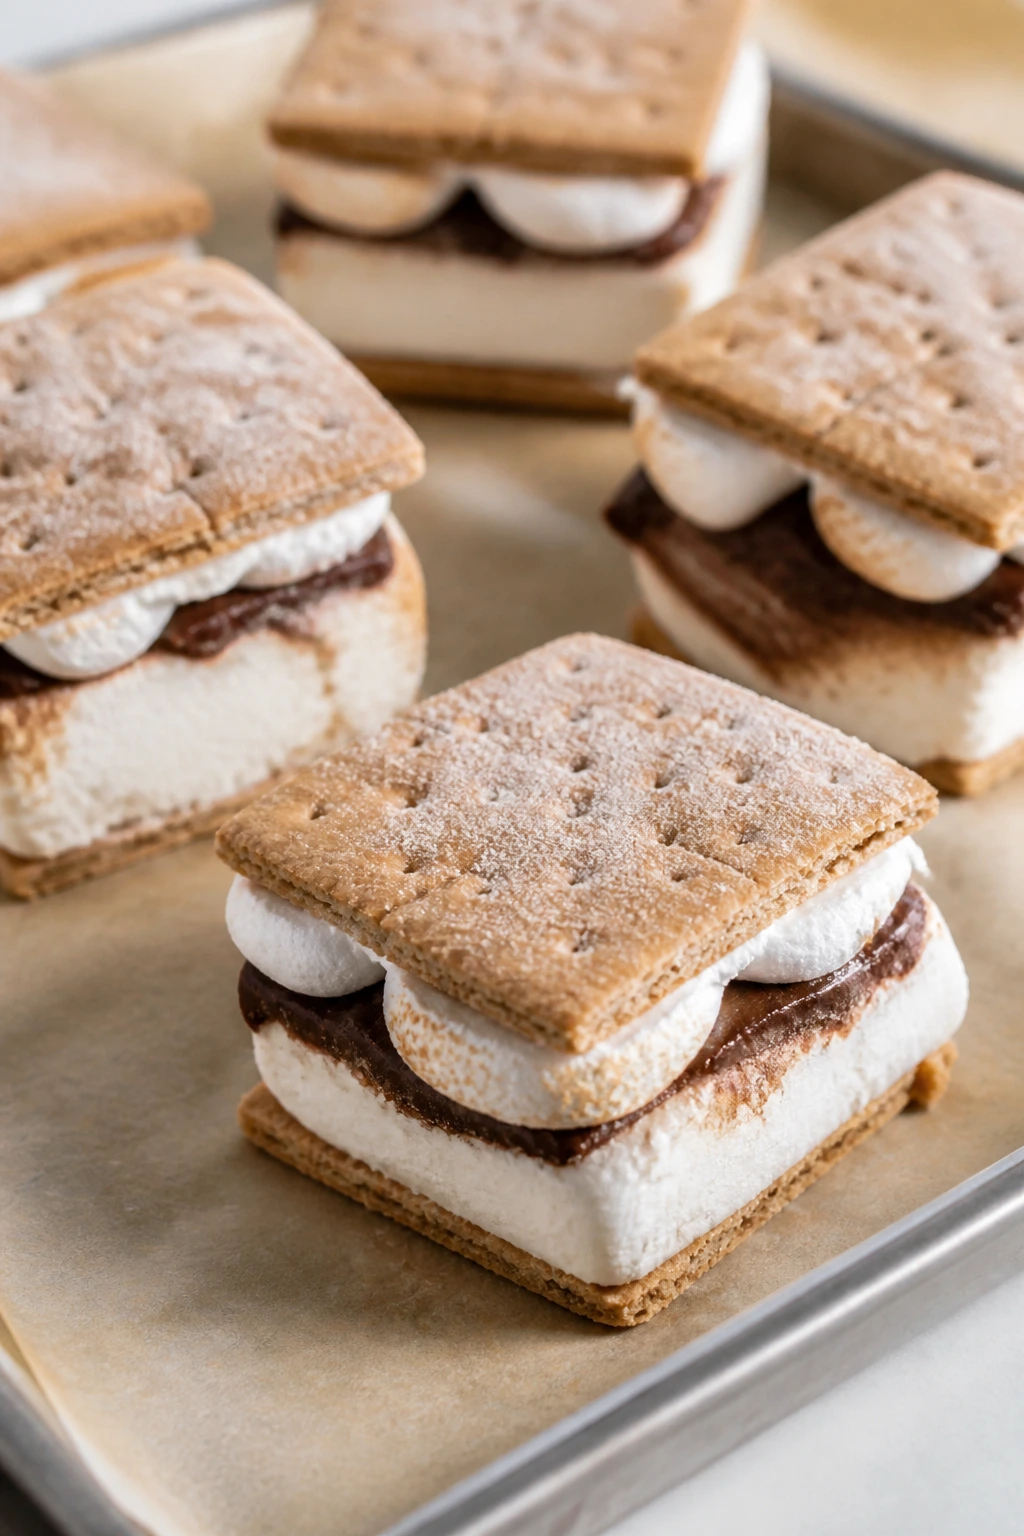
Frozen s’mores take the familiar campfire stack and cool it down into something cleaner and more portable. The graham crackers soften just enough, the chocolate layer firms up, and the marshmallow cream keeps the whole thing from feeling hard. They’re a freezer win.
Why It Works:
Ice cream or whipped filling gives the sandwich body, while the graham crackers act like a shell that softens slightly in the freezer. Marshmallow fluff gives the classic s’mores flavor without needing a fire. Build them quickly and freeze them flat so they set in neat squares.
Key Ingredients:
- 12 graham cracker squares — broken evenly.
- 1 pint chocolate ice cream, softened slightly — or vanilla if you prefer.
- 1 cup marshmallow fluff — the sticky middle.
- 1/2 cup mini chocolate chips — optional.
- 1 tablespoon cocoa powder — optional for dusting.
Quick Steps:
- Line a sheet pan with parchment.
- Spread marshmallow fluff on half the graham squares, then add a scoop or layer of ice cream.
- Sprinkle chips if using, top with the remaining crackers, and press gently.
- Freeze 4 hours, then wrap individually.
Equipment for This Recipe:
- Sheet pan
- Parchment paper
- Offset spatula or spoon
- Freezer bags or wraps
How to Serve This Dish:
Serve them straight from the freezer, but let them sit 1 to 2 minutes before biting in. A paper napkin helps with the inevitable drips. They’re the sort of treat you hand to someone as you both head back outside.
Pro Tips for This Recipe:
- Soften the ice cream just enough to spread, not melt.
- Press the crackers gently; too much pressure squeezes out the filling.
- Wrap each sandwich after freezing so they don’t pick up freezer smell.
- Use square grahams if you want tidy edges.
Variations on This Dish:
- Peanut Butter S’mores: Add a thin peanut butter layer under the ice cream.
- Strawberry S’mores: Use strawberry ice cream for a fruitier version.
- Chocolate Wafer Swap: Replace graham crackers with chocolate wafers.
Common Mistakes to Avoid with This Dish:
- Building with rock-hard ice cream: It cracks the crackers.
- Freezing on an angle: The filling slides before it sets.
- Skipping the wrap: Freezer burn ruins the flavor fast.
20. No-Bake Peanut Butter Pretzel Bars
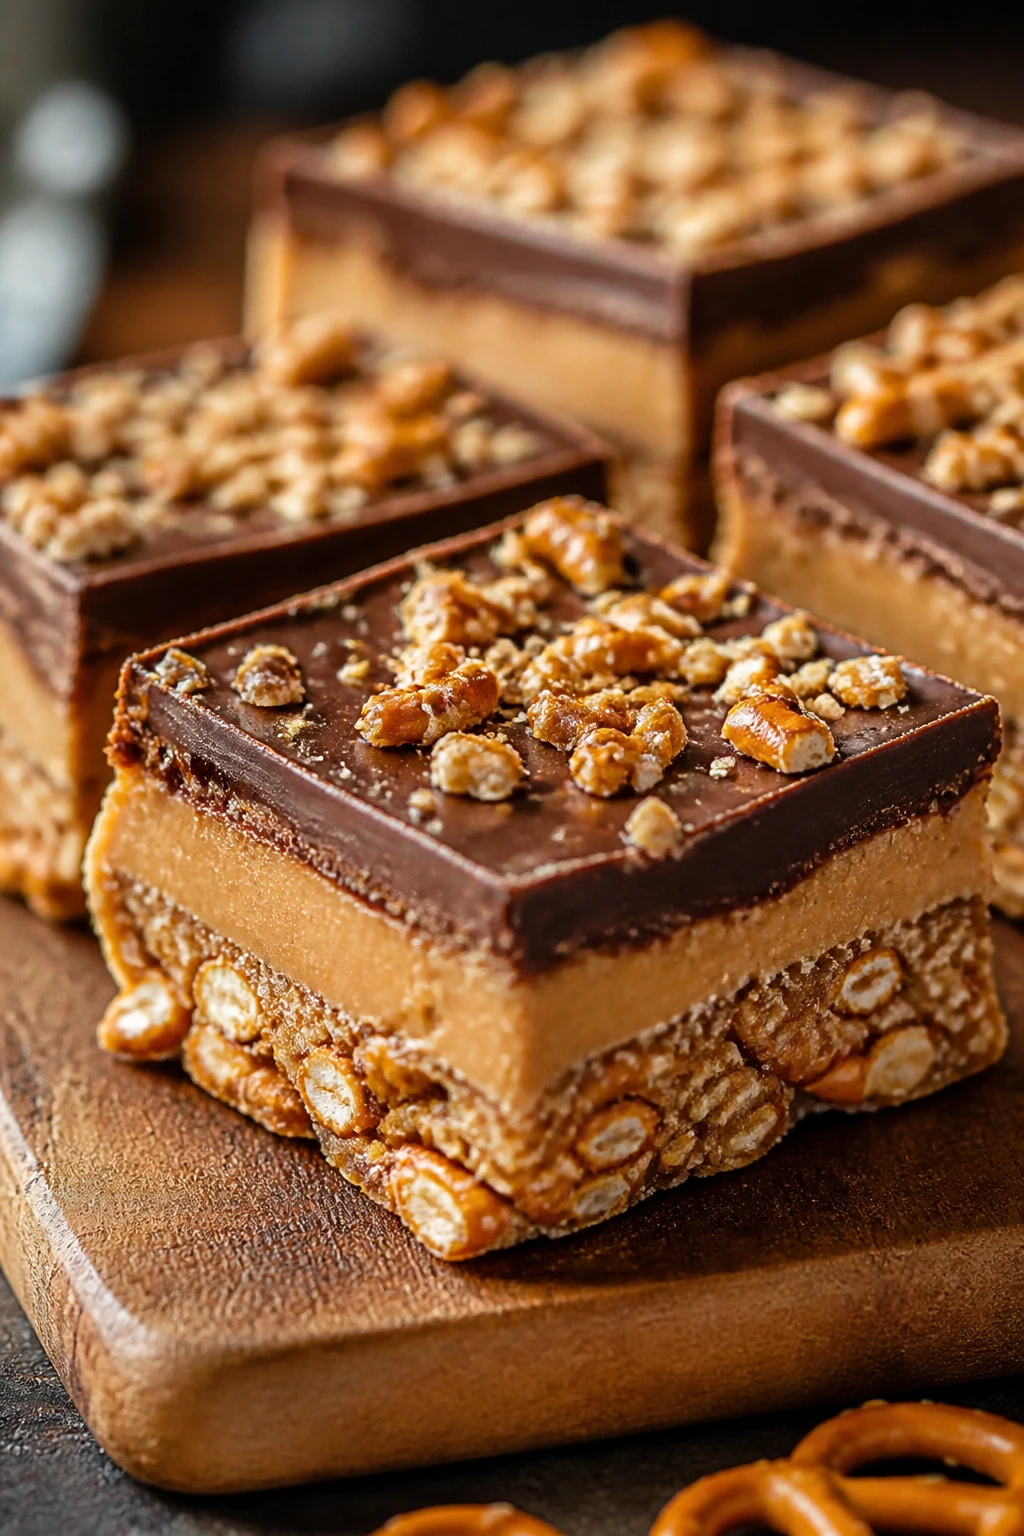
Sweet, salty, and a little chewy, these bars are the kind of thing you cut into small squares and somehow still run out of by morning. The pretzels keep the texture lively, and the peanut butter gives the bars a dense, snacky bite that suits late evenings on the couch.
Why It Works:
Crushed pretzels add salt and crunch, while honey or syrup binds the bar without baking. Peanut butter gives structure, and a thin chocolate top makes the whole thing feel finished instead of just assembled. They chill quickly and slice cleanly once firm.
Key Ingredients:
- 2 cups crushed pretzels — not powder, just small pieces.
- 1 cup old-fashioned oats — adds chew.
- 1 cup creamy peanut butter — natural or standard.
- 1/2 cup honey — binds the base.
- 1/2 cup chocolate chips — for the top.
- 1/4 teaspoon fine salt — only if your pretzels are low-salt.
Quick Steps:
- Mix pretzels and oats in a bowl.
- Warm peanut butter and honey together, then stir into the dry mix.
- Press into a lined 8-inch pan.
- Melt chocolate chips and spread over the top. Chill 1 hour, then cut.
Equipment for This Recipe:
- 8-inch square pan
- Parchment paper
- Saucepan or microwave-safe bowl
- Spatula
How to Serve This Dish:
Cut into small bars; they’re rich and filling. Serve them with cold milk or coffee after dinner, or tuck them into lunchboxes if there are any left. The chocolate top should crack cleanly when sliced.
Pro Tips for This Recipe:
- Warm the peanut butter mixture so it mixes without clumps.
- Press the base hard into the pan or the bars crumble.
- Chill fully before slicing.
- A sprinkle of flaky salt on the chocolate gives a sharp finish.
Variations on This Dish:
- Chocolate-Pretzel Swirl: Drizzle both milk and dark chocolate.
- Almond Butter Swap: Use almond butter for a softer nut flavor.
- Coconut Crunch: Add 1/2 cup shredded coconut to the base.
Common Mistakes to Avoid with This Dish:
- Too much honey: The bars turn sticky and soft.
- Not packing the base: Loose bars fall apart.
- Cutting too early: The chocolate smears instead of slicing.
21. Blackberry Buttermilk Popsicles
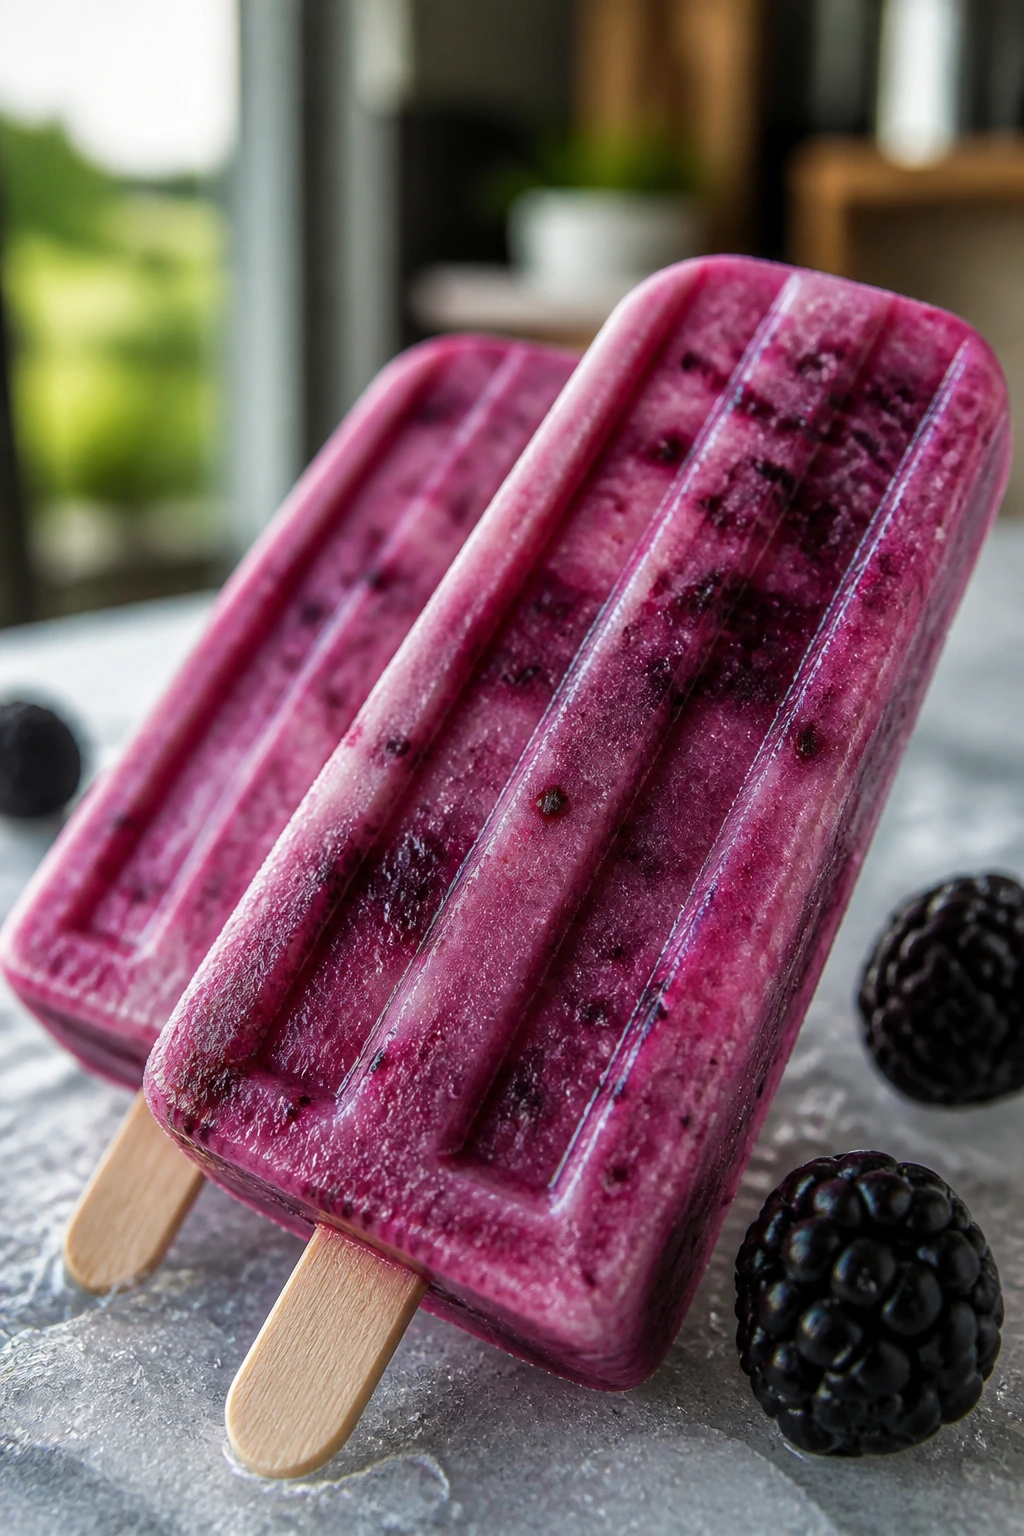
These popsicles taste like a cool, tangy cream puff turned into ice. Blackberry gives them a deep purple color and a little tartness, while buttermilk keeps them from tasting flat or sugary. They’re the rare frozen treat that feels grown-up without getting fussy.
Why It Works:
Buttermilk brings acidity and a faint cultured tang, which makes the berry flavor pop. Honey softens the sharpness without turning the mixture heavy, and yogurt helps the pops freeze creamy rather than icy. Blackberries break down quickly, so the base blends smooth.
Key Ingredients:
- 2 cups blackberries — fresh or thawed frozen.
- 1 cup buttermilk — shaken well.
- 1/2 cup plain yogurt — for creaminess.
- 1/3 cup honey — sweetens and smooths.
- 1 teaspoon lemon juice — brightens the berries.
- Pinch of salt — tiny, but needed.
Quick Steps:
- Blend blackberries, buttermilk, yogurt, honey, lemon juice, and salt.
- Strain if you want a smoother texture.
- Pour into molds and add sticks.
- Freeze 6 hours or overnight.
Equipment for This Recipe:
- Blender
- Popsicle molds
- Fine-mesh strainer, optional
- Funnel or small cup
How to Serve This Dish:
Serve with a napkin and a cold tray if you’re taking them outside. They’re pretty enough to stand on their own, but a few whole berries at the base of the plate looks nice. Eat them before the sun goes down too far; that’s when the texture is best.
Pro Tips for This Recipe:
- Strain for a smoother pop; skip straining if you like berry seeds.
- Taste the base before freezing because blackberries vary wildly.
- Don’t overfill the molds.
- Run the mold under warm water for 10 seconds to release cleanly.
Variations on This Dish:
- Strawberry Buttermilk Pops: Replace half the blackberries with strawberries.
- Lime Berry Version: Add lime zest for a brighter edge.
- Creamier Pop: Increase the yogurt by 1/4 cup.
Common Mistakes to Avoid with This Dish:
- Using very sour buttermilk without enough honey: The pops taste sharp instead of balanced.
- Skipping the strain if you want smooth pops: Seeds can feel gritty.
- Trying to unmold too early: They need time to set all the way through.
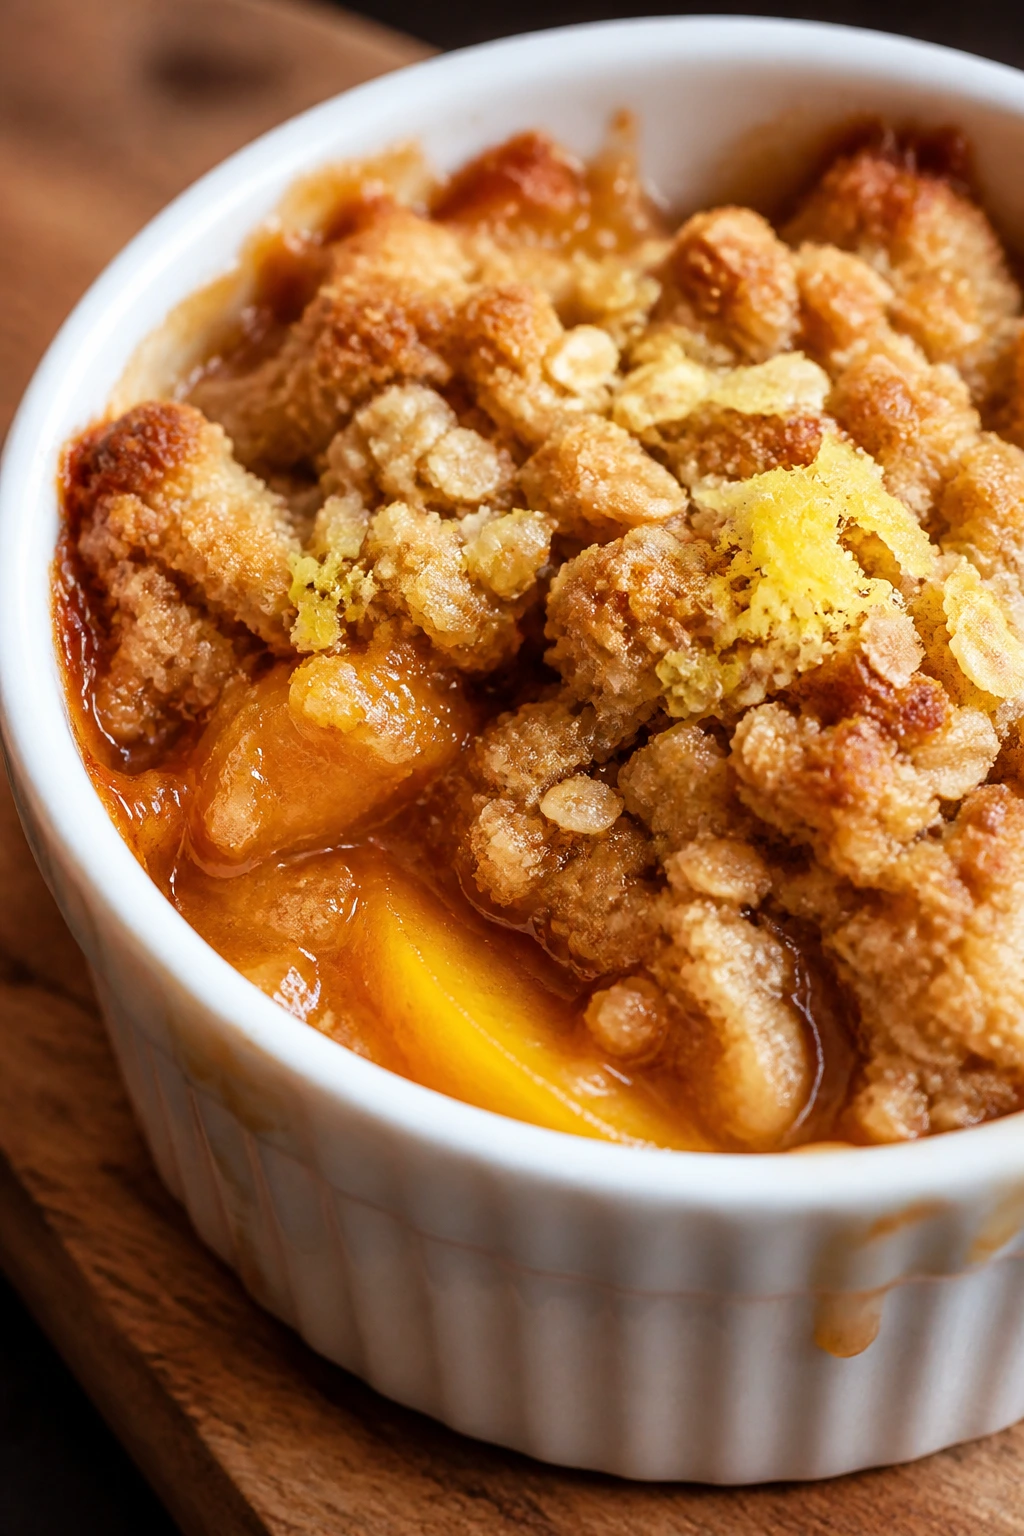
22. Peach Crisp Ramekins

A peach crisp in small ramekins is one of those desserts that feels neat and generous at the same time. The fruit bubbles underneath, the topping gets sandy and browned, and each person gets their own little dish. That alone solves half the serving problem.
Why It Works:
Ramekins help the fruit bake quickly and keep the topping crisp, because the portion is shallow. Oats and butter make a crumbly top that holds together without becoming a cookie. A little cinnamon is enough; peaches already do most of the work.
Key Ingredients:
- 4 ripe peaches, sliced — peel if the skins bother you.
- 1 tablespoon sugar — for the fruit.
- 1 teaspoon cinnamon — warm spice.
- 1/2 cup rolled oats — for the topping.
- 1/3 cup all-purpose flour — structure.
- 1/3 cup brown sugar — caramel flavor.
- 1/4 teaspoon fine salt — balance.
- 4 tablespoons cold butter, cubed — makes the crisp crumble.
Quick Steps:
- Heat oven to 375°F and butter 4 ramekins.
- Toss peaches with sugar and cinnamon; divide among ramekins.
- Mix oats, flour, brown sugar, salt, and butter until crumbly.
- Sprinkle over the fruit and bake 25 to 30 minutes until bubbling.
Equipment for This Recipe:
- 4 ramekins
- Baking sheet
- Mixing bowl
- Fork or pastry cutter
How to Serve This Dish:
Serve warm with a spoonful of ice cream on top. The smaller dish size makes it easy to portion out after a long meal, and each person gets their own crackly topping. It’s a quiet dessert, which I mean as praise.
Pro Tips for This Recipe:
- Use ripe peaches so the filling tastes juicy, not bready.
- Put the ramekins on a sheet pan so they’re easier to handle.
- If the topping browns too fast, tent loosely with foil.
- A tiny pinch of nutmeg works if you want more spice.
Variations on This Dish:
- Berry Peach Crisp: Add 1 cup blueberries to the fruit.
- Ginger Crisp: Add 1 teaspoon grated ginger to the peaches.
- Gluten-Free Crisp: Use almond flour and certified gluten-free oats.
Common Mistakes to Avoid with This Recipe:
- Using cold, hard peaches: They won’t soften enough in the oven.
- Packing the topping down: It bakes dense instead of crumbly.
- Serving immediately: Let it rest a few minutes so the juices thicken.
23. Banana Split Skewers

Banana split skewers take the old diner dessert and make it picnic-friendly. You still get banana, berries, chocolate, and nuts, but in a form that doesn’t require a bowl big enough to hold melting ice cream. They’re playful and fast.
Why It Works:
Skewering the fruit turns a messy dessert into finger food, and a drizzle of chocolate sauce gives you the split flavor without a full sundae build. A few mini marshmallows or pineapple chunks keep the mix varied. The trick is choosing fruit that holds on the skewer without tearing.
Key Ingredients:
- 2 bananas, cut into thick rounds — not too thin.
- 1 cup strawberries, hulled — small ones whole, large ones halved.
- 1 cup pineapple chunks — firm pieces only.
- 1/2 cup mini marshmallows — optional.
- 1/4 cup chocolate sauce — for drizzling.
- 2 tablespoons chopped peanuts — or walnuts.
Quick Steps:
- Thread bananas, strawberries, pineapple, and marshmallows onto skewers.
- Arrange on a platter.
- Drizzle with chocolate sauce.
- Finish with chopped peanuts and serve cold.
Equipment for This Recipe:
- Wooden or metal skewers
- Knife and cutting board
- Platter
- Small spoon for drizzling
How to Serve This Dish:
Serve them chilled and keep the chocolate sauce in a small bowl for extra drips. They’re good for a group because nobody needs a fork. Add a scoop of ice cream on the side if you want to make them more dessert-like.
Pro Tips for This Recipe:
- Use thick banana rounds so they don’t split.
- Chill the fruit before assembling.
- If the skewers are wooden, soak them first if you plan to grill them.
- A little shredded coconut gives a stronger banana split feel.
Variations on This Dish:
- Chocolate-Dipped Version: Dip the banana pieces in melted chocolate first.
- Nut-Free Option: Use toasted coconut instead of peanuts.
- Berry-Heavy Split: Add raspberries or cherries to the skewers.
Common Mistakes to Avoid with This Dish:
- Overloading the skewers: They become hard to eat.
- Using underripe bananas: The texture is chalky.
- Drizzling too early: The sauce runs off before serving.
24. Strawberry Basil Sorbet
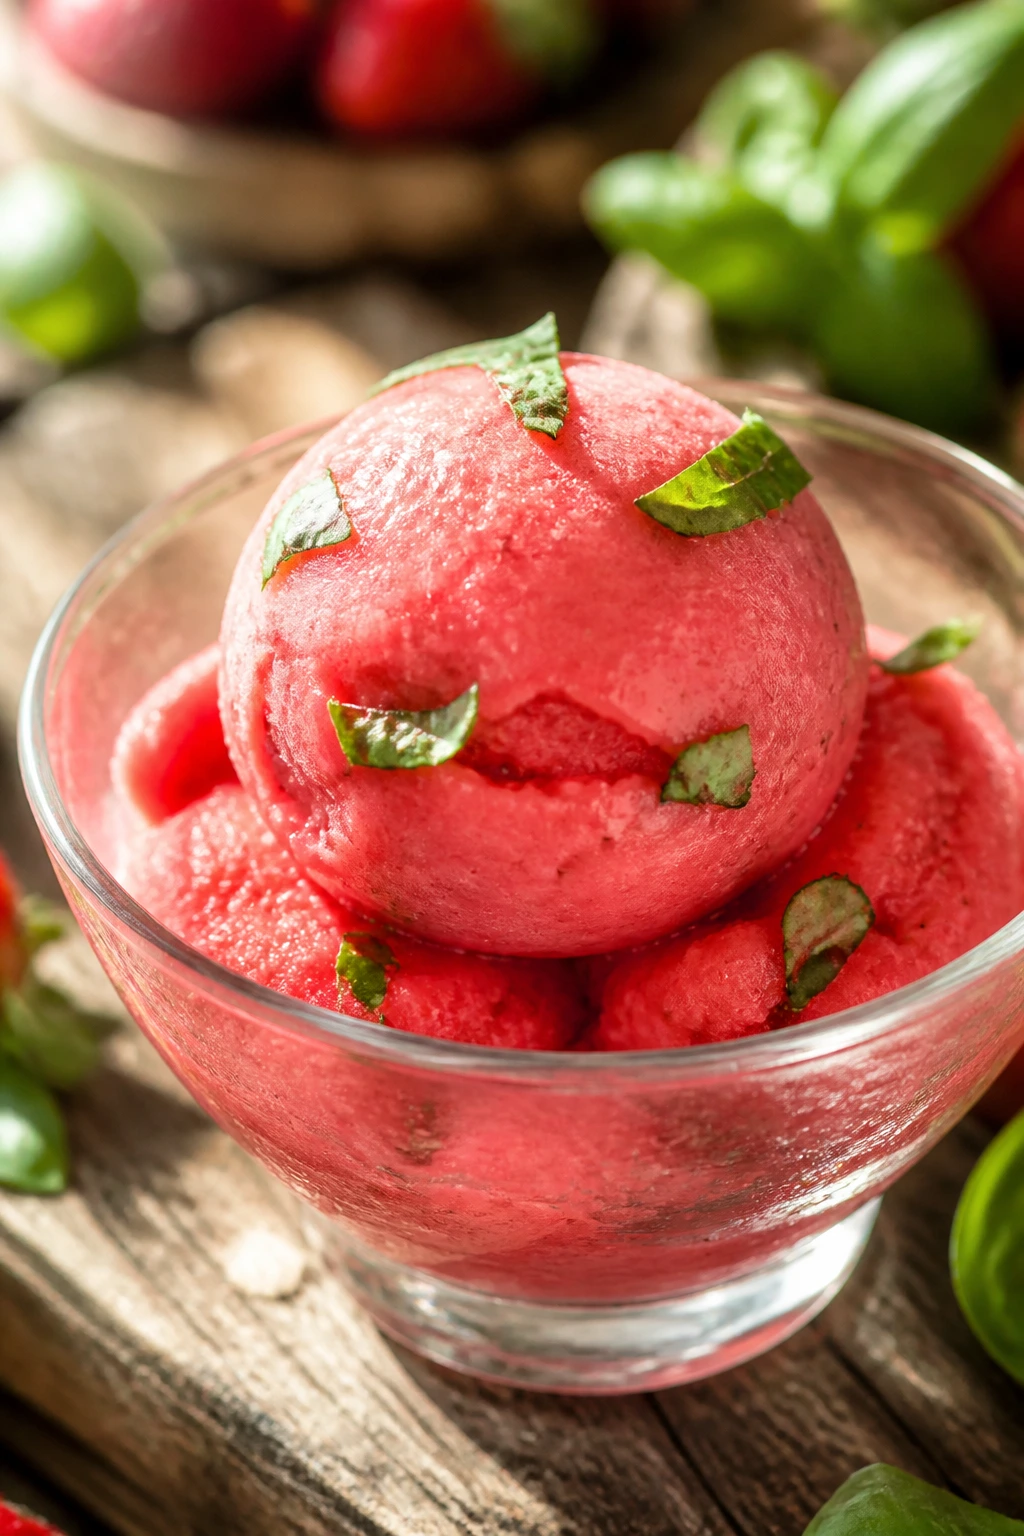
Strawberry sorbet with basil has a clean, almost cool herbal note that keeps the fruit from tasting one-dimensional. Basil sounds fancy here, but it mostly acts like a very calm flashlight for the strawberries. The sorbet should taste cold and bright, not sugary.
Why It Works:
Strawberries freeze into a smooth sorbet when blended with enough sugar and lemon juice. Basil adds a green, peppery edge that works especially well with ripe berries. A short churn or stir helps keep the texture from turning into a block of fruit ice.
Key Ingredients:
- 5 cups strawberries, hulled — ripe and fragrant.
- 1/2 cup sugar — dissolves in the puree.
- 1/2 cup water — for the syrup.
- 2 tablespoons lemon juice — keeps the flavor sharp.
- 6 basil leaves — lightly torn.
Quick Steps:
- Make a quick syrup by heating water and sugar until dissolved; cool slightly.
- Blend strawberries, syrup, lemon juice, and basil until smooth.
- Strain if you want it extra smooth.
- Freeze in a shallow pan, stirring every 30 minutes until scoopable, or churn in an ice cream maker.
Equipment for This Recipe:
- Blender
- Small saucepan
- Shallow freezer pan or ice cream maker
- Fine sieve, optional
How to Serve This Dish:
Serve in chilled bowls with a basil leaf on top. It’s a strong ending after grilled food because the flavor cleans the palate instead of weighing it down. A little sparkle of lemon zest makes the bowl look finished.
Pro Tips for This Recipe:
- Use very ripe strawberries; bland berries make bland sorbet.
- Cool the syrup before blending or the berries lose freshness.
- Taste before freezing and adjust lemon or sugar if needed.
- Stir while freezing if you don’t have a machine.
Variations on This Dish:
- Mint Strawberry Sorbet: Replace basil with mint.
- Berry Mix Sorbet: Add raspberries for a more tart finish.
- Sparkling Version: Spoon over a splash of chilled sparkling water for a slushier bowl.
Common Mistakes to Avoid with This Recipe:
- Too little sugar: The sorbet freezes hard and icy.
- Skipping the acid: Lemon matters more than people think.
- Freezing in a deep container: It takes too long and gets uneven.
25. Chocolate Chip Cookie Ice Cream Sandwiches
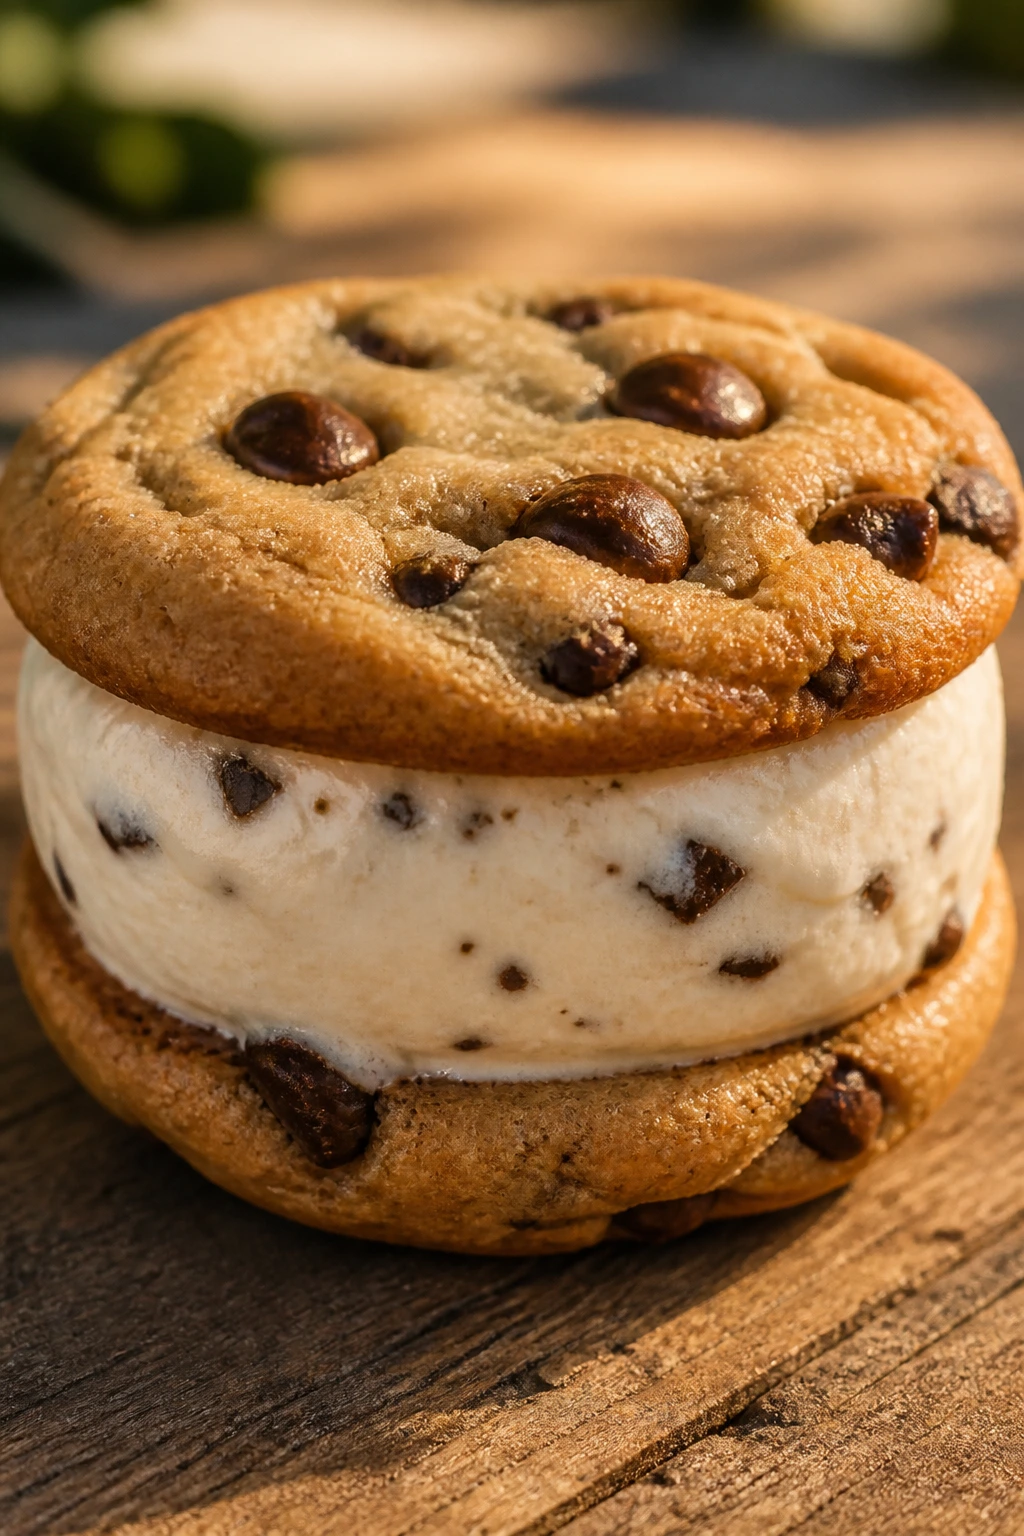
These are exactly what they sound like, and that is not a complaint. Soft cookies pressed around cold ice cream make a dessert that feels nostalgic without needing any decorating skills. The edges should squish a little when you bite in.
Why It Works:
A slightly soft cookie keeps the sandwich from cracking apart, while firm ice cream gives clean edges once frozen. Chocolate chip cookies are sturdy enough to hold the filling without turning soggy right away. Wrapping them individually makes storage easier.
Key Ingredients:
- 12 chocolate chip cookies, cooled — store-bought or homemade.
- 1 quart ice cream, slightly softened — vanilla, chocolate, or coffee.
- 1/4 cup mini chocolate chips or sprinkles — optional edges.
Quick Steps:
- Let the ice cream soften for 5 minutes.
- Spoon or scoop a thick layer onto the flat side of 6 cookies.
- Top with the remaining cookies and roll edges in chips or sprinkles if using.
- Freeze 1 hour before serving.
Equipment for This Recipe:
- Baking sheet
- Ice cream scoop
- Spoon or offset spatula
- Plastic wrap or parchment
How to Serve This Dish:
Serve straight from the freezer after a brief 2-minute rest. A paper wrap around the bottom keeps the sandwich from dripping onto your hands. They’re a strong choice for kids and grown-ups who don’t want to negotiate dessert.
Pro Tips for This Recipe:
- Choose cookies that are chewy, not crispy, or the sandwich cracks.
- Press gently so the filling spreads to the edges.
- Freeze on a sheet pan before wrapping.
- If the ice cream is too soft, the sandwiches slide apart.
Variations on This Dish:
- Mint Chip Sandwiches: Use mint chip ice cream.
- Peanut Butter Cookies: Swap the cookie base.
- Brownie Sandwiches: Use thin brownies instead of cookies.
Common Mistakes to Avoid with This Dish:
- Overfilling the cookie: The ice cream oozes out when you bite.
- Using hard cookies: They crack instead of bending.
- Skipping the freeze: They need time to set.
26. Peaches and Cream Oat Bars
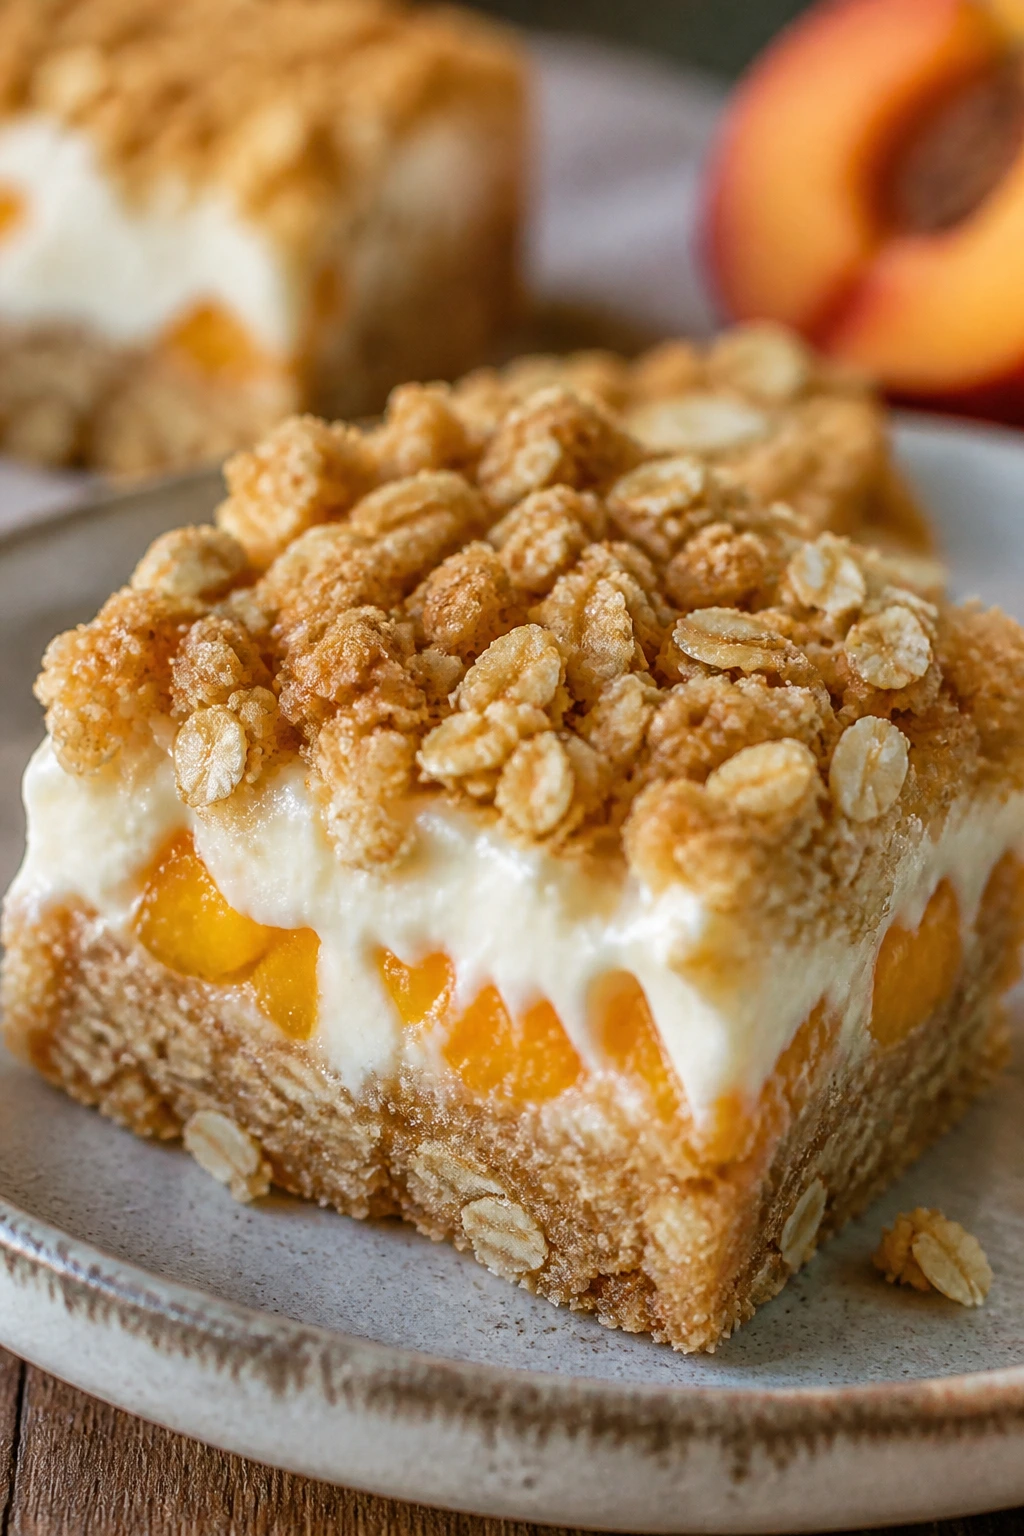
These bars have the feel of breakfast sneaking into dessert and getting away with it. The oat base is chewy, the cream layer is soft, and the peaches bring enough juice to keep the bars from tasting dry. I like them cut cold, in tidy squares.
Why It Works:
Oats and flour make a sturdy base that can hold cream cheese and fruit without becoming a crumble disaster. Peaches bake into the top layer and perfume the whole pan. The bars slice better after chilling, which is a useful fact if you hate messy squares.
Key Ingredients:
- 2 cups rolled oats — for the base.
- 1 1/2 cups all-purpose flour — structure.
- 1 cup brown sugar — sweet and caramel-like.
- 1 cup melted butter — binds the oat layer.
- 8 ounces cream cheese, softened — for the cream layer.
- 1/3 cup powdered sugar — sweetens the cream.
- 3 peaches, sliced — ripe but firm.
Quick Steps:
- Heat oven to 350°F and line an 8-inch pan.
- Mix oats, flour, brown sugar, and butter; press two-thirds into the pan and bake 10 minutes.
- Beat cream cheese and powdered sugar, spread over the base, then layer on peaches.
- Crumble the rest of the oat mixture over the top and bake 30 minutes.
Equipment for This Recipe:
- 8-inch baking pan
- Parchment paper
- Mixing bowls
- Hand mixer or spatula
How to Serve This Dish:
Chill the bars before cutting so the cream layer firms up. They’re good cold from the fridge, which makes them a handy make-ahead dessert. A small square with coffee is enough for most evenings.
Pro Tips for This Recipe:
- Pat the peaches dry so the bars don’t weep too much.
- Use parchment with overhang for easy lifting.
- Let the bars cool fully before chilling.
- A little cinnamon in the oat base works if you want more warmth.
Variations on This Dish:
- Berry Cream Bars: Swap peaches for blueberries or raspberries.
- Gluten-Free Oats: Use gluten-free oats and a GF flour blend.
- Lemon Cream Version: Add lemon zest to the cream layer.
Common Mistakes to Avoid with This Recipe:
- Too much peach juice: The bars become wet. Dry the slices first.
- Cutting while warm: They break apart.
- Packing the oat topping too hard: It bakes dense instead of crumbly.
27. Coconut Lime Pudding Cups
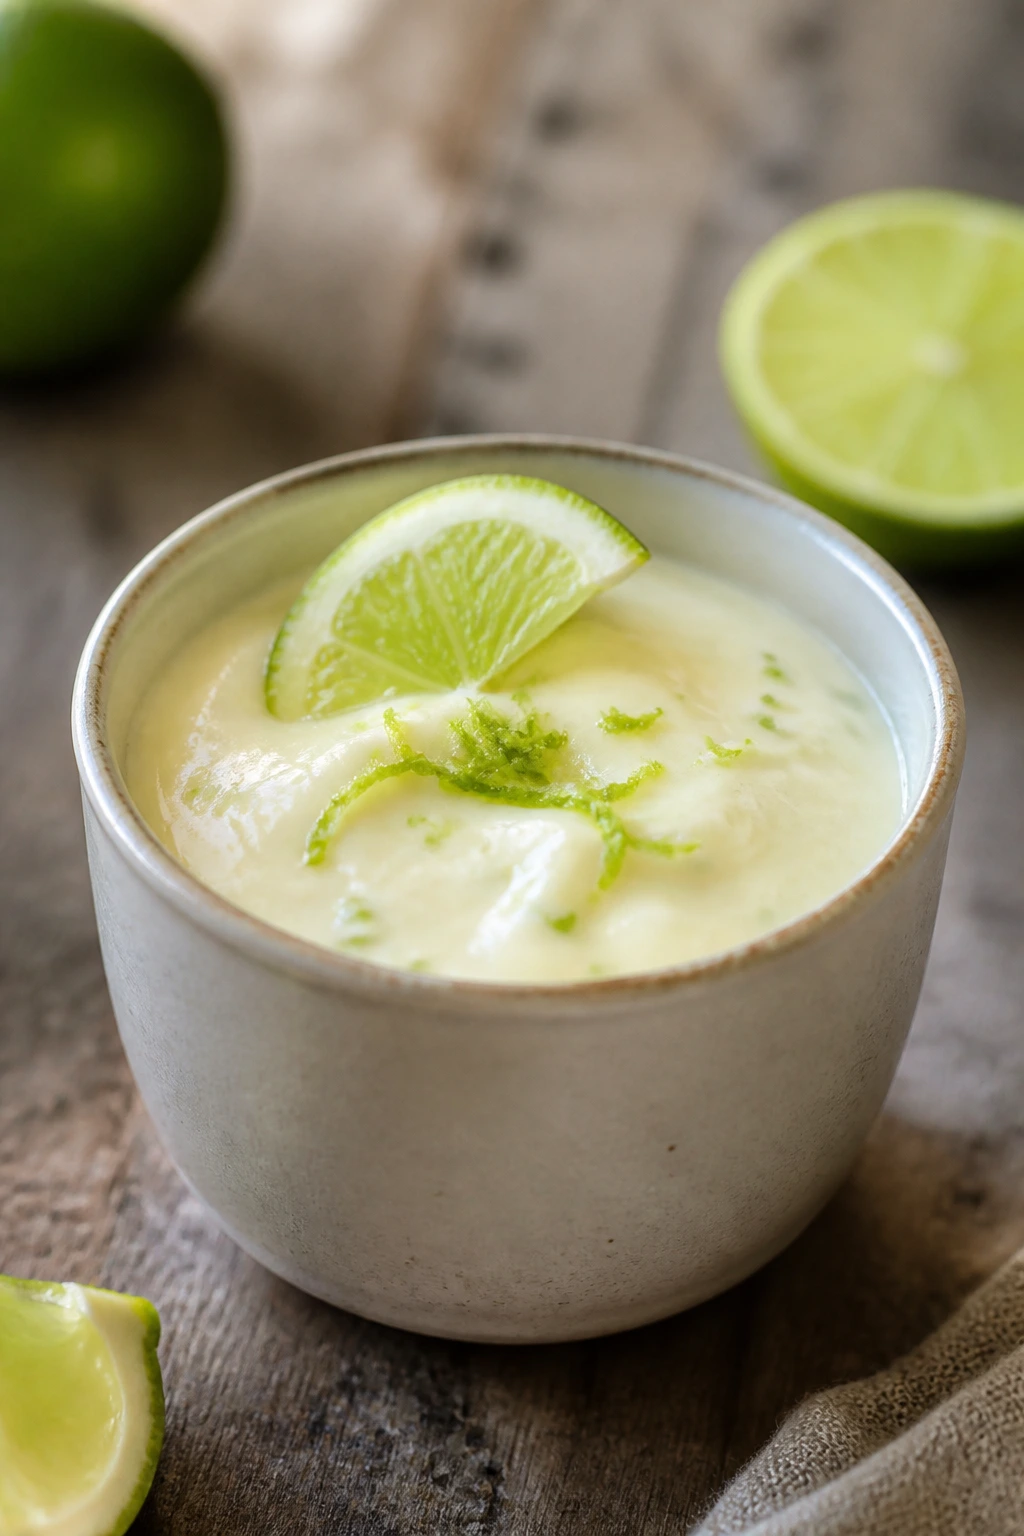
Coconut lime pudding tastes like a colder, silkier version of a tropical pie filling. It’s smooth enough to feel fancy and easy enough to stir on a weeknight. The lime should show up at the end, not bully the coconut.
Why It Works:
Cornstarch thickens the milk mixture into pudding, and coconut milk gives a rich body without needing heavy cream. Lime zest adds aroma first, then lime juice brings the sharp finish after the pudding has cooked. Cups chill faster than one large bowl.
Key Ingredients:
- 1 can coconut milk, 13.5 ounces — full-fat.
- 2 cups whole milk — or half-and-half for a richer cup.
- 1/2 cup sugar — for sweetness.
- 1/3 cup cornstarch — thickener.
- 1 tablespoon lime zest — bright scent.
- 2 tablespoons lime juice — added after cooking.
- 1/2 teaspoon vanilla extract — rounds the flavor.
- Toasted coconut, for topping — optional.
Quick Steps:
- Whisk coconut milk, milk, sugar, cornstarch, and zest in a saucepan.
- Cook over medium heat, whisking, until thick and bubbling.
- Remove from heat, stir in lime juice and vanilla.
- Pour into cups, chill 2 hours, and top with coconut.
Equipment for This Recipe:
- Saucepan
- Whisk
- Measuring cups
- Small cups or ramekins
How to Serve This Dish:
Serve with toasted coconut and a thin lime curl if you want to make the cups look polished. They’re cool, clean, and useful after a salty meal. A spoon that reaches the bottom cleanly matters here.
Pro Tips for This Recipe:
- Whisk constantly once the mixture warms, or the bottom can scorch.
- Add lime juice after cooking so the dairy stays smooth.
- Strain the pudding if you want a silkier result.
- Chill with plastic wrap pressed onto the surface to prevent a skin.
Variations on This Dish:
- Mango Coconut Cups: Spoon diced mango on top.
- Cardamom Version: Add a pinch of cardamom to the base.
- Dairy-Light Swap: Use all coconut milk and reduce the cornstarch slightly.
Common Mistakes to Avoid with This Recipe:
- Adding lime too early: Acid can make the pudding grainy.
- Stopping the whisking: Lumps form fast.
- Serving warm: It needs time to set and cool.
28. Apple Nachos with Caramel Drizzle

Apple nachos sound a little playful because they are. Sliced apples laid out like chips, then drizzled with caramel, peanut butter, and a handful of crunchy toppings, make a treat that’s part snack tray and part dessert. No fork required unless you want one.
Why It Works:
Apples bring crispness that holds up under toppings, so the whole dish stays lively. Caramel and peanut butter add sweetness and richness, but the fruit keeps it from feeling heavy. Thin slices are easier to stack and eat.
Key Ingredients:
- 3 apples, cored and thinly sliced — crisp varieties work best.
- 1/2 cup caramel sauce — warmed slightly.
- 1/4 cup peanut butter — or almond butter.
- 1/4 cup chopped peanuts — for crunch.
- 2 tablespoons mini chocolate chips — optional.
- 1 tablespoon shredded coconut — optional.
Quick Steps:
- Slice the apples and fan them out on a platter.
- Warm the caramel and peanut butter just enough to drizzle.
- Drizzle both over the apples.
- Finish with peanuts, chocolate chips, and coconut.
Equipment for This Recipe:
- Knife and cutting board
- Large platter
- Spoon or squeeze bottle
- Small microwave-safe bowl
How to Serve This Dish:
Serve right after assembling so the apples stay crisp. If you want to keep them from browning, brush the slices lightly with lemon juice first. This is a dessert that disappears fastest when people are already standing.
Pro Tips for This Recipe:
- Slice the apples thin so each bite gets toppings.
- Use tart apples if you like balance with the caramel.
- Warm the peanut butter just enough to drizzle.
- Add toppings right before serving, not earlier.
Variations on This Dish:
- S’mores Apples: Add crushed graham crackers and mini marshmallows.
- Cinnamon Apple Nachos: Dust the slices with cinnamon first.
- Nut-Free Version: Skip nuts and add crushed pretzels.
Common Mistakes to Avoid with This Dish:
- Cutting apples too thick: They’re hard to eat with toppings.
- Assembling early: The fruit browns and the caramel soaks in.
- Using watery caramel: It slides off the slices.
29. Brown Butter Rice Krispie Treats

Brown butter turns a plain square into something that tastes toasted, nutty, and a little less sweet. The marshmallows still do their sticky job, but the browned butter adds a deeper edge that keeps you coming back for “just one more piece.” Dangerous in the best way.
Why It Works:
Browning the butter cooks off some moisture and builds a nutty flavor that plain melted butter can’t match. Marshmallows melt into a glossy binder, and cereal gives the needed crunch. A pinch of salt keeps the sweetness from flattening out.
Key Ingredients:
- 6 tablespoons unsalted butter — browned until golden.
- 10 ounces mini marshmallows — about 6 cups.
- 6 cups crisp rice cereal — use fresh cereal for best crunch.
- 1/2 teaspoon vanilla extract — added off heat.
- Pinch of flaky salt — optional but smart.
Quick Steps:
- Brown the butter in a large pot over medium heat until it smells nutty.
- Stir in marshmallows until melted and smooth.
- Remove from heat and stir in vanilla, then fold in cereal.
- Press into a lined pan and cool before cutting.
Equipment for This Recipe:
- Large pot
- Rubber spatula
- 9-inch square pan
- Parchment paper
How to Serve This Dish:
Cut into small squares and stack them on a plate. They’re best at room temperature, when the texture stays chewy instead of stiff. A little flaky salt on top looks sharp and keeps the sweetness in check.
Pro Tips for This Recipe:
- Brown the butter slowly; burnt butter tastes bitter fast.
- Grease your spatula or hands before pressing the mixture down.
- Don’t pack the bars too hard or they turn dense.
- Use fresh cereal so the crunch stays intact.
Variations on This Dish:
- Chocolate Krispie Treats: Stir in 1/3 cup cocoa powder.
- Pretzel Crunch Version: Replace 1 cup cereal with crushed pretzels.
- Marshmallow Swirl: Fold in extra mini marshmallows at the end.
Common Mistakes to Avoid with This Recipe:
- Overcooking the butter: It goes from brown to burnt in a blink.
- Pressing too firmly: The bars become hard instead of chewy.
- Using stale cereal: The texture suffers immediately.
30. Grilled Nectarines with Mascarpone
Nectarines grill almost as well as peaches, maybe better if you like a smoother bite. The fruit softens and picks up char quickly, while mascarpone brings a cool, milky richness that doesn’t need much help. This one feels like a dessert plate from a restaurant that understood restraint.
Why It Works:
Nectarines have enough sugar to brown fast, and the grill concentrates that flavor in minutes. Mascarpone is mild and creamy, so it doesn’t fight the fruit. Honey and vanilla lift the cheese without making it cloying.
Key Ingredients:
- 4 nectarines, halved and pitted — ripe but still firm.
- 1 tablespoon neutral oil — for the grill and fruit.
- 1/2 cup mascarpone — softened slightly.
- 1 tablespoon honey — for the cheese.
- 1/2 teaspoon vanilla extract — optional.
- 2 tablespoons sliced almonds — toasted.
Quick Steps:
- Heat a grill or grill pan over medium-high and oil it lightly.
- Brush nectarine halves with oil and grill cut-side down for 2 to 3 minutes.
- Stir mascarpone with honey and vanilla.
- Spoon mascarpone onto plates, top with nectarines, and finish with almonds.
Equipment for This Recipe:
- Grill or grill pan
- Small bowl
- Spoon
- Tongs
How to Serve This Dish:
Serve the nectarines warm on cold mascarpone so the cheese softens at the edges. A drizzle of extra honey looks and tastes right. This is a dessert for when you want something polished but not complicated.
Pro Tips for This Recipe:
- Choose nectarines that still hold shape when pressed.
- Oil the fruit lightly so it doesn’t tear on the grill.
- Toast the almonds in advance for better crunch.
- A pinch of salt in the mascarpone makes the dish taste fuller.
Variations on This Dish:
- Peach Swap: Use peaches if nectarines aren’t available.
- Lime Honey Mascarpone: Add a little lime zest to the cheese.
- Crumble Finish: Scatter crushed amaretti or shortbread on top.
Common Mistakes to Avoid with This Recipe:
- Grilling over high heat: The fruit can scorch before it softens.
- Using mascarpone straight from the fridge: It spreads poorly.
- Overloading the plate: Keep the fruit and cheese in balance.
31. Cherry Vanilla Crumble Bars
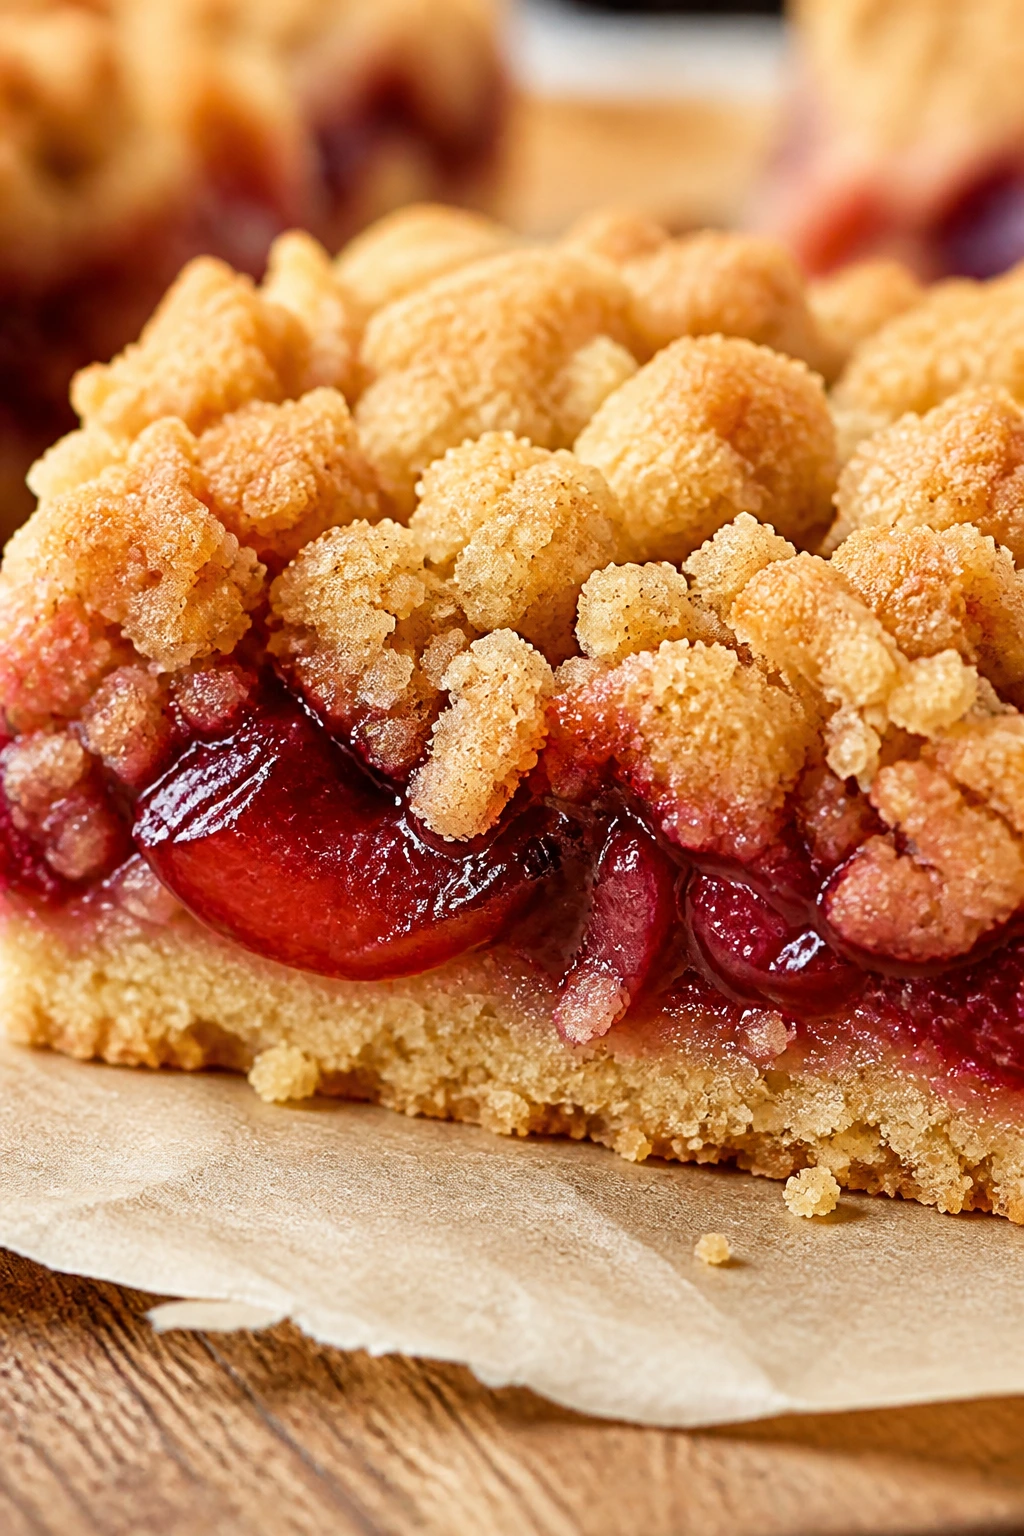
Cherry crumble bars give you pie energy with bar-cookie convenience. The fruit layer turns jammy, the topping browns at the edges, and the vanilla in the dough ties it all together. They cut best after a good chill, which is worth the wait.
Why It Works:
A buttery crumb mixture does double duty as base and topping, so you don’t have to make a separate dough and streusel. Cherries soften into a thick filling with cornstarch, and vanilla smooths the tartness. The bars hold up well in the fridge, which makes them useful for making ahead.
Key Ingredients:
- 1 1/2 cups flour — for structure.
- 1 cup rolled oats — for crumble.
- 1 cup brown sugar — sweetness and depth.
- 1 cup cold butter, cubed — for the crumb.
- 3 cups pitted cherries — fresh or thawed frozen.
- 2 tablespoons cornstarch — thickens the fruit layer.
- 1 teaspoon vanilla extract — for the filling.
- Pinch of salt — in the crumb.
Quick Steps:
- Heat oven to 350°F and line an 8-inch pan.
- Mix flour, oats, sugar, salt, and butter into crumbs.
- Press half into the pan, then top with cherries tossed with cornstarch and vanilla.
- Sprinkle the rest on top and bake 40 minutes. Cool fully before cutting.
Equipment for This Recipe:
- 8-inch baking pan
- Parchment paper
- Mixing bowl
- Pastry cutter or fork
How to Serve This Dish:
Serve these bars cold or room temperature. A small square with whipped cream is enough if you want to dress them up. They’re tidy, which is rare for cherry desserts.
Pro Tips for This Recipe:
- Use cold butter for the crumb.
- If the cherries are very juicy, add 1 extra teaspoon of cornstarch.
- Cool completely before slicing or the filling runs.
- Line the pan for easy lifting.
Variations on This Dish:
- Almond Cherry Bars: Add almond extract and sliced almonds.
- Berry Crumble Bars: Use blueberries or mixed berries.
- Lemon Cherry Bars: Add lemon zest to the fruit filling.
Common Mistakes to Avoid with This Recipe:
- Warm bars on the cutting board: The filling smears.
- Too little thickener: The fruit layer can slide.
- Pressing the crumble too hard: You lose the light texture.
32. Frozen Yogurt Bark with Pistachios and Apricots
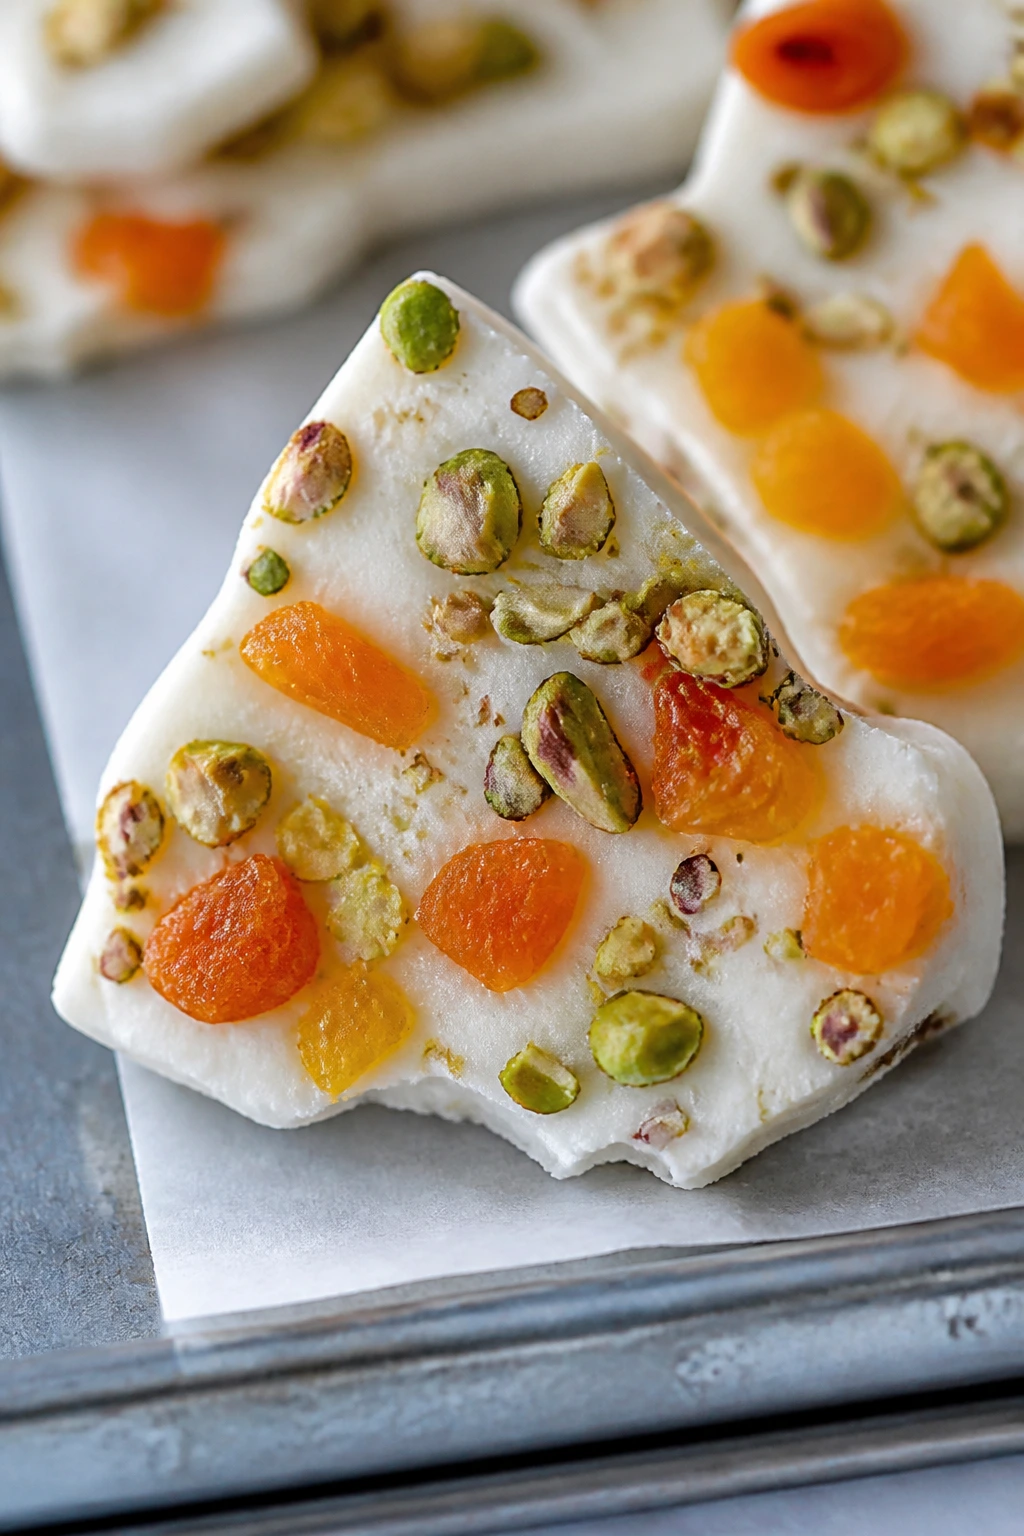
This bark has a salty, tangy thing going on that makes it easy to keep eating. The yogurt freezes into a clean snap, the apricots bring chew, and pistachios add a buttery crunch. It tastes like a freezer snack that got dressed up a little.
Why It Works:
Greek yogurt freezes well because it starts thick and tangy. Dried apricots stay chewy instead of icy, which gives the bark texture without adding extra water. Pistachios bring color and enough salt to keep the sweetness in line.
Key Ingredients:
- 2 cups Greek yogurt — plain and thick.
- 2 tablespoons honey — sweetens the base.
- 1/2 cup chopped dried apricots — small pieces work best.
- 1/4 cup chopped pistachios — salted or unsalted.
- 1 tablespoon chia seeds — optional.
- Pinch of salt — if your nuts are unsalted.
Quick Steps:
- Mix yogurt and honey.
- Spread on a parchment-lined tray into a thin layer.
- Sprinkle apricots, pistachios, and chia seeds over the top.
- Freeze 3 hours, then break into shards.
Equipment for This Recipe:
- Sheet pan
- Parchment paper
- Spatula
- Freezer container
How to Serve This Dish:
Serve shards in a cold bowl or keep them in a freezer bag for snacking later. They’re good when you want something small after dinner, not a full plated dessert. A little extra honey on top is optional, not needed.
Pro Tips for This Recipe:
- Use a thin layer so the bark breaks cleanly.
- Pat the apricots dry if they seem sticky or damp.
- Freeze on a flat tray so the layer stays even.
- Break the bark with your hands, not a knife.
Variations on This Dish:
- Berry Pistachio Bark: Use chopped dried berries or fresh raspberries.
- Coconut Apricot Bark: Add shredded coconut.
- Chocolate Drizzle Bark: Drizzle melted dark chocolate over the top.
Common Mistakes to Avoid with This Recipe:
- Too thick a layer: It freezes slowly and bends instead of snapping.
- Wet toppings: They make the bark icy.
- Serving at room temp: It softens in minutes.
33. Ginger Peach Crumble Cups
Ginger gives peaches a little heat and sharpness, which keeps a crumble from tasting sleepy. In small cups, the fruit bubbles up around the edges and the topping stays crunchy on top. It’s a small-batch dessert that feels thoughtful without asking much of you.
Why It Works:
Fresh ginger wakes up ripe peaches and adds contrast to the soft fruit. Individual cups bake quickly, so the topping stays crisp while the filling thickens underneath. Oats and brown sugar create enough texture that each spoonful feels complete.
Key Ingredients:
- 4 peaches, sliced — ripe but still structured.
- 1 teaspoon grated fresh ginger — or 1/4 teaspoon ground.
- 1 tablespoon sugar — for the fruit.
- 1/2 cup rolled oats — for the topping.
- 1/3 cup flour — structure.
- 1/3 cup brown sugar — caramel notes.
- 4 tablespoons cold butter, cubed — for the crumble.
- Pinch of salt — balances the topping.
Quick Steps:
- Heat oven to 375°F and butter 4 small ramekins.
- Toss peaches with ginger and sugar; divide among ramekins.
- Rub oats, flour, brown sugar, butter, and salt into a crumbly topping.
- Scatter over the fruit and bake 25 minutes until bubbling.
Equipment for This Recipe:
- Ramekins
- Mixing bowl
- Fork or pastry cutter
- Baking sheet
How to Serve This Dish:
Serve warm with a spoonful of cream or ice cream. The ginger keeps it from feeling too soft, and the individual cups make portioning easy. If the evening is hot, let the ramekins cool for 10 minutes before serving.
Pro Tips for This Recipe:
- Grate ginger finely so it spreads through the fruit.
- Use a baking sheet under the ramekins for easier handling.
- Don’t overmix the topping; crumbs are the goal.
- Add a few blueberries if you want more color and juice.
Variations on This Dish:
- Cardamom Peach Cups: Replace ginger with a pinch of cardamom.
- Berry Peach Cups: Mix in blueberries or raspberries.
- Nutty Crisp: Add chopped pecans to the topping.
Common Mistakes to Avoid with This Recipe:
- Using too much ginger: It can overpower the peaches.
- Packing the topping: It loses the crisp texture.
- Serving without resting: The juices need a minute to settle.
34. Lemon Posset with Shortbread
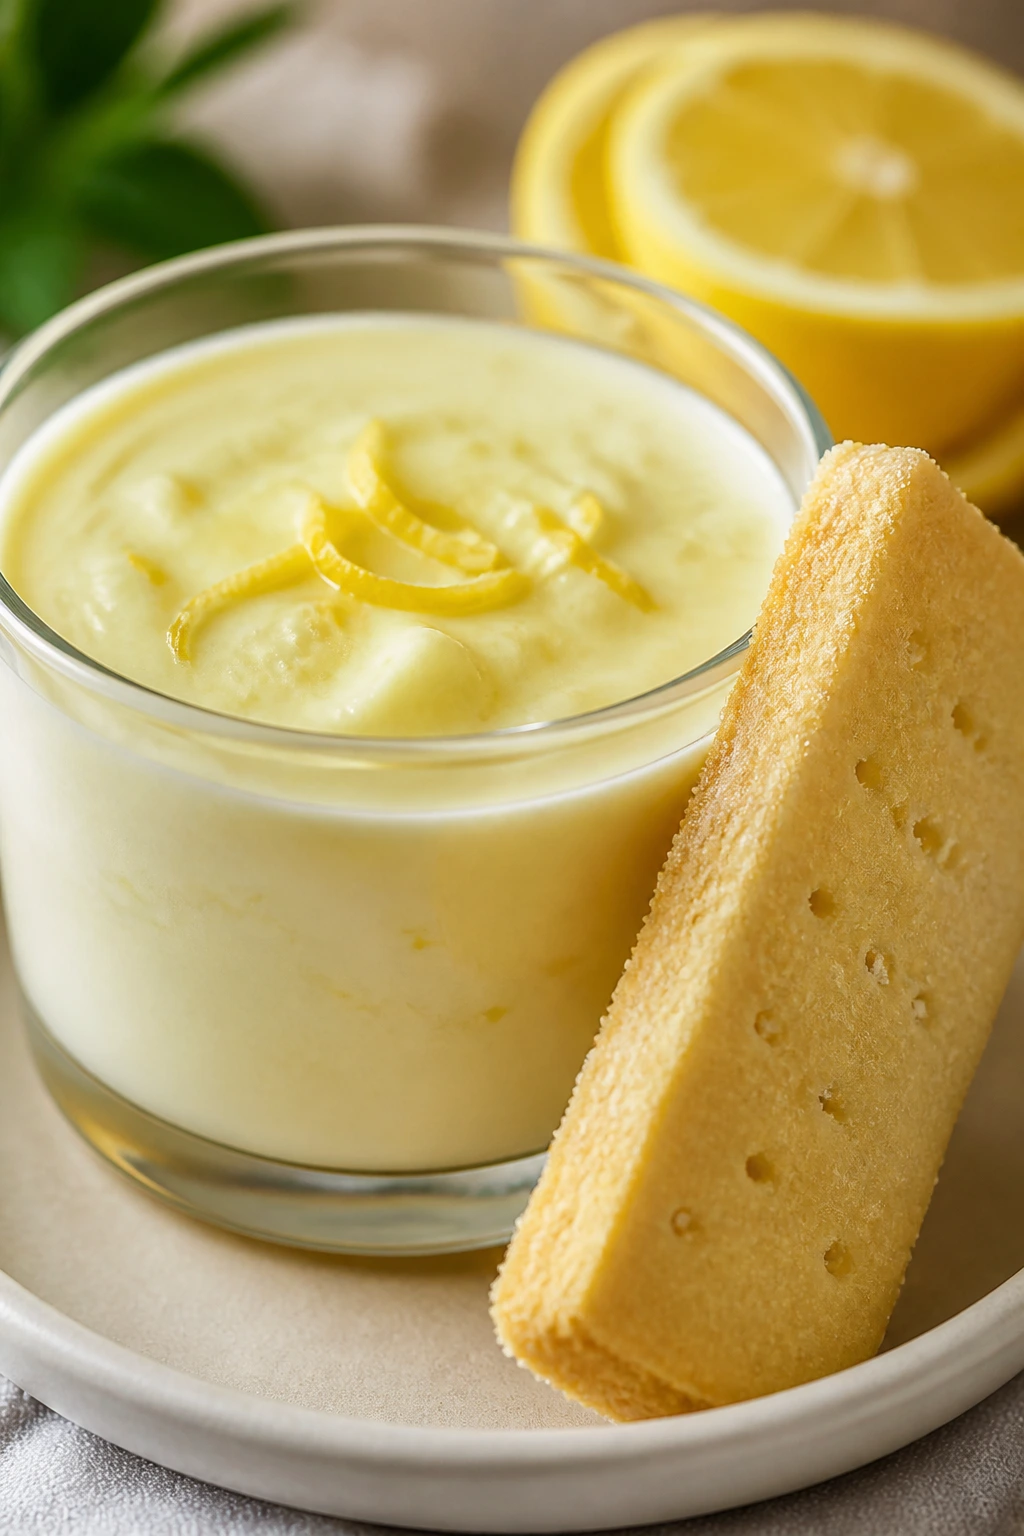
Lemon posset is a three-ingredient cream dessert that sets into something silky and spoonable, with enough citrus bite to keep it awake. It feels old-fashioned in the best way. Paired with shortbread, it becomes the sort of treat that looks spare but tastes complete.
Why It Works:
Heavy cream and sugar reduce together, then lemon juice thickens the mixture as it cools. That means no eggs, no gelatin, and no stove drama beyond a few minutes of simmering. Shortbread gives you a buttery bite against the smooth custard.
Key Ingredients:
- 2 cups heavy cream — the base.
- 3/4 cup sugar — sweetens and helps the set.
- 1/3 cup fresh lemon juice — strained.
- 1 teaspoon lemon zest — optional but good.
- Shortbread cookies, for serving — store-bought works well.
Quick Steps:
- Bring cream and sugar to a gentle boil, then simmer 3 minutes.
- Remove from heat and stir in lemon juice and zest.
- Pour into cups and chill at least 4 hours.
- Serve with shortbread on the side.
Equipment for This Recipe:
- Saucepan
- Whisk
- Strainer
- Small cups or ramekins
How to Serve This Dish:
Serve the posset cold with a cookie on the side, or crumble the shortbread over the top if you want texture in the cup. The dessert should jiggle just a little when moved. That soft wobble is the whole point.
Pro Tips for This Recipe:
- Use heavy cream, not half-and-half, or the set will be weak.
- Strain the lemon juice if the pulp is heavy.
- Chill the cups on a flat shelf so they set level.
- Add zest after cooking for a fresher lemon smell.
Variations on This Dish:
- Orange Posset: Replace lemon with orange and a little extra zest.
- Lime Posset: Use lime juice for a sharper edge.
- Berry Top: Add a spoonful of berry compote before serving.
Common Mistakes to Avoid with This Recipe:
- Boiling too hard: Cream can taste scorched.
- Adding lemon at the wrong time: Stir it in off heat only.
- Serving before it sets: It needs several hours in the fridge.
35. Warm Cinnamon Sugar Tortilla Chips with Chocolate Fondue
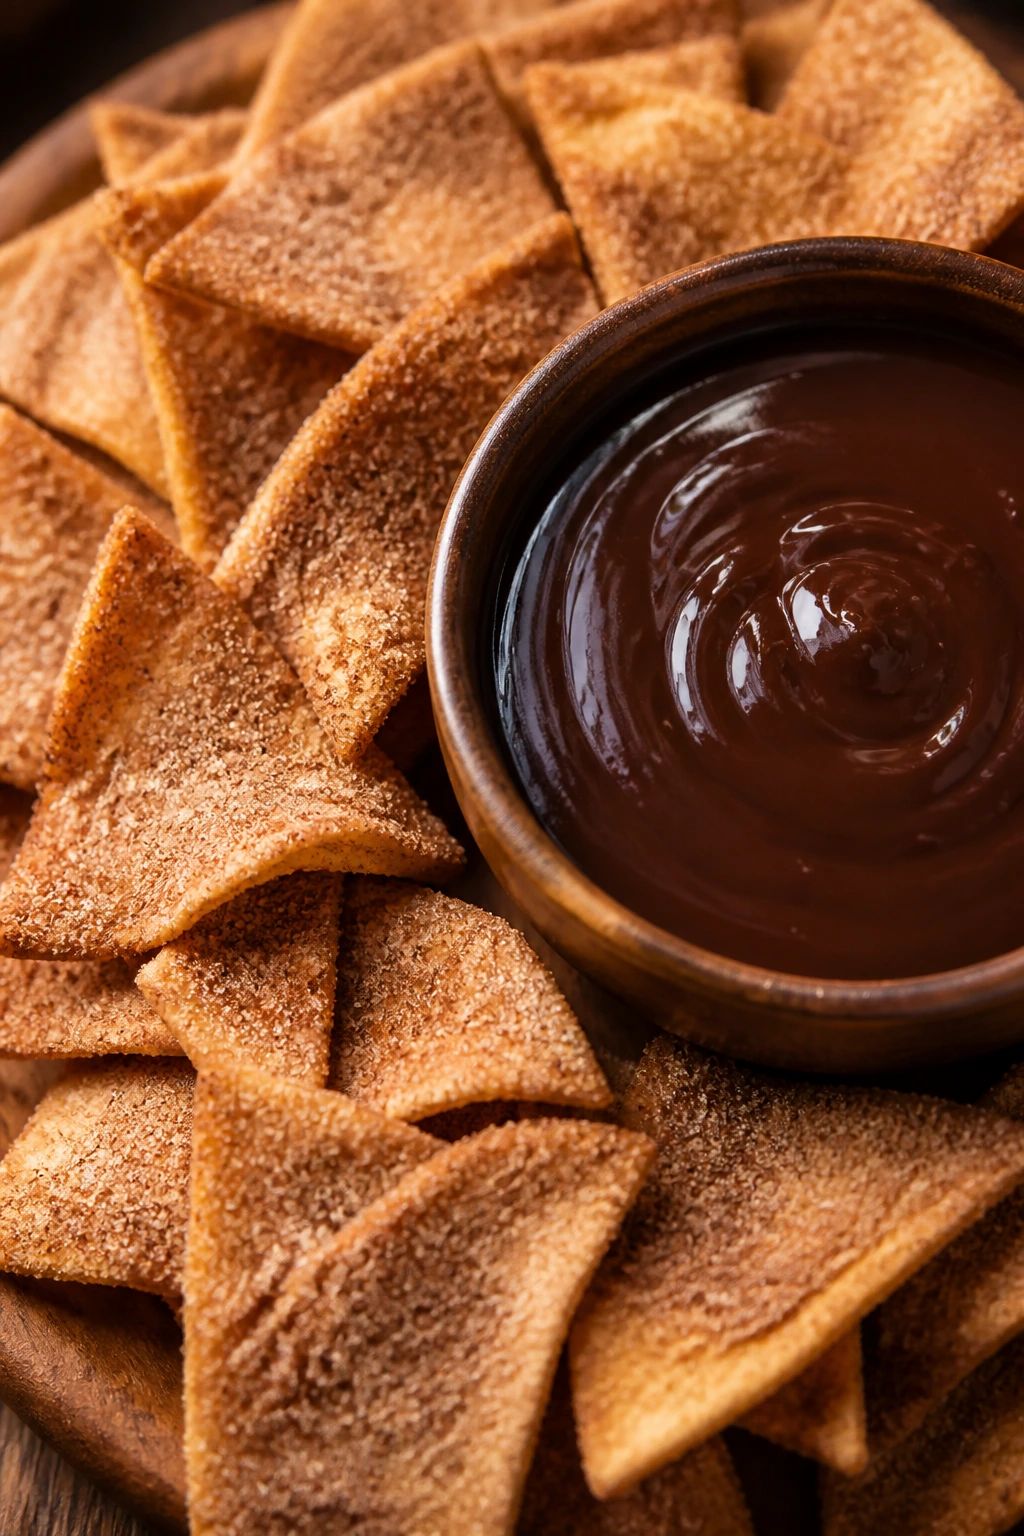
This one lands somewhere between snack and dessert tray, which is why I like it late at night. The chips are crisp and sweet, the fondue is smooth and warm, and the whole spread asks people to keep reaching. Not subtle. Not a problem.
Why It Works:
Flour tortillas bake into fast, crisp chips when brushed with butter and sugar. Cinnamon gives them the churro feeling without the fryer, and a simple chocolate cream sauce turns the plate into a dip situation. It’s cheap, quick, and satisfying in that very particular late-summer way.
Key Ingredients:
- 6 flour tortillas — cut into triangles.
- 3 tablespoons melted butter — for brushing.
- 1/4 cup sugar — for the coating.
- 1 teaspoon cinnamon — mix with the sugar.
- 1/2 cup chocolate chips — for the fondue.
- 1/4 cup heavy cream — thins the chocolate.
- Pinch of salt — in the fondue.
Quick Steps:
- Heat oven to 375°F and line a baking sheet.
- Brush tortilla triangles with butter, then toss with cinnamon sugar.
- Bake 8 to 10 minutes until crisp and lightly browned.
- Warm chocolate chips, cream, and salt together until smooth; serve with the chips.
Equipment for This Recipe:
- Baking sheet
- Pastry brush
- Small saucepan or microwave bowl
- Serving plate and dipping bowl
How to Serve This Dish:
Pile the chips on one side of a platter and set the chocolate in a bowl beside them. Add strawberries, banana slices, or pineapple chunks if you want fruit on the side. It’s casual, and the looseness is part of the charm.
Pro Tips for This Recipe:
- Cut the tortillas evenly so they bake at the same speed.
- Watch the chips closely in the oven; they burn fast at the tips.
- Warm the chocolate gently so it stays glossy.
- A tiny pinch of espresso powder in the fondue deepens the chocolate.
Variations on This Dish:
- Coconut Chips: Sprinkle shredded coconut over the buttered tortillas.
- White Chocolate Dip: Swap the fondue for white chocolate and a little lime zest.
- Fruit Plate Version: Serve with berries and melon for dipping and topping.
Common Mistakes to Avoid with This Dish:
- Too much butter: The chips turn greasy instead of crisp.
- Overbaking: They go from browned to bitter fast.
- Fondue too hot: Chocolate seizes if you blast it with heat.
Why These Summer Treats Work So Well on Warm Nights
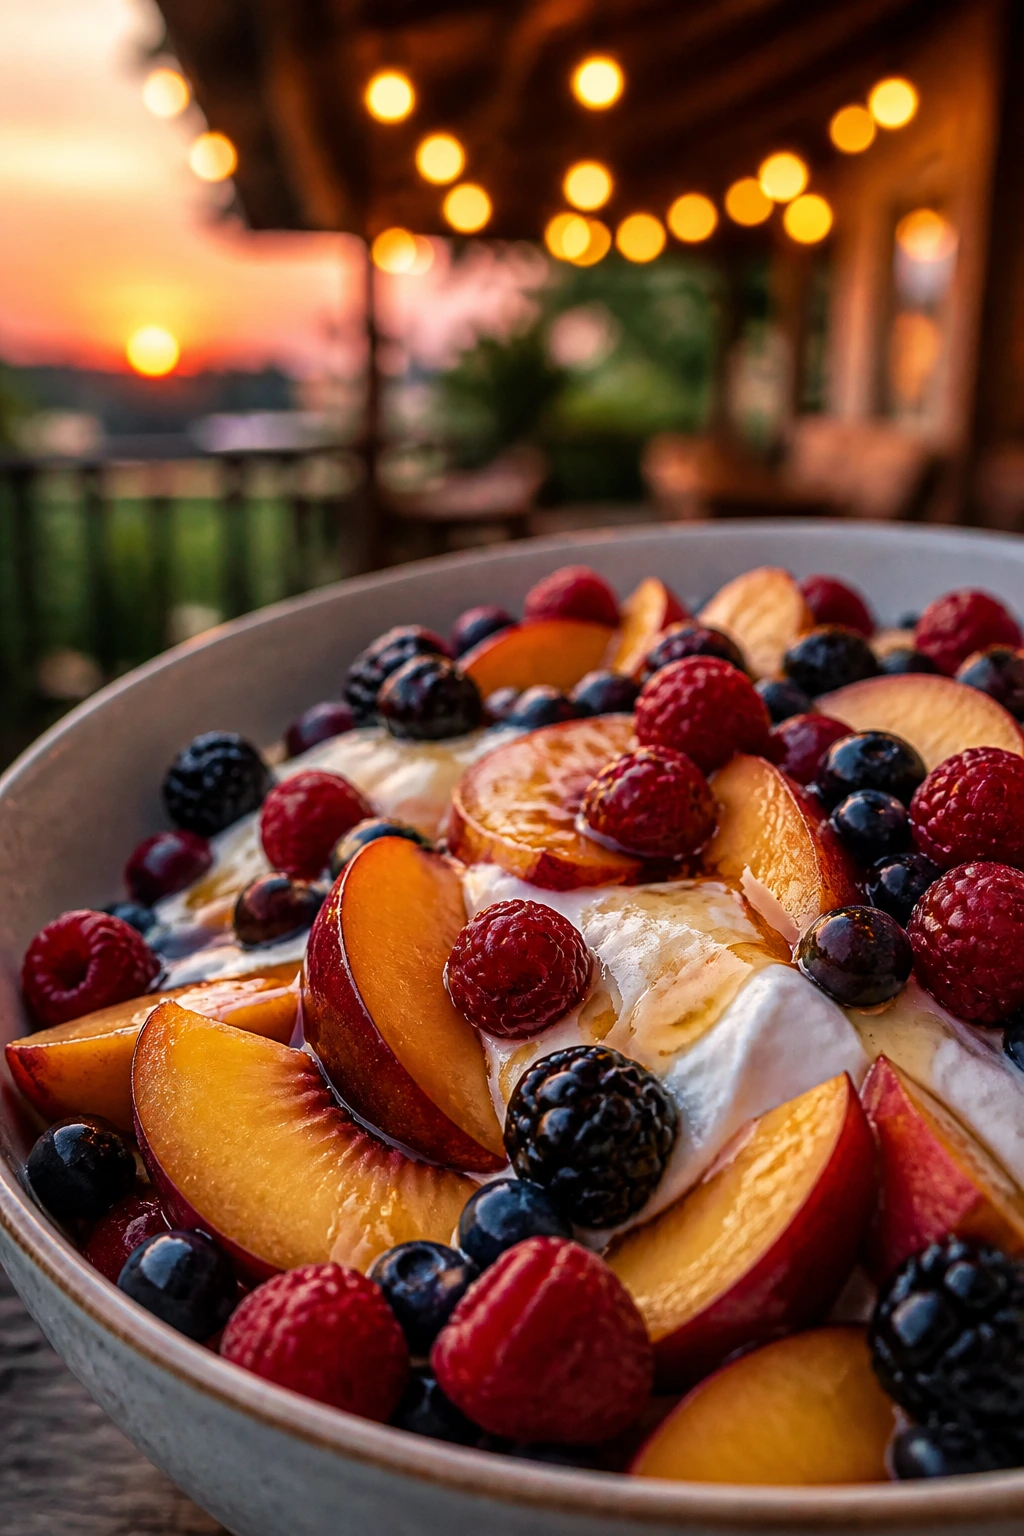
The nicest thing about summer desserts is that they don’t have to pretend to be grand. A few of the best ones are a bowl of fruit, a tray in the freezer, or a hot skillet that gets a single minute under the broiler. That’s enough. The season gives you peaches that smell like perfume, berries that stain your fingers, and citrus that still tastes sharp even when the air is thick.
A lot of these treats lean on contrast, and that’s where the fun lives. Cold yogurt against grilled peaches. Crispy graham crackers against soft filling. Tangy lime against sweet melon. Even the warm desserts here stay light because they’re built around fruit, small portions, or a fast bake that doesn’t heat the whole house.
I also like that most of these can be adjusted without turning into a project. Use store-bought pound cake, frozen fruit, or premade crust if that’s what you have. Summer nights are not the time for dessert perfectionism. They’re the time for desserts that show up fast, taste like ripe fruit, and leave you enough energy to sit outside a little longer.
Essential Equipment for These Recipes
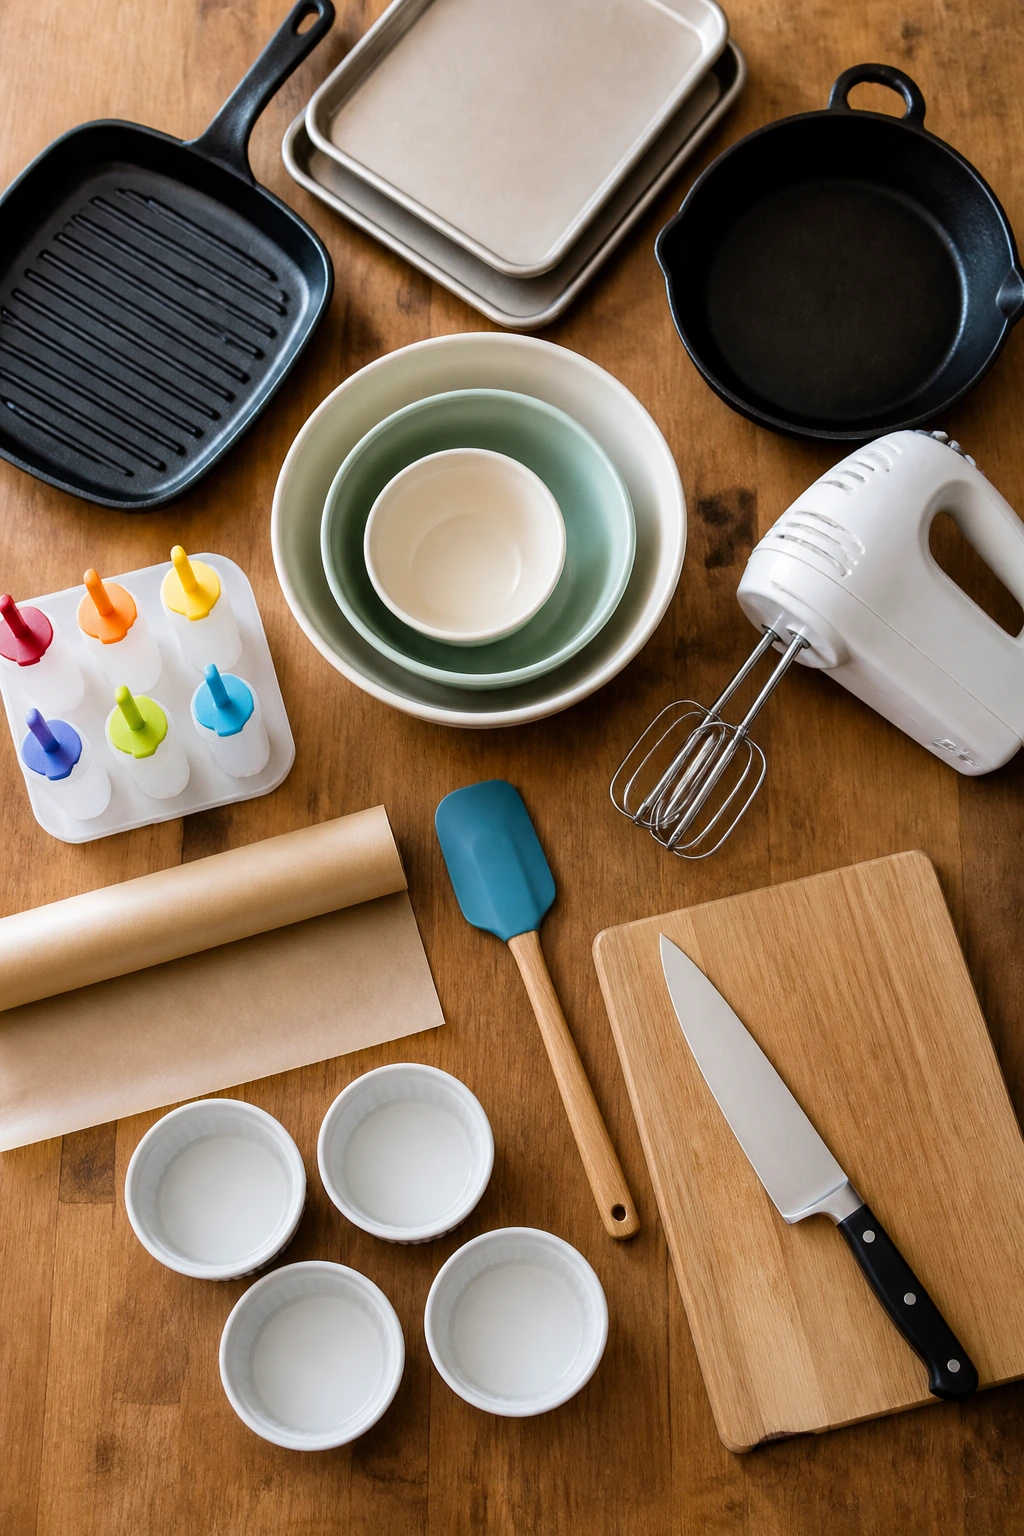
- Grill or grill pan — needed for peaches, nectarines, and pineapple; a grill pan works when you don’t want to fire up the outdoor grill.
- Sheet pans — useful for bark, frozen treats, and anything that needs a flat freeze.
- Cast-iron skillet — ideal for s’mores dip and cobbler because it holds heat and browns well.
- Mixing bowls — a few sizes save you from constant rinsing.
- Hand mixer or stand mixer — helpful for whipped cream, cheesecake bars, pavlovas, and no-churn ice cream.
- Popsicle molds — not fancy, just useful for clean frozen treats.
- Parchment paper — keeps bars, bark, and sandwiches from sticking.
- Rubber spatula — the best tool for folding, spreading, and scraping every last bit from the bowl.
- Sharp knife and cutting board — fruit desserts live or die on clean slices.
- Ramekins or small jars — make serving neat and help portions chill faster.
Smart Shopping and Ingredient Tips
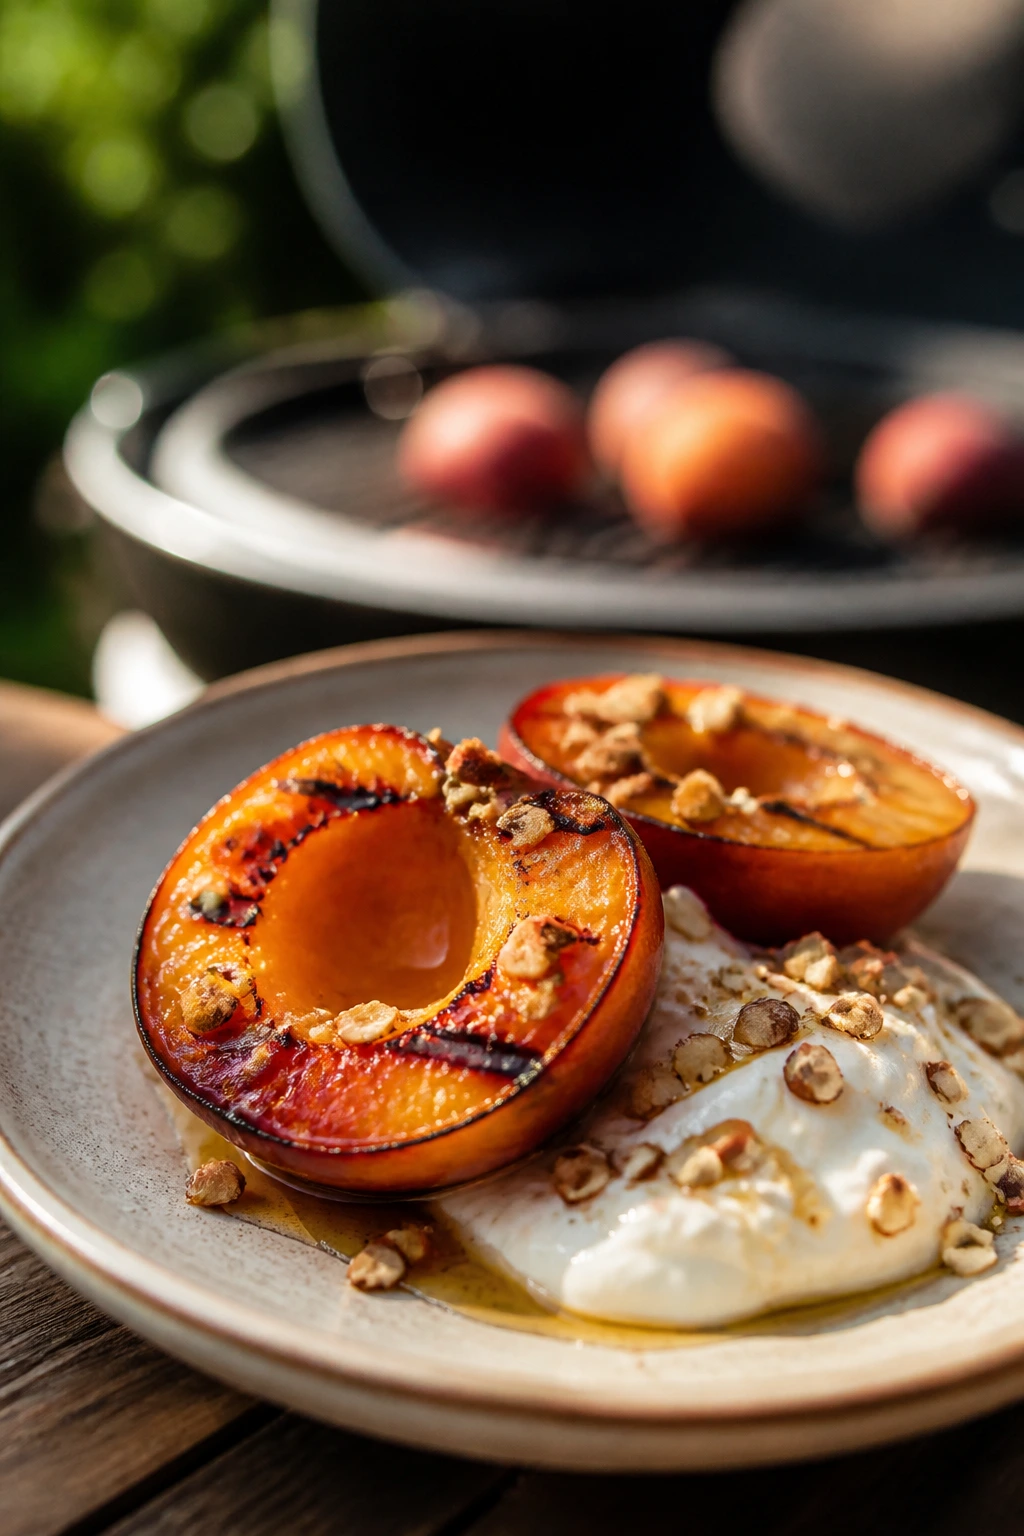
Pick fruit that smells like fruit. Peaches, nectarines, and mangoes should have a scent at the stem end, and berries should look dry, not wet and tired. If peaches are hard, leave them on the counter for a day or two. If they’re already soft, use them for parfaits, crisp, or grilled desserts before they bruise.
For dairy, choose the full-fat version when the dessert is frozen or chilled. Greek yogurt, cream cheese, mascarpone, and heavy cream all behave better when they have some richness. Low-fat products can work in a pinch, but they usually freeze harder and taste thinner. That shows up fast in no-churn ice cream and popsicles.
Coconut milk is one of those ingredients where the can matters. Use full-fat coconut milk for pops, puddings, and ice cream-style treats because the texture is smoother. Shake the can before opening, and if it looks separated, stir it well. For chocolate, semisweet chips are the safest all-around choice, though dark chocolate can be better when the dessert already leans sweet.
Store-bought shortcuts are worth buying for several of these recipes. Good graham crackers, pound cake, shortbread, lemon curd, and pie dough save time without making the result feel cheap. I’d skip bargain whipped topping only when the dessert needs a real cream flavor, like pavlovas or parfaits. Otherwise, use the shortcut and keep moving.
How to Serve These Recipes

Presentation:
Use clear glasses for parfaits, trifle, puddings, and posset so the layers show. For grilled fruit and crisp desserts, a shallow white plate or bowl helps the color pop. A tiny spoonful of sauce or a clean dusting of zest looks better than a pile of garnish that tries too hard.
Accompaniments:
Vanilla ice cream works with crisps, cobblers, galette, grilled peaches, and grilled nectarines. Shortbread, graham crackers, and crisp cookies fit the chilled desserts. For lighter treats like fruit salad, granita, or melon cups, a spoonful of yogurt or a few toasted nuts gives the bowl more staying power.
Portions:
Most of these desserts serve best in smaller portions than people expect. Rich bars and cheesecake squares do well cut into 1 1/2- to 2-inch pieces, while fruit salads and popsicles can be a little larger. If you’re serving a group, plan for one substantial treat per person plus a few extra bites for the people who always “just want a taste.”
Beverage Pairing:
Cold brew, iced tea, sparkling water with lime, or a light dessert wine all work across this collection. For the grilled fruit and s’mores-style dishes, a chilled coffee drink makes sense. For the fruit-heavy bowls and pops, sparkling water or lemonade keeps the finish clean.
Additional Tips and Flavor Boosters
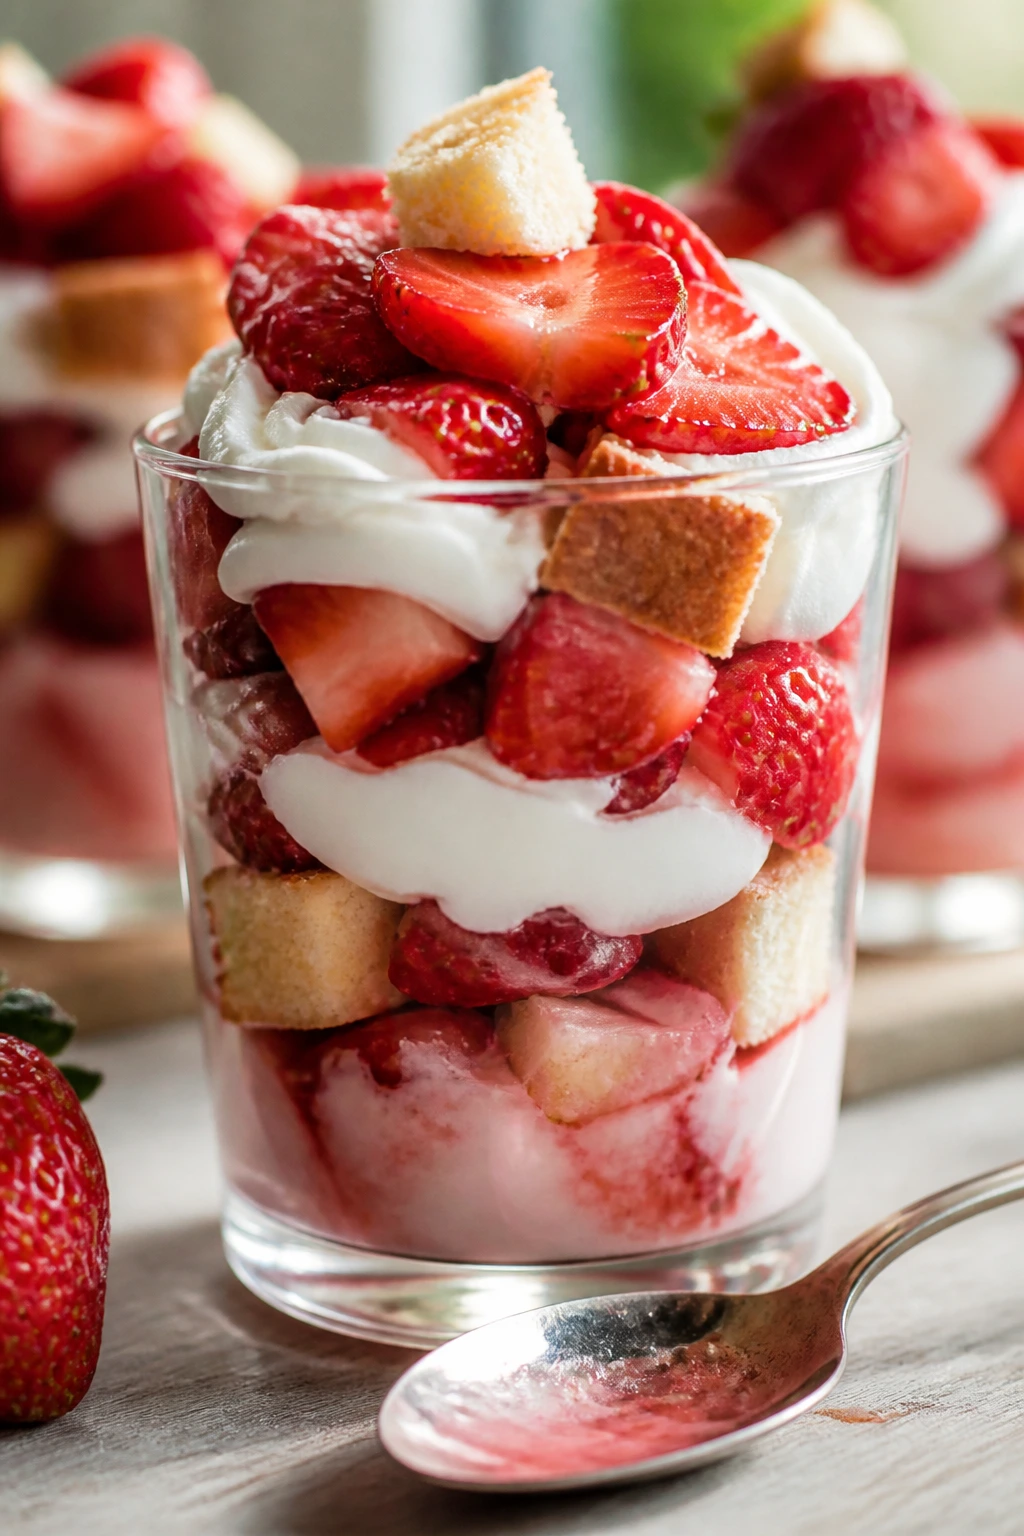
Flavor Enhancement:
A tiny pinch of salt belongs in almost every sweet recipe here, even the fruit bowls. It sharpens berries, wakes up chocolate, and stops cream from tasting dull. Don’t add much. Add enough that you notice the flavor, not the salt.
Customization:
Most of these can take one extra fruit without complaint. Blueberries fit in parfaits, trifle, crisps, and bark. Peaches can trade places with nectarines. Mango can slide into pops, cups, and sorbet. Keep the texture in mind; juicy fruit works best in chilled desserts, while firmer fruit is better for grilling and bars.
Serving Suggestions:
Toast nuts and coconut before using them. That warm, browned smell changes the whole dessert, and it takes only a few minutes in a dry skillet or oven. Fresh mint, basil, lime zest, and flaky salt are the small finishing touches that make a bowl look intentional.
Make-It-Yours:
For a dairy-free approach, lean on coconut milk, coconut yogurt, or a whipped coconut topping. For a gluten-free spread, use almond flour crusts, gluten-free grahams, or fruit-forward desserts like granita and melon cups. If you want lower sugar, choose the fruitiest recipes here and cut the sweetener a little, not all the way. Sugar matters for texture in frozen desserts.
Make-Ahead, Storage, and Reheating Guidance

A lot of these treats are better when they’ve had time to chill, which is a gift on a warm night. Bark, popsicles, no-churn ice cream, cheesecake bars, posset, pudding cups, and granita all do well with a make-ahead window. Most need at least 2 to 6 hours in the freezer or fridge, and some are happiest overnight. If you’re planning a dinner, make the cold desserts earlier in the day and leave the fruit cutting and garnishing for the end.
Fruit-based desserts that hold texture — like galette, cobbler, crisp, and bars — usually keep 3 to 4 days in the fridge, though the topping softens a little over time. Wrap bars tightly and store them in a single layer when possible. Cobblers and crisps can be reheated in a 325°F oven for 10 to 15 minutes, loosely covered with foil if the top browns too fast. That brings the edges back without drying out the fruit.
Frozen desserts need tighter storage. Pops, bark, ice cream sandwiches, and frozen bites should be wrapped or sealed well and used within 2 months for the best texture. They’ll last longer, but freezer smell and ice crystals creep in. Granita is the exception; it’s best eaten the same day or the next, after a quick scrape to wake it up again. If it hardens into a solid block, let it sit for 5 minutes and scrape before serving.
For items with whipped cream or creamy fillings, think in terms of assembly timing. Parfaits, trifles, and banana split skewers are best built close to serving. You can prep the components ahead — fruit sliced, cream whipped, cake cubed — and then layer at the last minute. That gives you the easy part without the soggy middle.
Variations and Adaptations to Try
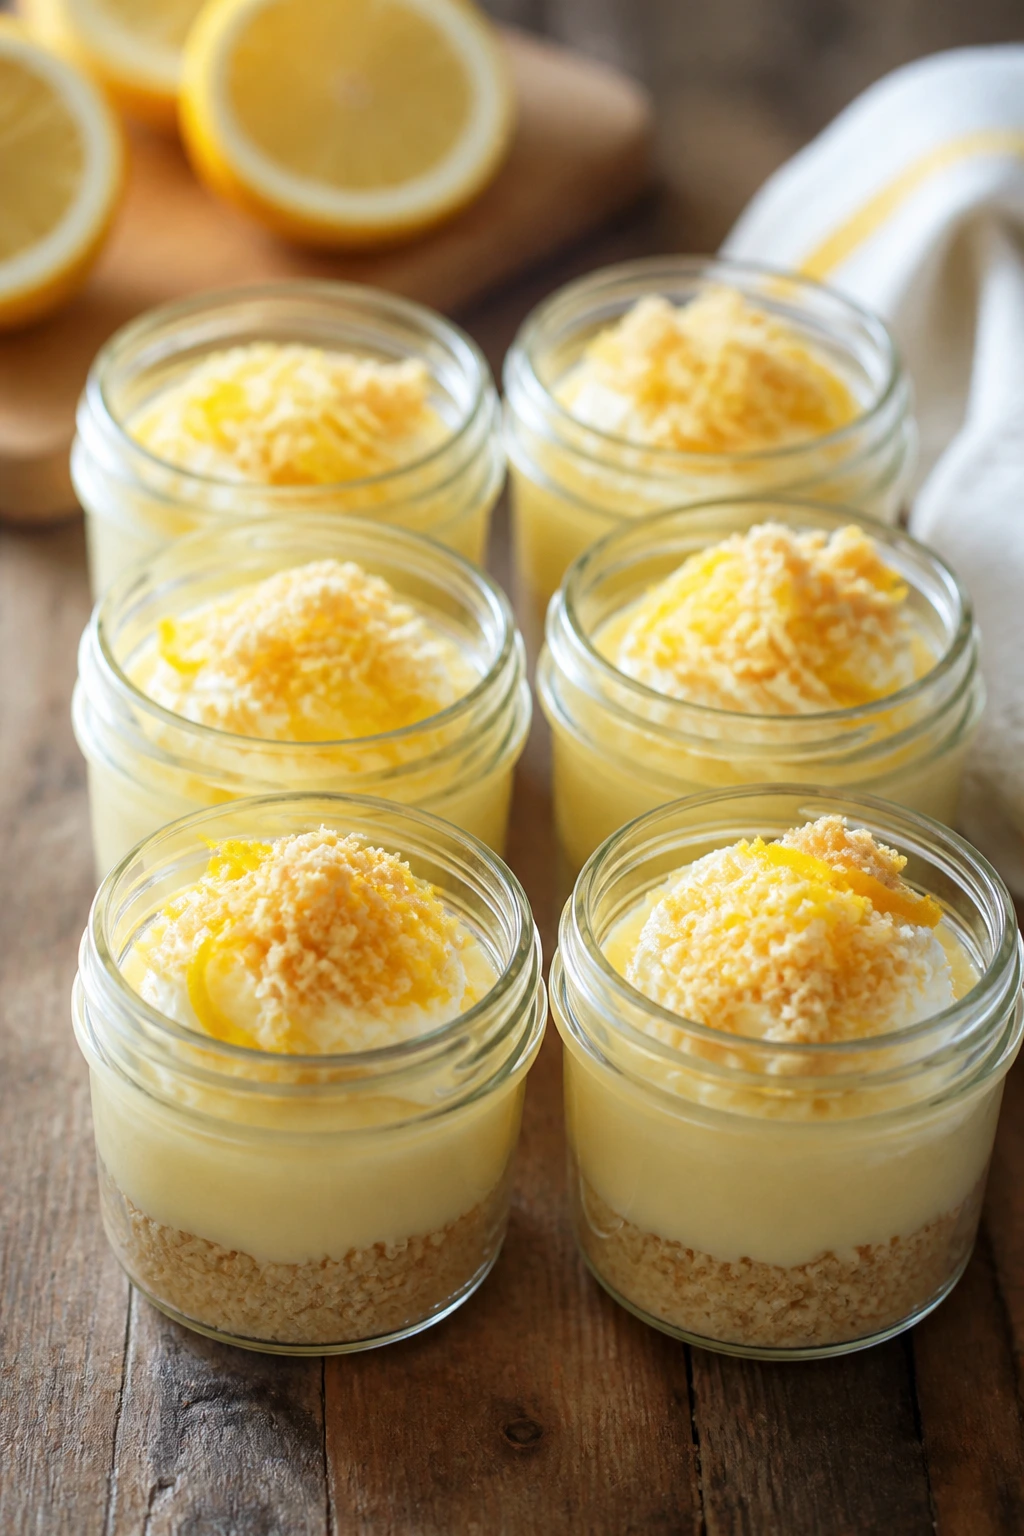
Dairy-Free Summer Tray:
Lean on coconut milk, coconut yogurt, and whipped coconut topping for popsicles, puddings, and bark. Grilled fruit, granita, melon bowls, and fruit skewers slide naturally into this version without losing much. The only thing I’d avoid is trying to force a dairy-free cream filling to behave exactly like cheesecake; let it be its own thing.
Gluten-Free Dessert Lineup:
Use almond flour or gluten-free oats for crisps, crumble bars, and oat bars. Graham-style gluten-free cookies can handle pies and bark. Fruit-forward desserts like sorbet, fruit salads, popsicles, and puddings need no adjustment at all.
Lower-Sugar Route:
Choose the recipes that rely on ripe fruit, tart citrus, and cream rather than heavy syrup. Granita, grilled peaches, melon salad, nectarine plates, and posset can all take less sugar without falling apart. Reduce sweeteners a little, not by half, or the texture of frozen desserts may suffer.
Kid-Friendly Build:
Put the toppings out in bowls and let kids build their own parfaits, bark, or skewers. Chocolate chips, sprinkles, crushed cookies, and mini marshmallows work better than elegant garnish when the goal is a dessert that gets eaten, not admired. Frozen bananas and cookie sandwiches are the safest bets.
Extra-Rich Treat Night:
If the evening calls for something louder, add chocolate drizzle, toasted nuts, or caramel to grilled fruit and bar desserts. Use dark chocolate with mango, pineapple, and banana. Use caramel with apples, peaches, and cookie bars. The trick is adding one strong note, not three.
Common Mistakes to Avoid with Summer Treats
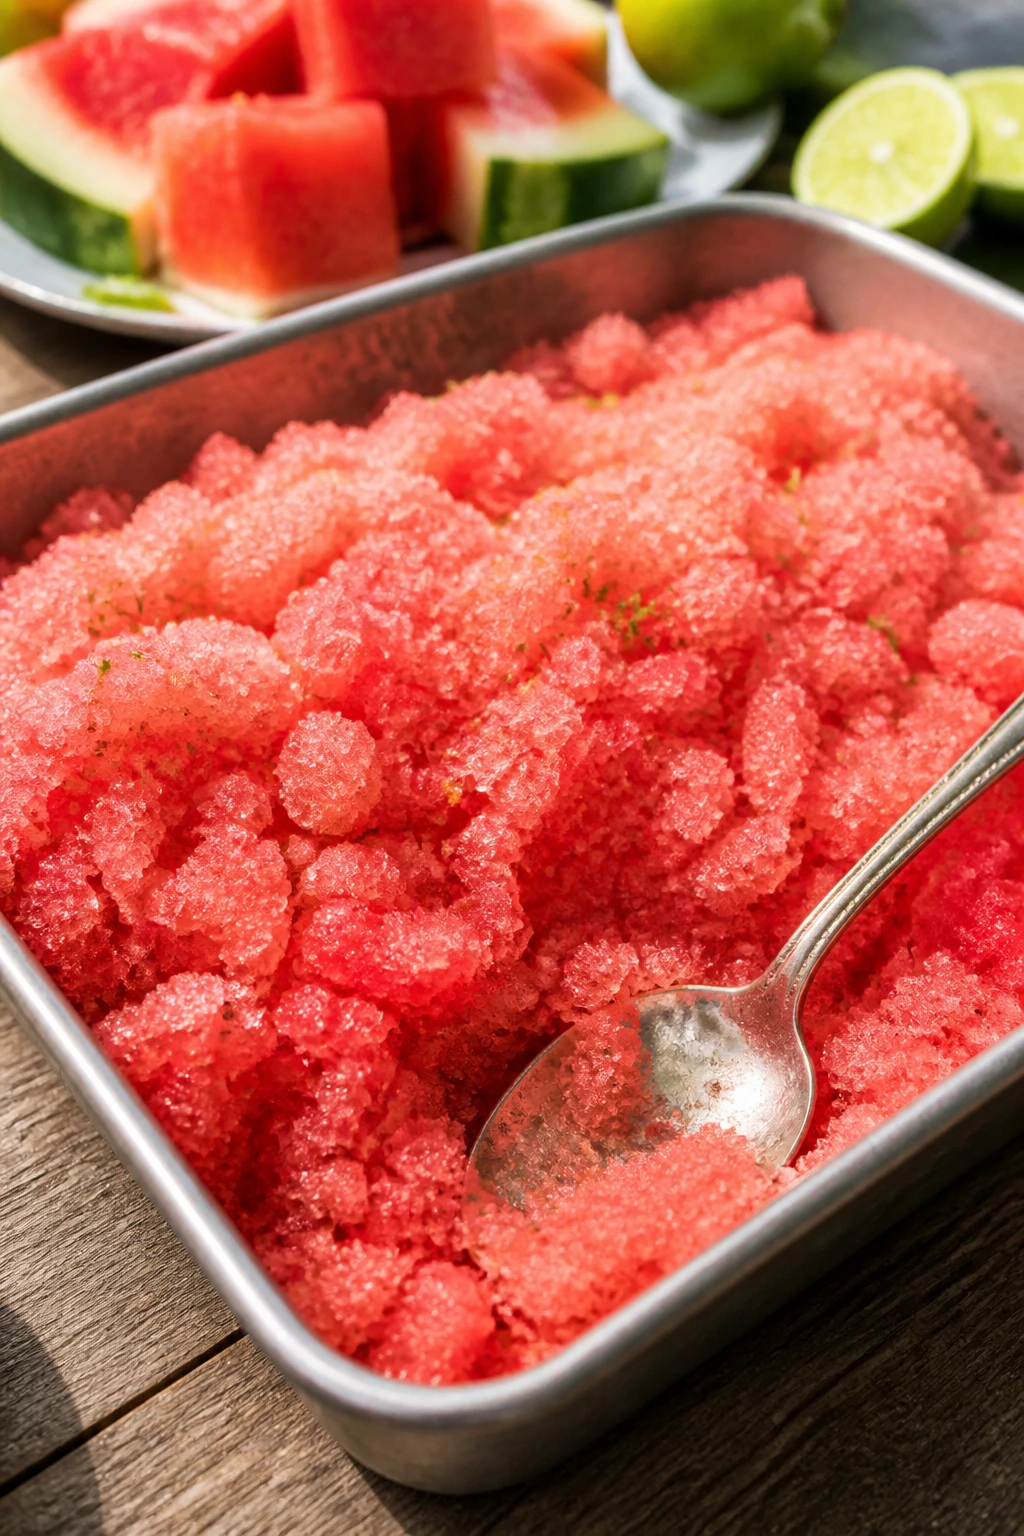
The first mistake is forcing every dessert into the oven. A hot night is not the time for a long bake unless the result really earns it. Fruit, freezer desserts, and chilled cups solve most summer problems with less heat and less cleanup. If a recipe needs the oven, keep the bake time short and the pan small.
The second mistake is using fruit at the wrong stage. Hard peaches, underripe mangoes, and watery berries make desserts taste thin or gritty. On the other hand, fruit that’s too soft falls apart on skewers, in grilled desserts, and in bars. Choose fruit based on the job: firm for grilling, ripe for chilling, and very ripe only when you’re mashing or blending.
The third mistake is rushing the chill. Popsicles need a full freeze. Cheesecake bars need enough time to set. Trifles and parfaits need a little rest so the layers settle. If you cut corners on chilling, the dessert will taste fine and look tired, which is a shame because the fix is usually just time.
The fourth mistake is drowning the dessert in toppings. A handful of nuts, a spoon of sauce, or a pinch of zest is enough most of the time. When the topping stack gets too tall, the fruit disappears and the whole thing turns sloppy. Use the garnish to sharpen the flavor, not hide it.
Finally, don’t ignore the salt. A pinch in yogurt, chocolate, fruit fillings, and cookie bars keeps the sweetness from flattening out. It’s a small move. It changes the whole bite.
Frequently Asked Questions
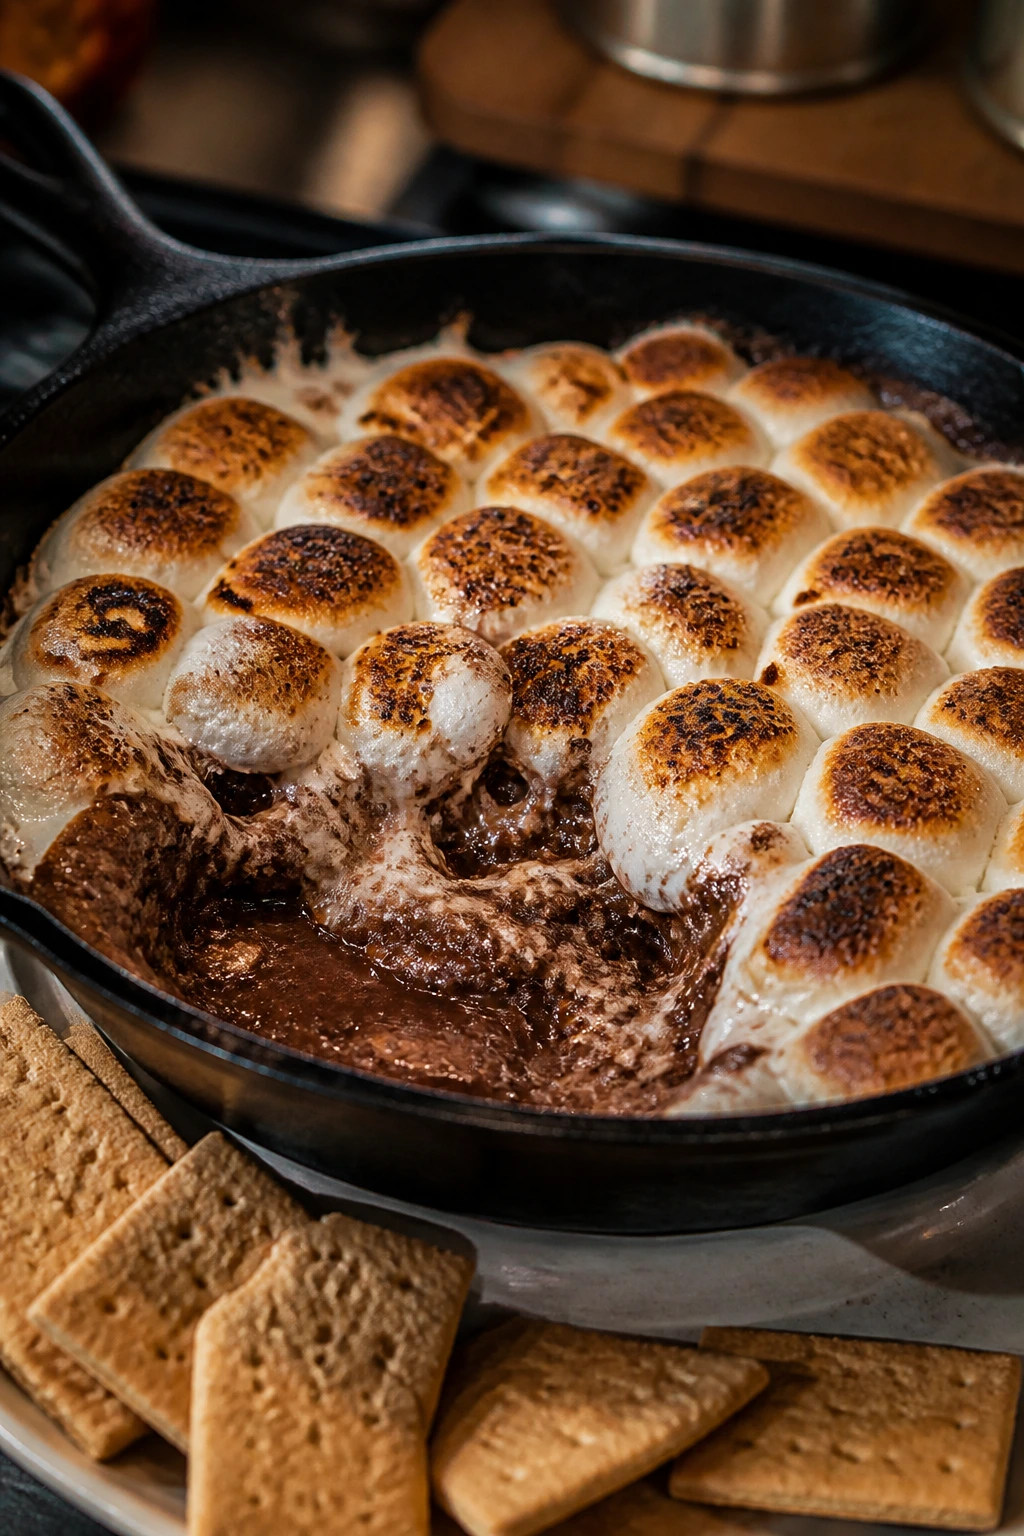
Can I make most of these desserts ahead of time?
Yes, but the timing depends on the texture. Bars, popsicles, bark, puddings, cheesecake bars, and no-churn ice cream can be made hours or even a day ahead. Fruit bowls, skewers, and dipped items are best assembled close to serving so they stay crisp and bright.
What if I only have frozen fruit?
Frozen fruit works well in granita, sorbet, pops, puddings, and many baked bars and crisps. For grilled fruit, skewers, and fresh salads, frozen fruit is usually the wrong choice because it softens too much after thawing. If you thaw it first, drain off excess liquid or the dessert can turn watery.
How do I keep popsicles from getting icy?
Use full-fat dairy or coconut milk, add a little sugar or honey, and avoid excess water. Blending in yogurt, condensed milk, or fruit puree with some natural body helps too. Thin mixtures freeze into ice blocks; thicker ones stay creamy.
Can I swap store-bought ingredients without ruining the dessert?
Absolutely. Store-bought pound cake, pie dough, lemon curd, whipped cream, graham crackers, and even caramel sauce can save the night. I’d rather see good store-bought components used well than watch someone spend an hour making a pastry from scratch and lose the evening to dishes.
What’s the easiest dessert here for a last-minute guest?
Grilled peaches with yogurt, melon salad, banana split skewers, apple nachos, and s’mores dip are all fast enough to pull together without a long lead time. If the freezer is already stocked, berry bark or frozen bananas work too. The best emergency dessert is the one you can assemble in under 15 minutes.
How do I stop fruit desserts from turning watery?
Use a little acid, a little sugar, and the right thickener when the dessert needs one. Cornstarch helps in crisps, cobblers, bars, and galettes. For fresh bowls, drain off excess juice or add it in small amounts right before serving.
Can I make these sweeter if my fruit is tart?
Yes, but add sweetness in small steps. A teaspoon or two of honey, a spoonful of sugar, or a little extra whipped cream can fix a tart batch. If you dump in a lot of sugar, the fruit flavor gets buried instead of balanced.
What if my chocolate seizes or gets grainy?
Usually it’s too much heat or a drop of water. Melt chocolate gently in short bursts, stir often, and keep the bowl dry. If it goes grainy, sometimes a spoonful of warm cream can rescue it for sauces and fondue, though dipped shells are harder to save.
A Cooler Kind of Sweet
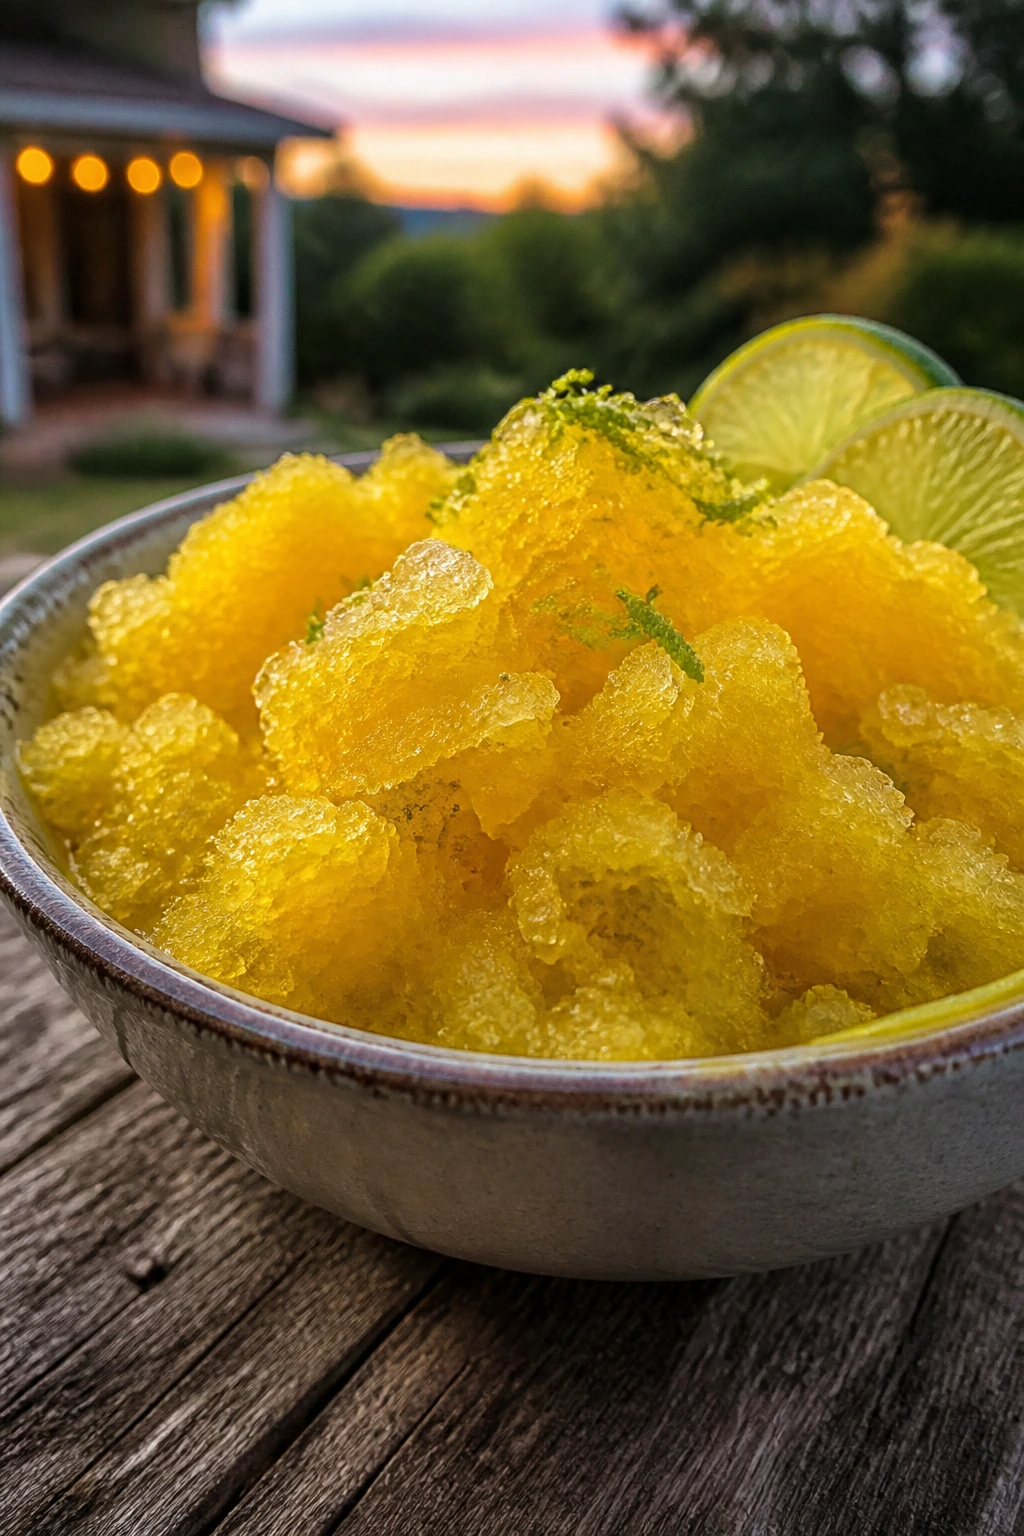
The nicest summer desserts don’t ask for much. They use ripe fruit, a cold bowl, a hot grill, or a freezer tray, then they get out of the kitchen and onto the table before the evening slips away. That’s the rhythm these treats share, whether you’re spooning grilled peaches into yogurt or breaking a frozen bark into shards.
I like a dessert list that leaves room for mood. Some nights call for a clean granita. Some call for a skillet of chocolate and marshmallows that people attack with graham crackers. Some call for a bowl of mango with chili and lime because the air feels heavy and you want something that snaps awake on the tongue. Keep a few of these in your back pocket and summer nights get easier to feed.