
A good kids picnic foods list has one job: survive the drive, the blanket, and the hands that reach for the same piece twice. That means no soggy bottoms, no drippy fillings, no brittle crackers that turn to dust the second a kid squeezes a lunch box. It also means the food has to taste good cold, because a picnic cooler is not a kitchen and nobody should be waiting around for a reheated anything while the lemonade sweats in the grass.
The best picnic snacks for children are sturdy, tidy, and easy to grab. A tortilla wrap cut into coins. A fruit skewer that doesn’t fall apart after two bites. A muffin that stays tender after chilling. These are the kinds of foods that still feel appealing when they’ve been sitting next to an ice pack for an hour, which is the whole trick.
There’s also the safe-food part, and it matters. Dairy, eggs, meat, and rice need to stay cold in an insulated cooler with ice packs, and the old USDA two-hour rule still does the heavy lifting here: if food has been out in the warm air too long, it’s not worth the gamble. That sounds a little stern, I know. It’s also the difference between a picnic that ends with sticky fingers and one that ends with stomach aches.
Why This Picnic Spread Works
-
Built for little hands: Every food in this mix can be picked up, speared, or eaten with a fork in one or two bites, which keeps the blanket cleaner than a pile of loose chips and mystery crumbs.
-
Cold-drink friendly flavors: Salty cheese, mild fruit, creamy fillings, and a little sweetness all sit nicely beside iced tea, lemonade, milk, or sparkling water.
-
Less meltdown, more structure: These snacks lean on tortillas, muffins, crackers, skewers, and bars instead of soft bread that collapses when it meets moisture.
-
Make-ahead without drama: Most of these can be packed a few hours ahead, and several taste even better after a short chill in the fridge.
-
Picky-eater friendly, but not boring: There’s enough variety here to keep one child reaching for fruit while another heads straight for the cheesy thing.
-
Easy to portion: You can make a few items for a small lunch or mix six or seven for a full picnic basket without changing the whole plan.
1. Peanut Butter and Banana Pinwheels
A tortilla wrapped around peanut butter and banana looks almost too plain until you slice it into spirals. Then it turns into one of those snacks that disappears faster than you expect, because the banana brings sweetness, the peanut butter brings salt, and the whole thing holds together in a neat little coil.
Why It Works:
Pinwheels are picnic gold because the filling acts like glue. Peanut butter keeps the tortilla from tearing, and a quick chill firms everything up so the slices don’t smear into a mess. A little cinnamon makes the banana smell warmer and more dessert-like, which kids usually notice before they even take a bite.
Key Ingredients:
- 2 large flour tortillas
- 1/2 cup creamy peanut butter
- 2 medium bananas, peeled
- 1 tablespoon honey
- 1/4 teaspoon ground cinnamon
- 1 tablespoon mini chocolate chips, optional
Quick Steps:
- Lay the tortillas flat and spread each with 1/4 cup peanut butter, leaving a 1/2-inch border at the edge.
- Place a banana near one end of each tortilla, drizzle with honey, and sprinkle with cinnamon.
- Roll tightly, press the seam down, and chill for 10 minutes so the wrap firms up.
- Slice into 1-inch pinwheels with a sharp knife and pack in a lined container.
Equipment for This Recipe:
- Cutting board
- Sharp knife
- Small spatula or butter knife
- Airtight container
How to Serve This Dish:
Serve these spirals with apple slices and a small bottle of cold milk. They look best stacked in a shallow container so the cut sides stay visible, and they’re usually enough for 2 kids as a snack or 4 kids if the basket has other food.
Pro Tips for This Recipe:
- Use soft, fresh tortillas. Stiff tortillas crack at the seam.
- If the banana is very ripe, skip the honey or the filling can get slippery.
- Wipe the knife between cuts so the slices stay clean.
Variations on This Dish:
- SunButter Swap: Replace peanut butter with sunflower seed butter for a nut-free version.
- Crunchy Finish: Add a thin sprinkle of granola before rolling for texture.
- Chocolate Swirl: Use a few chocolate chips instead of honey when you want it to eat more like dessert.
Common Mistakes to Avoid with This Dish:
- Don’t overfill the tortilla. Too much banana makes the roll burst open when you slice it.
- Don’t skip the chill. Warm pinwheels flatten and smear.
- Don’t use overripe bananas unless you’re okay with a softer, sweeter filling.
2. Turkey and Cheddar Roll-Ups
This is the closest thing to a sandwich that never falls apart in a picnic basket. Thin turkey, sharp cheddar, and a little cream cheese make a tidy roll that can be sliced into coins or eaten whole with one hand while the other hand guards the drink cup.
Why It Works:
Deli meat is already cooked, so you’re mostly building structure here. The cream cheese helps the turkey cling to the tortilla, and cheddar adds enough salt to keep the bite interesting even when it’s cold. If you keep the filling thin, the roll-up stays compact instead of puffing into a lumpy cylinder.
Key Ingredients:
- 2 large flour tortillas
- 4 ounces cream cheese, softened
- 6 slices deli turkey
- 4 slices sharp cheddar
- 1/4 cup shredded lettuce
- 1 tablespoon Dijon mustard, optional
Quick Steps:
- Spread each tortilla with 2 ounces cream cheese, then a thin swipe of mustard if using.
- Layer turkey, cheddar, and lettuce in a narrow strip down the center.
- Roll tightly, tuck in the ends, and chill for 15 minutes.
- Slice into 1-inch rounds or leave whole for a bigger lunch portion.
Equipment for This Recipe:
- Cutting board
- Butter knife or offset spatula
- Sharp serrated knife
- Parchment or wax paper
How to Serve This Dish:
Pile the rounds next to cucumber sticks and a cold lemonade. Whole roll-ups work well for older kids; sliced pinwheels are easier for younger ones and look neater in a lunch box or picnic tray.
Pro Tips for This Recipe:
- Pat the lettuce dry. Wet greens make the tortilla slick.
- Use cheddar slices, not a thick block. Thin slices roll better and stay centered.
- Wrap the roll in parchment before chilling so the seam stays closed.
Variations on This Dish:
- Ham and Swiss Version: Swap the turkey for thin ham and use Swiss for a softer, buttery flavor.
- Ranch Lunch Roll-Up: Mix a teaspoon of ranch seasoning into the cream cheese.
- No-Tortilla Bite: Wrap the filling around celery sticks for a crunchier, lower-carb option.
Common Mistakes to Avoid with This Dish:
- Don’t overdo the lettuce. Too much crunch turns the roll-up into a mess.
- Don’t slice before chilling. Soft filling squishes out the sides.
- Don’t pack it next to warm food. Cream cheese needs the cooler side of the basket.
3. Mini Pizza Muffins
Mini pizza muffins taste like a slice of pepperoni pizza that took a bath in a muffin tin and came out more portable. They’re cheesy, a little saucy, and sturdy enough to eat at the park without sauce running down a wrist.
Why It Works:
A muffin batter gives you structure, and the pizza toppings keep it familiar. The little bits of pepperoni and mozzarella distribute evenly, so every bite has something salty and melty. Bake them just until the tops spring back; overbaking dries out the crumb and makes the cheese tough.
Key Ingredients:
- 1 cup all-purpose flour
- 1 teaspoon baking powder
- 1/2 teaspoon salt
- 1 cup shredded mozzarella
- 1/2 cup mini pepperoni
- 3/4 cup milk
- 1 egg
- 1/2 cup pizza sauce
Quick Steps:
- Heat the oven to 375°F and grease a 24-cup mini muffin tin.
- Whisk flour, baking powder, and salt in a bowl.
- Stir in milk, egg, mozzarella, pepperoni, and pizza sauce until just combined.
- Spoon into the tin and bake 12 to 14 minutes, until puffed and lightly golden.
Equipment for This Recipe:
- Mini muffin tin
- Mixing bowl
- Whisk
- Small scoop or spoon
How to Serve This Dish:
Serve warm or at room temperature with a side cup of marinara for dipping and a cold sparkling water. They fit nicely into a divided container, and 3 to 4 muffins make a solid kid portion.
Pro Tips for This Recipe:
- Grease the muffin tin well. Melted cheese sticks to dry metal.
- Keep the sauce amount modest. Too much sauce makes the muffins wet in the middle.
- If using larger pepperoni, chop it first so the pieces spread out better.
Variations on This Dish:
- Veggie Pizza Muffins: Swap pepperoni for diced bell pepper and olives.
- Cheese-Only Muffins: Leave out the meat and add a pinch of oregano.
- Spicy Pizza Muffins: Add a small spoon of chopped jalapeño for older kids who like heat.
Common Mistakes to Avoid with This Dish:
- Don’t overmix the batter. Dense muffins taste heavy and bake unevenly.
- Don’t fill the cups to the top. They need room to puff.
- Don’t pack them steaming hot or condensation will soften the tops.
4. Strawberry Yogurt Parfaits in Jars
These jars look fancy in a completely accidental way. Sweet berries, creamy yogurt, and crunchy granola stack into a snack that feels cool and fresh the second the lid comes off.
Why It Works:
The texture contrast is the whole point. Yogurt stays cold, strawberries bring juice and brightness, and granola gives you the crackle that keeps the spoonful from tasting flat. If you pack the granola separately and add it at the picnic, it stays crisp instead of turning into cereal mush.
Key Ingredients:
- 2 cups plain Greek yogurt
- 1 tablespoon honey
- 1 teaspoon vanilla extract
- 2 cups sliced strawberries
- 1 cup granola
- 4 small lidded jars
Quick Steps:
- Stir yogurt with honey and vanilla until smooth.
- Spoon a layer of yogurt into each jar, then add strawberries.
- Repeat the layers until the jars are nearly full.
- Pack granola in a separate bag or sprinkle it on right before serving.
Equipment for This Recipe:
- 4 small jars or cups with lids
- Spoon
- Paring knife
- Small mixing bowl
How to Serve This Dish:
Set the jars in a cooler until the picnic starts, then hand them out with cold iced tea or lemonade. They’re a nice option when you want something that feels like a treat but still eats cleanly with a spoon.
Pro Tips for This Recipe:
- Use thick yogurt. Thin yogurt leaks into the fruit and makes the jar watery.
- Slice the berries right before layering so they keep their shape.
- If the picnic is long, keep granola in a separate container and add it at the blanket.
Variations on This Dish:
- Peach Parfait: Swap strawberries for diced peaches.
- Berry-Mix Jar: Use blueberries, raspberries, and strawberries together.
- Chocolate Crunch: Add a few crushed chocolate wafers between layers.
Common Mistakes to Avoid with This Dish:
- Don’t add granola too early. It softens fast.
- Don’t use overripe berries. They collapse and stain the yogurt gray-pink.
- Don’t skip the lid. Parfaits need a tight seal to stay chilled and neat.
5. Cucumber Cream Cheese Tea Sandwiches
There’s something old-fashioned about cucumber sandwiches, but kids usually like them more than adults expect. The bread is soft, the filling is cool, and the cucumber slices give each bite a fresh snap that tastes clean beside a cold drink.
Why It Works:
Cream cheese is thick enough to hold the cucumber in place, and soft sandwich bread makes the whole thing feel light. A little dill or lemon zest wakes up the flavor without making it sharp. The biggest trick is slicing the cucumber thin enough that it doesn’t slide the bread apart.
Key Ingredients:
- 8 slices soft white bread
- 4 ounces cream cheese, softened
- 1 tablespoon mayonnaise
- 1 teaspoon lemon zest
- 1/2 teaspoon dried dill
- 1 medium cucumber, thinly sliced
Quick Steps:
- Stir cream cheese, mayonnaise, lemon zest, and dill until smooth.
- Spread the mixture on 4 slices of bread.
- Layer cucumber slices in a single layer, then top with the remaining bread.
- Trim the crusts and cut into triangles or small rectangles.
Equipment for This Recipe:
- Sharp knife
- Cutting board
- Small bowl
- Butter knife or spatula
How to Serve This Dish:
Serve these with a cup of chilled melon pieces and cold limeade. They look especially tidy when cut into little triangles and lined up in rows, which is useful if the picnic has a few picky eaters watching closely.
Pro Tips for This Recipe:
- Dry the cucumber slices with a paper towel before assembling.
- Use very soft bread. Firm bread fights the filling and cracks when cut.
- Chill the sandwiches before trimming for the cleanest edges.
Variations on This Dish:
- Herb Garden Swap: Add chopped chives or parsley to the spread.
- Whole-Wheat Version: Use soft whole-wheat bread if you want a sturdier slice.
- Salty Finish: A tiny pinch of salt over the cucumbers sharpens the flavor.
Common Mistakes to Avoid with This Dish:
- Don’t leave cucumber slices wet. Moisture turns the bread soggy in minutes.
- Don’t slice with a dull knife. It compresses the sandwich instead of cutting it.
- Don’t make them too far ahead unless you’re storing them wrapped and cold.
6. Chicken Salad Slider Bites
Chicken salad gets a bad reputation when it’s overloaded with mayo and left sloppy. Keep it light, tuck it into soft slider buns, and it becomes a picnic food that children can actually eat without asking for an extra napkin every thirty seconds.
Why It Works:
Cooked chicken gives you protein, and the creamy dressing keeps the filling from crumbling out of the bun. A little celery adds crunch, and a few chopped grapes can make the whole thing lean sweet without turning dessert-like. These taste best chilled, which makes them a natural picnic basket fit.
Key Ingredients:
- 2 cups cooked chicken, chopped
- 1/3 cup mayonnaise
- 1 tablespoon plain yogurt
- 1 celery stalk, finely diced
- 1/4 cup halved red grapes
- 8 mini slider buns
Quick Steps:
- Stir chicken, mayo, yogurt, celery, and grapes in a bowl.
- Taste and add a pinch of salt if needed.
- Spoon the mixture onto the bottom buns.
- Cap with the tops and wrap tightly for the cooler.
Equipment for This Recipe:
- Mixing bowl
- Spoon
- Knife and cutting board
- Plastic wrap or lidded container
How to Serve This Dish:
These work well with cucumber slices and cold apple juice. Two sliders make a good lunch portion for a smaller child, while older kids usually want three and a handful of fruit on the side.
Pro Tips for This Recipe:
- Use chopped chicken, not shredded stringy bits, so the filling stays neat.
- Dry the grapes after washing them. Extra water thins the dressing.
- Keep the buns separate until you’re close to eating if you want the softest bread.
Variations on This Dish:
- Curried Chicken Version: Add a pinch of curry powder and a few raisins.
- Mustard Chicken Salad: Replace part of the mayo with Dijon.
- Plain Picnic Chicken: Leave out the grapes and keep the flavor savory only.
Common Mistakes to Avoid with This Dish:
- Don’t add too much mayo. The filling should look creamy, not glossy and loose.
- Don’t use hot chicken. It warms the cooler and softens the buns.
- Don’t pack lettuce inside unless it’s very dry and tucked in right before serving.
7. Rainbow Fruit Kabobs
Fruit on a stick has a lot going for it. It’s colorful, it’s easy, and it gives kids the feeling that they’re eating something slightly more exciting than a bowl of cut fruit, even though that’s exactly what it is.
Why It Works:
Firm fruit holds its shape better than soft fruit, and the skewer turns snack time into something portable. When you combine colors, you also get a mix of textures: juicy grapes, crisp melon, and a little bite from strawberries or pineapple. A yogurt dip on the side gives kids a place to dunk without making the fruit heavy.
Key Ingredients:
- 1 cup strawberries, hulled
- 1 cup green grapes
- 1 cup cantaloupe chunks
- 1 cup pineapple chunks
- 8 small wooden skewers
- 1 cup vanilla yogurt, optional dip
Quick Steps:
- Wash and dry all fruit thoroughly.
- Thread fruit onto skewers in alternating colors.
- Chill until serving so the fruit stays crisp.
- Serve with yogurt in a small cup if you want a dip.
Equipment for This Recipe:
- Wooden skewers
- Knife
- Cutting board
- Paper towels
How to Serve This Dish:
Lay the kabobs across a tray and serve them with cold water or lemonade. They look best when the fruit is cut into even, bite-size pieces, and one or two skewers make a nice side with a sandwich-heavy lunch.
Pro Tips for This Recipe:
- Choose grapes that are firm, not wrinkled.
- Cut melon into chunks that are big enough to stay on the skewer.
- If using wooden skewers, snip the sharp tips shorter for younger kids.
Variations on This Dish:
- Berry-Only Skewers: Use strawberries, blueberries, and raspberries.
- Tropical Skewers: Swap cantaloupe for mango and kiwi.
- Dip-and-Dunk Tray: Serve the fruit off the sticks with a thick yogurt dip.
Common Mistakes to Avoid with This Dish:
- Don’t use soft bananas unless you’re serving immediately.
- Don’t make the pieces too tiny. Small fruit slips off the skewer.
- Don’t leave the fruit warm in the sun; chilled fruit tastes better and feels fresher.
8. Cheddar Broccoli Muffins
These muffins lean savory, which is a nice break from all the sweet picnic food that tends to pile up. They smell like melted cheese and toasted bread when they come out of the oven, and the broccoli disappears into the crumb enough to keep even cautious eaters from objecting too hard.
Why It Works:
The muffin batter gives the broccoli a soft landing. Cheddar adds salt and richness, and the small chopped florets keep the texture interesting without making the muffins bulky. Bake them just until the tops set; overbaking makes the broccoli taste dull and the crumb dry.
Key Ingredients:
- 2 cups all-purpose flour
- 2 teaspoons baking powder
- 1 tablespoon sugar
- 1 cup shredded cheddar
- 1 cup steamed broccoli, chopped small
- 1 cup milk
- 2 eggs
- 1/4 cup melted butter
Quick Steps:
- Heat the oven to 400°F and line a 12-cup muffin tin.
- Whisk flour, baking powder, sugar, and a pinch of salt.
- Stir in milk, eggs, butter, cheddar, and broccoli.
- Divide into the tin and bake 18 to 20 minutes, until golden and springy.
Equipment for This Recipe:
- Muffin tin
- Mixing bowl
- Whisk
- Rubber spatula
How to Serve This Dish:
Serve them warm or room temperature with cold milk or iced tea. One muffin is a good snack, and two make a solid side when the picnic basket needs something less sweet and more filling.
Pro Tips for This Recipe:
- Chop the broccoli very fine so the muffins slice cleanly.
- Let the steamed broccoli cool before mixing it in.
- Add a pinch of mustard powder if you want the cheese flavor to pop.
Variations on This Dish:
- Corn and Cheddar Muffins: Swap broccoli for thawed corn.
- Ham-Studded Version: Add a handful of diced ham.
- Mini Muffin Version: Bake in a mini tin for faster, bite-size snacks.
Common Mistakes to Avoid with This Dish:
- Don’t use wet broccoli. Extra water throws off the batter.
- Don’t fill the cups too high. The muffins need room to rise.
- Don’t pack them while hot if you want the tops to stay dry.
9. Hummus Veggie Cups
These are the picnic answer to the endless question of how to serve vegetables without a sticky dip bowl tipping over. Each cup keeps the hummus at the bottom and the vegetables upright, which feels organized in a way kids actually notice.
Why It Works:
The individual cup format solves the double-dip problem and keeps the vegetables crisp. Hummus is thick enough to cling to carrot sticks and cucumber spears, and it travels well when chilled. You can make the cups look playful without doing any extra cooking.
Key Ingredients:
- 1 1/2 cups hummus
- 2 carrots, cut into sticks
- 1 cucumber, cut into spears
- 1 red bell pepper, sliced
- 2 celery stalks, cut into sticks
- 4 small clear cups
Quick Steps:
- Spoon hummus into the bottom of each cup.
- Cut vegetables into sturdy sticks.
- Stand the vegetables upright in the hummus.
- Chill until ready to pack.
Equipment for This Recipe:
- Knife
- Cutting board
- Small cups with lids
- Spoon
How to Serve This Dish:
Set the cups on the picnic blanket with cold lemonade or sparkling water. They make a nice side next to sandwiches, and the clear cups show off the color of the vegetables, which helps with kids who eat first with their eyes.
Pro Tips for This Recipe:
- Pat the vegetables dry so the hummus stays thick.
- Use wider cups if the veggie sticks are tall.
- A sprinkle of paprika on the hummus makes the cups look finished with almost no effort.
Variations on This Dish:
- Ranch Dip Cups: Use ranch dip instead of hummus.
- Guacamole Cups: Swap in guacamole, but keep them extra cold.
- Mediterranean Mix: Add cherry tomatoes and pita wedges on the side.
Common Mistakes to Avoid with This Dish:
- Don’t cut the vegetables too thin or they flop over.
- Don’t add watery veggies like tomatoes into the hummus unless you’re serving immediately.
- Don’t skip the lid if you’re moving the cups around in a cooler.
10. Pasta Salad Cups with Peas and Ham
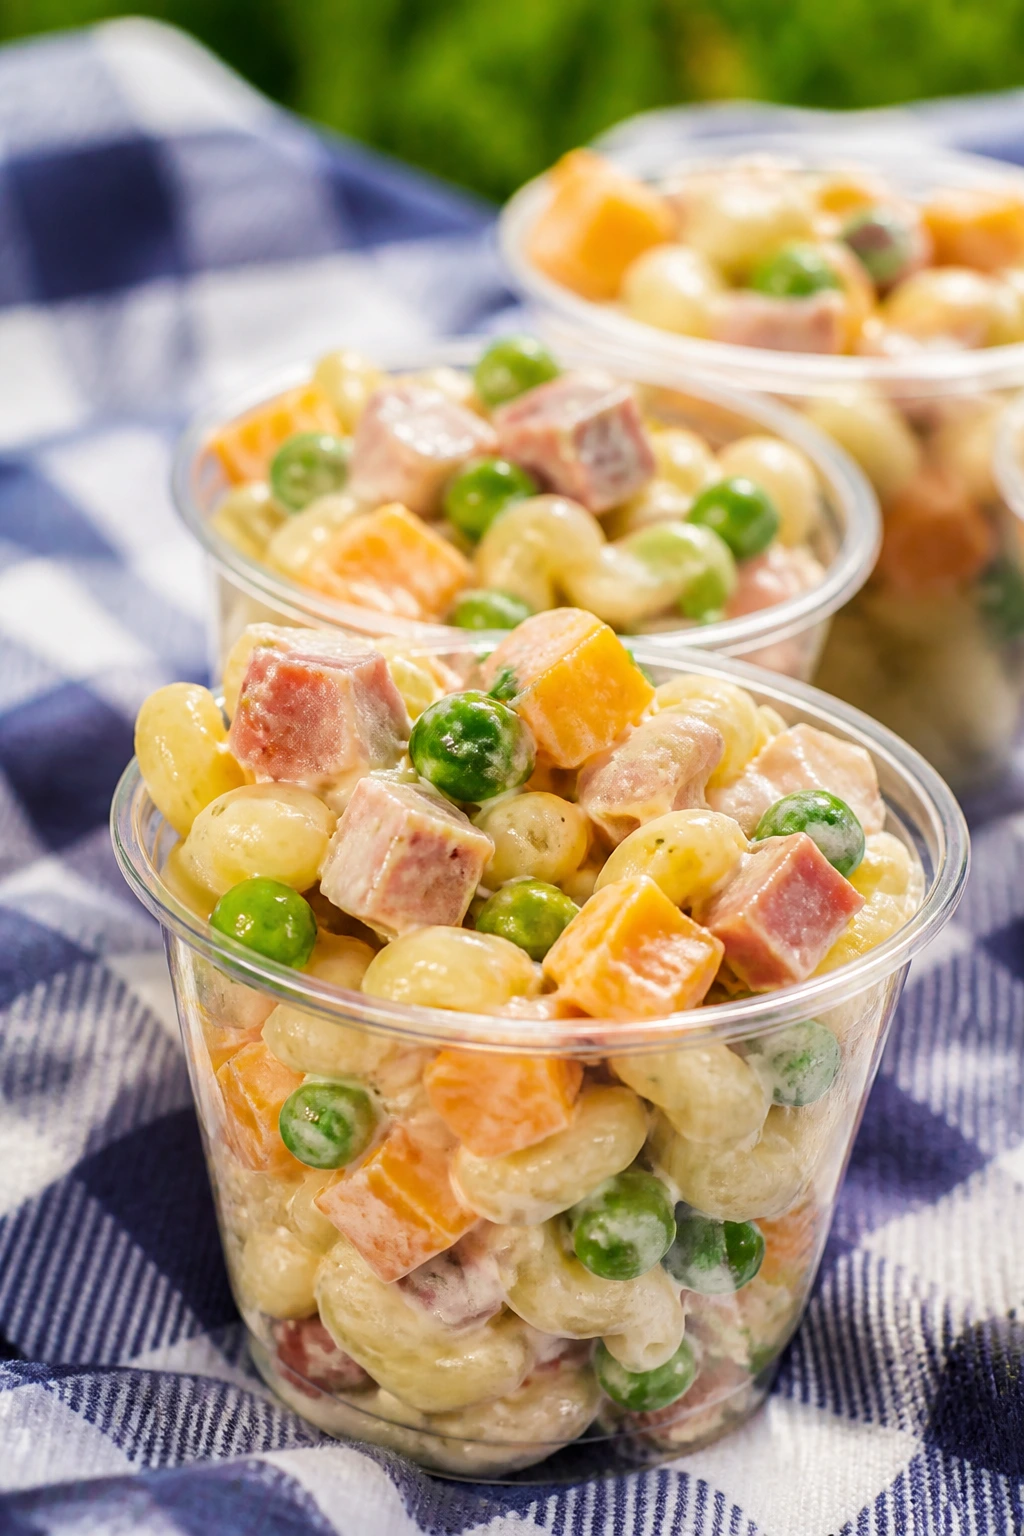
Pasta salad gets a lot more kid-friendly when it’s portioned into individual cups instead of left in one giant bowl that turns into a fork wrestling match. Peas, ham, and a light creamy dressing make it salty, cool, and easy to eat without chasing noodles across the blanket.
Why It Works:
Short pasta holds dressing better than long noodles, and the ham gives the salad enough savory flavor to keep it from tasting like cold starch. The peas stay sweet and bright, and the small cup format means every child gets a balanced portion instead of digging through for the “good stuff.”
Key Ingredients:
- 2 cups cooked small pasta
- 1 cup diced ham
- 1 cup thawed peas
- 1/2 cup diced cheddar
- 1/3 cup mayonnaise
- 2 tablespoons plain yogurt
- 4 small cups
Quick Steps:
- Cook the pasta until just tender, then rinse under cold water and drain well.
- Mix mayo and yogurt for the dressing.
- Toss pasta, ham, peas, and cheddar with the dressing.
- Spoon into cups and chill before packing.
Equipment for This Recipe:
- Pot
- Colander
- Mixing bowl
- Spoon or spatula
How to Serve This Dish:
Serve the cups with chilled fruit and cold sparkling water. They work as a side or a light main, and they stay neat if you keep them cold right up until the blanket comes out.
Pro Tips for This Recipe:
- Rinse the pasta after cooking so it doesn’t clump.
- Cut the ham into small cubes, not long strips.
- Keep the dressing light; too much makes the pasta slick and heavy.
Variations on This Dish:
- Bacon Pasta Cups: Swap ham for crisp bacon bits.
- Veggie-Only Version: Leave out the meat and add more peas and peppers.
- Italian Style: Use mozzarella, olive bits, and a spoon of pesto.
Common Mistakes to Avoid with This Dish:
- Don’t overdress the pasta. It should glisten, not swim.
- Don’t pack it warm; hot pasta wakes up the cooler and softens the rest of the food.
- Don’t let it sit open too long if there’s mayo in the dressing.
11. Mini Corn Dog Muffins
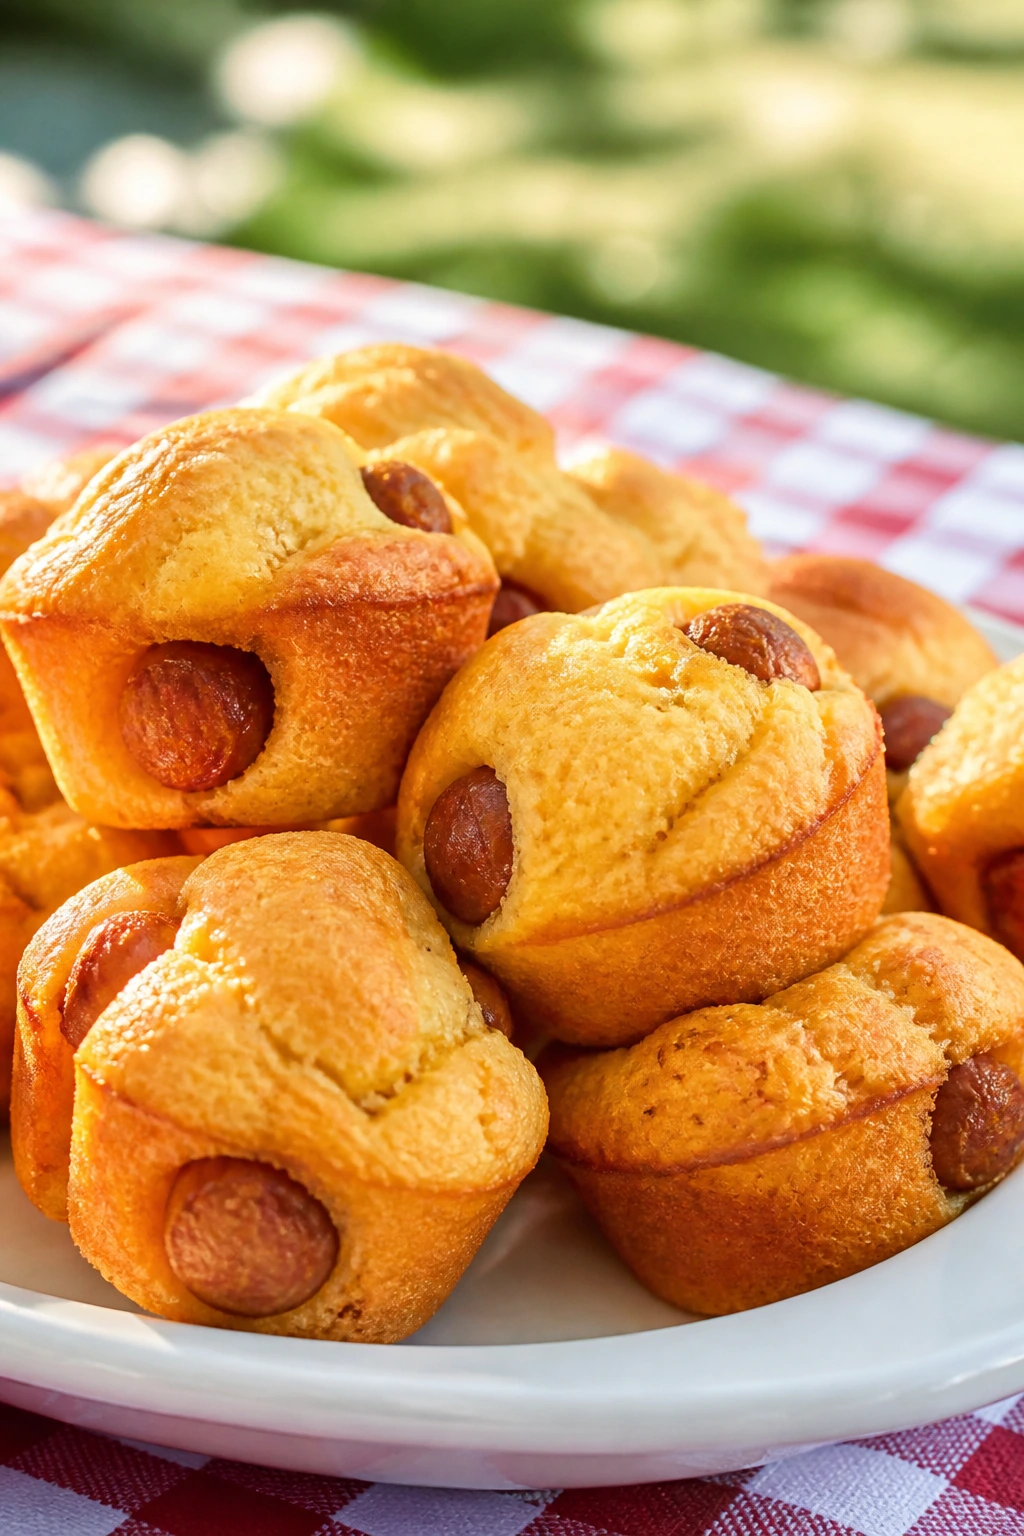
These taste like fair food in a tin, which is exactly why kids reach for them so fast. The cornbread is slightly sweet, the hot dog pieces add salt, and the whole thing behaves better than actual corn dogs in a car seat.
Why It Works:
Cornmeal batter bakes around the hot dog pieces and keeps the snack compact. Mini muffins cool faster than full-sized ones, so they’re easier to pack and less likely to turn soggy in the container. A little honey in the batter gives them that classic corn dog sweetness without making them sticky.
Key Ingredients:
- 1 cup all-purpose flour
- 1 cup yellow cornmeal
- 1 tablespoon sugar
- 1 tablespoon baking powder
- 1 cup milk
- 1 egg
- 2 hot dogs, cut into small chunks
Quick Steps:
- Heat the oven to 375°F and grease a mini muffin tin.
- Whisk flour, cornmeal, sugar, baking powder, and a pinch of salt.
- Stir in milk and egg, then fold in hot dog pieces.
- Spoon into the tin and bake 12 to 14 minutes until lightly golden.
Equipment for This Recipe:
- Mini muffin tin
- Mixing bowl
- Whisk
- Small spoon
How to Serve This Dish:
Pack them with a small container of ketchup or mustard and a cold juice box. They’re easy to eat one-handed, which matters when the other hand is already handling a juice box and a blanket edge.
Pro Tips for This Recipe:
- Chop the hot dogs small so every muffin has a little meat in it.
- Grease the tin well; cornbread edges stick fast.
- Let them cool before packing or the steam softens the bottoms.
Variations on This Dish:
- Cheddar Corn Dog Muffins: Fold in shredded cheddar for a richer bite.
- Turkey Dog Version: Use turkey hot dogs for a lighter flavor.
- Jalapeño Adults-Only Bite: Add diced jalapeño if the picnic has older eaters too.
Common Mistakes to Avoid with This Dish:
- Don’t use too much batter in each cup. They need room to rise.
- Don’t chop the hot dog pieces too large or they sink.
- Don’t skip the cooling step if you want the texture to stay crumbly and neat.
12. Deviled Egg Halves with Paprika
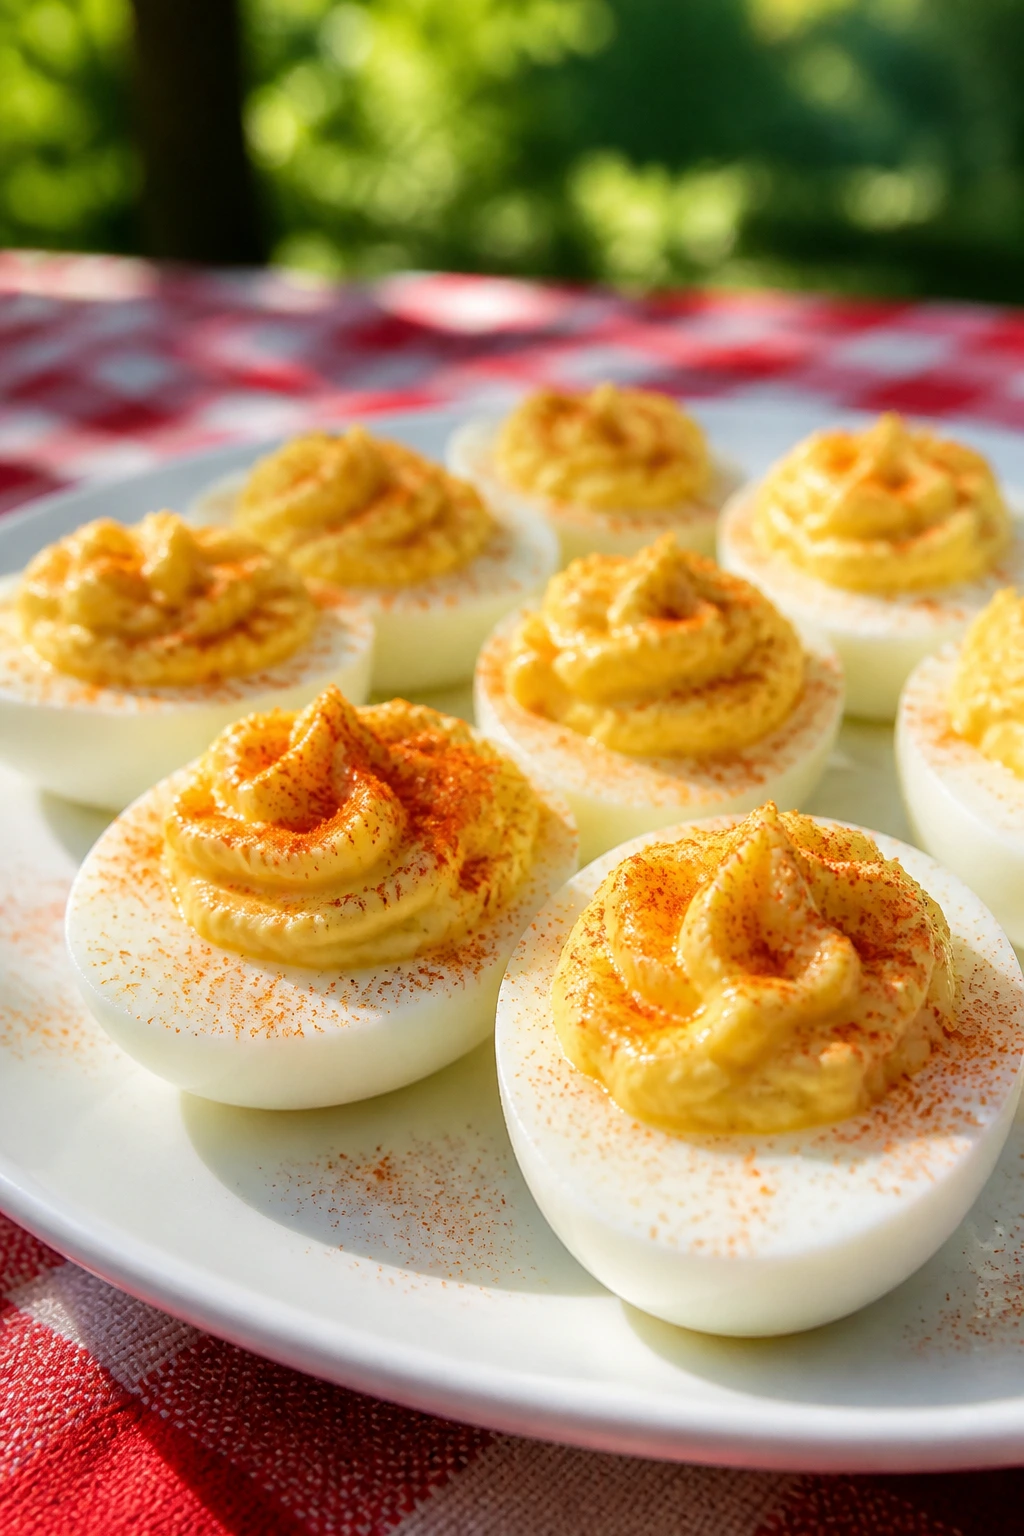
Deviled eggs can disappear fast at a picnic if you keep the filling simple and the yolks smooth. They’re cool, salty, and easy to eat in one or two bites, which makes them one of those old-school snacks that still earns its spot.
Why It Works:
Egg yolks mash into a creamy filling that feels rich without needing a lot of ingredients. A small hit of mustard gives the filling a little bite, and paprika on top makes the eggs look more finished than they actually are. Chilling them before packing keeps the filling firm and easier to transport.
Key Ingredients:
- 6 large eggs
- 3 tablespoons mayonnaise
- 1 teaspoon yellow mustard
- 1 teaspoon pickle relish, optional
- 1/4 teaspoon salt
- Paprika for topping
Quick Steps:
- Hard-boil the eggs, cool them, peel them, and slice in half lengthwise.
- Scoop out the yolks and mash with mayo, mustard, relish, and salt.
- Spoon or pipe the filling back into the whites.
- Sprinkle lightly with paprika and chill.
Equipment for This Recipe:
- Saucepan
- Mixing bowl
- Spoon or piping bag
- Egg slicer or knife
How to Serve This Dish:
Set the eggs on a chilled plate beside cold lemonade and cucumber sticks. They’re best eaten soon after packing, so keep them in the coldest part of the cooler until the picnic begins.
Pro Tips for This Recipe:
- Cool the eggs in ice water so the shells peel more cleanly.
- Mash the yolks until no lumps remain if you want a smooth filling.
- Pack them in a flat container so the tops don’t get smashed.
Variations on This Dish:
- Relish Pickle Eggs: Add more relish for a sweeter finish.
- Greek Yogurt Version: Replace half the mayo with plain Greek yogurt.
- Smoked Paprika Eggs: Use smoked paprika instead of regular for a deeper flavor.
Common Mistakes to Avoid with This Dish:
- Don’t leave them out warm. Eggs belong in the cooler.
- Don’t overfill the whites or the tops smear when the lid goes on.
- Don’t undercook the yolks; they should be dry and easy to mash.
13. No-Bake Cereal Bars
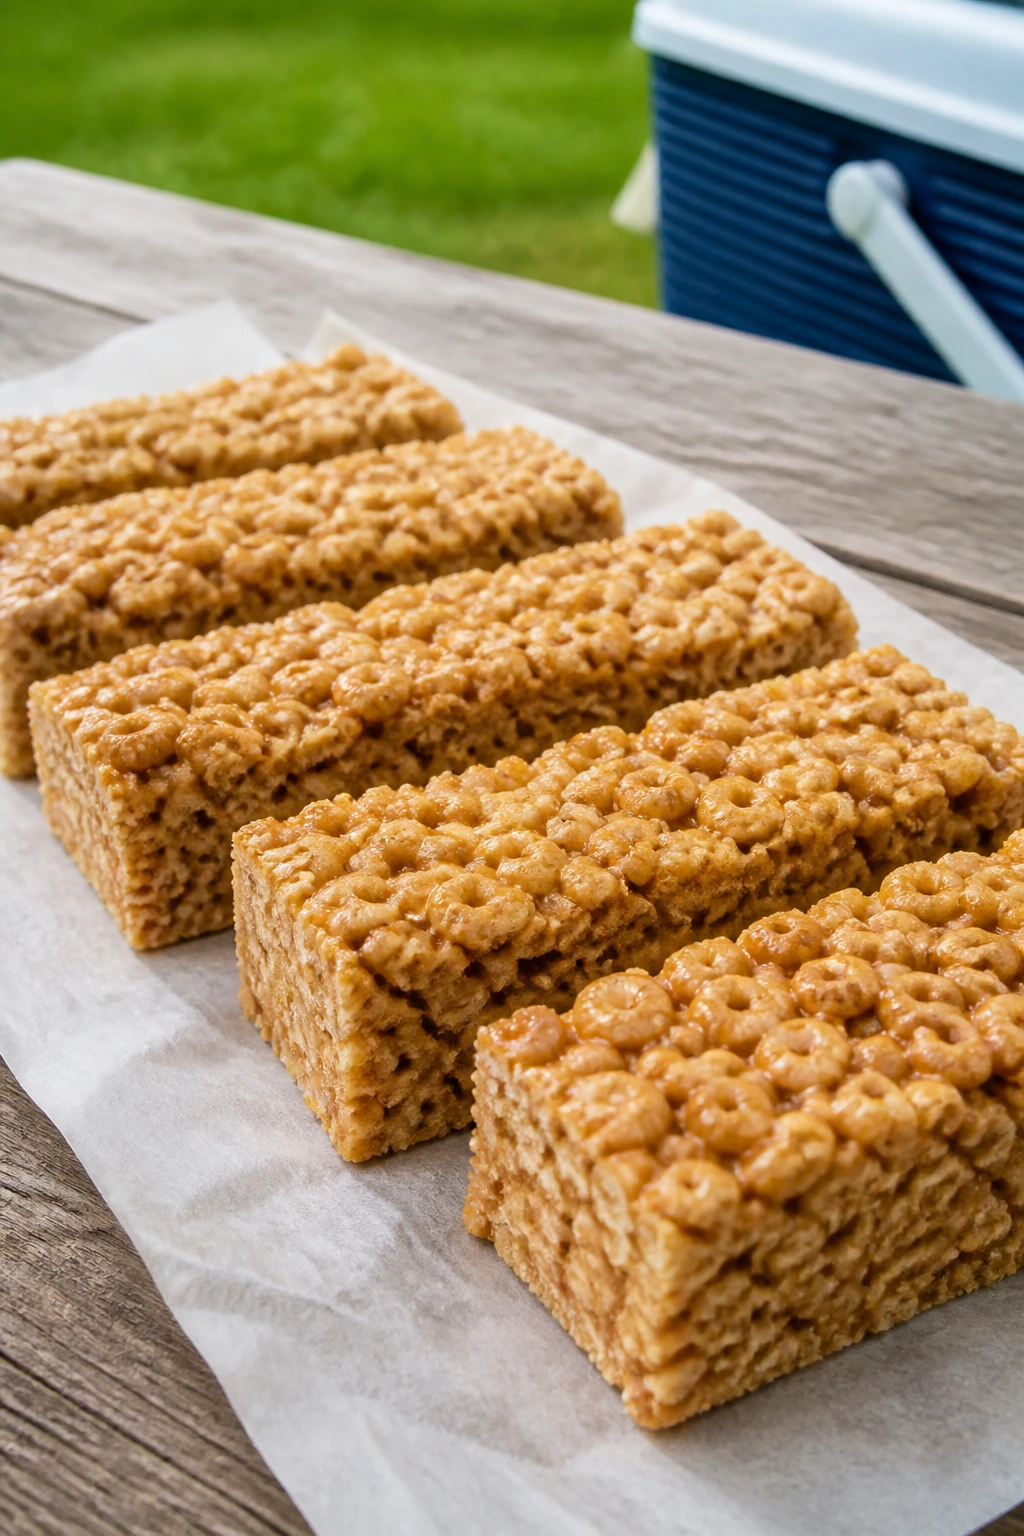
These bars are the kind of snack that saves you when the picnic prep window is tiny. They’re chewy, a little sticky, and sturdy enough to wrap individually so nobody ends up with a fistful of loose cereal.
Why It Works:
Melted peanut butter and honey bind the cereal without needing the oven. That means you get a bar with structure but not a rock-hard bite. The trick is pressing the mixture firmly into the pan while it’s still warm so the bars hold together when cut.
Key Ingredients:
- 3 cups crispy rice cereal
- 2 cups corn flakes or oat cereal
- 1/2 cup peanut butter
- 1/2 cup honey
- 2 tablespoons butter
- 1 teaspoon vanilla extract
Quick Steps:
- Line an 8×8-inch pan with parchment.
- Warm peanut butter, honey, and butter together until smooth, then stir in vanilla.
- Fold in the cereal until evenly coated.
- Press firmly into the pan and chill until set before slicing.
Equipment for This Recipe:
- Saucepan
- Spatula
- 8×8-inch baking pan
- Parchment paper
How to Serve This Dish:
Wrap each bar in parchment and serve with cold milk or a juice box. They make a tidy sweet snack between savory bites, and they travel well even when the cooler is packed full.
Pro Tips for This Recipe:
- Press the mixture down with the bottom of a measuring cup for a compact bar.
- Let the bars set fully before cutting or they crumble at the edges.
- If the cereal seems dry, add 1 more tablespoon of honey.
Variations on This Dish:
- Chocolate Chip Bars: Stir in mini chocolate chips after the mixture cools slightly.
- Seed Crunch Bars: Add sunflower seeds for a nut-free twist.
- Cinnamon Bars: Add 1 teaspoon cinnamon for a warmer flavor.
Common Mistakes to Avoid with This Dish:
- Don’t boil the binder. Hot sugar mixtures can make the bars hard.
- Don’t skip the parchment or they’ll stick to the pan.
- Don’t cut them while warm unless you want crumbs instead of bars.
14. Mini Meatballs with Toothpicks
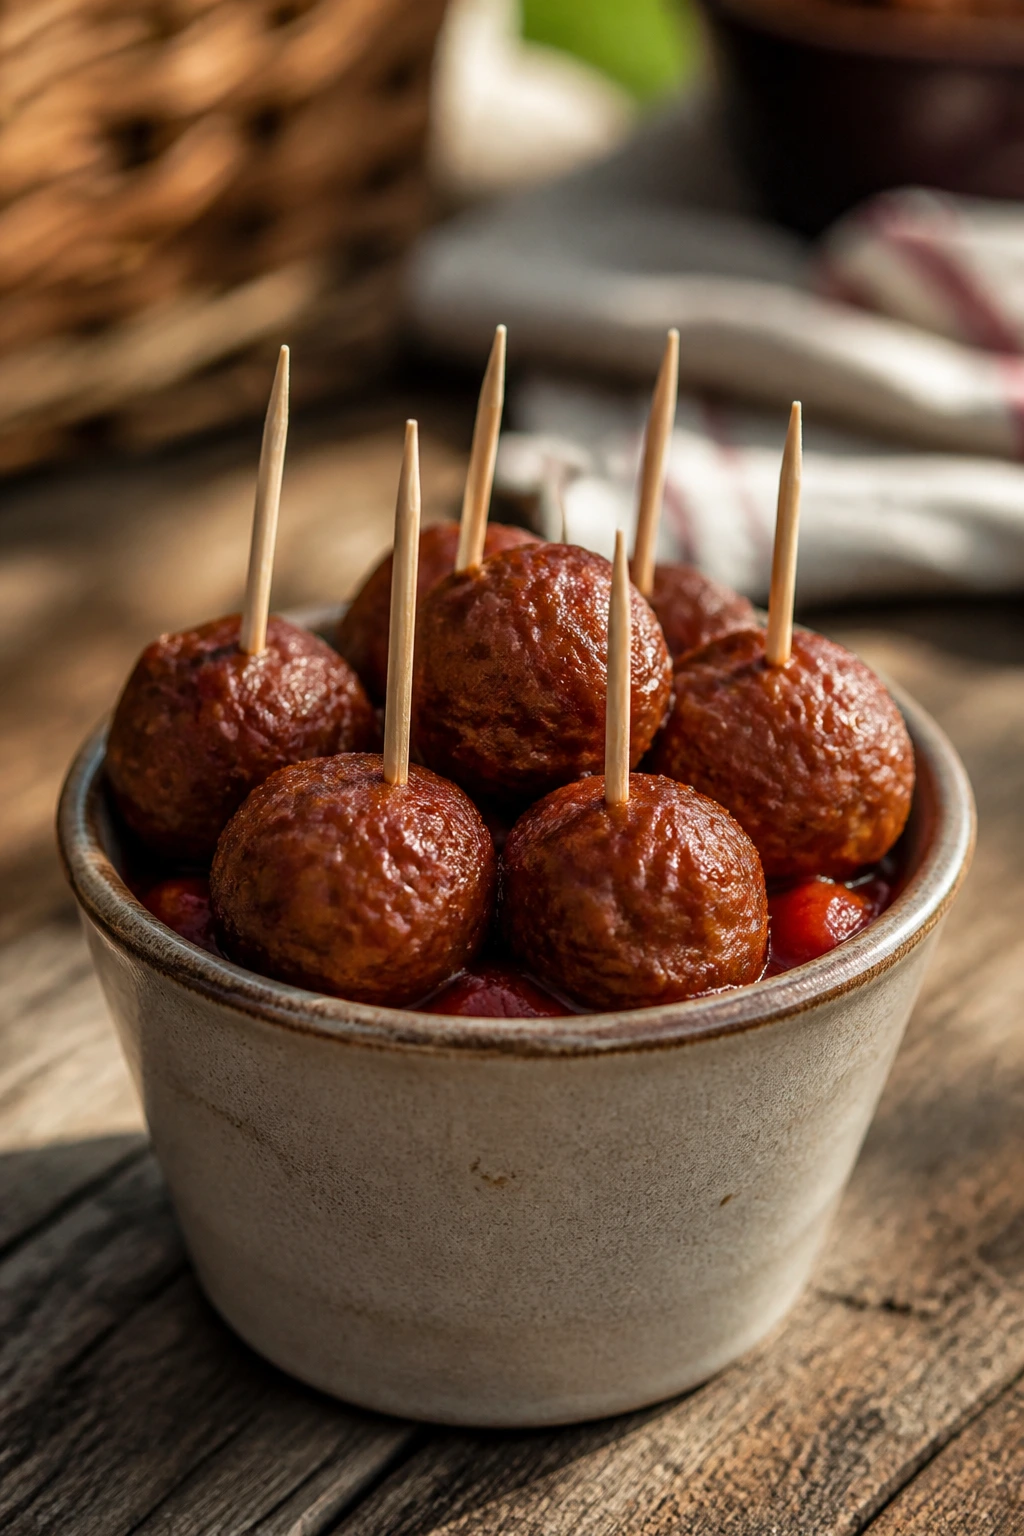
Mini meatballs are one of those foods that make kids hover near the tray. They’re small enough to spear, hearty enough to feel like a meal, and good warm or room temperature, which is picnic-friendly in a way a lot of meats are not.
Why It Works:
Ground meat mixed with breadcrumbs and egg bakes into a compact bite that doesn’t fall apart on a plate. A little parmesan or onion powder adds flavor without making the meatballs complicated. If you serve them with toothpicks and a cup of sauce, they stop being dinner and turn into smart little snacks.
Key Ingredients:
- 1 pound ground turkey or beef
- 1/2 cup breadcrumbs
- 1 egg
- 1/4 cup grated parmesan
- 1 teaspoon garlic powder
- 1 cup marinara sauce, for serving
Quick Steps:
- Heat the oven to 400°F and line a sheet pan.
- Mix meat, breadcrumbs, egg, parmesan, garlic powder, and a pinch of salt.
- Roll into 1-inch balls and bake 14 to 16 minutes.
- Warm the marinara and serve the meatballs with toothpicks.
Equipment for This Recipe:
- Sheet pan
- Mixing bowl
- Measuring spoon
- Small saucepan
How to Serve This Dish:
Serve them in a shallow cup with a little sauce at the bottom and cold sparkling water on the side. They’re easiest to manage if you give each child a toothpick or two and keep the sauce separate until eating time.
Pro Tips for This Recipe:
- Wet your hands before rolling so the mixture doesn’t cling.
- Make the balls small; picnic food should not require a knife.
- Bake until just cooked through so they stay tender after cooling.
Variations on This Dish:
- Italian Herb Meatballs: Add dried basil and oregano.
- BBQ Meatballs: Swap marinara for barbecue sauce.
- Chicken Meatballs: Use ground chicken and a little extra parmesan for moisture.
Common Mistakes to Avoid with This Dish:
- Don’t overwork the mixture or the meatballs turn dense.
- Don’t make them huge; they’ll dry before the centers cook evenly.
- Don’t drown them in sauce if you’re packing them for later.
15. Watermelon Feta Skewers
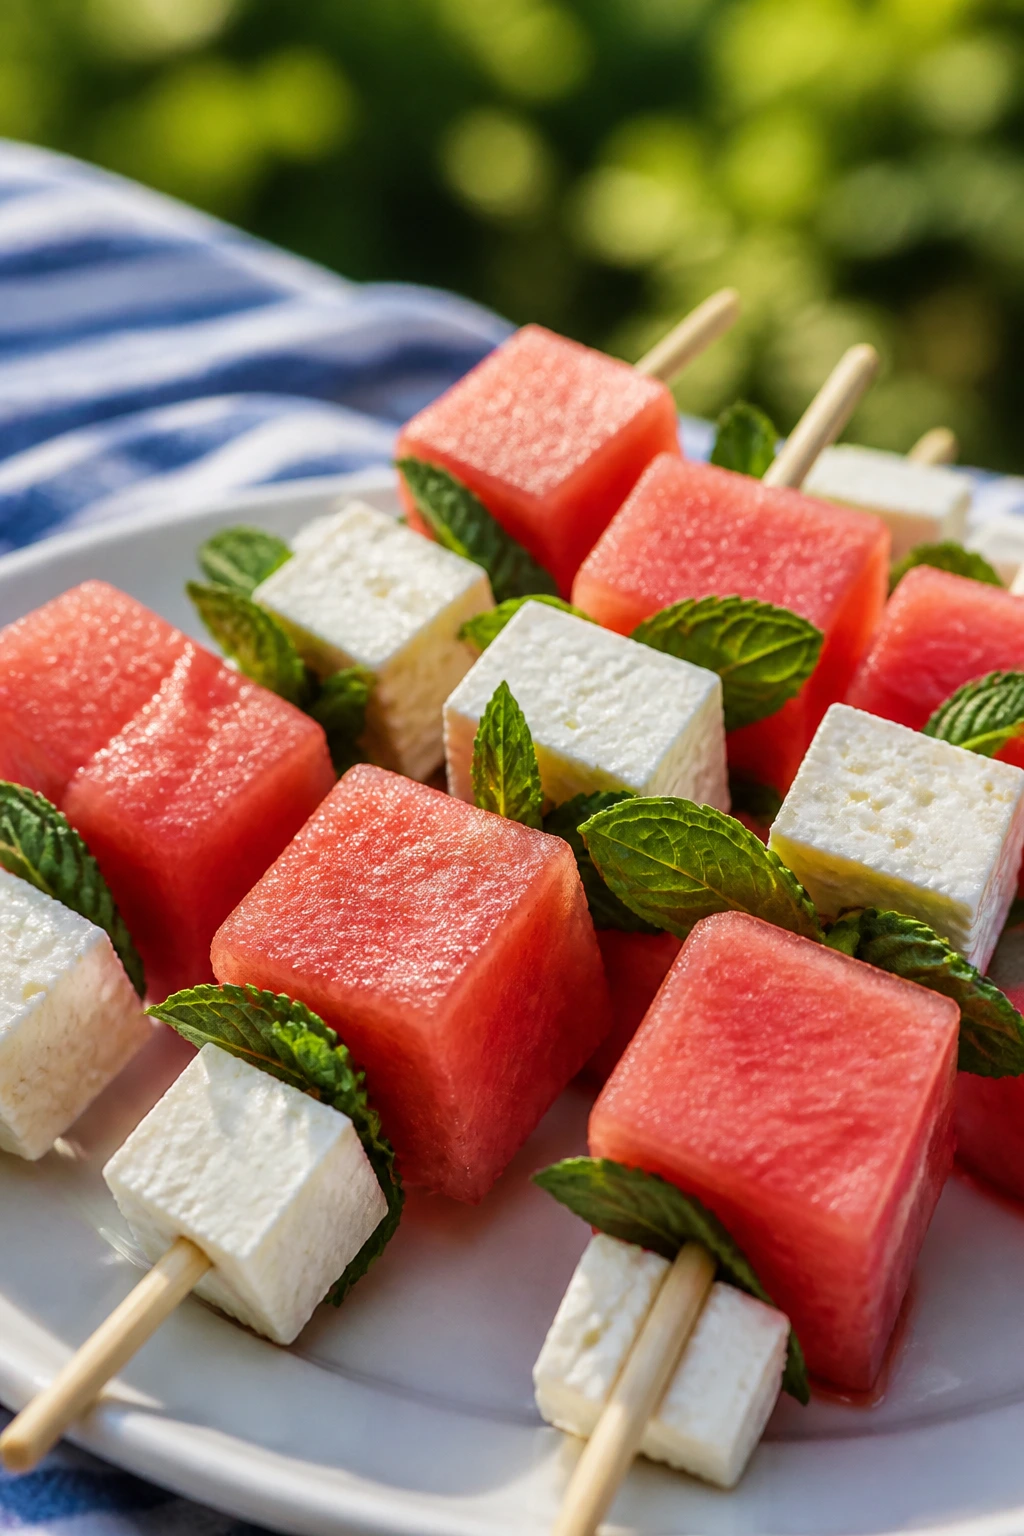
Watermelon and feta sounds like a grown-up idea until kids taste the sweet-salty combo and start grabbing the skewers faster than the fruit salad. The mint gives it a cool smell, and the whole thing feels bright and cold on the tongue.
Why It Works:
Watermelon carries a lot of water, so pairing it with feta keeps the flavor from getting one-note sweet. The salt sharpens the fruit, and a squeeze of lime makes everything taste cleaner. Because the cubes are firm, they hold up well on small skewers without collapsing.
Key Ingredients:
- 3 cups seedless watermelon, cut into cubes
- 1 cup feta, cut into cubes
- 2 tablespoons fresh mint, torn
- 1 lime, cut into wedges
- Small skewers
Quick Steps:
- Cut the watermelon and feta into similar-size cubes.
- Thread watermelon, feta, and mint onto the skewers.
- Squeeze a little lime over the top right before serving.
- Keep chilled until the moment the picnic starts.
Equipment for This Recipe:
- Knife
- Cutting board
- Small skewers
- Paper towels
How to Serve This Dish:
Serve these with cold water or a light lemonade. They make a good bright side on a tray that otherwise leans heavy, and they’re one of the few picnic foods that looks almost too pretty to eat, which kids usually solve quickly.
Pro Tips for This Recipe:
- Chill the watermelon before cutting if you want the skewers extra refreshing.
- Pat the feta dry so it doesn’t smear.
- Build the skewers close to serving time to keep the mint fresh.
Variations on This Dish:
- Basil Swap: Use basil instead of mint.
- No-Skewer Bowl: Toss the cubes in a bowl for a simpler serve.
- Berry Addition: Add strawberries for more color and sweetness.
Common Mistakes to Avoid with This Dish:
- Don’t use overripe melon. It falls apart on the stick.
- Don’t dress the skewers too early or the feta starts to crumble.
- Don’t forget the cooler; watermelon tastes best icy cold.
16. Apple Cheddar Crackers
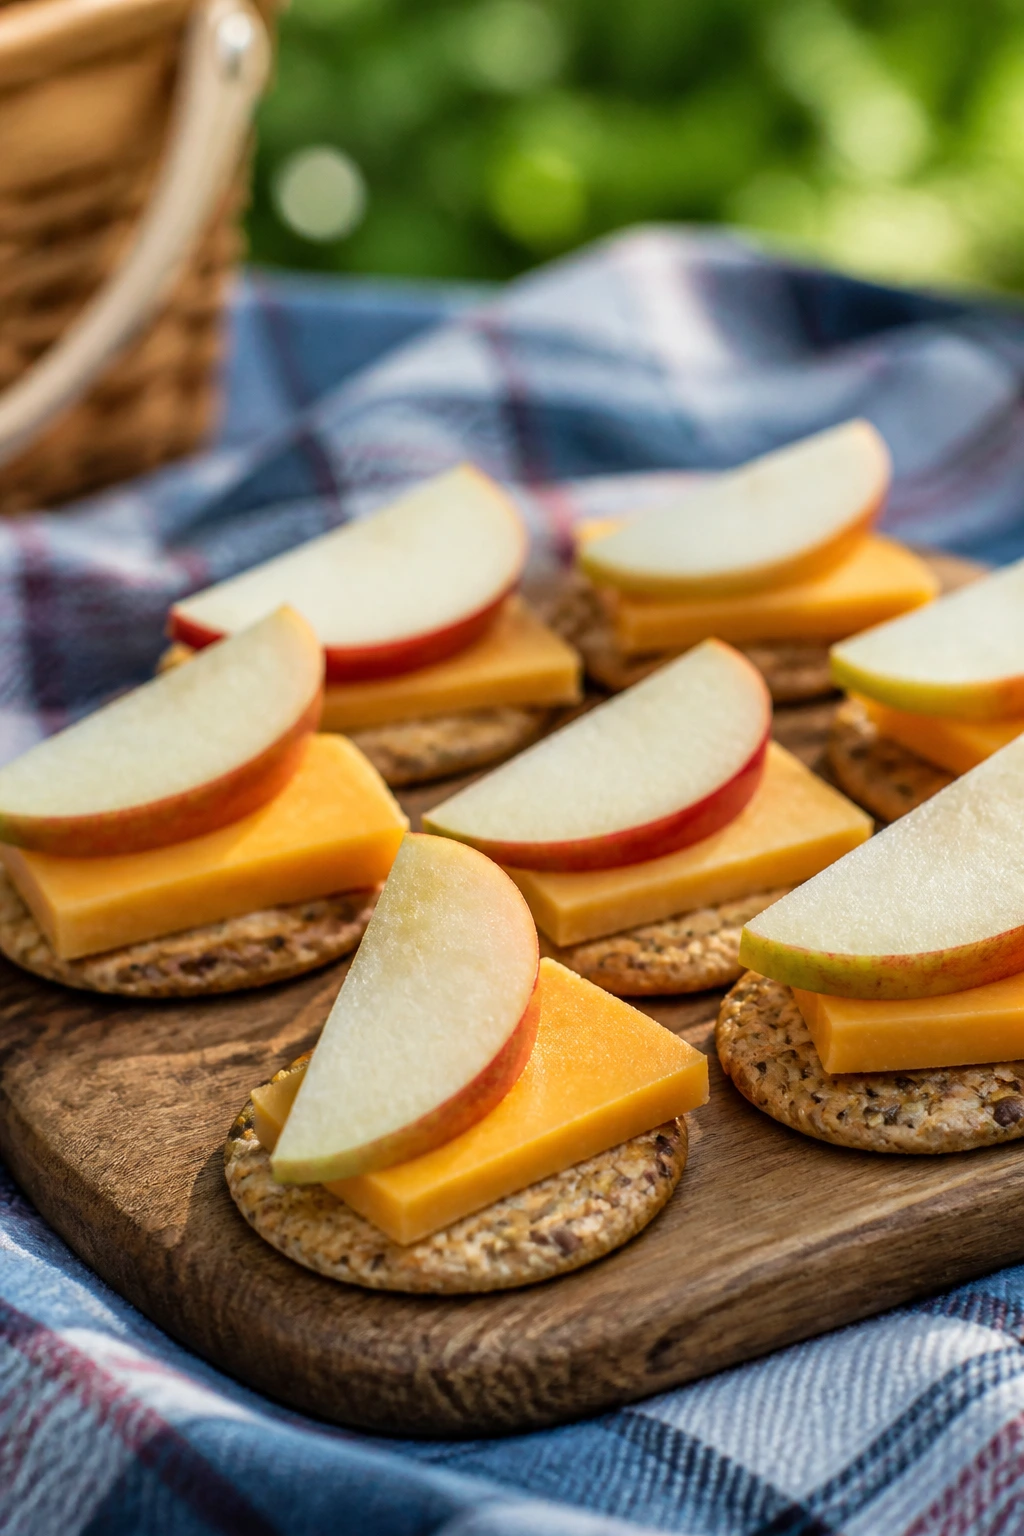
This is the snack that tastes more put-together than it really is. Crisp apple slices, sharp cheddar, and a cracker underneath make a crunchy-salty-sweet bite that feels tidy enough for a blanket lunch.
Why It Works:
The cracker gives you a stable base, the cheddar adds salt and protein, and the apple keeps the snack fresh instead of heavy. If you slice the apples thin, they layer neatly without cracking the cracker or sliding off the top.
Key Ingredients:
- 2 apples, thinly sliced
- 6 ounces sharp cheddar, sliced or cut into thin sticks
- 1 sleeve whole-grain crackers
- 1 tablespoon lemon juice
- 1 tablespoon peanut butter or cream cheese, optional spread
Quick Steps:
- Toss apple slices with lemon juice to slow browning.
- Spread crackers with a thin layer of peanut butter or cream cheese if using.
- Top with cheddar and one apple slice.
- Pack in a flat container so the layers stay intact.
Equipment for This Recipe:
- Paring knife
- Cutting board
- Flat container
- Small spoon or spreader
How to Serve This Dish:
Serve these with cold apple juice or iced tea. They work as a snack or the “something crunchy” on a picnic plate, and the color looks nice when you mix red and green apples.
Pro Tips for This Recipe:
- Slice the cheddar thin. Thick cheese blocks the cracker from snapping cleanly.
- Choose firm apples like Honeycrisp or Gala so the slices stay crisp.
- Assemble close to serving if you want the crackers extra crunchy.
Variations on This Dish:
- Nutty Apple Stack: Add a dab of almond butter.
- Cinnamon Apple Bites: Dust the apples with a tiny bit of cinnamon.
- Brie Swap: Use soft brie for an older-kid version.
Common Mistakes to Avoid with This Dish:
- Don’t leave cut apples exposed too long or they brown fast.
- Don’t stack too much on one cracker. It will slide.
- Don’t pack them in a warm lunch bag without an ice pack.
17. Tortilla Pinwheel Sandwiches
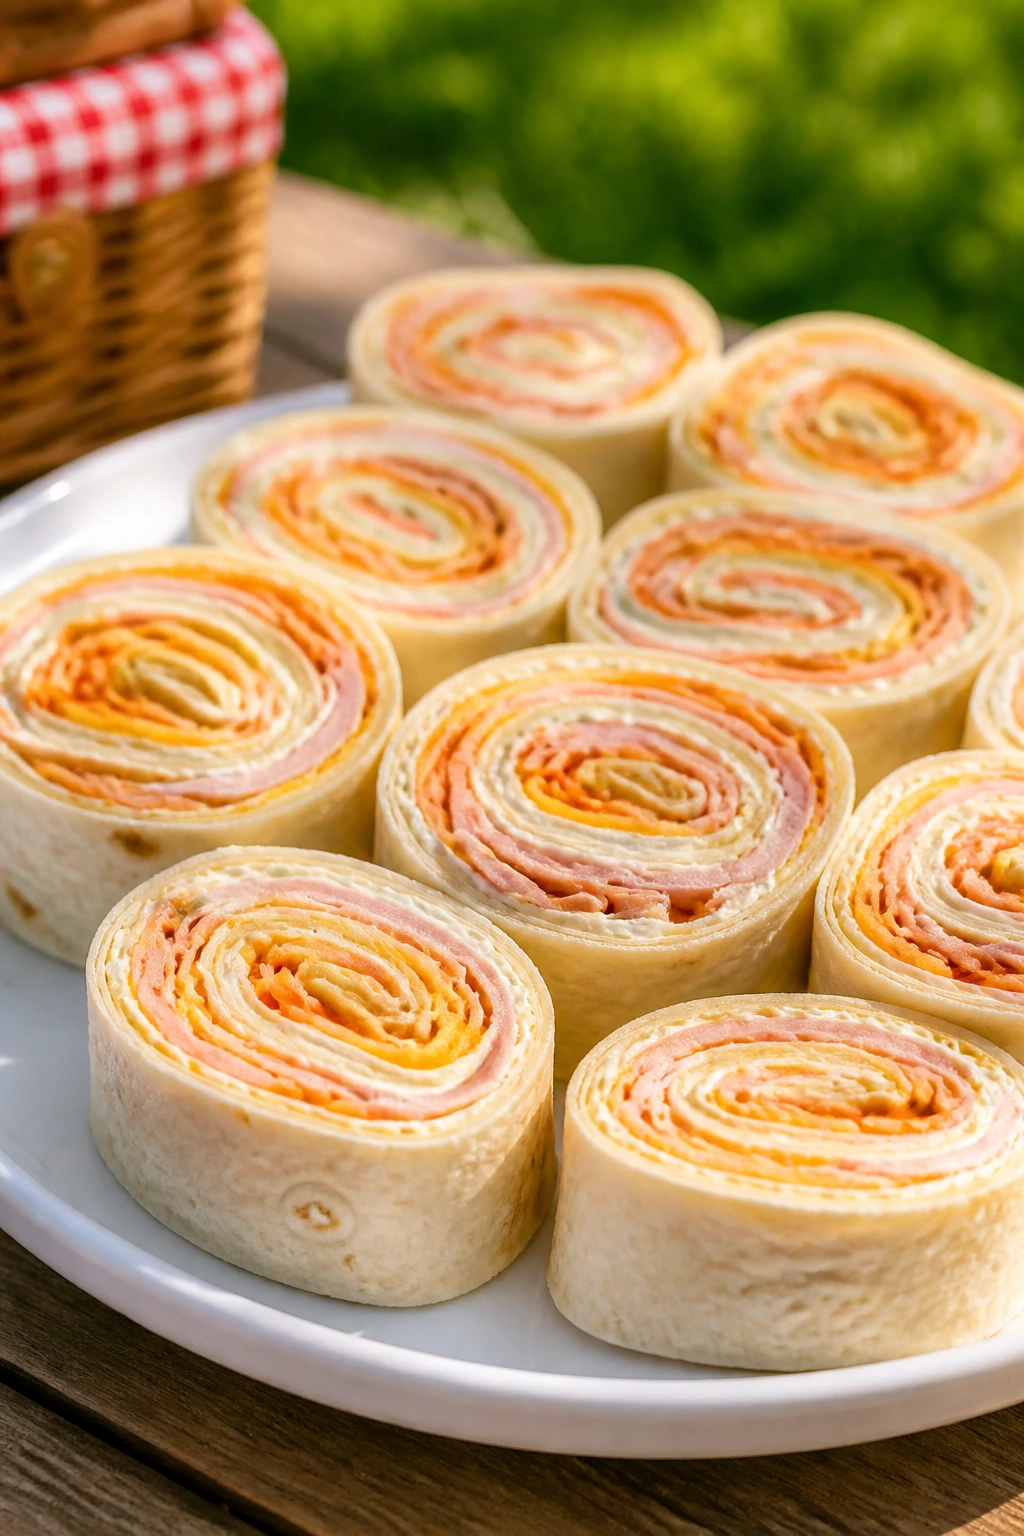
Pinwheel sandwiches are the trick for kids who like sandwiches but hate crusts, soggy edges, or any hint of a “normal” lunch. Rolled tight and sliced clean, they look tidy and taste familiar, which is a rare combination.
Why It Works:
A soft tortilla seals in the filling better than sliced bread, especially when you use a spread that acts like glue. Cream cheese or mayo keeps the tortilla from tearing, and the small round shape means the flavors are balanced in every bite. They’re also easy to make in batches, which matters when several children are heading to the same park.
Key Ingredients:
- 2 large flour tortillas
- 4 ounces cream cheese
- 4 slices ham
- 1/2 cup shredded cheddar
- 1/4 cup shredded carrots
- 1 teaspoon ranch seasoning, optional
Quick Steps:
- Mix cream cheese with ranch seasoning if using.
- Spread each tortilla with the cream cheese mixture.
- Layer ham, cheddar, and carrots, then roll tightly.
- Chill for 15 minutes and slice into 1-inch rounds.
Equipment for This Recipe:
- Cutting board
- Knife
- Spatula
- Parchment paper
How to Serve This Dish:
Set these next to grapes and a cold lemonade. They’re the kind of sandwich that looks better sliced, because the spirals show off the filling and help kids pick the one they want fastest.
Pro Tips for This Recipe:
- Keep the filling thin and even.
- Chill before slicing for clean spirals.
- Use finely shredded carrots so the roll stays tight.
Variations on This Dish:
- Turkey Ranch Pinwheels: Swap ham for turkey.
- Veggie Cream Cheese Pinwheels: Leave out the meat and add cucumber ribbons.
- Cheesy Pizza Pinwheels: Use pizza sauce, mozzarella, and chopped pepperoni.
Common Mistakes to Avoid with This Dish:
- Don’t overstuff the tortilla or it splits at the seam.
- Don’t use dry cream cheese straight from the fridge.
- Don’t slice with a blunt knife; it smears the filling.
18. Baked Chicken Tenders
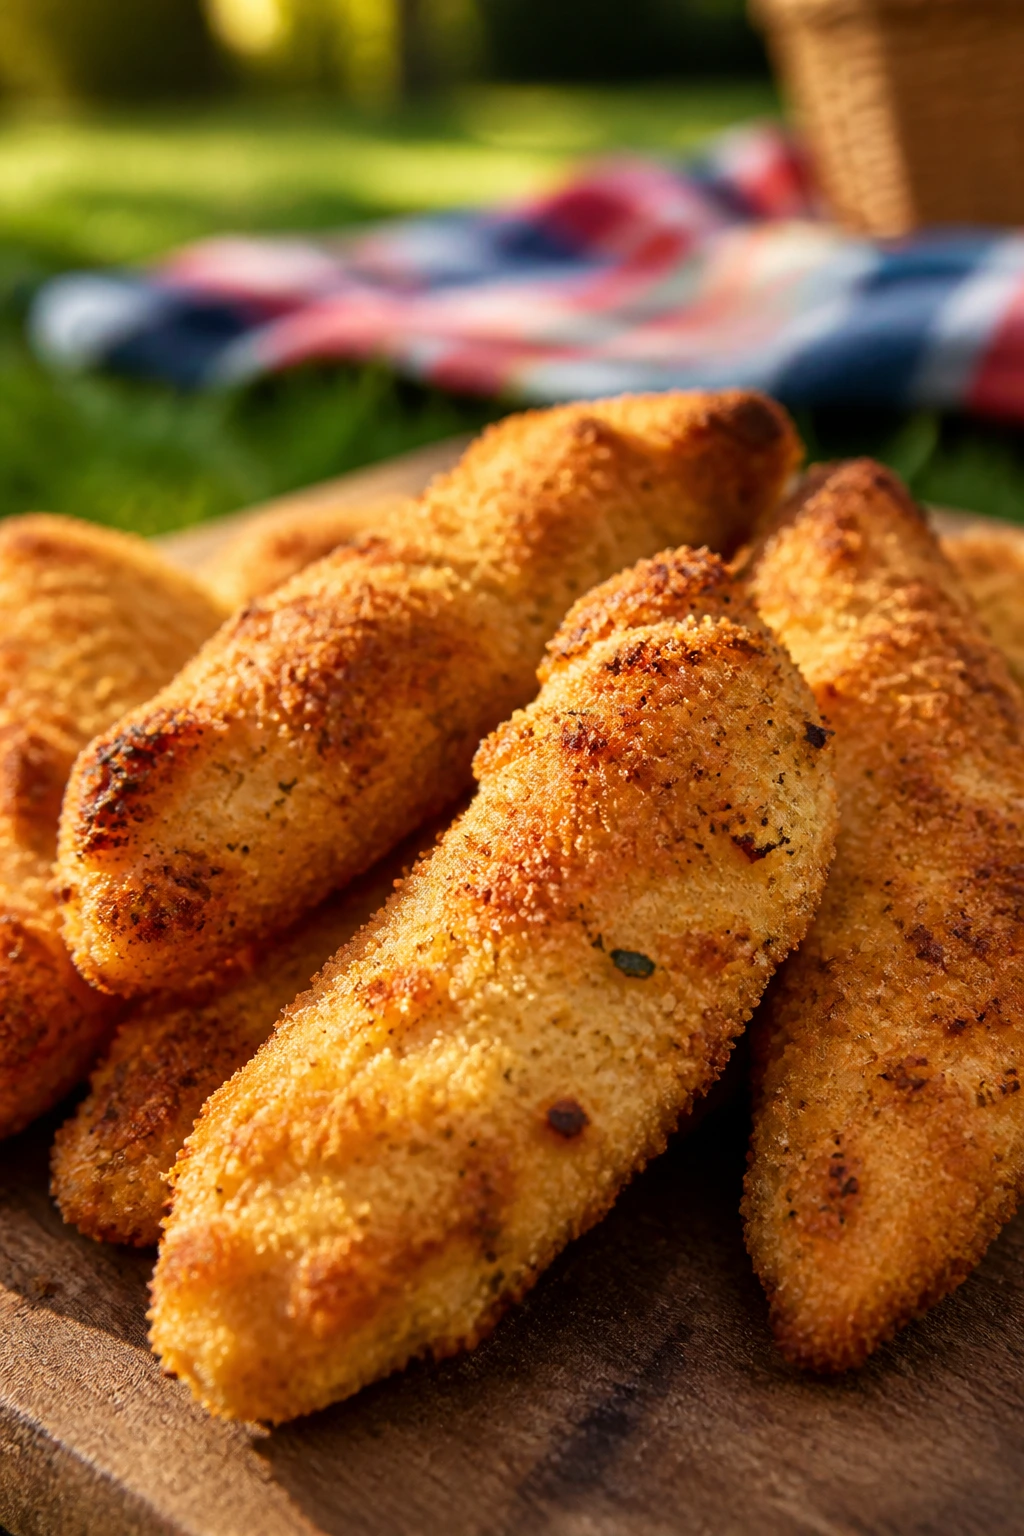
Chicken tenders are picnic royalty because they work hot, warm, or merely not-cold. They’re also one of the few foods kids will pick up happily without a speech about eating protein first, which is a small miracle.
Why It Works:
A breadcrumb coating gives the chicken a crisp shell that survives transport better than a loose batter. Baking instead of frying keeps the crust lighter and less greasy, so the tenders don’t leave a slick stain on the container. A quick rest after baking helps the coating settle before you pack them.
Key Ingredients:
- 1 1/2 pounds chicken tenders
- 1 cup breadcrumbs
- 1/2 cup flour
- 2 eggs
- 1 teaspoon garlic powder
- 1 teaspoon paprika
- Salt and pepper
Quick Steps:
- Heat the oven to 425°F and line a sheet pan with parchment.
- Set up flour, beaten eggs, and seasoned breadcrumbs in separate bowls.
- Coat each tender in flour, egg, then breadcrumbs.
- Bake 15 to 18 minutes until golden and the center reaches 165°F.
Equipment for This Recipe:
- Sheet pan
- Parchment paper
- Three shallow bowls
- Tongs
How to Serve This Dish:
Serve with ketchup, honey mustard, or ranch and a cold iced tea. They’re easy to pair with fruit and crackers, and they stay satisfying even after cooling down in the cooler.
Pro Tips for This Recipe:
- Use tenders, not thick breast chunks, for even cooking.
- Press the crumbs gently so the coating sticks.
- Let them cool on a rack before packing so the bottoms don’t steam.
Variations on This Dish:
- Parmesan Crumb Tenders: Add parmesan to the breading.
- Cornflake Coating: Crush cornflakes for a crunchier crust.
- Spice-Free Kid Version: Leave out paprika for a milder flavor.
Common Mistakes to Avoid with This Dish:
- Don’t pack them while hot or the coating softens.
- Don’t crowd the pan, or the crumbs steam instead of crisp.
- Don’t underbake; the center should be fully cooked before transport.
19. Banana Oat Breakfast Cookies
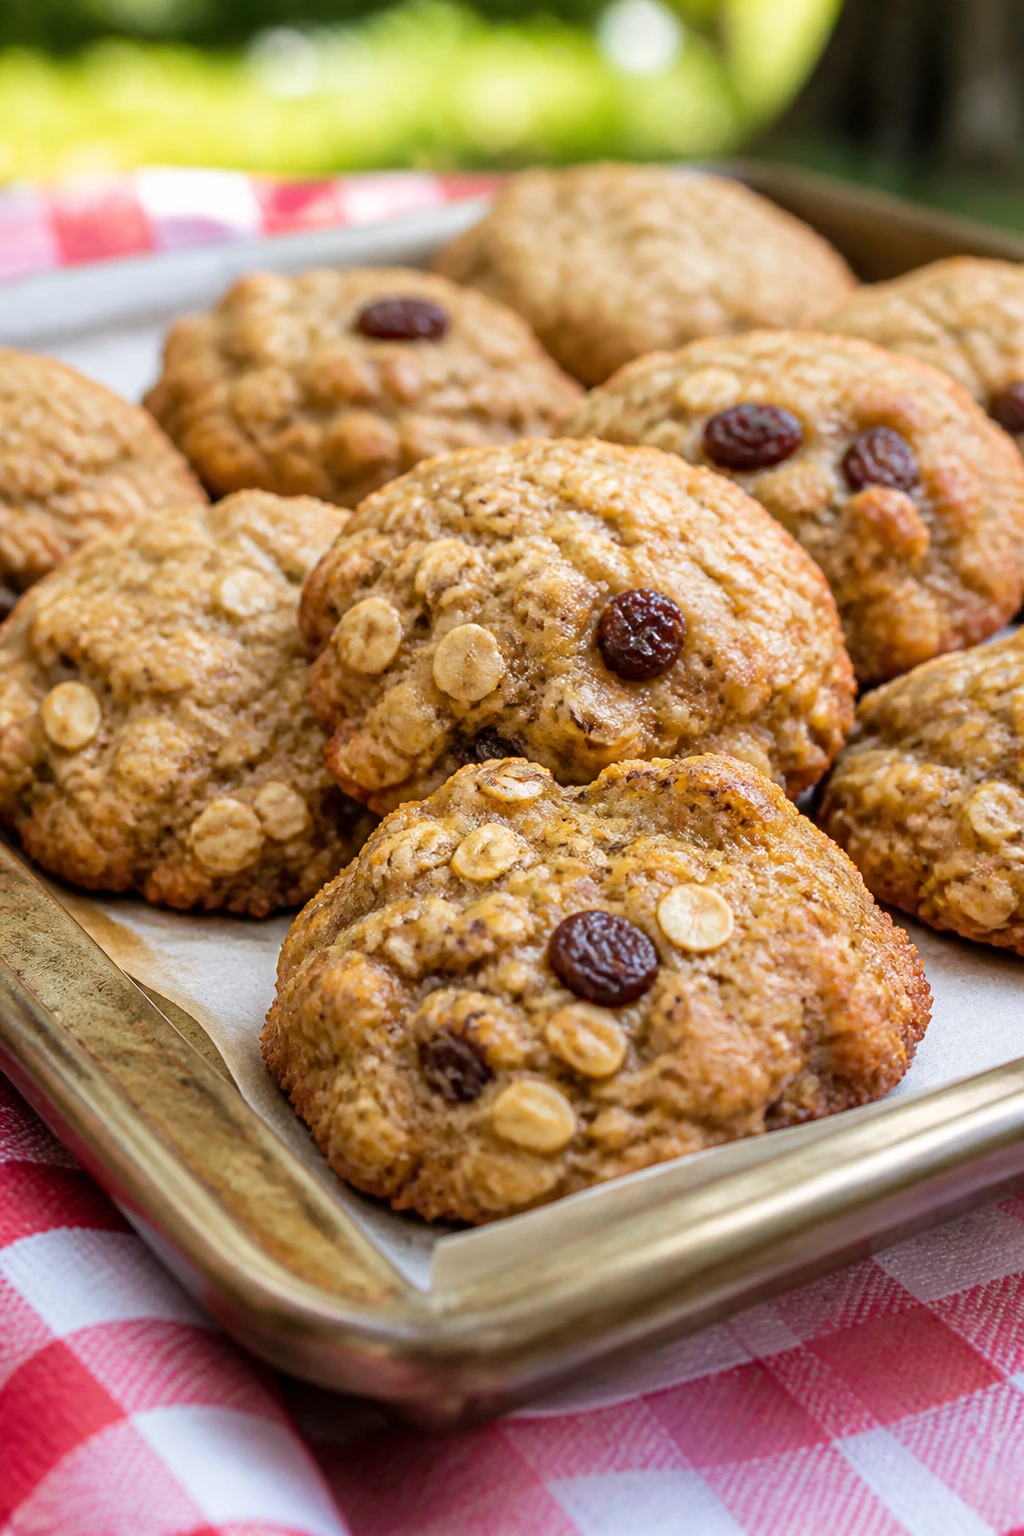
These are the kind of cookie that can be breakfast without anyone rolling their eyes. They’re soft, lightly sweet, and sturdy enough to hand out in a car or at the edge of a picnic blanket with a cold drink beside them.
Why It Works:
Mashed banana binds the oats together without needing much sugar. That keeps the texture chewy and the ingredient list short, which is useful when you want something that feels homemade but not fussy. A few raisins or chocolate chips give just enough surprise in the center.
Key Ingredients:
- 2 ripe bananas, mashed
- 2 cups rolled oats
- 1/2 teaspoon cinnamon
- 1/4 cup raisins or mini chocolate chips
- 2 tablespoons peanut butter
Quick Steps:
- Heat the oven to 350°F and line a sheet pan.
- Mix bananas, oats, cinnamon, and peanut butter.
- Stir in raisins or chips.
- Scoop into small mounds and bake 12 to 14 minutes.
Equipment for This Recipe:
- Mixing bowl
- Sheet pan
- Spoon or cookie scoop
- Parchment paper
How to Serve This Dish:
Serve them with cold milk, especially if the picnic has younger kids who like a softer bite. Three cookies make a satisfying snack, and they tuck easily into a lunch box without breaking into crumbs.
Pro Tips for This Recipe:
- Use bananas with brown spots so the cookies are sweet enough.
- Flatten the mounds slightly before baking so they cook evenly.
- Cool fully before stacking or they can stick together.
Variations on This Dish:
- Apple Cinnamon Cookies: Use finely grated apple instead of raisins.
- Nut-Free Version: Replace peanut butter with sunflower seed butter.
- Chocolate Chip Finish: Add chips after the cookies cool a little.
Common Mistakes to Avoid with This Dish:
- Don’t expect them to act like crisp cookies; they’re soft by design.
- Don’t use under-ripe bananas or the flavor falls flat.
- Don’t overbake them or they dry out fast.
20. Pesto Pasta Salad
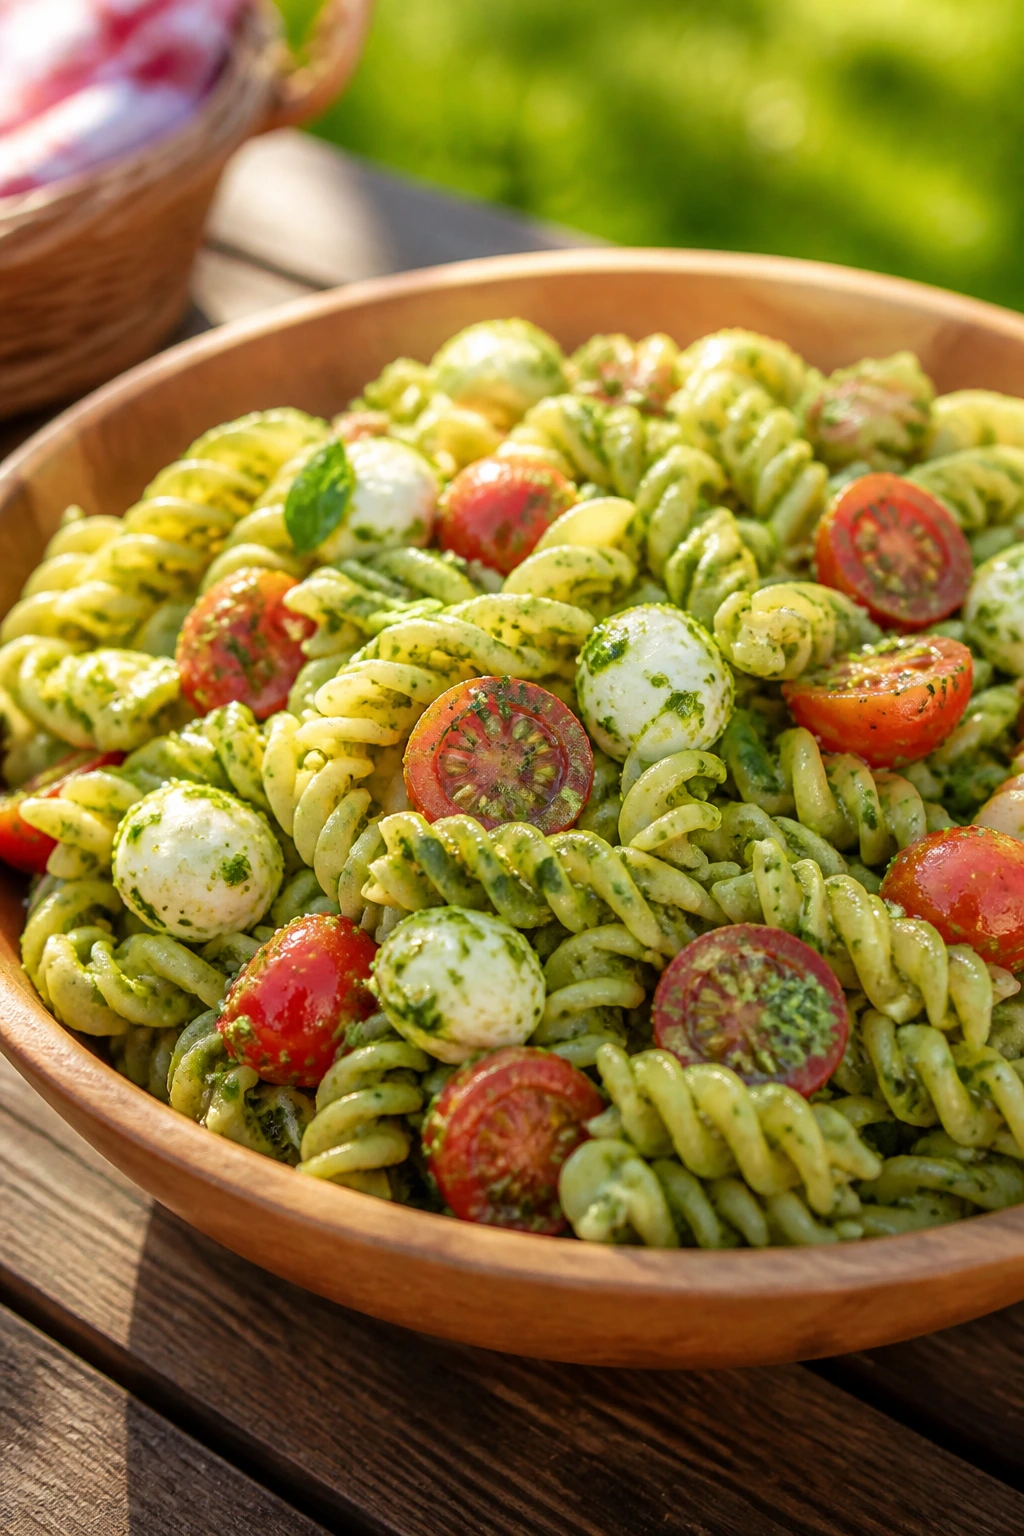
Pesto pasta salad brings a more grown-up flavor to the picnic table, but kids often like it because the noodles are green, the cheese is little and soft, and the flavor is familiar without being plain. It’s also one of the easier dishes to make ahead and forget about.
Why It Works:
Pesto coats pasta better than a thin dressing, so it stays flavorful even after chilling. Little tomatoes and mozzarella balls add sweetness and creaminess, and the pasta shape matters here: rotini or bowties grab sauce better than spaghetti would. It’s a cold dish that doesn’t apologize for being cold.
Key Ingredients:
- 3 cups cooked rotini
- 1/2 cup basil pesto
- 1 cup cherry tomatoes, halved
- 1 cup small mozzarella balls
- 1/4 cup grated parmesan
- Salt to taste
Quick Steps:
- Cook the pasta until just tender, then drain and cool.
- Toss pasta with pesto while still slightly warm.
- Add tomatoes, mozzarella, and parmesan.
- Chill before serving so the flavors settle.
Equipment for This Recipe:
- Pot
- Colander
- Large bowl
- Spoon
How to Serve This Dish:
Serve it in a cold bowl with sparkling water or lemonade. It makes a nice side for chicken tenders or sandwiches, and it holds up well if you need one dish that feels more substantial.
Pro Tips for This Recipe:
- Salt the pasta water well so the salad isn’t bland.
- Use pesto sparingly at first; you can always add more.
- Chill the salad before packing to keep the mozzarella firm.
Variations on This Dish:
- Sun-Dried Tomato Pesto Salad: Swap in sun-dried tomato pesto.
- Veggie Boost: Add peas or diced cucumber.
- Pasta-Free Version: Toss the pesto with chickpeas instead.
Common Mistakes to Avoid with This Dish:
- Don’t drown the pasta in pesto or the salad turns heavy.
- Don’t use tiny watery tomatoes unless you’ve dried them well.
- Don’t serve it warm if you want the cheese to stay neat.
21. Cheese Quesadilla Wedges
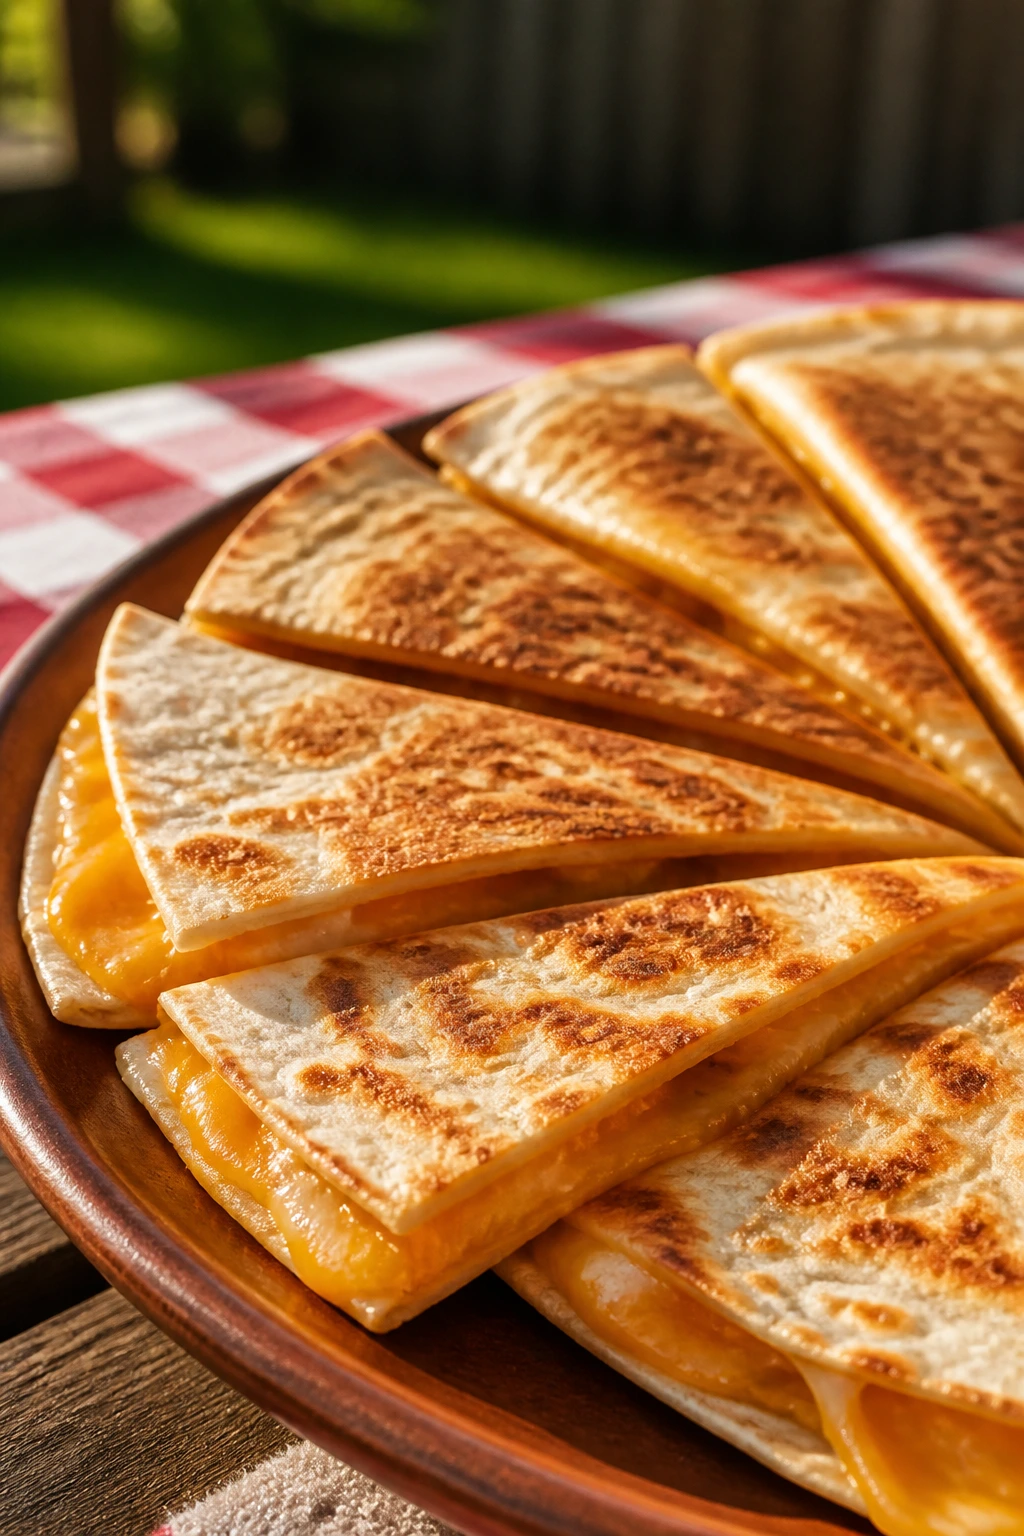
Quesadilla wedges are reliable in the best way. They’re cheesy, crisp at the edges, and easy to cut into triangles that kids can hold without the filling falling out all over the place.
Why It Works:
A skillet gives you quick browning, and the tortillas seal the cheese inside once it melts. You get a crisp outside and a stretchy center, which is usually the sweet spot for kids. If you let the quesadilla rest for a minute before cutting, the cheese settles and the wedges hold better.
Key Ingredients:
- 4 flour tortillas
- 2 cups shredded cheddar or Monterey Jack
- 1/2 cup refried beans, optional
- 1 tablespoon butter
- Salsa for serving
Quick Steps:
- Heat a skillet over medium heat and melt a little butter.
- Place one tortilla in the pan, sprinkle with cheese and beans if using, then top with another tortilla.
- Cook 2 to 3 minutes per side until golden and melted.
- Rest briefly, cut into wedges, and pack once cooled.
Equipment for This Recipe:
- Skillet
- Spatula
- Knife or pizza cutter
- Cutting board
How to Serve This Dish:
Serve the wedges with a cup of salsa and cold milk or lemonade. They’re best packed in a single layer so the triangles don’t stick together, and they’re a solid pick when the picnic needs one warm thing turned room-temp.
Pro Tips for This Recipe:
- Use medium heat; high heat burns the tortilla before the cheese melts.
- Grate your own cheese if you want a smoother melt.
- Let them cool before stacking or the steam softens the crisp edges.
Variations on This Dish:
- Bean and Cheese Quesadilla: Keep it simple with refried beans.
- Chicken Quesadilla: Add chopped cooked chicken.
- Veggie Quesadilla: Use finely diced peppers and corn.
Common Mistakes to Avoid with This Dish:
- Don’t overload the cheese or it leaks out and burns.
- Don’t cut them straight from the pan.
- Don’t use a cold skillet; the tortilla needs even heat to crisp.
22. Popcorn Snack Mix
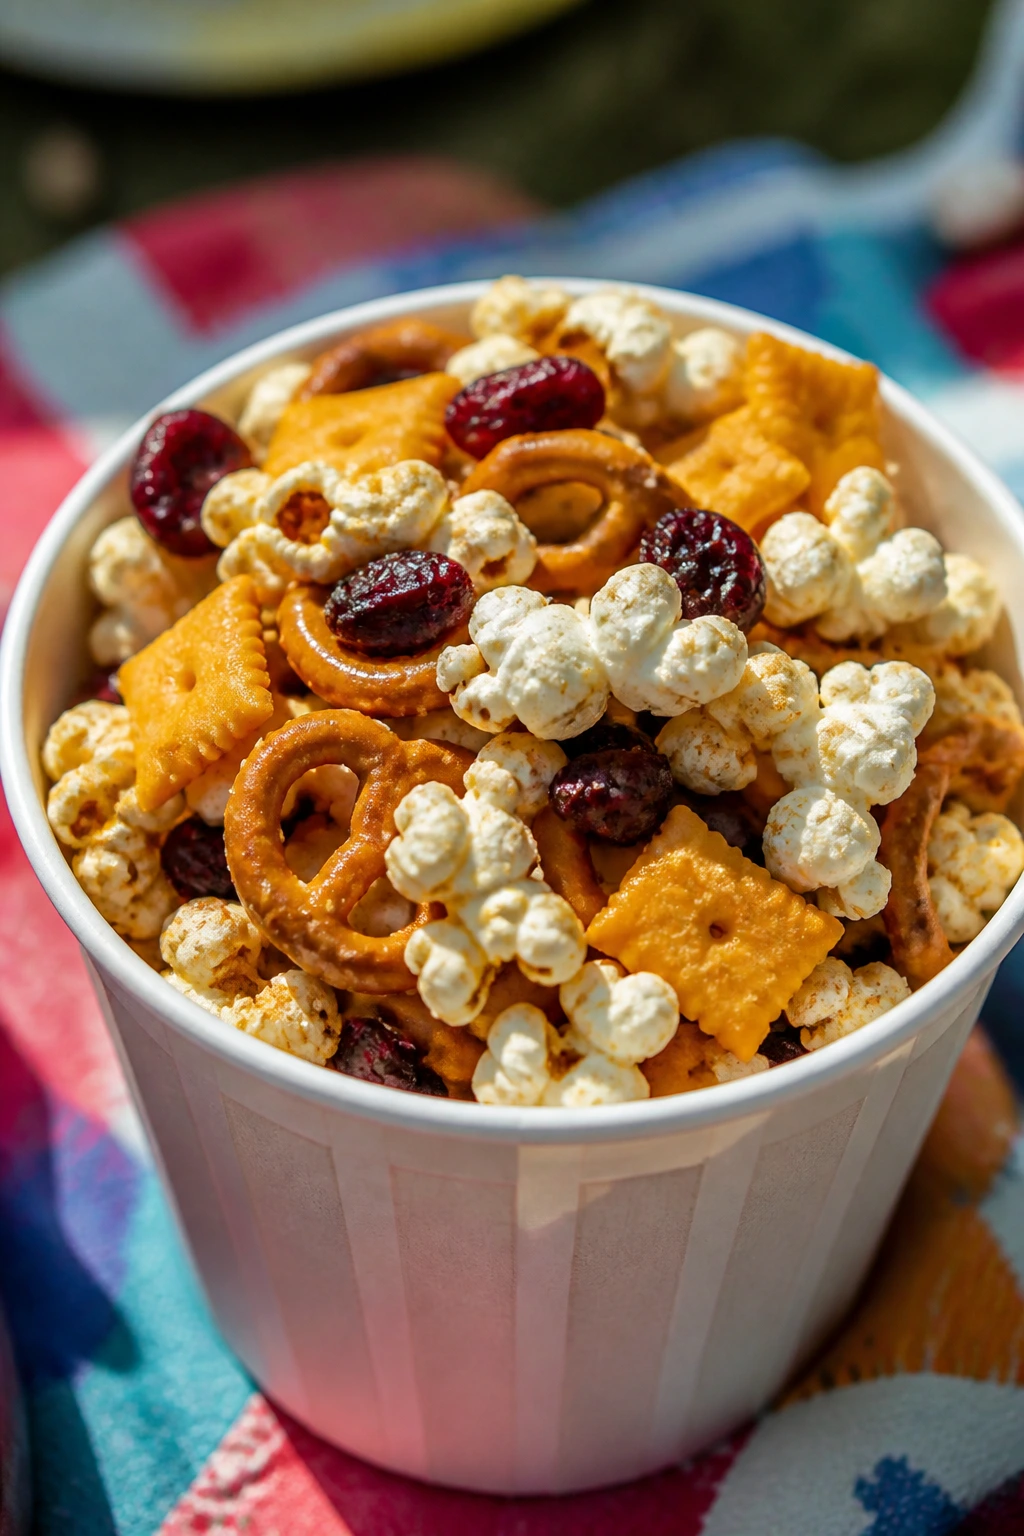
Popcorn snack mix is what you make when the basket needs a crunchy thing that isn’t a full meal. It’s light, salty, and easy to scoop by the handful, which makes it the kind of snack kids keep circling back to between the “real” foods.
Why It Works:
Popcorn is cheap, airy, and easy to stretch with pretzels or cereal. A little butter and seasoning help the salt cling, while a few sweet bits keep it from tasting like plain movie-night leftovers. The key is keeping the mix dry enough that it doesn’t turn limp in the container.
Key Ingredients:
- 8 cups plain popcorn
- 2 cups mini pretzels
- 1 cup cheese crackers
- 1/2 cup dried cranberries
- 2 tablespoons melted butter
- 1 teaspoon ranch seasoning
Quick Steps:
- Pop the popcorn and remove any unpopped kernels.
- Toss popcorn, pretzels, crackers, and cranberries in a large bowl.
- Drizzle with butter and sprinkle with ranch seasoning.
- Mix gently and pack once fully cool.
Equipment for This Recipe:
- Large bowl
- Measuring cups
- Spoon
- Airtight container
How to Serve This Dish:
Serve in small cups with cold fruit punch or sparkling water. It’s the snack you put out while the more delicate foods are still in the cooler, and it keeps kids occupied in the best possible way.
Pro Tips for This Recipe:
- Let the popcorn cool before mixing so it stays crisp.
- Add buttery seasoning slowly to avoid soggy patches.
- Use low-salt crackers if the pretzels are already salty.
Variations on This Dish:
- Sweet-and-Salty Mix: Add mini marshmallows and chocolate chips.
- Cheesy Ranch Mix: Skip the dried fruit and add parmesan powder.
- Nutty Trail Mix Version: Add roasted sunflower seeds.
Common Mistakes to Avoid with This Dish:
- Don’t pack warm popcorn; trapped steam ruins the crunch.
- Don’t overcoat the mix with butter.
- Don’t forget to pick out unpopped kernels before serving to kids.
23. Mini Pancake Stacks with Berries
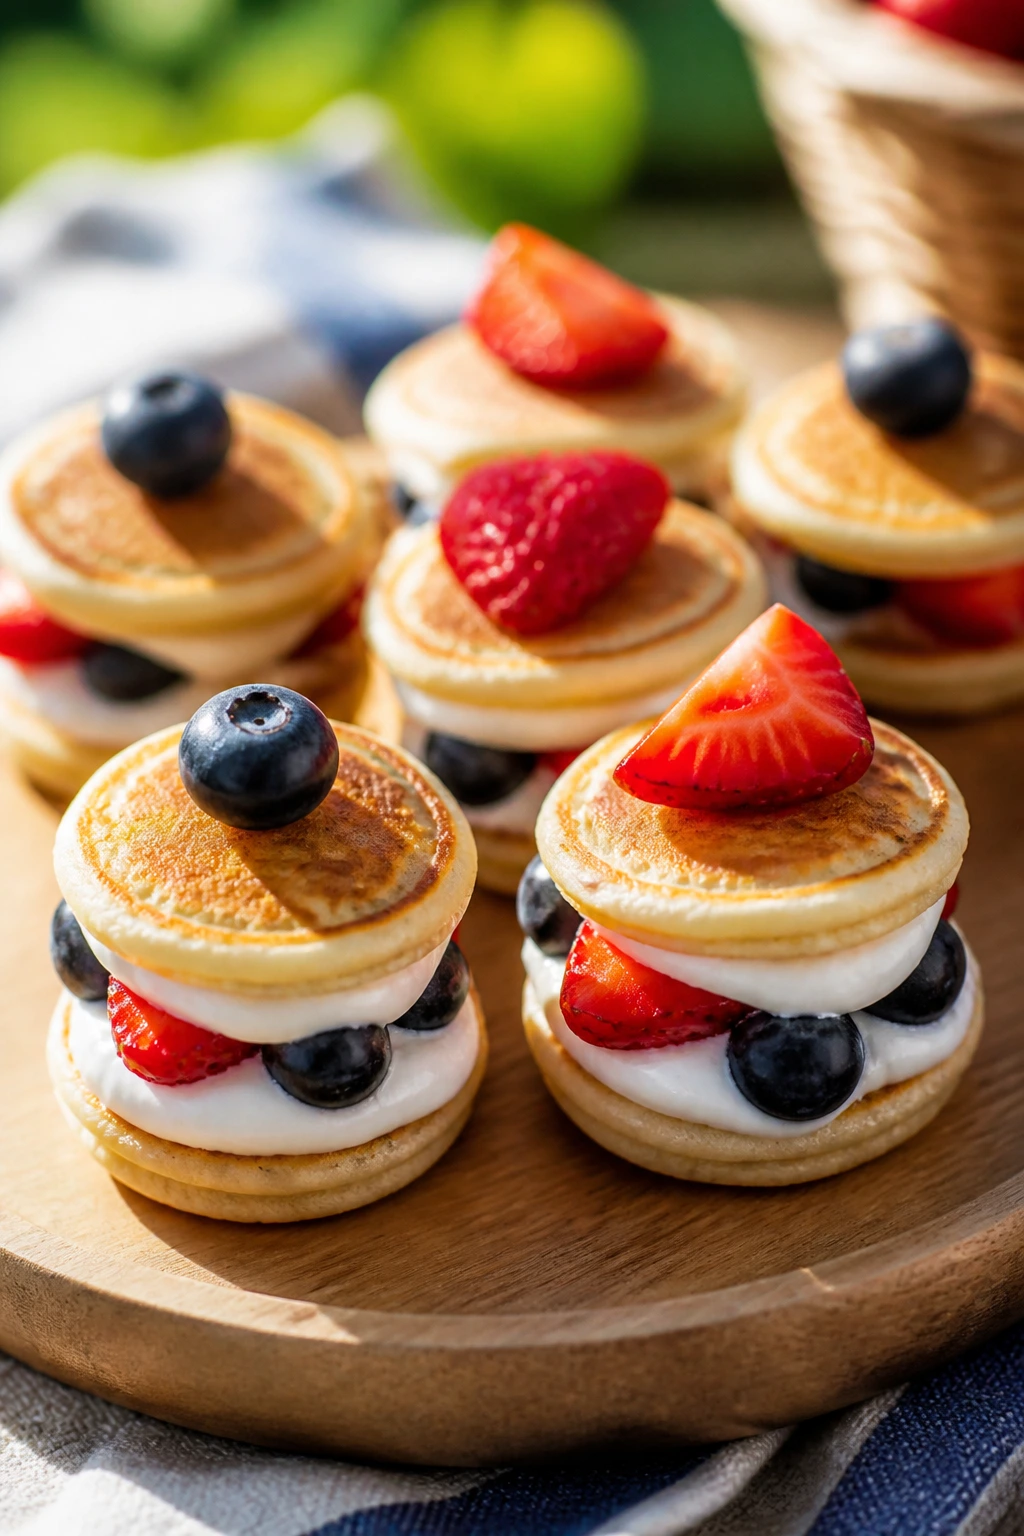
Mini pancake stacks feel playful in a way kids pick up immediately. You stack a few little pancakes, tuck berries in between, and suddenly breakfast has become picnic food that can be eaten with fingers or a tiny fork.
Why It Works:
Small pancakes cool faster than big ones and stack neatly without folding. Berries add juice and color, and a light smear of cream cheese or yogurt can make the stack taste richer without making it heavy. They’re best when the pancakes are not too sweet on their own.
Key Ingredients:
- 1 cup pancake mix
- 3/4 cup milk
- 1 egg
- 1 cup strawberries or blueberries
- 1/2 cup plain or vanilla yogurt
- Maple syrup, optional
Quick Steps:
- Mix pancake batter according to the package or your favorite base recipe.
- Cook silver-dollar pancakes on a greased skillet.
- Cool, then stack with berries and a small spoonful of yogurt between layers.
- Pack syrup separately if you want it.
Equipment for This Recipe:
- Skillet
- Mixing bowl
- Spoon
- Small container for syrup
How to Serve This Dish:
Serve with cold milk or a fruit smoothie in a sealed cup. The stacks look cute arranged in a flat container, and they work well as a sweet lunchbox surprise if the picnic leans more brunch than lunch.
Pro Tips for This Recipe:
- Make the pancakes a touch thicker so they don’t tear when stacked.
- Let them cool before adding yogurt, or the filling slides.
- Use berries that are dry on the outside so the stacks don’t get wet.
Variations on This Recipe:
- Banana Stack: Add sliced banana instead of berries.
- Chocolate Chip Stack: Fold mini chips into the batter.
- Lemon Berry Stack: Add lemon zest to the batter for a brighter flavor.
Common Mistakes to Avoid with This Recipe:
- Don’t overfill the layers with yogurt.
- Don’t stack warm pancakes if you want the filling to stay put.
- Don’t use syrup inside the stacks unless you’re serving immediately.
24. Yogurt-Dipped Pretzel Rods

Pretzel rods with a sweet coating give you that salty-crunchy-sweet bite kids chase after. They’re also one of the most portable snacks on the list because each rod is already its own handle.
Why It Works:
The pretzel gives you structure, and the yogurt-flavored coating dries into a shell that keeps the snack from feeling sticky. A little sprinkle of colored sugar or crushed cereal makes them look finished without adding more work. Since the coating needs to set, they’re best made ahead and kept cold until packing.
Key Ingredients:
- 12 pretzel rods
- 1 1/2 cups vanilla yogurt chips or candy coating
- 2 tablespoons sprinkles
- Parchment paper
Quick Steps:
- Melt the yogurt chips slowly until smooth.
- Dip each pretzel rod halfway into the coating.
- Sprinkle with decorations before the coating sets.
- Lay on parchment and chill until firm.
Equipment for This Recipe:
- Microwave-safe bowl
- Parchment paper
- Spoon
- Baking sheet
How to Serve This Dish:
Serve them beside fruit and cold lemonade. They’re a good “one more thing” snack after the savory food is gone, and they keep hands clean better than a frosted cookie.
Pro Tips for This Recipe:
- Melt the coating slowly so it stays smooth.
- Work one or two rods at a time before the coating firms up.
- Store them flat so the coating doesn’t smear.
Variations on This Dish:
- Chocolate Stripe Version: Drizzle melted chocolate over the set coating.
- Crushed Cookie Finish: Roll the wet coating in crushed vanilla wafers.
- Rainbow Sprinkle Rods: Use colored sprinkles for a birthday picnic.
Common Mistakes to Avoid with This Dish:
- Don’t overheat the coating or it seizes into lumps.
- Don’t dip on a humid day if you can help it; the finish may stay tacky.
- Don’t stack them before they’re firm.
25. Sweet Corn Fritters
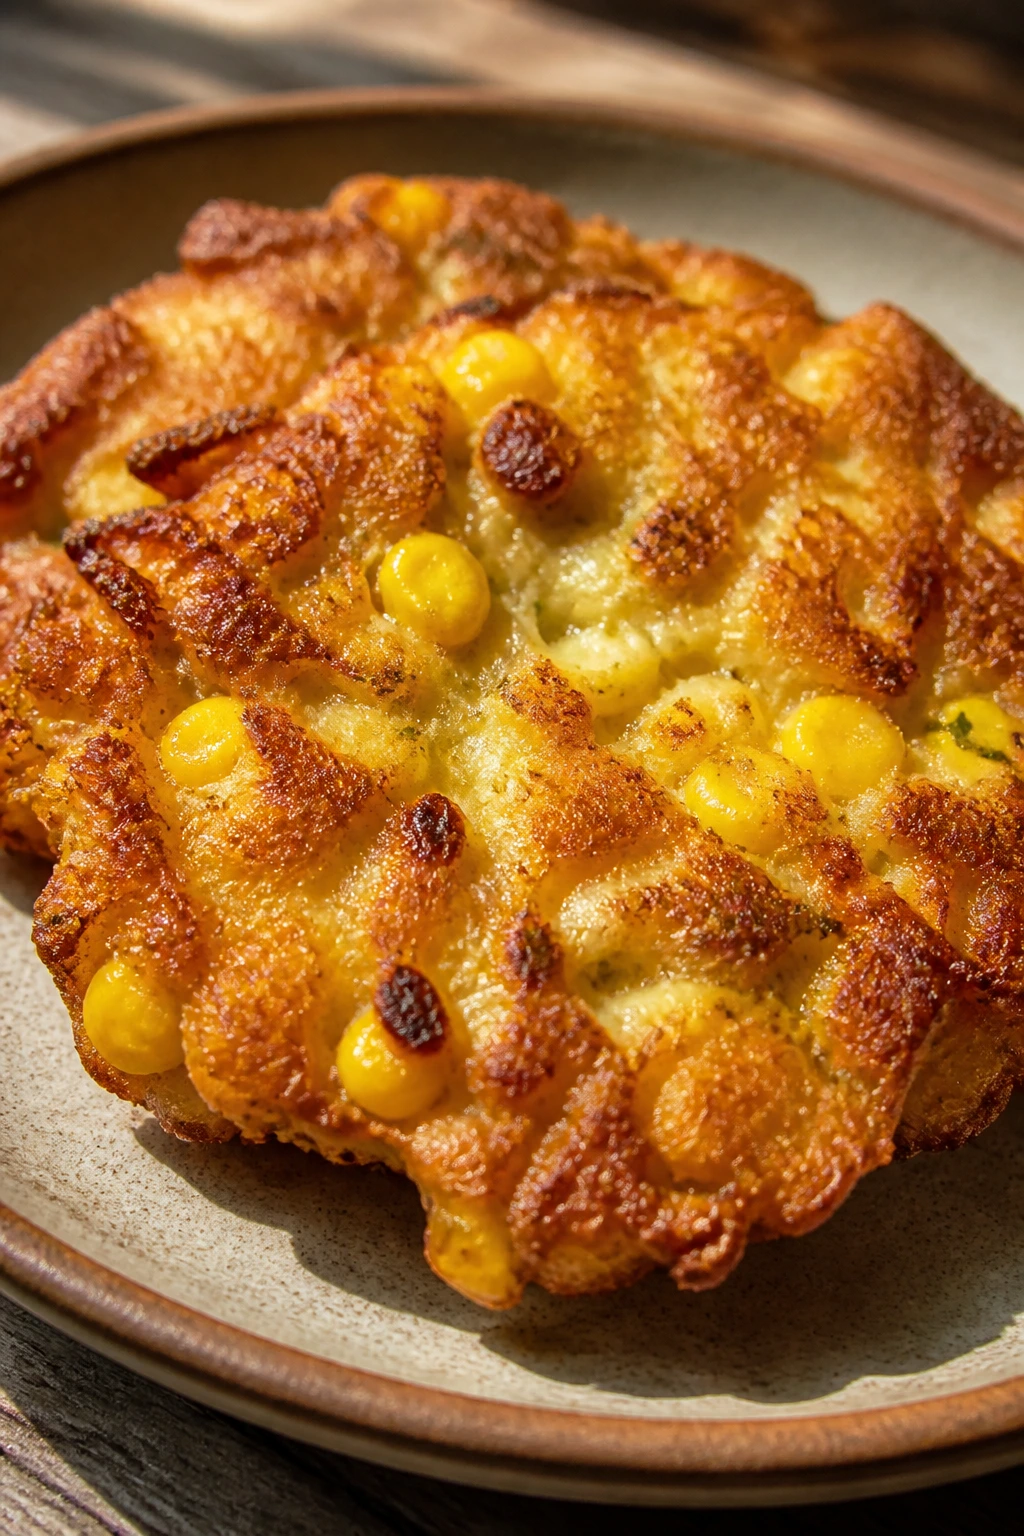
Sweet corn fritters hit that spot between savory snack and side dish. They’re lightly crisp outside, soft inside, and taste like warm cornbread that got a little more interesting in the skillet.
Why It Works:
Corn kernels keep the batter juicy, and a shallow fry gives the fritters a browned edge without making them greasy. A little scallion or cheddar helps keep the flavor from leaning bland. They travel well if you cool them on a rack first.
Key Ingredients:
- 1 1/2 cups corn kernels
- 1 cup flour
- 1 teaspoon baking powder
- 1 egg
- 3/4 cup milk
- 2 scallions, thinly sliced
- Salt and pepper
Quick Steps:
- Mix flour, baking powder, salt, and pepper.
- Stir in egg, milk, corn, and scallions to make a thick batter.
- Drop spoonfuls into a lightly oiled skillet over medium heat.
- Cook 2 to 3 minutes per side until golden.
Equipment for This Recipe:
- Skillet
- Mixing bowl
- Spatula
- Paper towels
How to Serve This Dish:
Serve with a little sour cream or yogurt dip and a cold iced tea. They’re nice as a side or a small savory bite, and they taste especially good when the edges are still a little crisp.
Pro Tips for This Recipe:
- Don’t make the batter too thin or the fritters spread.
- Use frozen corn if needed, but thaw and drain it first.
- Drain the fritters on paper towels before packing.
Variations on This Dish:
- Cheddar Corn Fritters: Add a handful of shredded cheddar.
- Herb Corn Fritters: Mix in chopped parsley.
- Spiced Corn Fritters: Add a tiny pinch of smoked paprika.
Common Mistakes to Avoid with This Recipe:
- Don’t crowd the skillet or they steam instead of brown.
- Don’t flip too early; wait for the edges to set.
- Don’t pack them while hot if you want the outside to stay crisp.
26. Mini Sloppy Joe Sliders
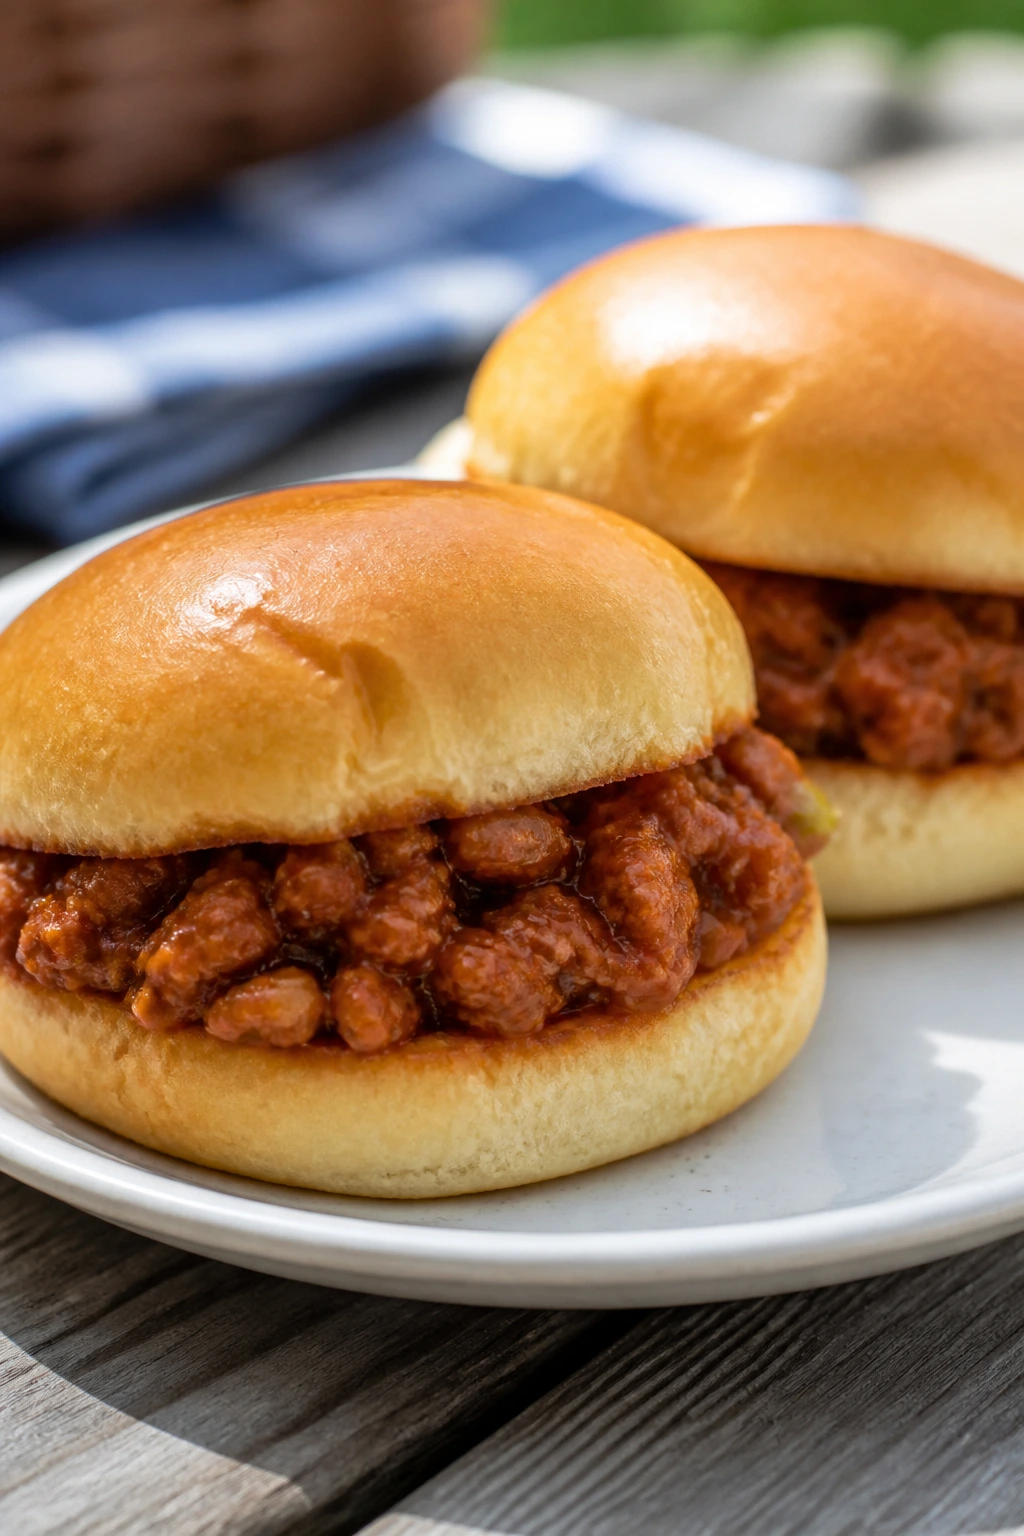
Sloppy Joes are messy by nature, which is why mini sliders are such a smart fix. You still get the tangy, meaty filling, but in a size that won’t collapse into the grass after one bite.
Why It Works:
The sauce clings to ground beef or turkey and gives the filling a sticky texture that holds inside the bun. Mini rolls keep the portion small enough for kids, and a short simmer thickens the mixture so it doesn’t run. The key is letting the filling cool a bit before assembling.
Key Ingredients:
- 1 pound ground beef or turkey
- 1/2 cup ketchup
- 2 tablespoons tomato paste
- 1 tablespoon Worcestershire sauce
- 1 teaspoon onion powder
- 8 mini slider buns
Quick Steps:
- Brown the meat in a skillet and drain any excess grease.
- Stir in ketchup, tomato paste, Worcestershire sauce, onion powder, and salt.
- Simmer 5 to 7 minutes until thick.
- Spoon onto buns and let cool slightly before packing.
Equipment for This Recipe:
- Skillet
- Wooden spoon
- Measuring spoons
- Serving spoon
How to Serve This Dish:
Serve with cold lemonade and a few dill pickle chips on the side. They’re filling enough to count as a main, and the sweet-tangy sauce makes them a strong match for a cold drink with some acidity.
Pro Tips for This Recipe:
- Simmer until the filling is thick enough to mound on a spoon.
- Toast the buns lightly if you want extra structure.
- Pack the sauce separately if the picnic is long and the buns are very soft.
Variations on This Dish:
- BBQ Sliders: Replace some ketchup with barbecue sauce.
- Turkey Sloppy Joes: Use ground turkey and a little extra seasoning.
- Cheesy Sliders: Add a slice of cheddar on the bun before spooning in the filling.
Common Mistakes to Avoid with This Recipe:
- Don’t leave the filling loose and watery.
- Don’t use full-size buns unless the eaters are older kids with bigger appetites.
- Don’t pack the sliders steaming hot, or the buns go soggy fast.
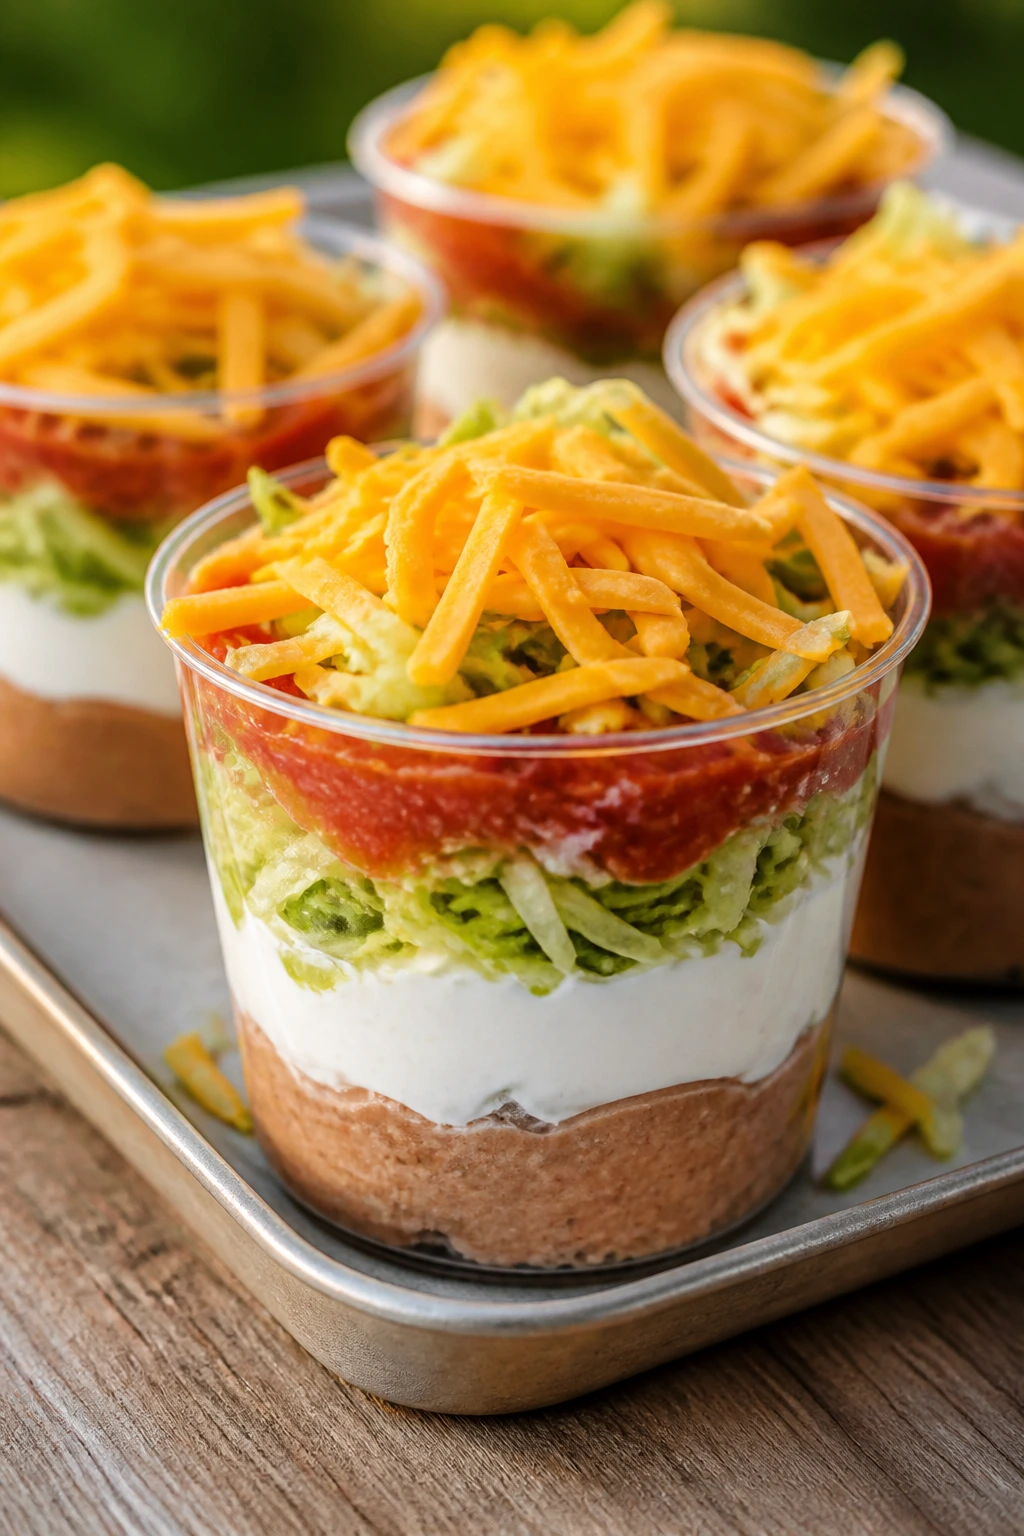
27. Taco Dip Cups
Taco dip cups are the picnic version of a party dip that usually needs a whole chip bowl and a steady hand. Split into little cups, they turn into a tidy snack with layers instead of one messy communal scoop.
Why It Works:
Refried beans and sour cream make a thick base, and the toppings stay visible instead of getting buried. The cup format keeps the chips crisp and the layers separate until the moment a child digs in. That matters. Nobody wants a chip that goes limp before it reaches the mouth.
Key Ingredients:
- 1 cup refried beans
- 1 cup sour cream
- 1 cup shredded lettuce
- 1/2 cup salsa
- 1/2 cup shredded cheddar
- Tortilla chips for serving
Quick Steps:
- Spoon beans into the bottom of each cup.
- Add a layer of sour cream.
- Top with lettuce, salsa, and cheddar.
- Pack tortilla chips separately and chill the cups.
Equipment for This Recipe:
- Small cups
- Spoon
- Cutting board
- Airtight container
How to Serve This Dish:
Serve with cold limeade or sparkling water. It works as a snack or side, and the little layers make it feel special without requiring a fork fight over one bowl.
Pro Tips for This Recipe:
- Drain the salsa a little if it’s very watery.
- Keep the chips separate until serving.
- Use clear cups so the layers are easy to see.
Variations on This Dish:
- Chicken Taco Cups: Add shredded chicken over the beans.
- Guacamole Layer: Swap sour cream for guacamole if you want a richer cup.
- Mild Kid Cups: Use mild salsa and skip hot peppers.
Common Mistakes to Avoid with This Recipe:
- Don’t add chips into the cup early or they soften.
- Don’t overfill the cups; kids need room to scoop.
- Don’t use a runny sour cream dip unless you’re serving immediately.
28. Pita Chips with Tomato Salsa
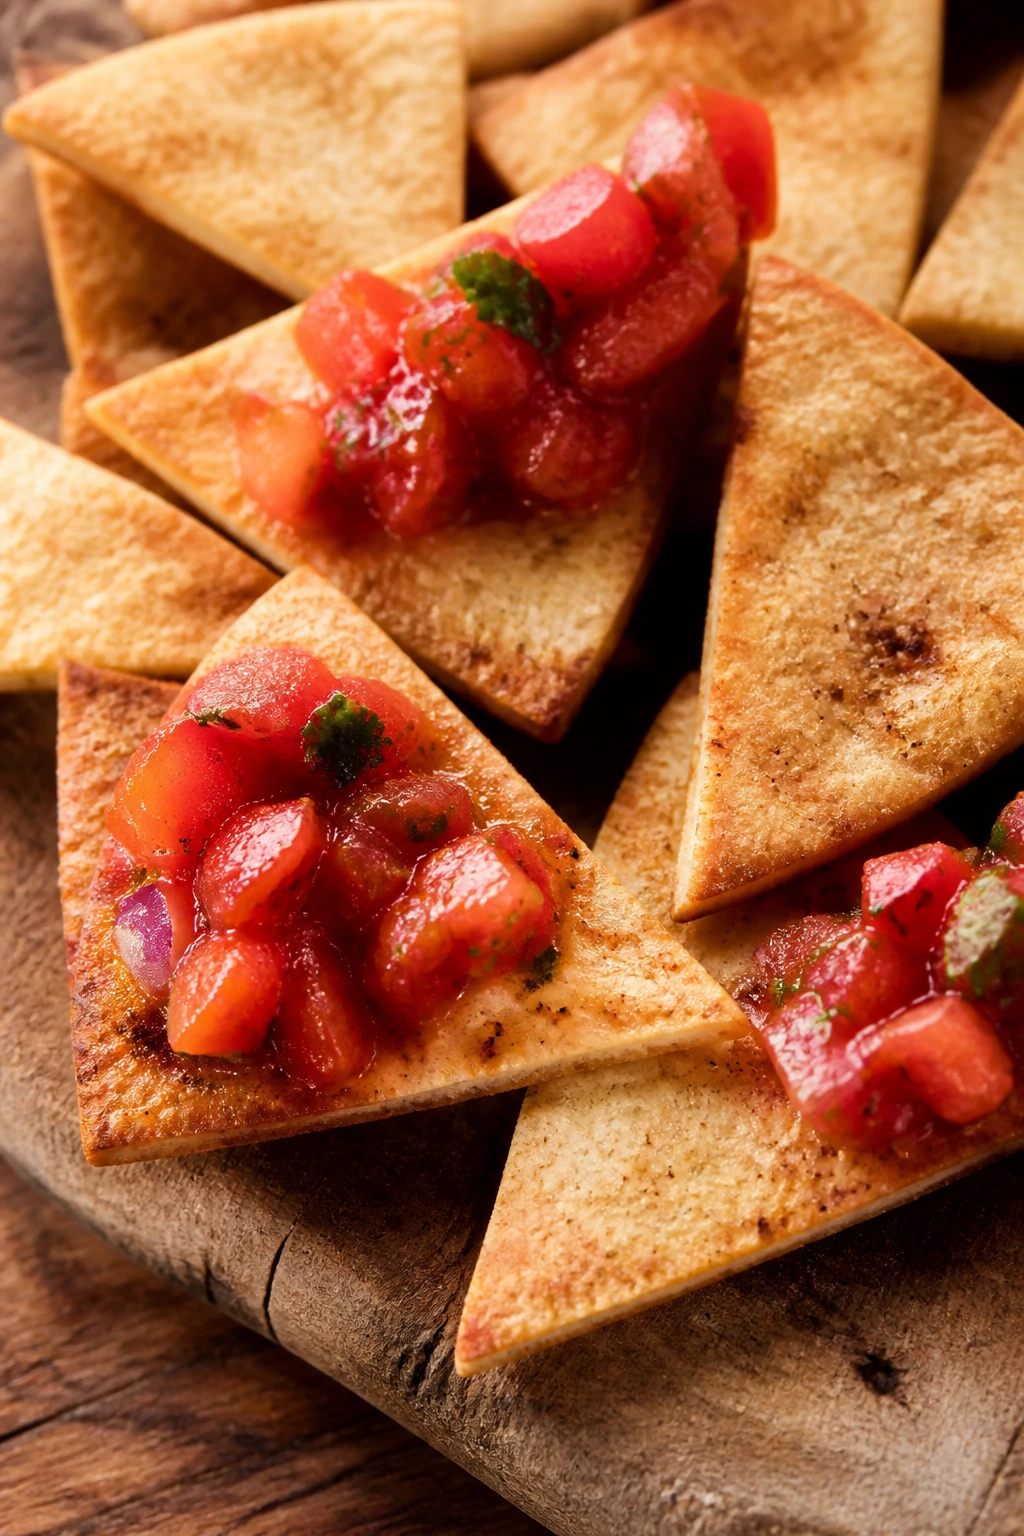
Crunchy pita chips and bright tomato salsa give you a snack that feels fresh without needing any special handling. It’s the kind of thing you can set on the blanket and know it will disappear at a steady, polite pace.
Why It Works:
Baked pita chips stay sturdy enough for dipping, and homemade salsa can be drained slightly so it doesn’t flood the chips. That balance between crisp and juicy matters more than people think. A snack like this lives or dies on whether the first chip survives the dip.
Key Ingredients:
- 4 pita breads
- 2 tablespoons olive oil
- 1/2 teaspoon salt
- 3 tomatoes, diced
- 1/4 small red onion, finely chopped
- 1 tablespoon lime juice
Quick Steps:
- Cut pita into wedges, brush with oil, and sprinkle with salt.
- Bake at 375°F for 8 to 10 minutes until crisp.
- Mix tomatoes, onion, lime juice, and a pinch of salt for the salsa.
- Chill the salsa and pack it separately.
Equipment for This Recipe:
- Baking sheet
- Knife
- Mixing bowl
- Airtight container
How to Serve This Dish:
Serve the chips and salsa with cold water or lemonade. Put the salsa in a small lidded cup, because once the chips are packed with it, the whole tray starts losing its crunch.
Pro Tips for This Recipe:
- Let the chips cool fully before storing.
- Remove some tomato seeds if the salsa seems wet.
- If the pita is thick, split it before cutting into wedges.
Variations on This Dish:
- Corn Salsa Swap: Use corn salsa instead of tomato salsa.
- Cheesy Chips: Dust the pita with parmesan before baking.
- Mild Pico Style: Leave out onion for a gentler flavor.
Common Mistakes to Avoid with This Dish:
- Don’t pack the chips with warm salsa.
- Don’t underbake the pita or it bends instead of crunching.
- Don’t leave the salsa watery if you want the dip to last.
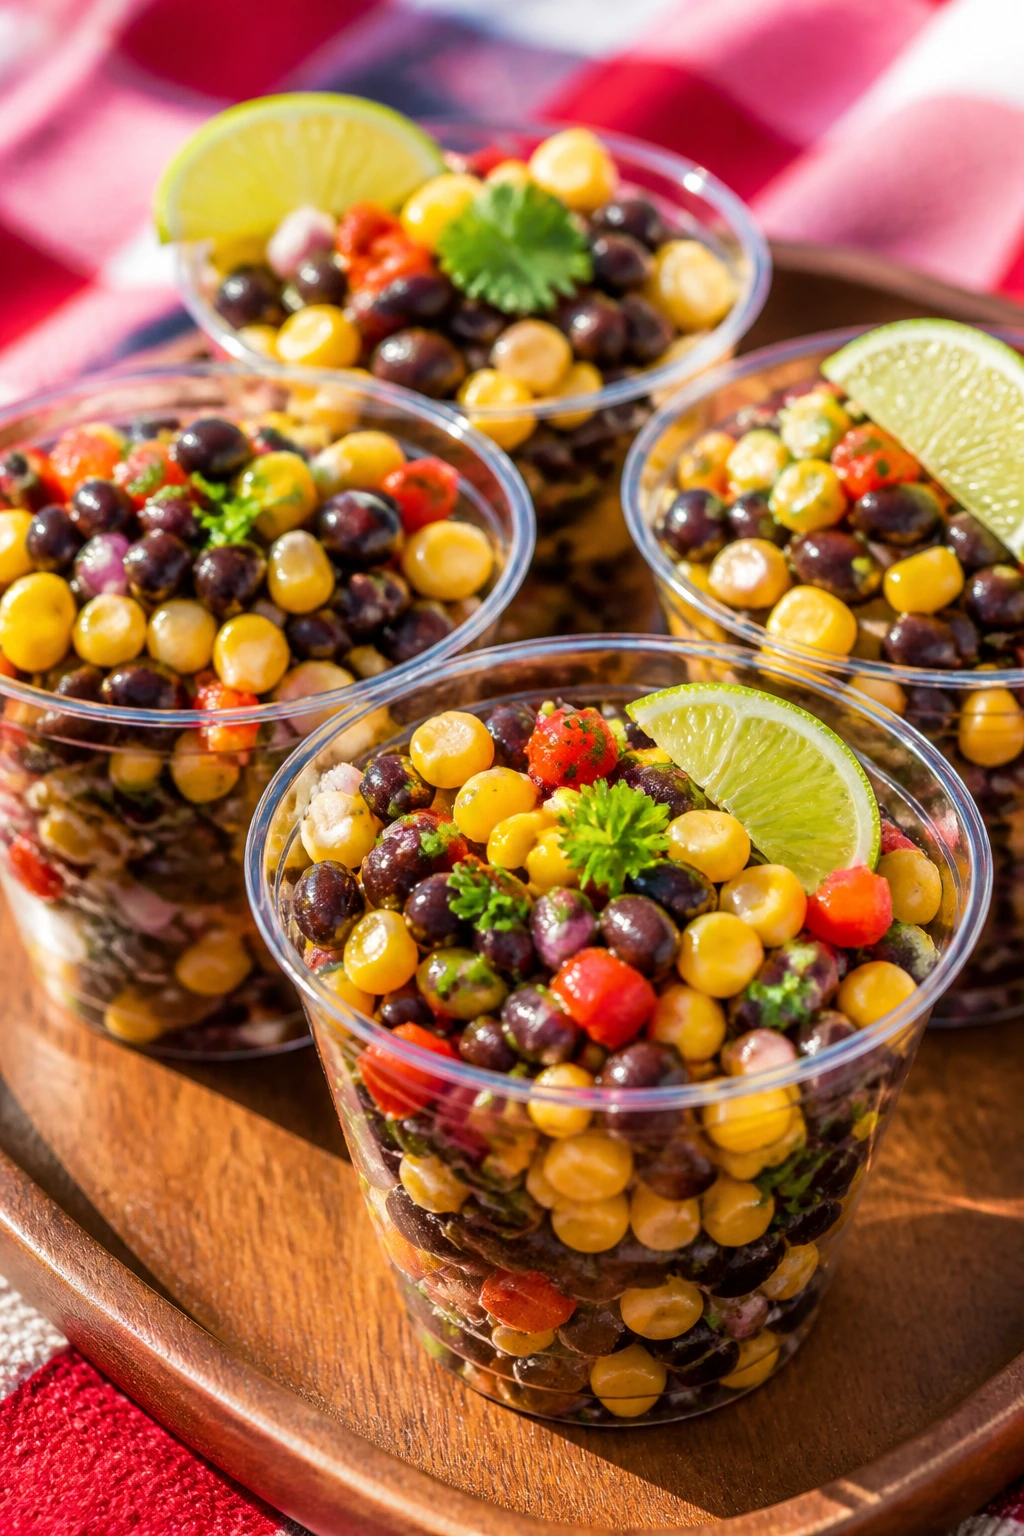
29. Black Bean and Corn Salad Cups
Black bean and corn salad is one of those picnic foods that tastes even better after a little chill. The beans bring heft, the corn brings sweetness, and the lime dressing makes the whole thing taste bright instead of heavy.
Why It Works:
The cup format keeps the salad from spilling and makes the portions simple. Beans are sturdy, corn stays sweet after chilling, and diced peppers add a clean crunch. It’s a fork snack that still feels easy enough for a child to manage.
Key Ingredients:
- 1 can black beans, rinsed and drained
- 1 cup corn kernels, thawed if frozen
- 1 red bell pepper, diced
- 2 tablespoons lime juice
- 1 tablespoon olive oil
- 1/4 teaspoon salt
Quick Steps:
- Rinse and drain the black beans well.
- Mix beans, corn, bell pepper, lime juice, oil, and salt.
- Spoon into small cups.
- Chill before serving so the flavors settle.
Equipment for This Recipe:
- Colander
- Mixing bowl
- Spoon
- Small cups with lids
How to Serve This Dish:
Serve with cold limeade or plain sparkling water. It’s a good side for anything cheesy or meaty, and it stays neat if you don’t overfill the cups.
Pro Tips for This Recipe:
- Pat the beans dry so the dressing clings.
- Dice the pepper small for easier eating.
- Add a pinch of cumin if you want a warmer flavor.
Variations on This Dish:
- Avocado Finish: Add avocado right before serving.
- Mild Salsa Cup: Toss in a spoon of mild salsa.
- No-Bean Version: Use chickpeas instead of black beans.
Common Mistakes to Avoid with This Recipe:
- Don’t add avocado too early or it browns.
- Don’t forget to drain the beans well.
- Don’t use too much dressing; the salad should stay spoonable, not soupy.
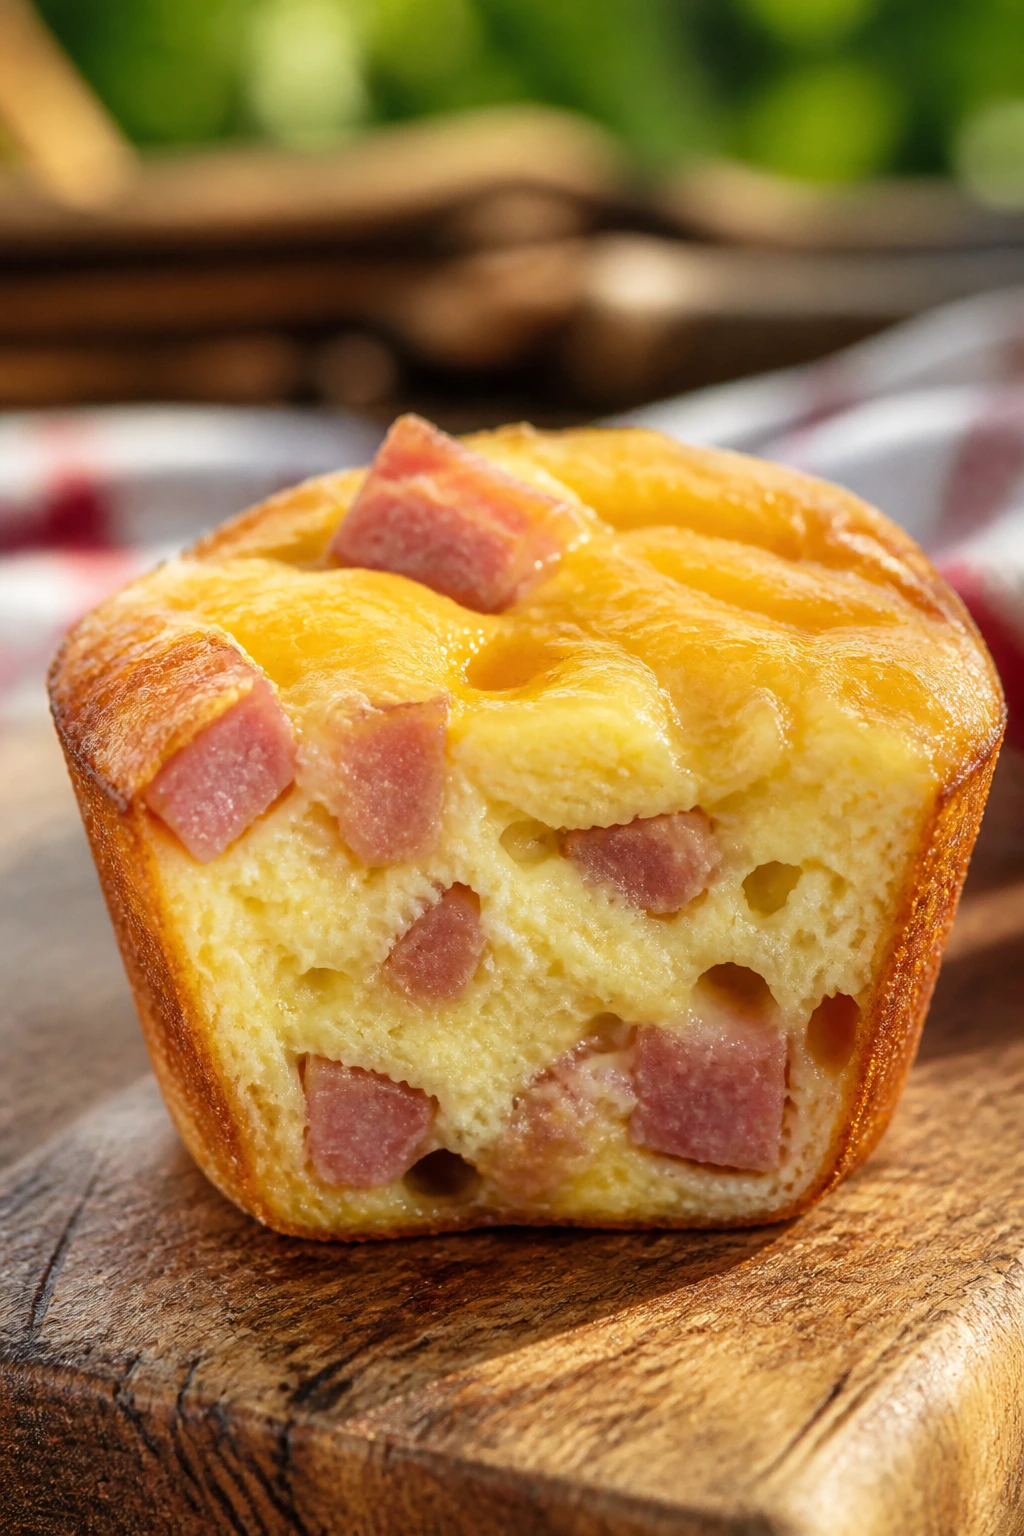
30. Mini Ham and Egg Muffins
These are the closest thing to breakfast in a picnic basket, which is why kids who skipped breakfast somehow always find them. They’re savory, soft, and easy to pack once the edges are set.
Why It Works:
Eggs bake into a compact little cup, and diced ham adds enough salt to keep them from tasting flat. Cheese helps hold the filling together, and a muffin tin gives the eggs a shape that travels well. They’re especially handy if you want protein without bread.
Key Ingredients:
- 6 eggs
- 1/2 cup diced ham
- 1/2 cup shredded cheddar
- 2 tablespoons milk
- 1 tablespoon chopped spinach, optional
- Salt and pepper
Quick Steps:
- Heat the oven to 350°F and grease a muffin tin.
- Whisk eggs, milk, salt, and pepper.
- Stir in ham, cheese, and spinach if using.
- Pour into the cups and bake 15 to 18 minutes until set.
Equipment for This Recipe:
- Muffin tin
- Whisk
- Mixing bowl
- Ladle or measuring cup
How to Serve This Dish:
Serve them with cold orange juice or milk. Two muffins make a nice snack portion, and they hold their shape well if you pack them once they’re fully cooled.
Pro Tips for This Recipe:
- Grease the tin generously so the eggs release cleanly.
- Chop the ham small so it spreads through each cup.
- Don’t overbake or the eggs get rubbery.
Variations on This Dish:
- Veggie Egg Muffins: Swap ham for diced bell pepper.
- Cheddar-Only Version: Keep the filling simple for younger kids.
- Breakfast Sandwich Style: Tuck one muffin into a small biscuit or English muffin.
Common Mistakes to Avoid with This Recipe:
- Don’t fill the cups to the very top or they puff over.
- Don’t pack them warm; trapped steam softens them.
- Don’t leave them in a metal tin after baking, or they keep cooking.
31. Frozen Grapes and Cheese Cubes
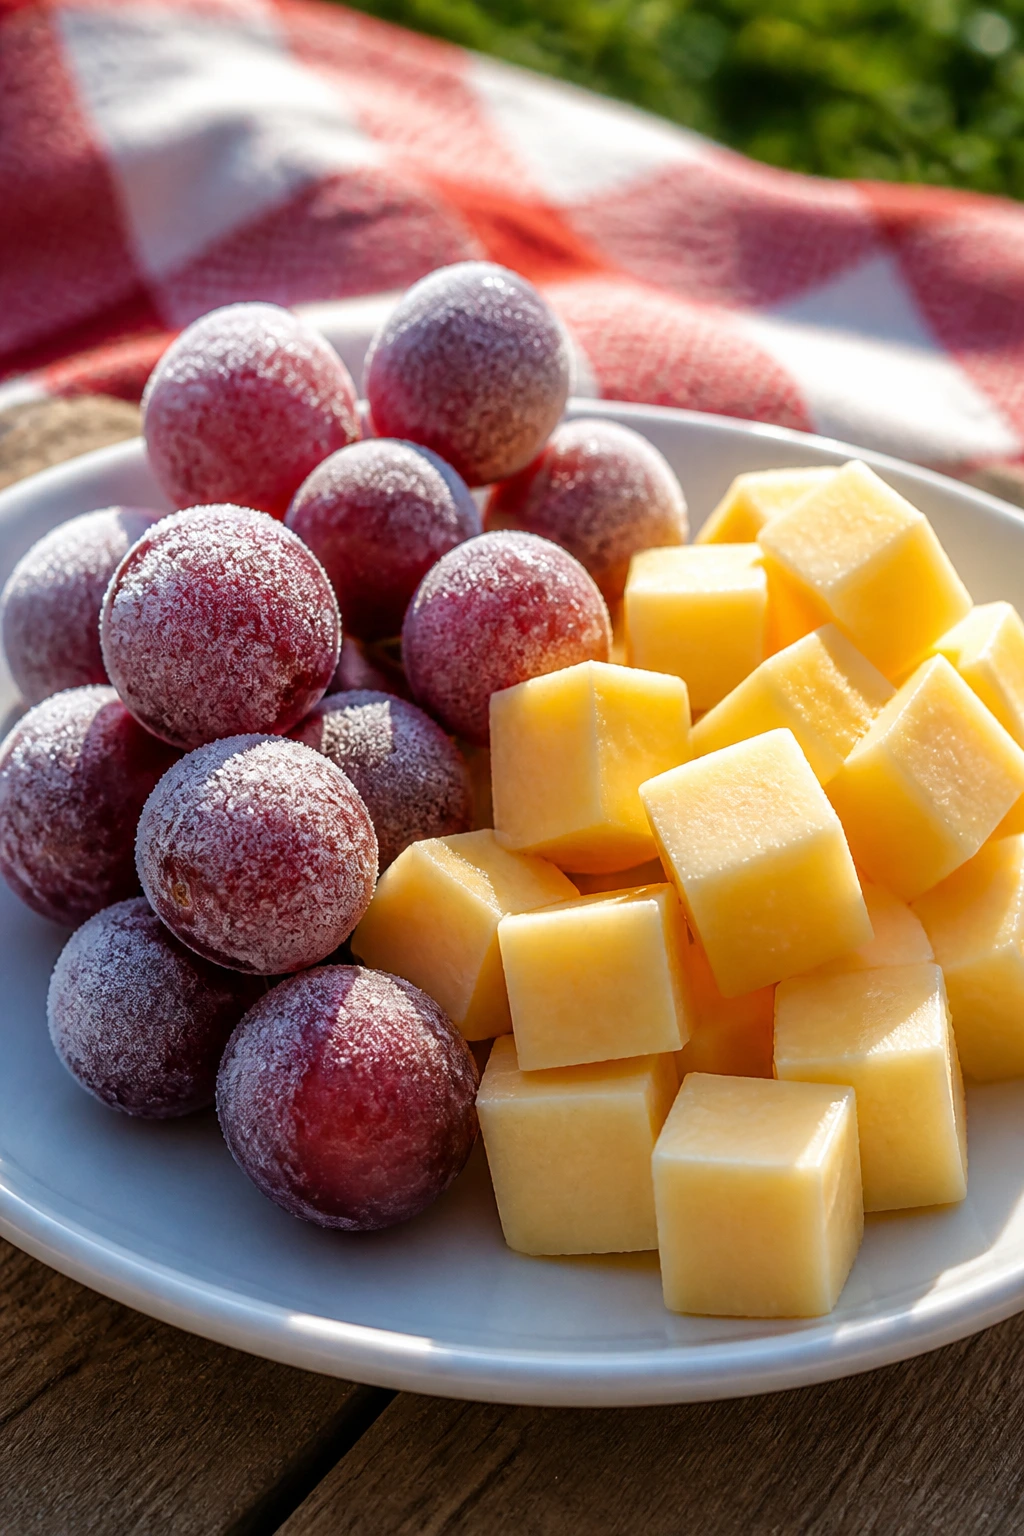
This is the simplest item on the list, and it earns its place by being cold in a good way. Frozen grapes are like candy with a crunch, and cheese cubes give you something savory to balance them out.
Why It Works:
Freezing grapes makes them firmer and extra refreshing, while cheese stays pleasantly cold in the cooler. The two together give you a snack that feels less like a recipe and more like a smart picnic move. It’s the kind of no-cook option that saves the basket when everything else is more involved.
Key Ingredients:
- 2 cups seedless grapes
- 8 ounces cheddar or Monterey Jack, cut into cubes
- 1 tablespoon lemon juice, optional
- Small containers
Quick Steps:
- Wash and dry the grapes completely.
- Freeze the grapes in a single layer for at least 2 hours.
- Cut the cheese into bite-size cubes.
- Pack grapes and cheese together in small containers.
Equipment for This Recipe:
- Freezer-safe tray
- Knife
- Cutting board
- Small containers
How to Serve This Dish:
Serve these with cold water or a mild lemonade. They’re best when the grapes are firm but not icy solid, and they make a good reset snack between richer foods.
Pro Tips for This Recipe:
- Dry the grapes well before freezing so ice doesn’t build up.
- Use seedless grapes only.
- Keep the cheese cold right until the picnic begins.
Variations on This Dish:
- Apple Cubes Swap: Use peeled apple chunks instead of grapes.
- Pepper Jack Version: If the kids like a little kick, use mild pepper jack.
- Fruit-and-Cheese Skewers: Thread the pieces onto toothpicks for older kids.
Common Mistakes to Avoid with This Recipe:
- Don’t freeze cheese; it changes the texture too much.
- Don’t pack grapes while still wet.
- Don’t let the containers sit in direct sun, or the cheese softens fast.
32. Mini Zucchini Bread Loaves

Mini zucchini bread brings a sweet, soft slice to a picnic without acting like dessert. The crumb stays moist, the cinnamon smells warm, and the mini loaf shape makes it easy to wrap and tuck into a basket.
Why It Works:
Zucchini adds moisture without making the bread taste like vegetables, which is the whole point. Mini loaves bake faster and give you more crust per bite, so the edges stay pleasantly firm while the center stays soft. A handful of nuts is optional, but not necessary.
Key Ingredients:
- 1 1/2 cups grated zucchini, squeezed dry
- 1 1/2 cups all-purpose flour
- 1/2 cup sugar
- 2 eggs
- 1/3 cup vegetable oil
- 1 teaspoon cinnamon
- 1/2 teaspoon baking soda
Quick Steps:
- Heat the oven to 350°F and grease mini loaf pans.
- Whisk flour, sugar, cinnamon, and baking soda.
- Stir in eggs, oil, and zucchini until just combined.
- Bake 28 to 32 minutes, until a toothpick comes out clean.
Equipment for This Recipe:
- Mini loaf pans
- Grater
- Mixing bowl
- Whisk
How to Serve This Dish:
Serve slices with cold milk or iced tea. It’s a good bridge between snack and dessert, and the mini loaf form makes it easy to cut neat pieces without crumbling the whole thing.
Pro Tips for This Recipe:
- Squeeze the zucchini dry before measuring.
- Don’t overmix once the flour goes in.
- Let the loaves cool fully before slicing for the cleanest crumb.
Variations on This Recipe:
- Chocolate Chip Zucchini Bread: Add mini chocolate chips.
- Nutty Version: Stir in chopped walnuts or pecans.
- Apple Zucchini Bread: Replace part of the zucchini with grated apple.
Common Mistakes to Avoid with This Recipe:
- Don’t skip draining the zucchini or the bread turns wet.
- Don’t bake in a pan that’s too large; mini loaves need their own shape.
- Don’t cut too soon or the middle squashes.
33. Mac and Cheese Muffins
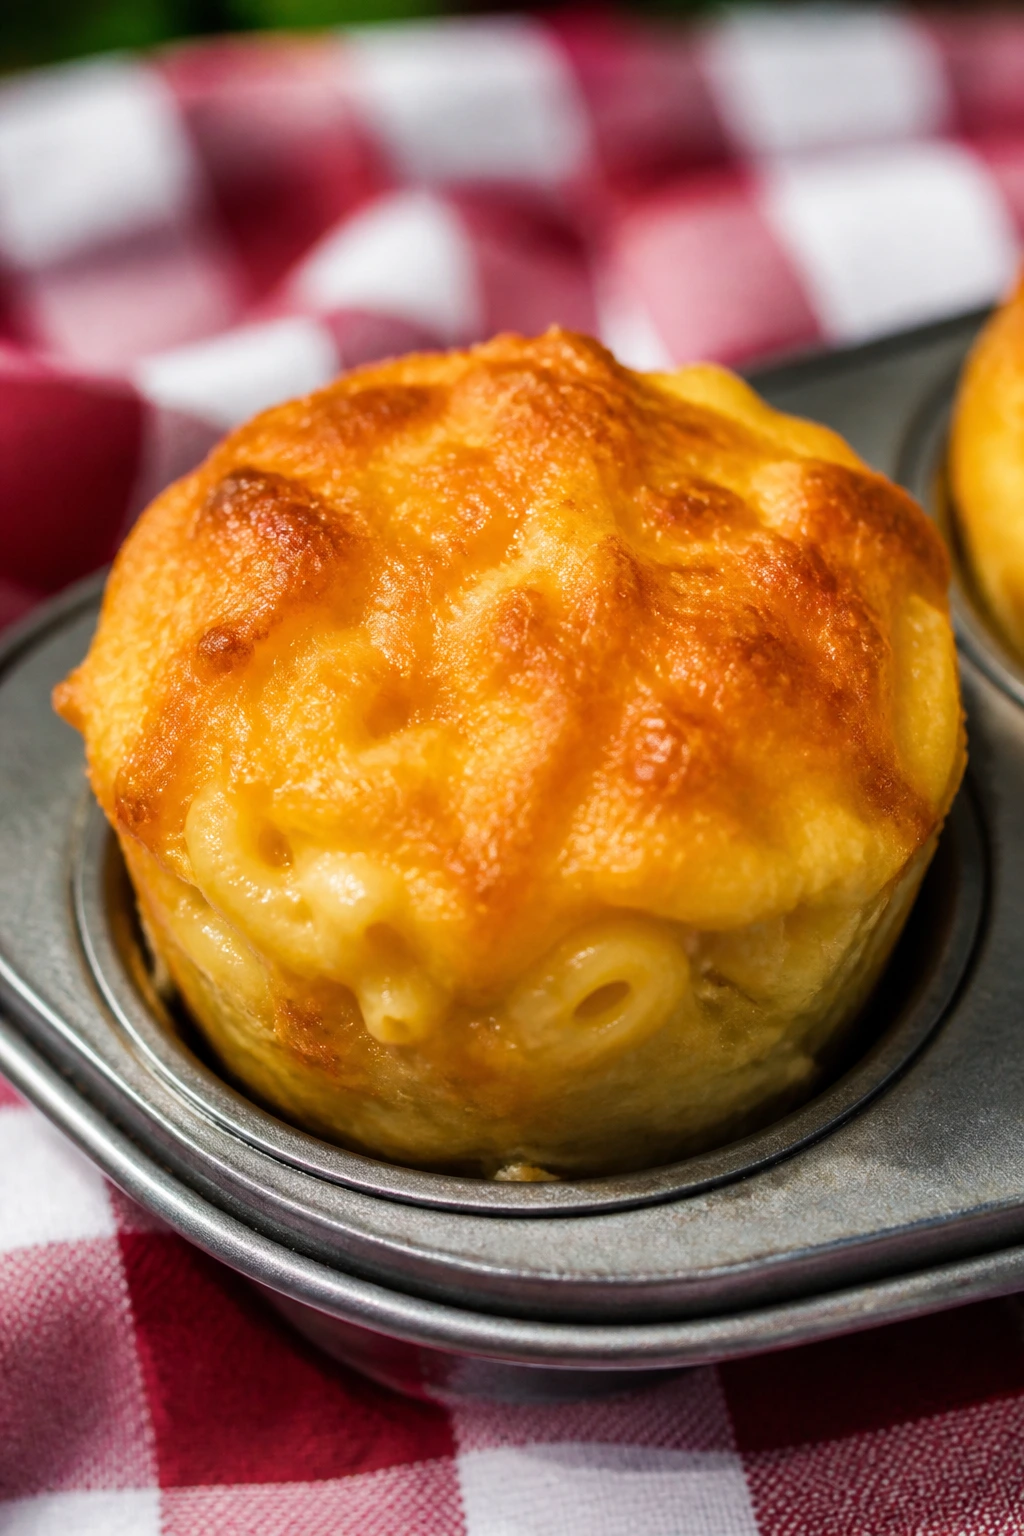
Mac and cheese muffins sound slightly odd until you make them and realize they’re exactly what portable comfort food should be. They’re cheesy, compact, and easy to eat with fingers once cooled.
Why It Works:
Leftover mac and cheese firms up in the oven when you add egg and a little extra cheese. That turns a loose side dish into a bite that holds together in a muffin tin. The edges get lightly crisp, which is the part most kids go for first anyway.
Key Ingredients:
- 3 cups cooked mac and cheese
- 1 egg
- 1/2 cup shredded cheddar
- 1/4 cup parmesan
- 2 tablespoons breadcrumbs
- Butter for greasing
Quick Steps:
- Heat the oven to 375°F and grease a muffin tin.
- Stir the egg into the cooled mac and cheese.
- Mix in cheddar, parmesan, and breadcrumbs.
- Spoon into the tin and bake 18 to 20 minutes until set.
Equipment for This Recipe:
- Muffin tin
- Mixing bowl
- Spoon
- Spatula
How to Serve This Dish:
Serve with cold milk or lemonade and a few cucumber sticks on the side. These work well as a picnic main for small kids or as the cheese-heavy side to balance fruit and lighter snacks.
Pro Tips for This Recipe:
- Use mac that isn’t too saucy.
- Let it cool before adding the egg so the egg doesn’t scramble.
- Grease the pan well; cheese likes to stick.
Variations on This Recipe:
- Bacon Mac Muffins: Add crisp bacon bits.
- Broccoli Mac Muffins: Stir in tiny broccoli pieces.
- Spicy Cheddar Version: Add a pinch of mild chili powder for older kids.
Common Mistakes to Avoid with This Recipe:
- Don’t use watery mac and cheese.
- Don’t overpack the muffin cups.
- Don’t expect them to stay neat if you cut them while hot.
34. Apple Cinnamon Oat Bars
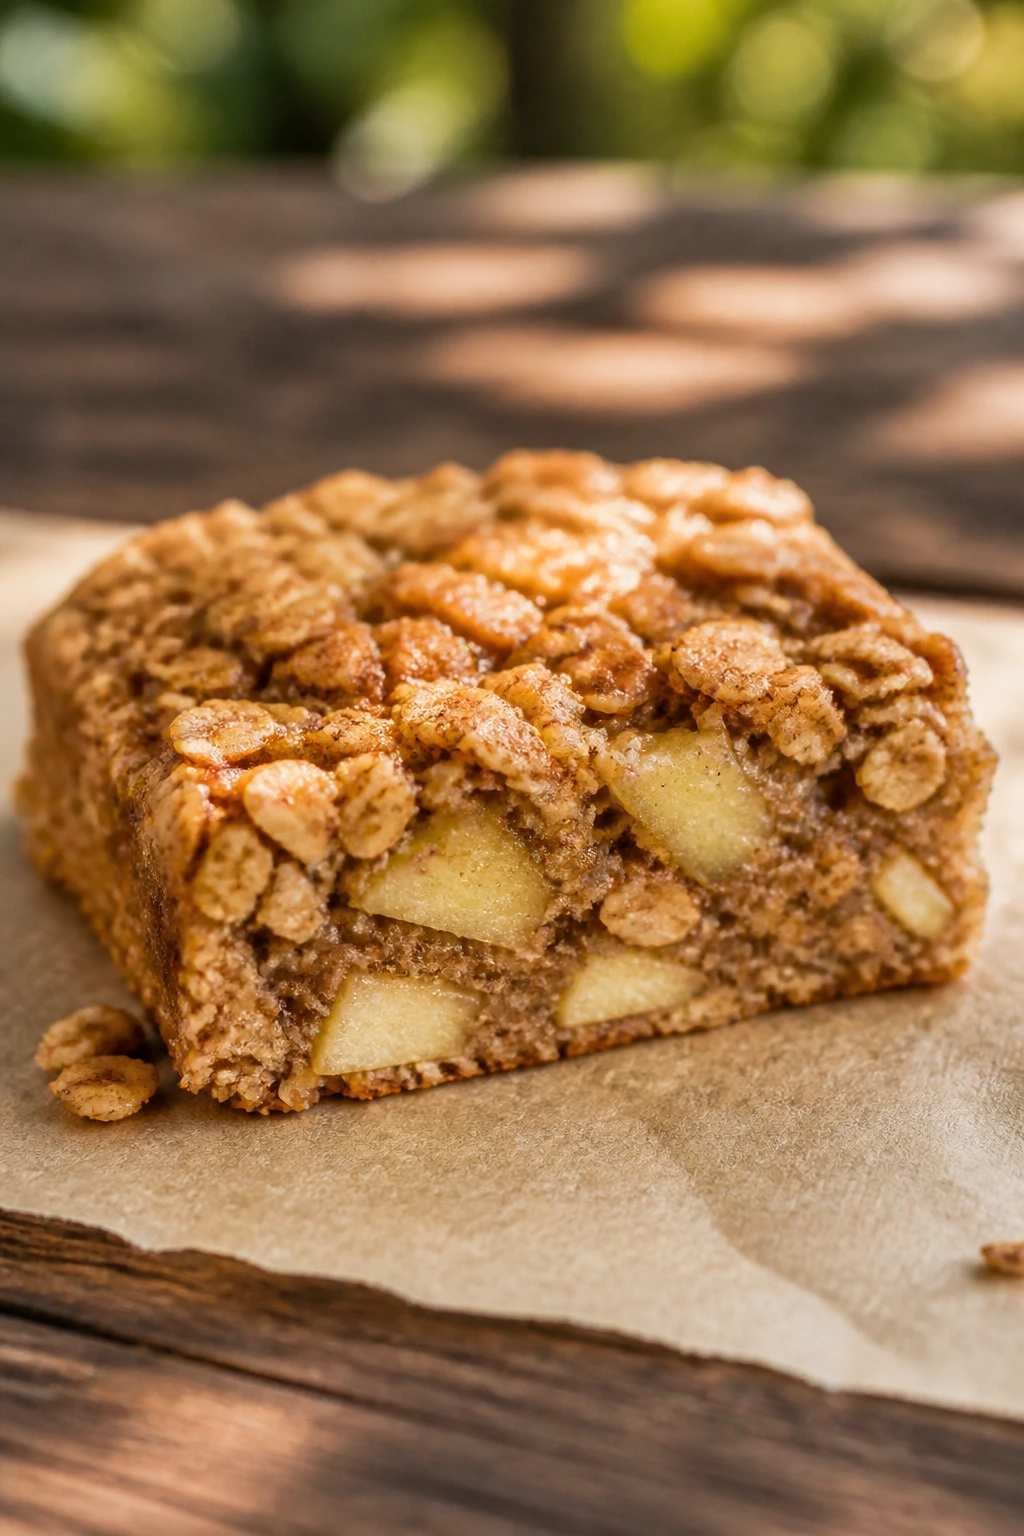
These bars taste like the snack version of apple crumble, except they fit in one hand and don’t need a spoon. They’re chewy, lightly sweet, and sturdy enough to sit in a picnic tin without breaking apart.
Why It Works:
Oats give the bars structure, applesauce keeps them moist, and diced apples add little pockets of fruit. Cinnamon makes the smell warm and inviting, even when the bars are served cold. They’re a useful change of pace when the basket has had enough cheese for one afternoon.
Key Ingredients:
- 2 cups rolled oats
- 1 cup flour
- 1/2 cup applesauce
- 1/2 cup diced apple
- 1/3 cup maple syrup or honey
- 1 teaspoon cinnamon
- 1 egg
Quick Steps:
- Heat the oven to 350°F and line an 8×8-inch pan.
- Mix oats, flour, cinnamon, and a pinch of salt.
- Stir in applesauce, maple syrup, egg, and diced apple.
- Press into the pan and bake 22 to 25 minutes.
Equipment for This Recipe:
- Baking pan
- Mixing bowl
- Spoon
- Parchment paper
How to Serve This Dish:
Serve with cold milk or apple juice. They’re good as a sweet snack after something salty, and they cut into tidy squares that stack well in a lunch container.
Pro Tips for This Recipe:
- Dice the apple small so the bars cut cleanly.
- Let the bars cool fully before slicing.
- If the batter seems dry, add 1 tablespoon more applesauce.
Variations on This Recipe:
- Raisin Oat Bars: Add raisins instead of diced apple.
- Cranberry Version: Use dried cranberries for a tart edge.
- Nut Butter Bars: Stir in a spoon of almond or peanut butter.
Common Mistakes to Avoid with This Recipe:
- Don’t underbake or the center stays gummy.
- Don’t cut while warm unless you like crumbly edges.
- Don’t make the apple pieces too large.
35. Tuna Salad Celery Boats
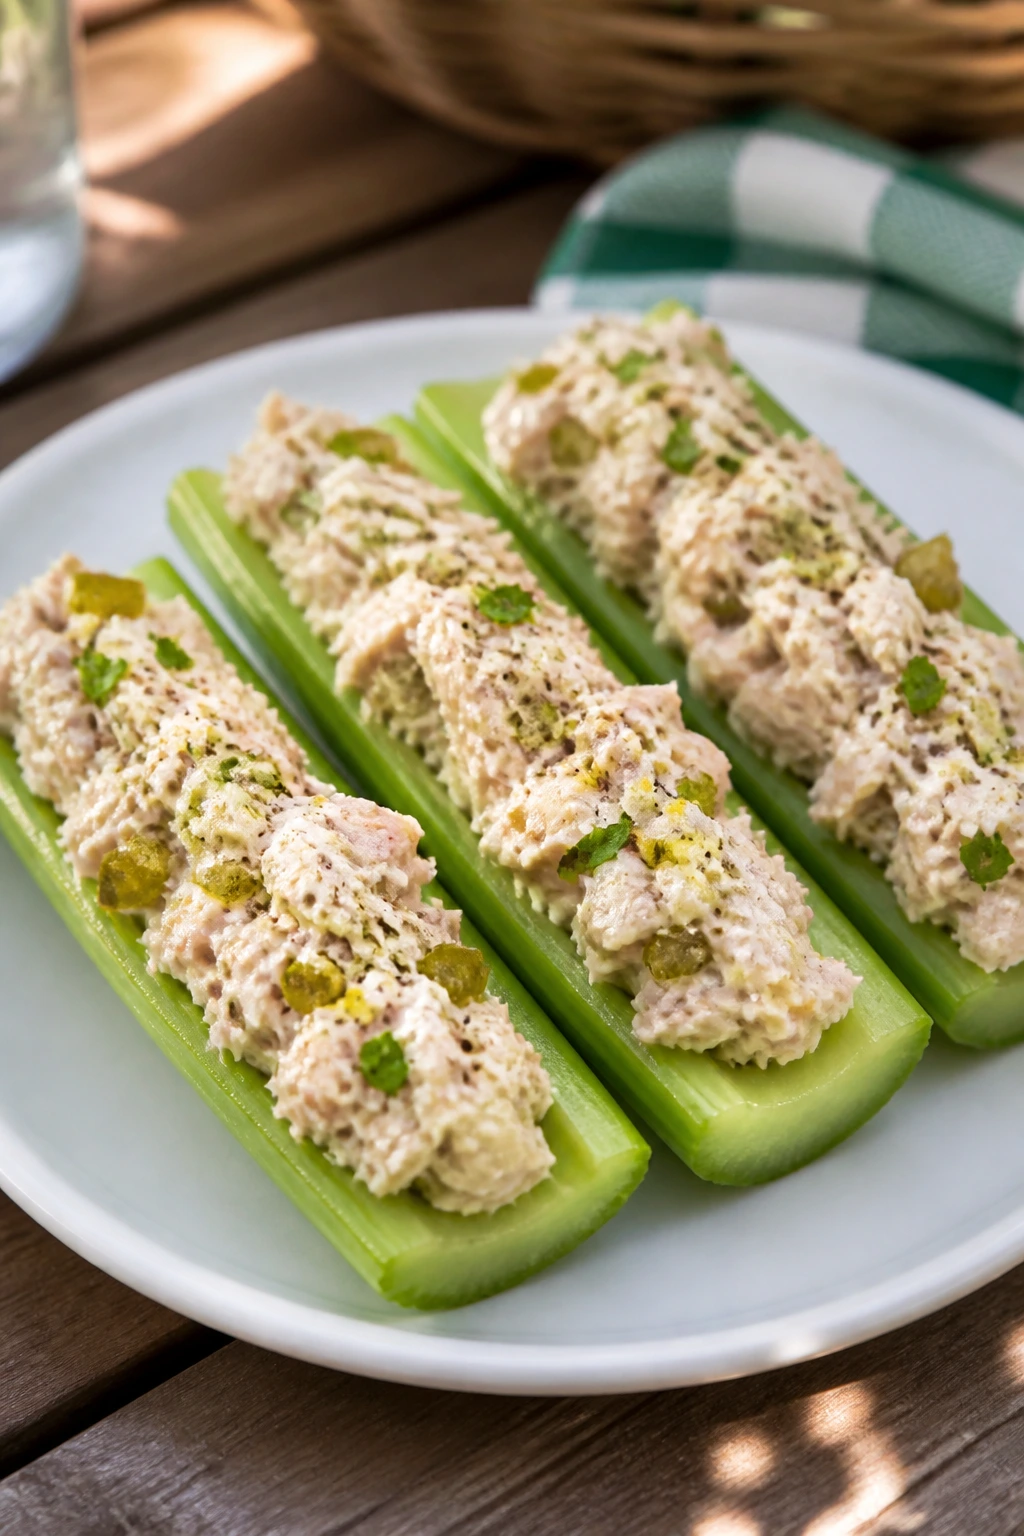
Celery boats are one of the few ways tuna salad feels fresh instead of heavy. The celery gives crunch, the tuna salad fills the groove, and the whole thing stays cold and neat if you pack it right.
Why It Works:
Celery acts like its own serving dish, which is smart for picnics because it cuts down on bread getting soggy. Tuna salad brings the protein, while a little lemon and pickle relish keep the flavor from going flat. This is a chilled snack that benefits from being assembled close to eating time.
Key Ingredients:
- 2 celery stalks, cut into 3-inch pieces
- 1 can tuna, drained
- 3 tablespoons mayonnaise
- 1 teaspoon lemon juice
- 1 teaspoon pickle relish
- Salt and pepper
Quick Steps:
- Mix tuna, mayo, lemon juice, relish, salt, and pepper.
- Cut celery stalks into short pieces and trim the bottoms so they sit flat.
- Spoon tuna salad into each celery piece.
- Chill until ready to pack.
Equipment for This Recipe:
- Mixing bowl
- Fork
- Knife
- Small container
How to Serve This Dish:
Serve with cold iced tea and a few crackers on the side. The boats are a good option when you want something lighter than a sandwich, and they’re much neater than tuna on soft bread.
Pro Tips for This Recipe:
- Dry the celery well so the filling doesn’t slide.
- Chill the tuna salad before stuffing the stalks.
- Chop the celery leaves finely if you want to use them as garnish.
Variations on This Dish:
- Greek Tuna Boats: Add chopped cucumber and a little dill.
- Egg-Free Version: Use mashed avocado instead of mayo.
- Cracker Dip Version: Serve the tuna salad with crackers instead of celery.
Common Mistakes to Avoid with This Recipe:
- Don’t overfill the celery or the tuna spills out.
- Don’t leave canned tuna warm too long before chilling.
- Don’t use limp celery; it won’t hold the filling well.
36. Mini Bagel Pizzas
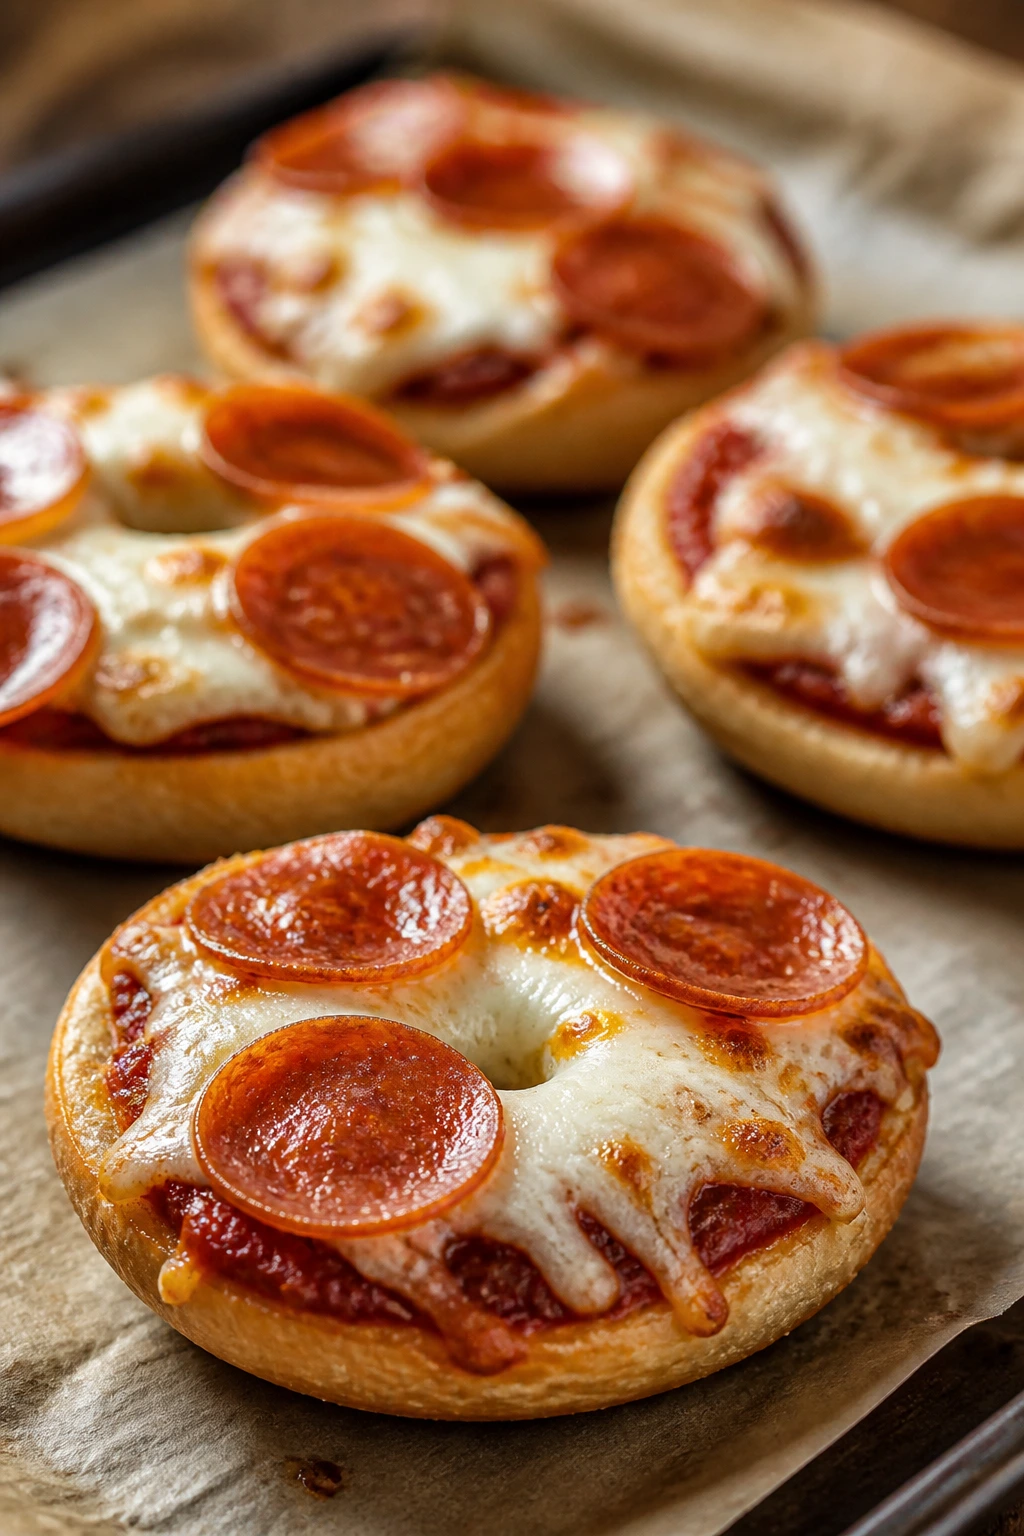
Mini bagel pizzas are the lunchbox version of a comfort food kids already know. They’re chewy at the edges, gooey in the center, and easy to eat cold or at room temperature without any trouble.
Why It Works:
A mini bagel gives you a built-in crust that doesn’t need shaping. Sauce, cheese, and small toppings bake together quickly, so the topping layer doesn’t turn watery. Letting them cool before packing keeps the bagels from going soft underneath.
Key Ingredients:
- 4 mini bagels, split
- 1/2 cup pizza sauce
- 1 1/2 cups shredded mozzarella
- 1/4 cup mini pepperoni
- 1 teaspoon dried oregano
Quick Steps:
- Heat the oven to 400°F and line a sheet pan.
- Place bagel halves cut-side up on the pan.
- Spread with sauce, add cheese, pepperoni, and oregano.
- Bake 8 to 10 minutes until the cheese melts.
Equipment for This Recipe:
- Sheet pan
- Spoon
- Knife
- Parchment paper
How to Serve This Dish:
Serve with cold lemonade or sparkling water. They’re good hot or cool, but the texture is best when they’ve had enough time to settle and not enough time to turn soggy.
Pro Tips for This Recipe:
- Toast the bagels lightly before topping if you want extra crunch.
- Keep the sauce layer thin.
- Use a small amount of toppings so the mini bagels stay balanced.
Variations on This Recipe:
- Veggie Bagel Pizzas: Add finely chopped peppers or mushrooms.
- White Pizza Version: Use ricotta and mozzarella instead of sauce.
- Breakfast Bagels: Top with scrambled egg and cheese.
Common Mistakes to Avoid with This Recipe:
- Don’t pile on too much sauce.
- Don’t overload the cheese or the topping slides off.
- Don’t pack them hot if you want the bagels to keep their bite.
37. Strawberry Cream Cheese Roll-Ups
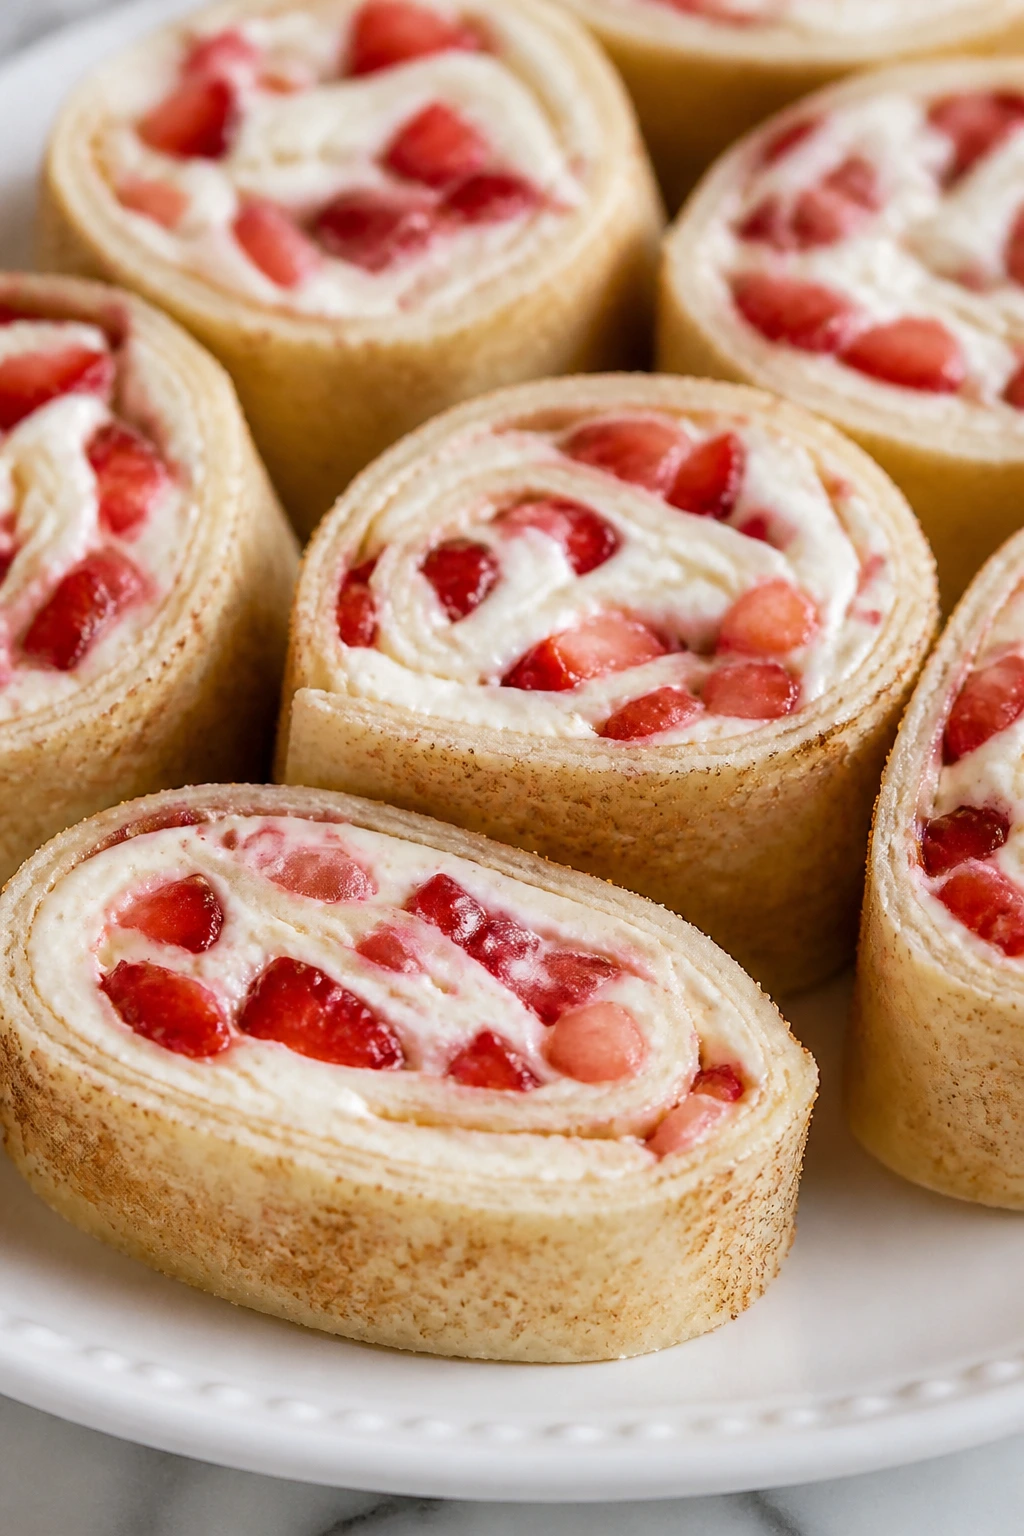
These roll-ups taste like a dessert sandwich that found a way to behave at a picnic. Cream cheese smooths out the tortilla, strawberries bring the bright fruit note, and a little cinnamon sugar makes the edges taste like a bakery snack.
Why It Works:
Cream cheese gives the tortilla a sweet, tangy base, and chopped strawberries add enough freshness to keep it from feeling heavy. If you cut them into rounds, you get a tidy snack that can sit beside a cold drink without crumbling apart. The main thing is keeping the strawberries dry.
Key Ingredients:
- 2 large flour tortillas
- 4 ounces cream cheese, softened
- 1 cup strawberries, finely chopped
- 1 tablespoon powdered sugar
- 1 teaspoon cinnamon sugar
Quick Steps:
- Mix cream cheese and powdered sugar until smooth.
- Spread over the tortillas, then scatter chopped strawberries on top.
- Roll tightly and chill for 10 minutes.
- Slice into pinwheels and dust lightly with cinnamon sugar.
Equipment for This Recipe:
- Mixing bowl
- Butter knife
- Cutting board
- Sharp knife
How to Serve This Dish:
Serve with cold milk or fruit punch. They’re sweetest when eaten soon after slicing, and they look neat lined up in a flat container with the spiral sides facing up.
Pro Tips for This Recipe:
- Chop strawberries small so the roll stays tight.
- Pat the fruit dry before adding it to the spread.
- Chill before slicing for the cleanest rounds.
Variations on This Recipe:
- Blueberry Roll-Ups: Replace strawberries with blueberries.
- Honey Version: Use a drizzle of honey instead of powdered sugar.
- Chocolate Strawberry Roll-Ups: Add mini chocolate chips.
Common Mistakes to Avoid with This Recipe:
- Don’t add wet fruit or the tortilla turns slick.
- Don’t roll too loosely.
- Don’t slice before chilling or the filling squishes out.
38. Peaches and Cottage Cheese Cups
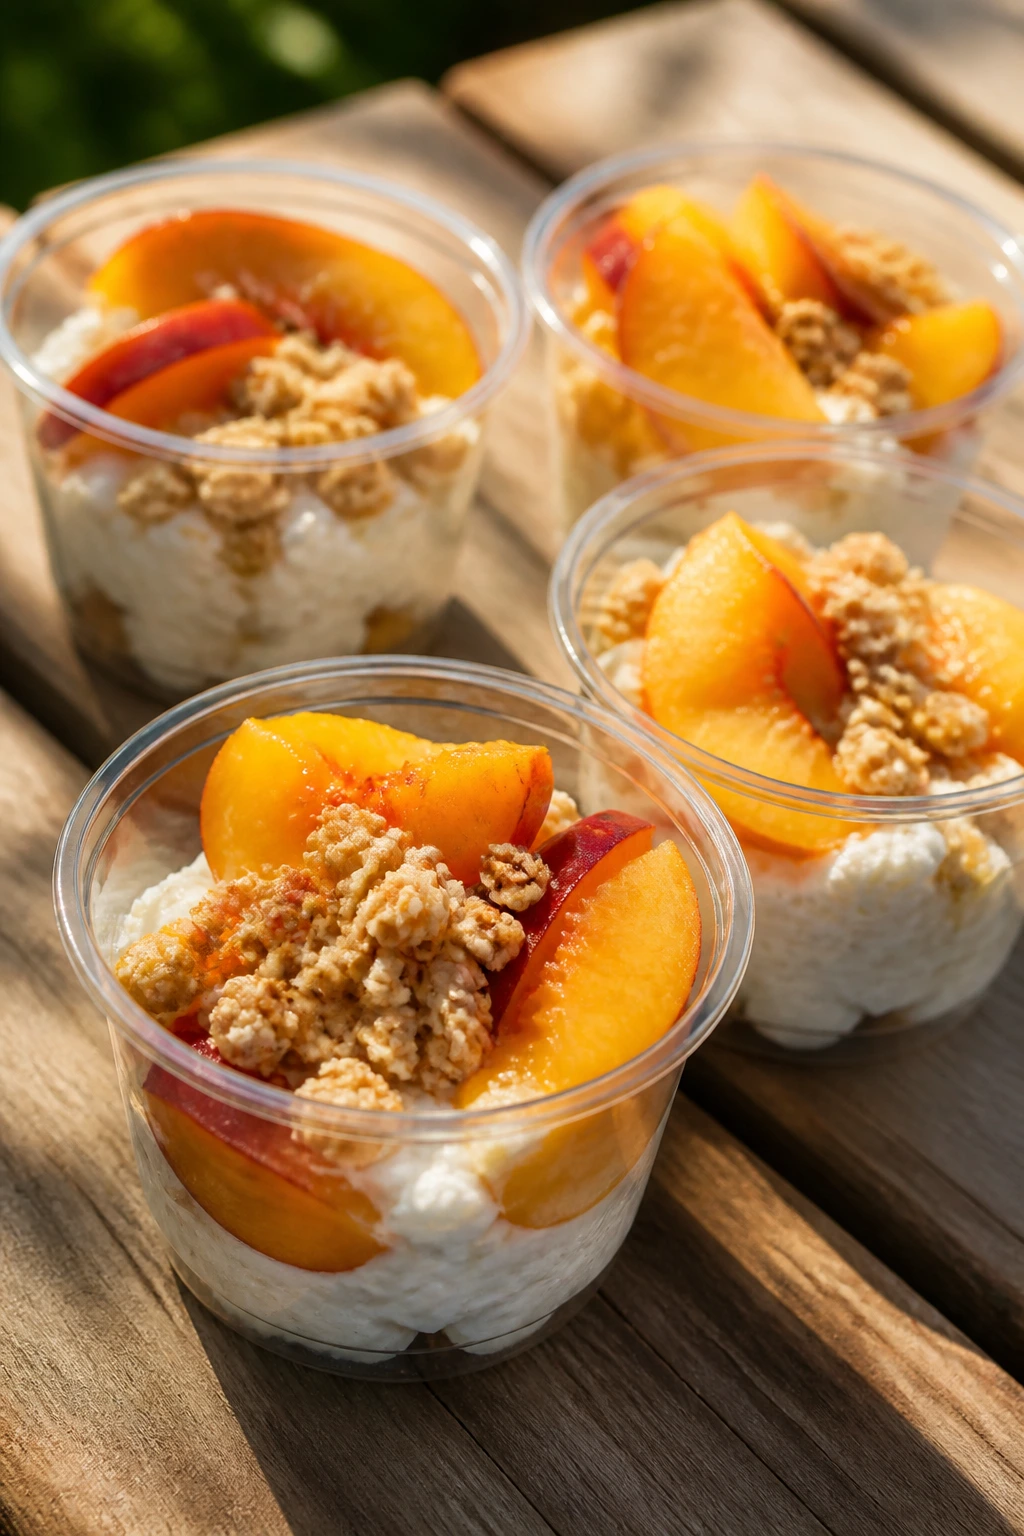
This is the quiet one in the basket, and it’s better than it looks. Sweet peaches, cool cottage cheese, and a little granola give you a snack that feels refreshing, creamy, and not too heavy.
Why It Works:
Cottage cheese brings protein and a cold, soft texture that goes well with juicy fruit. Peaches add sweetness without needing sugar, and a sprinkle of granola gives the cup some crunch. It’s a nice change when the picnic has gone deep into salty territory.
Key Ingredients:
- 2 cups cottage cheese
- 2 ripe peaches, sliced
- 1/2 cup granola
- 1 teaspoon honey, optional
- 4 small cups
Quick Steps:
- Spoon cottage cheese into each cup.
- Top with peach slices.
- Add granola right before serving.
- Drizzle with honey if you want extra sweetness.
Equipment for This Recipe:
- Knife
- Cutting board
- Spoon
- Small cups
How to Serve This Dish:
Serve cold with iced tea or plain water. It works well as a light snack between heavier picnic foods, and the peach slices make the cups look bright without much effort.
Pro Tips for This Recipe:
- Use firm-ripe peaches so they slice cleanly.
- Add granola at the last minute to keep it crisp.
- Chill the cups before packing for the freshest texture.
Variations on This Recipe:
- Berry Cottage Cups: Swap peaches for berries.
- Cinnamon Honey Version: Add a pinch of cinnamon on top.
- Yogurt Swap: Use Greek yogurt instead of cottage cheese.
Common Mistakes to Avoid with This Recipe:
- Don’t add granola too early.
- Don’t use overripe peaches that collapse in the cup.
- Don’t leave the cups warm; they belong in the cooler.
39. Chicken and Veggie Rice Balls
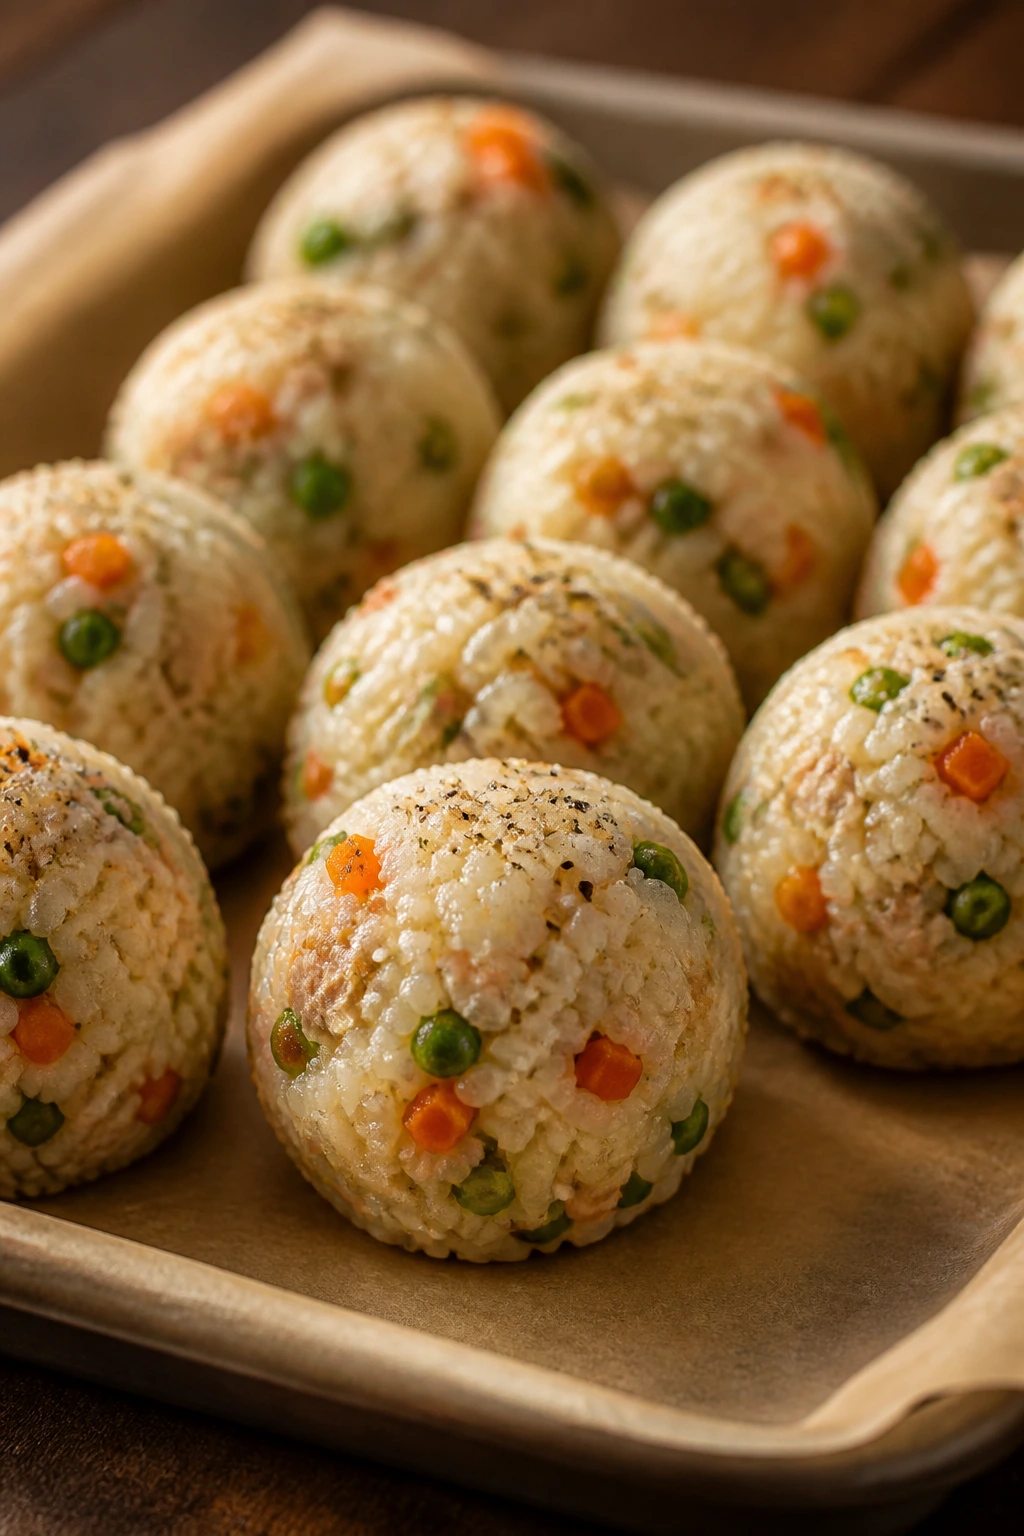
Rice balls are handy picnic food because they turn leftovers into something that can be picked up without a fork. Chicken, rice, and a few small vegetables form a compact snack that stays tidy if you shape it while the rice is still sticky.
Why It Works:
Short-grain or freshly cooked rice clings well enough to hold the ball together. Finely chopped chicken and vegetables spread the flavor through each bite instead of dumping everything into the center. A light seasoning gives the rice enough taste to stand on its own even when cold.
Key Ingredients:
- 2 cups cooked rice
- 1 cup chopped cooked chicken
- 1/2 cup finely diced carrots
- 1/4 cup peas
- 1 egg, lightly beaten
- Salt and pepper
Quick Steps:
- Mix rice, chicken, carrots, peas, egg, salt, and pepper in a bowl.
- Shape into small balls with damp hands.
- Chill for 20 minutes so they firm up.
- Pack in a single layer until ready to eat.
Equipment for This Recipe:
- Mixing bowl
- Spoon
- Shallow tray
- Plastic wrap or container
How to Serve This Dish:
Serve with cold lemonade and a small cup of soy sauce or mild dipping sauce if the kids like dip. They’re a neat way to use leftover chicken, and they work especially well when the rest of the basket leans sweet.
Pro Tips for This Recipe:
- Use slightly sticky rice so the balls hold together.
- Keep the pieces of carrot tiny so they don’t poke out.
- Wet your hands before shaping to prevent sticking.
Variations on This Recipe:
- Teriyaki Rice Balls: Add a little teriyaki sauce to the mixture.
- Cheddar Rice Balls: Stir in shredded cheddar for a richer flavor.
- Veggie-Only Balls: Leave out chicken and add more peas.
Common Mistakes to Avoid with This Recipe:
- Don’t use dry rice; it won’t pack properly.
- Don’t make the balls too large or they fall apart.
- Don’t skip the chill time before packing.
40. Lemon Sugar Shortbread Fingers
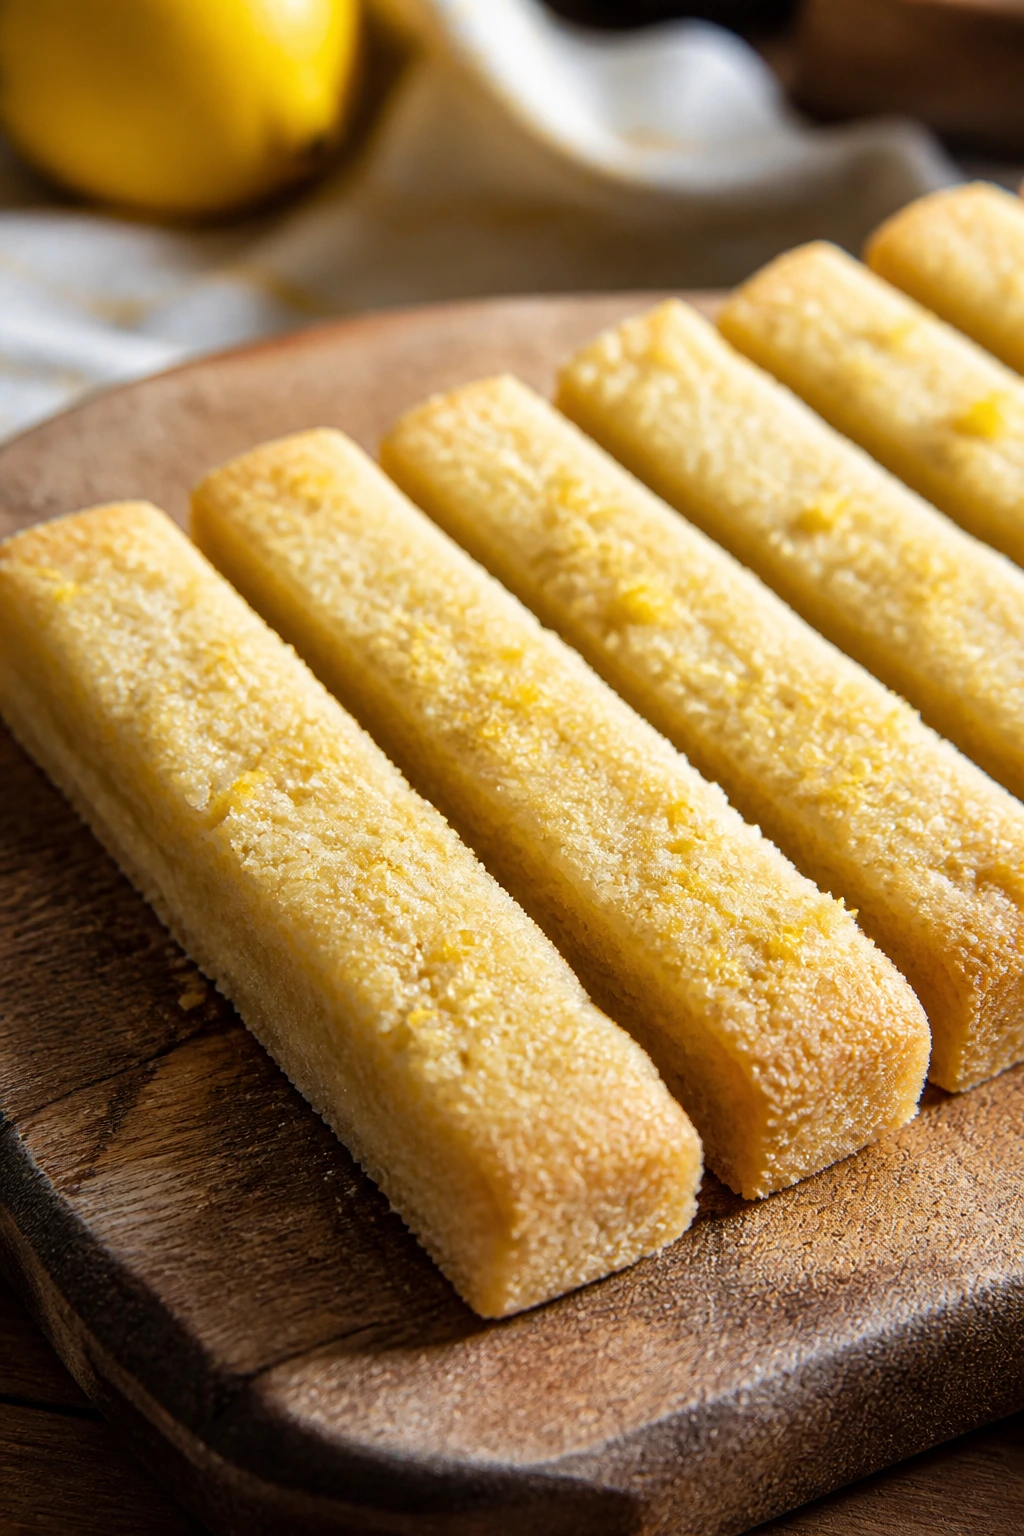
Shortbread fingers are the final sweet note in the basket, and they’re a good one. Buttery, crisp, and lightly lemony, they snap cleanly instead of crumbling into dust, which makes them far more picnic-friendly than a frosted cookie.
Why It Works:
Shortbread is all about ratio: butter, sugar, flour, and not much else. That simplicity gives you a firm cookie that travels well and tastes even better after it cools. Lemon zest keeps the flavor from feeling flat, and the finger shape makes it easy for small hands to manage.
Key Ingredients:
- 1 cup unsalted butter, softened
- 1/2 cup sugar
- 2 cups all-purpose flour
- 1 tablespoon lemon zest
- 1/4 teaspoon salt
Quick Steps:
- Heat the oven to 325°F and line a baking sheet.
- Cream butter and sugar until smooth, then mix in lemon zest.
- Add flour and salt, mixing until a soft dough forms.
- Press into a rectangle, score into fingers, and bake 18 to 22 minutes until pale golden.
Equipment for This Recipe:
- Mixing bowl
- Baking sheet
- Parchment paper
- Knife for scoring
How to Serve This Dish:
Serve with iced tea or cold milk, depending on how sweet the rest of the picnic is. They’re nice at the end of the meal or tucked into a small bag as a take-home snack.
Pro Tips for This Recipe:
- Don’t brown them too deeply; shortbread should stay pale.
- Score the dough before baking so the fingers break cleanly later.
- Let them cool fully before moving them.
Variations on This Recipe:
- Orange Shortbread: Swap lemon zest for orange zest.
- Vanilla Shortbread: Leave out the citrus and add vanilla.
- Dip Finish: Dip one end in melted chocolate after cooling.
Common Mistakes to Avoid with This Recipe:
- Don’t overmix once the flour goes in.
- Don’t bake until deeply golden or they’ll taste dry.
- Don’t cut while warm if you want neat fingers.
Why Picnic Foods Need to Travel Well
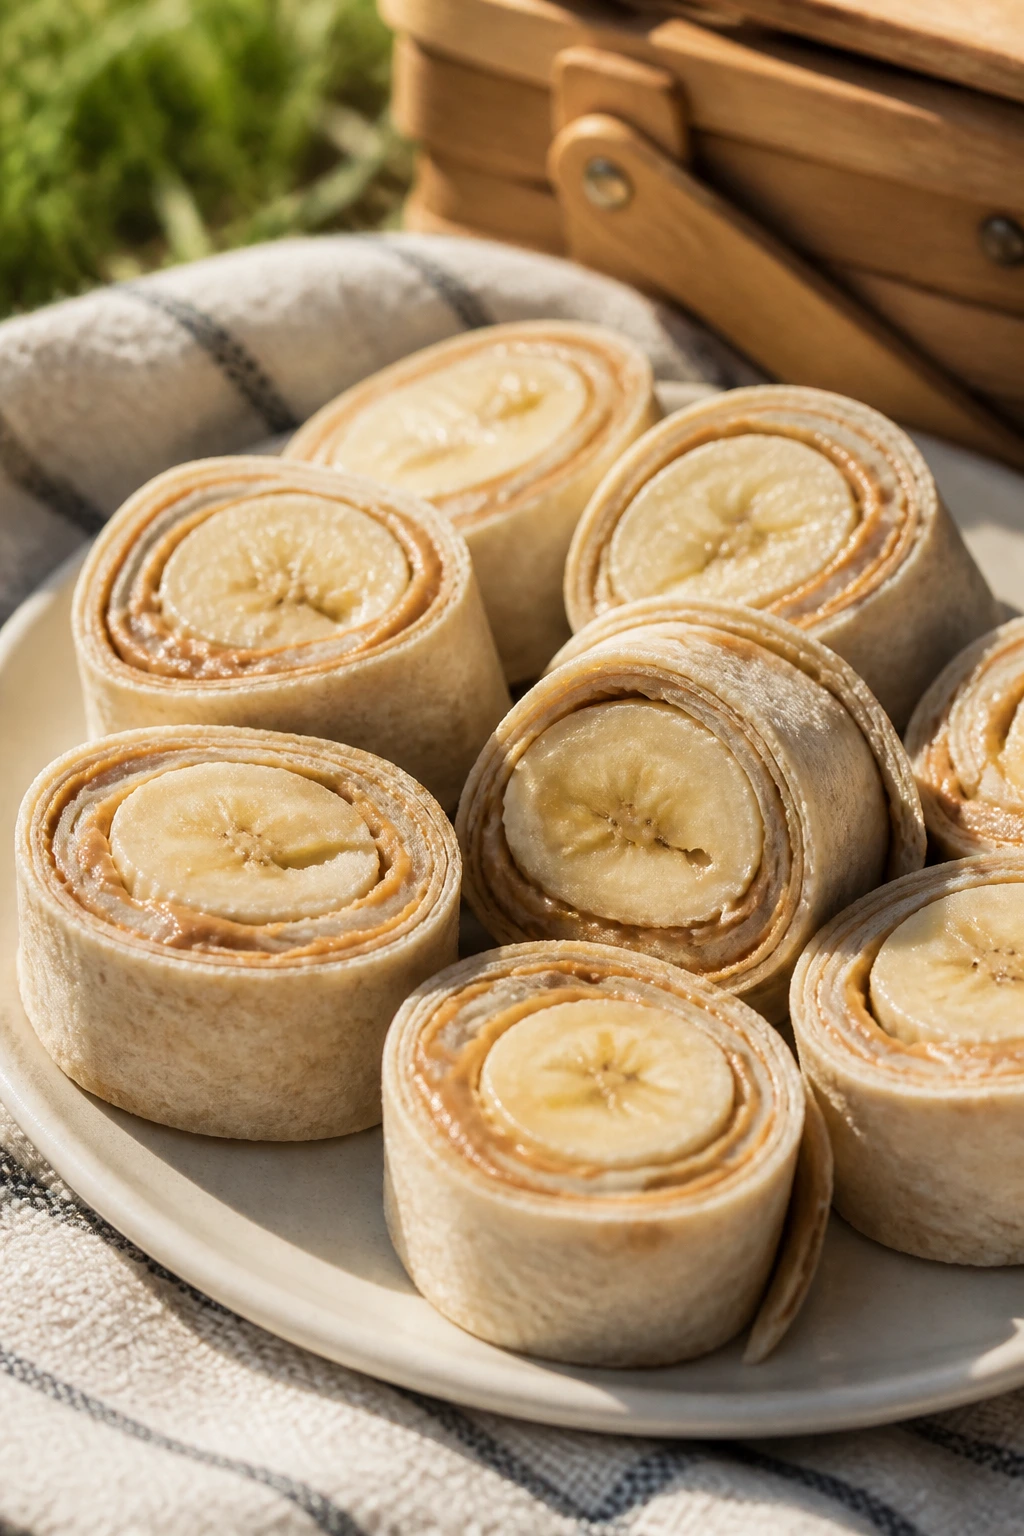
A picnic snack succeeds or fails before anyone takes the first bite. If it leaks, wilts, sweats, or turns to crumbs in the bottom of the bag, the whole thing feels careless. The best kids picnic foods are built for transport first and decoration second, which is why tortillas, muffins, bars, skewers, and chilled cups show up so often in a basket that actually gets eaten.
Texture is the real hidden issue. Crisp things need to stay crisp. Soft things need enough structure to survive a blanket, a cup holder, or a backpack pocket. Creamy fillings need a wall around them, whether that wall is a tortilla, a cracker, a celery stalk, or a muffin cup. That’s the difference between a snack and a cleanup job.
Temperature matters just as much. The USDA’s two-hour rule is worth obeying with eggs, dairy, meat, and rice, and the fix is simple enough: pack those foods cold, nestle them in ice packs, and keep the cooler closed until you’re ready. It’s not glamorous. It’s just the part that keeps the good stuff safe and the picnic pleasant.
Essential Equipment for These Recipes
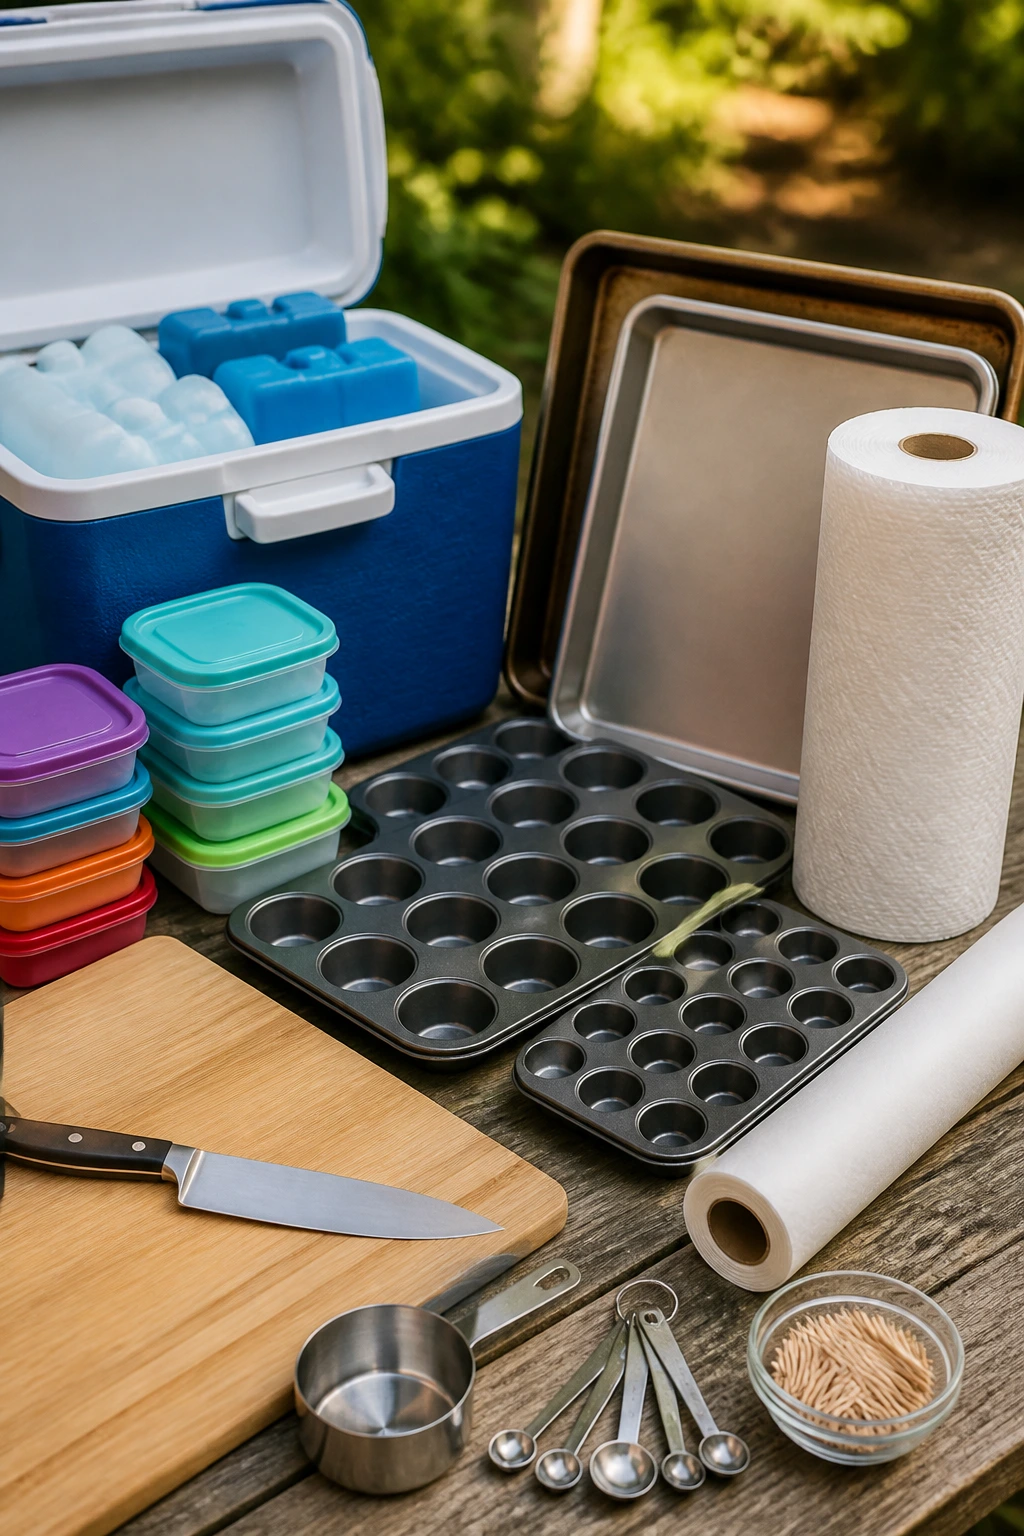
-
Insulated cooler with ice packs: Keep anything with dairy, eggs, meat, or rice cold until serving time.
-
Small lidded containers and jars: Perfect for dips, parfaits, fruit cups, and anything that should stay separated until the blanket is out.
-
Mini muffin tin and standard muffin tin: Useful for pizza muffins, egg muffins, cornbread bites, and mac and cheese muffins.
-
Sheet pans: Handy for baked tenders, shortbread, fritters, and anything that needs even browning.
-
Sharp knife and cutting board: You’ll use these constantly for fruit, sandwiches, and clean slices.
-
Parchment paper: Keeps bars, pinwheels, and pretzel rods from sticking.
-
Toothpicks or small skewers: Useful for meatballs, fruit kabobs, and snacks that need a little handle.
-
Measuring cups and spoons: A lot of picnic food fails because the filling is too wet or the seasoning is off.
-
Paper towels: Dry fruit, cucumbers, and washed greens before packing.
Smart Shopping and Ingredient Tips
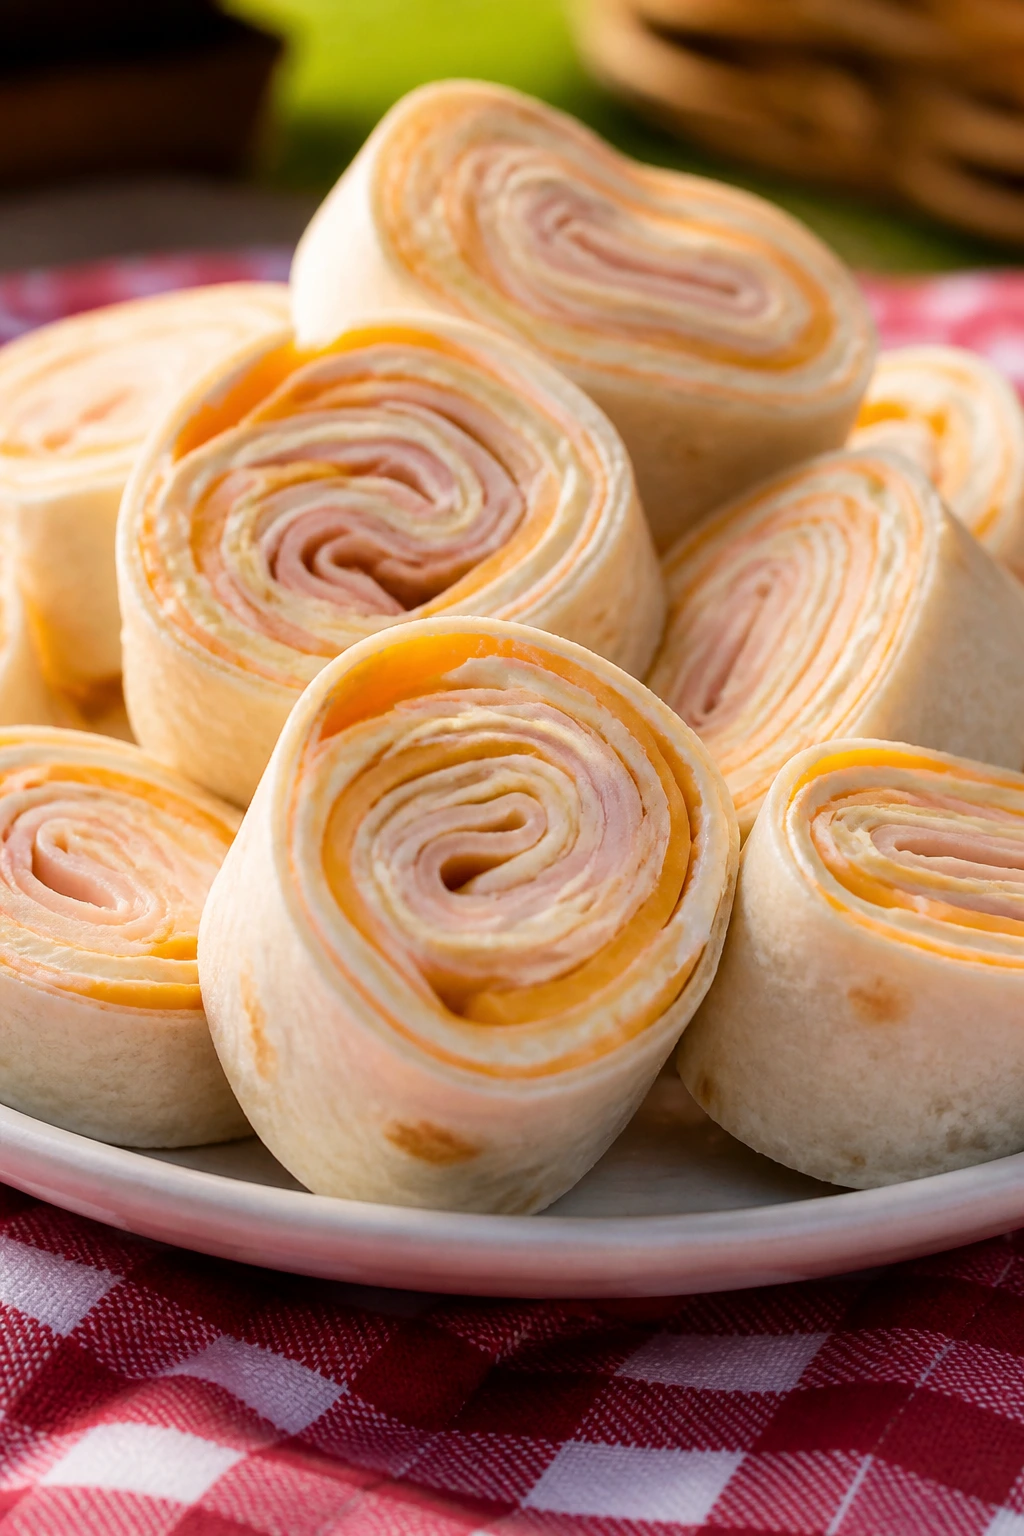
Start with ingredients that hold their shape. For breaded or rolled foods, soft flour tortillas are better than stiff ones because they bend instead of cracking. For fruit, choose pieces that are ripe but still firm: strawberries should be bright and dry, grapes should feel plump, apples should snap when you bite them, and peaches should yield just a little without turning mushy in your hand.
Cheese matters more than people think. Sharp cheddar gives you more flavor in a small amount, which is useful when you don’t want to overstuff a pinwheel or muffin. Mozzarella is best when you want stretch and mildness. Feta should be dry and crumbly, not packed in watery brine unless you drain it well first.
For deli meats, look for slices that are thin enough to roll but thick enough not to tear. For chicken salad, make sure the cooked chicken is cooled before mixing with mayo so the dressing doesn’t separate. For canned beans and tuna, drain them harder than you think you need to. Extra liquid is the enemy of picnic food.
Granola, crackers, and pretzels should be bought with crunch in mind. If the bag feels crushed on the shelf, it won’t magically recover in your picnic basket.
How to Serve These Recipes
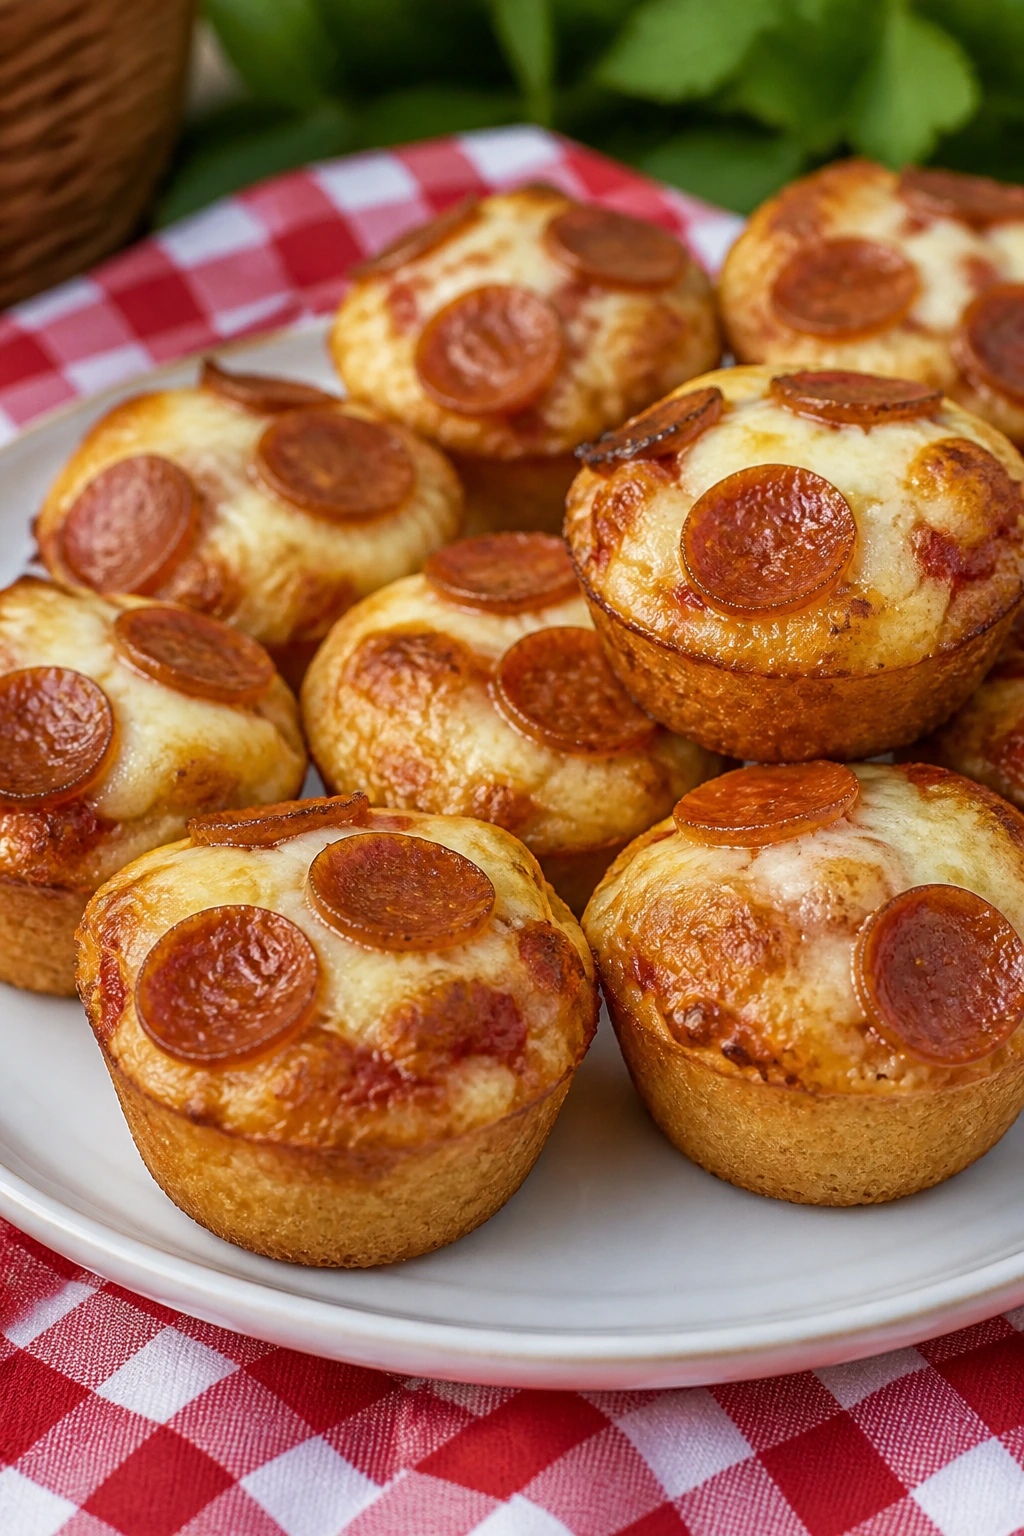
Presentation:
Use a mix of flat trays, small cups, and parchment-lined containers so each food has its own space. Stack pinwheels cut-side up, line fruit kabobs across a tray, and keep dips in separate lidded cups to avoid soggy edges and messy hands.
Accompaniments:
These foods play well with cold fruit, cucumber sticks, simple crackers, and a salty crunch like pretzels or popcorn. If the basket leans sweet, add something savory like turkey roll-ups or deviled eggs. If it leans savory, bring fruit kabobs, shortbread, or fruit-and-yogurt cups for balance.
Portions:
For younger kids, plan on 2 to 4 small items plus fruit. Older kids often eat 5 to 7 pieces, especially if the food is small and snackable. If the picnic lasts a long time, make one filling item, one crunchy item, one fruit item, and one sweet item; that keeps the basket from getting one-note.
Beverage Pairing:
Cold lemonade is the easy win for salty snacks, milk pairs best with muffins and cookies, and sparkling water works well with fruit, cheese, and anything that needs a clean finish. For a very simple setup, pack water plus one sweet drink and let the food do the talking.
Additional Tips and Flavor Boosters
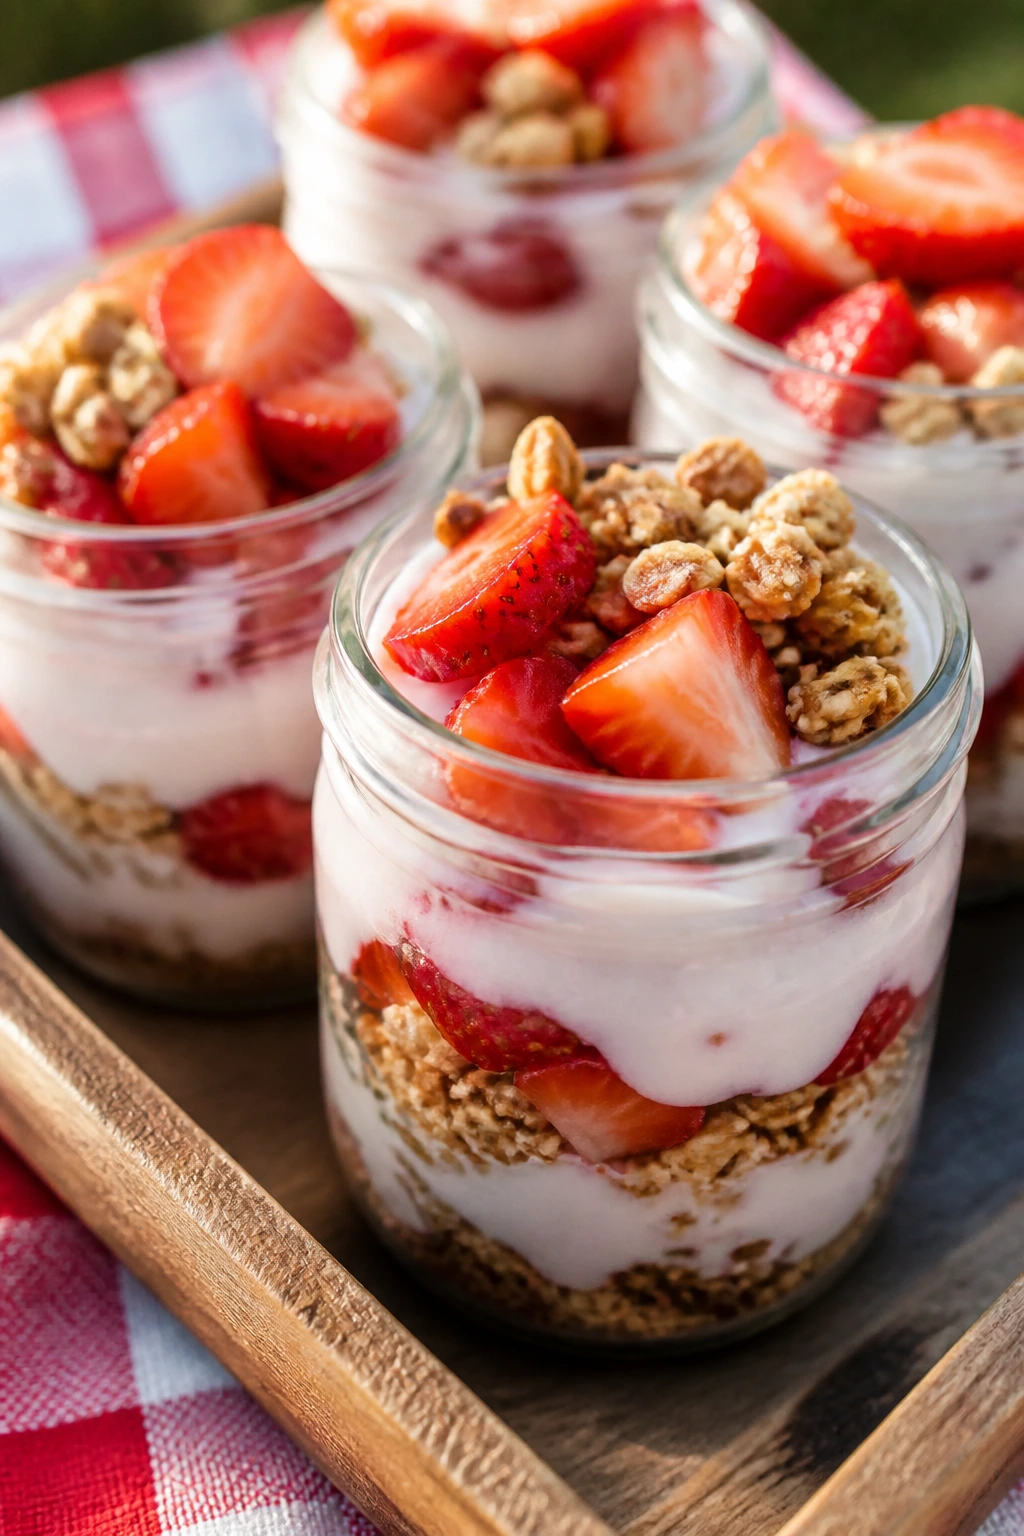
Flavor Enhancement:
A tiny squeeze of lemon or lime wakes up sandwiches, fruit cups, and bean salads in a way salt alone can’t. It’s the fastest way to stop a cold snack from tasting dull.
Customization:
Mix and match one savory, one fruity, one crunchy, and one sweet item so kids can build their own plate. If you know someone is picky, keep one section of the basket plain: simple cheese cubes, plain fruit, or a basic muffin usually gets eaten without debate.
Serving Suggestions:
Use little paper cups for dips and toothpicks for bite-size foods. It sounds almost too simple, but it keeps the basket from becoming one shared mess.
Make-It-Yours:
For nut-free lunches, rely on sunflower seed butter, hummus, cheese, and egg-based snacks. For dairy-light baskets, use fruit kabobs, popcorn mix, rice balls, and salsa cups. For gluten-free needs, lean on skewers, egg muffins, bean salads, and cheese cups instead of pinwheels and breads.
Make-Ahead, Storage, and Reheating Guidance
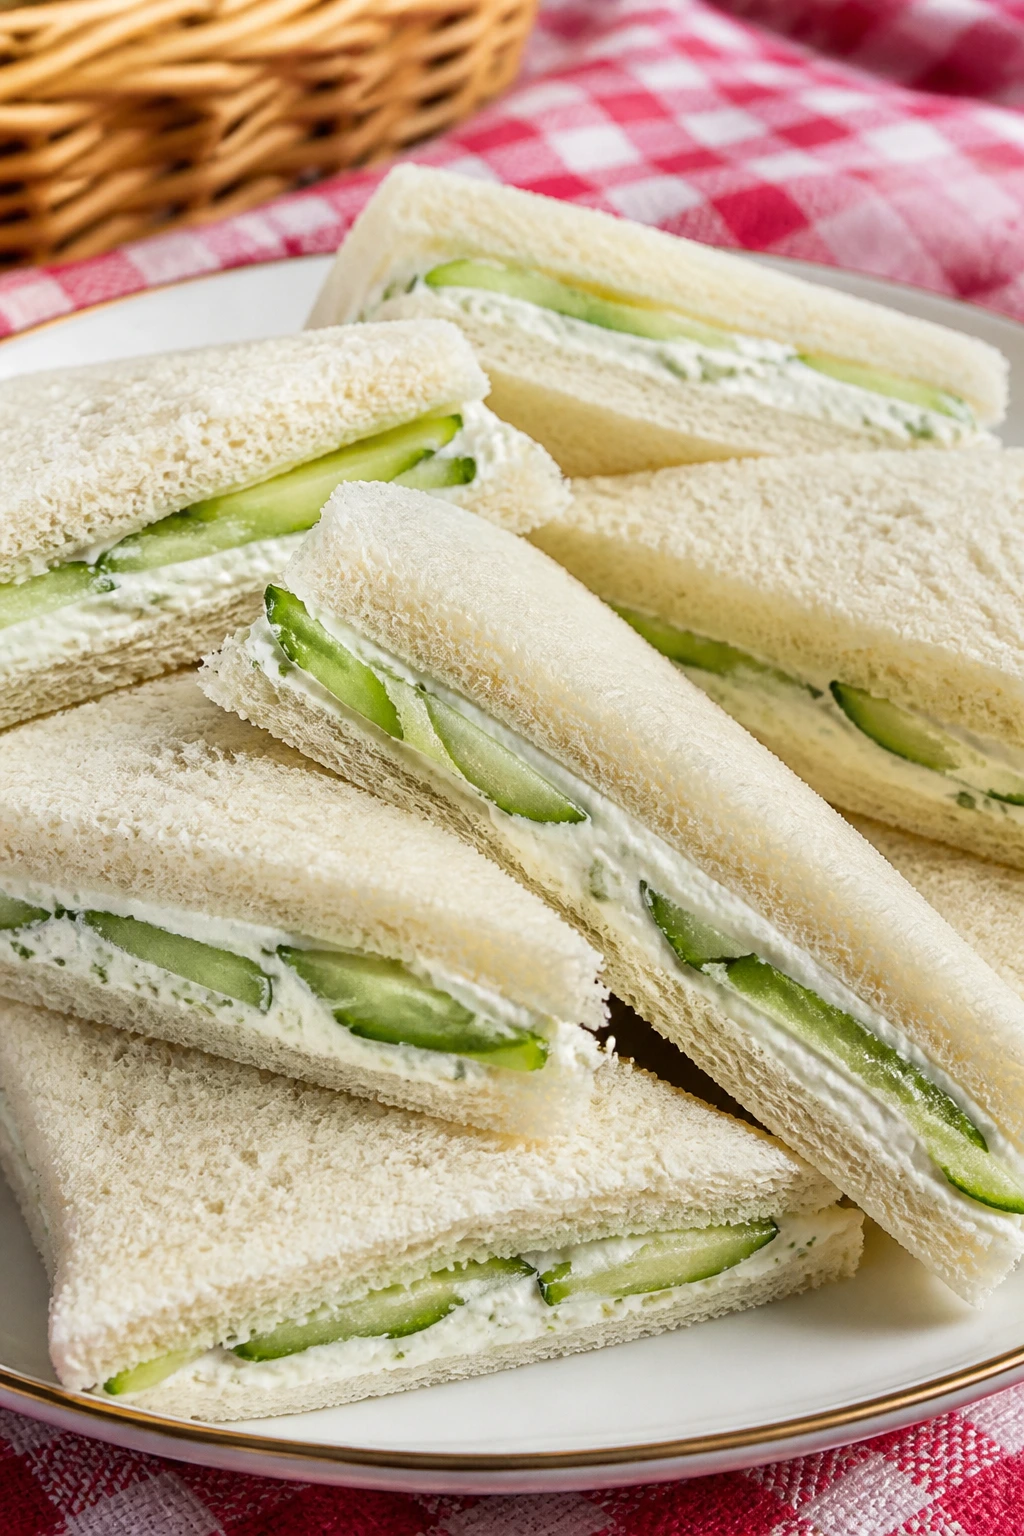
Most of these picnic foods can be made ahead, and the refrigerator is your friend. Tortilla roll-ups, pasta salads, chicken salad, deviled eggs, egg muffins, hummus cups, and fruit jars usually keep for 3 to 4 days refrigerated if they stay sealed and cold. Fruit that browns fast, like apples and peaches, is better when cut the same day or tossed with a little citrus first.
For the freezer, baked items are the easiest winners. Mini pizza muffins, corn dog muffins, chicken tenders, shortbread fingers, mini meatballs, and baked bars can usually be frozen for up to 2 months in airtight containers or freezer bags. Thaw overnight in the fridge, then reheat as needed. Muffins and tenders do well in a 350°F oven for 8 to 12 minutes; meatballs can be warmed in sauce on the stovetop over low heat until hot through.
Cold picnic foods should stay cold. Pack them with ice packs on both sides if you can, and keep the cooler shut until serving time. If you’re dealing with egg, dairy, meat, or rice, the two-hour rule is not a suggestion. Use it. Leftovers that spent a long picnic day in the warm air belong in the compost, not back in the fridge.
A few foods are worth assembling late. Granola should stay separate from yogurt until the last second. Chips should stay away from salsa. Crackers and pretzels should be packed dry. That little bit of restraint keeps the texture where it belongs.
Variations and Adaptations to Try
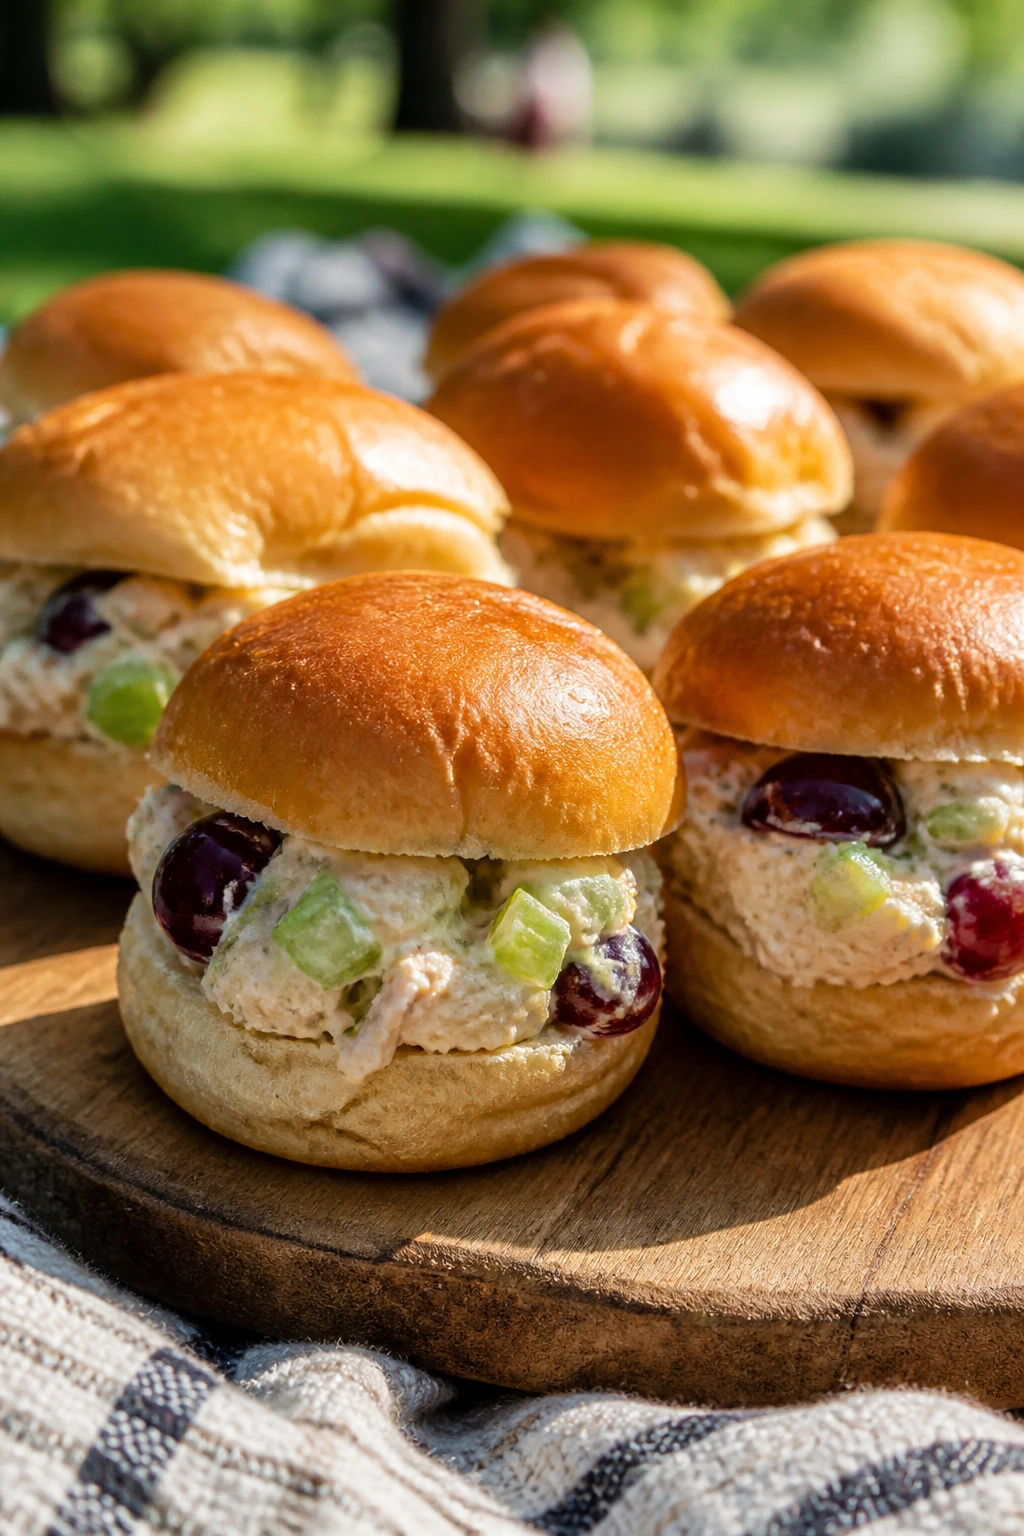
-
Nut-Free Lunchbox Swap: Replace peanut butter recipes with sunflower seed butter, and skip any trail mix or bars with nuts. It keeps the menu safe for school-age picnics without changing the whole feel of the basket.
-
Cooler-First Dairy-Light Basket: Build around fruit kabobs, popcorn mix, rice balls, salsa cups, and baked items that taste fine at room temperature. You’ll use less ice and still have a full spread.
-
Gluten-Free Picnic Box: Lean on deviled eggs, hummus cups, fruit, cheese cubes, rice balls, and corn fritters. Use gluten-free tortillas or crackers where needed, but keep the fillings the same.
-
Protein-Heavy Lunch Plan: Add chicken tenders, mini meatballs, egg muffins, tuna celery boats, and chicken salad sliders. That version works well when the picnic needs to function like lunch, not just snack time.
-
Sweet-Forward Blanket Spread: Build around fruit kabobs, yogurt jars, shortbread fingers, cereal bars, and banana oat cookies. Add one savory item so the basket doesn’t turn into a sugar rush.
-
Tiny-Hand Version: Cut everything smaller than you think you need. Halve grapes, cut sandwiches into quarters, use mini muffin tins, and slice skewers into shorter lengths. Smaller portions feel easier for younger kids and reduce the amount of food dropped into the dirt.
Common Mistakes to Avoid
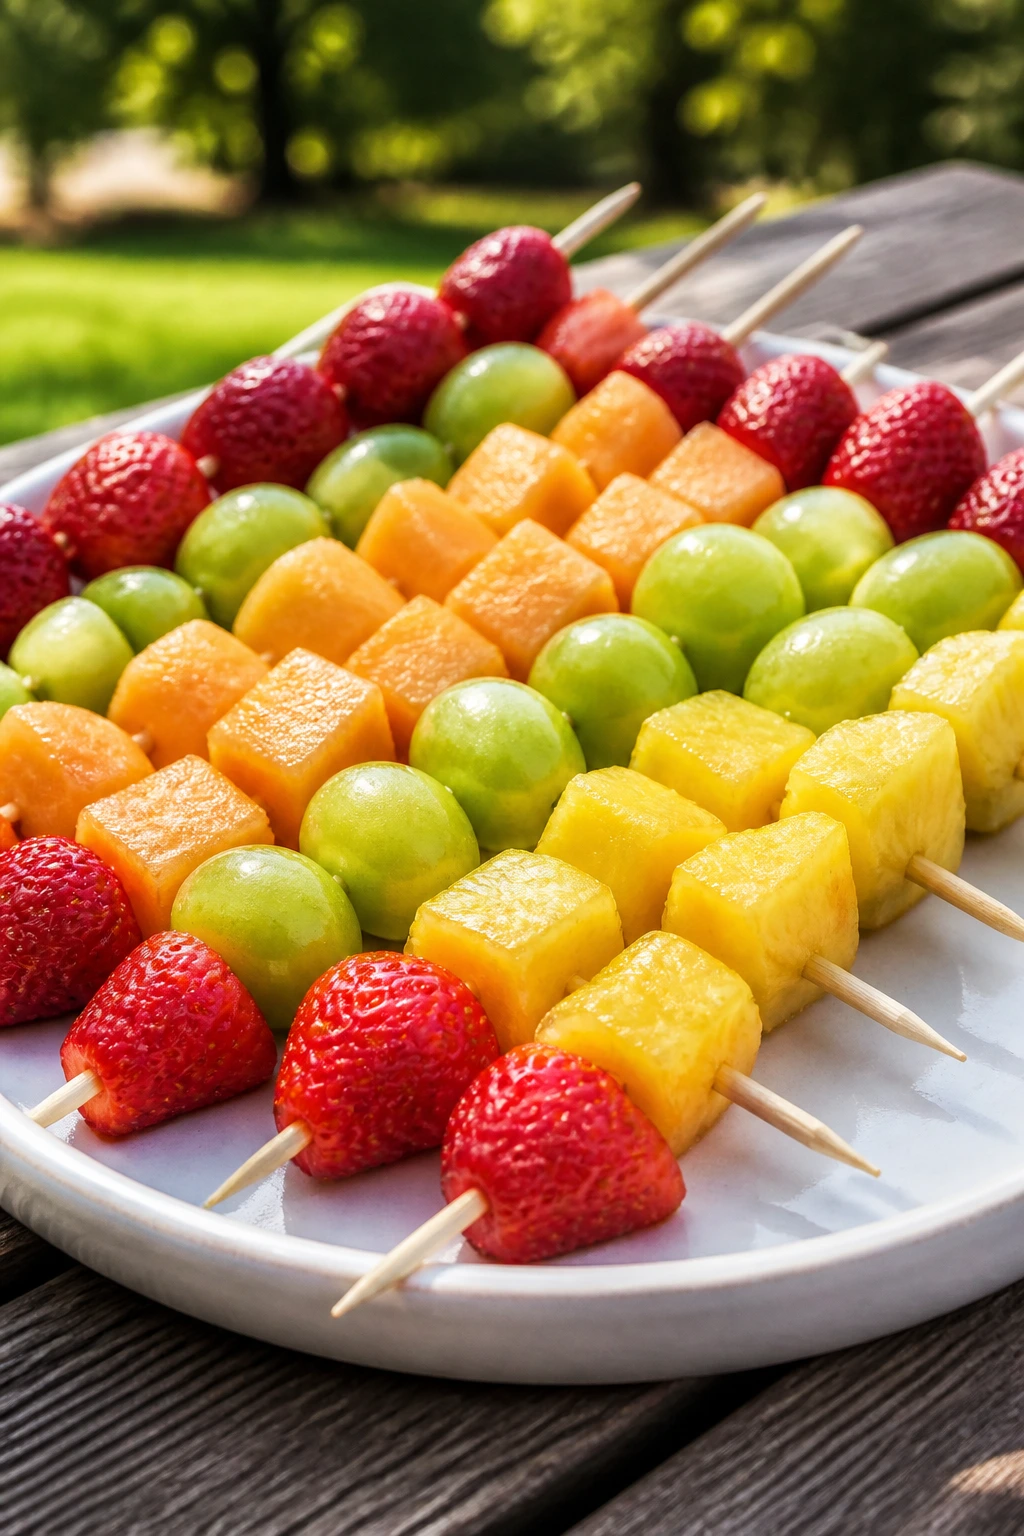
The biggest mistake is packing foods with too much moisture. Wet cucumber slices, watery salsa, juicy tomatoes, and overripe fruit soften bread, chips, and crackers fast. Dry the vegetables, drain the salsa, and keep crunchy things separate until serving time.
Another easy slip is letting the cooler turn into a warm basket with ice packs. If you’re packing eggs, mayo, chicken, tuna, or rice, those foods need to stay chilled, not just “kinda cool.” Put the cooler in the shade, keep the lid closed, and arrange the ice packs so the food is actually touching cold surfaces.
People also overload picnic food with fillings. It’s tempting to make pinwheels huge or stack sliders tall, but children usually do better with smaller, flatter, easier bites. If a food needs both hands and a napkin tent, it probably belongs at home, not on the blanket.
Then there’s the texture problem. Crispy things get soggy, creamy things get runny, and soft bread gets smashed. Solve that by using stronger containers, packing components separately, and choosing foods that are meant to be eaten cold. That’s why this list leans so hard on muffins, cups, skewers, and bars. They behave.
Frequently Asked Questions
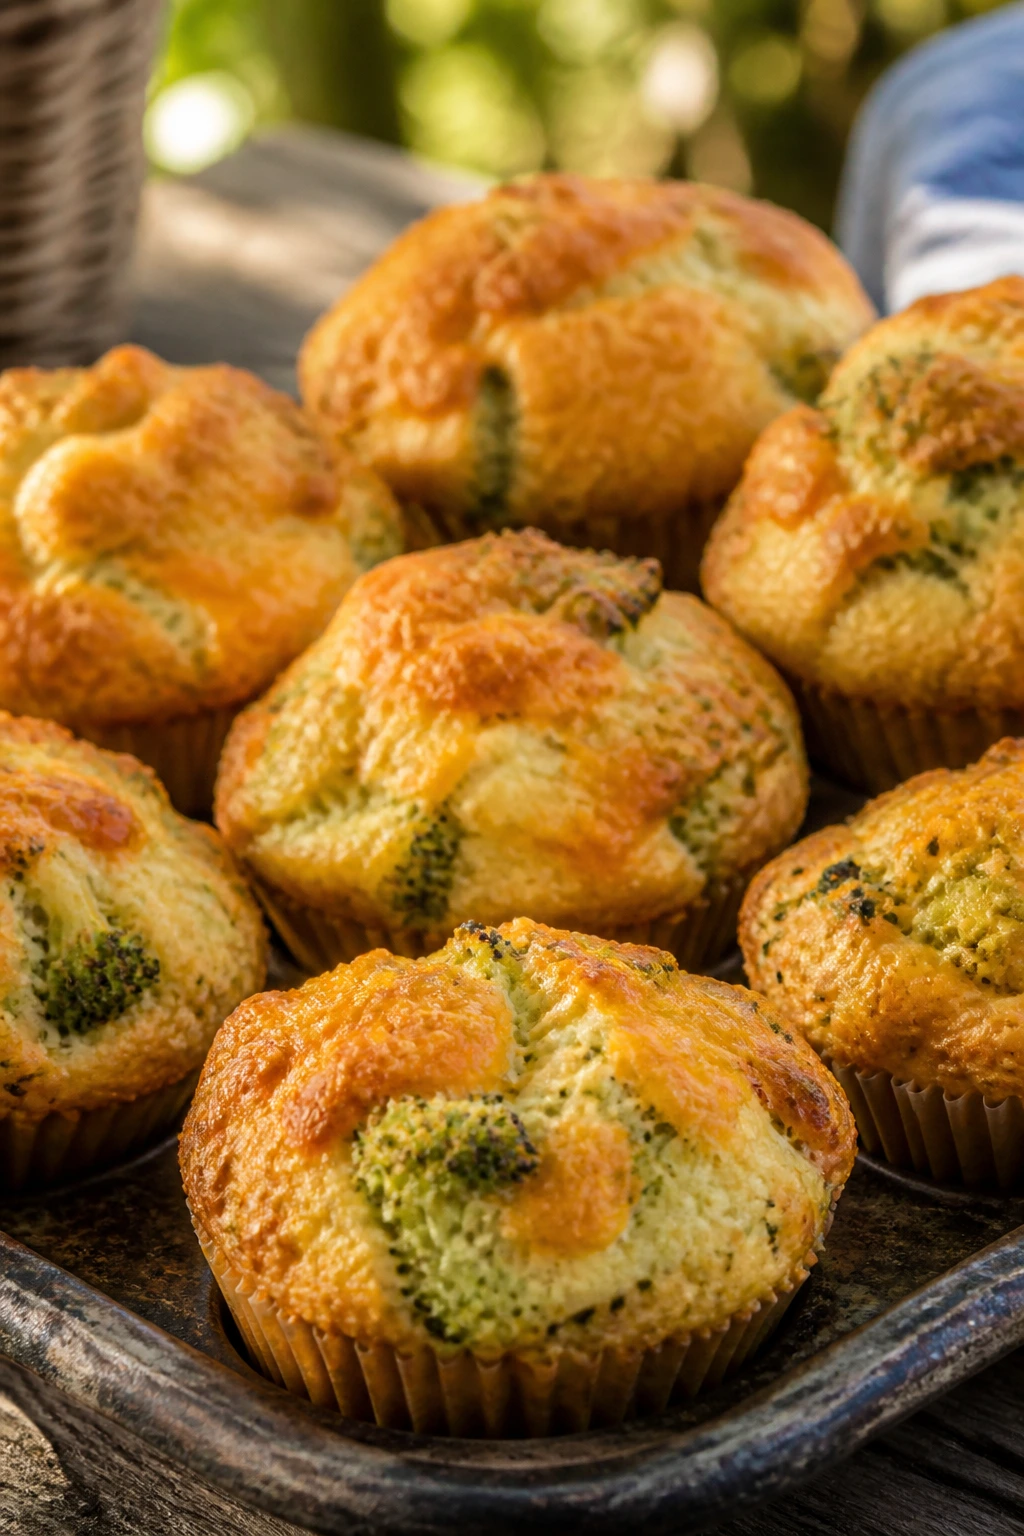
What kinds of food hold up best in a picnic cooler?
Foods with structure: muffins, pinwheels, bars, cut fruit, hard cheese, egg muffins, pasta salad cups, and baked items that don’t rely on a crisp crust. If something turns limp after ten minutes on a counter, it probably isn’t picnic food.
How long can picnic food sit out before it needs to go back in the cooler?
The safe rule to follow is two hours at normal warm-weather picnic temperatures, and one hour if it’s very hot. Anything with egg, dairy, meat, or rice should stay chilled as much as possible, and leftovers that sit too long should be tossed.
Can I make these foods the night before?
Yes, most of them are better that way. Roll-ups, pasta salads, bars, muffins, deviled eggs, and baked snacks all benefit from a night in the fridge because the flavors settle and the texture firms up.
What if my child won’t eat sandwiches?
Use the basket as a mix of shapes, not just sandwiches. Try pinwheels, egg muffins, chicken tenders, fruit kabobs, cheese crackers, pasta cups, and mini muffins. A child who rejects a sandwich will often eat the same filling in a different shape.
Which foods should I keep completely separate until serving?
Granola, chips, crackers, pretzels, and anything crunchy should stay dry until the last minute. Salsa, yogurt, and dips should stay in their own containers. That single habit saves more picnic textures than any fancy trick.
How do I keep apples and bananas from browning?
Apples do best with a quick toss in lemon juice. Bananas are trickier; they’re happiest in pinwheels or cookies where the browning is less visible. If bananas are going into a picnic snack, make that food close to serving time.
Can I pack these without a cooler?
If the basket is only going out for a short stretch and the foods are shelf-stable, maybe. But once you’re using eggs, dairy, meat, or rice, a cooler is the safer move. I wouldn’t send deviled eggs or chicken salad anywhere without ice packs.
What’s the easiest way to feed a mixed-age group?
Make a spread with different sizes and textures: a few mini muffins, a fruit tray, a protein bite, a crunchy snack, and one sweet item. Little kids nibble, older kids stack their plates, and nobody has to commit to one giant sandwich they don’t want.
A Basket That Gets Eaten
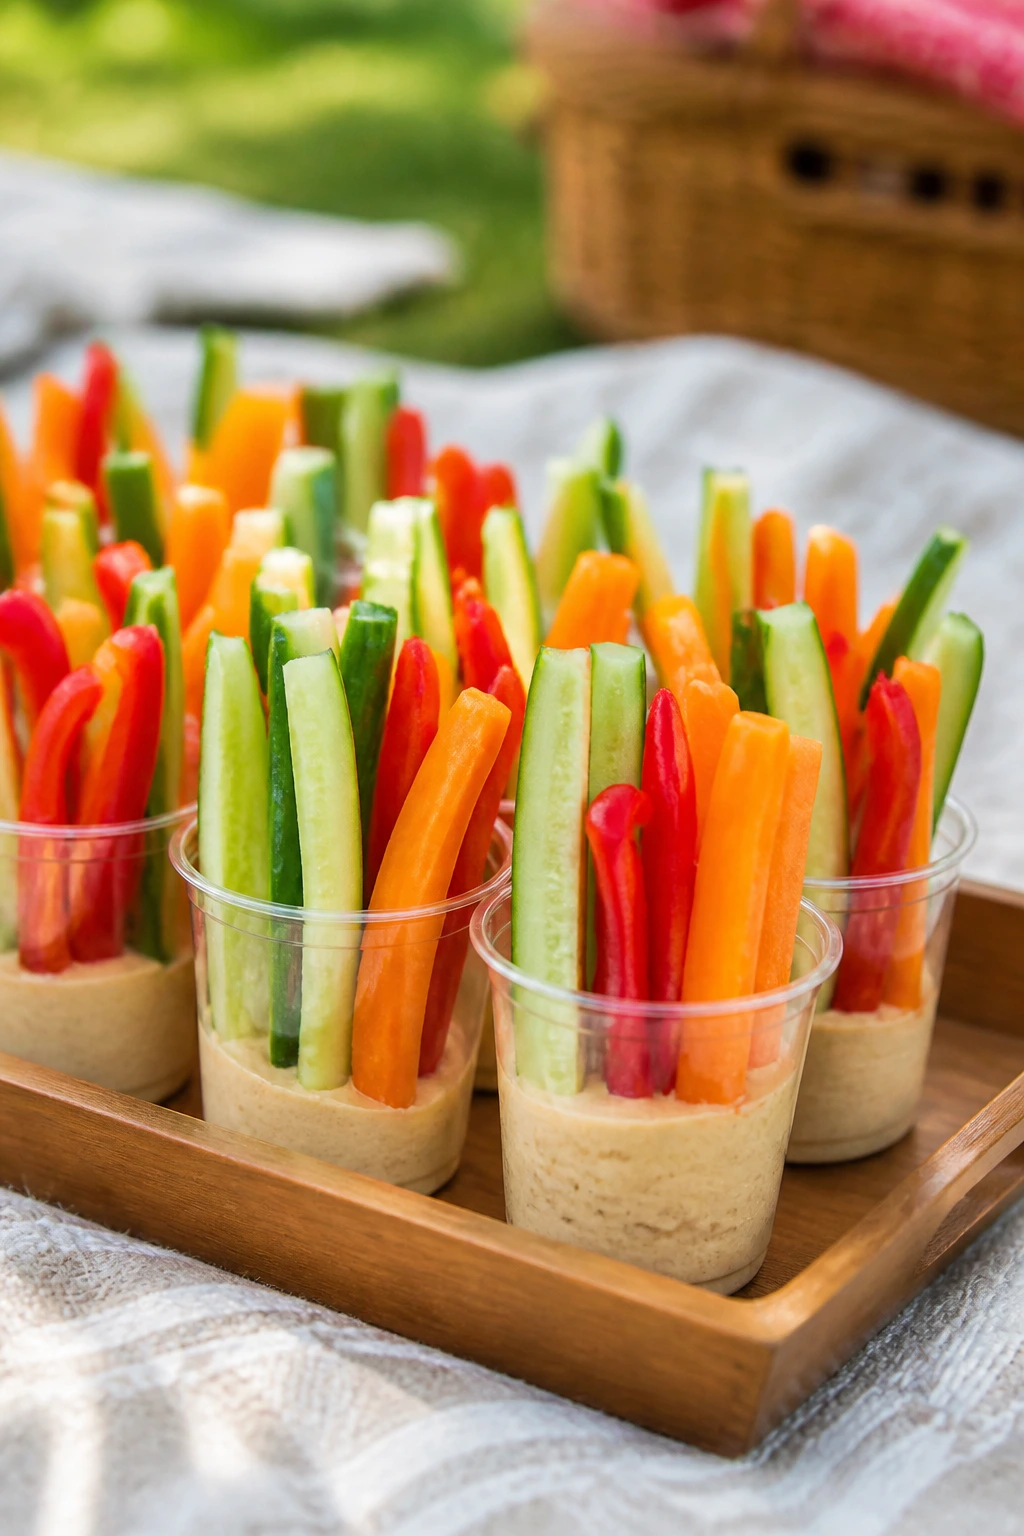
The nicest picnic basket isn’t the prettiest one. It’s the one that comes home lighter, with empty jars, a few crumbs, and maybe one lonely grape rolling around in the bottom. That’s what these foods are built for: small hands, cold drinks, and the kind of outdoor meal that doesn’t collapse under its own planning.
I’d pack the same mix again and again: one creamy thing, one crunchy thing, one fruity thing, one protein bite, and one sweet finish. Keep the cooler cold, keep the fillings tidy, and don’t overcomplicate the basket. The grass doesn’t care how fancy the menu sounded, but kids absolutely care whether the food is easy to grab.