
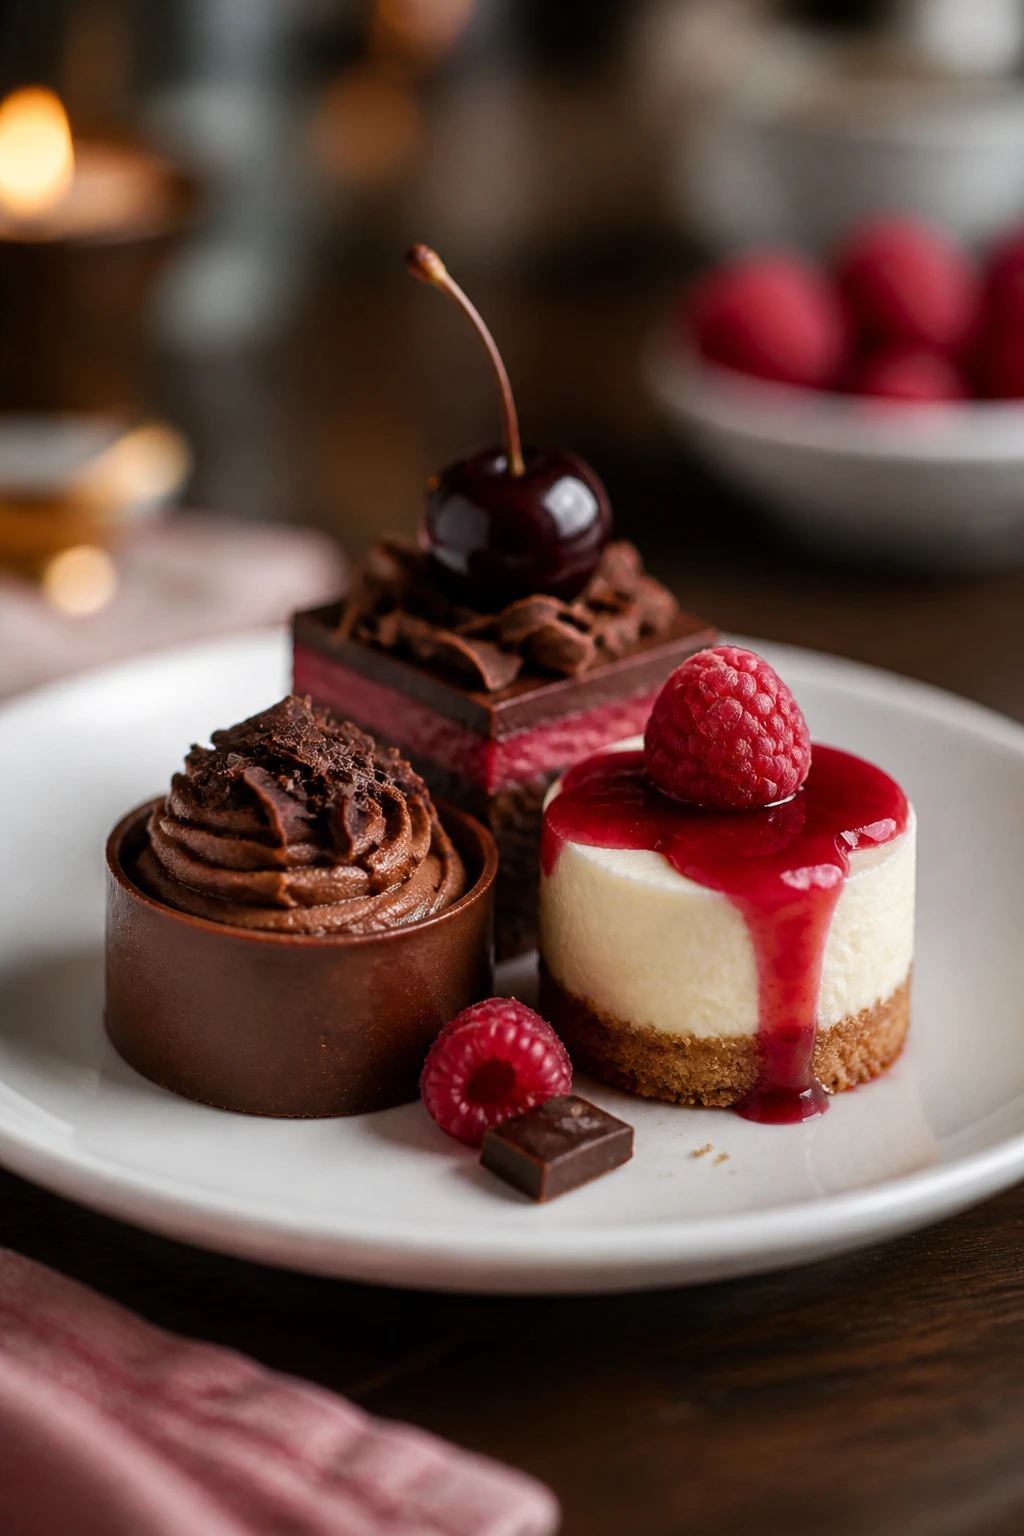
Valentine’s Day desserts get clumsy fast when every plate tastes like pink sugar and not much else. The ones worth baking usually have a sharper edge: bitter chocolate, tart berries, a little salt, or a filling that stays cool and creamy instead of slumping into syrup.
That balance matters more than heart-shaped cutters. A glossy tart with strawberries on top, a tray of raspberry bars, or a pan of brownies finished with flaky salt can feel more thoughtful than an ornate cake that tastes the same after the first bite as it did in the oven.
I like a dessert spread that can handle a long evening. Some pieces should be make-ahead, some should slice cleanly, and at least one should be small enough to eat standing up with a cup of coffee. That mix keeps a Valentine dessert table from feeling like one giant sugar bomb, and it gives you options when the oven is busy or your guests arrive in waves.
Why These Desserts Earn Their Place on the Table
-
Chocolate and fruit keep each other honest: Dark chocolate, raspberries, cherries, and strawberries pull sweetness back into line so the plate tastes rich instead of flat.
-
The list covers different skill levels: You get simple bars, quick cookies, and a few showier bakes, which means you can pick a project that fits your patience.
-
Several desserts improve after chilling: Cheesecake bars, truffles, panna cotta, and mousse all settle into better texture after a rest in the fridge.
-
Small shapes make serving less fussy: Truffles, hand pies, parfaits, and cookies are easier to portion than a giant frosted cake when people want “just one more bite.”
-
The colors do half the work: Raspberry, strawberry, cherry, pistachio, and cocoa give you that Valentine look without forcing every dessert into the same pink frosting box.
1. Red Velvet Layer Cake
A good red velvet layer cake should look almost dramatic when you cut into it—deep red crumb, pale cream cheese frosting, and those clean slices that hold their shape on the plate. I like this version because the cocoa stays in the background instead of taking over, so you get tangy buttermilk, vanilla, and a soft chocolate note all at once.
Why It Works:
The batter uses both butter and a little oil, which keeps the crumb tender for two or three days. A touch of vinegar sharpens the color and gives the cake that classic red velvet bite.
Key Ingredients:
- 2 1/2 cups all-purpose flour, spooned and leveled, for structure
- 2 tablespoons unsweetened cocoa powder, for the subtle chocolate note
- 1 teaspoon baking soda, for lift
- 1/2 teaspoon fine salt, to keep the frosting from tasting flat
- 1 cup unsalted butter, softened, for richness
- 1 3/4 cups granulated sugar, for sweetness and crumb
- 2 large eggs, room temperature, for binding
- 1 cup buttermilk, room temperature, for tang and tenderness
- 1 tablespoon red food coloring, liquid or gel, for color
- 1 teaspoon vanilla extract, for warmth
- 1 teaspoon white vinegar, for the velvet texture
- For the Frosting: 16 oz cream cheese, 1 cup unsalted butter, 4 cups powdered sugar, 1 teaspoon vanilla, pinch of salt
Quick Steps:
- Preheat the oven to 350°F (175°C) and grease two 9-inch round pans; line the bottoms with parchment.
- Whisk the flour, cocoa, baking soda, and salt in one bowl.
- Beat the butter and sugar for 2 to 3 minutes until pale, then add the eggs, buttermilk, food coloring, vanilla, and vinegar.
- Mix in the dry ingredients just until the batter is smooth, then divide it between the pans and bake 25 to 30 minutes. Do not overbake; the centers should spring back lightly.
- Cool completely, then beat the frosting ingredients until fluffy and spread between the layers and over the cake.
Equipment for This Recipe:
- 2 9-inch round cake pans
- Hand mixer or stand mixer
- Parchment paper
- Offset spatula
How to Serve This Dish:
Slice the cake with a hot knife wiped clean between cuts. A few raspberries on the plate make the red crumb look sharper, and a thin drizzle of extra frosting on the side makes the whole thing feel deliberate.
Pro Tips for This Recipe:
- Use gel coloring if you want a deeper red without thinning the batter.
- Chill the frosted cake for 20 minutes before slicing.
- Bring the cream cheese and butter fully to room temperature or the frosting will stay lumpy.
Variations on This Dish:
- Chocolate-Rich Velvet: Add 1 extra tablespoon of cocoa for a darker, slightly more chocolate-forward crumb.
- Berry-Filled Velvet: Spread 1/3 cup raspberry jam between the layers under the frosting.
- Cupcake Version: Bake the batter in lined muffin tins for 18 to 20 minutes.
Common Mistakes to Avoid with This Dish:
- Using cold dairy: The batter can look broken and bake unevenly; let the buttermilk and eggs warm up first.
- Skipping parchment: The layers can stick at the bottom, and that ruins the clean stack.
2. Chocolate-Dipped Strawberry Tart
This tart is all about contrast: a crisp, buttery shell, a dark ganache that sets with a soft sheen, and strawberries that look almost jewel-like on top. It tastes richer than it looks, which is one of the few things on a dessert table I actually prefer to the obvious choice.
Why It Works:
The shortcrust bakes blind first, so the ganache never soaks into the shell. Strawberries stay fresh and bright because they go on after the tart has cooled.
Key Ingredients:
- 1 1/2 cups all-purpose flour, for the tart shell
- 1/2 cup powdered sugar, for a tender crust
- 1/2 teaspoon fine salt, for balance
- 1/2 cup unsalted butter, cold and cubed, for flakiness
- 1 large egg yolk, for binding
- 8 oz bittersweet chocolate, chopped, for the ganache
- 1 cup heavy cream, for smoothing the filling
- 1 tablespoon unsalted butter, for shine
- 2 cups fresh strawberries, hulled and halved
- Flaky salt, for the finish
Quick Steps:
- Pulse the flour, powdered sugar, salt, butter, and egg yolk until the dough just comes together, then press it into a 9-inch tart pan.
- Chill the crust for 30 minutes, prick it with a fork, and bake at 375°F (190°C) for 18 to 20 minutes with pie weights.
- Heat the cream until steaming, pour it over the chocolate, wait 1 minute, then stir in the butter until smooth.
- Pour the ganache into the cooled shell, top with strawberries, and chill for 2 hours until set. Do not add the fruit while the ganache is warm.
Equipment for This Recipe:
- 9-inch tart pan with a removable bottom
- Food processor or pastry cutter
- Pie weights or dried beans
- Small saucepan
How to Serve This Dish:
Cut it into slim wedges. A little extra flaky salt on the strawberries makes the chocolate taste deeper, and one spoonful of lightly whipped cream on the side is enough.
Pro Tips for This Recipe:
- Brush the baked shell with a thin layer of melted chocolate if you want it to stay crisp longer.
- Choose berries with dry skins and green caps still attached.
- Warm the knife under hot water before slicing for cleaner edges.
Variations on This Dish:
- White Chocolate Finish: Swap half the bittersweet chocolate for white chocolate and top with raspberries.
- Orange Zest Tart: Stir 1 teaspoon of orange zest into the ganache for a brighter aroma.
Common Mistakes to Avoid with This Dish:
- Wet berries: They slide around and dilute the topping; pat them dry first.
- Skipping the chill: The filling needs time to set or the slices slump.
3. Raspberry Swirl Cheesecake Bars
These bars cut neatly, travel well, and carry that bright raspberry streak that always feels right in February. The filling is creamy without being heavy, and the jammy swirl keeps each square from tasting like straight cream cheese.
Why It Works:
A graham crust gives you crunch under the soft filling, and the raspberry puree stays vivid because it’s swirled in rather than mixed flat through the batter. Cooling them slowly helps prevent cracks and keeps the top smooth.
Key Ingredients:
- 1 1/2 cups graham cracker crumbs, finely crushed, for the base
- 5 tablespoons unsalted butter, melted, to bind the crust
- 2 tablespoons granulated sugar, for the crust
- 16 oz cream cheese, softened, for the filling
- 2/3 cup granulated sugar, for sweetness
- 2 large eggs, room temperature, for structure
- 1/3 cup sour cream, for tang and silkiness
- 1 teaspoon vanilla extract, for depth
- 3/4 cup raspberry puree or seedless jam, for the swirl
Quick Steps:
- Heat the oven to 325°F (165°C) and line an 8-inch square pan with parchment.
- Mix the graham crumbs, butter, and sugar, then press into the pan and bake 8 minutes.
- Beat the cream cheese and sugar until smooth, then mix in the eggs, sour cream, and vanilla.
- Pour the filling over the crust, spoon on the raspberry puree, and swirl with a knife.
- Bake 30 to 35 minutes until the center wobbles slightly, then cool and chill for at least 4 hours.
Equipment for This Recipe:
- 8-inch square baking pan
- Electric mixer
- Parchment paper
- Offset knife or skewer for swirling
How to Serve This Dish:
Cut the bars into small squares and serve them cold. A few fresh raspberries on top make the swirl obvious, and they look tidy on a dessert tray.
Pro Tips for This Recipe:
- Seedless jam gives a smoother swirl than loose fruit puree.
- Let the bars chill overnight if you want the cleanest cut.
- Wipe the knife between slices or the filling will smear.
Variations on This Dish:
- Chocolate Crust Bars: Swap the graham crumbs for chocolate cookie crumbs.
- Lemon-Raspberry Bars: Add 1 tablespoon of lemon zest to the filling.
Common Mistakes to Avoid with This Dish:
- Overmixing after the eggs go in: That traps extra air and can lead to cracks.
- Slicing too soon: Warm bars collapse and lose their shape.
4. Heart-Shaped Sugar Cookies
Sugar cookies earn their keep when they hold sharp edges after baking and still taste like butter instead of cardboard. These are crisp at the rim, tender in the middle, and sturdy enough for icing, sanding sugar, or plain powdered sugar if you like your cookies quieter.
Why It Works:
Chilling the dough prevents spread, which matters more than people think when the whole point is shape. A little almond extract gives the cookies a bakery smell without pushing them into marzipan territory.
Key Ingredients:
- 3 cups all-purpose flour, spooned and leveled, for the dough
- 1 teaspoon baking powder, for slight lift
- 1/2 teaspoon fine salt, for balance
- 1 cup unsalted butter, softened, for tenderness
- 1 cup granulated sugar, for sweetness
- 1 large egg, room temperature, to bind the dough
- 1 teaspoon vanilla extract, for flavor
- 1/2 teaspoon almond extract, optional, for a light bakery note
- Royal icing or simple glaze, for decorating
Quick Steps:
- Whisk the flour, baking powder, and salt in a bowl.
- Beat the butter and sugar until fluffy, then mix in the egg and extracts.
- Add the dry ingredients, shape the dough into two discs, and chill for 1 hour.
- Roll to 1/4 inch thick, cut heart shapes, and bake at 350°F (175°C) for 9 to 11 minutes until the edges are barely golden.
- Cool completely before icing. Warm cookies will melt the decoration into a mess.
Equipment for This Recipe:
- Rolling pin
- Heart-shaped cookie cutter
- Baking sheets
- Parchment paper
How to Serve This Dish:
Stack them in a small tin or fan them out on a platter. They look neat with just a dusting of sugar, and they package well if you’re giving a few away.
Pro Tips for This Recipe:
- Roll the dough between two sheets of parchment to avoid extra flour.
- Chill the cut cookies for 10 minutes before baking if the kitchen feels warm.
- Bake one tray at a time for the best shape.
Variations on This Dish:
- Pink Icing Cookies: Tint the glaze with a drop of food coloring.
- Citrus Sugar Cookies: Add 1 teaspoon of lemon zest for a brighter finish.
Common Mistakes to Avoid with This Dish:
- Overbaking: The cookies should still look pale in the center when you pull them.
- Too much flour on the counter: That makes the dough dry and crumbly.
5. Molten Chocolate Lava Cakes
A lava cake should feel a little theatrical when you break into it—firm edges, soft center, and a warm chocolate river that runs onto the plate instead of staying buried inside. These are small, rich, and best when they come out the minute they’re done.
Why It Works:
The short bake time sets the outer shell before the center fully cooks. Chilled batter also helps the middle stay molten, which is the whole point here.
Key Ingredients:
- 4 oz bittersweet chocolate, chopped, for the base flavor
- 1/2 cup unsalted butter, plus more for the ramekins
- 2 large eggs, room temperature, for structure
- 2 large egg yolks, for richness
- 1/4 cup granulated sugar, for sweetness
- 2 tablespoons all-purpose flour, for just enough body
- Pinch of fine salt, to keep the chocolate from tasting flat
- Cocoa powder, for dusting the ramekins
Quick Steps:
- Butter and cocoa-dust four 6-ounce ramekins, then heat the oven to 425°F (220°C).
- Melt the chocolate and butter together until smooth.
- Whisk the eggs, yolks, sugar, flour, and salt, then fold in the chocolate mixture.
- Divide into the ramekins and bake 10 to 12 minutes; the edges should be set and the centers still soft.
- Rest 1 minute, run a knife around the edge, and invert onto plates.
Equipment for This Recipe:
- 4 ramekins
- Whisk
- Baking sheet
- Small saucepan or microwave-safe bowl
How to Serve This Dish:
Serve immediately with berries or a small scoop of vanilla ice cream. The contrast between hot cake and cold cream is the whole show.
Pro Tips for This Recipe:
- Test one cake early; ovens vary and lava cakes go from soft to overdone fast.
- Use good chocolate because the ingredient list is short.
- Dusting with cocoa instead of flour keeps the outside darker and cleaner.
Variations on This Dish:
- Raspberry Center Cakes: Drop a teaspoon of raspberry jam in the middle before baking.
- Mocha Lava Cakes: Add 1 teaspoon of instant espresso powder to the batter.
Common Mistakes to Avoid with This Dish:
- Overbaking: A minute too long and you lose the center.
- Skipping the rest before unmolding: The cake can tear if you turn it out too fast.
6. Strawberry Shortcake Parfaits
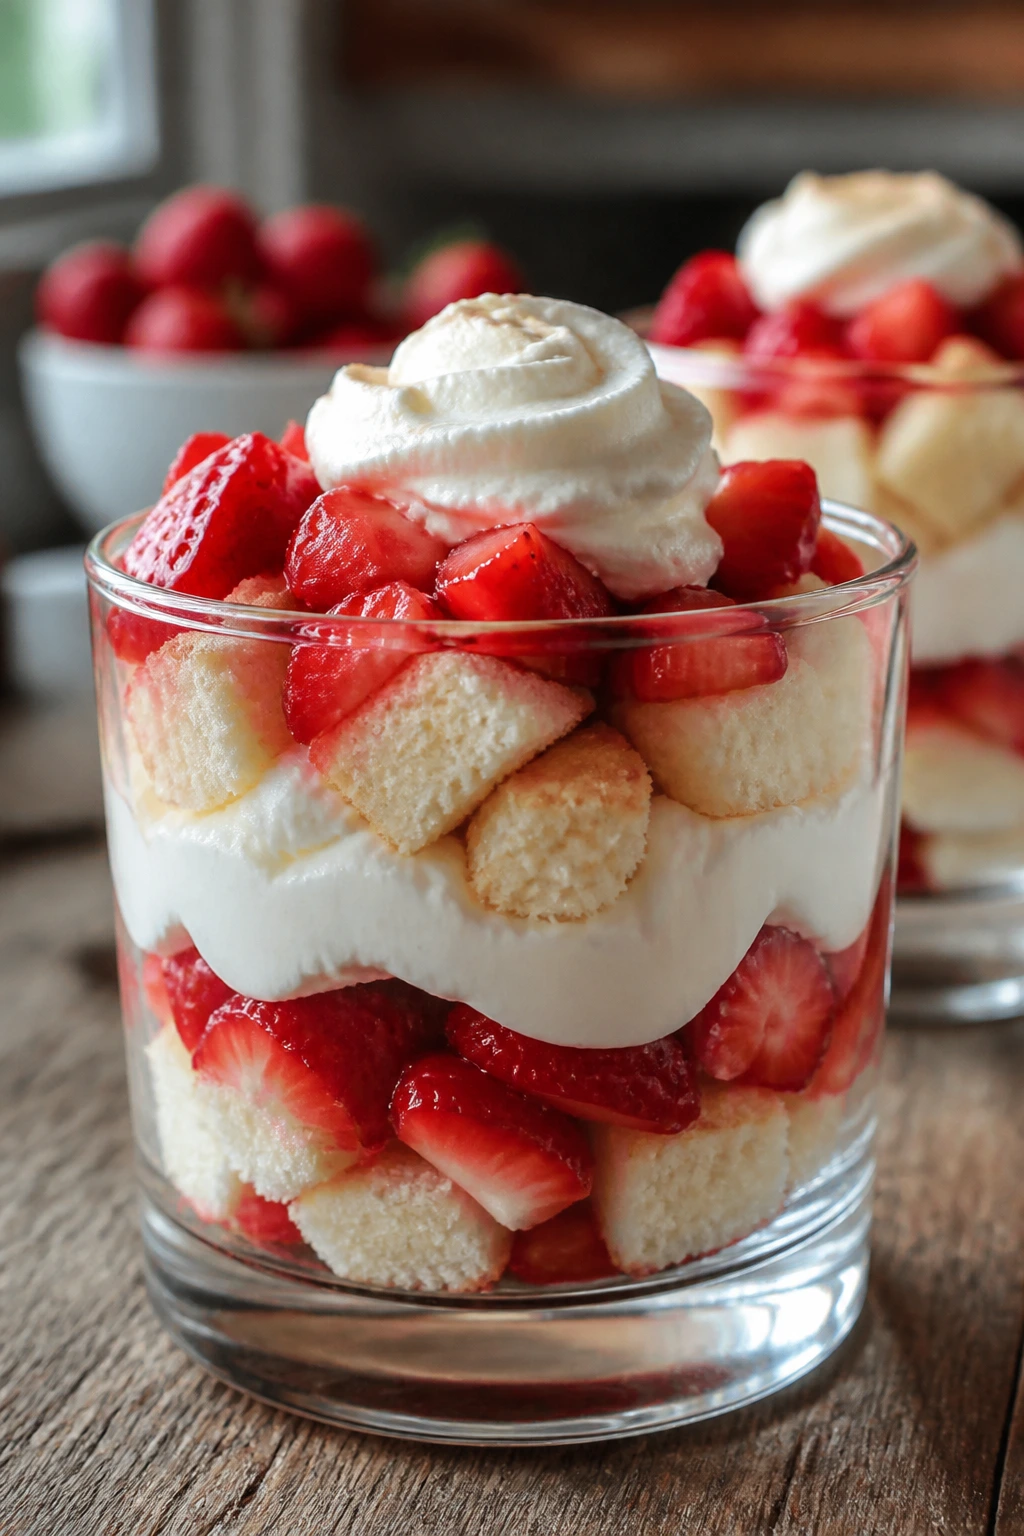
These feel casual in the best way: cream, berries, soft cake, repeat. They’re the dessert you make when you want something sweet that still tastes like fruit instead of frosting pretending to be fruit.
Why It Works:
Macerating the strawberries with sugar pulls out their juice, which soaks lightly into the cake cubes. The whipped cream keeps the layers airy, so the glass never feels heavy.
Key Ingredients:
- 3 cups fresh strawberries, hulled and sliced
- 2 tablespoons granulated sugar, to draw out juice
- 1 teaspoon lemon juice, to sharpen the berries
- 2 cups pound cake or shortcake, cut into cubes
- 1 1/2 cups heavy cream, cold, for whipping
- 3 tablespoons powdered sugar, for the cream
- 1 teaspoon vanilla extract, for flavor
- Lemon zest, optional, for brightness
Quick Steps:
- Toss the strawberries with sugar and lemon juice, then rest 15 minutes until glossy and juicy.
- Whip the cream, powdered sugar, and vanilla to soft peaks.
- Spoon cake cubes into glasses, add strawberries, then cream.
- Repeat the layers and finish with a berry on top. Build the parfaits close to serving so the cake stays soft but not soggy.
Equipment for This Recipe:
- Mixing bowl
- Hand mixer or whisk
- 4 to 6 clear glasses
- Paring knife
How to Serve This Dish:
Serve them in small glasses or jars so the layers show through. One parfait per person is enough unless your crowd leans shamelessly dessert-heavy.
Pro Tips for This Recipe:
- Use a slightly stale pound cake; it absorbs juice better.
- Chill the bowls and beaters before whipping the cream.
- A tiny pinch of salt in the cream makes the berries taste louder.
Variations on This Dish:
- Angel Food Version: Swap in angel food cake for a lighter, spongier base.
- Chocolate Strawberry Parfaits: Add a layer of chocolate cookie crumbs between the cream and berries.
Common Mistakes to Avoid with This Dish:
- Over-soaking the cake: Too much juice turns the parfait mushy.
- Whipping cream too far: Grainy cream ruins the texture fast.
7. Salted Caramel Brownies

These brownies land in that sweet spot between fudgy and sliceable, with caramel ribbons that stay a little gooey even after cooling. The salt on top keeps them from tasting like a sugar rush in a square pan.
Why It Works:
Brownies built with melted chocolate and butter stay dense and moist. A layer of caramel in the middle gives you a soft center without making the whole pan sticky.
Key Ingredients:
- 1 cup unsalted butter, melted, for richness
- 8 oz semisweet chocolate, chopped, for the base
- 1 1/2 cups granulated sugar, for sweetness
- 3 large eggs, room temperature, for structure
- 1 teaspoon vanilla extract, for depth
- 1 cup all-purpose flour, for the crumb
- 1/2 cup unsweetened cocoa powder, for extra chocolate flavor
- 1/2 teaspoon fine salt, for balance
- 1/2 cup thick caramel sauce, for the ribbon
- Flaky salt, for the top
Quick Steps:
- Heat the oven to 350°F (175°C) and line an 8-inch square pan with parchment.
- Melt the butter and chocolate together, then whisk in the sugar, eggs, and vanilla.
- Fold in the flour, cocoa, and salt until just combined.
- Spread half the batter in the pan, drizzle with caramel, add the rest of the batter, and swirl lightly.
- Bake 28 to 32 minutes until the center is set with a slight wobble. Pull them before the top looks dry.
Equipment for This Recipe:
- 8-inch square pan
- Parchment paper
- Mixing bowls
- Rubber spatula
How to Serve This Dish:
Cut them cold for the neatest edges, then let them sit 10 minutes before serving. A scoop of vanilla ice cream turns the caramel into a sauce again.
Pro Tips for This Recipe:
- Warm caramel drizzles more cleanly than cold caramel.
- Chill the brownies before cutting if you want bakery-style squares.
- Sprinkle salt after baking so it stays crisp.
Variations on This Dish:
- Espresso Brownies: Stir 1 teaspoon of instant espresso powder into the melted chocolate.
- Nutty Caramel Brownies: Add 1/2 cup chopped pecans to the batter.
Common Mistakes to Avoid with This Dish:
- Overmixing the flour: That makes brownies cakier than you probably want.
- Using thin caramel: It can sink straight to the bottom.
8. Cherry Almond Galette
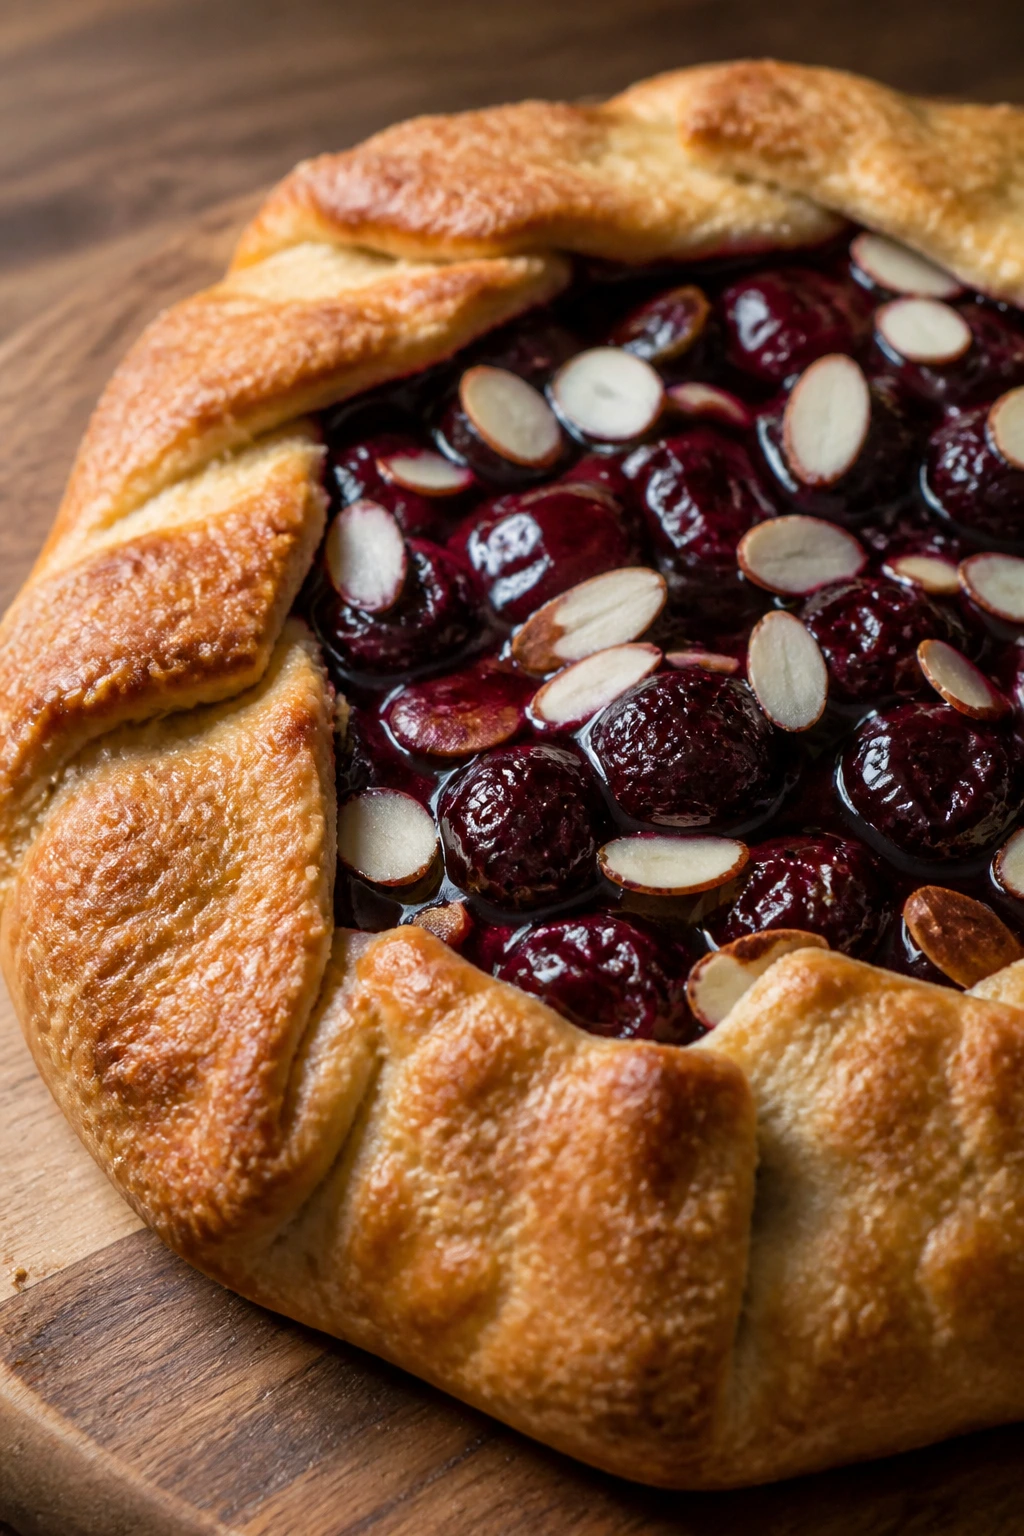
A galette is what you bake when you want pie flavor without pretending you have the patience for a perfect crimp. The cherries cook down into a glossy, tart filling, and the almond notes make the whole thing feel a little old-fashioned in a good way.
Why It Works:
Free-form pastry means less fuss, and the crust gets extra crisp where the fruit juices hit it. Almond extract makes cherries taste deeper, not louder.
Key Ingredients:
- 1 1/2 cups all-purpose flour, for the dough
- 1 tablespoon granulated sugar, for the crust
- 1/2 teaspoon fine salt, to season the pastry
- 1/2 cup cold unsalted butter, cubed, for flake
- 4 to 5 tablespoons ice water, to bring the dough together
- 3 cups pitted cherries, fresh or thawed and drained
- 1/4 cup granulated sugar, for the filling
- 1 tablespoon cornstarch, to thicken the juices
- 1/2 teaspoon almond extract, for flavor
- 1 egg, beaten, for brushing
- Sliced almonds, for the top
Quick Steps:
- Mix the flour, sugar, salt, and butter into a shaggy dough, then add ice water until it holds. Chill 30 minutes.
- Toss the cherries with sugar, cornstarch, and almond extract.
- Roll the dough into a rough circle, pile the fruit in the center, and fold the edges over.
- Brush with egg, scatter on almonds, and bake at 400°F (205°C) for 35 to 40 minutes until the crust is golden and the filling bubbles.
Equipment for This Recipe:
- Rolling pin
- Baking sheet
- Parchment paper
- Mixing bowl
How to Serve This Dish:
Serve warm with cream or vanilla ice cream. A slice looks especially nice with a few extra cherries spooned beside it.
Pro Tips for This Recipe:
- Drain thawed cherries well or the crust gets soggy.
- Keep the butter cold for the flakiest edges.
- Let the galette rest 15 minutes before slicing so the filling settles.
Variations on This Dish:
- Mixed Berry Galette: Use half cherries and half raspberries.
- Chocolate Almond Galette: Sprinkle chopped dark chocolate on the crust before adding fruit.
Common Mistakes to Avoid with This Dish:
- Too much filling: The center leaks and burns on the pan.
- Rolling the dough too thin: It tears when you fold the sides up.
9. Pink Velvet Cupcakes

These are the lighter, smaller cousins of red velvet cake, and they wear pink frosting without looking childish if you keep the crumb soft and the icing clean. The best ones taste like vanilla with a whisper of cocoa, not like food coloring and frosting paste.
Why It Works:
Cupcakes bake fast enough to stay tender, and the frosting sits high without needing a giant layer cake structure. A little buttermilk keeps the crumb plush.
Key Ingredients:
- 1 1/2 cups all-purpose flour, for the base
- 1 tablespoon cocoa powder, for the velvet note
- 1 teaspoon baking powder, for rise
- 1/4 teaspoon baking soda, for lift
- 1/2 teaspoon fine salt, to balance the sweetness
- 1/2 cup unsalted butter, softened, for richness
- 3/4 cup granulated sugar, for sweetness
- 2 large eggs, room temperature, to bind
- 1/2 cup buttermilk, room temperature, for tang
- 1 teaspoon vanilla extract, for flavor
- Pink gel food coloring, for color
- For the Frosting: 8 oz cream cheese, 1/2 cup butter, 3 cups powdered sugar, 1 teaspoon vanilla
Quick Steps:
- Heat the oven to 350°F (175°C) and line a 12-cup muffin tin.
- Whisk the dry ingredients, then beat the butter and sugar until fluffy.
- Add the eggs, buttermilk, vanilla, and coloring, then fold in the dry ingredients.
- Divide into cups and bake 16 to 18 minutes until the tops spring back.
- Cool completely and pipe on the frosting.
Equipment for This Recipe:
- Muffin tin
- Cupcake liners
- Hand mixer
- Piping bag or zip-top bag
How to Serve This Dish:
Stand them on a white plate or cake stand so the color pops. A dusting of freeze-dried raspberry powder gives the frosting a sharper pink and a little tartness.
Pro Tips for This Recipe:
- Gel coloring keeps the batter from thinning out.
- Don’t overfill the liners; two-thirds full is enough.
- Chill the frosted cupcakes briefly if the kitchen is warm.
Variations on This Dish:
- Strawberry Pink Cupcakes: Fold 1/4 cup finely chopped freeze-dried strawberries into the batter.
- Chocolate Frosted Cupcakes: Swap the cream cheese frosting for cocoa buttercream.
Common Mistakes to Avoid with This Dish:
- Overbaking: Cupcakes dry out fast, so test early.
- Using too much coloring: The flavor can turn odd and the color can look artificial.
10. Chocolate Mousse Cups
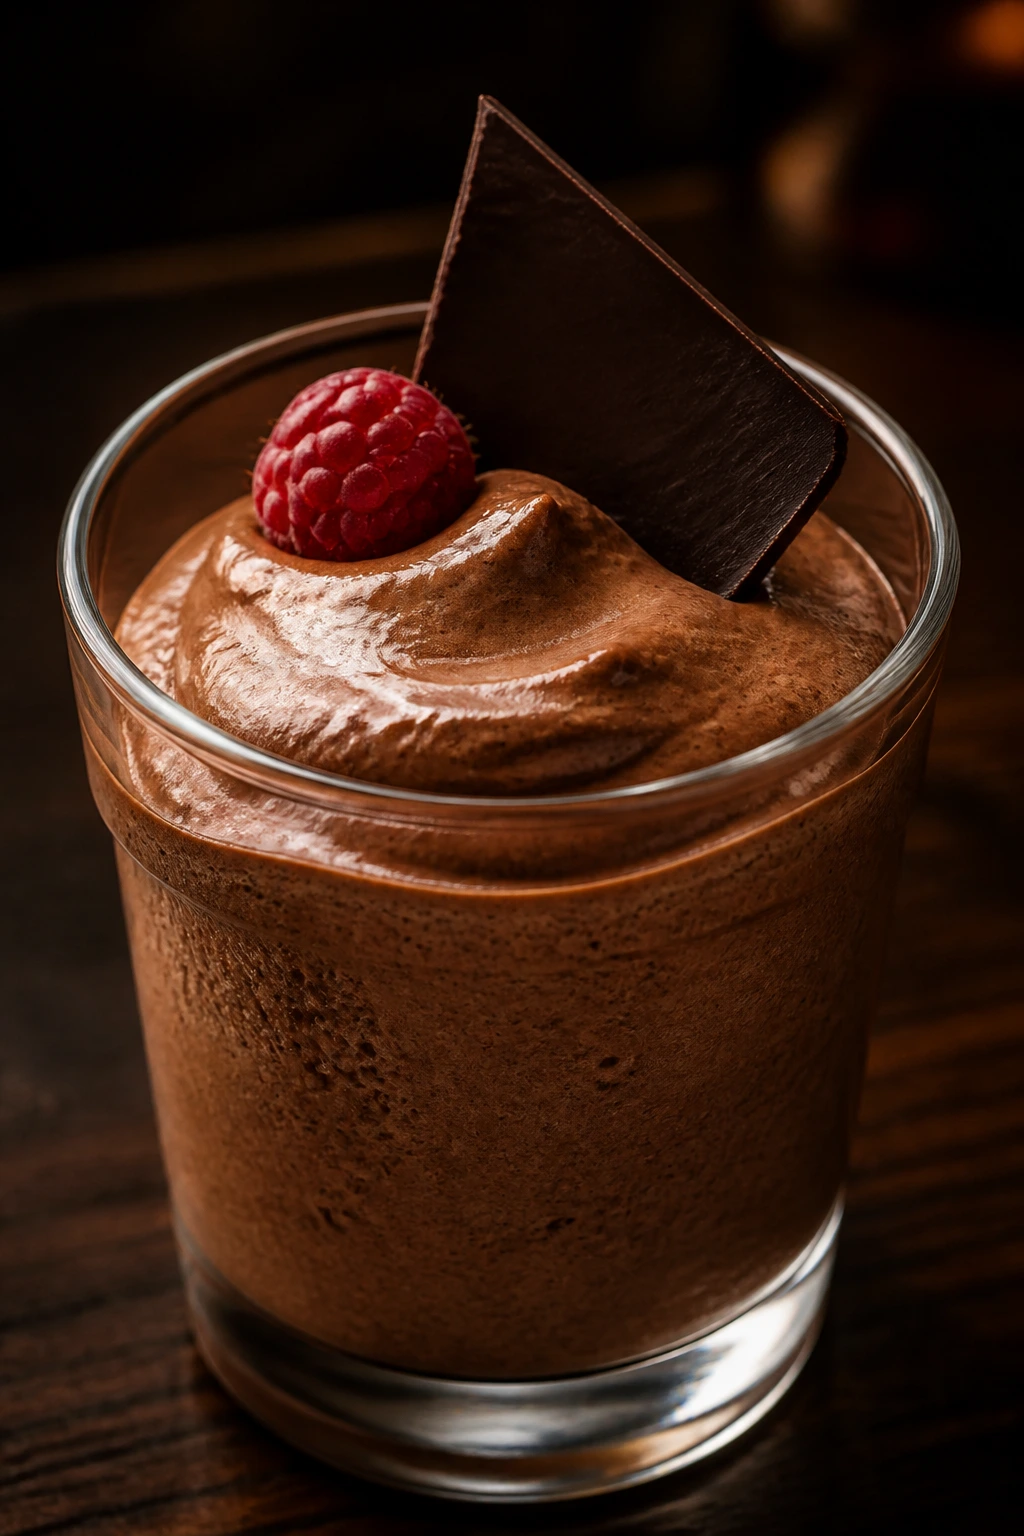
Chocolate mousse in a small glass has a way of looking polished even when the technique is simple. The texture should feel like a soft cloud, not a pudding brick, with a clean chocolate hit that finishes before it turns sugary.
Why It Works:
Whipped cream folds into melted chocolate and keeps the mousse light. Chilling gives the cocoa fat time to set, which is what makes the spoon glide through instead of drag.
Key Ingredients:
- 8 oz bittersweet chocolate, chopped, for the mousse
- 1 1/2 cups heavy cream, divided, for whipping and smoothing
- 2 tablespoons granulated sugar, for sweetness
- 1 teaspoon vanilla extract, for aroma
- Pinch of fine salt, to sharpen the chocolate
- Raspberries or shaved chocolate, for topping
Quick Steps:
- Melt the chocolate gently and let it cool until warm, not hot.
- Whip 1 cup of the cream with the sugar to soft peaks.
- Whisk the remaining cream with the vanilla and salt into the chocolate, then fold in the whipped cream.
- Spoon into glasses and chill at least 2 hours.
- Top with berries or chocolate shavings just before serving.
Equipment for This Recipe:
- Mixing bowls
- Hand mixer or whisk
- Rubber spatula
- 4 to 6 dessert glasses
How to Serve This Dish:
Serve the cups cold with a few raspberries or a thin cookie on the side. Small portions are enough; this mousse is rich.
Pro Tips for This Recipe:
- Fold gently so the cream stays airy.
- Use chocolate you’d actually want to eat plain.
- Chill the bowls first if your kitchen runs warm.
Variations on This Dish:
- Mocha Mousse: Add 1 teaspoon of instant espresso to the chocolate.
- Orange Chocolate Mousse: Stir in 1 teaspoon of orange zest.
Common Mistakes to Avoid with This Dish:
- Hot chocolate base: It melts the cream and gives you a greasy mousse.
- Overwhipped cream: The mousse turns dense and grainy.
11. Raspberry Linzer Cookies
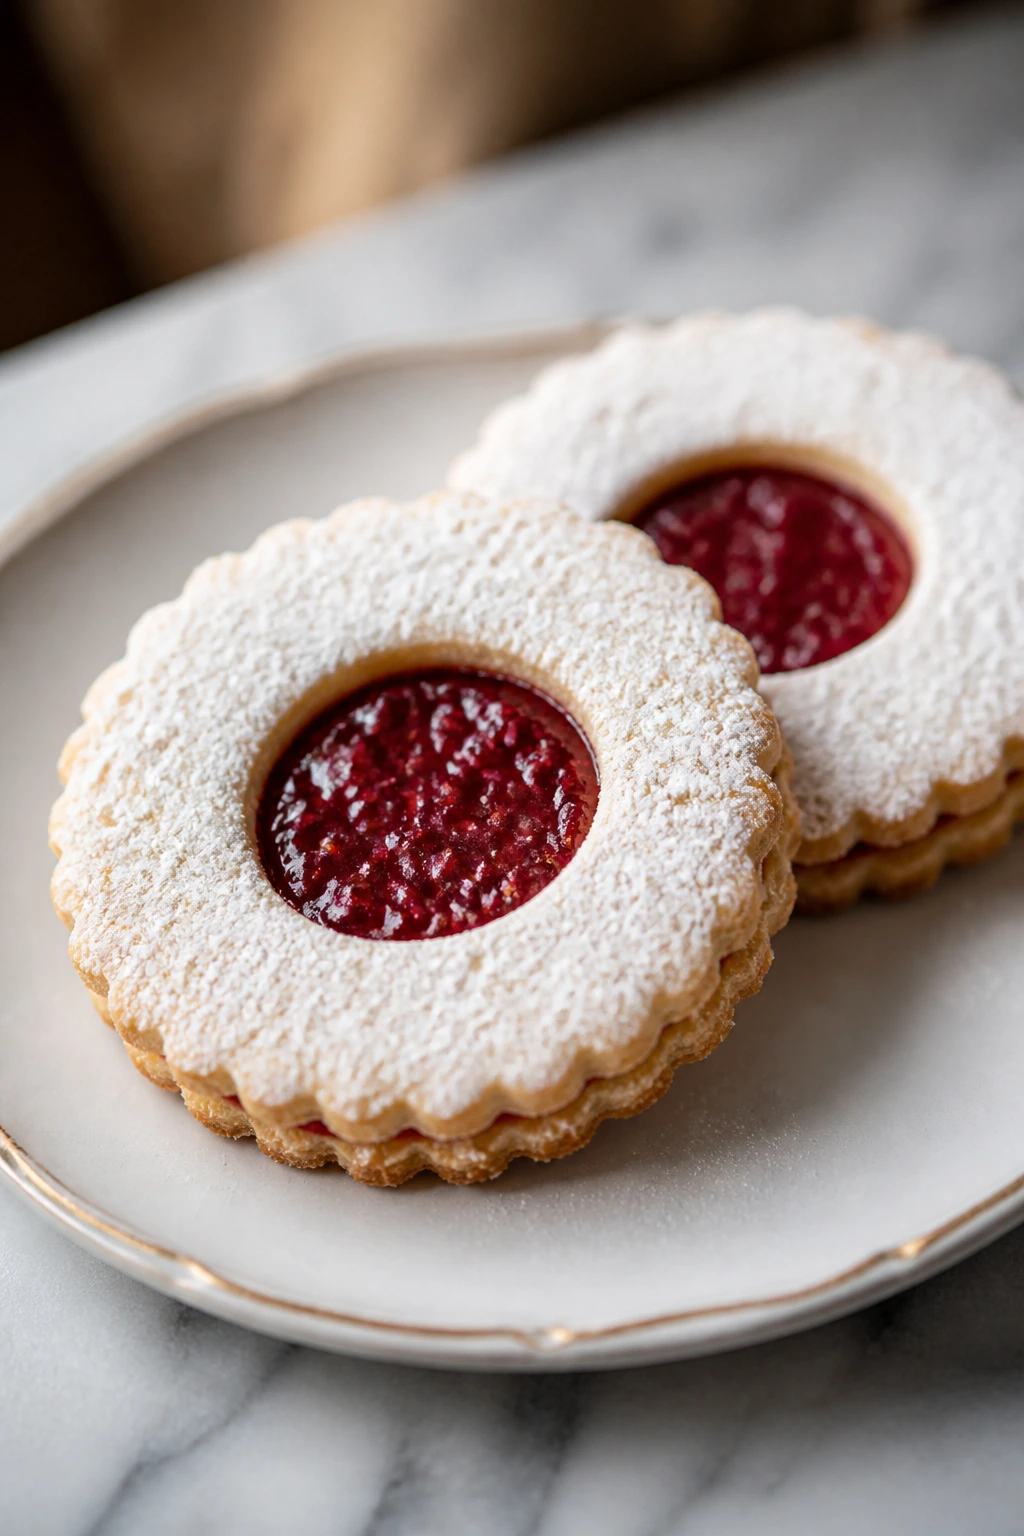
Linzer cookies bring a tidy little window of jam to the table, and that makes them feel more dressed up than their size suggests. Almond flour gives the dough a sandy tenderness that works well with raspberry jam’s sharp edge.
Why It Works:
The dough bakes crisp enough to hold a cutout shape, but not so crisp that it shatters. Seedless jam keeps the centers smooth and neat.
Key Ingredients:
- 1 cup almond flour, for flavor and tenderness
- 1 1/2 cups all-purpose flour, for structure
- 1/2 teaspoon cinnamon, optional, for warmth
- 1/4 teaspoon fine salt, to sharpen the sweetness
- 3/4 cup unsalted butter, softened, for richness
- 2/3 cup powdered sugar, for a delicate crumb
- 1 large egg yolk, for binding
- 1 teaspoon vanilla extract, for flavor
- 3/4 cup raspberry jam, seedless if possible, for filling
- Powdered sugar, for dusting
Quick Steps:
- Mix the dry ingredients, then beat the butter and powdered sugar until smooth.
- Add the yolk and vanilla, then blend in the flour mixture and chill the dough for 1 hour.
- Roll the dough to 1/8 to 1/4 inch thick, cut rounds, and cut a smaller window from half of them.
- Bake at 350°F (175°C) for 10 to 12 minutes until the edges are lightly golden.
- Sandwich with jam and dust the tops with powdered sugar.
Equipment for This Recipe:
- Rolling pin
- Round cookie cutters
- Baking sheets
- Fine sieve for sugar
How to Serve This Dish:
Stack them on a plate where the jam centers show. They also work well in small boxes because they travel better than frosted cookies.
Pro Tips for This Recipe:
- Chill the cut cookies before baking so the cutouts stay sharp.
- Warm the jam slightly if it’s too stiff to spread.
- Dust the tops after assembly, not before.
Variations on This Dish:
- Apricot-Almond Linzers: Swap the raspberry jam for apricot preserves.
- Chocolate Linzers: Add 1 tablespoon of cocoa to the dough.
Common Mistakes to Avoid with This Dish:
- Rolling too thin: The cookies brown too quickly and break.
- Overfilling with jam: It squeezes out the sides when you press the cookies together.
12. Strawberry Pavlova
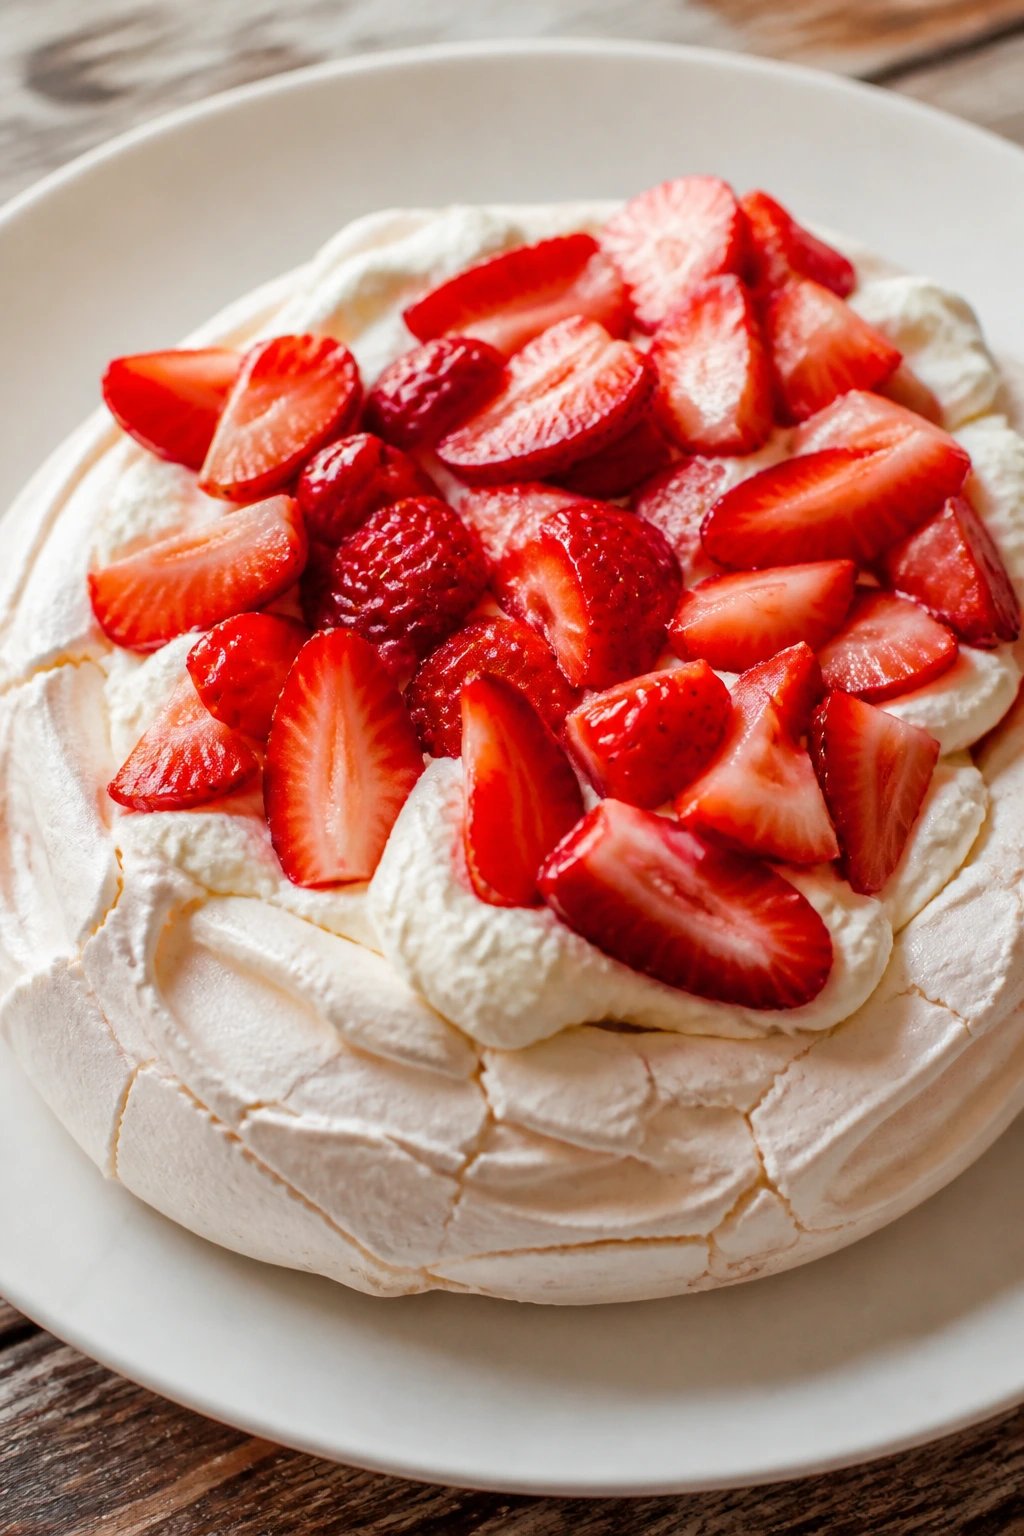
A pavlova is crisp on the outside, marshmallow-soft in the middle, and fragile in a way that feels almost luxurious. Piled with whipped cream and strawberries, it has that airy, slightly messy look that works better than anything too polished.
Why It Works:
Slow baking dries the shell without turning the center leathery. Vinegar and cornstarch help keep the interior soft, which is the whole reason people go after pavlova in the first place.
Key Ingredients:
- 4 large egg whites, room temperature, for the meringue
- 1 cup granulated sugar, for structure and shine
- 1 teaspoon cornstarch, for the marshmallow center
- 1 teaspoon white vinegar, to stabilize the foam
- 1 teaspoon vanilla extract, for flavor
- 1 1/2 cups heavy cream, whipped, for topping
- 2 cups strawberries, sliced, for the fruit layer
- 1 tablespoon sugar, optional, for the berries
Quick Steps:
- Heat the oven to 250°F (120°C) and line a baking sheet with parchment.
- Whip the egg whites until soft peaks form, then add the sugar slowly and beat until glossy.
- Fold in the cornstarch, vinegar, and vanilla, shape into a nest, and bake 1 hour.
- Turn the oven off and let the pavlova cool inside for another hour.
- Top with cream and berries just before serving. Do not assemble early or the shell will soften.
Equipment for This Recipe:
- Stand mixer or hand mixer
- Baking sheet
- Parchment paper
- Offset spatula
How to Serve This Dish:
Place it on a wide platter and spoon the cream into the center. The cracks and soft edges are part of the appeal.
Pro Tips for This Recipe:
- Make meringue on a dry day if you can.
- Keep yolk traces out of the whites.
- Use berries that are sweet but still firm.
Variations on This Dish:
- Mixed Berry Pavlova: Add raspberries and blueberries with the strawberries.
- Chocolate Pavlova: Fold 1 tablespoon of cocoa into the meringue before baking.
Common Mistakes to Avoid with This Dish:
- Opening the oven too soon: The shell can crack badly from the temperature swing.
- Adding cream too early: The base softens fast once it’s topped.
13. Chocolate Raspberry Macarons
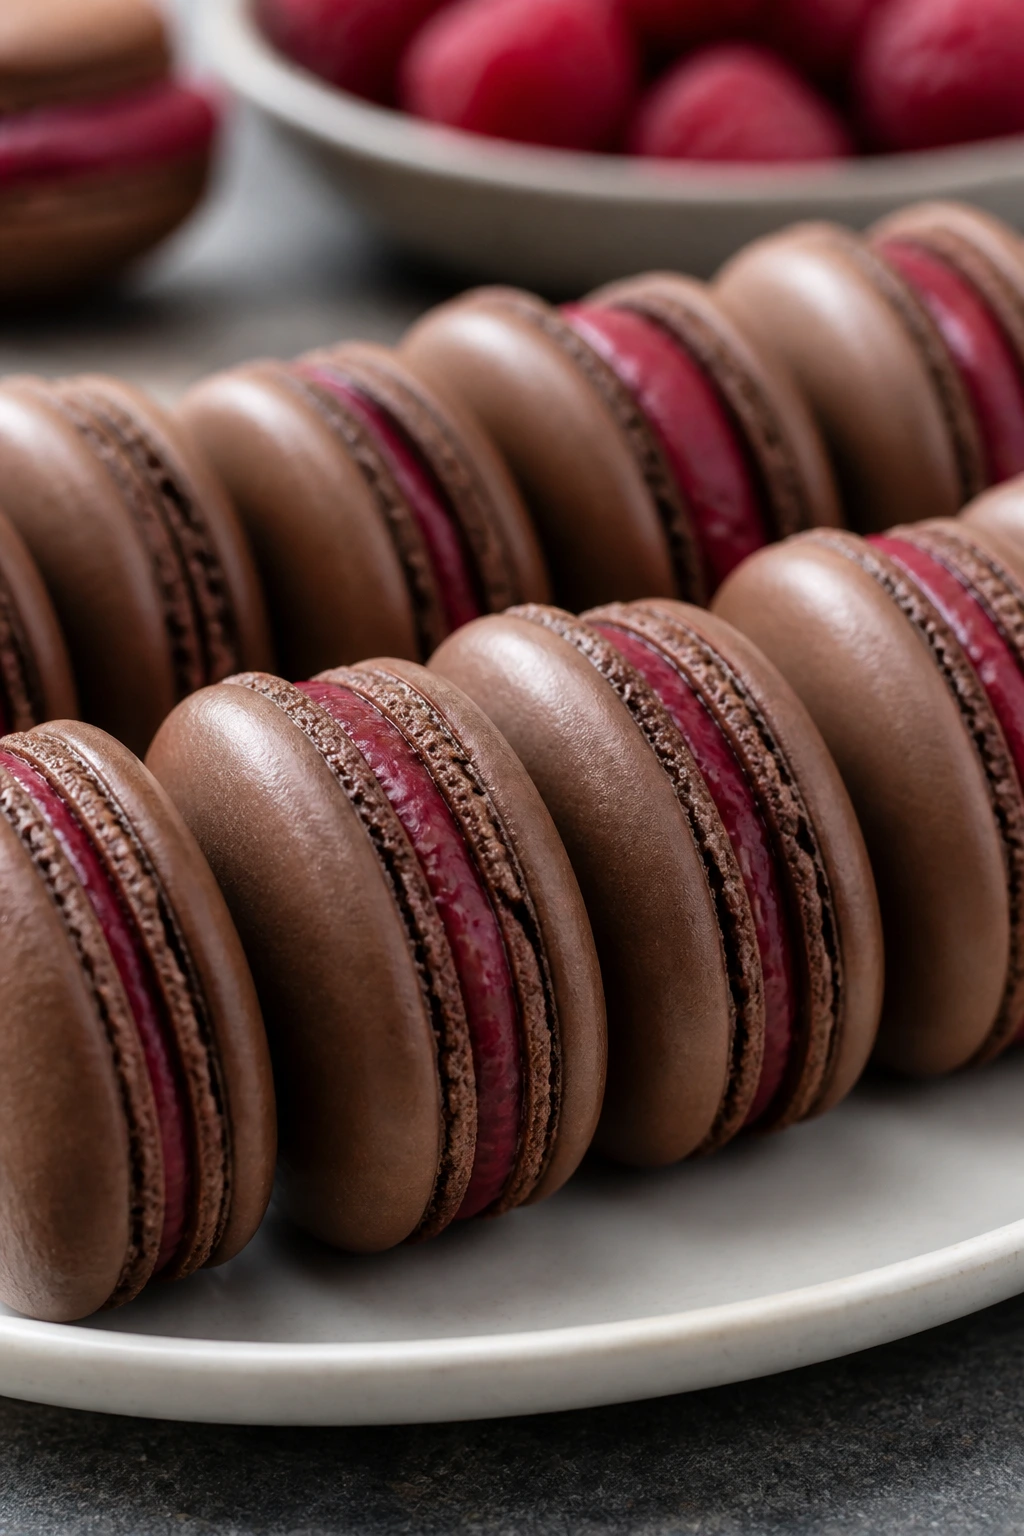
Macarons are the fussy guest on the dessert tray, but when they work, they look like little polished coins with a sharp chocolate shell and a tart raspberry center. They’re worth the trouble if you want something that feels detailed rather than oversized.
Why It Works:
The almond flour shell bakes dry and crisp, then softens slightly after filling. Raspberry jam or ganache brings acidity that keeps the chocolate from tasting heavy.
Key Ingredients:
- 1 cup almond flour, finely ground, for the shells
- 1 3/4 cups powdered sugar, for smooth tops
- 2 tablespoons cocoa powder, for the chocolate shell
- 3 large egg whites, room temperature, for the meringue
- 1/4 cup granulated sugar, for stability
- 1/3 cup raspberry jam or raspberry ganache, for the filling
- Pinch of fine salt, for balance
Quick Steps:
- Sift the almond flour, powdered sugar, and cocoa together.
- Whip the egg whites to soft peaks, add the granulated sugar slowly, and beat to glossy stiff peaks.
- Fold in the dry ingredients until the batter flows like thick ribbon, then pipe rounds onto parchment and rest 30 to 45 minutes.
- Bake at 300°F (150°C) for 14 to 16 minutes.
- Cool fully, then sandwich with raspberry filling and refrigerate overnight.
Equipment for This Recipe:
- Stand mixer or hand mixer
- Piping bag
- Fine sieve
- Silicone or parchment-lined baking sheets
How to Serve This Dish:
Serve them at room temperature so the centers soften a little. A small stack of three on a saucer looks far more intentional than it has any right to.
Pro Tips for This Recipe:
- Sift the dry ingredients twice for smoother shells.
- Stop folding the batter as soon as it flows in a thick ribbon.
- Age the filled macarons overnight for the best texture.
Variations on This Dish:
- Dark Chocolate Ganache Macarons: Fill them with a whipped chocolate ganache instead of jam.
- Strawberry Macarons: Add freeze-dried strawberry powder to the shells.
Common Mistakes to Avoid with This Dish:
- Undermixed batter: The shells can peak instead of spreading.
- Skipping the rest before baking: That usually leads to cracked tops.
14. Red Velvet Whoopie Pies
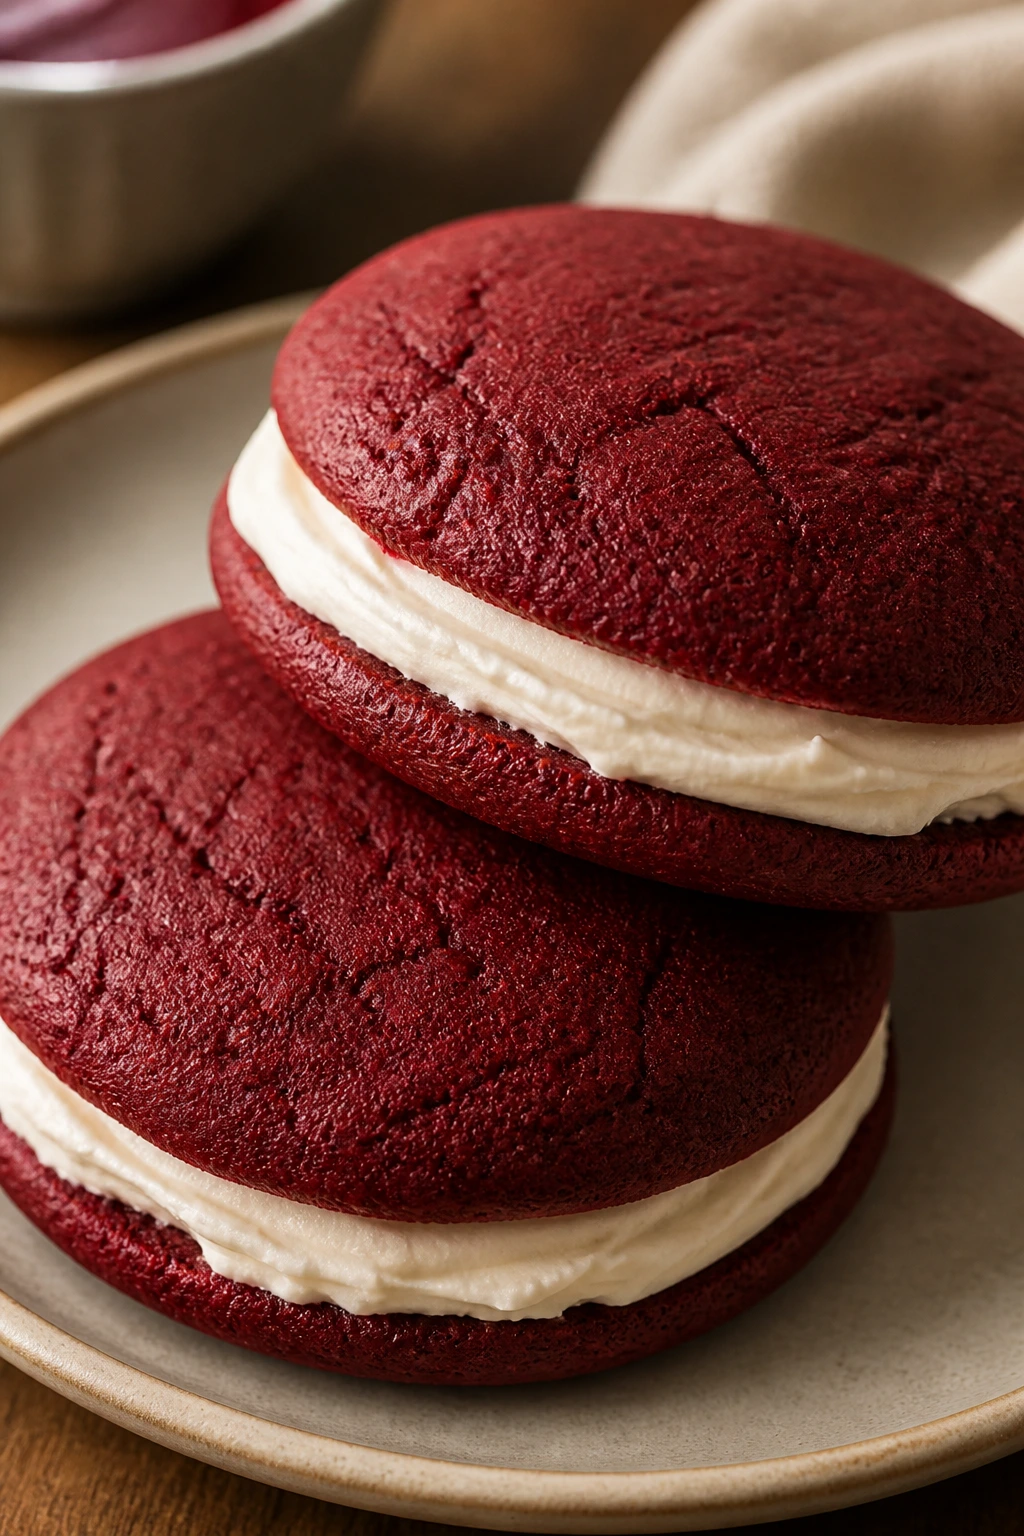
Whoopie pies are less formal than cake and easier to hand around, which is part of their charm. The soft rounds sandwich a cream cheese filling that stays cool in the center, almost like a little cake you can hold with one hand.
Why It Works:
The batter is thick enough to hold dome-shaped cookies, and the filling has enough tang to balance the cocoa. They’re also easier to portion than a full layer cake.
Key Ingredients:
- 2 cups all-purpose flour, for the cookies
- 2 tablespoons cocoa powder, for flavor
- 1 teaspoon baking soda, for lift
- 1/2 teaspoon fine salt, for balance
- 1/2 cup unsalted butter, softened, for the batter
- 1 cup brown sugar, for chew
- 1 large egg, room temperature, to bind
- 1 cup buttermilk, for tang
- 1 teaspoon vanilla extract, for flavor
- Red food coloring, for color
- For the Filling: 8 oz cream cheese, 1/4 cup butter, 2 cups powdered sugar, 1 teaspoon vanilla
Quick Steps:
- Heat the oven to 350°F (175°C) and line two baking sheets with parchment.
- Beat the butter and brown sugar, then mix in the egg, buttermilk, vanilla, and coloring.
- Stir in the dry ingredients and drop 2-tablespoon rounds onto the trays.
- Bake 10 to 12 minutes and cool completely.
- Beat the filling until fluffy, then sandwich the cookies.
Equipment for This Recipe:
- Baking sheets
- Parchment paper
- Hand mixer
- Small ice cream scoop
How to Serve This Dish:
Serve them whole or halved on a tray. They’re soft enough to pair with coffee, and they make good little take-home pieces.
Pro Tips for This Recipe:
- Cool the cookies completely before filling or the cream cheese melts.
- Keep the scoops even so the sandwiches match.
- Chill briefly before serving if you want cleaner sides.
Variations on This Dish:
- Chocolate Filling Pies: Use cocoa frosting instead of cream cheese.
- Mini Whoopies: Make teaspoon-sized rounds for bite-size pieces.
Common Mistakes to Avoid with This Dish:
- Too much batter per cookie: They spread into flat pancakes.
- Warm filling: It squeezes out the sides when you press the cookies together.
15. White Chocolate Raspberry Blondies
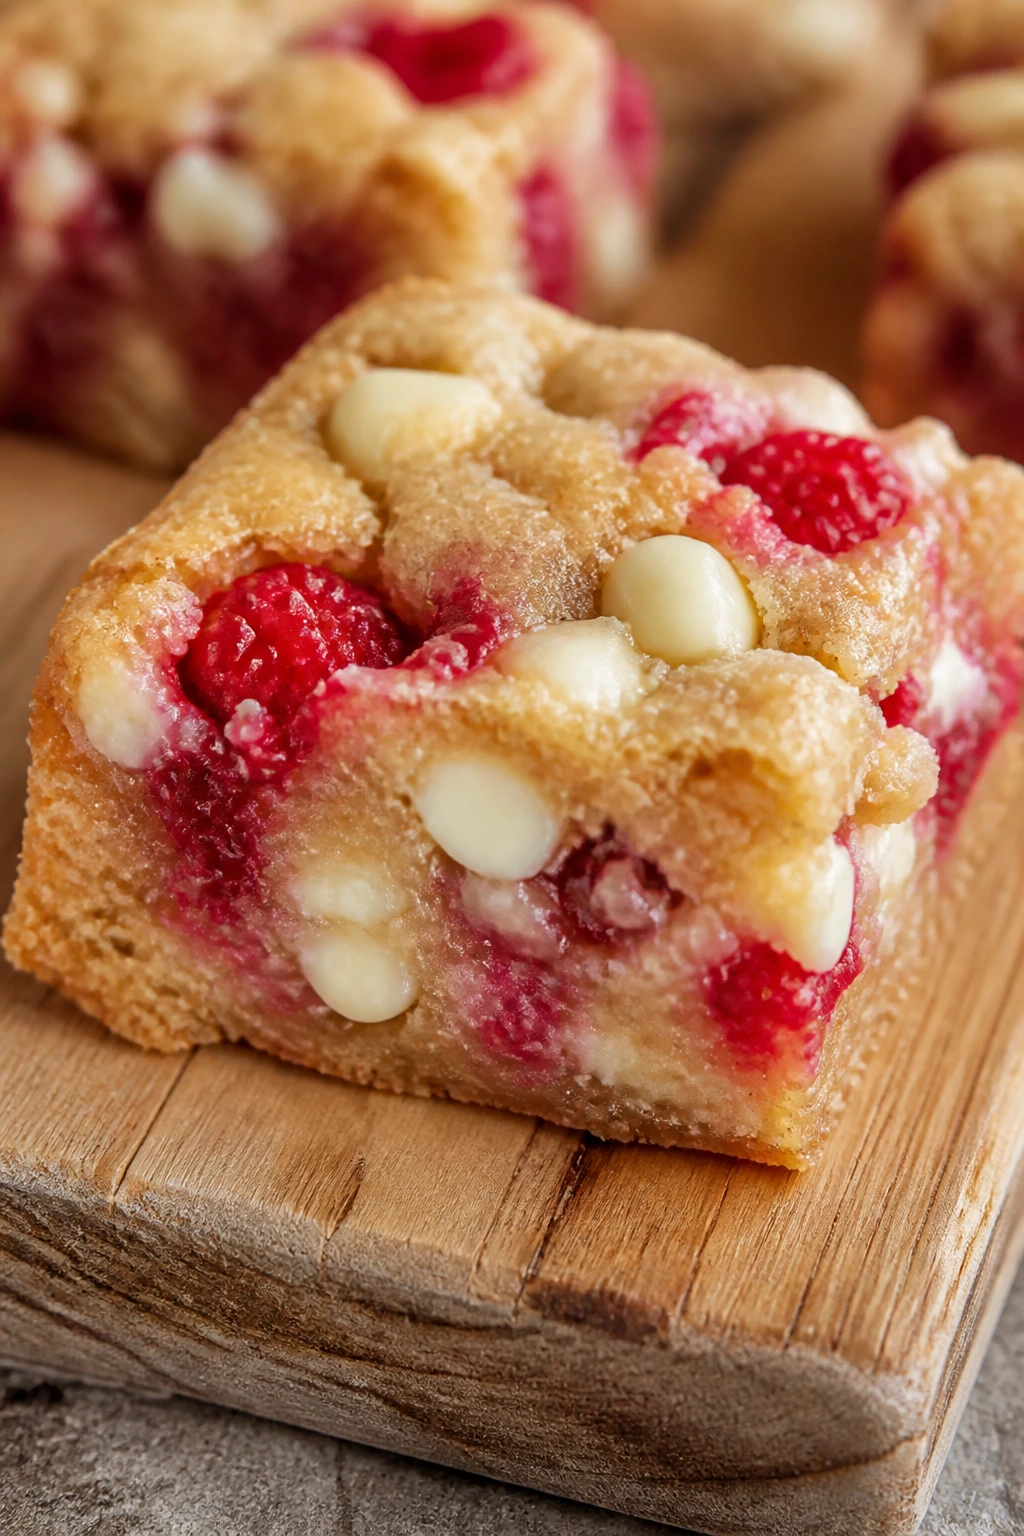
These blondies bake into a dense, chewy square with pockets of melted white chocolate and streaks of raspberry through the middle. They’re sweeter than the chocolate-heavy desserts, but the fruit keeps them from turning into a sugar slab.
Why It Works:
Brown sugar gives the bars chew, and the raspberries cut through the sweetness. Freeze-dried raspberries work especially well because they won’t leak as much water.
Key Ingredients:
- 1 cup unsalted butter, melted, for richness
- 1 1/2 cups light brown sugar, for chew
- 2 large eggs, room temperature, for structure
- 2 teaspoons vanilla extract, for warmth
- 2 cups all-purpose flour, for the crumb
- 1/2 teaspoon fine salt, for balance
- 1 cup white chocolate chips, for sweetness
- 1/2 cup freeze-dried raspberries, lightly crushed, for tartness
Quick Steps:
- Heat the oven to 350°F (175°C) and line an 8-inch square pan.
- Whisk the butter and brown sugar, then add the eggs and vanilla.
- Stir in the flour and salt, then fold in the white chocolate and raspberries.
- Spread the batter in the pan and bake 25 to 30 minutes until the edges are set and the center is just a little soft.
- Cool fully before slicing.
Equipment for This Recipe:
- 8-inch square pan
- Mixing bowl
- Parchment paper
- Rubber spatula
How to Serve This Dish:
Cut them into neat squares and serve at room temperature. A few extra crushed raspberries on top give the bars a sharper look and a little crunch.
Pro Tips for This Recipe:
- Freeze-dried raspberries keep the bars from getting soggy.
- Underbake them slightly if you want a fudgier center.
- Let them cool before cutting or the chips smear.
Variations on This Dish:
- Dark Chocolate Swap: Use chopped dark chocolate instead of white chocolate.
- Pistachio Raspberry Blondies: Add 1/3 cup chopped pistachios for crunch.
Common Mistakes to Avoid with This Dish:
- Using fresh raspberries without adjustment: They can release too much juice.
- Cutting warm bars: The middle stays too soft and messy.
16. Chocolate Fondue Board
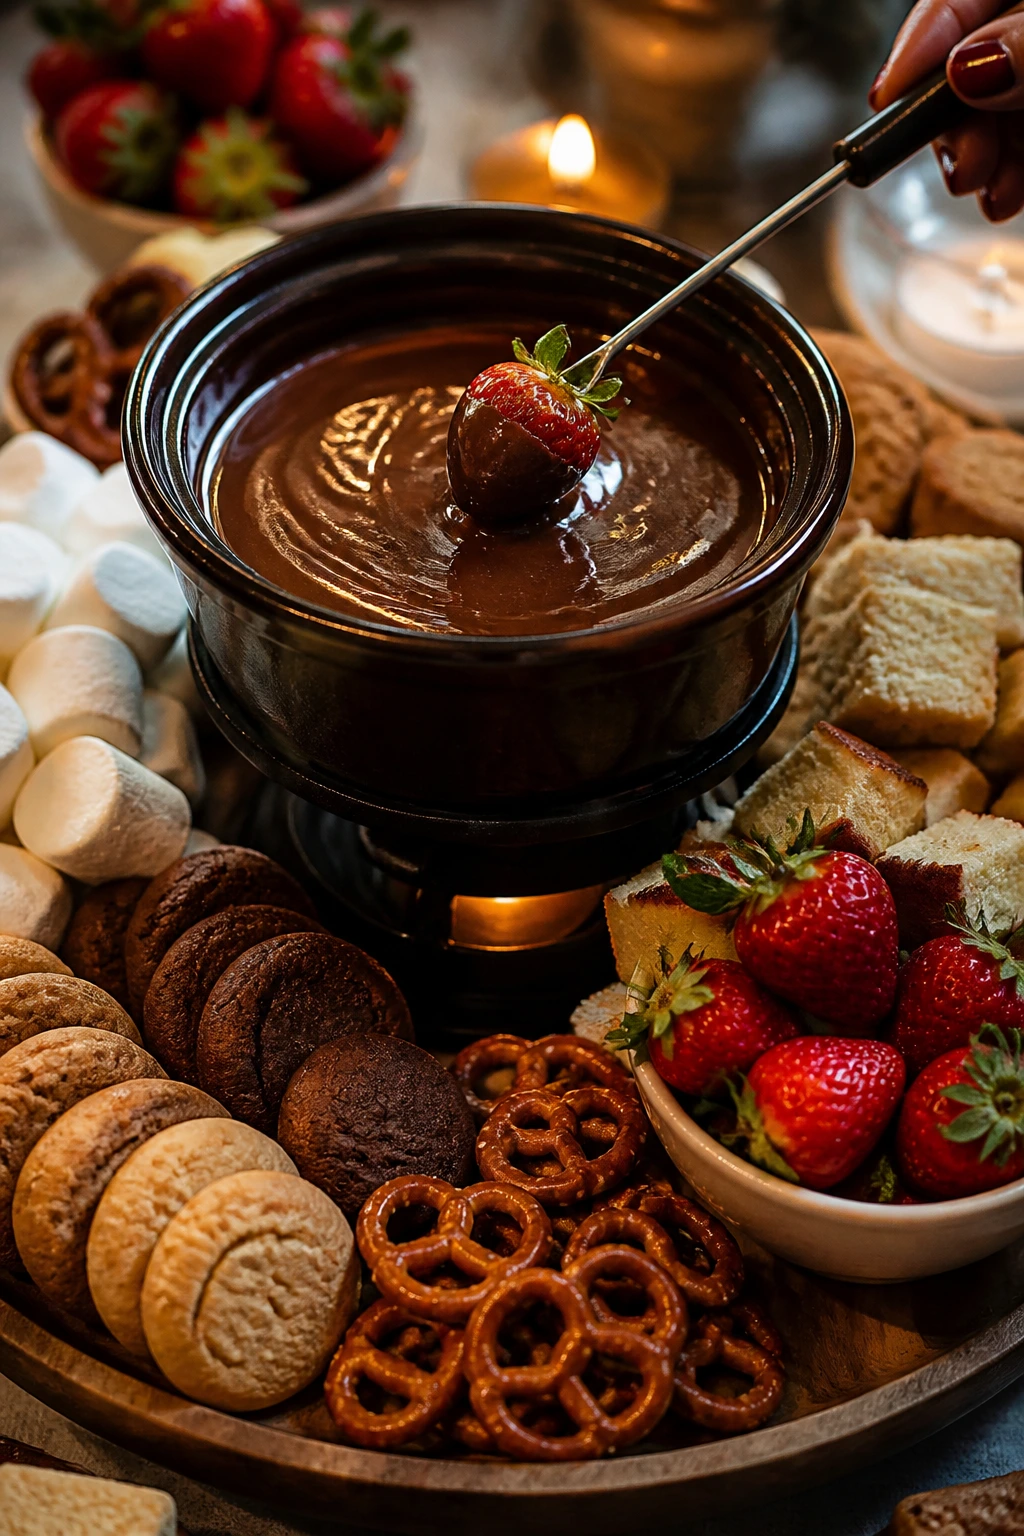
A fondue board is less dessert, more edible centerpiece. People graze, dip, and wander back for another strawberry, which makes it one of the easiest ways to feed a crowd without sending everyone into a slice-and-plate routine.
Why It Works:
Warm chocolate stays fluid long enough for conversation to outlast the dip. The board setup gives you contrast—fruit, cookies, cake, pretzels, and marshmallows—so every bite can be a little different.
Key Ingredients:
- 12 oz dark chocolate, chopped, for the fondue
- 3/4 cup heavy cream, for thinning the chocolate
- 1 tablespoon unsalted butter, for gloss
- 1 teaspoon vanilla extract, for flavor
- 2 cups strawberries, hulled
- 1 cup pretzel rods or twists, for salt and crunch
- 1 cup pound cake cubes, for a soft dip
- 1 cup marshmallows, for contrast
- 1 cup pineapple or banana slices, optional, for extra fruit
Quick Steps:
- Warm the cream until steaming, then pour it over the chocolate and let it sit 1 minute.
- Stir in the butter and vanilla until smooth.
- Transfer to a fondue pot or small bowl set over warm water.
- Arrange the dipping items on a board and serve right away. Keep the chocolate warm, not boiling, or it thickens and scorches.
Equipment for This Recipe:
- Small saucepan
- Heatproof bowl
- Serving board or platter
- Fondue pot, optional
How to Serve This Dish:
Put the chocolate in the center and ring it with fruit and dippers. Small forks or skewers help keep the strawberries from slipping into the bowl.
Pro Tips for This Recipe:
- Dry the fruit well so water doesn’t seize the chocolate.
- Add a splash more cream if the chocolate gets too thick.
- Offer salty and sweet dippers together; the contrast matters.
Variations on This Dish:
- Milk Chocolate Board: Use milk chocolate and a pinch of espresso powder.
- Peppermint Board: Add crushed peppermint candies to the topping bowl.
Common Mistakes to Avoid with This Recipe:
- Using high heat: Chocolate scorches fast and turns grainy.
- Wet fruit: It can cause the fondue to seize.
17. Rosewater Panna Cotta
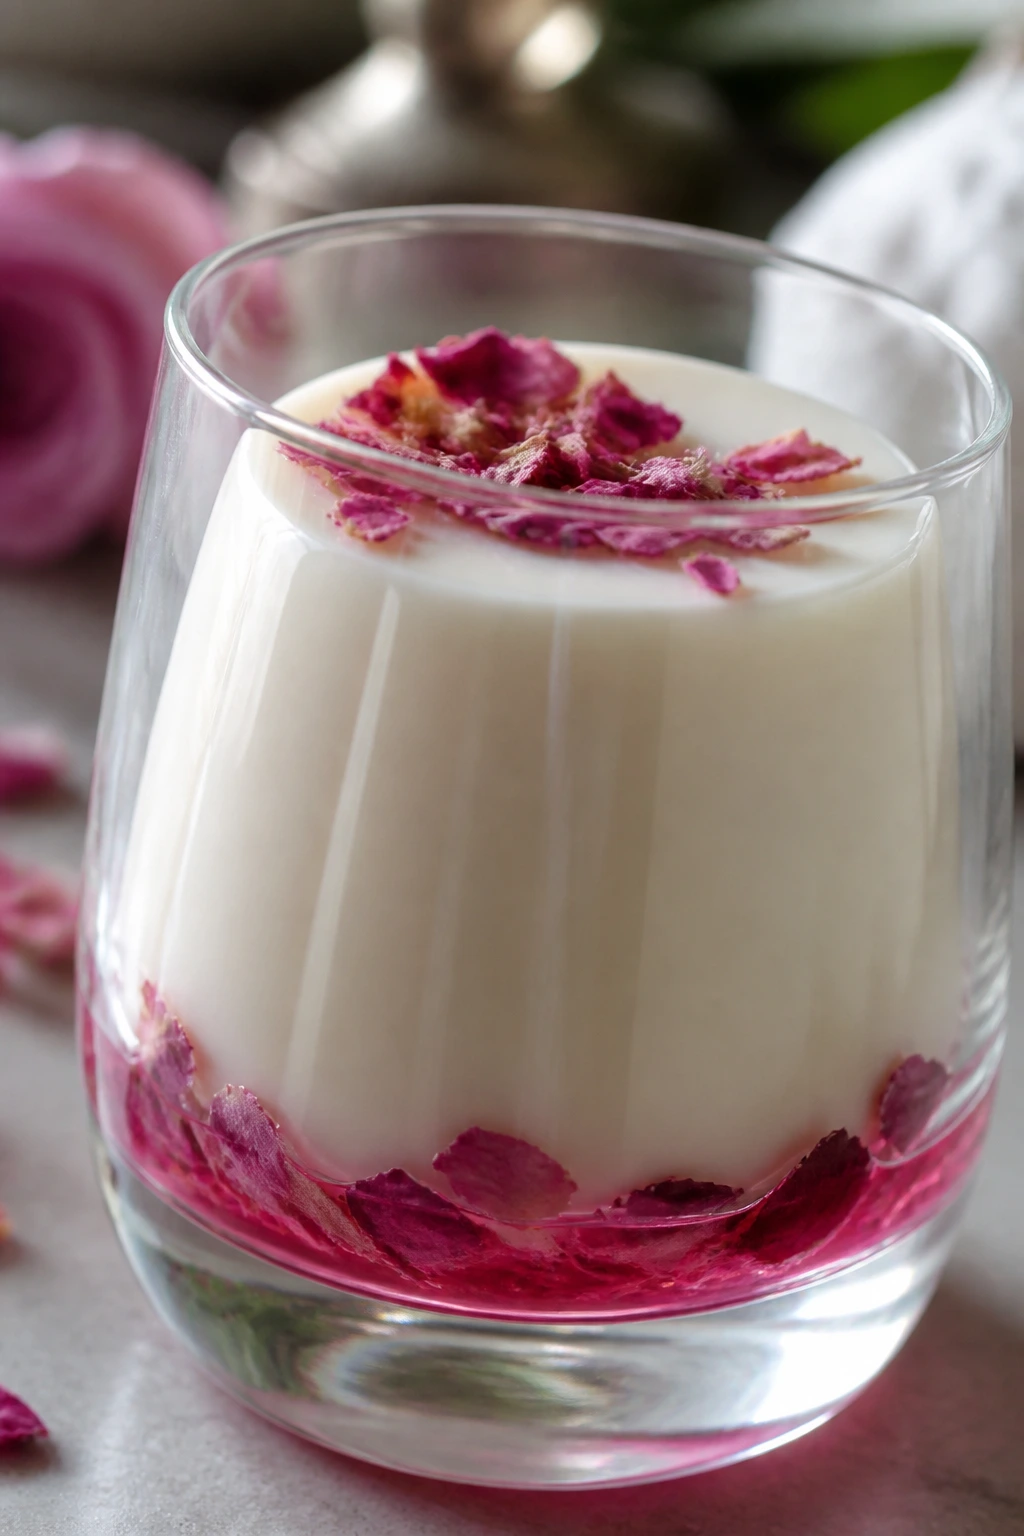
Panna cotta is quietly elegant without trying to be. The texture should wobble softly when the spoon touches it, and rosewater gives it a floral note that tastes more grown-up than pink frosting ever could.
Why It Works:
Gelatin sets the cream just enough to hold a shape, and a small amount of rosewater keeps the flavor light. Raspberry sauce or fresh berries add the tartness the custard needs.
Key Ingredients:
- 2 cups heavy cream, for richness
- 1 cup whole milk, for balance
- 1/3 cup sugar, for sweetness
- 2 teaspoons gelatin powder, for setting
- 2 tablespoons cold water, to bloom the gelatin
- 1 to 1 1/2 teaspoons rosewater, for flavor
- 1 teaspoon vanilla extract, for warmth
- Raspberries or raspberry sauce, for serving
Quick Steps:
- Bloom the gelatin in cold water for 5 minutes.
- Warm the cream, milk, and sugar until the sugar dissolves and steam rises.
- Stir in the gelatin, then add the rosewater and vanilla.
- Pour into molds or glasses and chill at least 4 hours.
- Serve with raspberries or sauce. Go easy on the rosewater; it can take over fast.
Equipment for This Recipe:
- Small saucepan
- Whisk
- Ramekins or glasses
- Fine sieve, optional, for a silky finish
How to Serve This Dish:
Unmold it onto a plate if you want drama, or leave it in glasses for less fuss. A few crushed pistachios add color and a little crunch.
Pro Tips for This Recipe:
- Strain the custard before pouring if you want it extra smooth.
- Chill it on a level shelf so it sets evenly.
- Test the rosewater by smell first; brands vary a lot.
Variations on This Dish:
- Orange Blossom Panna Cotta: Swap rosewater for orange blossom water.
- Vanilla Berry Panna Cotta: Skip the floral note and top with a berry compote.
Common Mistakes to Avoid with This Dish:
- Too much gelatin: The custard turns rubbery.
- Boiling the dairy: That can dull the flavor and change the texture.
18. Mini Heart Hand Pies
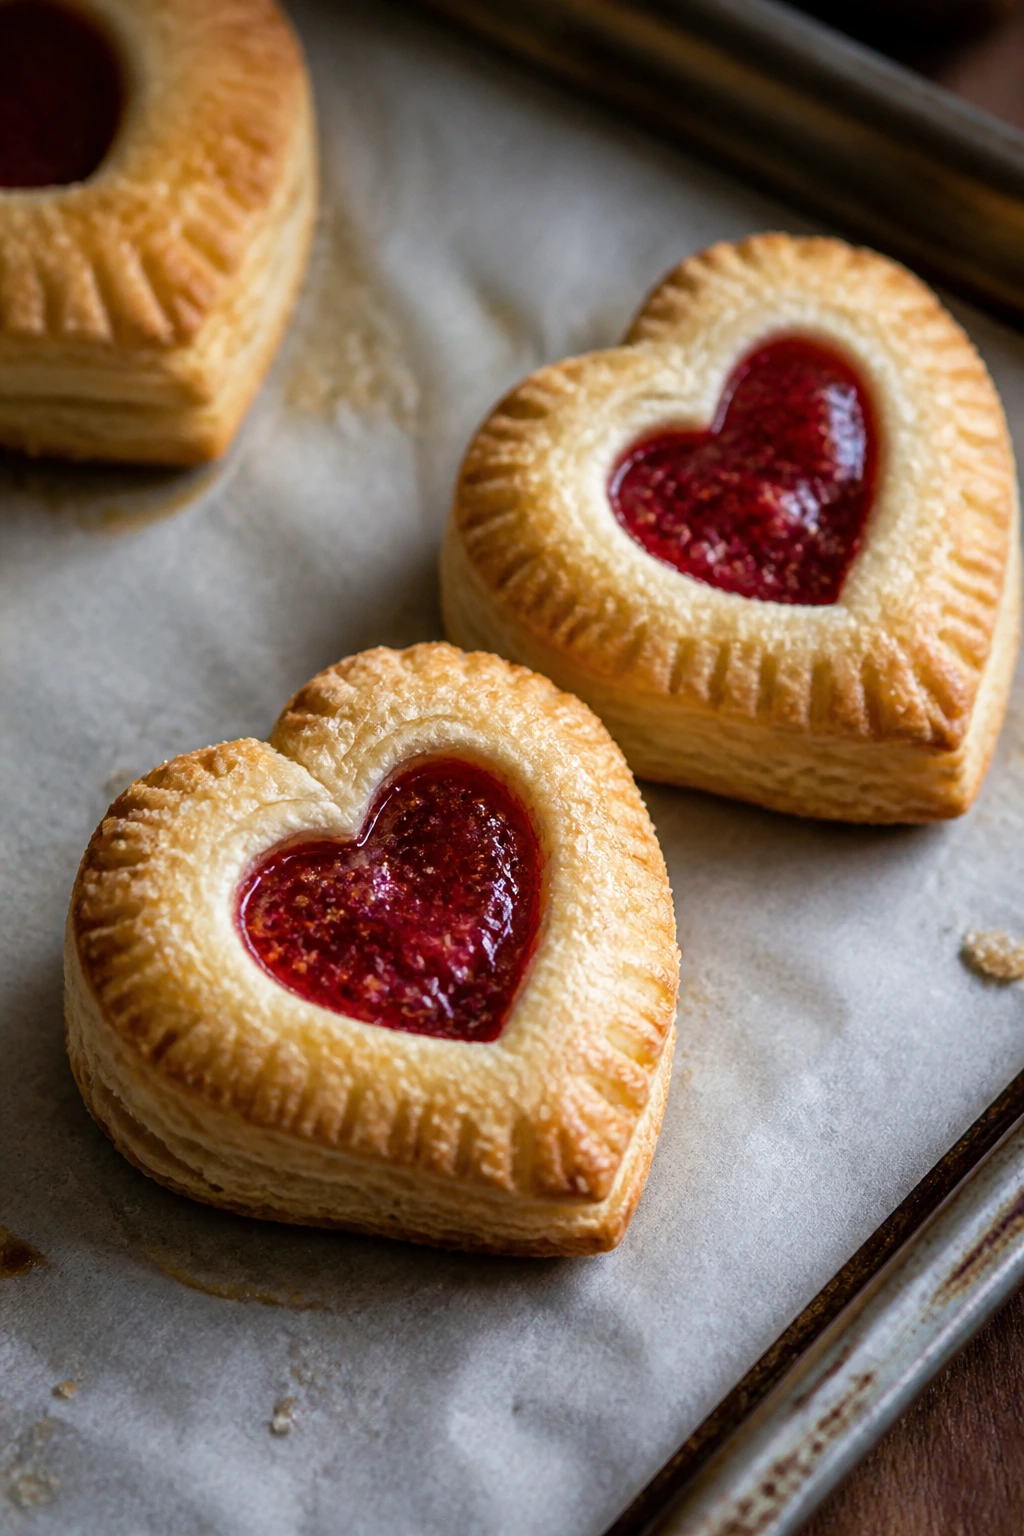
These are the kind of dessert that makes a tray look cheerful before anyone takes a bite. The crust bakes flaky and the filling stays tucked inside, which means they’re easier to serve than a slice of pie at a crowded table.
Why It Works:
Small hand pies bake quickly, so the edges crisp before the filling runs. A little cornstarch keeps the fruit from escaping the pastry.
Key Ingredients:
- 2 pie crust rounds, homemade or store-bought, chilled
- 1 cup strawberry jam or thick strawberry filling, for the centers
- 1 tablespoon cornstarch, if the filling is loose
- 1 egg, beaten, for sealing and brushing
- 2 tablespoons coarse sugar, for sparkle
- Powdered sugar glaze, optional, for finishing
Quick Steps:
- Heat the oven to 400°F (205°C) and line two baking sheets.
- Roll the dough and cut heart shapes in pairs.
- Spoon a small amount of filling onto half the hearts, brush the edges with egg, and top with the remaining hearts.
- Crimp with a fork, cut a vent, brush with egg, and sprinkle with sugar.
- Bake 16 to 20 minutes until golden.
Equipment for This Recipe:
- Rolling pin
- Heart cutter
- Baking sheets
- Pastry brush
How to Serve This Dish:
Serve them warm or at room temperature. A little glaze drizzled over the top makes them look bakery-made without much extra work.
Pro Tips for This Recipe:
- Keep the filling scant or it will leak.
- Chill the assembled pies for 10 minutes before baking.
- Brush the edges well so they seal.
Variations on This Dish:
- Cherry Heart Pies: Fill them with cherry pie filling instead.
- Lemon Heart Pies: Use lemon curd for a sharper flavor.
Common Mistakes to Avoid with This Recipe:
- Overfilling: The centers burst open in the oven.
- Skipping vents: Steam needs somewhere to go.
19. Chocolate Pretzel Toffee
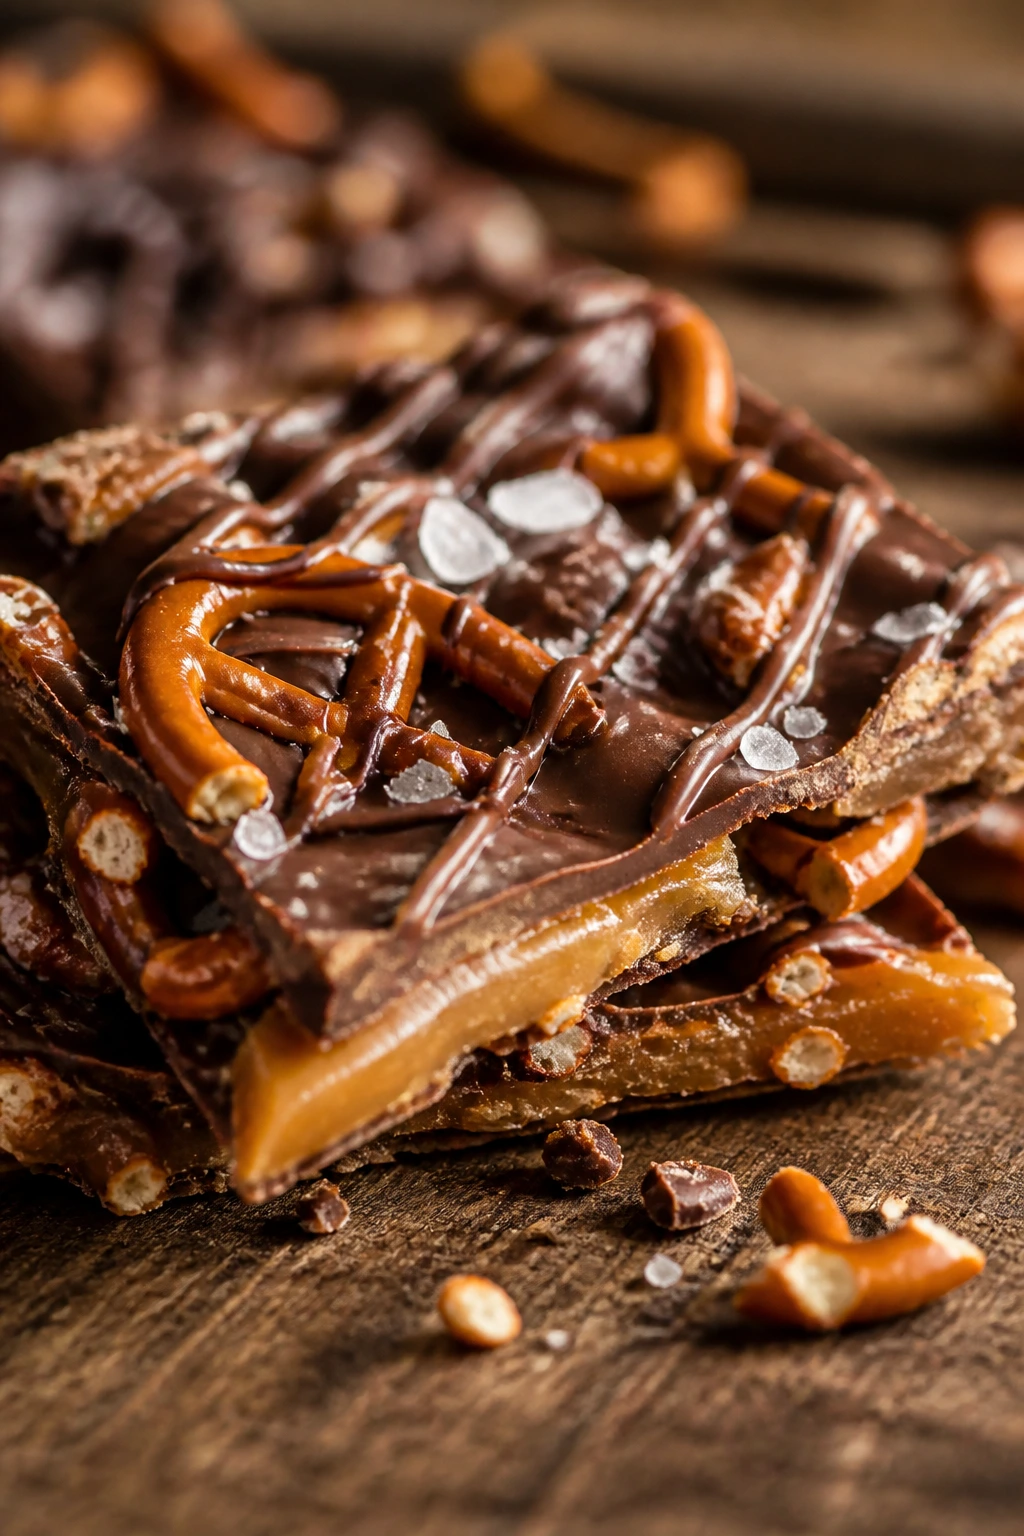
This candy brings the sweet-salty thing home without a lot of ceremony. You get brittle toffee, melted chocolate, and pretzels that stay crunchy long after the pan is cool, which makes it good for gift boxes and snack plates.
Why It Works:
The butter-sugar base cooks into hard toffee, and the pretzels anchor the chocolate so each shard breaks in a clean, jagged way. A pinch of salt sharpens the caramel notes.
Key Ingredients:
- 1 cup unsalted butter, for the toffee
- 1 cup light brown sugar, packed, for caramel flavor
- 1/2 teaspoon fine salt, for balance
- 3 cups mini pretzels, for crunch
- 1 1/2 cups semisweet chocolate chips, for the top
- Flaky salt, optional, for finishing
- Chopped peanuts or almonds, optional, for extra bite
Quick Steps:
- Heat the oven to 350°F (175°C) and line a rimmed baking sheet with foil and parchment.
- Arrange the pretzels in a single layer.
- Cook the butter, brown sugar, and salt together for 3 to 4 minutes until bubbling and slightly thickened.
- Pour over the pretzels, bake 5 minutes, then scatter chocolate on top and let it melt.
- Spread the chocolate, cool completely, and break into shards.
Equipment for This Recipe:
- Rimmed baking sheet
- Foil and parchment
- Saucepan
- Offset spatula or knife
How to Serve This Dish:
Pile the shards in a bowl or wrap them as gifts. It looks best when the broken edges stay rough and irregular.
Pro Tips for This Recipe:
- Line the pan well or cleanup turns miserable.
- Let the candy cool fully before breaking it.
- Use mini pretzels for more even coverage.
Variations on This Dish:
- White Chocolate Pretzel Bark: Swap the topping chocolate for white chocolate.
- Peppermint Toffee: Add crushed peppermint to the melted chocolate.
Common Mistakes to Avoid with This Dish:
- Undercooked toffee: It stays chewy instead of snapping.
- Breaking too soon: Warm bark bends and smears.
20. Strawberry Cream Cheese Danish

Puff pastry makes this feel like a bakery case dessert without dragging you through a full laminated dough project. Cream cheese and strawberries give you that familiar brunch-sweet flavor that still reads as dessert.
Why It Works:
The pastry puffs around the filling, so the center stays soft while the edges go crisp. Cream cheese keeps the strawberry layer from tasting like jam on bread.
Key Ingredients:
- 1 sheet puff pastry, thawed but cold, for the base
- 8 oz cream cheese, softened, for the filling
- 1/4 cup granulated sugar, for sweetness
- 1 teaspoon vanilla extract, for flavor
- 1 cup strawberries, diced, for the top
- 1 teaspoon cornstarch, if the berries are juicy
- 1 egg, beaten, for brushing
- Powdered sugar glaze, optional, for the finish
Quick Steps:
- Heat the oven to 400°F (205°C) and line a baking sheet.
- Cut the puff pastry into squares or hearts and score a border.
- Mix the cream cheese, sugar, and vanilla, then spread inside the border.
- Top with strawberries, brush the edges with egg, and bake 18 to 22 minutes until puffed and golden.
- Cool slightly and add glaze if you like.
Equipment for This Recipe:
- Baking sheet
- Sharp knife or cutter
- Mixing bowl
- Pastry brush
How to Serve This Dish:
Serve warm enough that the filling is soft but not runny. One danish with coffee feels right; two is the kind of thing that starts a conversation.
Pro Tips for This Recipe:
- Keep the pastry cold until it goes into the oven.
- Drain the berries if they’re extra juicy.
- Score the border lightly so the edges puff up nicely.
Variations on This Recipe:
- Raspberry Danish: Swap the strawberries for raspberries and a little lemon zest.
- Chocolate Danish: Add a thin smear of chocolate hazelnut spread under the cream cheese.
Common Mistakes to Avoid with This Recipe:
- Using warm puff pastry: It won’t puff properly.
- Overloading with filling: The center can sink and leak.
21. Dark Chocolate Truffles
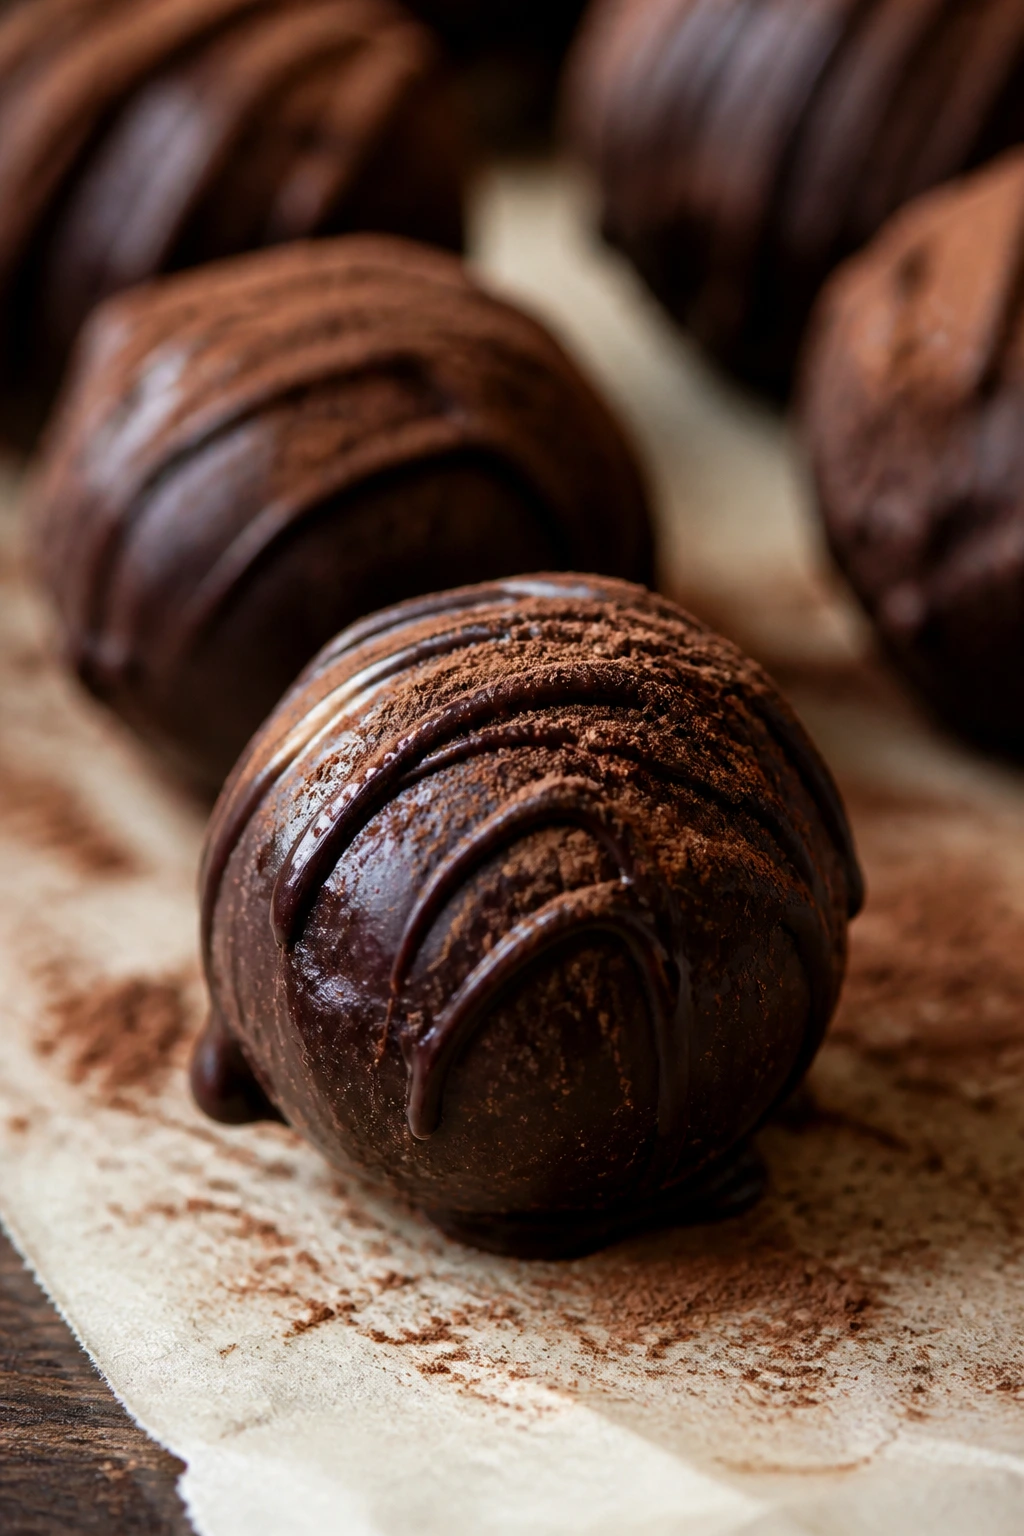
Truffles are tiny, rich, and mercifully forgiving. A small plate of them looks generous, and the soft center gives you that dense chocolate hit without a fork, a plate, or much cleanup.
Why It Works:
Ganache made from good dark chocolate and cream sets into a smooth center that can be rolled or piped. Cocoa powder, nuts, or shredded coconut give you different finishes without changing the base.
Key Ingredients:
- 8 oz dark chocolate, finely chopped, for the ganache
- 1/2 cup heavy cream, for smoothing
- 1 tablespoon unsalted butter, for shine
- 1 teaspoon vanilla extract, for flavor
- Pinch of fine salt, to sharpen the chocolate
- Unsweetened cocoa powder, for rolling
- Finely chopped nuts or coconut, optional, for coating
Quick Steps:
- Warm the cream until steaming and pour it over the chocolate.
- Let it sit 1 minute, then stir in the butter, vanilla, and salt until smooth.
- Chill 1 to 2 hours until scoopable.
- Scoop and roll into balls, then coat in cocoa or nuts.
- Chill again until firm.
Equipment for This Recipe:
- Small saucepan
- Mixing bowl
- Small scoop or teaspoon
- Baking sheet lined with parchment
How to Serve This Dish:
Arrange them in mini paper cups or on a small plate with strawberries. They also make easy edible gifts if you box them before the cocoa coating gets damp.
Pro Tips for This Recipe:
- Use a warm scoop for cleaner portions.
- Dust your hands with cocoa if the ganache gets sticky.
- Chill the chocolate long enough or the balls won’t hold shape.
Variations on This Recipe:
- Espresso Truffles: Add 1/2 teaspoon espresso powder to the cream.
- Orange Truffles: Stir in orange zest before chilling.
Common Mistakes to Avoid with This Recipe:
- Too much cream: The ganache won’t set firmly.
- Rolling too soon: Sticky ganache is messy and uneven.
22. Cherry Hand Pies
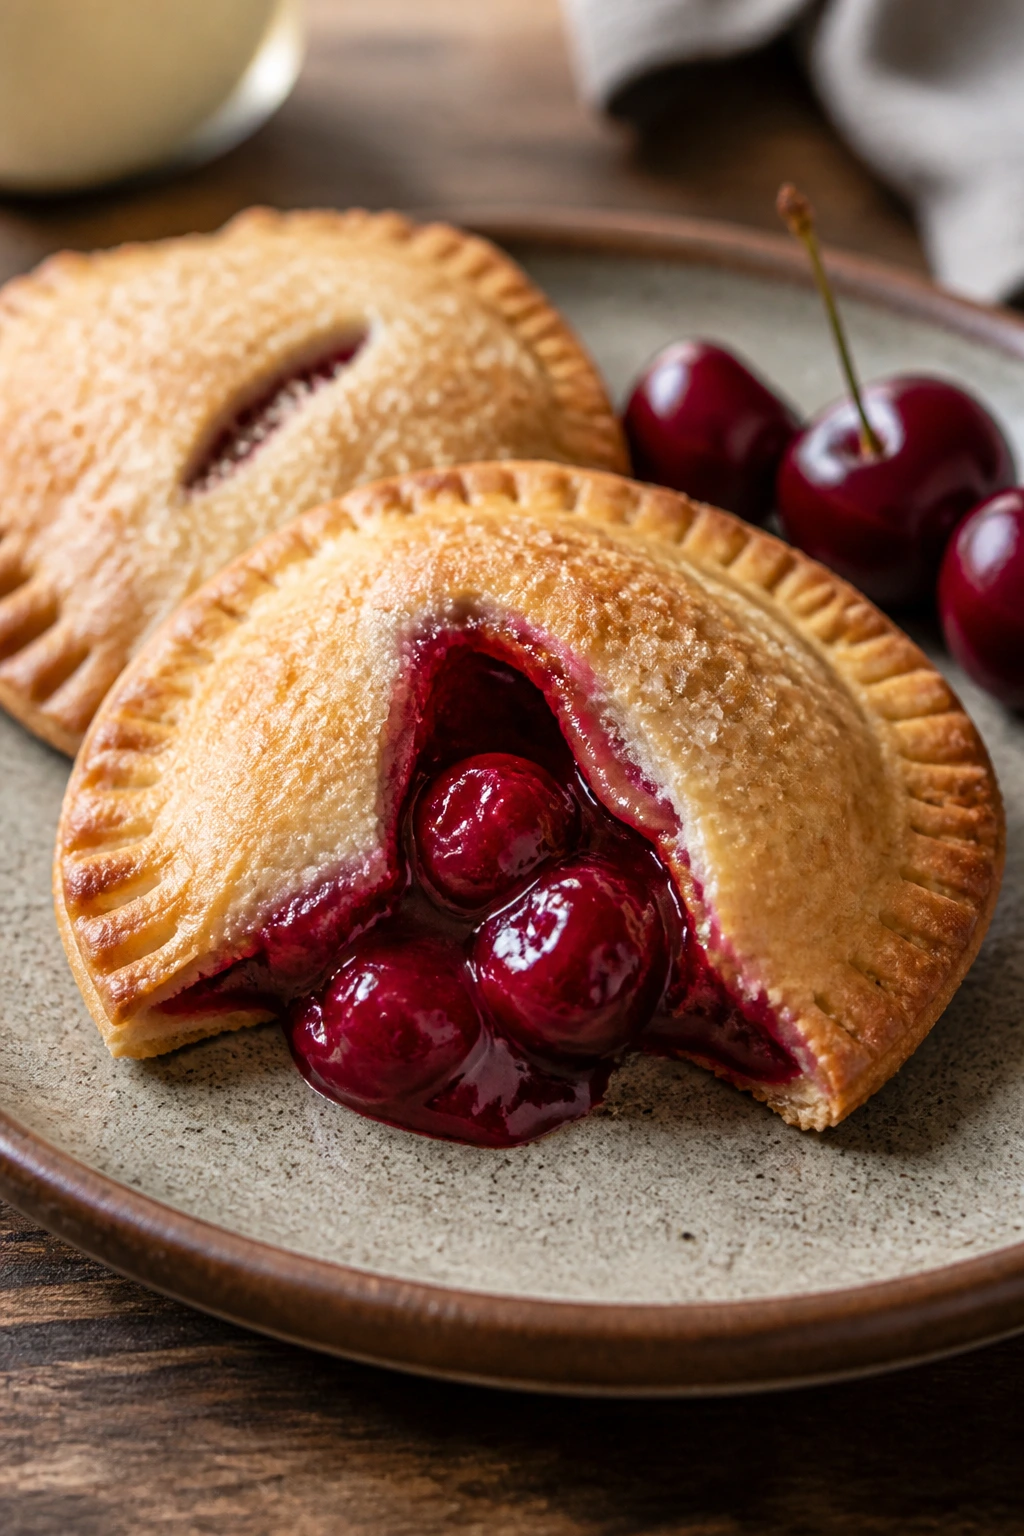
Cherry hand pies feel a little more classic and a little less shiny than strawberry versions, which I like. The filling turns jammy in the oven, and the pastry seals it in so each bite tastes like pie without the plate.
Why It Works:
Cherry filling holds its flavor after baking, and the small size keeps the crust from getting limp. A lemon squeeze brightens the cherries so they don’t taste like cough syrup.
Key Ingredients:
- 2 pie crust rounds, chilled, for the pastry
- 2 cups pitted cherries, fresh or thawed and drained, for the filling
- 1/4 cup sugar, for sweetness
- 1 tablespoon cornstarch, to thicken the juices
- 1 tablespoon lemon juice, to brighten the fruit
- 1 egg, beaten, for sealing
- Coarse sugar, for the top
Quick Steps:
- Heat the oven to 400°F (205°C) and line a baking sheet.
- Toss the cherries with sugar, cornstarch, and lemon juice.
- Cut the crust into circles or hearts, spoon filling onto half, and seal with egg wash and a second piece of dough.
- Crimp, vent, brush with egg, and sprinkle with sugar.
- Bake 18 to 22 minutes until deeply golden.
Equipment for This Recipe:
- Rolling pin
- Cookie cutter or round bowl
- Baking sheet
- Fork for crimping
How to Serve This Dish:
Serve them warm if you want the filling looser, or room temperature if you want cleaner bites. A light drizzle of vanilla glaze works if the pies need dressing up.
Pro Tips for This Recipe:
- Drain thawed cherries well before filling.
- Use a small spoonful of filling; these overfill fast.
- Chill the pies before baking for a sharper edge.
Variations on This Recipe:
- Black Forest Hand Pies: Add mini chocolate chips to the filling.
- Almond Cherry Hand Pies: Stir in 1/4 teaspoon almond extract.
Common Mistakes to Avoid with This Recipe:
- Loose filling: It leaks through the seams.
- Thin dough: It tears when you fold the pies shut.
23. Meringue Kisses
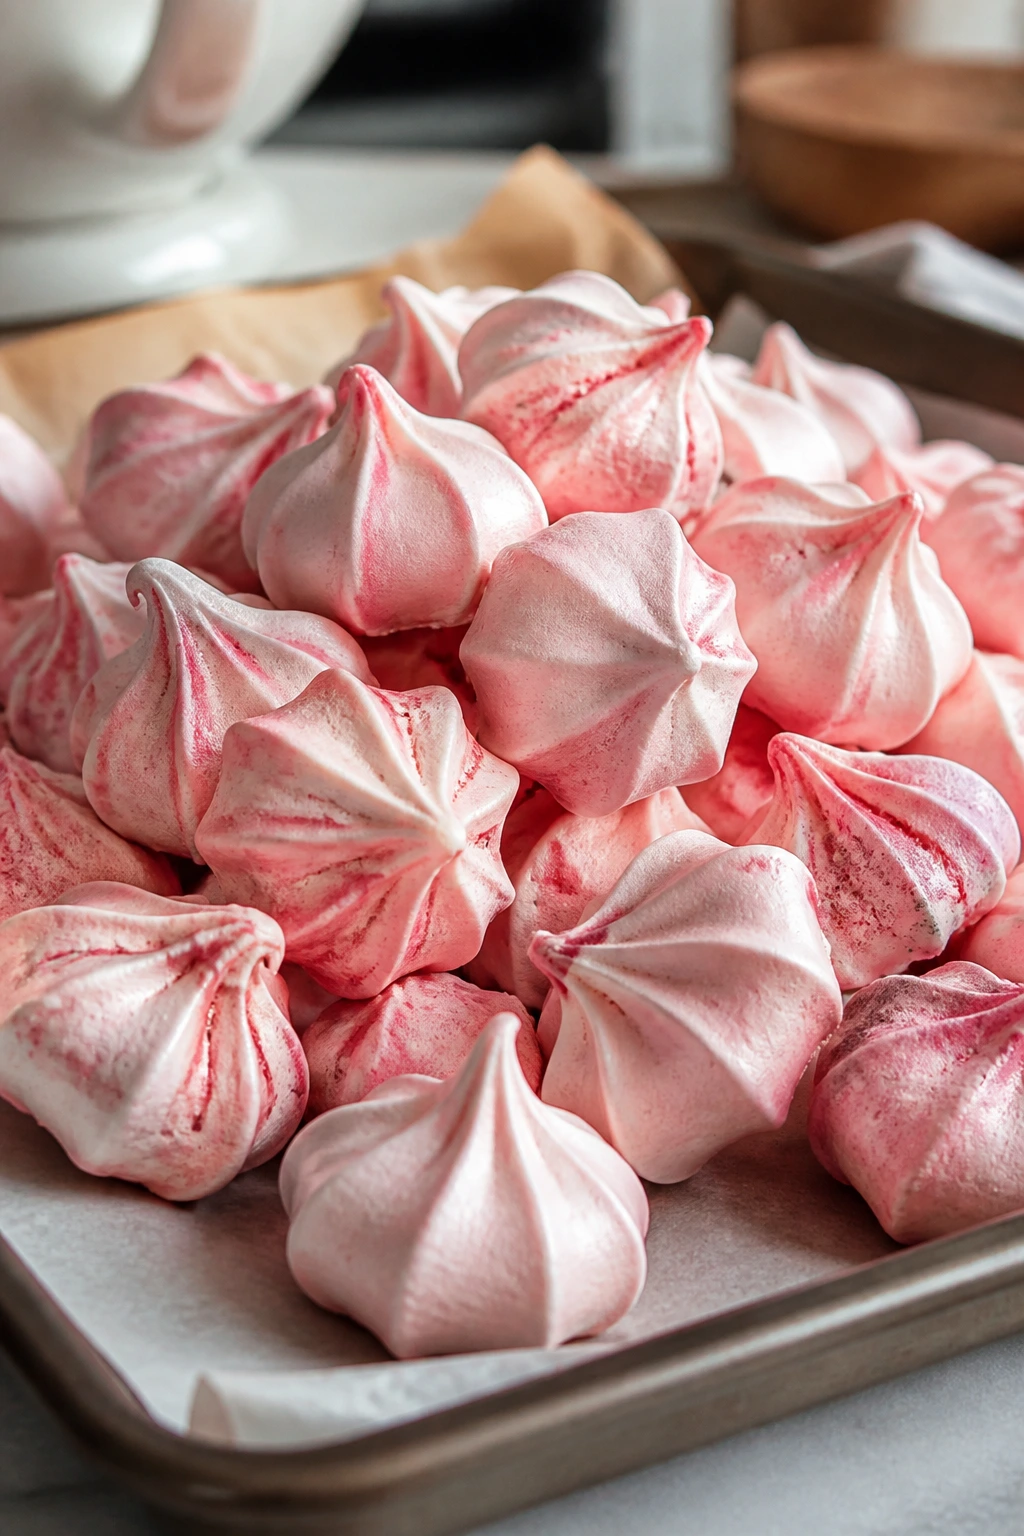
Meringue kisses are feather-light and crisp, and they make a tray look fuller than it is. They snap cleanly, melt fast, and taste like sugar air with a little vanilla, which sounds simple until you realize how easy it is to eat twelve.
Why It Works:
Egg whites and sugar whip into a stable foam, then low heat dries the kisses instead of browning them. That long, gentle bake is what gives them their crisp shell.
Key Ingredients:
- 3 large egg whites, room temperature, for the foam
- 3/4 cup granulated sugar, added slowly, for structure
- 1/4 teaspoon cream of tartar, to stabilize the whites
- 1 teaspoon vanilla extract, for flavor
- Pink food coloring, optional, for a Valentine tint
- Mini chocolate chips or sprinkles, optional, for garnish
Quick Steps:
- Heat the oven to 225°F (110°C) and line two baking sheets.
- Whip the egg whites and cream of tartar to soft peaks, then add the sugar gradually until glossy and stiff.
- Pipe small kisses onto the trays and add color or sprinkles if you want.
- Bake 1 hour, then turn off the oven and let them dry inside for another hour.
- Cool completely before storing.
Equipment for This Recipe:
- Stand mixer or hand mixer
- Piping bag with star tip
- Baking sheets
- Parchment paper
How to Serve This Dish:
Pile them in a bowl or use them to top mousse and pudding cups. They’re fragile, so handle them with dry hands.
Pro Tips for This Recipe:
- Make sure the bowl is grease-free.
- Add sugar slowly so the meringue stays fine and glossy.
- Keep them away from humidity once baked.
Variations on This Dish:
- Chocolate Meringue Kisses: Fold in a teaspoon of cocoa powder.
- Strawberry Meringues: Add freeze-dried strawberry powder.
Common Mistakes to Avoid with This Dish:
- Any trace of yolk: The whites won’t whip properly.
- Opening the oven too early: The kisses can crack or collapse.
24. Strawberry Cheesecake Bites
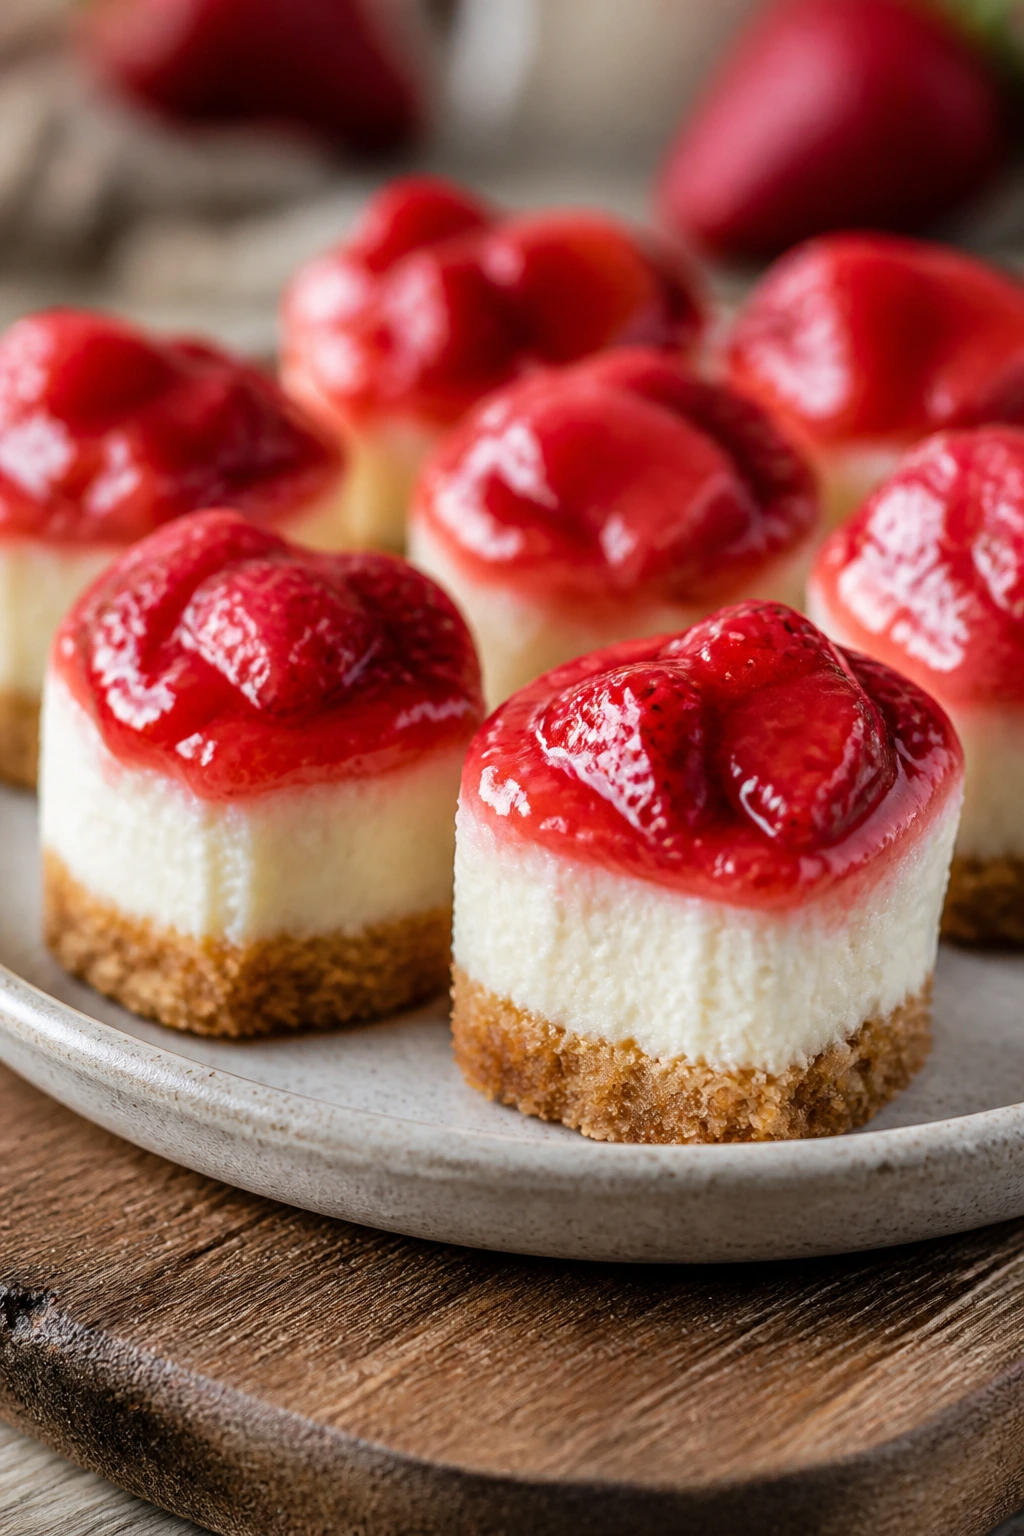
These little bites give you cheesecake flavor without dragging out a springform pan. They’re cold, creamy, and tidy enough to serve on a dessert tray where forks feel optional.
Why It Works:
The crust gives a sturdy base, and the filling sets in the fridge instead of the oven, which keeps the texture smooth. Fresh strawberry topping adds color right before serving.
Key Ingredients:
- 1 1/2 cups graham cracker crumbs, for the crust
- 5 tablespoons unsalted butter, melted, to bind
- 2 tablespoons sugar, for the crust
- 8 oz cream cheese, softened, for the filling
- 1/3 cup powdered sugar, for sweetness
- 1 teaspoon vanilla extract, for flavor
- 1/2 cup whipped cream or whipped topping, folded in for lightness
- 1 cup strawberries, diced, for topping
Quick Steps:
- Mix the crust ingredients and press into a lined 8-inch pan or mini muffin cups.
- Beat the cream cheese, powdered sugar, and vanilla until smooth, then fold in the whipped cream.
- Spread or pipe over the crust and chill 2 hours.
- Top with strawberries before serving.
Equipment for This Recipe:
- Muffin pan or square pan
- Hand mixer
- Parchment liners or parchment paper
- Small spoon or piping bag
How to Serve This Dish:
Serve them cold in small squares or cups. They’re best when the berry topping is fresh and the filling has just enough firmness to hold a clean edge.
Pro Tips for This Recipe:
- Line the pan well so you can lift the bars out cleanly.
- Use full-fat cream cheese for the smoothest filling.
- Dice the strawberries small so they sit neatly on top.
Variations on This Recipe:
- Chocolate Crust Bites: Swap the graham crumbs for chocolate crumbs.
- Raspberry Cheesecake Bites: Use raspberry topping instead of strawberries.
Common Mistakes to Avoid with This Recipe:
- Warm cream cheese: It stays lumpy if you don’t soften it first.
- Adding wet fruit too early: It can soften the top layer.
25. Brownie Hearts
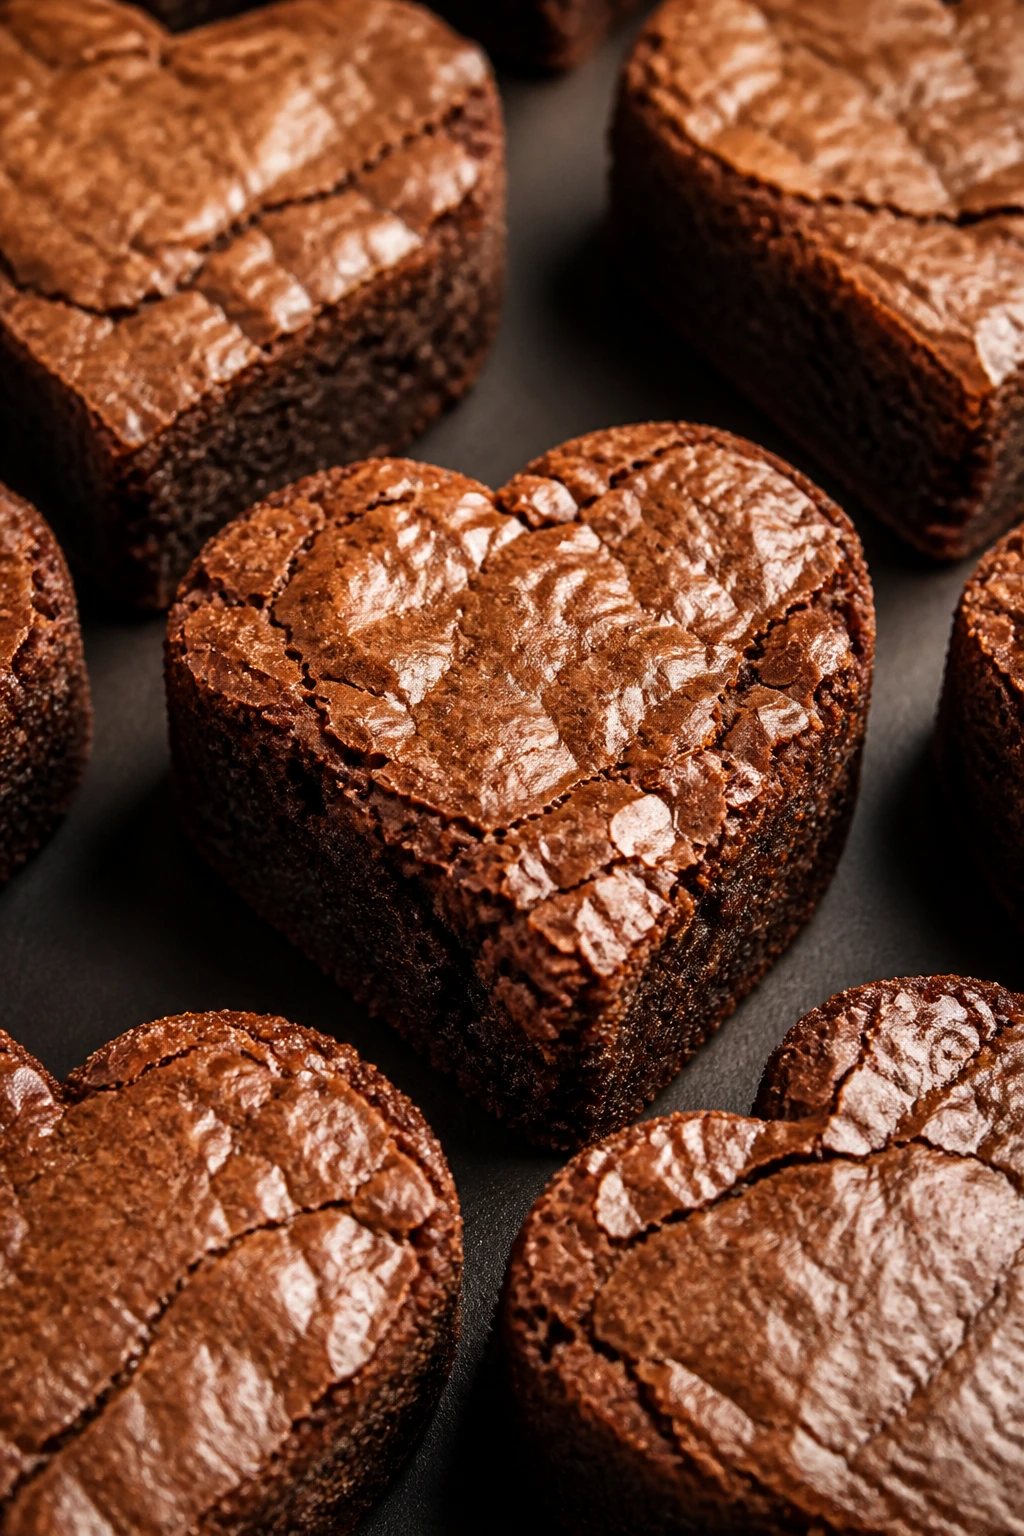
Brownie hearts look playful, but the flavor should still be serious: fudgy, cocoa-rich, and a little dense around the edges. Cutting them into hearts is the easiest way to make an ordinary pan feel like a gift.
Why It Works:
A sheet-pan brownie bakes evenly and cuts cleanly once chilled. Heart cutters waste less than you’d think, and leftover scraps can go straight into a snack bowl.
Key Ingredients:
- 1 cup unsalted butter, melted, for richness
- 8 oz bittersweet chocolate, chopped, for flavor
- 1 3/4 cups granulated sugar, for sweetness
- 3 large eggs, room temperature, for structure
- 1 teaspoon vanilla extract, for warmth
- 1 cup all-purpose flour, for body
- 1/2 cup cocoa powder, for chocolate depth
- 1/2 teaspoon fine salt, for balance
- Chocolate ganache or powdered sugar, optional, for topping
Quick Steps:
- Heat the oven to 350°F (175°C) and line a 9×13-inch pan.
- Melt the butter and chocolate, then whisk in sugar, eggs, and vanilla.
- Fold in flour, cocoa, and salt, spread into the pan, and bake 22 to 28 minutes.
- Cool completely, chill if needed, then cut heart shapes.
Equipment for This Recipe:
- 9×13-inch baking pan
- Parchment paper
- Heart cutter
- Offset spatula
How to Serve This Dish:
Drizzle with ganache or dust with powdered sugar. A tiny spoon of raspberry sauce beside the heart gives the plate a little brightness.
Pro Tips for This Recipe:
- Chill the brownie slab before cutting clean shapes.
- Use a warm cutter wiped between cuts.
- Save the scraps; they’re good with coffee.
Variations on This Recipe:
- Salted Caramel Brownie Hearts: Drizzle caramel over the cut pieces.
- Mint Chocolate Hearts: Add a drop of peppermint extract to the batter.
Common Mistakes to Avoid with This Recipe:
- Cutting warm brownies: They shred instead of slicing.
- Overbaking the pan: Brownies go dry fast and lose their chew.
26. Raspberry Crumb Bars
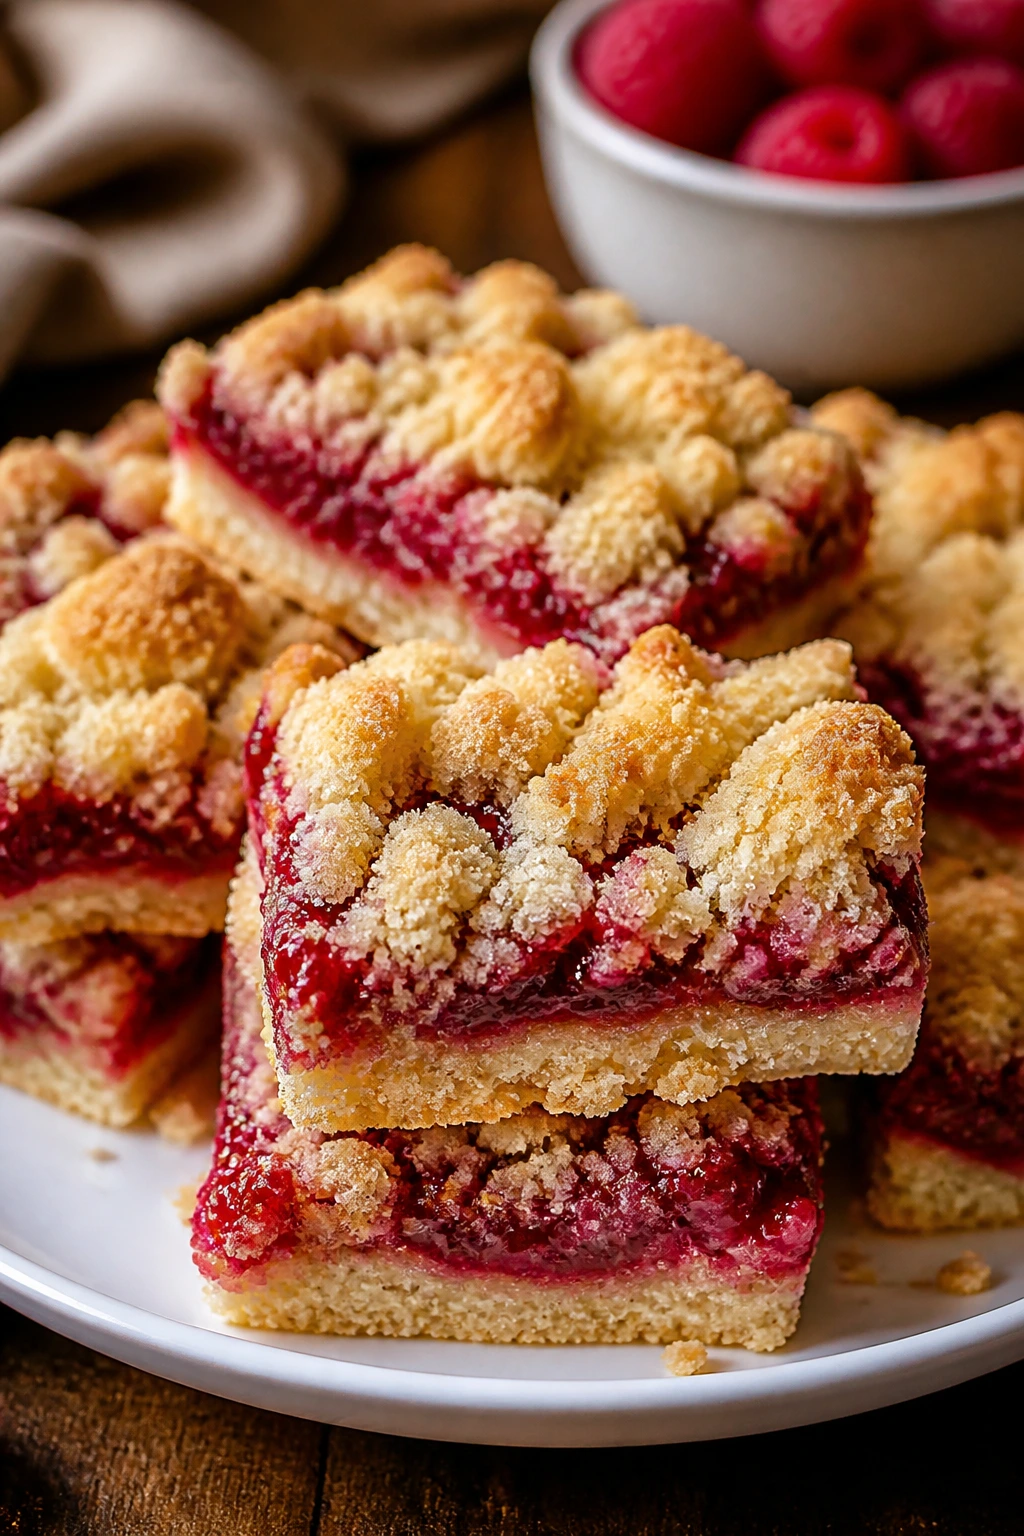
These bars taste like raspberry jam tucked between a shortbread base and a sandy crumble top. They’re one of the easiest ways to get a bright fruit dessert on the table without touching a pie dish.
Why It Works:
The same dough does double duty as crust and crumble, which keeps the recipe simple. Raspberry jam thickens as it bakes, so the middle stays sliceable.
Key Ingredients:
- 2 cups all-purpose flour, for the base and topping
- 1 cup old-fashioned oats, for texture
- 1 cup light brown sugar, for sweetness
- 1/2 teaspoon fine salt, for balance
- 1 cup unsalted butter, cold and cubed, for the crumble
- 1 1/4 cups raspberry jam, for the filling
- 1 teaspoon lemon juice, to brighten the jam
Quick Steps:
- Heat the oven to 350°F (175°C) and line an 8-inch square pan.
- Mix the flour, oats, brown sugar, salt, and butter until crumbly.
- Press two-thirds into the pan, spread on the jam mixed with lemon juice, and scatter the rest over the top.
- Bake 30 to 35 minutes until the top is golden.
- Cool fully before cutting.
Equipment for This Recipe:
- Square baking pan
- Parchment paper
- Mixing bowl
- Pastry cutter or fingertips
How to Serve This Dish:
Serve them in small squares at room temperature. They pack well for lunchbox treats or small dessert boxes.
Pro Tips for This Recipe:
- Use thick jam rather than runny preserves.
- Cool the bars completely so the filling sets.
- A pinch of extra salt in the crumble helps the fruit pop.
Variations on This Recipe:
- Strawberry Crumb Bars: Use strawberry jam and a little lemon zest.
- Almond Crumb Bars: Add 1/2 teaspoon almond extract to the filling.
Common Mistakes to Avoid with This Recipe:
- Using too much jam: The bars can turn wet in the middle.
- Cutting while warm: The filling won’t hold.
27. Chocolate-Dipped Madeleines
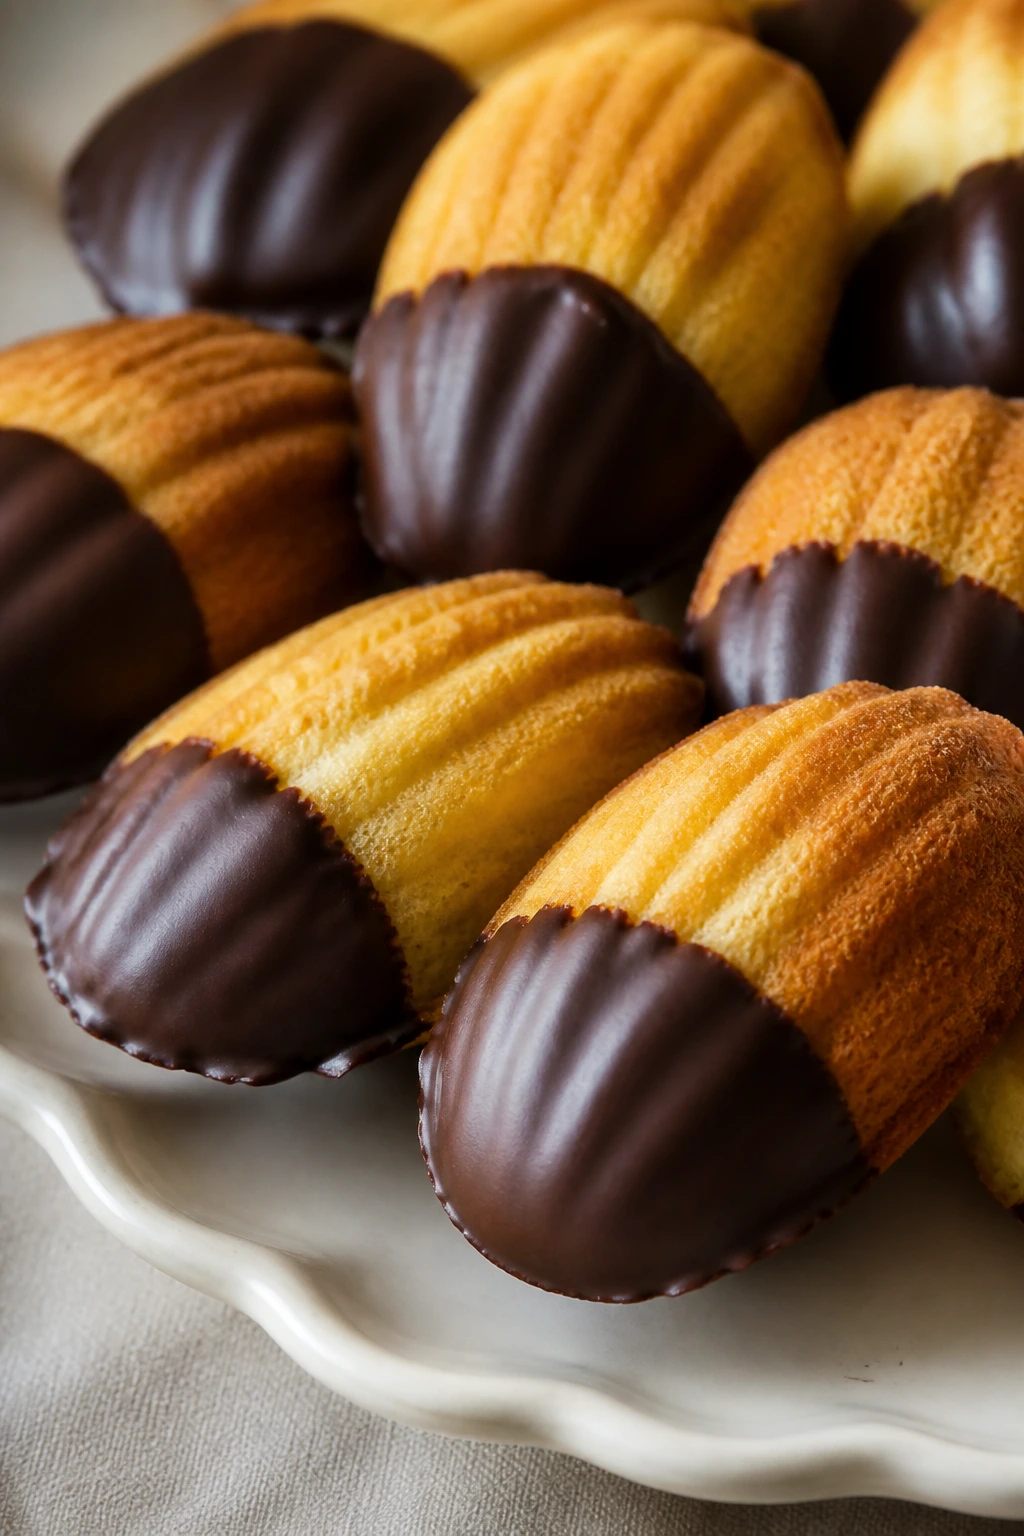
Madeleines are small and delicate, with that shell shape that always looks more refined than the effort involved. Dipping the ends in chocolate gives them enough drama for a Valentine tray without burying their buttery crumb.
Why It Works:
The sponge is light because the eggs are whipped before the flour goes in. A quick chocolate dip adds richness and helps the cookies feel more finished.
Key Ingredients:
- 2 large eggs, room temperature, for the sponge
- 2/3 cup granulated sugar, for sweetness and lift
- 1 teaspoon vanilla extract, for flavor
- 1 teaspoon lemon zest, optional, for brightness
- 3/4 cup all-purpose flour, for the crumb
- 1/2 teaspoon baking powder, for a little rise
- 1/2 cup unsalted butter, melted and cooled, for flavor
- 4 oz dark chocolate, melted, for dipping
Quick Steps:
- Beat the eggs and sugar until thick and pale.
- Fold in vanilla, zest, flour, baking powder, and melted butter.
- Chill the batter 1 hour, then spoon into a greased madeleine pan.
- Bake at 375°F (190°C) for 8 to 10 minutes until domed and golden.
- Cool, then dip one side in melted chocolate.
Equipment for This Recipe:
- Madeleine pan
- Mixer
- Small bowl for chocolate
- Cooling rack
How to Serve This Dish:
Serve them on a narrow plate or in a row on a board. They look good next to espresso or tea, which keeps the whole dessert spread from getting too heavy.
Pro Tips for This Recipe:
- Chill the batter or the shells won’t form properly.
- Grease the pan well, especially the grooves.
- Dip the chocolate after the cookies cool fully.
Variations on This Recipe:
- Orange Madeleines: Swap lemon zest for orange zest.
- Raspberry-Dipped Madeleines: Add crushed freeze-dried raspberries to the melted chocolate.
Common Mistakes to Avoid with This Recipe:
- Skipping the rest: The signature hump usually won’t form.
- Overfilling the molds: Batter spills and loses the shell shape.
28. Sweetheart Cinnamon Rolls
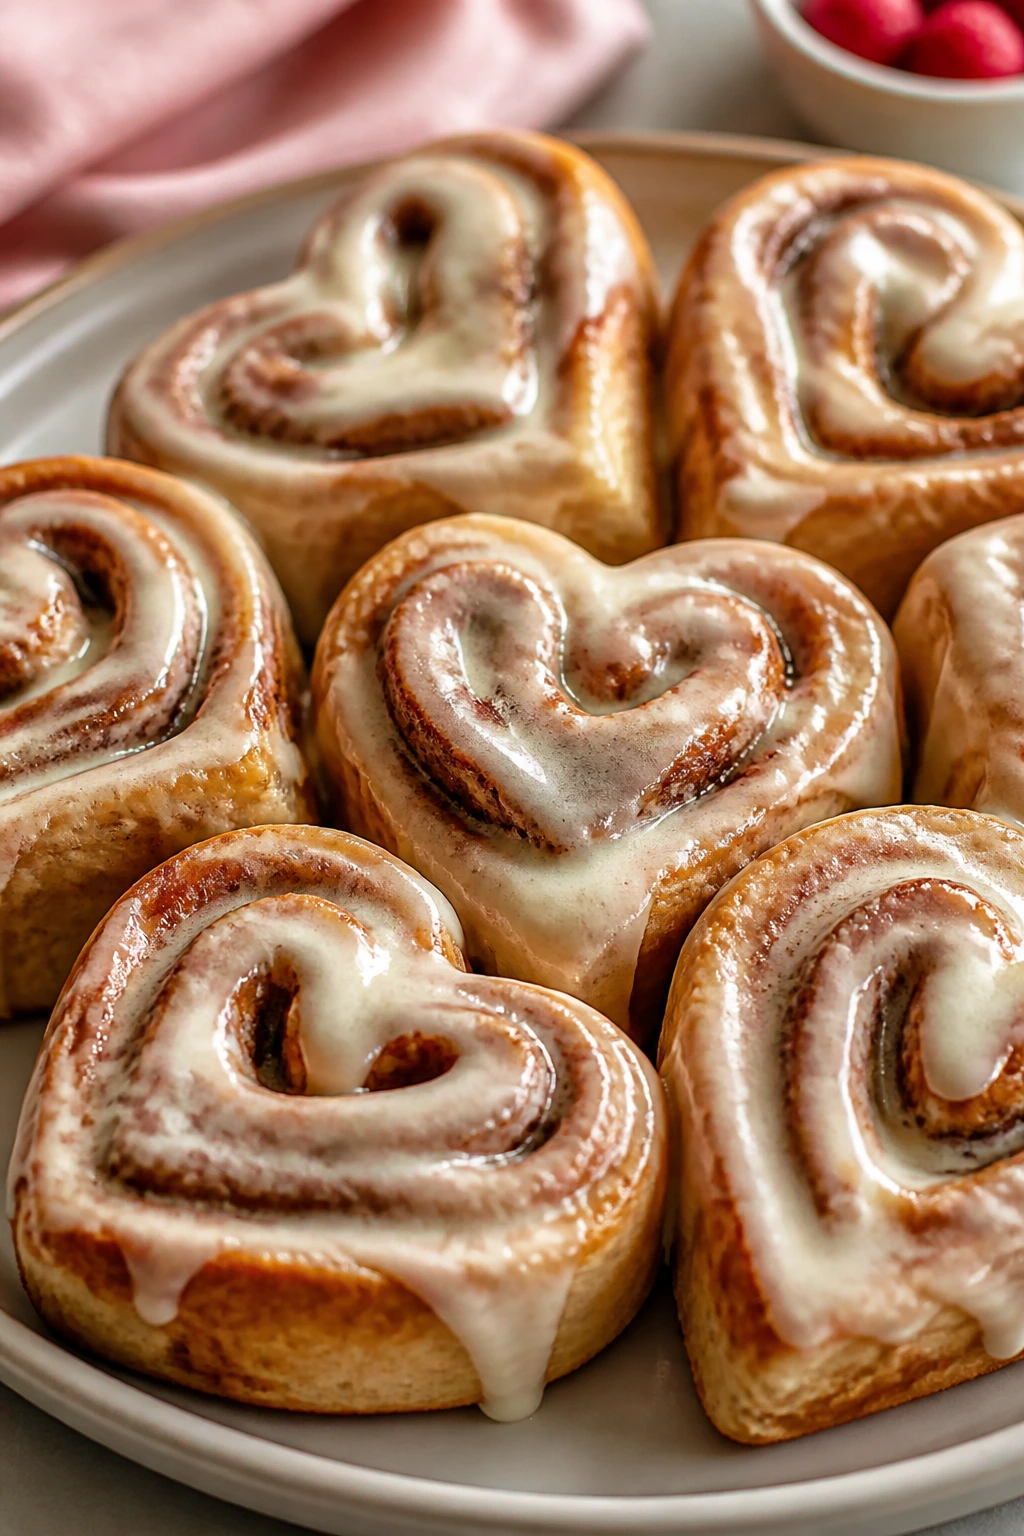
Cinnamon rolls are not subtle, and that’s part of the fun. Shaping them into hearts and finishing with cream cheese glaze turns a breakfast-style dough into a dessert that can take up the middle of a plate without looking overworked.
Why It Works:
The enriched dough stays soft, the cinnamon filling melts into the swirls, and the glaze settles into the folds instead of sitting on top like icing paint.
Key Ingredients:
- 3 cups all-purpose flour, for the dough
- 2 1/4 teaspoons active dry yeast, for rise
- 1/4 cup granulated sugar, for the dough
- 1/2 teaspoon fine salt, for balance
- 3/4 cup warm milk, around 110°F, to activate the yeast
- 1 large egg, room temperature, for tenderness
- 4 tablespoons unsalted butter, melted, for the dough
- 1/2 cup brown sugar, for the filling
- 2 teaspoons cinnamon, for the swirl
- 2 tablespoons softened butter, for the filling
- For the Glaze: 4 oz cream cheese, 1 cup powdered sugar, 2 tablespoons milk, 1 teaspoon vanilla
Quick Steps:
- Mix the yeast, warm milk, and sugar, then stir in flour, salt, egg, and butter to form a soft dough.
- Knead 6 to 8 minutes, rise until doubled, then roll into a rectangle.
- Spread with butter, brown sugar, and cinnamon, roll up, cut, and shape into hearts.
- Let them rise again, then bake at 350°F (175°C) for 20 to 24 minutes.
- Glaze while warm.
Equipment for This Recipe:
- Mixing bowl
- Rolling pin
- 9-inch round or square pan
- Sharp knife or dental floss
How to Serve This Dish:
Serve them warm so the glaze melts a little into the spirals. They work for dessert, but nobody complains if one lands on a brunch table.
Pro Tips for This Recipe:
- Warm milk, not hot milk, keeps the yeast happy.
- Slice with floss for cleaner swirls.
- Let them cool 5 minutes before glazing or the frosting slides right off.
Variations on This Recipe:
- Cardamom Heart Rolls: Add 1/2 teaspoon ground cardamom to the filling.
- Raspberry Rolls: Spread a thin layer of raspberry jam before the cinnamon sugar.
Common Mistakes to Avoid with This Recipe:
- Dead yeast: The dough won’t rise if the milk is too hot or cold.
- Overbaking: The rolls dry out quickly and lose that soft pull.
29. Mocha Pots de Crème
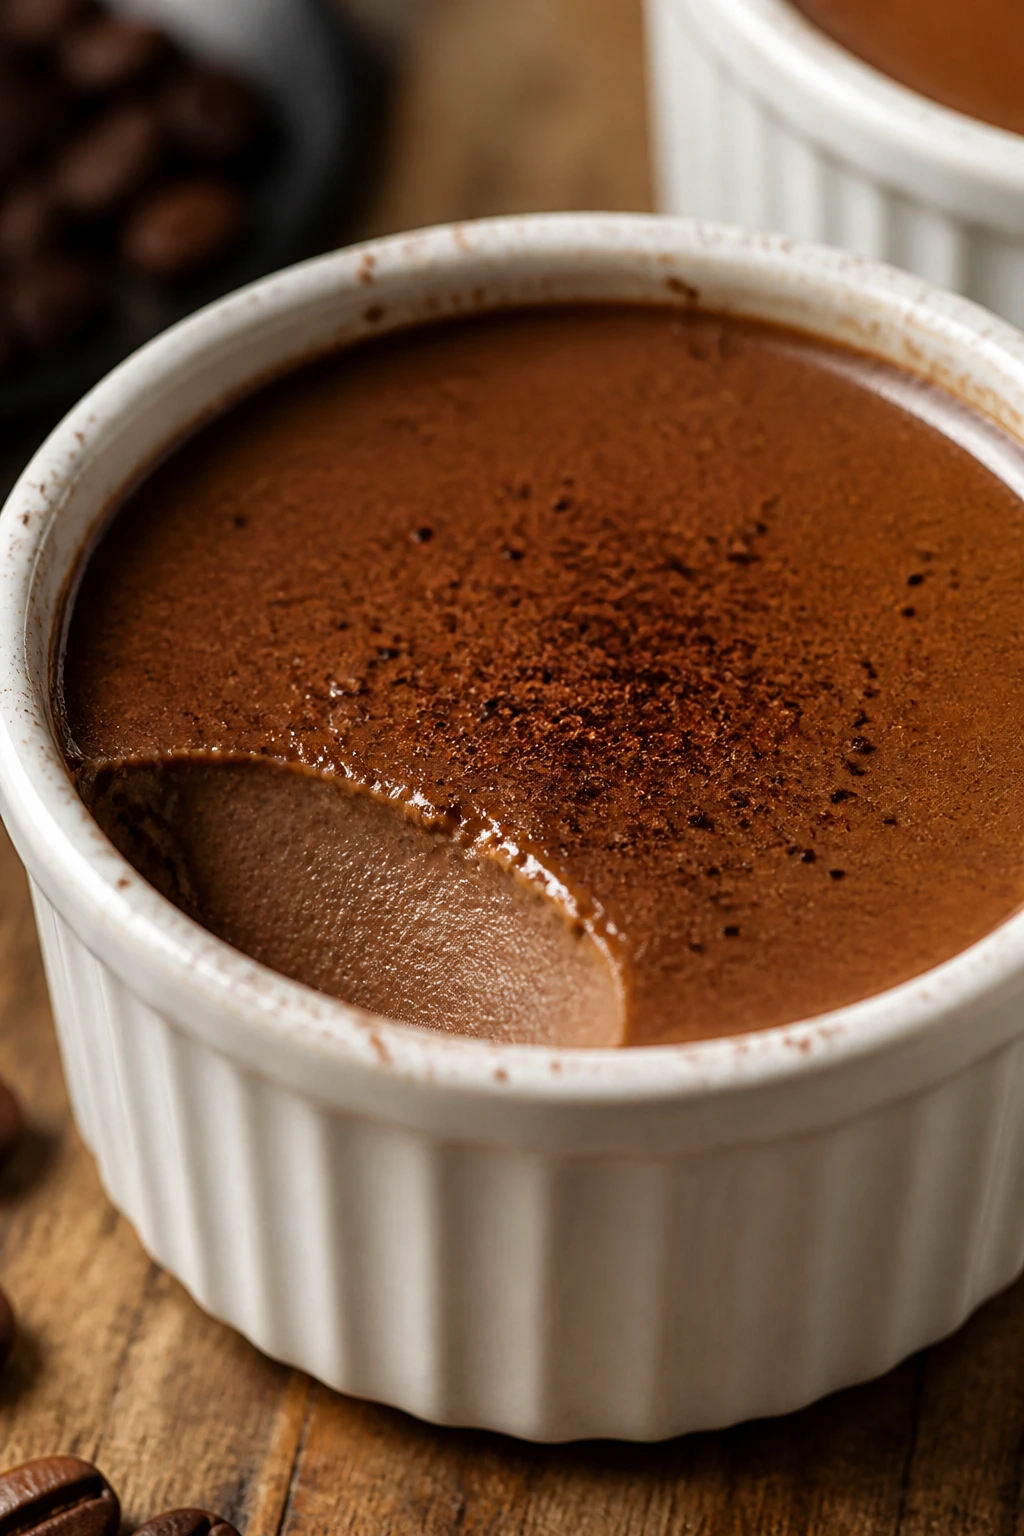
These custards are smooth, deep, and quiet in the best possible way. Coffee and chocolate pull in the same direction, which makes the spoonful taste darker than a simple chocolate pudding.
Why It Works:
Egg yolks set the custard slowly, and a water bath keeps the texture silky. Espresso sharpens the chocolate so it doesn’t taste flat.
Key Ingredients:
- 1 1/2 cups heavy cream, for richness
- 1/2 cup whole milk, for balance
- 4 large egg yolks, for the custard
- 1/3 cup granulated sugar, for sweetness
- 4 oz bittersweet chocolate, chopped, for flavor
- 1 tablespoon instant espresso powder, for the mocha note
- 1 teaspoon vanilla extract, for warmth
- Pinch of fine salt, for balance
Quick Steps:
- Heat the cream, milk, espresso powder, and salt until steaming.
- Whisk the yolks and sugar, then slowly add the hot cream.
- Stir in the chocolate and vanilla until smooth.
- Divide into ramekins, place in a baking dish, add hot water halfway up the sides, and bake at 300°F (150°C) for 30 to 35 minutes.
- Chill 4 hours before serving.
Equipment for This Recipe:
- Ramekins
- Whisk
- Baking dish for the water bath
- Fine mesh strainer, optional
How to Serve This Dish:
Serve cold with whipped cream or a few raspberries. A small spoon is better than a big one; these are rich enough to linger.
Pro Tips for This Recipe:
- Strain the custard for the smoothest finish.
- Don’t let the water bath boil hard.
- Chill overnight if you want the deepest texture.
Variations on This Recipe:
- Orange Mocha Pots: Add orange zest to the cream.
- White Chocolate Pots: Swap the dark chocolate for white chocolate and reduce the sugar a bit.
Common Mistakes to Avoid with This Recipe:
- Overbaking: The custard should still wobble in the center.
- Skipping the chill: It needs time to set properly.
30. Berry Chantilly Layer Cake
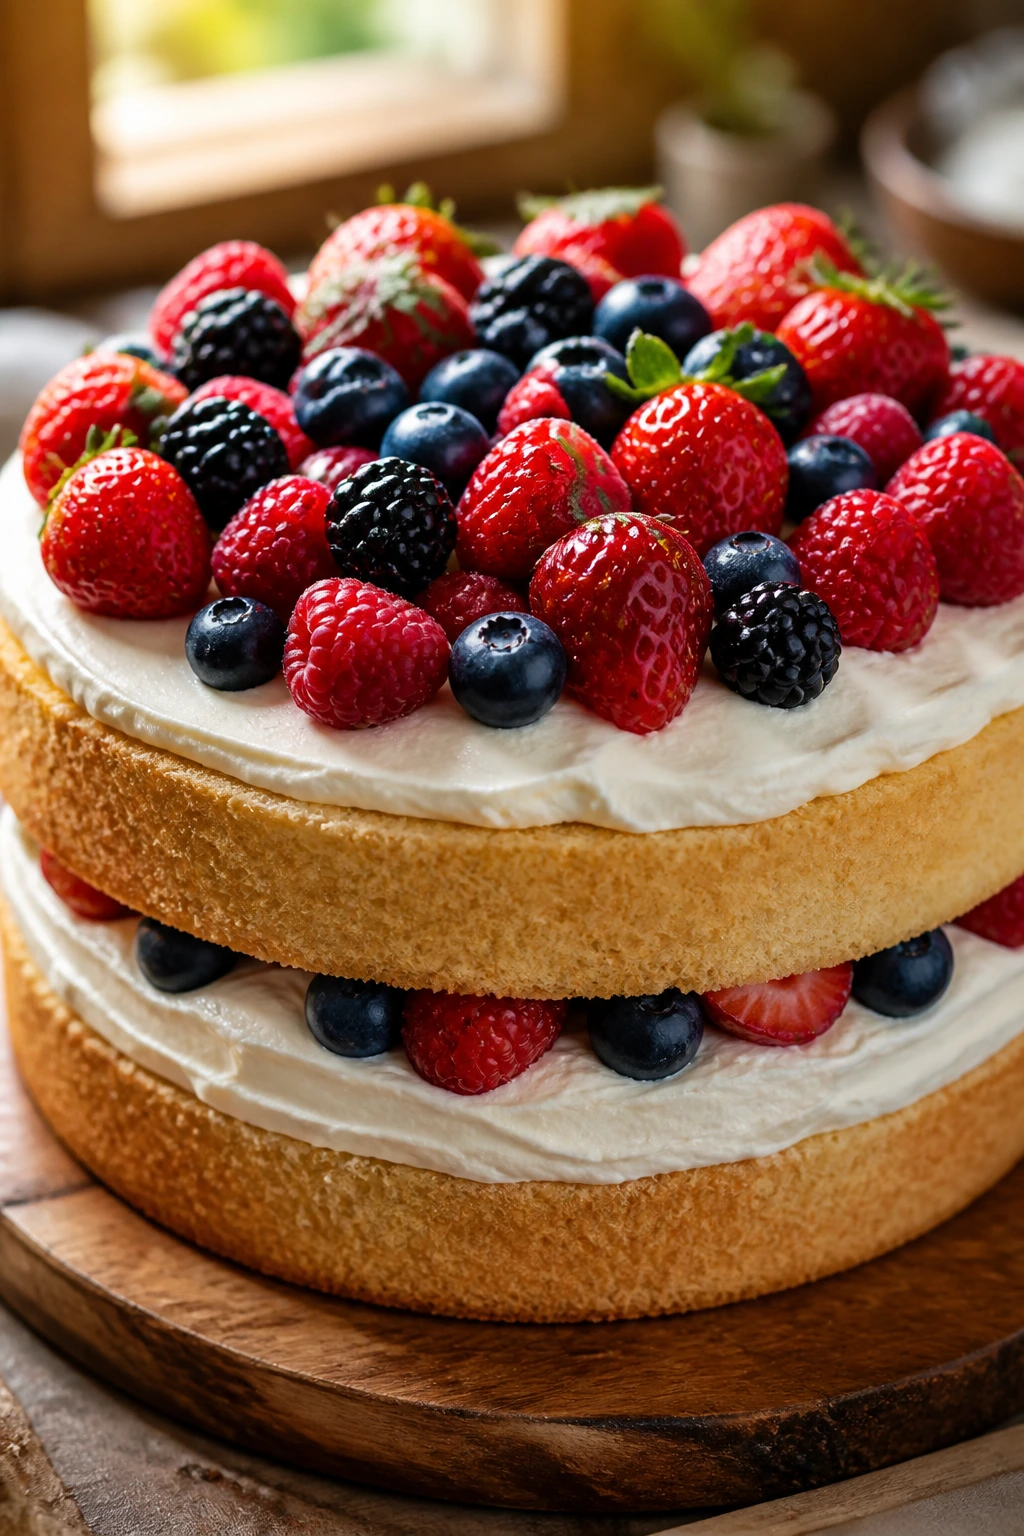
This cake feels airy compared with red velvet, and that’s part of its charm. Soft vanilla layers, whipped mascarpone cream, and mixed berries give you something that tastes like a bakery window without leaning on heavy frosting.
Why It Works:
Mascarpone keeps the cream stable enough to stack, and the berries bring tartness so the cake doesn’t taste like plain whipped cream in layers. It’s a good cake for people who want fruit to count.
Key Ingredients:
- 2 1/2 cups all-purpose flour, for the cake
- 2 1/2 teaspoons baking powder, for rise
- 1/2 teaspoon fine salt, for balance
- 3/4 cup unsalted butter, softened, for richness
- 1 1/2 cups granulated sugar, for sweetness
- 4 large eggs, room temperature, for structure
- 1 cup whole milk, room temperature, for the batter
- 1 teaspoon vanilla extract, for flavor
- 8 oz mascarpone, cold, for the cream
- 1 1/2 cups heavy cream, cold, for whipping
- 2 cups mixed berries, for filling and topping
Quick Steps:
- Heat the oven to 350°F (175°C) and prep two 9-inch pans.
- Beat the butter and sugar, then add eggs, vanilla, dry ingredients, and milk.
- Bake the layers 25 to 28 minutes and cool completely.
- Whip the mascarpone, cream, and a little powdered sugar until spreadable.
- Fill the cake with cream and berries, then frost the outside lightly.
Equipment for This Recipe:
- 2 round cake pans
- Mixer
- Offset spatula
- Parchment paper
How to Serve This Dish:
Serve chilled or just slightly cool so the cream stays firm. Extra berries on top make the layers easy to read.
Pro Tips for This Recipe:
- Keep the mascarpone cold or the cream can loosen too much.
- Slice berries evenly so the layers stay level.
- Chill the assembled cake before slicing.
Variations on This Recipe:
- Strawberry Chantilly: Use only strawberries for a more unified flavor.
- Chocolate Chantilly: Add a thin cocoa layer to one of the cake layers.
Common Mistakes to Avoid with This Recipe:
- Warm cake layers: They melt the cream filling.
- Overwhipped mascarpone cream: It can turn grainy fast.
31. Cherry Chocolate Chip Cookies
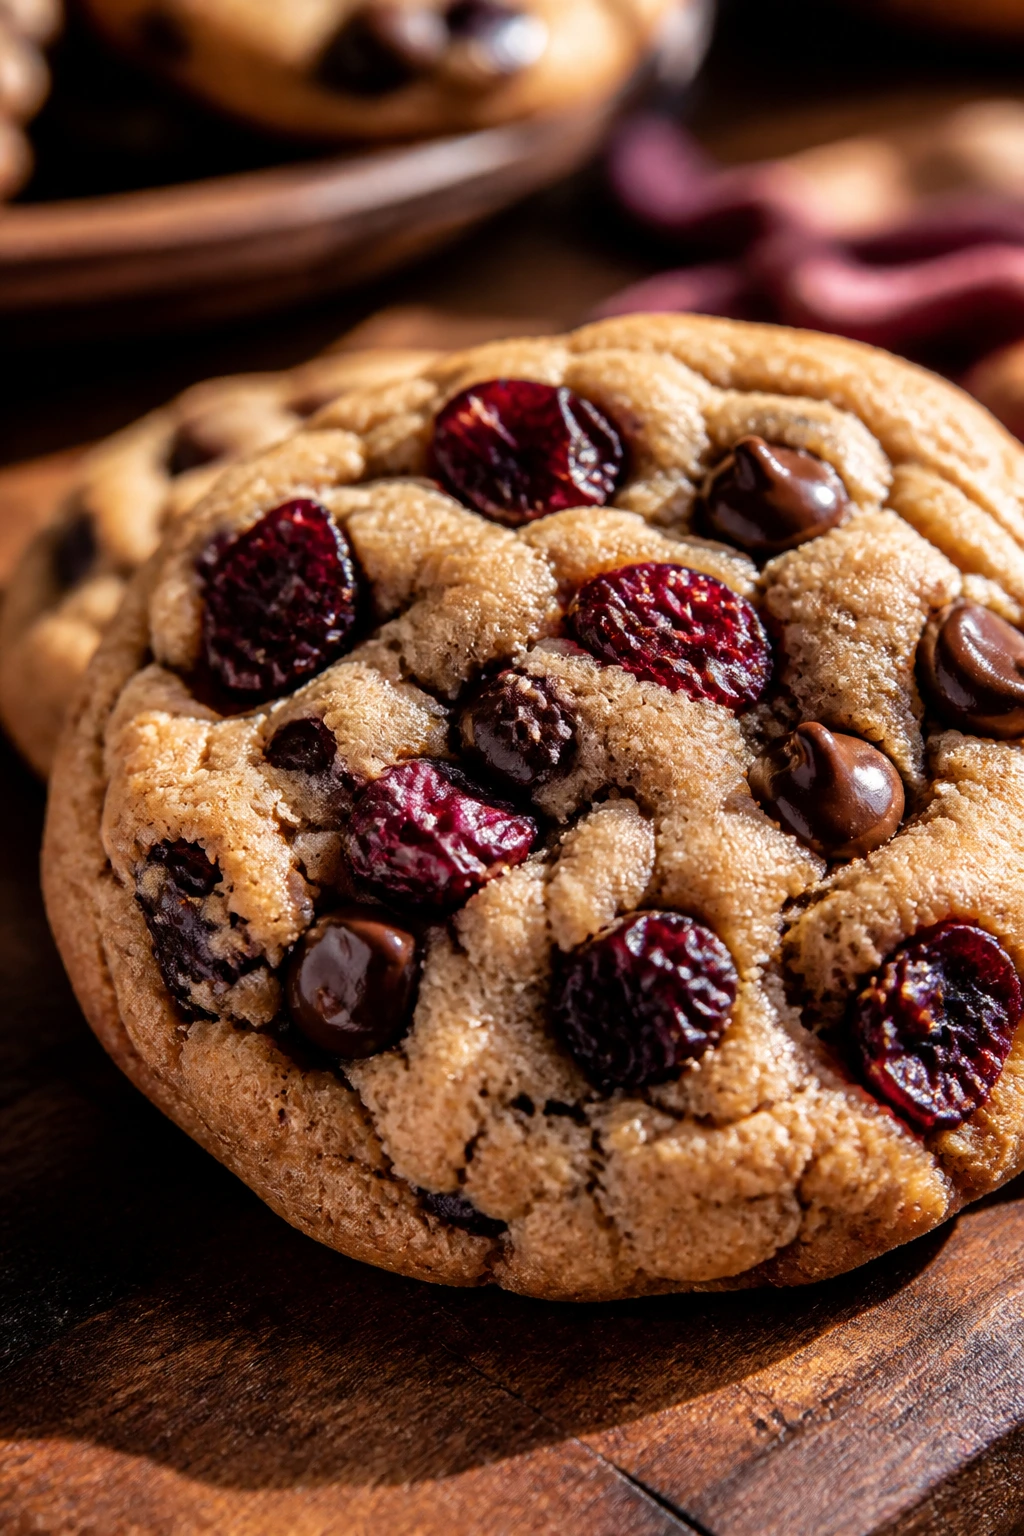
These cookies are chewy in the center, crisp at the edge, and dotted with dried cherries that wake up the chocolate chips. They’re a good answer when you want something easy to portion but not boring.
Why It Works:
Brown sugar keeps the centers soft, and dried cherries bring a tart chew that fresh fruit can’t manage in cookie dough. The chocolate melts into little pockets instead of running everywhere.
Key Ingredients:
- 1 cup unsalted butter, softened, for the dough
- 3/4 cup brown sugar, for chew
- 1/2 cup granulated sugar, for sweetness
- 2 large eggs, room temperature, for binding
- 2 teaspoons vanilla extract, for flavor
- 2 1/2 cups all-purpose flour, for structure
- 1 teaspoon baking soda, for spread
- 1/2 teaspoon fine salt, for balance
- 1 cup semisweet chocolate chips, for the chocolate
- 3/4 cup dried cherries, chopped, for the tart bite
Quick Steps:
- Heat the oven to 350°F (175°C) and line baking sheets.
- Beat the butter and sugars until fluffy, then mix in the eggs and vanilla.
- Stir in the flour, baking soda, and salt, then fold in the chips and cherries.
- Scoop onto the trays and bake 10 to 12 minutes until the edges are set.
- Cool on the pan for 5 minutes before moving.
Equipment for This Recipe:
- Baking sheets
- Mixer
- Cookie scoop
- Parchment paper
How to Serve This Dish:
Serve warm for melty chips or cooled for a cleaner bite. A stack of three with a glass of milk is about as uncomplicated as dessert gets.
Pro Tips for This Recipe:
- Chop the cherries so the dough portions evenly.
- Underbake by a minute if you want a softer center.
- Chill the dough 20 minutes if it feels greasy.
Variations on This Recipe:
- Dark Chocolate Cherry Cookies: Swap semisweet chips for dark chunks.
- Cherry Almond Cookies: Add 1/2 teaspoon almond extract.
Common Mistakes to Avoid with This Recipe:
- Too many cherries: They can make the dough heavy and wet.
- Skipping the rest on the pan: Fresh cookies can break apart.
32. Almond Cake with Berries
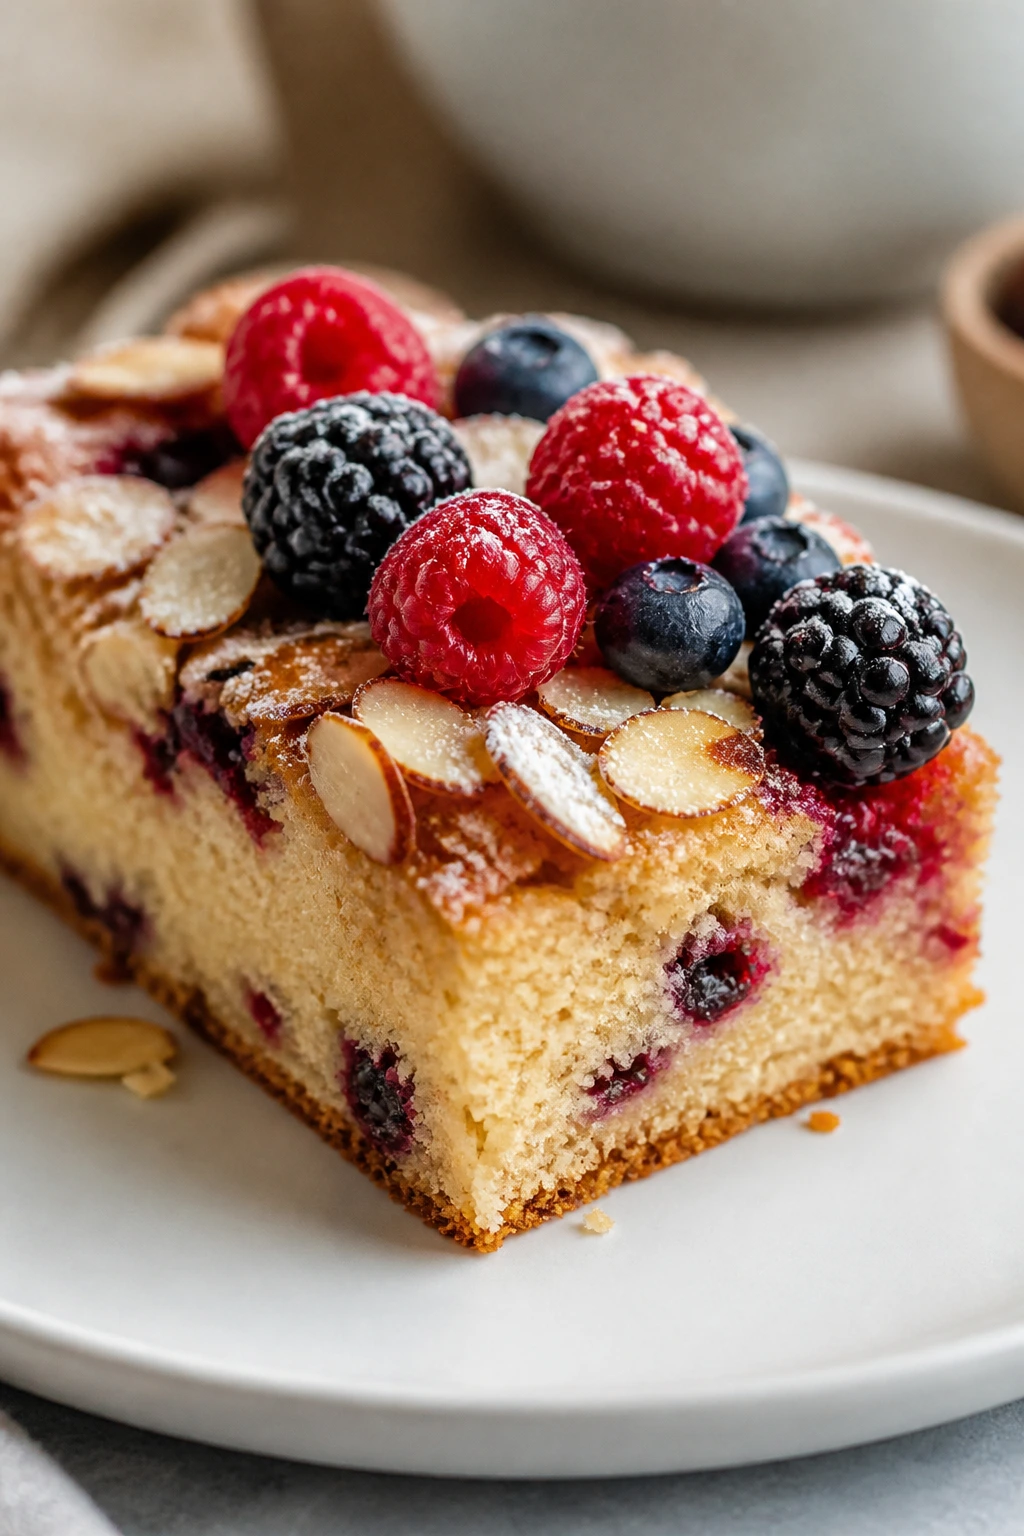
This cake tastes like a bakery almond loaf dressed up for company. The crumb is tender and a little dense in the best way, with berries on top that add both color and a sharp bite.
Why It Works:
Almond flour or almond extract gives the cake a warm, nutty base that pairs well with berries. Sour cream keeps the crumb moist without making it greasy.
Key Ingredients:
- 1 1/2 cups all-purpose flour, for structure
- 1/2 cup almond flour, for flavor
- 1 1/2 teaspoons baking powder, for rise
- 1/2 teaspoon fine salt, for balance
- 1/2 cup unsalted butter, softened, for richness
- 1 cup granulated sugar, for sweetness
- 3 large eggs, room temperature, for binding
- 1/2 cup sour cream, for moisture
- 1 teaspoon almond extract, for flavor
- 1 teaspoon vanilla extract, for balance
- 1 1/2 cups berries, for the top
Quick Steps:
- Heat the oven to 350°F (175°C) and prep an 8-inch round pan.
- Whisk the dry ingredients, then beat the butter and sugar until fluffy.
- Add the eggs, sour cream, and extracts, then fold in the dry mix.
- Spread in the pan, top with berries, and bake 35 to 40 minutes.
- Cool before slicing.
Equipment for This Recipe:
- Round cake pan
- Mixer
- Parchment paper
- Cooling rack
How to Serve This Dish:
Dust the top with powdered sugar and serve with extra berries. It’s the kind of cake that does not need frosting, which is useful when you already have a crowded dessert spread.
Pro Tips for This Recipe:
- Toss the berries in a little flour so they don’t sink.
- Use room-temp eggs for a smoother batter.
- Check early; almond cakes dry out if you bake them past done.
Variations on This Recipe:
- Lemon Almond Cake: Add lemon zest to the batter.
- Stone Fruit Version: Use raspberries or sliced peaches when berries aren’t the thing.
Common Mistakes to Avoid with This Recipe:
- Too much almond extract: It can overpower the cake fast.
- Adding berries without flouring them: They sink straight down.
33. Tiramisu Cups with Cocoa Hearts

Tiramisu cups give you the familiar coffee-and-cream pairing without the need for a big pan. The cocoa on top can be stenciled into tiny hearts, which is more charming than it sounds and less annoying than it might look.
Why It Works:
Layered cups chill fast and stay neat. The espresso-soaked ladyfingers soften just enough, while the mascarpone cream keeps the dessert from collapsing into mush.
Key Ingredients:
- 8 oz mascarpone, cold, for the cream
- 1 cup heavy cream, cold, for whipping
- 1/3 cup powdered sugar, for sweetness
- 1 teaspoon vanilla extract, for flavor
- 1 cup strong espresso or coffee, cooled, for soaking
- 12 to 16 ladyfingers, for the layers
- Unsweetened cocoa powder, for dusting
- Chocolate hearts or shavings, optional, for garnish
Quick Steps:
- Whip the mascarpone, cream, sugar, and vanilla until smooth and thick.
- Dip the ladyfingers quickly in the coffee.
- Layer cookies and cream in cups, repeating once or twice.
- Chill 4 hours, then dust with cocoa before serving.
Equipment for This Recipe:
- Mixing bowl
- Hand mixer
- Small dessert cups
- Fine sieve for cocoa
How to Serve This Dish:
Serve them cold with the cocoa dusting fresh on top. Small clear cups make the layers visible and save you from cutting anything.
Pro Tips for This Recipe:
- Dip the ladyfingers fast; soggy cookies make a muddy bottom layer.
- Chill long enough for the flavors to meld.
- Dust cocoa just before serving so it stays dry.
Variations on This Recipe:
- Chocolate Tiramisu Cups: Add a layer of chocolate shavings between the cream layers.
- Amaretto Version: Add a small splash of amaretto to the coffee.
Common Mistakes to Avoid with This Recipe:
- Over-soaking the ladyfingers: They turn to paste.
- Thin cream: The layers won’t hold their shape.
34. Black Forest Trifle
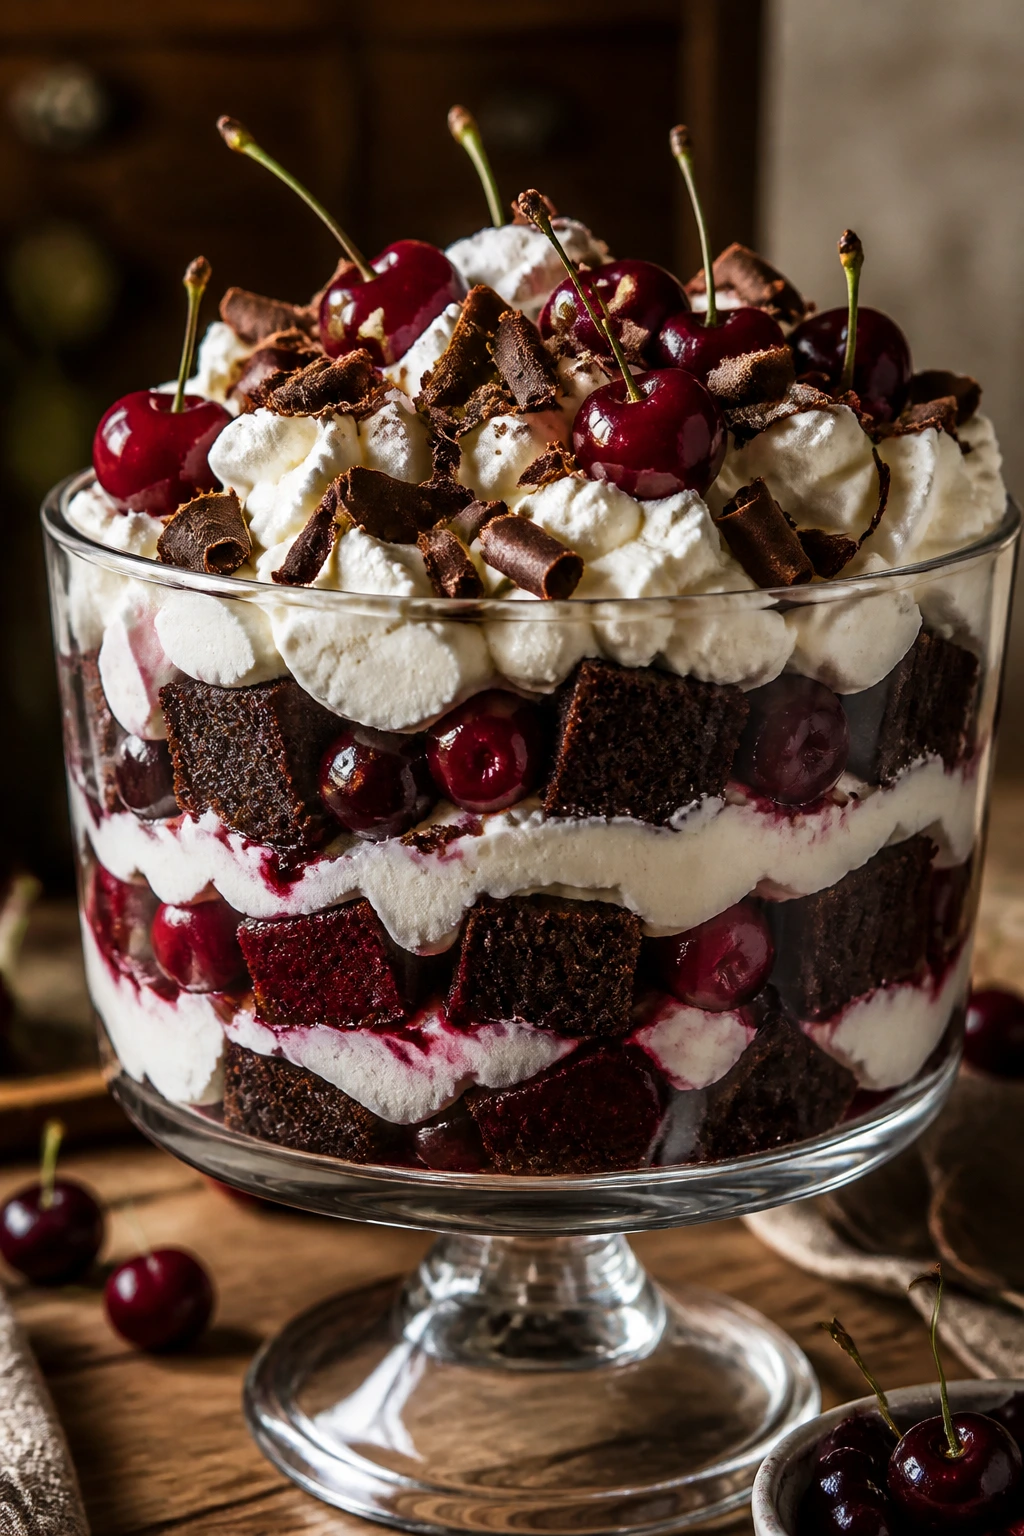
A trifle is what happens when you stop worrying about neat layers and lean into abundance. Chocolate cake, cherries, and whipped cream build into a bowl that looks relaxed but still feels festive enough for a Valentine table.
Why It Works:
The cake soaks up cherry juice without turning soggy if you layer it with whipped cream between each tier. Chocolate shavings on top give you the Black Forest note without extra baking.
Key Ingredients:
- 1 chocolate cake, baked and cooled, cut into cubes
- 2 cups pitted cherries or cherry filling, for the fruit layer
- 2 tablespoons sugar, optional, for the cherries
- 2 cups heavy cream, whipped, for the filling
- 1 teaspoon vanilla extract, for the cream
- 1/2 cup chocolate shavings or chips, for the top
- 1 tablespoon kirsch, optional, for a grown-up note
Quick Steps:
- If using fresh cherries, toss them with sugar and kirsch and let them sit 15 minutes.
- Whip the cream with vanilla.
- Layer cake cubes, cherries, and cream in a trifle bowl.
- Repeat and finish with chocolate shavings.
- Chill at least 2 hours.
Equipment for This Recipe:
- Large glass bowl or trifle dish
- Mixer
- Spatula
- Sharp knife for cubing cake
How to Serve This Dish:
Spoon it into bowls rather than trying to slice it. A trifle looks nicest when the layers are visible through glass.
Pro Tips for This Recipe:
- Use day-old cake so it absorbs fruit juice better.
- Keep the whipped cream soft, not stiff.
- Chill before serving so the layers settle.
Variations on This Recipe:
- Cherry Brownie Trifle: Swap cake cubes for brownie cubes.
- Berry Forest Trifle: Use strawberries and raspberries instead of cherries.
Common Mistakes to Avoid with This Recipe:
- Over-wetting the cake: The base turns heavy.
- Lumpy layers: Spread the cream gently to keep the lines visible.
35. Rose Shortbread
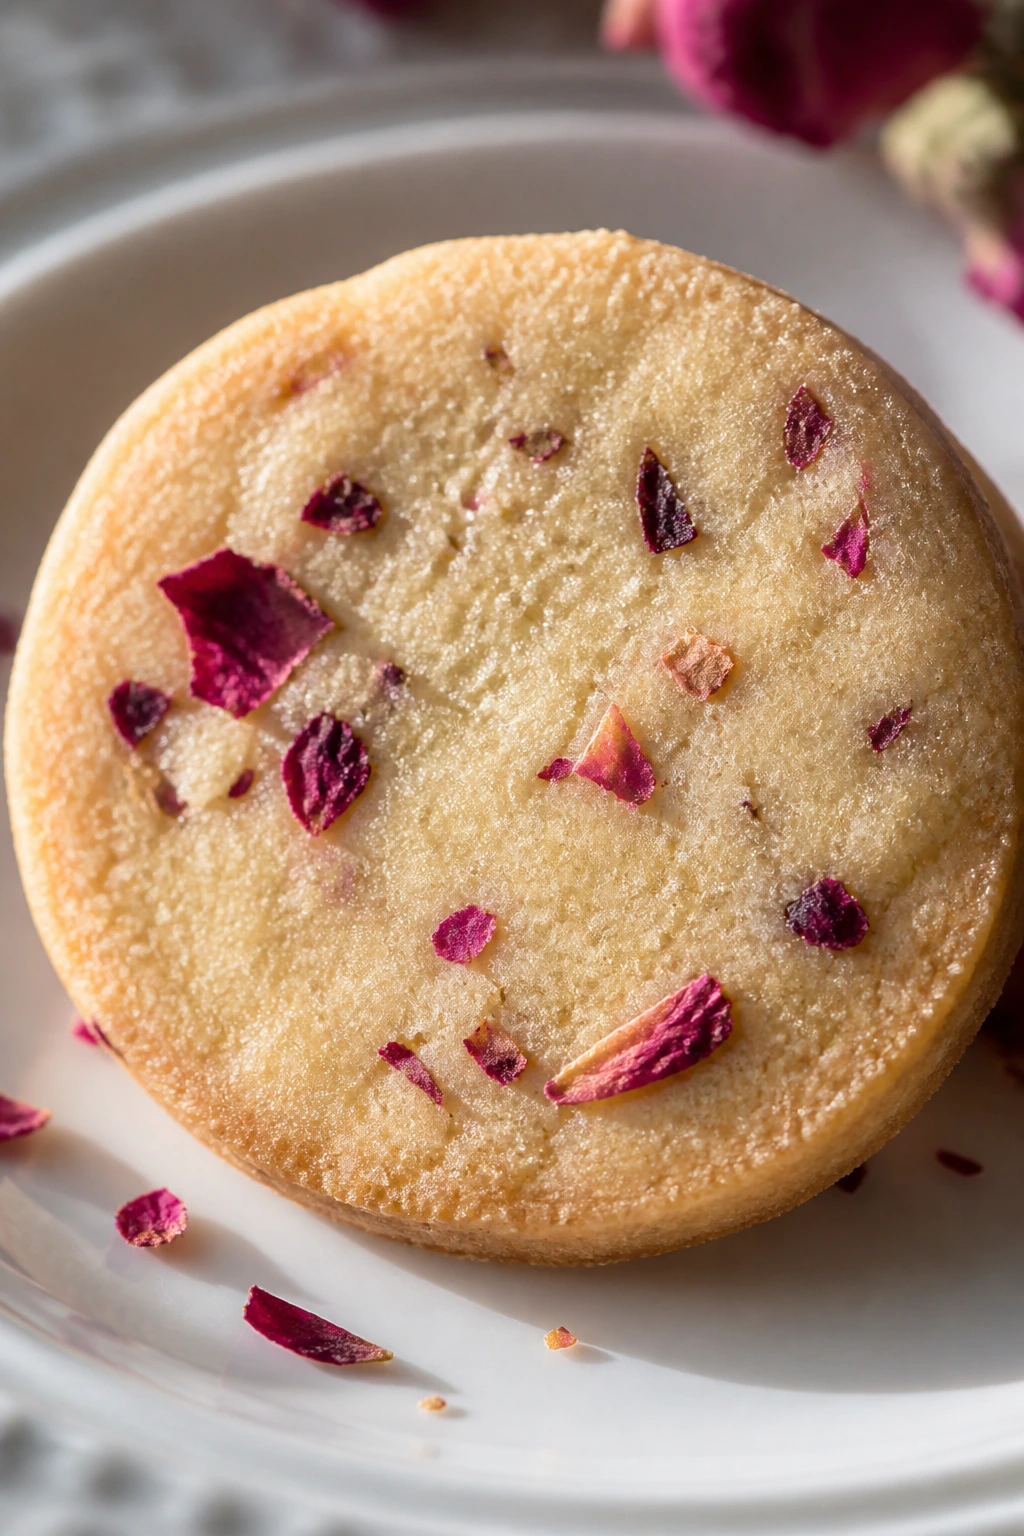
Rose shortbread is delicate and fragrant in the way a special occasion cookie ought to be. The flavor needs a light hand—too much rosewater and it tastes like soap, too little and it disappears.
Why It Works:
Shortbread has so little in it that every ingredient matters. Butter and powdered sugar make it tender, and pistachios or dried petals give it a Valentine look without adding frosting.
Key Ingredients:
- 1 cup unsalted butter, softened, for the dough
- 1/2 cup powdered sugar, for a fine crumb
- 2 cups all-purpose flour, for structure
- 1/4 cup cornstarch, for tenderness
- 1/4 teaspoon fine salt, for balance
- 1 teaspoon rosewater, for flavor
- 1/4 cup finely chopped pistachios, optional, for color
- Dried rose petals, optional, for garnish
Quick Steps:
- Beat the butter and powdered sugar until smooth.
- Mix in rosewater, flour, cornstarch, salt, and pistachios if using.
- Shape, chill 30 minutes, and cut into rounds or hearts.
- Bake at 325°F (165°C) for 12 to 15 minutes until the edges are pale gold.
- Cool fully before moving.
Equipment for This Recipe:
- Mixing bowl
- Baking sheet
- Cookie cutter
- Parchment paper
How to Serve This Dish:
Serve with tea or coffee and keep the presentation simple. A few pistachio crumbs on the plate look better than a heavy glaze here.
Pro Tips for This Recipe:
- Start with less rosewater than you think you need.
- Chill the dough so the cookies hold their shape.
- Pull them before they color too much.
Variations on This Recipe:
- Lemon-Rose Shortbread: Add lemon zest for a brighter fragrance.
- Chocolate-Dipped Shortbread: Dip half the cookie in dark chocolate.
Common Mistakes to Avoid with This Recipe:
- Using too much rosewater: The flavor turns sharp and perfumey.
- Overbaking: Shortbread should stay pale.
36. Berry Clafoutis
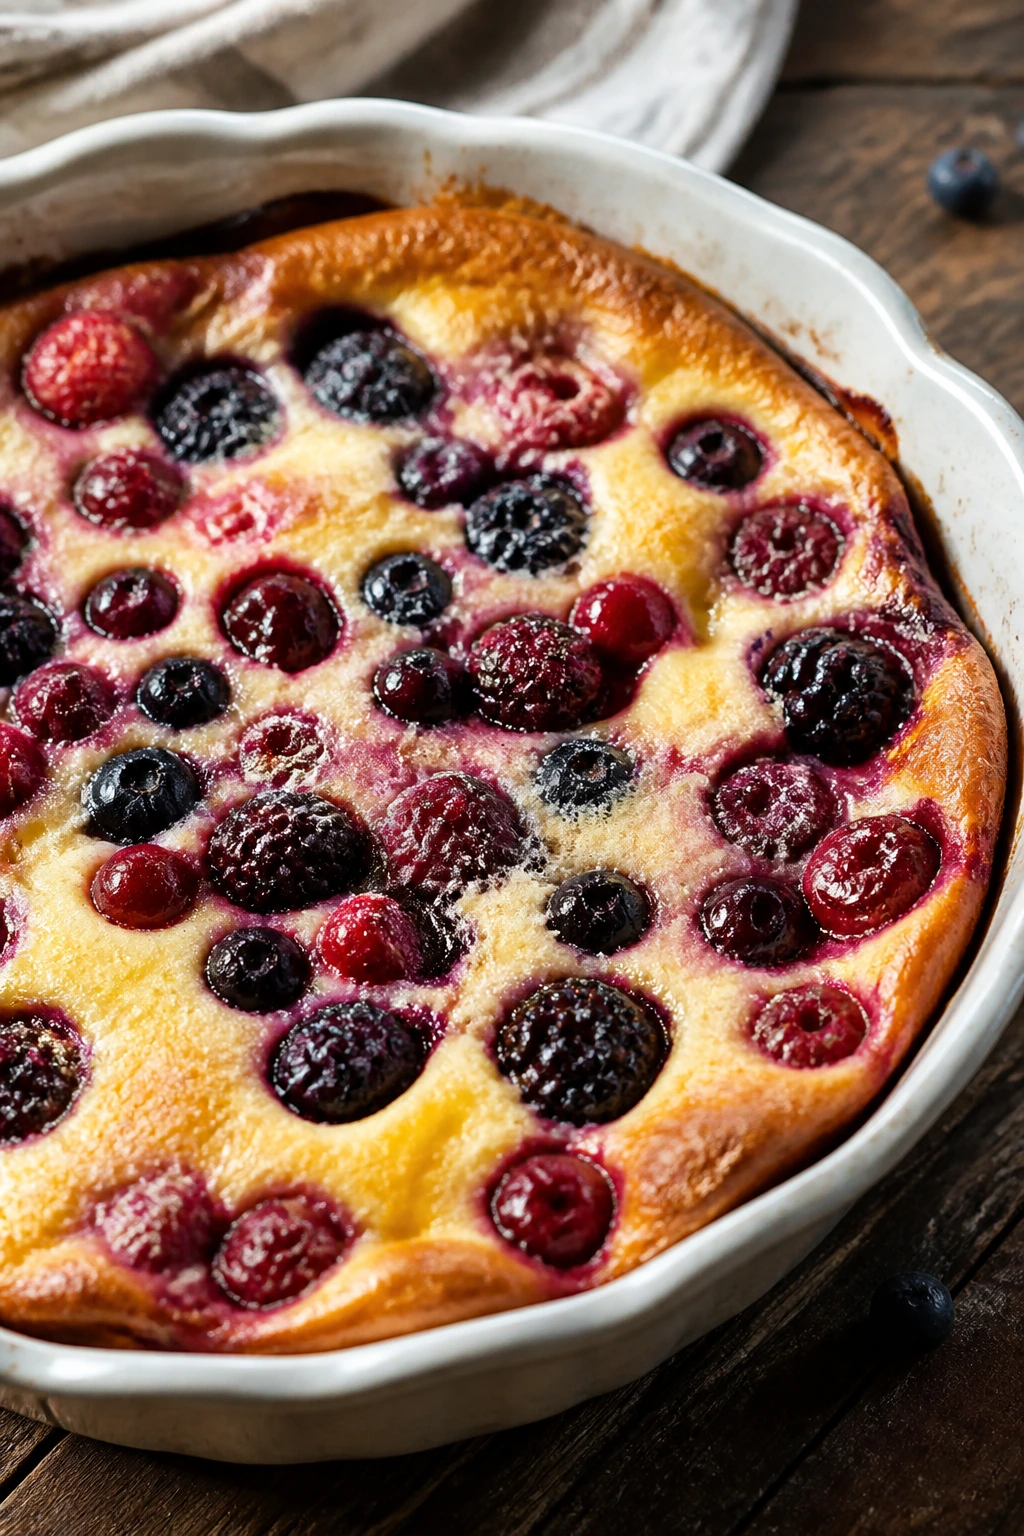
Clafoutis sits somewhere between custard and cake, which is part of why it’s so pleasant. The batter bakes around the berries rather than against them, and the result lands soft, spoonable, and not at all fussy.
Why It Works:
A thin batter rises around the fruit and sets into a tender custard. Berries that hold their shape give you pockets of tartness in every spoonful.
Key Ingredients:
- 3 large eggs, for the custard
- 1/2 cup granulated sugar, for sweetness
- 1 cup whole milk, for the batter
- 1 teaspoon vanilla extract, for flavor
- 1/2 cup all-purpose flour, for structure
- 1 tablespoon unsalted butter, melted, for richness
- 2 cups mixed berries, for the fruit layer
- Powdered sugar, for dusting
Quick Steps:
- Heat the oven to 350°F (175°C) and butter a pie dish.
- Whisk the eggs and sugar, then add milk, vanilla, flour, and melted butter.
- Scatter the berries in the dish and pour the batter over them.
- Bake 35 to 40 minutes until puffed and set.
- Dust with powdered sugar and serve warm.
Equipment for This Recipe:
- Pie dish or shallow baking dish
- Whisk
- Mixing bowl
- Fine sieve for sugar
How to Serve This Dish:
Serve it warm in wedges or spooned into bowls. It looks nicest when the powdered sugar lands unevenly and the berries peek through.
Pro Tips for This Recipe:
- Use a shallow dish so the batter bakes evenly.
- Don’t overfill with berries; the custard needs room.
- Serve soon after baking while it still has some lift.
Variations on This Recipe:
- Cherry Clafoutis: Use pitted cherries instead of mixed berries.
- Lemon Clafoutis: Add lemon zest to the batter.
Common Mistakes to Avoid with This Recipe:
- Too much flour: The texture turns heavy instead of custardy.
- Serving it cold when it should be warm: The texture loses its charm.
37. Chocolate Pecan Tart
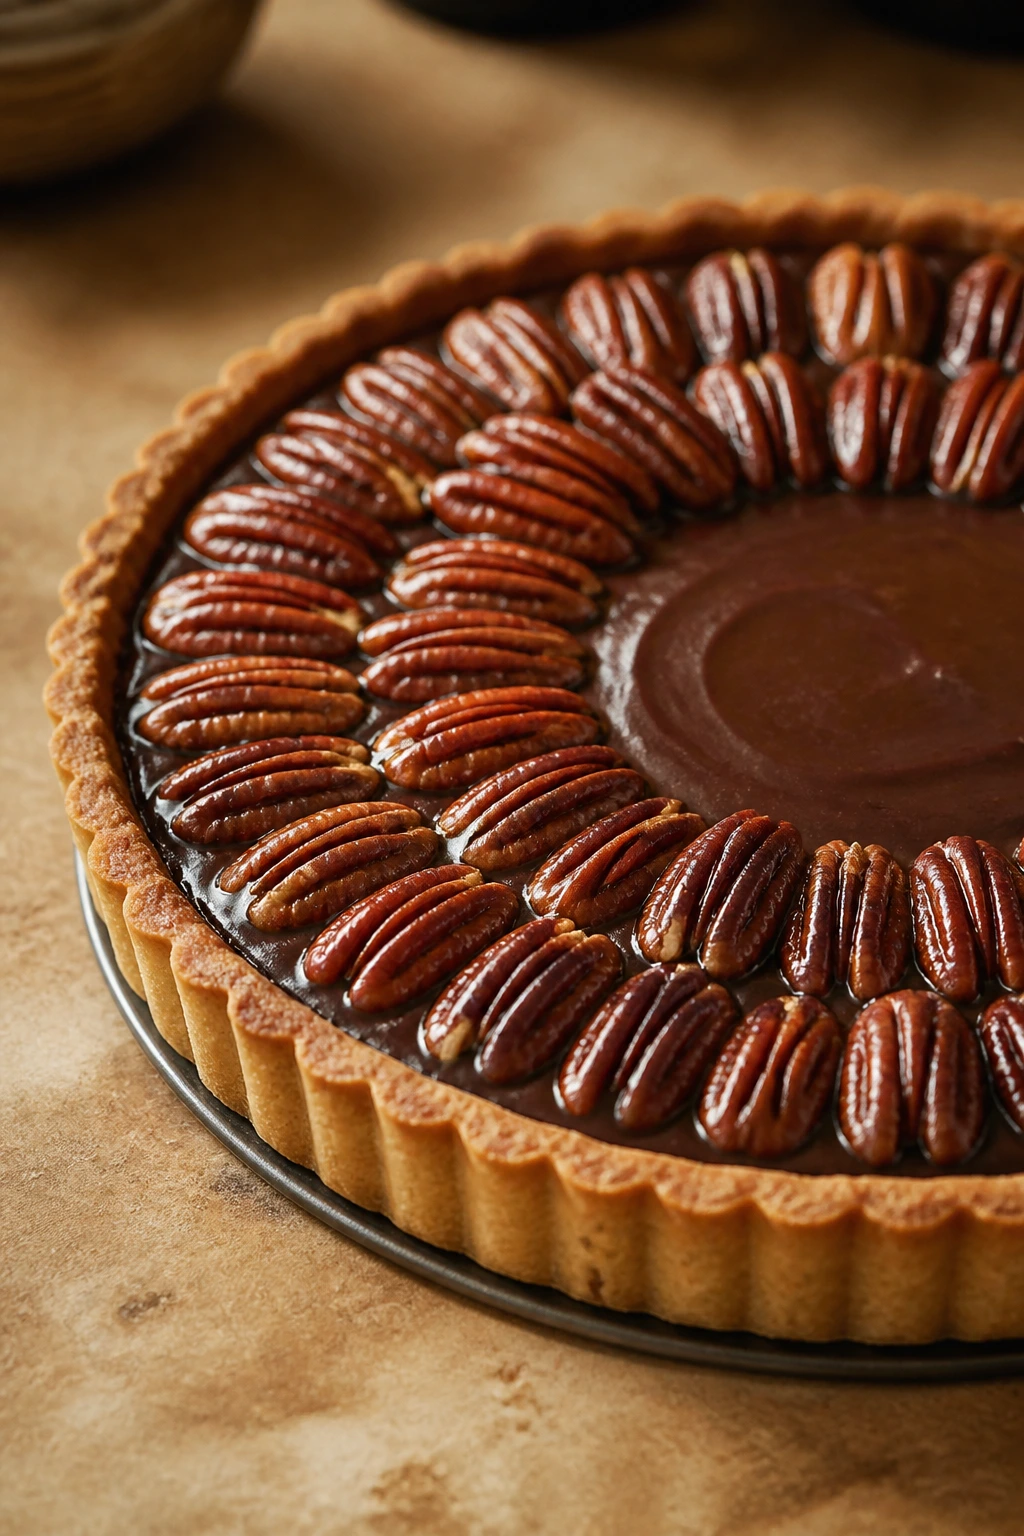
This tart is richer and deeper than the fruit-based desserts, with a pecan top that looks almost lacquered once it bakes. The chocolate underneath keeps the filling from tasting one-note sweet.
Why It Works:
Pecans add crunch and a toasted edge, while chocolate anchors the tart in something darker and less syrupy. A blind-baked shell keeps the bottom crisp.
Key Ingredients:
- 1 tart shell, baked blind, 9-inch
- 1 cup pecans, halved, for the topping
- 4 oz bittersweet chocolate, chopped, for the base
- 3 large eggs, for the filling
- 3/4 cup light corn syrup or maple syrup, for sweetness
- 1/4 cup brown sugar, for depth
- 2 tablespoons melted butter, for richness
- 1 teaspoon vanilla extract, for flavor
- 1/2 teaspoon fine salt, for balance
Quick Steps:
- Bake the tart shell blind and cool it.
- Scatter the chocolate over the bottom.
- Whisk the eggs, syrup, sugar, butter, vanilla, and salt, then pour into the shell.
- Arrange the pecans on top and bake at 350°F (175°C) for 30 to 35 minutes.
- Cool fully before slicing.
Equipment for This Recipe:
- 9-inch tart pan
- Whisk
- Baking sheet
- Pie weights for the shell
How to Serve This Dish:
Serve thin wedges with whipped cream. The tart is dense enough that small slices go a long way.
Pro Tips for This Recipe:
- Cool it completely or the filling will run.
- Toast the pecans first if you want a stronger nut flavor.
- Use dark chocolate for more contrast.
Variations on This Recipe:
- Bourbon Pecan Tart: Add a splash of bourbon to the filling.
- Orange Pecan Tart: Add orange zest to the syrup mixture.
Common Mistakes to Avoid with This Recipe:
- Undercooking the center: The filling should be set, not loose.
- Skipping the blind bake: The crust can turn soggy under the filling.
38. Vanilla Bean Crème Brûlée with Raspberries
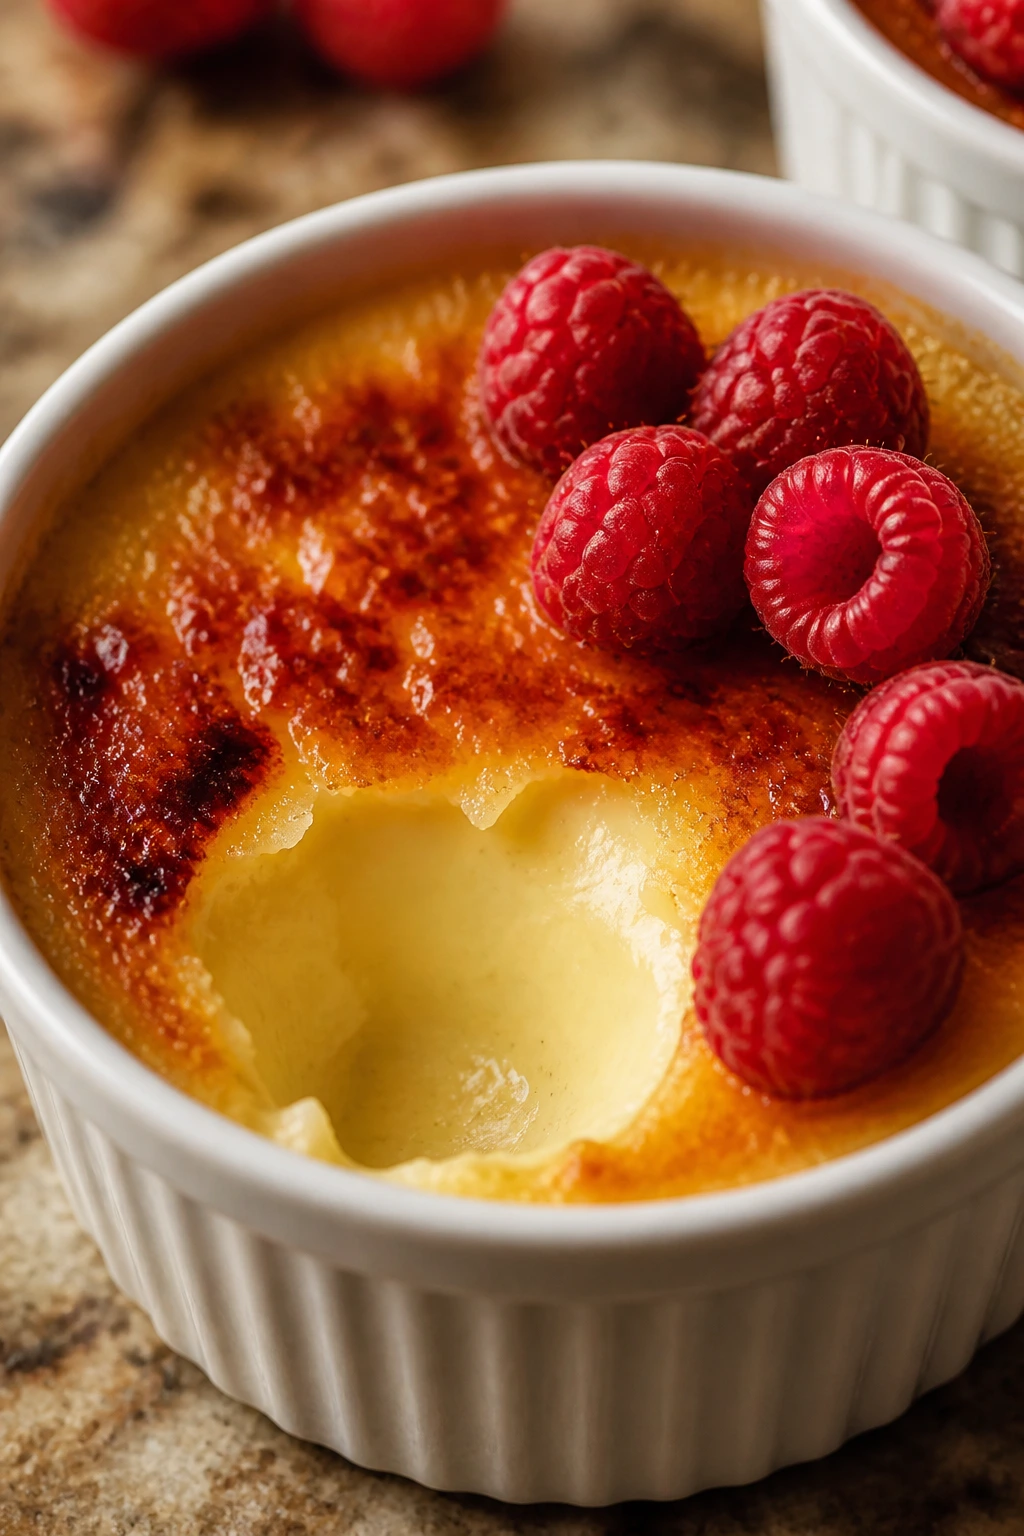
Crème brûlée always feels a little ceremonial because of the sugar crust you crack with a spoon. Vanilla bean gives the custard a clean, direct flavor, and raspberries keep it from tasting too rich after a few spoonfuls.
Why It Works:
The custard bakes gently in a water bath, which keeps the texture silky. A thin sugar layer caramelized right before serving gives you that crack and contrast.
Key Ingredients:
- 2 cups heavy cream, for the custard
- 1 vanilla bean or 2 teaspoons vanilla extract, for flavor
- 5 large egg yolks, for richness and setting
- 1/2 cup granulated sugar, for the custard
- Pinch of fine salt, to sharpen the sweetness
- 2 tablespoons granulated sugar, for the brûlée top
- 1 cup raspberries, for serving
Quick Steps:
- Heat the oven to 300°F (150°C) and set ramekins in a baking dish.
- Warm the cream with the vanilla, then whisk the yolks and sugar in a separate bowl.
- Slowly combine, pour into ramekins, and bake in a water bath 30 to 35 minutes until just set.
- Chill at least 4 hours.
- Sprinkle sugar over the top and caramelize with a torch right before serving.
Equipment for This Recipe:
- Ramekins
- Baking dish for the water bath
- Kitchen torch or broiler
- Whisk
How to Serve This Dish:
Serve with raspberries beside the ramekin or tucked on top after the sugar shell cracks. The contrast of hard sugar and cold custard is the whole reason to make it.
Pro Tips for This Recipe:
- Strain the custard for a smoother set.
- Caramelize the top right before serving.
- Pull the custards when the center still jiggles.
Variations on This Recipe:
- Raspberry Brûlée: Add a spoonful of raspberry puree under the sugar crust.
- Lavender Vanilla Brûlée: Infuse the cream with a tiny bit of dried lavender.
Common Mistakes to Avoid with This Recipe:
- Overcooking: The custard turns grainy and eggy.
- Too much sugar on top: The crust can burn before it melts.
39. Heart-Shaped Donuts
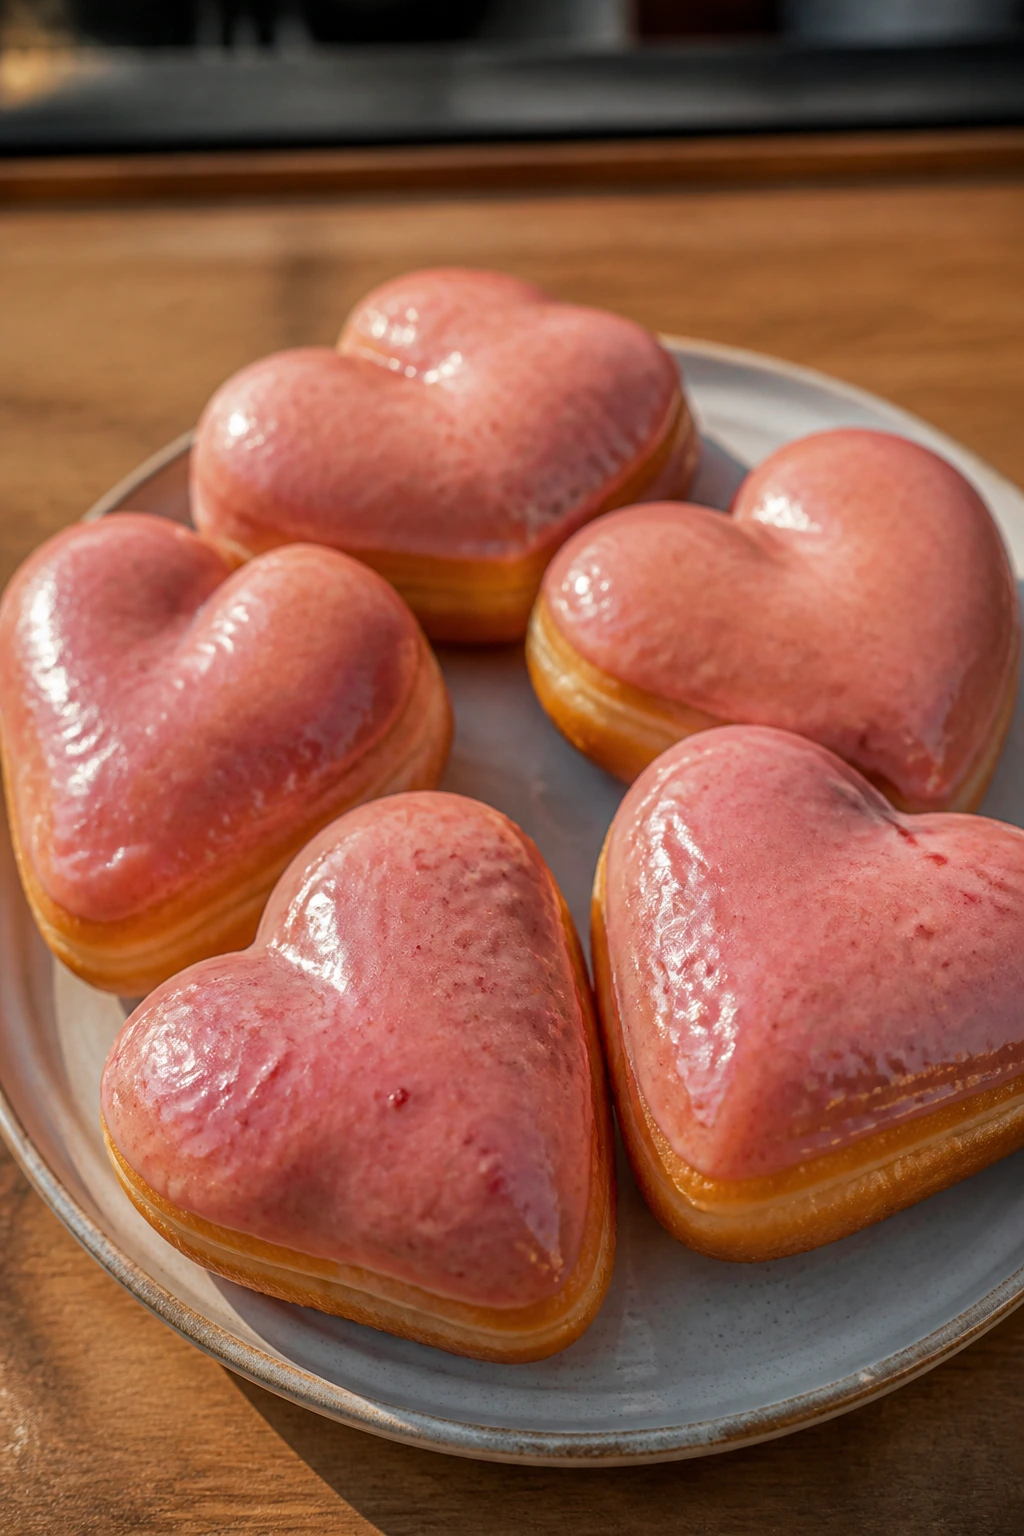
Heart-shaped donuts give you bakery energy without needing a huge ingredient list, and they look playful without relying on a lot of decoration. A strawberry glaze keeps them on theme, while the dough stays soft and yeasty inside.
Why It Works:
A rich yeast dough fries up tender and light. Cutting the dough into hearts before the second rise helps the shape stay obvious even after frying.
Key Ingredients:
- 3 cups all-purpose flour, for the dough
- 2 1/4 teaspoons active dry yeast, for rise
- 1/4 cup granulated sugar, for the dough
- 1/2 teaspoon fine salt, for balance
- 3/4 cup warm milk, for activation
- 1 large egg, for richness
- 3 tablespoons unsalted butter, softened, for tenderness
- Oil for frying, enough for 2 inches in the pot
- 1 cup powdered sugar, for the glaze
- 2 to 3 tablespoons strawberry puree, for color and flavor
Quick Steps:
- Make the dough, knead until smooth, and let it rise until doubled.
- Roll to about 1/2 inch thick and cut heart shapes.
- Let the hearts puff again for 20 to 30 minutes.
- Fry at 350°F (175°C) until golden on both sides, then drain.
- Mix the glaze and dip the warm donuts.
Equipment for This Recipe:
- Heavy pot or deep fryer
- Heart cutter
- Rolling pin
- Thermometer
How to Serve This Dish:
Serve them the day they’re made while the glaze is still set but soft. A few sliced strawberries on the plate make the shape and color read fast.
Pro Tips for This Recipe:
- Keep the oil temperature steady or the donuts soak it up.
- Don’t crowd the pot.
- Glaze while warm so it clings cleanly.
Variations on This Recipe:
- Chocolate Glaze Donuts: Swap strawberry puree for cocoa and milk.
- Sugar-Cinnamon Hearts: Roll the warm donuts in cinnamon sugar instead of glaze.
Common Mistakes to Avoid with This Recipe:
- Too-hot oil: The outside browns before the inside cooks.
- Overproofing: The hearts lose their shape and go slack.
40. Strawberry Fruit Pizza
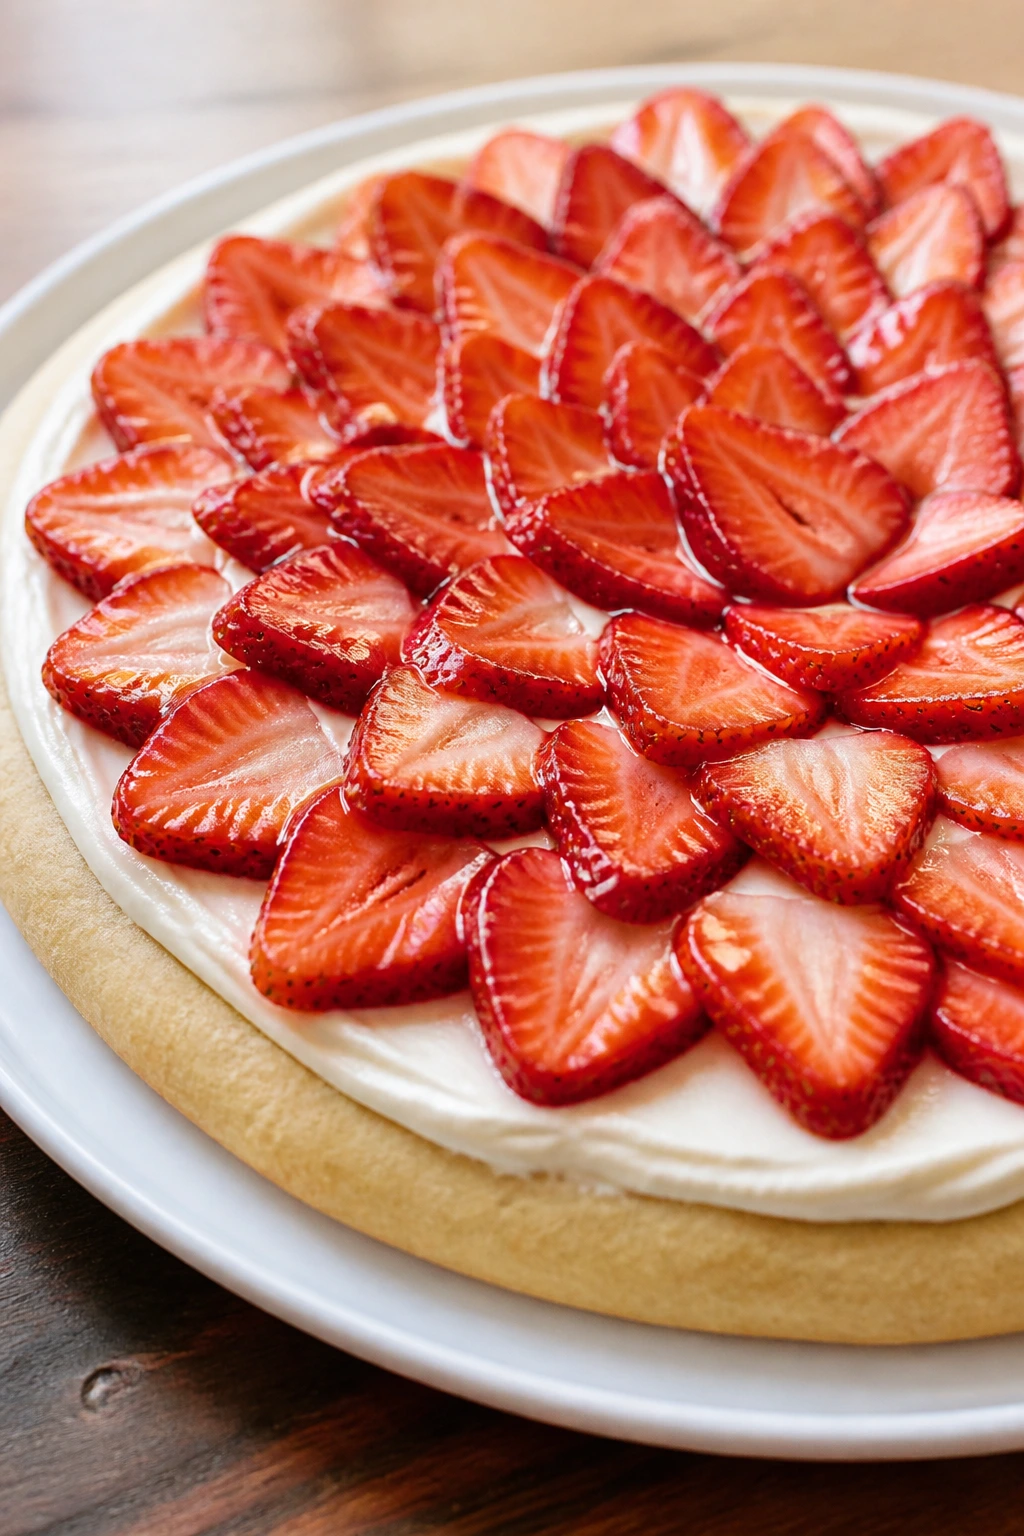
Fruit pizza is the playful end of the list, and I mean that kindly. A sugar cookie crust, cream cheese frosting, and sliced strawberries make it feel bright and casual, which is useful when you want one dessert that can feed a few more people than the fancy stuff.
Why It Works:
The cookie base bakes into a soft, sturdy slab that holds frosting without cracking. Fresh fruit gives the top its color and keeps the whole thing from tasting like sweetened cream alone.
Key Ingredients:
- 1 sugar cookie dough round, homemade or refrigerated, for the crust
- 8 oz cream cheese, softened, for the frosting
- 1/4 cup powdered sugar, for sweetness
- 1 teaspoon vanilla extract, for flavor
- 2 cups strawberries, sliced, for the topping
- 1 kiwi, sliced, optional, for color contrast
- Blueberries, optional, for extra color
- 1 teaspoon lemon juice, to keep the fruit bright
Quick Steps:
- Bake the cookie dough on a pizza pan or sheet at 350°F (175°C) until golden and cool completely.
- Beat the cream cheese, powdered sugar, and vanilla into a smooth frosting.
- Spread the frosting over the cooled crust.
- Arrange the fruit on top and brush lightly with lemon juice.
- Chill 30 minutes before slicing.
Equipment for This Recipe:
- Pizza pan or baking sheet
- Mixer
- Offset spatula
- Sharp knife
How to Serve This Dish:
Slice it like a pizza and serve it cold. The strawberries look best when arranged in overlapping rings instead of scattered randomly.
Pro Tips for This Recipe:
- Cool the crust all the way before frosting it.
- Pat the fruit dry or the top gets slick.
- Add the fruit close to serving for the freshest look.
Variations on This Dish:
- Chocolate Fruit Pizza: Use a chocolate cookie crust instead.
- Mixed Berry Fruit Pizza: Swap in raspberries and blueberries for some of the strawberries.
Common Mistakes to Avoid with This Recipe:
- Warm crust: It melts the frosting.
- Overloading the fruit: The top can slide when you cut it.
Why These Desserts Work Better Together Than Alone
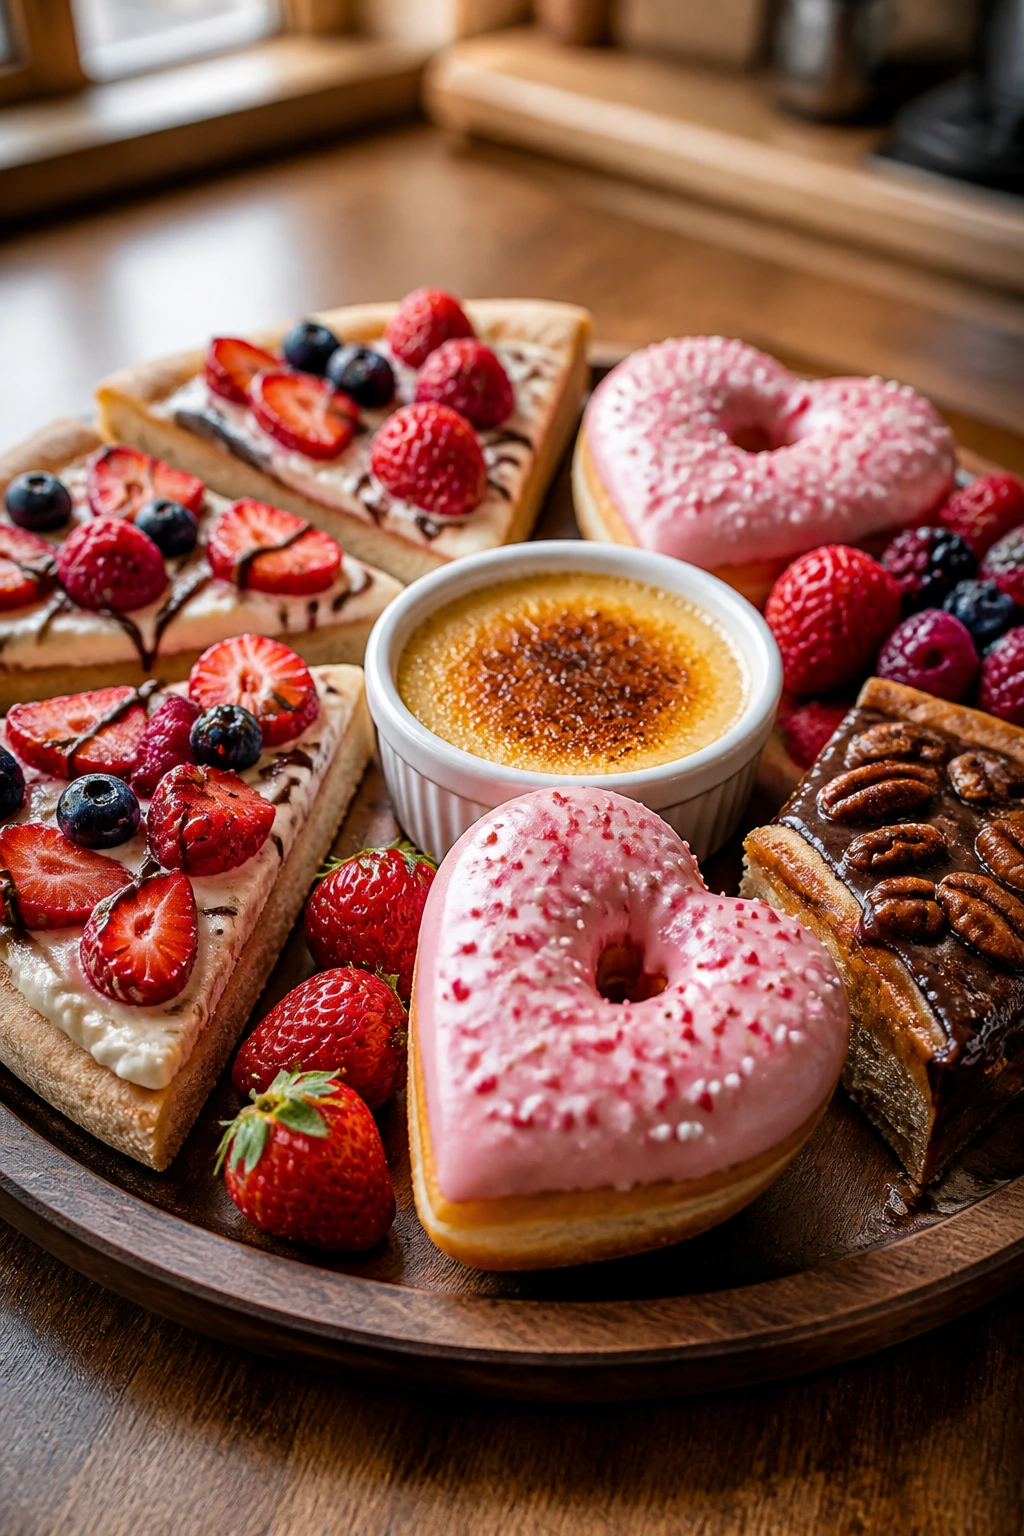
A Valentine dessert table gets better when it stops trying to be one thing. Chocolate needs tart fruit beside it. Soft cream desserts need something crisp next to them. A tray of truffles and meringues and berries gives the table movement, and movement matters because people eat with their eyes before they ever pick up a fork.
I also like how these desserts handle timing. Some can wait in the fridge, some can be baked the day before, and some need to come out of the oven right before serving. That mix lets you plan around your oven instead of letting the oven boss you around.
The trick is not to make everything compete. Pick one rich centerpiece, one fruit-forward bake, one bite-size item, and one chilled dessert if you have room. That combination makes the whole spread feel deliberate without looking overdone.
The Baking Tools That Keep the Batch Moving
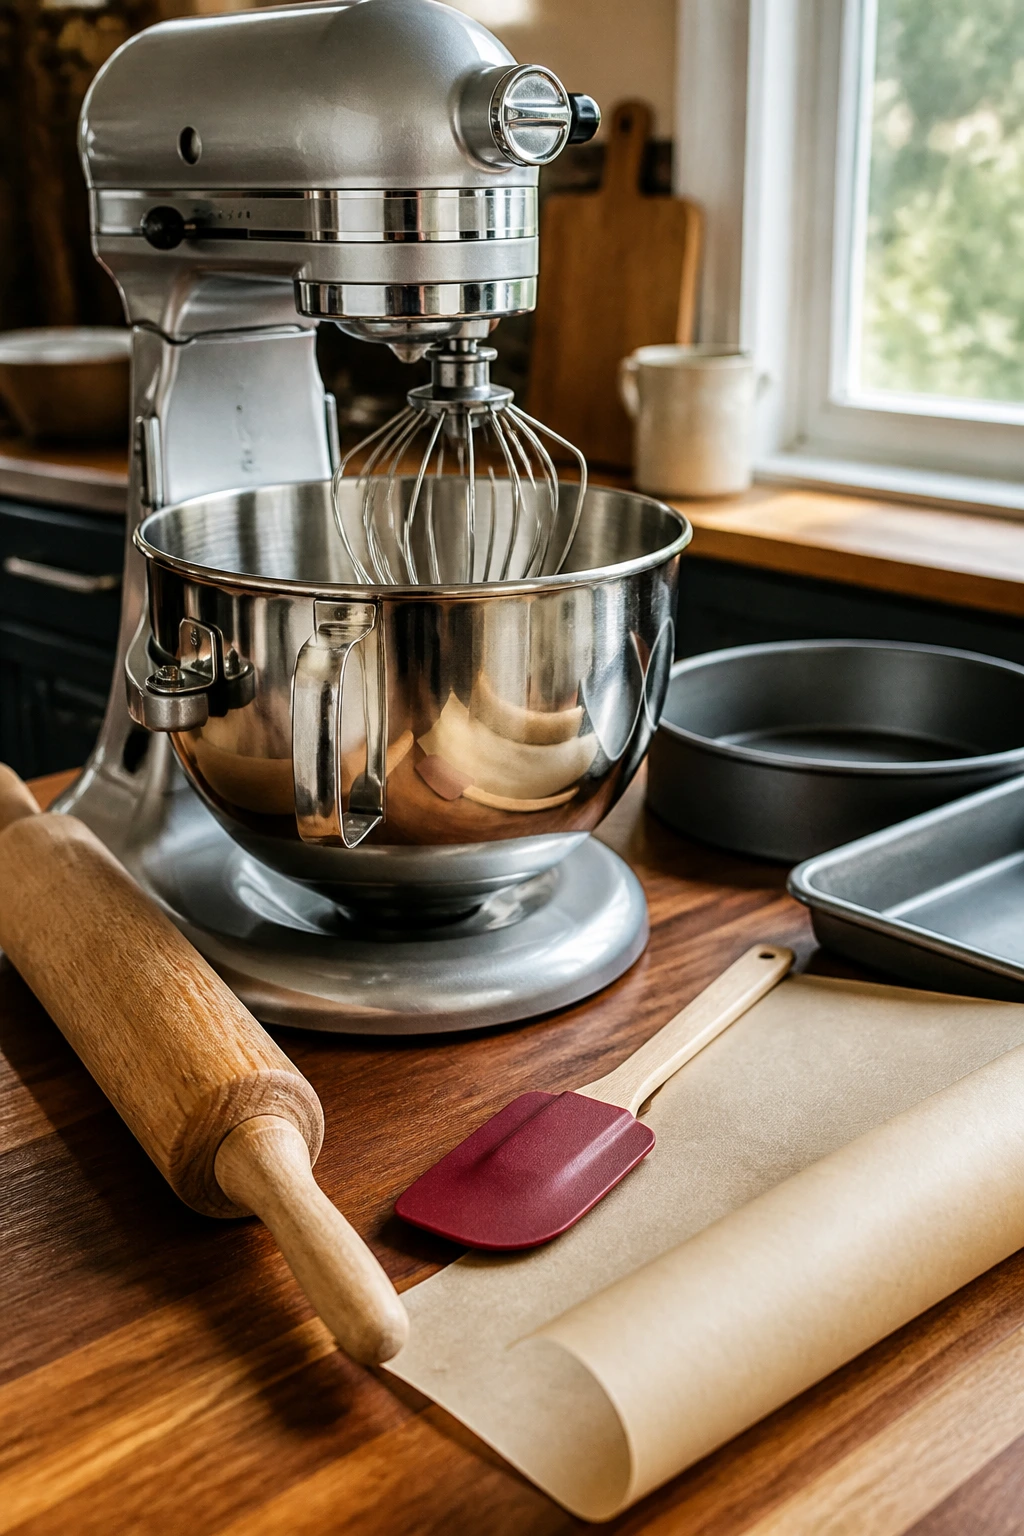
- Stand mixer or hand mixer: Useful for cakes, mousses, creams, and meringues.
- 9-inch round cake pans: The workhorse size for layer cakes and some cheesecake bakes.
- 8-inch square pan: Best for bars and brownies that need clean, giftable slices.
- Tart pan with removable bottom: Makes tarts and galettes look finished when you lift them out.
- Baking sheets: You will use these for cookies, hand pies, meringues, and donuts.
- Parchment paper: Keeps sticky sugar, ganache, and fruit fillings from welding themselves to the pan.
- Silicone spatula: Good for folding cream and scraping the last bit of batter.
- Rolling pin: Needed for cookies, hand pies, and galettes.
- Cooling racks: Let baked goods stop steaming so bottoms stay crisp.
- Fine-mesh sieve: Handy for powdered sugar, cocoa, and dusting brûlée tops.
- Thermometer: Worth owning for fried donuts, caramel, and any yeast dough with warm milk.
- Piping bag or zip-top bag: Makes frosting cupcakes, whoopie pies, and layered cups less messy.
Shopping for Berries, Chocolate, and Flavoring Without Wasting Money
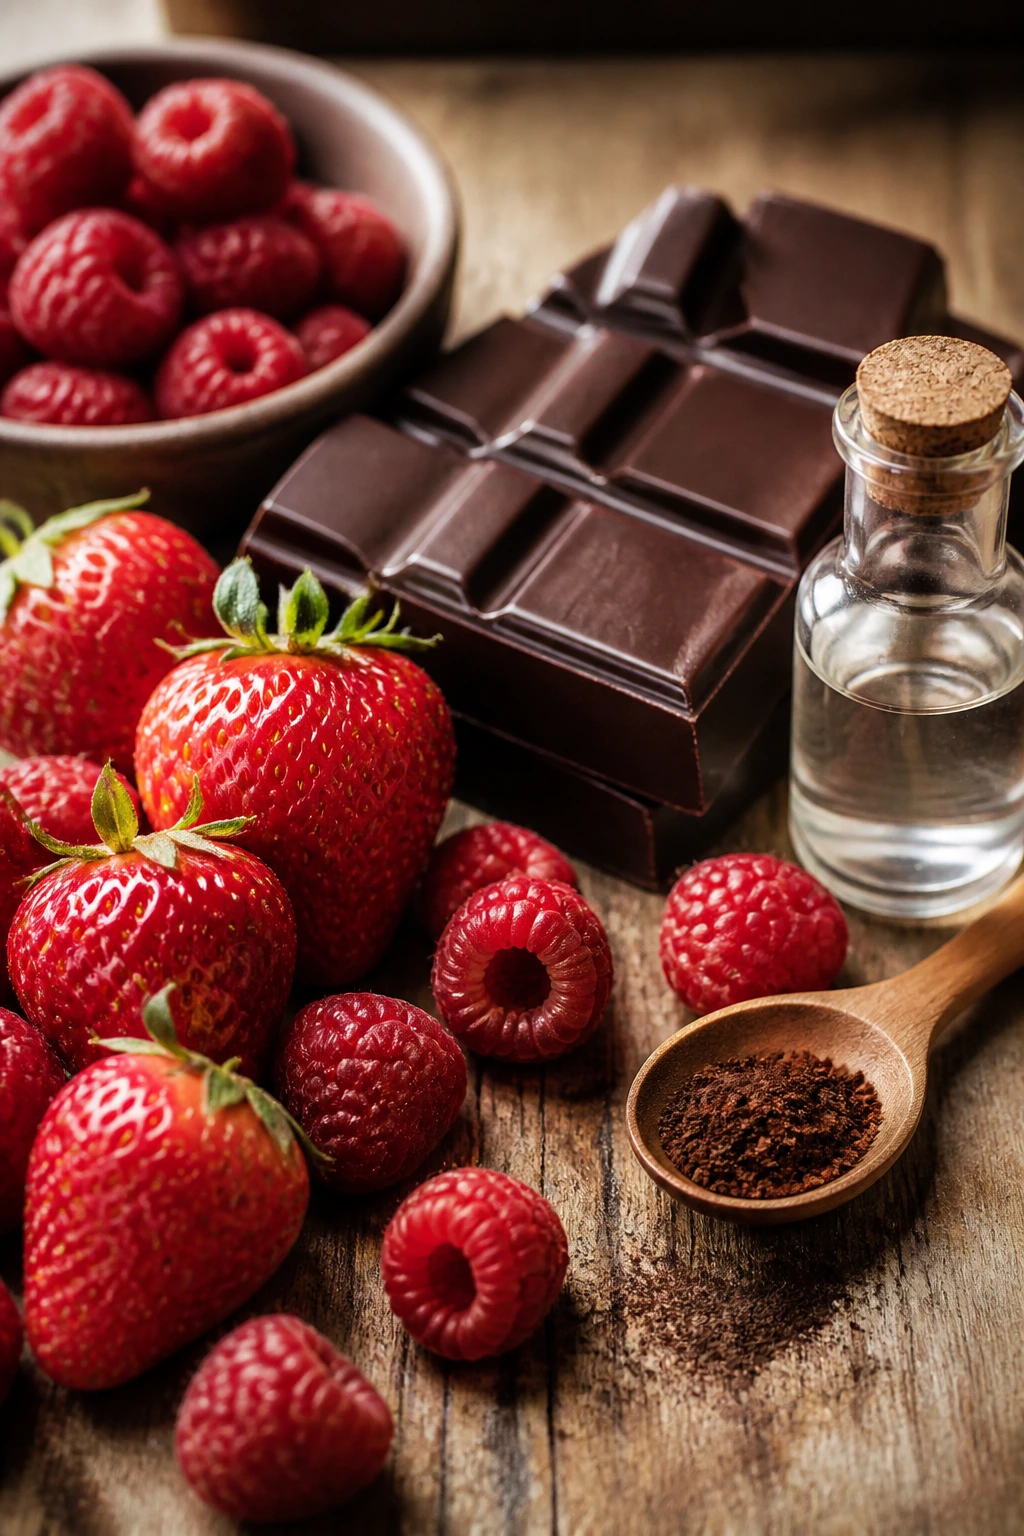
Berries are the obvious expense here, so buy them with your hands, not your eyes. Strawberries should smell like strawberries at the stem end; if they’re pale and shiny with no scent, they’ll usually taste that way too. Raspberries should be dry and intact, not wet or collapsing in the clamshell. Cherries need firmness; soft cherries are fine for sauce, not so fine for a tart or hand pie where they’ll go mushy in the oven.
Chocolate matters more than the wrapper suggests. For ganache, mousse, truffles, and tart fillings, use something in the 60 to 70 percent range if you want a clean dark-chocolate finish. If you go too low, the desserts can taste sweet before they taste chocolatey. White chocolate is a different story; buy a real cocoa-butter white chocolate if you can, because the cheap stuff can taste waxy once it melts.
Rosewater, almond extract, and espresso powder should be used with a light hand. A teaspoon of rosewater is enough for panna cotta or shortbread. Almond extract goes from fragrant to loud very quickly, and espresso powder is strongest when it disappears into chocolate instead of shouting over it.
For cream cheese desserts, buy the brick-style blocks rather than the whipped tubs. The tubs often hold too much air and soften fillings at the wrong time. And if you’re using frozen berries in bars, pies, or compotes, plan for extra thickener and a little more cook time. Frozen berries are fine. They just leak more juice, and you need to respect that.
How to Serve These Recipes
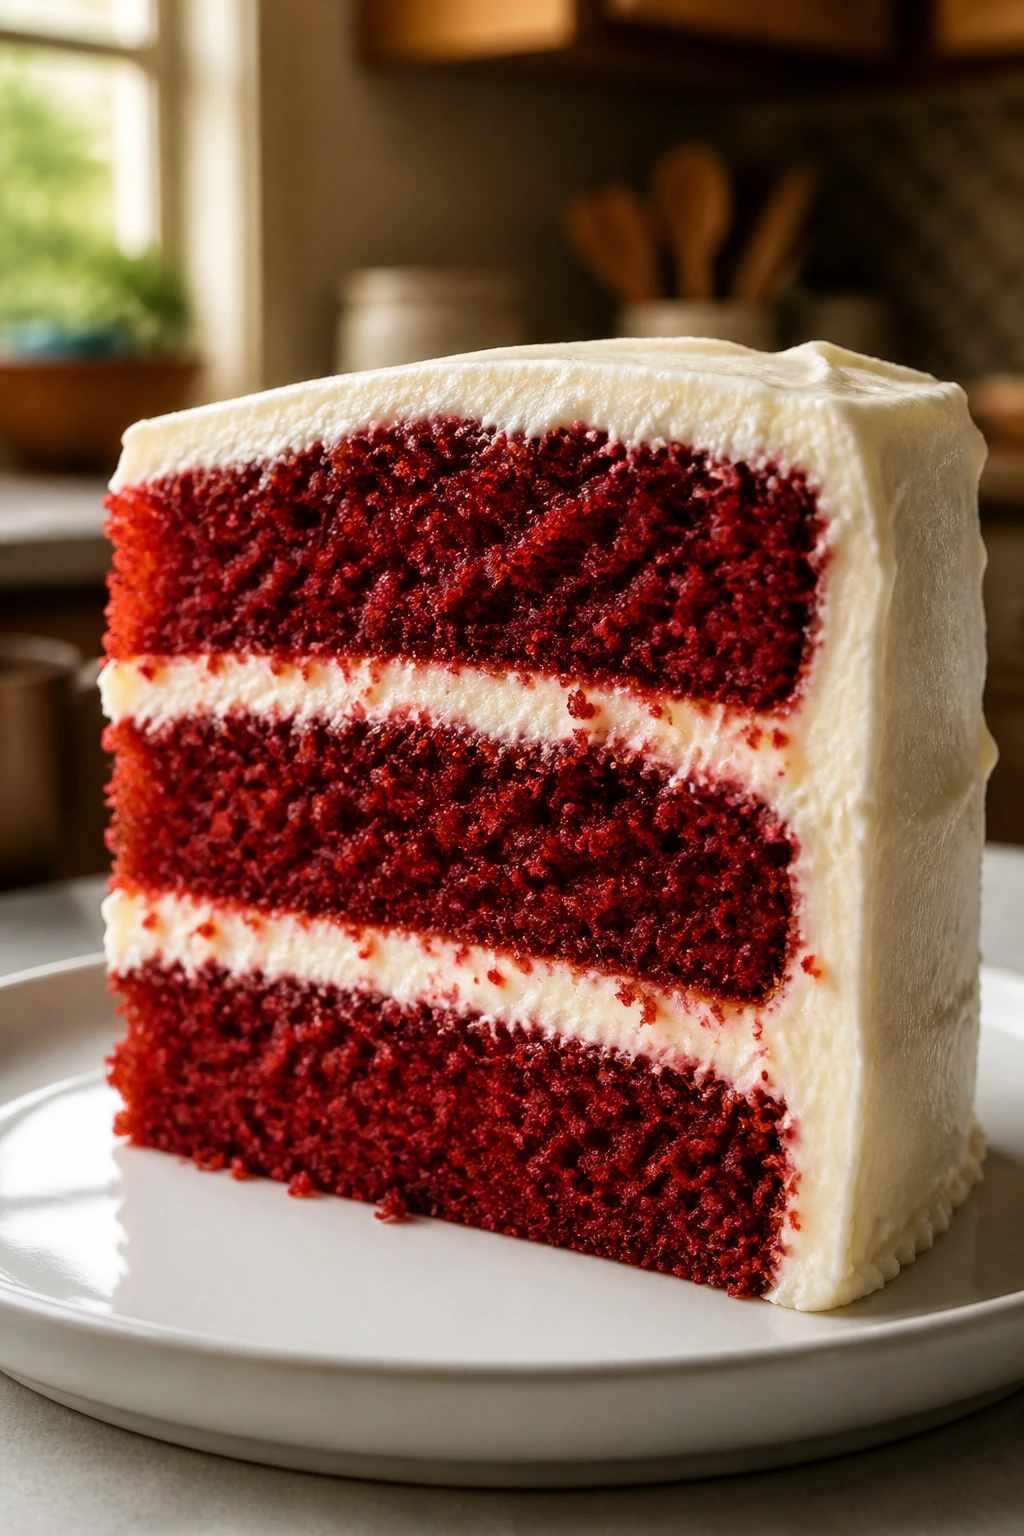
Presentation:
Use one tall item, one low item, and one bite-size item on the same table so the spread has height. A cake stand, a shallow bowl of truffles, and a platter of cookies do more visual work than a room full of identical plates. Powdered sugar, cocoa dust, and a few intact berries go a long way.
Accompaniments:
Serve richer desserts with plain whipped cream, vanilla ice cream, or a berry sauce so the plate doesn’t feel sealed shut. Coffee works with chocolate, custard, and tiramisu cups. Tea makes a better match for shortbread, meringues, and panna cotta. If you want a sharper pairing, a sparkling wine or a dry rosé cuts through creamy fillings and ganache.
Portions:
A slice of layer cake, two small bars, three cookies, or one mousse cup is usually enough. The richer the dessert, the smaller the serving should be. That rule saves the table from becoming exhausting halfway through the evening.
Beverage Pairing:
Espresso for mocha, black tea for shortbread and cookies, and sparkling rosé for fruit-forward desserts. For the chocolate-heavy items, a glass of cold milk still works better than any clever pairing I could invent.
Small Flavor Boosters That Change the Whole Tray
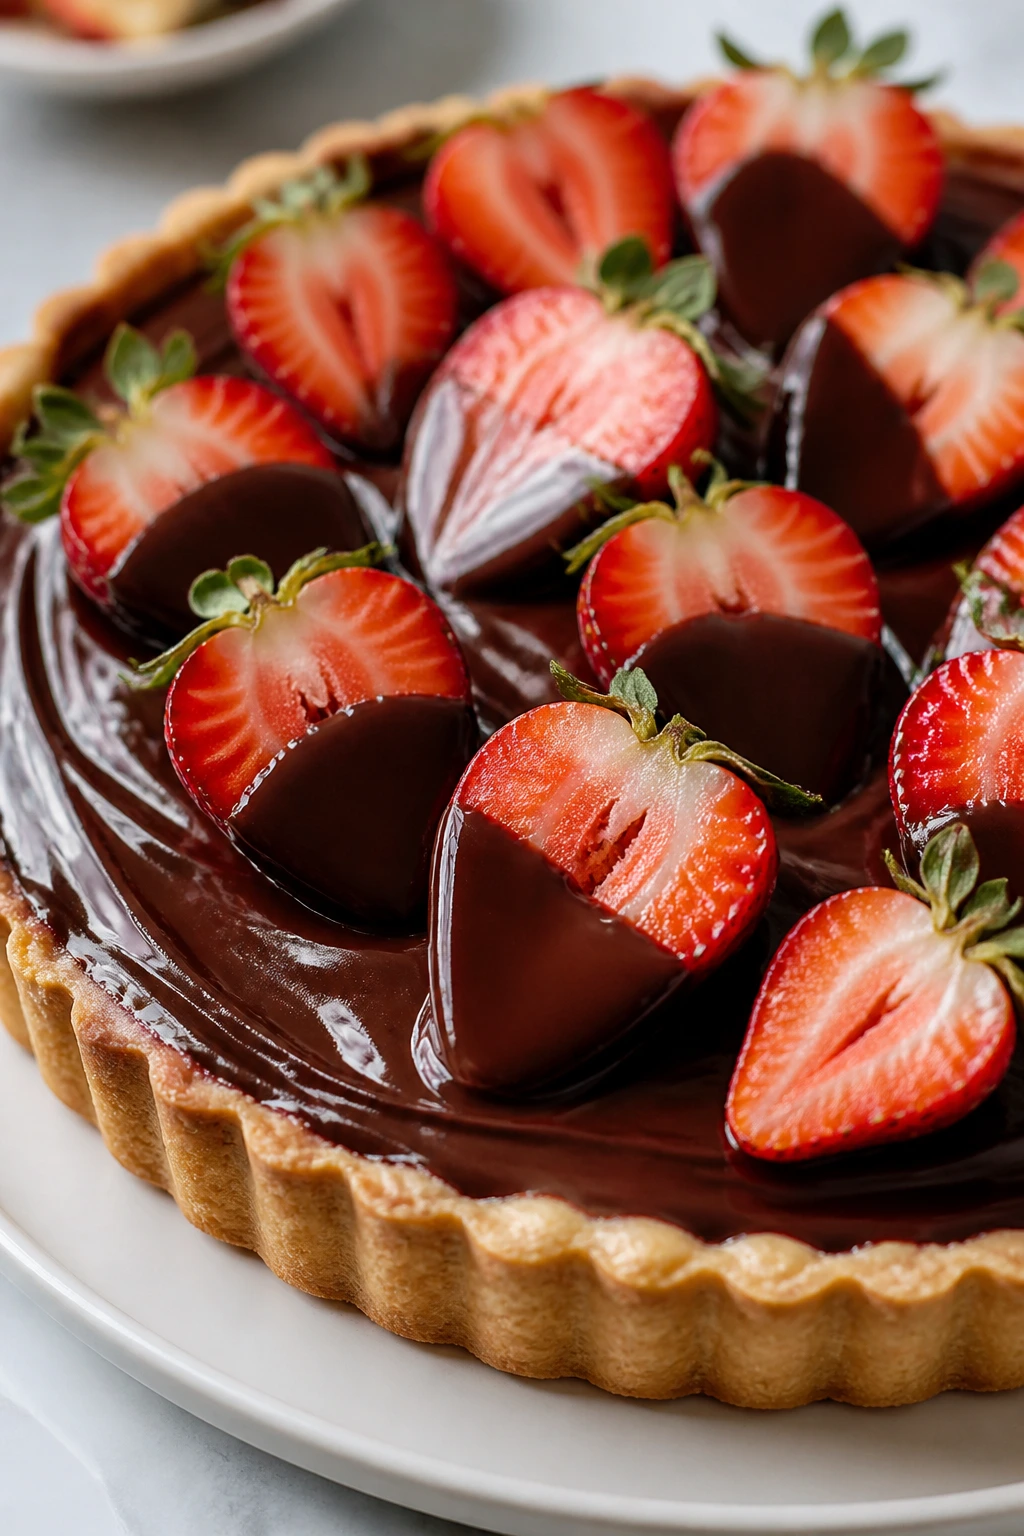
Flavor Enhancement:
A pinch of flaky salt on chocolate desserts does more than make them taste “salty-sweet.” It clears the sugar off the top of your tongue so the chocolate tastes deeper. A little lemon zest in berry desserts does the same thing in a brighter register.
Customization:
Use freeze-dried raspberries to tint frostings and keep the texture clean. Swap pistachios for almonds when you want a greener, more dramatic finish. For anything with cream cheese, a spoonful of sour cream can loosen the texture without thinning it to nothing.
Serving Suggestions:
A few fresh berries, a dusting of cocoa, or a simple drizzle of ganache can make even plain bars look deliberate. Keep the garnish restrained. Two or three elements usually look better than seven.
Make-It-Yours:
For gluten-free bakes, almond flour and gluten-free flour blends work well in cookies, cakes, and bars if you respect the moisture balance. For dairy-free desserts, coconut cream can step in for whipped cream in cups and mousses, but it brings its own flavor, so use it where that flavor helps rather than hides. Vegan bakers can lean on aquafaba for meringues and silken tofu for some chilled fillings, though that’s a different texture on purpose, not a perfect copy.
Keeping Cakes, Cookies, and Cream Desserts Fresh
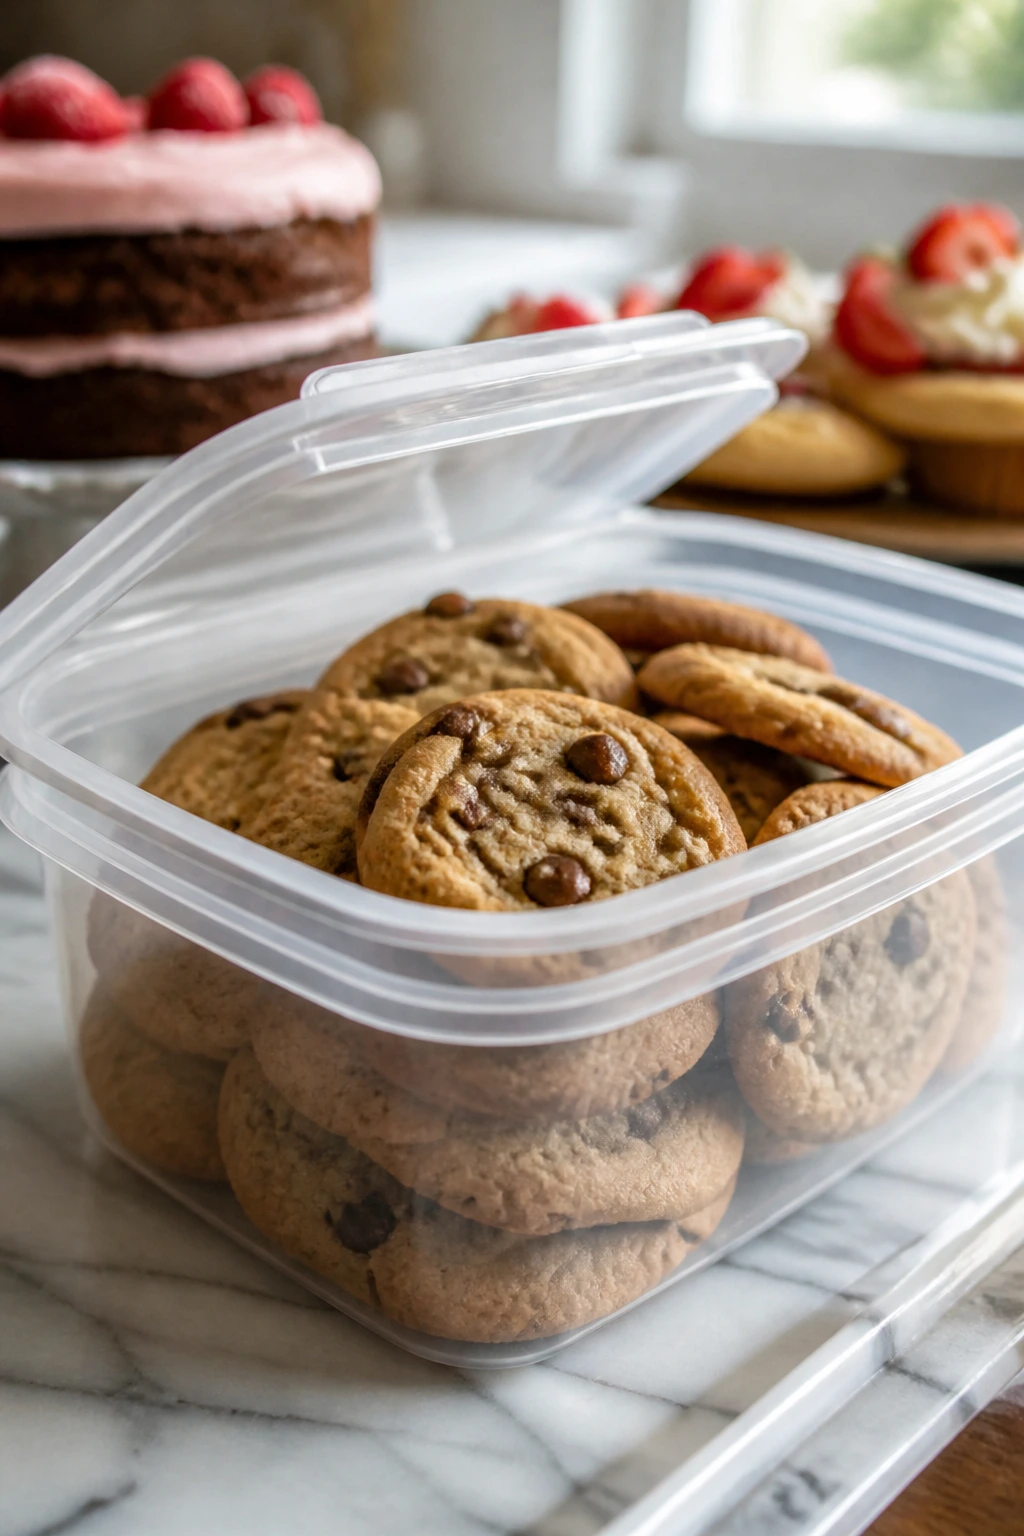
Most of the baked items here keep best at room temperature for a day or two, then move to the fridge if they’re frosted or filled with cream, cheesecake, or custard. Cookies, brownies, bars, and shortbread usually stay good for 3 to 5 days in an airtight container. Layer cakes, cheesecake bars, truffles, and mousse cups belong in the refrigerator and usually hold for 3 to 4 days.
Freezer storage works well for several of the baked desserts. Unfrosted cake layers, brownie slabs, cookie dough, hand pies, and some bars can be frozen for up to 2 months if wrapped tightly. Truffles freeze well too, though their coatings can pick up a little condensation, so thaw them in the fridge instead of on the counter.
For reheating, think in terms of texture, not speed. Cookies and brownies can warm in a 300°F (150°C) oven for 5 to 8 minutes. Hand pies and danishes need 325°F (165°C) for a few minutes to re-crisp the shell. Custards, panna cotta, mousse, and brûlée do not get reheated; they get chilled and served cold. Pavlova, meringue kisses, and fruit pizza should be assembled as close to serving as you can manage so the crisp textures stay crisp.
If you want to get ahead, bake the sturdier pieces first: bars, cookies, cake layers, and tarts all give you breathing room. Leave fruit toppings, whipped cream, and sugar crusts for the last possible minute. That order saves texture, and texture is half the job with dessert.
Flavor Swaps and Dessert-Table Adaptations to Try
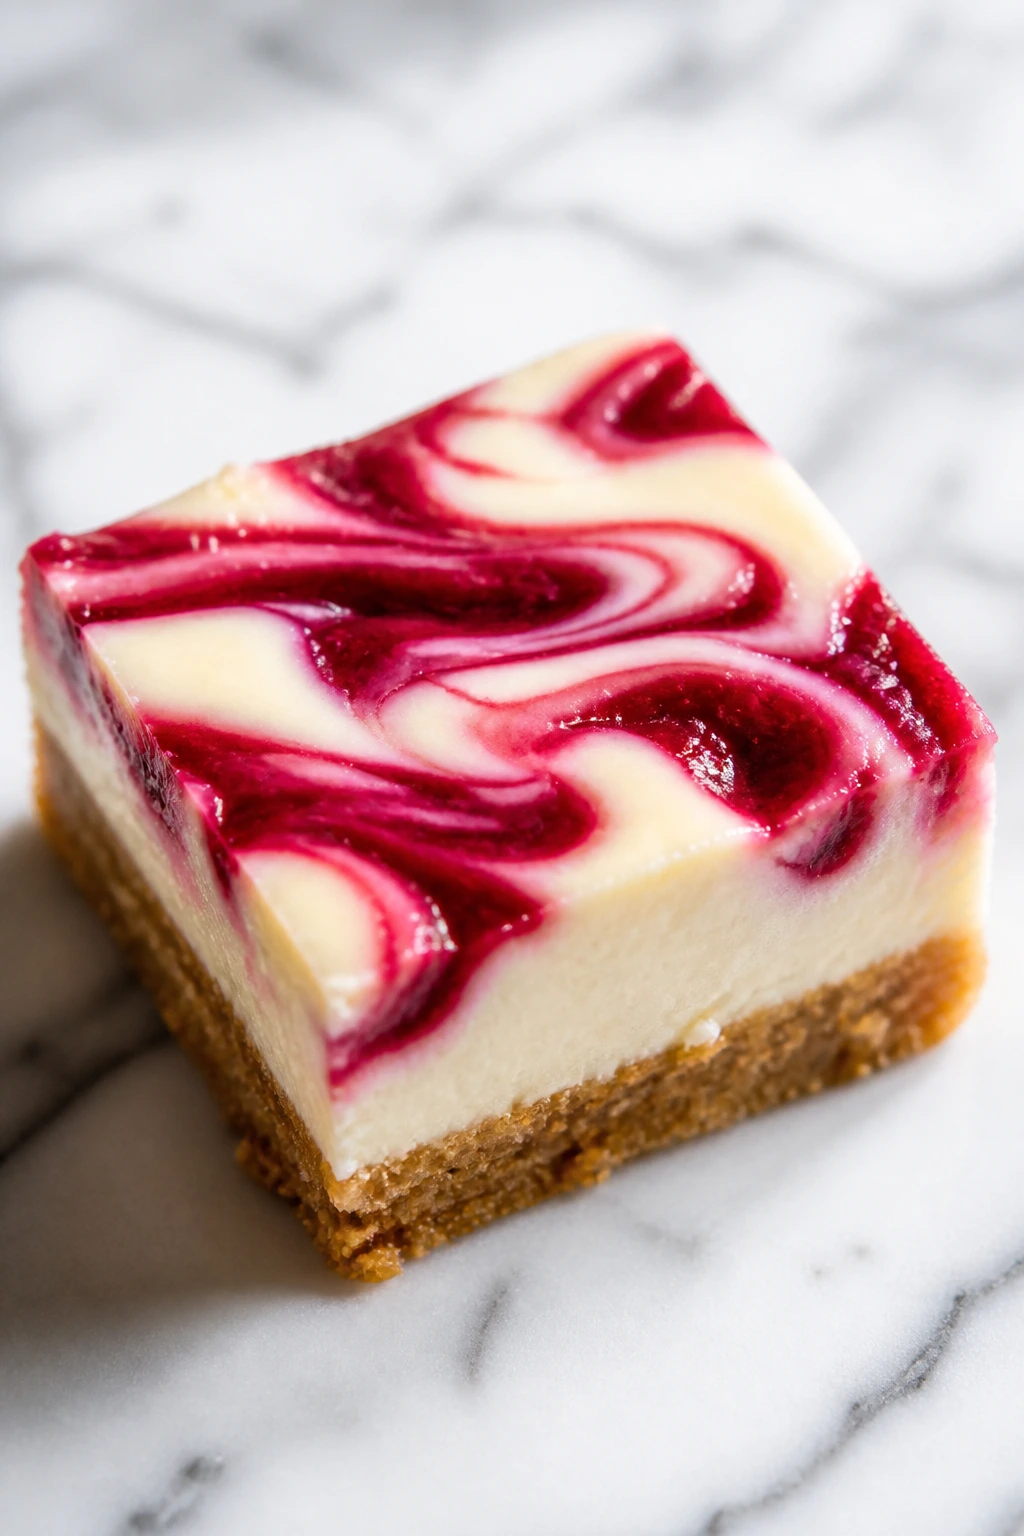
Berry-Forward Table:
If strawberries aren’t sharp enough on their own, mix in raspberries or cherries across the menu. The tart fruit balances the chocolate and cream-heavy desserts, and the color looks richer on a plate.
Chocolate-Heavy Tray:
Build around brownies, truffles, mousse, and lava cakes, then add one lighter dessert like pavlova or fruit pizza. That keeps the table from feeling flat and dark all the way through.
Gluten-Free Path:
Use almond flour in Linzers, flourless-style chocolate desserts, and pavlova. For cake-like bakes, choose a good gluten-free flour blend and don’t skip the rest time if the batter feels loose. The crumb will be different, but it can still be good.
Dairy-Free Route:
Coconut cream whips well for toppings, and dairy-free chocolate works in ganache, truffles, and bark. Stick with fruit-forward items, meringues, and crisp pastry shells where the dairy swap doesn’t have to imitate a full cream cheese filling.
Mini Dessert Spread:
Turn pies into hand pies, cakes into cupcakes, bars into bites, and truffles into small rounds. That makes the whole menu easier to serve and easier to eat standing up, which matters more than people admit.
Lower-Sugar Finish:
Lean on fresh fruit, unsweetened cocoa, and plain whipped cream instead of heavy frosting. The desserts still feel special, but the sweetness stops earlier, and that matters when the table already has several items.
Common Mistakes to Avoid
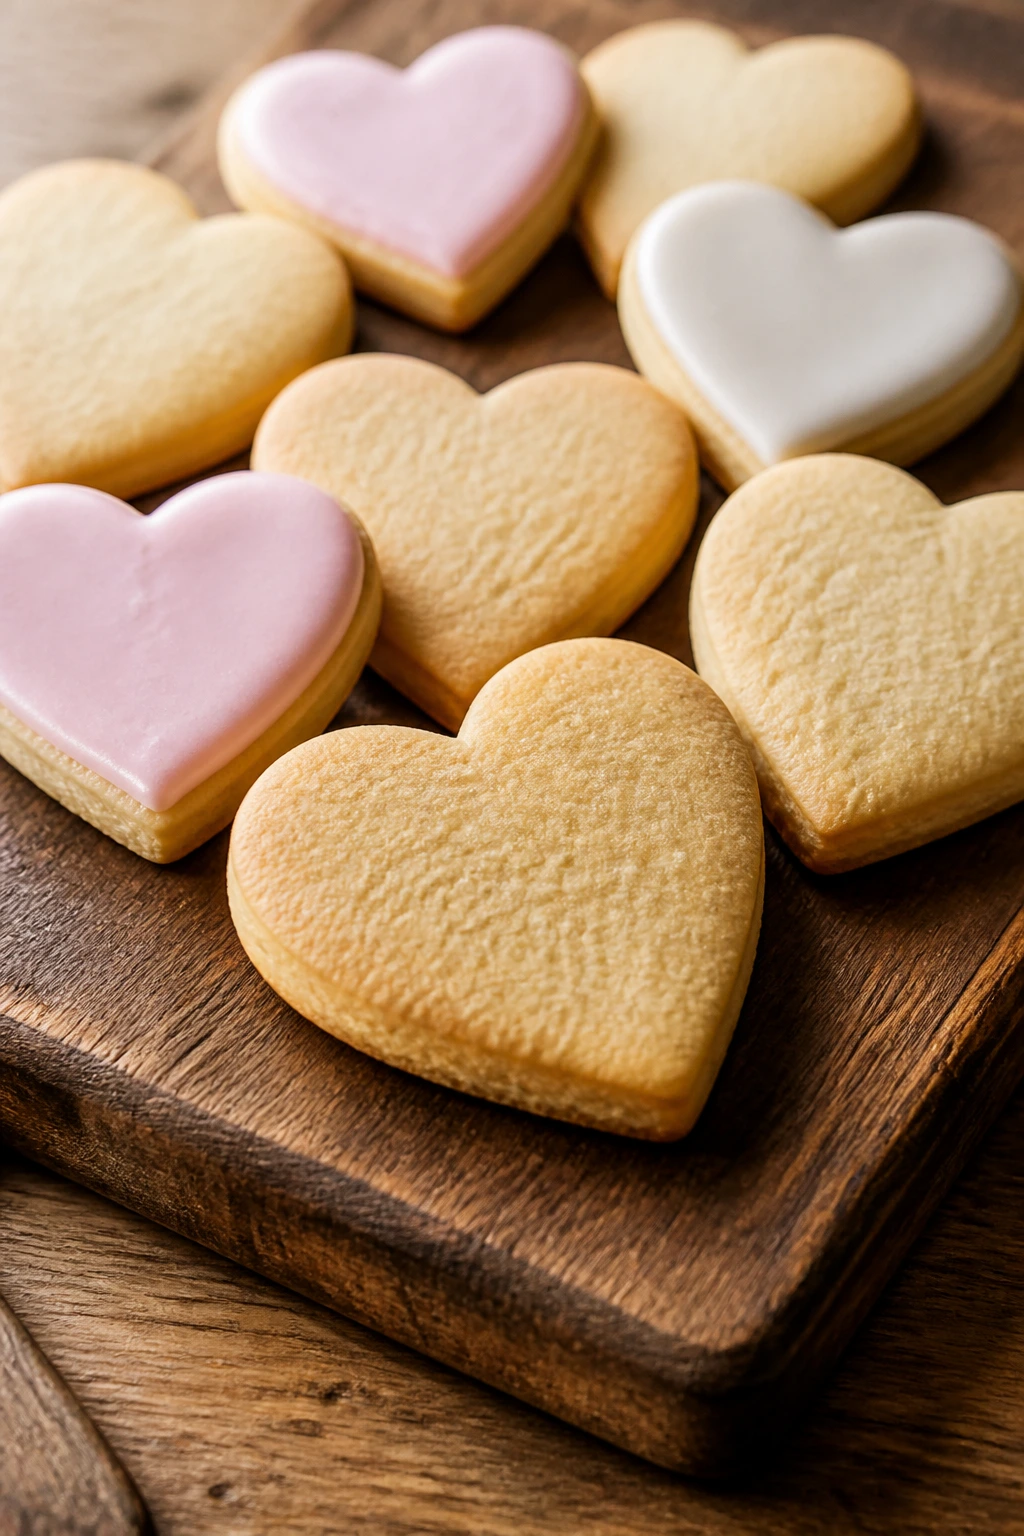
The first trap is overloading the table with fruit that leaks. Wet berries and under-thickened fillings make a dessert spread look sloppy fast. Dry the fruit, thicken the fillings, and let chilled desserts set all the way before you move them.
Another one: baking everything to the same level of sweetness. Chocolate tart, marshmallow meringue, whipped cream, and sugar cookies all land differently. If every dessert is frosted, glazed, and dusted, the table starts to feel noisy. Give some items a quiet finish.
People also rush the chilling step. Cheesecake bars need hours, mousse needs hours, truffles need time, and even brownies cut better after they cool. The dessert might taste fine warm, but the texture usually doesn’t. Patience is part of the recipe, annoying as that sounds.
Watch the oven on the delicate bakes. Macarons, meringues, madeleines, and lava cakes all punish a hot oven or a tired timer. If your oven runs strong, lower the temperature a notch and check a little early. It is easier to add a minute than to rescue a cracked shell.
Last, don’t put every dessert on the table at once if some of them soften quickly. Pavlova, fruit pizza, danish, and fondue all look and taste better when they’re assembled near the moment of serving. The pretty part lasts longer when the clock is working with you instead of against you.
Questions Bakers Ask Every Time

Can I use frozen strawberries or raspberries in these desserts?
Yes, but use them where the juice won’t wreck the texture. Frozen berries work well in bars, sauces, fillings, and baked tarts if you add a little more cornstarch and drain excess liquid after thawing. For toppings and fresh fruit desserts, stick with fresh berries so the plate doesn’t puddle.
Which desserts can I make the day before?
Cheesecake bars, truffles, mousse cups, panna cotta, brownie hearts, bars, and many cookies can be made ahead with no drama. Cakes are usually fine if you frost them the next day. Anything with crisp pastry, like pavlova, fruit pizza, or meringues, is better assembled closer to serving.
What if I only want one dessert for a small dinner?
Pick something with both fruit and chocolate, like the tart, the mousse cups, or the lava cakes. Those feel complete on their own and don’t need much else besides maybe whipped cream and berries. If you want less effort, the cheesecake bars or brownie hearts are safer bets.
How do I keep whipped cream from going soft?
Start with cold cream, cold bowls, and stop whipping at soft-to-medium peaks, not stiff peaks. If the dessert needs to sit for a while, mascarpone or a little cream cheese in the filling helps it hold longer. Plain whipped cream is fine for last-minute serving, but it is not a patient ingredient.
Can I halve these recipes?
Usually, yes, especially for bars, cookies, truffles, mousse, and pudding-style desserts. Layer cakes and meringues are a bit trickier because eggs and pan sizes matter more. If you halve a recipe, watch the bake time closely and don’t assume the oven math stays identical.
What dessert travels best for a party?
Cookies, bars, truffles, hand pies, and fudge-like brownies travel the cleanest. Put parchment between layers if you’re stacking them. Avoid custards, pavlova, and anything with fresh whipped cream unless you can assemble it after you arrive.
How do I stop fruit fillings from making pastry soggy?
Use a thicker filling, cool it before assembly when possible, and bake the shell long enough to set. A thin brush of melted chocolate or egg white on the crust can also help in tarts and pies. The point is to give the fruit somewhere to go besides straight into the pastry.
What if my chocolate seizes or gets grainy?
Usually it means water got into the bowl or the heat was too aggressive. Start over if it is badly broken; otherwise, sometimes a spoonful of warm cream can bring it back if you’re making ganache. Keep bowls and utensils dry, and melt chocolate gently.
A Sweet Table That Knows When to Stop
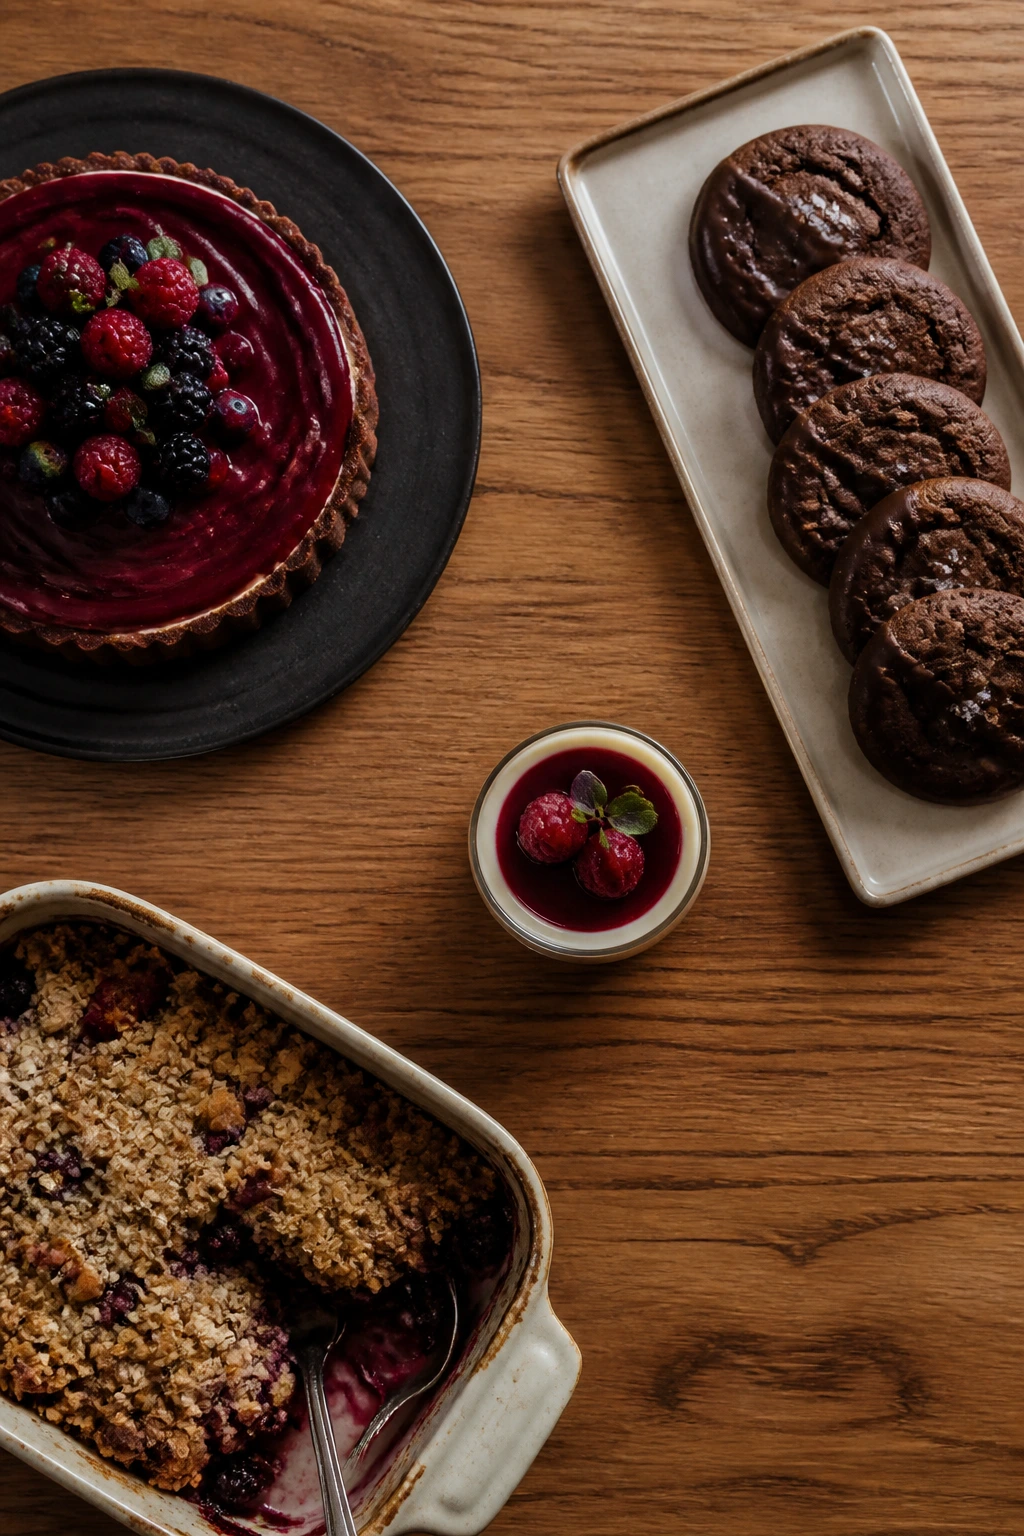
A Valentine dessert spread works best when it has contrast instead of repetition. One tart, one tray of cookies, one chilled cream dessert, one sharp fruit bake, and maybe a box of truffles if you’re feeling generous—that’s enough. More than that and the whole thing starts to blur.
The nicest part is that none of these desserts demands a single style of service. You can stack, slice, dust, drizzle, chill, or just pile them on a board and let the colors do the work. That flexibility matters when the evening is long and the kitchen is already full of bowls.
Pick a few that fit your oven, your patience, and your crowd. Then bake the ones you’d actually want a second piece of, because that’s the real test.