
A properly browned vegetable side dish can disappear faster than the roast beside it. Give broccoli a blast of heat, finish it with garlic and parmesan, and watch the people who “don’t usually go for vegetables” fork up the last crisp edges from the tray. That’s the whole trick here: not disguising vegetables, but cooking them hard enough, salting them well enough, and finishing them smartly enough that they earn a place at the center of the plate.
The best vegetable side dishes have a little swagger. They aren’t wet, pale, or apologetic. They’ve got charred bits on the Brussels sprouts, butter clinging to green beans, vinegar cutting through roasted squash, and cheese doing the quiet heavy lifting where it belongs. Meat eaters tend to love these sides for the same reason they love a good sear on steak or chicken skin that crackles when you cut into it: texture, salt, and a real sense of contrast.
That’s what this lineup is built around. Some of these dishes are fast enough for a Tuesday dinner, some are Sunday-dinner material, and a few sit right in the sweet spot where you can make them ahead, reheat them, and still get a plate that tastes like effort. The vegetables change, but the logic stays the same: high heat, good seasoning, a little fat, and a finishing touch that makes the whole thing taste complete.
Why These Vegetable Sides Win Over Skeptics
-
Browning changes everything: A 425°F oven or a hot skillet gives vegetables the savory edge that steaming never will, and that browned flavor is what pulls people back for seconds.
-
Fat carries flavor: Butter, olive oil, Parmesan, feta, and a little miso or cream make vegetables taste fuller and more satisfying, not heavy.
-
Acid keeps things bright: Lemon, vinegar, balsamic, and citrus stop roasted vegetables from tasting flat or tired on the plate.
-
Texture matters more than most cooks think: Crisp edges, toasted nuts, crunchy crumbs, and tender centers give each bite enough contrast to feel like a side worth paying attention to.
-
These sides play well with meat: They can sit next to steak, roast chicken, pork chops, sausages, grilled fish, or a holiday ham without getting lost.
-
Most of them are flexible: If your carrots are smaller, your broccoli is a little older, or your squash is extra sweet, you can still make the dish work with a small adjustment in time or seasoning.
1. Garlic-Parmesan Roasted Broccoli
Broccoli turns into something else when the florets get dark at the tips and the stems stay tender. The garlic perfumes the oil first, the parmesan melts into salty little freckles, and the lemon at the end wakes the whole tray up.
Why It Works: High heat drives out moisture fast, so the florets brown instead of steaming. Finely grated parmesan melts onto the hot broccoli and gives you a crisp, savory crust. The lemon juice keeps the flavor from going heavy, which matters when you’re serving it beside roast beef or chicken thighs.
Key Ingredients:
- 2 large heads broccoli, cut into florets and peeled stems
- 3 tablespoons olive oil
- 4 garlic cloves, finely minced
- 1/2 teaspoon kosher salt
- 1/2 teaspoon black pepper
- 1/3 cup finely grated Parmesan
- 1 tablespoon lemon juice
- Pinch red pepper flakes
Quick Steps:
- Preheat the oven to 425°F and line a rimmed sheet pan with parchment.
- Toss the broccoli with olive oil, garlic, salt, and pepper until every floret is lightly coated.
- Spread it in a single layer and roast for 18 to 22 minutes, flipping once, until the edges are deeply browned.
- Sprinkle with Parmesan, add lemon juice, and serve right away while the cheese still clings to the hot florets.
Equipment for This Recipe:
- Rimmed sheet pan
- Large mixing bowl
- Microplane or fine grater
How to Serve This Dish: Pile it in a shallow bowl so the browned edges stay visible. It sits well next to steak, pork chops, or roasted chicken, and it also works under a fried egg if you’ve got leftovers.
Pro Tips for This Recipe:
- Dry the broccoli well after washing; wet florets steam.
- Grate the Parmesan fine, not in shreds, so it sticks.
- If your pan feels crowded, use two pans. Crowding kills browning.
Variations on This Dish:
- Lemon-Chile Broccoli: Add extra red pepper flakes and a little zest for more bite.
- Pecorino Swap: Use Pecorino Romano instead of Parmesan for a sharper finish.
Common Mistakes to Avoid with This Dish:
- Don’t skip the high heat; 400°F can work, but it won’t brown as aggressively.
- Don’t add the cheese too early or it melts into a gummy layer instead of clinging in crisp bits.
2. Crispy Balsamic Brussels Sprouts
When Brussels sprouts are roasted cut-side down until the outer leaves go lacey and dark, even the most skeptical eaters usually quiet down. The balsamic glaze lands at the end, sticky and sharp, which is exactly the kind of contrast these little cabbages need.
Why It Works: Roasting cut-side down gives the flat surface direct contact with the pan, so you get caramelization instead of limp greens. A quick balsamic-honey glaze adds sweetness and acid without drowning the sprouts. That combo feels rich enough for a steakhouse plate.
Key Ingredients:
- 1 1/2 pounds Brussels sprouts, halved
- 3 tablespoons olive oil
- 1 teaspoon kosher salt
- 1/2 teaspoon black pepper
- 2 tablespoons balsamic vinegar
- 1 tablespoon honey
- 2 tablespoons grated Pecorino or Parmesan, optional
Quick Steps:
- Heat the oven to 425°F and place the sprouts cut-side down on a sheet pan.
- Toss with olive oil, salt, and pepper, then roast for 20 to 25 minutes until the cut sides are dark and crisp.
- Warm the balsamic and honey in a small pan for 1 minute, just until it thickens slightly.
- Drizzle the glaze over the sprouts and toss with cheese, if using.
Equipment for This Recipe:
- Sheet pan
- Small saucepan
- Tongs or a spatula
How to Serve This Dish: Serve hot, not lukewarm; the crisp edges soften as they sit. They’re good with pork tenderloin, roast chicken, or a holiday spread where something tangy cuts through the rich food.
Pro Tips for This Recipe:
- Trim only the dry stem end; don’t strip off half the sprout.
- If some leaves fly off in the oven, leave them on the pan. They crisp like chips.
- Add the glaze at the end, not before roasting.
Variations on This Dish:
- Maple-Balsamic Version: Swap the honey for maple syrup for a rounder sweetness.
- Sriracha Finish: Add a teaspoon of sriracha to the glaze for heat.
Common Mistakes to Avoid with This Dish:
- Don’t roast soggy sprouts straight from the fridge after washing; dry them first.
- Don’t pile them on top of one another or they steam and turn gray-green.
3. Brown Butter Green Beans with Toasted Almonds
These green beans taste like someone paid attention. The butter goes nutty, the almonds toast in the same pan, and the beans stay snappy enough that each bite has a little resistance. That matters.
Why It Works: Green beans cook fast, so they keep some bite while still taking on the flavor of the butter. Brown butter gives you toasted milk solids, which read as deeper and richer than plain melted butter. Almonds add crunch, and lemon keeps the dish from feeling soft around the edges.
Key Ingredients:
- 1 1/2 pounds green beans, trimmed
- 4 tablespoons unsalted butter
- 1/3 cup sliced almonds
- 2 garlic cloves, thinly sliced
- 1 teaspoon lemon zest
- 1 tablespoon lemon juice
- 1/2 teaspoon kosher salt
- Black pepper to taste
Quick Steps:
- Blanch the green beans in salted boiling water for 2 to 3 minutes, then drain well.
- Melt the butter in a skillet over medium heat and cook until the foam subsides and the butter smells nutty.
- Add the almonds and garlic, stirring for 1 to 2 minutes until the almonds turn golden.
- Add the beans, toss until coated and hot, then finish with lemon zest, lemon juice, salt, and pepper.
Equipment for This Recipe:
- Large skillet
- Slotted spoon
- Saucepan for blanching
How to Serve This Dish: Put it on a long platter so the almonds and beans spread out instead of piling up. It works especially well beside roast turkey, grilled salmon, or a simple roast chicken.
Pro Tips for This Recipe:
- Drain the beans thoroughly so the butter doesn’t spit.
- Keep the heat moderate; brown butter goes from nutty to burnt fast.
- Slice the garlic thin so it cooks in time with the almonds.
Variations on This Dish:
- Shallot Butter Beans: Replace garlic with thinly sliced shallot for a sweeter finish.
- Herb Finish: Add chopped tarragon or parsley at the end.
Common Mistakes to Avoid with This Dish:
- Don’t skip the blanching if your beans are thick; they need that head start.
- Don’t walk away from the butter. A minute too long and you’re scraping black bits instead of brown ones.
4. Honey-Thyme Roasted Carrots
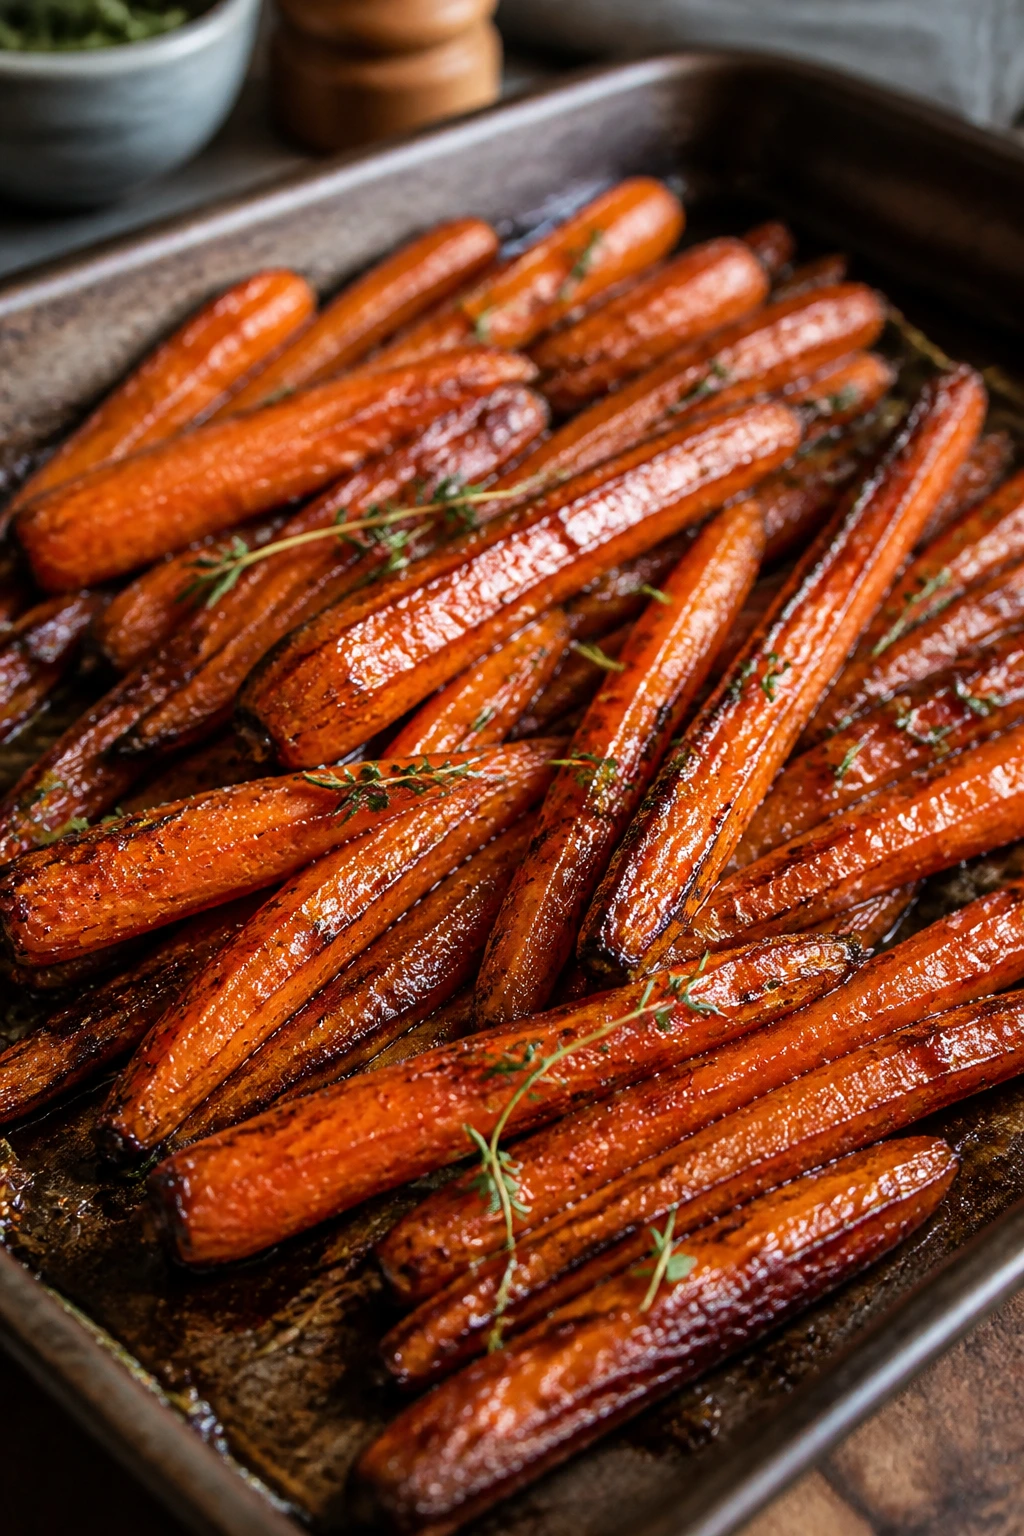
Roasted carrots can taste like candy when they’re done right, but the trick is to keep them grounded with salt and thyme so they don’t tip into dessert territory. The edges caramelize, the centers go soft, and the honey catches in the pan juices.
Why It Works: Carrots naturally sweeten as they roast, and the honey reinforces that without making the dish syrupy. Thyme adds an earthy note that keeps the flavor from drifting too far toward sugar. A hot oven brings out the browned spots that meat eaters usually love in roasted potatoes.
Key Ingredients:
- 2 pounds carrots, peeled and halved lengthwise if thick
- 2 tablespoons olive oil
- 1 1/2 tablespoons honey
- 1 teaspoon fresh thyme leaves, or 1/2 teaspoon dried
- 1/2 teaspoon kosher salt
- 1/4 teaspoon black pepper
- 1 teaspoon Dijon mustard, optional
Quick Steps:
- Heat the oven to 400°F and line a sheet pan.
- Toss the carrots with olive oil, honey, thyme, salt, pepper, and Dijon, if using.
- Roast for 25 to 30 minutes, turning once, until the carrots are browned at the edges and tender enough to pierce easily.
- Spoon the pan juices over the carrots before serving.
Equipment for This Recipe:
- Sheet pan
- Mixing bowl
- Vegetable peeler
How to Serve This Dish: Arrange the carrots in a loose fan and spoon the glossy pan juices over the top. They sit nicely beside glazed ham, roast beef, or a pan-seared pork chop.
Pro Tips for This Recipe:
- Cut the carrots to similar thickness so they finish together.
- Don’t overload the pan; crowded carrots steam and look pale.
- Add a little lemon zest if you want less sweetness.
Variations on This Dish:
- Maple-Orange Carrots: Replace honey with maple syrup and finish with orange zest.
- Spiced Carrots: Add a pinch of cumin and coriander for a warmer profile.
Common Mistakes to Avoid with This Dish:
- Don’t roast huge whole carrots without splitting them; the outsides will brown before the centers soften.
- Don’t use so much honey that the pan burns before the carrots are done.
5. Creamed Spinach with Nutmeg
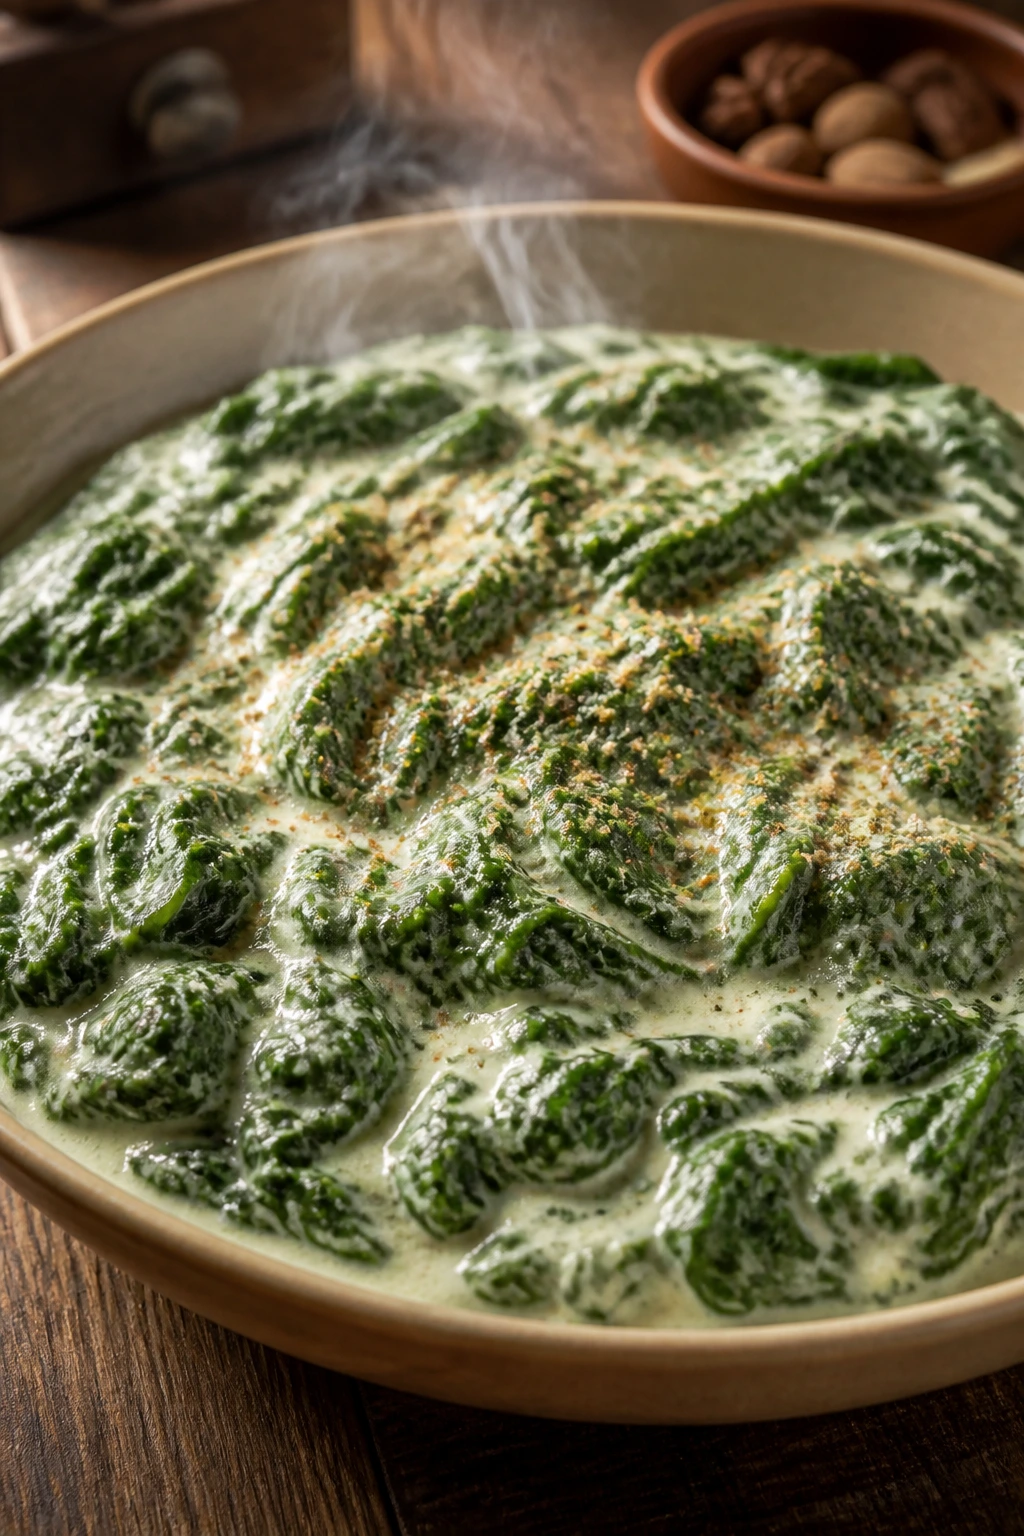
This is the side that shows up in a steakhouse and means business. It’s silky, faintly sweet from the cream, and anchored by enough garlic and nutmeg that it doesn’t taste like baby food pretending to be grown up.
Why It Works: Spinach shrinks hard, so you need a creamy base that can coat it without turning watery. A quick roux thickens the milk and cream just enough to hold the leaves. Nutmeg is small but essential; without it, the dish tastes flat.
Key Ingredients:
- 2 pounds fresh spinach, or 20 ounces frozen spinach, thawed and squeezed dry
- 2 tablespoons unsalted butter
- 1 shallot, finely diced
- 2 garlic cloves, minced
- 2 tablespoons all-purpose flour
- 1 cup whole milk
- 1/2 cup heavy cream
- 1/2 cup grated Parmesan
- Pinch freshly grated nutmeg
- Salt and pepper
Quick Steps:
- Melt the butter in a skillet over medium heat and cook the shallot until soft.
- Add the garlic and flour, stirring for 1 minute to make a pale roux.
- Whisk in the milk and cream and cook until the sauce thickens enough to coat a spoon.
- Stir in the spinach, Parmesan, nutmeg, salt, and pepper, then cook just until hot and glossy.
Equipment for This Recipe:
- Large skillet
- Whisk
- Colander or clean towel for squeezing spinach
How to Serve This Dish: Serve it in a warm bowl with a spoon, not on a flat plate. It belongs next to steak, roast beef, or pork tenderloin, where the cream can balance something deeply browned.
Pro Tips for This Recipe:
- Squeeze frozen spinach dry; excess water ruins the texture.
- Add the Parmesan off the heat if your stove runs hot and the sauce starts to tighten too fast.
- Taste at the end. Spinach needs more salt than you think.
Variations on This Dish:
- Gruyère Spinach: Swap half the Parmesan for Gruyère if you want a richer flavor.
- Lighter Version: Use half-and-half instead of cream and keep the sauce a little looser.
Common Mistakes to Avoid with This Dish:
- Don’t dump wet spinach into the sauce; it turns the whole dish thin and gray.
- Don’t boil the cream hard or it can taste cooked and separate a little at the edges.
6. Lemon-Feta Grilled Zucchini
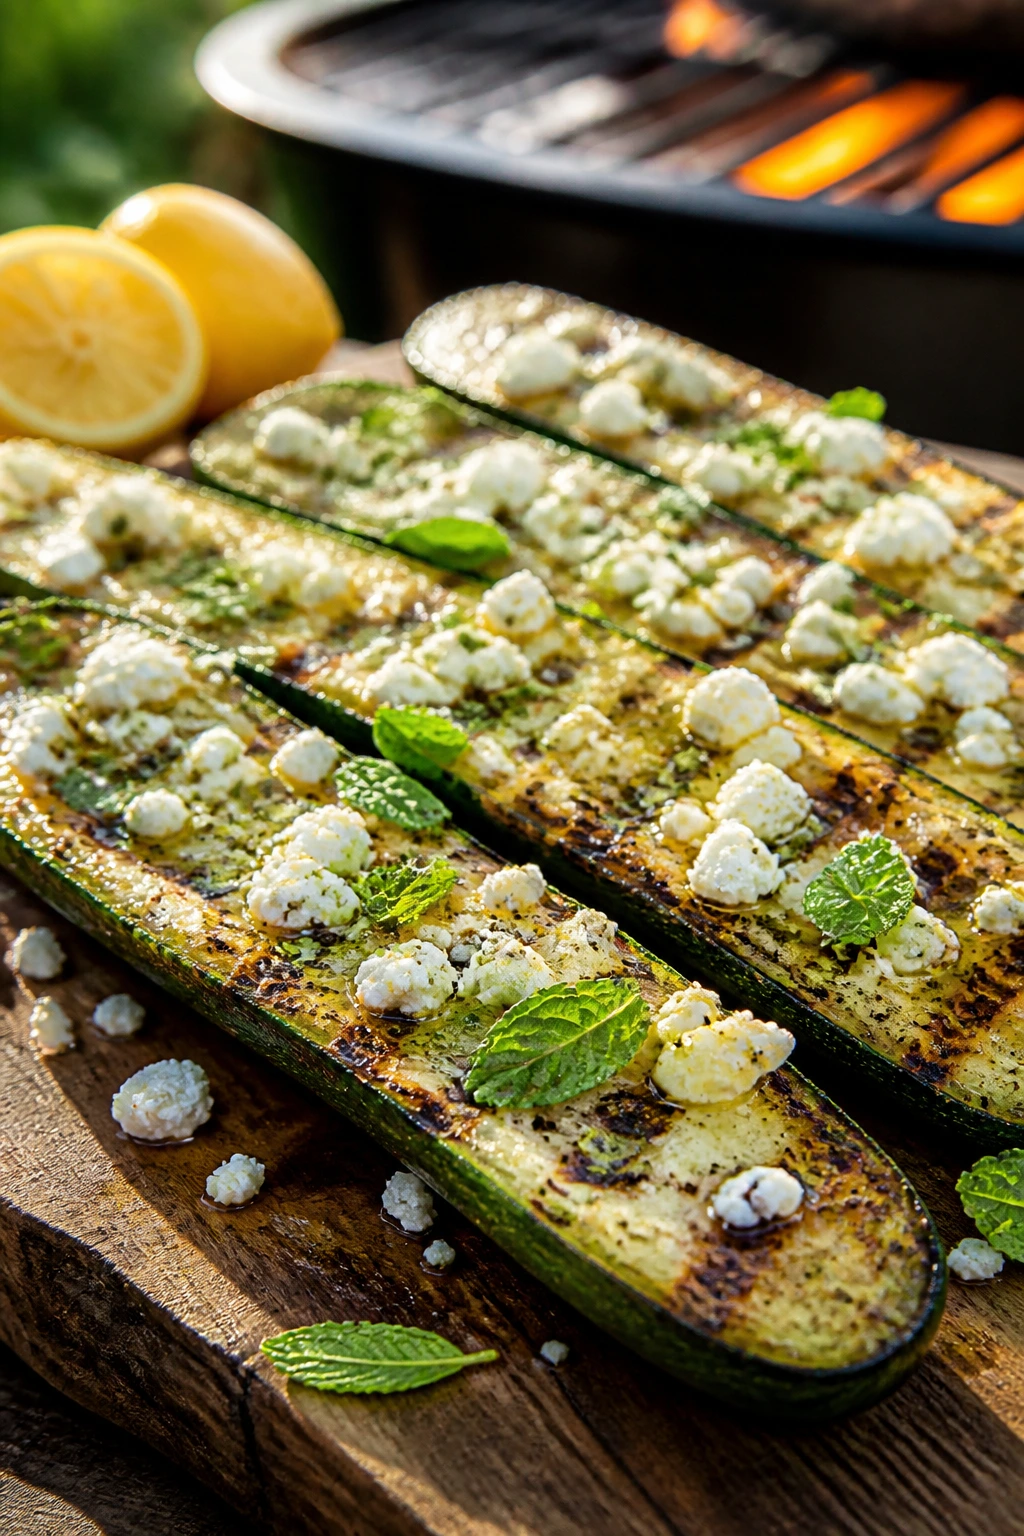
Zucchini can go soggy fast, which is why grilling it is the better move. You get smoky stripes, a tender center, and enough char to keep the vegetable from feeling soft in the wrong way.
Why It Works: Zucchini has a lot of water, so quick high heat gives you color before the flesh turns mushy. Feta adds salt and tang, which the squash-like flavor needs. Lemon and mint keep the dish bright enough to sit beside grilled meat without feeling heavy.
Key Ingredients:
- 4 medium zucchini, sliced lengthwise into planks
- 3 tablespoons olive oil
- 1 teaspoon kosher salt
- 1/2 teaspoon black pepper
- 1/2 cup crumbled feta
- 1 tablespoon lemon juice
- 2 tablespoons chopped mint or parsley
Quick Steps:
- Heat a grill or grill pan over medium-high.
- Brush the zucchini with olive oil and season with salt and pepper.
- Grill for 2 to 3 minutes per side until tender with visible char.
- Transfer to a platter, scatter feta and herbs over the top, and finish with lemon juice.
Equipment for This Recipe:
- Grill or grill pan
- Pastry brush
- Serving platter
How to Serve This Dish: Lay the zucchini in a crosswise stack so the char marks show. It pairs well with lamb, grilled chicken, or a simple rice pilaf.
Pro Tips for This Recipe:
- Cut the planks thick enough to hold together on the grill.
- Don’t overdo the oil or the zucchini slips and flares.
- Add feta after grilling so it stays crumbly, not melted.
Variations on This Dish:
- Garlic Yogurt Zucchini: Serve with a garlic yogurt drizzle instead of feta.
- Chili-Lime Version: Swap lemon for lime and add chili flakes.
Common Mistakes to Avoid with This Dish:
- Don’t slice the zucchini too thin or it collapses.
- Don’t salt it far ahead of time; it will sweat and get watery before it hits the grill.
7. Cauliflower Gratin with Gruyère

Cauliflower gratin is what happens when a mild vegetable gets dressed for dinner. The florets soften under a blanket of cheese sauce, the top turns bronze, and the whole thing smells like a cold-weather meal even if you serve it any time of year.
Why It Works: Cauliflower has enough structure to hold a creamy sauce without falling apart. Gruyère melts smoothly and brings a nutty edge that reads richer than plain cheddar. A little mustard and nutmeg keep the sauce from tasting one-note.
Key Ingredients:
- 1 large head cauliflower, cut into florets
- 2 tablespoons unsalted butter
- 2 tablespoons flour
- 1 1/2 cups milk
- 1 cup shredded Gruyère
- 1/2 cup grated Parmesan
- 1 teaspoon Dijon mustard
- Pinch nutmeg
- Salt and pepper
- 1/3 cup breadcrumbs
Quick Steps:
- Steam or boil the cauliflower for 4 to 5 minutes until just barely tender, then drain well.
- Make a sauce with butter, flour, milk, Gruyère, Parmesan, mustard, nutmeg, salt, and pepper.
- Fold the cauliflower into the sauce and transfer to a baking dish.
- Top with breadcrumbs and bake at 375°F for 20 to 25 minutes until bubbling and browned.
Equipment for This Recipe:
- Medium saucepan
- Baking dish
- Whisk
How to Serve This Dish: Spoon it next to roast beef, pork chops, or baked ham. The browned top is the best part, so use a shallow dish rather than a deep casserole if you want more crust.
Pro Tips for This Recipe:
- Drain the cauliflower well; trapped water thins the sauce.
- Grate the cheese yourself if possible so it melts more cleanly.
- Let it rest 5 minutes before serving so the sauce settles.
Variations on This Dish:
- Sharp Cheddar Gratin: Swap some Gruyère for cheddar if you want a punchier bite.
- Garlic-Thyme Gratin: Add a minced garlic clove and chopped thyme to the sauce.
Common Mistakes to Avoid with This Dish:
- Don’t overcook the cauliflower before baking; it should still hold shape.
- Don’t pour the sauce over soggy florets or the gratin turns loose and watery.
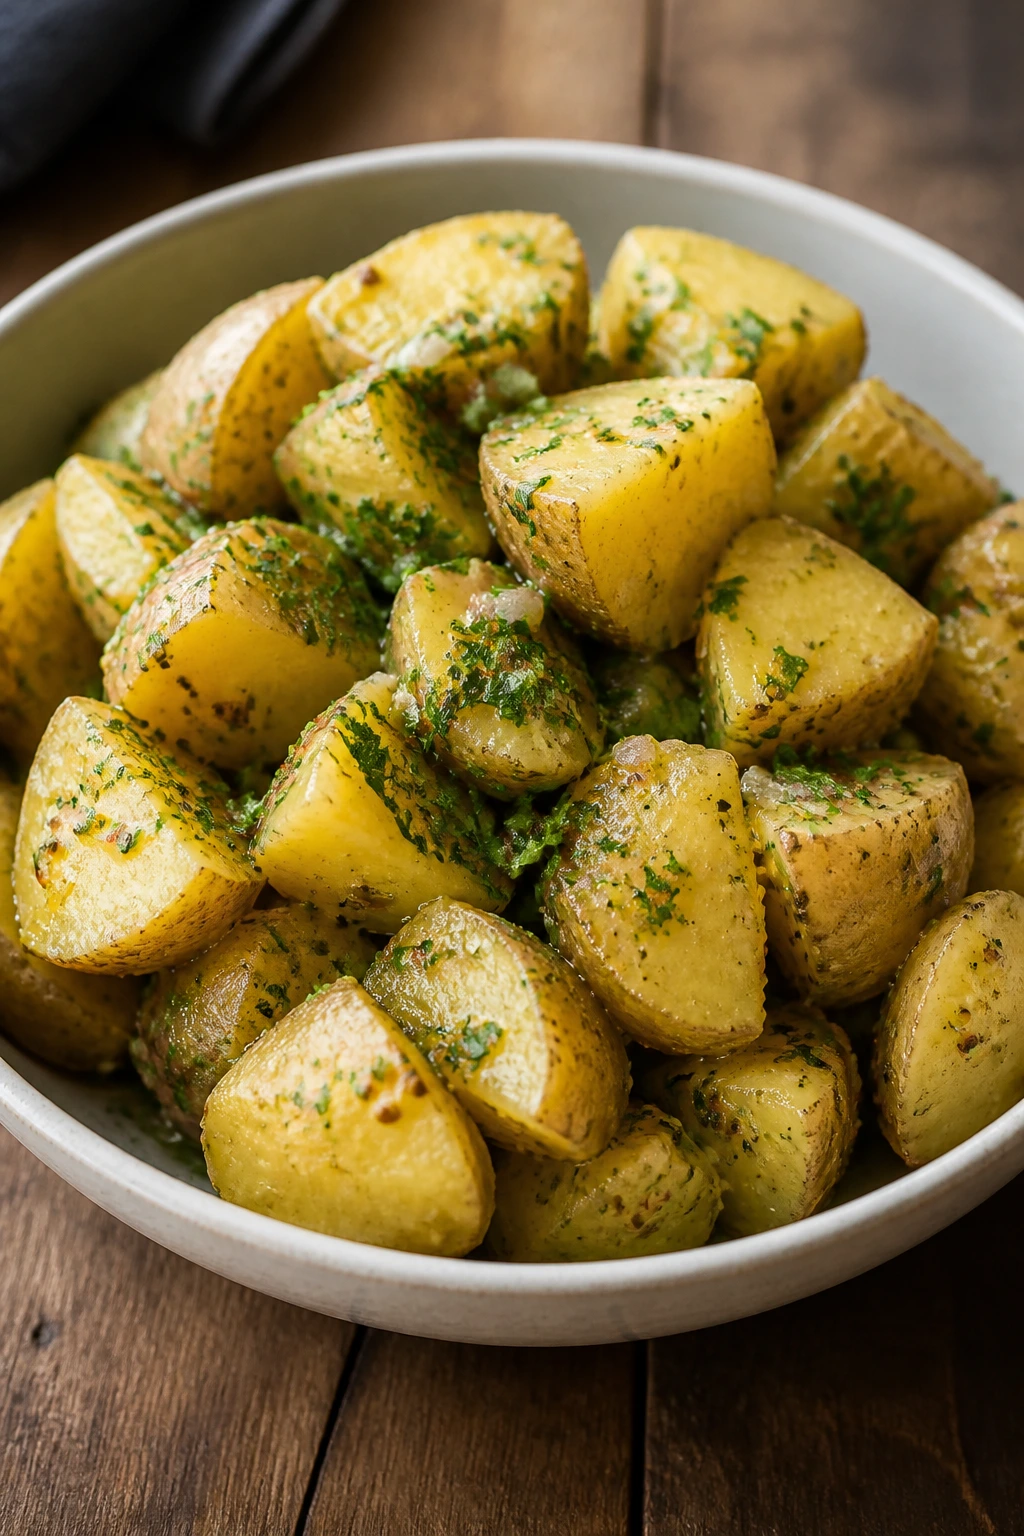
8. Rosemary Smashed Potatoes
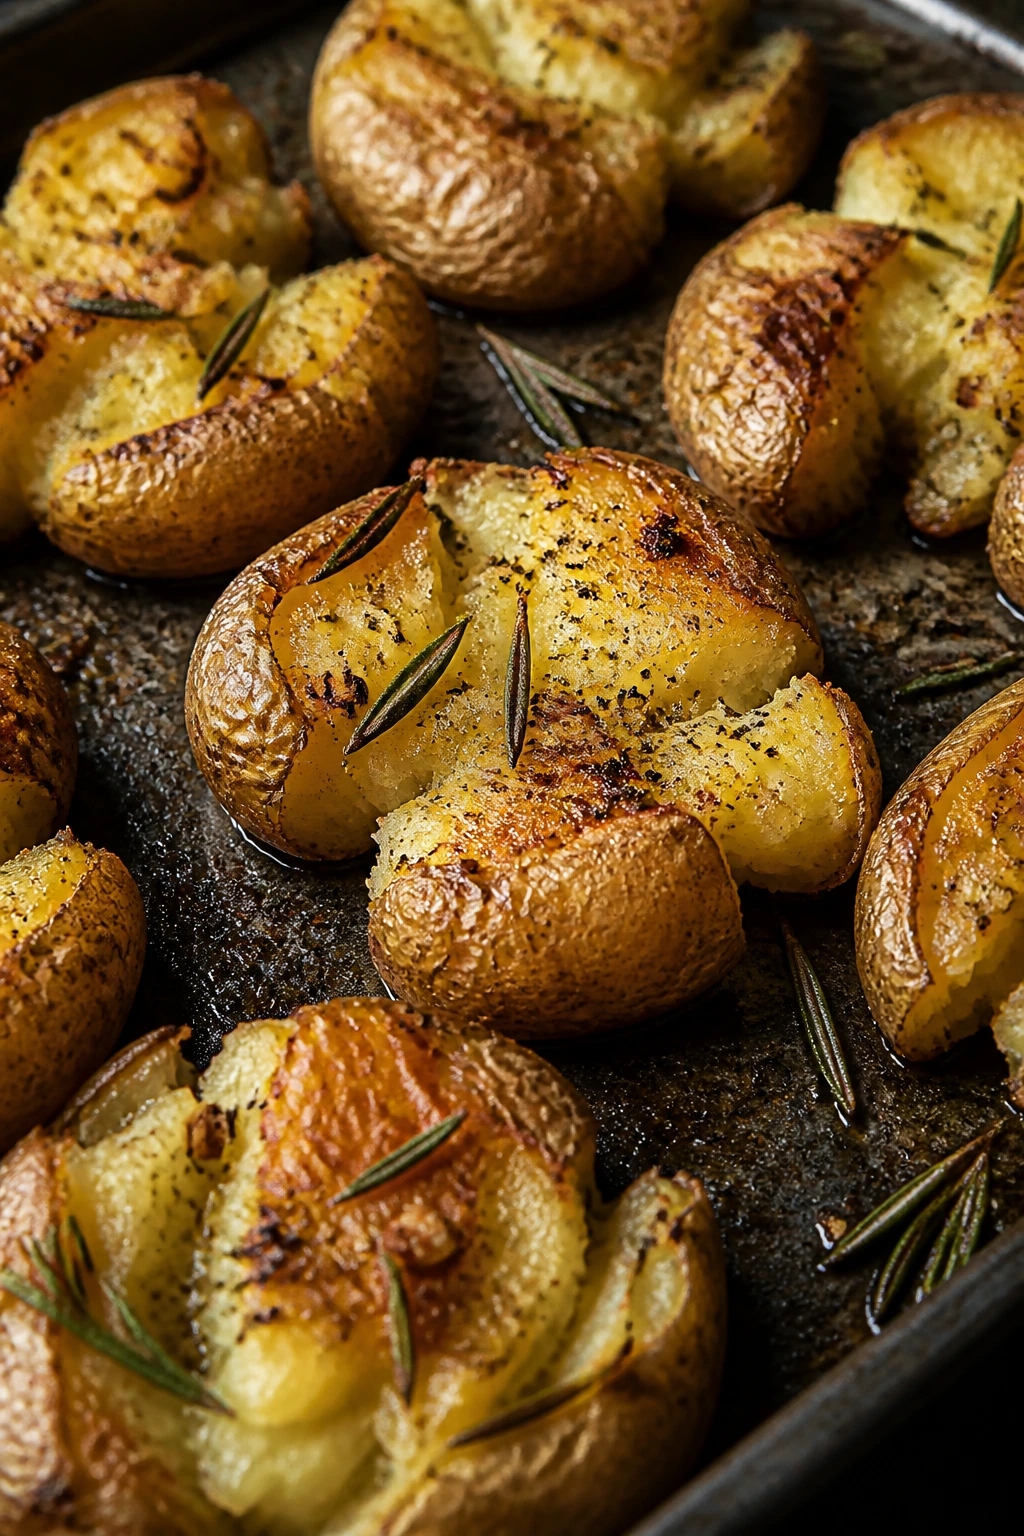
These are the potatoes people fight over. Boil them until tender, smash them flat, then roast them until the edges go shattery and crisp. Rosemary and garlic make the kitchen smell like someone knows what they’re doing.
Why It Works: Smashed potatoes give you two textures in one bite: fluffy inside, crisp outside. The smash creates more surface area, which means more browning. Rosemary and garlic infuse the oil before roasting, so every crevice gets flavor.
Key Ingredients:
- 2 pounds baby potatoes
- 3 tablespoons olive oil
- 2 tablespoons melted butter
- 2 teaspoons chopped rosemary
- 2 garlic cloves, minced
- 1 teaspoon kosher salt
- 1/2 teaspoon black pepper
- 1/4 cup grated Parmesan, optional
Quick Steps:
- Boil the potatoes in salted water until fork-tender, about 15 to 18 minutes.
- Drain and let them steam dry for 5 minutes.
- Place on a sheet pan and smash each potato with the bottom of a glass.
- Drizzle with olive oil, butter, rosemary, garlic, salt, and pepper, then roast at 425°F for 20 to 25 minutes until crisp.
Equipment for This Recipe:
- Large pot
- Sheet pan
- Potato masher or glass
How to Serve This Dish: Serve them hot and a little rough-looking; that’s the point. They fit beside roast chicken, steak, or grilled sausages, and they’re strong enough to hold a spoonful of sour cream if you want.
Pro Tips for This Recipe:
- Use waxy potatoes like Yukon Gold or baby reds so they hold together.
- Let the potatoes dry after boiling; wet skins won’t crisp.
- Flip carefully if you want both sides browned.
Variations on This Dish:
- Cheddar-Chive Smash: Add cheddar and chives in the last 5 minutes.
- Smoked Paprika Potatoes: Dust with smoked paprika for a deeper roast flavor.
Common Mistakes to Avoid with This Dish:
- Don’t smash them too hard or they turn to rubble.
- Don’t crowd the pan; the edges need room to crisp.
9. Smoked Paprika Roasted Sweet Potatoes
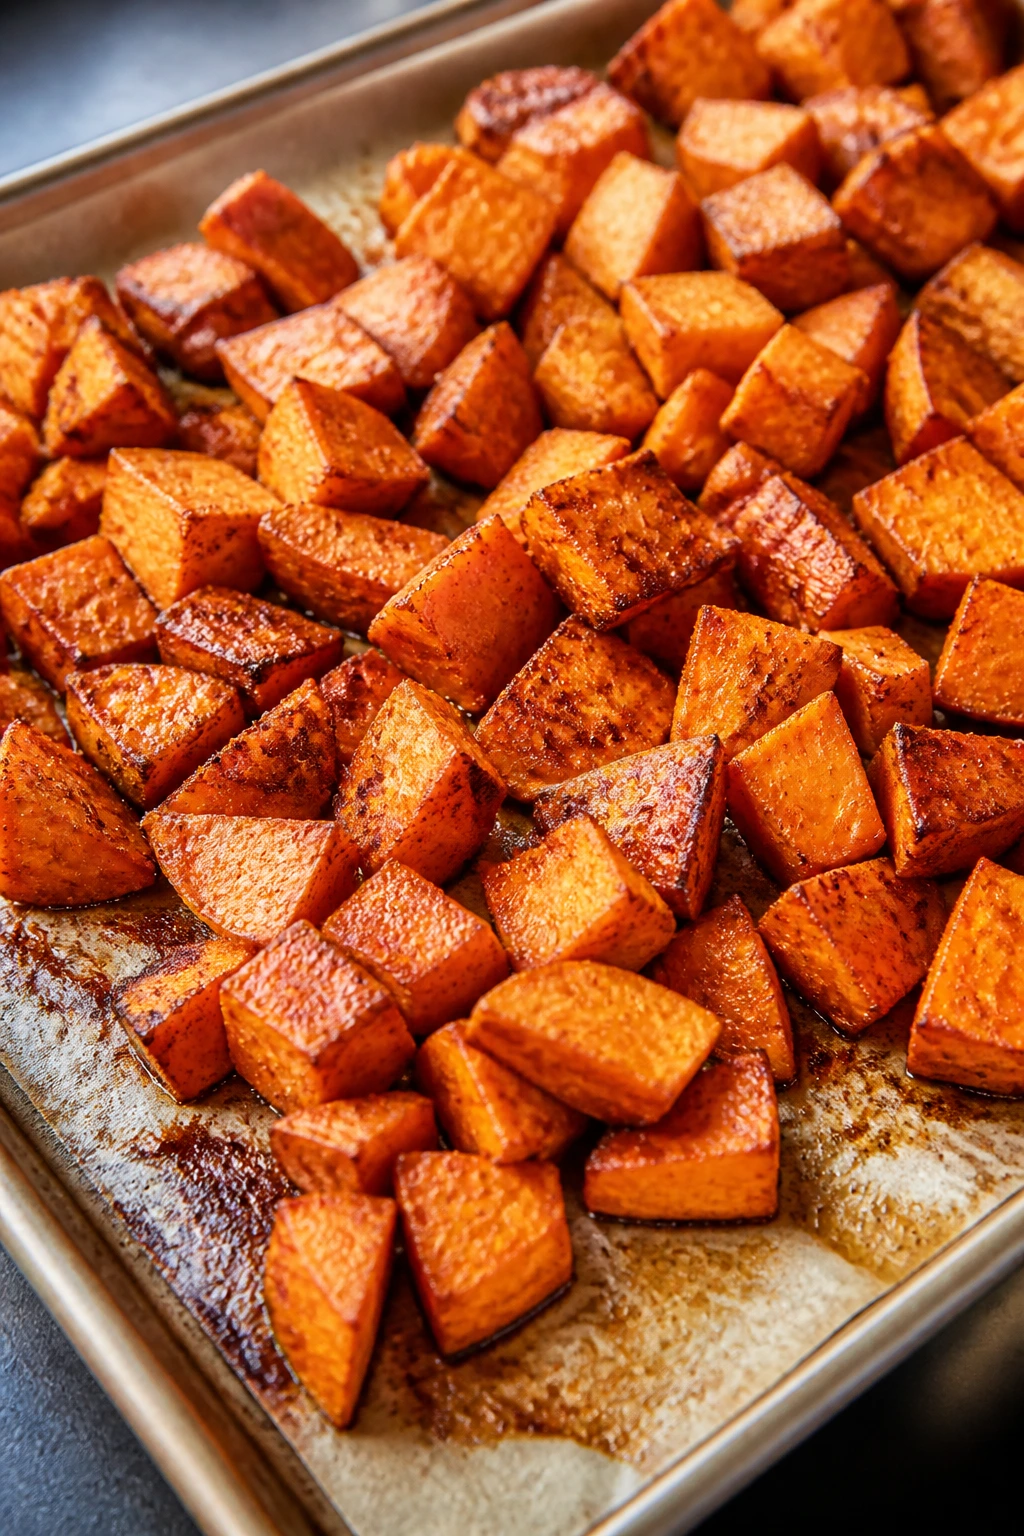
Sweet potatoes can slide into dessert territory fast, which is why smoked paprika and a little salt matter so much. You get caramelized edges, a dense soft center, and a faint smoky note that keeps the sweetness honest.
Why It Works: Sweet potatoes brown well when they’re cut into even cubes and roasted in a hot oven. Smoked paprika gives them depth without heat if you don’t want spice. A squeeze of lime at the end pulls the whole tray into balance.
Key Ingredients:
- 2 pounds sweet potatoes, peeled and cubed
- 2 tablespoons olive oil
- 1 1/2 teaspoons smoked paprika
- 1/2 teaspoon ground cumin
- 1 teaspoon kosher salt
- 1/4 teaspoon black pepper
- 1 tablespoon lime juice
- Chopped cilantro, optional
Quick Steps:
- Heat the oven to 425°F.
- Toss the cubes with oil, paprika, cumin, salt, and pepper.
- Roast for 25 to 30 minutes, turning once, until the edges caramelize.
- Finish with lime juice and cilantro.
Equipment for This Recipe:
- Sheet pan
- Large bowl
- Spatula
How to Serve This Dish: Serve them with grilled pork, roast chicken, or black bean mains if the meal is vegetarian. The sweet-smoky flavor also sits well beside anything with a creamy sauce.
Pro Tips for This Recipe:
- Cut the cubes to the same size so they cook evenly.
- Don’t overload the pan or they soften instead of browning.
- Add the lime after roasting so the flavor stays sharp.
Variations on This Dish:
- Cinnamon-Chile Sweet Potatoes: Add a pinch of cinnamon and cayenne.
- Garlic Herb Version: Use garlic powder and rosemary instead of cumin.
Common Mistakes to Avoid with This Dish:
- Don’t use too much oil; the potatoes will go slick and pale.
- Don’t pull them early just because the centers feel soft — the browned edges are the payoff.
10. Charred Corn Salad with Lime and Cotija
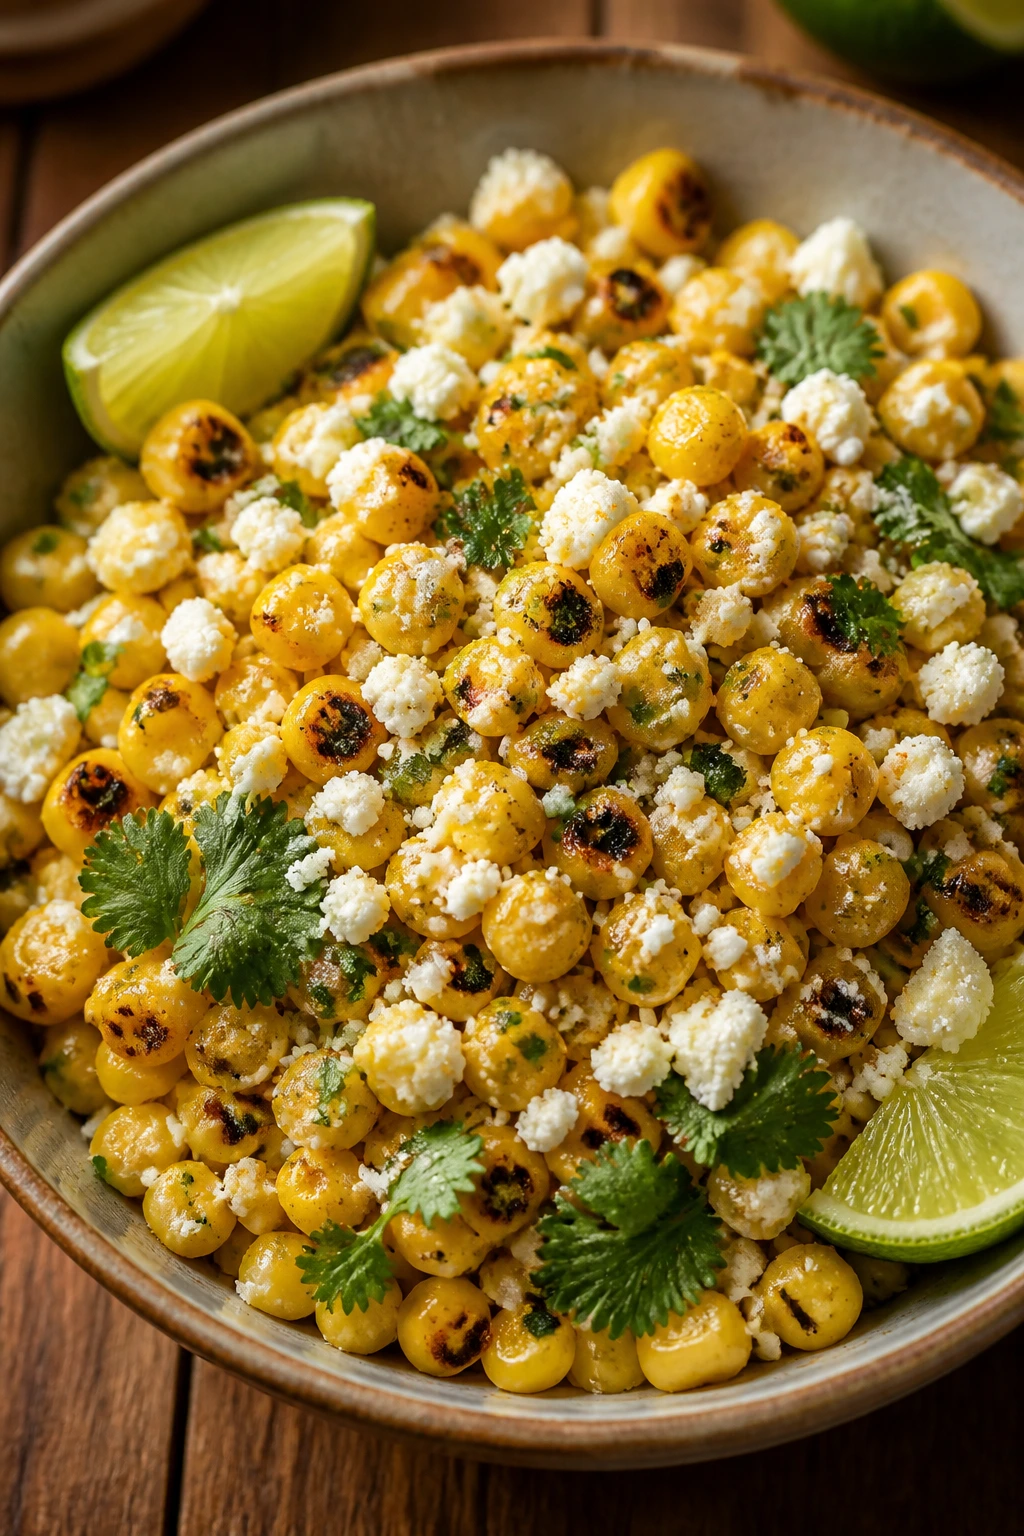
Corn salad is one of those sides that tastes louder than it looks. The kernels pick up char, the lime brings a snap of acidity, and the cotija crumbles into salty pockets that make the whole bowl feel more complete.
Why It Works: Charring the corn deepens its sweetness and gives it a smoky edge. Lime juice and a little mayo or olive oil make a light dressing that coats the kernels without turning them creamy in the wrong way. Cotija adds the salty finish that keeps people reaching back in.
Key Ingredients:
- 6 ears corn, kernels cut off, or 4 cups frozen corn
- 2 tablespoons olive oil
- 1/4 cup mayonnaise or Greek yogurt
- 2 tablespoons lime juice
- 1/3 cup crumbled cotija
- 1/4 cup chopped cilantro
- 1 small jalapeño, minced
- 2 tablespoons diced red onion
- Salt to taste
Quick Steps:
- Heat a cast-iron skillet over medium-high and add the oil.
- Cook the corn until some kernels blister and brown, about 6 to 8 minutes.
- Mix with mayo, lime juice, cotija, cilantro, jalapeño, onion, and salt.
- Taste and add more lime if the corn is very sweet.
Equipment for This Recipe:
- Cast-iron skillet
- Mixing bowl
- Sharp knife
How to Serve This Dish: Spoon it into a wide bowl so the charred kernels stay visible. It belongs next to grilled meat, tacos, or a simple roasted chicken and can handle a spoonful of hot sauce on the side.
Pro Tips for This Recipe:
- If using frozen corn, thaw and pat it dry first.
- Don’t overmix; you want some kernels to stay distinct.
- Add cilantro at the end so it stays fresh and green.
Variations on This Dish:
- Street-Corn Style: Add chili powder and extra mayo.
- Herb Corn Salad: Swap cilantro for basil and parsley.
Common Mistakes to Avoid with This Dish:
- Don’t simmer the corn in water and call it done; you lose the char.
- Don’t drown it in dressing or the salad turns mushy.
11. Miso-Butter Cabbage Steaks
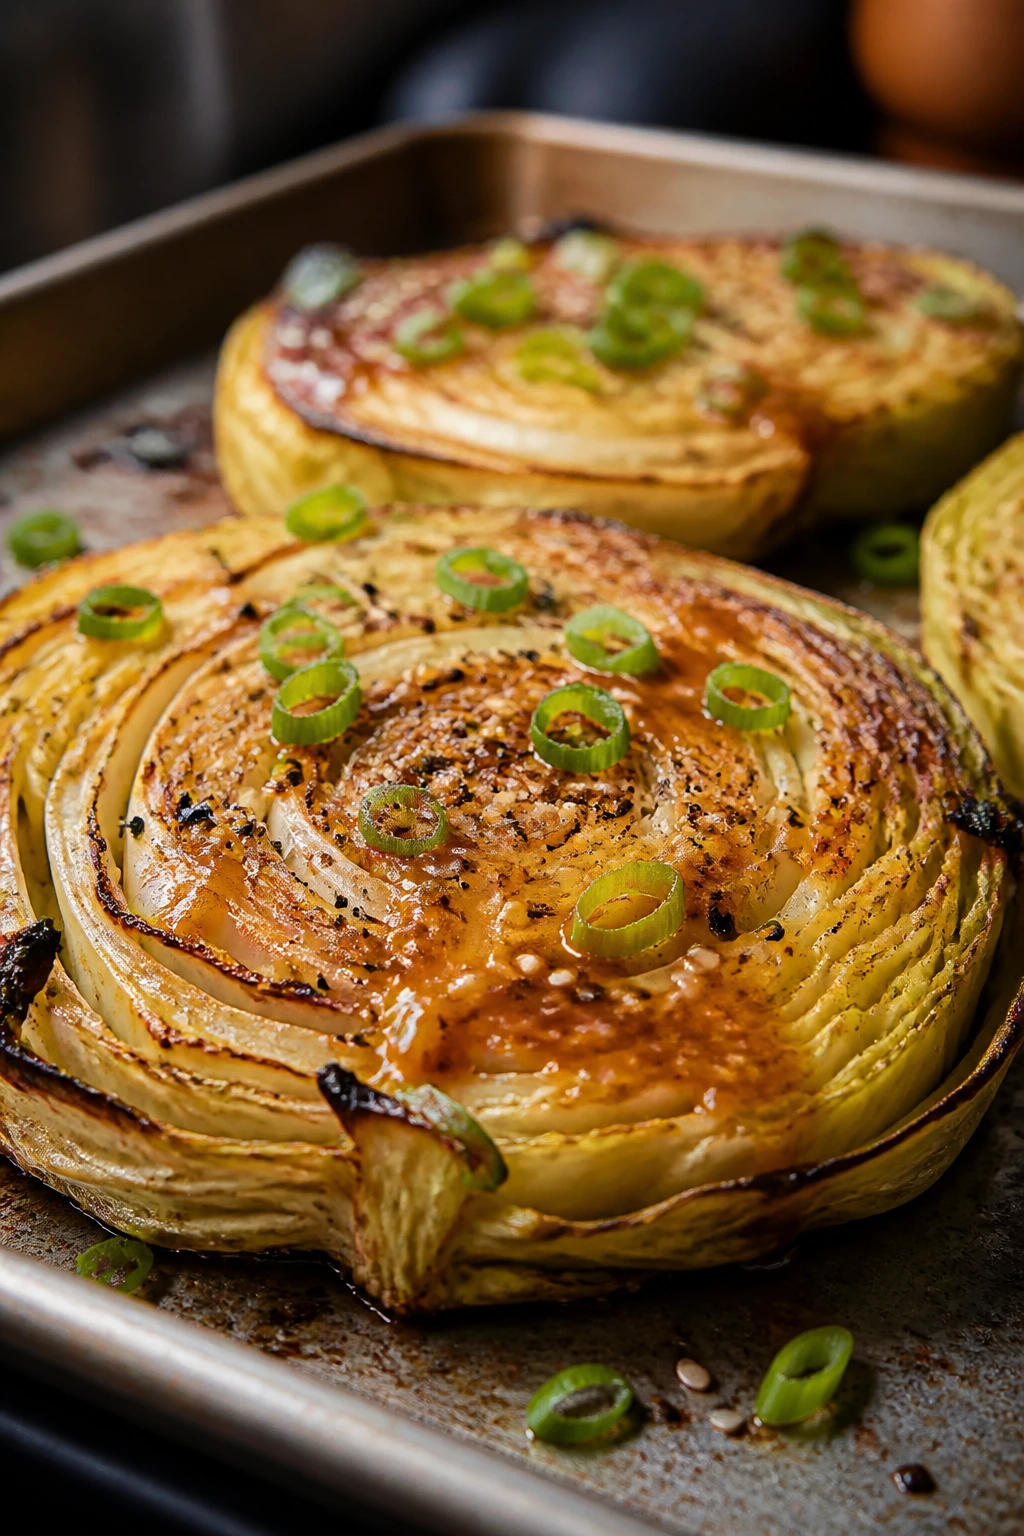
Cabbage steaks have a reputation problem, and it mostly comes from underseasoning. Brush them with miso butter, roast them hard, and the edges turn sweet, savory, and a little crisp while the centers stay tender.
Why It Works: Cabbage softens beautifully when roasted, but it needs fat and salt to taste full. Miso brings fermented depth, which reads almost meaty beside roast pork or grilled sausages. Butter helps the cabbage brown instead of drying out.
Key Ingredients:
- 1 large green cabbage, cut into 1-inch slabs
- 3 tablespoons unsalted butter, melted
- 1 tablespoon white miso
- 1 tablespoon soy sauce
- 1 teaspoon honey
- 1 tablespoon sesame seeds
- 2 scallions, sliced
Quick Steps:
- Heat the oven to 425°F and line a sheet pan.
- Mix the butter, miso, soy sauce, and honey into a smooth glaze.
- Brush both sides of the cabbage slabs, then roast for 25 to 30 minutes, flipping once.
- Sprinkle with sesame seeds and scallions before serving.
Equipment for This Recipe:
- Large sheet pan
- Pastry brush
- Small bowl
How to Serve This Dish: Serve the steaks with the browned side up so the caramelization shows. They pair well with pork chops, grilled chicken, or rice bowls that need a sturdy vegetable.
Pro Tips for This Recipe:
- Keep the slabs attached at the core so they hold together.
- Use a thin brush coat first, then add a little more halfway through roasting.
- If the edges darken too fast, tent loosely with foil.
Variations on This Dish:
- Chili Crisp Cabbage: Drizzle with chili crisp after roasting.
- Garlic Sesame Version: Add grated garlic to the glaze.
Common Mistakes to Avoid with This Dish:
- Don’t slice the cabbage too thin or the steaks fall apart.
- Don’t skip the flip; one side needs direct pan contact for real browning.
12. Classic Ratatouille
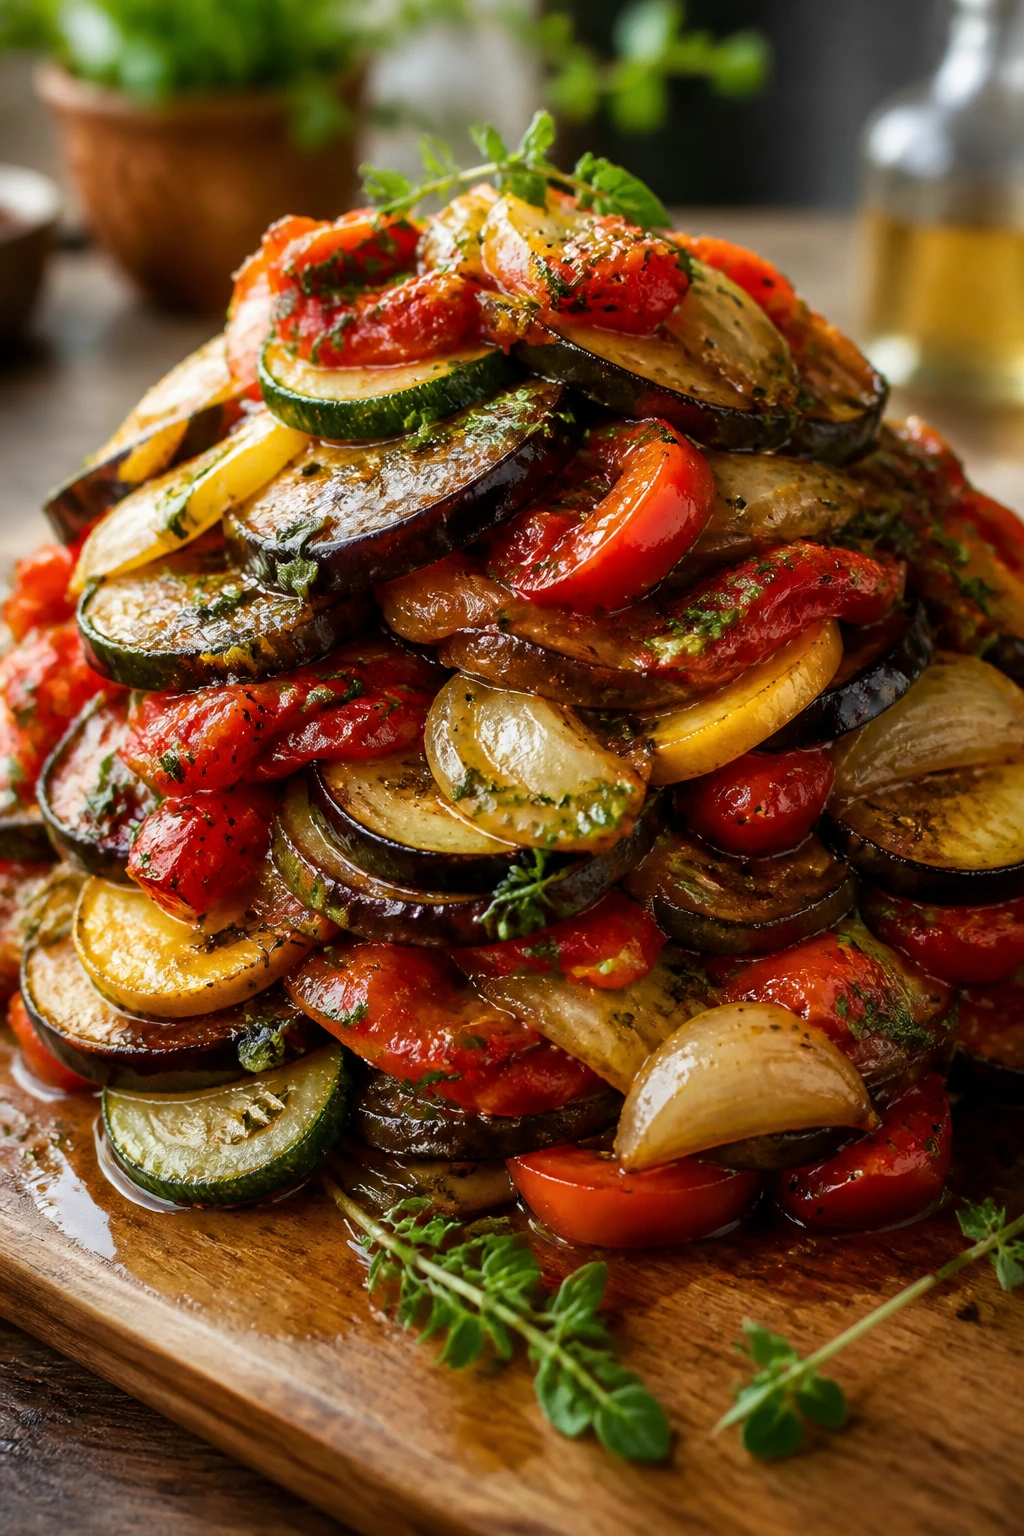
Ratatouille looks rustic because it is rustic, but that’s part of the charm. Eggplant, zucchini, peppers, tomatoes, garlic, and herbs simmer into a glossy pile that tastes like summer vegetables with more patience than usual.
Why It Works: The vegetables soften at different speeds, so cooking them in stages keeps each one from dissolving. Olive oil carries the herb flavor, while tomatoes add acidity to keep the dish from feeling muddy. It’s one of those sides that gets better as it rests a bit.
Key Ingredients:
- 1 eggplant, diced
- 2 zucchini, sliced
- 1 yellow squash, sliced
- 1 red bell pepper, diced
- 1 onion, sliced
- 4 garlic cloves, minced
- 4 tomatoes, chopped
- 3 tablespoons olive oil
- 1 teaspoon dried thyme
- 1 teaspoon dried basil
- Salt and pepper
Quick Steps:
- Sauté the onion and bell pepper in olive oil until softened.
- Add the eggplant and cook until it starts to turn tender.
- Stir in the zucchini, squash, garlic, tomatoes, thyme, basil, salt, and pepper.
- Simmer uncovered for 20 to 25 minutes until glossy and spoonable.
Equipment for This Recipe:
- Large skillet or Dutch oven
- Wooden spoon
- Sharp knife
How to Serve This Dish: Serve warm, not piping hot, with crusty bread or alongside roast chicken. It also works under a piece of baked fish where the tomatoes can act like a light sauce.
Pro Tips for This Recipe:
- Salt the eggplant lightly and let it sit 10 minutes if it tends to be bitter.
- Cut the vegetables to similar sizes so they cook evenly.
- Let the ratatouille rest 15 minutes before serving; the flavor settles in.
Variations on This Dish:
- Provencal Herbes Version: Add rosemary and oregano.
- Baked Ratatouille: Layer the slices in a dish and bake for a more structured look.
Common Mistakes to Avoid with This Dish:
- Don’t rush the onion and pepper base; it gives the dish its backbone.
- Don’t crank the heat so high that the tomatoes scorch before the vegetables soften.
13. Maple-Roasted Parsnips
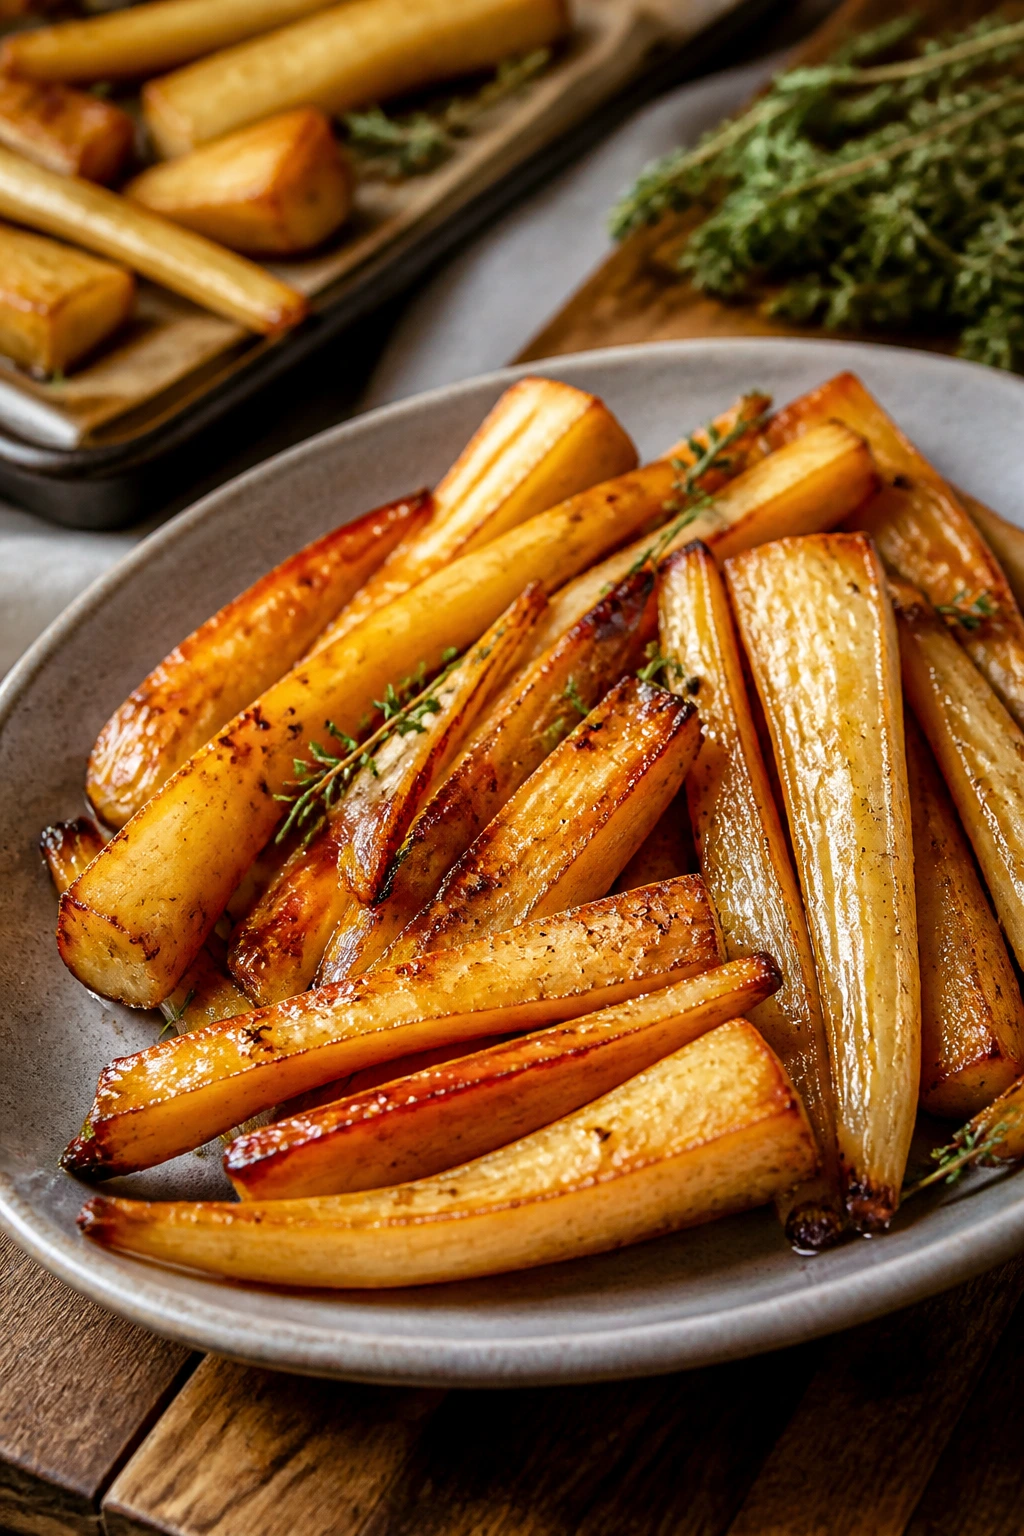
Parsnips taste a little like carrots wearing a wool coat. Roast them with maple and thyme and they turn sweet, earthy, and just strange enough to feel special beside a standard dinner plate.
Why It Works: Parsnips brown well because they’re starchy, and maple syrup amplifies their natural sweetness. A little thyme keeps the flavor grounded. The result is a side that feels rich enough for a roast, even though the ingredients are simple.
Key Ingredients:
- 2 pounds parsnips, peeled and cut into batons
- 2 tablespoons olive oil
- 2 tablespoons maple syrup
- 1 teaspoon fresh thyme leaves
- 1/2 teaspoon kosher salt
- 1/4 teaspoon black pepper
- 1 teaspoon Dijon mustard, optional
Quick Steps:
- Heat the oven to 425°F.
- Toss the parsnips with oil, maple syrup, thyme, salt, pepper, and Dijon if using.
- Roast for 25 to 30 minutes, turning once, until browned at the edges and fork-tender.
- Serve with the sticky pan glaze spooned over the top.
Equipment for This Recipe:
- Sheet pan
- Mixing bowl
- Peeler
How to Serve This Dish: Put them on a warm platter and keep the glaze visible. They work especially well with roast pork, glazed ham, or chicken with herbs.
Pro Tips for This Recipe:
- Choose smaller parsnips if possible; they’re less woody.
- Cut off the core if it looks tough and thick.
- Use parchment if your maple syrup tends to stick to pans.
Variations on This Dish:
- Carrot-Parsnip Mix: Roast a 50/50 mix for more color.
- Mustard Herb Parsnips: Add a little extra Dijon and chopped rosemary.
Common Mistakes to Avoid with This Dish:
- Don’t leave huge parsnips whole; they brown unevenly.
- Don’t add too much syrup or the edges can burn before the centers soften.
14. Beet and Orange Salad with Pistachios
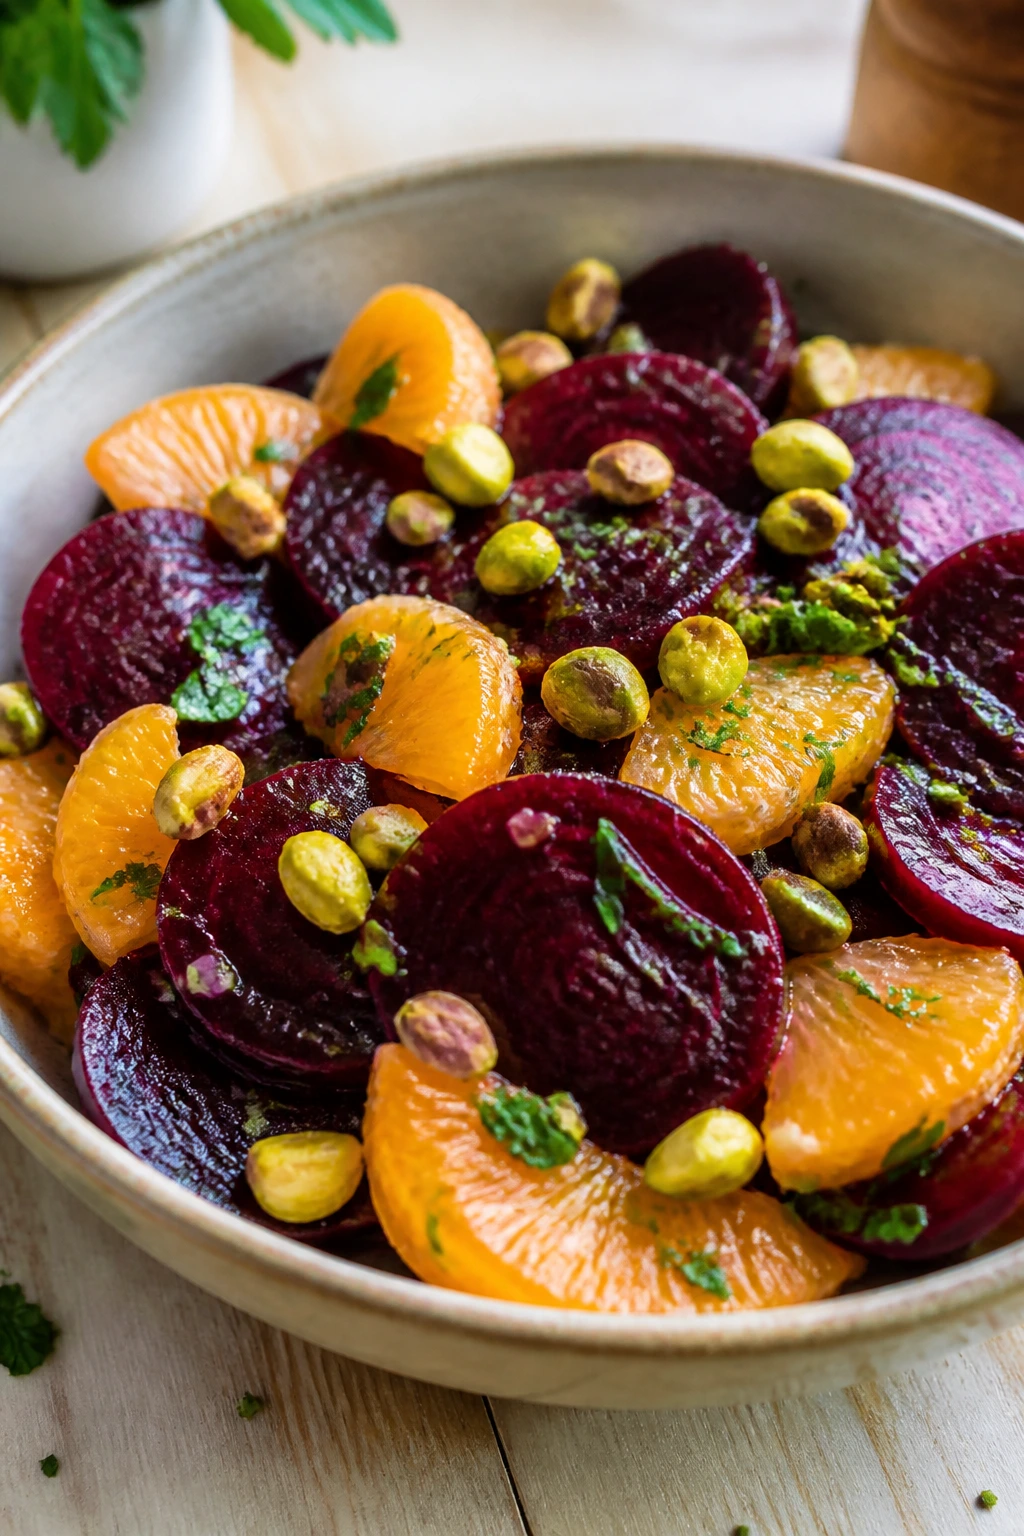
Beets and orange belong together because one is deep and earthy while the other cuts through with clean juice. Add pistachios for crunch and a little salty cheese if you want the salad to read more like a side than a garnish.
Why It Works: Roasted beets have sweetness and density, while oranges provide acidity and fresh flavor. Pistachios keep the texture from going soft, and a simple vinaigrette ties the bowl together. It’s the kind of side that holds its own next to roasted meat instead of hiding beside it.
Key Ingredients:
- 4 medium beets, roasted and peeled
- 2 oranges, peeled and segmented
- 2 tablespoons olive oil
- 1 tablespoon red wine vinegar
- 1/4 cup pistachios, roughly chopped
- 1/4 cup crumbled goat cheese, optional
- 1 tablespoon chopped dill
- Salt and pepper
Quick Steps:
- Roast the beets wrapped in foil at 400°F until tender, about 45 to 60 minutes.
- Cool, peel, and cut into wedges.
- Whisk the olive oil, vinegar, salt, and pepper into a dressing.
- Toss the beets with oranges, pistachios, dill, and goat cheese, then drizzle with dressing.
Equipment for This Recipe:
- Foil
- Mixing bowl
- Small whisk
How to Serve This Dish: Serve it slightly chilled or at room temperature. It works beside grilled lamb, roast chicken, or a holiday spread that needs something bright and not heavy.
Pro Tips for This Recipe:
- Roast the beets until a knife slips in easily; underdone beets taste blunt.
- Peel oranges over a bowl so you catch the juices.
- Dress lightly so the beets don’t stain everything into one color.
Variations on This Dish:
- Fennel Orange Beet Salad: Add shaved fennel for more crunch.
- No-Cheese Version: Use extra pistachios and herbs if you want it dairy-free.
Common Mistakes to Avoid with This Dish:
- Don’t toss everything too early or the oranges break down.
- Don’t forget salt; beets need it to taste like more than dirt and sugar.
15. Garlic-Sherry Mushrooms
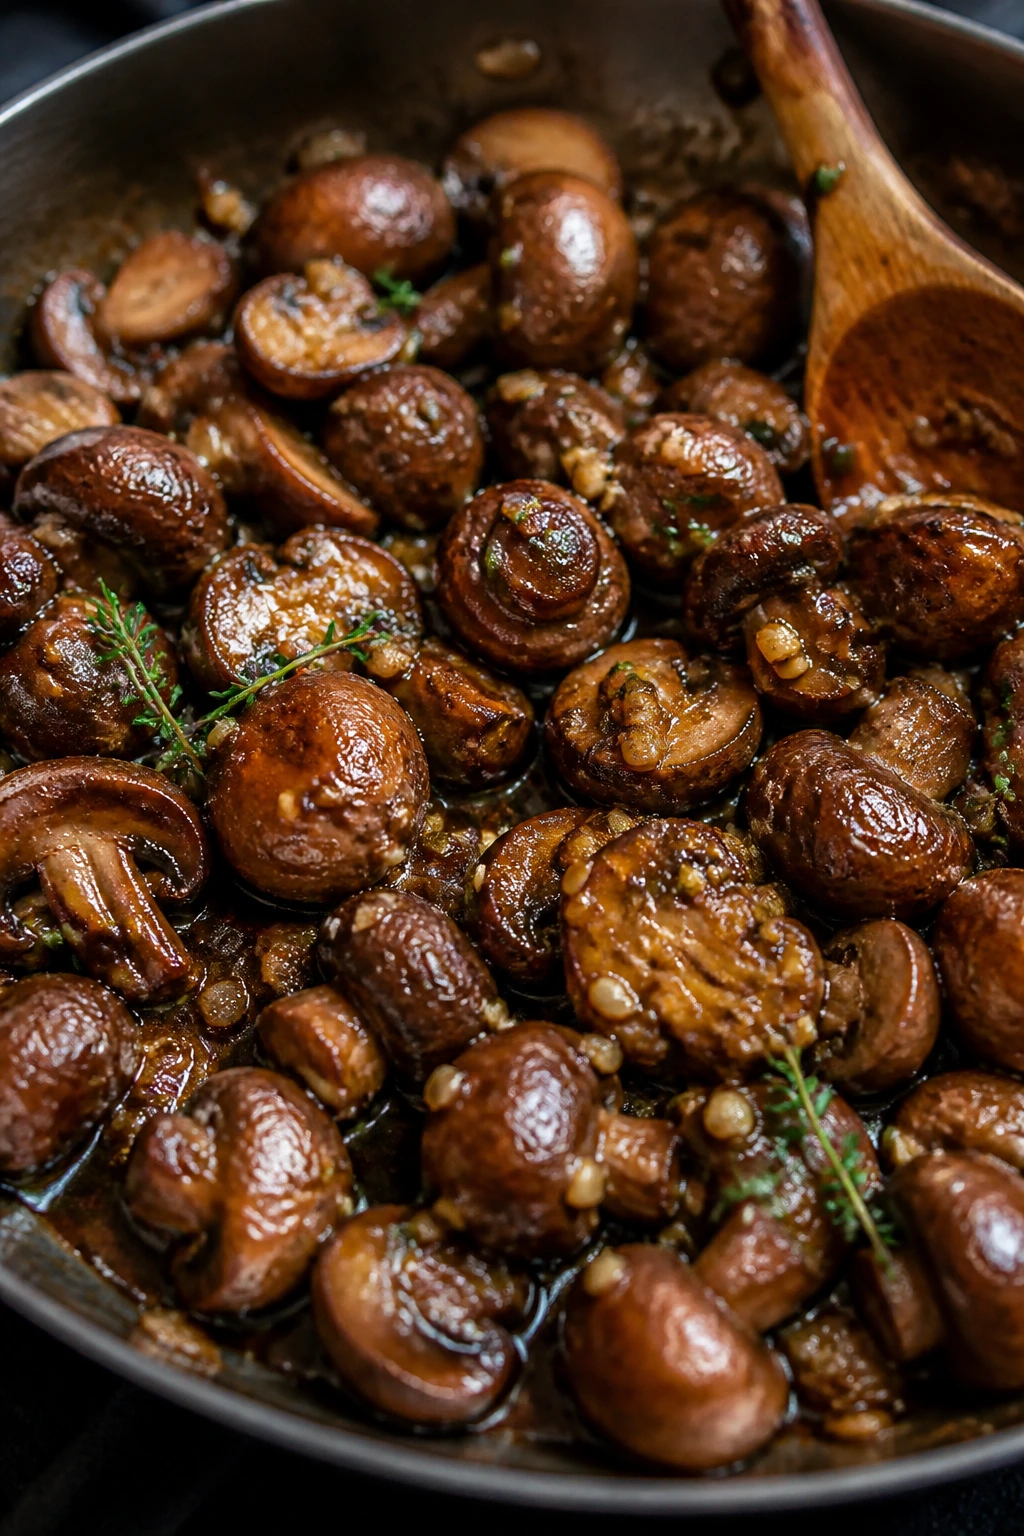
Mushrooms are one of the easiest vegetable sides to make taste expensive. Cook them hot and fast, let the liquid evaporate, then splash in sherry so the pan picks up a glossy, savory sauce that clings to every cap.
Why It Works: Mushrooms release a lot of water before they brown, so you need enough heat to drive that moisture off. Sherry deglazes the pan and brings a slightly sweet, nutty note. Garlic and thyme give the mushrooms the kind of depth that sits well beside steak.
Key Ingredients:
- 1 1/2 pounds cremini mushrooms, cleaned and halved
- 2 tablespoons olive oil
- 2 tablespoons unsalted butter
- 3 garlic cloves, minced
- 1/4 cup dry sherry
- 1 teaspoon thyme leaves
- 1/2 teaspoon kosher salt
- Black pepper and parsley
Quick Steps:
- Heat the oil and butter in a skillet over medium-high.
- Add the mushrooms and cook without stirring much until they release moisture and start browning.
- Stir in the garlic and thyme for 30 seconds, then add the sherry and let it bubble until almost gone.
- Season and finish with parsley.
Equipment for This Recipe:
- Large skillet
- Wooden spoon
- Paper towel for cleaning mushrooms
How to Serve This Dish: Serve in a shallow bowl so the pan juices stay with the mushrooms. They belong next to steak, roast chicken, or mashed potatoes that can soak up the sauce.
Pro Tips for This Recipe:
- Don’t wash mushrooms under a running tap; wipe them clean instead.
- Use a wide skillet so they brown instead of steaming.
- Salt after browning if your mushrooms shrink fast.
Variations on This Dish:
- White Wine Mushrooms: Use dry white wine instead of sherry.
- Creamed Version: Stir in 2 tablespoons cream at the end for a richer sauce.
Common Mistakes to Avoid with This Dish:
- Don’t crowd the pan or the mushrooms stew in their own liquid.
- Don’t add garlic too early; it burns before the mushrooms are ready.
16. Spicy Roasted Okra
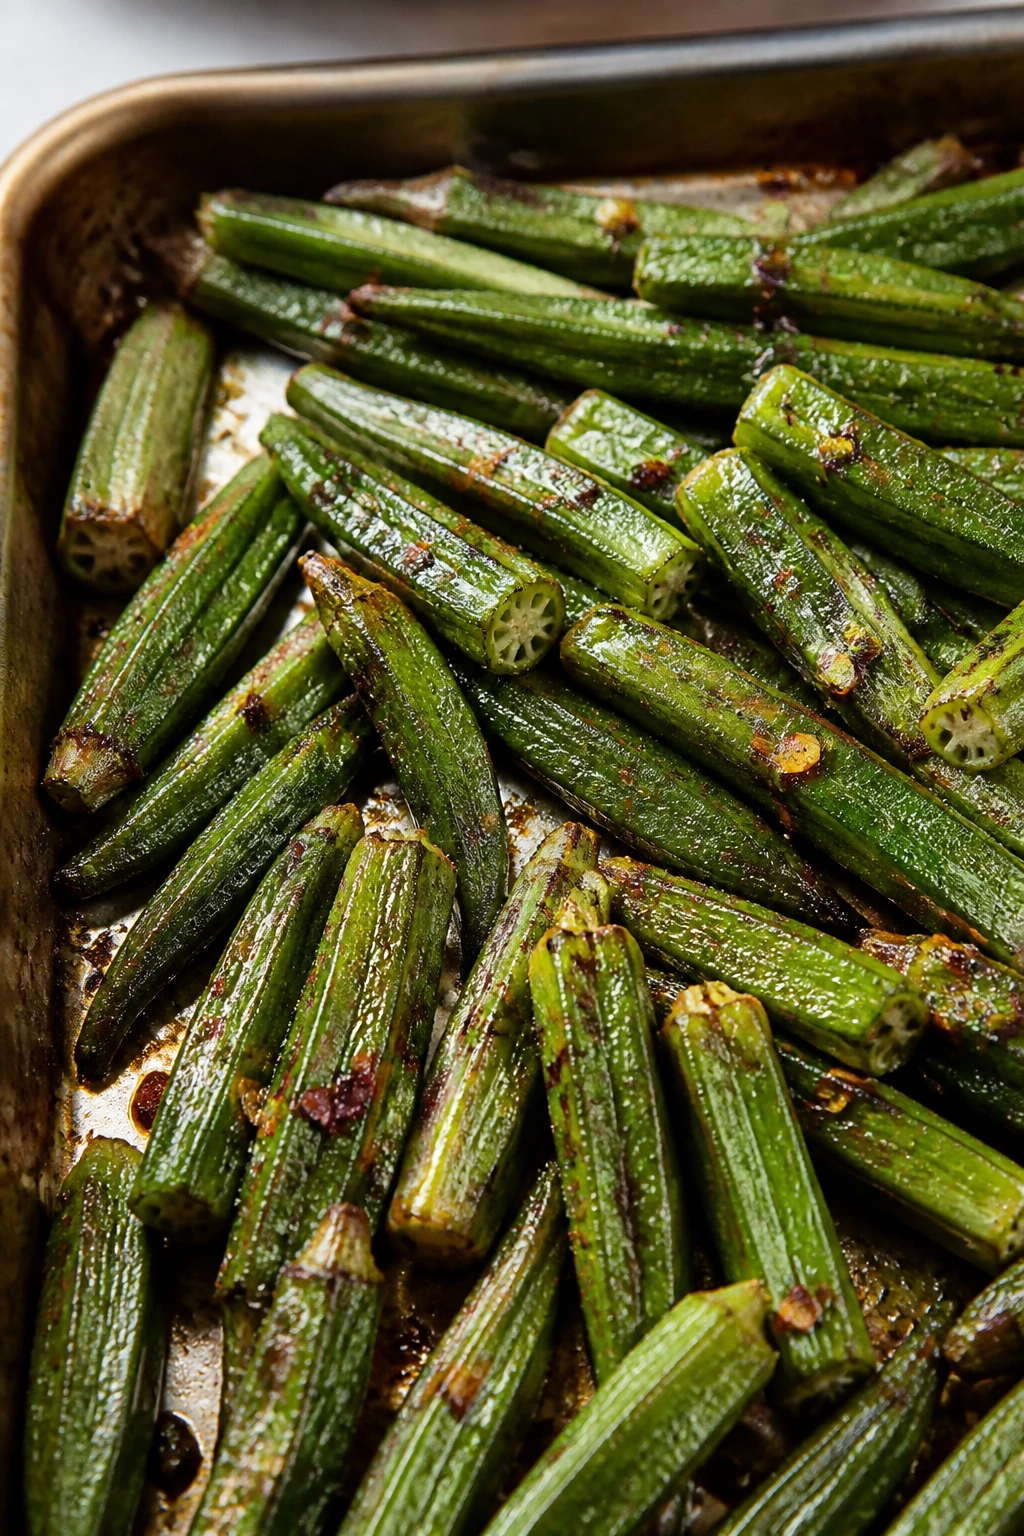
Okra gets a bad name mostly from people who’ve only met it limp. Roast it hot with spices and it turns tender, a little smoky, and surprisingly crisp at the edges, with none of the slimy texture that scares people off.
Why It Works: High heat dries the surface fast, which is the enemy of slime. A light coating of oil and spice helps okra brown instead of steam. The result is a side that works almost like a roasted snack, especially next to grilled meat.
Key Ingredients:
- 1 1/2 pounds okra, trimmed and halved lengthwise if large
- 2 tablespoons olive oil
- 1 teaspoon kosher salt
- 1 teaspoon smoked paprika
- 1/2 teaspoon garlic powder
- 1/4 teaspoon cayenne, optional
- Black pepper
Quick Steps:
- Heat the oven to 450°F and line a sheet pan.
- Toss the okra with oil and spices until lightly coated.
- Roast for 15 to 18 minutes, turning once, until the edges are browned and crisp.
- Serve immediately.
Equipment for This Recipe:
- Rimmed sheet pan
- Mixing bowl
- Spatula
How to Serve This Dish: Serve while hot, because okra loses its crisp edge as it cools. It fits well beside fried chicken, grilled pork, or any plate that benefits from something earthy and a little spicy.
Pro Tips for This Recipe:
- Choose smaller pods when you can; they’re more tender.
- Dry the okra well after washing.
- Don’t crowd the pan or the pods soften.
Variations on This Dish:
- Cornmeal Okra: Toss in a tablespoon or two of cornmeal for extra crunch.
- Lemon Pepper Okra: Swap cayenne for lemon pepper seasoning.
Common Mistakes to Avoid with This Dish:
- Don’t slice the pods too thin or the seeds can dry out.
- Don’t underseason; okra needs salt to taste like a side dish, not a green afterthought.
17. Parmesan Asparagus with Lemon Zest
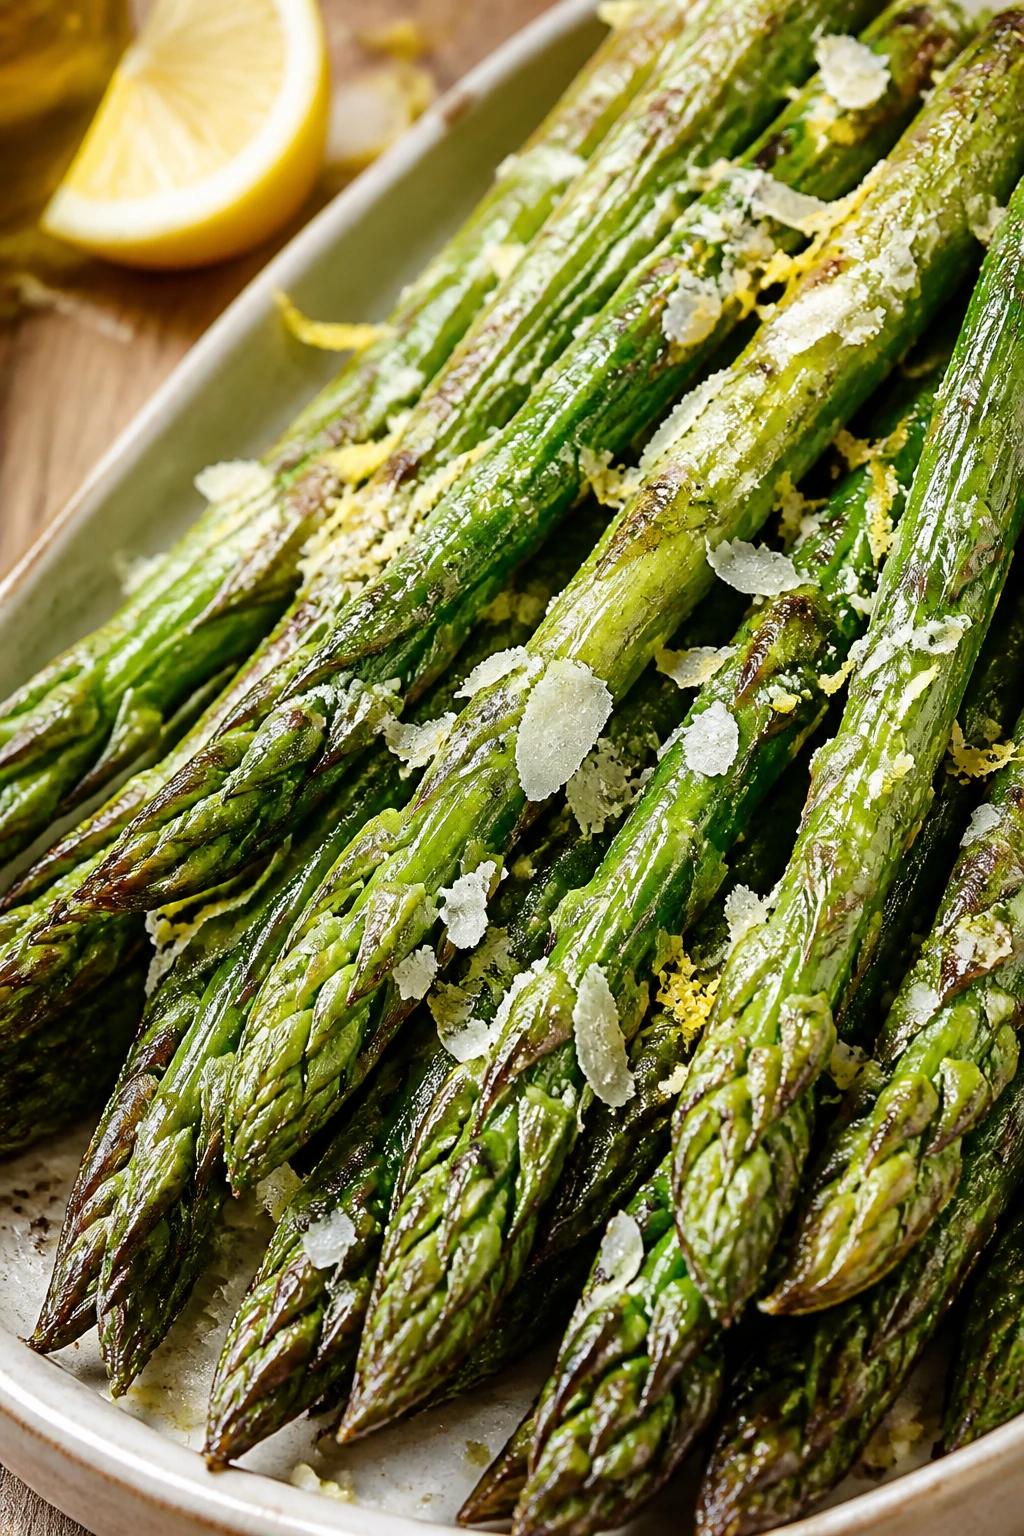
Asparagus has a short window where it tastes sweet, grassy, and sharp all at once. Roast it with parmesan and lemon and you get a side that feels polished without requiring much more than a sheet pan.
Why It Works: Asparagus cooks fast, so the high heat gives you color before the stalks go floppy. Parmesan brings salt and a crisp finish. Lemon zest makes the whole dish smell brighter, which matters when the rest of dinner is rich.
Key Ingredients:
- 2 pounds asparagus, trimmed
- 2 tablespoons olive oil
- 2 garlic cloves, minced
- 1/2 teaspoon kosher salt
- 1/4 teaspoon black pepper
- 1/3 cup grated Parmesan
- 1 teaspoon lemon zest
- Lemon wedges for serving
Quick Steps:
- Heat the oven to 425°F.
- Toss the asparagus with oil, garlic, salt, and pepper.
- Roast for 10 to 12 minutes until just tender and lightly browned.
- Sprinkle with Parmesan and lemon zest, then serve with wedges.
Equipment for This Recipe:
- Sheet pan
- Microplane
- Tongs
How to Serve This Dish: Serve in a neat bundle so the stalks stay aligned. It sits well next to salmon, roast chicken, or steak, and it doesn’t need much else beyond a squeeze of lemon.
Pro Tips for This Recipe:
- Use medium-thick asparagus for the best balance of tender and crisp.
- Trim the woody ends instead of peeling the whole stalk.
- Add the Parmesan at the end so it softens without vanishing.
Variations on This Dish:
- Panko Asparagus: Add toasted breadcrumbs for crunch.
- Balsamic Version: Drizzle with a little balsamic at the end.
Common Mistakes to Avoid with This Dish:
- Don’t roast it too long or the tips dry out.
- Don’t use thick, uneven stalks without sorting them by size.
18. Creamy Cucumber Dill Salad

This is the cold side that keeps a heavy meal from feeling overbuilt. The cucumbers stay crisp, the dill brings a clean green flavor, and the creamy dressing has enough vinegar to stay awake.
Why It Works: Cucumbers have so much water that they need salt and a short rest to settle down. The dressing should be tangy rather than thick, so it coats the slices without making them limp. Dill does the rest; it gives the salad that cool, fresh smell people associate with summer plates and deli counters.
Key Ingredients:
- 3 medium cucumbers, thinly sliced
- 1/2 red onion, very thinly sliced
- 1/2 cup sour cream or Greek yogurt
- 2 tablespoons white vinegar
- 2 tablespoons chopped dill
- 1 teaspoon sugar
- 1/2 teaspoon kosher salt
- Black pepper
Quick Steps:
- Toss the cucumbers with salt and let them sit for 10 minutes, then drain.
- Whisk the sour cream, vinegar, dill, sugar, and pepper.
- Fold in the cucumber and onion.
- Chill for 15 minutes before serving.
Equipment for This Recipe:
- Mixing bowl
- Sharp knife or mandoline
- Colander
How to Serve This Dish: Serve it cold in a shallow bowl. It works beside grilled chicken, meatloaf, or anything fried that needs something cool on the plate.
Pro Tips for This Recipe:
- Salt the cucumbers first or the dressing gets watery.
- Slice the onion paper-thin so it doesn’t dominate the bowl.
- Add the dressing close to serving if you want maximum crunch.
Variations on This Dish:
- Garlic Dill Salad: Add a tiny grated garlic clove.
- Vinegar-Forward Version: Use more vinegar and less sour cream.
Common Mistakes to Avoid with This Dish:
- Don’t skip draining the cucumbers.
- Don’t let the salad sit too long once dressed or the texture fades.
19. Maple-Sage Acorn Squash
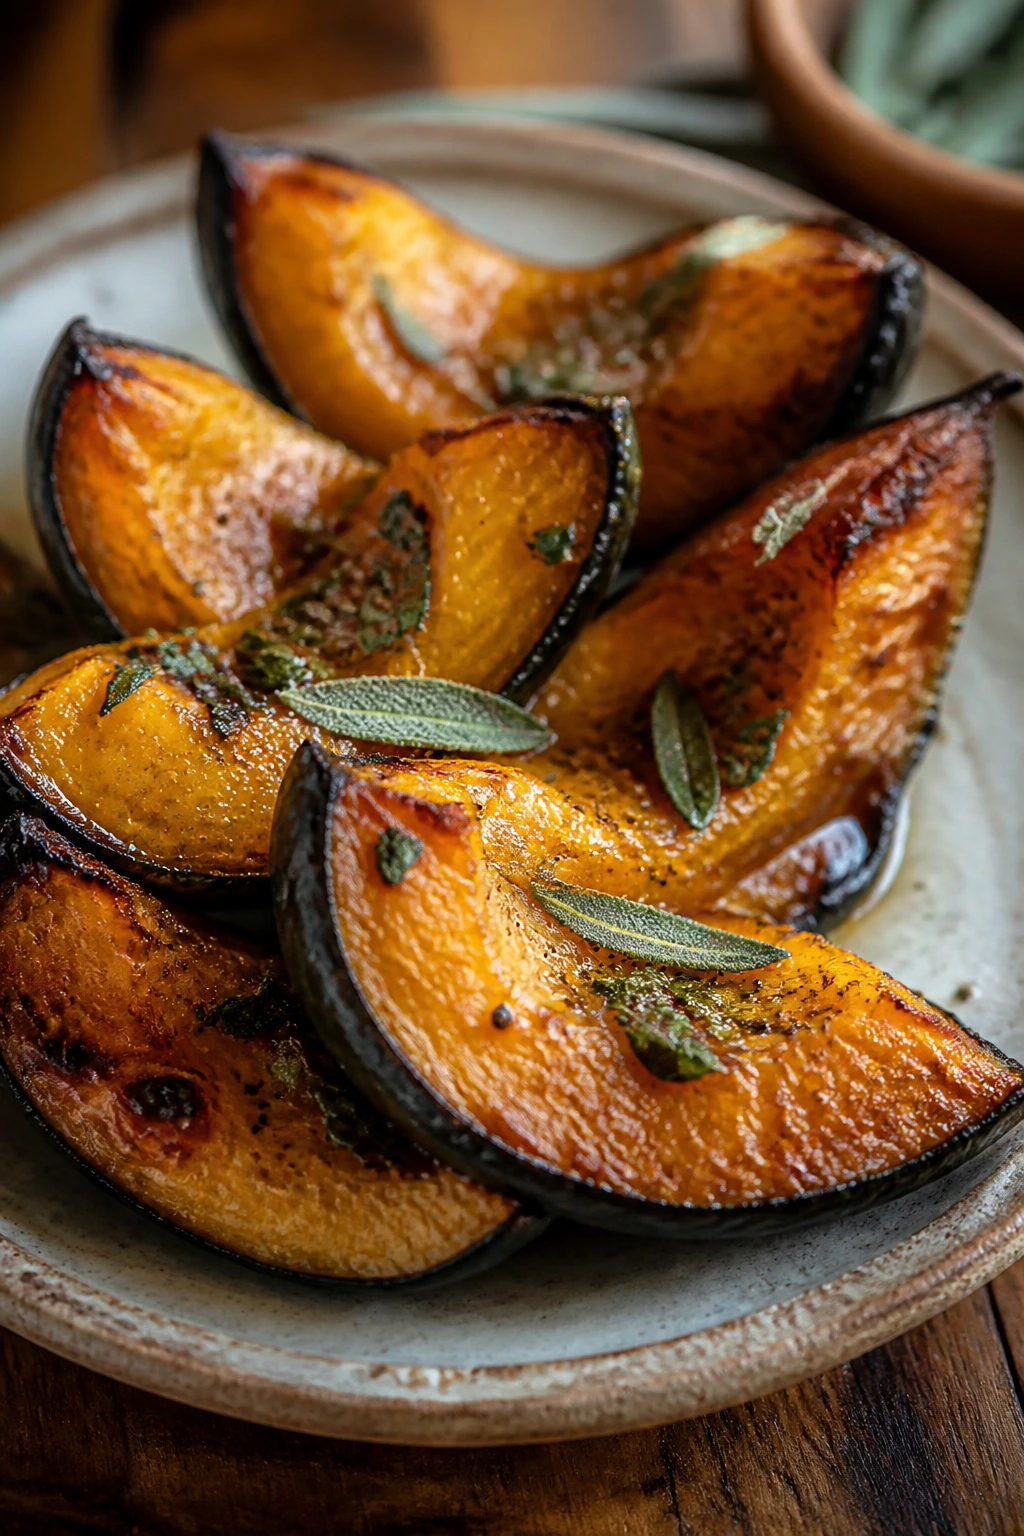
Acorn squash has a sweet, almost nutty flesh that gets even better when roasted in wedges. Maple and sage give it a buttery, fall-leaning flavor that works because it doesn’t lean into dessert.
Why It Works: The squash caramelizes naturally, and maple syrup helps the edges brown. Sage adds a savory note that keeps it on the side-dish side of the table. A little butter at the end smooths out the flavor and makes each wedge glossy.
Key Ingredients:
- 2 acorn squash, halved, seeded, and cut into wedges
- 2 tablespoons olive oil
- 2 tablespoons maple syrup
- 2 tablespoons melted butter
- 1 tablespoon chopped sage
- 1/2 teaspoon kosher salt
- Black pepper
Quick Steps:
- Heat the oven to 425°F.
- Toss the squash with oil, maple, butter, sage, salt, and pepper.
- Roast for 30 to 35 minutes, flipping once, until browned and tender.
- Spoon any pan glaze over the wedges before serving.
Equipment for This Recipe:
- Sheet pan
- Sharp chef’s knife
- Spoon for seeding
How to Serve This Dish: Serve the wedges skin-on so they hold together. They’re good beside roast pork, turkey, or any meal that already has a rich sauce.
Pro Tips for This Recipe:
- Microwave the squash for 1 minute if the skin is too hard to cut safely.
- Cut wedges evenly so they roast at the same rate.
- Don’t skimp on salt; sweet squash needs it.
Variations on This Dish:
- Brown Sugar Sage Squash: Replace maple with brown sugar.
- Chili Maple Squash: Add a pinch of red pepper flakes.
Common Mistakes to Avoid with This Dish:
- Don’t roast huge wedges without turning them; one side goes too dark.
- Don’t overdo the maple or the pan glaze burns.
20. Butternut Squash Purée with Sage Oil

If mashed potatoes are the usual comfort side, butternut squash purée is the smoother, slightly sweeter cousin with a cleaner finish. The sage oil on top makes it feel restaurant-ish without becoming fussy.
Why It Works: Roasting concentrates the squash so the purée doesn’t taste watery. Butter and cream make it silky, while sage oil adds aroma and a savory edge. The bowl ends up tasting layered instead of one-note sweet.
Key Ingredients:
- 1 large butternut squash, peeled, seeded, and cubed
- 2 tablespoons olive oil
- 2 tablespoons butter
- 1/4 cup heavy cream
- 8 to 10 sage leaves
- Salt and pepper
Quick Steps:
- Roast the squash cubes at 425°F with olive oil and salt for 25 to 30 minutes.
- Blend or mash with butter, cream, salt, and pepper until smooth.
- Fry the sage leaves in a little butter or oil until crisp.
- Spoon the purée into a bowl and top with the sage.
Equipment for This Recipe:
- Sheet pan
- Blender or food processor
- Small skillet
How to Serve This Dish: Spread it with the back of a spoon and drizzle the sage oil over the top. It works with roast chicken, pork tenderloin, or a holiday plate that needs something softer than potatoes.
Pro Tips for This Recipe:
- Roast until the squash has browned spots for a deeper flavor.
- Blend while warm for the smoothest texture.
- Add cream slowly; you can always loosen it more.
Variations on This Dish:
- Garlic Squash Purée: Roast a few garlic cloves with the squash.
- Maple Sage Version: Add 1 teaspoon maple syrup if you want a sweeter finish.
Common Mistakes to Avoid with This Dish:
- Don’t boil the squash unless you want a watery purée.
- Don’t add too much cream too fast or the texture turns loose.
21. Roasted Romanesco with Breadcrumbs
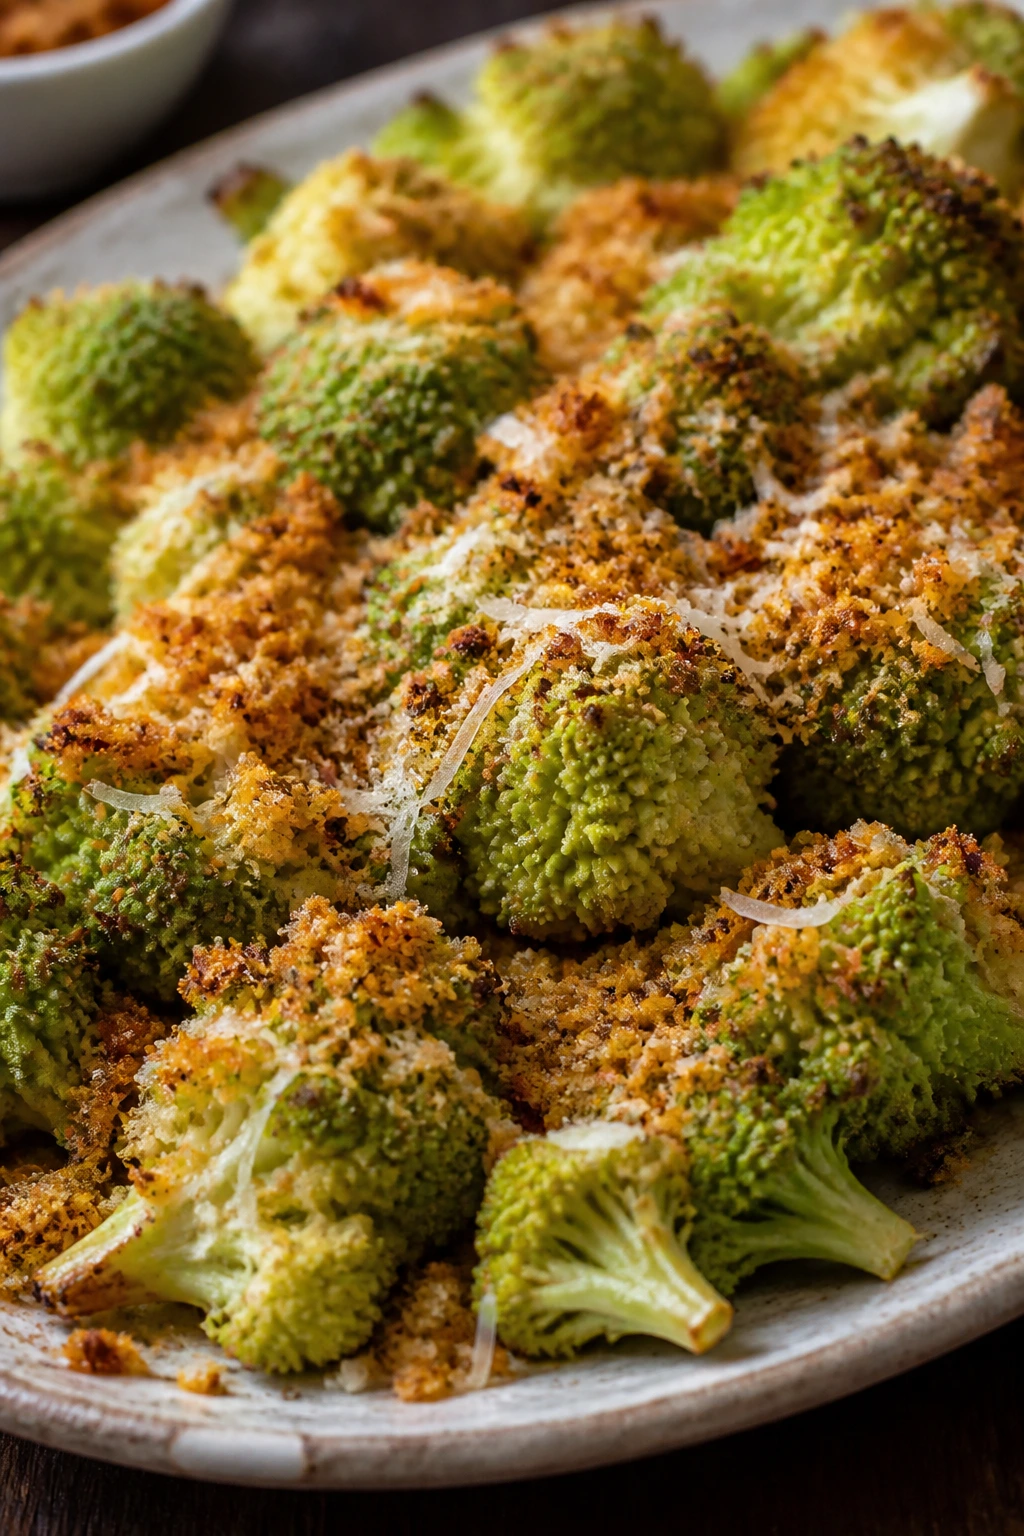
Romanesco has the kind of shape that makes people stop mid-sentence. Roast it until the little spirals brown, then throw toasted breadcrumbs over the top and it turns into a side that tastes as interesting as it looks.
Why It Works: Romanesco is firmer than cauliflower, so it holds up well to high heat. Breadcrumbs add a toasted crust that mimics the crunch meat eaters often want from roasted potatoes. Lemon at the end keeps the brassica flavor lively.
Key Ingredients:
- 2 heads romanesco, cut into florets
- 3 tablespoons olive oil
- 2 garlic cloves, minced
- 1/2 cup breadcrumbs
- 2 tablespoons grated Parmesan
- 1 teaspoon lemon zest
- 1 teaspoon kosher salt
- Black pepper
Quick Steps:
- Roast the romanesco with olive oil, garlic, salt, and pepper at 425°F for 20 to 25 minutes.
- Toast breadcrumbs in a small skillet until golden, then mix with Parmesan and lemon zest.
- Scatter the crumbs over the hot romanesco and serve.
Equipment for This Recipe:
- Sheet pan
- Small skillet
- Mixing bowl
How to Serve This Dish: Put it on a platter so the spiral shapes are visible. It pairs well with lamb, roast chicken, or a pork roast that needs a vegetable with some presence.
Pro Tips for This Recipe:
- Don’t overcut the florets; bigger pieces keep their shape better.
- Toast the crumbs separately so they stay crisp.
- A squeeze of lemon just before serving brightens the whole tray.
Variations on This Dish:
- Chili Crumb Romanesco: Add red pepper flakes to the breadcrumbs.
- Herby Version: Mix parsley and thyme into the crumb topping.
Common Mistakes to Avoid with This Dish:
- Don’t treat romanesco like cauliflower and boil it first.
- Don’t add breadcrumbs too soon or they soften from steam.
22. Old-School Coleslaw with Tangy Dressing
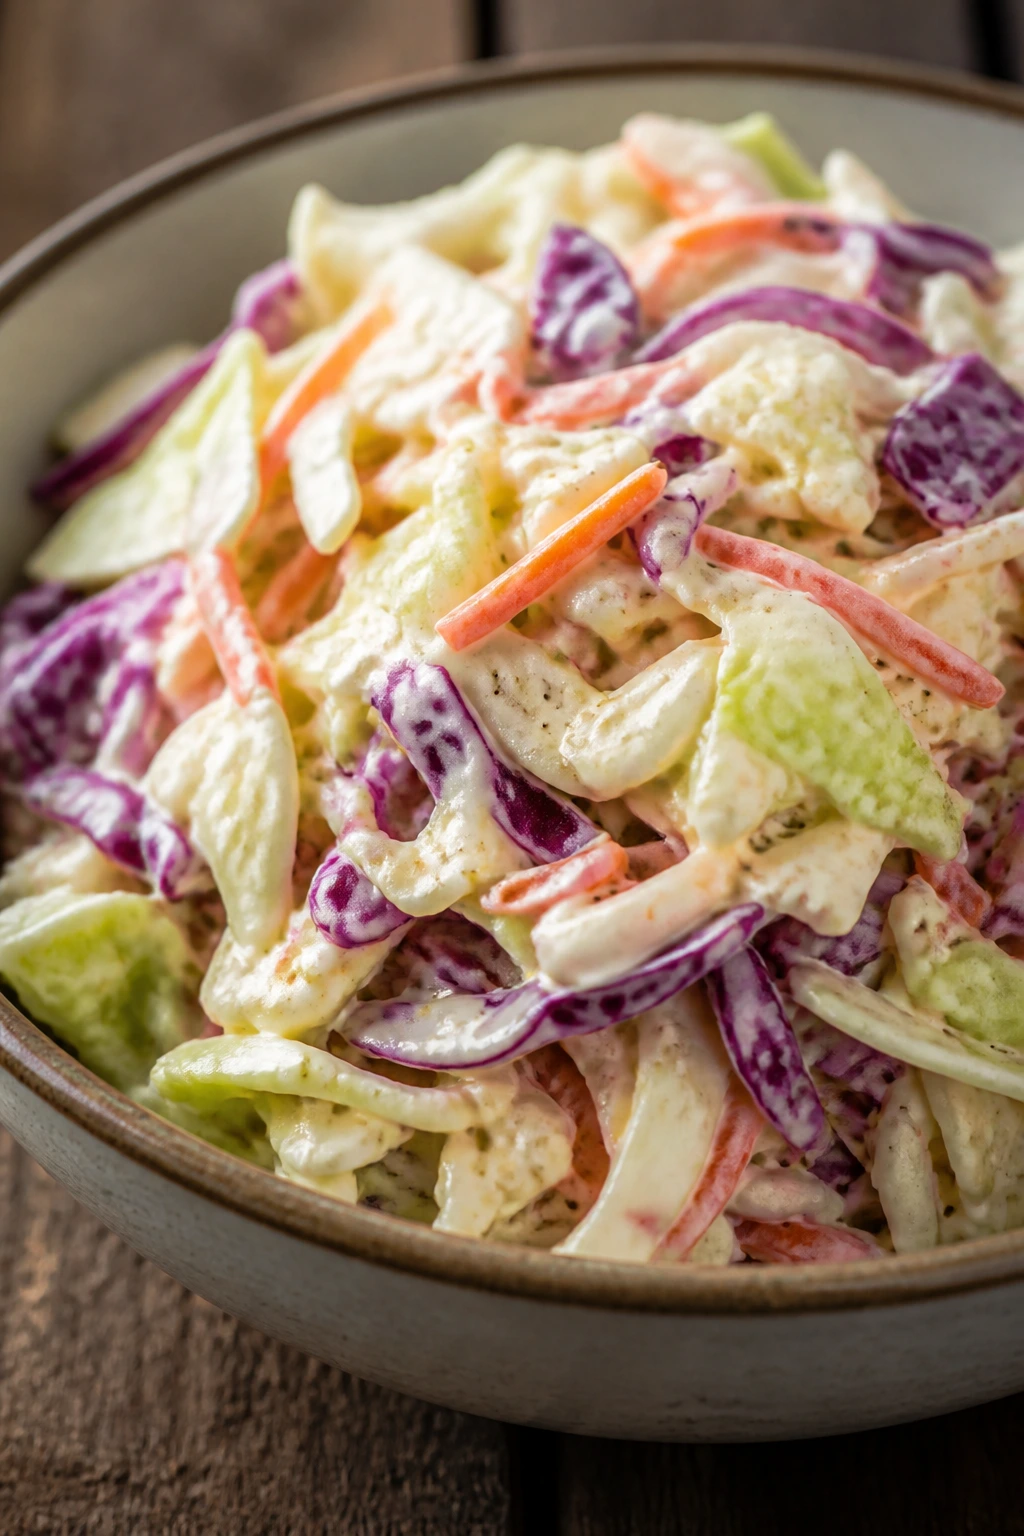
Coleslaw earns its place when it’s sharp, crunchy, and not overloaded with sugar. This version keeps the cabbage crisp, the dressing tangy, and the whole bowl sturdy enough to sit beside barbecue or fried chicken.
Why It Works: Cabbage holds its crunch longer than most salad greens, which is why slaw shows up with rich meats so often. Vinegar gives the dressing bite, mayonnaise gives it body, and celery seed adds that old deli flavor that people either know instantly or remember after one bite.
Key Ingredients:
- 6 cups shredded green cabbage
- 2 cups shredded red cabbage
- 1 large carrot, grated
- 1/2 cup mayonnaise
- 2 tablespoons apple cider vinegar
- 1 tablespoon sugar
- 1/2 teaspoon celery seed
- Salt and pepper
Quick Steps:
- Whisk the mayonnaise, vinegar, sugar, celery seed, salt, and pepper.
- Toss with the cabbage and carrot.
- Chill for at least 20 minutes so the cabbage softens slightly.
- Taste again before serving and adjust the salt.
Equipment for This Recipe:
- Large mixing bowl
- Sharp knife or box grater
- Whisk
How to Serve This Dish: Heap it beside pulled pork, fried chicken, burgers, or ribs. It also works tucked into a sandwich if you have leftovers.
Pro Tips for This Recipe:
- Shred the cabbage finely so the dressing coats every strand.
- Salt lightly at first; cabbage loses water as it sits.
- Make it a little tangier than you think, because richer mains need that edge.
Variations on This Dish:
- Mustard Slaw: Add a teaspoon of Dijon for extra bite.
- Creamy Yogurt Slaw: Swap half the mayo for Greek yogurt.
Common Mistakes to Avoid with This Dish:
- Don’t overdress the slaw or it collapses in the bowl.
- Don’t serve it immediately after mixing if you want the cabbage to soften just enough.
23. Warm Mustard Potato Salad
Warm potato salad has a different personality from the mayonnaise-heavy version. It’s more savory, more direct, and better suited to a plate with roasted meat because the mustard-vinegar dressing wakes everything up.
Why It Works: Waxier potatoes hold their shape after boiling, so the salad stays chunky instead of mushy. A warm vinaigrette clings better than a cold one, and the potatoes drink up flavor while they’re still hot. Fresh parsley keeps the bowl from feeling heavy.
Key Ingredients:
- 2 pounds baby Yukon Gold potatoes
- 3 tablespoons olive oil
- 2 tablespoons Dijon mustard
- 2 tablespoons apple cider vinegar
- 1 small shallot, minced
- 2 tablespoons chopped parsley
- 1 teaspoon kosher salt
- Black pepper
Quick Steps:
- Boil the potatoes until just tender, then drain.
- Whisk the olive oil, mustard, vinegar, shallot, salt, and pepper.
- Toss the hot potatoes with the dressing and parsley.
- Serve warm.
Equipment for This Recipe:
- Large pot
- Mixing bowl
- Whisk
How to Serve This Dish: Serve it warm, not hot from a rolling boil. It goes well with grilled sausages, roast chicken, or seared pork chops.
Pro Tips for This Recipe:
- Dress the potatoes while they’re still warm so they absorb more flavor.
- Halve larger potatoes so the dressing can get in.
- Add a splash of the potato cooking water if the dressing feels too thick.
Variations on This Dish:
- Herb Potato Salad: Add dill and chives.
- Shallot-Caper Version: Stir in capers for a briny edge.
Common Mistakes to Avoid with This Dish:
- Don’t overboil the potatoes or they crumble when tossed.
- Don’t chill it if you want that warm, savory finish.
24. Broccolini with Chili Crisp
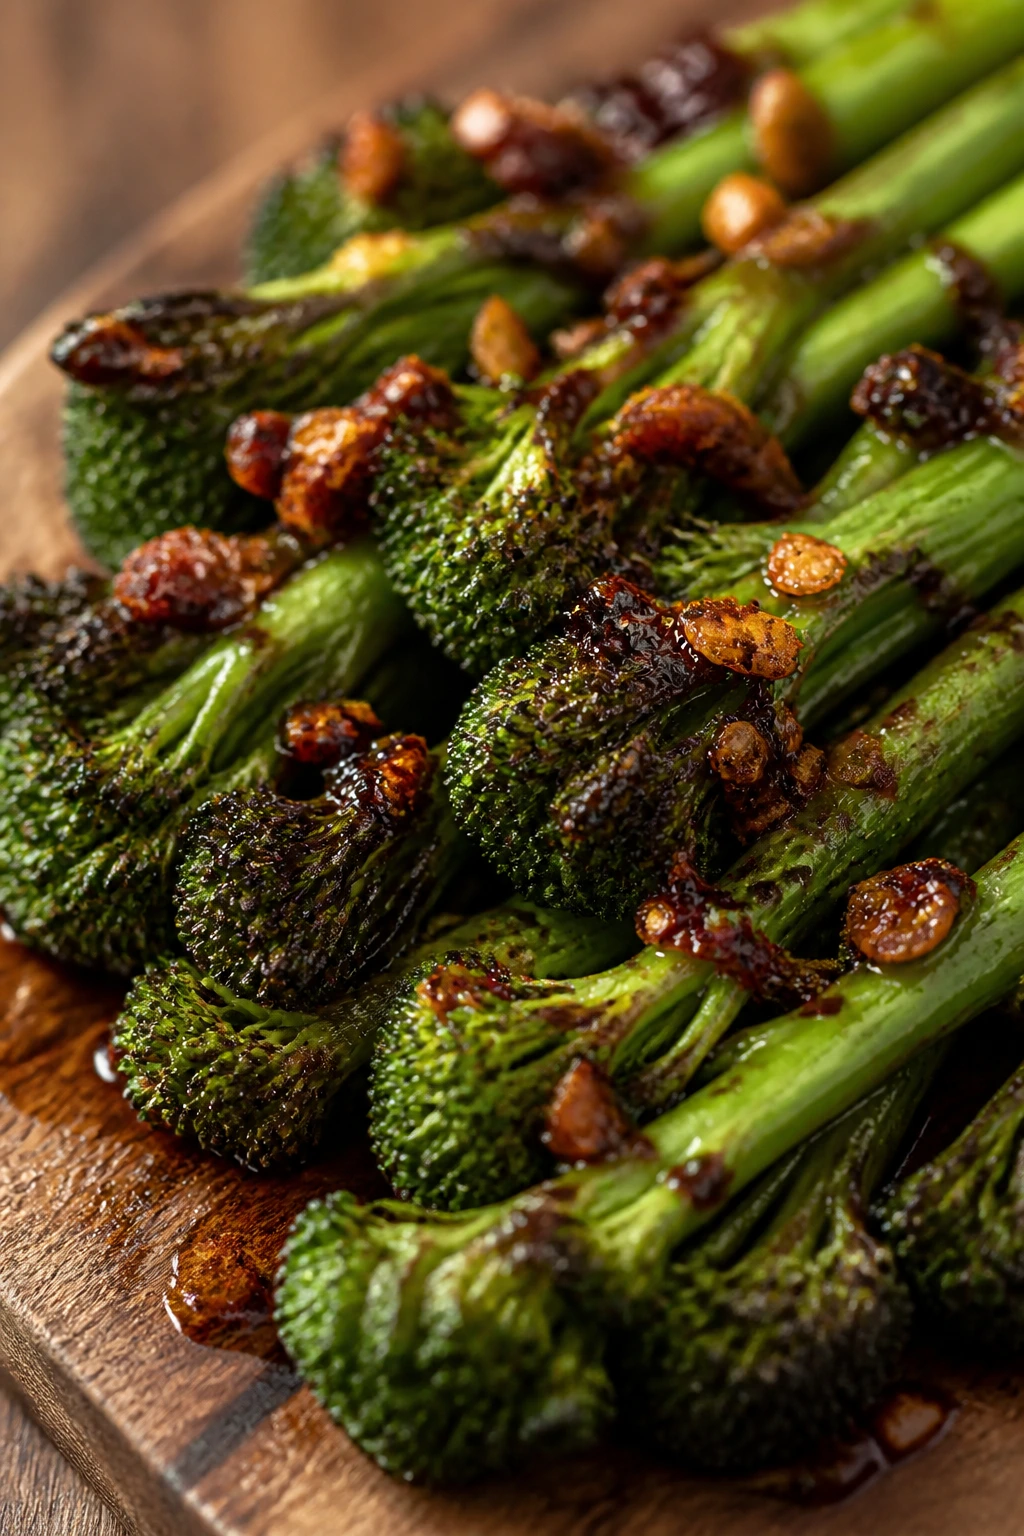
Broccolini is broccoli’s leaner, faster cousin, and it takes to chili crisp like it was made for it. You get tender stalks, crisp tips, and little red flecks of oil that make the dish look more exciting than the ingredient list suggests.
Why It Works: Broccolini cooks fast, which means you can keep the stems crisp and the florets lightly charred. Chili crisp brings heat, garlic, and crunch in one spoonful. A little soy and lime keep the oil from feeling heavy.
Key Ingredients:
- 2 bunches broccolini
- 2 tablespoons olive oil
- 1 tablespoon chili crisp
- 1 teaspoon soy sauce
- 1 tablespoon lime juice
- 1 garlic clove, thinly sliced
- Salt to taste
Quick Steps:
- Sauté or roast the broccolini until the stalks are tender and the tips brown lightly.
- Warm the olive oil with the sliced garlic just until fragrant.
- Toss with chili crisp, soy sauce, lime juice, and salt.
- Serve while the tips are still crisp.
Equipment for This Recipe:
- Large skillet or sheet pan
- Tongs
- Small bowl
How to Serve This Dish: Serve on a long plate so the broccolini keeps its shape. It works with steak, salmon, or rice bowls that need a sharp, savory vegetable.
Pro Tips for This Recipe:
- Trim the stems if they’re very thick; the tip and stem should cook together.
- Add chili crisp after cooking so the chili bits stay crunchy.
- A little lime goes a long way here.
Variations on This Dish:
- Sesame Broccolini: Add toasted sesame oil and seeds.
- Garlic-Lemon Version: Swap lime for lemon if that’s what you have.
Common Mistakes to Avoid with This Dish:
- Don’t overcook the broccolini or the florets go limp.
- Don’t drown it in chili crisp; the vegetable should still taste green.
25. Stuffed Mini Bell Peppers
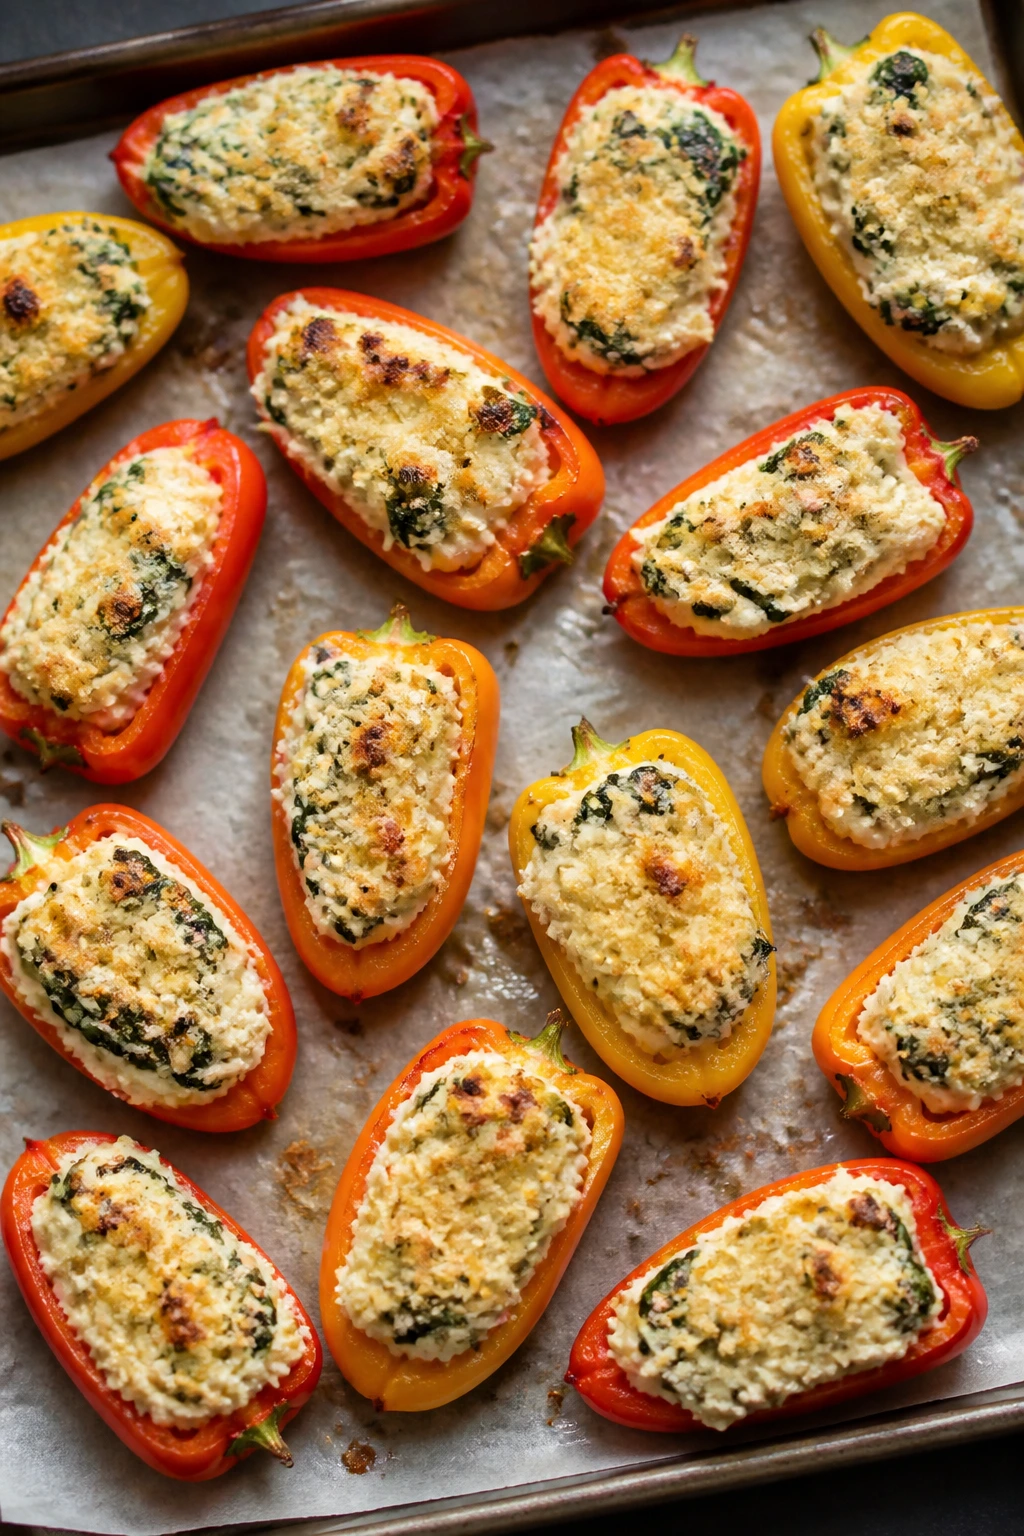
Mini peppers roast into sweet little cups that hold a creamy filling well. The ricotta and Parmesan make them rich enough to matter, while spinach and garlic keep them from tasting like a party tray only pretending to be dinner.
Why It Works: The peppers soften and caramelize at the edges while the filling stays cool and creamy inside. Ricotta gives the stuffing body without making it dense, and breadcrumbs on top add a little crust. It’s a neat side for plates where you want something that looks tidy.
Key Ingredients:
- 20 mini bell peppers, halved and seeded
- 1 cup ricotta
- 1/2 cup grated Parmesan
- 1 cup chopped cooked spinach, squeezed dry
- 1 garlic clove, grated
- 1/4 cup breadcrumbs
- 1 tablespoon olive oil
- Salt and pepper
Quick Steps:
- Mix the ricotta, Parmesan, spinach, garlic, salt, and pepper.
- Fill the pepper halves and place on a baking sheet.
- Sprinkle with breadcrumbs and drizzle with olive oil.
- Bake at 400°F for 18 to 20 minutes until the peppers soften and the tops brown.
Equipment for This Recipe:
- Baking sheet
- Mixing bowl
- Spoon or small scoop
How to Serve This Dish: Serve them warm in a single layer so the filling stays put. They work beside grilled meats, roast chicken, or as a sturdy vegetarian side on a mixed plate.
Pro Tips for This Recipe:
- Squeeze the spinach dry or the filling loosens.
- Use a piping bag or zip-top bag if you want cleaner filling.
- Add a pinch of chili flakes if you want more heat.
Variations on This Dish:
- Goat Cheese Stuffing: Swap some ricotta for goat cheese.
- Herbed Filling: Add chopped basil or parsley.
Common Mistakes to Avoid with This Dish:
- Don’t overfill the peppers or the filling spills as they bake.
- Don’t use watery ricotta; drain it first if needed.
26. Greek Village Salad
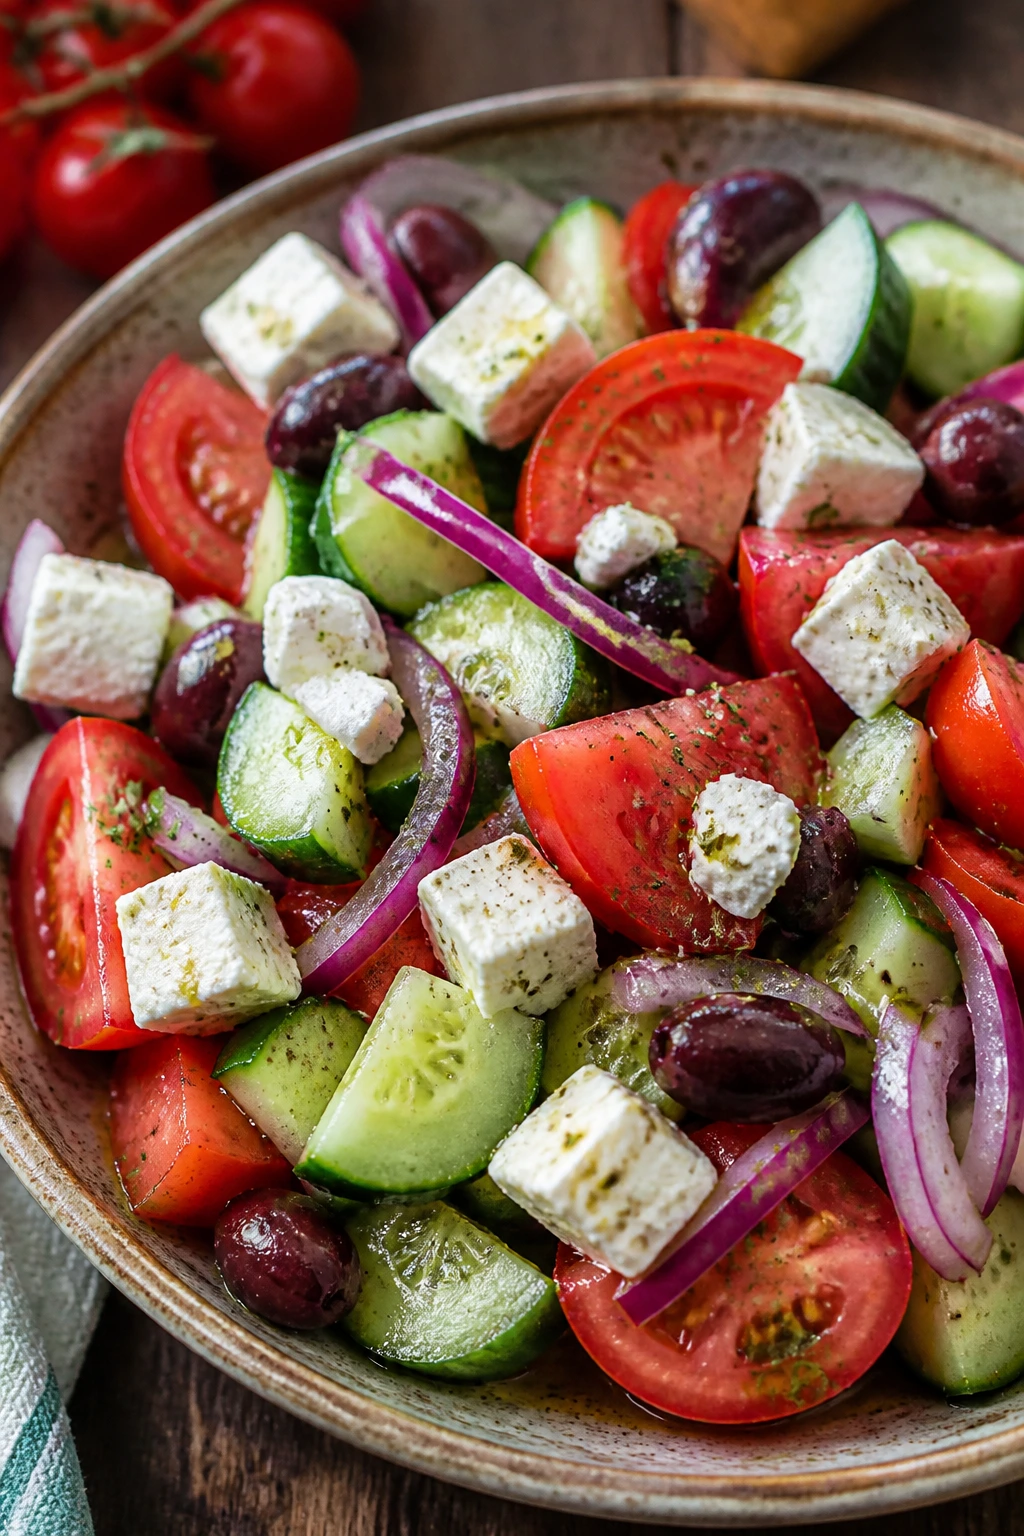
This salad is all about sharp edges and good tomatoes. No lettuce. No fluff. Just cucumbers, tomatoes, onions, olives, feta, and oregano, all dressed enough to taste like they belong on the same plate.
Why It Works: The vegetables stay in distinct pieces, which means the salad brings crunch as well as juice. Feta adds salt, olives add brine, and oregano gives the dressing that unmistakable Greek profile. It cuts through grilled meat better than a soft salad ever could.
Key Ingredients:
- 4 ripe tomatoes, cut into wedges
- 2 cucumbers, sliced thick
- 1/2 red onion, thinly sliced
- 1 cup Kalamata olives
- 1 cup feta, broken into chunks
- 3 tablespoons olive oil
- 1 tablespoon red wine vinegar
- 1 teaspoon dried oregano
- Salt and pepper
Quick Steps:
- Combine the tomatoes, cucumbers, onion, and olives in a bowl.
- Whisk the olive oil, vinegar, oregano, salt, and pepper.
- Drizzle lightly over the vegetables.
- Top with feta and serve right away.
Equipment for This Recipe:
- Large salad bowl
- Sharp knife
- Small whisk
How to Serve This Dish: Serve cold or barely cool. It sits well next to lamb, grilled chicken, or anything with a strong spice rub.
Pro Tips for This Recipe:
- Use ripe tomatoes or the salad tastes hollow.
- Don’t overmix; the feta should stay in chunks.
- Add the dressing just before serving so the cucumber stays crisp.
Variations on This Dish:
- Peppery Version: Add sliced bell pepper for more crunch.
- Capers and Herbs: Stir in capers and fresh dill for a brighter bowl.
Common Mistakes to Avoid with This Dish:
- Don’t use watery tomatoes and expect the salad to hold.
- Don’t crumble the feta too finely; the chunks matter.
27. Garlic Sautéed Swiss Chard
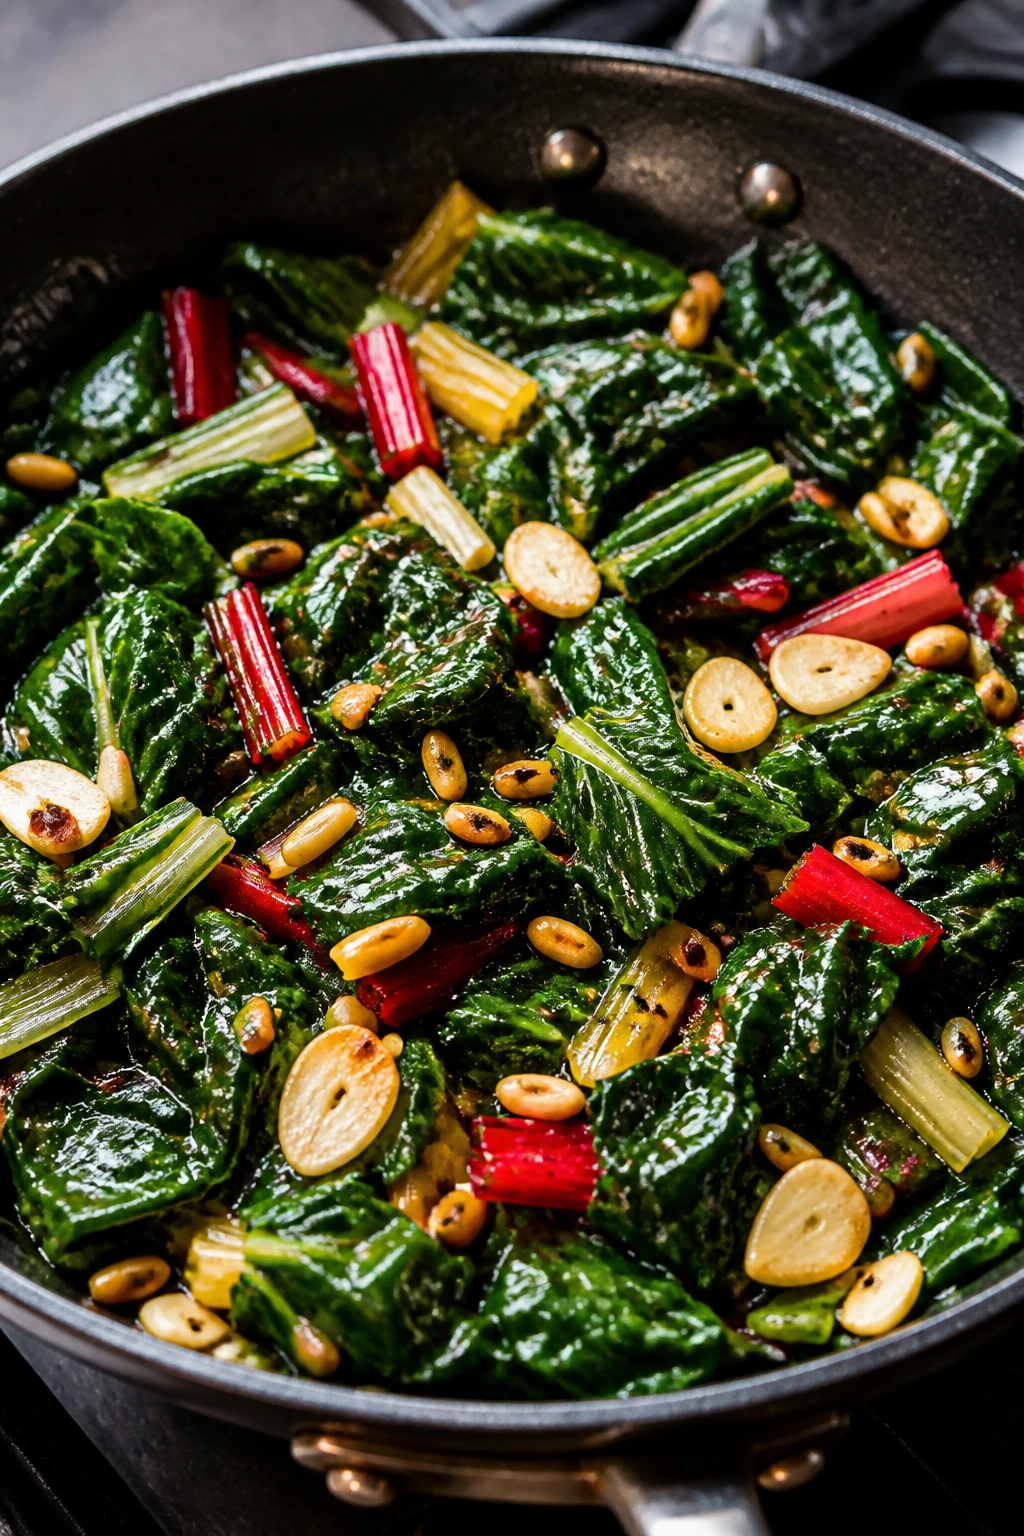
Swiss chard is one of those vegetables people forget until they taste it cooked in garlic and olive oil. The stems stay a little crisp, the leaves wilt into silky ribbons, and the lemon at the end sharpens the whole pan.
Why It Works: Chard cooks in two parts because the stems need more time than the leaves. Garlic and olive oil provide a simple base that lets the vegetable taste clean but not plain. A little acid at the end keeps the greens from feeling heavy.
Key Ingredients:
- 2 bunches Swiss chard, stems and leaves separated
- 2 tablespoons olive oil
- 2 garlic cloves, sliced
- 1/4 teaspoon red pepper flakes
- 1 tablespoon lemon juice
- 1/2 teaspoon kosher salt
- Black pepper
- 2 tablespoons toasted pine nuts, optional
Quick Steps:
- Sauté the chopped stems in olive oil for 3 to 4 minutes.
- Add the garlic and red pepper flakes for 30 seconds.
- Add the leaves and cook until wilted, about 2 minutes.
- Finish with lemon juice, salt, pepper, and pine nuts.
Equipment for This Recipe:
- Large skillet
- Wooden spoon
- Knife and cutting board
How to Serve This Dish: Pile it beside roast chicken or pork, and spoon a little of the garlicky oil over the meat if you want. It also works with beans or grains if the meal is vegetarian.
Pro Tips for This Recipe:
- Separate stems from leaves so you can cook each part properly.
- Don’t overcook the leaves or they lose their color and turn dull.
- Toast the pine nuts separately if you want real crunch.
Variations on This Dish:
- Balsamic Chard: Finish with a few drops of balsamic.
- Anchovy-Free Umami Version: Add a tiny spoon of miso to the oil if you want more depth.
Common Mistakes to Avoid with This Dish:
- Don’t toss stems and leaves in together at the start.
- Don’t drown the pan; chard likes a light hand.
28. Eggplant Caponata
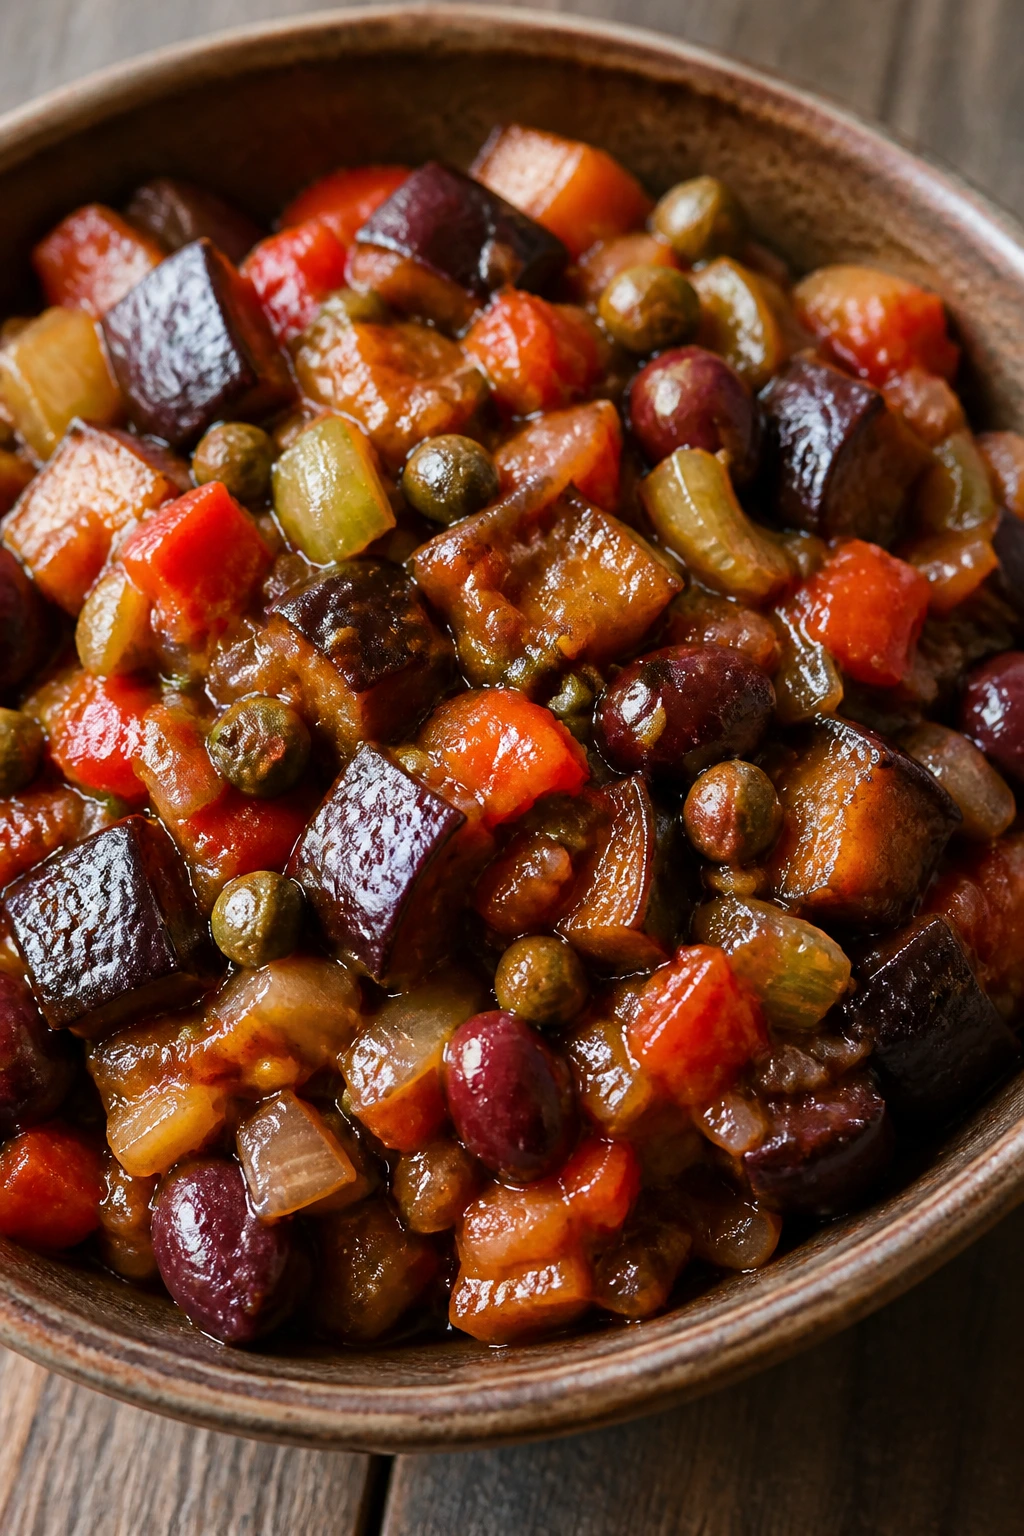
Caponata is the kind of vegetable side that tastes better after it sits for a little while. Eggplant, celery, capers, tomatoes, olives, and vinegar make a sweet-sour mix that works almost like a relish with more substance.
Why It Works: Eggplant soaks up oil and flavor, so browning it first gives the dish structure. Vinegar and capers cut through the eggplant’s softness, while a touch of sweetness rounds everything out. It’s a side that behaves like a condiment beside grilled meat.
Key Ingredients:
- 1 large eggplant, cubed
- 1 onion, diced
- 2 celery stalks, diced
- 2 garlic cloves, minced
- 1 can crushed tomatoes, 14 ounces
- 2 tablespoons capers
- 1/4 cup pitted olives, chopped
- 2 tablespoons red wine vinegar
- 2 tablespoons olive oil
- Salt and pepper
Quick Steps:
- Brown the eggplant cubes in olive oil in batches.
- Add onion and celery and cook until softened.
- Stir in garlic, tomatoes, capers, olives, vinegar, salt, and pepper.
- Simmer 15 to 20 minutes until thick and glossy.
Equipment for This Recipe:
- Large skillet or Dutch oven
- Wooden spoon
- Knife
How to Serve This Dish: Serve at room temperature with bread or alongside roast chicken, grilled fish, or pork. It also works spooned over polenta or toasted baguette slices.
Pro Tips for This Recipe:
- Brown the eggplant in batches or it turns greasy.
- Taste after simmering; capers and olives add their own salt.
- Let it rest before serving so the flavors marry.
Variations on This Dish:
- Raisin Caponata: Add a small handful of raisins for sweetness.
- Pine Nut Version: Stir in toasted pine nuts at the end.
Common Mistakes to Avoid with This Dish:
- Don’t rush the browning step.
- Don’t serve it piping hot if you want the vinegar and sweetness to show.
29. Crispy Polenta Fries with Marinara

Polenta fries bring the crunch people expect from potato wedges, but with a cornmeal flavor that feels a little more interesting. Bake them until the outside sets and the center stays soft, then dip them in marinara and watch them disappear.
Why It Works: Cooked polenta firms up when chilled, which makes it easy to slice and crisp. Parmesan and butter add richness, while the oven gives the fries a crust. They’re a smart side when you want something that acts like comfort food.
Key Ingredients:
- 1 cup polenta
- 4 cups water or broth
- 2 tablespoons butter
- 1/2 cup grated Parmesan
- 1 teaspoon kosher salt
- 1/2 teaspoon black pepper
- 2 tablespoons olive oil
- Marinara for serving
Quick Steps:
- Cook the polenta in salted water or broth until thick.
- Stir in butter and Parmesan, then spread into a lined pan to chill until firm.
- Cut into fries, brush with olive oil, and bake at 425°F for 25 to 30 minutes, flipping once.
- Serve with warm marinara.
Equipment for This Recipe:
- Saucepan
- Lined baking dish
- Sharp knife
How to Serve This Dish: Serve them like a side or snack with a bowl of marinara on the side. They work well with grilled chicken, burgers, or as a starter before a heavier main.
Pro Tips for This Recipe:
- Chill the polenta fully or the fries won’t slice cleanly.
- Use a sharp knife and a gentle hand when cutting.
- A hotter oven gives a better crust.
Variations on This Dish:
- Herb Polenta Fries: Stir rosemary or thyme into the polenta.
- Spicy Fries: Add red pepper flakes and serve with arrabbiata sauce.
Common Mistakes to Avoid with This Dish:
- Don’t try to bake soft polenta; it needs to firm up first.
- Don’t skip flipping or one side stays pale.
30. Herb-Roasted Mushrooms
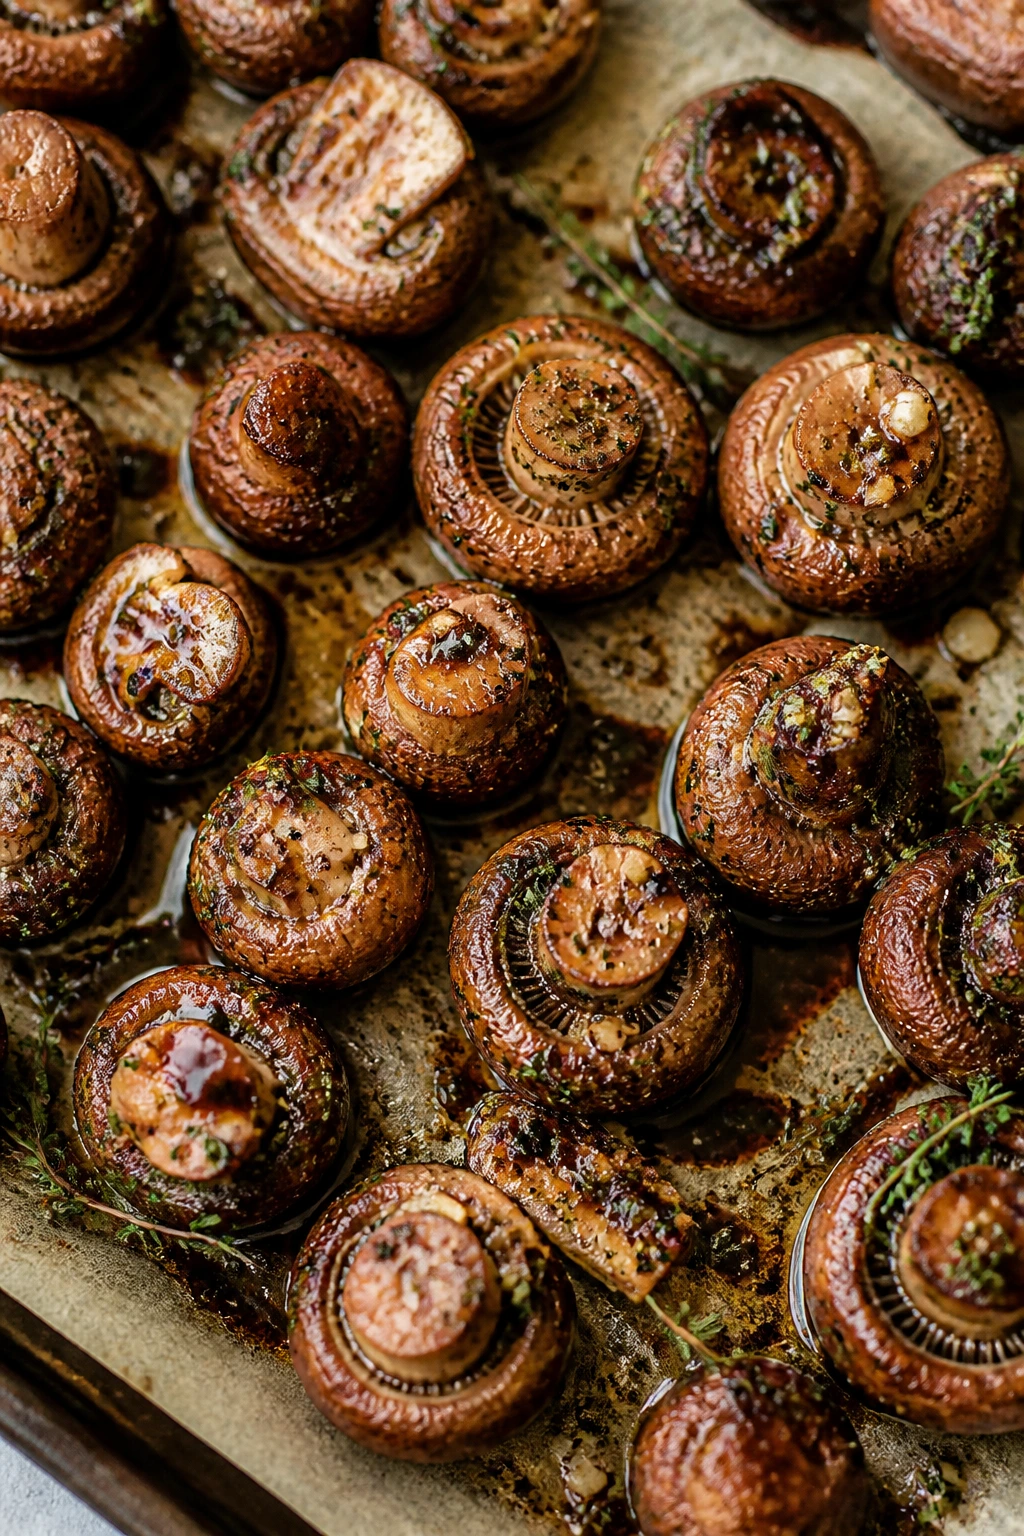
Mushrooms roasted with herbs and butter are one of those sides that smell more expensive than they are. They shrink, brown, and pick up every bit of garlic and thyme, which is exactly why they work next to meat.
Why It Works: Roasting concentrates mushroom flavor while freeing you from standing over a skillet. Butter and olive oil give you browning and gloss. A splash of balsamic at the end makes the pan juices feel rounded instead of flat.
Key Ingredients:
- 1 1/2 pounds cremini or button mushrooms
- 2 tablespoons olive oil
- 2 tablespoons melted butter
- 3 garlic cloves, minced
- 1 teaspoon thyme leaves
- 1 tablespoon balsamic vinegar
- Salt and pepper
- Chopped parsley
Quick Steps:
- Toss the mushrooms with oil, butter, garlic, thyme, salt, and pepper.
- Roast at 425°F for 20 to 25 minutes, stirring once.
- Drizzle with balsamic and toss with parsley.
- Serve immediately.
Equipment for This Recipe:
- Sheet pan
- Mixing bowl
- Spatula
How to Serve This Dish: Serve them hot enough that the pan juices still glisten. They’re excellent beside steak, roast beef, or mashed potatoes that can catch the liquid.
Pro Tips for This Recipe:
- Don’t wash mushrooms too aggressively; wipe them clean instead.
- Use a broad pan so moisture can evaporate.
- Stir only once so the mushrooms can brown.
Variations on This Dish:
- Rosemary Mushrooms: Swap thyme for rosemary.
- Wine-Roasted Version: Add a splash of dry white wine with the balsamic.
Common Mistakes to Avoid with This Dish:
- Don’t crowd the mushrooms.
- Don’t add balsamic too early or it can taste harsh.
31. Cabbage and Caraway Skillet
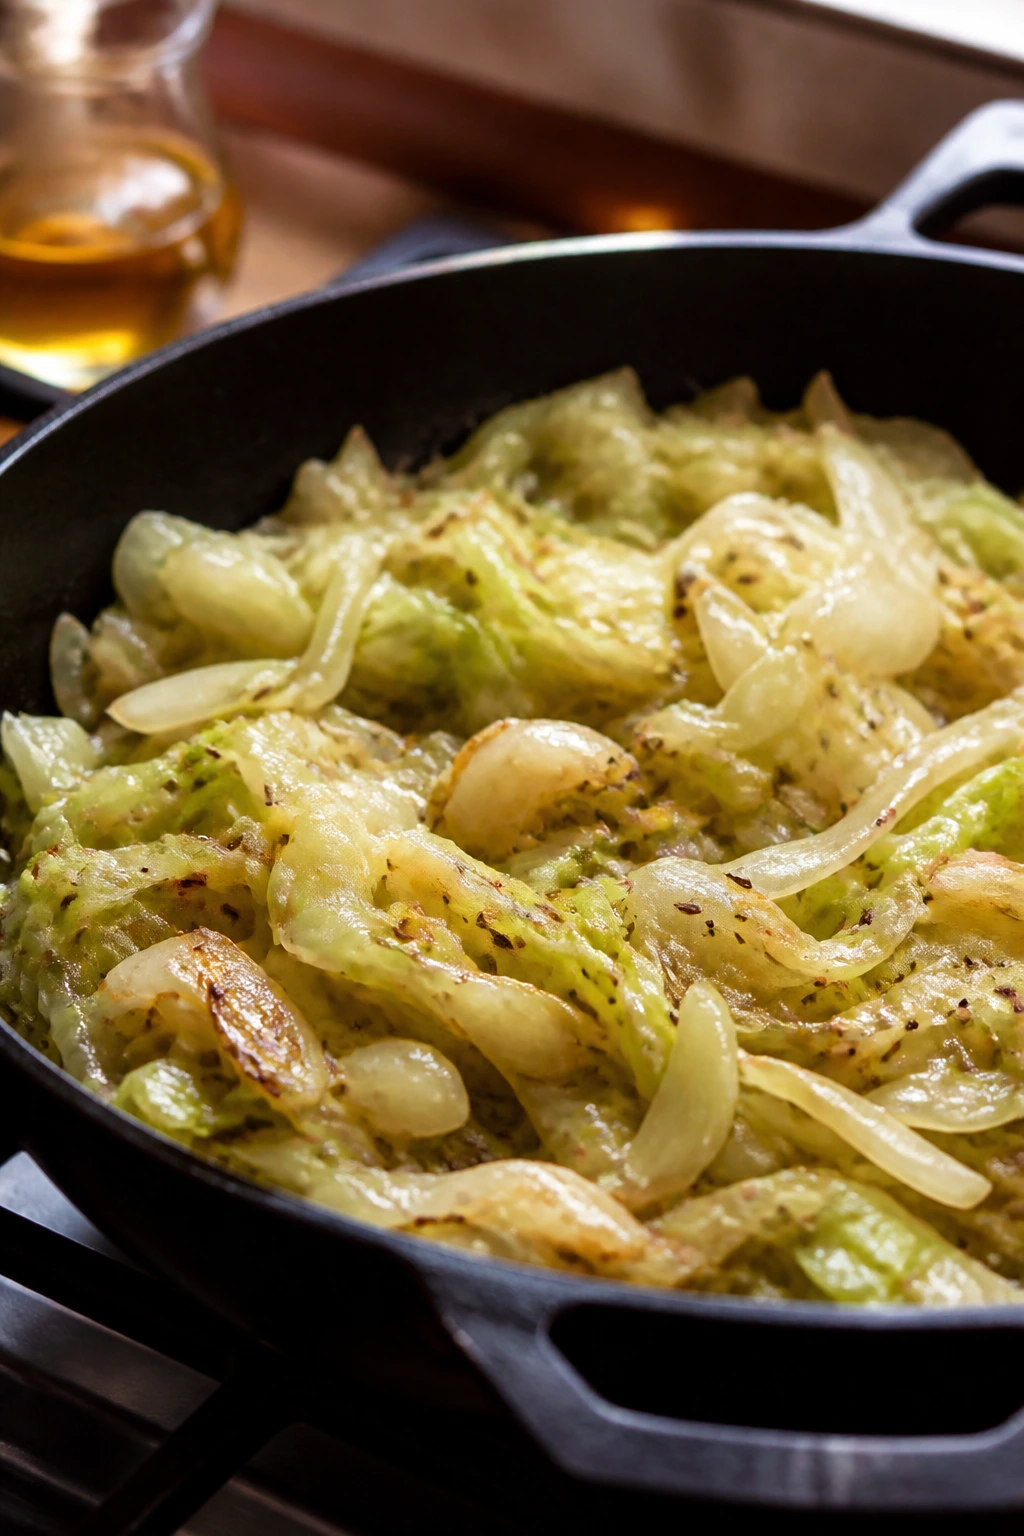
Cabbage gets overlooked because it’s cheap and sturdy, which is silly. Cook it with butter, onions, and caraway, and it becomes sweet, faintly anise-like, and good enough to sit next to sausages or roast pork.
Why It Works: Heat breaks down cabbage’s raw sharpness and turns it sweet. Caraway gives the pan a classic old-world flavor that works especially well with browned meat. A little vinegar at the end keeps the skillet from feeling heavy.
Key Ingredients:
- 1 medium green cabbage, sliced
- 1 onion, sliced
- 3 tablespoons butter
- 1 teaspoon caraway seeds
- 1 tablespoon apple cider vinegar
- 1 teaspoon kosher salt
- Black pepper
Quick Steps:
- Melt butter in a large skillet and cook onion with caraway until soft.
- Add the cabbage and salt.
- Cook, stirring occasionally, until the cabbage is tender and lightly browned, about 15 minutes.
- Splash in vinegar and season with pepper.
Equipment for This Recipe:
- Large skillet with lid
- Wooden spoon
- Sharp knife
How to Serve This Dish: Serve warm from the skillet. It’s a strong match for sausage, roast pork, or corned beef, but it also works with potatoes if you want a meatless plate.
Pro Tips for This Recipe:
- Slice the cabbage thin so it softens evenly.
- Keep a little bite in the cabbage; mushy is not the goal.
- A splash of stock can help if the pan dries before the cabbage is tender.
Variations on This Dish:
- Apple Cabbage Skillet: Add thin slices of apple for sweetness.
- Smoked Paprika Version: Add a pinch of smoked paprika for more depth.
Common Mistakes to Avoid with This Dish:
- Don’t cook on high heat the whole time or the onion burns.
- Don’t forget the vinegar; cabbage needs that lift.
32. Roasted Delicata Squash with Pepitas
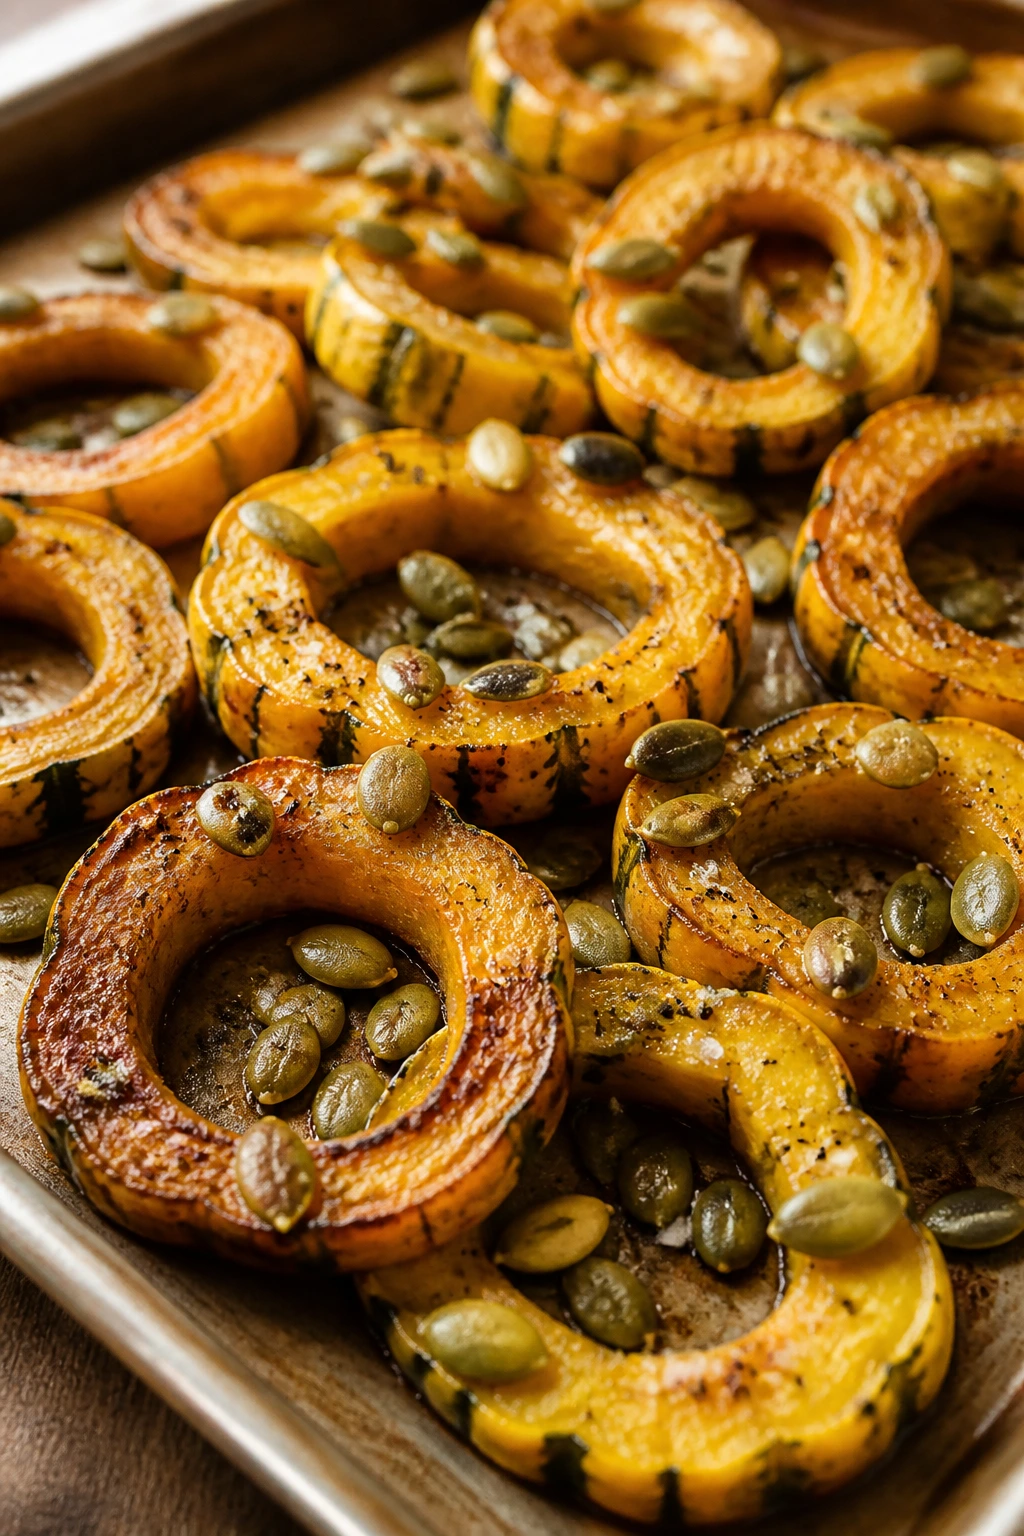
Delicata squash is one of the easiest winter squashes to work with because you don’t have to peel it. Roast the slices until the edges caramelize, then shower them with pepitas for a side that has sweetness, salt, and crunch.
Why It Works: Delicata has a thin skin that turns tender in the oven, so the prep stays simple. Pepitas add a roasted nut flavor and the sort of crunch that keeps squash from feeling soft. A little chile powder or lime can push it toward savory instead of sweet.
Key Ingredients:
- 2 delicata squash, halved, seeded, and sliced
- 2 tablespoons olive oil
- 1 tablespoon maple syrup
- 1 teaspoon kosher salt
- 1/4 teaspoon black pepper
- 1/3 cup pepitas
- Pinch chili powder, optional
Quick Steps:
- Heat the oven to 425°F.
- Toss the squash with oil, maple, salt, pepper, and chili powder if using.
- Roast for 25 to 30 minutes until the edges brown.
- Top with pepitas before serving.
Equipment for This Recipe:
- Sheet pan
- Sharp knife
- Spoon for seeding
How to Serve This Dish: Serve the rings in overlapping rows so the browned edges show. It pairs well with pork, chicken, or a grain bowl that needs a sweet-savory element.
Pro Tips for This Recipe:
- Slice the squash into even half-moons so the pieces finish together.
- Toast the pepitas separately if you want more crunch.
- A squeeze of lime can keep the flavor bright.
Variations on This Dish:
- Cinnamon Chili Squash: Add a pinch of cinnamon with the chili.
- Herb Version: Finish with sage or thyme instead of maple.
Common Mistakes to Avoid with This Dish:
- Don’t peel delicata; the skin is part of the charm.
- Don’t skip the salt, or the squash tastes flat and sugary.
33. Green Bean Almondine
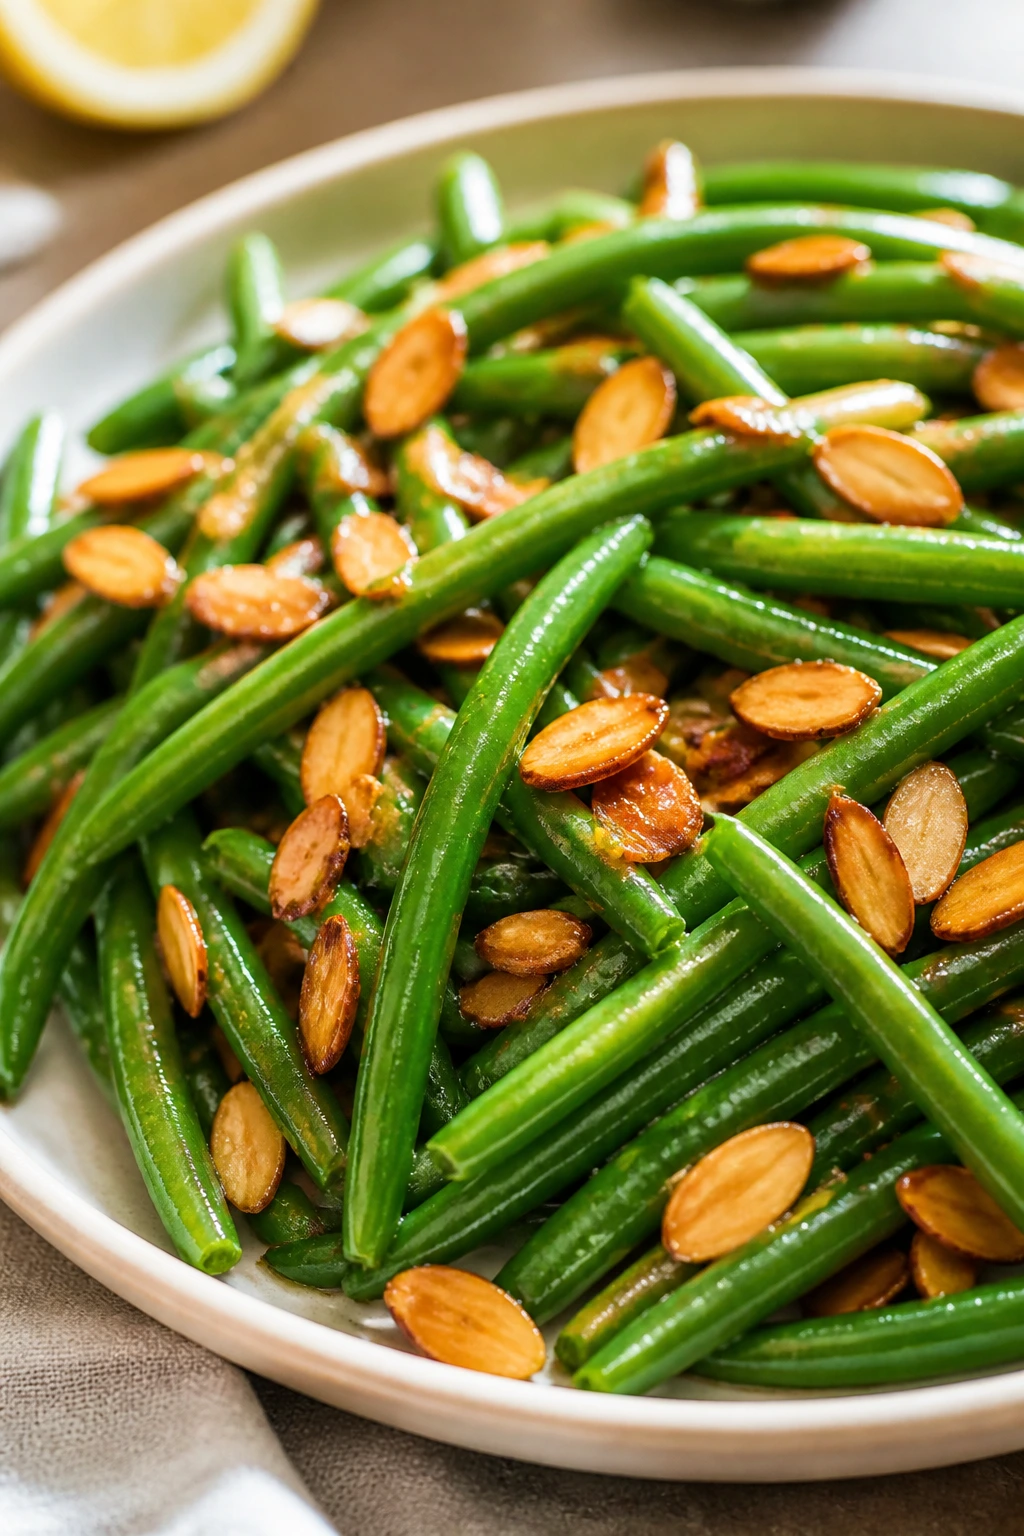
Green bean almondine is old-fashioned for a reason: it works. The beans stay crisp, the butter turns the almonds golden, and the lemon keeps the dish from feeling like a side you had to eat rather than wanted.
Why It Works: Blanching the beans locks in color and keeps them snappy. Butter browns the almonds and coats the beans in flavor, while lemon adds the necessary cut. The whole thing feels polished without being fussy.
Key Ingredients:
- 1 1/2 pounds green beans, trimmed
- 3 tablespoons butter
- 1/3 cup sliced almonds
- 1 garlic clove, minced
- 1 tablespoon lemon juice
- 1/2 teaspoon kosher salt
- Black pepper
Quick Steps:
- Blanch the green beans for 2 to 3 minutes, then drain and dry.
- Melt the butter in a skillet and toast the almonds until golden.
- Stir in the garlic for 30 seconds, then add the beans.
- Finish with lemon juice, salt, and pepper.
Equipment for This Recipe:
- Saucepan
- Skillet
- Slotted spoon
How to Serve This Dish: Arrange the beans in a neat line or loose mound so the almonds stay on top. They fit next to roast turkey, chicken, or a steak-and-potatoes dinner that needs a green note.
Pro Tips for This Recipe:
- Dry the beans after blanching so the butter clings.
- Watch the almonds closely; they brown fast.
- Add lemon at the end so the flavor stays sharp.
Variations on This Dish:
- Shallot Almondine: Swap garlic for minced shallot.
- Brown Butter Almondine: Let the butter brown before adding the almonds.
Common Mistakes to Avoid with This Dish:
- Don’t overboil the beans or they lose their snap.
- Don’t let the almonds burn while you’re reaching for the salt.
34. Creamy Corn Pudding

Corn pudding is one of those sides that pulls double duty: it’s tender, sweet, and savory enough to sit beside ham, turkey, or roast chicken. The texture lands between custard and spoonbread, which is why people tend to go back for another spoonful.
Why It Works: Corn brings sweetness and texture, while eggs and dairy set the pudding into a soft, scoopable bake. A little flour or cornmeal helps it hold together without getting dense. Butter on top gives the surface a faintly browned finish.
Key Ingredients:
- 4 cups corn kernels, fresh or thawed frozen
- 3 eggs
- 1 cup whole milk
- 1/2 cup heavy cream
- 3 tablespoons melted butter
- 2 tablespoons flour
- 1 tablespoon sugar
- 1 teaspoon kosher salt
Quick Steps:
- Whisk the eggs, milk, cream, butter, flour, sugar, and salt.
- Stir in the corn kernels.
- Pour into a buttered baking dish and bake at 350°F for 35 to 40 minutes.
- Bake until the center is just set and the top is lightly golden.
Equipment for This Recipe:
- Baking dish
- Mixing bowl
- Whisk
How to Serve This Dish: Serve warm in spoonfuls, not as clean squares. It plays well with glazed ham, roast chicken, or barbecue plates where you want a soft, sweet side.
Pro Tips for This Recipe:
- Fresh corn gives the best texture, but frozen works well.
- Don’t overbake or the custard becomes rubbery.
- Let it rest 10 minutes before scooping.
Variations on This Dish:
- Cheddar Corn Pudding: Add a handful of shredded cheddar.
- Jalapeño Corn Pudding: Add minced jalapeño for gentle heat.
Common Mistakes to Avoid with This Dish:
- Don’t bake until the middle is firm like cake; it should still jiggle slightly.
- Don’t use skim milk and expect the same creamy result.
35. Dijon Roasted Turnips
Turnips don’t need to be hidden under other vegetables. Roast them with Dijon and thyme and they turn sweet, earthy, and a little sharp in the best way, with enough bite to make a meat-heavy plate feel balanced.
Why It Works: Turnips roast into tender cubes or wedges with a flavor that sits between radish and potato. Dijon adds tang and helps the surface brown, while thyme gives the dish a savory edge. The finish is cleaner than most people expect from turnips.
Key Ingredients:
- 2 pounds turnips, peeled and cut into wedges
- 2 tablespoons olive oil
- 1 tablespoon Dijon mustard
- 1 teaspoon thyme leaves
- 1/2 teaspoon kosher salt
- Black pepper
- 1 teaspoon honey, optional
Quick Steps:
- Toss the turnips with oil, Dijon, thyme, salt, and pepper.
- Spread on a sheet pan and roast at 425°F for 25 to 30 minutes.
- Turn once halfway through.
- Taste and drizzle with honey if you want more balance.
Equipment for This Recipe:
- Sheet pan
- Mixing bowl
- Spatula
How to Serve This Dish: Serve with roast pork, chicken, or beef. They’re sturdy enough to sit under pan juices if you want to spoon them together.
Pro Tips for This Recipe:
- Cut the turnips evenly or some pieces will stay firm while others collapse.
- A little honey helps if your turnips are especially peppery.
- Don’t crowd the pan; browning matters here.
Variations on This Dish:
- Herb Butter Turnips: Add butter in the last 5 minutes.
- Mustard Seed Version: Sprinkle with mustard seeds before roasting.
Common Mistakes to Avoid with This Dish:
- Don’t underseason; turnips need more salt than potatoes.
- Don’t assume they’ll taste bland forever. Good roasting fixes a lot.
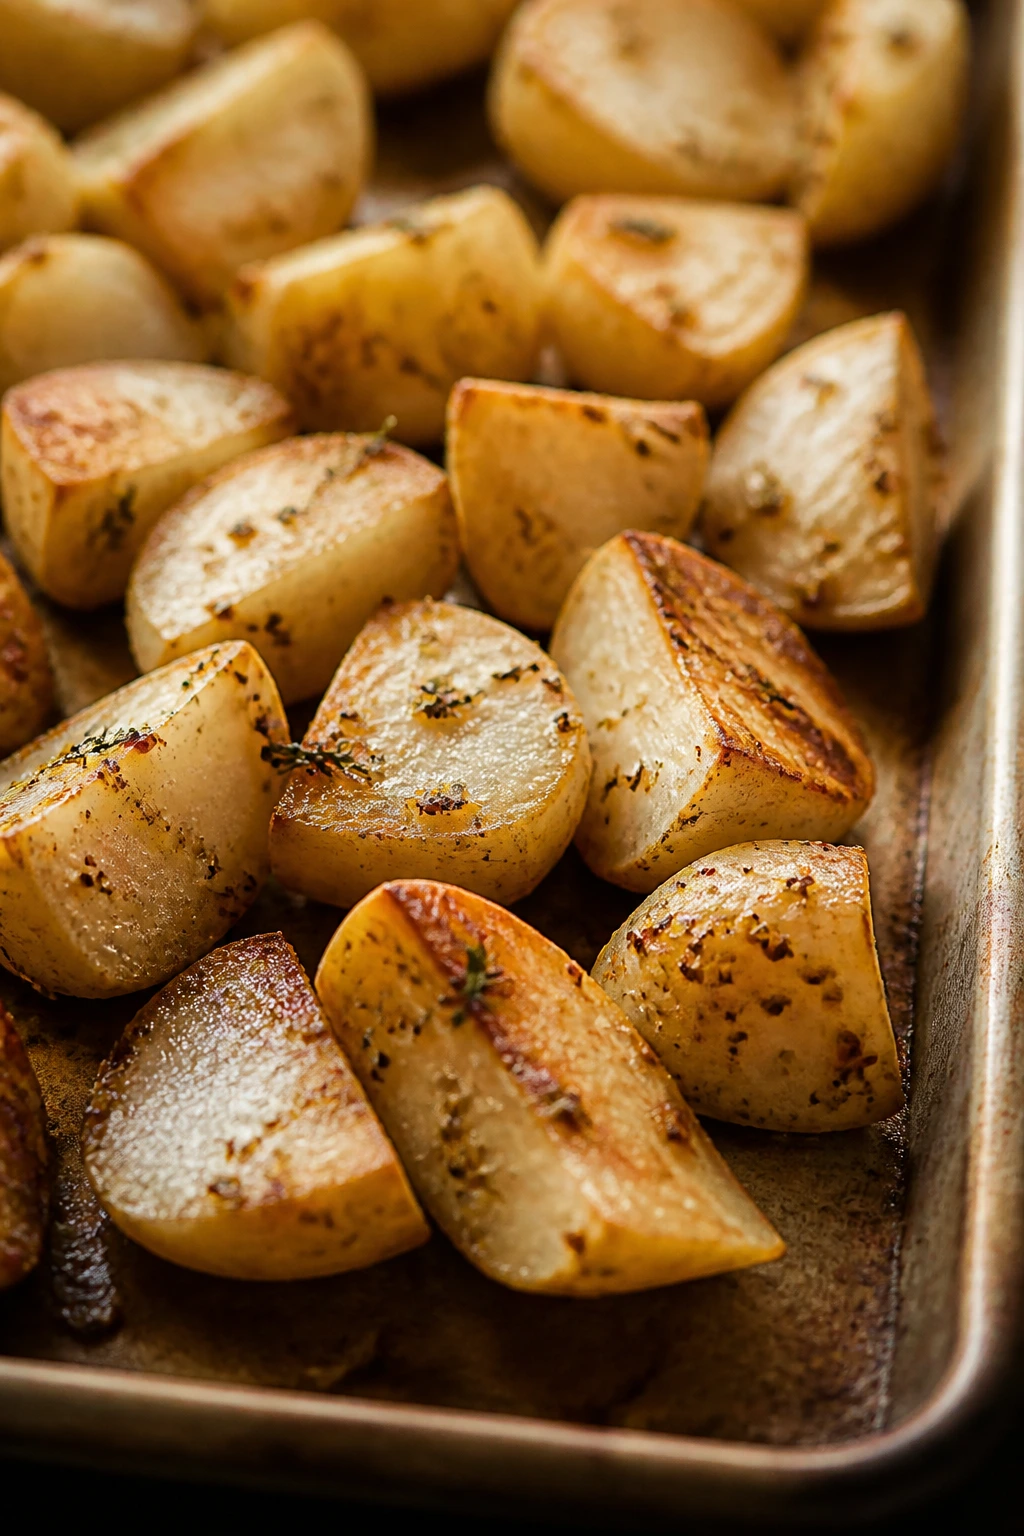
36. Herb-Roasted New Potatoes
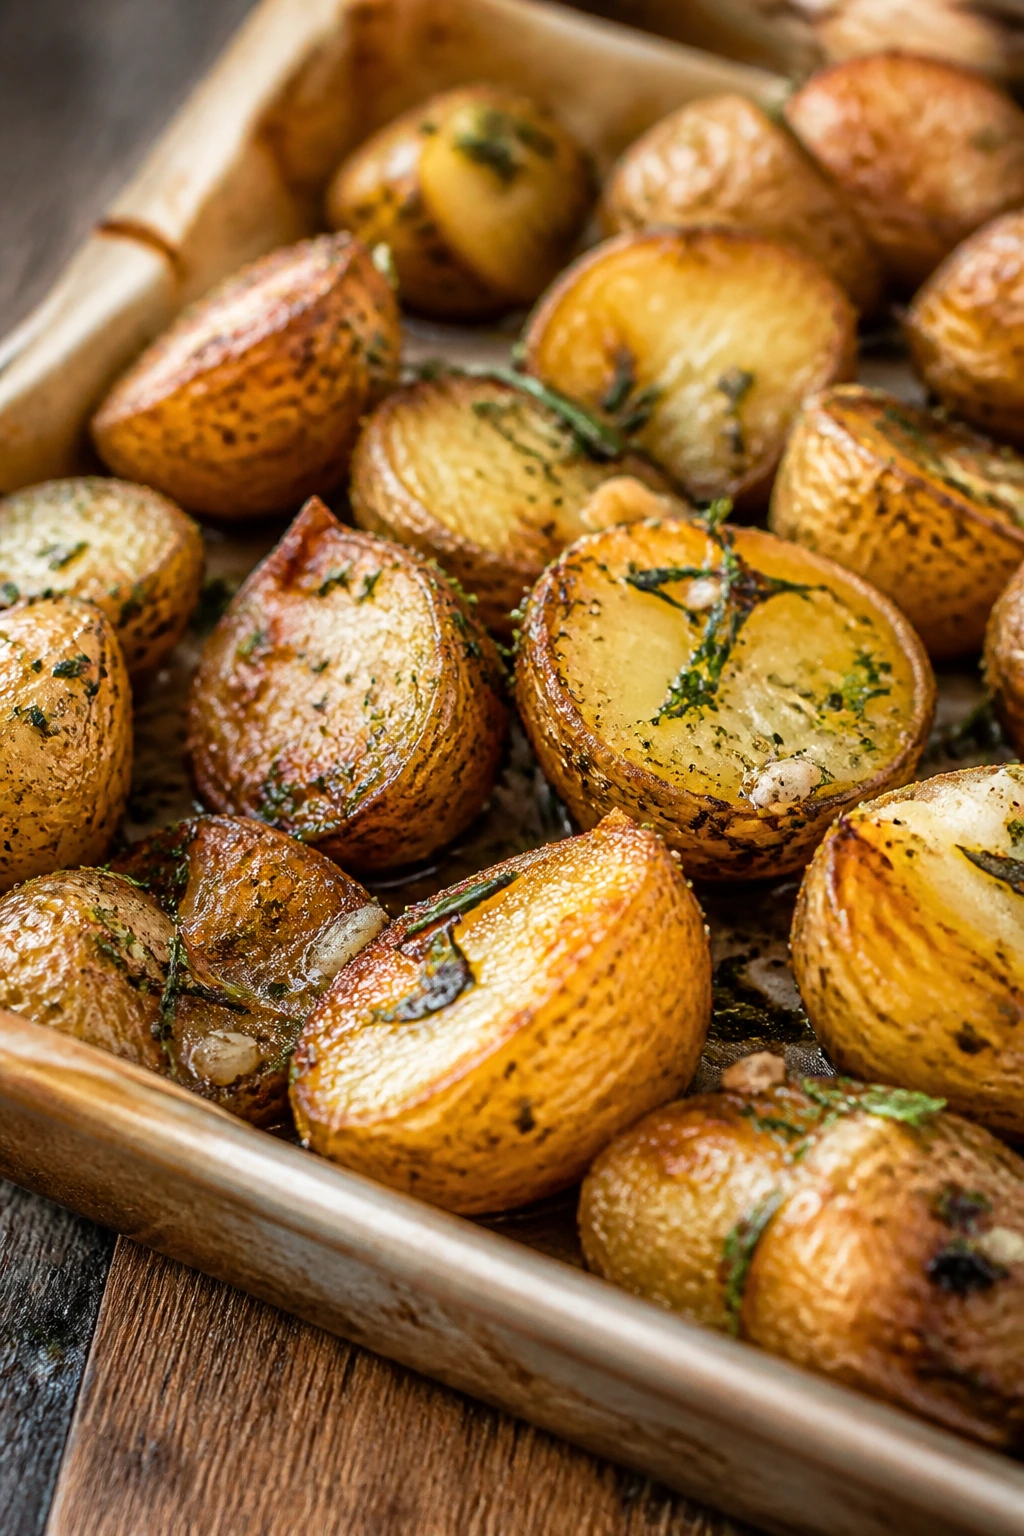
New potatoes are reliable in the best possible way. Roast them with herbs and garlic and they become crisp outside, creamy inside, and the kind of side that disappears before the meat is finished resting.
Why It Works: Small potatoes have thin skins and a creamy interior, so roasting gives you a natural contrast. Fresh herbs perfume the oil, and garlic adds a roasted sweetness. The skin gets the crispness everyone wants in roasted potatoes without any extra work.
Key Ingredients:
- 2 pounds new potatoes, halved if large
- 3 tablespoons olive oil
- 2 tablespoons melted butter
- 2 garlic cloves, minced
- 1 tablespoon chopped rosemary
- 1 tablespoon chopped parsley
- 1 teaspoon kosher salt
- Black pepper
Quick Steps:
- Toss the potatoes with oil, butter, garlic, rosemary, salt, and pepper.
- Roast at 425°F for 30 to 35 minutes, turning once.
- Add parsley at the end.
- Serve hot.
Equipment for This Recipe:
- Sheet pan
- Mixing bowl
- Spatula
How to Serve This Dish: Serve with a roast, grilled chicken, or a skillet dinner that needs a sturdy starch. These are good enough to stand in for the usual potatoes without any apology.
Pro Tips for This Recipe:
- Give the cut side room on the pan for better browning.
- Use fresh rosemary sparingly; it can take over.
- Finish with a touch of flaky salt if you like extra crunch.
Variations on This Dish:
- Lemon Herb Potatoes: Add lemon zest at the end.
- Garlic-Parmesan Potatoes: Toss with Parmesan in the last few minutes.
Common Mistakes to Avoid with This Dish:
- Don’t boil them first unless you want a softer finish.
- Don’t use dried herbs too heavily; fresh potatoes can absorb bitterness.
37. Crispy Zucchini Coins with Yogurt Dip
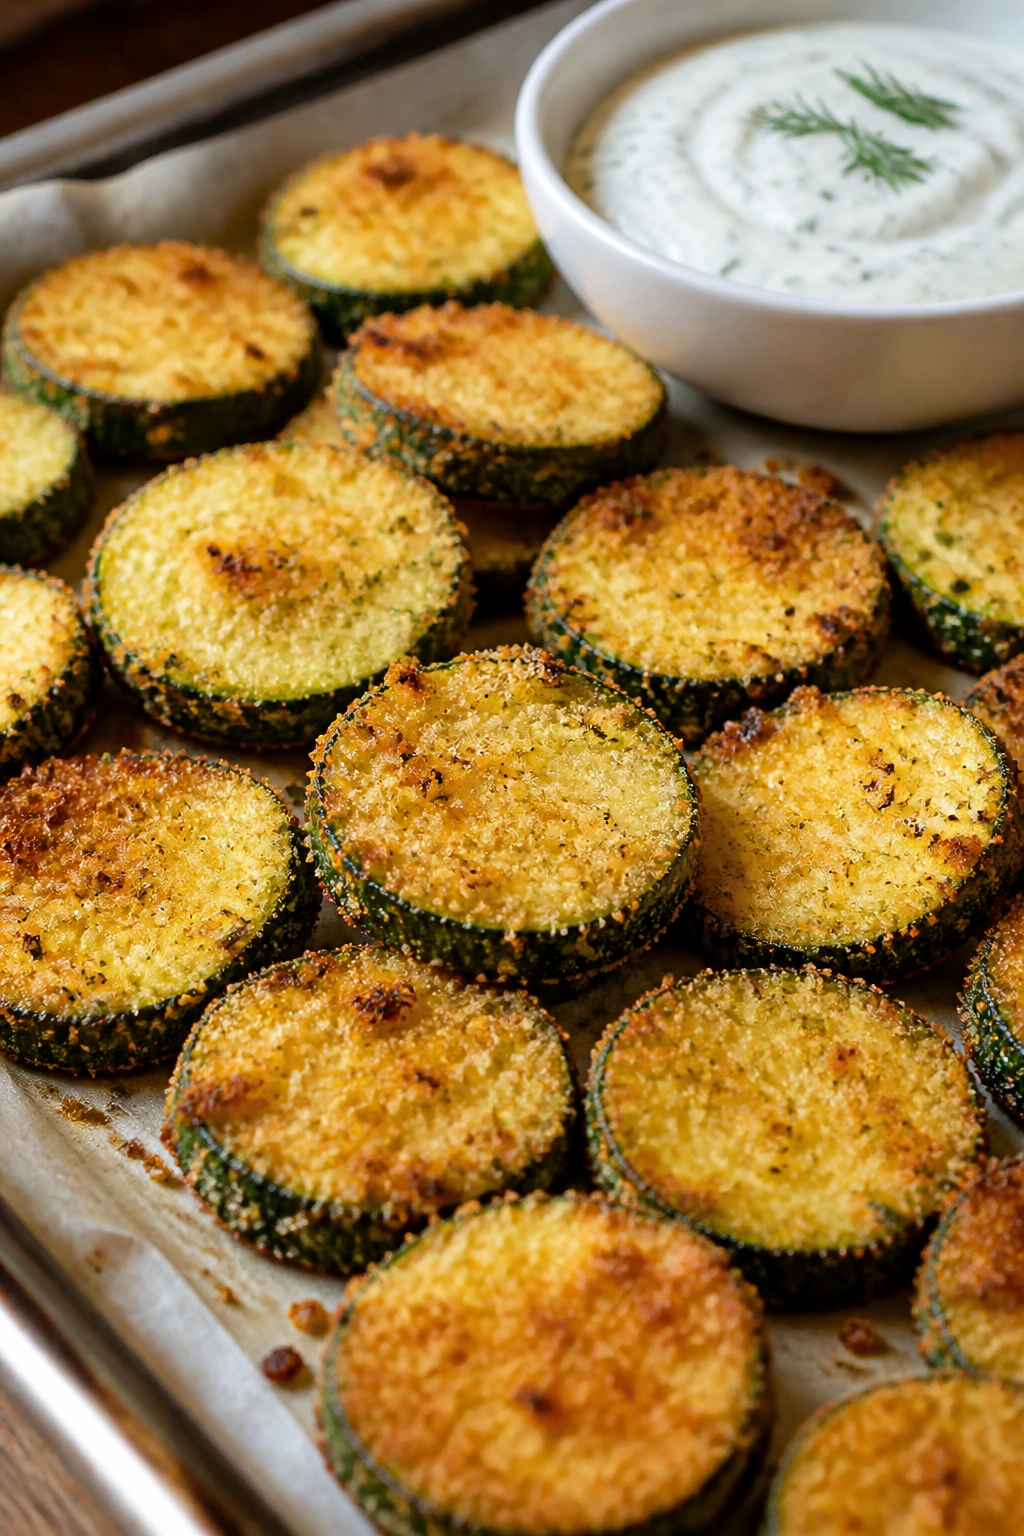
Zucchini coins can go from crisp to limp in a hurry, which is why a hot oven and a dry breading matter. With a cool yogurt dip on the side, they read more like a real vegetable side and less like a compromise.
Why It Works: The breading protects the zucchini from direct heat long enough to brown. Parmesan in the coating adds salt and depth, and the yogurt dip cools the plate while giving you something tangy to drag the coins through.
Key Ingredients:
- 2 medium zucchini, sliced into 1/2-inch coins
- 1/2 cup flour
- 2 eggs, beaten
- 1 cup breadcrumbs
- 1/3 cup grated Parmesan
- 1 teaspoon salt
- 1/2 teaspoon black pepper
- 1 cup Greek yogurt
- 1 tablespoon chopped dill
- 1 teaspoon lemon juice
Quick Steps:
- Set up flour, egg, and breadcrumb bowls.
- Dip zucchini in flour, then egg, then breadcrumbs mixed with Parmesan, salt, and pepper.
- Bake at 425°F for 20 to 22 minutes, flipping once, until crisp and golden.
- Mix the yogurt, dill, and lemon juice for the dip.
Equipment for This Recipe:
- Sheet pan
- Three shallow bowls
- Whisk
How to Serve This Dish: Serve the coins hot with the dip on the side. They work as a side with burgers, roast chicken, or anything that needs a crunchy green vegetable.
Pro Tips for This Recipe:
- Pat the zucchini dry before breading.
- Use panko if you want a rougher, crunchier crust.
- Serve immediately; breaded zucchini softens as it sits.
Variations on This Dish:
- Air-Fryer Version: Cook in a single layer for a lighter crust.
- Spiced Crumb Zucchini: Add paprika and garlic powder to the coating.
Common Mistakes to Avoid with This Dish:
- Don’t slice the coins too thin or they collapse.
- Don’t skip drying the zucchini, or the breading slips off.
38. Leek and Pea Sauté
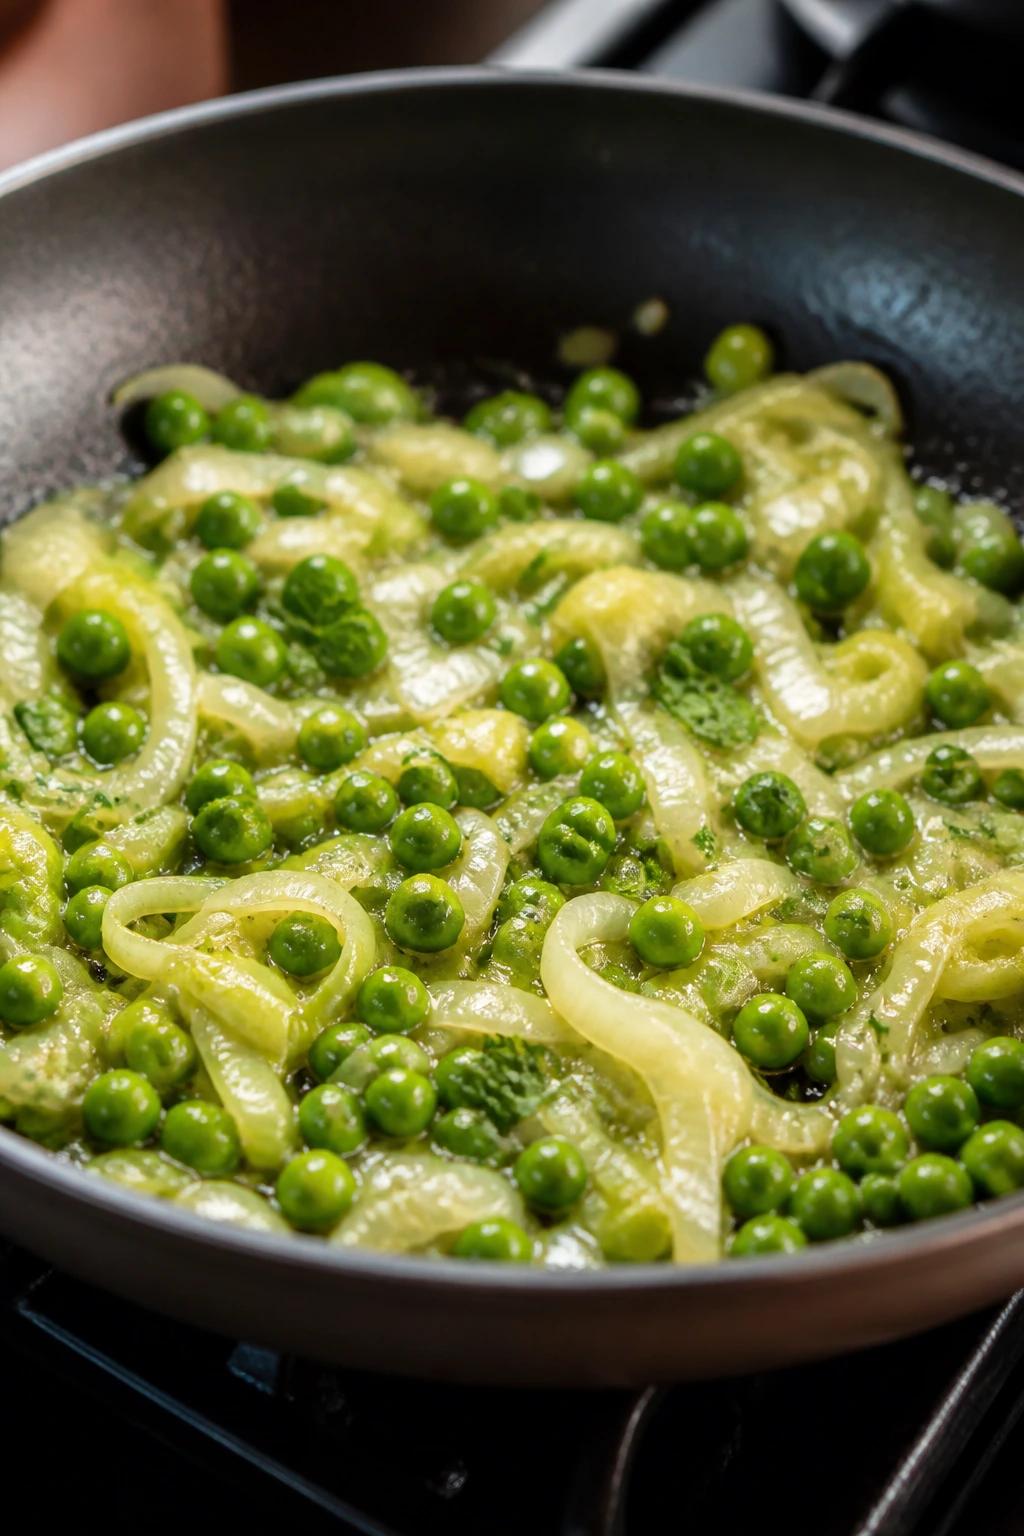
Leeks and peas taste like spring woke up and got organized. The leeks soften into something sweet and buttery, the peas stay bright, and mint gives the whole pan a clean finish that helps it sit beside richer mains.
Why It Works: Leeks need a little patience, because their sweetness comes out once they soften. Peas need only a brief cook so they stay green and sweet. Butter, mint, and lemon keep the dish fresh without making it sharp.
Key Ingredients:
- 2 large leeks, cleaned and sliced
- 2 cups peas, fresh or frozen
- 2 tablespoons butter
- 1 tablespoon olive oil
- 1 tablespoon chopped mint
- 1 tablespoon lemon juice
- 1/2 teaspoon kosher salt
- Black pepper
Quick Steps:
- Cook the leeks in butter and oil over medium heat until soft.
- Add the peas and cook just until hot and bright.
- Stir in mint, lemon juice, salt, and pepper.
- Serve right away.
Equipment for This Recipe:
- Large skillet
- Knife
- Colander for cleaning leeks
How to Serve This Dish: Serve it as a side with roast chicken, lamb, or fish. It also works under a spoonful of rice if you want a more substantial vegetarian plate.
Pro Tips for This Recipe:
- Clean the leeks well; sand hiding in the layers is a bad surprise.
- Don’t overcook the peas or they turn dull.
- Add lemon at the end so the flavor stays fresh.
Variations on This Dish:
- Creamed Peas and Leeks: Add a splash of cream.
- Basil Version: Use basil instead of mint if you want a sweeter herb note.
Common Mistakes to Avoid with This Dish:
- Don’t rush the leeks; they need time to soften.
- Don’t let frozen peas sit in the pan too long or they go starchy.
39. Spinach and Artichoke Bake
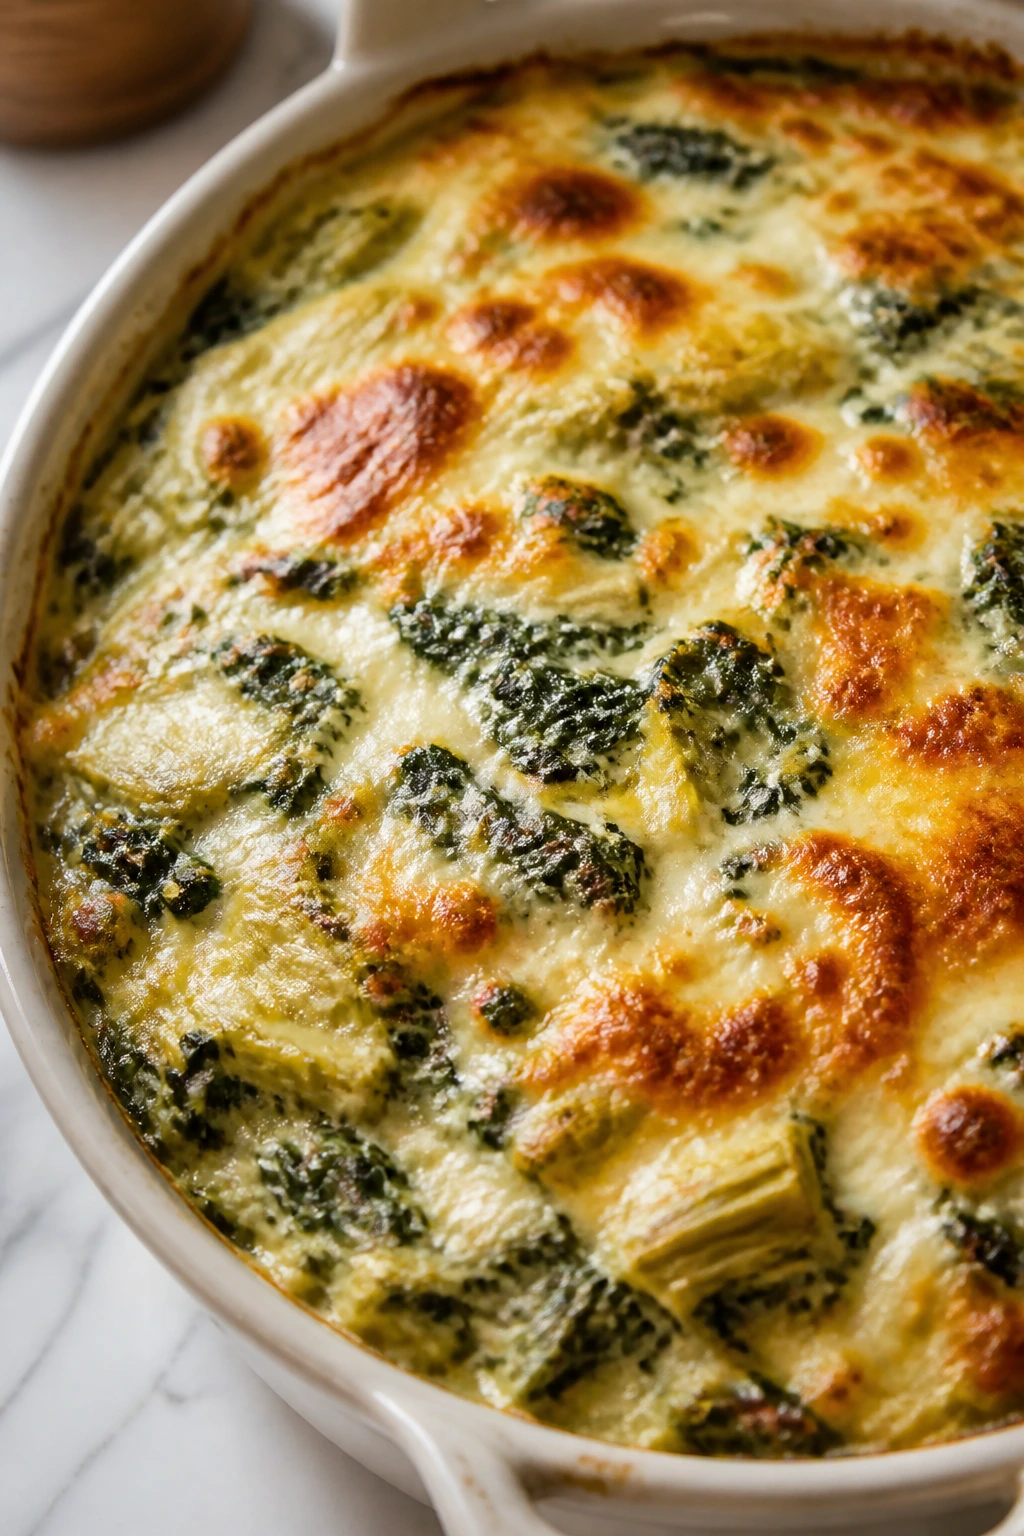
This is the party dip that grew up and decided to sit beside dinner like it belonged there. The spinach, artichokes, cream cheese, and mozzarella make a thick, scoopable side that works with a spoon, a cracker, or a slice of roast chicken.
Why It Works: The creamy base holds the vegetables together and keeps the bake moist. Artichokes bring tang, spinach gives body, and a browned top turns the dish from dip into side. It’s rich, yes, but not in a sleepy way.
Key Ingredients:
- 10 ounces spinach, thawed and squeezed dry
- 1 can artichoke hearts, 14 ounces, chopped
- 8 ounces cream cheese, softened
- 1/2 cup sour cream
- 1 cup shredded mozzarella
- 1/2 cup grated Parmesan
- 2 garlic cloves, minced
- Salt and pepper
Quick Steps:
- Mix the cream cheese, sour cream, garlic, half the mozzarella, Parmesan, salt, and pepper.
- Fold in spinach and artichokes.
- Spread into a baking dish and top with remaining mozzarella.
- Bake at 375°F for 20 to 25 minutes until bubbly and golden.
Equipment for This Recipe:
- Mixing bowl
- Baking dish
- Spatula
How to Serve This Dish: Serve it warm and spoonable. It belongs beside grilled meats, roast chicken, or as the rich vegetable on a buffet where everyone expects seconds.
Pro Tips for This Recipe:
- Squeeze the spinach dry or the bake turns loose.
- Use a shallow dish for more browned top.
- Let it rest a few minutes so it scoops cleanly.
Variations on This Dish:
- Jalapeño Spinach Bake: Add minced jalapeño for heat.
- Smoked Gouda Version: Swap some mozzarella for smoked gouda.
Common Mistakes to Avoid with This Dish:
- Don’t use watery artichokes straight from the jar without draining.
- Don’t overbake or the cheese firms up too much.
40. Mediterranean Roasted Vegetables
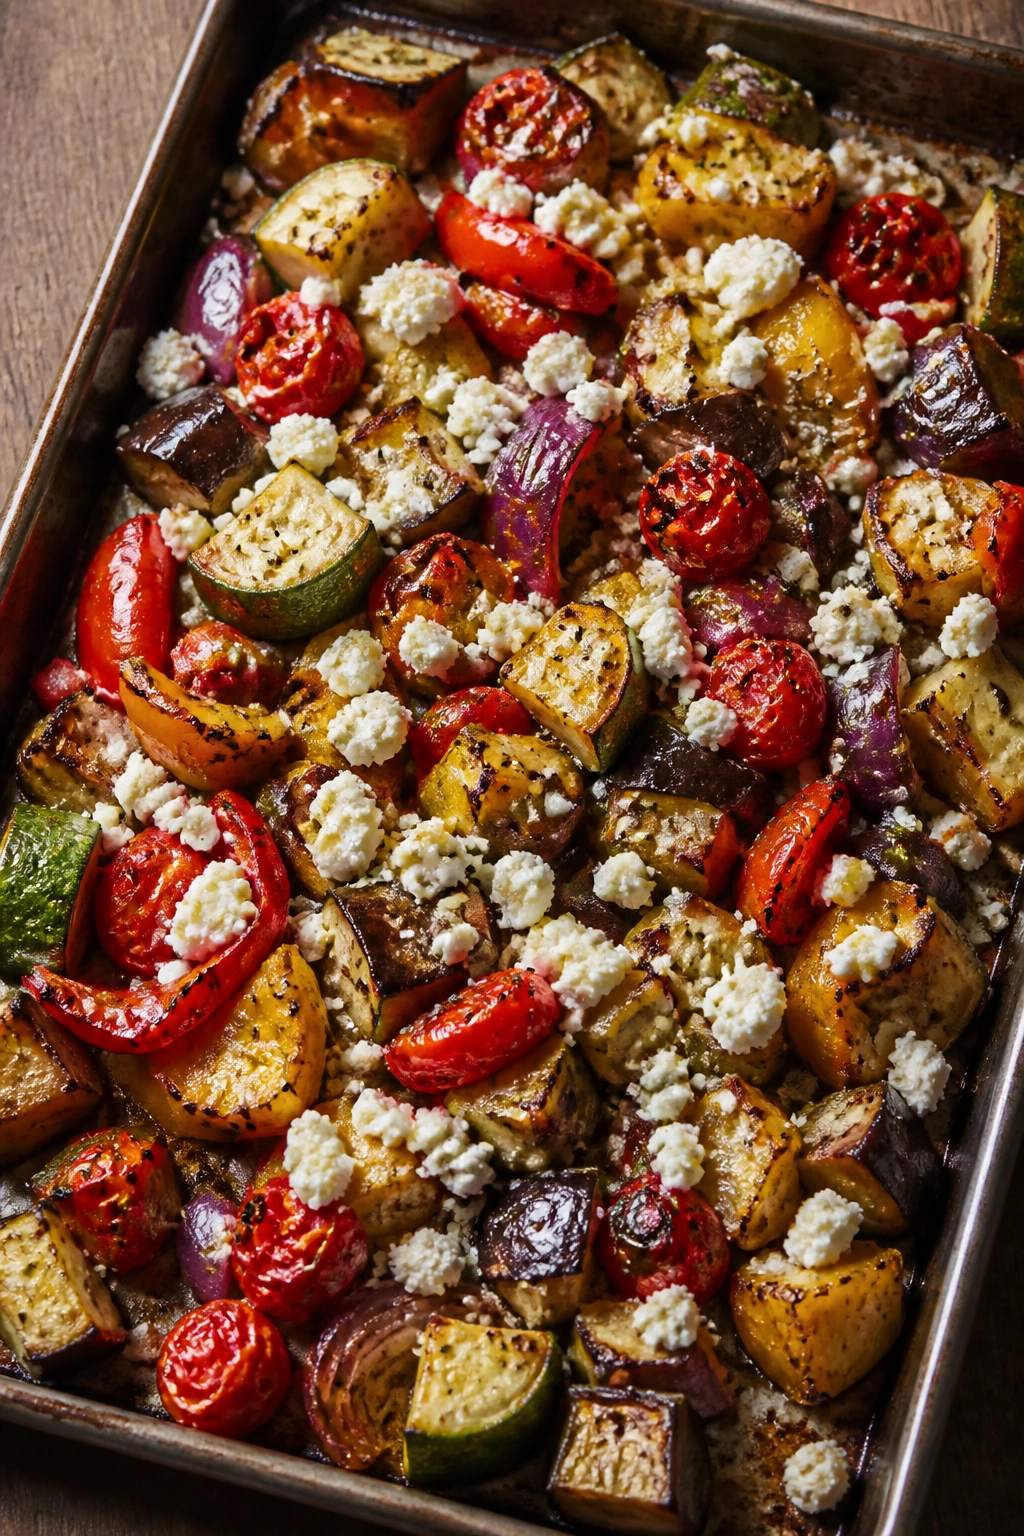
This is the tray that uses the oven like a blunt instrument and gets rewarded for it. Eggplant, zucchini, peppers, onions, and tomatoes roast until they slump into a savory tangle, and oregano plus feta make it taste finished instead of merely cooked.
Why It Works: Different vegetables need different amounts of heat, but when you cut them to a similar size and roast them together, the edges char while the centers soften. Olive oil carries the herbs and helps the vegetables brown. Feta at the end adds salt and a creamy, crumbly finish that makes the tray feel like a side with a plan.
Key Ingredients:
- 1 eggplant, cubed
- 2 zucchini, thickly sliced
- 2 bell peppers, cut into strips
- 1 red onion, cut into wedges
- 2 cups cherry tomatoes
- 3 tablespoons olive oil
- 2 teaspoons dried oregano
- 1 teaspoon kosher salt
- Black pepper
- 1/2 cup feta, crumbled
Quick Steps:
- Toss the vegetables with olive oil, oregano, salt, and pepper.
- Spread on a sheet pan in a single layer.
- Roast at 425°F for 25 to 30 minutes, stirring once, until browned and tender.
- Top with feta and serve.
Equipment for This Recipe:
- Sheet pan
- Large mixing bowl
- Spatula
How to Serve This Dish: Serve it warm as a side or room temperature as part of a bigger spread. It goes with grilled chicken, lamb, fish, or a crusty loaf that can mop up the pan juices.
Pro Tips for This Recipe:
- Cut the eggplant a little larger than the zucchini so it doesn’t collapse.
- Use two pans if your vegetables are crowded.
- Add feta only after roasting so it stays crumbly.
Variations on This Dish:
- Olive and Caper Version: Add olives and capers for a brinier pan.
- Harissa Roast: Stir a spoonful of harissa into the oil for heat.
Common Mistakes to Avoid with This Dish:
- Don’t stir constantly; the vegetables need contact with the pan.
- Don’t skip the salt, or the roast tastes dull and flat.
Why Roasting, Sautéing, and Finishing Matter Most
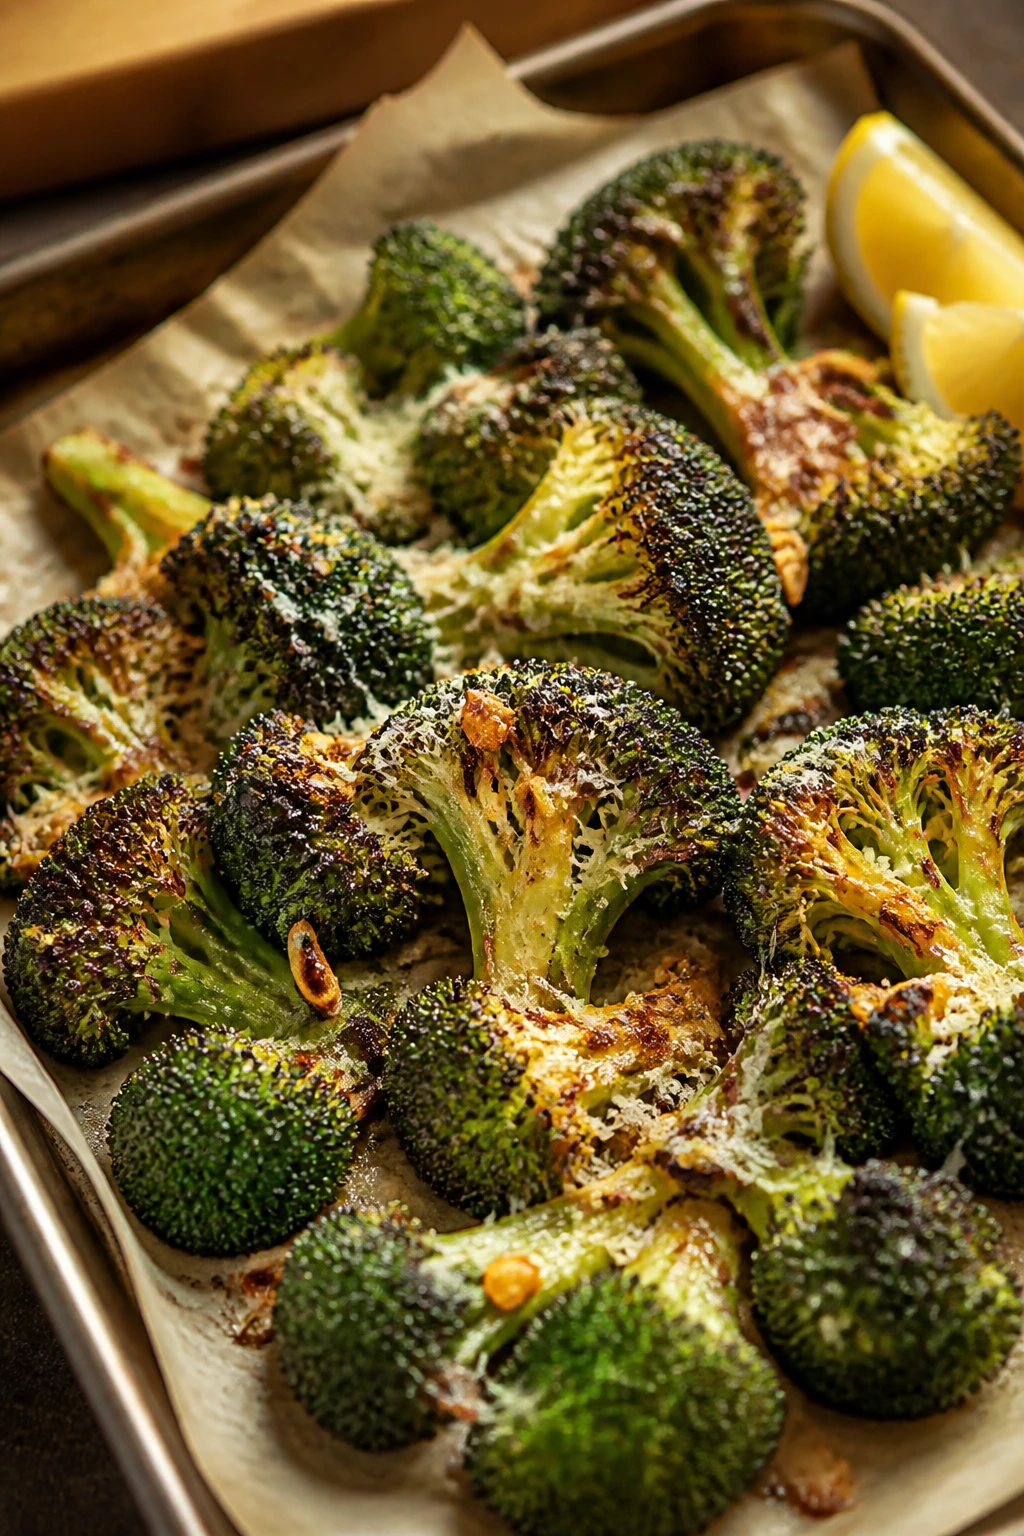
The best vegetable side dishes usually win because of technique, not because the vegetable itself is exotic. A cauliflower head, a bunch of green beans, or a pile of cabbage can all taste ordinary if they’re underseasoned and overcooked. Put the same vegetables in a hot oven or a hot pan, and you start building browned edges, layered flavor, and a texture that feels worth chewing.
That’s why a lot of these recipes lean on heat first, then a finishing move second. Roasting concentrates sweetness. Sautéing keeps delicate greens bright. A little acid at the end — lemon, vinegar, lime, balsamic — keeps the finished plate from drifting into one-note richness. If you only remember one thing from this whole collection, make it that.
Essential Equipment for These Recipes
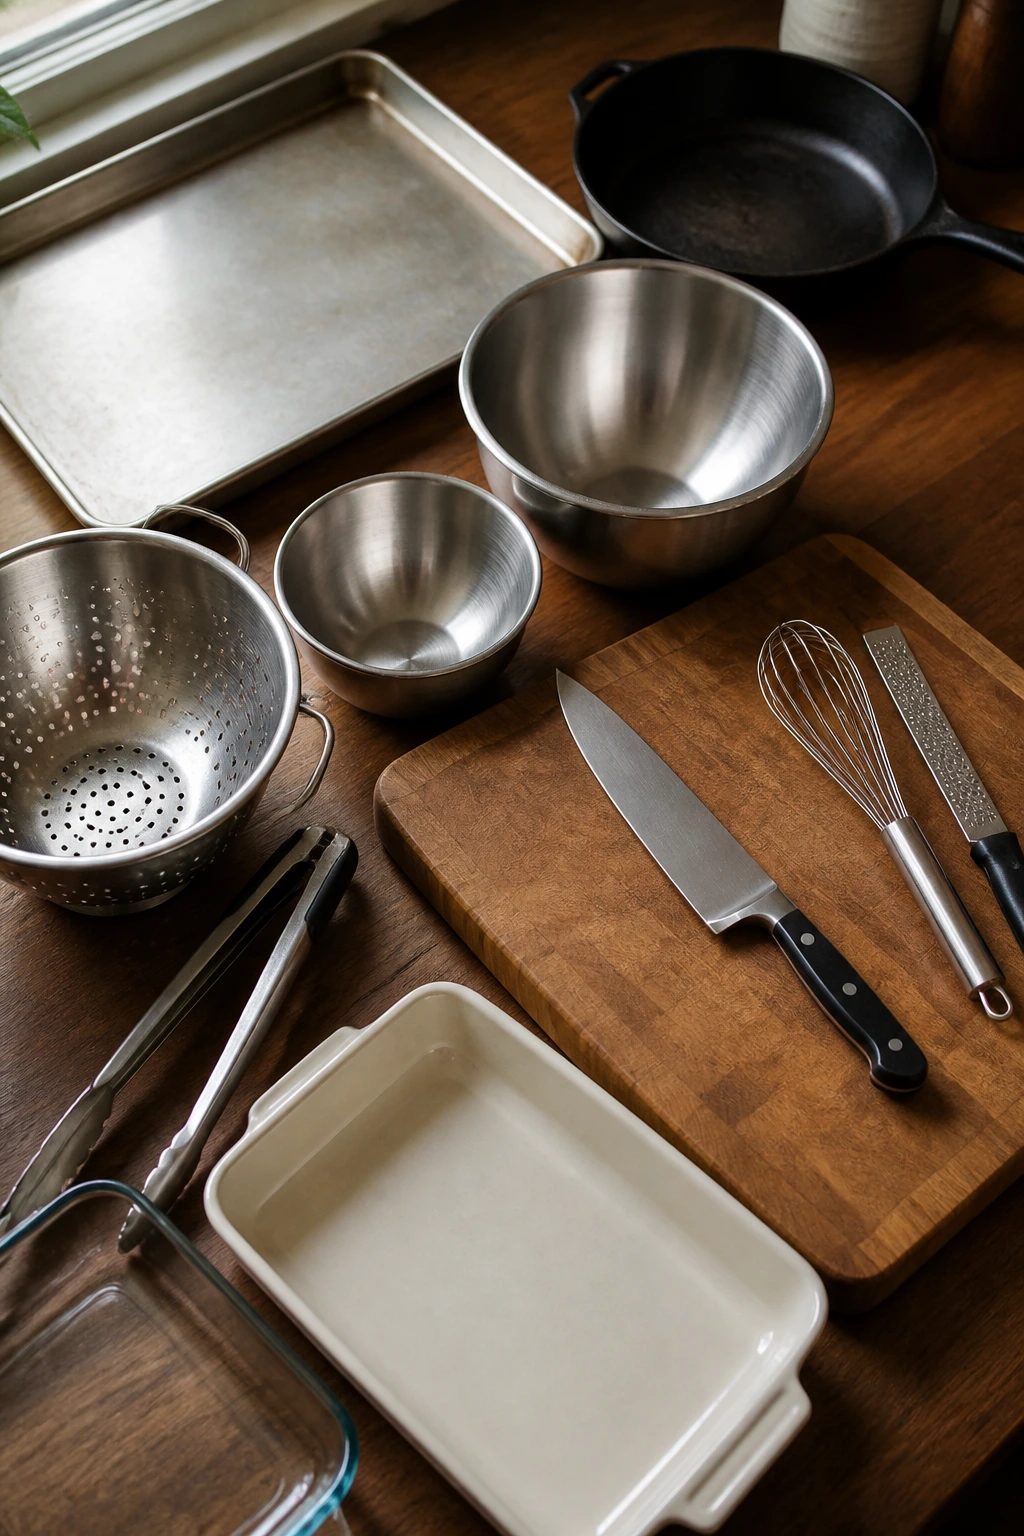
-
Rimmed sheet pans: The workhorse for roasting broccoli, carrots, squash, potatoes, and most of the tray-style sides.
-
Large skillets, ideally cast iron or heavy stainless steel: Best for mushrooms, cabbage, chard, green beans, and anything that needs direct heat.
-
Mixing bowls in two or three sizes: You’ll need them for tossing vegetables with oil, whisking dressings, and mixing fillings.
-
Sharp chef’s knife: Clean cuts matter when you’re trying to keep vegetables the same size for even cooking.
-
Cutting board with enough space to spread out: Tiny boards make prep slower and sloppier.
-
Whisk: Useful for mustard dressings, cream sauces, and quick vinaigrettes.
-
Microplane or fine grater: Handy for garlic, lemon zest, and finely grated cheese that melts well.
-
Tongs and a spatula: Tongs help with grilling and turning roasted vegetables; a spatula helps when a pan needs lifting or scraping.
-
Colander or salad spinner: Especially useful for washing greens, spinach, and herbs so excess water doesn’t ruin the texture.
-
Baking dishes: Needed for gratins, corn pudding, spinach and artichoke bake, and anything creamy that needs to bubble in one place.
Smart Shopping and Ingredient Tips
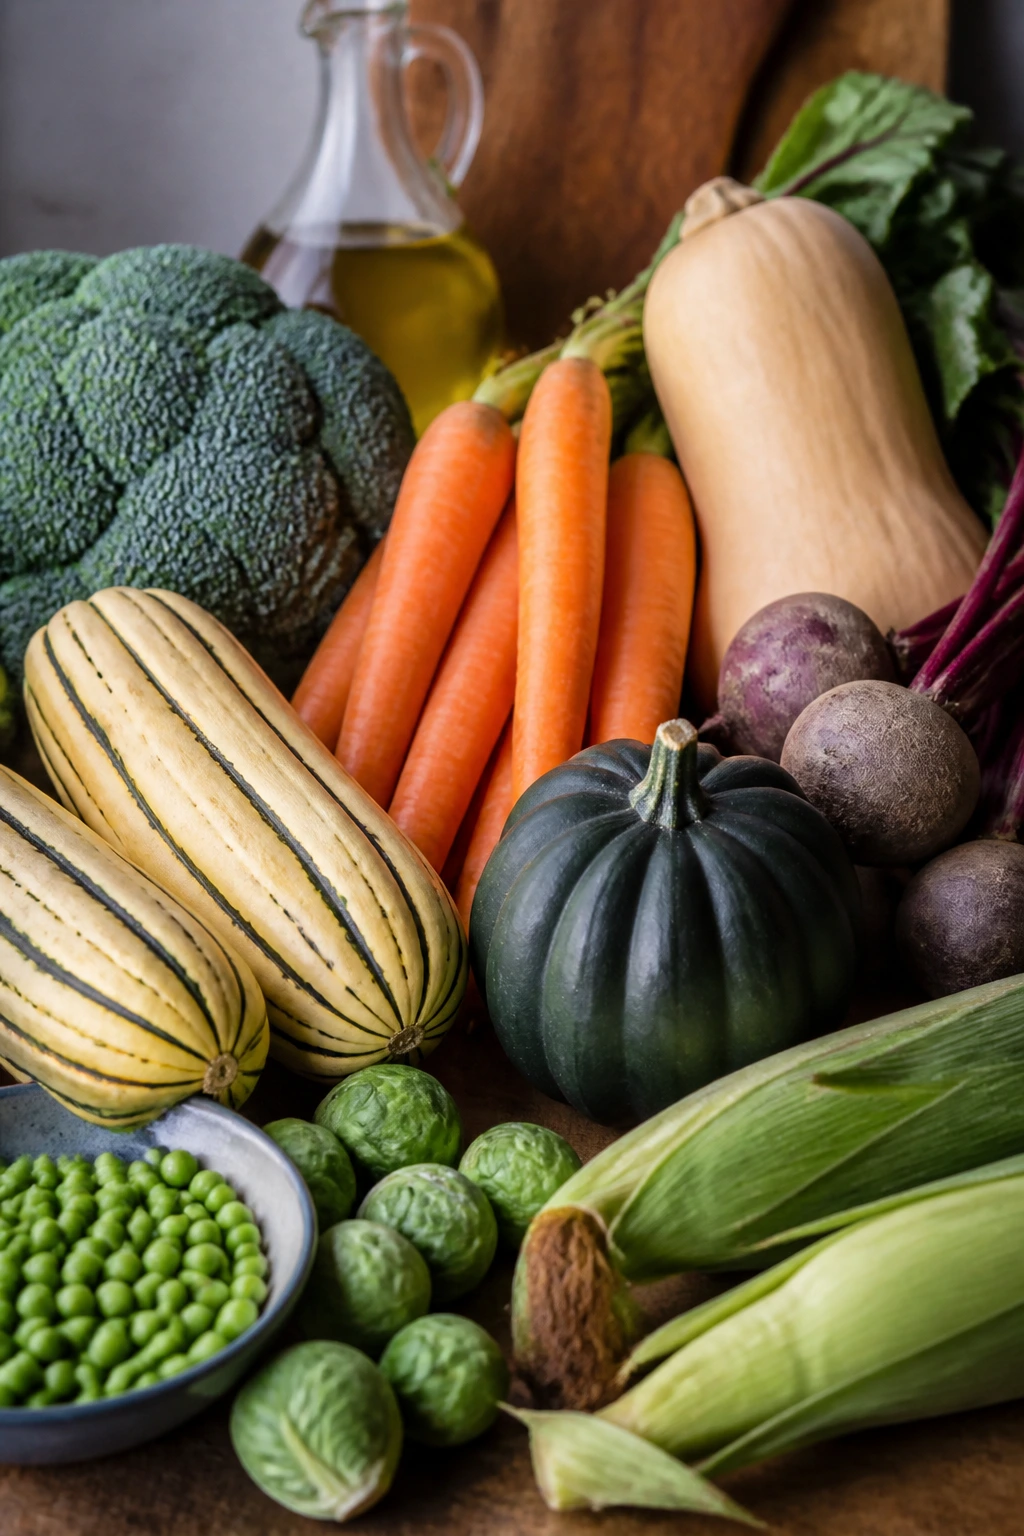
Good vegetable sides start in the produce aisle, and the little choices matter. Broccoli should feel heavy for its size, with tight florets and stems that aren’t woody at the base. Brussels sprouts should be firm and small to medium; huge ones can taste bitter and take longer to soften. For carrots, pick ones with bright color and a clean snap rather than rubbery bend.
For squash, look at the skin and the weight. Delicata is easiest because you can eat the skin, but acorn and butternut work well if they feel dense and unbruised. Beets can be cooked from raw, but if you want to save time, use vacuum-packed cooked beets for salads. Frozen peas and corn are worth buying without guilt; they’re picked at the right stage and often taste better than tired “fresh” produce that’s been sitting around too long.
Cheese makes a difference too. For gratins and baked dishes, grate your own when you can, because pre-shredded cheese often carries anti-caking starch that can dull the melt. For salads and finishing, crumbly cheeses like feta and cotija should taste salty, not chalky. Olive oil doesn’t need to be fancy, but it should taste clean and not waxy or stale. And if a recipe calls for lemon or lime zest, buy an unwaxed citrus fruit if possible and zest it right before cooking; the oils fade fast once the skin is cut.
How to Serve These Recipes
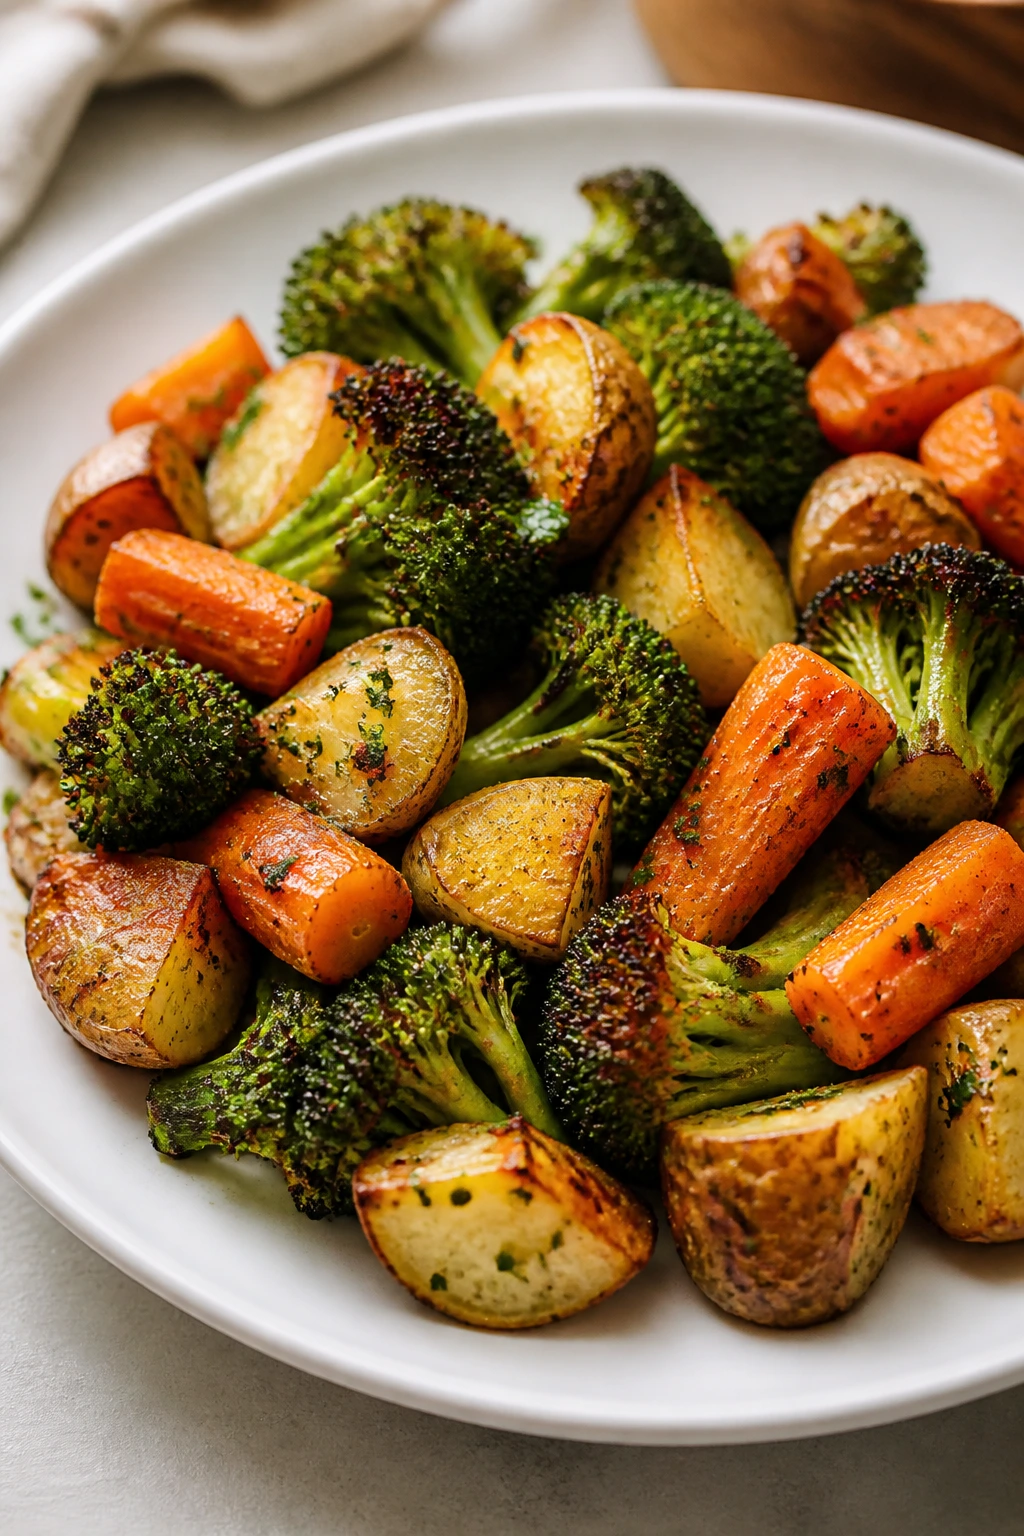
Presentation: Keep the shape of the vegetable visible whenever you can. Broccoli should show its browned tips, potatoes should be spread out instead of stacked, and salads with tomatoes or beets should be tossed lightly enough that they still look like individual pieces, not a blur.
Accompaniments: These sides work beside roast chicken, steak, pork chops, sausages, grilled fish, meatloaf, or a holiday roast. Bread helps with saucy dishes like ratatouille, caponata, mushrooms, and spinach bakes; rice or potatoes help when you need a steadier base.
Portions: For most cooked vegetable sides, plan on about 3/4 cup to 1 cup per person if there are several other dishes on the table, or 1 1/2 cups if the vegetables are the main side. For gratins, gratin-style bakes, and potato dishes, a smaller portion goes farther because they’re richer.
Beverage Pairing: Lemon-forward sparkling water works across the board, especially with roasted vegetables and creamy sides. For something with more presence, a crisp pilsner, dry white wine, or a light red like Beaujolais handles the salt, browning, and cheese without fighting them.
Additional Tips and Flavor Boosters

Flavor Enhancement: A finishing acid almost always helps. Lemon juice, red wine vinegar, balsamic, or lime can make a roasted vegetable side taste like it has a second draft of seasoning, which is often what it needs.
Customization: If you like heat, add red pepper flakes, chili crisp, cayenne, or a spoonful of harissa near the end rather than at the start. If you like richness, finish with butter or a shower of finely grated Parmesan while the vegetables are still hot.
Serving Suggestions: Chopped herbs matter more than people think. Parsley, dill, mint, basil, and chives turn a brownish roasted tray into something that tastes freshly finished. Toasted nuts or seeds work the same way, especially on green beans, squash, and Brussels sprouts.
Make-It-Yours: For dairy-free plates, lean on olive oil, nuts, seeds, capers, olives, or a garlicky vinaigrette. For gluten-free sides, skip the breadcrumbs or use gluten-free crumbs and crushed nuts. For lower-sodium cooking, use acid and herbs more aggressively so you do not feel like you’re missing something.
Make-Ahead, Storage, and Reheating Guidance

Most roasted vegetable sides are best within a day of cooking, but many hold for 3 to 4 days in the refrigerator if you store them in shallow airtight containers. The texture changes first, not the safety: browned edges soften, and crisp coatings lose their snap. That’s normal. If you’re making salads with raw cucumber, slaw, or dressed greens, store the dressing separately when possible and combine within an hour of serving.
Creamy dishes such as gratins, creamed spinach, corn pudding, and spinach-artichoke bake keep well for 3 to 4 days chilled. Reheat them covered at 325°F until warmed through, or use the microwave at medium power in short bursts so the sauce doesn’t split. For roasted vegetables, reheat on a sheet pan at 400°F for 8 to 12 minutes so the edges wake back up. A skillet works well for mushrooms, cabbage, chard, and green beans; a splash of water or broth can bring the pan back to life without making the food soggy.
Freezing works best for the soft, saucy dishes: gratins, creamed spinach, corn pudding, caponata, and some purées. Most roasted vegetables freeze poorly because they go soft after thawing, though purées and bakes usually survive. If you do freeze a creamy dish, cool it fully, wrap it well, and use it within 2 months. Thaw overnight in the fridge and reheat slowly. For make-ahead prep, chop sturdy vegetables like carrots, broccoli, and cauliflower a day ahead, and wash greens just before cooking so they stay crisp.
Variations and Adaptations to Try
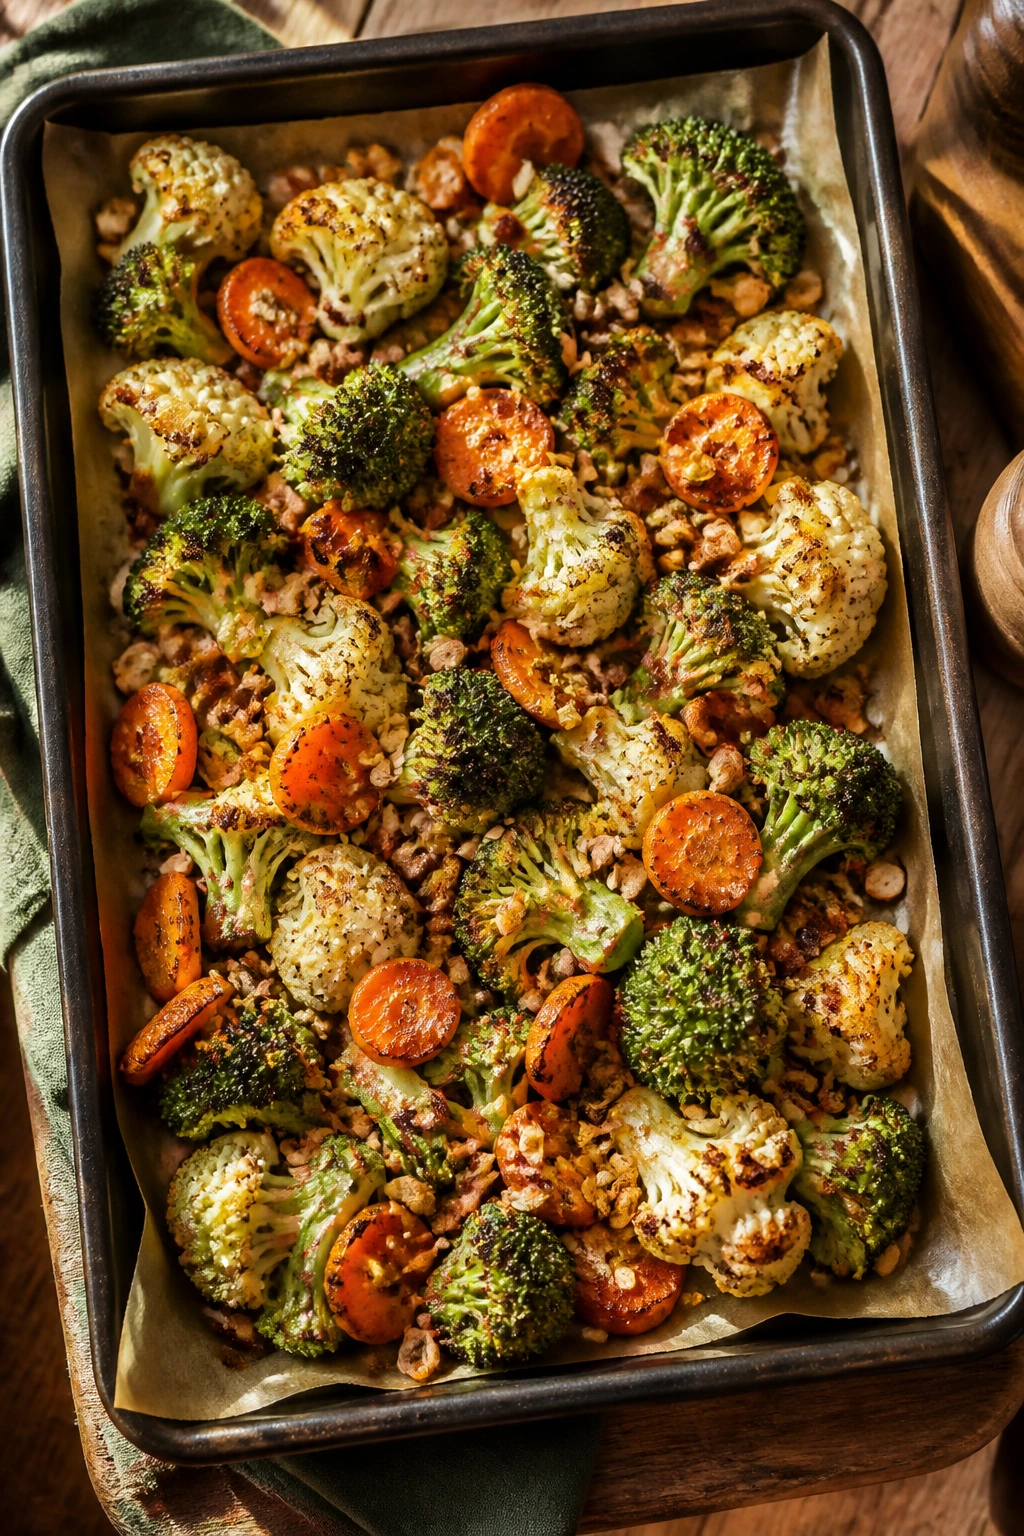
Fire-and-Smoke Tray: Add smoked paprika, chipotle powder, or chili crisp to roasted vegetables like broccoli, carrots, sweet potatoes, and cauliflower. The smoke makes the vegetables taste deeper without needing meat or bacon.
Cheese-Free Savory Finish: Replace cheese with toasted nuts, capers, lemon zest, or breadcrumbs fried in olive oil. This works especially well on broccoli, Brussels sprouts, asparagus, and Romanesco, where crunch matters more than creaminess.
Dairy-Light Creaminess: Use olive oil plus a little vegetable broth in place of butter or cream for dishes like green beans, chard, mushrooms, and ratatouille. You’ll lose some richness, but the vegetables stay bright and clean.
Bright and Herbaceous: Push parsley, dill, mint, chives, basil, and lemon harder across salads, sautéed greens, and roasted squash. This keeps richer mains from swallowing the side whole.
Crumb and Crunch Upgrade: Add toasted panko, almonds, pepitas, pistachios, or sesame seeds to almost any of these dishes. Crunch is the simplest way to make a vegetable side feel more finished.
Sweet-Savory Balance: A teaspoon of honey, maple syrup, or brown sugar can help carrots, squash, parsnips, and Brussels sprouts brown more evenly. Use it lightly; you want caramelization, not glaze-heavy vegetables that taste sticky.
Common Mistakes to Avoid
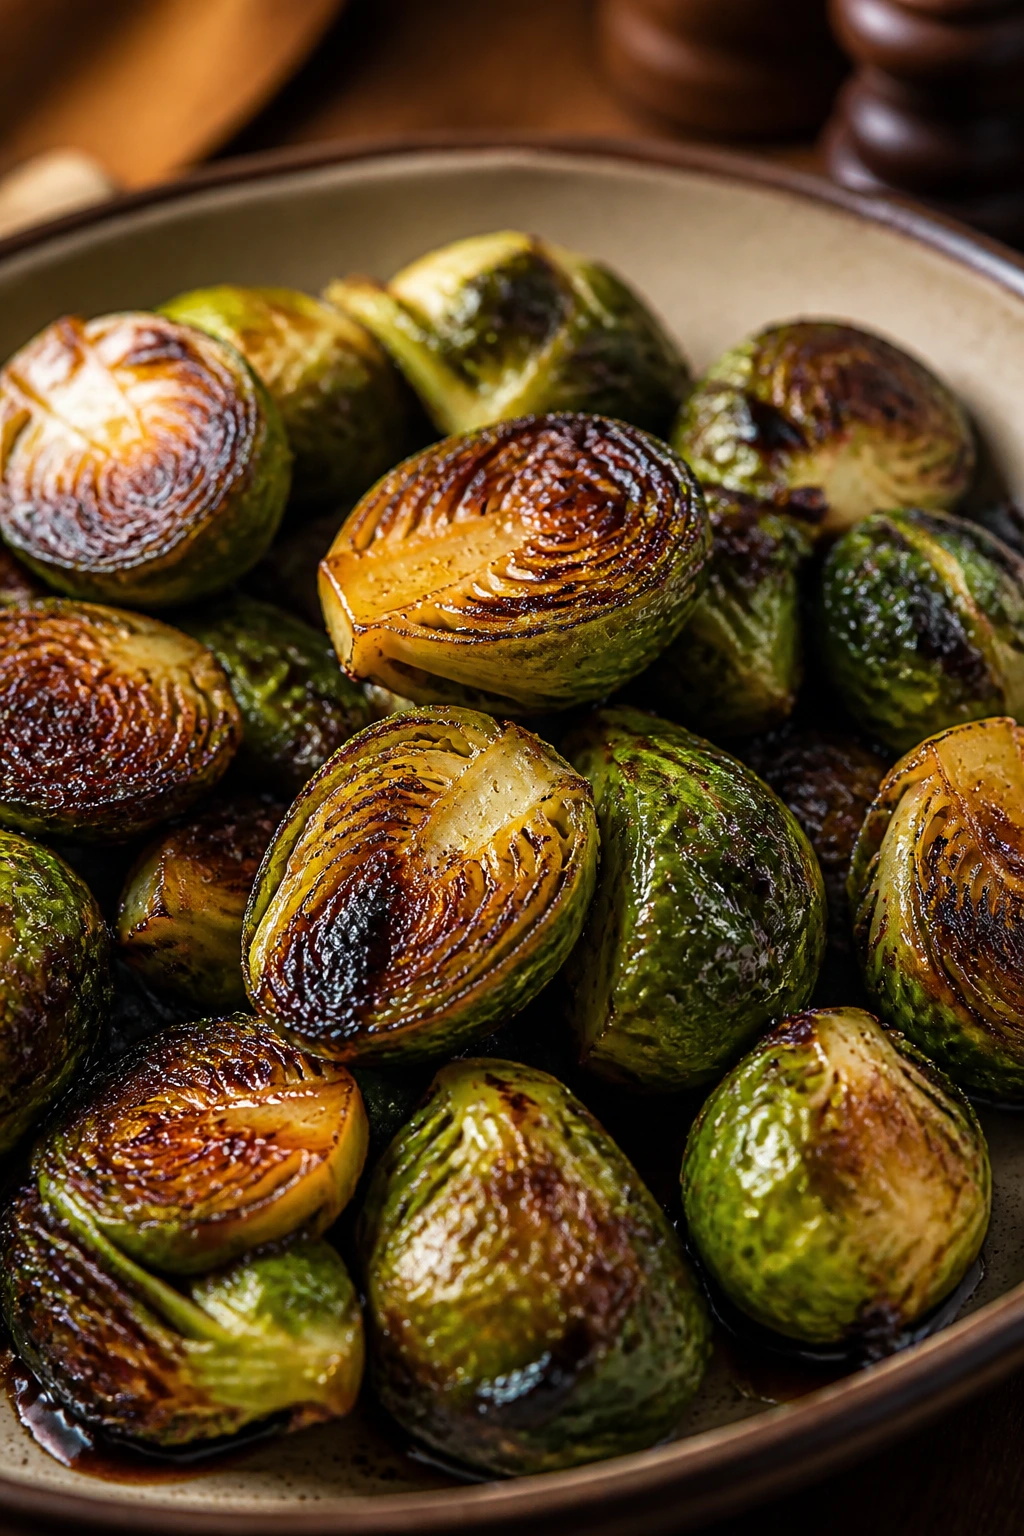
Crowding the pan: This is the big one. When vegetables sit on top of one another, they steam and turn soft instead of browning. Use two sheet pans if you need to; the extra pan is cheaper than throwing out a pale tray.
Skipping the dry step: Wet broccoli, washed mushrooms, rinsed okra, and damp potatoes all fight browning. Pat them dry, drain them well, or let them steam off in the colander for a few minutes before oiling.
Overcooking delicate vegetables: Asparagus, broccolini, green beans, zucchini, peas, and spinach all need less time than most people think. If you cook them until they look “fully done” in the pan, they often end up tired on the plate.
Underseasoning vegetables before the oven: Salt before roasting matters because it pulls flavor into the surface. If you wait until the end, the seasoning sits on top instead of inside the bite.
Using too much sugar or glaze: Honey, maple syrup, and balsamic are useful, but they burn if you overdo them. A thin coating is enough; the vegetables themselves supply the sweetness.
Forgetting the finish: Herbs, acid, cheese, toasted crumbs, seeds, or nuts are not decoration. They’re the last layer that turns “cooked vegetables” into a side people remember.
Frequently Asked Questions
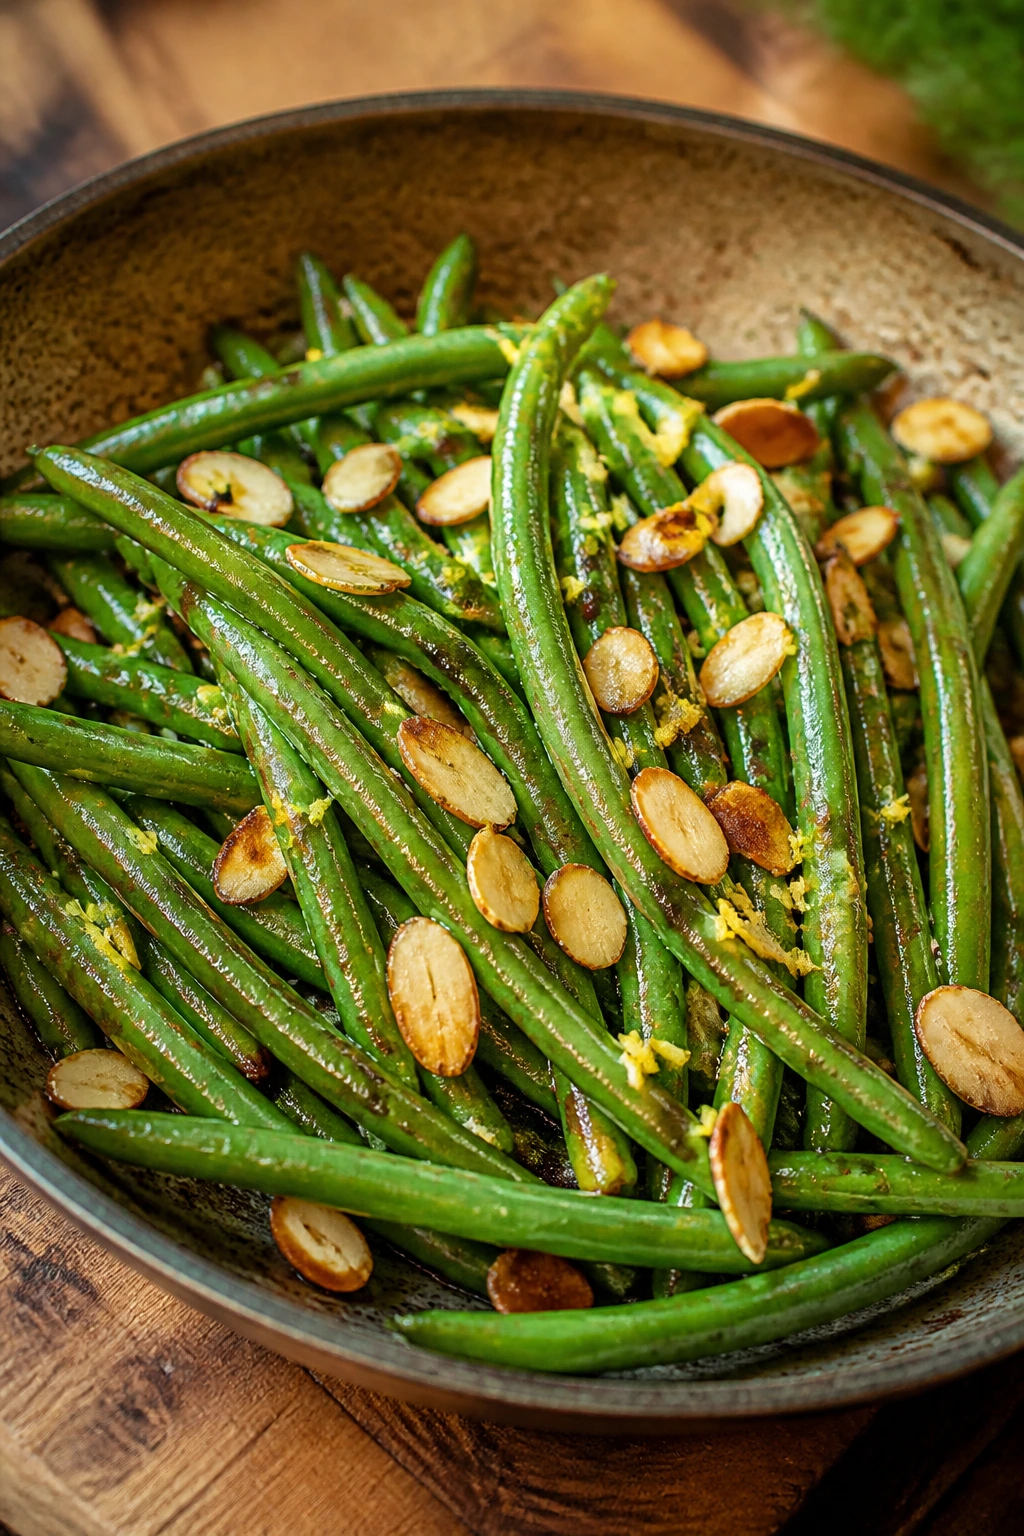
Can I make most of these vegetable side dishes ahead of time?
Yes, especially the roasted, creamy, and saucy ones. Roast vegetables can be cooked a day ahead and reheated on a sheet pan, while gratins, creamed spinach, corn pudding, and caponata usually hold well for a few days.
How do I keep roasted vegetables from getting soggy?
Use high heat, dry the vegetables well, and give them space on the pan. A crowded pan traps steam, which is the fastest way to lose the browned edges that make these sides taste worth serving.
Which vegetables work best for meat-eater-friendly sides?
Broccoli, Brussels sprouts, cauliflower, potatoes, mushrooms, carrots, squash, cabbage, and green beans are the easiest wins. They all take well to salt, fat, and browning, which is usually what makes the plate feel satisfying.
Can I use frozen vegetables in these recipes?
For corn, peas, and spinach, yes. For broccoli, cauliflower, Brussels sprouts, and mushrooms, fresh usually gives better texture, because frozen versions release a lot of water and fight browning.
What if my roasted vegetables are browning too fast before they’re tender?
Lower the oven by 25°F and cover loosely with foil for the last stretch. That usually solves the problem without flattening the flavor, especially with carrots, parsnips, and squash.
How do I make vegetable sides feel more filling without adding meat?
Lean on richer textures: gratins, creamy bakes, potato dishes, polenta fries, and squash purée. Add cheese, nuts, breadcrumbs, or a bean-based side if you want the plate to feel more substantial.
Can I swap the cheese in these recipes?
Usually, yes. Parmesan can become Pecorino or Asiago, feta can become goat cheese, and Gruyère can become sharp cheddar in some bakes. Just keep the melt and salt level in mind so the dish doesn’t turn too sharp or too greasy.
What’s the easiest side in the whole list for a weeknight dinner?
Garlic-parmesan broccoli, roasted carrots, and sautéed green beans are the quickest reliable wins. They need little prep, use common ingredients, and finish fast enough that you can make them while the main dish rests.
Why do some vegetable sides taste better the next day?
Braised and saucy dishes like ratatouille, caponata, and warm potato salad have time to settle, so the flavors blend and get rounder. Crunchy roasted vegetables, by contrast, usually lose some of their edge and need reheating in the oven to come back.
How can I make these sides taste more restaurant-like at home?
Use more salt than feels comfortable at the beginning, finish with acid, and add one texture contrast at the end — herbs, crumbs, nuts, or cheese. That last step is what gives the plate a finished look and a cleaner bite.
A Plateful Worth Reaching For
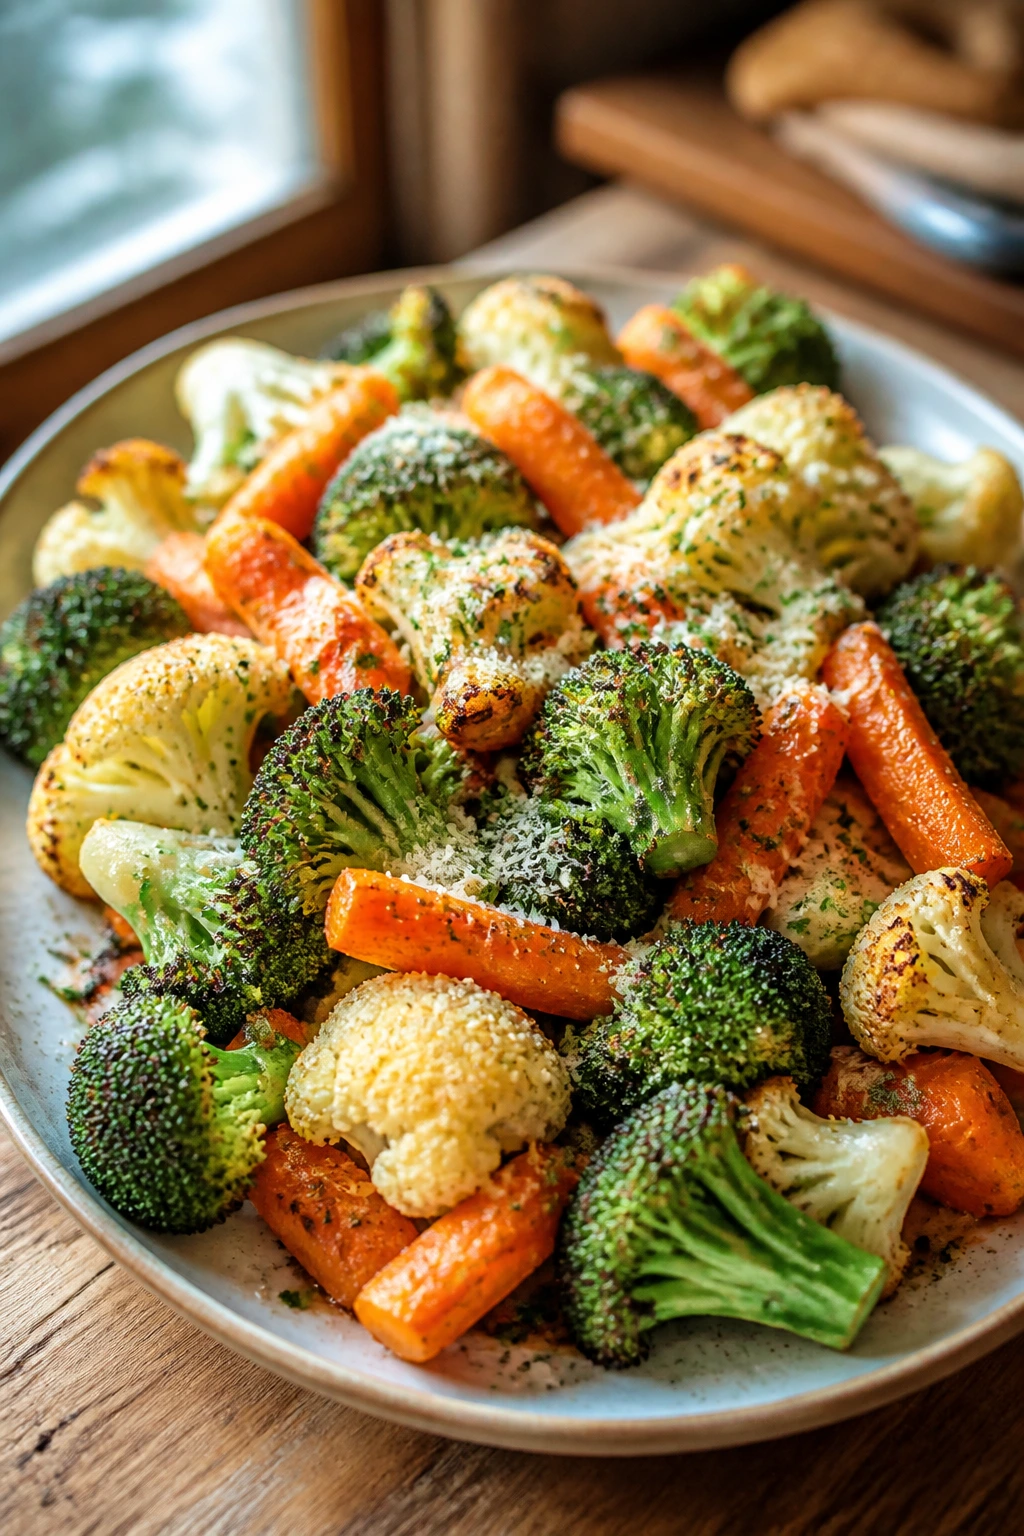
Vegetable side dishes stop being forgettable the moment you treat them like they matter. Give them heat, salt, fat, and one sharp finishing move, and they stop acting like filler and start acting like part of the meal people remember.
The nice part is that none of this requires fancy shopping or weird tricks. A hot oven, a skillet, a lemon, a little cheese, and enough care to keep the vegetables from steaming into submission will get you a long way. Start with the dish that sounds easiest, then work toward the ones with more browning, more sauce, or more texture.