
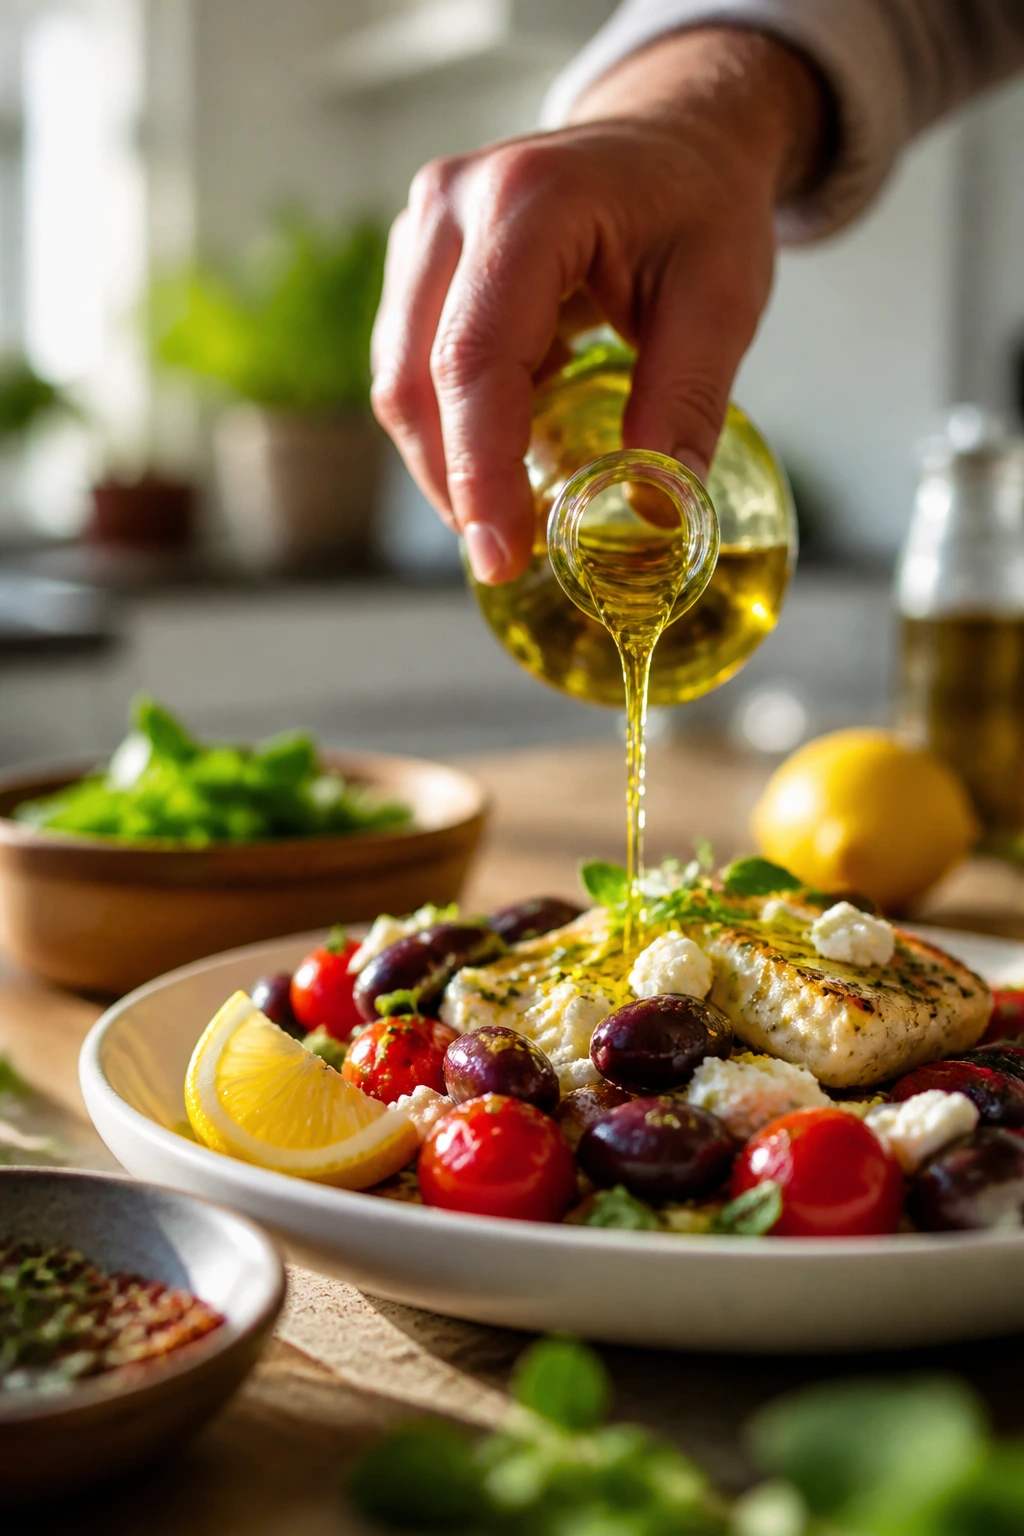
Some nights ask for food that behaves itself. Not a long braise. Not a heavy casserole that turns the kitchen into a sauna. Just bright, quick Mediterranean dinners with enough lemon to wake up the plate and enough olive oil, herbs, tomatoes, and briny bits to make you forget the heat outside. That’s the sweet spot of lemony Mediterranean dinners for hot summer nights: they feel fresh, but they still eat like dinner, not a sad compromise.
I keep coming back to this style of cooking because it understands restraint. A skillet of chicken thighs with blistered cherry tomatoes. Shrimp barely cooked through and tossed with orzo. Fish with fennel, capers, and lemon slices that soften in the oven. These aren’t fussy dishes. They’re practical, and that’s the reason they work. Lemon does a lot of the heavy lifting, but not in the flimsy way people sometimes mean when they say “light.” It brings sharpness, yes, but it also makes olive oil taste fruitier, herbs taste greener, and beans taste less starchy.
And there’s a second reason this kind of cooking earns a permanent place in the rotation: it adapts. If you’ve got chicken thighs, use them. If dinner needs to lean vegetarian, chickpeas and white beans can carry the load. If you want something that can sit on the table for ten minutes while everyone wanders in from the yard, these recipes can handle that too. They’re the kind of dishes that still taste good when they’ve cooled from blazing hot to merely warm, which is a bigger gift than it sounds.
Why These Dinners Belong on the Short List
-
Fast-cooking proteins: Shrimp, salmon, halloumi, chicken thighs, and swordfish all cook quickly enough to keep the kitchen from turning sticky and miserable.
-
Bright finish, not heavy sauce: Lemon juice, zest, herbs, and a little feta or yogurt give these dishes lift without leaning on cream.
-
Pantry-friendly backbone: Chickpeas, white beans, olives, capers, orzo, couscous, and canned artichokes show up again and again because they work hard and keep well.
-
Good warm or room temperature: Several of these dinners still taste sharp and balanced after they’ve sat on the table for a few minutes, which matters when people are late, hungry, or both.
-
Flexible enough to bend: Swap the protein, switch the grain, add a handful of spinach, and the structure still holds. That’s the mark of a useful recipe, not just a pretty one.
-
Less oven time, fewer regrets: A lot of these recipes finish on the stovetop, grill, or with a short roast at 400°F to 425°F, which keeps the house from feeling like a brick oven.
1. Lemon-Garlic Chicken Thighs with Cherry Tomatoes and Kalamata Olives
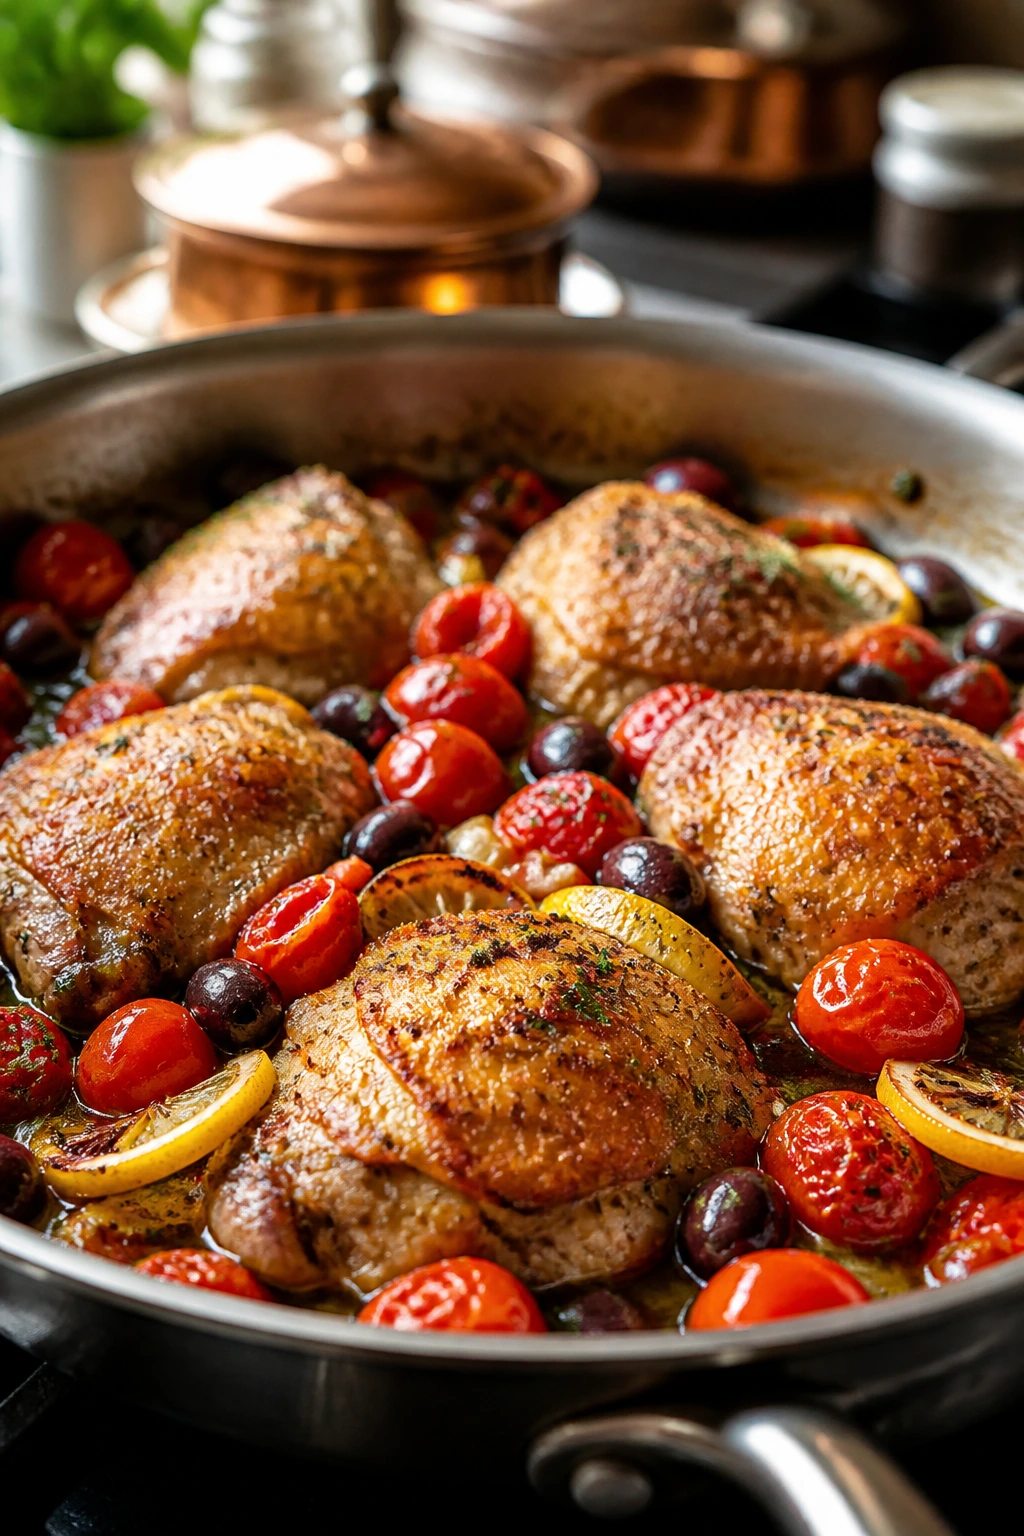
The skin on these chicken thighs turns bronzed and a little blistered, while the tomatoes slump into a saucy puddle that tastes like summer cooked down to its bare essentials. Kalamata olives bring a salty, winey note that keeps the lemon from reading too sharp. It’s a skillet dinner that looks like it took more work than it did, which is always a nice trick.
Why It Works:
Bone-in, skin-on chicken thighs love high heat, and that matters here because 425°F gives you crisp skin without drying out the meat. Cherry tomatoes burst in the pan and mix with the chicken juices, so you get a built-in sauce without standing over the stove with a whisk. The lemon juice goes in at the end, where it tastes fresh instead of bitter. I also like this one because it leaves you with a pan full of spoonable juices that are excellent with bread.
Key Ingredients:
- 8 bone-in, skin-on chicken thighs, about 3 pounds — they stay juicy and brown well.
- 1 1/2 teaspoons kosher salt — seasons the meat past the surface.
- 1/2 teaspoon black pepper — enough to give the skin a little edge.
- 2 tablespoons olive oil — helps the thighs sear and keeps the garlic from sticking.
- 4 garlic cloves, thinly sliced — sliced garlic softens instead of burning fast.
- 1 pint cherry tomatoes — they collapse into the pan sauce.
- 1 cup pitted Kalamata olives — rinse if they taste too salty.
- 1 lemon, zested and juiced — zest early, juice late.
- 1 teaspoon dried oregano — gives the dish its Mediterranean backbone.
- 1/2 cup low-sodium chicken broth — keeps the pan juices from drying out.
- 2 tablespoons chopped parsley — sharpens the final plate.
Quick Steps:
- Preheat and dry: Heat the oven to 425°F (220°C). Pat the chicken thighs very dry with paper towels; dry skin browns, wet skin steams.
- Season well: Rub the thighs with salt, pepper, half the lemon zest, and oregano. Let them sit while the pan heats, even if it’s only 10 minutes.
- Sear the skin: Warm the olive oil in a large oven-safe skillet over medium-high heat. Lay the thighs skin-side down and cook for 5 to 6 minutes, until the skin is deep golden and releases easily.
- Turn and build the pan: Flip the chicken, then add garlic, tomatoes, olives, and broth around the thighs. Sprinkle in the remaining lemon zest.
- Roast: Slide the skillet into the oven and roast for 15 to 18 minutes, until the chicken reaches 175°F to 185°F at the thickest part and the tomatoes have burst.
- Finish bright: Pull the skillet out, spoon lemon juice over everything, and shower with parsley. Let it rest for 5 minutes before serving.
Equipment for This Recipe:
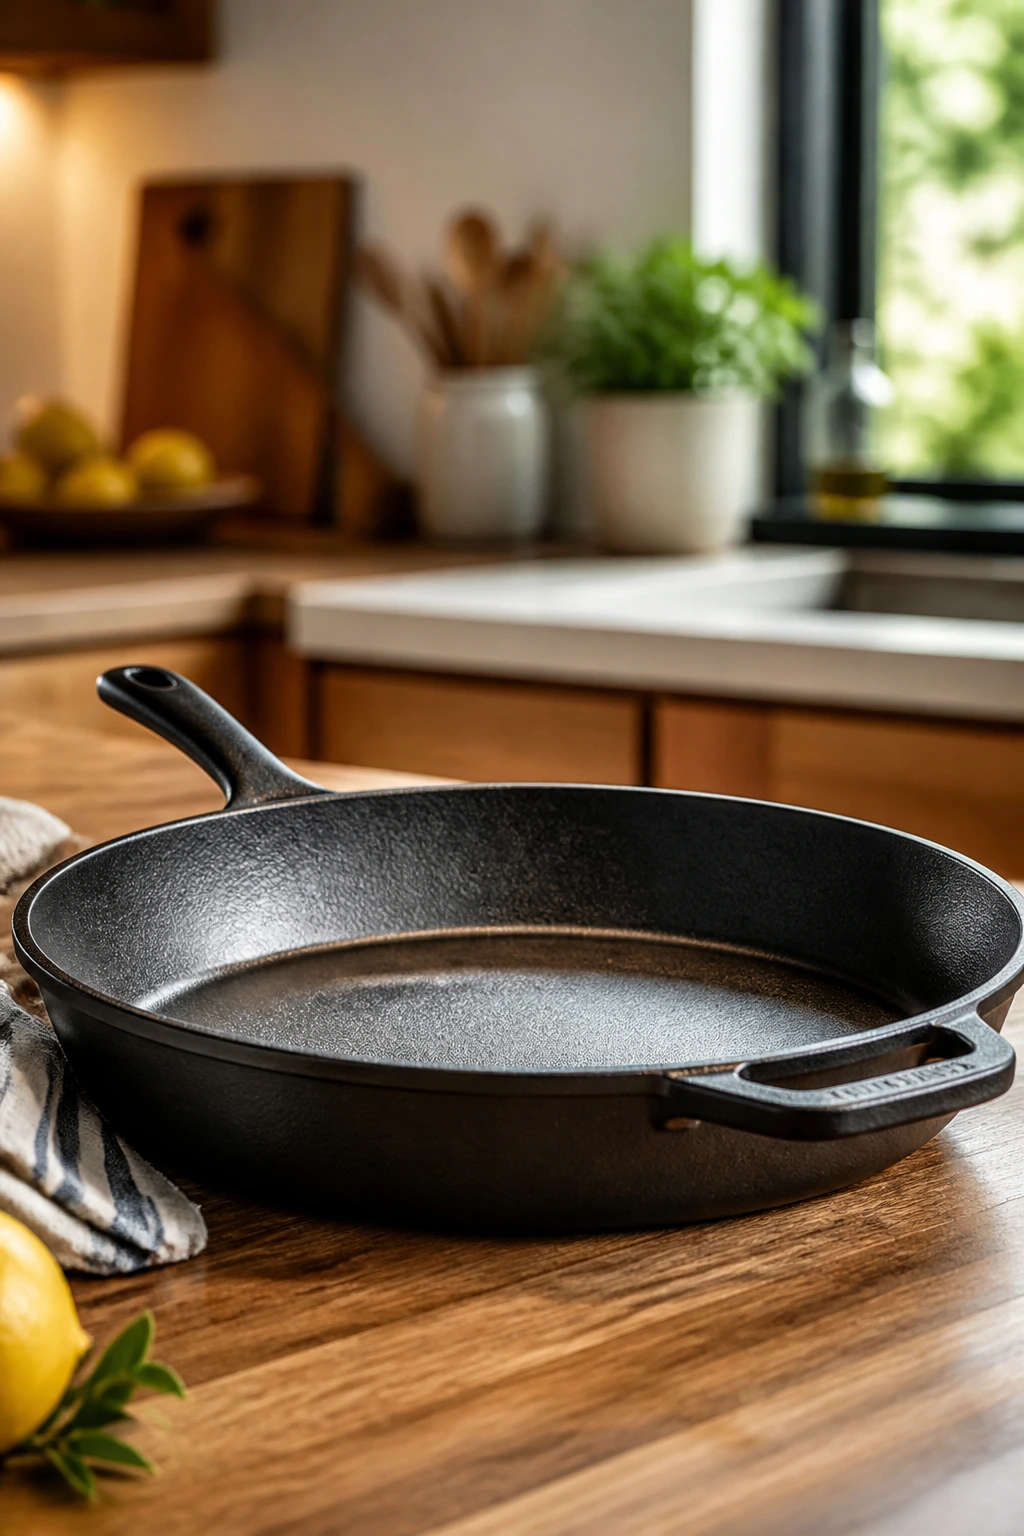
- 12-inch oven-safe skillet — cast iron works best.
- Tongs — for turning the thighs without tearing the skin.
- Microplane or fine grater — for lemon zest.
- Instant-read thermometer — thighs should be properly cooked, not guessed at.
How to Serve This Dish:
Spoon the chicken and juices over couscous, rice, or torn pieces of toasted sourdough. I like a rough pile of herbs on top and a few extra olives scattered around the plate. One thigh per person is enough for a lighter dinner; two if the table is hungry and you skipped lunch.
Pro Tips for This Recipe:
- Use chicken thighs with skin on. Breasts work, but they dry faster and don’t give you the same pan flavor.
- If your olives are packed in a very salty brine, rinse them briefly so the sauce doesn’t turn harsh.
- Don’t add the lemon juice before roasting. It dulls the citrus and can make the chicken taste flat.
- If the tomatoes are tiny and firm, give the finished dish a minute under the broiler to push them toward collapse.
Variations on This Dish:
- Caper and Fennel Version: Swap half the olives for capers and add a thinly sliced fennel bulb with the tomatoes.
- Boneless Shortcut: Use boneless thighs and roast for 12 to 14 minutes total; the flavor stays strong, but the skin won’t crisp as deeply.
- Chicken-and-Cauliflower Tray Bake: Add cauliflower florets to the pan and use a second sheet if the skillet feels crowded.
Common Mistakes to Avoid with This Dish:
- Starting with damp chicken: Moisture on the skin keeps it pale and soft. Pat it dry until the paper towel comes away clean.
- Crowding the pan: If the thighs overlap, they steam. Use a larger skillet or cook in two batches.
- Adding lemon too early: Acid can mute the roasted flavor and make the sauce taste sharp instead of bright.
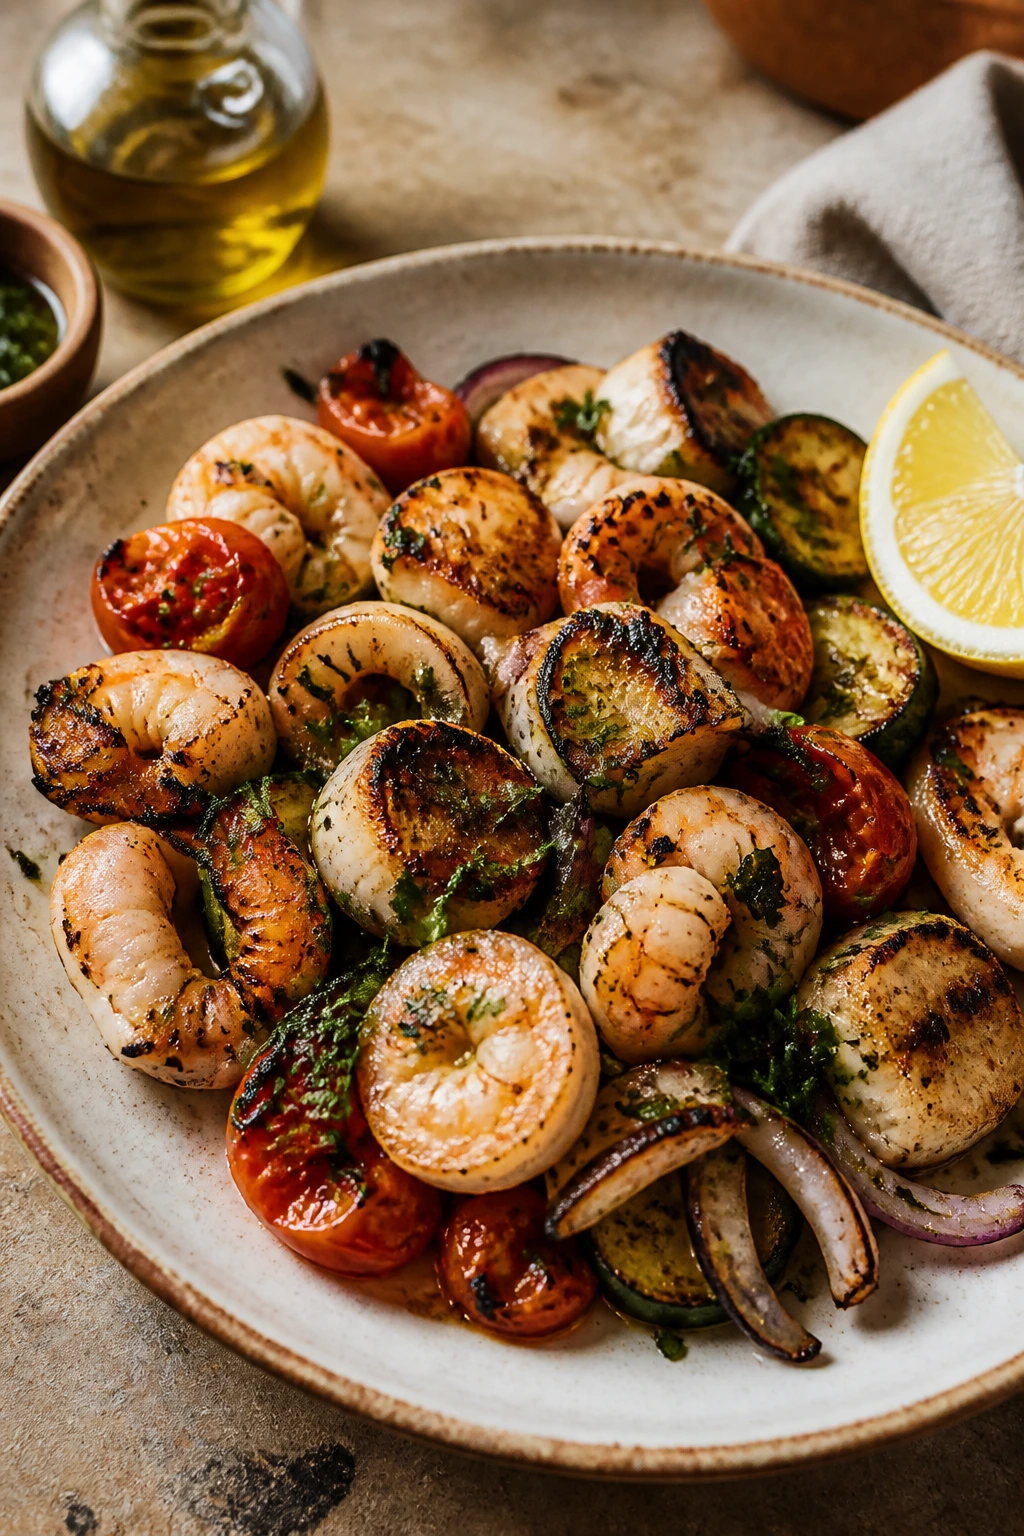
2. Skillet Lemon Shrimp Orzo with Zucchini and Dill
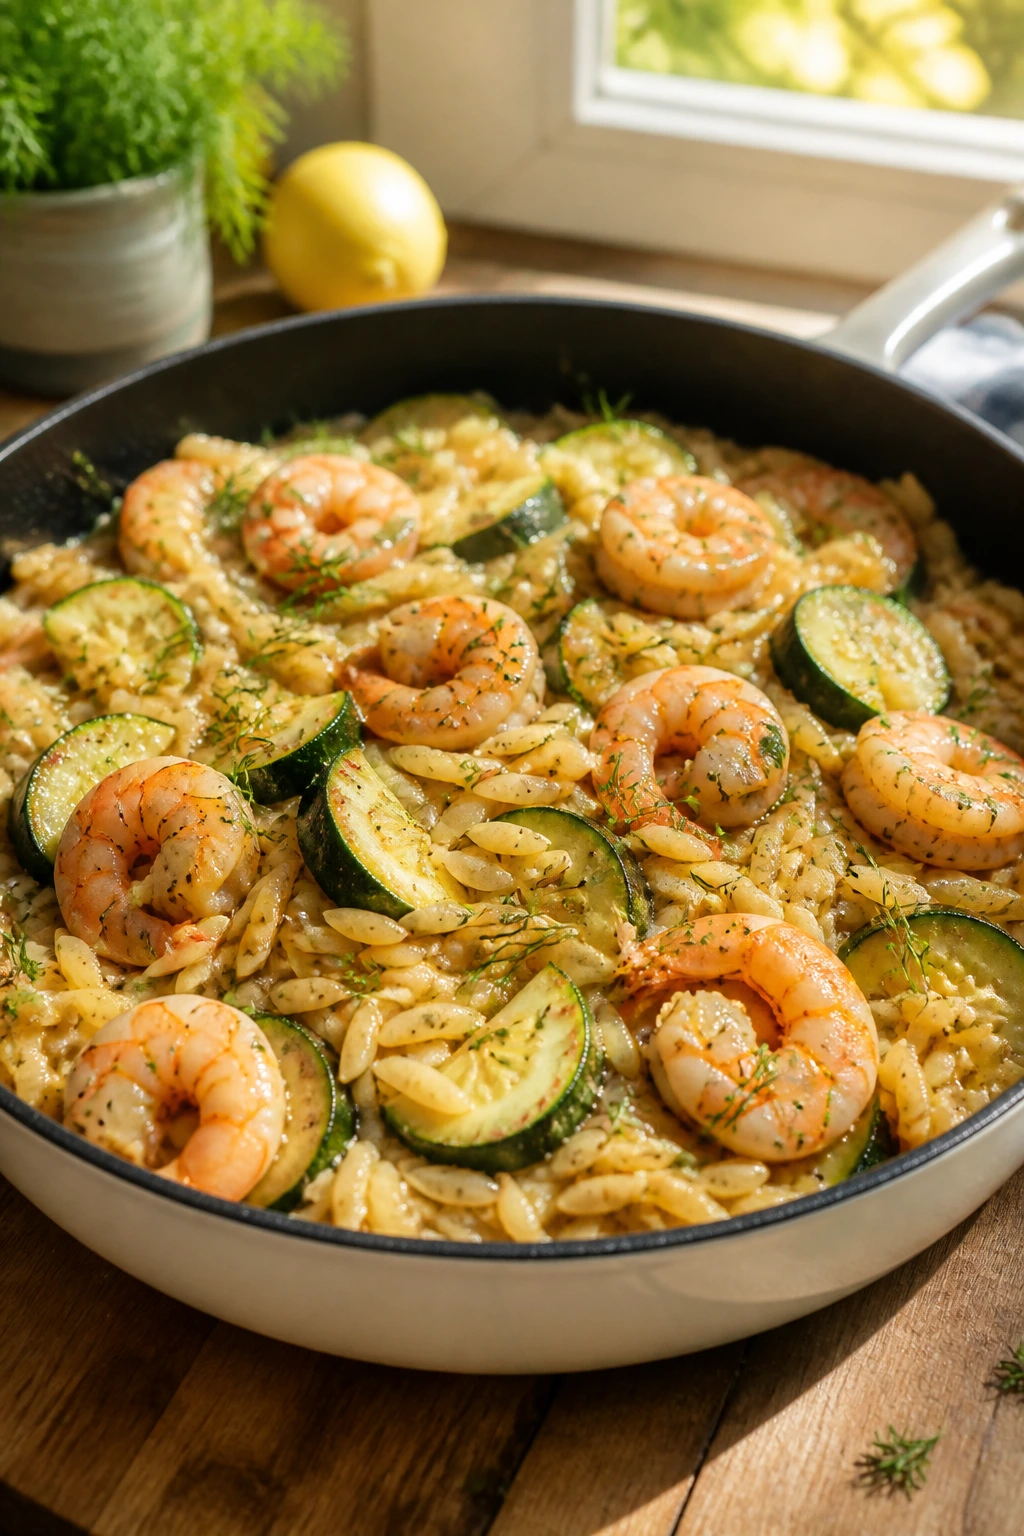
This one tastes like it was made for the kind of evening when you want dinner in a bowl and you want it fast. The orzo turns creamy from the broth, the zucchini stays tender with a little bite, and the shrimp curl into pink commas right at the end. Dill and lemon do the clean, bright work; feta adds the salty finish.
Why It Works:
Orzo is the right pasta here because it cooks in the skillet in about 8 to 10 minutes and drinks in flavor without becoming bulky. Shrimp need almost no time at all, which makes them ideal for hot-weather cooking. Zucchini softens just enough to fold into the pasta, and if you cut it into half-moons about 1/4-inch thick, it won’t vanish. A little feta on top gives the whole dish the salty edge it needs.
Key Ingredients:
- 1 1/2 cups orzo — it cooks quickly and gives the skillet body.
- 1 pound large shrimp, peeled and deveined — look for shrimp that smell clean, not fishy.
- 2 medium zucchini, cut into half-moons — they bring freshness and color.
- 1 shallot, finely diced — sweeter than onion and less aggressive.
- 3 garlic cloves, minced — adds the savory base.
- 3 cups low-sodium chicken or vegetable broth — enough liquid for the orzo to absorb.
- 1 lemon, zested and juiced — the whole dish leans on it.
- 1/2 teaspoon red pepper flakes — optional, but nice.
- 1/3 cup crumbled feta — for salt and creaminess.
- 2 tablespoons chopped dill — don’t skip it.
- 2 tablespoons olive oil — for sautéing.
Quick Steps:
- Sauté the vegetables: Warm the olive oil in a deep skillet over medium heat. Cook the shallot and zucchini for 4 minutes, until the shallot softens and the zucchini starts to pick up color.
- Toast the orzo: Stir in the garlic and orzo, then cook for 1 minute until the pasta smells nutty at the edges.
- Add the liquid: Pour in the broth, lemon zest, and red pepper flakes. Bring to a simmer, then lower the heat and cook for 8 to 10 minutes, stirring often so the orzo doesn’t stick.
- Cook the shrimp: When the orzo is almost tender and a little broth still remains, nestle in the shrimp. Cook for 2 to 3 minutes, turning once, until they’re pink and opaque.
- Finish: Stir in lemon juice, dill, and half the feta. Taste. Add a pinch more salt only if it needs it.
- Serve hot: Spoon into bowls and top with the remaining feta.
Equipment for This Recipe:
- Deep 12-inch skillet — you need room for the orzo to move.
- Wooden spoon — keeps the pasta from sticking.
- Microplane — for zest.
- Sharp knife — zucchini cuts better when the slices are even.
How to Serve This Dish:
Serve it straight from the skillet with a little extra dill and a few lemon wedges on the side. A crisp cucumber salad is enough if you want a second dish, though I often stop there. It feeds 4 as a light dinner or 3 if people are hungry.
Pro Tips for This Recipe:
- Don’t overcook the shrimp; they should curl into loose C-shapes. Tight little O-shapes mean they’ve gone too far.
- If the skillet looks dry before the orzo is done, splash in 1/4 cup more broth or water.
- Feta can be salty, so taste before adding any extra salt.
- Add lemon juice only after the heat is low. High heat flattens the citrus.
Variations on This Dish:
- Spinach Fold-In: Stir in 2 packed cups baby spinach at the very end and let it wilt in the residual heat.
- Scallop Swap: Use dry-packed scallops instead of shrimp and sear them separately for 90 seconds per side.
- Rice Orzo Hybrid: If you have little pasta left in the pantry, use half orzo and half broken spaghetti for a looser texture.
Common Mistakes to Avoid with This Dish:
- Using a shallow pan: Orzo spits and sticks; a deep skillet gives you room to stir.
- Adding shrimp too soon: They turn rubbery fast. Wait until the pasta is nearly done.
- Skipping the stir: Orzo settles at the bottom and can scorch in one spot if you walk away.
3. Lemon Herb Salmon with Fennel and Capers
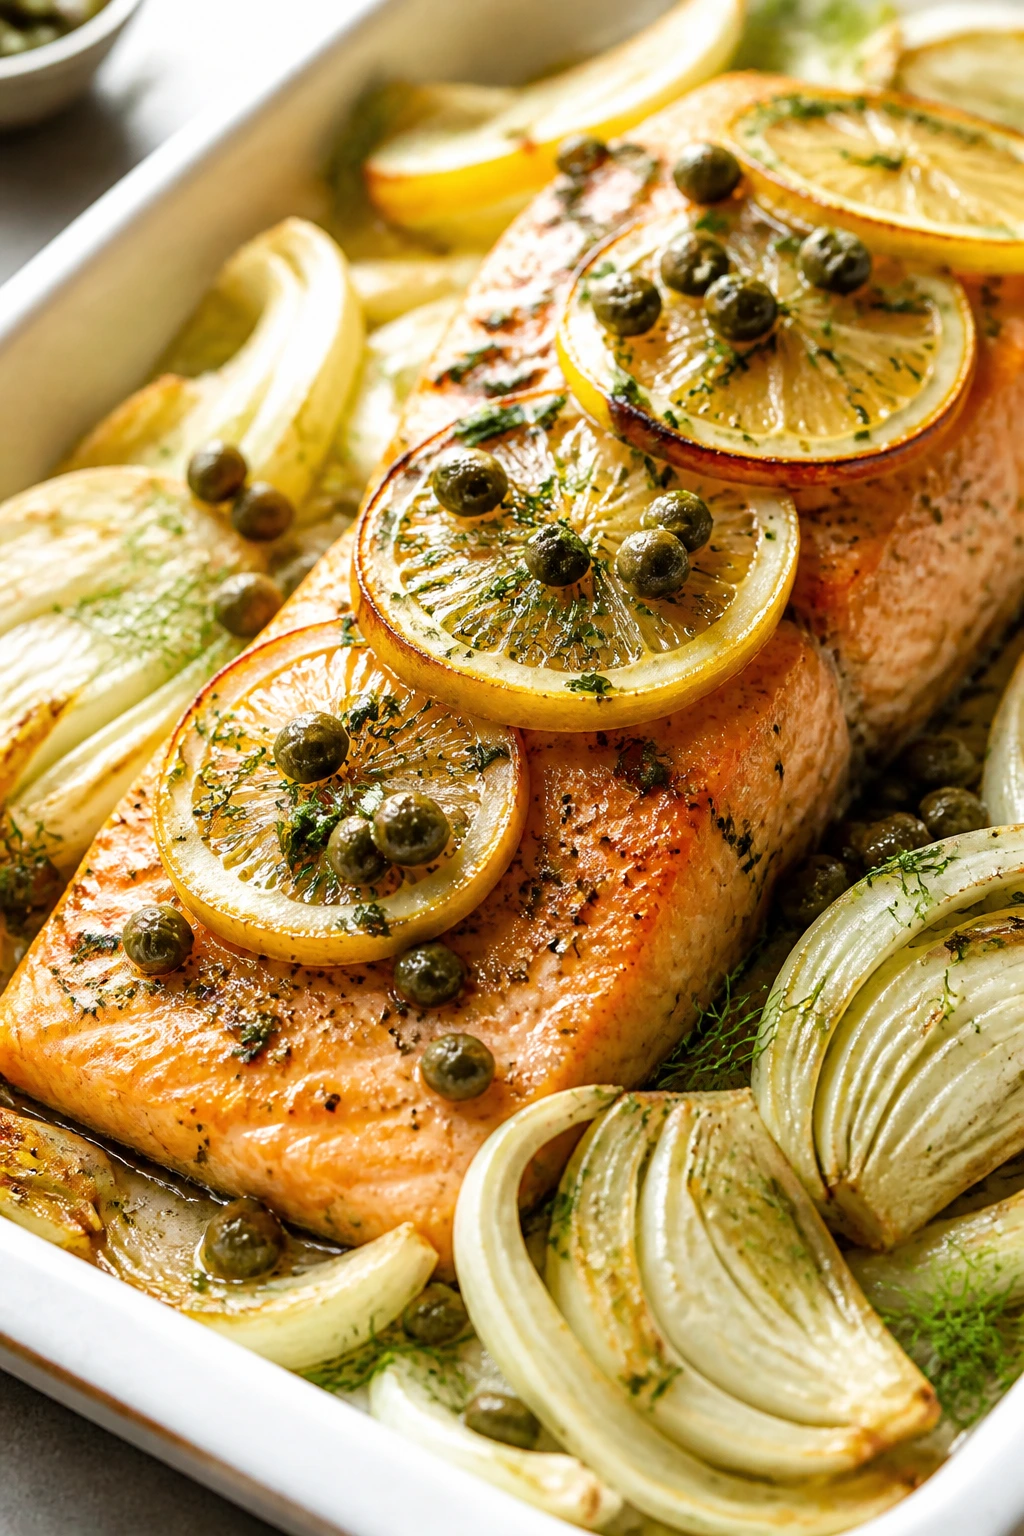
Salmon and fennel are one of those quietly smart pairings that never need to shout. The fennel softens and sweetens in the oven, capers pop with tiny bursts of salt, and the lemon slices go a little jammy around the edges. It’s a dinner that feels clean on the plate and still has enough richness to satisfy.
Why It Works:
Salmon likes heat, but it likes the right amount of heat. Roasting at 400°F gives the fish a clean edge while keeping the center moist and tender. Fennel is one of the few vegetables that gets sweeter as it roasts, which means it fits the salmon instead of fighting it. Capers act like little seasoning bombs, and the lemon slices soften enough to eat, rind and all.
Key Ingredients:
- 4 salmon fillets, 6 ounces each — center-cut fillets cook most evenly.
- 1 fennel bulb, thinly sliced — save the fronds for garnish.
- 2 tablespoons olive oil — for the fennel and the fish.
- 1 teaspoon kosher salt — use less if your capers are very salty.
- 1/2 teaspoon black pepper — enough to keep the salmon from tasting flat.
- 2 garlic cloves, minced — tucked under the salmon for aroma.
- 2 tablespoons capers, drained — rinse if needed.
- 1 lemon, thinly sliced and juiced — slices roast, juice finishes.
- 2 tablespoons chopped dill or parsley — both work.
- 1/4 cup dry white wine or broth — keeps the fennel from drying out.
Quick Steps:
- Heat the oven: Set it to 400°F (205°C) and line a sheet pan with parchment for easier cleanup.
- Roast the fennel first: Toss the fennel with half the olive oil, half the salt, and the wine or broth. Roast for 10 minutes.
- Add the salmon: Push the fennel aside, place the salmon on the pan, and season with the remaining salt and pepper. Scatter garlic, capers, and lemon slices around and over the fish.
- Finish roasting: Cook for 10 to 12 minutes, until the salmon flakes at the edge but still looks slightly glossy in the center. Aim for 125°F to 130°F if you like it medium.
- Brighten: Spoon pan juices over the fish and add lemon juice and herbs right before serving.
Equipment for This Recipe:
- Rimmed sheet pan — the juices need somewhere to go.
- Parchment paper — helps prevent sticking.
- Thin spatula — salmon moves best when it’s not torn.
- Instant-read thermometer — especially useful for thicker fillets.
How to Serve This Dish:
I like this with new potatoes, couscous, or a simple arugula salad dressed with olive oil and lemon. Put the fennel under the salmon, then drizzle the pan juices over the top so every bite gets a little of that briny, citrusy sauce. It’s elegant enough for company and plain enough for a Tuesday.
Pro Tips for This Recipe:
- Cut the fennel thinly. Thick wedges take forever and won’t soften enough in the same time as the fish.
- Don’t overcook salmon. A dry fillet is the one thing that can wreck this plate.
- If your capers are packed in heavy brine, rinse them first so the pan juices don’t turn salty and harsh.
- Save the fennel fronds. They look good and taste faintly like anise.
Variations on This Dish:
- Trout and Dill Version: Swap salmon for trout fillets and keep the same timing, though trout may finish a minute sooner.
- Tomato Addition: Add halved cherry tomatoes during the last 8 minutes of roasting for extra juice.
- Lime-Forward Swap: Use lime instead of lemon if you want a sharper, greener edge.
Common Mistakes to Avoid with This Dish:
- Slicing fennel too thickly: It stays crunchy while the fish finishes.
- Overbaking the salmon: Fish keeps cooking after it leaves the oven; pull it early.
- Forgetting to season the fennel: The vegetable needs salt, or it tastes watery beside the salmon.
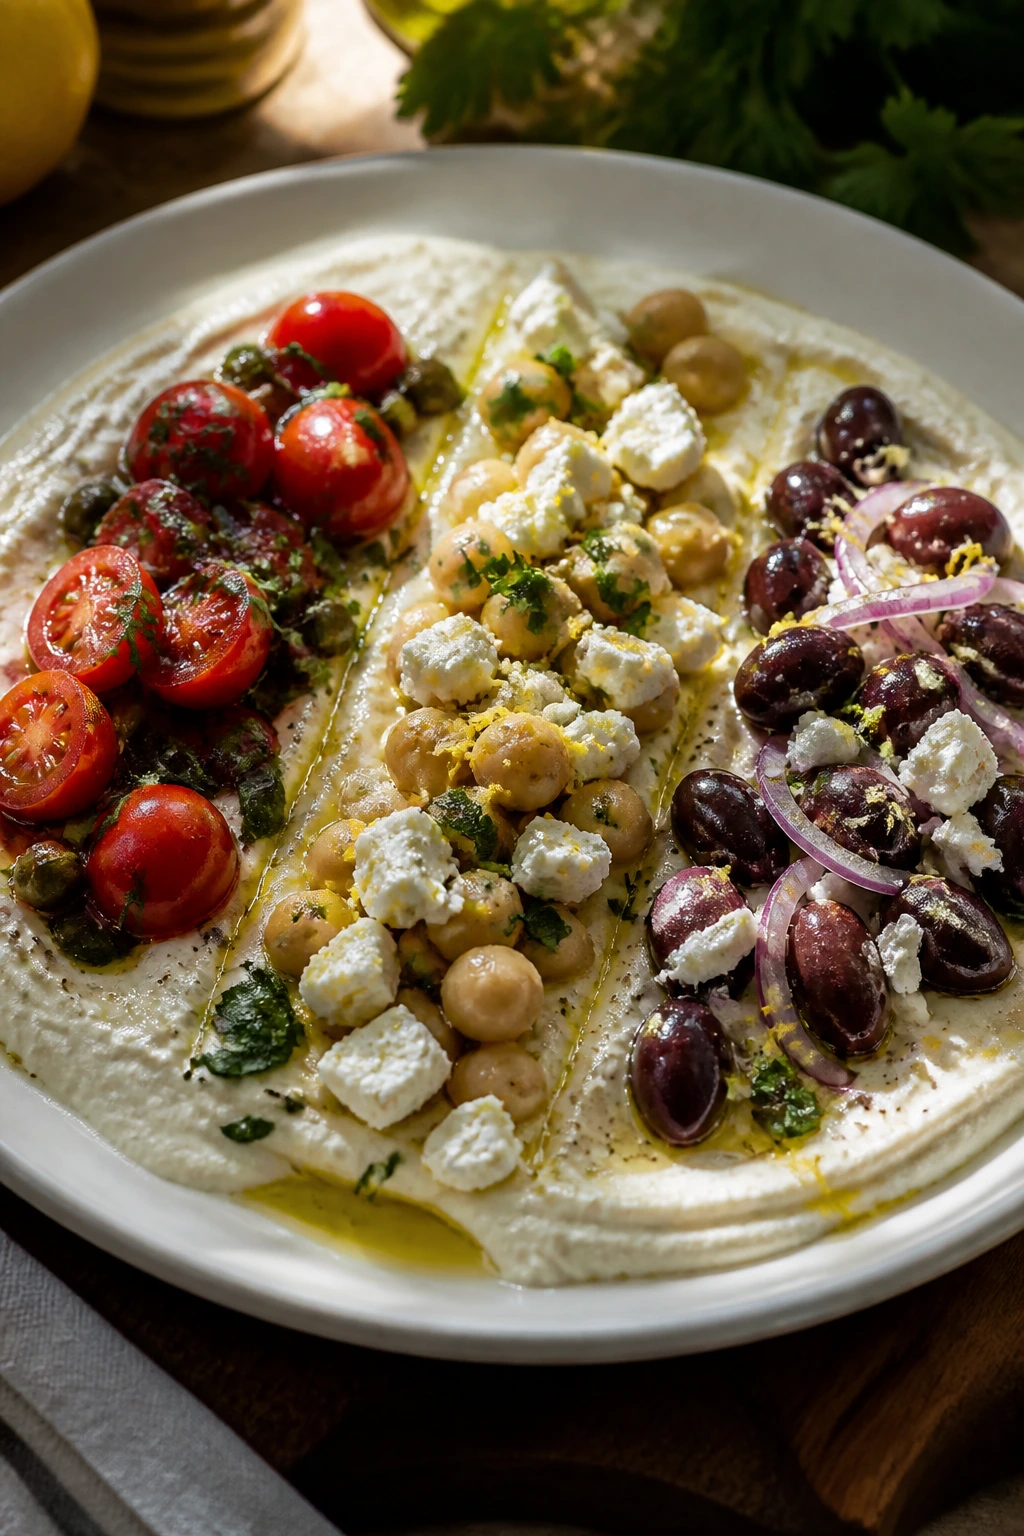
4. Chickpea, Spinach, and Lemon Stew with Feta

This is the vegetarian dinner I reach for when I want something with body but no heat stress. Chickpeas make it substantial, spinach melts into the broth, and lemon wakes up the whole pot at the end. The feta doesn’t disappear; it softens into salty pockets that make each spoonful a little different.
Why It Works:
Canned chickpeas are not glamorous, but they’re excellent weeknight material because they hold their shape and absorb flavor fast. A short simmer with onion, garlic, and cumin turns them from pantry filler into dinner. The lemon goes in late, which matters here because it keeps the broth bright. Mash a small scoop of chickpeas against the side of the pot and the stew thickens without cream.
Key Ingredients:
- 2 tablespoons olive oil — for the base.
- 1 small yellow onion, diced — gives the stew sweetness.
- 3 garlic cloves, minced — the savory anchor.
- 1 teaspoon ground cumin — warm but not heavy.
- 1/2 teaspoon dried oregano — keeps the flavor profile Mediterranean.
- 2 cans chickpeas, 15 ounces each, drained and rinsed — the main body of the stew.
- 2 cups low-sodium vegetable broth — enough to simmer without making it soupy.
- 5 ounces baby spinach — a big handful.
- 1 lemon, zested and juiced — the finish.
- 1/2 cup crumbled feta — salty topping.
- 2 tablespoons chopped parsley — for freshness.
Quick Steps:
- Build the base: Warm the olive oil in a medium pot over medium heat. Cook the onion for 5 to 6 minutes, until soft and lightly golden.
- Add the spices: Stir in garlic, cumin, and oregano for 30 seconds, just until fragrant.
- Simmer the chickpeas: Add the chickpeas and broth. Bring to a simmer and cook for 12 to 15 minutes so the broth picks up flavor.
- Thicken a little: Mash about 1 cup of the chickpeas with the back of a spoon against the pot wall.
- Wilt the spinach: Stir in the spinach and cook for 1 to 2 minutes until it collapses.
- Finish with lemon: Add zest and juice, taste, and adjust salt. Top with feta and parsley.
Equipment for This Recipe:
- Medium soup pot — 4-quart is enough.
- Wooden spoon — for mashing chickpeas.
- Citrus zester — the zest matters here.
- Ladle — makes serving easier.
How to Serve This Dish:
Serve it with crusty bread, pita, or over rice if you want a bigger meal. A drizzle of olive oil and an extra crumble of feta on top makes the bowl look finished, not bare. This feeds 4 as a main dish, or 6 if it’s part of a larger spread.
Pro Tips for This Recipe:
- Rinse the chickpeas well. Canned bean liquid can taste tinny if you leave it on.
- Don’t dump in all the lemon at once. Start with half the juice, taste, then add the rest.
- If you want more richness, stir in 2 tablespoons of tahini at the end. It makes the broth silky.
- Fresh spinach goes in last. Frozen spinach can work, but squeeze it dry first.
Variations on This Dish:
- Tomato Chickpea Stew: Add 1 cup diced tomatoes with the broth for a saucier version.
- Harissa Heat: Stir in 1 to 2 teaspoons harissa paste with the garlic if you want a little fire.
- Dairy-Free Finish: Skip the feta and top with toasted pine nuts instead.
Common Mistakes to Avoid with This Dish:
- Skipping the mash: Whole chickpeas only take you so far; the mash gives the broth body.
- Adding spinach too early: It turns dull green and limp if it cooks too long.
- Underseasoning the broth: Beans need salt. Lemon alone won’t carry the whole pot.
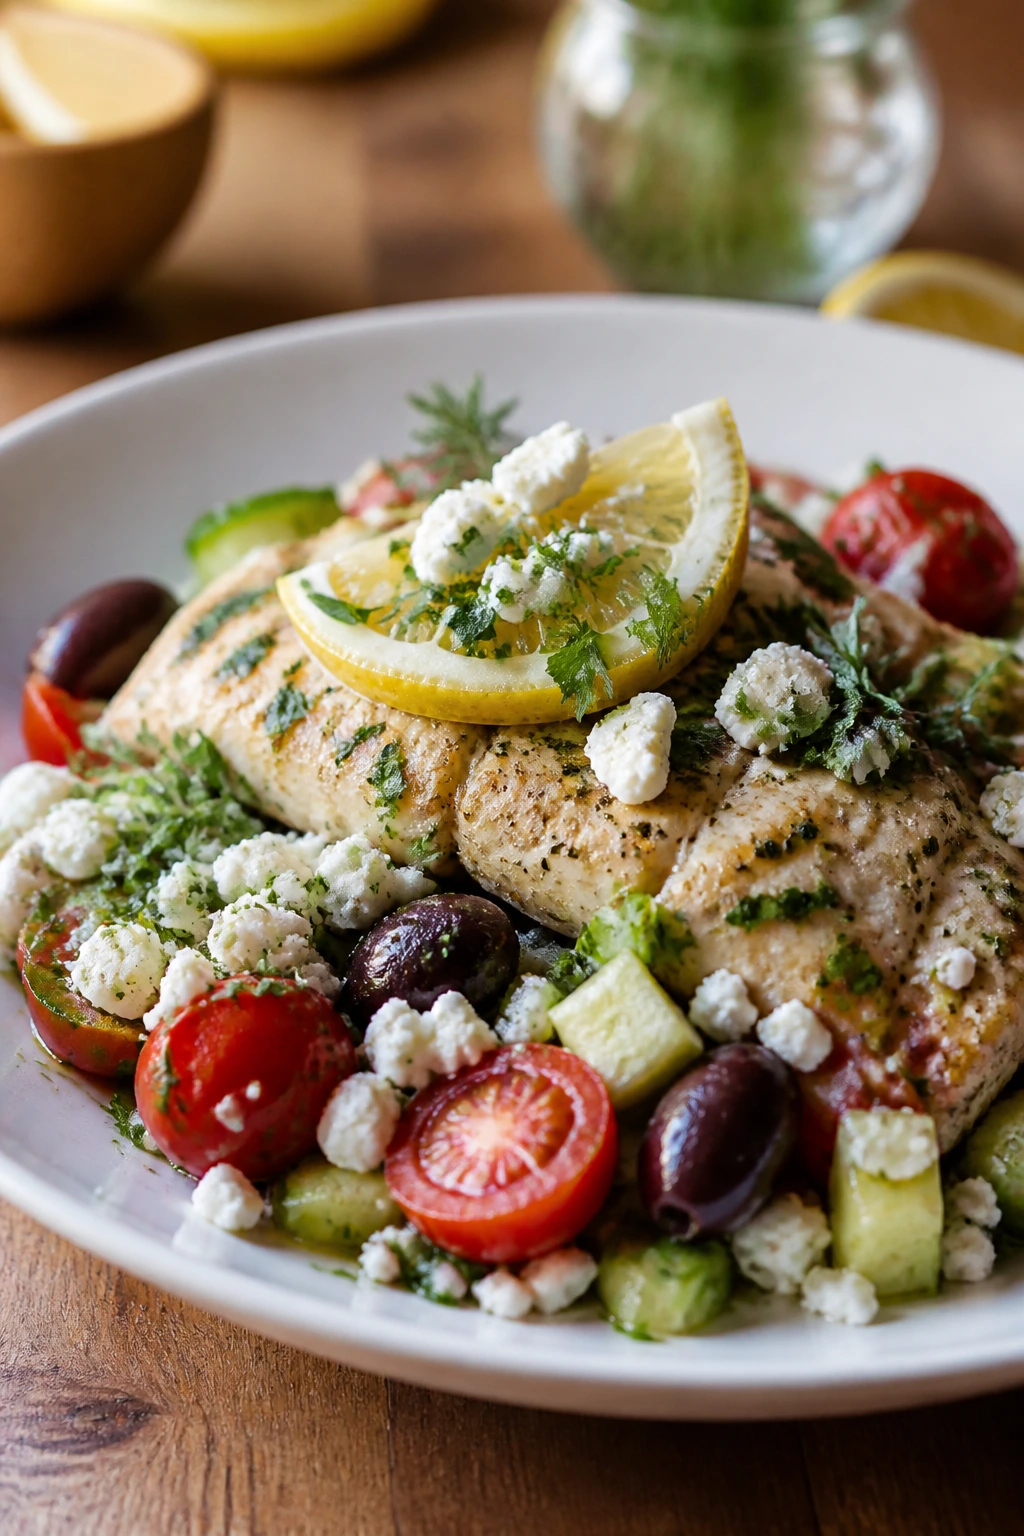
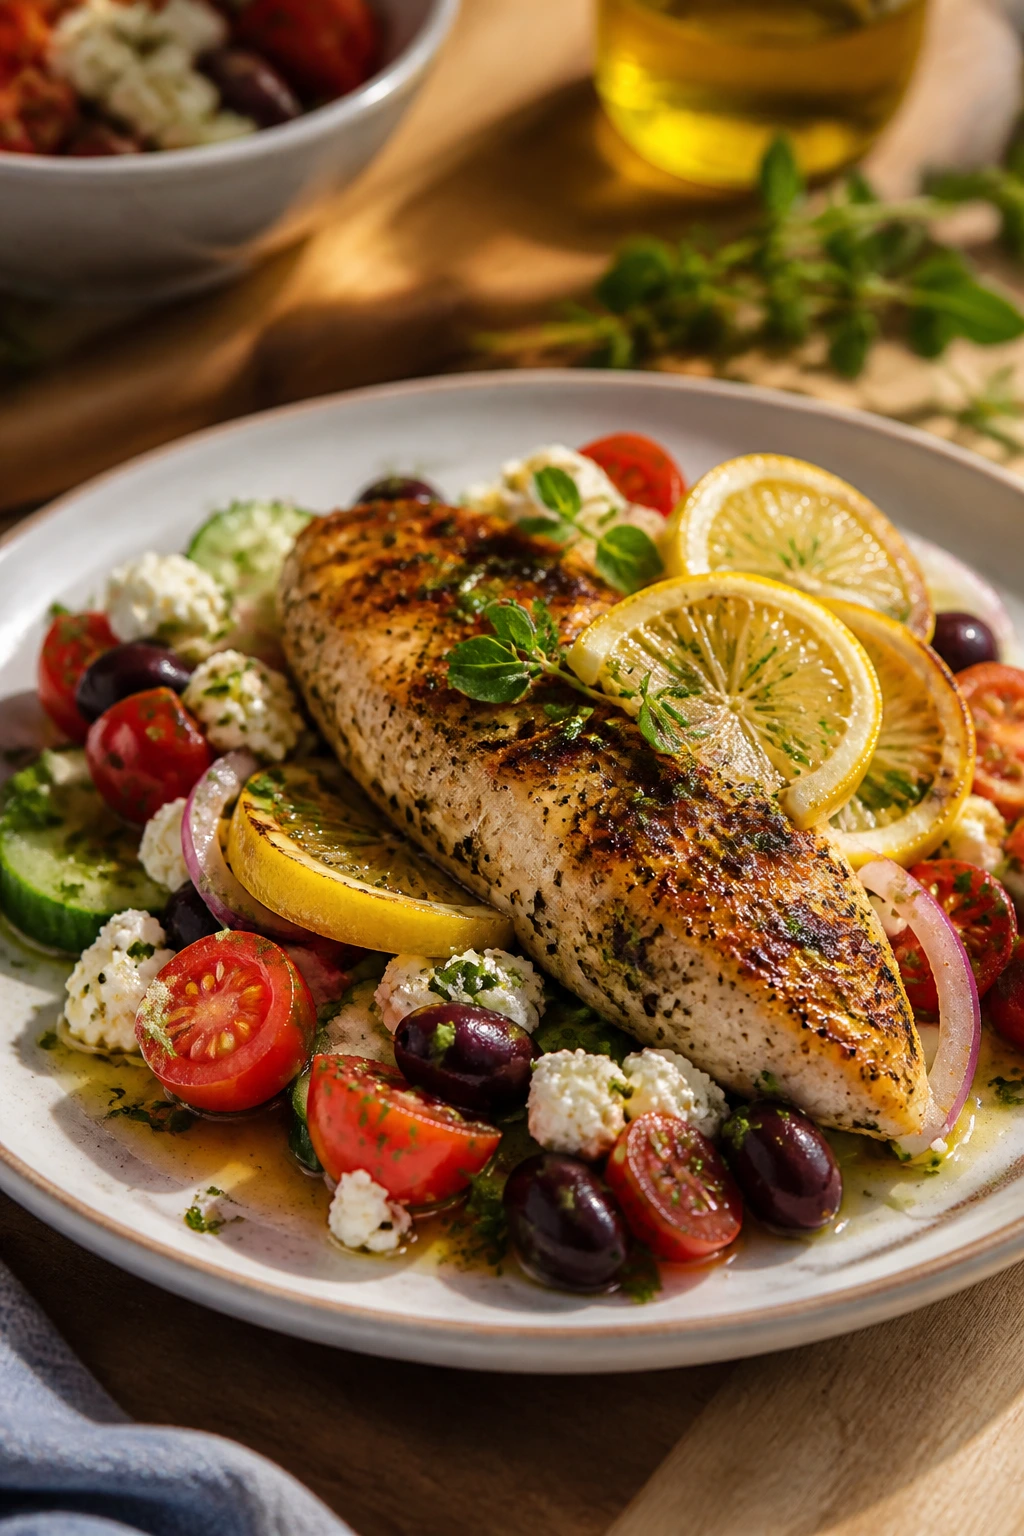
5. Greek Lemon Chicken Pita Bowls
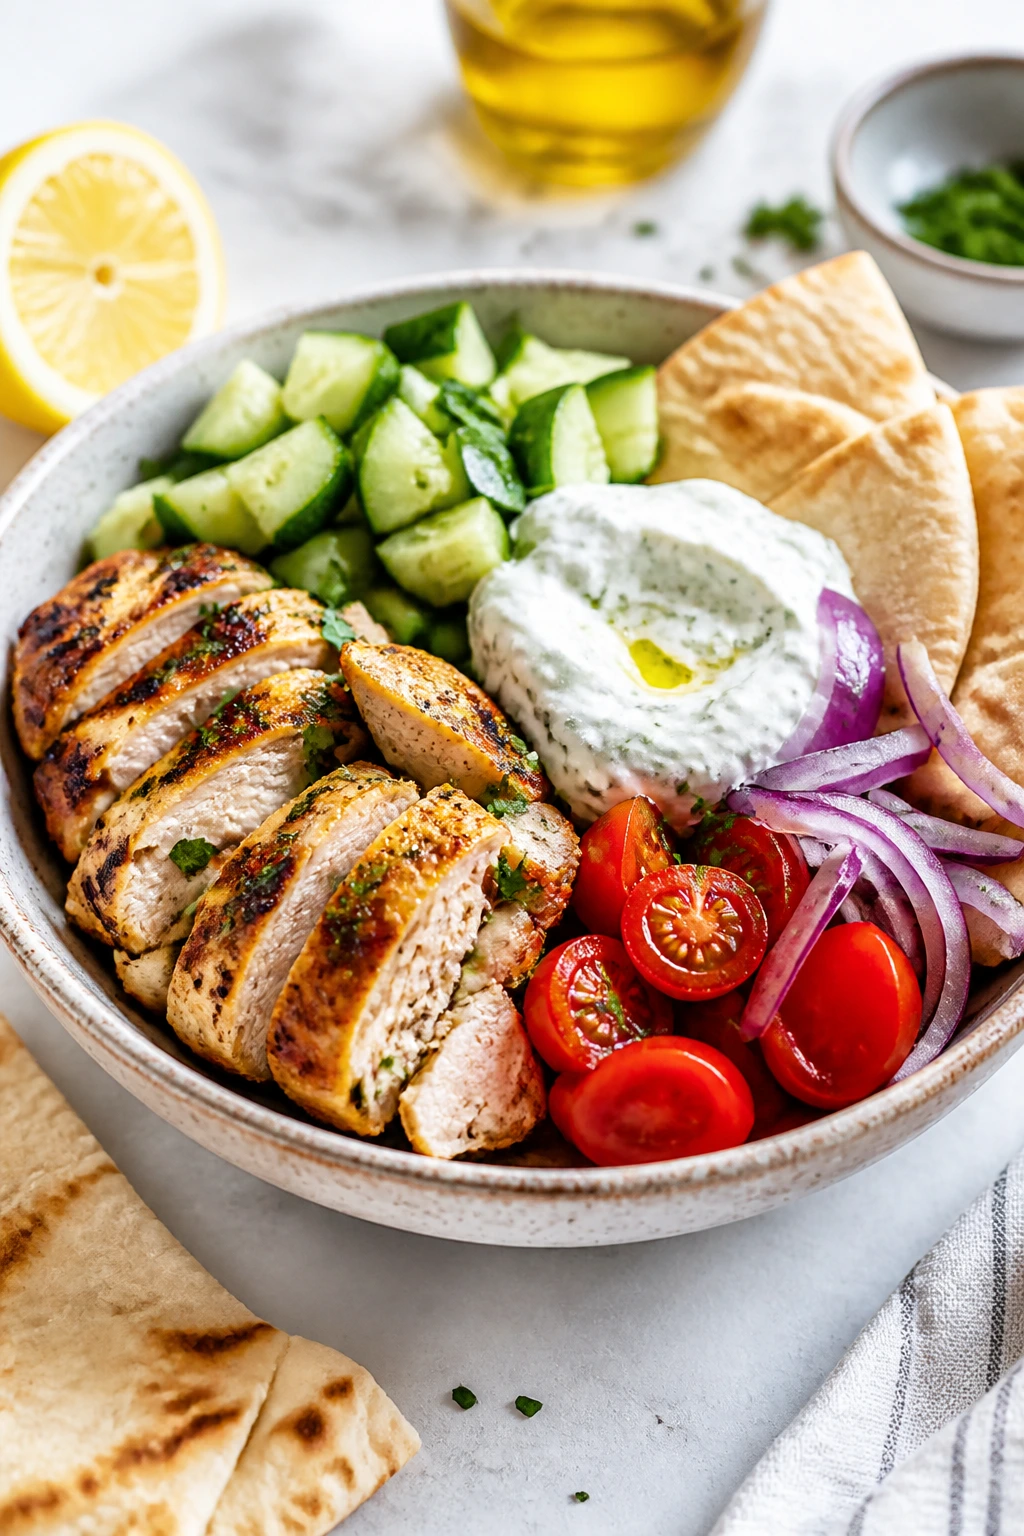
These bowls have the same energy as a good beach lunch, but they eat like dinner. Juicy chicken, cucumber, tomato, onion, and a swipe of yogurt sauce all land in one bowl or folded into pita. The lemon and oregano marinade keeps the chicken from tasting plain, and the crunchy vegetables keep things from feeling heavy.
Why It Works:
Chicken loves a yogurt and lemon marinade because the yogurt cushions the meat while the acid seasons it. Grill marks or a hard sear add just enough char to make the chicken taste cooked, not steamed. The bowl format is useful on warm nights because everyone can build their own, and a little tzatziki covers a lot of sins. I also like the fact that the leftovers become lunch without any extra effort.
Key Ingredients:
- 1 1/2 pounds boneless chicken thighs or breasts — thighs stay juicier.
- 1/2 cup plain Greek yogurt — tenderizes the chicken.
- 2 tablespoons olive oil — for the marinade.
- 1 lemon, zested and juiced — use both.
- 3 garlic cloves, grated or minced — stronger when grated.
- 1 teaspoon dried oregano — classic Greek flavor.
- 1 teaspoon kosher salt — don’t be shy.
- 4 pitas, warmed — for serving.
- 1 cucumber, diced — for crunch.
- 2 tomatoes, diced — ripe but firm.
- 1/2 small red onion, thinly sliced — soak if it tastes sharp.
- 1/2 cup tzatziki — store-bought or homemade.
- 1/4 cup feta — optional, but useful.
- Handful of parsley — for the top.
Quick Steps:
- Marinate the chicken: Stir yogurt, olive oil, lemon zest and juice, garlic, oregano, and salt in a bowl. Coat the chicken and let it sit for 20 to 30 minutes, or up to overnight.
- Cook the chicken: Grill over medium-high heat or sear in a skillet for 5 to 6 minutes per side, depending on thickness, until the internal temperature hits 165°F.
- Rest and slice: Let the chicken rest for 5 minutes, then slice into strips.
- Build the bowls: Divide pitas, cucumber, tomato, onion, and chicken among bowls.
- Finish: Spoon tzatziki over the top and add feta and parsley.
Equipment for This Recipe:
- Grill, grill pan, or skillet — all work.
- Mixing bowl — for the marinade.
- Sharp knife — sliced chicken eats better than chunks.
- Tongs — for turning the chicken cleanly.
How to Serve This Dish:
Pile everything into shallow bowls with a torn pita on the side, or stuff it all into warm pitas and wrap them in parchment. If you want a side, keep it simple: olives, melon, or a cucumber salad with extra lemon. This one feeds 4 with moderate appetite and 5 if you go heavy on the vegetables.
Pro Tips for This Recipe:
- If you use chicken breasts, pound them to an even thickness so they cook at the same speed.
- Warm the pita for 20 to 30 seconds in a dry skillet. Cold pita tears.
- Red onion can be sharp; soak the slices in cold water for 10 minutes if needed.
- Don’t let the marinade drape into the hot pan without draining a little. Too much yogurt can stick and scorch.
Variations on This Dish:
- Salad Bowl Version: Skip the pita and serve everything over chopped romaine.
- Rice Bowl Route: Spoon the chicken over rice or freekeh for a sturdier base.
- Herb Swap: Use dill and mint instead of parsley for a cooler finish.
Common Mistakes to Avoid with This Dish:
- Overmarinating the chicken breasts: Yogurt and lemon can make the texture mushy if you leave it too long.
- Serving the pita cold: It seems minor. It isn’t. Warm bread changes the whole bowl.
- Cutting the chicken too soon: Resting keeps the juices where they belong.
6. Lemon Turkey Meatballs with Tzatziki and Cucumbers
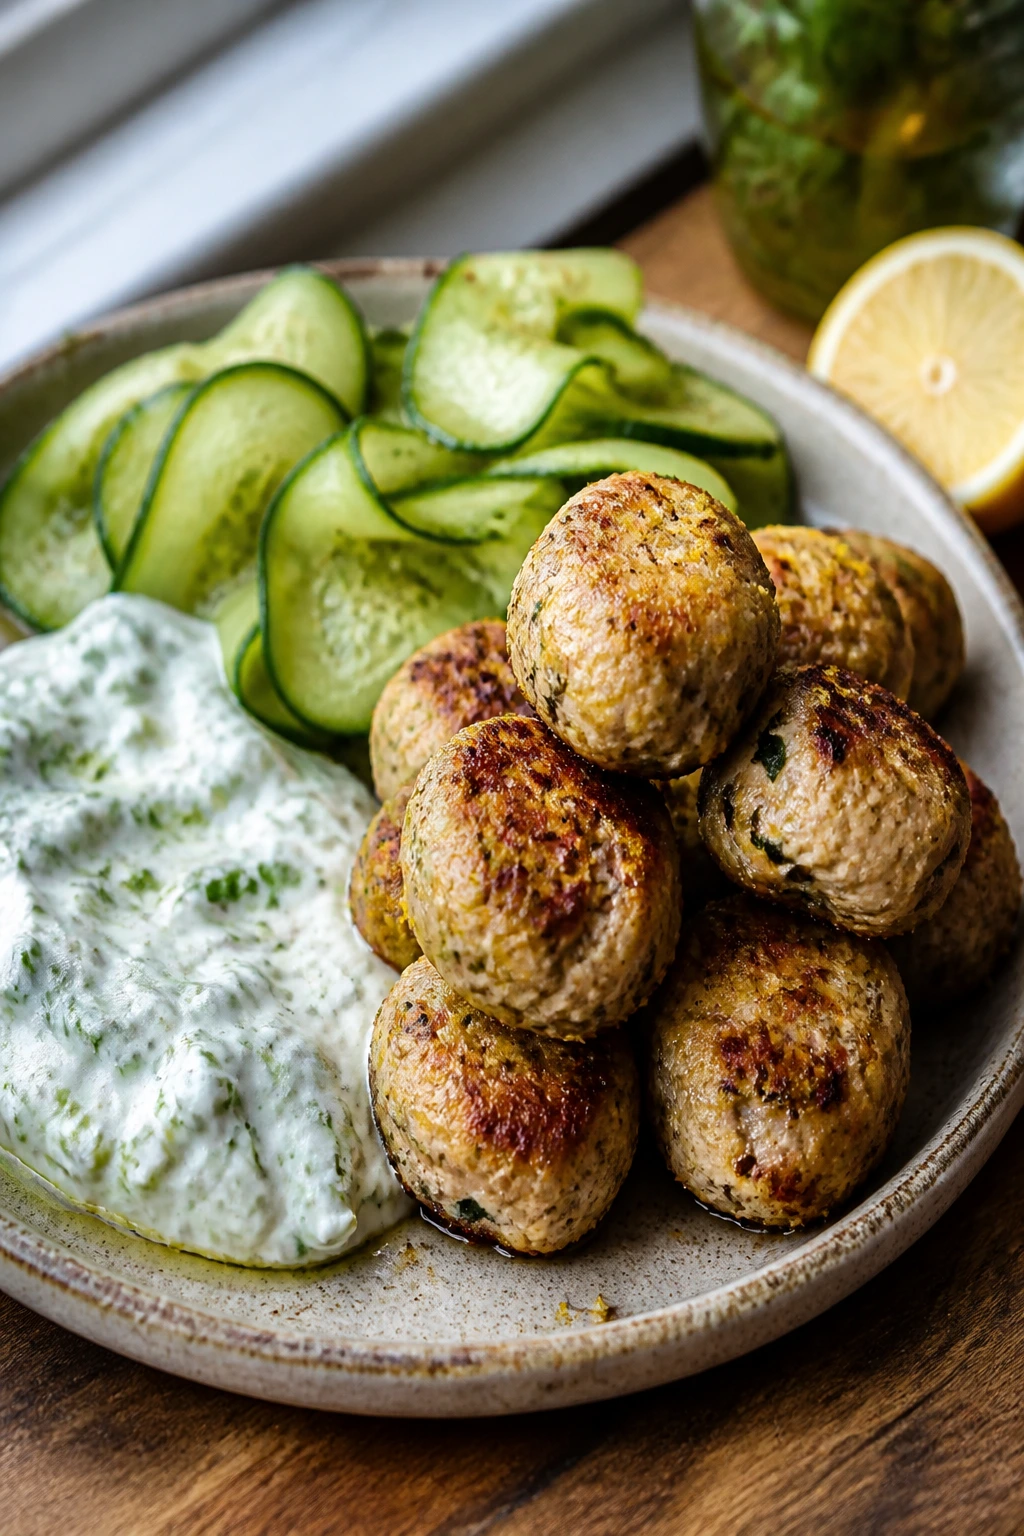
These meatballs are lean, but not dry, and that’s because the lemon zest and yogurt sauce step in where turkey can fall flat. The outside gets a little browned, the inside stays tender, and the cool cucumber-tzatziki situation on the side makes the whole plate feel balanced. I prefer them in a pile over rice, but pita works too.
Why It Works:
Ground turkey needs help. Lemon zest, parsley, garlic, and a little breadcrumb keep the meatballs from eating like chalk. Baking at 425°F gives you quick browning without a greasy skillet. Tzatziki adds moisture after cooking, which is the right place for it. If you want a summer dinner that doesn’t sit like a brick, this is a useful one.
Key Ingredients:
- 1 pound ground turkey, 93% lean — lean enough, but not too lean.
- 1/2 cup breadcrumbs — binds without making the texture heavy.
- 1 egg — keeps the meatballs together.
- 1 lemon, zested — the juice goes in the sauce.
- 2 garlic cloves, minced — flavor base.
- 2 tablespoons chopped parsley — freshens the mixture.
- 1 teaspoon dried oregano — background warmth.
- 1/2 teaspoon kosher salt — enough to season the meat.
- 1 cup plain Greek yogurt — for the tzatziki.
- 1/2 cucumber, grated and squeezed dry — use the back of a spoon to press out water.
- 1 tablespoon lemon juice — for the sauce.
- 1 teaspoon dill — in the sauce, if you have it.
Quick Steps:
- Heat the oven: Set it to 425°F (220°C) and line a sheet pan with parchment.
- Mix gently: Combine turkey, breadcrumbs, egg, lemon zest, garlic, parsley, oregano, and salt in a bowl. Mix only until combined; overmixing makes meatballs dense.
- Shape: Form into 16 meatballs, each about 1 1/2 inches wide. Put them on the pan.
- Bake: Cook for 14 to 16 minutes, until browned and the center reaches 165°F.
- Make the tzatziki: Stir yogurt, grated cucumber, lemon juice, dill, and a pinch of salt together.
- Serve: Spoon tzatziki over the meatballs and add sliced cucumbers alongside.
Equipment for This Recipe:
- Rimmed sheet pan — keeps the meatballs from rolling away.
- Parchment paper — for easy cleanup.
- Box grater — for the cucumber.
- Small bowl — for the sauce.
How to Serve This Dish:
Serve these with rice, pita, or a chopped tomato salad. A few mint leaves on top are a small thing that helps more than you’d think. They feed 4 as a full dinner, or 6 if you serve them with grains and vegetables.
Pro Tips for This Recipe:
- Squeeze the cucumber until it feels almost dry. Watery tzatziki slides right off the meatballs.
- A small cookie scoop makes uniform meatballs, which helps them cook at the same rate.
- If the mixture feels too soft, chill it for 10 minutes before shaping.
- Turkey should be cooked to 165°F, but don’t drag it much past that or it turns dry.
Variations on This Dish:
- Lamb-Turkey Blend: Replace half the turkey with ground lamb for deeper flavor.
- Herb-Heavy Version: Add mint to the meat mixture if you want a cooler, greener note.
- Skillet Finish: Brown the meatballs in a skillet first, then finish in the oven for a firmer crust.
Common Mistakes to Avoid with This Dish:
- Using grated cucumber that’s still wet: It makes the sauce thin and runny.
- Overmixing the meat: The meatballs turn rubbery and tight.
- Skipping the thermometer: Ground turkey should not be guessed at.
7. One-Pan Lemon Artichoke Pasta
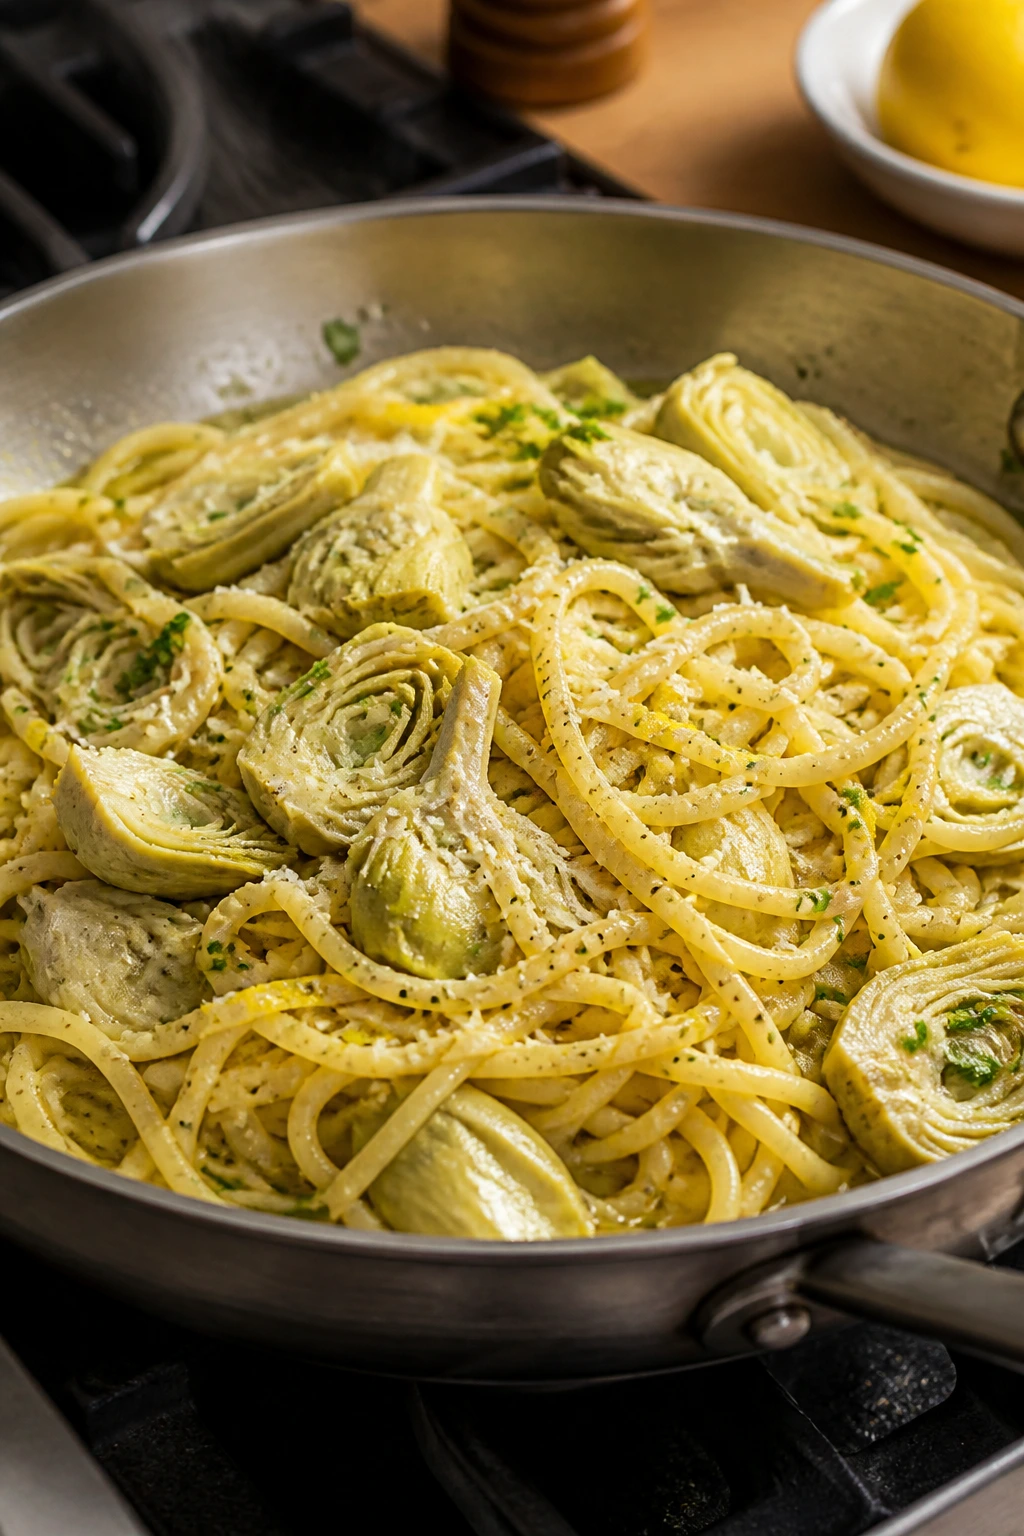
Artichokes bring a chewy, almost meaty texture to this pasta, while lemon keeps the whole thing from getting sleepy. The sauce is light, but not weak; it clings to the noodles in a glossy way and picks up garlic, parmesan, and a little brine from the artichokes. It’s the kind of dinner that feels more polished than it is.
Why It Works:
One-pan pasta works because the starch from the noodles stays in the sauce instead of getting poured down the sink. Artichoke hearts bring heft and a slightly tangy note that plays well with lemon. If you use a shallow wide pan and keep the liquid at a steady simmer, the pasta cooks evenly and the sauce thickens right in place. I like this better with long noodles like linguine or fettuccine, but short pasta can do the job too.
Key Ingredients:
- 12 ounces linguine — spaghetti works, but linguine gives better sauce cling.
- 1 jar marinated artichoke hearts, 12 ounces, drained and chopped — use the oil too if it tastes good.
- 3 garlic cloves, minced — non-negotiable.
- 3 cups low-sodium vegetable broth — the cooking liquid.
- 1/2 cup grated parmesan — melts into the sauce.
- 1 lemon, zested and juiced — brighten at the end.
- 2 tablespoons olive oil — only if the artichokes are not very oily.
- 2 cups baby spinach — optional, but useful.
- 1/4 teaspoon red pepper flakes — gives the sauce a little lift.
- Salt and black pepper — to taste.
Quick Steps:
- Start the aromatics: Warm the olive oil in a large straight-sided skillet over medium heat. Cook the garlic and red pepper flakes for 30 seconds.
- Add pasta and broth: Put the linguine, broth, artichokes, and lemon zest into the pan. Bring to a simmer.
- Cook and stir: Cook for 10 to 12 minutes, stirring often and turning the noodles as they soften. Add small splashes of water if the pan looks dry before the pasta is tender.
- Thicken: When the noodles are al dente and the liquid has reduced, stir in parmesan and spinach until the spinach wilts.
- Finish: Add lemon juice, black pepper, and more parmesan if needed. Serve right away.
Equipment for This Recipe:
- Large straight-sided skillet or sauté pan — the noodles need room.
- Tongs — helps turn the pasta.
- Measuring cup — for the broth.
- Microplane — for lemon zest.
How to Serve This Dish:
Serve it in shallow bowls with extra parmesan and a little chopped parsley. A slice of toasted bread is enough if you want something on the side, but I usually don’t bother. This feeds 4 as a main course.
Pro Tips for This Recipe:
- Use a pan wide enough for the pasta to lie mostly flat; crowded pasta cooks unevenly.
- Marinated artichokes vary a lot. Taste one before adding more salt.
- Don’t drown the pasta in broth. If it looks soupy at the end, keep cooking for another minute or two.
- Lemon juice goes in after the heat is lower so the sauce stays bright.
Variations on This Dish:
- White Bean Pasta: Add 1 cup white beans for more body.
- Shrimp Add-On: Stir in cooked shrimp at the end if you want protein without changing the sauce much.
- Dairy-Light Version: Use 2 tablespoons parmesan and finish with olive oil instead of more cheese.
Common Mistakes to Avoid with This Dish:
- Using too little salt in the broth: Pasta tastes flat if the liquid is bland.
- Adding spinach too early: It disappears and loses its color.
- Walking away from the pan: One-pan pasta still needs stirring, or it sticks.
8. Lemon-Oregano White Bean Skillet with Sausage
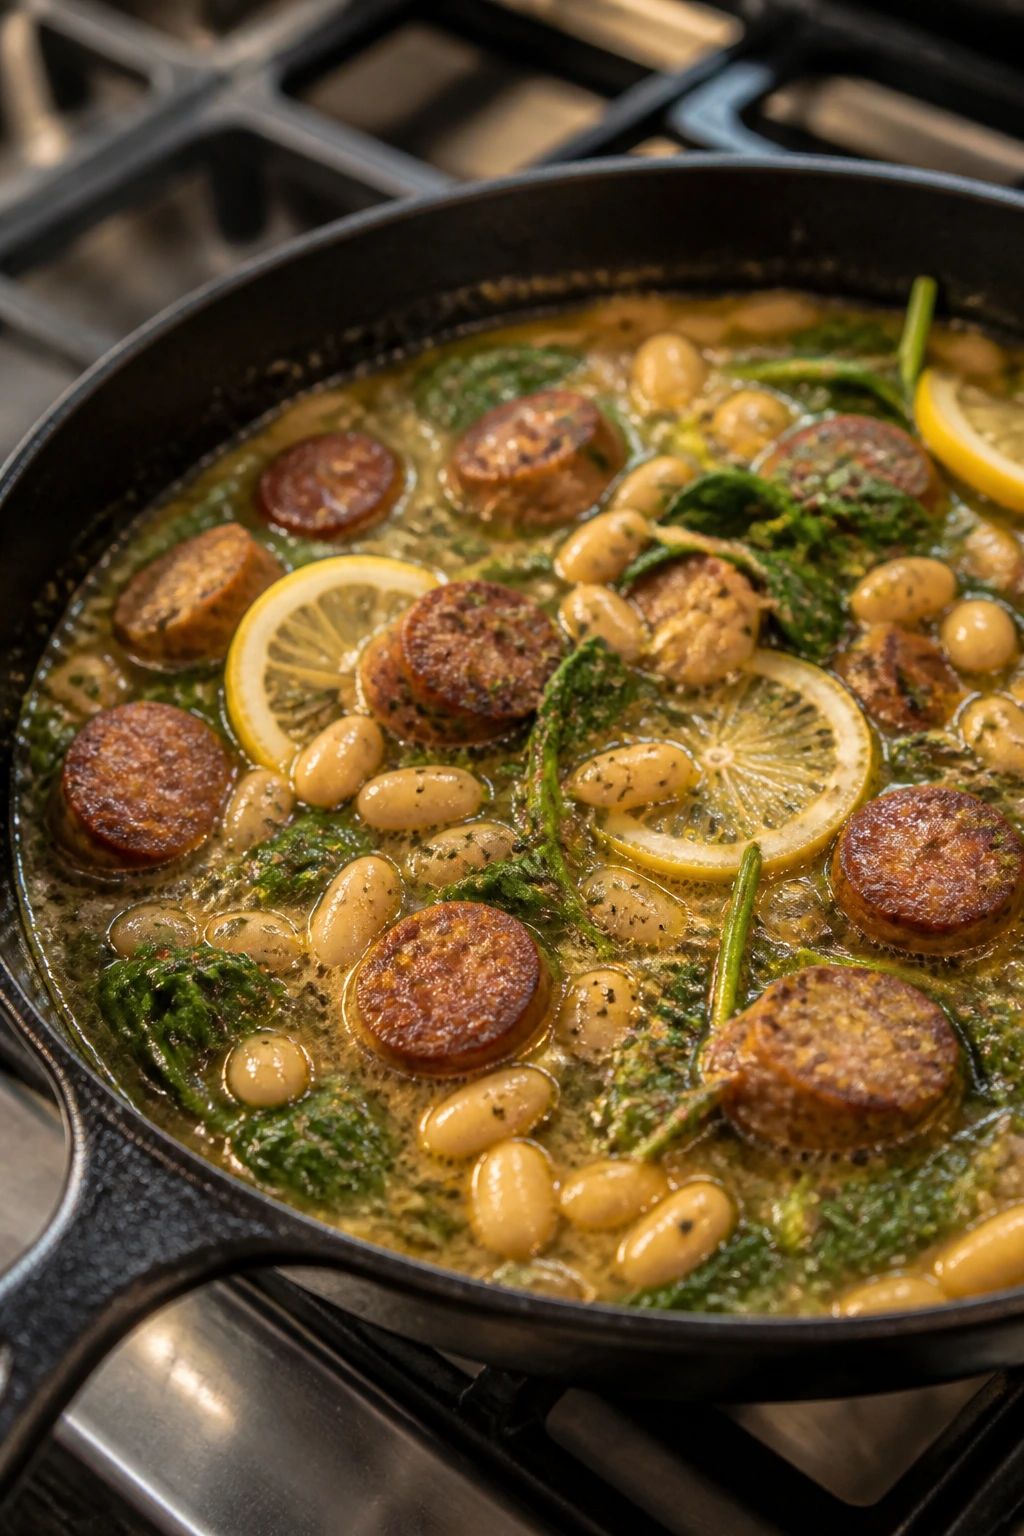
This is the sturdy one in the bunch, the dinner you make when “light” needs a little more backbone. White beans soak up the lemony broth, sausage adds a smoky edge, and kale or spinach gives the skillet a green finish. It’s fast, but it eats like something you planned.
Why It Works:
White beans are one of the best summer pantry foods because they heat through quickly and bring a creamy texture without any dairy. Chicken or turkey sausage gives you enough fat and seasoning that you don’t need to build a complicated sauce. Lemon at the end wakes up the beans, and a handful of greens keeps the whole pan from feeling too dense. This one is especially good if you want dinner to hold up on the table while everyone drifts in from outside.
Key Ingredients:
- 12 ounces chicken or turkey sausage, sliced into rounds — look for garlic or fennel if you want more flavor.
- 2 tablespoons olive oil — just enough for browning.
- 1 small red onion, sliced — sweeter than yellow here.
- 3 garlic cloves, sliced — sliced again works better than minced in a skillet like this.
- 2 cans white beans, 15 ounces each, drained and rinsed — cannellini or great northern.
- 1/2 cup low-sodium broth — loosens the skillet.
- 1 teaspoon dried oregano — keeps the flavor on theme.
- 1 lemon, zested and juiced — the whole point.
- 3 cups kale, torn into bite-size pieces — or use spinach if you want softer greens.
- 2 tablespoons chopped parsley — at the end.
Quick Steps:
- Brown the sausage: Heat the olive oil in a large skillet over medium-high heat. Cook the sausage rounds for 4 to 5 minutes, until browned on both sides.
- Cook the onion: Add the red onion and cook for 3 minutes until it softens.
- Add garlic and beans: Stir in the garlic, oregano, beans, and broth. Simmer for 5 minutes so the beans take on the sausage flavor.
- Add greens: Stir in kale and cook for 2 to 3 minutes until wilted.
- Finish bright: Add lemon zest, lemon juice, and parsley. Taste and adjust salt.
Equipment for This Recipe:
- Large skillet — a 12-inch one gives the beans space.
- Wooden spoon — for stirring the beans without breaking them all.
- Citrus zester — lemon zest matters here.
- Lid — useful if the kale needs help wilting.
How to Serve This Dish:
Serve it with grilled bread, rice, or just a bowl and a spoon. A drizzle of olive oil and a little black pepper on top goes a long way. This is a generous 4-serving skillet, and it stretches nicely if you add bread.
Pro Tips for This Recipe:
- Brown the sausage properly. Pale sausage tastes flat.
- Rinse canned beans well, or the pan sauce turns cloudy and tinny.
- If you want more sauce, add another 1/4 cup broth at the end.
- Lemon juice at the end makes the beans taste less heavy; don’t skip it.
Variations on This Dish:
- Bean-Only Version: Leave out the sausage and add 1 teaspoon smoked paprika plus extra olive oil.
- Tomato Skillet: Toss in 1 cup halved cherry tomatoes with the beans.
- Spicy Route: Use hot Italian-style chicken sausage and a pinch of chili flakes.
Common Mistakes to Avoid with This Dish:
- Not browning the sausage: The whole skillet loses depth if you skip that step.
- Letting the beans boil hard: They break apart and go mushy.
- Forgetting the lemon: Beans and sausage need the acid to keep the dish awake.
9. Grilled Halloumi and Veggie Couscous with Lemon Mint Dressing
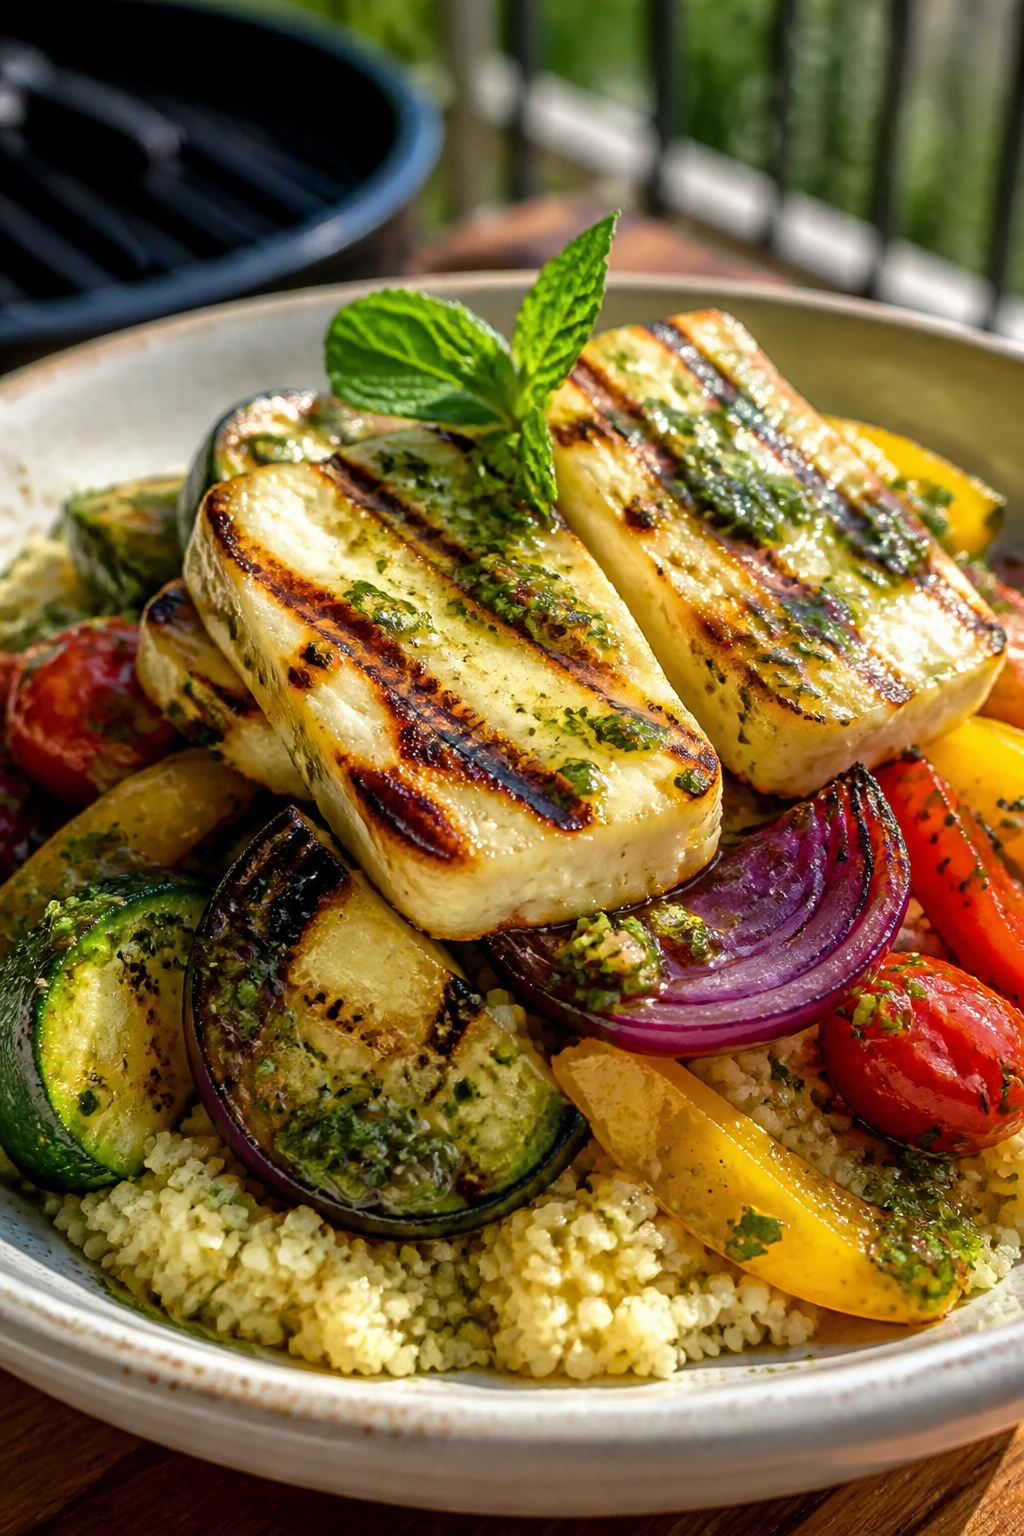
Halloumi is the cheese for people who want dinner with some personality. It sears into salty, squeaky slabs that hold their shape, and that matters when the rest of the plate is built from soft couscous and vegetables. The lemon-mint dressing is sharp enough to keep the cheese from feeling too rich, and the grilled vegetables make the whole thing feel like a meal, not a side dish.
Why It Works:
Halloumi can take direct heat because it’s firm and salty, which means you get color before it melts away. Couscous cooks in minutes with just boiling water, so the base is fast. Mint and lemon are a smart pairing with halloumi because they cut the salt and give the dish a colder, cleaner finish on the tongue. If the night is hot enough that you do not want to stand near the oven, this is a very useful dinner.
Key Ingredients:
- 8 ounces halloumi, sliced into 1/2-inch slabs — pat it dry before grilling.
- 1 1/2 cups couscous — regular couscous cooks fastest.
- 1 zucchini, sliced lengthwise — good for grill marks.
- 1 red bell pepper, cut into strips — sweet and sturdy.
- 1 small red onion, cut into wedges — holds up on the grill.
- 1 cup cherry tomatoes — can be grilled in a pan basket or left raw.
- 1 lemon, zested and juiced — for the dressing.
- 2 tablespoons olive oil — dressing and grilling.
- 2 tablespoons chopped mint — don’t bury it.
- 2 tablespoons chopped parsley — balances the mint.
- 1/4 teaspoon black pepper — enough to sharpen the dressing.
Quick Steps:
- Cook the couscous: Pour 1 1/2 cups boiling water over the couscous with a pinch of salt. Cover and let it sit for 5 minutes, then fluff with a fork.
- Mix the dressing: Whisk lemon juice, zest, olive oil, mint, parsley, and black pepper together.
- Grill the vegetables: Cook the zucchini, pepper, and onion over medium-high heat for 3 to 4 minutes per side, until marked and tender.
- Grill the halloumi: Sear the cheese for 1 to 2 minutes per side until golden.
- Assemble: Toss the couscous with half the dressing, then add vegetables, tomatoes, and halloumi. Spoon the rest of the dressing over the top.
Equipment for This Recipe:
- Grill or grill pan — or a cast-iron skillet if that’s what you have.
- Medium bowl — for the couscous.
- Whisk — for the dressing.
- Tongs — for turning the halloumi carefully.
How to Serve This Dish:
Serve it warm, not blazing hot, with a few extra mint leaves and a squeeze of lemon at the table. It can sit for a bit and still taste good, which is part of the appeal. It feeds 4 as a main dish or 6 if it shows up alongside other plates.
Pro Tips for This Recipe:
- Dry the halloumi well before cooking. Wet cheese sticks.
- Don’t overcook couscous. It should be fluffy, not gluey.
- If the mint tastes too strong, cut it with more parsley.
- A handful of chickpeas can be stirred into the couscous if you want more bulk.
Variations on This Dish:
- Roasted Veg Version: If grilling isn’t happening, roast the vegetables at 425°F for 18 minutes.
- Chicken Addition: Add leftover grilled chicken for a bigger protein-heavy bowl.
- Vegan Route: Swap halloumi for firm tofu pressed dry and seared well.
Common Mistakes to Avoid with This Dish:
- Skipping the halloumi drying step: It won’t brown as well.
- Overdressing the couscous: Start with half and add more only if it needs it.
- Using limp herbs: Mint and parsley should taste fresh; tired herbs make the whole bowl dull.
10. Lemon Basil Swordfish Steaks with White Beans
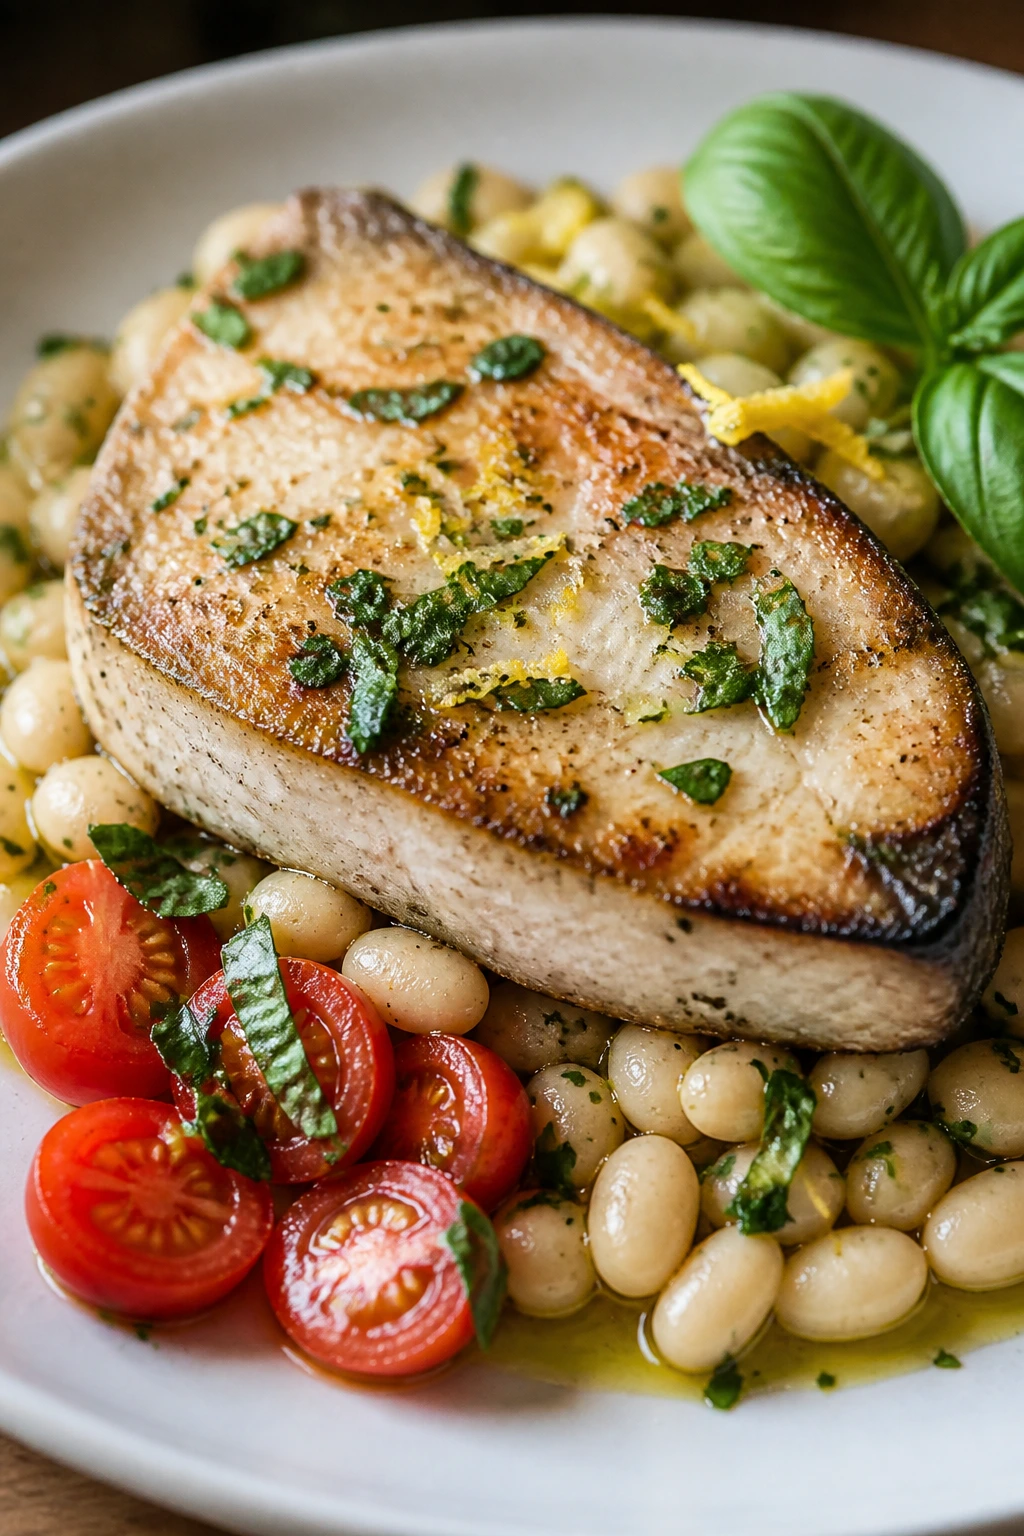
Swordfish is one of those dinners that feels bold without being complicated. The steaks sear fast, the beans underneath soak up lemony juices, and basil gives the plate a sweet, almost peppery finish. It’s the kind of meal that makes a table go quiet for a minute, which is often a good sign.
Why It Works:
Swordfish is dense enough to handle a hot pan without falling apart, which makes it ideal for a quick sear. White beans act like a soft bed under the fish, catching the olive oil, lemon, and tomato juices that run off the top. Basil goes in at the end because heat flattens it. The whole thing lands somewhere between elegant and low-effort, which is the right zone for a summer dinner.
Key Ingredients:
- 4 swordfish steaks, 6 ounces each — about 1 inch thick.
- 2 cans white beans, drained and rinsed — cannellini are best here.
- 1 cup cherry tomatoes, halved — they release sweet juices.
- 3 garlic cloves, minced — for the bean base.
- 2 tablespoons olive oil — to sear the fish and flavor the beans.
- 1 lemon, zested and juiced — the final brightness.
- 1/4 teaspoon red pepper flakes — optional heat.
- 1/4 cup basil leaves, torn — added at the end.
- Salt and black pepper — enough to season both fish and beans.
Quick Steps:
- Season the fish: Pat the swordfish dry and season both sides with salt and pepper.
- Build the bean base: Warm 1 tablespoon olive oil in a skillet over medium heat. Cook the garlic for 30 seconds, then add beans and tomatoes with a splash of water. Simmer for 5 minutes until the tomatoes soften.
- Sear the swordfish: Heat the remaining oil in a separate skillet or push the beans aside if your pan is wide enough. Sear the fish for 3 to 4 minutes per side, until browned and just opaque in the center.
- Finish the beans: Stir in lemon zest, a little juice, red pepper flakes, and most of the basil.
- Plate: Spoon beans onto plates, top with fish, and finish with the remaining basil and lemon juice.
Equipment for This Recipe:
- Heavy skillet — for a solid sear.
- Fish spatula or wide spatula — swordfish is thick and needs support.
- Sharp knife — to halve tomatoes and chop basil.
- Instant-read thermometer — swordfish should hit about 130°F to 135°F.
How to Serve This Dish:
Serve with grilled bread or a small pile of rice to catch the juices. A few extra tomatoes on the plate don’t hurt. This feeds 4, and it looks best when the beans spread out under the fish instead of being piled on top.
Pro Tips for This Recipe:
- Buy swordfish steaks that are evenly thick. Thin ends overcook fast.
- Don’t cook swordfish until it flakes apart; that’s already too far.
- If you can’t find swordfish, tuna steaks or halibut hold up well.
- Basil loses its snap in heat, so add it after the pan comes off the stove.
Variations on This Dish:
- Tomato-Caper Route: Add capers for a briny punch.
- Tuna Swap: Use ahi or yellowfin tuna, seared briefly and sliced.
- Lemon Butter Finish: A small knob of butter whisked in at the end gives the beans a silkier finish.
Common Mistakes to Avoid with This Dish:
- Overcooking the fish: Swordfish turns dry and chalky fast.
- Using low-quality beans: Cheap beans can be mushy; good ones hold shape.
- Adding basil too early: It turns dark and loses its sweet smell.
11. Baked Lemon Eggplant and Chickpea Casserole
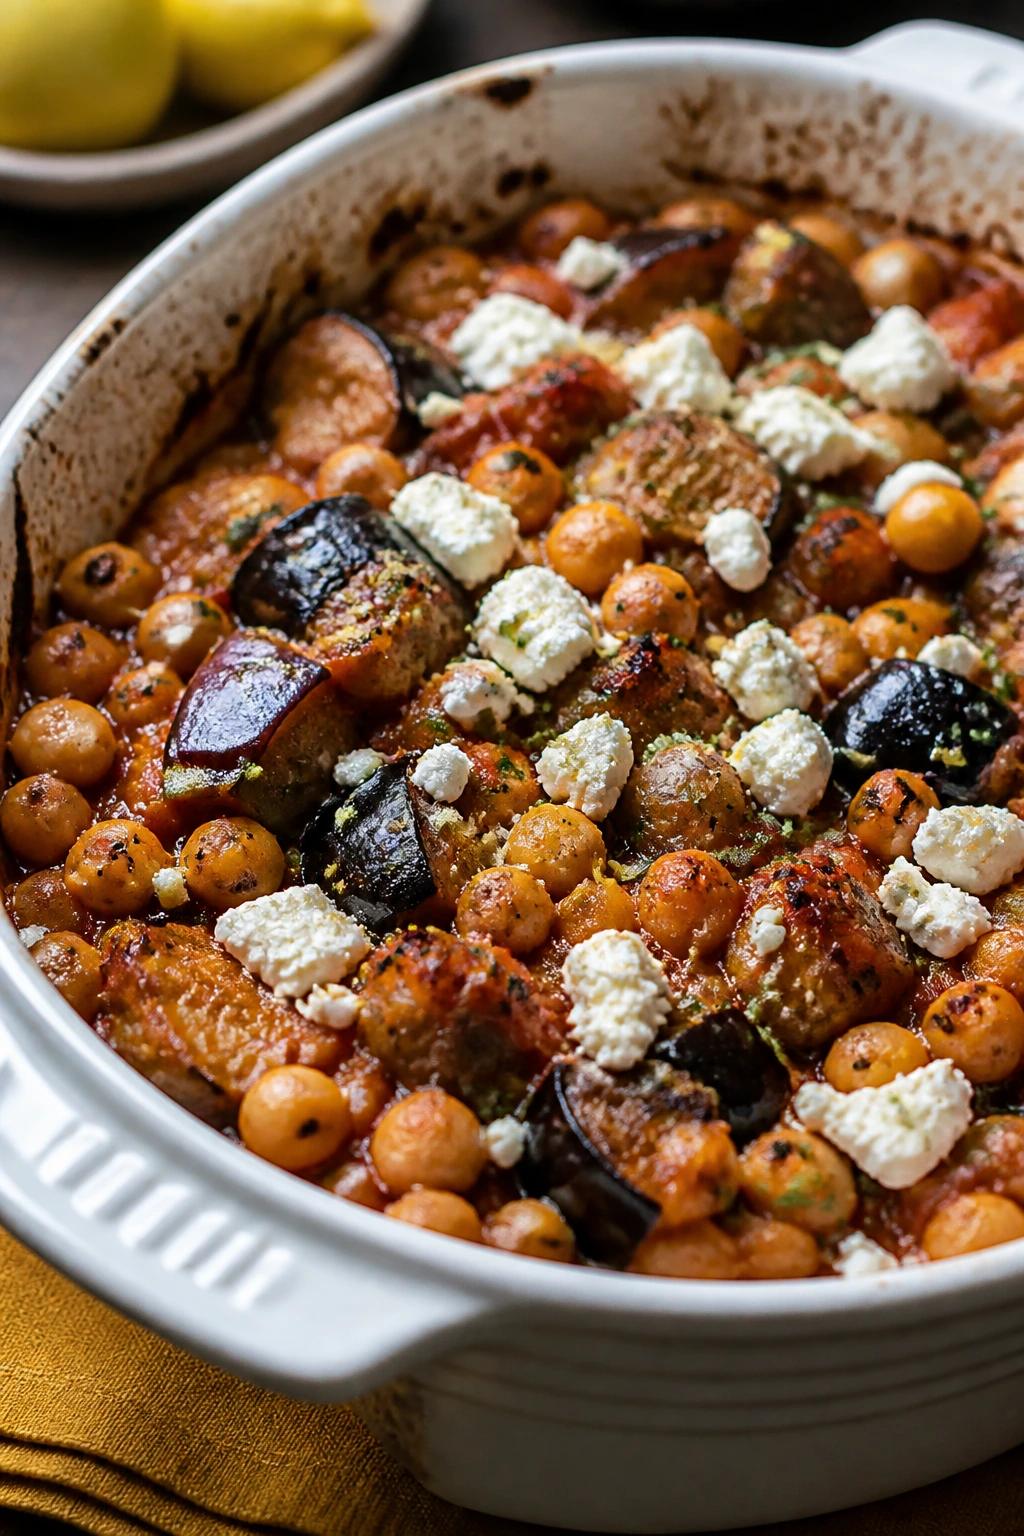
Eggplant gets a bad reputation because people cook it badly. Roast it hard enough and it turns silky, almost custardy, and in this casserole it soaks up tomato, garlic, lemon, and herbs without collapsing into mush. Chickpeas keep the texture grounded, and a shower of feta on top gives the whole dish a salty snap.
Why It Works:
Eggplant needs enough heat to brown before it goes soft, so this dish starts with a roast at 425°F. Chickpeas add protein and a chewy contrast to the soft eggplant. The tomato base keeps the casserole juicy, while lemon zest and juice at the end stop it from tasting heavy. I like this one because it’s filling without being fussy, and it still tastes good after it sits for a few minutes.
Key Ingredients:
- 2 medium eggplants, cut into 1-inch cubes — size matters for even roasting.
- 2 cans chickpeas, drained and rinsed — the texture anchor.
- 1 small onion, diced — adds sweetness.
- 3 garlic cloves, minced — the main seasoning.
- 1 can crushed tomatoes, 14 ounces — forms the sauce.
- 1 lemon, zested and juiced — for the finish.
- 1 teaspoon dried oregano — classic and safe.
- 1/2 teaspoon ground cumin — optional, but gives depth.
- 1/2 cup crumbled feta — for topping.
- 2 tablespoons olive oil — for roasting and sautéing.
- 2 tablespoons breadcrumbs — optional for a little top crunch.
Quick Steps:
- Roast the eggplant: Toss eggplant cubes with half the olive oil and a pinch of salt. Roast at 425°F for 20 minutes, turning once, until browned and soft at the edges.
- Cook the sauce: In a skillet, sauté onion in the remaining olive oil for 5 minutes, then add garlic, oregano, cumin, and crushed tomatoes. Simmer for 8 minutes.
- Add chickpeas: Stir the chickpeas into the sauce and cook for 2 minutes.
- Assemble: Fold in the roasted eggplant, lemon zest, and half the juice. Transfer to a baking dish if needed.
- Bake: Top with feta and breadcrumbs, then bake for 10 minutes until bubbling.
- Finish: Add the remaining lemon juice and let it sit for 5 minutes before serving.
Equipment for This Recipe:
- Rimmed baking sheet — for roasting eggplant.
- Skillet — for the sauce.
- 8×8 or similar baking dish — if you want a more formal casserole.
- Wooden spoon — for folding without smashing the eggplant.
How to Serve This Dish:
Serve it with rice, couscous, or warm bread. A spoonful of yogurt on the side is optional but useful if you want extra coolness against the heat of the tomatoes and garlic. It feeds 4 to 6, depending on whether you make it the center of the plate or a larger spread.
Pro Tips for This Recipe:
- Cut the eggplant evenly so it roasts at the same speed.
- If the eggplant seems dry after roasting, that’s fine. It will drink up the sauce.
- Don’t dump the lemon in before baking. Keep the finish bright.
- Breadcrumbs are optional, but a little crunch on top helps with the soft texture.
Variations on This Dish:
- Zucchini Addition: Add half-moons of zucchini with the eggplant for more volume.
- Halloumi Topper: Replace feta with sliced halloumi if you want a firmer top.
- Spicy Tomato Version: Add chili flakes to the tomato sauce for more heat.
Common Mistakes to Avoid with This Dish:
- Under-roasting the eggplant: Pale eggplant tastes spongy.
- Skipping the salt on the vegetables: The flavors stay flat if you don’t season at each stage.
- Flooding the casserole with liquid: The dish should be juicy, not watery.
12. Lemony Ground Lamb Stuffed Peppers

Stuffed peppers can go wrong when the filling tastes dull or the peppers stay stubbornly crunchy. This version avoids both problems. Lamb brings a deep, savory flavor; lemon and parsley lift it; and the peppers soften just enough in the oven to slice cleanly while still holding their shape.
Why It Works:
Ground lamb carries spice and acid well, which makes it a strong fit for lemon, garlic, and herbs. Pre-roasting the peppers helps them soften before the filling goes in, so you don’t end up with raw bell pepper at the edges. A little rice or cauliflower rice gives the filling structure without making it heavy. Pine nuts are optional, but I like the nutty crunch they add.
Key Ingredients:
- 4 large bell peppers, halved and seeded — use red, yellow, or orange for sweetness.
- 1 pound ground lamb — rich enough to stand up to lemon.
- 1 small onion, diced — the savory base.
- 3 garlic cloves, minced — essential.
- 1 cup cooked rice or cauliflower rice — binds the filling.
- 1 lemon, zested and juiced — brightness at the end.
- 2 tablespoons chopped parsley — freshness.
- 1/4 cup pine nuts, lightly toasted — optional but very good.
- 1/2 teaspoon ground cinnamon — just enough to hint at warmth.
- 1/2 teaspoon kosher salt — season the meat properly.
- 2 tablespoons olive oil — for the peppers and filling.
Quick Steps:
- Preheat and soften the peppers: Heat the oven to 400°F (205°C). Brush the pepper halves with olive oil and roast cut-side up for 10 minutes.
- Cook the filling: In a skillet, sauté onion in a little oil for 4 minutes. Add lamb, garlic, cinnamon, and salt, then cook until the lamb is browned and no pink remains, about 6 minutes.
- Finish the filling: Stir in rice, lemon zest, half the lemon juice, parsley, and pine nuts if using.
- Stuff: Fill the pepper halves generously.
- Bake: Return to the oven for 15 to 18 minutes, until the peppers are tender and the tops are lightly browned.
- Finish: Spoon over the remaining lemon juice before serving.
Equipment for This Recipe:
- Rimmed baking dish — holds the pepper halves upright.
- Skillet — for the filling.
- Sharp knife — for halving and seeding peppers.
- Wooden spoon — for breaking up the lamb.
How to Serve This Dish:
Serve two pepper halves per person with a spoon of yogurt or a chopped cucumber salad on the side. They’re substantial enough to stand alone, though a little bread never hurts. Four servings is the norm, but one half can go far if the peppers are large.
Pro Tips for This Recipe:
- Don’t skip the pre-roast on the peppers. It solves the raw-pepper problem.
- If the lamb seems greasy, drain a little fat before mixing in the rice.
- Lemon juice at the end keeps the filling lively.
- A pinch of cumin can join the cinnamon if you want a slightly warmer profile.
Variations on This Dish:
- Beef Swap: Ground beef works if lamb isn’t in the fridge; add a touch more oregano.
- Herbed Rice Version: Use leftover rice mixed with dill and mint.
- Vegetarian Peppers: Replace lamb with chopped mushrooms and chickpeas sautéed until dry.
Common Mistakes to Avoid with This Dish:
- Packing in raw filling: The rice or cauliflower rice should already be cooked.
- Leaving peppers unroasted first: They stay too firm and can taste bitter.
- Over-salting the filling: Lamb has flavor on its own; season, but don’t bury it.
13. Lemon Capellini with Sardines and Parsley
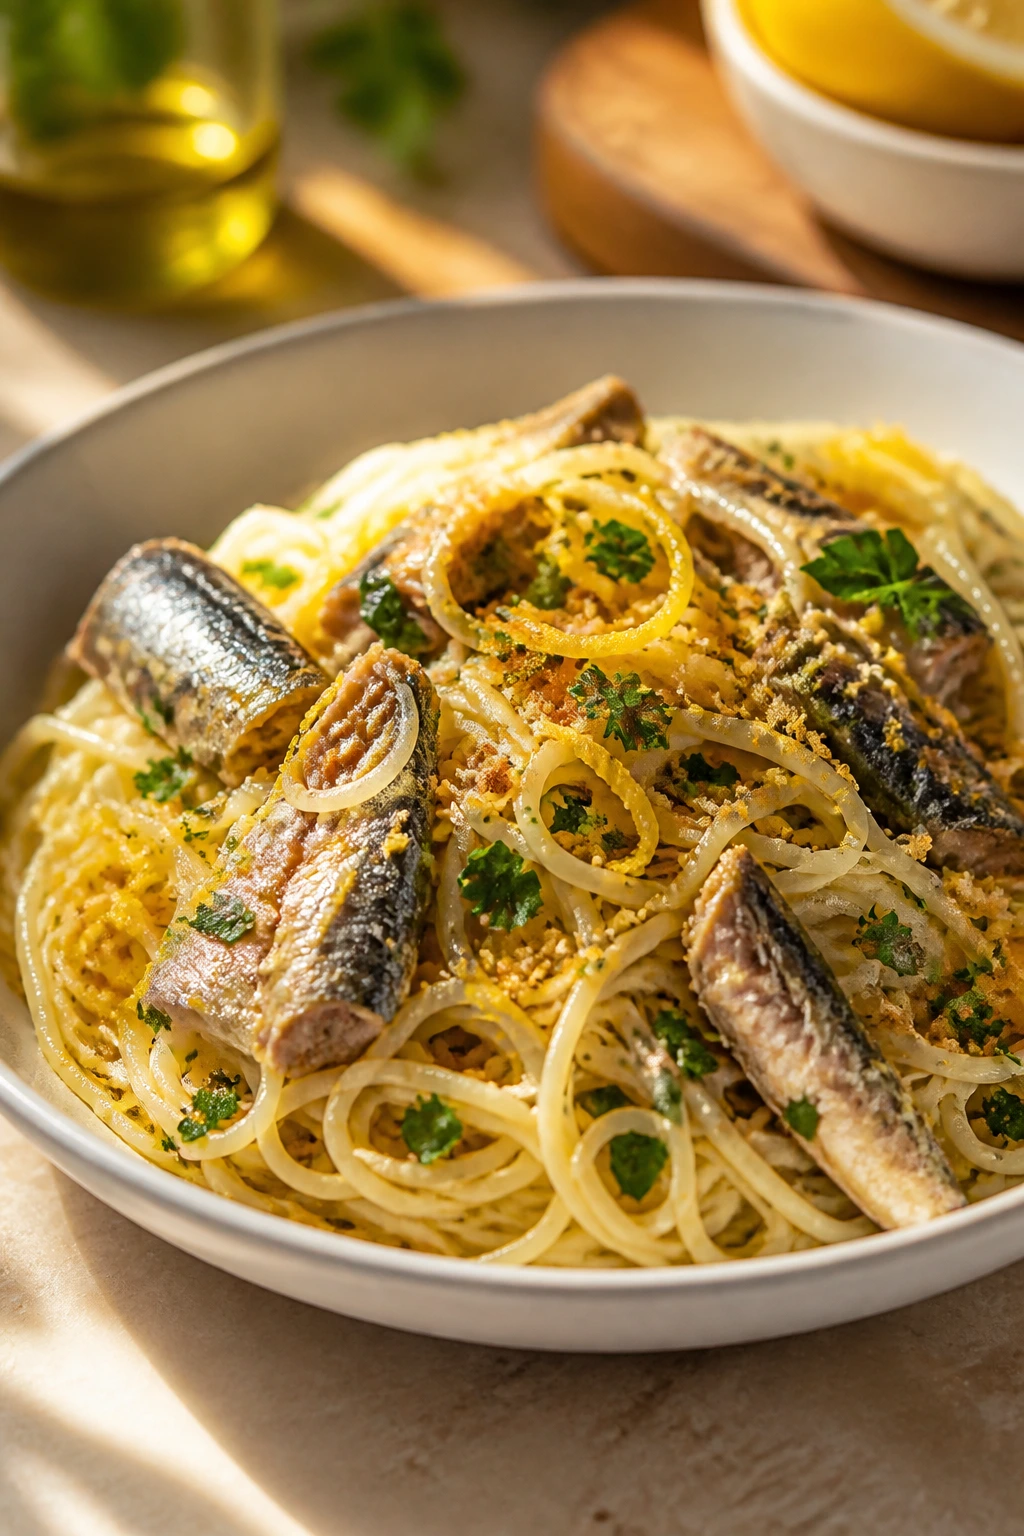
Sardines are not shy, and that’s the point. They bring salt, richness, and a little old-school pantry charm to a bowl of capellini that cooks in almost no time. Lemon keeps the fish from feeling heavy, parsley sharpens everything, and toasted breadcrumbs add the crunch that pasta often needs but rarely gets.
Why It Works:
Capellini is thin enough to coat quickly with oil, lemon, and the soft flakes of sardine. Sardines packed in olive oil are already tender and flavorful, so you don’t need to cook them much—just warm them through gently. That means this dinner can come together fast without losing texture. Breadcrumbs matter here because they soak up the oil and give the pasta something crisp to contrast with.
Key Ingredients:
- 12 ounces capellini — very thin pasta that cooks in a flash.
- 2 cans sardines in olive oil, about 4 ounces each — choose good ones.
- 3 tablespoons olive oil — only if needed, since sardines bring oil.
- 3 garlic cloves, sliced thin — slices are better than minced here.
- 1 lemon, zested and juiced — the whole plate leans on it.
- 2 tablespoons capers, drained — add a salty pop.
- 1/2 cup chopped parsley — a generous handful.
- 1/3 cup breadcrumbs, toasted — for the top.
- Black pepper — enough to wake up the oil.
Quick Steps:
- Toast the crumbs: Warm a small skillet with a little olive oil and toast breadcrumbs for 2 to 3 minutes until golden. Set aside.
- Cook the pasta: Boil the capellini in salted water until just al dente, usually 2 to 4 minutes.
- Build the sauce: In a large skillet, warm the olive oil and gently cook the garlic for 30 seconds. Add capers and sardines, breaking the fish into chunks, and warm for 1 minute.
- Toss: Add drained pasta, lemon zest, lemon juice, and parsley. Toss quickly with a splash of pasta water if needed.
- Finish: Top with toasted breadcrumbs and black pepper.
Equipment for This Recipe:
- Large pot — for boiling the pasta.
- Skillet — for the sauce.
- Tongs — capellini tosses best with them.
- Fine grater — for lemon zest.
How to Serve This Dish:
Serve immediately, while the sardines are still warm and the breadcrumbs still have some crunch. A small green salad is enough on the side. This feeds 4 with moderate portions, and the leftovers are fine cold, though the crumbs lose their snap.
Pro Tips for This Recipe:
- Buy sardines packed in olive oil, not watery brine.
- Use more pasta water than you think you need; capellini dries out fast.
- Don’t mash the sardines into paste. Leave a few larger flakes.
- Parsley should go in at the end so it stays bright.
Variations on This Dish:
- Tomato-Caper Pasta: Stir in chopped cherry tomatoes for a softer, sweeter version.
- Anchovy Helper: Add one chopped anchovy fillet with the garlic if you want more savory depth.
- Whole-Wheat Route: Whole-wheat capellini works, but cook it carefully; it can go past done fast.
Common Mistakes to Avoid with This Dish:
- Overcooking capellini: Thin pasta goes from tender to tired quickly.
- Using bland sardines: Cheap, flavorless sardines make the dish flat.
- Skipping the breadcrumbs: The crunch matters more than it seems.
14. Sheet-Pan Lemon Chicken Souvlaki with Potatoes
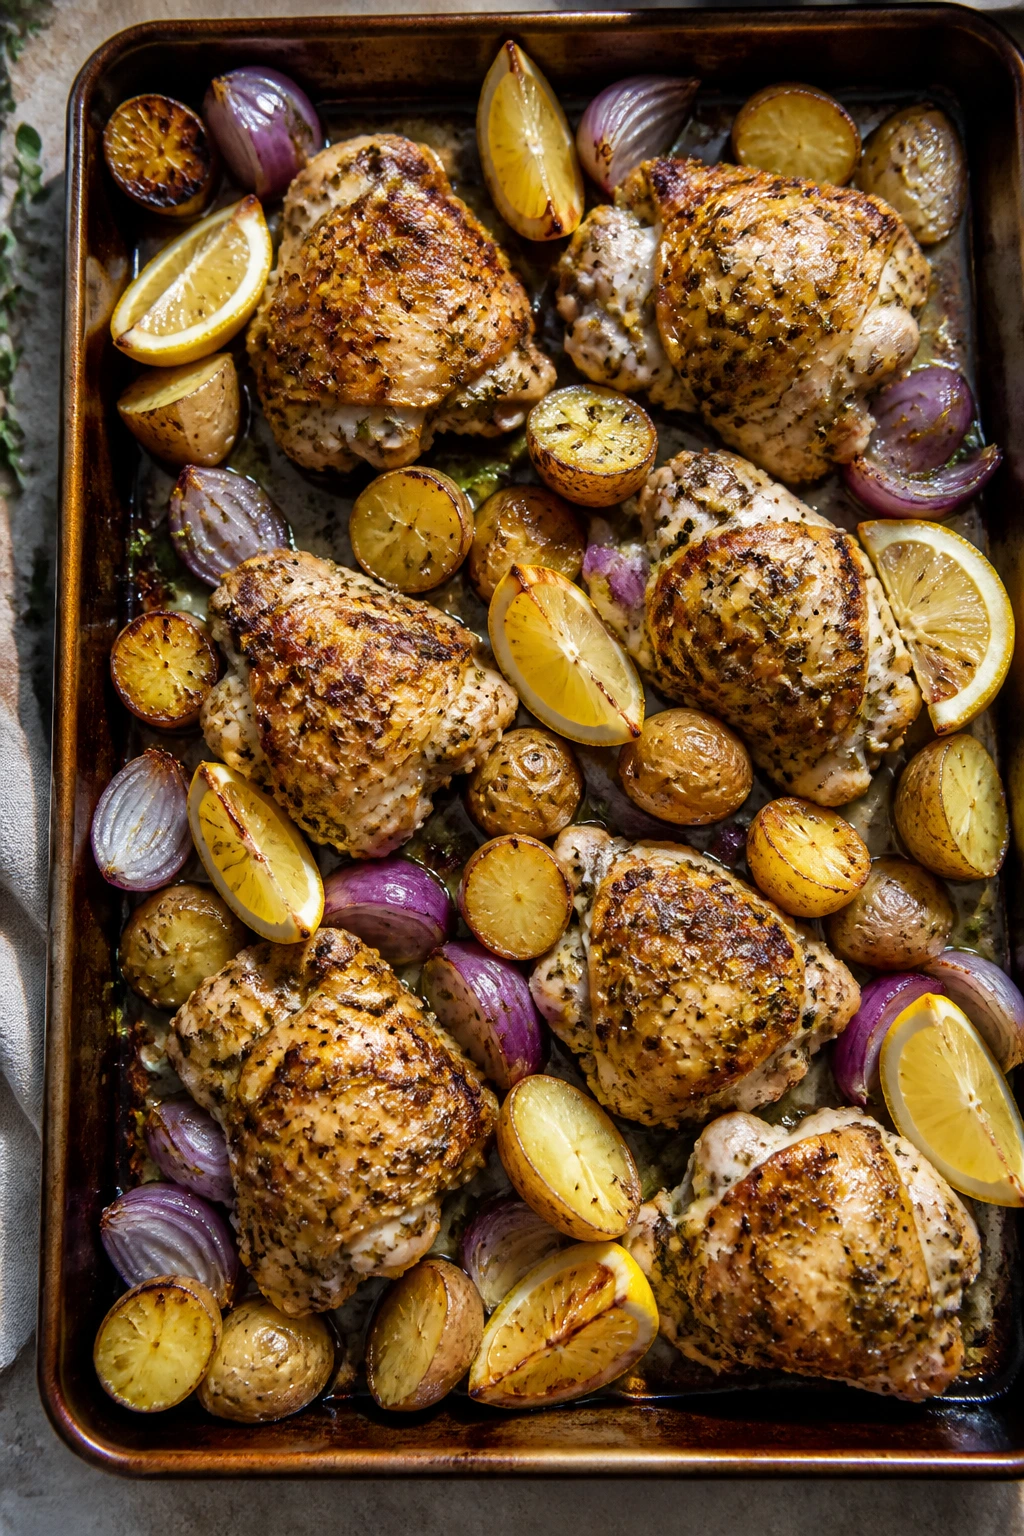
This is the biggest, most familiar-flavored dinner in the set, but it still keeps the heat under control because the oven does the work. Lemon, oregano, garlic, and olive oil soak into the chicken and potatoes, and the red onion softens just enough to turn sweet at the edges. It smells like a backyard grill without requiring a grill.
Why It Works:
Chicken souvlaki gets its personality from the marinade, and this one leans hard on lemon zest, garlic, oregano, and olive oil. Potatoes roasted on the same sheet pan catch the drippings, which is the real reason they taste good here. A sheet pan means direct heat and easy cleanup, and if you cut the potatoes small enough, they finish around the same time as the chicken. That’s the whole trick.
Key Ingredients:
- 2 pounds boneless chicken thighs, cut into 2-inch pieces — thighs stay juicier than breasts.
- 1 1/2 pounds baby potatoes, halved — small enough to roast on schedule.
- 1 red onion, cut into wedges — sweetens as it roasts.
- 1/4 cup olive oil — for the marinade.
- 1 lemon, zested and juiced — use both.
- 4 garlic cloves, minced — don’t hold back.
- 2 teaspoons dried oregano — the signature flavor.
- 1 teaspoon kosher salt — season the chicken and potatoes.
- 1/2 teaspoon black pepper — enough to keep it lively.
- 1/2 cup tzatziki — for serving.
- Chopped parsley — optional finish.
Quick Steps:
- Marinate the chicken: Mix olive oil, lemon zest and juice, garlic, oregano, salt, and pepper in a bowl. Toss with the chicken and let it sit for 20 minutes while you prep the potatoes.
- Start the potatoes: Heat the oven to 425°F (220°C). Toss the potatoes with a little olive oil and salt on a sheet pan and roast for 15 minutes.
- Add the chicken and onion: Pull the pan out, add the marinated chicken and onion wedges, and toss everything gently so the potatoes stay in contact with the pan.
- Roast again: Cook for 18 to 22 minutes, turning once halfway through, until the chicken reaches 165°F and the potatoes are tender.
- Optional broil: Broil for 1 to 2 minutes if you want more color.
- Serve: Finish with parsley and a spoon of tzatziki.
Equipment for This Recipe:
- Rimmed sheet pan — use two if yours is cramped.
- Mixing bowl — for the marinade.
- Tongs — for turning the pieces.
- Instant-read thermometer — especially for the chicken.
How to Serve This Dish:
Serve it right from the pan with pita, tzatziki, and a cucumber-tomato salad. If you want a more formal plate, tuck the chicken and potatoes over rice with a few lemon wedges. It feeds 6 comfortably.
Pro Tips for This Recipe:
- Cut the potatoes evenly so they finish together.
- Don’t crowd the pan. A second sheet pan is better than steamed chicken.
- Let the chicken marinate while the potatoes get their head start.
- A final squeeze of lemon after roasting makes the whole pan taste fresher.
Variations on This Dish:
- Pepper Version: Add bell peppers with the onion for more color and sweetness.
- Pita Bowl Route: Serve everything over greens or rice instead of as a sheet-pan dinner.
- Garlic Lover’s Version: Add a few extra smashed garlic cloves to the pan; they mellow as they roast.
Common Mistakes to Avoid with This Dish:
- Using chicken breast chunks too small: They dry out before the potatoes are done.
- Skipping the potato head start: Then you end up with either raw potatoes or overcooked chicken.
- Overloading the pan: Browning needs space and dry heat.
Why Lemony Mediterranean Dinners Stay Cool on Busy Nights
The real genius of this style of cooking is that it gives you a lot of flavor without asking for a long simmer. Lemon, olive oil, garlic, herbs, tomatoes, olives, capers, beans, and quick-cooking proteins do most of the work. Heat does not need to be your enemy if you keep the methods short and the ingredients sharp.
There’s also a texture lesson hiding in plain sight. A good Mediterranean-style summer dinner usually has at least three things happening at once: something soft, something crisp or charred, and something bright or briny. Think chickpeas with spinach and feta. Or salmon with fennel and capers. Or orzo with zucchini and shrimp. When those pieces are in place, the food feels complete without leaning on cream, butter, or a long oven bake.
I like that this cooking style gives you permission to stop early. A little char on chicken thighs? Great. Salmon just barely medium? Even better. Beans warmed through with lemon and herbs? Done. The food benefits from a firm hand and a short cook, not a big production.
One more thing. Don’t treat lemon like a polite garnish. It’s the backbone. Zest gives perfume, juice gives snap, and both should be used with intent. If the dish tastes flat, nine times out of ten it needs salt or acid, not more herbs. That’s the part people forget, and it matters here.
Essential Equipment for These Recipes
-
12-inch oven-safe skillet: The workhorse for chicken thighs, sausage beans, and any recipe that starts on the stove and ends in the oven.
-
Rimmed sheet pan: Best for salmon, souvlaki, eggplant, and stuffed peppers. The rim catches juices and keeps the oven clean.
-
Large straight-sided sauté pan: Handy for one-pan pastas because the pasta needs room to move with the liquid.
-
Instant-read thermometer: Especially useful for chicken, salmon, swordfish, and turkey meatballs. Guessing is where dinner goes sideways.
-
Microplane or fine grater: Lemon zest is a big part of the flavor here, and a coarse grater misses the good oils.
-
Tongs and a fish spatula: Tongs for chicken and vegetables, fish spatula for salmon or swordfish. They keep delicate food from tearing.
-
Mixing bowls in two sizes: One for marinades and one for quick sauces or dressings.
-
Sharp chef’s knife: You’ll be slicing onions, lemons, zucchini, fennel, and herbs. A dull knife makes all of that slower and more dangerous.
-
Measuring cups and spoons: Not glamorous, but the balance of broth, lemon, and oil matters in these recipes.
-
Airtight storage containers: The leftovers are part of the plan, especially for bowls, stew, and pasta.
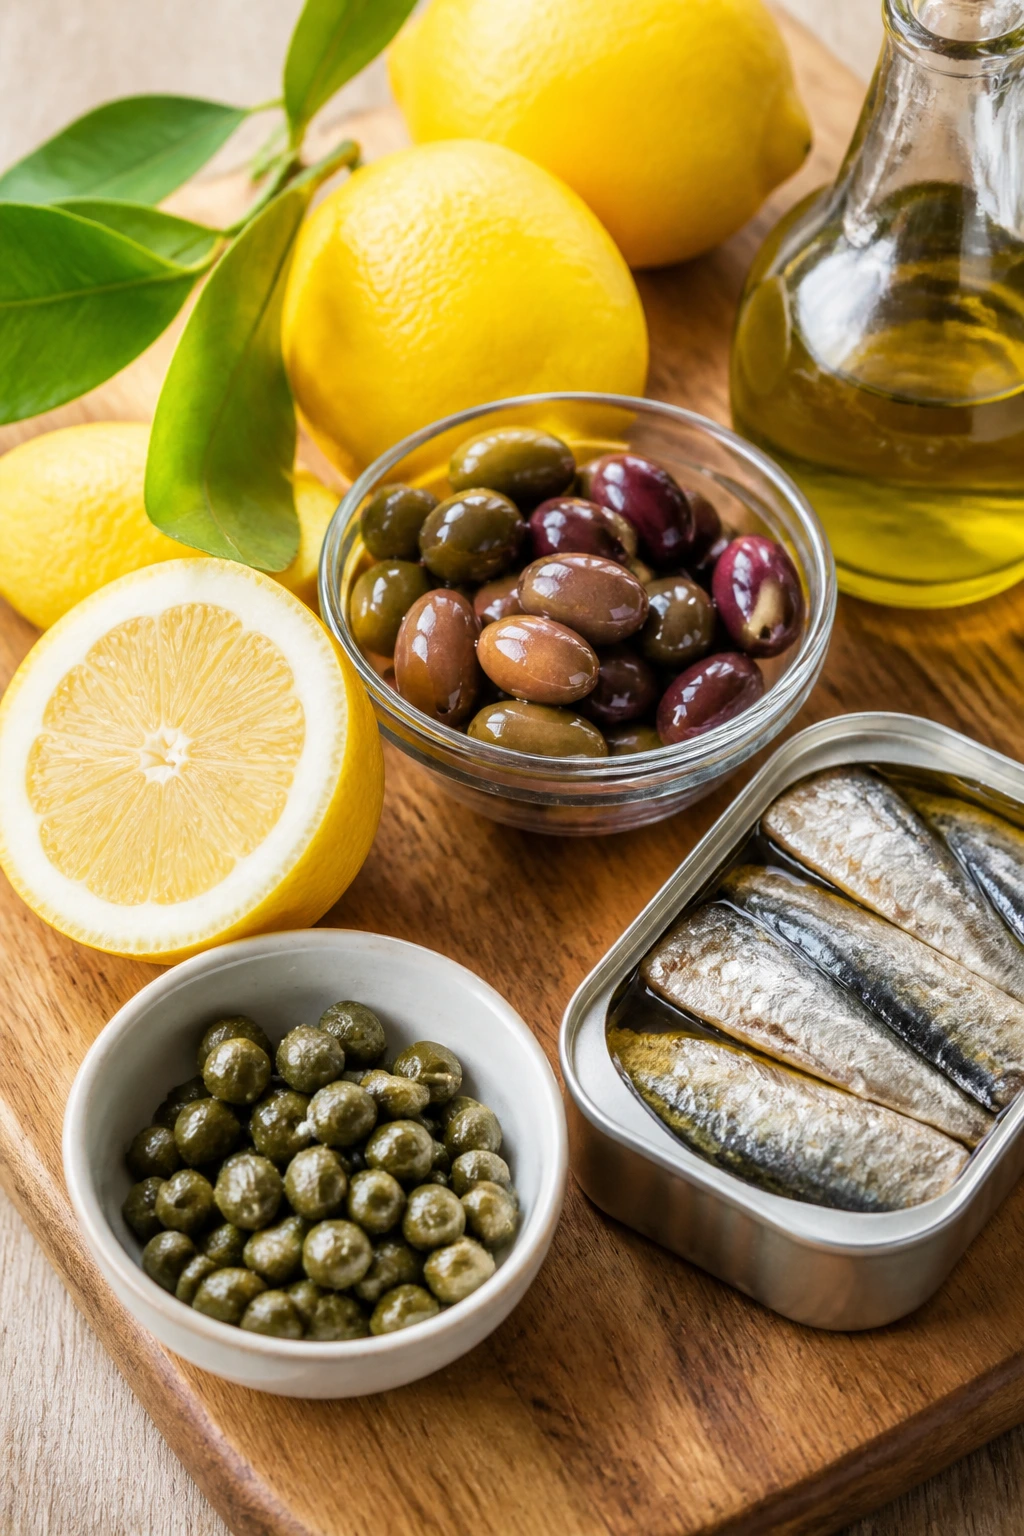
Smart Shopping and Ingredient Tips
Pick lemons that feel heavy for their size. That usually means more juice. The peel should be firm and fragrant, not soft and dull. I prefer to zest first and juice second, because once the lemon is cut, it gets awkward to handle and you lose some of that nice outer oil.
For olives, capers, feta, and sardines, buy the best jar or tin you can find without turning this into a treasure hunt. Briny ingredients bring the flavor, which means a harsh one shows up fast. If olives taste aggressively salty, rinse them. If capers are packed in a punishing brine, do the same. Sardines packed in olive oil give a softer, rounder flavor than the watery kind.
Chicken thighs are the easiest protein to buy well because they stay juicy under heat and tolerate a little overcooking. Salmon should look moist and smell clean. Shrimp should be firm and neutral, not fishy. If you’re buying swordfish, look for steaks with even thickness so they cook at the same speed. Thin, ragged edges dry out first.
On the produce side, choose zucchini that are small to medium; big ones can be watery and seedy. Fennel should feel tight and white at the base, not wilted. Eggplant should be glossy and heavy, not spongy. Fresh herbs matter more here than in some other kinds of cooking because they get used as a finish, not just a background note.
Pantry-wise, keep canned chickpeas, white beans, artichoke hearts, orzo, couscous, and breadcrumbs around. Those are the ingredients that turn a lemon and a handful of herbs into dinner. And if you use broth, low-sodium is the safer bet. You can always add salt later. You cannot take it back.
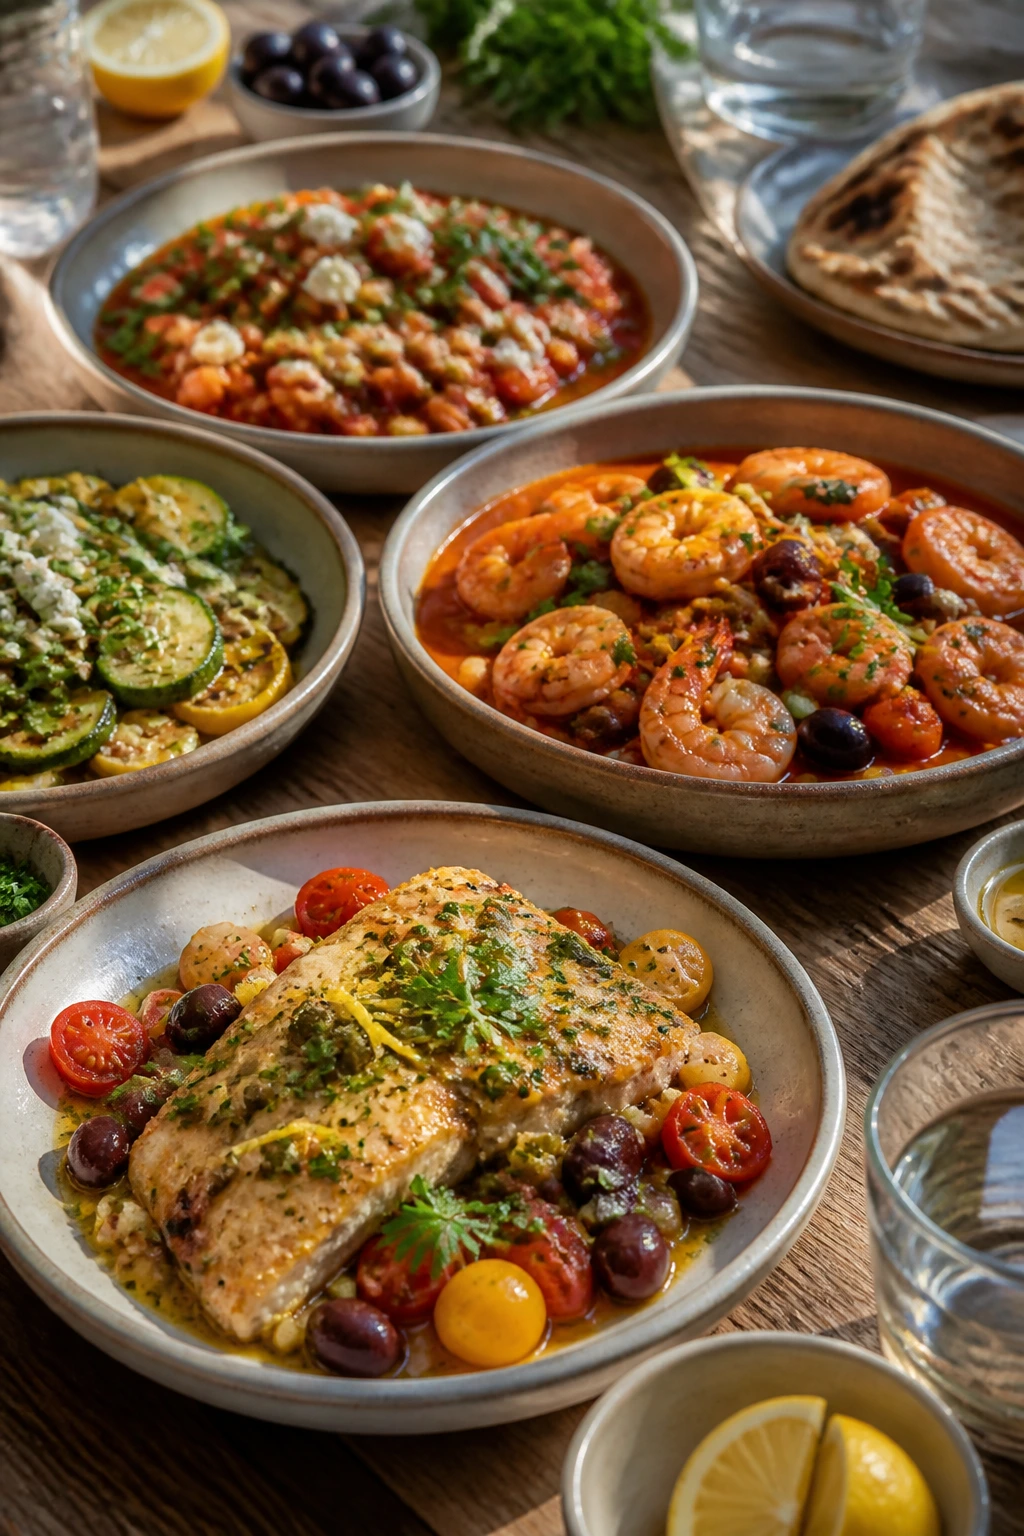
How to Serve These Recipes
Presentation:
Spread the food out. These dinners look best when they’re not crammed into one heavy mound. Spoon saucy dishes into shallow bowls, lay fish over beans instead of burying it, and finish with herbs or lemon zest so the plate looks fresh before the first bite.
Accompaniments:
Lean on simple sides that don’t fight the main dish: warm pita, couscous, rice, grilled bread, cucumber salad, arugula with olive oil, or plain tomatoes with salt. If the dinner already has potatoes or pasta, keep the side dish minimal. Cold melon or sliced peaches can be a nice reset after something briny or garlicky.
Portions:
Most of these recipes feed 4 with a normal appetite. The chicken thighs, stuffed peppers, and sheet-pan souvlaki stretch to 6 if you serve bread or salad alongside them. Shrimp or fish dishes are best cooked for the actual number of people at the table; leftovers are fine, but seafood doesn’t improve forever in the fridge.
Beverage Pairing:
A crisp white wine like Sauvignon Blanc or a dry Assyrtiko fits the lemon and olive oil without muddying the finish. If you want something nonalcoholic, chilled sparkling water with a lemon peel twist does the job nicely. I also like iced mint tea with the bean or chickpea dishes because it echoes the herbs without adding sweetness.
Additional Tips and Flavor Boosters
Flavor Enhancement:
A final spoon of good olive oil changes more than people expect. It softens sharp lemon, coats beans, and gives roasted vegetables a little shine. On the seafood dishes, a tiny pinch of flaky salt right at the end can make the flavor snap into focus.
Customization:
If you want more heat, add red pepper flakes to the oil at the start, not just on top. If you want more body, stir chickpeas or white beans into any of the vegetable-forward dinners. For a softer finish, add a spoon of Greek yogurt to the bowl or plate, especially with chicken and lamb.
Serving Suggestions:
I like a blunt handful of herbs—parsley, dill, mint, basil—scattered at the end rather than chopped into dust. Lemon wedges on the side help each person adjust the brightness. Toasted breadcrumbs, pine nuts, or a few extra olives can give a plate some texture without turning it into a project.
Make-It-Yours:
For dairy-free diners, skip feta and tzatziki and lean on olive oil, herbs, and lemon zest. For gluten-free meals, use rice, potatoes, polenta, or extra beans instead of pasta and bread. For lower-carb plates, the chicken, fish, and halloumi recipes work especially well over greens or roasted vegetables.
Make-Ahead, Storage, and Reheating Guidance
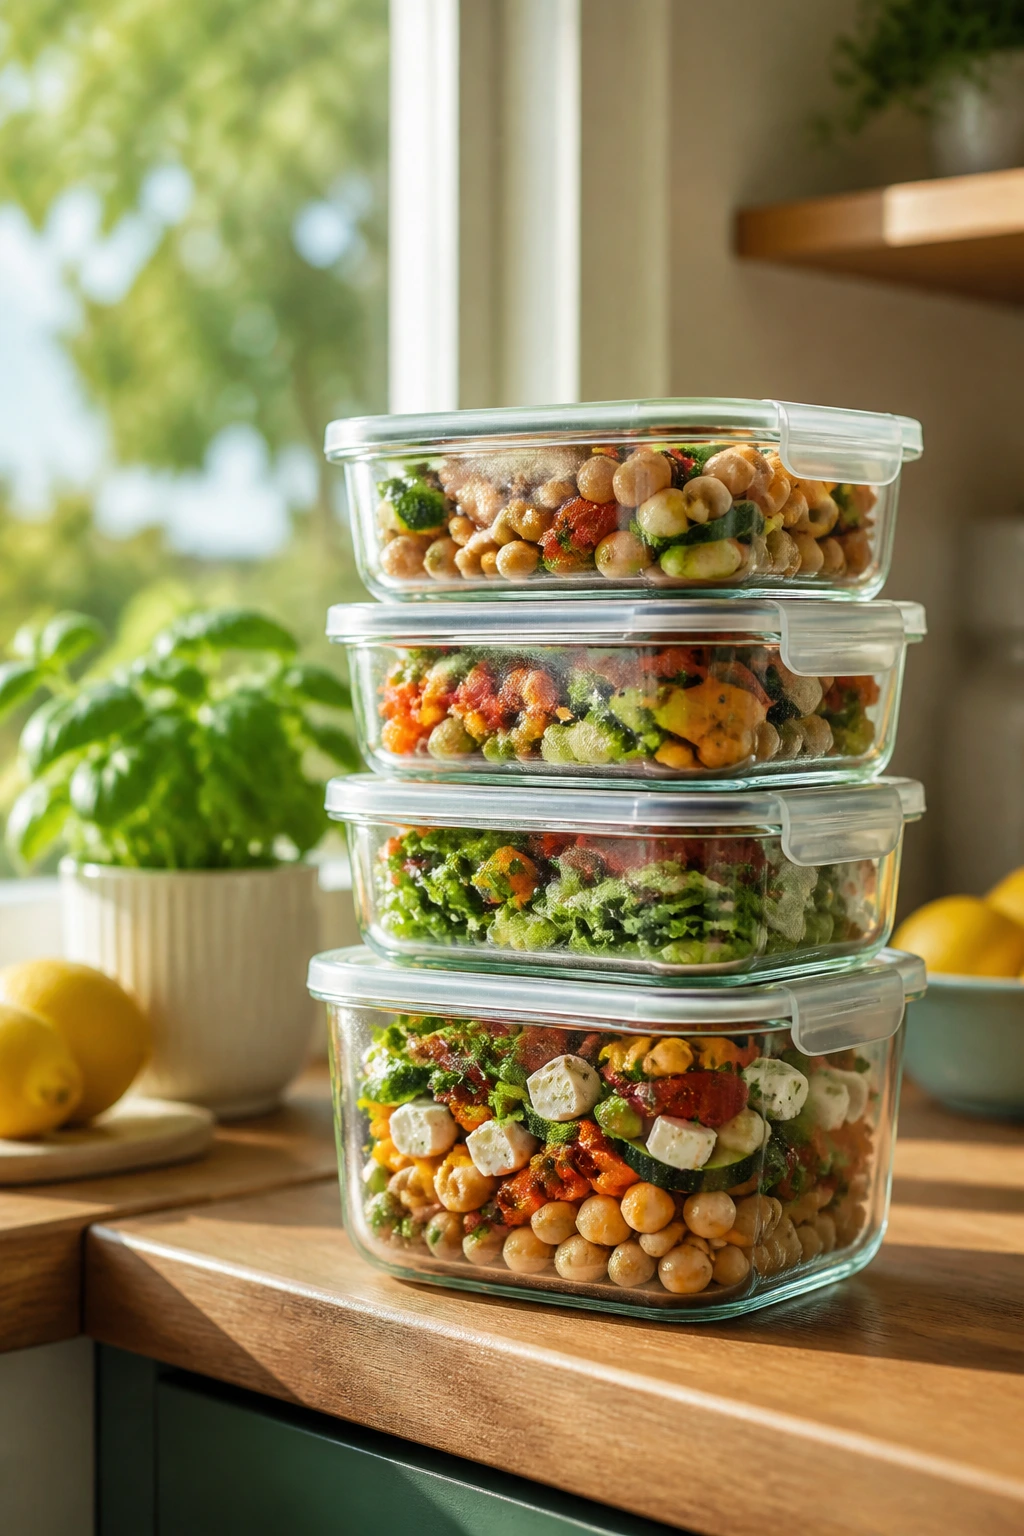
A lot of these dinners can be made partly ahead, and that’s one reason I trust them on busy evenings. Marinades for chicken, fish, or turkey meatballs can sit in the fridge for up to 24 hours, though seafood should be marinated more briefly—15 to 30 minutes is enough because lemon can start changing the texture if it sits too long. Vegetable prep is fair game: slice fennel, zucchini, onions, peppers, and eggplant earlier in the day, then store them in sealed containers.
Cooked chicken dishes and bean-based stews keep well in the fridge for 3 to 4 days. Pasta dishes are best eaten within 3 days, because the noodles keep absorbing sauce. Fish and shrimp are the short-timers: 2 days refrigerated is the practical limit if you want decent flavor and texture. For freezer storage, chicken, lamb, bean stews, stuffed peppers, and meatballs all freeze well for up to 2 months. Seafood and pasta are less forgiving in the freezer, so I don’t bother unless I have to.
Reheat chicken, lamb, beans, and stuffed peppers gently at 325°F covered with foil, or on the stovetop with a splash of broth or water. For pasta, use a skillet over low heat with a spoon or two of water to loosen the sauce. For shrimp and fish, the oven is better than the microwave; warm them just until heated through, because both go rubbery fast if you rush them. If you’re reheating halloumi, expect the texture to firm up. It will still taste good, but it won’t be as soft as it was fresh.
A few of these dishes also improve overnight. Chickpea stew, white bean skillet, and lemon artichoke pasta can taste even more settled the next day, once the flavors have had time to meet each other. The crisp things won’t stay crisp, though, so keep toasted breadcrumbs, herbs, and lemon wedges separate until serving.
Variations and Adaptations to Try
The All-Vegetable Switch:
Use chickpeas, white beans, halloumi, eggplant, zucchini, or artichokes as your base instead of meat or fish. The trick is to season more aggressively with lemon, salt, and herbs, because vegetables need the louder hand.
Gluten-Free Without the Fuss:
Swap couscous and orzo for rice, quinoa, or extra potatoes. Most of the collection already leans naturally in that direction, which makes the switch feel easy rather than engineered.
Dairy-Free Finish:
Skip feta, yogurt, and parmesan, then finish with olive oil, lemon zest, herbs, and toasted nuts or breadcrumbs if bread is fine for you. The food won’t feel empty; it will just lean more on the briny and herbal side.
Spice-Forward Route:
Add chili flakes, harissa, or a little Aleppo pepper to chicken, beans, pasta, or chickpeas. Keep the heat modest at first. Lemon and spice can trip over each other if you get carried away.
Pantry-First Version:
Build dinner from canned beans, jarred artichokes, olives, capers, sardines, or frozen shrimp. This is the route I’d take when the fridge is half empty and the stores are not worth a second trip.
Rice-Bowl Treatment:
Any of the chicken, lamb, bean, or fish recipes can be spooned over rice with extra herbs and a squeeze of lemon. That shift makes the meal feel calmer and more substantial, which is useful when people are very hungry and sitting down late.
Common Mistakes to Avoid
The biggest mistake is treating lemon like an afterthought. Lemon juice added too early can taste flat or aggressive by the time the dish reaches the table. Zest and juice have different jobs; zest goes in earlier, juice comes in near the end, and that separation matters.
Another easy error is under-seasoning because olives, feta, capers, or sardines are already salty. They are. But that salt doesn’t season the whole pan by itself. The chicken, potatoes, beans, pasta water, or vegetables still need their own salt so the dish doesn’t taste oddly hollow.
Crowding is a quiet killer. On a sheet pan or in a skillet, too many ingredients packed together trap steam. The chicken skin stays pale, the vegetables soften without browning, and the fish sits there looking sad. If the pan feels cramped, use a second one. It’s cheaper than disappointing dinner.
Seafood deserves its own warning. Shrimp and fish go from tender to rubbery fast, and people often leave them in the pan because they’re waiting for the sauce or the pasta to finish. Don’t. Cook the rest of the dish so the seafood can be added at the end, or pull the pan early and let carryover heat finish the job.
And one more, because it comes up often: don’t ignore the temperature of the food when it comes off the heat. Chicken thighs should be rested before serving. Fish should be plated at once. Pasta should be eaten while the sauce is still glossy. Different dishes ask for different timing, and forcing them all into one rhythm usually makes the meal worse.
Frequently Asked Questions

Can I use bottled lemon juice instead of fresh lemons?
You can, but the flavor will be flatter and a little one-note. Fresh lemon gives you both juice and zest, and the zest is a huge part of why these dinners taste bright instead of sour. If bottled juice is all you have, use it in the cooked parts and save a fresh lemon, if possible, for finishing.
Which of these recipes are best for leftovers?
The chickpea stew, white bean skillet, chicken thighs, stuffed peppers, and turkey meatballs hold up well. Pasta is fine for a day or two, but seafood is the least forgiving. I would not save salmon or shrimp past the short window if texture matters to you.
Can I make these dishes ahead for guests?
Yes, but choose the right ones. Bean stews, stuffed peppers, meatballs, and chicken thighs are all forgiving. For fish or shrimp, do the prep ahead and cook them close to serving time so they stay tender.
What if I don’t have fresh herbs?
Use dried oregano in the cooking and keep the finishing simple with lemon, olive oil, and black pepper. Dried parsley or dill won’t give you the same lift, so I’d rather use fewer herbs done well than a sad mix of old jars. A little fresh parsley, if you can get it, goes a long way.
How do I keep shrimp and fish from turning rubbery?
Pull them early and trust the carryover heat. Shrimp should be pink and opaque, with a loose curl. Fish should flake at the edge but still look a little glossy in the center. An instant-read thermometer helps if you don’t want to guess.
Can I swap chicken thighs for breasts?
Yes, but you need to shorten the cooking time and watch closely. Breasts dry out faster, especially in skillet or oven recipes with lemon. If you make the swap, pound them to an even thickness and start checking early.
What should I do if a dish tastes too sharp?
Add salt first, then a little olive oil or a spoon of yogurt or feta, depending on the recipe. Sharpness can mean too much acid, but it can also mean the dish is under-seasoned and the lemon is standing alone. A bland base makes lemon seem harsher than it is.
Do these recipes work for meal prep?
The bean dishes, chicken bowls, meatballs, and stuffed peppers do. Pack sauces separately when you can, and keep crunchy toppings like breadcrumbs or herbs in a small container until serving. That one small habit keeps the food from going soggy by day two.
Bright Plates, Warm Nights
The nice thing about these dinners is that they don’t ask the kitchen to do too much. A hot pan, a few good lemons, some herbs, and a smart protein are usually enough. That’s the whole point: dinner should taste lively even when the air feels heavy.
If you keep one habit from this collection, make it this one—finish with lemon at the end, not in the middle, and don’t be stingy with the herbs. That’s where the food wakes up. That’s where the plate stops feeling like “summer cooking” as a category and starts feeling like something you actually want to eat again.