
4th of July desserts do not need a special grocery run. If your pantry has flour, sugar, cocoa, oats, graham crackers, canned fruit, peanut butter, marshmallows, chocolate chips, and a couple of boxed mixes, you already have enough to build a dessert table that feels festive without turning your kitchen upside down.
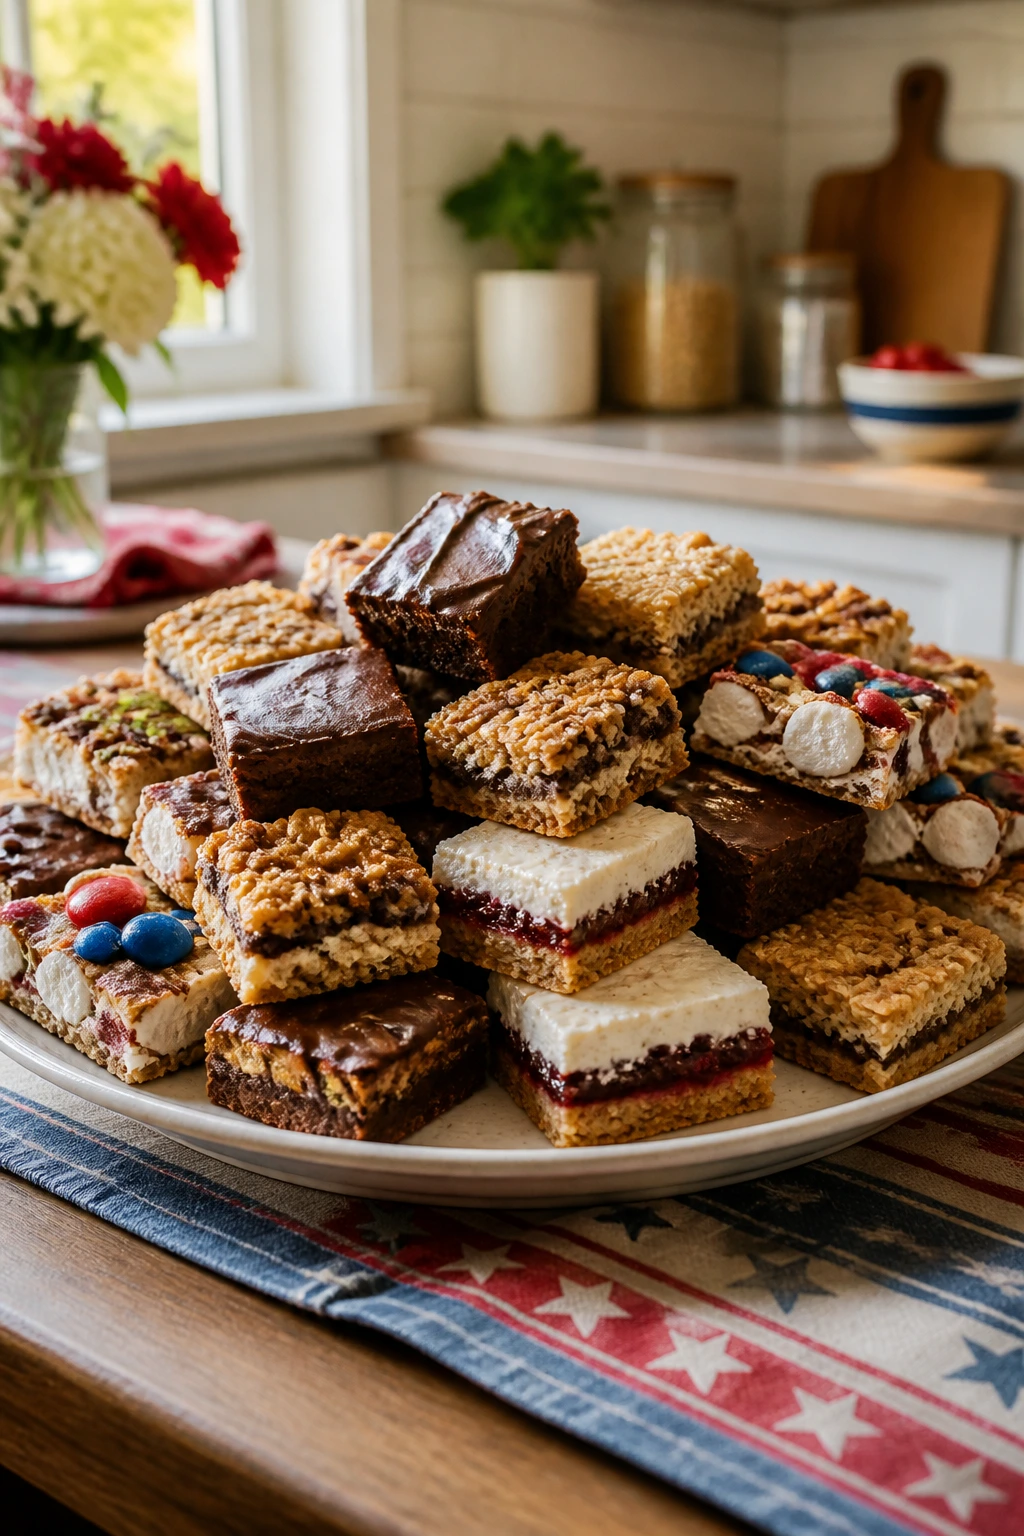
That’s the real charm of pantry-staple sweets for a holiday like this. The grill is busy, the fridge is packed, and nobody wants to spend two hours rolling pie dough while the potato salad sweats on the counter. Give me a dump cake, a tray of brownies, a pan of bars, or a chilled pie made from shelf-stable ingredients and a few fridge basics, and I’m happy.
There’s also a practical side people forget: pantry desserts travel well, cut cleanly, and usually taste even better after they’ve had an hour or two to settle. The fruit thickens. The crumb firms up. The chocolate gets glossy instead of soft. That’s the kind of detail that makes a dessert table look organized instead of frantic, which is worth more than a fussy finish ever is.
Why Pantry-Staple Desserts Belong on a Holiday Table
-
You can make them without a second grocery trip: A box of cake mix, a can of fruit, or a sleeve of graham crackers is often enough to save the day when the guest count grows.
-
They hold up in warm weather better than delicate pastries: Bars, fudgy squares, bark, and crisps keep their shape longer than whipped desserts that slump after 20 minutes.
-
They scale without drama: A 9×13 pan can feed a crowd, and most of these recipes double or halve cleanly if your guest list shifts.
-
They look more festive than they sound: A little red jam, blueberry filling, sprinkles, or a white chocolate drizzle turns humble pantry ingredients into a plate that feels on-theme.
-
They give you breathing room: Dessert is the one course that benefits from being made early. Pantry-based sweets free up the oven and the last hour before people arrive.
1. Red, White, and Blue Dump Cake
Intro: This is the kind of dessert that looks as if you worked harder than you did. Cherry pie filling, blueberry pie filling, and a white cake mix bake into a bubbling base with a sandy, buttery top that cracks a little when you spoon into it. Serve it warm, and the fruit runs in thick stripes through the crumb.
Why It Works: Dump cake works because the dry mix stays on top, where it drinks in melted butter and turns crisp in patches instead of becoming a uniform batter. That uneven texture is the point. A 9×13 pan gives enough surface area for the top to brown in 35 to 40 minutes at 350°F.
Key Ingredients:
- 1 can cherry pie filling, 21 ounces
- 1 can blueberry pie filling, 21 ounces
- 1 box white cake mix, 15.25 ounces
- 1/2 cup unsalted butter, melted
- 1 teaspoon almond extract
- 1/4 teaspoon fine salt
Quick Steps:
- Preheat the oven to 350°F and grease a 9×13-inch baking dish.
- Spread the cherry pie filling in the bottom, then spoon the blueberry filling over it in thick dollops.
- Sprinkle the cake mix evenly over the fruit. Do not stir.
- Drizzle the melted butter across the top, trying to cover most of the dry spots.
- Bake for 35 to 40 minutes, until the top is golden and the fruit is bubbling at the edges. Rest 15 minutes before serving.
Equipment for This Recipe:
- 9×13-inch baking dish
- Measuring cup
- Rubber spatula
- Small bowl for the butter
How to Serve This Dish: Spoon it into shallow bowls and add vanilla ice cream while it is still warm so the fruit sauce melts into the edge. A few fresh berries on top make the colors pop without extra work.
Pro Tips for This Recipe:
- Use cold pie filling straight from the can; it spreads more cleanly and does not turn runny before baking.
- If the top still looks dusty after drizzling butter, add 2 more tablespoons melted butter over the driest patches.
- Let it sit before scooping. Dump cake firms up in that short rest, and the fruit stops sliding around.
Variations on This Dish:
- Lemon-Zest Version: Add 1 teaspoon lemon zest to the fruit for a sharper finish.
- Peach-Blueberry Swap: Replace the cherry filling with peach filling for a softer, sweeter base.
Common Mistakes to Avoid with This Dish:
- Stirring the layers: That turns dump cake into a mushy batter. Keep the fruit on the bottom and the mix on top.
- Missing dry patches on top: Unbuttered flour spots bake up chalky, so drizzle carefully and check the corners.
2. Fudgy Cocoa Brownies
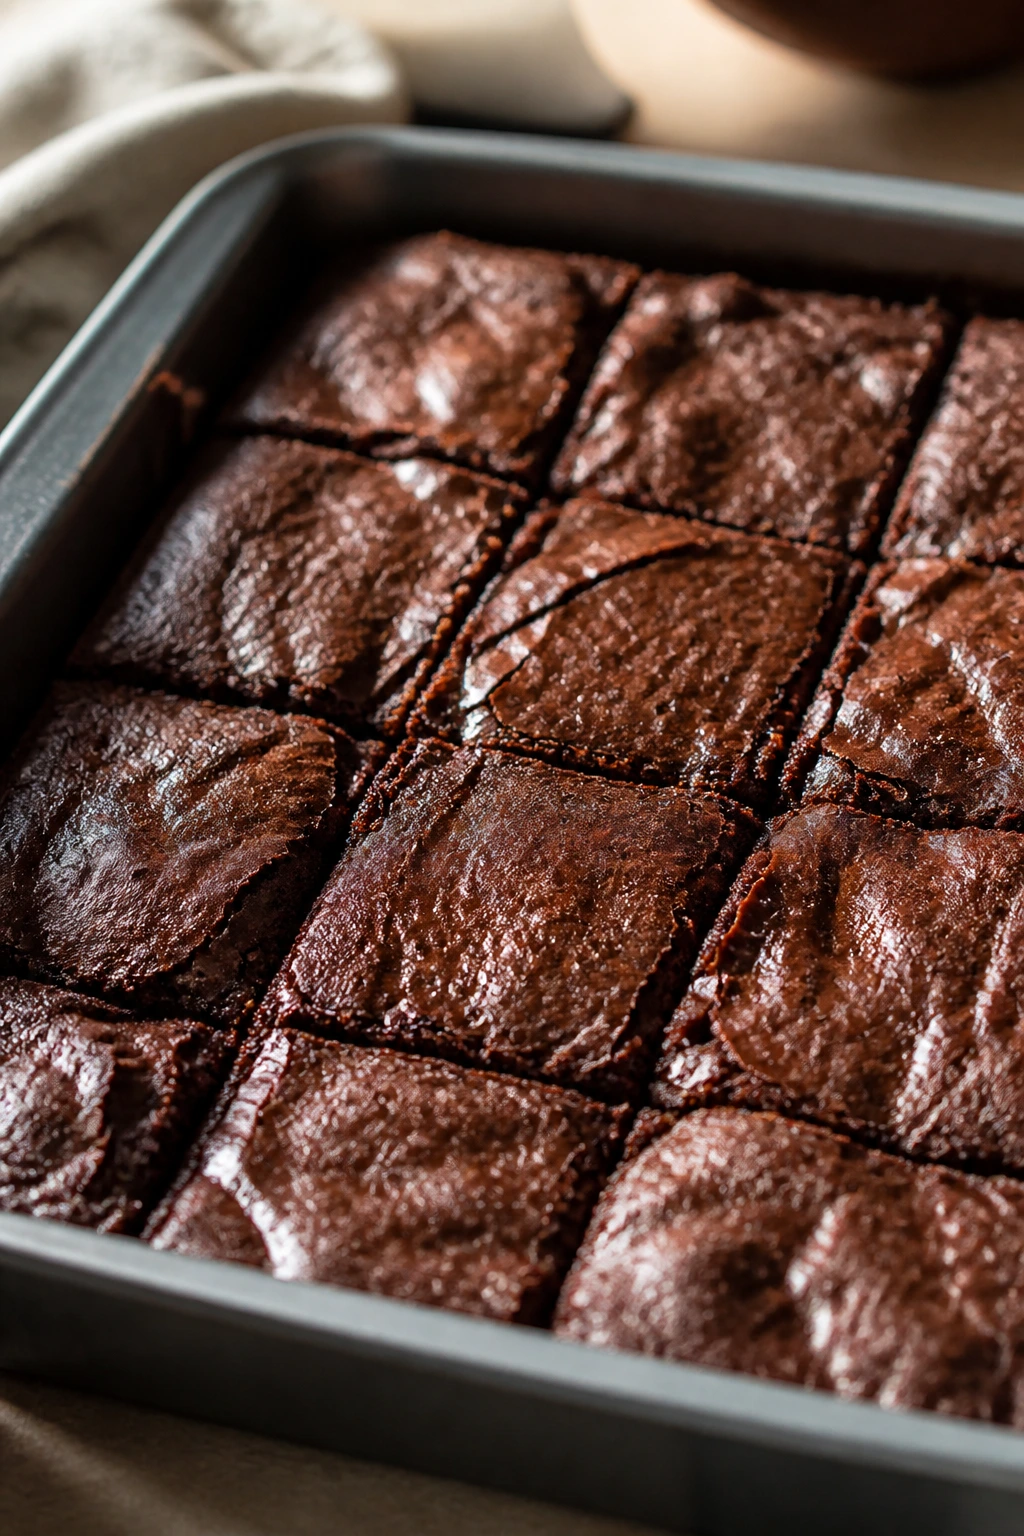
Intro: These brownies are dark, dense, and a little glossy on top, the kind that leave a clean square on the knife if you let them cool long enough. They taste like pure cocoa, not cake pretending to be chocolate. That matters.
Why It Works: Brownies like this stay on the fudgy side because the batter uses more fat than flour and bakes just long enough to set the edges. At 350°F, the center should still have a few moist crumbs when you test it, not a dry stick.
Key Ingredients:
- 1 cup unsalted butter, melted
- 1 1/2 cups granulated sugar
- 3/4 cup unsweetened cocoa powder
- 3 large eggs
- 1 teaspoon vanilla extract
- 1 cup all-purpose flour
- 1/2 teaspoon fine salt
- 1 cup chocolate chips, optional
Quick Steps:
- Heat the oven to 350°F and line an 8×8-inch pan with parchment.
- Whisk the melted butter, sugar, cocoa, and salt until the mixture looks thick and glossy.
- Beat in the eggs one at a time, then stir in the vanilla.
- Fold in the flour and chocolate chips just until the streaks disappear.
- Bake for 22 to 26 minutes, until the center is set but still soft. Cool completely before cutting.
Equipment for This Recipe:
- 8×8-inch baking pan
- Parchment paper
- Whisk
- Silicone spatula
How to Serve This Dish: Cut into small squares and serve with a scoop of vanilla ice cream or a few raspberries on the side. They hold up well on a buffet because they do not slump.
Pro Tips for This Recipe:
- Do not overbeat after the flour goes in or the brownies turn cakier and tougher.
- Pull them a minute early if your oven runs hot; brownies keep cooking in the pan.
- A pinch of flaky salt on top makes the cocoa taste deeper.
Variations on This Dish:
- Peanut Butter Swirl: Drop spoonfuls of peanut butter over the batter and swirl once with a knife.
- Espresso Edge: Stir in 1 teaspoon instant espresso powder to sharpen the chocolate flavor.
Common Mistakes to Avoid with This Dish:
- Overbaking: Dry brownies are the easiest thing to avoid here. Pull them when the center still looks slightly underdone.
- Cutting too soon: Warm brownies smear instead of slicing cleanly, so give them time.
3. Star-Spangled Peanut Butter Blossoms
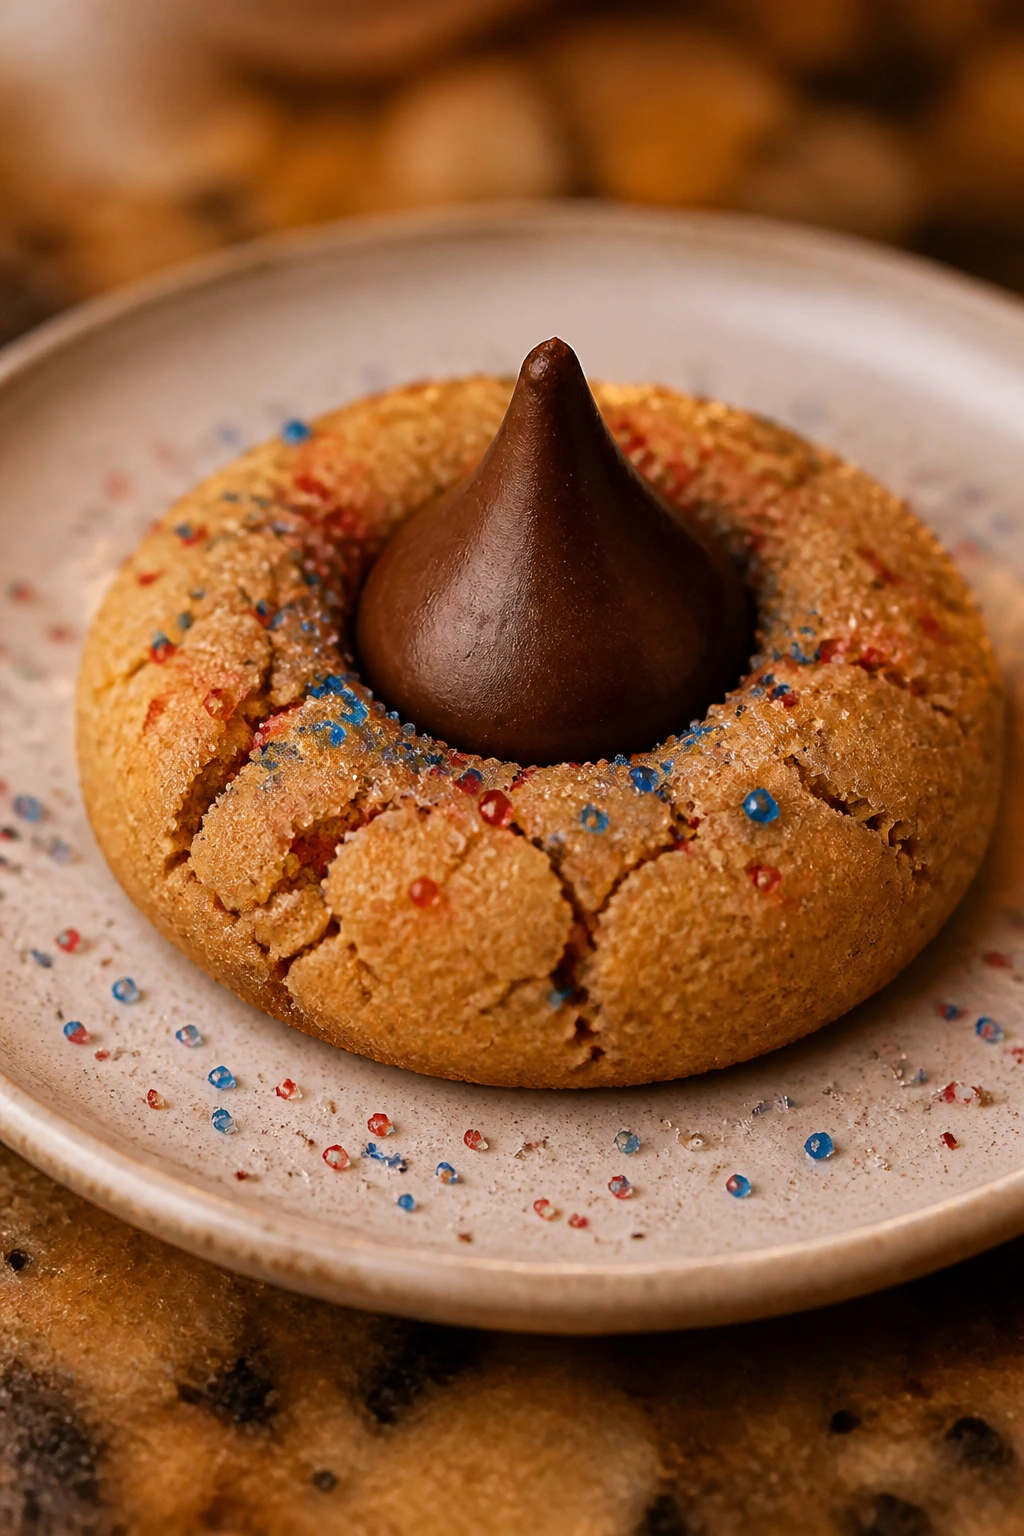
Intro: Peanut butter blossoms are old-school in the best way. The cookie is soft and salty, the chocolate kiss melts just enough to settle into the middle, and the sugar coating gives the edges a crackly little shell. They disappear fast because they taste like nostalgia with better texture.
Why It Works: Peanut butter brings fat and salt, which keeps the cookie tender while making the chocolate taste sweeter by contrast. Rolling the dough in sugar before baking gives the outside a light crunch that stands up well in a cookie tin.
Key Ingredients:
- 1/2 cup unsalted butter, softened
- 1/2 cup creamy peanut butter
- 1/2 cup granulated sugar
- 1/2 cup packed brown sugar
- 1 large egg
- 1 teaspoon vanilla extract
- 1 1/2 cups all-purpose flour
- 1/2 teaspoon baking soda
- 1/4 teaspoon fine salt
- 24 chocolate kisses, unwrapped
Quick Steps:
- Heat the oven to 375°F and line two baking sheets with parchment.
- Beat the butter, peanut butter, sugars, egg, and vanilla until smooth.
- Mix in the flour, baking soda, and salt until a soft dough forms.
- Roll into 1-inch balls, coat in sugar, and bake for 8 to 10 minutes.
- Press one chocolate kiss into each cookie the moment they come out of the oven. Let them set on the tray.
Equipment for This Recipe:
- Two baking sheets
- Parchment paper
- Mixing bowl
- Small scoop or spoon
How to Serve This Dish: Stack them on a plate in a loose ring and tuck a few red and blue candies around the edges. They pair well with cold milk, which sounds basic and is exactly right here.
Pro Tips for This Recipe:
- Keep the chocolate kisses nearby and unwrap them before baking; you need them ready the second the cookies come out.
- If the dough feels sticky, chill it for 15 minutes instead of adding extra flour.
- Bake until the tops look set but not browned.
Variations on This Dish:
- Dark Chocolate Center: Swap in dark chocolate stars or discs for a less sweet bite.
- Pretzel Crunch: Roll the dough balls in crushed pretzels and sugar for a salty edge.
Common Mistakes to Avoid with This Dish:
- Pressing the chocolate too hard: That flattens the cookie. A gentle push is enough.
- Letting the cookies overbake: They should finish soft; the pan will firm them up after you remove it.
4. Sparkler Snickerdoodle Bars
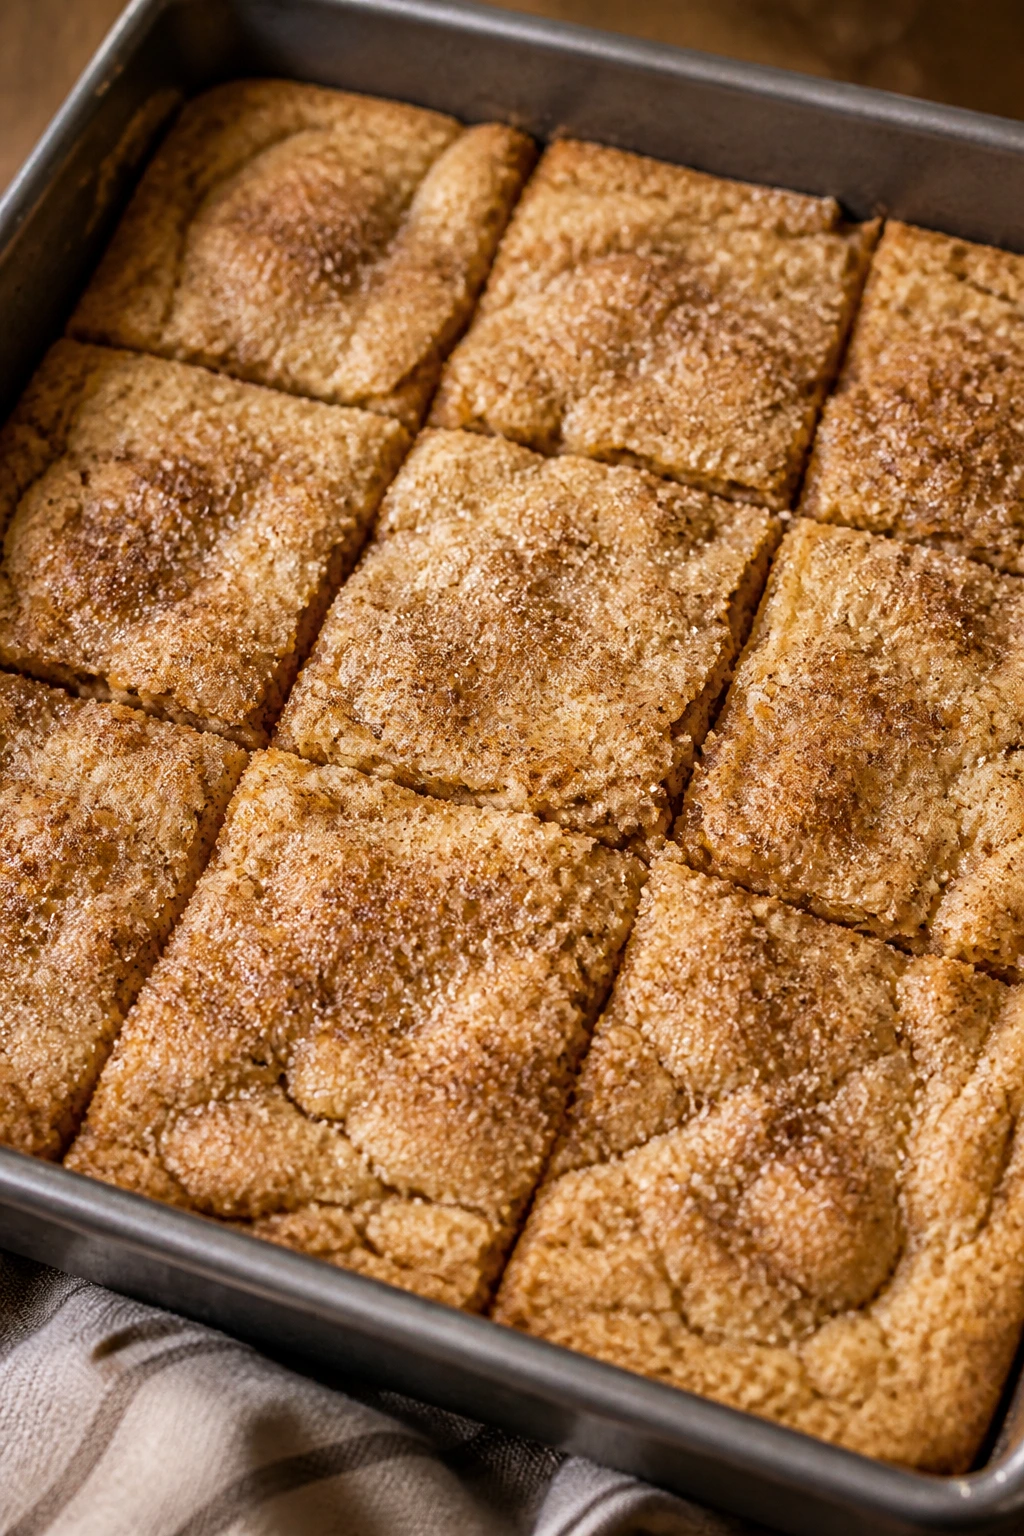
Intro: Snickerdoodle bars give you the cinnamon-sugar flavor of the classic cookie without rolling a single dough ball. The top turns golden, the middle stays soft, and the whole pan smells like a bakery the second it comes out of the oven.
Why It Works: Bars are easier than cookies when the crowd is large because the batter spreads once and bakes all at once. Cream of tartar gives that familiar tang, while a cinnamon-sugar top bakes into a crisp lid.
Key Ingredients:
- 1/2 cup unsalted butter, softened
- 1 cup granulated sugar
- 1/2 cup packed brown sugar
- 2 large eggs
- 1 teaspoon vanilla extract
- 1 1/2 cups all-purpose flour
- 1 teaspoon cream of tartar
- 1/2 teaspoon baking soda
- 1/2 teaspoon fine salt
- 2 teaspoons ground cinnamon
Quick Steps:
- Preheat the oven to 350°F and line an 8×8-inch pan with parchment.
- Cream the butter and sugars, then beat in the eggs and vanilla.
- Stir in the flour, cream of tartar, baking soda, and salt until just combined.
- Spread in the pan and sprinkle with cinnamon sugar.
- Bake for 24 to 28 minutes, until the center is set and the edges pull away slightly. Cool before slicing.
Equipment for This Recipe:
- 8×8-inch pan
- Parchment paper
- Hand mixer or sturdy whisk
- Offset spatula
How to Serve This Dish: Cut into neat squares and serve with sliced strawberries or a spoonful of berry jam. The cinnamon edge makes them taste more finished than plain blondies.
Pro Tips for This Recipe:
- Mix the cinnamon sugar in a small bowl before you start so it goes on evenly.
- Slightly underbake the center if you want the softest texture.
- Use a metal pan if you can; it gives the edges better color than glass.
Variations on This Dish:
- Apple Pie Finish: Fold in 1/2 cup finely chopped dried apples.
- Extra-Spice Version: Add 1/4 teaspoon nutmeg for a warmer finish.
Common Mistakes to Avoid with This Dish:
- Overmixing once the flour goes in: That makes the bars dense.
- Skipping parchment: Snickerdoodle bars can stick around the edges if the pan is bare.
5. Lemon Icebox Pie
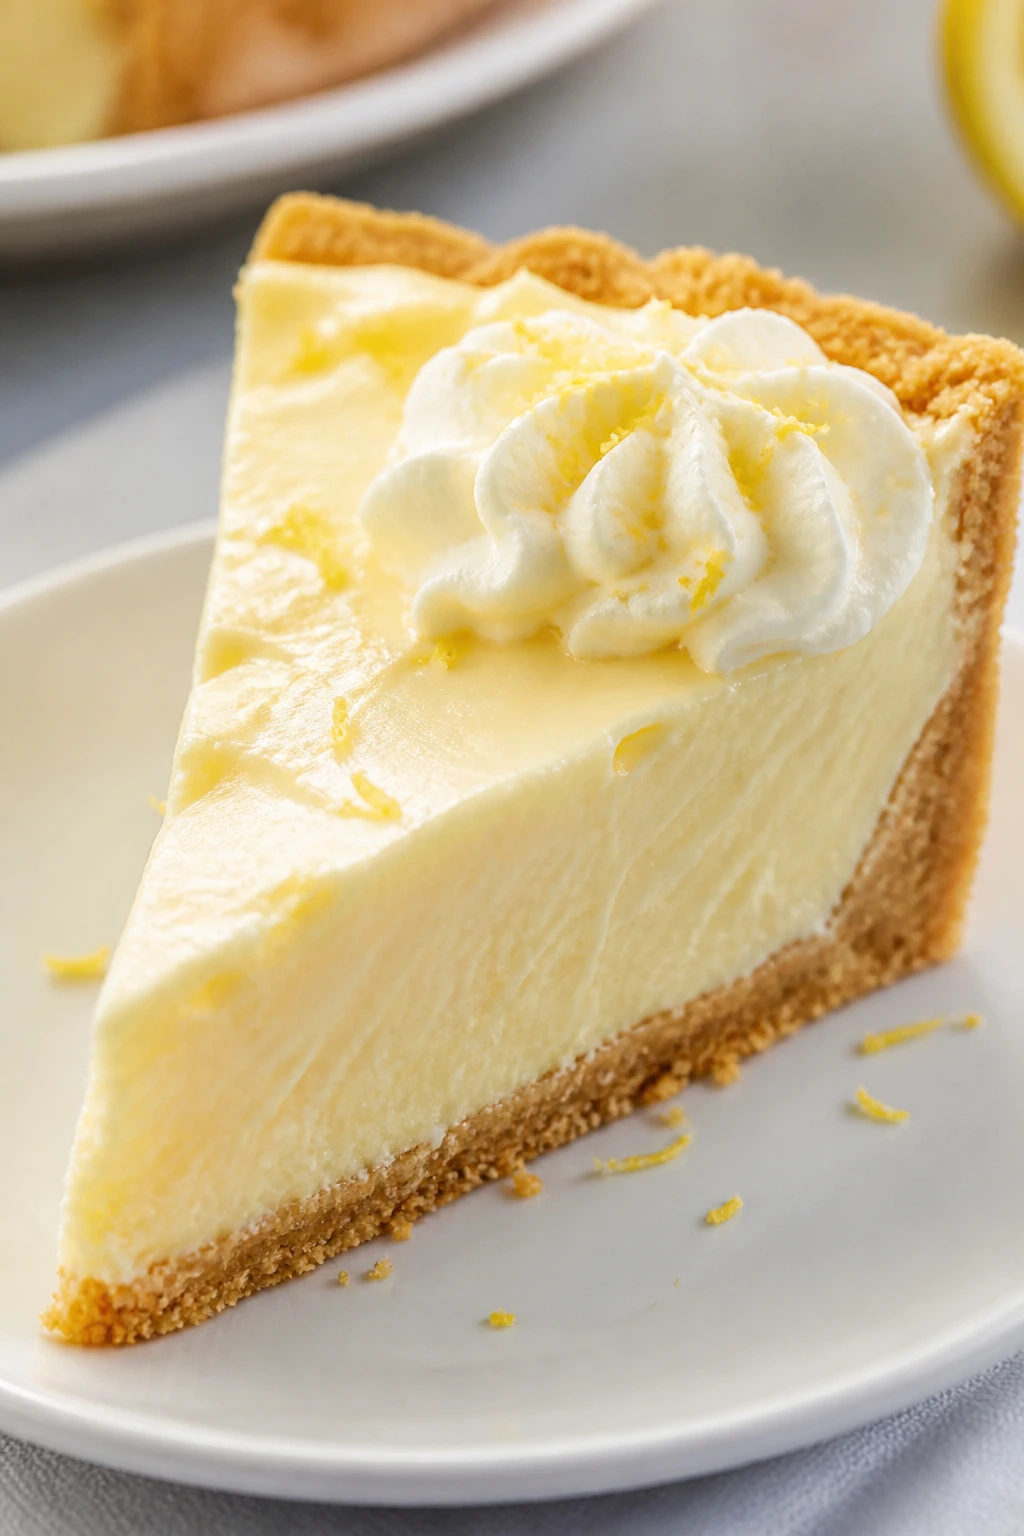
Intro: This pie is cold, sharp, and creamy, the sort of dessert that feels like relief after a heavy holiday plate. The filling sets without fuss, and the graham crust gives each bite a sandy, buttery crunch that keeps the lemon from tasting flat.
Why It Works: Sweetened condensed milk and cream cheese give the pie enough structure to hold its shape without baking the filling. The acid from lemon juice thickens the mixture and keeps the sweetness in check. A chilled pie needs at least 4 hours so the slice lands cleanly.
Key Ingredients:
- 1 1/2 cups graham cracker crumbs
- 6 tablespoons unsalted butter, melted
- 2 tablespoons sugar
- 8 ounces cream cheese, softened
- 1 can sweetened condensed milk, 14 ounces
- 1/2 cup fresh or bottled lemon juice
- 1 teaspoon lemon zest
- 1 cup whipped topping or whipped cream
Quick Steps:
- Mix the crumbs, butter, and sugar, then press into a 9-inch pie plate.
- Beat the cream cheese until smooth.
- Add the condensed milk, lemon juice, and zest, and beat until the filling thickens.
- Fold in the whipped topping and spread into the crust.
- Chill for at least 4 hours, or until firm enough to slice.
Equipment for This Recipe:
- 9-inch pie plate
- Mixing bowls
- Hand mixer
- Rubber spatula
How to Serve This Dish: Serve it cold with extra zest on top and a few blueberries scattered around the plate. The pale filling makes a strong contrast with dark fruit.
Pro Tips for This Recipe:
- Soften the cream cheese fully or the filling stays lumpy.
- Use bottled lemon juice if the fruit is tiny or dry; consistency matters more than romance here.
- Chill overnight if you want the neatest slices.
Variations on This Dish:
- Key Lime Swap: Replace the lemon juice with lime juice and the zest with lime zest.
- Berry Swirl: Ripple a few spoonfuls of raspberry jam through the filling before chilling.
Common Mistakes to Avoid with This Dish:
- Using warm cream cheese: It makes the filling smoother and faster to mix.
- Cutting before it sets: You’ll get a puddle instead of a slice.
6. Banana Pudding Trifle
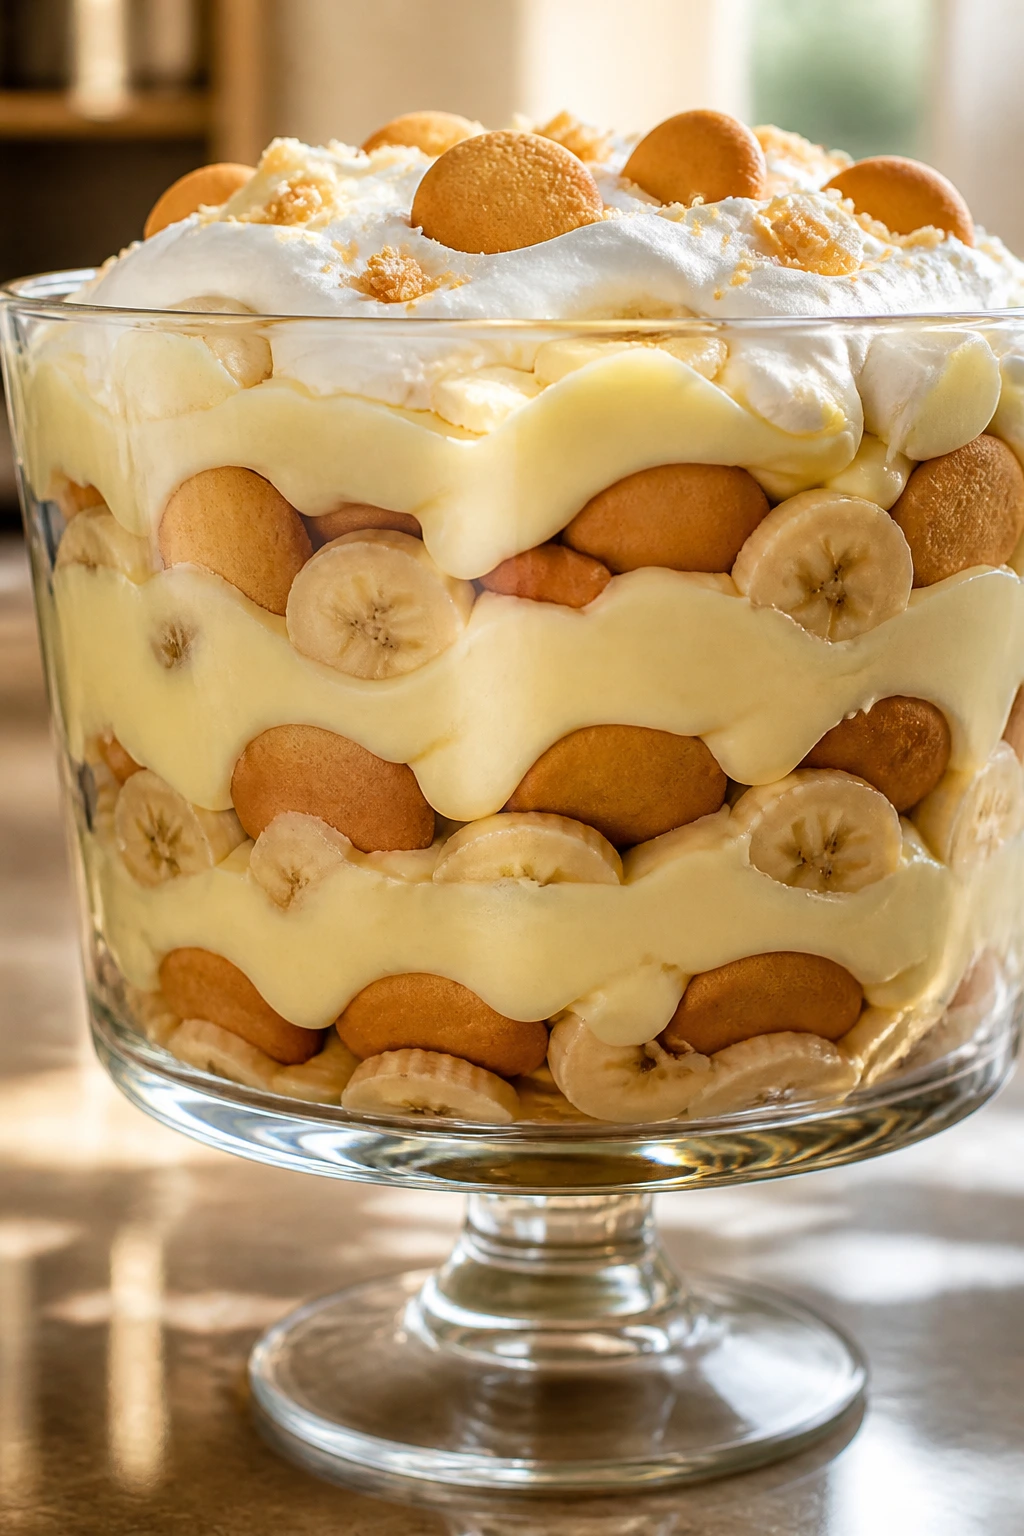
Intro: Banana pudding trifle is one of those desserts that looks layered and generous even when you make it fast. Vanilla wafers soften into the pudding, the bananas stay sweet, and the whipped topping gives the whole bowl that familiar diner-style finish.
Why It Works: Instant pudding sets quickly, which makes this a smart make-ahead dessert when you are juggling a lot of dishes. The wafers absorb moisture from the pudding and bananas, so the texture gets better after a few hours instead of worse.
Key Ingredients:
- 2 boxes instant vanilla pudding mix, 3.4 ounces each
- 4 cups cold milk
- 1 container whipped topping, 8 ounces, thawed
- 4 bananas, sliced
- 1 box vanilla wafers, about 11 ounces
- 1/2 teaspoon vanilla extract
Quick Steps:
- Whisk the pudding mix and milk for 2 minutes, then let it stand for 5 minutes.
- Fold in half the whipped topping and the vanilla.
- Layer wafers, banana slices, and pudding in a trifle bowl or large glass dish.
- Repeat the layers, finishing with pudding and the remaining whipped topping.
- Chill for at least 2 hours before serving.
Equipment for This Recipe:
- Large glass bowl or trifle dish
- Whisk
- Rubber spatula
- Sharp knife for bananas
How to Serve This Dish: Spoon it into clear cups if you want a cleaner buffet setup. A few crushed wafers on top give it a little texture right before serving.
Pro Tips for This Recipe:
- Slice the bananas just before layering so they do not brown too fast.
- Press the wafers slightly into the pudding so they soften evenly.
- If you want a stronger vanilla note, add a pinch of salt.
Variations on This Dish:
- Chocolate Banana Trifle: Swap one pudding mix for chocolate.
- Peanut Butter Layer: Spread a thin ribbon of peanut butter between two layers of wafers.
Common Mistakes to Avoid with This Dish:
- Overloading with banana slices: Too many slices make the bowl watery.
- Making it too far ahead: The wafers can turn mushy after a full day.
7. Oatmeal Chocolate Chip Bars
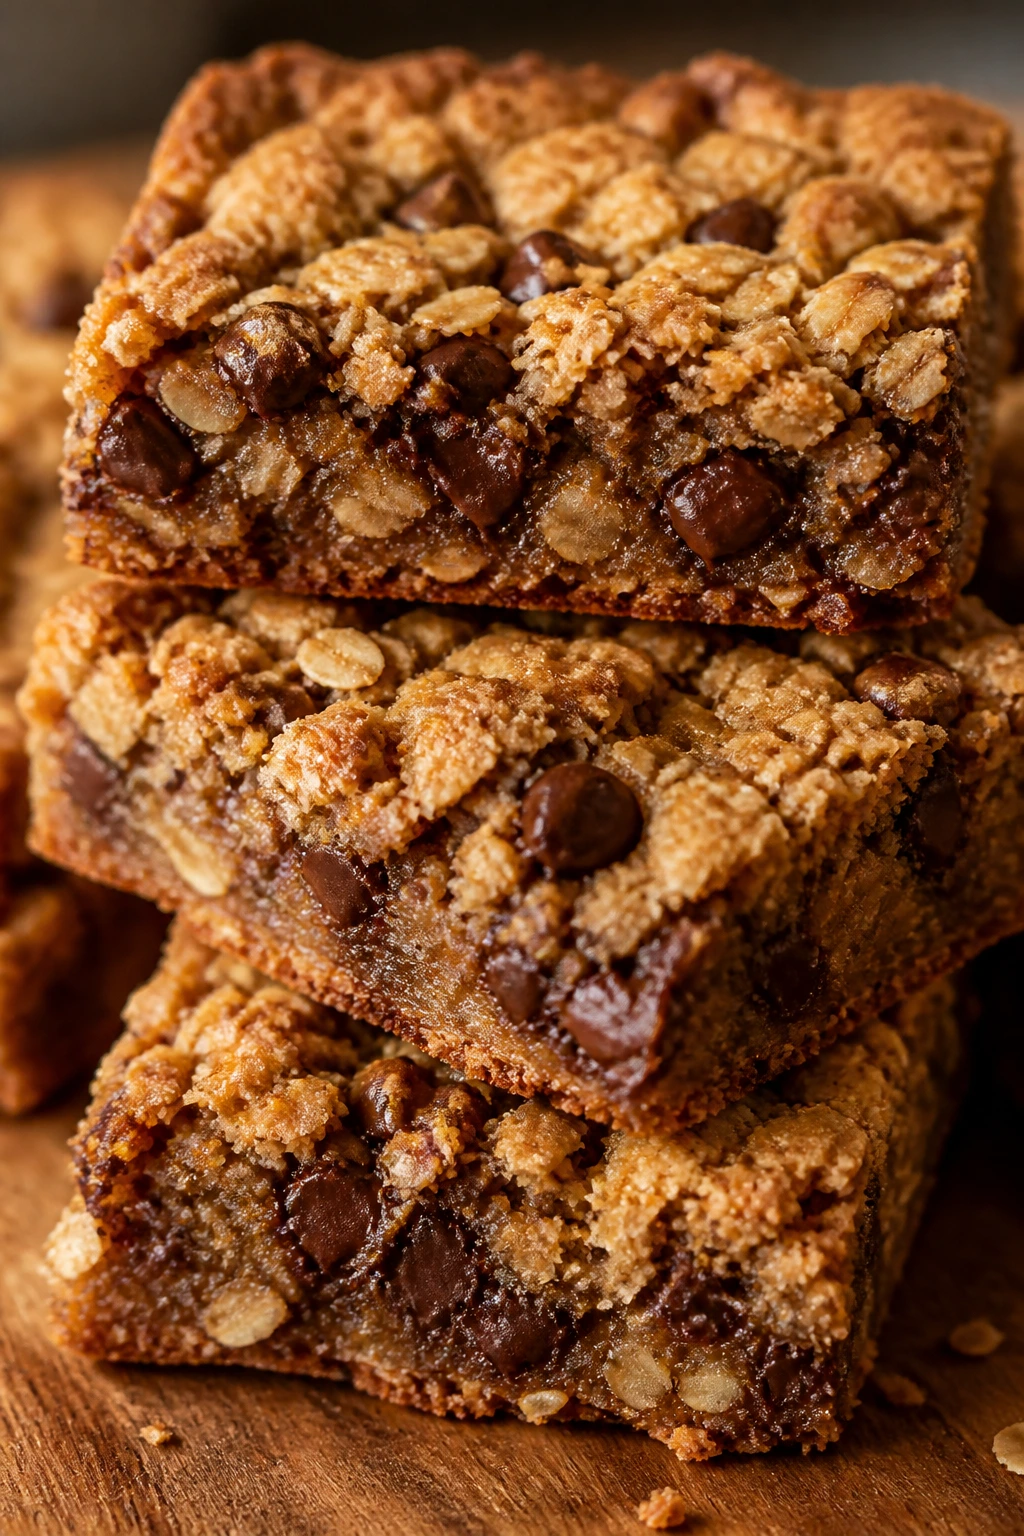
Intro: These are sturdy, chewy bars with the kind of texture that survives a picnic table. The oats give them a little bite, the brown sugar brings a caramel note, and the chocolate chips keep the whole pan from feeling too plain.
Why It Works: Oats absorb butter and sugar without drying out, which is why these bars stay chewy for days. Baking them in a lined 9×13 pan keeps the center soft while the edges crisp just enough to cut cleanly.
Key Ingredients:
- 1 cup unsalted butter, melted
- 1 cup packed brown sugar
- 1/2 cup granulated sugar
- 2 large eggs
- 2 teaspoons vanilla extract
- 1 1/2 cups all-purpose flour
- 2 cups old-fashioned oats
- 1 teaspoon baking soda
- 1/2 teaspoon fine salt
- 1 1/2 cups chocolate chips
Quick Steps:
- Preheat the oven to 350°F and line a 9×13-inch pan.
- Whisk the butter and sugars, then beat in the eggs and vanilla.
- Stir in the flour, oats, baking soda, and salt.
- Fold in the chocolate chips and spread the dough evenly in the pan.
- Bake for 22 to 26 minutes, until the edges are golden and the center looks set. Cool before slicing.
Equipment for This Recipe:
- 9×13-inch pan
- Mixing bowl
- Whisk
- Spatula
How to Serve This Dish: Cut them into small rectangles and stack them on a platter with cherries or berries tucked around the edges. They are easy to grab with one hand, which matters when people are juggling plates.
Pro Tips for This Recipe:
- Use old-fashioned oats, not quick oats, if you want more chew.
- Reserve a handful of chips to press on top before baking.
- Let the bars cool fully so the slices do not crumble.
Variations on This Dish:
- White Chocolate Cranberry: Swap half the chips for white chocolate and dried cranberries.
- Peanut Butter Chip Version: Replace the chocolate chips with peanut butter chips.
Common Mistakes to Avoid with This Dish:
- Packing the oats too tightly into the cup: That throws off the ratio and makes the bars dry.
- Cutting warm bars: The centers need time to set.
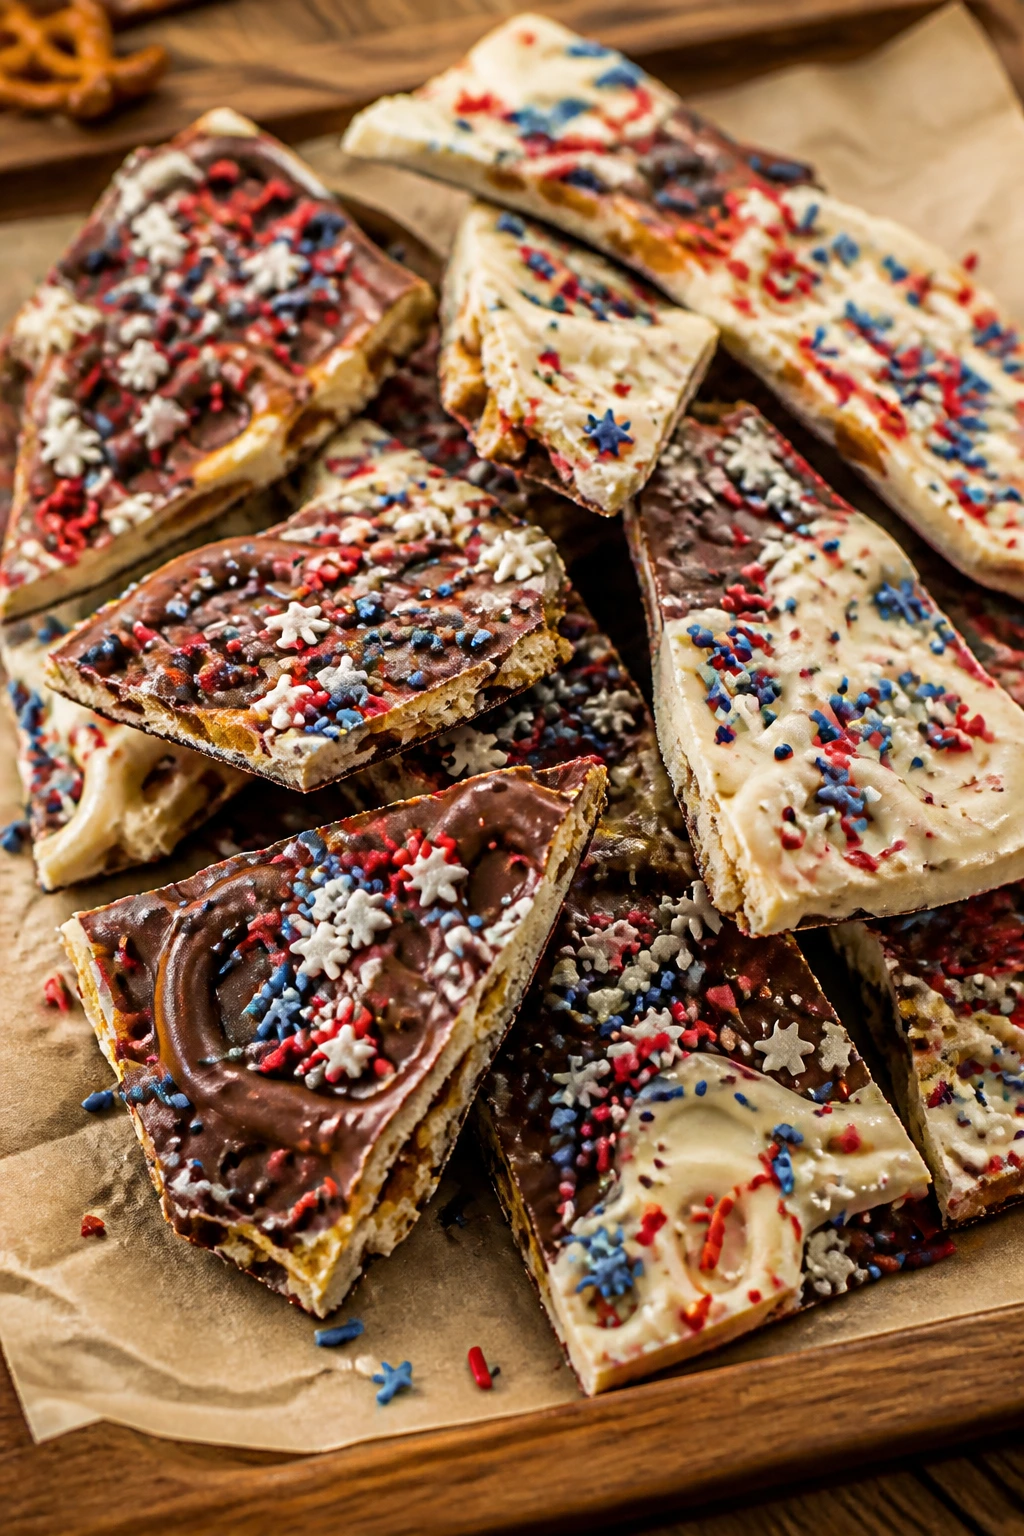
8. Saltine Toffee Fireworks

Intro: Sweet-salty toffee bark made with saltines is one of those recipes that sounds improvised and tastes deliberate. The crackers go crisp, the brown sugar and butter caramelize, and the chocolate layer seals the whole thing into shards that snap instead of bend.
Why It Works: Saltines stay thin enough to absorb the caramel without turning soggy. The toffee cooks directly on top of them in the oven, and the quick chocolate melt after baking gives you a smooth finish without tempering anything.
Key Ingredients:
- 1 sleeve saltine crackers, about 40 crackers
- 1 cup unsalted butter
- 1 cup packed brown sugar
- 2 cups semisweet chocolate chips
- 1/2 cup chopped pecans or peanuts, optional
- Pinch of fine salt
Quick Steps:
- Heat the oven to 400°F and line a rimmed baking sheet with parchment.
- Arrange the saltines in a single layer.
- Boil the butter and brown sugar together for 3 minutes, then pour over the crackers.
- Bake for 5 minutes until bubbling, then scatter the chocolate chips on top and let them melt.
- Spread the chocolate, add nuts if using, and chill until firm. Break into pieces.
Equipment for This Recipe:
- Rimmed baking sheet
- Parchment paper
- Saucepan
- Offset spatula
How to Serve This Dish: Pile the shards into a wide bowl so the broken edges show. A few red and blue sprinkles on top make it look intentional instead of accidental.
Pro Tips for This Recipe:
- Line the pan well; toffee sticks like glue.
- Spread the chocolate while it is warm, not after it hardens.
- Chill fully before breaking or you’ll get soft pulls instead of crisp shards.
Variations on This Dish:
- White Chocolate Twist: Use white chocolate chips and top with sprinkles.
- Pretzel Swap: Use mini pretzels in place of saltines for a bolder salty crunch.
Common Mistakes to Avoid with This Dish:
- Undercooking the caramel: It needs the full boil or it stays soft.
- Skipping parchment: Scraping hardened toffee from bare metal is a small nightmare.
9. Golden Coconut Macaroons
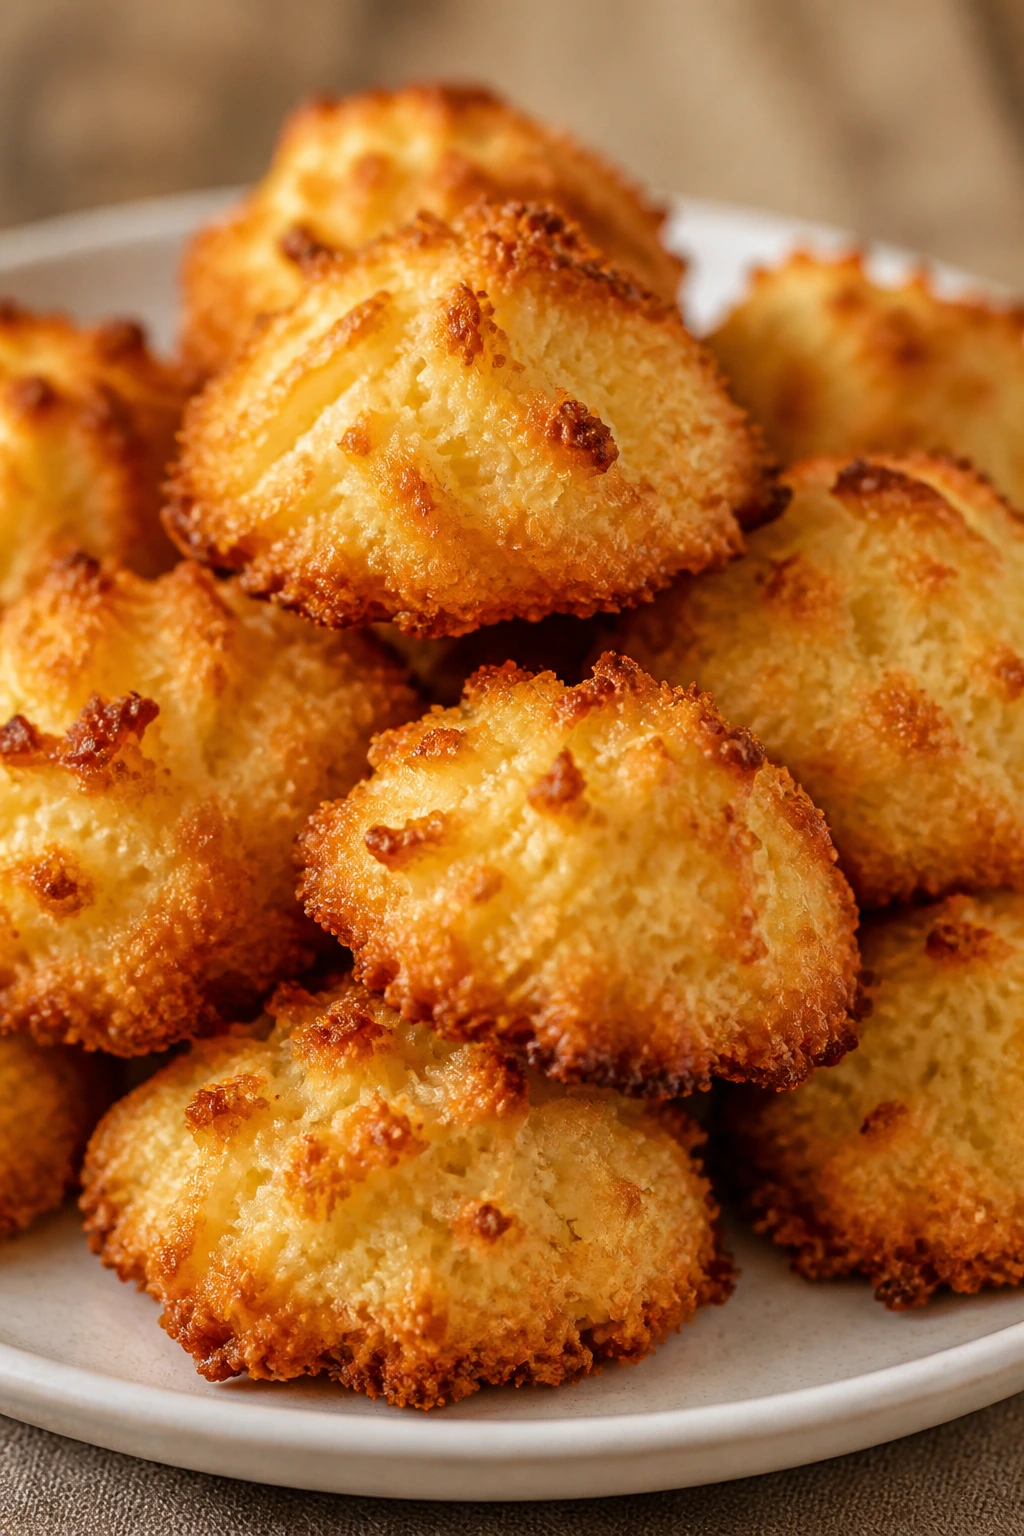
Intro: Coconut macaroons are chewy in the middle, toasty on the outside, and almost absurdly simple once you know the rhythm. They look fancy enough for a holiday tray, but the ingredient list is bare-bones.
Why It Works: Sweetened condensed milk binds the shredded coconut without a lot of structure work, and the egg white helps the mounds bake into tidy little domes. A hot oven gives the edges color before the centers dry out.
Key Ingredients:
- 4 cups sweetened shredded coconut
- 1/2 cup sweetened condensed milk
- 2 large egg whites
- 1 teaspoon vanilla extract
- 1/4 teaspoon fine salt
- 4 ounces semisweet chocolate, melted, optional
Quick Steps:
- Heat the oven to 325°F and line a baking sheet with parchment.
- Stir the coconut, condensed milk, vanilla, and salt together.
- Whip the egg whites to soft peaks and fold them in.
- Scoop mounds onto the tray and bake for 18 to 22 minutes, until the tips are golden.
- Cool completely. Drizzle or dip in chocolate if you want.
Equipment for This Recipe:
- Baking sheet
- Parchment paper
- Mixing bowl
- Cookie scoop
How to Serve This Dish: Put them on a plate with fresh berries so the white coconut stands out against the red and blue fruit. They also work well beside coffee after dinner.
Pro Tips for This Recipe:
- Squeeze the coconut mixture lightly in the scoop so the mounds hold together.
- Pull them when the tips are just golden; too much color dries the centers.
- If the batter feels loose, chill it for 10 minutes.
Variations on This Dish:
- Chocolate-Dipped Edge: Dip half of each macaroon in melted chocolate.
- Almond Coconut: Add 1/2 teaspoon almond extract for a sharper finish.
Common Mistakes to Avoid with This Dish:
- Overwhipping the egg whites: Stiff peaks are not needed here; soft peaks mix better.
- Baking too long: Coconut can go from golden to dry fast.
10. Cherry Hand Pies
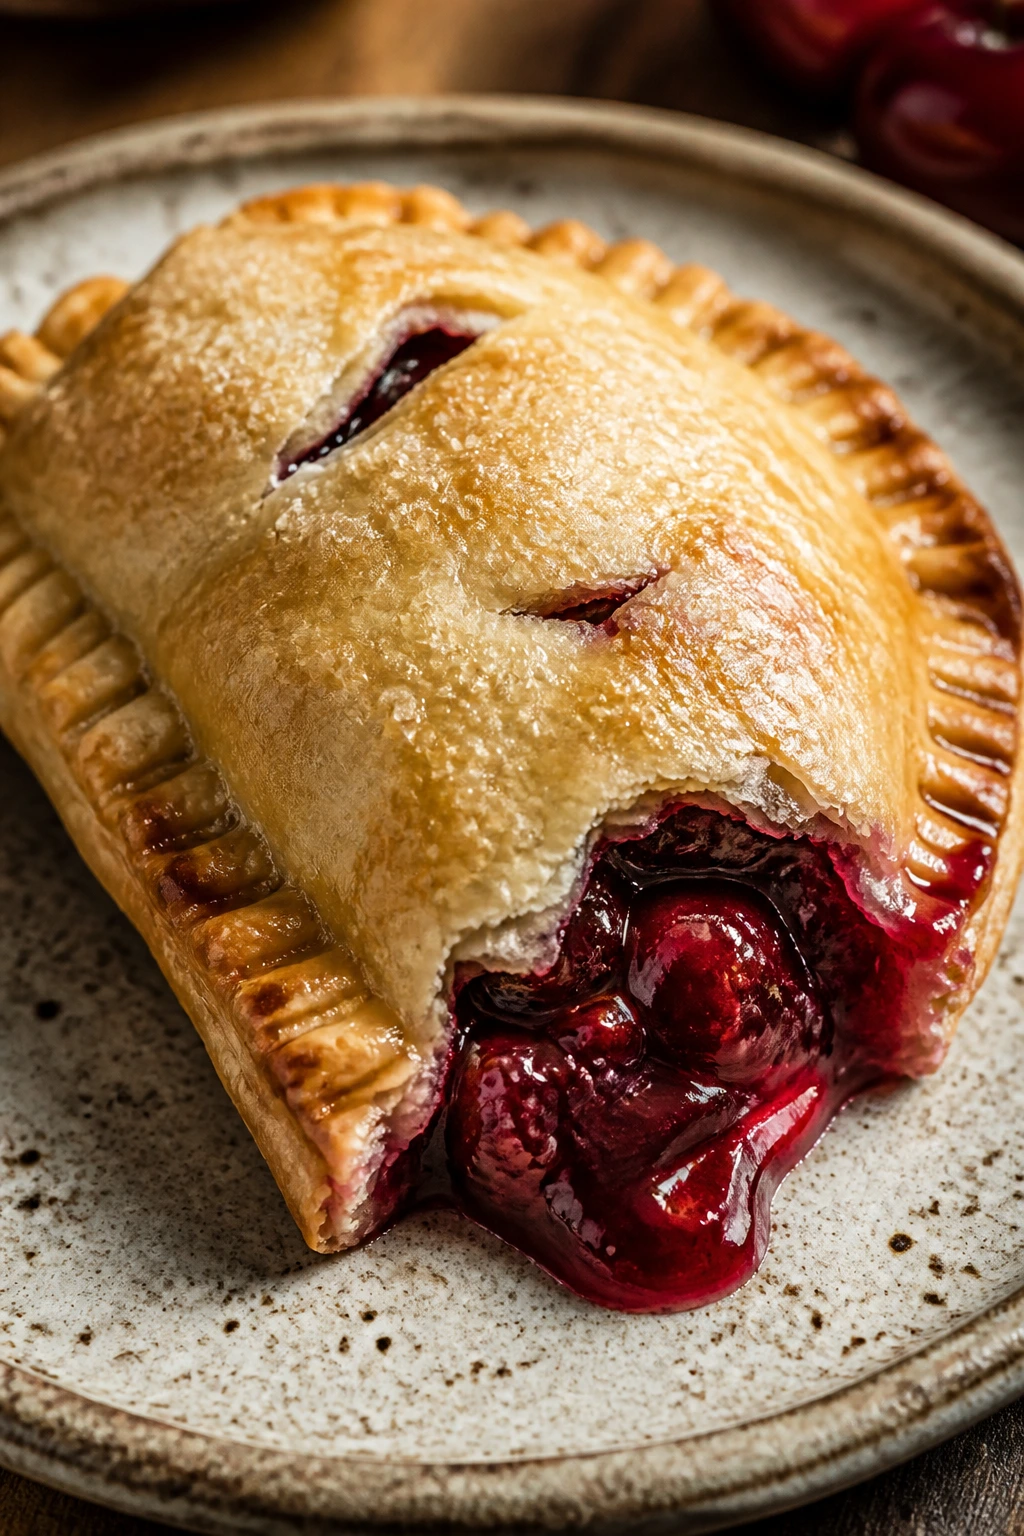
Intro: Hand pies feel old-fashioned in the best way: crisp edges, jammy filling, and a size that fits in one hand without a fork. The cherry center gets hot and glossy, which is half the fun.
Why It Works: A simple flour-butter dough bakes into a flaky shell that keeps the filling contained instead of letting it run all over the pan. Chilling the dough for 20 minutes helps the butter stay in pieces, which is what gives you flake.
Key Ingredients:
- 2 cups all-purpose flour
- 1 tablespoon sugar
- 1/2 teaspoon fine salt
- 1 cup cold unsalted butter, cubed
- 5 to 7 tablespoons ice water
- 1 can cherry pie filling, 21 ounces
- 1 egg, beaten, for brushing
- 2 tablespoons coarse sugar
Quick Steps:
- Mix flour, sugar, and salt, then cut in the butter until pea-size pieces remain.
- Add ice water 1 tablespoon at a time until the dough holds together.
- Chill the dough for 20 minutes, then roll and cut into circles.
- Spoon cherry filling onto half the circles, fold, seal, and brush with egg.
- Sprinkle with sugar and bake at 375°F for 18 to 22 minutes, until golden.
Equipment for This Recipe:
- Rolling pin
- Baking sheet
- Parchment paper
- Fork for sealing
How to Serve This Dish: Serve them warm, plain, or with a little powdered sugar dusted over the top. They fit nicely on a picnic plate because they do not need a fork.
Pro Tips for This Recipe:
- Keep the butter cold all the way through shaping.
- Do not overfill the pies or the seams burst.
- Cut a tiny steam slit in the top if the filling is especially thick.
Variations on This Dish:
- Blueberry Filling: Swap the cherry filling for blueberry pie filling.
- Cinnamon Crust: Add 1/2 teaspoon cinnamon to the dough.
Common Mistakes to Avoid with This Dish:
- Stretching the dough while sealing: It shrinks in the oven and opens the seam.
- Skipping the chill: Warm dough turns greasy instead of flaky.
11. Jam Thumbprint Cookies
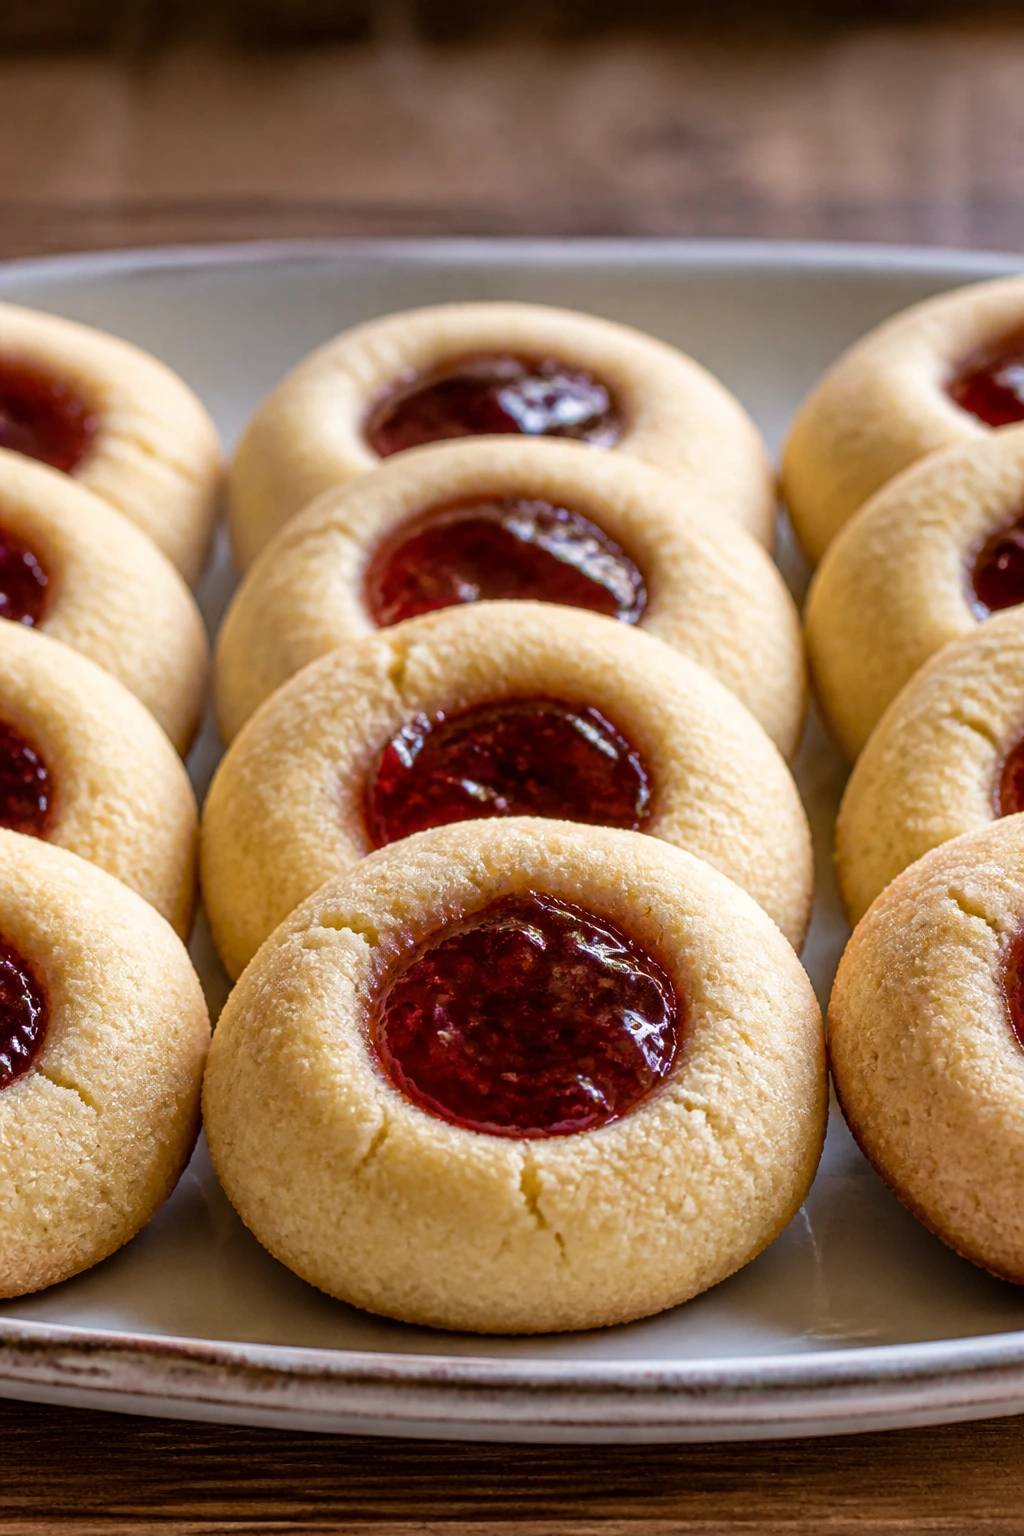
Intro: Thumbprints are humble cookies with a polished finish. The buttery base melts in your mouth, and the spoonful of jam in the center bakes down into a bright little jewel.
Why It Works: A short, rich dough holds its shape because the flour stays low and the butter stays high. Pressing the center before baking gives you a neat well that keeps the jam from running off the cookie sheet.
Key Ingredients:
- 1 cup unsalted butter, softened
- 1/2 cup granulated sugar
- 1 large egg yolk
- 1 teaspoon vanilla extract
- 2 cups all-purpose flour
- 1/4 teaspoon fine salt
- 1/2 cup raspberry or strawberry jam
Quick Steps:
- Heat the oven to 350°F and line a sheet pan with parchment.
- Cream the butter and sugar, then mix in the egg yolk and vanilla.
- Stir in the flour and salt until a soft dough forms.
- Roll into balls, press centers with your thumb, and fill with a small spoon of jam.
- Bake for 12 to 14 minutes, until the edges are just turning pale gold.
Equipment for This Recipe:
- Baking sheet
- Parchment paper
- Mixing bowl
- Teaspoon or small spoon
How to Serve This Dish: Arrange them in rings of red and blue jam for a patriotic tray that takes almost no extra effort. They are neat enough to stack in a tin, too.
Pro Tips for This Recipe:
- If the dough cracks when you press it, let it warm for 5 minutes.
- Use thick jam rather than thin jelly so it stays put.
- Refill the wells after baking if the jam sinks.
Variations on This Dish:
- Mixed Berry Version: Use blackberry jam for a darker color.
- Lemon Center: Fill with lemon curd instead of jam.
Common Mistakes to Avoid with This Dish:
- Overfilling the centers: Jam boils over and glues the cookies to the pan.
- Overbaking: Thumbprints should stay pale, not browned all over.
12. Firecracker Rice Krispies Treats
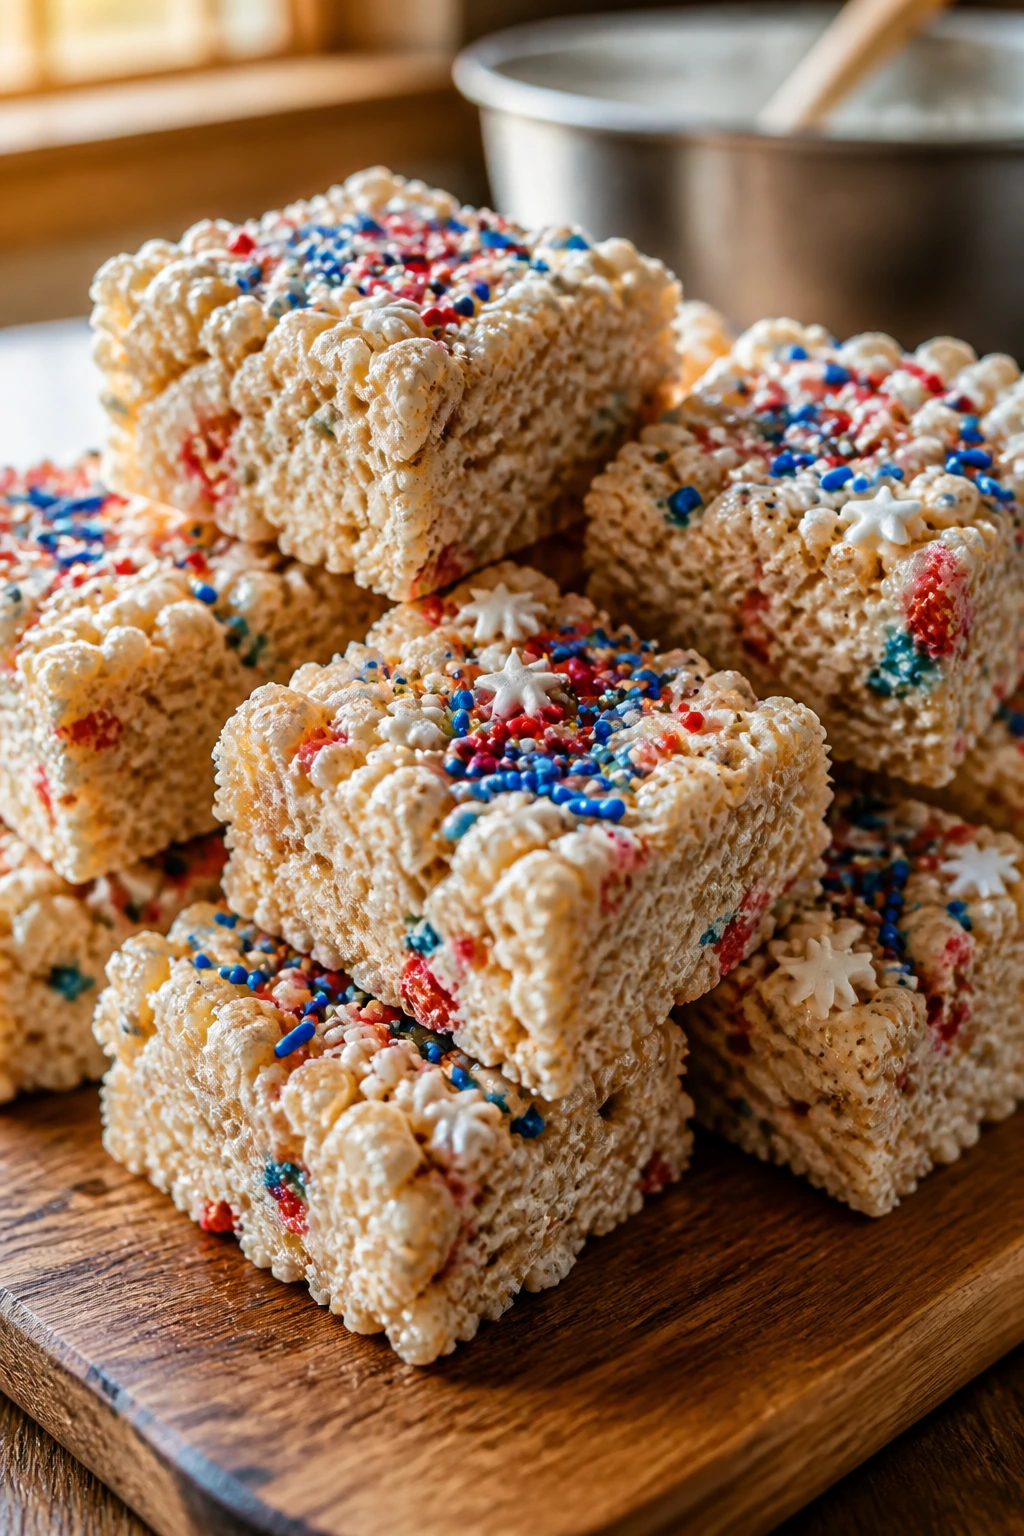
Intro: Rice Krispies treats are the dessert version of a blank canvas, and that’s exactly why they work here. The marshmallow base sets fast, the cereal keeps its snap, and a few sprinkles turn the pan into a party tray.
Why It Works: Marshmallows bind the cereal without baking, so the texture stays light and chewy. A little extra butter keeps the mixture from seizing into one hard block, which is the main mistake people make.
Key Ingredients:
- 6 cups crisp rice cereal
- 1 package mini marshmallows, 10 ounces
- 3 tablespoons unsalted butter
- 1/4 teaspoon fine salt
- 2 tablespoons red, white, and blue sprinkles
- 1 teaspoon vanilla extract
Quick Steps:
- Butter a 9×13-inch pan and set it aside.
- Melt the butter over low heat, then add the marshmallows and salt.
- Stir until smooth, remove from heat, and mix in the vanilla.
- Fold in the cereal and sprinkles, then press gently into the pan.
- Let cool before cutting into bars.
Equipment for This Recipe:
- Large saucepan
- Rubber spatula
- 9×13-inch pan
- Butter wrapper or parchment for pressing
How to Serve This Dish: Cut into squares and wrap them in parchment for easy grabbing. A few extra sprinkles on top keep the color bright.
Pro Tips for This Recipe:
- Keep the heat low so the marshmallows stay soft.
- Press the mixture with a lightly buttered hand, not a heavy spatula.
- Add the sprinkles after the cereal goes in so they do not bleed.
Variations on This Dish:
- Peanut Butter Version: Stir in 1/2 cup peanut butter with the marshmallows.
- Chocolate Stripe: Drizzle melted chocolate over the cooled bars.
Common Mistakes to Avoid with This Dish:
- Packing the pan too hard: The treats turn brick-like.
- Overheating the marshmallows: They get stiff and stringy instead of smooth.
13. Creamy Peanut Butter Fudge
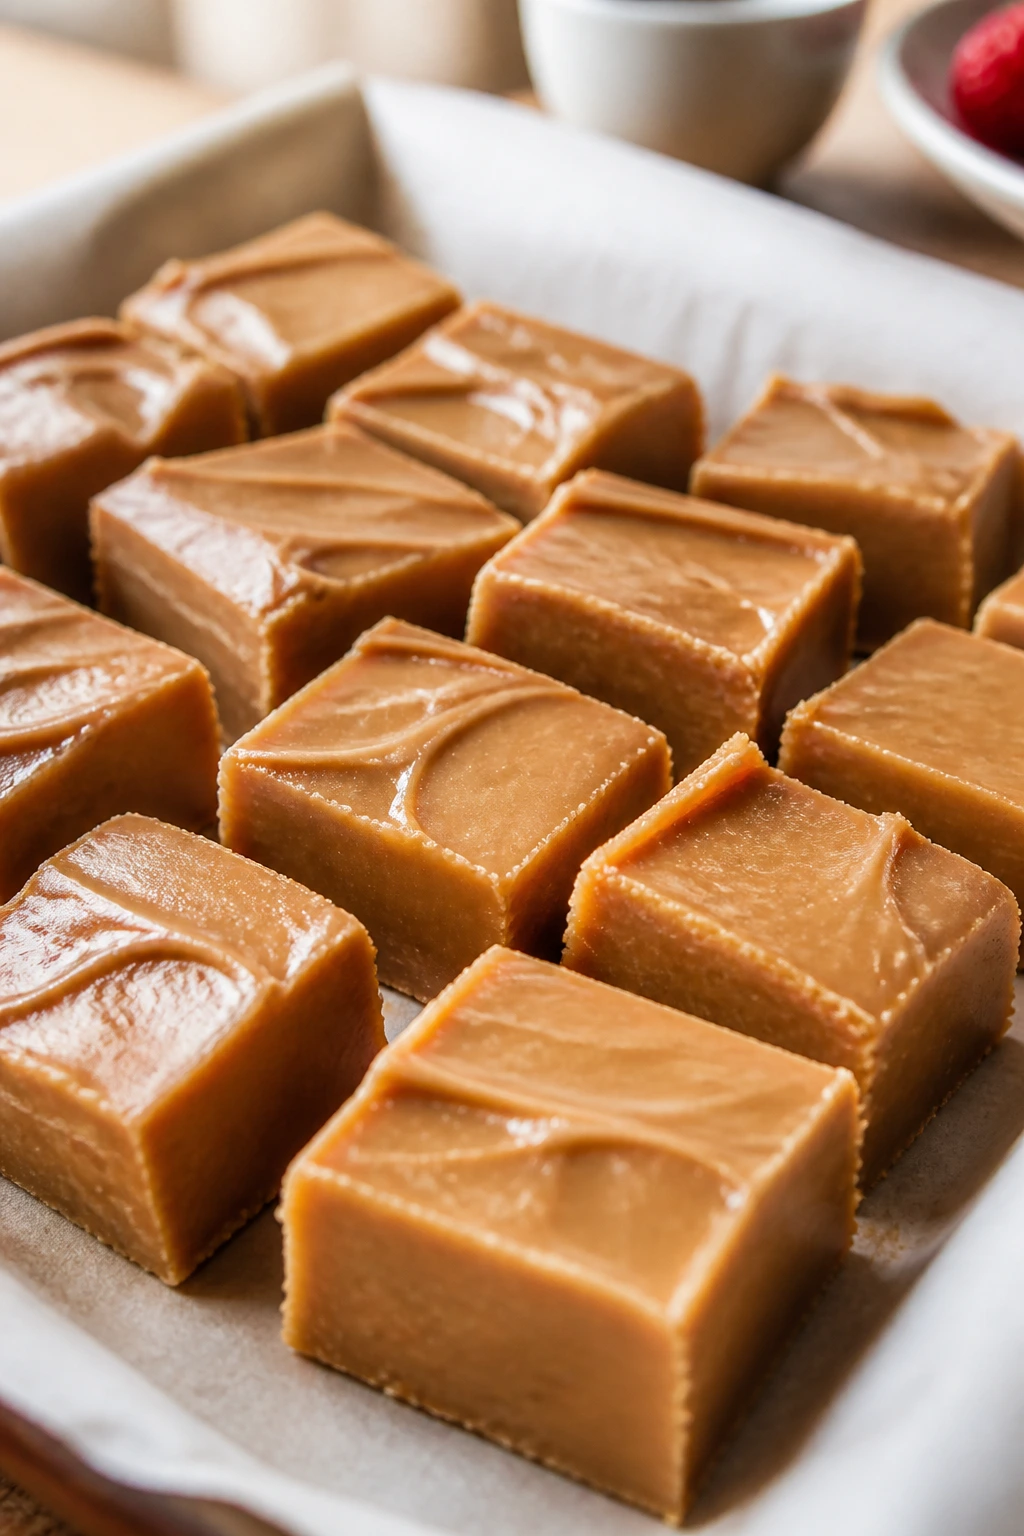
Intro: Peanut butter fudge gives you that old candy-shop flavor with only a few ingredients and a saucepan. It is dense, sweet, and a little salty, which keeps each square from tasting flat.
Why It Works: Sugar, butter, and milk boil into a base that firms up as it cools. Peanut butter and vanilla go in at the end so they keep their flavor instead of cooking away. The fudge slices best after a full chill.
Key Ingredients:
- 2 cups granulated sugar
- 1/2 cup whole milk
- 1/2 cup unsalted butter
- 1 cup creamy peanut butter
- 1 teaspoon vanilla extract
- 1/4 teaspoon fine salt
Quick Steps:
- Line an 8×8-inch pan with parchment.
- Boil the sugar, milk, and butter together for 2 minutes, stirring constantly.
- Remove from the heat and stir in the peanut butter, vanilla, and salt until smooth.
- Pour into the pan and smooth the top.
- Chill for 2 hours, then cut into small squares.
Equipment for This Recipe:
- Saucepan
- Parchment-lined pan
- Wooden spoon
- Sharp knife
How to Serve This Dish: Cut it small. Fudge is rich, and a tiny square goes farther than people think. It sits nicely beside salty snacks on a dessert table.
Pro Tips for This Recipe:
- Keep the boil steady for the full 2 minutes.
- Stir continuously so the sugar does not scorch on the bottom.
- Use a hot knife for cleaner cuts.
Variations on This Dish:
- Chocolate Swirl: Spoon melted chocolate over the top and drag a knife through once.
- Crunchy Peanut Version: Stir in chopped peanuts before pouring.
Common Mistakes to Avoid with This Dish:
- Undercooking the sugar base: The fudge stays soft and sticky.
- Cutting warm fudge: It needs cold time to firm up.
14. Brown Sugar Peach Crisp
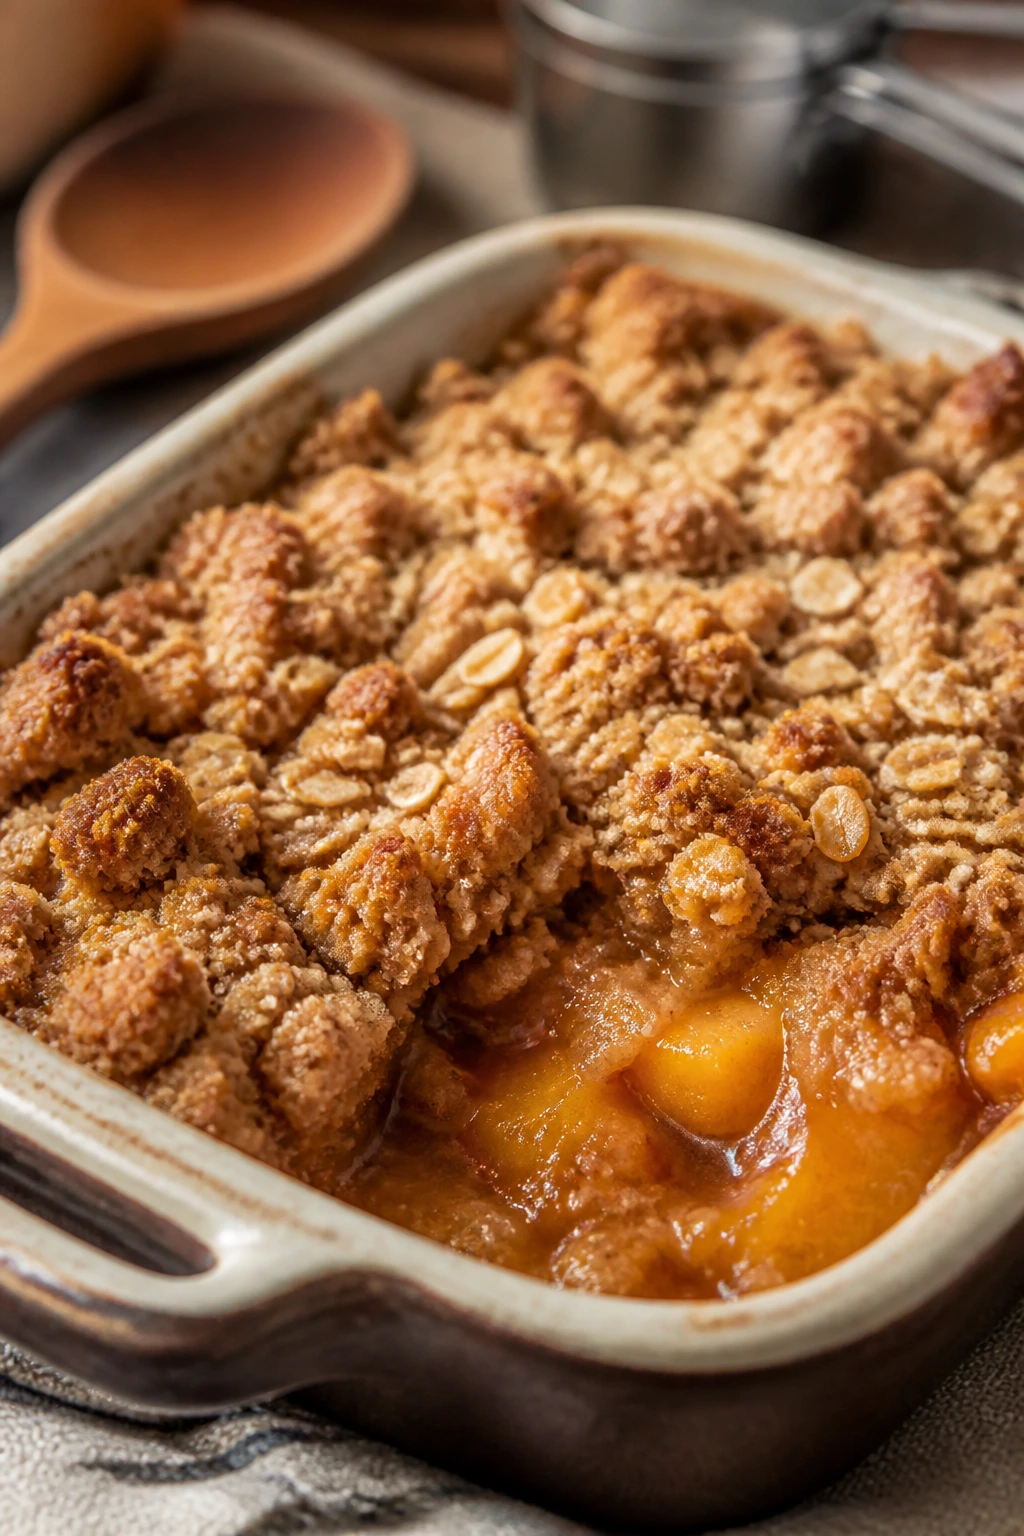
Intro: Peach crisp is what happens when canned fruit and oats decide to act like they were meant for each other. The filling turns syrupy underneath, while the topping bakes into a rough, buttery crumble that tastes especially good warm.
Why It Works: The fruit base thickens with cornstarch while the oat topping crisps because the butter melts through the dry mix and toasts in the oven. Canned peaches make this work year-round without fuss.
Key Ingredients:
- 2 cans sliced peaches, 15 ounces each, drained
- 2 tablespoons cornstarch
- 1/4 cup brown sugar
- 1 teaspoon cinnamon
- 1 cup old-fashioned oats
- 3/4 cup all-purpose flour
- 1/2 cup packed brown sugar
- 1/2 cup unsalted butter, cold and cubed
- Pinch of salt
Quick Steps:
- Heat the oven to 350°F and grease an 8×8-inch baking dish.
- Toss the peaches with cornstarch, brown sugar, and cinnamon.
- Mix the oats, flour, brown sugar, salt, and butter until crumbly.
- Spread the fruit in the dish and scatter the topping evenly over it.
- Bake for 30 to 35 minutes, until the filling bubbles and the top is golden.
Equipment for This Recipe:
- Baking dish
- Mixing bowl
- Fork or pastry cutter
- Spoon
How to Serve This Dish: Serve it warm with vanilla ice cream or plain whipped cream. A little extra cinnamon on top makes the peaches smell like they belong in a bakery case.
Pro Tips for This Recipe:
- Drain the peaches well or the filling gets watery.
- Keep the butter cold for a crumblier topping.
- Let it rest 10 minutes before serving so the juices settle.
Variations on This Dish:
- Berry-Peach Crisp: Add 1 cup frozen blueberries to the filling.
- Ginger Note: Add 1/2 teaspoon ground ginger for a sharper finish.
Common Mistakes to Avoid with This Dish:
- Using too much fruit liquid: That creates soup under the topping.
- Pressing the crumble down: Leave it loose so it browns instead of steaming.
15. Vanilla Pudding Poke Cake
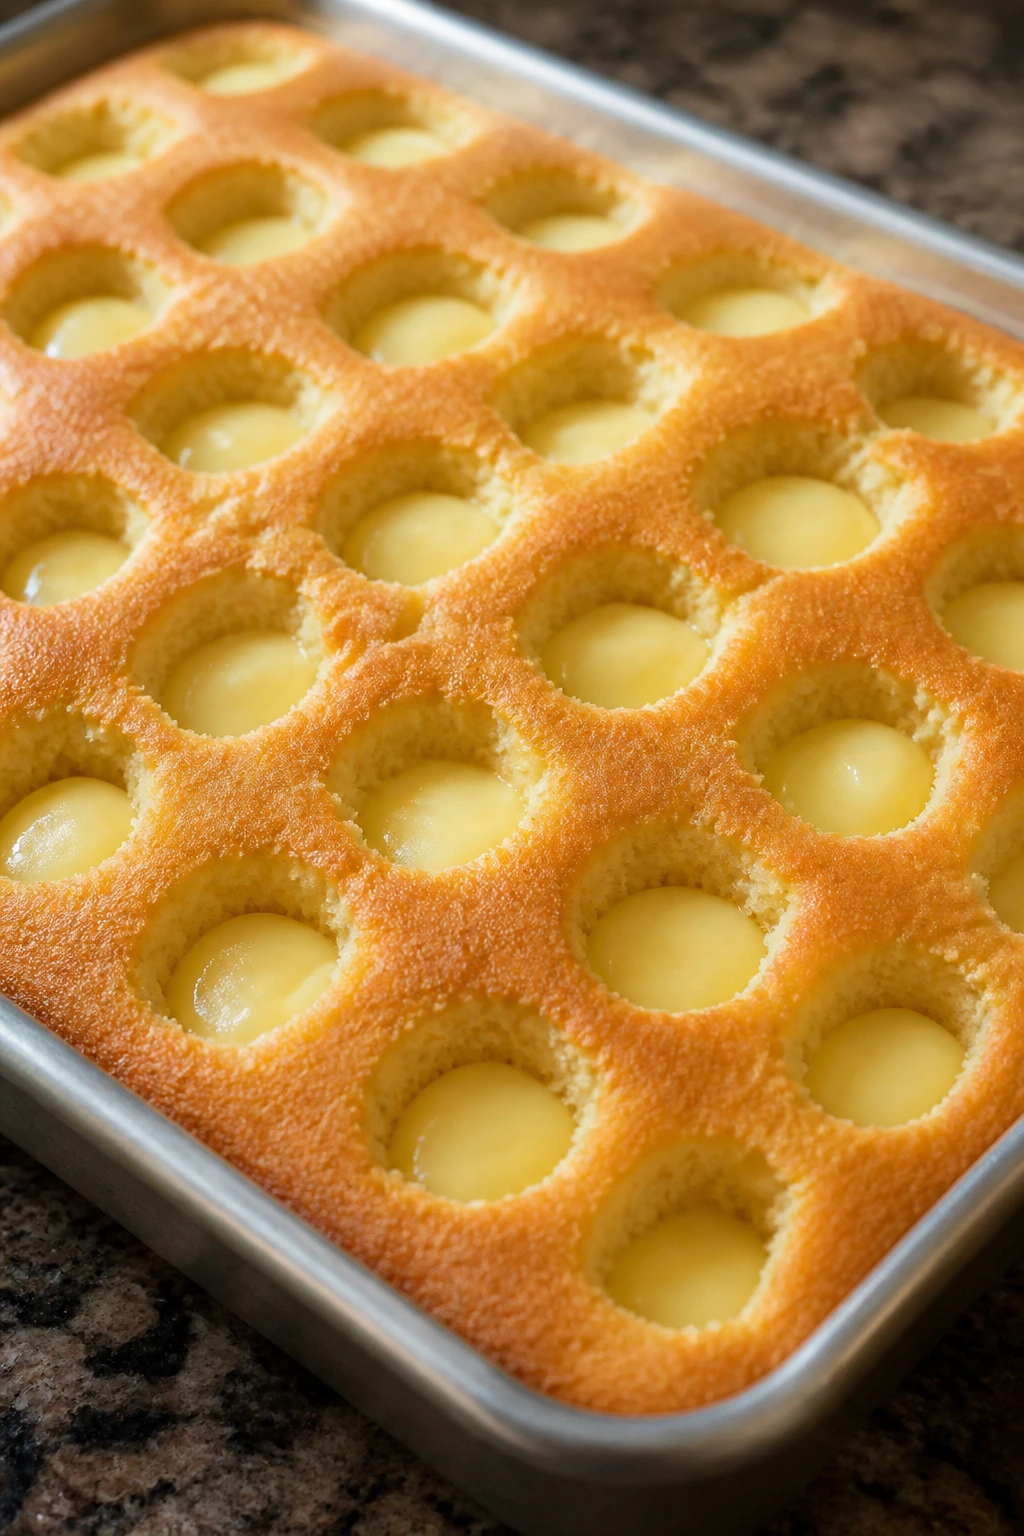
Intro: Poke cake is a little showy in the easiest way possible. You bake a simple cake, poke holes across the top, and pour pudding over it so every slice tastes moist all the way through.
Why It Works: The holes give the pudding somewhere to go, which means the flavor reaches deeper than frosting ever would. A boxed yellow cake mix keeps the crumb soft and reliable, and the chilled finish cuts cleanly for a buffet.
Key Ingredients:
- 1 box yellow cake mix, 15.25 ounces
- Eggs, oil, and water required by the cake mix
- 1 box instant vanilla pudding mix, 3.4 ounces
- 2 cups cold milk
- 1 container whipped topping, 8 ounces, thawed
- 1/2 cup red and blue sprinkles or chopped berries
Quick Steps:
- Bake the cake in a 9×13-inch pan according to the box directions.
- Cool for 10 minutes, then poke holes across the surface with the handle of a wooden spoon.
- Whisk the pudding mix and milk for 2 minutes, then pour it over the cake.
- Chill for at least 1 hour.
- Spread with whipped topping and finish with sprinkles or berries.
Equipment for This Recipe:
- 9×13-inch pan
- Wooden spoon handle
- Mixing bowl
- Offset spatula
How to Serve This Dish: Slice it straight from the pan and top each piece with a few berries. It is soft enough to spoon but neat enough to serve.
Pro Tips for This Recipe:
- Poke the holes while the cake is still slightly warm.
- Pour the pudding while it is still loose.
- Chill long enough for the topping to settle, or the cake slices raggedly.
Variations on This Dish:
- Chocolate Poke Cake: Use chocolate cake mix and chocolate pudding.
- Lemon Version: Switch to lemon cake mix and lemon pudding.
Common Mistakes to Avoid with This Dish:
- Waiting too long to poke the cake: The holes close as it cools.
- Using hot pudding: It thins the cake instead of soaking in nicely.
16. Magic Cookie Bars
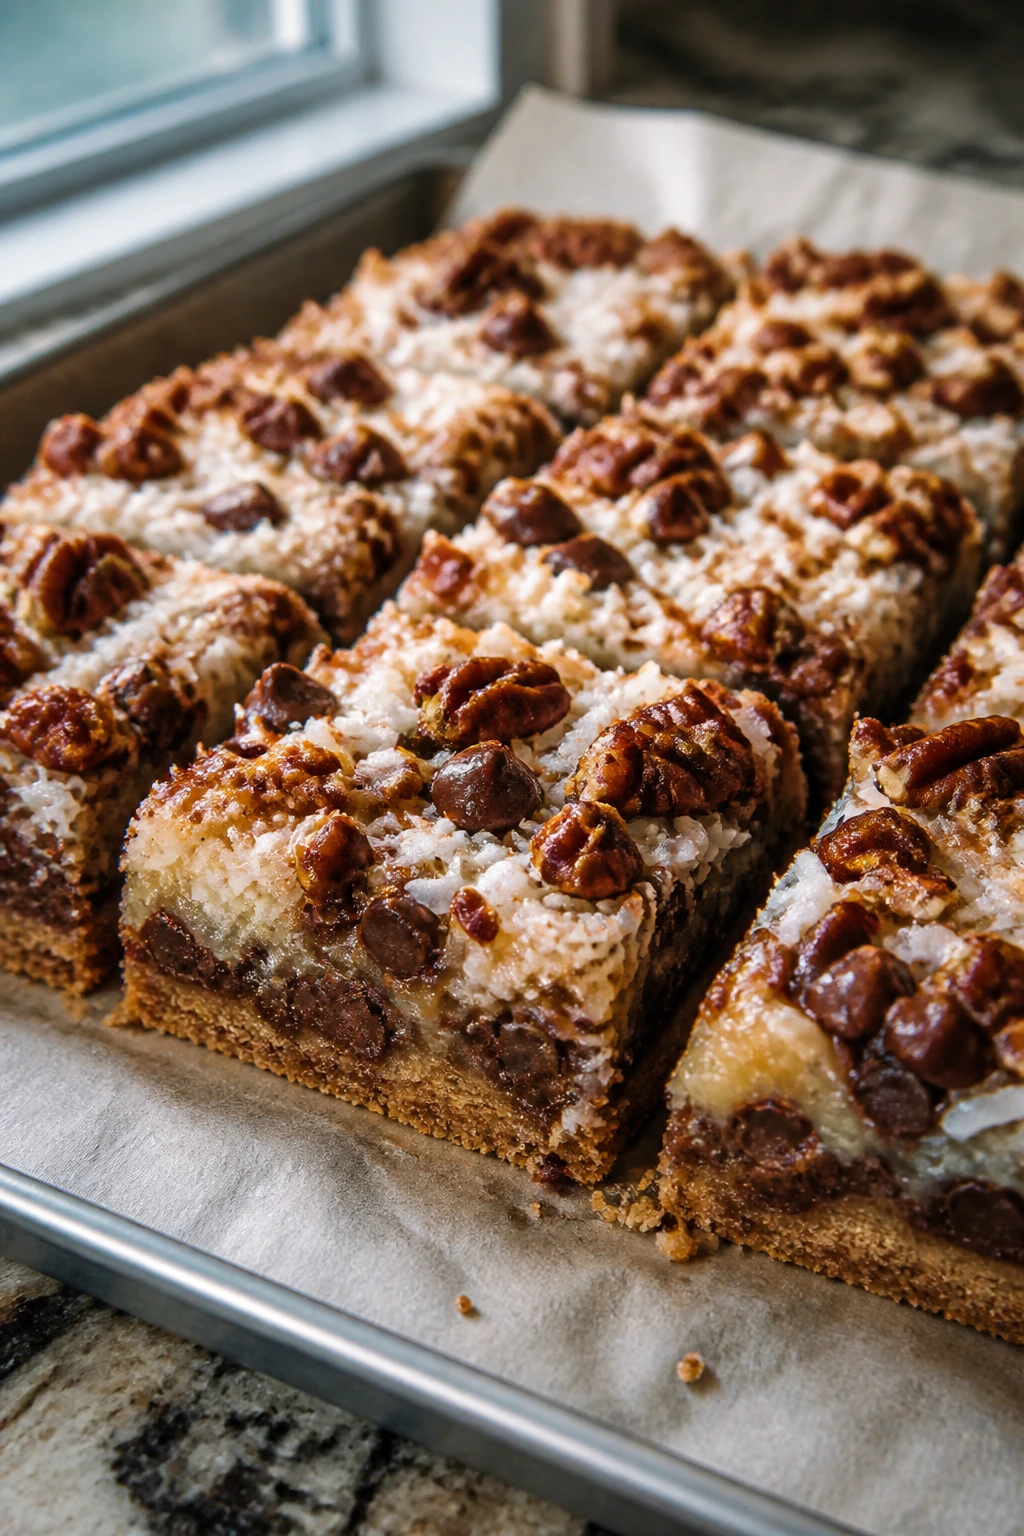
Intro: Magic bars are a pantry treasure because they turn a handful of shelf-stable ingredients into a layered square that feels almost too rich to be this simple. Graham crumbs, chocolate, coconut, and pecans bake together under a blanket of condensed milk.
Why It Works: Sweetened condensed milk acts as both glue and caramel base, so the toppings settle into a dense, chewy slab. The graham crust needs a brief pre-bake to keep it from going sandy under the filling.
Key Ingredients:
- 1 1/2 cups graham cracker crumbs
- 1/2 cup unsalted butter, melted
- 1 can sweetened condensed milk, 14 ounces
- 1 cup semisweet chocolate chips
- 1 cup sweetened shredded coconut
- 3/4 cup chopped pecans
Quick Steps:
- Heat the oven to 350°F and line an 8×8-inch pan with parchment.
- Mix the crumbs and melted butter, then press into the pan and bake for 5 minutes.
- Pour the condensed milk evenly over the crust.
- Sprinkle on the chocolate chips, coconut, and pecans.
- Bake for 22 to 25 minutes, until the top is golden at the edges. Cool completely before cutting.
Equipment for This Recipe:
- 8×8-inch pan
- Parchment paper
- Measuring cups
- Spatula
How to Serve This Dish: Cut these into small squares because they are rich. They sit nicely on a tray beside fruit, which keeps the dessert spread from feeling heavy.
Pro Tips for This Recipe:
- Press the crust firmly so it slices cleanly later.
- Let the bars cool all the way through or the layers slide apart.
- Toasting the coconut first adds a deeper flavor if you have an extra 5 minutes.
Variations on This Dish:
- Butterscotch Swap: Replace the chocolate chips with butterscotch chips.
- Salted Peanut Version: Use chopped peanuts and a pinch of flaky salt.
Common Mistakes to Avoid with This Dish:
- Not lining the pan: The condensed milk glue is stubborn.
- Cutting before cool: The bars need time to set into layers.
17. Apple Crumble Bars

Intro: Apple crumble bars are the sort of dessert that feels more autumn than holiday, and that is exactly why they work. They bring a warm, spiced note to a summer table without asking for fresh orchard fruit.
Why It Works: The crust and topping use the same dough, which saves time and gives you a sturdy base. Cornstarch thickens the apple layer so it does not leak through the bottom.
Key Ingredients:
- 2 cups all-purpose flour
- 1 cup rolled oats
- 3/4 cup packed brown sugar
- 1/2 teaspoon baking powder
- 1/2 teaspoon cinnamon
- 1/4 teaspoon salt
- 3/4 cup unsalted butter, melted
- 2 cups diced apples, peeled
- 2 tablespoons cornstarch
- 1 tablespoon lemon juice
Quick Steps:
- Heat the oven to 350°F and line an 8×8-inch pan with parchment.
- Mix the flour, oats, brown sugar, baking powder, cinnamon, and salt.
- Stir in the melted butter to make a crumbly dough; press half into the pan.
- Toss the apples with cornstarch and lemon juice, then spread them over the crust.
- Scatter the remaining crumble on top and bake for 35 to 40 minutes, until golden.
Equipment for This Recipe:
- 8×8-inch pan
- Mixing bowls
- Parchment paper
- Knife and cutting board
How to Serve This Dish: Serve warm or at room temperature with a spoonful of whipped cream. A dusting of cinnamon over the top keeps the apple flavor front and center.
Pro Tips for This Recipe:
- Dice the apples small so they soften at the same rate.
- Use a firm apple if you have it; mushy apples turn the bars watery.
- Chill before slicing if you want tidy squares.
Variations on This Dish:
- Blueberry Apple: Add 1/2 cup blueberries to the filling.
- Maple Finish: Replace 1/4 cup of the brown sugar with maple sugar if you have it.
Common Mistakes to Avoid with This Dish:
- Using too much apple juice: Drain extra liquid if the fruit is very wet.
- Skipping the parchment: These bars cling to the pan edge.
18. No-Bake Cocoa Oat Cookies
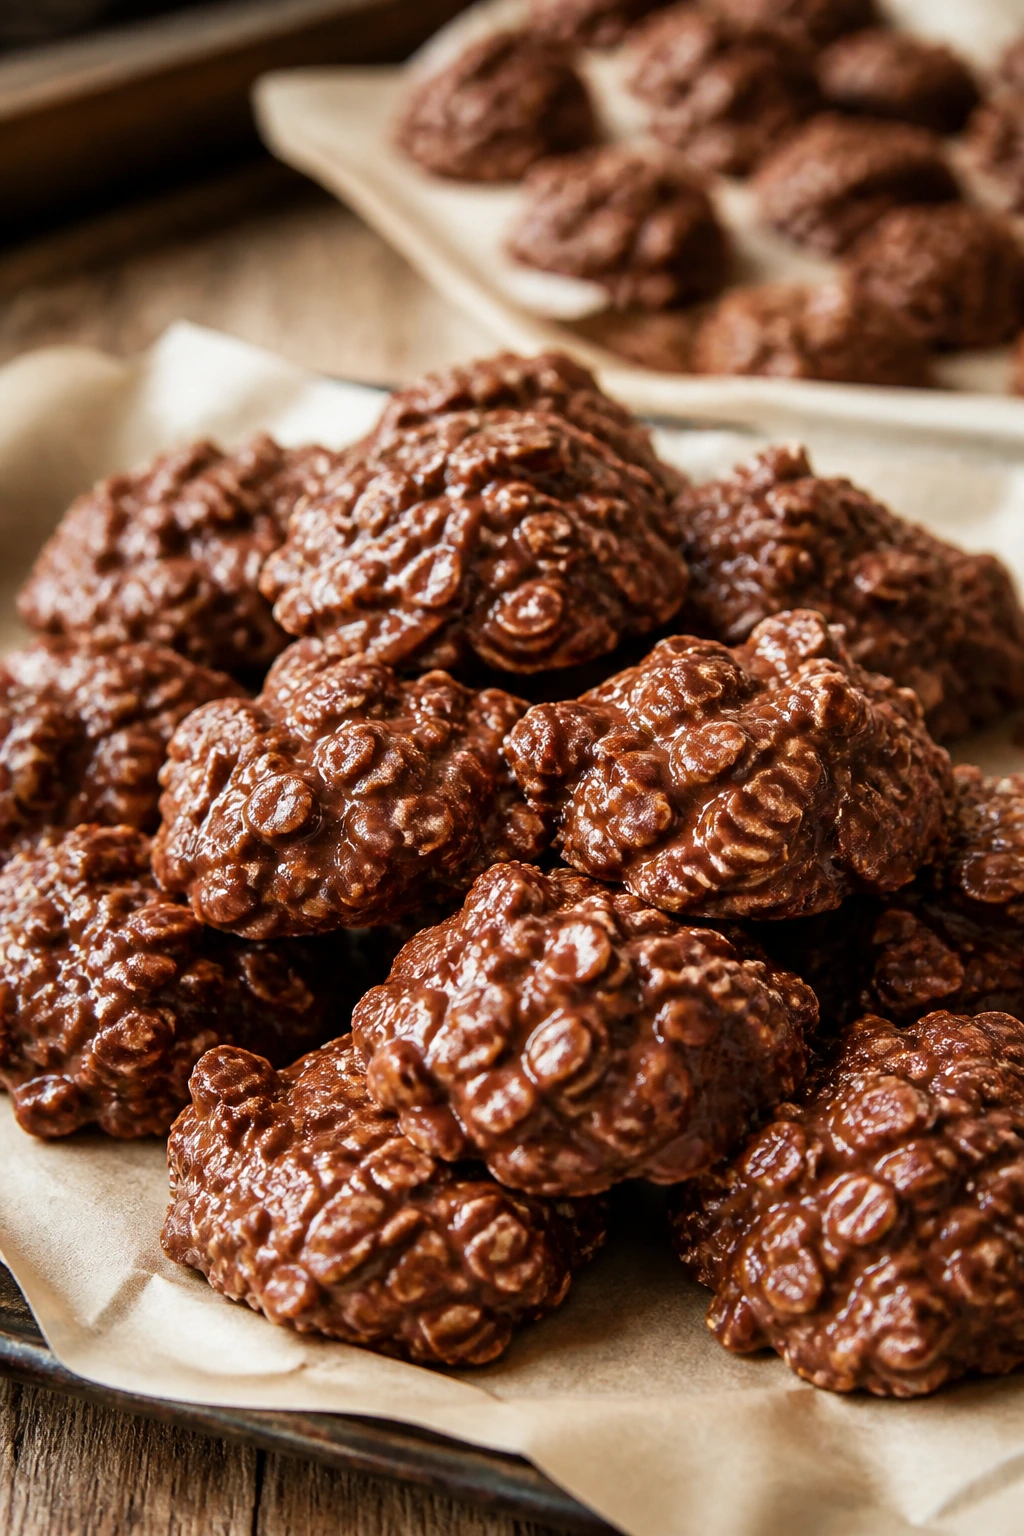
Intro: These cookies are messy in the saucepan and excellent on the plate. Cocoa, oats, butter, and peanut butter cook into a fudgy little mound that sets firm as it cools.
Why It Works: The sugar syrup binds the oats without needing an oven, which makes this a smart choice when the kitchen is already hot. The peanut butter adds body so the cookies hold their shape instead of turning grainy.
Key Ingredients:
- 2 cups granulated sugar
- 1/2 cup whole milk
- 1/2 cup unsalted butter
- 1/4 cup unsweetened cocoa powder
- 1/2 cup creamy peanut butter
- 3 cups quick oats
- 1 teaspoon vanilla extract
- Pinch of salt
Quick Steps:
- Line two baking sheets with parchment.
- Boil the sugar, milk, butter, and cocoa for 1 minute.
- Remove from the heat and stir in peanut butter, vanilla, salt, and oats.
- Drop spoonfuls onto the parchment.
- Let them cool until firm, about 20 minutes.
Equipment for This Recipe:
- Saucepan
- Parchment-lined trays
- Wooden spoon
- Cookie scoop or tablespoon
How to Serve This Dish: Set them out on a plate in little clusters. They are rich, so a small cookie does the job.
Pro Tips for This Recipe:
- Start timing the boil once the mixture reaches a full rolling bubble.
- Work fast after adding the oats; the mixture sets quickly.
- If the cookies are sticky after cooling, your syrup needed another 20 seconds on the stove.
Variations on This Dish:
- Coconut Cocoa: Stir in 1/2 cup shredded coconut.
- Nut-Free Version: Use sunflower seed butter instead of peanut butter.
Common Mistakes to Avoid with This Dish:
- Underboiling the syrup: The cookies will stay soft and puddly.
- Using old oats: Fresh oats give the best chew.
19. Graham Cracker Coconut Cream Pie
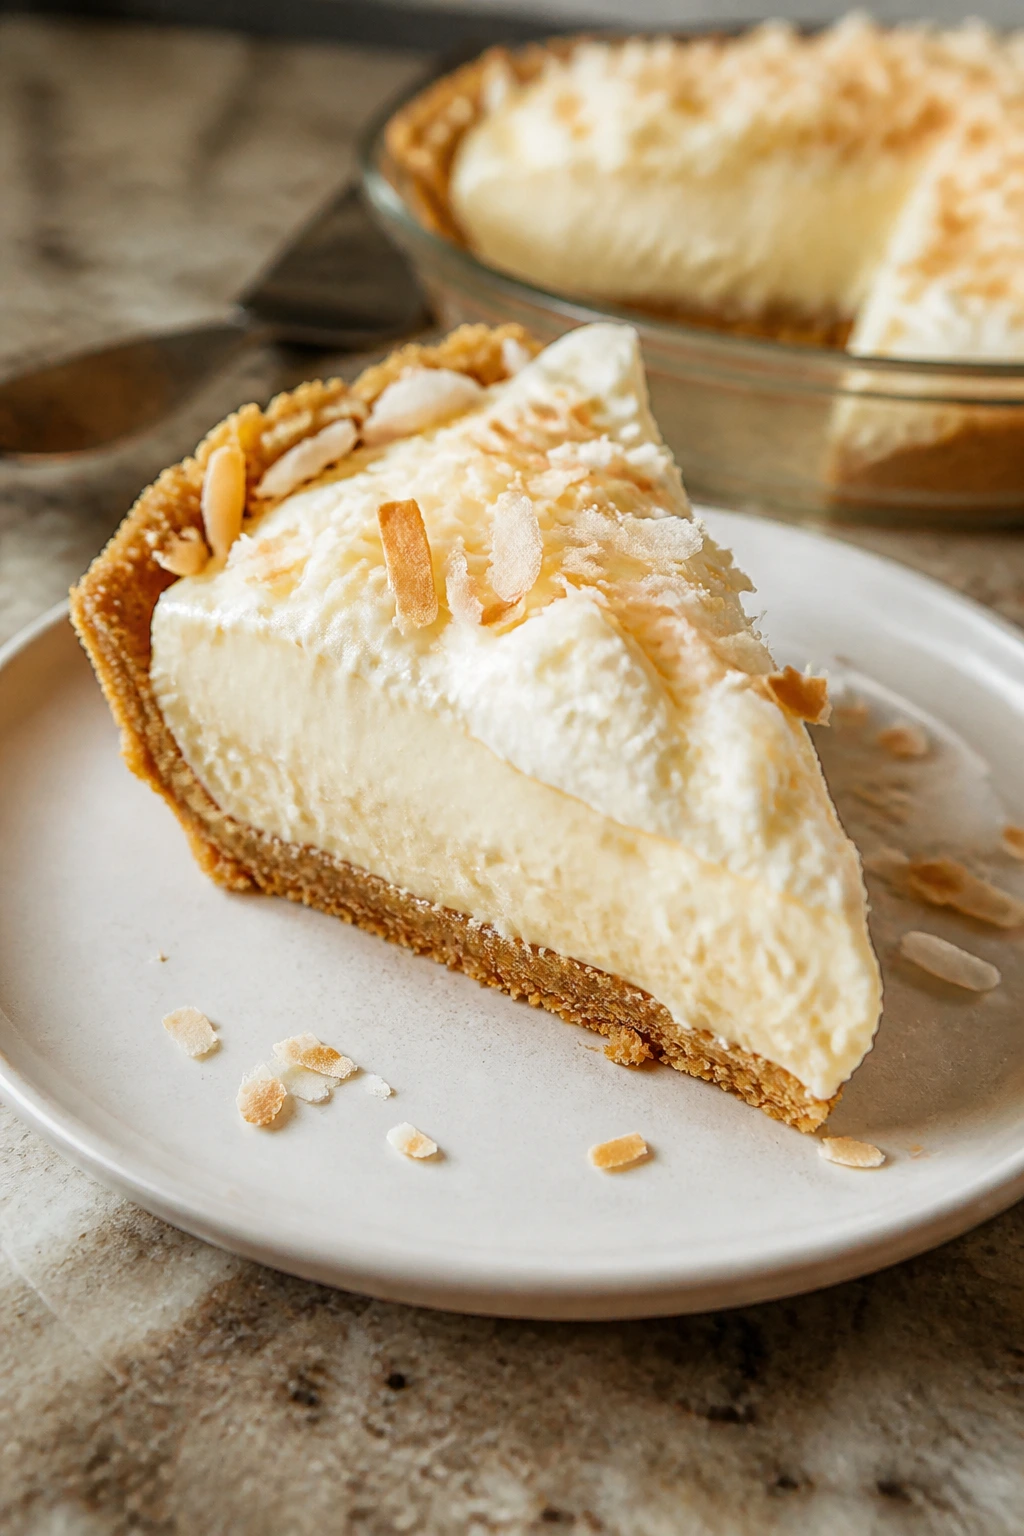
Intro: Coconut cream pie tastes like something that belongs in a diner case, but the pantry version is easier than the old-fashioned one. The graham crust keeps it from feeling too sweet, and the coconut pudding filling sets into a smooth, cool slice.
Why It Works: Instant coconut pudding thickens quickly and gives the pie enough body to slice without a custard-cooking detour. Graham crumbs add a toasty note that keeps the coconut from tasting one-note.
Key Ingredients:
- 1 1/2 cups graham cracker crumbs
- 6 tablespoons unsalted butter, melted
- 2 tablespoons sugar
- 1 box instant coconut cream pudding mix, 3.4 ounces
- 2 cups cold milk
- 1 cup sweetened shredded coconut
- 1 cup whipped topping
Quick Steps:
- Mix the crumbs, butter, and sugar, then press into a 9-inch pie plate.
- Whisk the pudding mix and milk for 2 minutes.
- Stir in the coconut and fold in half the whipped topping.
- Spoon into the crust and smooth the top.
- Chill for 4 hours, then finish with the remaining whipped topping.
Equipment for This Recipe:
- 9-inch pie plate
- Mixing bowl
- Whisk
- Rubber spatula
How to Serve This Dish: Serve it cold with a few toasted coconut flakes on top. The contrast between the cream filling and crust is the whole point.
Pro Tips for This Recipe:
- Toast the coconut in a dry skillet if you want a deeper flavor.
- Chill the crust first if you have time; it helps the slices stay neat.
- Add a pinch of salt to keep the sweetness from flattening out.
Variations on This Dish:
- Banana-Coconut Pie: Add a layer of sliced bananas under the filling.
- Chocolate Crust: Use chocolate graham crackers if you want more contrast.
Common Mistakes to Avoid with This Dish:
- Using warm milk: The pudding will set too slowly.
- Overmixing the whipped topping: Fold gently so the filling stays airy.
20. Brown Butter Blondies
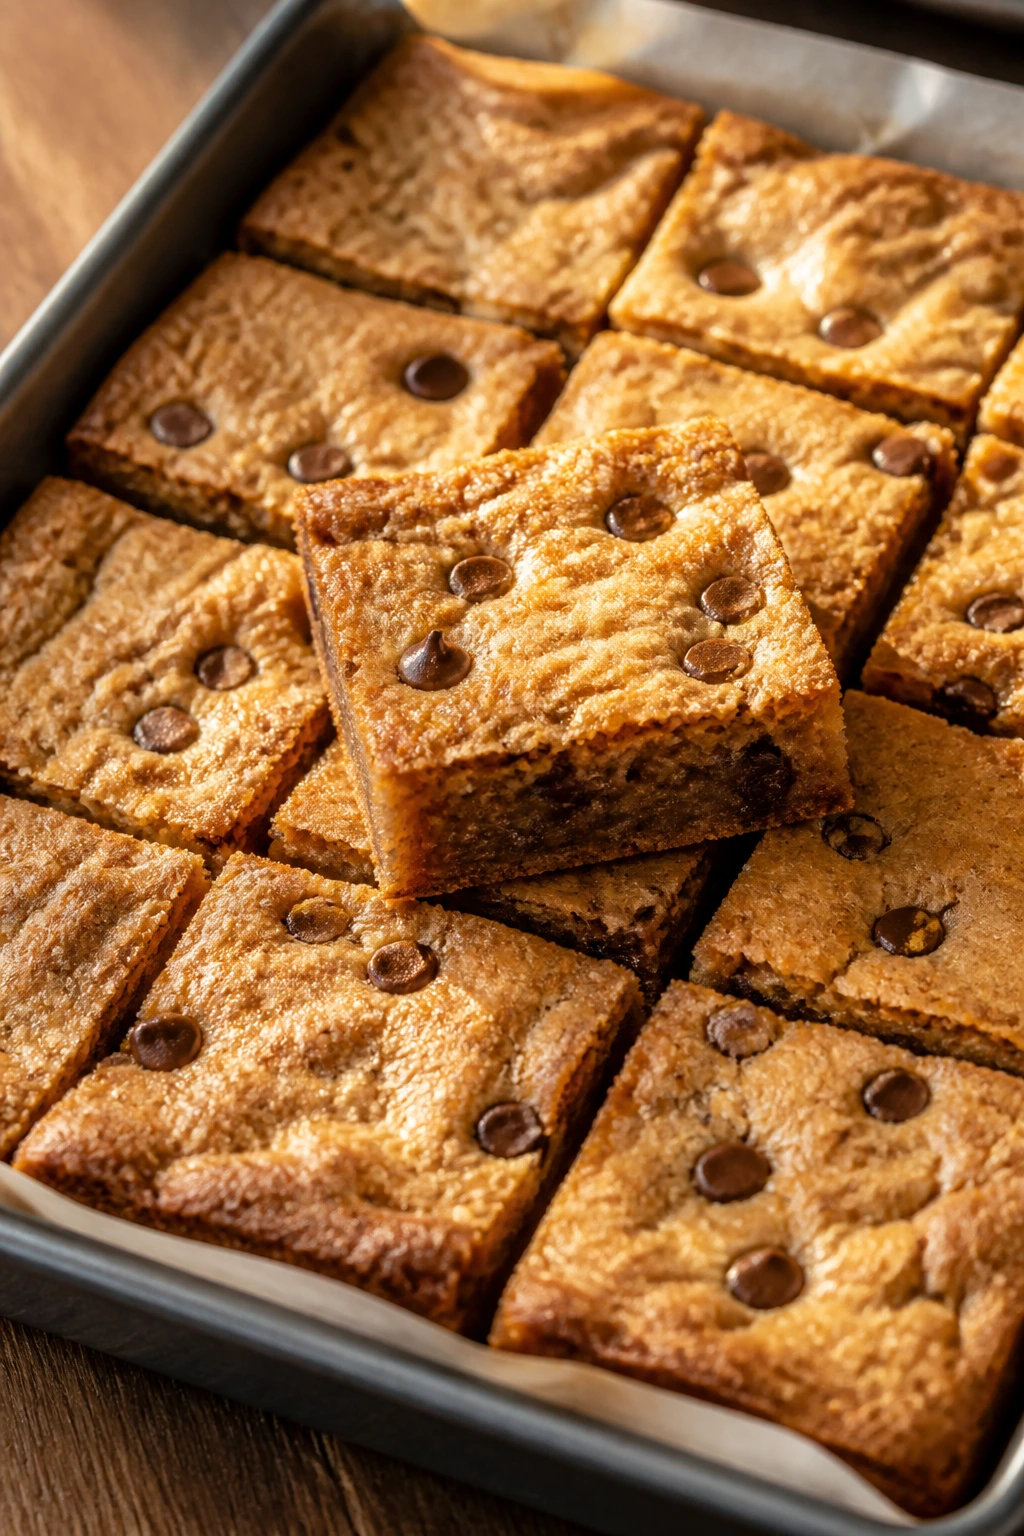
Intro: Blondies sit somewhere between a cookie and a brownie, which is why they always disappear. Brown sugar gives them a caramel note, and brown butter adds a toasted edge that tastes more expensive than it is.
Why It Works: The batter is simple, but the flavor comes from browning the butter until it smells like toasted nuts. That step deepens the whole pan and gives the bars a slightly chewy edge.
Key Ingredients:
- 3/4 cup unsalted butter
- 1 1/2 cups packed brown sugar
- 2 large eggs
- 2 teaspoons vanilla extract
- 1 1/2 cups all-purpose flour
- 1/2 teaspoon baking powder
- 1/2 teaspoon fine salt
- 1 cup white chocolate chips or chopped pecans
Quick Steps:
- Heat the oven to 350°F and line an 8×8-inch pan with parchment.
- Brown the butter in a saucepan until it smells nutty, then cool for 5 minutes.
- Whisk in the brown sugar, eggs, and vanilla.
- Stir in the flour, baking powder, salt, and chips or pecans.
- Bake for 24 to 28 minutes, until the top is set and the center is no longer glossy.
Equipment for This Recipe:
- Saucepan
- Mixing bowl
- Whisk
- Parchment-lined baking pan
How to Serve This Dish: Slice into tight squares and serve with berries or a scoop of vanilla ice cream. They are rich enough that small portions feel right.
Pro Tips for This Recipe:
- Brown the butter until you see tiny amber flecks.
- Let the pan cool before cutting or the bars will smear.
- A few extra chips pressed on top make the top look polished.
Variations on This Dish:
- Raspberry Blondies: Swirl in 1/3 cup raspberry jam before baking.
- Toasted Pecan Version: Add 1 cup toasted pecans for crunch.
Common Mistakes to Avoid with This Dish:
- Burning the butter: Brown butter should smell nutty, not bitter.
- Overbaking: Blondies are better a touch soft than dry.
21. Oreo Truffle Bites
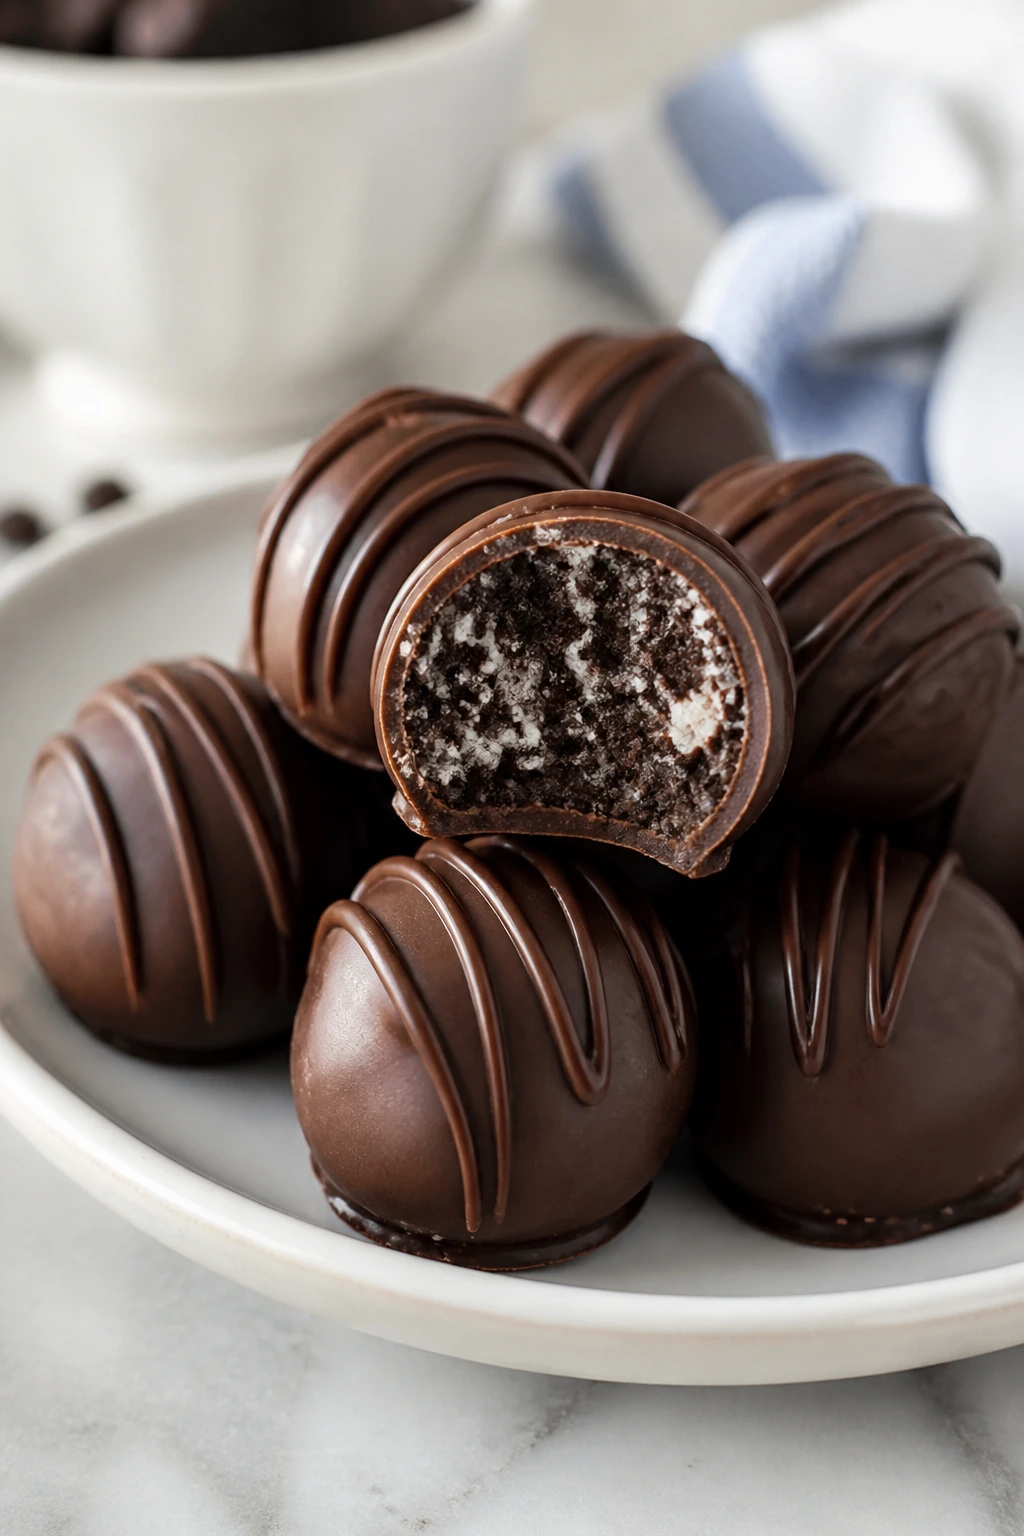
Intro: Oreo truffles are the no-bake dessert people pretend took more time than it did. Crushed cookies and cream cheese become dense little balls that set under a shell of melted chocolate.
Why It Works: The cream cheese turns the cookie crumbs into a moldable dough, and the chocolate coating locks in the texture. They are easy to make ahead because the freezer does most of the work.
Key Ingredients:
- 1 package Oreo cookies, 14 ounces
- 8 ounces cream cheese, softened
- 12 ounces white chocolate or semisweet chocolate, melted
- 2 tablespoons red, white, and blue sprinkles
Quick Steps:
- Crush the cookies into fine crumbs.
- Mix in the cream cheese until the dough holds together.
- Roll into 1-inch balls and chill for 20 minutes.
- Dip in melted chocolate and top with sprinkles.
- Chill again until the coating sets.
Equipment for This Recipe:
- Food processor or zip-top bag and rolling pin
- Mixing bowl
- Fork or dipping tool
- Parchment-lined tray
How to Serve This Dish: Pile them in a shallow dish so the glossy coating catches the light. They look tidy and travel well.
Pro Tips for This Recipe:
- Use softened cream cheese so the cookie crumbs blend smoothly.
- Chill the balls before dipping or they slide apart in the chocolate.
- Tap off extra chocolate so the coating stays thin.
Variations on This Dish:
- Peppermint Freebie: Swap in mint cookies if you want a cooler note.
- Cookies-and-Cream Pop: Insert a stick before chilling for truffle pops.
Common Mistakes to Avoid with This Dish:
- Too much cream cheese: The mixture turns soft and hard to roll.
- Skipping the chill: Warm centers can crack the coating.
22. Molasses Crinkle Cookies
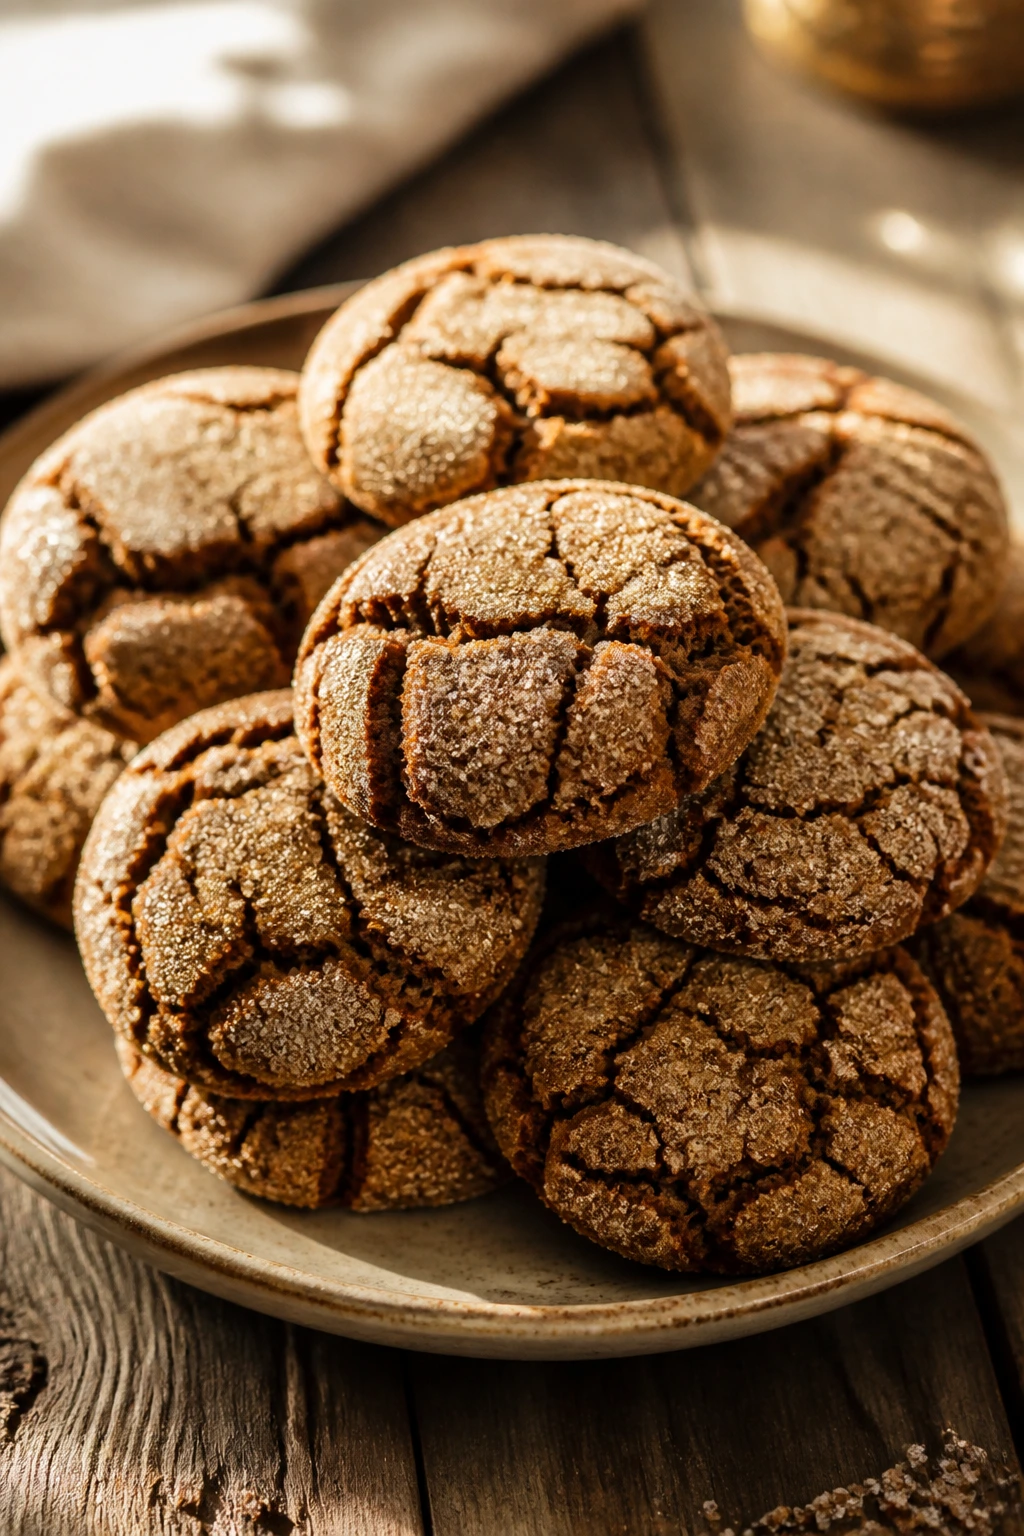
Intro: Molasses cookies bring a deep, spiced flavor that cuts through all the candy and cream on a holiday table. The crackled sugar top and chewy center give them a bit of drama without any decorating.
Why It Works: Molasses keeps the cookies soft while cinnamon, ginger, and cloves create the warm spice note. Rolling the dough in sugar before baking gives the crinkled top that classic look.
Key Ingredients:
- 3/4 cup unsalted butter, softened
- 1 cup packed brown sugar
- 1 large egg
- 1/4 cup molasses
- 2 cups all-purpose flour
- 2 teaspoons ground ginger
- 1 teaspoon cinnamon
- 1/4 teaspoon cloves
- 1/2 teaspoon baking soda
- 1/4 teaspoon fine salt
- 1/4 cup granulated sugar, for rolling
Quick Steps:
- Heat the oven to 350°F and line a baking sheet with parchment.
- Cream the butter and brown sugar, then beat in the egg and molasses.
- Stir in the flour, spices, baking soda, and salt.
- Roll into balls, coat in sugar, and bake for 10 to 12 minutes.
- Cool on the tray until the tops crackle.
Equipment for This Recipe:
- Baking sheet
- Parchment paper
- Mixing bowl
- Cookie scoop
How to Serve This Dish: Put them on a plate with chilled fruit or a glass of milk. They are strong enough in flavor to stand beside richer desserts.
Pro Tips for This Recipe:
- Chill the dough if it feels too sticky to roll.
- Pull them early; they firm up as they cool.
- Use dark molasses if you want a deeper flavor.
Variations on This Dish:
- Orange Spice: Add 1 teaspoon orange zest.
- Soft Sandwich Version: Spread with cream cheese frosting between two cookies.
Common Mistakes to Avoid with This Dish:
- Adding too much flour: The cookies turn dry and cakey.
- Overbaking until hard: They should stay chewy in the middle.
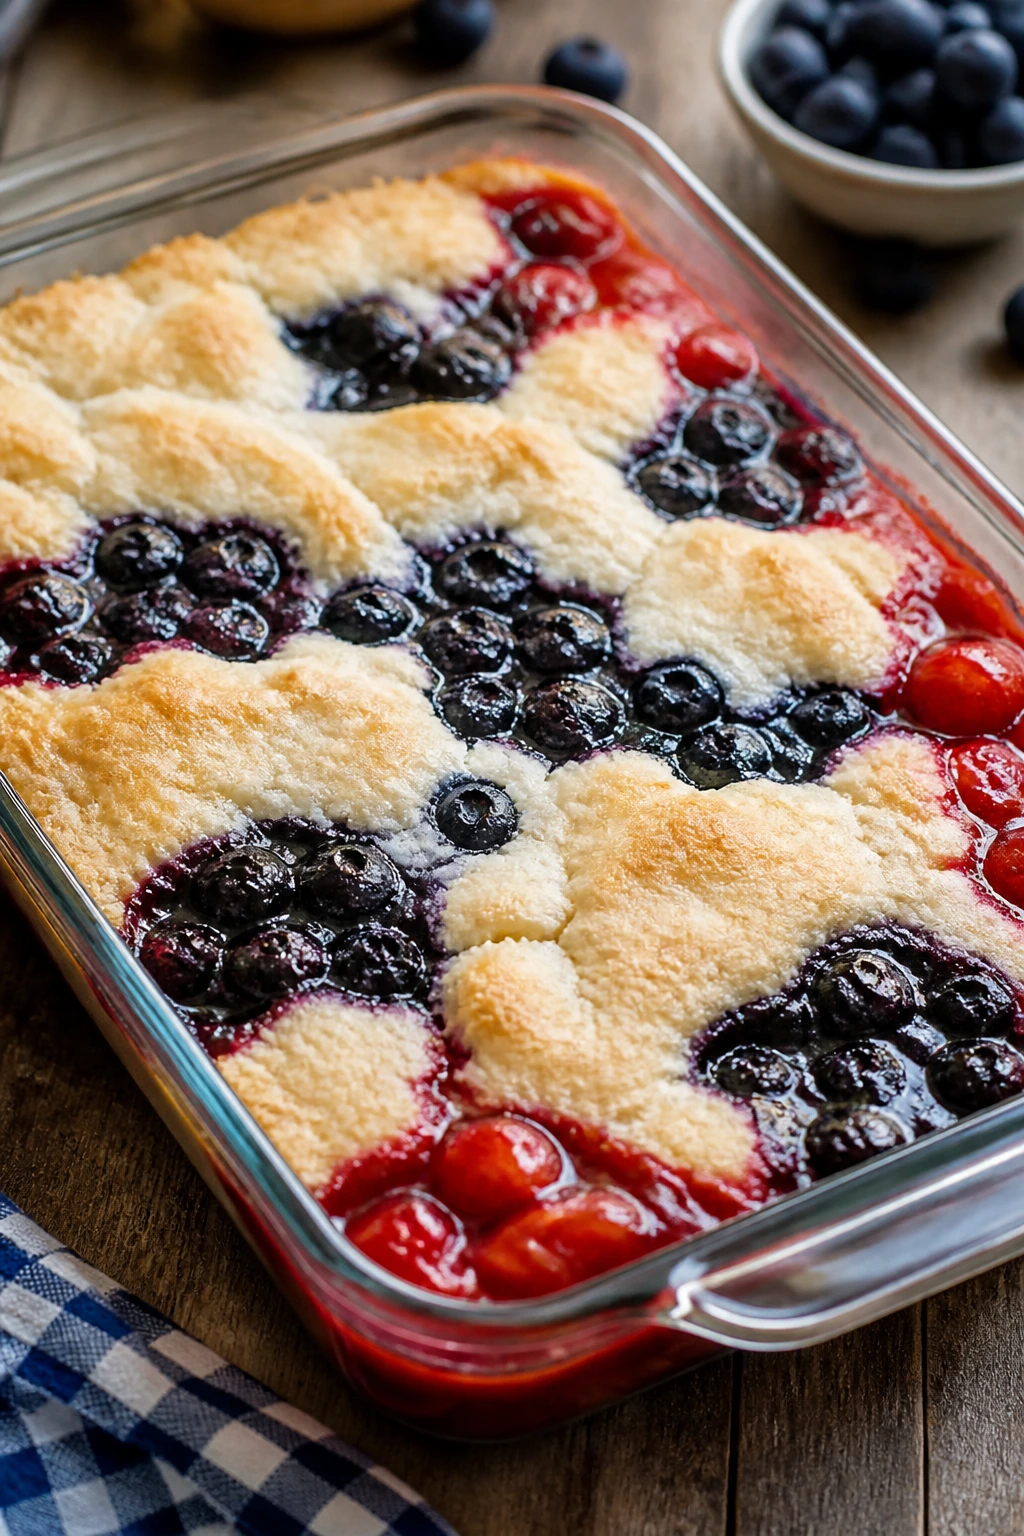
23. Blueberry Cobbler
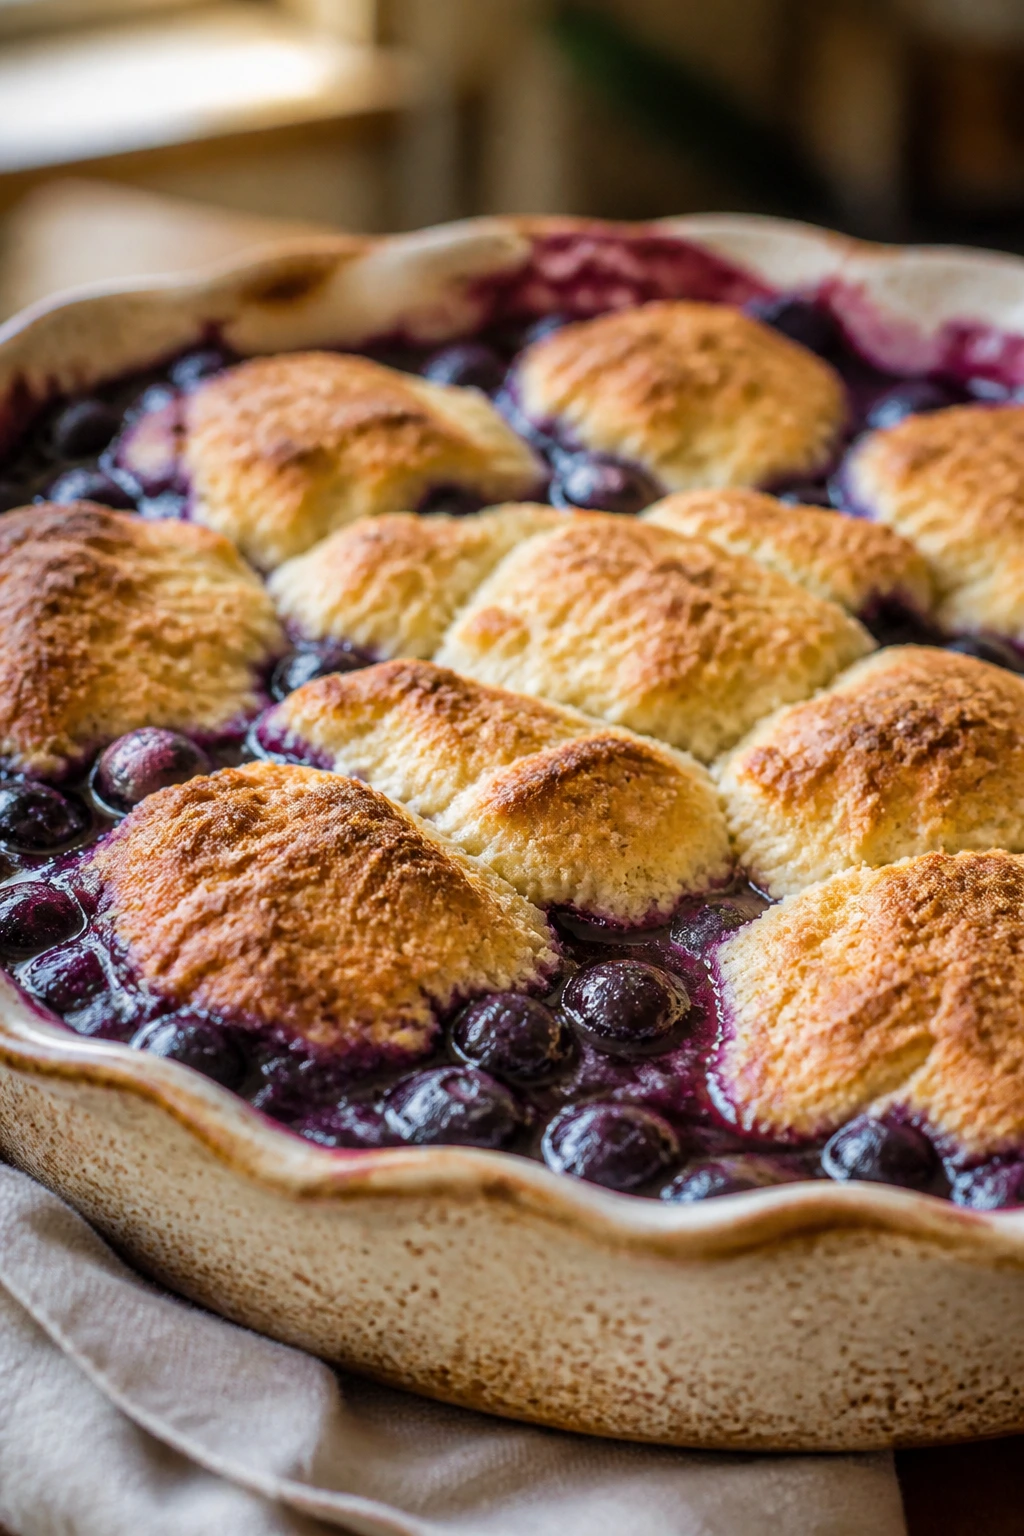
Intro: Blueberry cobbler is one of the easiest ways to make a pan of fruit feel special. The berries burst under a biscuit topping that bakes up golden and a little rough around the edges, which is exactly the look you want.
Why It Works: Frozen or canned blueberries cook down into a thick, syrupy filling, and the biscuit topping rises above the fruit instead of sinking into it. Baking hot gives the top enough color before the berries overcook.
Key Ingredients:
- 4 cups blueberries, fresh or frozen
- 1/2 cup sugar
- 2 tablespoons cornstarch
- 1 teaspoon lemon juice
- 1 1/2 cups all-purpose flour
- 2 teaspoons baking powder
- 1/3 cup sugar
- 1/2 teaspoon fine salt
- 6 tablespoons cold butter
- 3/4 cup milk
Quick Steps:
- Heat the oven to 375°F and butter an 8×8-inch dish.
- Toss the blueberries with sugar, cornstarch, and lemon juice, then spread in the dish.
- Mix the flour, baking powder, sugar, salt, and butter until crumbly.
- Stir in the milk just until combined, then drop spoonfuls over the fruit.
- Bake for 30 to 35 minutes, until the topping is golden and the fruit bubbles.
Equipment for This Recipe:
- Baking dish
- Mixing bowls
- Pastry cutter or fork
- Spoon
How to Serve This Dish: Serve warm with cream or vanilla ice cream. The bright berry sauce stains the ice cream in the best possible way.
Pro Tips for This Recipe:
- If using frozen berries, do not thaw them first.
- Keep the topping rustic; smooth dough is not the goal.
- Let the cobbler rest a few minutes or the filling will run.
Variations on This Dish:
- Mixed Berry Cobbler: Add raspberries or blackberries.
- Cornmeal Top: Replace 1/4 cup flour with fine cornmeal for texture.
Common Mistakes to Avoid with This Dish:
- Using too little thickener: The fruit turns soupy.
- Pressing the topping flat: Drop it in rough spoonfuls so it bakes light.
24. Chocolate Chip Skillet Cookie
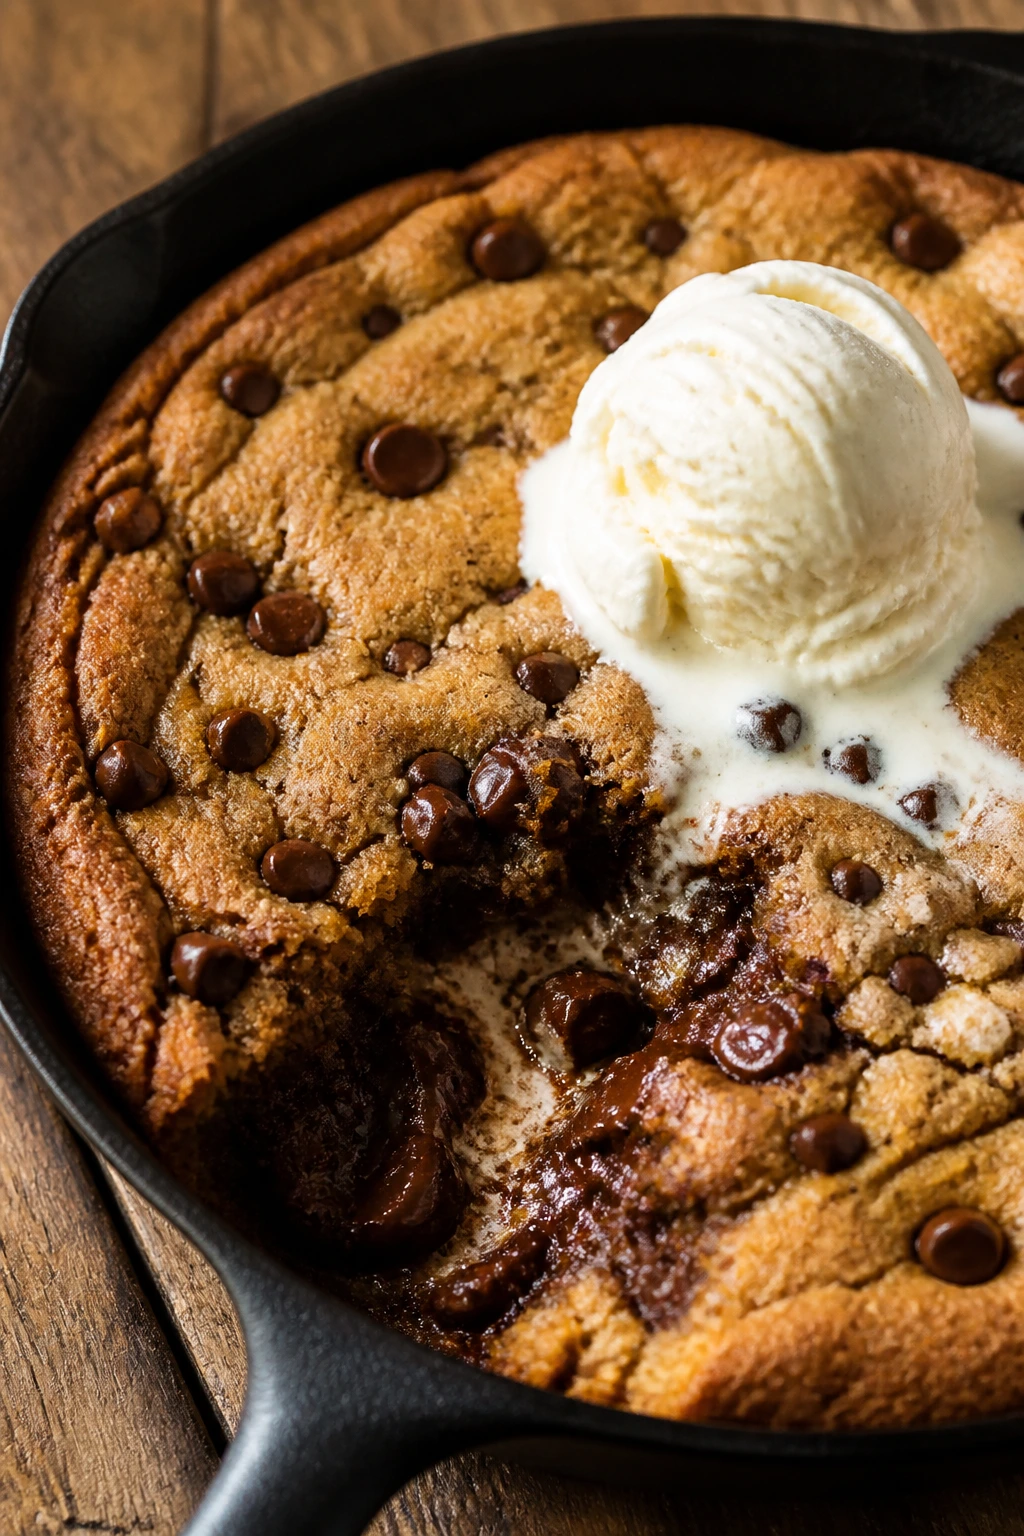
Intro: A skillet cookie is part dessert, part excuse to serve warm chocolate in a pan and call it festive. The edges crisp, the center stays soft, and the whole thing can be scooped at the table.
Why It Works: Cast iron holds heat longer than a baking sheet, so the outer ring browns while the middle stays gooey. That contrast is the payoff, and it only takes one pan.
Key Ingredients:
- 1/2 cup unsalted butter, softened
- 1/2 cup brown sugar
- 1/4 cup granulated sugar
- 1 large egg
- 1 teaspoon vanilla extract
- 1 1/4 cups all-purpose flour
- 1/2 teaspoon baking soda
- 1/2 teaspoon fine salt
- 1 cup chocolate chips
Quick Steps:
- Heat the oven to 350°F and grease a 10-inch skillet.
- Cream the butter and sugars, then beat in the egg and vanilla.
- Stir in the flour, baking soda, and salt, then fold in the chips.
- Press into the skillet and bake for 18 to 22 minutes, until the edges are set.
- Rest 10 minutes before scooping.
Equipment for This Recipe:
- 10-inch cast-iron skillet
- Mixing bowl
- Wooden spoon
- Oven mitts
How to Serve This Dish: Spoon it straight from the pan with vanilla ice cream on top. A scatter of berries makes the warm chocolate look more holiday-ready.
Pro Tips for This Recipe:
- Do not overbake the center; it should still look soft when you pull it.
- A sprinkle of flaky salt right after baking sharpens the chocolate.
- Use a skillet that’s well seasoned so the cookie releases easily.
Variations on This Dish:
- Double Chocolate: Add 2 tablespoons cocoa powder to the dough.
- Peanut Butter Cups: Fold in chopped peanut butter cups instead of chips.
Common Mistakes to Avoid with This Dish:
- Serving too soon: The center needs a short rest to settle.
- Using a skillet that is too small: The dough needs room or it overflows.
25. Pretzel Bark with Sprinkles
Intro: Pretzel bark is the salty-sweet snack that always gets eaten faster than planned. White chocolate, dark chocolate, and pretzels turn into a brittle sheet with crunch in every bite.
Why It Works: The pretzels give the chocolate something crisp to cling to, and the different chocolates create contrast without extra work. Bark is also one of the easiest desserts to customize with a handful of pantry toppings.
Key Ingredients:
- 4 cups mini pretzels
- 12 ounces white chocolate chips
- 8 ounces semisweet chocolate chips
- 2 tablespoons coconut oil or neutral oil
- 2 tablespoons red, white, and blue sprinkles
Quick Steps:
- Line a baking sheet with parchment and spread the pretzels in an even layer.
- Melt the white chocolate with 1 tablespoon oil and drizzle half over the pretzels.
- Melt the semisweet chocolate with the remaining oil and drizzle it over the top.
- Sprinkle with the sprinkles and chill until firm.
- Break into jagged pieces.
Equipment for This Recipe:
- Baking sheet
- Parchment paper
- Microwave-safe bowls or a double boiler
- Spoon
How to Serve This Dish: Break it into large shards and mound it in a bowl. The jagged pieces look intentional, which is half the fun.
Pro Tips for This Recipe:
- Keep the chocolate warm enough to drizzle but not hot enough to scorch.
- Press the sprinkles in lightly so they stick.
- Chill fully before breaking or the bark bends instead of snapping.
Variations on This Dish:
- Peanut Butter Pretzel Bark: Add a thin layer of peanut butter between the pretzels and chocolate.
- Toasted Coconut Bark: Scatter toasted coconut over the top with the sprinkles.
Common Mistakes to Avoid with This Dish:
- Overheating the chocolate: It seizes and turns grainy.
- Using wet toppings: Moist toppings can make the bark spotty.
26. Lemon Dream Bars
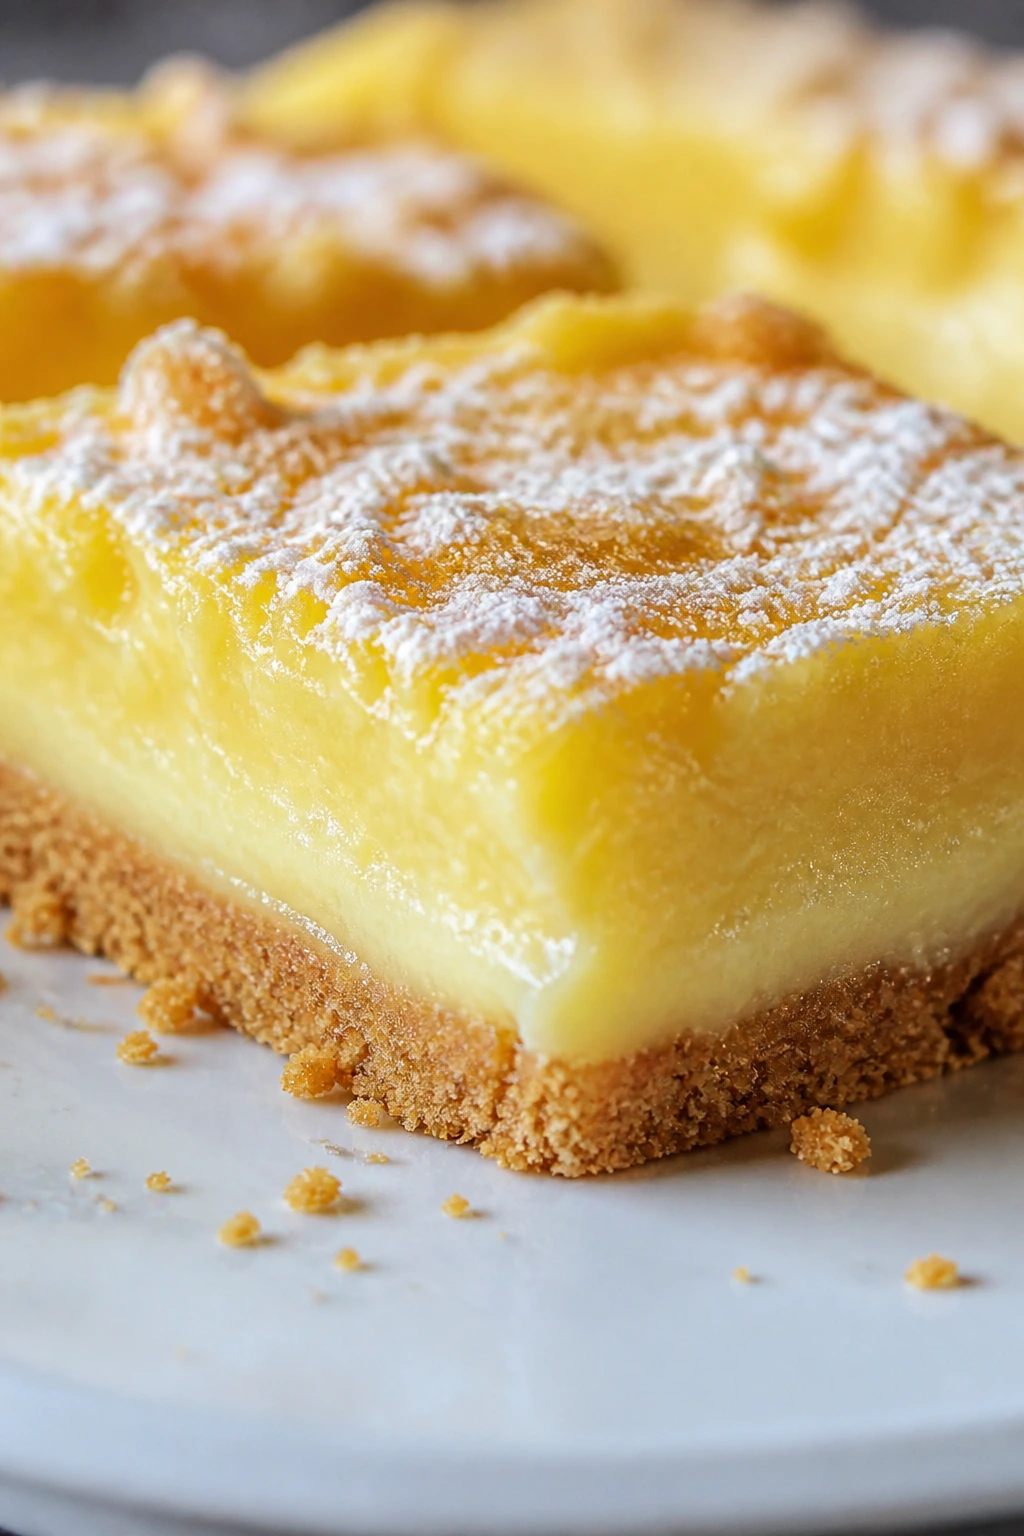
Intro: Lemon dream bars are creamy, tangy, and built for people who want a citrus dessert without a pie crust to roll. The filling is smooth enough to feel light but sturdy enough to cut into neat squares.
Why It Works: A graham base keeps the bars simple, while lemon pudding and cream cheese give the middle a mousse-like texture once chilled. They taste brighter than a lot of pantry desserts because the lemon is doing real work, not just whispering from the side.
Key Ingredients:
- 1 1/2 cups graham cracker crumbs
- 6 tablespoons unsalted butter, melted
- 2 tablespoons sugar
- 8 ounces cream cheese, softened
- 1 box instant lemon pudding mix, 3.4 ounces
- 2 cups cold milk
- 1 cup whipped topping
Quick Steps:
- Press the crumb mixture into an 8×8-inch pan and chill while you make the filling.
- Beat the cream cheese until smooth.
- Whisk the pudding mix and milk, then fold it into the cream cheese.
- Fold in the whipped topping and spread over the crust.
- Chill for at least 3 hours before slicing.
Equipment for This Recipe:
- 8×8-inch pan
- Mixing bowls
- Hand mixer
- Spatula
How to Serve This Dish: Slice into small bars and finish with a few crushed graham crumbs. They bring a cool, clean note to a dessert spread that might otherwise run heavy.
Pro Tips for This Recipe:
- Fully soften the cream cheese or the filling stays lumpy.
- Chill the crust before adding the filling for cleaner layers.
- Use a hot knife for the neatest slices.
Variations on This Dish:
- Berry Topper: Spoon raspberry jam in thin streaks over the bars.
- Orange-Lemon Mix: Swap half the lemon pudding for instant vanilla and add orange zest.
Common Mistakes to Avoid with This Dish:
- Adding warm pudding: It loosens the filling.
- Cutting before chilled: The bars need time to firm up.
27. Pecan Pie Bars

Intro: Pecan pie bars taste like pie in square form, which is exactly why they travel so well. You get a short crust on the bottom and a sticky, nutty top that slices cleanly once it cools.
Why It Works: A buttery crust supports the pecan layer, and a brown sugar filling gives you that caramel-like chew without rolling pastry. The bars are richer than they look, so small squares are enough.
Key Ingredients:
- 1 1/2 cups all-purpose flour
- 1/2 cup powdered sugar
- 3/4 cup unsalted butter, cold and cubed
- 3 large eggs
- 1 cup light corn syrup
- 1 cup packed brown sugar
- 2 tablespoons melted butter
- 1 teaspoon vanilla extract
- 2 cups chopped pecans
- Pinch of salt
Quick Steps:
- Heat the oven to 350°F and line a 9×13-inch pan with parchment.
- Mix the flour, powdered sugar, and cold butter until crumbly, then press into the pan.
- Bake the crust for 15 minutes.
- Whisk the eggs, corn syrup, brown sugar, melted butter, vanilla, and salt. Stir in the pecans.
- Pour over the crust and bake for 20 to 25 minutes, until set at the center.
Equipment for This Recipe:
- 9×13-inch pan
- Mixing bowls
- Whisk
- Parchment paper
How to Serve This Dish: Cut them small and serve at room temperature. A little whipped cream on the side keeps the bars from feeling too dense.
Pro Tips for This Recipe:
- Let the crust bake before adding the filling or the bottom stays soft.
- Cool completely before cutting.
- Toast the pecans if you have time; the flavor gets deeper fast.
Variations on This Dish:
- Chocolate Pecan Bars: Add 1/2 cup chocolate chips to the filling.
- Maple Version: Replace half the corn syrup with maple syrup.
Common Mistakes to Avoid with This Dish:
- Undercooked filling: The center should jiggle only slightly.
- Cutting while warm: The sticky filling needs a full cool.
28. Instant Pudding Parfaits
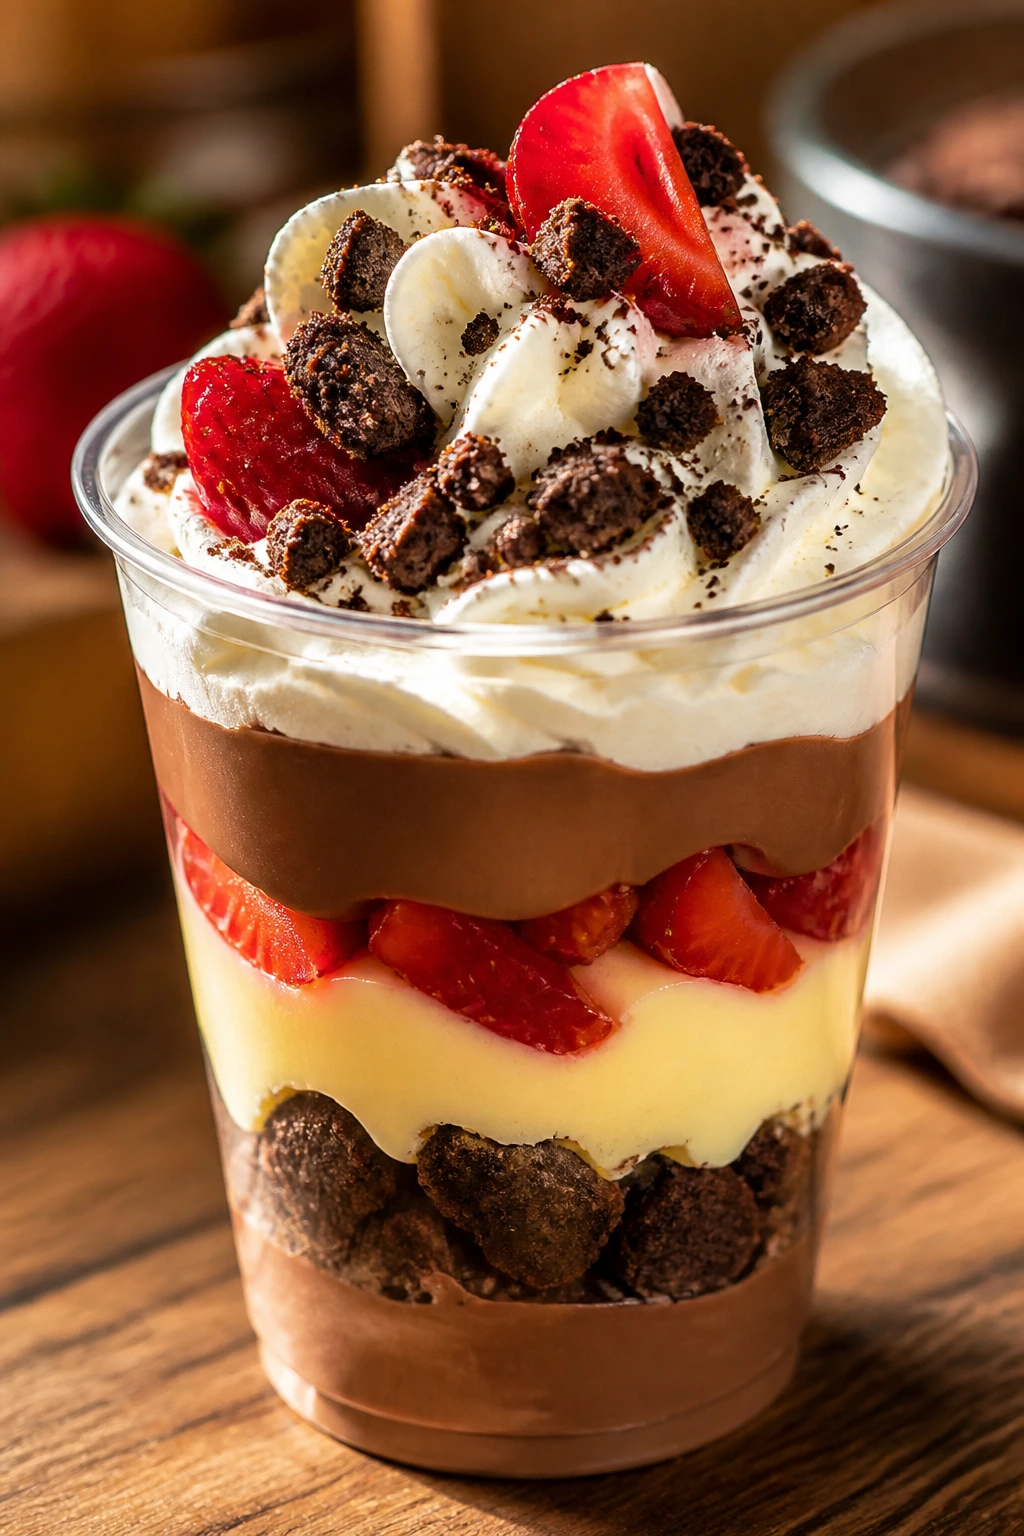
Intro: Parfaits are the easiest answer when you need dessert in individual cups instead of one pan. Layers of pudding, crushed cookies, fruit, and whipped topping look planned even when they came together in ten minutes.
Why It Works: The clear cups show the layers, which makes simple ingredients feel more composed. Instant pudding sets fast, and the cookies soften just enough to taste like a crust.
Key Ingredients:
- 2 boxes instant pudding mix, any flavor, 3.4 ounces each
- 4 cups cold milk
- 1 container whipped topping, 8 ounces
- 2 cups crushed cookies or graham crackers
- 2 cups berries or canned fruit, drained
- 1 teaspoon vanilla extract
Quick Steps:
- Whisk the pudding mix and milk until thick.
- Fold in vanilla and half the whipped topping.
- Layer pudding, crumbs, and fruit in small cups.
- Repeat, finishing with whipped topping.
- Chill until serving.
Equipment for This Recipe:
- Small cups or jars
- Whisk
- Spoon
- Mixing bowl
How to Serve This Dish: Use clear cups so the layers show through. A few berries on top make each serving look fresh without extra work.
Pro Tips for This Recipe:
- Use firm fruit or well-drained canned fruit to avoid watery layers.
- Crush the cookies in irregular pieces for better texture.
- Assemble a few hours ahead, not the night before, if you want crisp crumbs.
Variations on This Dish:
- Chocolate Cherry Parfait: Use chocolate pudding and cherries.
- Banana Cream Version: Layer with sliced bananas and vanilla wafers.
Common Mistakes to Avoid with This Dish:
- Using too much fruit juice: That turns the bottom layer thin.
- Overfilling the cups: Leave room for the topping.
29. Marshmallow Popcorn Clusters
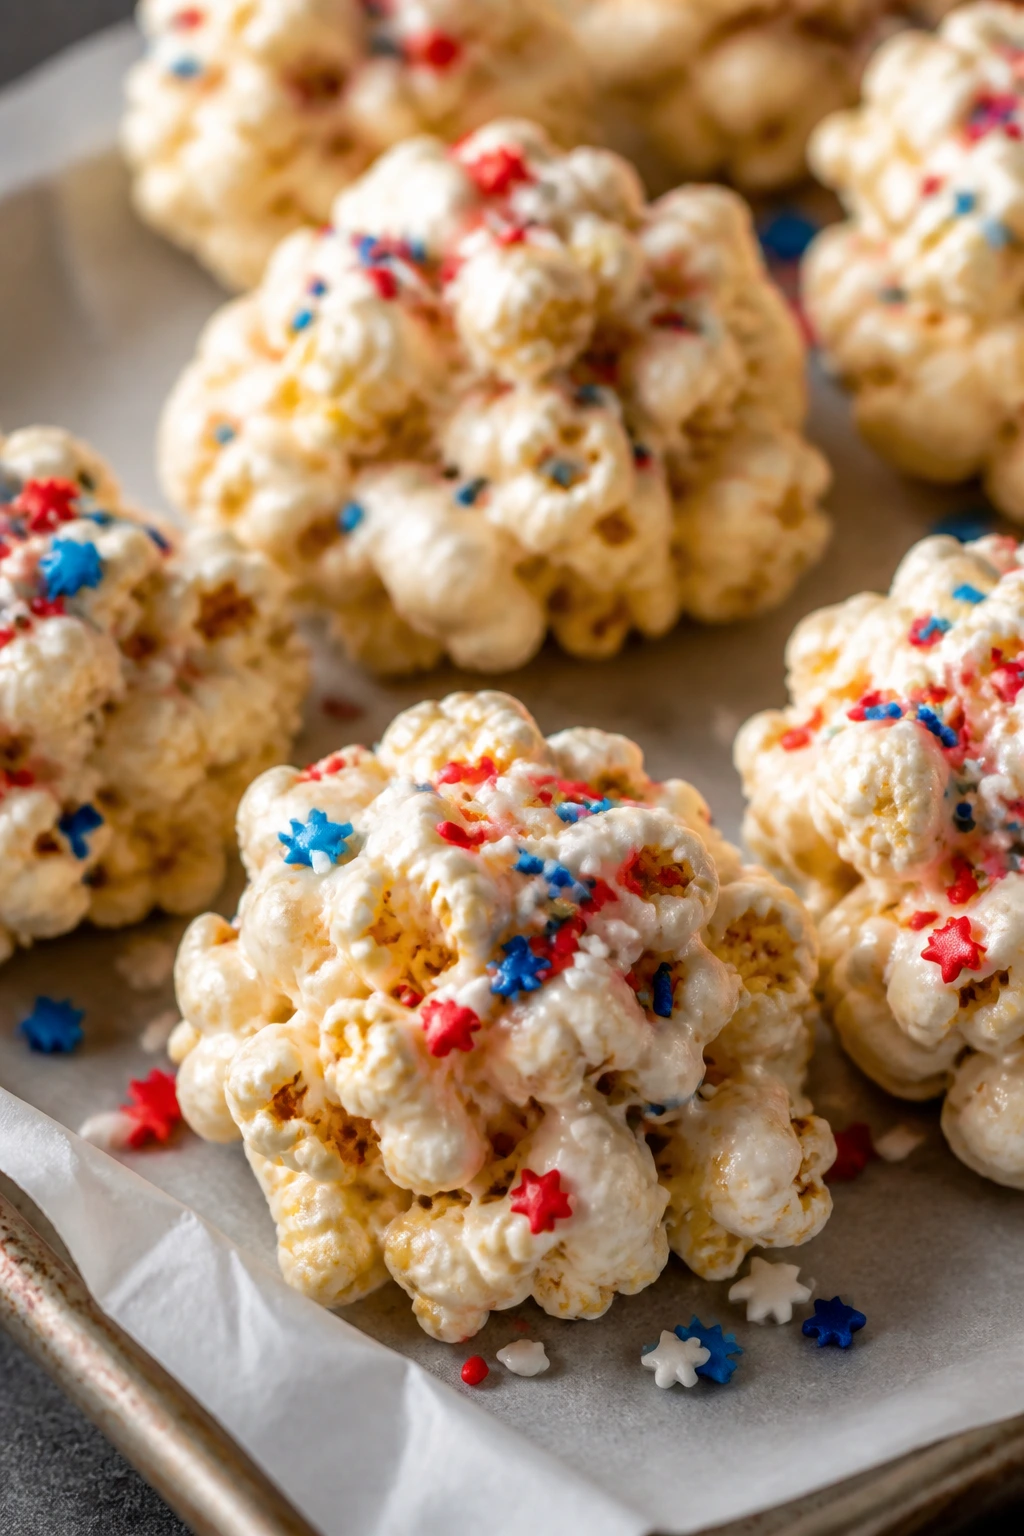
Intro: Popcorn clusters are crunchy, sweet, and a little bit sticky in the best way. Marshmallow binds the kernels together, and sprinkles make the whole bowl look like it belongs near the fireworks.
Why It Works: Melted marshmallow acts as a quick glue, so you get clusters instead of loose popcorn. A pinch of salt keeps the sugar from taking over. The texture stays light if you work fast.
Key Ingredients:
- 12 cups popped popcorn
- 3 tablespoons unsalted butter
- 4 cups mini marshmallows
- 1/4 teaspoon fine salt
- 2 tablespoons red, white, and blue sprinkles
- 1 teaspoon vanilla extract
Quick Steps:
- Line a baking sheet with parchment.
- Melt the butter and marshmallows over low heat with the salt.
- Stir in the vanilla, then fold in the popcorn and sprinkles.
- Drop clusters onto the parchment with two spoons.
- Cool until set.
Equipment for This Recipe:
- Large saucepan
- Parchment-lined tray
- Wooden spoon
- Two spoons for shaping
How to Serve This Dish: Pile the clusters in paper cups or a wide bowl. They work well for casual grazing because nobody needs a fork.
Pro Tips for This Recipe:
- Pop the popcorn plain and salt it lightly yourself.
- Coat the kernels quickly before the marshmallow cools.
- Add the sprinkles at the end so they keep their color.
Variations on This Dish:
- Peanut Butter Popcorn: Stir in 1/2 cup peanut butter with the marshmallows.
- Chocolate Drizzle: Add a thin chocolate stripe once the clusters cool.
Common Mistakes to Avoid with This Dish:
- High heat: Marshmallows scorch fast.
- Waiting too long to shape: The mixture stiffens fast.
30. Raspberry Streusel Bars
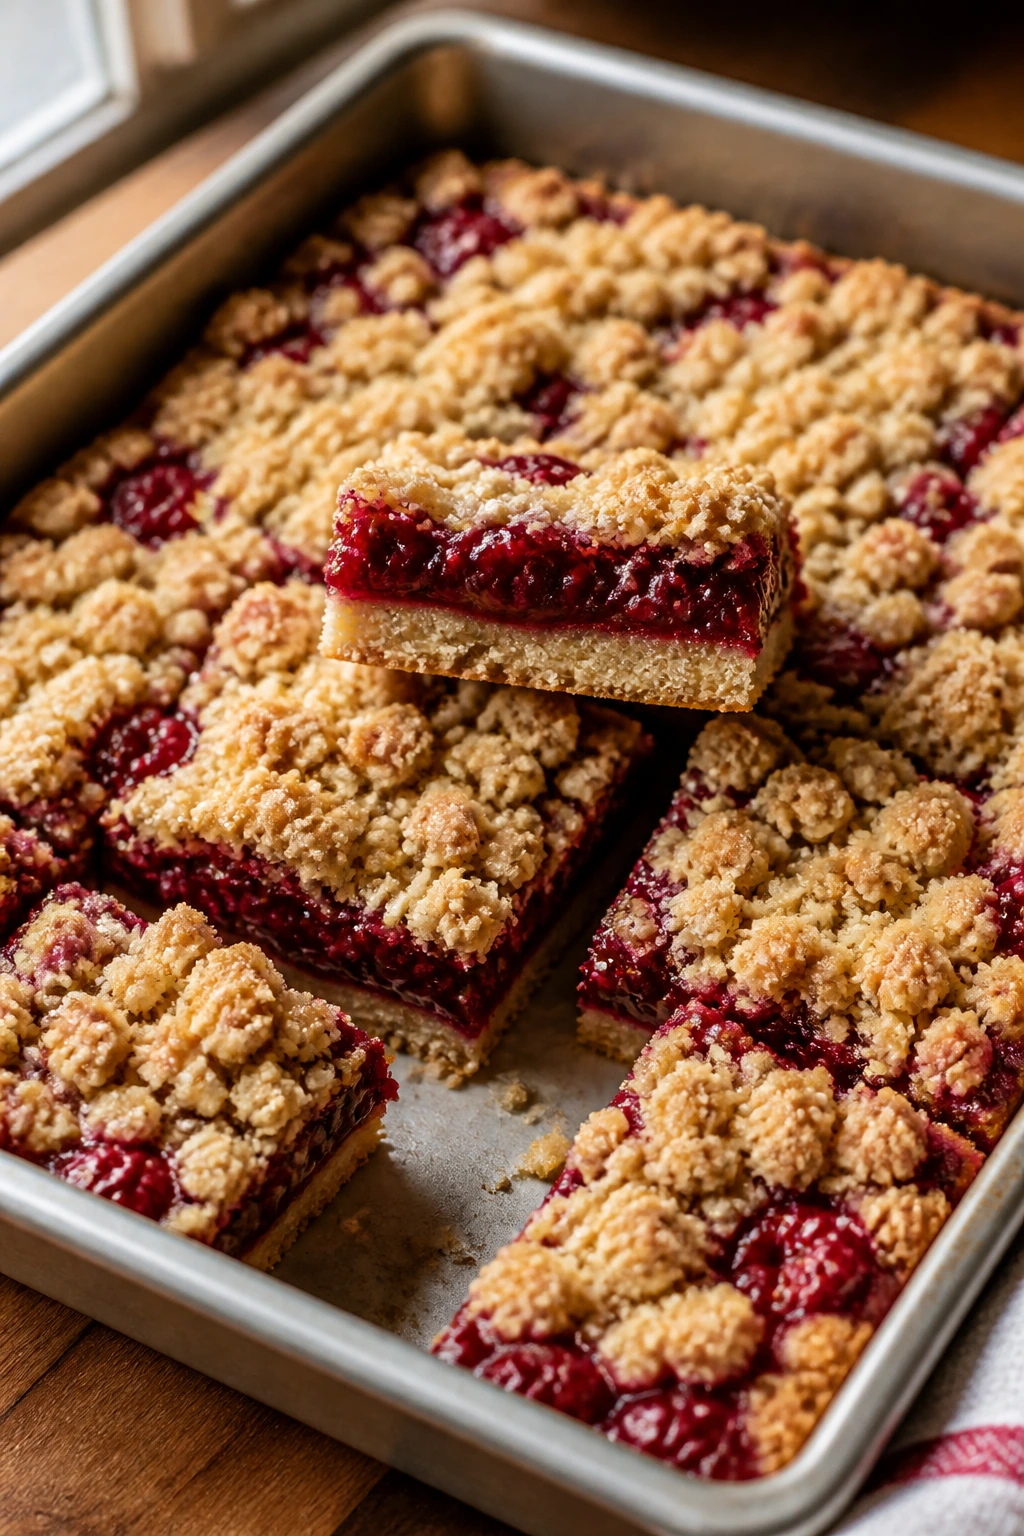
Intro: Raspberry streusel bars bring a bright, tart finish to the dessert table and use ingredients that are usually sitting in the pantry already. Jam in the middle, crumb on top, butter everywhere else. That’s the formula, and it works.
Why It Works: A single dough does triple duty as base, topping, and crumb, which keeps the method short. Raspberry jam bakes into a glossy layer that cuts neatly once cooled, especially if you do not overload the filling.
Key Ingredients:
- 2 cups all-purpose flour
- 1 cup rolled oats
- 3/4 cup packed brown sugar
- 1/2 teaspoon baking powder
- 1/2 teaspoon salt
- 1 cup unsalted butter, melted
- 1 1/2 cups raspberry jam
Quick Steps:
- Heat the oven to 350°F and line an 8×8-inch pan with parchment.
- Mix the flour, oats, brown sugar, baking powder, and salt.
- Stir in the melted butter until crumbly.
- Press half the mixture into the pan, spread the jam over it, then sprinkle the rest on top.
- Bake for 32 to 36 minutes, until the top is golden. Cool completely.
Equipment for This Recipe:
- 8×8-inch pan
- Parchment paper
- Mixing bowl
- Spoon or offset spatula
How to Serve This Dish: Cut into small bars and serve with plain whipped cream if you want to tame the jam’s tart edge. They bring a welcome red color to a dessert spread.
Pro Tips for This Recipe:
- Use thick jam so the layer stays put.
- Press the bottom layer firmly for cleaner slices.
- Chill before cutting if the kitchen is warm.
Variations on This Dish:
- Blueberry Jam Bars: Swap the raspberry jam for blueberry.
- Lemon Crumb Bars: Mix 1 teaspoon lemon zest into the crumb for brightness.
Common Mistakes to Avoid with This Dish:
- Using too much jam: The bars slide apart.
- Not cooling long enough: Warm bars fall apart on the knife.
Why Pantry Staples Make the Best Holiday Desserts
The smartest thing about pantry-staple desserts is not that they are cheap, though that helps. It is that they behave. A can of pie filling bakes the same way every time. A box of pudding mix sets when it should. A tray of brownies tells you exactly when to pull it if you watch the center and stop pretending a timer is enough.
That kind of predictability matters on a holiday when the stove is crowded and the oven may already be full of something salty. You can make one dessert the day before, chill another in the morning, and bake a pan of bars when the last guest texts that they’re running late. No panic. No improvising with a half-empty grocery basket.
Essential Equipment for These Recipes
- 9×13-inch baking pan: The workhorse for dump cakes, bars, poke cakes, and crisps.
- 8×8-inch baking pan: Best for smaller batches, fudge, and richer bars that you want to cut into neat squares.
- Rimmed baking sheet: Needed for bark, cookies, hand pies, and anything with a chance of bubbling over.
- Mixing bowls in two sizes: One large bowl saves time when you are making layers, batters, or no-bake fillings.
- Whisk and rubber spatula: The whisk handles puddings and custards; the spatula keeps sticky batters from wasting a bit.
- Parchment paper: This is not optional for most bars, bark, or fudge. It saves the pan and your mood.
- Cookie scoop or tablespoon: Useful for macaroons, truffles, and clusters when you want the portions even.
- Hand mixer: Helpful for cream cheese fillings, whipped layers, and any dough that needs a smoother finish.
- Cast-iron skillet: Optional, but perfect for skillet cookies and warm fruit desserts that need browning around the edges.
- Airtight containers: Necessary for keeping cookies and bars from drying out after the dessert table quiets down.
Smart Shopping and Ingredient Tips
A good pantry dessert starts with ingredients that are stable, not precious. For canned fruit, pick fillings with recognizable fruit pieces and not just syrup. If you want the dessert to taste like fruit instead of sugar, drain extra liquid where the recipe asks for it. Frozen fruit works well in crisps and cobblers because it holds its shape better than soft, overripe fresh fruit.
Boxed cake mix is not a shortcut to apologize for. It gives you consistent flour, leavening, and sugar in one packet, which is exactly why dump cakes and poke cakes behave so well. If the box includes pudding in the mix, expect a softer crumb. For bars and skillet cookies, standard yellow or white cake mix is the cleaner bet.
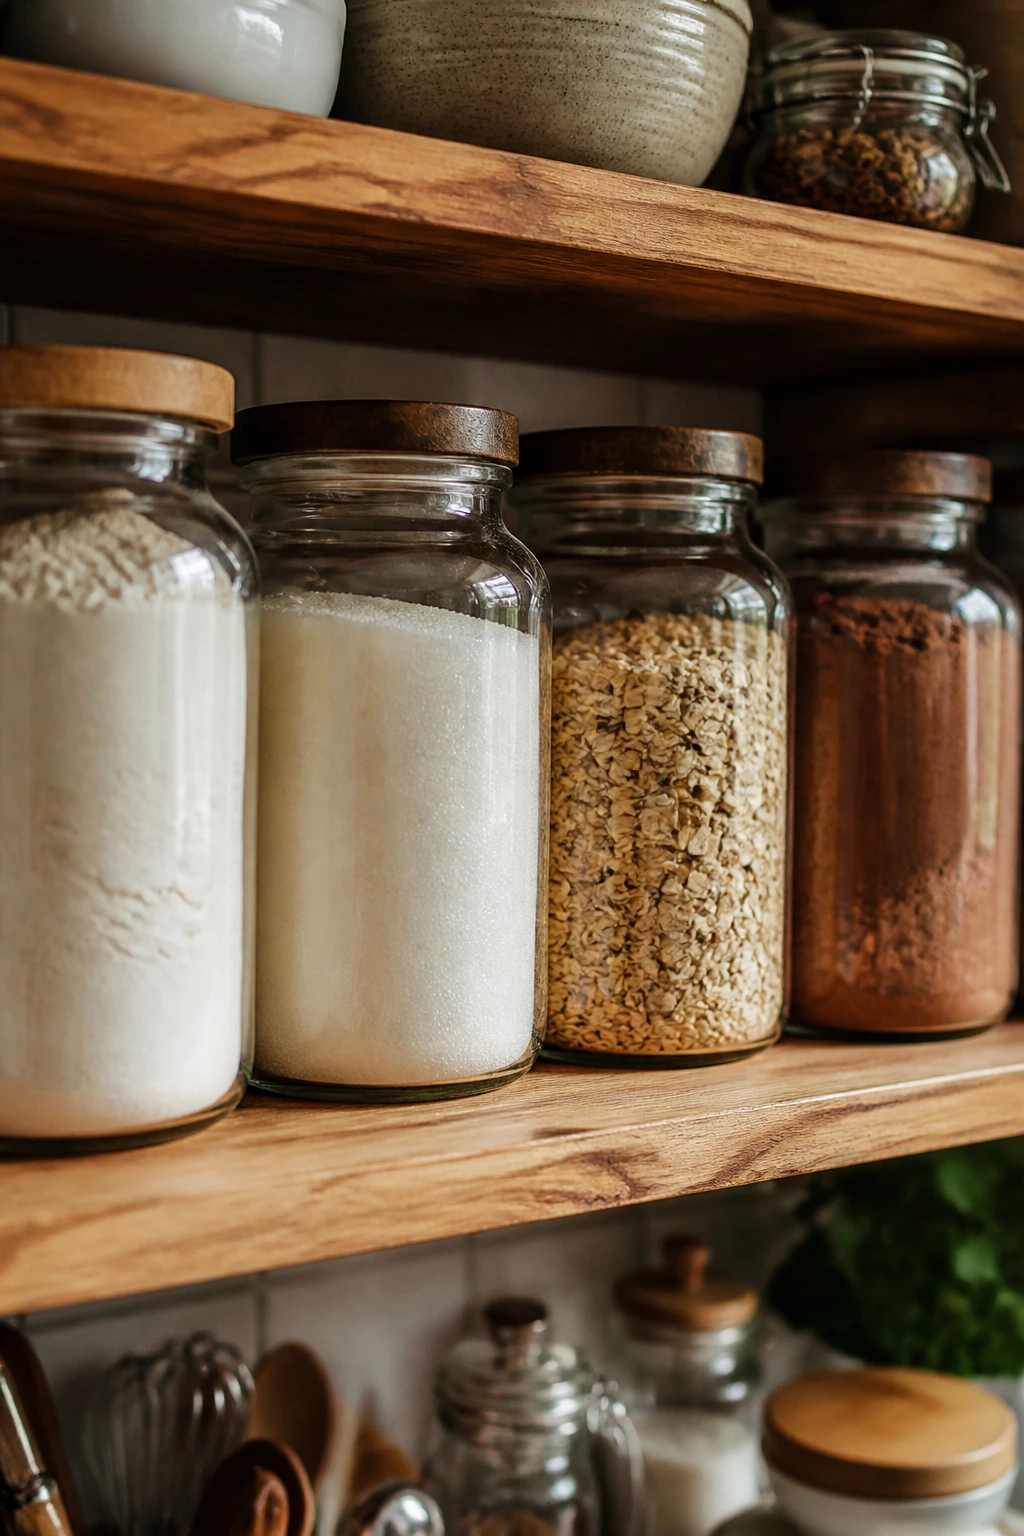
Sweetened condensed milk is one of those shelf-stable ingredients that quietly carries half the collection. It thickens fillings, sweetens without making them grainy, and helps no-bake desserts set after chilling. The same goes for graham cracker crumbs, instant pudding, oats, cocoa, and chocolate chips. Buy the plain versions when you can; flavored add-ins make it harder to control the final taste.
How to Serve 4th of July Desserts
Presentation: Build a dessert table in layers of height. Put bars on flat platters, spoon cobblers and crisps into shallow bowls, and use small glass cups for parfaits or pudding-based desserts so the layers show through.
Accompaniments: Fresh berries, vanilla ice cream, whipped cream, and cold milk cover almost every dessert in this collection. Lemonade and iced tea are the easiest drinks to keep nearby, and they do a good job of cutting through sweet fillings and chocolate bark.
Portions: Rich desserts like fudge, pecan bars, and truffles should be cut smaller than you think; one or two bites is enough. Softer desserts like dump cake and cobbler can be served in larger spoonfuls. If you are feeding a mixed crowd, plan for at least two dessert choices so people can choose between something creamy and something crisp.
Beverage Pairing: Cold brew coffee works better than hot coffee for brownies, blondies, and chocolate bark. Lemonade or sparkling water with citrus suits lemon pie, berry bars, and anything with fruit filling.
Additional Tips and Flavor Boosters
Flavor Enhancement: A tiny pinch of salt on chocolate desserts, even the sweet ones, keeps the flavor from flattening out. It matters more than another teaspoon of vanilla.
Customization: If you want a red-white-and-blue look without baking more than once, finish coconut macaroons, bark, or bars with berries and sprinkles. It takes seconds and gives the whole tray a holiday cue.
Serving Suggestions: Toasted coconut, chopped nuts, crushed pretzels, and a thin drizzle of melted chocolate are the easiest ways to make pantry desserts look finished. Use one garnish, not five. A little restraint goes a long way.
Make-It-Yours: For gluten-free guests, use certified gluten-free oats, a gluten-free flour blend in the bar recipes, or a bark/candy dessert that does not rely on flour at all. For dairy-free baking, coconut oil and plant milk can stand in for butter and milk in several of the no-bake recipes, though the texture changes a bit.
Make-Ahead, Storage, and Reheating Guidance
Bars, brownies, blondies, cookies, bark, and fudge all keep well in airtight containers at room temperature for 3 to 4 days, as long as they do not contain fresh fruit or cream filling. If you are stacking them, slip parchment between layers so the tops do not stick. Most of these desserts also freeze well for up to 2 months; freeze them in a single layer first, then move them to a container or freezer bag once solid.
Fruit desserts and anything with pudding, cream cheese, or whipped topping belong in the refrigerator. Keep them chilled for up to 3 days for the best texture. Banana pudding trifle, lemon icebox pie, lemon dream bars, coconut cream pie, and parfaits all taste better after a rest, but they do not like sitting out on a warm table for hours. If the weather is hot, put those dishes out in smaller batches and refill from the fridge.
For reheating, warm cobblers, crisps, skillet cookie scoops, and dump cake in a 300°F oven for 8 to 10 minutes, loosely covered with foil if the top is already dark. Brownies and bars usually do not need reheating at all, though a few seconds in the microwave softens the edges if that is your thing. Bark, truffles, and fudge should be served cool or at room temperature so the coating stays firm.
Variations and Adaptations to Try
Fruit-First Version: Use canned, frozen, or jam-based desserts when fresh fruit is scarce or too expensive. The key is draining liquid where needed and keeping the filling thick enough to stay put.
Gluten-Free Pantry Tray: Swap in certified gluten-free oats and a good gluten-free all-purpose blend for bars, crisps, and cookies. For the desserts that lean on graham crackers or cake mix, choose a recipe built around pudding, bark, fudge, or coconut instead.
Dairy-Light Swap: Some recipes can handle plant butter and oat milk without much trouble, especially no-bake cookies, bark, and fruit crisps. The texture may be a little softer, so chill time matters more.
Kid-Friendly Mix: Choose desserts that cut into squares or bite-size pieces—Rice Krispies treats, fudge, bark, and truffles are the easiest to hand to kids without a mess. Skip anything with runny filling if you are serving outside.
Sharper Citrus Finish: If the dessert feels too sweet, lemon zest or a spoonful of bottled lemon juice brings it back into balance fast. This works especially well in berry bars, parfaits, and whipped fillings.
Chocolate-Heavy Path: If half your crowd only wants chocolate, lean on brownies, skillet cookie, bark, fudge, and truffles. You can still keep the holiday look with red and blue sprinkles or berries on the side.
Common Mistakes to Avoid
The most common mistake is treating pantry desserts like they are all interchangeable. They are not. Bark needs a cold set, crisp cookies need room on the tray, and fruit desserts need enough rest time for the filling to thicken. If you rush the wrong dessert, the result is usually a puddle, a smear, or a pan that refuses to cut cleanly.
Another easy misstep is using wet fruit without adjusting for it. Canned peaches that are still dripping syrup, thawed berries that were never drained, and jam layers that are too thick all change the texture fast. The fix is simple: drain well, add a little cornstarch when needed, and let the dessert cool so the filling can settle.
Overbaking is the silent enemy in this whole collection. Brownies go dry. Bars get crumbly. Cookies harden after they leave the oven. Pull most baked desserts when the center still looks a touch soft, because carryover heat will finish the job on the counter.
A final mistake: building too much sweetness into one dessert. If the filling is sugary, add salt, lemon, or tart berries. If the topping is sweet, make the crust plain. The desserts that disappear first are usually the ones with contrast.
Frequently Asked Questions
Can I make these desserts a day ahead?
Yes, and many of them are better that way. Bars, brownies, fudge, bark, and most chilled desserts slice more cleanly after a full rest. The only ones I would make close to serving time are anything with bananas or a very crisp topping.
Which desserts travel best to a potluck or picnic?
Bars, cookies, bark, fudge, Rice Krispies treats, and hand pies travel the cleanest. Anything with a creamy filling or icebox texture should stay in a cooler until you serve it.
Can I use fresh fruit instead of canned or frozen?
You can, but the fruit needs to be ripe and not watery. Frozen fruit is often a better swap in crisps and cobblers because it bakes down predictably. Fresh fruit works well in parfaits and as a topping, where it does not have to hold the structure by itself.
How do I keep desserts from getting soggy outside?
Use shallow containers, keep chilled desserts in a cooler, and bring out only part of the batch at once. Bark, cookies, bars, and fudge are sturdier than pies and cream fillings, so they make better choices for warm tables.
What if I only have self-rising flour?
Use it only in recipes that do not already rely on baking powder or baking soda, or the balance gets thrown off. For bars and cookies, plain all-purpose flour is safer. If self-rising flour is all you have, choose a crisp or candy-style dessert instead.
Which desserts can be made without turning on the oven?
Lemon icebox pie, banana pudding trifle, Rice Krispies treats, peanut butter fudge, Oreo truffles, instant pudding parfaits, popcorn clusters, and several bark recipes need no oven at all. That’s the list I reach for first when the kitchen is hot.
How do I scale these recipes for a bigger crowd?
Double bars and sheet-pan desserts easily, but use a larger pan or two pans so the thickness stays the same. For cookies and truffles, make more batches instead of doubling the bowl if your mixer struggles. Candy-style desserts scale well, but they set faster when the batch is huge, so work quickly.
Can I reduce the sugar without ruining the texture?
A little, yes. Cut sugar by about 1/4 in brownies, bars, and crisps if you also add a pinch of salt or a tart fruit layer. In fudge, candy, and no-bake cookies, I would not tinker much; the sugar does structural work there.
A Dessert Table Built from the Pantry
The nicest thing about these desserts is how little drama they ask for. A can of fruit, a box of pudding, a sleeve of crackers, a stick of butter, and a bag of chocolate chips can turn into something that looks thought out and tastes like you knew exactly what you were doing.
That’s the real win here. Not perfection. Not a dessert spread that belongs in a magazine. Just a table full of crisp bark, chewy bars, cold pie, fudgy squares, and fruit desserts that hold together when the plates start moving. If you keep a few of these recipes in your back pocket, the holiday gets easier fast.