
A buttery kid friendly dessert with cream cheese frosting has to solve a very specific problem: it needs to taste rich without feeling heavy, and it needs to cut into neat squares instead of collapsing into a sugary heap on the plate. That is why I keep coming back to a vanilla sheet cake for this kind of job. It gives you the soft, tender crumb people expect from a homemade cake, but it also behaves like a snack cake that can survive a paper plate, a birthday napkin, or a lunchbox with one of those little blue ice packs tucked beside it.
The frosting matters just as much as the cake. Cream cheese frosting brings a clean tang that keeps the butter and sugar from turning cloying, and when it’s made with block cream cheese and real butter, it sets up in a way that feels creamy instead of slippery. The texture is part of the appeal here. You want a cake that smells like vanilla and warm butter when it comes out of the oven, then cools into something you can slice with confidence.
I like this style of dessert because it doesn’t ask for tricks. No layered assembly. No fussy piping. No panic if the top isn’t perfectly smooth, because a few casual swoops in the frosting look right on a cake like this. The whole thing is generous, friendly, and a little old-fashioned in the best way.
Why This Cake Works at a Family Table
A 9×13-inch sheet cake earns its keep because it behaves. The crumb stays soft, the edges get a little color, and every square comes out roughly the same size, which is a bigger advantage than people admit when kids are standing around waiting for dessert. You are not building a showpiece here. You are making something that disappears from the pan and leaves behind clean forks.
- Soft squares, not messy wedges: This cake slices into tidy pieces after a short chill, so the frosting stays on top instead of sliding off the sides.
- Cream cheese frosting with actual structure: Block cream cheese and butter make a topping that spreads smoothly, then firms up just enough to hold a swirl line from the spatula.
- One pan, no stacking: A single 9×13-inch pan means less stress, fewer dishes, and no layer cake balancing act.
- Mild vanilla flavor: The cake tastes familiar and mellow, with enough butter and vanilla to feel special without going in a sharp or spicy direction.
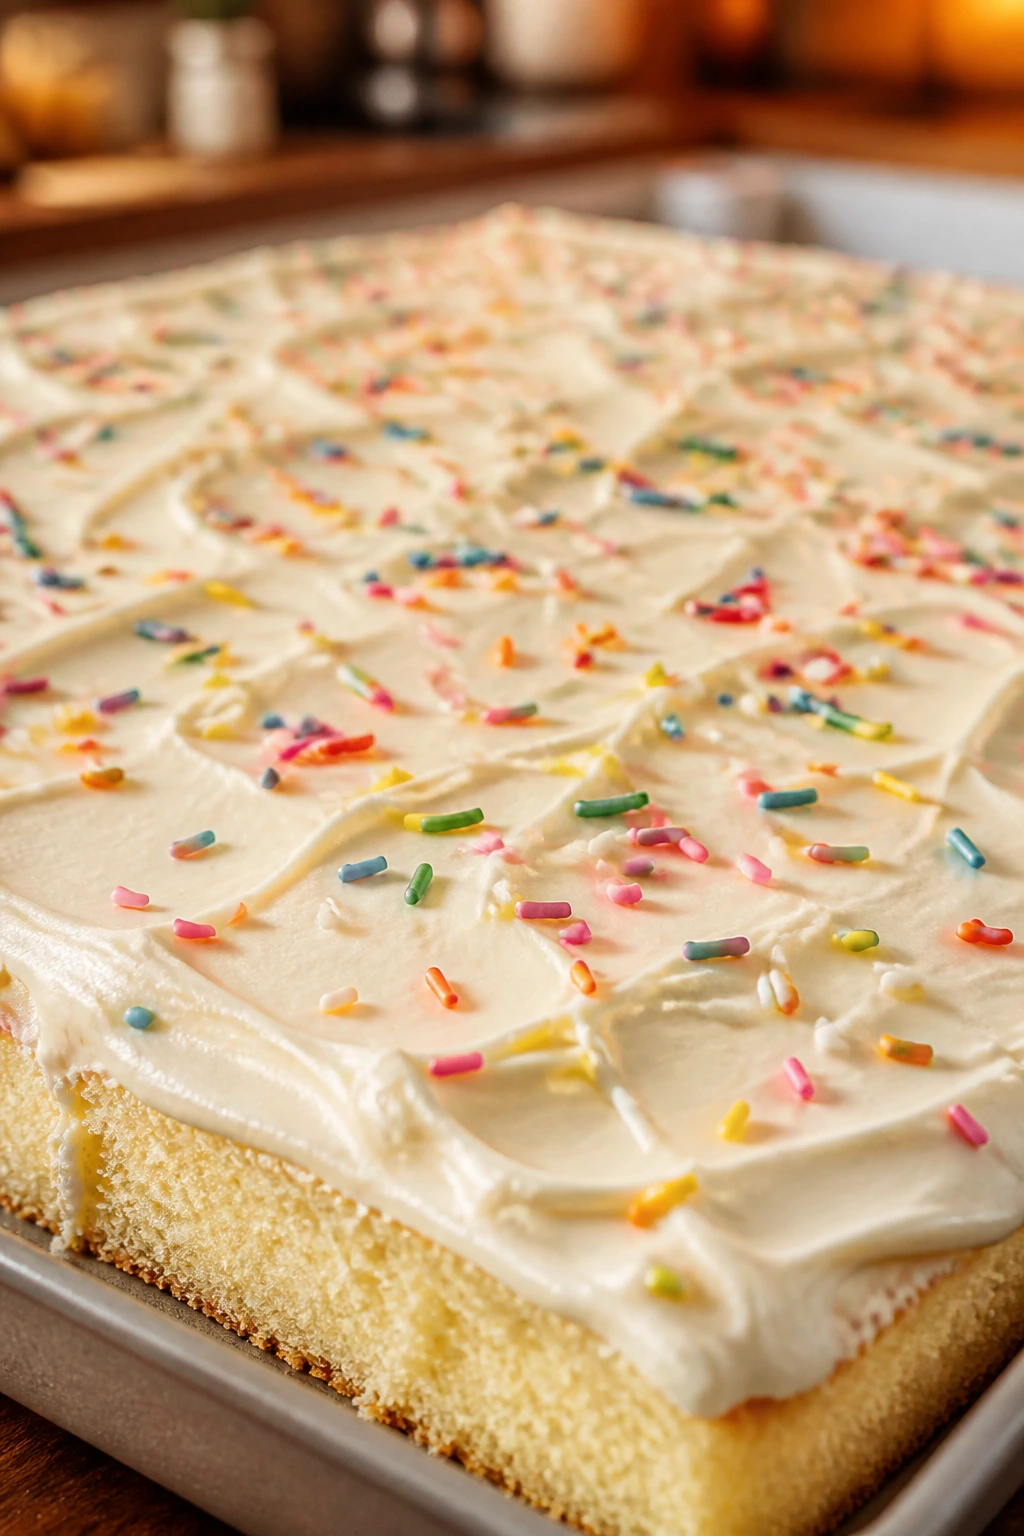
- Easy to dress up or leave plain: A handful of rainbow sprinkles changes the mood fast, but the cake still works with no topping beyond the frosting.
- Good the next day: The crumb stays tender overnight, and the frosting firms up a touch in the fridge, which makes leftovers easy to pack or serve later.
Pan Size, Yield, and Timing
A metal 9×13-inch pan is my pick here because it bakes evenly and gives the cake a gentle edge before the center dries out. Glass pans can work, but they tend to bake slower and leave the middle paler than I want for a vanilla sheet cake. This one should look faintly golden on top, not bronzed and dry.
Yield: 12 to 15 squares
Prep Time: 25 minutes
Cook Time: 30 to 35 minutes
Total Time: 1 hour 55 minutes, including cooling and frosting
Chill/Rest Time: 1 hour cooling before frosting, plus 20 minutes chilling after frosting if you want cleaner cuts
Difficulty: Beginner — the batter uses familiar pantry ingredients, and the frosting comes together in a few minutes with a hand mixer.
Best Served: Fully cooled and sliced, or chilled briefly after frosting for the neatest squares
Ingredients for the Cake and Frosting
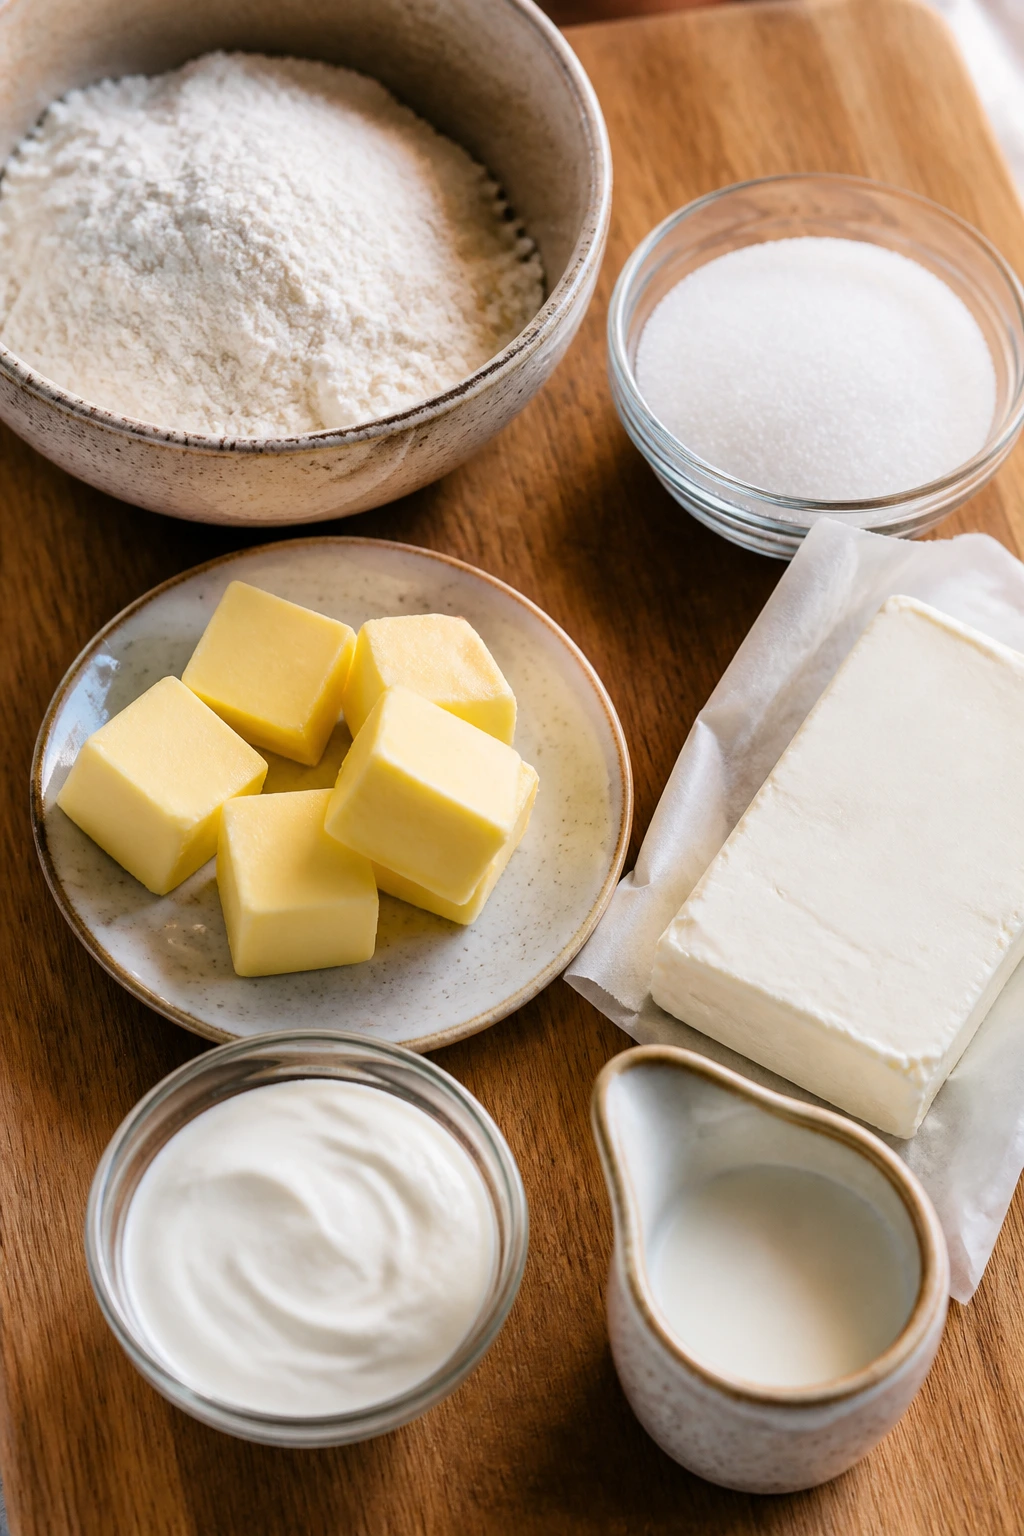
The ingredient list is ordinary on purpose. That is part of why this dessert works so well on a busy table. The butter does the heavy lifting, the sour cream keeps the crumb soft, and the cream cheese frosting gives the whole cake a cool, tangy top that keeps each bite from tasting flat.
For the Vanilla Sheet Cake:
- 2 1/2 cups all-purpose flour
- 2 teaspoons baking powder
- 1/2 teaspoon baking soda
- 1 teaspoon fine sea salt
- 1 cup (2 sticks) unsalted butter, softened to cool room temperature
- 1 1/2 cups granulated sugar
- 4 large eggs, room temperature
- 2 teaspoons pure vanilla extract
- 1 cup whole milk, room temperature
- 1/2 cup sour cream, room temperature
For the Cream Cheese Frosting:
- 8 ounces block cream cheese, softened but still cool
- 1/2 cup (1 stick) unsalted butter, softened
- 4 cups powdered sugar, sifted if lumpy
- 2 teaspoons vanilla extract
- 1/8 teaspoon fine salt
- 1 to 2 tablespoons heavy cream or whole milk, only if needed
Optional Finishing Touches:
- 1/4 cup rainbow sprinkles
Why Each Ingredient Matters
Cake Batter
What to use: 2 1/2 cups all-purpose flour, 2 teaspoons baking powder, 1/2 teaspoon baking soda, 1 teaspoon fine sea salt, 1 cup butter, 1 1/2 cups sugar, 4 eggs, 2 teaspoons vanilla, 1 cup whole milk, and 1/2 cup sour cream.
Preparation: Whisk the dry ingredients together before you start creaming the butter and sugar. Bring the milk, sour cream, and eggs to room temperature so the batter emulsifies instead of looking curdled and broken.
Substitutions: Cake flour can replace up to 1 cup of the all-purpose flour if you want an even softer crumb, and if you use salted butter, reduce the salt to 1/2 teaspoon. Buttermilk can stand in for the milk and sour cream together if that is what you have, though the texture will be a little tighter and the tang a little sharper.
Tips: The butter should feel pliable, not greasy. If it smears on your fingers like lotion, it is too warm and the cake may bake up heavier than you want. I also like the sour cream here because it gives the crumb a fine, almost velvety feel the next day, which matters more than people expect.
Cream Cheese Frosting
What to use: 8 ounces block cream cheese, 1/2 cup butter, 4 cups powdered sugar, 2 teaspoons vanilla, 1/8 teaspoon salt, and a little cream or milk only if the frosting needs loosening.
Preparation: Soften the cream cheese and butter just enough that they beat together without lumps, then stop there. You want them soft, not oily.
Substitutions: Mascarpone can replace part of the cream cheese if you want a milder tang, and if you only have salted butter, skip the extra salt in the frosting. Low-fat cream cheese will work in a pinch, but the frosting sets softer and has a more watery finish.
Tips: Use block cream cheese, not the whipped tub version. The tub stuff contains more air and less body, and you can feel the difference as soon as you start spreading it. The frosting should hold a soft peak on the spatula, not drip off the bowl.
Optional Finish
What to use: 1/4 cup rainbow sprinkles for a birthday feel, lunchbox squares, or a cake that needs a little color on top.
Preparation: Add them after the frosting is spread, while the top is still tacky enough to catch them.
Substitutions: Jimmies hold their shape better than tiny nonpareils, which can bleed color into the frosting. If you want a more grown-up finish, leave the sprinkles off and keep the frosting plain.
Tips: A small handful goes farther than you think. Too many sprinkles turn the top busy and gritty, and the cake loses that clean vanilla look that makes the frosting stand out.
Tools That Make the Process Easier
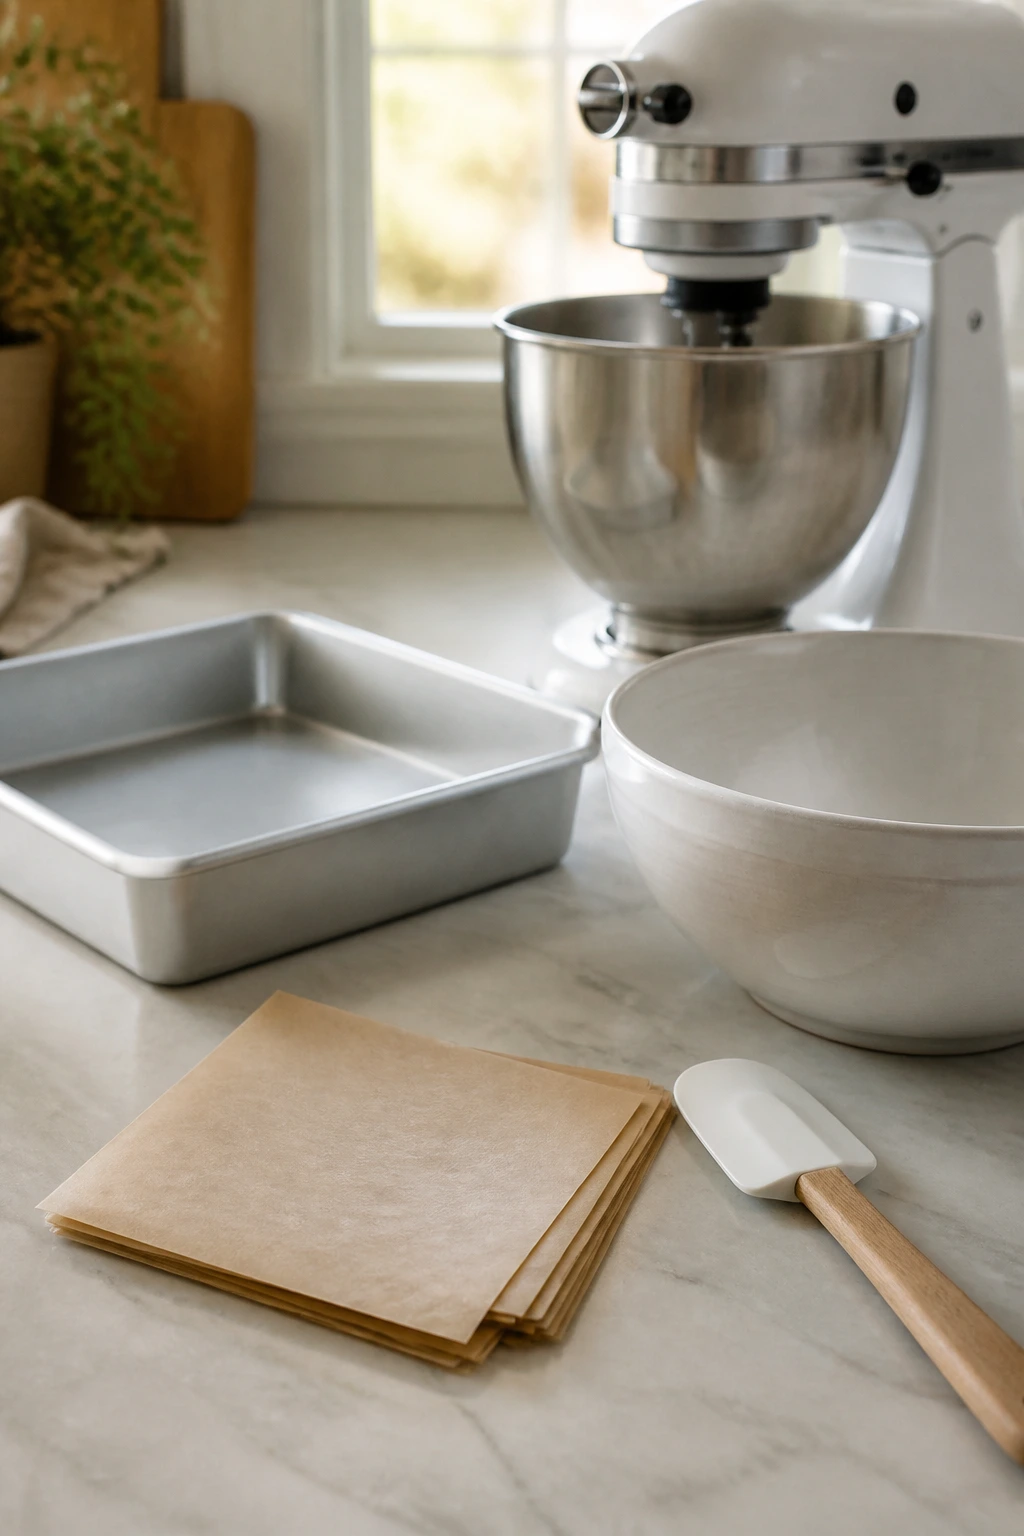
A cake like this does not need a pile of special gear, but the right few tools make the whole thing calmer. I am not a believer in fancy equipment for its own sake. A sturdy mixer and a good pan do more here than any decorative tool ever could.
- 9×13-inch metal baking pan — Bakes the cake evenly and gives the edges a light golden finish without drying the center.
- Parchment paper — Useful for a sling that lets you lift the cake out cleanly if you want sharp-cut squares.
- Stand mixer or hand mixer — Either one works; a hand mixer is enough, though a stand mixer saves your arms during the creaming step.
- Large mixing bowl — You need room to alternate wet and dry ingredients without flinging flour around the counter.
- Medium bowl or large measuring jug — Handy for whisking the milk and sour cream together before they go into the batter.
- Rubber spatula — Best for scraping the bowl and folding the batter the last little bit by hand.
- Offset spatula or butter knife — Helps spread the frosting into a smooth, even layer.
- Wire cooling rack — Lets air move around the pan so the cake cools instead of steaming itself soggy underneath.
- Fine-mesh sieve — Optional, but useful if your powdered sugar has clumps and you want a smooth frosting without extra beating.
Mixing the Batter Without Toughening It
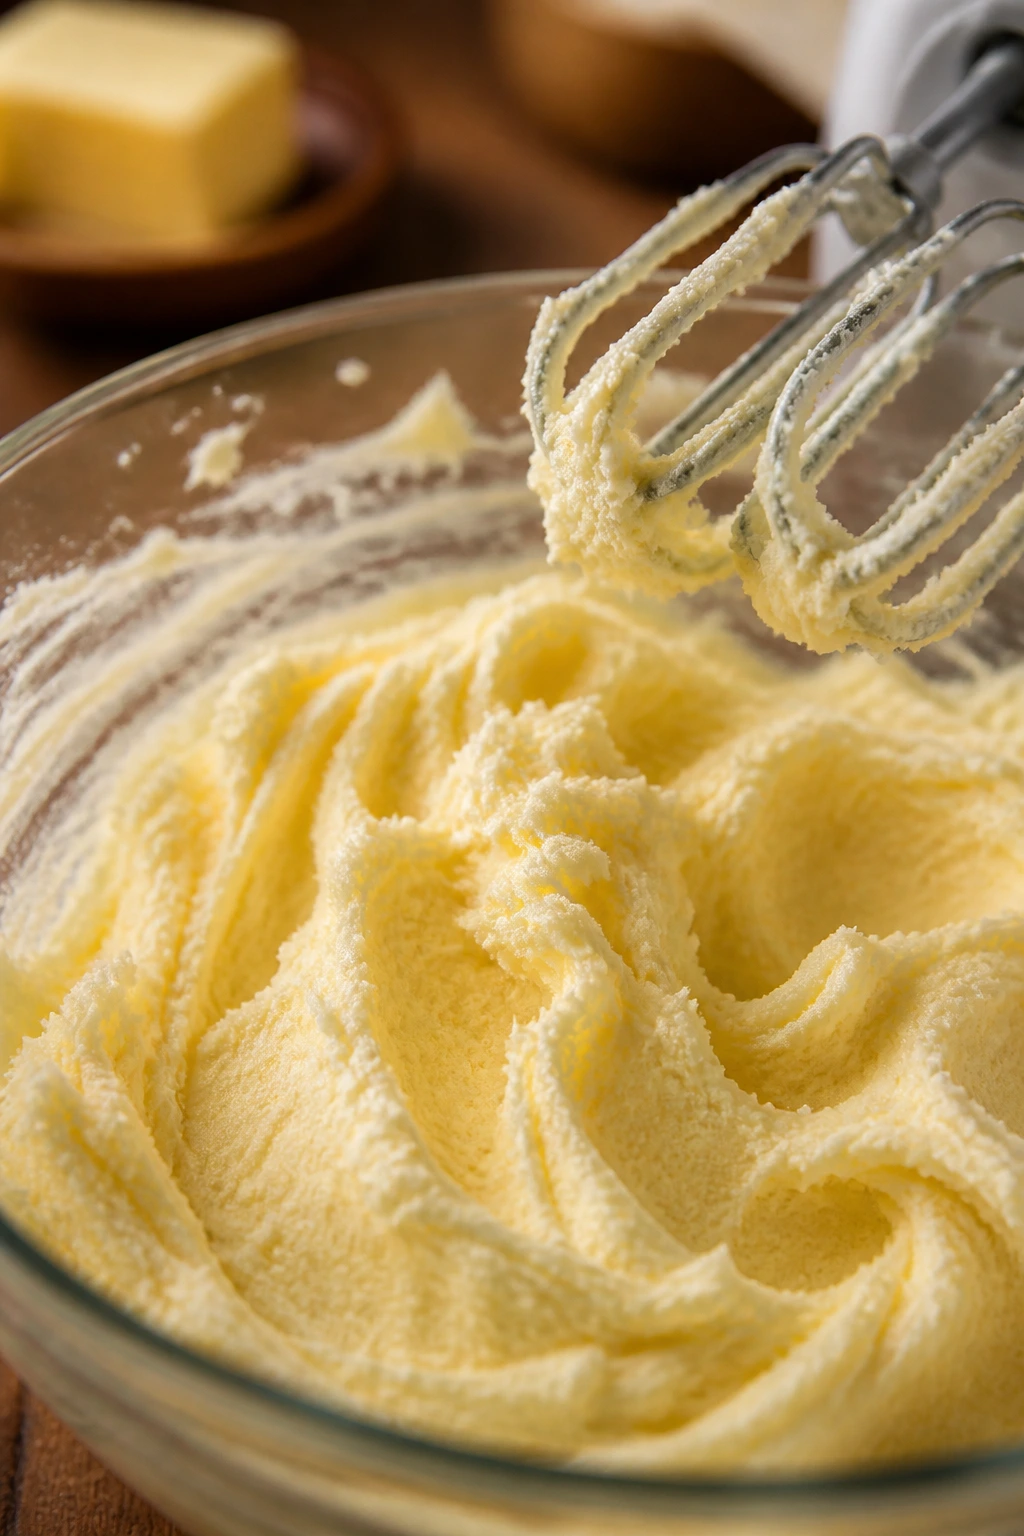
Cold butter is the enemy here. The cake wants butter that presses under your finger but still holds its shape, because that is what traps air when you cream it with sugar. If the butter is too soft, it smears instead of whipping, and the cake loses the lightness that keeps each square tender.
Prep the Pan and Dry Ingredients
-
Preheat the oven to 350°F (175°C) and position a rack in the center of the oven.
-
Grease a 9×13-inch metal baking pan with butter, then line it with parchment paper if you want a clean lift-out later. Leave enough parchment to make little handles on the short sides. That extra strip saves you from digging the first square out with a spatula.
-
Whisk the flour, baking powder, baking soda, and salt in a medium bowl until the mixture looks evenly combined. You should not see pockets of baking soda hiding in the flour.
Cream and Build the Batter
-
Beat the butter and sugar together in a large bowl on medium speed for 3 to 4 minutes, until the mixture is pale, fluffy, and noticeably larger. Scrape the bowl once or twice. The texture should look like softened whipped frosting, not grainy butter.
-
Add the eggs one at a time, then the vanilla, beating for about 20 to 30 seconds after each egg. If the mixture looks a little curdled at this point, keep going. It usually smooths out once the flour goes in.
-
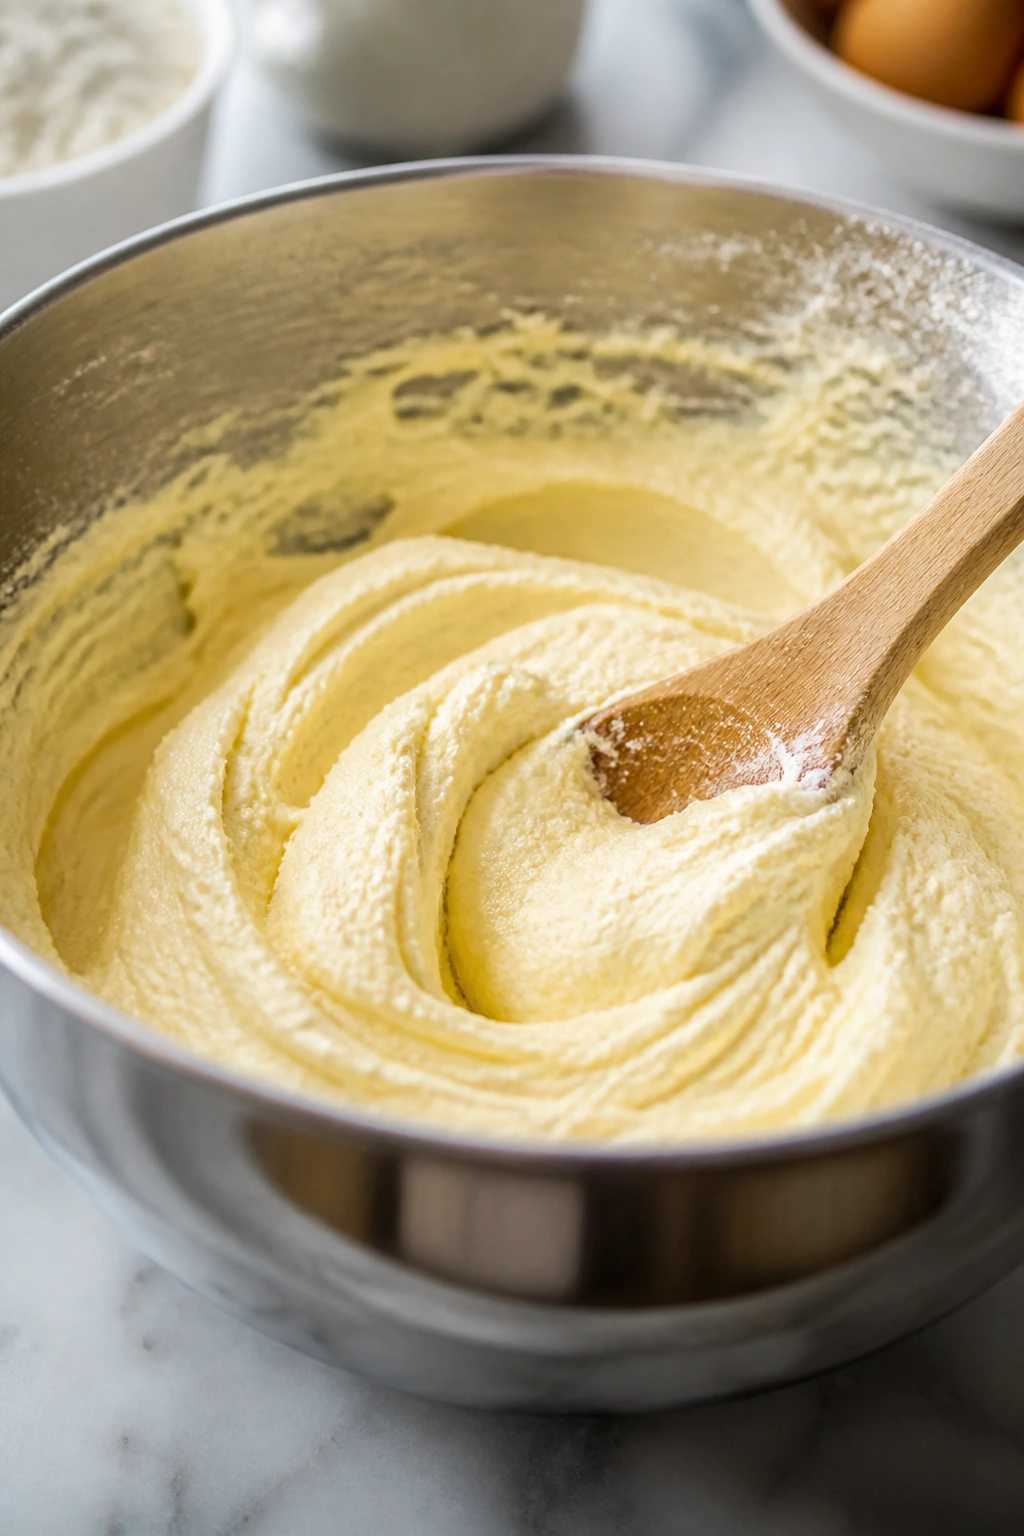
Stir the milk and sour cream together in a measuring jug or small bowl. Add the dry ingredients in three additions, alternating with the milk-sour cream mixture in two additions, beginning and ending with the dry ingredients. Mix on low speed and stop as soon as the streaks disappear. Do not overmix — overworked batter gives you a tighter, drier cake.
-
Spread the batter into the prepared pan and smooth the top with the spatula. Tap the pan once or twice on the counter to pop the biggest air bubbles. The surface does not need to be perfect; it only needs to be even.
Baking and Cooling for a Tender Crumb
The cake is done before it looks completely done. That sounds annoying until you bake it a few times and realize the center keeps cooking for a minute or two after the pan leaves the oven. If you wait for a bone-dry toothpick, you have already gone too far.
-
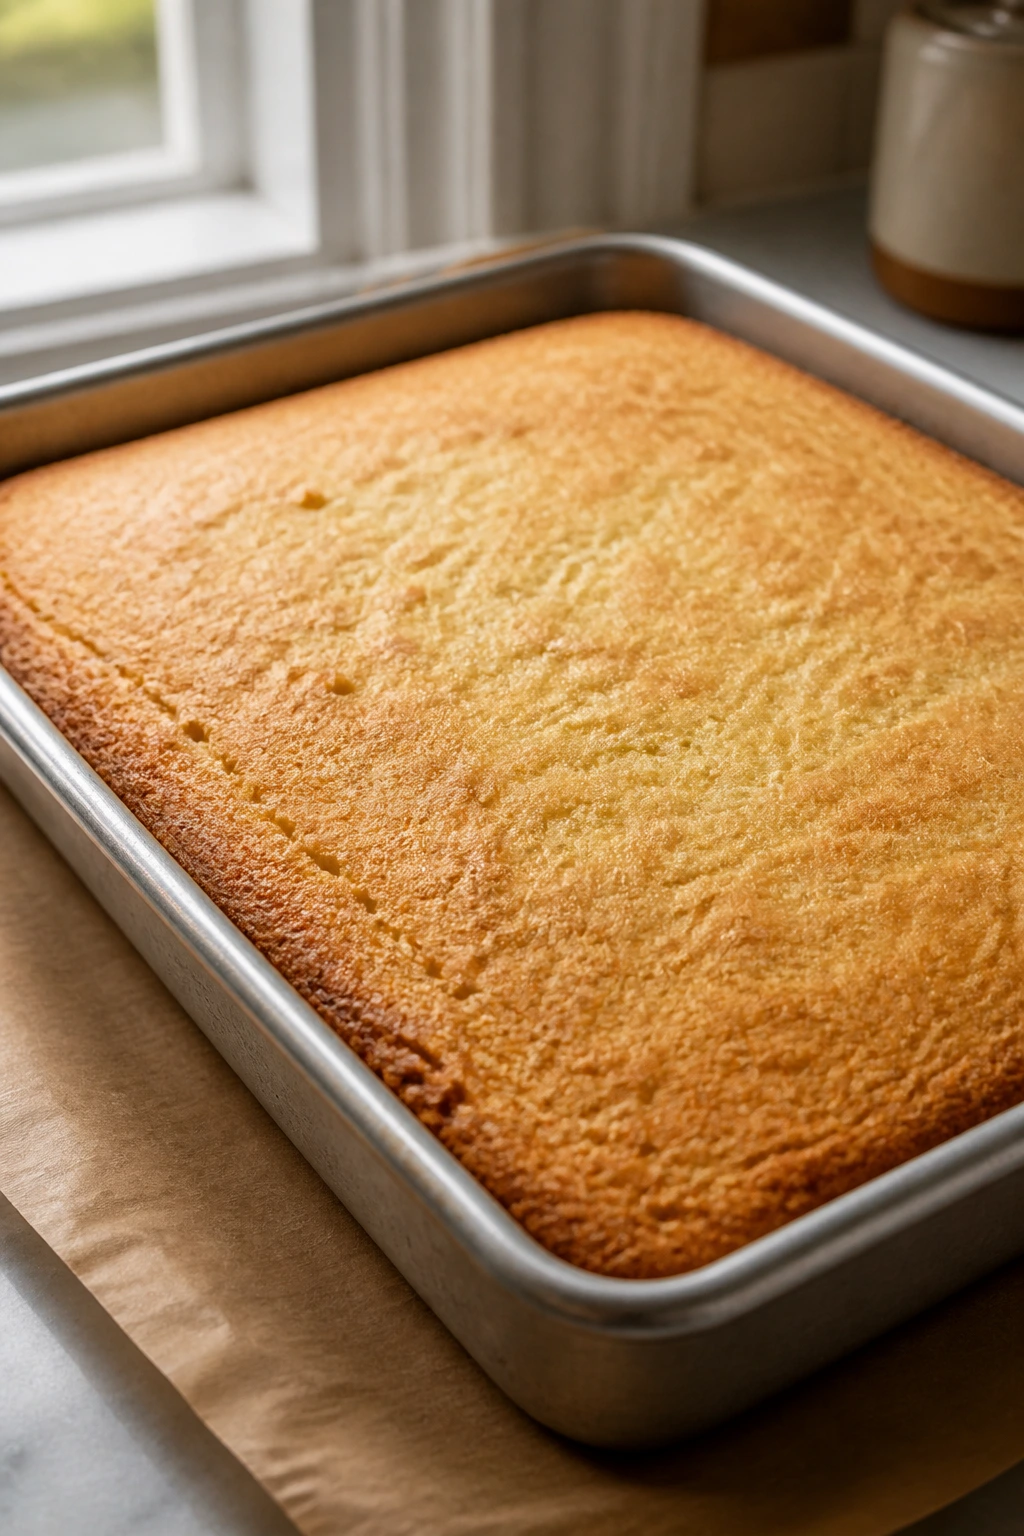
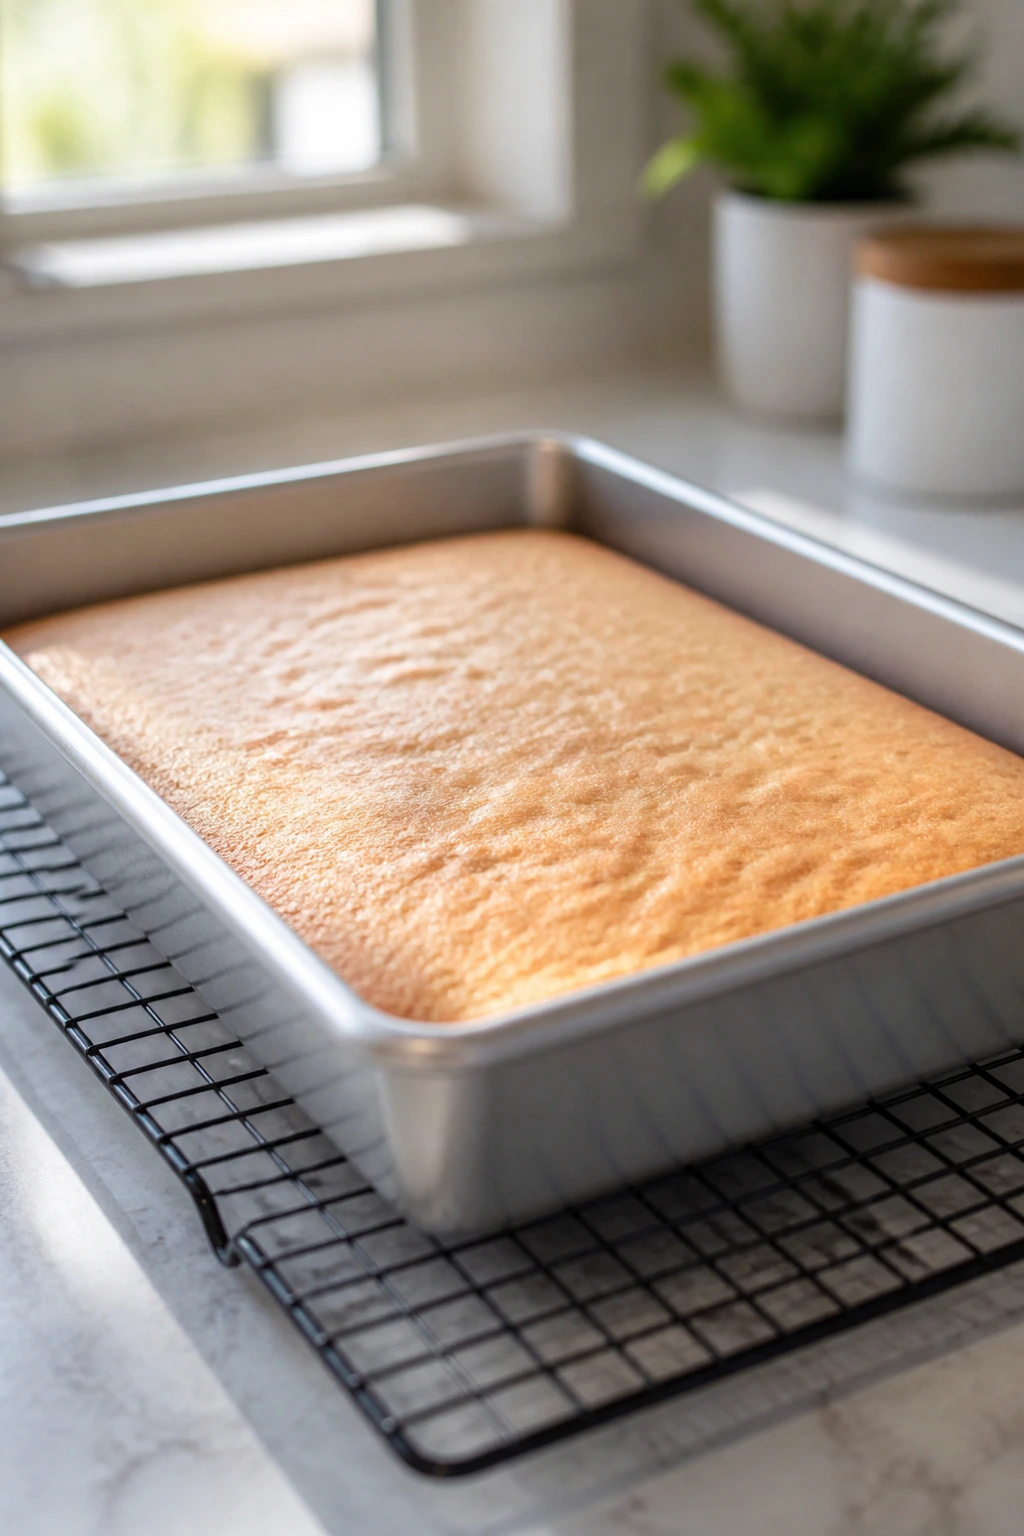
Bake for 30 to 35 minutes, rotating the pan once halfway through if your oven has a hot spot. The top should look lightly golden, the edges should pull away from the sides by a hair, and a toothpick inserted in the center should come out with a few moist crumbs attached. If you use a thermometer, the center should land around 200°F to 205°F.
-
Tent the pan loosely with foil if the top browns faster than the middle sets. That happens more often with dark pans and ovens that run hot. A sheet of foil keeps the top from overbaking while the center catches up.
-
Cool the cake in the pan for 15 minutes, then lift it onto a wire rack or leave it in the pan if you are not using parchment. Let it cool completely before frosting, which usually takes about 1 hour. Warm cake and cream cheese frosting do not get along. The frosting slides, the top softens, and the whole thing turns into a mess you did not need.
Whipping the Cream Cheese Frosting and Spreading It
Cream cheese frosting can go from silky to soupy faster than people expect, which is why I prefer making it only after the cake is out of the oven and cooling. It is easier to keep the texture thick when you are not trying to rush two jobs at once.
-
Beat the cream cheese and butter together on medium speed for about 2 minutes, until the mixture looks smooth and no lumps remain. Scrape the bowl so nothing dense hides at the bottom. If the bowl starts to feel warm, pause for a minute.
-
Add the powdered sugar in two additions, mixing on low speed first so the sugar stays in the bowl and not all over your shirt. Beat in the vanilla and salt, then add 1 tablespoon of cream or milk if the frosting feels too stiff to spread. You want a thick, spreadable texture that holds ridges but still moves under the spatula. If it looks loose, chill it for 10 minutes before using it.
-
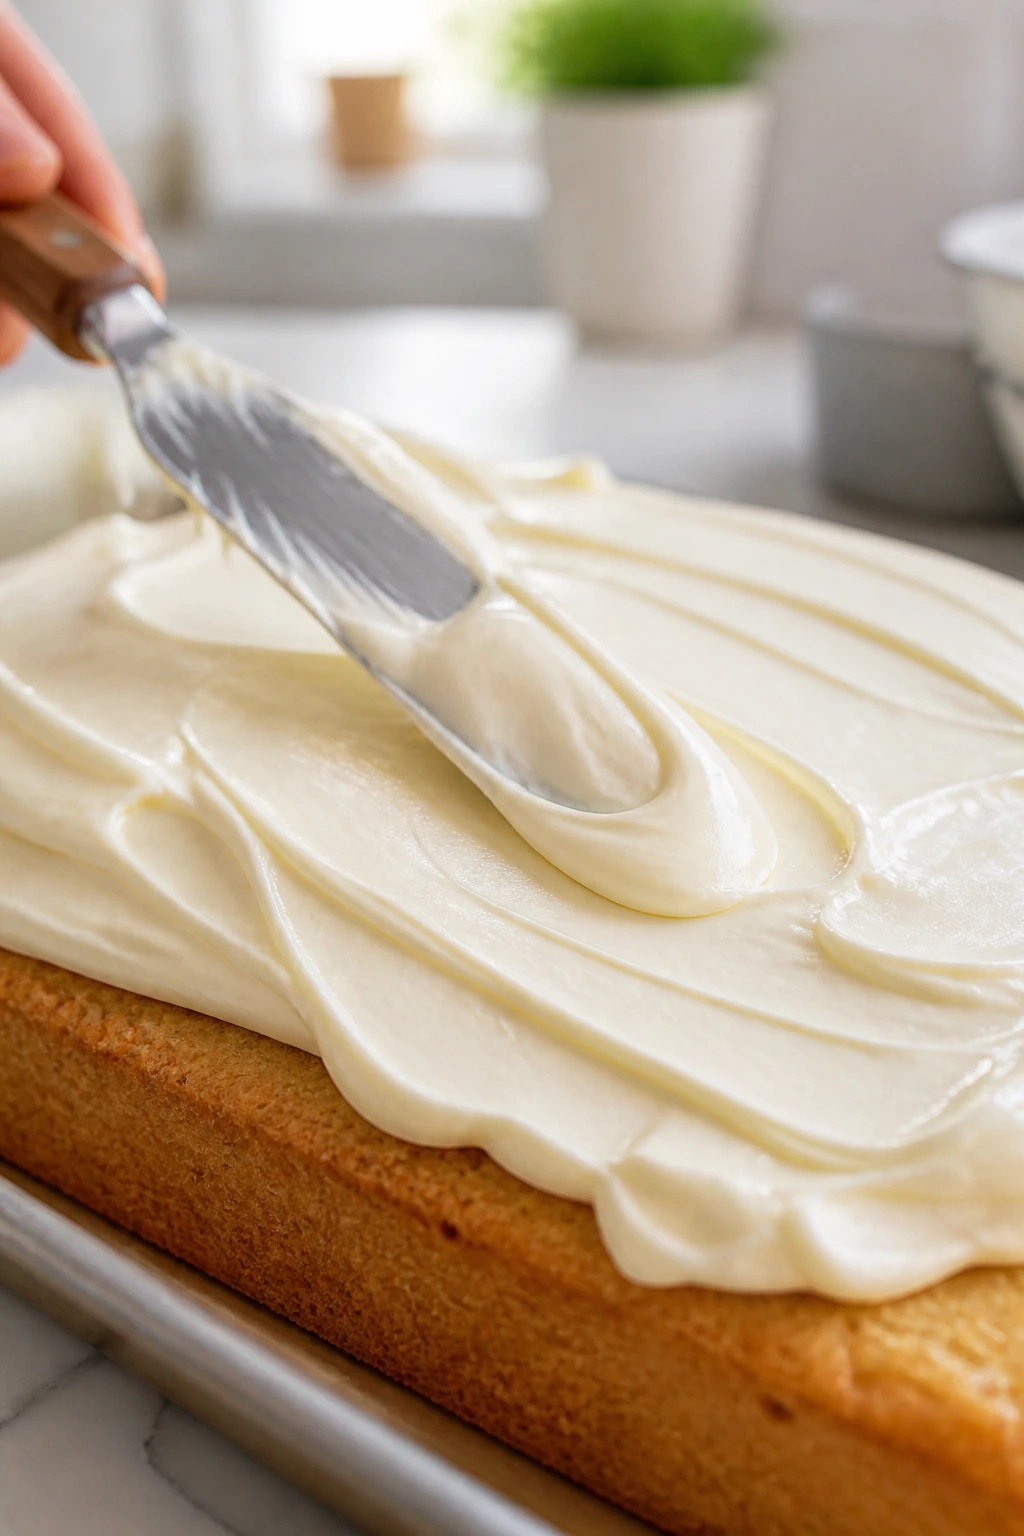
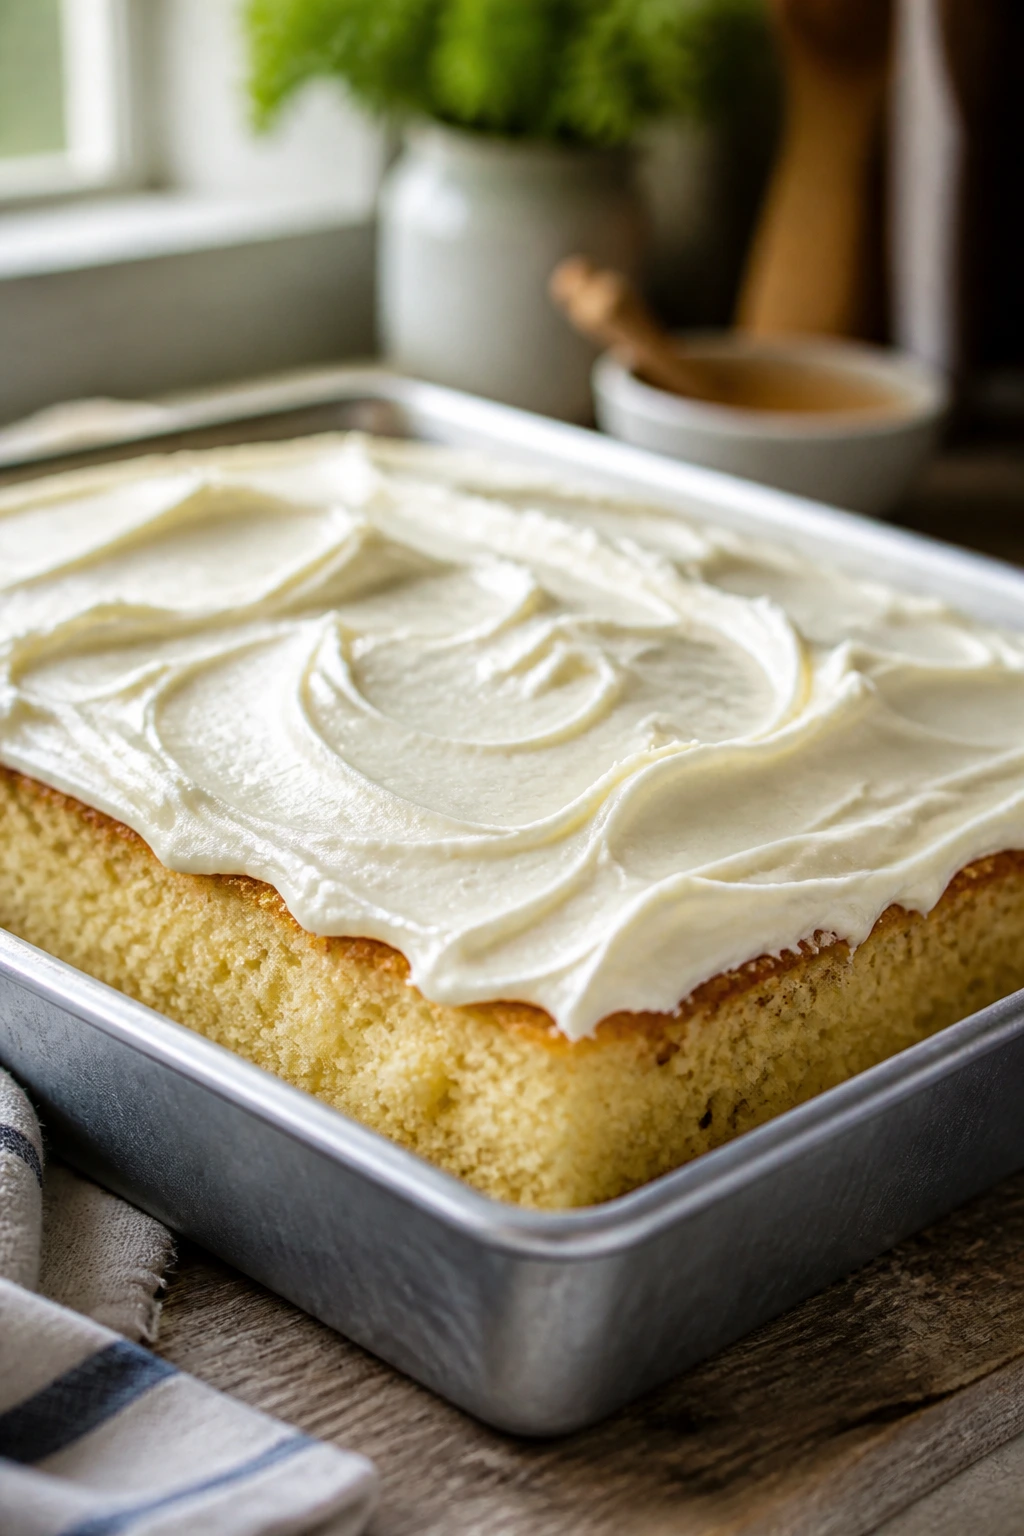
Spread the frosting over the fully cooled cake in a generous layer, then make a few soft swoops with the back of the spatula. Add sprinkles now if you are using them. I like leaving a few plain sections on top because the cake looks cleaner that way, and the sprinkles feel more deliberate when they are not everywhere.
-
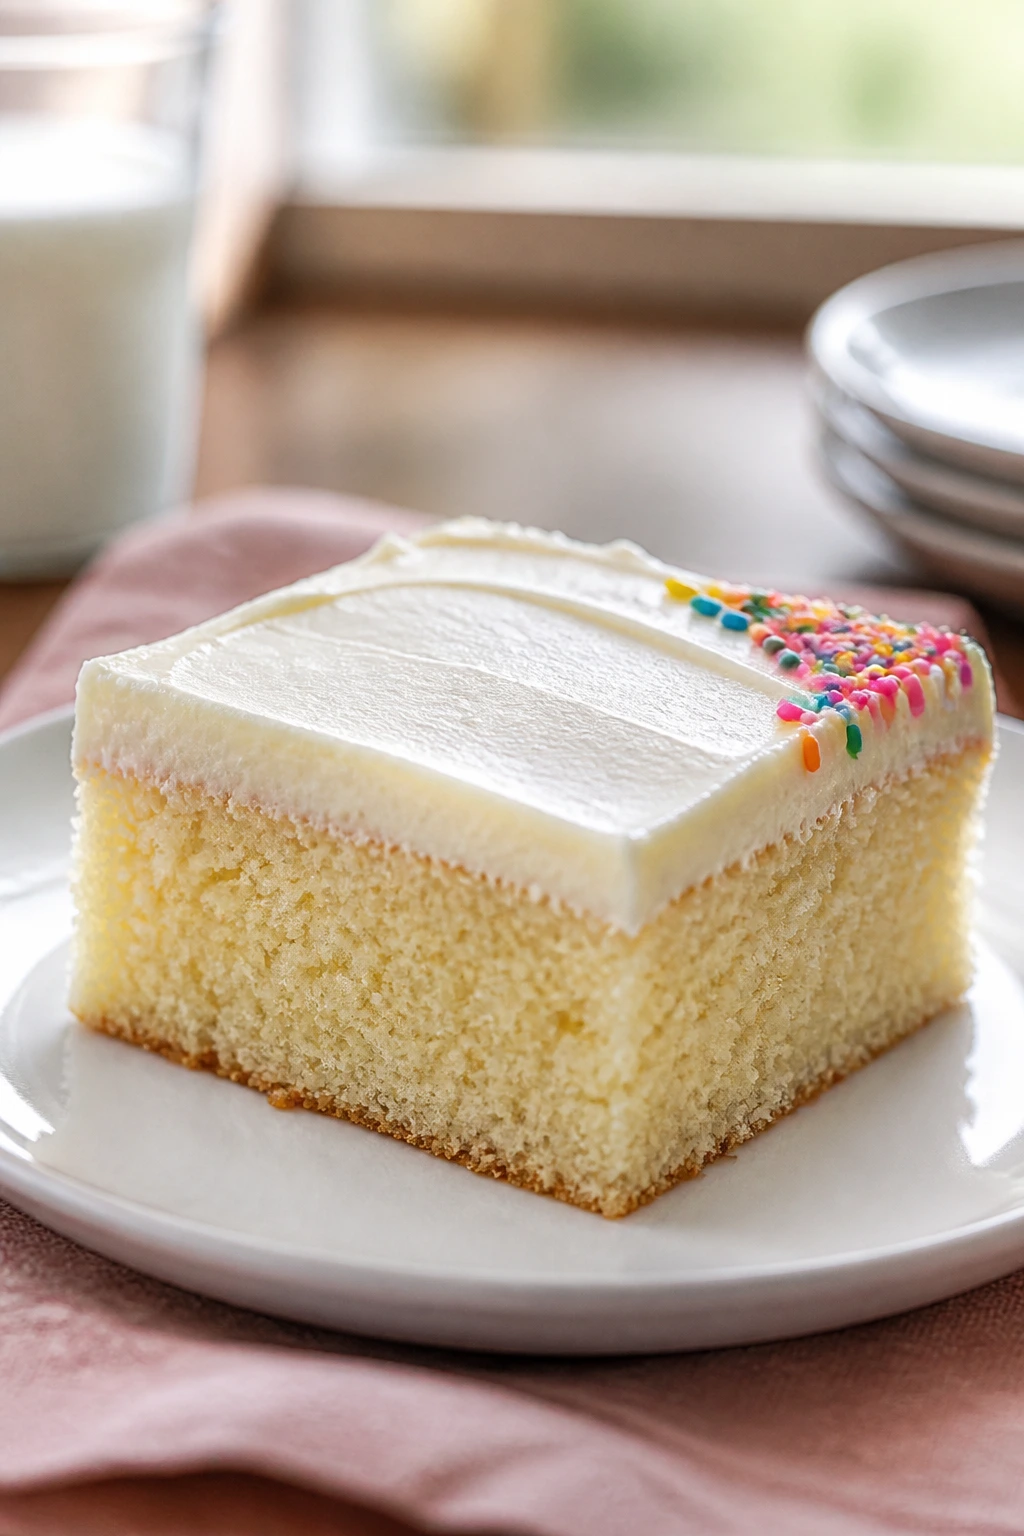
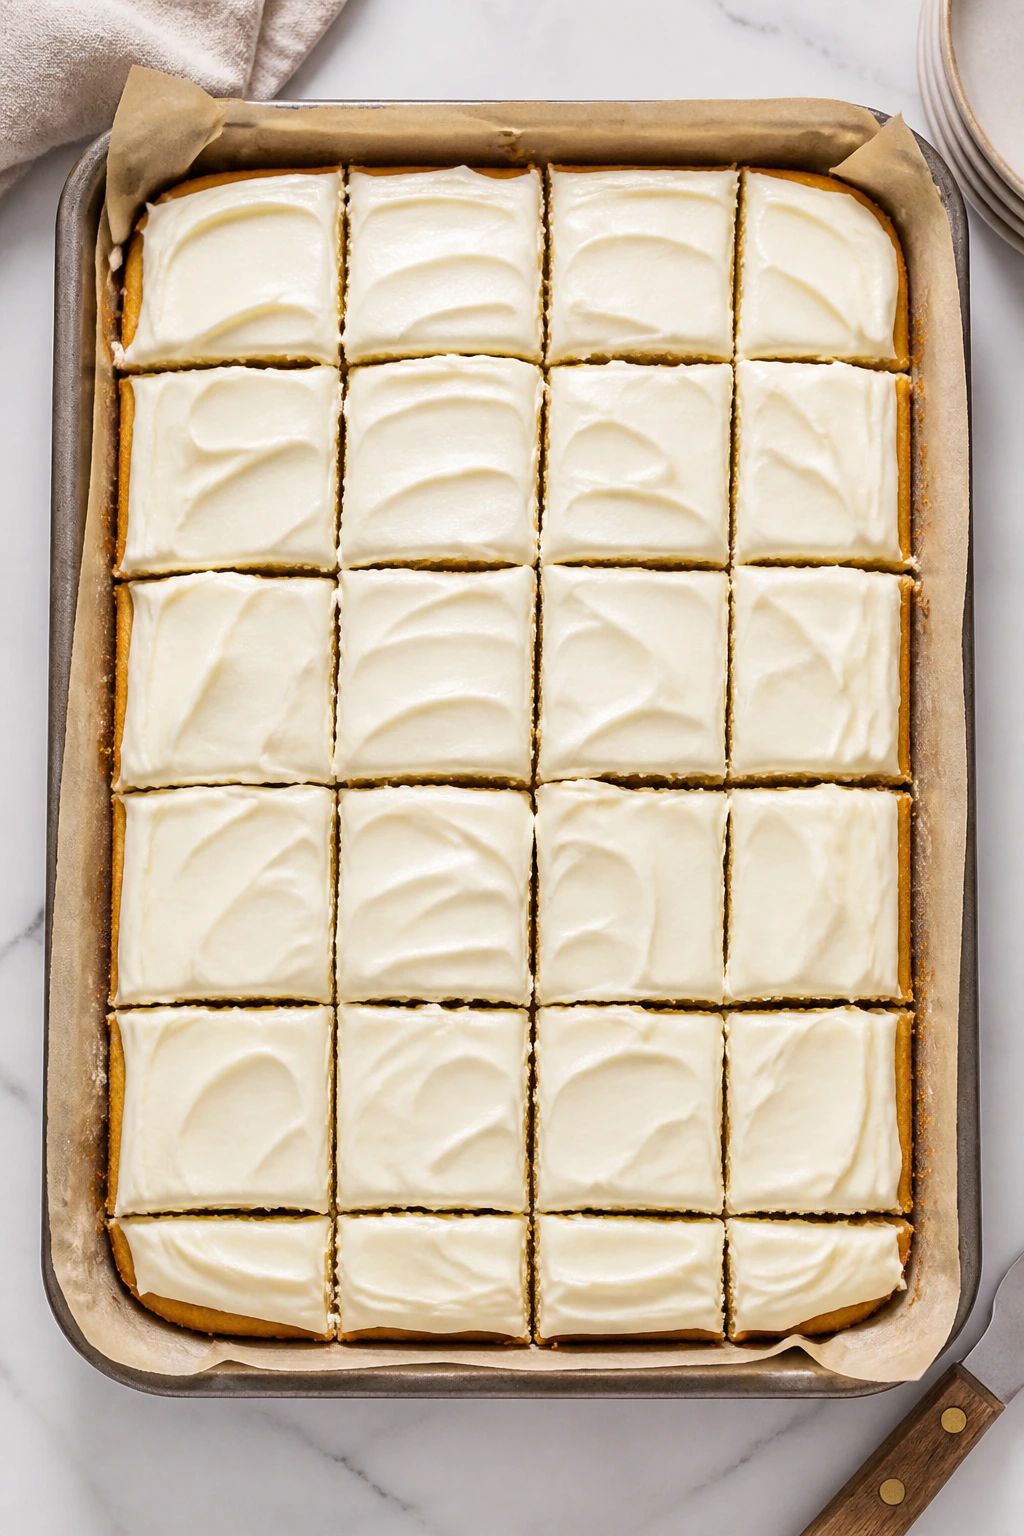
Chill the frosted cake for 20 minutes if you want the cleanest squares. Then cut with a sharp knife, wiping the blade between cuts if the frosting starts to drag. The slices should look neat, with a pale yellow crumb and a thick white cap on top.
How to Serve It Without Fuss
A square of this cake looks best when the frosting stays smooth and the edges stay straight. That means a sharp knife, a clean plate, and a little restraint with the garnish. A few sprinkles or a spoonful of berries is enough. The cake does not need a parade.
Presentation: Cut the sheet cake into 12 larger pieces for an after-dinner dessert or 15 smaller squares for a party table. A thin metal spatula slides under each square more cleanly than a wide server, and a light dusting of sprinkles across one corner gives the top a finished look without hiding the frosting.
Accompaniments: Fresh strawberries, raspberries, or sliced bananas sit well beside the tangy frosting. If you want a richer plate, serve each square with a small scoop of vanilla ice cream and let the cold melt into the cake a little. For a simpler setup, a handful of berries on the side is enough.
Portions: One square is usually plenty after a meal, especially if you cut 12 large pieces. For a school event or birthday spread, cut 15 smaller squares so every child gets a tidy portion and adults can go back for seconds without making the slices look ragged.
Beverage Pairing: Cold whole milk is the obvious match, and it works because the frosting is sweet enough to call for something plain and cold. For grown-ups, black coffee or a mild iced coffee cuts through the butter and cream cheese nicely. Lemonade also works if you want something sharper alongside the cake.
Small Upgrades That Matter
Flavor Enhancement: A teaspoon of lemon zest in the frosting gives the top a brighter finish without turning the cake into a lemon dessert. I like this when the cake is headed to a birthday table, because the citrus keeps the cream cheese from reading too heavy.
Time-Saver: Bake the cake the day before you need it. A fully cooled sheet cake actually slices better after an overnight rest, and frosting a cold cake is easier because the crumbs stay put instead of lifting into the icing.
Texture Move: If you want thicker frosting lines, chill the finished frosting bowl for 10 minutes before spreading. That tiny pause makes the swirls hold their shape instead of slumping flat the second the spatula leaves the surface.
Make-It-Yours: Rainbow sprinkles work for birthdays, mini chocolate chips work for after-school snacking, and a light dusting of cinnamon sugar works if you want the cake to feel a little cozier. The base is mild enough to take each of those directions without fighting back.
Mistakes That Dry Out the Crumb or Break the Frosting
Most problems with this cake are self-inflicted, which is annoying but also useful, because the fixes are easy once you know what to watch for.
- Starting with cold butter or cream cheese: The batter turns lumpy and the frosting stays grainy. Let both soften until they give under a fingertip but still hold their shape.
- Scooping flour straight from the bag: The flour packs down, and the cake bakes up dry. Spoon it into the measuring cup and level it off, or weigh it if you have a scale.
- Overmixing after the flour goes in: The batter gets glossy and thick in a way that looks smooth but bakes into a tighter crumb. Stop mixing when the streaks disappear and finish with a spatula if needed.
- Pulling the cake only when the toothpick is completely clean: That usually means the edges are already too far along. A few moist crumbs are the target, not a sterile tester.
- Frosting a warm cake: The icing melts, slips, and collects at the edges. Cool the cake all the way through before you even think about spreading frosting.
- Using whipped tub cream cheese: The frosting turns loose and never sets the same way. Block cream cheese is the one you want, and it is worth the small extra effort to buy it.
Ways to Change the Cake Without Losing Its Feel
Not every variation should try to reinvent the dessert. The whole point is to keep the soft vanilla cake and tangy frosting idea intact, then make one deliberate change that fits the moment.
Birthday Confetti Pan: Fold 1/2 cup rainbow jimmies into the batter just before spreading it in the pan, then finish the frosted top with another small scatter. Jimmies hold their shape better than tiny nonpareils, so the batter stays colorful instead of turning muddy.
Lemon-Kissed Frosting: Add 1 tablespoon finely grated lemon zest and replace 1 tablespoon of the milk in the frosting with lemon juice. That keeps the frosting bright and slightly sharper, which works especially well if the cake is served cold from the fridge.
Mini Chocolate Chip Squares: Toss 3/4 cup mini chocolate chips with 1 teaspoon of flour, then fold them into the finished batter. The flour helps them stay suspended, and the little chips give the cake a soft, cookie-like feel without making it dense.
Cinnamon Sugar Version: Stir 1 teaspoon cinnamon into the dry ingredients and dust the frosted top with 1 tablespoon cinnamon sugar. This is the version I would make when the weather turns cool and the cake is going to be served after dinner with coffee.
Gluten-Free Pan Cake: Use a 1:1 gluten-free all-purpose flour blend in place of the regular flour, and let the batter rest for 10 minutes before baking. That rest helps the starch hydrate so the crumb is less sandy. Start checking the cake a few minutes early, because gluten-free blends often brown sooner on the edges.
Keeping It Fresh for the Next Day
Cream cheese frosting changes the storage rules. You can let the finished cake sit out while everyone is eating, but I would not leave it on the counter all afternoon if the room is warm. Two hours at room temperature is the practical ceiling for a frosted cake. After that, it belongs in the fridge.
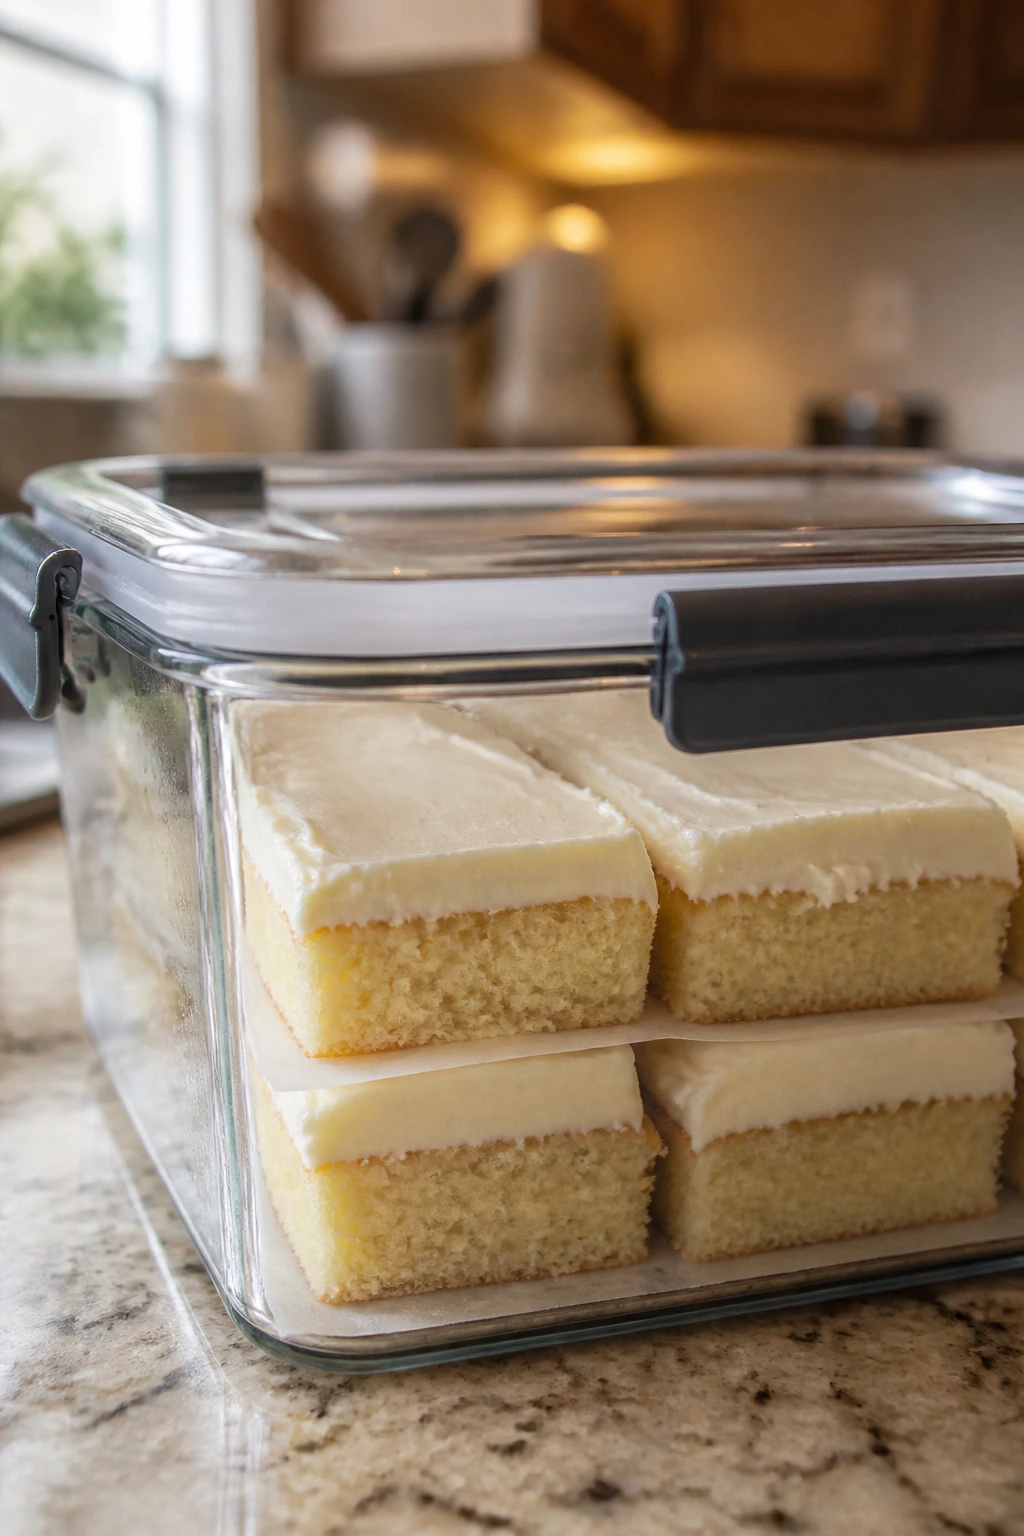
If you want the cake to stay soft, cover it tightly with plastic wrap or store the cut squares in an airtight container. The refrigerator keeps it in good shape for 4 to 5 days, and the frosting firms up enough that the pieces stack neatly with a sheet of parchment between them. Bring slices back toward room temperature for 20 to 30 minutes before serving if you want the frosting less firm.
Unfrosted cake keeps well too. Wrap the cooled cake tightly and leave it at room temperature for 1 day, or refrigerate it for up to 3 days before frosting. If you need a longer runway, freeze the unfrosted cake for up to 2 months. Wrap it first in plastic, then in foil, and thaw it overnight in the fridge before frosting.
The frosting itself can be made ahead and refrigerated for up to 4 days. When you are ready to use it, let it sit out for a few minutes and beat it briefly so it loosens back up. If it seems stubborn, a teaspoon of milk usually brings it back without making it runny.
Questions People Ask Before Baking

Can I make this as cupcakes instead of a sheet cake?
Yes. Line two standard muffin tins or one 12-cup tin in batches and fill each cup about two-thirds full. Bake at 350°F for about 18 to 20 minutes, or until the tops spring back and a tester comes out with a few crumbs. You may want to pipe the frosting on cupcakes because it looks cleaner than spreading with a knife.
Can I use low-fat cream cheese?
You can, but the frosting will be softer and less stable. If that is your only option, chill the frosting before spreading and use an extra 1/4 to 1/2 cup powdered sugar if it needs more body. Block cream cheese still gives the best texture, and I would pick that every time if the choice is there.
Why did my frosting turn runny?
Usually the cream cheese or butter was too warm, or the mixer ran too long and warmed the whole bowl. Chill the frosting for 10 to 15 minutes, then beat it briefly and see if it thickens. If the kitchen is hot, the frosting may need a second short chill before it behaves.
Can I bake the cake one day ahead?
Yes, and I actually like doing that. The crumb settles a little overnight, which makes the squares cleaner, and the flavor feels more even the next day. Bake, cool, wrap tightly, and frost when you are ready.
What if I only have salted butter?
Use it. Just cut the added salt in the cake to 1/2 teaspoon and leave the frosting salt out entirely or reduce it to a pinch. Salted butter varies by brand, so taste the frosting before adding any extra salt of your own.
Can I turn this into a layer cake?
You can bake the batter in two 9-inch round pans, but the texture is best when you keep the layers fairly thin. Start checking around 22 to 24 minutes. If you want a thick filling and a generous coat on the sides, make 1 1/2 times the frosting.
How do I keep the cake from drying out in the fridge?
Cover it tightly and do not leave the cut surface exposed. The frosting actually helps seal moisture in, so the cake holds up well as long as the pan or container is sealed. If you want the texture softer, let a slice sit on the counter for 20 minutes before serving.
A Cake Worth Pulling Out Again
Some desserts need a crowd and a full set of matching plates. This one doesn’t. A pan of soft vanilla cake with cream cheese frosting is the kind of thing that works just as well for a school celebration as it does on an ordinary Wednesday when somebody wants a square after dinner.
I like desserts that keep their promise after the first slice. This one does. The crumb stays tender, the frosting stays tangy, and the whole pan gives you clean edges instead of a sticky mess. If you keep butter, eggs, flour, and a block of cream cheese around, you are never too far from a cake that can handle both kids and adults without needing a lot of explanation.
Buttery Vanilla Sheet Cake with Cream Cheese Frosting — Recipe Card
Recipe Name: Buttery Vanilla Sheet Cake with Cream Cheese Frosting
Description: A soft, buttery vanilla sheet cake baked in a 9×13-inch pan and topped with a thick, tangy cream cheese frosting. It cuts into neat squares and holds up well for birthdays, lunchboxes, and simple after-dinner dessert.
Prep Time: 25 minutes
Cook Time: 30 to 35 minutes
Total Time: 1 hour 55 minutes, including cooling and frosting
Course: Dessert
Cuisine: American
Servings: 15 squares
Calories: About 540 kcal per serving
Ingredients
For the Vanilla Sheet Cake:
- 2 1/2 cups all-purpose flour
- 2 teaspoons baking powder
- 1/2 teaspoon baking soda
- 1 teaspoon fine sea salt
- 1 cup (2 sticks) unsalted butter, softened to cool room temperature
- 1 1/2 cups granulated sugar
- 4 large eggs, room temperature
- 2 teaspoons pure vanilla extract
- 1 cup whole milk, room temperature
- 1/2 cup sour cream, room temperature
For the Cream Cheese Frosting:
- 8 ounces block cream cheese, softened but still cool
- 1/2 cup (1 stick) unsalted butter, softened
- 4 cups powdered sugar, sifted if lumpy
- 2 teaspoons vanilla extract
- 1/8 teaspoon fine salt
- 1 to 2 tablespoons heavy cream or whole milk, only if needed
Optional Finishing Touches:
- 1/4 cup rainbow sprinkles
Instructions
-
Preheat the oven to 350°F (175°C) and grease a 9×13-inch metal baking pan. Line it with parchment if you want to lift the cake out easily.
-
Whisk the flour, baking powder, baking soda, and salt in a medium bowl.
-
Beat the butter and sugar together for 3 to 4 minutes, until pale and fluffy.
-
Beat in the eggs one at a time, then add the vanilla.
-
Stir the milk and sour cream together. Add the dry ingredients in three additions, alternating with the milk mixture in two additions, mixing on low speed just until combined.
-
Spread the batter into the pan and smooth the top.
-
Bake for 30 to 35 minutes, until the center is set and a toothpick comes out with a few moist crumbs.
-
Cool the cake in the pan for 15 minutes, then cool completely before frosting.
-
Beat the cream cheese and butter until smooth, then add the powdered sugar, vanilla, salt, and a little cream or milk if needed.
-
Spread the frosting over the cooled cake, top with sprinkles if using, chill for 20 minutes for cleaner slices, and cut into squares.
Notes: Use block cream cheese, not whipped cream cheese. Chill leftover cake in the fridge, and let slices sit out 20 to 30 minutes before serving if you want a softer frosting.