
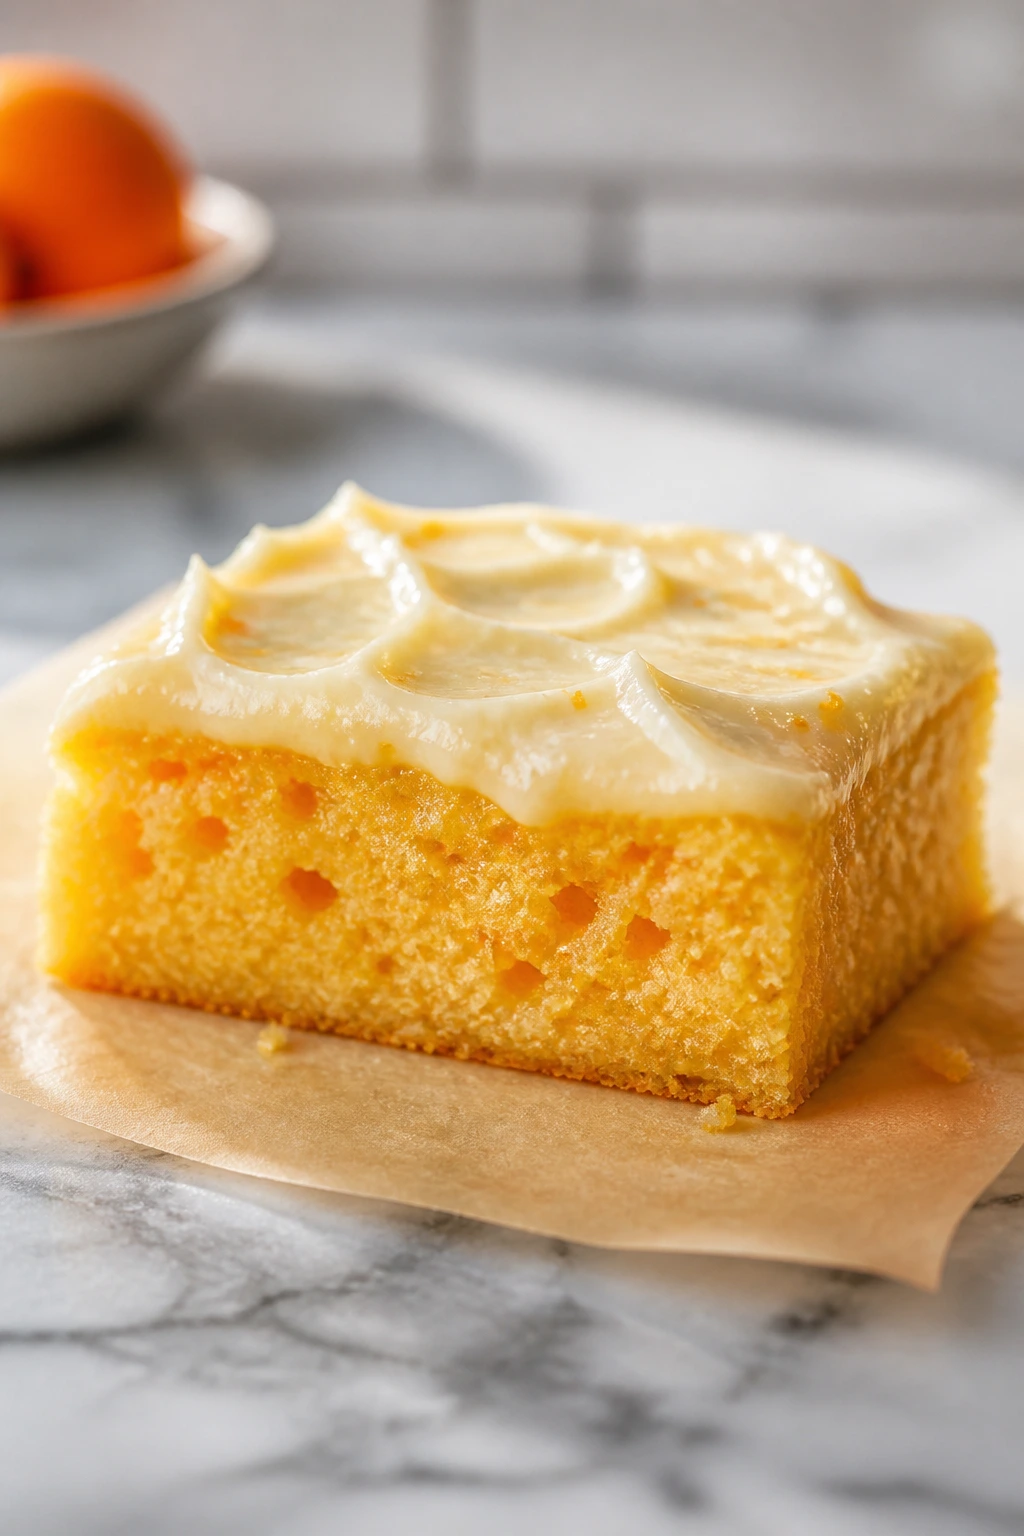
The first thing you notice about Buttery Orange Candy with Cream Cheese Frosting is the smell. Not a vague citrus smell. A real one. The kind that comes off the zest as soon as your fingers hit the peel and hangs in the kitchen while the butter softens and the sugar starts to look like satin. A lot of orange desserts flatten out in the oven. They turn sweet and pale and a little tired. This one doesn’t, because the orange flavor gets built from the start instead of being dumped on top at the end.
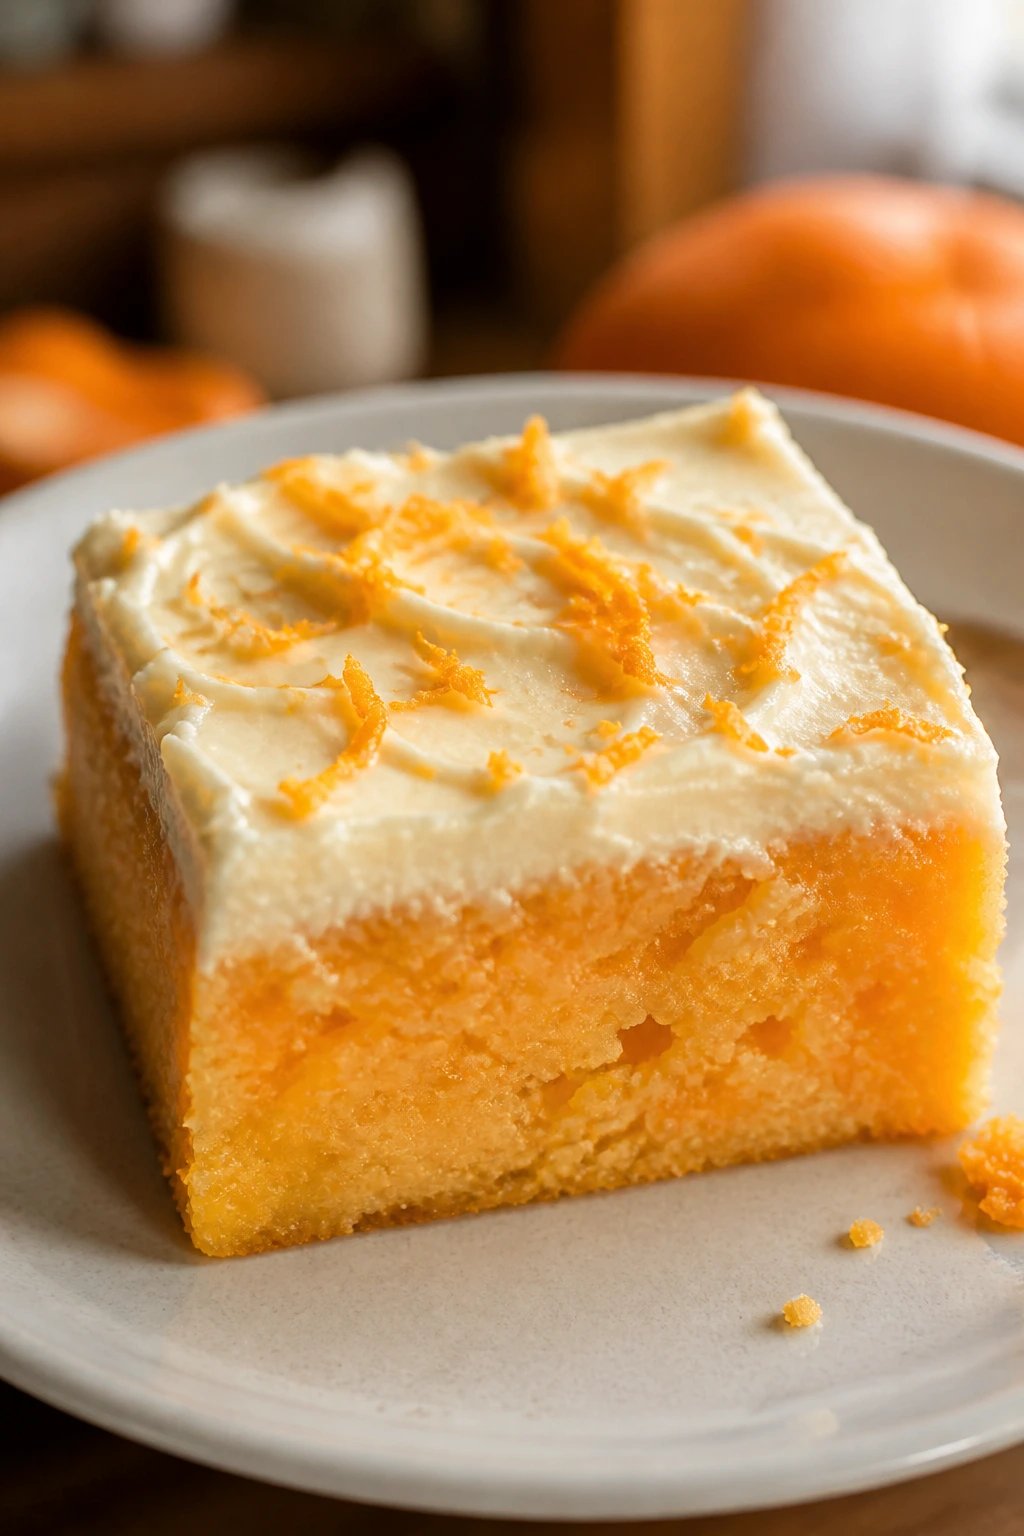
What makes it worth making is the texture. These squares bake up tender and rich, almost like a cross between a soft blondie and an old-fashioned snack cake, but they slice more neatly than either. The cream cheese frosting is there for a reason, too. It brings a cool tang that keeps the whole pan from reading as candy-sweet. And yes, the orange zest matters more than the juice — by a mile. Juice gives you acid and a little perfume. Zest gives you the oils that actually survive heat and still taste like orange after the oven has had its say.
I like desserts like this because they know what they are. No layers to stack. No candy thermometer. No fussy glaze that slides off the minute the kitchen warms up. Just a pan of buttery orange squares, a thick swipe of frosting, and a clean cut into small pieces that disappear faster than you expect. If you’ve ever wanted an orange dessert that tastes like someone cared about it, this is the one to keep around.
Why This Orange Candy Lands So Well on a Dessert Tray
- Orange flavor that survives baking: The zest goes into the batter and the frosting, so the citrus stays present instead of disappearing into sugar and butter.
- Soft squares with clean edges: Sour cream, butter, and an extra egg yolk give the bars enough richness to cut into tidy pieces without crumbling apart.
- Cream cheese frosting that earns its spot: The frosting is thick, tangy, and cool, which keeps the dessert from tasting like pure sugar with a hint of orange.
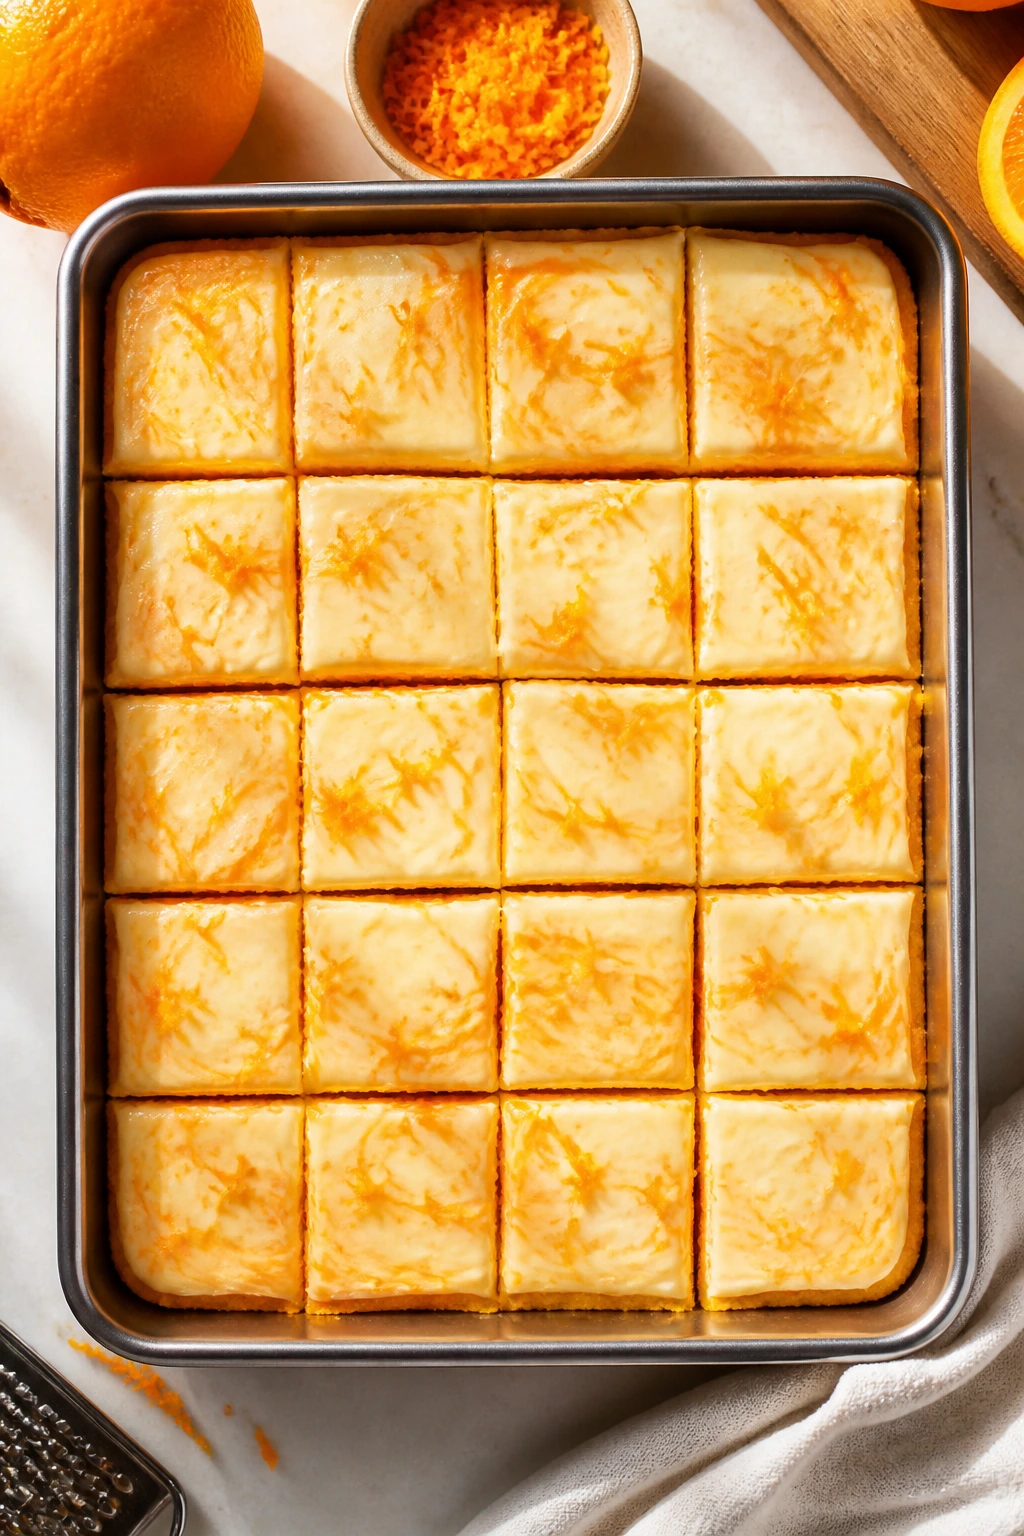
- Easy to portion for a crowd: A 9×13 pan turns into 24 neat squares without any complicated shaping or layering.
- Better after a short chill: The bars settle in the fridge and the frosting firms up, which makes slicing cleaner and the orange flavor more focused.
- Flexible enough for small tweaks: You can push it toward brighter citrus, more bakery-style sweetness, or a little nuttiness without rebuilding the whole recipe.
Timing, Yield, and the Texture You Should Expect
Yield: 24 small squares
Prep Time: 25 minutes
Cook Time: 28 to 32 minutes
Total Time: 2 hours 15 minutes
Chill/Rest Time: 1 hour 20 minutes, including cooling and chilling after frosting
Difficulty: Beginner-intermediate — the mixing is straightforward, but the bars need full cooling before frosting and slicing if you want neat edges.
Best Served: Slightly chilled or at cool room temperature, when the frosting is firm enough to slice cleanly.
The texture should be soft, not airy. If you tap the center of the baked bars, it should spring back gently, and a toothpick should come out with a few moist crumbs, not a smear of batter. That small detail matters here. Pull them too early and the middle sinks under the frosting. Leave them too long and you lose the buttery bite that makes the squares feel old-fashioned instead of dry.
The Ingredient List, Measured for a Pan That Cuts Cleanly
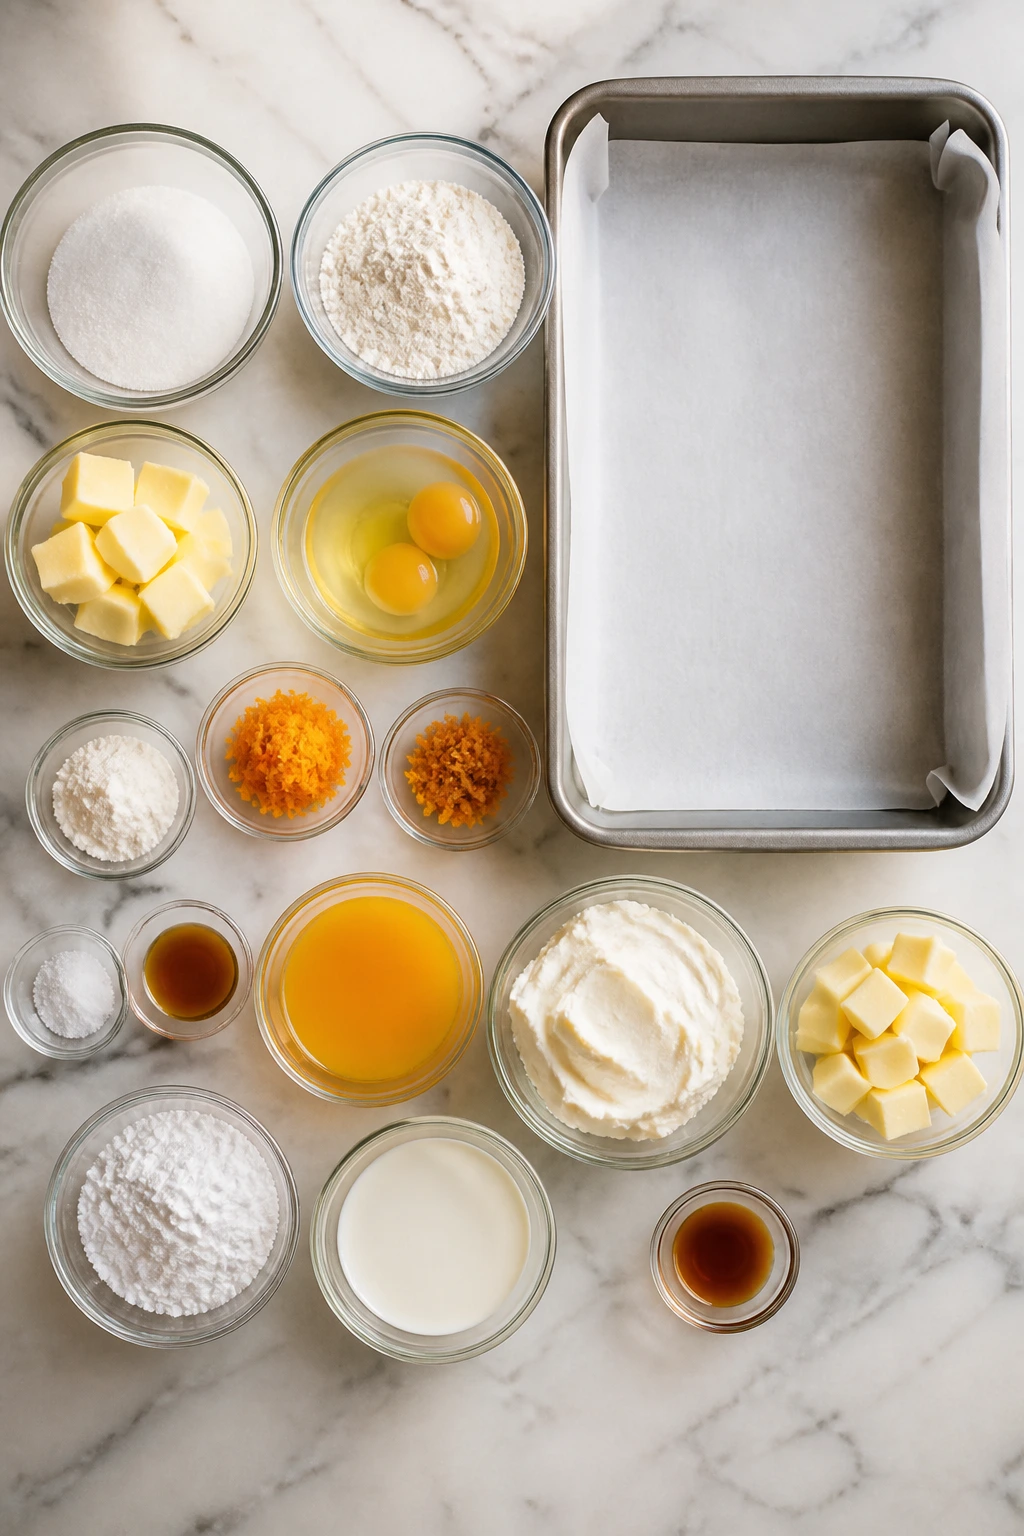
For the Orange Bar Base:
- 1 cup (2 sticks) unsalted butter, softened to room temperature
- 1 1/2 cups granulated sugar
- 2 large eggs, room temperature
- 1 large egg yolk, room temperature
- 2 tablespoons finely grated orange zest from 2 large oranges
- 1/3 cup fresh orange juice
- 1 teaspoon pure vanilla extract
- 1/2 teaspoon orange extract, optional but recommended
- 2 1/4 cups all-purpose flour
- 1 teaspoon baking powder
- 1/2 teaspoon baking soda
- 1/2 teaspoon fine sea salt
- 1/2 cup sour cream, room temperature
For the Cream Cheese Frosting:
- 8 ounces full-fat cream cheese, softened
- 1/2 cup (1 stick) unsalted butter, softened
- 3 to 3 1/2 cups powdered sugar, sifted
- 1 tablespoon fresh orange juice
- 1 teaspoon finely grated orange zest
- 1 teaspoon pure vanilla extract
- Pinch of fine salt
Optional Garnish:
- 1 teaspoon extra orange zest
- 2 tablespoons finely chopped candied orange peel or very thin orange curls
Why Orange Zest Does More Heavy Lifting Than Juice
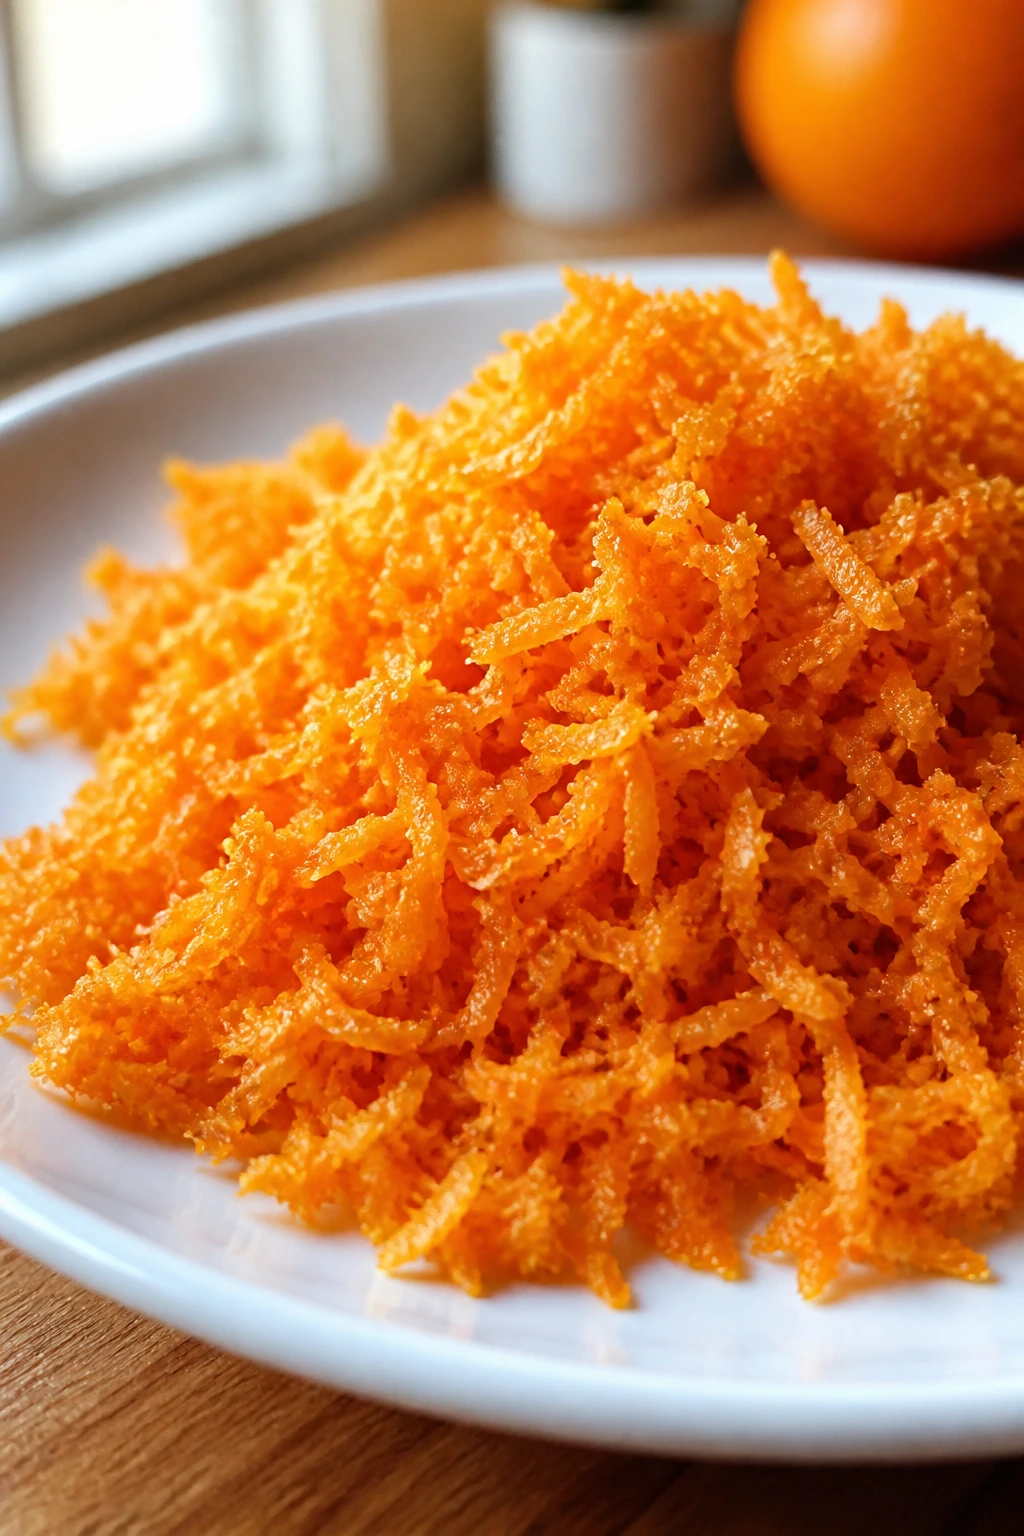
Orange desserts can go wrong in a sneaky way. The flavor tastes bright when the batter is raw, then the oven quietly drains it out. By the time the bars cool, you’ve got sweetness, butter, and a faint citrus note that feels more like a memory than a flavor. Orange zest fixes that. The outer peel carries aromatic oils that cling through baking much better than juice does, and that’s why the recipe uses zest in both the batter and the frosting.
Butter, Sugar, and Eggs
What to use: 1 cup softened unsalted butter, 1 1/2 cups granulated sugar, 2 large eggs, and 1 large egg yolk.
Preparation: Let the butter sit out until it dents easily with a fingertip, but does not feel greasy. The eggs should be room temperature so they blend without making the batter look broken.
Substitutions: If you only have salted butter, use it and reduce the added salt to 1/4 teaspoon. In a pinch, you can use three large eggs instead of two eggs plus a yolk, though the texture will be a little less plush.
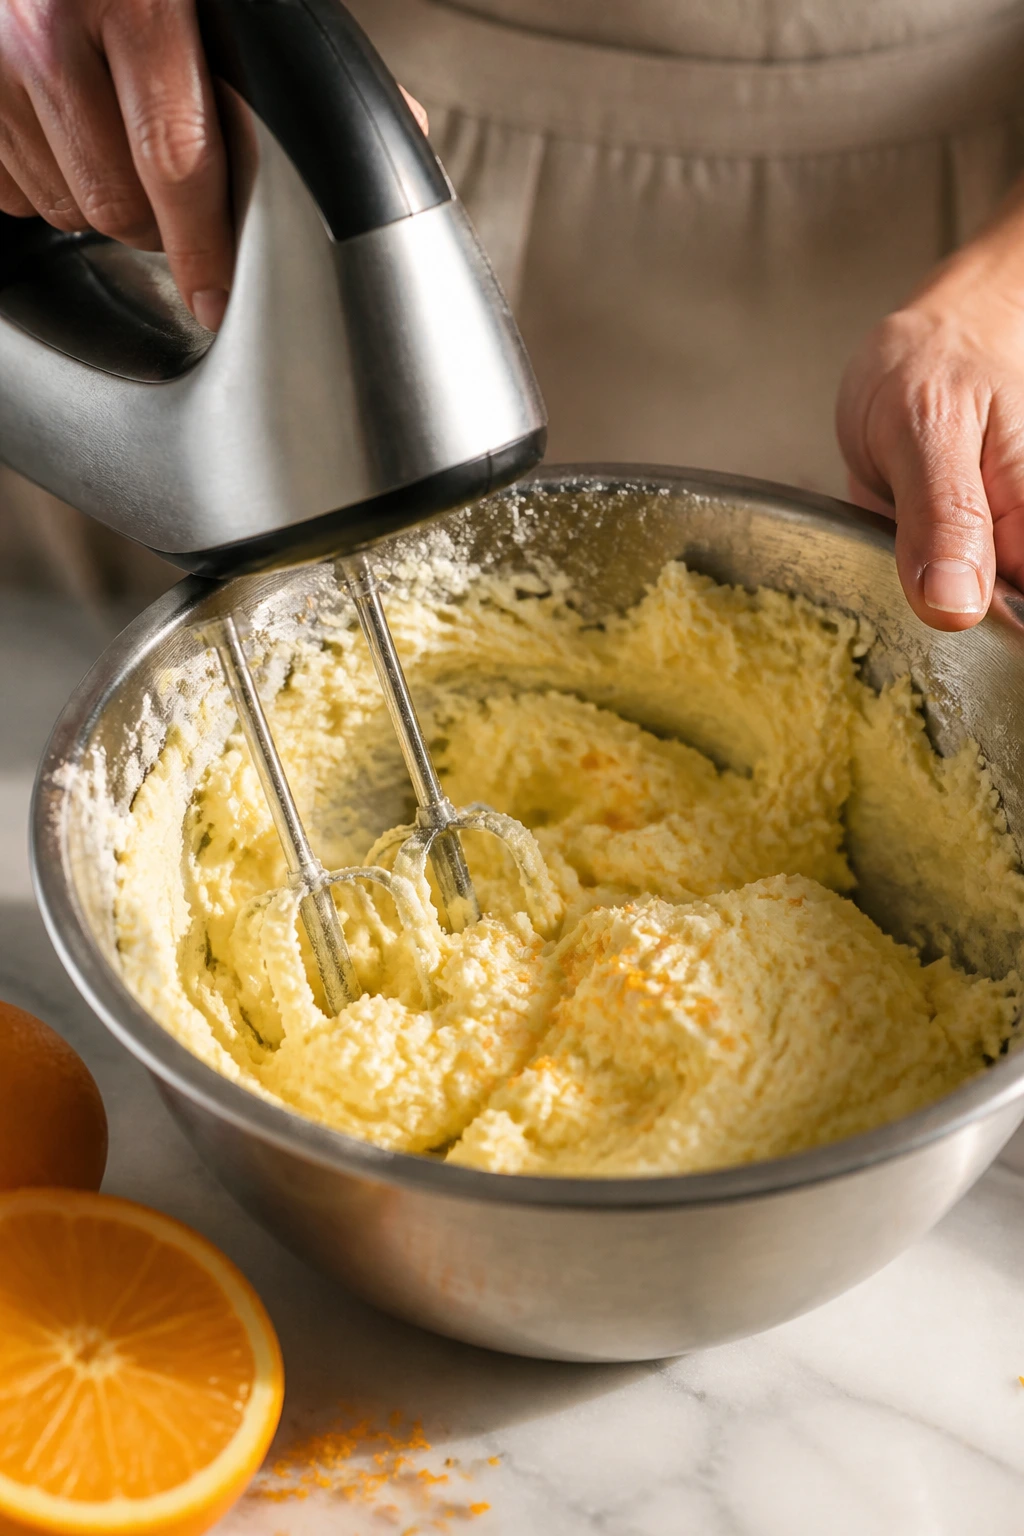
Tips: Cream the butter and sugar until it looks pale and slightly fluffy — about 3 to 4 minutes with a hand mixer. That step traps air and keeps the bars from baking up heavy.
Orange Zest, Juice, and Extract
What to use: 2 tablespoons fresh orange zest, 1/3 cup orange juice, 1 teaspoon vanilla extract, and 1/2 teaspoon orange extract if you want a stronger citrus note.
Preparation: Zest the oranges before juicing them. A microplane grater gives you a fine, fragrant zest that disappears into the batter instead of sitting in sharp little strips.
Substitutions: If your oranges are small or not very fragrant, add another teaspoon of zest and keep the juice the same. No orange extract? Use 1 extra teaspoon of zest and 1/2 teaspoon more vanilla.
Tips: Do not rely on juice alone. Juice helps with balance, but the real orange character comes from the zest — especially after the bars have been baked and chilled.
Flour, Leavening, Salt, and Sour Cream
What to use: 2 1/4 cups all-purpose flour, 1 teaspoon baking powder, 1/2 teaspoon baking soda, 1/2 teaspoon fine sea salt, and 1/2 cup sour cream.
Preparation: Whisk the dry ingredients together before they go into the bowl so the baking powder and baking soda spread evenly. The sour cream should be room temperature so it blends smoothly with the butter mixture.
Substitutions: Plain full-fat Greek yogurt works in place of sour cream. For a gluten-free version, use a 1:1 gluten-free baking flour blend that already contains xanthan gum.
Tips: All-purpose flour keeps the bars sturdy enough to frost and slice. Cake flour makes them too delicate, and they can lose that satisfying candy-bar feel when you cut them.
Cream Cheese Frosting
What to use: 8 ounces full-fat cream cheese, 1/2 cup softened unsalted butter, 3 to 3 1/2 cups sifted powdered sugar, 1 tablespoon orange juice, 1 teaspoon orange zest, 1 teaspoon vanilla extract, and a pinch of salt.
Preparation: Soften the cream cheese and butter until they’re cool to the touch but pliable. Sift the powdered sugar if it has any lumps; that saves you from beating forever and still finding little sugar pebbles.
Substitutions: Mascarpone can replace part of the cream cheese for a softer, milder frosting, though it loses a little tang. For a dairy-free version, use a brick-style dairy-free cream cheese and vegan butter with the understanding that the frosting will be a little softer.
Tips: Add the orange juice sparingly. Too much liquid turns the frosting loose, and once that happens you have to rescue it with more powdered sugar, which makes it sweeter than it needs to be.
Cream Cheese Frosting That Stays Smooth Instead of Runny
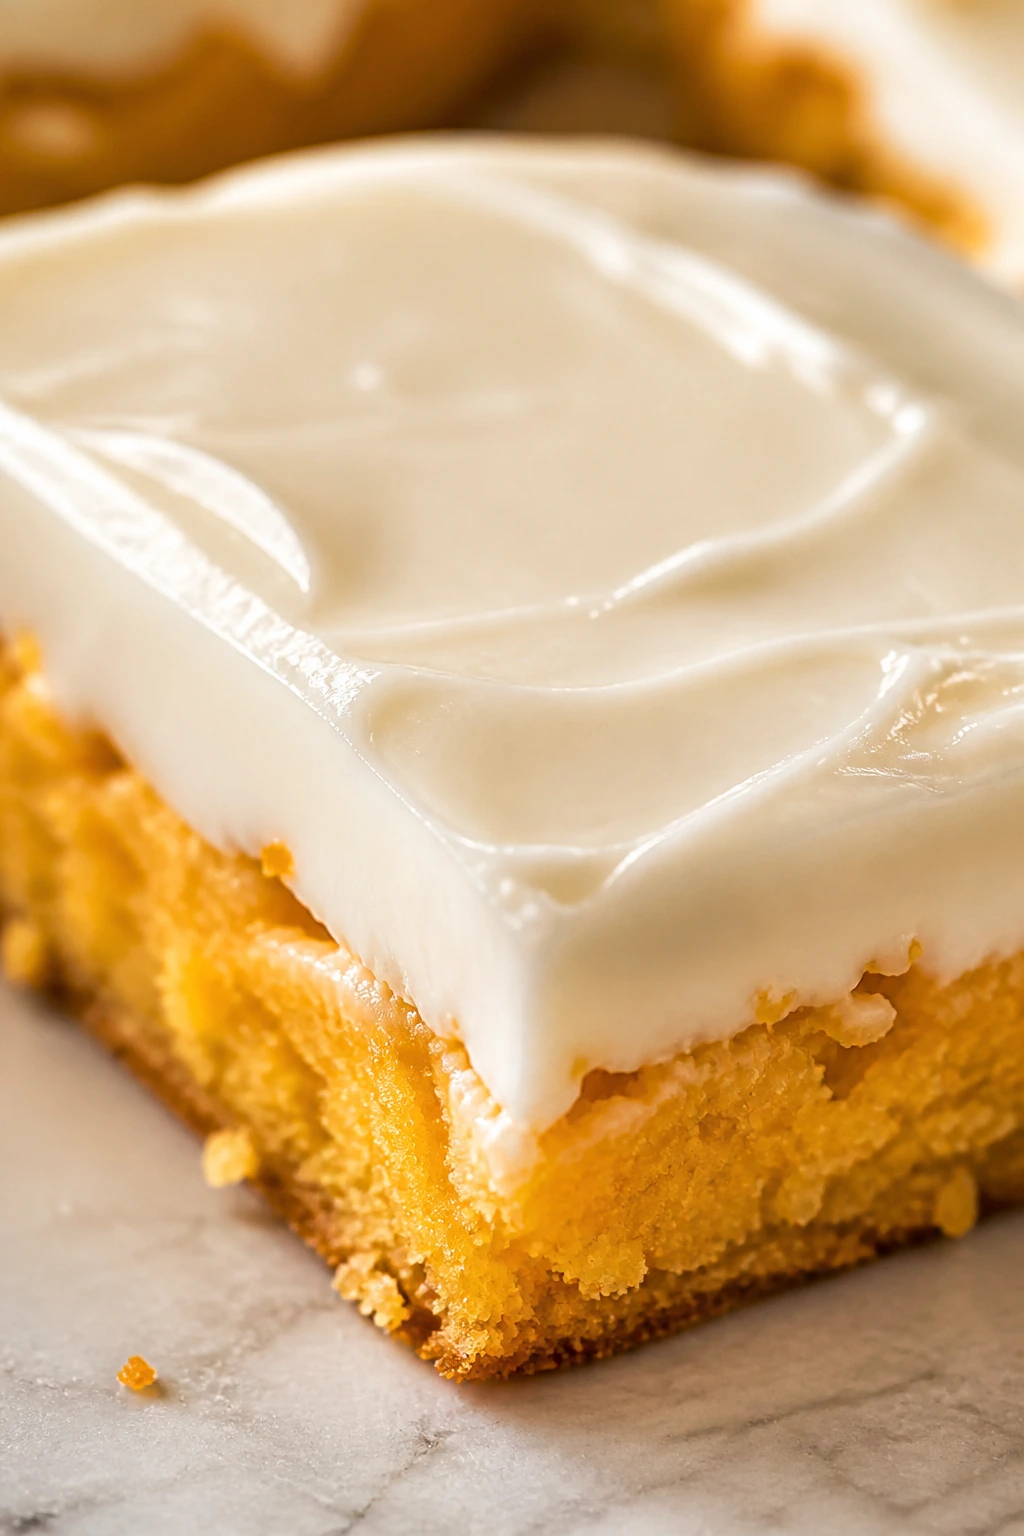
The frosting is where a lot of orange bars lose their nerve. People go heavy on juice, use cold cream cheese, beat it into a lumpy mess, and then wonder why it slides off the pan in a glossy puddle. This frosting wants restraint. It wants room-temperature ingredients and a little patience. That’s it.
The Texture to Aim For
What to use: 8 ounces cream cheese, 1/2 cup butter, 3 to 3 1/2 cups powdered sugar, 1 tablespoon orange juice, and zest plus vanilla.
Preparation: Beat the cream cheese and butter until the mixture is smooth before adding the sugar. If the bowl feels cold and the mixture still has little white streaks, keep going for another minute.
Substitutions: If you prefer a stiffer frosting, use the full 3 1/2 cups powdered sugar. If you like a softer, more spreadable top, stop at 3 cups and chill the frosted bars longer before slicing.
Tips: Full-fat brick cream cheese is the right choice here. Tub cream cheese is too loose and usually gives you a frosting that never really sets.
Why the Orange Juice Goes Last
What to use: 1 tablespoon orange juice, no more than that, plus the zest.
Preparation: Add the juice after the sugar has been beaten in so you can judge the consistency. If the frosting already looks soft, skip the juice and use only zest.
Substitutions: A half-teaspoon of orange extract can stand in for the juice if you want stronger flavor without extra liquid.
Tips: The frosting should hold its shape when you lift the spatula. If it slumps like softened ice cream, it needs more powdered sugar or a brief 10-minute chill in the refrigerator.
The Equipment That Makes the Pan Easy to Manage
- 9×13-inch baking pan: A metal pan gives the bars even browning and cleaner edges than glass.
- Parchment paper: Leave overhang on two sides so you can lift the baked bars out in one clean move.
- Microplane or fine zester: This is the difference between fragrant orange flavor and clumsy chunks of peel.
- Electric hand mixer or stand mixer: Creaming the butter and sugar by hand is possible, but you’ll work for it.
- Large mixing bowl and medium bowl: Keep the batter and dry ingredients separate until it’s time to combine them.
- Rubber spatula: Useful for scraping the bowl and spreading the batter into the corners.
- Wire cooling rack: Stops the pan from holding in steam, which keeps the bars from getting soggy underneath.
- Offset spatula or small icing spatula: Makes the frosting layer even and quick.
- Sharp chef’s knife: A hot, wiped-down knife gives the cleanest squares.
Mixing and Baking the Buttery Orange Base
A pan dessert lives or dies in the mixing bowl. That sounds dramatic, but it’s true. If the butter and sugar aren’t creamed properly, the bars can bake up dense in the wrong way — not rich, just heavy. If the flour goes in too aggressively, the crumb turns tight and dry. The sweet spot is simple: keep the batter smooth, but stop the second the flour disappears.
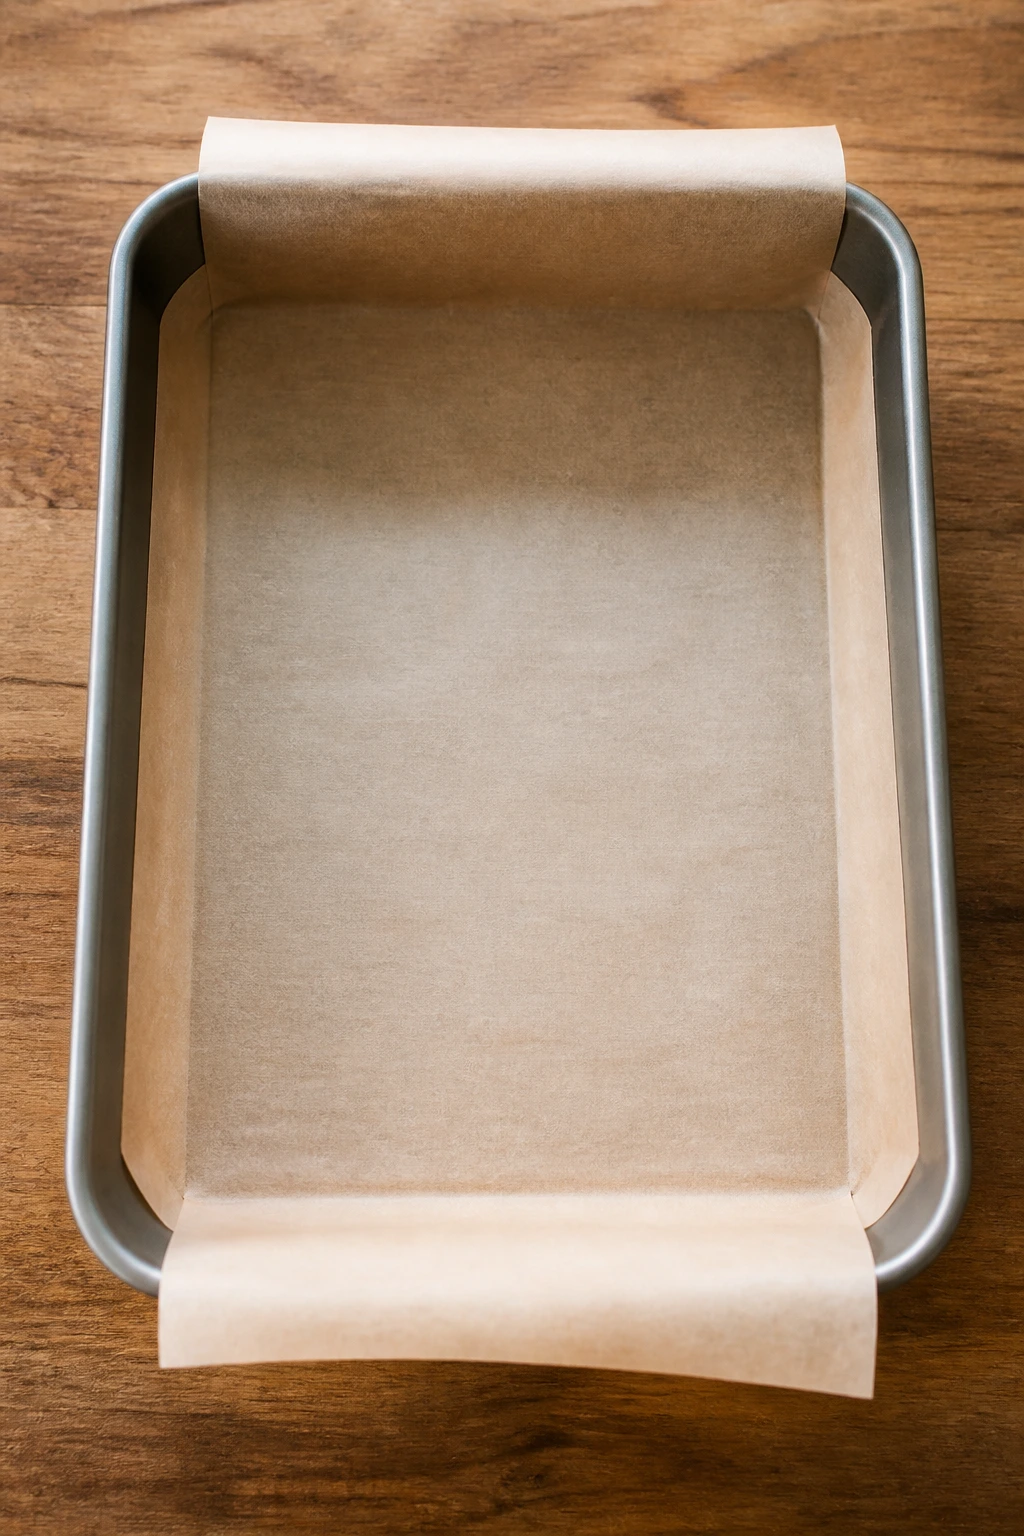
Prep the Pan and Oven:
- Preheat the oven to 350°F (175°C) and position a rack in the center.
- Grease a 9×13-inch metal baking pan and line it with parchment paper, leaving a 2-inch overhang on the two long sides. Grease the parchment lightly, too. Do not skip the overhang if you want to lift the bars out cleanly.
Mix the Dry Ingredients: 3. In a medium bowl, whisk together 2 1/4 cups flour, 1 teaspoon baking powder, 1/2 teaspoon baking soda, and 1/2 teaspoon fine salt until evenly combined.
Cream the Butter and Sugar: 4. In a large bowl, beat 1 cup softened butter and 1 1/2 cups granulated sugar on medium speed for 3 to 4 minutes, until the mixture looks pale, fluffy, and a little aerated around the edges. 5. Add 2 large eggs one at a time, beating for about 20 seconds after each egg. Beat in 1 large egg yolk. The mixture should look glossy and thicker, not curdled.
Build the Orange Batter: 6. Beat in 2 tablespoons orange zest, 1/3 cup orange juice, 1 teaspoon vanilla extract, 1/2 teaspoon orange extract if using, and 1/2 cup room-temperature sour cream. The batter may look slightly broken at this point. That is normal and it comes together once the flour is added. 7. Reduce the mixer to low speed and add the dry ingredients in 2 additions, mixing only until the flour disappears. Finish with a rubber spatula if needed. Do not overmix; that is how you end up with tough bars instead of tender ones.
Bake and Cool: 8. Spread the batter into the prepared pan and smooth the top with an offset spatula. 9. Bake for 28 to 32 minutes, until the edges are lightly golden and the center springs back when touched gently. A toothpick inserted in the center should come out with a few moist crumbs. 10. Set the pan on a wire rack and cool for 20 minutes in the pan, then lift the bars out using the parchment and cool completely for about 40 more minutes. Frosting warm bars will melt and slide.
Frosting, Chilling, and Cutting the Squares

This is the part where the dessert starts looking like the pan you probably had in mind when you read the title. The frosting goes on thick, almost like a soft blanket, and once it chills for a bit the whole thing slices with a neat edge. If you want the cleanest squares, think like a bakery worker, not a home baker in a hurry. Cold bars cut better. Period.
Make the Frosting: 11. In a medium bowl, beat 8 ounces softened cream cheese and 1/2 cup softened butter on medium speed for 1 to 2 minutes, until completely smooth. 12. Add 3 cups sifted powdered sugar in two additions, beating on low at first so the sugar does not drift everywhere. Add 1 tablespoon orange juice, 1 teaspoon orange zest, 1 teaspoon vanilla extract, and a pinch of salt. Beat for another 30 to 45 seconds until thick and spreadable. 13. If you want a stiffer frosting, beat in the remaining 1/2 cup powdered sugar. If it feels too dense, stop there; the frosting should be spreadable, not dry.
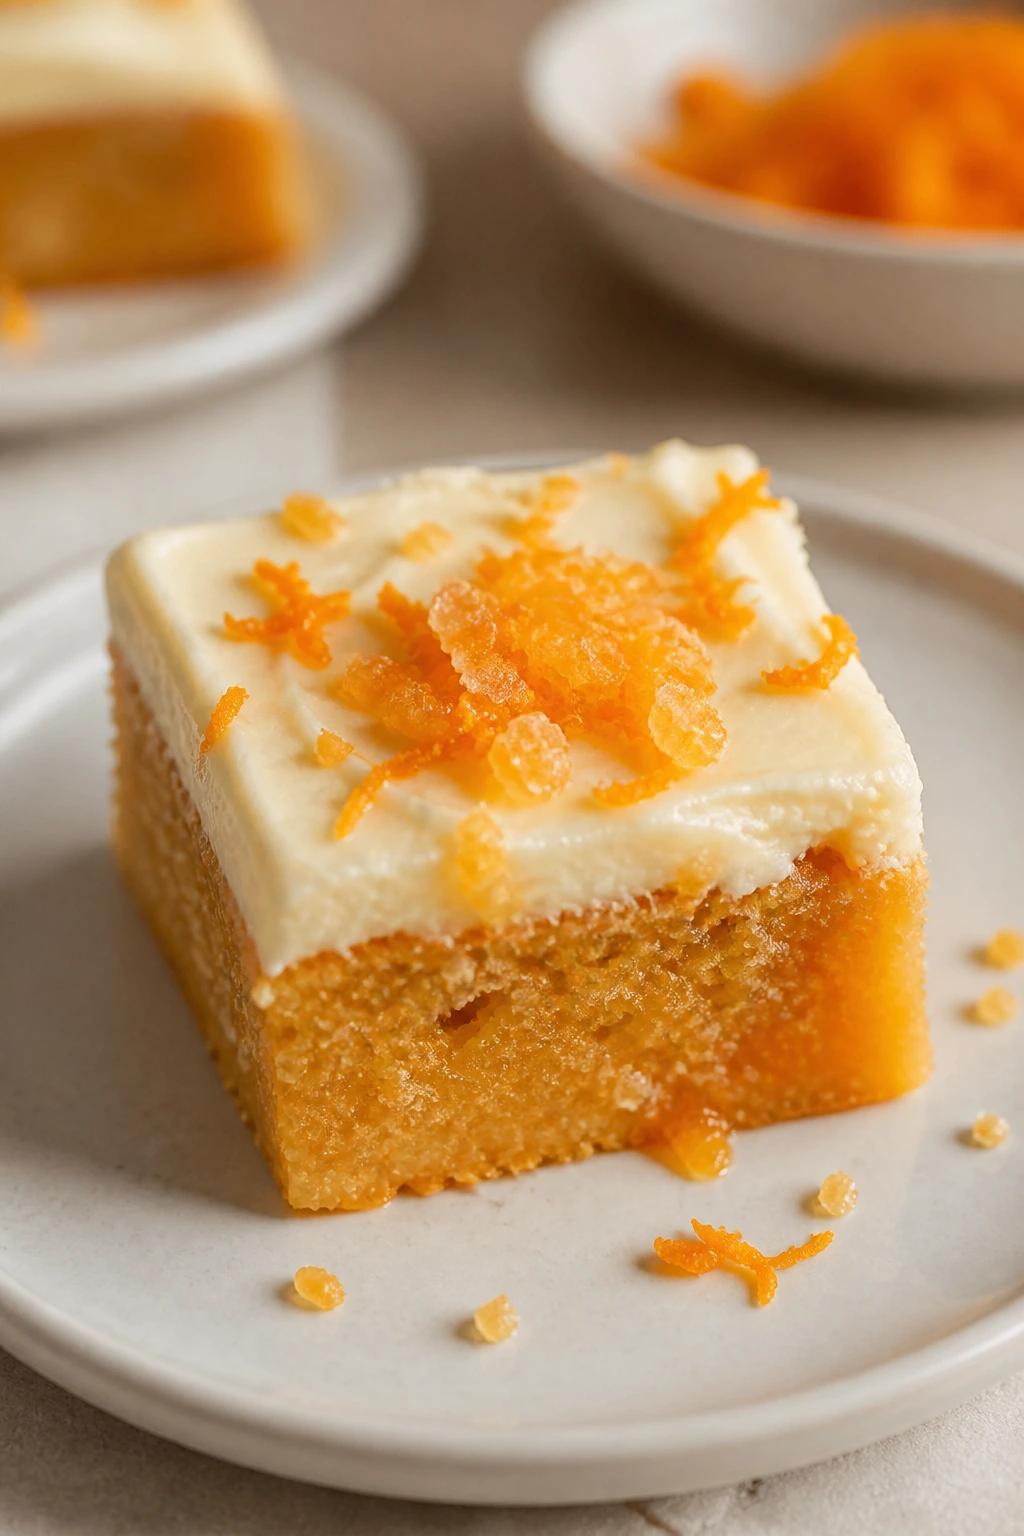
Frost and Set: 14. Spread the frosting over the completely cooled bars in an even layer. A small offset spatula works best, but the back of a spoon does the job too. 15. Sprinkle the top with extra orange zest or a few strands of candied orange peel if you like a little sparkle and chew. 16. Chill the frosted bars for 20 to 30 minutes before slicing. For the cleanest edges, use a sharp knife dipped in hot water and wiped dry between cuts. 17. Slice into 24 squares or smaller bite-size pieces if you’re serving a dessert tray. The smaller cut makes the orange flavor feel brighter and keeps the frosting from overwhelming the bite.
How to Serve These Squares
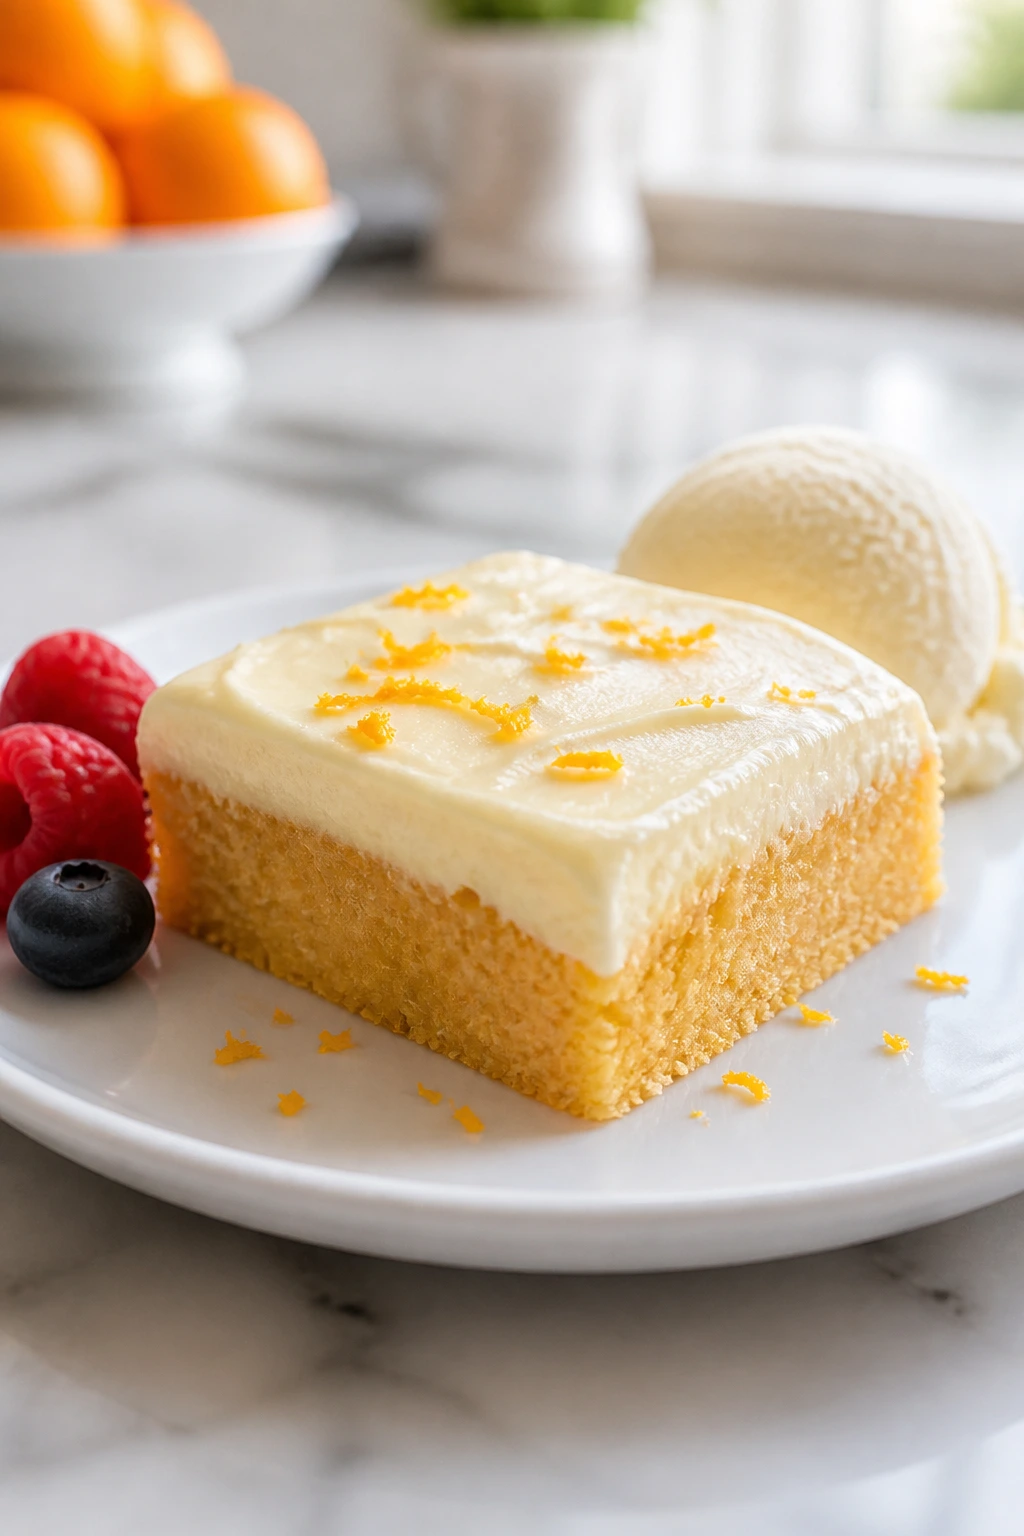
Presentation: Cut the bars cold, then let them sit for 10 minutes before serving so the frosting softens just enough to taste creamy instead of firm. A white platter shows off the pale frosting and tiny orange flecks better than a dark plate, and a few curls of zest on top make the whole pan look finished without fuss.
Accompaniments: These are rich enough to stand alone, but they play nicely with fresh berries, a bowl of strawberries, or even a small scoop of vanilla ice cream if you’re using them as a plated dessert. On a dessert tray, I like them beside plain shortbread or butter cookies so the citrus can do the talking.
Portions: One square is plenty after dinner if you cut the pan into 24 pieces. If you’re serving a crowd with other sweets, make the squares smaller — closer to 1 inch — and they’ll disappear without feeling heavy. For a more substantial dessert plate, serve two squares and keep the garnish light.
Beverage Pairing: Black tea with milk is a quiet, excellent match. Strong coffee works too, especially if you like the contrast between bitter coffee and sweet citrus frosting. If you want something cooler, an unsweetened iced tea with a slice of orange keeps the whole thing bright.
Extra Tips for Stronger Citrus Flavor and Better Texture
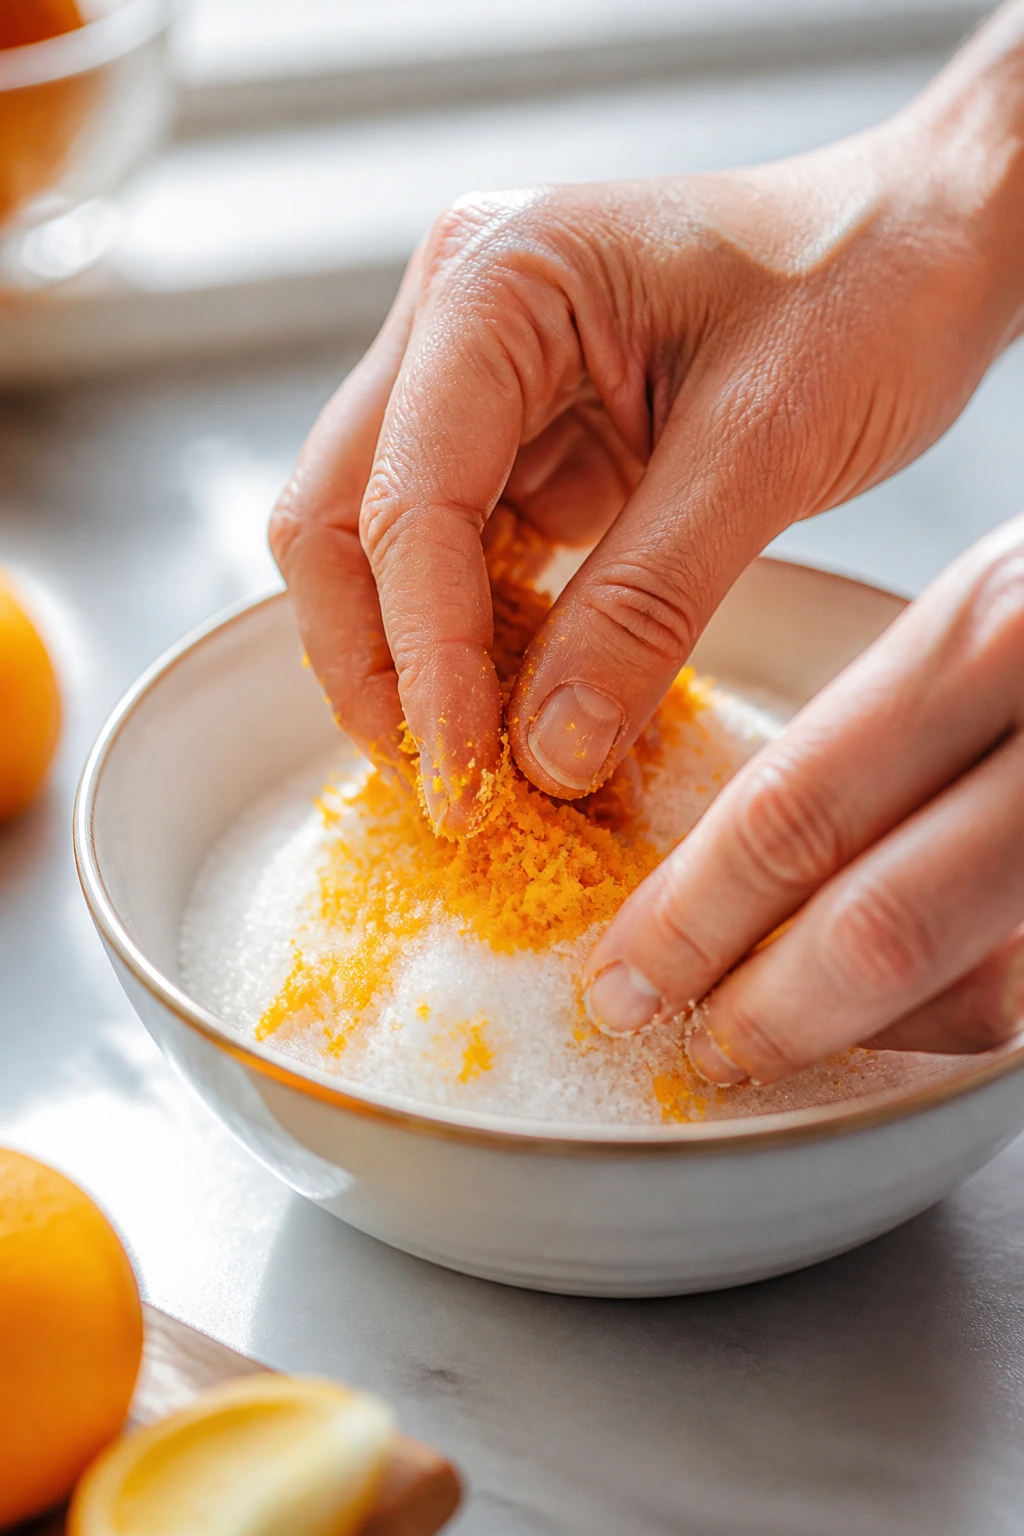
Flavor Enhancement: Rub the orange zest into the granulated sugar with your fingertips before creaming in the butter. That little move bruises the zest just enough to release more oil, and the sugar takes on a faint orange fragrance before the eggs even go in.
Time-Saver: Make the bars a day ahead and frost them once they’re fully cool. They cut cleaner after an overnight chill, and the orange flavor settles in a way that tastes more complete the next day.
Pro Move: If your kitchen runs warm, chill the frosted pan for 15 minutes before slicing. The frosting firms up just enough to keep the knife from dragging through it, which is one of those tiny things that makes the bars look bakery-made.
Make-It-Yours: Stir 1/2 cup toasted chopped pecans into the batter for a little crunch, or fold 3/4 cup white chocolate chips into the finished batter if you want a sweeter, softer profile. For a less sweet finish, reduce the powdered sugar in the frosting to 3 cups and use extra orange zest instead of extra juice.
Common Mistakes That Turn a Good Batch Flat or Gritty

- Using cold cream cheese or cold butter: The frosting turns lumpy and won’t smooth out easily. Let both soften until they dent when pressed but still hold their shape.
- Adding too much orange juice to the frosting: The frosting gets loose, shiny, and hard to spread in a thick layer. Keep the juice to 1 tablespoon or less and lean on zest for flavor.
- Overbaking the bars: The edges look fine, but the center feels dry once the squares cool. Pull the pan when the center still has a little bounce and a toothpick shows moist crumbs.
- Mixing the flour too long: The crumb turns tight and loses the soft, rich texture that makes these bars worth making. Stop as soon as the dry streaks disappear.
- Frosting warm bars: The frosting melts, thins out, and slides toward the edges. Cool the bars completely, then chill the frosted pan before cutting.
- Skipping the parchment overhang: The bars stick to the pan, and getting the first square out becomes an ugly little battle. Two long parchment handles solve that problem in one shot.
Variations Worth Trying
Candied Peel Orange Squares: Fold 1/3 cup finely chopped candied orange peel into the batter and scatter a little more on top of the frosting. The peel gives you tiny chewy bursts that feel old-fashioned and a little fancy at the same time.
White Chocolate Orange Bars: Stir 3/4 cup white chocolate chips into the batter before baking, then shave a few curls of white chocolate over the chilled frosting. The extra sweetness makes the orange taste softer and more dessert-like, almost like a bakery muffin bar in square form.
Poppy Seed Citrus Version: Add 1 tablespoon poppy seeds to the dry ingredients and bump the zest up to 3 tablespoons. It leans into that classic bakery-citrus thing and looks especially nice sliced into neat little squares.
Almond Orange Squares: Replace 1/2 teaspoon of the vanilla with 1/2 teaspoon almond extract and top the frosting with 2 tablespoons toasted sliced almonds. The almond gives the orange a marzipan-like edge that feels richer and slightly more grown-up.
Gluten-Free Orange Bars: Use 2 1/4 cups 1:1 gluten-free baking flour in place of the all-purpose flour. The bars will be a touch more delicate, so chill them before cutting and use a thin, sharp knife rather than a sawing motion.
Storing, Freezing, and Making Them Ahead
These bars like the refrigerator. That’s the short version. Because of the cream cheese frosting, they should not sit out on the counter for hours, especially in a warm kitchen. If you’re serving them at a party, you can leave them out for about 2 hours, then move the leftovers back to the fridge.
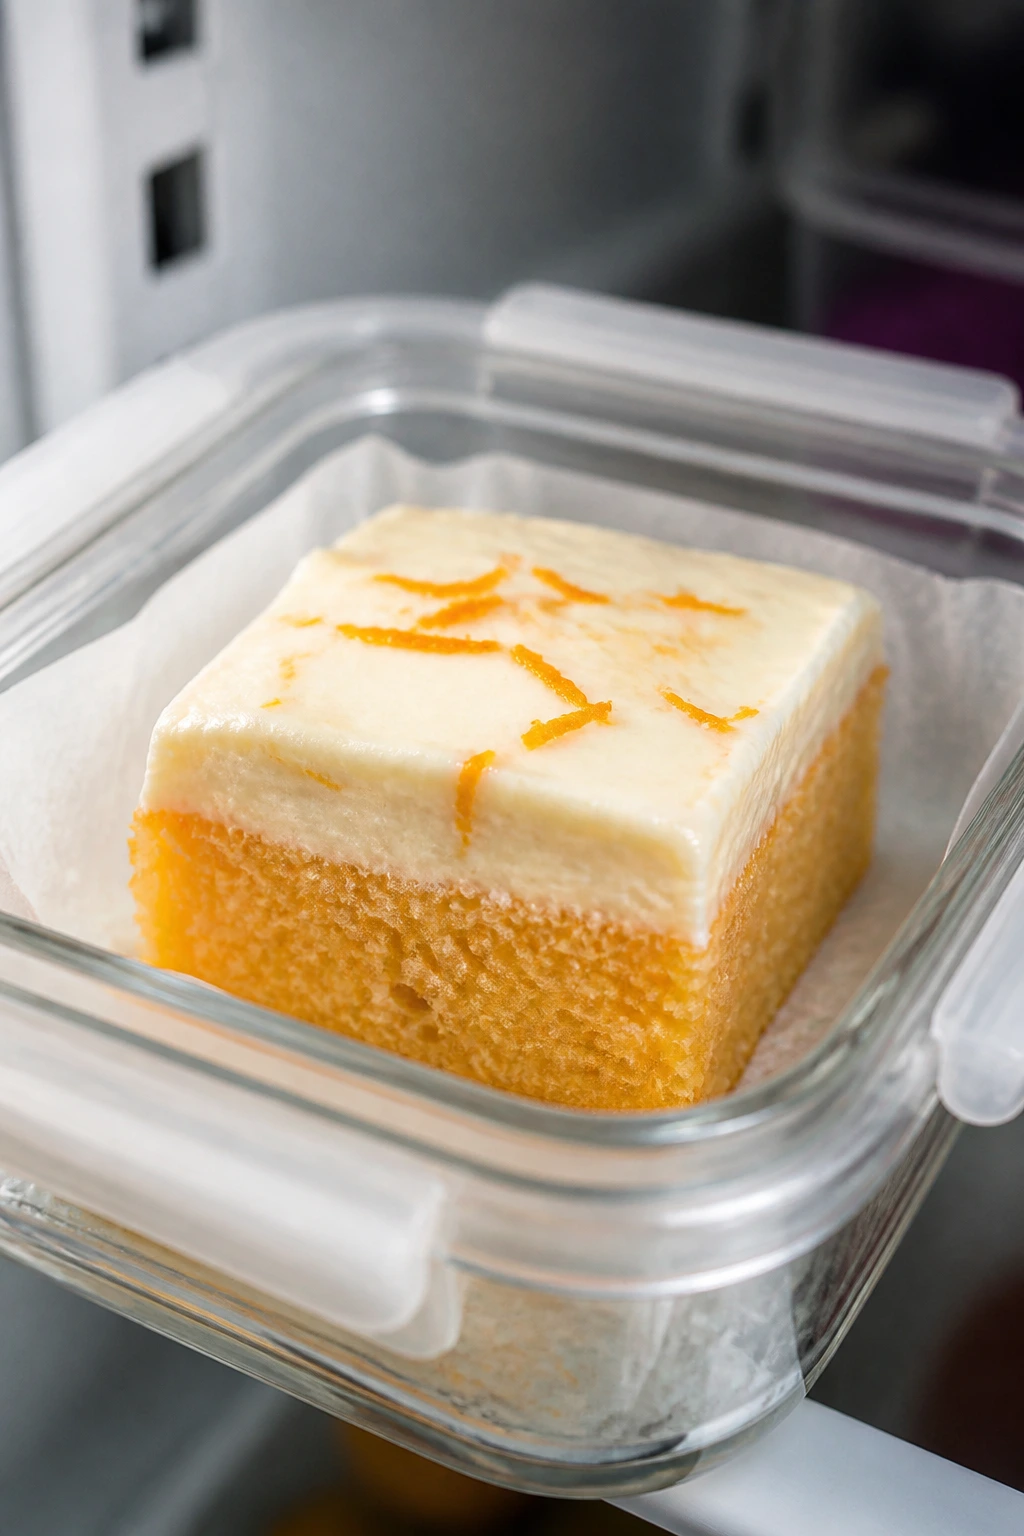
For refrigerated storage, keep the squares in an airtight container for 4 to 5 days. Slip parchment between layers if you need to stack them. The frosting firms up in the fridge, so the bars actually slice better the next day. I often prefer them after an overnight rest because the orange flavor tastes cleaner and the crumb settles.
For the freezer, wrap individual slices tightly in plastic wrap, then place them in a freezer bag or airtight container for up to 2 months. You can also freeze the unfrosted bars as a slab, which is a smart move if you want to frost them fresh later. Thaw overnight in the refrigerator, then let them sit at room temperature for 15 to 20 minutes before serving.
If you want a softer bite, don’t microwave the frosted bars. The frosting can get greasy and slick. Let them warm on the counter instead. If you froze the bars unfrosted, thaw them first, then frost once they’re fully cool again. That keeps the topping smooth and the cuts neat.
For make-ahead timing, the base can be baked a day ahead, frosted the next day, and chilled before serving. The frosting itself can be made up to 2 days ahead and stored in the refrigerator; just let it sit out until it’s spreadable again, then beat it for 20 seconds to bring back the texture.
Questions People Actually Ask
Can I use bottled orange juice instead of fresh?
You can, but fresh juice tastes brighter and the zest from fresh oranges makes a bigger difference than the juice itself. If bottled juice is what you have, keep the zest fresh and consider adding the optional orange extract so the flavor does not feel thin.
Do I really need orange extract?
No, but it helps if your oranges are mild or out of season for good flavor. Think of it as insurance, not a crutch. If you skip it, add an extra teaspoon of zest so the bars still taste like orange after baking.
Why did my frosting turn runny?
Usually it’s one of three things: the cream cheese was too warm, too much orange juice went in, or the butter was almost melted instead of softened. Chill the frosting for 10 to 15 minutes and beat in a little more powdered sugar if needed.
Can I make this recipe in an 8×8-inch pan?
Yes, but the bars will be thicker and need more time in the oven. Start checking around 35 to 40 minutes, and expect a denser square that needs a longer cool-down before frosting.
Can I make these ahead for an event?
Absolutely. Bake the bars the day before, frost them once they’re cool, and chill overnight. The texture gets cleaner, the orange flavor settles, and the slices hold their shape better than they do right after frosting.
Can I freeze the frosted bars?
Yes. Freeze them in a single layer first so the frosting firms up, then wrap well and store for up to 2 months. Thaw them in the refrigerator rather than on the counter so the frosting stays neat.
Can I cut the sugar without ruining the recipe?
You can trim the frosting sugar a little — down to about 3 cups — if you prefer a less sweet finish. I would not cut much more from the batter sugar, though, because it affects tenderness and the way the bars bake.
What if I want a stronger orange flavor without making the frosting loose?
Use more zest, not more juice. Extra zest gives you aroma and actual orange punch without watering down the frosting or changing the texture of the bars.
A Bright Pan Worth Repeating
Some desserts are built for dramatic entrances. This isn’t one of them. Buttery Orange Candy with Cream Cheese Frosting wins by being the thing people keep reaching for when the tray gets passed back around. The flavor is direct, the texture is soft without falling apart, and the frosting gives each square enough tang to keep the sweetness in check.
What I like most is that the recipe is honest about its strengths. It does not try to be a layer cake, a tart, or a candy-shop showpiece. It’s a pan dessert with good manners and a strong orange scent, and that is enough. Make it once, and you’ll probably start keeping oranges around with this recipe in mind instead of only for breakfast.
Buttery Orange Candy with Cream Cheese Frosting — Recipe Card
Recipe Name: Buttery Orange Candy with Cream Cheese Frosting
Description: Tender orange dessert squares with a rich, buttery crumb and a tangy cream cheese frosting. The bars slice cleanly after chilling and bring a bright citrus flavor that holds up in the oven.
Prep Time: 25 minutes
Cook Time: 28 to 32 minutes
Total Time: 2 hours 15 minutes
Course: Dessert
Cuisine: American
Servings: 24 squares
Calories: 320 kcal per serving
Ingredients
For the Orange Bar Base:
- 1 cup (2 sticks) unsalted butter, softened to room temperature
- 1 1/2 cups granulated sugar
- 2 large eggs, room temperature
- 1 large egg yolk, room temperature
- 2 tablespoons finely grated orange zest from 2 large oranges
- 1/3 cup fresh orange juice
- 1 teaspoon pure vanilla extract
- 1/2 teaspoon orange extract, optional but recommended
- 2 1/4 cups all-purpose flour
- 1 teaspoon baking powder
- 1/2 teaspoon baking soda
- 1/2 teaspoon fine sea salt
- 1/2 cup sour cream, room temperature
For the Cream Cheese Frosting:
- 8 ounces full-fat cream cheese, softened
- 1/2 cup (1 stick) unsalted butter, softened
- 3 to 3 1/2 cups powdered sugar, sifted
- 1 tablespoon fresh orange juice
- 1 teaspoon finely grated orange zest
- 1 teaspoon pure vanilla extract
- Pinch of fine salt
Optional Garnish:
- 1 teaspoon extra orange zest
- 2 tablespoons finely chopped candied orange peel or very thin orange curls
Instructions
-
Preheat the oven to 350°F (175°C) and line a 9×13-inch baking pan with parchment paper, leaving overhang on two sides.
-
Whisk together the flour, baking powder, baking soda, and salt in a medium bowl.
-
Beat the softened butter and granulated sugar together for 3 to 4 minutes until pale and fluffy.
-
Add the eggs one at a time, then beat in the egg yolk.
-
Mix in the orange zest, orange juice, vanilla extract, orange extract if using, and sour cream. The batter may look slightly curdled.
-
Add the dry ingredients in two additions, mixing on low speed just until combined.
-
Spread the batter into the prepared pan and bake for 28 to 32 minutes, until the center springs back lightly and a toothpick comes out with a few moist crumbs.
-
Cool in the pan for 20 minutes, then lift out and cool completely on a wire rack.
-
Beat the cream cheese and butter until smooth, then add the powdered sugar, orange juice, orange zest, vanilla, and salt. Beat until thick and spreadable.
-
Spread the frosting over the cooled bars, garnish with extra zest if you like, and chill for 20 to 30 minutes before slicing into squares.
Notes: Use fresh orange zest for the strongest flavor, and do not frost warm bars. A hot knife makes the cleanest cuts, especially after chilling.