
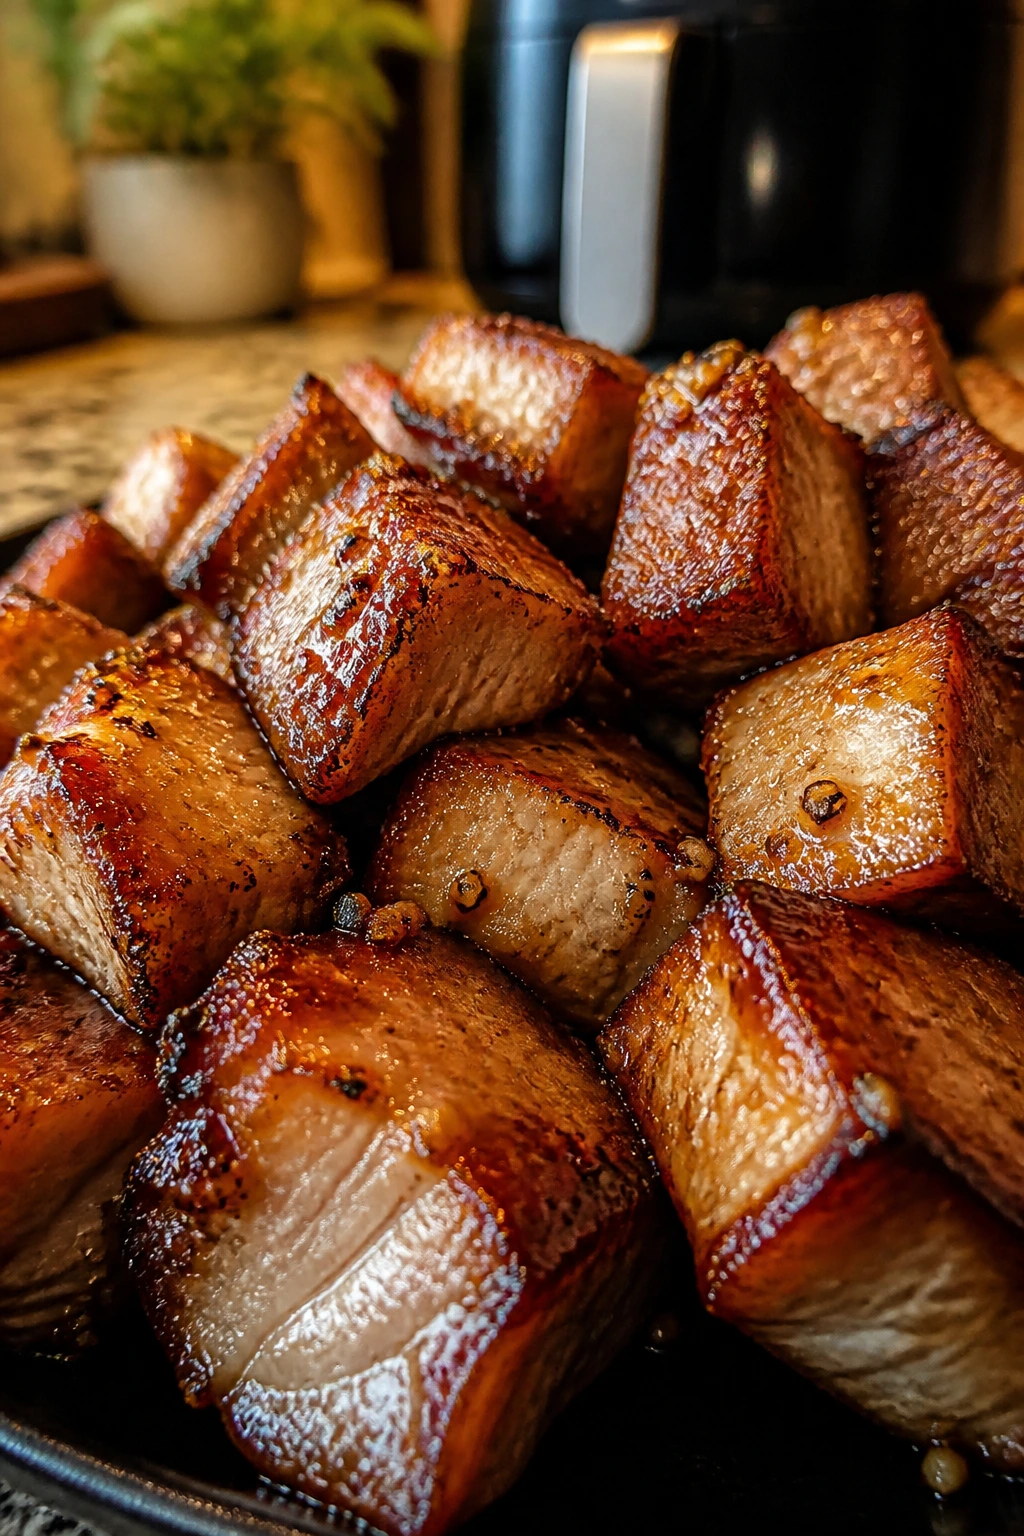
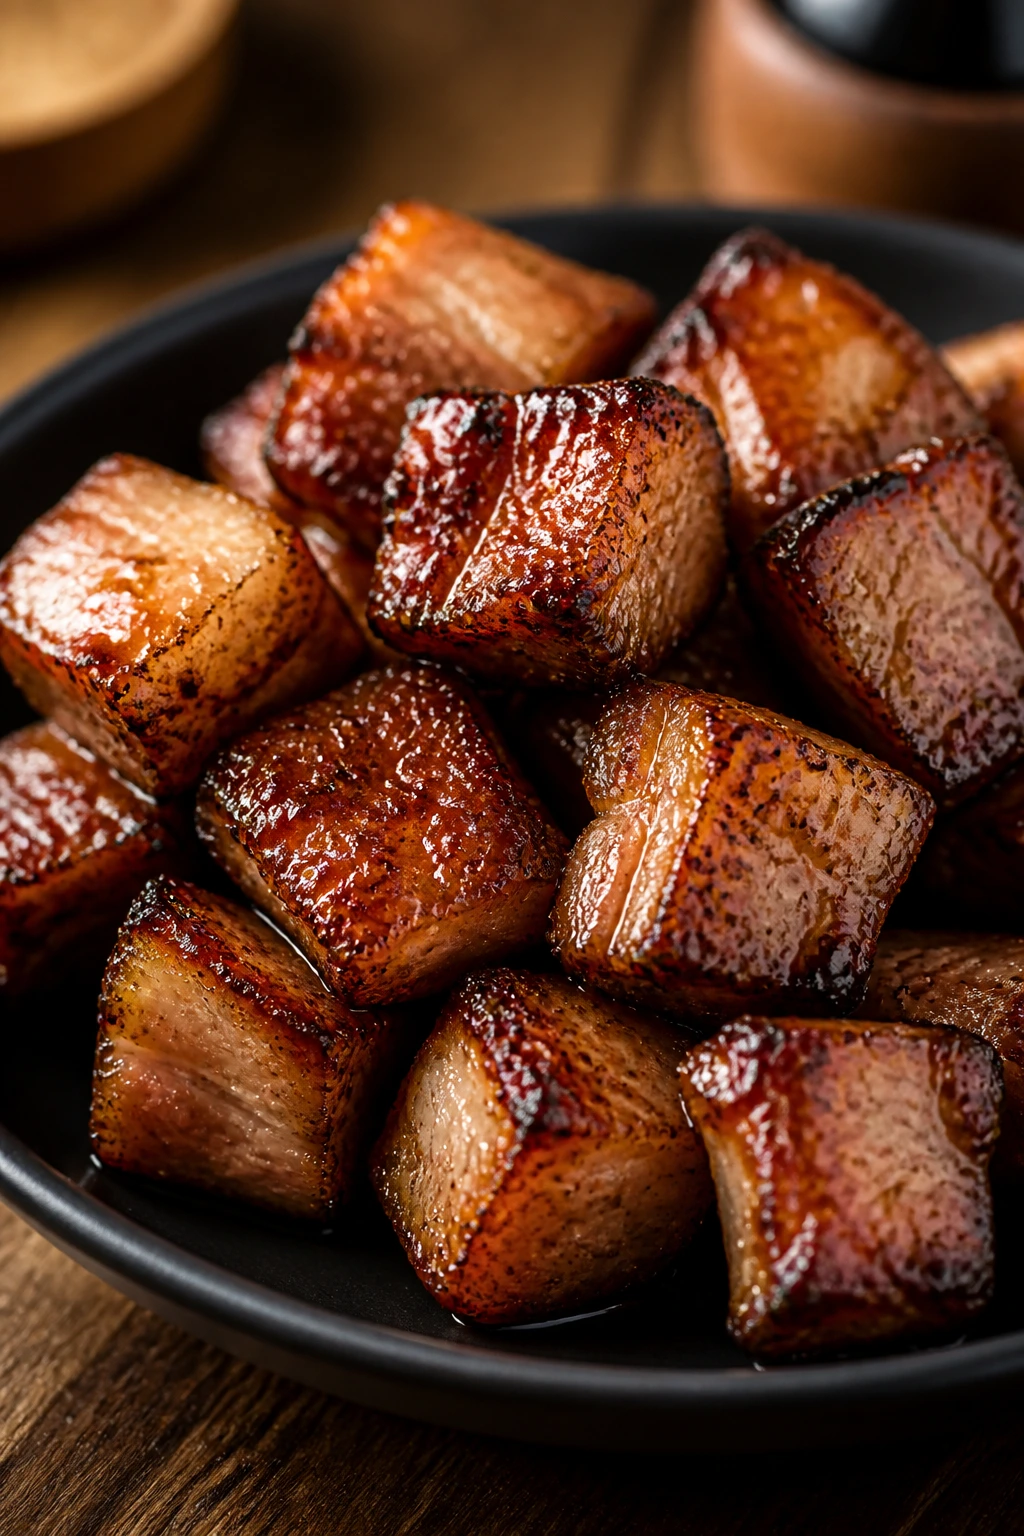
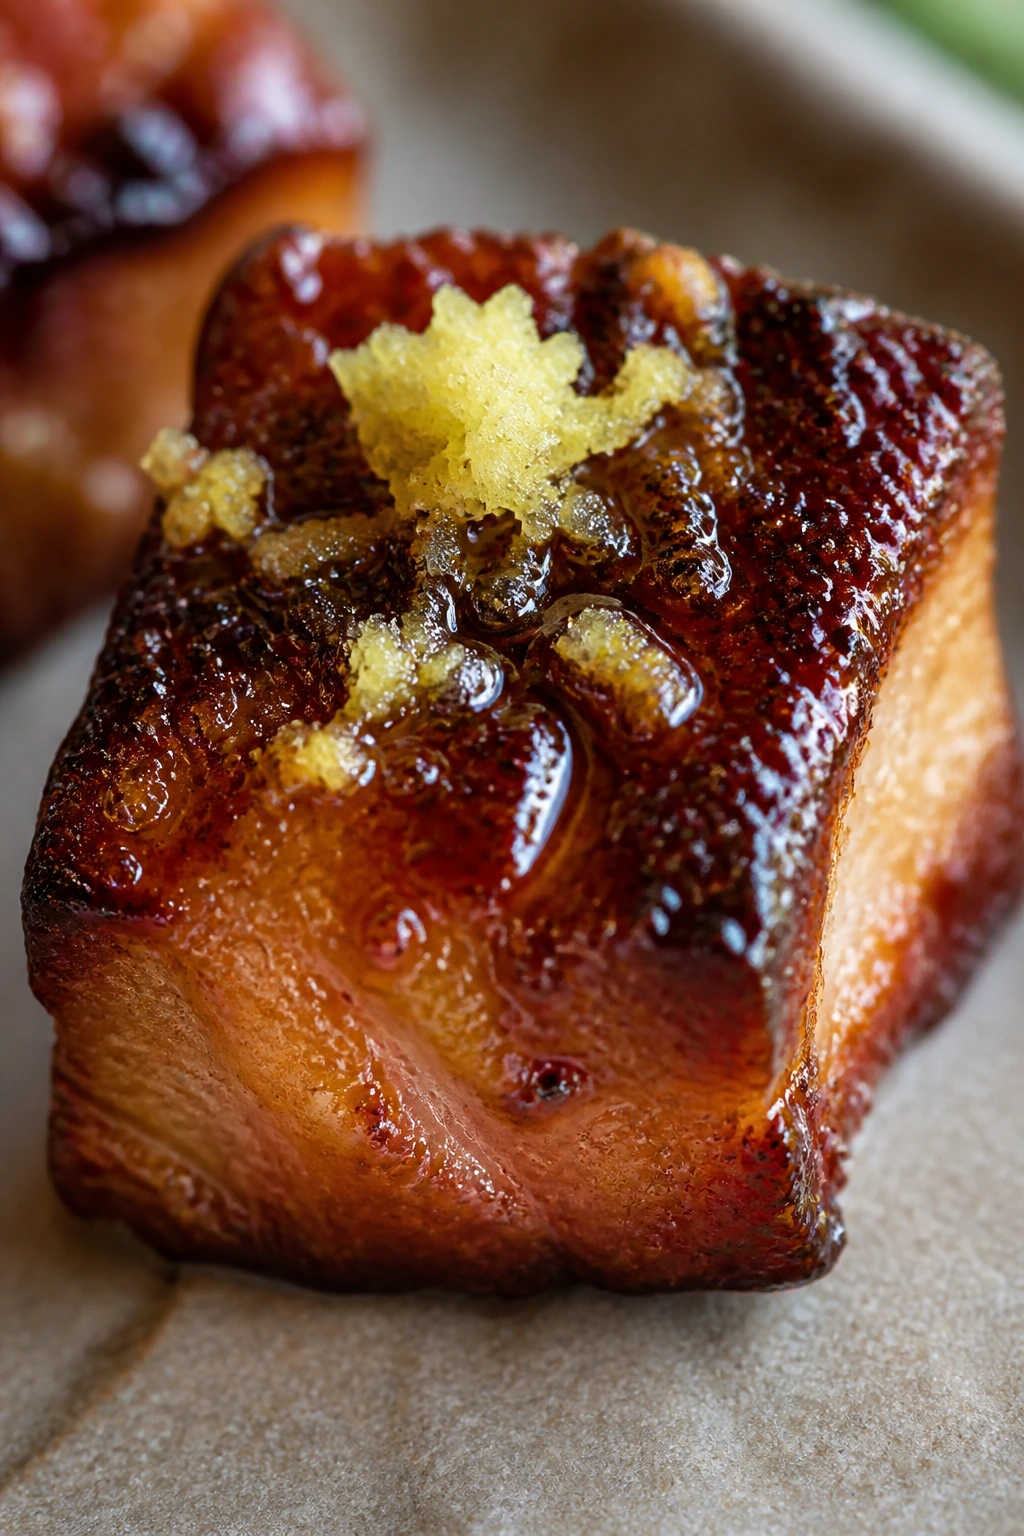
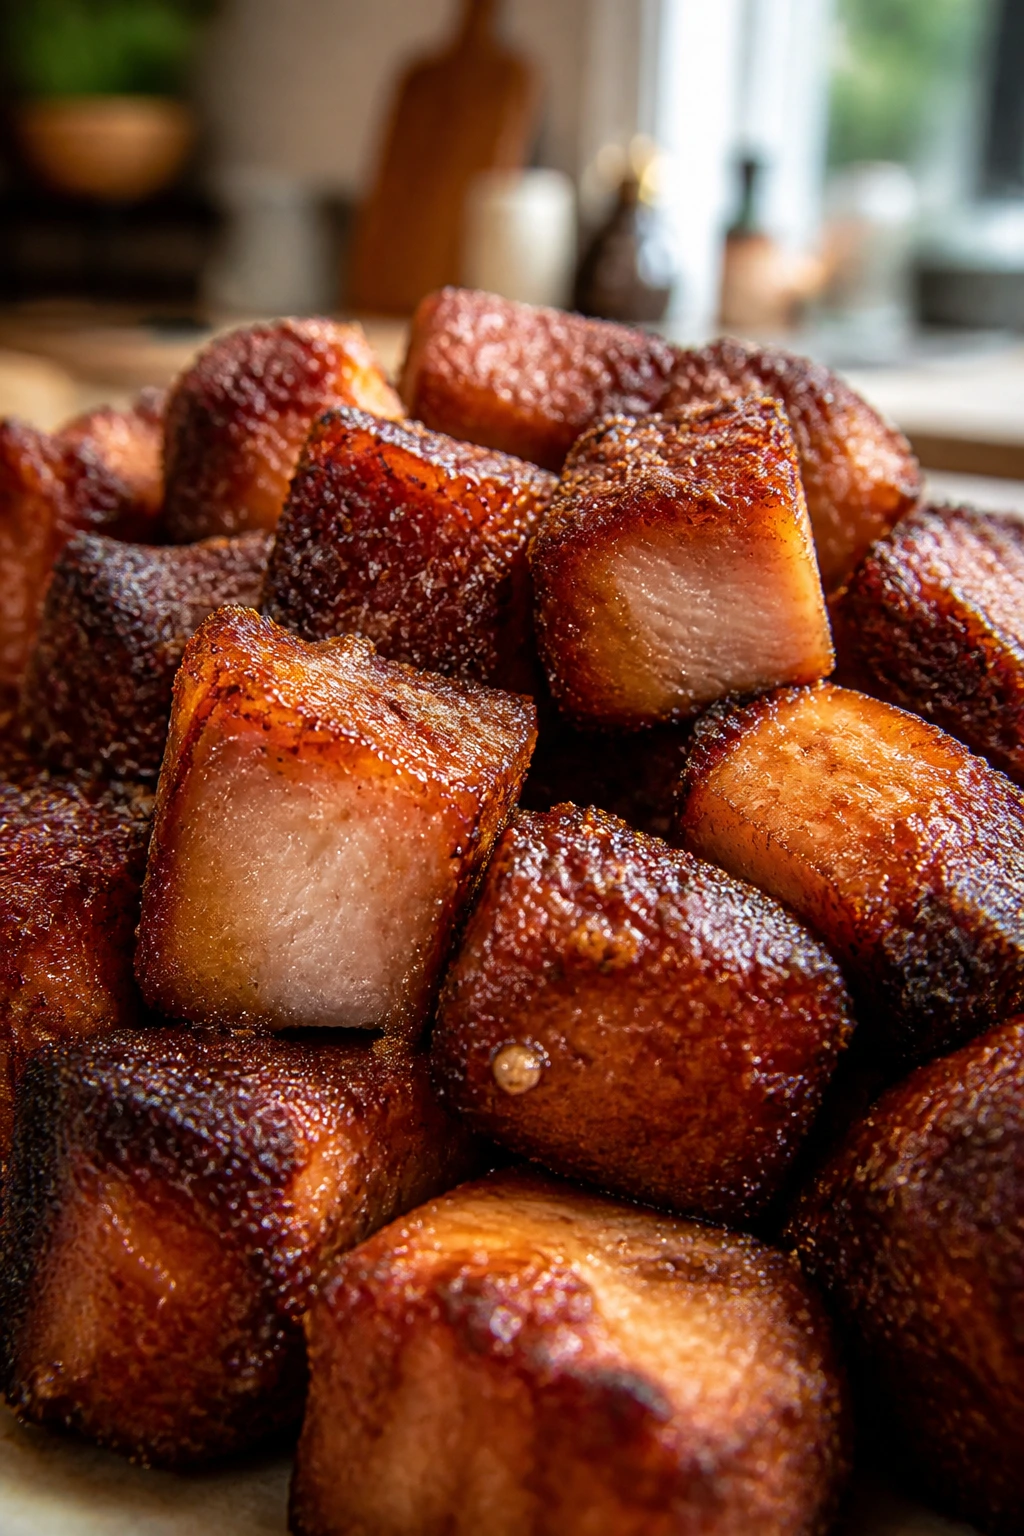
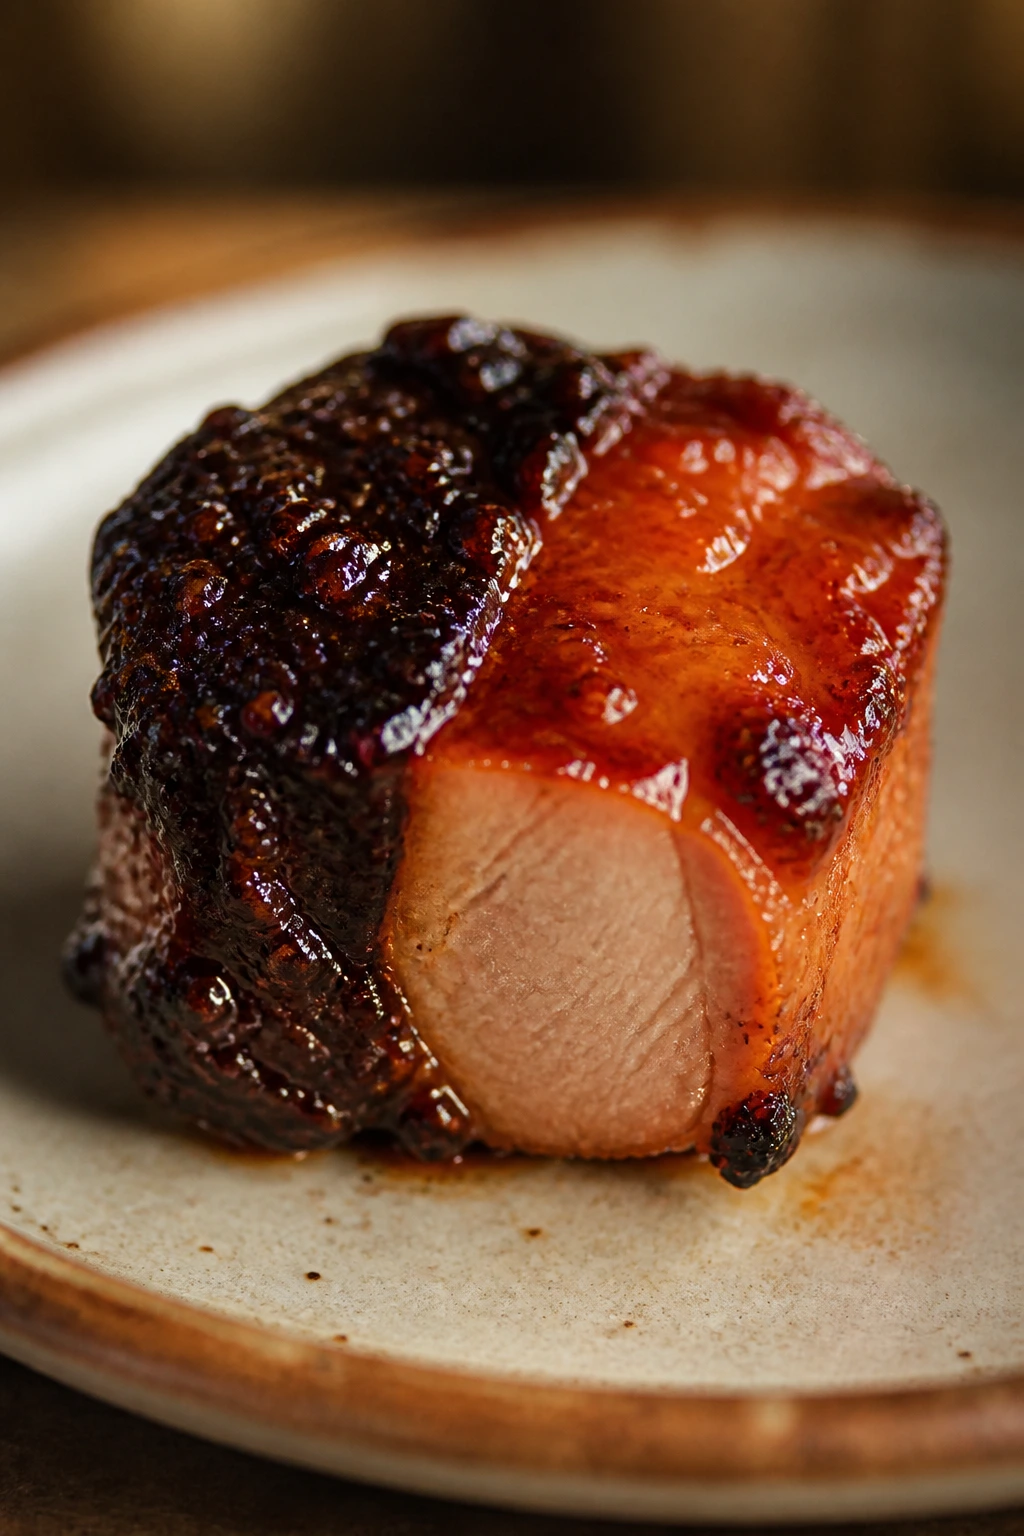
The first good batch of crispy air fryer pork with brown sugar glaze smells like toasted sugar, browned garlic, and hot pork fat that has finally done something useful. That’s the smell of dinner getting its act together. The surface goes a little rough and crackly, the glaze turns shiny instead of sticky-syrupy, and the whole thing lands somewhere between savory roast and candy-shop caramel — in a good way, not a cloying one.
What makes this dish worth repeating is the timing. The pork needs enough dry heat to brown, but the brown sugar needs to stay away from that heat until the very end. That sounds like a small thing. It isn’t. Put the glaze on too early and you get scorch marks, dark patches, and a basket that smells like burnt caramel for the next two cooks. Hold it back, and the edges stay crisp while the sauce turns glossy and clings like it belongs there.
I’m using pork tenderloin here because it takes the air fryer well. It’s lean, mild, and easy to cut into even pieces, which matters more than people think. Uneven chunks mean some bites are overcooked while others are still pale, and the air fryer is ruthless about that kind of sloppy cutting. If you’ve ever had pork that tasted dry even though it was technically cooked, this method fixes the problem at the source.
Why This Pork Works So Well
-
Fast Browning: The air fryer blasts hot air across every side of the pork, so 1-inch pieces pick up color in about 10 to 12 minutes instead of sitting in a skillet and stewing in their own moisture.
-
Crisp Edges, Tender Centers: A thin cornstarch coating gives the pork a dry, crackly shell that helps the glaze cling without turning the outside soggy.
-
Brown Sugar at the Right Moment: The glaze simmers separately, which keeps the sugar from burning before the pork is done; that one move makes the difference between glossy and bitter.
-
Cleaner Cleanup: You only need one bowl for seasoning and one small saucepan for the glaze, so the job feels bigger on the plate than it does at the sink.
-
Easy to Bend Toward Different Flavors: The base seasoning is sturdy enough to take smoked paprika, ginger, chili, or sesame without falling apart.
Yield: 4 servings
Prep Time: 15 minutes
Cook Time: 12 minutes
Total Time: 30 minutes
Rest Time: 3 minutes
Difficulty: Beginner — the steps are simple, but you do need to watch the basket and pull the pork at the right temperature.
Best Served: Right away, while the edges are crisp and the glaze is still warm enough to flow.
Why This Pork Tastes Better in Bite-Sized Pieces Than as a Whole Roast
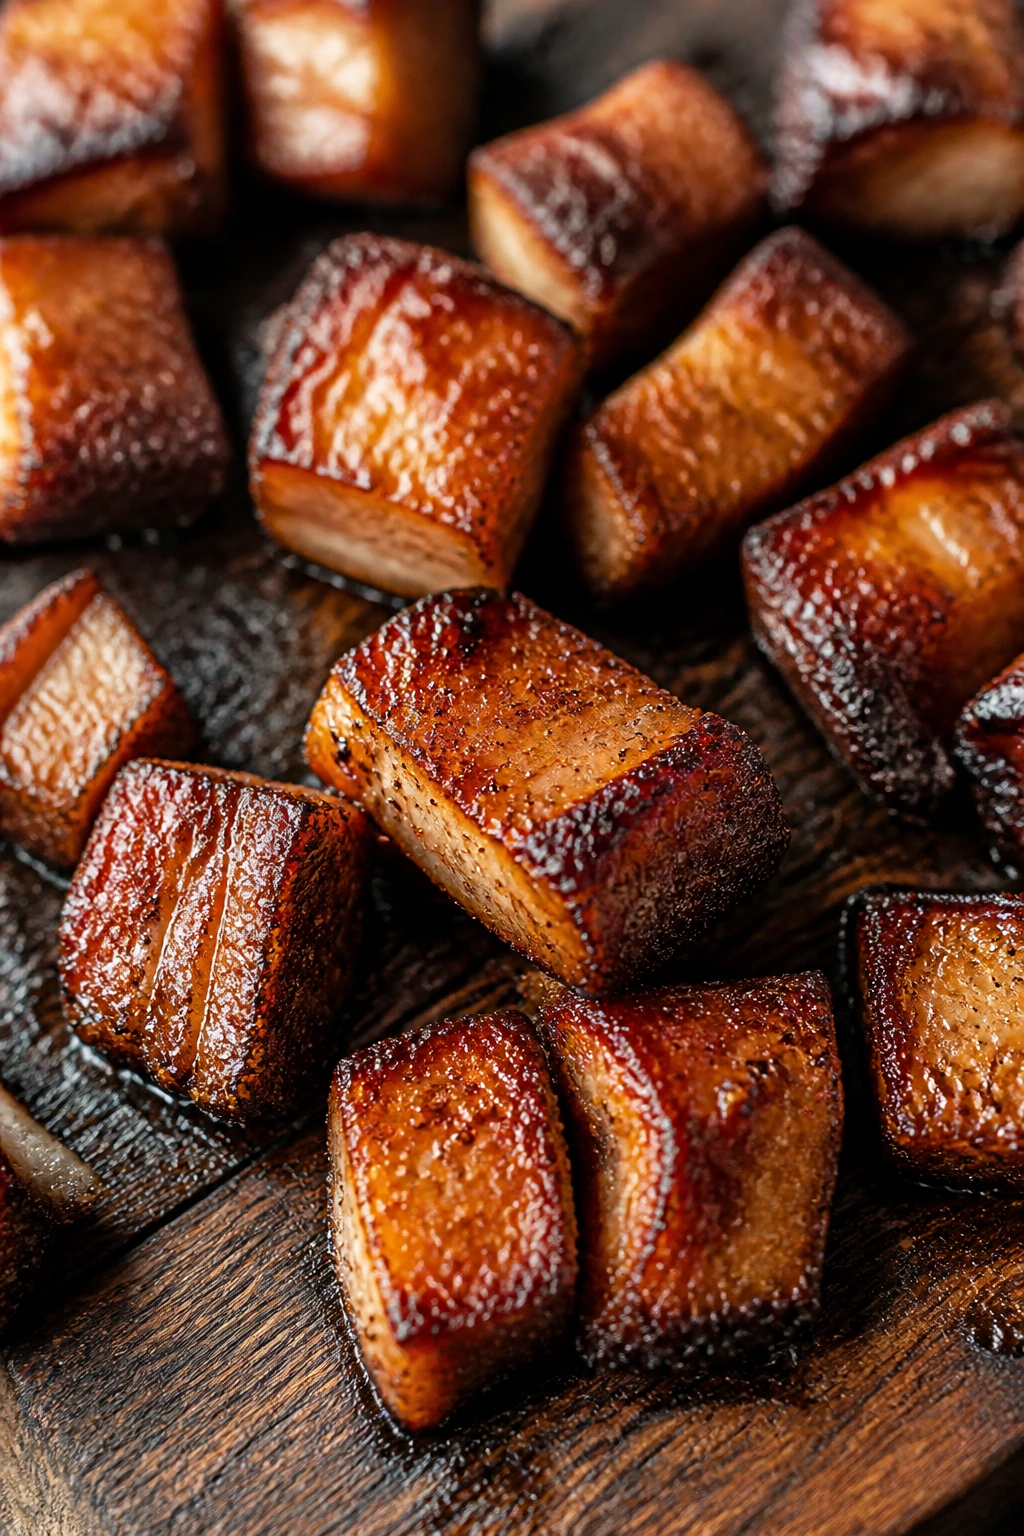
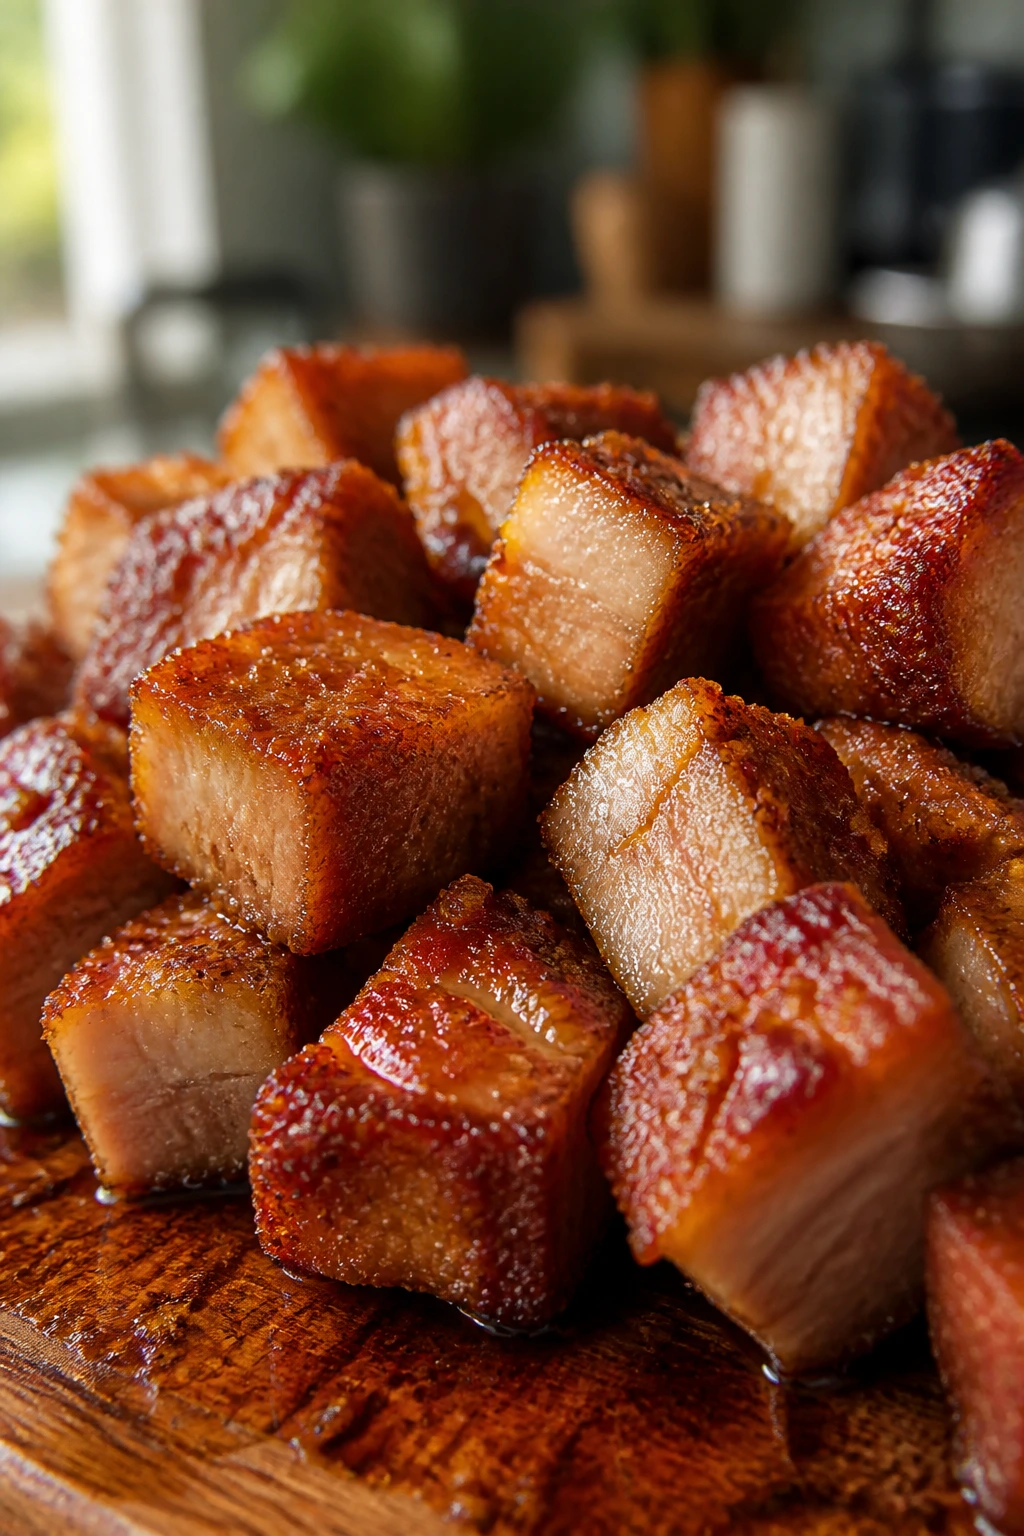
Pork tenderloin has a quiet personality. That’s a compliment. It doesn’t come with a lot of fat or connective tissue, which means it cooks quickly and takes on seasoning without fighting back. In the air fryer, that matters because the appliance rewards speed and surface area. Cut the tenderloin into 1-inch cubes and you give every piece more browned sides, more crisp edges, and more places for the glaze to grab.
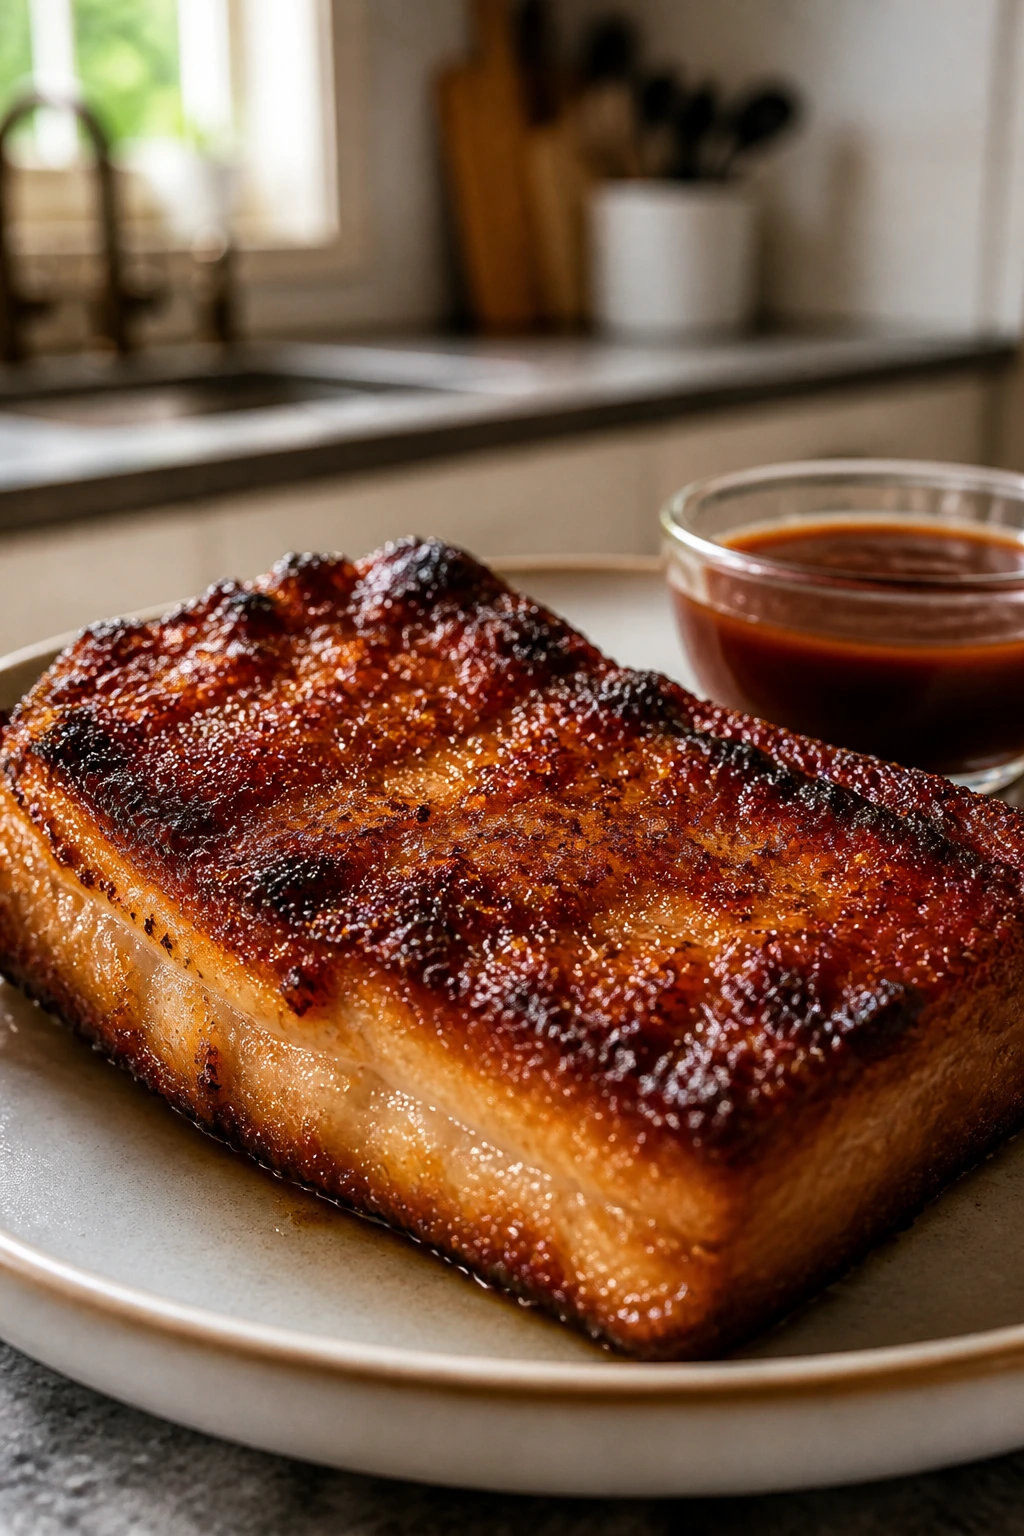
A whole tenderloin can work, sure. But the experience is different. You get a roast with a crust, not the tiny, lacquered bites that make this recipe feel a little more fun than the usual sliced pork dinner. I prefer the cubes because they eat like the best part of a roast: the browned outside, the juicy inside, the little bits where the glaze pools in the folds. That’s where the flavor lives.
There’s also a practical reason I like this shape. Pieces this size cook evenly in a basket air fryer without much fuss. The difference between a 1-inch cube and a 2-inch hunk is not small here. A bigger piece needs more time, which gives the sugar more chances to darken too much. Smaller pieces can dry out before the surface is set. The sweet spot sits right in the middle, and once you hit it, the recipe behaves.
The glaze deserves its own little stage, too. Brown sugar, soy sauce, vinegar, mustard, garlic, butter — it sounds like a pantry mashup because that’s exactly what it is. But the balance is careful. Sugar for shine. Soy for salt. Vinegar for lift. Mustard for a little bite. Butter for the round, soft finish that keeps the glaze from tasting sharp. If you’ve ever had a sweet glaze that felt flat by the third bite, the vinegar is why this one doesn’t.
The Ingredient List That Builds the Crust and the Glaze
For the Pork:
- 1 1/2 pounds pork tenderloin, silver skin removed, cut into 1-inch cubes
- 1 tablespoon olive oil
- 1 1/2 tablespoons cornstarch
- 1 teaspoon kosher salt
- 1 teaspoon smoked paprika
- 1 teaspoon garlic powder
- 1/2 teaspoon onion powder
- 1/2 teaspoon freshly ground black pepper
- 1/4 teaspoon cayenne pepper
For the Brown Sugar Glaze:
- 1/4 cup packed light brown sugar
- 2 tablespoons low-sodium soy sauce or tamari
- 1 tablespoon apple cider vinegar
- 1 tablespoon Dijon mustard
- 1 tablespoon water
- 2 cloves garlic, finely grated or minced
- 1 tablespoon unsalted butter
For Finishing:
- 1 tablespoon sliced scallions
- 1 teaspoon toasted sesame seeds
Why Each Ingredient Matters in the Bowl and in the Glaze
Pork Tenderloin
- What to use: 1 1/2 pounds pork tenderloin, trimmed well and cut into even 1-inch cubes.
- Preparation: Pull off the silver skin first, then trim away any thick pockets of connective tissue so the knife slides cleanly through the meat.
- Substitutions: Boneless pork loin chops can stand in if you cube them; they need about the same cook time, though the texture is a little firmer. Pork shoulder is not a swap I’d make here — it wants a longer cook and a different approach.
- Tips: Cut the cubes as evenly as you can. The air fryer punishes sloppy knife work, and uneven pieces are the fastest way to get half-dry pork and half-underbrowned pork on the same tray.
The Crisping Coating
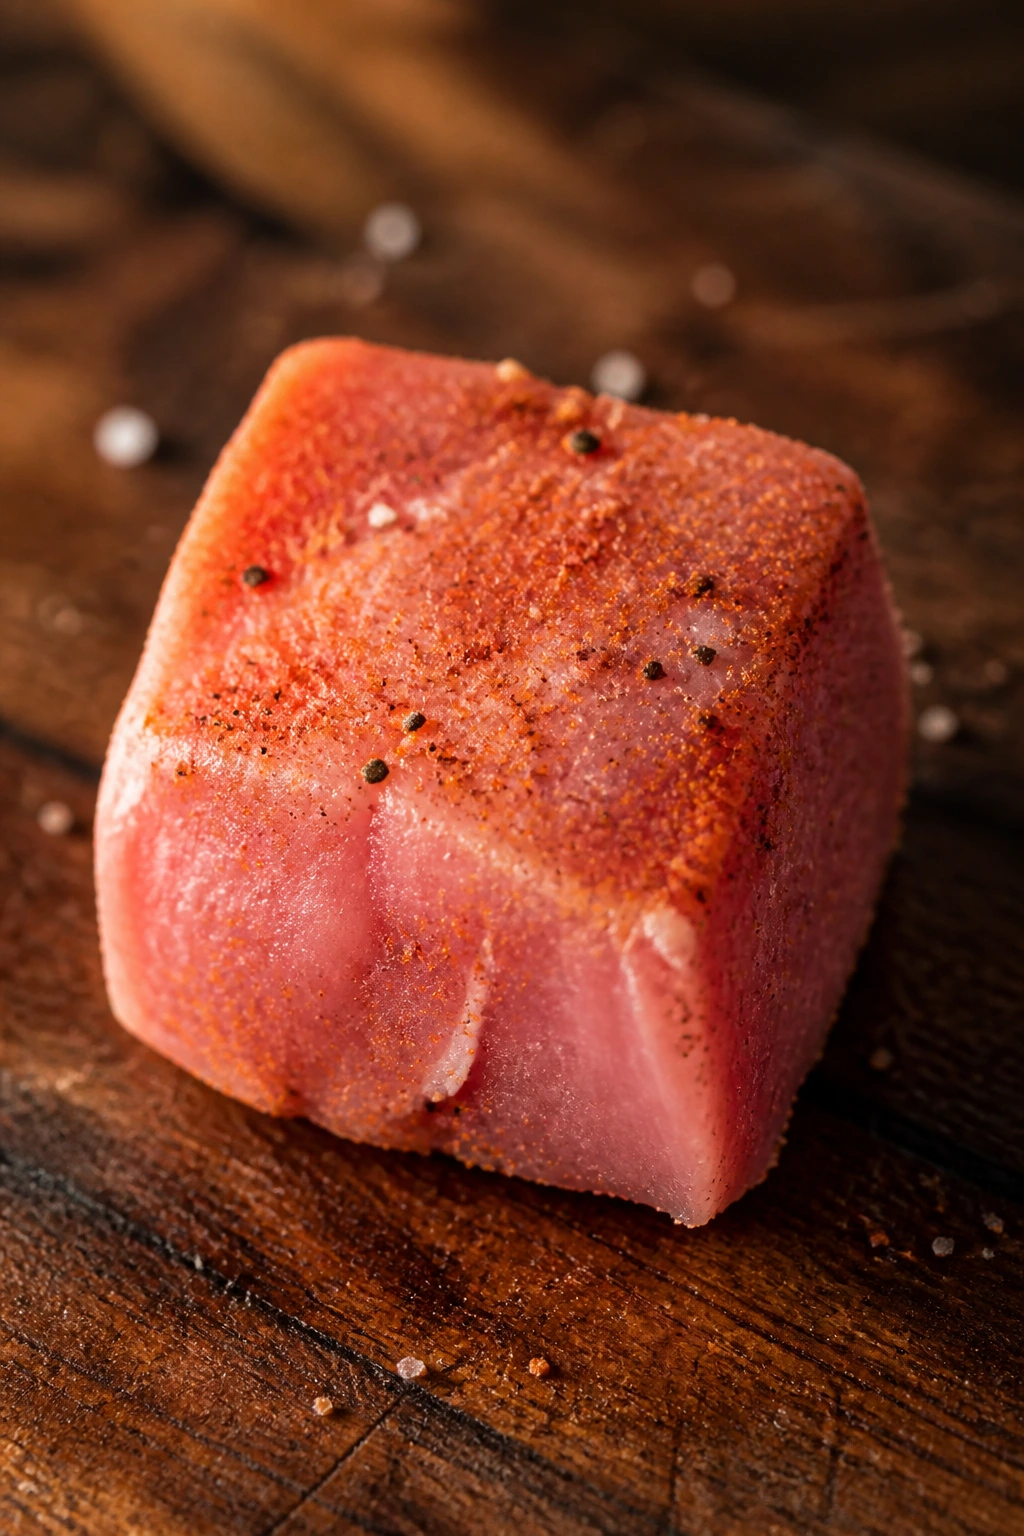
- What to use: 1 tablespoon olive oil, 1 1/2 tablespoons cornstarch, 1 teaspoon kosher salt, 1 teaspoon smoked paprika, 1 teaspoon garlic powder, 1/2 teaspoon onion powder, 1/2 teaspoon black pepper, and 1/4 teaspoon cayenne.
- Preparation: Mix the dry seasoning first, then toss it with the oil and pork so the cornstarch clings in a light, dusty coat rather than clumping into gluey spots.
- Substitutions: Arrowroot works in place of cornstarch, though I still think cornstarch gives a better dry crunch. Regular paprika is fine if you want less smoke; white pepper can replace black pepper for a softer finish.
- Tips: The pork has to be dry before the coating goes on. If the surface is wet, the seasoning slips and the crust turns patchy instead of even.
The Brown Sugar Glaze
- What to use: 1/4 cup packed light brown sugar, 2 tablespoons low-sodium soy sauce or tamari, 1 tablespoon apple cider vinegar, 1 tablespoon Dijon mustard, 1 tablespoon water, 2 cloves garlic, and 1 tablespoon unsalted butter.
- Preparation: Whisk everything together in a small saucepan and simmer just long enough for the sugar to dissolve and the sauce to turn glossy.
- Substitutions: Tamari makes the glaze gluten-free. Coconut aminos work too, but they’re sweeter, so I’d cut the brown sugar to 3 tablespoons if you use them.
- Tips: Light brown sugar gives a cleaner caramel flavor. Dark brown sugar is deeper and more molasses-heavy, which can bully the pork a little if you let the sauce reduce too far.
The Finishing Garnishes
- What to use: 1 tablespoon sliced scallions and 1 teaspoon toasted sesame seeds.
- Preparation: Slice the scallions thin so they don’t dominate the plate, and toast the sesame seeds if yours aren’t already toasted.
- Substitutions: Chopped parsley works if you want a fresher look, and crushed peanuts are nice if you want a little extra crunch.
- Tips: Add the garnish at the very end. Even a minute or two of sitting in the glaze softens the crisp edges, and you lose some of the texture that makes the dish fun to eat.
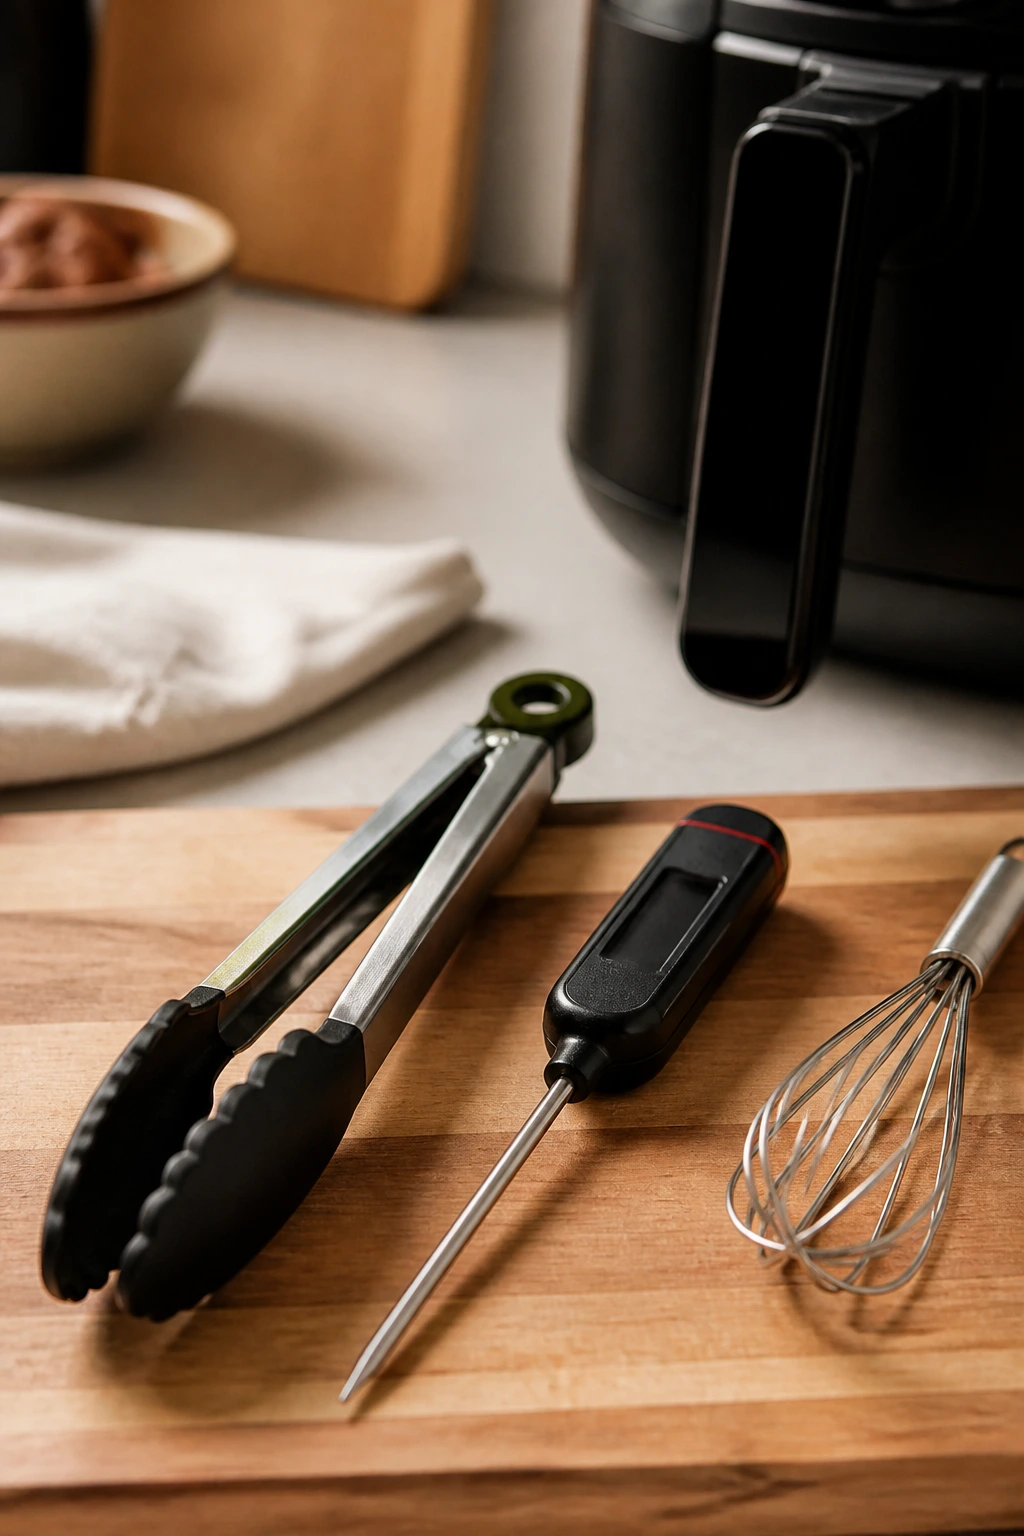
The Tools That Make the Air Fryer Behave
- Air fryer with basket or tray: A basket model is ideal here because it shakes easily and helps the pork brown on more than one side.
- Large mixing bowl: You need room to toss the pork without scattering cornstarch all over the counter.
- Small saucepan: This is for the glaze; a tiny pan keeps the sauce concentrated instead of spread thin.
- Instant-read thermometer: Non-negotiable. It keeps you from guessing on doneness and overcooking the pork by accident.
- Silicone tongs: Easier on the crust than a fork, and they help you turn the pieces without stabbing them open.
- Small whisk: Useful for keeping the glaze smooth as the sugar melts.
- Pastry brush, optional: Good if you want to paint the glaze on lightly instead of tossing the pork.
- Perforated parchment liner, optional: Helpful for cleanup, but only use one that is made for air fryers and won’t block airflow.
How to Cook the Pork So It Stays Crisp and Juicy
Prep the Pork
-
Pat the pork cubes dry with paper towels, then trim away any extra silver skin or thick connective bits you missed earlier. Dry pork browns; wet pork steams. Do not skip this step.
-
In a large bowl, whisk together the cornstarch, salt, smoked paprika, garlic powder, onion powder, black pepper, and cayenne. Add the pork cubes and olive oil, then toss until every piece looks lightly coated and a little dusty on the surface. The coating should cling, not clump.
-
Let the seasoned pork sit for 5 minutes while the air fryer preheats. That short pause helps the coating hydrate and stick better, which gives you a more even crust.
Preheat and Air Fry
-
Preheat the air fryer to 400°F (200°C) for 3 to 5 minutes. Lightly spray the basket with oil if your basket tends to grab food. A hot basket starts browning immediately.
-
Arrange the pork in a single layer with a little space between the pieces. Air fry for 6 minutes, then shake the basket well so the cubes roll onto new sides. The first shake is where a lot of the color begins, so don’t rush it.
-
Continue air frying for another 4 to 6 minutes, shaking once more if your basket has tight corners or if some pieces are sitting on top of others. Check the largest pieces with an instant-read thermometer; they should read 145°F (63°C) at the center, and the surface should look browned and slightly rough, not pale or wet.
Make the Glaze
- While the pork cooks, place the brown sugar, soy sauce, vinegar, Dijon mustard, water, garlic, and butter in a small saucepan over medium heat. Stir as the butter melts and the sugar dissolves, then simmer for 2 to 3 minutes until the sauce looks glossy and thick enough to coat the back of a spoon. Do not boil it hard. Hard boiling pushes the sugar toward burnt edges and a grainy finish.
Glaze and Serve
-
Transfer the cooked pork to a clean bowl. Spoon half the glaze over the hot pork and toss very quickly, just until the pieces are lightly coated. If you want the glaze to set a little more firmly, put the pork back in the air fryer for 30 to 45 seconds at 390°F (200°C). Any longer and the sugar starts drifting toward sticky-burnt territory.
-
Spoon the remaining glaze over the pork, then finish with scallions and sesame seeds. Rest the pork for 3 minutes before serving. That short rest keeps the juices from spilling out the second you cut in.
The Best Ways to Plate It Without Losing the Crunch
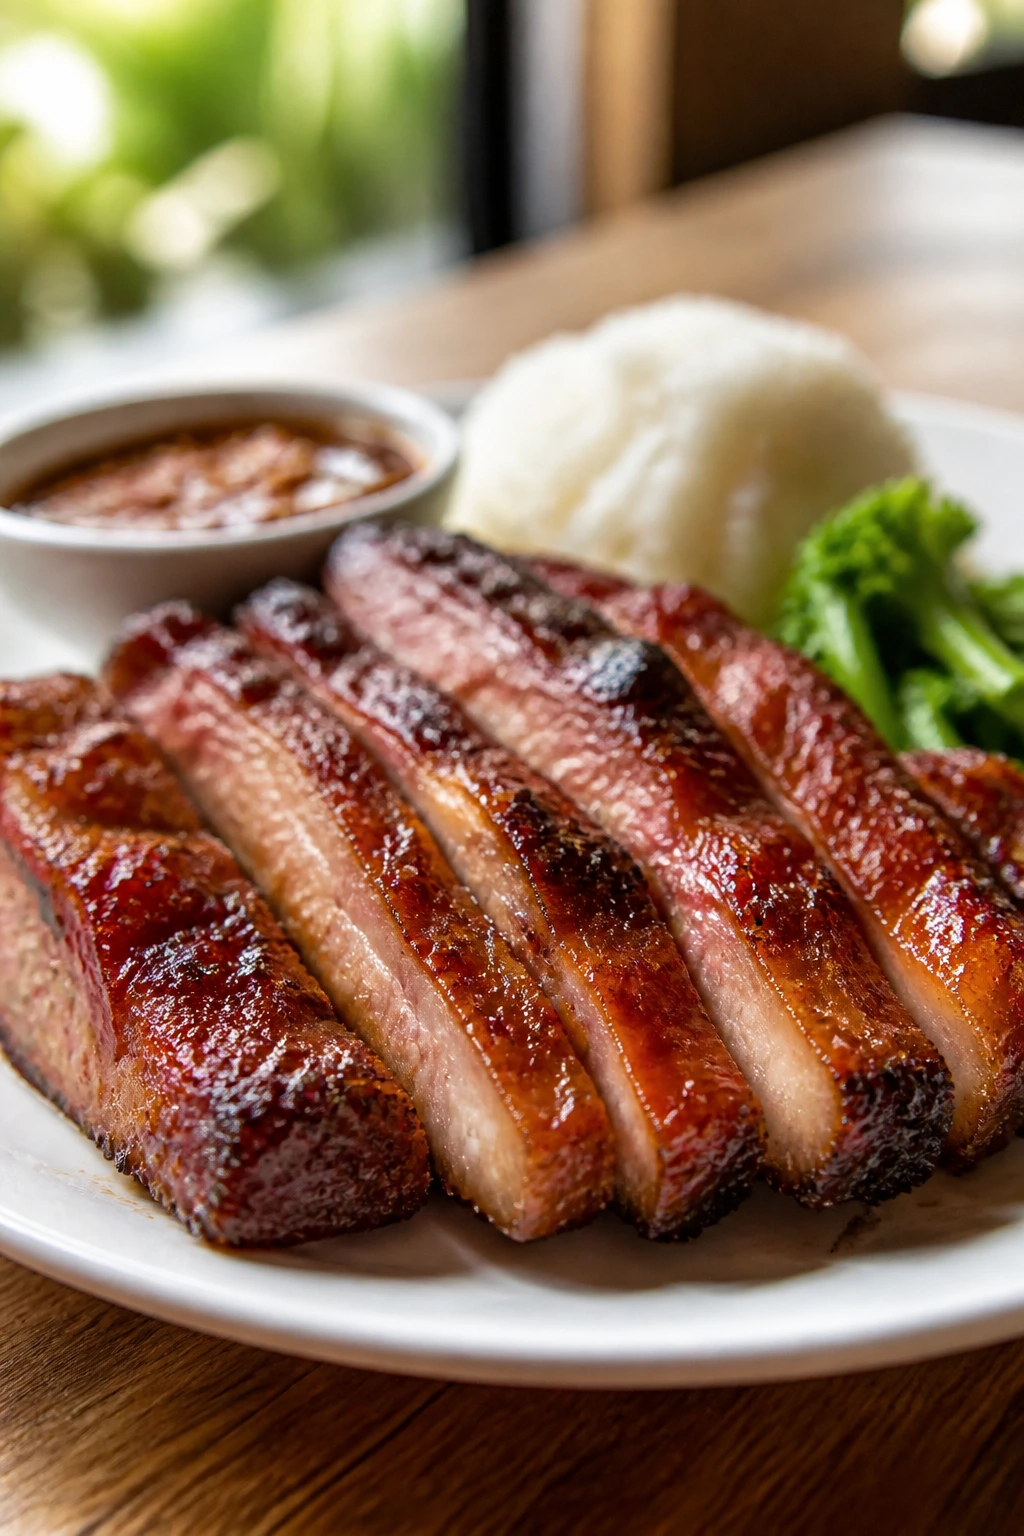
Presentation: Spoon the pork over a warm bed of rice, mashed potatoes, or shredded cabbage, then drizzle the glaze around the edges of the plate instead of flooding the top. A little air around the pieces keeps the crust from collapsing under its own sauce.
Accompaniments: I like this with plain jasmine rice, garlicky green beans, or a sharp cucumber salad with rice vinegar and a pinch of salt. If you want something richer, buttery mashed potatoes catch the glaze in the best possible way, and they tame the sweetness.
Portions: Four main-dish servings is the honest answer, especially if rice or vegetables are on the side. If you’re serving smaller eaters, or you’ve got a couple of sides doing real work, it stretches to 5 or 6 portions without looking stingy.
Beverage Pairing: A dry hard cider or a light lager is my first choice because both cut through the sweetness. For a nonalcoholic pairing, go with sparkling apple cider or iced black tea with lemon; both keep the plate from feeling too heavy.
Small Tweaks That Make the Dish Better
Flavor Enhancement: A teaspoon of finely grated fresh ginger in the glaze gives the sugar a sharper edge and keeps the sauce from leaning too sweet. I like it when the pork has a tiny bit of warmth underneath the brown sugar, especially if I’m serving rice on the side.
Time-Saver: Mix the dry seasoning in a jar ahead of time. If you cook pork often, a jar of the spice mix on the shelf saves a few minutes and keeps the recipe from feeling like a project every time you make it.
Cost-Saver: Boneless pork loin can stand in for tenderloin if it’s on sale. Slice it into 1-inch cubes and trim away any thick fat seam, but watch the clock closely; loin dries faster than tenderloin because it’s a little leaner and less forgiving.
Serving Suggestions: A squeeze of lime over the finished plate sounds minor, and it is, but it helps. The acidity cuts through the brown sugar and brightens the glaze so the whole thing tastes less sticky and more balanced.
Make-It-Yours: For gluten-free cooking, use tamari. For less sweetness, drop the brown sugar to 3 tablespoons and add another teaspoon of vinegar. For a spicier plate, add a pinch of red pepper flakes to the glaze after the heat comes off.
Common Mistakes That Flatten the Crispness
-
Starting with damp pork: If the meat goes into the bowl wet, the coating slides off and the basket starts steaming instead of browning. Pat the cubes dry until the surface feels tacky, not slick.
-
Crowding the basket: When the pork sits in a heap, you get gray spots and soft edges. Cook in batches if you need to; a single crowded batch takes longer and still tastes worse.
-
Adding the glaze too early: Sugar burns fast in an air fryer. If you brush the glaze on before the pork has browned, you’ll get dark patches and a bitter edge before the center is done.
-
Guessing on doneness: Pork that looks browned can still be undercooked inside, and pork that looks a touch pale can already be safe. Use the thermometer and pull the biggest pieces at 145°F.
-
Over-reducing the glaze: If the sauce gets too thick on the stove, it turns sticky and grainy once it cools. Stop when it coats a spoon and still pours in a slow ribbon.
-
Letting the glazed pork sit too long before serving: The crust softens as the sauce settles. Plate it fast, garnish at the last second, and get it to the table while the edges still have some bite.
Variations Worth Trying
Smoky Chipotle Pork: Add 1 teaspoon chipotle powder to the dry seasoning and stir 1 teaspoon adobo sauce into the glaze. The result is deeper and a little smoky, with a slow burn that sits under the brown sugar instead of fighting it.
Sesame-Ginger Glazed Pork: Replace the cayenne with 1 teaspoon grated fresh ginger in the seasoning bowl, then add another teaspoon of ginger to the glaze along with 1 teaspoon toasted sesame oil. This one tastes cleaner and a little more takeout-style, which is a nice change if you’re serving rice and quick vegetables.
Maple-Dijon Pork: Swap the brown sugar for 3 tablespoons maple syrup and reduce the water to 2 teaspoons. Maple loosens the glaze a little, so brush it on rather than tossing if you want to keep the crust as crisp as possible.
Hot Honey Pork: Replace 2 tablespoons of the brown sugar with 2 tablespoons honey and stir 1/2 teaspoon red pepper flakes into the glaze. The honey adds a round, sticky finish, and the pepper keeps the sweetness from feeling too polished.
Pork Chop Swap: If tenderloin isn’t what you have, use boneless pork loin chops cut into cubes. They need about the same air fryer time, but they’re a little firmer and can dry faster, so check them at the 9-minute mark instead of waiting until the end.
Make-Ahead, Storage, and Reheating Without Losing the Good Parts
The pork holds in the fridge for 3 to 4 days in a sealed container. The glaze keeps separately for about the same amount of time, and I strongly prefer storing them apart if I know there will be leftovers. Mixed together, the pork tastes fine later, but the crisp edges soften and stop being the reason you made the recipe in the first place.
If you want to freeze it, freeze the cooked pork without the glaze for up to 2 months. Freeze the glaze in a small container or ice cube tray, then thaw it in the fridge before reheating. That keeps the sugar from separating and gives you better texture than freezing everything together in one clump.
Reheat the pork in the air fryer at 350°F (175°C) for 3 to 5 minutes until the edges firm back up and the center is warm. A skillet over medium heat works too; add a teaspoon of oil, cover for the first minute, then uncover and let the surfaces re-crisp for another 2 minutes. The oven works at 375°F (190°C) for 8 to 10 minutes on a wire rack, though it won’t give you the same tight crispness as the basket.
For make-ahead cooking, the glaze is the easiest part to do early. You can make it up to a day ahead, cool it, and keep it in the fridge. Rewarm it gently over low heat with a teaspoon of water if it thickens too much. The pork itself is best cooked close to serving time; even a strong reheating method can’t fully restore the fresh crisp shell after a long sit.
Questions People Ask Before They Start

Can I use pork chops instead of pork tenderloin?
Yes, but boneless pork chops need to be cut into even cubes and watched a little more closely because they dry faster than tenderloin. Thin chops can work, but they’re easier to overcook, so I’d stick with chops that are at least 3/4 inch thick.
Do I have to use cornstarch?
No, but you do need some kind of dry coating if you want the outside to crisp instead of just brown. Arrowroot is the closest swap, and rice flour can work too, though the texture turns a little more delicate and less crackly.
Why did my glaze taste burned or bitter?
The sugar got too much direct heat or it reduced too far on the stove. Keep the glaze at a gentle simmer, and if you’re setting it back in the air fryer, limit that return trip to 30 to 45 seconds.
Can I make the glaze ahead of time?
Absolutely. It keeps in the fridge for about 4 days and reheats well over low heat. If it thickens into a paste, whisk in a teaspoon or two of water until it loosens again.
How do I know when the pork is done without drying it out?
Pull the largest pieces at 145°F (63°C) and let them rest for 3 minutes. If you wait until the meat feels very firm, you’ve probably gone a little too far already, especially with tenderloin.
What if my air fryer is small and the pork won’t fit in one layer?
Cook it in batches. Keep the first batch on a wire rack in a warm oven set to 200°F while the second batch cooks, then glaze everything together at the end so the pieces finish hot and glossy.
Can I make this without soy sauce?
Yes. Coconut aminos work well, though they’re sweeter, so cut the brown sugar a bit if you use them. If you need a soy-free but still salty glaze, add a little extra salt to the pork seasoning and use coconut aminos or a soy-free Worcestershire-style sauce.
Why This Pork Keeps Getting Pulled Back Into Rotation
The best thing about this recipe is that it doesn’t ask for a special night. It works on a Tuesday. It works when the fridge is half-empty and all you have is a pork tenderloin and a small bottle of soy sauce hiding behind the mustard. The air fryer does the hard part, but only if you give it dry pork, even pieces, and a glaze that arrives on time instead of too early.
I keep coming back to this kind of dinner because it has a built-in payoff. The edges brown. The glaze shines. The first bite gives you crisp, salty pork and then the brown sugar catches up a second later. That tiny delay is the whole trick, and once you’ve tasted it done right, it’s hard to go back to a flat, over-sauced version.
Crispy Air Fryer Pork with Brown Sugar Glaze — Recipe Card

Recipe Name: Crispy Air Fryer Pork with Brown Sugar Glaze
Description: Bite-size pork tenderloin cubes are seasoned, air fried until crisp at the edges, and finished with a glossy brown sugar glaze that lands somewhere between savory and caramelized. The pork stays juicy if you pull it at 145°F and glaze it at the very end.
Prep Time: 15 minutes
Cook Time: 12 minutes
Total Time: 30 minutes
Course: Dinner, Main Course
Cuisine: American
Servings: 4 servings
Calories: About 320 kcal per serving
Ingredients
For the Pork:
- 1 1/2 pounds pork tenderloin, silver skin removed, cut into 1-inch cubes
- 1 tablespoon olive oil
- 1 1/2 tablespoons cornstarch
- 1 teaspoon kosher salt
- 1 teaspoon smoked paprika
- 1 teaspoon garlic powder
- 1/2 teaspoon onion powder
- 1/2 teaspoon freshly ground black pepper
- 1/4 teaspoon cayenne pepper
For the Brown Sugar Glaze:
- 1/4 cup packed light brown sugar
- 2 tablespoons low-sodium soy sauce or tamari
- 1 tablespoon apple cider vinegar
- 1 tablespoon Dijon mustard
- 1 tablespoon water
- 2 cloves garlic, finely grated or minced
- 1 tablespoon unsalted butter
For Finishing:
- 1 tablespoon sliced scallions
- 1 teaspoon toasted sesame seeds
Instructions
-
Pat the pork dry, trim away any remaining silver skin, and cut it into even 1-inch cubes.
-
Whisk together the cornstarch, salt, smoked paprika, garlic powder, onion powder, black pepper, and cayenne in a large bowl. Add the pork and olive oil, then toss until lightly coated.
-
Let the seasoned pork sit for 5 minutes while you preheat the air fryer to 400°F (200°C).
-
Arrange the pork in a single layer in the basket and air fry for 6 minutes.
-
Shake the basket and continue air frying for 4 to 6 minutes more, until browned and the largest pieces reach 145°F (63°C) in the center.
-
While the pork cooks, combine the brown sugar, soy sauce, vinegar, Dijon, water, garlic, and butter in a small saucepan over medium heat. Simmer for 2 to 3 minutes until glossy and slightly thickened.
-
Transfer the pork to a bowl, toss quickly with half the glaze, and return it to the air fryer for 30 to 45 seconds if you want the glaze to set a little more.
-
Drizzle with the remaining glaze, sprinkle with scallions and sesame seeds, and serve right away.
Notes: Use tamari for a gluten-free version. Don’t over-reduce the glaze, and don’t let the glazed pork sit around before serving if you want the crisp edges to stay sharp.