
A fun kids lunch kids will actually eat is usually the one that looks almost boring to an adult. It opens at noon with soft bread, still-crisp crackers, fruit that hasn’t gone brown, and one main bite a child recognizes without needing a pep talk.
Parents often chase the wrong things. Tiny cookie cutters, rainbow toothpicks, six compartments—cute for a photo, not always good at 12:05 when a kid is hungry, rushed, and already annoyed that the apple touched the cheese.
What gets eaten is usually simpler: one familiar anchor, one crunchy thing, one cold or warm item that keeps its temperature, and a dip if the day needs a little bribery. Get the texture right, keep the food safe, and lunch starts doing its job instead of boomeranging back home.
Why This Lunch Strategy Works Better Than Cute-for-Cute’s-Sake
Texture wins early: A child will forgive plain turkey or basic pasta faster than they’ll forgive soggy crackers or limp cucumber slices, because the mouthfeel tells them before the taste does whether lunch is worth opening.
Familiar foods lower resistance: A lunch built around one known item—cheese cubes, buttered noodles, a turkey wrap, a peanut-free seed-butter sandwich—usually gets eaten faster than a box full of tiny surprises.
Separate parts stay edible longer: Crackers beside dip, bread away from tomatoes, fruit in its own cup. That little bit of separation keeps lunch from turning into a damp mash.
Temperature matters more than decoration: Cold grapes feel exciting. Warm spaghetti in a thermos feels like a treat. A room-temperature yogurt that was supposed to be cold feels wrong, and kids notice that immediately.
A dip changes the whole mood: Ranch, hummus, yogurt dip, cream cheese, sunflower butter—one little container can turn carrot sticks or pita wedges from “no thanks” into “I’ll eat these first.”
Small portions reduce lunch guilt: A lunch that looks manageable is more likely to disappear. A box stuffed to the lid can make a child shut down before the first bite.
Why Fun Kids Lunch Kids Will Actually Eat Depends on Texture
A lunchbox lives or dies on texture. That’s the part a lot of adults miss because we’re thinking about nutrition, color, and effort while the kid is thinking, “Will this still taste like lunch at noon, or will it feel like leftovers nobody wanted?”
Crunch is powerful. So is softness. The trick is knowing which foods need to stay crisp, which ones should stay tender, and which combinations turn weird after four hours in a backpack. Crackers that sit too close to wet fruit go from snack to sponge. Bread that hugs juicy tomato slices too long becomes soft and a little sticky at the roof of the mouth. Nobody wants that.
What kids notice first
Kids usually notice the first bite, not the fifth. If the first bite is dry, mushy, too cold, too hot, or too weirdly mixed, they often stop right there and pick at the safe parts. That is why a lunch with one reliable main item and one or two side textures tends to work better than a box full of competing flavors.
A child who loves chips may reject a lunch that has no crunch at all. A child who hates “mixed up” food may gladly eat the same ingredients if they’re separated. That is not fussiness for the sake of fussiness. It’s a real sensory preference, and lunch is one of the places it shows up most loudly.
Why bread fails quietly
Bread is the sneaky one. It doesn’t collapse in a dramatic way; it just slowly loses its shape until the sandwich tastes damp at the edges and tired in the middle. Butter, cream cheese, hummus, or even a thin layer of mayo can act as a moisture barrier, but the bigger fix is packing wet items apart when you can. A tomato slice on a sandwich at 7:00 a.m. is usually a soggy problem by noon.
How to build around the lunch clock
School lunch is not a long sit-down meal. It’s often 15 to 20 minutes with distractions, chatter, and a kid who wants to finish before recess ends. That means the food needs to be easy to open, easy to chew, and easy to identify. If they have to decode the box before they can eat it, you’re making lunch work too hard.
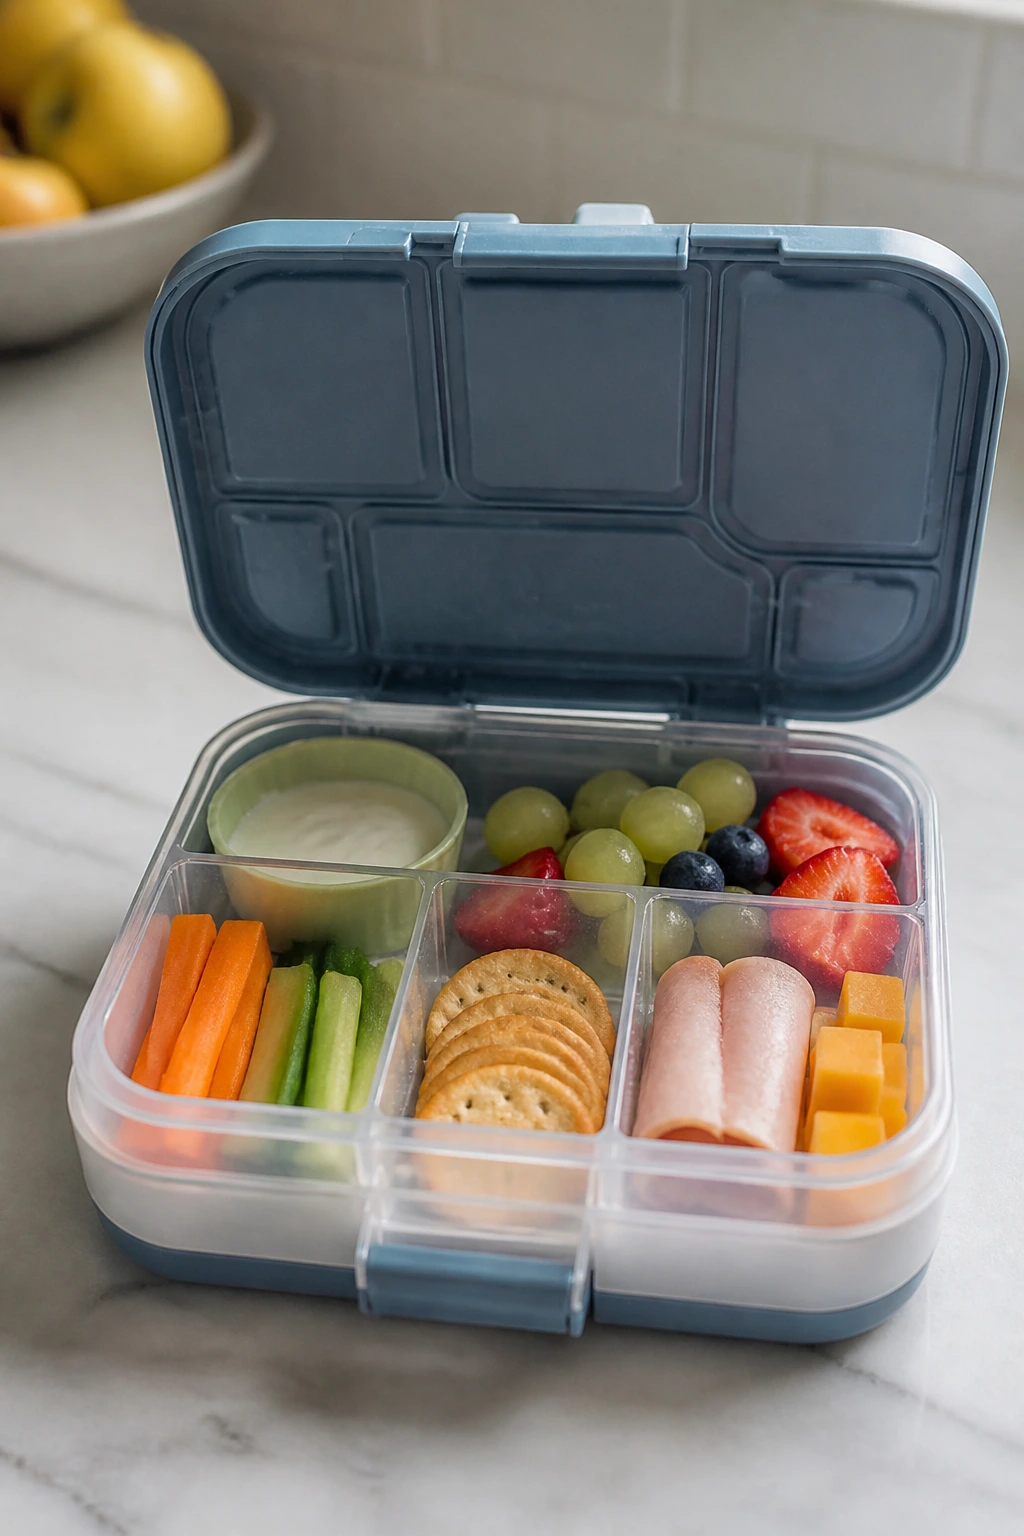
The Five-Part Lunchbox Formula That Quietly Solves Most Mornings
I like a lunchbox formula because it removes the daily invention problem. Most parents do not need a new masterpiece every morning. They need a pattern that survives sleepy hands, a full fridge, and a child who changes their mind halfway through packing.
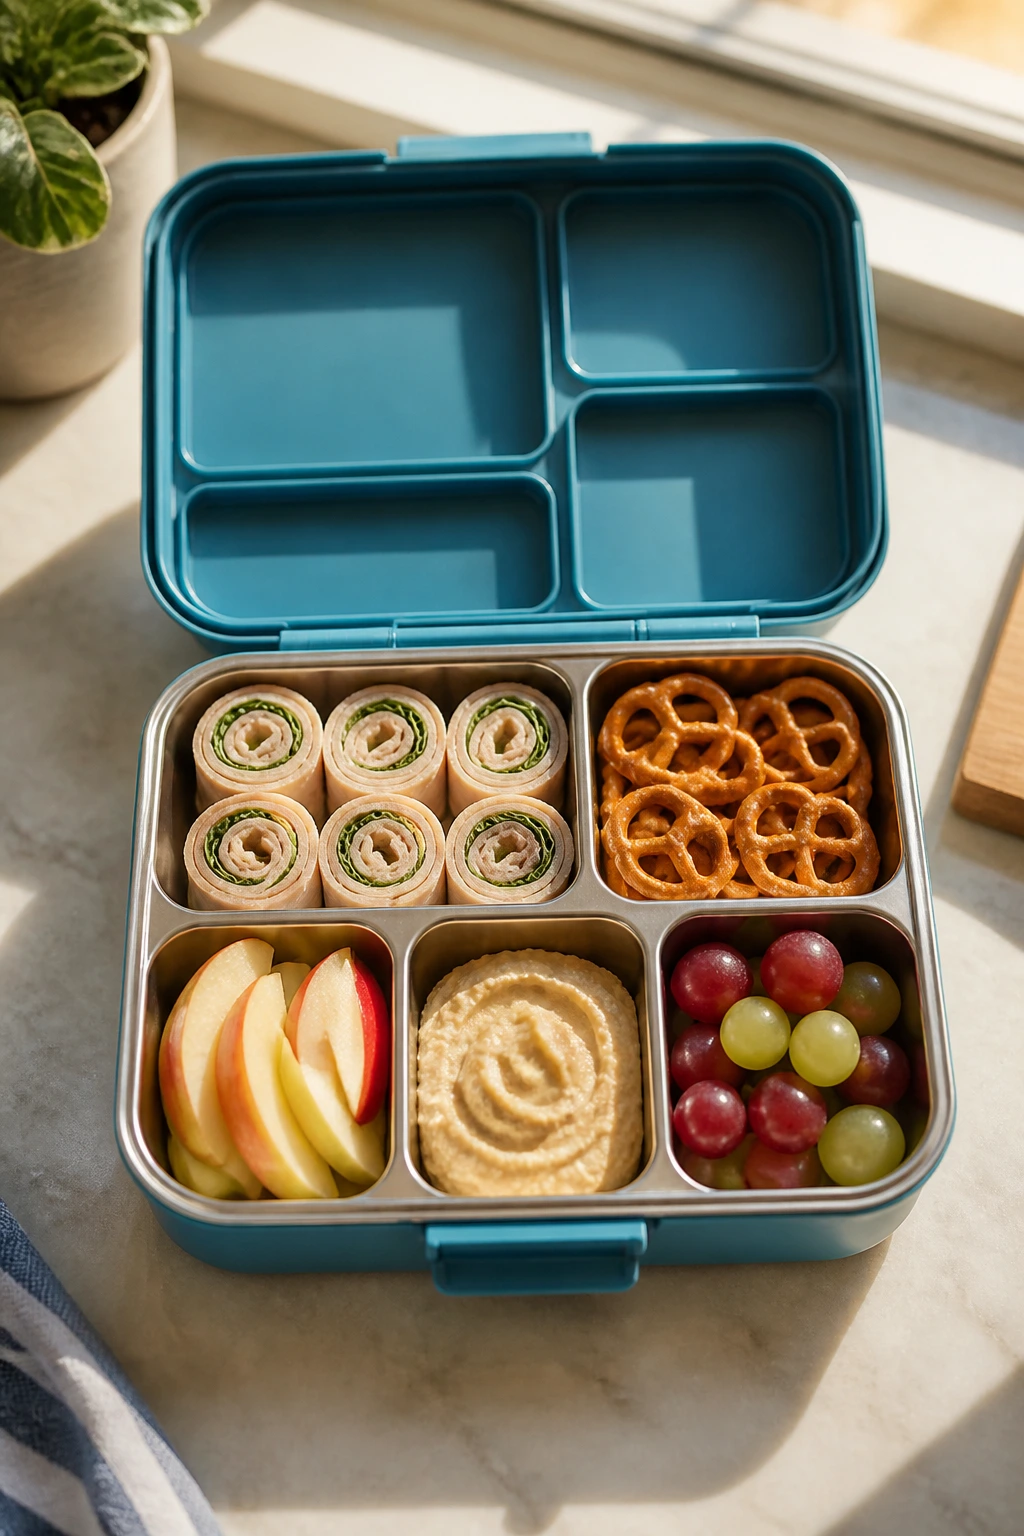
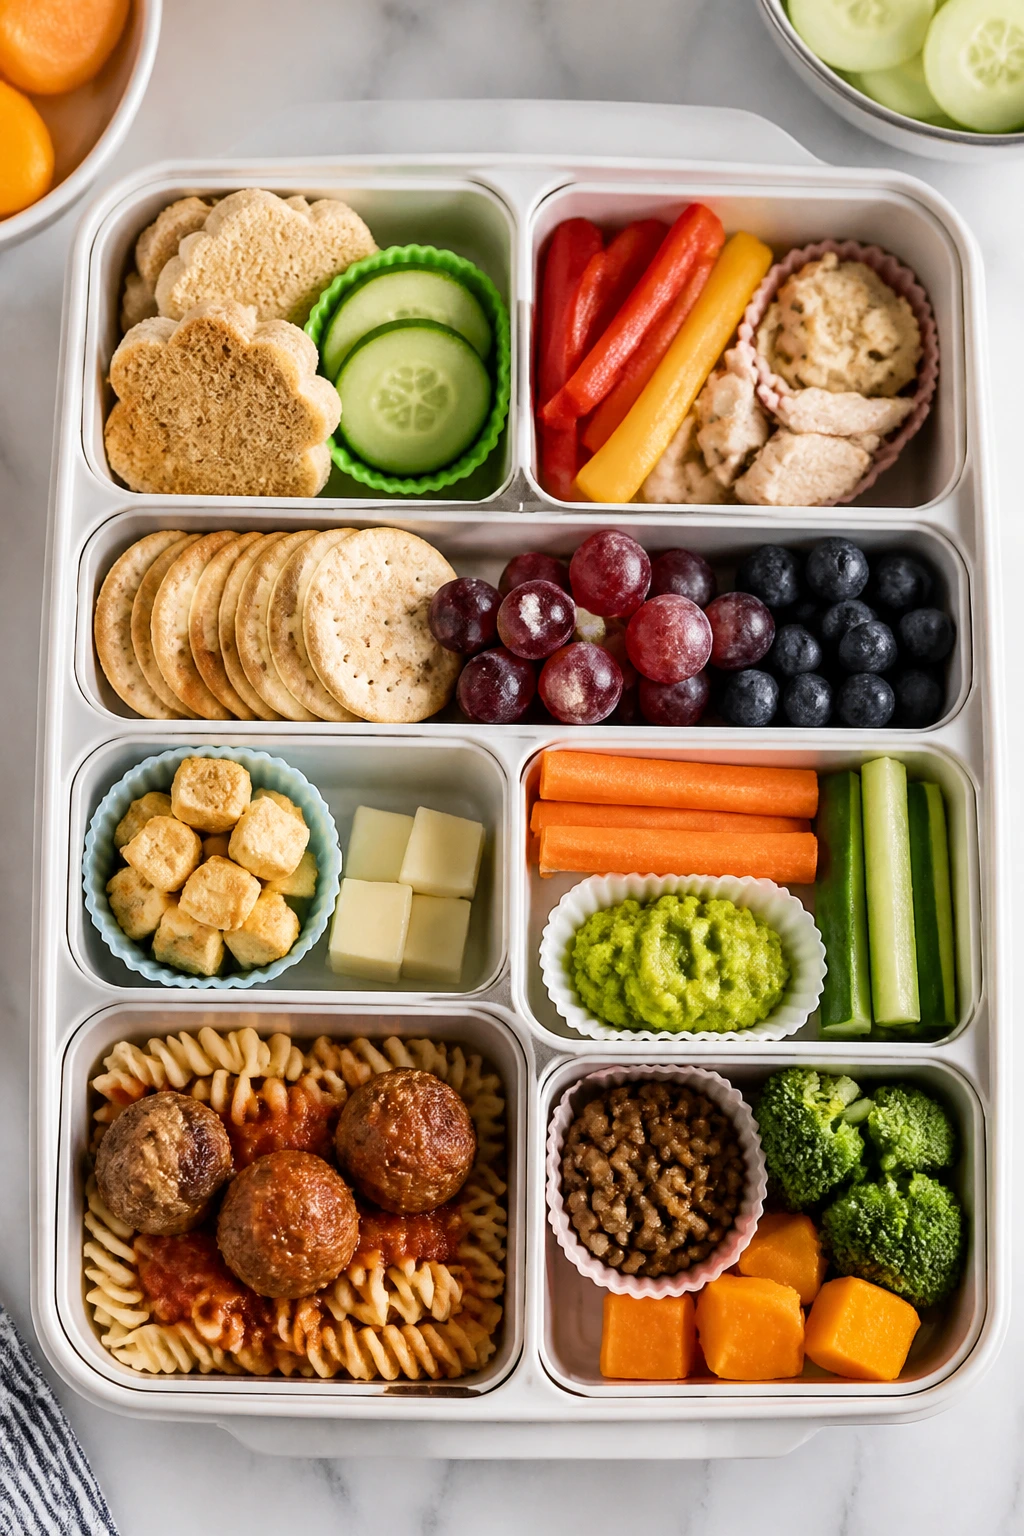
Think of the box in five parts: one anchor, one crunch, one produce item, one dip, and one small finish. That’s it. Not every lunch needs all five every day, but if you want a box that feels complete without becoming crowded, this pattern has a nice shape to it.
Anchor: The anchor is the food that gives the lunch its backbone. Turkey roll-ups, a cheese sandwich, pasta salad, rice with chicken, scrambled egg muffins, hummus and pita, leftover meatballs—anything your child already treats as real food. The anchor should be familiar enough that your kid doesn’t need a negotiation session to start eating it.
Crunch: This is the part that keeps the lunch from feeling soft and samey. Pretzels, snap peas, thin apple slices, baby carrots, crackers, cucumber spears, roasted chickpeas, pita chips. A little crunch goes a long way, especially in a lunchbox where soft foods dominate so easily.
Produce: One fruit or vegetable is enough to do the job. Grapes, strawberries, blueberries, orange segments, cucumber coins, bell pepper strips, cherry tomatoes cut for age-appropriateness, or a small container of melon. If you like the MyPlate-style half-fruit-and-vegetable idea, this is the lunchbox version of it: one bright thing, one easy thing.
Dip: Dip makes food feel more interactive. It also acts as a bridge for kids who like familiar flavor but reject dry textures. A little ranch with carrots, hummus with pita, yogurt dip with fruit, cream cheese with crackers, sunflower butter with apple slices if the school is nut-free.
Small finish: A cookie, a mini muffin, a few chocolate chips, a granola bite, or a second fruit if you prefer to keep lunch fully savory. The point is not bribery for its own sake. It’s ending the box with something the child actually wants to see, which can make the rest of the lunch feel less like a chore.
The magic here is repetition. Once you know the pattern, you’re not building lunch from scratch every day. You’re rotating parts.
Small Changes That Make a Fun Kids Lunch Kids Will Actually Eat More Often
A few small moves matter more than another cute container ever will. I’d take a lunch with strong temperature control and plain food over a beautiful box that’s gone limp by lunch period. Every time.
Flavor boost: Add a familiar spread or dip to one item instead of seasoning everything. A thin swipe of cream cheese on a tortilla, a little ranch on cucumber sticks, or a spoonful of hummus on pita changes the food without turning lunch into something new and suspicious.
Time-saver: Build lunches from two prep sessions a week instead of doing everything from scratch. Cook one protein, one grain, and one crunchy vegetable base, then mix and match the rest. A little repeat is a good thing here.
Pro move: Pack wet and dry items in separate compartments or cups, even if they end up in the same lunchbox. That one habit keeps crackers crunchy, fruit from soaking bread, and children from opening the box and seeing a swamp.
Cost-saver: Use leftovers that already taste good cold or room temperature. Roasted chicken, pasta, rice, meatballs, quesadillas, and baked tofu can all become lunch with almost no extra work. Buying special “kid lunch” products is usually the expensive way to get to the same place.
Kid-choice trick: Offer two safe options, not five. “Apple or grapes?” works better than “What do you want in your lunch?” because it gives a child control without handing them the wheel. Too many choices can freeze a tired kid before the day even starts.
Texture rule: Put one crispy thing in every lunch. One. That’s the difference between a lunch that feels flat and a lunch that gives a child something to enjoy with their hands and teeth.
Cold Lunches That Stay Crisp Instead of Going Limp
Cold lunch works best when it is built like a small, contained system. You want foods that can sit together without turning on each other. That means choosing ingredients with low drama: sturdy bread, thick spreads, cut produce that won’t weep all over the box, and proteins that taste good chilled.
A cold lunch does not have to be a sandwich. It just has to hold up in the bag.
Good cold lunch building blocks
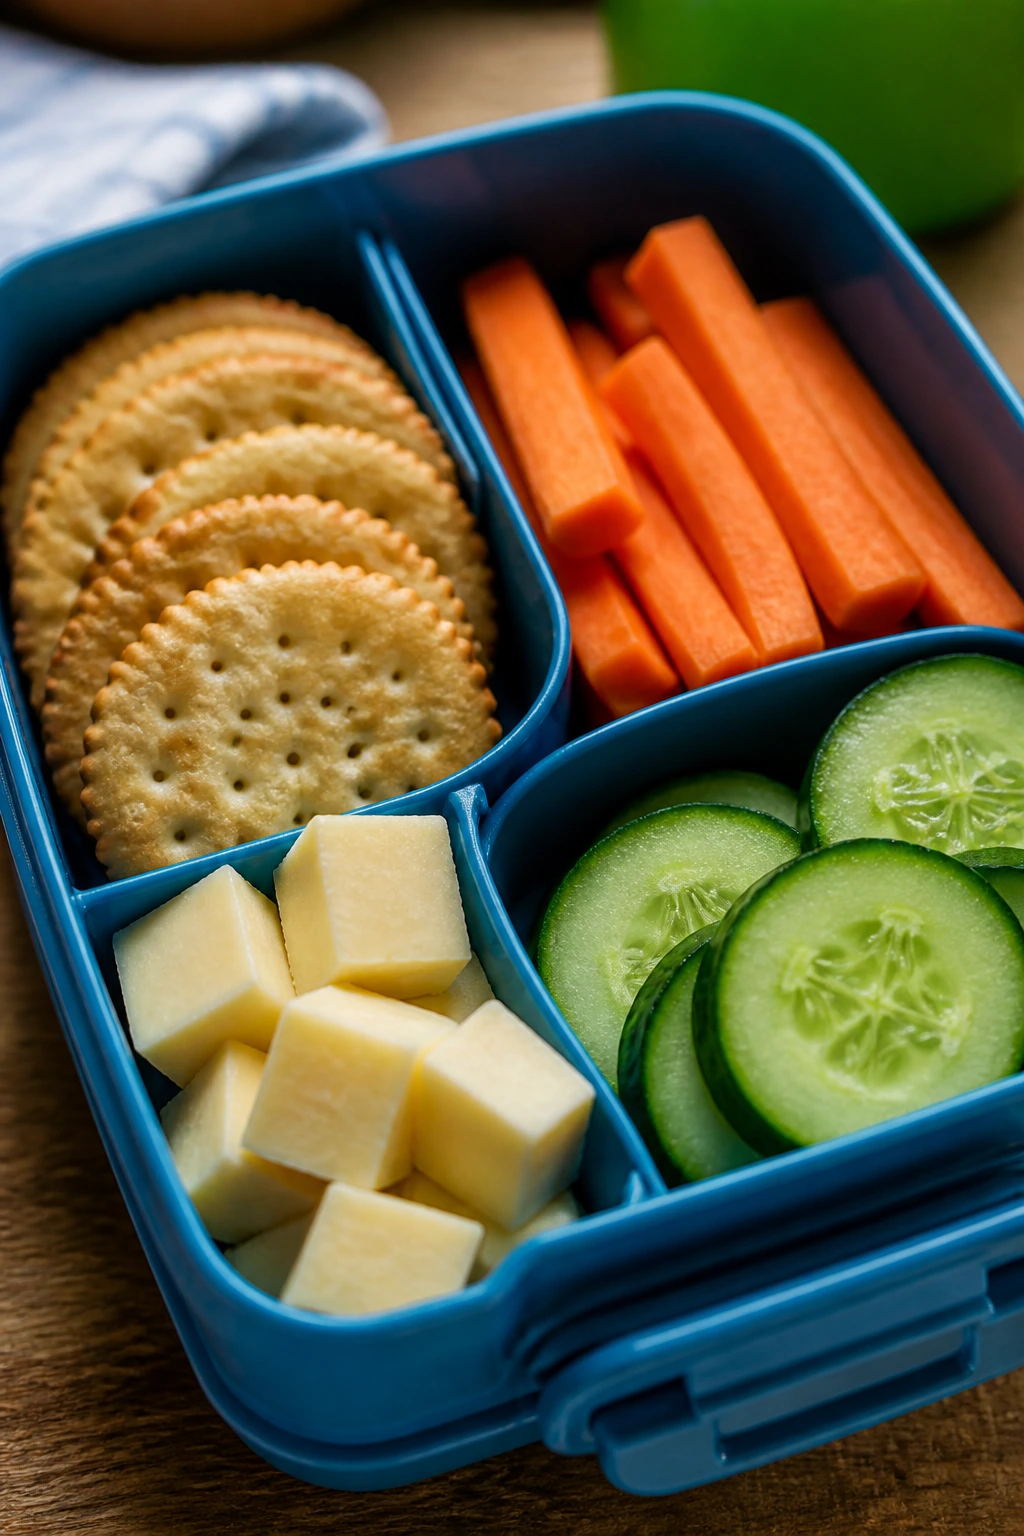
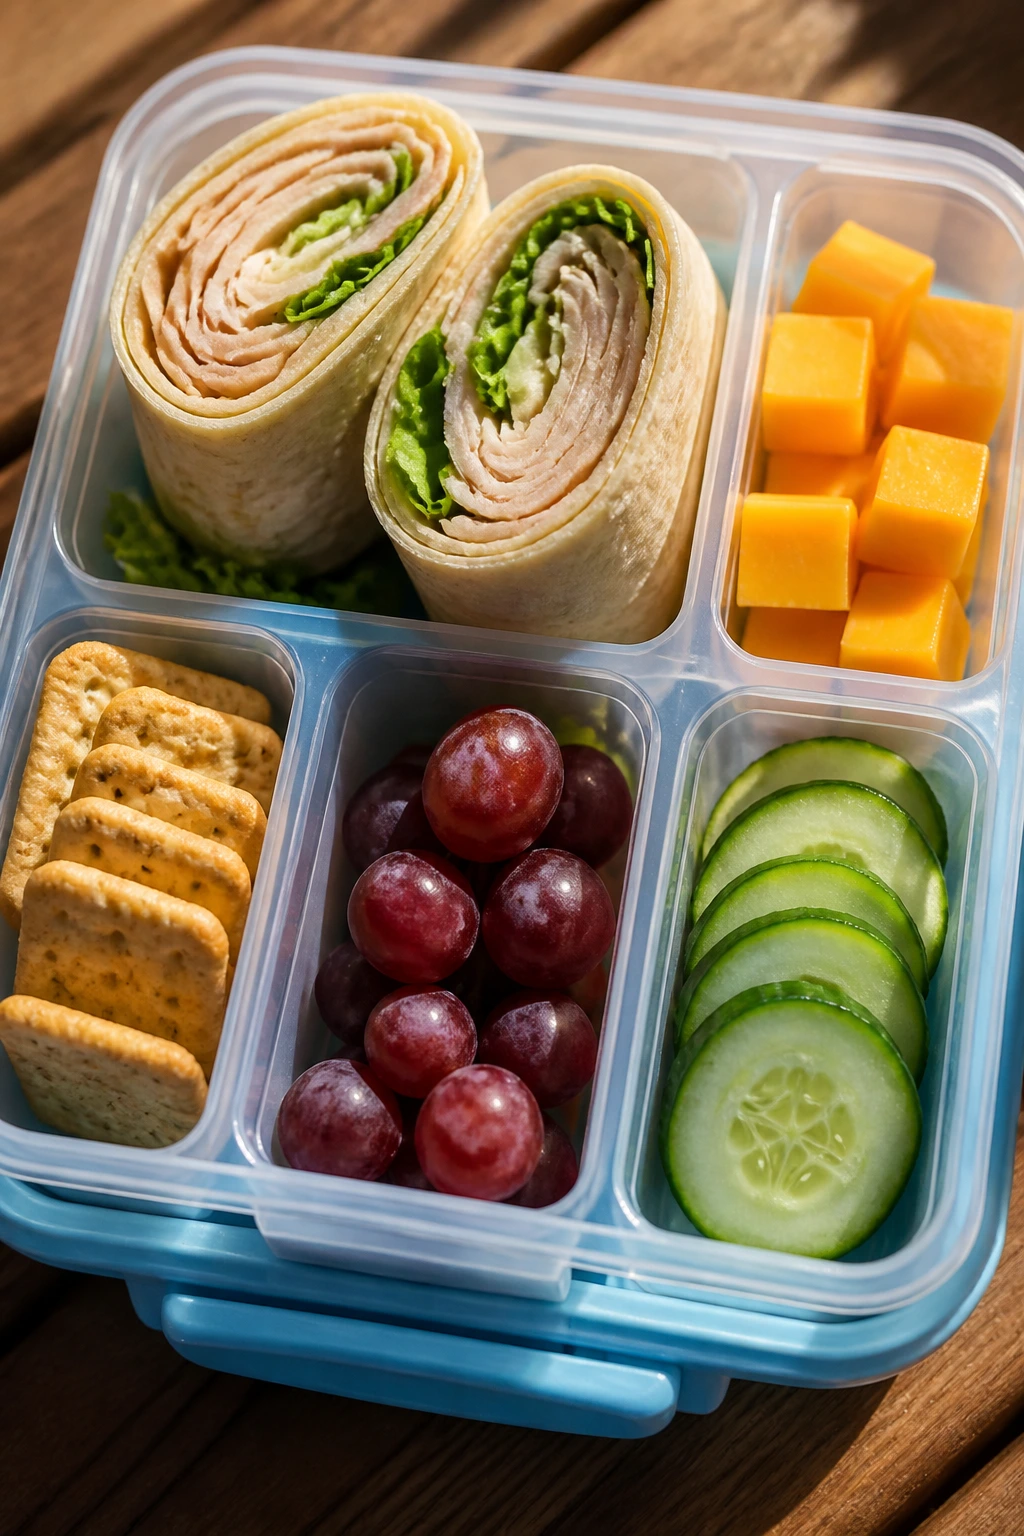
A turkey and cheese wrap with lettuce tucked in the middle holds far better than a tomato-heavy sandwich. Pasta salad made with a little olive oil or a light mayo base keeps its shape better than dry pasta with toppings scattered loosely on top. Cheese cubes, crackers, grapes, and cucumber coins can feel like a lunchable-style box without being a salt bomb.
I also like rice and grain bowls here, especially if the grain has been cooled properly and the sauce is kept light. Cold sesame noodles, chickpea pasta salad, and chicken salad on crackers can all work if the moisture is controlled. The mistake is to treat cold lunch like a damp buffet. It needs boundaries.
What to keep separate
Wet fruit and dry crackers do not belong in the same compartment. Tomato slices belong in their own little cup or not at all. Salad dressing should never be poured over greens if the greens are supposed to stay perky until noon. Lunchboxes are small; they punish laziness more than dinner plates do.
If you pack apple slices, toss them with a little lemon juice or use a produce saver method that keeps them from browning if they’ll sit for hours. If you pack berries, dry them well after washing. Water on the outside of fruit is the fastest way to soften anything nearby.
Cold lunch ideas that usually disappear
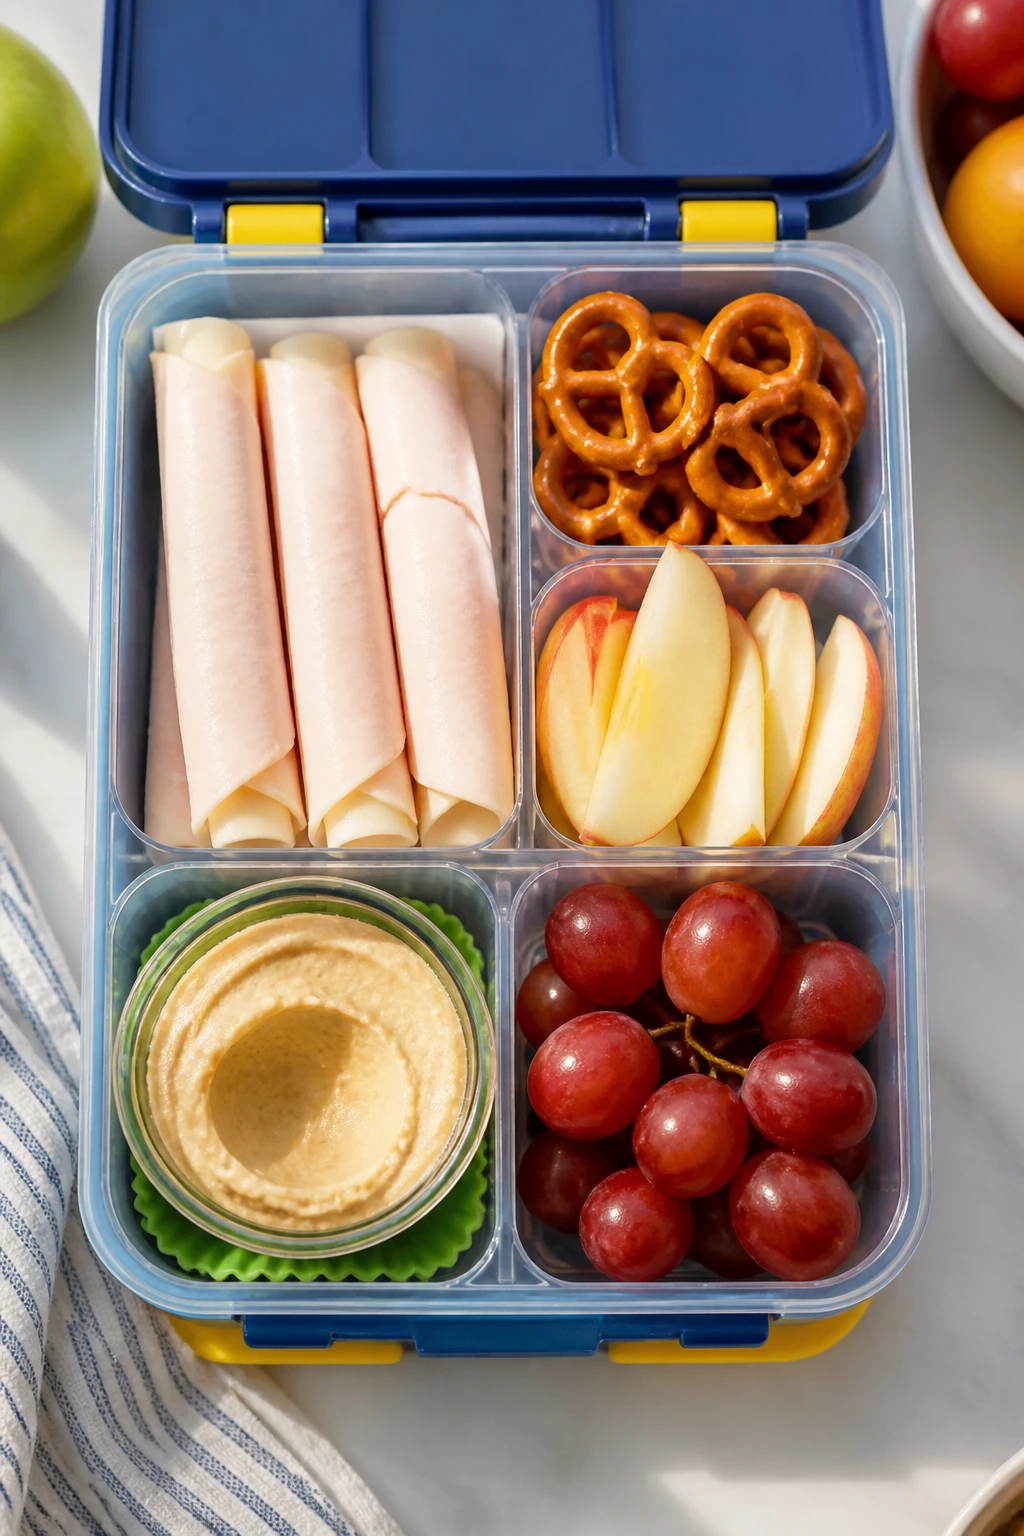
- Turkey roll-ups, pretzel sticks, grapes, and a small cup of ranch.
- Pasta salad with peas, diced cheddar, and a side of strawberries.
- Cheese cubes, whole-grain crackers, cucumber coins, and a mini muffin.
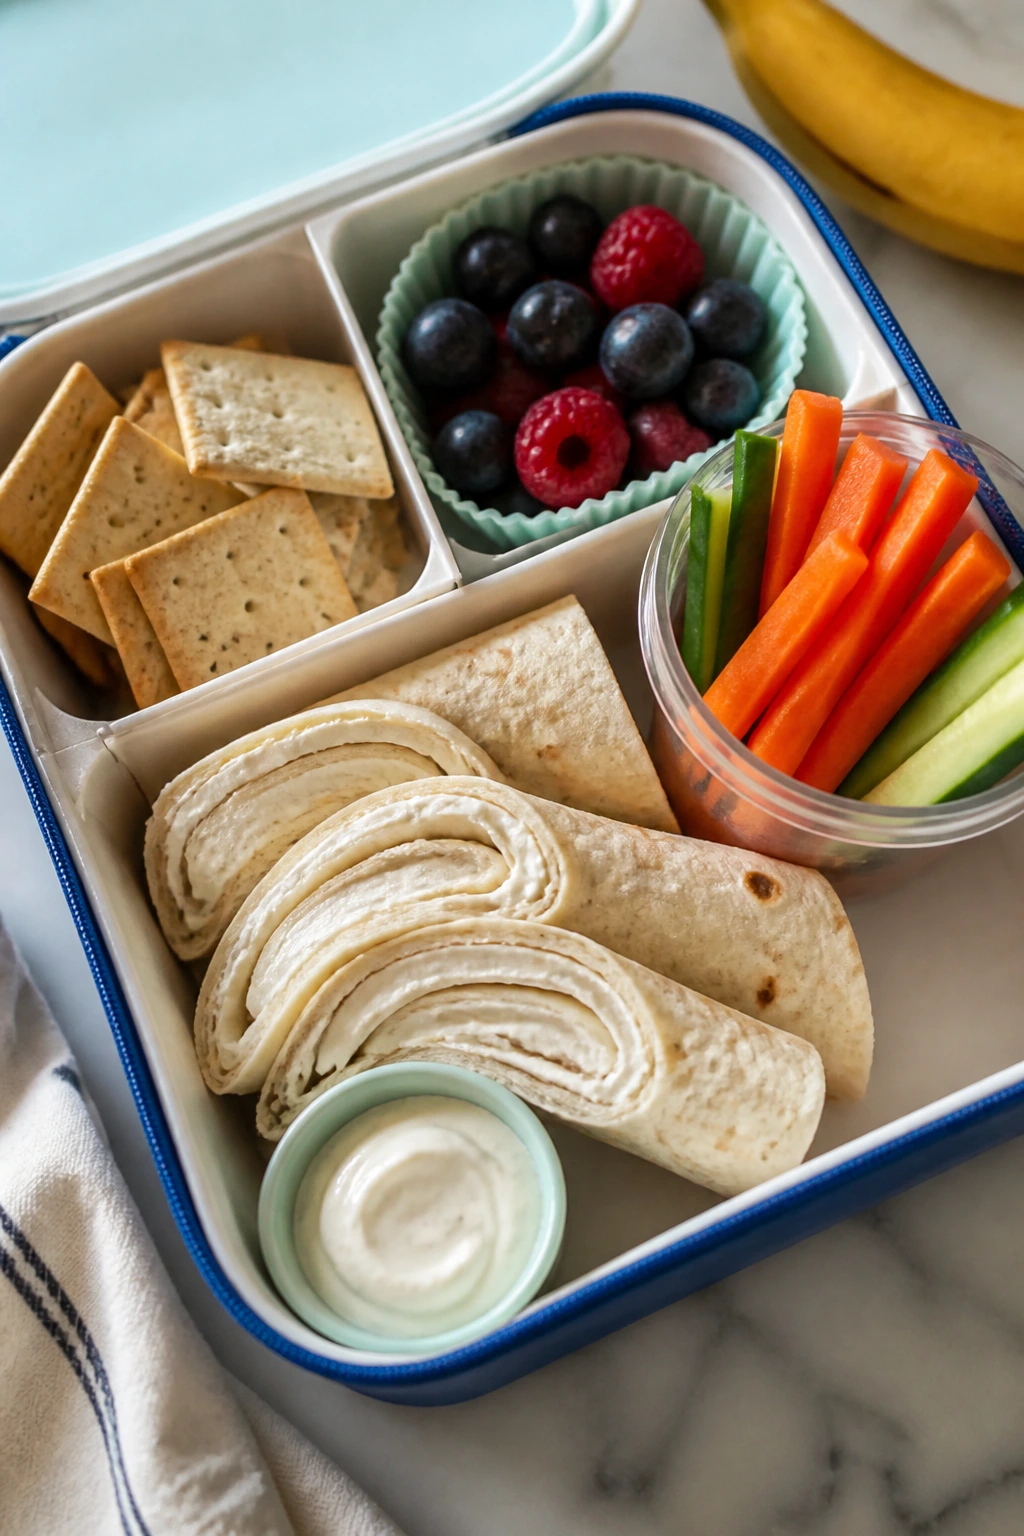
- Hummus, pita wedges, bell pepper strips, and orange segments.
- Rice salad with shredded chicken, corn, and a little sesame dressing packed lightly.
None of these are fussy. That’s the point.
Thermos Lunches That Arrive Warm and Smell Good
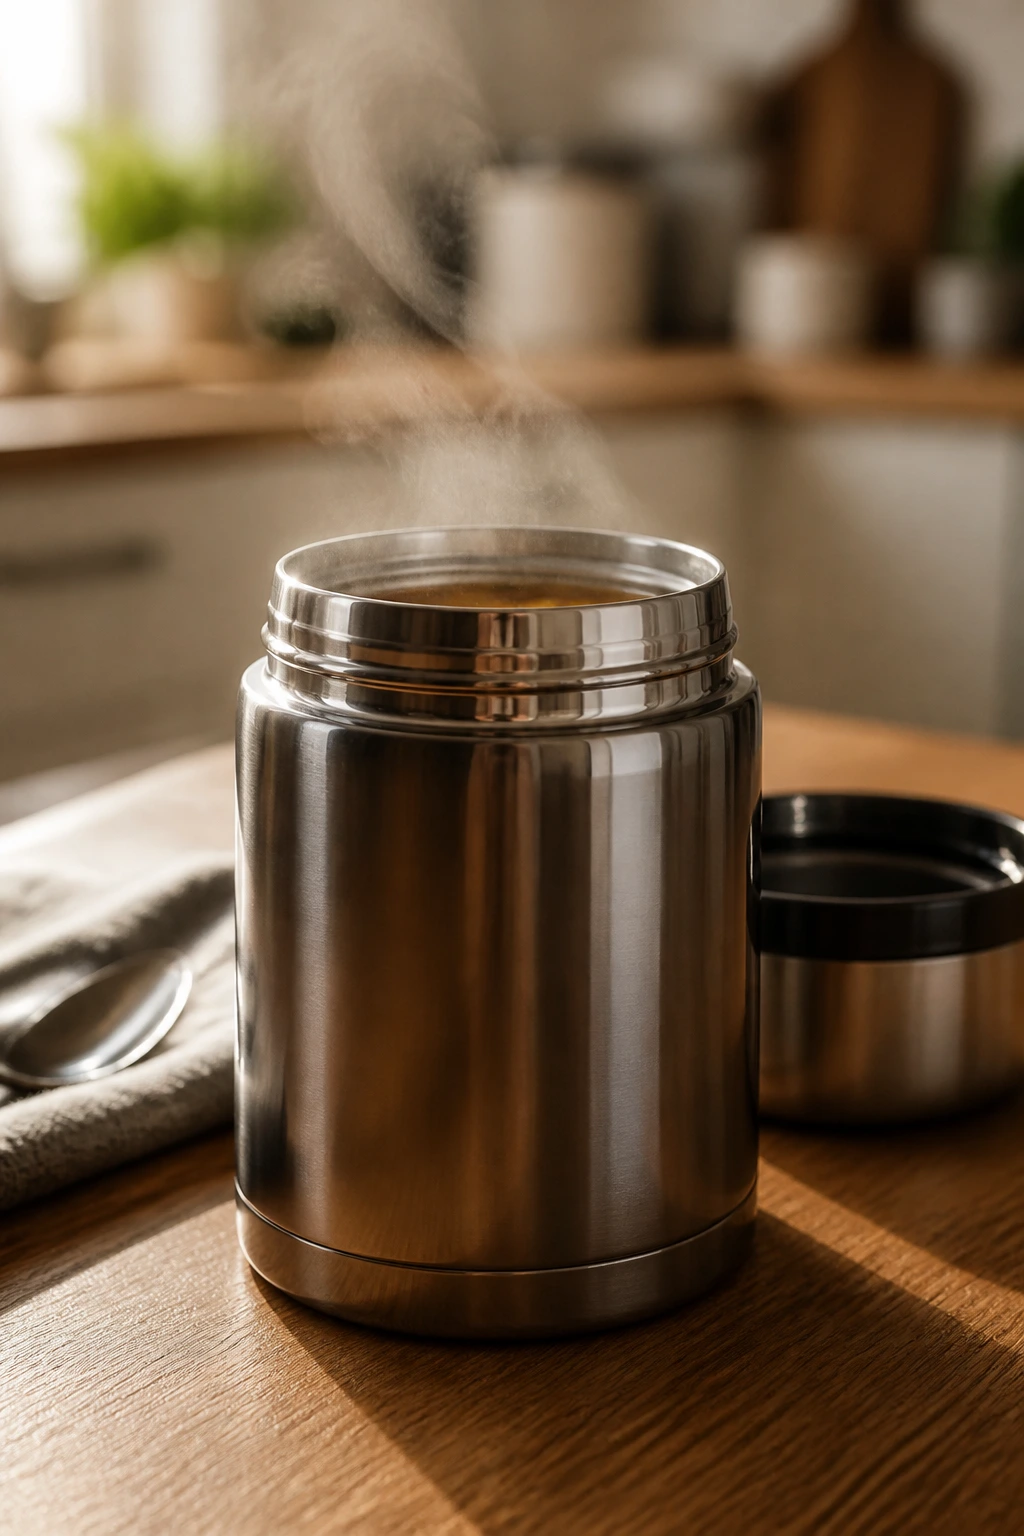
Hot lunch in a thermos has a very different energy from cold lunch. It feels generous. A little old-fashioned, even. But it only works if the thermos is doing real work, not pretending.
The best thermos lunches are thick, saucy, and forgiving. Thin soup cools faster than people expect. Dense food holds heat better because there’s less air space inside it. Mac and cheese, chili, fried rice, buttered noodles, meatballs in sauce, and thick stew all do a far better job than clear broth alone.
Preheat the thermos first
This step matters. Fill the thermos with boiling water for five minutes while you heat the food. Dump the water, dry the inside quickly, then add piping-hot food straight from the stove. You want the lunch to go in steaming, not merely warm. If it leaves the kitchen lukewarm, it will not stay satisfying until lunch.
A thermos also likes being filled. Don’t pack a half-empty container unless that’s the size you need. Less air means better heat retention. And once it’s closed, leave it alone. Opening it early drains the heat you were trying to preserve.
Foods that hold up better than you’d think
- Mac and cheese with a little extra sauce, so it doesn’t seize.
- Leftover fried rice with peas, egg, and small bits of chicken or tofu.
- Chili with beans and ground meat, especially if you top it with cheese only after reheating.
- Small pasta shapes with meat sauce.
- Stew, thick soup, or curry served with rice in a separate section if the thermos is wide enough.
A thermos can also save a child who hates cold lunches in winter or dislikes sandwiches every day. Warm food feels more like lunch and less like a task. That matters.
A quiet warning
Do not use a thermos as a dump zone for food that already sat around too long. Reheat leftovers until they’re steaming, then get them into the container. Food safety is not the place to guess.
Sandwiches and Wraps That Don’t Fall Apart by Noon
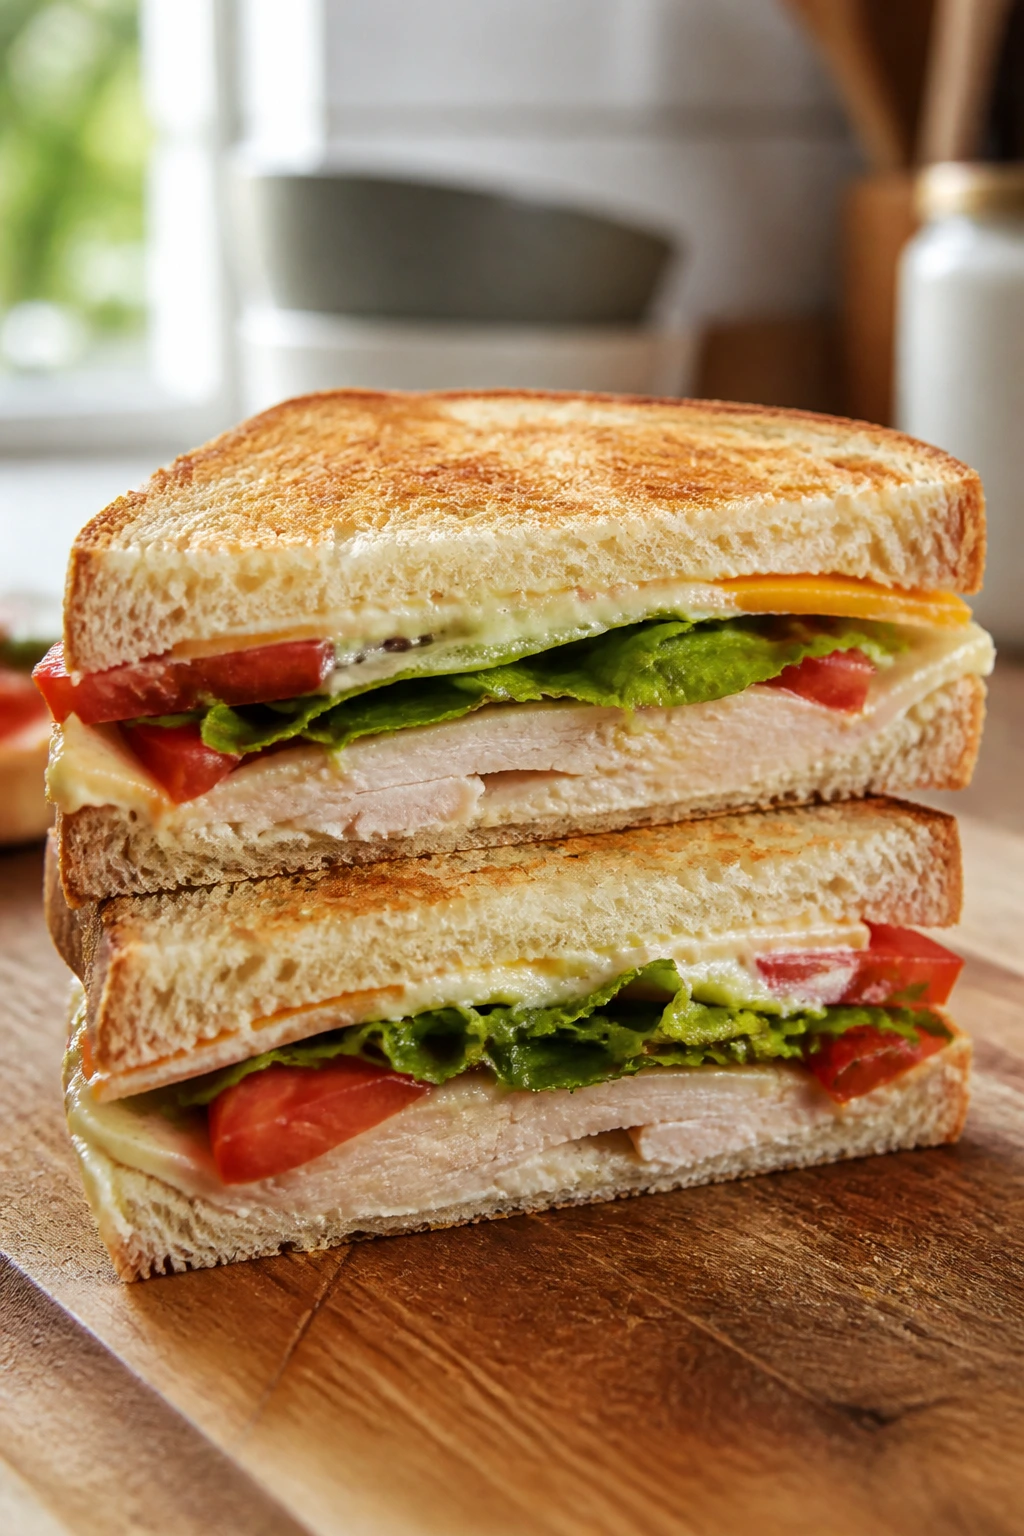
The sandwich gets treated like the default school lunch, and honestly, it deserves some of the bad reputation it gets. A bad sandwich is a sad thing: soft bread, wet middle, dry crust, and a bite that comes apart before the child does. But a well-built sandwich is still one of the most useful lunch forms around.
The fix starts with the bread. Soft sandwich bread works, but only if you protect it. Pita pockets, mini naan, English muffins, slider buns, tortillas, and sturdy sandwich thins often hold up better because they don’t collapse as easily. Toasting the bread lightly can help, too, especially when you’re packing it the night before.
Build the barrier first
Butter, cream cheese, hummus, mashed avocado with a little lemon, or a thin layer of mayo can protect the bread from moisture. I’m not wild about wet fillings sitting directly against soft bread for hours. Tomato slices, juicy cucumbers, and pickles belong behind a barrier or in a separate container if you want the sandwich to arrive in one piece.
Cheese can help as a shield. So can lettuce if it’s dry and used thoughtfully, but I wouldn’t rely on lettuce alone. It doesn’t block moisture the way a spread does. Bread wants a wall.
Better fillings for lunchbox sandwiches
Turkey and cheese. Ham and cheddar. Sunbutter and banana if the school allows it. Egg salad, but thick and not runny. Chicken salad with finely chopped celery. Cream cheese and cucumber. Hummus with shredded carrots and a slice of cheese. All of these hold up better than a sandwich packed with tomato, lettuce, and a lot of sauce.
A wrap can feel more manageable than a full sandwich for some kids. Cut it into pinwheels, half-moons, or short sections so it looks approachable. A giant cold burrito can intimidate a child who otherwise likes the filling.
One blunt opinion
Cute sandwich shapes are fine if they’re not turning half the bread into scraps. A star-shaped sandwich that creates a pile of crust and waste is not a win in my book. Clean triangles or small rectangles are often the better choice. Less drama. Less mess. More eating.
Fruit, Veg, and Dip Pairings Kids Reach For First
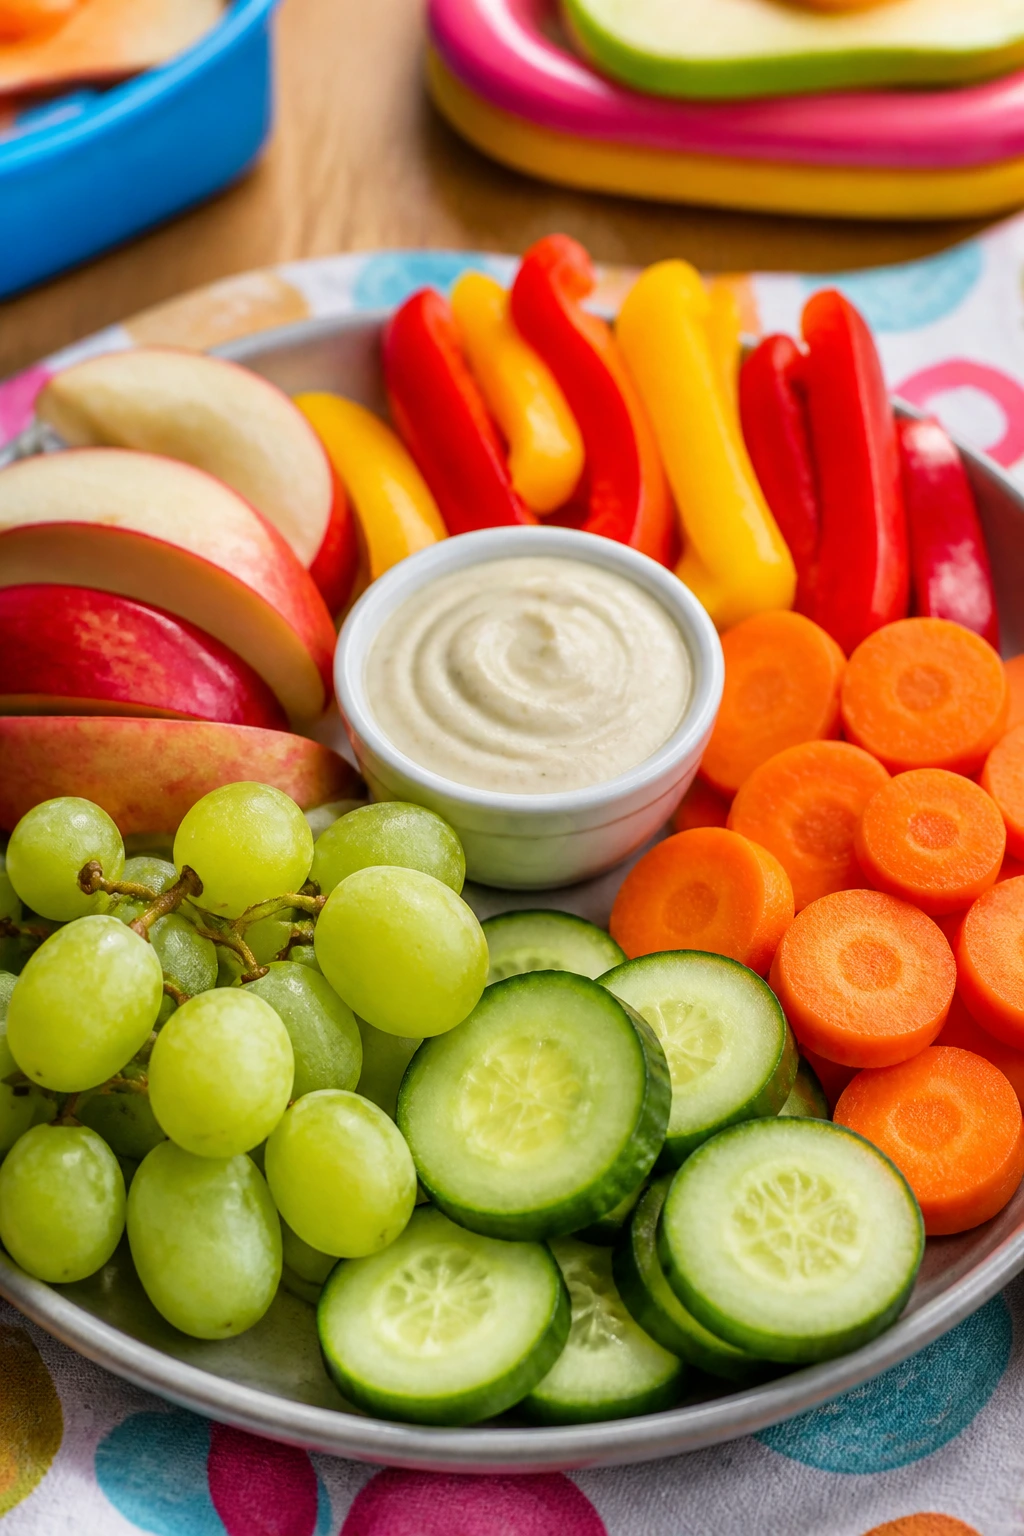
Sides are where lunch gets its color and some of its fun. They’re also where many lunchboxes fail, because the fruit is too soft, the vegetables are too big, or the dip is missing the one thing that makes the child want to touch it.
The best fruit and vegetable sides are either easy to spear, easy to crunch, or easy to dunk. The shape matters more than adults want to admit. A giant carrot stick can feel like work. A thin carrot coin feels snack-like. A whole apple sits there like an assignment. Apple wedges feel ready.
Pairings that tend to work
- Apple wedges with sunflower butter or cream cheese.
- Grapes cut in half for younger kids, packed with cheese cubes.
- Cucumber coins with ranch or hummus.
- Bell pepper strips with a thick dip.
- Strawberries with a yogurt dip.
- Snap peas with cream cheese or a simple herb dip.
- Orange segments in their own container so they don’t water down anything else.
If a child is sensitive to mixed textures, keep the dip separate and use a tiny container. If they like everything coated, give them the dip and let them control the mess. Both styles are fine. Lunch is not a moral test.
A note on age and safety
Smaller children need careful cutting. Grapes and cherry tomatoes should be halved or quartered depending on age and size. Hard raw vegetables should be cut into manageable pieces, not left in long sticks that encourage chomping without control. Lunch should feel inviting, not like a chewing challenge.
One more thing
If vegetables are a hard sell, don’t pack a giant pile and expect a conversion story. Pack one vegetable that the child can handle and let that be enough. Two cucumber coins eaten happily beat a heroic pile of carrots nobody touches.
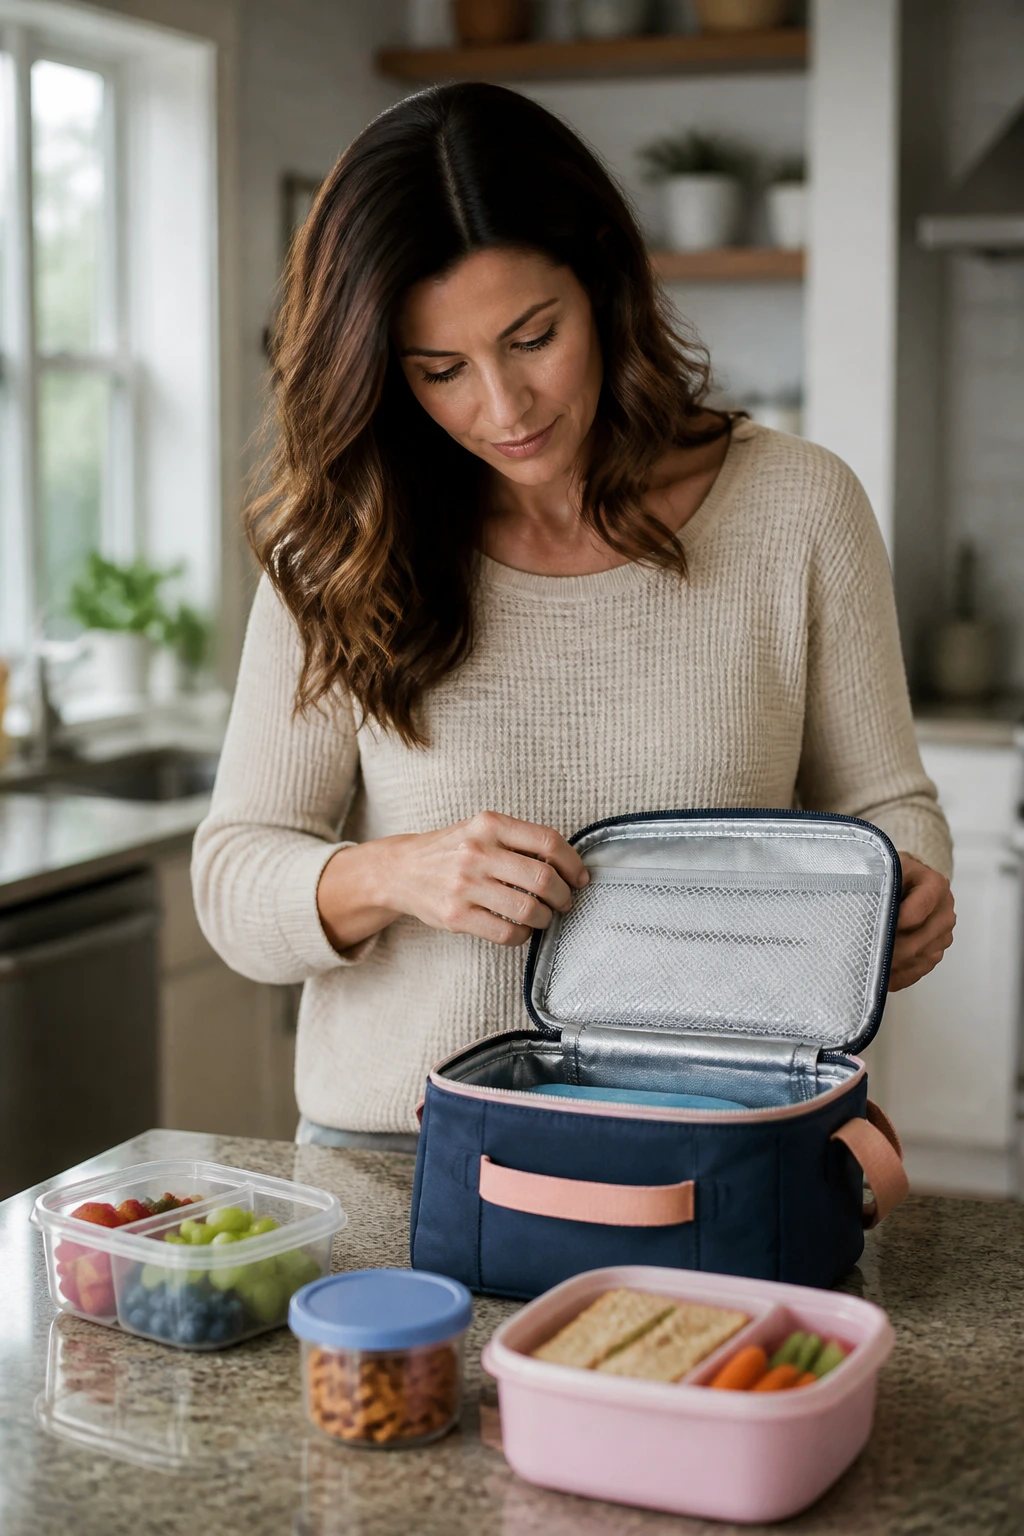
Lunchbox Gear That Earns Its Drawer Space
The right gear won’t solve picky eating, but it can save a lot of time, money, and cursing at 7:20 a.m. Good lunch containers do three things well: they keep foods separate, they seal without leaking, and they open without an adult intervention.
- Insulated lunch bag: Choose one with enough room for a lunch container and two ice packs. A bag that’s too tight loses its cooling power fast.
- Flat ice packs: Thin packs fit on top of and under containers better than chunky novelty shapes. Two smaller packs often cool better than one oversized one.
- Leakproof bento box: Look for tight lids and sections that keep fruit juice or dip from wandering into crackers.
- Wide-mouth thermos: A wide opening makes it easier to fill with hot food and easier for a child to eat from later.
- Small dip cups with lids: These keep ranch, hummus, yogurt dip, or sauces from spreading everywhere.
- Reusable silicone cups: Handy when you want to separate foods inside a bigger box without buying a dozen different containers.
- Re-sealable snack bags or reusable pouches: Good for pretzels, crackers, or cut fruit if you don’t need rigid structure.
- Water bottle that doesn’t leak: The lunch bag should not be a swamp by noon.
- Label or marker: If multiple lunch boxes live in the house, labels prevent confusion and lost lids.
I’d rather have three boring containers that work than six cute ones that need adult hands and a prayer. The lunchbox drawer is not a museum.
Make-Ahead Prep and Safe Storage That Save Your Sanity
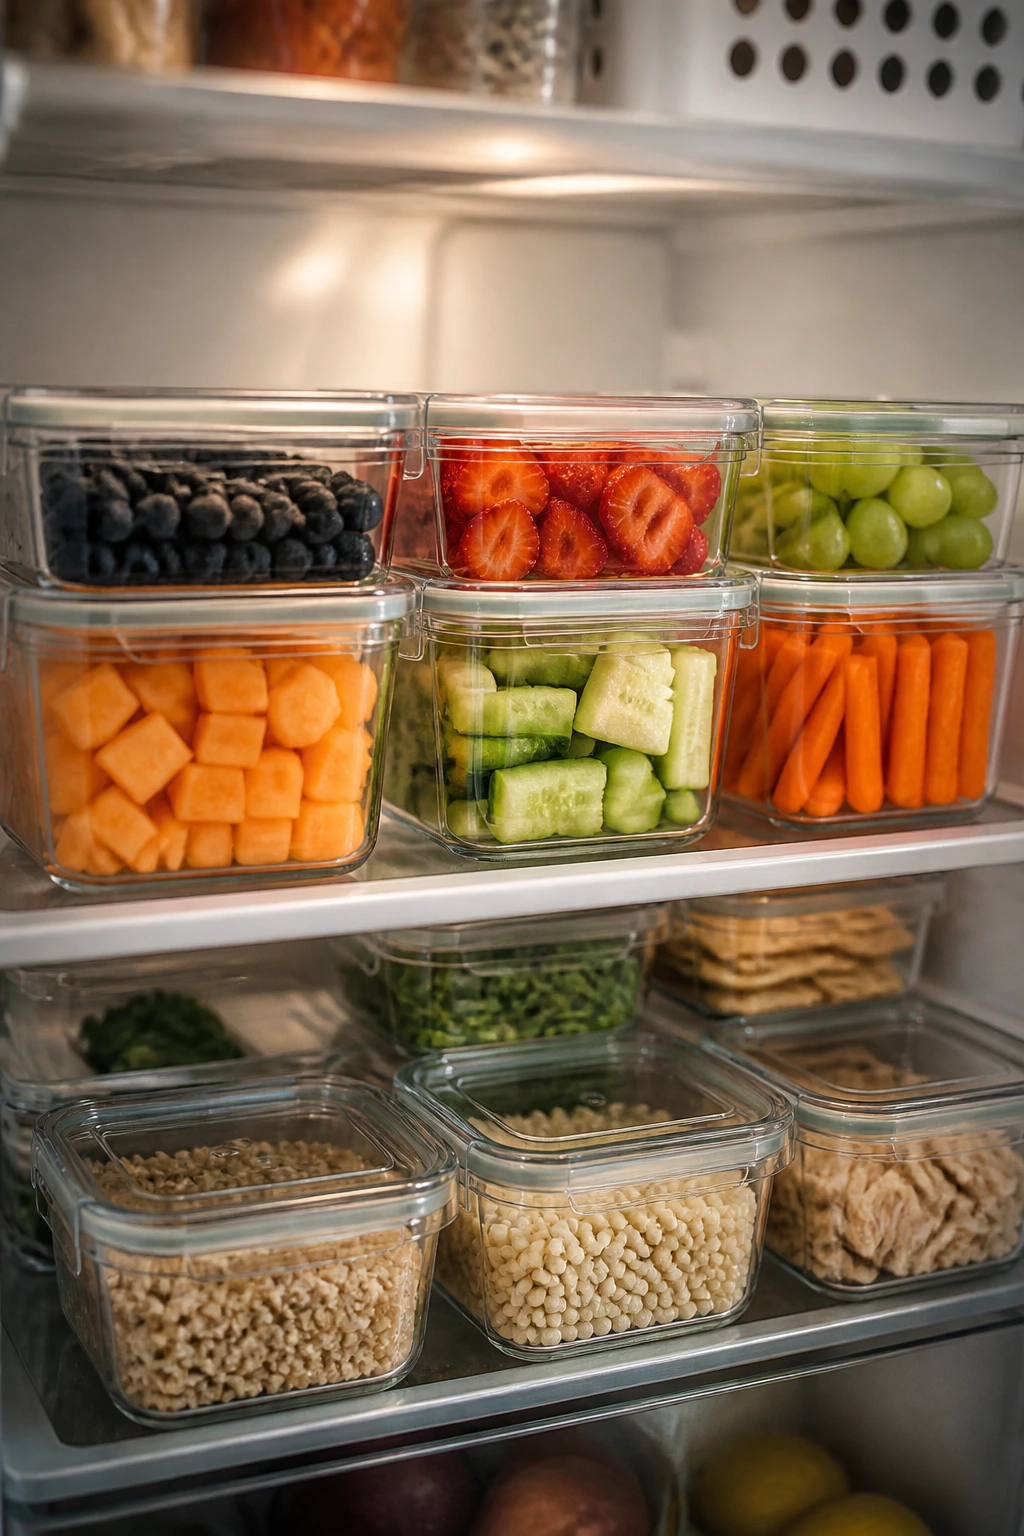
Lunch gets easier when you prep components, not full identities. A full lunch packed four days ahead tends to fall apart. A few ready-to-use parts can live in the fridge and turn into lunch fast without tasting old.
Night-before prep
Wash and dry fruit and vegetables the night before, then store them with a paper towel if needed to keep moisture down. Portion crackers, pretzels, seeds, or cereal into small containers or bags. If you’re making sandwiches in advance, add a moisture barrier and keep juicy fillings separate until morning if possible.
Cooked grains and proteins can be portioned ahead too. Rice, pasta, chicken, meatballs, tofu, and roasted vegetables all make good lunch foundations when they’ve been cooled quickly and stored properly. That means into the fridge within about two hours of cooking, then used within the usual safe window for leftovers.
Morning finish
Morning should be about assembly, not cooking from scratch. Slide the cold pack in. Add the dips. Put crunchy things in last so they keep their edges. If you’re packing a thermos, reheat the food until steaming first, then fill the container and seal it tightly.
How long things usually keep
- Most cooked proteins: 3 to 4 days refrigerated
- Cooked rice and pasta: 3 to 4 days refrigerated if cooled and stored promptly
- Cut fruit: 1 to 3 days refrigerated, depending on the fruit and how well it’s protected from browning
- Washed, cut vegetables: 3 to 4 days refrigerated if dry
- Dips and spreads: 3 to 5 days refrigerated, sometimes longer if the package says so
- Hard-boiled eggs: up to 1 week refrigerated
Room temperature is the line that matters for safety. Perishable foods should not sit out more than 2 hours, and if the lunch bag is left somewhere warm, that window shrinks to 1 hour. A cool lunch in a hot car is not a lunch plan.
One thing that helps a lot
Pack lunches from the same two or three containers every week. Familiar gear cuts packing time and makes it easier to spot what’s missing. Fancy is overrated. Predictable is good.
Common Mistakes That Make Lunch Come Home Uneaten
Packing too many “new” foods at once: The symptom is a lunchbox that looks exciting to you and suspicious to a child. The fix is simple: keep one safe food in every lunch and add only one new item at a time.
Letting wet foods touch dry ones: The symptom is limp crackers, steamed bread, and fruit juice leaking into everything else. The fix is separate compartments, small cups, and a little discipline about moisture control.
Ignoring temperature: The symptom is yogurt that tastes warm, cheese that looks slick, and hot food that’s gone lukewarm by lunch. The fix is real ice packs for cold lunches and a preheated thermos for hot ones.
Making lunch too large: The symptom is a box that comes home half-eaten because it looked like a chore. The fix is a smaller, more realistic portion with the option to send extra snack food later if your child needs it.
Choosing packaging a child cannot open: The symptom is an untouched lunch with a broken container and a frustrated teacher. The fix is to test lids at home. If a child can’t open it in 10 seconds, it is too complicated for daily use.
Packing food that takes too long to eat: The symptom is a child who spends lunch wrestling with a whole orange, a giant wrap, or a sticky sandwich. The fix is pre-cut, bite-size portions that can be eaten in the time school actually gives them.
Kid-Friendly Variations for Picky Phases, Allergies, and Different Ages
The Two-Bite Box: Best for younger children or kids in a picky phase. Keep it tiny: one main item, one fruit, one crunch, one dip. The goal is not volume. It’s trust. A small lunch that gets eaten is better than a large one that comes back untouched.
The Dip-and-Dunk Lunch: Perfect for kids who like control. Pack strips, coins, wedges, and dippers—cucumber, pepper, pita, apple, pretzels—plus one or two small cups of dip. The act of dipping gives the child something to do, which sounds small until you’ve seen a child suddenly decide carrots are acceptable because ranch was involved.
The Thermos Comfort Pack: Good for kids who hate cold food or need something more filling. Fill the thermos with mac and cheese, chili, soup, or fried rice, and pair it with a cold fruit or crisp side. Warm lunch tends to work well when the morning is rushed and the child wants something that feels like a real meal.
The Allergy-Safe Swap Box: Useful for nut-free classrooms and mixed groups. Use sunflower seed butter, hummus, cheese, dairy-free yogurt if needed, seed crackers, and fruit. The trick is making the box look like a real lunch instead of a set of restrictions.
The Bigger-Kid Fuel Box: Older kids often want more food and less fuss. Give them a bigger anchor—wrap, rice bowl, pasta salad, or leftovers—plus one crunchy side and one fruit. They may care less about tiny compartments and more about not being hungry again by mid-afternoon.
Questions Parents Ask About Packing Fun Kids Lunches
How do I keep lunch cold without a fridge?
Use an insulated lunch bag and at least one flat ice pack, two if the lunch has dairy, meat, or cut fruit. A frozen water bottle can do double duty as a drink and a cooling block. Pack cold foods straight from the fridge so they start cold, not just wishfully cool.
What if my child won’t eat sandwiches at all?
Skip the sandwich and build around snack-style foods or a thermos meal. Cheese cubes, crackers, fruit, pasta salad, rice bowls, meatballs, quesadillas, and hummus with pita can all work without a slice of bread in sight.
Are thermos lunches worth the trouble?
If your child likes warm food, yes. The extra minute it takes to preheat the thermos and heat the food pays off in a lunch that still feels like a meal at noon instead of a compromise. Thick foods work best, thin broth less so.
How do I stop fruit from turning brown?
Apples and pears need a little acid—lemon juice works well—or a produce saver method if you use one. Pack them tightly in a sealed container so air has less room to do its work. Bananas are trickier; they’re usually best packed only if they’ll be eaten quickly.
Can I pack leftovers the night before?
Yes, if the food is safe and stored properly. Cool leftovers quickly, refrigerate them, and pack them cold or reheat them fully in the morning if they’re going into a thermos. Foods with sauces, rice, pasta, or roasted vegetables usually do best.
What should I do if lunch keeps coming home half-eaten?
Look at the structure before you blame the child. Is the food too wet, too big, too cold, too hot, or too weirdly mixed? Fix the mechanics first. A better container or a smaller portion often does more than a new recipe ever will.
How many items should be in a kid’s lunchbox?
Usually four or five is enough: one main food, one fruit or vegetable, one crunchy side, one dip, and maybe one small treat. More than that can make lunch feel busy and hard to finish in time.
Do cute shapes actually help?
Sometimes, but only when they don’t create waste or extra work. A star-shaped sandwich is useless if half the bread gets turned into scraps and the child is still hungry. Smaller, neat pieces often do the job better.
Lunches That Get Eaten
A lunch that disappears is not magic. It is food that survives the morning, respects the clock, and feels familiar enough that a kid can get started without a debate.
The best lunchbox isn’t the prettiest one on the counter. It’s the one that opens at noon with everything still tasting like itself. Keep the formulas simple, keep the texture honest, and keep one or two lunches in heavy rotation so packing them becomes muscle memory. That’s where the real relief lives.
If you build from that place, lunch stops feeling like a daily gamble and starts feeling like a small, reliable win.