
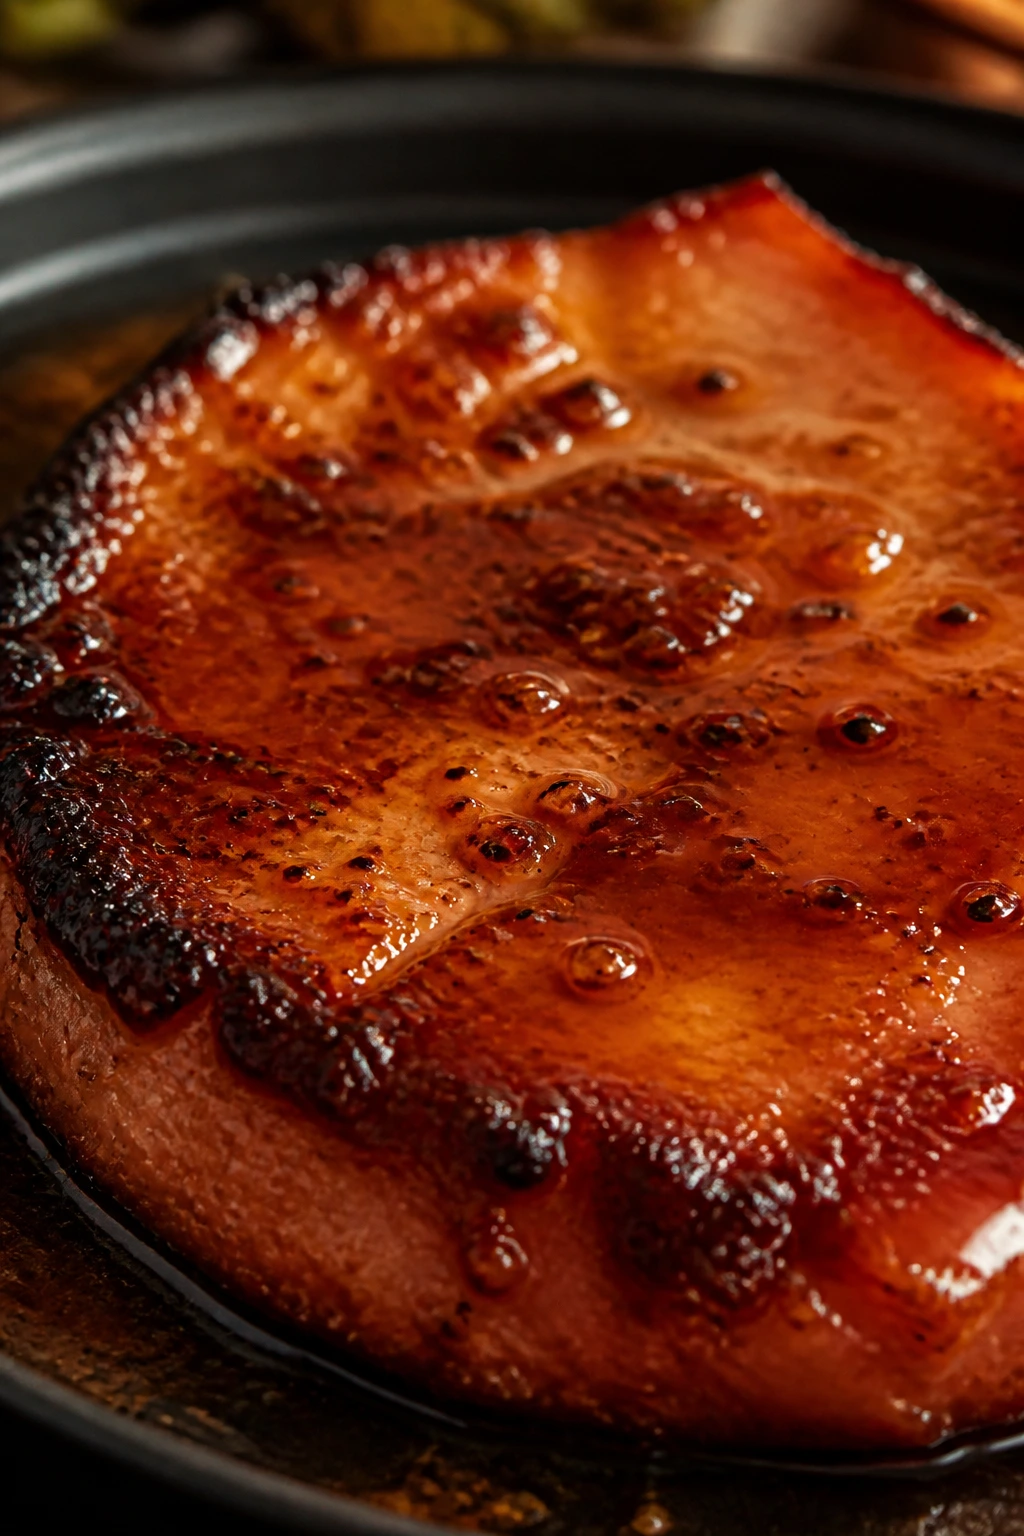
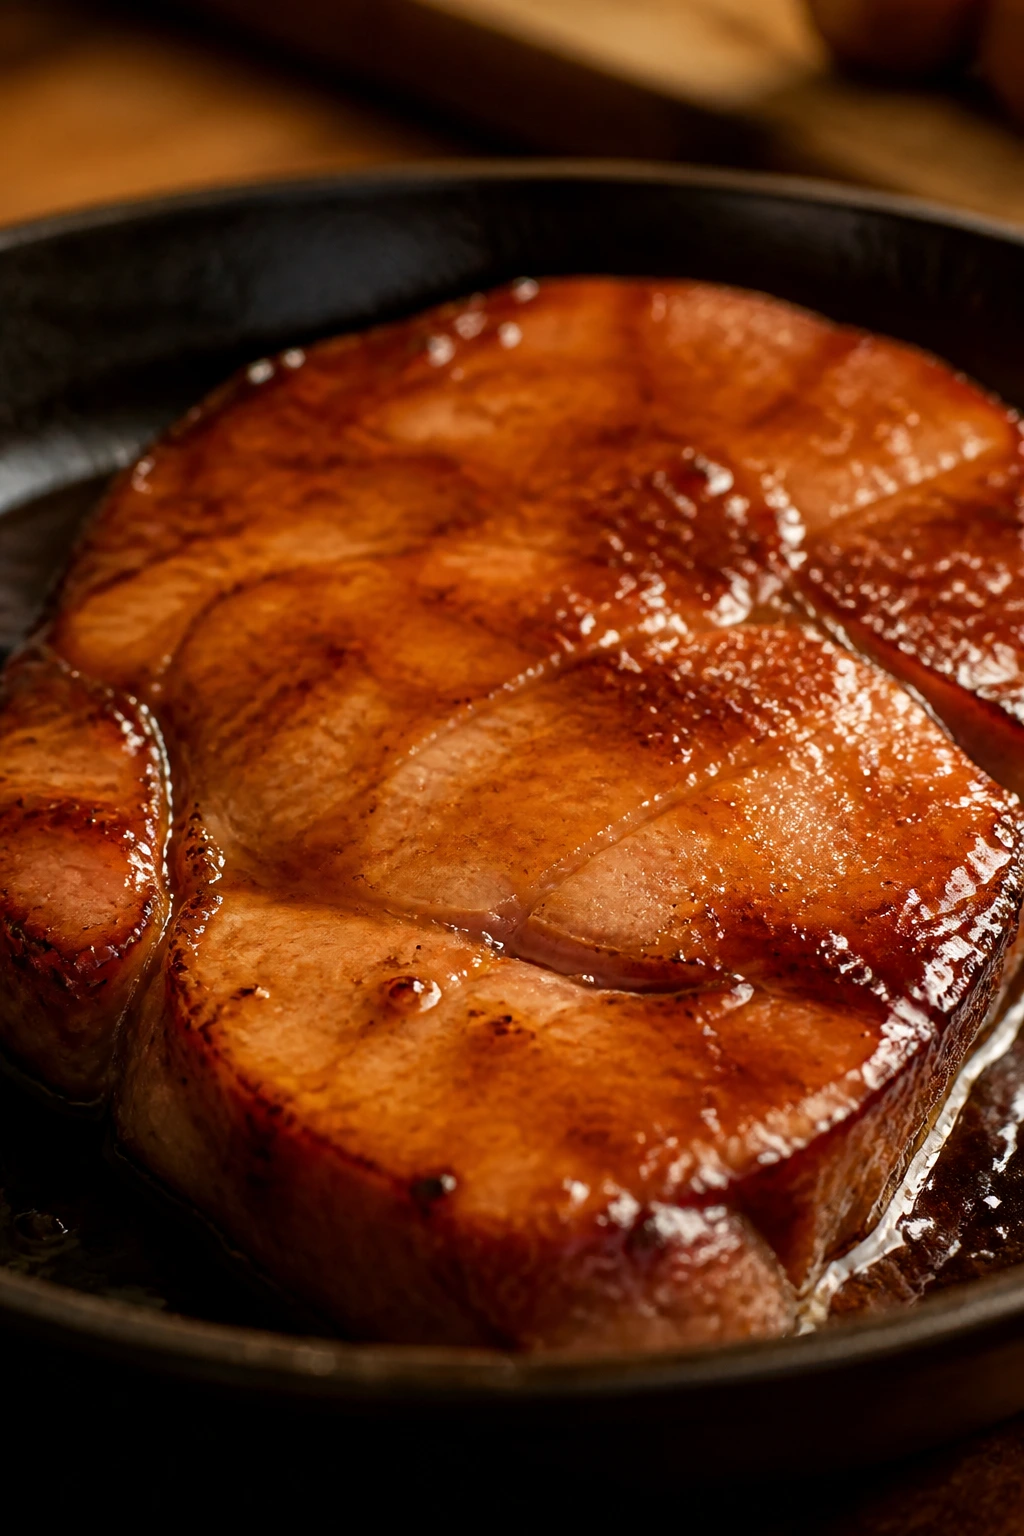
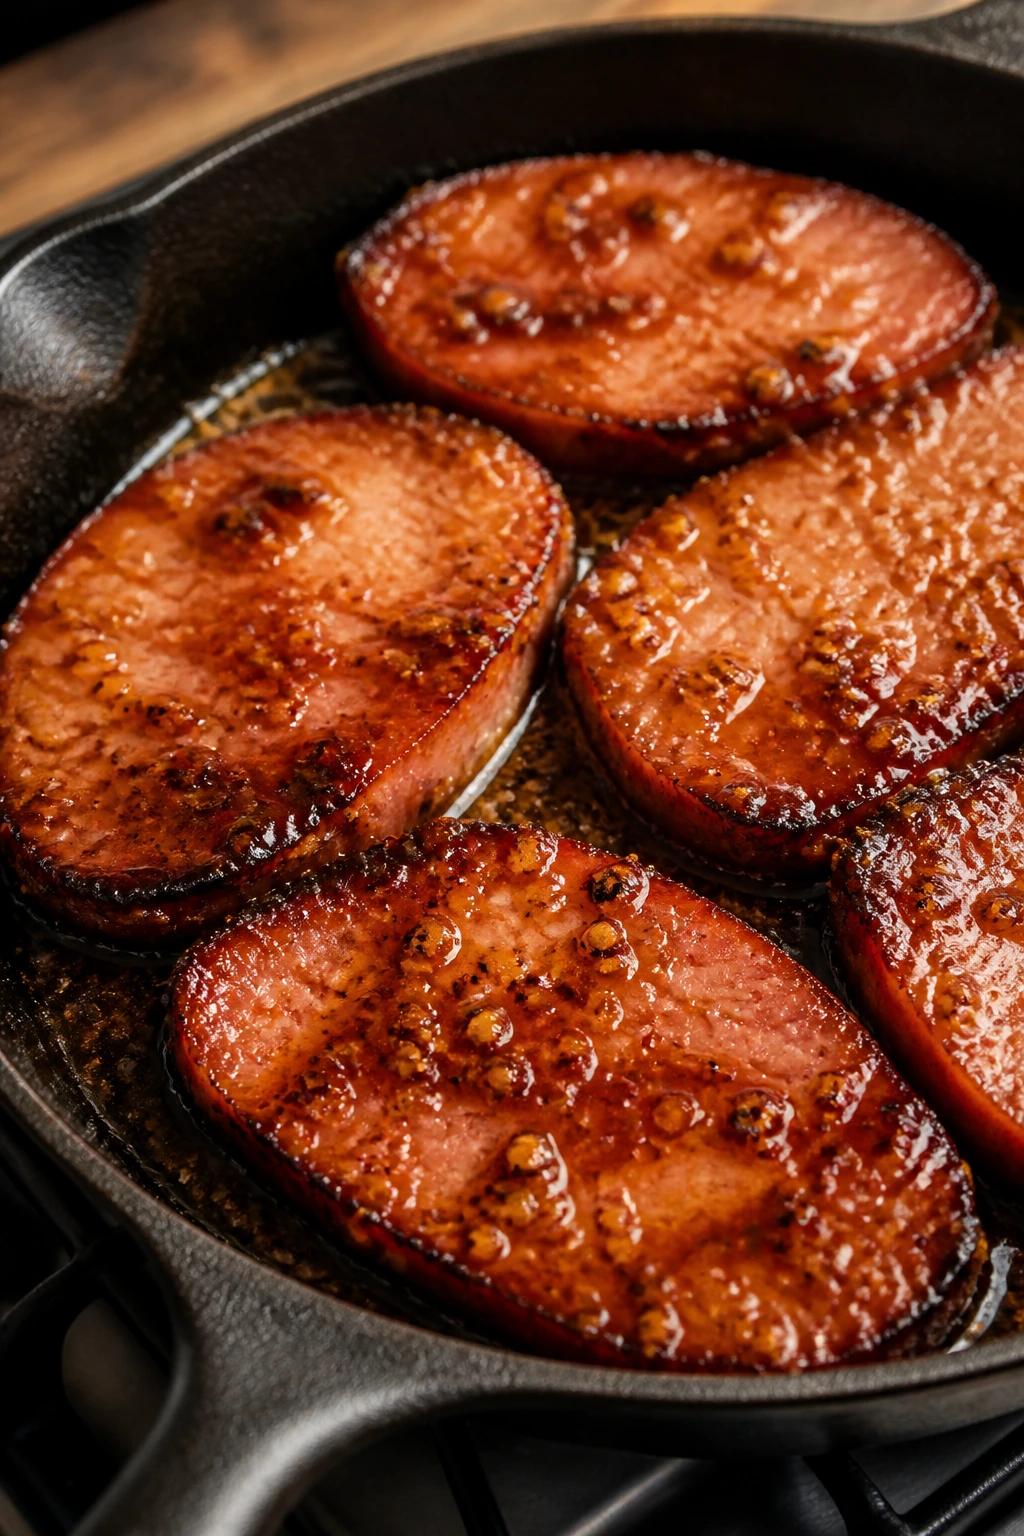
A good ham slice should sizzle, not sigh. The edges pick up color in the pan, the fat goes glossy, and the brown sugar glaze turns into something between caramel and gravy — sweet, salty, and a little sharp from the mustard. That’s the whole point of juicy ham slices with brown sugar glaze: you’re not cooking raw meat from scratch, you’re waking up a fully cooked piece of pork so it tastes hot, tender, and worth putting on a real plate.
Most people make ham dry by accident. They leave it in the oven too long, drown it in sugar too early, or use a pan that’s too hot and burn the glaze before the center is warm. Ham doesn’t need heroics. It needs attention, a heavy skillet, and enough acidity to keep the sugar from turning cloying.
There’s a reason this kind of dish keeps showing up on dinner tables, breakfast spreads, and holiday buffets. It takes a cut that can be plain on its own and gives it a lacquered finish, a little edge, and a sauce that clings to every bite instead of pooling sadly at the bottom of the platter. And if you’ve ever had ham that tasted like a salt lick in a shiny coat, this version fixes the problem with one smart move after another.
Why You’ll Love This Recipe
-
Fast stovetop finish: Thick ham slices only need a short sear and a brief bath in glaze, so dinner is on the table before the edges have time to dry out.
-
Sweet-salty balance: Dark brown sugar, Dijon, and apple cider vinegar keep the glaze from tasting one-note; every bite lands with salt, caramel, and a little bite at the back of the tongue.
-
One pan, less mess: The same skillet browns the ham and reduces the glaze, which means the browned bits from the meat become part of the sauce instead of getting washed down the sink.
-
Works with leftovers or fresh slices: If you’ve got cooked ham from a roast, this method brings it back to life. If you buy thick-cut ham slices from the deli counter or meat case, it works there too.
-
Easy to scale: Double the glaze for a bigger crowd, or cook only two slices in a smaller skillet and keep the heat steady. The method doesn’t get fussy when the numbers change.
-
Looks finished without extra effort: The glaze turns shiny and clingy, which gives the ham that just-right sheen you want on a platter without brushing on anything fancy.
Yield: Serves 4
Prep Time: 10 minutes
Cook Time: 15 minutes
Total Time: 25 minutes
Difficulty: Beginner — the method is short and forgiving as long as you watch the heat and do not let the sugar scorch.
Best Served: Warm, straight from the skillet or within 10 minutes of cooking
Why Brown Sugar and Ham Belong on the Same Pan
Ham already comes with a lot of personality. It’s salty, cured, and often smoky enough to hold its own without help. That can be a strength, but it can also be the reason a slice feels flat after reheating. Brown sugar fixes part of that problem by softening the salt with molasses-rich sweetness, and the right glaze does more than coat the meat; it gives the surface a sticky, browned finish that makes every bite feel more complete.
This recipe leans on a short, hot cooking method because that’s what ham wants. Thick slices only need to be warmed through and browned at the edges. Keep them in the pan too long and the moisture disappears fast, leaving you with something leathery around the edges and stringy in the middle. A medium flame, a little butter, and a spoonable glaze are enough. More heat is usually worse.
I like this dish because it behaves more like a diner ham steak than a holiday centerpiece. You can serve it with eggs and potatoes in the morning, or put it next to beans and greens at dinner. Either way, the brown sugar glaze gives the ham a glossy finish that feels deliberate, not thrown together, and that matters when the ingredient itself is already cooked before you begin.
What Goes Into the Glaze and Why It Matters
For the Ham and Brown Sugar Glaze:
- 2 pounds thick-cut fully cooked ham slices, about 1/2 inch thick
- 2 tablespoons unsalted butter
- 1 tablespoon neutral oil, such as avocado or canola
- 1/2 cup packed dark brown sugar
- 1/3 cup apple cider or orange juice
- 2 tablespoons Dijon mustard
- 1 tablespoon apple cider vinegar
- 1 tablespoon honey
- 1 teaspoon Worcestershire sauce
- 1/2 teaspoon ground cinnamon
- 1/4 teaspoon ground cloves or allspice
- 1/4 teaspoon black pepper
- 1 teaspoon orange zest, optional
The Ham Slices Themselves
What to use: 2 pounds of thick-cut fully cooked ham slices, about 1/2 inch thick, gives you enough body to sear without falling apart. Two larger slices or four medium ones both work; the important part is thickness, not the exact shape.
Preparation: Pat the slices dry on both sides before they go into the skillet. If there’s excess surface moisture, the ham steams instead of browns, and steamed ham looks pale and tastes a little flat.
Substitutions: Ham steaks work here too, as long as they’re fully cooked. If you only have thinner deli-style slices, cut the sear time way down and treat them like a quick warm-up instead of a real pan-fry.
Tips: Look for slices with a mix of lean meat and a thin ribbon of fat. A completely lean slice can dry out faster, while a little fat helps the glaze cling and keeps the edges from tightening too quickly.
Brown Sugar, Honey, and the Sweet Base
What to use: 1/2 cup packed dark brown sugar and 1 tablespoon honey make the glaze deep and sticky. The darker sugar brings molasses notes that taste better with ham than pale sugar does.
Preparation: Pack the brown sugar into the measuring cup so you get a true half-cup. Loose sugar makes the glaze thinner, and you’ll spend extra time reducing it in the pan.
Substitutions: Light brown sugar works if that’s what you have, though the glaze tastes a little cleaner and less rich. Maple syrup can stand in for the honey, and it gives the sauce a woodsy finish.
Tips: If the glaze tastes too sweet before it hits the pan, add a tiny splash more vinegar. Sugar and salt need something sharp underneath them or the whole dish leans sticky instead of balanced.
Dijon, Vinegar, and the Sharp Edge
What to use: 2 tablespoons Dijon mustard and 1 tablespoon apple cider vinegar bring the glaze back from the brink. They don’t make it sour; they keep it from tasting like brown sugar melted over salt.
Preparation: Whisk these in with the sugar before the mixture ever touches the heat. The mustard helps the glaze stay smooth instead of splitting into oil and syrup.
Substitutions: Yellow mustard will work in a pinch, but it’s louder and less elegant. White wine vinegar or sherry vinegar can replace the apple cider vinegar if that’s what’s on hand.
Tips: The vinegar should taste present, not aggressive. Once the glaze is hot, that sharpness softens, so don’t be timid with it at the mixing stage.
Butter, Oil, and the Spice Cabinet
What to use: 2 tablespoons unsalted butter and 1 tablespoon neutral oil give the pan enough fat for browning without scorching the sugar. Cinnamon, cloves, pepper, Worcestershire, and optional orange zest round out the finish.
Preparation: Keep the butter and oil ready before the ham goes into the skillet. Once the pan is hot, you won’t want to stop and measure while the fat is browning.
Substitutions: If you want a lighter spice profile, skip the cloves and use only cinnamon and black pepper. If you prefer more savory depth, add an extra half-teaspoon of Worcestershire and leave the orange zest out.
Tips: Don’t overdo the spices. Ham already brings salt and smoke, and a heavy hand with clove can make the glaze taste like dessert in the wrong way. One fourth teaspoon is enough to notice.
The Tools That Make This a One-Skillet Job
-
12-inch skillet or sauté pan — Wide enough to hold the ham slices in one layer so they brown instead of pile up.
-
Tongs — Useful for turning the slices without piercing them and letting juices run everywhere.
-
Small whisk — The glaze needs to be smooth before it goes into the pan, and a fork does the job poorly.
-
Measuring cups and spoons — Brown sugar and vinegar need real measurements here; guessing makes the glaze too thin or too sweet.
-
Instant-read thermometer — The easiest way to avoid dry ham is to pull it at 140°F in the thickest part if it’s fully cooked ham.
-
Wooden spoon or silicone spatula — Good for scraping up browned bits without chewing up the pan surface.
-
Small bowl — Handy for mixing the glaze before the skillet gets involved.
-
Serving platter or warmed plate — Optional, but worth it if you want the glaze to stay glossy while you carry it to the table.
How to Cook Ham Slices So They Stay Juicy
Mix the glaze and prep the ham:
-
In a small bowl, whisk together the brown sugar, apple cider or orange juice, Dijon mustard, apple cider vinegar, honey, Worcestershire sauce, cinnamon, cloves or allspice, black pepper, and orange zest if you’re using it. The mixture should look thick and glossy, like loose syrup.
-
Pat the ham slices dry with paper towels on both sides. Do not skip this step — dry surface = better browning, and better browning is what keeps the glaze from tasting raw and sugary.
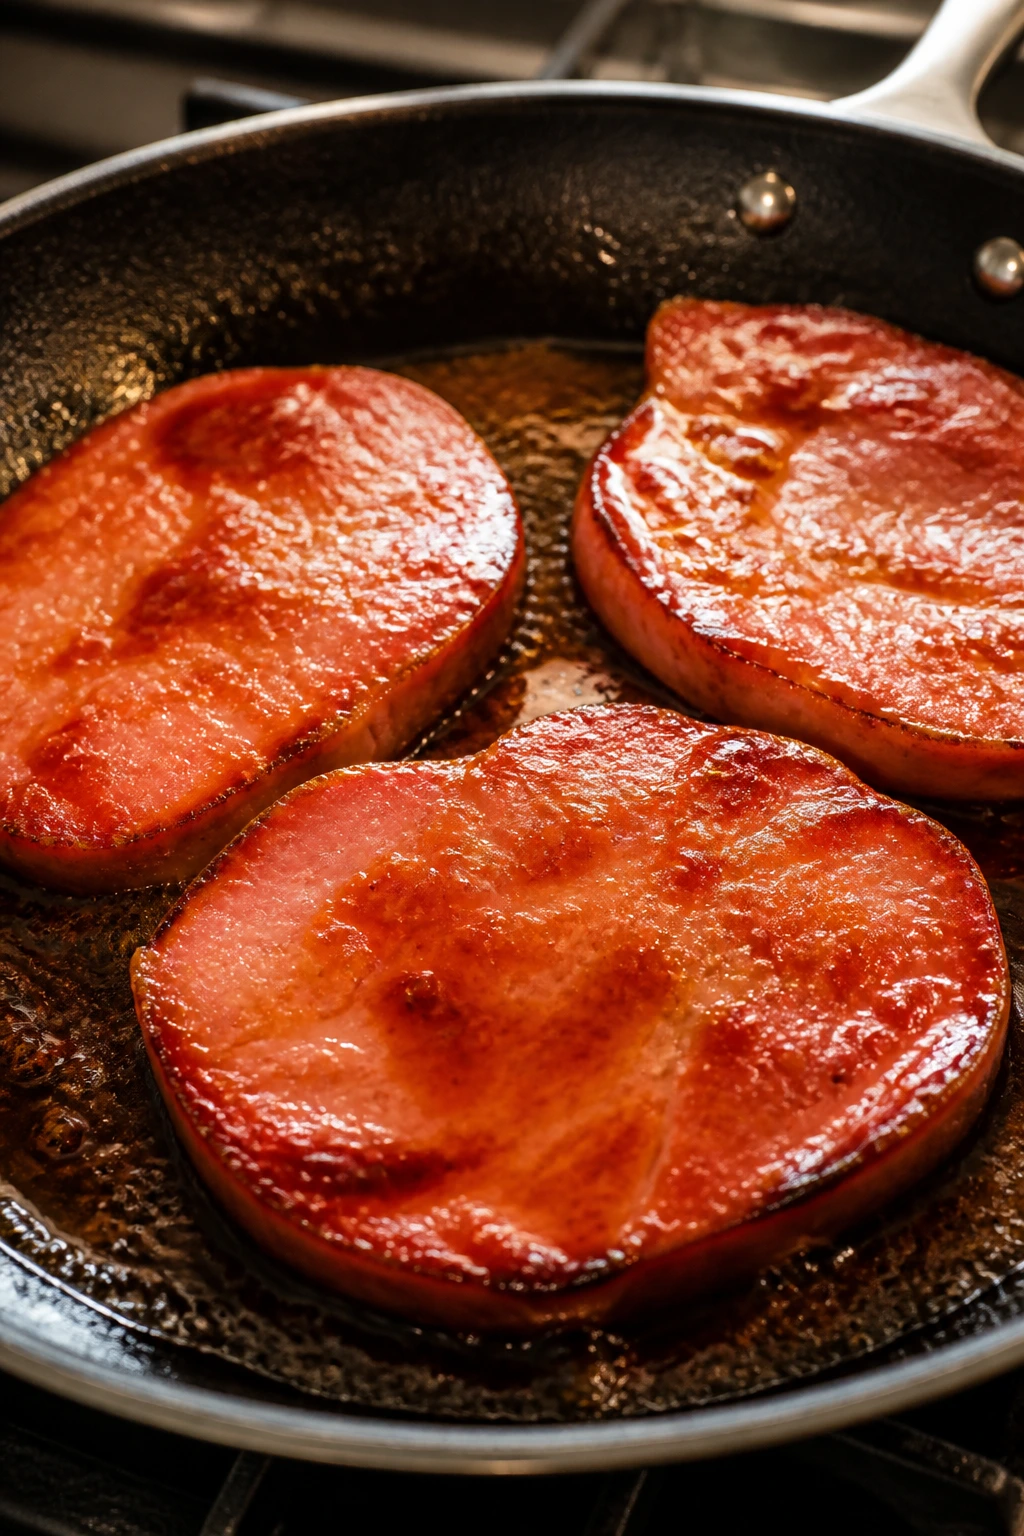
Brown the ham first:
-
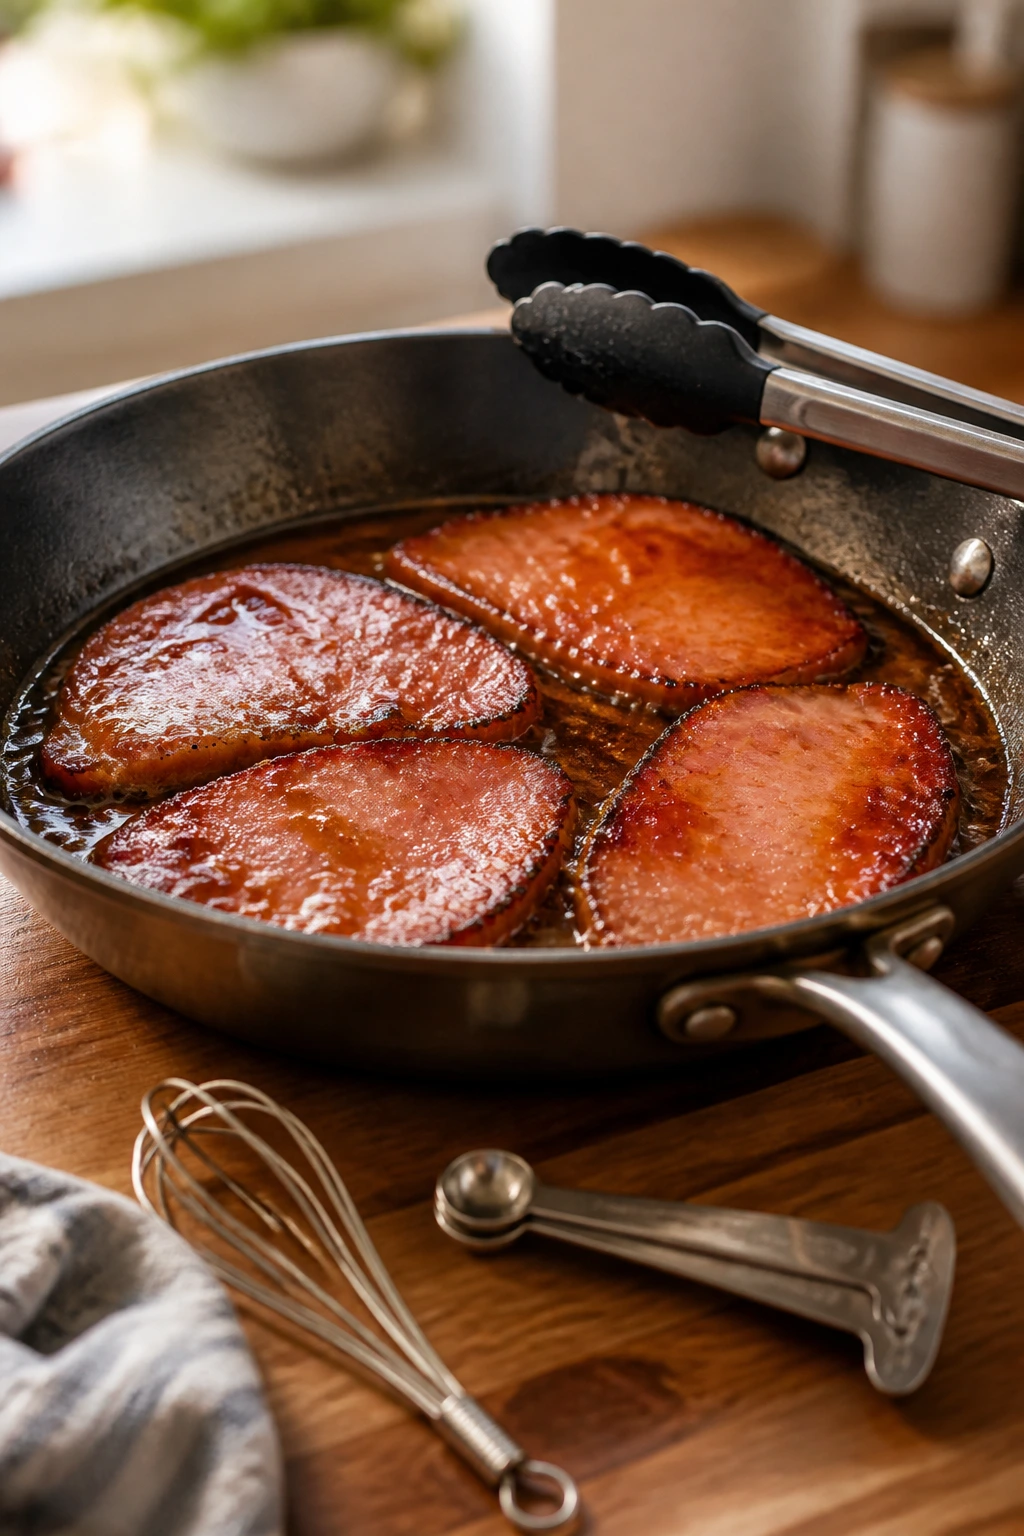
Set a 12-inch skillet over medium heat and add the butter and oil. When the butter foams and the smell turns nutty, lay in the ham slices in a single layer. You want a steady sizzle, not a violent spit.
-
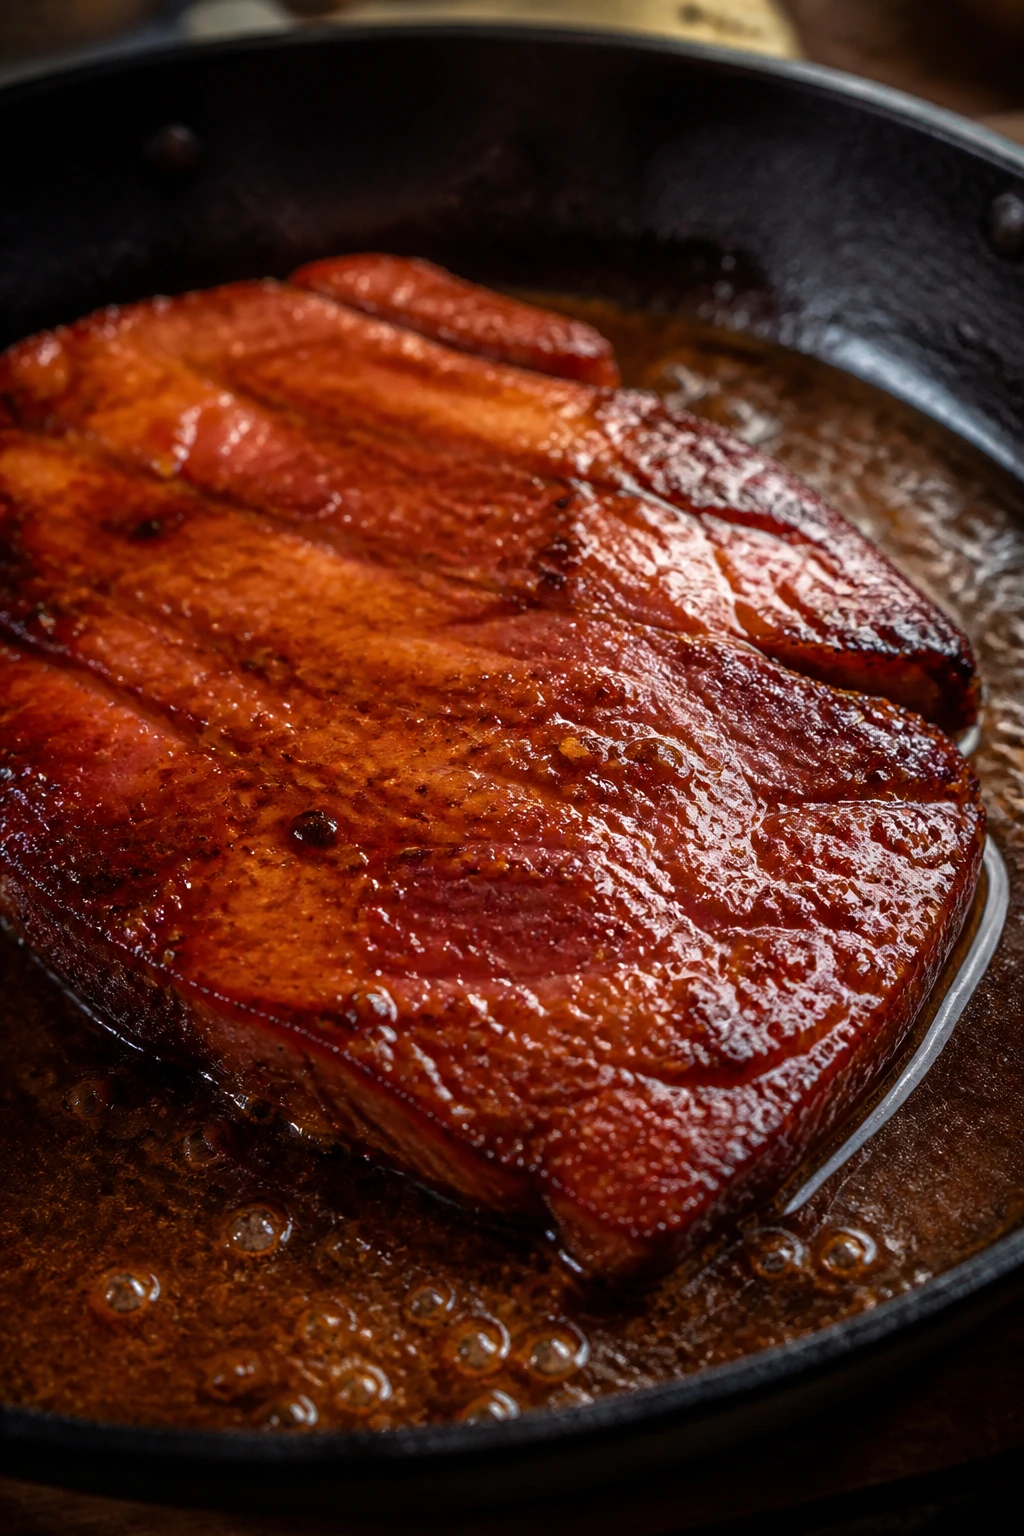
Cook the ham for 2 to 3 minutes on the first side, then flip and cook 2 minutes on the second side. The edges should look caramel-brown, and the slices should be hot through at the center. If the pan starts smoking hard, lower the heat immediately.
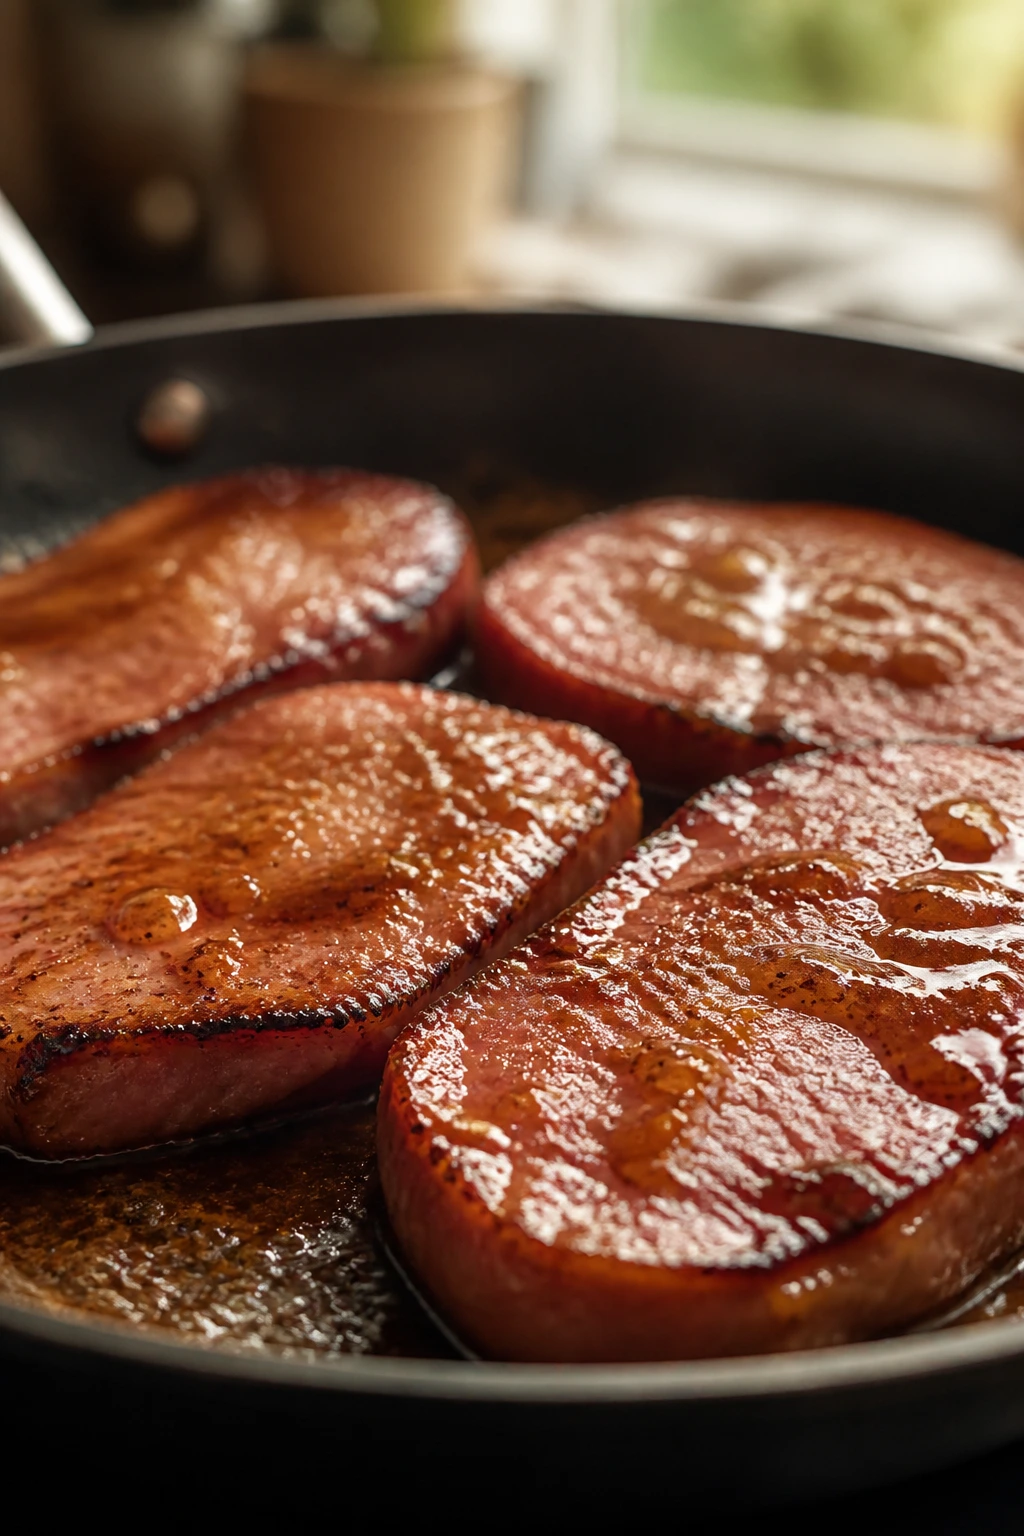
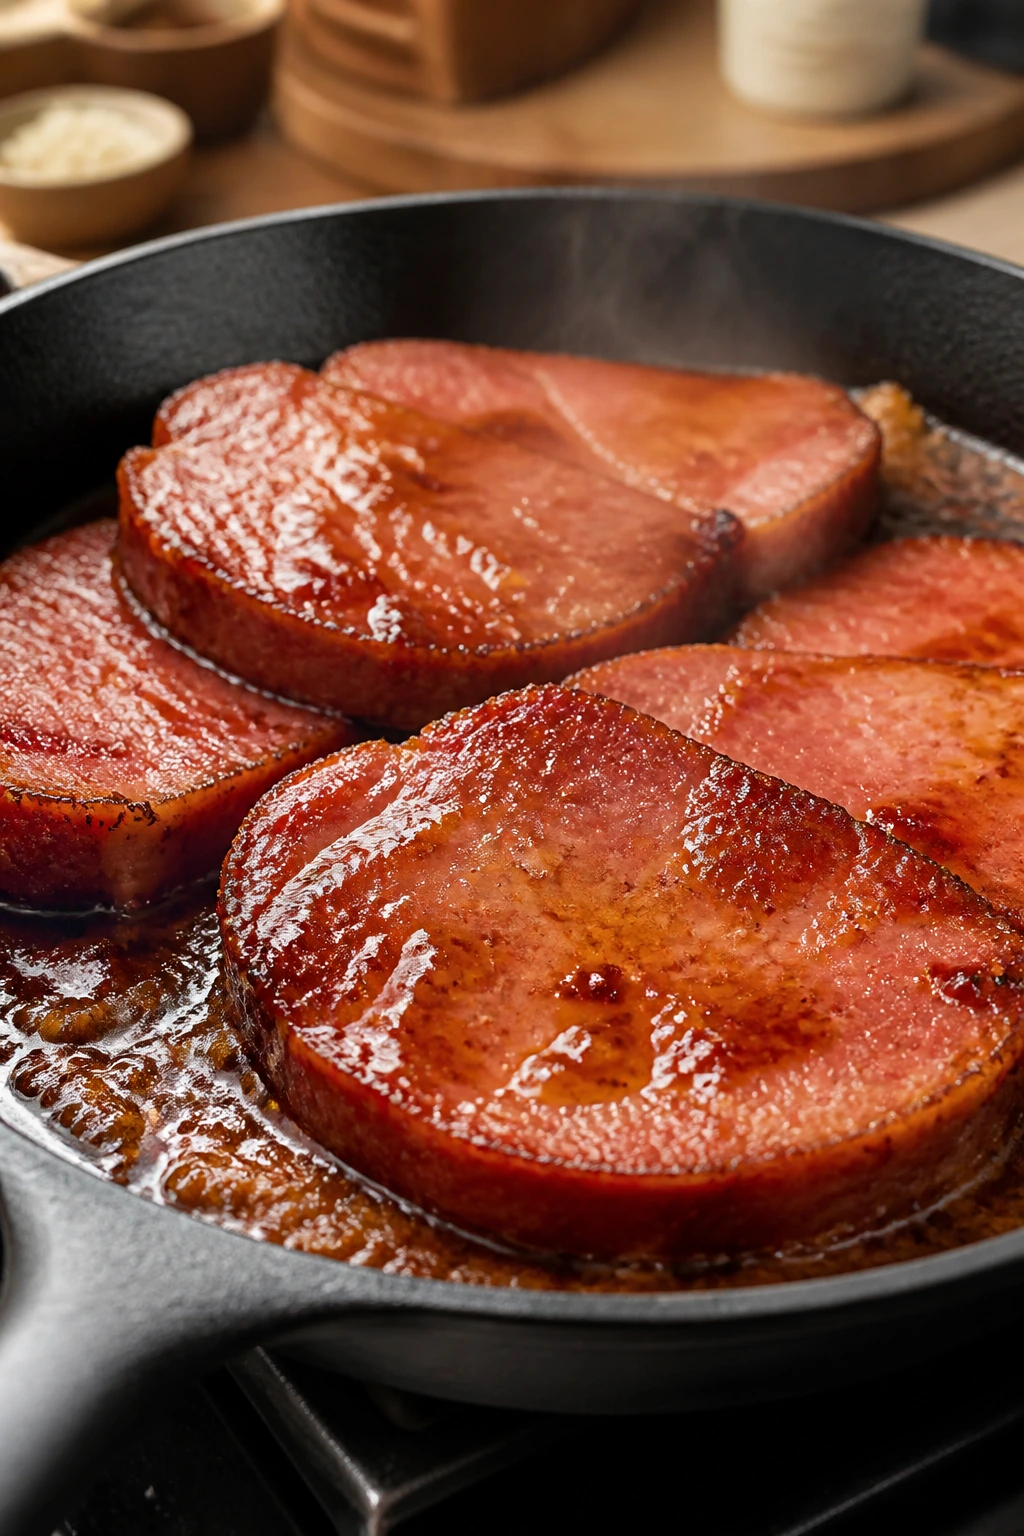
Build the glaze in the pan:
-
Pour the glaze mixture into the skillet around the ham, then lower the heat to medium-low. Spoon the sauce over the slices as it bubbles. After 1 to 2 minutes, it should thicken enough to coat the back of a spoon in a thin, shiny layer.
-
Turn the ham once more and continue spooning the glaze over the top for 2 to 4 minutes, until the thickest part of the ham reaches 140°F and the sauce clings instead of running off like water. If the glaze gets too thick before the ham is hot, stir in 1 tablespoon of water and keep going.
Rest and serve:
- Transfer the ham to a platter and spoon the remaining glaze over the top. Let it sit for 2 minutes before serving so the sauce settles and doesn’t flood the plate the second you cut into it.
How to Serve the Glazed Slices
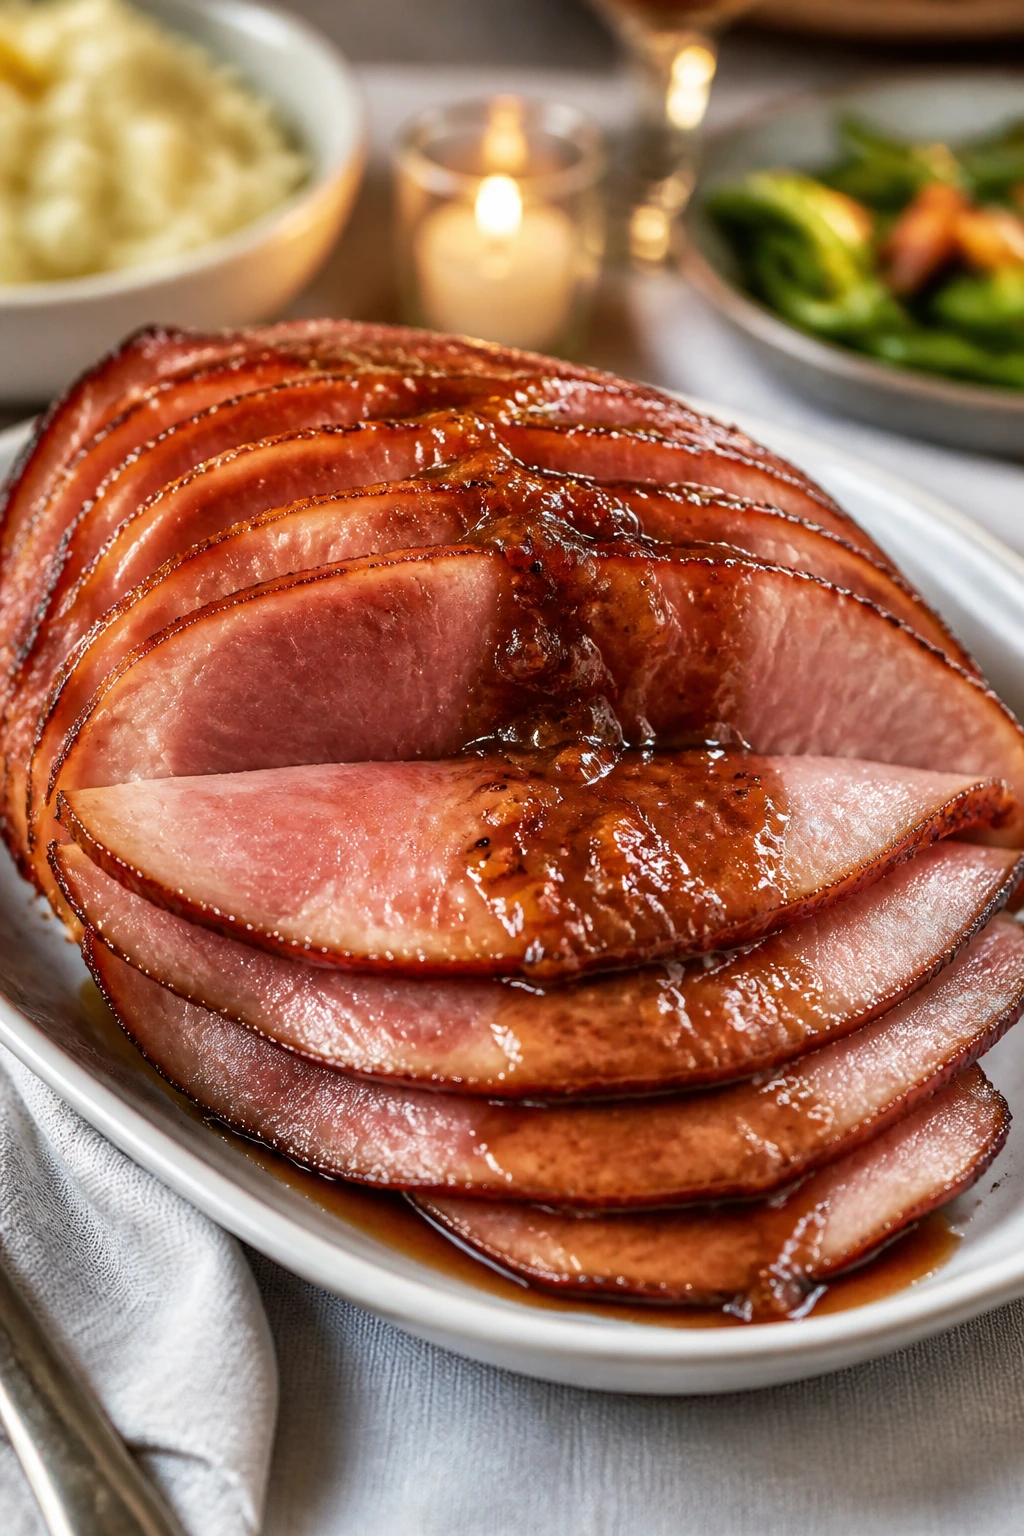
Presentation: Move the ham to a warmed platter and spoon the thickest part of the glaze over the center, then let a little run to the edges. A few spoonfuls over the top look better than drowning the slices; you want a glossy coat, not a soup.
Accompaniments: Mashed potatoes are the obvious move because they catch the glaze so well, but I also like buttered green beans, roasted carrots, skillet corn, or soft dinner rolls. If you’re serving it for brunch, go straight for eggs, hash browns, and biscuits. The sweet glaze loves a starchy side.
Portions: Figure on one thick slice per person if the slices are around 8 ounces each. If your ham is especially salty or you’ve got a heavy spread of sides, 6 ounces is enough. For a bigger group, double the glaze before you start and cook in batches so the slices don’t crowd the skillet.
Beverage Pairing: Unsweetened iced tea keeps the sweetness in check. A dry apple cider does the same job and feels a little more celebratory. If you want something nonalcoholic and sharp, sparkling water with lemon is plain in the best possible way.
The Small Details That Make the Difference
Flavor Enhancement: A final teaspoon of apple cider vinegar stirred in at the end wakes the glaze up if it starts tasting heavy. Do it off the heat so the sharpness stays bright. A tiny pinch of cayenne also works if you want the sweet finish to linger with a little heat.
Time-Saver: Mix the glaze before the skillet ever goes on. It only takes a minute, and it keeps you from standing over hot ham with a measuring spoon in your hand while sugar threatens to scorch.
Pro Move: Warm your serving platter in a low oven for 5 minutes. Ham cools fast, and a warm plate keeps the glaze loose long enough for people to actually notice the shine.
Cost-Saver: If you already have leftover baked ham, use it. The glaze does the heavy lifting, and leftovers need less cook time than packaged slices, which means you can spend less and still get the same sweet-savory finish.
Make-It-Yours: For a lower-sugar version, cut the brown sugar to 1/3 cup and add an extra tablespoon of Dijon and a little more vinegar. The glaze will be less sticky and more savory, but it still clings well.
Common Mistakes That Dry Out Ham
Using thin slices and treating them like steaks. Thin ham slices overcook in a blink. If the meat is only a quarter-inch thick, it can go from warm to dry before the glaze has time to thicken. The fix is simple: reduce the sear to about 45 seconds per side and keep the glaze stage short.
Starting with heat that’s too high. Sugar burns faster than people think. If the pan is screaming hot, the outside of the ham and the brown sugar glaze will blacken before the center is warm. Use medium heat for browning and medium-low once the sauce goes in.
Adding the glaze too early. If you pour the sugar mixture in before the ham has a little color, you lose the browned crust that gives the dish depth. Brown the ham first, then add the glaze after the pan has earned it.
Letting the skillet crowd up. When slices sit on top of each other, they steam. That means pale meat, watery glaze, and a plate that looks rushed. Work in batches if needed. It takes a few extra minutes, but the texture is better.
Cooking past the point of hot. Fully cooked ham does not need a long simmer. If you keep it on the stove while waiting for the glaze to reduce, the meat gets firm and the edges dry out. Pull it at 140°F, maybe 145°F if your slices are thick, and let the rest of the heat do the work.
Skipping the rest before serving. Two minutes doesn’t sound like much, but it lets the glaze settle and keeps the plate from flooding. Cut too soon and the sauce runs everywhere; wait a minute or two and it stays where it belongs.
Flavor Variations That Fit the Same Method
Pineapple Porch Glaze: Swap the apple cider for pineapple juice and add a tablespoon of crushed pineapple if you want a softer, fruitier glaze. This one leans brighter and works well with mashed sweet potatoes or rice.
Maple-Dijon Finish: Replace the honey with pure maple syrup and add 1/2 teaspoon smoked paprika. The maple deepens the sweetness, while the paprika pulls the glaze a little farther toward savory.
Orange-Clove Holiday Style: Use orange juice instead of cider, keep the orange zest, and bump the cloves up only slightly — 1/4 teaspoon is plenty. The result tastes more festive without turning the glaze into pie filling.
Peppery Tavern Ham: Add an extra 1/4 teaspoon black pepper and a pinch of cayenne, then reduce the brown sugar to 1/3 cup. This version is good with roasted Brussels sprouts or cabbage because the spice cuts through the fat.
Garlic Mustard Skillet Ham: Stir in 1 small grated garlic clove with the glaze and add another teaspoon of Dijon. Garlic changes the whole profile in a good way, making the dish taste less like a brunch piece and more like a weeknight dinner plate.
Storing, Reheating, and Making It Ahead
Ham slices keep well, but the glaze changes texture as it sits. Store leftovers in an airtight container in the refrigerator for up to 4 days. If you let them sit at room temperature, keep that window to 2 hours max, because the glaze and meat both deserve proper food safety handling.
For the freezer, wrap individual slices tightly or pack them in a freezer-safe container with a little extra glaze spooned over the top. They’ll keep for up to 2 months. The texture is best if you freeze the ham slices flat and separate with parchment, so they don’t glue themselves into one sweet brick.
Reheat gently. That’s the whole game. A 300°F oven, covered with foil and a tablespoon or two of water or extra glaze, takes about 10 to 15 minutes for thick slices. On the stovetop, use low heat in a covered skillet and spoon the glaze over the top until the center is hot. In the microwave, go low power in 30-second bursts, because full power turns the edges tough before the middle warms through.
If you want to make part of it ahead, the glaze can be whisked together up to 3 days in advance and kept in the fridge. You can also brown the ham slices ahead, chill them, and finish them in the glaze just before serving. That works especially well for a bigger dinner when the stove is crowded and you’d rather keep the final stage short.
Questions People Ask Before They Cook It
Can I use ham steaks instead of separate slices?
Yes, and that’s one of the easiest swaps here. Ham steaks are usually thicker and a little more uniform than deli slices, which makes them easier to brown and glaze. Just keep the skillet at medium heat and check the center temperature instead of guessing.
Do I need to rinse the ham first?
Usually, no. Rinsing adds moisture and slows browning, which is the opposite of what you want. If your ham is extremely salty, a quick blot with paper towels is enough. Keep the surface dry and let the glaze handle the rest.
Can I bake these instead of cooking them on the stove?
You can. Put the ham in a baking dish, brush or spoon the glaze over the top, and bake at 350°F until hot and glossy, usually 15 to 20 minutes depending on thickness. The skillet version gives you more caramelization, though, and I think that extra color is worth the small effort.
What if my glaze gets too thick before the ham is hot?
Stir in a tablespoon of water, apple cider, or orange juice and loosen it on low heat. Sugar reductions can tighten up fast, especially if your skillet runs hot. A splash of liquid brings the sauce back without making it thin.
Can I make this with leftover holiday ham?
Absolutely, and leftovers are where this recipe really earns its keep. Leftover ham is already cooked, so you’re just reheating and giving it a better finish. Cut it into thick slices if possible, or use large chunks and spoon the glaze over them in the pan.
What should I do if the edges start to brown too fast?
Lower the heat right away and add the glaze sooner rather than later. A lot of home cooks keep the burner too high because they’re waiting for color, then the sugar overreacts. Medium heat is enough. Patience helps more than brute force here.
Can I cut the sugar without losing the glaze?
Yes, but don’t remove it all at once. Drop the brown sugar to 1/3 cup and keep the mustard, vinegar, and honey in place so the sauce still has body and balance. The glaze will be less sticky, more savory, and still perfectly good on ham.
Is this recipe good for breakfast as well as dinner?
Very. It sits well beside eggs, hash browns, toast, or grits, and the glaze doesn’t clash with breakfast food the way heavier sauces sometimes do. If you’re serving it early in the day, keep the pepper and cloves gentle so it stays in breakfast territory.
A Sweet, Glossy Finish Worth Repeating
There’s a reason this kind of ham sticks in your memory. Not because it’s complicated. Because it’s clean, hot, and finished at exactly the right moment. The glaze is glossy, the meat stays tender, and the whole skillet smells like sugar, smoke, and butter in a way that makes people drift toward the stove.
Keep the heat moderate, keep the slices dry, and do not wait for the glaze to become candy. That’s the difference between ham that looks good in the pan and ham that actually eats well at the table.
Juicy Ham Slices with Brown Sugar Glaze — Recipe Card
Recipe Name: Juicy Ham Slices with Brown Sugar Glaze
Description: Thick-cut fully cooked ham slices are browned in a skillet, then coated with a glossy brown sugar glaze made with Dijon, vinegar, honey, and warm spice. The result is salty, sweet, and tender enough to serve for breakfast, dinner, or a holiday side plate.
Prep Time: 10 minutes
Cook Time: 15 minutes
Total Time: 25 minutes
Course: Main Course
Cuisine: American
Servings: 4 servings
Calories: About 410 kcal per serving
Ingredients
For the Ham and Glaze:
- 2 pounds thick-cut fully cooked ham slices, about 1/2 inch thick
- 2 tablespoons unsalted butter
- 1 tablespoon neutral oil, such as avocado or canola
- 1/2 cup packed dark brown sugar
- 1/3 cup apple cider or orange juice
- 2 tablespoons Dijon mustard
- 1 tablespoon apple cider vinegar
- 1 tablespoon honey
- 1 teaspoon Worcestershire sauce
- 1/2 teaspoon ground cinnamon
- 1/4 teaspoon ground cloves or allspice
- 1/4 teaspoon black pepper
- 1 teaspoon orange zest, optional
Instructions
-
Whisk together the brown sugar, apple cider or orange juice, Dijon mustard, apple cider vinegar, honey, Worcestershire sauce, cinnamon, cloves or allspice, black pepper, and orange zest in a small bowl.
-
Pat the ham slices dry with paper towels.
-
Heat the butter and oil in a 12-inch skillet over medium heat until the butter foams.
-
Add the ham slices in a single layer and cook for 2 to 3 minutes per side, until lightly browned and hot.
-
Pour in the glaze, reduce the heat to medium-low, and spoon it over the ham as it bubbles for 1 to 2 minutes.
-
Turn the ham once more and cook for 2 to 4 minutes, until the glaze thickens and the thickest part of the ham reaches 140°F.
-
Transfer to a platter, spoon the remaining glaze over the top, and let rest for 2 minutes before serving.
Notes: Use thick slices for the best texture. If the glaze gets too thick, add 1 tablespoon of water or cider. Reheat leftovers gently at low heat so the ham stays tender.