
A grilled cheese can be a limp little afterthought at a cookout, or it can be the sandwich people hover over while the burgers finish and the corn comes off the fire. The difference is usually not the cheese. It’s the heat, the bread, and whether you bothered to treat the filling like it deserves a place at the table.
That’s where a marinated fancy grilled cheese for backyard cookouts earns its keep. The quick tomato-and-onion marinade seasons the filling before it ever touches the bread, which means the sandwich tastes sharper, saltier, and more awake than the usual molten slab of dairy between two slices. And because the vegetables get drained before grilling, you get the bright, juicy flavor without turning the middle into a soggy mess.
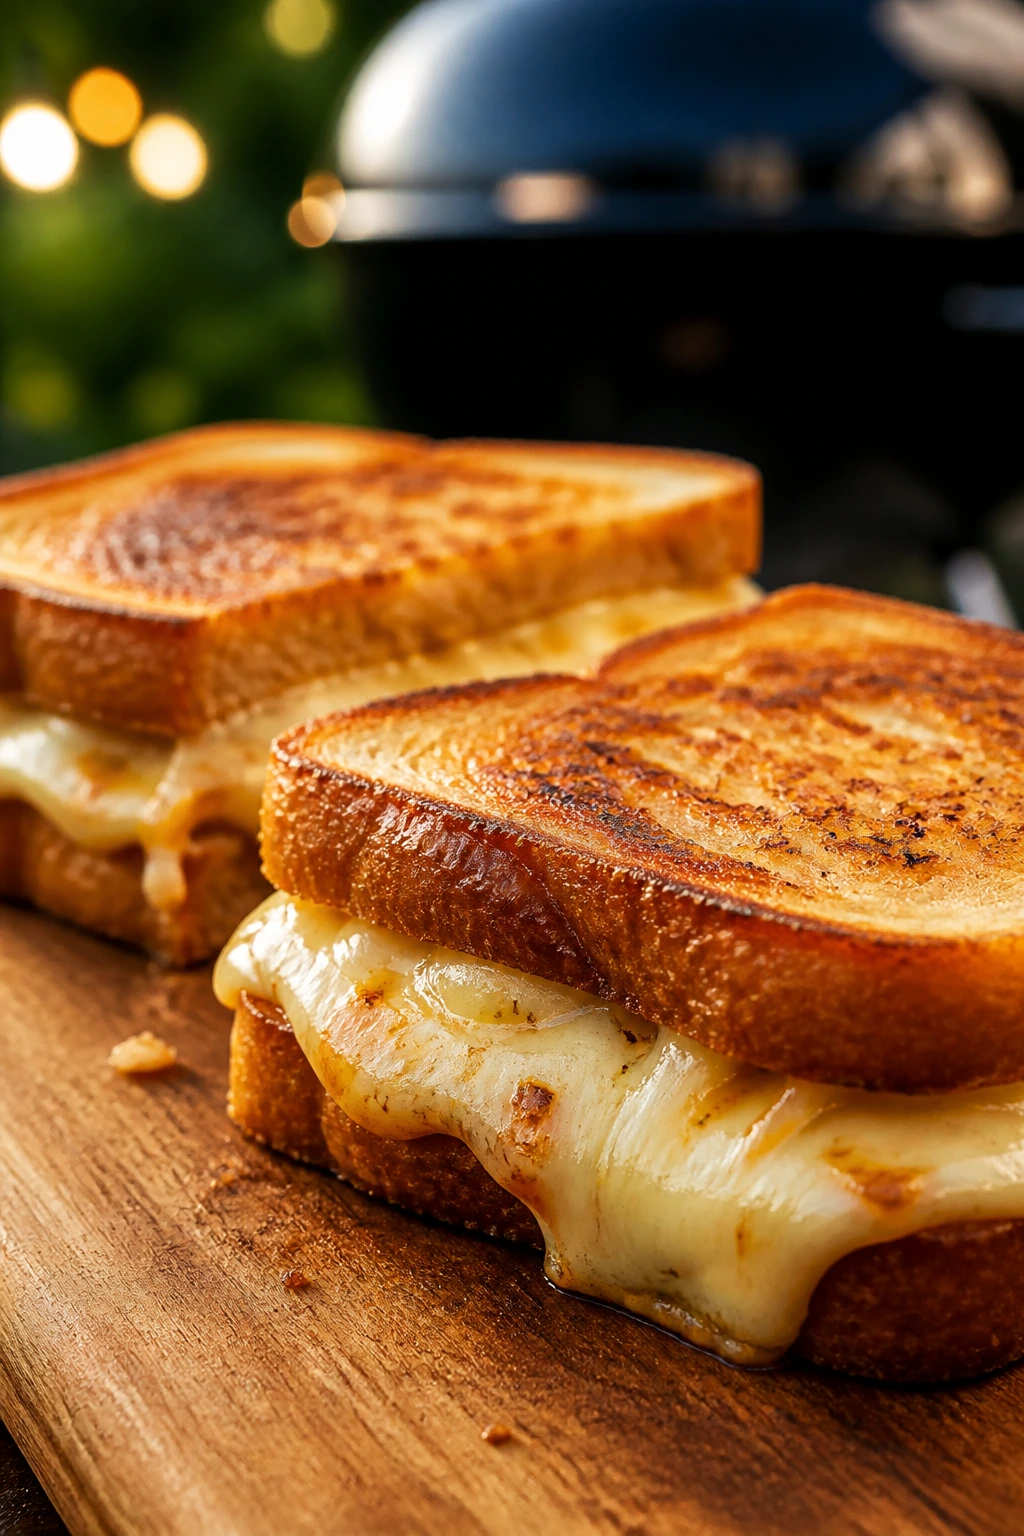
I like this sandwich on the grill because it behaves like a cookout food, not a kitchen orphan. It picks up a little smoke, the crust goes deeply golden in a cast-iron skillet, and the cheese melts into those glossy threads that pull apart when you slice it on a cutting board still warm from the sun. Use sturdy bread. Use enough salt. Give the filling ten quiet minutes to do its thing. Then let the grill take over.
Why This Sandwich Belongs on the Grill
-
It fixes the soggy-sandwich problem: The tomato and onion get marinated, then drained, so the filling tastes bright without soaking into the bread.
-
It eats like cookout food, not cafeteria food: A cast-iron skillet on the grill gives the crust a crisp edge and a faint smoky note that plain stovetop toast never quite has.
-
The cheese melts in a clean way: Fontina and Gruyère loosen first, while sharp cheddar brings the bite, so you get stretch, flavor, and structure in one bite.
-
It works beside smoky mains: This sandwich holds its own next to ribs, burgers, grilled chicken, or a pile of corn because the vinegar and herbs cut through all that richness.
-
It scales without drama: Make two for lunch or a dozen for a backyard spread; the filling can sit while you work in batches, and the finished sandwiches stay decent for a short hold on a rack in a low oven.
Timing, Yield, and the Heat You Want
Yield: 4 sandwiches
Prep Time: 20 minutes
Cook Time: 16 minutes
Total Time: 36 minutes, plus 10 to 15 minutes for marinating the filling
Chill/Rest Time: 10 to 15 minutes for the vegetables to marinate; 2 minutes for the finished sandwiches to rest before slicing
Difficulty: Intermediate — the method is simple, but the grill temperature and the moisture level in the filling matter if you want crisp bread and properly melted cheese
Best Served: Right off the skillet or grill, while the bread is crackly and the cheese is still soft enough to stretch
The timing assumes you already have the grill running at a steady medium-low. That part matters more than people think. Too hot, and the bread scorches before the cheese relaxes. Too cool, and you end up with pale toast and stiff cheese, which is not the mood here.
The marinade does most of the flavor work in a short window, not an overnight soak. That keeps the tomatoes fresh and the onions a little snappy instead of collapsing into a mushy pile. The point is seasoned brightness, not salad soup.
Ingredients That Keep the Sandwich Crisp, Tangy, and Melty
For the Marinated Filling:
- 2 medium ripe tomatoes, cored and sliced into 1/4-inch rounds
- 1 small red onion, sliced into paper-thin half-moons
- 2 tablespoons extra-virgin olive oil
- 1 tablespoon red wine vinegar
- 1 teaspoon Dijon mustard
- 1 teaspoon honey
- 1 small garlic clove, finely grated
- 1 teaspoon kosher salt, divided
- 1/2 teaspoon freshly ground black pepper
- 2 tablespoons chopped fresh basil
- 1 tablespoon chopped fresh parsley
- 1 tablespoon chopped pepperoncini or pickled jalapeños, drained, optional
For the Sandwiches:
- 8 slices sourdough bread, about 1/2 inch thick
- 6 ounces sharp white cheddar, shredded
- 4 ounces fontina, shredded
- 2 ounces Gruyère, shredded
- 3 tablespoons mayonnaise
- 2 tablespoons unsalted butter, softened
- 1/2 teaspoon flaky salt, for finishing
Why Each Ingredient Matters
Sturdy Bread Is Not a Nice-to-Have
What to use: 8 slices sourdough bread, cut about 1/2 inch thick. Thick, tight-crumb bread gives you enough structure to hold the melted filling without buckling when you flip the sandwich.
Preparation: If the loaf is fresh and soft, let the slices sit uncovered for 20 to 30 minutes so the surface dries a little. That small bit of staling helps the bread brown instead of steam.
Substitutions: Country loaf, seeded batard, or a firm artisan sandwich bread all work. I would skip flimsy soft white bread here; it collapses too fast once the marinade and cheese warm up.
Tips: If the bread is wider than your skillet, trim the slices to fit. That sounds fussy, but it makes flipping cleaner and keeps the edges from burning while the center catches up.
The Tomato-Onion Marinade Does the Real Work
What to use: 2 medium ripe tomatoes, 1 small red onion, 2 tablespoons olive oil, 1 tablespoon red wine vinegar, 1 teaspoon Dijon mustard, 1 teaspoon honey, 1 small garlic clove, 1 teaspoon kosher salt, 1/2 teaspoon black pepper, 2 tablespoons basil, 1 tablespoon parsley, and optional pepperoncini or pickled jalapeños.
Preparation: Slice the tomatoes into half-moons or rounds, and cut the onion as thin as you can manage without shaving skin off your knuckles. Thin slices soften fast, which is what you want for a sandwich filling.
Substitutions: Cherry tomatoes can be halved if that’s what you have, and a shallot can stand in for the red onion. If you want more heat, the optional pepperoncini are better than raw chili flakes because they bring acid along with the burn.
Tips: Salt is not a background player here. It draws moisture from the tomatoes and softens the onion edges, so the filling tastes seasoned instead of raw. Drain the mixture before building the sandwiches, or the bread will pay for your impatience.
The Cheese Blend Needs Melt and Bite
What to use: 6 ounces sharp white cheddar, 4 ounces fontina, and 2 ounces Gruyère, all shredded. That blend gives you a sharp top note, a supple melt, and a nutty finish.
Preparation: Shred the cheese yourself if you can. Freshly shredded cheese melts smoother than the bagged kind because it doesn’t carry the same anti-caking coating.
Substitutions: Monterey Jack can replace fontina, and provolone can replace Gruyère if you want a softer, more familiar melt. If you love a stronger bite, swap part of the cheddar for aged gouda.
Tips: Keep the cheese cold until assembly. Warm cheese gets greasy faster on the grill, and once it starts oozing before the bread is browned, the whole sandwich becomes harder to control.
The Outside Fat Is Part of the Flavor
What to use: 3 tablespoons mayonnaise and 2 tablespoons unsalted butter, softened. The butter gives flavor; the mayonnaise helps the bread brown evenly at lower heat.
Preparation: Mash the butter and mayonnaise together with a fork until the mixture looks smooth enough to spread. You want a thin, even coat, not big streaks of fat that melt in patches.
Substitutions: You can use all butter if that’s your preference, though mayo browns more predictably on a grill. Olive oil works in a pinch, but it gives you a thinner crust and less of that classic grilled cheese scent.
Tips: Spread the fat on the outside of the bread, not the inside. That sounds obvious, but people still smear it on the wrong side and then wonder why the filling slides around.
Small Finishes Make the Sandwich Taste Finished
What to use: 1/2 teaspoon flaky salt for the finished sandwiches, plus the optional pepperoncini or pickled jalapeños in the marinade.
Preparation: Keep the flaky salt for the last second, right after the sandwiches leave the heat. It gives the crust a little sparkle and helps the tomato flavor pop.
Substitutions: If you do not have flaky salt, use a tiny pinch of kosher salt. Go easy; the filling already carries salt, and too much on top can turn the first bite harsh.
Tips: If you’re making these for a crowd, set the flaky salt on the table and let people finish their own slices. Some folks love that extra salty edge; others don’t need it.
The Grill Gear That Saves You Trouble

-
Charcoal or gas grill with a lid: The lid helps steady the heat and gives you a more even melt than open flames alone.
-
12-inch cast-iron skillet or flat-top griddle: This is the workhorse. It gives the bread direct contact and keeps the filling from falling through the grates.
-
Wide metal spatula: A broad spatula makes flipping less nerve-wracking, especially once the cheese starts softening.
-
Mixing bowl: You need one medium bowl for the marinade and one small bowl for the butter-mayo spread.
-
Cutting board with a rim, if you have one: A little juice will escape when you slice the sandwiches. A rim keeps the board from becoming a slippery disaster.
-
Tongs: Handy for moving the skillet on and off the hotter part of the grill if you need to nudge the temperature down.
-
Fine-mesh strainer or slotted spoon: This is the easiest way to drain the marinated vegetables before they hit the bread.
-
Sheet pan with a wire rack, optional: If you’re making a batch, this lets finished sandwiches stay crisp for a short time without steaming underneath.
How to Build and Grill the Sandwiches
Marinate the Vegetables:
-
In a medium bowl, whisk together the olive oil, red wine vinegar, Dijon mustard, honey, grated garlic, 1/2 teaspoon of the kosher salt, and the black pepper until the mixture looks glossy and slightly thickened.
-
Add the tomato slices, red onion, basil, parsley, and optional pepperoncini or pickled jalapeños. Toss gently with your hands or a spoon until every slice is lightly coated. Let the mixture sit for 10 to 15 minutes, stirring once halfway through. The tomatoes should look a little slick and the onion should lose its sharp bite. Do not let the filling sit so long that it turns watery and dull.
-
Set a fine-mesh strainer over a bowl and drain the filling for 1 to 2 minutes. Give the strainer a gentle shake, or press lightly with the back of a spoon to knock off excess liquid. Keep the drained vegetables nearby and discard or reserve the collected liquid for a salad dressing if you like.
Preheat the Grill and Build the Sandwiches:
-
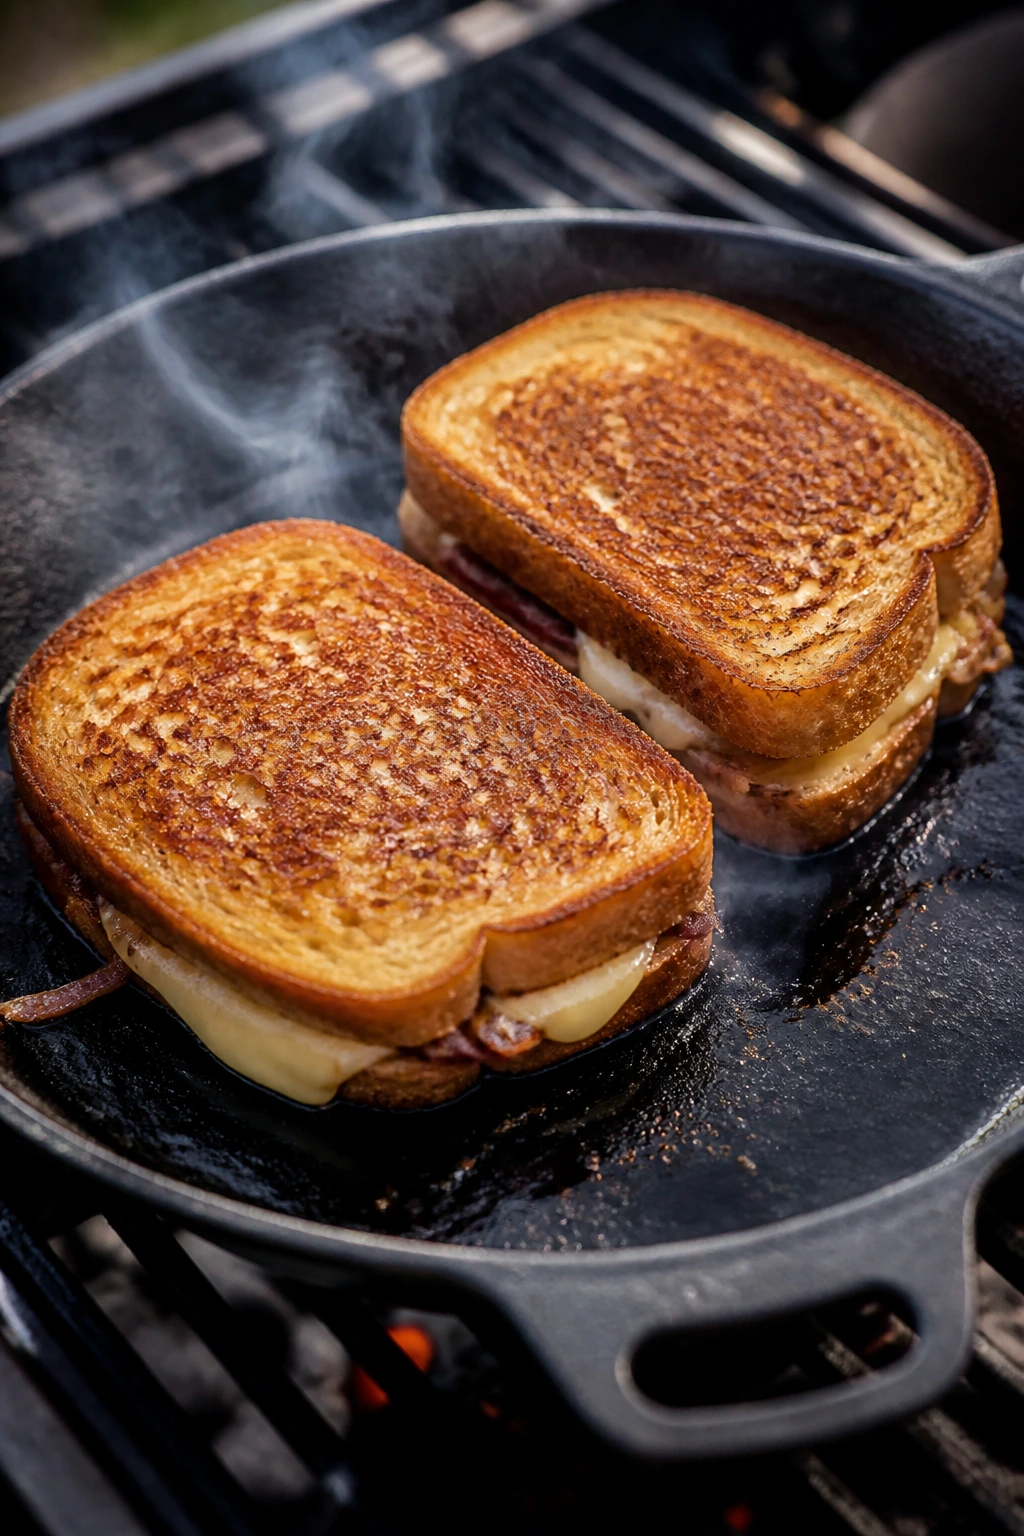
Preheat a gas grill to medium-low heat, about 325 to 350°F, or set up a charcoal grill with a cooler zone where a cast-iron skillet can sit without getting blasted by direct flame. Place the skillet or griddle on the grill and let it warm for 3 to 5 minutes.
-
In a small bowl, mash the mayonnaise and softened butter together until smooth. Spread a thin layer on one side of each bread slice; that side will face out. You want the coating even, all the way to the edges, because patchy spreading gives you patchy browning.
-
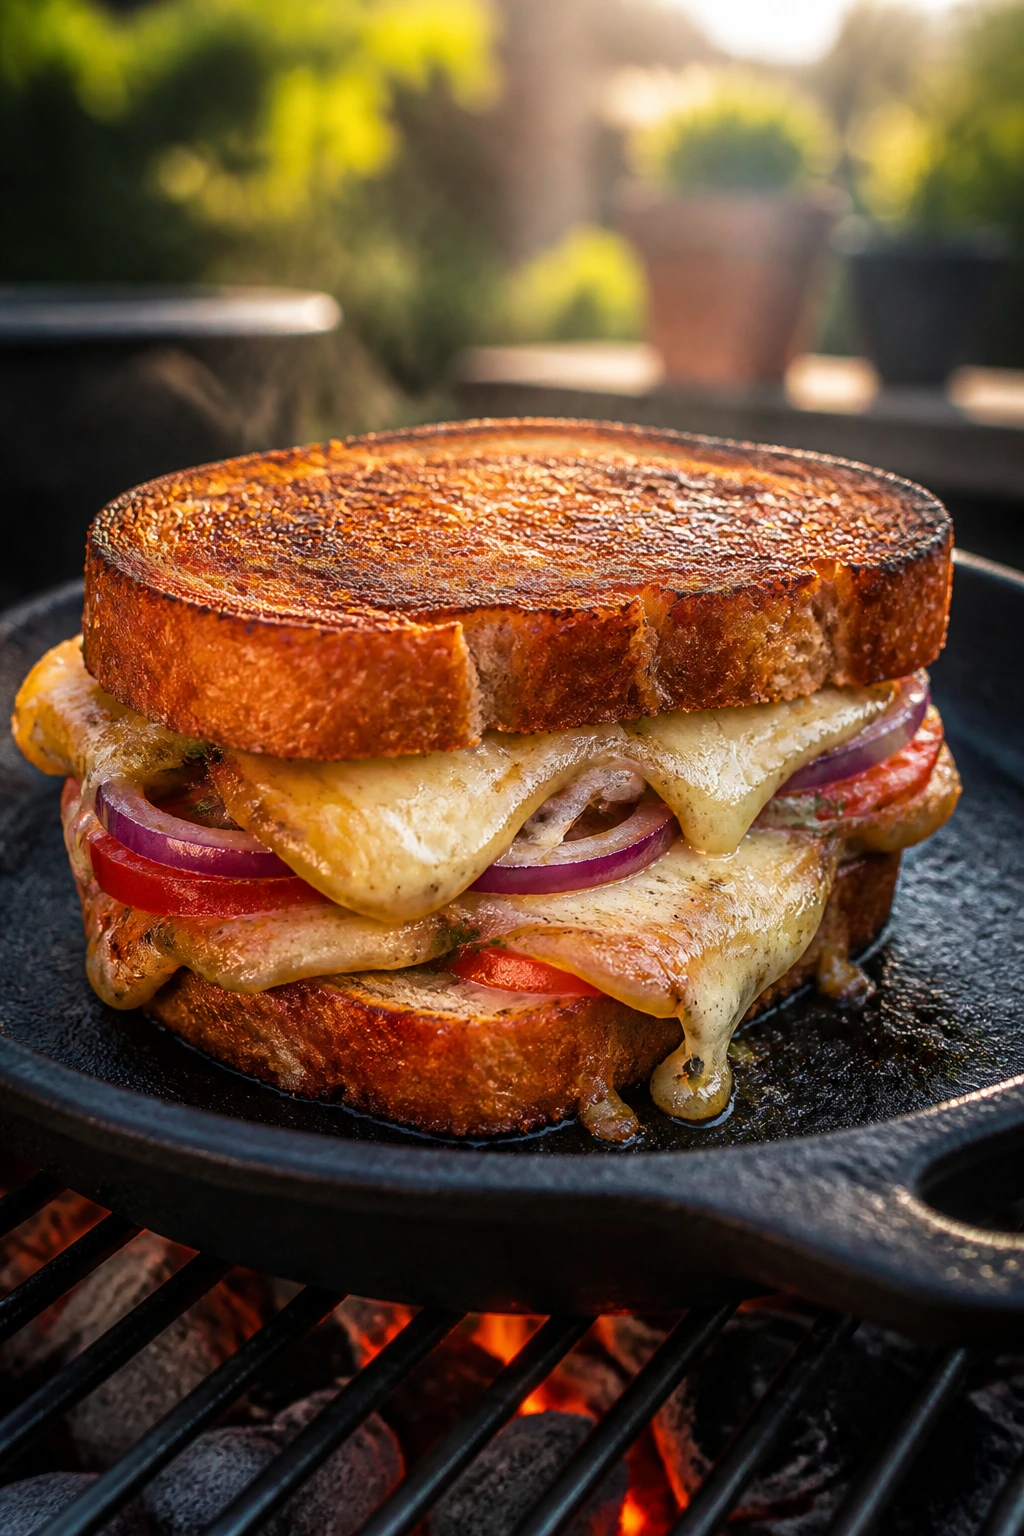
Mix the shredded cheddar, fontina, and Gruyère in a bowl. Divide the cheese into 4 equal mounds. Lay 4 bread slices butter-side down on a board, add a quarter of the cheese blend to each slice, top with a quarter of the drained marinated vegetables, then finish with the remaining cheese. Cap with the remaining bread slices, butter-side up.
Grill and Finish:
-
Place the sandwiches in the warm skillet. Cook for 3 to 4 minutes on the first side, pressing lightly with a wide spatula once during the cook time. You’re looking for deep golden edges and a crust that feels crisp when you nudge it. If the bread is browning too fast, move the skillet to a cooler part of the grill or lower the heat before you flip.
-
Flip each sandwich carefully and cook for another 3 to 4 minutes. If the bread is ready before the cheese is fully molten, cover the skillet with a lid or close the grill lid for 30 to 60 seconds. That short covered moment helps the center relax without turning the crust limp. Do not walk away with the lid closed; this goes from melted to mushy fast.
-
Transfer the sandwiches to a cutting board and let them rest for 2 minutes. Sprinkle with flaky salt, then cut each one diagonally so the cheese has a chance to drape out in those long, satisfying strands. Serve immediately, while the crust still crackles under the knife.
What to Put Next to It at a Backyard Spread
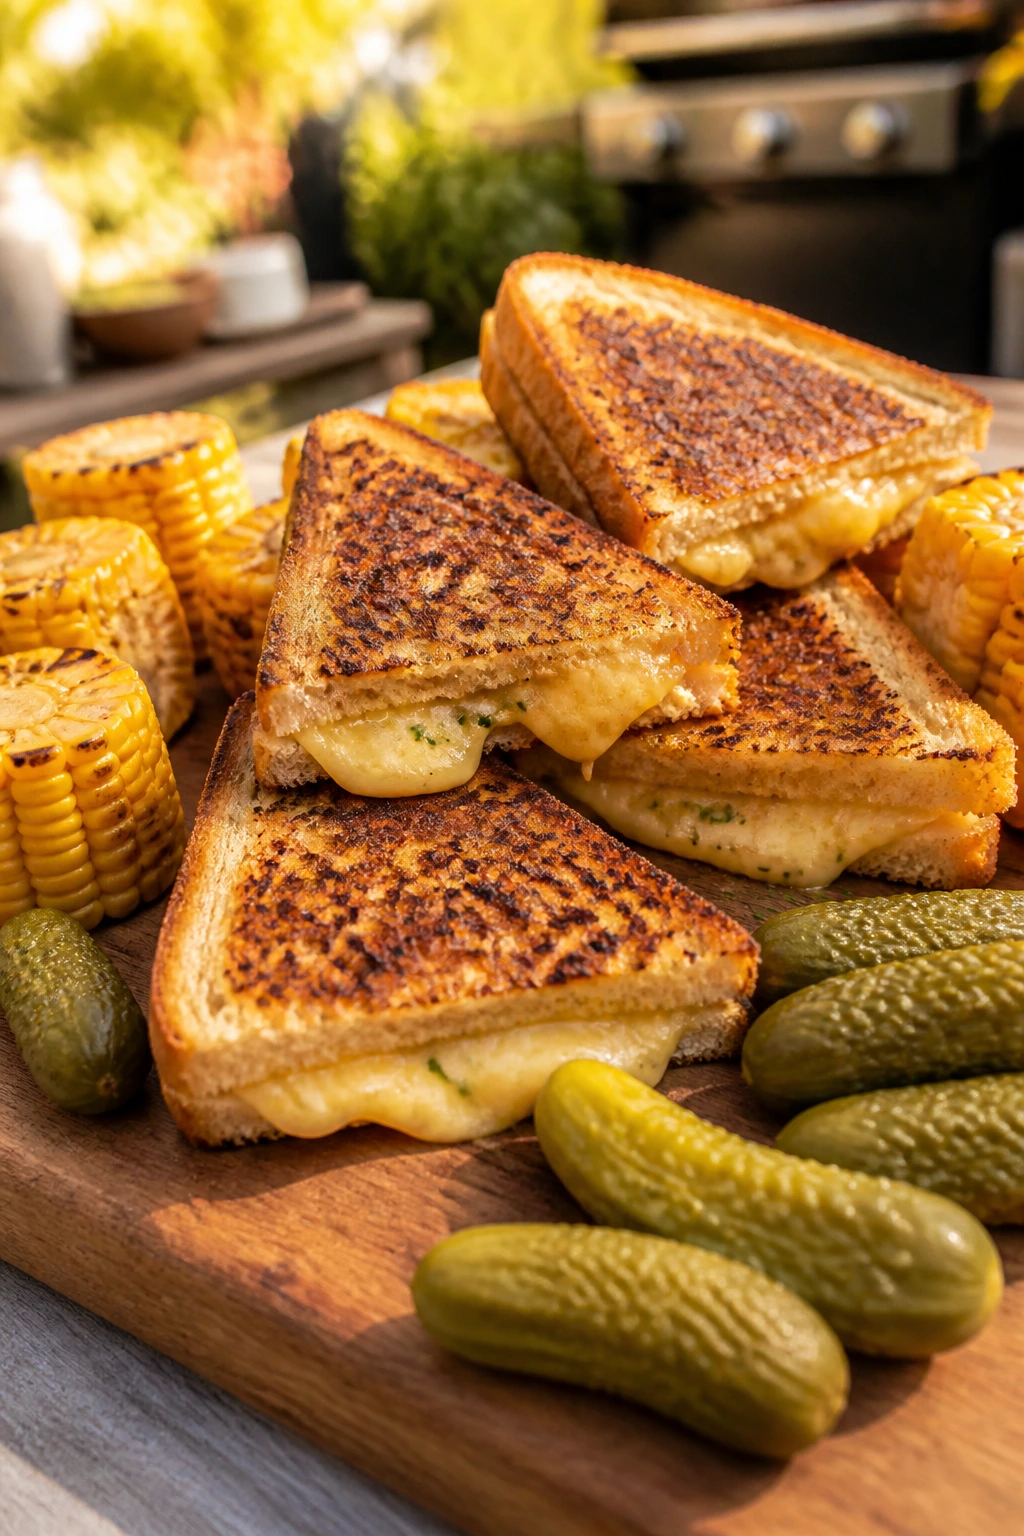
Presentation: Cut the sandwiches into triangles and stack them slightly offset on a big cutting board or platter. If you want them to look like they belong at an actual cookout instead of a hurried lunch, tuck a few dill pickles or grilled corn segments around the edges and keep the slices pointed outward.
Accompaniments: This sandwich likes sides with bite. A tart slaw, a bowl of kettle chips, grilled corn with chili-lime butter, or a simple arugula salad with lemon dressing all work because they keep the plate from feeling heavy. If you’re serving burgers too, cut the grilled cheese into quarters and let people take smaller pieces as a side.
Portions: One sandwich feeds one hungry adult as a main dish. If it’s sitting beside ribs, sausages, or burgers, half a sandwich is a good portion. For a crowd, count on 1 sandwich for every 2 people if it’s part of a larger cookout spread, but make a few extra. The plate always empties faster than you planned.
Beverage Pairing: A cold lager, a dry cider, or sparkling lemonade with a squeeze of lime makes sense here. The sandwich has enough richness that it likes something crisp and cold to reset your mouth between bites. I also like iced tea with mint, because mint and tomato are better friends than they get credit for.
Small Moves That Make the Sandwich Better
Flavor Enhancement: Stir a small pinch of smoked paprika into the cheese blend if your cookout already leans smoky. It doesn’t make the sandwich taste like paprika; it just gives the cheese a warmer edge that hangs around after the first bite.
Time-Saver: Shred the cheese and make the marinade earlier in the day, then keep both cold until you’re ready to cook. The vegetables can sit marinating for 15 minutes before the party starts, but they should still be drained right before assembly. That keeps the bread from softening while you’re chatting with people who “just want to watch the grill for a second.”
Pro Move: Toast the bread for 30 seconds on the grill before you assemble if your loaf is unusually soft. You’re not trying to brown it — you’re just drying the surface slightly so it stands up better to the filling and browns more evenly once it hits the skillet.
Cost-Saver: If Gruyère is too pricey, use Monterey Jack or provolone and keep the cheddar for flavor. Sharp cheddar is doing the loud work anyway; the milder cheese mostly helps with melt and body.
Make-It-Yours: If you want more herb flavor, add a few torn basil leaves right before assembly rather than mixing everything into the marinade. Fresh basil bruises easily in the vinegar, and a few intact leaves bring a fresher smell when you cut the sandwich open.
Where Grilled Cheese Usually Goes Wrong on the Grill
-
The filling is too wet.
Symptom: the first bite is delicious, then the bottom slice goes soft and the sandwich starts sliding.
Fix: drain the marinated vegetables in a strainer and build the sandwich with only the solids. That one step saves the crust. -
The heat is set too high.
Symptom: the bread turns dark brown or even black while the cheese inside still feels stubborn.
Fix: aim for medium-low heat, around 325 to 350°F, and use the lid only for a short melt at the end. A slower toast gives the cheese time to catch up. -
The cheese is piled in one thick lump.
Symptom: the middle never fully melts, and the outside oozes before the center softens.
Fix: spread the cheese in an even layer from edge to edge, and keep the marinated vegetables in the middle. Cheese on both sides of the filling helps the sandwich hold together. -
The bread is too soft or too thin.
Symptom: the slice tears when you flip it, or the center caves in under the filling.
Fix: use sturdy sourdough sliced about 1/2 inch thick. If the loaf is fresh and springy, let the slices sit out for a bit before building. -
You press the sandwich like you’re angry at it.
Symptom: cheese squeezes out the sides and the interior gets compressed into one flat, sad layer.
Fix: a light press is enough. You’re encouraging contact with the pan, not trying to squash the sandwich into submission. -
You slice it too soon.
Symptom: the cheese runs out in a hot stream and the filling escapes before the first plate reaches the table.
Fix: let the sandwiches rest for 2 minutes before cutting. That short pause gives the cheese a chance to settle.
Four Variations Worth Trying
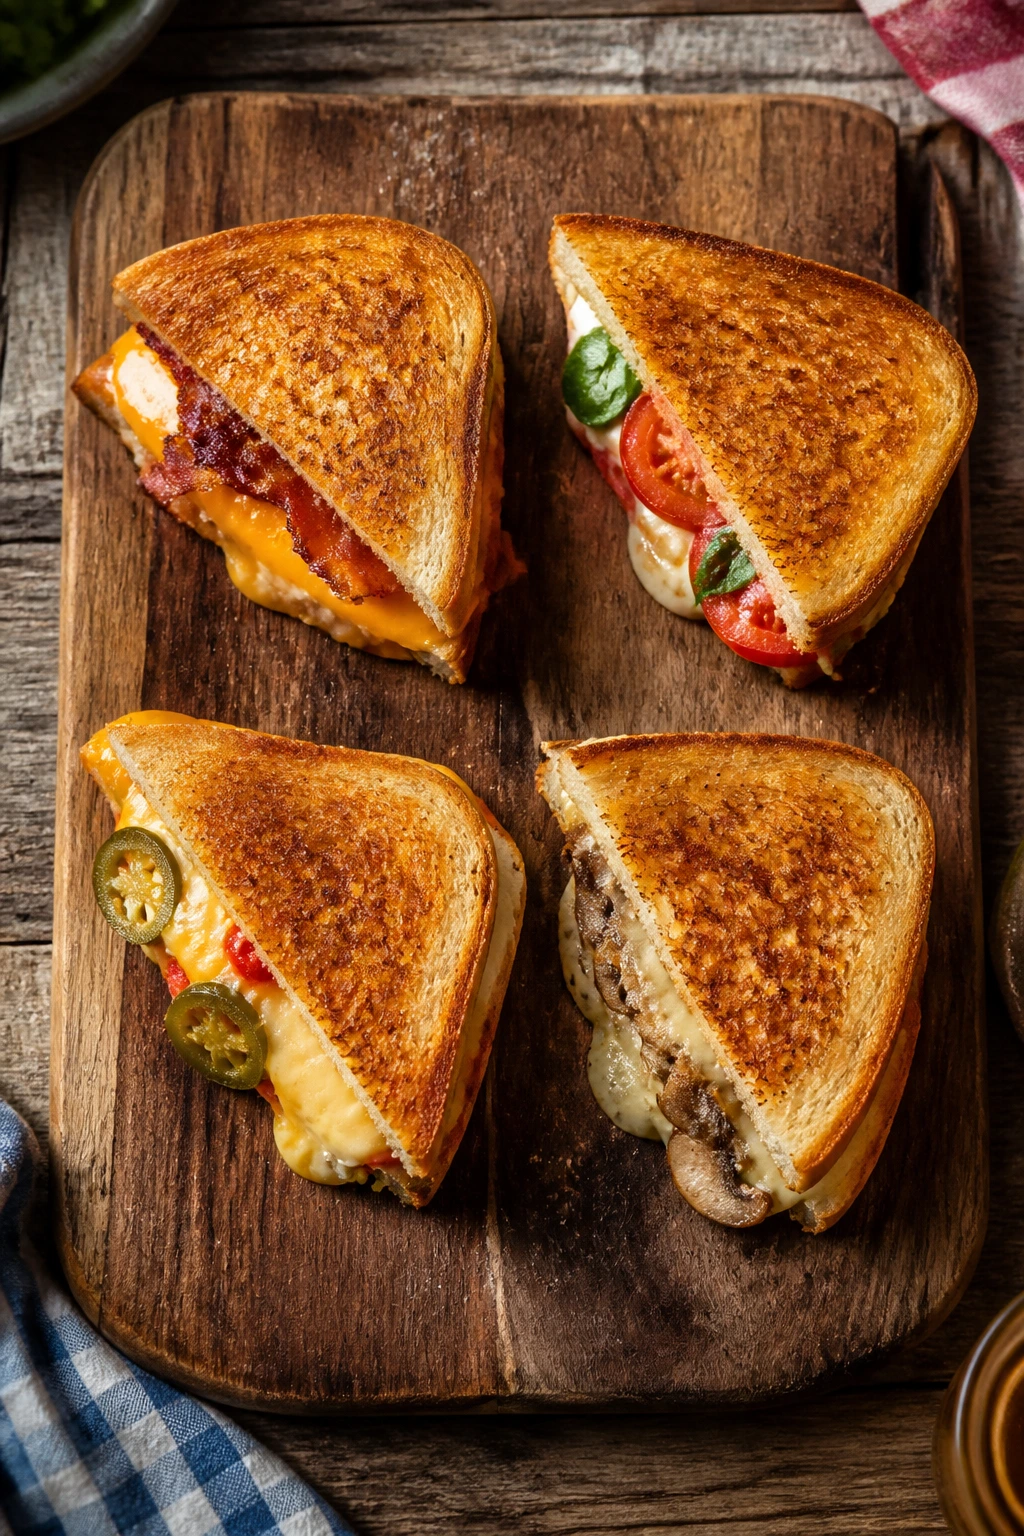
Smokehouse Bacon Melt: Add 4 slices of crisp bacon, broken in half, to the filling and replace 2 ounces of the Gruyère with smoked Gouda. The bacon gives the sandwich more salt and chew, and the smoked cheese makes it feel right at home beside a charcoal grill.
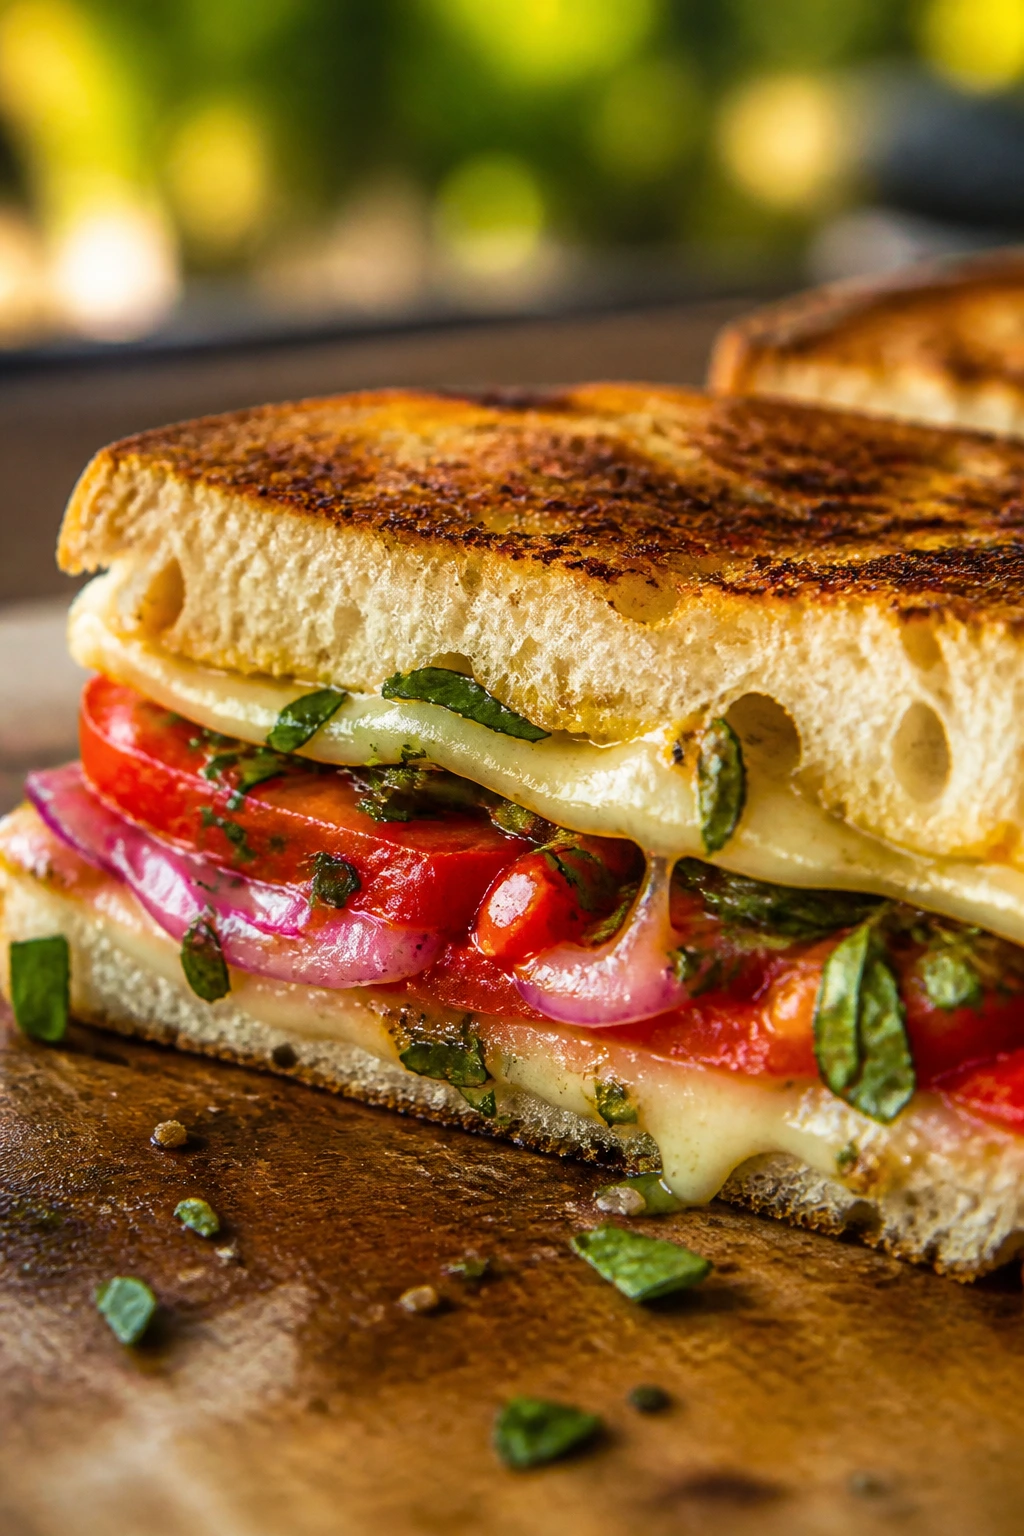
Caprese-Style Garden Melt: Swap the Gruyère for whole-milk mozzarella, trade the red wine vinegar for balsamic vinegar, and use fresh basil in bigger pieces. This version is softer and more classic, with a juicier center and a sweeter finish. It works well if you want the sandwich to lean more tomato-forward.
Spicy Pepper Jack Version: Replace the fontina with pepper jack and keep the pepperoncini in the marinade. You get a little heat in every bite without making the sandwich aggressive. Good move if your cookout already includes cooler sides like potato salad or cucumber salad.
Gluten-Free Skillet Melt: Use a sturdy gluten-free sandwich bread and cook a little more slowly so the crust can crisp before the center dries out. Gluten-free bread often browns fast but stays soft inside, so a lower flame and a slightly longer first side help a lot. The filling stays the same, which is nice; no need to reinvent the whole sandwich.
Make-Ahead, Storage, and Reheating Without the Sog
The marinated filling can be made up to 24 hours ahead and held in the fridge in a covered container. In fact, that’s probably the best way to do it if you’re cooking for a group, because the flavors settle in a little more and the onion loses its raw edge. Just drain it again before assembling.
The cheese can be shredded up to 3 days ahead and kept cold in a sealed container. If you’re doing prep for a cookout, this is the easiest thing to get out of the way early. Keep the bread wrapped at room temperature, not sealed in plastic, so the slices don’t turn damp and floppy.
Assembled but uncooked sandwiches are best grilled within 20 to 30 minutes. Longer than that, and the bread starts pulling moisture from the filling even if you’ve drained it well. If you need to pause, lay them on a tray, cover loosely with parchment, and keep them out of direct sun.
Cooked sandwiches keep for about 1 day in the refrigerator, wrapped in foil once they’ve cooled. They’ll still taste fine, but the crust loses its sharp snap. For reheating, use a dry skillet over medium-low heat for 2 to 3 minutes per side, or place the sandwich on a wire rack in a 375°F oven for 8 to 10 minutes. That gets the crust back in shape far better than a microwave.
Freezing is possible, but I only recommend it if you accept that the texture will soften. Wrap cooked, fully cooled sandwiches in parchment and then foil, and freeze for up to 1 month. Reheat from frozen in a 375°F oven until the center feels hot and the crust is crisp again, usually 12 to 15 minutes. The tomato filling does not freeze beautifully, so I would call this an emergency plan, not a habit.
Frequently Asked Questions
Can I make the marinated filling the day before?
Yes, and that’s the easiest part to prep ahead. Keep it in the fridge for up to 24 hours, then drain it again before assembly so the extra liquid doesn’t soak the bread.
What bread works if I don’t have sourdough?
Use a firm country loaf, a seeded batard, or any sandwich bread with a tight crumb and a good crust. Soft sandwich bread can work in a pinch, but it needs a gentler heat and a very light hand when you flip it.
Can I cook these directly on the grill grates instead of in a skillet?
You can, but I don’t think it’s the easiest route. A cast-iron skillet or griddle keeps the filling contained and gives the bread even contact, which matters once the cheese starts melting and the tomato juices get lively.
What cheese should I use if I can’t find Gruyère or fontina?
Monterey Jack, provolone, or low-moisture mozzarella are good backups. Keep the cheddar in the mix for flavor, because the mild cheeses do the melting while the cheddar gives the sandwich its sharp edge.
How do I keep the tomatoes from making the bread wet?
Drain the marinated vegetables in a strainer and build the sandwich with the solids, not the liquid. If your tomatoes are very juicy, press the slices gently with paper towels before marinating, which takes the edge off the moisture without flattening the flavor.
Can I make this without dairy?
Yes, but choose a vegan cheese that melts instead of one that only softens. Use olive oil on the outside of the bread, keep the filling very well drained, and cook a touch slower so the bread browns before the center dries out.
What if the bread is browning before the cheese melts?
Lower the heat and give the pan a short covered finish, 30 to 60 seconds at a time. The lid traps enough heat to loosen the cheese without forcing you to scorch the crust, which is usually the right trade.
One More Slice
There’s a reason this sandwich disappears fast at a cookout. It has the comfort people expect from grilled cheese, but the marinated filling keeps it from tasting flat or heavy, and the grill gives the whole thing a little edge that belongs outdoors. It feels casual, but it’s not lazy.
Make it once with good tomatoes, sturdy bread, and a real drain on the filling, and you’ll stop thinking of grilled cheese as a stovetop lunch. It becomes a backyard move, something you can slide onto a platter next to the corn and watch vanish one diagonal slice at a time.
Marinated Fancy Grilled Cheese for Backyard Cookouts — Recipe Card
Recipe Name: Marinated Fancy Grilled Cheese for Backyard Cookouts
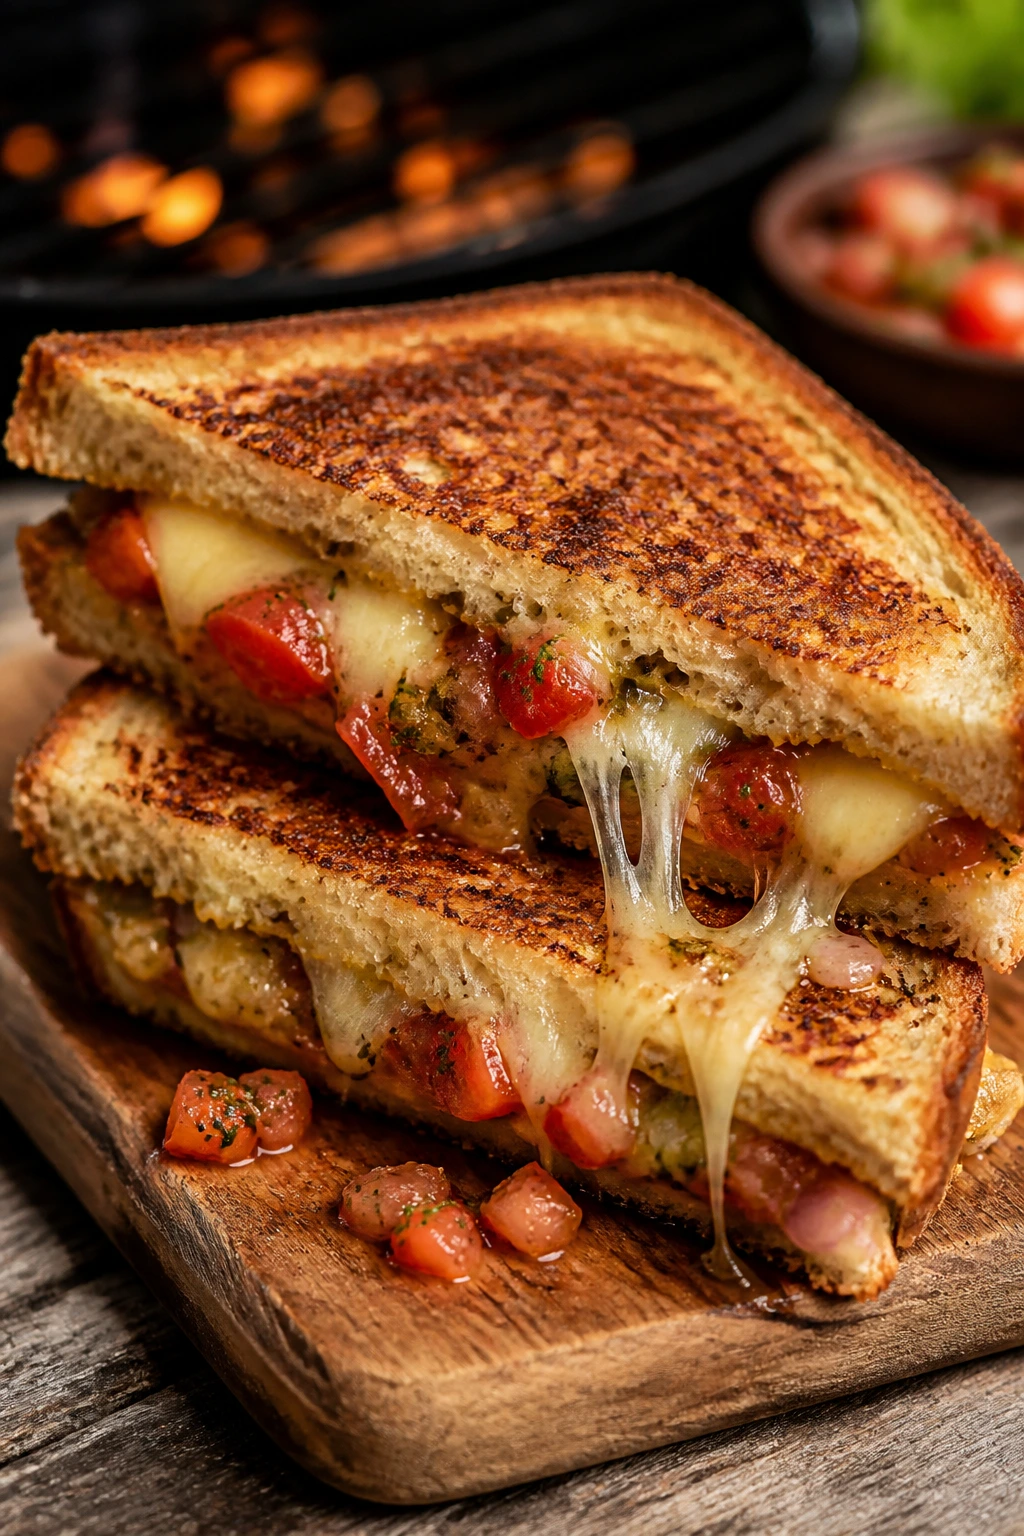
Description: Crisp sourdough, a tangy marinated tomato-and-onion filling, and a melty cheddar-fontina-Gruyère blend come together in a grill-side sandwich with real cookout energy. The filling stays bright, the crust stays crunchy, and the cheese pulls in long, glossy strands.
Prep Time: 20 minutes
Cook Time: 16 minutes
Total Time: 36 minutes, plus 10 to 15 minutes marinating
Course: Main Course, Lunch
Cuisine: American
Servings: 4 sandwiches
Calories: About 650 kcal per sandwich
Ingredients
For the Marinated Filling:
- 2 medium ripe tomatoes, cored and sliced into 1/4-inch rounds
- 1 small red onion, sliced into paper-thin half-moons
- 2 tablespoons extra-virgin olive oil
- 1 tablespoon red wine vinegar
- 1 teaspoon Dijon mustard
- 1 teaspoon honey
- 1 small garlic clove, finely grated
- 1 teaspoon kosher salt, divided
- 1/2 teaspoon freshly ground black pepper
- 2 tablespoons chopped fresh basil
- 1 tablespoon chopped fresh parsley
- 1 tablespoon chopped pepperoncini or pickled jalapeños, drained, optional
For the Sandwiches:
- 8 slices sourdough bread, about 1/2 inch thick
- 6 ounces sharp white cheddar, shredded
- 4 ounces fontina, shredded
- 2 ounces Gruyère, shredded
- 3 tablespoons mayonnaise
- 2 tablespoons unsalted butter, softened
- 1/2 teaspoon flaky salt, for finishing
Instructions
-
Whisk together the olive oil, red wine vinegar, Dijon mustard, honey, garlic, 1/2 teaspoon kosher salt, and black pepper in a medium bowl.
-
Add the tomatoes, red onion, basil, parsley, and optional pepperoncini or pickled jalapeños. Toss gently and let sit for 10 to 15 minutes.
-
Drain the filling in a fine-mesh strainer for 1 to 2 minutes.
-
Preheat a grill to medium-low, about 325 to 350°F, and warm a cast-iron skillet or griddle on the grill.
-
Mash the mayonnaise and softened butter together, then spread a thin layer on the outside of each bread slice.
-
Mix the cheddar, fontina, and Gruyère. Build 4 sandwiches with cheese, drained marinated vegetables, and more cheese in the middle.
-
Cook the sandwiches in the skillet for 3 to 4 minutes per side, pressing lightly once, until deep golden and crisp.
-
Cover briefly, if needed, to finish melting the cheese. Rest for 2 minutes, sprinkle with flaky salt, slice diagonally, and serve.
Notes: Drain the filling well or the bread will soften. A short covered finish helps the cheese melt without burning the crust. Freshly shredded cheese melts more smoothly than bagged shreds.