
A good summer picnic drink has to survive a warm car ride, a sloshing cooler, and at least one person who opens the lid before it’s fully chilled. That means it needs more than sweetness and ice. It needs real fruit flavor, enough acid to stay bright after dilution, and a format that travels well without turning sad and watery by the time the blanket is spread out.
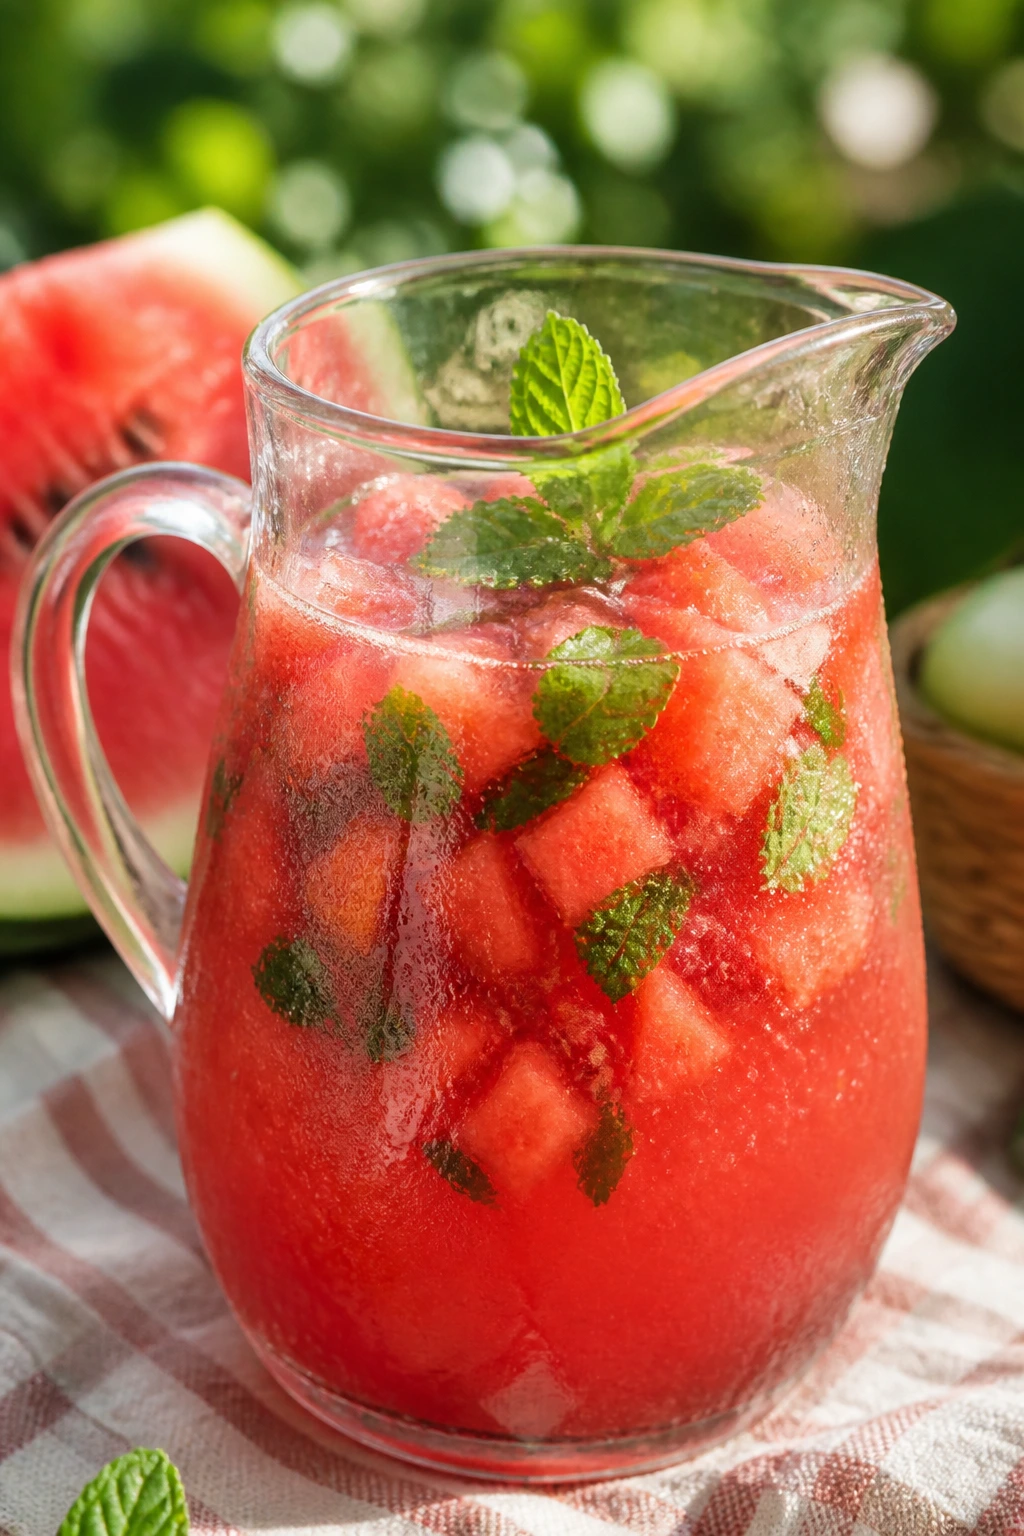
I’ve always had a soft spot for drinks that taste like they were made outdoors, not just served there. A pitcher of strawberry basil lemonade sweating in the shade. Watermelon agua fresca so cold it fogs the glass. Tea with peach syrup and a little fizz at the end. Those are the ones I reach for because they keep their shape, flavor, and mood even after they sit for a while.
The trick is knowing which drinks belong in a picnic basket and which ones fall apart the second the lid comes off. That’s where these summer picnic drinks earn their place.
Why You’ll Love This Collection

- Built for real heat: These drinks are designed to stay lively after ice starts melting, which matters more than fancy garnish when you’re outside on a blanket.
- Easy to batch: Most of them make one large pitcher or a small dispenser, so you can mix once and pour all afternoon.
- Fruit does the heavy lifting: Strawberries, peaches, watermelon, citrus, and berries bring natural color and flavor without requiring complicated prep.
- Herbs keep things sharp: Basil, mint, rosemary, sage, and thyme turn simple juice into something that tastes finished, not flat.
- Flexible for kids and adults: Every drink here works as written, but several can be adjusted with more sparkle, less sugar, or a stronger tea base.
- Picnic-proof textures: Some are clear and crisp, some are silky and blended, and a few become slushes that feel almost like dessert in a cup.
Why Picnic Drinks Need More Than Ice

Picnic drinks fail for two boring reasons: they get diluted too fast, and they start tasting dull once the temperature rises. Ice is useful, but it is not a flavor strategy. If a drink only tastes good when it’s ice-cold and untouched, it usually falls apart halfway through the first round of refills.
The better approach is to make the drink slightly stronger than you think you need. That means a punchy citrus base, a fruit syrup, or a brewed tea that has enough backbone to handle melting ice. It also means using a little salt in fruit drinks. Not enough to taste salty. Just enough to wake up watermelon, melon, berries, and citrus so they don’t read as one-note sugar water.
Carbonation needs special handling. Club soda, sparkling water, ginger beer, and lemon-lime soda should go in at the end, right before serving, or the bubbles vanish and you’re left with flat fruit juice wearing a costume. The same goes for mint and basil. Bruise them lightly, don’t shred them, or the drink turns grassy and bitter.
I also like picnic drinks that can be split into two parts: a base you make ahead, and a bubbly finish you add on site. That keeps the flavor sharp, the texture clean, and the cooler from becoming a swamp of half-melted ice and forgotten lemon slices.
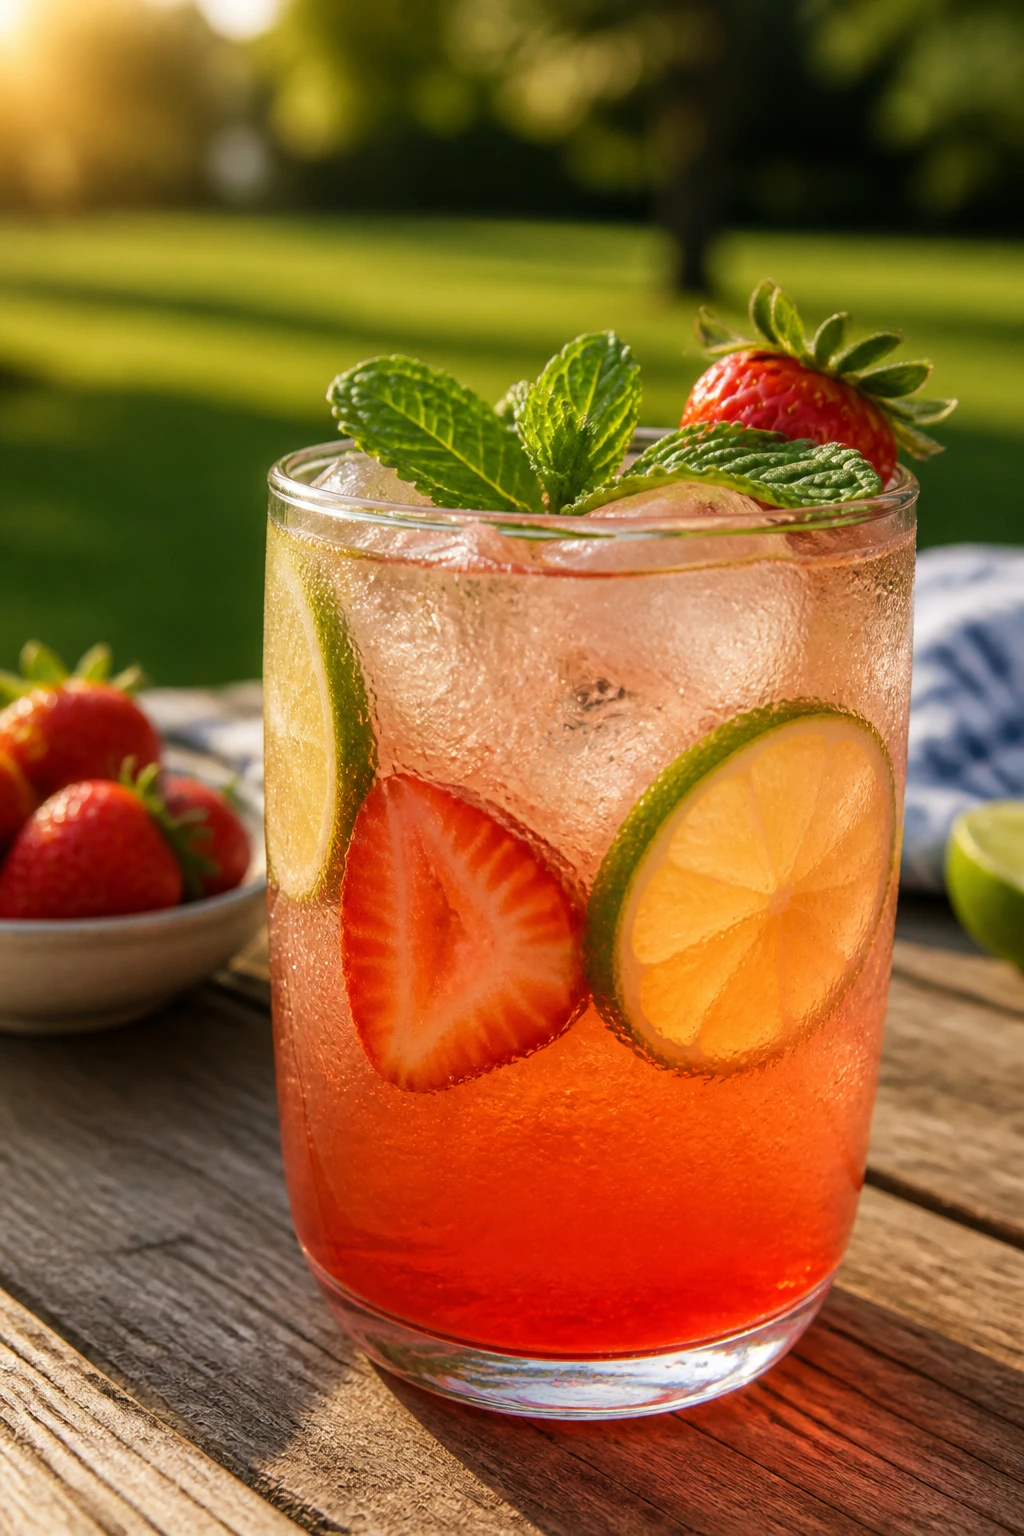
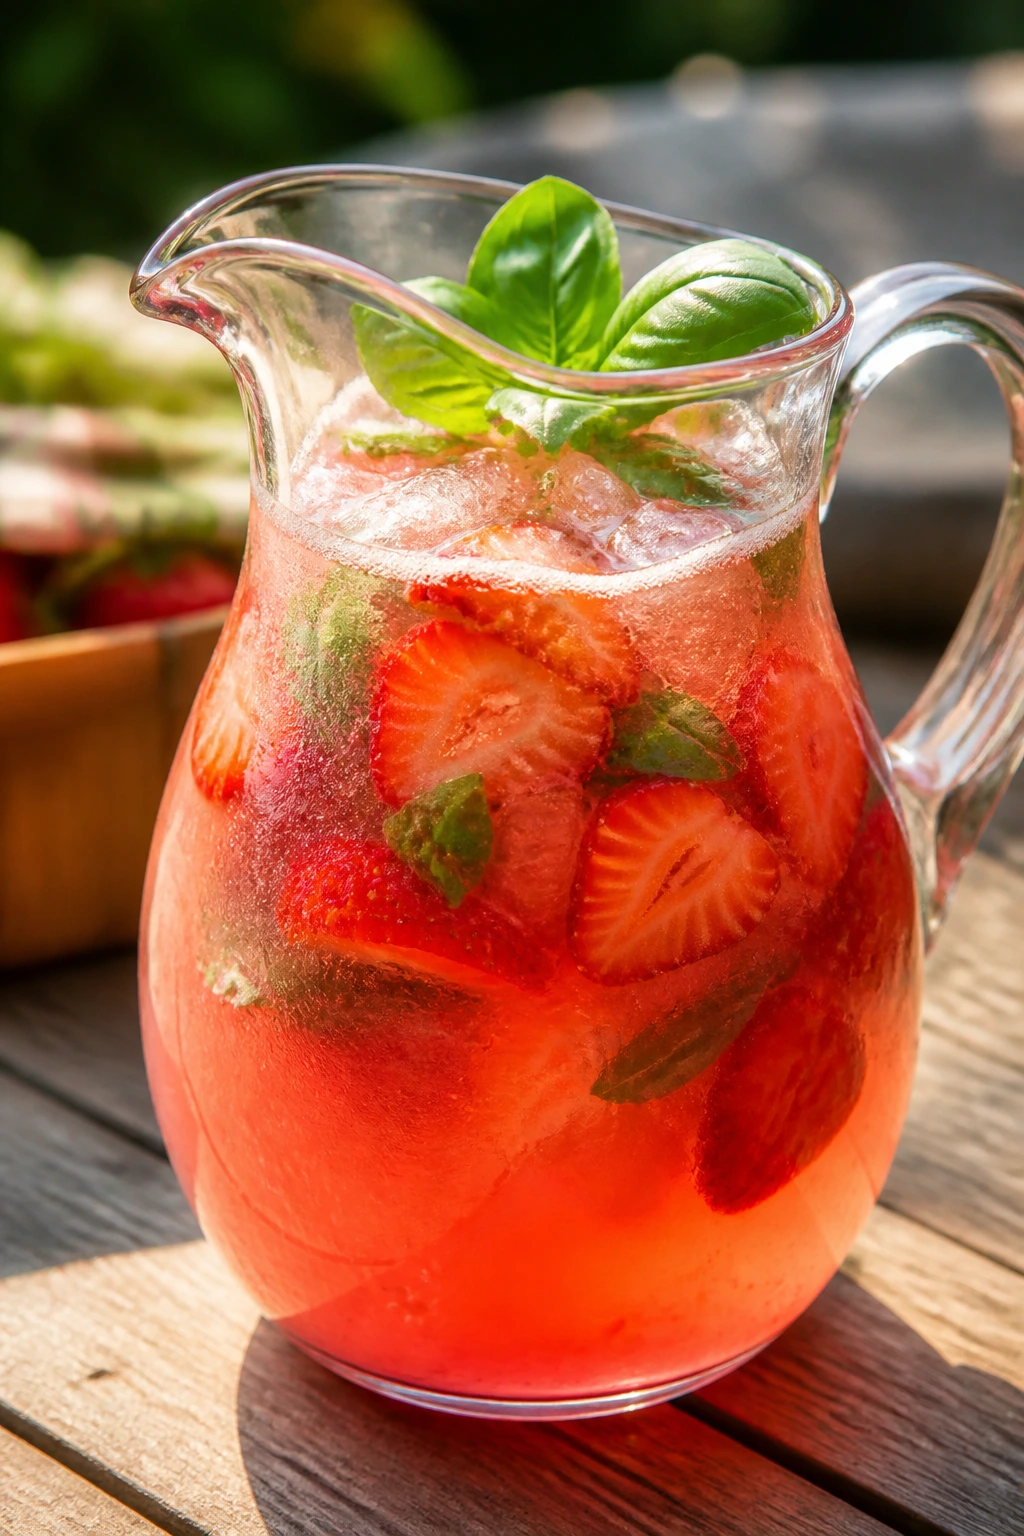
1. Strawberry Basil Lemonade
Intro:
This is the kind of lemonade that makes a plastic cup feel a little more deliberate. The strawberries give it a soft pink color and a round, almost jammy edge, while basil keeps it from tasting like plain syrup with lemon in it. I like this one best after it’s chilled for at least 30 minutes; the fruit settles, the basil gives off a clean herbal note, and the whole pitcher starts smelling like a backyard garden with a cutting board nearby.
Why It Works:
Strawberries and lemon are already a good pair, but basil gives the drink a little lift that plain lemonade misses. The simple syrup dissolves cleanly, which matters because cold lemonade won’t easily dissolve granulated sugar on its own. A small pinch of salt sharpens the fruit and keeps the drink from tasting thin once the ice melts.
Key Ingredients:
- 1 cup granulated sugar — for a simple syrup that blends smoothly into cold liquid.
- 1 cup water — to make the syrup without scorching the sugar.
- 1 cup fresh lemon juice, from about 6 lemons — bottled juice tastes flat here.
- 4 cups cold water — this stretches the lemon base into a full pitcher.
- 1½ cups strawberries, hulled and sliced — choose ripe berries with deep color.
- 8 basil leaves — torn lightly so they don’t go bitter.
- 1/4 teaspoon fine sea salt — just enough to sharpen the fruit.
- Ice and lemon slices — for serving and a clean finish.
Quick Steps:
- Make the syrup: Combine the sugar and 1 cup water in a small saucepan over medium heat. Stir until the sugar dissolves, then simmer for 1 minute and remove from the heat.
- Prep the fruit: Add the sliced strawberries and torn basil to a large pitcher. Muddle gently, just enough to bruise the berries and release the basil’s oils. Don’t mash it into a paste.
- Build the lemonade: Pour in the lemon juice, cooled syrup, cold water, and salt. Stir well until the mixture looks evenly pink and smells bright, not sugary.
- Chill: Refrigerate for at least 30 minutes, or until the pitcher feels cold to the touch.
- Serve: Fill glasses with ice, pour over the lemonade, and garnish with lemon slices and a basil leaf if you want the extra little flourish.
Equipment for This Recipe:
- Large pitcher
- Small saucepan
- Wooden spoon or long spoon
- Muddler or the back of a spoon
- Citrus juicer
How to Serve This Dish:
Pour it into mason jars or short glasses so the strawberry pieces stay visible. It looks best with a lemon wheel perched on the rim and one basil leaf pressed against the side of the glass. Serve it with picnic sandwiches, salted chips, or a bowl of cut fruit.
Pro Tips for This Recipe:
- Chill the syrup before mixing if you can; warm syrup dulls the flavor until the whole drink is cold again.
- If your strawberries are pale or weak, add 2 teaspoons extra lemon juice instead of more sugar.
- For a smoother drink, strain out the berry pieces after muddling. I usually keep them in because they look good and taste better after sitting.
Variations on This Dish:
- Sparkling Strawberry Basil: Replace 2 cups of the cold water with chilled club soda at serving time for a brighter, fizzier finish.
- Honey Basil Lemonade: Swap the sugar for 3/4 cup honey and warm it with the water just until it dissolves.
- Frozen Strawberry Slush: Blend the finished lemonade with 2 cups ice for a spoonable version that lands somewhere between drink and dessert.
Common Mistakes to Avoid with This Dish:
- Over-muddling the basil: If the leaves are shredded, the drink turns green and sharp. Bruise them lightly and stop there.
- Adding ice too early: Ice in the pitcher waters the lemonade down before it reaches the picnic. Keep it separate until serving.
- Using underripe berries: Pale strawberries make the drink taste flat. If your berries are bland, lean harder on the lemon and salt.
2. Watermelon Mint Agua Fresca
Intro:
Watermelon agua fresca has a clean, almost slippery texture when it’s done right. It should taste like the cold center of a melon on a hot day, not like sugary pink water. Mint keeps the flavor crisp, and a tiny bit of salt makes the watermelon taste more like itself.
Why It Works:
Watermelon is full of juice, which means you can build a drink with almost no cooking at all. That makes it a picnic favorite because the flavor stays fresh instead of syrupy. A squeeze of lime and a pinch of salt are doing real work here; without them, the drink can taste sleepy after a few minutes in the sun.
Key Ingredients:
- 8 cups seedless watermelon cubes — cold watermelon blends better and tastes brighter.
- 1 cup cold water — helps the blender move without turning the drink pulpy.
- 2 tablespoons fresh lime juice — gives the melon structure.
- 1 to 2 tablespoons honey — adjust depending on the sweetness of the fruit.
- 10 mint leaves — use whole leaves for a cleaner flavor.
- 1/4 teaspoon fine sea salt — wakes up the melon.
- Ice and mint sprigs — for serving.
- Optional lime wedges — useful if the melon needs more punch.
Quick Steps:
- Blend the base: Add half the watermelon, the cold water, mint leaves, honey, lime juice, and salt to a blender. Blend until smooth.
- Add the rest: Add the remaining watermelon and blend again until the mixture looks silky.
- Strain if needed: Pour through a fine-mesh strainer into a pitcher if you want a smoother drink. Skip this if you like a little body.
- Taste and adjust: Add more lime for brightness or a touch more honey if the melon is under-ripe.
- Chill and serve: Refrigerate until cold, then pour over ice and garnish with mint.
Equipment for This Recipe:
- Blender
- Fine-mesh strainer, optional but useful
- Large pitcher
- Paring knife and cutting board
How to Serve This Dish:
Serve it in tall glasses over a full handful of ice with a mint sprig tucked into the top. It’s especially good with salty foods like chips, roasted nuts, or grilled corn because the drink is light and refreshing rather than heavy. A few small watermelon cubes on a skewer make a simple garnish.
Pro Tips for This Recipe:
- Chill the watermelon before blending if you can. It gives the drink a colder, cleaner finish without needing as much ice.
- If the melon tastes weak, add another squeeze of lime and a tiny pinch more salt before adding more honey.
- I like to strain this one for picnics because it pours more neatly from a pitcher and doesn’t separate as quickly.
Variations on This Dish:
- Sparkling Watermelon Cooler: Replace 1 cup of the blended watermelon mixture with chilled club soda right before serving.
- Cucumber Watermelon Mint: Blend in 1/2 peeled cucumber for a greener, more spa-like flavor.
- Frozen Melon Slush: Add 2 cups ice to the blender for a thicker, frosty version that holds up well in hot weather.
Common Mistakes to Avoid with This Dish:
- Using overripe watermelon: If it tastes mushy or smells fermented, the drink will follow that same path.
- Skipping salt: Watermelon without a little salt can taste flat, especially after chilling.
- Blending it too long: Too much time in the blender warms the mixture and makes it foamy. Stop once it’s smooth.
3. Peach Iced Tea Sparkler
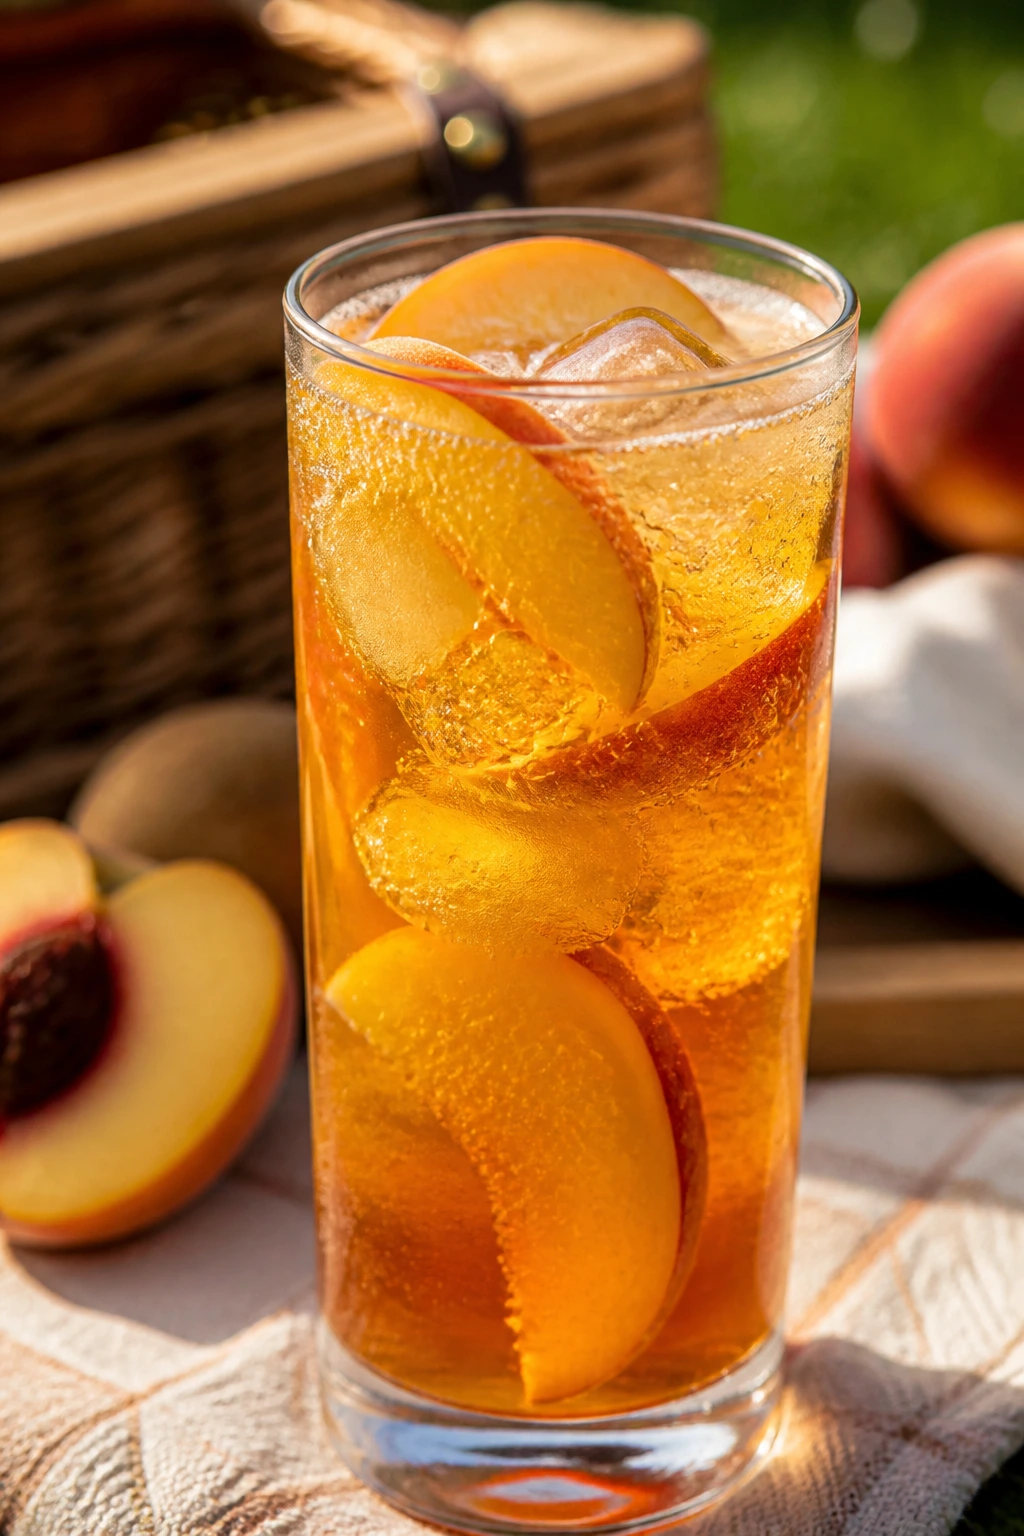
Intro:
This is iced tea with a little theater. The tea brings the backbone, the peach syrup gives it a round summer sweetness, and the sparkling water keeps the whole thing from feeling heavy. I like the way the bubbles lift the peach aroma right out of the glass.
Why It Works:
Black tea and peach are a classic pairing because the tea’s tannins keep the fruit from tipping into candy territory. A cooked peach syrup gives better flavor than just tossing peach slices into tea, which usually looks prettier than it tastes. Adding the sparkle at the end keeps the drink lively instead of flat.
Key Ingredients:
- 4 black tea bags — strong tea stands up to peach syrup.
- 4 cups boiling water — for brewing the tea.
- 2 ripe peaches, sliced — use freestone peaches if possible.
- 1/3 cup granulated sugar — balances the fruit.
- 1 cup water — for the peach syrup.
- 2 cups chilled sparkling water — added at the end.
- 2 teaspoons fresh lemon juice — brightens the tea.
- Ice and peach slices — for serving.
Quick Steps:
- Brew the tea: Steep the tea bags in 4 cups boiling water for 5 minutes. Remove the bags and let the tea cool.
- Make the peach syrup: Combine the peaches, sugar, and 1 cup water in a small saucepan over medium heat. Simmer for 8 to 10 minutes, until the peaches are soft and the liquid looks slightly thick.
- Strain or mash: Strain the syrup for a smooth finish, or mash the peaches lightly if you want a more rustic drink.
- Mix the base: In a large pitcher, stir together the cooled tea, peach syrup, and lemon juice.
- Finish with bubbles: Right before serving, add the sparkling water and plenty of ice. Do not add the bubbles early.
Equipment for This Recipe:
- Small saucepan
- Pitcher
- Fine-mesh strainer, optional
- Kettle or heatproof measuring cup
How to Serve This Dish:
Serve it in clear cups so the peach color shows through. A thin peach slice on the rim makes it look finished without extra work. It’s a strong match for grilled chicken, potato salad, or anything smoky and salty that benefits from a cold, fruity drink beside it.
Pro Tips for This Recipe:
- Brew the tea a little stronger than you’d drink it on its own; the ice will mellow it.
- Use ripe peaches, not hard ones. Hard peaches smell nice and taste like disappointment.
- If you want a cleaner pour, strain the syrup and chill it before mixing the tea.
Variations on This Dish:
- White Peach Sparkler: Swap in white peaches and reduce the sugar slightly if the fruit is very sweet.
- Ginger Peach Tea: Add 4 thin slices of fresh ginger to the syrup while it simmers.
- Decaf Picnic Tea: Use decaffeinated black tea and keep the same peach syrup for an evening picnic option.
Common Mistakes to Avoid with This Dish:
- Oversteeping the tea: Five minutes is enough. Much longer and the drink turns bitter.
- Mixing in sparkling water too soon: The bubbles disappear, and the drink loses its lift.
- Using peach pieces only: Slices floating in tea look nice but don’t flavor the drink much unless you cook them first.
4. Cucumber Lime Fizz
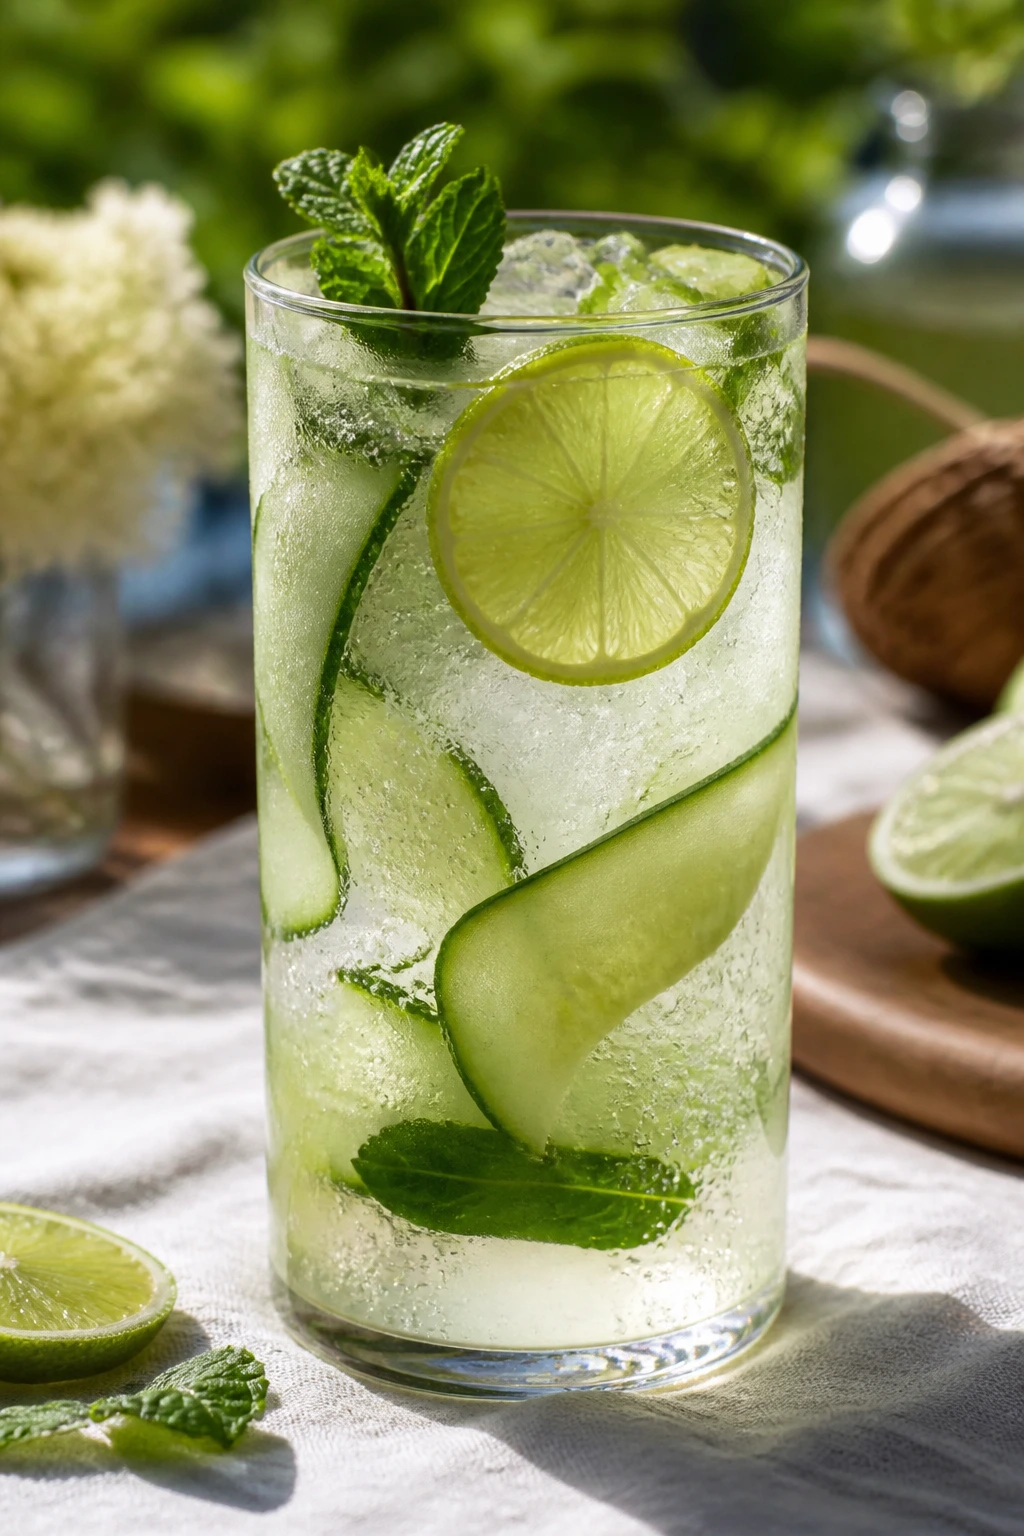
Intro:
Cucumber lime fizz is the drink I reach for when the picnic menu is heavy. It tastes cool and light, but not bland. The cucumber gives a clean, almost green snap, and the lime keeps the drink from drifting into spa-water territory.
Why It Works:
Cucumber is mild enough to blend into the background without disappearing, which lets the lime take center stage. Honey smooths out the citrus, and sparkling water gives the drink its crisp edge. This is one of those drinks that seems simple until you taste how much the salt and acid matter.
Key Ingredients:
- 1 large English cucumber, peeled in stripes if desired — gives a cleaner color and texture.
- 3 tablespoons fresh lime juice — keeps the drink bright.
- 2 tablespoons honey — enough to soften the citrus.
- 1 cup cold water — helps the cucumber blend.
- 3 cups chilled sparkling water — adds the fizz.
- 8 mint leaves — optional, but they fit the cucumber well.
- 1/4 teaspoon fine sea salt — sharpens the flavor.
- Ice and lime wheels — for serving.
Quick Steps:
- Blend the cucumber: Roughly chop the cucumber and add it to a blender with the cold water, lime juice, honey, mint, and salt. Blend until smooth.
- Strain: Pour the mixture through a fine-mesh strainer into a pitcher, pressing gently to extract the liquid. Don’t force the pulp through.
- Taste: Add another teaspoon of lime juice if the drink feels sleepy, or a little more honey if the cucumber is very sharp.
- Add fizz: Stir in the chilled sparkling water right before serving.
- Serve cold: Pour over ice and garnish with a thin cucumber ribbon or lime wheel.
Equipment for This Recipe:
- Blender
- Fine-mesh strainer
- Pitcher
- Vegetable peeler, if you want decorative cucumber strips
How to Serve This Dish:
This looks best in tall clear glasses because the pale green color is half the appeal. A cucumber ribbon twisted around a straw gives it a polished look without much effort. I like serving it next to salty snacks, sharp cheese, or picnic wraps with herbs in them.
Pro Tips for This Recipe:
- If your cucumber tastes watery, peel it fully and remove the seeds before blending.
- Chilled sparkling water matters here. Warm bubbles flatten fast.
- Mint is optional, but if you use it, keep the quantity low so the drink stays cucumber-forward.
Variations on This Dish:
- Basil Cucumber Fizz: Swap the mint for 6 basil leaves if you want a slightly sweeter herbal note.
- Spicy Lime Cucumber: Add 1 thin slice of jalapeño to the blender for a little heat.
- Salted Cucumber Cooler: Serve with a very light salted rim if you’re pairing it with rich picnic food.
Common Mistakes to Avoid with This Dish:
- Using too much mint: Cucumber is delicate. Mint can take over fast.
- Skipping the strain: Unstrained cucumber pulp makes the drink cloudy and heavy.
- Adding the sparkling water too early: The fizz disappears before the first cup is poured.
5. Blueberry Ginger Limeade

Intro:
Blueberry limeade has a deeper flavor than most pink summer drinks. The berries bring color and body, the ginger adds a little bite, and the lime keeps it from becoming syrupy. It tastes like lemonade’s sharper, more interesting cousin.
Why It Works:
Blueberries need heat or heavy blending to show up in a drink, which is why a quick simmer helps so much. Ginger keeps the syrup from tasting one-dimensional, and lime wakes up the fruit once it’s chilled. This one gets better after it sits in the fridge for a bit, because the ginger has time to spread through the whole pitcher.
Key Ingredients:
- 2 cups blueberries — fresh or frozen both work.
- 1 cup water — for the syrup base.
- 1/3 cup granulated sugar — balances the berries and ginger.
- 1-inch piece fresh ginger, thinly sliced — use peeled ginger for a cleaner finish.
- 3/4 cup fresh lime juice — gives the limeade its structure.
- 3 cups cold water — to stretch the syrup into a drink.
- 1/4 teaspoon fine sea salt — makes the blueberry flavor pop.
- Ice and lime slices — for serving.
Quick Steps:
- Cook the syrup: Combine the blueberries, water, sugar, and ginger in a small saucepan over medium heat. Simmer for 8 minutes, stirring and pressing the berries lightly with a spoon.
- Strain: Pour the mixture through a fine-mesh strainer into a pitcher, pressing to get out the juice. Discard the solids.
- Build the drink: Stir in the lime juice, cold water, and salt. Mix until the color is even and deep.
- Chill: Refrigerate until cold, at least 30 minutes if you have the time.
- Serve: Pour over ice and garnish with lime slices or a few whole blueberries.
Equipment for This Recipe:
- Small saucepan
- Fine-mesh strainer
- Pitcher
- Spoon for pressing the berries
How to Serve This Dish:
Serve it in a clear pitcher if you have one; the color is a big part of the appeal. A few blueberries floating in each glass look nice, but don’t overload them or the drink turns into a snack. It pairs well with salty crackers, cold chicken salad, or anything with herbs.
Pro Tips for This Recipe:
- Frozen blueberries give strong color and are often easier to cook down than soft fresh berries.
- If the ginger feels too sharp, strain the syrup a little longer and add an extra splash of water.
- Taste after chilling. Blueberry drinks often need one more pinch of salt once they’re cold.
Variations on This Dish:
- Sparkling Blueberry Limeade: Replace 1 cup of the cold water with chilled club soda at the last minute.
- Blackberry Ginger Limeade: Swap the blueberries for blackberries if you want a more tart flavor.
- Honey Ginger Limeade: Use 1/4 cup honey instead of sugar for a softer finish.
Common Mistakes to Avoid with This Dish:
- Not straining the berry skins: The drink can end up gritty if you leave them in.
- Using too much ginger: A heavy hand turns the drink spicy instead of fresh.
- Adding lime to hot syrup and serving it warm: The lime tastes sharper and rougher unless the base has cooled.
6. Pineapple Mint Punch
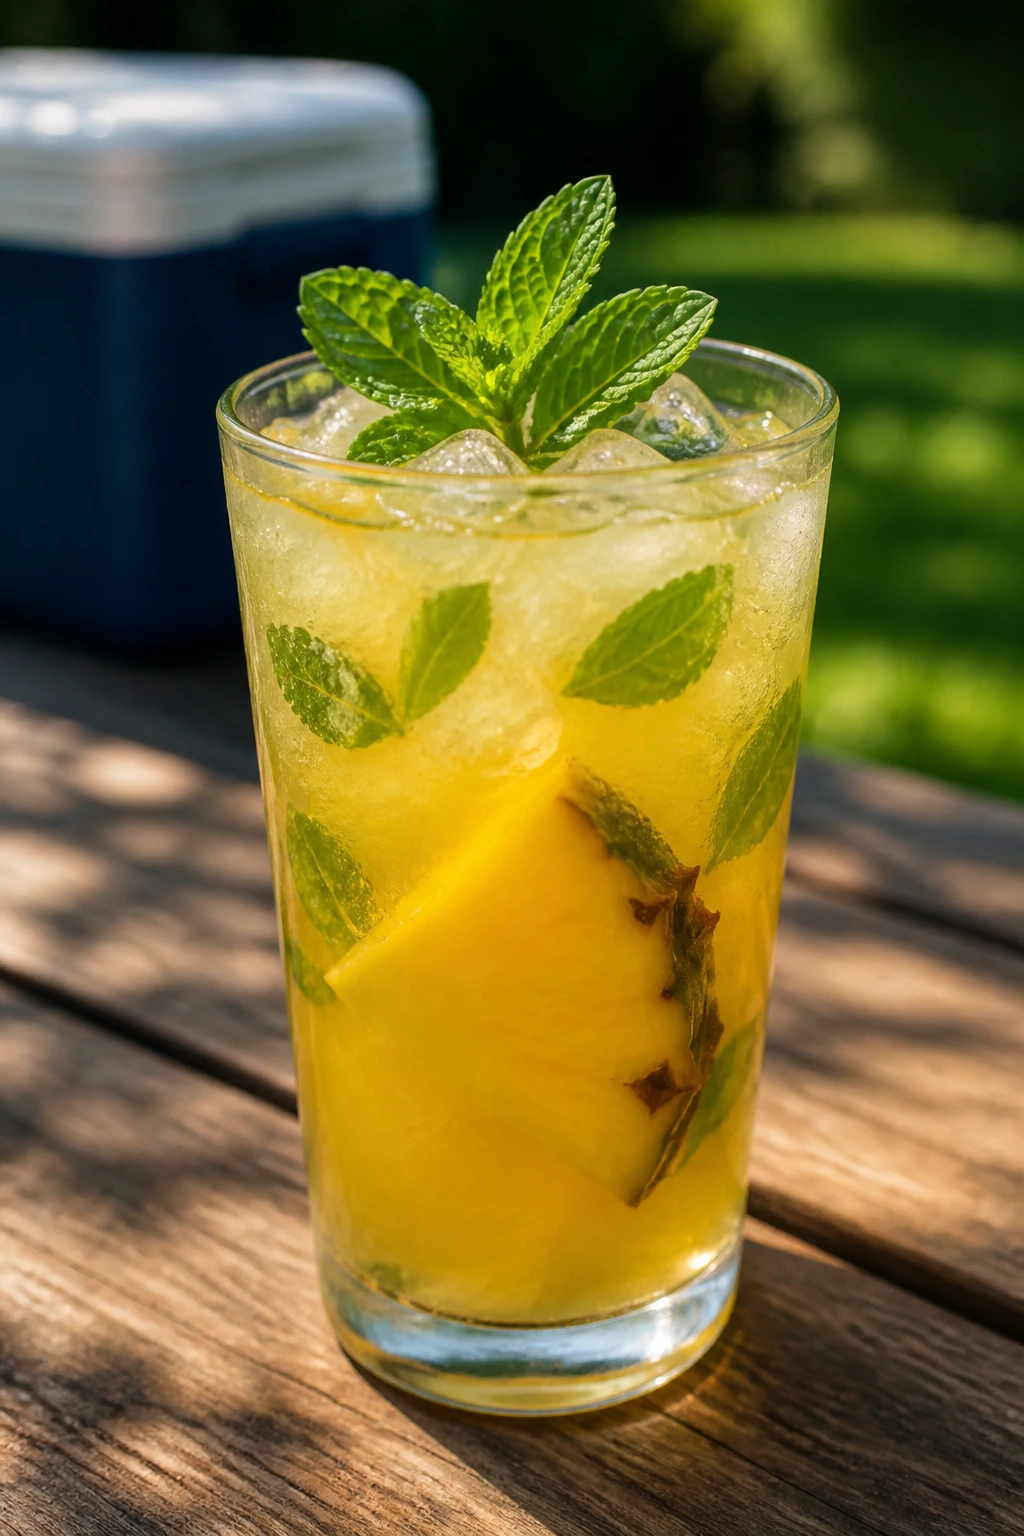
Intro:
Pineapple punch should taste bright first and sweet second. If the pineapple is doing its job, you get a sharp tropical edge, then mint follows behind it and keeps the drink from feeling heavy. This is one of the few drinks that can sit in a cooler for a while and still feel festive when it’s poured.
Why It Works:
Pineapple juice has enough acid to handle other sweet ingredients without going limp. Mint brings a cooling note that feels built for hot weather, and ginger beer gives the punch a little snap. Keep the bubbly ingredients separate until serving, and the whole thing stays fresher.
Key Ingredients:
- 3 cups pineapple juice — choose unsweetened if you can find it.
- 1 cup orange juice — rounds out the pineapple.
- 1 cup cold water — keeps the punch from getting too thick.
- 1/4 cup fresh lime juice — sharpens the tropical fruit.
- 1/4 cup fresh mint leaves — lightly bruised, not shredded.
- 1 cup chilled ginger beer — for spice and bubbles.
- 1 cup chilled club soda — keeps the ginger beer from feeling too sweet.
- Pineapple wedges and ice — for serving.
Quick Steps:
- Bruise the mint: Gently press the mint leaves with the back of a spoon in the bottom of the pitcher. You want fragrance, not torn leaves.
- Mix the base: Add the pineapple juice, orange juice, cold water, and lime juice. Stir well.
- Chill: Refrigerate the base until cold.
- Finish with fizz: Just before serving, add the ginger beer and club soda.
- Serve: Pour over ice and garnish with pineapple wedges or a mint sprig.
Equipment for This Recipe:
- Large pitcher or drink dispenser
- Wooden spoon
- Paring knife
- Measuring cup
How to Serve This Dish:
This drink belongs in a wide-mouth pitcher or dispenser where people can see the pineapple and mint. A pineapple wedge on the rim makes it feel special without getting fussy. It works nicely with grilled skewers, salty nuts, or anything that could use a cold, fruity counterpoint.
Pro Tips for This Recipe:
- Use very cold ginger beer and club soda so the punch doesn’t need much ice.
- If your pineapple juice is sweetened, cut the orange juice by 1/2 cup.
- Mint loses its clean flavor if you tear it to bits. Keep the leaves whole or lightly bruised.
Variations on This Dish:
- Coconut Pineapple Punch: Replace 1 cup of the cold water with coconut water for a softer, rounder flavor.
- Green Tea Pineapple Punch: Swap the water for chilled green tea if you want a little tannin and less sweetness.
- Spicy Pineapple Punch: Add 2 thin slices of fresh ginger to the base and let it sit in the fridge for 20 minutes.
Common Mistakes to Avoid with This Dish:
- Adding the ginger beer early: The punch goes flat before anyone gets a cup.
- Using too much mint: Overloaded mint can taste like toothpaste.
- Serving it warm: Pineapple reads cloying unless it’s properly cold.
7. Hibiscus Orange Cooler
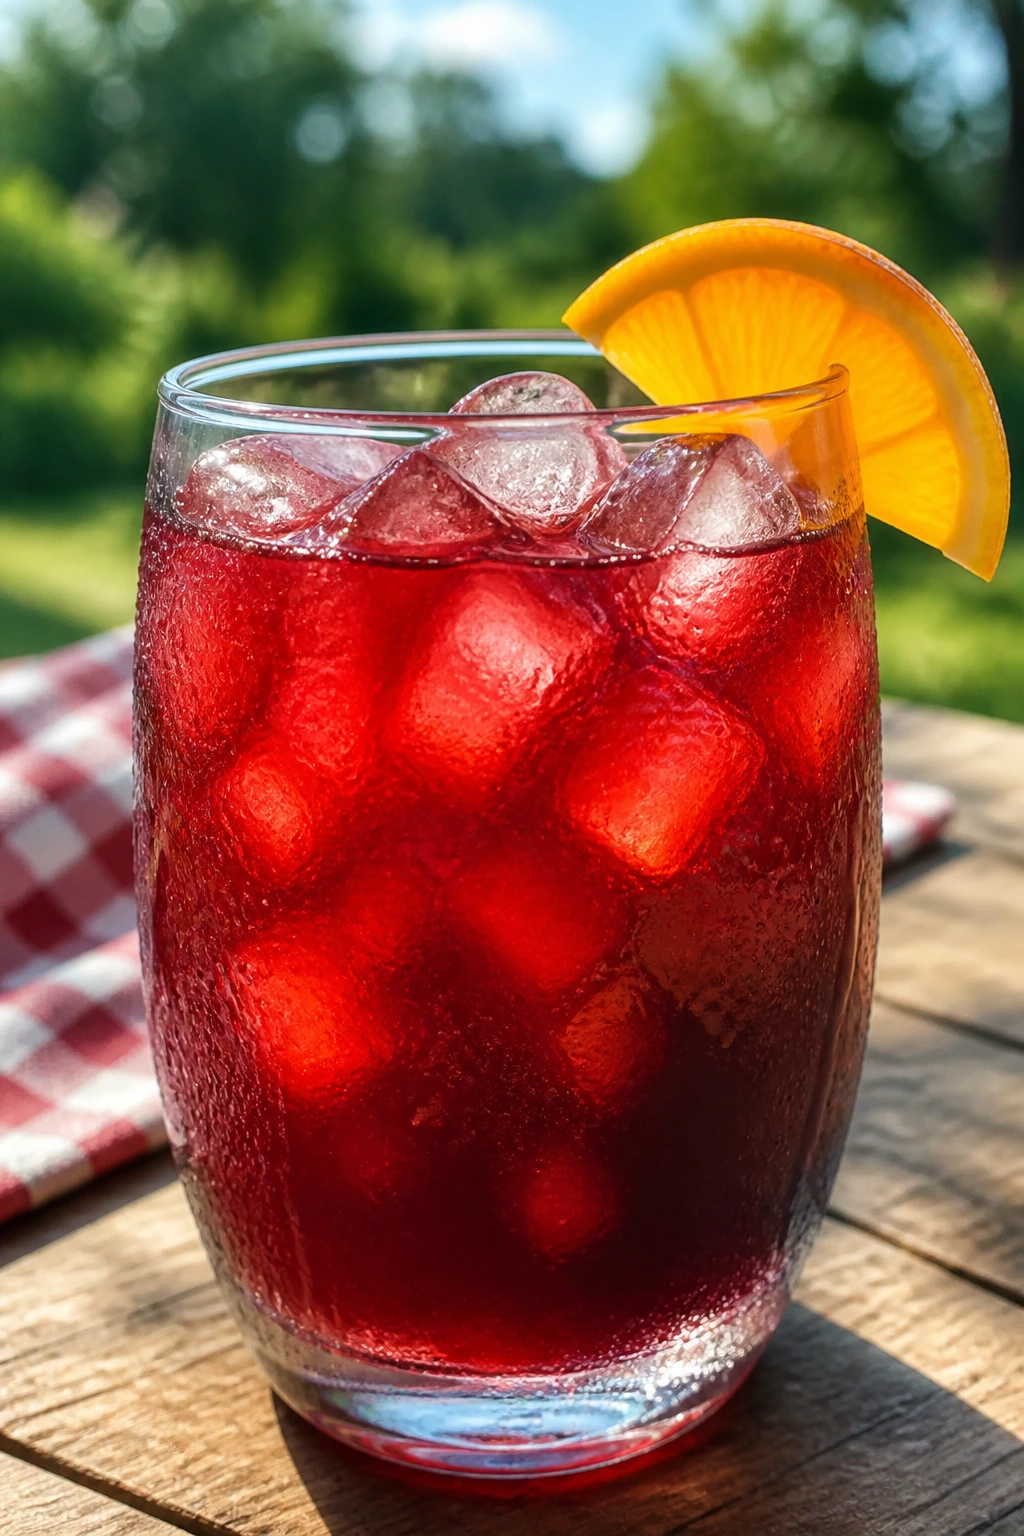
Intro:
Hibiscus makes the most dramatic-looking drink in this whole group, and it earns the color honestly. It’s tart, floral, and deeply red, almost like cranberry’s sharper cousin. Orange juice softens that tartness so the drink stays refreshing instead of sour.
Why It Works:
Hibiscus tea has a natural brightness that plays well with citrus, which is why orange and lemon both fit here. Honey dissolves cleanly in the hot tea, and a little extra lemon keeps the drink from feeling heavy once the orange goes in. This one is lovely poured over ice, but it also holds its color better than many fruit drinks.
Key Ingredients:
- 4 hibiscus tea bags — steeped strong for color.
- 3 cups boiling water — for the tea base.
- 1/4 cup honey — smooths the tartness.
- 2 cups orange juice — fresh or chilled, but not from concentrate if possible.
- 1 cup cold water — stretches the drink.
- 1 tablespoon lemon juice — keeps the flavor bright.
- Orange slices and ice — for serving.
Quick Steps:
- Steep the tea: Pour the boiling water over the hibiscus tea bags and steep for 8 minutes.
- Sweeten: Remove the bags and stir in the honey while the tea is still warm.
- Cool: Let the tea base come to room temperature, then chill it.
- Mix: Stir in the orange juice, cold water, and lemon juice.
- Serve: Pour over ice with orange slices in each glass.
Equipment for This Recipe:
- Kettle or saucepan
- Pitcher
- Spoon
- Fine strainer, if your tea bags split
How to Serve This Dish:
Use clear cups or a glass pitcher if you want the color to show off. Thin orange wheels floating on top look clean and make the drink seem more intentional. It’s a good partner for grilled food, cold pasta salad, or any picnic spread that needs a sharp, refreshing drink beside it.
Pro Tips for This Recipe:
- Steep hibiscus for 8 to 10 minutes, no longer. Past that, it gets aggressively tart.
- If your orange juice is very sweet, add an extra teaspoon of lemon juice.
- Chill the tea base before adding the juice so the flavor stays bright.
Variations on This Dish:
- Sparkling Hibiscus Cooler: Replace 1 cup of the cold water with chilled sparkling water at serving time.
- Blood Orange Hibiscus: Use blood orange juice for a deeper, more berry-like flavor.
- Mint Hibiscus Cooler: Add 6 mint leaves to the pitcher for a cooler finish.
Common Mistakes to Avoid with This Dish:
- Oversteeping the tea: It can go from tart to harsh fast.
- Using too much honey: The drink should stay brisk, not syrupy.
- Mixing in orange juice while the tea is hot: Heat can dull the citrus and make the drink taste flatter than it should.
8. Raspberry Vanilla Soda
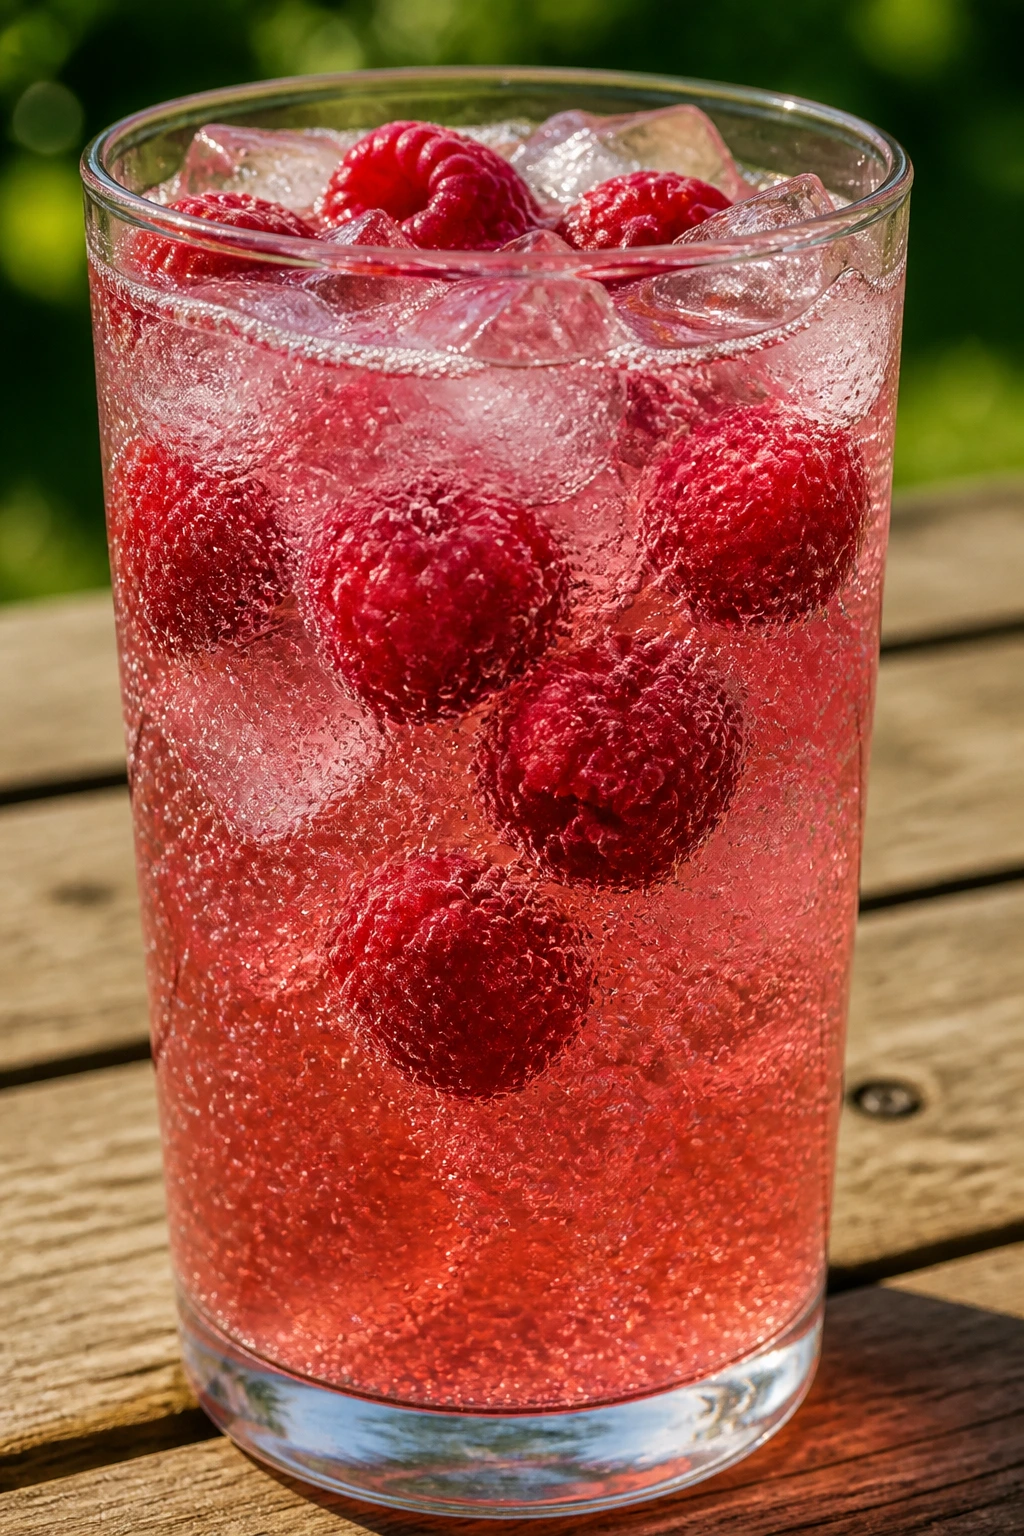
Intro:
Raspberry vanilla soda tastes like a homemade treat from a neighborhood diner, but with better fruit and less mystery syrup. The raspberries bring acidity and color, while vanilla smooths the edges so the drink feels round instead of sharp. It’s playful without being childish.
Why It Works:
A cooked berry syrup gives the raspberry flavor real weight, which is important because club soda alone won’t carry much fruit on its own. Vanilla works because it softens the tart berries and gives the drink a cream-soda feel without adding dairy. A tiny amount of lemon keeps the flavor from becoming flat-sweet.
Key Ingredients:
- 2 cups raspberries — fresh or frozen.
- 1/2 cup granulated sugar — for the syrup.
- 1/2 cup water — to cook the syrup.
- 1 teaspoon vanilla extract — use a good one; the flavor matters here.
- 2 teaspoons fresh lemon juice — sharpens the berry flavor.
- 4 cups chilled club soda — added at the end.
- Ice — for serving.
- Fresh raspberries, optional — for garnish.
Quick Steps:
- Cook the syrup: Combine raspberries, sugar, and water in a small saucepan over medium heat. Simmer for 6 to 8 minutes, stirring and pressing the berries down.
- Strain: Push the syrup through a fine-mesh strainer into a pitcher to remove the seeds. Let it cool for a few minutes.
- Flavor it: Stir in the vanilla and lemon juice.
- Add bubbles: Pour in the chilled club soda right before serving.
- Serve: Fill glasses with ice and top with the soda.
Equipment for This Recipe:
- Small saucepan
- Fine-mesh strainer
- Pitcher
- Spoon or spatula for pressing
How to Serve This Dish:
Serve it in short glasses if you want it to feel like a treat, or in tall ones if you’re making a full picnic pitcher. A few raspberries dropped into the glass look pretty and help carry the berry scent. I’d pair it with salty snacks, cookies, or anything buttery.
Pro Tips for This Recipe:
- Taste the syrup before adding the soda. If it seems too tart, add 1 to 2 teaspoons more sugar while it’s still warm.
- Vanilla can get loud fast. Measure it carefully.
- Club soda should be very cold or the soda loses its clean snap.
Variations on This Dish:
- Mixed Berry Vanilla Soda: Use half raspberries and half blackberries for a deeper flavor.
- Lemon Vanilla Soda: Reduce the berries and increase the lemon juice if you want something more citrus-forward.
- Frozen Raspberry Float: Blend the finished syrup with ice for a slushy version.
Common Mistakes to Avoid with This Dish:
- Leaving the seeds in: The texture gets gritty unless you strain the syrup.
- Overdoing the vanilla: Too much makes the drink taste more like frosting than fruit.
- Adding club soda too soon: The fizz disappears, and the drink feels tired.
9. Mango Coconut Agua Fresca
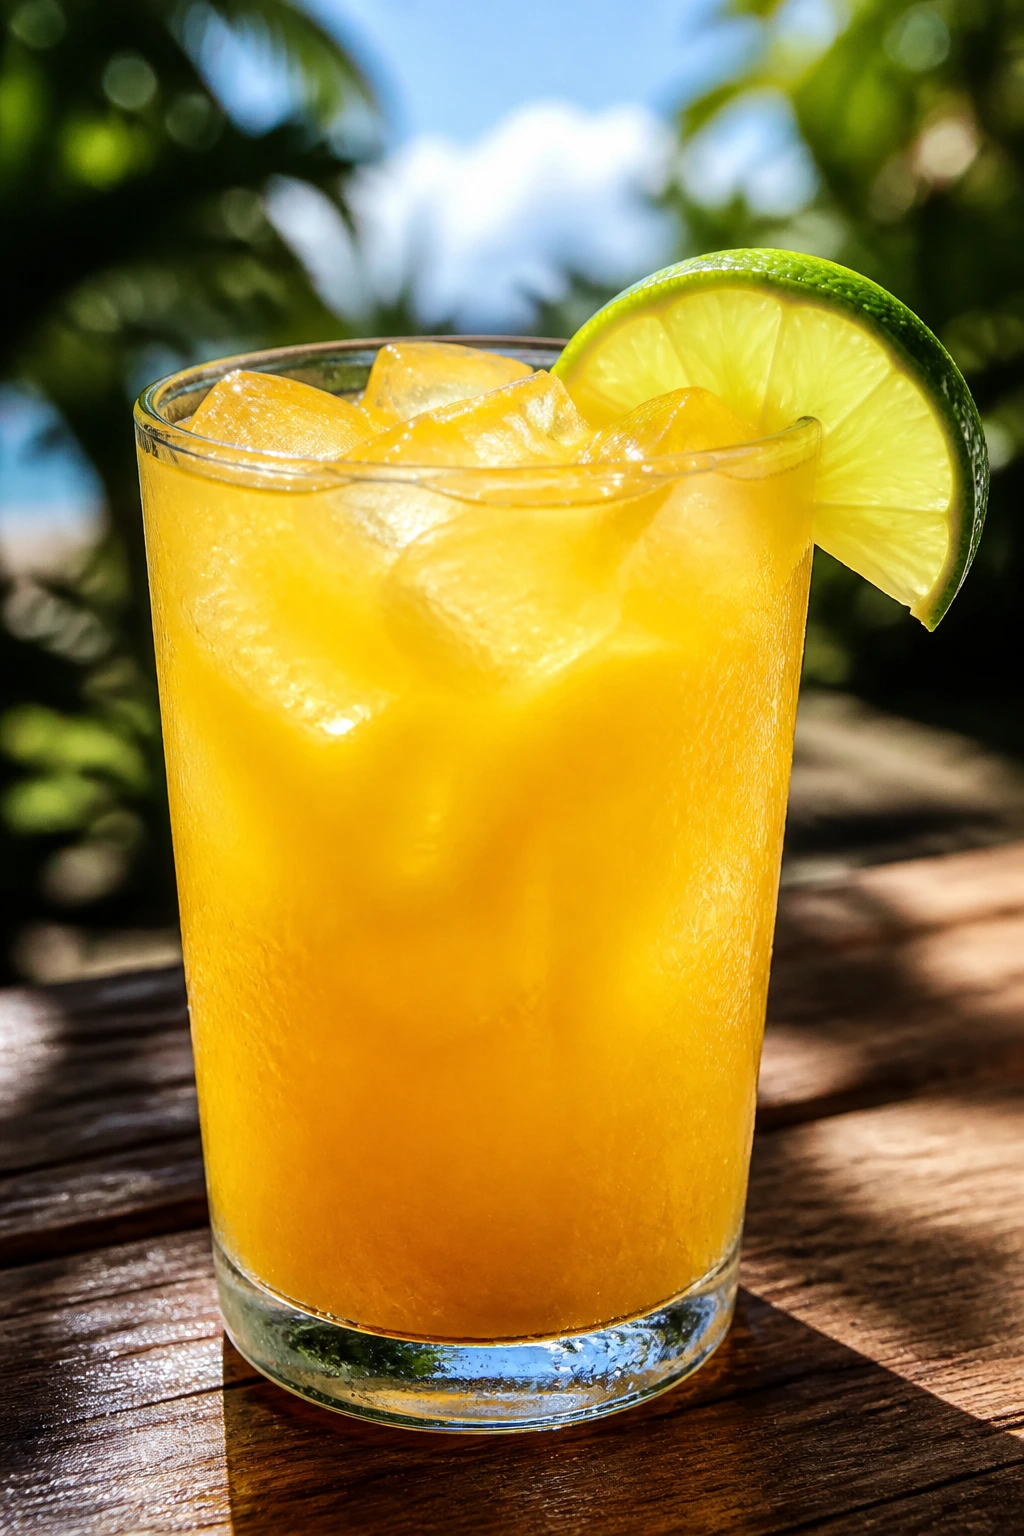
Intro:
Mango and coconut together can go in one of two directions: lush and balanced, or heavy and muddy. I like this version because it uses coconut water instead of coconut milk, which keeps the drink light enough for a picnic and still gives it a tropical edge. The mango should taste sunny and soft, not pulpy or dull.
Why It Works:
Mango has a thick, sweet texture that benefits from a little dilution, and coconut water gives the drink body without making it creamy. Lime keeps the sweetness under control, and a pinch of salt makes the mango taste fuller. If you use ripe fruit, this one barely needs sweetening.
Key Ingredients:
- 3 cups ripe mango chunks — fresh or thawed frozen mango works well.
- 2 cups coconut water — for a clean tropical note.
- 1 cup cold water — to help the blender.
- 2 tablespoons lime juice — keeps the flavor bright.
- 1 to 2 tablespoons honey — optional, depending on the sweetness of the mango.
- 1/4 teaspoon fine sea salt — sharpens the fruit.
- Ice and lime wedges — for serving.
- Toasted coconut flakes, optional — for garnish.
Quick Steps:
- Blend: Add the mango, coconut water, cold water, lime juice, honey, and salt to a blender. Blend until smooth.
- Taste: If the mango is a little flat, add another teaspoon of lime juice.
- Strain if desired: Pour through a fine-mesh strainer for a silkier drink, or skip this if you like more body.
- Chill: Refrigerate until cold.
- Serve: Pour over ice and garnish with a lime wedge or a few coconut flakes.
Equipment for This Recipe:
- Blender
- Pitcher
- Fine-mesh strainer, optional
- Citrus juicer
How to Serve This Dish:
This drink looks best in a tall clear glass with a bright lime wedge. If you use coconut flakes, toast them lightly first so they smell nutty instead of raw. It’s a good match for salty chips, spicy fruit, or grilled foods with a little char.
Pro Tips for This Recipe:
- If your mango is very sweet, skip the honey until after you taste the finished drink.
- Frozen mango makes the drink colder and often more consistent than under-ripe fresh mango.
- Don’t use coconut milk unless you want a richer, heavier drink that won’t stay as crisp in the cooler.
Variations on This Dish:
- Mango Pineapple Cooler: Replace 1 cup of the mango with pineapple for a sharper tropical edge.
- Mint Mango Agua Fresca: Add 6 mint leaves to the blender for a cooler finish.
- Spicy Mango Cooler: Add a tiny pinch of chili powder to the rim if you want sweet-heat contrast.
Common Mistakes to Avoid with This Dish:
- Using under-ripe mango: The drink tastes fibrous and dull.
- Choosing coconut milk by mistake: It makes the drink heavy and can separate if it sits.
- Skipping the lime: Mango without acid tastes broad and sleepy.
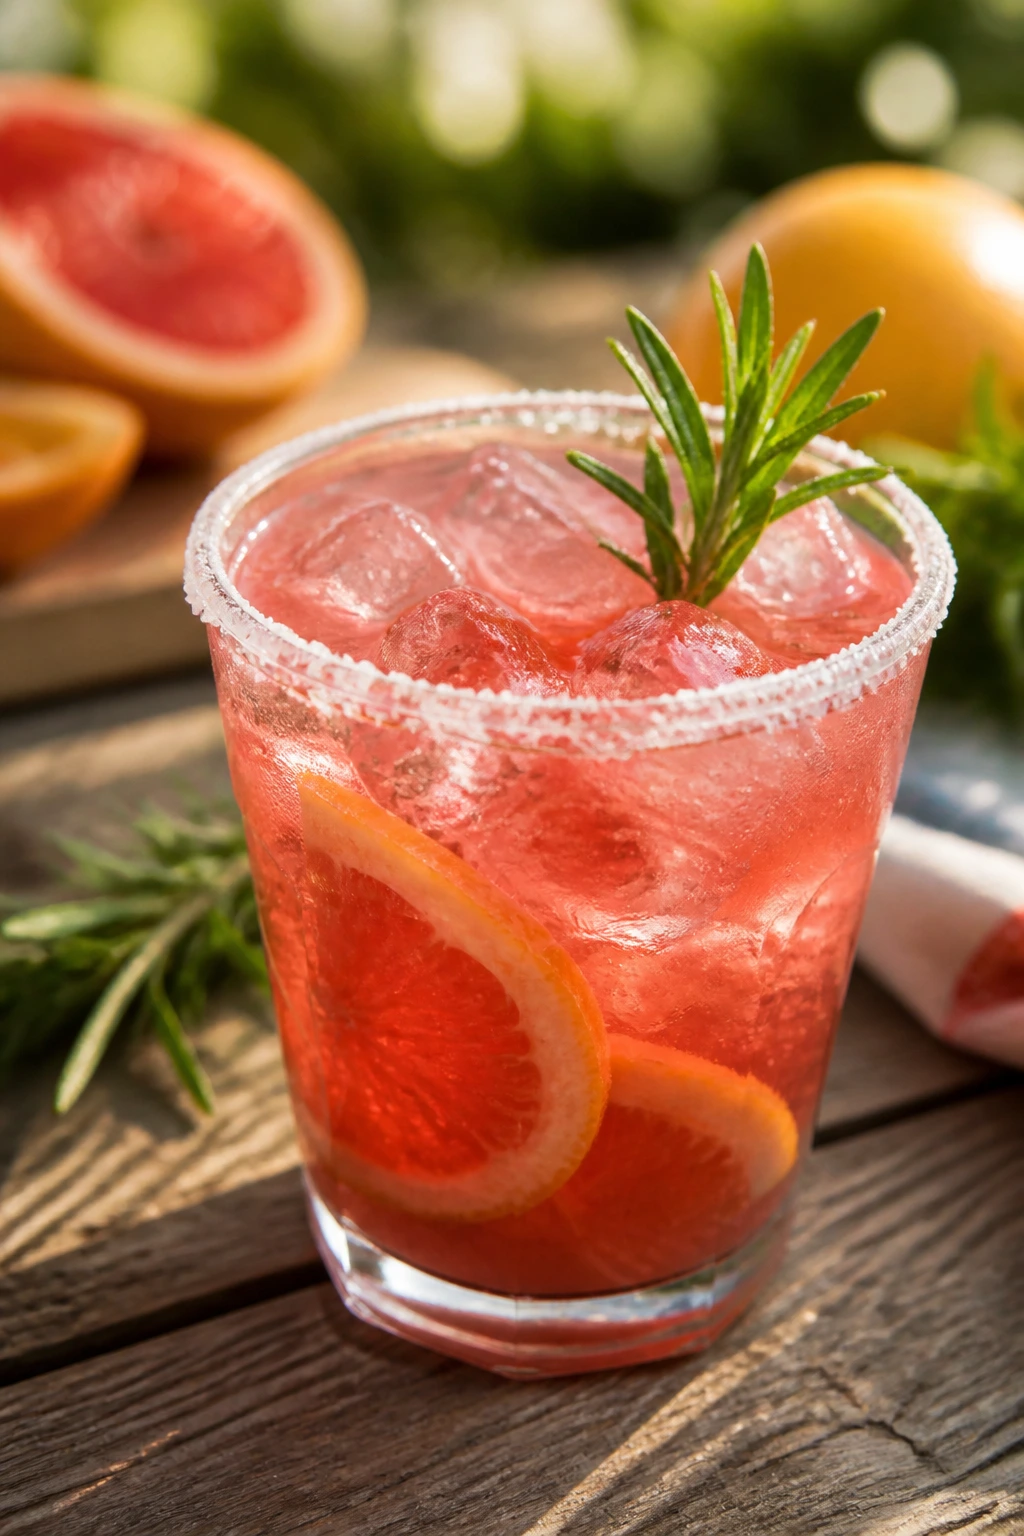
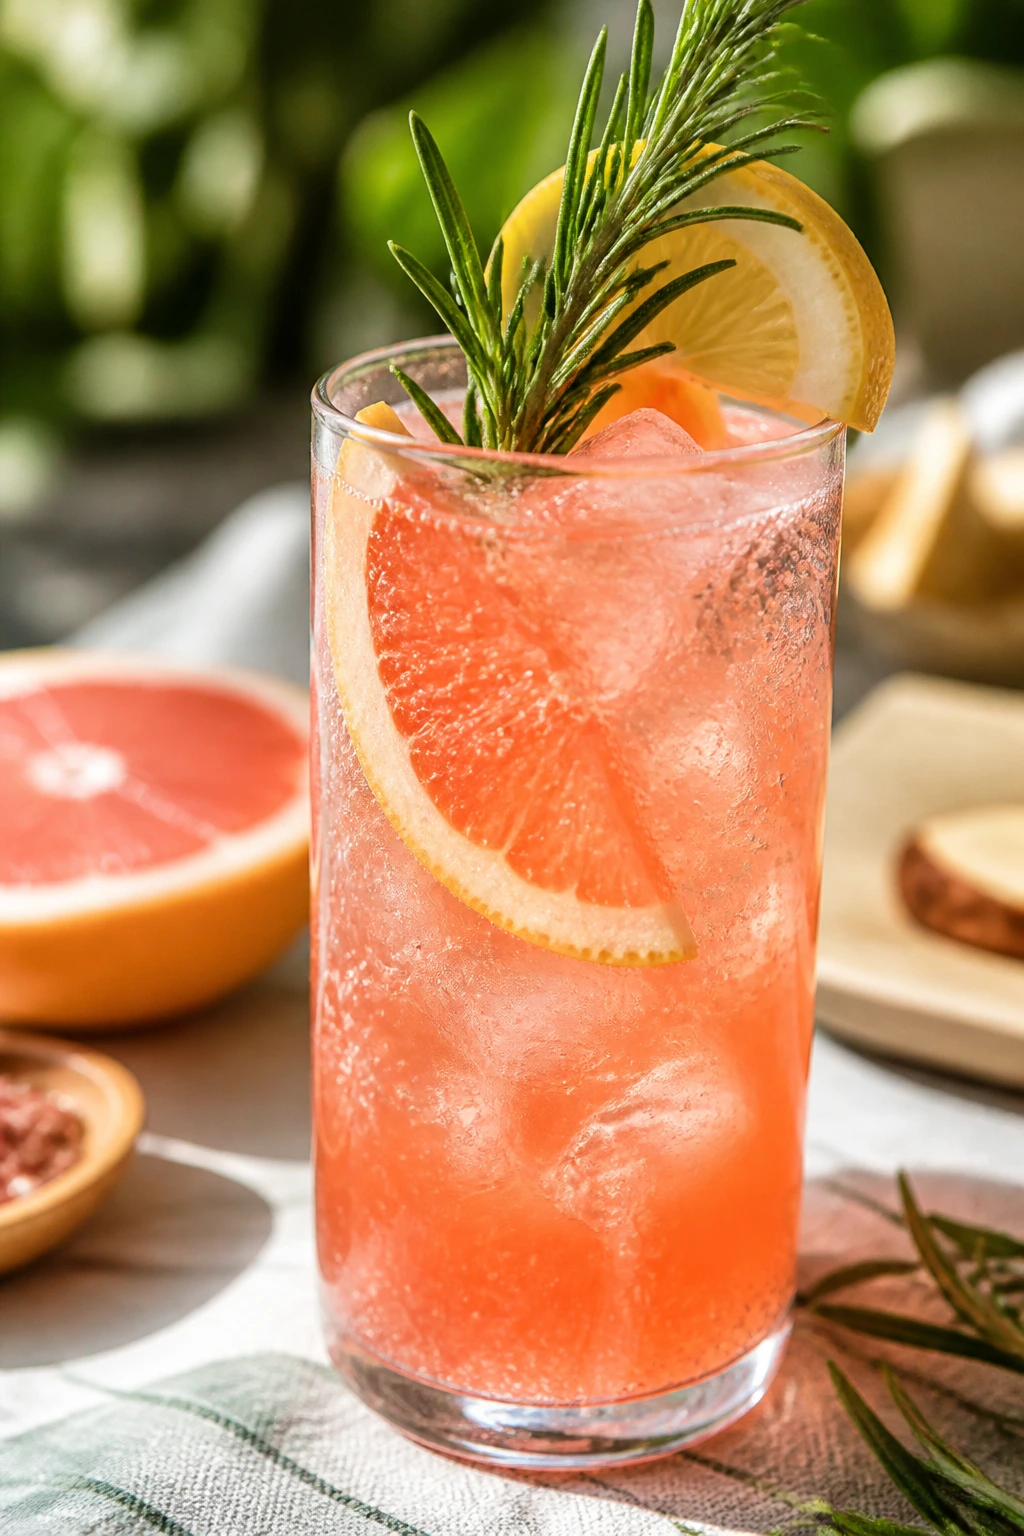
10. Grapefruit Rosemary Spritz
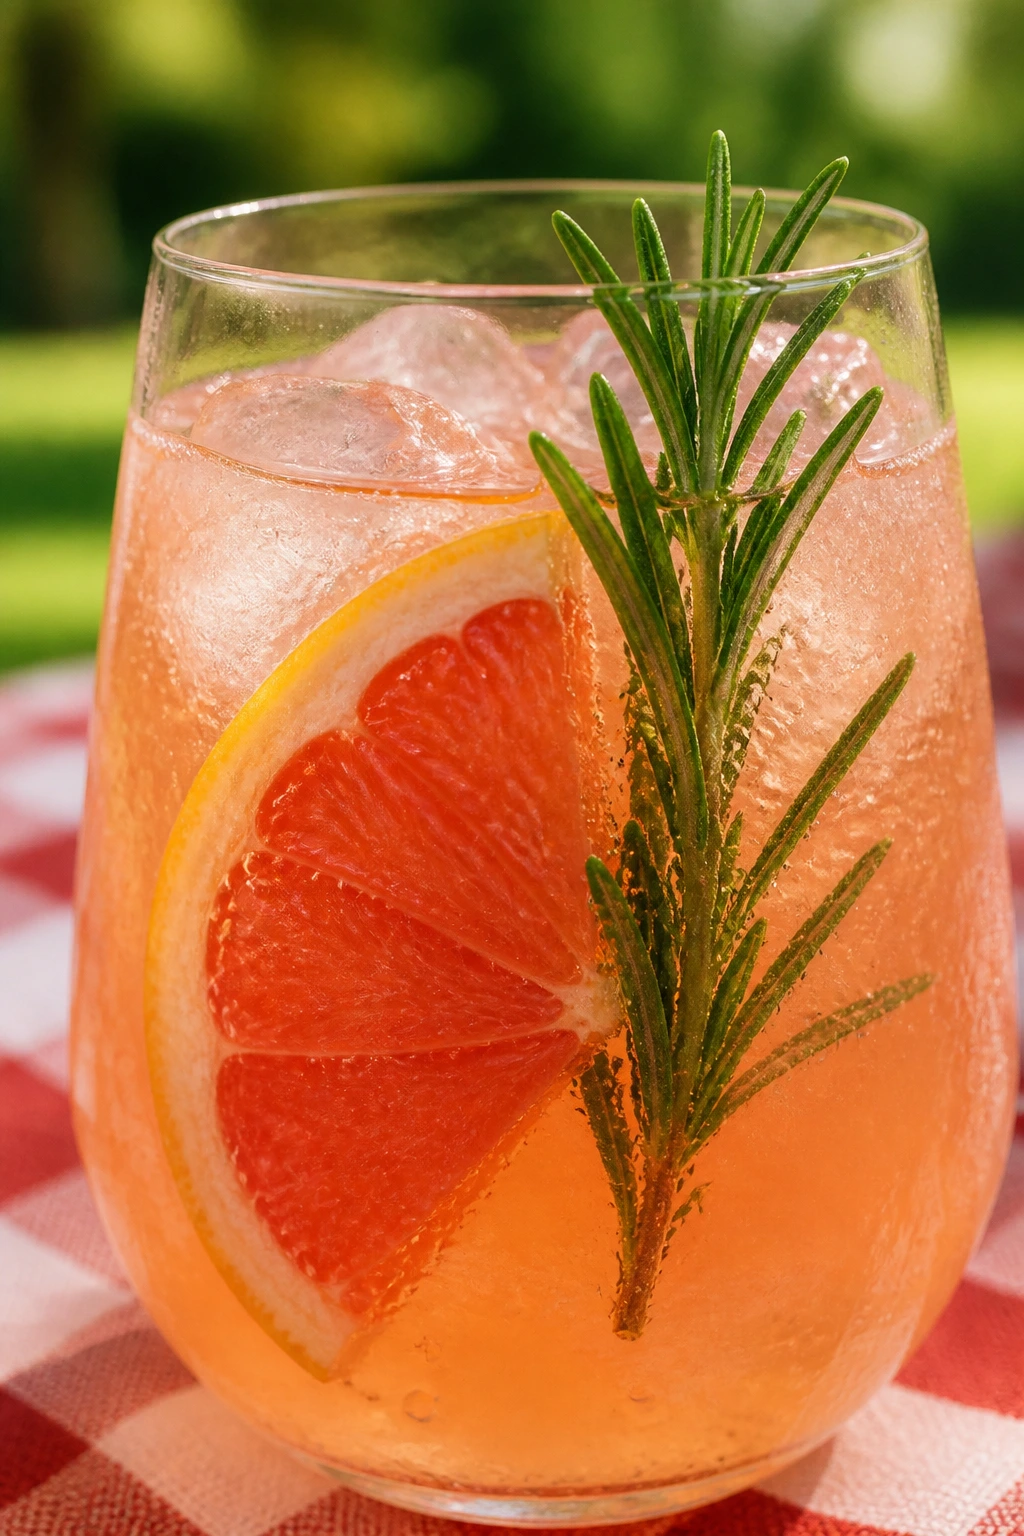
Intro:
Grapefruit spritz is for people who want a drink with a little bite. It’s tart, slightly bitter, and more grown-up than most fruit drinks, but rosemary softens the edges enough that it still belongs on a picnic table. This is one of my favorites because it doesn’t collapse under ice the way sweeter drinks do.
Why It Works:
Grapefruit has built-in bitterness, so it needs a sweetener that doesn’t bulldoze the flavor. Rosemary syrup does that job while adding a woodsy scent that feels clean, not heavy. Sparkling water keeps the drink light, and a little lime juice gives the grapefruit a sharper finish.
Key Ingredients:
- 3 cups fresh pink grapefruit juice — squeezed or refrigerated, but freshly juiced tastes best.
- 1/4 cup rosemary syrup — made from sugar, water, and rosemary sprigs.
- 2 cups chilled sparkling water — for the spritz.
- 1 tablespoon fresh lime juice — sharpens the citrus.
- 1/4 teaspoon fine sea salt — tames bitterness.
- Ice and grapefruit wedges — for serving.
- 2 rosemary sprigs — for garnish, if you like the look.
Quick Steps:
- Make the syrup: Combine 1/4 cup sugar, 1/4 cup water, and 2 rosemary sprigs in a small saucepan. Warm until the sugar dissolves, then simmer for 2 minutes and cool.
- Mix the base: Stir the grapefruit juice, rosemary syrup, lime juice, and salt in a pitcher.
- Chill: Refrigerate until cold.
- Add the sparkle: Stir in the sparkling water just before serving.
- Serve: Pour over ice and garnish with grapefruit wedges and a rosemary sprig.
Equipment for This Recipe:
- Small saucepan
- Pitcher
- Spoon
- Fine strainer, if you want to remove rosemary needles from the syrup
How to Serve This Dish:
Use stemless glasses or clear tumblers so the pink grapefruit color shows. A rosemary sprig tucked into the glass looks sharp and makes the drink smell like it came from a garden instead of a bottle. It’s a nice match for salty snack boards, grilled vegetables, or anything with citrus in the food too.
Pro Tips for This Recipe:
- Keep the rosemary syrup subtle. If it tastes like potpourri, you’ve gone too far.
- Pink grapefruit is softer than white grapefruit and usually easier for mixed drinks.
- Add the sparkling water at the last second. Grapefruit can handle waiting; bubbles cannot.
Variations on This Dish:
- Blood Grapefruit Spritz: Swap in blood grapefruit juice for a deeper color and a slightly sweeter note.
- Thyme Grapefruit Spritz: Use thyme instead of rosemary for a gentler herbal flavor.
- Salt-Rim Grapefruit Spritz: Add a very light salted rim if you’re serving it with rich picnic food.
Common Mistakes to Avoid with This Dish:
- Over-sweetening the grapefruit: The bitterness is part of the charm. Don’t erase it.
- Using a heavy hand with rosemary: One small sprig in the syrup is enough.
- Adding ice to the pitcher too early: The flavor goes thin fast.
11. Cherry Limeade Slush
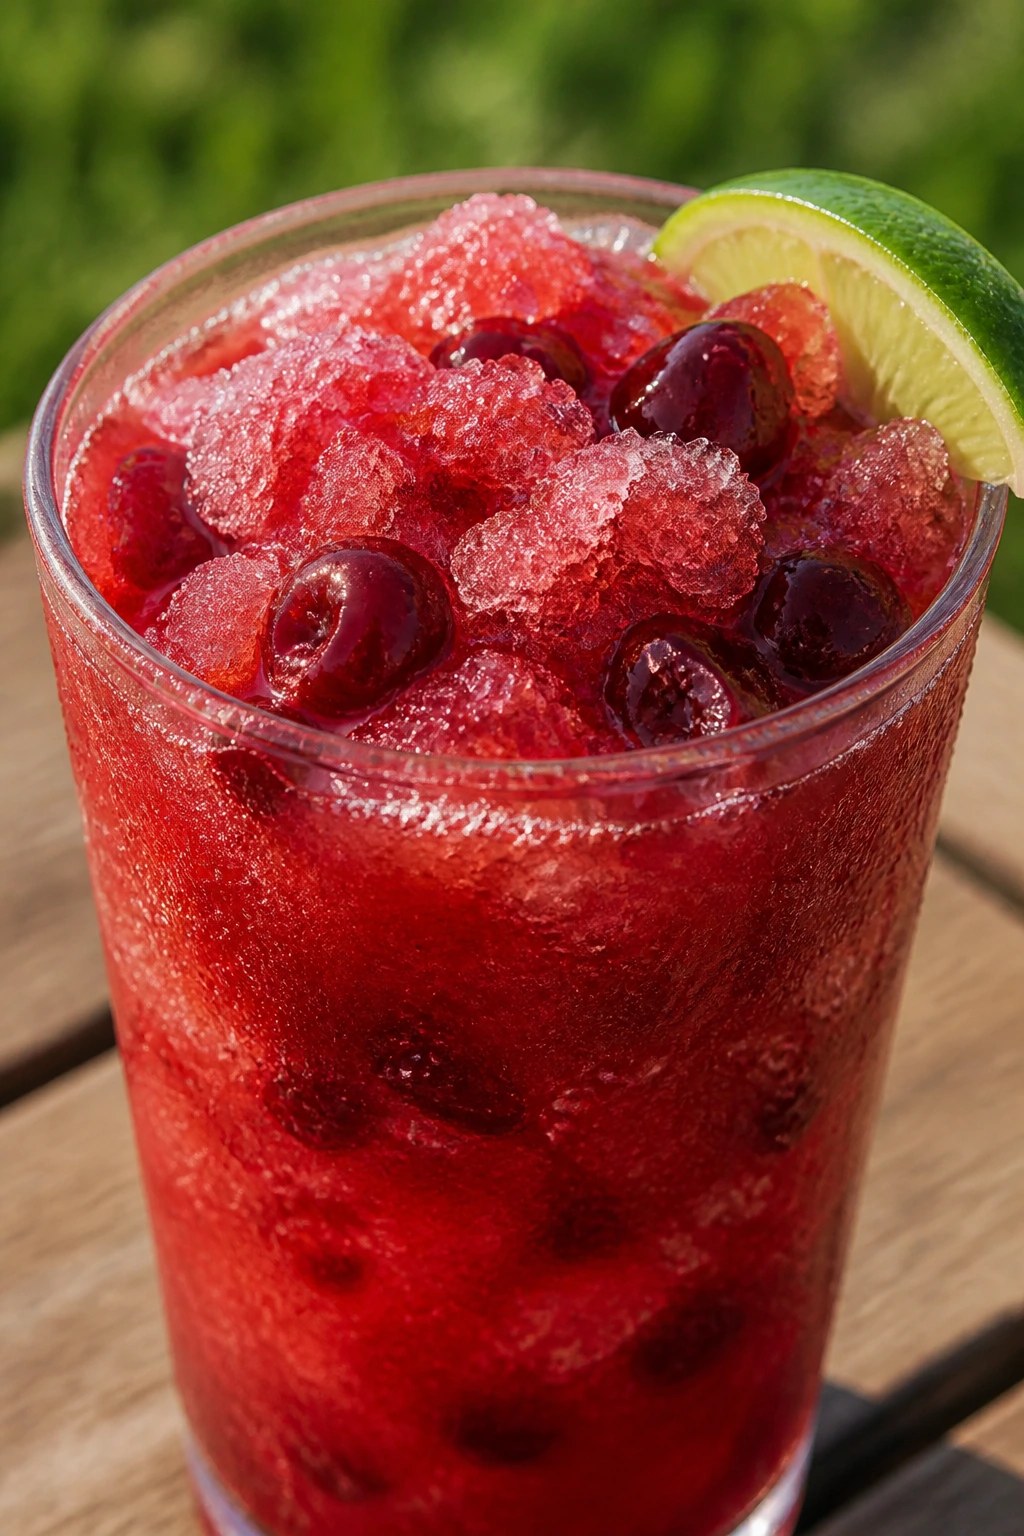
Intro:
A cherry limeade slush is a little messy, a little loud, and exactly the kind of thing kids and adults both grin at. It drinks like a frozen treat instead of a plain beverage, and that makes it perfect when the picnic table is hot enough to cook a sandwich wrapper. The tart cherry flavor keeps it from becoming pure sugar.
Why It Works:
Frozen cherries do half the work for you because they chill the drink while giving it a dense fruit flavor. Lime brightens the cherries, and a touch of honey rounds off the tart edges without making the slush heavy. You want this one cold, fast, and served right away.
Key Ingredients:
- 4 cups frozen sweet cherries — frozen fruit gives the best texture.
- 3/4 cup fresh lime juice — the slush needs real citrus.
- 1/3 cup honey — more flexible than sugar in a blender drink.
- 1½ cups cold water — helps the blender move.
- 2 cups ice — for extra body if needed.
- 1/4 teaspoon fine sea salt — deepens the cherry flavor.
- Lime wedges — for garnish.
- Optional maraschino cherries — if you want the classic soda-shop look.
Quick Steps:
- Blend the base: Add the frozen cherries, lime juice, honey, cold water, and salt to a blender.
- Check the texture: Blend until slushy and thick. If it’s too loose, add the ice and blend again.
- Taste: Add a little more honey if the cherries are tart or more lime if they taste too sweet.
- Serve immediately: Pour into glasses and garnish with lime wedges.
- Don’t wait: Slushes soften fast, so serve them while the texture still holds.
Equipment for This Recipe:
- High-speed blender
- Spatula
- Tall glasses or insulated cups
- Measuring cups
How to Serve This Dish:
Serve in wide glasses with straws that can handle a thicker texture. If you want a playful finish, tuck in a maraschino cherry or two. It’s one of the few drinks here that can stand alone as a little cold snack between sandwiches.
Pro Tips for This Recipe:
- Use frozen cherries instead of relying only on ice, or the flavor gets watered down quickly.
- A high-speed blender gives the smoothest slush, but a regular blender works if you stop and scrape it down once.
- Serve this one straight away. It doesn’t improve while sitting.
Variations on This Dish:
- Black Cherry Limeade Slush: Use black cherries for a deeper, darker flavor.
- Sparkling Cherry Limeade: Blend the cherry base without the ice, then top with club soda.
- Cherry Lemon Slush: Swap half the lime juice for lemon if you want a softer citrus profile.
Common Mistakes to Avoid with This Dish:
- Using too much water: The slush turns thin and loses its icy texture.
- Letting it sit: Cherry slush melts fast and separates.
- Over-blending: Too much blending makes it foamy instead of icy.
12. Honeydew Melon Cooler
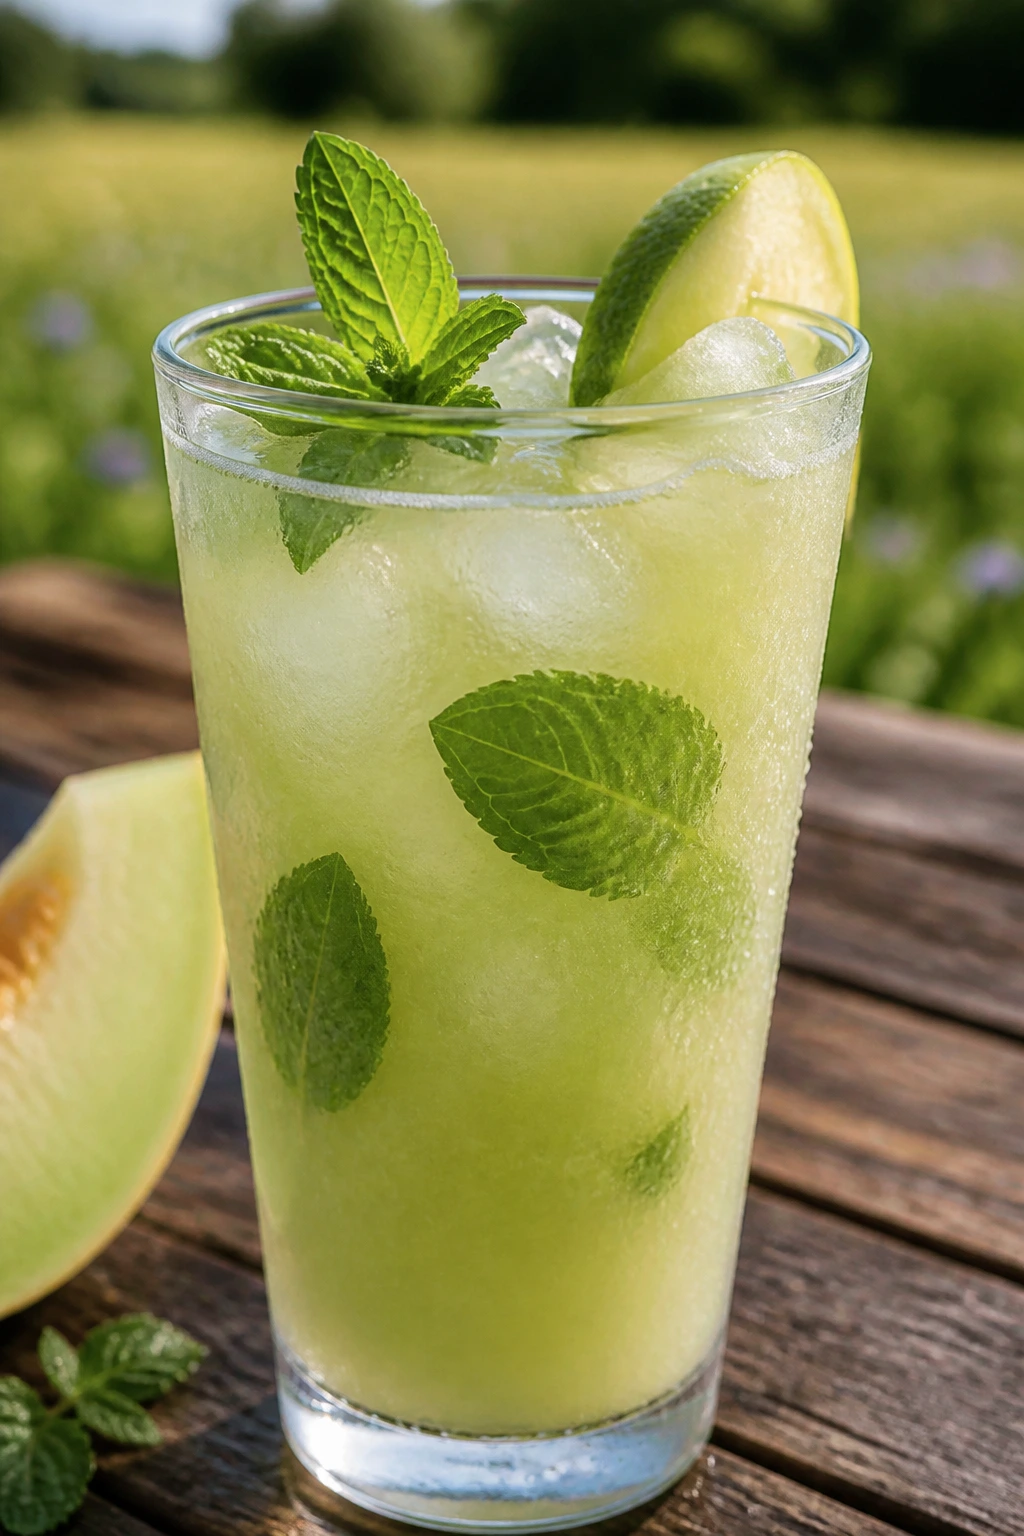
Intro:
Honeydew is tricky. When it’s good, it tastes smooth, floral, and quietly sweet. When it’s not, it tastes like nothing with a green tint. This cooler makes the melon earn its place by pairing it with lime, mint, and a little salt, which wakes up all the parts that usually stay hidden.
Why It Works:
Honeydew has a gentle flavor that gets lost unless something sharp sits next to it. Lime and mint keep the drink from feeling sleepy, and a pinch of salt pulls the melon flavor forward. Blending the fruit creates a silky texture that works well over ice without needing extra sugar.
Key Ingredients:
- 4 cups honeydew melon, cubed — cold melon gives a cleaner drink.
- 1 cup cold water — helps the blender.
- 2 tablespoons fresh lime juice — brightens the melon.
- 10 mint leaves — light herbal finish.
- 1 to 2 tablespoons honey — only if the melon needs it.
- 1/4 teaspoon fine sea salt — makes the melon taste more like melon.
- Ice and mint sprigs — for serving.
Quick Steps:
- Blend: Add the honeydew, cold water, lime juice, mint, honey, and salt to a blender.
- Taste: If the melon is bland, add a little more honey or lime depending on what it needs.
- Strain if desired: Pour through a fine-mesh strainer for a smoother cooler.
- Chill: Refrigerate until cold.
- Serve: Pour over ice and garnish with a mint sprig.
Equipment for This Recipe:
- Blender
- Fine-mesh strainer, optional
- Pitcher
- Spoon
How to Serve This Dish:
This drink looks clean and pale in a tall glass, especially with a mint sprig or a thin cucumber ribbon. It’s a good counterweight to anything smoky or salty on the picnic table. I especially like it when the rest of the spread is heavy and the drink has to do some palate-cleaning work.
Pro Tips for This Recipe:
- Pick a honeydew that smells fragrant at the stem end. No smell usually means no flavor.
- A little salt matters here more than you’d think.
- If the melon is very ripe, skip the honey until you’ve tasted the finished drink.
Variations on This Dish:
- Honeydew Basil Cooler: Use basil instead of mint for a sweeter herbal note.
- Honeydew Cucumber Cooler: Add 1/2 peeled cucumber for a lighter, greener flavor.
- Sparkling Honeydew Cooler: Top each glass with a splash of club soda right before serving.
Common Mistakes to Avoid with This Dish:
- Using bland melon: The drink can’t create flavor that isn’t there.
- Adding too much mint: The melon should stay in charge.
- Serving it warm: Honeydew tastes sleepy unless it’s cold from the start.
13. Blackberry Sage Lemonade
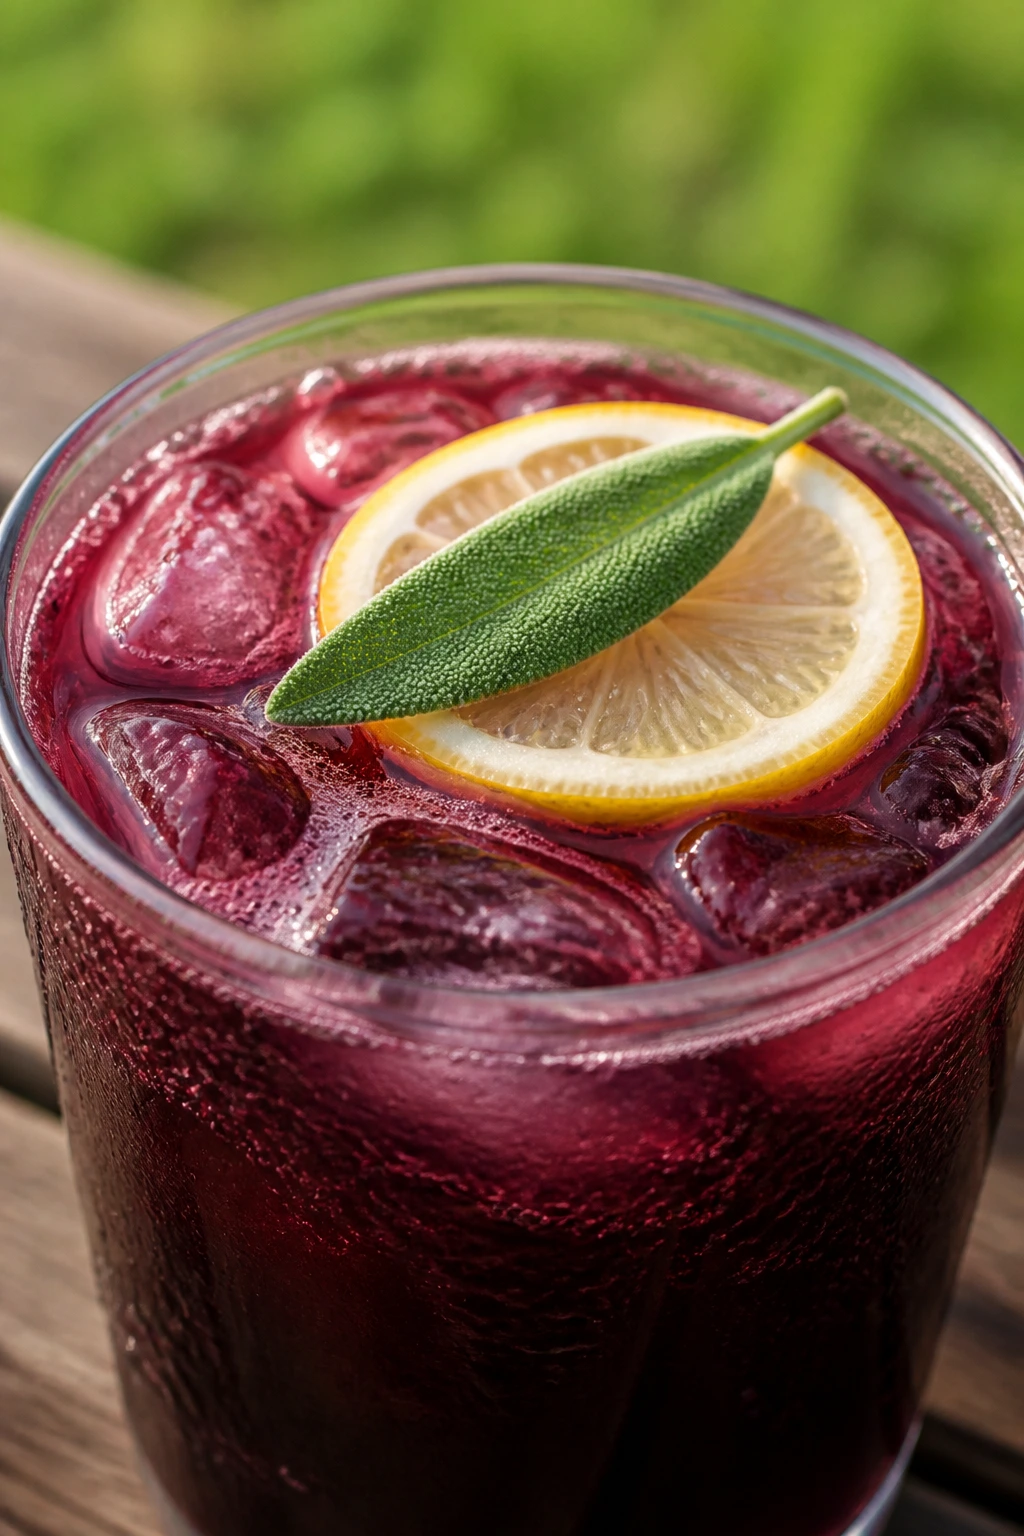
Intro:
Blackberry sage lemonade tastes like summer after a rainstorm — dark fruit, bright citrus, and a little herbal edge. Sage is stronger than basil or mint, which is why I use it carefully here. The result is a lemonade that feels a little more grown-up without becoming fussy.
Why It Works:
Blackberries bring color and tartness, and sage adds a savory-leaning aroma that makes the drink memorable. Lemon keeps the fruit from going jammy. If you make the berry-sage syrup first, the flavor spreads through the pitcher instead of sitting on top as a garnish no one notices.
Key Ingredients:
- 2 cups blackberries — fresh or frozen both work.
- 1 cup granulated sugar — for the syrup.
- 1 cup water — to cook the syrup.
- 4 sage leaves — enough to perfume the drink without taking over.
- 1 cup fresh lemon juice — the backbone of the lemonade.
- 3 cups cold water — to finish the pitcher.
- 1/4 teaspoon fine sea salt — rounds the fruit.
- Ice and lemon slices — for serving.
Quick Steps:
- Cook the syrup: Combine the blackberries, sugar, water, and sage leaves in a saucepan over medium heat. Simmer for 8 minutes, pressing the berries lightly as they soften.
- Strain: Pour the syrup through a fine-mesh strainer into a pitcher and press to get the juice through. Discard the solids and sage.
- Mix: Stir in the lemon juice, cold water, and salt.
- Chill: Refrigerate until cold.
- Serve: Pour over ice and garnish with lemon slices or a few blackberries.
Equipment for This Recipe:
- Small saucepan
- Fine-mesh strainer
- Pitcher
- Spoon for pressing
How to Serve This Dish:
Serve this in clear glasses so the deep purple color does its job. A lemon slice and one sage leaf make a very simple garnish that still feels finished. It’s a strong partner for anything rich, buttery, or salty on the picnic table.
Pro Tips for This Recipe:
- Sage is powerful. Four leaves are enough for the whole batch.
- If you want a smoother lemonade, strain the syrup twice.
- Taste after chilling, not while warm. Cold blackberry drinks need more acid than hot ones.
Variations on This Dish:
- Blueberry Sage Lemonade: Swap the blackberries for blueberries if you want a milder fruit note.
- Sparkling Blackberry Sage Lemonade: Replace 1 cup of the cold water with club soda at serving time.
- Honey Blackberry Sage Lemonade: Use honey instead of sugar for a softer finish.
Common Mistakes to Avoid with This Dish:
- Using too much sage: The drink turns savory fast.
- Skipping the straining step: Blackberry seeds make the texture rough.
- Adding lemon while the syrup is boiling hot: It can dull the citrus edge.
14. White Grape Berry Sangria Mocktail
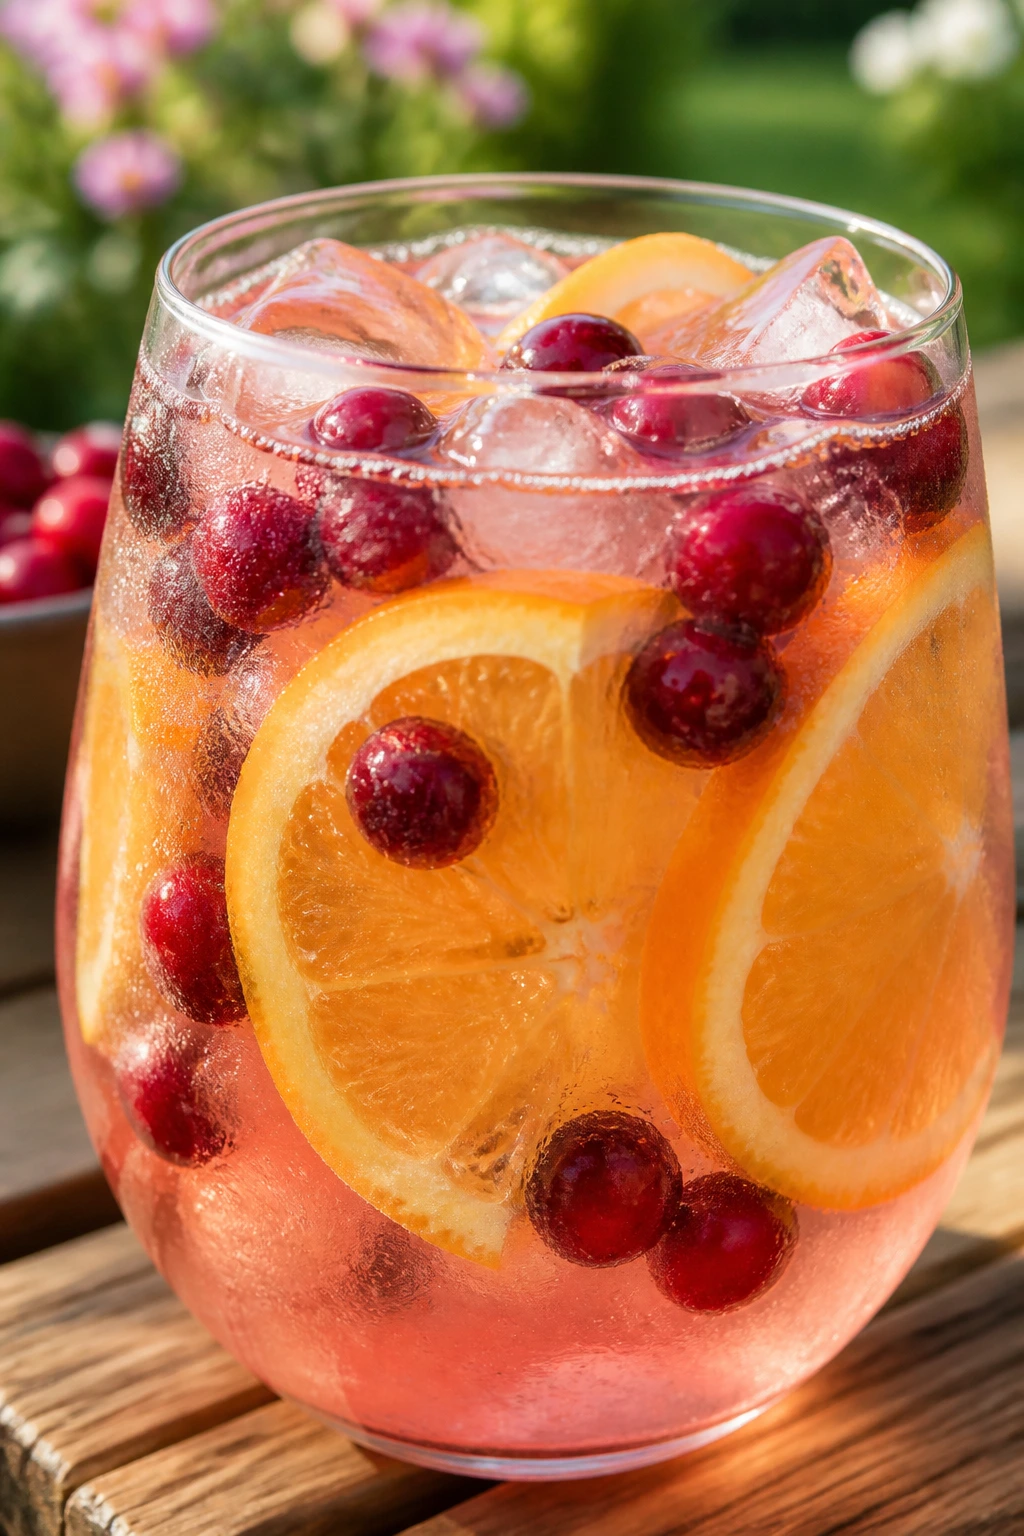
Intro:
This mock sangria has the same party feel as the real thing, but it stays family-friendly and picnic-safe. White grape juice gives it a crisp, lightly floral base, cranberry adds color and bite, and the fruit slices make the pitcher look busy in a good way. I like it because it tastes best after a short chill, which gives the fruit time to perfume the juice.
Why It Works:
White grape juice is a useful base because it’s sweeter and less dark than red juice, so the berries and citrus can show up clearly. Cranberry keeps the drink from becoming flat-sweet, and the fruit pieces add a little flavor while the pitcher sits. The sparkle at the end keeps it from feeling heavy.
Key Ingredients:
- 4 cups chilled white grape juice — the base of the mock sangria.
- 1 cup cranberry juice — adds tartness and color.
- 1 cup chilled sparkling water — added just before serving.
- 1 orange, thinly sliced — for aroma and visual appeal.
- 1 apple, diced — toss with lemon juice so it doesn’t brown.
- 1 cup mixed berries — blueberries, raspberries, or sliced strawberries.
- 1 tablespoon fresh lemon juice — keeps the flavor lively.
- 6 mint leaves — optional but helpful.
Quick Steps:
- Prep the fruit: Slice the orange, dice the apple, and toss the apple with the lemon juice.
- Combine: Add the grape juice, cranberry juice, orange, apple, berries, and mint to a large pitcher.
- Chill: Refrigerate for at least 30 minutes so the fruit can flavor the juice.
- Finish with bubbles: Add the sparkling water right before serving.
- Serve: Pour into glasses with some fruit in each cup.
Equipment for This Recipe:
- Large pitcher
- Paring knife
- Cutting board
- Long spoon
How to Serve This Dish:
Serve it in clear glasses with a few berries floating on top. A thin orange round pressed against the side of the pitcher looks good without needing a garnish parade. It pairs nicely with picnic cheese, sandwiches, and anything that tastes better with a cold, fruity companion.
Pro Tips for This Recipe:
- Chill all the juices first. Warm juice makes the fruit soft too fast.
- Toss the apple pieces with lemon juice so they don’t brown before the picnic starts.
- Add the sparkling water only when the pitcher is ready to go out.
Variations on This Dish:
- Peach Berry Mock Sangria: Swap the apple for sliced peaches if they’re in good shape.
- Pomegranate Grape Sangria: Replace the cranberry with pomegranate juice for a deeper tart note.
- Berry-Only Sangria: Skip the orange and use extra berries if you want a cleaner fruit flavor.
Common Mistakes to Avoid with This Dish:
- Using too much cranberry juice: It can overpower the grape base quickly.
- Adding bubbles too soon: The drink loses its sparkle before anyone gets a glass.
- Leaving the fruit in warm liquid: The fruit gets soft and the texture goes mushy.
15. Lemon Thyme Arnold Palmer
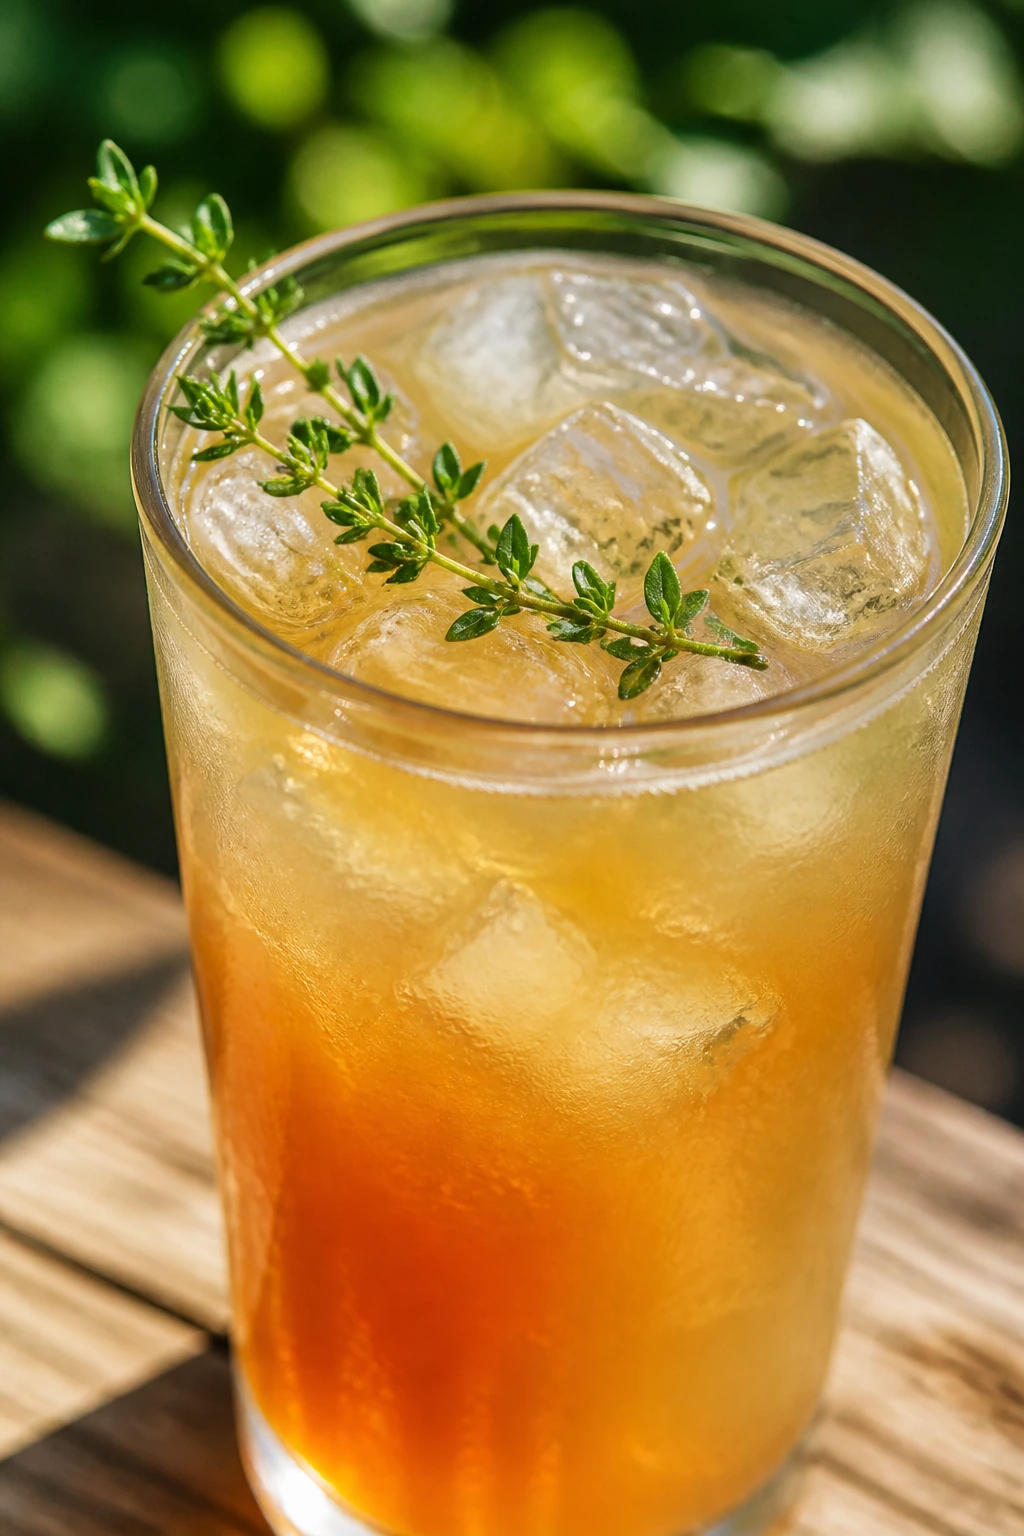
Intro:
A good Arnold Palmer is already one of the smartest picnic drinks on the planet. Lemon thyme makes it even better by adding a faint herbal note that keeps the tea and lemonade from tasting one-dimensional. It’s the drink I’d hand to someone who wants something familiar but not dull.
Why It Works:
Black tea gives the drink structure, lemonade gives it brightness, and thyme bridges the two with a clean herbal note that doesn’t shout. The thyme syrup is subtle, which is how it should be. You want people to notice that the drink tastes more interesting, not to wonder why it tastes like soup.
Key Ingredients:
- 3 cups cold black tea — brewed strong and chilled.
- 3 cups lemonade — homemade or good-quality store-bought.
- 1/4 cup thyme syrup — made from sugar, water, and thyme sprigs.
- 1 tablespoon fresh lemon juice — sharpens the finish.
- 1/4 teaspoon fine sea salt — keeps the sweetness in check.
- Ice and lemon wheels — for serving.
- 2 thyme sprigs — for garnish, if desired.
Quick Steps:
- Make the syrup: Combine 1/4 cup sugar, 1/4 cup water, and 2 thyme sprigs in a small saucepan. Warm until the sugar dissolves, simmer for 2 minutes, then cool.
- Mix the tea and lemonade: Stir the cold black tea, lemonade, thyme syrup, lemon juice, and salt in a pitcher.
- Chill: Refrigerate until cold.
- Serve: Pour over ice and garnish with lemon wheels or thyme sprigs.
Equipment for This Recipe:
- Small saucepan
- Pitcher
- Spoon
- Kettle or teapot
How to Serve This Dish:
This one is the easiest drink to pour by the glass all afternoon because everyone already understands the flavor. A lemon wheel floating on top keeps it looking clean and classic. It goes with sandwiches, chips, grilled food, and basically any picnic spread that needs a no-drama cold drink.
Pro Tips for This Recipe:
- Make the tea stronger than you think you need. Ice will soften it.
- Keep the thyme syrup mild; too much makes the drink taste savory.
- If your lemonade is very sweet, add a little extra lemon juice before chilling.
Variations on This Dish:
- Green Tea Palmer: Swap black tea for green tea if you want a lighter, grassier base.
- Sparkling Palmer: Replace 1 cup of the lemonade with sparkling water.
- Peach Thyme Palmer: Add 1/2 cup peach puree or a few peach slices for a fruitier version.
Common Mistakes to Avoid with This Dish:
- Oversteeping the tea: Bitterness shows up fast in a simple drink like this.
- Using too much thyme: A little goes a long way.
- Serving it warm: The balance disappears unless it’s properly chilled.
Why These Drinks Work So Well Outdoors
The best picnic drinks don’t just taste good in the kitchen. They hold up after a cooler ride, a slow pour, a few handfuls of ice, and the awkward pause while someone hunts for napkins. Fruit-forward drinks, tea-based drinks, and light spritzers all do that job well because they’re built on a base that can take a little dilution without collapsing.
I also like that these recipes cover a range of moods. Some are bright and sharp. Some are soft and juicy. A couple lean herbal, which is useful because a picnic spread usually benefits from contrast. If the food is rich, the drink should be clean. If the food is salty, the drink should have enough fruit or acid to push back.
And yes, they’re practical. That matters. A drink can look pretty in a pitcher and still be annoying to make again. These are the ones I’d actually repeat.
Essential Equipment for These Recipes
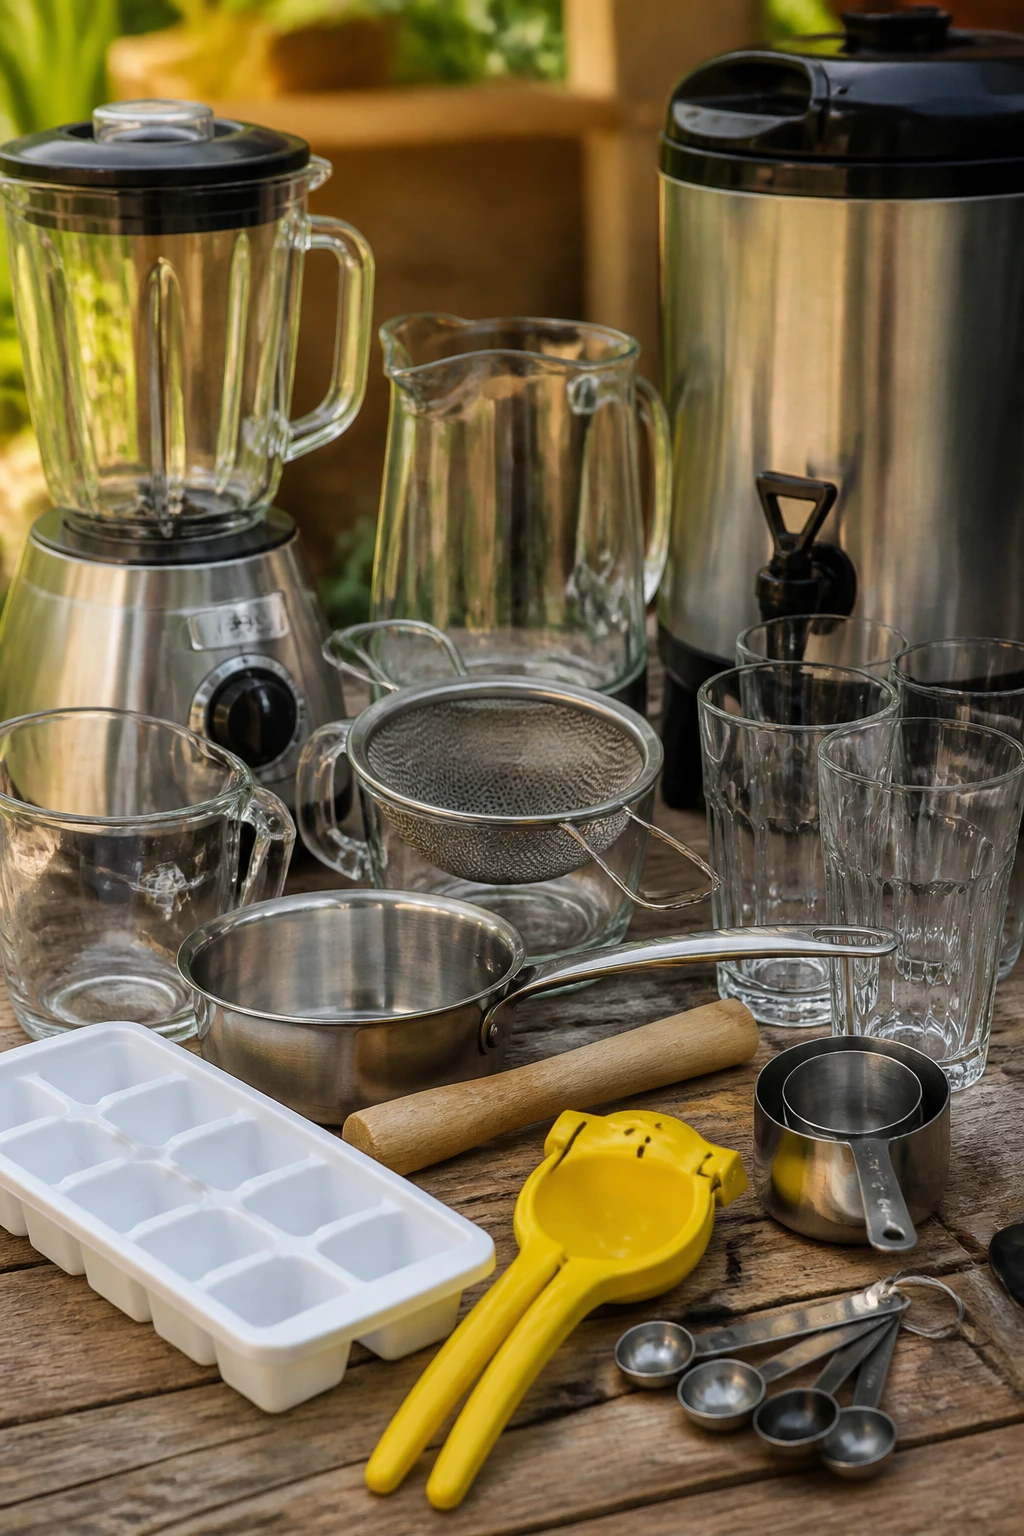
- Large pitchers, 2-quart or bigger — Most of these drinks make enough for a small group, and clear pitchers show off the color.
- Blender — Essential for watermelon, melon, mango, and slush-style drinks.
- Fine-mesh strainer — Useful for smoother fruit drinks and berry syrups.
- Small saucepan — Needed for simple syrups and tea concentrates.
- Citrus juicer — A hand juicer saves time and catches seeds.
- Wooden spoon or muddler — Best for bruising herbs without shredding them.
- Measuring cups and spoons — These drinks balance better when the sweetener and acid are measured, not guessed.
- Ice cube trays or freezer-safe containers — Handy for freezing extra fruit or tea into drink cubes.
- Tall serving glasses — Better for fizz, fruit chunks, and layered color.
- Insulated drink dispenser or thermos — Useful when you want to keep a batch cold during a long picnic.
Smart Shopping and Ingredient Tips for Fruit, Herbs, and Tea
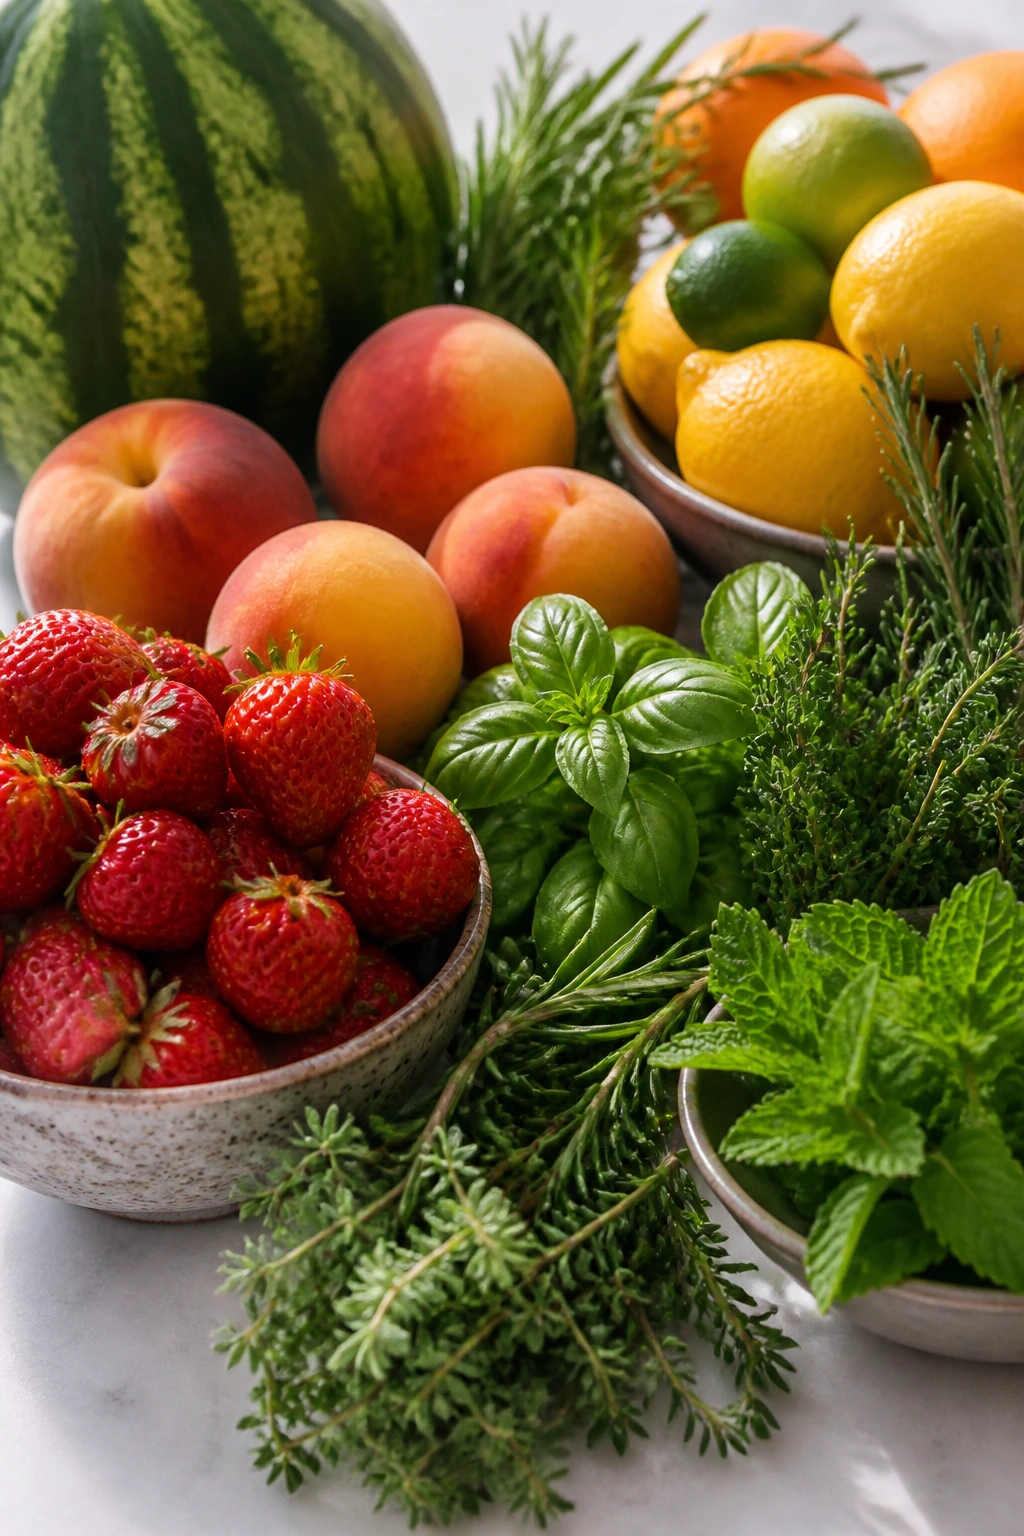
Fruit quality makes or breaks picnic drinks, and you can usually tell what you’re getting before you cut into it. Strawberries should be deeply red and fragrant. Peaches should give slightly at the shoulder when pressed. Watermelon should feel heavy for its size, with flesh that’s crisp rather than grainy. If you can only find fruit that’s a little underwhelming, use it in a cooked syrup or a blended drink instead of a raw garnish; heat and blending can hide some sins, but not all of them.
For herbs, buy the bunch that looks perky, not the one with the saddest leaves in the bin. Basil should feel soft and smell sweet. Mint should be bright and cool, not brown at the stem. Rosemary and thyme keep a little longer, which makes them easier for picnic prep, but even those taste better when the needles or leaves are fresh and not dry around the edges.
Juice matters more than people think. Bottled citrus juice can work in a pinch, but the flavor gets dull quickly, especially in drinks where lemon or lime is the main event. If you’re buying packaged juice, look for one that’s refrigerated and unsweetened. For tea, standard black tea bags are fine, but avoid flavored teas that already have vanilla or spice added unless you want that note in the drink too.
And here’s one small habit that saves a lot of disappointment: taste everything before it gets chilled. Cold mutes sweetness, acid, and herb flavor. If a drink tastes slightly too bright or slightly too sweet at room temperature, it usually lands in the right place once the ice goes in.
How to Serve These Recipes at a Picnic
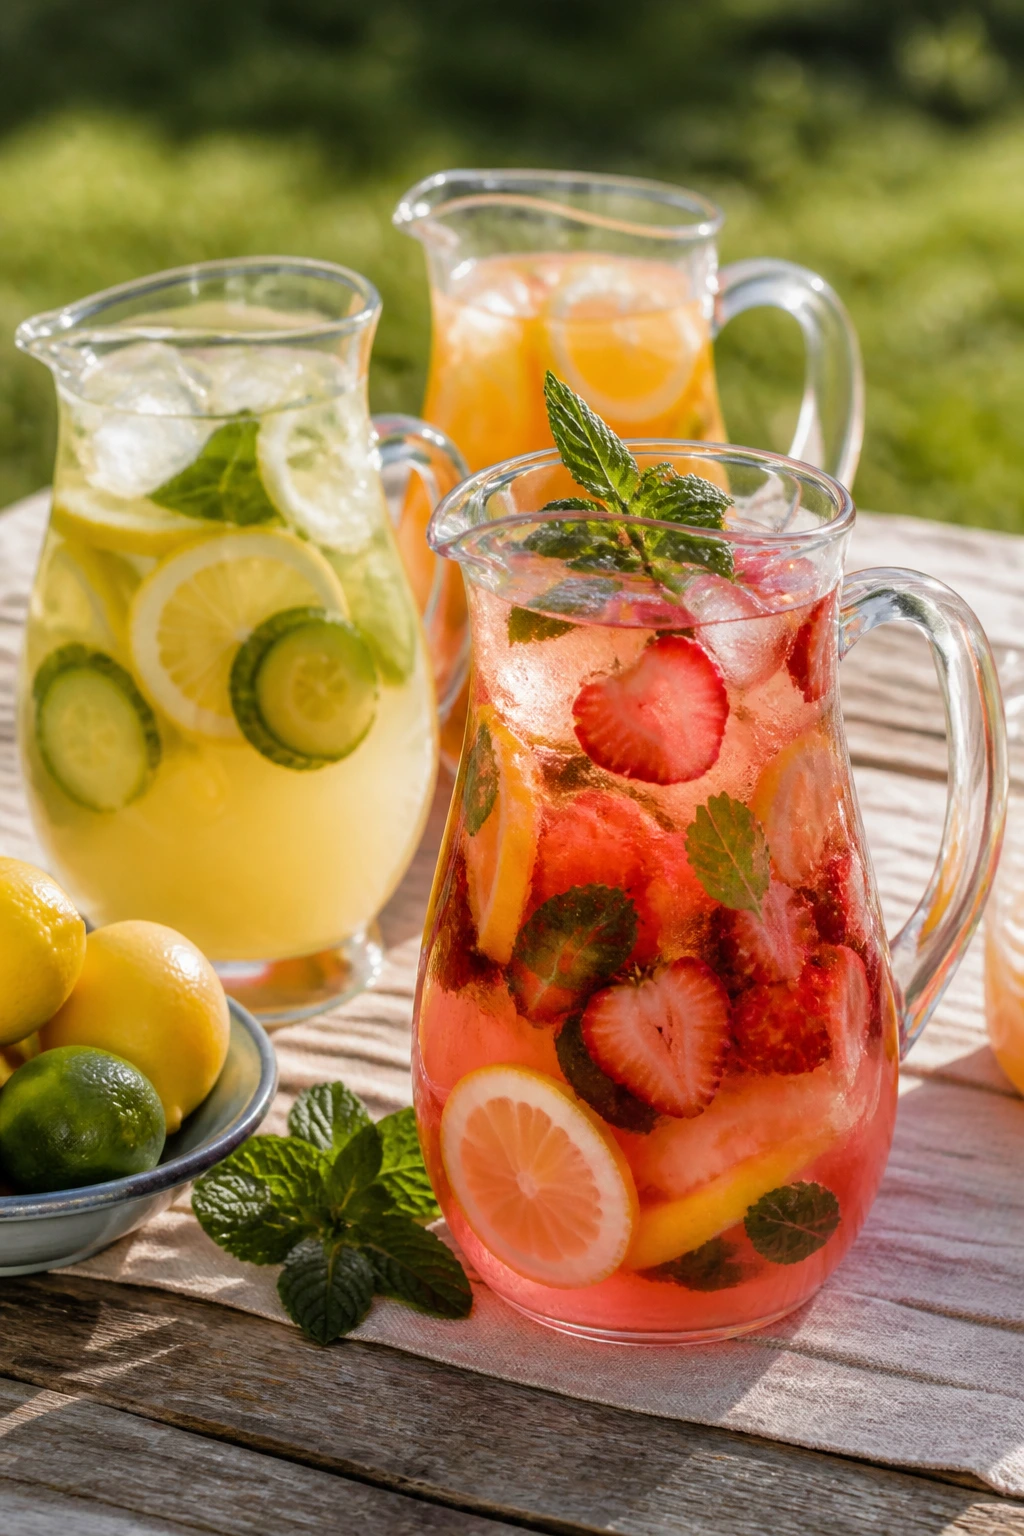
Presentation:
Use clear pitchers or glass dispensers when you can. These drinks earn their visual appeal from fruit pieces, deep color, and herb garnishes, so hiding them in opaque containers wastes half the fun. Mason jars, short tumblers, and insulated cups all work well; just keep the garnish simple so it doesn’t flop over in the heat.
Accompaniments:
These drinks like salty, crunchy food. Think potato chips, pretzels, grilled corn, fruit skewers, cold sandwiches, picnic wraps, or a cheese board that doesn’t sit out too long. A sharper drink like grapefruit rosemary spritz can cut through rich food, while a softer one like honeydew cooler is nice next to something heavily seasoned.
Portions:
Plan on about 8 ounces per child and 10 to 12 ounces per adult for the first round, then a little less for refills because people usually sample more than one drink. A 2-quart pitcher serves 6 to 8 comfortably, depending on glass size and how much ice you use. If you’re hosting a bigger picnic, make one fruit-forward drink and one tea- or water-based drink so guests have a lighter option.
Beverage Pairing:
Keep one neutral pitcher of still water or plain sparkling water beside the flavored drinks. It gives people a palate reset between sweet pours and keeps the menu from feeling sugary all afternoon. If you want a second flavored choice, pair a fruit drink with an unsweetened iced tea so the spread has both brightness and restraint.
Additional Tips and Flavor Boosters
Flavor Enhancement:
A tiny pinch of salt in fruit drinks does more than most people expect. It pulls out watermelon, berry, citrus, and melon flavor without making the drink taste salty. I use it especially in chilled drinks because cold suppresses flavor a little, and salt helps drag it back up.
Customization:
If you want more sparkle, add club soda or sparkling water at the end rather than blending it in. If you want more body, use frozen fruit in place of some ice. If you want a softer, sweeter drink, swap part of the sugar for honey or use a little simple syrup made with brown sugar for a caramel note.
Serving Suggestions:
Freeze berries, melon balls, or citrus slices into ice cubes so the drink stays cold without getting watery. Herb sprigs look nicest when you slap them lightly between your hands first; that wakes up the oils. A thin salted rim can help with grapefruit and cucumber drinks, but keep it very light.
Make-It-Yours:
For a less-sweet version, cut the sweetener by one-third and add more lemon or lime. For a kid-friendly treat, lean into the slushes and fruit punches. For a more adult picnic table, choose the tea-based drinks and the grapefruit spritz, because they have enough edge to feel balanced next to richer food.
Make-Ahead, Storage, and Chilling Guidance
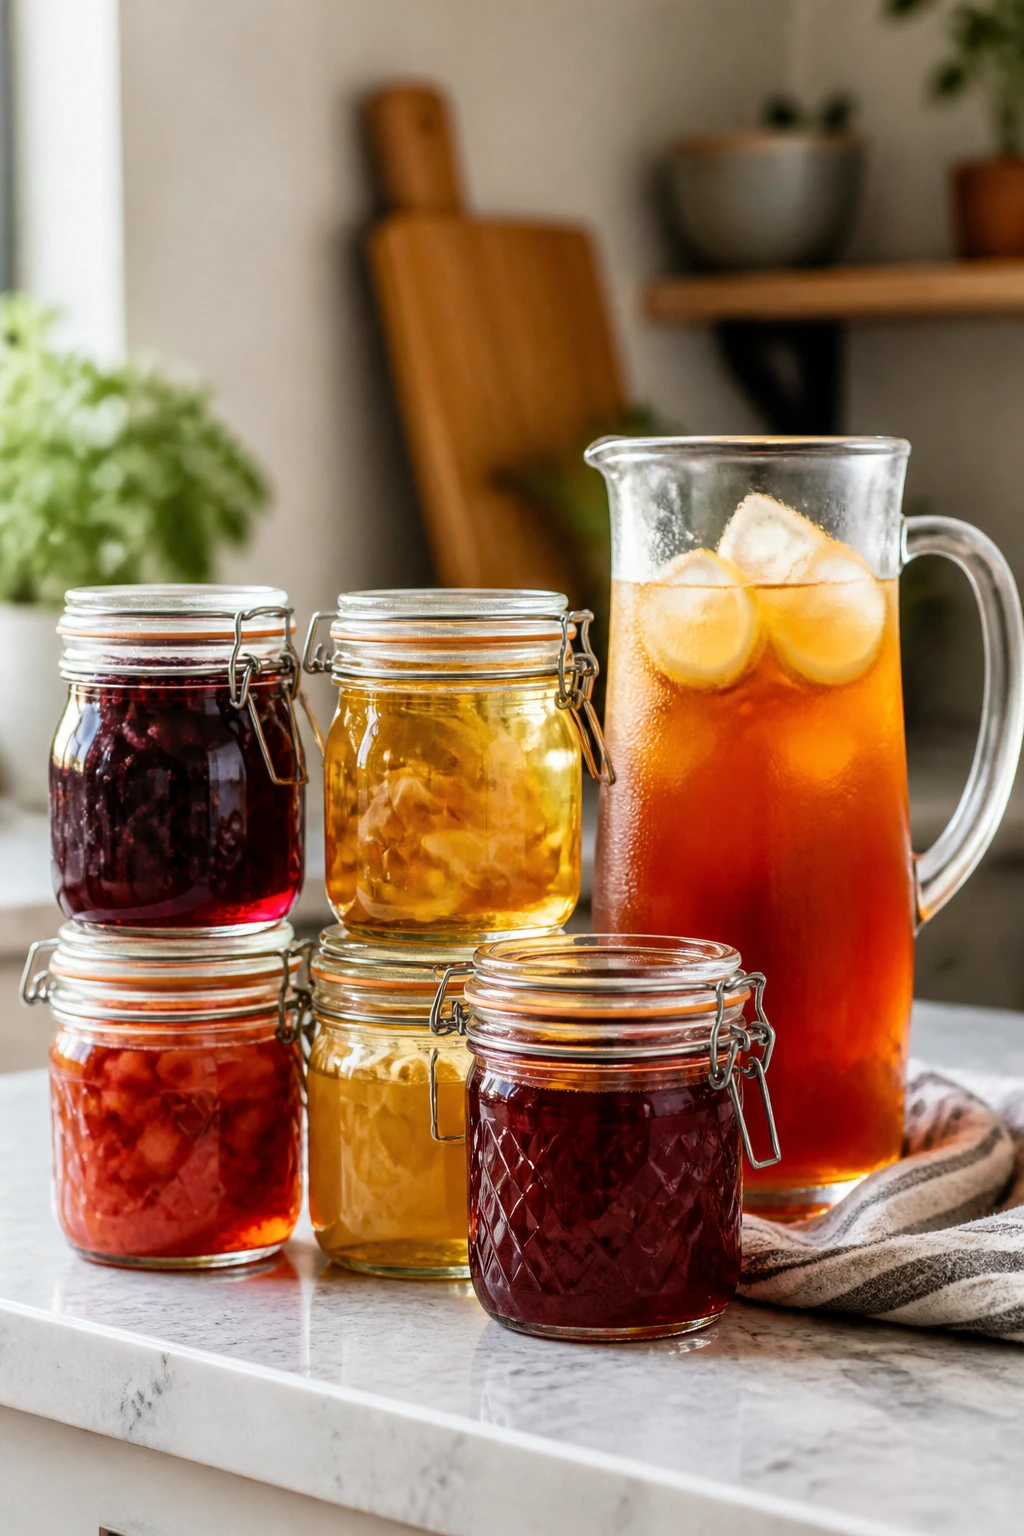
Most of these drinks can be made ahead, but not all parts should be mixed too early. Fruit syrups, brewed tea bases, and strained purees usually keep well in the refrigerator for 3 to 4 days in sealed containers. Drinks with fresh herbs are best within 24 to 48 hours because basil, mint, and sage start losing their clean scent after that. If a drink contains sparkling water, ginger beer, or club soda, add the bubbles right before serving. That’s the difference between a bright drink and one that tastes tired by the first refill.
For the slushes, freeze the fruit base in a sealed container for up to 2 months. Thaw it just enough to scoop into a blender with a little ice or cold water, then blend until thick. Watermelon, mango, and cherry bases all handle freezing well. Melon drinks that rely on fresh texture are a little softer after freezing, so I’d use those fresh when possible.
Tea-based drinks can be chilled overnight without losing much. In fact, some of them improve after the flavors settle. Strawberry lemonade, blueberry limeade, and blackberry sage lemonade all hold up nicely if you make the syrup one day ahead and add the cold water later. If you need to save space in the cooler, freeze part of the drink base in a bottle and let it act as both ice and flavor.
Reheating is mostly irrelevant here, because these drinks are supposed to stay cold. If a simple syrup has sat in the fridge and crystallized a little, warm that syrup alone in a saucepan for a minute, cool it again, and then mix the drink. Never try to fix a flat, over-diluted picnic drink by warming the whole thing. That ruins the point.
Variations and Adaptations to Try
Low-Sugar Picnic Pitcher:
Cut the sweetener in each recipe by one-third, then taste after chilling before deciding whether to add more. Cold drinks often need a touch more acid rather than more sugar, so lemon or lime is usually the better fix.
Extra-Fizzy Version:
Replace still water with sparkling water in the lemonade, cucumber, hibiscus, or berry drinks, but only at the last minute. If you like a stronger snap, use a little ginger beer instead of plain club soda in the pineapple or peach drinks.
Herb-Forward Twist:
Swap basil for mint, mint for thyme, or rosemary for sage where the flavor makes sense. Basil is soft and sweet, mint is cool, thyme is earthy, rosemary is stronger, and sage is the boldest of the group. Use the stronger herbs with a lighter hand.
Frozen Treat Mode:
Turn the watermelon, cherry, mango, or strawberry drinks into slushes by blending with 2 cups ice or using frozen fruit. This works especially well when the picnic site is hot and you need something that stays cold longer than a plain pitcher.
Kid-Friendly Swap:
Keep the fruit flavor, lower the herb intensity, and skip anything bitter like grapefruit unless you balance it with extra juice or sweetness. Kids usually go for strawberry, cherry, peach, and watermelon first, then come back for seconds if the texture is fun.
Bolder, Grown-Up Style:
Lean into grapefruit, hibiscus, rosemary, sage, and tea-based drinks. Those flavors hold up next to smoky food, salty snacks, and the kind of picnic spread that makes plain soda taste boring.
Common Mistakes to Avoid
Letting ice do all the work:
Ice should chill the drink, not rescue weak flavor. If the base tastes bland before it hits the cooler, it will taste worse by the time it’s poured. Build in enough acid, fruit, and sweetness first.
Adding bubbles too early:
Sparkling water, ginger beer, and club soda go flat fast. If you mix them in too soon, you lose the clean finish that makes drinks like the peach sparkler or grapefruit spritz worth making.
Overusing herbs:
Mint, basil, rosemary, sage, and thyme are not decoration. They’re ingredients. Too much turns a bright drink into something sharp, grassy, or piney. Start small, taste, and stop before the herb takes over.
Skipping the chill time:
Warm drinks taste louder and sweeter than they should. A batch that has rested in the fridge for 30 minutes usually tastes better balanced than one poured straight from the counter.
Not straining when the texture needs it:
Berry seeds, cucumber pulp, and melon fiber can make a drink feel muddy if you leave them in by accident. Smooth drinks should pour cleanly; slushes and fruit-heavy punches are the exceptions.
Using bruised or tired fruit:
Picnic drinks depend on fruit that tastes alive. Soft peaches with no perfume, dull berries, and flavorless melon won’t magically improve in the pitcher. If the fruit is weak, cook it into syrup or choose a different recipe.
Frequently Asked Questions
Can I make these summer picnic drinks the day before?
Yes, most of them can be made 1 day ahead if you leave out the sparkling water and add fresh ice at serving time. Tea bases, fruit syrups, and strained purees actually benefit from a little time in the fridge because the flavor settles and rounds out.
Which drinks hold up best in a cooler?
The tea-based drinks, lemonade variations, and fruit syrups keep their shape well. Watermelon, cucumber, and melon drinks are best when they stay very cold and get served within a few hours, while slushes should be blended right before serving.
How do I keep the drinks cold without watering them down?
Use frozen fruit as part of the drink, make ice cubes from tea or juice, and keep bubbles separate until the last minute. Pre-chill the pitcher or dispenser in the fridge if you have room, because a cold container buys you a surprising amount of time.
Can I use frozen fruit instead of fresh?
Absolutely. Frozen berries, mango, cherries, and blueberries work especially well because they’re picked at good ripeness and often give stronger color. For drinks like lemonade or spritzers, frozen fruit can even help chill the drink while adding flavor.
What if my drink tastes too sweet after chilling?
Add lemon or lime juice in small amounts, not more sugar. Cold dulls sweetness, but it also makes drinks taste flatter, so acid usually fixes the problem better than extra sweetener.
Do I need a blender for every recipe?
No. The blender is mainly for watermelon, melon, mango, cucumber, and slushes. The tea-based drinks, syrups, and spritzers can be made with a saucepan, a pitcher, and a spoon.
How much should I plan per person for a picnic?
Plan on 8 to 12 ounces per person for the first pour, depending on the heat and the rest of the menu. If the picnic includes salty or smoky food, people usually drink more than they would at a casual snack table.
What if the drink gets flat or watery halfway through the picnic?
Add a splash of fresh citrus juice and a pinch of salt, then top it with more cold water or sparkling water if the recipe uses fizz. If it’s a slush, you may need to blend a second batch or add frozen fruit cubes to bring the texture back.
The Pitcher I’d Pack First

A picnic drink should do a few things well and not ask for much drama. It should pour cold, taste bright, and hold together long enough that you’re not apologizing for the second glass. That’s why fruit, citrus, tea, and herbs keep showing up here; they’re sturdy flavors. They don’t fold when the ice starts working on them.
If I were packing one pitcher first, I’d pick the drink that matches the food, then make a second one with a completely different shape — maybe something bubbly beside something still, or something tart beside something round and sweet. That’s the part people remember. Not just the drink itself, but the way the whole table felt when it was poured.
Pick one that fits the menu, chill it hard, and keep the bubbles for the last minute. That alone does more for a summer picnic than any fancy garnish ever will.