
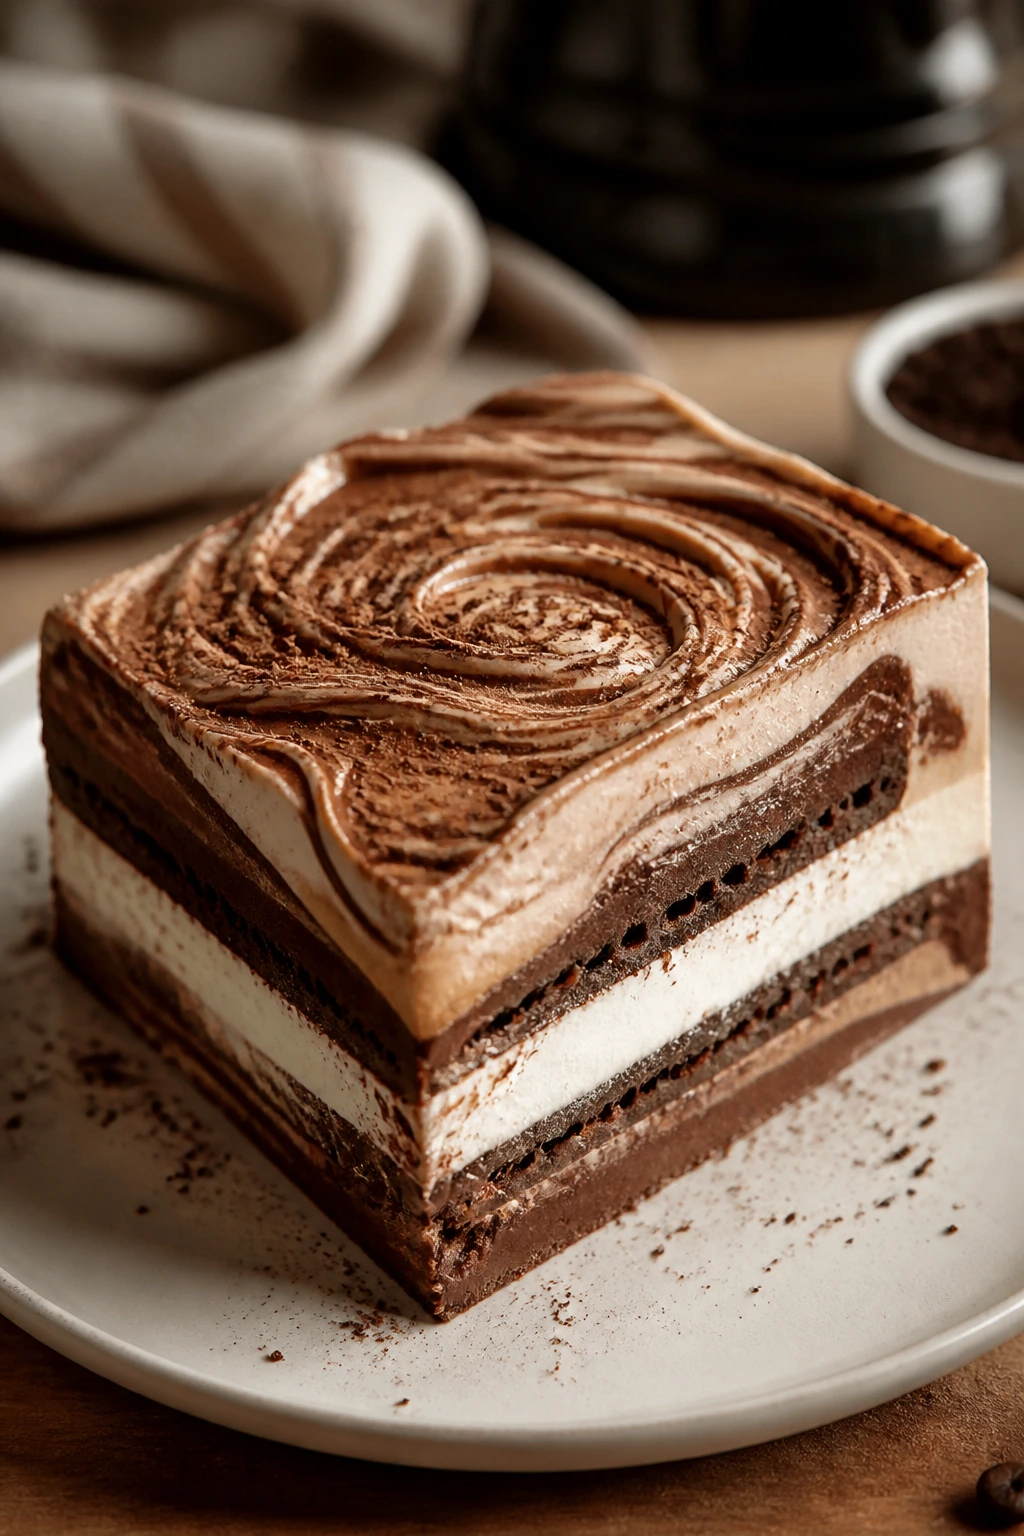
Cold desserts can be lazy in the best way, but an ice cream sandwich cake still has to do one hard thing well: stay cold, slice clean, and taste like more than a pile of freezer staples. That’s where the cream cheese frosting earns its keep. It cuts through the sugar, gives the whole thing a slight tang, and feels richer than the usual whipped topping version without turning heavy or cloying.
The first time you cut into a good one, you can hear the knife scrape through the cookie edges before it glides into the soft middle. There’s a little resistance, then a clean square, then that tidy contrast of cold ice cream, fudgy ribbons, and frosting that tastes faintly like cheesecake filling. If you’ve ever had a frozen cake that collapsed into a sticky mess on the plate, this one is the antidote.
I like this dessert because it has a real party trick built into it. It looks like you spent longer on it than you did, and it forgives the kind of kitchen chaos that happens when people are talking, the freezer door keeps opening, and somebody keeps asking where the spoons are. The trick is not complicated. You just need to respect the freeze time and keep the frosting thick enough to hold its shape.
Why This Ice Cream Sandwich Cake Works So Well
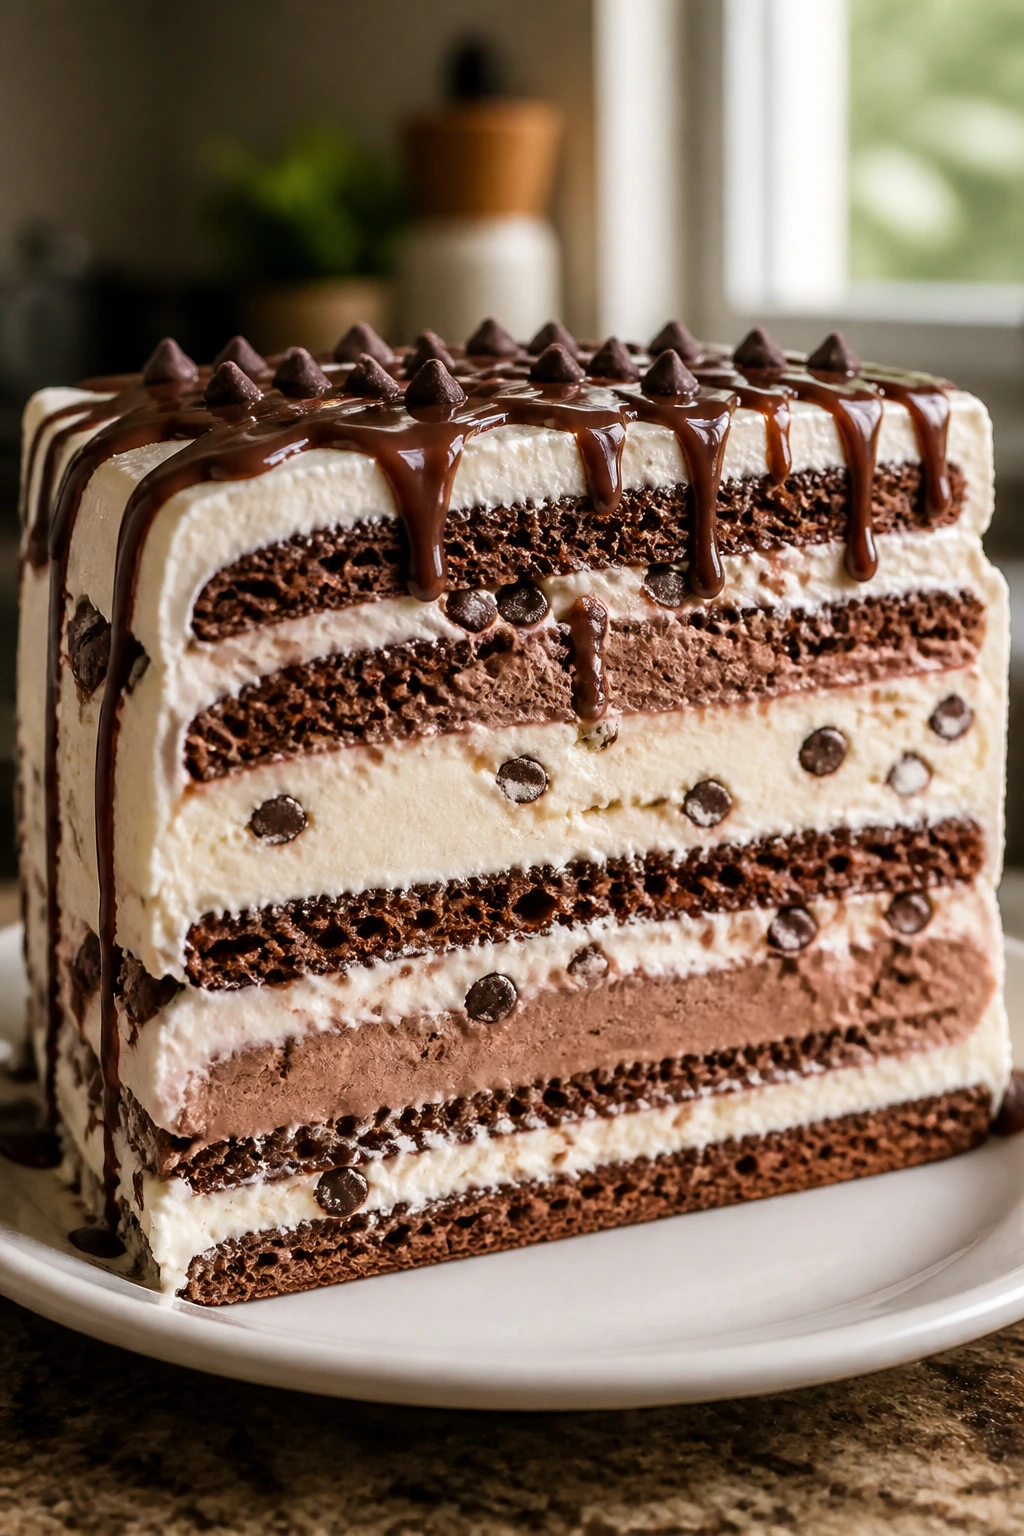
The best version of an ice cream sandwich cake is all about contrast. Cold cookie layers give you structure, the cream cheese frosting brings a soft, tangy middle note, and the hot fudge adds a glossy, almost diner-style richness that keeps every bite from tasting flat. That balance matters more than most people think. Without the tangy frosting, the cake can taste like straight sugar. Without the fudge, it can feel dry and one-note, even though it’s frozen.
The other reason this dessert works is that the ingredients are already doing half the job for you. Ice cream sandwiches are built to be stacked; they’re flat, portioned, and evenly shaped in a way that homemade sponge layers rarely are. That means you can focus on the texture play instead of fighting the cake into submission. The freezer does the setting. You just arrange the pieces and keep them from sliding around like hockey pucks.
There’s also a practical side here that people underestimate. Frozen desserts often fail because they’re either too hard to cut or too soft to serve. This one lands in the middle if you handle it right. Ten minutes on the counter before slicing is usually enough to soften the edges without letting the frosting collapse, and that tiny window is what gives you those neat, square slices instead of a scoopable pile.
Why You’ll Want This One in Your Back Pocket
- No oven required: The whole dessert comes together with a mixer, a pan, and a freezer, which is exactly what you want when the kitchen is already busy.
- Cream cheese frosting changes the game: A tangy frosting keeps the cake from tasting flat and gives the cold layers a richer, less sugary finish.
- It holds for a crowd: A 9×13 pan cuts into 16 solid servings, and the slices stay tidy if you freeze them long enough.
- The layers look intentional: Even simple ingredients feel polished once you stack them in clean rows and finish with fudge and crumbs.
- It’s easy to adapt: Chocolate, peanut butter, mint, berry, gluten-free — the base formula holds up without becoming fussy.
- Make-ahead friendly: This is one of those rare desserts that gets more useful when you make it ahead instead of trying to assemble it at the last minute.
Timing, Yield, and the Pan That Fits It
Yield: Serves 16
Prep Time: 25 minutes
Cook Time: 0 minutes
Total Time: 25 minutes active + 4 hours freezing
Difficulty: Beginner — there’s no baking, but you do need to work neatly and keep an eye on the freezer so the layers stay sharp.
Chill/Rest Time: Freeze at least 4 hours; 8 hours or overnight is better for cleaner slices.
Best Served: Slightly softened, about 10 to 12 minutes after coming out of the freezer.
A 9×13-inch pan is the sweet spot here. It gives the sandwiches enough room to line up without forcing them into a cramped stack, and the finished cake is easy to cut into squares that feel generous without being absurd. Glass works. Metal chills faster, which I prefer if your freezer runs warm or your kitchen gets steamy while you’re assembling.
If you want the neatest possible slices, plan on lining the pan with parchment or foil that overhangs the long sides. That little sling saves you from excavating frozen cake corners with a spatula, which is a job nobody wants.
The Ingredient List That Keeps It Rich, Not Sloppy

For the Cake Layers:
- 24 standard rectangular ice cream sandwiches, unwrapped
- 1 cup hot fudge sauce, divided
- 1 1/2 cups chocolate sandwich cookie crumbs, divided
- 1/2 cup chopped salted peanuts or toasted pecans, optional
For the Cream Cheese Frosting:
- 16 oz cream cheese, softened
- 1/2 cup unsalted butter, softened
- 3 1/4 cups powdered sugar, sifted
- 2 teaspoons pure vanilla extract
- 1/4 teaspoon fine salt
- 2 tablespoons heavy cream, plus 1 to 2 more teaspoons if needed
For the Finish:
- 1/2 cup chocolate shavings or curls
- 2 tablespoons reserved cookie crumbs, for a final dusting
That’s the full shopping list. Nothing fancy, nothing decorative for the sake of it. Every piece is there for a reason, and the frosting is the thing that makes the cake taste like a proper dessert instead of a frozen novelty.
Why These Ingredients Work Together
Ice Cream Sandwiches
What to use: 24 standard rectangular sandwiches, the plain kind with cookie wafers and vanilla ice cream.
Preparation: Keep them wrapped until the last minute, then let them sit out for 3 to 4 minutes so the edges soften just enough to press together.
Substitutions: Gluten-free sandwiches work well, and mini sandwiches can be used in a smaller dish. Chocolate, vanilla, or Neapolitan versions all fit the same structure.
Tips: Pick sandwiches that are close in size. The thinner, firmer kind slices cleaner than soft bakery-style versions, which tend to slump once they start thawing.
Cream Cheese Frosting
What to use: 16 oz cream cheese, 1/2 cup unsalted butter, 3 1/4 cups powdered sugar, vanilla, salt, and a little heavy cream for loosening.
Preparation: Beat the cream cheese and butter first until the mixture is smooth and pale, then add the sugar gradually so you don’t get a gritty frosting.
Substitutions: Mascarpone can replace half the cream cheese if you want a milder tang. Dairy-free cream cheese and plant butter also work, though the frosting may need an extra spoonful of powdered sugar to hold.
Tips: The frosting should be thick enough to hold a swoop from a spoon. If it looks loose, chill the bowl for 10 minutes before spreading.
Fudge, Crunch, and Finish
What to use: 1 cup hot fudge sauce, 1 1/2 cups chocolate sandwich cookie crumbs, and a handful of chocolate shavings for the top.
Preparation: Warm the fudge until it pours easily but does not feel hot, and crush the cookies into small, uneven crumbs about the size of peas.
Substitutions: Salted caramel can replace part of the fudge, and chopped peanuts or toasted pecans can stand in for the cookie crumbs if you want more crunch.
Tips: Keep the sauce warm, not steaming. If it’s too hot, it melts the sandwiches faster than you can spread the frosting.
The Tools That Make Assembly Less Messy
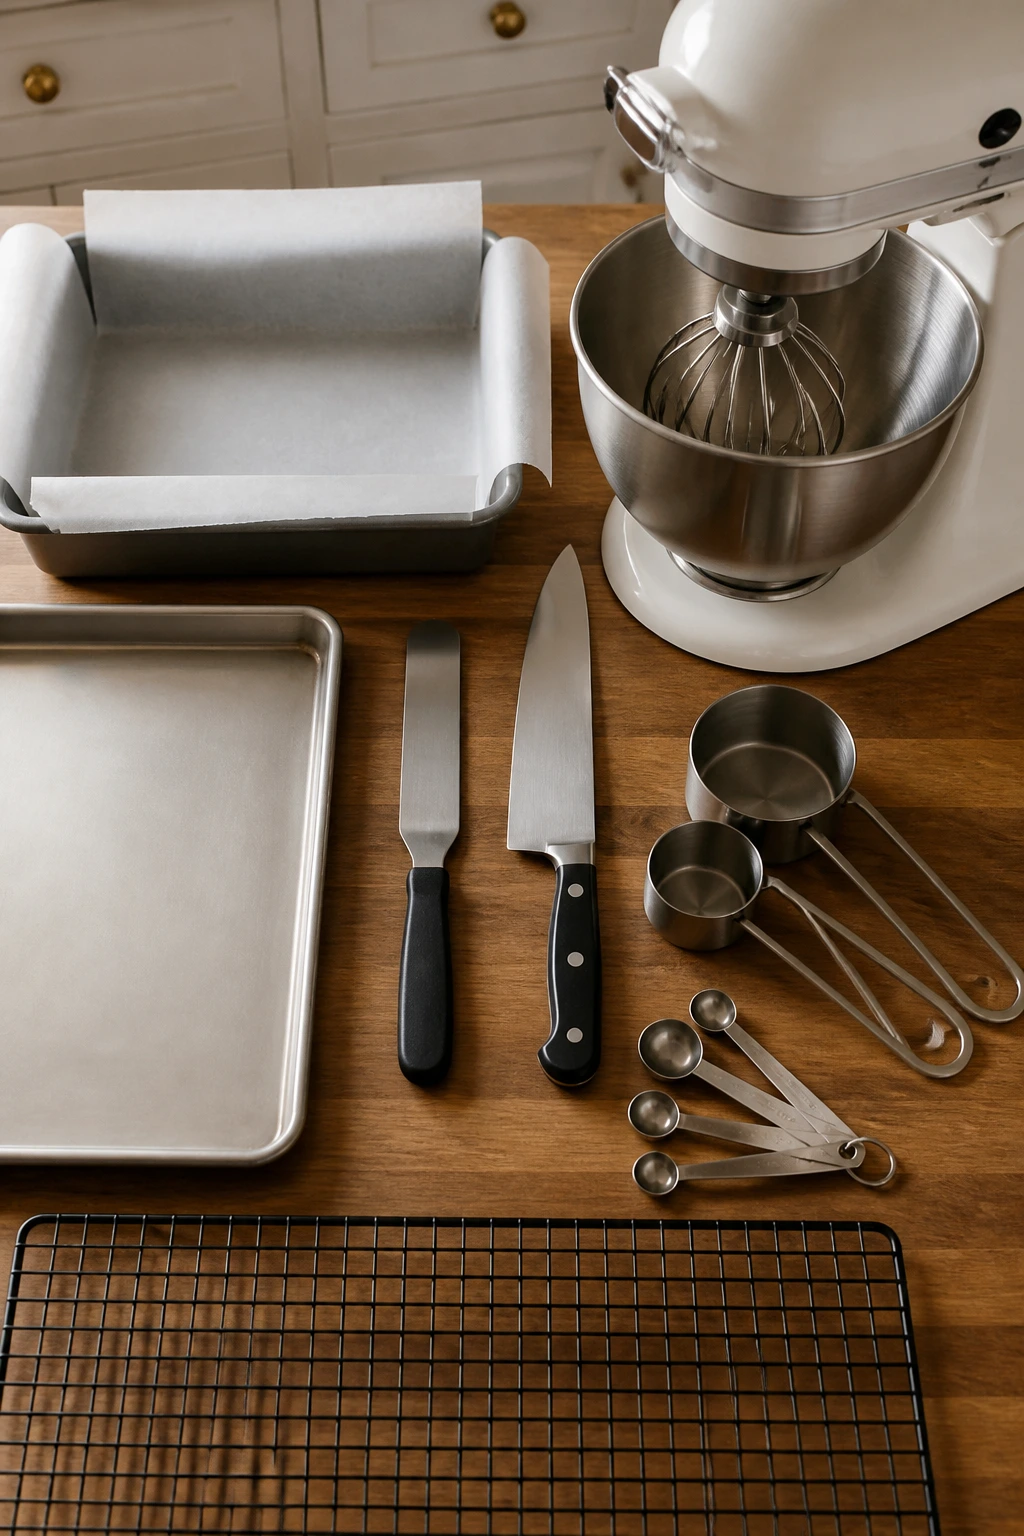
- 9×13-inch baking pan: Metal chills a little faster, but glass works if that’s what you have.
- Parchment paper or foil: A sling makes the whole cake easy to lift out in one piece.
- Stand mixer or hand mixer: You need this for the frosting; beating by hand is possible, but it’s a shoulder workout for no reason.
- Offset spatula or flexible rubber spatula: The offset spatula makes frosting the top much cleaner.
- Sharp chef’s knife: A long, thin blade gives neater slices than a short utility knife.
- Sheet pan or flat tray: Handy for carrying the finished dessert to the freezer without tilting the pan.
- Measuring cups and spoons: The frosting needs enough sugar to hold, and the fudge should not be guessed at.
- Cooling rack or counter space: You need a stable place to set the pan while you work quickly.
The Cream Cheese Frosting Layer and the Freeze You Should Respect
This dessert lives or dies on how the frosting behaves. Too soft, and it squeezes out the sides when you stack the sandwiches. Too stiff, and it tears the cookie layers instead of gliding over them. The target is thick, spreadable, and still smooth enough to make a clean ribbon when you drag a spatula through it.
The freezing step matters just as much. People get impatient here because the dessert looks finished before it actually is. It isn’t finished until the layers have had time to firm up into one unit, and that takes hours, not minutes. A quick chill only sets the outside. A proper freeze gives you the sliceable center that makes the whole thing worth serving.
There’s a nice side effect to that wait. The cream cheese frosting settles into the edges of the sandwiches and loses the raw sweetness that frosting can have when it’s freshly mixed. After a few hours in the freezer, the sugar softens, the vanilla deepens a little, and the whole thing tastes more balanced than it did when you were spreading it.
Building the Cake Without Letting It Melt
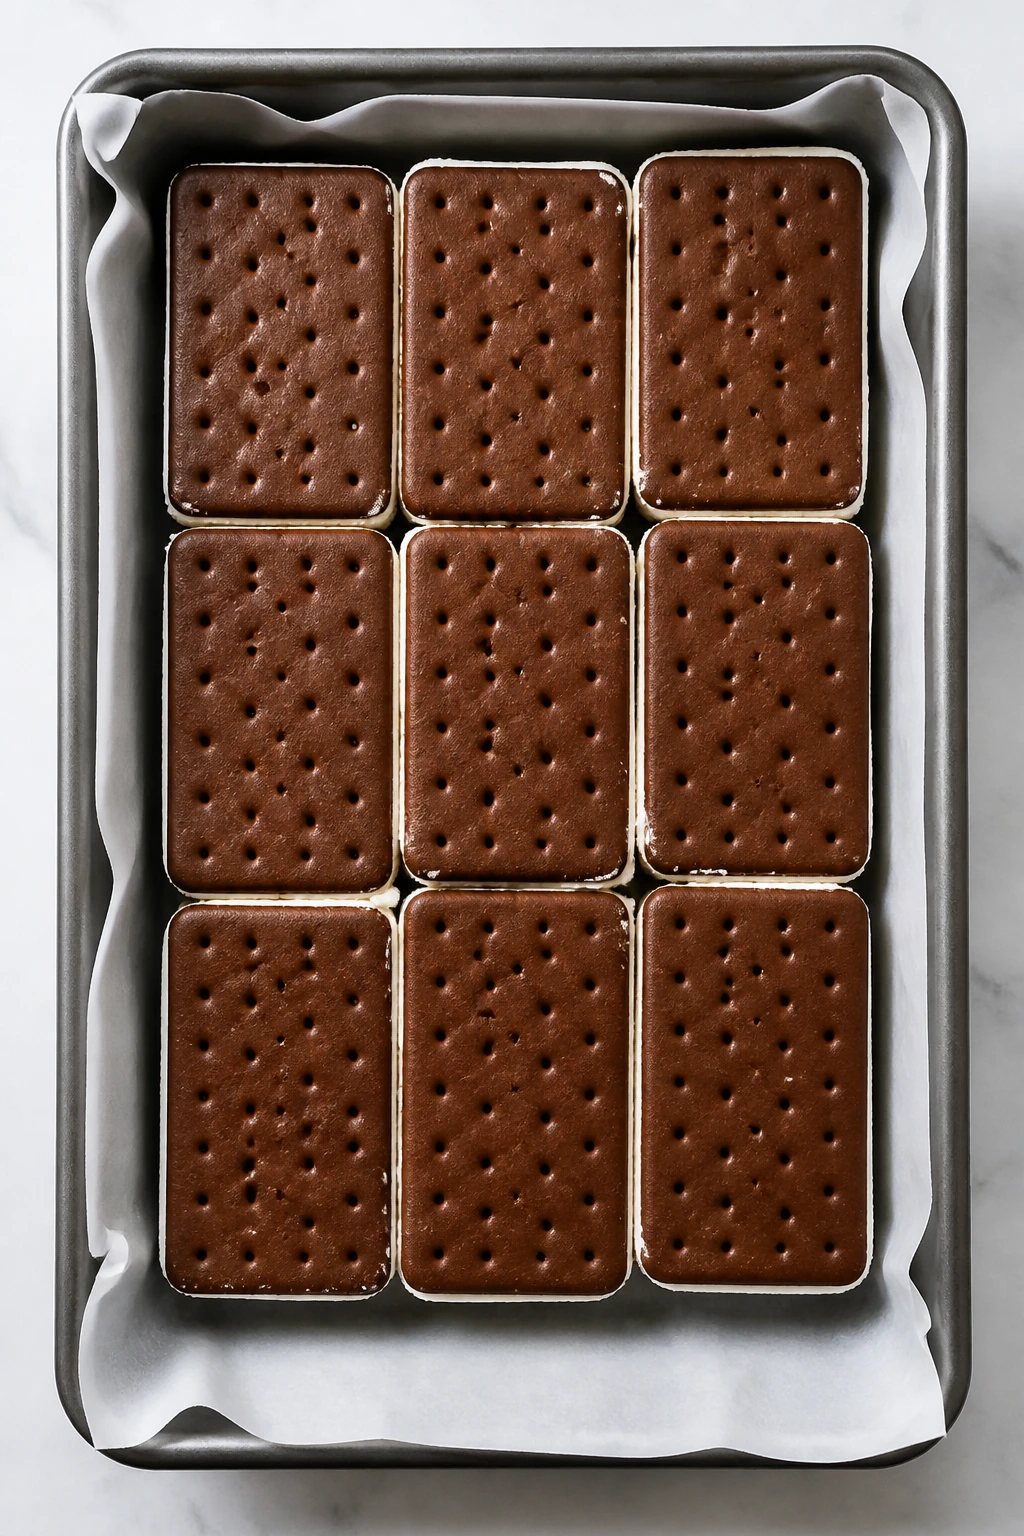
Prepare the Pan:
- Line a 9×13-inch pan with parchment paper or foil, leaving overhang on the two long sides. If you’re using foil, smooth it as flat as you can so the finished cake doesn’t pick up wrinkles.
- Set the pan in the freezer for 10 minutes while you make the frosting. A cold pan helps the first layer stay put.
Make the Frosting: 3. In a large bowl, beat the softened cream cheese and softened butter on medium speed for 2 to 3 minutes, until the mixture looks smooth, pale, and fluffy. Scrape down the bowl once or twice so you don’t leave streaks of butter behind. 4. Add the powdered sugar in two additions, mixing on low after each one so it doesn’t snow across your kitchen. Beat in the vanilla, salt, and 2 tablespoons heavy cream. The finished frosting should be thick, creamy, and easy to spread. If it feels loose, chill it for 10 minutes before assembling.
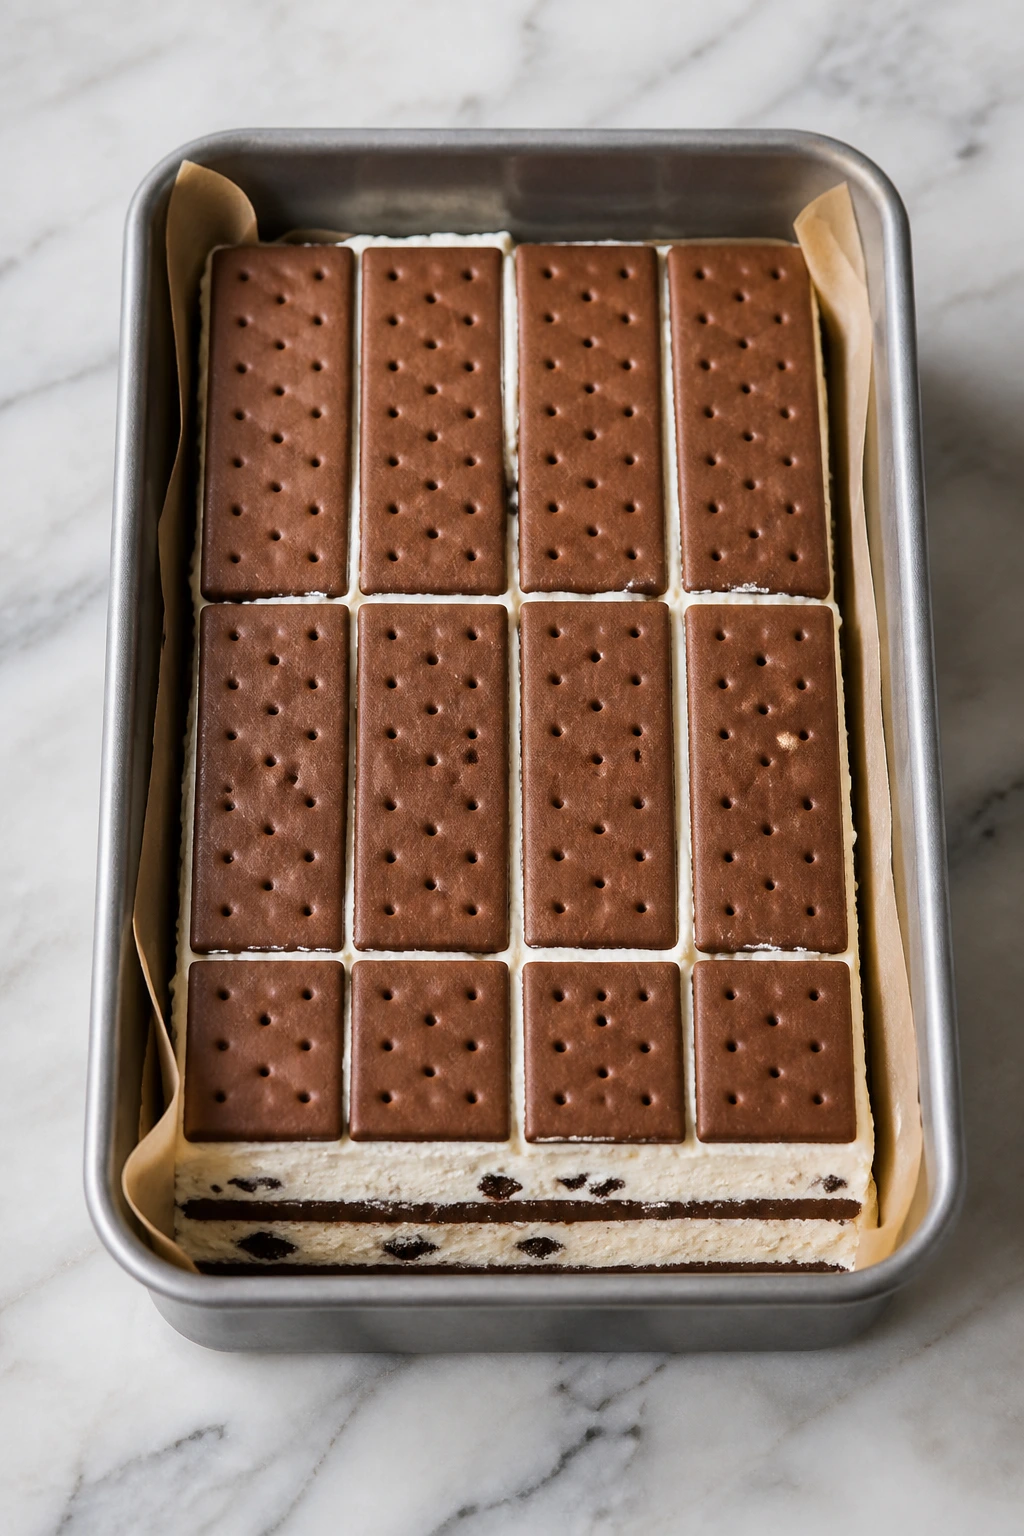
Build the First Layer: 5. Unwrap 12 ice cream sandwiches and let them sit at room temperature for 3 to 4 minutes, just until the edges soften slightly. Arrange them in the pan in a tight 3×4 layer, pressing them together so there are no big gaps. 6. Spread half of the cream cheese frosting over the sandwiches in an even layer. Don’t worry about getting it perfectly smooth at the edges; just keep the layer consistent from corner to corner. 7. Drizzle half of the hot fudge sauce over the frosting, then scatter half of the chocolate cookie crumbs and, if using, the chopped peanuts or pecans. Work quickly here so the frosting does not soften too much.
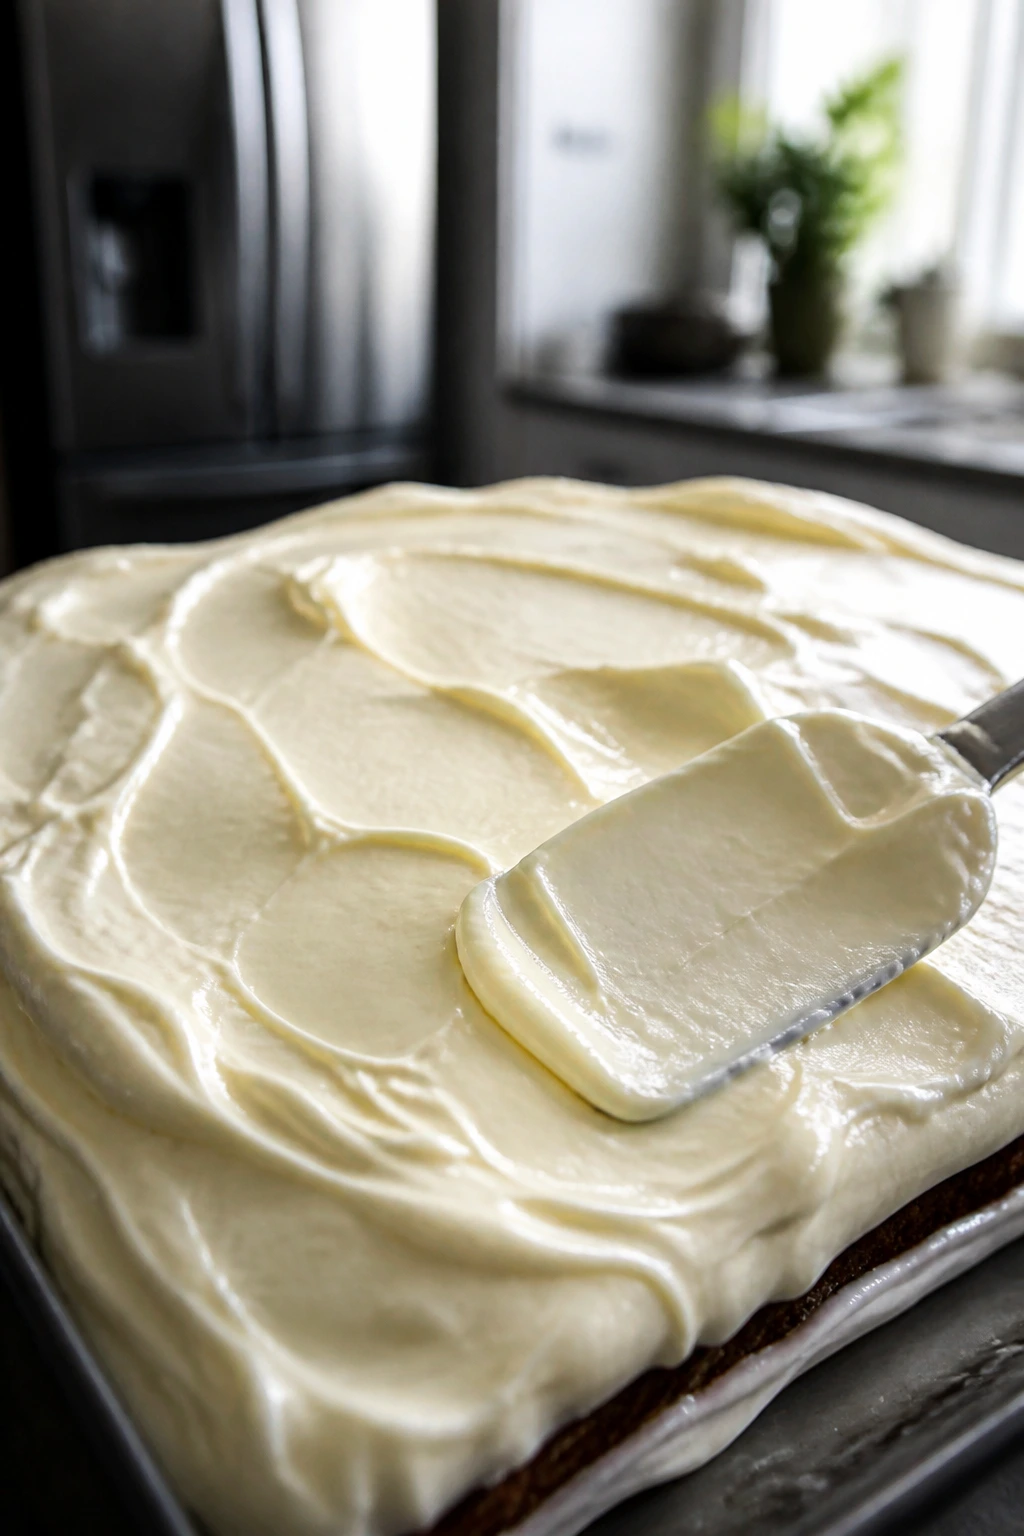
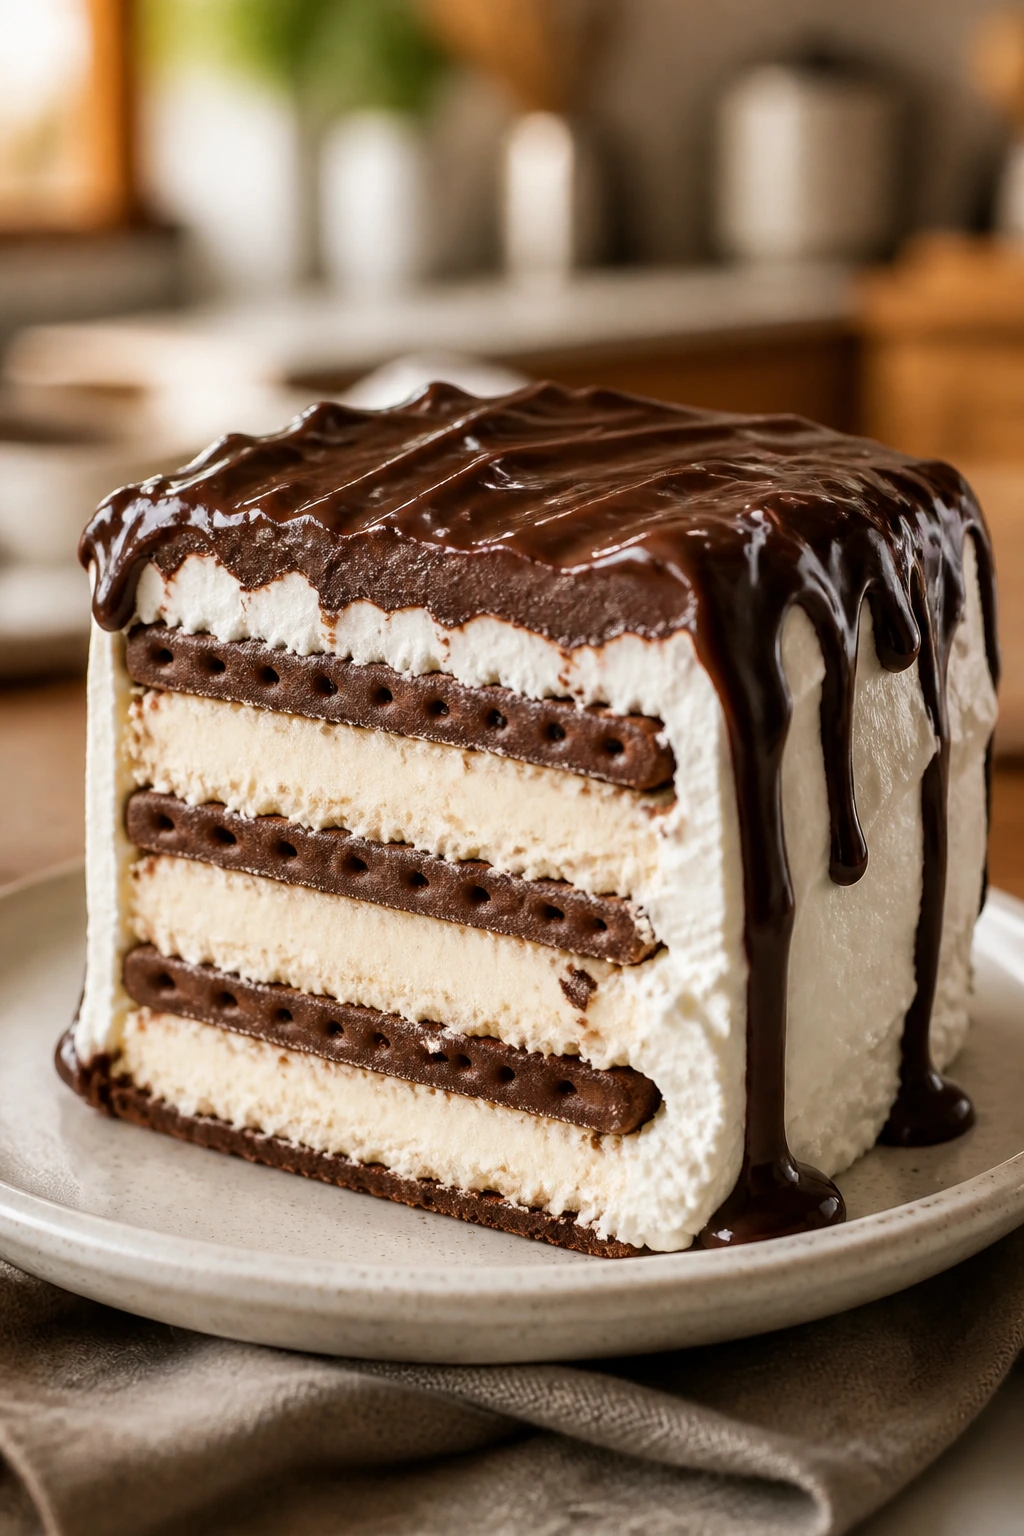
Add the Top Layer: 8. Unwrap the remaining 12 sandwiches and arrange them over the filling in the same 3×4 pattern. If the pieces are slightly different sizes, put the best-fitting ones around the edges and fill the center with the more uneven pieces. 9. Spread the remaining frosting over the top in thick, gentle swoops. Use the back of a spoon or an offset spatula to make soft ridges that will catch the fudge.
Finish and Freeze: 10. Drizzle on the remaining hot fudge and sprinkle over the remaining cookie crumbs and chocolate shavings. Cover the pan tightly with plastic wrap or a lid and freeze for at least 4 hours, or until the cake feels firm all the way through. Do not cut it early unless you want a slumping, messy square instead of a clean slice. 11. To serve, lift the cake out using the parchment overhang, set it on a cutting board, and let it sit for 10 to 12 minutes. Slice with a long knife dipped in hot water and wiped dry between cuts for the neatest edges.
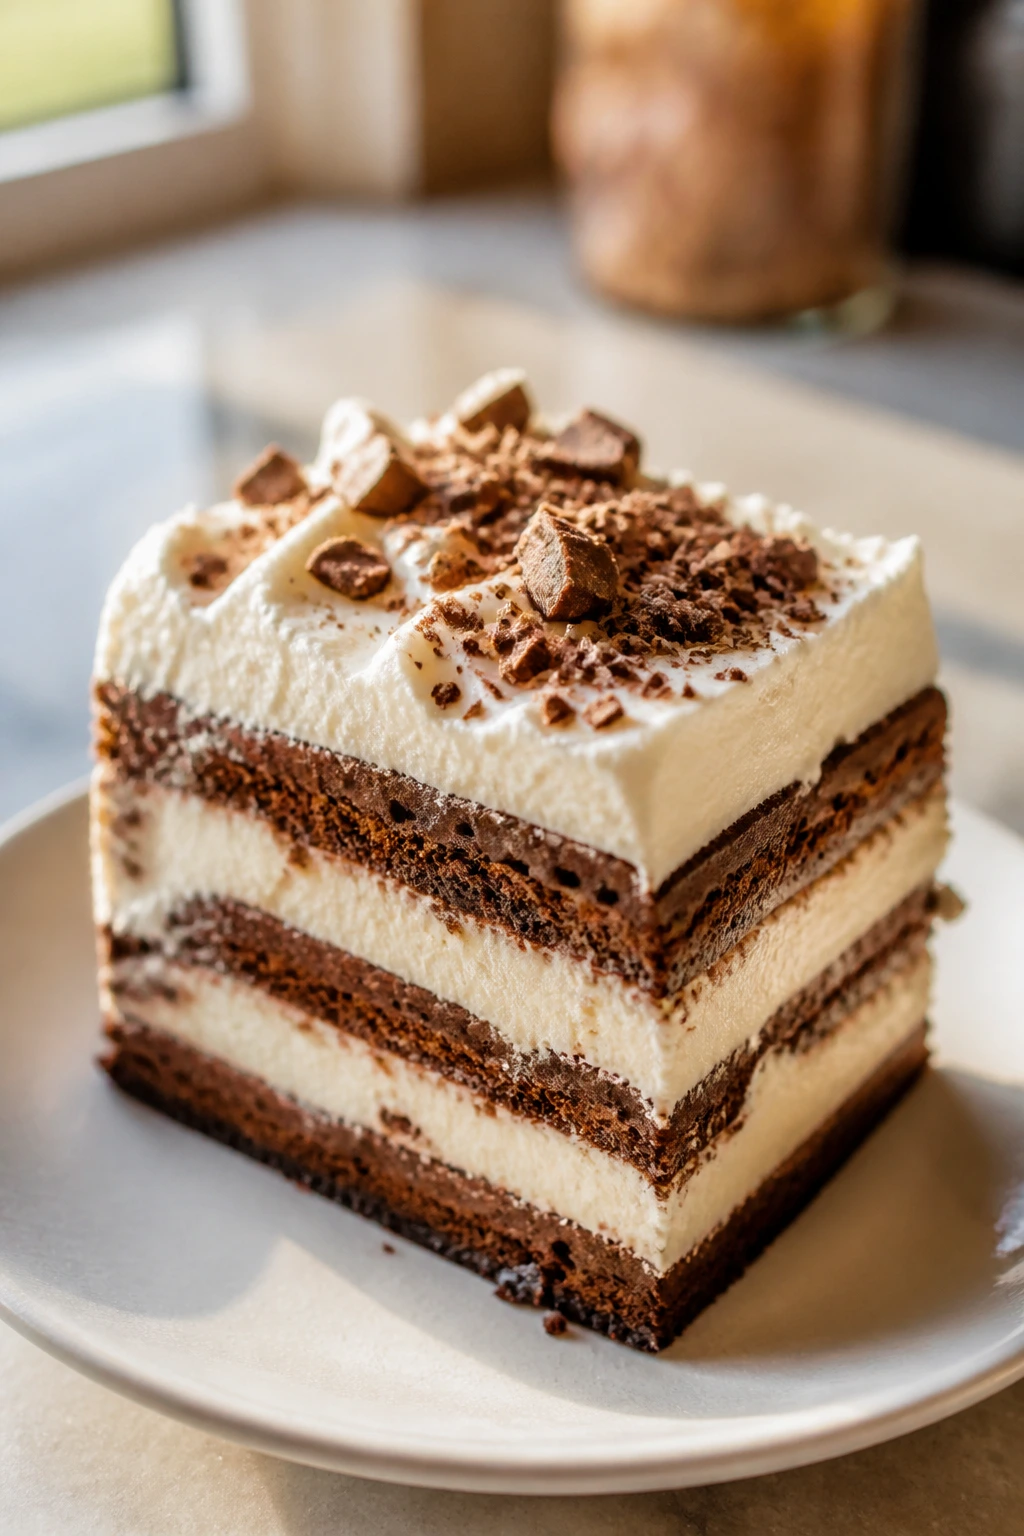
Slicing, Serving, and What to Put Beside It
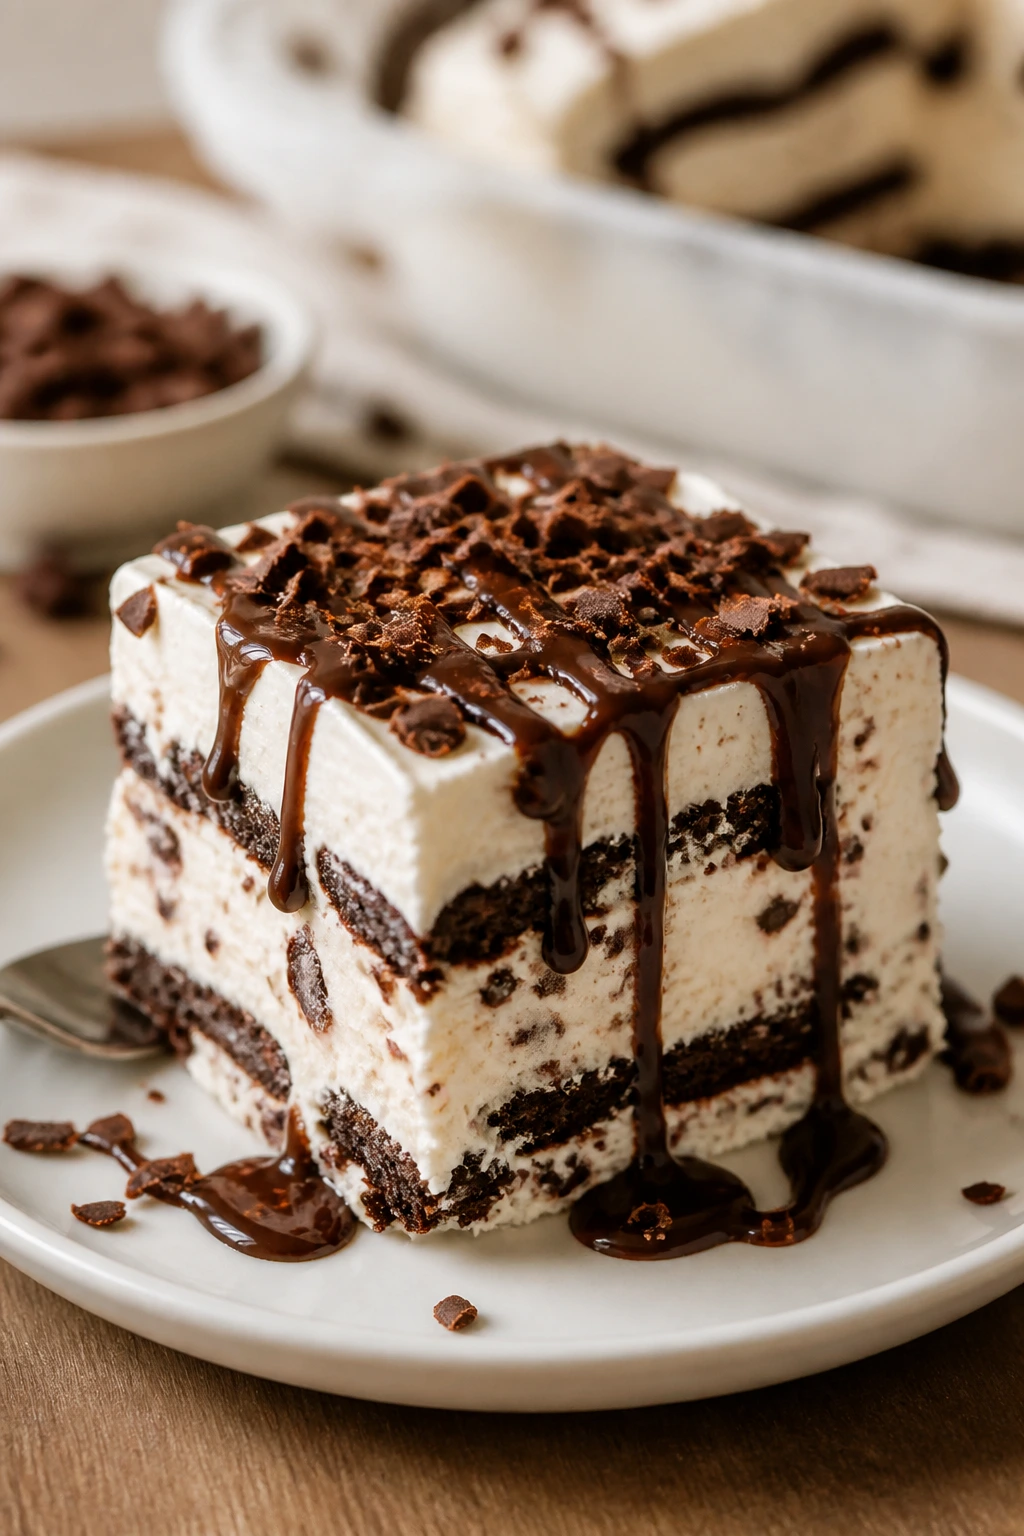
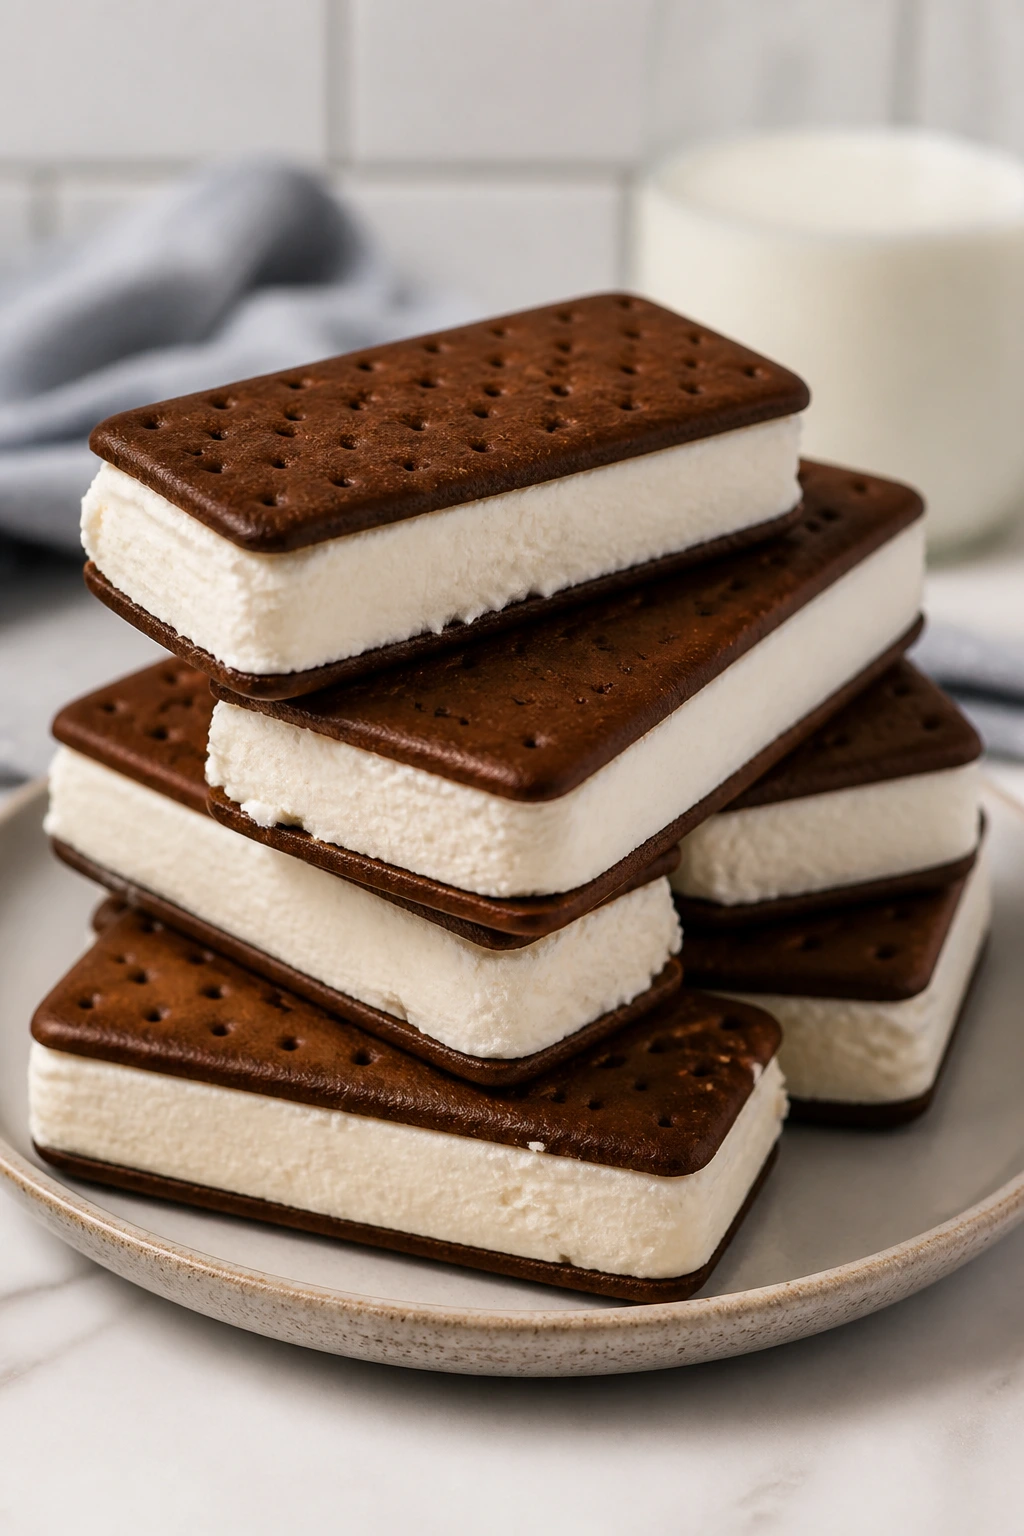
Presentation: Pull the cake out of the pan in one block and cut it into 16 squares with a hot, wiped knife. A drizzle of extra fudge on the plate and a few chocolate shavings on top give the dessert a finished look without adding work.
Accompaniments: Fresh raspberries are the best counterpoint if you want something bright next to all that cream and chocolate. Strawberries work too, though I prefer raspberries because their tartness cuts through the frosting more cleanly. A small bowl of salted peanuts on the side is a nice move if you leaned into the crunch layer.
Portions: Sixteen squares is the standard cut from a 9×13 pan, and that’s the size I’d use for most gatherings. If the dessert is following a heavy meal, cut 20 narrower bars. If it’s the only sweet on the table, 12 larger pieces is the right call.
Beverage Pairing: Cold milk is the obvious match, and I mean that in a good way. Black coffee or a very plain iced coffee also works because it keeps the sweetness in check. If you want an after-dinner drink, an espresso poured alongside a square does more for this dessert than any fancy garnish ever could.
Practical Tips That Keep the Texture Clean
Flavor Enhancement: A tiny pinch of instant espresso powder in the hot fudge deepens the chocolate without making the cake taste like coffee. You only need 1/2 teaspoon stirred into the warmed sauce. It’s a small move, but it makes the chocolate taste darker and less sugary.
Time-Saver: Freeze the pan for 10 minutes before you start, then keep the sandwiches on the counter only as long as it takes to unwrap them. That little bit of cold gives you a head start and makes the first layer much easier to line up.
Pro Move: If your kitchen runs warm, freeze the cake for 15 minutes after the first frosting layer and again after the top layer goes on. Those short pauses stop the filling from creeping out the sides and help the edges stay square.
Cost-Saver: Store-brand ice cream sandwiches and cookie crumbs work perfectly here. The frosting is where the flavor lives, so that’s the one place I wouldn’t skimp. Use the cheaper sandwiches if that’s what fits the budget, then make the cream cheese frosting taste deliberate.
Common Mistakes That Turn It Sloppy
- Letting the ice cream sandwiches soften too long: If they sit out for 10 minutes or more, the edges turn slippery and the layer starts to slide. Keep the rest in the freezer while you work, and only unwrap the sandwiches you’re placing right away.
- Making the frosting too loose: If you stop beating too early or add too much cream, the frosting will slump and squeeze out when you stack the top layer. Fix it by adding 1/4 cup more powdered sugar or chilling the bowl for 10 minutes before spreading.
- Pouring hot fudge straight from the microwave: Hot fudge should be warm and pourable, not steaming. If it’s too hot, it melts the lower layer and turns the middle into a syrupy mess.
- Skipping the full freeze: Four hours is the minimum if you want clean slices. Anything less and the center stays soft, which sounds harmless until your squares start leaning over on the plate.
- Using a dry knife: A dry blade drags frosting and tears the cookie edges. Dip the knife in hot water, wipe it dry, and clean it between cuts for the best finish.
Flavor Swaps and Variations That Actually Make Sense
Mocha Fudge Cut
Stir 1/2 teaspoon instant espresso powder into the hot fudge and add an extra pinch to the frosting. The chocolate tastes deeper, not coffee-flavored, and the whole cake feels a little more grown-up without changing the texture.
Peanut Butter Cup Version
Swirl 1/2 cup creamy peanut butter into the frosting and replace half the cookie crumbs with chopped peanut butter cups. The saltiness gives the dessert more bite, and it’s the version I’d make for anyone who likes sweet and salty in the same forkful.
Mint Chip Freeze
Use mint ice cream sandwiches, swap the chocolate shavings for crushed mint cookies, and scatter a few chopped chocolate mints over the top. The cold mint makes the frosting feel lighter, which sounds odd for a rich dessert, but it works.
Berry Ribbon Variation
Replace half the hot fudge with a thick strawberry or raspberry sauce, then add freeze-dried berry crumbs on top instead of extra cookies. The fruit keeps the cake from feeling heavy, and the color contrast is lovely without trying too hard.
Gluten-Free Swap
Use gluten-free ice cream sandwiches and gluten-free chocolate cookies for the crumbs. The cake still freezes and slices the same way, and the frosting doesn’t need any adjustment.
Make-Ahead, Freezer Storage, and the Thaw Time That Matters
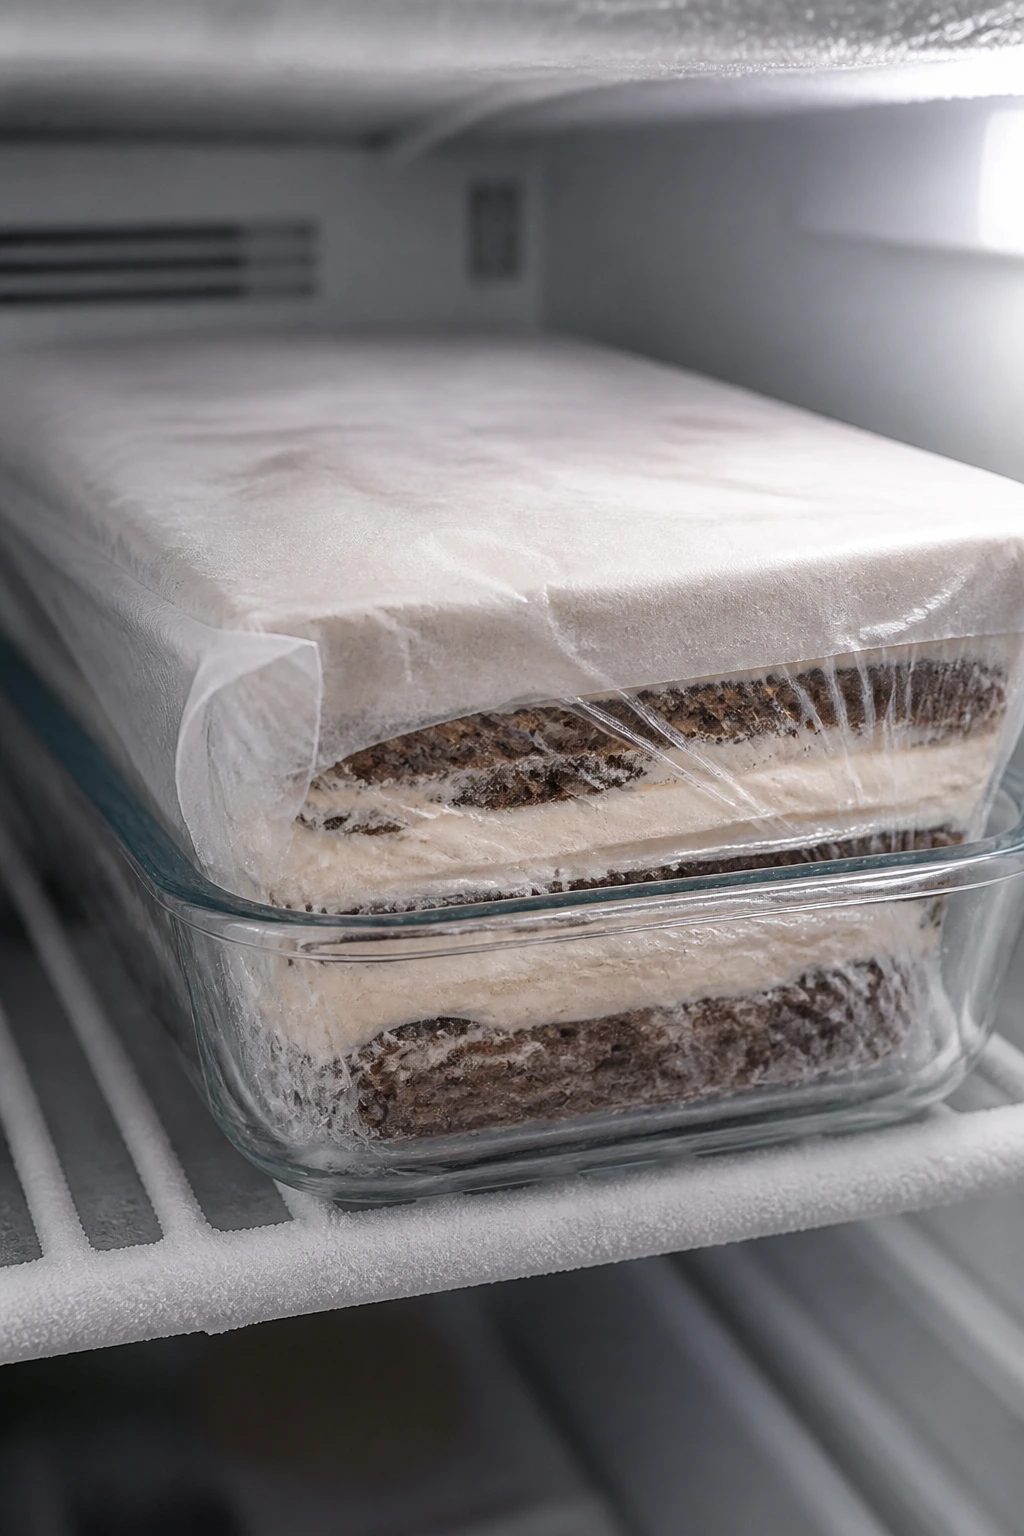
This dessert is happiest in the freezer. Assemble it up to 2 days ahead, cover it tightly, and leave it alone until the day you need it. If you’re making it for a party, I’d actually prefer the make-ahead version because the layers firm up more evenly and the frosting slices cleaner after an overnight freeze.
For longer storage, wrap the pan well in plastic wrap and then a layer of foil. Kept that way, the cake holds its best texture for about 2 weeks, though it will stay safe longer. After that, freezer burn starts nibbling at the edges and the frosting can pick up that faint cardboard note that ruins an otherwise good bite.
Individual slices can be wrapped in parchment and then sealed in a freezer bag for easy grab-and-go servings. That works for about a month if they’re wrapped tightly. There isn’t a real reheating step here, because heat is the enemy; what you want is a short thaw. Ten to 12 minutes on the counter softens the frosting and makes the cookie layers less hard without turning the dessert to mush.
One note I’ve learned the hard way: the fridge is not the answer. Refrigeration makes the ice cream sandwiches sweat and the frosting dense in a strange, waxy way. If you need to hold it overnight, leave it frozen and cover it well.
Questions People Ask Before They Build One

Can I make this ice cream sandwich cake without a mixer?
You can, though the frosting will take more effort. A sturdy bowl and a wooden spoon will work if the cream cheese and butter are very soft, but you’ll need to beat longer and scrape the bowl more often to avoid little lumps.
Do the ice cream sandwiches need to be softened before assembly?
Only a little. Three to four minutes at room temperature is enough to make the edges flexible; any longer and they start to melt at the corners, which makes the stack less stable.
Can I use homemade cream cheese frosting instead of the one here?
Yes, as long as it’s thick enough to spread cleanly. If your frosting recipe is very soft, reduce the liquid a bit or add more powdered sugar until it can hold a visible swirl on the spoon.
What if the layers start slipping while I’m building the cake?
Put the pan in the freezer for 10 to 15 minutes and come back to it. That short pause firms the bottom layer and gives the frosting enough body to hold the next round of sandwiches.
How do I get really clean slices?
Use a long knife dipped in hot water, then wiped dry. Cut straight down, lift the slice, wipe the blade, and repeat. That sounds fussy, but it keeps the frosting from smearing and the cookie crumbs from dragging across the cut edge.
Can I halve the recipe for a smaller pan?
Yes. An 8×8-inch or 8×11-inch pan works if you cut the sandwich count roughly in half and keep the layers thinner. The freezer time stays about the same, though smaller pans may firm up a little faster.
What if I want to add fruit?
Stick with fruit that isn’t watery. Thin layers of sliced strawberries or raspberries work if you blot them dry first, but juicy fruit piled on thick will turn the middle soft and make the cake slide.
One Last Slice
A frozen dessert doesn’t need a lot of drama to earn its place on the table. It needs clean flavors, good structure, and a texture that makes sense from the first bite to the last. This cake has all three, and the cream cheese frosting is the reason it feels richer than the usual freezer-aisle version.
The nice part is how easily it fits real life. You can make it ahead, keep it in the freezer, and cut it only when the crowd is actually ready for dessert. That’s not glamorous. It is useful. And in a dessert like this, useful usually tastes better too.
Rich Ice Cream Sandwich Cake with Cream Cheese Frosting — Recipe Card
Recipe Name: Rich Ice Cream Sandwich Cake with Cream Cheese Frosting
Description: A layered no-bake ice cream sandwich cake with tangy cream cheese frosting, hot fudge, and chocolate cookie crumbs. It slices into neat freezer-cold squares and tastes like the richer, less sugary version of the classic potluck dessert.
Prep Time: 25 minutes
Cook Time: 0 minutes
Total Time: 25 minutes active + 4 hours freezing
Course: Dessert
Cuisine: American
Servings: 16 servings
Calories: About 430 kcal per serving
Ingredients
For the Cake Layers:
- 24 standard rectangular ice cream sandwiches, unwrapped
- 1 cup hot fudge sauce, divided
- 1 1/2 cups chocolate sandwich cookie crumbs, divided
- 1/2 cup chopped salted peanuts or toasted pecans, optional
For the Cream Cheese Frosting:
- 16 oz cream cheese, softened
- 1/2 cup unsalted butter, softened
- 3 1/4 cups powdered sugar, sifted
- 2 teaspoons pure vanilla extract
- 1/4 teaspoon fine salt
- 2 tablespoons heavy cream, plus 1 to 2 more teaspoons if needed
For the Finish:
- 1/2 cup chocolate shavings or curls
- 2 tablespoons reserved cookie crumbs, for a final dusting
Instructions
- Line a 9×13-inch pan with parchment paper or foil, leaving overhang on the long sides. Freeze the pan for 10 minutes while you make the frosting.
- Beat the cream cheese and butter until smooth and fluffy, about 2 to 3 minutes. Add the powdered sugar, vanilla, salt, and heavy cream, then beat until thick and spreadable.
- Unwrap 12 ice cream sandwiches and let them sit for 3 to 4 minutes. Arrange them in a tight 3×4 layer in the pan.
- Spread half of the frosting over the sandwiches. Drizzle with half the hot fudge and scatter half the cookie crumbs and optional nuts over the top.
- Add the remaining 12 ice cream sandwiches in a second 3×4 layer.
- Spread the remaining frosting over the top. Drizzle with the remaining hot fudge, then finish with the remaining cookie crumbs and the chocolate shavings.
- Cover tightly and freeze for at least 4 hours, or until firm all the way through.
- Lift the cake out using the parchment overhang, let it sit for 10 to 12 minutes, and slice with a hot, dry knife.
Notes:
For the cleanest slices, freeze overnight if you can.
If the frosting feels loose, chill it for 10 minutes before spreading.
Let the cake stand briefly before cutting; if you cut it straight from the freezer, the knife will crack the layers instead of gliding through them.