
Valentine’s Day desserts do their best work when they taste like a small contradiction: rich, but bright; polished, but not fussy; sweet, but with enough fruit, salt, or dark chocolate to keep you reaching for one more bite. A plate of strawberries dipped in chocolate is fine. Nice, even. But the desserts people remember usually have a little more shape to them — a crackle of sugar, a chilled custard, a ribbon of raspberry, a warm center under a cold spoonful of cream.
When I put together a dessert table for a night in, I want variety before I want excess. One baked pan dessert. One chilled spoon dessert. One cookie or candy that can sit on the table without sulking. Maybe two if the dinner was long and the conversation got good. That mix is what makes Valentine’s Day desserts feel celebratory without turning the whole thing into a sugar sprint.
So here’s the generous version: 40 desserts that cover every mood from loud chocolate to quiet vanilla, from quick bars to plated little showpieces. Some are the kind you bake and slice. Some need a fridge and a spoon. A few are barely more work than melting chocolate and whipping cream, which is exactly the point when the rest of the evening already has enough moving parts.
Why These Valentine’s Day Desserts Work So Well
- Fruit keeps the sweeter desserts from flattening out: raspberries, strawberries, cherries, blood orange, and pomegranate add acid and color, which is why the richer chocolate and cream desserts still taste lively.
- There’s a dessert for every clock: some can be mixed and baked in under an hour, while the chilled ones quietly set in the fridge while you finish everything else.
- Texture does a lot of the heavy lifting: crisp cookies, silky mousse, chewy brownies, and tender cakes make the spread feel varied instead of one-note.
- Most of the ingredients are easy to source: butter, cream cheese, eggs, chocolate, cream, and frozen fruit can build a serious dessert table without a specialty shop run.
- A lot of these travel well: bars, cookies, truffles, and hand pies hold up better than frosted layer cakes if you need to carry dessert somewhere.
- The best ones scale cleanly: a single lava cake for two and a pan of cheesecake bars for eight can come from the same pantry attitude.
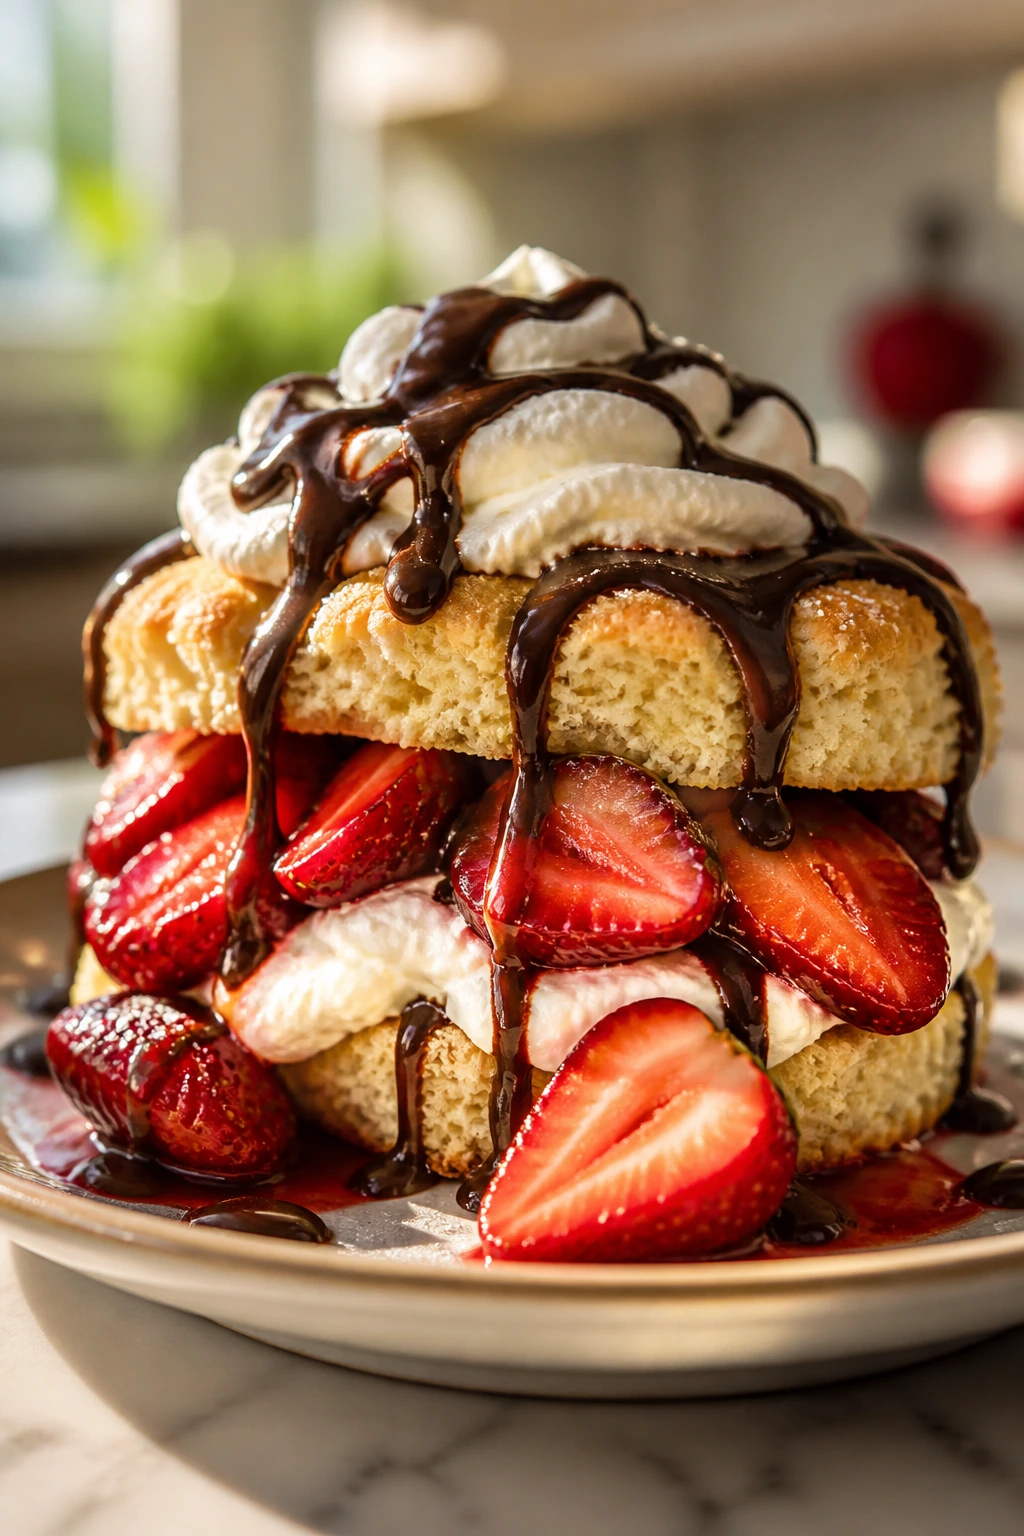
1. Chocolate-Covered Strawberry Shortcake
A shortcake like this hits the sweet spot between picnic dessert and dinner-party plate. Tender biscuits, sugared strawberries, and a dark chocolate drizzle give you the full Valentine’s Day mood without a heavy frosting situation.
Why It Works: The biscuits stay sturdy enough to split, but soft enough to soak up strawberry juice. The chocolate goes on last, so it keeps a thin shell instead of disappearing into the cream.
Key Ingredients:
- 2 cups all-purpose flour — the base for a biscuit-style shortcake.
- 1 tablespoon baking powder — gives the cakes lift.
- 6 tablespoons cold unsalted butter, cubed — keeps the crumb flaky.
- 3/4 cup cold buttermilk — adds tang and tenderness.
- 2 pints strawberries, sliced — the whole point.
- 2 tablespoons sugar — pulls juices out of the berries.
- 4 ounces dark chocolate, chopped — for a clean drizzle.
- 1/4 cup heavy cream — loosens the chocolate just enough.
- 1 cup whipped cream — the cool, soft finish.
Quick Steps:
- Heat the oven to 425°F and line a baking sheet with parchment.
- Whisk flour, baking powder, sugar, and salt, then cut in the butter until the mix looks like coarse crumbs.
- Stir in the buttermilk, pat the dough into a 3/4-inch slab, and cut out rounds.
- Bake for 12 to 15 minutes, until the tops are golden and the edges feel set.
- Toss the strawberries with sugar, melt the chocolate with the cream, then split the shortcakes and build with cream, berries, and chocolate.
Equipment for This Recipe:
- Rimmed baking sheet — keeps the shortcakes baking evenly.
- 2-inch biscuit cutter — gives you tidy, even rounds.
- Mixing bowl and pastry cutter — for cold butter work.
- Small saucepan — for the chocolate drizzle.
How to Serve This Dish: Serve it warm so the berries start to glisten against the cream. I like it on a wide plate with the chocolate dripping down one side, not buried in the middle.
Pro Tips for This Recipe:
- Chill the butter for 10 minutes before cutting it in; soft butter makes dense shortcakes.
- Slice the berries after sugar hits them so they stay glossy instead of watery.
- Drizzle the chocolate after assembly, not before, or it can seize into dull streaks.
Variations on This Dish:
- Bourbon Berry Shortcake: Add 1 tablespoon bourbon to the strawberries for a warmer note.
- White Chocolate Finish: Swap the dark chocolate for white chocolate if you want a softer, sweeter plate.
Common Mistakes to Avoid with This Dish:
- Don’t overwork the dough; tough shortcakes feel bready instead of tender.
- Don’t assemble too early; the bottoms get soggy fast once the berry juice starts moving.
2. Red Velvet Crinkle Cookies
These are the cookies that look dramatic before you even bite in. The powdered sugar crackles on the outside, and the middle stays soft with just enough cocoa to keep the flavor from reading like plain dyed sugar.
Why It Works: Red velvet wants a little tang and a little chocolate, not one or the other. A short chill helps the dough stay thick, which is what gives you those deep crinkles instead of flat pink pancakes.
Key Ingredients:
- 2 cups all-purpose flour — keeps the cookies tender.
- 1/4 cup unsweetened cocoa powder — the cocoa note is subtle, not heavy.
- 1/2 cup unsalted butter, softened — gives the crumb richness.
- 1 cup granulated sugar — helps the edges crackle.
- 2 large eggs — bind the dough.
- 1 teaspoon vanilla extract — rounds out the cocoa.
- 1 tablespoon red gel food coloring — gives the color without watering the dough.
- 1/2 cup powdered sugar — coats the outside.
Quick Steps:
- Whisk the flour, cocoa, baking powder, and salt in one bowl.
- Beat the butter and sugar until fluffy, then mix in the eggs, vanilla, and coloring.
- Stir in the dry ingredients, cover the dough, and chill it for 30 minutes.
- Roll the dough into 1-inch balls, coat each one in powdered sugar, and place them on parchment.
- Bake at 350°F for 10 to 11 minutes, until the tops crack but the centers still look soft.
Equipment for This Recipe:
- Hand mixer — helps the butter and sugar go airy.
- Baking sheet — a light-colored one browns more evenly.
- Parchment paper — keeps the powdered sugar from sticking.
How to Serve This Dish: Stack them in a loose pile on a white plate so the red centers show through the sugar. They’re good plain, but a small bowl of whipped cream for dipping makes them feel more dessert-y.
Pro Tips for This Recipe:
- Use gel coloring, not liquid, or the dough can get thin.
- Pull them early; crinkle cookies finish setting on the pan.
- Let the dough chill long enough to firm up, or the sugar coating melts into the crust.
Variations on This Dish:
- Chocolate-Heavy Version: Add 2 more tablespoons cocoa if you want a deeper brownie note.
- Cream Cheese Sandwiches: Pair two cooled cookies with cream cheese frosting in the middle.
Common Mistakes to Avoid with This Dish:
- Don’t skip the powdered sugar coat; that’s what gives the cracks their contrast.
- Don’t bake until the cookies look dry; they should still feel a little soft in the center.
3. Raspberry Swirl Cheesecake Bars
Cold cheesecake bars are the sensible dessert choice when you want clean slices and a dessert that can sit in the fridge until the conversation is ready for it. The raspberry swirl keeps the filling from tasting too rich, which matters after a full meal.
Why It Works: The graham crust bakes briefly before the filling goes in, so it stays crisp under the cream cheese layer. Raspberry preserves swirl through the top with almost no effort, and that tart ribbon keeps each square from feeling flat.
Key Ingredients:
- 1 1/2 cups graham cracker crumbs — the base.
- 6 tablespoons unsalted butter, melted — binds the crust.
- 16 ounces cream cheese, softened — the cheesecake body.
- 2/3 cup granulated sugar — sweetens the filling.
- 2 large eggs — help it set.
- 1/2 cup sour cream — gives the filling a softer texture.
- 1/3 cup raspberry preserves — for the swirl.
- 1 teaspoon vanilla extract — keeps the flavor warm.
Quick Steps:
- Mix crumbs, melted butter, and sugar, then press into a parchment-lined 8-inch pan.
- Bake the crust at 350°F for 8 minutes, just until it smells toasty.
- Beat cream cheese, sugar, eggs, sour cream, and vanilla until smooth, then pour over the crust.
- Dollop the preserves on top and drag a knife through them in loose ribbons.
- Bake for 28 to 32 minutes, cool completely, then chill for at least 3 hours before slicing.
Equipment for This Recipe:
- 8-inch square baking pan — gives tidy bars.
- Electric mixer — smooths the filling.
- Parchment sling — makes lifting easy.
How to Serve This Dish: Cut them cold with a hot knife for neat edges. A few fresh raspberries and a dusting of powdered sugar make the bars look finished without hiding the swirl.
Pro Tips for This Recipe:
- Bring the cream cheese fully to room temperature or you’ll get little lumps.
- Chill before cutting; warm cheesecake bars bend and tear.
- Wipe the knife between slices for cleaner edges.
Variations on This Dish:
- Chocolate Crust Swap: Use chocolate cookie crumbs instead of graham crackers.
- Mixed Berry Swirl: Replace half the raspberry preserves with strawberry jam.
Common Mistakes to Avoid with This Dish:
- Don’t overbake until the center is hard; the bars firm up as they chill.
- Don’t use jam straight from the jar if it’s stiff; warm it slightly so it swirls easily.
4. Molten Lava Cakes
The first spoonful through a lava cake is pure theater. You get a thin cake shell, then a warm chocolate center that runs onto the plate and soaks into the vanilla ice cream if you’re smart enough to add some.
Why It Works: A hot oven and a short bake time create a set exterior before the middle finishes cooking. The batter is simple, which means the timing matters more than the ingredient list.
Key Ingredients:
- 4 ounces bittersweet chocolate — use something you’d actually eat plain.
- 1/2 cup unsalted butter — melts into the batter.
- 2 large eggs — give structure.
- 2 large egg yolks — create the molten middle.
- 1/3 cup sugar — sweetens without turning it cloying.
- 1/4 cup all-purpose flour — just enough to hold the edges.
- Pinch of salt — sharpens the chocolate.
- Butter and cocoa for the ramekins — keeps them from sticking.
Quick Steps:
- Butter four ramekins and dust them with cocoa powder.
- Melt chocolate and butter together until glossy, then let the mix cool for a minute.
- Whisk in eggs, yolks, sugar, vanilla, salt, and flour until the batter looks smooth.
- Divide into ramekins and bake at 425°F for 8 to 10 minutes, until the edges are set and the centers jiggle slightly.
- Let them rest for 1 minute, then invert onto plates and serve immediately.
Equipment for This Recipe:
- Four 6-ounce ramekins — the right size for a molten center.
- Small saucepan — for melting.
- Whisk — keeps the batter smooth.
How to Serve This Dish: Serve it the second it leaves the ramekin. A scoop of vanilla ice cream or a spoonful of softly whipped cream gives the hot chocolate center something cool to run into.
Pro Tips for This Recipe:
- Err on the side of underbaking; the center keeps thickening after it leaves the oven.
- Prep the ramekins well or the cakes can stick and tear.
- Use the same batter weight in each ramekin so they bake at the same pace.
Variations on This Dish:
- Espresso Lava Cake: Add 1 teaspoon instant espresso powder to the melted chocolate.
- Orange Chocolate Version: Stir in 1 teaspoon orange zest for a brighter finish.
Common Mistakes to Avoid with This Dish:
- Don’t leave them in the oven too long; a fully set center is just a small chocolate cake.
- Don’t invert them onto a cold plate and wait around. They collapse fast.
5. Heart-Shaped Sugar Cookies
Rolling sugar cookies into hearts sounds old-school because it is, and that’s part of the charm. These are the cookies you make when you want crisp edges, a buttery vanilla scent, and enough icing to write tiny messages if you feel like it.
Why It Works: The dough rolls cleanly and holds an edge, which is exactly what you want from a cutout cookie. A little almond extract makes the flavor feel less flat than plain vanilla.
Key Ingredients:
- 2 3/4 cups all-purpose flour — gives the cookie enough body.
- 1/2 teaspoon baking powder — keeps the texture light.
- 1 cup unsalted butter, softened — for a rich crumb.
- 1 cup granulated sugar — sweetens the dough.
- 1 large egg — binds the batter.
- 1 teaspoon vanilla extract — the main flavor note.
- 1/2 teaspoon almond extract — adds a bakery-style edge.
- Royal icing or glaze — for decorating.
Quick Steps:
- Whisk flour, baking powder, and salt.
- Beat butter and sugar until pale, then mix in the egg, vanilla, and almond extract.
- Add the dry ingredients, divide the dough, and chill it for 1 hour.
- Roll to 1/4-inch thick, cut heart shapes, and bake at 350°F for 8 to 10 minutes.
- Cool fully before icing, or the decorations will melt into puddles.
Equipment for This Recipe:
- Rolling pin — for even thickness.
- Heart cutter — the obvious one.
- Wire rack — keeps the bottoms from steaming.
How to Serve This Dish: Pile them in a shallow bowl or wrap a few in parchment for small gifts. They look best with a thin line of icing rather than a thick flood.
Pro Tips for This Recipe:
- Chill the dough before rolling, then chill the cut cookies again for 10 minutes before baking.
- Roll between parchment sheets if the dough feels sticky.
- Keep the icing thin enough to pipe clean lines.
Variations on This Dish:
- Lemon Sugar Hearts: Replace the almond extract with lemon zest and a spoonful of lemon juice.
- Pink Sprinkle Version: Add pink sanding sugar while the icing is still tacky.
Common Mistakes to Avoid with This Dish:
- Don’t roll the dough too thin or the points on the hearts overbake.
- Don’t skip chilling. Warm cutouts lose their shape in the oven.
6. Chocolate Ganache Tart
A tart like this behaves best when you keep it simple. Crisp shell, smooth ganache, maybe a pinch of salt on top — that’s enough. Anything more starts talking over the chocolate.
Why It Works: The shell bakes separately, which means the crust stays firm under the filling. The ganache sets into a clean slice if you let it chill long enough, and a flaky salt finish cuts through the richness.
Key Ingredients:
- 1 1/2 cups all-purpose flour — for the tart shell.
- 1/4 cup cocoa powder — gives the crust a chocolate note.
- 1/2 cup unsalted butter, cold and cubed — keeps the shell tender.
- 12 ounces bittersweet chocolate, chopped — the filling.
- 1 cup heavy cream — turns the chocolate into ganache.
- 1 tablespoon butter — adds gloss.
- 1/2 teaspoon flaky salt — for finishing.
- 1 egg yolk — helps bind the crust.
Quick Steps:
- Mix flour, cocoa, powdered sugar, and salt, then cut in the butter and yolk until crumbly.
- Add cold water by the teaspoon until the dough holds together, then press into a tart pan.
- Chill for 20 minutes, prick with a fork, and bake at 350°F for 18 to 20 minutes.
- Heat the cream until steaming, pour over the chocolate, wait 2 minutes, then stir in the butter until smooth.
- Pour into the crust, chill until set, and finish with flaky salt.
Equipment for This Recipe:
- 9-inch tart pan with removable bottom — gives a clean edge.
- Saucepan — for the cream.
- Offset spatula — smooths the ganache.
How to Serve This Dish: Slice it with a warm knife so the cuts stay sharp. A few raspberries on the plate make the whole thing look more awake.
Pro Tips for This Recipe:
- Blind-bake the shell if your tart pan leaks a little.
- Chop the chocolate finely so it melts in the hot cream without stubborn bits.
- Let the tart chill fully before slicing or the filling will slump.
Variations on This Dish:
- Salted Caramel Layer: Spread 1/3 cup caramel under the ganache.
- Orange Zest Tart: Stir orange zest into the cream before heating.
Common Mistakes to Avoid with This Dish:
- Don’t pour boiling cream over the chocolate; hot, not furious, is the goal.
- Don’t try to slice it warm. You’ll get chocolate soup.
7. Strawberry Mousse Cups
Strawberry mousse should taste like a chilled berry cloud, not candy. These cups do that well: light, pink, and soft enough to spoon without feeling like you need a knife and fork to survive dessert.
Why It Works: Puréed strawberries bring real fruit flavor, and a little gelatin gives the mousse enough structure to hold its shape in the fridge. Folding in whipped cream at the end keeps the texture airy instead of dense.
Key Ingredients:
- 2 cups strawberries, hulled — the flavor base.
- 1/4 cup sugar — sweetens the berries.
- 1 teaspoon lemon juice — sharpens the fruit.
- 1 teaspoon unflavored gelatin — helps it set.
- 1 cup heavy cream, cold — for volume.
- 1/2 cup mascarpone — makes the mousse richer.
- 1 teaspoon vanilla — rounds the flavor.
- Fresh berries for topping — keep it bright.
Quick Steps:
- Purée strawberries with sugar and lemon juice.
- Sprinkle gelatin over 2 tablespoons cold water, let it bloom, then warm it gently until dissolved.
- Stir the gelatin into the strawberry purée, then fold in mascarpone.
- Whip the cream to soft peaks and fold it in in two additions.
- Spoon into cups and chill for at least 2 hours.
Equipment for This Recipe:
- Blender or food processor — for the purée.
- Hand mixer — for whipping cream.
- Small serving glasses or ramekins — for neat portions.
How to Serve This Dish: Top each cup with one sliced strawberry and a small mint leaf if you want a clean, cool look. I like serving them cold from the fridge, not half-soft from the counter.
Pro Tips for This Recipe:
- Bloom the gelatin first or you’ll get gritty flecks.
- Fold the cream gently; overmixing knocks out the air.
- Use ripe strawberries, because underripe ones taste watery and dull.
Variations on This Dish:
- Strawberry-Rose Mousse: Add 1/4 teaspoon rosewater for a floral note.
- Mixed Berry Cups: Swap half the strawberries for raspberries.
Common Mistakes to Avoid with This Dish:
- Don’t pour hot gelatin into cold cream; temper it through the purée first.
- Don’t whip the cream past soft peaks unless you want a grainy mousse.
8. Raspberry Almond Thumbprints
Thumbprints are tiny, but they carry a lot of butter and jam. These lean into almond flavor, which gives them a quiet, nutty edge under the raspberry center.
Why It Works: The dough is rich enough to hold a thumb-sized well without cracking apart. Raspberry jam bakes into a glossy center that firms as the cookies cool, so each bite feels tidy.
Key Ingredients:
- 1 cup unsalted butter, softened — for the cookie base.
- 2/3 cup sugar — sweetens and aerates.
- 1 egg yolk — enriches the dough.
- 2 teaspoons almond extract — the main flavor note.
- 2 cups all-purpose flour — keeps the cookies shaped.
- 1/2 teaspoon salt — sharpens the sweetness.
- 1/2 cup raspberry jam — the filling.
- 1/3 cup sliced almonds — for the edges.
Quick Steps:
- Beat butter and sugar until pale, then mix in the yolk and almond extract.
- Stir in flour and salt until a soft dough forms.
- Roll into 1-inch balls, press a thumbprint in each, and roll the sides in sliced almonds.
- Fill each center with 1/2 teaspoon jam.
- Bake at 350°F for 12 to 14 minutes, until the edges turn light gold.
Equipment for This Recipe:
- Baking sheet — lined with parchment.
- Small spoon — for the jam.
- Cooling rack — keeps the bottoms from going soft.
How to Serve This Dish: They’re good on a small plate with tea or coffee, and they look especially nice stacked in a loose spiral. The jam center should stay visible.
Pro Tips for This Recipe:
- Make the indentation before the cookies go in the oven, then press again halfway through if they puff.
- Warm stiff jam for 10 seconds in the microwave so it spoons cleanly.
- Let the cookies cool on the pan for 5 minutes so the centers set.
Variations on This Dish:
- Orange Almond Thumbprints: Add orange zest to the dough and use marmalade.
- Chocolate Center Version: Swap raspberry jam for chocolate hazelnut spread.
Common Mistakes to Avoid with This Dish:
- Don’t overfill the wells or the jam bubbles over.
- Don’t skip the salt; the cookies taste flat without it.
9. Mini Pavlovas with Berries
Pavlovas are fragile on purpose. The shell cracks, the middle stays marshmallow-soft, and the berries give you the kind of tartness that keeps the whole dessert from turning into sweet air.
Why It Works: A slow bake dries the exterior while the center stays soft. Cornstarch and vinegar help the meringue hold that marshmallow middle, which is the part people usually remember.
Key Ingredients:
- 4 large egg whites — the structure.
- 1 cup granulated sugar — makes the meringue glossy.
- 1 teaspoon cornstarch — softens the center.
- 1 teaspoon white vinegar — stabilizes the foam.
- 1 teaspoon vanilla extract — flavor.
- 1 cup heavy cream — for topping.
- 2 cups mixed berries — for brightness.
- 1 tablespoon powdered sugar — sweetens the cream lightly.
Quick Steps:
- Beat the egg whites until soft peaks form, then add sugar gradually until the meringue is stiff and shiny.
- Fold in cornstarch, vinegar, and vanilla.
- Spoon into small rounds on parchment, making a shallow well in the center.
- Bake at 250°F for 1 hour, then turn the oven off and let them cool inside.
- Top with whipped cream and berries just before serving.
Equipment for This Recipe:
- Stand mixer or hand mixer — meringue needs steady air.
- Parchment-lined baking sheet — keeps the shells from sticking.
- Offset spatula or spoon — shapes the centers.
How to Serve This Dish: Build them right before dessert so the cream doesn’t soften the shells. The contrast between crisp edge, soft middle, and cold berries is the whole trick.
Pro Tips for This Recipe:
- Make sure the bowl is grease-free or the whites won’t whip properly.
- Add sugar slowly so the meringue stays smooth.
- Keep humidity in mind; damp air makes pavlovas lose their crisp shell faster.
Variations on This Dish:
- Chocolate Pavlovas: Fold 1 tablespoon cocoa into the meringue.
- Citrus Berry Version: Add lemon zest to the cream and top with strawberries plus oranges.
Common Mistakes to Avoid with This Dish:
- Don’t open the oven during baking; the sudden temperature shift can collapse the shells.
- Don’t assemble too far ahead or the meringue turns sticky.
10. Black Forest Trifle
Black Forest trifle is the dessert version of layering blankets. Chocolate, cherries, and cream keep showing up in the same bowl, and somehow the result tastes more relaxed than a cake.
Why It Works: The soft layers absorb cherry syrup without turning mushy if you keep the cake pieces fairly dry. Chocolate shavings on top add a little bitter edge, which keeps the cream from taking over.
Key Ingredients:
- 1 batch brownies or chocolate cake, cut into cubes — the base.
- 2 cups cherries, pitted — fresh or thawed frozen.
- 2 tablespoons sugar — for the cherry juice.
- 2 cups heavy cream — whipped topping.
- 2 tablespoons powdered sugar — sweetens the cream.
- 1 teaspoon vanilla — rounds the whipped cream.
- 1/2 cup chocolate shavings — garnish.
- 2 tablespoons cherry liqueur or juice — optional, for soaking.
Quick Steps:
- Toss cherries with sugar and let them sit until juicy.
- Whip the cream, powdered sugar, and vanilla to soft peaks.
- Layer brownies, cherries, and cream in a trifle bowl or glasses.
- Repeat the layers, then finish with chocolate shavings.
- Chill for 30 minutes so the flavors settle.
Equipment for This Recipe:
- Clear trifle bowl or tall glasses — shows off the layers.
- Sharp knife — for clean cake cubes.
- Whisk or mixer — for the cream.
How to Serve This Dish: Serve it in glass bowls if you want the stripes to show. A spoon that can dig deep enough for all three layers is the only tool that matters at the table.
Pro Tips for This Recipe:
- Use dry brownies, not gooey ones, or the layers slide.
- Pit the cherries carefully; a stray pit in trifle is a dinner-stopper.
- Chill briefly before serving so the cream firms a little.
Variations on This Dish:
- Kirsch Trifle: Add a small splash of cherry liqueur to the fruit.
- Shortcut Trifle: Use store-bought brownies when time is tight.
Common Mistakes to Avoid with This Dish:
- Don’t make the cherry layer too wet; the cake will collapse.
- Don’t pile on thick cream layers if you still want the cherry flavor to show.
11. Chocolate-Dipped Meringue Kisses
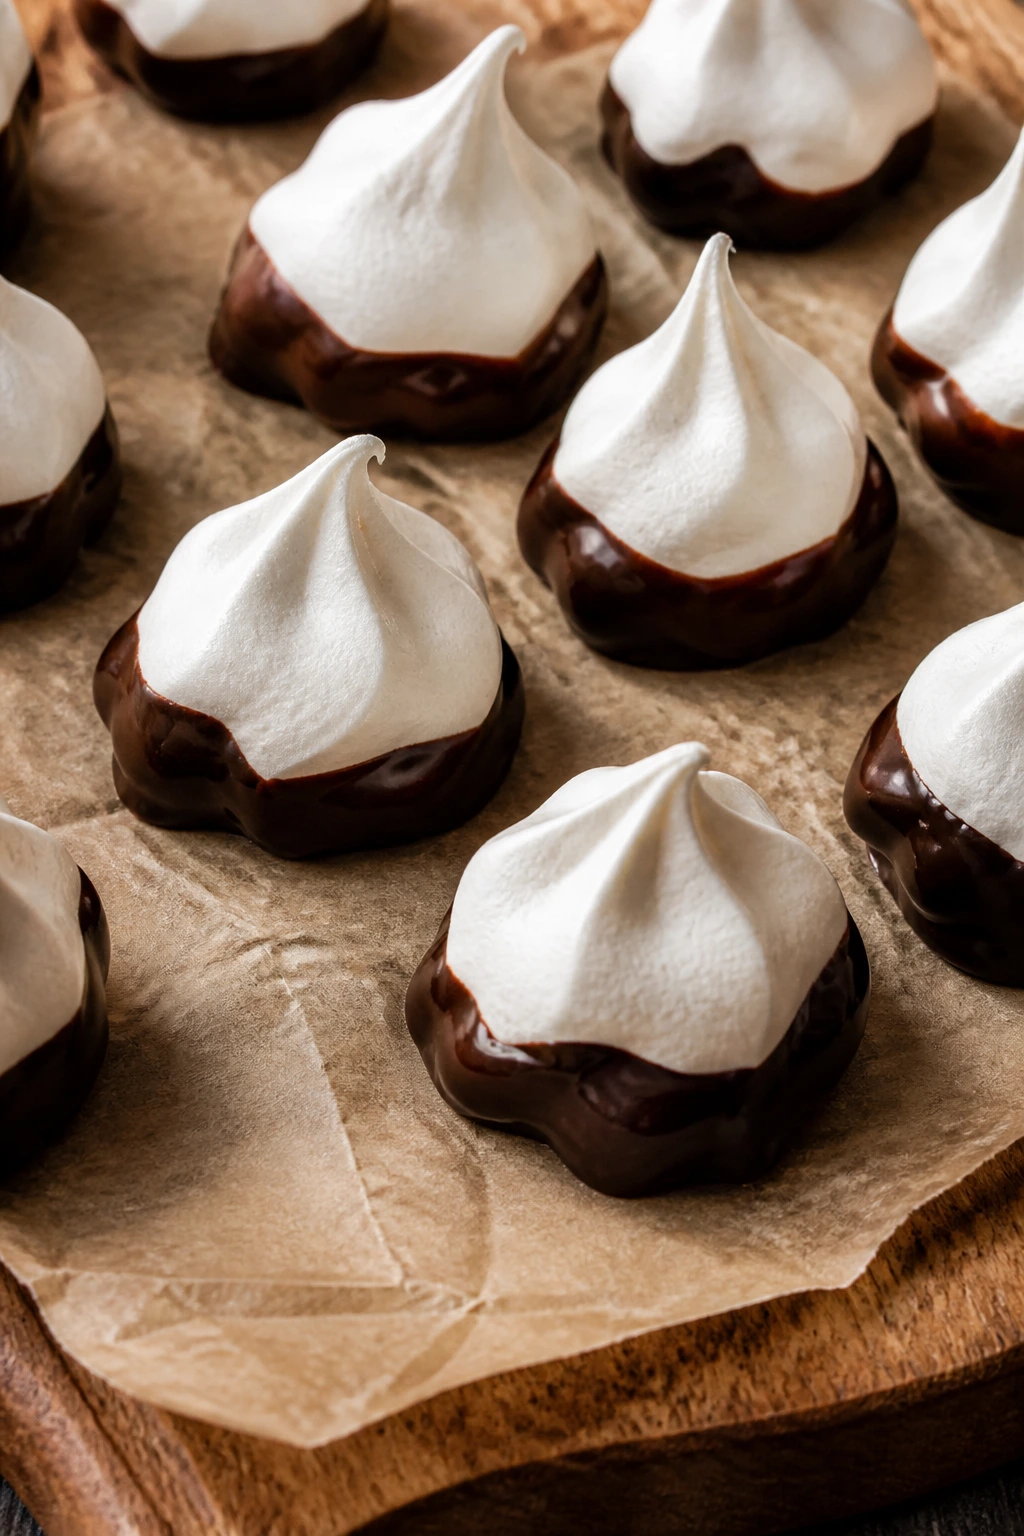
Meringue kisses vanish fast. They’re crisp, light, and sweet in that clean way that makes a chocolate dip feel like a bonus instead of a fix.
Why It Works: Low heat dries the meringue instead of browning it, so the shells stay pale and brittle. A quick dip in dark chocolate gives the cookies a little bite at the end.
Key Ingredients:
- 3 large egg whites — the whole structure.
- 3/4 cup granulated sugar — for shine and sweetness.
- 1/4 teaspoon cream of tartar — helps the whites hold.
- 1 teaspoon vanilla extract — flavor.
- Pink gel coloring — optional, for the Valentine look.
- 2 ounces dark chocolate, melted — for dipping.
- Pinch of salt — rounds the sweetness.
Quick Steps:
- Beat egg whites and cream of tartar until foamy, then add sugar one spoonful at a time.
- Beat until stiff, glossy peaks form, then mix in vanilla and coloring.
- Pipe small kisses onto parchment.
- Bake at 200°F for 1 hour, then let them cool in the turned-off oven.
- Dip the bottoms in melted chocolate and let them set on parchment.
Equipment for This Recipe:
- Piping bag with star tip — gives the classic ridges.
- Baking sheet and parchment — for drying.
- Microwave-safe bowl — for melting the chocolate.
How to Serve This Dish: Scatter them around a dessert board or tuck them into a box as a small gift. They’re best dry and crisp, not stacked under anything heavy.
Pro Tips for This Recipe:
- Make sure there’s no yolk in the whites, or the foam won’t rise cleanly.
- Add the sugar slowly; rushing it makes grainy meringue.
- Store in a dry container or the kisses absorb humidity fast.
Variations on This Dish:
- Peppermint Dip: Add crushed peppermint to the chocolate.
- White Chocolate Kiss: Dip in white chocolate for a sweeter finish.
Common Mistakes to Avoid with This Dish:
- Don’t bake at a normal cookie temperature; meringue needs drying, not browning.
- Don’t pack them away while warm or they sweat and soften.
12. Pink Velvet Cupcakes
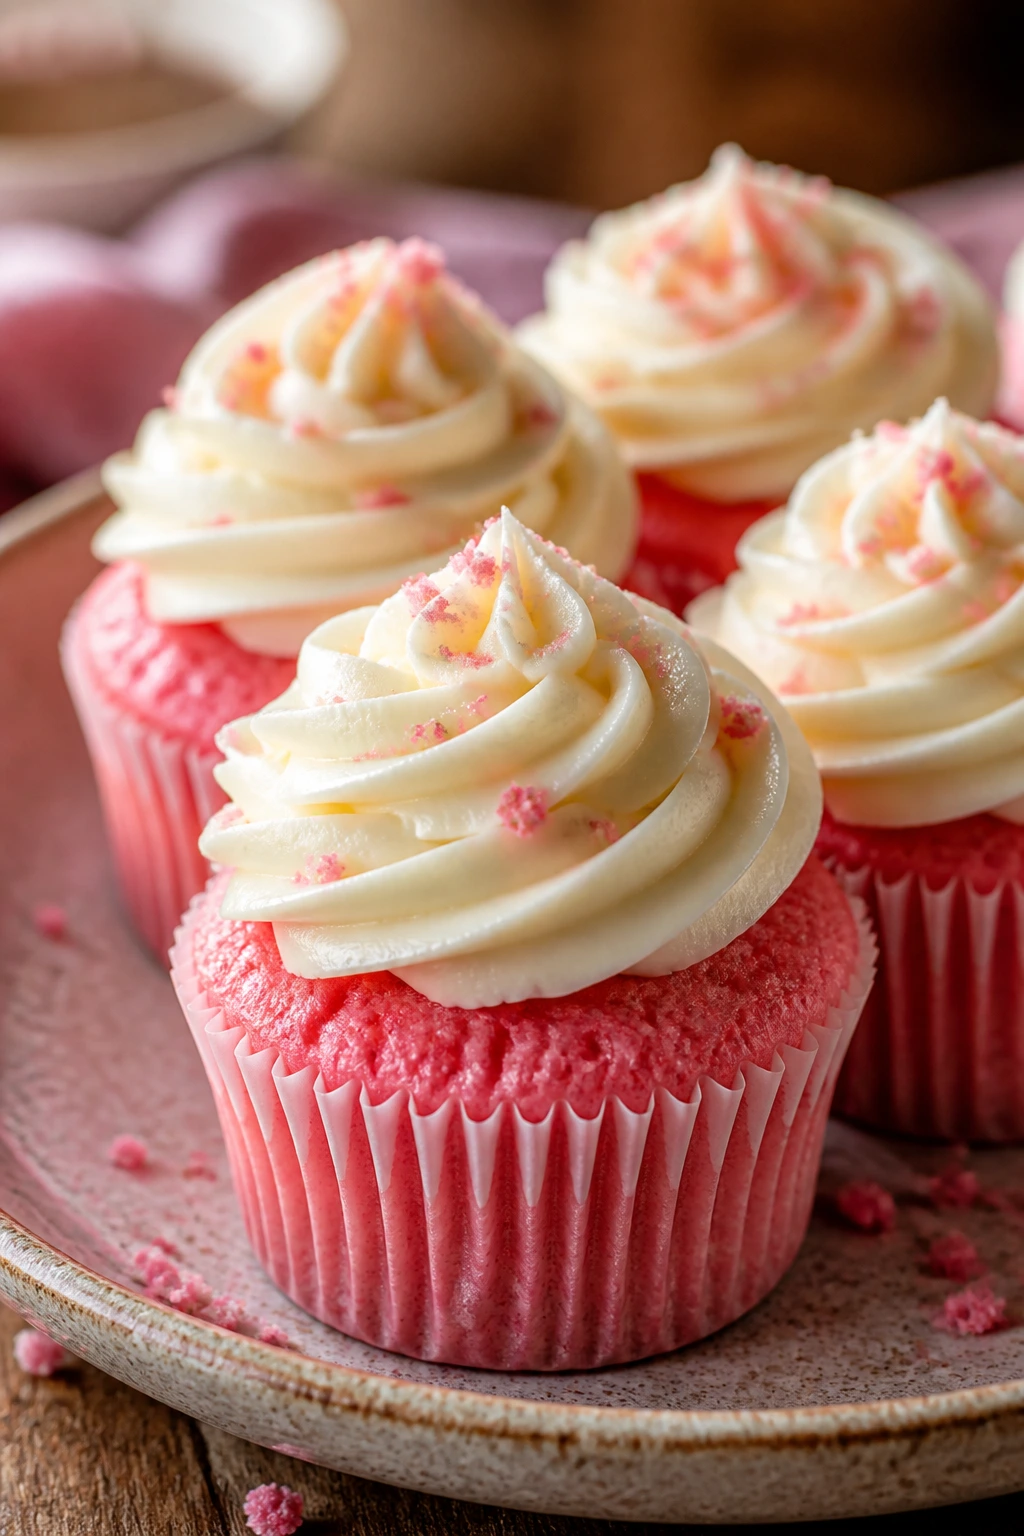
Pink velvet cupcakes should taste like a soft cocoa cake with a little tang, not like vanilla cake wearing lipstick. The cream cheese frosting is what makes them feel like a proper Valentine’s dessert instead of a dyed cupcake.
Why It Works: A little cocoa gives the crumb depth, while buttermilk keeps the cake tender and light. Beet powder or gel coloring gives the pink color without flooding the batter.
Key Ingredients:
- 1 1/2 cups all-purpose flour — the cake structure.
- 1 tablespoon cocoa powder — just enough for velvet flavor.
- 1 teaspoon baking powder — for lift.
- 1/2 teaspoon baking soda — helps with buttermilk.
- 1/2 cup unsalted butter, softened — richness.
- 3/4 cup sugar — sweetens the batter.
- 2 large eggs — bind the cupcakes.
- 1/2 cup buttermilk — keeps the crumb soft.
- 1 tablespoon beet powder or pink gel coloring — for color.
- Cream cheese frosting — for topping.
Quick Steps:
- Whisk the dry ingredients together.
- Beat butter and sugar until fluffy, then add eggs, buttermilk, vanilla, and coloring.
- Stir in the dry ingredients just until combined.
- Divide into lined muffin cups and bake at 350°F for 18 to 20 minutes.
- Cool fully before frosting.
Equipment for This Recipe:
- Muffin tin — standard 12-cup.
- Paper liners — keep the cupcakes neat.
- Offset spatula or piping bag — for frosting.
How to Serve This Dish: Frost them in tall swirls and finish with a few crumbs or a tiny strawberry slice. They look best when the frosting isn’t overworked into a heavy blob.
Pro Tips for This Recipe:
- Room-temperature butter and eggs help the batter mix evenly.
- Don’t overfill the liners; two-thirds full is enough.
- Chill the frosted cupcakes for 10 minutes if the frosting feels soft.
Variations on This Dish:
- Chocolate Cream Filling: Hollow the center and add a spoon of ganache.
- Strawberry Velvet Version: Add 1 tablespoon freeze-dried strawberry powder to the batter.
Common Mistakes to Avoid with This Dish:
- Don’t skip the buttermilk; it’s part of the texture.
- Don’t frost warm cupcakes or the icing slides off the top.
13. Cherry Hand Pies
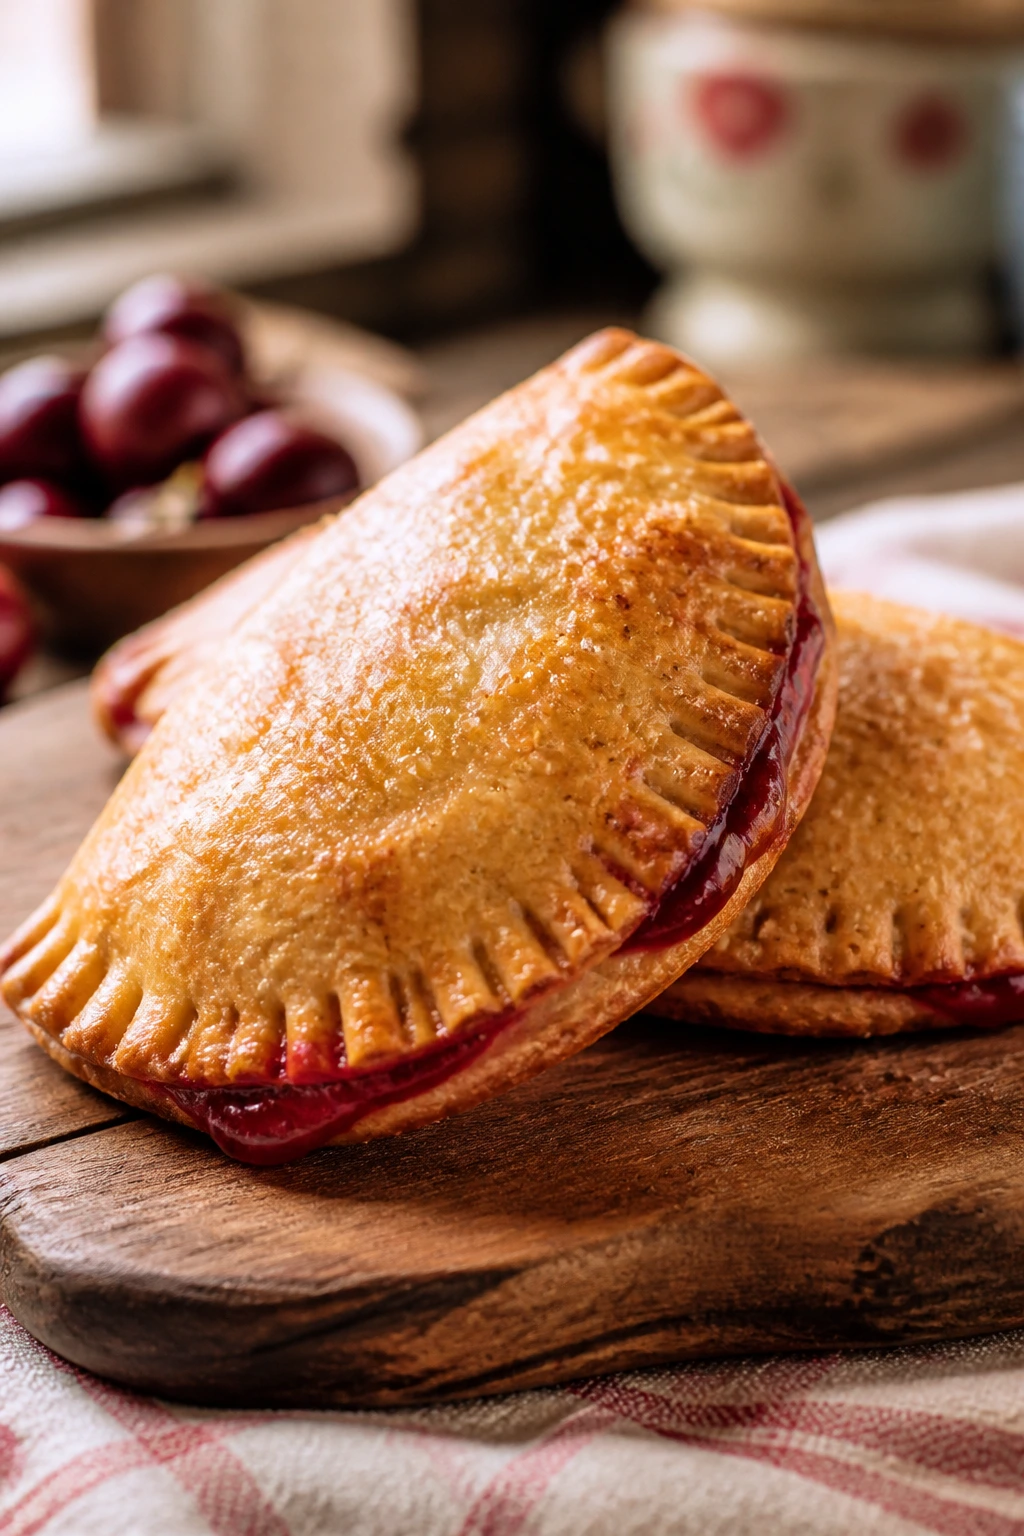
Cherry hand pies give you the smell of pie without the whole pie job. They’re tidy, portable, and the fruit filling turns jammy in a way that makes every bite feel a little warmer than it should.
Why It Works: A thickened cherry filling stays inside the pastry instead of leaking across the pan. Egg wash and sugar on top give the crust color and a slight crunch.
Key Ingredients:
- 2 pie crusts, chilled — homemade or store-bought.
- 2 cups pitted cherries — the filling.
- 1/3 cup sugar — sweetens the fruit.
- 2 tablespoons cornstarch — thickens the juices.
- 1 teaspoon lemon zest — brightens the filling.
- 1 egg, beaten — for sealing and shine.
- 1 tablespoon turbinado sugar — for the top.
- 1/2 teaspoon vanilla — optional, but nice.
Quick Steps:
- Cook cherries, sugar, cornstarch, and lemon zest over medium heat until thick and glossy.
- Roll the pie dough and cut into rectangles or hearts.
- Spoon filling onto half of each shape, brush the edges with egg, and fold closed.
- Crimp with a fork, cut a steam vent, brush with egg wash, and sprinkle with sugar.
- Bake at 400°F for 20 to 22 minutes, until golden and bubbling.
Equipment for This Recipe:
- Baking sheet — lined with parchment.
- Rolling pin — for the dough.
- Fork — for crimping the edges.
How to Serve This Dish: Let them cool for at least 10 minutes so the filling doesn’t run. A little powdered sugar on top is enough; these don’t need a full glaze.
Pro Tips for This Recipe:
- Cool the filling before assembling or the pastry softens too quickly.
- Don’t overfill; a teaspoon too much fruit will leak out.
- Cut a small vent so steam can escape.
Variations on This Dish:
- Almond Cherry Pie: Add 1/4 teaspoon almond extract to the filling.
- Lattice Top Hand Pies: Leave the top open and cross-strip it with dough.
Common Mistakes to Avoid with This Dish:
- Don’t bake with wet seams; they burst open in the oven.
- Don’t skip the cornstarch unless you like fruit soup.
14. White Chocolate Blondies with Freeze-Dried Strawberries
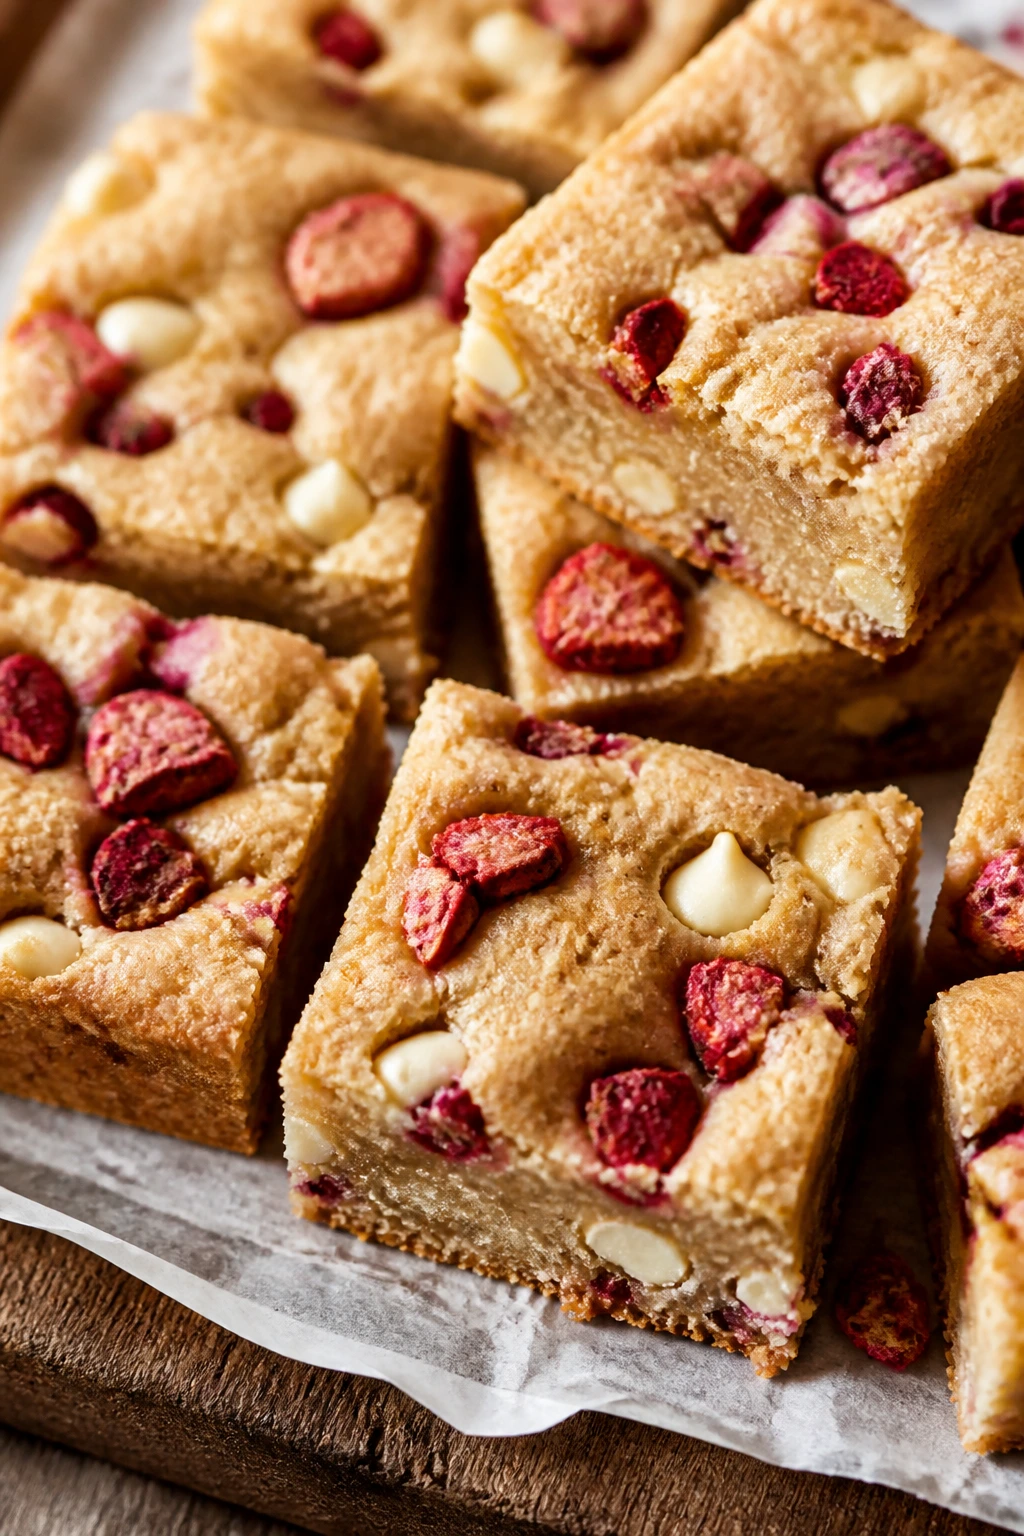
Brownies get interesting when white chocolate and freeze-dried strawberries enter the room. The blondie base stays chewy, and the berry pieces bring sharp little pops that keep the sweetness in check.
Why It Works: Brown sugar gives the bars a caramel note, while freeze-dried strawberries keep their flavor without adding water. White chocolate melts into pockets instead of disappearing, which is the whole fun of it.
Key Ingredients:
- 1/2 cup unsalted butter, melted — for chew.
- 1 cup light brown sugar — gives the blondies depth.
- 2 large eggs — hold the bars together.
- 1 tablespoon vanilla extract — rounds the flavor.
- 1 1/2 cups all-purpose flour — the structure.
- 1/2 teaspoon baking powder — for a small lift.
- 3/4 cup white chocolate chips — sweet pockets.
- 1/2 cup freeze-dried strawberries, lightly crushed — the berry punch.
Quick Steps:
- Whisk melted butter and brown sugar, then add eggs and vanilla.
- Stir in flour, baking powder, and salt just until no dry streaks remain.
- Fold in white chocolate and strawberries.
- Spread into a parchment-lined 8-inch pan and bake at 350°F for 24 to 28 minutes.
- Cool fully before cutting into squares.
Equipment for This Recipe:
- 8-inch baking pan — for thick bars.
- Rubber spatula — for folding.
- Parchment sling — makes lifting easier.
How to Serve This Dish: Cut them into small squares and serve on a platter with fresh strawberries. They’re rich enough that a little piece goes a long way.
Pro Tips for This Recipe:
- Pull the bars while the center still looks slightly soft; they finish setting as they cool.
- Crush the freeze-dried strawberries lightly so you still get chunks.
- Line the pan with parchment so the white chocolate doesn’t glue the bars down.
Variations on This Dish:
- Pistachio Version: Add 1/3 cup chopped pistachios for a salty crunch.
- Milk Chocolate Swap: Use milk chocolate if you want a sweeter bar.
Common Mistakes to Avoid with This Dish:
- Don’t overbake until the top is dark brown; blondies should stay pale and chewy.
- Don’t use fresh strawberries, which dump too much water into the batter.
15. Strawberry Tiramisu Cups
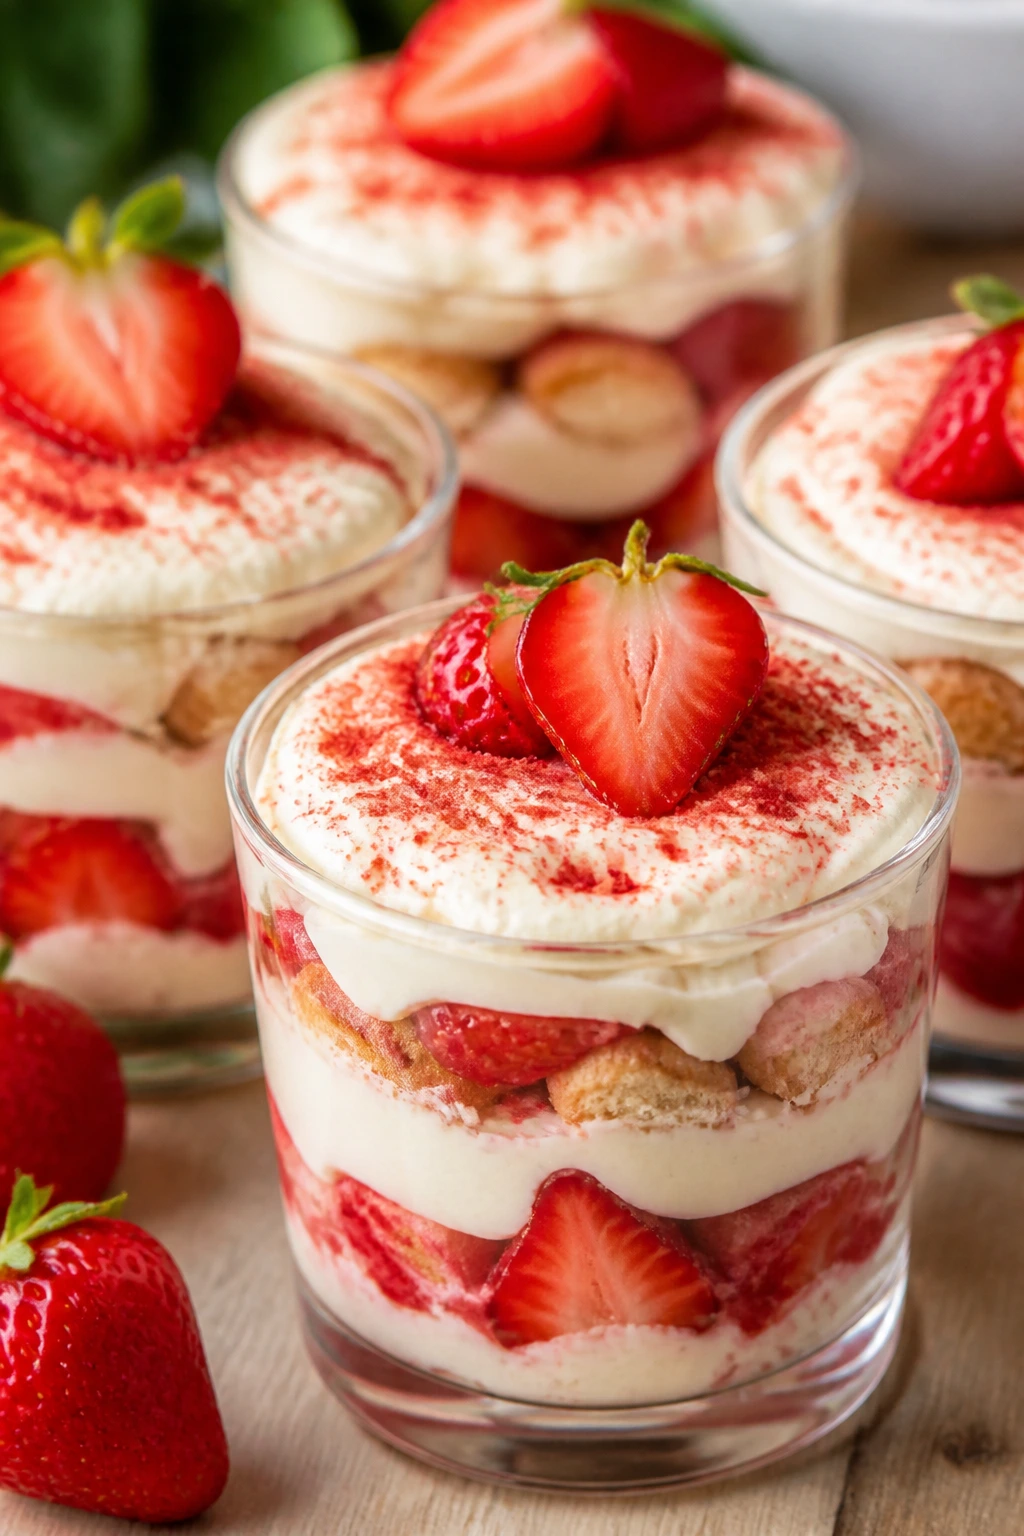
Strawberry tiramisu is a better fit for Valentine’s Day than the coffee-heavy original. It still has the creamy layers and soft soak, but the berries make it taste lighter and more playful.
Why It Works: Mascarpone and whipped cream make the filling rich without turning dense. Briefly dipped ladyfingers absorb enough strawberry syrup to soften, but not so much that they collapse.
Key Ingredients:
- 8 ounces mascarpone — the creamy layer.
- 1 cup heavy cream, cold — for whipping.
- 1/3 cup sugar — sweetens the filling.
- 1 teaspoon vanilla — flavor.
- 12 ladyfingers — the sponge layer.
- 1 cup strawberry sauce or purée — for soaking.
- 2 cups sliced strawberries — fresh fruit layers.
- Cocoa powder or freeze-dried strawberry powder — for finishing.
Quick Steps:
- Whip mascarpone, cream, sugar, and vanilla until thick and spreadable.
- Dip ladyfingers quickly into strawberry sauce so they soften but don’t fall apart.
- Layer ladyfingers, cream, and strawberries in small cups.
- Repeat the layers and finish with cream on top.
- Chill for at least 2 hours, then dust before serving.
Equipment for This Recipe:
- Small glasses or ramekins — show off the layers.
- Mixer — for the cream filling.
- Small spoon — for the stacking.
How to Serve This Dish: Serve it cold with a spoon that can reach all the layers. A few sliced strawberries on top make the cups look finished without a lot of garnish work.
Pro Tips for This Recipe:
- Dip the ladyfingers fast, not long, or they disintegrate.
- Use a thick strawberry sauce rather than runny purée.
- Chill long enough for the layers to settle and slice more cleanly.
Variations on This Dish:
- Coffee-Strawberry Blend: Add a splash of espresso to half the soaking liquid.
- Chocolate Stripe Version: Add shaved dark chocolate between layers.
Common Mistakes to Avoid with This Dish:
- Don’t oversoak the cookies; soggy cups lose their shape.
- Don’t skip the chill time; the filling tastes better once it firms up.
16. Salted Caramel Brownies with Raspberries
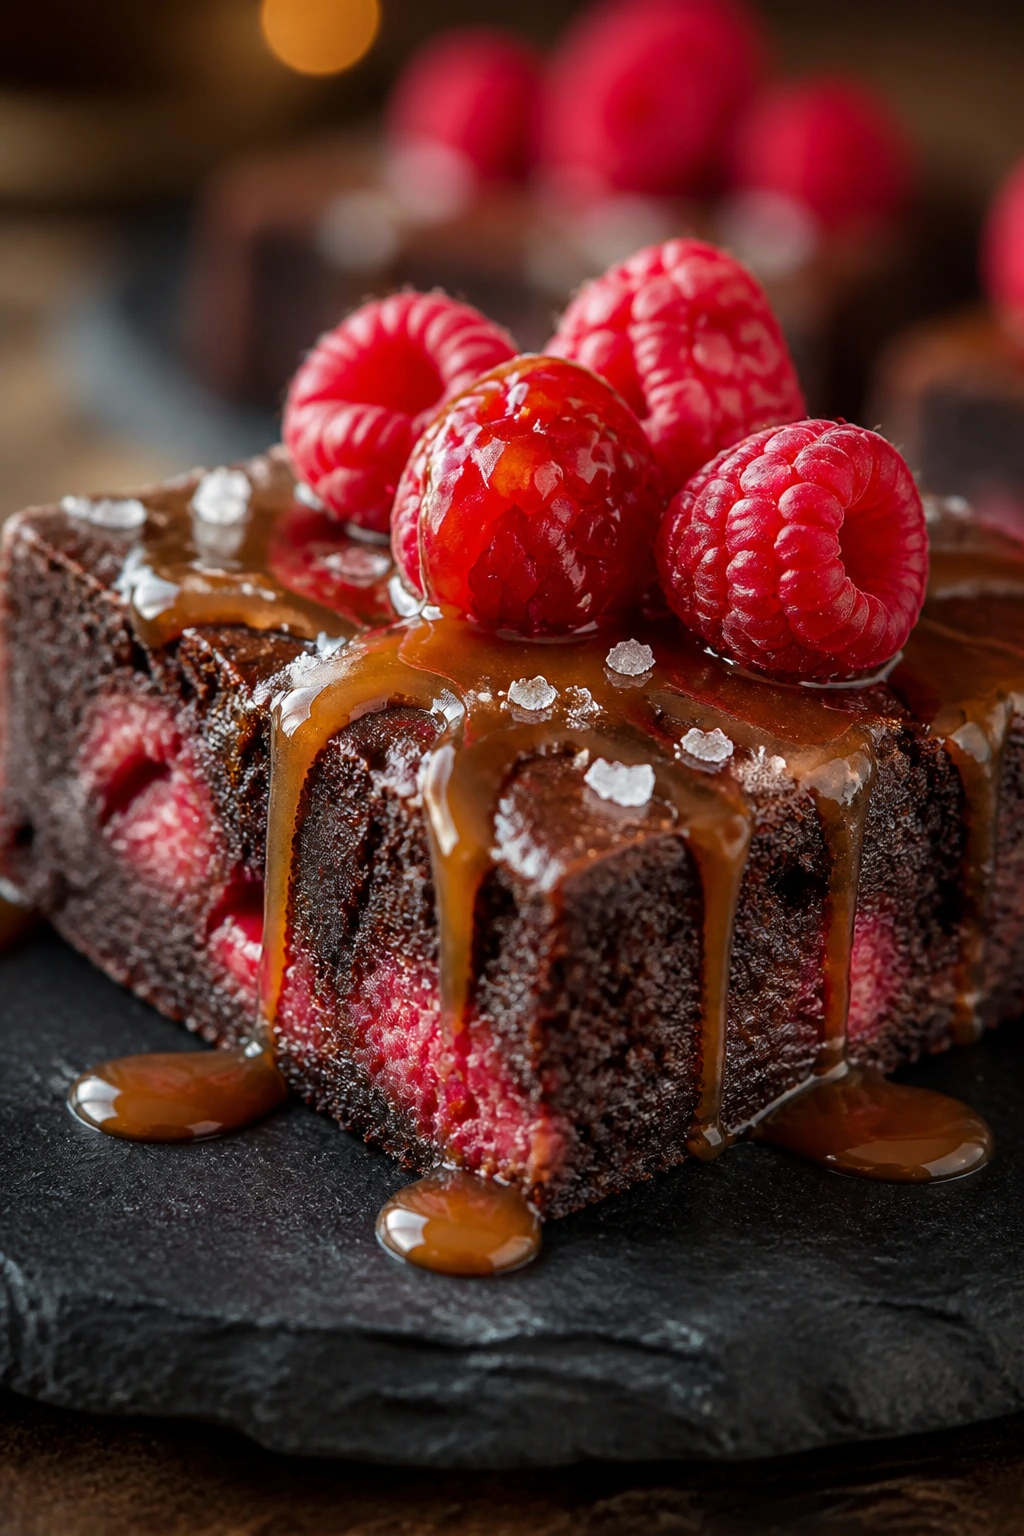
Raspberry streaks cut through dense brownies in exactly the right way. You get the dark chocolate chew, then a tart burst of fruit, then a little salted caramel on top that keeps the whole square from becoming too heavy.
Why It Works: Brownie batter holds the raspberries without collapsing if you scatter them over the top instead of folding them all the way through. Caramel and flaky salt turn a standard brownie into something that feels more considered.
Key Ingredients:
- 1/2 cup unsalted butter — the brownie base.
- 1 cup sugar — for sweetness and crackly tops.
- 2 large eggs — for structure.
- 1/3 cup cocoa powder — deep chocolate flavor.
- 3/4 cup all-purpose flour — the crumb.
- 1 cup raspberries — the tart contrast.
- 1/2 cup caramel sauce — the topping.
- 1/2 teaspoon flaky salt — the finish.
Quick Steps:
- Melt butter, then whisk in sugar, eggs, and vanilla.
- Stir in cocoa, flour, and salt until the batter just comes together.
- Spread into a lined 8-inch pan and scatter raspberries over the top.
- Bake at 350°F for 25 to 28 minutes, until a toothpick comes out with a few moist crumbs.
- Cool, drizzle with caramel, and finish with flaky salt.
Equipment for This Recipe:
- 8-inch square pan — gives thick brownies.
- Parchment paper — for lifting.
- Small offset spatula — for smoothing caramel.
How to Serve This Dish: Cut into small squares and serve slightly warm. A spoon of softly whipped cream works, but plain is good too.
Pro Tips for This Recipe:
- Use room-temperature eggs so the batter emulsifies well.
- Scatter the raspberries on top to prevent streaky wet batter.
- Add the caramel after cooling, or it sinks in and disappears.
Variations on This Dish:
- Cherry Brownies: Swap raspberries for pitted cherries.
- Espresso Brownies: Add 1 teaspoon instant espresso powder to the batter.
Common Mistakes to Avoid with This Dish:
- Don’t overbake until the center is dry; brownies dry out fast.
- Don’t add too much caramel or the top gets sticky instead of glossy.
17. Rosewater Panna Cotta
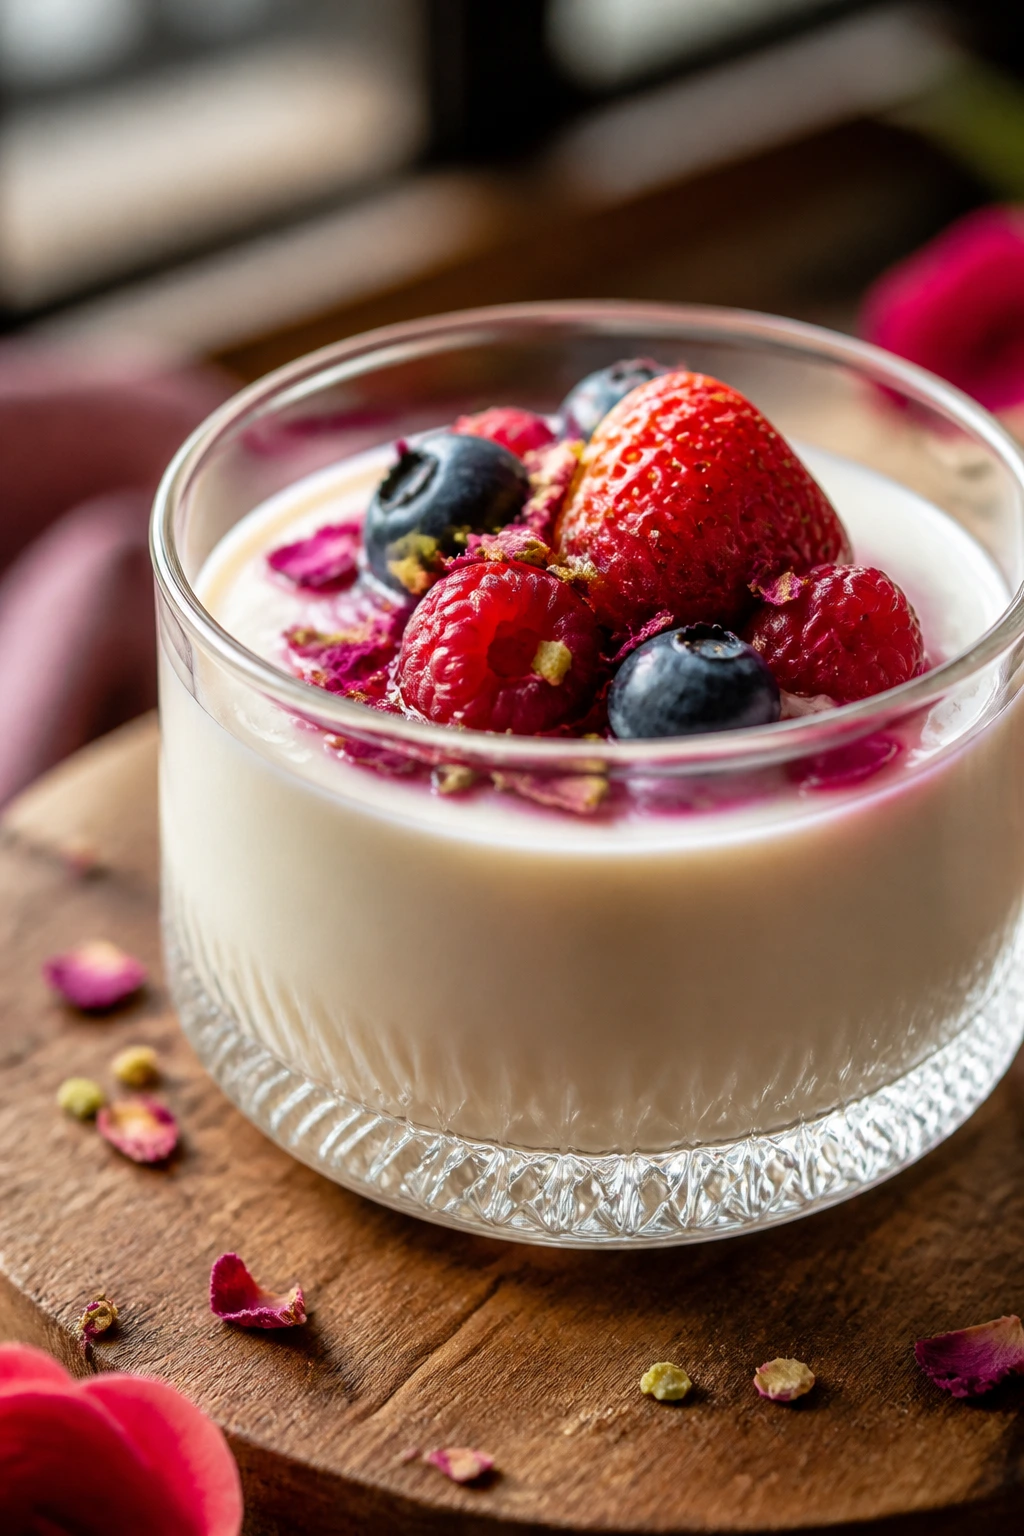
Panna cotta doesn’t forgive sloppy measuring, but when it’s done right, it’s elegant in a quiet way. The rosewater keeps the cream from feeling plain, and the berries give the soft set something to lean against.
Why It Works: Gelatin sets the cream into a spoonable shape without baking. Rosewater is strong, so a little goes far; too much and the dessert starts tasting like perfume.
Key Ingredients:
- 2 cups heavy cream — the base.
- 1 cup whole milk — lightens the texture.
- 1/3 cup sugar — sweetens it.
- 2 teaspoons unflavored gelatin — for the set.
- 2 tablespoons cold water — to bloom the gelatin.
- 1 teaspoon rosewater — keep it restrained.
- 1/2 teaspoon vanilla — softens the floral note.
- Fresh raspberries or pomegranate seeds — for topping.
Quick Steps:
- Bloom the gelatin in cold water.
- Warm cream, milk, and sugar until steaming but not boiling.
- Stir in the gelatin until dissolved, then add rosewater and vanilla.
- Pour into cups or molds and chill for at least 4 hours.
- Top with berries just before serving.
Equipment for This Recipe:
- Saucepan — for the cream mixture.
- Fine sieve — helpful if you want extra-smooth panna cotta.
- Ramekins or cups — for setting.
How to Serve This Dish: Unmold it onto a plate if you want a polished look, or serve it straight in glasses for less stress. A few tart berries on top are enough.
Pro Tips for This Recipe:
- Taste the cream before chilling; rosewater should whisper, not shout.
- Let the gelatin fully dissolve or you’ll get rubbery bits.
- Use shallow molds if you want the set to release cleanly.
Variations on This Dish:
- Vanilla-Forward Version: Skip the rosewater and add another half teaspoon vanilla.
- Honey Rose Panna Cotta: Replace part of the sugar with honey for a softer flavor.
Common Mistakes to Avoid with This Dish:
- Don’t boil the cream or the texture gets grainy.
- Don’t overdo the rosewater; the dessert should smell like a garden, not a bottle.
18. Nutella Puff Pastry Hearts
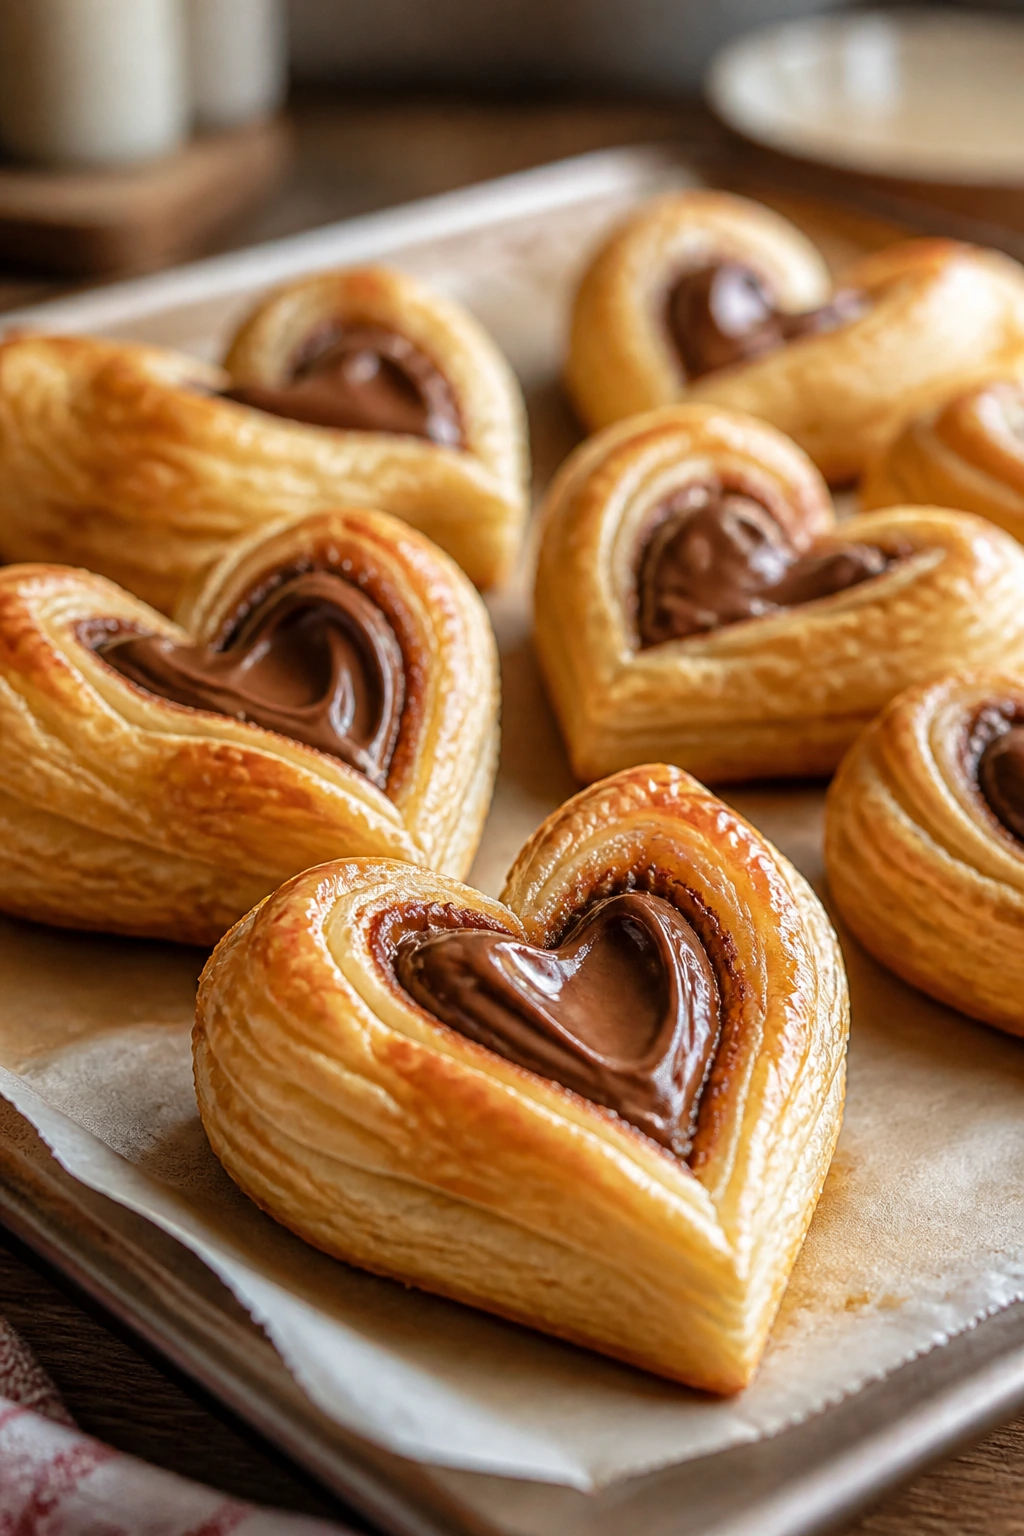
Puff pastry hearts look fussy, but the freezer does most of the work. Nutella melts into the layers, the edges puff up and separate, and the whole thing comes out looking more complicated than it is.
Why It Works: Store-bought puff pastry bakes into crisp, buttery layers with very little effort. Nutella stays soft in the center, so each heart gives you flaky edges and a smooth filling.
Key Ingredients:
- 1 sheet puff pastry, thawed — the shell.
- 1/2 cup Nutella — the filling.
- 1 egg, beaten — for sealing and shine.
- 1 tablespoon sugar — for the top.
- 1 tablespoon powdered sugar — for finishing.
- Flour, for dusting — keeps the pastry from sticking.
Quick Steps:
- Roll the puff pastry slightly and cut heart shapes.
- Spread Nutella on half the hearts, leaving a border.
- Brush edges with egg, top with another heart, and press to seal.
- Brush with egg wash, sprinkle with sugar, and cut a tiny vent.
- Bake at 400°F for 15 to 18 minutes, until deeply golden.
Equipment for This Recipe:
- Baking sheet — lined with parchment.
- Sharp knife or cutter — for the hearts.
- Pastry brush — for the egg wash.
How to Serve This Dish: Dust them with powdered sugar once they cool for a minute. Serve warm enough that the Nutella is still soft, not runny.
Pro Tips for This Recipe:
- Keep the pastry cold so the layers puff.
- Seal the edges well or the filling leaks out.
- Bake until the bottom is fully browned, not just pale gold.
Variations on This Dish:
- Strawberry-Nutella Hearts: Add a thin layer of strawberry jam under the Nutella.
- Dark Chocolate Hearts: Swap Nutella for chopped dark chocolate squares.
Common Mistakes to Avoid with This Dish:
- Don’t overfill the hearts; a little Nutella goes farther than you think.
- Don’t thaw the pastry too long before cutting or it softens and tears.
19. Lemon Raspberry Layer Cake
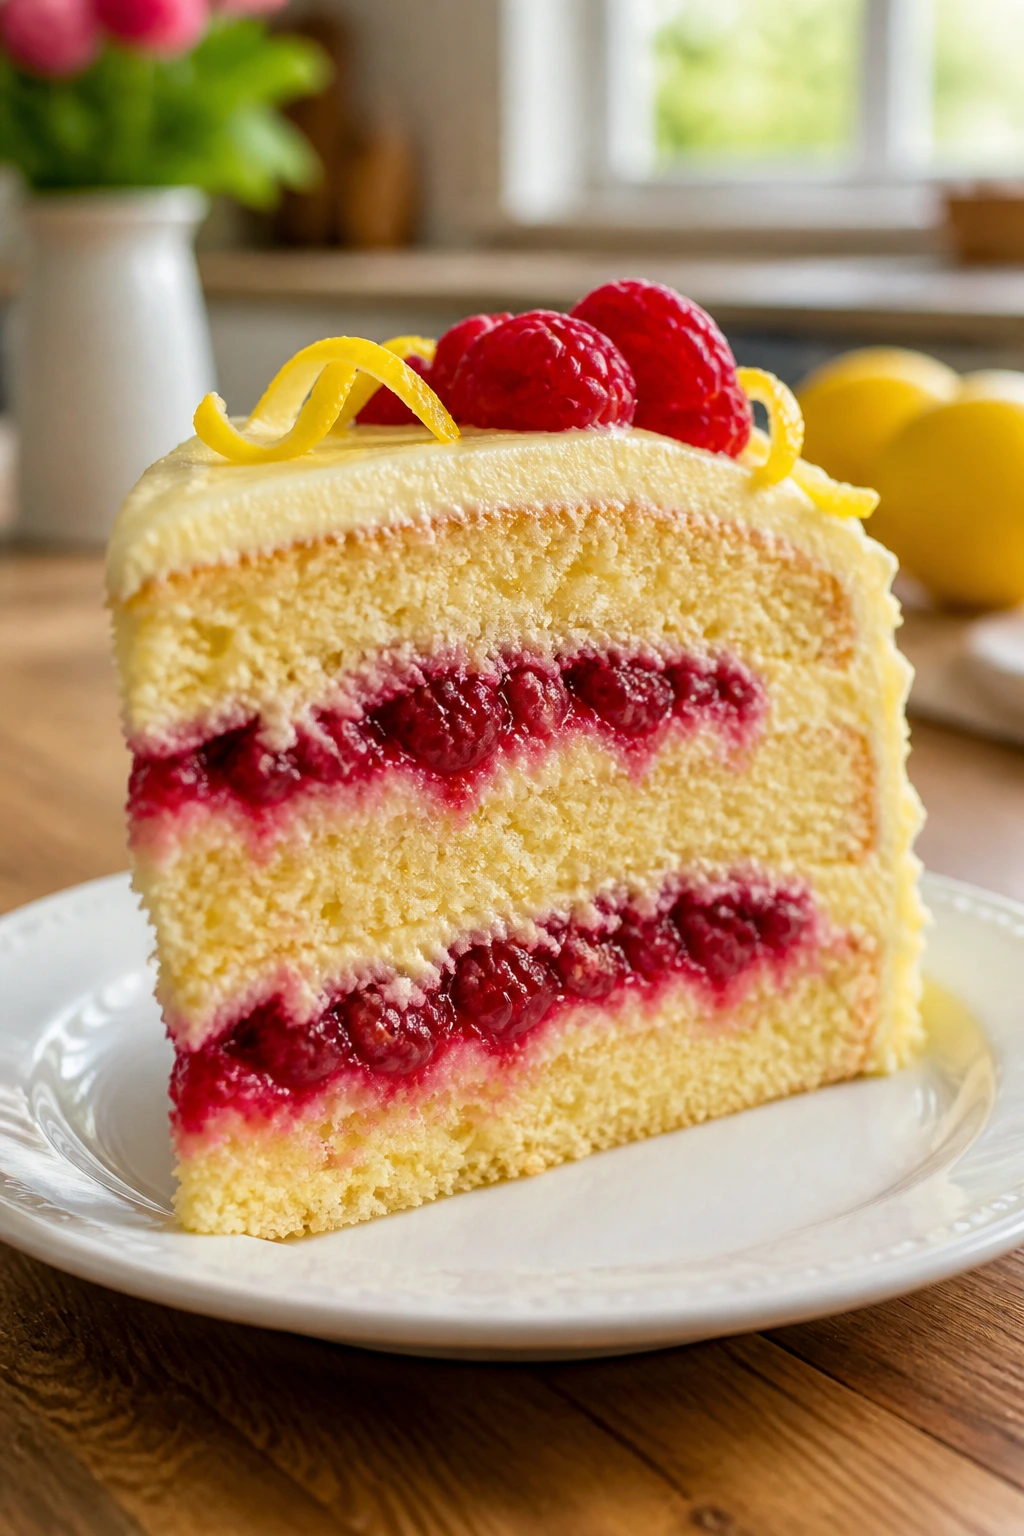
Lemon and raspberry keep a layer cake from feeling heavy, which matters when dessert comes after a full dinner. The tart filling and bright frosting give you that bakery-style slice with enough color to make the plate look alive.
Why It Works: Lemon zest perfumes the cake, while raspberry filling gives you a vivid layer in the middle. Sour cream in the batter keeps the crumb tender, even after a few hours on the counter.
Key Ingredients:
- 2 1/2 cups all-purpose flour — the cake body.
- 2 teaspoons baking powder — for lift.
- 1 cup unsalted butter, softened — richness.
- 1 3/4 cups sugar — sweetness.
- 4 large eggs — structure.
- 1 cup sour cream — keeps the crumb soft.
- 2 lemons, zested and juiced — the citrus note.
- 1 cup raspberry preserves — the filling.
- Lemon buttercream — for frosting.
Quick Steps:
- Whisk flour, baking powder, baking soda, and salt.
- Beat butter and sugar until pale, then add eggs, zest, juice, vanilla, and sour cream.
- Mix in the dry ingredients and divide between two 8-inch pans.
- Bake at 350°F for 24 to 28 minutes, then cool completely.
- Layer with raspberry preserves and frosting, then chill briefly before slicing.
Equipment for This Recipe:
- Two 8-inch round cake pans — for even layers.
- Mixer — for the batter and frosting.
- Offset spatula — for smooth frosting.
How to Serve This Dish: Cut thin slices and let the raspberry layer show. A few fresh berries on the side make the plate feel finished without adding clutter.
Pro Tips for This Recipe:
- Level the cake layers if they dome too much.
- Use room-temperature ingredients so the batter doesn’t curdle.
- Chill the frosted cake for 20 minutes before cutting.
Variations on This Dish:
- White Chocolate Drizzle: Add a thin white chocolate drizzle over the top.
- Strawberry Filling Swap: Replace raspberry preserves with strawberry jam.
Common Mistakes to Avoid with This Dish:
- Don’t frost warm layers or the buttercream slips.
- Don’t use too much filling; it will squeeze out the sides.
20. Chocolate Pots de Crème
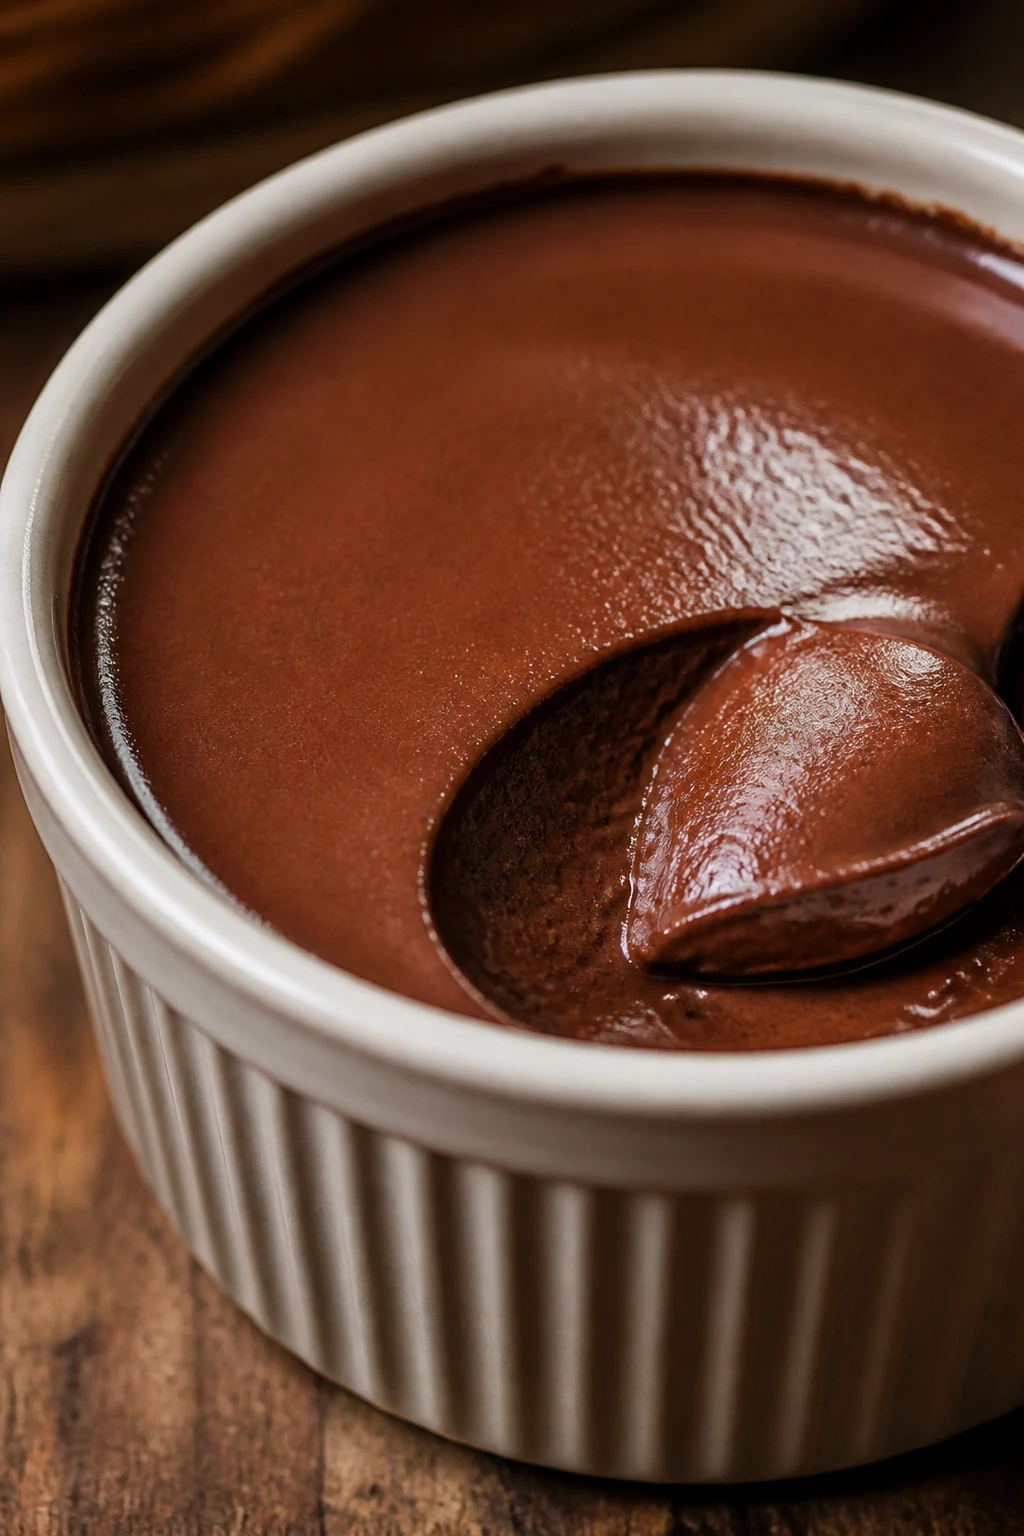
Pots de crème is the dessert I make when I want one spoonful to feel like a small event. It’s smooth, dark, and steady, with no drama beyond the first dip of a spoon through the top.
Why It Works: Egg yolks and cream bake into a custard that sets gently in a water bath. Chocolate gives the custard a dense, satin texture that tastes richer than the ingredient list looks on paper.
Key Ingredients:
- 1 cup heavy cream — richness.
- 1 cup whole milk — lightens the custard.
- 6 ounces bittersweet chocolate, chopped — the flavor.
- 4 large egg yolks — for the set.
- 1/4 cup sugar — keeps it balanced.
- 1 teaspoon vanilla — softens the edges.
- Pinch of salt — sharpens the chocolate.
Quick Steps:
- Heat cream and milk until steaming, then pour over the chocolate and stir smooth.
- Whisk yolks, sugar, vanilla, and salt in a bowl.
- Slowly whisk the warm chocolate mixture into the yolks.
- Pour into ramekins, set them in a baking dish, and add hot water halfway up the sides.
- Bake at 300°F for 25 to 30 minutes, until the edges are set and the center still jiggles slightly; chill before serving.
Equipment for This Recipe:
- Ramekins — individual servings.
- Baking dish — for the water bath.
- Whisk — to keep the custard smooth.
How to Serve This Dish: Serve cold with a spoonful of whipped cream or a few raspberries. A thin dusting of cocoa on top makes them look finished fast.
Pro Tips for This Recipe:
- Stir the custard gently so you don’t add too many bubbles.
- Don’t let the water bath boil hard in the oven.
- Chill until firm or the custard will look loose in the ramekin.
Variations on This Dish:
- Espresso Pots de Crème: Add 1 teaspoon espresso powder to the cream.
- Orange Chocolate Version: Stir in orange zest before baking.
Common Mistakes to Avoid with This Dish:
- Don’t bake until the custards are fully firm; that means overdone.
- Don’t skip the water bath unless you want scrambled edges.
21. Raspberry Linzer Cookies
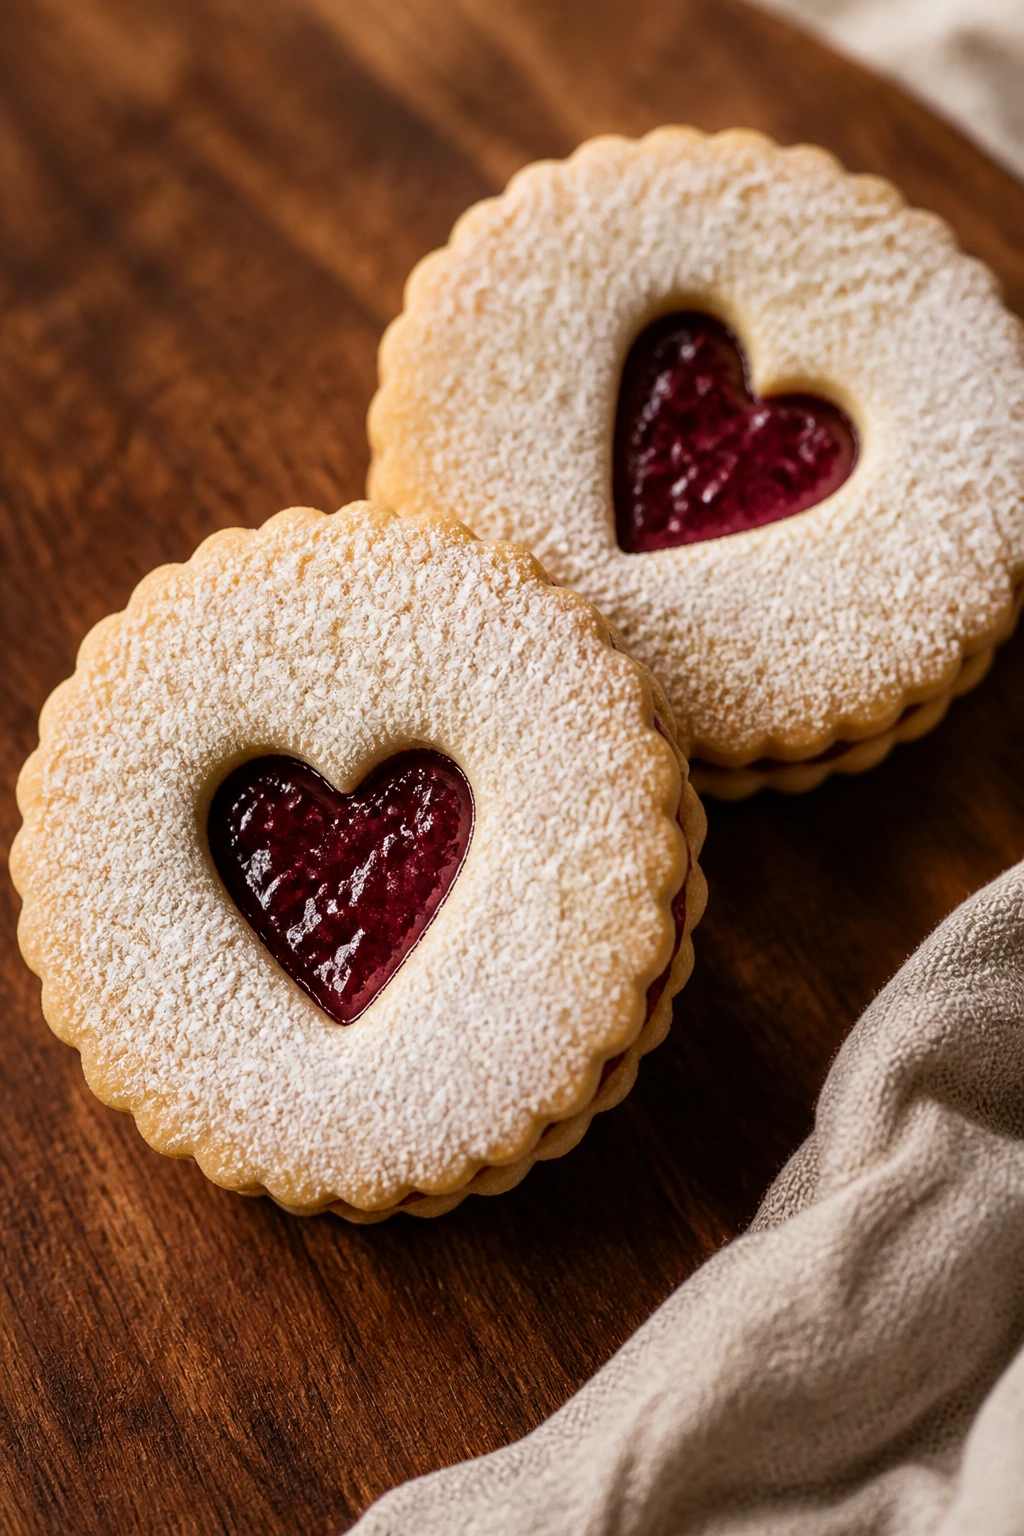
Linzer cookies are built for a little window of jam. They look refined, but the dough is just buttery enough to feel familiar, which is probably why people eat them two at a time.
Why It Works: Almond flour adds a soft, nutty crumb, and raspberry jam gives the sandwich cookie its bright center. The cutout top turns a simple cookie into something that looks deliberate.
Key Ingredients:
- 1 cup unsalted butter, softened — for the dough.
- 3/4 cup powdered sugar — keeps the crumb tender.
- 1 large egg — binds the dough.
- 1 teaspoon vanilla — flavor.
- 1 1/2 cups all-purpose flour — structure.
- 1 cup almond flour — adds a soft texture.
- 1/2 teaspoon cinnamon — optional warmth.
- 1/2 cup raspberry jam — filling.
Quick Steps:
- Cream butter and powdered sugar, then beat in egg and vanilla.
- Mix in the flours, salt, and cinnamon until the dough forms.
- Chill for 1 hour, then roll to 1/8-inch thick and cut shapes.
- Cut a smaller window in half the cookies and bake at 350°F for 10 to 12 minutes.
- Sandwich with jam and dust the tops with powdered sugar.
Equipment for This Recipe:
- Rolling pin — for thin, even dough.
- Round or heart cutters — one large, one small.
- Sifter — for the powdered sugar finish.
How to Serve This Dish: Dust them after they cool, or the sugar melts into the jam. They’re tidy enough for a cookie tray and pretty enough to wrap as a gift.
Pro Tips for This Recipe:
- Chill the cut cookies before baking so they hold their shape.
- Warm the jam slightly if it’s too thick to spread.
- Don’t overbake; Linzers should stay pale.
Variations on This Dish:
- Apricot Linzers: Swap raspberry jam for apricot.
- Chocolate Linzers: Add 1 tablespoon cocoa to the dough.
Common Mistakes to Avoid with This Dish:
- Don’t roll the dough too thin or it tears when filled.
- Don’t overfill the centers, or the jam squeezes out the sides.
22. Cherry Almond Cake
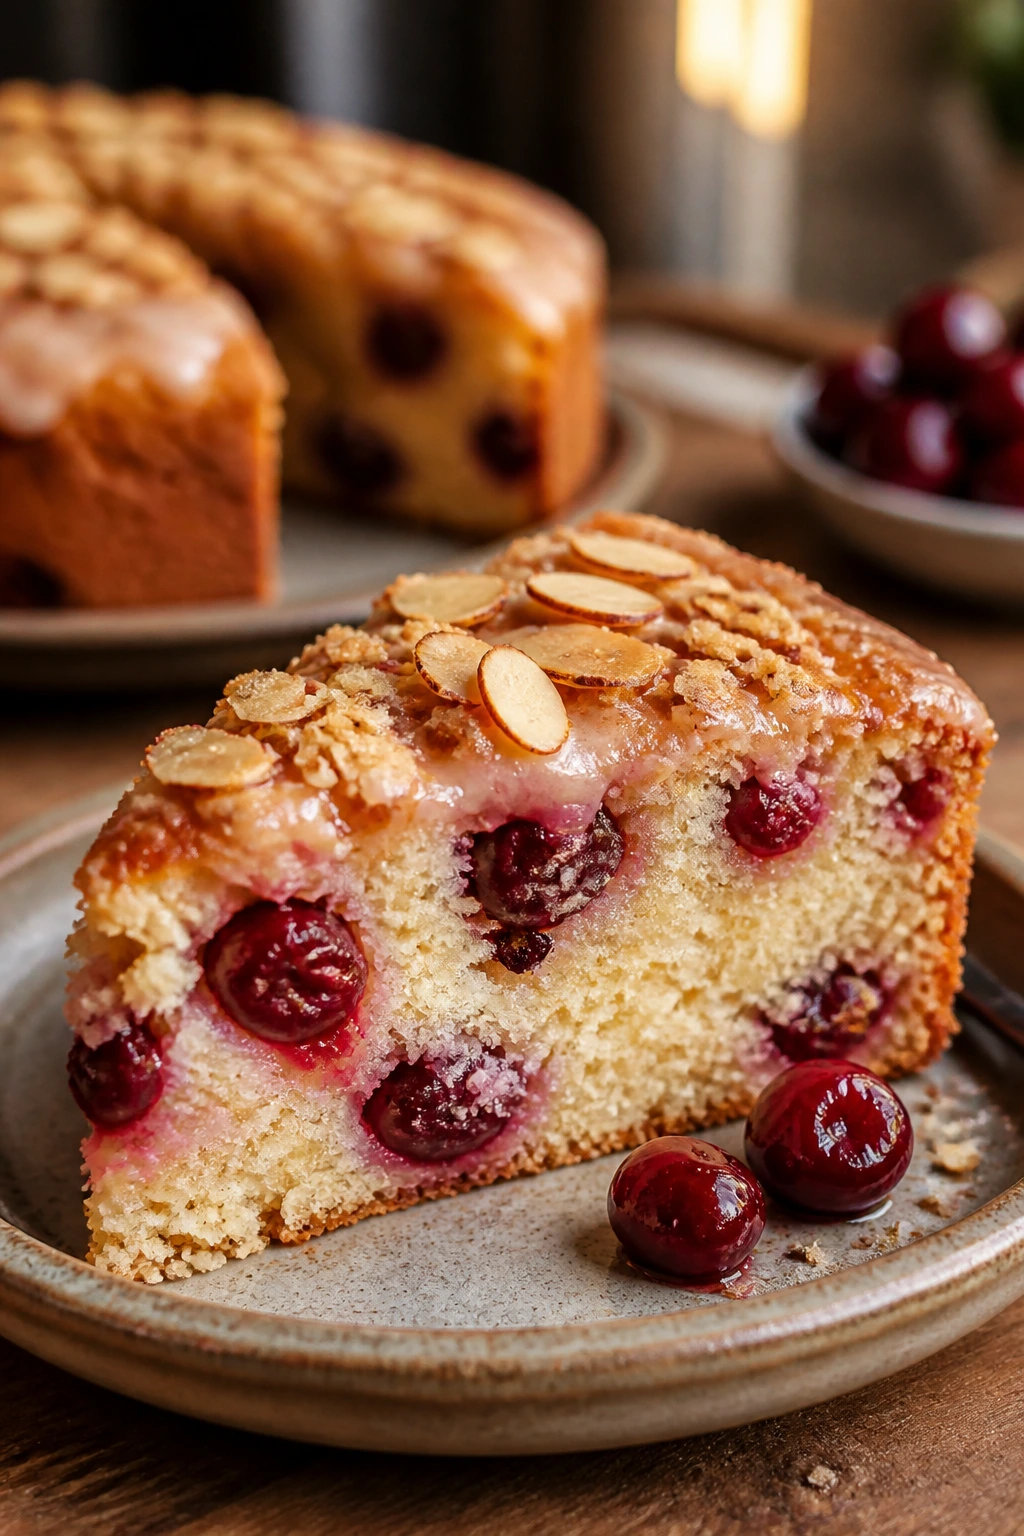
Cherry almond cake smells like a bakery before the oven timer even rings. The almond extract gives the crumb a sweet, nutty edge, and the cherries keep the slices from feeling too soft or too plain.
Why It Works: Almond flour and sour cream make the crumb tender, while chopped cherries cut through the richness. A simple glaze or dusting of sugar is enough because the cake already does a lot.
Key Ingredients:
- 1 cup unsalted butter, softened — the cake base.
- 1 1/2 cups sugar — sweetness.
- 3 large eggs — structure.
- 2 cups all-purpose flour — the main dry ingredient.
- 1/2 cup almond flour — softer texture.
- 2 teaspoons baking powder — lift.
- 1/2 cup sour cream — tenderness.
- 1 teaspoon almond extract — the flavor cue.
- 1 1/2 cups cherries, pitted and halved — the fruit.
Quick Steps:
- Whisk the dry ingredients together.
- Beat butter and sugar, then add eggs, sour cream, vanilla, and almond extract.
- Fold in the dry ingredients and cherries.
- Bake in a greased 9-inch pan at 350°F for 40 to 45 minutes.
- Cool, then glaze lightly or dust with powdered sugar.
Equipment for This Recipe:
- 9-inch cake pan — or springform.
- Mixer — for the batter.
- Parchment round — helps with release.
How to Serve This Dish: Serve with a few fresh cherries on the side if you have them. A small spoon of softly whipped cream works well, but the cake can stand alone.
Pro Tips for This Recipe:
- Toss the cherries in a teaspoon of flour so they don’t sink.
- Use almond extract lightly; it can dominate fast.
- Cool fully before slicing or the crumb smears.
Variations on This Dish:
- Chocolate Cherry Cake: Add 1/3 cup cocoa and reduce the flour slightly.
- Amaretto Glaze: Stir a splash of amaretto into the glaze.
Common Mistakes to Avoid with This Dish:
- Don’t use too many cherries or the cake turns gummy.
- Don’t bake before the center is done; almond cakes can brown early.
23. Strawberry Pretzel Parfaits
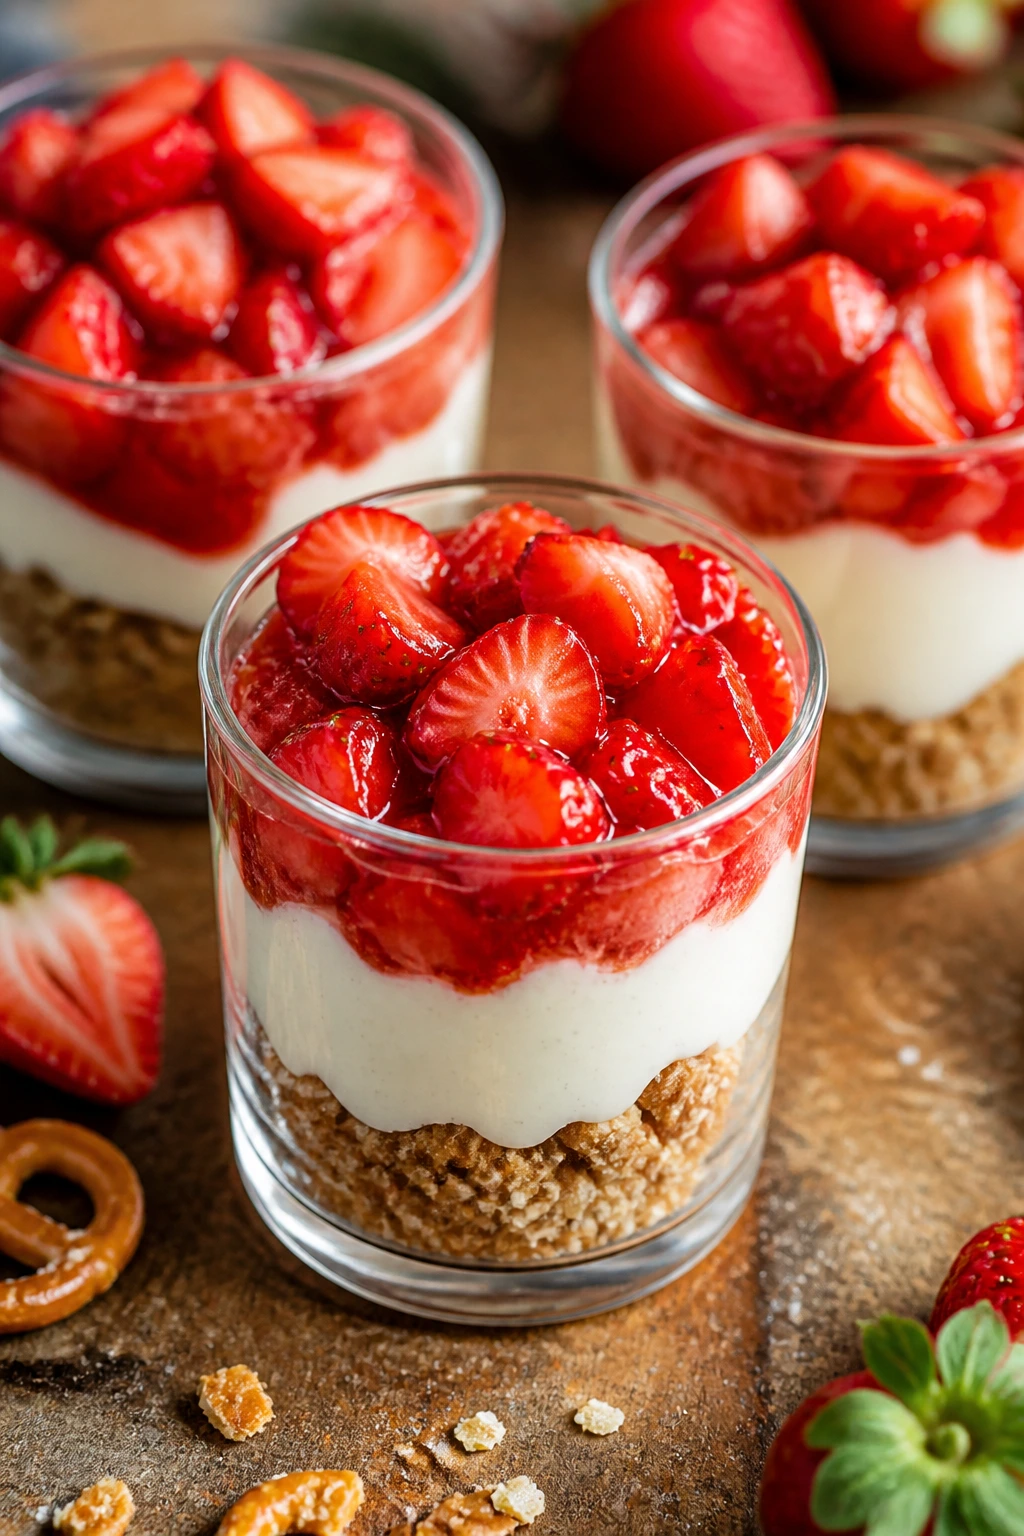
Pretzel parfaits bring crunch to a table full of soft desserts. The salty base and creamy middle make a sharp contrast with the strawberry layer, and that contrast is what keeps people going back.
Why It Works: Crushed pretzels give you salt and texture, while cream cheese and whipped cream make a filling that tastes like cheesecake without the oven. Strawberry topping finishes the glass with color and brightness.
Key Ingredients:
- 1 1/2 cups pretzels, crushed — the salty base.
- 4 tablespoons butter, melted — binds the crumbs.
- 2 tablespoons sugar — rounds the salt.
- 8 ounces cream cheese, softened — the creamy layer.
- 1/2 cup powdered sugar — sweetens the filling.
- 1 cup whipped cream — lightens the mix.
- 2 cups strawberries, chopped — the fruit layer.
- 1 tablespoon lemon juice — brightens the strawberries.
Quick Steps:
- Stir pretzel crumbs, melted butter, and sugar, then spoon into cups.
- Beat cream cheese and powdered sugar until smooth, then fold in whipped cream.
- Toss strawberries with lemon juice and a little sugar if needed.
- Layer crust, cream, and strawberries in glasses.
- Chill for 30 minutes so the layers hold.
Equipment for This Recipe:
- Small glasses or jars — for building the layers.
- Mixer — for the cream layer.
- Spoon or piping bag — for cleaner assembly.
How to Serve This Dish: Serve these cold and layered high enough that the stripes show through the glass. They work best as individual portions, not one big bowl.
Pro Tips for This Recipe:
- Crush the pretzels fine enough to pack, but not into dust.
- Don’t make the strawberry layer too wet or it seeps into the cream.
- Use cold glasses if you want the dessert to stay firm longer.
Variations on This Dish:
- Blueberry Pretzel Cups: Swap strawberries for blueberries.
- Chocolate Pretzel Version: Add a spoon of cocoa to the cream layer.
Common Mistakes to Avoid with This Dish:
- Don’t leave the pretzel crumbs loose or the base falls apart.
- Don’t mix the whipped cream too hard into the cream cheese layer.
24. Baked Ricotta Cheesecake with Berries
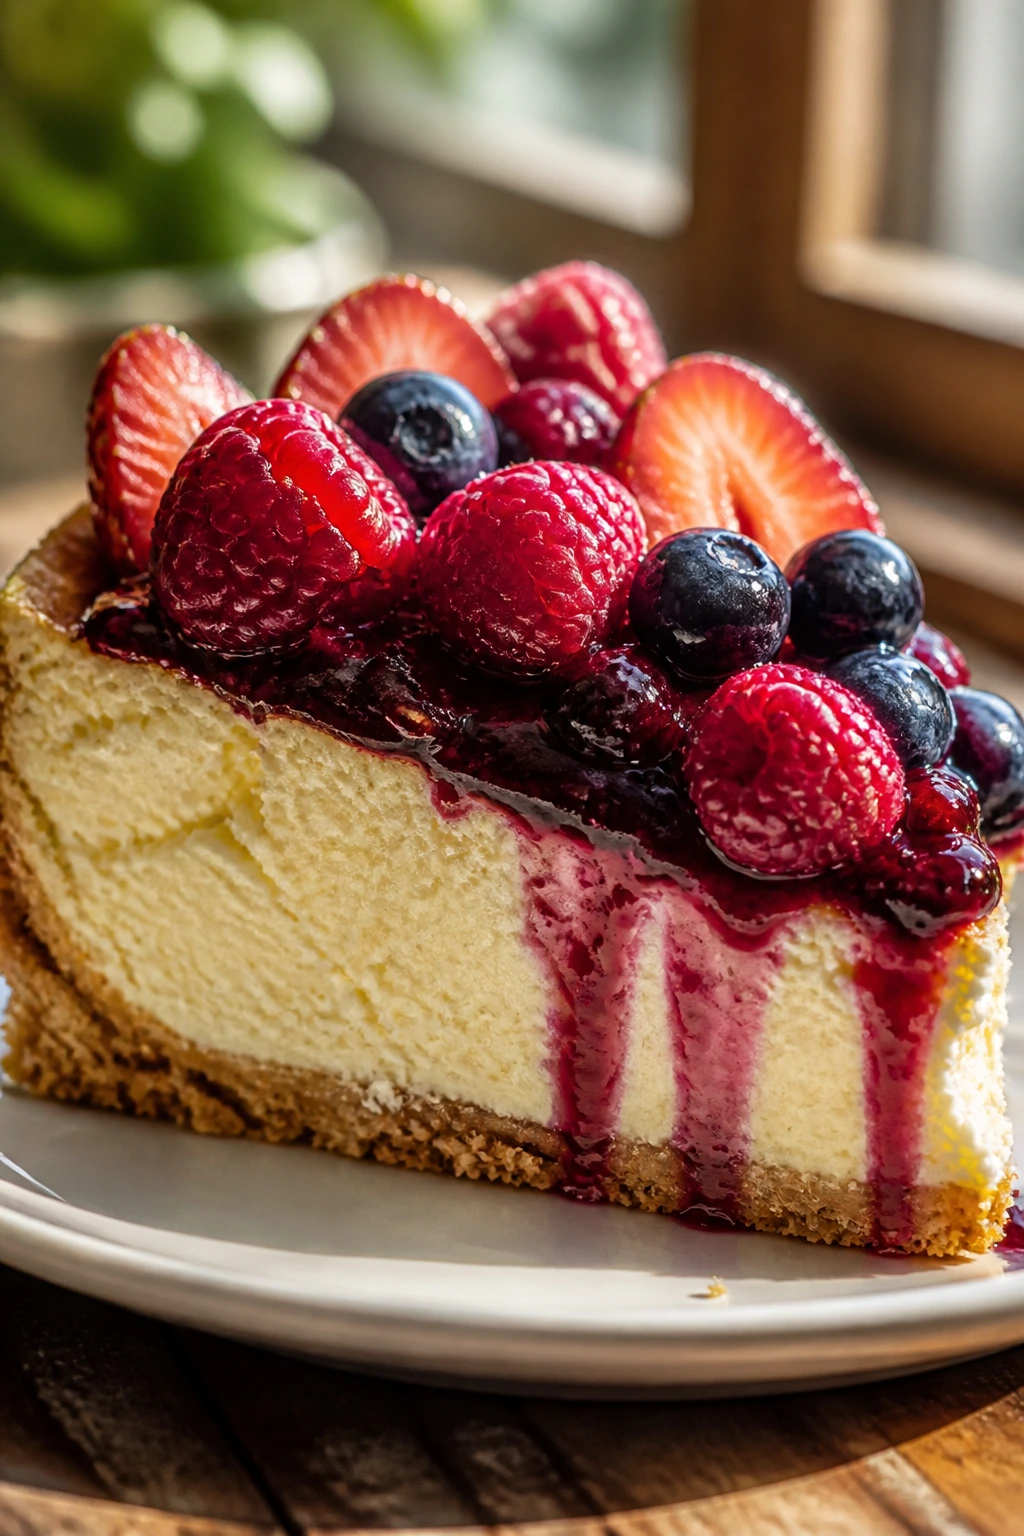
Ricotta cheesecake tastes lighter than the dense New York version, and that matters here. It’s still rich, but the texture is more tender than thick, which makes a berry topping feel like part of the plan rather than a rescue.
Why It Works: Ricotta gives the filling a soft, slightly grainy richness that bakes up beautifully when blended with cream cheese. Berries on top keep the slice from feeling too heavy.
Key Ingredients:
- 1 1/2 cups graham cracker crumbs — crust.
- 5 tablespoons melted butter — binds the crust.
- 16 ounces ricotta — the main filling.
- 8 ounces cream cheese — for body.
- 3/4 cup sugar — sweetness.
- 3 large eggs — structure.
- 1 teaspoon vanilla — flavor.
- 1 lemon, zested — brightness.
- 1 1/2 cups berries — topping.
Quick Steps:
- Press the crust into a springform pan and bake for 8 minutes at 350°F.
- Beat ricotta, cream cheese, sugar, eggs, vanilla, and lemon zest until smooth.
- Pour over the crust and bake in a water bath or set pan at low temperature until just set.
- Cool completely, then chill for at least 4 hours.
- Top with berries before serving.
Equipment for This Recipe:
- Springform pan — the cleanest release.
- Mixer — for smoothing the filling.
- Roasting pan — if you use a water bath.
How to Serve This Dish: Slice it cold and add berries at the last minute so they stay glossy. A thin berry sauce drizzled around the plate makes the whole thing look deliberate.
Pro Tips for This Recipe:
- Blend the ricotta well or the filling can taste grainy.
- Don’t overbake; a slight center wobble is good.
- Chill fully before removing the pan ring.
Variations on This Dish:
- Lemon Berry Cheesecake: Add extra lemon zest and a thinner berry topping.
- Chocolate Crust Swap: Use chocolate cookie crumbs for the crust.
Common Mistakes to Avoid with This Dish:
- Don’t use watery ricotta straight from the tub; drain it if needed.
- Don’t rush the chill or the slices will slump.
25. Mocha Mousse Cups

Mocha mousse cups lean darker and less sweet than most Valentine desserts. That’s their charm. They taste like chocolate first, coffee second, and sugar only in the background.
Why It Works: Espresso powder wakes up the chocolate without turning the mousse into a coffee drink. Whipped cream gives the mousse body and a clean finish on the spoon.
Key Ingredients:
- 6 ounces bittersweet chocolate — the main flavor.
- 1 tablespoon instant espresso powder — the mocha note.
- 1 cup heavy cream, divided — for melting and whipping.
- 2 tablespoons sugar — keeps the sweetness light.
- 1 teaspoon vanilla — rounds the flavor.
- Pinch of salt — sharpens the chocolate.
- Cocoa powder or shaved chocolate — for topping.
Quick Steps:
- Heat 1/2 cup cream until steaming and stir in the chocolate and espresso powder until smooth.
- Whip the remaining cream with sugar, vanilla, and salt to soft peaks.
- Fold the chocolate mixture into the whipped cream in two additions.
- Spoon into cups and chill for at least 2 hours.
- Finish with cocoa or shaved chocolate.
Equipment for This Recipe:
- Mixing bowl — for the mousse.
- Hand mixer — for whipping cream.
- Small serving cups — for portioning.
How to Serve This Dish: Serve cold with a spoon that can cut through the top layer cleanly. A few chocolate curls look elegant without making the cups feel fussy.
Pro Tips for This Recipe:
- Let the chocolate cool slightly before folding, or it melts the whipped cream.
- Fold gently to keep the mousse light.
- Chill long enough for the flavor to settle and the texture to firm.
Variations on This Dish:
- Salted Mocha Cups: Add a small pinch more salt.
- Orange Mocha Version: Add orange zest to the melted chocolate.
Common Mistakes to Avoid with This Dish:
- Don’t let the chocolate get too hot before folding.
- Don’t overwhip the cream; stiff peaks make the mousse grainy.
26. Blood Orange Olive Oil Cake
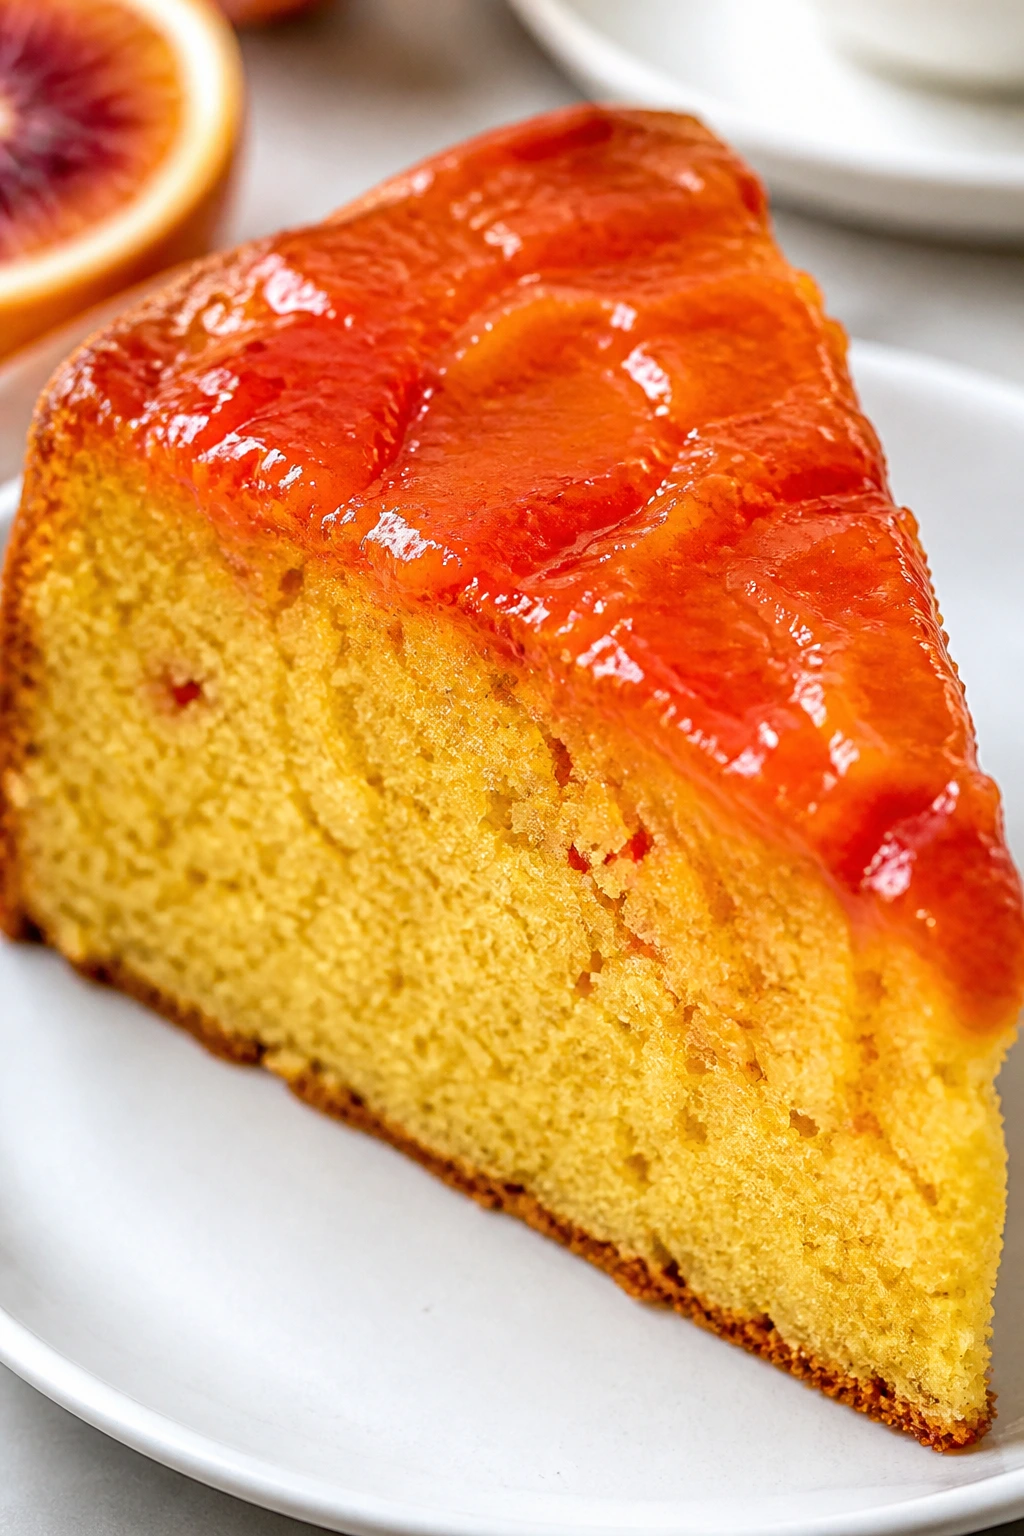
Blood orange brings a sharper red-citrus note that feels right for this holiday. Olive oil keeps the crumb moist for days, and the glaze picks up the fruit without covering the cake’s own flavor.
Why It Works: Oil makes the cake stay soft longer than butter alone would. Yogurt or sour cream adds tenderness, while blood orange juice gives the glaze enough color to look special on a plain slice.
Key Ingredients:
- 2 cups all-purpose flour — the structure.
- 2 teaspoons baking powder — for lift.
- 3/4 cup olive oil — the fat.
- 1 cup sugar — sweetness.
- 3 large eggs — binding.
- 1 cup plain yogurt — keeps the crumb moist.
- 2 blood oranges, zested and juiced — the flavor.
- 1 cup powdered sugar — for glaze.
Quick Steps:
- Whisk flour, baking powder, and salt.
- Beat sugar, eggs, olive oil, yogurt, zest, and juice together.
- Stir in the dry ingredients, then pour into a greased loaf or round pan.
- Bake at 350°F until a toothpick comes out with a few crumbs, about 40 to 50 minutes depending on the pan.
- Cool and drizzle with blood orange glaze.
Equipment for This Recipe:
- Loaf pan or 8-inch round pan — both work.
- Whisk — for the wet ingredients.
- Cooling rack — helps the glaze set.
How to Serve This Dish: Serve at room temperature so the citrus scent comes through. A few thin orange slices on the plate make it feel deliberate.
Pro Tips for This Recipe:
- Use a mild olive oil, not an aggressively peppery one.
- Don’t glaze a hot cake or it disappears into the crumb.
- Zest the oranges before juicing them; that’s always easier.
Variations on This Dish:
- Lemon Olive Oil Cake: Swap blood orange for lemon.
- Poppy Seed Version: Add 1 tablespoon poppy seeds for texture.
Common Mistakes to Avoid with This Dish:
- Don’t overbake; olive oil cake dries out faster than people expect.
- Don’t use stale citrus juice, which makes the glaze dull.
27. Chocolate Shortbread Hearts
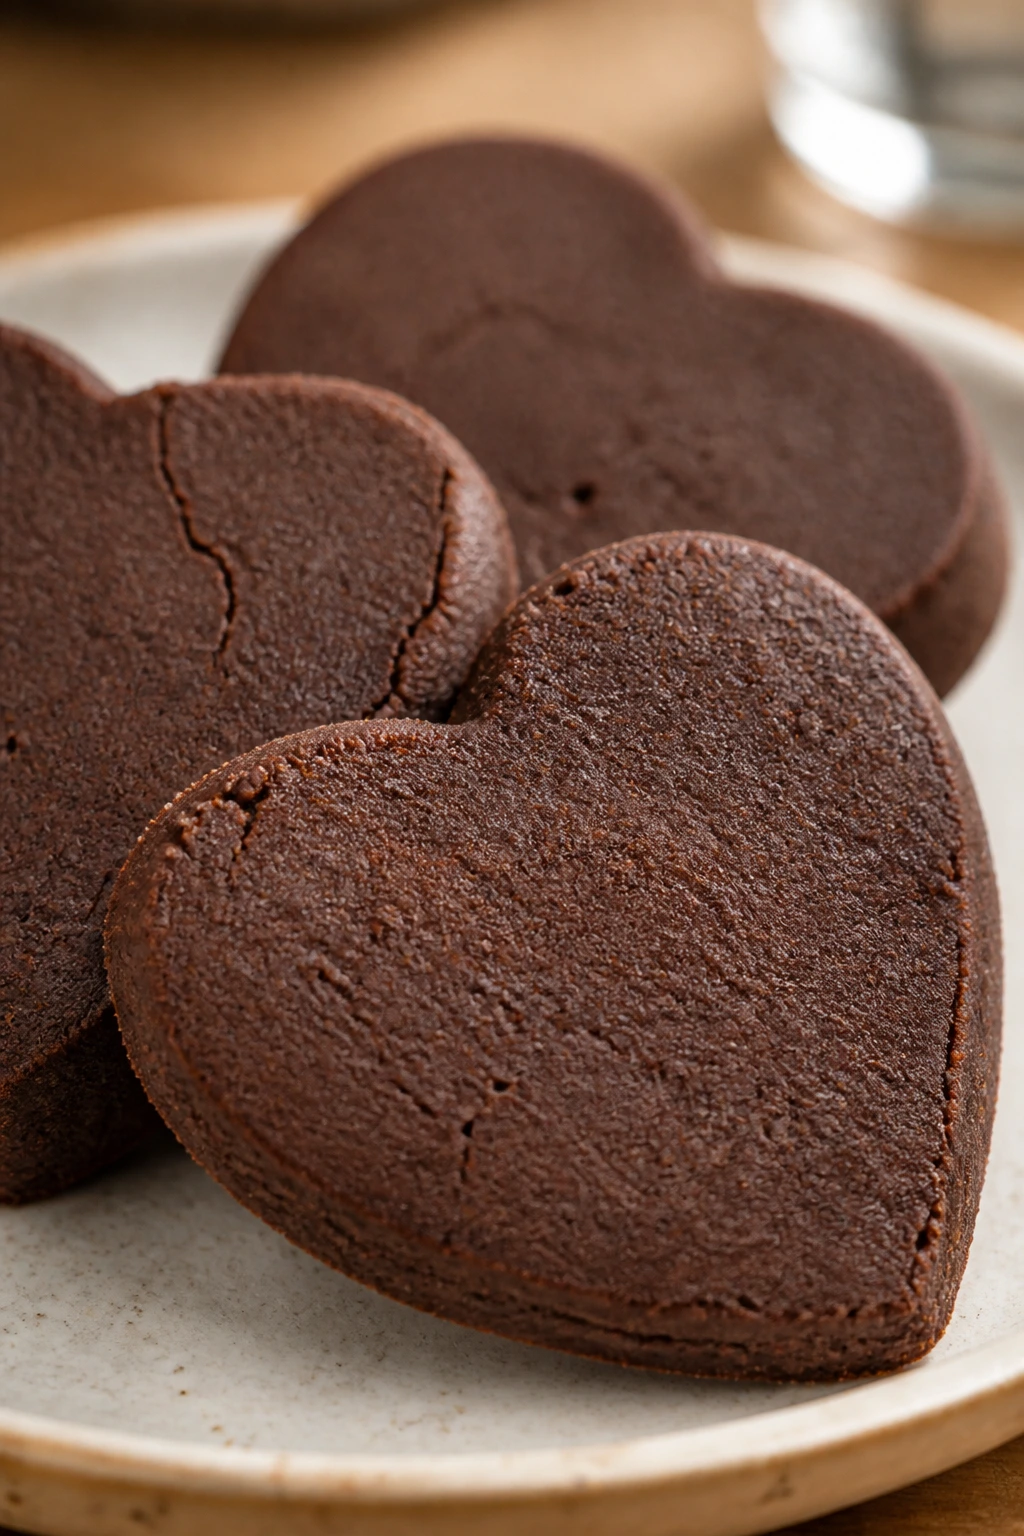
Chocolate shortbread is all snap and cocoa. These hearts are the cookie you make when you want something restrained, not frosted, and very willing to be dipped in coffee or hot chocolate.
Why It Works: Powdered sugar and butter create a short, sandy crumb that breaks cleanly. Cocoa gives the dough a dark, grown-up edge without asking for a lot of extra work.
Key Ingredients:
- 1 cup unsalted butter, softened — the base.
- 1/2 cup powdered sugar — keeps the texture tender.
- 2 cups all-purpose flour — structure.
- 1/3 cup cocoa powder — chocolate flavor.
- 1/2 teaspoon salt — balance.
- 1 teaspoon vanilla — flavor.
- 4 ounces dark chocolate, melted — optional dip.
- Flaky salt — optional finish.
Quick Steps:
- Beat butter and powdered sugar until smooth.
- Mix in vanilla, then stir in flour, cocoa, and salt to make a crumbly dough.
- Chill 30 minutes, roll to 1/4-inch thick, and cut heart shapes.
- Bake at 325°F for 14 to 16 minutes, until set.
- Cool, then dip one edge in chocolate if you want more contrast.
Equipment for This Recipe:
- Rolling pin — for even thickness.
- Heart cutter — for clean shapes.
- Baking sheet — lined with parchment.
How to Serve This Dish: Serve them plain or with a thin chocolate dip. They’re good with coffee after dinner and even better packed into a small tin.
Pro Tips for This Recipe:
- Chill the dough well or the edges get ragged.
- Bake low and slow; shortbread should not brown much.
- Let them cool completely before moving them.
Variations on This Dish:
- Orange Chocolate Shortbread: Add orange zest to the dough.
- Hazelnut Dip: Roll the edges in chopped hazelnuts after dipping.
Common Mistakes to Avoid with This Dish:
- Don’t overmix the dough or it gets tough.
- Don’t bake until dark; shortbread should stay pale and crisp.
28. Coconut Cream Pie
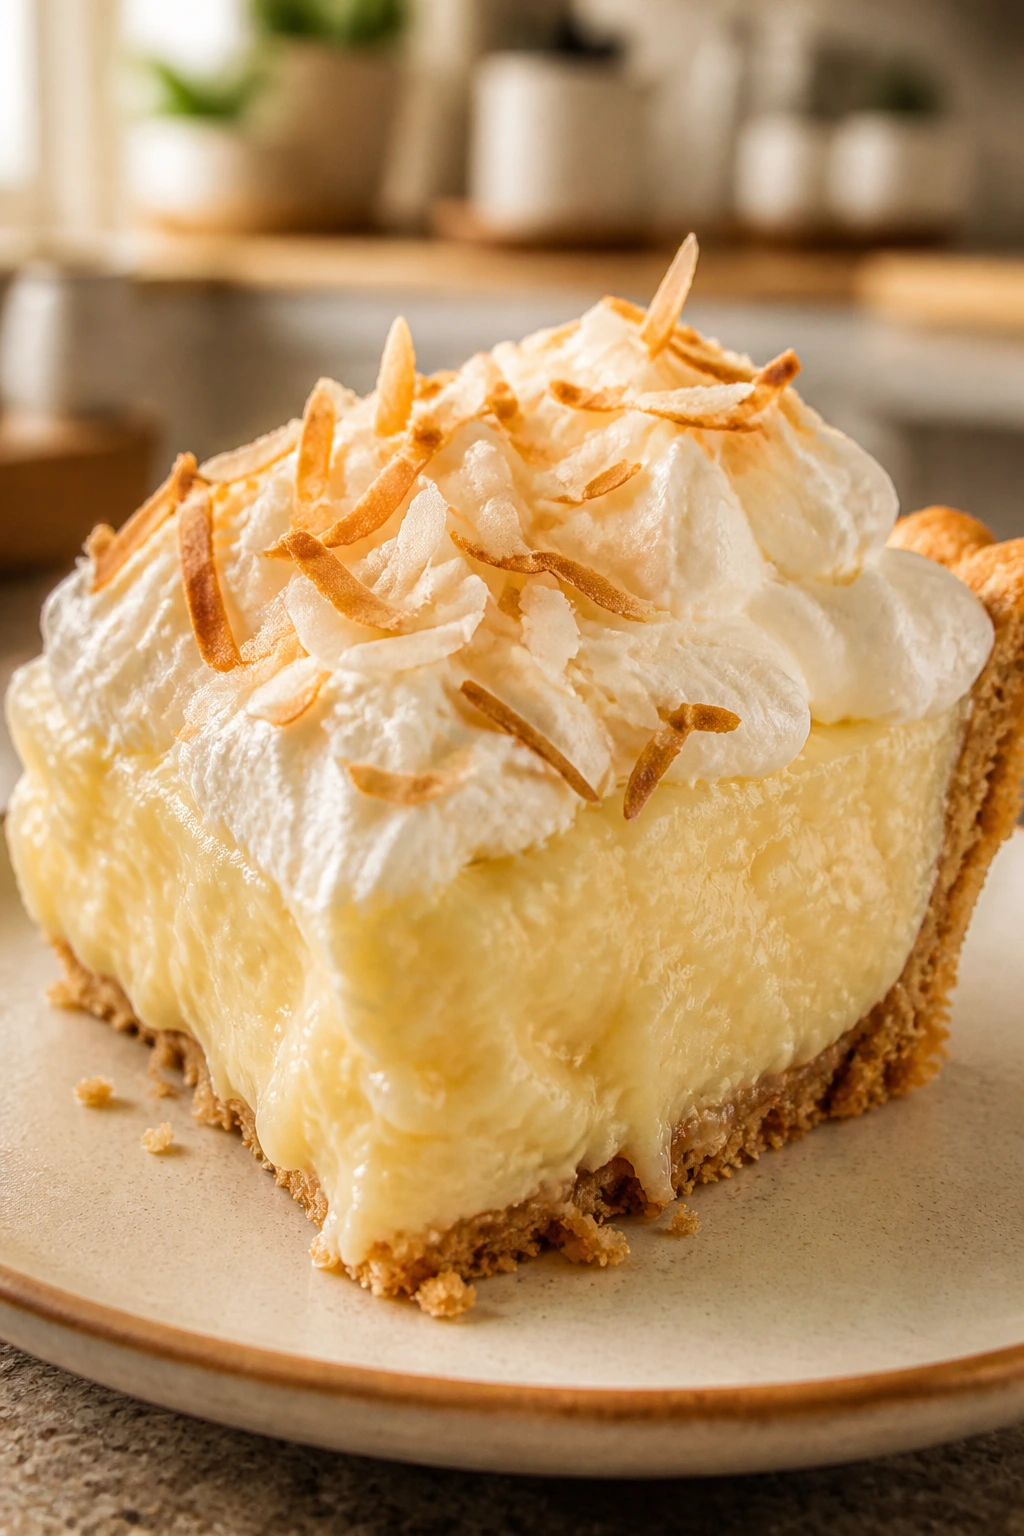
Coconut cream pie is for people who like their sweets cool, silky, and a little messy in the best way. The whipped cream top and toasted coconut make the slice feel like a soft landing after dinner.
Why It Works: The custard thickens on the stove before it goes into the crust, which gives you control over the texture. Toasted coconut on top keeps the pie from tasting one-dimensional.
Key Ingredients:
- 1 9-inch pie crust, baked and cooled — the shell.
- 1 1/2 cups coconut milk — the main flavor.
- 1 cup whole milk — smooths the filling.
- 1/2 cup sugar — sweetness.
- 1/4 cup cornstarch — thickener.
- 3 egg yolks — richness.
- 1 cup sweetened shredded coconut — the body.
- 1 cup whipped cream — for topping.
Quick Steps:
- Whisk coconut milk, milk, sugar, cornstarch, egg yolks, and salt in a saucepan.
- Cook over medium heat, whisking constantly, until thick and bubbling.
- Stir in butter, vanilla, and shredded coconut.
- Pour into the crust and chill until set, at least 4 hours.
- Top with whipped cream and toasted coconut before slicing.
Equipment for This Recipe:
- Saucepan — for the custard.
- Whisk — keeps it smooth.
- Pie plate — for serving.
How to Serve This Dish: Slice it cold with a hot knife and a broad spatula. Toasted coconut on top gives enough contrast that you don’t need much else.
Pro Tips for This Recipe:
- Whisk the whole time once the custard starts thickening.
- Chill fully or the filling won’t cut cleanly.
- Toast the coconut separately so it doesn’t burn in the oven.
Variations on This Dish:
- Pineapple Coconut Pie: Add a spoon of crushed pineapple to the filling.
- Chocolate Shell Version: Use a chocolate cookie crust.
Common Mistakes to Avoid with This Dish:
- Don’t boil the custard hard or it can turn lumpy.
- Don’t skip the chill time; coconut pie needs it.
29. Raspberry Swirl Bundt Cake
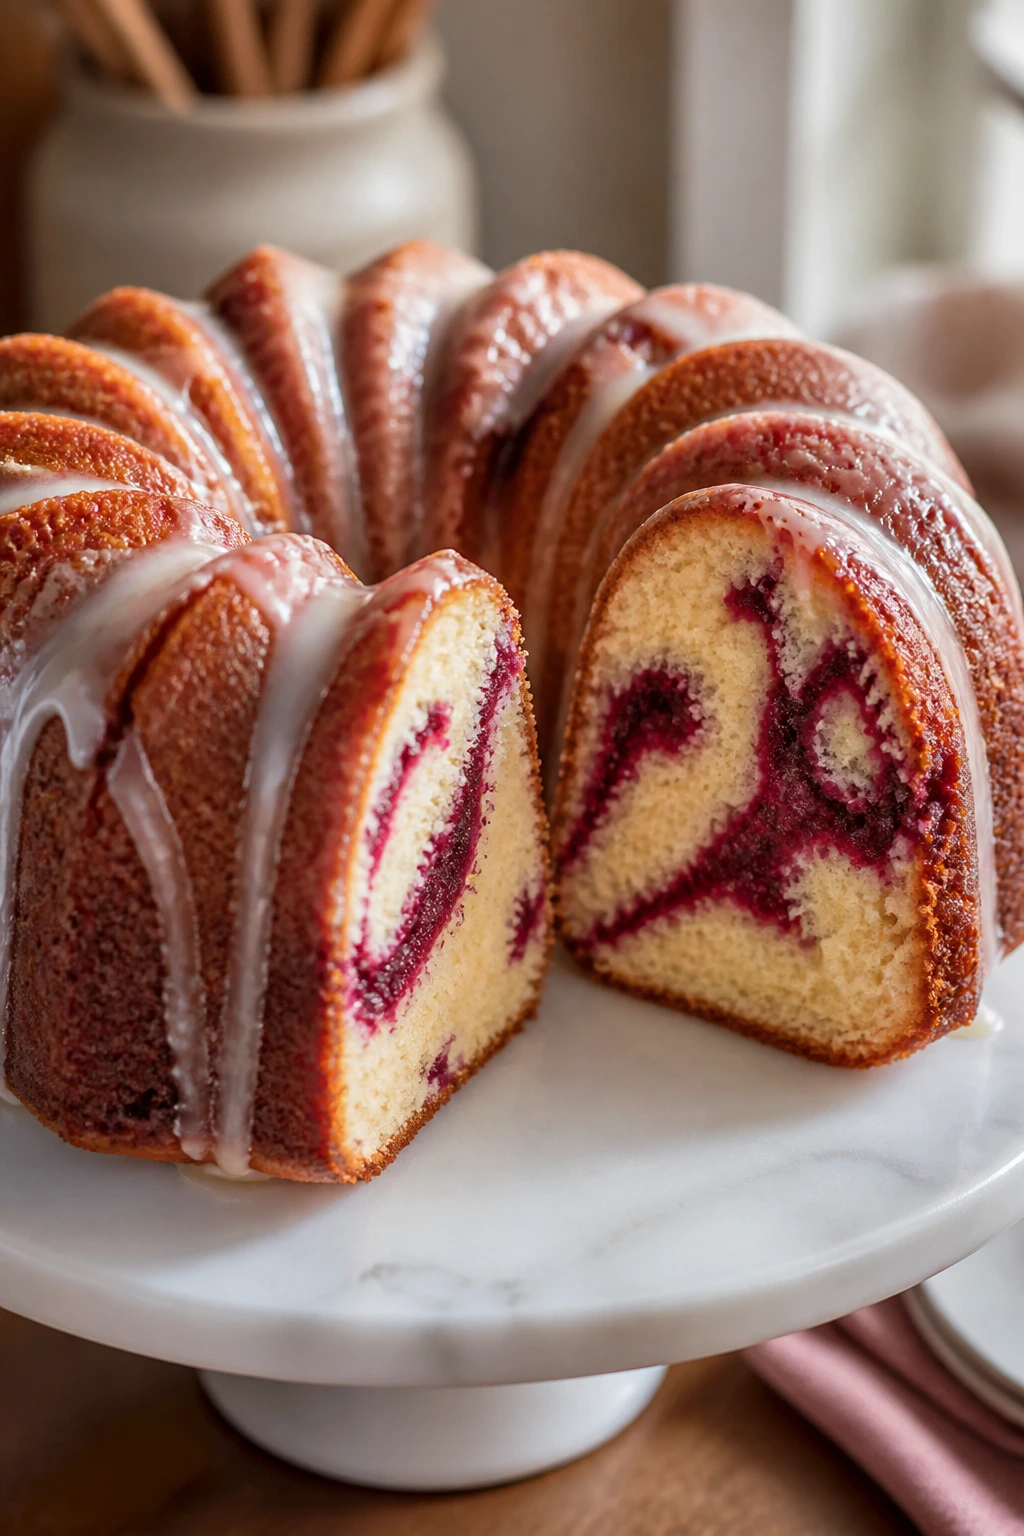
Bundt cakes love a ribbon of fruit. The raspberry swirls show up in the slices, and the glaze pools in the ridges where it belongs, which is satisfying in a very specific cake-lover way.
Why It Works: Sour cream keeps the crumb moist, while raspberry purée or jam ribbons through the batter without sinking if it’s thick enough. The bundt shape means every slice looks more dressed up than it really is.
Key Ingredients:
- 2 1/2 cups all-purpose flour — cake structure.
- 2 teaspoons baking powder — lift.
- 1 cup unsalted butter, softened — richness.
- 1 3/4 cups sugar — sweetness.
- 4 large eggs — binding.
- 1 cup sour cream — tenderness.
- 1 cup raspberry jam or thick purée — the swirl.
- 1 cup powdered sugar — glaze.
Quick Steps:
- Grease and flour a bundt pan very well.
- Beat butter and sugar, then add eggs, vanilla, and sour cream.
- Fold in the dry ingredients and half the raspberry swirl.
- Spoon batter into the pan, adding the rest of the raspberry in ribbons and gently swirling with a knife.
- Bake at 350°F for 45 to 55 minutes, then cool before glazing.
Equipment for This Recipe:
- Bundt pan — generously greased.
- Mixer — for the batter.
- Cooling rack — for proper release.
How to Serve This Dish: Turn it out onto a stand or platter and let the glaze drip down the sides. A few raspberries around the base help the shape stand out.
Pro Tips for This Recipe:
- Use thick jam or reduced purée so the swirl doesn’t disappear.
- Grease every ridge of the pan or the cake sticks.
- Wait before unmolding; bundt cakes need a short rest.
Variations on This Dish:
- Lemon Raspberry Bundt: Add lemon zest to the batter.
- White Chocolate Glaze: Swap the glaze for melted white chocolate.
Common Mistakes to Avoid with This Dish:
- Don’t use too much raspberry sauce or the center turns wet.
- Don’t rush the pan release; broken bundts are heartbreaking.
30. Cherry Clafoutis
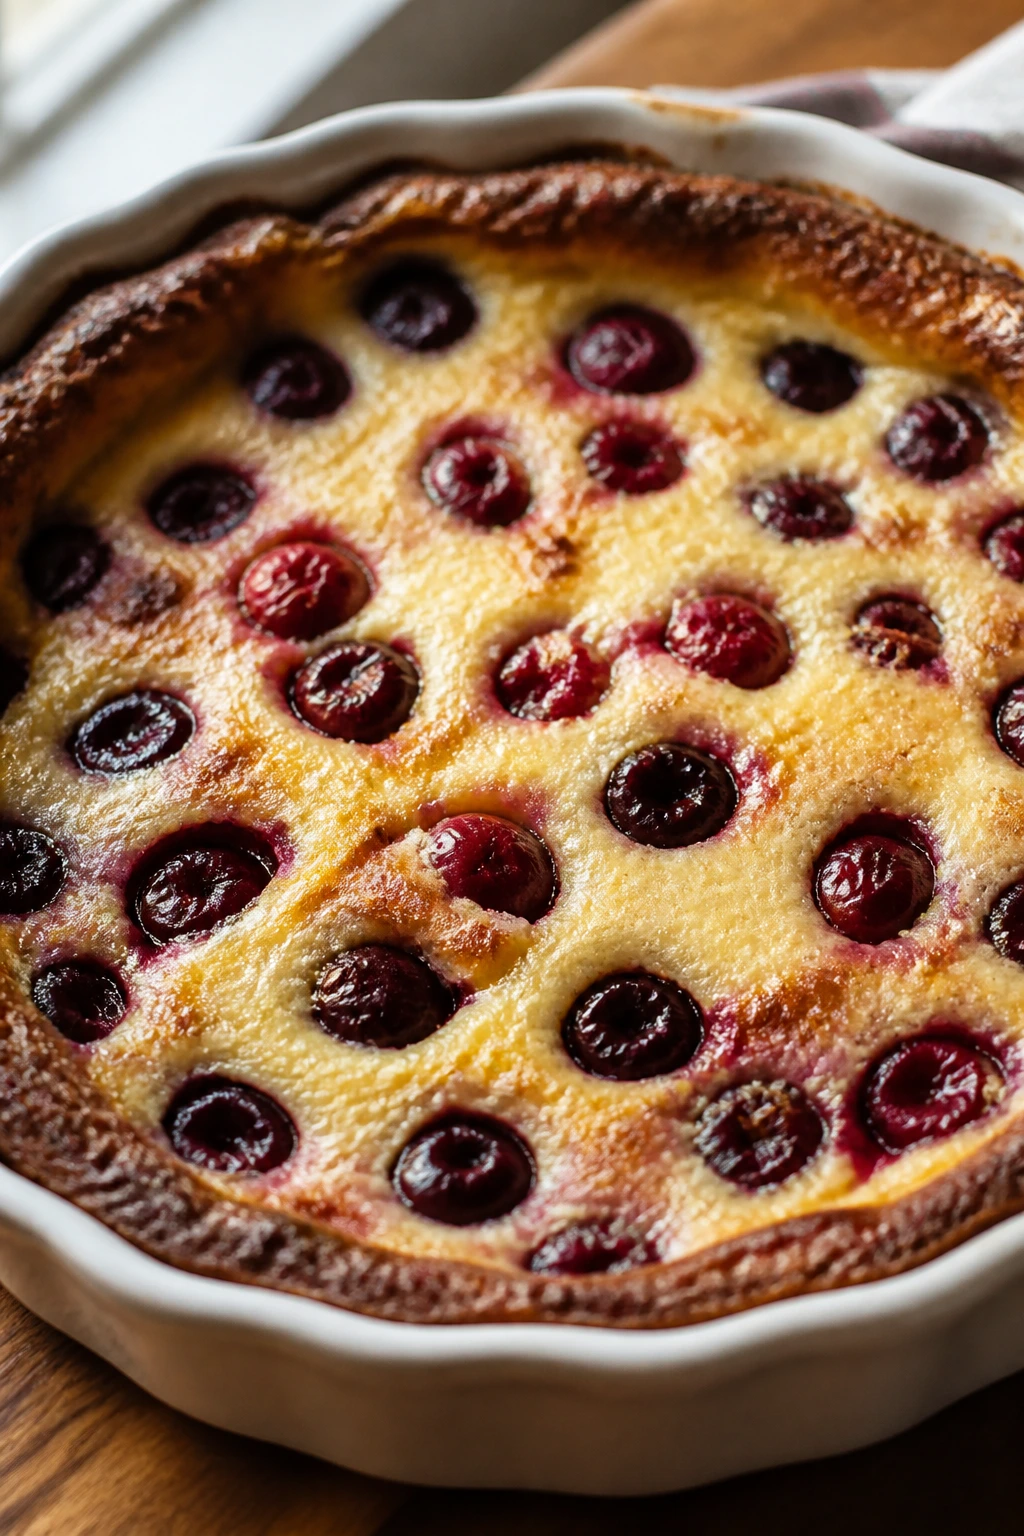
Clafoutis is part custard, part cake, and all about the eggs. It’s a French dessert that doesn’t fuss over perfection, which is probably why the cherries taste so good inside it.
Why It Works: The batter bakes around the fruit and turns silky in the middle, with browned edges that taste almost like pancake trim. Cherries stay juicy and sink into the custard just enough to look embedded, not scattered.
Key Ingredients:
- 2 cups cherries, pitted — the fruit.
- 3 large eggs — the custard base.
- 1/2 cup sugar — sweetness.
- 1/2 cup all-purpose flour — gives the batter body.
- 1 cup whole milk — loosens the custard.
- 1 teaspoon vanilla — flavor.
- 1 tablespoon melted butter — richness.
- Powdered sugar — for finishing.
Quick Steps:
- Butter a baking dish and scatter the cherries in the bottom.
- Whisk eggs, sugar, flour, milk, vanilla, salt, and melted butter until smooth.
- Pour over the cherries and bake at 350°F for 35 to 40 minutes.
- Bake until puffed and golden with a slight wobble in the center.
- Cool a little, then dust with powdered sugar.
Equipment for This Recipe:
- Shallow baking dish — classic for clafoutis.
- Whisk — for the batter.
- Sifter — for the sugar finish.
How to Serve This Dish: Serve warm or room temperature, scooped rather than sliced. It’s especially nice with softly whipped cream or plain yogurt if you want to soften the sweetness.
Pro Tips for This Recipe:
- Pit the cherries unless you like living dangerously.
- Don’t overbake; clafoutis turns rubbery if pushed too far.
- A shallow dish helps the custard set evenly.
Variations on This Dish:
- Mixed Berry Clafoutis: Use blueberries and raspberries with the cherries.
- Almond Clafoutis: Add 1/2 teaspoon almond extract.
Common Mistakes to Avoid with This Dish:
- Don’t worry if it deflates a bit after baking; that’s normal.
- Don’t skip the butter in the dish or the custard clings to the pan.
31. Strawberry Crumb Bars
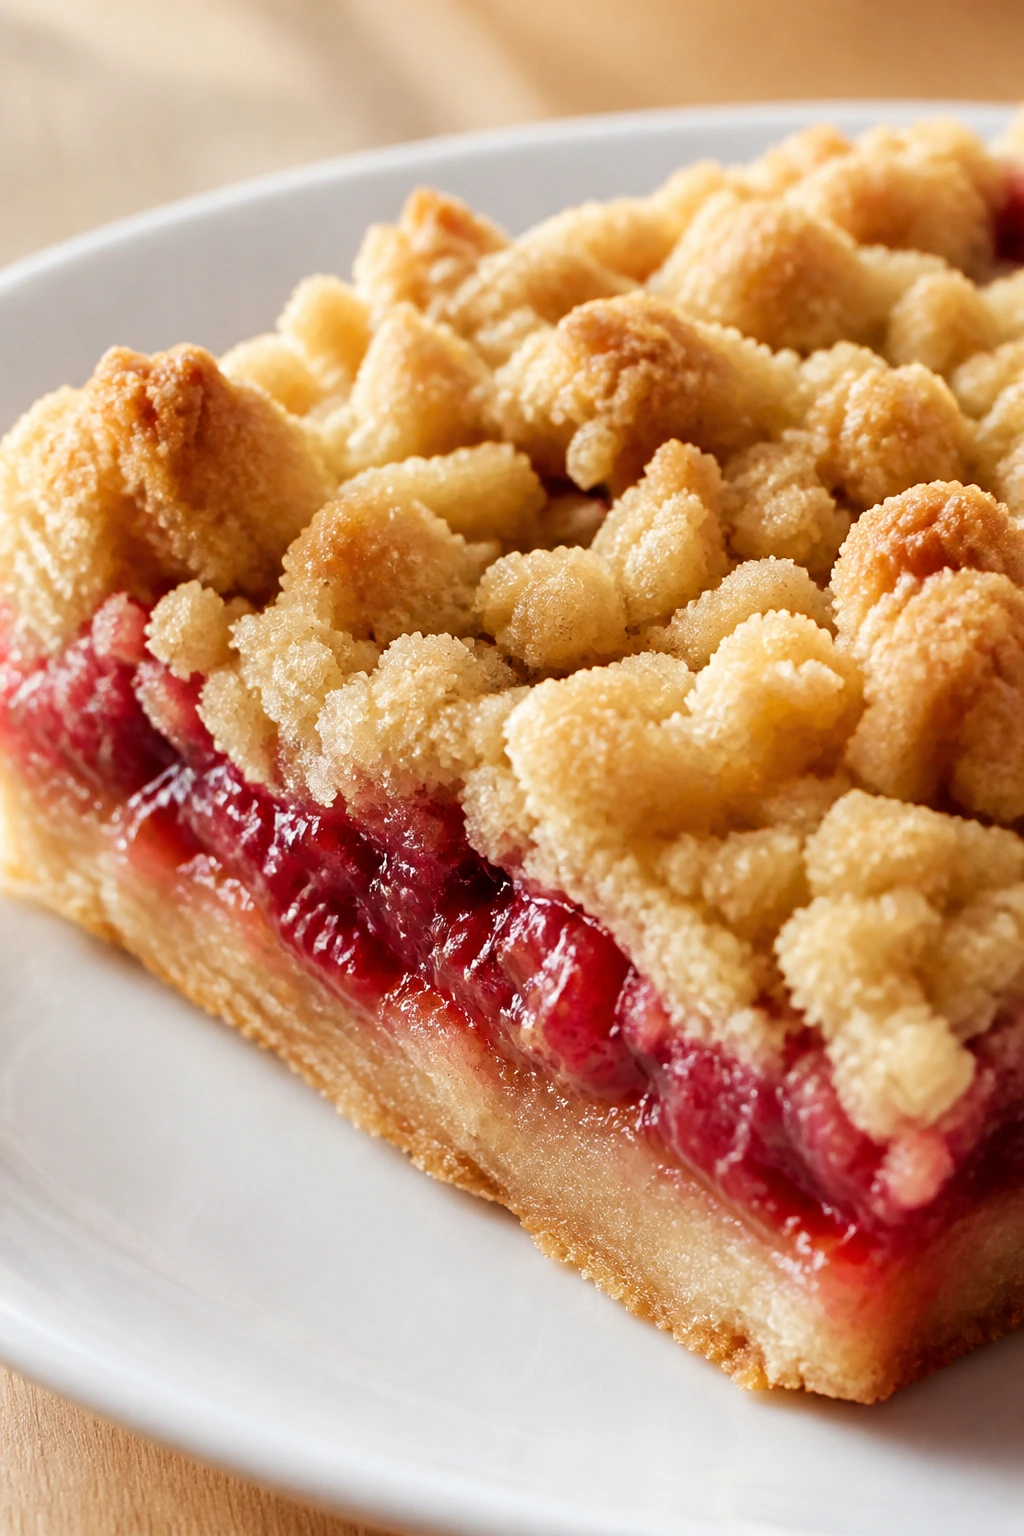
Strawberry crumb bars give you a jammy center and a sturdy top, which is a good combination when you want dessert you can cut with one hand and eat with the other. They taste like pie that decided to simplify its life.
Why It Works: The same dough does double duty as crust and crumb topping, so you get contrast without extra mixing. A little cornstarch thickens the strawberries into a sliceable layer instead of a puddle.
Key Ingredients:
- 2 cups all-purpose flour — the crumb base.
- 1 cup rolled oats — adds texture.
- 3/4 cup brown sugar — sweetness and chew.
- 1 cup cold unsalted butter, cubed — binds the crumble.
- 2 cups strawberries, chopped — filling.
- 2 tablespoons sugar — for the berries.
- 2 tablespoons cornstarch — thickens the fruit.
- 1 teaspoon lemon juice — brightens the filling.
Quick Steps:
- Mix flour, oats, brown sugar, salt, and butter until crumbly.
- Press half the mixture into a lined 9-inch pan and bake for 10 minutes at 350°F.
- Toss strawberries with sugar, cornstarch, and lemon juice, then spread over the crust.
- Sprinkle the remaining crumbs on top and bake 30 to 35 minutes.
- Cool completely before slicing.
Equipment for This Recipe:
- 9-inch square pan — for bars.
- Parchment sling — helps remove them cleanly.
- Mixing bowl — for the crumble.
How to Serve This Dish: Cut into small rectangles because they’re rich enough to satisfy in a few bites. A dusting of powdered sugar makes the top look finished.
Pro Tips for This Recipe:
- Cool the bars fully or the filling runs.
- Press the bottom crust firmly so it doesn’t crumble apart.
- Use ripe strawberries; under-ripe ones taste flat after baking.
Variations on This Dish:
- Raspberry Crumb Bars: Swap half the strawberries for raspberries.
- Almond Crumb Version: Add sliced almonds to the topping.
Common Mistakes to Avoid with This Dish:
- Don’t skip the cornstarch or the filling stays loose.
- Don’t cut while warm unless you want a sticky mess.
32. Dark Chocolate Truffles
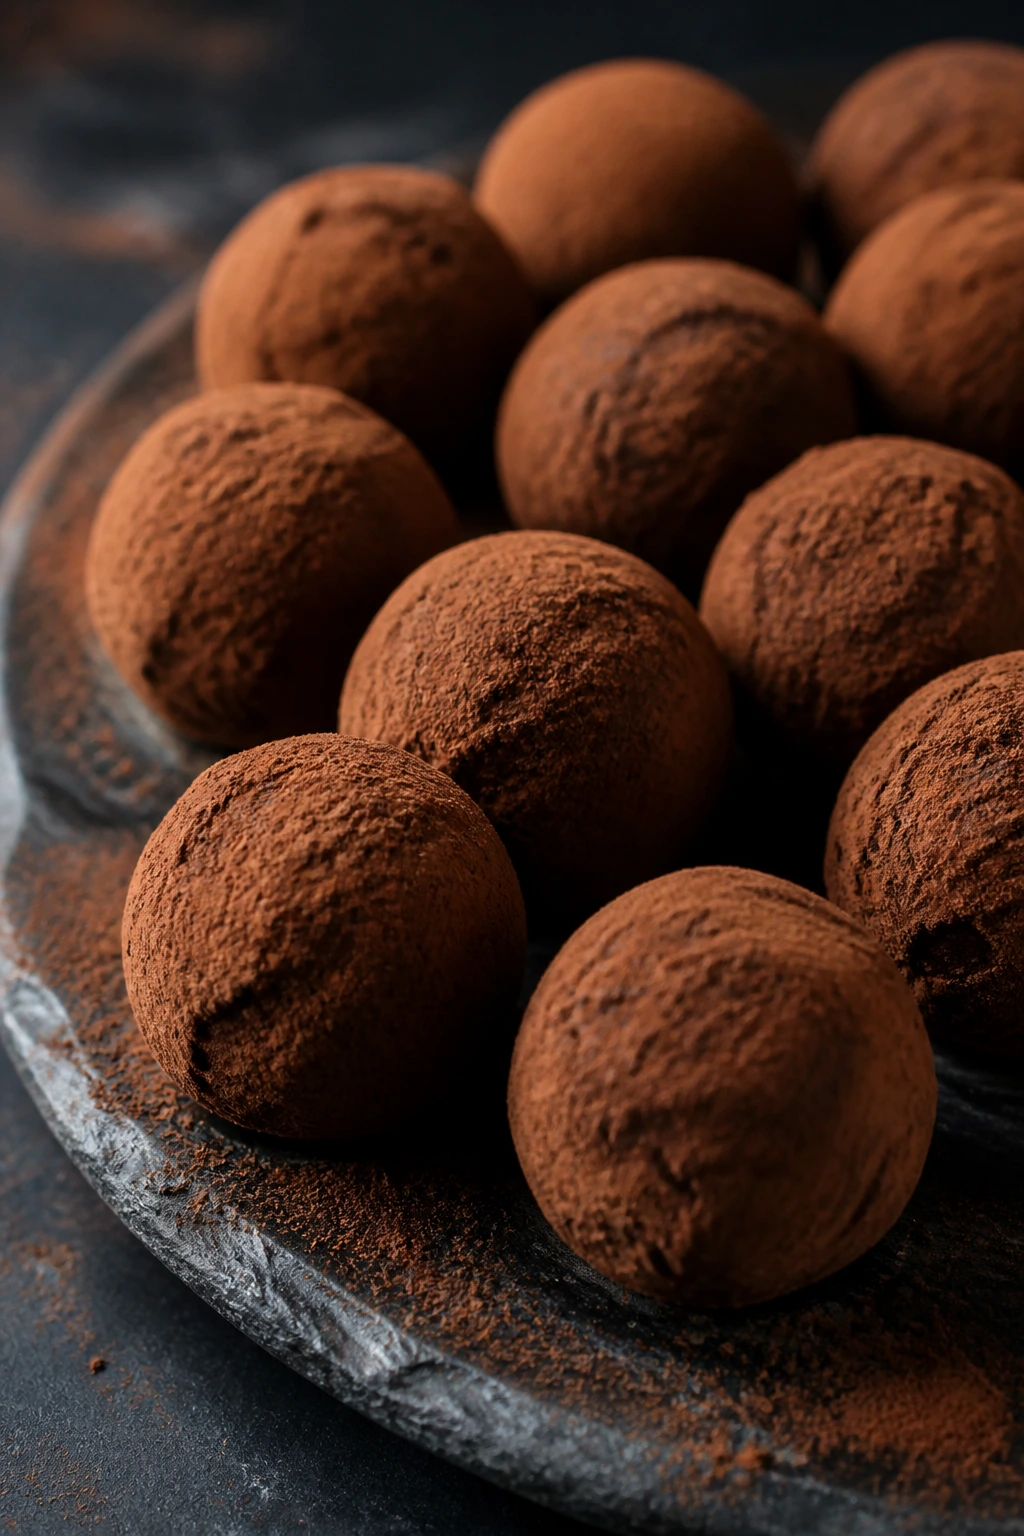
Truffles are the easiest thing to make look expensive. Roll them in cocoa, and suddenly you’ve got a box of small, dark, glossy rounds that disappear one by one.
Why It Works: Ganache is just chocolate and cream in the right ratio, which means the texture can be as soft or firm as you want depending on the chill. A little butter gives the center a smoother melt.
Key Ingredients:
- 8 ounces dark chocolate, chopped — the truffle base.
- 1/2 cup heavy cream — turns it into ganache.
- 1 tablespoon butter — smooths the texture.
- 1 teaspoon vanilla — flavor.
- Pinch of salt — balance.
- Cocoa powder — for coating.
- Powdered sugar or chopped nuts — optional coatings.
Quick Steps:
- Heat the cream until steaming and pour over the chocolate.
- Wait 2 minutes, then stir in butter, vanilla, and salt until smooth.
- Chill the ganache until scoopable.
- Scoop into small balls and roll quickly between your hands.
- Coat in cocoa powder, powdered sugar, or nuts.
Equipment for This Recipe:
- Small scoop — for even portions.
- Baking sheet — for chilling.
- Gloves or clean hands — truffles get sticky fast.
How to Serve This Dish: Serve them in tiny paper cups or pile them in a shallow bowl. They’re best cold or cool, not warm.
Pro Tips for This Recipe:
- Chill the ganache just until firm; too hard and it cracks.
- Dust your hands with cocoa if the mixture sticks.
- Keep the truffles small so they feel rich, not heavy.
Variations on This Dish:
- Orange Truffles: Add orange zest to the cream.
- Sea Salt Truffles: Finish with a few salt flakes on top.
Common Mistakes to Avoid with This Dish:
- Don’t add too much cream or the ganache won’t roll.
- Don’t handle them too long or your hands melt the coating.
33. Caramelized White Chocolate Blondies
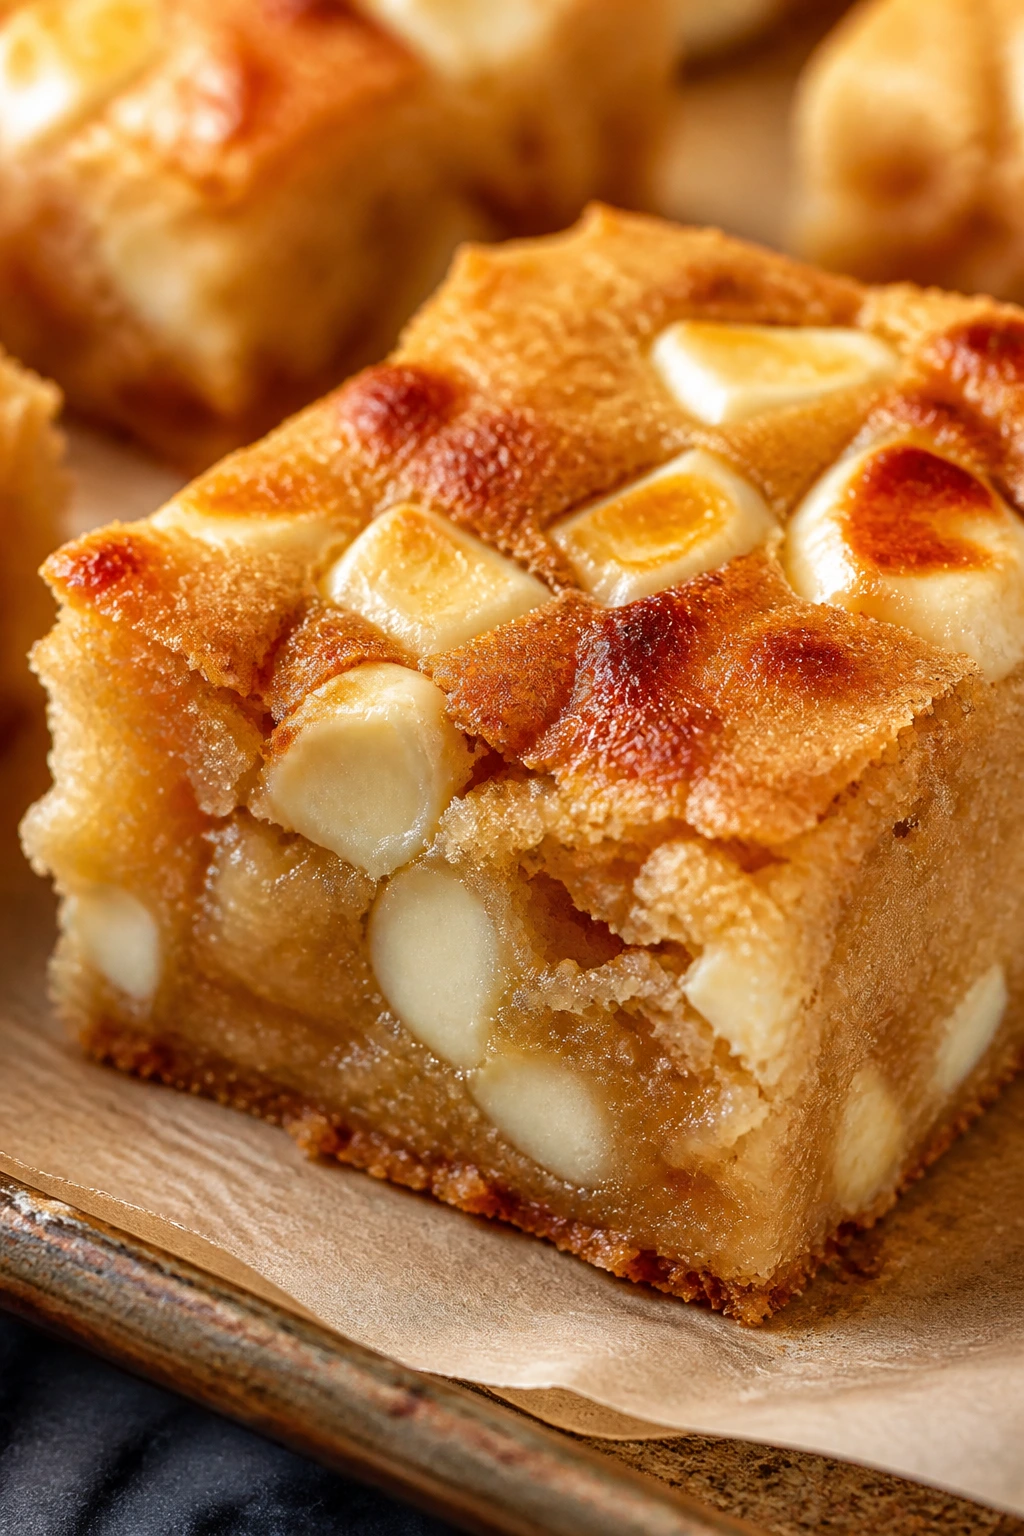
Caramelized white chocolate tastes toasted, not sugary, and that makes it behave better in blondies than plain white chocolate does. The bars end up chewy in the middle with little pockets that taste like caramel and milk.
Why It Works: Brown sugar keeps the blondies moist, while toasted white chocolate adds depth instead of just sweetness. A little salt keeps the whole pan from leaning dessert-toothache.
Key Ingredients:
- 1/2 cup unsalted butter, melted — for chew.
- 1 cup brown sugar — caramel flavor.
- 2 large eggs — binds the batter.
- 1 teaspoon vanilla — flavor.
- 1 1/2 cups all-purpose flour — structure.
- 1/2 teaspoon baking powder — slight lift.
- 6 ounces caramelized white chocolate, chopped — the star.
- 1/2 teaspoon flaky salt — balance.
Quick Steps:
- Stir melted butter and brown sugar together, then add eggs and vanilla.
- Mix in flour, baking powder, and salt just until combined.
- Fold in the caramelized white chocolate.
- Spread in a lined 8-inch pan and bake at 350°F for 22 to 26 minutes.
- Cool before slicing into bars.
Equipment for This Recipe:
- 8-inch square pan — for thick bars.
- Spatula — for folding.
- Parchment paper — for removal.
How to Serve This Dish: Slice them small, because they’re richer than they look. A few strawberry slices on the plate keep the blondies from reading as too sweet.
Pro Tips for This Recipe:
- Chop the caramelized white chocolate unevenly for bigger melt pockets.
- Pull them before the center looks fully dry.
- Let the pan cool before cutting or the bars smear.
Variations on This Dish:
- Macadamia Version: Add chopped macadamias for crunch.
- Raspberry Swirl Blondies: Drag a little raspberry jam through the batter before baking.
Common Mistakes to Avoid with This Dish:
- Don’t use regular white chocolate and expect the same toasted flavor.
- Don’t overbake or the bars lose their chew.
34. Mini Cheesecake Cups with Strawberries
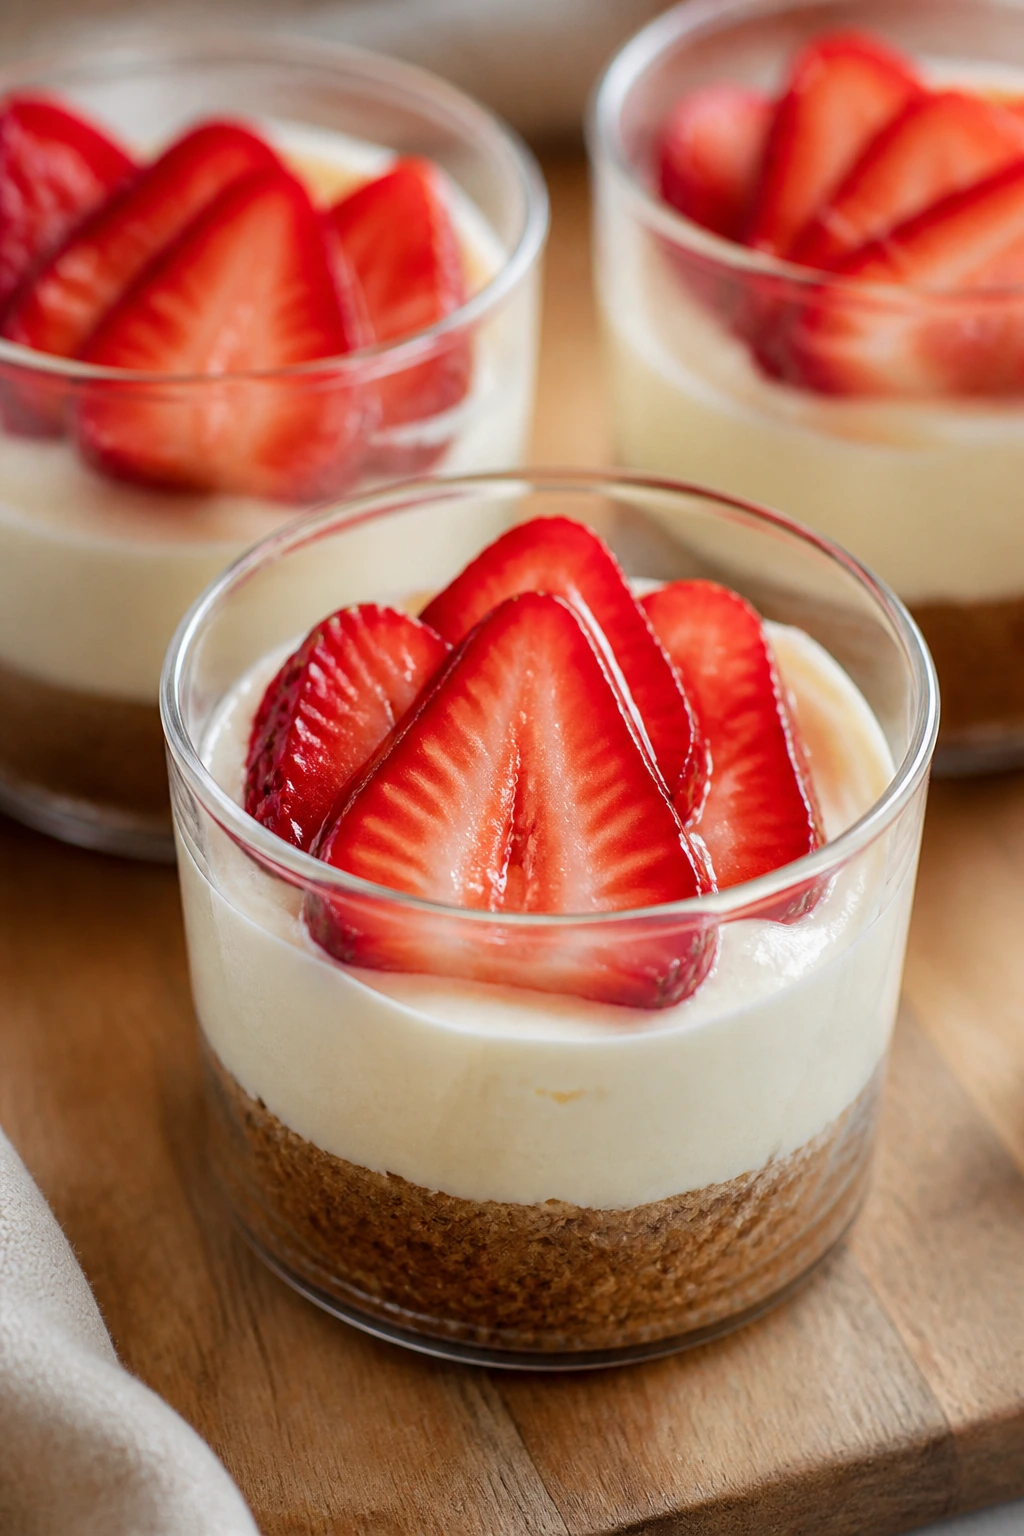
Mini cheesecake cups save you from slicing drama. They’re neat, portable, and each one carries its own strawberry crown, which makes them feel more special than a square pan ever could.
Why It Works: The crust and filling bake in a muffin tin, so each portion sets evenly. Strawberries on top keep the individual cups from feeling too heavy or too white.
Key Ingredients:
- 1 cup graham cracker crumbs — the crust.
- 3 tablespoons melted butter — binds the crumbs.
- 8 ounces cream cheese, softened — the filling.
- 1/3 cup sugar — sweetness.
- 1 large egg — helps set the cheesecake.
- 1 teaspoon vanilla — flavor.
- 1/2 cup sour cream — smooths the texture.
- 1 cup strawberries, sliced — topping.
Quick Steps:
- Press crumb mixture into lined muffin cups and bake for 5 minutes at 350°F.
- Beat cream cheese, sugar, egg, vanilla, and sour cream until smooth.
- Spoon over the crusts and bake 15 to 18 minutes, until the centers wobble slightly.
- Cool, then chill for at least 2 hours.
- Top with strawberries before serving.
Equipment for This Recipe:
- Muffin tin — standard size.
- Paper liners — for easy release.
- Mixer — for the filling.
How to Serve This Dish: Serve each cup chilled with a single strawberry slice or two on top. They’re easy to pass around, which helps at a dinner table.
Pro Tips for This Recipe:
- Don’t overmix the filling; too much air can cause cracks.
- Chill thoroughly before topping.
- Use fresh strawberries for the best color.
Variations on This Dish:
- Chocolate Crust Cups: Use chocolate cookie crumbs instead.
- Mixed Berry Cups: Add raspberries or blueberries on top.
Common Mistakes to Avoid with This Dish:
- Don’t overbake until the centers are firm; they should still jiggle.
- Don’t pile on warm fruit or the tops get watery.
35. Strawberry Galette
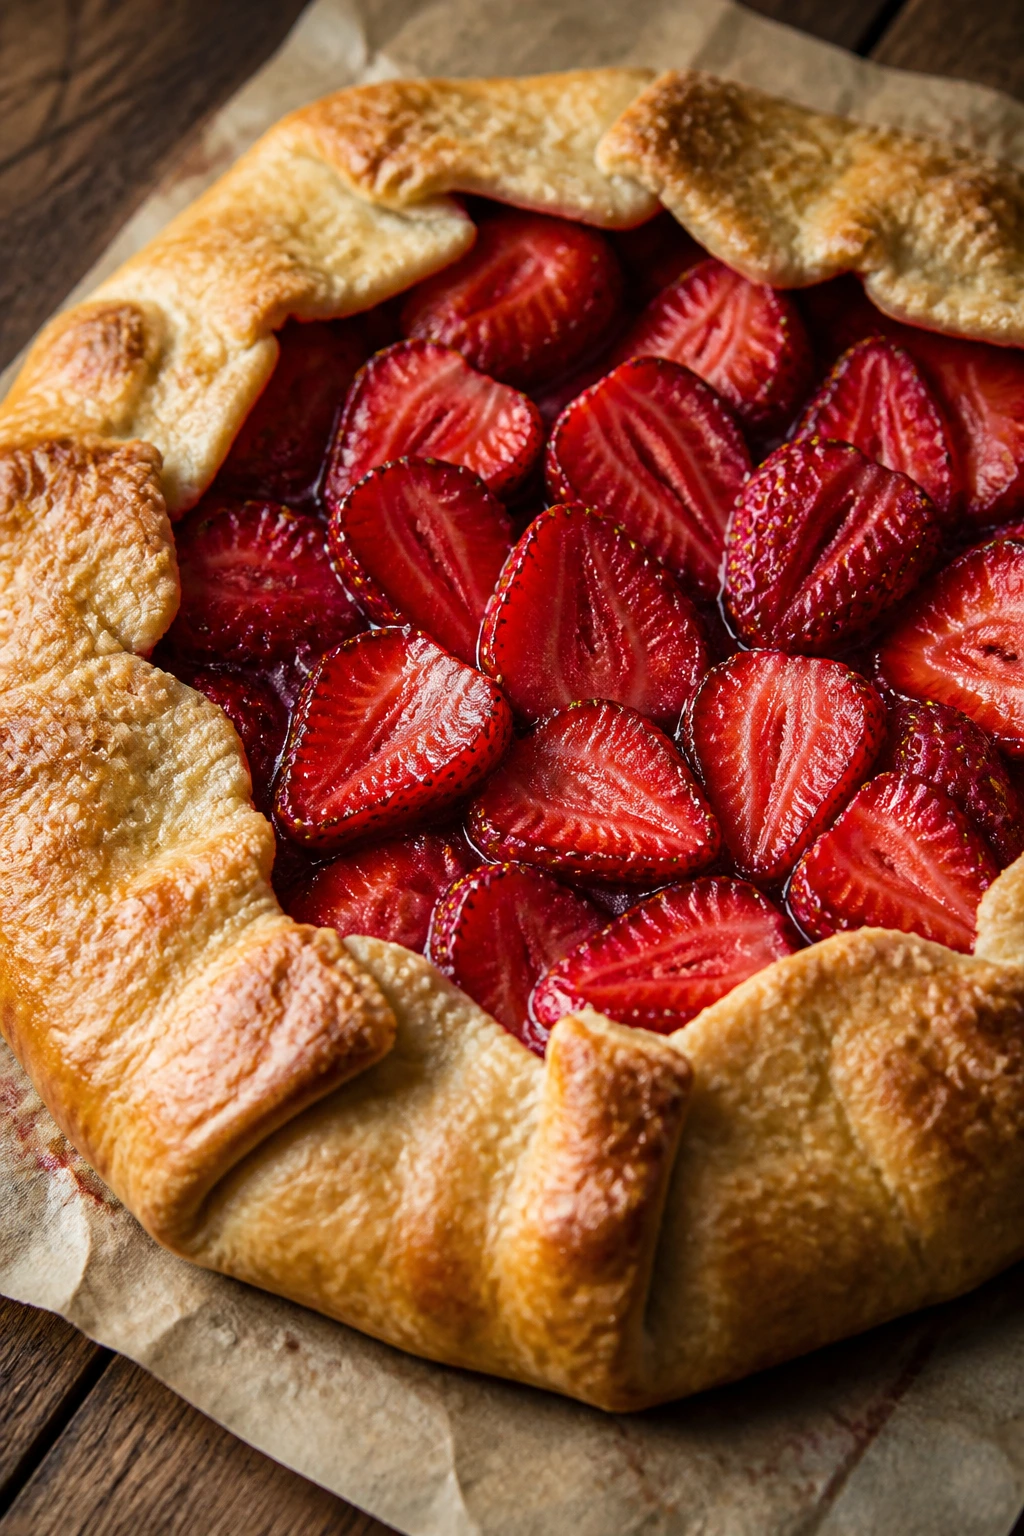
A strawberry galette brings a rustic edge to the table. It’s the dessert for people who like fruit to look loose and free instead of locked into a perfect slice.
Why It Works: The dough bakes crisp on the outside while the center stays soft under the fruit. A little cornstarch keeps the strawberry juices from flooding the pan.
Key Ingredients:
- 1 pie dough round, chilled — the crust.
- 3 cups strawberries, sliced — the filling.
- 1/4 cup sugar — sweetens the fruit.
- 2 tablespoons cornstarch — thickens the juices.
- 1 teaspoon lemon zest — brightness.
- 1 egg, beaten — for the crust.
- 1 tablespoon turbinado sugar — crunch on top.
Quick Steps:
- Toss strawberries with sugar, cornstarch, and lemon zest.
- Roll the dough into a 12-inch round on parchment.
- Pile the fruit in the center, leaving a 2-inch border.
- Fold the edges over the filling, brush with egg, and sprinkle with sugar.
- Bake at 400°F for 30 to 35 minutes, until the crust is golden and the fruit is bubbling.
Equipment for This Recipe:
- Baking sheet — lined with parchment.
- Rolling pin — for the dough.
- Pastry brush — for the egg wash.
How to Serve This Dish: Let it cool until the juices settle, then slice into wedges. A scoop of vanilla ice cream is classic, but whipped cream works fine too.
Pro Tips for This Recipe:
- Keep the dough cold for the flakiest edges.
- Don’t mound the fruit too high or the center stays underbaked.
- Let it rest before cutting so the filling thickens.
Variations on This Dish:
- Strawberry Rhubarb Galette: Add chopped rhubarb for more tartness.
- Almond Crust Version: Sprinkle almond flour under the fruit.
Common Mistakes to Avoid with This Dish:
- Don’t use watery berries unless you increase the cornstarch.
- Don’t skip the parchment; bubbling fruit is sticky.
36. Almond Butter Blossoms with Heart Candies
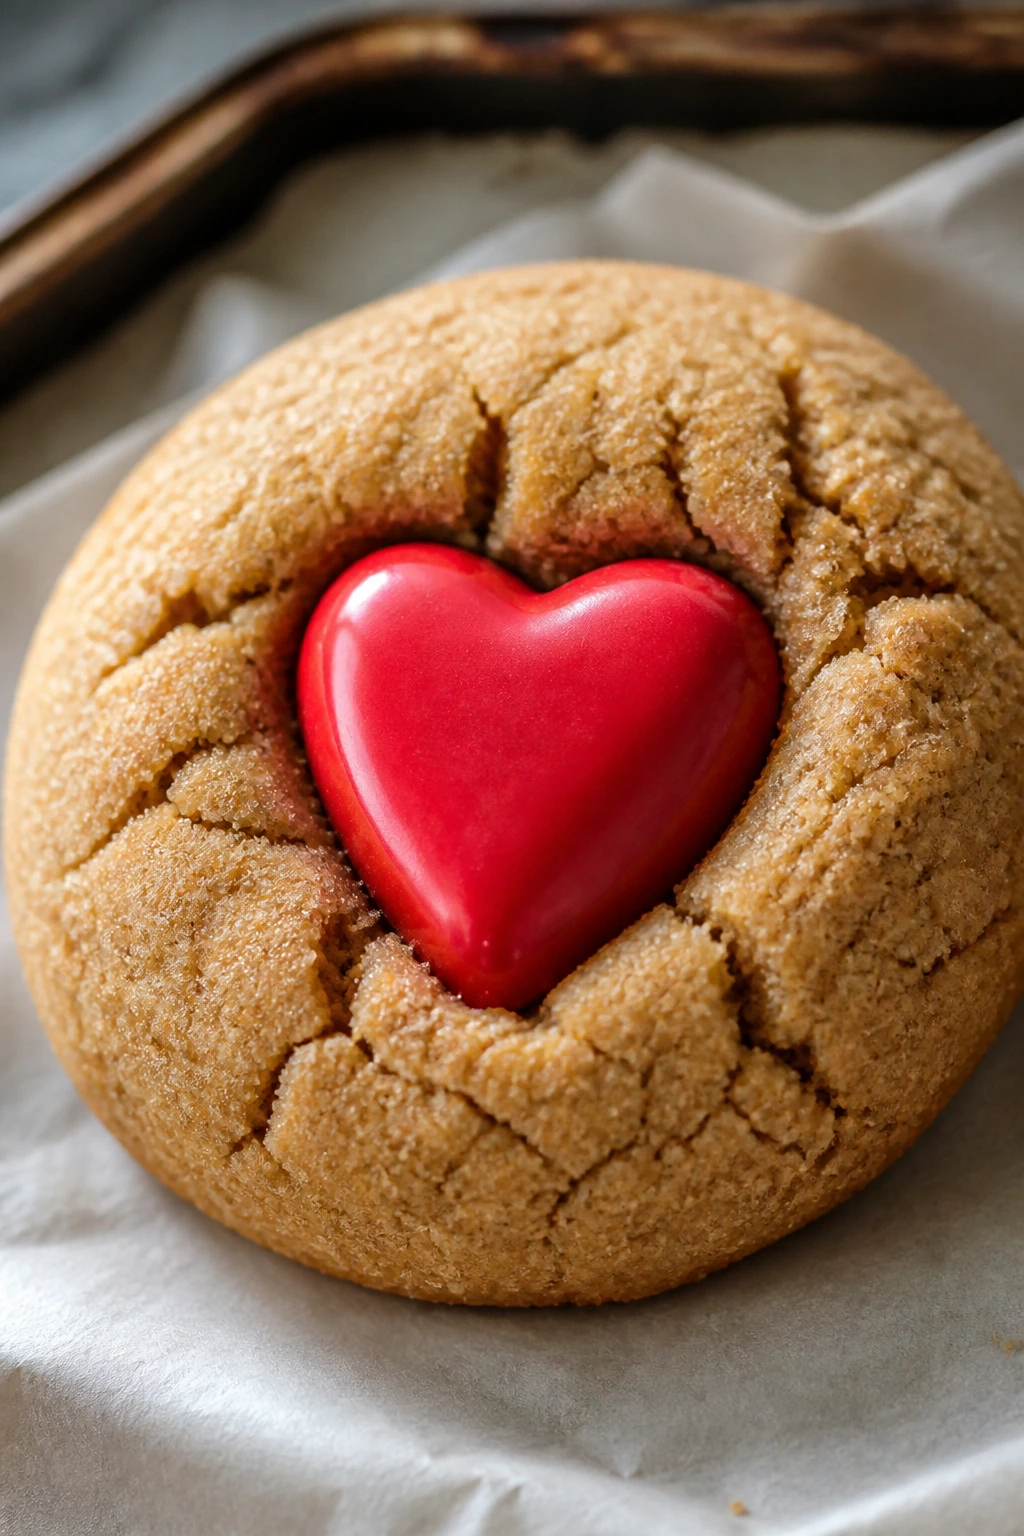
Blossom cookies are the kind of bake people pick up before dinner is done. The cookie is tender and nutty, and the heart candy in the middle gives each one a neat Valentine finish.
Why It Works: Almond butter makes the cookie rich and slightly savory, which stops the sweetness from running away. Pressing the candy in after baking keeps it from melting into the dough.
Key Ingredients:
- 1/2 cup unsalted butter, softened — for tenderness.
- 1/2 cup almond butter — the nut flavor.
- 3/4 cup sugar — sweetness.
- 1 large egg — binding.
- 1 1/2 cups all-purpose flour — structure.
- 1/2 teaspoon baking soda — lift.
- 1/4 teaspoon salt — balance.
- Heart-shaped chocolate candies — the center.
Quick Steps:
- Cream butter, almond butter, and sugar.
- Beat in the egg and vanilla.
- Stir in the dry ingredients and roll into 1-inch balls.
- Bake at 350°F for 10 to 11 minutes.
- Press a heart candy into each cookie right away and let them cool.
Equipment for This Recipe:
- Baking sheet — lined with parchment.
- Small scoop — keeps the cookies even.
- Cooling rack — helps them set.
How to Serve This Dish: Serve them once the candy has set but is still glossy. They look especially nice stacked in rows with the hearts facing up.
Pro Tips for This Recipe:
- Press the candy in while the cookies are hot, not after they cool.
- Make the dough balls even so the cookies bake at the same rate.
- Don’t overbake; they should stay soft.
Variations on This Dish:
- Peanut Butter Blossoms: Swap almond butter for peanut butter.
- Dark Chocolate Center: Press a dark chocolate square into the middle instead.
Common Mistakes to Avoid with This Dish:
- Don’t wait too long to add the candy or it won’t stick.
- Don’t use runny nut butter; the dough loses shape.
37. Vanilla Bean Panna Cotta with Pomegranate
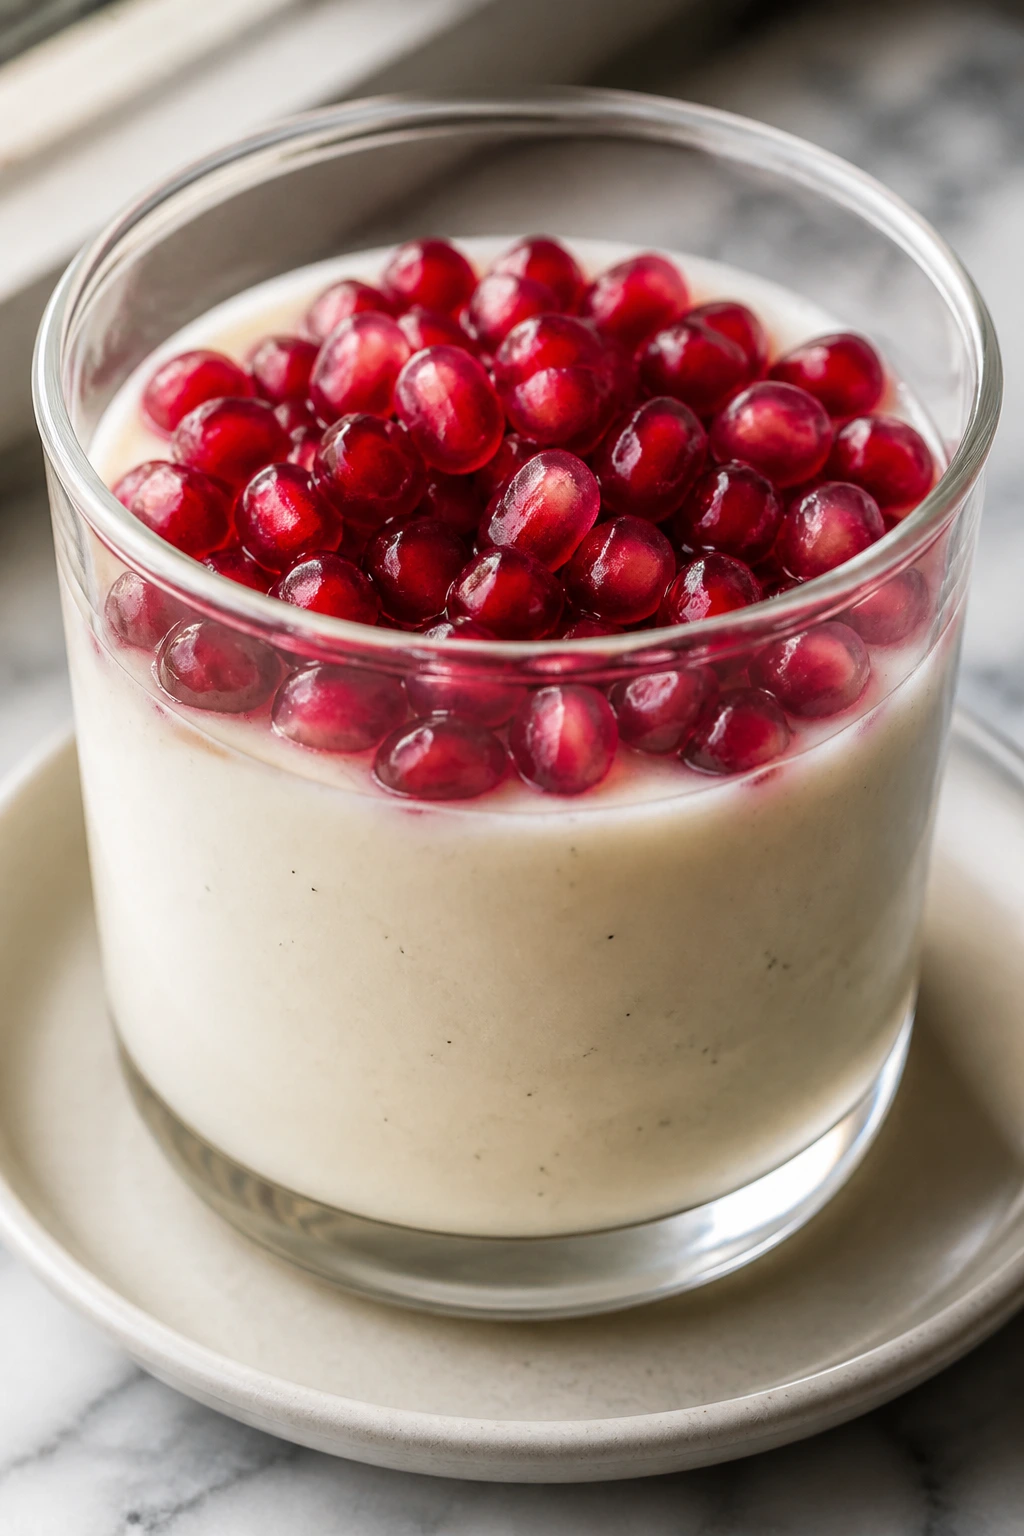
Panna cotta with pomegranate gets its charm from contrast. The cream is pale and soft, the seeds are bright and tart, and the vanilla bean leaves little specks that look almost too good to hide under fruit.
Why It Works: Vanilla bean gives the cream a deeper flavor than extract alone. Pomegranate seeds add a snap that keeps each spoonful from feeling too smooth.
Key Ingredients:
- 2 cups heavy cream — the base.
- 1 cup whole milk — lightens the texture.
- 1/3 cup sugar — sweetness.
- 2 teaspoons unflavored gelatin — set.
- 1 vanilla bean, split and scraped — flavor.
- 1 cup pomegranate seeds — topping.
- 1 teaspoon lemon juice — optional, for the fruit.
Quick Steps:
- Bloom gelatin in cold water.
- Warm cream, milk, sugar, vanilla bean seeds, and pod until steaming.
- Remove the pod, stir in the gelatin, and pour into cups.
- Chill at least 4 hours until set.
- Top with pomegranate seeds before serving.
Equipment for This Recipe:
- Saucepan — for the cream.
- Strainer — optional, for extra smoothness.
- Serving glasses — easiest for unmolding-free service.
How to Serve This Dish: Serve it cold with a spoonful of pomegranate on top. The contrast in texture is the reason to make it, so don’t bury that under other toppings.
Pro Tips for This Recipe:
- Use a real vanilla bean if you want the speckled look.
- Dissolve the gelatin fully before chilling.
- Taste the cream before it sets; you can still adjust the sweetness.
Variations on This Dish:
- Honey Vanilla Panna Cotta: Replace part of the sugar with honey.
- Berry Topper: Use raspberries if pomegranate isn’t in the fridge.
Common Mistakes to Avoid with This Dish:
- Don’t boil the cream or the texture changes.
- Don’t unmold too early; the set needs time.
38. Chocolate Mousse Pie
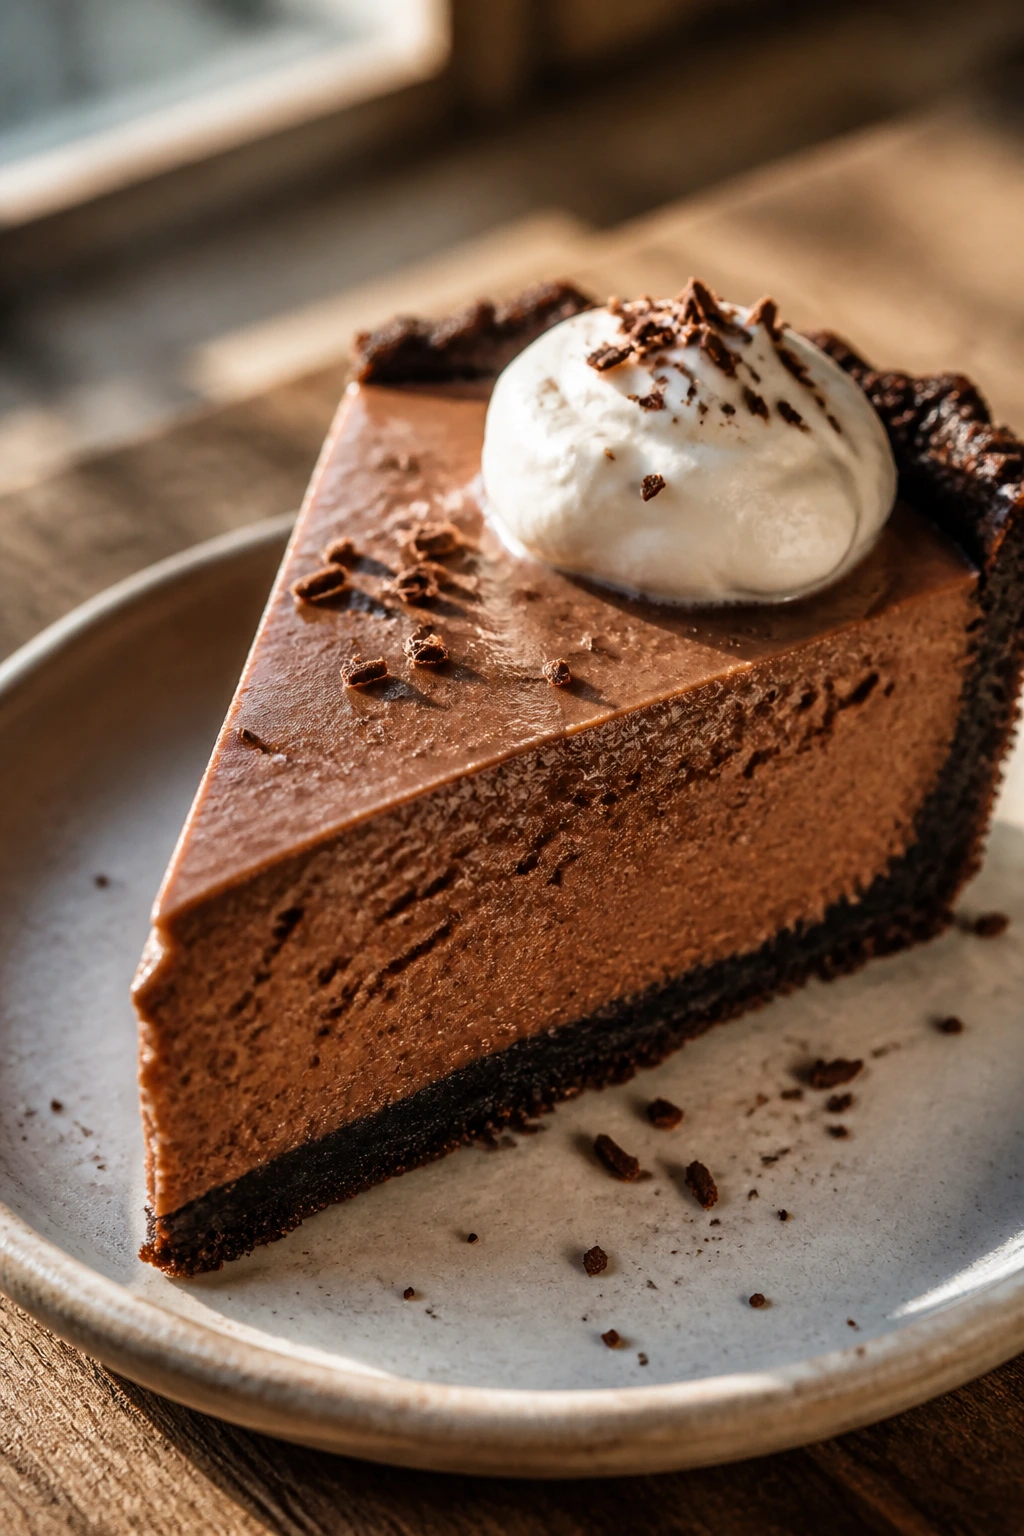
Chocolate mousse pie is what happens when a cookie crust gets serious. It’s soft, cold, and deeply chocolatey, with just enough air in the filling to keep it from eating like pudding in disguise.
Why It Works: The crust gives you a crisp base, while the mousse stays light because the whipped cream carries most of the texture. A little salt keeps the chocolate from tasting blunt.
Key Ingredients:
- 1 1/2 cups chocolate cookie crumbs — the crust.
- 5 tablespoons melted butter — binds the crust.
- 8 ounces bittersweet chocolate — the mousse.
- 1 cup heavy cream, divided — for melting and whipping.
- 1/4 cup sugar — sweetness.
- 1 teaspoon vanilla — flavor.
- Pinch of salt — balance.
- Whipped cream for topping — optional.
Quick Steps:
- Mix crumbs and melted butter, then press into a pie plate and chill.
- Melt the chocolate with 1/2 cup cream and let it cool slightly.
- Whip the remaining cream with sugar, vanilla, and salt to soft peaks.
- Fold the chocolate into the whipped cream and spoon into the crust.
- Chill at least 4 hours, then top with whipped cream.
Equipment for This Recipe:
- Pie plate — standard 9-inch.
- Mixer — for the cream.
- Rubber spatula — for folding.
How to Serve This Dish: Slice it cold, not frozen, so the mousse stays plush. A few chocolate shavings on top are enough.
Pro Tips for This Recipe:
- Cool the chocolate before folding, or the cream melts.
- Chill fully so the pie cuts cleanly.
- Don’t press the crust too hard or it becomes rock solid.
Variations on This Dish:
- Mocha Mousse Pie: Add espresso powder to the melted chocolate.
- Raspberry Topping Pie: Add a thin raspberry layer before the mousse.
Common Mistakes to Avoid with This Dish:
- Don’t overwhip the cream or the filling turns grainy.
- Don’t rush the chill, because the pie will slump.
39. Cherry Chocolate Chip Ice Cream Sandwiches
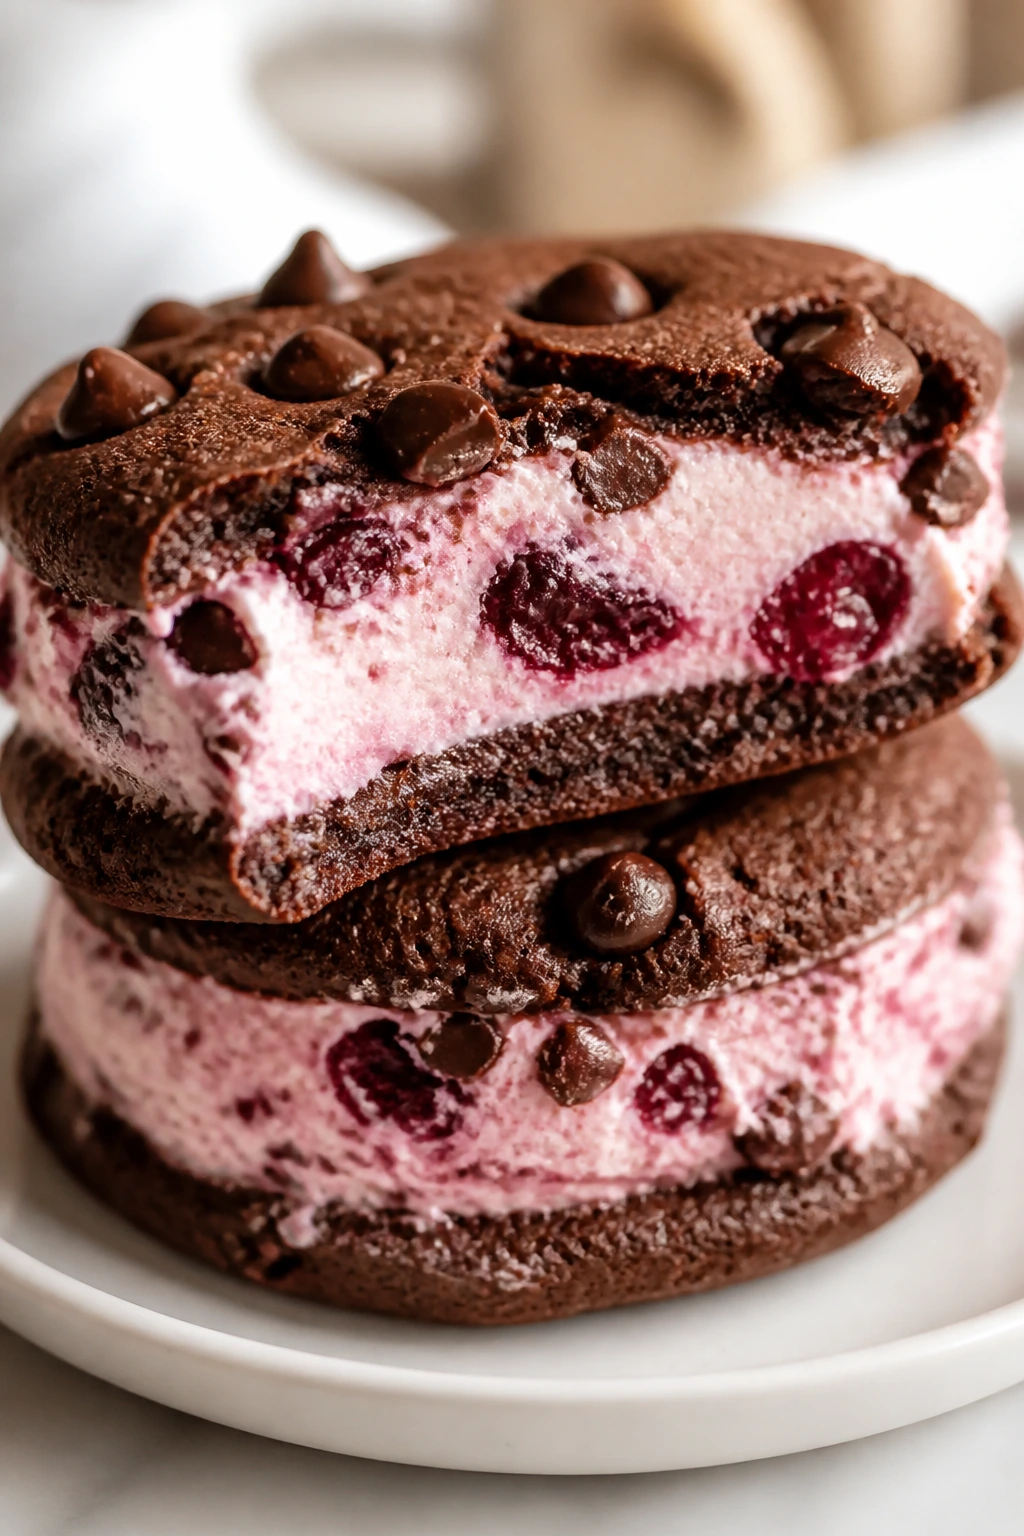
Ice cream sandwiches are the one dessert here that wants the freezer, not the oven, to do the final work. The chewy chocolate cookies and the cherry-studded ice cream make a cold, messy, very happy kind of Valentine treat.
Why It Works: Soft chocolate cookies stay flexible enough to sandwich ice cream without shattering. Chopped cherries in the filling give you little bright pops that keep the dessert from reading as plain chocolate-on-chocolate.
Key Ingredients:
- 2 cups chocolate cookie dough, homemade or chilled — the shell.
- 1 quart vanilla ice cream, softened — the filling.
- 1 cup chopped cherries — mix-in.
- 1/2 cup mini chocolate chips — extra texture.
- Parchment paper — for freezing.
Quick Steps:
- Bake the chocolate cookies and cool them completely.
- Soften the ice cream just enough to stir in cherries and mini chips.
- Scoop ice cream onto one cookie and press a second cookie on top.
- Wrap each sandwich in parchment and freeze until firm.
- Slice the edges clean if you want a neater look before serving.
Equipment for This Recipe:
- Baking sheet — for the cookies.
- Ice cream scoop — for even portions.
- Parchment or wax paper — for wrapping.
How to Serve This Dish: Serve straight from the freezer on a plate that’s been chilled for a few minutes. That keeps the cookies from going soft too fast.
Pro Tips for This Recipe:
- Let the cookies cool fully or the ice cream melts on contact.
- Freeze the sandwiches before wrapping them tightly.
- Use a slightly under-softened ice cream so it doesn’t ooze.
Variations on This Dish:
- Brownie Cookie Version: Use brownie-style cookies instead.
- Strawberry Chip Filling: Swap cherries for strawberries and add white chocolate chips.
Common Mistakes to Avoid with This Dish:
- Don’t overfill the sandwiches or the ice cream squishes out.
- Don’t leave them sitting out too long before serving.
40. Love Letter Macarons
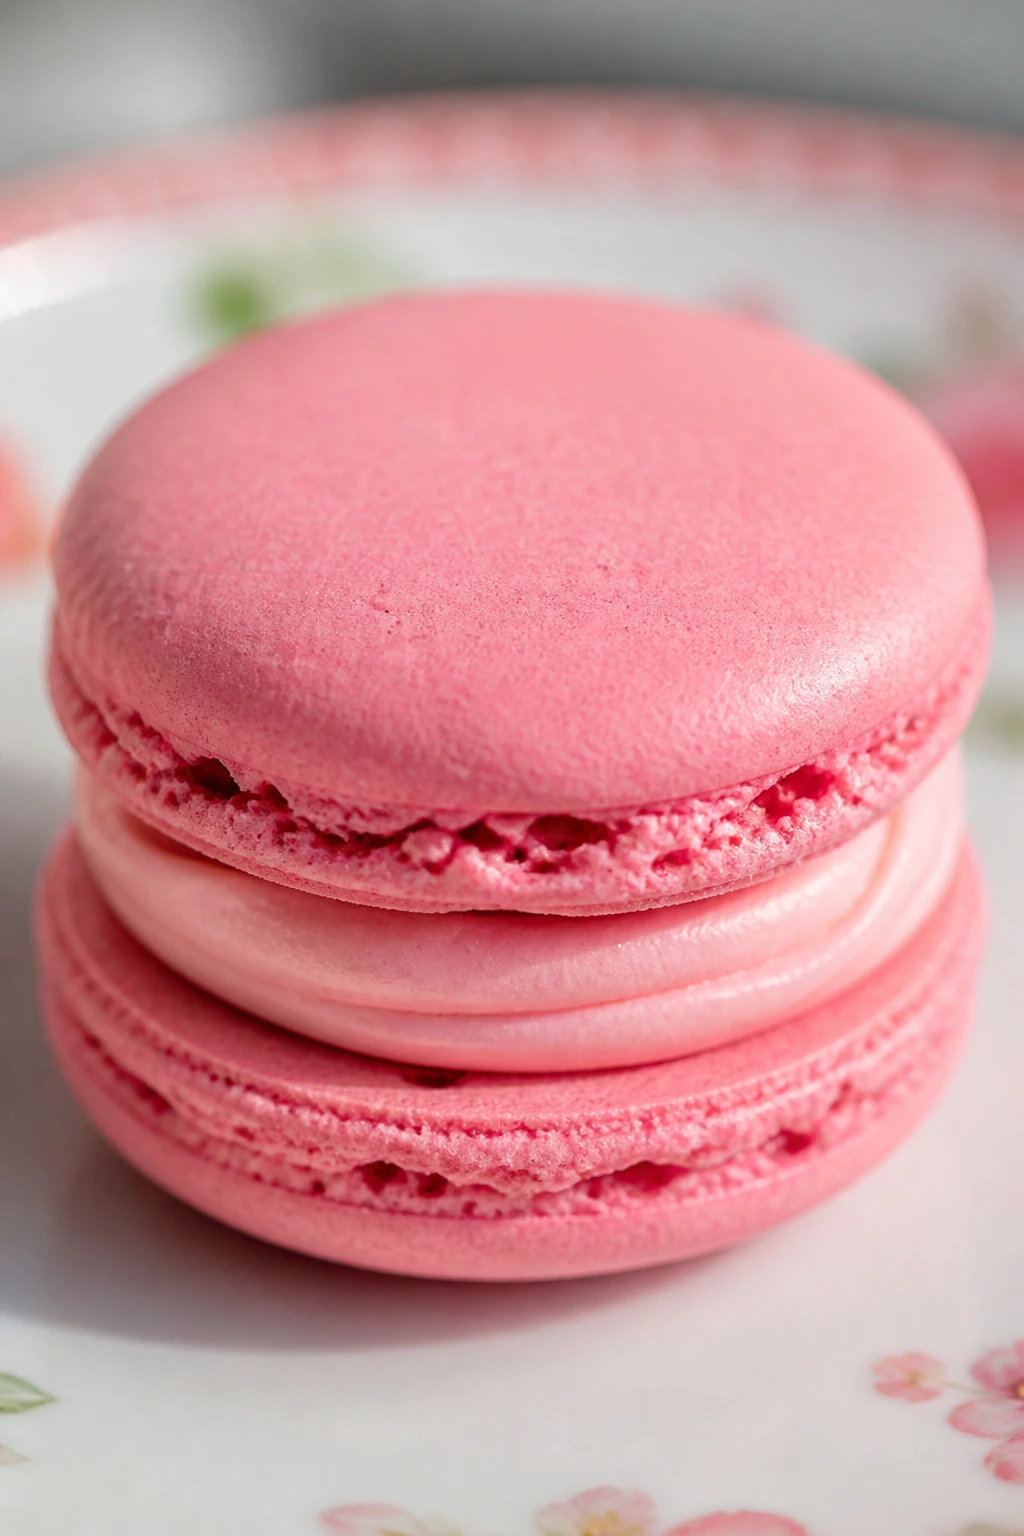
Macarons are demanding, sure, but the pink shell-and-cream filling combo is hard to beat. These feel like the dessert version of a sealed note: crisp on the outside, soft in the middle, and a little dramatic in the best way.
Why It Works: Almond flour gives the shells their structure, while aged egg whites whip into a stable meringue. A raspberry or vanilla buttercream filling keeps the sweetness from turning sharp.
Key Ingredients:
- 1 3/4 cups almond flour — the shell base.
- 1 3/4 cups powdered sugar — smooths the batter.
- 3 large egg whites — the meringue.
- 1/4 cup granulated sugar — stabilizes the whites.
- Pink gel coloring — for the shell.
- 1/2 cup unsalted butter, softened — the filling.
- 1 cup powdered sugar — for the buttercream.
- 2 tablespoons raspberry jam or 1 teaspoon vanilla — filling flavor.
Quick Steps:
- Sift almond flour and powdered sugar together.
- Beat egg whites until foamy, add granulated sugar gradually, and whip to stiff glossy peaks.
- Fold in the dry ingredients and coloring until the batter flows in thick ribbons.
- Pipe rounds onto parchment, let them rest until a skin forms, then bake at 300°F for 14 to 16 minutes.
- Fill cooled shells with buttercream and sandwich gently.
Equipment for This Recipe:
- Piping bag with round tip — for even shells.
- Baking sheets — lined with parchment or silicone mats.
- Mixer — essential for the meringue.
How to Serve This Dish: Let the filled macarons rest for a few hours so the shells soften slightly around the filling. They’re the most delicate dessert in the set, so handle them like they mean it.
Pro Tips for This Recipe:
- Sift the dry ingredients well or the shells get bumpy.
- Let the piped shells rest before baking; the skin helps form feet.
- Age the egg whites a little if your kitchen is humid.
Variations on This Dish:
- Raspberry Heart Macarons: Fill with raspberry buttercream and a tiny dot of jam.
- Vanilla Rose Version: Add a drop of rosewater to the buttercream.
Common Mistakes to Avoid with This Dish:
- Don’t underfold or overfold the batter; both cause bad shells.
- Don’t bake without resting, or the tops crack.
The Baking Logic Behind a Good Valentine’s Dessert
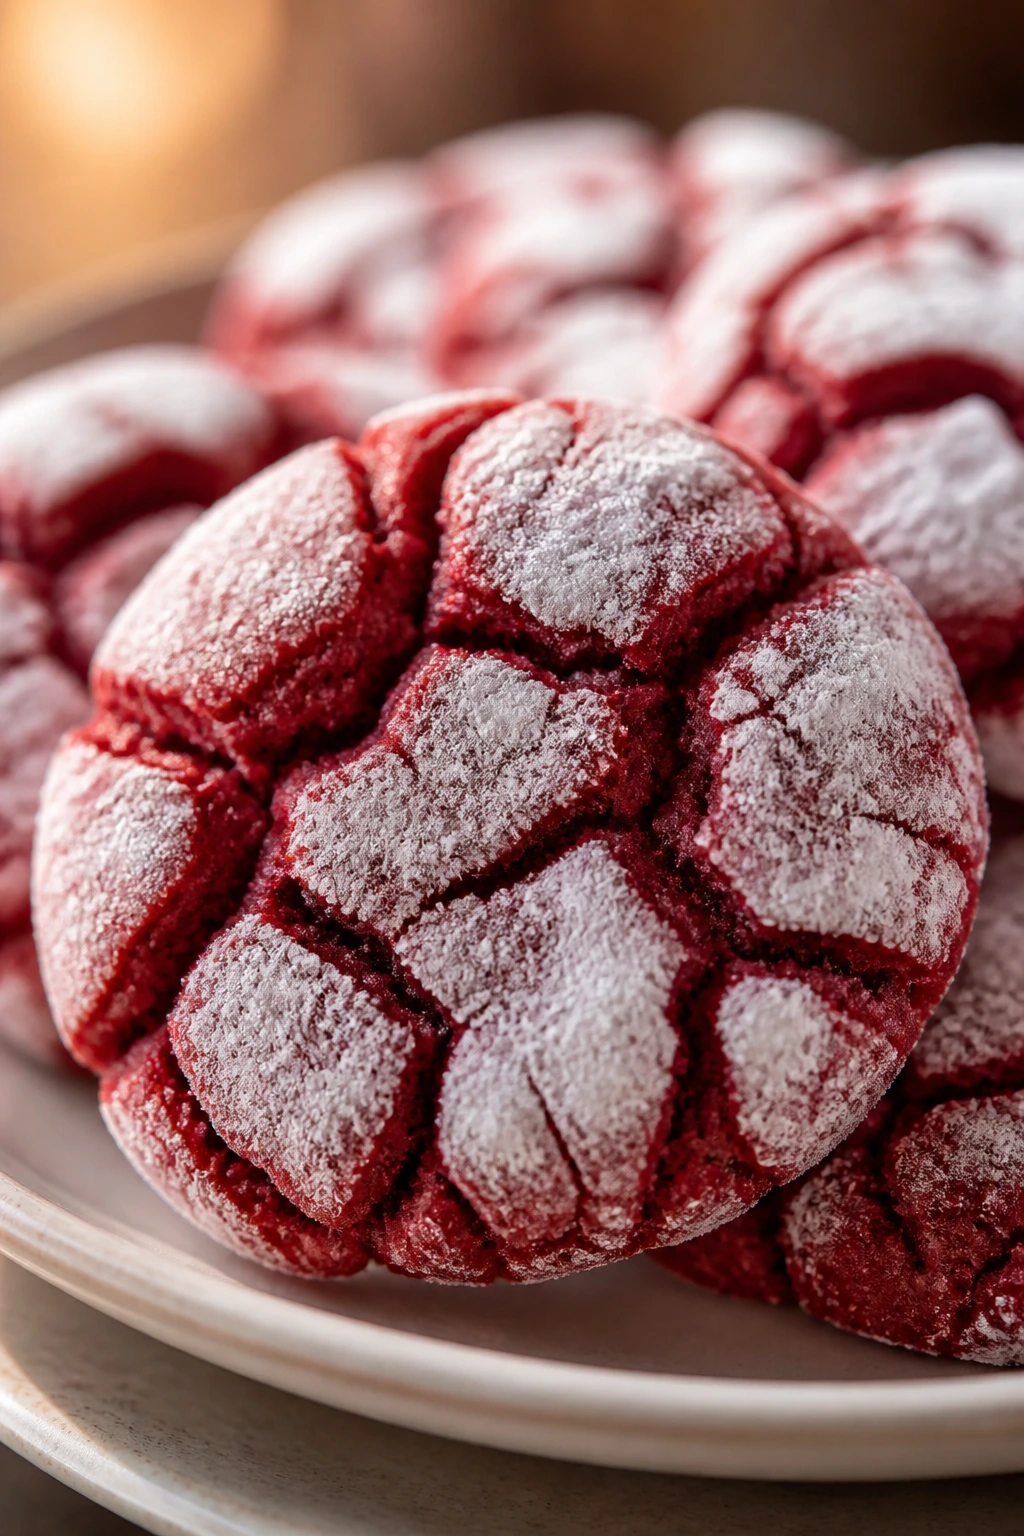
A good Valentine dessert usually has three things going for it: contrast, restraint, and one clear visual cue. Contrast can be tart fruit against dark chocolate, crisp shell against soft cream, or cold filling against a warm cake. Restraint is the part people forget. If every bite is sweet, creamy, and soft, the whole thing turns flat by the second forkful.
There’s also the timing piece, which matters more than the romance-adjacent branding would suggest. The desserts that sit well in the fridge — cheesecake bars, mousse cups, panna cotta, truffles — give you breathing room. The ones that need the oven at the last minute — lava cakes, hand pies, puff pastry hearts — give you theater. Mixing both is how you make a dessert table feel intentional without making yourself miserable.
And then there’s color. Red, pink, white, and deep brown show up over and over here because they work on a plate. A raspberry swirl looks lively against cream cheese. A dusting of powdered sugar on a dark cookie actually reads. Even a plain tart gets more interesting when a few berries are scattered beside it instead of dumped on top. Small things. Big payoff.
Tools That Make the Whole Spread Easier
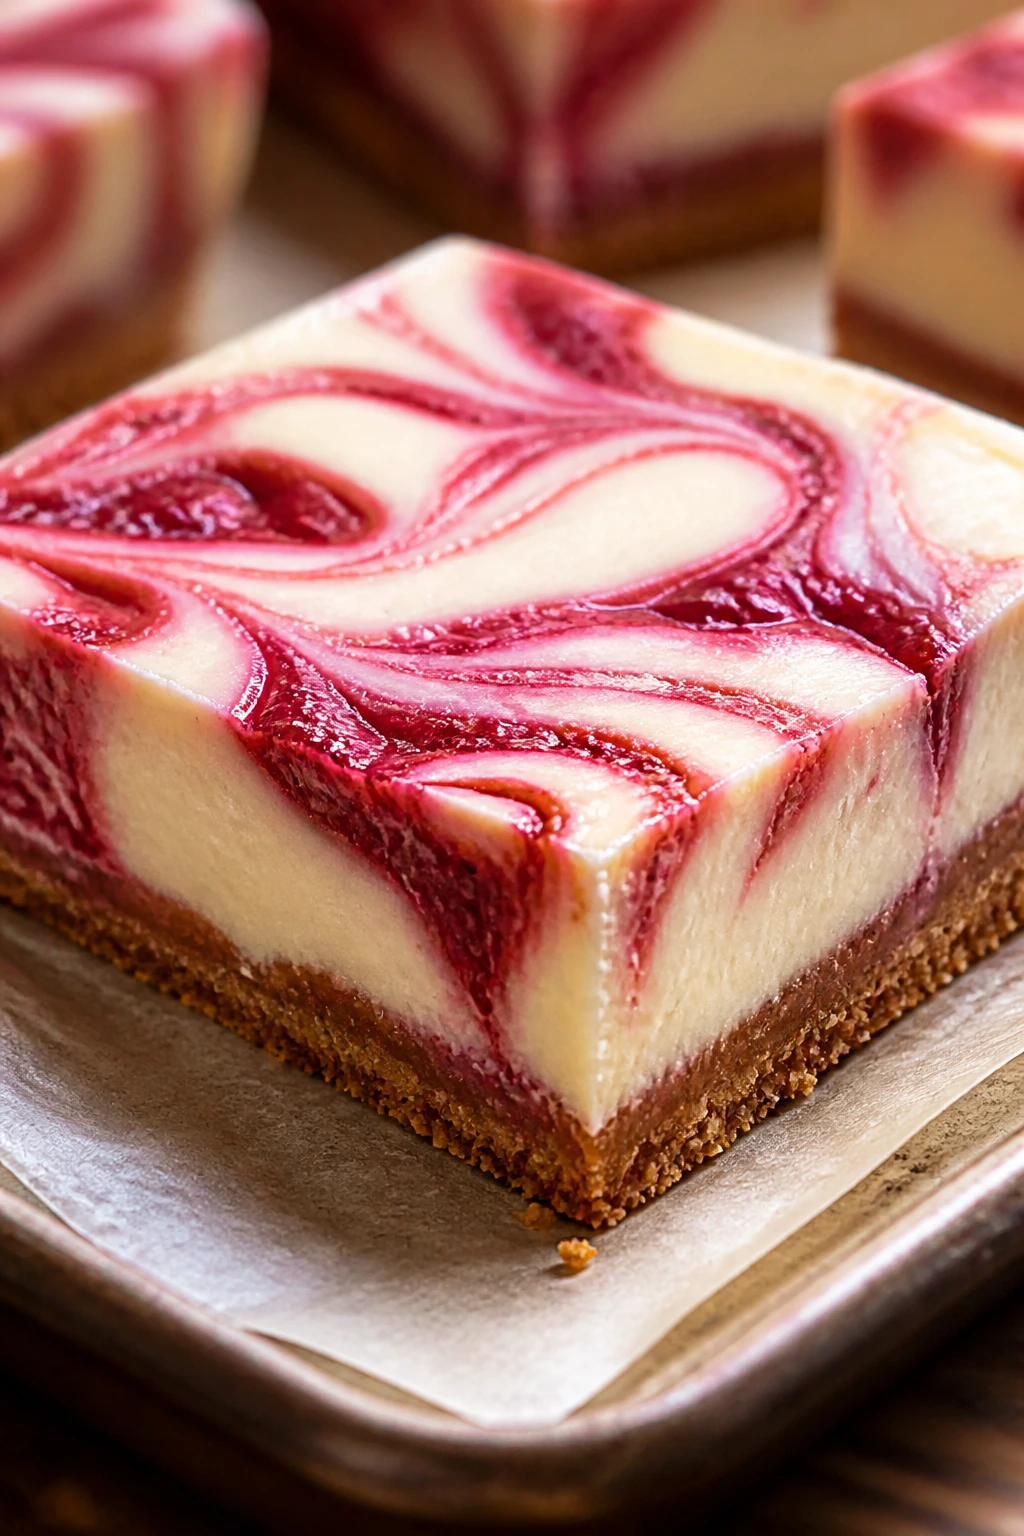
- Rimmed baking sheets — useful for cookies, hand pies, puff pastry, and anything that wants a little boundary.
- Parchment paper and silicone mats — keep sticky sugar and chocolate from welding themselves to the pan.
- 8-inch and 9-inch round pans — cover cakes, cheesecakes, and tart shells without a pile of extras.
- 9×13-inch baking pan — the workhorse for brownies, bars, and tray desserts.
- Muffin tin — perfect for mini cheesecakes, cupcakes, and individual desserts.
- Tart pan with a removable bottom — the cleanest way to handle ganache tart or similar fillings.
- Hand mixer or stand mixer — saves a lot of arm work for frostings, meringue, and batters.
- Saucepan with a heavy bottom — helps custards and ganache heat evenly.
- Fine-mesh sieve — handy for cocoa dusting, powdered sugar, and smooth custards.
- Offset spatula — makes frosting, ganache, and batters spread more cleanly.
- Ramekins and small glasses — essential for lava cakes, pots de crème, mousse, and layered cups.
- Instant-read thermometer — optional, but useful for custards and chocolate work.
Smart Shopping for Chocolate, Berries, and Butter
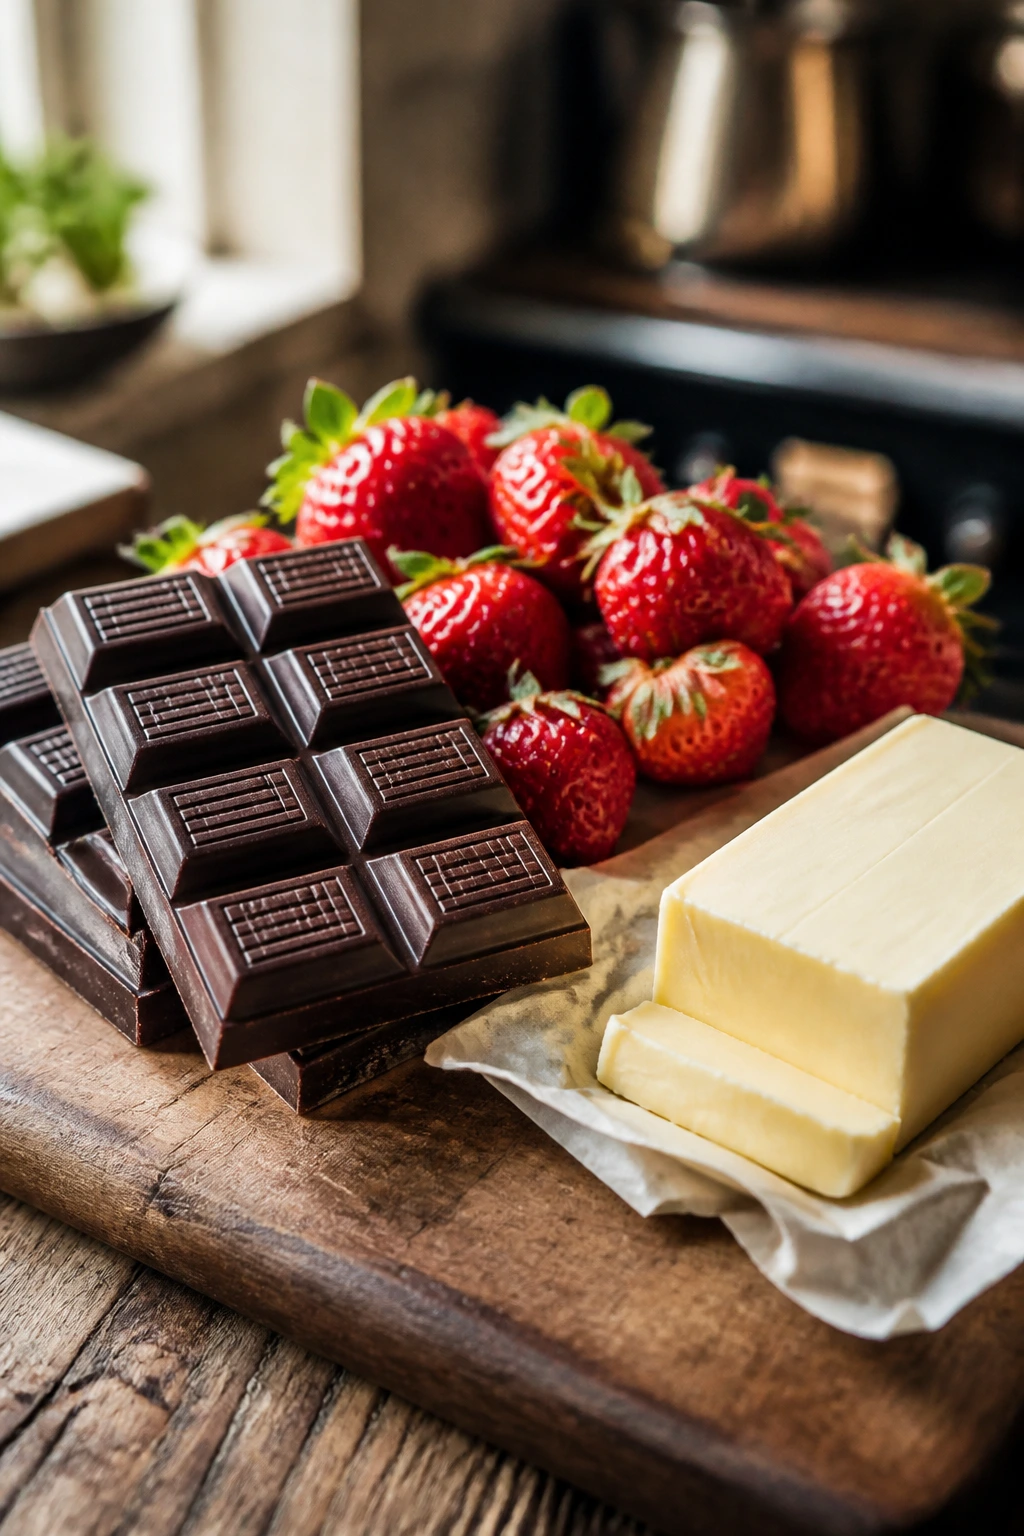
Chocolate matters more than the label on the box suggests. For baking, bittersweet chocolate in the 60 to 70 percent cocoa range usually gives the cleanest flavor, while milk chocolate can make some desserts taste flatter and sweeter than you expect. If you’re making ganache, mousse, truffles, or pots de crème, buy chocolate you’d be happy to eat plain.
Berries are trickier. Fresh strawberries and raspberries are lovely when they’re ripe and fragrant, but if the fruit is pale or watery, it will drag down anything you bake with it. Frozen berries often work better for fillings, swirls, and sauces because they’re picked ripe and break down in a more useful way. Just cook off the extra liquid when a recipe needs structure.
Butter, cream cheese, sour cream, and eggs all need the same basic shopping rule: buy the good standard version, not the bargain-bin mystery version. Unsalted butter lets you control the salt in cookies and cakes. Full-fat cream cheese gives cheesecake and mousse the right body. And if a recipe depends on vanilla, use extract that actually smells like vanilla when you open the bottle, because that scent carries through more than people expect.
How to Serve These Desserts Without Overthinking the Plate
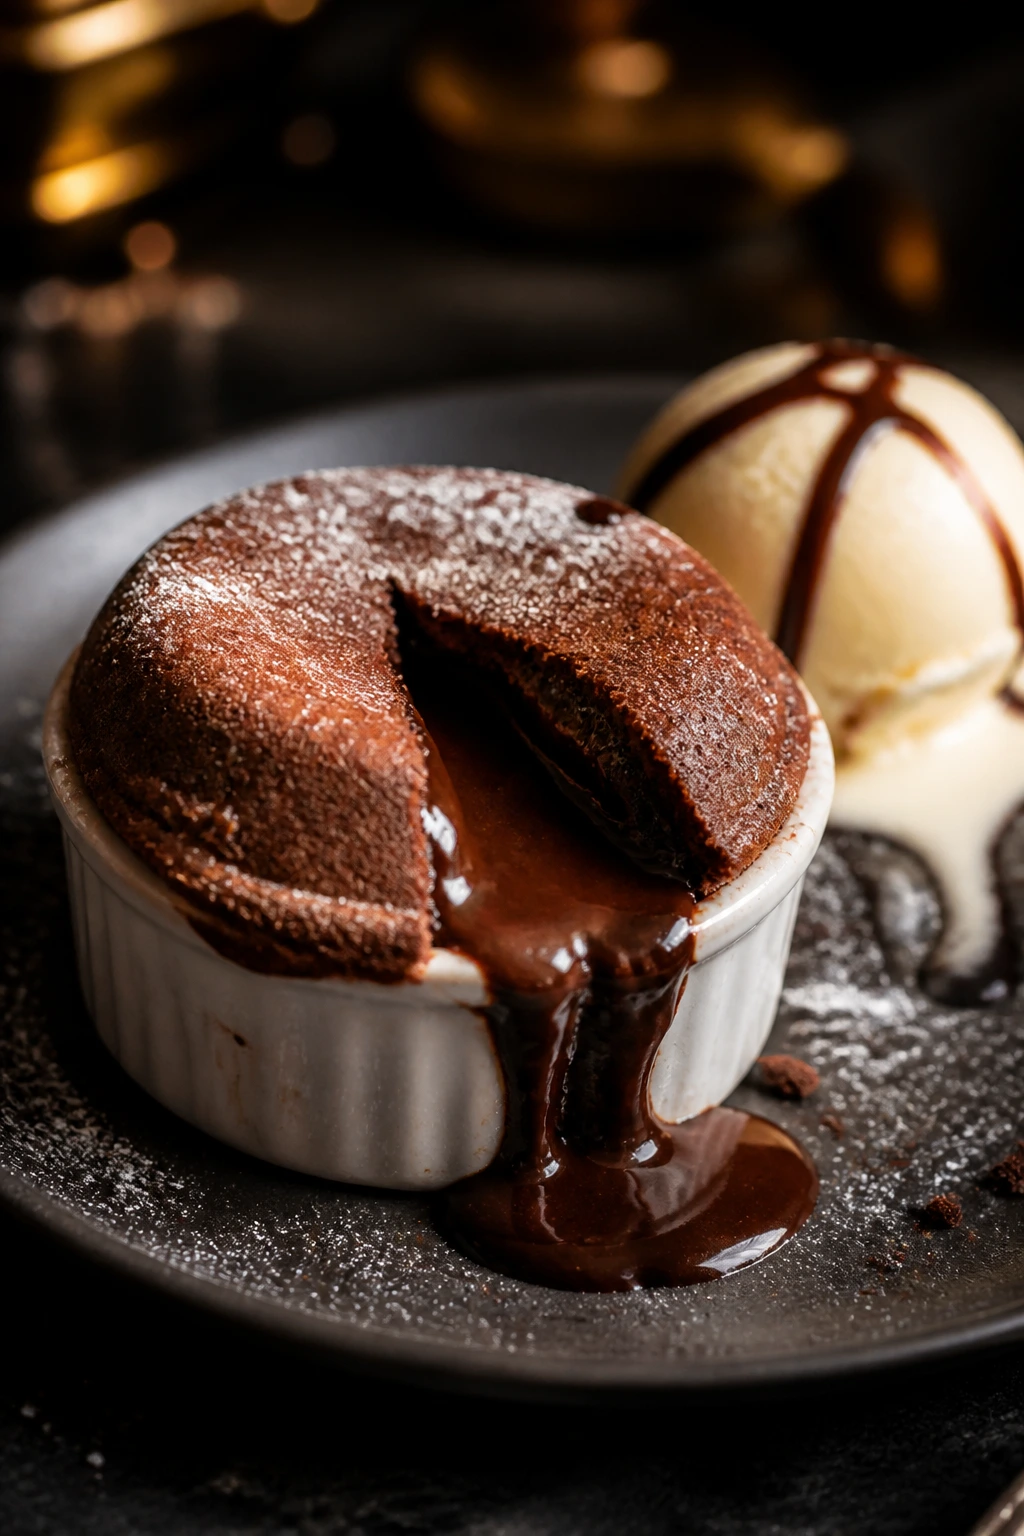
Presentation: Clean white plates make the reds and browns stand out, but shallow bowls work better for anything saucy, like lava cakes, trifle, and galette. A dusting of powdered sugar or cocoa on one edge of the plate looks more finished than a dusting over everything.
Accompaniments: Whipped cream, vanilla ice cream, fresh raspberries, sliced strawberries, and a spoon of berry sauce are the reliable sidekicks here. For richer desserts, a small cup of espresso or strong coffee cuts the sweetness better than another sweet drink would.
Portions: Most of these recipes are happier in small servings. A square of cheesecake bar, one mini tart, two cookies, or a single ramekin dessert is usually enough after a full dinner. If you’re scaling up for a crowd, add more varieties instead of making every portion huge.
Beverage Pairing: Espresso fits the chocolate-forward desserts. Sparkling wine works with fruit-heavy plates, especially the strawberry and raspberry ones. If you want something nonalcoholic, cold milk with a dash of vanilla or a tart cherry spritz does the job without fighting the dessert.
Small Flavor Boosters That Punch Above Their Weight
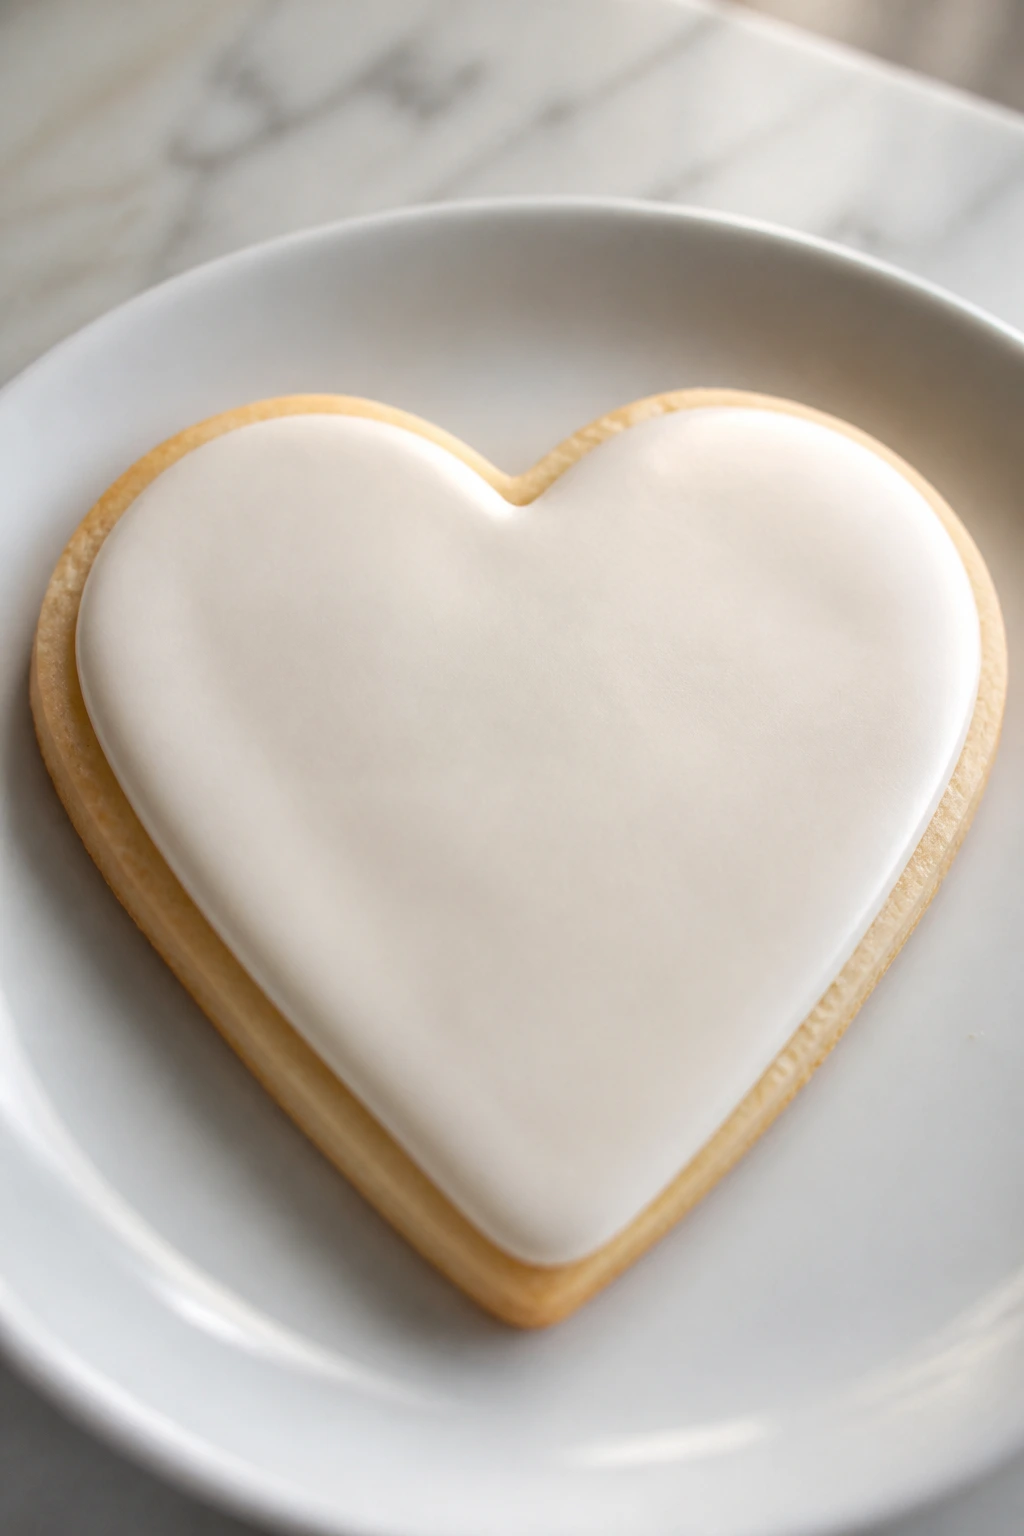
Flavor Enhancement: A pinch of flaky salt on brownies, ganache tart, truffles, or caramel-topped desserts wakes up the chocolate faster than another spoon of sugar ever could. Orange zest, espresso powder, and lemon zest do the same thing in different directions.
Customization: Chopped pistachios, toasted almonds, or hazelnuts give cookies and bars a better crunch, while freeze-dried strawberry powder can tint frosting and add real fruit flavor without extra liquid. If you want to lean more floral, use rosewater with a light hand — one measured drop too many and the whole dessert goes perfumed.
Serving Suggestions: Fresh berries, chocolate curls, edible flowers, and a spoon of berry sauce are all enough. I’d skip heavy garnishes that bury the food. Let the dessert look like itself.
Make-It-Yours: For gluten-free baking, use a good measure-for-measure flour in bars, cookies, and cakes that don’t rely on pastry structure. For dairy-free plates, coconut cream and dairy-free chocolate can handle a surprising amount of the work. For people who like less sweetness, add more fruit and cut back on glaze or icing instead of trying to force the recipe into a completely different dessert.
Make-Ahead, Storage, and Reheating Guidance
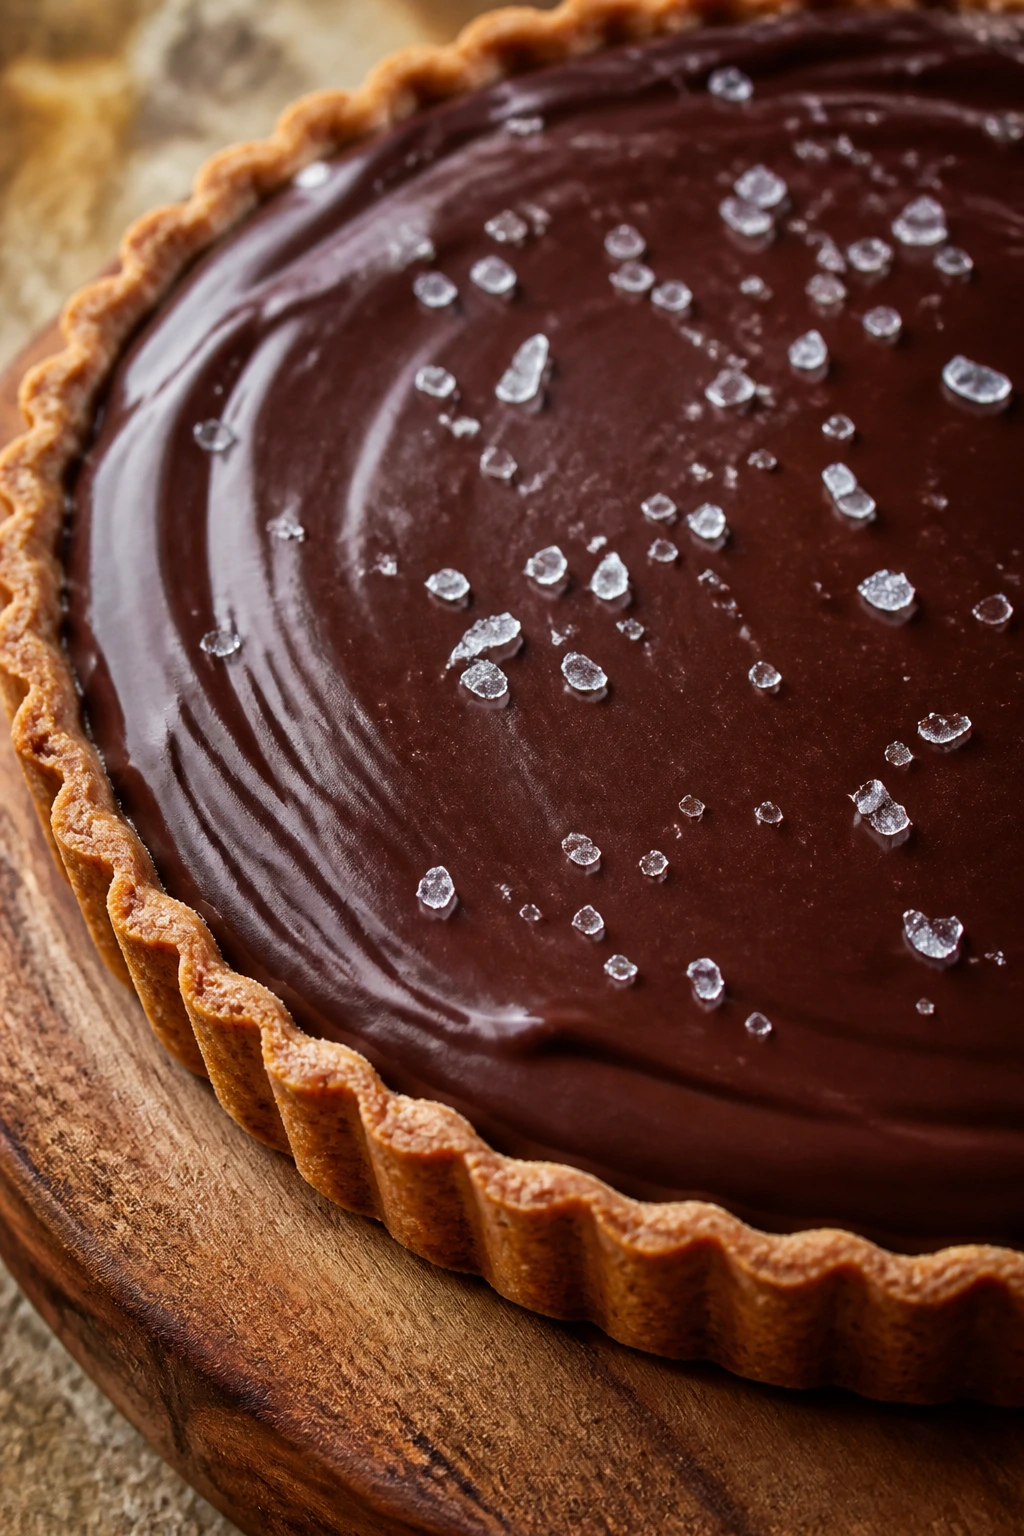
Cookies, bars, truffles, and shortbread are the easiest winners for make-ahead work. Most of them keep 3 to 5 days in an airtight container at room temperature, and many freeze well for up to 2 months if you wrap them tightly and separate layers with parchment. If the dessert has a crisp sugar shell, like meringue kisses or macarons, keep it away from humidity and do not refrigerate unless the filling forces you to.
Cheesecake bars, mousse cups, panna cotta, pots de crème, and layered jars belong in the fridge. They usually hold for 3 to 4 days refrigerated, though the texture is best in the first 48 hours. Cover them well so they don’t pick up the smell of whatever else is in the fridge — onions and chocolate are not a charming combination.
Cakes and cupcakes usually keep 2 days at room temperature if they’re unfrosted or lightly frosted, or up to 4 days refrigerated if they’re heavily frosted or filled with cream. For longer storage, freeze the unfrosted layers tightly wrapped for up to 2 months. Hand pies, brownies, and blondies can be warmed in a 300°F oven for 5 to 8 minutes to bring back a little edge and softness. Lava cakes, once baked, are best fresh; the center is the whole point.
Variations and Adaptations to Try

-
Gluten-Free Dessert Swaps: Bars, brownies, cheesecake crusts, and some cookies convert well with a good measure-for-measure flour blend. If you’re baking something that depends on structure, like macarons or meringue-based desserts, choose recipes that already fit that style instead of forcing a swap.
-
Dairy-Free Creaminess: Coconut cream works well in panna cotta, mousse-style fillings, and custard-like desserts if you like the flavor. Dairy-free butter and chocolate can also carry cookies, bars, and truffles without much drama.
-
Less-Sweet Berry Forward: Cut the glaze in half, lean on raspberries or cherries, and use bittersweet chocolate instead of milk chocolate. This version tastes cleaner after a big dinner and keeps the last bite from feeling heavy.
-
Mini Dessert Flight: Make two or three of the smaller recipes — truffles, mousse cups, thumbprints — and serve them in tiny portions. That gives people choices without asking you to build one giant centerpiece dessert.
-
Kid-Friendly Pink and White Plate: Skip liqueurs, keep the coloring light, and lean on strawberry, vanilla, and white chocolate. Heart cookies, cupcakes, and marshmallow-soft desserts tend to disappear fastest at that table.
-
Deep Chocolate Edition: Add espresso powder, use dark chocolate more often than not, and finish with flaky salt. It pulls the whole collection toward something darker and less sugary, which some people prefer immediately.
Common Mistakes to Avoid
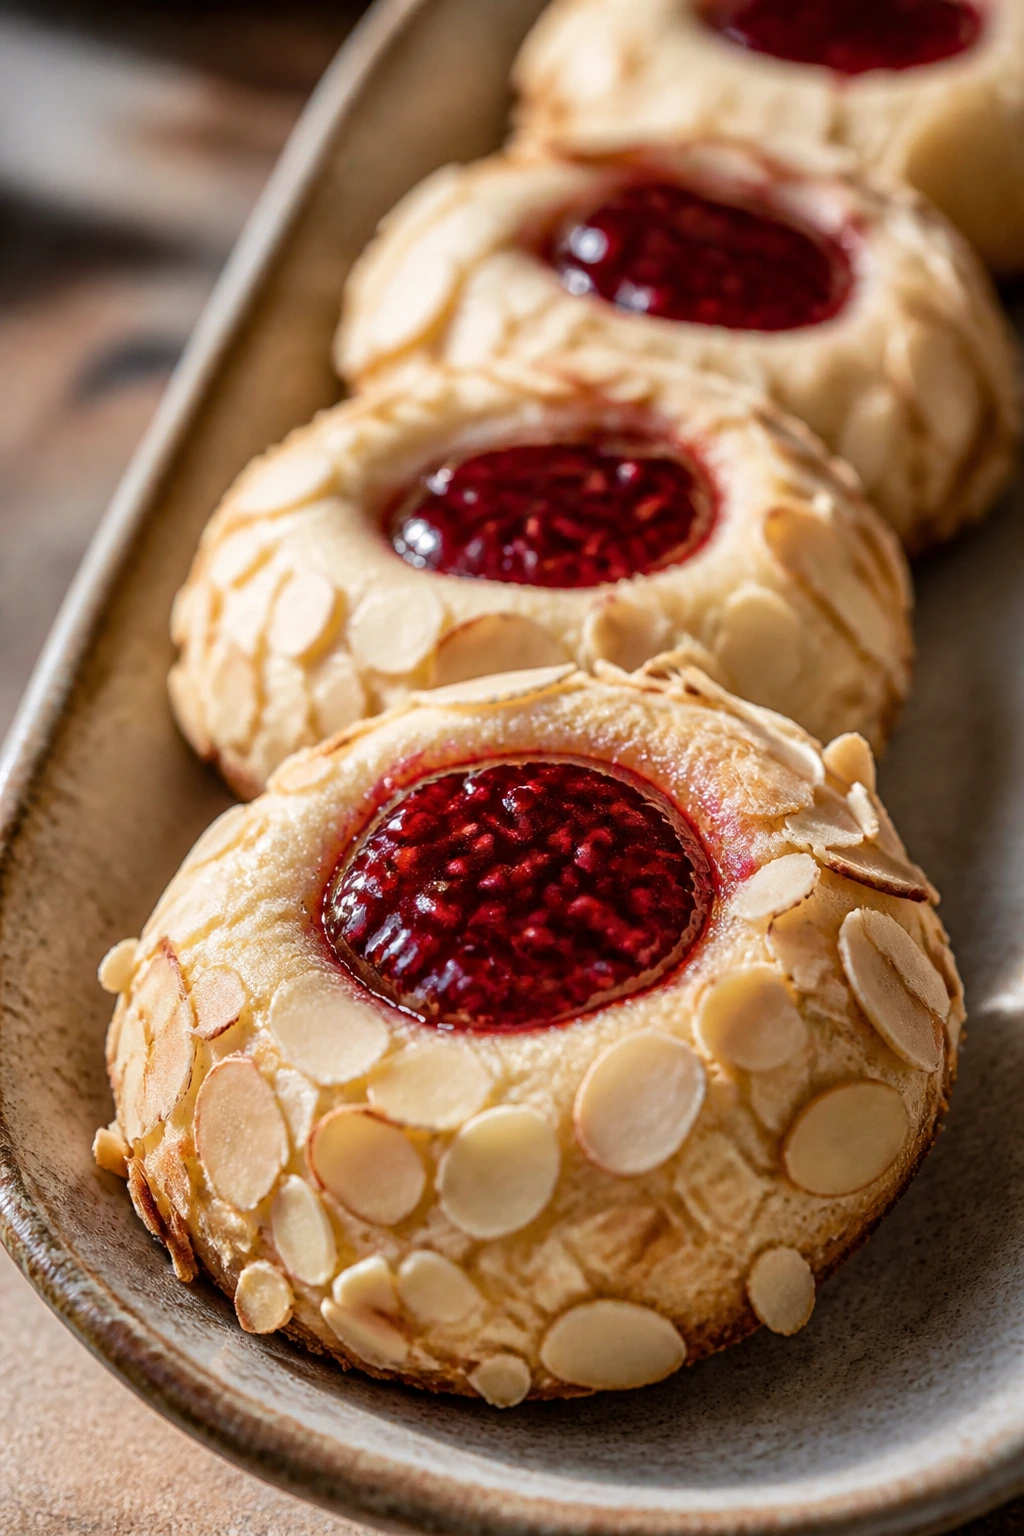
-
Overbaking the custards and cheesecakes: If the center is rock solid in the oven, it will be dry on the plate. Pull these desserts when they still wobble a little in the center and let the fridge finish the job.
-
Using wet fruit without thickening it: Fresh berries can leak fast once heat or sugar gets involved. If a filling needs to hold shape, add cornstarch, reduce the juices, or use preserves instead of raw fruit.
-
Rushing chocolate: Hot cream is fine; boiling cream is how you get a broken ganache or grainy mousse. Melt chocolate gently and let it cool a touch before folding it into whipped cream.
-
Skipping chill time: Cheesecake bars, mousse cups, panna cotta, truffles, and pie fillings all need time to settle. Cutting or serving them too soon usually means slumping, smearing, or filling that tastes unfinished.
-
Overwhipping cream or meringue: Grainy cream looks dull and tastes dense. Stiff meringue can crack in ugly ways. Stop at soft peaks when the recipe asks for softness and firm peaks only when you need real structure.
-
Making every dessert equally sweet: That’s the fastest route to palate fatigue. The better spread has one bright fruit dessert, one darker chocolate dessert, and one creamy thing with a little salt or citrus.
Frequently Asked Questions
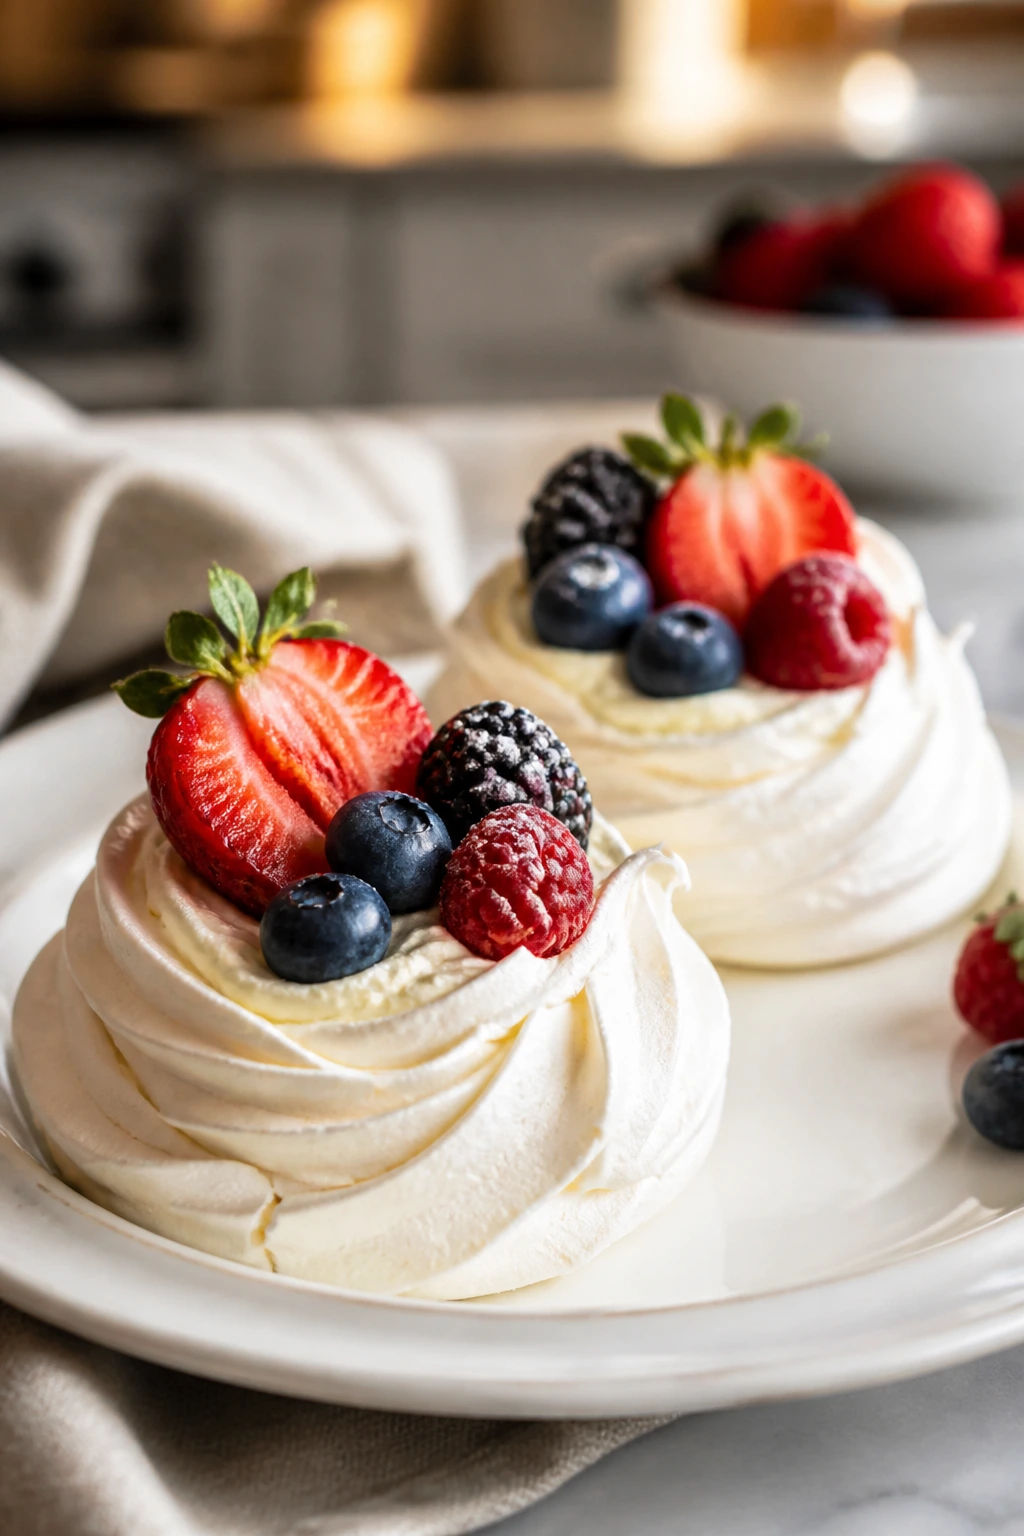
Can I make several of these desserts the day before serving?
Yes, and many of the best ones are better that way. Cheesecake bars, mousse cups, panna cotta, truffles, and layered desserts often set more cleanly overnight, while cookies and bars keep their shape just fine.
Which desserts hold up best for a dinner party?
Bars, cookies, truffles, hand pies, and cheesecake cups travel and sit well. If you want something plated at the table, lava cakes and fresh shortcake make more of a scene, but they need attention right before serving.
Can I use frozen strawberries or raspberries?
Absolutely, especially for fillings, sauces, and swirls. Frozen fruit is often the better choice when the recipe needs juice and color, though you should cook off extra liquid if the filling has to hold its shape.
What if I only have one cake pan or one muffin tin?
Batch the recipe or choose desserts that don’t depend on multiple layers at once. Bars, truffles, cookies, and no-bake cups are the easiest things to scale with limited equipment.
How do I keep chocolate from seizing?
Use dry tools, avoid splashes of water, and melt it gently. If you’re mixing chocolate into cream or custard, let the hot liquid do the work and stir patiently instead of blasting it with heat.
What’s the easiest dessert here for a beginner?
Chocolate shortbread, truffles, thumbprints, and crumb bars are the least stressful starting points. They forgive small timing mistakes better than custards, soufflé-style bakes, or macarons.
Which desserts are best if I want something less sweet?
Pots de crème, chocolate mousse pie, olive oil cake, and ganache tart lean darker and more balanced. Using tart fruit — raspberries, blood orange, pomegranate — helps even more.
How far ahead can I make desserts with cream or mascarpone?
Usually 1 to 2 days ahead is comfortable if they stay chilled and covered. After that, the texture can still be fine, but the flavors get a little quieter and the garnishes lose their shine.
Can I freeze baked desserts for later?
Yes. Brownies, blondies, cookies, and unfrosted cakes freeze well when wrapped tightly. Cream-based desserts like mousse and panna cotta are better kept in the fridge rather than frozen, because the texture changes when they thaw.
A Sweet Finish
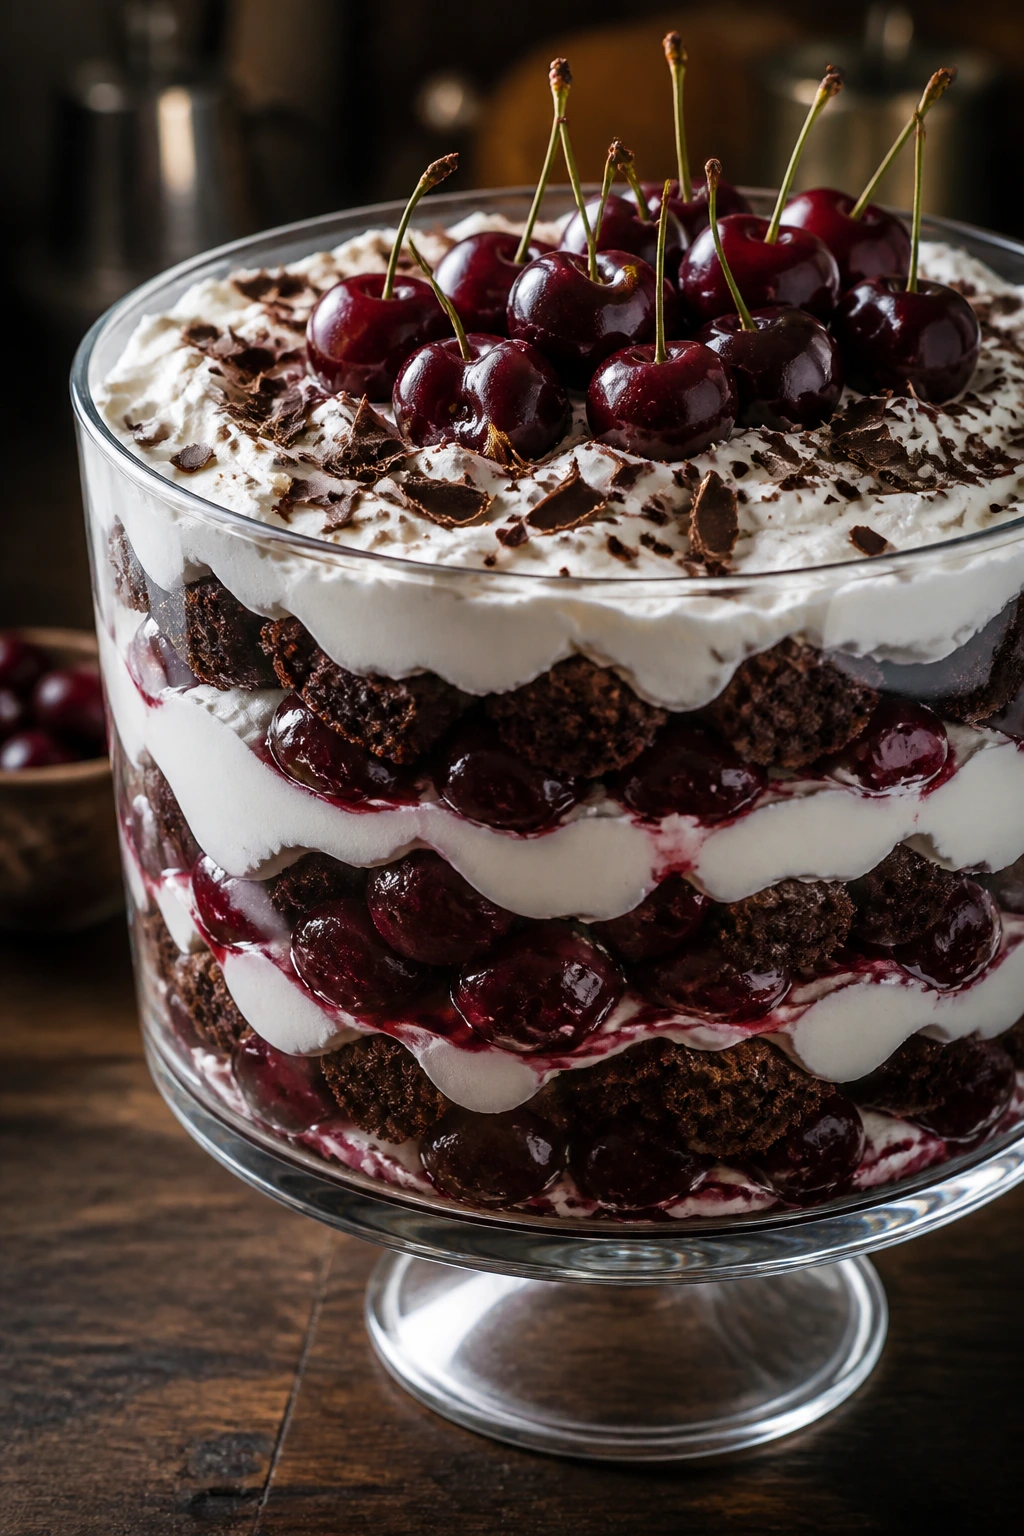
The nicest thing about a Valentine dessert spread is that it doesn’t need one perfect centerpiece to work. A tray of cookies, a chilled cup of mousse, a slice of tart, and a few berries on a plate can feel every bit as intentional as a layer cake with ribbons and roses — sometimes more so, because each dessert gets to do one job well.
Pick one recipe that matches your energy, then pair it with one that can wait in the fridge or freezer. That little bit of planning makes the whole table feel calmer, and calmer desserts usually taste better too.