
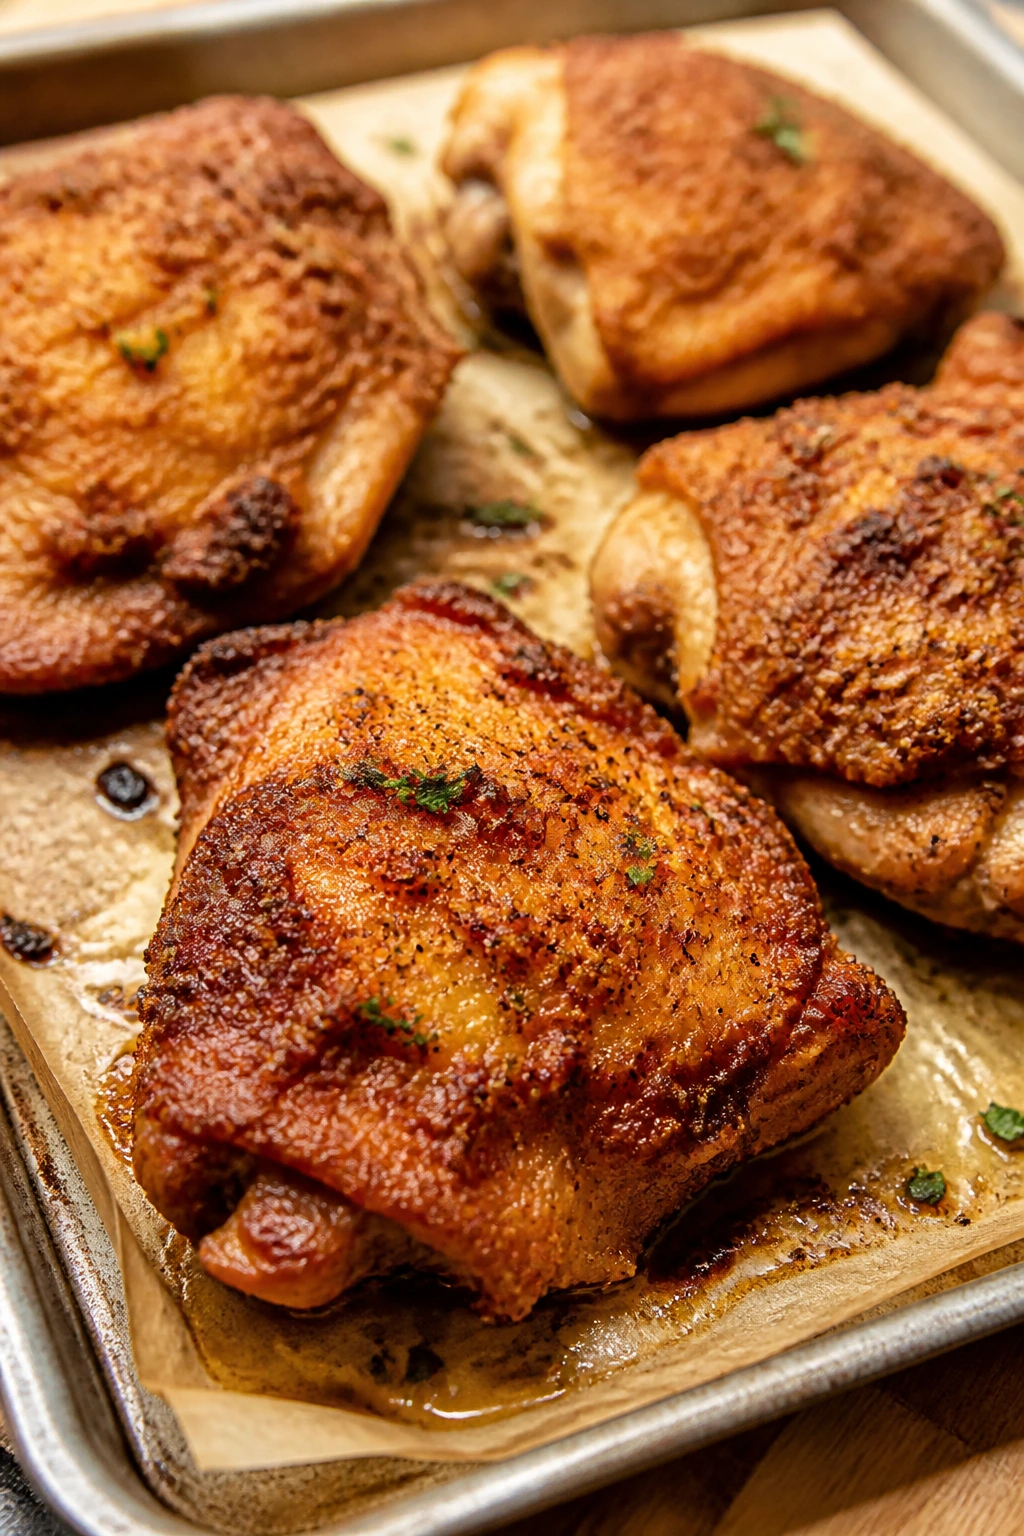
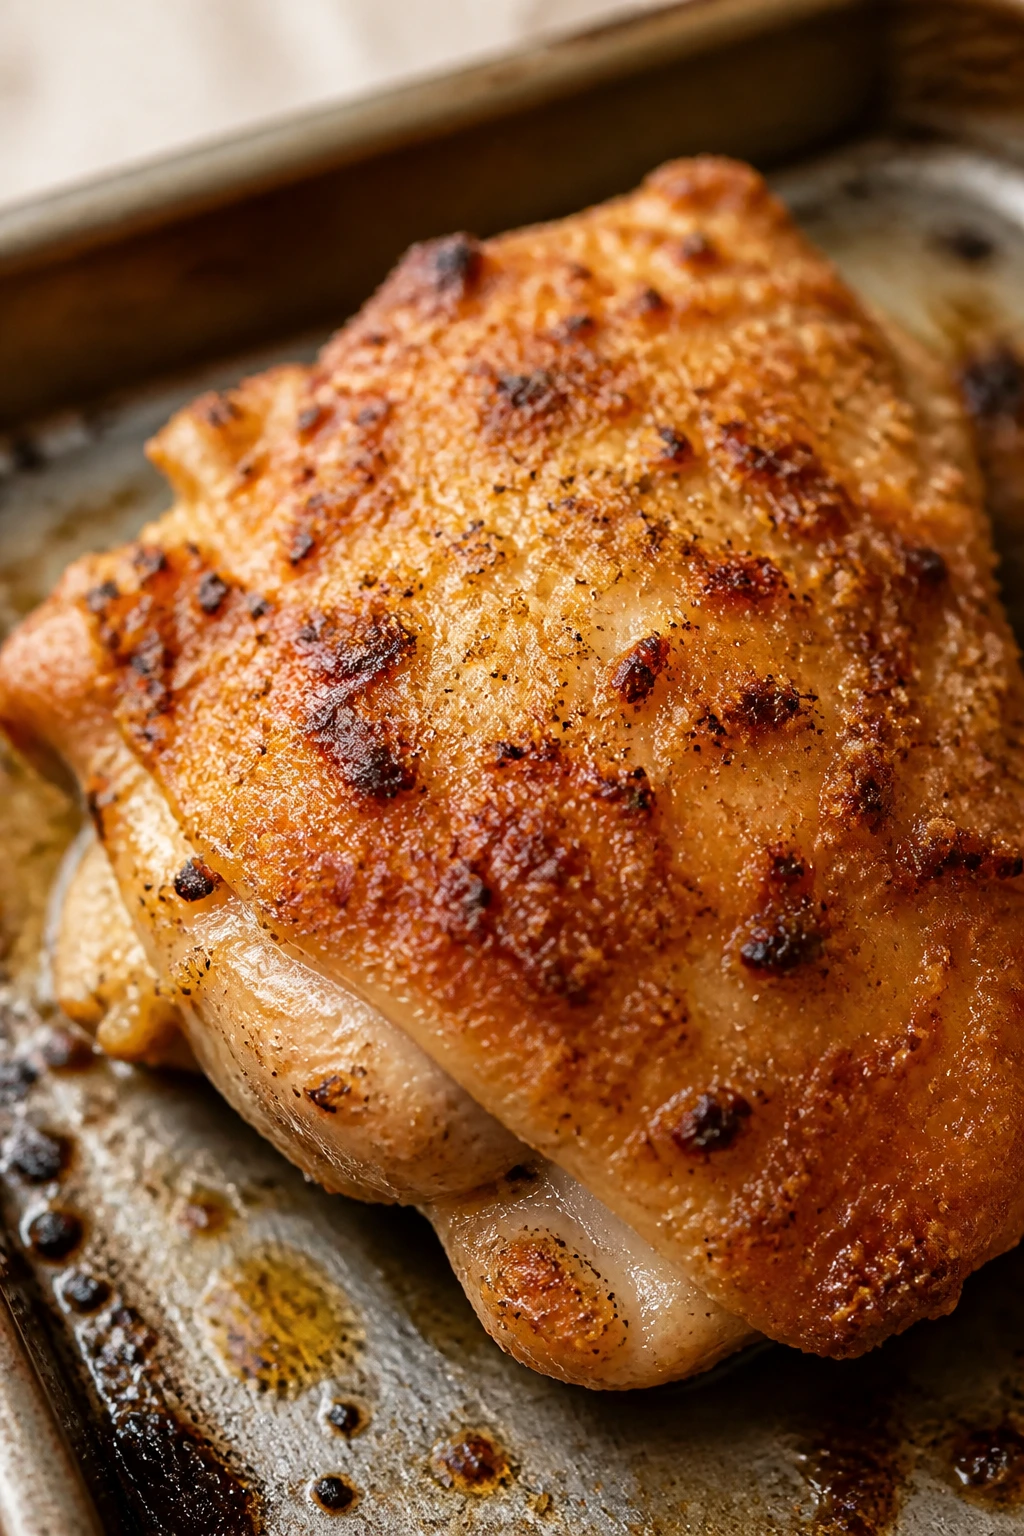
Roasted easy garlic Parmesan chicken earns its place on a weeknight table because it does the one thing plain chicken often refuses to do: it browns. The oven turns the Parmesan into a salty, toasted crust, the garlic slips into the butter and oil, and the edges of the chicken pick up those little dark spots that taste better than they look. That’s the whole trick here. Color.
I’ve never had much patience for chicken dinners that ask for a long marinade, three pans, and a prayer. This one doesn’t. You mix a crust, brush on a garlicky fat, press, roast, and eat. If you use boneless thighs, the meat stays juicy even if your oven runs a touch hot, and if you finish it with a squeeze of lemon, the whole plate stops tasting heavy and starts tasting alive. That small hit of acid matters more than people think.
If you’ve ever pulled a pan of chicken from the oven and found pale cheese sliding off onto the sheet pan, the fix is not more cheese. It’s drier chicken, a hotter oven, and a Parmesan coating that has something to hold onto. Panko helps. A fine grate helps. Space on the pan helps. A thermometer helps even more.
This is the kind of dinner that feels composed without being fussy. The kitchen smells like garlic toast and roasted poultry, the crust stays craggy at the edges, and the leftovers, if there are any, reheat with less drama than most breaded chicken.
Why This Chicken Belongs in the Rotation
-
It uses one pan and one mixing bowl: That sounds small, but on a weeknight, skipping an extra skillet is the difference between dinner and a sink full of regret.
-
The crust actually browns: A 425°F oven gives the Parmesan and panko enough heat to toast before the chicken overcooks, so you get crisp edges instead of damp cheese.
-
Thighs make it forgiving: Boneless, skinless thighs stay tender even if you leave them in a minute too long, which is worth a lot when you’re cooking around homework, laundry, or a dog underfoot.
-
The garlic flavor gets deep, not harsh: Minced garlic mixed into oil and butter tastes rounded and savory, not raw and sharp the way it can when it’s sprinkled on late.
-
It plays well with real side dishes: Roasted broccoli, mashed potatoes, buttered noodles, or a simple green salad all make sense here because the chicken has enough personality to carry the plate.
-
Leftovers still taste like dinner: Reheated in the oven or air fryer, the chicken keeps its shape better than a saucy skillet dish and doesn’t collapse into one soft, sad texture.
Timing, Yield, and the Kind of Evening It Fits
Yield: 4 servings
Prep Time: 15 minutes
Cook Time: 22 to 25 minutes
Total Time: 40 minutes
Difficulty: Beginner — the steps are straightforward, but using an instant-read thermometer keeps the chicken juicy and the timing clean.
Best Served: Right after a 5-minute rest, while the crust is still crisp.
A recipe like this earns points by being honest about time. You can get the pan in the oven in about fifteen minutes if the chicken is already thawed and the garlic is minced. If you’re trying to shave minutes off the process, grate the Parmesan and mix the dry coating earlier in the day. Small moves, big payoff.
I like this for the stretch of evening when nobody wants a project. It is not a lazy recipe in the pejorative sense. It is a well-built one. The oven does the heavy lifting, but the flavor still tastes deliberate.
The Short Ingredient List
For the Chicken
- 2 lb boneless, skinless chicken thighs, patted dry
- 2 tbsp olive oil
- 2 tbsp unsalted butter, melted
- 4 cloves garlic, finely grated or minced
- 1 tsp lemon zest, optional
For the Parmesan Crust
- 1/2 cup finely grated Parmesan cheese
- 1/3 cup panko breadcrumbs
- 1 tsp kosher salt
- 1 tsp Italian seasoning
- 1/2 tsp paprika
- 1/2 tsp black pepper
For Serving
- 1 tbsp chopped fresh parsley
- Lemon wedges, for serving
That is the whole cast. No soup mix. No bottled sauce. No breadcrumb mountain that needs to be rescued with extra oil. Just enough ingredients to make the chicken taste like a finished dish instead of a raw idea.
Why Each Ingredient Earns Its Place
The Chicken
- What to use: 2 lb boneless, skinless chicken thighs, trimmed of loose fat and patted very dry.
- Preparation: Pat the thighs dry with paper towels, then let them sit while the oven heats so the surface loses a little more moisture.
- Substitutions: Boneless, skinless chicken breasts work if you want a leaner cut, but they need less time and a little more attention.
- Tips: Thighs are more forgiving than breasts and stay tender even when roasted to 170°F to 175°F, which is a safer zone for juicy meat here.
The Parmesan Crust
- What to use: 1/2 cup finely grated Parmesan, 1/3 cup panko breadcrumbs, kosher salt, Italian seasoning, paprika, and black pepper.
- Preparation: Mix the crust until the cheese and crumbs are evenly combined and there are no dry pockets of seasoning.
- Substitutions: If you’re out of panko, use crushed plain crackers or very fine plain breadcrumbs; if you want less crunch, cut the panko back to 1/4 cup.
- Tips: Fine grates cling better than coarse shreds. The dusty shaker stuff tends to melt unevenly and leaves you with patchy browning.
The Garlic Fat
- What to use: 2 tbsp olive oil, 2 tbsp melted unsalted butter, and 4 cloves garlic, grated or minced.
- Preparation: Stir the garlic into the warm fat so it disperses evenly instead of sitting in one bitter little pile.
- Substitutions: If you want a sharper garlic hit, add 1/4 tsp garlic powder to the crust; if dairy is an issue, use all olive oil and skip the butter.
- Tips: Fat carries the garlic into the crust and onto the chicken’s surface. Skip it, and the coating dries out before it can brown properly.
The Finish
- What to use: 1 tbsp chopped parsley and lemon wedges.
- Preparation: Chop the parsley right before serving so it stays bright and doesn’t slump into the pan juices.
- Substitutions: Chives, basil, or a few thyme leaves work if parsley is missing from the crisper drawer.
- Tips: Lemon at the end cuts through the salt and cheese. Without it, the dish can read a little heavy after a few bites.
The Tools That Make Roasting Easier

- Rimmed half-sheet pan: The low sides help hot air move around the chicken, which is what gives the coating those browned edges.
- Foil: I like foil here for cleanup, especially because melted Parmesan likes to glue itself to metal.
- Two mixing bowls: One for the crust and one for the garlic fat keeps the process simple and prevents overmixing.
- Microplane or fine grater: This is the easiest way to get garlic and lemon zest fine enough to disappear into the coating.
- Instant-read thermometer: Non-negotiable if you want juicy thighs without guesswork.
- Tongs or a thin spatula: Helpful for moving the chicken onto plates without scraping off the crust.
- Paper towels: Dry chicken roasts better. Wet chicken steams. That’s the whole argument in one sentence.
From Raw Chicken to Golden Edges
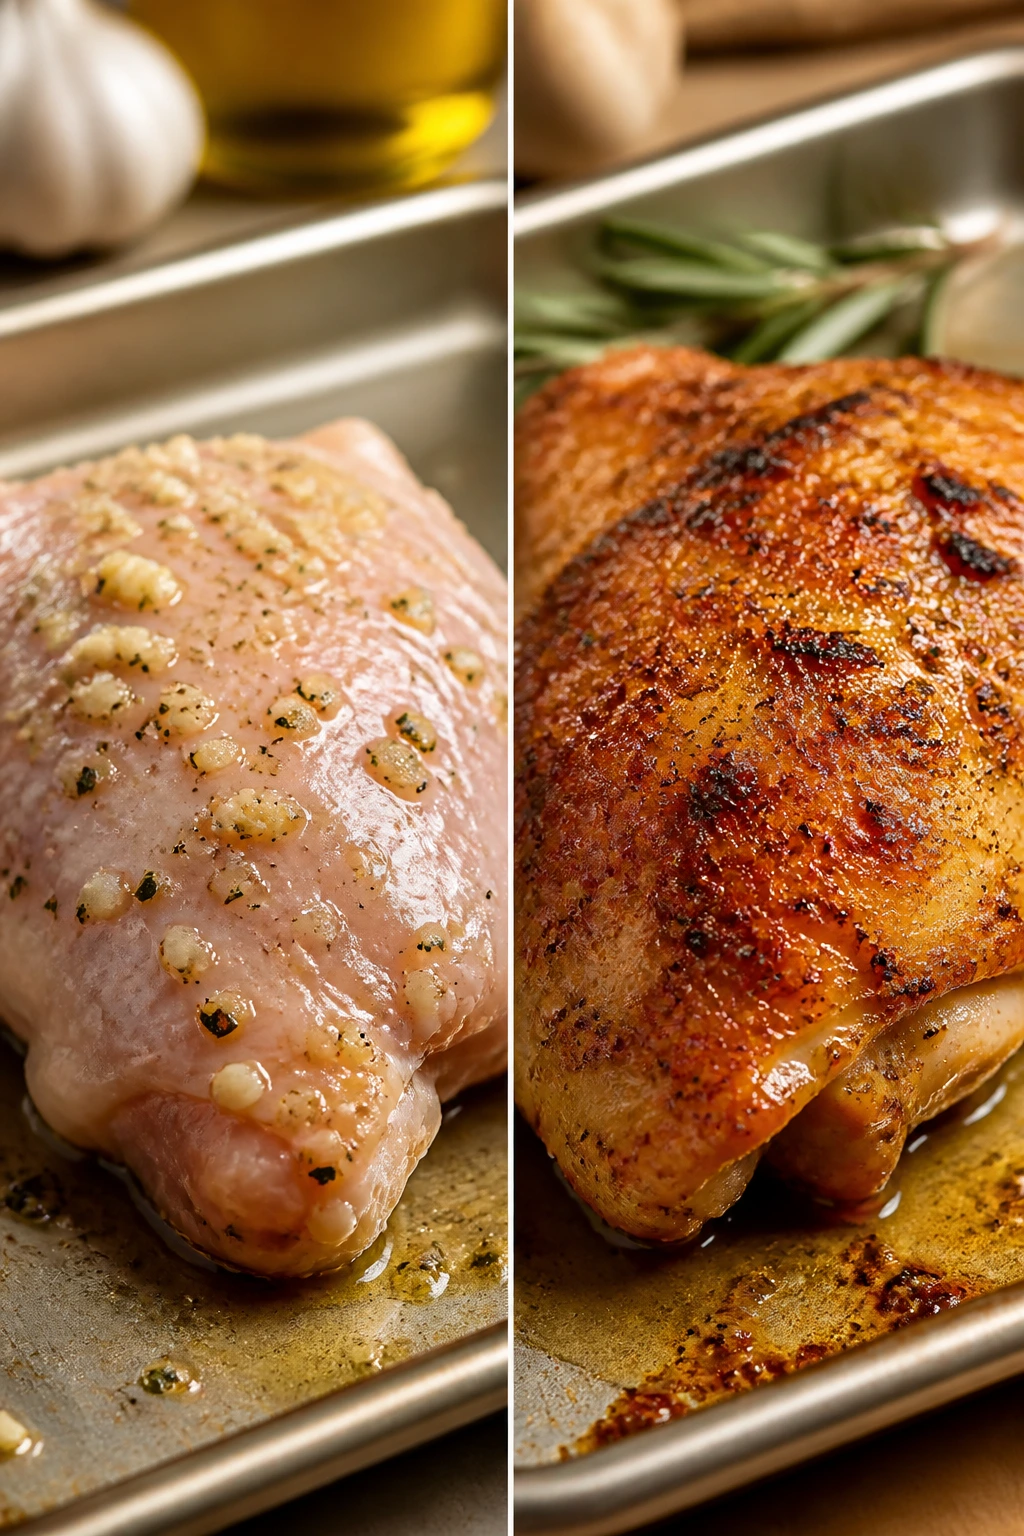
Prep the Pan and Heat the Oven
- Position a rack in the upper-middle of the oven and preheat to 425°F (220°C).
- Line a rimmed half-sheet pan with foil and lightly brush or spray it with oil. Do not skip the oiling step — Parmesan can weld itself to dry foil.
Mix the Coating
- In a medium bowl, stir together the Parmesan, panko, salt, Italian seasoning, paprika, and black pepper until the mixture looks even and sandy.
- In a second bowl, whisk the olive oil, melted butter, garlic, and lemon zest, if using, until the garlic is spread through the fat.
Coat the Chicken
- Pat the chicken thighs dry again if they’ve sat for a while. Moisture is the enemy of browning.
- Brush each thigh lightly on both sides with the garlic-butter mixture, then spoon a generous mound of the Parmesan crust over the top side.
- Press the coating gently with your fingers so it adheres. You want it stuck, not loose. If the crumbs are just sitting there, they’ll fall off in the oven.
Roast and Finish
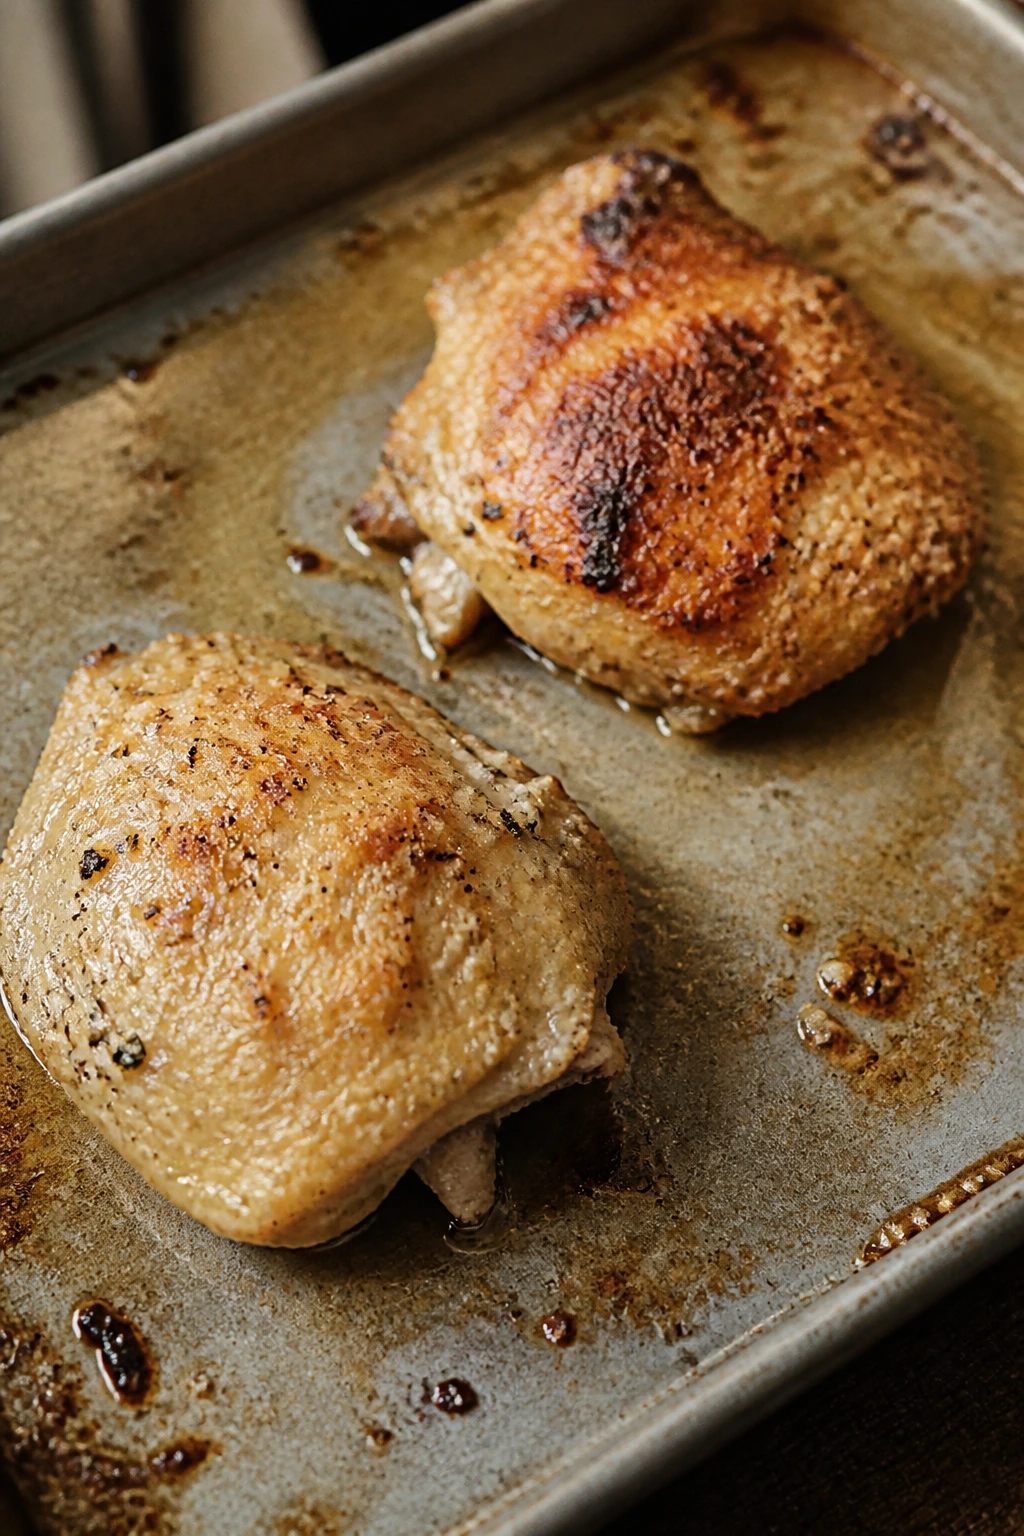
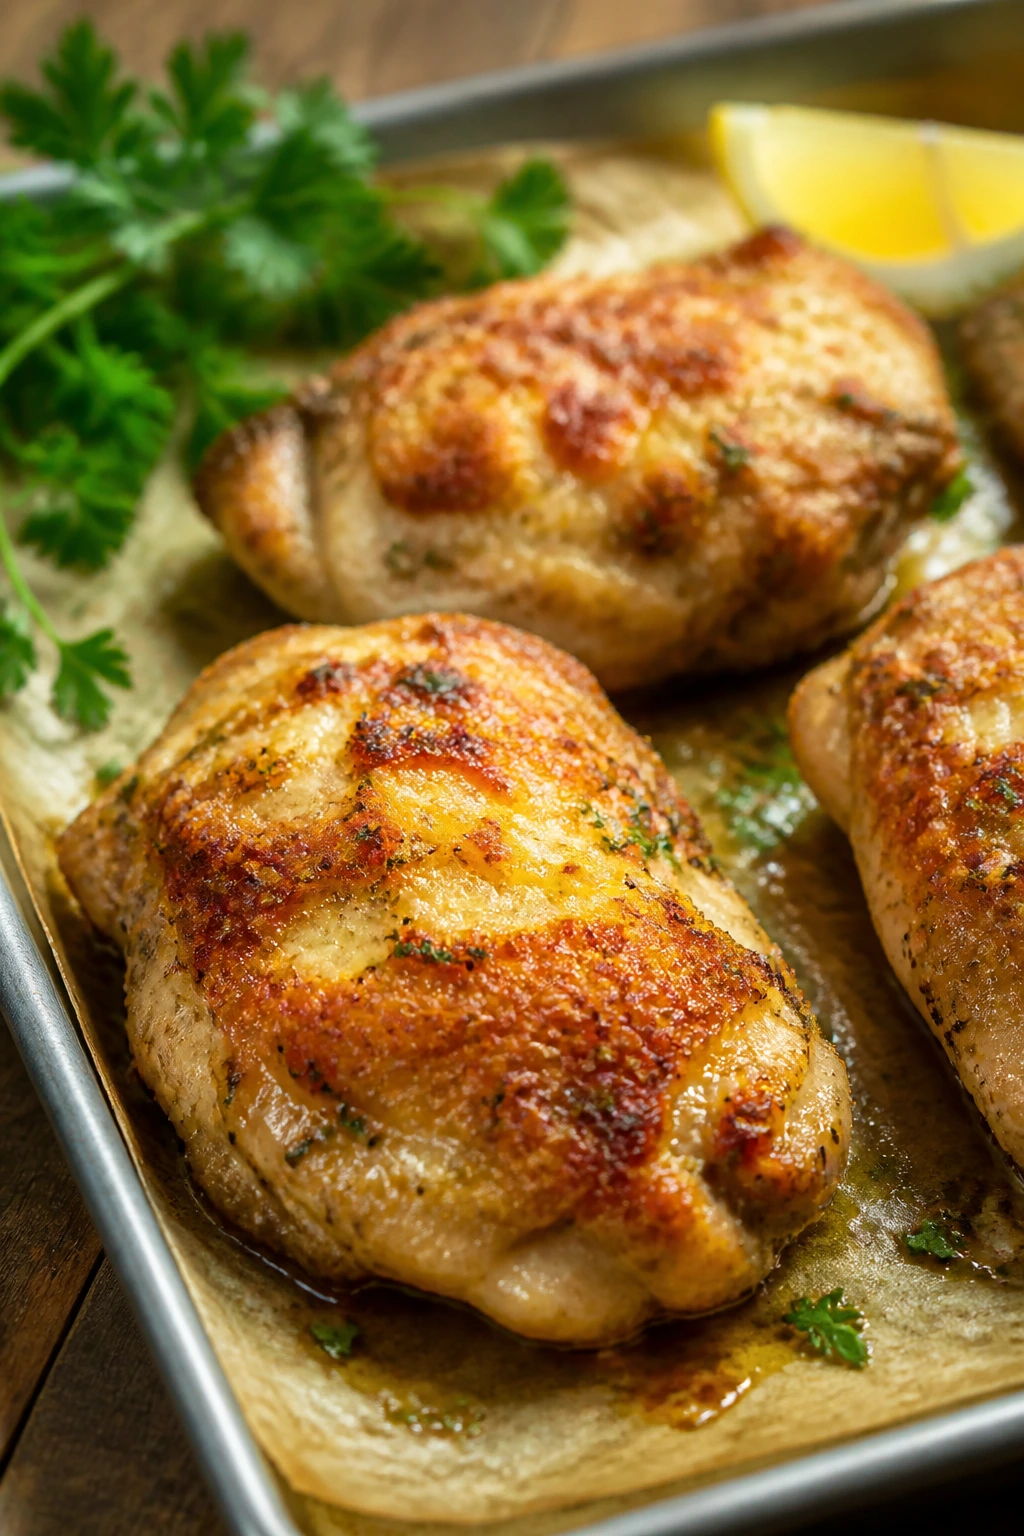
- Arrange the thighs on the prepared pan with a little space between them. Roast for 20 to 25 minutes, until the top is deep golden and the thickest piece reads 170°F to 175°F on an instant-read thermometer.
- If the crust looks pale at the end, broil for 30 to 90 seconds from a safe distance, watching the pan the entire time. Cheese goes from bronzed to burnt fast.
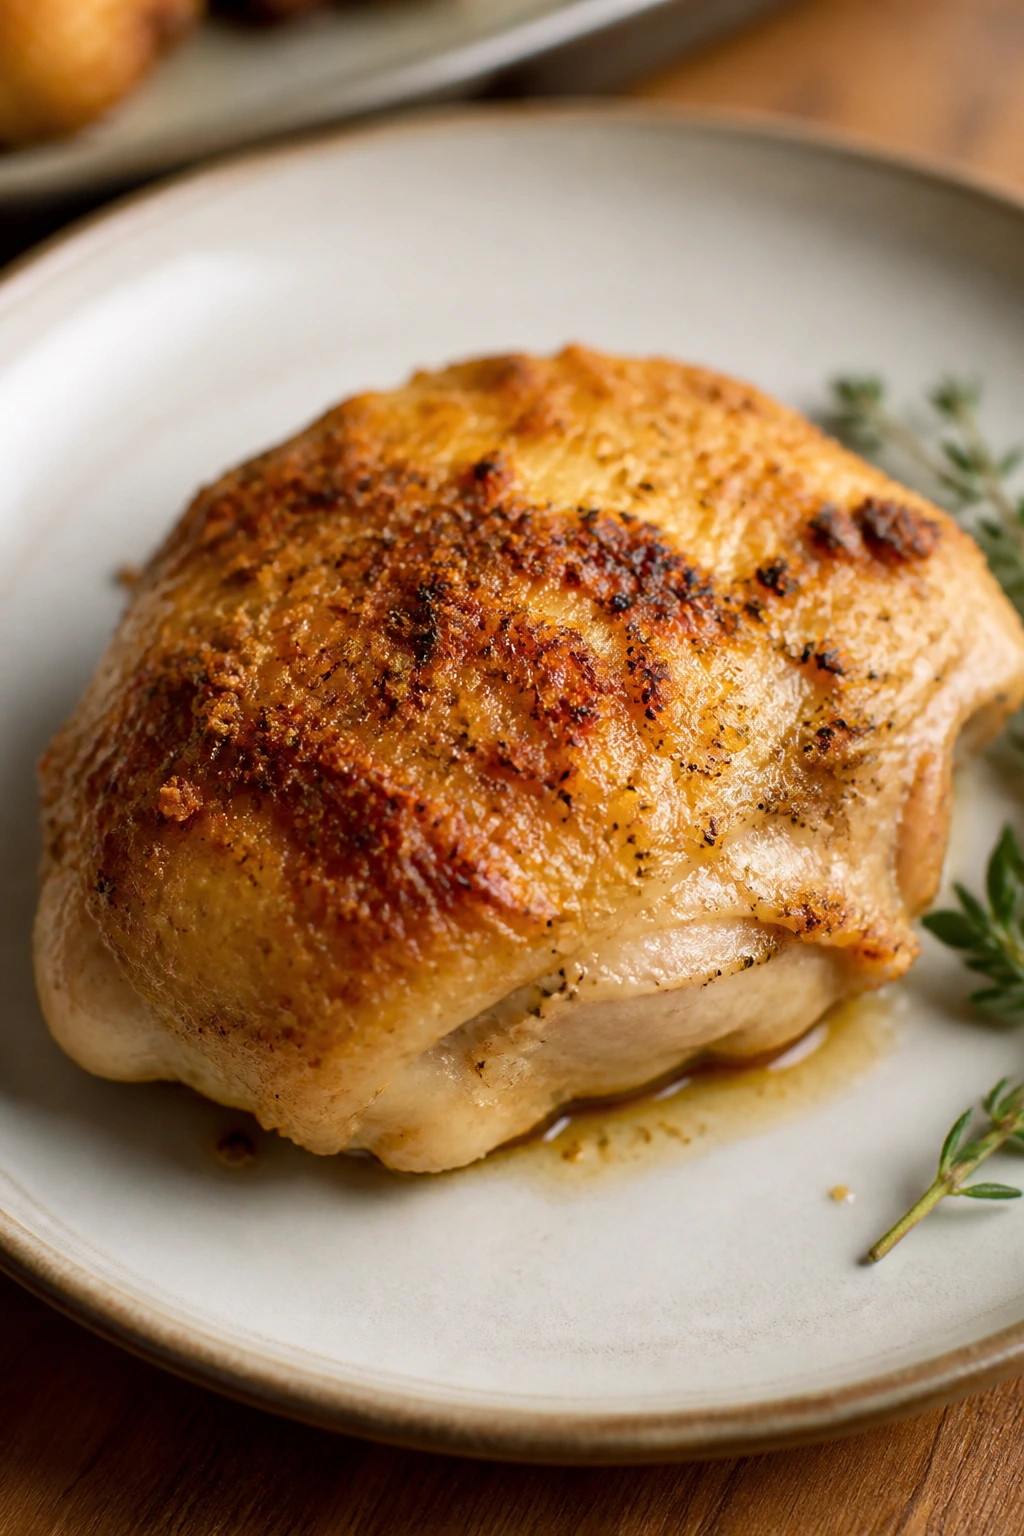
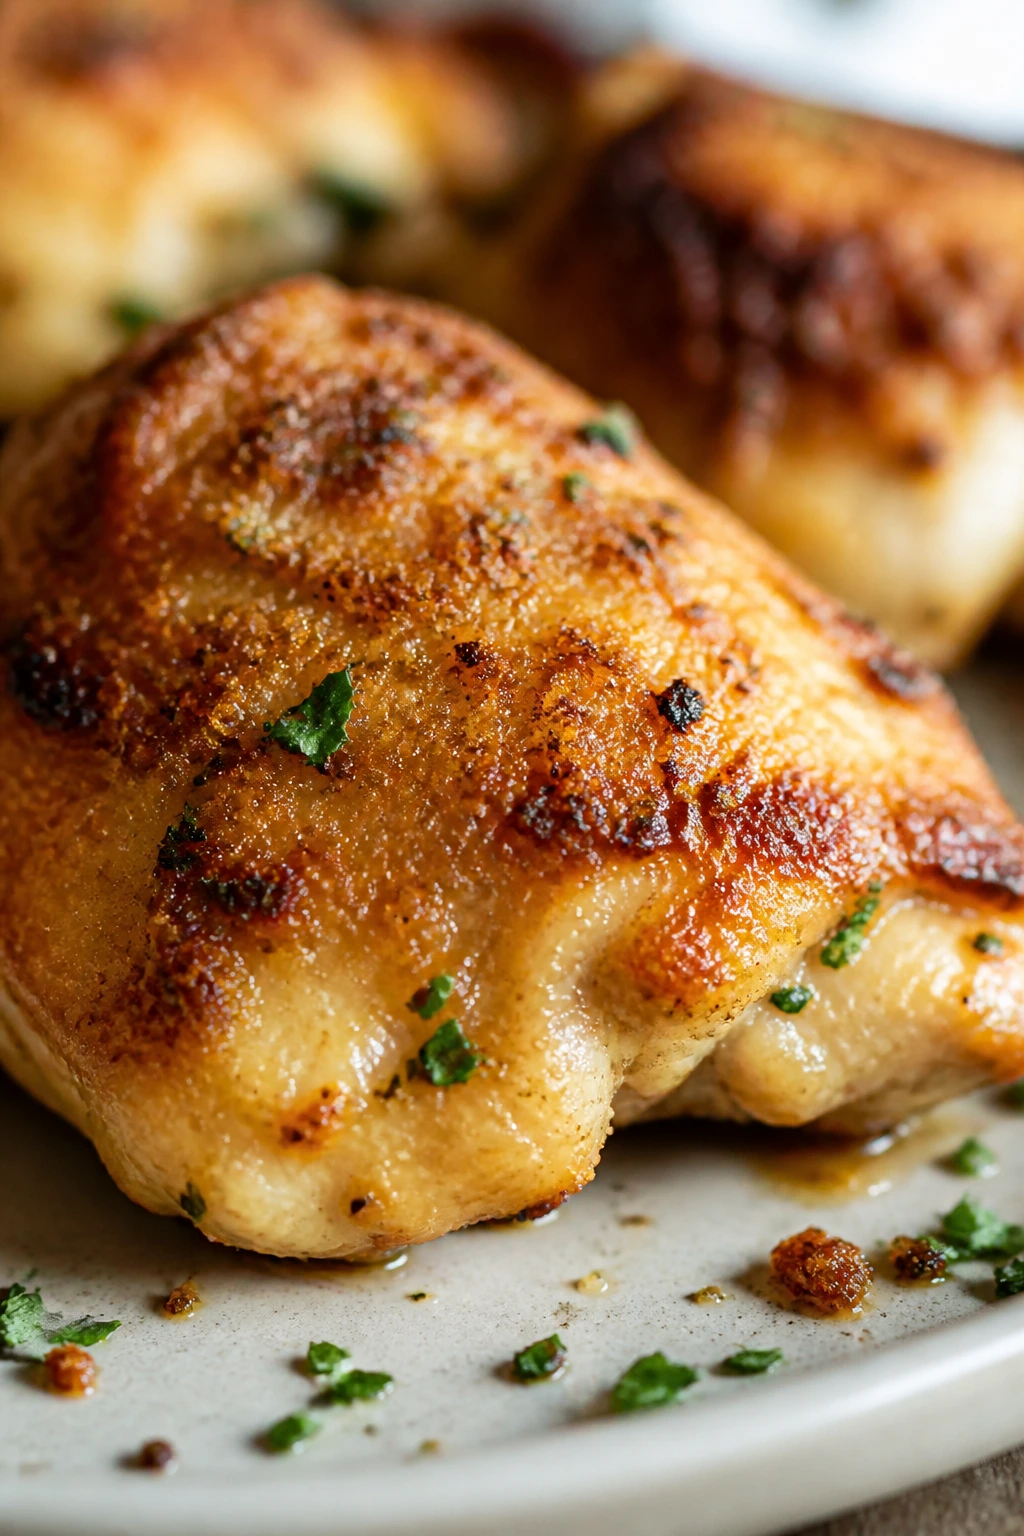
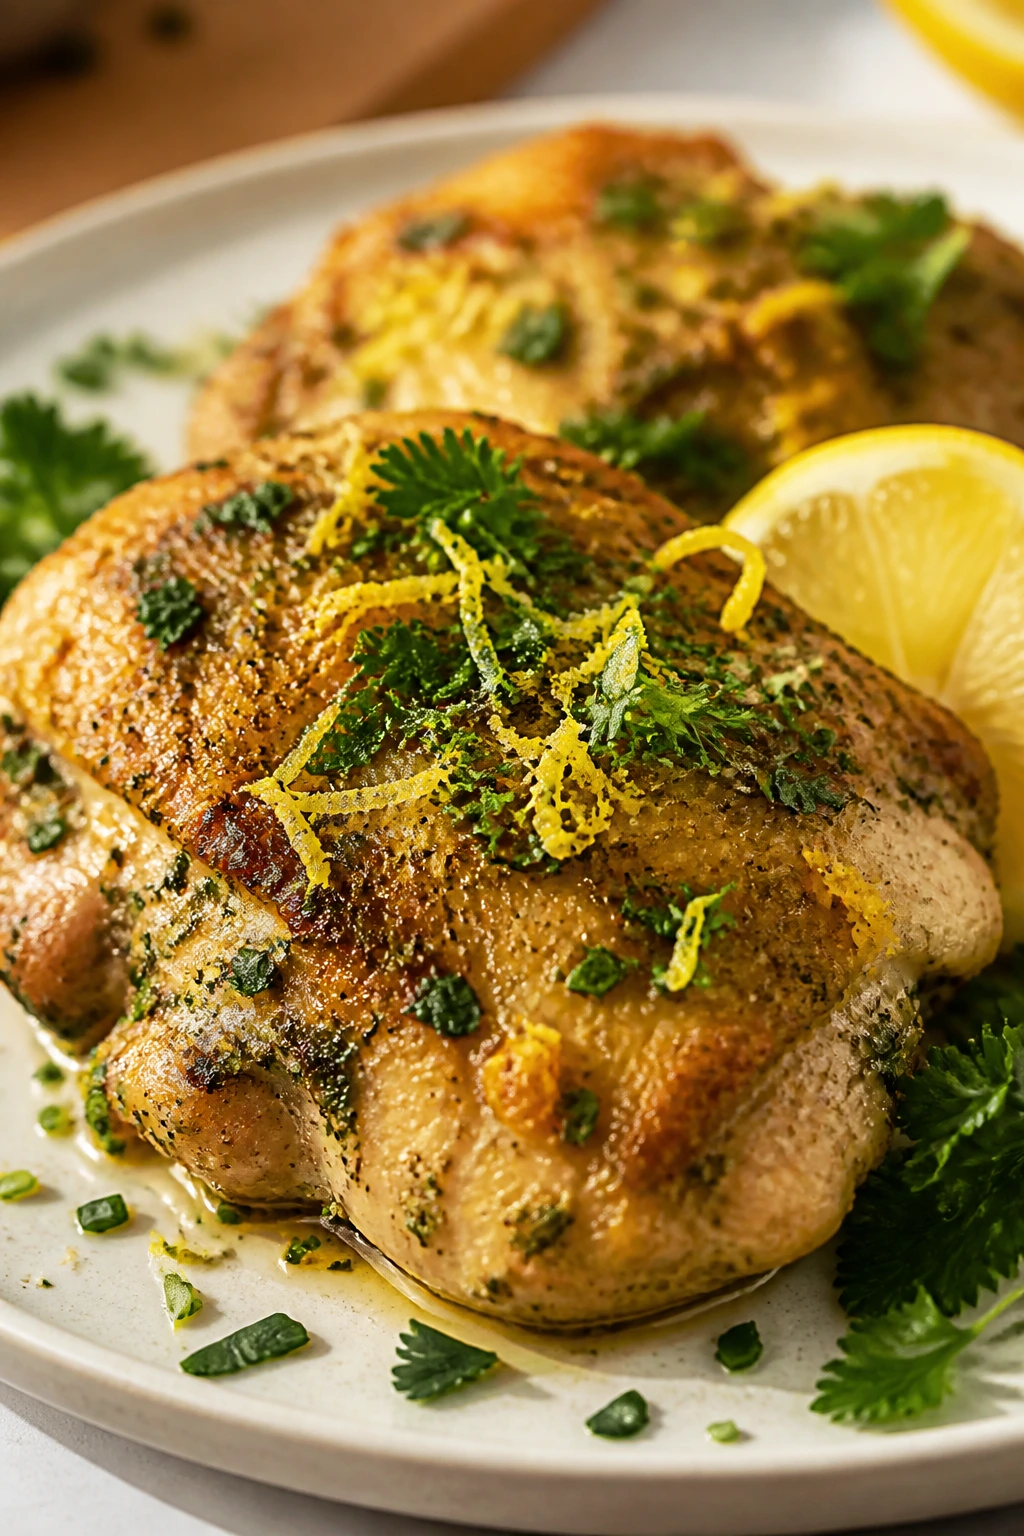
- Rest the chicken for 5 minutes on the pan or a plate, then finish with parsley and lemon wedges. Resting lets the juices settle back into the meat and keeps the crust from sliding off at the first cut.
If you’re using smaller thighs, start checking at the 18-minute mark. If your pieces are thick and squat, they may need the full 25 minutes, maybe a minute or two more. Oven shape matters. So does chicken shape. Cooking is full of those annoying little truths.
How I’d Put It on the Table
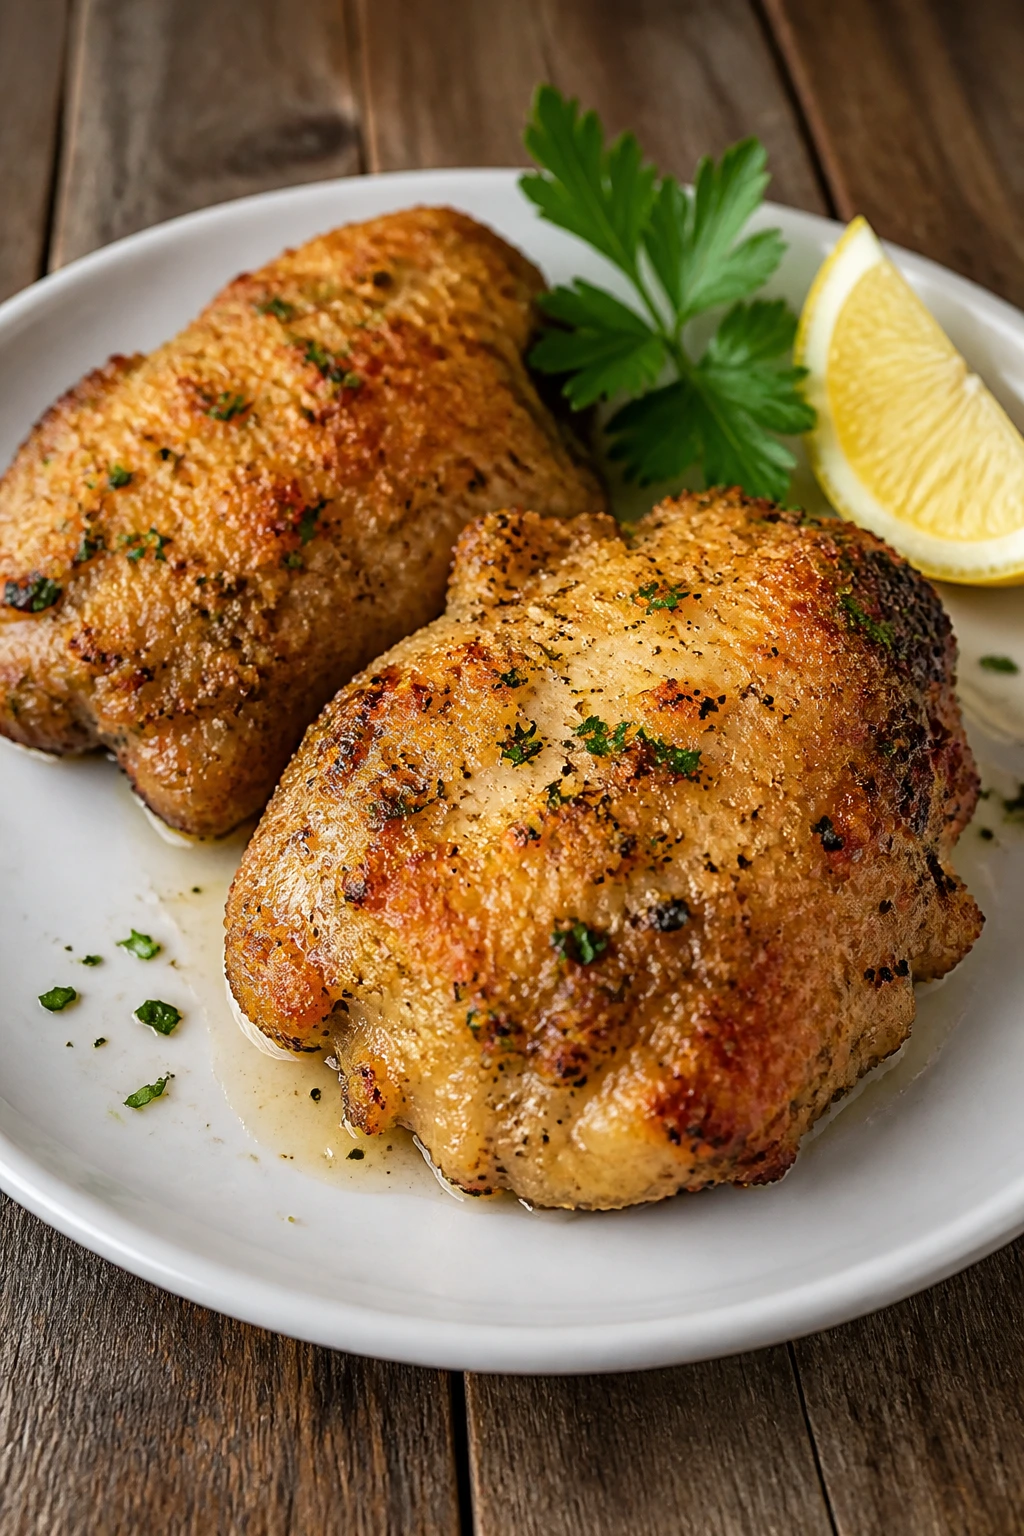
Presentation: Slide two thighs onto each plate and spoon any toasted crumbs from the pan over the top. A small shower of parsley and a lemon wedge on the side make the plate look finished without trying too hard.
Accompaniments: Roasted broccoli is my first pick because its bitter edges keep the Parmesan from feeling heavy. Mashed potatoes, buttered noodles, or a pile of rice work too, but I like a green vegetable with bite — green beans, broccolini, or Brussels sprouts all make sense here.
Portions: Plan on 2 thighs per adult if this is the main event and the side dishes are modest. If you’re serving big starches, one thigh can be enough for lighter eaters. To feed 6 to 8, use two sheet pans instead of crowding everything onto one.
Beverage Pairing: A chilled sauvignon blanc is sharp enough to cut through the cheese, and sparkling water with a thick slice of lemon keeps the meal from feeling weighty. If you lean toward beer, a pale lager does the job without fighting the garlic.
Small Tweaks That Matter
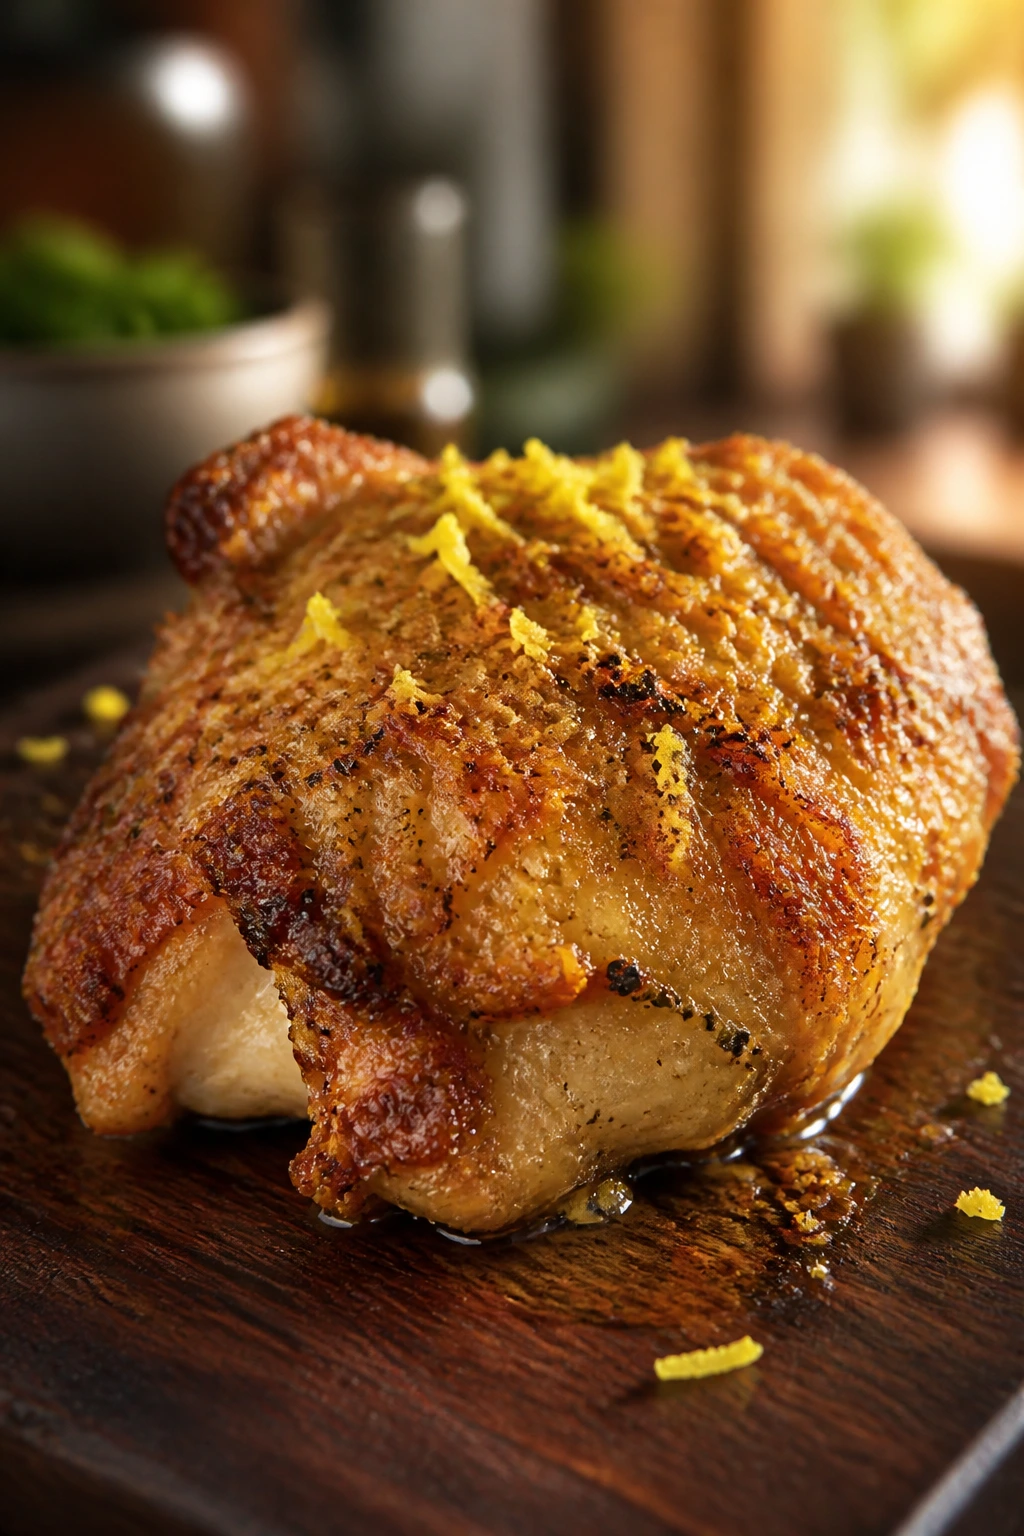
Flavor Enhancement: Zest half a lemon into the crust and finish the chicken with a few drops of lemon juice right before serving. The dish changes from “good roasted chicken” to something sharper and more awake.
Time-Saver: Mix the dry crust ingredients the night before and keep them in a covered container. In the same breath, mince the garlic and store it in the fridge under a thin film of olive oil for a day or two if you know the evening will be tight.
Texture Fix: If you want a more craggy top, add 2 extra tablespoons of panko and press the coating on with your palm so the crumbs make small ridges. Those ridges catch heat and brown faster than a flat layer.
Make-It-Yours: Add 1/4 teaspoon red pepper flakes for heat, or swap the Italian seasoning for dried thyme and rosemary if you want a more woodsy flavor. For a richer plate, finish with a few curls of shaved Parmesan after the chicken leaves the oven, not before.
One thing I’d avoid is drowning the chicken in sauce after it comes out of the oven. The crust is the point. If you want something saucy, keep it on the side — a little garlic aioli or warm marinara is fine, but pour it under the chicken, not over the top, if you want to keep the texture intact.
What Usually Goes Wrong
-
Starting with wet chicken: If the thighs go onto the pan damp, the coating turns spotty and the bottom side steams instead of roasting. Pat the chicken dry twice if needed, especially after thawing.
-
Using coarse Parmesan or the shelf-stable shaker cheese: Large shreds don’t meld into the crust as well, and the powdered stuff can brown unevenly. Use finely grated Parmesan from a block or wedge for the best cling and the cleanest flavor.
-
Crowding the pan: If the thighs sit too close together, the heat traps moisture and the crust stays pale. Leave a small gap around each piece or use a second sheet pan.
-
Trusting the clock more than the thermometer: Oven temps drift, chicken sizes vary, and a gorgeous top can hide undercooked meat. Pull for the thermometer, not for the minute hand.
-
Broiling too long: Parmesan burns quickly once the broiler hits it. Thirty seconds can be enough; ninety seconds is plenty; two minutes can turn the top bitter and black.
-
Skipping the rest: Cut too soon and the juices run out, the coating loosens, and the first bite feels drier than it should. Five minutes is enough to make a difference.
Three Good Ways to Change It
Lemon-Herb Bright Version
Add 1 extra teaspoon of lemon zest to the crust and finish with 1 tablespoon of chopped parsley plus a few chopped chives. This version tastes cleaner and lighter, which is nice if you’re serving mashed potatoes or a butter-heavy side.
Spicy Red-Pepper Version
Stir 1/2 teaspoon red pepper flakes and 1/2 teaspoon smoked paprika into the crust. The cheese gets a little warmth, the garlic tastes deeper, and the whole pan has more snap without turning into a hot dish.
Breast-Friendly Sheet-Pan Version
Use 4 boneless, skinless chicken breasts, pounded to an even 1-inch thickness, and start checking for doneness at 18 minutes. Pull them closer to 165°F, because breasts dry out faster than thighs and do not forgive extra time the way thighs do.
Lower-Dairy Crunch Version
Cut the Parmesan to 1/3 cup and add 2 tablespoons of nutritional yeast plus 2 tablespoons more panko. You lose a little of the classic Parmesan punch, but the chicken still gets a savory crust and the dairy load drops a bit.
Keeping Leftovers Moist
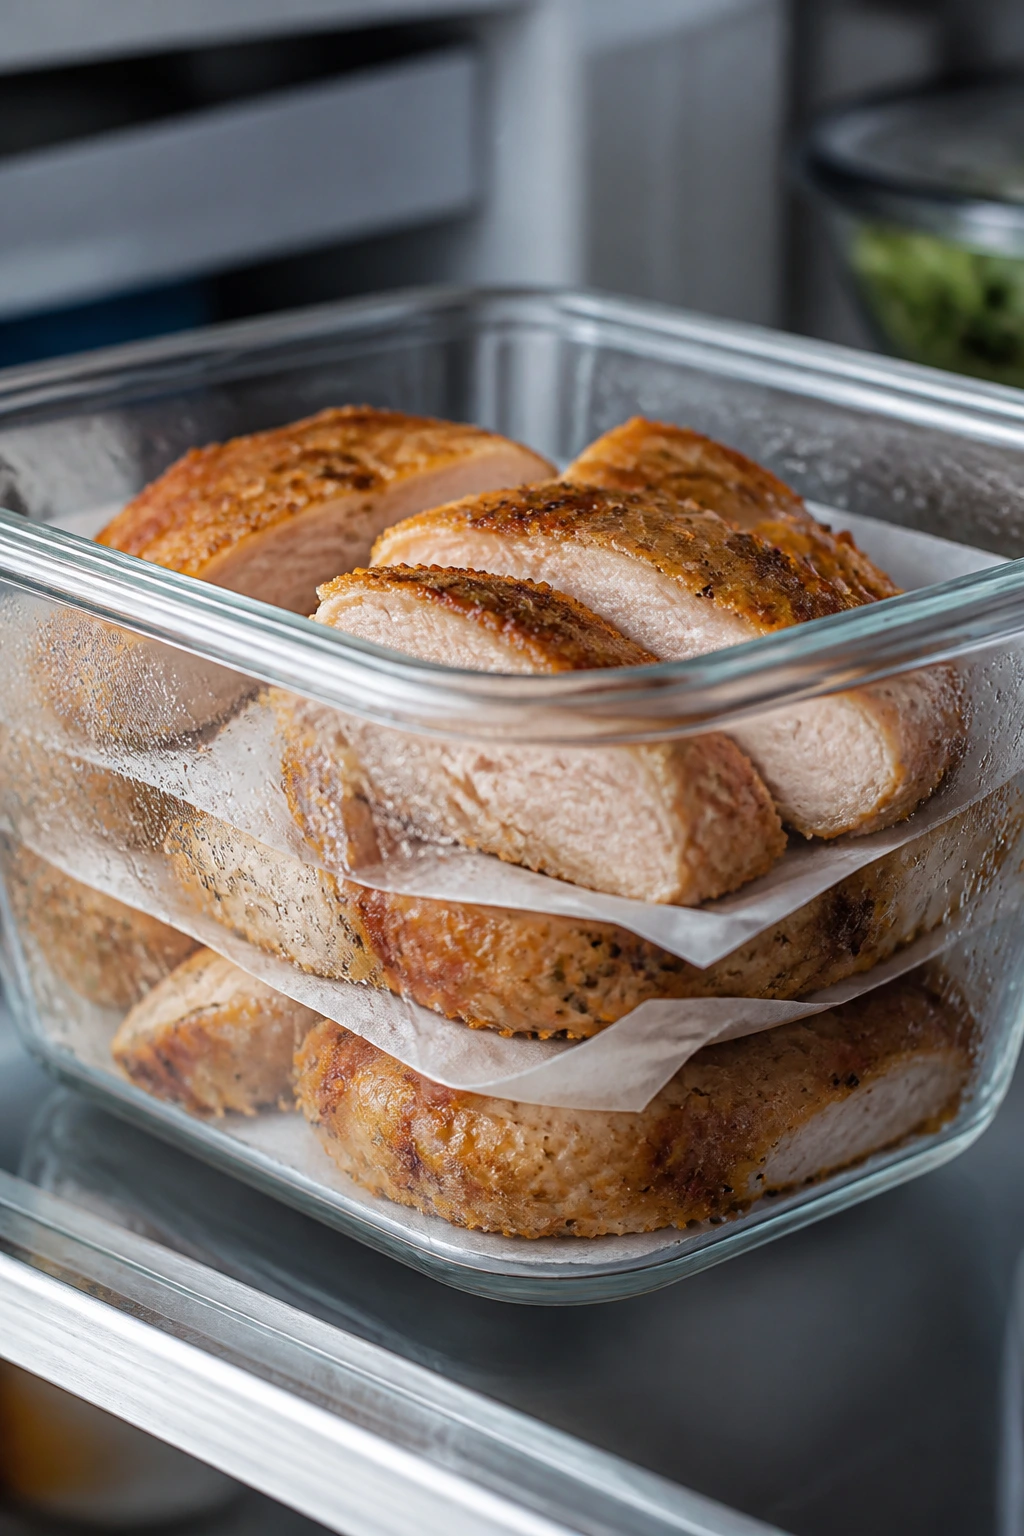
Cooked chicken keeps best in the refrigerator for 3 to 4 days in an airtight container. I like to tuck a folded paper towel under the pieces to catch condensation, because trapped steam softens the crust fast. If you stack the pieces, separate them with a small sheet of parchment so the coating doesn’t weld together in the fridge.
For freezing, cool the chicken completely, then wrap each piece tightly and freeze for up to 2 months. Thaw it overnight in the refrigerator rather than on the counter. The texture stays cleaner that way, and you don’t get cold centers with warm edges.
Reheat in a 325°F oven for 10 to 12 minutes if you want the crust to stay close to its original texture. An air fryer set to 350°F for 5 to 7 minutes also works well for one or two pieces. The microwave is fast, but it softens the crust and makes the Parmesan a little rubbery, so I reserve that for emergencies and very low expectations.
If you want to make part of the recipe ahead, mix the crust up to 3 days in advance and keep it sealed in the fridge. The garlic-butter mixture can sit for a day. I would not coat the chicken too far ahead, though; once the wet fat meets the crumbs, they start to lose their sharp edges.
Questions People Ask Before They Start

Can I use chicken breasts instead of thighs?
Yes, and the flavor profile still works. Pound the breasts to an even thickness and start checking earlier, usually around 18 minutes, so they don’t go from juicy to chalky.
Do I need to marinate the chicken first?
No. The garlic butter and Parmesan crust do the heavy lifting, and marinating can add time without adding much benefit here. A dry surface and a hot oven matter more than a long soak.
What Parmesan works best?
Finely grated Parmesan from a wedge gives the cleanest melt and the best cling. The pre-shredded bagged kind can work in a pinch, but the texture is coarser and the browning is less even.
Why did my coating fall off?
Usually the chicken was too wet, the coating was too loose, or the chicken was moved around too much before it hit the oven. Press the crumbs on firmly and leave the pieces alone once they’re on the pan.
Can I make it without panko?
You can. The crust will be more cheese-forward and a little less airy, which is fine if you like a denser top. Crushed crackers or very fine breadcrumbs can step in for panko and still give you some crunch.
How do I keep it from drying out when I reheat it?
Use the oven or air fryer instead of the microwave, and reheat at a moderate temperature. A short rest after reheating helps too; the juices calm down a bit before you cut in.
Can I roast vegetables on the same pan?
Yes, but pick vegetables that roast in about the same time, like broccoli florets or zucchini chunks. Dense vegetables such as carrots need a head start, or they’ll still be hard when the chicken is done.
A Pan Worth Keeping on Repeat
Some chicken dinners feel like homework. This one doesn’t. It gives you browned Parmesan edges, garlic in the right place, and a clean route from raw ingredients to a plate that looks deliberate without asking for much from you.
The real appeal is the balance. It’s rich, but the lemon keeps it from dragging. It’s crisp, but the thighs stay tender. It’s simple, but not plain. Make it once, and the oven starts feeling like the easiest place to build dinner.
Roasted Easy Garlic Parmesan Chicken — Recipe Card
Recipe Name: Roasted Easy Garlic Parmesan Chicken
Description: Juicy boneless chicken thighs are brushed with garlic butter, coated with Parmesan and panko, then roasted until the edges turn golden and crisp. A squeeze of lemon at the end keeps the flavor sharp and balanced.
Prep Time: 15 minutes
Cook Time: 22 to 25 minutes
Total Time: 40 minutes
Course: Dinner, Main Course
Cuisine: American
Servings: 4 servings
Calories: About 430 kcal per serving
Ingredients
For the Chicken
- 2 lb boneless, skinless chicken thighs, patted dry
- 2 tbsp olive oil
- 2 tbsp unsalted butter, melted
- 4 cloves garlic, finely grated or minced
- 1 tsp lemon zest, optional
For the Parmesan Crust
- 1/2 cup finely grated Parmesan cheese
- 1/3 cup panko breadcrumbs
- 1 tsp kosher salt
- 1 tsp Italian seasoning
- 1/2 tsp paprika
- 1/2 tsp black pepper
For Serving
- 1 tbsp chopped fresh parsley
- Lemon wedges, for serving
Instructions
- Preheat the oven to 425°F (220°C) and line a rimmed half-sheet pan with foil. Lightly oil the foil.
- Stir together the Parmesan, panko, salt, Italian seasoning, paprika, and black pepper in a medium bowl.
- Whisk the olive oil, melted butter, garlic, and lemon zest in a second bowl.
- Pat the chicken dry, brush it with the garlic-butter mixture, and press the Parmesan crust onto the top side.
- Arrange the chicken on the prepared pan with a little space between pieces and roast for 20 to 25 minutes, until the top is deep golden and the thickest piece reads 170°F to 175°F.
- Broil for 30 to 90 seconds if you want deeper color, watching carefully.
- Rest for 5 minutes, then finish with parsley and lemon wedges.
Notes:
For a sharper finish, add lemon zest to the crust and a squeeze of juice at the table. Leftovers keep for 3 to 4 days in the fridge and reheat best in a 325°F oven. If the topping looks pale, give it a brief broil rather than adding more cheese.