
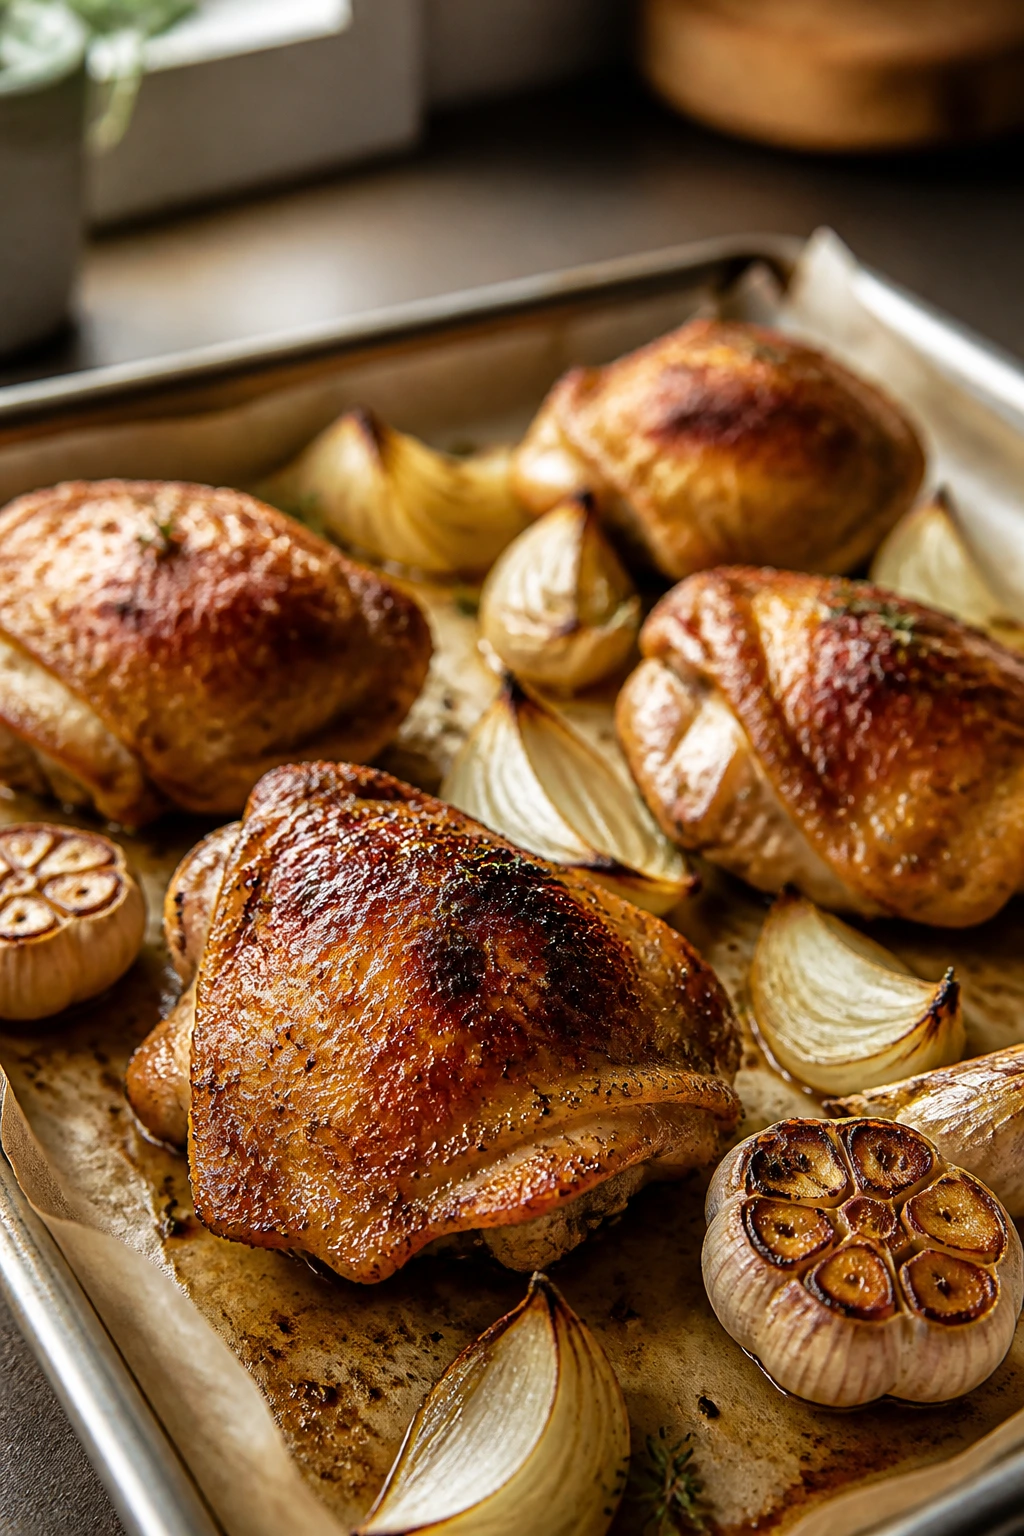
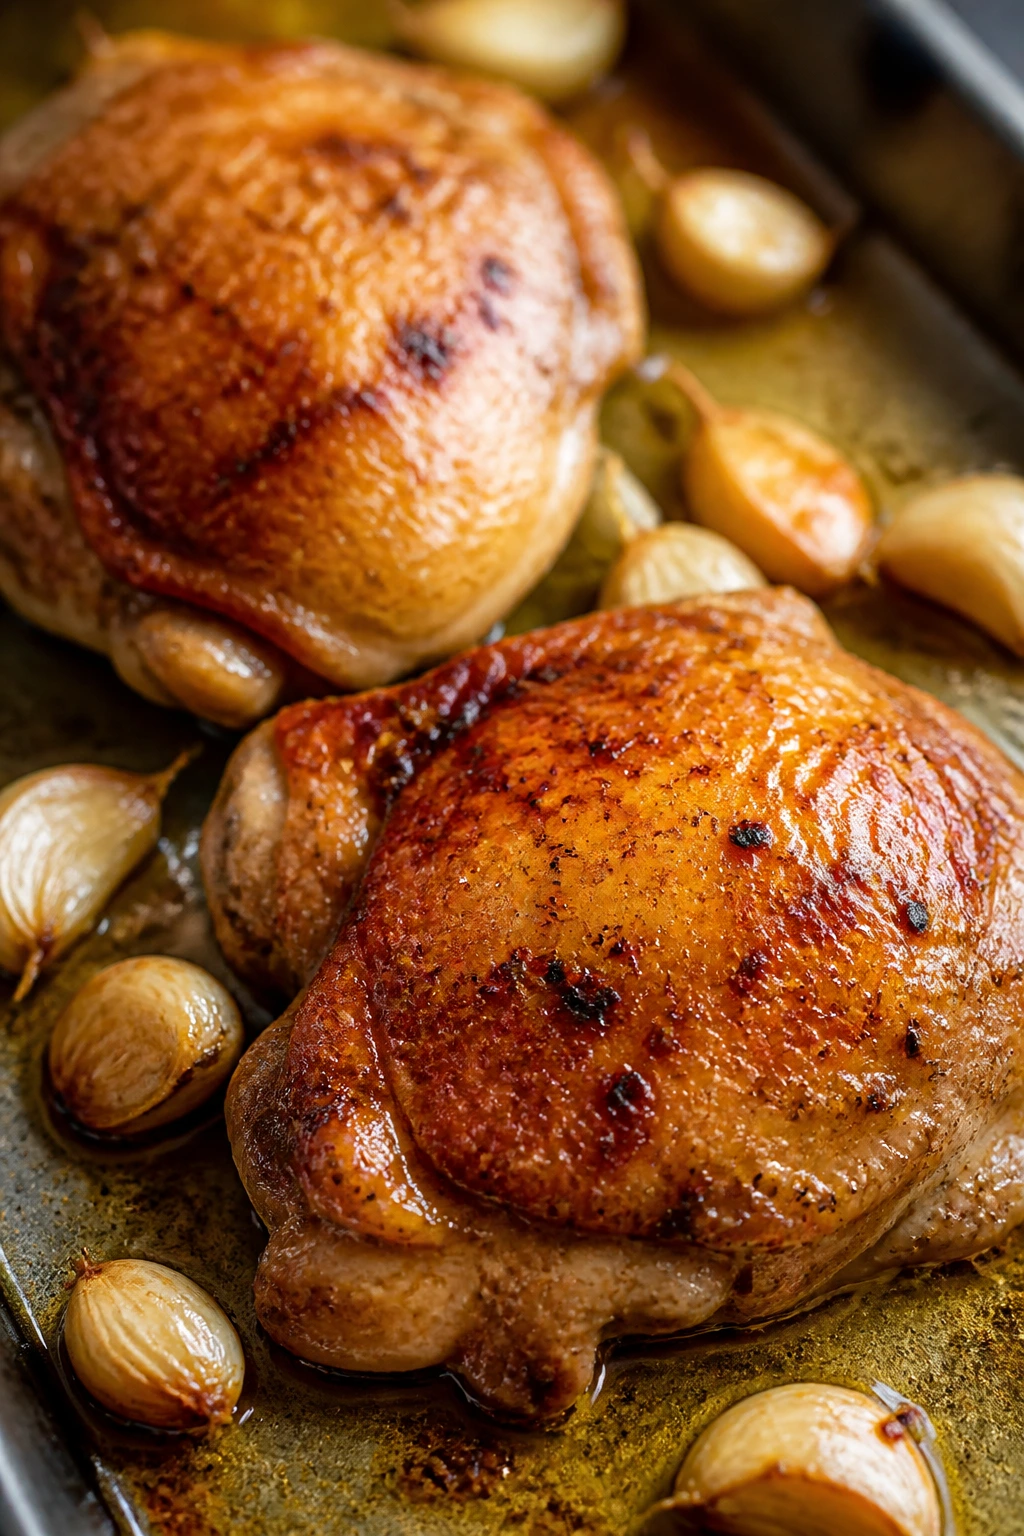
The smell hits first. Roasted garlic chicken thighs pull out of the oven with browned skin, onion sweetness, and garlic that has gone soft and almost spreadable, the kind you can mash right into the pan juices with the back of a fork. It’s a small kitchen win that feels bigger than it should, especially on a night when you want dinner to land without a dozen moving parts.
Thighs are the right cut for this job. They handle a hot oven better than breasts, they stay juicy even if you leave them in for a few extra minutes, and they carry garlic better than leaner chicken ever could. Raw garlic can turn sharp and bitter fast at 425°F; roasted garlic, tucked into foil and cooked until the cloves give way, turns mellow and sweet. That shift is the whole trick here.
I come back to this kind of chicken dinner when I want something that tastes deliberate but doesn’t ask for much. A rimmed pan, a thermometer, a few pantry seasonings, and one small saucepan for the sauce — that’s enough. The skin gets crisp, the garlic turns silky, and the whole thing comes together in a way that makes a regular Tuesday feel less beige.
Why Roasted Garlic Chicken Thighs Belong on a Weeknight
Chicken thighs and garlic are a better pair than they look on paper. Thighs bring fat, skin, and enough connective tissue to stay tender even when the oven is running hot, while roasted garlic brings a sweet depth that raw minced garlic never has the patience to develop. That matters because a weeknight dinner can’t afford much drama. You want reliable browning, not a recipe that turns on the exact mood of your oven.
The other reason this pairing works is practical. Garlic heads roast in their own little foil packets while the chicken does its thing, which means you get deep garlic flavor without having to stand over a skillet trying to keep tiny bits of minced garlic from burning. I’d take the foil packets every time. They’re not glamorous. They work.
There’s also the matter of texture, and this is where thighs really earn their keep. A thigh pulled at 175°F to 185°F has a richer, softer bite than one yanked out at the first legal temperature of 165°F. That higher finish sounds fussy until you taste it. The meat loosens, the skin tightens, and the whole pan starts to smell like dinner has already won.
One more thing. The pan drippings do a lot of work here. Onion wedges soften under the chicken, garlic melts into the sauce, and the browned bits at the bottom give the final spoonful a savory backbone that plain broth would never manage on its own. That’s the part I never get tired of.
Why You’ll Love This Recipe
-
It fits into a real evening: The prep is about 20 minutes if you move with purpose, and the oven does the rest while you make a salad or boil rice.
-
The garlic turns sweet instead of sharp: Roasting the heads in foil gives you soft cloves that can be mashed into the sauce or spread onto bread.
-
The skin gets properly crisp: A hot oven and enough space on the pan pull the fat out from under the skin, which is what gives you that bronze, crackly top.
-
There’s a built-in pan sauce: The chicken drippings, broth, lemon, and butter make a glossy sauce that tastes richer than its short ingredient list.
-
Thighs forgive a little extra time: If your oven runs a touch cool or the pieces are larger than average, you still have room before the meat dries out.
-
Leftovers don’t fall apart: Sliced cold or reheated gently, the meat stays useful for grain bowls, sandwiches, and quick lunches the next day.
A recipe earns regular rotation when it gives back more than it takes. This one does that without asking for special shopping or a long list of herbs you’ll only use once.
Timing, Yield, and the Shape of the Meal
You can pull this together in a little under an hour, and most of that time is the oven doing its job. The active part is mostly cutting an onion, seasoning chicken, and wrapping garlic heads in foil. The rest is waiting for the skin to bronze and the garlic to soften into something you want to eat with a spoon.
Yield: Serves 4
Prep Time: 20 minutes
Cook Time: 35 to 40 minutes
Total Time: About 1 hour
Difficulty: Beginner — the steps are straightforward, and an instant-read thermometer keeps the chicken in the right zone.
Chill/Rest Time: 5 minutes
Best Served: Right after the short rest, while the skin still has some crackle at the edges.
If your thighs are on the large side — and plenty of them are — plan on the longer end of the cook time. The only number I trust here more than the clock is the thermometer. Pulling thighs at 175°F to 185°F gives you meat that feels supple instead of tight, and that temperature window matters more than people think.
The Ingredients That Give the Chicken Its Sweet, Savory Finish
The ingredient list is short, but every piece has a job. The chicken brings the body, the garlic brings sweetness, and the lemon keeps the sauce from feeling heavy. Once those parts are balanced, the rest is a matter of heat management and not crowding the pan.
For the Chicken:
- 6 bone-in, skin-on chicken thighs, about 2 1/2 to 3 pounds
- 3 tablespoons olive oil, divided
- 1 tablespoon Dijon mustard
- 1 teaspoon lemon zest, finely grated
- 1 3/4 teaspoons kosher salt
- 1 teaspoon black pepper
- 1 teaspoon smoked paprika
- 1 teaspoon dried thyme
- 1/2 teaspoon onion powder
For the Roasted Garlic Pan Sauce:
- 2 heads garlic
- 1 medium yellow onion, cut into 8 wedges
- 1/2 cup low-sodium chicken broth
- 1 tablespoon fresh lemon juice
- 1 tablespoon unsalted butter
- 2 tablespoons chopped flat-leaf parsley
- Lemon wedges, for serving
- Pinch red pepper flakes, optional
Chicken Thighs
What to use: 6 bone-in, skin-on thighs, roughly 2 1/2 to 3 pounds total. That amount feeds 4 people with normal sides, or 3 people if you want generous leftovers.
Preparation: Pat the thighs dry with paper towels and let them sit while the oven heats; even 10 to 15 minutes helps the skin tighten a little before it goes into the oven.
Substitutions: Boneless thighs work too, but cut the roast time by about 8 to 10 minutes. Drumsticks can stand in, though they usually need a few minutes longer.
Tips: Buy thighs with skin that still covers the meat cleanly. Packs with a lot of liquid usually need extra drying time, and wet skin is the enemy of crisp edges.
Roasted Garlic
What to use: 2 whole heads garlic, tops sliced off just enough to expose the cloves.
Preparation: Leave the papery skins on the heads, wrap each one in foil, and drizzle a little olive oil over the cut face before sealing the packet.
Substitutions: Peeled garlic cloves can roast faster, but they’re easier to burn and less forgiving. Jarred roasted garlic paste can work in a pinch, though the flavor is flatter and less sweet.
Tips: Keep the cut side facing up inside the foil. If the cloves sit in direct liquid or get crushed flat, they soften unevenly and can go mushy before they’re truly roasted.
Aromatics and Sauce Base
What to use: 1 medium yellow onion cut into wedges, 1/2 cup low-sodium chicken broth, 1 tablespoon lemon juice, 1 tablespoon butter, and 2 tablespoons parsley.
Preparation: Cut the onion into thick wedges so it keeps some shape under the chicken. Save the parsley for the end so it stays bright.
Substitutions: Shallots make the sauce sweeter. Dry white wine can replace 1/4 cup of the broth if you want a little more lift.
Tips: Low-sodium broth matters because the chicken drippings already bring plenty of salt. If the sauce tastes flat, it usually needs lemon first, not more salt.
Seasoning and Flavor
What to use: 1 tablespoon Dijon mustard, 1 teaspoon lemon zest, 1 3/4 teaspoons kosher salt, 1 teaspoon black pepper, 1 teaspoon smoked paprika, 1 teaspoon dried thyme, and 1/2 teaspoon onion powder.
Preparation: Stir the seasonings with the olive oil and Dijon until you get a loose paste, then rub it all over the thighs.
Substitutions: Use oregano instead of thyme if that’s what’s in your cupboard, or swap sweet paprika for smoked paprika if you want a softer finish.
Tips: Dijon is doing more than adding flavor. It helps the spice paste cling to the chicken, and that means more seasoning where you actually want it.
The one ingredient I would not cut back on is the garlic. Two heads sounds like a lot until it roasts down, and then it tastes measured, not loud.
The Gear That Keeps the Skin Crisp
I keep the equipment list short because this recipe does not need a pile of gadgets. What matters is a pan with enough surface area, a way to check temperature, and something to handle the hot garlic without burning your fingers.
- Rimmed half-sheet pan — My first choice for better browning and less crowding; use two pans if your thighs are large.
- Aluminum foil — Needed for the garlic packets and worth keeping nearby for easy cleanup.
- Instant-read thermometer — The easiest way to check for 175°F to 185°F without guessing.
- Small mixing bowl — For blending the oil, mustard, and seasonings into a paste.
- Tongs — Better than a fork for moving the chicken without tearing the skin.
- Sharp knife and cutting board — For trimming the garlic tops and cutting the onion into wedges.
- Small saucepan — Useful for turning the pan drippings and roasted garlic into a quick sauce.
- Microplane or fine grater — Optional, but handy if you want a very fine lemon zest.
If you only own one bigger baking dish, use it. Still, a rimmed sheet pan gives you more browning because moisture evaporates faster. That’s the difference between bronzed skin and skin that looks a little damp around the edges.
The Roasting Method, Step by Step
Roasting chicken thighs is mostly about restraint. You want enough heat to crisp the skin and soften the garlic, but not so much that the garlic goes bitter or the pan gets overcrowded and steamy. Once you get the rhythm, the method feels sturdy. Almost boring. That’s a compliment.
Prep the Oven and Garlic
-
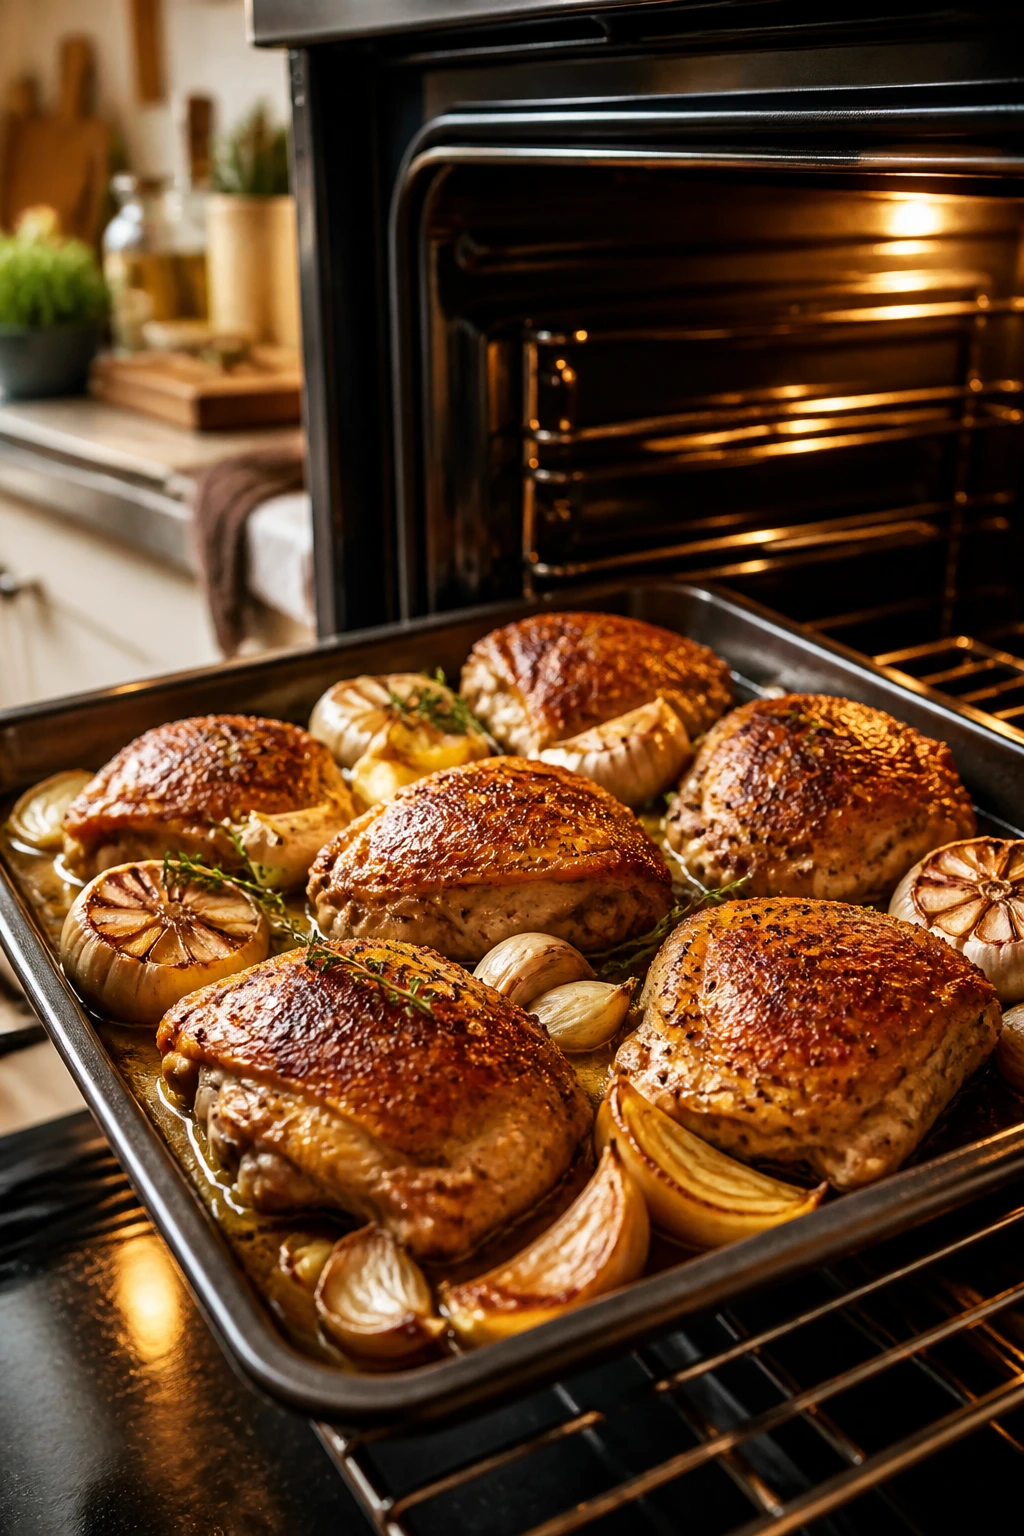
Heat the oven: Preheat to 425°F (220°C) and set a rack in the upper-middle position. That higher heat gives the skin a fighting chance, and the rack position keeps the top of the chicken close enough to brown.
-
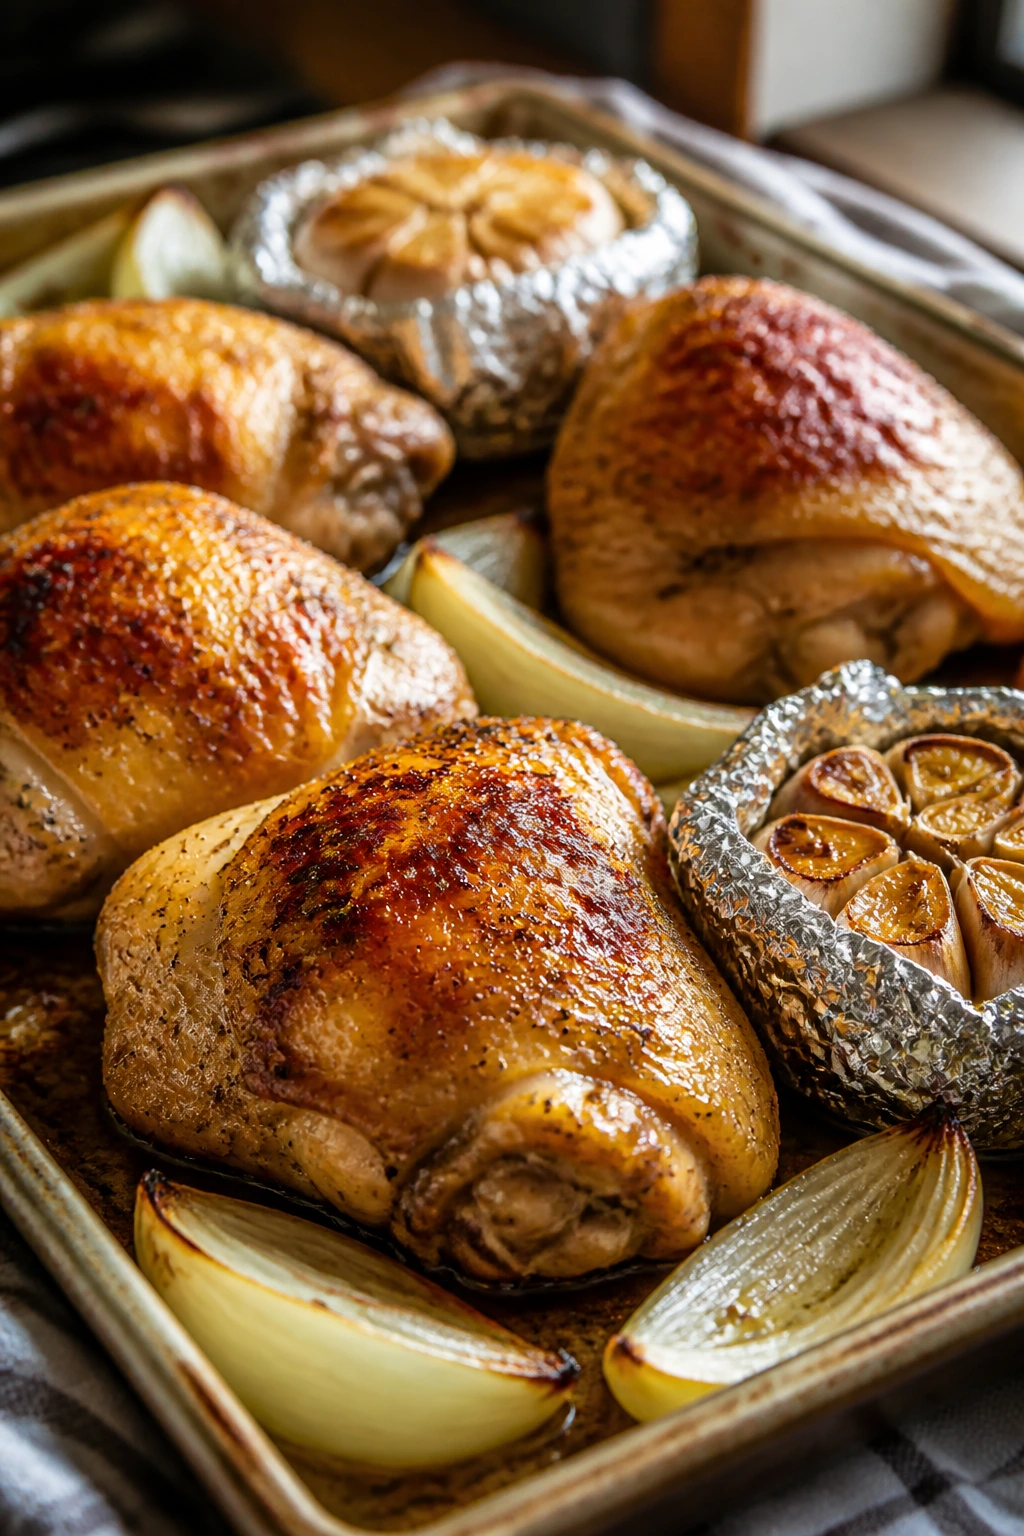
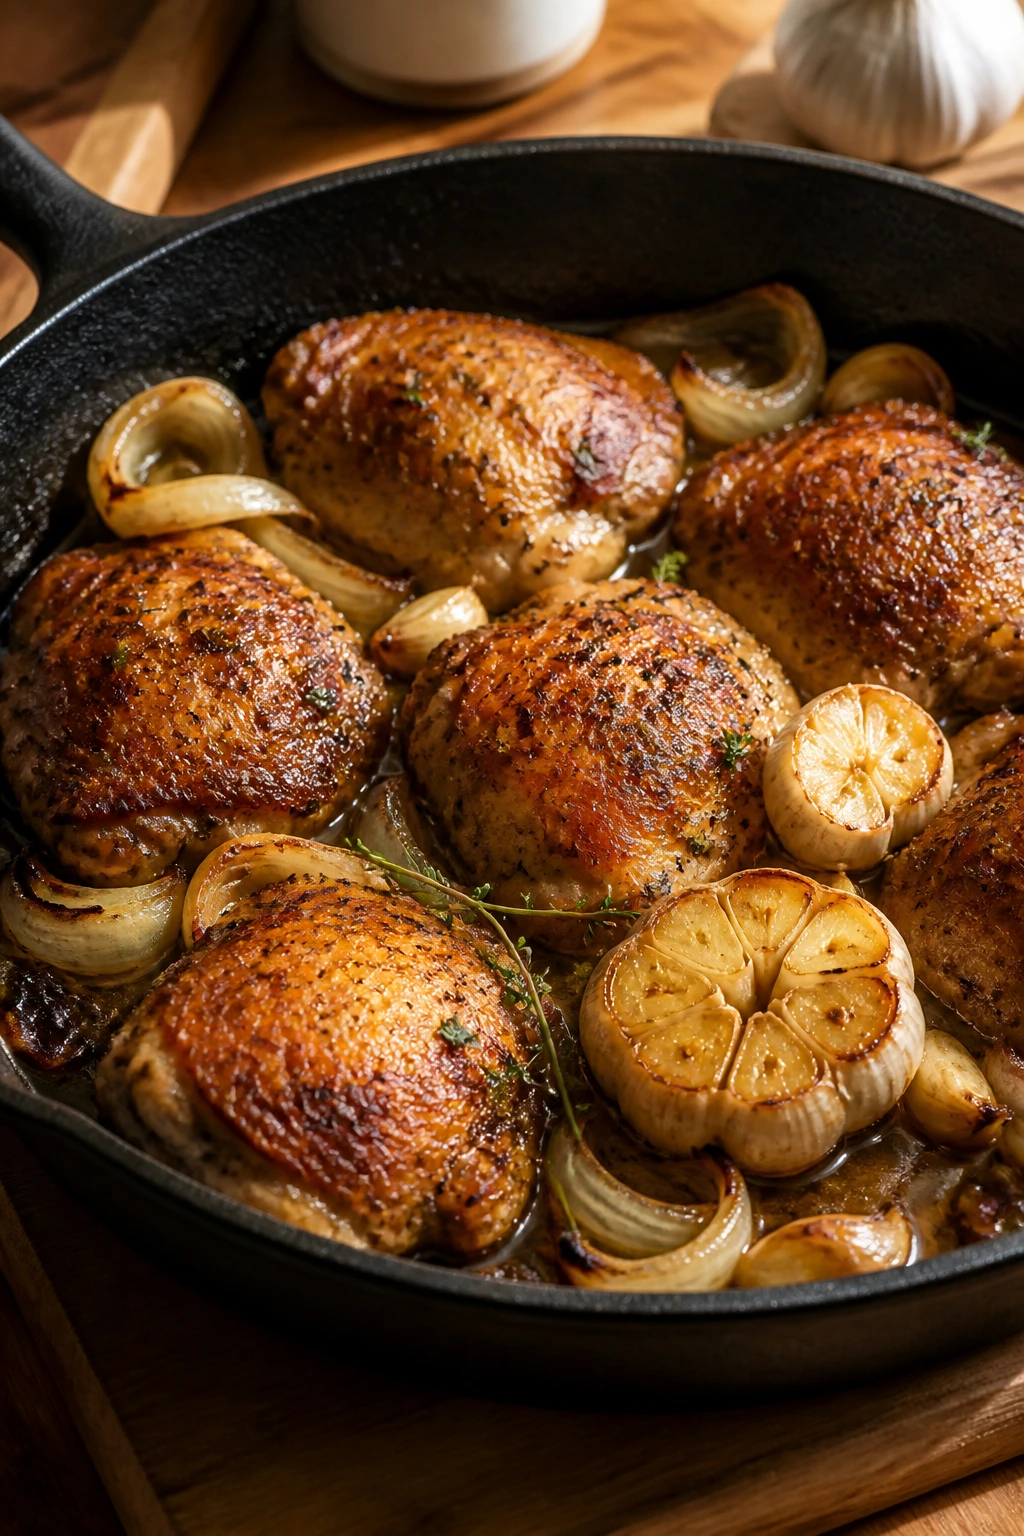
Build the garlic packets: Cut the top 1/4 inch off each garlic head so the cloves are exposed. Set each head on a square of foil, drizzle with a little olive oil, and add a pinch of salt. Wrap the foil loosely around the heads, leaving a little room above the cut surface so the garlic can steam and roast at the same time. Do not smash the heads flat; they need some air.
Season and Arrange the Pan
-
Mix the seasoning paste: In a bowl, stir together the olive oil, Dijon, lemon zest, salt, pepper, smoked paprika, thyme, and onion powder. The mixture should look like a loose, brick-colored paste. That paste sticks better than dry seasoning scattered on its own.
-
Coat the chicken: Pat the thighs dry again if needed, then rub the seasoning paste over both sides. Keep the skin intact. If it lifts easily, nudge a little paste underneath; if it resists, leave it alone. Torn skin means less crispness, and it’s not worth forcing.
-
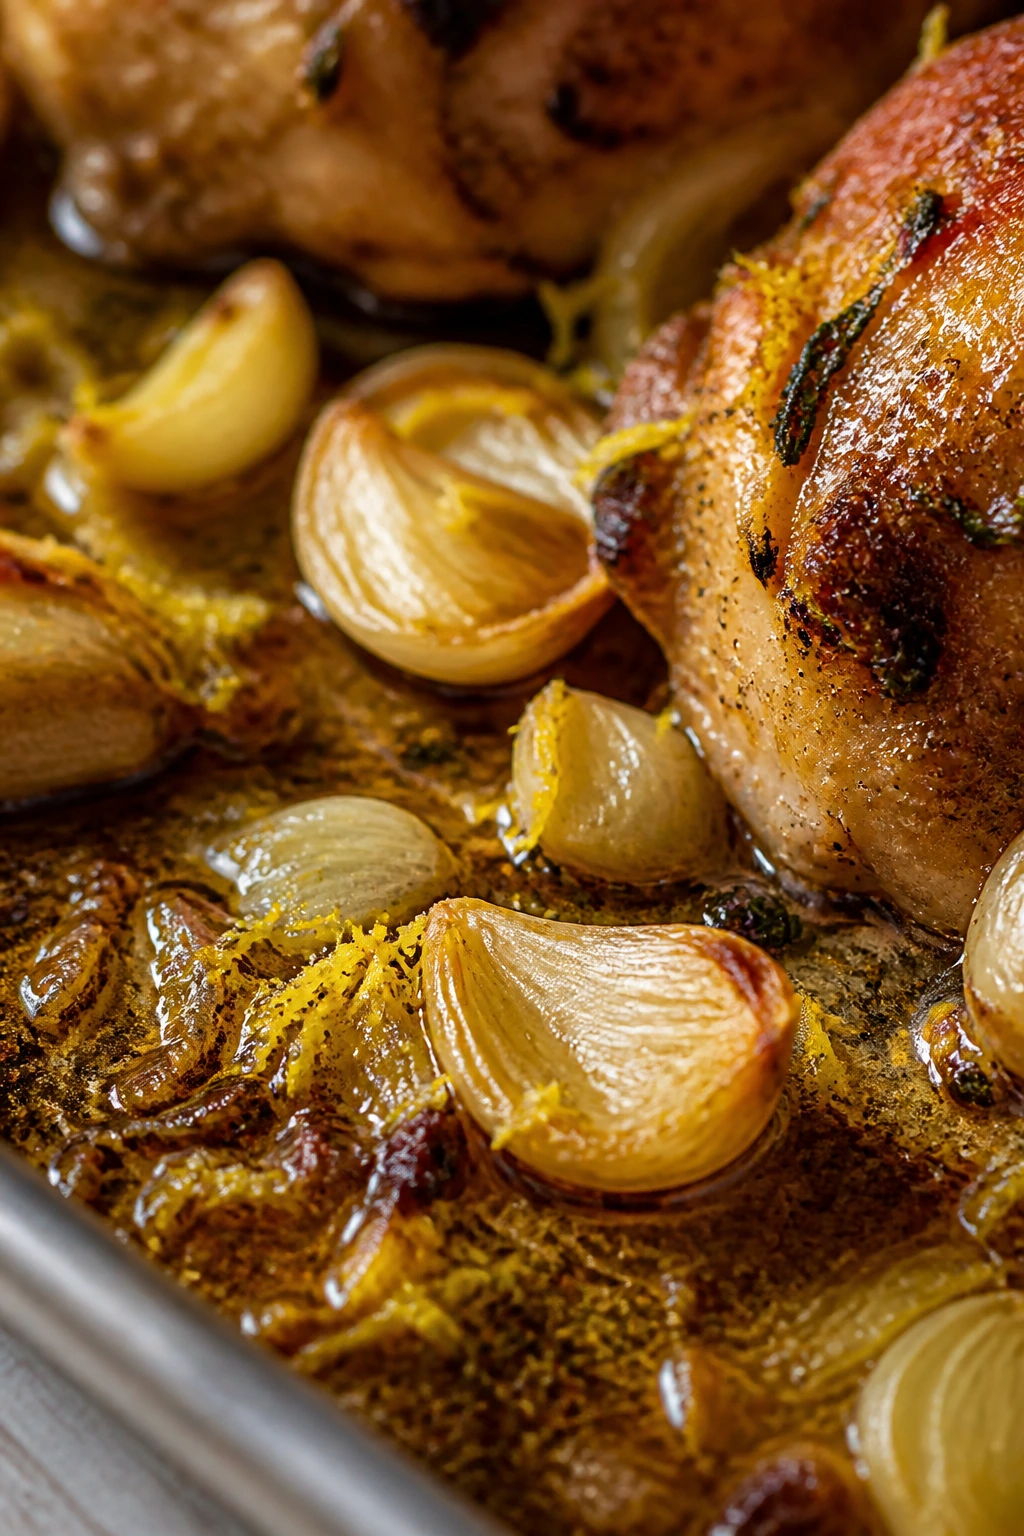
Set up the pan: Scatter the onion wedges across the sheet pan and place the garlic packets near the corners. Arrange the thighs skin-side up over and around the onions, leaving at least a little space between each piece. A crowded pan steams. A spaced-out pan browns. That trade is real.
Roast and Finish
-
Roast for the first stretch: Slide the pan into the oven and roast for 25 minutes. Rotate the pan front to back so the heat hits more evenly. By then, the onions should be soft at the edges and the skin should be starting to bronze.
-
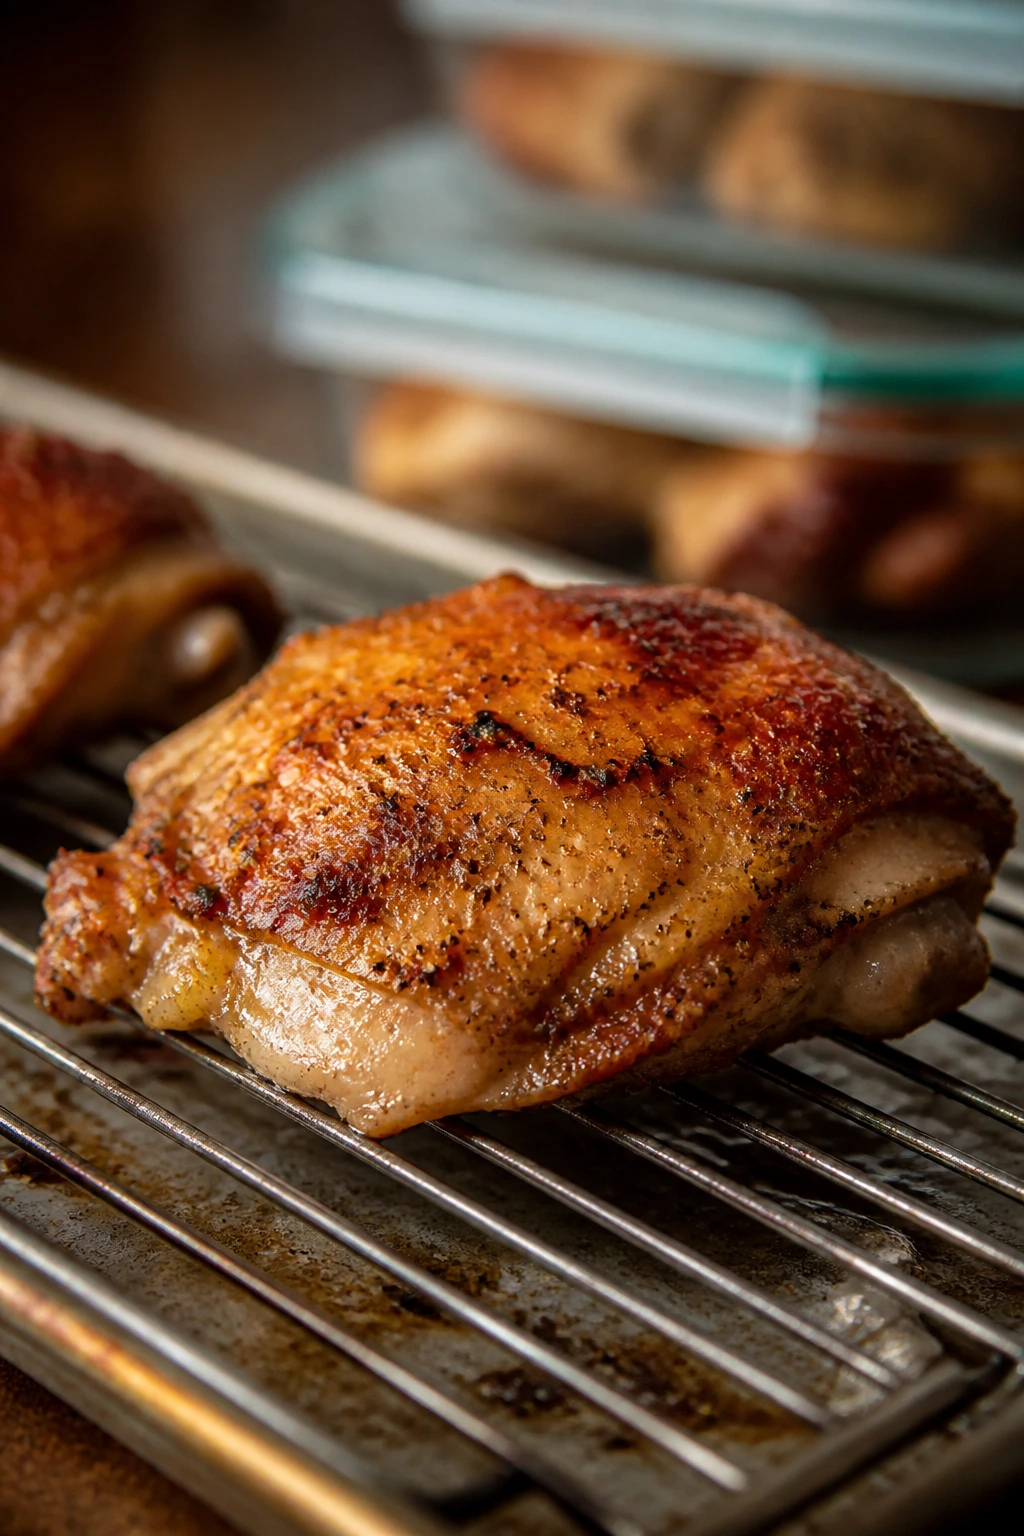
Finish the roast: Continue roasting for another 10 to 15 minutes, until an instant-read thermometer reads 175°F to 185°F in the thickest part of a thigh, without touching bone. If the skin still looks a little pale but the temperature is there, broil for 1 to 2 minutes. Watch closely — the line between bronzed and burnt is short.
-
Rest the chicken: Move the chicken and onions to a platter and let them rest for 5 minutes. Don’t cover it tightly. A loose tent of foil is fine if you need it, but a tight cover softens the skin fast.
Make the Pan Sauce
-
Open the garlic packets carefully: Steam comes out fast here, and it’s hot enough to sting your hand. Squeeze the softened cloves into the small saucepan, add the chicken broth, lemon juice, and butter, and stir over medium heat for 1 to 2 minutes. Mash the garlic with a fork until it breaks down into the sauce and the whole thing turns glossy.
-
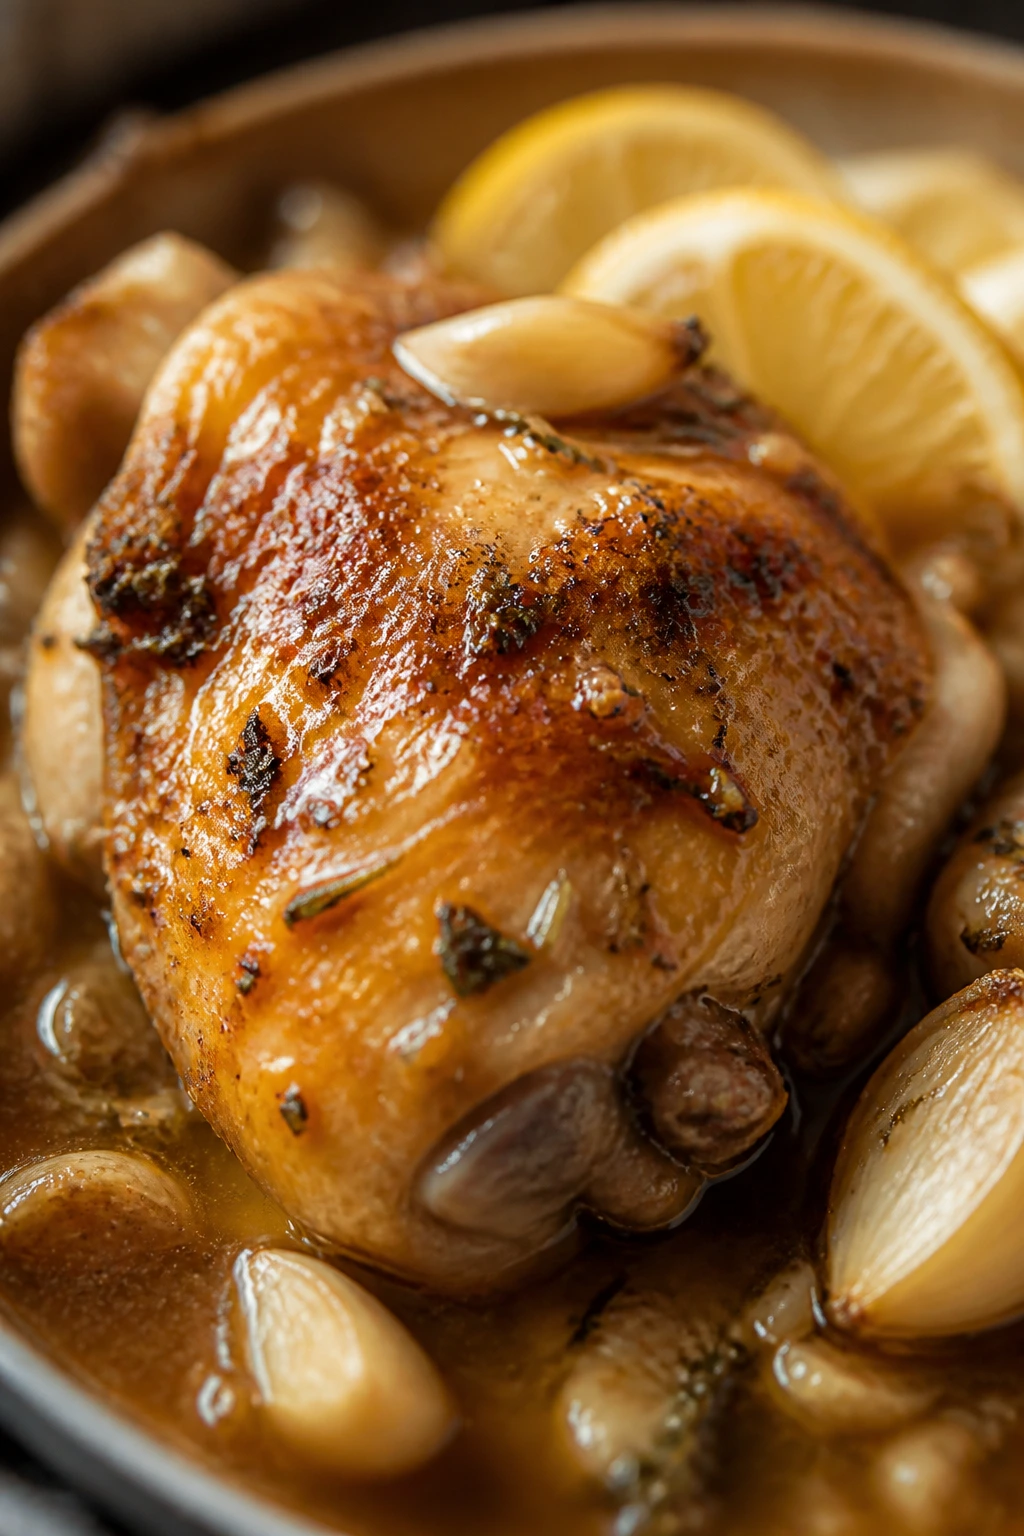
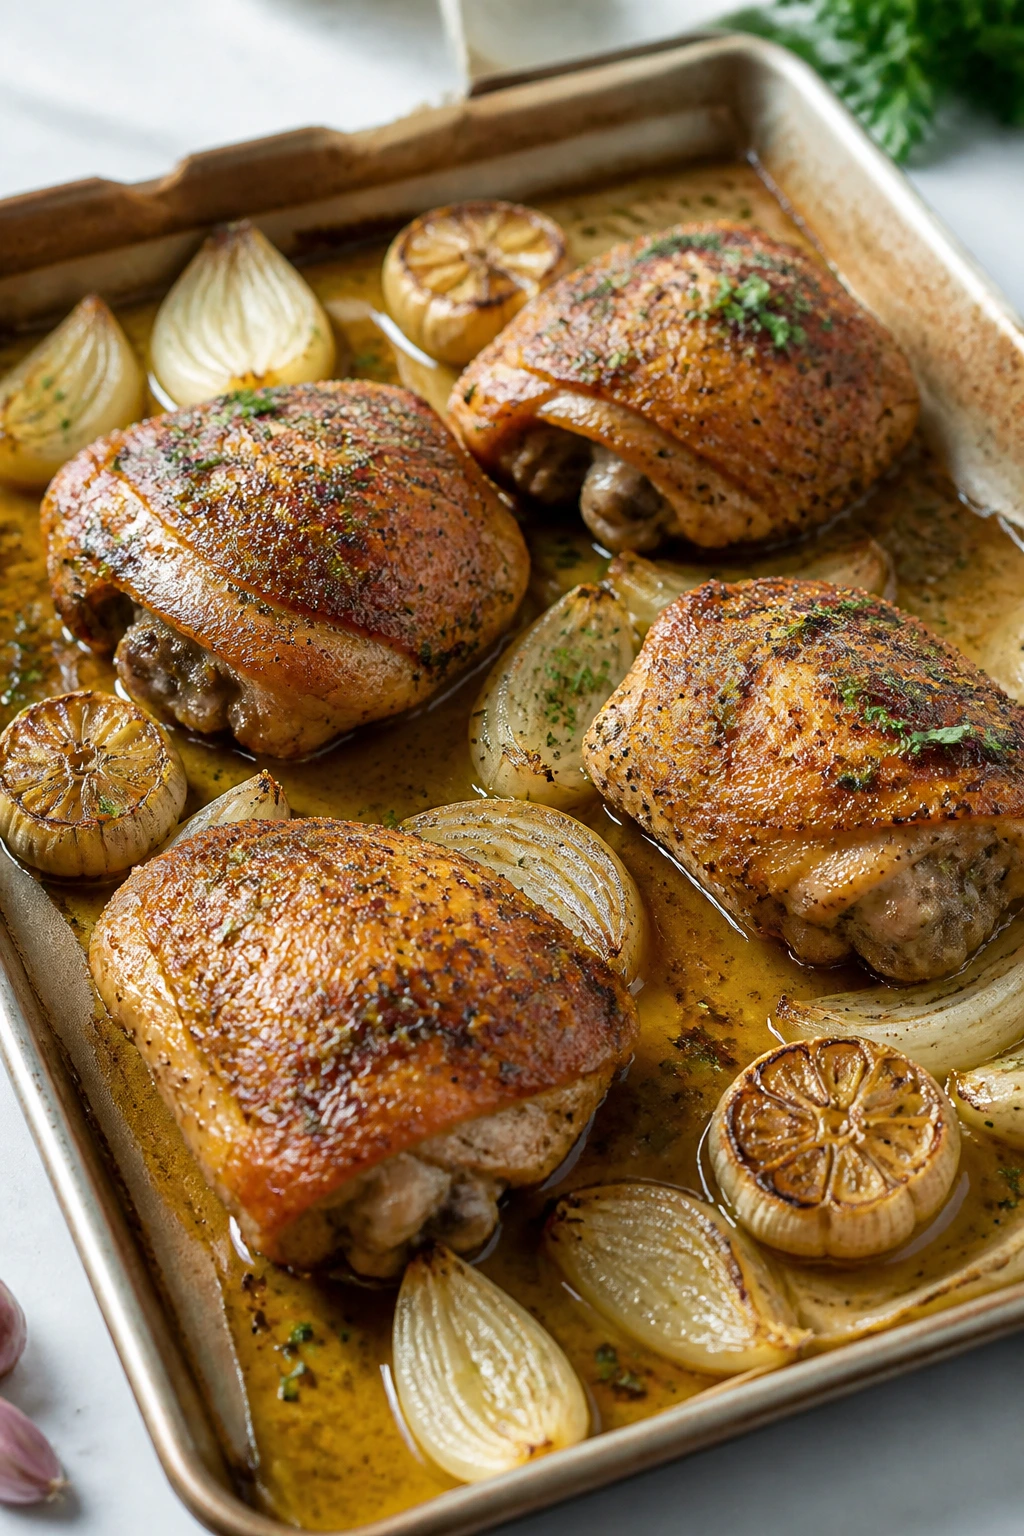
Finish and serve: Spoon the sauce and onions around the chicken, not all over the skin if you want to keep the top crisp. Shower with parsley and add lemon wedges on the side. The best bites are usually the ones where a little garlic sauce touches the meat, the onion, and the edge of the skin all at once.
If your sauce seems thin, let it bubble for another minute. If it gets too thick, add a tablespoon of broth or water. The sauce should coat the back of a spoon lightly, not sit like gravy.
How to Serve Roasted Garlic Chicken Thighs Without Softening the Skin
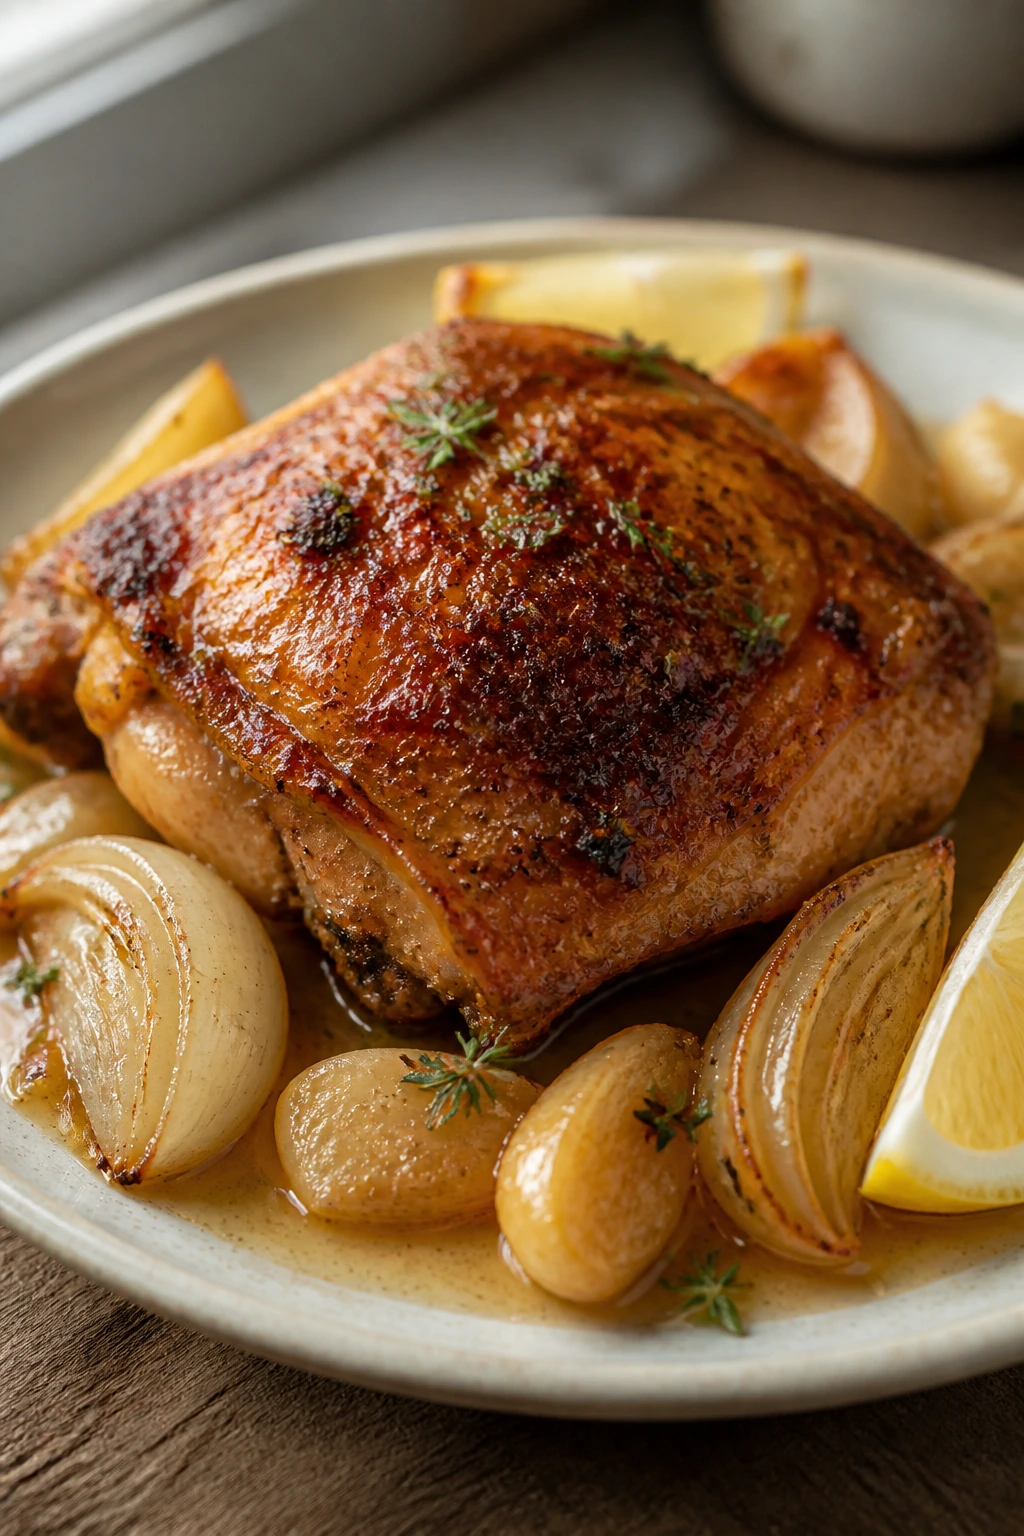
Presentation: Put the onion wedges and a little sauce on the plate first, then set the chicken thighs on top so the skin stays exposed. Spoon a bit of the garlic sauce around the meat rather than over the top, and finish with parsley and a few lemon wedges. The plate should look glossy at the edges, not flooded.
Accompaniments: Mashed potatoes are the obvious choice because they catch the garlic sauce in all the right places. Buttered egg noodles, rice, or crusty bread work just as well. If I’m serving a vegetable, I lean toward something green and a little bitter — broccolini, roasted green beans, or a simple arugula salad with lemon and olive oil.
Portions: One large thigh per person is enough if you have bread or a starch on the side. If the thighs are on the smaller side, two per person makes sense. For a bigger table, you can scale the recipe up, but use two pans so the pieces still roast instead of steaming.
Beverage Pairing: A dry riesling or sauvignon blanc cuts through the garlic and chicken fat without fighting the lemon. If you want something colder and easier, a light lager does the job. For a nonalcoholic option, sparkling water with lemon or a very unsweet iced tea keeps the plate from feeling heavy.
The one serving move I swear by is bread. A piece of good crusty bread lets you chase the last garlic cloves across the pan without reaching for a spoon.
Small Details That Change the Whole Pan
Flavor Enhancement: A little lemon zest in the seasoning paste and lemon juice in the sauce gives the chicken two different kinds of brightness. The zest smells like the peel itself; the juice cuts through the butter and chicken fat at the end. If you skip both, the dish still works, but it lands flatter.
Time-Saver: Cut the onion and wrap the garlic packets before you preheat the oven. It sounds tiny, and it is, but it keeps the active work from spilling out over the whole cook time. I also mix the seasoning paste in the same bowl I use to coat the chicken, which saves one dish without changing the result.
Pro Move: Salt the thighs and leave them uncovered on a rack in the fridge for a few hours if your schedule allows it. Even 4 hours helps the skin dry and brown better. If you only have 15 minutes, that’s still fine. Just dry the thighs well and do not skip the thermometer.
Cost-Saver: Buy thighs in family packs and freeze them in meal-sized portions. Thighs reheat better than breasts, which makes them one of the few cheaper cuts that don’t punish you for stretching the meal into leftovers. That matters more than it sounds like it should.
A small extra worth mentioning: if your oven tends to run cool, give the chicken another 5 minutes and broil at the end only if the skin needs help. Guessing is where good thighs go sideways.
Common Mistakes That Leave the Chicken Pale or Dry
-
Starting with wet skin: If the thighs go into the oven damp, the skin steams before it browns. The fix is boring but effective: pat them dry twice, and let them sit exposed for a few minutes while the oven heats.
-
Crowding the pan: When the thighs touch too much or sit on top of each other, the air can’t move and the onions turn soft before they brown. If your pan is too small, split the recipe across two pans. Less drama. Better skin.
-
Letting the garlic sit naked under high heat: Peeled garlic cloves or split heads without foil can go bitter fast at 425°F. Wrapping the heads loosely in foil protects them long enough to turn sweet and soft instead of dark and sharp.
-
Pulling the chicken at 165°F because the package said so: Thighs are not breasts. They’re better a little hotter, and the meat under the skin gets much more relaxed at 175°F to 185°F. If you stop too early, the texture can feel a bit tight even though the chicken is safe.
-
Pouring sauce over the skin too soon: The sauce tastes great, but it softens the crisp top almost on contact. Spoon it around the chicken or under the pieces if you want the skin to stay crackly for the table.
-
Using too much salt in the seasoning paste: Thighs can take salt, but salty broth plus salty Dijon plus table salt can stack up fast. If you swap kosher salt for table salt, cut the amount back by about one-third.
The easiest way to avoid half of these problems is to slow down for thirty seconds before the pan goes in the oven. Dry chicken. Space between pieces. Garlic sealed. That’s most of it.
Named Variations for Different Nights

Lemon-Rosemary Roast
Swap the thyme for 1 1/2 teaspoons chopped fresh rosemary or 3/4 teaspoon dried rosemary. Lay a few lemon slices under the onions and chicken before roasting. The rosemary is sharper and more piney than thyme, so it suits people who want the garlic to stay sweet but the finish to lean herbier.
Smoky Honey Finish
Stir 1 tablespoon honey into the garlic sauce at the end and bump the smoked paprika to 1 1/2 teaspoons. The glaze turns the surface of the chicken a little shinier and gives the sauce a deeper, rounder finish. Keep a close eye on the pan in the last 5 minutes, because sugar darkens quickly.
Creamy Roasted Garlic Sauce
Add 1/4 cup heavy cream to the garlic sauce after the butter has melted, and simmer just until it thickens slightly. The sauce turns silkier and less sharp, which is useful if you’re serving the chicken over mashed potatoes or rice. I’d skip this version if you want the skin to stay crisp for a long stretch, because cream invites more spooning.
Spicy Calabrian Thighs
Mix 1 to 2 teaspoons Calabrian chili paste or 1/2 teaspoon red pepper flakes into the seasoning paste. The heat lands in the background, not the front, which makes it a good fit for people who want the garlic to stay center stage. A squeeze of extra lemon at the end keeps the spice from feeling heavy.
Vegetable Tray-Bake
Add thick carrot chunks, halved baby potatoes, or fennel wedges to the pan before the chicken goes in. Potatoes need the longest head start, so cut them small if you use them. This version turns the recipe into a fuller pan dinner, but don’t crowd the vegetables or the skin will lose its edge.
If you need a dairy-free version, skip the butter and finish the sauce with an extra tablespoon of olive oil. That doesn’t sound glamorous, but it still gives the garlic a soft, lush finish.
Make-Ahead, Storage, and Reheating
You can do part of the work ahead without hurting the result. Season the chicken up to 24 hours in advance and leave it uncovered on a rack in the fridge if you want the skin drier and better browned. The garlic packets can also be assembled a day ahead and held in the refrigerator. On the day you roast, let the chicken sit at room temperature for 15 to 20 minutes while the oven preheats so the cold edge comes off the meat.
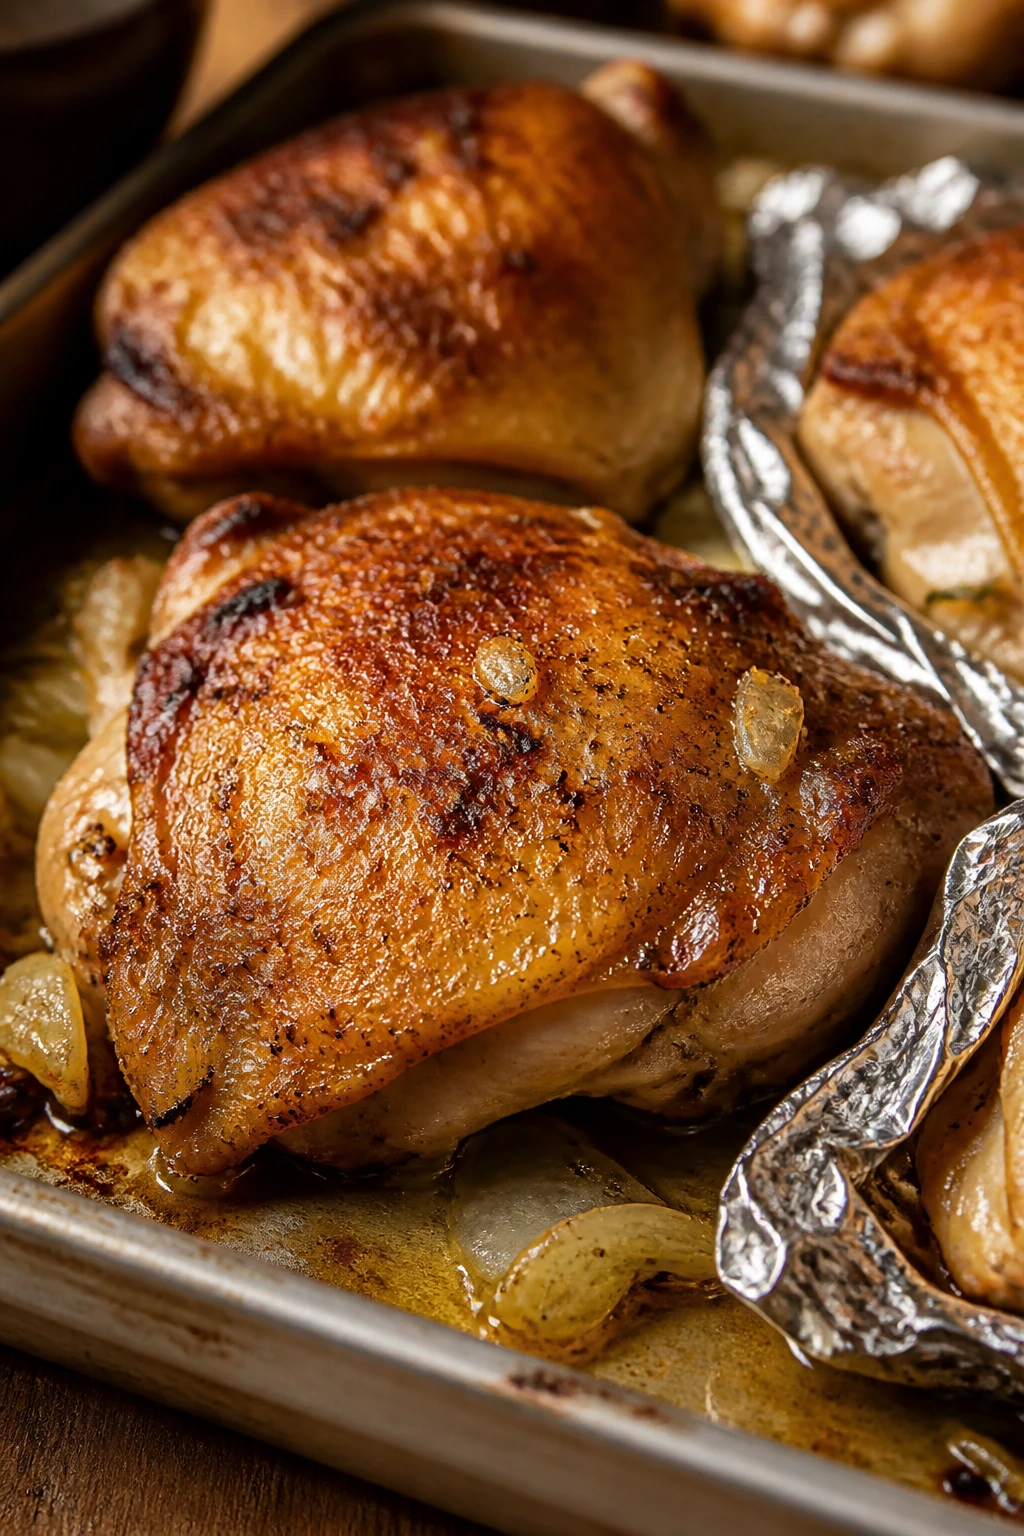
Leftovers keep well in the fridge for 3 to 4 days in an airtight container. I like to store the chicken and sauce separately if I can, because the skin stays in better shape that way. If everything is already combined, it still tastes fine; the skin just won’t stay crisp.
For the freezer, wrap the cooled thighs tightly and freeze them for up to 2 months. The sauce can freeze too, though it may need a quick whisk after thawing to come back together. If you’re freezing for later, pull the meat off the bone first and freeze it with a little sauce. It reheats more evenly that way.
The best reheating method is a 325°F oven. Set the chicken on a rack over a sheet pan, cover loosely with foil, and heat until the center reaches 165°F, usually 15 to 20 minutes depending on size. Uncover for the last 5 minutes if you want the skin to firm up a little. A microwave works in a pinch, but use half power and add a spoonful of broth or sauce so the meat doesn’t tighten. Garlic sauce should be reheated gently over low heat; a hard boil makes it taste flatter.
One thing I wouldn’t do is leave this out on the counter. Two hours is the usual safe window, and less is better if your kitchen runs warm. After that, into containers.
Questions Home Cooks Ask Most Often
Can I use boneless chicken thighs instead of bone-in thighs?
Yes, and they’ll cook faster. Plan on about 22 to 28 minutes at 425°F, depending on thickness, and start checking temperature early. You’ll lose a little of that rich, juicy finish, but the recipe still works well.
Do I have to wrap the garlic in foil?
You don’t have to, but I prefer it. Foil keeps the heads from scorching before the cloves soften, especially at a hot roast, and it makes the garlic easier to squeeze into the sauce later. If you skip the foil, watch the garlic closely and move it to a lower part of the pan.
What temperature should the thighs reach when they’re done?
For this recipe, 175°F to 185°F is the sweet spot. That’s where the meat under the skin relaxes and turns tender without going stringy. 165°F is technically safe, but thighs usually taste better a little higher.
Can I make this with chicken breasts?
You can, but the method changes. Breasts cook faster and dry out more quickly, so you’d want to reduce the oven time and probably roast at 400°F instead of 425°F. The garlic sauce still works, but breasts don’t give you the same forgiving texture.
How do I keep the skin crisp after adding sauce?
Put the sauce around the chicken, not over the skin. If you want extra insurance, serve the sauce in a small bowl and let people spoon it on themselves. That keeps the top of the thigh bronzed instead of soggy.
Can I add vegetables to the pan?
Yes, but choose vegetables that can handle the oven time. Carrots, fennel, and small potato chunks work well; delicate vegetables like asparagus should go in near the end. Keep the pan from getting crowded or the chicken skin will soften.
Why did my garlic taste bitter?
Usually it got too much direct heat or sat too exposed in the oven. The fix is simple: keep the heads in foil, add a little oil, and make sure they roast long enough to turn soft instead of dark. Bitter garlic is one of those problems that shows up fast and feels dramatic, but the fix is mostly about protection.
Can I make the garlic sauce ahead of time?
Yes. It keeps in the fridge for 3 to 4 days and reheats gently over low heat. If it thickens too much, stir in a teaspoon or two of broth before serving.
A Pan Worth Repeating
There’s a reason roasted garlic chicken thighs keep showing up in my own dinner rotation. They don’t ask for much, but they give back more than the effort would suggest: crisp skin, soft garlic, onions that collapse into sweetness, and a sauce that tastes like you paid more attention than you actually did.
That’s the right kind of weeknight recipe. Not flashy. Not needy. Just solid, fragrant, and good enough that you’ll start keeping a couple of garlic heads on hand without even thinking about it. Once you’ve made it a few times, the pan stops feeling like a project and starts feeling like a dependable answer.
Roasted Garlic Chicken Thighs for Weeknight Dinners — Recipe Card
Recipe Name: Roasted Garlic Chicken Thighs for Weeknight Dinners
Description: Bone-in chicken thighs roast on a hot sheet pan with onion wedges and foil-wrapped garlic heads, then finish with a bright pan sauce of broth, lemon, butter, and parsley. The skin stays crisp if you keep the sauce around the chicken instead of over it.
Prep Time: 20 minutes
Cook Time: 35 to 40 minutes
Total Time: About 1 hour
Course: Dinner, Main Course
Cuisine: American
Servings: 4
Calories: About 500 kcal per serving
Ingredients
For the Chicken:
- 6 bone-in, skin-on chicken thighs, about 2 1/2 to 3 pounds
- 3 tablespoons olive oil, divided
- 1 tablespoon Dijon mustard
- 1 teaspoon lemon zest, finely grated
- 1 3/4 teaspoons kosher salt
- 1 teaspoon black pepper
- 1 teaspoon smoked paprika
- 1 teaspoon dried thyme
- 1/2 teaspoon onion powder
For the Roasted Garlic Pan Sauce:
- 2 heads garlic
- 1 medium yellow onion, cut into 8 wedges
- 1/2 cup low-sodium chicken broth
- 1 tablespoon fresh lemon juice
- 1 tablespoon unsalted butter
- 2 tablespoons chopped flat-leaf parsley
- Lemon wedges, for serving
- Pinch red pepper flakes, optional
Instructions
-
Preheat the oven to 425°F (220°C) and set a rack in the upper-middle position.
-
Cut the top off each garlic head, place on foil, drizzle with a little olive oil and a pinch of salt, and wrap into loose packets.
-
Stir together the remaining olive oil, Dijon, lemon zest, salt, pepper, smoked paprika, thyme, and onion powder. Pat the chicken thighs dry and coat them with the mixture.
-
Scatter the onion wedges on a rimmed sheet pan, place the garlic packets near the corners, and arrange the chicken skin-side up with space between the pieces.
-
Roast for 25 minutes, then rotate the pan.
-
Roast 10 to 15 minutes longer, until the chicken reaches 175°F to 185°F and the skin is bronzed. Broil for 1 to 2 minutes only if the skin needs extra color.
-
Transfer the chicken and onions to a platter and let rest for 5 minutes.
-
Open the garlic packets carefully, squeeze the soft cloves into a small saucepan, add the broth, lemon juice, and butter, and stir over medium heat for 1 to 2 minutes until glossy.
-
Spoon the sauce and onions around the chicken, finish with parsley and lemon wedges, and serve.
Notes:
- Keep the sauce around the chicken, not over the skin, if you want the top to stay crisp.
- If your thighs are large, check temperature at 35 minutes.
- Leftover sauce makes excellent mashed potatoes the next day.