
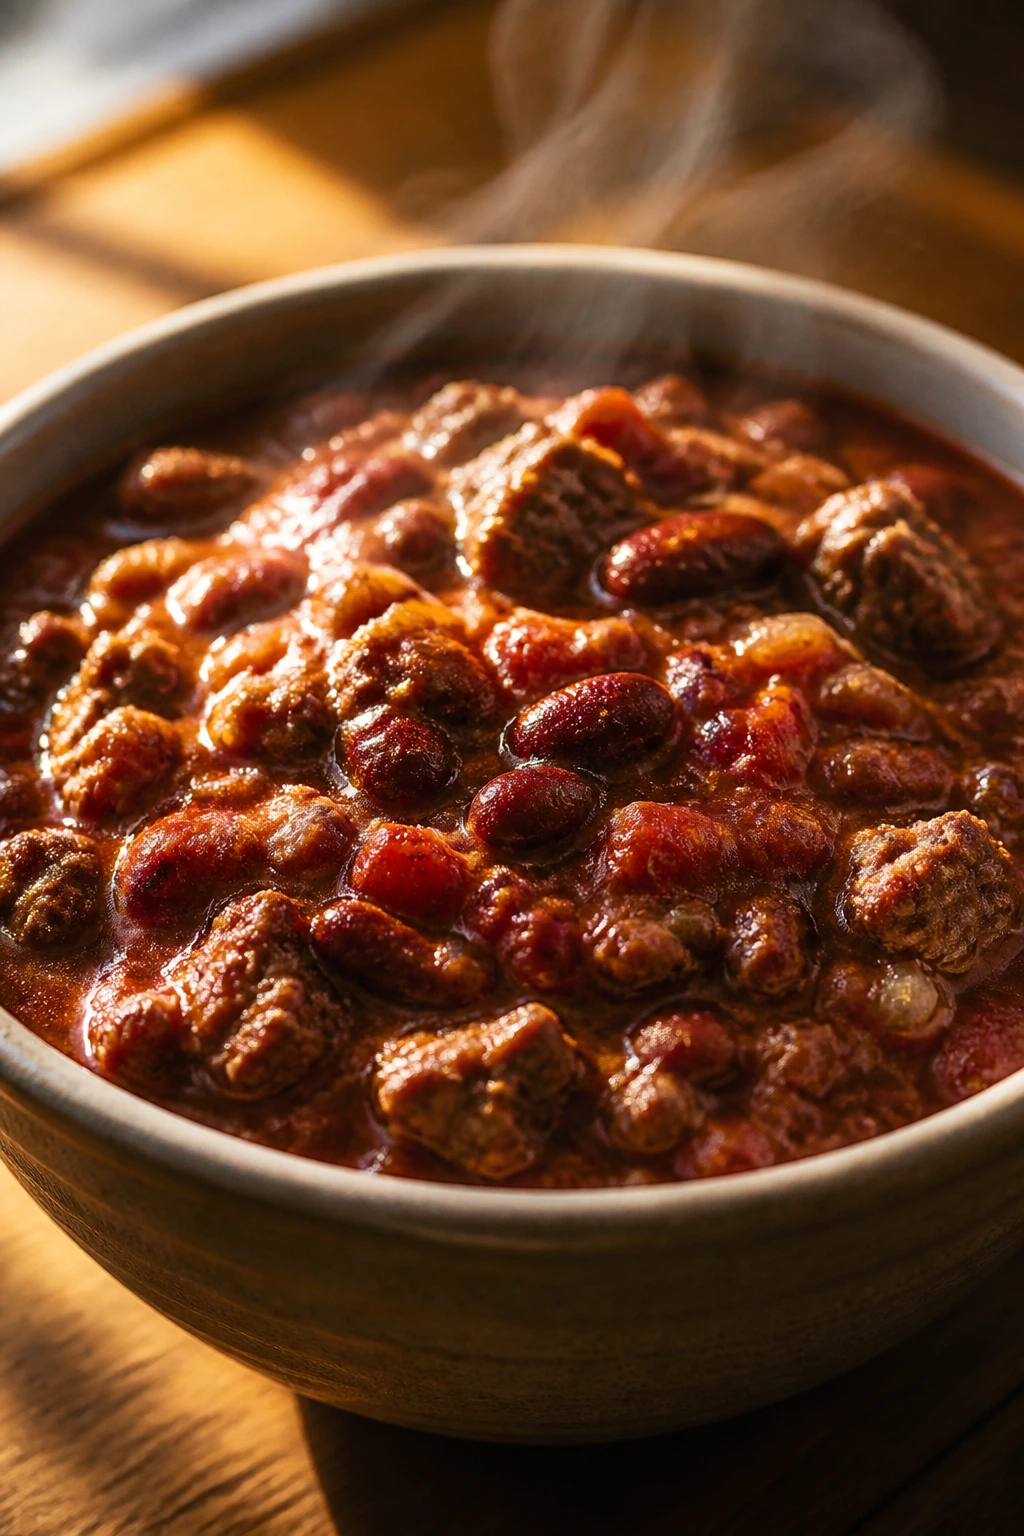
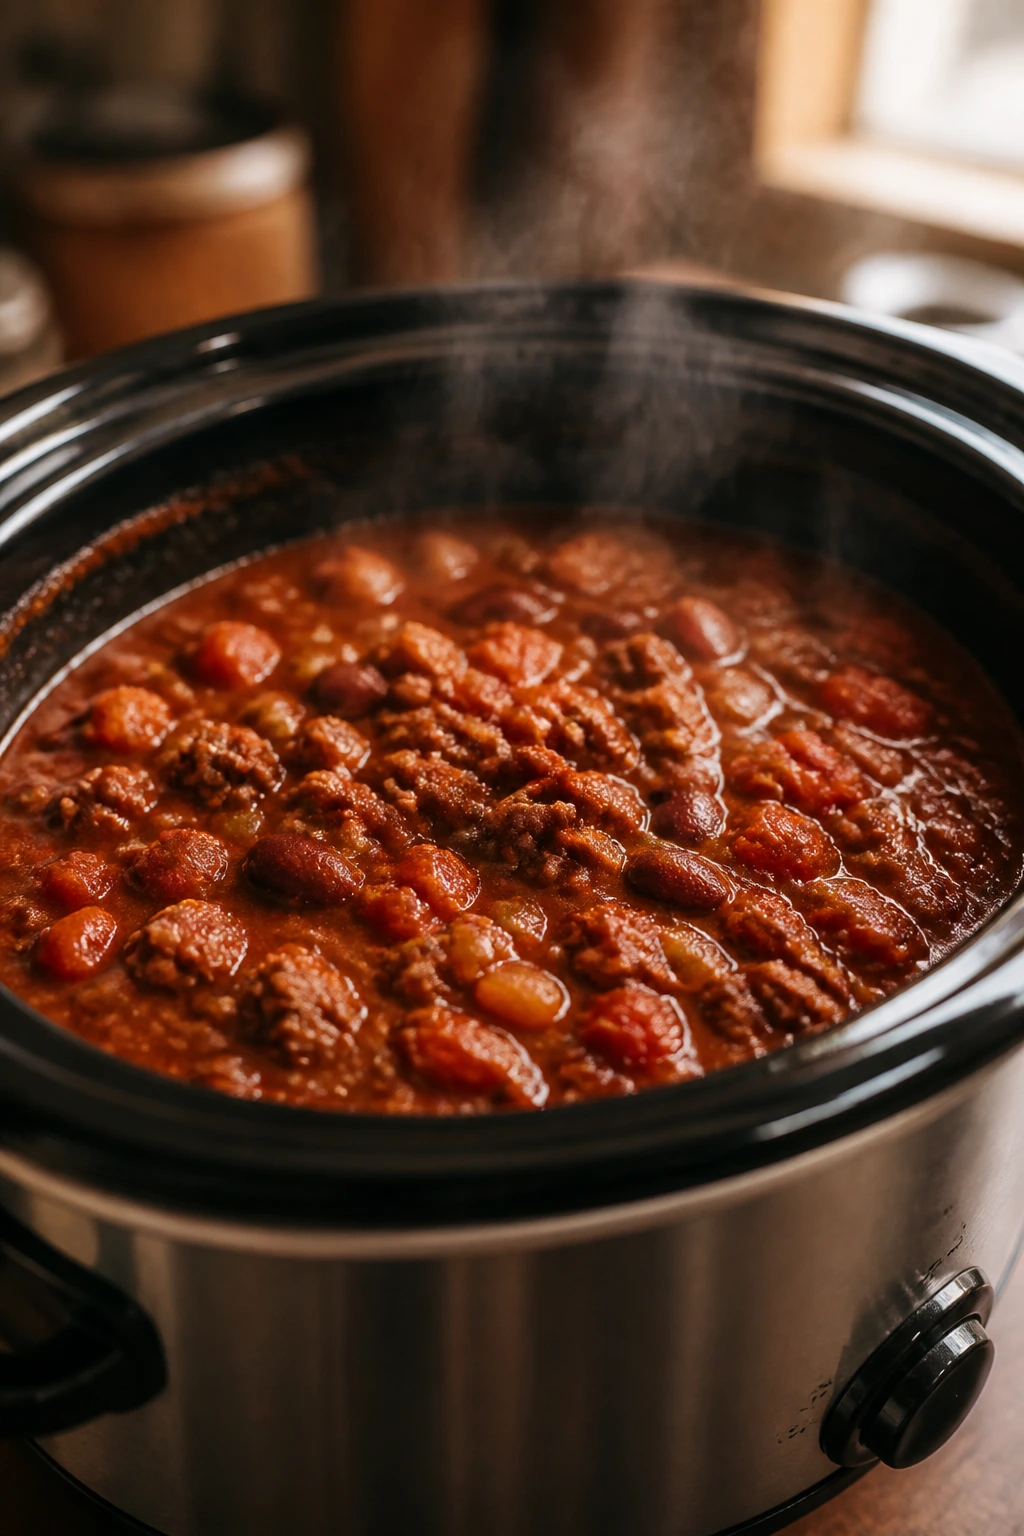
A good pot of slow cooker chili should smell like onion softening into tomato, cumin blooming in warm fat, and beef turning savory enough that the whole kitchen starts to feel inhabited. That’s the draw here. You put in a little work at the front end, walk away, and come back to a pot that tastes like it sat on the stove for half the day, except your stove stayed clean and your attention stayed on everything else.
The version I reach for most often is the one that respects the slow cooker without pretending it can do every job perfectly. Browning the meat first matters. So does not drowning the pot in broth. So does giving the beans enough time to soak up the seasoning without letting them go mushy and tired. Chili is not delicate, but it is specific. The difference between a flat bowl and a deep, red, spoon-coating chili usually comes down to a handful of choices made before the lid goes on.
And that is exactly why this dish works so well when you want dinner to mostly take care of itself. It is hearty without being fussy, forgiving without being bland, and it gets better as it rests. If you’ve ever opened a crockpot and found soup with aspirations, the fix is in the details below.
Why You’ll Love This Slow Cooker Chili
-
Hands-Off Cooking: Once the browned base is in the slow cooker, the pot does the long simmering for you, and the only real job left is a final taste check near the end.
-
Deep, Rounded Flavor: The onions, tomato paste, cumin, and chili powder have hours to mellow together, which gives the chili a darker, less sharp taste than a fast stovetop batch.
-
Weeknight-Friendly Leftovers: One pot makes enough for dinner tonight and lunch tomorrow, and the flavor usually settles into something even better after a night in the fridge.
-
Flexible Heat Level: Keep it mild for kids, add cayenne or hot sauce at the table for people who want a little bite, and nobody has to fight over one pot.
-
Pantry-Good Ingredients: Canned tomatoes, canned beans, dried spices, and ground beef are the sort of ingredients most kitchens can assemble without a special trip.
-
Feeds a Crowd Without Drama: A 6-quart slow cooker makes enough for a family dinner, a game-day spread, or a few containers for the freezer with no scaling headache.
The Bowl That Starts With a Sizzle
Chili has roots that run through American cookery in a messy, practical way. It’s one of those dishes that grew out of people needing dinner to be filling, cheap, and adaptable, which is why there are so many versions and so many strong opinions about beans, beef, tomatoes, and heat. The slow cooker version sits squarely in that tradition. It is not trying to be elegant. It’s trying to be useful and worth eating twice.
What makes this style of chili worth making is the balance. You get browned beef for savory depth, tomatoes for body and acidity, beans for heft, and spices that smell dusty and warm before they ever hit liquid. In a good crockpot chili, none of those things should scream over the others. They should stack. The beef should taste beefier after the long cook, the tomato should lose its raw edge, and the beans should absorb enough seasoning to taste like they belong there instead of showing up as an afterthought.
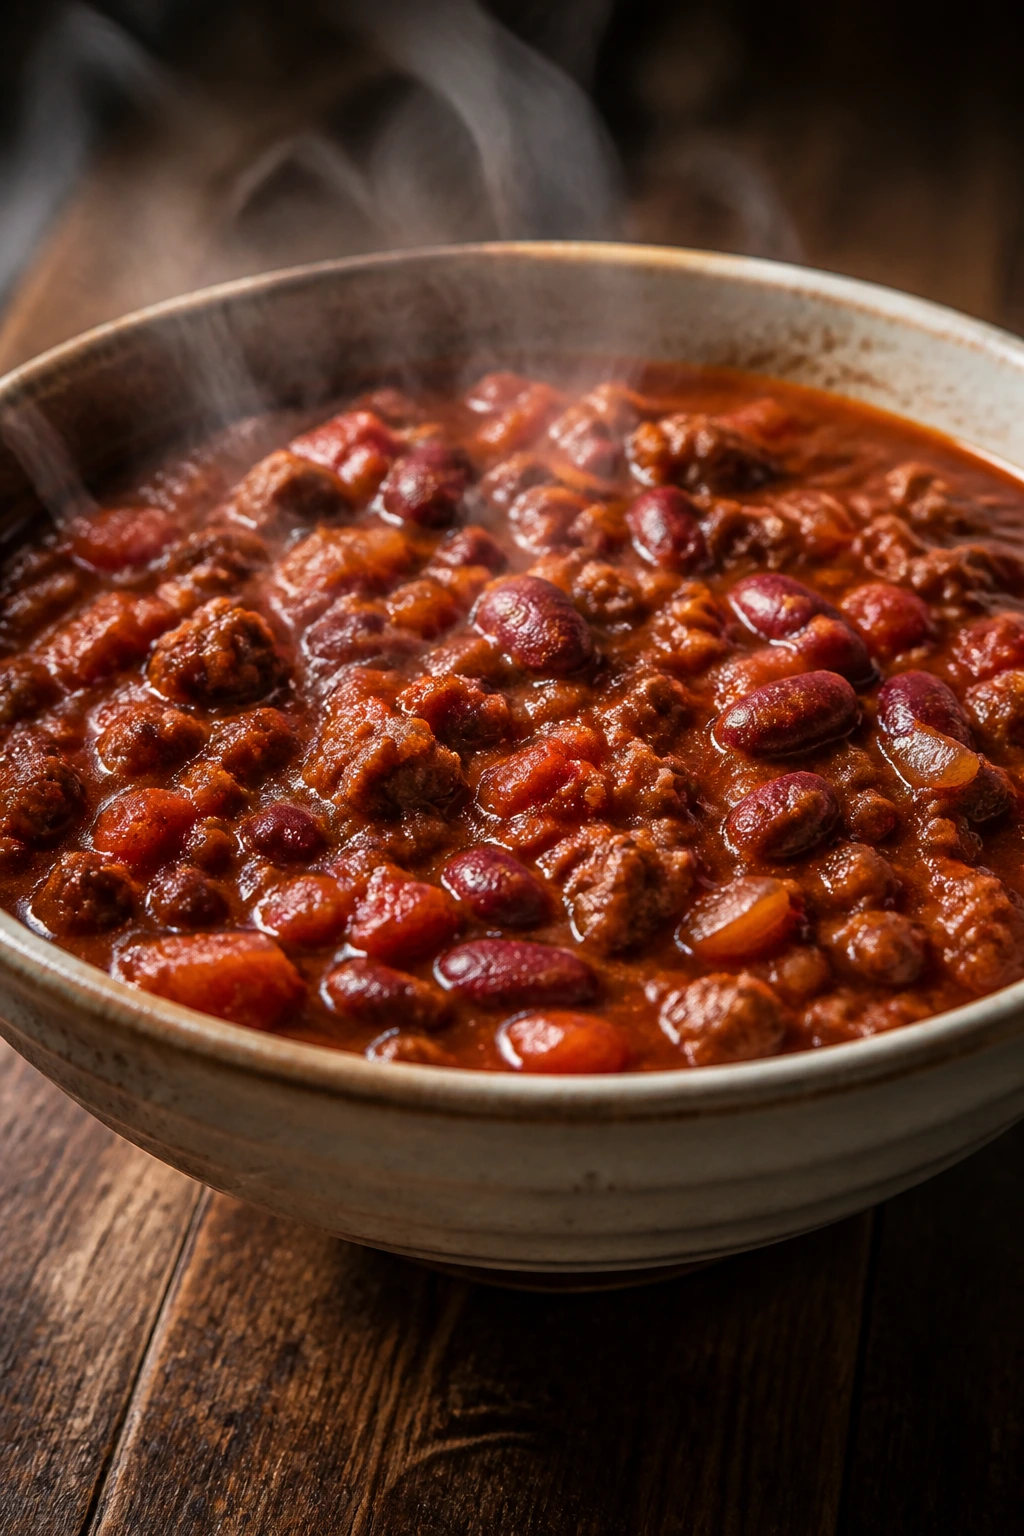
I also like the way slow cooker chili behaves at the table. It holds well. It doesn’t punish you if everyone eats at different times. It stays thick enough to mound on a spoon, and if you let it sit 15 to 20 minutes after cooking, it settles into a texture that feels cohesive rather than loose. That resting time is not fluff. It matters. Chili straight from the cooker can look a touch wetter than you want; chili that rests a bit usually lands exactly where it should.
There’s a small truth here that a lot of recipes gloss over: the crockpot is not a magic flavor machine. It rewards good prep. A few minutes of browning, a sensible ratio of liquid, and a willingness to taste at the end make the difference between “fine” and “this is the pot everyone keeps revisiting with a spoon.”
The Ingredients That Give the Pot Its Backbone
Yield: Serves 6 to 8
Prep Time: 20 minutes
Cook Time: 6 to 8 hours on Low, or 3 to 4 hours on High
Total Time: 6 hours 20 minutes to 8 hours 20 minutes on Low, or 3 hours 20 minutes to 4 hours 20 minutes on High
Difficulty: Beginner — the steps are straightforward, and the only skill that really matters is browning the meat well before the slow cook starts.
Best Served: Hot, after a short rest of 10 to 20 minutes, with toppings added at the table.
For the Chili Base:
- 1 tablespoon neutral oil
- 2 pounds ground beef, preferably 85/15 or 90/10
- 1 large yellow onion, diced
- 1 green bell pepper, diced
- 4 garlic cloves, minced
- 2 tablespoons tomato paste
- 1 (28-ounce) can diced tomatoes, undrained
- 1 (15-ounce) can tomato sauce
- 1 cup beef broth
- 1 tablespoon Worcestershire sauce
For the Beans and Body:
- 2 (15-ounce) cans kidney beans, drained and rinsed
- 1 (15-ounce) can black beans, drained and rinsed
- 1 tablespoon light brown sugar
For the Seasoning:
- 2 tablespoons chili powder
- 2 teaspoons ground cumin
- 1 teaspoon smoked paprika
- 1 teaspoon dried oregano
- 1/2 teaspoon cayenne pepper, optional
- 1 1/2 teaspoons kosher salt
- 1/2 teaspoon black pepper
For Serving:
- Shredded cheddar cheese
- Sour cream
- Sliced green onions
- Chopped cilantro
- Diced jalapeños
- Tortilla chips or cornbread
Why Each Ingredient Pulls Its Weight
Ground Beef and Aromatics
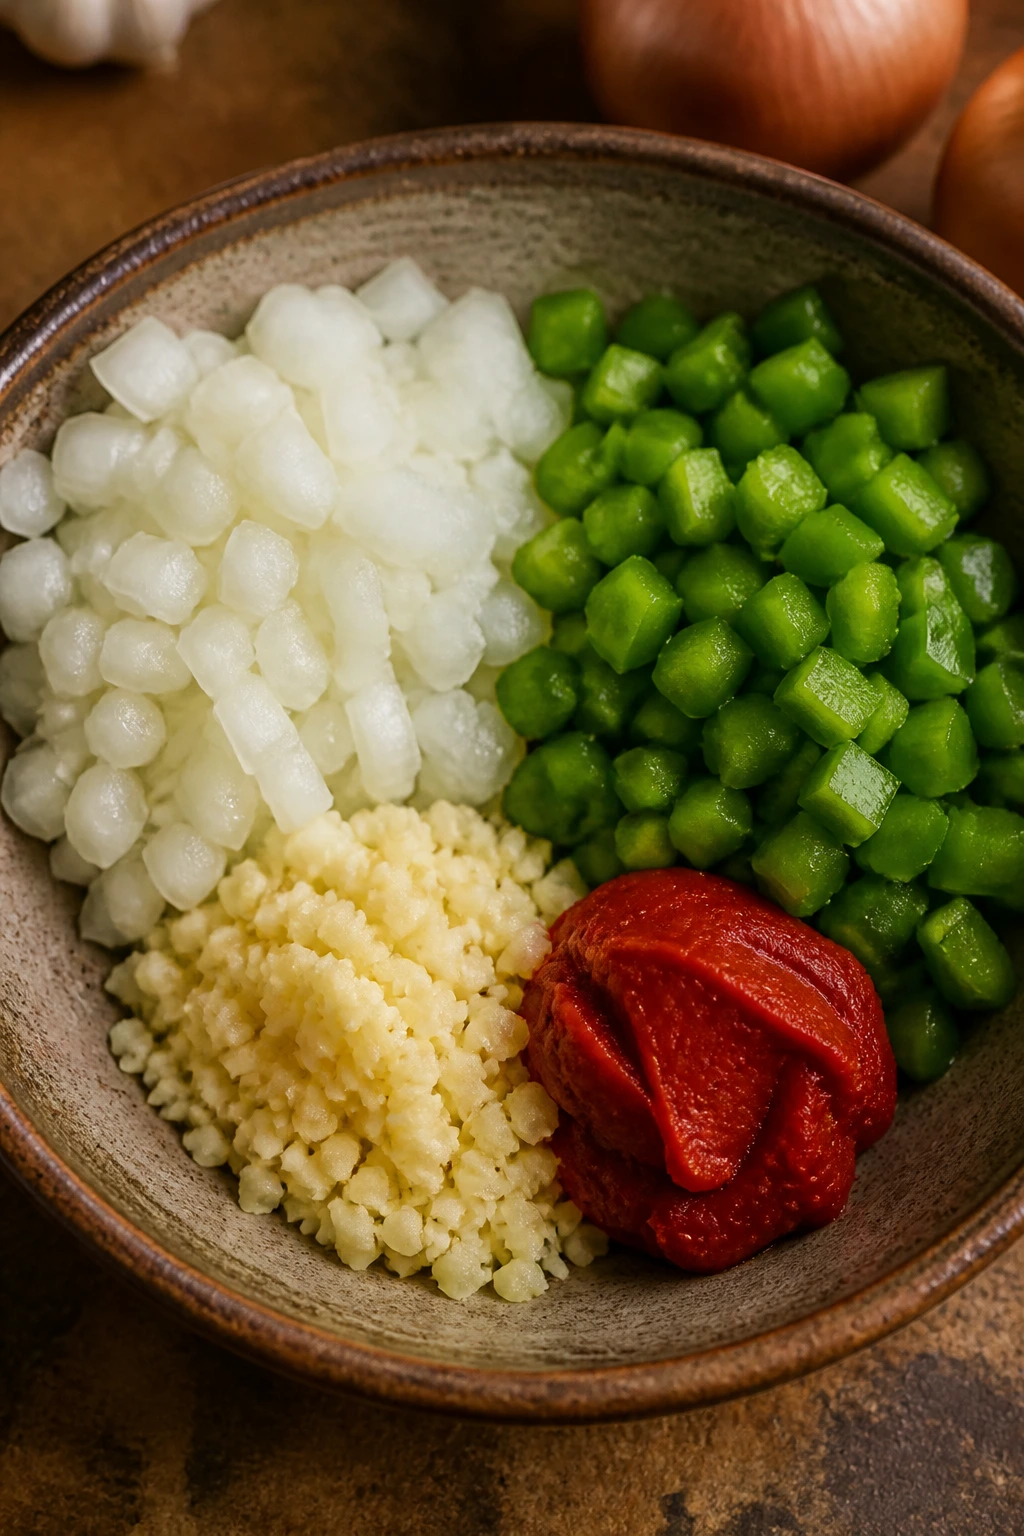
What to use: 2 pounds ground beef, 1 large yellow onion, 1 green bell pepper, and 4 garlic cloves.
Preparation: Dice the onion and bell pepper into small, even pieces so they soften at the same rate, and mince the garlic finely so it doesn’t land in sharp little chunks.
Substitutions: Ground turkey works if you want a leaner pot, and ground chicken can work too, though it needs a little more fat in the pan. For a richer bowl, use half ground beef and half ground pork.
Tips: Browning the meat before it goes into the slow cooker makes the final chili taste roasted instead of boiled. If your beef gives off a lot of fat, drain most of it off after browning so the top of the chili doesn’t feel greasy after six hours.
Tomatoes, Broth, and Tomato Paste
What to use: 1 can diced tomatoes, 1 can tomato sauce, 1 cup beef broth, 2 tablespoons tomato paste, and 1 tablespoon Worcestershire sauce.
Preparation: Leave the diced tomatoes undrained so the juice becomes part of the cooking liquid, and measure the broth instead of pouring freely. Tomato paste should be stirred into the hot pan before the slow cooker phase so it darkens a little and loses that raw canned taste.
Substitutions: Crushed tomatoes can replace diced tomatoes if you want a smoother spoonful. Chicken broth works in a pinch, though beef broth gives the pot a deeper, darker edge.
Tips: The broth should support the chili, not flood it. Start with 1 cup, then adjust at the end if the chili needs loosening for leftovers.
Beans and Body
What to use: 2 cans kidney beans and 1 can black beans, all drained and rinsed.
Preparation: Rinse the beans under cool water until the foam disappears and the water runs mostly clear. That quick rinse removes the metallic canning liquid and keeps the chili from tasting tinny.
Substitutions: Pinto beans are the easiest swap, and navy beans work if you want a softer, creamier texture. If you prefer a no-bean chili, replace those cans with extra beef and a little more tomato sauce.
Tips: Kidney beans hold their shape well after a long cook, while black beans break down a bit more and thicken the pot. That mix gives you some bite and some body in the same bowl.
Seasonings and Finish
What to use: Chili powder, cumin, smoked paprika, oregano, cayenne, brown sugar, salt, and black pepper.
Preparation: Measure the spices before you start so they go into the pan in one go. Brown sugar belongs in the pot, not because chili should taste sweet, but because a spoonful rounds off the tomatoes and gives the spice blend a softer finish.
Substitutions: Hot paprika can replace smoked paprika if you want more heat than smoke. Maple syrup can stand in for brown sugar, though it gives a slightly different finish.
Tips: Chili powder brands vary a lot. Some are earthy, some are hot, and some are mostly mild. Taste the finished pot before adding extra heat, because a tablespoon of a stronger blend can do more than you expect.
What a Slow Cooker Does Better Than a Stovetop Pot
The slow cooker is made for dishes that get better when they stop rushing themselves. Chili belongs in that category. Once the beef is browned and the aromatics have taken on a little color, the crockpot gives the spices time to blur together in a good way, not a muddy one. The tomato acid softens. The cumin stops tasting raw. The beans take on the seasoning instead of floating in their own lane.
There’s also a texture benefit that matters more than people admit. On the stovetop, chili can reduce too quickly and start to taste intense in a narrow, sharp way. In the slow cooker, the liquid moves gently. Nothing scorches. The edges stay round. If you’ve ever noticed that a slow-simmered chili tastes deeper even when it uses the same ingredients, that’s the reason. The heat is quieter, and the bowl comes out more balanced.
The slow cooker is also forgiving in a way a heavy pot on a burner is not. If you’re juggling school pickup, emails, or the usual dinner chaos, the lid buys you time. That matters. But it only works if you respect the method. Too much liquid and the chili turns soupy. Too many open-lid peeks and the cook drags on. Add-ins tossed in too early can get tired. The machine does the long, steady work; you still have to give it a sensible starting point.
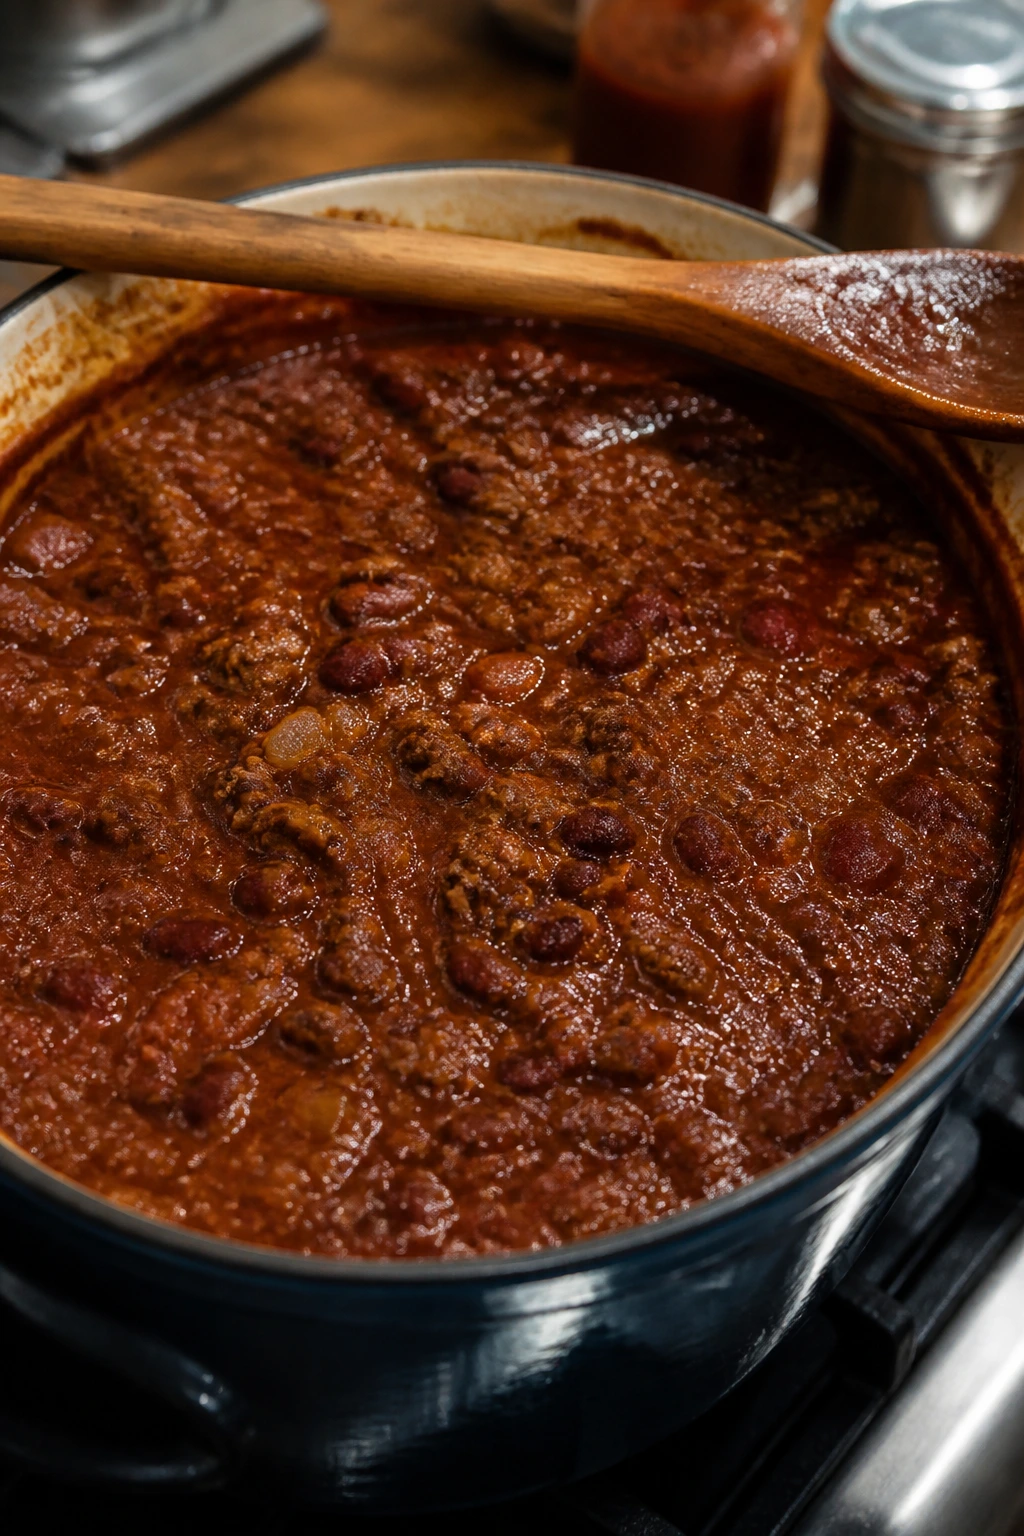
I have a soft spot for chili that starts with a real browning step because it gives the final bowl a deep, almost roasted smell. Not burnt. Roasted. That little bit of crust on the beef and tomato paste is the difference between a pot that tastes assembled and a pot that tastes built.
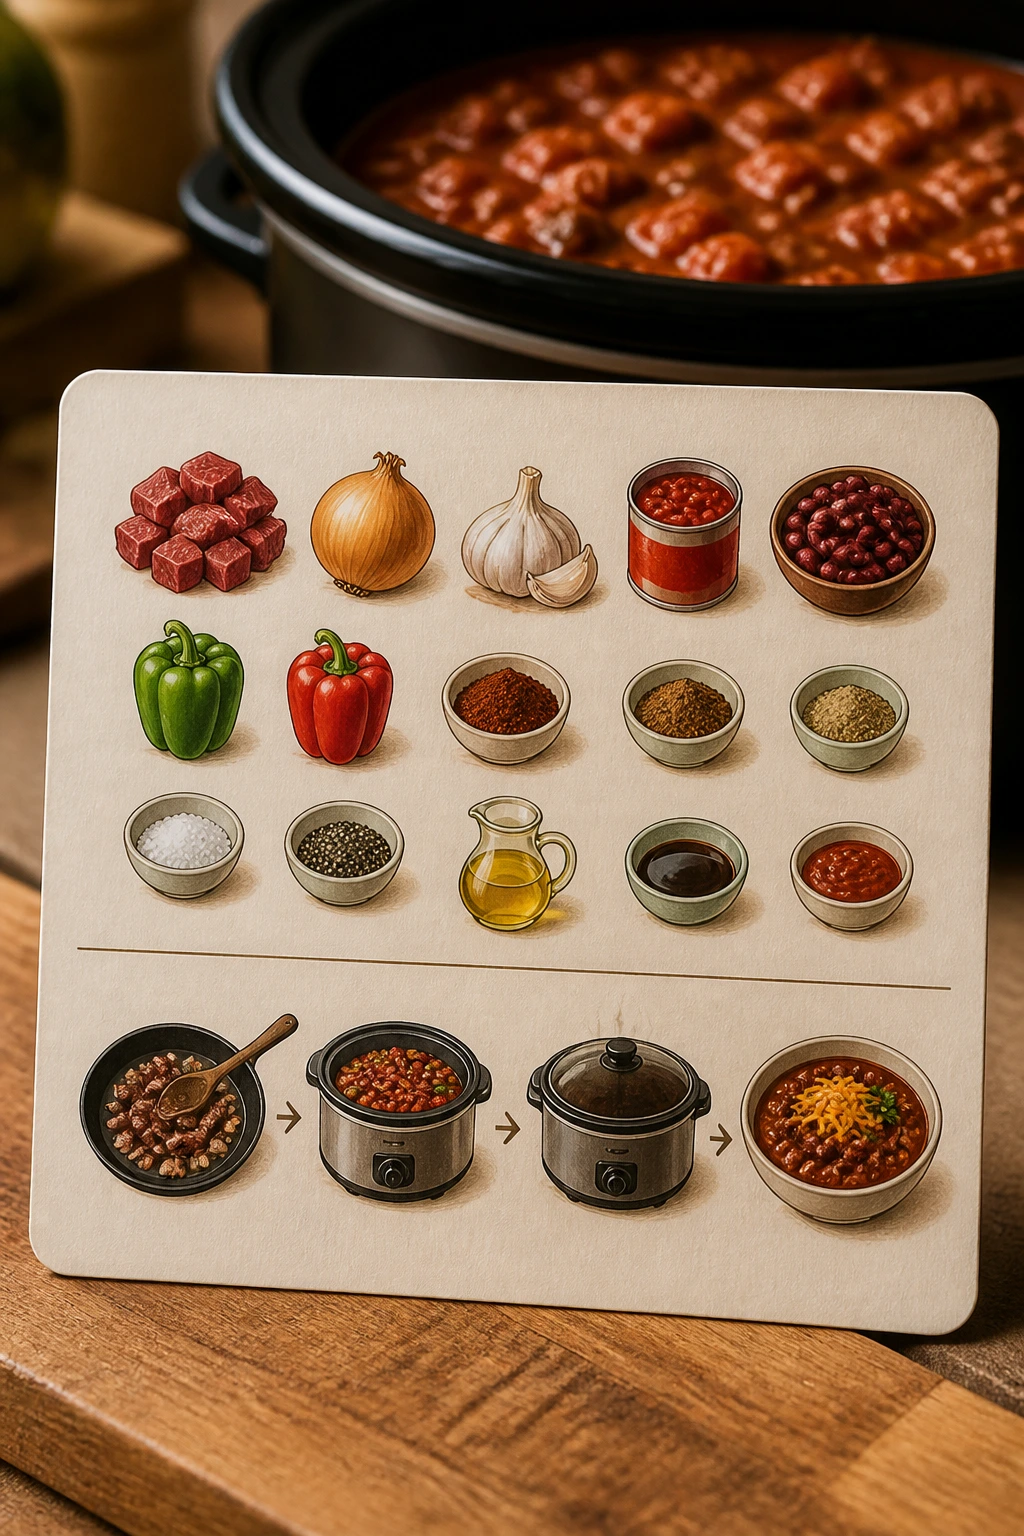
The Brown-and-Dump Method, Step by Step
Prep the Meat and Vegetables
-
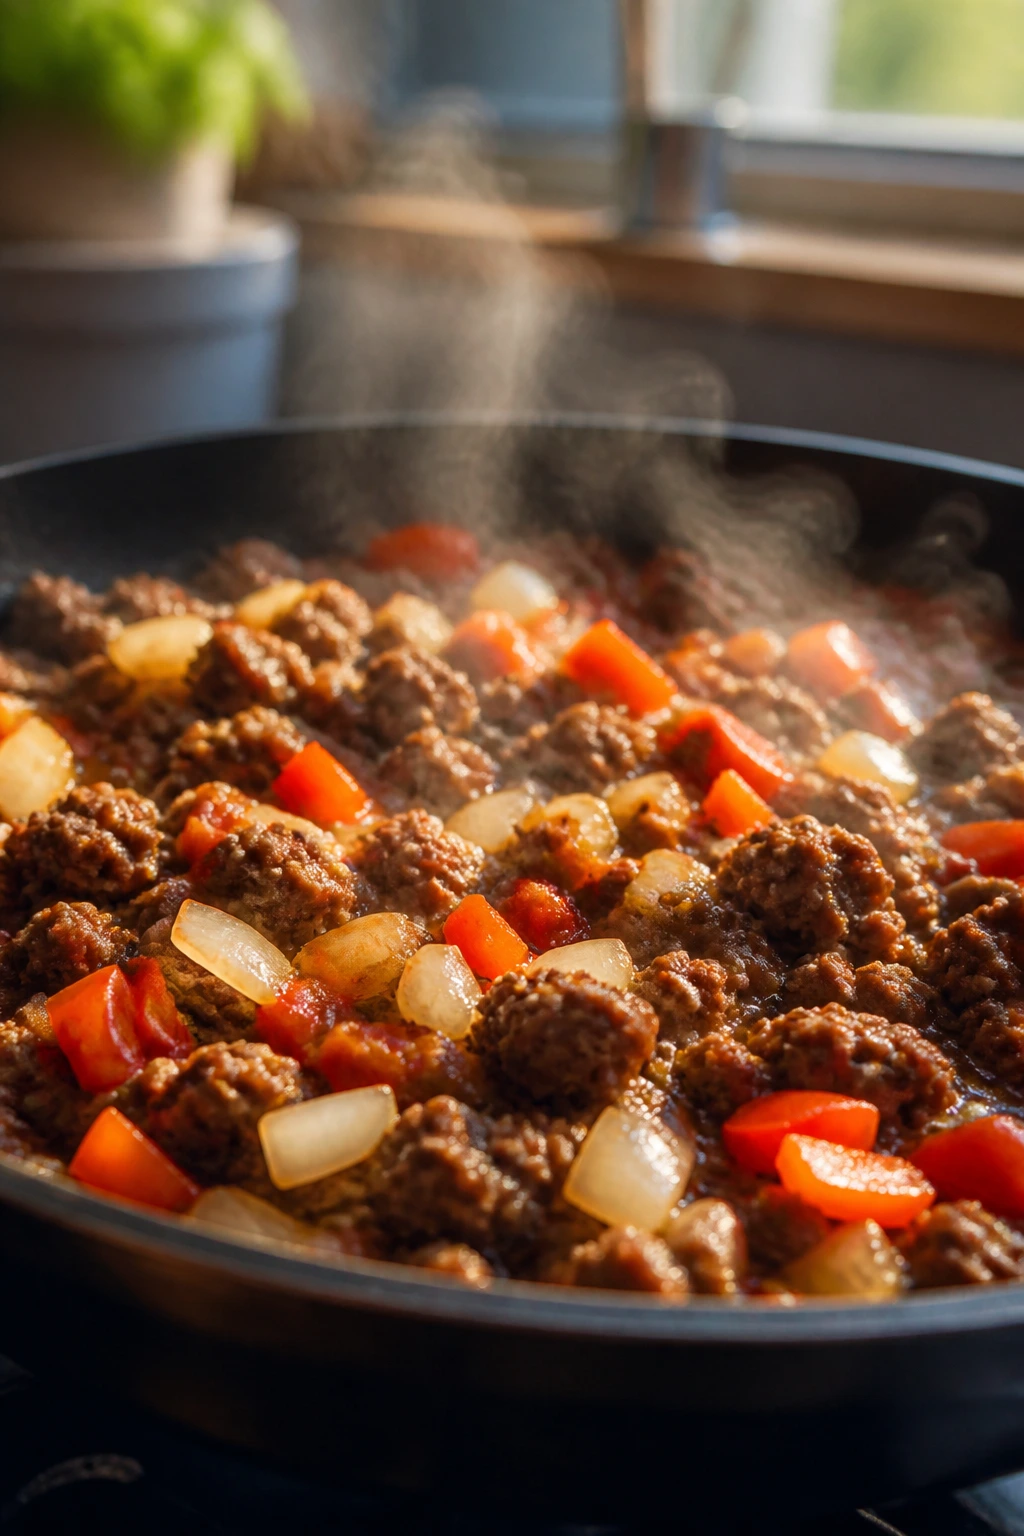
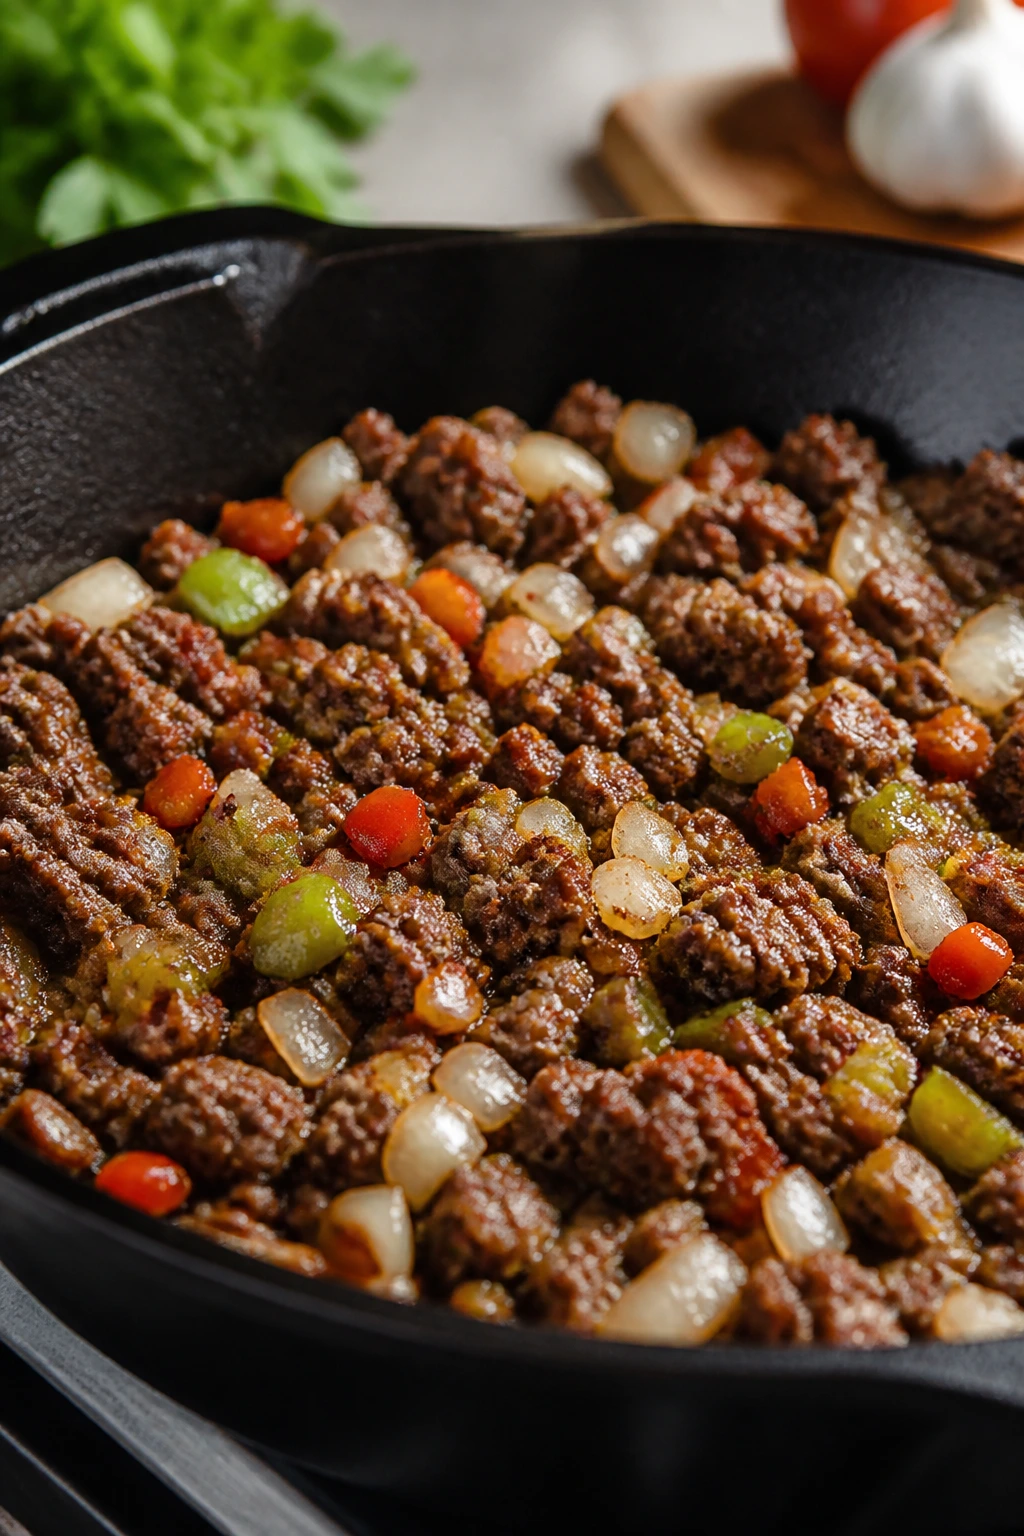
Heat 1 tablespoon neutral oil in a large skillet over medium-high heat. Add the diced onion and bell pepper, then cook for 4 to 5 minutes, stirring once or twice, until the onion turns translucent and the edges of the pepper soften.
-
Add the minced garlic and cook for 30 seconds, just until fragrant. Stir in the tomato paste, chili powder, cumin, smoked paprika, oregano, cayenne if using, salt, and black pepper, and cook for 1 minute. The spices should smell warm and toasty, not harsh.
-
Add the ground beef to the skillet, breaking it up with a wooden spoon. Cook for 6 to 8 minutes, until the meat is browned and no pink remains. If you have a thermometer, the beef should reach 160°F. Drain off excess fat if the pan looks slick; too much grease will sit on top of the chili later.
Load the Slow Cooker
-
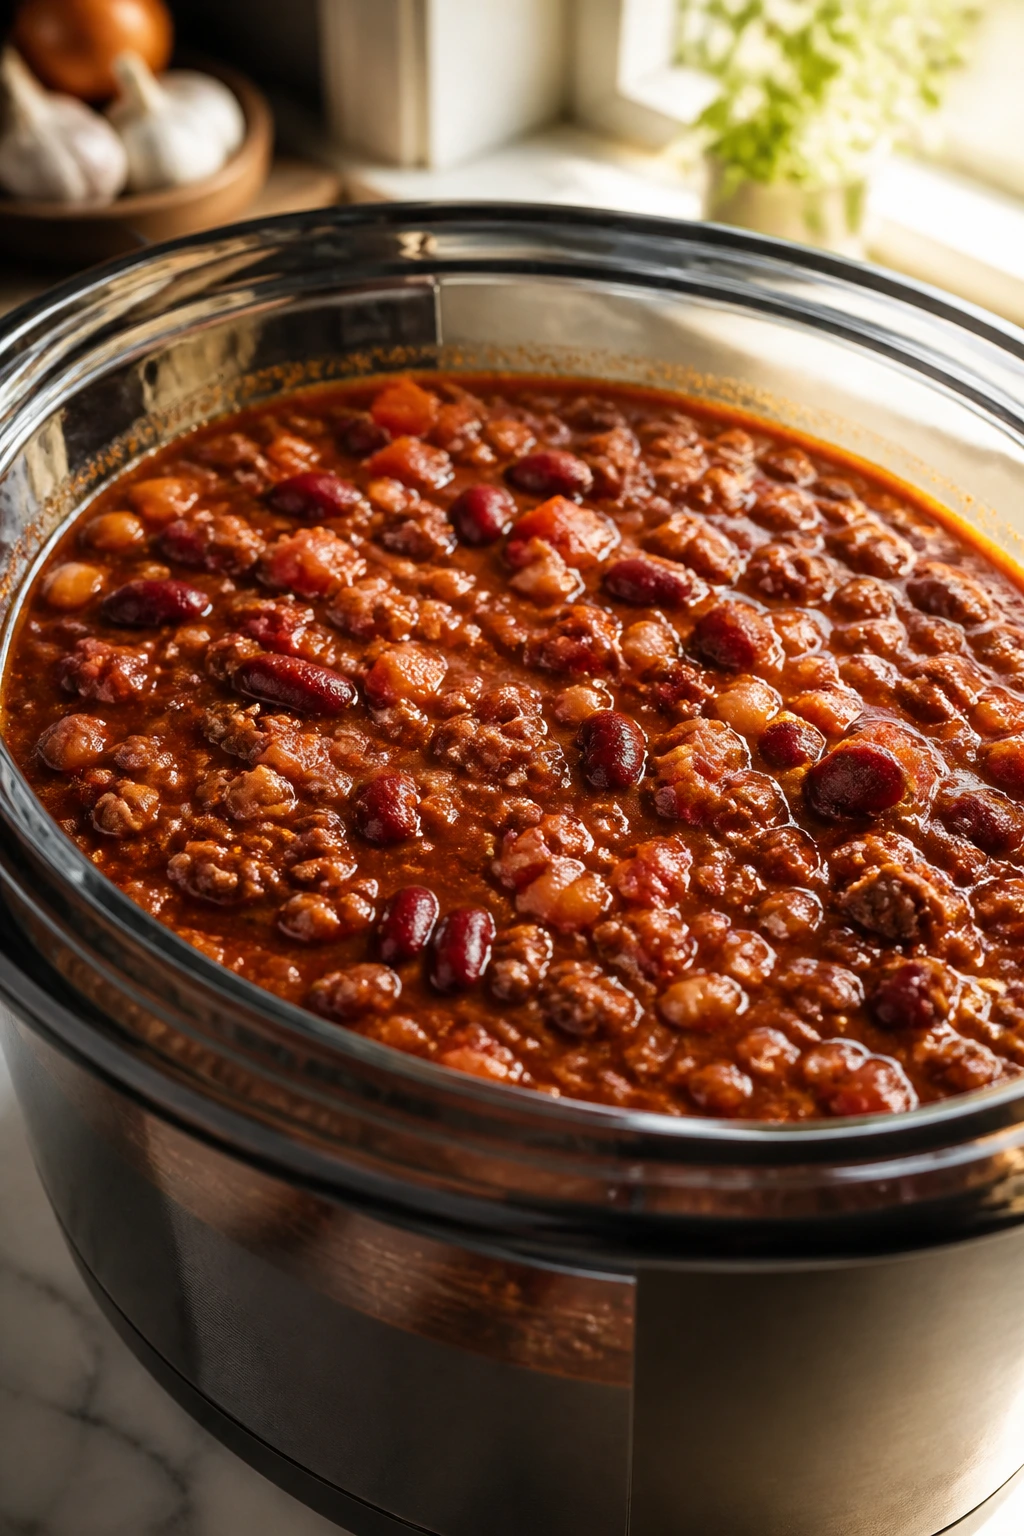
Transfer the beef mixture to a 6-quart slow cooker. Add the diced tomatoes with their juices, tomato sauce, beef broth, Worcestershire sauce, kidney beans, black beans, and brown sugar. Stir until everything looks evenly mixed and the tomato paste disappears into the liquid.
-
Cover and cook on Low for 6 to 8 hours or on High for 3 to 4 hours. The chili is ready when the onions are soft, the beans are tender, and the broth has thickened enough to coat a spoon lightly.
Taste, Thicken, and Finish
-
Taste the chili about 20 minutes before serving. Add more salt if the flavor feels flat, another pinch of cayenne if you want more heat, or a splash of broth if the pot has thickened more than you like.
-
If the chili seems thinner than you want, leave the lid off for the last 20 to 30 minutes on High, or mash a few spoonfuls of beans against the side of the pot with a spoon. That releases starch and thickens the chili without turning it pasty.
-
Let the chili rest with the lid cracked open for 10 to 15 minutes before serving. The surface settles, the steam calms down, and the texture lands where it should.
Tools That Make Chili Night Easier

- 6-quart slow cooker: Big enough for a family-size batch without crowding the pot.
- Large skillet, 12-inch if you have one: Gives the beef enough room to brown instead of steam.
- Wooden spoon or heatproof spatula: Better for breaking up the meat and scraping up the tomato paste.
- Chef’s knife and cutting board: A sharp knife makes the onion and pepper work faster and less irritating.
- Measuring spoons and a measuring cup: Chili spices are forgiving, but the broth amount should stay honest.
- Can opener: Not glamorous. Still essential.
- Ladle: Makes serving cleaner and keeps the toppings from sinking under the first scoop.
- Optional fat separator or paper towels: Handy if your beef releases more grease than you want to leave in the pot.
How to Serve It Like a Proper Dinner
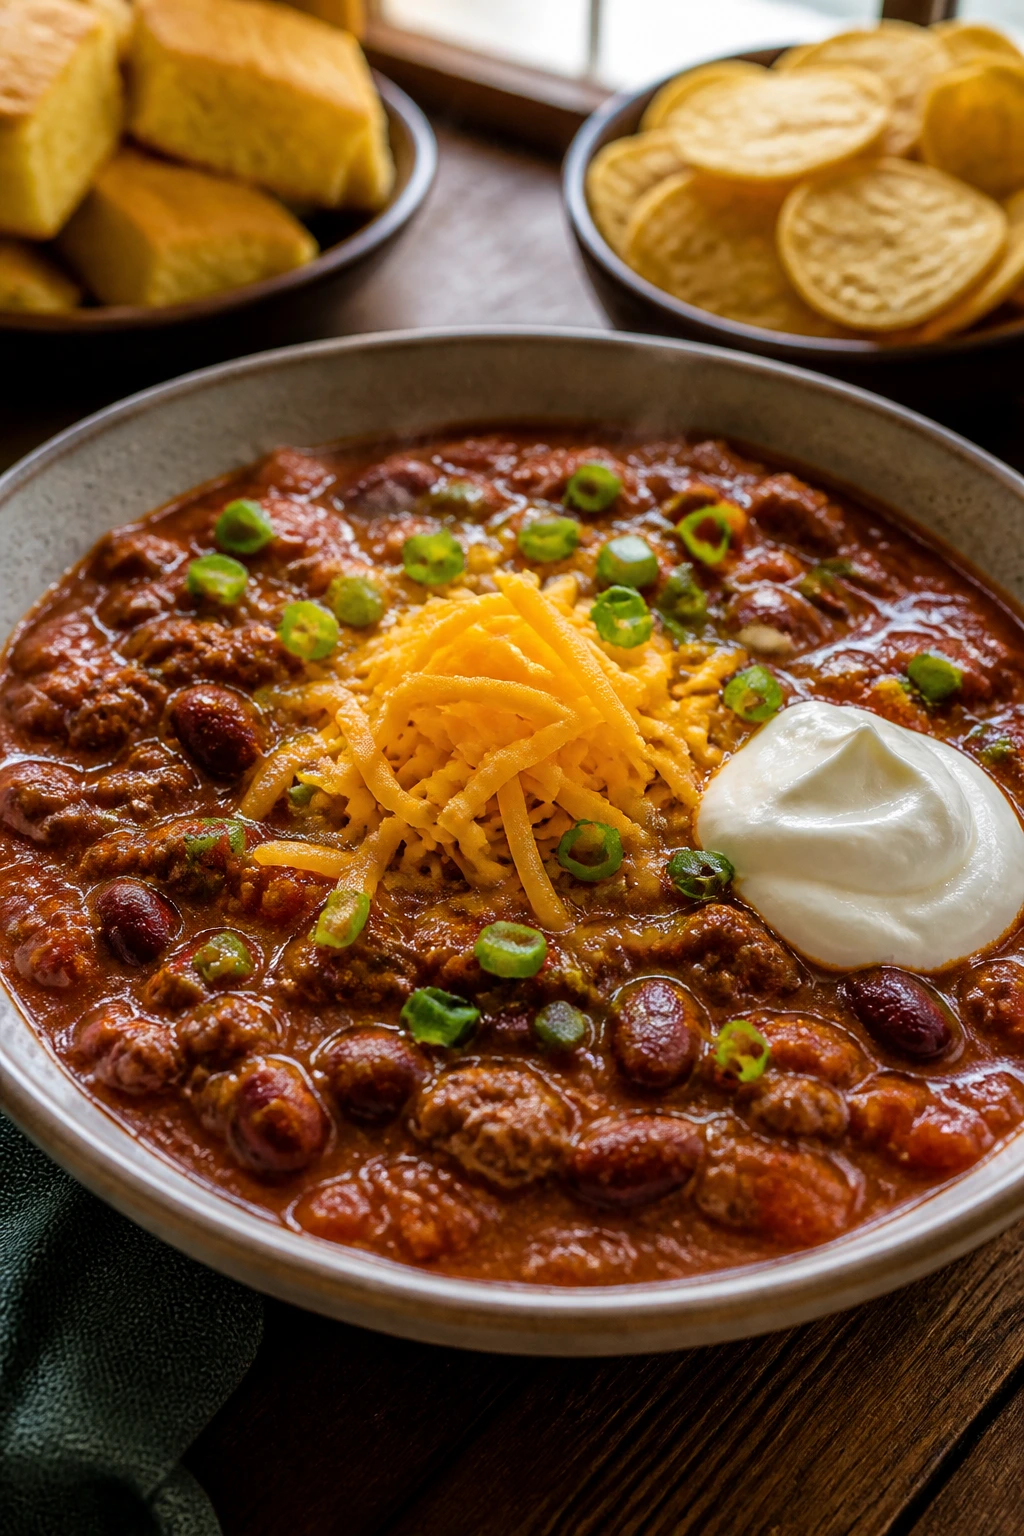
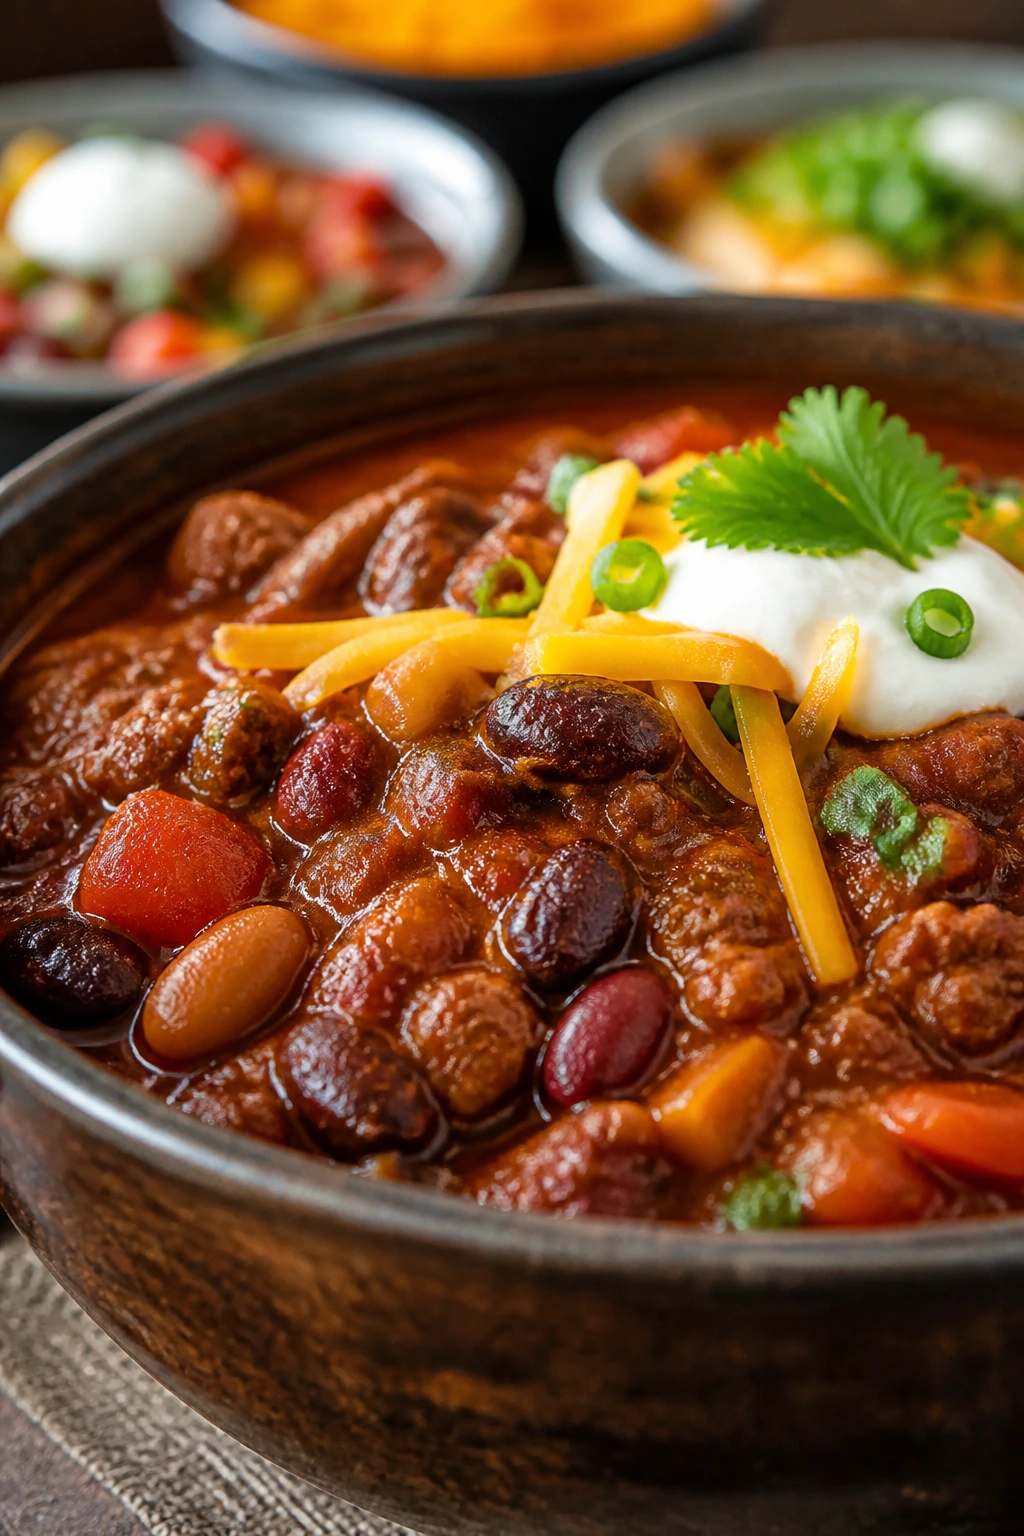
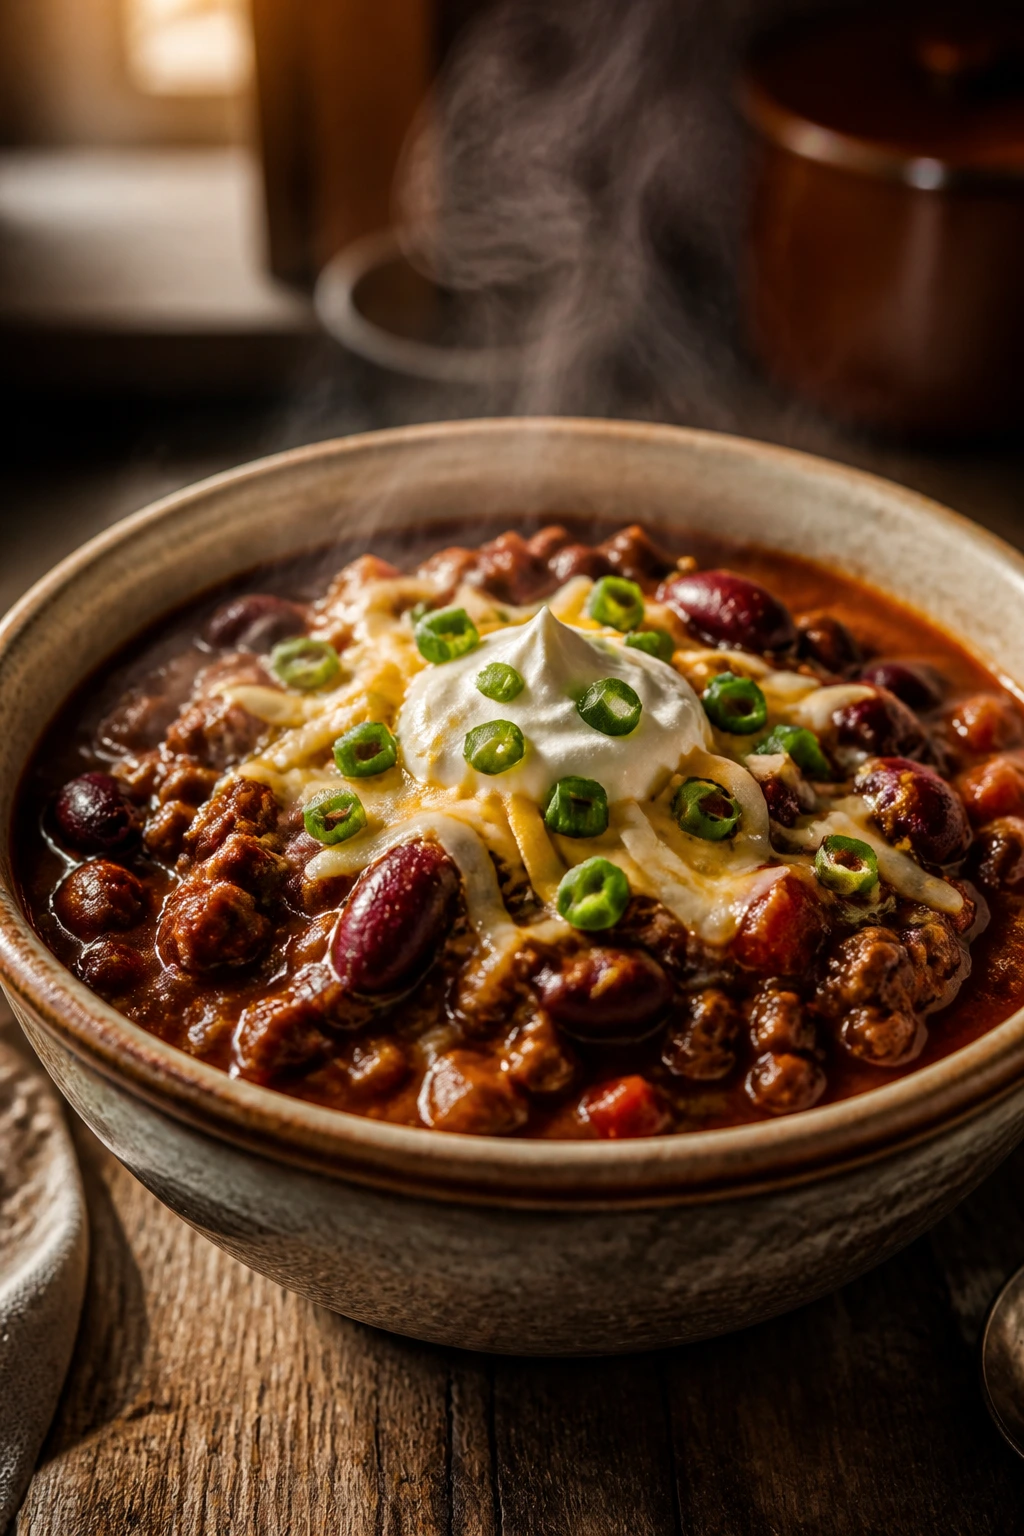
Presentation: Spoon the chili into wide bowls rather than deep soup mugs. A wide bowl shows off the texture, and it gives you room to add toppings without burying them. I like a mound of shredded cheddar in the center, a spoonful of sour cream off to one side, and a scatter of green onions or cilantro over the top so the bowl looks intentional, not piled on at random.
Accompaniments: Cornbread is the obvious partner, and for good reason. The sweet, crumbly edges of a skillet cornbread handle the chili’s tomato heat well. Tortilla chips bring crunch. Buttered rice works if you want to stretch the pot. A chopped salad with crisp romaine, cucumber, and a sharp vinaigrette cuts through the richness better than another heavy side.
Portions: Plan on 1 1/2 cups per adult if you’re serving chili as the main meal with cornbread or chips on the side. If you’re serving it over baked potatoes, a slightly smaller bowl is enough because the potato does part of the work. For a buffet or game-day spread, keep the pot on warm and portion more modestly; people tend to come back for seconds when the toppings are laid out clearly.
Beverage Pairing: A cold amber lager fits the smoky tomato base nicely without fighting the spices. If you want something nonalcoholic, iced tea with lemon or sparkling water with lime keeps the meal from feeling too heavy.
Practical Tweaks, Shortcuts, and Flavor Boosts
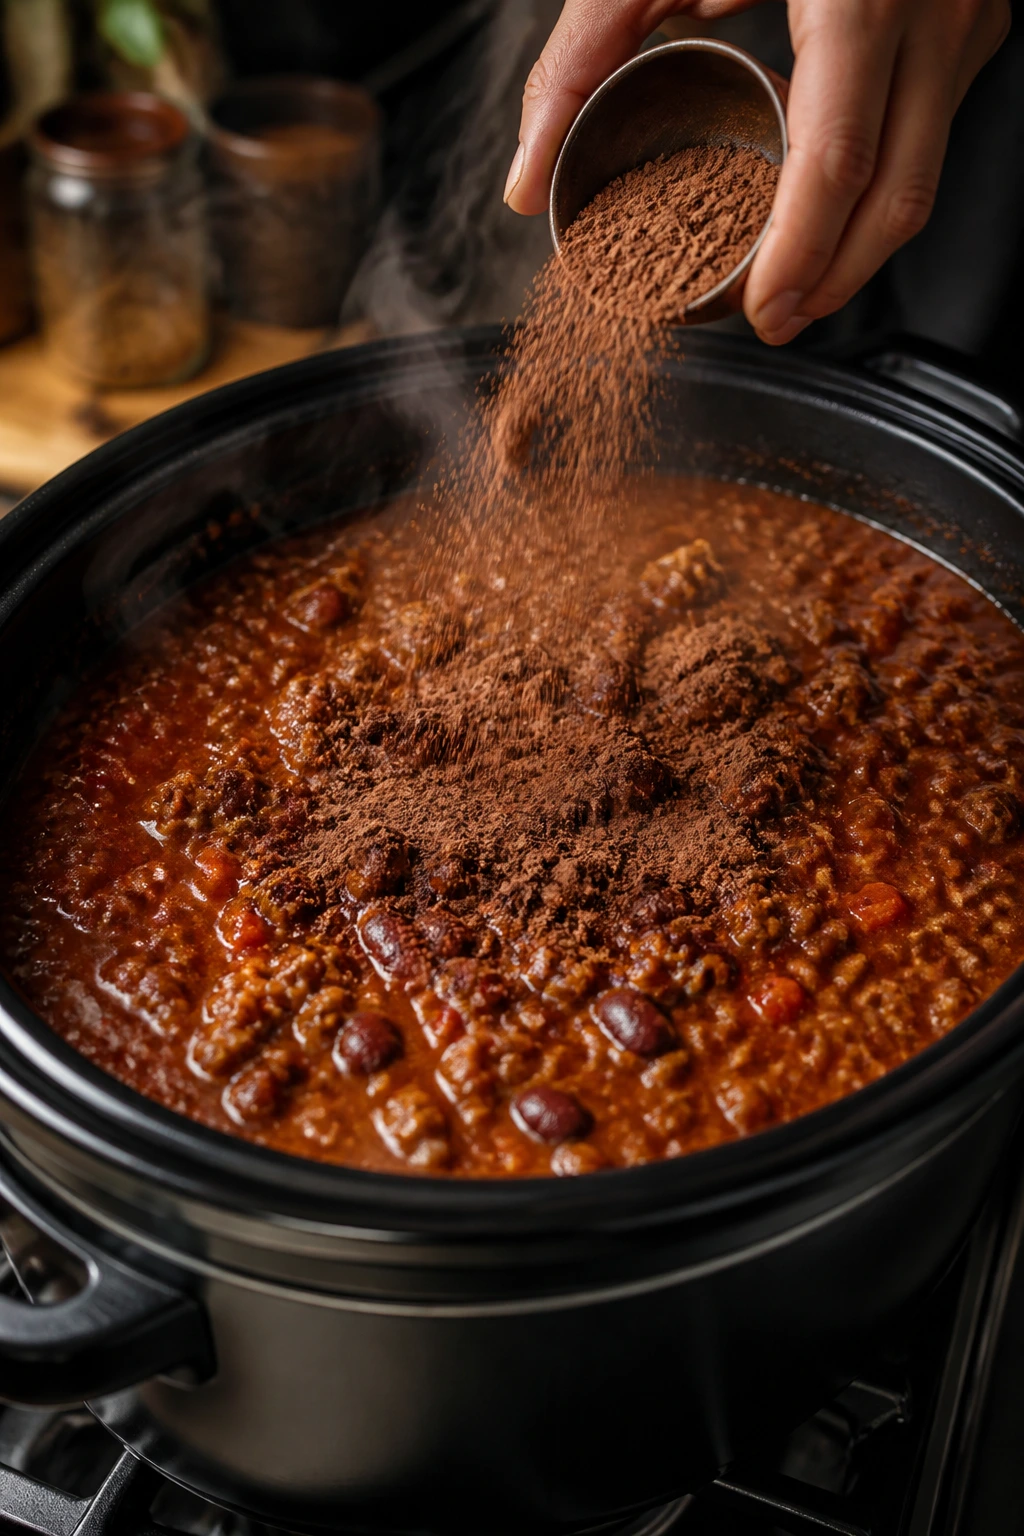
Flavor Enhancement: Stir in 1 teaspoon of unsweetened cocoa powder or 1 tablespoon of masa harina during the final 20 minutes if you want the chili to taste a little deeper and thicker. Cocoa should disappear into the background; masa gives the pot a gentle corn note and a silkier body.
Time-Saver: Brown the beef, onion, bell pepper, garlic, and spices the night before, then chill the mixture in a container. In the morning, dump it into the slow cooker with the remaining ingredients and turn it on. That move turns a morning rush into a one-step start.
Texture Trick: If the chili feels loose near the end, mash about 1 cup of beans against the side of the pot. That thickens the liquid without making the bowl gluey, which is a mistake a lot of thickening tricks make if they’re overdone.
Cost-Saver: If beef prices make you wince, use 1 pound ground beef and 1 pound ground turkey or cut the meat back and add an extra can of beans. The chili still eats like a full meal, and the beans carry more of the load than people expect.
Heat Control: Keep the cayenne out of the pot if you’re serving kids or mixed spice preferences. Put hot sauce, sliced jalapeños, or crushed red pepper on the table instead. That keeps the base balanced and lets each bowl go its own direction.
Where Chili Goes Flat
Skipping the browning step: Raw ground beef in a slow cooker can work, but the flavor usually lands duller and the texture can turn crumbly in a way that feels boiled. Browning gives you those browned bits on the bottom of the skillet, and those bits are where the savory depth starts.
Using too much liquid: Chili should slump, not pour. If you add extra broth because you’re nervous about it drying out, you’ll end up with a soupy bowl that needs fixing at the end. Start with the measured broth and only loosen the pot after the long cook if it really needs it.
Forgetting to drain the beans: Canned bean liquid can make the chili taste murky and a little metallic. A quick rinse under cool water takes 20 seconds and pays you back at the table.
Seasoning only at the end: Chili powder and cumin need time to lose their raw edge. If the pot tastes flat after cooking, you can rescue it with a little salt and acid, but it’s easier to season the beef mixture before the slow cook starts.
Adding dairy too early: Sour cream, cream cheese, or shredded cheese mixed into the crockpot can turn grainy or oily, especially if the heat is high. Save dairy for the bowl.
Opening the lid every hour: The slow cooker loses heat each time you peek, and the pot needs time to rebuild that temperature. It’s an annoying detail, but it matters. Leave it alone until the last half hour unless you’re checking thickness.
Variations for Heat, Meat, and Meatless Bowls
Texas-Style No-Bean Bowl: Leave out the kidney beans and black beans, bump the beef up to 2 1/2 pounds, and reduce the broth by 1/4 cup. For a little body, stir in 1 tablespoon masa harina near the end. The result is meatier, denser, and more in line with the bean-free style some chili fans swear by.
Smoky Chipotle Pot: Add 1 chopped chipotle pepper in adobo plus 1 teaspoon of adobo sauce when you load the slow cooker. Skip or reduce the cayenne unless you want the heat to stack. This version smells darker and smokier, and it works especially well with cheddar on top.
Turkey and Black Bean Version: Swap the beef for 2 pounds ground turkey and use the oil in the skillet instead of relying on rendered fat. Turkey gives you a lighter bowl, but it needs the same seasoning backbone, so don’t trim the spices too hard.
Vegetarian Pantry Chili: Replace the beef with 2 extra cans of beans and 8 ounces of chopped mushrooms, then use vegetable broth instead of beef broth. Mushrooms bring a meaty bite, and the beans keep the pot thick enough to feel like dinner instead of a side dish.
How to Store, Reheat, and Freeze Leftovers
Chili is one of those dishes that does well with a second day in the fridge. The flavors settle, the tomatoes mellow, and the beans absorb even more of the seasoning. If you can make it a day ahead, it often tastes fuller the next time you warm it.
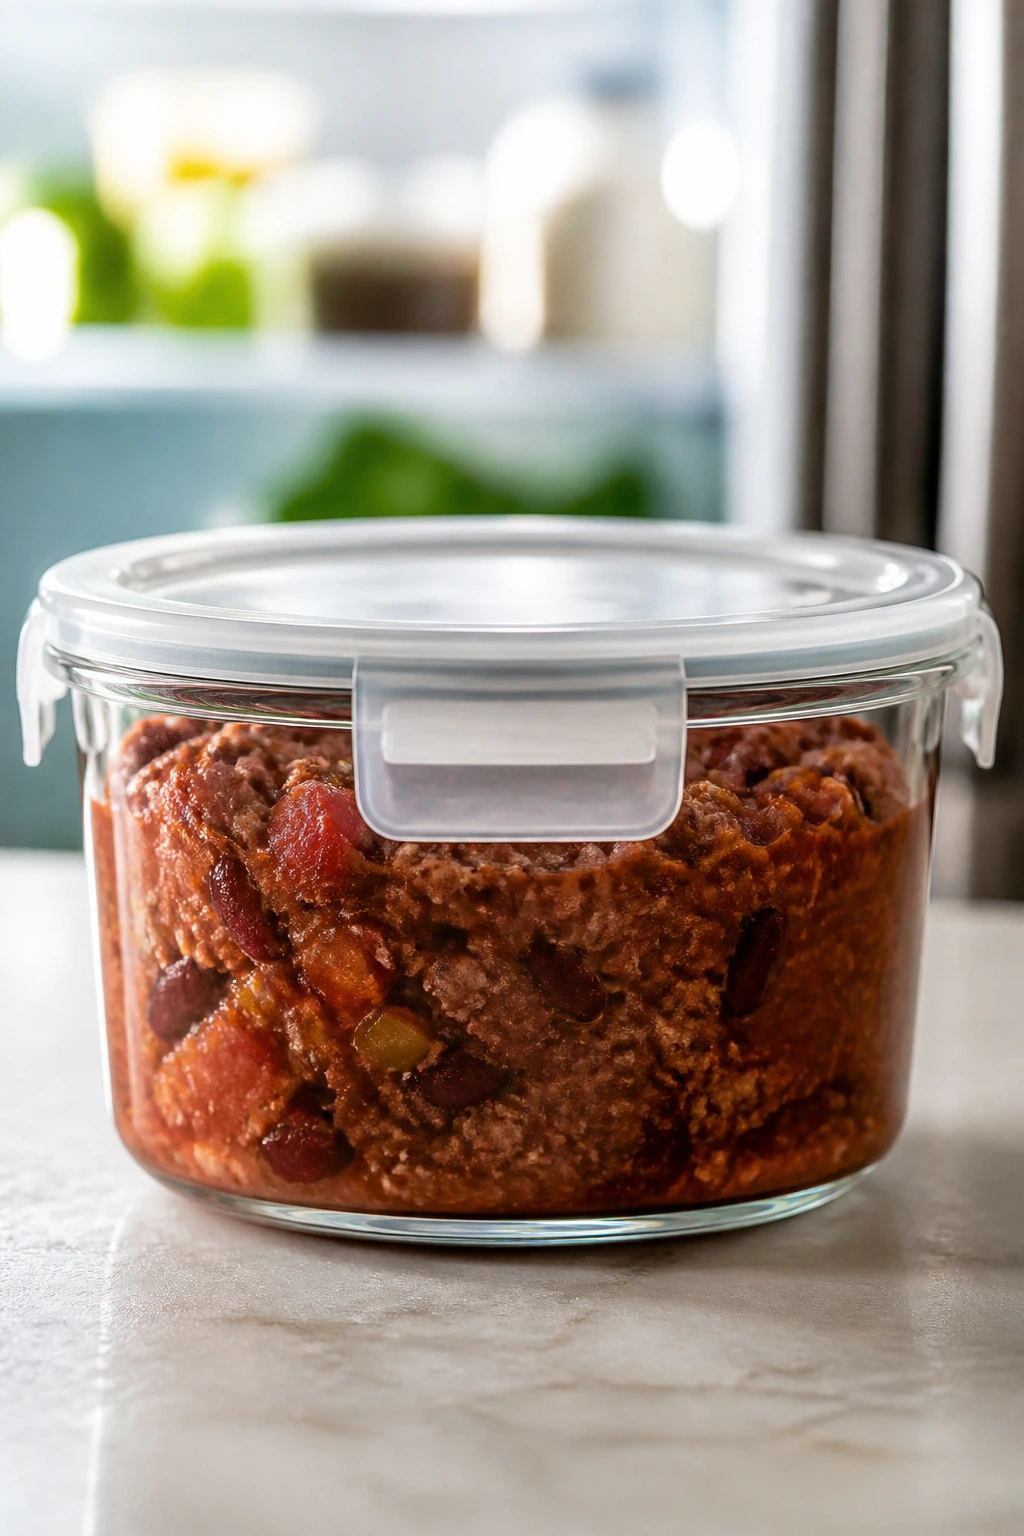
Let the chili cool for no more than 2 hours at room temperature, then pack it into shallow containers so it drops in temperature quickly. In the refrigerator, it keeps well for up to 4 days. For the freezer, use airtight containers or freezer bags and leave a little headspace for expansion. It holds for up to 3 months frozen without losing its shape badly.
For reheating, the stovetop is the cleanest option. Warm the chili over medium-low heat, stirring every few minutes, and add a splash of broth or water if the texture has tightened up too much. In the microwave, use a covered bowl and heat in 60-second bursts, stirring between rounds so the edges do not overheat while the center stays cold.
If you plan to freeze it, hold back the toppings. Freeze the chili plain, then add cheese, sour cream, onions, and cilantro after reheating. Dairy and herbs do not freeze with much grace, and there’s no reason to ask them to.
Slow Cooker Chili Questions People Ask
Can I put raw ground beef straight into the slow cooker?
You can, but I do not recommend it for this recipe. Raw beef tends to clump, and the final texture is softer and less savory than a browned base. Browning also gives you a chance to cook off excess grease and toast the spices for a minute, which changes the whole pot.
Can I use ground turkey or chicken instead of beef?
Yes. Ground turkey is the easiest swap because it stays pleasantly firm after the long cook, especially if you add the tablespoon of oil in the skillet. Ground chicken works too, but it tastes a little lighter, so I’d keep the full spice blend and the Worcestershire sauce.
How do I make the chili thicker if it comes out thin?
Leave the lid off for the last 20 to 30 minutes on High, or mash some of the beans against the side of the pot. A spoonful of masa harina can help too, but add it slowly; too much turns the texture dusty. Thicker chili should coat a spoon, not sit in a puddle.
Can I make this without beans?
Yes. That turns it into a Texas-style pot. Increase the beef, cut the broth a little, and think about adding a spoonful of masa harina at the end for body. Without beans, the chili needs more attention to texture because the beans normally help carry the sauce.
What should I do if the chili tastes flat at the end?
Add salt first. Most flat chili is under-salted. If it still tastes dull after that, add 1 tablespoon of Worcestershire or a small splash of apple cider vinegar to sharpen the tomato. A little acid wakes up the whole pot without making it taste sour.
Can I double this recipe in one slow cooker?
Only if your cooker is large enough to hold it comfortably, usually 8 quarts or more, and you still keep the pot under about two-thirds full. Overfilling slows the cook and leaves you with uneven heat around the edges. If you’re feeding a crowd, two smaller batches are safer than one stuffed cooker.
Is this chili spicy?
As written, it’s mild to medium. The chili powder brings warmth more than burn, and the cayenne is optional. If you want more heat, add chipotle, cayenne, or hot sauce at the table so the base stays balanced for everyone else.
Does chili really taste better the next day?
Usually, yes. The spices settle in, the tomato softens, and the beans absorb more seasoning overnight. The texture also thickens a bit in the fridge, which is one of those rare leftover changes that works in your favor.
A Bowl Worth Making Again
There are fancier dinners, sure. There are also dinners that demand attention every five minutes and leave you with three pans to wash. This isn’t that. A well-made slow cooker chili gives you the thing most home cooks are after on an ordinary day: a meal that feels complete, tastes like you paid attention, and doesn’t ask you to stand over the stove the whole time.
What keeps this one in rotation for me is the balance of effort and payoff. A few minutes of chopping, one skillet for browning, a crockpot that quietly does its job, and you end up with a pot thick enough to spoon into bowls and sturdy enough to feed people twice. Make it once and you’ll probably keep canned tomatoes and beans on hand for the next round.
Slow-Cooked Slow Cooker Chili — Recipe Card
Recipe Name: Slow-Cooked Slow Cooker Chili
Description: A beefy, tomato-rich slow cooker chili with kidney beans, black beans, onion, bell pepper, and a smoky chili spice blend. Browning the meat first gives the pot deeper flavor and keeps the texture hearty.
Prep Time: 20 minutes
Cook Time: 6 to 8 hours on Low, or 3 to 4 hours on High
Total Time: 6 hours 20 minutes to 8 hours 20 minutes on Low, or 3 hours 20 minutes to 4 hours 20 minutes on High
Course: Dinner, Main Course
Cuisine: American
Servings: 6 to 8 servings
Calories: About 360 kcal per serving
Ingredients
For the Chili Base:
- 1 tablespoon neutral oil
- 2 pounds ground beef, preferably 85/15 or 90/10
- 1 large yellow onion, diced
- 1 green bell pepper, diced
- 4 garlic cloves, minced
- 2 tablespoons tomato paste
- 1 (28-ounce) can diced tomatoes, undrained
- 1 (15-ounce) can tomato sauce
- 1 cup beef broth
- 1 tablespoon Worcestershire sauce
For the Beans and Body:
- 2 (15-ounce) cans kidney beans, drained and rinsed
- 1 (15-ounce) can black beans, drained and rinsed
- 1 tablespoon light brown sugar
For the Seasoning:
- 2 tablespoons chili powder
- 2 teaspoons ground cumin
- 1 teaspoon smoked paprika
- 1 teaspoon dried oregano
- 1/2 teaspoon cayenne pepper, optional
- 1 1/2 teaspoons kosher salt
- 1/2 teaspoon black pepper
For Serving:
- Shredded cheddar cheese
- Sour cream
- Sliced green onions
- Chopped cilantro
- Diced jalapeños
- Tortilla chips or cornbread
Instructions
-
Heat the oil in a large skillet over medium-high heat. Add the onion and bell pepper and cook for 4 to 5 minutes until softened.
-
Add the garlic, tomato paste, chili powder, cumin, smoked paprika, oregano, cayenne if using, salt, and black pepper. Cook for 1 minute until fragrant.
-
Add the ground beef and cook, breaking it up, until browned and no pink remains, about 6 to 8 minutes. Drain excess fat if needed.
-
Transfer the beef mixture to a 6-quart slow cooker. Add the diced tomatoes, tomato sauce, beef broth, Worcestershire sauce, kidney beans, black beans, and brown sugar. Stir well.
-
Cover and cook on Low for 6 to 8 hours or on High for 3 to 4 hours, until thick and flavorful.
-
Taste and adjust with more salt, pepper, or cayenne if needed. If the chili is too thin, cook uncovered for 20 to 30 minutes more or mash a few beans into the pot.
-
Let the chili rest for 10 to 15 minutes before serving.
Notes: For a thicker chili, mash some beans near the end. For extra heat, add chipotle or hot sauce at the table. Store leftovers up to 4 days in the fridge or 3 months in the freezer.