
A good Korean beef bowl meal prep has one job: taste bold on day one and still feel worth eating on day four. That means savory beef, a sauce with enough backbone to cling to rice, and vegetables that keep some crunch instead of collapsing into a damp heap.
A lot of make-ahead dinners fail in tiny, annoying ways. The rice gets gummy. The sauce disappears. The vegetables turn soft and tired. Korean beef bowls dodge most of that because the flavor lives in the sauce, the texture lives in the toppings, and the whole thing can be built in layers without feeling fussy.
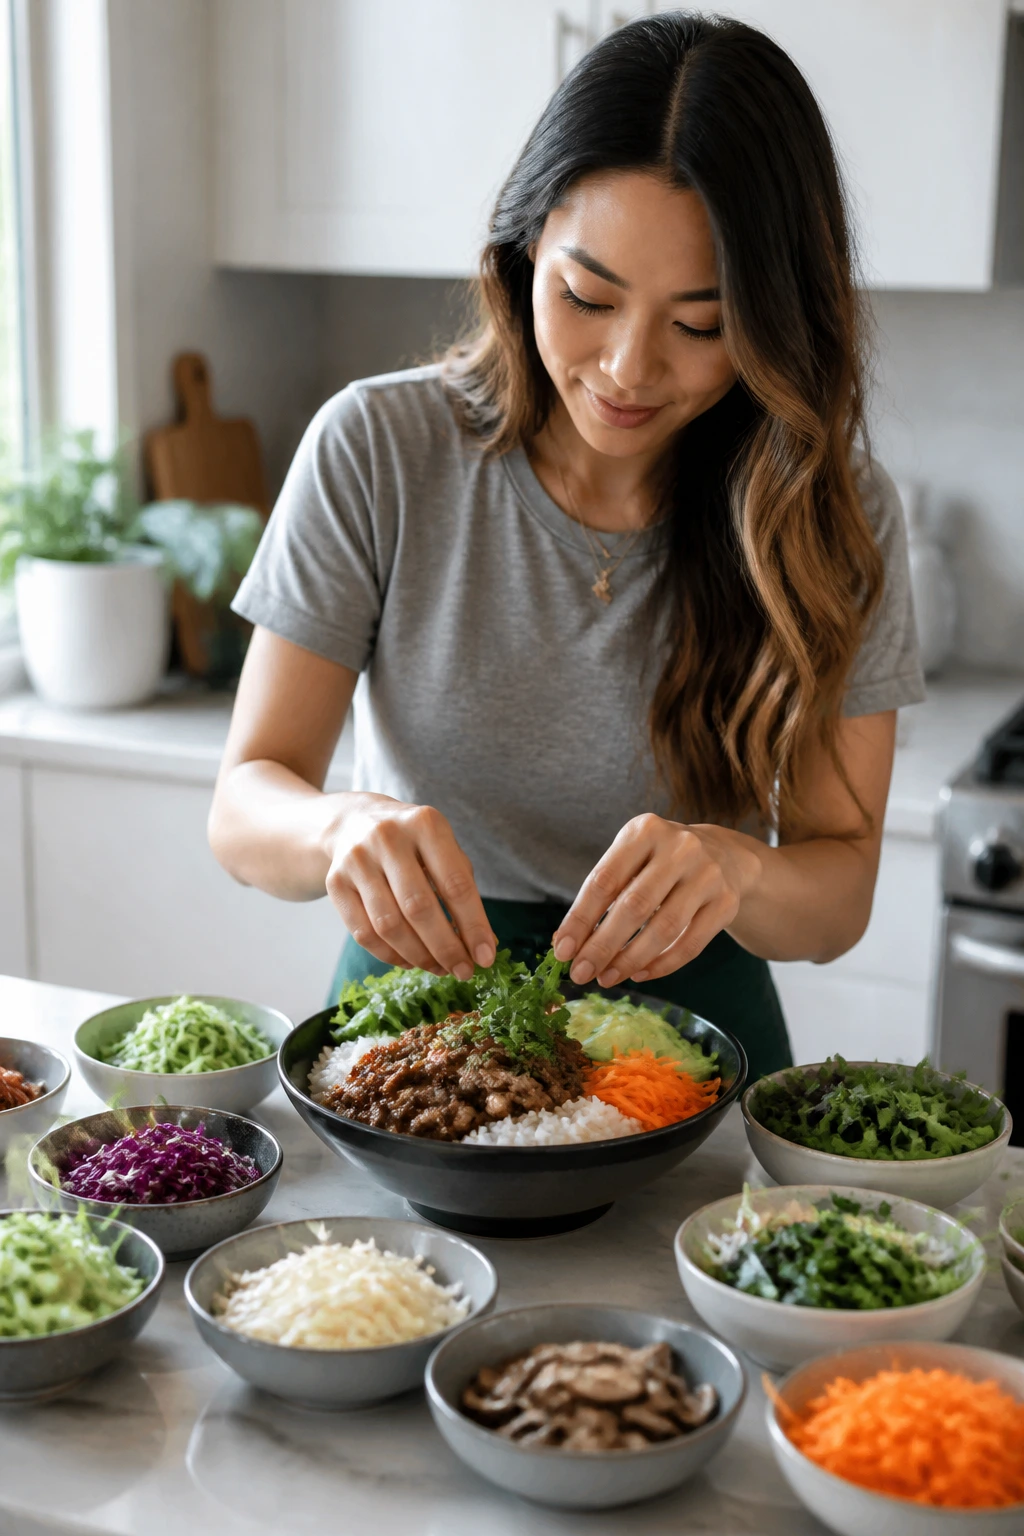
I keep coming back to this style because it’s forgiving. Ground beef works. Thin-sliced sirloin works. Chuck roast works if you want to let the slow cooker do the heavy lifting. Rice, noodles, cauliflower rice, lettuce — all fair game. That flexibility is exactly why these bowls belong in real meal prep, not just in glossy photos with sesame seeds sprinkled from a heroic height.
Why These Korean Beef Bowls Earn a Spot in the Fridge
-
They reheat with dignity: A soy-gochujang sauce holds onto beef better than a thin pan sauce, so the meat still tastes seasoned after a microwave warm-up.
-
You can build them around what’s in the kitchen: Rice, noodles, cauliflower rice, cabbage, broccoli, mushrooms, and cucumbers all fit the same flavor family without fighting each other.
-
They do not need expensive cuts: Ground beef, flank steak, chuck roast, and sirloin each work in different ways, which keeps the grocery bill more realistic.
-
The texture stays interesting for days: Quick pickles, slaw, scallions, sesame seeds, and fried eggs keep the bowls from tasting flat after a couple of nights.
-
They scale cleanly: Double the beef, cook more rice, and you’ve got lunches plus dinners without rebuilding the recipe from scratch.
-
They let you cook once and eat well twice: Most of the work is front-loaded, then the fridge takes over the boring part.
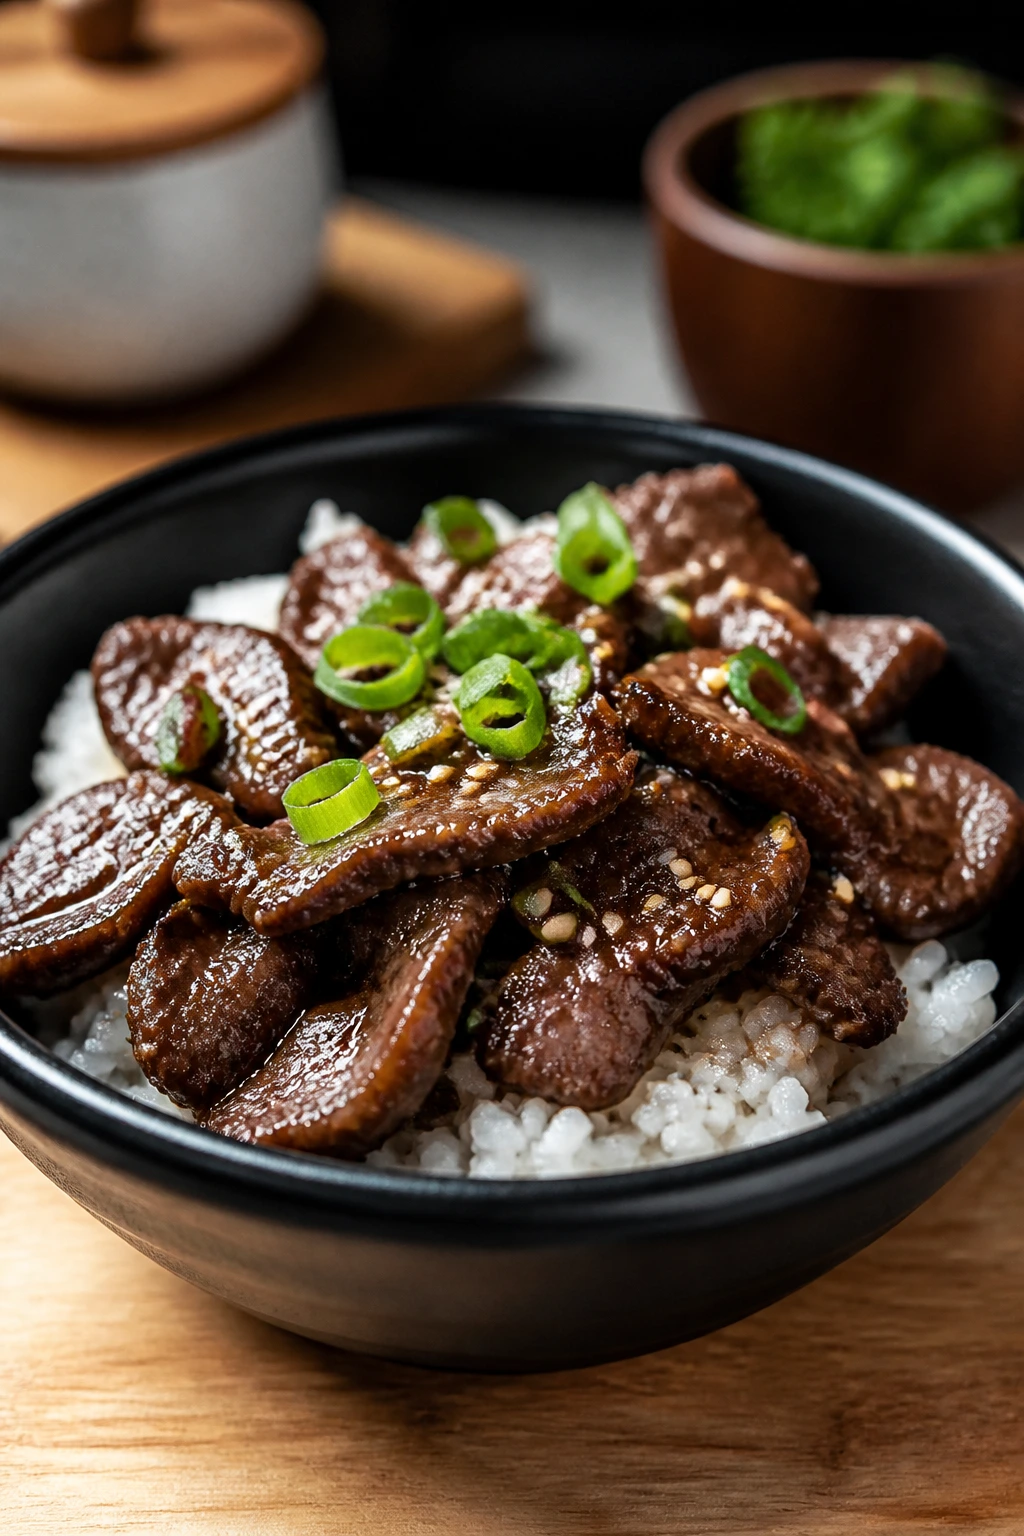
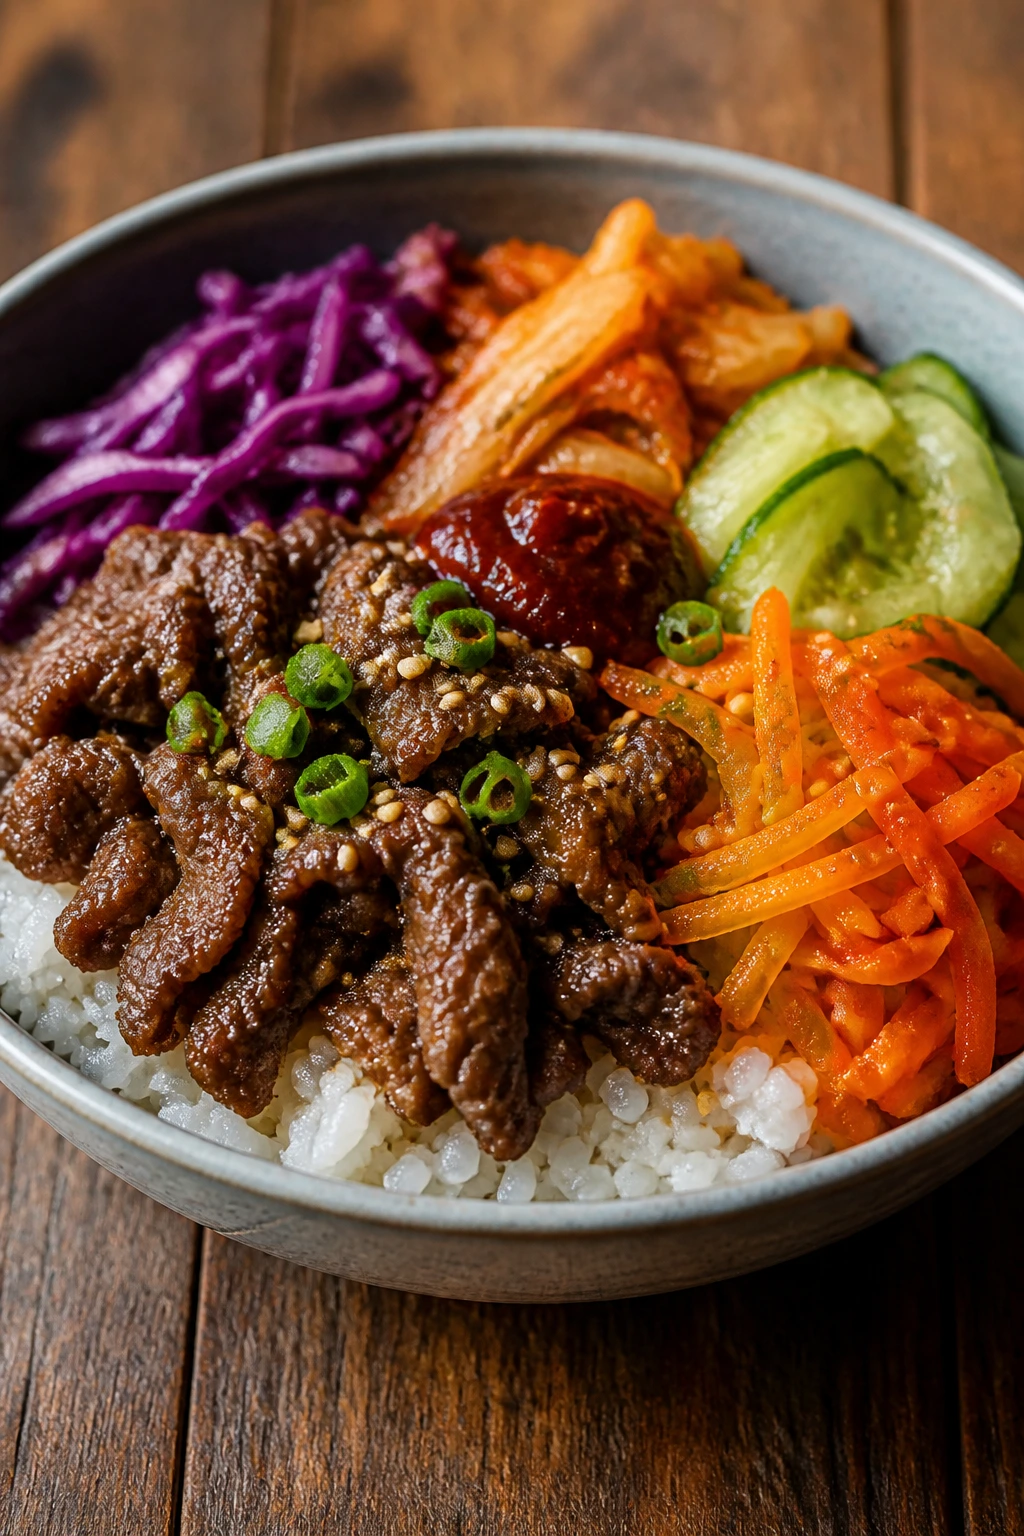
1. Weeknight Gochujang Ground Beef Bowls
This is the bowl I’d make first if I wanted dinner fast and didn’t feel like negotiating with my own pantry. Ground beef turns glossy with gochujang, garlic, ginger, soy sauce, and a little brown sugar, then lands over rice with cool cucumber on top. It smells salty-sweet and a little smoky the second the sauce hits the hot pan.
The magic here is that the sauce is thick enough to cling, but not so thick that it turns pasty. That matters for meal prep. When you reheat it, you want the beef to stay saucy enough to moisten the rice without flooding the whole container.
Why It Works
Ground beef takes on Korean flavors quickly because there’s a lot of surface area. A lean-but-not-too-lean grind, like 85/15, browns well and leaves enough fat to carry the garlic and gochujang. The brown sugar softens the heat, while rice vinegar keeps the sauce from tasting heavy. If you’ve ever eaten a bowl that felt one-note, this balance is why that happened. Too much soy and no acid. Too much sugar and no bite. This version avoids both.
Key Ingredients
-
1 1/2 pounds ground beef, 85/15 — Enough fat for flavor without turning the bowl greasy.
-
3 tablespoons low-sodium soy sauce — The salty base; low-sodium gives you more control.
-
2 tablespoons gochujang — The sweet-spicy paste that gives the bowl its Korean backbone.
-
1 tablespoon brown sugar — Helps the sauce glaze instead of tasting harsh.
-
4 garlic cloves, finely minced — Fresh garlic matters here; powdered garlic tastes flat.
-
1 teaspoon grated fresh ginger — A small amount goes a long way and keeps the sauce bright.
-
1 tablespoon rice vinegar — Adds the little hit of acid that makes the beef taste alive.
-
1 tablespoon toasted sesame oil — Use it at the end; it’s a finishing oil, not a frying oil.
-
2 scallions, thinly sliced — Stir some in and save some for the top.
-
3 cups cooked short-grain or jasmine rice — Warm, fluffy rice gives the sauce something to cling to.
-
1 cucumber, thinly sliced — A cold, crisp contrast that keeps the bowl from feeling heavy.
Quick Steps
Brown the Beef:
-
Heat a large skillet over medium-high heat. Add the ground beef and cook for 6 to 8 minutes, breaking it into small crumbles, until it’s fully browned and no pink remains.
-
If there’s a large pool of fat in the pan, spoon off most of it, but leave about 1 tablespoon for flavor.
Build the Sauce:
-
Add the garlic and ginger and cook for 30 seconds, just until fragrant. Stir in the soy sauce, gochujang, brown sugar, rice vinegar, and sesame oil.
-
Reduce the heat to medium and simmer for 2 to 3 minutes, stirring often, until the sauce coats the beef in a glossy layer. Do not let it cook down to a dry paste.
Finish and Pack:
-
Stir in half the scallions, then divide the beef and rice into containers. Add cucumber to the side so it stays crisp.
-
Sprinkle the remaining scallions on top after reheating, not before.
Tips and Variations
-
Fried Egg Upgrade: Add a jammy egg on top when serving. It makes the bowl feel like dinner, not lunch leftovers.
-
Veggie Stretch: Stir in 1 cup shredded carrots or finely chopped spinach in the last minute of cooking.
-
Make It Milder: Use 1 tablespoon gochujang instead of 2 and add an extra teaspoon of brown sugar.
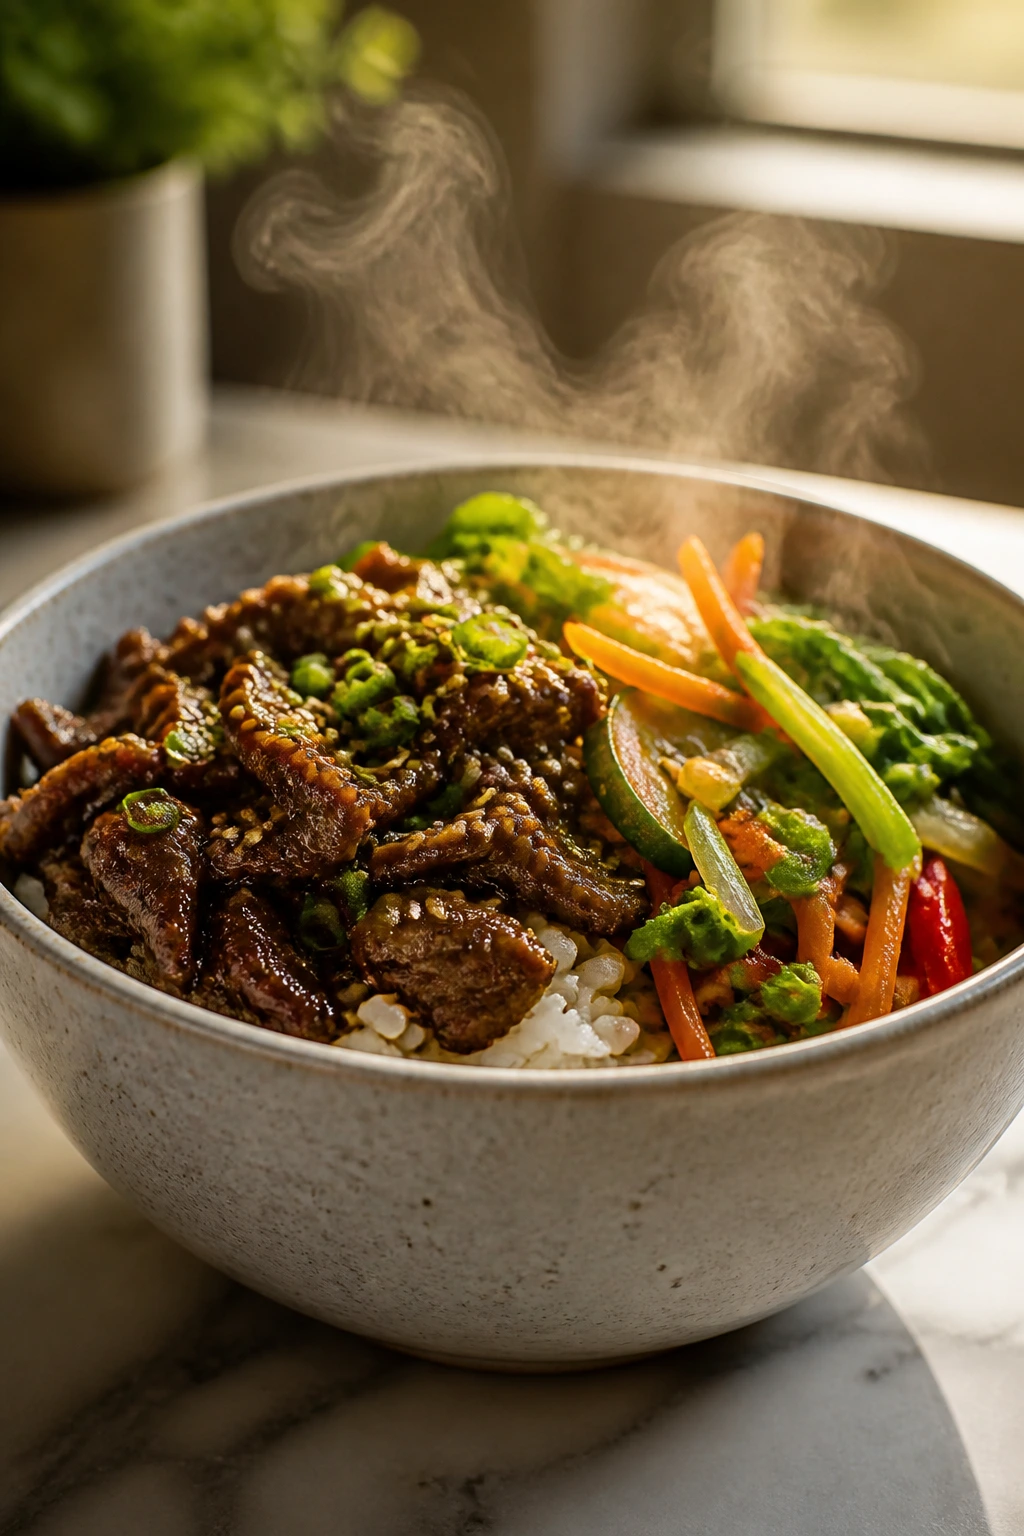
2. Bulgogi-Style Sirloin Rice Bowls with Pear and Sesame
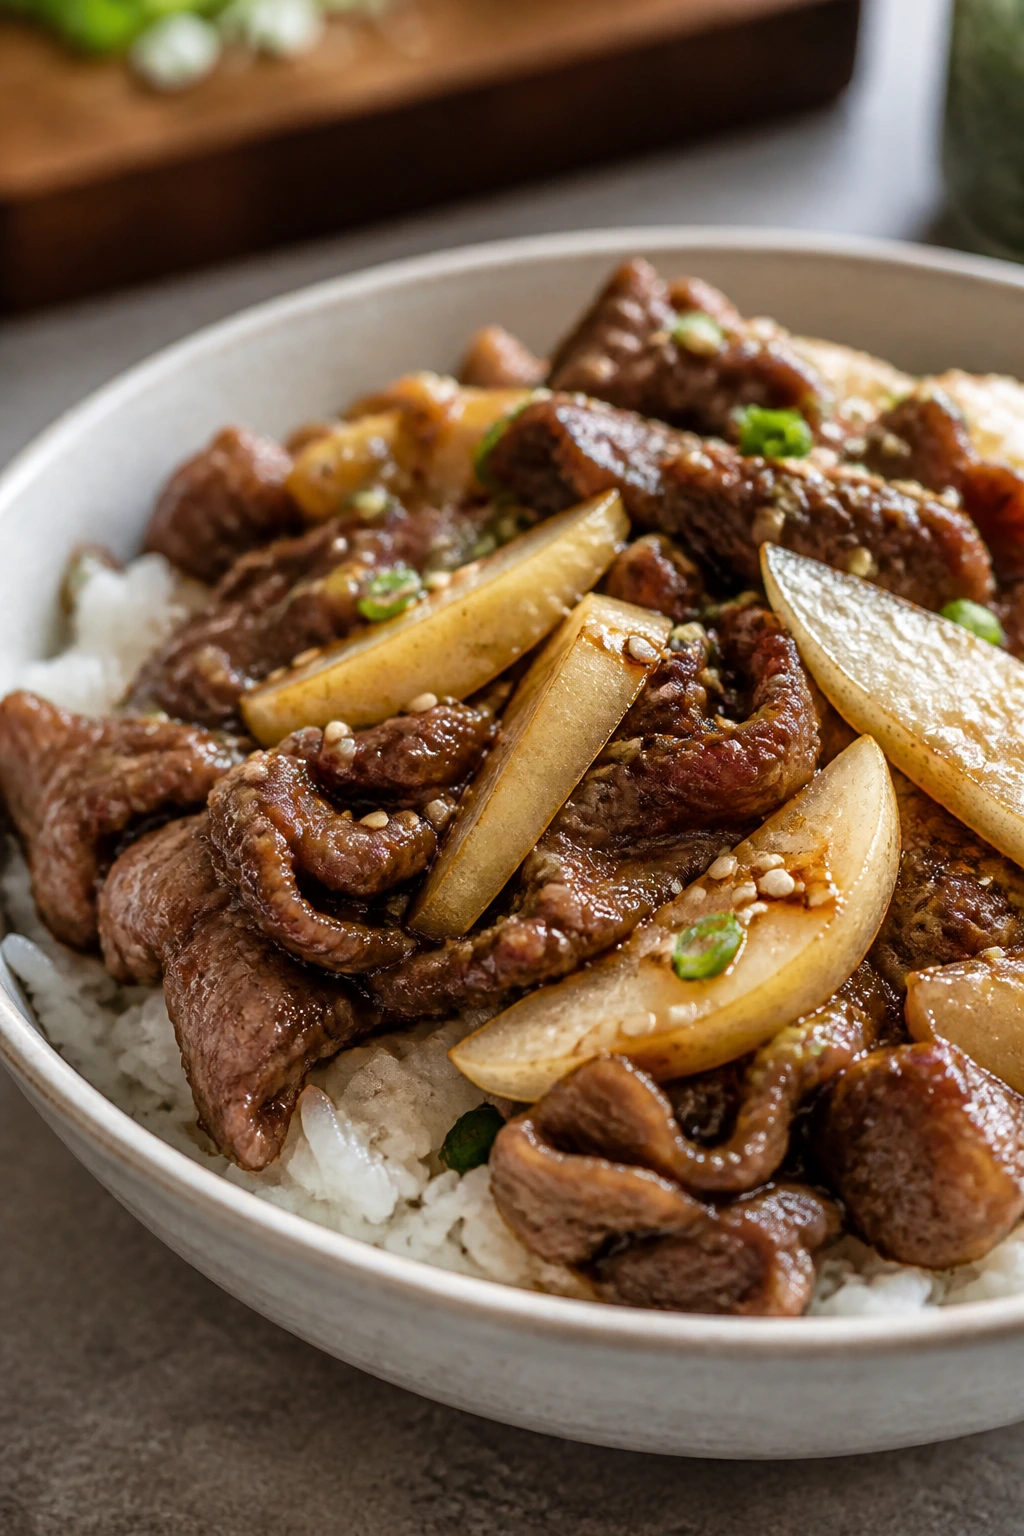
Thin-sliced beef has a different kind of appeal. It’s cleaner, a little dressier, and it cooks so fast you can blink and miss the whole thing. Bulgogi-style marinade brings soy, pear, garlic, sesame, and onion into a sweet-savory mix that smells like it should cost more than it does.
This is the bowl for people who want meal prep to feel a bit special without turning dinner into a project. The pear does quiet work here, softening the beef and giving the sauce a natural sweetness that doesn’t taste sticky.
Why It Works
Bulgogi sauce works because it’s thin enough to penetrate the meat and balanced enough to caramelize quickly in a hot pan. Grated pear or apple adds flavor and a little gentle tenderness, especially if the beef is sliced thin across the grain. That’s the part people skip. Don’t. If the slices are too thick, they steam instead of sear, and the whole bowl loses that faint charred edge that makes bulgogi worth making.
Key Ingredients
-
1 1/4 pounds sirloin, sliced very thin — Freeze the steak for 20 minutes first so the slicing is easier.
-
1/4 cup low-sodium soy sauce — The savory base of the marinade.
-
2 tablespoons grated Asian pear or Bosc pear — Sweetness plus a little tenderizing power.
-
2 tablespoons brown sugar — Keeps the caramelization moving.
-
1 tablespoon toasted sesame oil — Adds that unmistakable nutty aroma.
-
4 garlic cloves, minced — Bulgogi should taste garlicky, not timid.
-
1 tablespoon grated fresh ginger — Brightens the marinade and cuts the richness.
-
1 small onion, thinly sliced — Softens into the sauce and gives the pan more depth.
-
8 ounces cremini mushrooms, sliced — They catch the sauce and make the bowl feel fuller.
-
3 cups cooked rice — Short-grain rice is especially good here, but any warm rice works.
-
1 tablespoon toasted sesame seeds — For a little crunch at the end.
Quick Steps
Marinate the Beef:
-
Whisk the soy sauce, pear, brown sugar, sesame oil, garlic, ginger, and a pinch of black pepper in a bowl.
-
Add the sliced sirloin and onion, then toss until everything is coated. Marinate for 30 minutes on the counter or up to 12 hours in the fridge.
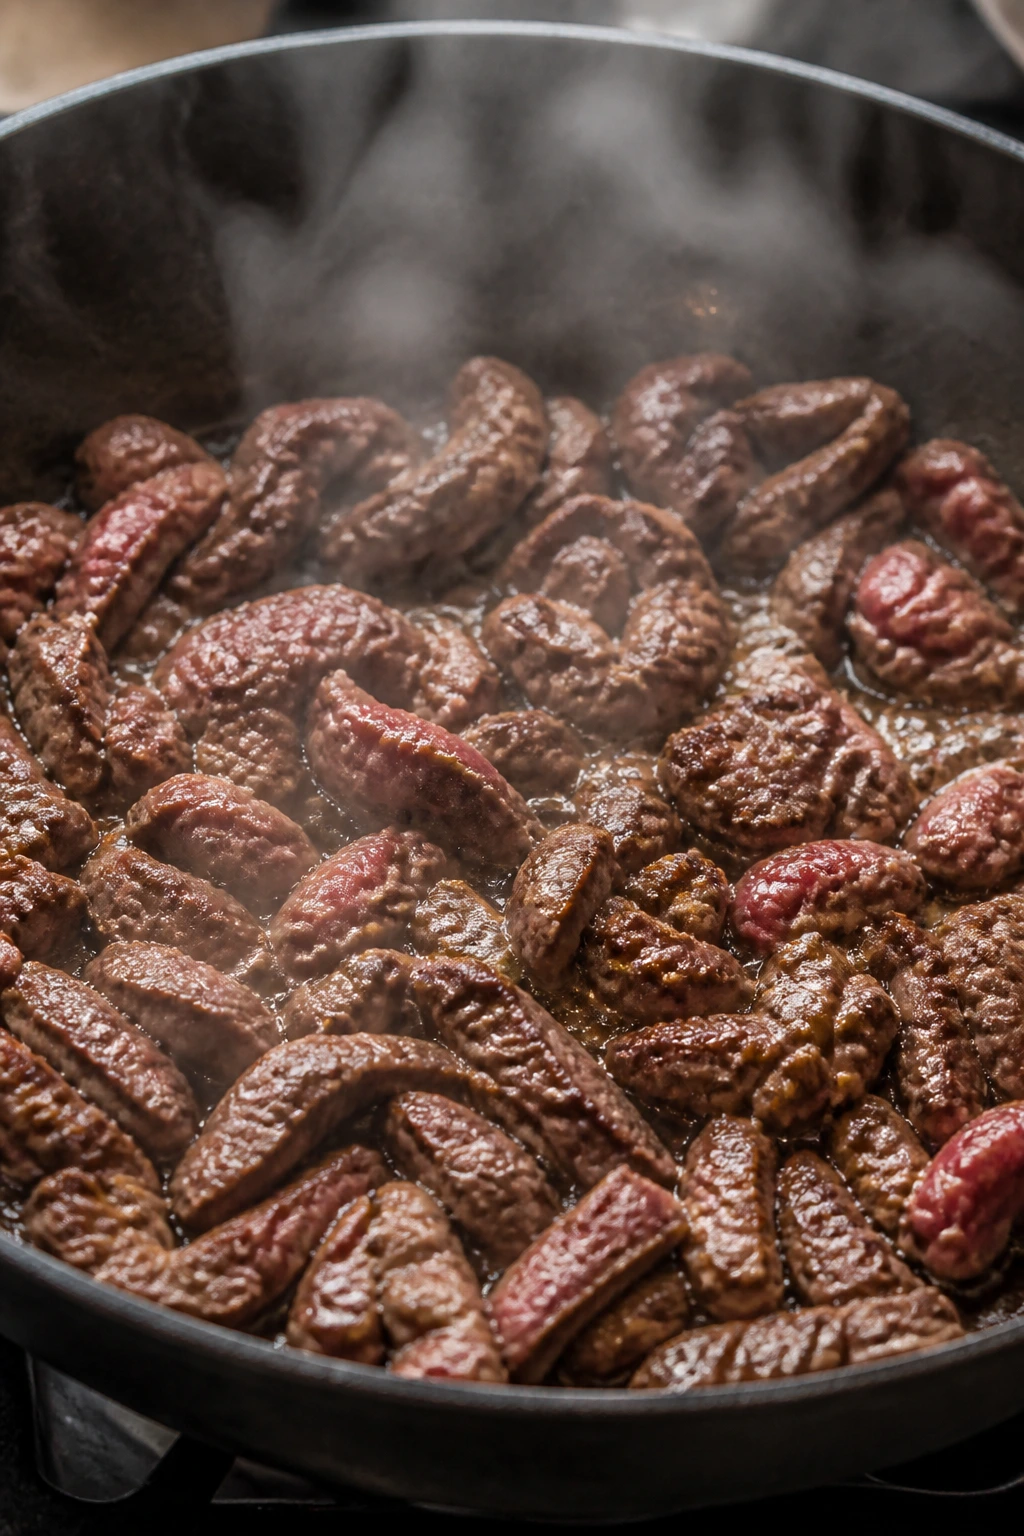
Cook Fast and Hot:
-
Heat a heavy skillet over high heat until it’s hot enough that a drop of water sizzles instantly.
-
Add the beef in a single layer, working in batches if needed. Cook for 1 to 2 minutes per side until browned at the edges and still tender. Crowding the pan will steam the meat.
-
Cook the mushrooms in the same pan for 3 to 4 minutes, then return the beef and any juices. Toss for 30 seconds.
-
Serve over rice and finish with sesame seeds and sliced scallions.
Tips and Variations
-
Better Slice Tip: If the beef shreds instead of slicing cleanly, chill it another 10 minutes and use a sharper knife.
-
Vegetable Add-In: Thin-sliced bell pepper or baby spinach can go into the pan right before the beef comes back.
-
Sauce Note: If the marinade tastes too sweet, add 1 teaspoon rice vinegar before cooking.
3. Sheet Pan Beef and Broccoli with Sticky Korean Glaze
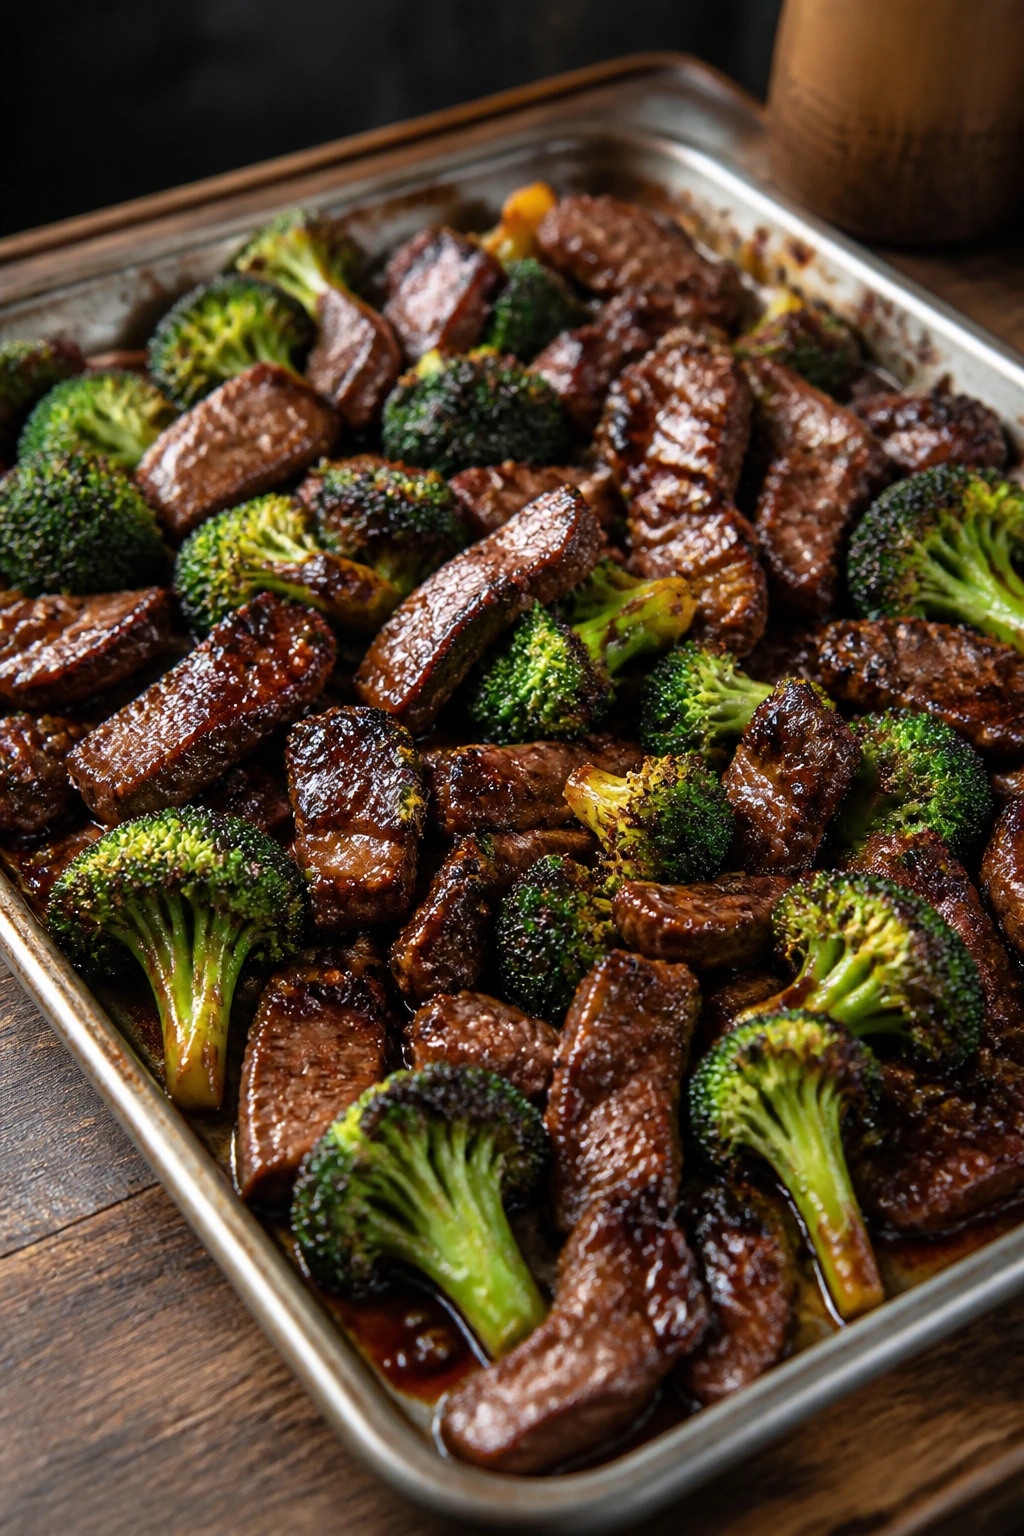
Some dinners want a skillet. This one wants a hot oven and a rimmed sheet pan. The edges of the broccoli pick up little charred freckles, the beef browns fast, and the glaze gets sticky in that almost-snacky way you can’t fake on the stovetop.
I like this bowl when I want less standing and more roasting. You get concentrated flavor because the heat is dry and direct, which gives the vegetables a bit of edge instead of boiling them into submission.
Why It Works
A sheet pan is useful here because it creates space. Beef strips can brown instead of crowding, and broccoli gets those roasted edges that hold up better in the fridge. Gochujang, honey, soy, garlic, and vinegar form a glaze that thickens on contact with heat. If you toss the beef and broccoli together only at the end, the sauce stays on the food rather than pooling at the bottom of the pan.
Key Ingredients
-
1 1/2 pounds flank steak or sirloin, sliced against the grain — Thin strips cook quickly and stay tender.
-
5 cups broccoli florets — Cut them medium, not tiny, so they don’t overcook.
-
1 red bell pepper, sliced — Brings color and a little sweetness.
-
3 tablespoons low-sodium soy sauce — The savory base of the glaze.
-
1 1/2 tablespoons gochujang — Enough heat to notice, not enough to overwhelm.
-
1 1/2 tablespoons honey — Helps the glaze caramelize in the oven.
-
2 teaspoons rice vinegar — Keeps the sauce from tasting flat.
-
2 garlic cloves, minced — Sharpens the whole pan.
-
1 teaspoon grated ginger — Adds warmth and keeps the glaze lively.
-
1 tablespoon cornstarch — Helps the sauce cling once it hits the heat.
-
3 cups cooked rice — A plain, steady base is all you need here.
Quick Steps
Prep and Roast:
-
Preheat the oven to 425°F (220°C). Line a rimmed sheet pan with parchment for easier cleanup.
-
Toss the broccoli and bell pepper with 1 tablespoon neutral oil and a pinch of salt. Spread them on the pan and roast for 10 minutes.
Glaze the Beef:
-
Whisk the soy sauce, gochujang, honey, vinegar, garlic, ginger, cornstarch, and 2 tablespoons water in a bowl until smooth.
-
Toss the sliced beef with the glaze. Pull the pan from the oven, add the beef in a single layer over and between the vegetables, and roast for 7 to 9 minutes more.
-
Broil for 1 to 2 minutes at the end if you want more browning, watching closely so the honey doesn’t scorch. The broccoli should be tender at the stems and dark at the tips.
-
Serve over rice and finish with sesame seeds and sliced scallions.
Tips and Variations
-
Batching Tip: If your sheet pan is small, split the beef across two pans. A crowded pan makes wet beef.
-
Extra Crunch: Toss in a handful of sesame-roasted cashews after roasting for texture.
-
Flavor Boost: A tiny splash of toasted sesame oil after baking makes the whole pan smell louder in the best way.
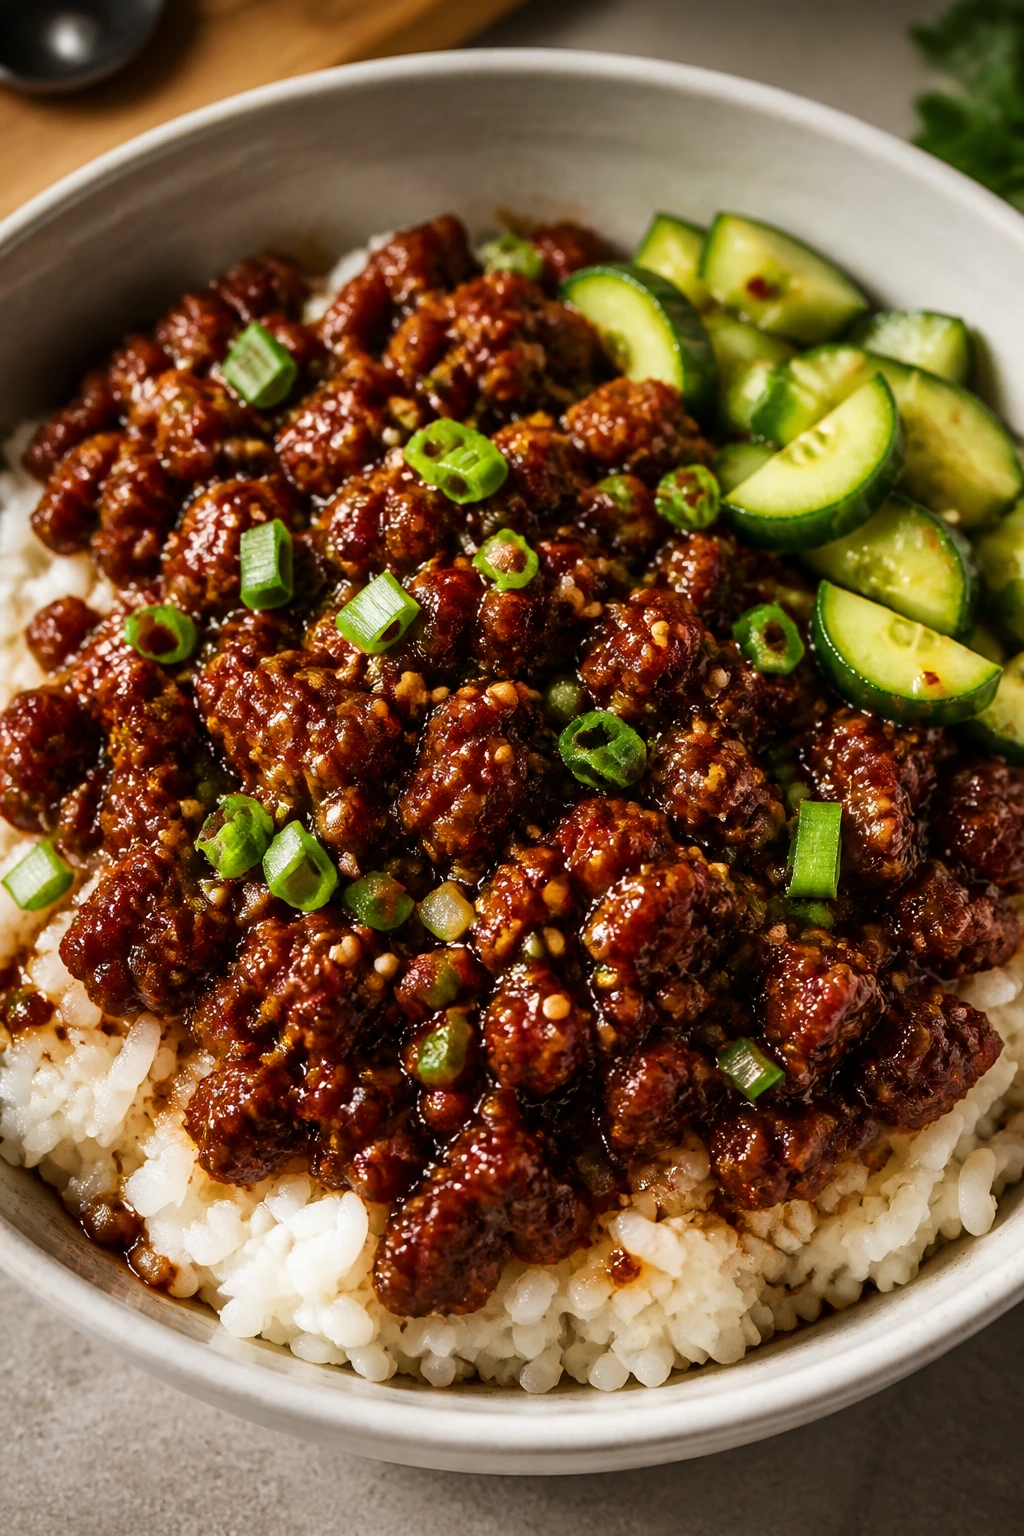
4. Kimchi Fried Rice Beef Bowls with Crispy Edges

This one has attitude. Kimchi fried rice brings heat, sourness, and a little funk, then ground beef rounds it out so the bowl doesn’t feel like it’s all edge and no comfort. The rice should hit the pan cold and stay there long enough to pick up crisp bits, because those browned edges are the whole point.
If you’ve ever had fried rice that tasted like warmed-over takeout, this is the fix. Kimchi juice gives the rice seasoning from the inside out, and the beef provides enough richness to balance the tang.
Why It Works
Day-old rice is the non-negotiable here. Fresh rice holds too much steam and turns sticky before it can fry. Kimchi adds moisture, but that moisture is also flavor, so the trick is cooking hard enough to evaporate the excess while leaving the rice seasoned. A quick fried egg on top is not decoration. It softens the sharpness and gives the bowl a creamy center.
Key Ingredients
-
1 pound ground beef — Enough to make the bowl filling without crowding the rice.
-
4 cups cold cooked rice — Use rice that has been chilled and loosened with your fingers.
-
1 1/2 cups chopped kimchi — Pick a kimchi with a bright, sour smell.
-
2 tablespoons kimchi juice — The hidden flavor booster.
-
1 small onion, diced — Sweats into the rice and makes it taste fuller.
-
3 garlic cloves, minced — Keeps the skillet fragrant.
-
1 tablespoon soy sauce — Gives the rice a deeper savory note.
-
1 teaspoon sugar — Balances the kimchi’s sharpness.
-
1 tablespoon toasted sesame oil — Stir in at the end so it stays aromatic.
-
2 eggs — Fried or soft scrambled, your call.
-
2 scallions, sliced — Freshness on top.
Quick Steps
Cook the Beef Base:
-
Heat a large skillet or wok over medium-high heat. Cook the ground beef for 5 to 7 minutes, breaking it up until browned. Drain excess fat if needed.
-
Add the onion and cook for 2 minutes, then add the garlic and kimchi. Stir for 2 more minutes until the kimchi smells sweet and a little jammy.
Fry the Rice:
-
Add the cold rice, soy sauce, kimchi juice, and sugar. Stir and press the rice into the pan so it can fry in spots. Cook for 4 to 6 minutes, stirring occasionally, until some grains are crisp at the edges.
-
Drizzle in the sesame oil and fold through.
Finish the Bowls:
-
In a separate pan, fry the eggs until the whites are set and the yolks are still soft, or scramble them lightly if that’s easier for meal prep.
-
Divide the rice into bowls, top with eggs and scallions, and add a little extra kimchi if you want more bite.
Tips and Variations
-
Rice Tip: If the rice clumps, spread it on a tray for 10 minutes before cooking.
-
More Veg: Add diced carrots or frozen peas with the onion if you want the bowl to go farther.
-
Heat Control: Use less kimchi juice if your kimchi is extra sharp.
5. Slow Cooker Korean Beef and Sweet Potato Bowls
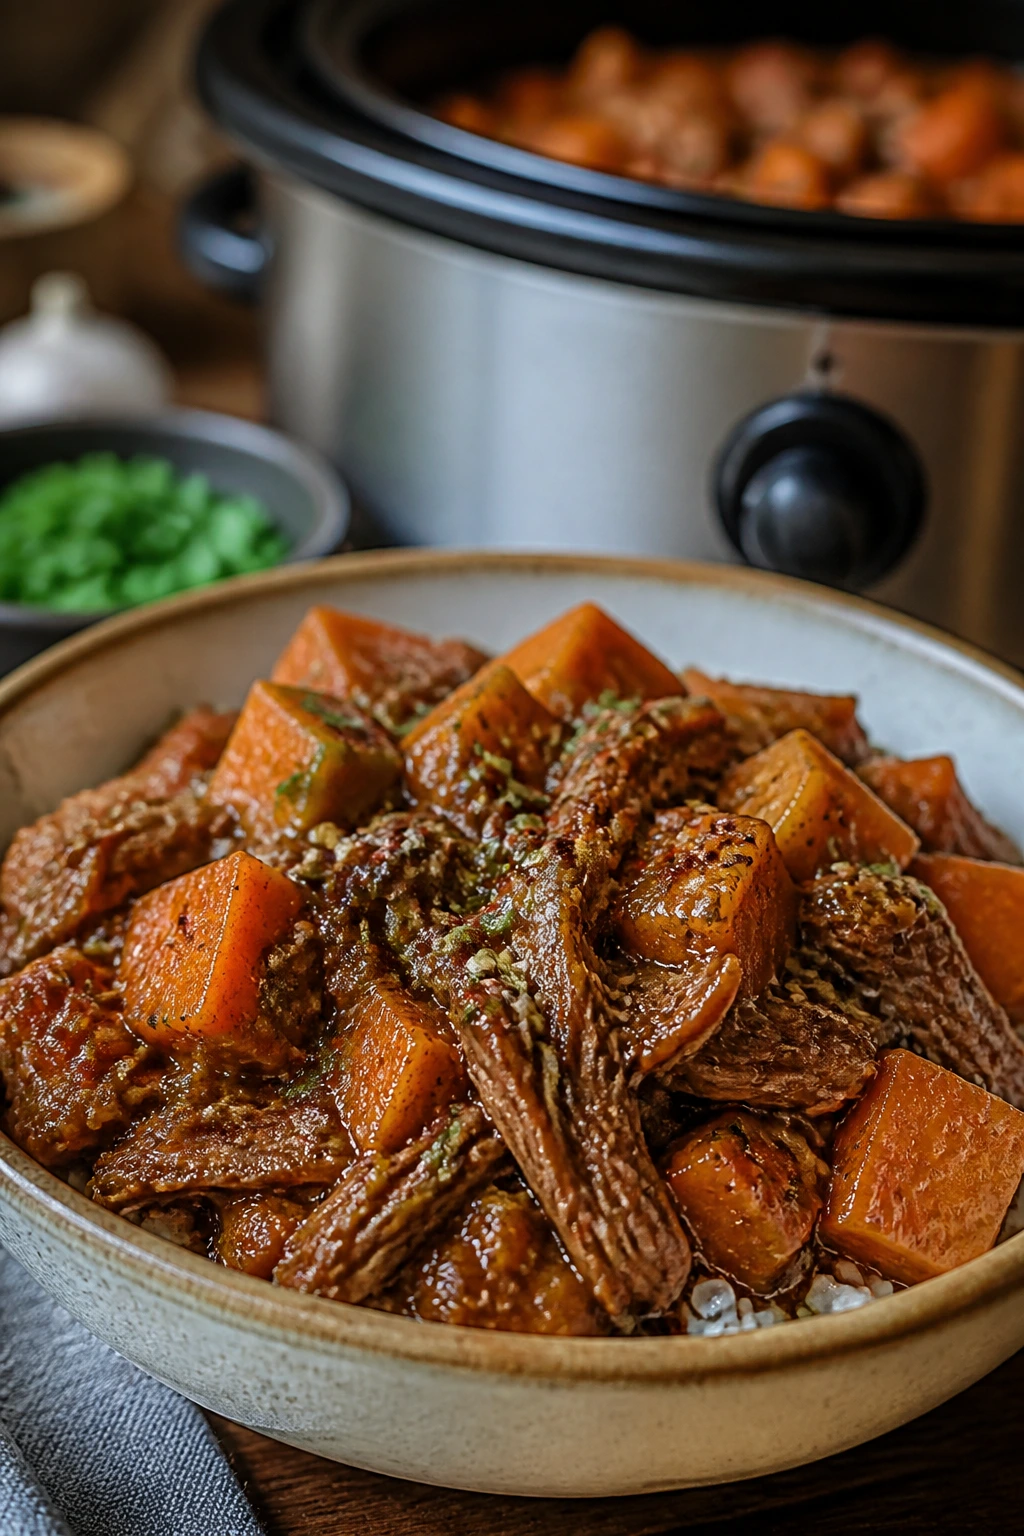
This is the bowl you make when you want the house to smell like dinner all day. Chuck roast turns tender without much attention, and the sweet potatoes soak up the sauce in a way that feels cozy instead of heavy. It’s a little softer and rounder than the skillet versions, which is useful when you want variety in the fridge.
I like this one for days when I know I won’t have the patience to stand at the stove. It asks for a bit of chopping, then mostly leaves you alone.
Why It Works
Chuck roast is built for long cooking. The connective tissue breaks down slowly, which gives you shredded beef that stays moist even after reheating. Gochujang, soy sauce, garlic, ginger, and a little broth make the braising liquid savory and deep. Sweet potatoes fit here because they hold their shape better than regular potatoes and pick up the sauce without turning bland.
Key Ingredients
-
2 1/2 pounds chuck roast — Trim large hard pieces of fat, but don’t over-trim.
-
1 small onion, sliced — Forms the base layer in the slow cooker.
-
1/3 cup low-sodium soy sauce — The braising liquid’s salty backbone.
-
2 tablespoons gochujang — Adds heat and a little thickness.
-
2 tablespoons brown sugar — Balances the long cook.
-
1 tablespoon toasted sesame oil — Add it to the sauce mix, not at the end only.
-
1 tablespoon rice vinegar — Keeps the finished beef from tasting flat.
-
4 garlic cloves, minced — Essential, not optional.
-
1 tablespoon grated fresh ginger — Keeps the sauce from going muddy.
-
1/2 cup beef broth — Gives the slow cooker enough liquid to start.
-
2 medium sweet potatoes, peeled and cut into 1-inch cubes — Add them later so they don’t turn to mush.
-
3 cups cooked rice or noodles — Your base choice.
-
2 scallions, sliced — For the top.
Quick Steps
Build the Braise:
-
Spread the onion in the bottom of the slow cooker. Place the chuck roast on top.
-
Whisk the soy sauce, gochujang, brown sugar, sesame oil, vinegar, garlic, ginger, and broth in a bowl. Pour it over the beef.
Cook Low and Slow:
-
Cover and cook on low for 7 to 8 hours or on high for 4 to 5 hours, until the beef pulls apart with a fork.
-
Add the sweet potato cubes during the last 90 minutes on low or the last 45 to 60 minutes on high, until they’re tender but still intact.
-
Shred the beef directly in the cooker, stir to coat, and let it sit for 10 minutes so the sauce settles into the meat.
-
Serve over rice or noodles and top with scallions.
Tips and Variations
-
Cleaner Texture: Roast the sweet potatoes at 425°F for 20 minutes instead if you want them firmer.
-
Extra Sauce: Stir in 1 to 2 tablespoons of water when reheating if the braise thickens too much.
-
Freezer Note: This is one of the easiest bowls to freeze because the meat stays moist.
6. Bibimbap-Style Beef Bowls with Quick Pickles
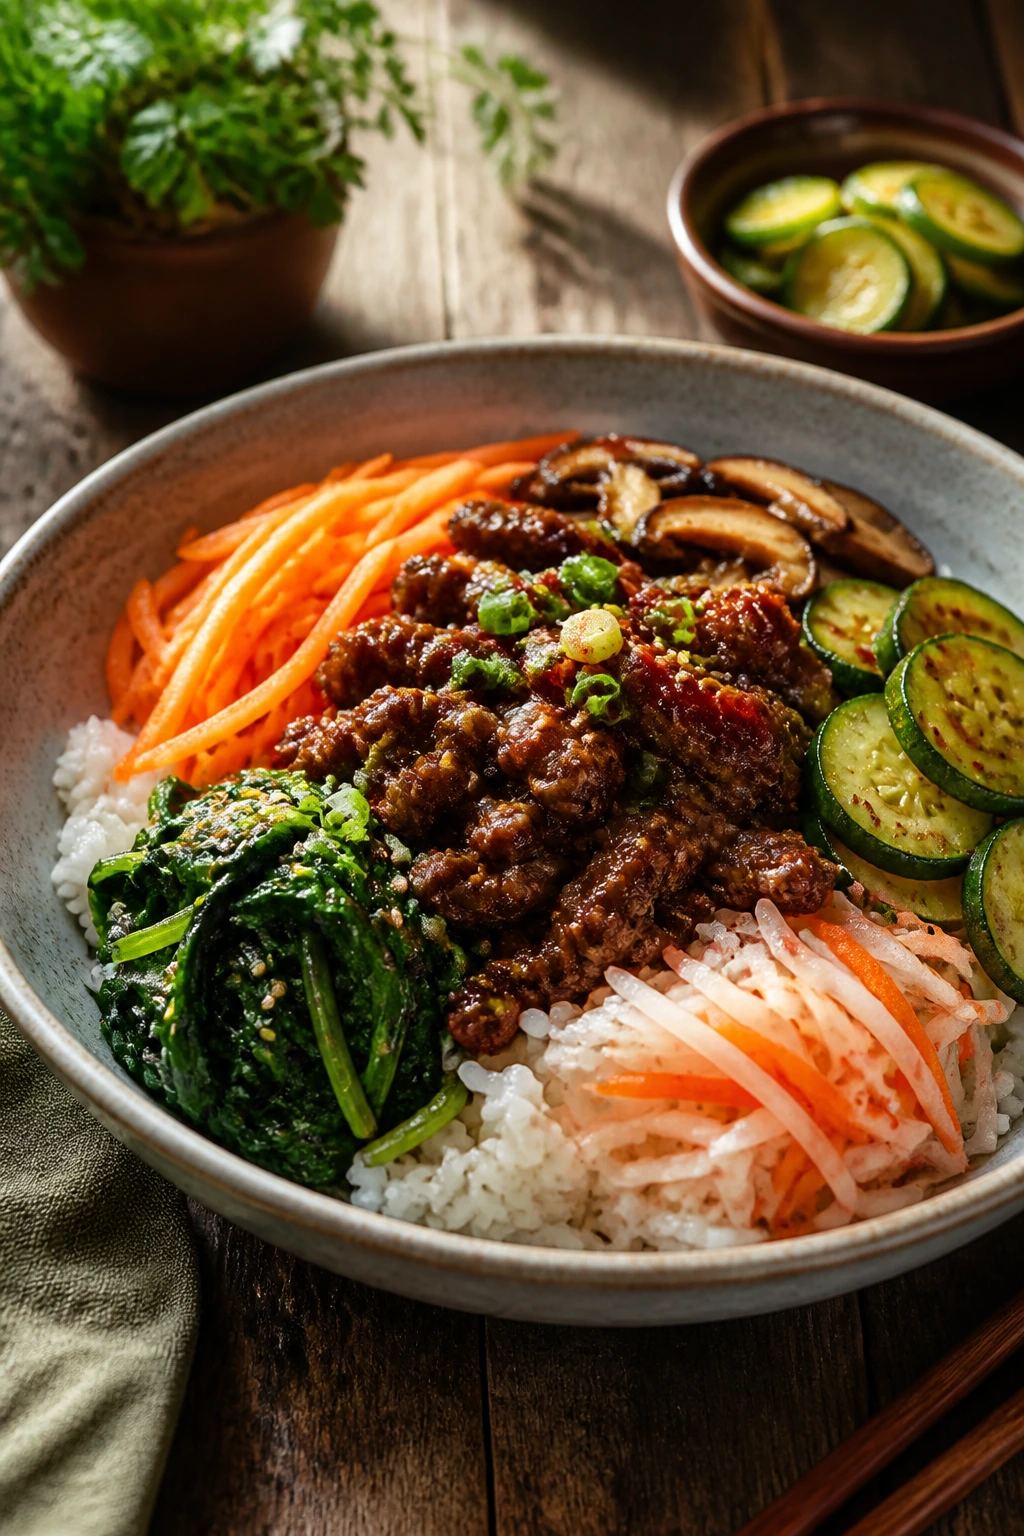
This is the pretty bowl, but it earns its looks. Bibimbap-style meal prep works because every vegetable gets its own quick cook, which means you end up with color, contrast, and textures that don’t blur together after a day in the fridge. You’re not making one blob. You’re making a collection of pieces that happen to taste like dinner.
I’m partial to this one when I want a bowl that feels a little more deliberate. It takes a few extra minutes, sure. Worth it.
Why It Works
Bibimbap is basically a lesson in controlled chaos. The beef is seasoned, the vegetables stay distinct, and the sauce gets added at the last possible second. Quick pickles give the bowl acidity, which matters because rice and beef can get heavy on their own. If the vegetables are cooked in separate small batches, each one keeps its own color and bite. That’s the part people skip when they rush. And then they wonder why the bowl tastes tired.
Key Ingredients
-
1 pound ground beef — Easy to season and portion.
-
2 cups cooked rice — White or brown rice both work.
-
2 cups baby spinach — Wilts in seconds and adds a soft layer.
-
1 medium zucchini, julienned — Cooks fast and stays delicate.
-
2 medium carrots, julienned — Add crunch and sweetness.
-
1 cup bean sprouts — Optional, but they bring the right bite.
-
2 eggs — Fried sunny-side-up for a classic finish.
-
2 tablespoons gochujang — For the bibimbap sauce.
-
1 tablespoon soy sauce — Seasons the beef.
-
1 tablespoon rice vinegar — For quick pickles and balance.
-
1 tablespoon sesame oil — Use across the bowl, but sparingly.
-
1 teaspoon sugar — Helps the sauce smooth out.
Quick Steps
Make the Quick Pickles:
- Toss the carrots with 1 tablespoon rice vinegar, a pinch of sugar, and a pinch of salt. Let them sit while you cook the rest.
Cook the Beef and Veg:
-
Brown the beef in a skillet over medium-high heat for 5 to 7 minutes. Stir in the soy sauce, a little minced garlic if you like, and half the sesame oil.
-
In a second skillet, sauté the zucchini for 2 to 3 minutes, just until it softens but still looks green. Remove it and quickly wilt the spinach with a splash of water.
-
If using bean sprouts, blanch them for 30 seconds or sauté briefly with a pinch of salt.
Assemble the Bowls:
-
Fry the eggs in a lightly oiled pan until the whites are set and the yolks still run.
-
Divide the rice into bowls, arrange the beef and vegetables in sections, top with pickled carrots, and spoon gochujang over the center.
-
Drizzle with the remaining sesame oil right before eating.
Tips and Variations
-
Storage Trick: Keep the sauce separate from the vegetables if you want the bowl to stay brighter.
-
Shortcut: Use pre-julienned carrots and zucchini when time is tight.
-
Serving Tip: A wide bowl makes the sections look cleaner and helps with packing.
7. Korean Beef Lettuce Wrap Bowls with Crunchy Slaw
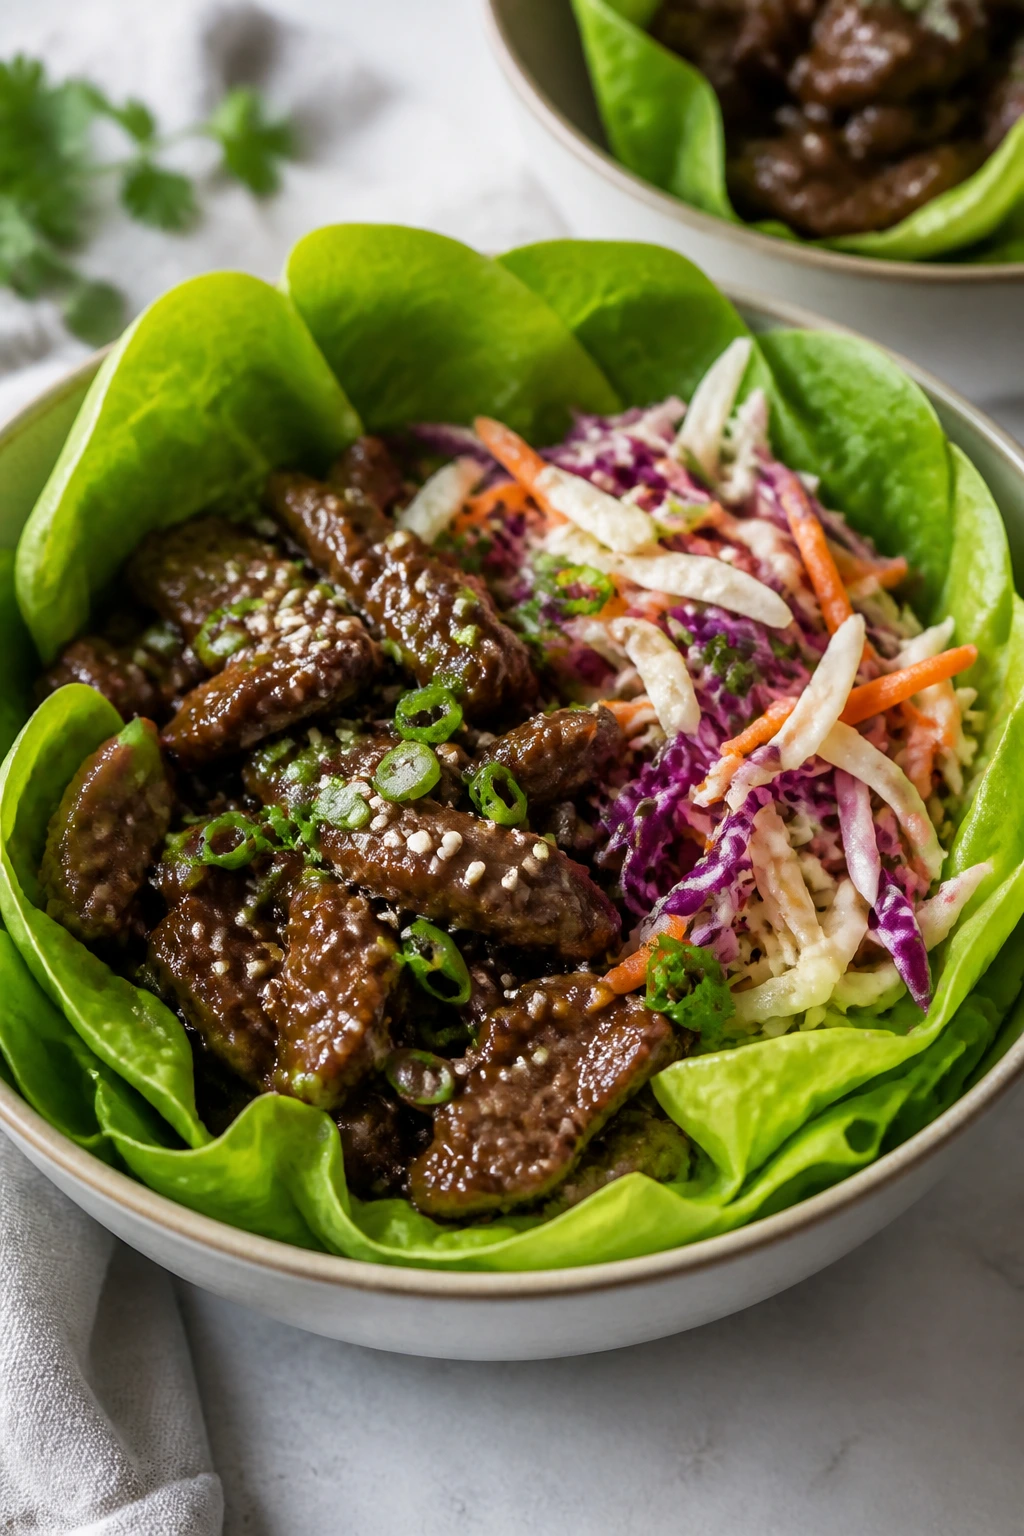
This one is lighter without feeling like compromise. The beef stays richly seasoned, but the base shifts to lettuce and cabbage, so the whole bowl lands with crunch instead of starch. That makes it handy for nights when you want dinner to feel fresh even after a few days in the fridge.
I like this version because it gives you two textures at once. Soft beef. Crisp greens. That’s enough to keep the bowl interesting without needing a long grocery list.
Why It Works
Lettuce and cabbage hold up better than a lot of people expect, especially if you keep the dressing separate until serving. The beef needs to be a little saucier than usual because the fresh vegetables soak up flavor as they sit. Rice is optional here, which makes the bowl flexible for different appetites. If you want it more filling, add a scoop. If you want it lighter, skip the rice and let the slaw do the work.
Key Ingredients
-
1 1/4 pounds ground beef — Enough to anchor the bowl without overwhelming the greens.
-
3 tablespoons soy sauce — The salty base.
-
1 1/2 tablespoons gochujang — Enough heat to wake up the slaw.
-
1 tablespoon honey — Rounds out the sauce.
-
2 garlic cloves, minced — Keeps the beef sharp and savory.
-
1 tablespoon toasted sesame oil — Stir in after cooking.
-
4 cups shredded cabbage — Green, purple, or a mix.
-
2 cups romaine or butter lettuce, chopped — For a tender, crisp base.
-
1 cucumber, thinly sliced — A fresh counterpoint.
-
2 carrots, shredded — Sweetness and crunch.
-
1 tablespoon rice vinegar — For the slaw.
-
2 cups cooked rice, optional — Add if you want a heartier bowl.
Quick Steps
Make the Slaw:
- Toss the cabbage, lettuce, cucumber, and carrots with rice vinegar and a pinch of salt. Set aside while the beef cooks.
Cook the Beef:
-
Brown the ground beef in a skillet over medium-high heat for 6 to 8 minutes, breaking it into small pieces.
-
Stir in the soy sauce, gochujang, honey, garlic, and a splash of water. Simmer for 2 minutes until the sauce coats the meat.
-
Turn off the heat and add the sesame oil.
Build the Bowls:
-
Divide rice into containers if using, then layer on the slaw and beef.
-
Pack extra sauce or a little gochujang mixed with water in a small cup if you like a saucier finish.
Tips and Variations
-
Crispness Tip: Keep the lettuce dry. Wet greens wilt fast in meal prep containers.
-
Bigger Dinner: Add edamame or avocado if you want more staying power.
-
Flavor Note: A few sesame seeds on top help the bowl taste more finished.
8. Sesame Beef and Green Bean Bowls
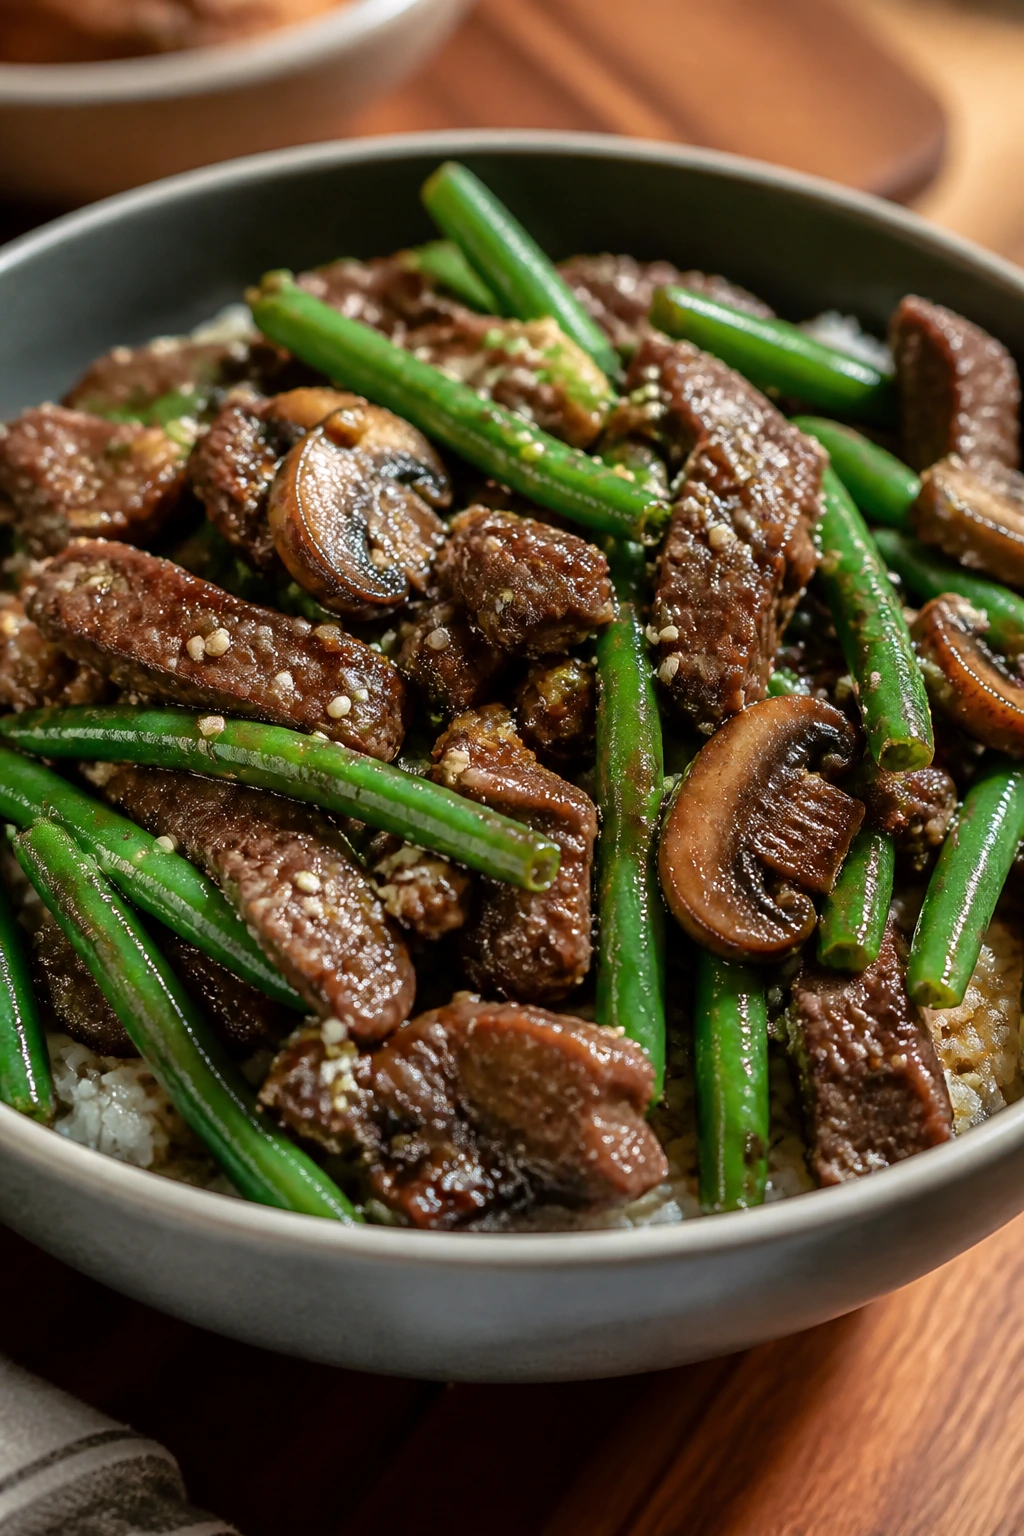
Green beans are underrated in bowls like this. They stay snappy, they soak up sauce without going limp, and they make the whole dinner feel sturdier than it looks on paper. Mushrooms bring a soft, earthy note that plays nicely with soy and sesame.
This is one of those recipes that tastes as if it took more planning than it did. I like that in meal prep. Quiet competence. No drama.
Why It Works
Green beans are one of the better vegetables for reheating because they don’t collapse as fast as broccoli or zucchini. If you blanch them first, they keep a brighter color and a little more crunch. Mushrooms absorb the sauce, which means the beef doesn’t have to do all the flavor work. Sesame oil ties everything together at the end and gives the bowl that warm, toasty smell that makes it feel complete.
Key Ingredients
-
1 1/4 pounds ground beef or thin-sliced flank steak — Ground beef is easier; flank steak feels a little dressier.
-
8 ounces green beans, trimmed — Fresh beans are best, but frozen can work if thawed well.
-
8 ounces cremini mushrooms, sliced — They pull in the sauce.
-
1 small onion, thinly sliced — Adds sweetness as it softens.
-
3 garlic cloves, minced — Essential for a savory base.
-
3 tablespoons soy sauce — The main seasoning.
-
1 tablespoon toasted sesame oil — Stir in at the end.
-
1 tablespoon brown sugar — Keeps the sauce from tasting too sharp.
-
1 teaspoon rice vinegar — Small amount, big difference.
-
3 cups cooked rice — A simple base for the beef and vegetables.
-
2 scallions, sliced — For freshness on top.
Quick Steps
Prep the Vegetables:
- Bring a pot of salted water to a boil and blanch the green beans for 2 minutes. Drain and run under cold water so they stay bright and firm.
Cook the Pan:
-
Heat a skillet over medium-high heat. Brown the beef, or if using flank steak, sear it quickly in batches and remove it from the pan.
-
Add the onion and mushrooms and cook for 4 to 5 minutes until the mushrooms release their liquid and start to brown.
-
Stir in the garlic, soy sauce, brown sugar, and rice vinegar. Return the beef and toss in the green beans.
-
Cook for 1 to 2 minutes more, then finish with sesame oil.
-
Serve over rice and top with scallions.
Tips and Variations
-
Frozen Bean Tip: If you use frozen green beans, thaw and pat them dry first.
-
Heartier Bowl: Add a boiled egg or a handful of shredded cabbage under the rice.
-
Sauce Control: If the pan looks dry, add 1 to 2 tablespoons water before the final toss.
9. Low-Carb Beef Bowls with Cauliflower Rice
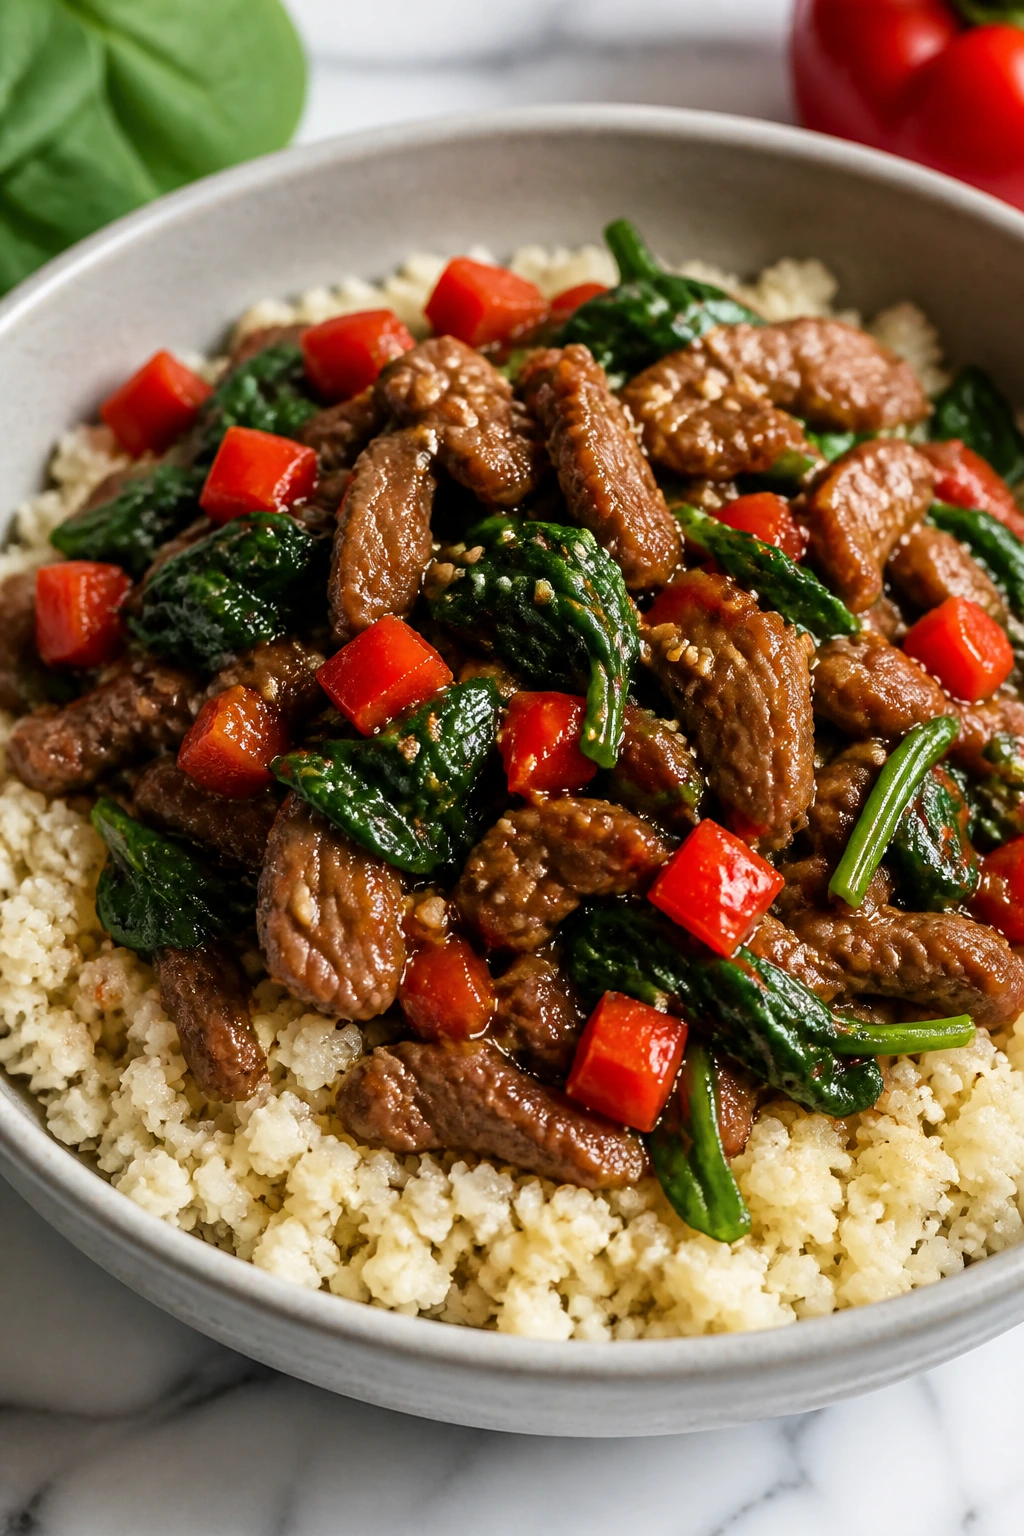
Some nights you want the same flavor profile, just not the rice nap that usually comes with it. Cauliflower rice handles Korean-style beef surprisingly well, as long as you cook off the moisture and keep the pan hot. Once it’s seasoned, the bowl still feels full.
This is the version I’d make when I want something lighter but not punishing. No weird diet energy. Just beef, vegetables, sauce, and a base that doesn’t bulldoze the rest of the bowl.
Why It Works
Cauliflower rice has one job: stay dry enough to soak up sauce without turning soupy. That means a hot skillet, a short cook time, and no lid. The beef gives the bowl the richness it would otherwise lose when you skip rice, while spinach and peppers add volume and color. Edamame adds a little chew and makes the bowl feel more substantial. If you only think of cauliflower rice as a substitute, you’ll miss what it actually does well: it carries seasoning without stealing the show.
Key Ingredients
-
1 1/4 pounds ground beef — The anchor of the bowl.
-
4 cups cauliflower rice — Fresh or frozen, but thaw frozen rice first.
-
2 cups baby spinach — Wilts into the bowl with almost no effort.
-
1 red bell pepper, diced — Sweet crunch and color.
-
1 cup shelled edamame — Adds body and a little protein.
-
3 garlic cloves, minced — Keeps the bowl from tasting flat.
-
3 tablespoons soy sauce — The salt and savory base.
-
1 1/2 tablespoons gochujang — Enough heat to make the bowl interesting.
-
1 tablespoon toasted sesame oil — Stir in after cooking.
-
1 tablespoon rice vinegar — Gives the bowl a clean finish.
-
2 scallions, sliced — For the top.
Quick Steps
Cook the Beef:
-
Brown the ground beef in a large skillet over medium-high heat for 6 to 8 minutes, breaking it into small bits.
-
Add the garlic, soy sauce, gochujang, and rice vinegar. Stir for 1 minute until the beef is glossy.
Build the Base:
-
Push the beef to one side of the skillet and add the cauliflower rice to the other side. Cook it uncovered for 4 to 5 minutes, stirring occasionally, until the moisture cooks off and the grains look dry.
-
Add the red bell pepper and edamame and cook for 2 minutes more.
-
Fold in the spinach and sesame oil. The spinach should wilt in about 30 seconds.
-
Divide into containers and top with scallions after reheating.
Tips and Variations
-
Dry Pan Rule: If the cauliflower rice looks watery, keep cooking. Wet cauliflower rice ruins the bowl.
-
Extra Fat: A teaspoon of mayonnaise stirred into the beef at the end sounds odd, but it gives a softer, richer finish.
-
Add Crunch: Cucumber slices are a smart cold topping here.
10. Japchae-Style Beef Noodle Bowls
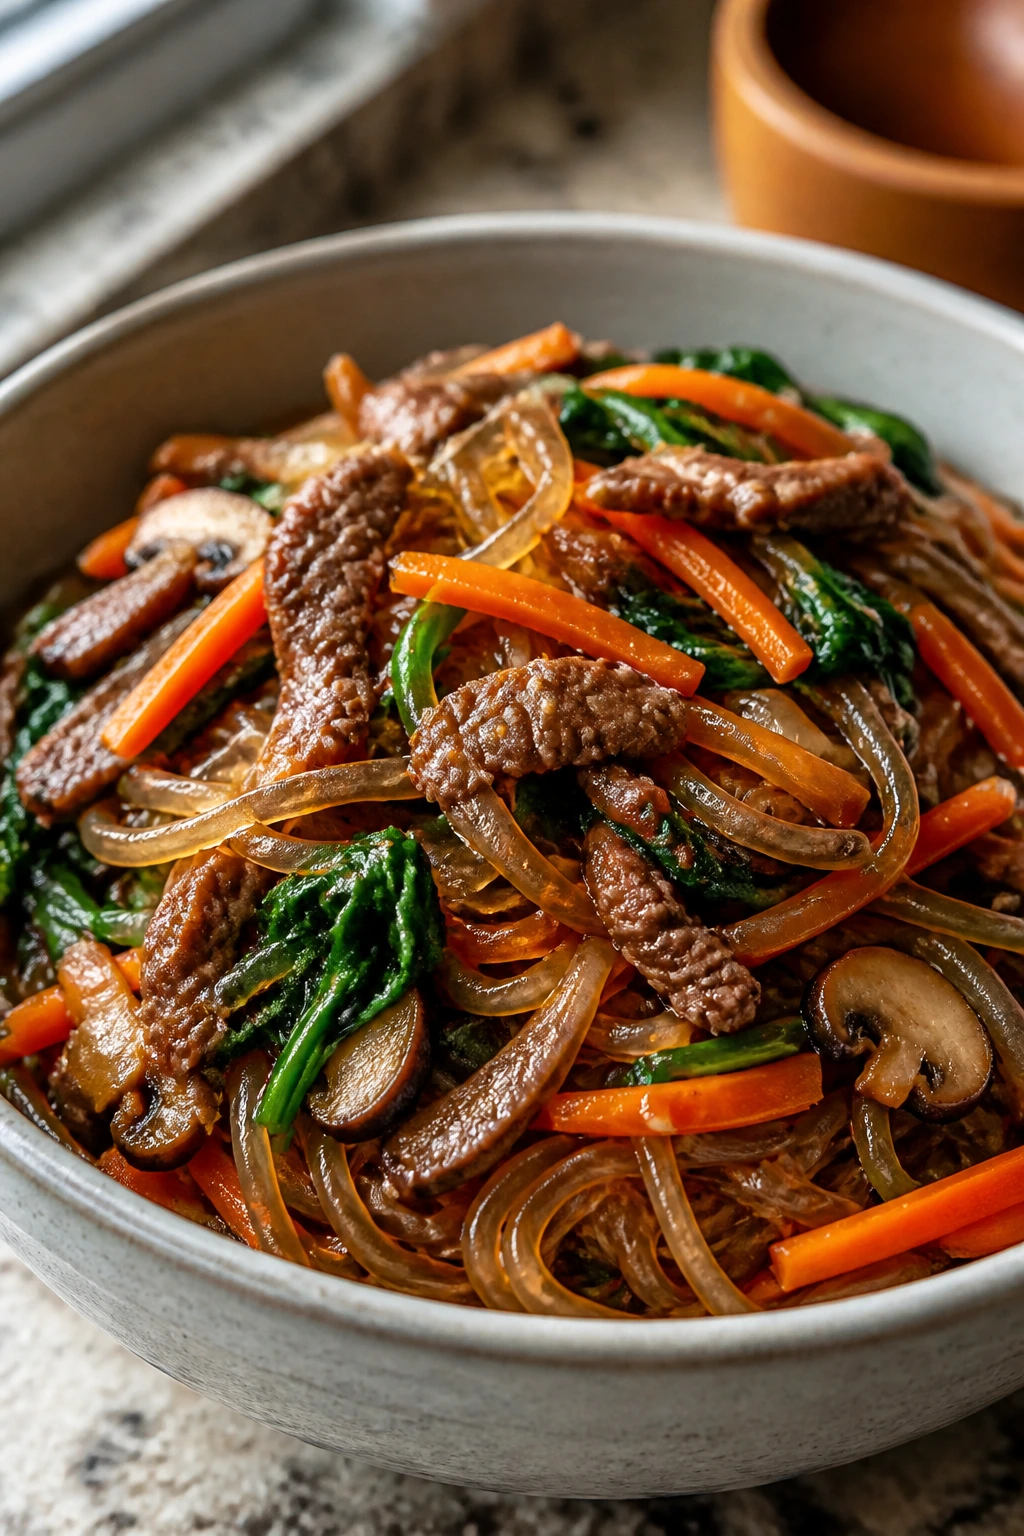
Japchae-style bowls have a different kind of chew, and that’s why they belong in this lineup. Sweet potato noodles stay springy, the beef stays savory, and the vegetables bring color instead of just filler. It tastes like a dinner you sat down for, even if you packed it on a Sunday.
I love this one for meal prep because it doesn’t depend on rice to feel complete. The noodles carry the sauce beautifully, and the dish still eats well after reheating if you don’t overcook the vegetables in the first place.
Why It Works
Sweet potato noodles, or dangmyeon, have a slippery, chewy texture that holds up better than many wheat noodles in a saucy bowl. They absorb seasoning without turning mushy if you rinse and toss them properly. Thin beef cooks fast, while carrots, mushrooms, spinach, and onion add enough structure to keep the noodles from feeling bare. Sesame oil and soy sauce are the main flavor drivers, but a little sugar keeps the whole bowl balanced.
Key Ingredients
-
1 pound flank steak, sliced thin — Best sliced against the grain for tenderness.
-
8 ounces sweet potato noodles — The chewy base that makes the dish feel special.
-
2 medium carrots, julienned — Bring color and bite.
-
8 ounces mushrooms, sliced — They absorb the sauce well.
-
1 medium onion, thinly sliced — Adds sweetness as it softens.
-
2 cups baby spinach — Wilts in seconds.
-
3 tablespoons soy sauce — The salt and savory backbone.
-
1 tablespoon brown sugar or honey — Balances the soy.
-
2 tablespoons toasted sesame oil — The aroma matters here.
-
4 garlic cloves, minced — Japchae should smell deep and garlicky.
-
1 tablespoon sesame seeds — For the finish.
Quick Steps
Prep the Noodles:
- Soak or boil the sweet potato noodles according to the package directions until tender but still chewy, usually 6 to 8 minutes. Drain and rinse briefly with cool water.
Cook the Beef and Vegetables:
-
In a large skillet, cook the beef over medium-high heat for 2 to 3 minutes until browned, then remove it from the pan.
-
Add the onion, carrots, and mushrooms to the same skillet and cook for 4 to 5 minutes until softened but not limp.
-
Stir in the garlic, soy sauce, brown sugar, and a splash of water. Add the noodles and toss for 1 to 2 minutes so they absorb the sauce.
-
Return the beef and fold in the spinach and sesame oil. Cook just until the spinach wilts.
-
Finish with sesame seeds and pack into containers once the noodles have cooled a bit.
Tips and Variations
-
Cut the Noodles: Kitchen shears make it much easier to eat these bowls after reheating.
-
Vegetable Swap: Thin-sliced bell pepper or zucchini can step in for carrots if that’s what you have.
-
Don’t Overcook: The noodles keep their spring better if you stop as soon as they look glossy and coated.
Why Korean Beef Bowl Meal Prep Works So Well
A lot of meal prep falls apart because everything is cooked to the same texture and stored the same way. That’s the mistake. Korean beef bowls work because they give each part of the meal a job. Beef carries the seasoning. Rice or noodles carry the sauce. Crunchy vegetables keep the bowl from turning soft. Pickles, scallions, sesame seeds, and eggs act like little reset buttons every time you open the container.
The other reason this style works is the sauce itself. Soy sauce, gochujang, sesame oil, garlic, ginger, vinegar, and a touch of sweetener make a flavor profile that survives refrigeration better than delicate herbs or creamy sauces. It doesn’t go stale as fast. It holds. That’s a very useful quality when you’re cooking ahead for a few days at a stretch.
And there’s a practical side people forget. You can cook a skillet version on a Tuesday night, then turn around and make the slow-cooked version on a weekend without buying a different set of pantry staples. The core ingredients repeat, but the textures shift enough that your fridge doesn’t feel monotonous. That matters more than most recipe blogs admit.
Essential Equipment for These Recipes
-
Large nonstick or stainless-steel skillet — The workhorse for ground beef, stir-fry beef, and fried rice.
-
Rimmed sheet pan — Needed for the roasted broccoli bowl and useful for cooling rice fast.
-
Slow cooker or Dutch oven — Best for the shredded beef version and any long braise.
-
Medium saucepan with a lid — Handy for cooking rice or noodles without burning attention.
-
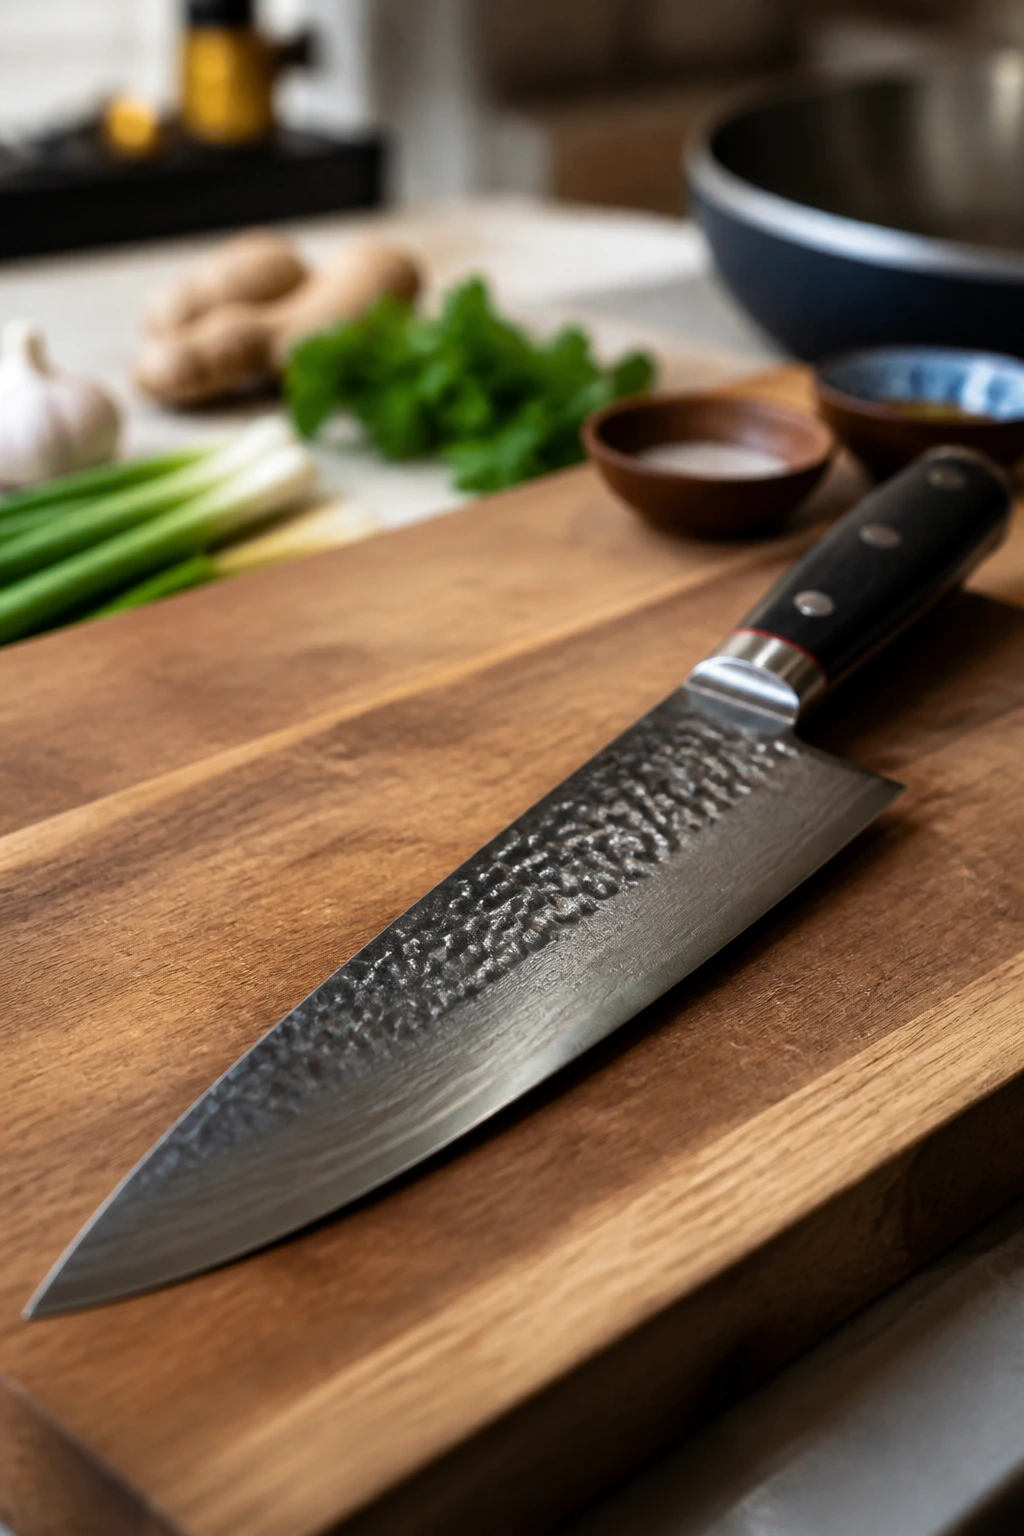
Sharp chef’s knife — Thin slicing matters for bulgogi and japchae.
-
Cutting board — A big one. Thin vegetable prep creates a mess fast.
-
Fine grater or microplane — Useful for ginger and pear in the bulgogi marinade.
-
Tongs and a sturdy spatula — For flipping beef, tossing noodles, and stirring fried rice.
-
Measuring cups and spoons — Go closer to exact here than your instincts might want.
-
Airtight meal prep containers — Preferably with compartments or room for toppings on the side.
Smart Shopping and Ingredient Tips for Korean Beef Bowl Meal Prep
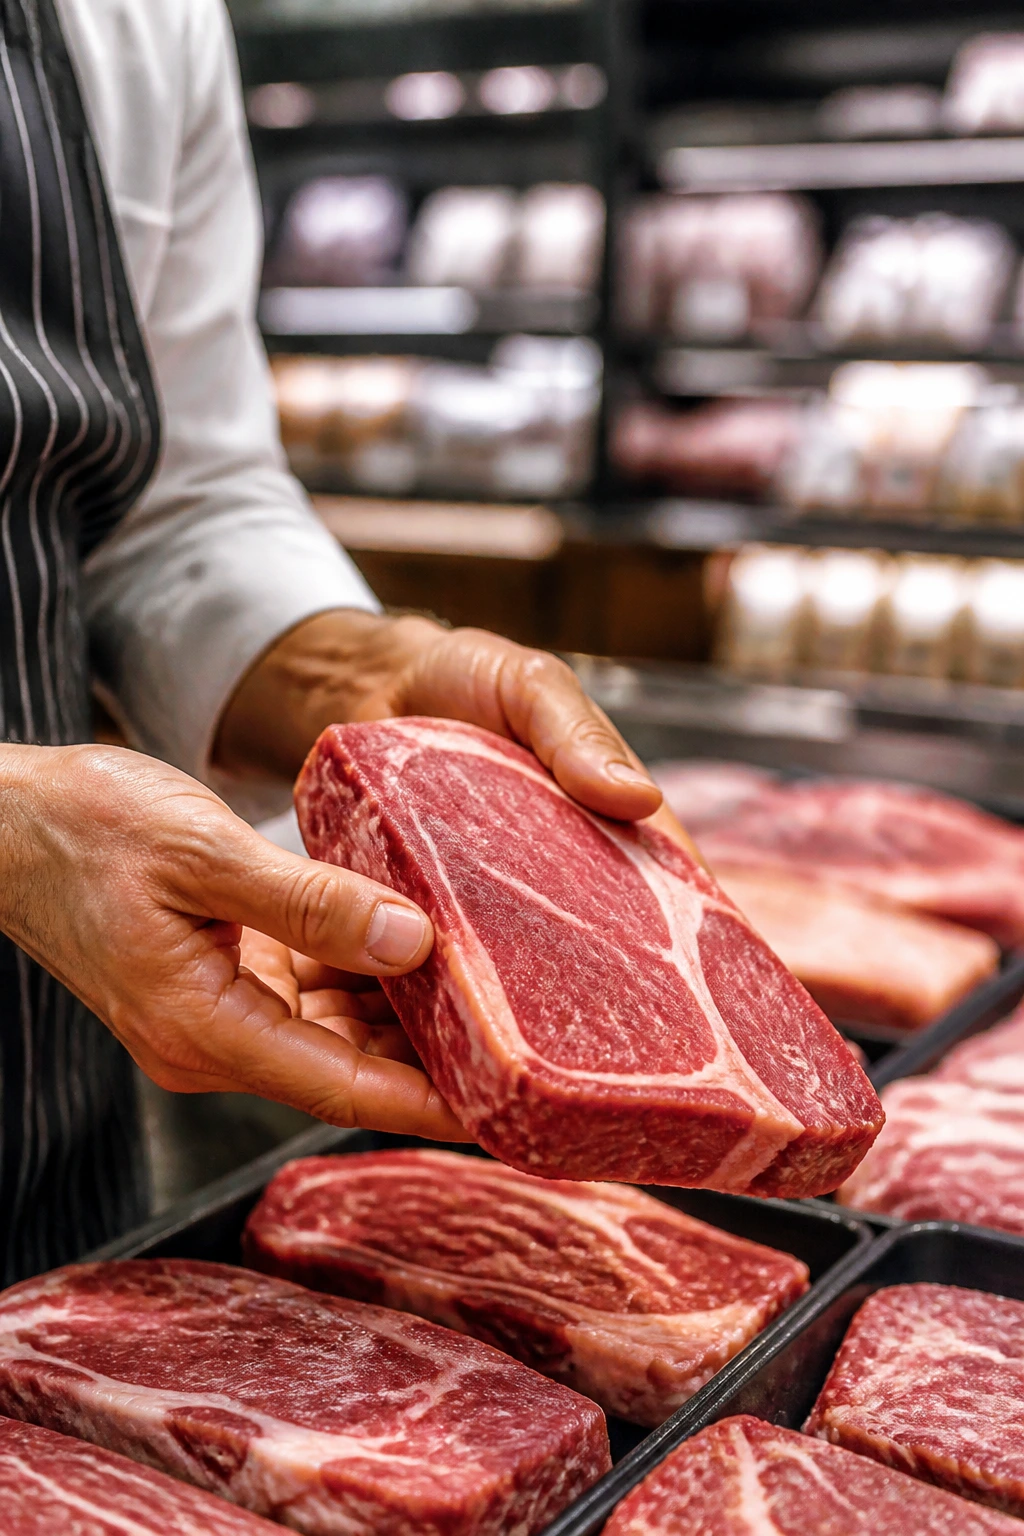
The beef choice changes the whole mood of the bowl. For ground beef, I like 85/15 because it browns well and still has enough fat to taste like something. If you go leaner, you’ll need to be more careful with sauce and perhaps add a bit more sesame oil or a splash of water when reheating. For sliced beef, look for sirloin, flank steak, or skirt steak, and slice across the grain as thinly as you can manage. That one step is the difference between tender and chewy.
Gochujang deserves a little attention, too. Some jars lean sweeter, some are saltier, and some hit much harder than expected. Taste a little before you cook with it. If it’s thick and deeply fermented, start smaller and build up. Soy sauce should usually be low-sodium for these recipes, because gochujang and kimchi already bring plenty of salt. Tamari works if you need a gluten-free option, but check the label on the gochujang as well; some versions include wheat.
Rice is another place where quality matters more than brand. Short-grain rice feels stickier and more classic, but jasmine rice gives you a softer, fluffier result. If you’re using brown rice, make sure it’s cooked well and not dry in the middle, because reheated brown rice can turn stubborn fast. For meal prep, cook rice a little on the generous side and fluff it before cooling so it doesn’t clump into bricks.
Vegetables can be fresh or frozen, depending on the recipe. Broccoli, green beans, and edamame all handle frozen versions pretty well. Cucumbers, lettuce, and quick-pickled vegetables should stay fresh. Mushrooms should look dry and firm, not slimy. And if you’re buying kimchi, look for a jar that smells bright and sour rather than flat or overly sweet. That tang is what keeps the bowls awake after a few days in the fridge.
How to Serve These Recipes
Presentation: Build the bowls in layers instead of stirring everything together. Rice or noodles on the bottom, beef in one section, vegetables in another, then a final scatter of scallions, sesame seeds, or a fried egg. It looks better, and it keeps the textures more distinct when you open the container later.
Accompaniments: A quick cucumber salad, steamed broccoli, pickled radish, shredded cabbage, or a simple seaweed snack fits these bowls without crowding them. If you want more food on the table, add a soft-boiled egg, a bowl of broth, or a side of roasted vegetables. Keep the sides simple. The bowls are already doing enough work.
Portions: Most of these dinners land well at about 4 to 6 ounces of cooked beef per serving, 3/4 to 1 cup cooked rice or noodles, and 1 to 1 1/2 cups vegetables. If you’re feeding bigger appetites, add more rice or a second egg. If you want a lighter dinner, lean on the vegetables and cut the starch down a bit.
Beverage Pairing: Unsweetened iced green tea, barley tea, sparkling water with lime, or a crisp light lager all play nicely with the soy-gochujang profile. The goal is refreshment, not another strong flavor fighting for attention.
Additional Tips and Flavor Boosters

Flavor Enhancement: A tiny finish of toasted sesame oil right before serving does more than people expect. It smells rich, tastes round, and makes the whole bowl feel more finished. Use it as a finishing note, not a cooking fat.
Customization: If you like a bigger vegetable load, add shredded cabbage, sautéed mushrooms, roasted broccoli, or quick-pickled carrots to almost any of these bowls. If you need a softer spice level, cut the gochujang by a third and add a teaspoon of brown sugar or honey.
Serving Suggestions: Toasted sesame seeds, sliced scallions, cucumber ribbons, fried eggs, and thin strips of roasted nori give the bowls a clean look and a better bite. A spoonful of kimchi on the side works almost everywhere here, even on the low-carb bowl.
Make-It-Yours: For gluten-free bowls, use tamari and check the gochujang label. For lower sodium, use low-sodium soy sauce and add rice vinegar for brightness instead of more salt. If you want more richness without much extra work, stir a teaspoon of butter into the hot beef at the end of cooking. It sounds odd. It works.
Common Mistakes to Avoid
The biggest mistake is using beef that’s too lean and then wondering why the bowl tastes dry. Meat with no fat can still work, but you’ll need extra sauce and careful cooking. A little fat is not the enemy here.
Another common problem is overloading the pan. That happens in the skillet recipes and in the sheet-pan version. If the meat or vegetables are piled on top of one another, they steam. Steam is the enemy of browning. Browned bits are where the flavor lives.
People also pack everything together while it’s still hot. Don’t. The steam from the rice or noodles will soften cucumbers, wilt slaw, and make the whole container feel tired by lunch. Let the food cool for a bit, then store crunchy toppings separately if you can.
A fourth mistake is skipping acid. Gochujang, soy sauce, and sesame oil are great, but without rice vinegar, kimchi juice, or another bright element, the bowl can land heavy and one-dimensional. That small sour note is doing more work than it looks like.
Last, there’s overcooking during reheating. If the beef looks dry after three days in the fridge, don’t blast it in the microwave for four minutes straight. Add a spoonful of water, cover it loosely, and warm it in short bursts. It comes back much better that way.
Variations and Adaptations to Try

The Brown Rice Stack: Swap white rice for brown rice or a brown rice and barley mix. The texture is nuttier and a little chewier, which works well with saucy beef and crunchy vegetables.
The Heat-Seeker Bowl: Add 1 teaspoon gochugaru or an extra teaspoon of gochujang to any of the skillet bowls. It gives a cleaner kind of heat than just piling on more sauce.
The Gentle Bowl: Use only 1 tablespoon gochujang, add a little more brown sugar, and lean on cucumber, carrot, or cabbage for freshness. This is the version people usually eat more of than they expect.
The Freezer-First Plan: Make the slow-cooker shredded beef or the ground beef base without cucumber, lettuce, or eggs, then freeze in portions. When you thaw it, add fresh toppings and a fresh batch of rice.
The Double-Vegetable Version: Use half beef and half mushrooms in the ground beef recipes. It stretches the meal without making it feel empty, and the mushrooms pick up the sauce nicely.
The Noodle Swap: Use soba, udon, or ramen in place of rice for the skillet bowls when you want a different kind of comfort. Just keep the sauce a little lighter so the noodles do not drown.
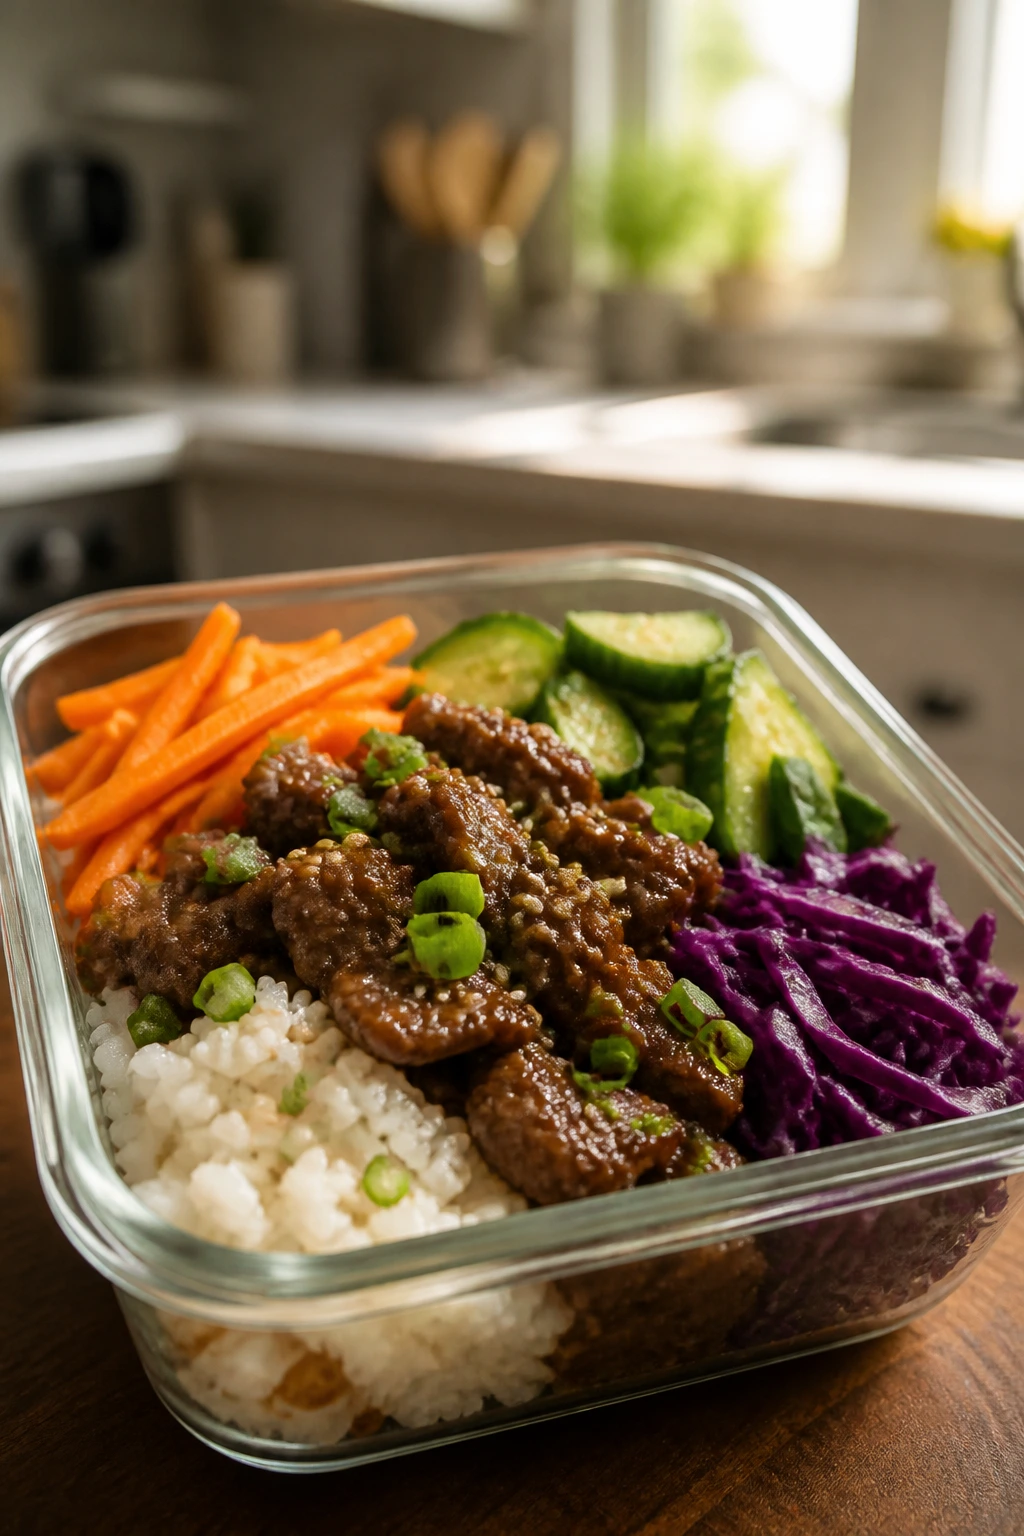
Make-Ahead, Storage, and Reheating Guidance
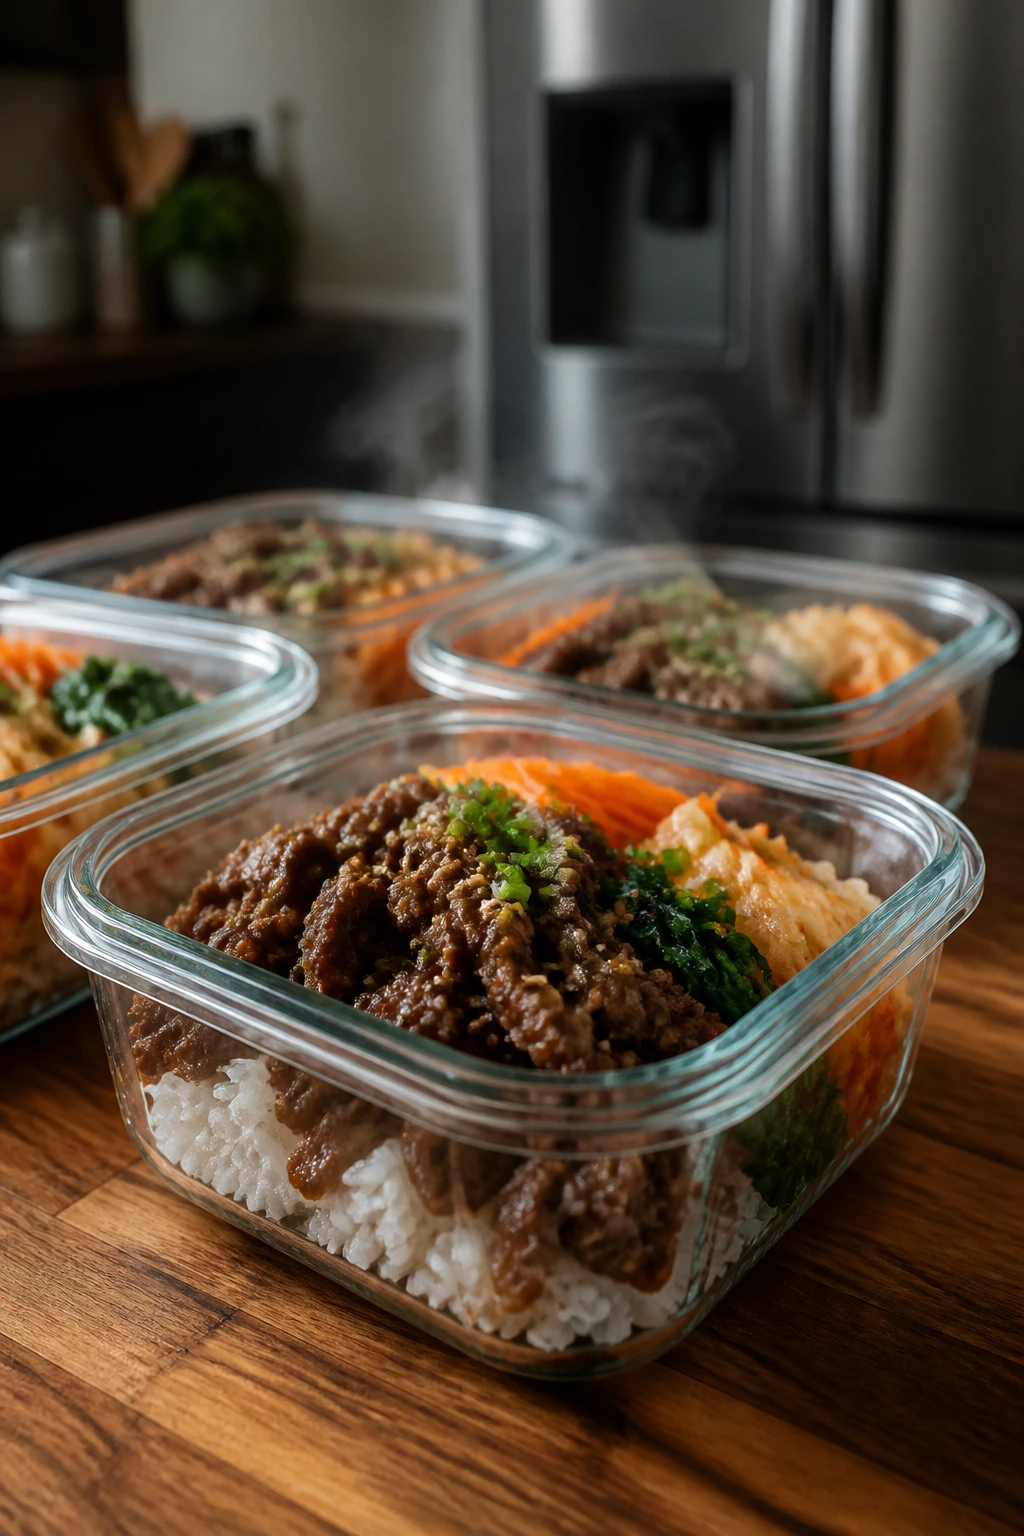
Most cooked Korean beef bowls keep well for 3 to 4 days in the fridge when stored in airtight containers. Rice and beef can sit together, but crunchy toppings are better kept separate. Cucumbers, lettuce, slaw, and fried eggs all lose their edge faster than the beef does, so tuck those into a second container or add them fresh at serving time.
For the freezer, the saucy beef bases are your safest bet. Ground beef, bulgogi beef, and slow-cooked shredded beef all freeze nicely for up to 2 to 3 months. Plain rice can also be frozen for about a month, though the texture is best if you cool it quickly, portion it flat, and reheat it with a splash of water. I would not freeze cucumber, lettuce, or fried eggs. That road leads nowhere good.
Reheating works best in a skillet when you have the time. Add the beef and rice with 1 to 2 tablespoons water over medium heat and stir until hot, usually 3 to 5 minutes. The microwave is fine too. Cover the container loosely, heat in 60-second bursts, and stir once in the middle so the edges do not dry out while the center stays cold. For noodle bowls, a splash of water and a short toss in a skillet bring the texture back better than a long microwave session.
If you’re making bowls ahead for the whole week, let the food cool before sealing the lids. Hot food in a closed container turns into steam, and steam is what gives you soggy rice and limp vegetables. The beef itself can be cooked a day ahead, the rice can be cooked a day ahead, and the vegetables can be prepped a day ahead. That sequence makes the whole thing easier without forcing you to eat the same bowl at the same texture every day.
Handy Swaps and Style Changes Worth Trying
Gluten-Free Pantry Switch: Use tamari instead of soy sauce and check the gochujang label for wheat. The flavor stays close, and the texture of the bowls does not change.
Lower-Sodium Build: Start with low-sodium soy sauce, then add rice vinegar and scallions for brightness instead of more salt. It keeps the bowl lively without making it salty.
Mild Family Version: Cut the gochujang by a third and add more brown sugar or pear. That keeps the Korean flavor in place while softening the heat for kids or spice-sensitive eaters.
High-Veg Version: Double the broccoli, mushrooms, cabbage, or green beans in any of the skillet recipes and reduce the rice a little. The bowls still feel full, and the beef stretches farther.
No-Rice Night: Use lettuce, cabbage, or cauliflower rice as the base and keep the beef slightly saucier than usual. That keeps the meal satisfying instead of feeling like a side dish pretending to be dinner.
Questions People Ask Before Making These Bowls
Can I use ground turkey instead of beef?
Yes, but the flavor needs a little help because turkey is leaner and milder. Add a touch more sesame oil and a little extra gochujang or soy sauce so the bowl does not taste thin.
What cut of beef is best for bulgogi-style bowls?
Sirloin is the easiest choice, and flank steak is a close second if you slice it thinly against the grain. Ribeye is richer, but it costs more and doesn’t buy you much for meal prep.
How do I keep rice from getting hard in the fridge?
Cook it until just tender, cool it quickly, and store it in airtight containers. Reheat with a spoonful of water so the grains relax again instead of staying stiff.
Can these bowls be frozen?
The saucy beef bases freeze well for 2 to 3 months. Rice also freezes decently, but fresh vegetables and fried eggs should be added after thawing.
What if my sauce turns too salty?
Add a splash of water, a teaspoon of rice vinegar, or a bit more brown sugar. You can also stir in more beef or vegetables if the pan is already cooked.
How spicy are these bowls?
That depends on the gochujang and how much you use. Most of these recipes sit in the mild-to-medium range, but the heat is easy to raise or lower.
Can I make the vegetables ahead of time?
Yes, though some should be cooked and some should stay raw. Roasted broccoli, sautéed mushrooms, and blanched green beans keep well, while cucumbers and lettuce are better cut fresh or the day before.
Do I have to use short-grain rice?
No. Jasmine rice, brown rice, and even noodles work well. Short-grain rice just gives a stickier texture that feels a little more classic in the bowls.
Bowls That Make Weeknights Easier
The useful thing about Korean beef bowl dinners is that they do not ask you to choose between flavor and practicality. You can have both. A good one tastes sharp and savory, still feels balanced after refrigeration, and gives you enough texture to stay interesting when the fridge door opens for the third time.
That’s the part I trust. Not perfection. Just bowls that hold up.
Pick two or three recipes from this group, rotate them through the month, and you’ll stop staring into the fridge like it has offended you personally. The next meal will already be waiting.