
A tired mom dinner has a smell of its own: onion, melted cheese, a little garlic powder, and the relief of not standing over the stove. Dump and bake dinners earn their keep because they let the oven do the boring part while you answer homework questions, hunt for a clean water bottle, or sit down for five quiet minutes with something hot to drink.
The trick is not dumping random things into a pan and hoping for dinner. A good baked meal uses the right liquid, the right dish size, and ingredients that can finish at the same speed — rice with broth, pasta with sauce, potatoes cut small enough to soften before the top scorches. Get that part right and the result is cozy instead of clumsy.
What follows leans hard on that idea: dinners with short prep, forgiving ingredients, and enough flavor that nobody pushes the plate away because it “looks weird.” Some use rotisserie chicken, some use raw chicken or fish, and a few are vegetarian without feeling like a backup plan. The oven takes the weight off your shoulders. Good.
Why These Dump-and-Bake Dinners Keep Saving Weeknights
-
Less stovetop traffic: You get one pan, one oven, and far less standing around while something bubbles over on the front burner.
-
Friendly to leftovers: Rice bakes, pasta casseroles, and tortilla layers reheat better than a lot of pan dinners, which matters when lunch tomorrow is already solved.
-
Built from normal groceries: Broth, pasta, beans, cheese, salsa, frozen vegetables, and rotisserie chicken show up in these recipes because they work, not because they sound clever.
-
Flexible for picky eaters: Mild cheese, familiar starches, and soft textures make these easier to land with kids who treat dinner like a negotiation.
-
Cleanup stays contained: A baking dish, a spoon, maybe a knife. That’s the whole point. Fewer dishes after a long day feels like a real win, not a small one.
1. Creamy Chicken and Rice Bake with Broccoli
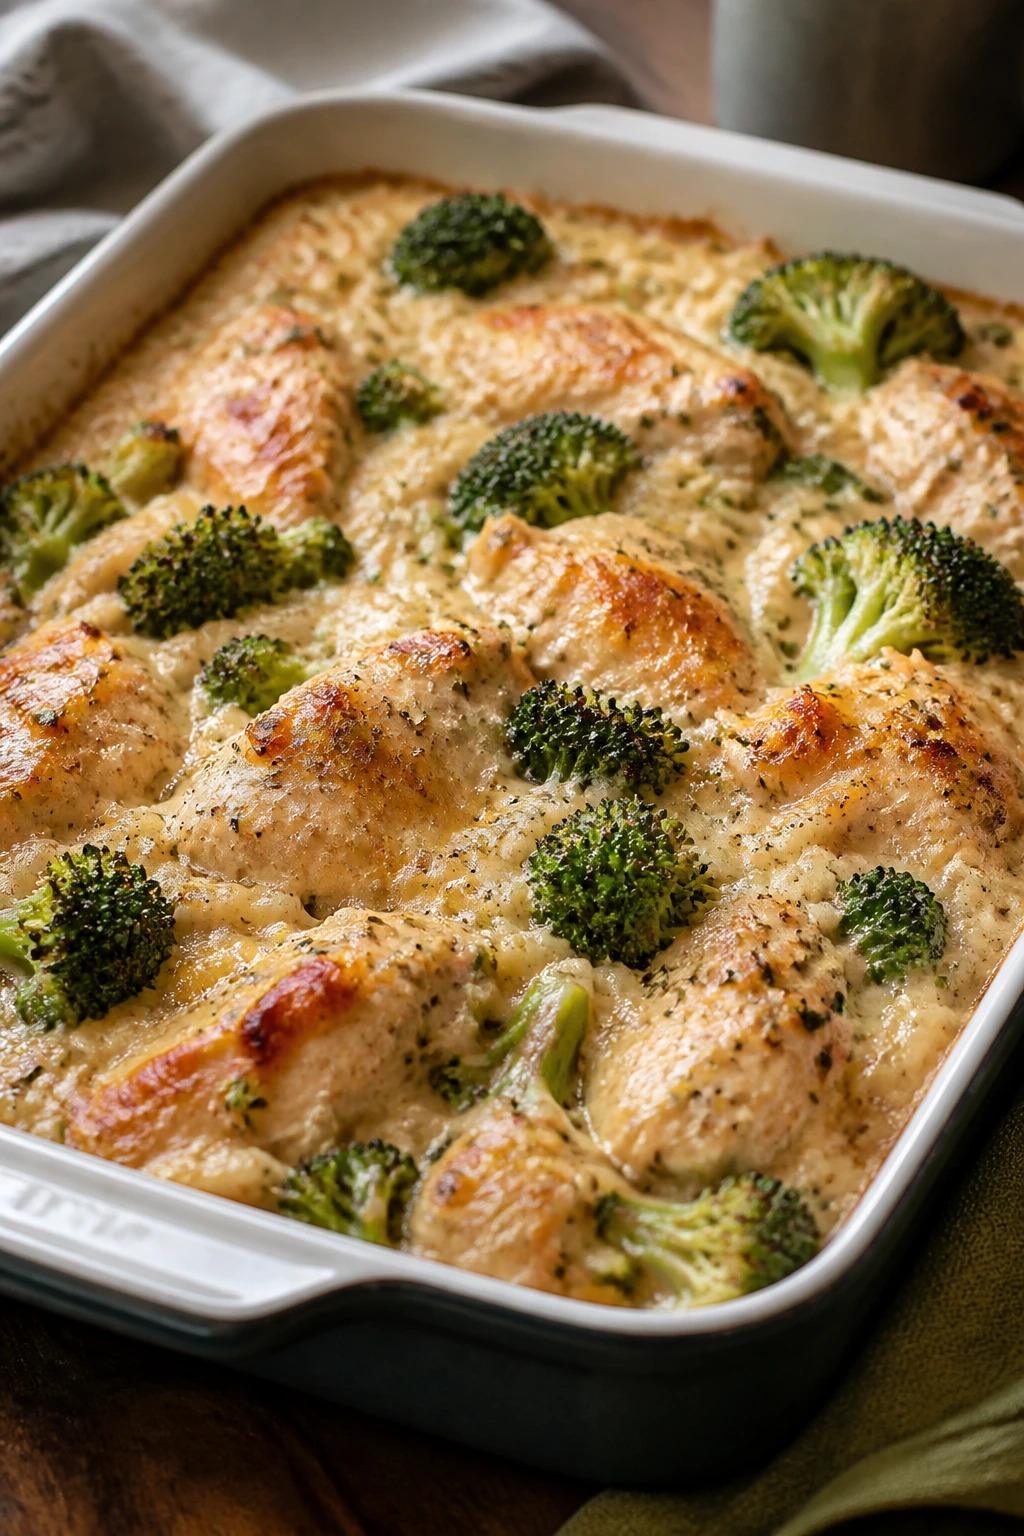
Creamy chicken and rice is the casserole version of a deep breath. It comes out rich and comforting, with tender chicken, soft rice, and broccoli that still has a little bite if you don’t overbake it. The cheese on top does what cheese should do: make the whole pan smell like dinner is already handled.
Why It Works
The real strength here is timing. Long-grain white rice cooks best when it has enough liquid and a tight cover, while boneless chicken thighs stay juicy through a longer bake instead of drying out. Broccoli goes in partway through, so it keeps some color and doesn’t collapse into green paste. The whole pan tastes like it took more effort than it did, which is one of the nicest tricks in weeknight cooking.
Key Ingredients
- 1 1/2 lbs boneless, skinless chicken thighs, cut into 1-inch pieces — thighs stay tender and forgive a longer bake.
- 1 cup long-grain white rice — rinse it if you want a less sticky finish.
- 2 cups low-sodium chicken broth — the rice needs the liquid, so don’t skimp.
- 1 can cream of chicken soup, 10.5 oz — adds body without extra work.
- 1/2 cup whole milk — loosens the sauce just enough.
- 2 cups small broccoli florets — cut them bite-size so they finish with the rice.
- 1 small yellow onion, finely diced — it melts into the base and sweetens as it bakes.
- 1 teaspoon garlic powder, 1 teaspoon kosher salt, 1/2 teaspoon black pepper — simple seasoning, no drama.
- 1 1/2 cups shredded cheddar — sharp cheddar gives the pan more backbone.
- 1 tablespoon olive oil or melted butter — helps the onions and chicken start with a little richness.
Quick Steps
-
Preheat and prep the dish: Heat the oven to 375°F (190°C). Lightly grease a 9×13-inch baking dish.
-
Build the base: Stir the rice, chicken broth, cream of chicken soup, milk, onion, garlic powder, salt, and pepper in the dish until the rice is evenly distributed.
-
Add the chicken: Nestle the chicken pieces into the rice mixture and press them down so they sit just under the surface.
-
Cover and bake: Tightly cover the dish with foil and bake for 35 minutes, until the rice has started to soften and the chicken is mostly cooked through. Do not skip the foil here; the rice needs steam.
-
Add the broccoli: Remove the foil, stir the edges once, then scatter the broccoli over the top. Re-cover and bake for 12 to 15 minutes more, until the rice is tender and the chicken reaches 165°F in the thickest piece.
-
Finish with cheese: Sprinkle the cheddar over the top and bake uncovered for 5 minutes, just until melted and a little bubbly.
-
Rest before serving: Let the pan sit for 5 to 10 minutes. The rice will finish settling, and the sauce will thicken instead of running everywhere.
Tips and Variations
- Make it creamier: Stir in 2 tablespoons of sour cream at the end if you like a softer, richer sauce.
- Broccoli caution: Keep the florets small. Huge pieces turn the whole bake awkward.
- Easy swap: Use leftover shredded chicken instead of raw thighs and cut the first bake time down by about 10 minutes.
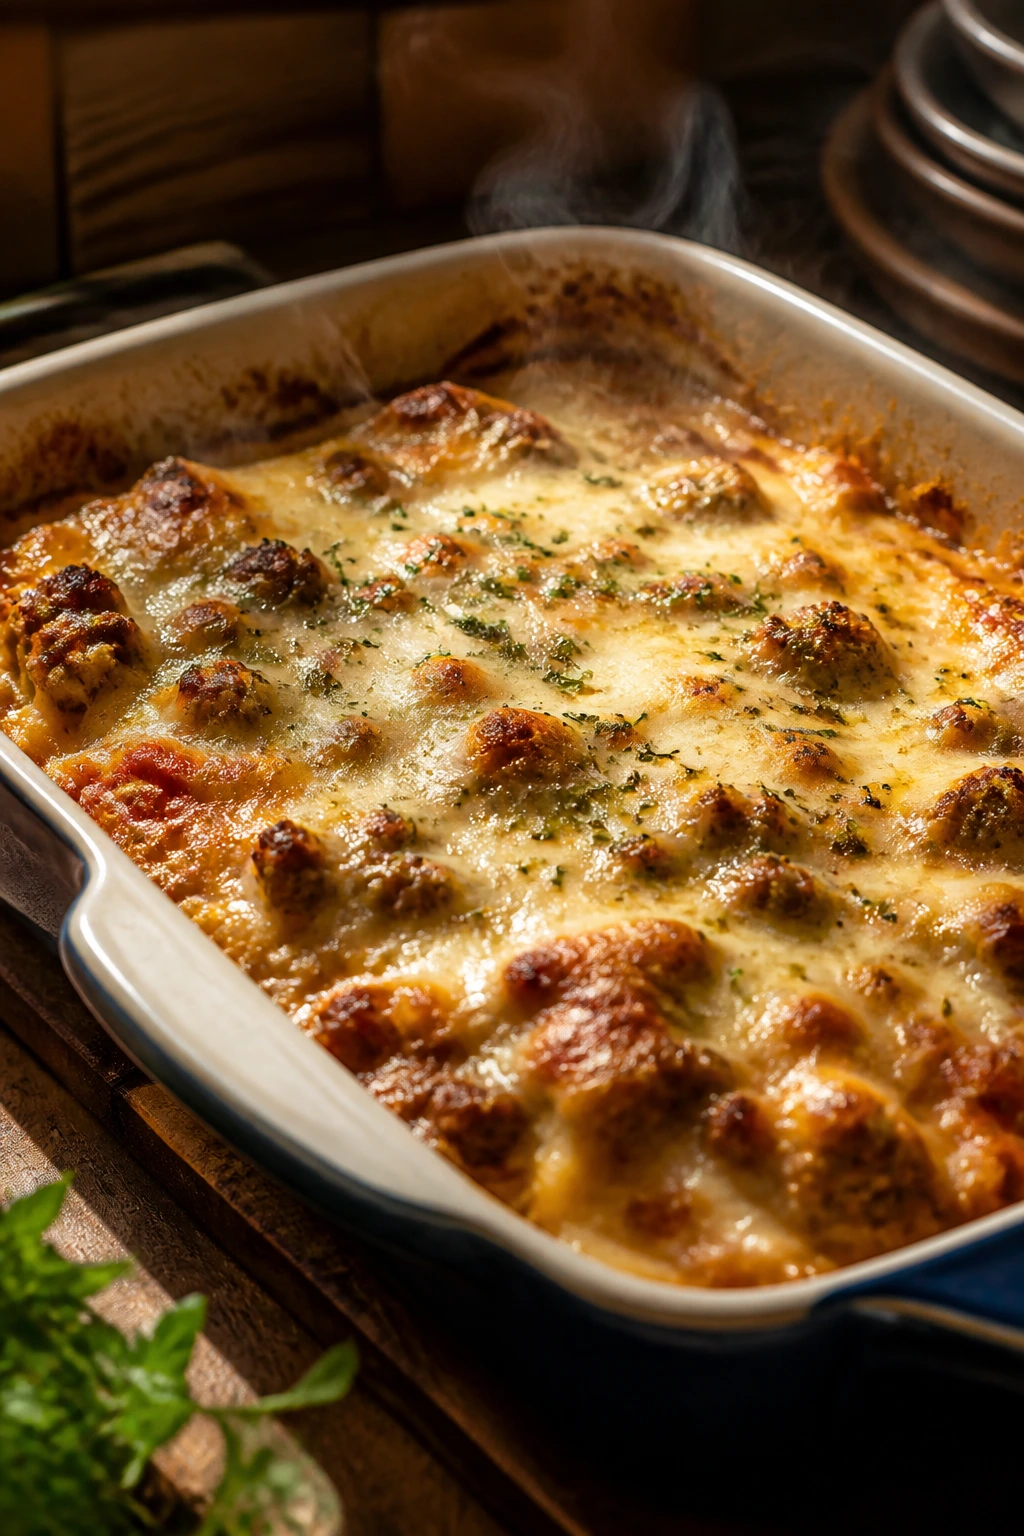
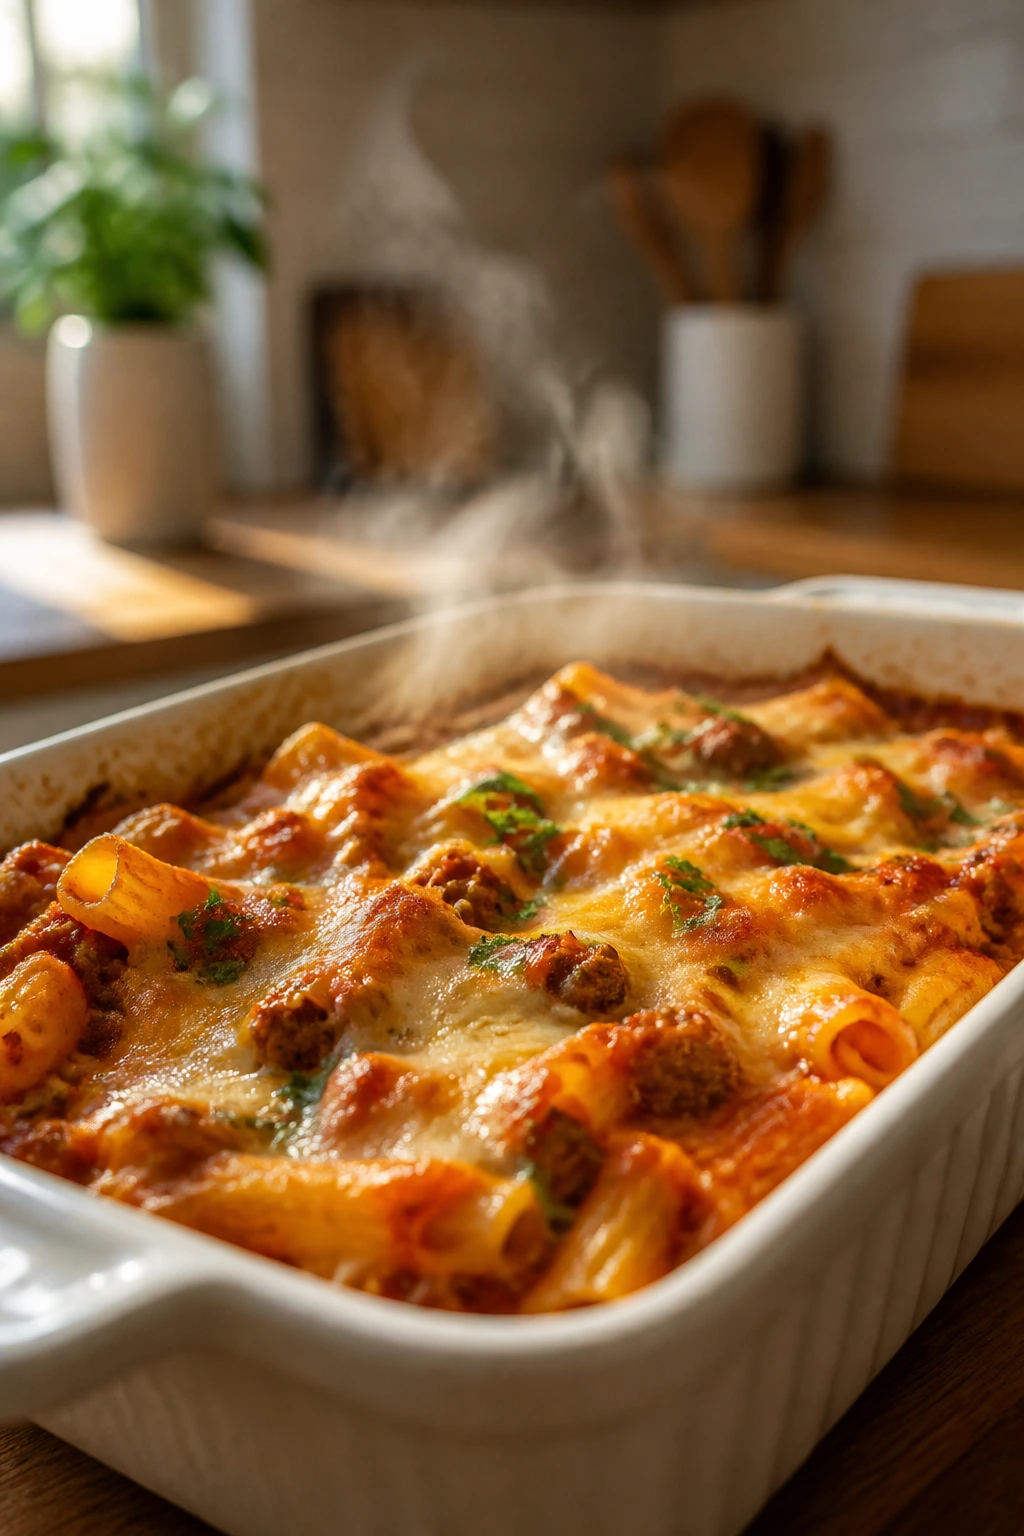
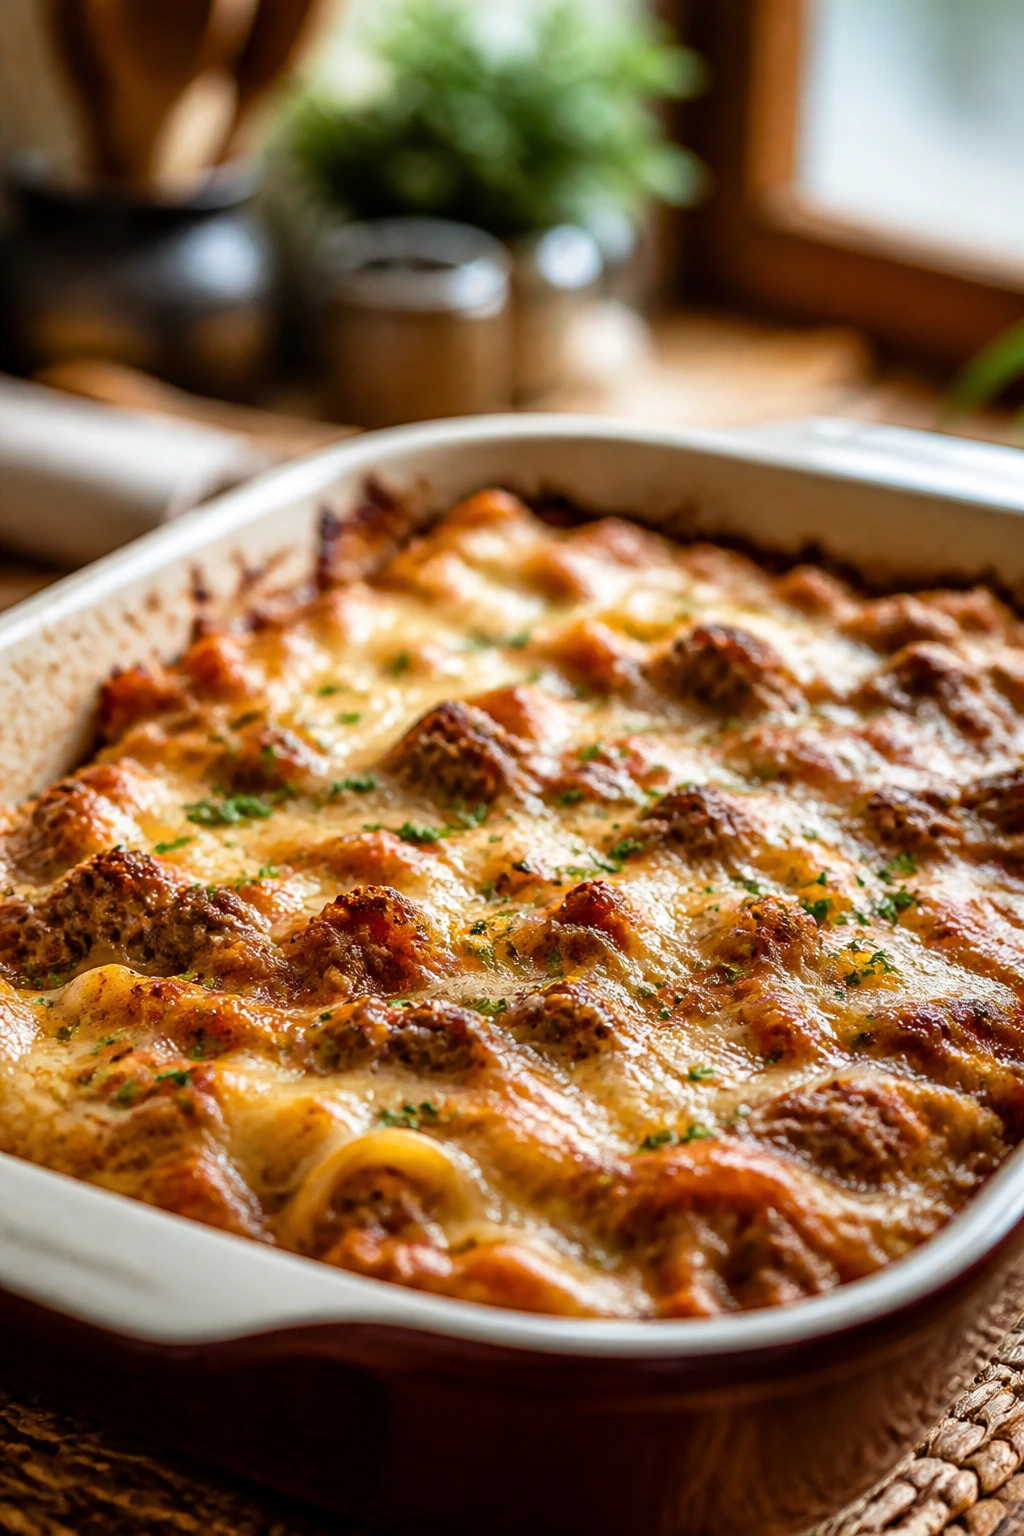
2. No-Boil Baked Ziti with Spinach and Mozzarella
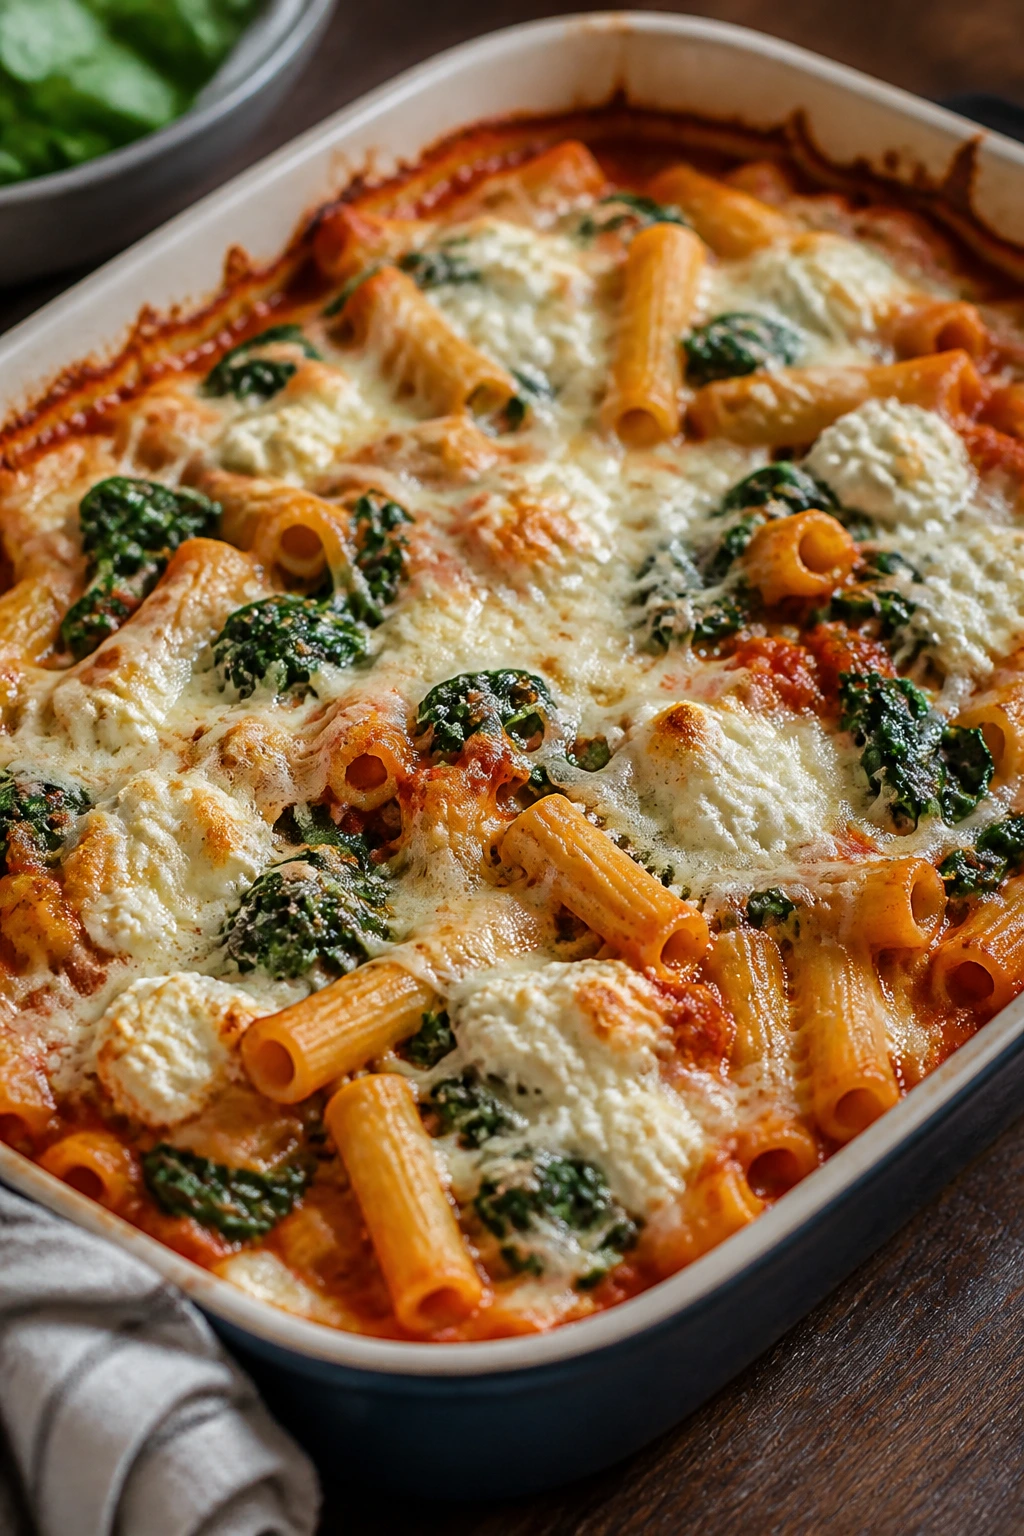
Can baked ziti work without boiling a pot of water first? Yes, and when the sauce is thin enough, it works beautifully. This version comes out saucy, stretchy, and a little rustic, with ricotta pockets tucked between the noodles and spinach disappearing into the red sauce like it was never there.
What Makes This Ziti Work
No-boil pasta needs enough liquid to hydrate in the oven, which is why the sauce here is loosened with water. The pasta soaks up the flavor while the ricotta and mozzarella keep the dish from tasting flat or heavy. Ziti and penne are sturdy shapes, which matters more than people think; delicate noodles turn to mush before the center is done. This is the kind of dinner that feels generous without demanding much from you.
Key Ingredients
- 12 oz ziti or penne pasta — sturdy shapes hold up best in the oven.
- 24 oz marinara sauce — use a jarred sauce you actually like.
- 2 1/2 cups water — the no-boil trick lives or dies here.
- 15 oz ricotta cheese — gives the bake creamy pockets.
- 2 cups shredded mozzarella — one cup inside, one cup on top works well.
- 2 cups baby spinach — it wilts down fast and doesn’t need chopping.
- 1 teaspoon Italian seasoning — a simple herb blend keeps it balanced.
- 1/2 teaspoon kosher salt and 1/4 teaspoon red pepper flakes, optional — season to taste.
- 1/2 cup grated parmesan — sharpens the finish.
Quick Steps
-
Heat the oven: Set it to 375°F (190°C) and grease a 9×13-inch baking dish.
-
Make the sauce base: Stir the marinara, water, Italian seasoning, salt, and red pepper flakes in the dish until smooth.
-
Add the pasta: Stir in the uncooked ziti or penne so every piece is coated. The liquid should mostly cover the pasta; if it doesn’t, add a splash more water.
-
Dot in the ricotta: Spoon the ricotta over the top in rough tablespoons, then tuck the spinach between the noodles and around the edges.
-
Cover and bake: Seal the dish tightly with foil and bake for 40 minutes, until the pasta is starting to soften.
-
Stir and finish: Remove the foil, stir once from the bottom, top with half the mozzarella and the parmesan, then bake uncovered for 10 minutes.
-
Melt the last layer: Add the remaining mozzarella and bake 5 to 10 minutes more, until the cheese is melted and the sauce bubbles at the edges. Rest 10 minutes before serving.
Tips and Variations
- Thicker sauce fix: If your marinara is very thick, add another 1/2 cup water before baking.
- Better browning: Use a metal pan if you want the top a little more toasted.
- Kid move: Skip the red pepper flakes and serve crushed red pepper at the table for everyone else.
3. Salsa Verde Chicken Enchilada Rice Bake

Tangy salsa verde gives this casserole a bright edge that keeps it from tasting heavy. The rice cooks in the salsa and broth, the beans add heft, and the cheese lands on top like the final blanket on a bed you didn’t have to make twice. It smells like a cross between enchiladas and a very good rice bowl.
Why This Version Holds Up
This bake works because salsa verde does more than flavor the dish — it also supplies acidity and moisture, which keeps the rice from tasting dull. Shredded chicken goes in late enough to stay tender, while black beans and corn give the pan more texture so it doesn’t feel soft all the way through. If you want one dinner that tastes lively without needing a stovetop skillet, this is a strong place to start.
Key Ingredients
- 1 1/2 cups long-grain white rice — the base needs a rice that cooks evenly.
- 2 cups salsa verde — pick a jar with a clean, tangy flavor.
- 1 3/4 cups chicken broth — enough to hydrate the rice without making it soupy.
- 2 cups shredded cooked chicken — rotisserie chicken is the fastest route.
- 1 can black beans, 15 oz, rinsed and drained — adds protein and substance.
- 1 cup frozen corn — no thawing required.
- 1 can diced green chiles, 4 oz — mild heat and a little smokiness.
- 1 teaspoon cumin and 1 teaspoon chili powder — keep the spice profile warm, not sharp.
- 2 cups shredded Monterey Jack — melts smoothly over the top.
- 1/2 cup chopped cilantro and 1 lime — the finish keeps it from feeling heavy.
Quick Steps
-
Preheat the oven: Set it to 375°F (190°C) and grease a 9×13-inch baking dish.
-
Combine the base: Stir the rice, salsa verde, broth, cumin, chili powder, beans, corn, and green chiles in the dish.
-
Cover and bake: Tightly cover with foil and bake for 40 minutes, until the rice is nearly tender. Keep the cover sealed so the rice steams instead of drying out.
-
Add the chicken: Remove the foil and fold in the shredded chicken. If the pan looks dry around the edges, add 1/4 cup more broth.
-
Top and melt: Sprinkle the Monterey Jack over the top and bake uncovered for 10 to 12 minutes, until the cheese melts and the edges bubble.
-
Finish fresh: Let it rest for 5 minutes, then add cilantro and a squeeze of lime.
Tips and Variations
- Heat level: If your family likes it mild, use mild salsa verde and skip extra chiles.
- Make it stretch: Add a second can of beans if you want the pan to feed more people.
- Bright finish: Avocado slices on the side do a lot of work here.
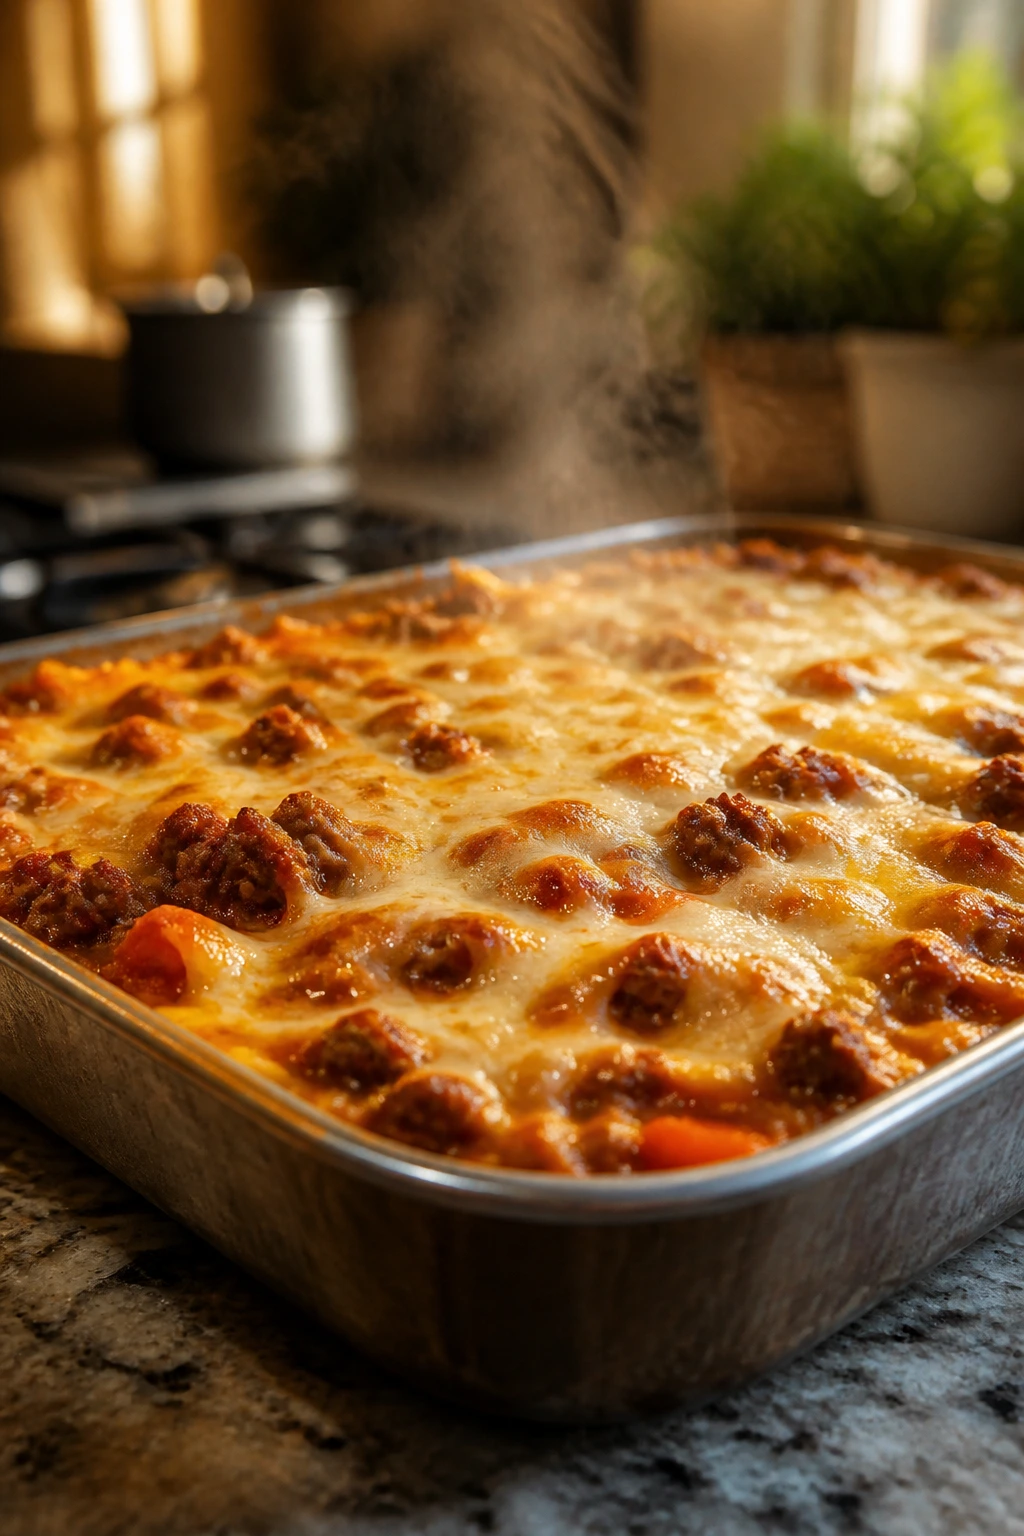
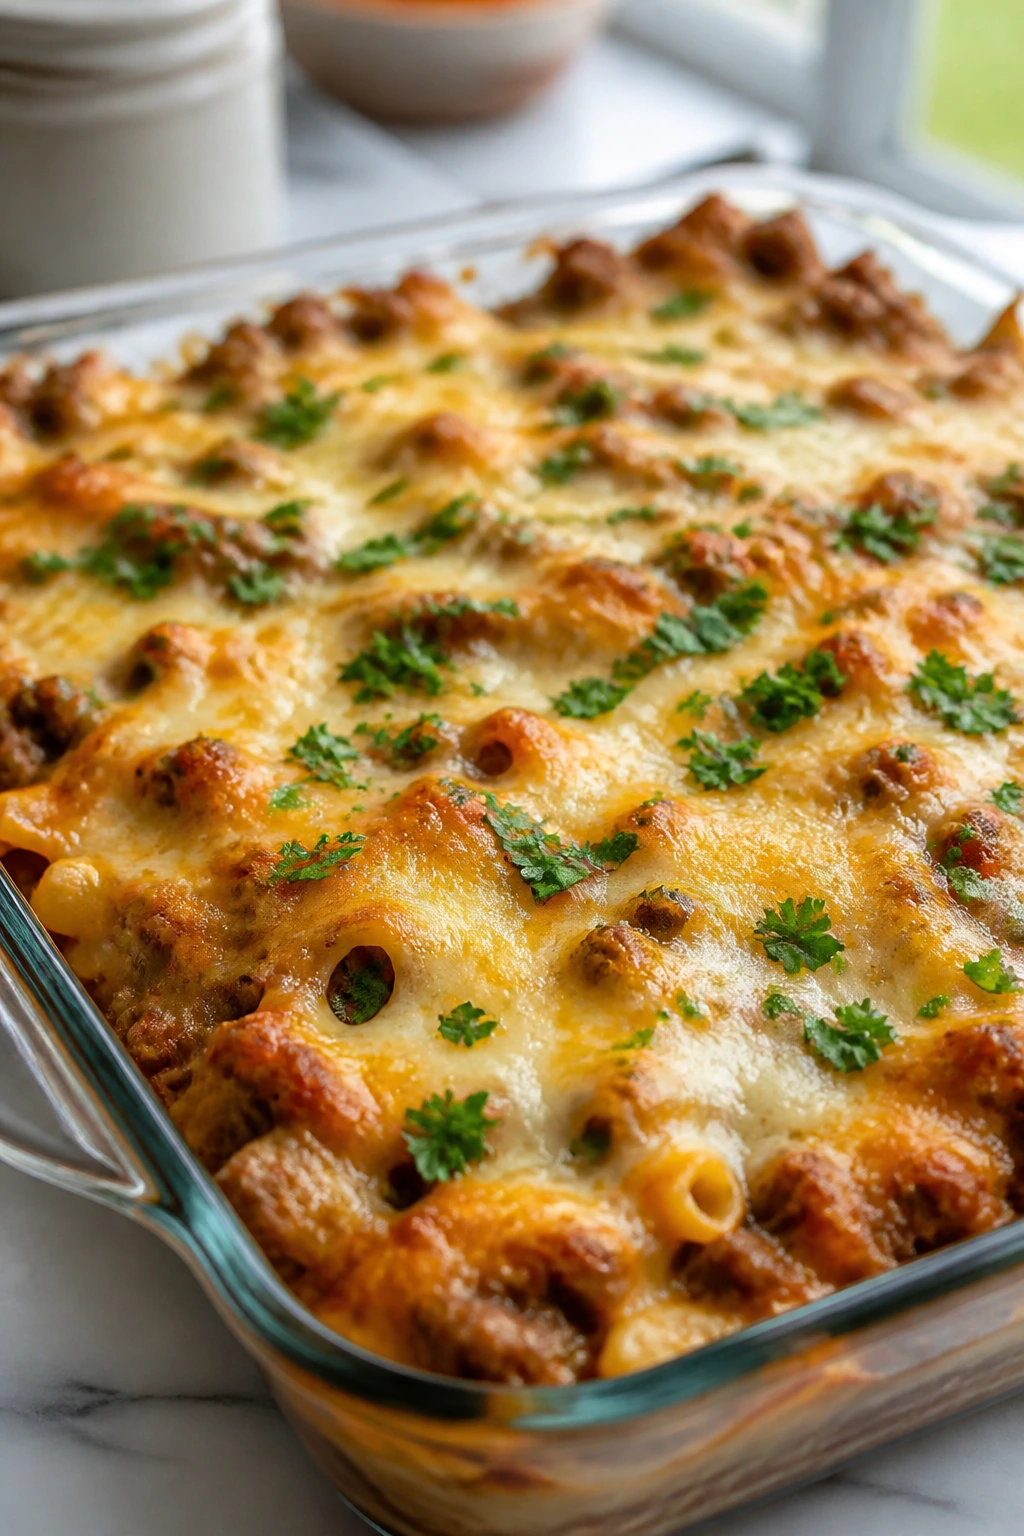
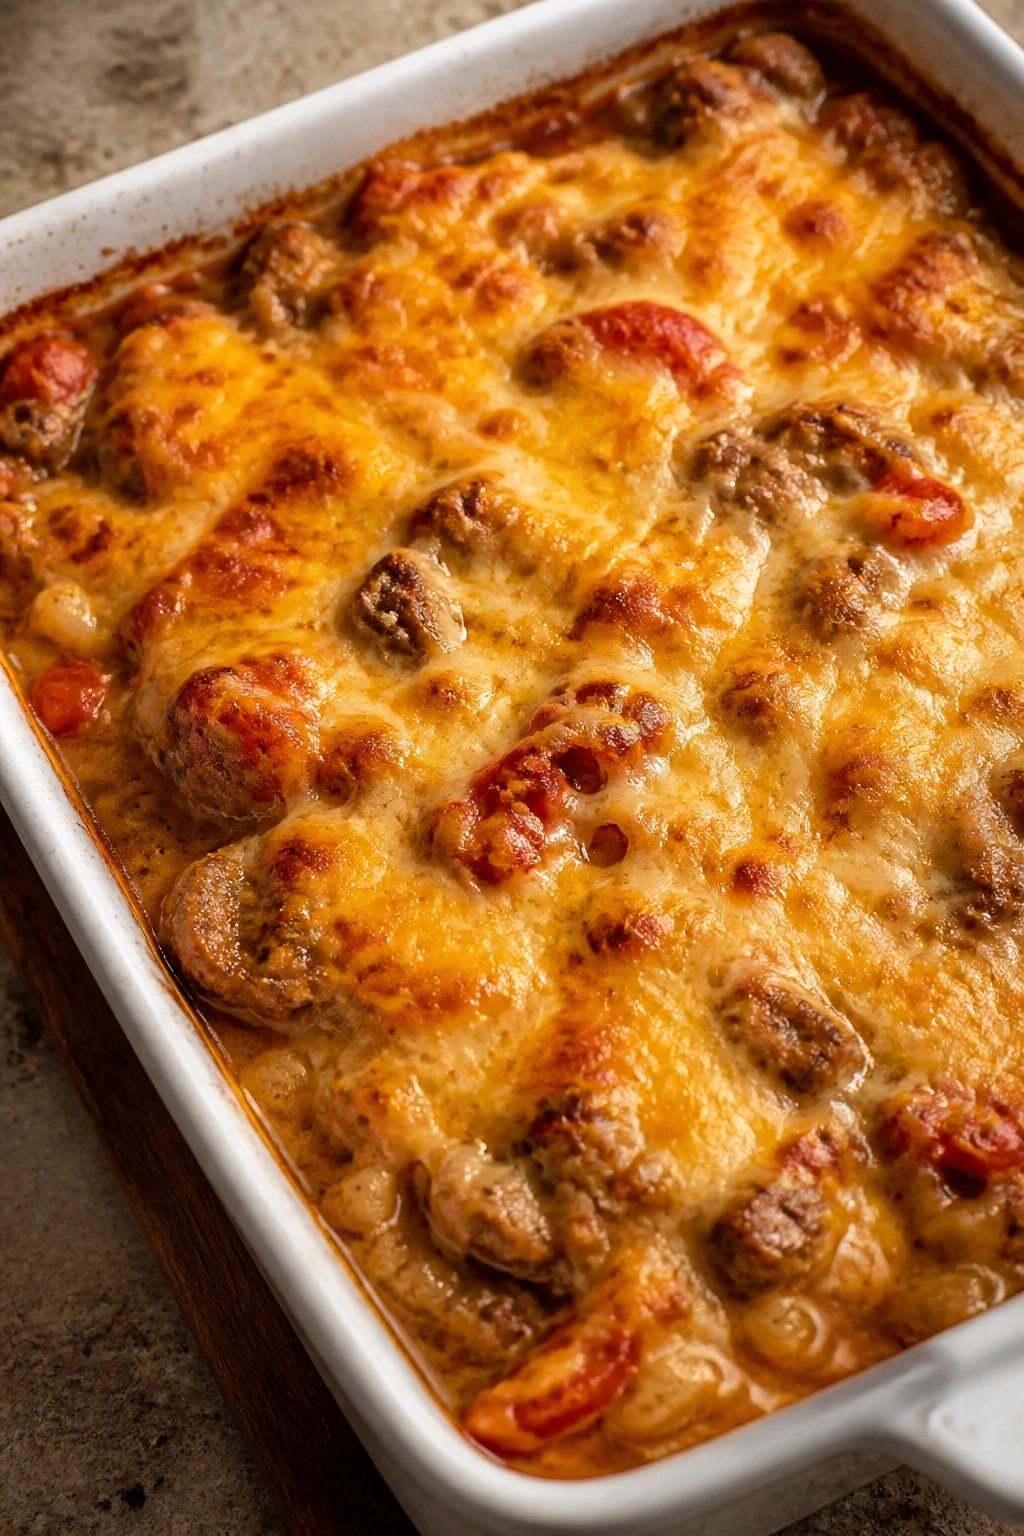
4. Sausage, Bell Pepper, and Gnocchi Bake
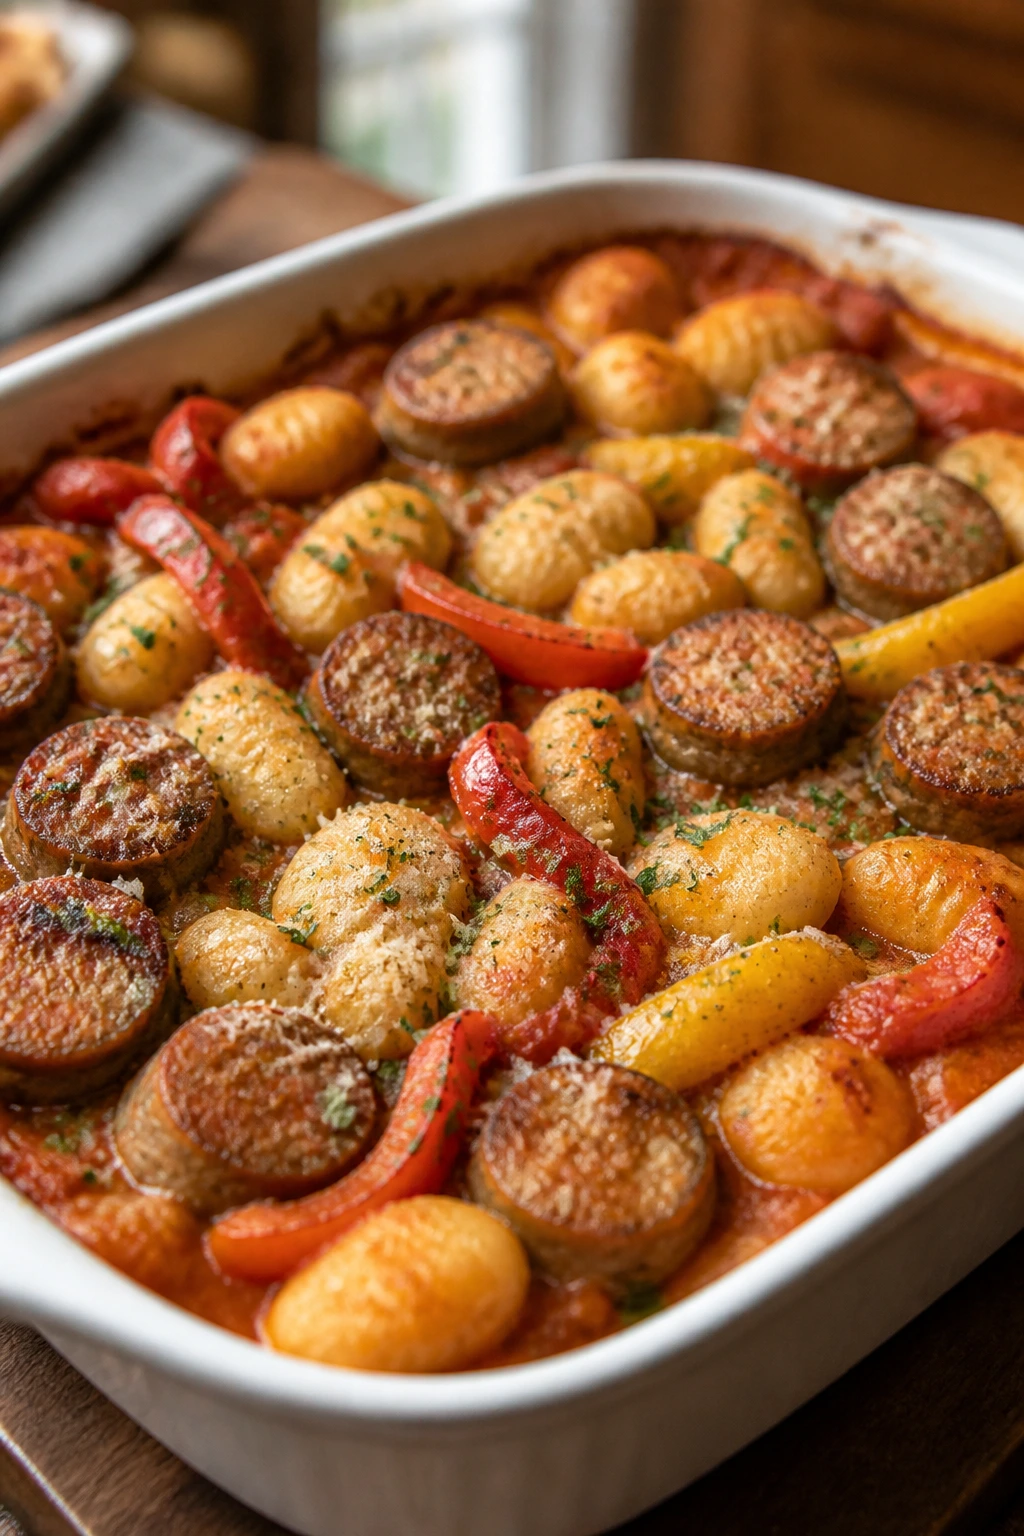
Gnocchi in the oven is one of those shortcuts that feels a little suspicious until you taste it. Then it makes perfect sense. The gnocchi soaks up marinara, the peppers soften into sweet strips, and the sausage brings enough salt and richness that you do not need to fuss over much of anything.
What Makes Gnocchi a Smart Shortcut
Shelf-stable gnocchi is built for this kind of dinner because it cooks quickly and keeps a pleasant chew. Fully cooked sausage gives you flavor without requiring a separate skillet, and bell peppers break down just enough to make the sauce taste fuller. This is not a delicate dish; it’s sturdy, filling, and good at reheating, which is exactly the point on a busy night.
Key Ingredients
- 1 lb fully cooked Italian sausage, sliced into coins — mild or spicy both work.
- 16 oz shelf-stable gnocchi — no boiling needed.
- 24 oz marinara sauce — use a sauce with garlic and herbs already in it.
- 1 cup water — loosens the sauce so the gnocchi can cook through.
- 1 red bell pepper and 1 yellow bell pepper, sliced thin — thin strips soften at the same pace as the gnocchi.
- 1 small onion, thinly sliced — gives the pan a sweeter base.
- 1 teaspoon dried oregano and 1/2 teaspoon garlic powder — basic Italian flavor with no extra work.
- 2 cups shredded mozzarella — use enough to cover the top.
- 2 tablespoons grated parmesan — adds a salty finish.
Quick Steps
-
Heat the oven: Set it to 400°F (205°C). Grease a 9×13-inch baking dish.
-
Mix everything together: Stir the sausage, gnocchi, marinara, water, peppers, onion, oregano, and garlic powder directly in the dish.
-
Cover and bake: Seal with foil and bake for 25 minutes, until the peppers are softening and the gnocchi feels tender when pressed with a spoon.
-
Stir once: Remove the foil and stir gently, scraping the bottom so nothing sticks.
-
Add the cheese: Scatter mozzarella and parmesan over the top.
-
Finish uncovered: Bake for 10 to 12 minutes more, until the cheese melts and the sauce is bubbling at the edges. Rest 5 minutes before serving.
Tips and Variations
- Sauce check: If the marinara is very thick, add another 1/4 cup water before baking.
- Better texture: Slice the sausage on a slight angle so it looks generous and heats evenly.
- Vegetable swap: Zucchini ribbons or mushrooms can stand in for one of the peppers.
5. Tuna and Pea Pasta Casserole
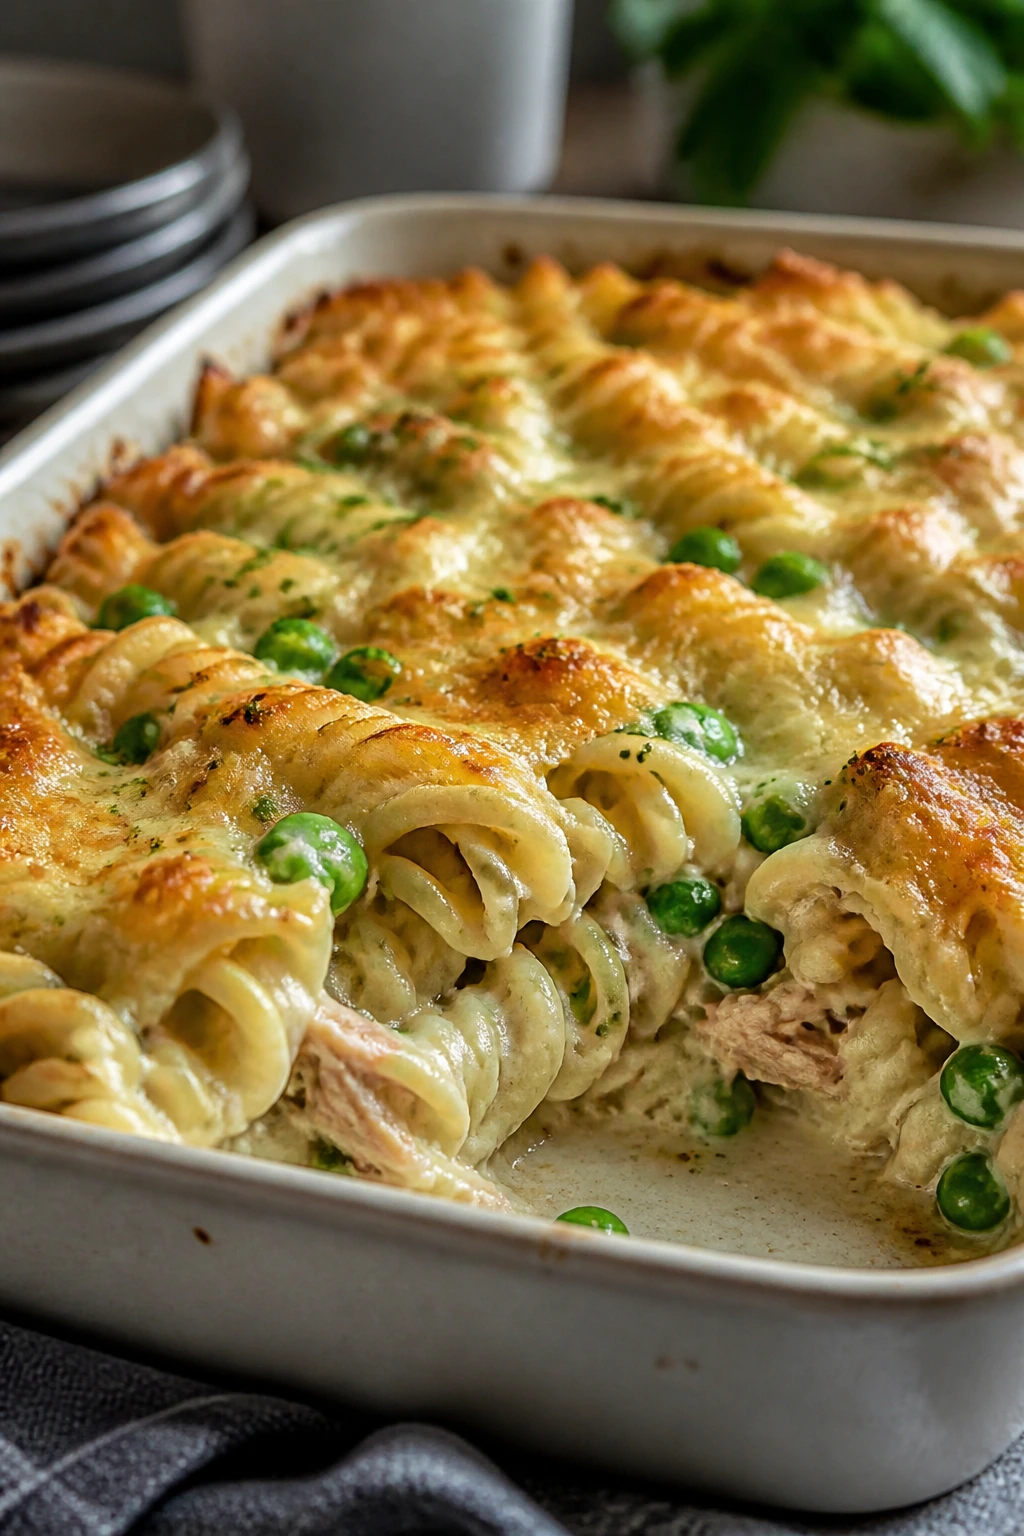
Tuna casserole gets a bad reputation from dry, underseasoned versions, which is a shame. When it’s made with enough liquid and a little patience, it turns into a creamy, pantry-friendly dinner with soft noodles, sweet peas, and a savory finish that feels more thoughtful than the ingredient list suggests.
Why Canned Tuna Still Deserves a Spot
This bake works because the pasta cooks directly in a milk-and-broth mixture instead of relying on a separate pot of water. The tuna goes in after the pasta starts to soften so it stays meaty instead of disappearing, and the peas bring a sweet pop that cuts through the richness. It is a smart use of shelf-stable food, which matters when the fridge looks thin and you still need a real dinner.
Key Ingredients
- 12 oz rotini or medium shells — shapes with ridges hold the sauce.
- 2 cans tuna in water, 5 oz each, drained — solid white tuna gives a firmer bite.
- 1 1/2 cups frozen peas — use them straight from the freezer.
- 2 cups low-sodium chicken broth — the pasta needs enough liquid to soften.
- 1 1/2 cups milk — creates the creamy base.
- 1 small onion, very finely diced — it melts down as the pasta bakes.
- 1 teaspoon Dijon mustard — gives the sauce a little edge.
- 1 teaspoon garlic powder, 1/2 teaspoon salt, 1/4 teaspoon black pepper — simple seasoning that works.
- 1 cup shredded cheddar and 1/2 cup parmesan — cheddar for melt, parmesan for salt.
- 2 tablespoons butter — rounds out the sauce.
Quick Steps
-
Preheat the oven: Set it to 375°F (190°C) and grease a 9×13-inch baking dish.
-
Start the base: Stir the uncooked pasta, broth, milk, onion, Dijon, garlic powder, salt, pepper, and butter in the dish.
-
Cover and bake: Tightly cover with foil and bake for 25 minutes, until the pasta is beginning to soften but still has a little bite.
-
Add the tuna and peas: Remove the foil, stir in the tuna and peas, and scrape the bottom so the sauce stays even.
-
Top with cheese: Sprinkle cheddar and parmesan over the pan.
-
Finish baking: Bake uncovered for 15 to 20 minutes, until the pasta is tender and the top is lightly golden.
-
Rest before scooping: Let it sit 5 minutes so the sauce thickens instead of running loose.
Tips and Variations
- Crunchy topping: If you like a little texture, add crushed buttery crackers during the last 10 minutes.
- Lighter version: Use 2 cups broth and 1 cup milk if you want a less creamy finish.
- Good leftovers: This one reheats well with a spoonful of milk stirred in first.
6. BBQ Chicken Sweet Potato Bake
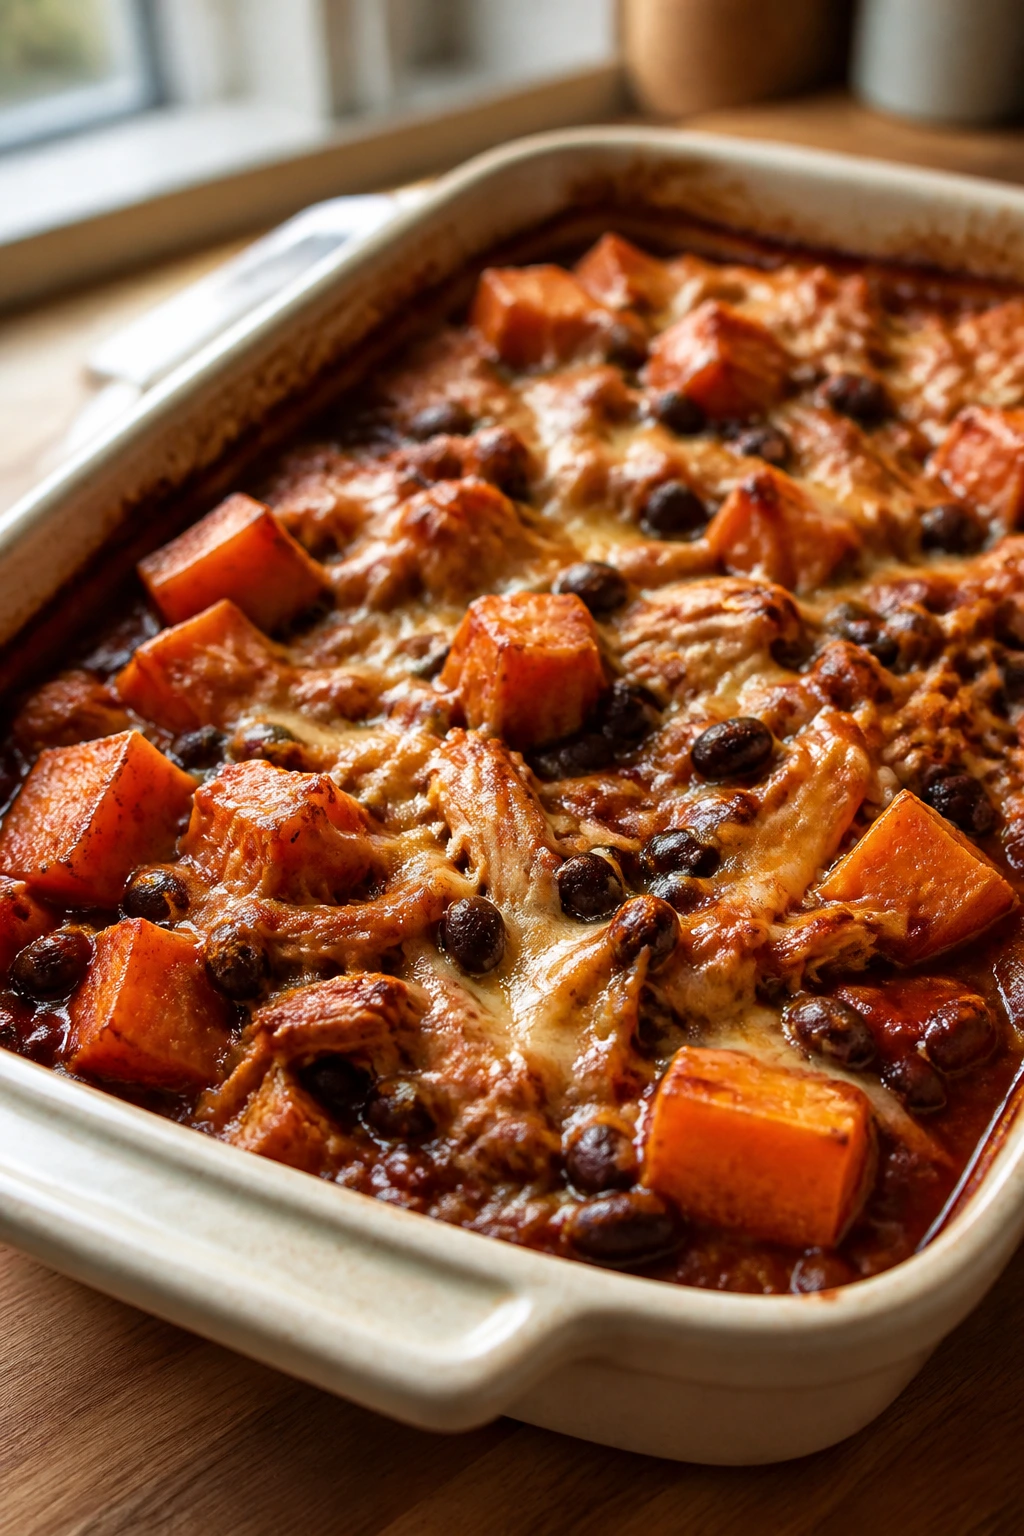
Smoke, sweetness, and a little tang make this one feel more layered than the time it takes to put together. The sweet potatoes soften into the sauce, the chicken brings protein without extra work, and the black beans keep the whole thing from being all starch and no backbone. It’s a casserole that smells like dinner has personality.
Why Sweet Potatoes Fit the BBQ Route
Sweet potatoes need a head start because they are denser than rice or pasta, and this recipe gives them that without turning the whole dish into a multi-step project. The BBQ sauce goes in after the first bake, which keeps the sugar from scorching while the potatoes are still catching up. Cutting the sweet potatoes small matters more than almost anything else here; 1/2-inch dice cook far more evenly than large chunks.
Key Ingredients
- 2 large sweet potatoes, peeled and diced into 1/2-inch cubes — smaller dice cook faster and more evenly.
- 2 cups shredded cooked chicken — rotisserie chicken works well here.
- 1 1/2 cups BBQ sauce — choose one that isn’t overly sweet.
- 1 can black beans, 15 oz, rinsed and drained — adds heft and a little earthiness.
- 1 cup frozen corn — no thawing, no extra fuss.
- 1 small red onion, thinly sliced — turns sweet in the oven.
- 2 tablespoons olive oil — helps the potatoes roast instead of steam.
- 1 teaspoon smoked paprika, 1/2 teaspoon salt, 1/2 teaspoon black pepper — makes the barbecue flavor read louder.
- 1 cup shredded cheddar or Monterey Jack — optional, but useful.
Quick Steps
-
Preheat and prep: Heat the oven to 400°F (205°C). Grease a 9×13-inch baking dish.
-
Start with the potatoes: Toss the sweet potatoes with olive oil, smoked paprika, salt, and pepper in the dish. Add 1/2 cup water around the edges.
-
Cover and bake: Seal tightly with foil and bake for 25 minutes, until the potatoes are starting to soften.
-
Add the rest: Remove the foil, stir in the chicken, black beans, corn, red onion, and BBQ sauce.
-
Bake again: Cover and bake for 15 minutes more, until the sweet potatoes are tender when pierced with a fork.
-
Melt the cheese: Sprinkle cheese over the top and bake uncovered for 5 to 7 minutes, until melted.
-
Serve hot: Rest a few minutes, then spoon it into bowls.
Tips and Variations
- Too sweet? Use a tangy sauce with more vinegar and less sugar.
- Fresh finish: Sliced green onions or cilantro help cut through the richness.
- Extra filling: Serve over cooked rice if you need the pan to stretch farther.
7. Lemon Herb Salmon, Potatoes, and Green Beans
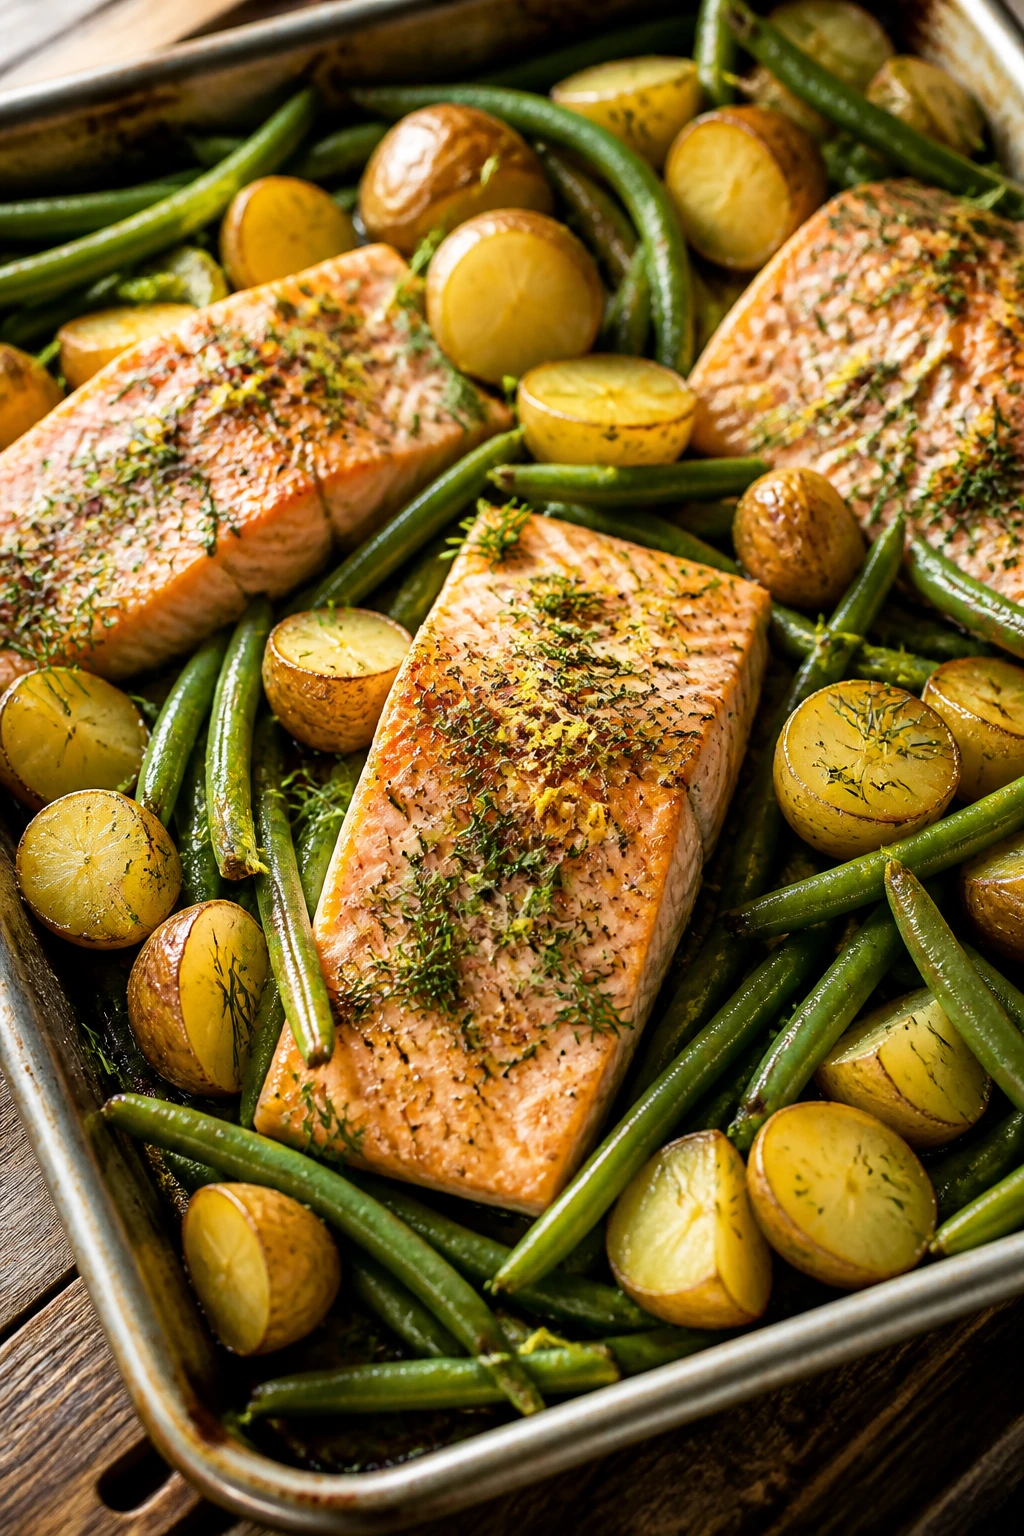
Some nights you need dinner that looks like effort even when it was not. This sheet-pan meal does that nicely. The potatoes go in first, the green beans join later, and the salmon slides onto the pan just long enough to cook through without drying out. Lemon keeps the whole tray bright.
What Keeps the Salmon Dinner Balanced
Salmon cooks fast, potatoes do not, and that mismatch is exactly why the staged bake matters. Giving the potatoes a head start lets them soften while the salmon stays tender and the beans stay green. An instant-read thermometer is worth using here; salmon is best when it reaches about 145°F in the thickest part, and guessing usually means overcooking. Simple food. Smart timing.
Key Ingredients
- 1 1/2 lbs baby potatoes, halved — cut any larger ones into quarters.
- 1 lb green beans, trimmed — keep them whole or in long pieces.
- 4 salmon fillets, 5 to 6 oz each — similar thickness helps them finish together.
- 3 tablespoons olive oil — enough to coat the potatoes and fish.
- 1 lemon, zested and sliced — zest for the pan, slices for the top.
- 3 garlic cloves, minced — a small amount goes a long way.
- 1 teaspoon dried dill or 1 tablespoon fresh dill — either works.
- 1 teaspoon kosher salt and 1/2 teaspoon black pepper — enough seasoning for the whole pan.
Quick Steps
-
Preheat the oven: Set it to 425°F (220°C). Line a large sheet pan with parchment or foil if you want easier cleanup.
-
Roast the potatoes first: Toss the potatoes with 2 tablespoons olive oil, half the salt, half the pepper, and half the dill. Spread them out and bake for 20 minutes.
-
Add the beans: Pull the pan out, scatter the green beans around the potatoes, and drizzle with the remaining oil, salt, pepper, dill, garlic, and lemon zest.
-
Nestle the salmon: Place the fillets on the pan, then lay lemon slices on top.
-
Finish roasting: Bake for 12 to 15 minutes more, until the salmon flakes easily and the potatoes are fork-tender. Thicker fillets may need 2 to 3 minutes more.
-
Serve right away: Salmon is at its best fresh from the oven, so don’t let it sit too long.
Tips and Variations
- No soggy beans: Keep them in a single layer so they roast, not steam.
- Flavor twist: A spoonful of Dijon brushed on the salmon before baking works well.
- Pan trick: If your sheet pan is dark, check the potatoes a few minutes early.
8. Chicken Taco Tortilla Bake
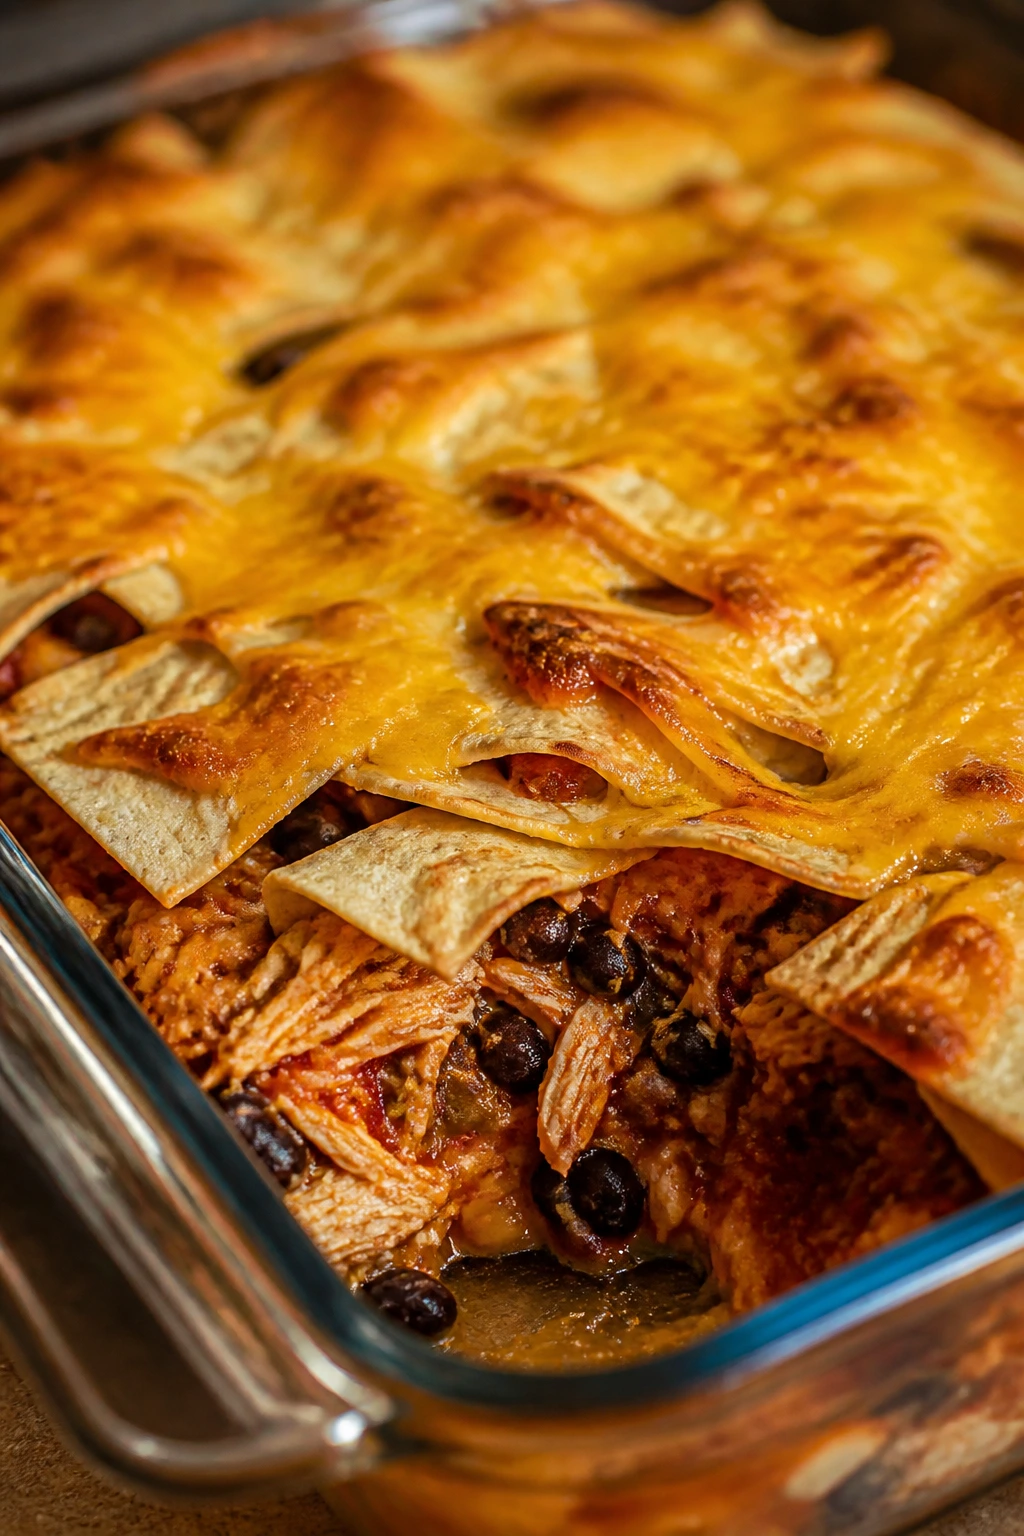
This is the kind of casserole that disappears fast because it tastes familiar in the best way. Tortilla layers soak up salsa and sauce, the chicken stays soft, and the beans make the whole pan feel more substantial. It’s basically taco night with fewer bowls and less chaos.
Why Tortilla Layers Beat a Plain Bake
Tortillas turn into soft, saucy layers that hold the filling together, almost like a lazy lasagna. Using shredded chicken instead of raw meat keeps the cook time short and the texture stable, and black beans add enough body that you don’t need to brown anything first. Corn tortillas hold up better than flour tortillas in the oven, which is the small detail that saves this from turning gummy.
Key Ingredients
- 10 corn tortillas, cut into strips — they layer better than whole tortillas.
- 2 cups shredded cooked chicken — rotisserie chicken is the fastest option.
- 2 cups enchilada sauce or thick salsa — the sauce keeps the layers soft.
- 1 can black beans, 15 oz, rinsed and drained — adds protein and texture.
- 1 cup frozen corn — no thawing required.
- 2 1/2 cups shredded Mexican blend cheese — enough to cover the top generously.
- 1 teaspoon cumin and 1 teaspoon chili powder — round out the taco flavor.
- 1/2 teaspoon salt — adjust if your sauce is already salty.
- 2 green onions, sliced — good on top after baking.
- Sour cream or plain Greek yogurt, for serving — optional, but useful.
Quick Steps
-
Preheat the oven: Heat to 375°F (190°C) and grease a 9×13-inch baking dish.
-
Build the first layer: Spread a little sauce on the bottom, then add a layer of tortilla strips.
-
Add the filling: Scatter chicken, black beans, corn, cumin, chili powder, and a little cheese over the tortillas.
-
Repeat the layers: Add another round of tortillas, sauce, chicken, beans, and cheese until the dish is filled, finishing with cheese on top.
-
Cover and bake: Seal with foil and bake for 25 minutes, until the center is hot and the tortillas have softened.
-
Brown the top: Remove the foil and bake 10 minutes more, until the cheese is melted and lightly browned.
-
Rest and garnish: Let it sit for 10 minutes, then top with green onions and a spoon of sour cream if you like.
Tips and Variations
- Spice control: Use mild enchilada sauce if you’re feeding kids.
- Add crunch: A handful of crushed tortilla chips on top in the last 5 minutes gives the pan some texture.
- Extra vegetables: Diced bell pepper can go in with the beans and corn.
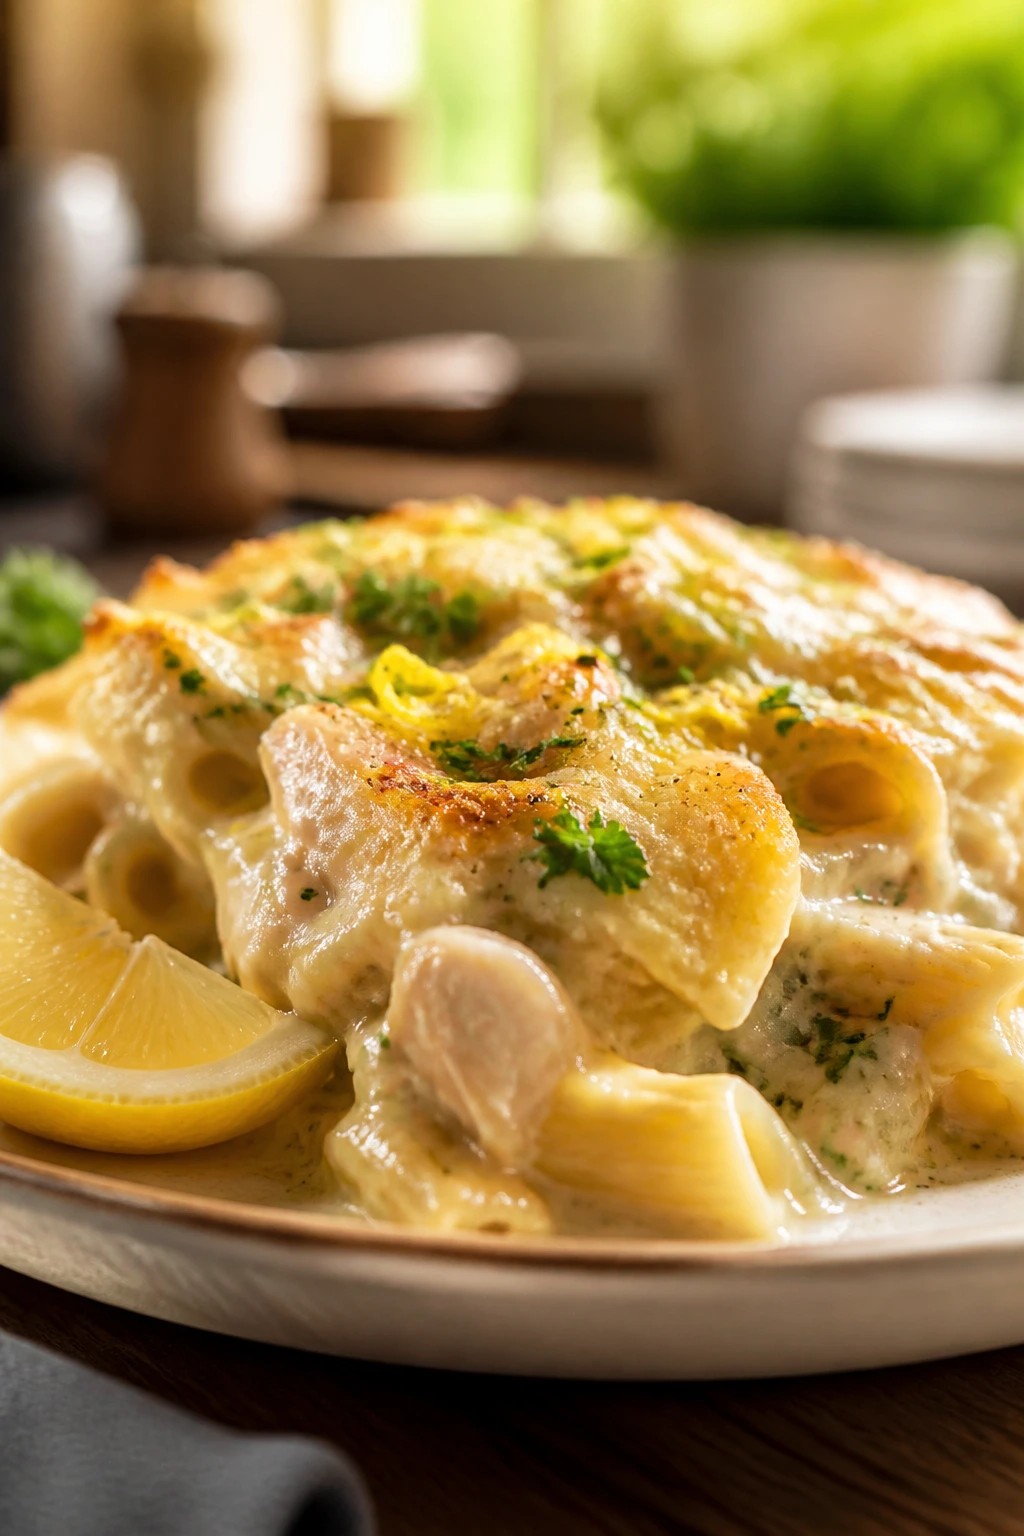
9. Spinach Artichoke Tortellini Bake
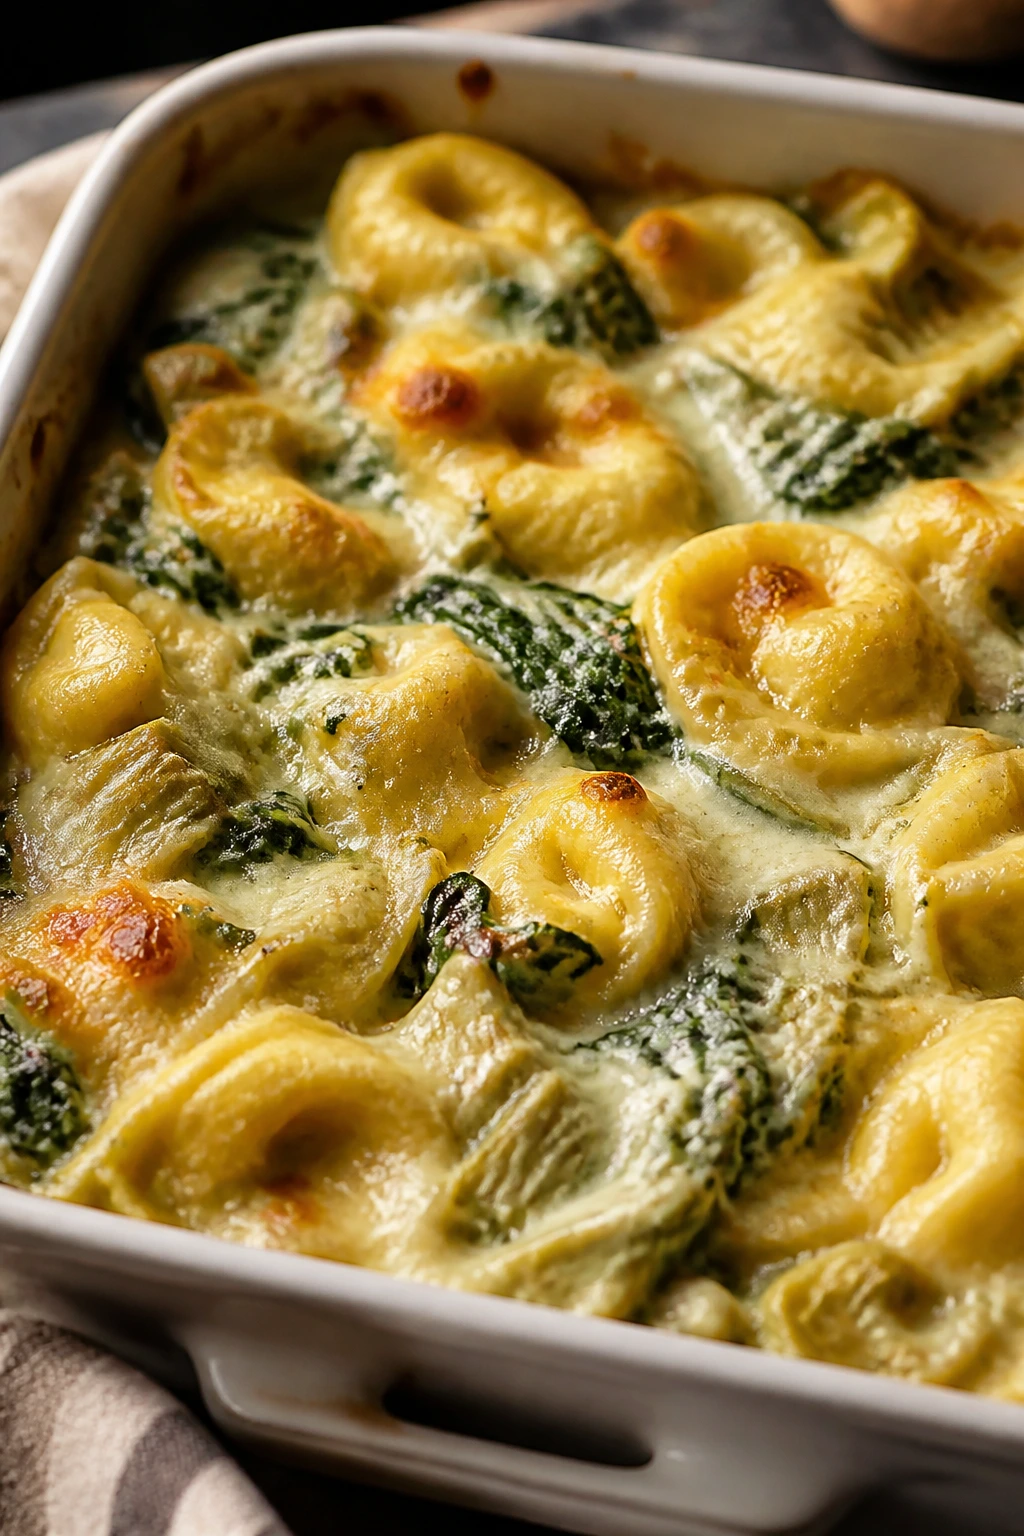
This tastes like baked dip met dinner and decided to stay for the long haul. Creamy sauce clings to the tortellini, spinach melts down into the background, and artichoke hearts give the dish a little tang so it doesn’t feel one-note. It’s rich, but not heavy in the dull way that makes you stop halfway through.
What Makes It Creamy Without Getting Heavy
Refrigerated tortellini cooks fast and brings its own filling, which means you do not need a huge amount of sauce to make the whole pan feel substantial. Sour cream and Alfredo give you the creamy body, while artichokes cut through the richness with a sharper flavor. Draining the artichokes well is a small step with a big payoff; wet artichokes thin the sauce and make the bake sloppy.
Key Ingredients
- 20 oz refrigerated cheese tortellini — fresh pasta cooks quickly and stays tender.
- 1 1/2 cups Alfredo sauce — jarred is fine here.
- 1 1/2 cups chicken or vegetable broth — helps the tortellini cook through.
- 1 cup sour cream — adds tang and body.
- 1 can artichoke hearts, 14 oz, drained and chopped — squeeze out extra liquid if needed.
- 5 oz baby spinach — enough to wilt down into the sauce.
- 2 cups shredded mozzarella — for the top.
- 1/2 cup grated parmesan — sharpens the flavor.
- 2 cloves garlic, minced — gives the sauce some edge.
- Black pepper to taste — the dish likes a little bite.
Quick Steps
-
Preheat and grease: Heat the oven to 375°F (190°C) and grease a 9×13-inch baking dish.
-
Make the sauce base: Stir the Alfredo sauce, broth, sour cream, garlic, and black pepper in the dish.
-
Add the pasta and vegetables: Fold in the tortellini, artichokes, and spinach until everything is coated.
-
Top with cheese: Sprinkle mozzarella and parmesan over the surface.
-
Cover and bake: Bake tightly covered for 25 minutes, until the tortellini is tender and the spinach has wilted.
-
Brown the top: Remove the foil and bake 10 minutes more, until the cheese is melted and starting to spot gold.
-
Let it settle: Rest 5 minutes before serving so the sauce thickens.
Tips and Variations
- Extra garlic? Add another clove if your family likes a sharper sauce.
- Make it heartier: Stir in shredded chicken or canned white beans.
- Serving move: Warm bread on the side helps, but a simple salad does too.
10. Mediterranean Chickpea and Couscous Bake
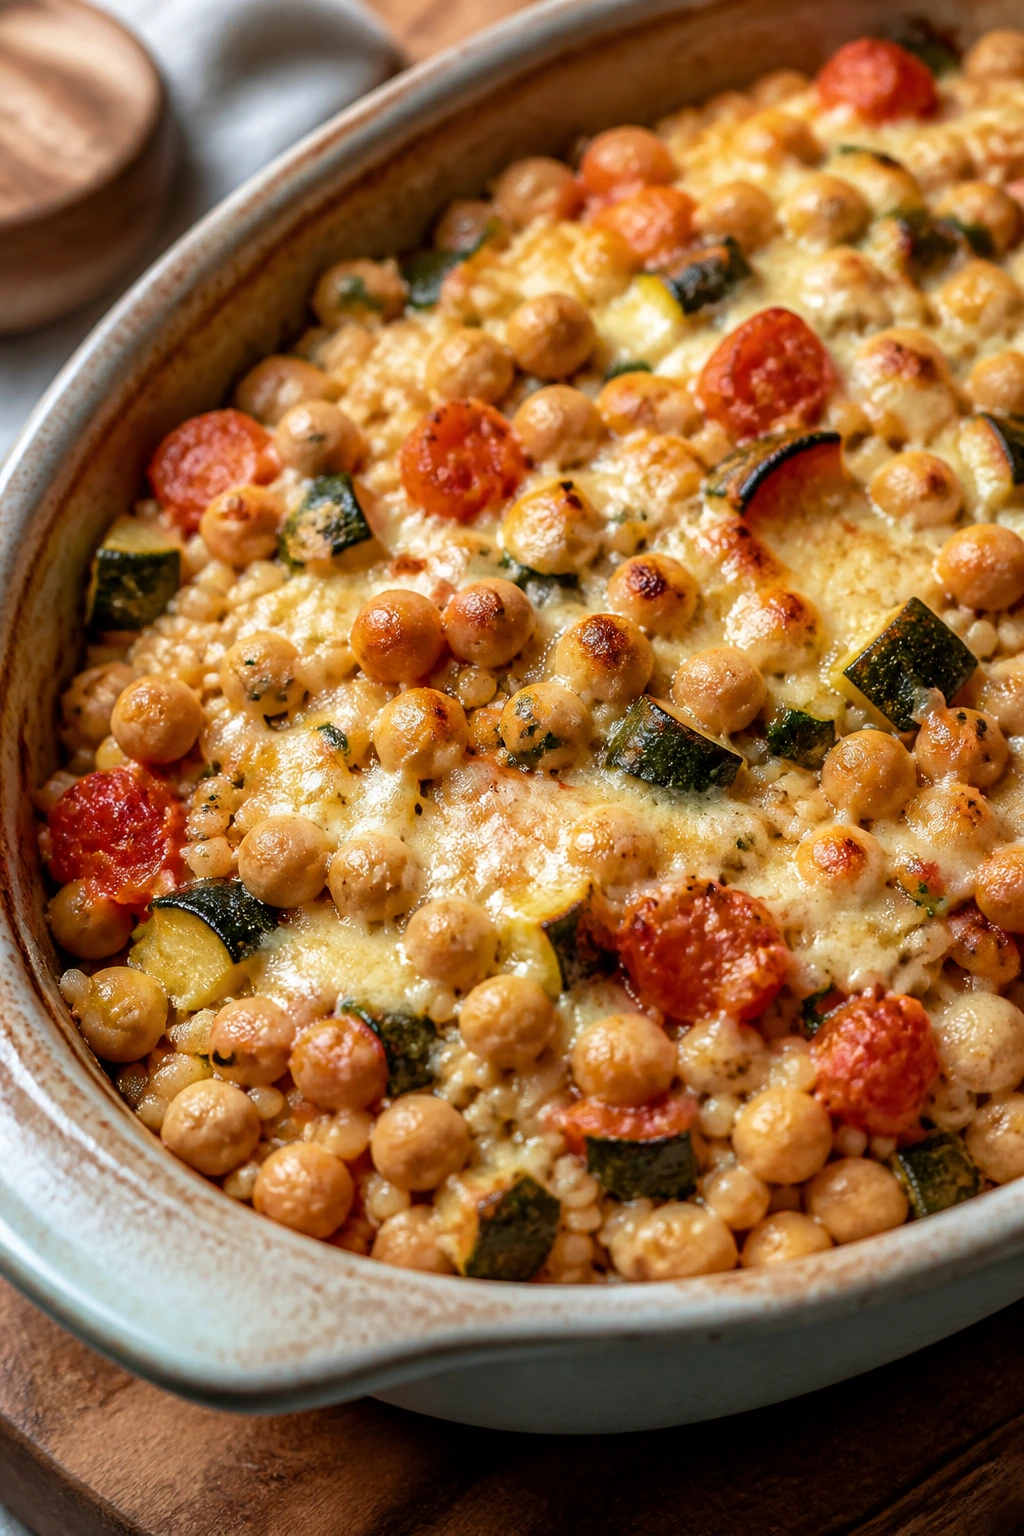
Pearl couscous is what I reach for when rice feels too sleepy and pasta feels too heavy. It bakes up with a pleasant chew, so the whole dish has more texture than you might expect. Chickpeas, zucchini, tomatoes, and olives bring enough color and flavor that the pan doesn’t need a lot of extra help.
Why Pearl Couscous Does the Heavy Lifting
Pearl couscous is made for this style of dinner because the little pasta balls soak up broth without disintegrating. Chickpeas bring the protein, vegetables bring moisture, and feta adds a salty finish after baking instead of before, which keeps it from getting muddy. This is a good place to trust the oven; the ingredients need time together, not constant stirring.
Key Ingredients
- 1 1/2 cups pearl couscous — use the larger kind, not instant couscous.
- 2 1/2 cups vegetable broth — the couscous needs enough liquid to plump up.
- 1 can chickpeas, 15 oz, rinsed and drained — keep them whole for texture.
- 1 zucchini, diced — small dice helps it soften in time.
- 1 red bell pepper, diced — sweet and sturdy.
- 1/2 red onion, thinly sliced — adds sharpness that softens in the oven.
- 1 cup cherry tomatoes — they burst and make their own sauce.
- 1/2 cup kalamata olives, sliced — optional, but they give the pan more character.
- 2 tablespoons olive oil, 1 teaspoon dried oregano, 1/2 teaspoon salt, 1/2 teaspoon black pepper — basic seasoning.
- 1/2 cup crumbled feta and 1 lemon — finish after baking.
Quick Steps
-
Preheat the oven: Set it to 375°F (190°C). Grease a 9×13-inch baking dish.
-
Mix the base: Stir the couscous, broth, chickpeas, zucchini, bell pepper, onion, tomatoes, olives, olive oil, oregano, salt, and pepper in the dish.
-
Cover and bake: Seal with foil and bake for 25 minutes, until the couscous is tender and the vegetables have softened.
-
Stir once: Remove the foil and gently stir from the bottom so the couscous cooks evenly.
-
Finish the bake: Bake uncovered for 10 minutes more, until the top looks lightly dry and the liquid has mostly absorbed.
-
Add the feta: Scatter feta over the pan and squeeze lemon over the top.
-
Serve warm: The dish is best while still warm and loose.
Tips and Variations
- Keep it bright: A handful of chopped parsley at the end lifts the whole pan.
- No olives? Add extra tomatoes or chopped roasted red peppers.
- More protein: Stir in shredded chicken or white beans if you want a fuller meal.
11. Stuffed Pepper Quinoa Bake
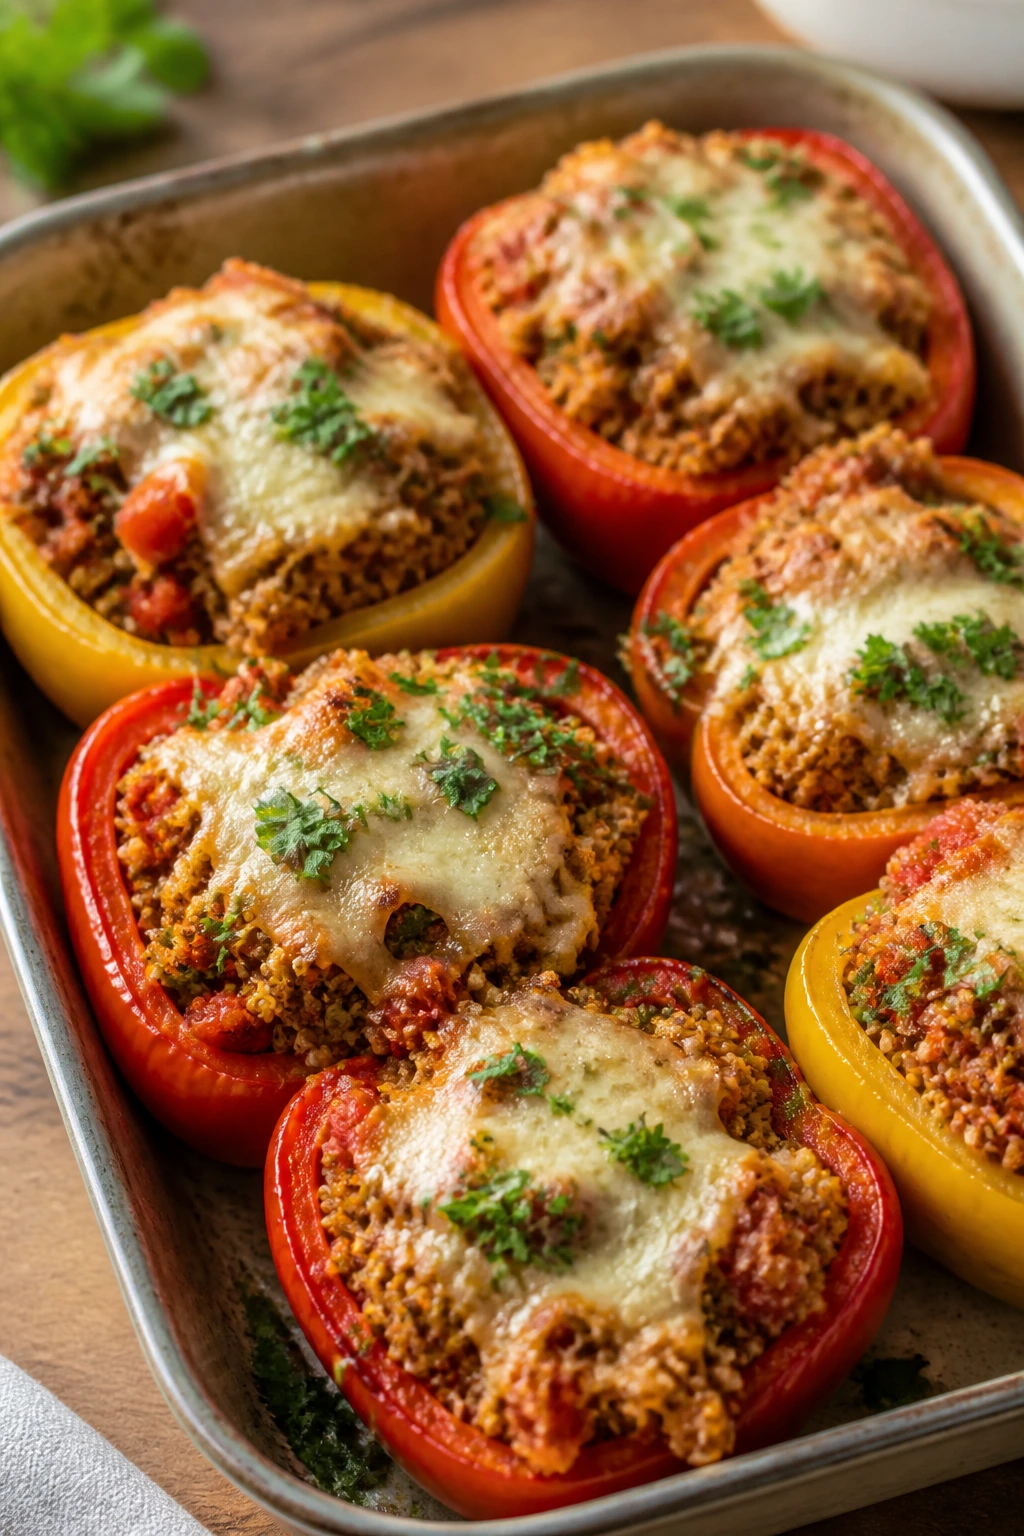
All the flavor of stuffed peppers, none of the fiddly stuffing. That’s the appeal here. Quinoa cooks into a soft, nutty base while the bell peppers stay in little sweet chunks, and the tomatoes keep the whole thing from drying out. It is a nice change from pasta without feeling like a health-food lecture.
Why Quinoa Makes Sense Here
Quinoa handles oven-baking well as long as it gets enough liquid and a covered start. Diced peppers soften faster than whole peppers would, so the whole pan tastes like stuffed peppers without the work of hollowing and filling vegetables. Rinsing the quinoa matters because it removes the bitter coating that can show up if you skip that step.
Key Ingredients
- 1 cup quinoa, rinsed well — rinse until the water runs clear.
- 2 cups low-sodium chicken or vegetable broth — quinoa needs a full 2:1 liquid ratio.
- 2 bell peppers, diced — any colors you like.
- 1 can diced tomatoes, 14.5 oz — juice and all.
- 1 can black beans, 15 oz, rinsed and drained — adds heft and protein.
- 1 cup frozen corn — a small sweet note.
- 1 teaspoon Italian seasoning — keeps the flavor familiar.
- 1 teaspoon kosher salt and 1/2 teaspoon black pepper — enough to season the grain.
- 1 cup shredded cheddar or mozzarella — for melting on top.
- 2 tablespoons tomato paste — optional, but useful if you want a deeper tomato flavor.
Quick Steps
-
Preheat the oven: Set it to 375°F (190°C) and grease a 9×13-inch baking dish.
-
Combine everything: Stir the quinoa, broth, peppers, diced tomatoes, black beans, corn, Italian seasoning, salt, pepper, and tomato paste in the dish.
-
Cover and bake: Tightly cover with foil and bake for 35 minutes, until the quinoa has absorbed most of the liquid.
-
Fluff and check: Remove the foil and fluff the mixture with a spoon. If the center still seems wet, bake 5 minutes more uncovered.
-
Add cheese: Sprinkle cheese over the top and bake for 5 to 7 minutes, until melted.
-
Rest before serving: Let the pan sit 5 minutes so the quinoa firms up a bit.
Tips and Variations
- Meat option: Stir in cooked ground turkey or shredded chicken if you want more protein.
- Pepper tip: Red and yellow peppers taste sweeter; green peppers are sharper.
- Sauce helper: A spoon of salsa on top makes leftovers taste fresh again.
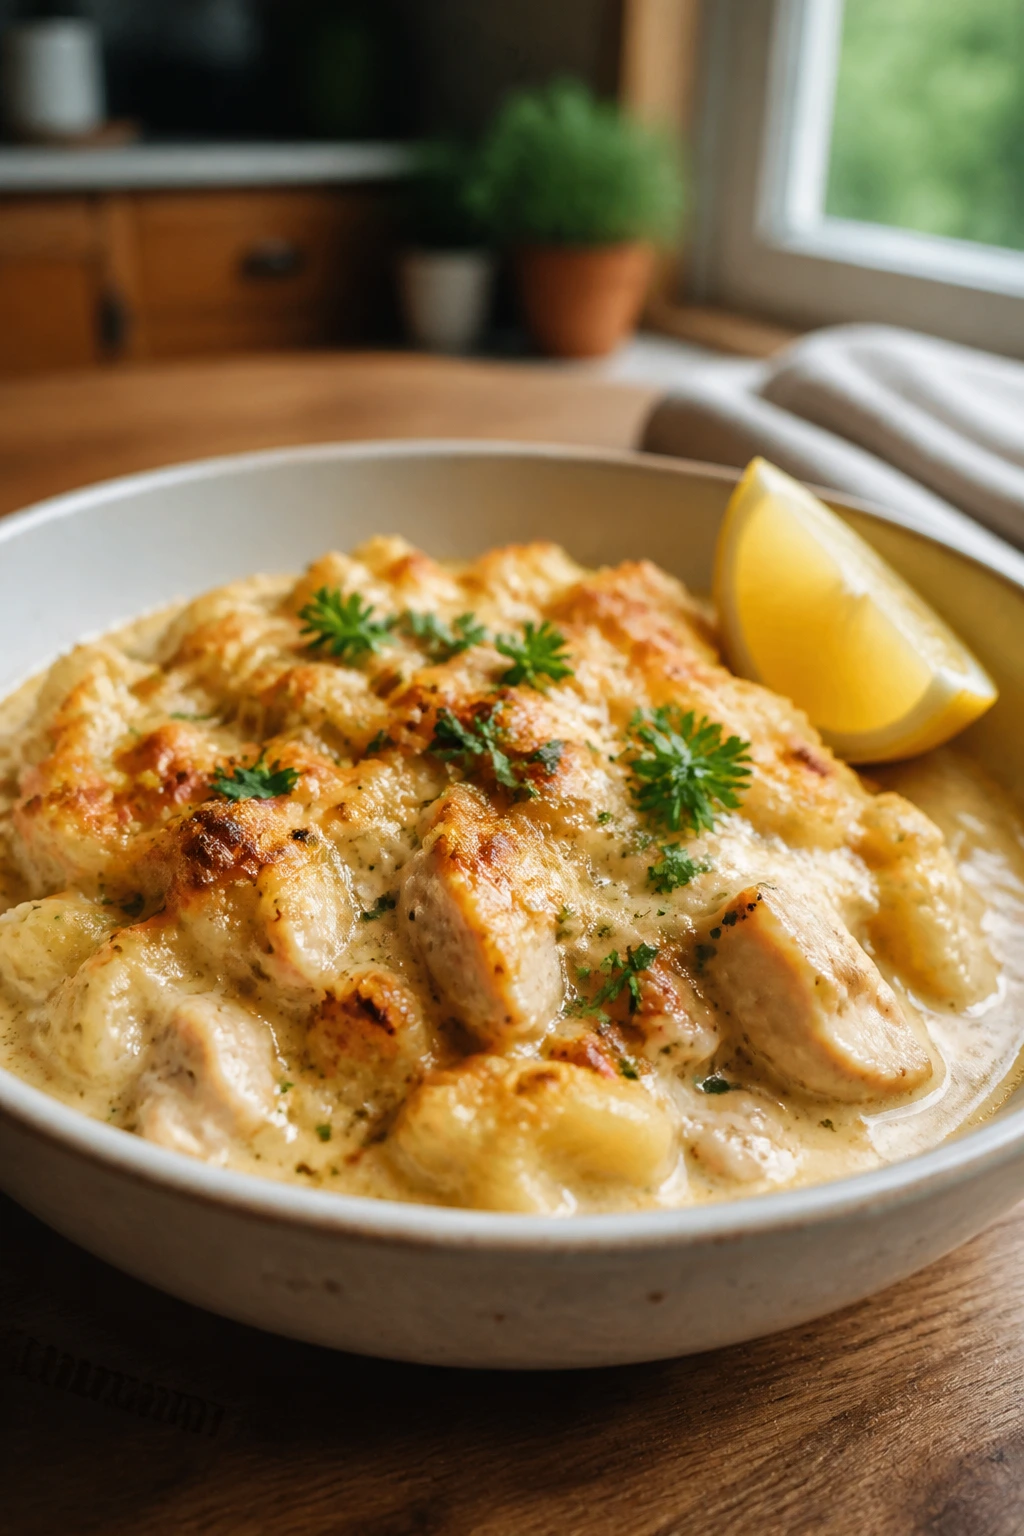
12. Broccoli Cheddar Potato Chicken Bake
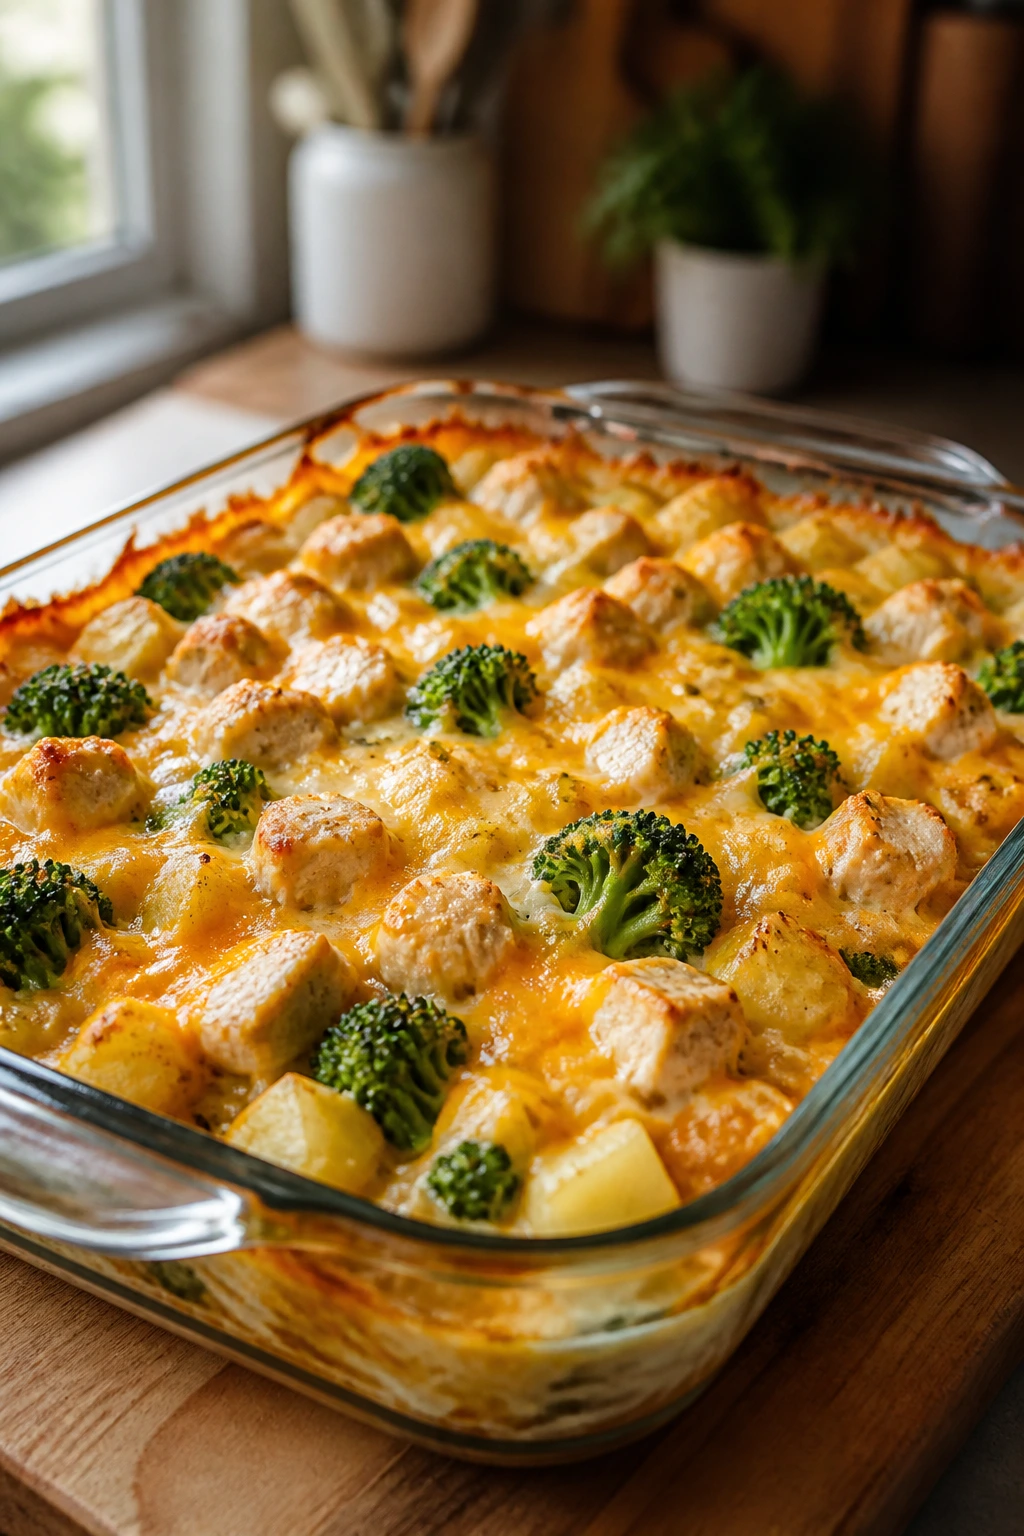
Frozen hash browns are not glamorous, and that’s the point. They save chopping, they cook evenly, and they turn this into the sort of dinner you can build quickly without feeling like you took a shortcut in a bad way. Broccoli and chicken make it a meal, and cheddar soup gives the pan a thick, familiar comfort-food feel.
Why This Recipe Changes the Game
This bake leans on frozen potatoes because they are consistent, which is what tired cooks need most. Fresh potatoes are fine, but they take longer and need more knife work; frozen diced hash browns go straight into the dish and soften at the same pace as the rest of the ingredients. The broccoli goes in later so it stays green instead of turning olive and soft, which is the difference between a good casserole and a sad one.
Key Ingredients
- 32 oz frozen diced hash browns — do not thaw them first.
- 3 cups broccoli florets — cut them small.
- 2 cups shredded cooked chicken — rotisserie chicken works well.
- 2 cups low-sodium chicken broth — helps the potatoes soften.
- 1 cup milk — rounds out the sauce.
- 1 can condensed cheddar soup, 10.5 oz — adds body and flavor.
- 1 small onion, finely diced — melts into the base.
- 1/2 teaspoon garlic powder, 1/2 teaspoon salt, 1/2 teaspoon black pepper — keep the seasoning straightforward.
- 2 1/2 cups shredded sharp cheddar — sharp cheese keeps it from tasting bland.
Quick Steps
-
Preheat the oven: Heat to 375°F (190°C). Grease a 9×13-inch baking dish.
-
Mix the base: Stir the frozen hash browns, broth, milk, cheddar soup, onion, garlic powder, salt, and pepper in the dish.
-
Cover and bake: Seal tightly with foil and bake for 35 minutes, until the potatoes are starting to soften.
-
Add chicken and broccoli: Remove the foil, stir in the chicken, and fold the broccoli through the mixture.
-
Top with cheese: Spread the shredded cheddar over the top.
-
Bake uncovered: Return to the oven for 15 minutes more, until the broccoli is tender and the cheese is melted.
-
Rest briefly: Let it sit 5 to 10 minutes before serving so the sauce settles.
Tips and Variations
- Fresh potato swap: If you use fresh potatoes, dice them tiny and add 10 to 15 minutes.
- Flavor boost: A pinch of dry mustard gives cheddar bakes more depth.
- Crisp finish: Broil for 1 minute at the end if you like darker cheese, but watch it closely.
13. Bean and Cheese Enchilada Casserole
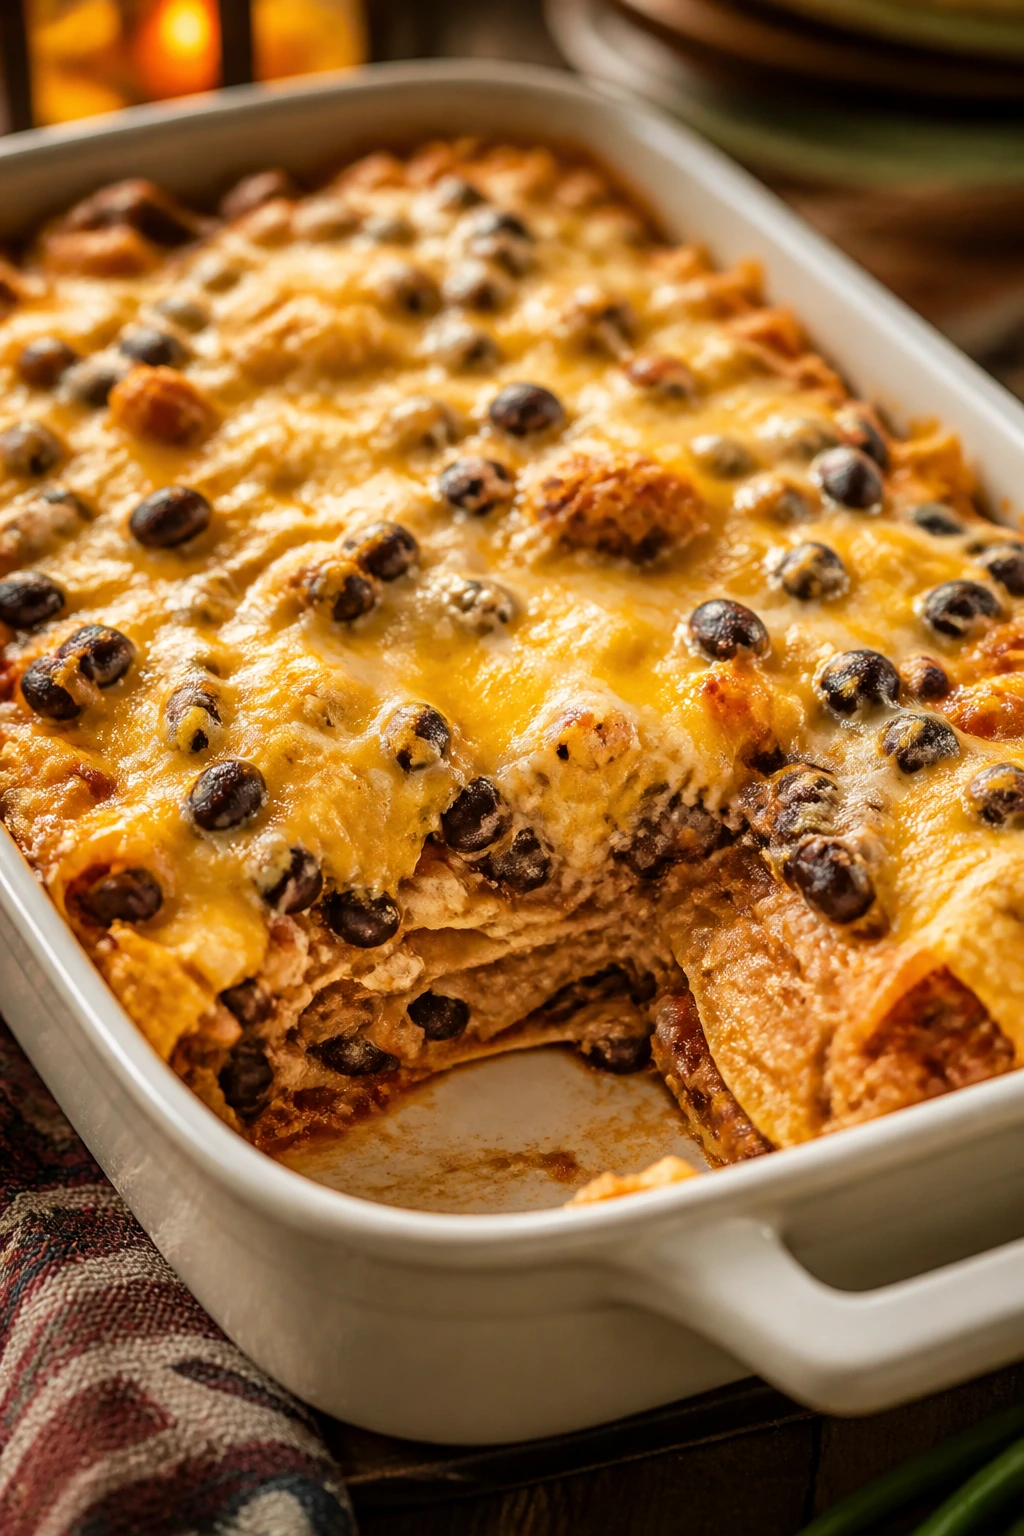
This is the vegetarian casserole that never feels like a compromise. Refried beans give it a soft, creamy layer, black beans add texture, and enchilada sauce keeps everything saucy and bold. It’s the sort of pan that makes people stop asking where the meat is.
Why This Enchilada Casserole Works
The combination of refried beans and black beans makes the filling both creamy and chunky, which is more satisfying than a straight bean mash. Corn tortillas soften into layers without turning to mush, and the enchilada sauce keeps the whole thing from drying out in the oven. Letting the casserole rest is not optional; the layers need a few minutes to set or the slices slide apart in the pan.
Key Ingredients
- 12 corn tortillas — cut into strips or tear them into pieces.
- 1 can refried beans, 16 oz — the creamy layer that binds everything.
- 1 can black beans, 15 oz, rinsed and drained — adds texture and protein.
- 2 cups enchilada sauce — red or green both work.
- 1 cup corn — fresh, frozen, or canned and drained.
- 2 1/2 cups shredded Mexican cheese blend — enough to cover the top.
- 1 small onion, finely diced — softens into the filling.
- 1 teaspoon cumin and 1/2 teaspoon chili powder — give the casserole body.
- Cilantro, avocado, and sour cream for serving — optional, but they help.
Quick Steps
-
Preheat the oven: Set it to 375°F (190°C) and grease a 9×13-inch baking dish.
-
Start with sauce: Spread a thin layer of enchilada sauce on the bottom of the dish.
-
Layer the filling: Add tortillas, then spread refried beans, black beans, corn, onion, cumin, and chili powder over them. Drizzle more sauce and sprinkle cheese.
-
Repeat the layers: Add another round of tortillas, beans, sauce, and cheese, finishing with cheese on top.
-
Cover and bake: Seal with foil and bake for 25 minutes, until the center is hot and the tortillas are soft.
-
Brown the top: Remove the foil and bake for 10 minutes more, until the cheese melts and spots of gold appear.
-
Rest before cutting: Let the casserole sit for 10 minutes, then scoop or slice.
Tips and Variations
- Milder version: Use green enchilada sauce if red sauce feels too strong.
- Make it heartier: Stir in cooked rice or shredded chicken if you want extra bulk.
- Serving move: Sliced avocado on top gives the pan a fresher feel.
14. Creamy Mushroom and Spinach Orzo Bake
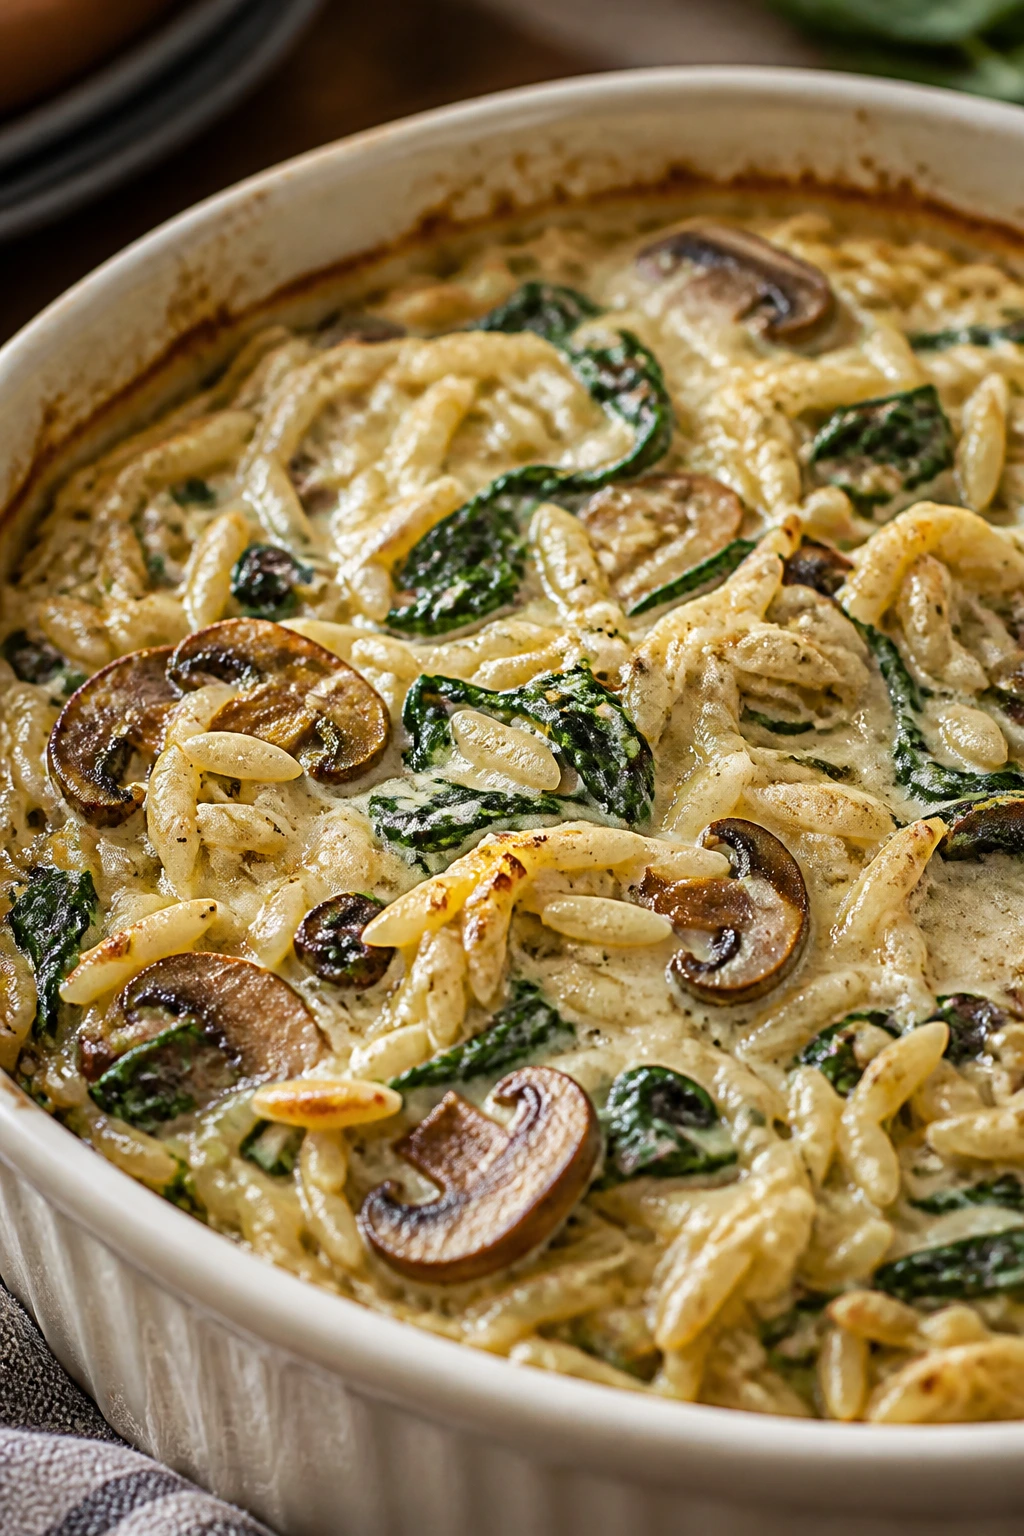
Orzo is tiny, which sounds cute until you realize how much liquid it can drink. That’s why it works so well here. The mushrooms soften and release their juices, the spinach folds in at the end, and the parmesan gives the whole pan a savory edge that makes this feel more dinner-than-side-dish.
What Keeps the Orzo Creamy Instead of Gluey
Orzo needs enough broth to finish tender, but it also needs a little breathing room so it doesn’t turn into a thick paste. Mushrooms help by releasing their own moisture, and the spinach goes in late so it stays green and doesn’t disappear into the sauce. This is one of those bakes that improves with a short rest because the liquid thickens into a silky sauce rather than a puddle.
Key Ingredients
- 1 1/2 cups orzo — the small pasta cooks evenly in the oven.
- 16 oz sliced mushrooms — cremini or white mushrooms both work.
- 5 oz baby spinach — no chopping needed.
- 3 cups low-sodium vegetable or chicken broth — enough to cook the orzo.
- 1 cup half-and-half or milk — adds creaminess without making it too rich.
- 1 small onion, finely diced — starts the flavor base.
- 3 cloves garlic, minced — mushrooms love garlic.
- 1 can cannellini beans, 15 oz, rinsed and drained — adds protein and makes it a full dinner.
- 1 tablespoon butter, 1 teaspoon dried thyme, 1/2 cup grated parmesan — for richness and finish.
- Salt and black pepper to taste — season carefully if the broth is salty.
Quick Steps
-
Preheat the oven: Set it to 375°F (190°C) and grease a 9×13-inch baking dish.
-
Build the base: Stir the orzo, mushrooms, onion, garlic, broth, half-and-half, butter, thyme, salt, and pepper in the dish.
-
Cover and bake: Tightly cover with foil and bake for 25 minutes, until the orzo is almost tender.
-
Add the beans and spinach: Remove the foil, stir in the cannellini beans, and fold in the spinach. It will look like a lot at first; that’s fine.
-
Finish the bake: Bake uncovered for 10 to 12 minutes more, until the orzo is tender and the sauce has thickened.
-
Stir in parmesan: Add the parmesan, stir gently, and let the pan sit for 5 minutes before serving.
Tips and Variations
- More mushroom flavor: Let the mushrooms sit on top of the dish rather than burying them all the way down.
- Creamier finish: Add a small spoonful of cream cheese if you want a richer sauce.
- Vegetable add-in: Chopped zucchini or peas can join the pan without changing the method much.
Why Dump-and-Bake Dinners Work So Well on Exhausting Nights
The oven is a quiet kind of help. It does not ask where the serving spoon is. It does not need you to stand there and stir while one child suddenly remembers a school project and another insists they never had a pencil. That alone makes dump-and-bake dinners worth keeping around.
The method works because starches, sauces, and proteins can be matched to the same finish line. Rice wants steam and liquid, pasta wants enough sauce to hydrate, potatoes want a longer head start, and cheese wants to wait until the end. Once you know that rhythm, the whole category gets easier to trust.
I like meals that are honest about their limits, too. A dump-and-bake dinner will not give you crisp edges on every ingredient or the layered drama of a long braise. It gives you something better on a weekday: a hot pan, a short cleanup, and a meal that lands on the table without asking for a second round of effort.
Essential Equipment for These Recipes
- 9×13-inch baking dish — the standard size for most casseroles and rice bakes.
- Large sheet pan — best for salmon, potatoes, and vegetable dinners.
- Heavy-duty foil — helps trap steam for rice, pasta, quinoa, and tortellini.
- Instant-read thermometer — the easiest way to check chicken and salmon doneness.
- Sharp chef’s knife — useful for small, even dice on potatoes, peppers, and onion.
- Cutting board — a large one keeps prep moving faster.
- Mixing bowls — helpful when you want to combine ingredients before they hit the pan.
- Measuring cups and spoons — liquid ratios matter a lot in these recipes.
- Wooden spoon or silicone spatula — sturdy enough to stir pasta and rice without scratching the dish.
- Box grater — optional, but freshly grated cheese melts better.
- Airtight storage containers — leftovers stay in better shape when they cool fast and get packed promptly.
Smart Shopping for Dump-and-Bake Ingredients
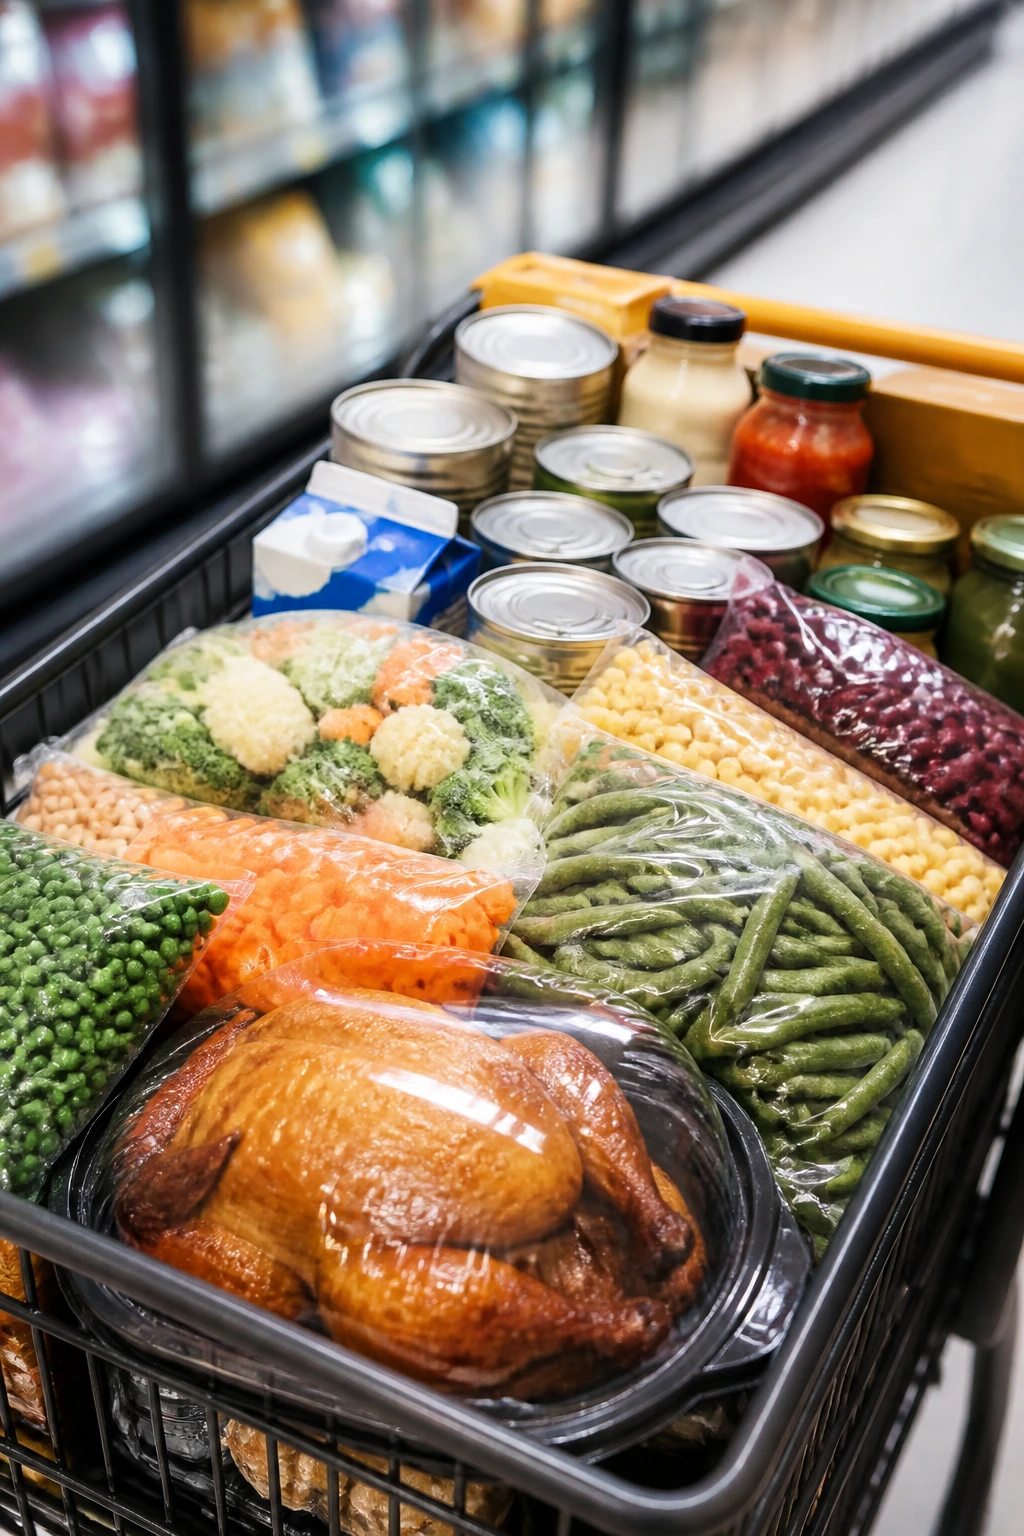
The smartest buy in this whole category is the one that saves you from a second step later. That means rotisserie chicken when you need speed, shelf-stable gnocchi when you want a one-dish pasta bake, and low-sodium broth when the sauce already includes cheese, soup, or enchilada sauce. Salt stacks fast in baked dishes, so starting with a lighter hand gives you more control at the end.
Sturdy starches matter more than people think. Long-grain white rice, orzo, ziti, rotini, pearl couscous, and shelf-stable gnocchi all handle oven heat better than fragile noodles or fancy specialty grains that need a different liquid ratio. Brown rice can work, but it needs more time and more broth. Thin spaghetti is a bad candidate for this kind of dinner. It turns into a tangle.
Frozen vegetables are your friend here. Broccoli florets, peas, corn, spinach, and green beans all work well because they cook quickly and don’t need to be perfect before they go in. Fresh vegetables are fine too, but if the choice is between a tired fresh pepper and a bag of frozen corn that’s been waiting patiently in the freezer, I know which one I’d trust.
For cheese, block cheese grated at home melts more smoothly than pre-shredded bags, though pre-shredded still wins when the clock is ugly. Jarred sauces and salsas should taste good on their own before they go into the pan, because the oven won’t hide a weak sauce. If a marinara tastes tinny or a BBQ sauce tastes like sugar paste, it will not improve in heat.
How to Serve These Dinners Without Making More Work
Presentation: Spoon baked rice, pasta, or quinoa into shallow bowls so the sauce gathers around the edges instead of vanishing under the food. A sprinkle of herbs, a squeeze of lemon, or a few slices of green onion is enough to make dinner look finished.
Accompaniments: Keep the sides low-effort. Bagged salad, sliced cucumbers, apple wedges, garlic bread, warm pita, or a simple fruit platter all fit beside these dishes without turning dinner into a second project.
Portions: Most of these recipes feed 4 to 6 people, with a standard serving landing around 1 to 1 1/2 cups for casseroles and pasta bakes. If you’re feeding hungrier eaters, stretch the meal with bread or a salad instead of stretching the casserole so thin it stops feeling like dinner.
Beverage Pairing: For family dinner, cold sparkling water with lemon or unsweetened iced tea works with almost everything here. For adults, a crisp white wine with the salmon or a chilled light red with the tomato-based bakes fits nicely.
Extra Flavor Boosts That Cost Almost Nothing
Flavor Enhancement: A squeeze of lemon, a spoonful of Dijon, or a handful of fresh herbs at the end wakes up creamy casseroles faster than another layer of cheese. Acid matters. It keeps rich food from tasting sleepy.
Customization: Add frozen peas to tuna casserole, jalapeños to enchilada bakes, or extra mushrooms to the orzo if your crew likes a little more texture. The best dump-and-bake dinners leave room for that kind of small personal decision.
Serving Suggestions: Toasted breadcrumbs, crushed crackers, scallions, parsley, cilantro, and even a drizzle of chili crisp can make a baked dinner feel more finished. Use one finishing touch, not five. More is not always better.
Make-It-Yours: For gluten-free dinners, lean on rice, quinoa, corn tortillas, or certified gluten-free pasta. For dairy-light versions, use tomato-based sauces, extra broth, and a smaller amount of cheese on top instead of mixed into the base. For vegetarian meals, beans and mushrooms do more than enough heavy lifting if you season them well.
Make-Ahead, Storage, and Reheating Guidance
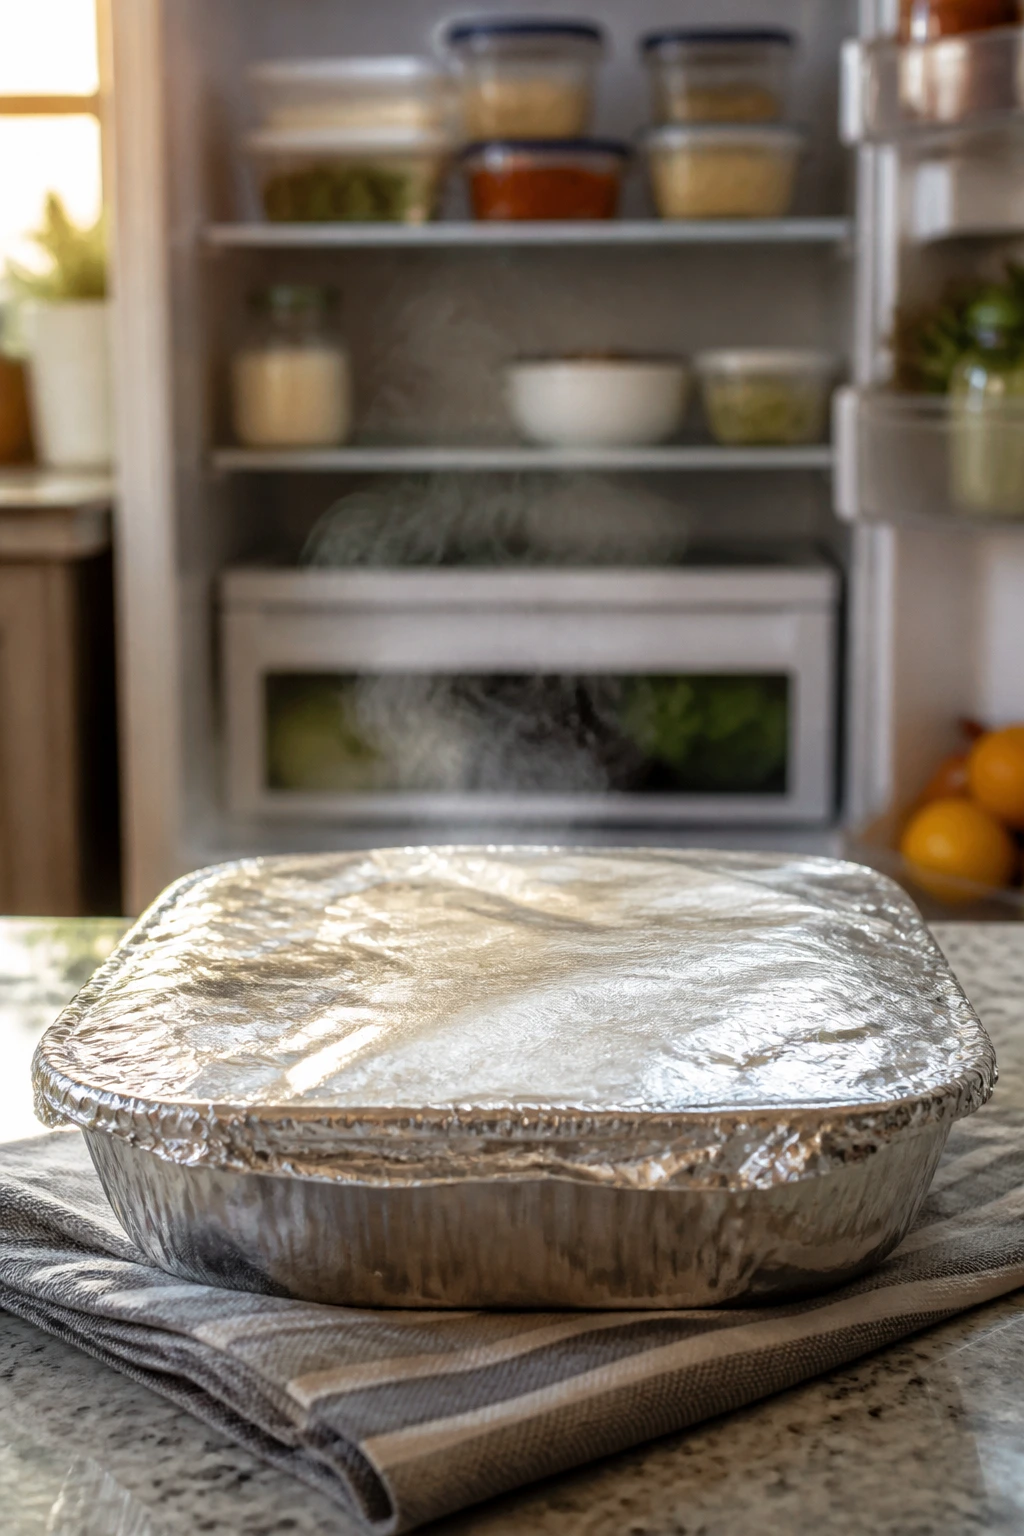
Most of these dinners keep well for 3 to 4 days in the refrigerator when stored in airtight containers. Let the pan cool first, then portion it out so the leftovers chill faster and reheat more evenly. Fish is the exception: salmon is at its best within 1 to 2 days, and I would not freeze it if the texture matters to you.
For freezer storage, the rice bakes, enchilada casseroles, ziti, and quinoa dishes are the strongest candidates. Wrap the cooled casserole tightly or portion it into freezer containers, then freeze for up to 2 months. If you know you’re freezing a rice or pasta dish, stop the bake a little early so the reheated version doesn’t cross into mush.
Reheat casseroles in a 325°F (165°C) oven, covered with foil, until hot through. Add a splash of broth, milk, or water to rice and pasta bakes before reheating so they loosen instead of drying out. The microwave works too, especially for single servings, but use a lower power setting and cover the dish so the edges do not turn leathery.
If you want to assemble ahead, most of these can be built in the pan and refrigerated for a few hours before baking. For rice and pasta dishes, add a small extra splash of liquid if they sit overnight; those starches keep drinking while they wait. Hold back delicate toppings like cheese or breadcrumbs until the last stretch, and you’ll get a cleaner finish.
Variations and Adaptations to Try
Freezer-Stacker Casseroles: The chicken and rice bake, baked ziti, enchilada casserole, and quinoa pan all freeze well in disposable foil pans. Assemble them unbaked, wrap tightly, and freeze flat. When you’re ready, thaw overnight in the fridge and add a little extra bake time.
Gluten-Free Comfort: Use rice, quinoa, corn tortillas, and certified gluten-free broth or sauce for easy swaps. The rice bakes and enchilada casseroles are the most natural fits, while pasta-based recipes can be converted with gluten-free pasta that holds its shape in the oven.
Dairy-Light Dinner: Tomato-heavy bakes, lemon salmon, and Mediterranean couscous all work without much cheese at all. Use olive oil, broth, and fresh herbs to give the dish enough personality that you don’t miss the heavy cream.
Gentle-Spice Family Night: Cut chili powder, use mild salsa, and keep hot sauce on the table instead of in the pan. That lets grown-ups add heat later while the base stays friendly for younger eaters.
Pantry-Pure Version: Canned beans, jarred sauce, frozen vegetables, and shelf-stable pasta can cover a surprising amount of ground. The trick is choosing one bright thing to finish with — lemon, herbs, or a splash of vinegar — so pantry food doesn’t taste flat.
Protein-Plus Swaps: Add shredded chicken, canned beans, or cooked sausage to stretch the meal without changing the basic method. If you’re cooking for a bigger crew, protein plus starch is the easiest way to make the pan feel more substantial.
Common Mistakes That Trip Up Dump-and-Bake Meals
-
Using the wrong pan size: A pan that’s too wide makes the liquid evaporate too fast, while a pan that’s too deep can leave the center underdone. Use the size the recipe suggests, or split the mixture into two smaller dishes.
-
Skipping the foil when the recipe asks for it: Rice, quinoa, tortellini, and pasta need steam at the beginning. If you leave the dish uncovered too soon, the top dries out before the center finishes.
-
Cutting vegetables too large: Big potato chunks and thick pepper strips take longer than the starch around them. Keep the pieces small and even so everything lands on the same schedule.
-
Adding cheese too early: Cheese can turn oily or dark before the base is fully cooked. Most of these recipes want cheese near the end, after the starch has absorbed the liquid.
-
Not seasoning the liquid enough: Broth, rice, pasta, and quinoa all absorb flavor as they cook. If the liquid tastes flat before it goes into the pan, the finished dish will taste flat too.
-
Forgetting the rest time: A casserole that looks loose right out of the oven often sets up after 5 to 10 minutes. Scoop too soon and the whole thing slides around like soup with opinions.
Frequently Asked Questions
Can I assemble these dump-and-bake dinners ahead of time?
Yes, most of them can be assembled a few hours ahead and kept covered in the fridge. If you’re using rice or pasta, add a small splash of extra broth because those ingredients keep absorbing liquid while they wait.
Do frozen vegetables work in these recipes?
They do, and they often work better than vegetables that have gone limp in the fridge drawer. Use them straight from frozen, and keep pieces small so they blend into the bake instead of sitting there icy and awkward.
Can I use brown rice or whole-wheat pasta instead of white rice or regular pasta?
You can, but those swaps need more liquid and more time. If you change the starch, expect to adjust the bake by at least 15 minutes and add enough broth to keep the center from drying out.
What if the middle is still crunchy when the timer ends?
Cover the dish back up and give it another 10 to 15 minutes. That extra steam usually fixes the problem, especially for rice and no-boil pasta.
Which recipes freeze best?
The chicken and rice bake, baked ziti, enchilada casseroles, and quinoa dishes freeze well. Salmon and green beans are the one exception; fish does not love the freezer quite as much.
Can I use rotisserie chicken in place of raw chicken?
Absolutely. In fact, rotisserie chicken is one of the easiest ways to make these dinners even faster. Stir it in near the end so it warms through without drying out.
How do I keep the top from burning before the inside is done?
Bake covered for the first stretch, then uncover only when the starch is nearly tender. If the cheese browns too quickly, lay foil loosely over the top for the last few minutes.
Can I double these recipes for a bigger family?
Yes, but use two pans instead of one giant dish whenever you can. A huge deep casserole often cooks unevenly, which means the edges dry out while the center is still catching up.
The Dinner Shortcut Worth Keeping
Some nights ask for patience. Most just ask for a plan. That’s where dump-and-bake dinners earn their place: they give you one pan, a fair amount of flavor, and a real meal without turning the kitchen into a second shift.
The best ones here are the ones that understand their own job. Rice gets steam, pasta gets sauce, potatoes get time, and cheese waits until the end. Nothing fancy. Nothing fussy. Just dinner that shows up on the table without making the evening harder than it already was.