
The best sheet pan dinner ideas have a smug little secret: they make dinner feel orderly even when the rest of the evening is not. One rimmed pan, a hot oven, and a short list of ingredients can get you from chopping board to table before the second round of “what’s for dinner?” starts bouncing around the kitchen.
The trick is not magic. It’s timing. Thin chicken cutlets, salmon fillets, shrimp, sausages, and quick-roasting vegetables all like the same oven temperature, or close enough that a little staggering does the work. A sheet pan dinner falls apart when everything goes in at the same time without a plan. It works when the carrots, peppers, broccoli, asparagus, and Brussels sprouts each get the head start they need, and the protein comes in just when the pan is hot and fragrant.
That’s the part most people miss. Sheet pans are not a dumping ground. They’re a stage. Give the ingredients space, use high heat, and don’t drown the tray in sauce too early, and you get browned edges, juicy centers, and a pan that looks like you meant business.
Why These Sheet Pan Dinner Ideas Earn Their Keep

- Fast cleanup: One rimmed pan, one cutting board, and one mixing bowl are usually enough, which keeps the sink from turning into a second job.
- Real dinner, not a sad shortcut: Salmon, chicken, shrimp, steak, sausage, halloumi, and cod all show up here with vegetables that can actually keep pace.
- The timing is forgiving: Most of these recipes rely on thin cuts, quick-cooking vegetables, or a short head start in the oven, so you do not need to babysit the pan.
- Browning does the heavy lifting: A hot oven gives peppers, onions, Brussels sprouts, and broccoli those dark, tasty edges that make simple food taste finished.
- Easy to scale: Two sheet pans can feed a bigger table without turning dinner into a production line.
- Flexible enough to survive real life: If your fridge has asparagus instead of green beans or zucchini instead of peppers, most of these dinners can take the swap without falling apart.
1. Lemon Garlic Salmon with Asparagus and Cherry Tomatoes
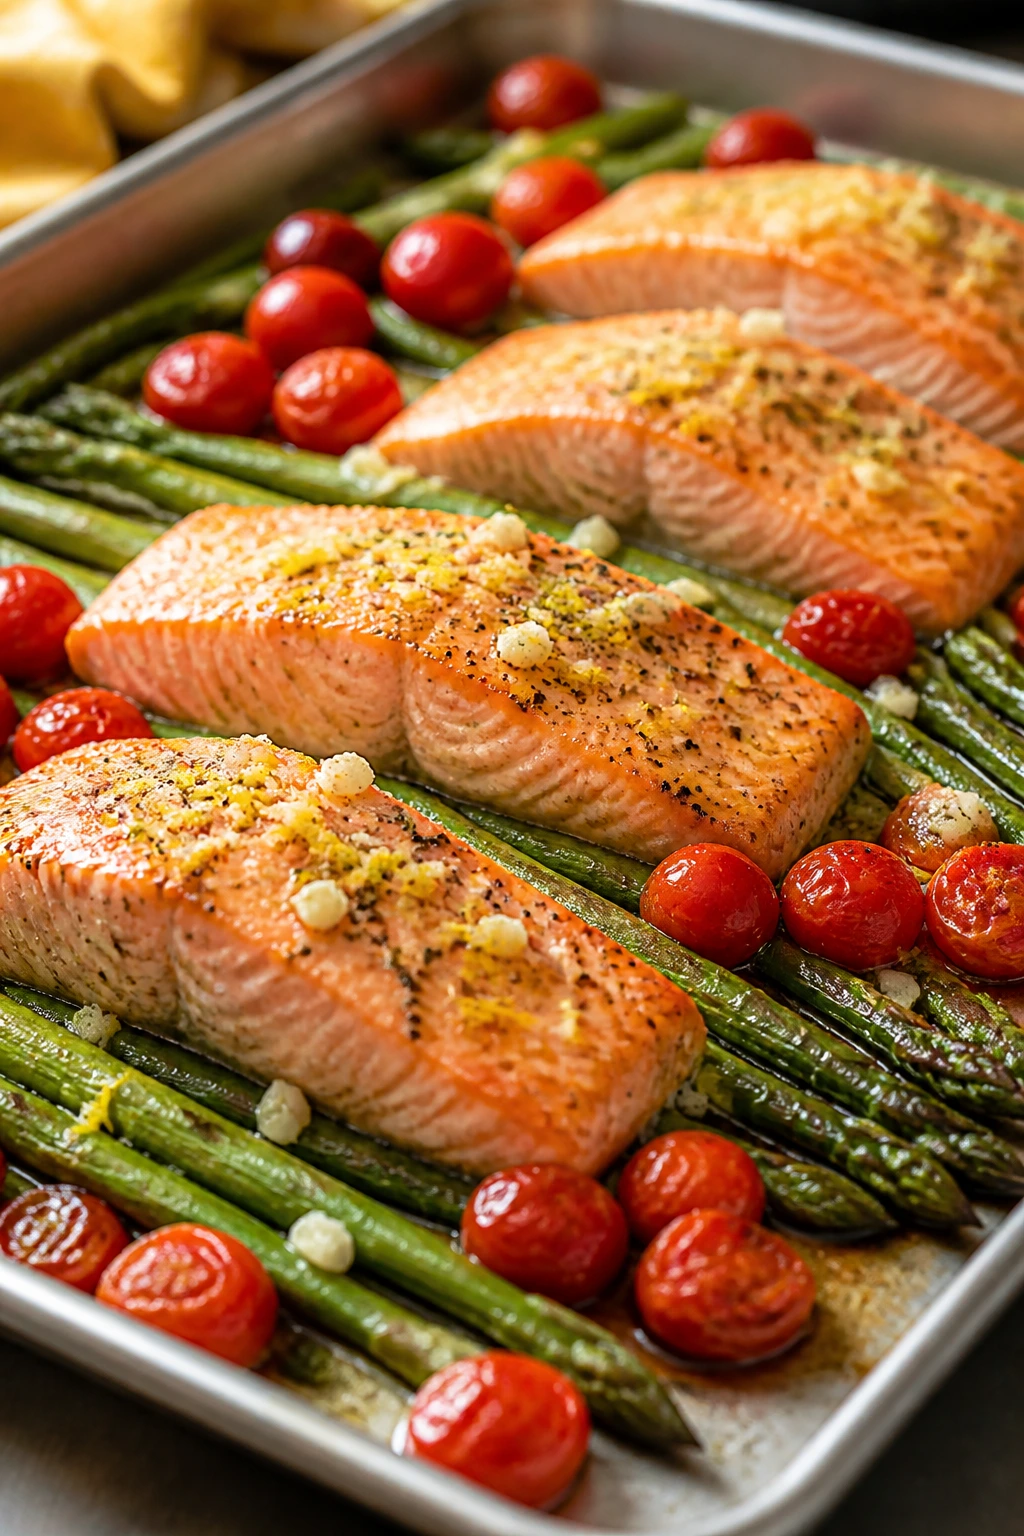
Salmon is one of those rare proteins that looks polished with almost no effort. On a sheet pan, it turns glossy and flaky, the asparagus tips blister, and the cherry tomatoes collapse just enough to make a light pan sauce of their own. The whole tray smells like lemon zest, garlic, and hot olive oil.
Why It Works:
This dinner stays under 30 minutes because the vegetables get a head start and the salmon goes in only after the asparagus begins to soften. Salmon fillets of even thickness cook fast at 425°F, and the cherry tomatoes burst at the same time the fish flakes. A little butter or olive oil mixed with lemon juice keeps the top from drying out while the bottom stays tender.
Key Ingredients:
- 4 salmon fillets, 5 to 6 ounces each, skin on or skinless
- 1 pound asparagus, tough ends trimmed
- 1 pint cherry tomatoes
- 2 tablespoons olive oil
- 2 cloves garlic, finely minced
- 1 lemon, zested and juiced
- 1 teaspoon kosher salt
- 1/2 teaspoon black pepper
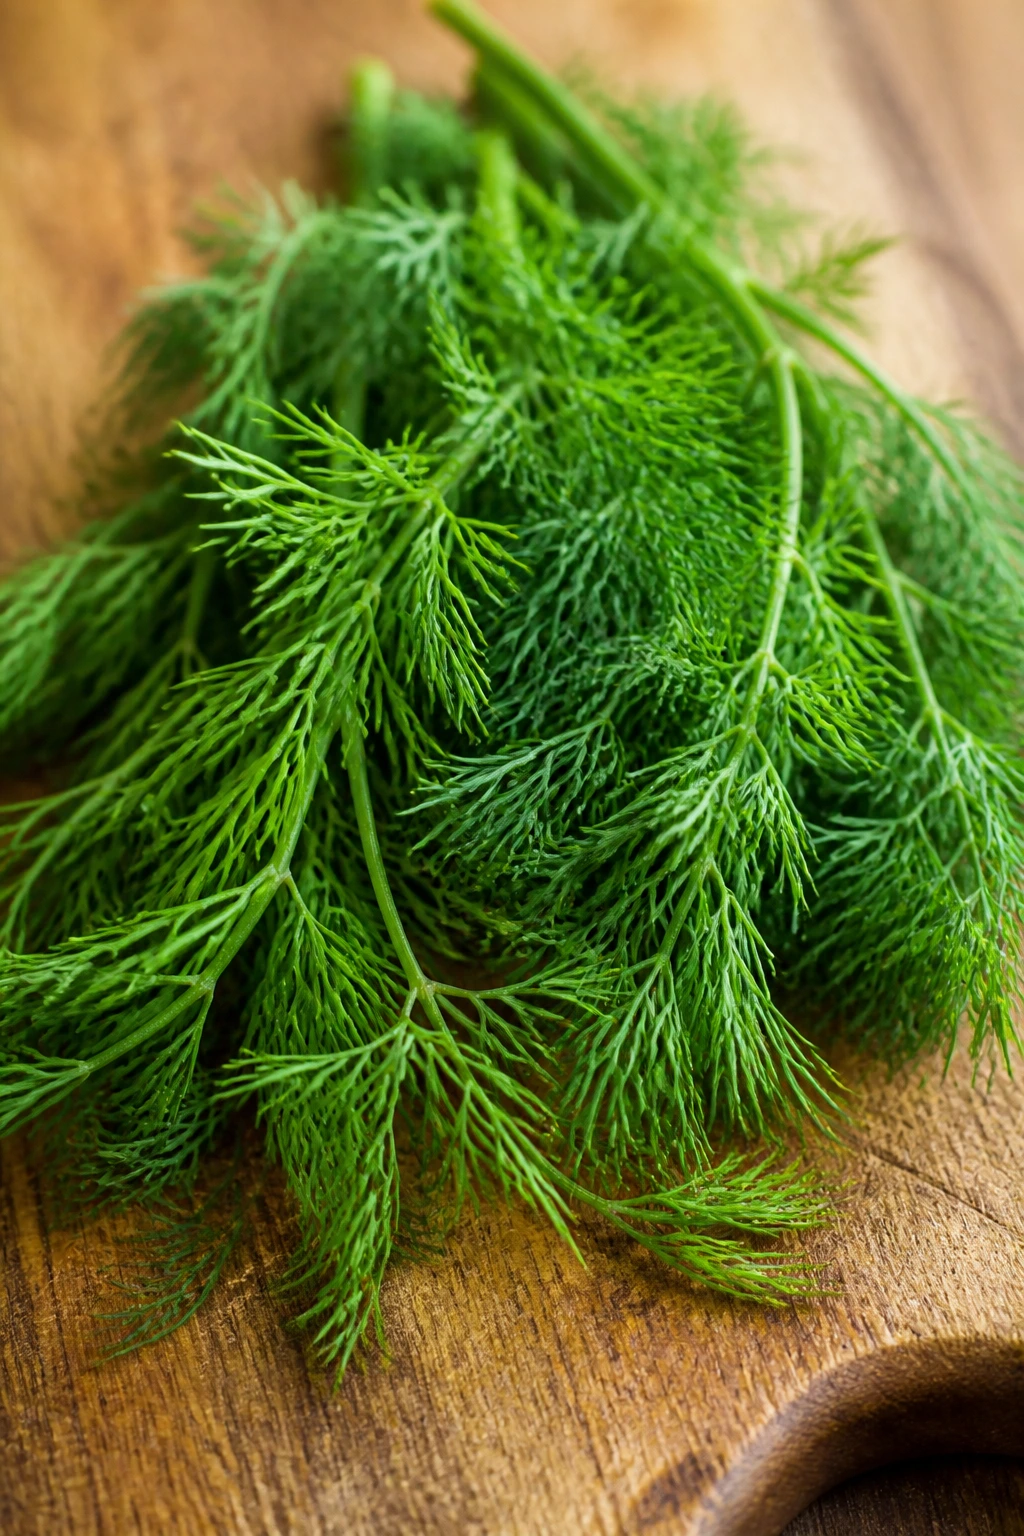
- 1 teaspoon dried dill or 2 tablespoons chopped fresh dill
- 1 tablespoon unsalted butter, optional but worth it
Quick Steps:
- Preheat the oven to 425°F and line a rimmed sheet pan with parchment for easier cleanup.
- Toss the asparagus and cherry tomatoes with 1 tablespoon olive oil, half the garlic, half the salt, and half the pepper.
- Spread the vegetables in a single layer and roast for 8 minutes, just until the asparagus starts to bend at the tips.
- Stir the remaining olive oil, lemon zest, lemon juice, butter if using, garlic, salt, pepper, and dill in a small bowl.
- Nestle the salmon fillets on the pan, brush them with the lemon mixture, and return the tray to the oven for 10 to 12 minutes.
- Check for doneness when the salmon flakes easily with a fork and the thickest part reaches 125°F to 130°F for medium or 145°F for fully cooked.
- Finish with extra dill and a squeeze of lemon right before serving.
Tips and Variations:
- Swap the herb: Parsley, tarragon, or chives all work if dill isn’t your thing.
- Add starch carefully: Thin slices of baby potatoes need a head start, or they will still be firm when the fish is done.
- Serve with restraint: A spoonful of yogurt-dill sauce is nice, but don’t bury the salmon under it.
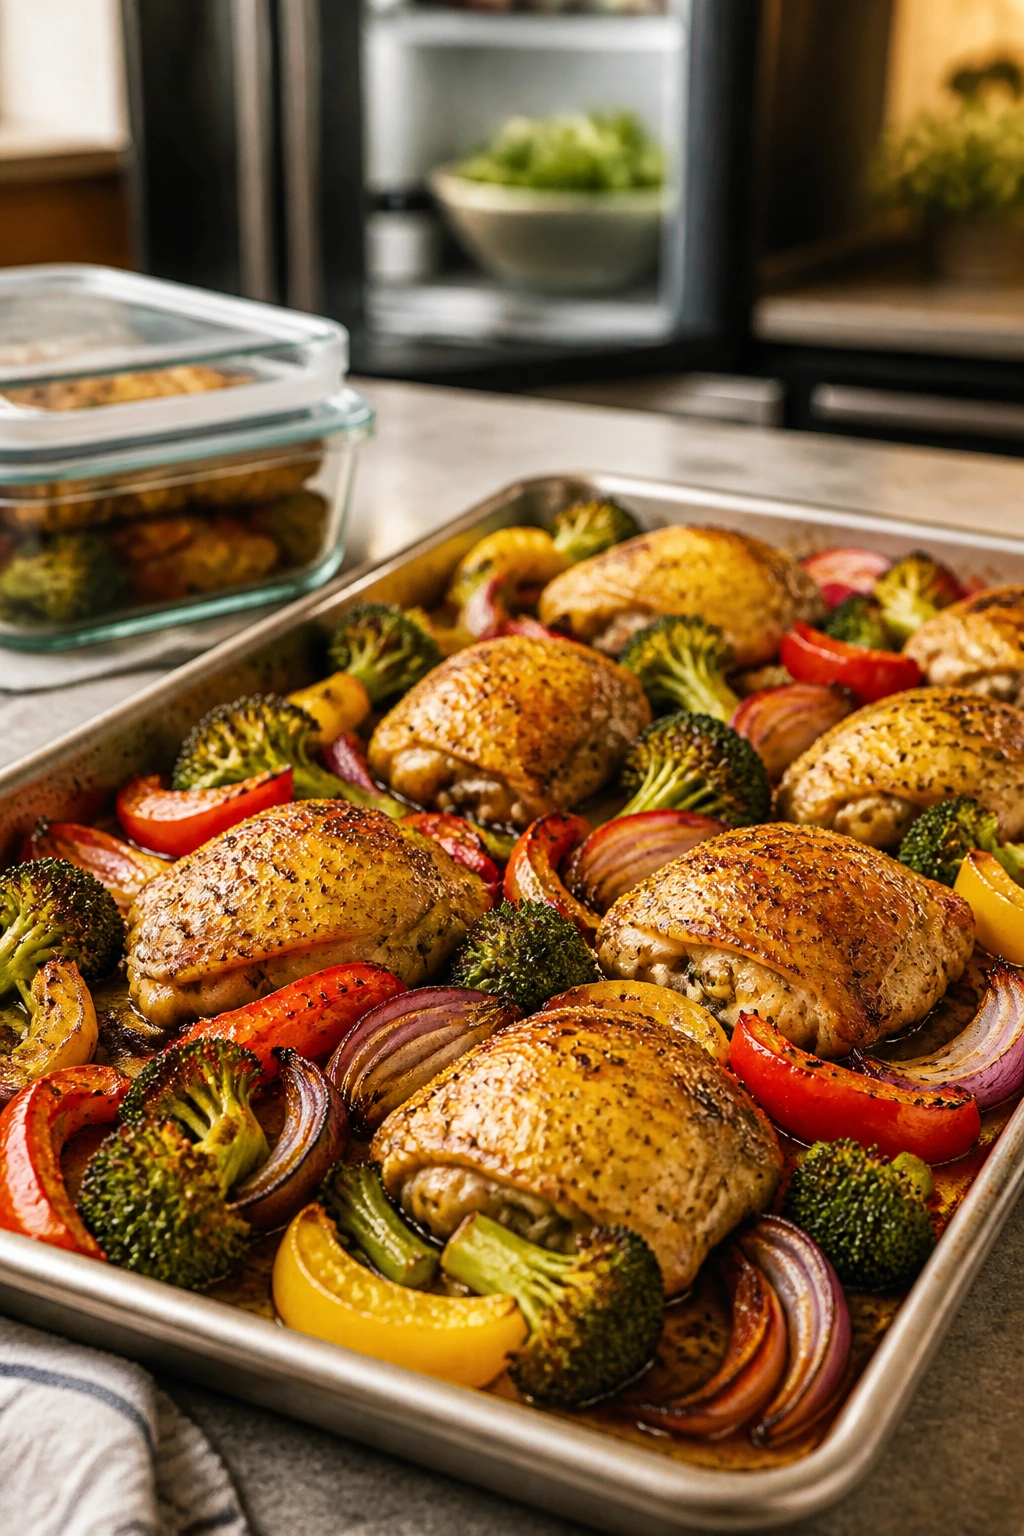
2. Chicken Fajita Sheet Pan Dinner
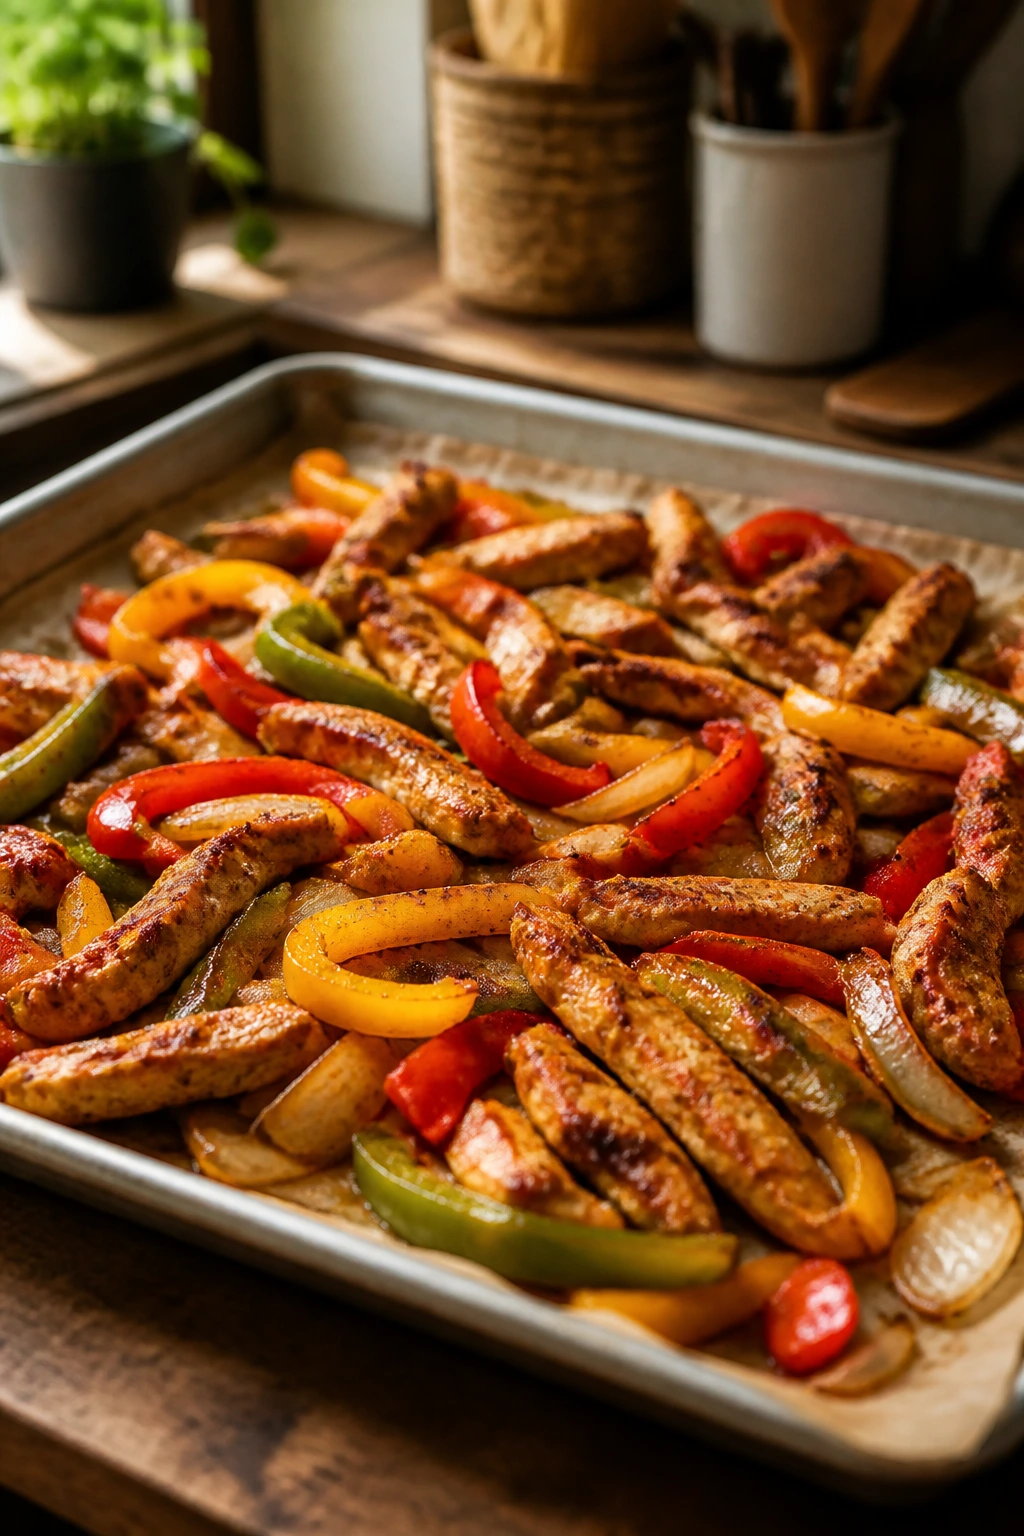
Why do fajita dinners work so well on a sheet pan? Because the ingredients already want the same thing: hot heat, quick browning, and a little char around the edges. Thin chicken strips, peppers, and onions perfume the kitchen in about ten minutes, and that’s before the lime shows up.
Why It Works:
The recipe depends on slicing the chicken thin so it cooks in the same window as the peppers and onions. At 425°F, the vegetables soften and blister while the chicken stays juicy, especially if you toss everything with oil and seasoning before it hits the tray. If you want the onions sweet and the peppers still with some bite, this is the cleanest way to get both.
Key Ingredients:
- 1 1/2 pounds boneless, skinless chicken breasts, sliced into thin strips
- 3 bell peppers, sliced into 1/2-inch strips
- 1 large red onion, sliced into wedges
- 2 tablespoons olive oil
- 2 teaspoons chili powder
- 1 teaspoon ground cumin
- 1 teaspoon garlic powder
- 1/2 teaspoon smoked paprika
- 1 teaspoon kosher salt
- 1 lime, cut into wedges
- Warm tortillas, sliced avocado, or cilantro, for serving
Quick Steps:
- Preheat the oven to 425°F and set a rack in the center.
- Whisk the olive oil, chili powder, cumin, garlic powder, smoked paprika, and salt in a large bowl.
- Toss the chicken, peppers, and onion in the spice mixture until every piece is coated.
- Spread the mixture on a large rimmed sheet pan, keeping the vegetables in a fairly even layer.
- Roast for 16 to 18 minutes, stirring once halfway through, until the chicken reaches 165°F and the onions are tender with browned edges.
- Broil for 1 to 2 minutes if you want more char, but watch it closely. Sugar in the seasoning can burn fast.
- Serve with lime wedges, tortillas, and any toppings you like.
Tips and Variations:
- Make it saucy: A spoonful of salsa verde or chipotle crema turns this into a fuller dinner.
- Change the protein: Thin-sliced chicken thighs also work, though they may need a minute or two longer.
- Don’t crowd the pan: If the vegetables pile up, use two pans. Steam is the enemy here.
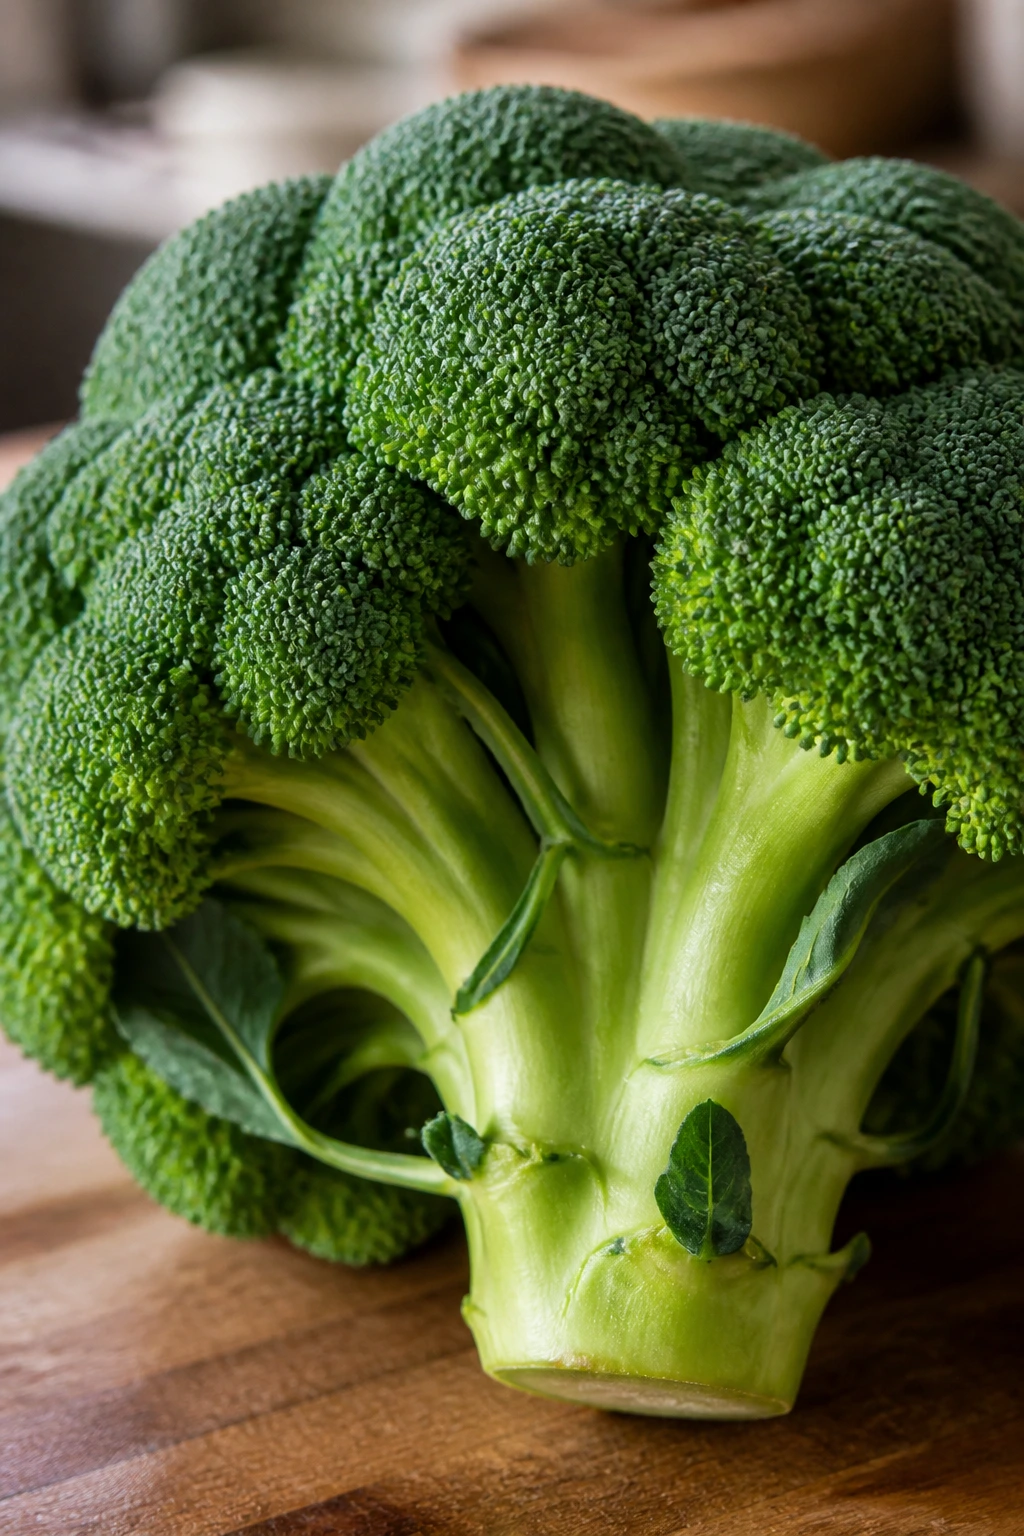
3. Shrimp, Broccoli, and Sesame Snap Peas
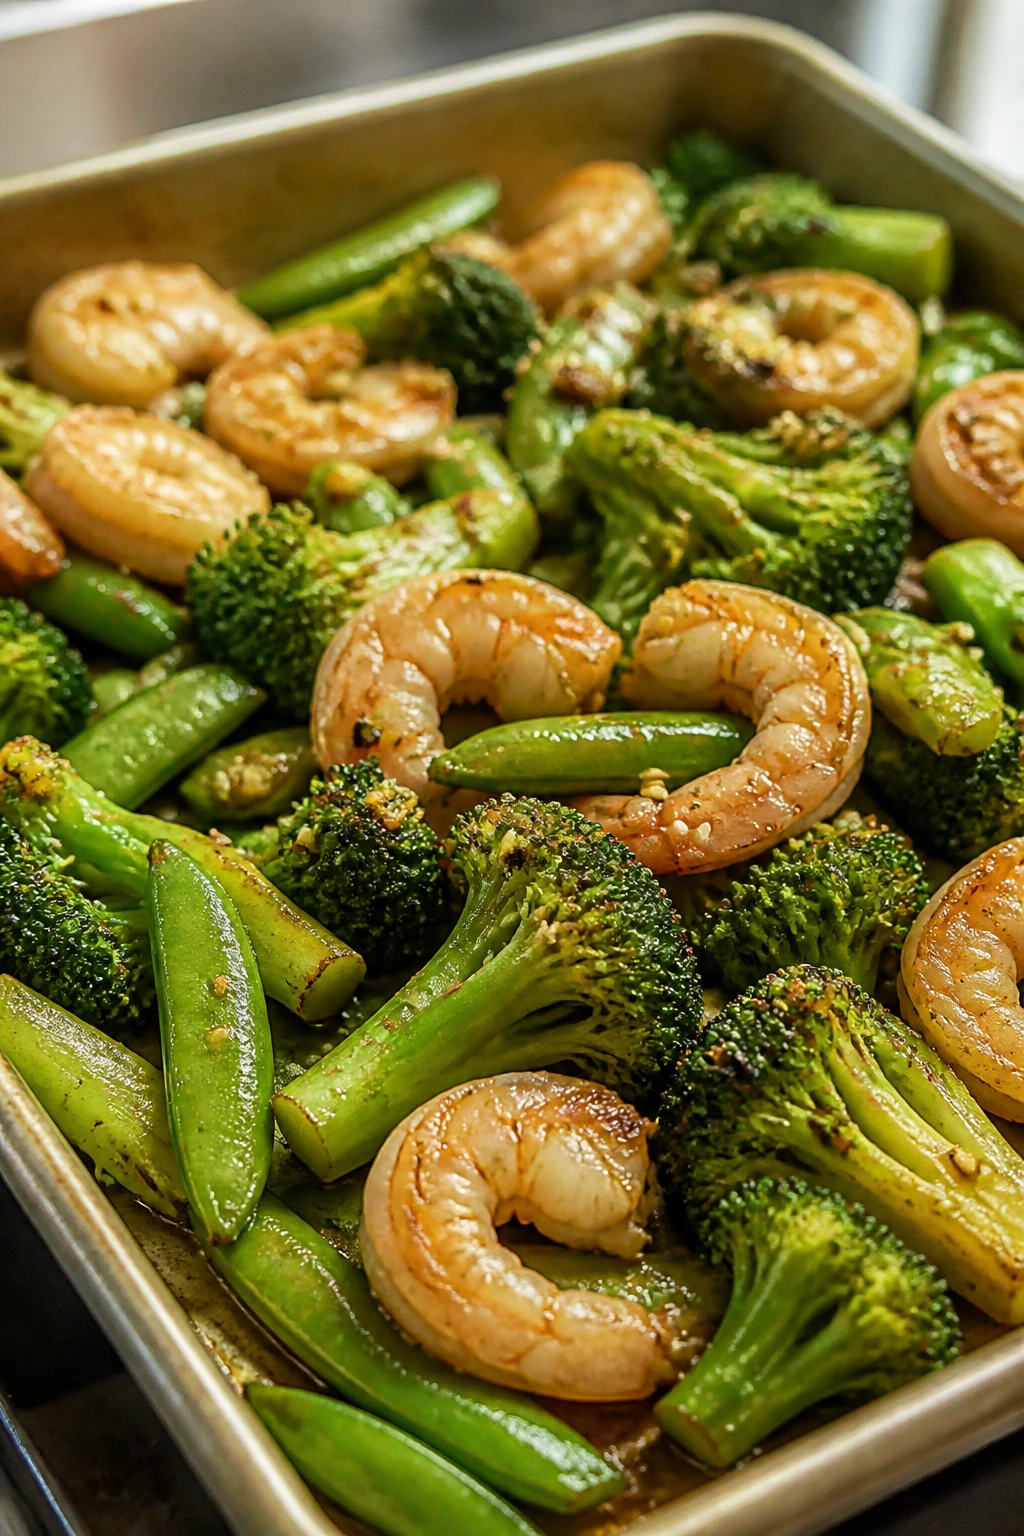
Shrimp and broccoli are a natural pair when the goal is speed. The broccoli gets earthy and crisp at the edges, the shrimp turn pink and curled, and snap peas bring that fresh, grassy crunch that keeps the tray from feeling heavy. It smells like garlic, soy sauce, and sesame oil the second the pan comes out.
Why It Works:
Broccoli needs a small head start because shrimp cook faster than almost anything else in this lineup. Roasting the broccoli first gives it time to brown while the shrimp stay tender and the snap peas only wilt at the edges. A light honey-soy glaze clings to the tray without drowning the vegetables, which keeps the whole thing bright instead of sticky.
Key Ingredients:
- 1 1/2 pounds large shrimp, peeled and deveined
- 4 cups broccoli florets, cut small and dried well
- 8 ounces snap peas, strings removed if needed
- 2 tablespoons neutral oil or avocado oil
- 3 tablespoons low-sodium soy sauce
- 1 tablespoon honey
- 1 tablespoon sesame oil
- 2 cloves garlic, minced
- 1 teaspoon fresh ginger, grated
- 1 tablespoon sesame seeds
- Sliced scallions, for finishing
Quick Steps:
- Preheat the oven to 425°F and line the sheet pan with parchment.
- Toss the broccoli with 1 tablespoon oil, half the garlic, and a pinch of salt.
- Roast the broccoli for 8 minutes until the florets begin to brown at the tips.
- Mix the soy sauce, honey, sesame oil, ginger, remaining garlic, and remaining oil in a small bowl.
- Add the shrimp and snap peas to the pan, pour the sauce over the top, and toss lightly on the tray.
- Roast for 6 to 8 minutes more, just until the shrimp are opaque and curled into loose C-shapes.
- Finish with sesame seeds and scallions. Pull the pan the moment the shrimp lose their translucent centers.
Tips and Variations:
- Use dry shrimp: Pat them dry before seasoning or they’ll steam instead of roast.
- Turn it into bowls: Spoon everything over rice or rice noodles if you want a fuller dinner.
- Add heat: A pinch of red pepper flakes or chili crisp works well with the sesame glaze.
4. Italian Sausage, Peppers, and Zucchini
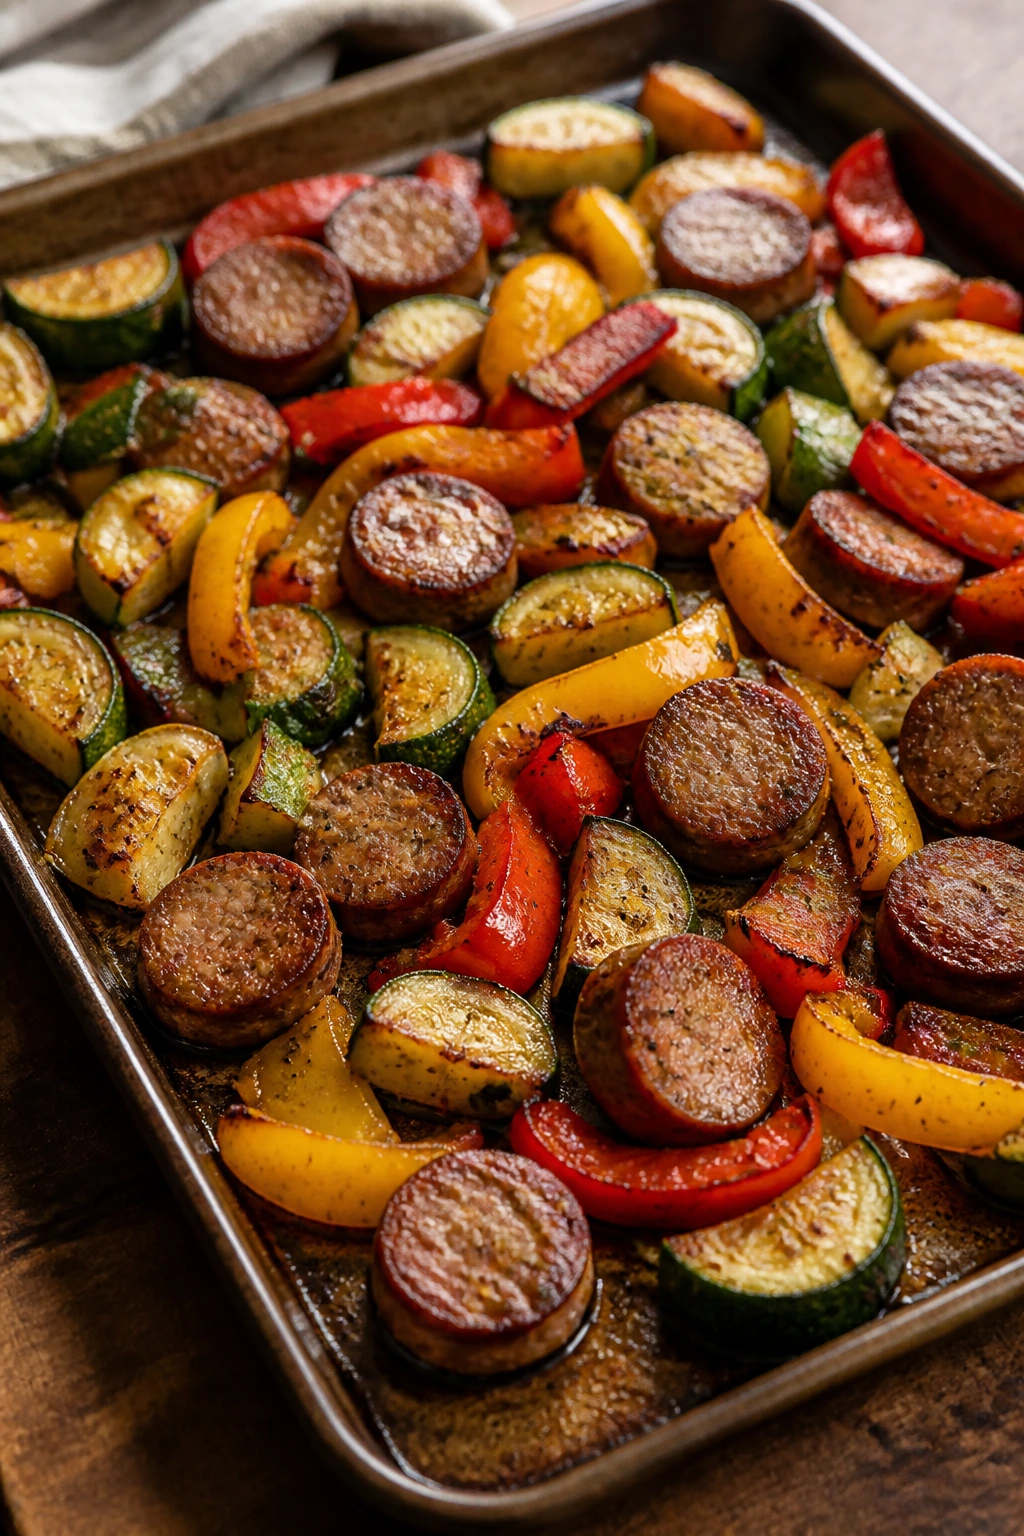
A pan of sausage and peppers is the kind of dinner that smells like more work than it actually takes. The sausages brown, the peppers turn sweet, the zucchini softens at the edges, and the tomatoes collapse into little jammy pockets. It is rustic in the best way, the kind of meal that needs crusty bread and not much else.
Why It Works:
Using fully cooked Italian sausage keeps the whole dinner safely inside the 30-minute window. The vegetables get sliced into thick enough pieces to hold their shape, but thin enough to pick up color in a hot oven. A few chopped tomatoes or a splash of balsamic at the end gives the tray a glossy finish and keeps the sausage from feeling heavy.
Key Ingredients:
- 1 1/2 pounds fully cooked Italian sausage links, sliced on a bias
- 2 bell peppers, cut into 1-inch strips
- 2 medium zucchini, cut into half-moons
- 1 red onion, sliced into wedges
- 1 pint cherry tomatoes
- 2 tablespoons olive oil
- 1 tablespoon Italian seasoning
- 1 teaspoon kosher salt
- 1/2 teaspoon black pepper
- 1 to 2 tablespoons balsamic vinegar, optional
Quick Steps:
- Preheat the oven to 425°F.
- Toss the peppers, zucchini, onion, and tomatoes with olive oil, Italian seasoning, salt, and pepper.
- Spread the vegetables on the sheet pan and roast for 10 minutes.
- Add the sliced sausage to the pan and stir everything gently so the sausage catches some heat on the cut sides.
- Roast for 8 to 10 minutes more, until the peppers are tender and the sausage edges are browned.
- Drizzle with balsamic vinegar if using and toss once more.
- Serve hot with polenta, bread, or plain rice.
Tips and Variations:
- Make it sharper: A few roasted pepperoncini or a pinch of crushed red pepper adds bite.
- Choose the right sausage: Mild, hot, or fennel-heavy links all work, but use one style so the tray tastes balanced.
- Leftovers hold well: This one reheats better than most fish or shrimp trays.
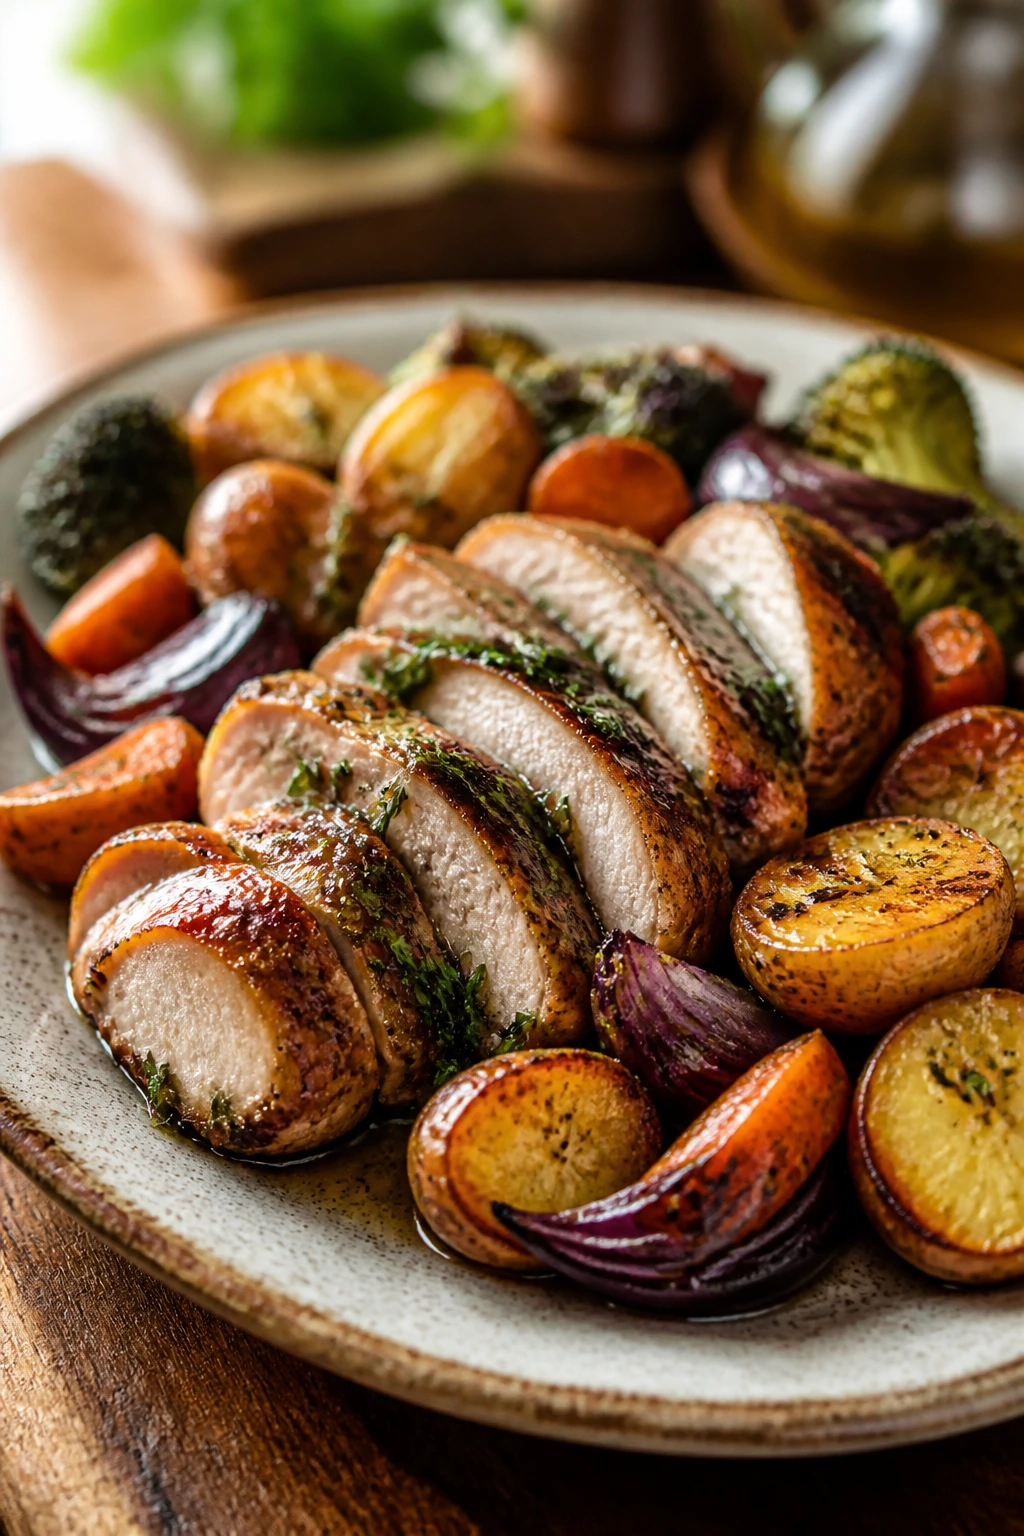
5. Dijon Pork Tenderloin Medallions with Green Beans and Mushrooms
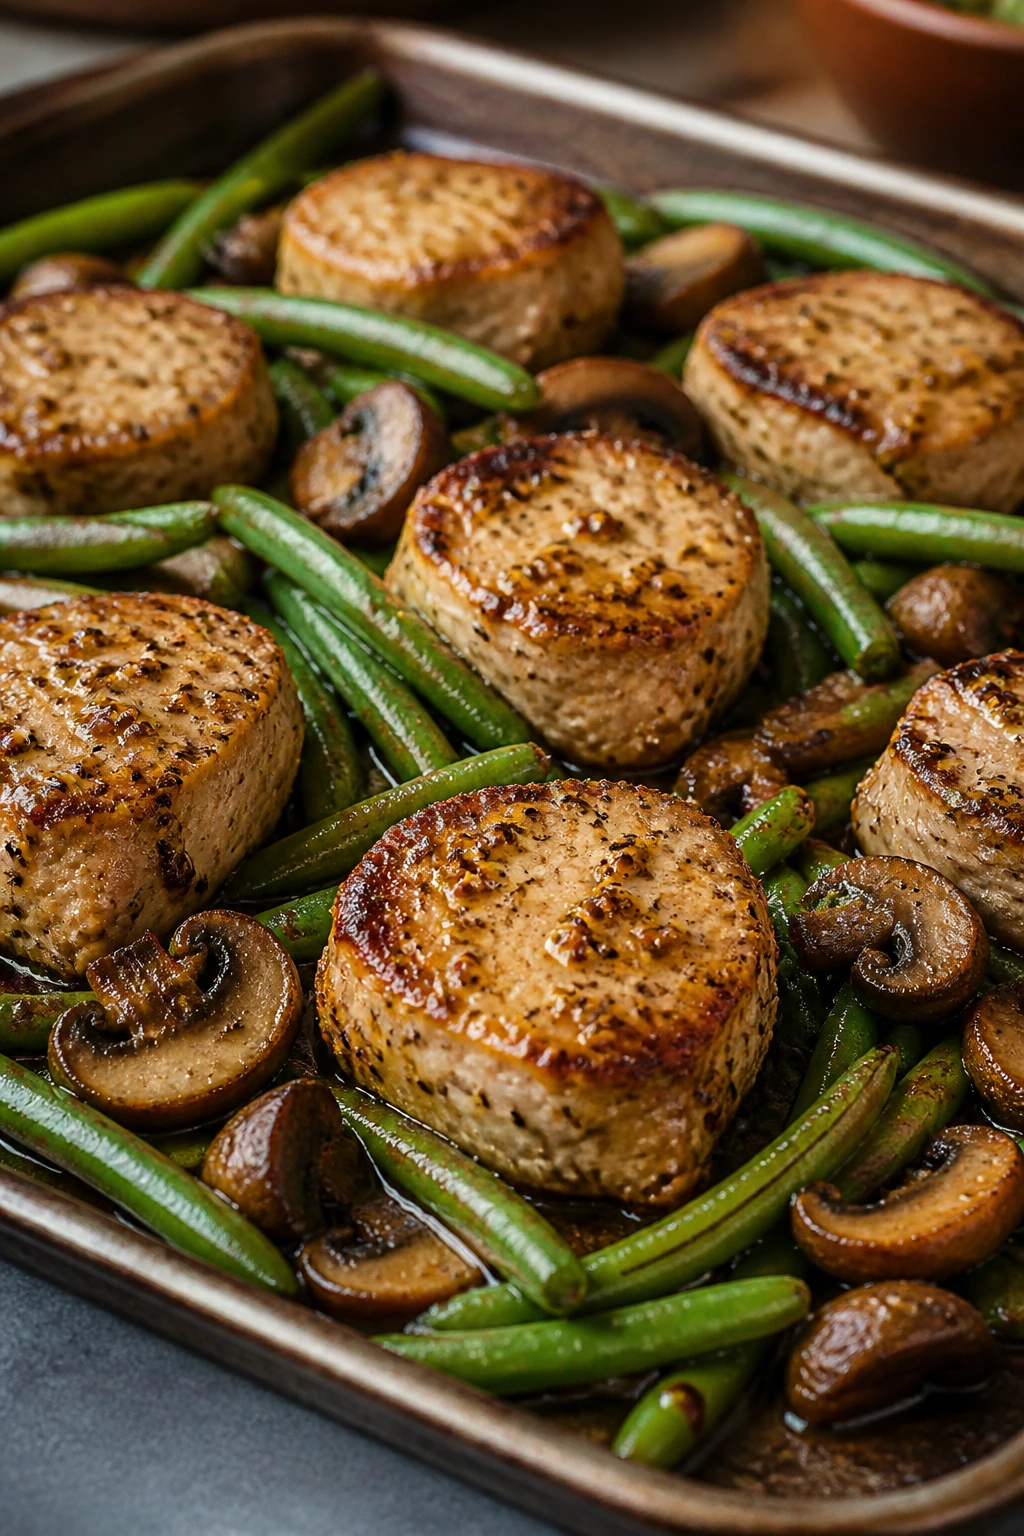
Pork tenderloin can be boring when it’s treated like a roast that needs a long, slow sit in the oven. Slice it into medallions, though, and it cooks fast, stays tender, and gets a proper browned edge. The green beans stay snappy, the mushrooms soak up the mustard glaze, and the whole tray feels sharper and more grown-up than the average weeknight plate.
Why It Works:
Pork tenderloin is lean, so the medallion cut matters. Pieces about 1 inch thick cook quickly and evenly, which is exactly what a sheet pan dinner needs when the vegetables are already in the same hot oven. Dijon, honey, and garlic make a glaze that clings without burning if you add some of it after the first roast rather than soaking the pan from the start.
Key Ingredients:
- 1 1/4 pounds pork tenderloin, trimmed and cut into 1-inch medallions
- 1 pound green beans, trimmed
- 8 ounces cremini mushrooms, halved
- 2 tablespoons olive oil
- 2 tablespoons Dijon mustard
- 1 tablespoon honey
- 2 cloves garlic, minced
- 1 teaspoon fresh thyme leaves or 1/2 teaspoon dried thyme
- 1 teaspoon kosher salt
- 1/2 teaspoon black pepper
Quick Steps:
- Preheat the oven to 425°F and line the pan with parchment.
- Toss the green beans and mushrooms with half the olive oil, half the salt, and half the pepper.
- Roast the vegetables for 8 minutes so they start to blister and release some moisture.
- Stir the Dijon, honey, garlic, thyme, remaining oil, salt, and pepper in a bowl.
- Coat the pork medallions with the mustard mixture and add them to the pan.
- Roast for 10 to 12 minutes more, until the pork reaches 145°F and the beans are tender-crisp.
- Rest the pork for 3 minutes before serving. That short rest keeps the juices in the meat instead of on the pan.
Tips and Variations:
- Swap the vegetables: Asparagus or sliced fennel can stand in for green beans if that’s what you have.
- Add a little acid: A squeeze of lemon at the end sharpens the mustard glaze.
- Watch the pork carefully: Tenderloin dries out fast if you chase a full hour of baking out of it. Don’t.
6. Cajun Cod with Corn, Bell Peppers, and Lime
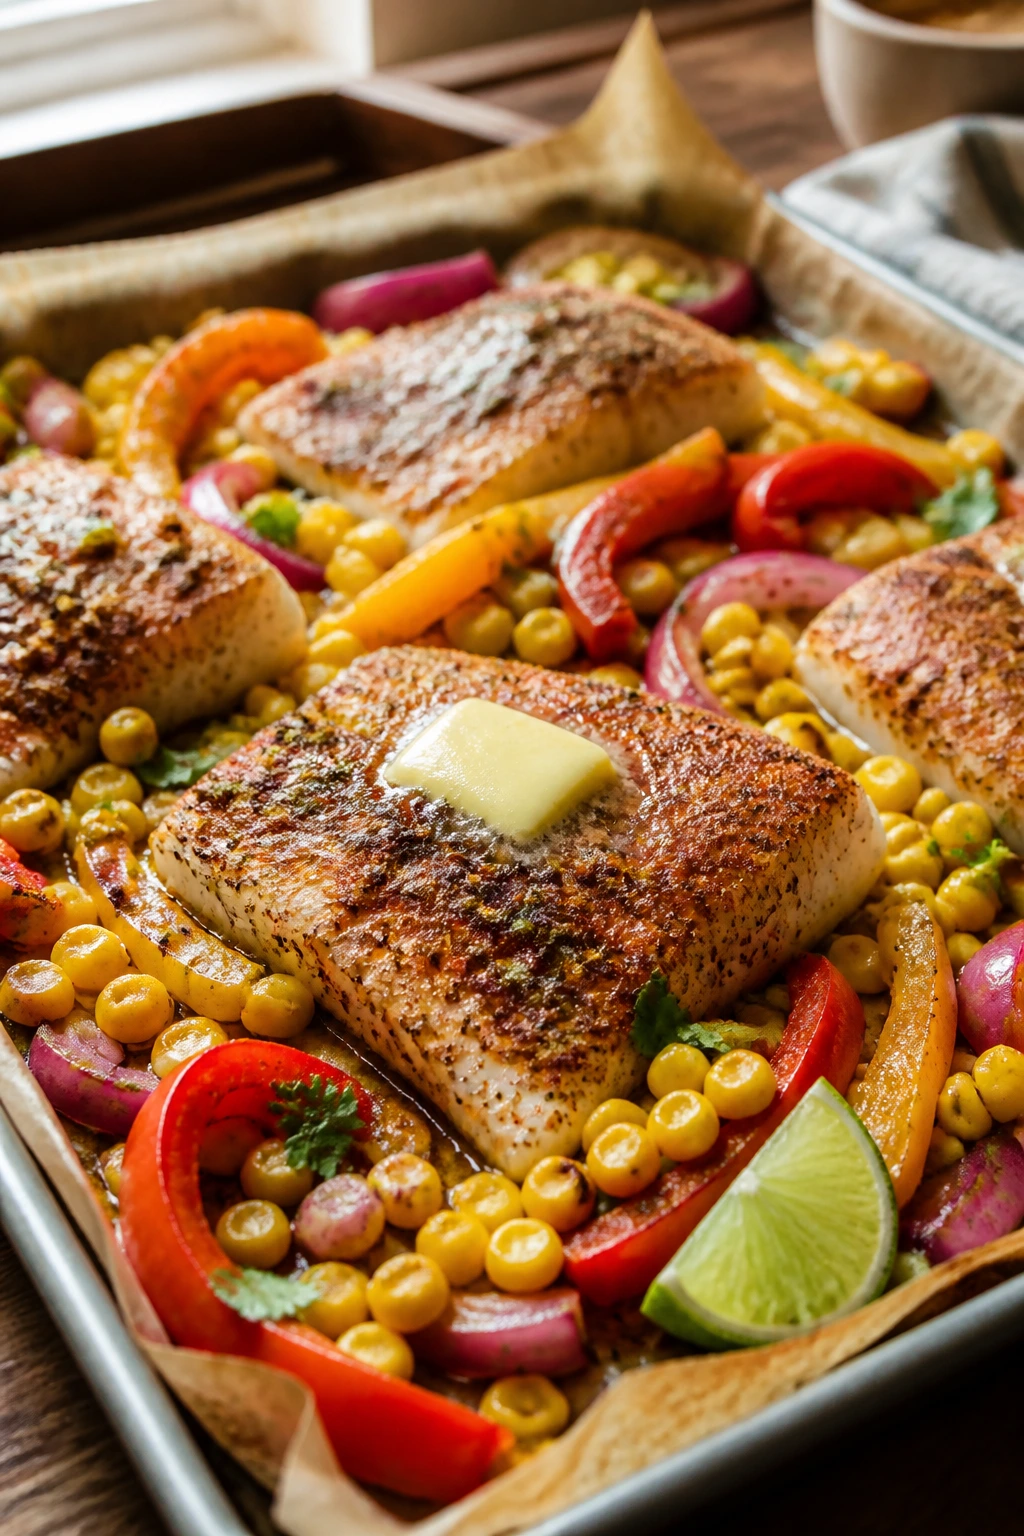
Cod is a dare on busy nights, and that is exactly why it belongs here. It cooks fast, flakes softly, and takes on Cajun seasoning like it was built for it. The corn adds sweetness, the peppers bring color, and the lime at the end keeps the whole tray from drifting into heaviness.
Why It Works:
Cod is delicate, so the vegetables go in first and the fish follows once the tray is hot and the peppers have begun to soften. A little butter brushed on top protects the fillets from drying out and helps the spices bloom in the oven. If you keep the fillets the same thickness, the timing stays predictable, which is a rare gift on a weeknight.
Key Ingredients:
- 4 cod fillets, 5 to 6 ounces each
- 2 cups fresh or thawed corn kernels
- 2 bell peppers, cut into strips
- 1 small red onion, sliced
- 2 tablespoons olive oil
- 1 1/2 tablespoons Cajun seasoning
- 2 tablespoons unsalted butter, melted
- 1 lime, cut into wedges
- 1 tablespoon chopped parsley
- Salt only if your seasoning blend is low in salt
Quick Steps:
- Preheat the oven to 425°F and line the pan with parchment.
- Toss the corn, peppers, and onion with olive oil and half the Cajun seasoning.
- Roast the vegetables for 10 minutes until they start to brown at the edges.
- Pat the cod dry, then brush it with melted butter and sprinkle it with the remaining seasoning.
- Set the cod on the pan and roast for 10 to 12 minutes more, until the fish flakes and looks opaque all the way through.
- Check the thickest part with a fork or thermometer; cod should reach 145°F if you want a firm finish.
- Finish with parsley and a hard squeeze of lime.
Tips and Variations:
- Use parchment, not bare metal: Cod sticks more than people expect.
- Try smoked paprika: If your Cajun blend leans sharp, a pinch of smoked paprika rounds it out.
- Serve immediately: Cod is best when it comes off the pan hot and still moist.
7. Teriyaki Chicken Meatballs with Pineapple and Snap Peas
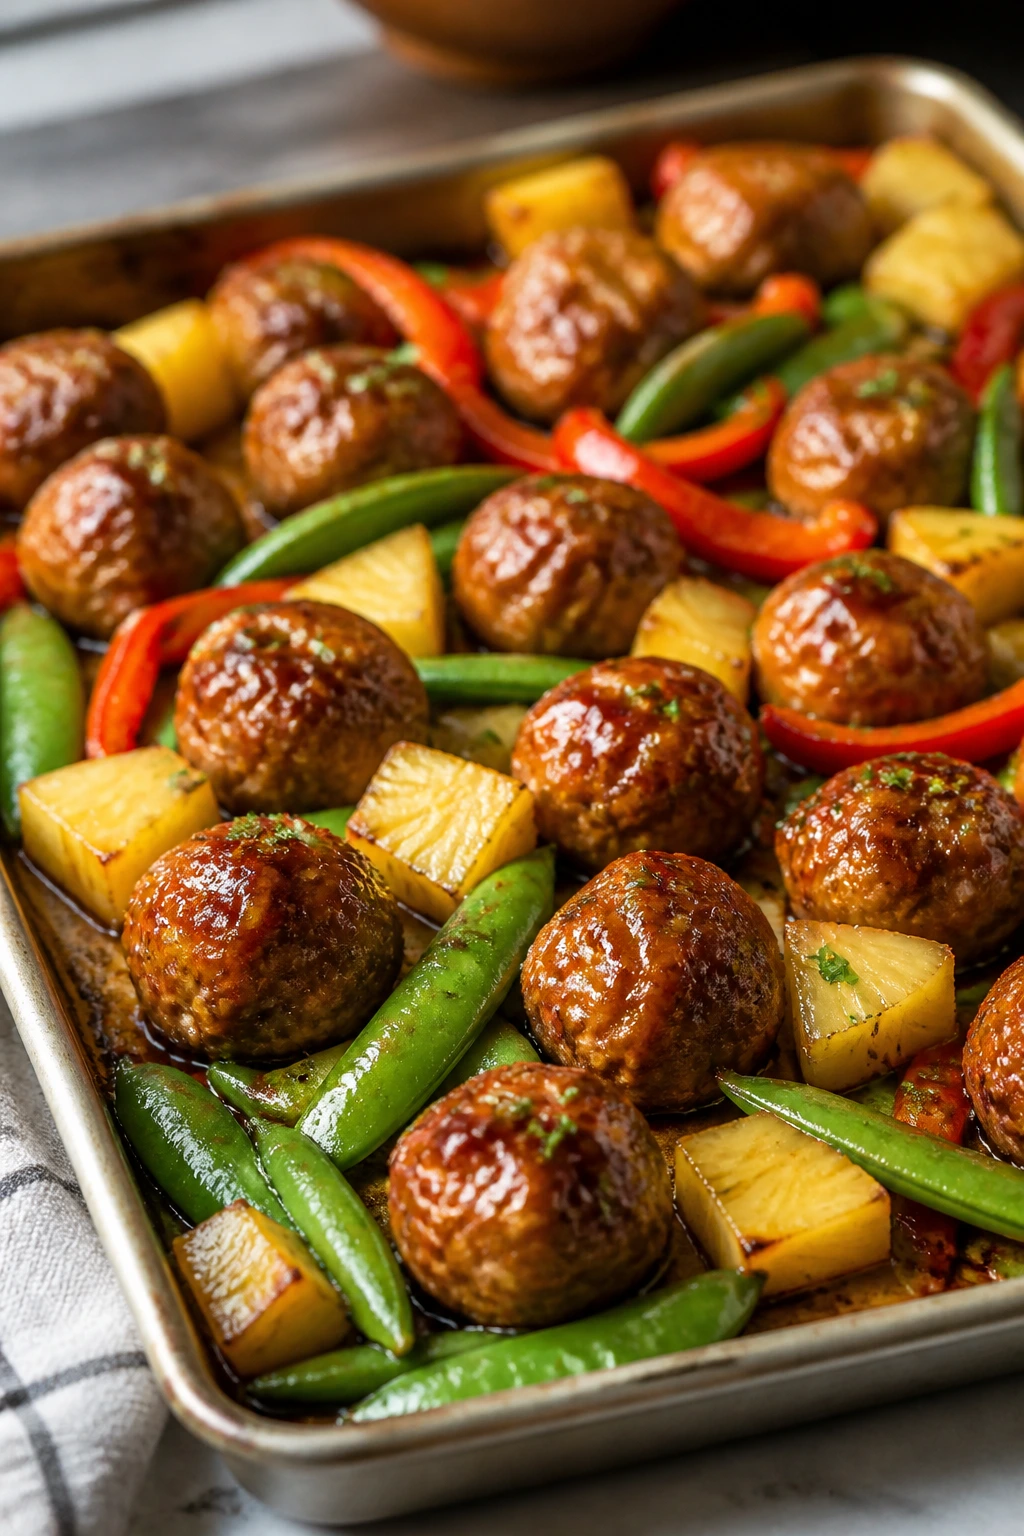
Store-bought meatballs deserve more respect. They’re the shortcut that can still produce a dinner with caramelized edges, sticky glaze, and enough color to look planned. Pineapple brings sweetness, snap peas keep it bright, and the teriyaki sauce turns glossy in the oven without turning gluey.
Why It Works:
This is one of the cleanest ways to keep a dinner under 30 minutes because the meatballs are already formed and cooked, or nearly cooked, before they hit the tray. Pineapple chunks release a little juice as they roast, which loosens the sauce just enough to coat the meatballs without flooding the pan. Snap peas need almost no time at all, so they go in near the end and stay crisp.
Key Ingredients:
- 24 small cooked chicken or turkey meatballs, about 1 1/2 pounds
- 1 1/2 cups pineapple chunks, fresh or well-drained canned
- 8 ounces snap peas, trimmed
- 1 red bell pepper, cut into strips
- 1/3 cup teriyaki sauce
- 1 tablespoon sesame oil
- 1 teaspoon grated fresh ginger
- 1 tablespoon sesame seeds
- Sliced scallions, for finishing
- Cooked rice, for serving if desired
Quick Steps:
- Preheat the oven to 425°F.
- Toss the meatballs, pineapple, pepper, and snap peas with sesame oil, ginger, and half the teriyaki sauce.
- Spread everything in a single layer on the sheet pan.
- Roast for 12 minutes, then stir the mixture and spoon the remaining teriyaki sauce over the top.
- Roast for 4 to 6 minutes more, until the meatballs are hot through and the sauce looks sticky at the edges.
- Sprinkle with sesame seeds and scallions.
- Serve over rice or noodles if you want a larger meal.
Tips and Variations:
- Drain canned pineapple well: Extra juice can make the tray soggy.
- Add broccoli if you want more veg: Use small florets and give them a 5-minute head start.
- Keep the sauce back: A little sauce early, a little at the end. That’s the trick.
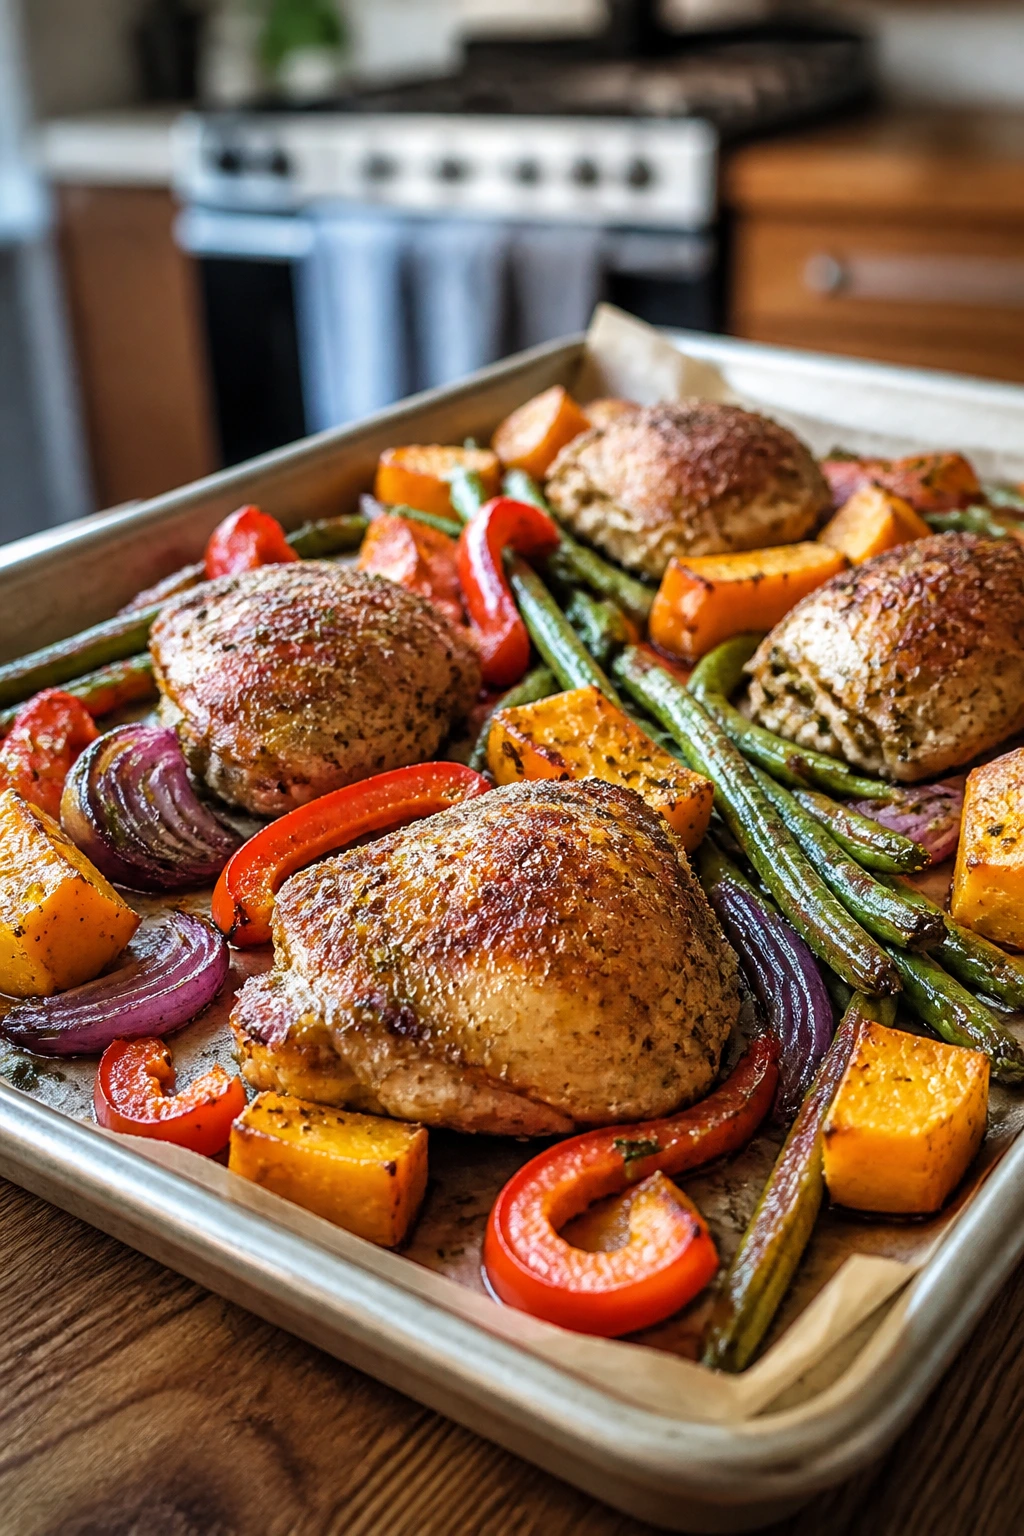
8. Mediterranean Chicken with Cherry Tomatoes, Olives, and Artichokes
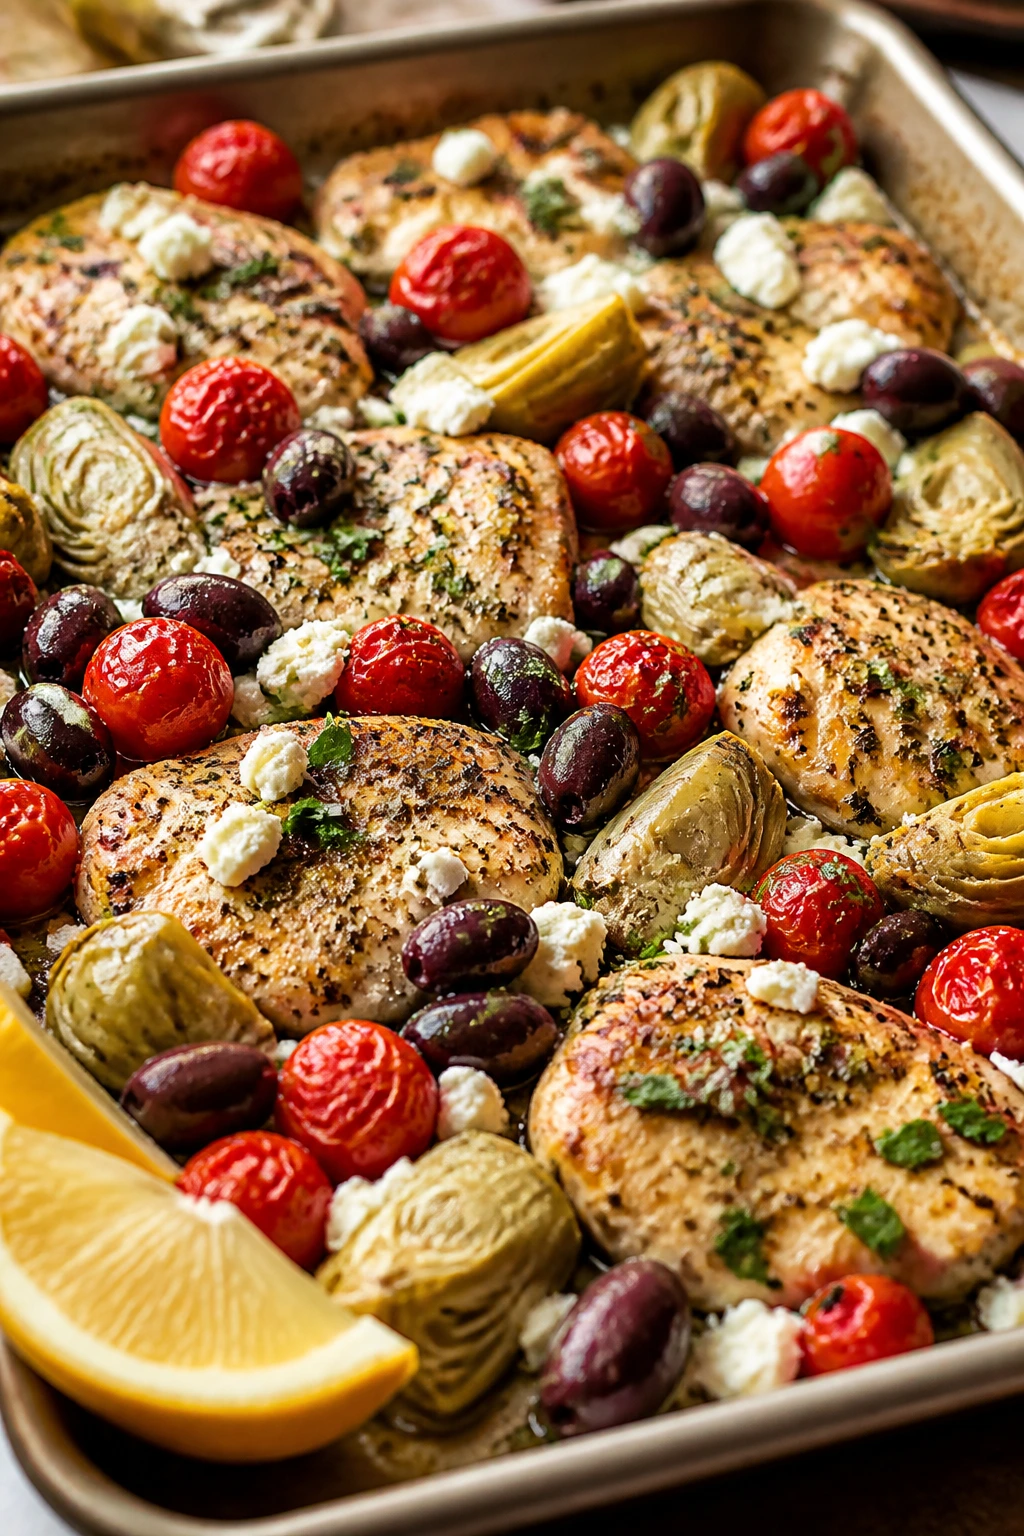
Mediterranean chicken on a sheet pan has the sort of bright, salty smell that makes the kitchen feel awake. Tomatoes burst, artichokes soften, olives turn the pan briny, and the chicken picks up all of it without much effort. Feta at the end seals the deal.
Why It Works:
Thin chicken cutlets cook quickly, which keeps the tomatoes and artichokes from overcooking while the meat stays juicy. The tomatoes do a little of the sauce work for you; once they split, they release enough juice to coat the tray with a light, savory glaze. Lemon and oregano cut through the olives and feta, so the final dish tastes clean instead of crowded.
Key Ingredients:
- 1 1/2 pounds chicken cutlets or thin-sliced boneless breasts
- 1 pint cherry tomatoes
- 1 cup quartered artichoke hearts, drained
- 1/2 cup pitted Kalamata olives
- 1 small red onion, thinly sliced
- 2 tablespoons olive oil
- 1 tablespoon dried oregano
- 1 teaspoon garlic powder
- 1 teaspoon kosher salt
- 1/2 teaspoon black pepper
- 1 lemon, zested and cut into wedges
- 1/3 cup crumbled feta, for serving
Quick Steps:
- Preheat the oven to 425°F.
- Toss the tomatoes, artichokes, olives, and onion with olive oil, oregano, garlic powder, salt, and pepper.
- Spread the vegetables on the pan and roast for 8 minutes.
- Season the chicken cutlets lightly with salt and pepper, then set them on the pan among the vegetables.
- Roast for 8 to 10 minutes more, until the chicken reaches 165°F and the tomatoes have started to collapse.
- Squeeze lemon over everything and shower the pan with feta.
- Serve with couscous, rice, or warm pita.
Tips and Variations:
- Use marinated artichokes carefully: If they’re packed in oil and herbs, rinse them lightly so the pan doesn’t get too salty.
- Add capers if you love a brinier finish: A teaspoon goes a long way.
- Don’t overbake thin cutlets: They go from juicy to dry in a hurry.
9. Steak Fajita Sheet Pan Dinner
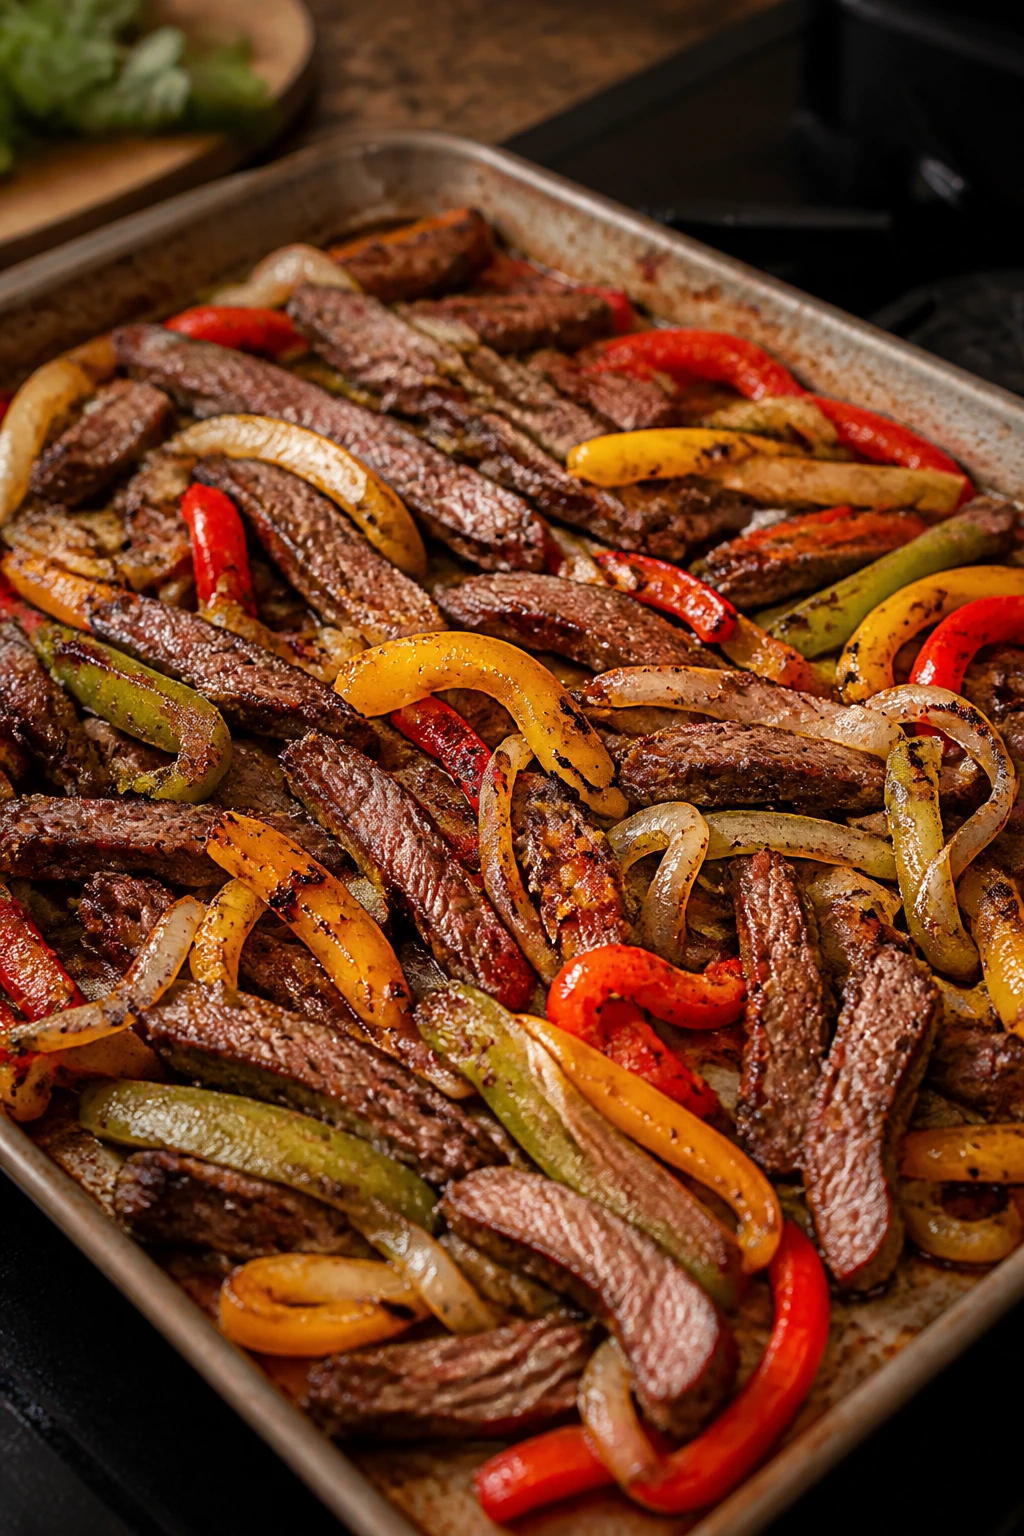
Steak fajitas on a tray look like they took more effort than they did. The peppers get charred edges, the onions soften into sweet ribbons, and the steak stays juicy if you keep the strips thin and the oven hot. It’s the kind of dinner that feels loud and generous.
Why It Works:
Flank steak or sirloin strips cook fast when they’re cut across the grain and spread out instead of piled on top of the peppers. The vegetables get a head start so they have time to soften before the steak is done, and a hot oven at 450°F gives you some real browning in a short window. Fajita seasoning behaves better when it’s mixed with oil first; dry spice alone tends to scorch.
Key Ingredients:
- 1 1/4 pounds flank steak or sirloin, sliced into thin strips
- 3 bell peppers, sliced
- 1 large onion, sliced
- 2 tablespoons olive oil
- 2 teaspoons fajita seasoning or a mix of chili powder, cumin, and garlic powder
- 1 teaspoon kosher salt
- 1 lime, cut into wedges
- 1 tablespoon chopped cilantro
- Flour tortillas, if serving as wraps
Quick Steps:
- Preheat the oven to 450°F.
- Toss the peppers and onion with 1 tablespoon oil, half the seasoning, and half the salt.
- Roast the vegetables for 10 minutes so they pick up color before the steak joins them.
- Season the steak strips with the remaining oil, seasoning, and salt.
- Add the steak to the pan and roast for 6 to 8 minutes more, just until the beef is browned at the edges and still a little pink inside.
- Rest the steak for 3 minutes before serving.
- Finish with lime and cilantro, then pile everything into tortillas if you like.
Tips and Variations:
- Freeze the steak for 15 minutes first: It slices thinner and cleaner when it’s slightly firm.
- Use a second pan if needed: Beef needs space to brown; a crowded tray gives you gray strips.
- Serve with salsa or guacamole: The dinner gets better with one cool, creamy side.
10. Buffalo Chicken with Cauliflower and Celery
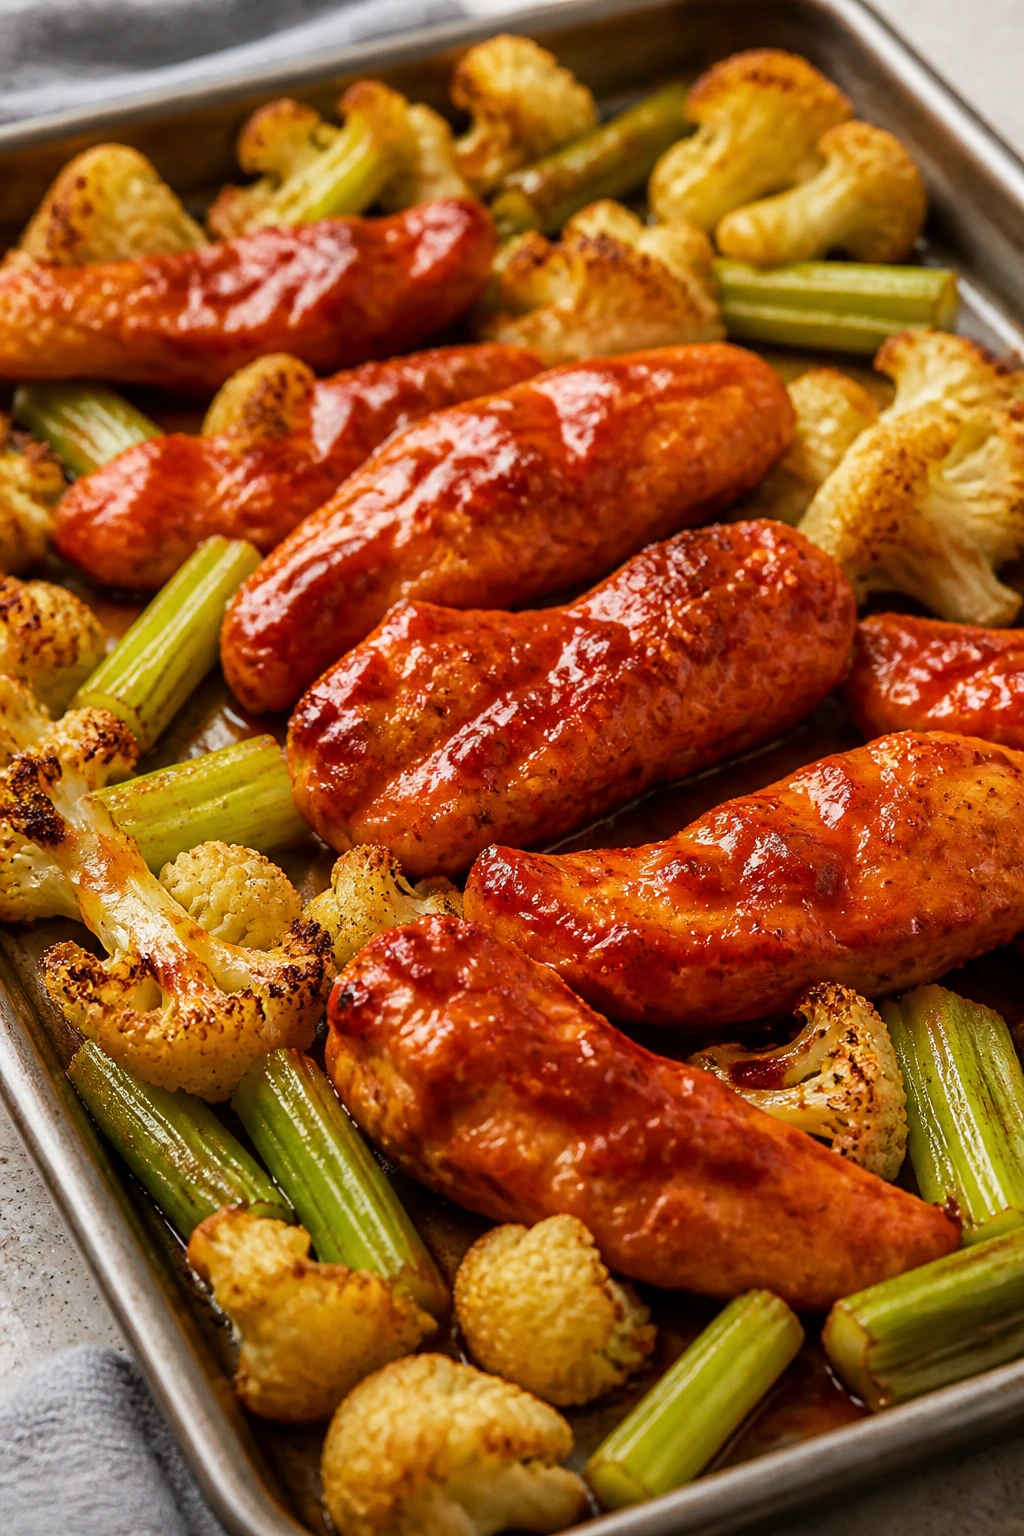
Buffalo sauce can be a wreck on a busy weeknight if you pour it too early and let it scorch into a sticky mess. The better move is to let the cauliflower roast first, then add the chicken and sauce near the end so the heat coats everything without burning the sugars. Celery and ranch on the side keep the tray feeling sharp instead of one-note.
Why It Works:
Chicken tenders or thin cutlets cook fast, which keeps the whole dinner inside the 30-minute mark. Cauliflower florets need a head start because they take longer to soften and brown, and buffalo sauce behaves best when it’s brushed on after the first roast rather than baked from raw. That timing gives you spicy, tangy chicken with cauliflower that still has a little structure.
Key Ingredients:
- 1 1/2 pounds chicken tenders or thin-cut chicken breasts
- 1 medium head cauliflower, cut into small florets
- 2 celery stalks, cut into short sticks
- 2 tablespoons olive oil
- 1/3 cup buffalo sauce
- 1 teaspoon garlic powder
- 1/2 teaspoon kosher salt
- 1/4 teaspoon black pepper
- Ranch or blue cheese dressing, for serving
- Chopped chives or parsley, optional
Quick Steps:
- Preheat the oven to 425°F and line the pan with parchment.
- Toss the cauliflower with olive oil, garlic powder, salt, and pepper.
- Roast the cauliflower for 10 minutes so the edges start to brown.
- Add the chicken to the pan and brush it with half the buffalo sauce.
- Roast for 8 to 10 minutes more, until the chicken reaches 165°F and the cauliflower is tender with caramelized edges.
- Brush on the remaining buffalo sauce right after the pan comes out.
- Serve with celery sticks and ranch or blue cheese dressing.
Tips and Variations:
- Use a milder sauce for kids: Mix buffalo sauce with melted butter or olive oil to soften the heat.
- Skip the dressing if you want a lighter plate: A squeeze of lemon and a few herbs do the job.
- Roast cauliflower in small florets: Large chunks take longer and break the timing.
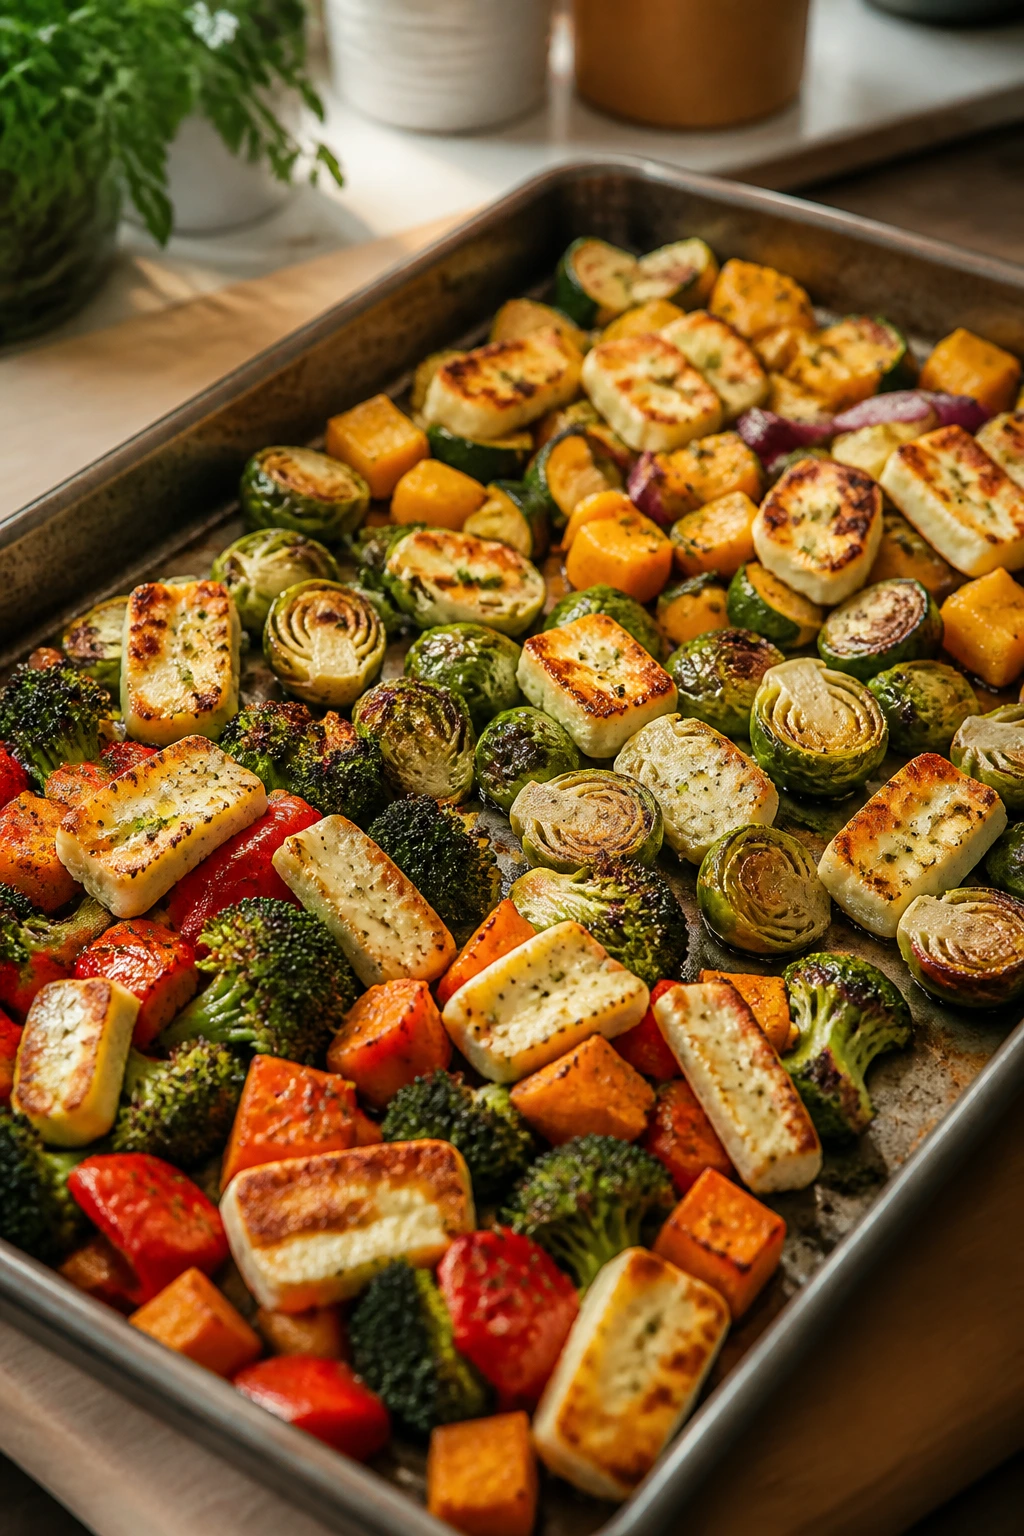
11. Halloumi and Chickpea Shawarma
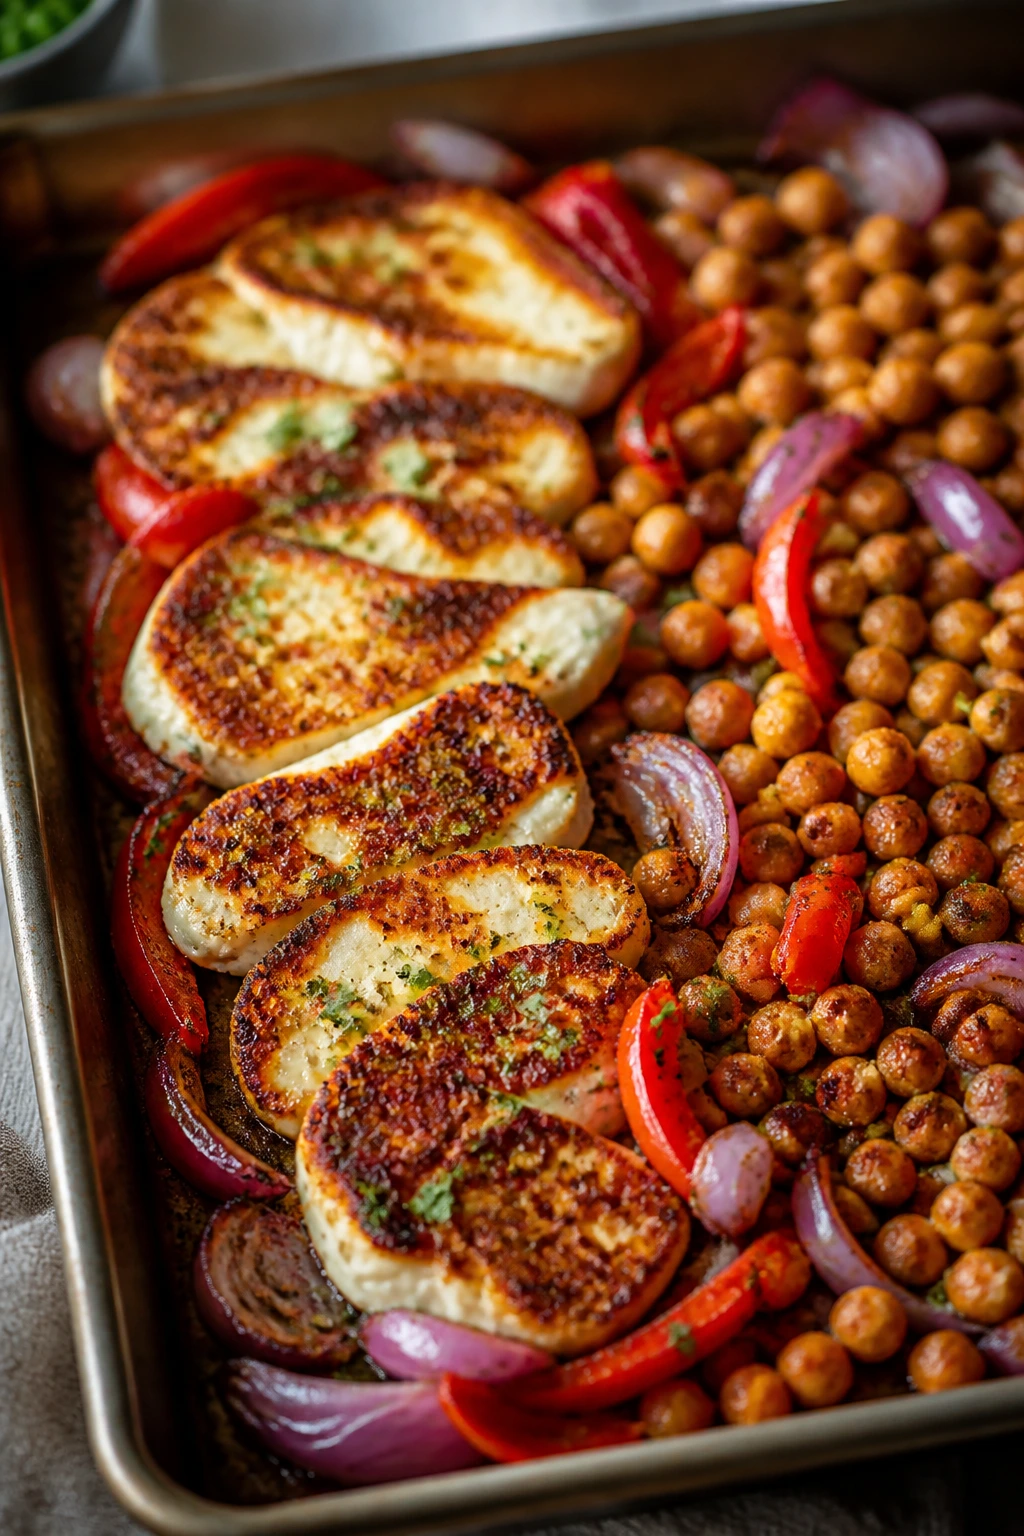
Halloumi is one of those cheeses that behaves almost suspiciously well in a hot oven. It browns, it firms up, and it keeps its shape instead of melting into a puddle. Pair it with chickpeas, onion, and shawarma spice, and you get a vegetarian tray that has crunch, salt, and enough heft to stand in for a full dinner.
Why It Works:
Chickpeas crisp at the edges when they’re dried well and given a hot pan, while halloumi only needs a short stint in the oven to brown. Vegetables like bell pepper and zucchini fit into the same timing window, so the tray stays simple. A tahini-lemon drizzle at the end adds creaminess without making the pan soggy.
Key Ingredients:
- 1 (15-ounce) can chickpeas, drained, rinsed, and dried very well
- 8 ounces halloumi, sliced into 1/2-inch thick pieces
- 1 red bell pepper, sliced
- 1 medium zucchini, sliced into half-moons
- 1 small red onion, sliced
- 2 tablespoons olive oil
- 2 teaspoons shawarma seasoning
- 1 teaspoon kosher salt
- 1/4 teaspoon black pepper
- 2 tablespoons tahini
- 1 lemon, juiced
- Warm pita, chopped parsley, or cucumber slices for serving
Quick Steps:
- Preheat the oven to 425°F.
- Toss the chickpeas, pepper, zucchini, and onion with olive oil, shawarma seasoning, salt, and pepper.
- Roast the vegetables and chickpeas for 10 minutes.
- Add the halloumi slices to the pan and roast for 6 to 8 minutes more, until the cheese is browned in spots and the chickpeas look crisp around the edges.
- Whisk the tahini with lemon juice and a spoonful of water until it turns pourable.
- Drizzle the sauce over the tray and finish with parsley.
- Serve with pita or cucumber slices for a fresh crunch.
Tips and Variations:
- Dry the chickpeas well: Wet chickpeas steam; dry ones blister.
- Use a spice blend you trust: Shawarma seasoning varies a lot, so taste yours before you dump in a full measure.
- If you like more texture: A handful of toasted pistachios is excellent here.
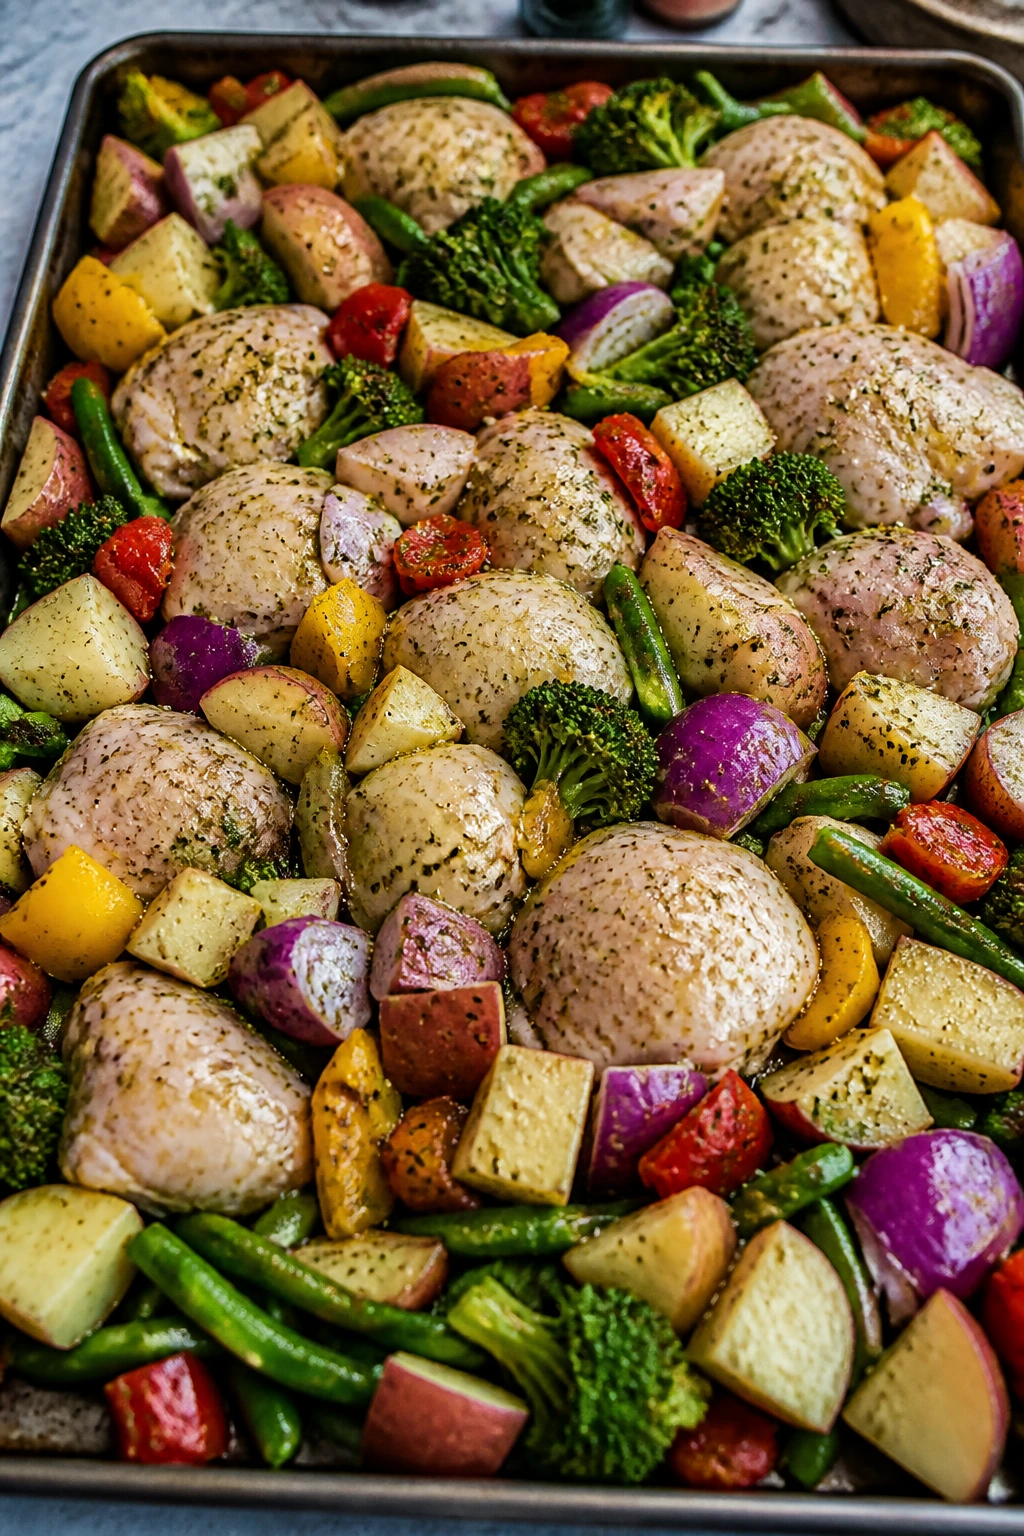
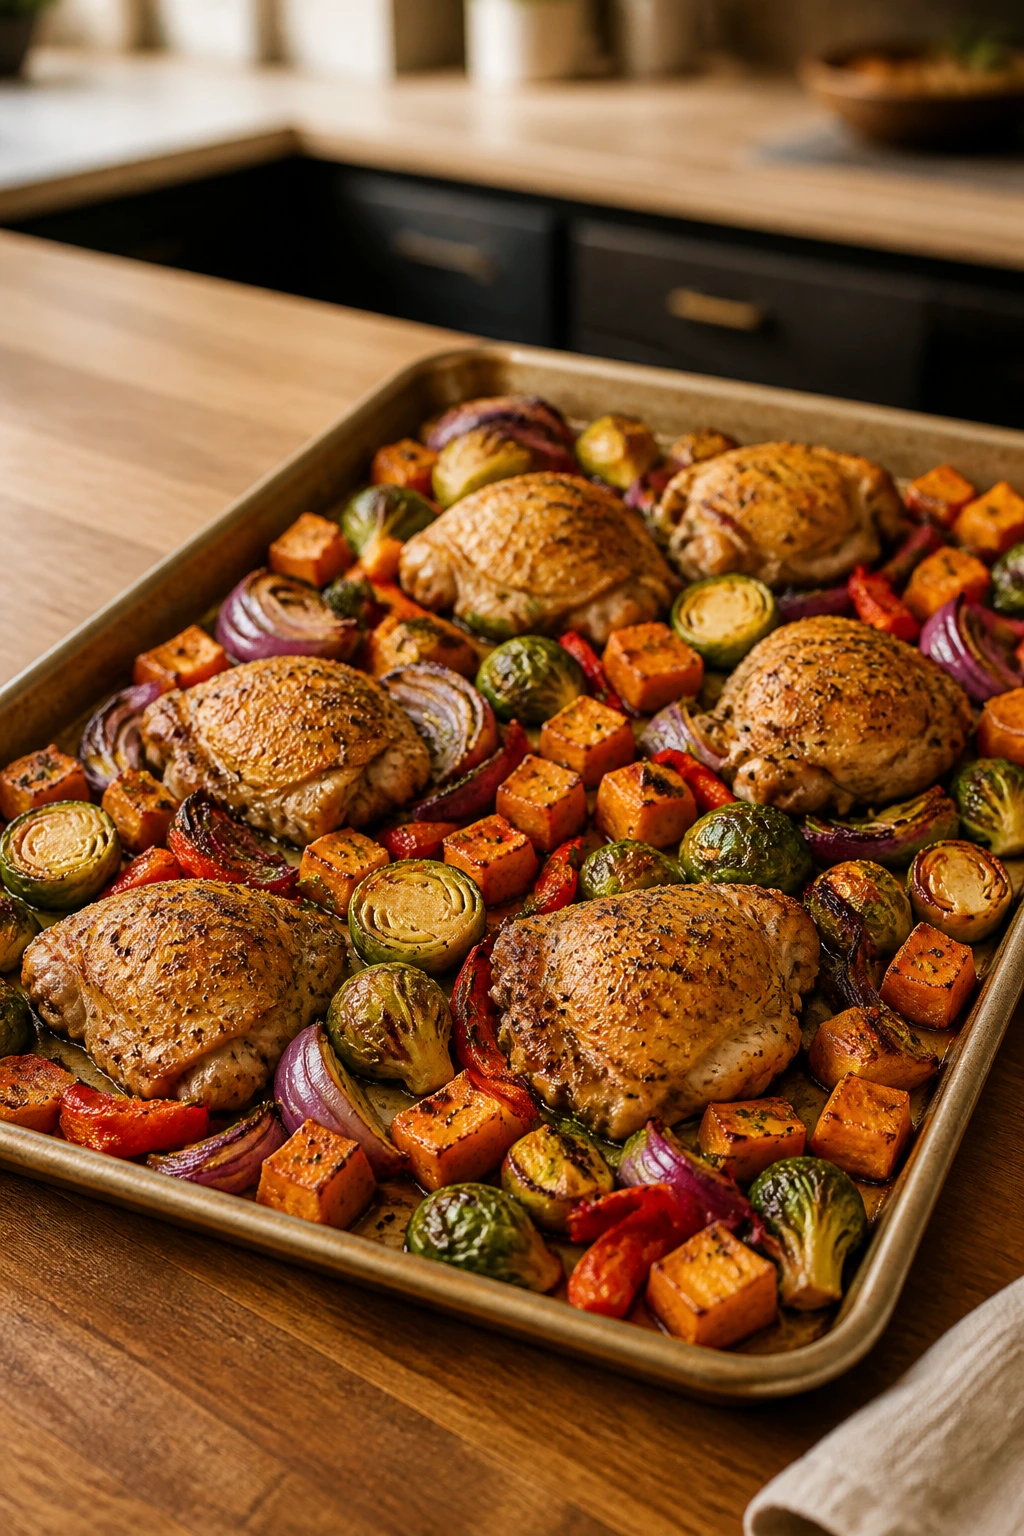
12. Honey Mustard Chicken Cutlets with Brussels Sprouts and Apples

Apples and Brussels sprouts together sound odd until the oven starts doing its thing. The sprouts get nutty, the apples soften at the edges but stay intact, and the honey mustard glaze turns the chicken into something sweet, sharp, and a little glossy. It’s a neat tray, the kind that makes a weekday dinner feel composed.
Why It Works:
Thin chicken cutlets are the key here. They cook in the same short window as halved Brussels sprouts and sliced apples, which means you do not need a separate roasting timeline or a second pan. The honey mustard glaze should go on after the sprouts have started browning; if you coat everything too early, the honey can darken before the chicken is done.
Key Ingredients:
- 1 1/2 pounds chicken cutlets
- 1 pound Brussels sprouts, trimmed and halved
- 2 crisp apples, cored and sliced into wedges
- 2 tablespoons olive oil
- 2 tablespoons Dijon mustard
- 2 tablespoons honey
- 1 tablespoon apple cider vinegar
- 1 teaspoon kosher salt
- 1/2 teaspoon black pepper
- 1/2 teaspoon dried thyme
- Chopped parsley, for serving
Quick Steps:
- Preheat the oven to 425°F and line the pan with parchment.
- Toss the Brussels sprouts with olive oil, salt, pepper, and thyme.
- Roast the sprouts for 10 minutes so the cut sides begin to brown.
- Whisk the Dijon, honey, and apple cider vinegar in a small bowl.
- Add the chicken cutlets and apple wedges to the pan, then brush everything with the honey mustard mixture.
- Roast for 8 to 10 minutes more, until the chicken reaches 165°F and the apples are soft at the edges.
- Finish with parsley and any extra glaze from the bowl.
Tips and Variations:
- Choose a firm apple: Honeycrisp, Gala, or Pink Lady keep their shape better than mealy fruit.
- Add bacon if you want it richer: A few cooked crumbles can be scattered on at the end.
- Keep the sprouts small and even: Big halves roast at a different pace and throw off the tray.
Why the Sheet Pan Method Stays Fast Without Getting Boring
The reason these dinners work has less to do with the pan and more to do with the timing. A sheet pan gives heat an open path, so the food browns instead of steaming. That is the whole deal.
Quick dinners fall apart when the ingredients fight each other. Wet vegetables, crowded trays, and sauces poured on too early all turn a promising meal into something gray and tired. The recipes above avoid that by using thin cuts, quick vegetables, or a short vegetable-first roast before the protein joins the party. That tiny stagger changes everything.
The other piece is flavor concentration. High heat shrinks moisture, which means sweet peppers taste sweeter, onions go soft and sharp at the same time, and the edges of salmon, chicken, or halloumi pick up a little crust. You can do a lot with that. Honestly, more than a lot of people expect from what looks like a simple weeknight pan.
Essential Equipment for These Recipes
- Rimmed half-sheet pans: Two are better than one; crowding is the fastest way to lose browning.
- Parchment paper: Helps with sticky sauces and makes cleanup easier, especially on salmon, teriyaki, or buffalo trays.
- Instant-read thermometer: The cleanest way to check chicken, pork, fish, or steak without guessing.
- Large mixing bowls: One for proteins and one for vegetables keeps seasoning even.
- Sharp chef’s knife: Thin, even slices matter more than people think.
- Cutting board: A roomy board makes prep faster and safer.
- Tongs or a wide spatula: Useful for turning peppers, sausage, steak, or fish without tearing them.
- Microplane or fine grater: Handy for garlic, lemon zest, and ginger.
- Small whisk or fork: Good for quick glazes and dressings.
- Measuring spoons and cups: Sheet pan cooking is casual, but the seasoning still needs balance.
Smart Shopping and Ingredient Tips
The easiest way to make sheet pan dinner ideas taste better is to shop for ingredients that cook at the same pace. Thin chicken cutlets, salmon fillets of similar thickness, shrimp that are already peeled and deveined, and fully cooked sausage all remove the guesswork. If you buy full chicken breasts, slice them horizontally so they do not lag behind the vegetables.
Vegetables matter more than most people think. Look for broccoli with tight florets, peppers with firm walls, asparagus with dry cut ends, Brussels sprouts that feel heavy for their size, and mushrooms with dry caps instead of slick ones. Wet vegetables steam. Dry vegetables roast.
Frozen shrimp are a smart buy if you thaw them in cold water and pat them dry well. Frozen vegetables can work, too, but they need space and a hot oven or they’ll go soft before they brown. Canned chickpeas should be drained, rinsed, and dried with a towel before they hit the pan, or they’ll stay pale.
For sauces and seasonings, simple is better. Dijon, soy sauce, lemon, honey, balsamic vinegar, Cajun seasoning, and olive oil can carry an entire tray if you use them with some restraint. The mistake is not buying enough flavor. The mistake is burying the food under too much of it.
How to Serve These Recipes
Presentation:
Serve each tray family-style when the food is rustic, like sausage and peppers or halloumi shawarma, or plate it in shallow bowls when the pan has sauce, like salmon, teriyaki meatballs, or honey mustard chicken. A final hit of herbs, lemon wedges, scallions, or sesame seeds makes the tray look finished without much work.
Accompaniments:
Couscous, rice, crusty bread, warm pita, simple buttered noodles, or a green salad all fit naturally beside these dinners. For the richer trays — buffalo chicken, steak fajitas, sausage and peppers — something crisp and cool on the side helps. For fish and shrimp, plain rice or roasted potatoes give the plate a calmer base.
Portions:
Most of these recipes serve 4, with 5 to 6 ounces of protein per person and a generous scoop of vegetables. If you want a lighter dinner, one pan and a salad is enough. If you’re feeding hungry people, add rice, tortillas, or bread rather than piling the tray higher.
Beverage Pairing:
Crisp white wine, sparkling water with citrus, light beer, or unsweetened iced tea all fit these dinners without fighting the seasoning. Salmon and Mediterranean trays like something clean and acidic. Buffalo, fajita, and steak trays are happy with beer or a lime-heavy drink.
Additional Tips and Flavor Boosters
Flavor Enhancement:
A finishing acid changes almost everything. Lemon on salmon, lime on fajitas, vinegar on honey mustard chicken, or a little extra Dijon on pork wakes up the tray at the last second. Fresh herbs do the same job in a softer way — dill, parsley, cilantro, chives, and basil all have a place here.
Customization:
If you want more heat, add red pepper flakes, cayenne, chipotle powder, or chili crisp to the sauce rather than dusting the whole pan. If you want a richer finish, a spoonful of yogurt, tahini, sour cream, or blue cheese dressing on the side gives the dinner more range. If you want more vegetables, choose ones that roast in the same time frame: zucchini, mushrooms, asparagus, peppers, green beans, snap peas, cauliflower florets, and Brussels sprouts.
Serving Suggestions:
Toast sesame seeds or pine nuts for 3 to 4 minutes in a dry skillet and sprinkle them over the tray. It sounds small. It isn’t. For saucy dinners, a quick drizzle of herb oil or yogurt sauce over the finished pan gives the food a more pulled-together look and helps every bite taste less one-note.
Make-It-Yours:
For dairy-free plates, use olive oil or tahini instead of butter, feta, or ranch. For gluten-free dinners, swap soy sauce for tamari and check sausage or meatball labels. For lower-carb meals, skip the bread and serve the pan over greens or cauliflower rice. That kind of swap feels practical because it is — the core recipe stays the same.
Make-Ahead, Storage, and Reheating Guidance
Most of these sheet pan dinners can be partially prepped a day ahead without losing their edge. You can slice the vegetables, mix the seasoning, and whisk the sauces in advance, then store everything separately in the fridge. Keep cut vegetables dry and sealed, because moisture is what flattens the roast.
Cooked leftovers keep well for 3 to 4 days in the refrigerator for chicken, sausage, steak, pork, and vegetarian trays. Fish and shrimp are pickier; they’re best within 1 to 2 days and taste better when reheated gently or eaten cold in a salad or grain bowl. Halloumi and chickpeas hold about 3 days, though the cheese will firm up a bit as it cools.
Freezing works best for chicken, pork, sausage, steak, meatballs, and chickpea-based trays. Pack them in airtight containers and freeze for up to 2 to 3 months. Salmon, cod, and shrimp can be frozen after cooking, but the texture softens, so I’d treat that as a backup plan rather than a habit.
Reheat on a rimmed sheet pan at 350°F for 8 to 12 minutes until hot. That keeps the vegetables from going limp and helps proteins stay closer to their original texture than the microwave does. Shrimp and cod need a gentler touch — low oven heat or a covered skillet works better than blasting them. If you’re reheating buffalo or teriyaki trays, add a splash of water or a little extra sauce so the glaze loosens instead of hardening.
Variations and Adaptations to Try
Gluten-Free Straight Shot:
Use tamari instead of soy sauce, and check the labels on sausage, meatballs, and seasoning blends. Most of these trays are already close to gluten-free, which makes the swap easy rather than fussy.
Dairy-Free Without the Loss:
Skip butter, feta, blue cheese, and ranch, then finish with olive oil, lemon, tahini, or avocado. The food still tastes complete because the acid and herbs do the lifting.
Low-Sodium Reset:
Choose unsalted seasoning blends, reduce soy sauce, and lean harder on lemon, lime, garlic, and vinegar. That keeps the trays bright even when you cut the salt back.
Vegetarian Tray Night:
Halloumi and chickpeas already prove the point, but you can also build a good tray from mushrooms, cauliflower, zucchini, peppers, and a handful of white beans. The trick is to roast until the edges brown, not until everything turns soft.
Extra-Heat Version:
Add chili flakes, cayenne, harissa, chipotle powder, or hot honey to the end of the cook, not the start. That keeps the heat clean and keeps sugary sauces from burning.
Kid-Friendly Mild Plate:
Use the same tray, but pull back on chili powder, Cajun seasoning, and buffalo sauce. Serve the bolder sauces on the side so everyone can build their own bite without making the whole dinner too hot.
Common Mistakes to Avoid
Crowding the pan:
If the ingredients are piled on top of each other, they steam instead of roast. The fix is annoying but simple: use two pans, or roast in batches.
Putting everything in at once:
Shrimp, salmon, chicken cutlets, and pork medallions do not all need the same timing as broccoli or Brussels sprouts. Give the vegetables a head start when needed, then add the protein later.
Using wet vegetables:
Water on peppers, broccoli, mushrooms, or chickpeas sabotages browning. Pat ingredients dry after washing, especially if you want crisp edges.
Glazing too early:
Honey, teriyaki, and buffalo sauces can darken too fast if they go on from the start. Brush them on halfway through or at the end, then watch the pan closely.
Skipping the thermometer:
Chicken and pork are easy to overdo by eye. Use an instant-read thermometer and pull chicken at 165°F, pork at 145°F, and fish when it flakes and still looks juicy.
Choosing the wrong cut:
Thick chicken breasts, large bone-in pieces, and dense root vegetables usually need more than 30 minutes. Thin cuts and quick vegetables are what make these recipes work in the first place.
Frequently Asked Questions

Can I use frozen vegetables in sheet pan dinners?
Yes, but thaw them and dry them first if you want any browning. Frozen vegetables straight from the bag usually steam and shed water, which softens the whole tray.
What’s the best way to keep chicken from drying out?
Use thin cutlets or sliced breasts, season them well, and pull them as soon as they hit 165°F. A little oil or glaze on the surface helps, but the bigger fix is not leaving them in the oven for “just a minute more.”
Do I need parchment paper or foil?
You don’t need either one, but both make cleanup easier. Parchment is better for fish and sticky sauces; foil is fine for high-heat roasting, though it doesn’t release as cleanly as parchment.
Can I make these dinners ahead of time?
You can prep the vegetables, mix the sauce, and season the protein several hours ahead or even the night before. For the best texture, roast right before serving rather than cooking the whole tray in advance.
What if the vegetables are done before the protein?
That usually means the pieces were cut too small or the protein was too thick. Pull the vegetables to one side of the pan, add the protein, and keep roasting; next time, match the cut size more closely.
Can I use one giant pan instead of two?
Only if there’s still space between the pieces. A single packed pan is a steam trap, and the food loses the browning that makes sheet pan dinners taste worth repeating.
How do I know when shrimp are done?
They turn opaque and curl into loose C-shapes, usually in 6 to 8 minutes depending on size. If they curl into tight O-shapes, they’re overcooked and heading toward rubbery.
Which recipes freeze best?
Chicken-based trays, sausage and peppers, pork medallions, steak fajitas, and chickpea-halloumi-style meals hold up best. Fish and shrimp are more fragile after freezing and reheating, so I’d treat those as eat-it-soon dinners.
The Pan That Makes Dinner Easier
A good sheet pan dinner doesn’t ask for a lot of ceremony. It asks for the right cut, the right heat, and a little respect for timing. That’s enough to turn a scattered evening into dinner that looks calm and tastes deliberate.
These 12 sheet pan dinner ideas cover fish, poultry, beef, pork, seafood, sausage, and a solid vegetarian tray, which means there’s almost always one that fits what’s in the fridge. Pick the one that matches your night, not your fantasy of a perfectly stocked kitchen. That’s where this method earns its keep.