
An Instant Pot can feel a little bossy the first time you use it. The lid clicks, the seal closes, and suddenly dinner depends on steam, timing, and a pot that looks more like a small appliance from a spaceship than a pan on a stove. That’s exactly why these Instant Pot dinners for beginners stay simple, forgiving, and honest about what actually works.
The pressure cooker is brilliant with the right ingredients. Tough cuts like chuck roast and pork shoulder turn tender because they sit in a closed, wet environment under pressure. Chicken breasts, pasta, beans, and rice can work too, but they need shorter cook times and a few careful finishing touches. Miss that part, and you get mushy noodles or dry meat. Nail it, and the machine starts to feel less mysterious.
What I like most is how it turns basic groceries into real dinner with almost no babysitting. Salsa, broth, onions, a bag of potatoes, a can of beans, a pack of ground turkey—those are not glamorous ingredients. But under pressure, they become chili, shredded chicken, creamy pasta, soup, or a roast that tastes like you paid attention all afternoon.
These recipes lean beginner-friendly on purpose. No fussy layering. No pressure-cooking gymnastics. Just dinner that rewards common sense and a little patience. Start where your pantry is strongest, and the rest falls into place.
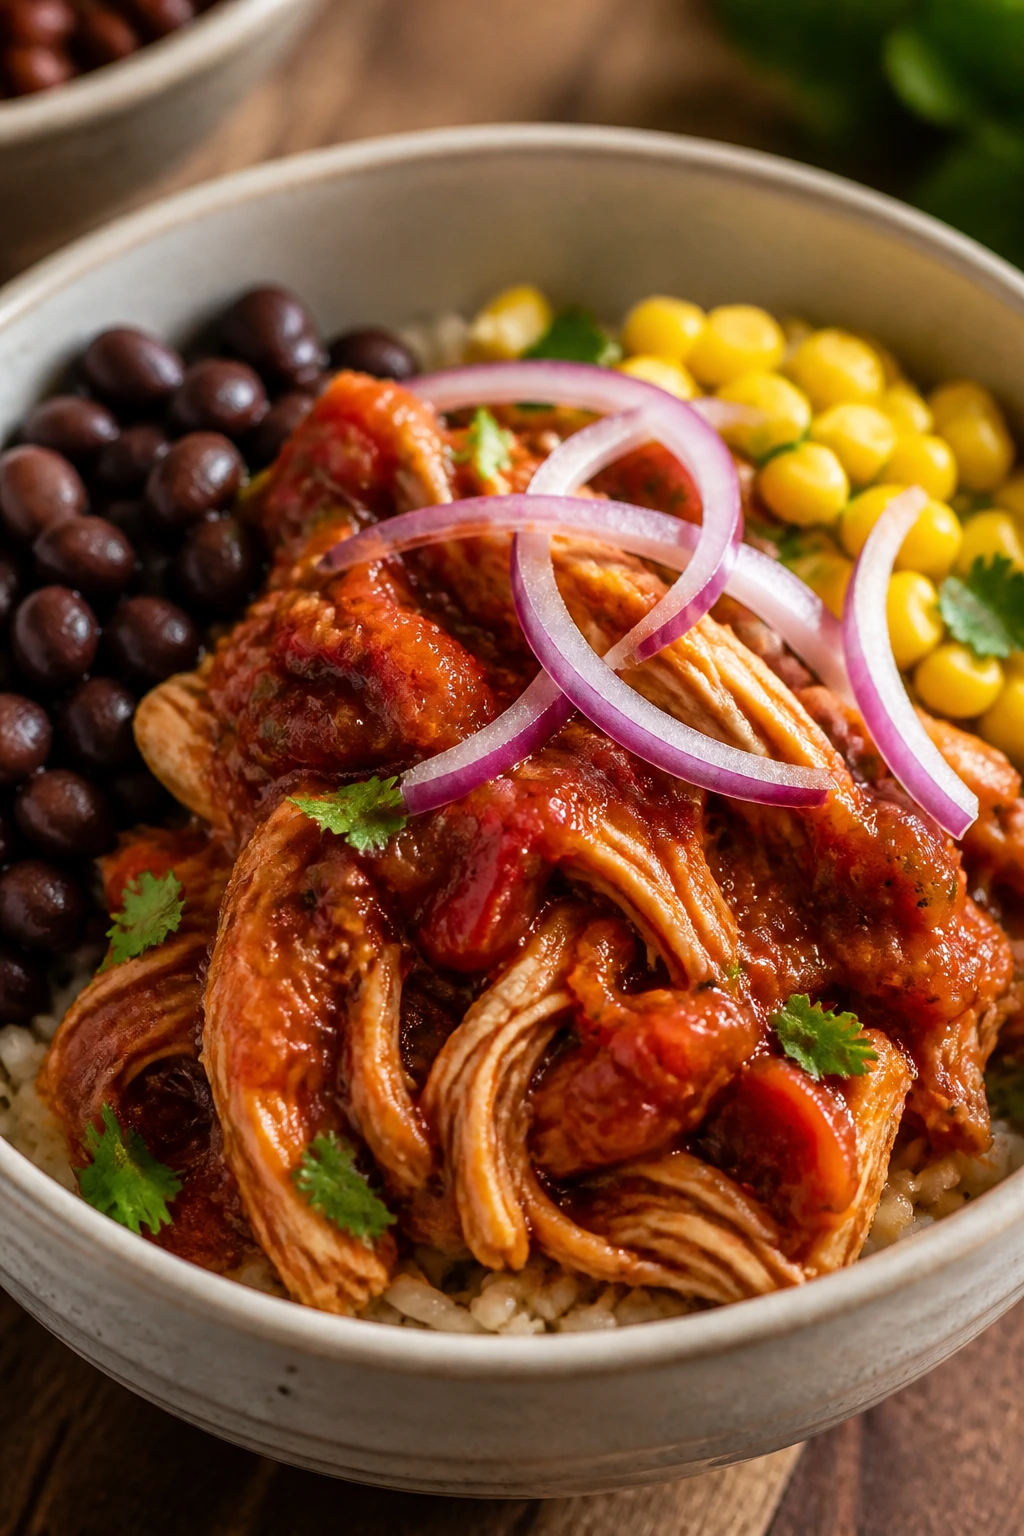
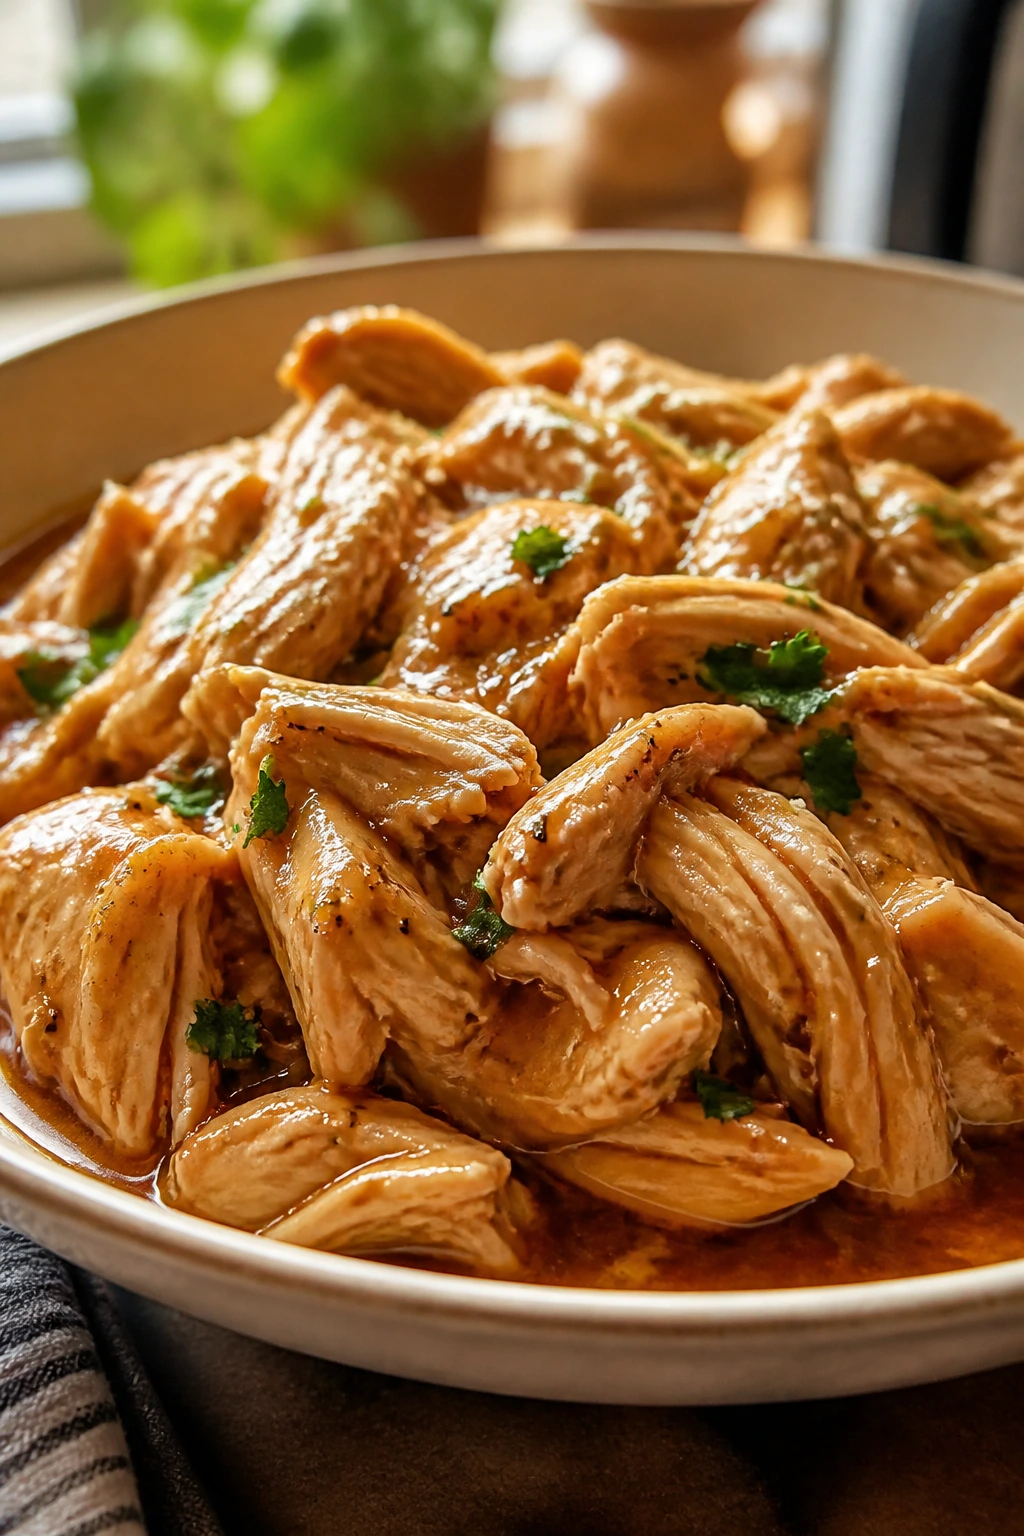
1. Salsa Shredded Chicken Bowls
Why It Works
Some dinners ask for a sauce, a simmer, and a sink full of pans. This is not one of them. Salsa shredded chicken is the kind of recipe that makes the Instant Pot look smarter than it has any right to be, because the salsa handles most of the seasoning work for you.
The 8-minute pressure time keeps the chicken juicy, and a short natural release helps the meat relax before you shred it. Black beans and corn turn it into a full bowl instead of a bare protein pile. It smells like taco night from the second the lid comes off.
Key Ingredients
- 2 lbs boneless skinless chicken breasts — Choose thicker pieces if you can; they shred more cleanly and stay moist.
- 1 1/2 cups chunky salsa — A thicker salsa gives the pot more body and keeps the final sauce from tasting thin.
- 1/2 cup low-sodium chicken broth — Just enough liquid to build pressure without watering down the flavor.
- 1 medium yellow onion, sliced — It softens into the sauce and gives the bowls a little sweetness.
- 2 tsp ground cumin — The warm, earthy note that makes the whole pot smell like dinner.
- 1 tsp garlic powder, 1 tsp kosher salt, 1/2 tsp black pepper — Simple, reliable seasoning that keeps the chicken from tasting flat.
- 1 can (15 oz) black beans, drained and rinsed — Stirred in at the end so they stay intact.
- 1 cup frozen corn — Sweet, quick, and easy.
- 1 lime, juiced — The squeeze at the end wakes everything up.
Quick Steps
-
Sauté the onion. Set the Instant Pot to Sauté, add a small drizzle of oil, and cook the sliced onion for 3 minutes until it starts to soften and smell sweet at the edges.
-
Load the pot. Add the chicken breasts, salsa, broth, cumin, garlic powder, salt, and black pepper. Spoon the salsa over the chicken so it stays mostly covered.
-
Pressure cook. Lock the lid, set the pot to High Pressure for 8 minutes, and let it sit for 5 minutes after the timer ends before releasing the remaining pressure. That short rest keeps the chicken from tightening up.
-
Shred and finish. Remove the chicken, shred it with two forks, then return it to the pot with the black beans and corn. Switch back to Sauté for 2 to 3 minutes until everything is hot and the sauce looks glossy.
-
Brighten and serve. Turn off the heat, stir in the lime juice, and top with cilantro if you want it. Serve over rice, in tortillas, or over lettuce if you want a lighter bowl.
Tips and Variations
- Use chunky salsa, not watery salsa. Thin salsa can make the bowl taste loose and a little bland.
- Swap the beans. Pinto beans work well if that’s what you have.
- Make it into tacos. Drain off a spoonful of the liquid before serving so the tortillas do not get soggy.
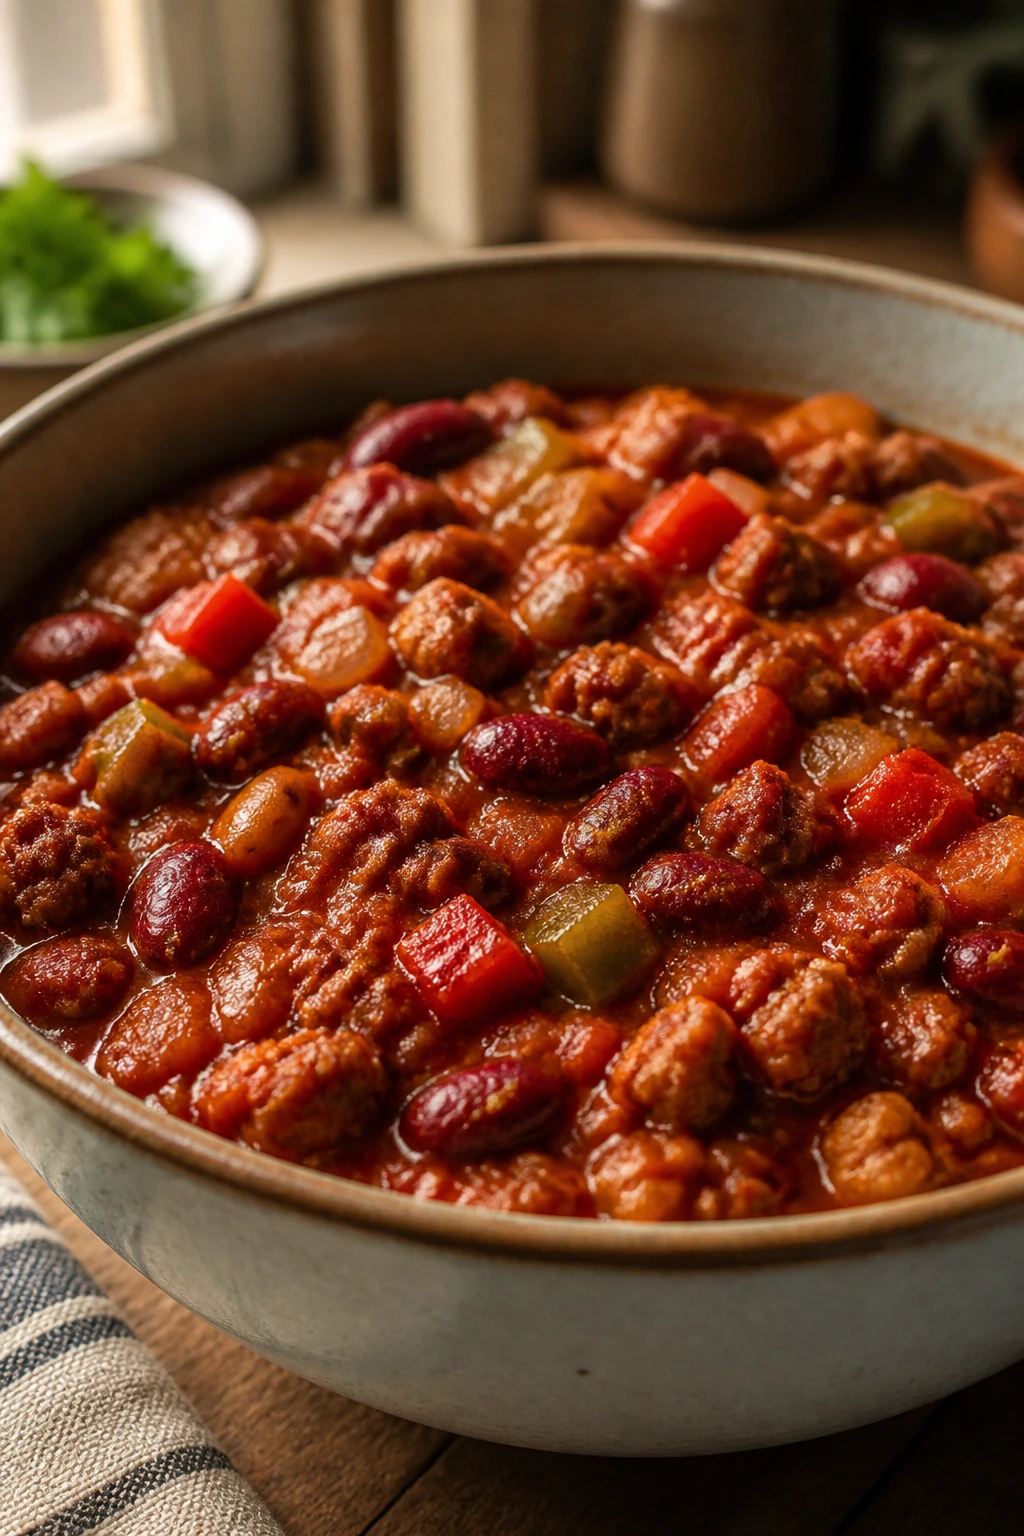
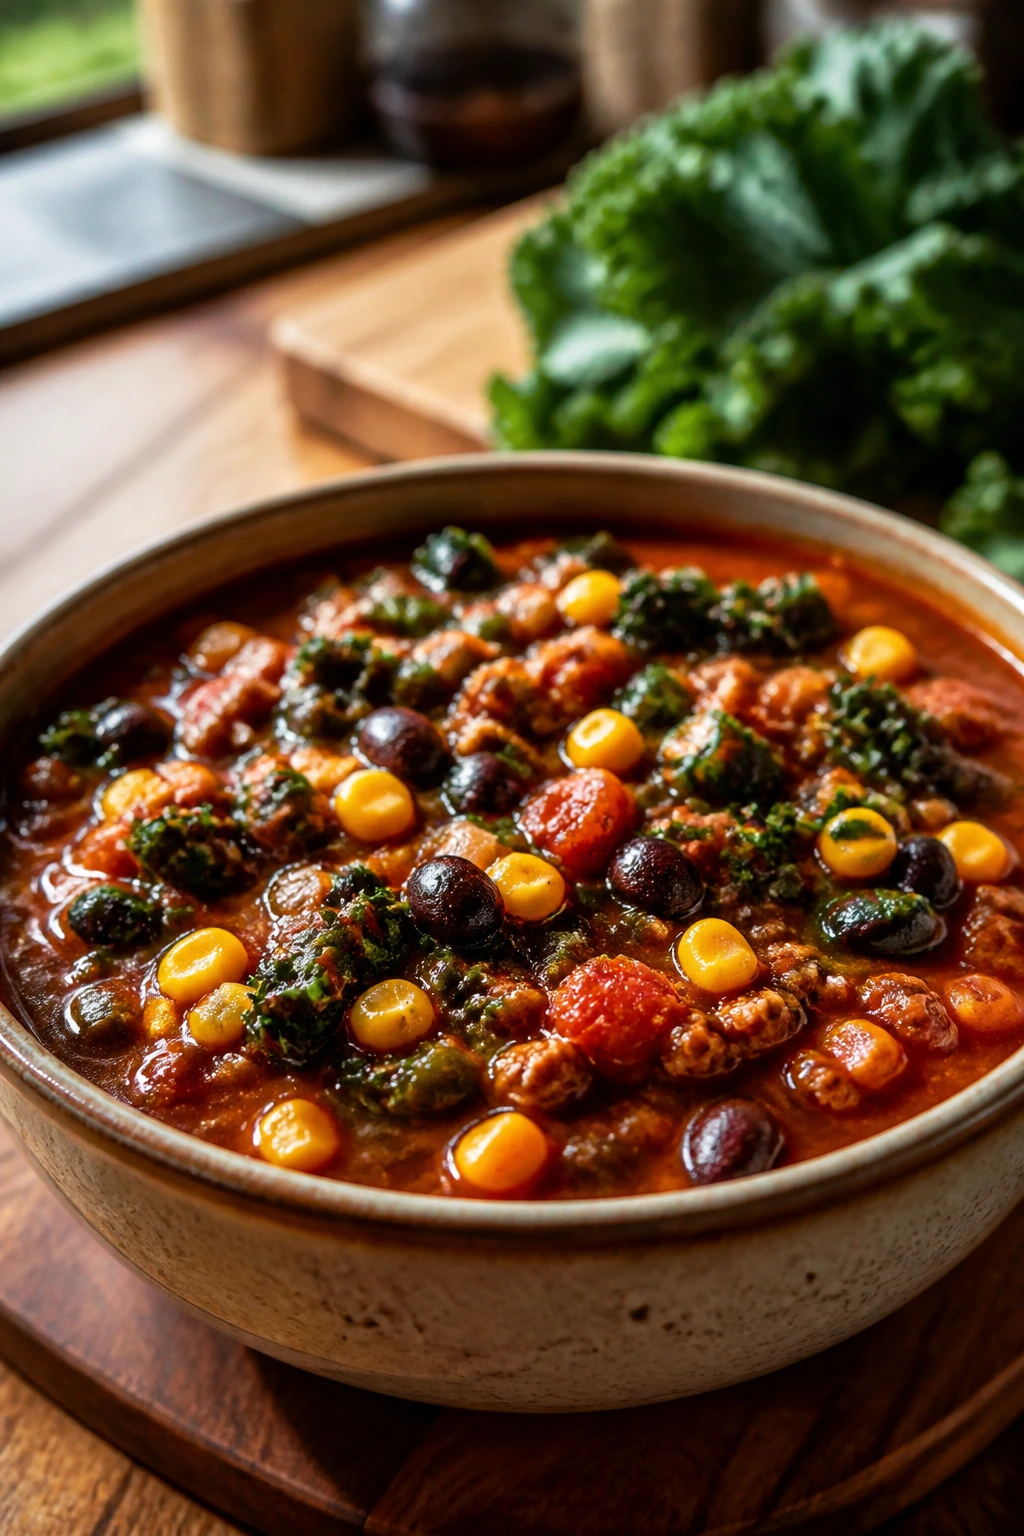
2. Classic Turkey Chili
Why It Works
Chili is one of the easiest places to start with a pressure cooker. Ground turkey, onions, peppers, tomatoes, and beans all like the same warm, steady heat, and the Instant Pot gets them there fast without making you stand over the stove.
The trick here is to brown the turkey well enough to give it some actual flavor, then let the pressure do the rest. The beans thicken the chili as it cooks, and the vinegar at the end keeps it from tasting heavy. It is a big pot of dinner that behaves.
Key Ingredients
- 1 tbsp olive oil — Helps the vegetables soften before the pressure phase.
- 1 large yellow onion, diced — Builds the base flavor.
- 1 red bell pepper, diced — Adds sweetness and a little color.
- 2 lbs lean ground turkey — 93/7 works well; too lean and it can turn dry.
- 3 cloves garlic, minced — Adds depth in the background.
- 2 tbsp chili powder, 2 tsp ground cumin, 1 tsp smoked paprika — The main flavor trio.
- 1 tbsp tomato paste — Gives the chili a darker, fuller taste.
- 1 tsp kosher salt, 1/2 tsp black pepper — Start here and adjust at the end.
- 1 can (28 oz) crushed tomatoes — The body of the chili.
- 1 can (15 oz) tomato sauce — Helps it turn thick and spoonable.
- 1 cup low-sodium chicken broth — Keeps the texture loose enough to pressure cook.
- 2 cans kidney beans, drained and rinsed — They hold up well and make the chili hearty.
- 1 can black beans, drained and rinsed — Adds another texture.
- 1 tbsp apple cider vinegar — Sharpens the flavor right before serving.
Quick Steps
-
Sauté the onion and pepper. Heat the oil on Sauté for 3 to 4 minutes, until the onion starts to turn translucent and the pepper loses its raw crunch.
-
Brown the turkey. Add the ground turkey and cook for 5 to 6 minutes, breaking it up with a spoon until no pink remains and the pieces look crumbly, not wet.
-
Build the flavor. Stir in the garlic, chili powder, cumin, smoked paprika, tomato paste, salt, and black pepper. Cook for 1 minute, just until the spices smell toasted.
-
Add the liquid and beans. Pour in the crushed tomatoes, tomato sauce, broth, kidney beans, and black beans. Scrape the bottom of the pot well. That deglazing step matters or you may trigger a burn warning.
-
Pressure cook. Lock the lid and cook on High Pressure for 10 minutes. Let the pressure release naturally for 10 minutes before venting the rest.
-
Finish and serve. Stir in the vinegar, taste for salt, and serve with shredded cheese, diced onion, or a spoonful of sour cream.
Tips and Variations
- Want it thicker? Leave the lid off and simmer on Sauté for 3 to 5 minutes after pressure cooking.
- Use pinto beans instead. They give a softer, creamier texture.
- Add heat carefully. A minced jalapeño in step 1 is enough for most people.
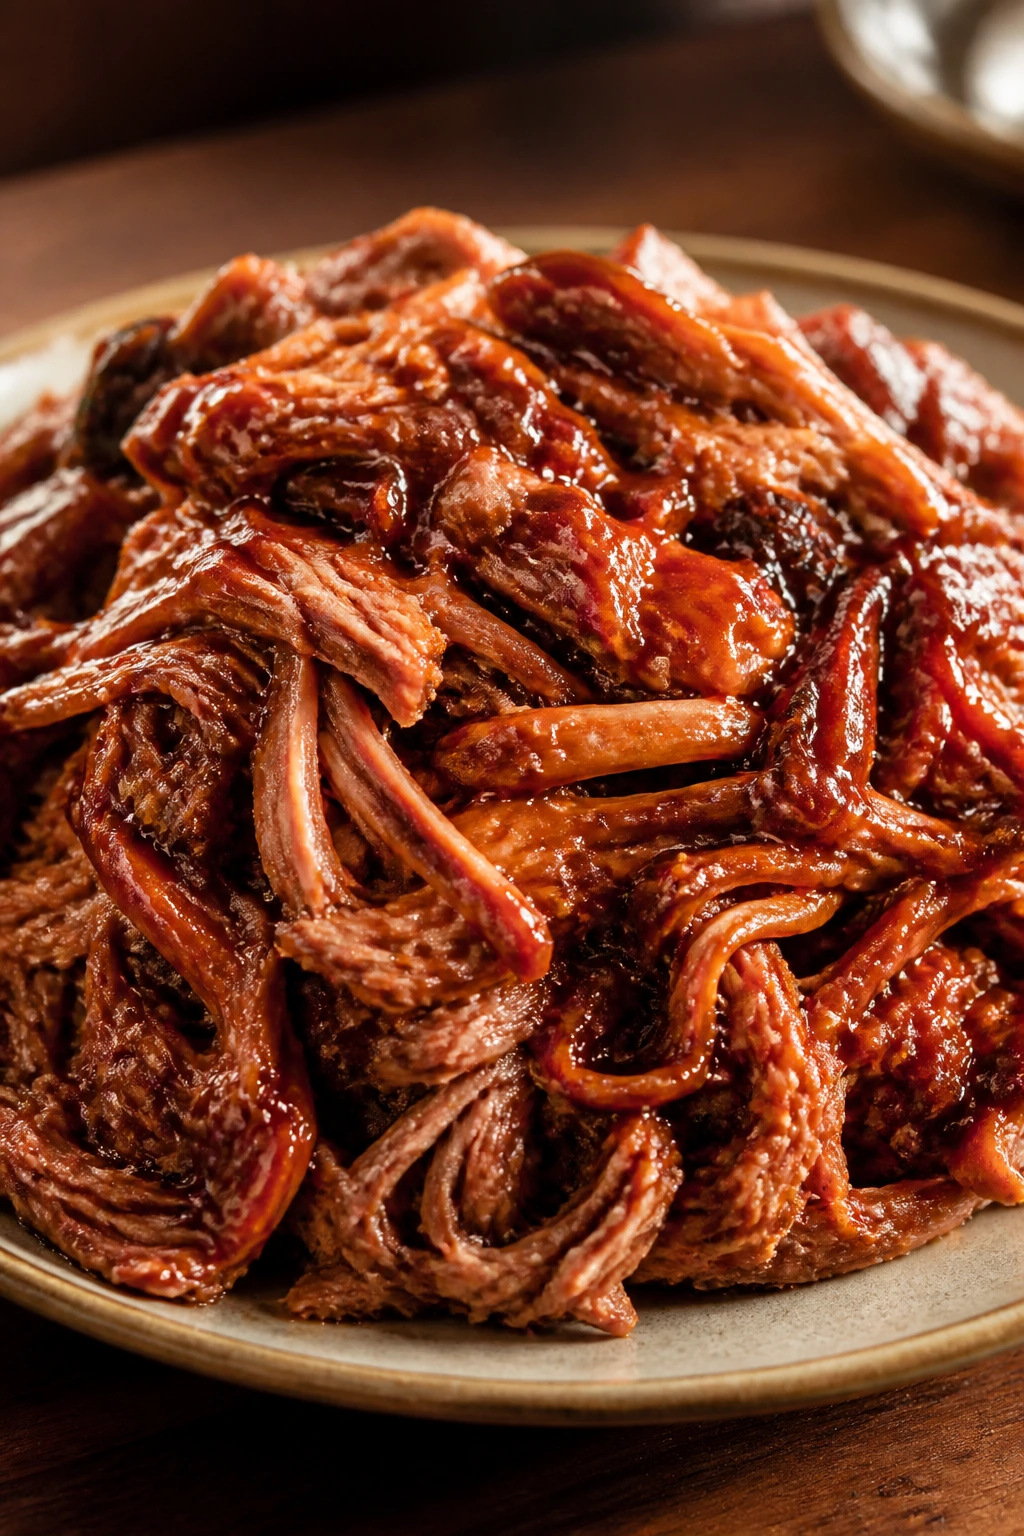
3. BBQ Pulled Pork
Why It Works
Pork shoulder is the cut that makes new pressure-cooker cooks look better than they feel. It has enough fat and connective tissue to turn tender under pressure, and it does not punish you if the cook time runs a little long.
The Instant Pot gets you shredded pork without babysitting a smoker or an oven for hours. The vinegar keeps the sauce from tasting flat, and the barbecue sauce goes in at the end, which is the part I prefer. Put sauce on too early and it can taste dull. Add it later and it stays bright and sticky.
Key Ingredients
- 3 lbs boneless pork shoulder, cut into 3 to 4 large chunks — Keep the pieces fairly big so they do not dry out.
- 1 tsp kosher salt — Enough to season the meat before cooking.
- 1 tsp black pepper — Adds a little bite.
- 1 tsp smoked paprika — Gives the pork a subtle smoky note.
- 1 tbsp brown sugar — Helps the outside brown and balances the vinegar.
- 1 tbsp oil — For searing.
- 1 medium onion, sliced — Softens into the cooking liquid.
- 1 cup low-sodium chicken broth — Necessary for pressure and for keeping the pot from drying out.
- 2 tbsp apple cider vinegar — Brightens the finished pork.
- 1 cup barbecue sauce, plus more for serving — Stirred in after shredding so the flavor stays fresh.
- 1 tsp garlic powder — Simple and useful here.
Quick Steps
-
Season the pork. Pat the chunks dry, then rub them with salt, pepper, smoked paprika, brown sugar, and garlic powder.
-
Sear the meat. Set the Instant Pot to Sauté, add the oil, and brown the pork for 2 to 3 minutes per side. You are not cooking it through; you are building flavor.
-
Add the onion and liquid. Scatter the onion over the pork, then pour in the broth and vinegar. Scrape up any browned bits from the bottom.
-
Pressure cook. Lock the lid and cook on High Pressure for 55 minutes. Let the pressure release naturally for 15 minutes before venting the rest. Skip the quick release here; pork shoulder likes a longer rest.
-
Shred and sauce. Remove the pork, shred it, and toss it with the barbecue sauce. If you like a sticky edge, spread it on a sheet pan and broil for 2 to 3 minutes.
Tips and Variations
- Do not use pork loin. It is too lean for this method and tends to dry out.
- Make it smoky. Add 1/2 teaspoon chipotle powder to the seasoning mix.
- Serve it in more than sandwiches. It also works over baked potatoes or rice.
4. Creamy Instant Pot Mac and Cheese with Ham

Why It Works
Mac and cheese is the dish people think the Instant Pot will ruin. It won’t, if you keep the liquid right and add the cheese after the pressure cooking is done.
The pasta cooks in broth, butter, and seasoning, so it picks up flavor before the cheese even goes in. The evaporated milk keeps the sauce creamy without making it grainy, and the ham turns it into a real dinner instead of a side dish posing as one. This one is comfort food with good manners.
Key Ingredients
- 1 lb elbow macaroni — Elbows cook evenly and hold the sauce well.
- 4 cups low-sodium chicken broth — The pasta absorbs this and picks up flavor as it cooks.
- 2 tbsp unsalted butter — Adds richness.
- 1 tsp kosher salt, 1/2 tsp black pepper — Enough to season the pasta base.
- 1 tsp dry mustard powder — A small pinch of sharpness keeps the cheese from tasting flat.
- 1 cup diced ham — Turn it into a full meal.
- 2 cups shredded sharp cheddar — Sharp cheese gives the sauce more character.
- 1 cup shredded Monterey Jack — Melts smoothly.
- 1/2 cup evaporated milk — Keeps the sauce creamy and stable.
Quick Steps
-
Add the pasta base. Put the macaroni, broth, butter, salt, pepper, and mustard powder into the pot. Stir once so the pasta is mostly submerged.
-
Pressure cook briefly. Lock the lid and cook on High Pressure for 4 minutes. As soon as the time ends, do a quick release. Do not let it sit under pressure or the noodles will go soft fast.
-
Stir in the dairy. Open the lid and stir in the evaporated milk, diced ham, cheddar, and Monterey Jack. Keep the heat off for a moment while the cheese starts to melt.
-
Settle the sauce. Stir gently for 1 to 2 minutes until the cheese melts and the sauce turns creamy and glossy. If it seems thick, add a splash of milk; if it seems loose, let it sit uncovered for another minute.
-
Serve right away. Mac and cheese waits for nobody. A short rest is fine, but the texture is best when it is still loose and hot.
Tips and Variations
- Shred your own cheese. Pre-shredded cheese can make the sauce a little grainy.
- Swap in cooked bacon. Six strips, crumbled, work well if you want a saltier version.
- Keep leftovers moist. Add a splash of milk when reheating.
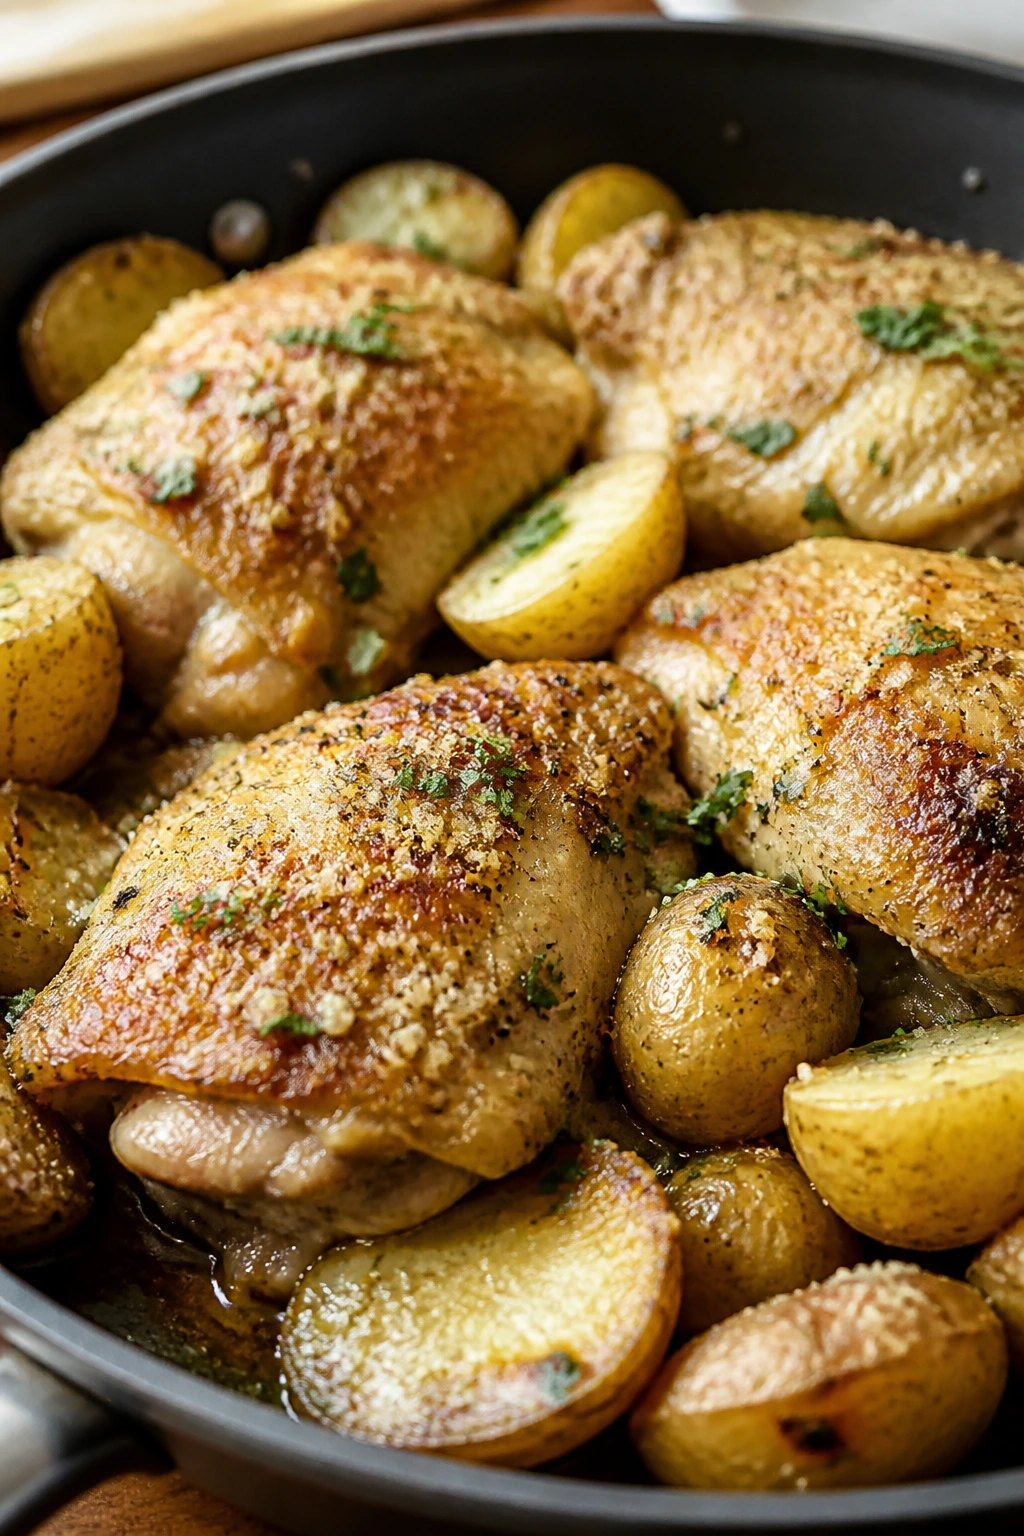
5. Garlic Parmesan Chicken and Potatoes
Why It Works
Chicken and potatoes belong together in the Instant Pot. The potatoes soak up the garlic, broth, and Parmesan, while the thighs stay juicy enough to forgive a few extra minutes of pressure.
I like this one because it feels like a tray-bake dinner without turning on the oven. The broth becomes a light sauce, the spinach disappears into the heat at the end, and the whole thing tastes more deliberate than the effort required. That is my favorite kind of weeknight recipe.
Key Ingredients
- 2 lbs boneless skinless chicken thighs — Thighs stay tender and handle pressure better than breasts.
- 1 1/2 lbs baby potatoes, halved — Cut any large ones so they match the smaller ones.
- 1 cup low-sodium chicken broth — Needed for pressure and for the sauce base.
- 4 cloves garlic, minced — Use fresh garlic here if you can.
- 2 tbsp olive oil — Helps the garlic bloom.
- 2 tsp Italian seasoning — Gives the pot a savory, herby note.
- 1 tsp kosher salt, 1/2 tsp black pepper — Basic seasoning that keeps the dish from tasting bland.
- 2 tbsp unsalted butter — Stirred in at the end for gloss.
- 1 cup grated Parmesan — The sharp, salty finish.
- 1/2 cup half-and-half — Adds body to the sauce.
- 2 cups baby spinach — Wils into the hot potatoes.
- 1 tsp lemon juice optional — Brightens the final flavor if the sauce tastes heavy.
Quick Steps
-
Sauté the garlic. Add the oil to the Instant Pot and cook the garlic for 30 seconds on Sauté, just until it smells sweet and not harsh.
-
Add the potatoes and broth. Stir in the halved potatoes and the broth, then lay the chicken thighs on top. Season with Italian seasoning, salt, and pepper.
-
Pressure cook. Lock the lid and cook on High Pressure for 8 minutes. Let it sit for 5 minutes before quick releasing the rest of the pressure.
-
Finish the sauce. Remove the chicken, then stir the butter, Parmesan, half-and-half, and spinach into the potatoes. The spinach should wilt within a minute and the sauce should look creamy around the edges.
-
Return the chicken. Put the chicken back on top and spoon some of the sauce over it. Taste and add lemon juice if you want a brighter finish.
Tips and Variations
- Cut potatoes evenly. Uneven pieces mean some turn mushy while others stay firm.
- Use grated Parmesan, not the powdery shelf-stable kind. It melts cleaner.
- Add mushrooms. A cup of sliced mushrooms can go in with the potatoes.
6. Beef Stroganoff
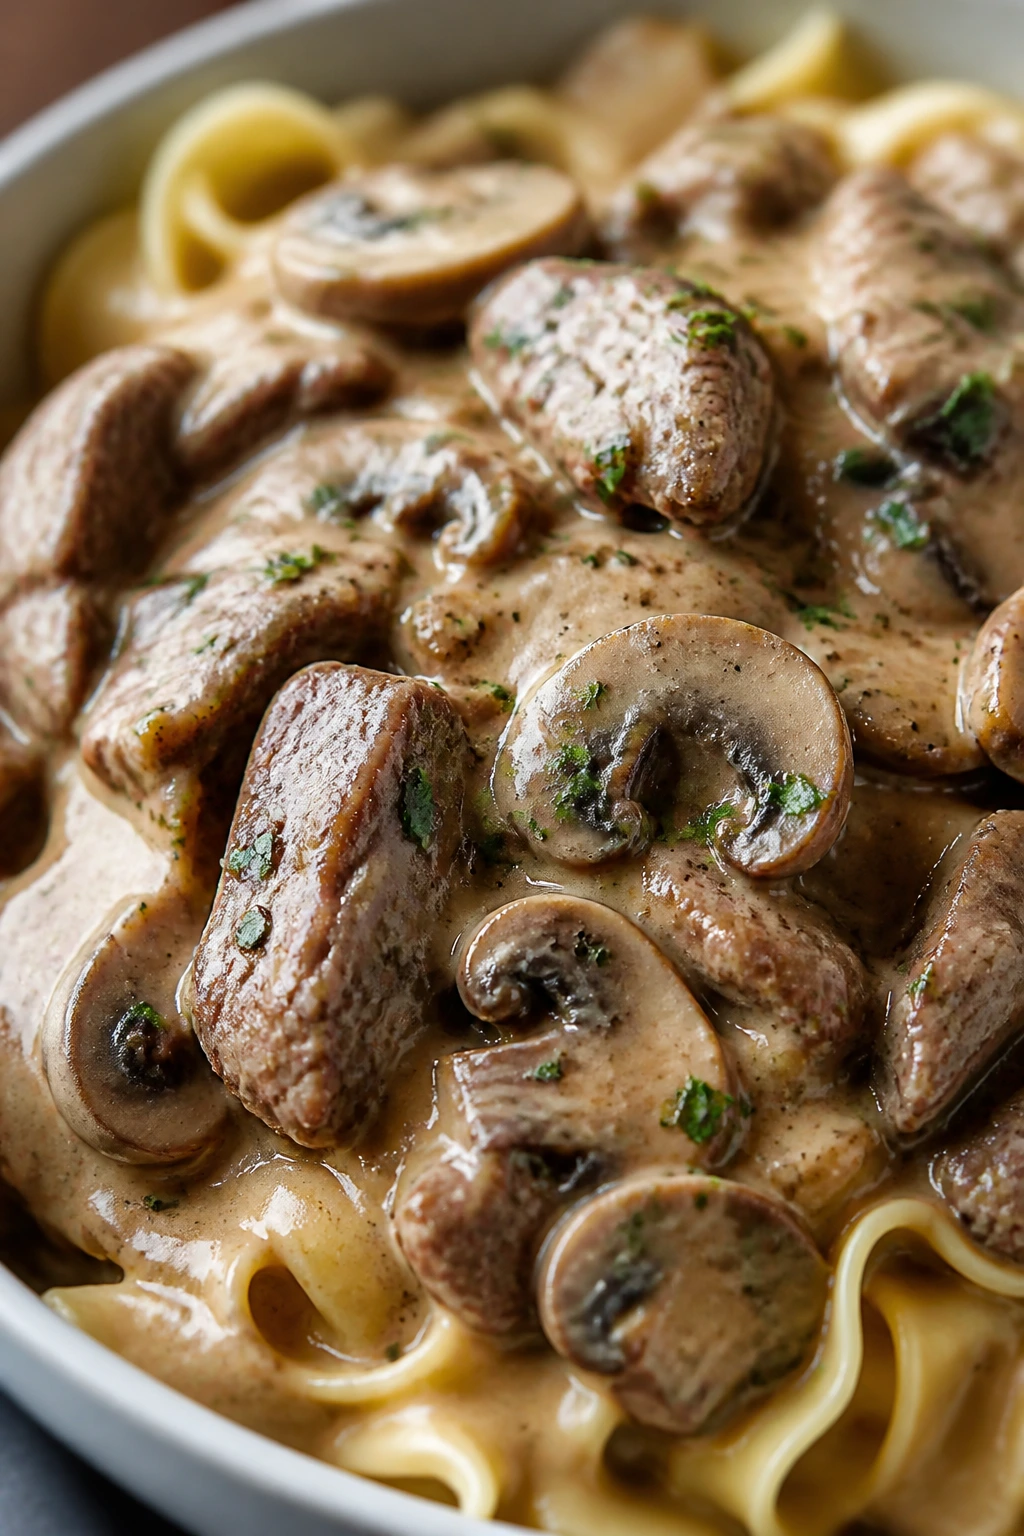
Why It Works
Beef stroganoff sounds fussy. It isn’t. The pressure cooker takes a tougher cut of beef and turns it into something tender, while mushrooms and Worcestershire sauce build a dark, savory base that tastes like you worked much longer than you did.
This version keeps the noodles separate enough to avoid mush, which is the part so many recipes get wrong. The sour cream goes in after pressure cooking, not before, so the sauce stays smooth instead of splitting. That last step matters more than people think.
Key Ingredients
- 1 1/2 lbs beef stew meat or sirloin tips, cut into 1-inch pieces — Stew meat is cheaper; sirloin tips cook a little faster.
- 1 tbsp oil — For sautéing.
- 1 medium onion, diced — Softens into the sauce.
- 8 oz cremini mushrooms, sliced — Adds body and a deep savory flavor.
- 3 cloves garlic, minced — A small amount goes a long way.
- 2 tbsp Worcestershire sauce — Gives the sauce a meaty backbone.
- 1 tbsp Dijon mustard — Sharpens the creamy sauce.
- 3 cups low-sodium beef broth and 1 cup water — Enough liquid for pressure and for cooking the noodles.
- 1 tsp kosher salt, 1/2 tsp black pepper — Start here, then taste at the end.
- 8 oz egg noodles — Added after the beef has cooked.
- 1 cup sour cream — Stirred in off heat for a smooth finish.
- 2 tbsp cornstarch mixed with 2 tbsp water — Thickens the sauce.
- 2 tbsp chopped parsley — Freshness at the end.
Quick Steps
-
Sauté the onion and mushrooms. Heat the oil on Sauté and cook the onion and mushrooms for 4 minutes, until the mushrooms release their moisture and start to brown at the edges.
-
Add the beef and broth. Stir in the garlic, beef, Worcestershire, Dijon, broth, water, salt, and pepper. Scrape the bottom well so nothing sticks.
-
Pressure cook. Lock the lid and cook on High Pressure for 18 minutes. Let the pressure release naturally for 10 minutes before venting.
-
Cook the noodles. Stir in the egg noodles and switch to Sauté. Cook for 6 to 8 minutes, stirring often, until the noodles are tender and the broth has thickened a little.
-
Finish the sauce. Stir in the cornstarch slurry and cook for 1 minute. Turn off the heat, then stir in the sour cream until the sauce looks creamy and pale.
-
Serve. Finish with parsley and serve it while the noodles are still springy.
Tips and Variations
- If the sauce looks thin, let it sit for 3 minutes before serving. It thickens as it cools.
- Use Greek yogurt in a pinch, but add it off heat so it does not curdle.
- Add a splash of lemon if the dish needs more lift.
7. White Chicken Chili
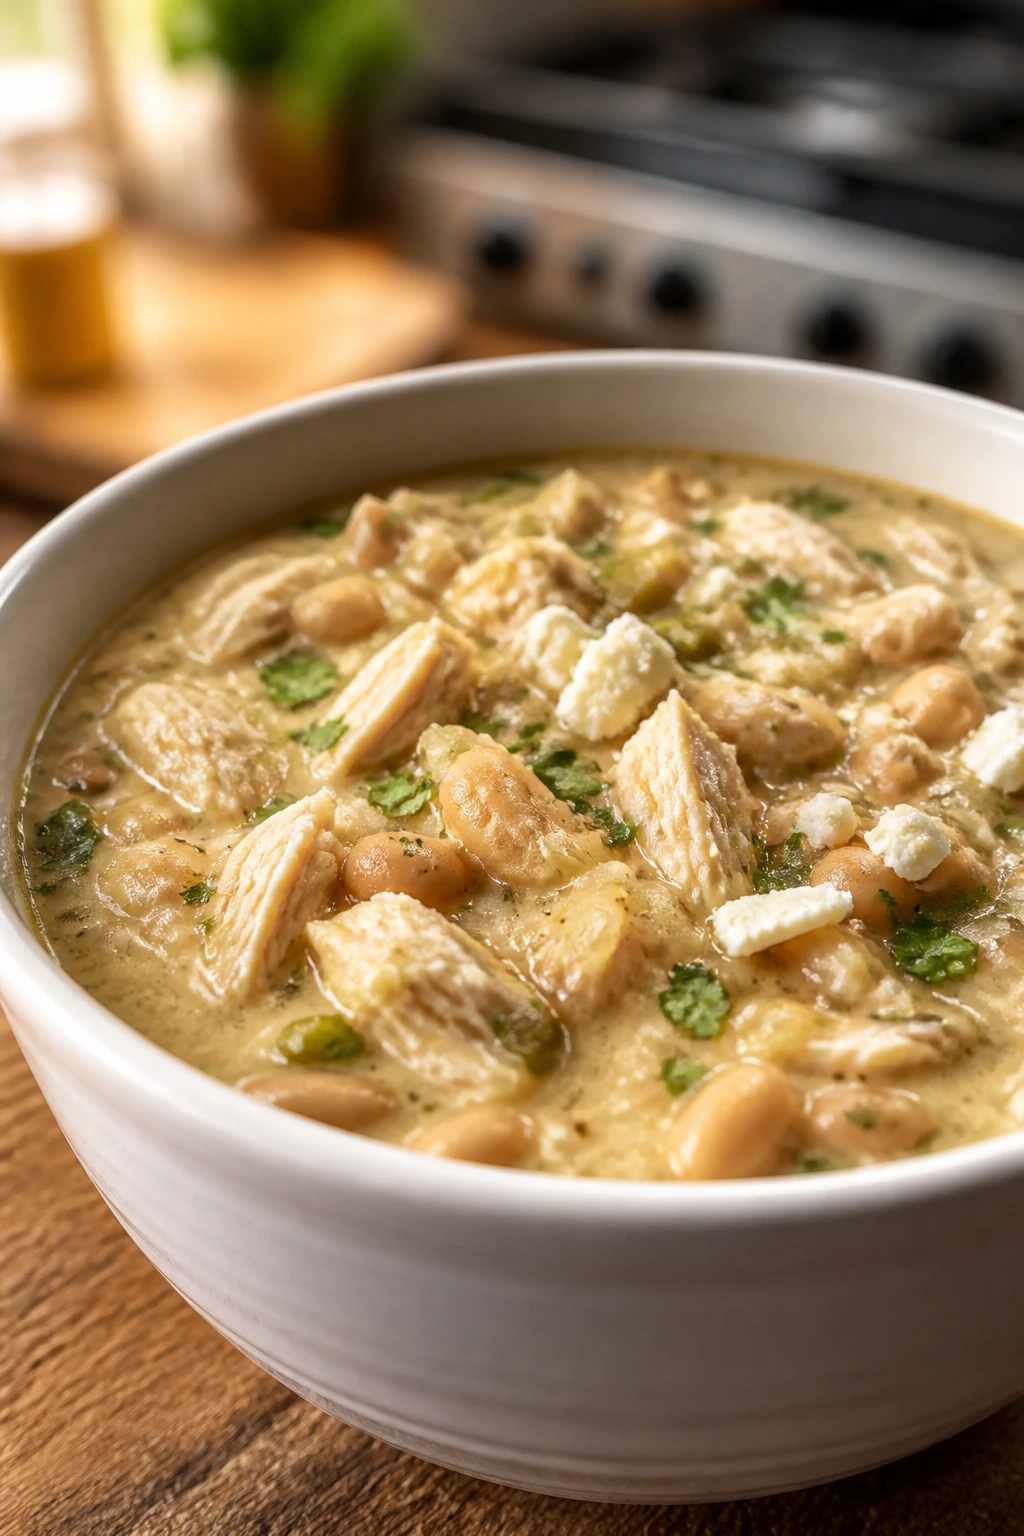
Why It Works
White chicken chili is the cleaner, lighter cousin of red chili, and it suits the Instant Pot beautifully. The beans thicken the broth, the green chiles bring a little heat without overwhelming the pot, and the cream cheese melts into the broth at the end.
The best part is that you do not need to build a complicated base. Onion, cumin, oregano, beans, broth, chicken—that’s enough. The pressure cooker handles the long simmer you would normally need on the stove, and the chicken shreds so easily that dinner starts looking like a shortcut worth keeping.
Key Ingredients
- 1 tbsp olive oil — For softening the onion.
- 1 large onion, diced — Forms the savory base.
- 2 lbs boneless skinless chicken breasts — Shreds easily and stays mild.
- 2 cans cannellini beans, drained and rinsed — Help thicken the chili.
- 1 can (4 oz) diced green chiles — Adds a gentle, tangy heat.
- 1 cup frozen corn — A little sweetness and texture.
- 4 cups low-sodium chicken broth — The body of the soup.
- 2 tsp ground cumin, 1 tsp dried oregano — The main seasoning profile.
- 1 tsp kosher salt, 1/2 tsp black pepper — Straightforward and enough to begin with.
- 4 oz cream cheese — Stirred in at the end.
- 1 lime, juiced — Brightens the whole pot.
- Cilantro optional — Good if you like a fresh finish.
Quick Steps
-
Sauté the onion. Cook the onion in oil for 3 minutes on Sauté until it softens and smells sweet.
-
Add the remaining base. Stir in the chicken breasts, beans, green chiles, corn, broth, cumin, oregano, salt, and pepper.
-
Pressure cook. Lock the lid and cook on High Pressure for 10 minutes. Let the pressure release naturally for 5 minutes, then vent the rest.
-
Shred the chicken. Pull out the chicken, shred it, and return it to the pot.
-
Melt in the cream cheese. Stir in the cream cheese and lime juice until the broth turns creamy and smooth. Taste and adjust the salt.
Tips and Variations
- Add jalapeño if you want more heat. One minced pepper is plenty.
- Use navy beans instead of cannellini beans. They work just as well.
- Serve with tortilla chips. They give the soup some crunch.
8. Chicken Fajita Bowls
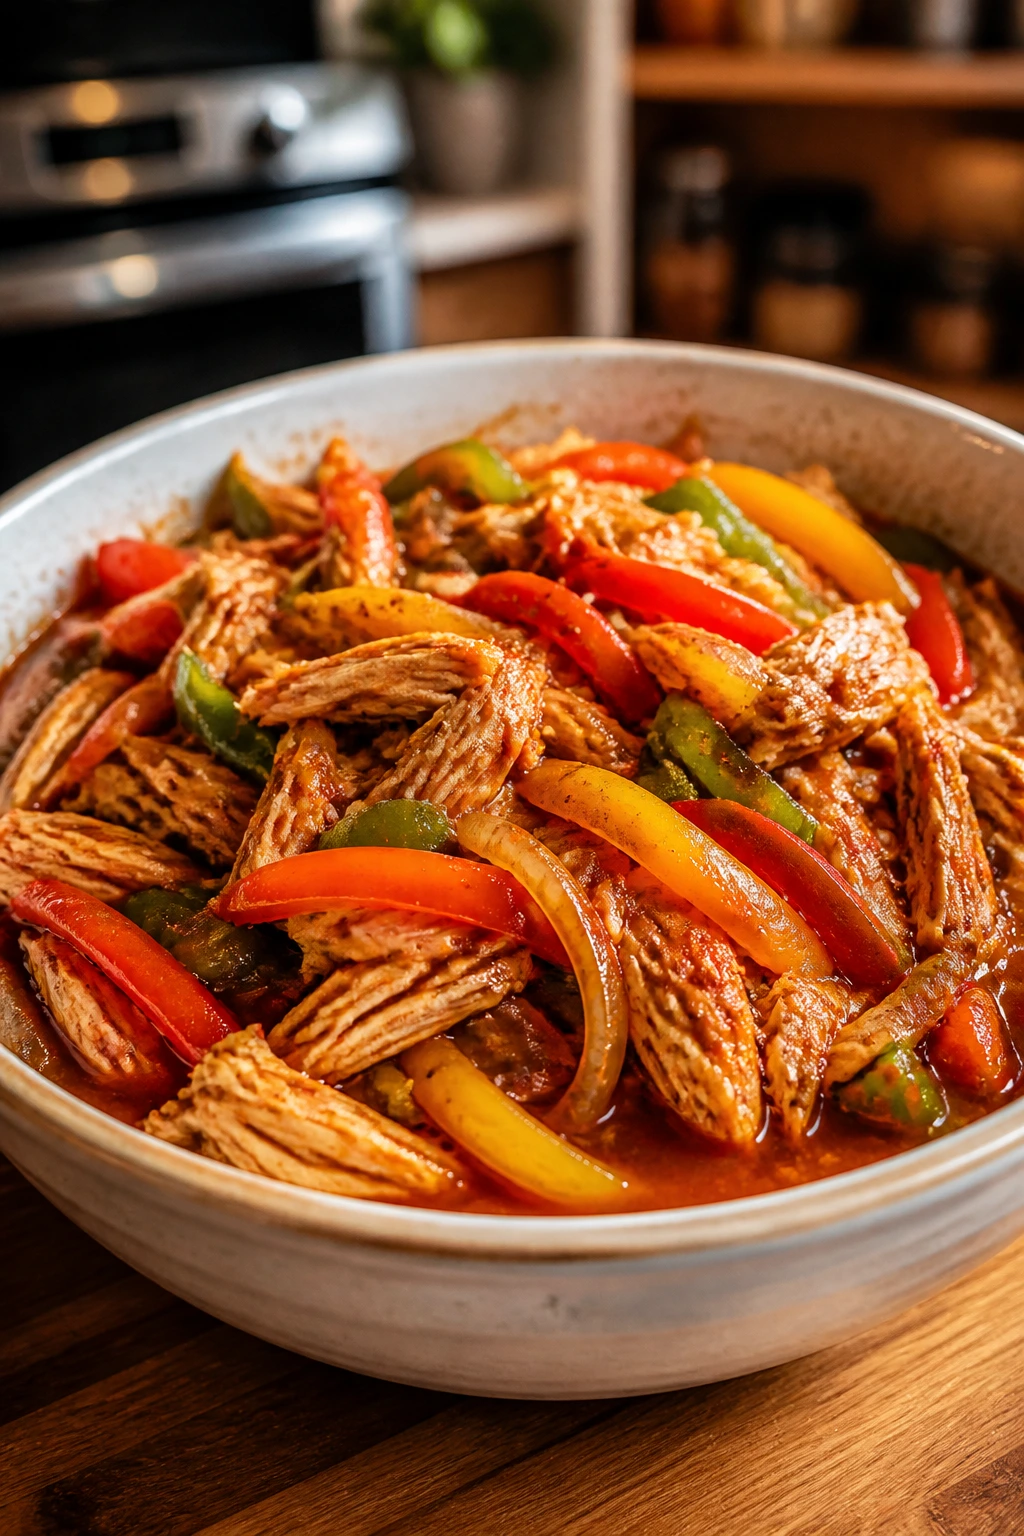
Why It Works
Fajita night usually means a hot skillet, a little splatter, and at least one onion that goes too far while you answer a text. The Instant Pot makes the same flavor profile without that chaos.
Chicken thighs are the smart move here because they stay tender even after a short pressure cook. The peppers and onions soften into the broth, and the lime juice at the end keeps the bowls from tasting heavy. It is the kind of dinner that feels built, not thrown together.
Key Ingredients
- 2 lbs boneless skinless chicken thighs — The juicier choice for pressure cooking.
- 3 bell peppers, sliced — Use a mix of colors if you want the pot to look brighter.
- 1 large onion, sliced — Sweetens as it cooks.
- 1 can (15 oz) black beans, drained and rinsed — Makes the bowls more filling.
- 1 cup low-sodium chicken broth — Keeps the pot from drying out.
- 2 tbsp olive oil — Helps the seasoning coat the vegetables.
- 2 tbsp fajita seasoning — Store-bought or homemade both work.
- 1 tsp kosher salt, 1/2 tsp black pepper — Add only if your seasoning blend is unsalted.
- 1 lime, juiced — For the end.
- Cilantro optional — Freshness if you like it.
Quick Steps
-
Layer the vegetables. Add the sliced onion and bell peppers to the bottom of the pot, then pour in the broth.
-
Add the chicken and seasoning. Nestle the chicken thighs on top, then sprinkle on the fajita seasoning, salt, pepper, and drizzle with olive oil.
-
Pressure cook. Lock the lid and cook on High Pressure for 8 minutes. Quick release as soon as the timer ends.
-
Slice and stir. Remove the chicken and slice it into strips. Return it to the pot with the black beans and stir until everything is coated in the juices.
-
Finish with lime. Stir in the lime juice and serve over rice, in tortillas, or over shredded lettuce.
Tips and Variations
- If you want browner peppers, spoon the filling onto a sheet pan and broil it for 2 minutes.
- Use chicken breasts if that’s what you have, but cut the pressure time to 6 minutes.
- Add avocado at serving. It makes the bowls feel fuller and cooler.
9. Lentil Vegetable Soup
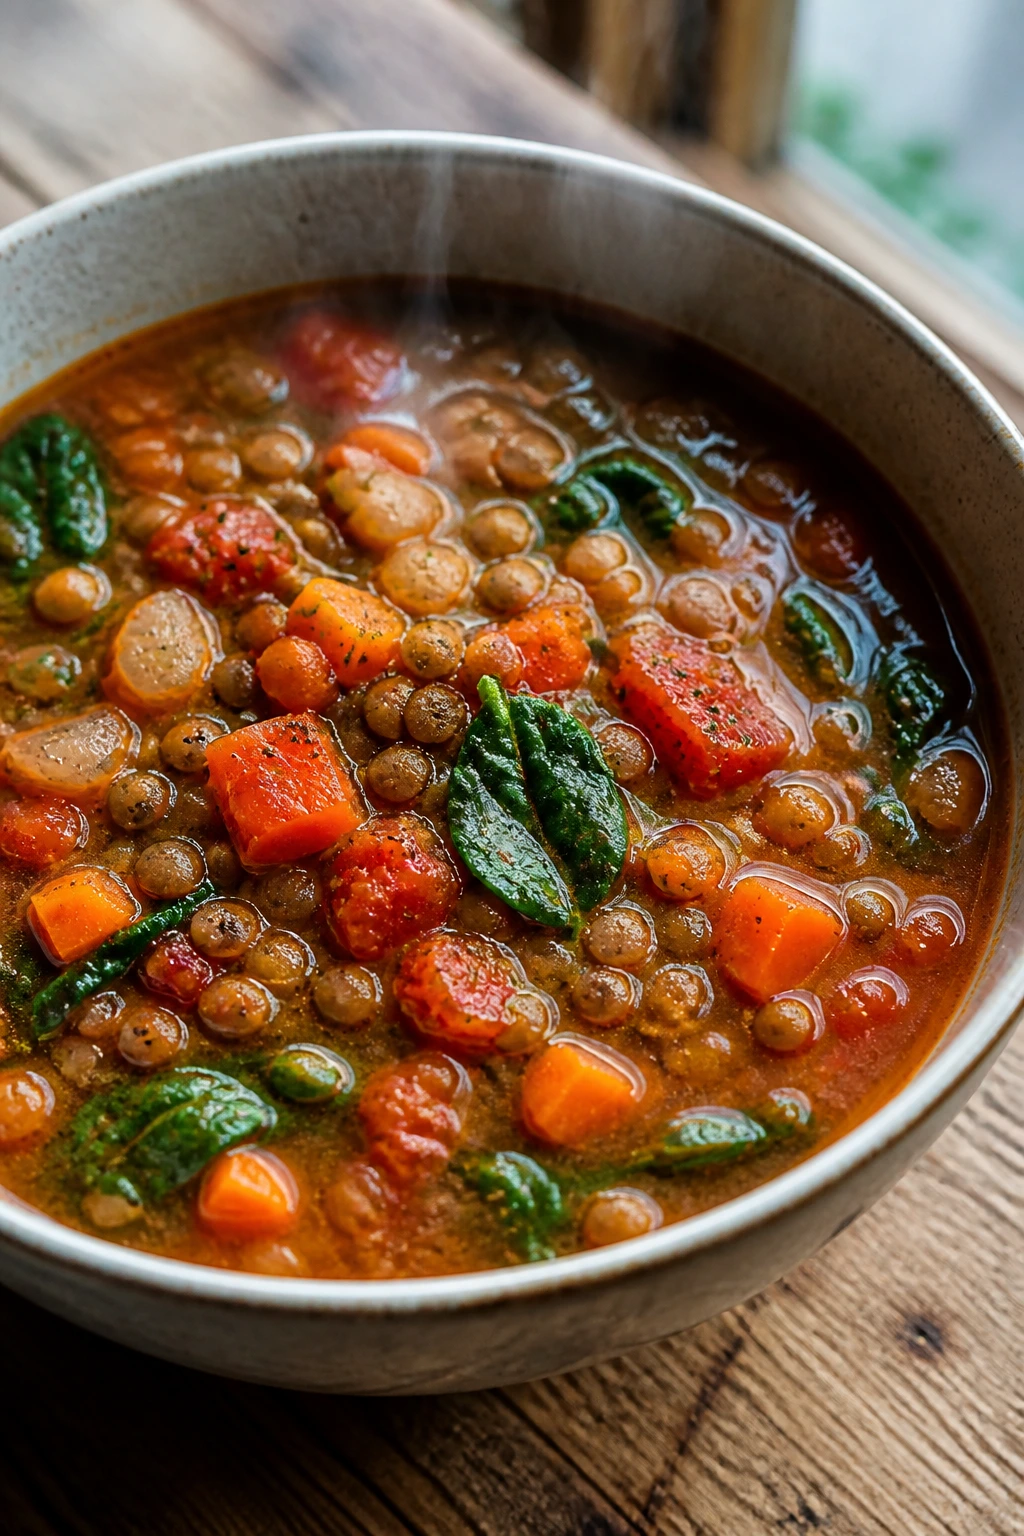
Why It Works
Lentils are the quiet heroes of pressure cooking. They do not need soaking, they do not complain, and they turn into a full dinner with a few vegetables and a good broth.
This soup is especially useful because it feels light but still fills a bowl in a meaningful way. The tomatoes give the broth some color, the thyme keeps it earthy, and the lemon at the end makes the vegetables taste fresher. That squeeze matters. Without it, the soup can taste a little sleepy.
Key Ingredients
- 1 tbsp olive oil — For the vegetables.
- 1 onion, diced — The base flavor.
- 2 carrots, diced — Sweet and sturdy.
- 2 celery stalks, diced — Classic soup flavor.
- 3 cloves garlic, minced — Added after the vegetables soften.
- 1 1/2 cups brown or green lentils, rinsed — Brown and green hold their shape better than red lentils.
- 1 can diced tomatoes — Adds brightness and a little acidity.
- 6 cups vegetable broth or chicken broth — Enough liquid for the lentils to cook through.
- 1 tsp dried thyme, 1 bay leaf — The simple herb backbone.
- 1 tsp kosher salt, 1/2 tsp black pepper — Enough to begin with.
- 2 cups baby spinach — Added at the end so it stays green.
- 1 tbsp lemon juice — Bright finish.
Quick Steps
-
Sauté the vegetables. Cook the onion, carrots, and celery in olive oil for 4 minutes on Sauté, until the onion softens and the carrots start to glisten.
-
Add garlic and lentils. Stir in the garlic and cook for 30 seconds, then add the lentils, tomatoes, broth, thyme, bay leaf, salt, and pepper.
-
Pressure cook. Lock the lid and cook on High Pressure for 12 minutes. Let the pressure release naturally for 10 minutes before venting the rest.
-
Finish the greens. Remove the bay leaf, then stir in the spinach until it wilts into the hot soup.
-
Brighten and serve. Stir in the lemon juice, taste for salt, and ladle into bowls while it is steaming.
Tips and Variations
- Do not use red lentils here. They break down too fast and make the soup mushy.
- Add diced zucchini near the end. It softens quickly and gives the soup more body.
- Freeze it without the spinach if you want the cleanest texture later.
10. Spaghetti and Meat Sauce
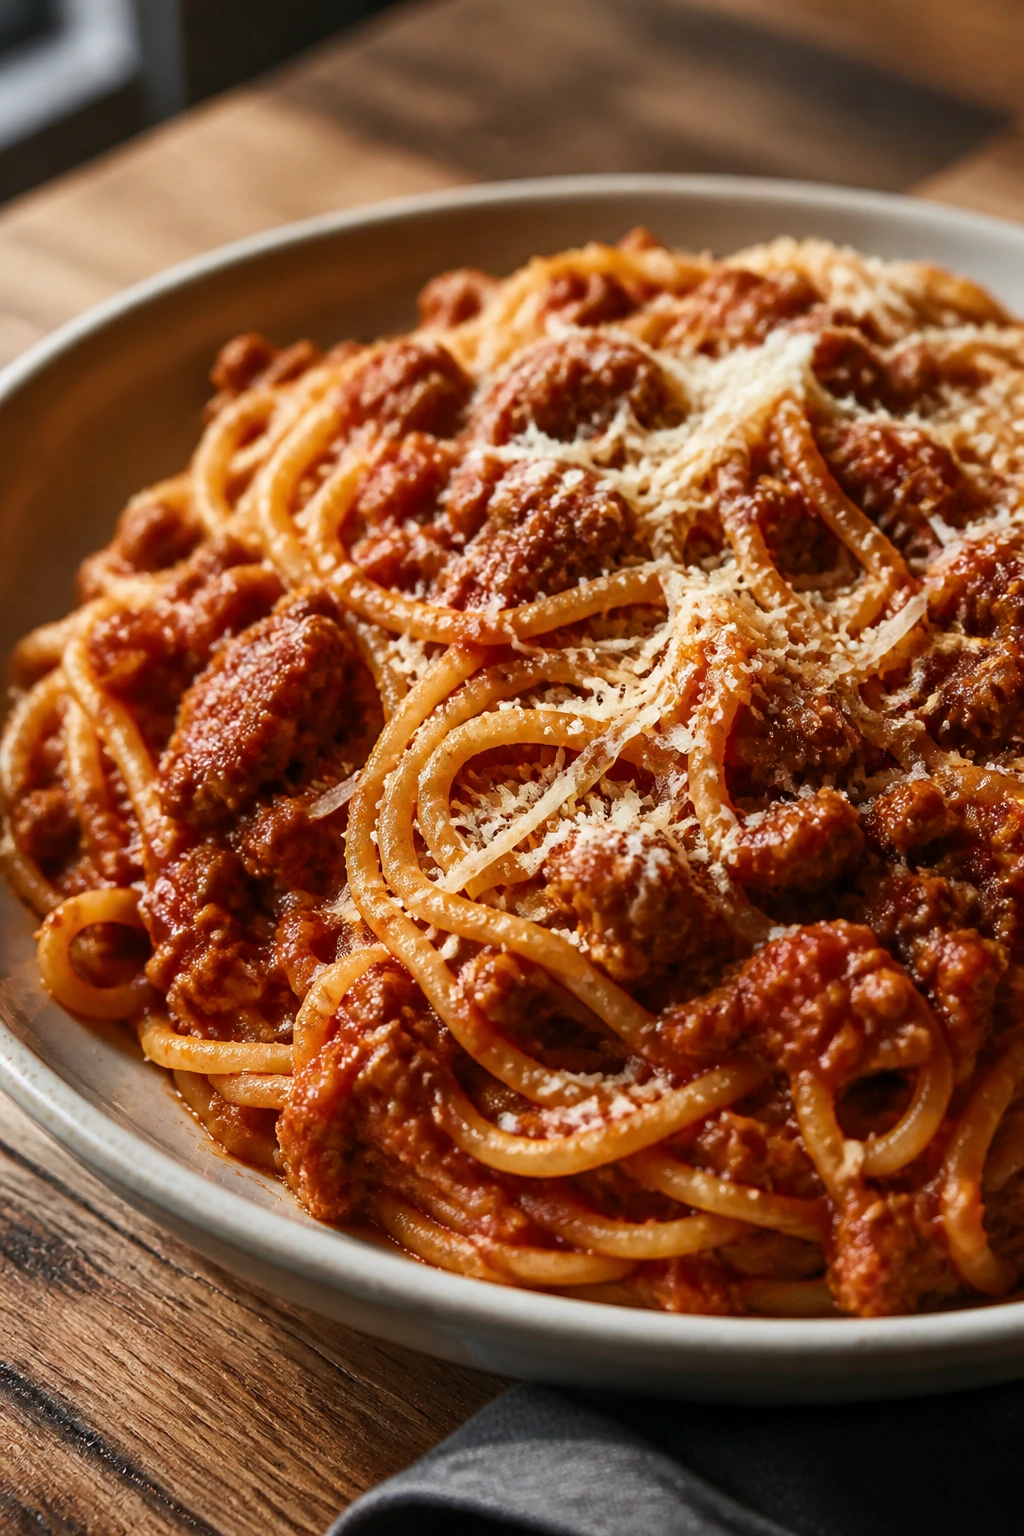
Why It Works
Dry spaghetti in a pressure cooker looks wrong until it isn’t. The noodles cook in the sauce and broth, which means they absorb flavor from the start instead of tasting like plain pasta tossed with sauce at the end.
The trick is to keep the liquid ratio sensible and avoid stirring the noodles before pressure cooking. You want them pressed under the sauce, not mashed into it. A quick stir after cooking loosens everything up, and the Parmesan finishes the job with a little salt and body.
Key Ingredients
- 1 tbsp olive oil — For the meat.
- 1 lb ground beef or Italian sausage — Use one or the other, or a mix.
- 1 small onion, diced — Builds the sauce base.
- 3 cloves garlic, minced — Added after the meat browns.
- 1 jar marinara sauce — The easiest way to get a good dinner moving.
- 3 cups water or low-sodium broth — The liquid that cooks the pasta.
- 12 oz dry spaghetti, broken in half — Half-length noodles fit better.
- 1 tsp Italian seasoning, 1 tsp kosher salt, 1/2 tsp black pepper — The seasoning backbone.
- 1/4 cup grated Parmesan — Stirred in at the end.
- Basil optional — Nice if you have it.
Quick Steps
-
Brown the meat. Set the pot to Sauté, add the oil, and cook the ground beef and onion for 5 to 6 minutes until the meat loses its pink color.
-
Add the garlic. Stir in the garlic and cook for 30 seconds until it smells fragrant.
-
Build the sauce. Add the marinara, water or broth, Italian seasoning, salt, and pepper. Stir well.
-
Add the spaghetti carefully. Scatter the broken noodles over the top, pressing them gently under the liquid. Do not stir at this stage. That is how you avoid a sticky, clumped mess.
-
Pressure cook. Lock the lid and cook on High Pressure for 8 minutes. Quick release as soon as the timer ends.
-
Finish the pasta. Stir vigorously to separate the noodles, then add the Parmesan. Let it sit uncovered for 2 minutes until the sauce looks smooth and clingy.
Tips and Variations
- If the sauce seems loose, let it sit a few minutes; the pasta keeps absorbing liquid.
- Use Italian sausage for more flavor. It gives the sauce a little extra richness.
- Add spinach at the end. A few handfuls wilt quickly and disappear into the sauce.
11. Butter Chicken

Why It Works
Butter chicken brings one of the richest sauces in this roundup, but the steps stay friendly enough for a first attempt. The Instant Pot gives you the same soft, slow-simmered flavor much faster, and the chicken thighs stay tender in the process.
The cream goes in after pressure cooking, which keeps the sauce silky instead of broken. Garam masala, ginger, and tomato sauce build the familiar flavor without requiring a dozen separate spices. It tastes like you know what you are doing, even if you are still learning the appliance.
Key Ingredients
- 2 lbs boneless skinless chicken thighs, cut into 1 1/2-inch pieces — Thighs stay moist and hold flavor well.
- 2 tbsp unsalted butter — Adds richness.
- 1 large onion, diced — Softens into the sauce.
- 3 cloves garlic, minced — Essential here.
- 1 tbsp grated fresh ginger — Gives the sauce warmth.
- 2 tsp garam masala, 1 tsp ground cumin, 1 tsp paprika — The main spice blend.
- 1 tsp kosher salt — Start here and adjust later.
- 1 can (15 oz) tomato sauce — Creates the sauce base.
- 1 cup low-sodium chicken broth — Helps the pressure build and loosens the sauce.
- 1/2 cup heavy cream — Stirred in at the end.
- 1 tbsp honey — Balances the acidity.
- Cilantro optional — Nice on top if you want a fresher finish.
Quick Steps
-
Sauté the onion. Cook the onion in butter on Sauté for 4 minutes until soft and lightly golden.
-
Add the aromatics. Stir in the garlic, ginger, garam masala, cumin, and paprika. Cook for 30 seconds until the spices smell warm.
-
Add the chicken and sauce. Stir in the chicken pieces, tomato sauce, broth, and salt.
-
Pressure cook. Lock the lid and cook on High Pressure for 8 minutes. Quick release when the time is up.
-
Finish the sauce. Stir in the cream and honey, then simmer on Sauté for 2 minutes until the sauce looks smooth and slightly glossy.
-
Serve. Taste for salt, top with cilantro, and spoon over rice or with naan.
Tips and Variations
- Use thighs, not breasts, if you want the softest texture.
- Add a pinch of cayenne if you want more heat.
- A spoonful of yogurt on top works if you want extra tang.
12. Pot Roast with Vegetables
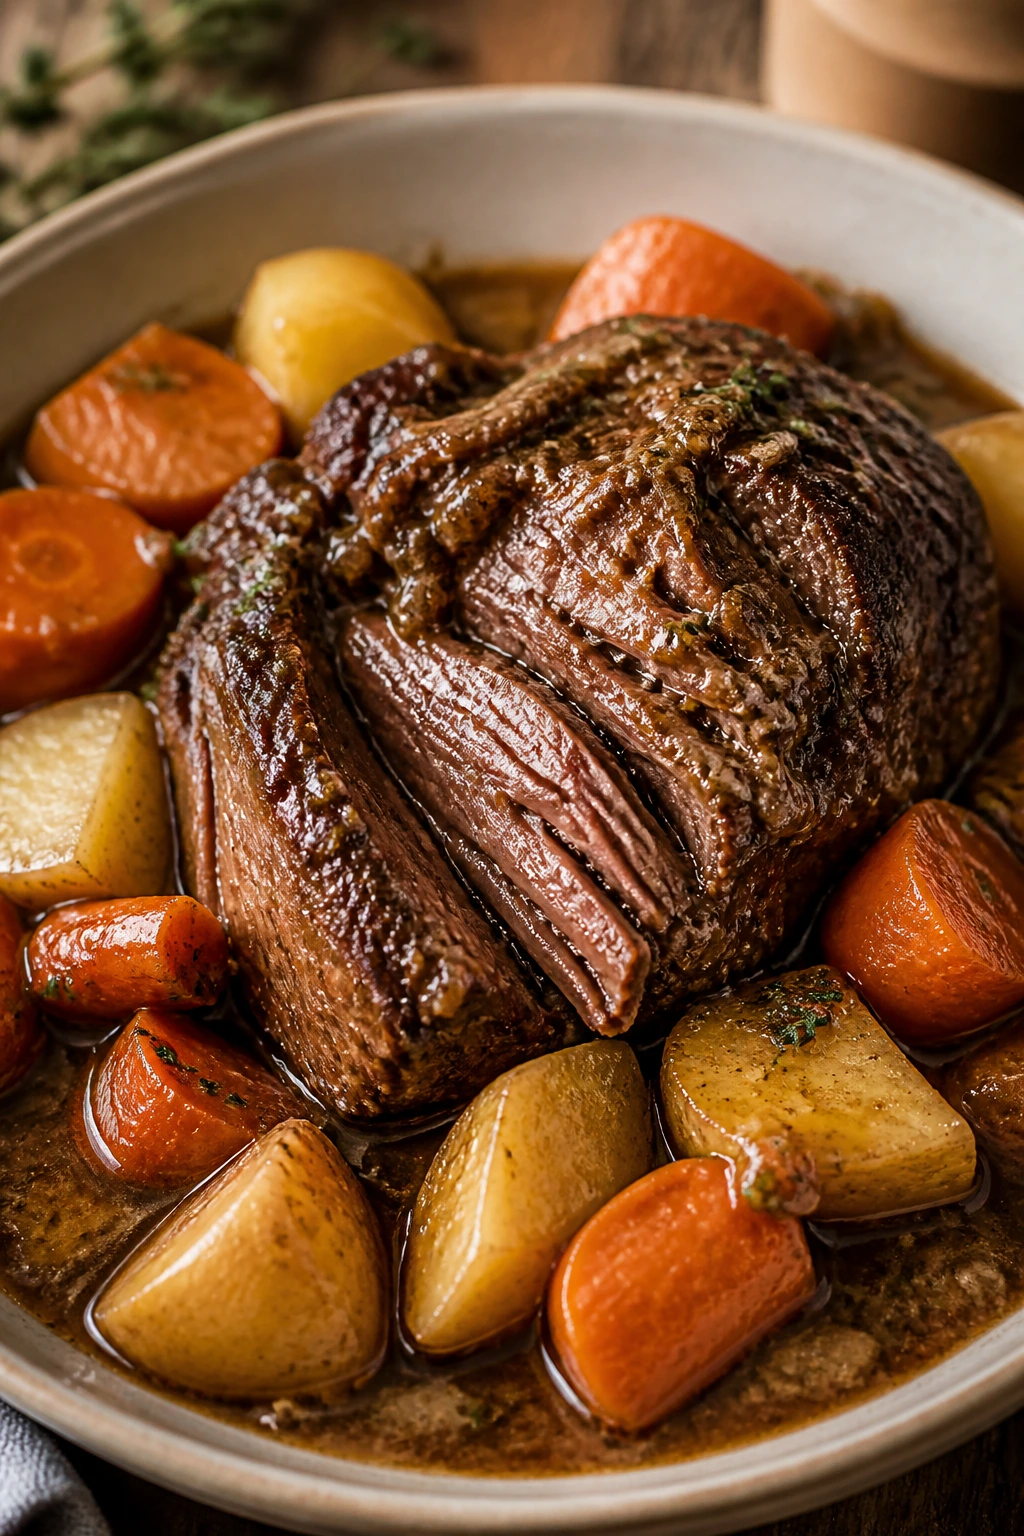
Why It Works
Chuck roast is the cut that teaches you to trust the Instant Pot. It feels firm and plain before cooking, then turns tender after a long pressure cycle because the connective tissue finally gives up.
The smarter move is to cook the meat first, then add the vegetables so they do not collapse into a pile of orange mush. That two-stage approach sounds like more work, but it is mostly patience. The gravy at the end pulls everything together.
Key Ingredients
- 3 to 3 1/2 lbs chuck roast — The best cut for this style of pot roast.
- 1 1/2 tsp kosher salt — Enough to season the meat well.
- 1 tsp black pepper — Straightforward seasoning.
- 2 tbsp oil — For searing.
- 1 large onion, quartered — Softens into the cooking liquid.
- 4 cloves garlic, smashed — Adds flavor without becoming sharp.
- 2 cups low-sodium beef broth — The pressure-cooking liquid.
- 2 tbsp Worcestershire sauce — Deepens the gravy.
- 2 tbsp tomato paste — Gives the sauce a little color and body.
- 1 tsp dried thyme — Classic pot-roast herb.
- 1 1/2 lbs Yukon Gold potatoes, halved — Hold their shape well.
- 4 carrots, cut into 2-inch pieces — Large pieces keep them from falling apart.
- 2 tbsp cornstarch mixed with 2 tbsp water — Thickens the gravy.
- Parsley optional — Fresh garnish if you want it.
Quick Steps
-
Season and sear the roast. Pat the beef dry, season it with salt and pepper, and brown it in oil on all sides for 3 minutes per side. You want a dark crust, not a full cook.
-
Add the flavor base. Put the onion, garlic, broth, Worcestershire sauce, tomato paste, and thyme in the pot around the roast.
-
Pressure cook the beef. Lock the lid and cook on High Pressure for 55 minutes. Let the pressure release naturally for 10 minutes before venting the rest.
-
Add the vegetables. Nestle the potatoes and carrots around the roast, lock the lid again, and cook on High Pressure for 5 minutes. Quick release when the timer ends.
-
Make the gravy. Remove the meat and vegetables, then turn on Sauté. Stir in the cornstarch slurry and cook for 1 to 2 minutes until the liquid turns glossy and thick enough to coat a spoon.
-
Serve. Slice the beef or shred it, spoon the gravy over the top, and scatter parsley if you have it.
Tips and Variations
- Cut the vegetables big. Small chunks vanish during the second cook.
- Do not skip the sear if you have time. It adds a lot of flavor.
- Use parsnips if you want a sweeter edge.
13. Teriyaki Chicken Thighs
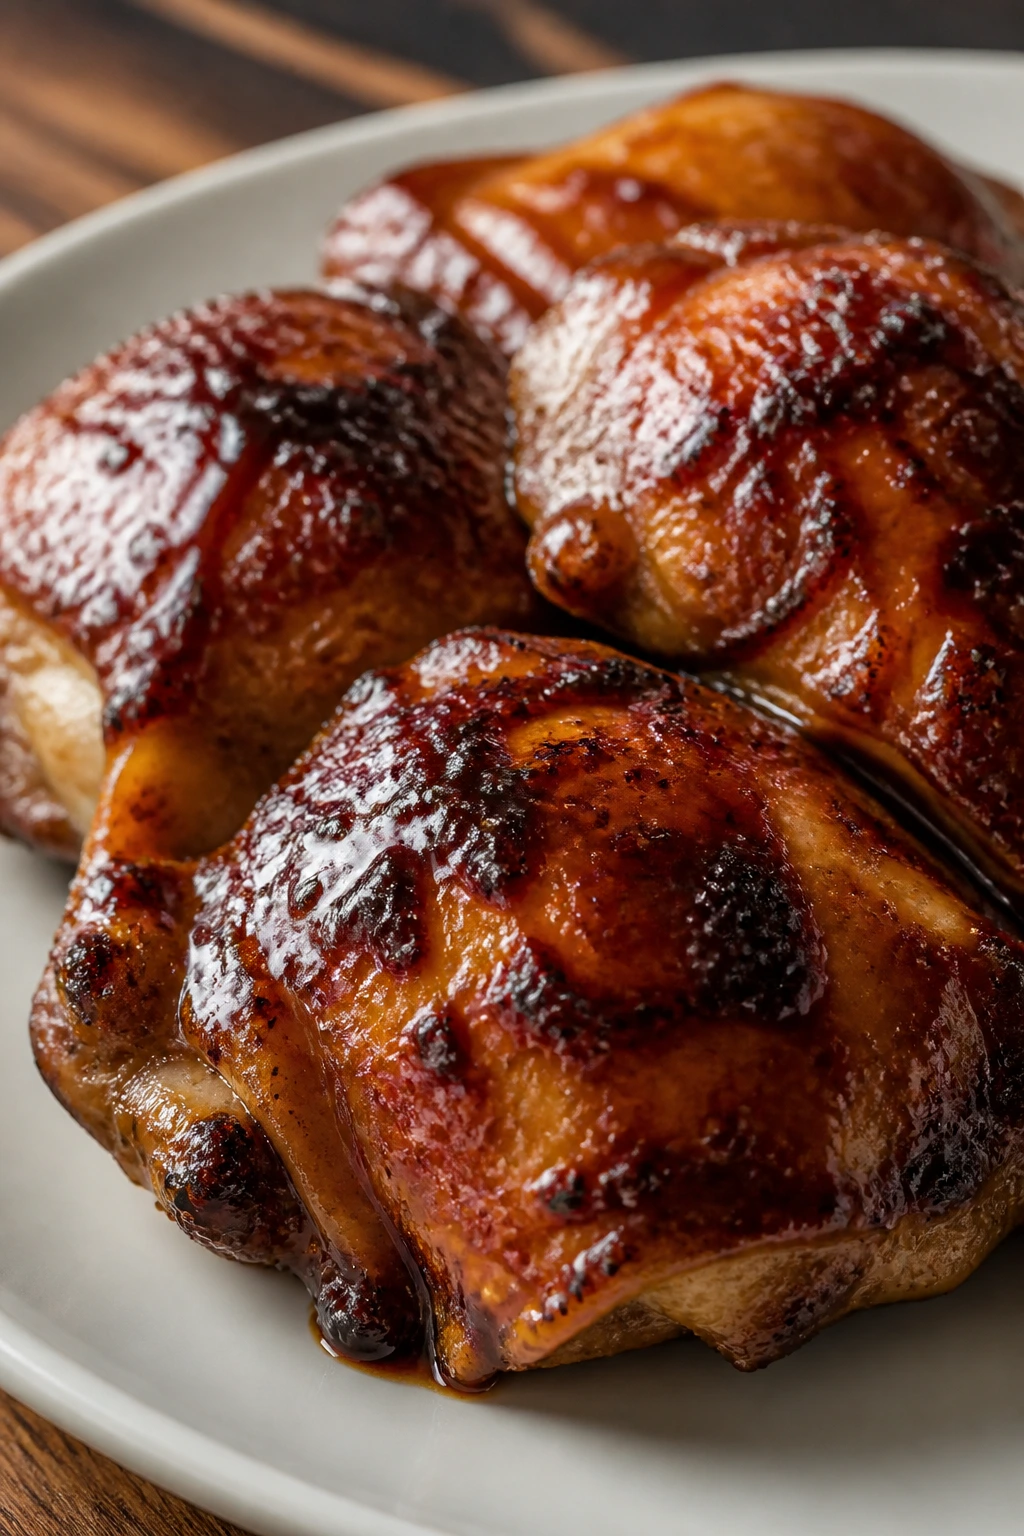
Why It Works
Teriyaki chicken can turn cloying fast if the sauce gets too sweet or too thick. This version stays balanced because the soy sauce, rice vinegar, and ginger keep the sweetness in check.
Chicken thighs make the whole recipe easier. They stay juicy under pressure, and they do not mind a glossy sauce at the end. The cornstarch slurry is the last move, and it gives you that sticky takeout-style coating without needing a wok.
Key Ingredients
- 2 lbs boneless skinless chicken thighs — Better than breasts here.
- 1/2 cup low-sodium soy sauce — Salty enough to season the meat.
- 1/2 cup water — Keeps the sauce from getting too intense.
- 1/3 cup honey — The sweet part of the glaze.
- 3 cloves garlic, minced — Strong flavor base.
- 1 tbsp grated fresh ginger — Sharp and fragrant.
- 2 tbsp rice vinegar — Keeps the sauce from tasting flat.
- 1 tbsp sesame oil — A little goes a long way.
- 1 tbsp cornstarch mixed with 2 tbsp water — Thickens the sauce.
- 2 tbsp sliced green onions — For garnish.
- Sesame seeds optional — Adds a little texture.
Quick Steps
-
Whisk the sauce. Stir together the soy sauce, water, honey, garlic, ginger, rice vinegar, and sesame oil.
-
Add the chicken. Put the thighs in the pot and pour the sauce over them, turning them once so they are coated.
-
Pressure cook. Lock the lid and cook on High Pressure for 10 minutes. Quick release when the timer ends.
-
Thicken the glaze. Remove the chicken, switch to Sauté, and stir in the cornstarch slurry. Cook for 1 to 2 minutes until the sauce turns shiny and coats the spoon.
-
Finish and serve. Return the chicken to the pot, spoon the glaze over the top, and garnish with green onions and sesame seeds.
Tips and Variations
- Add broccoli after pressure cooking. Stir in small florets and let the heat soften them.
- Use less honey if you prefer a saltier sauce.
- Leftovers are good over rice the next day.
14. Chicken Noodle Soup
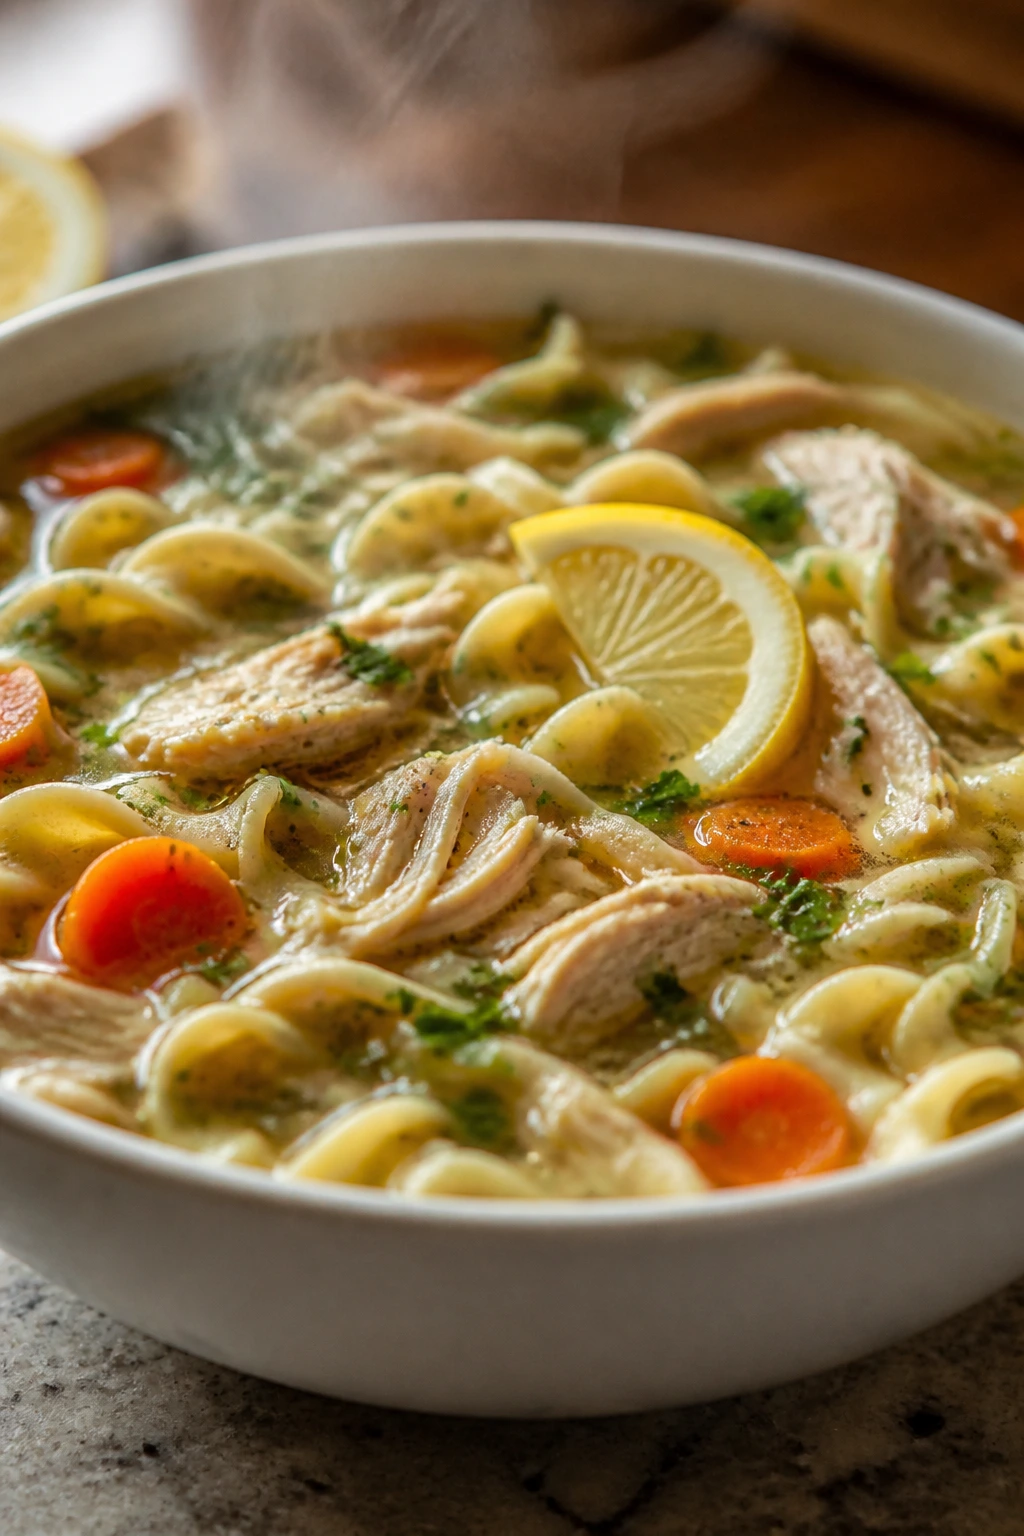
Why It Works
Chicken noodle soup can go bland in a hurry if you do not salt the broth and finish it with something bright. The Instant Pot gets the broth deep and savory, but the lemon at the end keeps it tasting fresh.
The chicken cooks gently in the broth and shreds without a fight. The noodles go in after the pressure phase so they stay springy instead of bloated. That last step is the difference between a nice soup and a tired one.
Key Ingredients
- 1 tbsp olive oil — For the vegetables.
- 1 onion, diced — The first layer of flavor.
- 3 carrots, sliced — Sweet and classic.
- 3 celery stalks, sliced — Gives the broth its familiar backbone.
- 3 cloves garlic, minced — Added after the vegetables soften.
- 2 lbs boneless skinless chicken breasts or thighs — Thighs give a richer broth; breasts shred a little cleaner.
- 8 cups low-sodium chicken broth — The soup base.
- 1 tsp dried thyme, 1 bay leaf — Simple herb flavor.
- 1 1/2 tsp kosher salt, 1/2 tsp black pepper — Enough to start.
- 6 oz egg noodles — Added after the chicken is cooked.
- 2 tbsp lemon juice — Makes the soup taste alive.
- 2 tbsp chopped parsley — Fresh finish.
Quick Steps
-
Sauté the vegetables. Cook the onion, carrots, and celery in olive oil for 4 minutes on Sauté until the onion softens.
-
Add the garlic. Stir in the garlic for 30 seconds, just until fragrant.
-
Cook the broth and chicken. Add the chicken, broth, thyme, bay leaf, salt, and pepper. Lock the lid and cook on High Pressure for 10 minutes.
-
Shred the chicken. Quick release the pressure, remove the chicken, shred it, and return it to the pot.
-
Add the noodles. Stir in the egg noodles and cook on Sauté for 6 to 8 minutes, stirring now and then, until the noodles are tender but not mushy.
-
Finish the soup. Stir in the lemon juice and parsley, remove the bay leaf, and serve hot.
Tips and Variations
- Cook the noodles separately if you want the soup to keep better in the fridge.
- Use thighs for a richer broth. They bring more flavor to the pot.
- Add peas at the end if you want a little more color.
Why the Instant Pot Makes Weeknight Cooking Easier

The best thing about a pressure cooker is not speed by itself. Speed helps, sure, but the real advantage is how it handles dinner without demanding your full attention. Once the lid is locked, you are free to slice bread, make a salad, answer a text, or stand still for a minute and breathe.
It also likes foods that are otherwise a little inconvenient. Tough beef, dry beans, pork shoulder, lentils, and shredded chicken all behave well under pressure because the sealed pot keeps moisture where it belongs. That means fewer pans, less stirring, and less of the old “is it done yet?” guessing game.
There is a catch, though. The machine likes liquid, and it likes precision. Pasta, dairy, and quick-cooking vegetables need to go in at the right time, or they can turn limp and sad. Respect that part, and it feels dependable. Ignore it, and it will remind you with a burn warning or a pot of overcooked noodles. Fair enough.
Essential Equipment for These Recipes

- 6-quart Instant Pot or similar electric pressure cooker — Big enough for most family dinners without being awkward on the counter.
- Wooden spoon or silicone spatula — Useful for stirring and, more important, deglazing the bottom after sautéing.
- Sharp chef’s knife — Makes onion, carrot, pepper, and potato prep much easier.
- Cutting board — A sturdy one helps when you are chopping several ingredients in a row.
- Measuring cups and spoons — Pressure-cooker recipes are less forgiving when you guess.
- Tongs — Handy for searing meat and lifting chicken or roast out of the pot.
- Instant-read thermometer — Not required for every recipe, but useful if you want to check chicken or pork without cutting into it.
- Small bowl — Good for cornstarch slurry, mustard mixes, or whisking sauce ingredients.
- Ladle — Useful for soups, chili, and brothy chicken dishes.
- A shallow storage container — Cools leftovers faster than a deep bowl.
Smart Shopping and Ingredient Tips

Choose cuts that match the method. Chicken thighs, chuck roast, pork shoulder, and stew meat are the pressure-cooker sweet spot because they stay moist while they cook. Chicken breasts work too, but they need shorter times and a little more care at the end. I reach for thighs when I want the recipe to behave.
Canned ingredients matter more than people admit. A good crushed tomato has a clean, tomato-forward flavor; a cheap one can taste tinny. Beans should be rinsed unless the recipe says otherwise, and broth should usually be low-sodium so you control the salt yourself. That one choice makes almost every recipe easier to season properly.
For dairy, buy the kind that melts well. Block cheese you shred yourself behaves better than pre-shredded cheese, which often carries a coating that keeps it from melting smoothly. For vegetables, frozen corn and spinach are perfectly fine here. They save time and still taste like dinner.
Make-Ahead, Storage, and Reheating Guidance

Most of these dinners hold well for 3 to 4 days in the refrigerator if you cool them quickly and store them in shallow containers. Soups, chili, shredded chicken, pulled pork, and pot roast all reheat well. Pasta dishes are a little fussier, but they still keep for a few days if you add a splash of broth or milk when warming them up.
Freezing works best for chili, pulled pork, pot roast, butter chicken, lentil soup, and shredded chicken. Those can usually be frozen for up to 2 to 3 months without much trouble. Pasta, mac and cheese, and noodle soups are less freezer-friendly because the starch softens after thawing. They are still edible, but the texture is not as good.
Reheat gently. On the stovetop, use low to medium-low heat and add a few tablespoons of broth, water, or milk if the sauce has tightened up. In the microwave, cover the bowl loosely and stir halfway through. For anything creamy, low heat is kinder than blasting it until the edges bubble hard. That is how sauces split and cheese turns grainy.
Variations and Adaptations to Try
Gluten-Free Swaps: Most of these recipes are easy to adapt if you check the labels on broth, soy sauce, barbecue sauce, and seasoning blends. Use gluten-free pasta or rice where needed, and skip flour-based thickeners in favor of cornstarch.
Dairy-Free Finish: Chili, shredded chicken, pulled pork, lentil soup, and teriyaki chicken all work fine without dairy. For creamy recipes, a plain unsweetened oat milk or canned coconut milk can help, though the flavor shifts a little and that is not always a bad thing.
Lower-Sodium Cooking: Use low-sodium broth, rinse canned beans, and cut added salt by about one-third at the start. Then finish with acid—lime, lemon, or vinegar—because that brightens the food without loading it with salt.
Vegetable-Forward Add-Ins: Frozen corn, spinach, chopped kale, diced zucchini, and mushrooms are easy additions for most of these dinners. Add quick-cooking vegetables after pressure cooking so they stay bright and do not dissolve into the sauce.
Heat-It-Up Version: A minced jalapeño, a pinch of cayenne, or a spoonful of chipotle in adobo can sharpen chili, shredded chicken, butter chicken, and white chicken chili. Start small. It is easier to add heat than to take it away.
Common Mistakes to Avoid
-
Not using enough liquid. The Instant Pot needs liquid to build pressure. If a recipe is dry going in, it usually turns into a burn warning instead of dinner.
-
Forgetting to scrape the bottom. After sautéing meat or onions, deglaze the pot with broth or water and scrape up every browned bit. A few stuck crumbs can be enough to cause trouble.
-
Adding dairy too early. Cream, sour cream, and most cheeses belong at the end. Pressure plus dairy can create a broken, grainy sauce.
-
Overcooking pasta and vegetables. Pasta needs a short pressure time or it turns gluey. Quick-cooking vegetables like spinach, corn, and peas should go in after pressure cooking.
-
Overfilling the pot. Stay under the max fill line. Soups, beans, and saucy dishes expand more than you think, and the machine needs room to do its job safely.
Frequently Asked Questions

Can I use frozen chicken in these recipes?
Yes, in some of them. Frozen chicken breasts or thighs can work in salsa chicken, white chicken chili, or chicken noodle soup, but you usually need to add a few extra minutes of pressure time. The meat should reach 165°F in the thickest part before serving.
Do I really need to sear the meat first?
Not always, but it helps. Searing adds flavor to pot roast, pulled pork, and ground turkey chili. If you are tired or short on time, you can skip it and still get a solid dinner.
Can I double these recipes?
Sometimes, but not blindly. The pot needs to stay under the max fill line, and the pressure time usually stays the same even when you double the ingredients. The part that changes most is how long it takes to come to pressure.
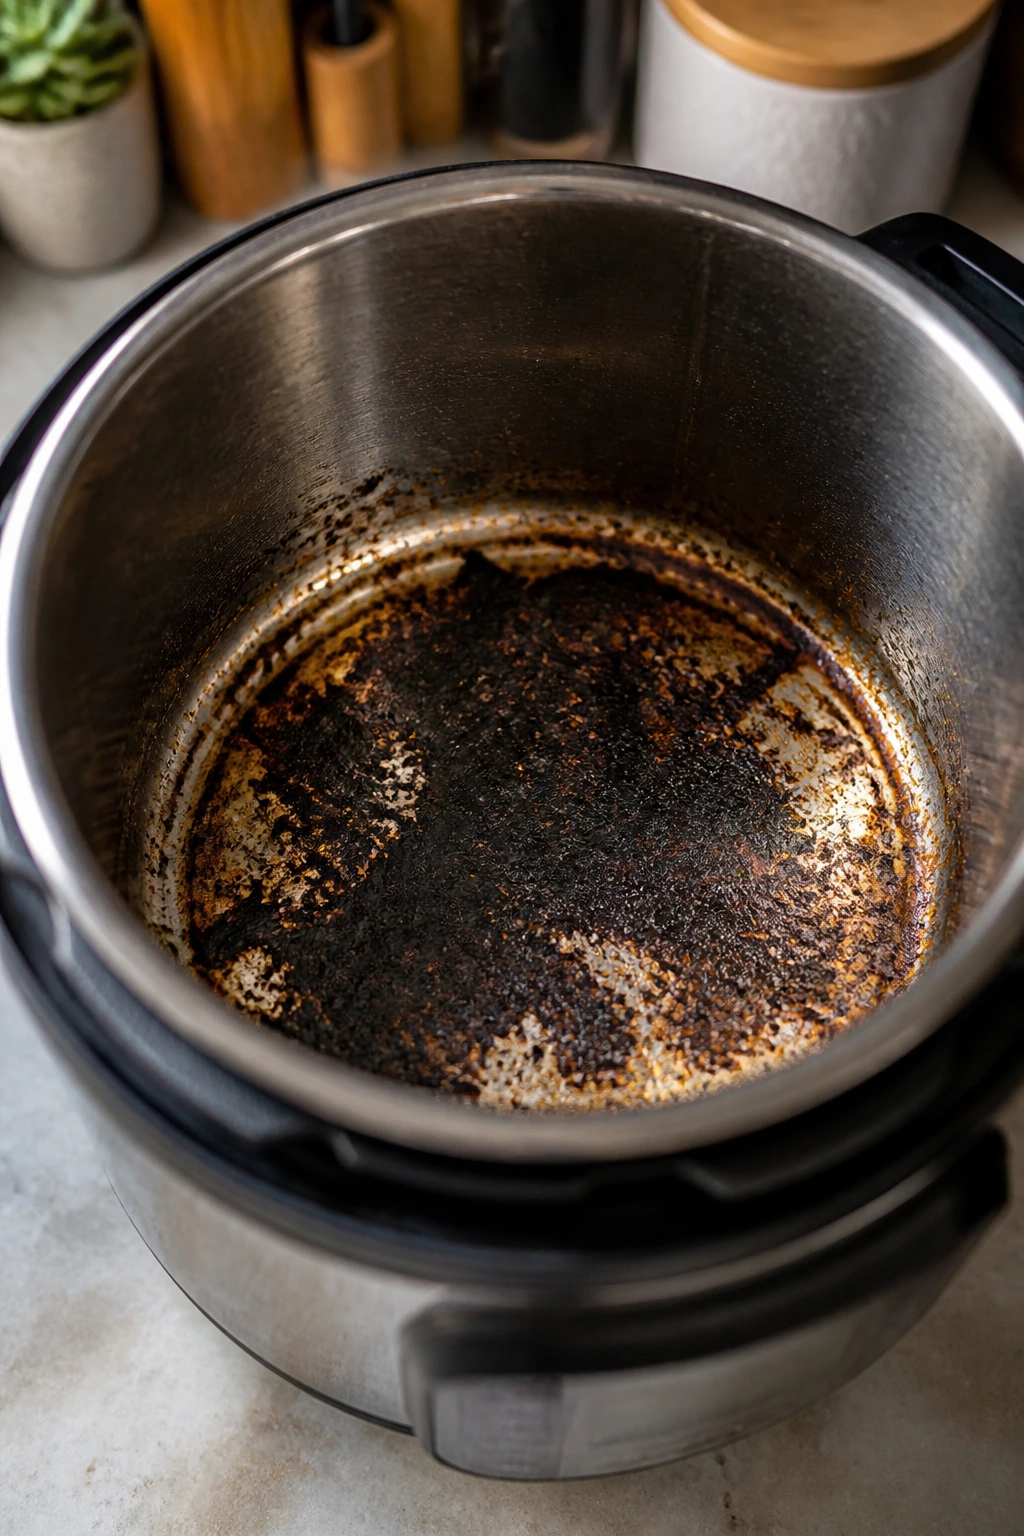
Why did I get a burn warning?
Usually because something stuck to the bottom or the liquid ratio was too low. Scrape the pot well after sautéing, and keep thick sauces like tomato paste or barbecue sauce from sitting directly on the bottom without liquid around them.
Can I use chicken breasts instead of thighs?
Yes, but reduce the pressure time a little. Breasts cook faster and dry out more easily, so they need a gentler hand. I prefer thighs for most pressure-cooker dinners because they stay tender even if you are a little late releasing the pressure.
What if I do not have low-sodium broth?
Use regular broth and cut back on the added salt. Taste the dish at the end before adding more seasoning. That one habit keeps a lot of beginner mistakes from happening.
Are these good for meal prep?
Very much so, especially the chili, shredded chicken, pulled pork, pot roast, lentil soup, and butter chicken. If you are making a noodle dish, store the pasta separately when you can so it stays springy instead of soaking up all the sauce.
On Repeat
The smartest beginner pressure-cooker dinners are the ones that do one thing well and do not ask for much drama. Tender meat, a solid liquid base, short finishing moves, and the discipline to add dairy or pasta at the right moment—that is the whole trick.
Once you trust those parts, the Instant Pot stops feeling fussy. It becomes a tool you can reach for on the nights when you want dinner to be hot, filling, and calm instead of another small kitchen project. Keep a few of these in your back pocket, and the machine starts earning its space on the counter.