
Dinner ideas for empty nesters shouldn’t feel like reduced-service versions of the meals you used to cook. The best ones are right-sized: enough food to feel generous, not so much that you spend three days negotiating a half-pan of leftovers.
I have very little patience for tiny “adult” dinners that look elegant and taste thin. If the kitchen smells like garlic, lemon, browned butter, roasted vegetables, or a pot that’s been simmering for a while, dinner still feels like dinner — even if there are only two plates on the table and no one is rushing off to a soccer practice afterward.
That’s the sweet spot here. These meals are built for smaller households, but they still have some backbone: a proper protein, vegetables that taste like themselves, sauces that do the heavy lifting, and portions that make sense when you’re not feeding a crowd. Some are fast enough for a Tuesday. Some want a little more attention. All of them avoid the usual trap of cooking too much food just because a recipe was written for a full house.
Why These Dinner Ideas Work So Well
-
Right-Sized Portions: Most of these recipes make 2 to 4 servings, so you can eat well without filling the fridge with food nobody wants on day three.
-
Less Waste, More Flavor: Smaller batches make it easier to buy a good piece of fish, a modest roast, or a handful of vegetables and actually use everything you bring home.
-
Real Dinners, Not Side Projects: These plates have protein, vegetables, and something saucy or hearty enough to feel complete, which is the part a lot of “light” dinners forget.
-
Leftovers That Still Taste Good: Several of these meals reheat cleanly, especially chili, baked pasta, stuffed peppers, and grain bowls.
-
Easy to Scale Up or Down: If a friend comes by or you want lunch for tomorrow, most of these recipes can stretch without turning floppy or bland.
-
Friendly to Small Kitchens: Sheet pans, skillets, and one-pot methods keep cleanup sane, which matters more than people admit.
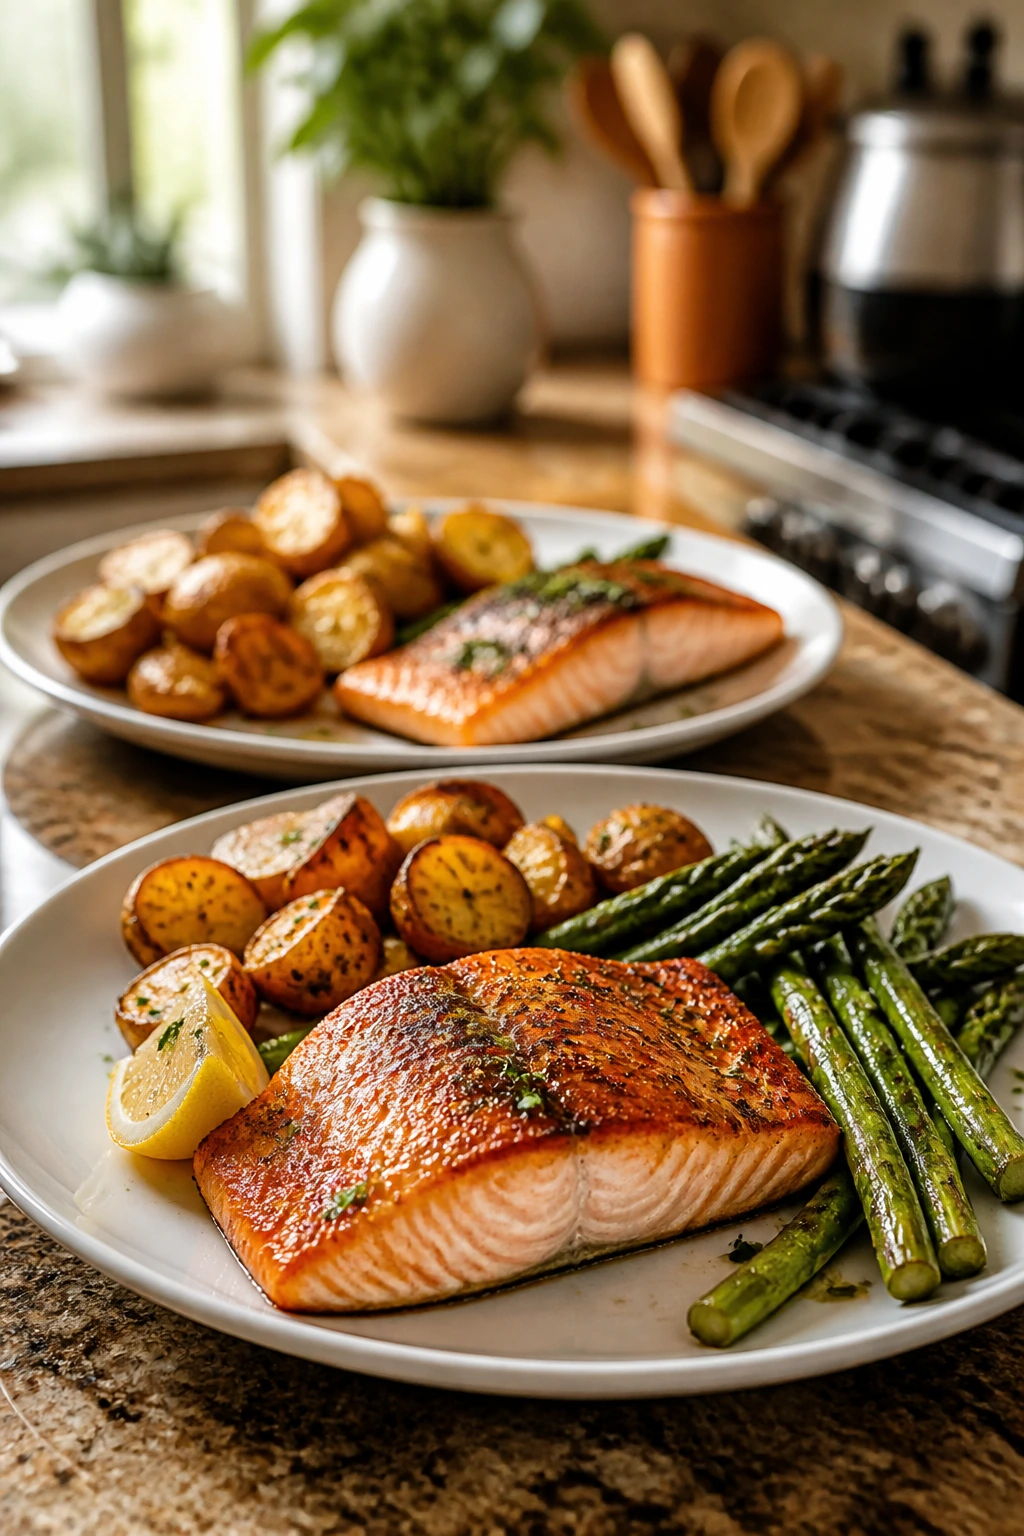
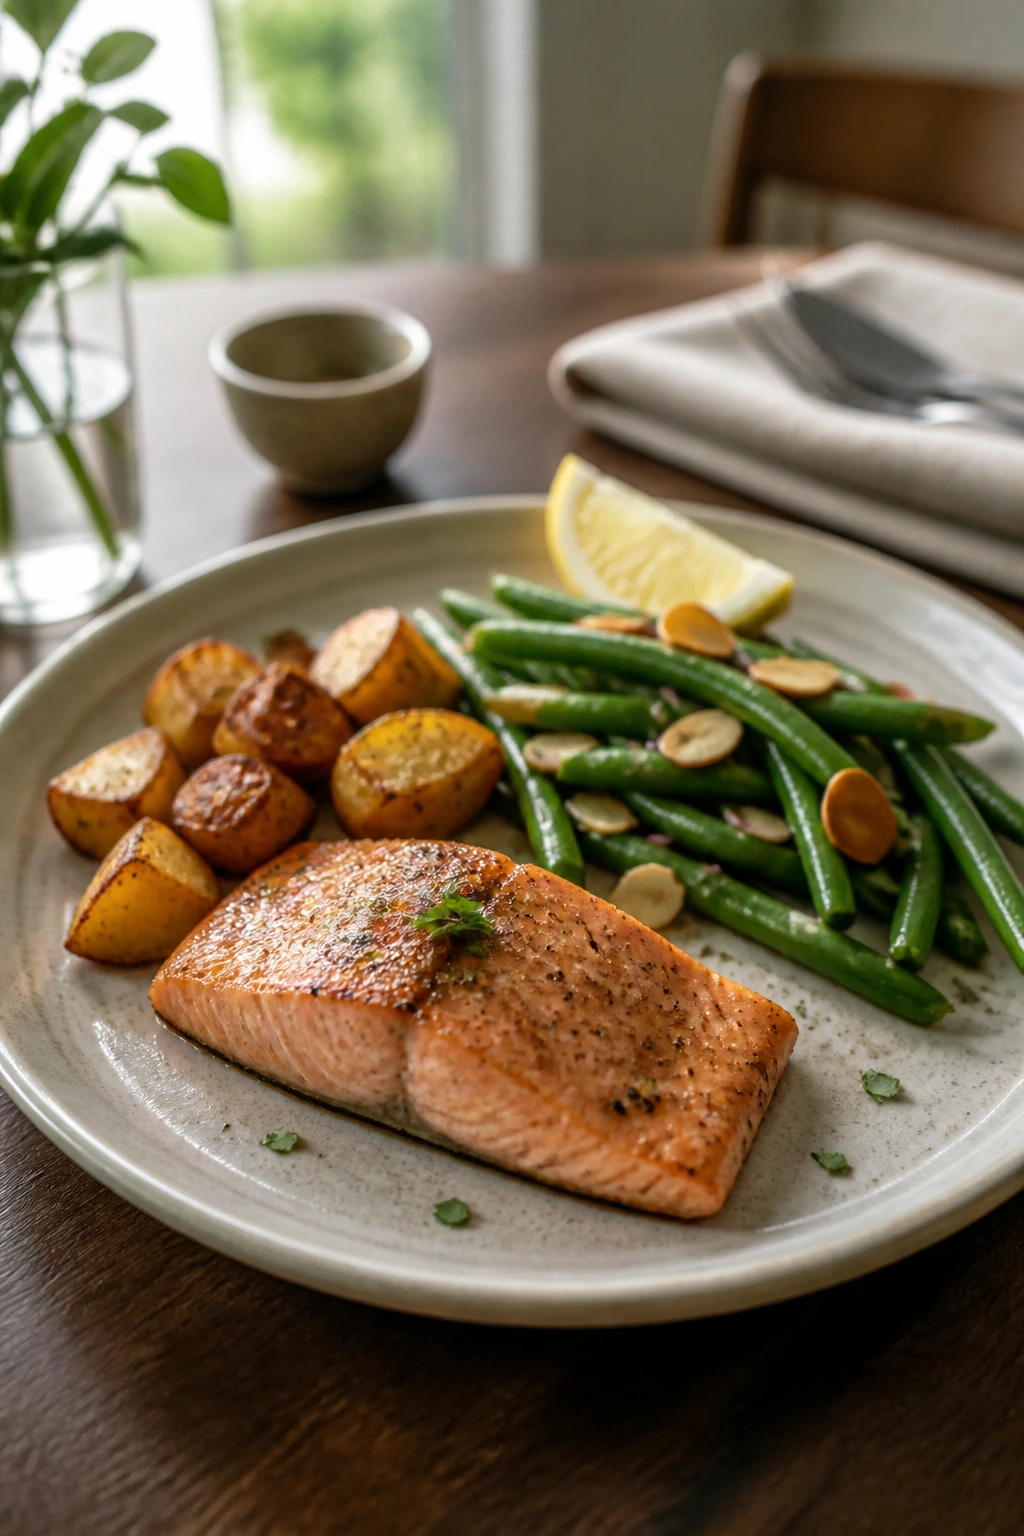
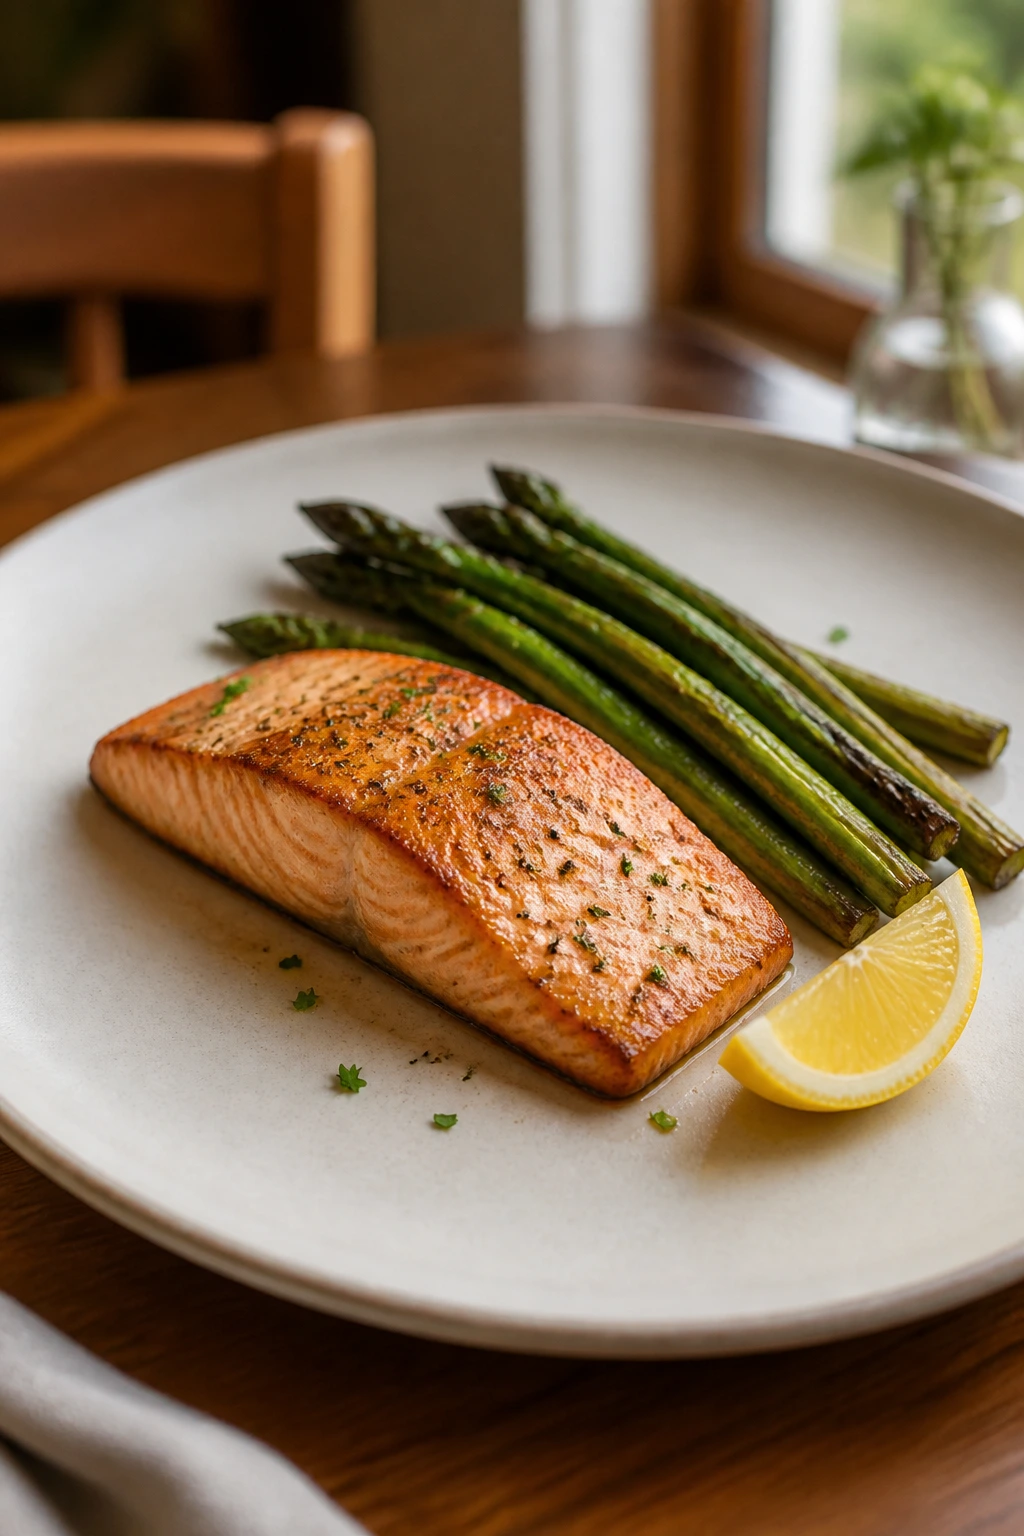
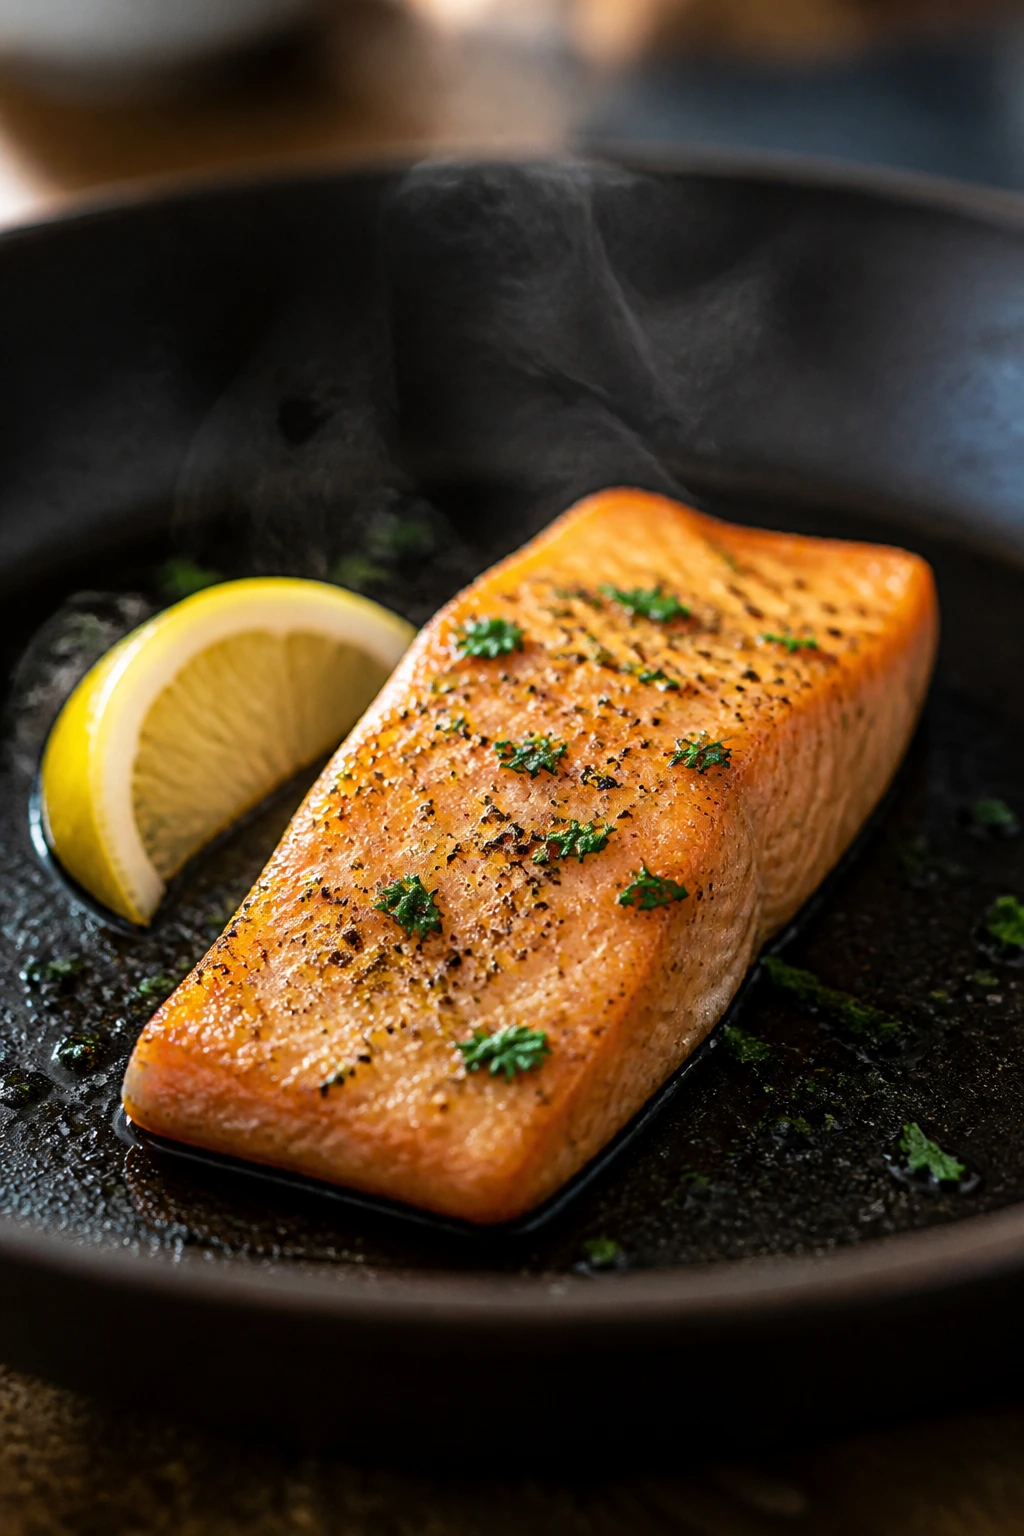
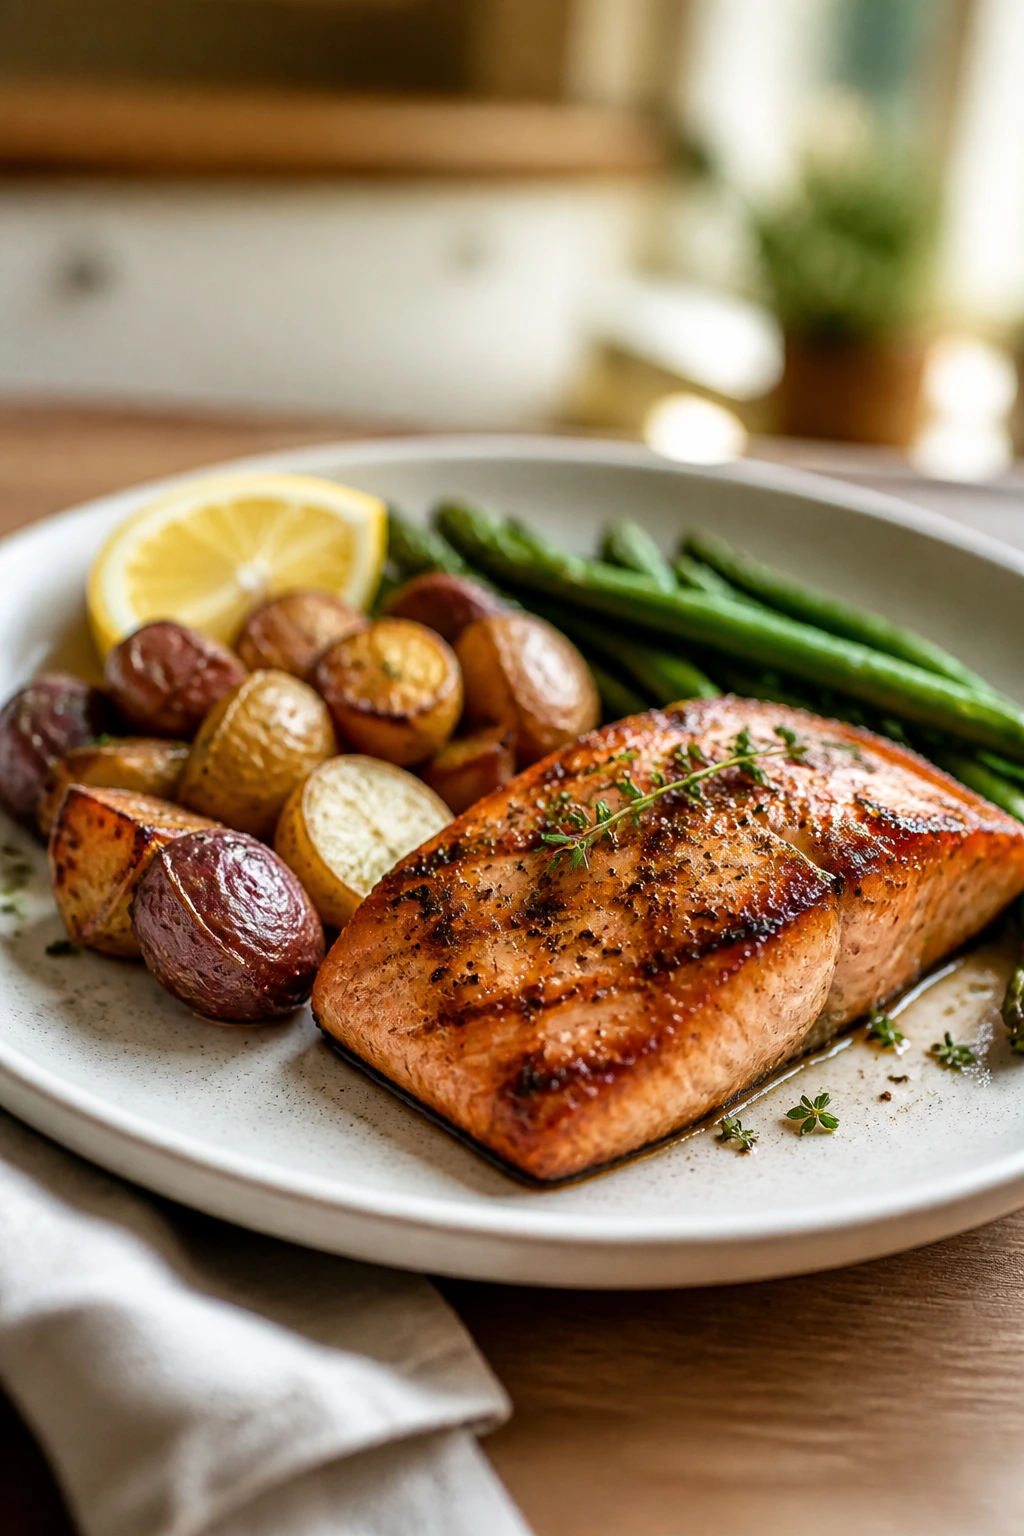
1. Lemon-Garlic Salmon with Asparagus
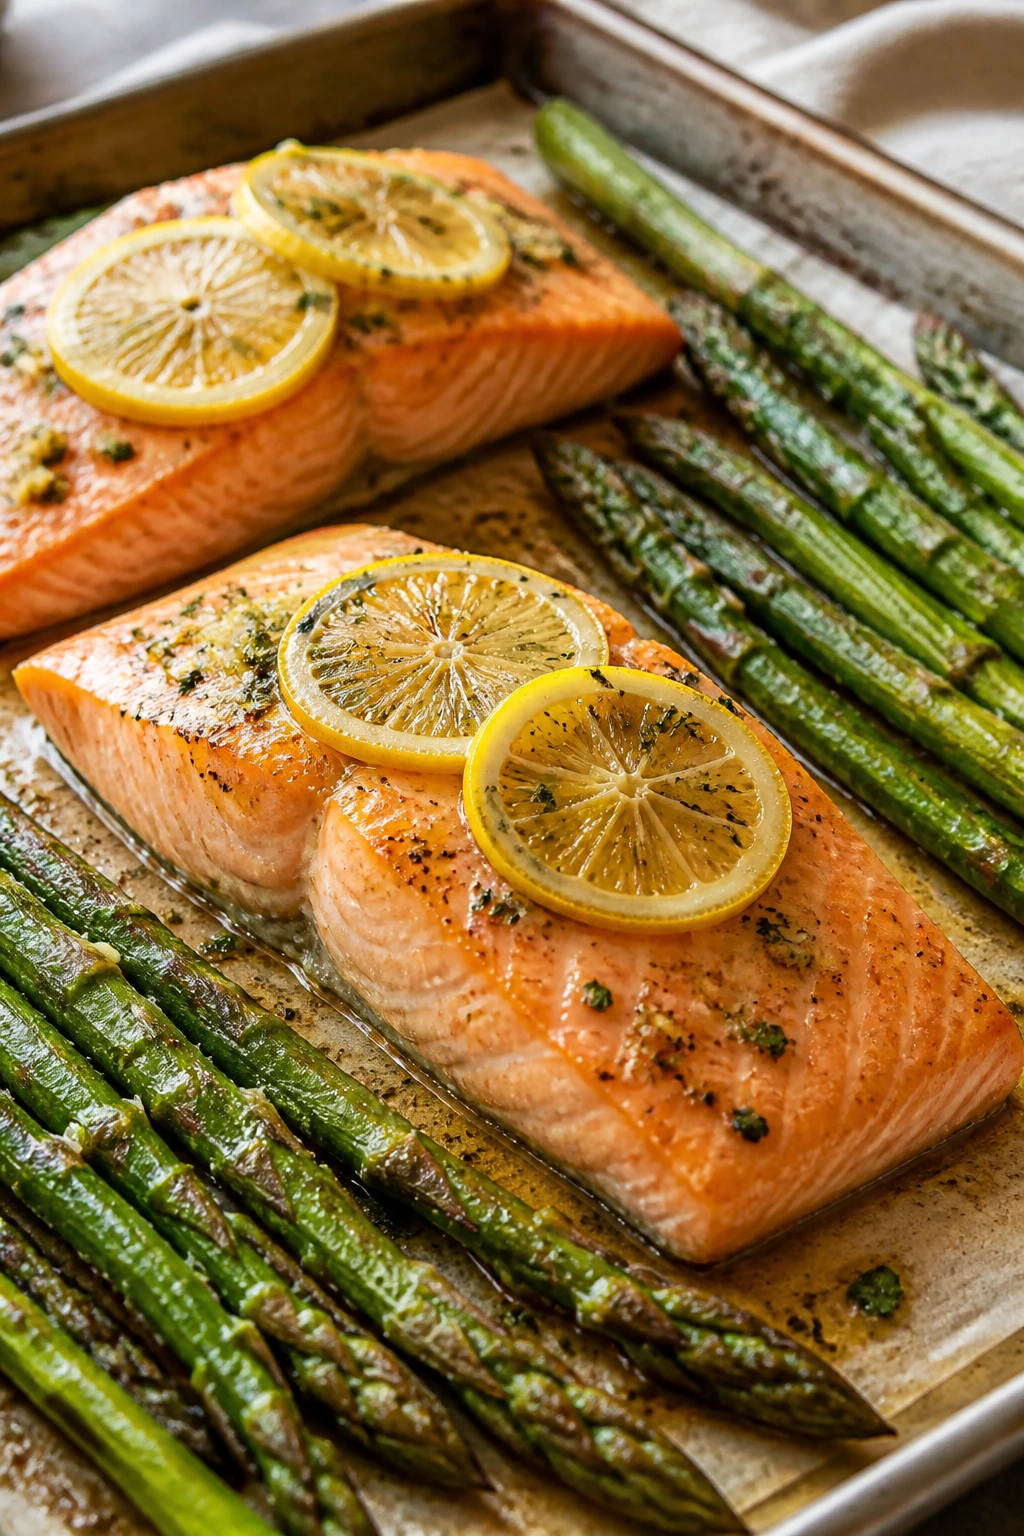
A salmon dinner like this has a way of making a plain evening feel a little more deliberate. The fish gets glossy with butter and lemon, the asparagus turns sweet at the tips, and the whole pan smells bright and clean the second it leaves the oven.
This is one of those meals that looks polished without asking much from you. Two fillets, one bunch of asparagus, and a hot oven are enough to make dinner for two feel composed instead of patched together.
Why It Works: Salmon cooks fast and asparagus cooks fast, so both land on the table at the same moment instead of one waiting while the other goes soft. A 425°F oven gives the fish enough heat to develop a little color while keeping the center tender, and the lemon does better here than a heavy sauce ever could. Zest before baking, juice after — that two-step citrus move keeps the flavor sharp.
Key Ingredients
- 2 salmon fillets, 6 oz each, skin-on or skinless
- 1 lb asparagus, woody ends trimmed
- 2 tbsp olive oil
- 2 tbsp unsalted butter, melted
- 2 garlic cloves, finely minced
- 1 lemon, zested and juiced
- 1/2 tsp kosher salt
- 1/4 tsp black pepper
- 1 tbsp chopped dill or parsley
Quick Steps
- Preheat the oven to 425°F and line a sheet pan with parchment.
- Toss the asparagus with 1 tablespoon of the olive oil, half the salt, and half the pepper. Spread it in a single layer.
- Pat the salmon dry, then brush the tops with the melted butter, garlic, lemon zest, remaining oil, salt, and pepper.
- Set the salmon on the pan and roast for 10 to 12 minutes, until the fish flakes at the thickest part and the asparagus is tender but still a little crisp at the stem.
- Finish with lemon juice and herbs. If you want light browning, broil for 1 minute at the end and watch it closely.
Tips and Variations
- Make-Ahead: Trim the asparagus and mix the garlic butter earlier in the day; keep both chilled.
- Swap It: Green beans or broccolini work well if asparagus looks tired.
- Serve It With: A small scoop of rice, roasted potatoes, or crusty bread catches the buttery juices.
2. Skillet Chicken Piccata
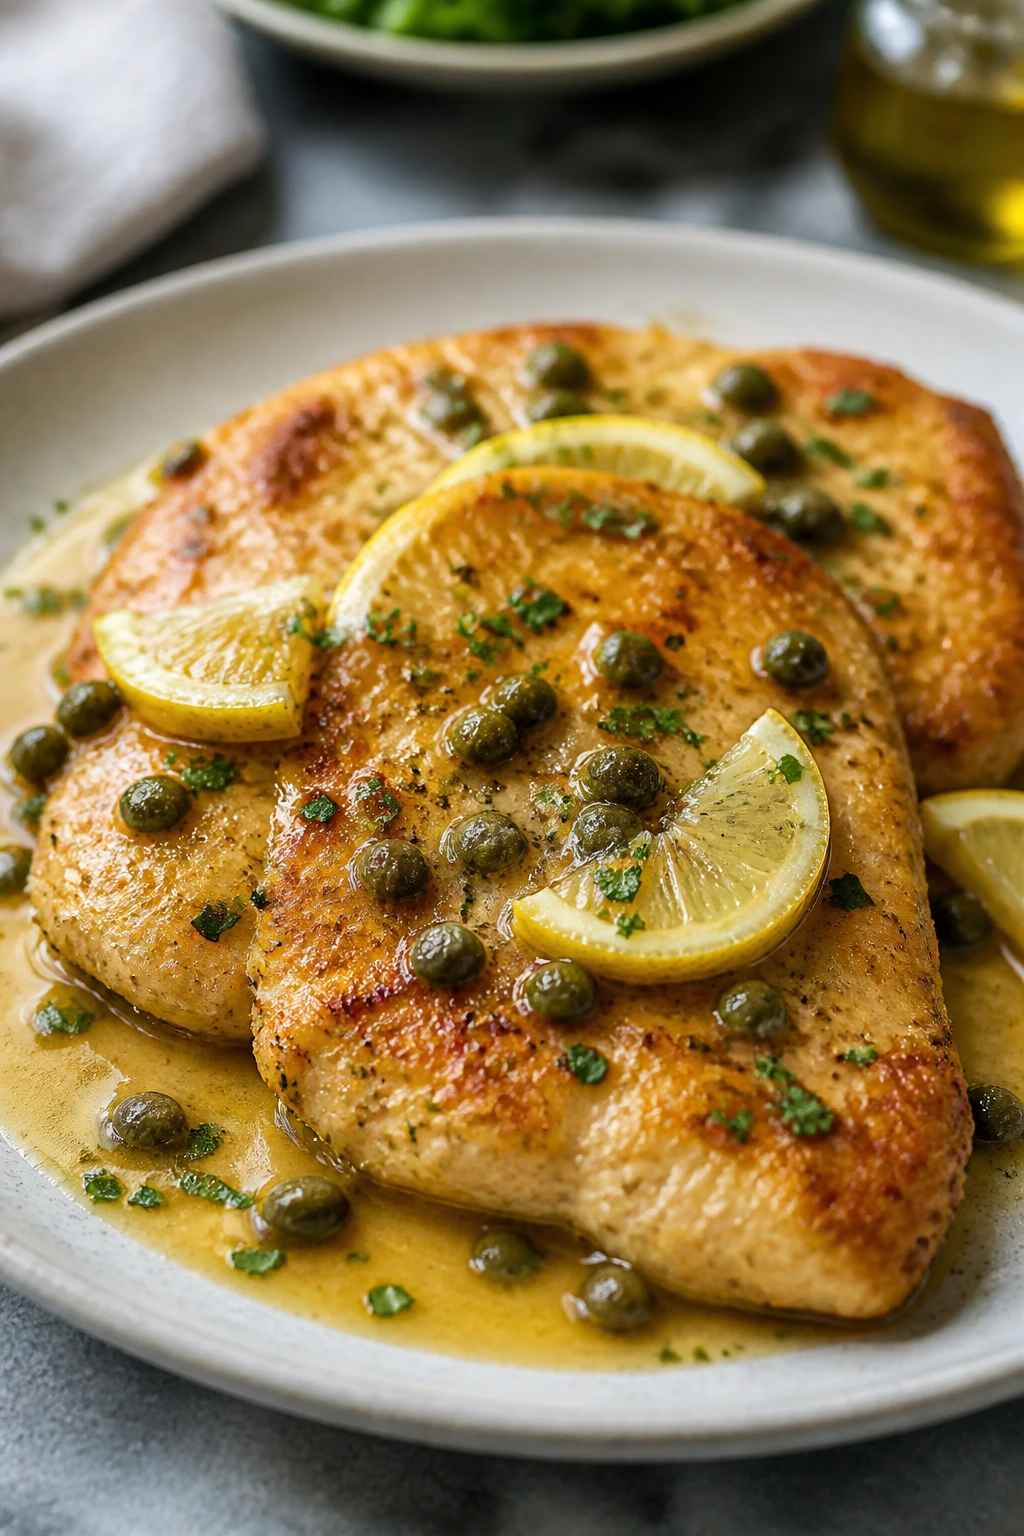
Chicken piccata has one of those sauces that doesn’t stay on the plate for long. The lemon, butter, and capers hit salt, sharp, and rich in the same bite, which is exactly why this old-school skillet dinner still earns a place in a small kitchen.
The chicken cooks in minutes, but the dish still feels layered. You get golden edges on the cutlets, a glossy pan sauce, and enough brightness to keep the whole thing from feeling heavy.
Why It Works: Thin chicken cutlets cook evenly and fast, which is a gift when you’re making dinner for two or three and do not want to fuss with a thick breast that’s raw in the middle and dry at the edge. A quick dredge in flour helps the chicken brown and also gives the sauce something to cling to. The capers matter more than people think — they keep the lemon sauce from tasting flat.
Key Ingredients
- 1 lb chicken breasts, sliced into cutlets or pounded thin
- 1/4 cup all-purpose flour
- 1/2 tsp kosher salt
- 1/4 tsp black pepper
- 2 tbsp olive oil
- 2 tbsp unsalted butter
- 2 garlic cloves, minced
- 1/2 cup low-sodium chicken broth
- 1/4 cup dry white wine or extra broth
- 2 tbsp lemon juice
- 2 tbsp capers, drained
- 2 tbsp chopped parsley
Quick Steps
- Pound the chicken to an even 1/2-inch thickness and season it with salt and pepper.
- Dredge the cutlets lightly in flour, shaking off the excess.
- Heat the olive oil and 1 tablespoon of the butter in a large skillet over medium-high heat. Sear the chicken for 3 to 4 minutes per side, until golden and cooked through, then move it to a plate.
- Lower the heat to medium, add the garlic, broth, wine, lemon juice, and capers, and simmer for 2 to 3 minutes, scraping up the browned bits until the sauce looks glossy.
- Whisk in the remaining butter, return the chicken to the skillet, and spoon sauce over the top. Finish with parsley.
Tips and Variations
- Shortcut: Buy pre-cut chicken cutlets if you don’t want to pound them yourself.
- Serve It With: Buttered noodles, mashed potatoes, or a simple green salad.
- Flavor Move: Add a spoonful of chopped green olives if you want a slightly brinier sauce.
3. Shrimp Scampi with Angel Hair
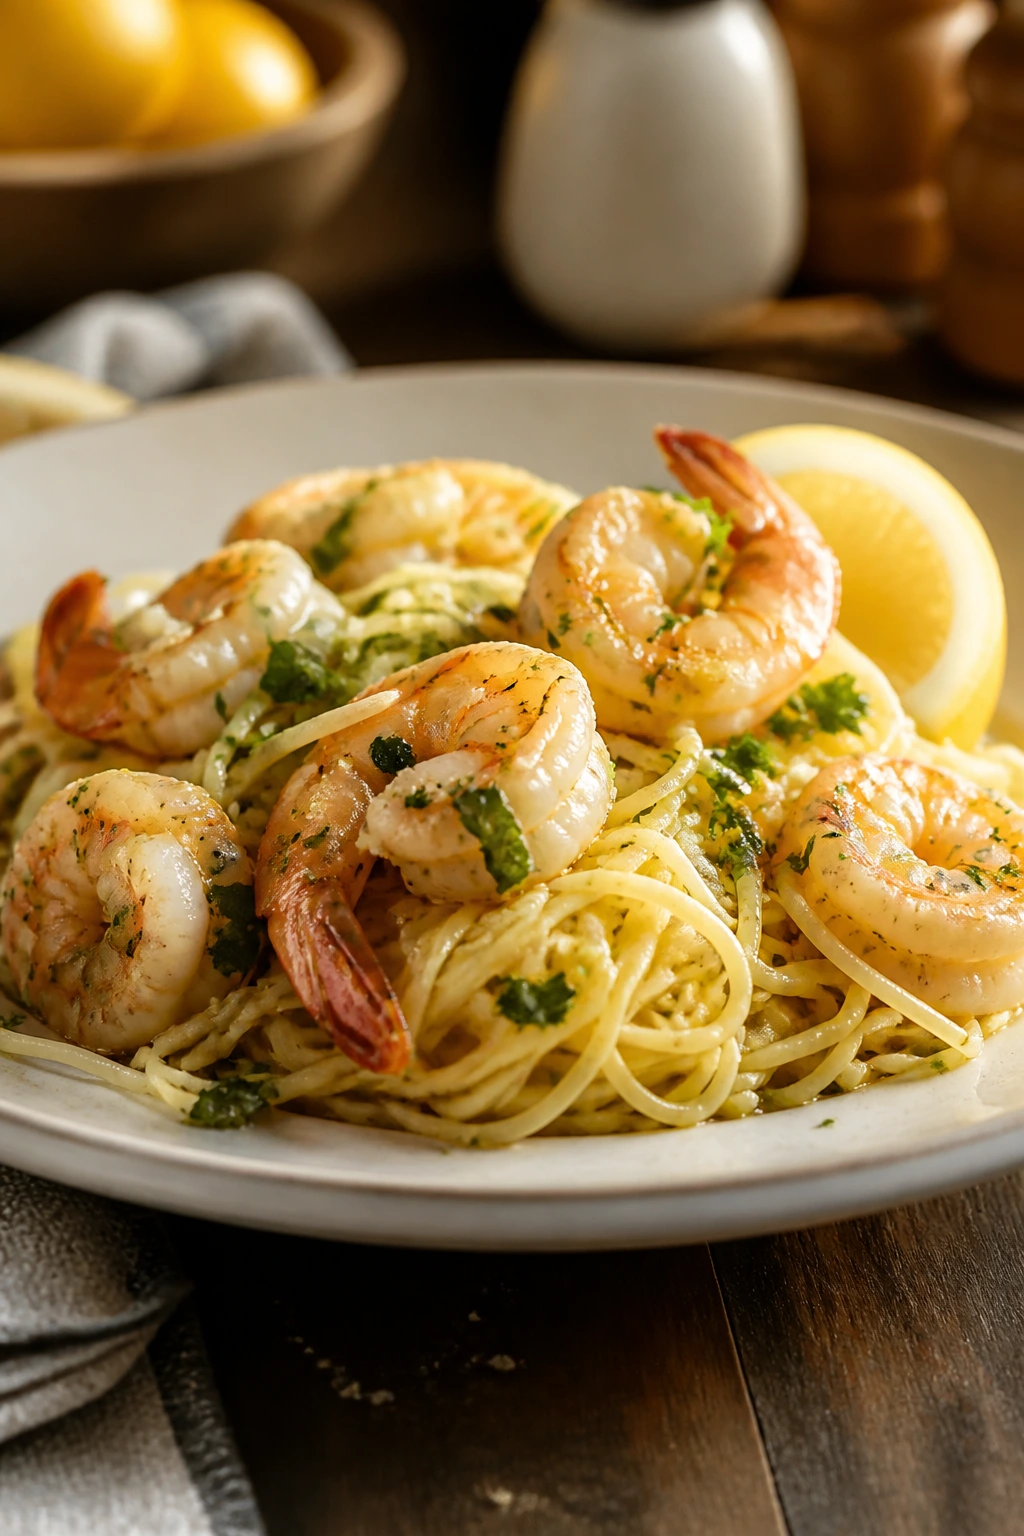
Want dinner that lands on the table in half an hour and still feels a little special? Shrimp scampi is the answer I keep circling back to. It’s fast, fragrant, and just messy enough with garlic butter to feel like you made an effort.
Angel hair gives the sauce somewhere to go, and the shrimp cook so fast they barely need attention. This is one of those meals that makes sense when you don’t want leftovers shouting from the fridge the next morning.
Why It Works: Shrimp are at their best when they spend only a minute or two in heat before turning pink and tender. That speed keeps the texture snappy, which matters more here than size or fancy presentation. The butter-and-oil combo keeps the garlic from burning, and the lemon juice cuts through the richness so the dish doesn’t slump.
Key Ingredients
- 8 oz angel hair pasta
- 1 lb large shrimp, peeled and deveined
- 3 tbsp unsalted butter
- 2 tbsp olive oil
- 4 garlic cloves, thinly sliced
- 1/4 tsp red pepper flakes
- 1/4 cup dry white wine or chicken broth
- 1 lemon, juiced
- 2 tbsp chopped parsley
- 2 tbsp grated Parmesan, optional
Quick Steps
- Bring a pot of salted water to a boil and cook the angel hair until just al dente, about 4 to 5 minutes. Reserve 1/2 cup of the pasta water, then drain.
- Heat the butter and olive oil in a large skillet over medium heat. Add the garlic and red pepper flakes and cook for about 30 seconds, until fragrant but not browned.
- Add the shrimp in one layer and cook for 1 to 2 minutes per side, until pink and opaque.
- Pour in the wine or broth and lemon juice, then simmer for 1 minute to loosen the browned bits and reduce the liquid slightly.
- Toss in the pasta, parsley, and a splash of pasta water if the sauce needs help clinging. Finish with Parmesan if you like a little salt and depth.
Tips and Variations
- Best Texture: Do not overcook the shrimp; they should curl gently, not clamp into tight little rings.
- Swap It: Use spaghetti or linguine if angel hair feels too delicate.
- Make It Bright: A spoonful of chopped basil at the end gives the dish a fresher finish.
4. Creamy Mushroom Risotto with Parmesan and Thyme

Risotto is not a fast dinner. It is, however, the kind of dinner that makes a small table feel intentional. Stirring a pot of rice until it turns creamy has its own quiet rhythm, and mushrooms make the whole thing earthy enough to stand on its own.
This is one of the richer meals in the group, but it still behaves well for two or three people. A single cup of rice goes a long way when it gets coaxed with broth, butter, and parmesan.
Why It Works: Arborio rice releases starch as you stir, which gives risotto its soft, almost flowing texture without needing cream. Warm broth added in stages keeps the rice cooking evenly, and mushrooms bring enough savory depth that the dish doesn’t need meat to feel complete. Thyme and parmesan do the finishing work; without them, it tastes unfinished. With them, it feels like a meal someone meant to make.
Key Ingredients
- 1 cup arborio rice
- 6 cups low-sodium chicken or vegetable broth, kept warm
- 8 oz cremini mushrooms, sliced
- 1 shallot, finely chopped
- 1/2 cup dry white wine
- 2 tbsp unsalted butter
- 1 tbsp olive oil
- 1 tsp fresh thyme leaves or 1/2 tsp dried thyme
- 1/2 cup grated Parmesan
- 2 tbsp chopped parsley
Quick Steps
- Warm the broth in a saucepan over low heat and keep it steaming, not boiling.
- In a wide skillet or saucepan, heat the olive oil and 1 tablespoon of butter over medium heat. Cook the mushrooms and shallot for 6 to 8 minutes, until the mushrooms shrink and their edges turn golden.
- Stir in the rice and thyme, and cook for 1 minute until the grains look glossy at the edges.
- Pour in the wine and stir until it’s mostly absorbed. Add the warm broth 1/2 cup at a time, stirring often and waiting until each addition is almost absorbed before adding the next. The rice should be creamy and tender after about 18 to 20 minutes.
- Stir in the remaining butter, Parmesan, parsley, salt, and pepper. Let it sit for 1 minute off the heat before serving.
Tips and Variations
- Do Not Rush: If you dump in all the broth at once, you’ll get rice soup, not risotto.
- Swap It: Use mixed mushrooms or add a handful of peas near the end.
- Serve It With: A crisp salad and a glass of dry white wine make the meal feel finished.
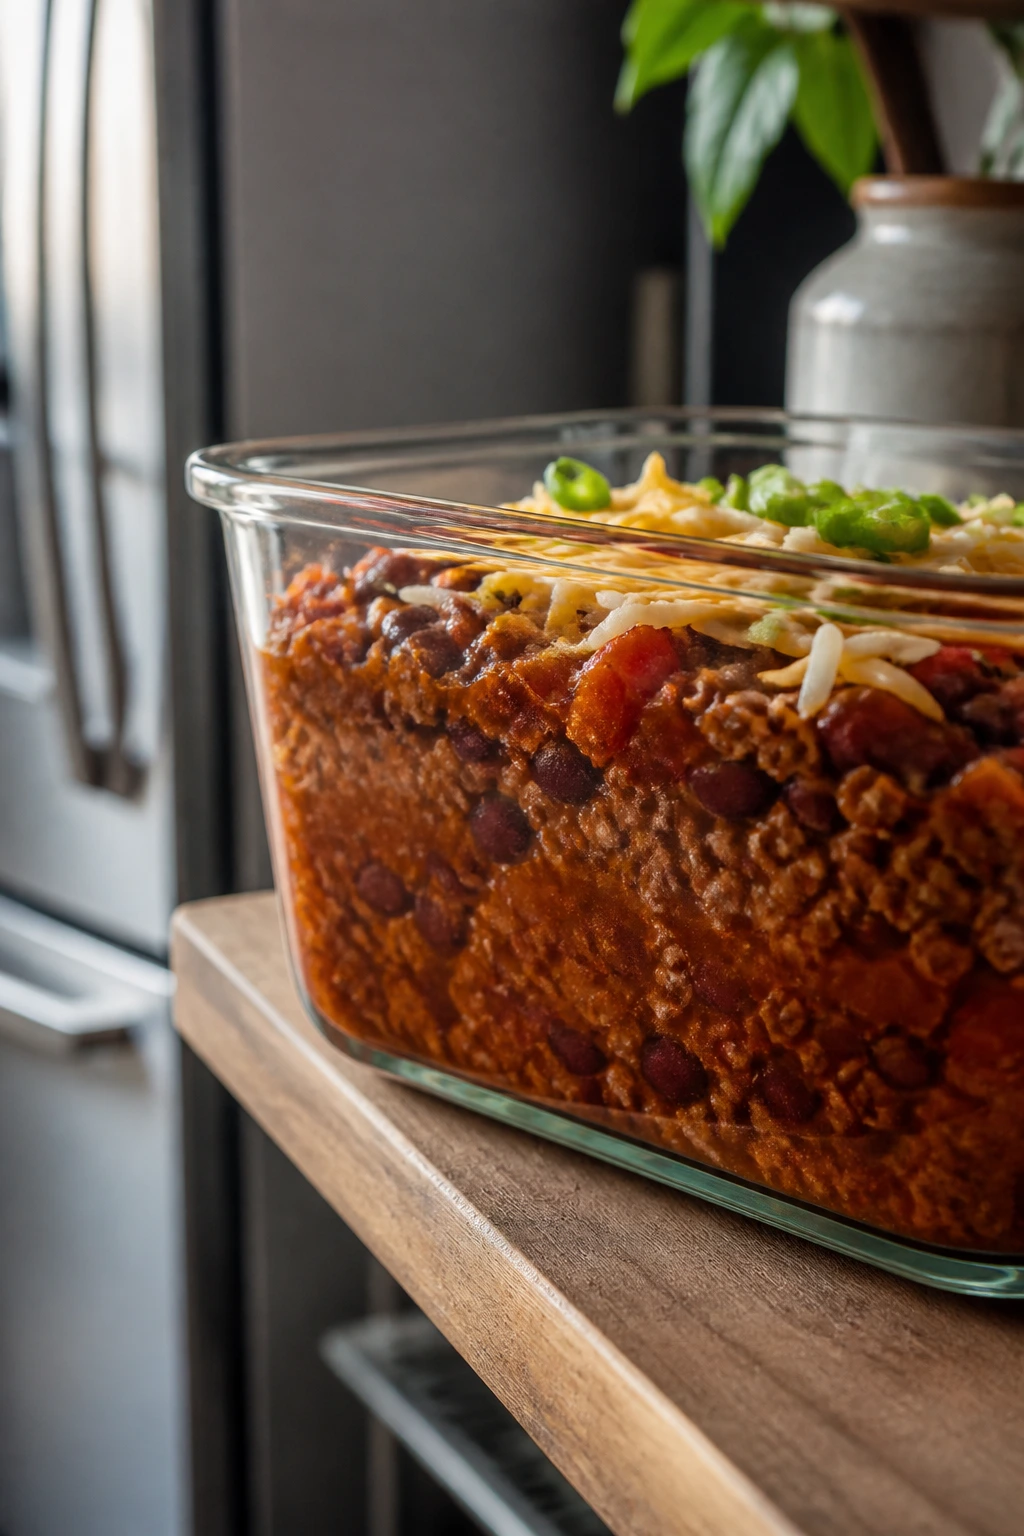
5. Turkey and White Bean Chili
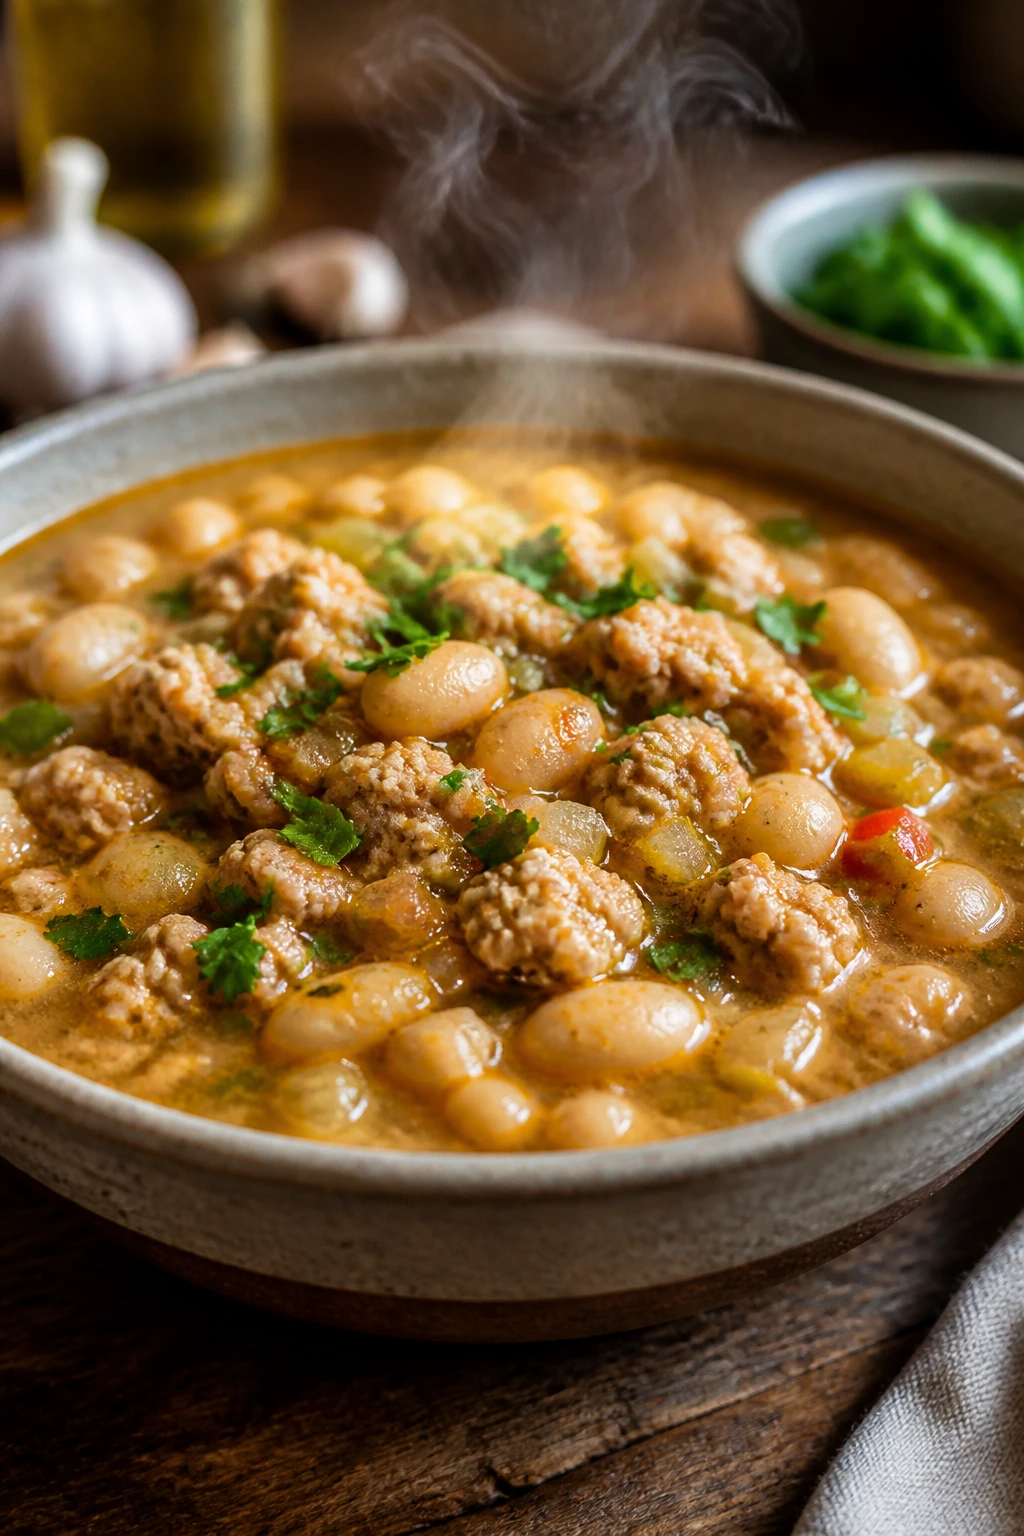
Turkey chili earns its keep because it’s sturdy without being heavy. The beans soften into the broth, the turkey soaks up cumin and chile powder, and the whole pot tastes better after a short rest on the stove.
This is one of the best “cook once, eat twice” dinners in the list. It’s friendly to small households because it freezes well, reheats cleanly, and still tastes like dinner instead of leftovers wearing a different shirt.
Why It Works: Ground turkey gives you a lean base that cooks quickly, while white beans add creaminess and body without making the chili feel dense. Tomato paste deepens the flavor in a way that canned tomatoes alone can’t, and the spices bloom in the hot oil before any liquid goes in. That one step is the difference between a chili that tastes flat and one that tastes built.
Key Ingredients
- 1 lb ground turkey
- 1 tbsp olive oil
- 1 onion, diced
- 1 bell pepper, diced
- 2 garlic cloves, minced
- 2 tbsp tomato paste
- 1 tbsp chili powder
- 1 tsp ground cumin
- 1/2 tsp dried oregano
- 1 can (15 oz) diced tomatoes
- 2 cans (15 oz each) white beans, drained and rinsed
- 2 cups low-sodium chicken broth
- 1 can diced green chiles, optional
- Salt and black pepper to taste
- Lime wedges, sour cream, or chopped cilantro for serving
Quick Steps
- Heat the oil in a Dutch oven over medium heat. Add the onion and bell pepper and cook for 4 to 5 minutes, until softened.
- Add the turkey and cook, breaking it up with a spoon, until no pink remains and the meat looks crumbly, about 5 to 6 minutes.
- Stir in the garlic, tomato paste, chili powder, cumin, and oregano. Cook for 1 minute, until the spices smell toasty.
- Add the tomatoes, beans, broth, and green chiles if using. Bring to a simmer, then cook uncovered for 25 to 30 minutes, stirring now and then, until the chili thickens slightly.
- Taste and adjust the salt. Serve hot with lime, cilantro, or sour cream.
Tips and Variations
- Make-Ahead: Chili tastes even better the next day after the spices settle in.
- Serve It With: Cornbread, tortilla chips, or a baked potato keep the meal simple and filling.
- Swap It: Great northern beans, cannellini beans, or navy beans all work.
6. Pork Tenderloin with Apples and Onions
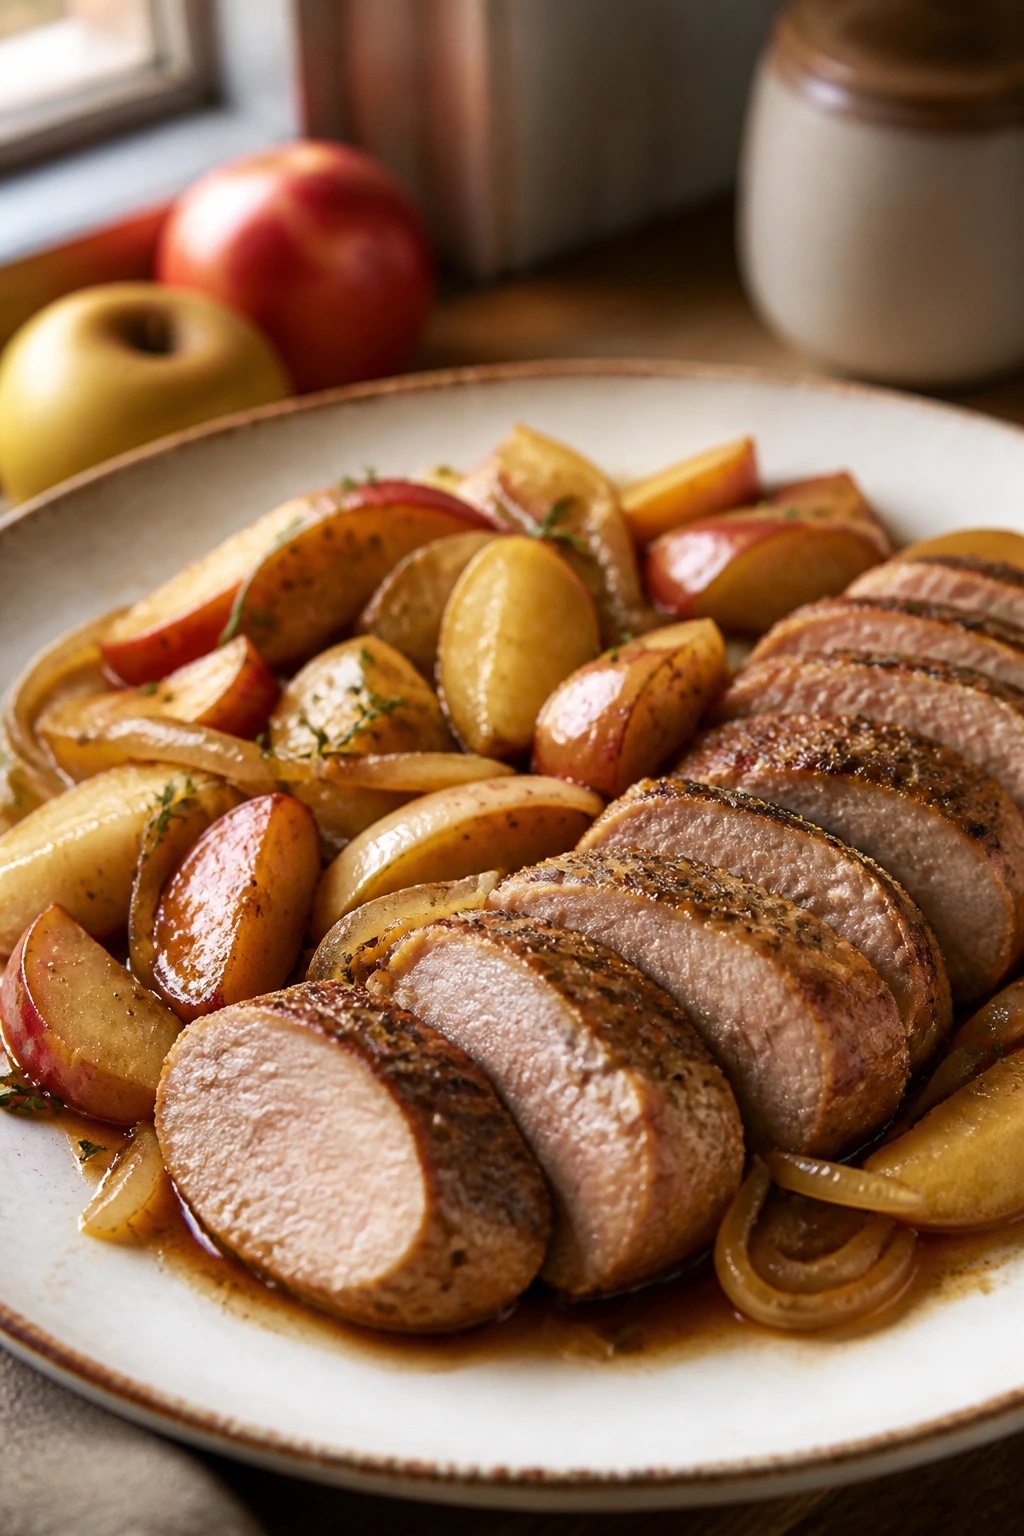
Pork tenderloin is the roast I reach for when the fridge looks half-empty but dinner still needs to feel like dinner. It cooks fast, slices neatly, and loves the sweet edge of apples and onions.
This dish lands somewhere between weeknight practical and Sunday-ish comfort. You get a browned crust on the pork, soft fruit in the pan juices, and enough sauce to make a small plate feel complete.
Why It Works: Tenderloin is lean and relatively quick, which makes it easier to manage in a smaller kitchen than a giant roast that needs a long oven stay. Apples and onions soften into a sweet-savory mix while the pork roasts, and a little Dijon in the pan juice keeps the sauce from turning sugary. The key is pulling the pork at 145°F and letting it rest.
Key Ingredients
- 1 pork tenderloin, about 1 to 1 1/4 lb
- 1 tbsp Dijon mustard
- 1 tsp kosher salt
- 1/2 tsp black pepper
- 2 tbsp olive oil
- 1 onion, sliced
- 2 apples, cored and sliced
- 1 tsp fresh thyme leaves or 1/2 tsp dried thyme
- 1/2 cup apple cider or low-sodium broth
- 1 tbsp butter
Quick Steps
- Preheat the oven to 400°F.
- Pat the pork dry, then rub it with Dijon, salt, and pepper.
- Heat 1 tablespoon of the oil in an oven-safe skillet over medium-high heat. Sear the pork for 2 to 3 minutes per side, until browned all over.
- Remove the pork briefly and add the remaining oil, onion, apples, and thyme. Cook for 4 minutes, stirring now and then, until the onion starts to soften.
- Pour in the cider or broth, nestle the pork back in, and roast for 12 to 15 minutes, until the center reaches 145°F. Rest the pork for 5 to 10 minutes, slice, and spoon the pan juices over the top.
Tips and Variations
- Best Cut: Look for a tenderloin, not a pork loin; they cook differently and the loin needs more time.
- Serve It With: Mashed potatoes, buttered egg noodles, or roasted carrots.
- Flavor Move: A splash of apple cider vinegar at the end sharpens the sauce if the apples taste too sweet.
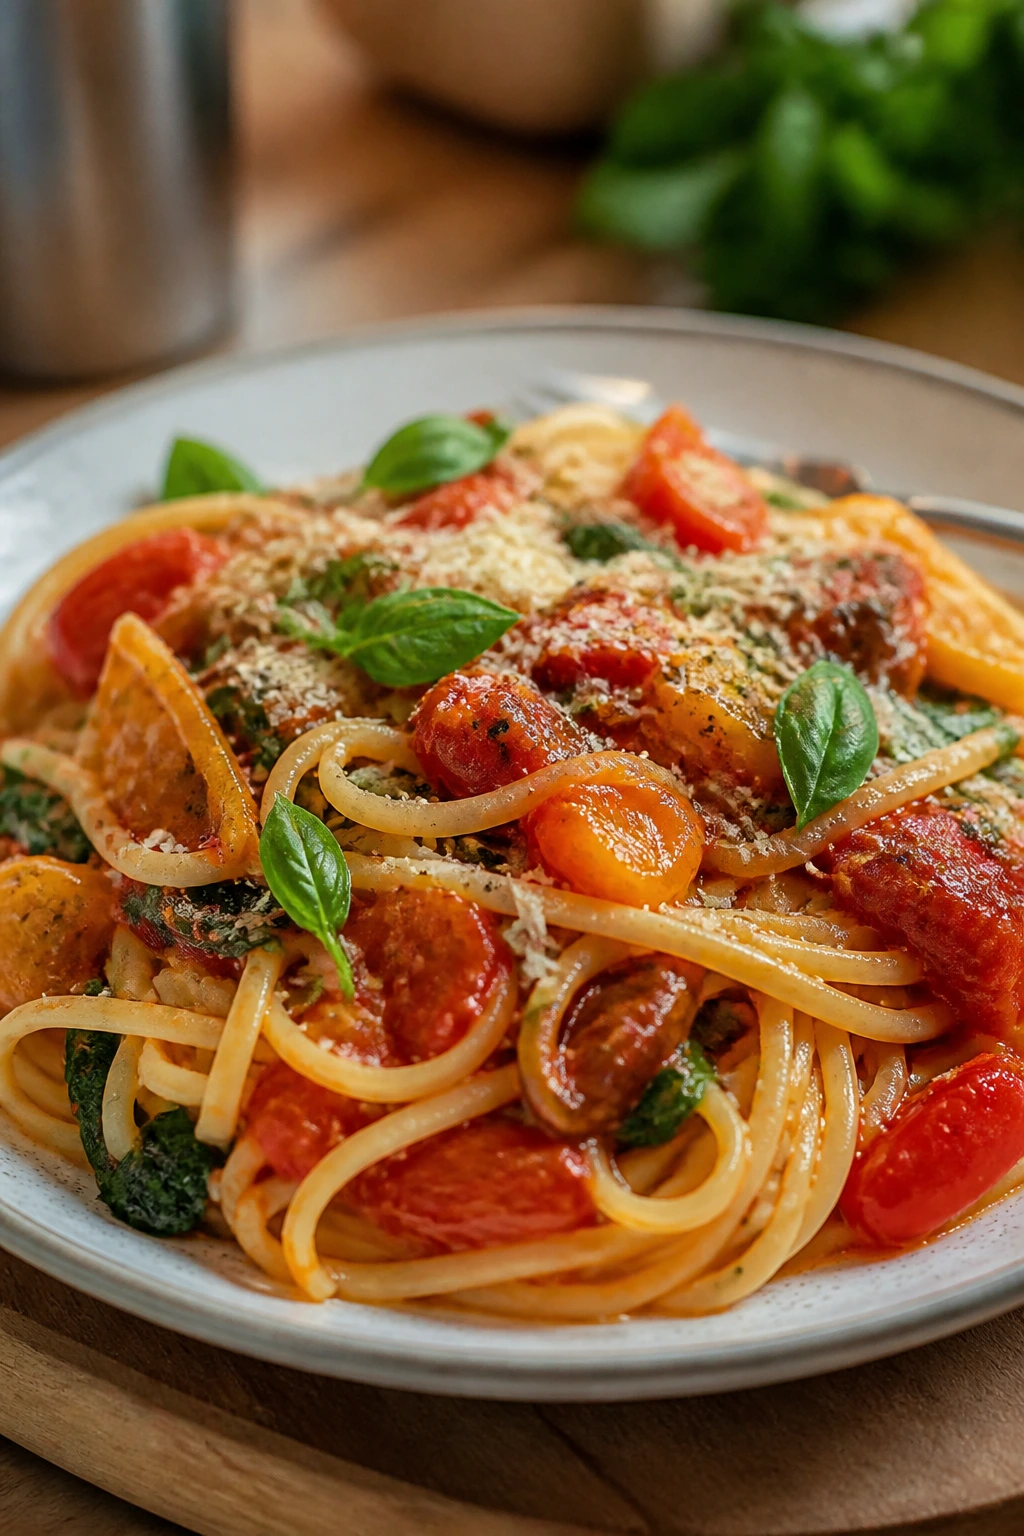
7. Small-Batch Baked Ziti
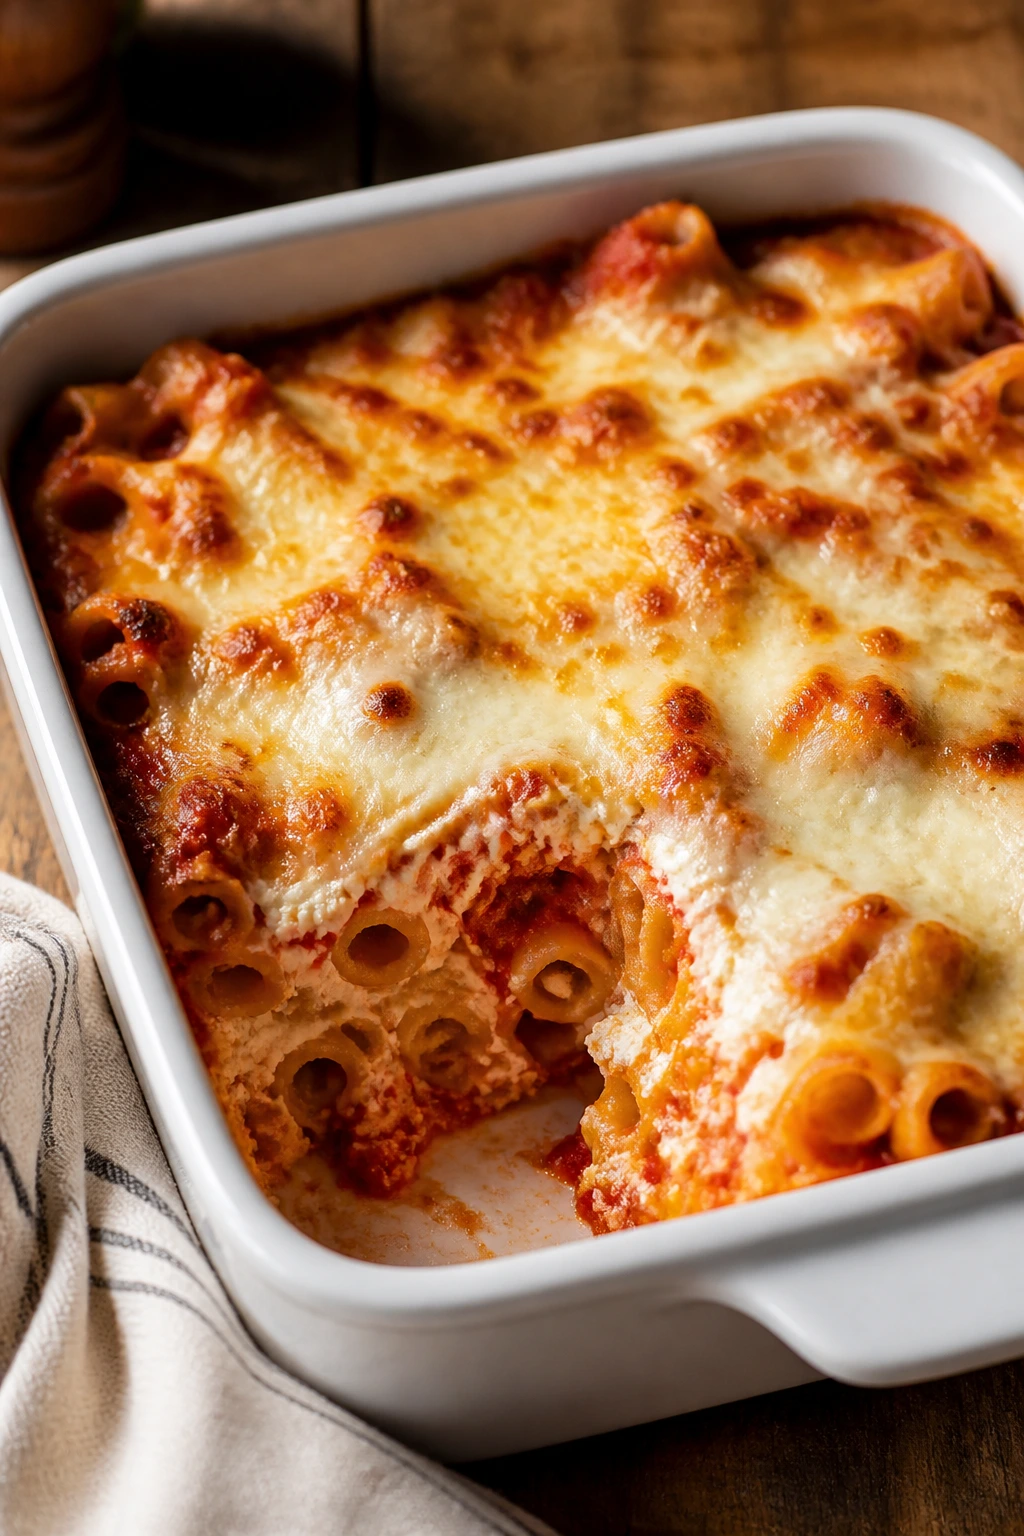
I like a baked ziti that behaves. Not a dish that spills over the pan, not a mountain of pasta that needs an army, just enough creamy, saucy baked comfort to feed two or four without leftovers taking over the week.
This version keeps the spirit of the classic casserole but trims the scale. The ricotta gives it body, the marinara keeps it bright, and the top turns golden in a way that never fails to make people hover near the oven.
Why It Works: Pasta bakes are one of the easiest ways to cook for a smaller household because you can build the whole dish in a modest 8×8-inch or small oval baking dish. A little sausage gives the sauce depth, ricotta softens the middle, and mozzarella forms that familiar stretchy top everyone expects. Cooking the pasta just shy of al dente matters here because it finishes in the oven.
Key Ingredients
- 8 oz ziti or penne
- 1/2 lb Italian sausage, casings removed
- 1 tbsp olive oil
- 1 small onion, diced
- 2 garlic cloves, minced
- 2 cups marinara sauce
- 1 cup whole-milk ricotta
- 1 egg, lightly beaten
- 1 1/2 cups shredded mozzarella
- 1/4 cup grated Parmesan
- 2 tbsp chopped basil or parsley
Quick Steps
- Preheat the oven to 400°F and grease an 8×8-inch baking dish.
- Bring a pot of salted water to a boil and cook the pasta for 2 minutes less than the package says. Drain it well.
- Heat the oil in a skillet over medium heat. Cook the sausage and onion for 6 to 7 minutes, breaking up the meat until the sausage is browned and the onion is soft. Add the garlic and cook for 30 seconds.
- Stir in the marinara. In a bowl, mix the ricotta, egg, half the mozzarella, half the Parmesan, and half the herbs.
- Toss the pasta with the sauce, then layer half of it in the baking dish, spread over the ricotta mixture, and top with the remaining pasta and cheeses. Bake for 20 to 25 minutes, until bubbling and browned in spots.
- Rest for 10 minutes before serving so it slices instead of slumping.
Tips and Variations
- Make-Ahead: Assemble the ziti earlier in the day and refrigerate it; add 5 to 10 minutes to the bake time.
- Swap It: Spinach, mushrooms, or roasted zucchini can stand in for some of the sausage.
- Serve It With: A green salad and garlic bread make this feel like a full supper.
8. Greek Chicken Bowls with Tzatziki
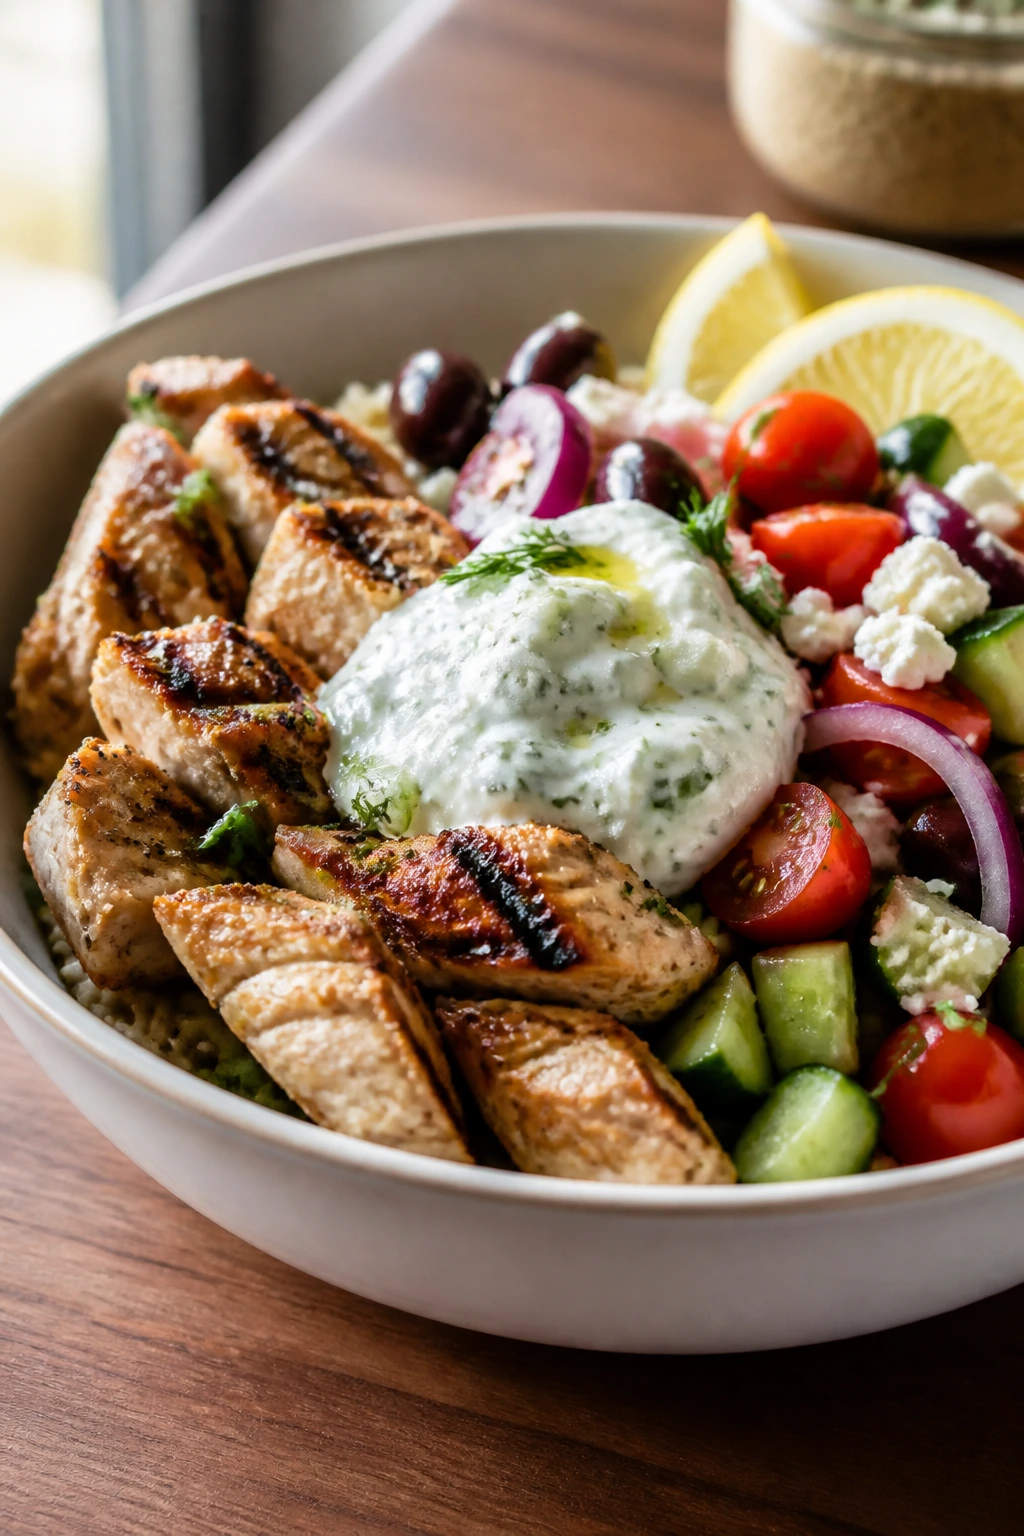
Two bowls, a pile of cucumber, and a tangy spoonful of yogurt can feel like a proper dinner when the flavors are sharp enough. These Greek chicken bowls are fresh, filling, and nicely structured, which is a useful quality when you’re cooking for fewer people and don’t want the meal to sprawl.
The chicken is savory and lemony, the vegetables stay crisp, and the tzatziki cools everything down. It’s one of those dinners that tastes lighter than it looks, which is a pleasant surprise when you’re hungry.
Why It Works: Chicken thighs stay juicier than breasts during quick cooking, and they hold up well if you want leftovers for lunch. The bowl format also makes this recipe easy to mix and match: rice, quinoa, pita, or even lettuce all work as the base. Tzatziki brings moisture and acidity, which keeps the whole meal from tasting dry or repetitive.
Key Ingredients
- 1 lb boneless skinless chicken thighs
- 2 tbsp olive oil
- 1 lemon, zested and juiced
- 2 garlic cloves, minced
- 1 tsp dried oregano
- 1/2 tsp kosher salt
- 1/4 tsp black pepper
- 1 cup cooked rice or quinoa
- 1 cup cherry tomatoes, halved
- 1 cucumber, diced
- 1/4 red onion, thinly sliced
- 1/2 cup feta cheese
- 1/2 cup plain Greek yogurt
- 1/2 cup grated cucumber, squeezed dry
- 1 tbsp chopped dill
Quick Steps
- Mix the olive oil, lemon zest and juice, garlic, oregano, salt, and pepper. Coat the chicken and let it sit while you prep the vegetables.
- Stir the Greek yogurt, grated cucumber, dill, and a pinch of salt together to make the tzatziki.
- Heat a skillet over medium-high heat and cook the chicken for 5 to 6 minutes per side, until browned and cooked through. The juices should run clear and the thickest part should reach 165°F.
- Let the chicken rest for 5 minutes, then slice it.
- Build the bowls with rice or quinoa, chicken, tomatoes, cucumber, onion, feta, and a generous spoonful of tzatziki.
Tips and Variations
- Shortcut: Use store-bought tzatziki if you do not want to grate cucumber.
- Serve It With: Warm pita or hummus on the side keeps the meal relaxed.
- Flavor Move: A few olives or chopped roasted red peppers make the bowl feel a little more Mediterranean.
9. Stuffed Bell Peppers with Beef and Rice
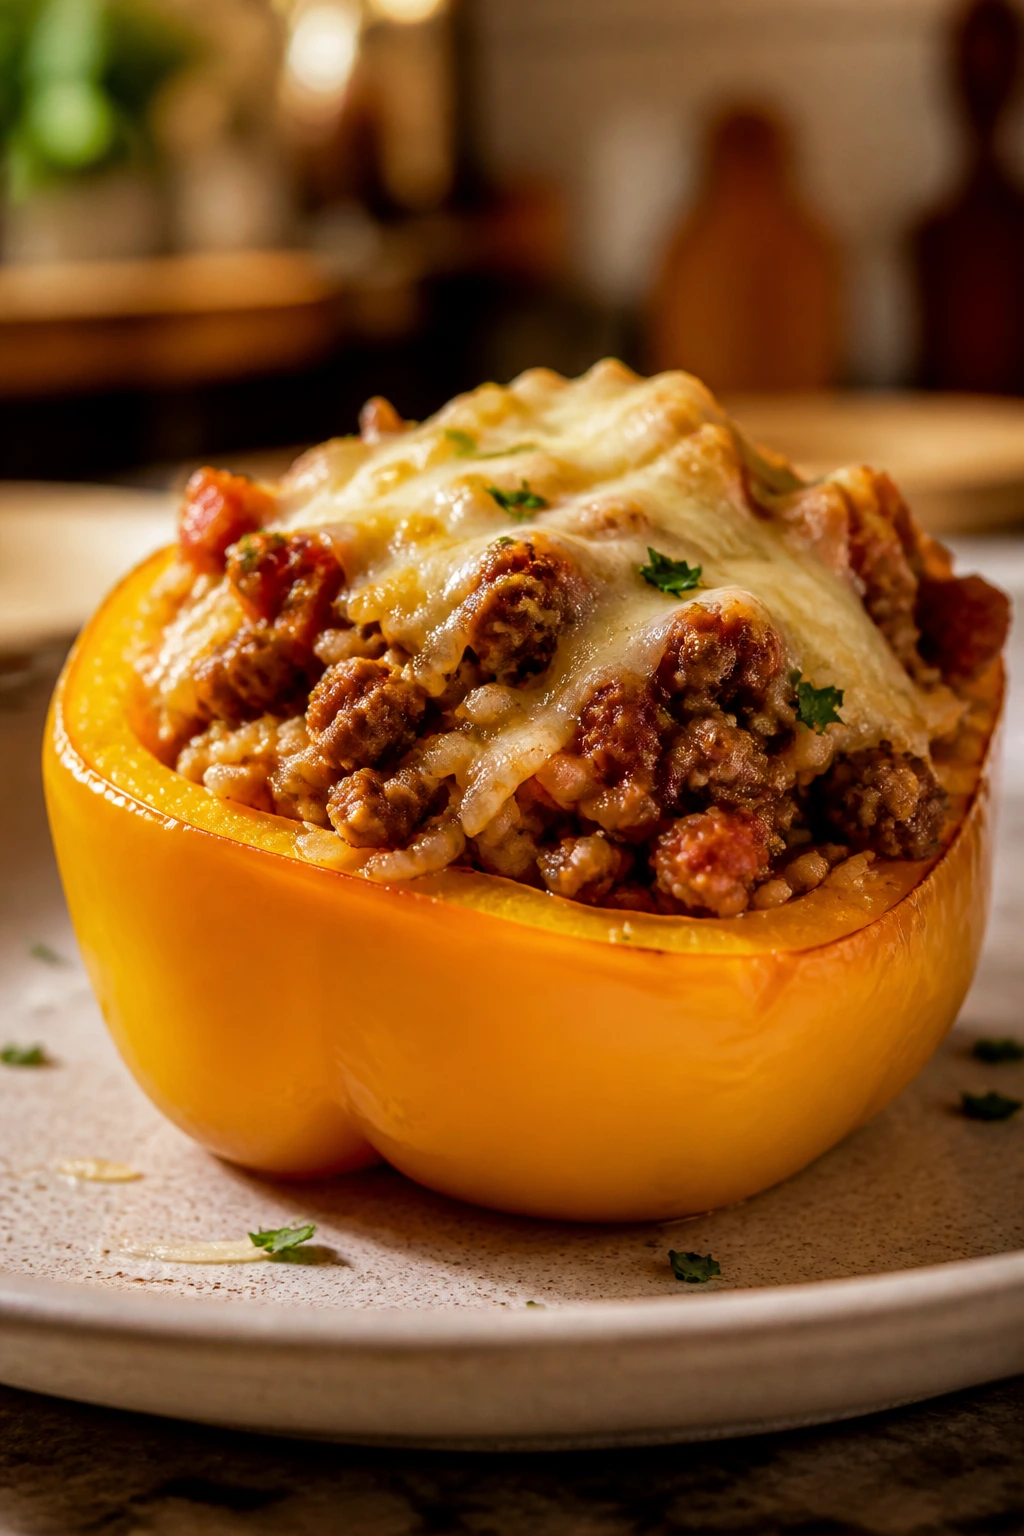
Stuffed bell peppers are old-school for a reason. They hold a filling neatly, they look tidy on the plate, and they give you a built-in portion size without any guesswork.
For smaller households, they’re surprisingly useful. Four peppers can feed two people generously with lunch left over, and the filling can lean beefy, grainy, or even half-vegetable if that’s how you like to cook.
Why It Works: Bell peppers soften just enough in the oven to become sweet and tender without collapsing. The filling combines rice, tomato sauce, and beef so each bite has protein, starch, and moisture, which keeps the dish from tasting dry. A little cheese on top helps the peppers brown and gives the filling a salty finish.
Key Ingredients
- 4 medium bell peppers
- 1/2 lb ground beef
- 1 tbsp olive oil
- 1 small onion, diced
- 2 garlic cloves, minced
- 1 cup cooked rice
- 1 1/2 cups tomato sauce
- 1 tsp dried Italian seasoning
- 1/2 tsp kosher salt
- 1/4 tsp black pepper
- 1 cup shredded mozzarella or cheddar
- 2 tbsp chopped parsley
Quick Steps
- Preheat the oven to 375°F. Halve the peppers lengthwise and remove the seeds and membranes.
- Heat the oil in a skillet over medium heat. Cook the onion for 3 minutes, then add the beef and cook until browned, breaking it up as it cooks.
- Stir in the garlic, rice, 1 cup of the tomato sauce, Italian seasoning, salt, and pepper. Let it simmer for 2 minutes until the mixture looks thick and cohesive.
- Spoon the filling into the peppers and arrange them in a baking dish. Pour the remaining sauce into the bottom of the dish if you want a little extra moisture.
- Cover with foil and bake for 25 minutes. Uncover, add the cheese, and bake 10 to 15 minutes more, until the peppers are tender and the cheese is melted.
Tips and Variations
- Make-Ahead: Stuff the peppers a day early and bake when needed.
- Swap It: Ground turkey, lentils, or chopped mushrooms can replace some or all of the beef.
- Serve It With: A green salad or a slice of crusty bread keeps the plate balanced.
10. Black Bean and Sweet Potato Tacos
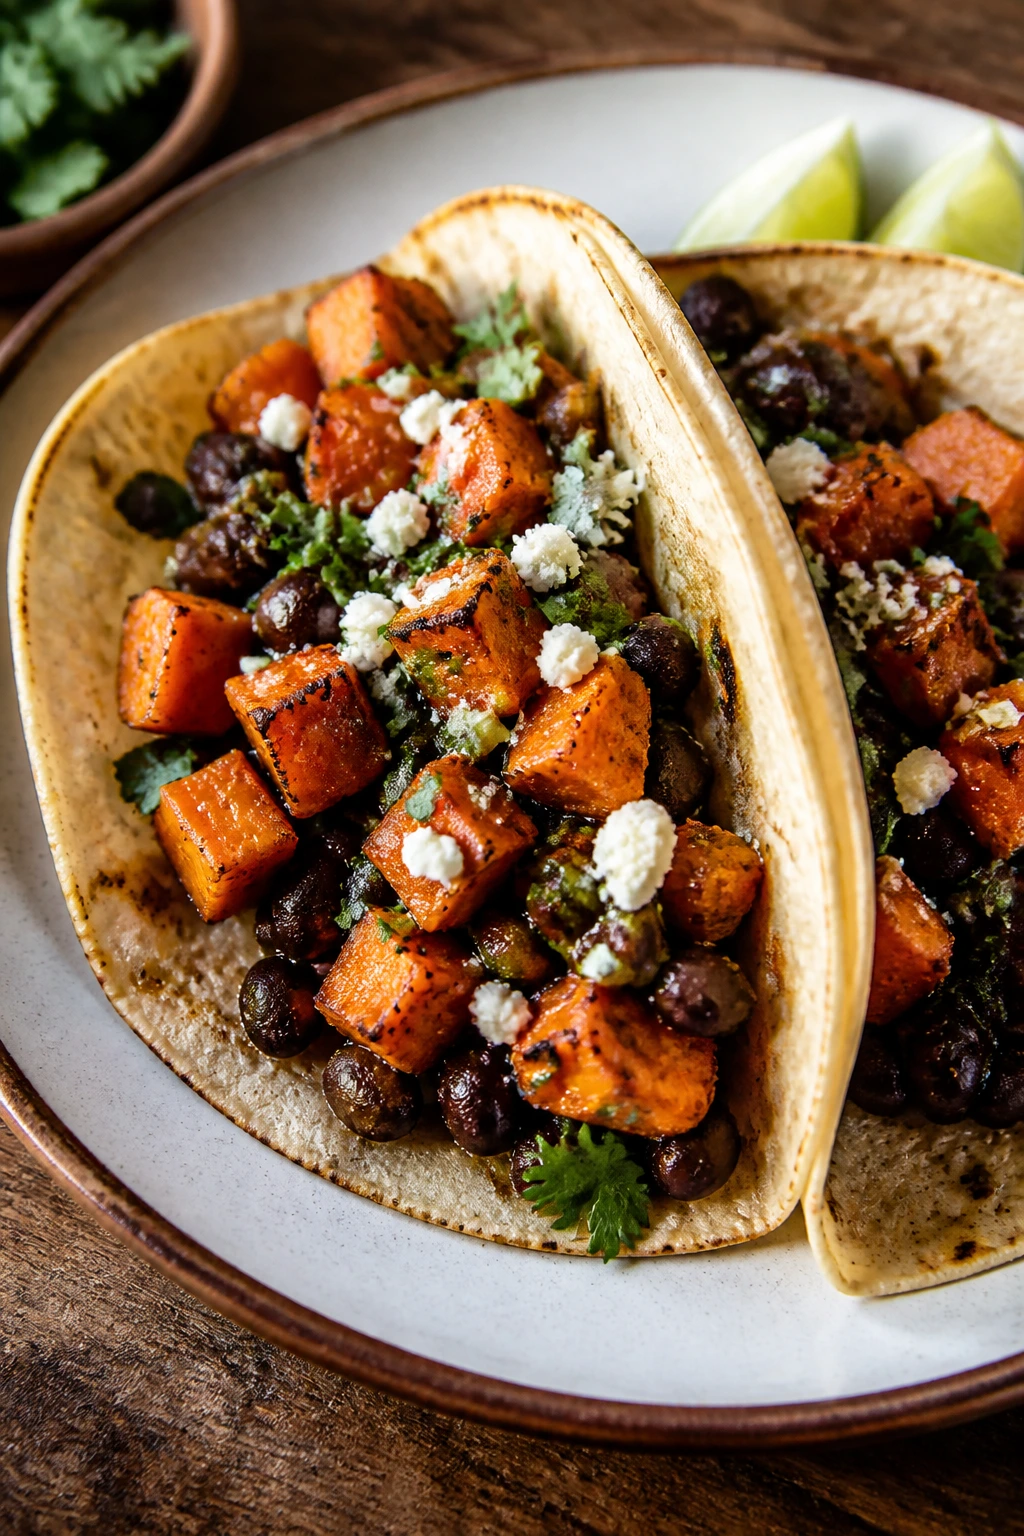
Sweet potatoes do a lot of heavy lifting in tacos. They roast into soft, caramel-edged cubes that play nicely with black beans, cool toppings, and a squeeze of lime, and the result feels far more complete than the short ingredient list suggests.
These tacos are also one of the easiest dinners to scale down. Two people can eat well without a pile of leftovers, and if you want lunch tomorrow, the filling holds up without turning tired.
Why It Works: Sweet potatoes bring sweetness, body, and a little crispness at the corners after roasting, which gives the tacos texture without extra effort. Black beans add protein and a creamy bite, while lime and cabbage keep the whole thing bright. This is a dinner that tastes better when the toppings are cold and the filling is hot, which makes assembly half the fun.
Key Ingredients
- 2 medium sweet potatoes, peeled or scrubbed and diced
- 1 tbsp olive oil
- 1 tsp ground cumin
- 1 tsp chili powder
- 1 can (15 oz) black beans, drained and rinsed
- 8 small corn tortillas
- 1 cup shredded cabbage or slaw mix
- 1 avocado, sliced
- 1 lime, cut into wedges
- 2 tbsp chopped cilantro
- 1/4 cup crumbled cotija or feta
- Sour cream or Greek yogurt, optional
Quick Steps
- Preheat the oven to 425°F and line a sheet pan.
- Toss the sweet potatoes with olive oil, cumin, chili powder, salt, and pepper. Roast for 20 to 25 minutes, stirring once, until tender and browned at the edges.
- Warm the black beans in a small saucepan with a splash of water and a pinch of salt until they’re hot and creamy.
- Warm the tortillas in a dry skillet for 20 to 30 seconds per side, or wrap them in foil and heat them in the oven for a few minutes.
- Fill each tortilla with sweet potatoes, black beans, cabbage, avocado, cilantro, cheese, and lime juice.
Tips and Variations
- Texture Trick: A quick pan toast gives corn tortillas better flavor than microwaving.
- Swap It: Roasted cauliflower can stand in for half the sweet potato if you want a less sweet filling.
- Finish Strong: A spoonful of salsa verde or chipotle yogurt gives the tacos more depth.
11. Cod with Cherry Tomatoes, Olives, and Fennel
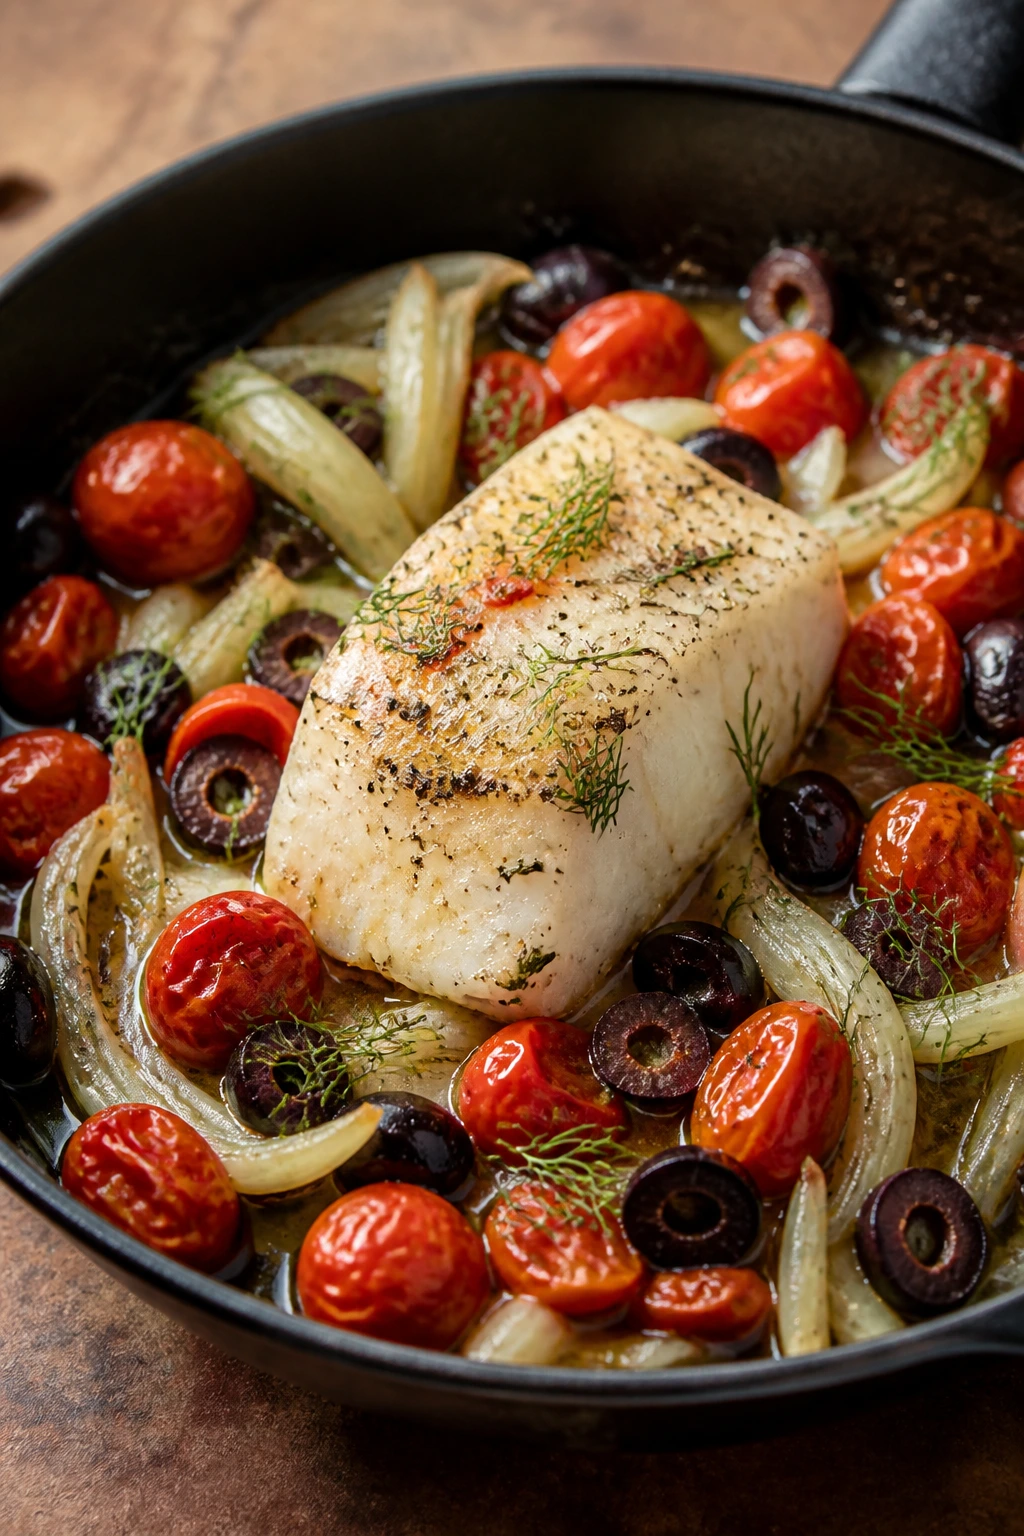
Cod likes hot, fast heat and a salty partner. Here, cherry tomatoes burst in the oven, fennel turns soft and sweet, and olives give the whole dish enough brine to keep it lively.
This is the kind of dinner that feels light on paper and satisfying on the plate. The fish cooks gently on top of the vegetables, which means less fuss and better flavor than a plain baked fillet ever gets.
Why It Works: Cod is mild, so it needs help from a sauce or a very assertive vegetable base. Tomatoes, fennel, olives, garlic, and lemon do that job well, and roasting the vegetables first gives them a head start before the fish goes in. The result is juicy, not watery, and the pan juices are good enough to spoon over bread.
Key Ingredients
- 2 cod fillets, about 6 oz each
- 1 fennel bulb, thinly sliced
- 1 pint cherry tomatoes
- 1/3 cup pitted olives
- 2 tbsp olive oil
- 2 garlic cloves, sliced
- 1 lemon, sliced and juiced
- 1 tsp dried oregano
- 1/2 tsp kosher salt
- 1/4 tsp black pepper
- 2 tbsp chopped parsley
Quick Steps
- Preheat the oven to 425°F.
- Toss the fennel, tomatoes, olives, garlic, olive oil, oregano, salt, and pepper on a sheet pan. Roast for 12 minutes, until the tomatoes begin to blister and the fennel starts to soften.
- Push the vegetables aside and nestle the cod onto the pan. Season the fish lightly with salt and pepper and tuck a few lemon slices around it.
- Roast for 8 to 10 minutes more, until the fish turns opaque and flakes with a fork.
- Finish with lemon juice and parsley before serving.
Tips and Variations
- Best Pan: Use a rimmed sheet pan so the tomato juices stay put.
- Swap It: Halibut or haddock work if cod isn’t available.
- Serve It With: Couscous, orzo, or a thick piece of bread catches the juices nicely.
12. One-Pan Sausage, Potatoes, and Green Beans
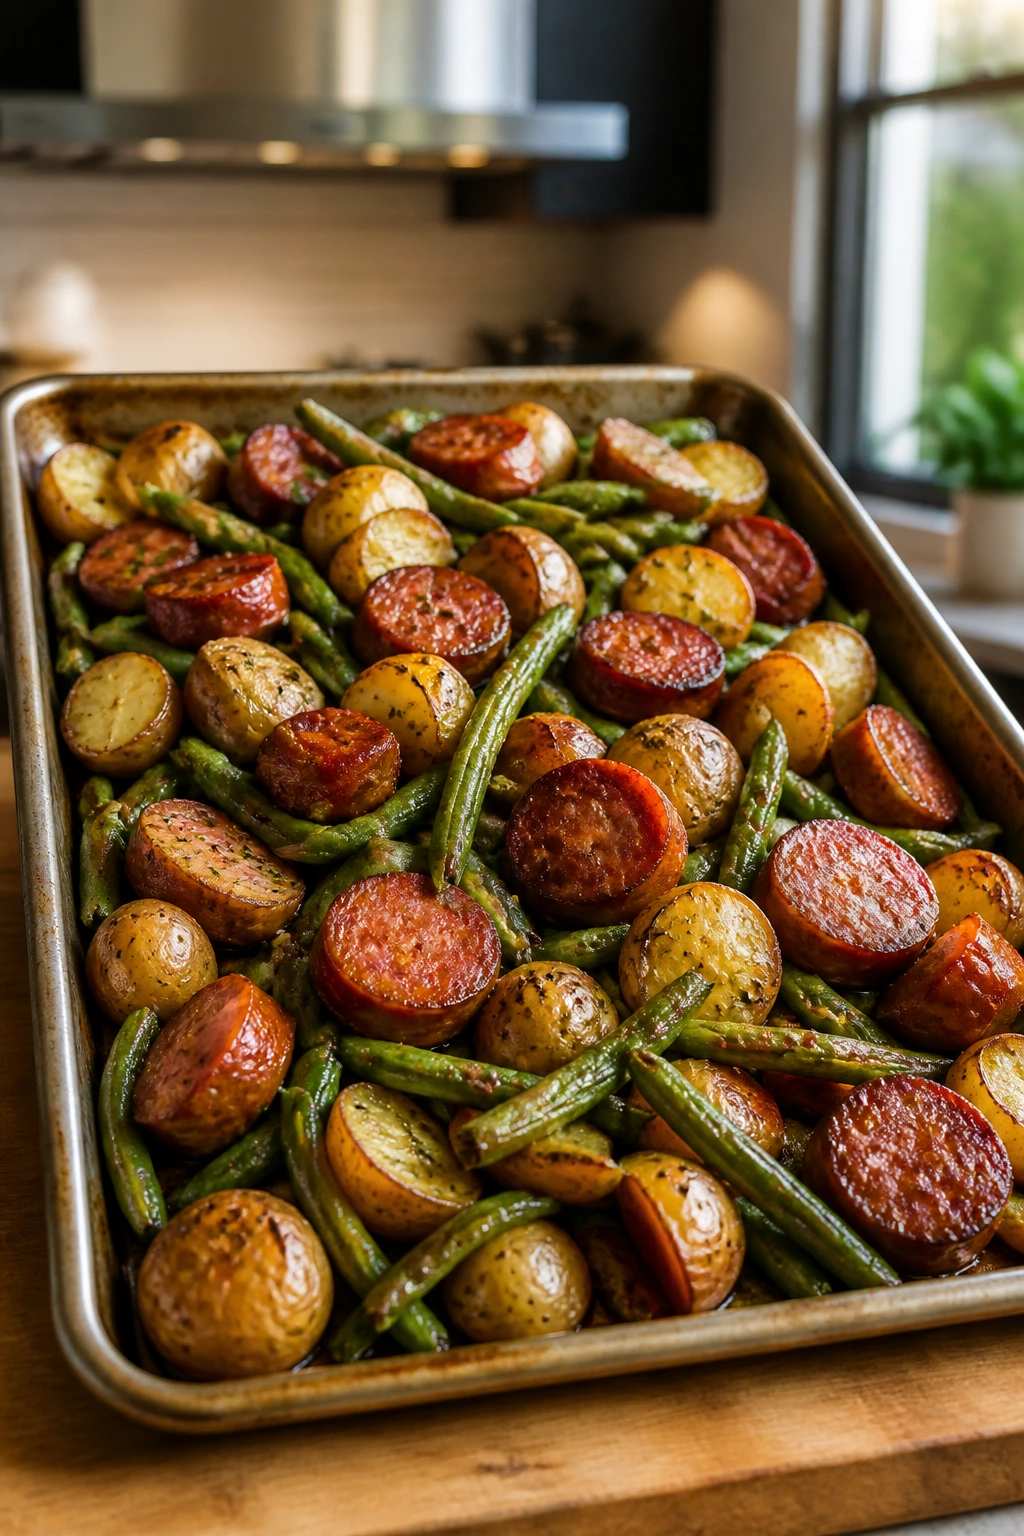
One pan, three vegetables, and a sausage that browns properly. That’s the whole appeal, really. The potatoes get crisp, the green beans stay bright enough to taste like vegetables, and the sausage brings the salty, smoky part that keeps the plate from feeling too tidy.
This is a practical dinner for smaller households because it gives you a full meal without requiring much mental energy. You chop, season, roast, and eat. That’s the whole job.
Why It Works: Baby potatoes need a head start, so they roast first until the edges begin to color. The sausage adds fat and seasoning to the pan, which helps the beans and potatoes pick up flavor without extra sauce. If you slice the sausage after roasting instead of before, it browns better and stays juicier.
Key Ingredients
- 1 lb baby potatoes, halved
- 12 oz smoked sausage or chicken sausage, sliced into 1-inch pieces
- 12 oz green beans, trimmed
- 2 tbsp olive oil
- 1 tsp smoked paprika
- 1 tsp garlic powder
- 1 tsp Dijon mustard
- 1/2 tsp kosher salt
- 1/4 tsp black pepper
- 1 tbsp chopped parsley
Quick Steps
- Preheat the oven to 425°F and line a sheet pan.
- Toss the potatoes with 1 tablespoon of olive oil, smoked paprika, garlic powder, salt, and pepper. Roast for 20 minutes.
- Add the sausage and green beans to the pan. Drizzle with the remaining olive oil and stir everything around so the beans pick up the seasoning.
- Roast for 12 to 15 minutes more, until the potatoes are tender, the sausage is browned, and the beans still have some snap.
- Stir the Dijon with a spoonful of hot pan juices, then drizzle it over the tray and finish with parsley.
Tips and Variations
- Heat Control: If your sausage is already very smoky, go lighter on the paprika.
- Swap It: Broccoli florets or Brussels sprouts can replace the green beans.
- Serve It With: Mustard on the side is not mandatory, but it’s never a bad idea.
13. Spinach and Goat Cheese Frittata
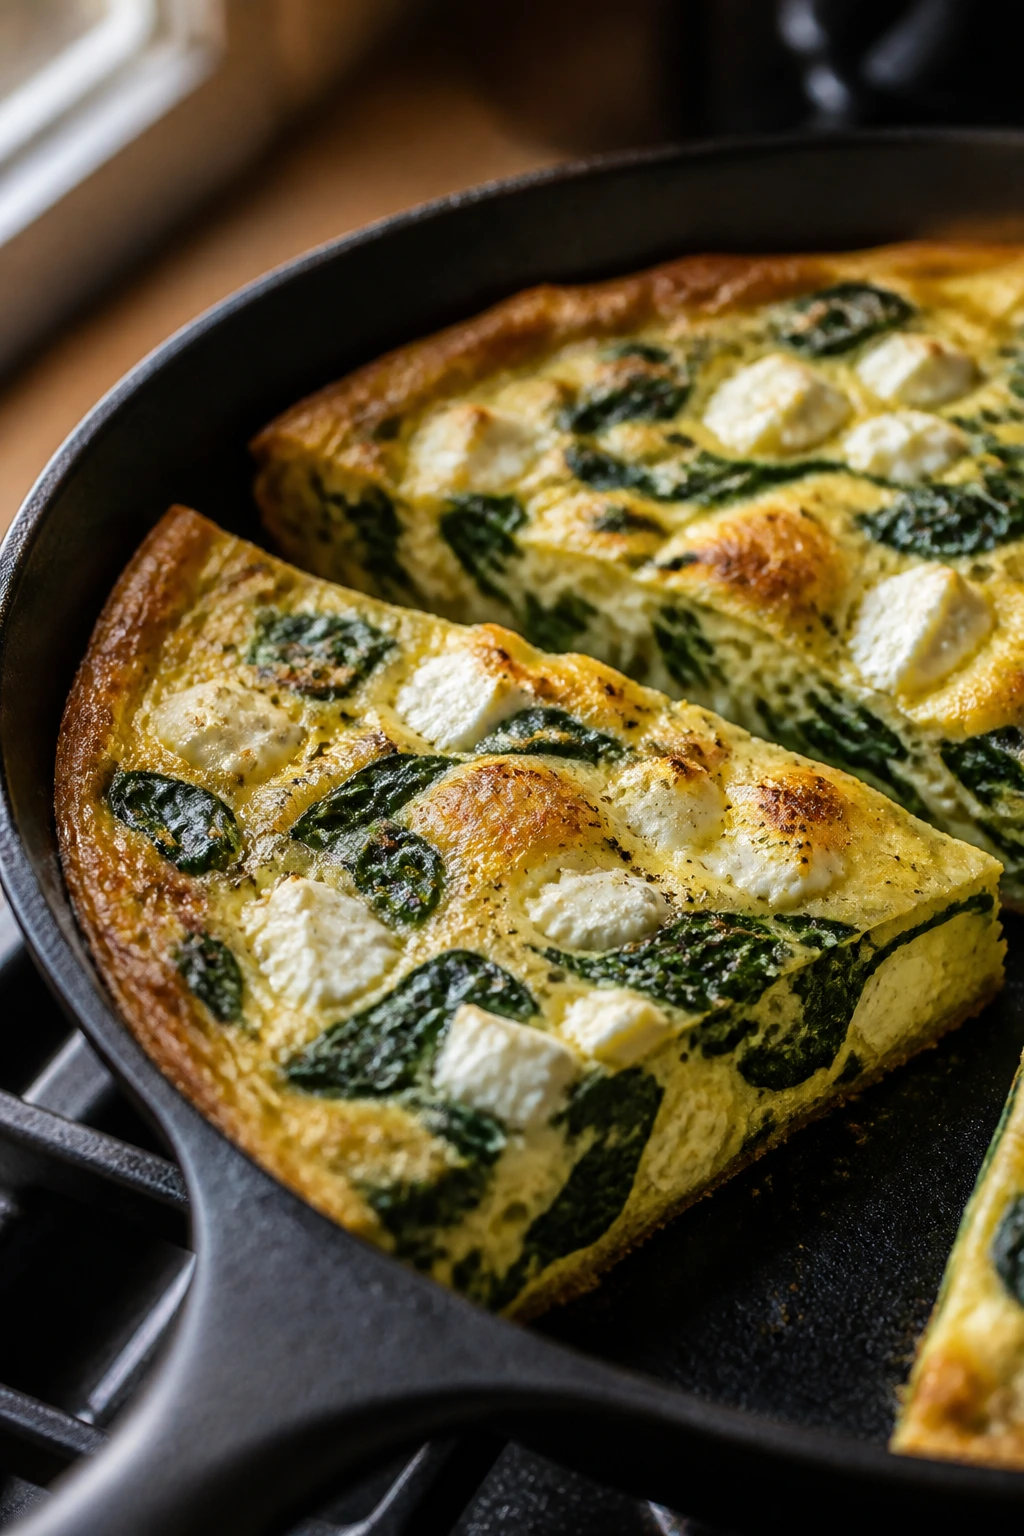
A frittata is what I make when the vegetable drawer starts looking sorry for itself. Eggs, a handful of greens, and a bit of tangy cheese can turn that half-empty fridge into a dinner that feels composed instead of improvised.
This one is especially kind to smaller households because it works hot, warm, or room temperature. That means dinner doesn’t go from “finished” to “useless” the second it leaves the pan.
Why It Works: Eggs set quickly in a skillet, which makes frittata one of the easiest ways to get dinner on the table without a long wait. Spinach wilts down to almost nothing, so it gives you vegetable presence without crowding the pan, and goat cheese adds sharpness in little pockets instead of taking over. The final minute under the broiler gives the top a little lift and keeps the center tender.
Key Ingredients
- 8 large eggs
- 1/4 cup milk or half-and-half
- 1 tbsp olive oil
- 1 small shallot, sliced
- 2 cups fresh spinach
- 1/2 tsp kosher salt
- 1/4 tsp black pepper
- 1/2 cup goat cheese, crumbled
- 2 tbsp grated Parmesan
- 1 tbsp chopped chives or parsley
Quick Steps
- Preheat the oven broiler and position a rack about 6 inches from the heat.
- Whisk the eggs, milk, salt, and pepper together in a bowl. Stir in the goat cheese and Parmesan.
- Heat the olive oil in an oven-safe 10-inch skillet over medium heat. Cook the shallot for 2 minutes, then add the spinach and cook just until wilted.
- Pour the egg mixture into the skillet and cook without stirring for 3 to 4 minutes, until the edges start to set.
- Transfer the skillet to the broiler and cook for 2 to 4 minutes, until the center is just set and the top looks lightly puffed. Rest for 5 minutes, then cut into wedges.
Tips and Variations
- Don’t Rush: Pull it before the center looks fully dry; carryover heat finishes the job.
- Swap It: Use kale or chopped Swiss chard if spinach is running low.
- Serve It With: Toast, fruit, or a tomato salad makes the meal feel complete.
14. Sesame Ginger Noodles with Edamame and Mushrooms
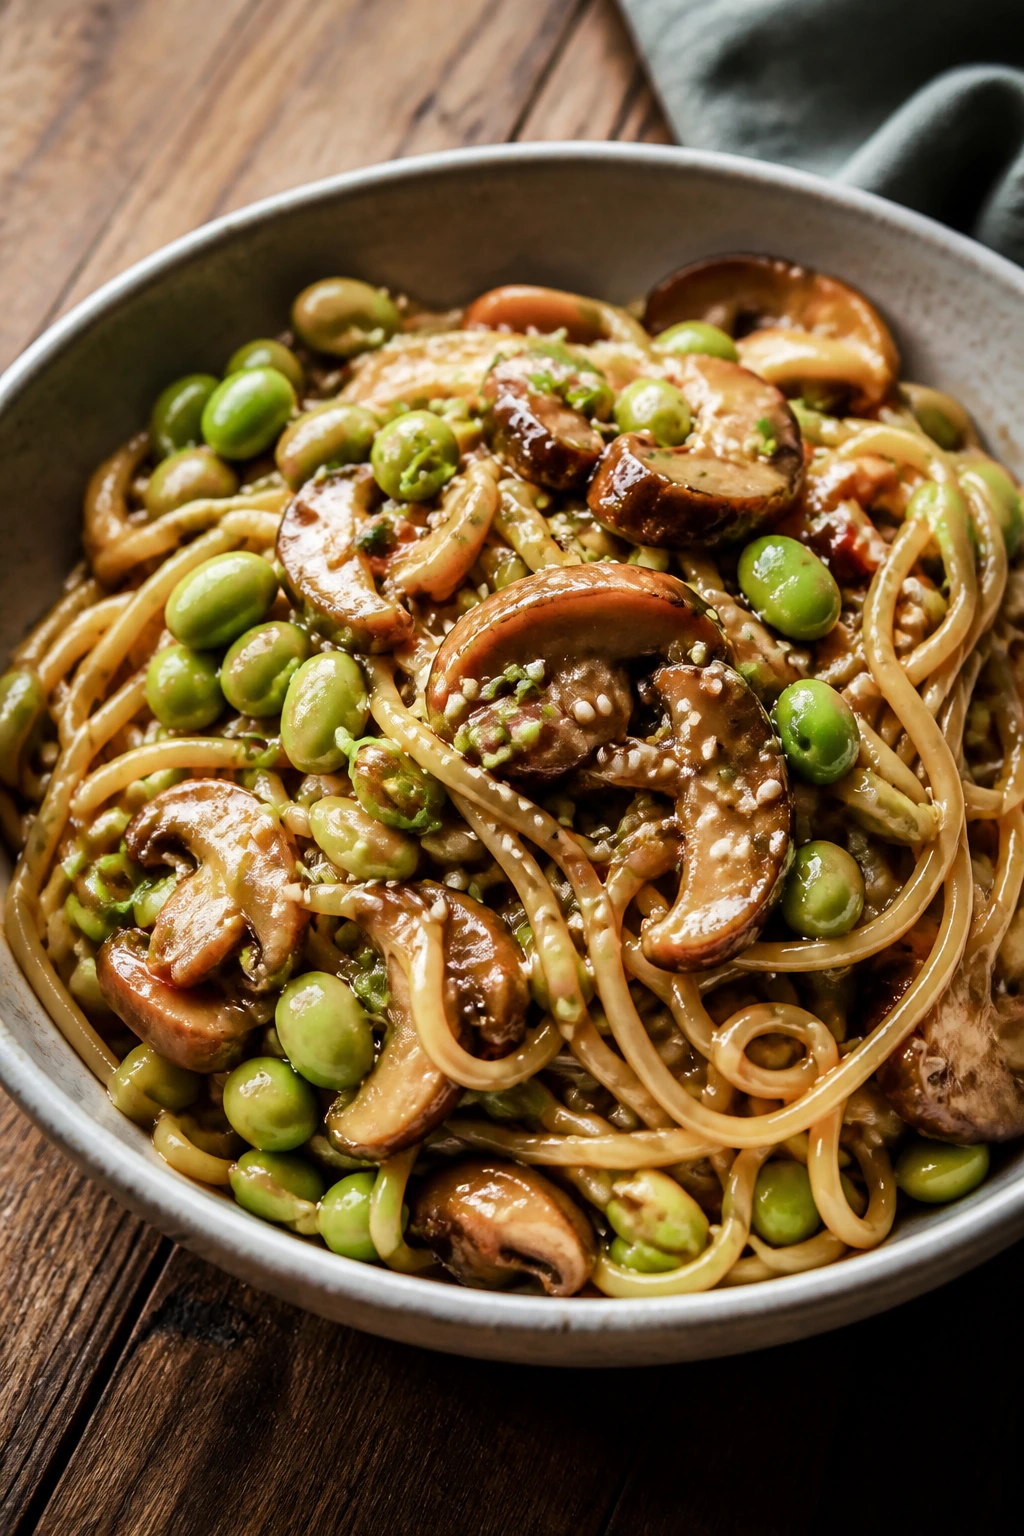
These noodles are pantry food with a pulse. They’re glossy, savory, and fast, but they also have enough vegetables and texture to feel like a real dinner instead of a rescue mission.
This is the sort of meal I like when I want something comforting that doesn’t lean heavy. The sesame oil gives it a nutty smell, the ginger wakes everything up, and the mushrooms carry enough meatiness to keep the bowl honest.
Why It Works: Noodles and sauce are the backbone, but the mushrooms and edamame matter just as much. Mushrooms brown and soak up the soy-ginger dressing, while edamame adds a clean, slightly sweet bite that keeps the dish from becoming one-note. Because the sauce is simple and punchy, you can get dinner on the table before the noodles lose their heat.
Key Ingredients
- 8 oz soba, udon, or spaghetti
- 8 oz mushrooms, sliced
- 1 cup shelled edamame, frozen or thawed
- 2 tbsp soy sauce
- 1 tbsp sesame oil
- 1 tbsp rice vinegar
- 1 tbsp honey
- 1 tbsp grated fresh ginger
- 2 garlic cloves, minced
- 2 scallions, sliced
- 1 tbsp sesame seeds
- Chili crisp or red pepper flakes, optional
Quick Steps
- Cook the noodles in salted water according to the package directions. Add the edamame for the last 1 minute if it’s frozen, then drain.
- Heat a skillet over medium-high heat and cook the mushrooms until browned and the moisture has cooked off, about 5 to 6 minutes.
- Add the garlic and ginger and cook for 30 seconds, just until fragrant.
- Stir together the soy sauce, sesame oil, rice vinegar, and honey, then pour it into the pan.
- Toss in the noodles and edamame. Add a splash of hot water if the sauce seems too tight. Finish with scallions, sesame seeds, and chili crisp if you want heat.
Tips and Variations
- Better Bite: Don’t drown the noodles in sauce; they should look glossy, not soupy.
- Swap It: Snow peas, shredded carrots, or spinach can replace the mushrooms if needed.
- Serve It With: A fried egg on top turns this into a more substantial supper.
15. Sheet-Pan Steak Fajitas
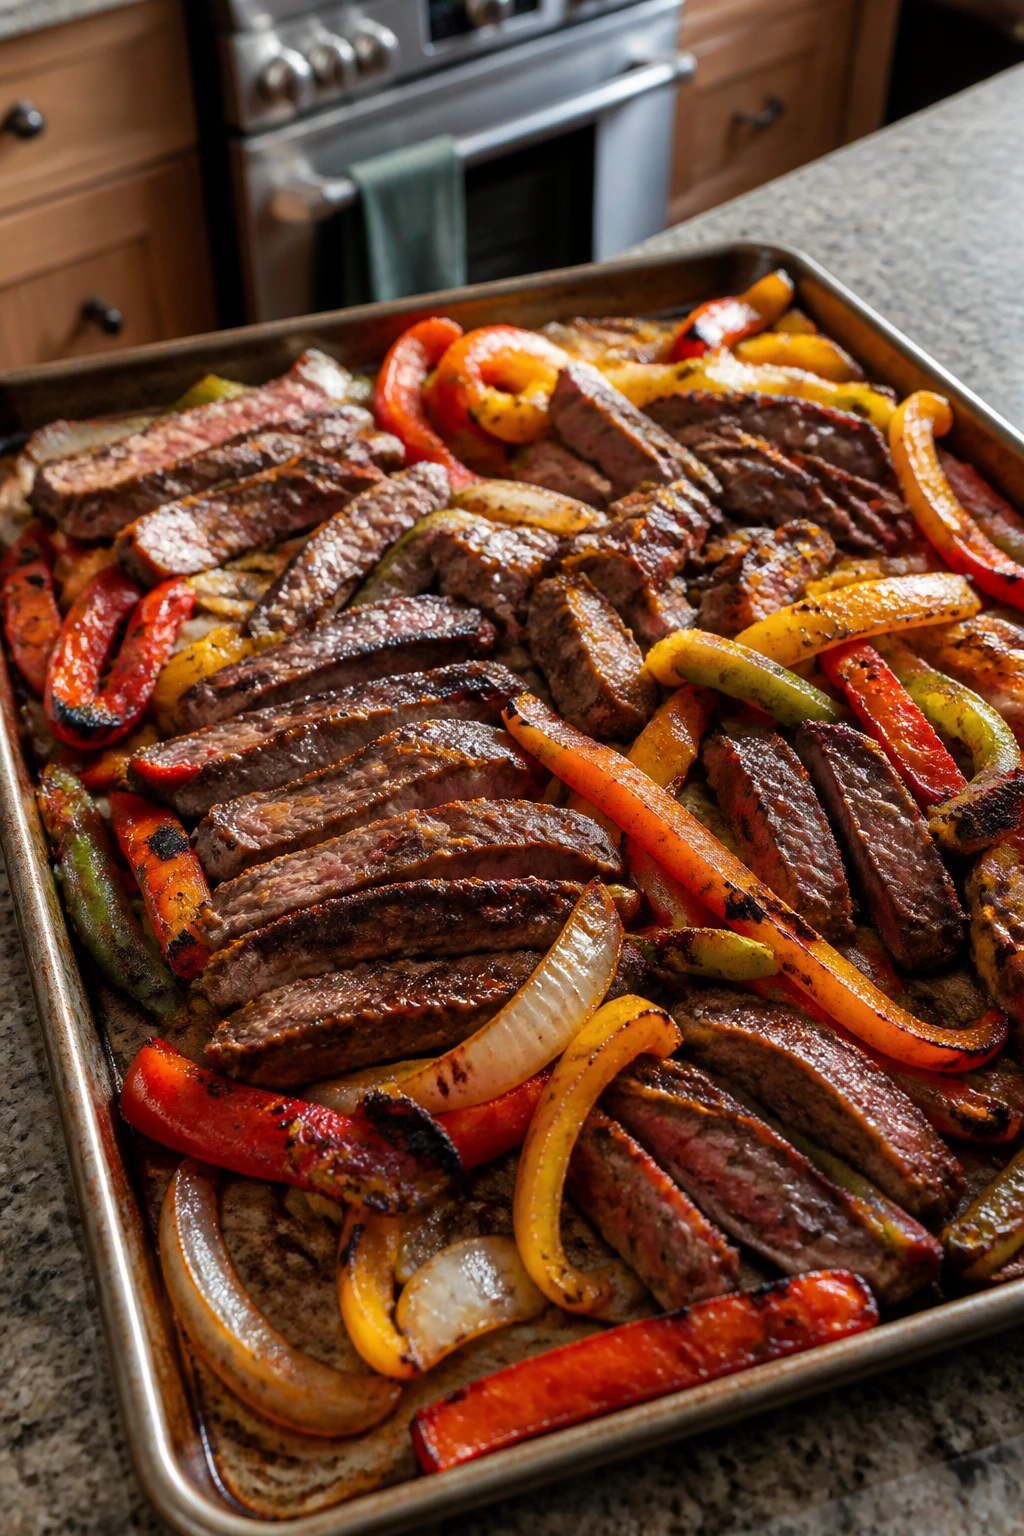
Sheet-pan fajitas give you the sizzle without turning dinner into a cleanup project. The peppers char at the edges, the onions soften and sweeten, and the steak slices across the grain into something juicy enough to tuck into warm tortillas.
For empty nesters, this is a good one because it scales neatly. One pound of steak makes four modest servings, and the leftovers — if there are any — work well in a breakfast scramble the next morning.
Why It Works: High heat is what fajitas want. Roasting the vegetables first keeps them from going limp, and adding the steak near the end prevents it from overcooking while the peppers finish. A quick rest after roasting matters here; slice too early and the juices run all over the cutting board instead of staying in the meat.
Key Ingredients
- 1 lb flank steak or skirt steak
- 3 bell peppers, sliced
- 1 medium onion, sliced
- 2 tbsp olive oil
- 1 1/2 tsp chili powder
- 1 tsp ground cumin
- 1/2 tsp garlic powder
- 1/2 tsp kosher salt
- 1/4 tsp black pepper
- 1 lime, juiced
- 8 small flour or corn tortillas
- Cilantro, sour cream, or salsa for serving
Quick Steps
- Preheat the oven to 425°F and line a sheet pan.
- Toss the peppers and onion with olive oil, chili powder, cumin, garlic powder, salt, and pepper. Roast for 10 minutes.
- Slice the steak into thin strips against the grain. Pull the pan from the oven, scatter the steak over the vegetables, and toss lightly.
- Roast for 6 to 8 minutes more, until the steak is browned at the edges and the vegetables are tender with a few charred spots.
- Rest the meat for 5 minutes, then finish with lime juice and serve in warm tortillas.
Tips and Variations
- Best Searing Trick: Thin slices of steak cook faster and stay more tender than thick strips.
- Swap It: Chicken thighs or portobello mushrooms work if beef isn’t on the menu.
- Serve It With: Guacamole, shredded lettuce, or a spoon of pickled jalapeños adds a sharp finish.
Why Smaller Dinners Fit the Empty-Nest Table So Well
Cooking for fewer people changes the rhythm of dinner in a good way. You can buy a better piece of fish instead of stretching a bargain pack. You can roast a single tenderloin or simmer a smaller pot of chili without worrying about feeding a crowd that isn’t coming. That freedom matters.
There’s also something nice about food that lands on the table in the right size. Not tiny. Not fussy. Just enough to feel generous, with a second helping if someone wants it and a lunch container if they don’t. That’s the real advantage of small-batch cooking: the food fits the household instead of asking the household to adapt to the food.
The Tools That Keep Small-Batch Cooking Easy
- 12-inch skillet: Big enough for chicken cutlets, fajita vegetables, and quick sauces without crowding.
- Rimmed sheet pan: The workhorse for salmon, cod, vegetables, steak fajitas, and sausage dinners.
- Dutch oven or heavy soup pot: Useful for chili, risotto, and anything that needs steady heat.
- 8×8-inch baking dish: A better fit than a full casserole dish for small-batch baked pasta and peppers.
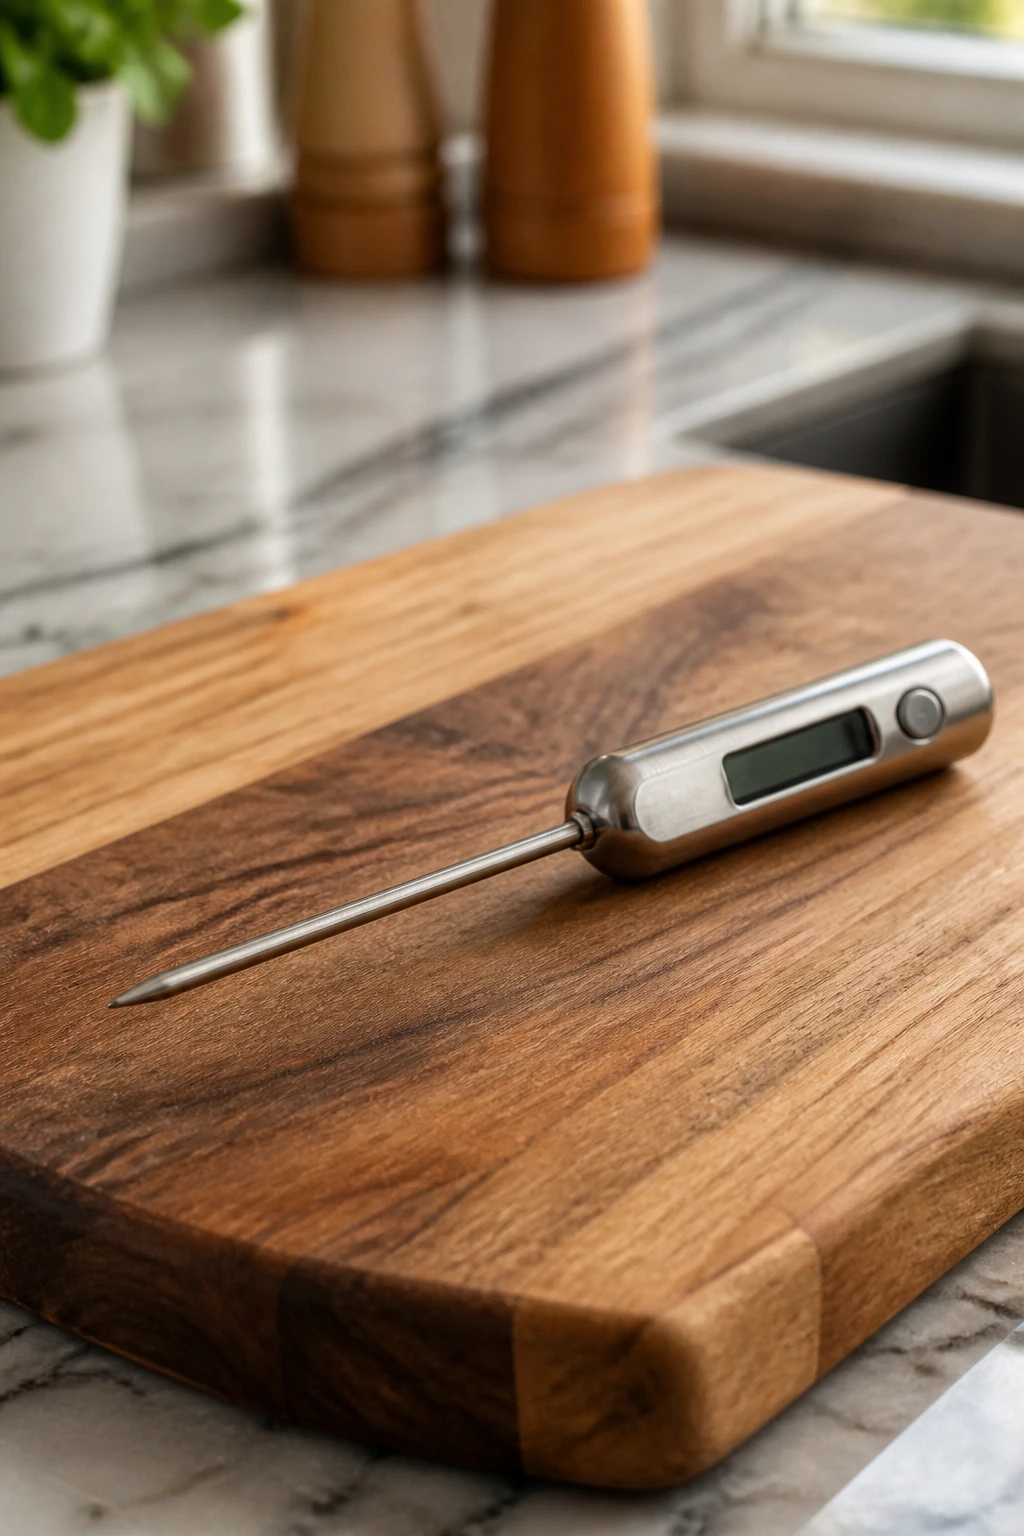
- Instant-read thermometer: The easiest way to keep salmon, chicken, pork, and steak from overcooking.
- Sharp chef’s knife: Makes slicing peppers, onions, apples, and herbs less of a chore.
- Cutting board with a wide surface: Helpful when you’re building bowls or prepping sheet-pan meals.
- Fine grater or microplane: Good for lemon zest, garlic, and Parmesan.
- Wooden spoon or heatproof spatula: Necessary for stirring risotto, chili, and noodle sauces.
- Tongs: Handy for turning chicken, shrimp, sausage, and steak without tearing them up.
Shopping Smarter When You’re Cooking for Two
Smaller households can be a blessing at the grocery store if you shop with a little more precision. Buy the exact amount of protein you need instead of defaulting to family packs, and if a package is bigger than the recipe calls for, plan the second use before you get to the checkout. That one habit saves a lot of uneaten food.
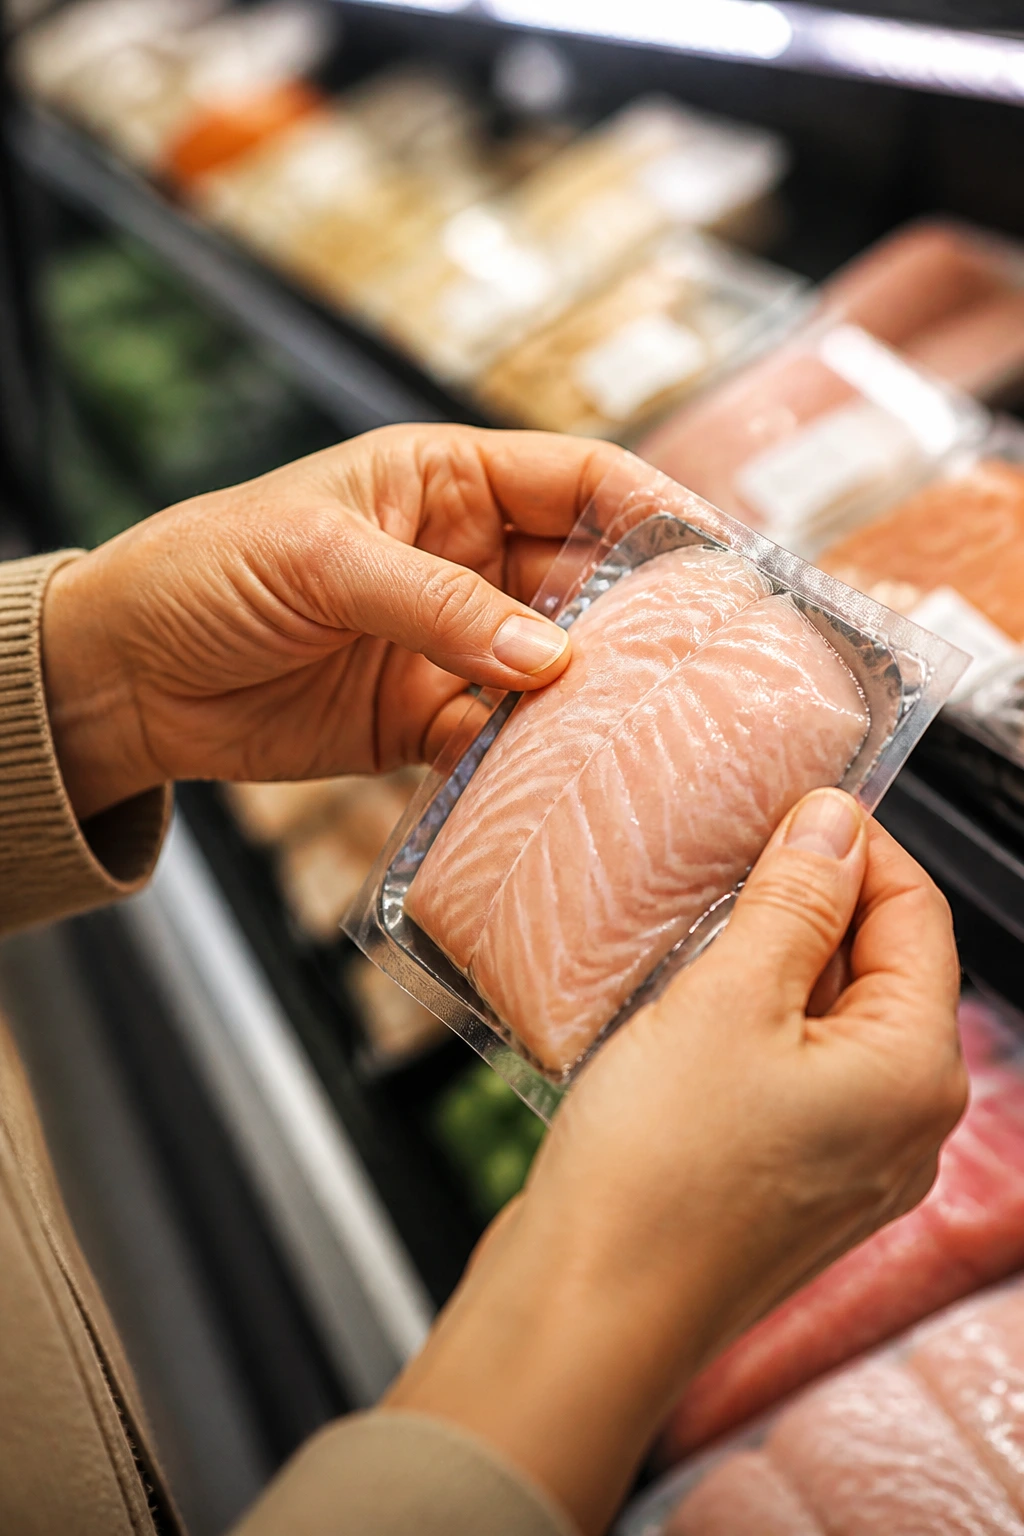
A lot of these dinners lean on ingredients that keep well: onions, garlic, potatoes, lemons, carrots, cabbage, rice, pasta, canned beans, and sturdy greens. Those are good pantry neighbors because they don’t force you into a same-day cooking schedule. For fish and shrimp, frozen is often the smarter choice. Good frozen seafood is usually picked and packed quickly, and it can be fresher by the time you cook it than the “fresh” tray that’s been sitting around.
Pay attention to cheese and sauces too. Block Parmesan grates better than the powdery stuff in a shaker. Whole-milk ricotta tastes richer and bakes more smoothly than low-fat versions. Low-sodium broth gives you more control, which is worth a little extra seasoning at the stove.
And herbs — buy fewer, not more. One small bunch of parsley or dill used well beats a giant bundle that wilts in the crisper because you felt ambitious on a grocery run.
How to Put the Plates Together
Presentation: Keep the plates modest and clean. A single salmon fillet with asparagus, a bowl of chili with a spoonful of yogurt, or a frittata wedge with a green salad all look better when the food has room to breathe on the plate. If you want the meal to feel finished, add one bright thing — lemon, herbs, chopped scallions, or a quick pickle.
Accompaniments: These dinners like simple sidekicks. Bread is the obvious one, but don’t ignore a quick salad, steamed rice, roasted potatoes, couscous, or warm tortillas. For the richer dishes — risotto, baked ziti, pork tenderloin — a crisp vegetable on the side keeps the meal from feeling heavy.
Portions: A good target for smaller households is 4 to 6 ounces of protein per person, plus about a cup of vegetables and a sensible scoop of starch. You do not need to pile the plate high to make it feel generous. Sometimes a smaller portion with a better sauce is more satisfying than a giant plate that starts to cool before the first bite.
Beverage Pairing: Dry white wine works well with salmon, cod, chicken piccata, and shrimp scampi. A light red such as pinot noir can sit beside pork tenderloin or steak fajitas without bulldozing the food. If you’d rather skip alcohol, sparkling water with lemon or lime is a fine answer, and it’s a lot less fussy.
Flavor Boosters That Keep These Dinners Interesting

Flavor Enhancement: Keep a lemon, a lime, and a bottle of good vinegar in the house. A last-minute squeeze or splash can wake up roasted vegetables, seafood, grain bowls, and bean dishes in a way salt alone can’t manage.
Customization: Add one finishing texture to most of these dinners — toasted breadcrumbs on baked ziti, sesame seeds on noodles, chopped nuts over salads, or a few crispy onions on chili. A crunchy top changes the whole plate.
Serving Suggestions: Fresh herbs should go on at the end, not in the middle. Parsley, dill, basil, cilantro, scallions, and chives all bring a little lift when they’re still green and raw. If you want a richer finish, a small spoon of yogurt, sour cream, or crème fraîche can soften spice and make the dish feel composed.
Make-It-Yours: If you like heat, keep chili flakes, hot sauce, and chili crisp within reach. If you don’t, leave them off and focus on acid, herbs, and good browning instead. If you’re cooking for someone who wants more bread, rice, or potatoes, that’s an easy scale-up; the base recipes stay the same.
Storing Leftovers Without Losing Texture
Most of these dinners keep well for 3 to 4 days in the refrigerator, but seafood deserves a shorter window. Salmon, shrimp, and cod are best eaten within 1 to 2 days, and they reheat gently, if at all. I usually warm fish only enough to take the chill off, because hard reheating turns it dry in a hurry.
Heavier dishes are much friendlier in the freezer. Chili, baked ziti, stuffed peppers, and some chicken or pork dishes freeze for 2 to 3 months in airtight containers. Portion them before freezing if you can; two-person households rarely need a single giant block of food. Noodles, frittatas, and roasted vegetable dishes can be refrigerated, but they tend to soften in the freezer, so I would not make that the plan unless you have no other choice.
For reheating, use the gentlest method that makes sense. Covered skillets or low ovens around 300°F to 325°F work well for chicken, pork, and pasta bakes. Add a spoonful of broth, water, or sauce before reheating so the food doesn’t dry out. Microwaves are fine for chili, bowls, and rice dishes if you use medium power and stop once or twice to stir.
Make-ahead prep helps more than people think. Chop vegetables a day ahead, mix marinades the morning before dinner, and cook grains early so assembling dinner feels easy rather than hurried. A few of these dishes — chili, baked ziti, and stuffed peppers — even taste better after the flavors settle overnight.
Easy Swaps for Different Tastes and Diets
The Pantry-First Version: Build meals around what’s already in the cupboard: beans, canned tomatoes, rice, pasta, olives, jarred roasted peppers, and frozen vegetables. This version works especially well for chili, noodle bowls, and pasta bakes, where the sauce matters more than a fresh shopping list.
The Lighter Plate: Trim back butter and cheese a little, then lean harder on olive oil, lemon, herbs, and broth. Salmon, cod, Greek chicken bowls, and stuffed peppers all take this shift well without losing their shape.
The Gluten-Free Path: Corn tortillas, rice, quinoa, polenta, and gluten-free pasta can carry most of these dinners without much trouble. Use cornstarch or rice flour for dredging chicken if you want a crisp sear without wheat.
The Vegetarian Turn: Black beans, white beans, mushrooms, eggs, and tofu can stand in for meat in several spots here. The key is keeping enough seasoning and a bit of acid so the dish does not collapse into something bland and soft.
The Guest-Night Upgrade: If two turns into four, add a salad, a loaf of bread, and one extra vegetable side rather than trying to force one recipe to do everything. That keeps the meal relaxed and lets the main dish stay centered.
The Small Mistakes That Make Dinner Feel Bigger Than It Should
- Cooking too much food by default: A casserole built for six can feel like homework for two. The fix is to buy smaller cuts, use an 8×8 dish, and scale starches down with the protein.
- Overcooking lean protein: Salmon, shrimp, cod, chicken cutlets, and pork tenderloin all go from done to dry quickly. An instant-read thermometer is the cleanest fix, especially when you’re cooking small portions that move fast.
- Skipping the finishing acid: Without lemon, lime, vinegar, or a bright sauce, smaller dinners can taste flat. The fix is simple: keep one sharp ingredient for the end and use it.
- Making leftovers nobody wants: Some foods are fine fresh but lose their texture fast after refrigeration. If leftovers matter to you, favor chili, pasta bakes, grain bowls, and roasted vegetables over delicate fried or creamed dishes.
- Under-seasoning because the batch is small: Small pans still need salt. The fix is to season in layers — a little on the protein, a little in the sauce, and a final taste before serving.
- Letting vegetables stew when they should roast: Crowding a pan turns browning into steaming. Use a rimmed sheet pan, keep space between pieces, and let the oven do its job.
Questions People Ask Before They Cook

How much should dinner make for empty nesters?
Most of the time, 2 to 4 servings is the sweet spot. That gives you a proper meal, maybe one lunch portion, and no pressure to keep eating the same thing for half the week.
Can I halve a recipe that serves four without messing it up?
Usually, yes, but watch the pan size and the seasoning. Half the food in the same giant dish can dry out or spread too thin, so use a smaller skillet or baking dish and taste the sauce carefully.
Which of these dinners holds up best as leftovers?
Turkey chili, baked ziti, stuffed peppers, Greek chicken bowls, and sausage with potatoes all reheat well. Seafood is the least forgiving, so make those meals when you want to eat them fresh.
Can I use frozen vegetables instead of fresh ones?
Absolutely, and in some cases they’re the better choice. Frozen edamame, green beans, and spinach work especially well because they save prep time and still taste clean after cooking.
What if one person wants spicy food and the other doesn’t?
Keep the base mild and put heat on the table at the end. Chili crisp, hot sauce, red pepper flakes, and sliced jalapeños are easy add-ons that let each plate go its own way.
Can I cook any of these in an air fryer or slow cooker?
A few can be adapted, but not all of them need that detour. Salmon, chicken cutlets, and sausage work in an air fryer; chili and pork tenderloin can go into a slow cooker if you adjust the timing and accept a softer finish.
What’s the easiest dinner to start with if I don’t want anything fussy?
The sheet-pan salmon, sausage with potatoes, and black bean sweet potato tacos are the least demanding. They use short ingredient lists, one pan or one tray, and they don’t ask for much more than chopping and timing.
How do I keep these meals from feeling repetitive?
Change the finishing details instead of changing everything. Lemon one night, lime the next; parsley here, dill there; rice this time, tortillas next time. That small rotation makes a familiar dinner feel new without rebuilding the whole recipe.
A Better Weeknight Rhythm
Smaller households deserve dinner that feels finished, not compromised. That’s the real trick with these meals: they’re sized for the table you actually have, they don’t waste as much food, and they still taste like someone cared enough to brown the onions, season the fish, or let the sauce simmer for a few minutes.
A good empty-nest dinner should leave you satisfied, not swimming in leftovers and regret. Keep a few of these in your back pocket, and weeknight cooking gets lighter without getting dull.