
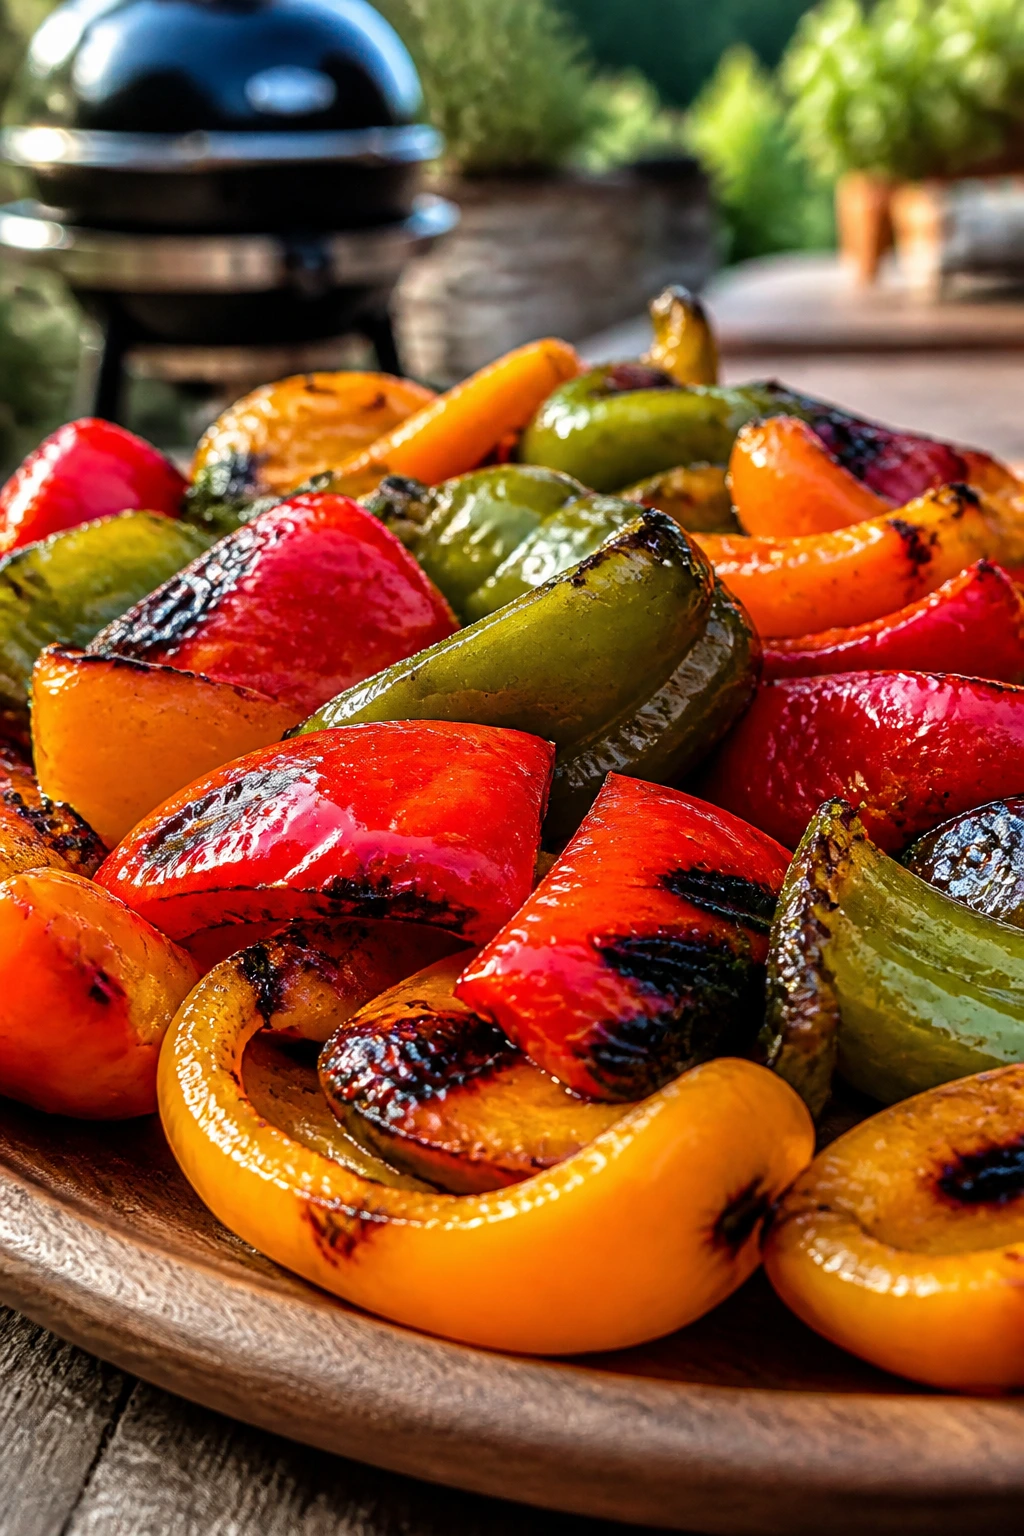
A platter of grilled bell peppers can disappear with embarrassing speed at a backyard cookout. Set them next to ribs, burgers, sausages, or a pile of charred corn, and the peppers get treated like an afterthought right up until someone tastes one and reaches for a second piece before the meat is even carved.
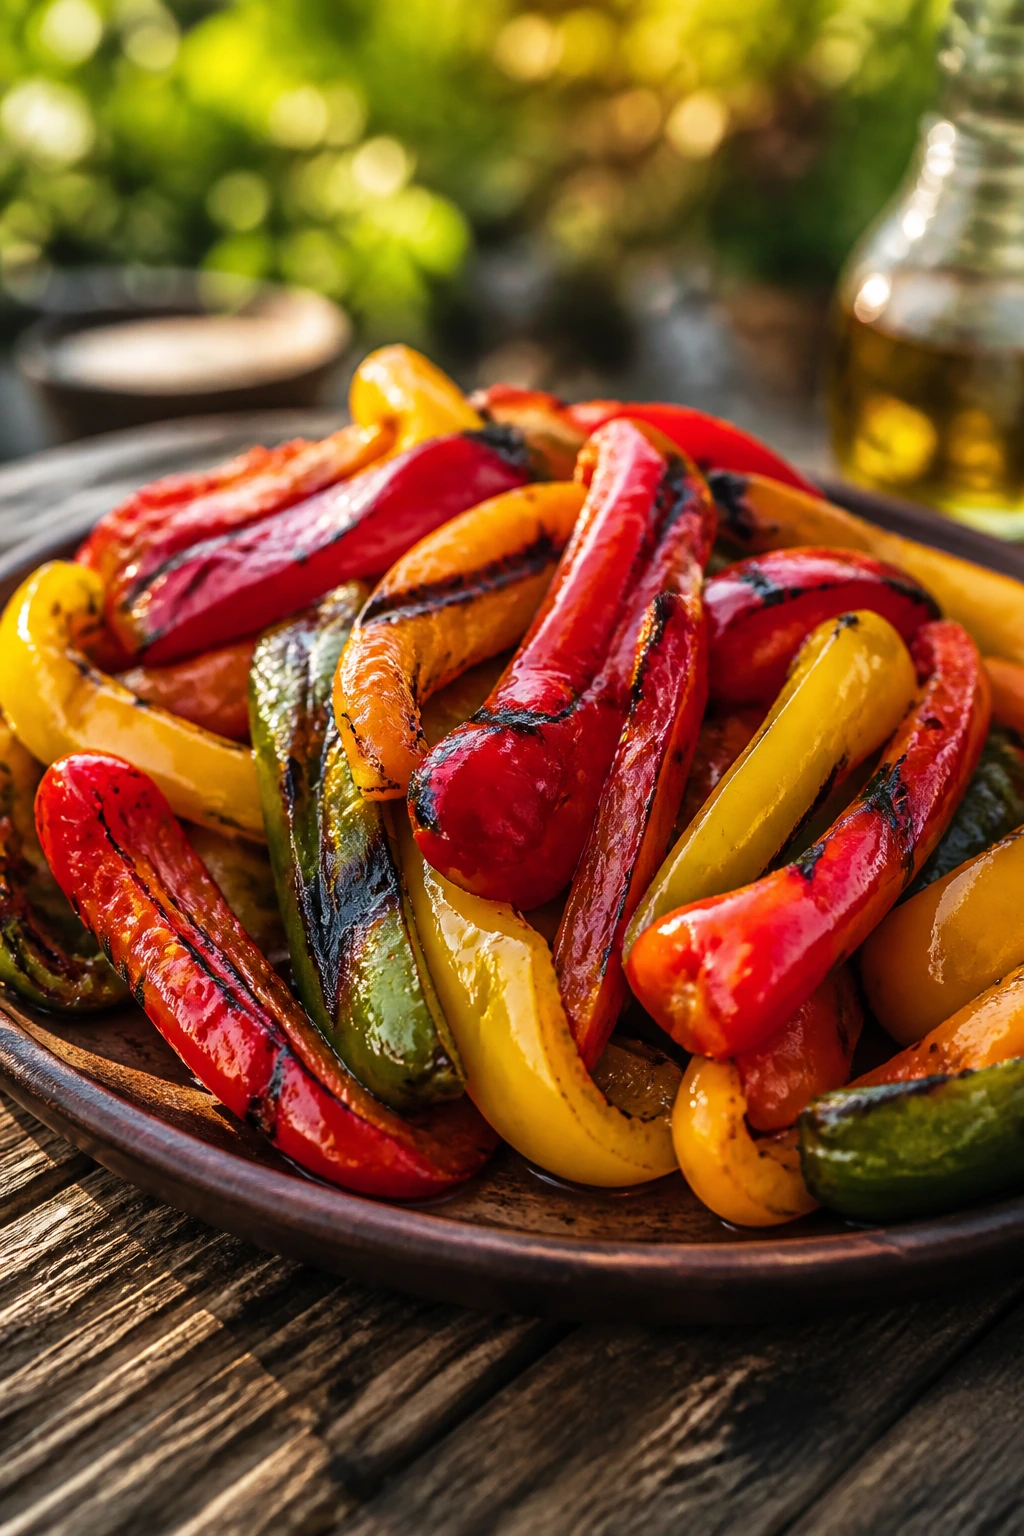
That’s because grilled bell peppers do something plain raw peppers never quite manage. The skin blisters and blackens in spots, the flesh softens just enough to go silky, and the natural sweetness wakes up under heat. Red and orange peppers turn almost jammy at the edges; green peppers stay a little sharper, a little grassier, and that contrast is part of the fun. When people say they want “something simple” for the grill, this is the sort of thing they usually mean, whether they know it or not.
The trick is not fancy. It’s timing, heat control, and a light hand with oil. Too much flame and the skins burn before the centers relax. Too little heat and you get limp, steamed peppers with no char and no personality. Get it right, and you’ve got one of the easiest crowd-side dishes on the table — glossy, smoky, sweet, and ready to sit beside just about anything you’re cooking.
Why These Peppers Earn Their Spot on the Table
- They do real work on a crowded grill: Bell peppers take about 10 to 15 minutes total, so they fit neatly between the first round of meat and the last sweep of the grate.
- The flavor changes in a way raw peppers never can: The heat concentrates the sugars in red, orange, and yellow peppers, while the char adds a dry, smoky edge that makes each bite taste fuller.
- They travel well across the whole cookout menu: Slice them over burgers, tuck them into sandwiches, pile them beside grilled chicken, or serve them as a vegetarian side without changing a thing.
- They look lively on a platter: The mix of red, gold, orange, and green gives you a plate that feels bright even after it’s been sitting on the table for a few minutes.
- They forgive a little scheduling chaos: If the chicken finishes late or the burgers need another minute, these peppers can rest warm or at room temperature without falling apart.
- They’re easy to scale up: Three peppers or thirteen, the method stays the same. That matters when the guest count is fuzzy and the cooler is already full.
Yield: Serves 4 to 6 as a side dish
Prep Time: 15 minutes
Cook Time: 12 to 15 minutes
Total Time: 27 to 30 minutes
Chill/Rest Time: 5 to 10 minutes, optional for steaming and peeling
Difficulty: Beginner — the steps are straightforward, and the grill does most of the heavy lifting.
Best Served: Warm or at room temperature, with the peppers still glossy from the oil and heat
Why Grilled Bell Peppers Taste So Different on the Fire
A raw bell pepper is crisp, watery, and loud in a fresh, green way. A grilled one is another animal entirely. The skin blisters, the flesh loses some of its raw crunch, and the sugars concentrate enough that red and orange peppers start tasting almost sweet-savory, with a little caramel note at the edges.
That change is mostly about moisture. Heat drives water out of the pepper, which tightens the flavor and softens the texture. The surface chars first, so you get a little bitterness from the blackened spots, but it’s a useful bitterness — the sort that makes the sweet flesh underneath taste bigger. Green peppers stay firmer and a little more bitter than the others, which is why I like mixing colors instead of grilling a whole tray of one shade.
There’s also a practical reason grilled bell peppers show up so often at cookouts. They can take a direct hit from the grate without collapsing into mush, and they don’t need a sauce to make sense. That matters when everything else on the grill is rich, smoky, and a little greasy. A pepper half with blistered skin and a slick of olive oil is a clean reset between bites of brisket or sausage.
I also like the way they smell while they cook. First you get that sharp, green pepper scent, then a sweeter roasted note once the skins start to blister. If you’ve never noticed that shift, wait for it. It’s one of the best signs you’re in the right heat zone.
The Short Ingredient List
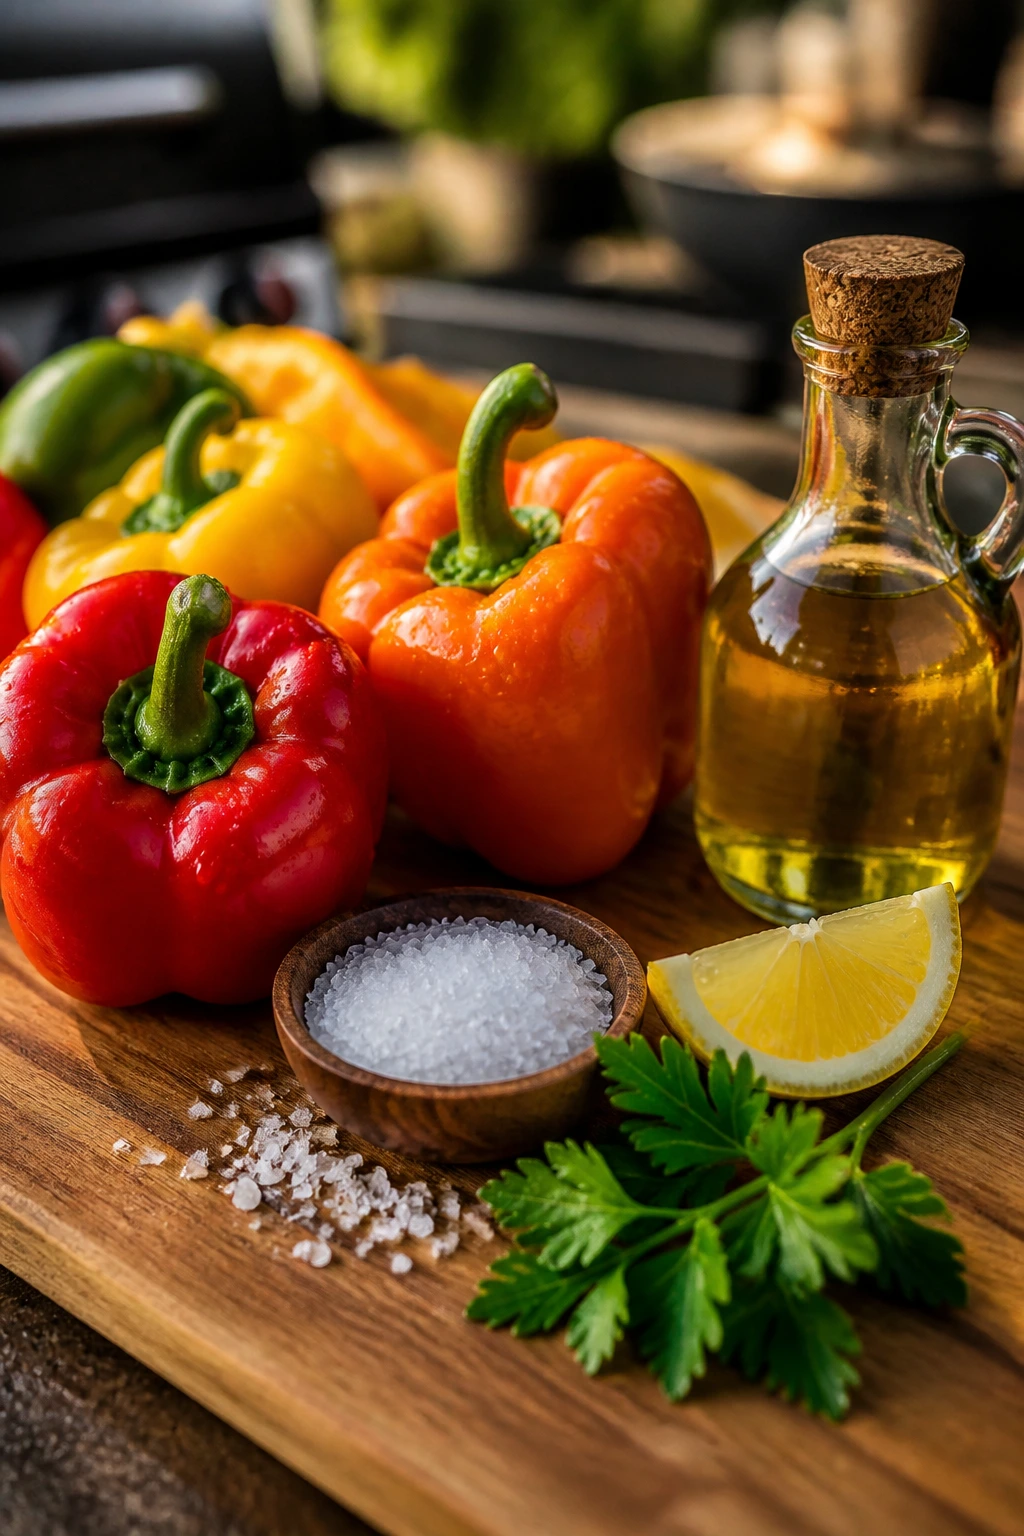
The ingredient list is short on purpose. The grill brings the drama; the rest is there to keep the peppers from drying out and to give the finished dish a clean, bright finish.
For the Grilled Bell Peppers:
- 6 large bell peppers, mixed colors if possible
- 2 tablespoons extra-virgin olive oil
- 1 teaspoon kosher salt
- 1/2 teaspoon freshly ground black pepper
- 1/2 teaspoon garlic powder
- 1 tablespoon red wine vinegar or fresh lemon juice
- 1 tablespoon chopped flat-leaf parsley
- Pinch of red pepper flakes, optional
Ingredient Breakdown: What Each Piece Does
Bell Peppers
What to use: 6 large bell peppers, ideally a mix of red, yellow, orange, and green peppers. Aim for peppers that feel heavy for their size, with taut skin and firm shoulders near the stem.
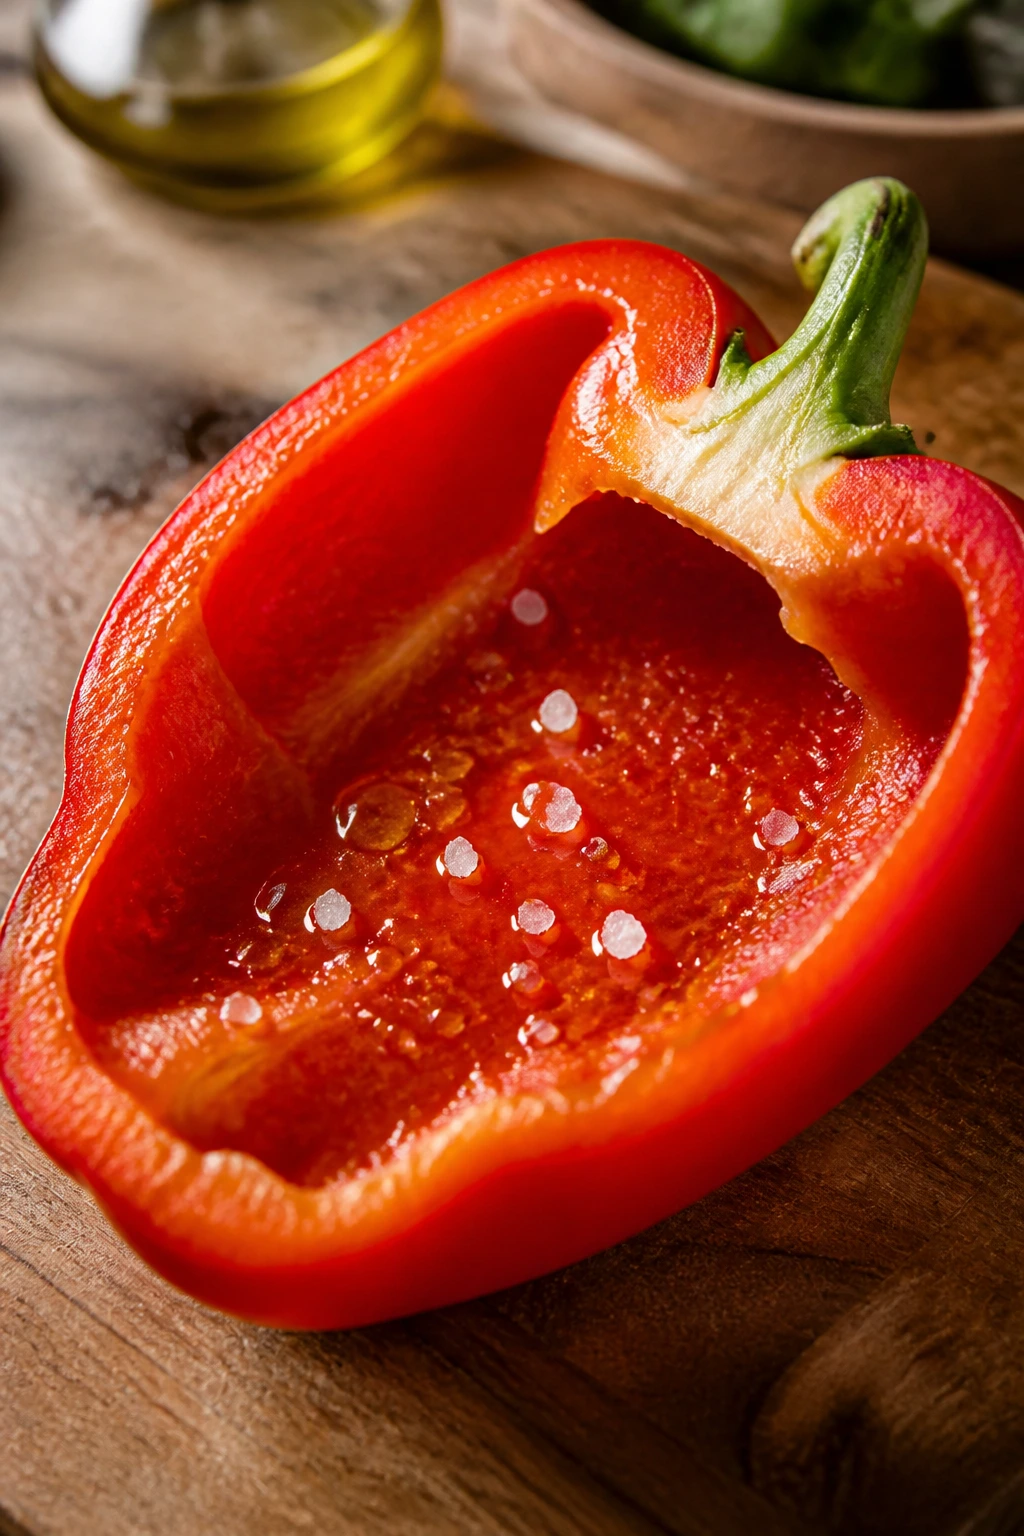
Preparation: Wash and dry them well, then cut each pepper in half lengthwise, from stem to base. Remove the seeds and white membranes, but leave the stem attached if it helps the halves stay more intact on the grill.
Substitutions: Poblano peppers can stand in for one or two of the bells if you want a little heat, and mini sweet peppers work if you’re planning to slice them or use a grill basket.
Tips: Choose peppers with flatter sides so they sit better on the grate. The ones with deep curves still work, but they can tilt and cook unevenly if your grill bars are wide.
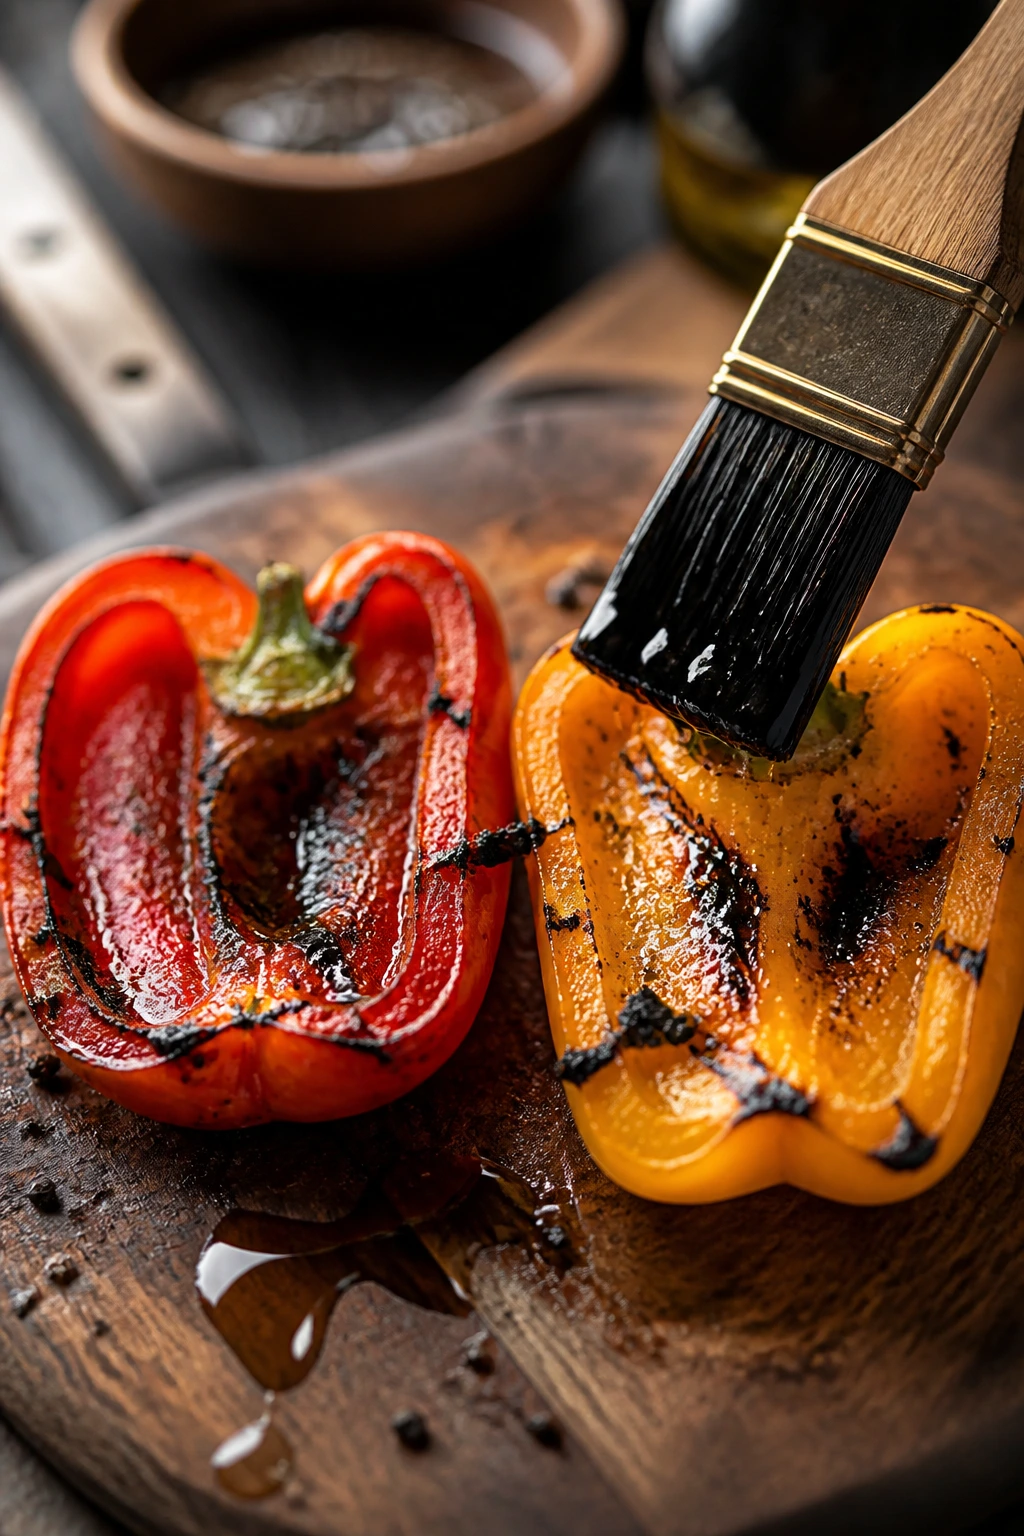
Olive Oil and Salt
What to use: 2 tablespoons extra-virgin olive oil and 1 teaspoon kosher salt.
Preparation: Brush the oil over the cut sides and outer skins in a thin, even layer. Sprinkle the salt over the cut surfaces right before the peppers go on the grill.
Substitutions: Avocado oil handles high heat well if that’s what you keep on hand, and fine sea salt works if you reduce the amount a bit.
Tips: The oil is doing more than preventing sticking. It helps the skin blister instead of drying out into a leathery shell, and the salt pulls the sweetness forward once the peppers are hot.
Pepper, Garlic, and a Little Heat
What to use: 1/2 teaspoon freshly ground black pepper, 1/2 teaspoon garlic powder, and a pinch of red pepper flakes if you want a little edge.
Preparation: Mix the dry seasonings together so they dust the peppers evenly instead of landing in one angry pile on a single half.
Substitutions: Smoked paprika can replace the garlic powder if you want a deeper grill-leaning flavor, and crushed coriander seeds give the peppers a brighter, floral note.
Tips: Keep the seasoning modest. Bell peppers are carrying their own sweetness, and if you bury them under too much spice, you lose the clean, smoky flavor that makes this dish work.
The Acidic Finish and Fresh Herbs
What to use: 1 tablespoon red wine vinegar or fresh lemon juice, plus 1 tablespoon chopped flat-leaf parsley.
Preparation: Hold the acid and herbs until the peppers come off the grill. Toss or drizzle while they’re still warm so the finish clings instead of sliding away.
Substitutions: Sherry vinegar gives a softer edge, and chopped basil can replace the parsley if you’re serving the peppers with tomatoes or grilled chicken.
Tips: Acid at the end matters. Grilling mutes brightness a little, and a splash of vinegar or lemon wakes the peppers back up without turning them into a salad.
The Tools That Make Grilling Easier
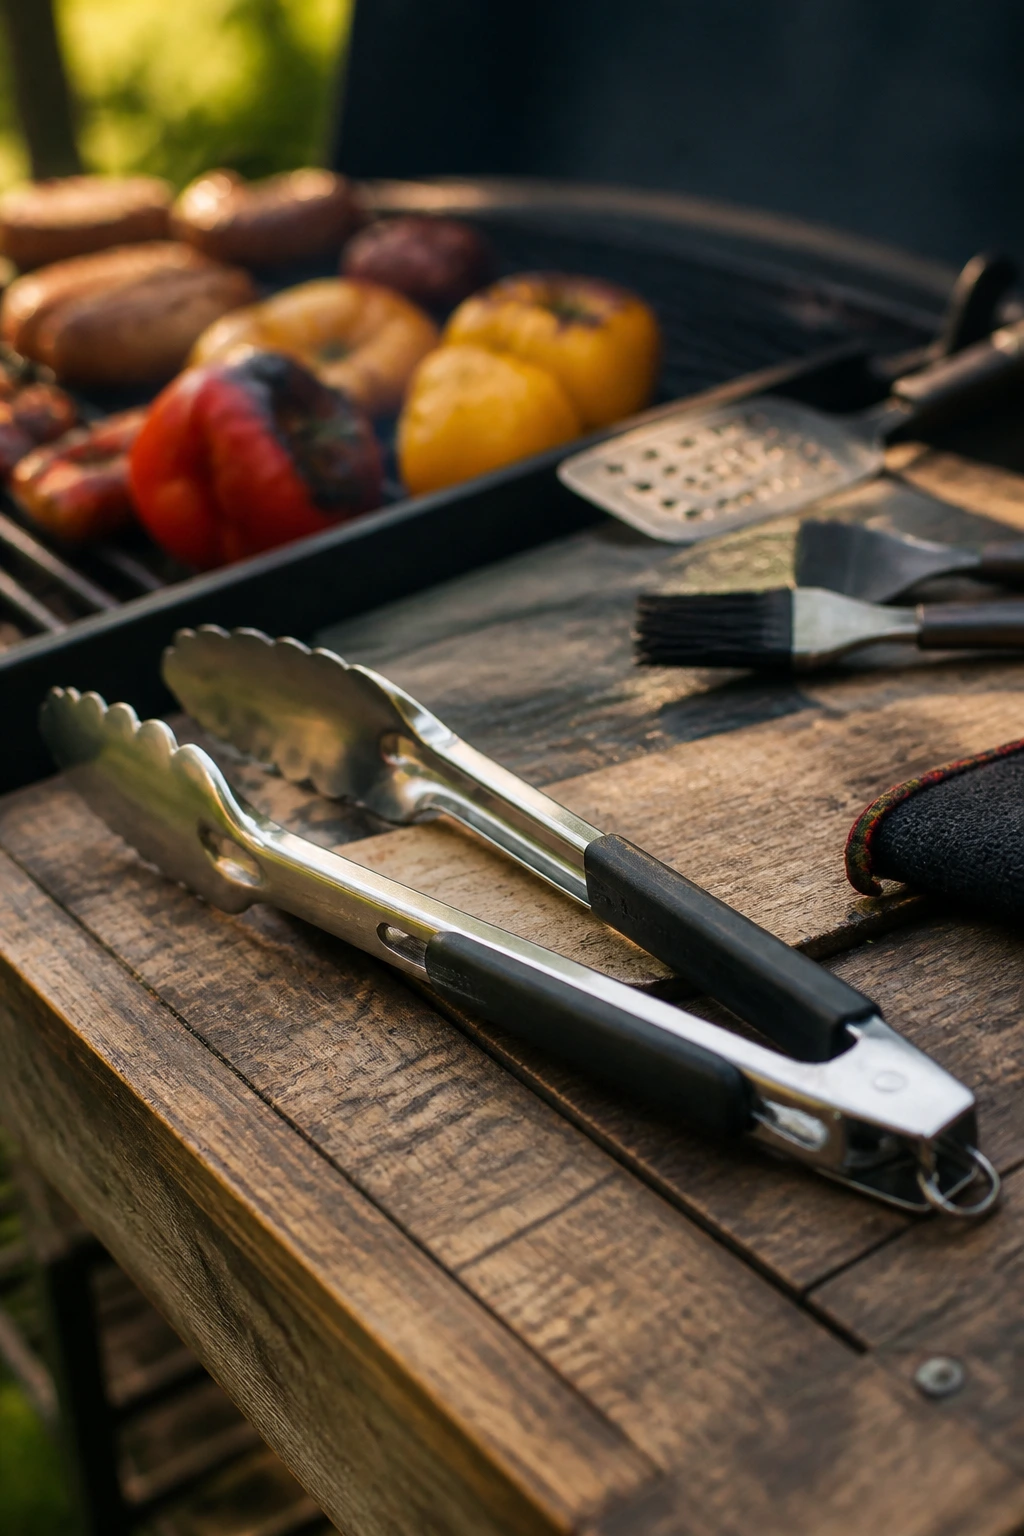
- Gas grill, charcoal grill, or pellet grill: Any of the three works if you can keep the heat steady around medium-high.
- Long-handled tongs: Bell peppers get slippery once the skins start to soften, and short tongs put your knuckles closer to the heat than they should be.
- Grill brush or stiff scraper: Clean grates give you cleaner char marks and fewer stuck skins.
- Vegetable oil brush or folded paper towel: Use this for a thin oil coat on the peppers and, if needed, a light swipe on the grates.
- Rimmed sheet pan or large platter: You need a broad landing spot when the peppers come off the fire.
- Sharp chef’s knife and cutting board: A clean cut through the stem end makes halving easier and keeps the pepper halves neat.
- Heatproof bowl with a lid or a piece of foil, optional: Useful if you want to steam the peppers for easier peeling.
How to Grill Bell Peppers Without Losing Their Shape
The best version of this dish starts before the peppers touch the fire. A clean grill, a steady medium-high heat, and peppers cut into large halves give you the kind of char that looks intentional instead of scorched by accident.
Prepare the Grill and the Peppers:
- Preheat your grill to medium-high heat, aiming for about 425 to 450°F at grate level. Clean the grates well, then oil them lightly so the pepper skins don’t stick and tear when you turn them.
- Cut each bell pepper lengthwise from stem to base. Remove the seeds and white ribs, then shake out any loose bits that would burn and leave a bitter edge.
- Brush the peppers lightly with olive oil on both the cut sides and the outer skins. Season the cut sides with kosher salt, black pepper, and garlic powder.
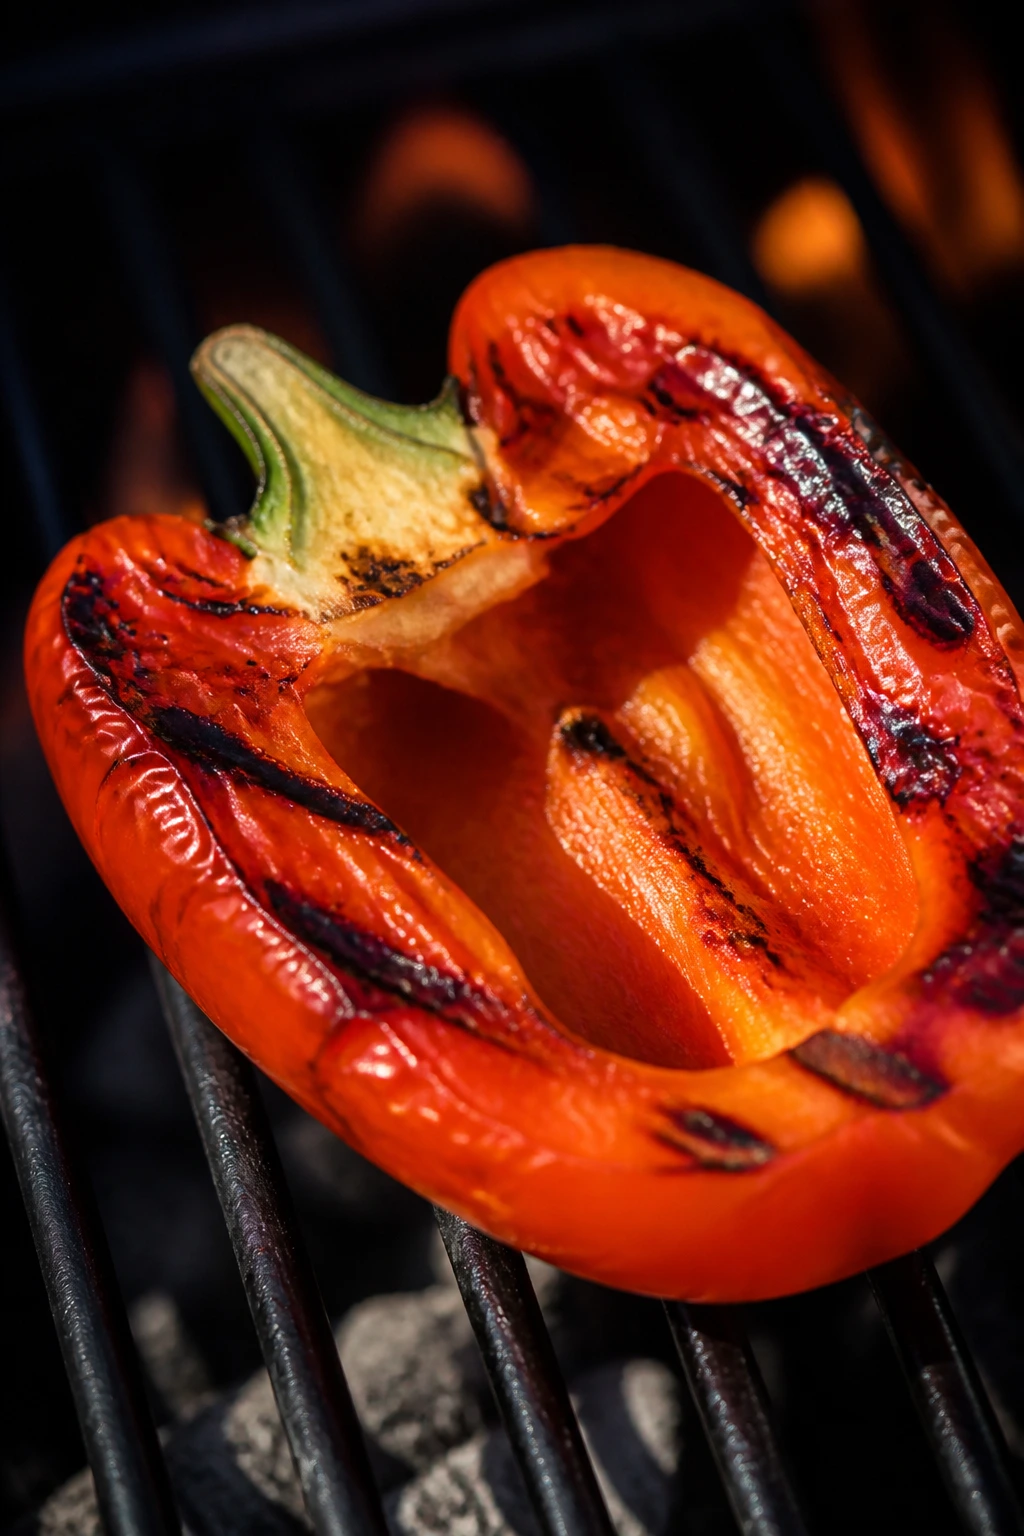
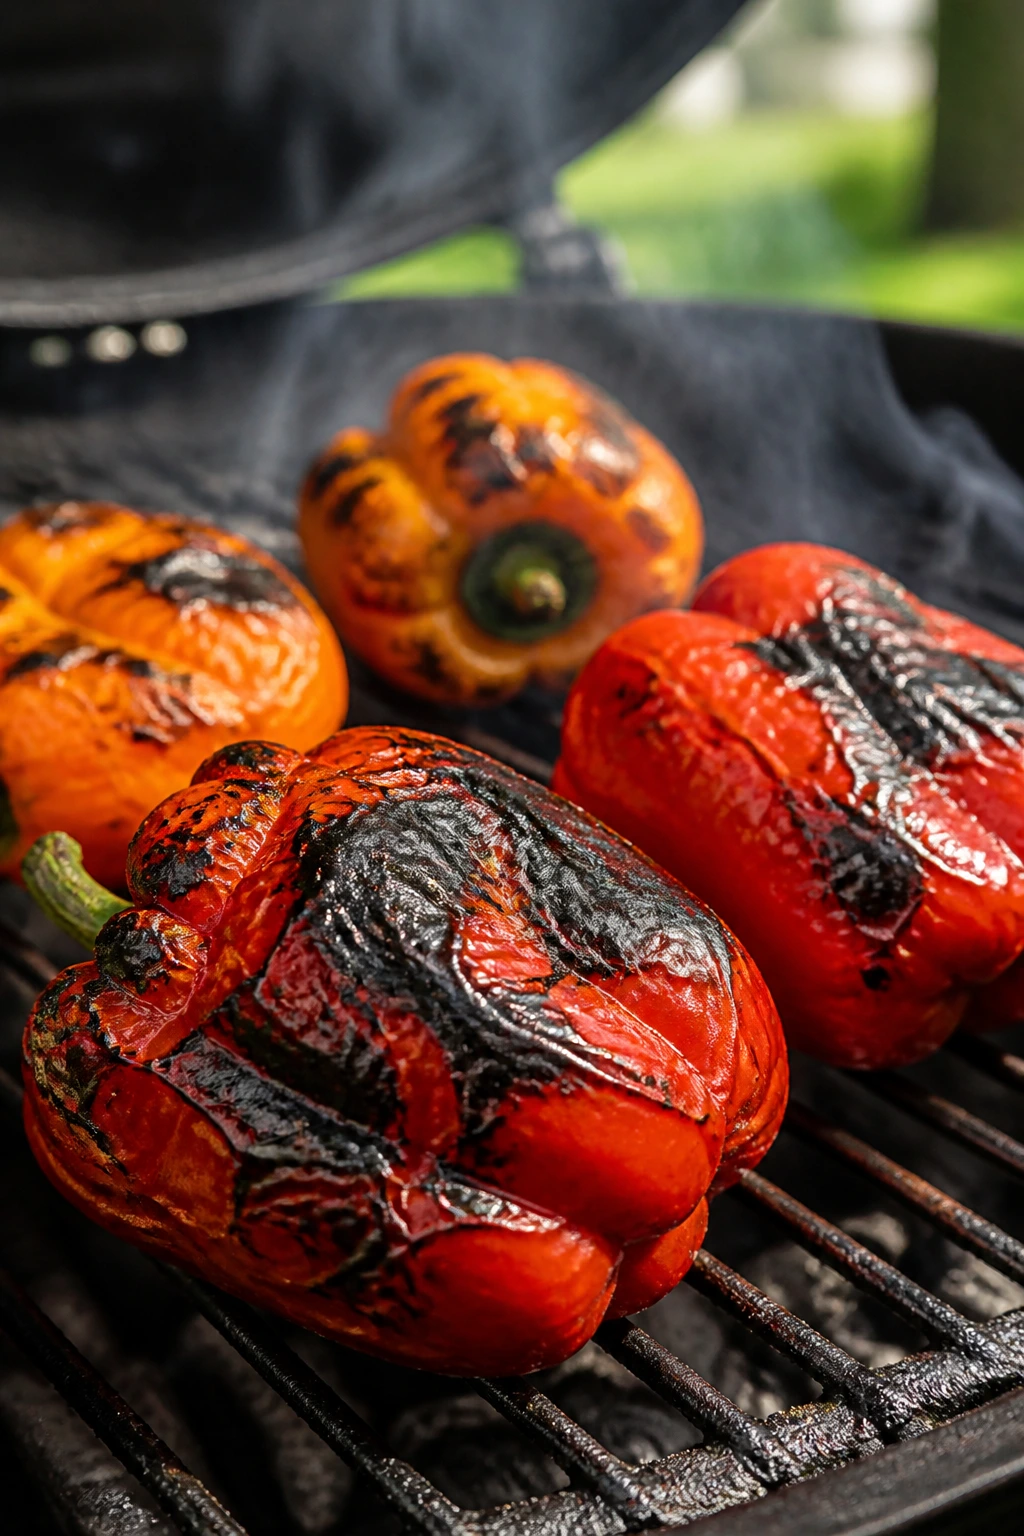
Grill and Blister:
- Place the peppers cut-side down over direct heat. Close the lid and grill for 4 to 5 minutes, until you see clear grill marks and the cut surface starts to soften around the edges.
- Flip the peppers skin-side down and grill for another 3 to 5 minutes. You want blistered skin, deep dark spots, and flesh that has relaxed but still holds its shape. Do not chase a raging flame here — burnt skins can happen fast, and the sweet flesh underneath will taste bitter if you let the fire run wild.
- If the peppers are especially thick-walled or very large, move them to a cooler spot on the grill for 2 to 3 more minutes with the lid closed. That last stretch softens the center without turning the outside to mush.
Steam, Finish, and Serve:
- Transfer the peppers to a platter. If you want to peel them, cover the platter loosely with foil or place the peppers in a bowl and cover it for 5 to 10 minutes. The trapped steam loosens the skins enough to slip off with your fingers.
- Drizzle the warm peppers with vinegar or lemon juice, then scatter the parsley and red pepper flakes over the top. If you wait until they cool completely before seasoning, the acid won’t cling as well and the peppers can taste flatter.
A few things to watch for while they cook. The pepper skins should blister and blacken in spots, but the flesh should not collapse into a wet ribbon. If that happens, the heat was too high or the peppers stayed on the grate too long. You want tender, not collapsed.
I also like to turn the peppers only once if I can help it. Every extra flip risks tearing the softened skin, and it doesn’t buy you much. One clean turn from cut-side down to skin-side down is enough for a simple cookout side.
Gas, Charcoal, and Pellet Grills Change the Result in Small Ways
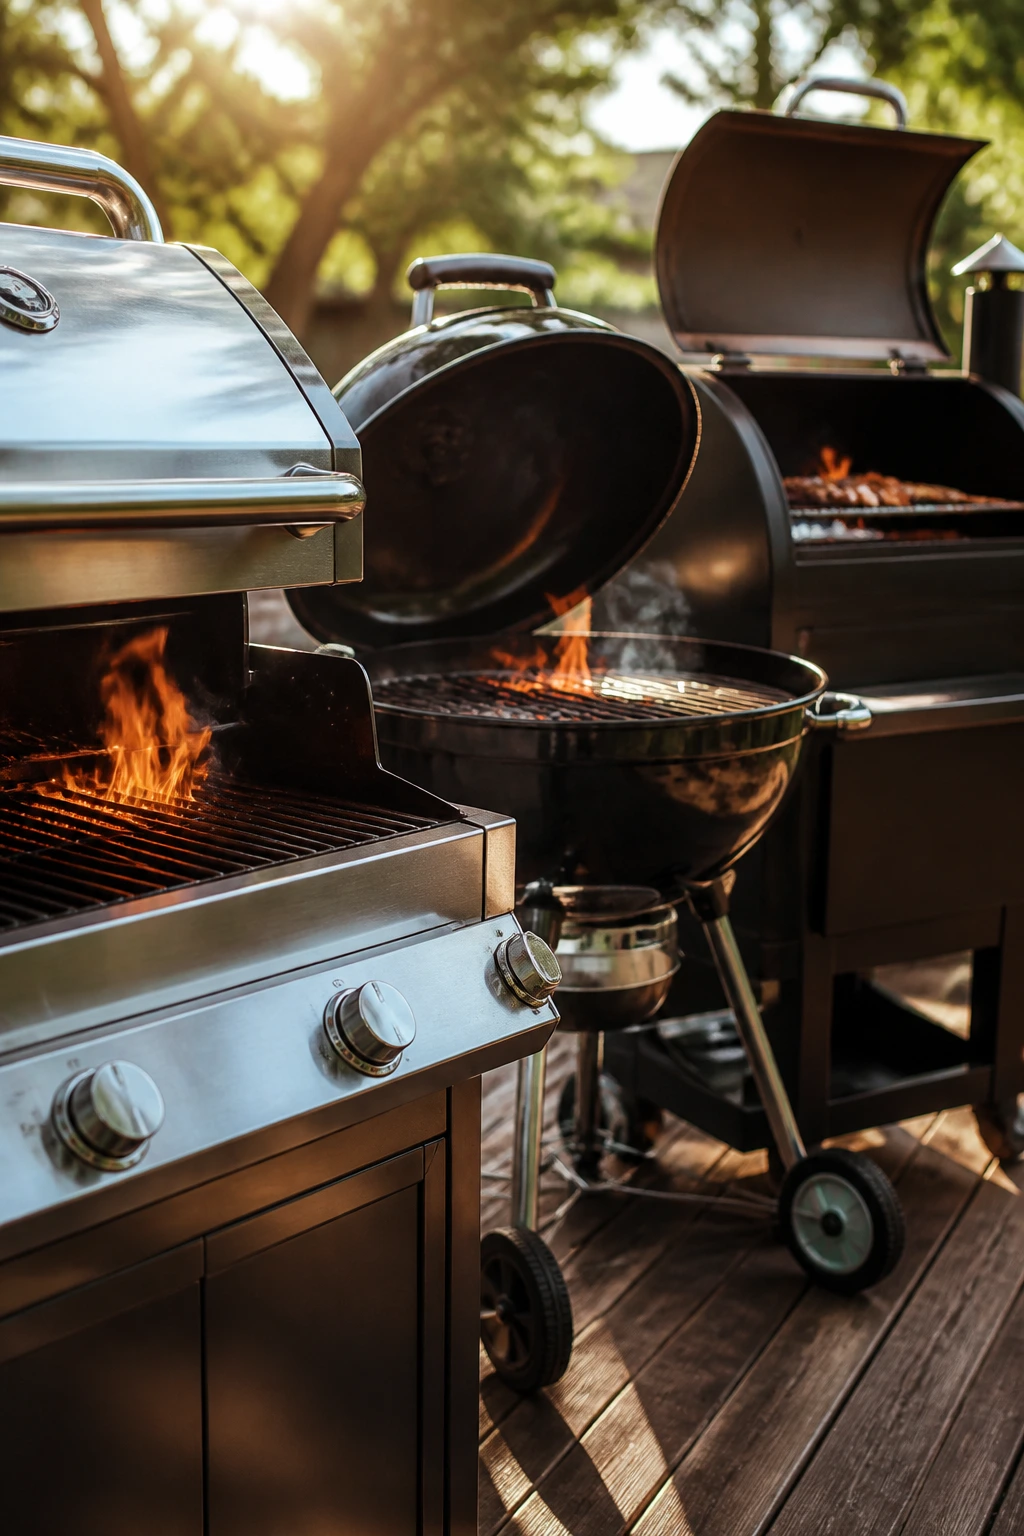
Gas grills give you the easiest control. If the grate thermometer says 425°F and the flame stays steady, the peppers blister predictably, and you can move them around the grate without dealing with hot spots that feel like a trapdoor. For a backyard cookout, that kind of calm control is underrated.
Charcoal brings a deeper smoke note, and I think it suits bell peppers better than most vegetables. The pepper flesh loves a little wood smoke, especially red and orange peppers, which already lean sweet. The catch is that charcoal punishes sloppy heat management. If the coals are too fierce, the skins blacken before the flesh softens, and you end up with charred wrappers around crunchy centers.
Pellet grills sit somewhere in the middle. They’re steady, clean, and a little less punchy on smoke than charcoal, but they do a fine job if you’re grilling a bigger batch. I use them when I’m making peppers for sandwiches or salads later in the week, because the even heat gives me fewer surprises.
A grill pan can work indoors, too. It won’t give you the same smoke, and the stripes are more theatrical than practical, but the flavor is still good if you use medium-high heat and don’t crowd the pan. The peppers will soften a little faster in a pan because they’re sitting in their own steam, so keep an eye on them and don’t let the cut sides turn leathery.
To Peel or Leave the Skins On
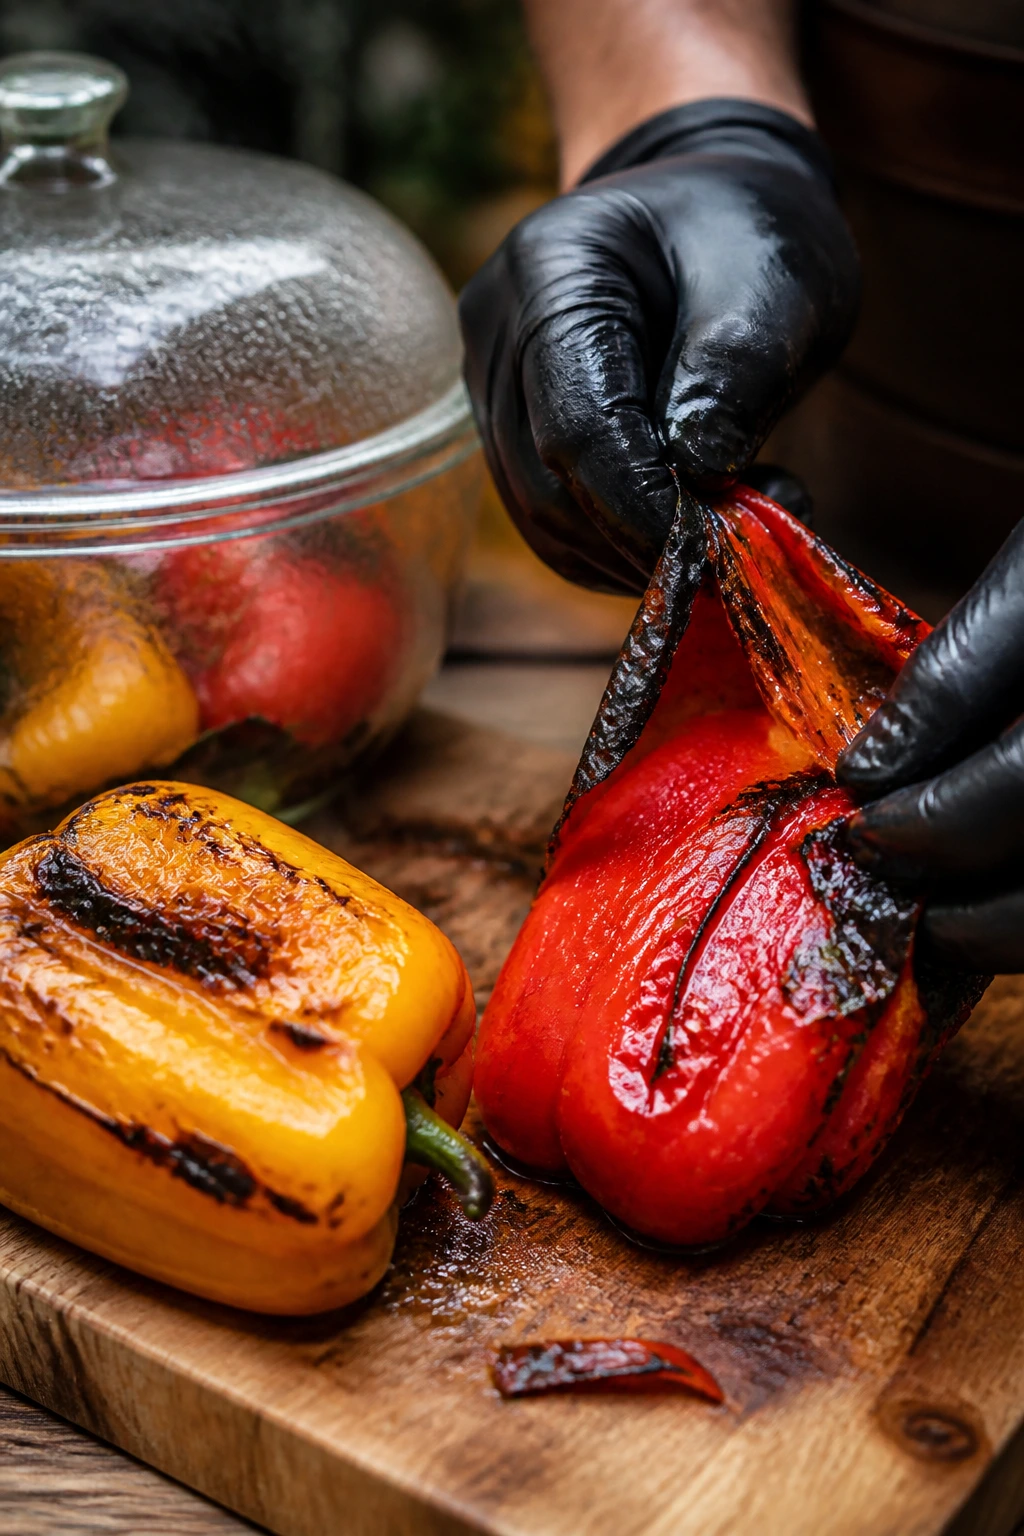
I leave the skins on for most backyard cookouts. The char is part of the point, and the slight chew of the skin gives the peppers more presence on the plate. If you’re serving them beside grilled steak or sausage, that extra texture helps them hold their own.
Peeling makes more sense when the peppers are heading into a sandwich, antipasto platter, or salad. The flesh turns silky and almost spreadable after a short steam, and the blackened skins come away in loose strips if you’re patient. Don’t run them under water to clean them. That washes off the smoke and cools the texture too fast.
If you want to peel, let the hot peppers steam in a covered bowl or under foil for 5 to 10 minutes. Start at a lifted edge and peel with your fingers; a paring knife can scrape off the stubborn bits, but it’s easier when the steam has done its job. Leave a few char flecks behind if you like. They carry flavor.
For most cookouts, I use a half-and-half approach. Peel a few peppers for sandwiches and leave a few intact for the platter. That way people can choose the texture they want, and you don’t end up doing extra work for no reason.
How to Serve Them at a Backyard Cookout
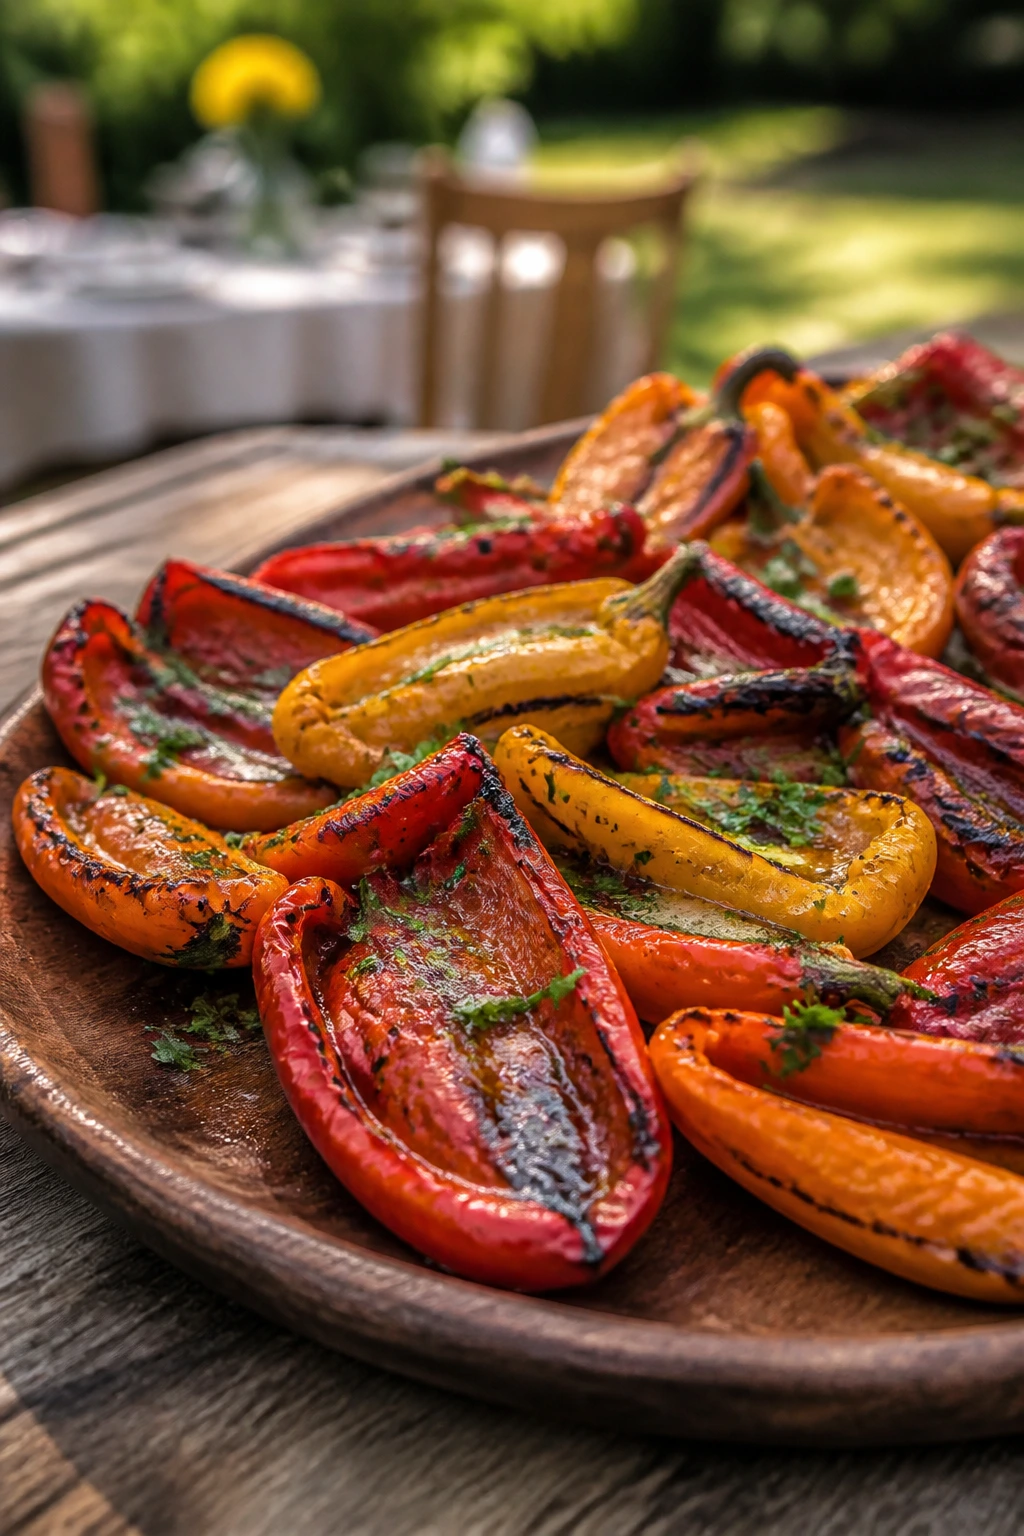
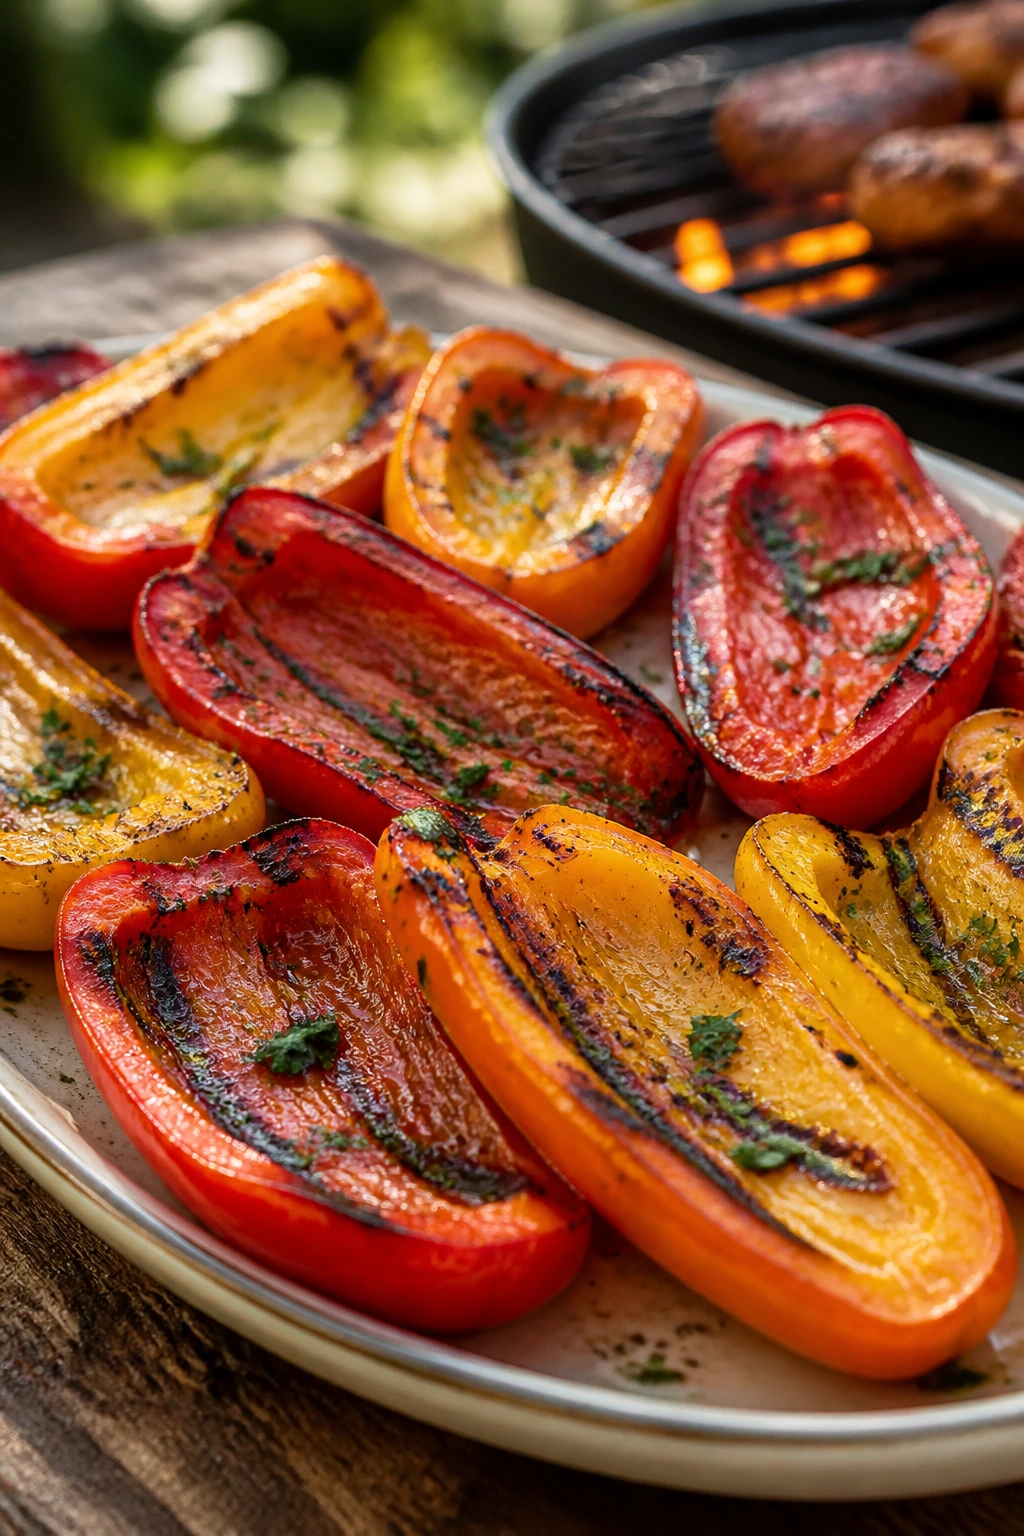
Presentation: Fan the pepper halves or strips on a wide platter, then drizzle with the finishing oil, vinegar, and parsley. If the peppers are still in halves, turn a few cut-side up and a few skin-side up so the char and the glossy flesh both show. A scattered pinch of flaky salt on top looks casual and tastes sharper than a heavy hand of table salt.
Accompaniments: These peppers sit nicely next to grilled chicken thighs, burgers, sausages, pork chops, or a pile of grilled bread brushed with garlic oil. They also make sense with cold things: potato salad, tomato salad, cucumber salad, or a bowl of herbed yogurt. If you’re building a cookout spread with one vegetarian anchor, add halloumi or grilled corn and the platter stops feeling lopsided.
Portions: One large pepper half per person works as a side when the table already has meat, bread, and another vegetable. If the peppers are part of a vegetable spread, figure on one full pepper per two guests, then scale up if you know your crowd tends to reach for smoky vegetables first. The pieces look generous, but the platter empties faster than you expect.
Beverage Pairing: A cold lager, a dry rosé, or sparkling water with lemon all fit the sweetness and char without fighting the smoke. If the rest of the menu is heavy, a crisp beer or a simple white wine keeps the whole meal from feeling sluggish.
Additional Tips and Flavor Boosters
Flavor Enhancement: A tiny splash of balsamic glaze can be useful, but keep it light — about a teaspoon per two peppers. Too much and you cover the smoke with syrup. I like using it only when the peppers are headed toward a platter with tomatoes or grilled bread.
Customization: Toss the warm peppers with thin-sliced red onion, chopped olives, or crumbled feta if you want a more Mediterranean angle. For a sharper, picnic-style finish, add capers and a little extra lemon juice. If you’re serving them with steak, a knob of butter melted over the hot peppers is not elegant, but it is good.
Serving Suggestions: Slice the peppers into strips and tuck them into sandwiches, fold them into pasta salad, or scatter them over hummus with toasted pine nuts. They also make a fine topping for scrambled eggs the next morning. I wouldn’t waste them on a plain green salad unless the salad has enough salt and acid to stand up to the sweetness.
Time-Saver: Grill the peppers right after the main proteins come off, while the grate is still hot. Scrape the grates first if there’s sticky marinade on them, then keep the heat steady. You’ll save time and pick up a bit of leftover smoke without changing the method.
Common Mistakes That Turn Sweet Peppers Mushy
- Cranking the grill too high: The skins blacken in a hurry while the centers stay stiff. The fix is a steady medium-high heat, not a roaring fire.
- Leaving the peppers whole for too long: Whole peppers take much longer to soften and can burn in one spot while the rest stays firm. Halving them lengthwise gives you a faster, more even cook.
- Using too much oil: A heavy coat drips, smokes, and can make the peppers taste greasy. Brush on a thin film instead; you want sheen, not puddles.
- Crowding the grate: Packed peppers steam each other, which blunts the char and makes the skins rubbery. Leave a little breathing room between pieces.
- Skipping the rest after grilling: If you want peeled peppers, the short covered rest matters. Without it, the skins cling stubbornly and tear the flesh when you try to remove them.
- Drowning the peppers in acid before they’re done: Vinegar or lemon before grilling can mute the sweet flavor and doesn’t help the char. Save the bright finish for the end, when the heat has done its job.
Four Ways to Change the Flavor
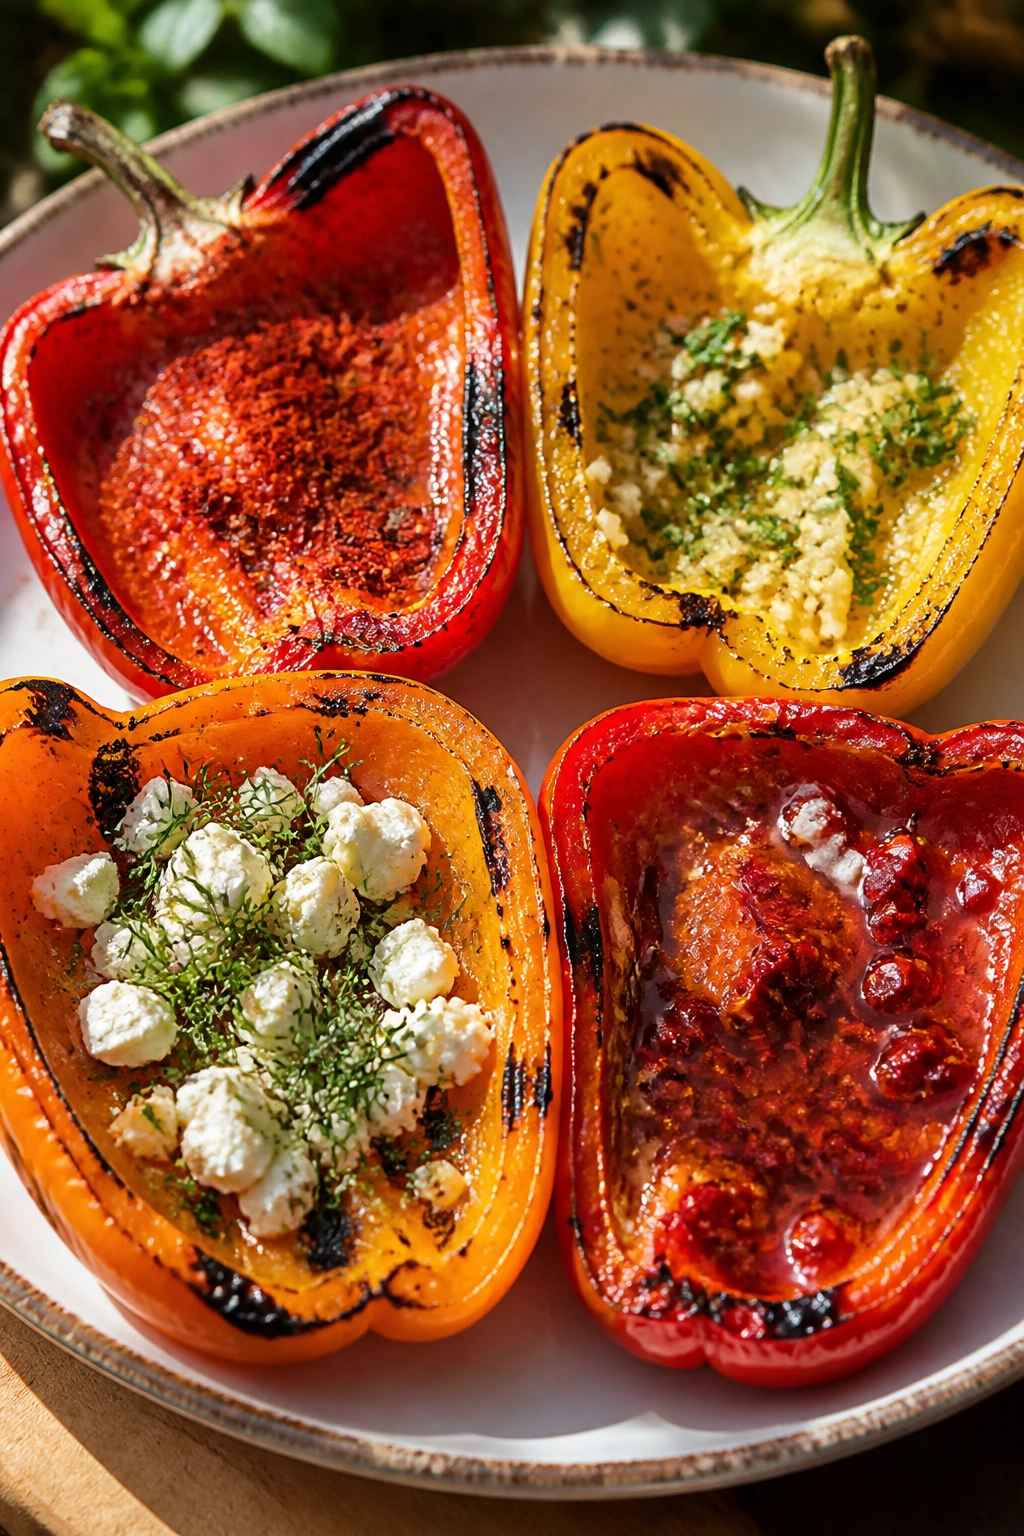
Smoky Paprika Finish: Dust the peppers with 1/2 teaspoon smoked paprika before they go on the grill, then finish with olive oil and parsley. It gives you a deeper, campfire-style flavor without needing extra sauce.
Garlic-Lemon Picnic Peppers: Add a grated garlic clove to the finishing oil and use lemon juice instead of vinegar. This version tastes sharp and fresh, which makes it a good match for chicken, fish, or anything that needs a brighter side.
Feta and Herb Platter: Grill the peppers plain, then top them with crumbled feta, chopped dill, and a few chopped olives. This leans more mezze-board than cookout side, and it works well if you’re serving grilled bread.
Calabrian Heat: Add a pinch of Calabrian chili flakes or crushed red pepper to the oil before grilling, then finish with a tiny drizzle of honey if you want the heat to land softly. That sweet-heat balance is especially good with grilled sausage or pork.
Keeping Leftovers Useful
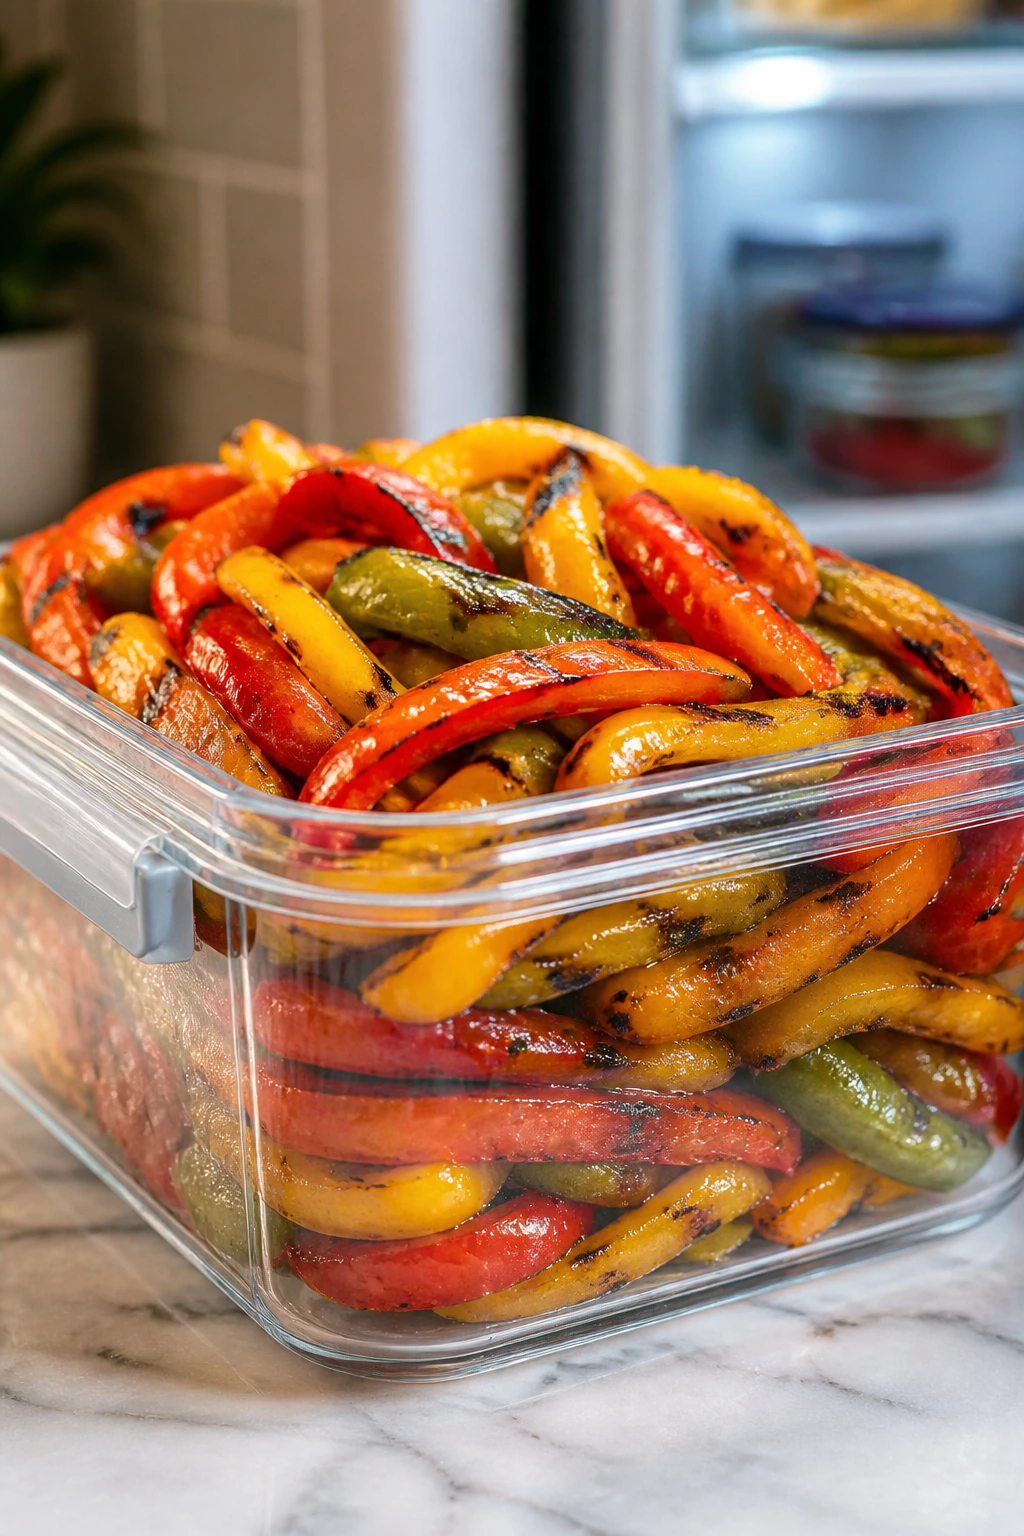
Refrigerator Storage
Store leftover grilled bell peppers in an airtight container in the refrigerator for 3 to 4 days. If they’ve been dressed with vinegar or lemon, keep them toward the shorter end of that range because the acid keeps softening the flesh. Let them cool first before sealing the container; if you trap steam, the peppers can turn watery.
Freezer Storage
Grilled peppers freeze well for up to 2 months, though the texture softens after thawing. Freeze them in a single layer on a parchment-lined tray first, then pack them into a freezer bag or container once they’re firm. That keeps the slices from freezing into one soggy block.
Reheating
For the best texture, reheat peppers in a skillet over medium-low heat for 2 to 3 minutes, just until warm. An oven at 400°F for 5 to 7 minutes also works if you’re reheating a larger batch. The microwave is fine in a pinch, but it makes the peppers softer and a little more slumped.
Make-Ahead
These peppers can be grilled a day ahead and chilled without losing much character. In fact, if you’re using them in sandwiches or grain bowls, a few hours in the fridge helps the seasoning settle into the flesh. Keep them plain until serving if you want the texture to stay cleaner.
Frequently Asked Questions About Grilled Bell Peppers
Can I grill bell peppers whole instead of halving them?
Yes, but whole peppers take longer and need more turning. You’ll need to blacken the skins on several sides, then steam and peel them, which makes sense for antipasto but feels slow for a backyard cookout side.
Do I have to peel grilled bell peppers?
No. The skins are edible, and I often leave them on for cookout platters because the char adds flavor and the peppers hold together better. Peel them only when you want a silkier texture for sandwiches, salads, or dips.
How do I keep grilled peppers from getting soggy?
Use medium-high heat, a light coat of oil, and don’t cover them tightly unless you’re steaming for peeling. If they sit in a sealed container while piping hot, they’ll trap steam and soften more than you want.
Can I make these ahead for a party?
Yes, and that’s one of their best traits. Grill them a day ahead, cool them, then refrigerate them in a covered container; dress them just before serving or right after reheating if you want the flavors to stay bright.
What if I only have an oven or broiler?
A broiler is your closest stand-in for the grill. Put the peppers cut-side down or skin-side up on a sheet pan under high heat, watch them closely, and pull them once the skins blister and the flesh softens.
Can I use mini sweet peppers instead of full-size bell peppers?
You can, but the method changes a little. Use a grill basket or cut them into larger strips so they don’t fall through the grates, and shorten the cook time to about 6 to 8 minutes total.
Why do green peppers taste sharper than red ones on the grill?
Green peppers are harvested earlier, so they keep a firmer texture and a more vegetal flavor. Red, orange, and yellow peppers have had longer to ripen, which gives them more sugar and a softer finish when they hit the heat.
What should I do if the skins burn before the flesh softens?
Move the peppers to a cooler part of the grill and close the lid for a few minutes. The problem is usually heat that’s too high or peppers that were too thick, not the peppers themselves.
A Side Dish That Disappears First
Grilled bell peppers earn their place by doing something a lot of cookout sides never quite manage: they taste like the grill without tasting heavy. There’s sweetness, smoke, a little bite from the char, and enough texture left in the flesh that they still feel like real food instead of soft garnish. That balance is the whole reason I keep making them.
They also solve a practical problem. When the main platter is crowded and the timing gets messy, peppers give you something forgiving, colorful, and useful. They can be served warm, room temperature, or folded into leftovers the next day, which means the work keeps paying off long after the last burger is gone.
Next time the grill is hot, slide a few peppers onto the grate before the steaks go on. You may find the pepper platter empties first.
Grilled Bell Peppers for Backyard Cookouts — Recipe Card
Recipe Name: Grilled Bell Peppers for Backyard Cookouts
Description: Sweet bell peppers are halved, seasoned lightly, and grilled until the skins blister and the flesh turns silky with smoky edges. A splash of vinegar or lemon and a scatter of parsley keep the flavor bright enough for burgers, sausages, chicken, or grilled bread.
Prep Time: 15 minutes
Cook Time: 12 to 15 minutes
Total Time: 27 to 30 minutes
Course: Side Dish
Cuisine: American
Servings: 4 to 6 servings
Calories: About 65 kcal per serving
Ingredients
- 6 large bell peppers, mixed colors
- 2 tablespoons extra-virgin olive oil
- 1 teaspoon kosher salt
- 1/2 teaspoon freshly ground black pepper
- 1/2 teaspoon garlic powder
- 1 tablespoon red wine vinegar or fresh lemon juice
- 1 tablespoon chopped flat-leaf parsley
- Pinch of red pepper flakes, optional
Instructions
- Preheat the grill to medium-high heat, about 425 to 450°F, and clean the grates well.
- Halve the peppers lengthwise, remove the seeds and white membranes, and pat them dry.
- Brush the peppers with olive oil and season the cut sides with salt, black pepper, and garlic powder.
- Place the peppers cut-side down on the grill and cook for 4 to 5 minutes, until grill marks appear and the edges start to soften.
- Flip the peppers skin-side down and cook for 3 to 5 minutes more, until the skins blister and the flesh is tender but still holds its shape.
- Transfer to a platter. If you want to peel them, cover loosely for 5 to 10 minutes, then slip off the skins.
- Finish with vinegar or lemon juice, parsley, and red pepper flakes if using. Serve warm or at room temperature.
Notes:
Use red, yellow, and orange peppers for the sweetest flavor; green peppers add a sharper edge.
If the peppers are very large, give them an extra 2 to 3 minutes over indirect heat rather than turning up the flame.
They keep well for 3 to 4 days in the fridge and are good cold, warm, or reheated gently in a skillet.