
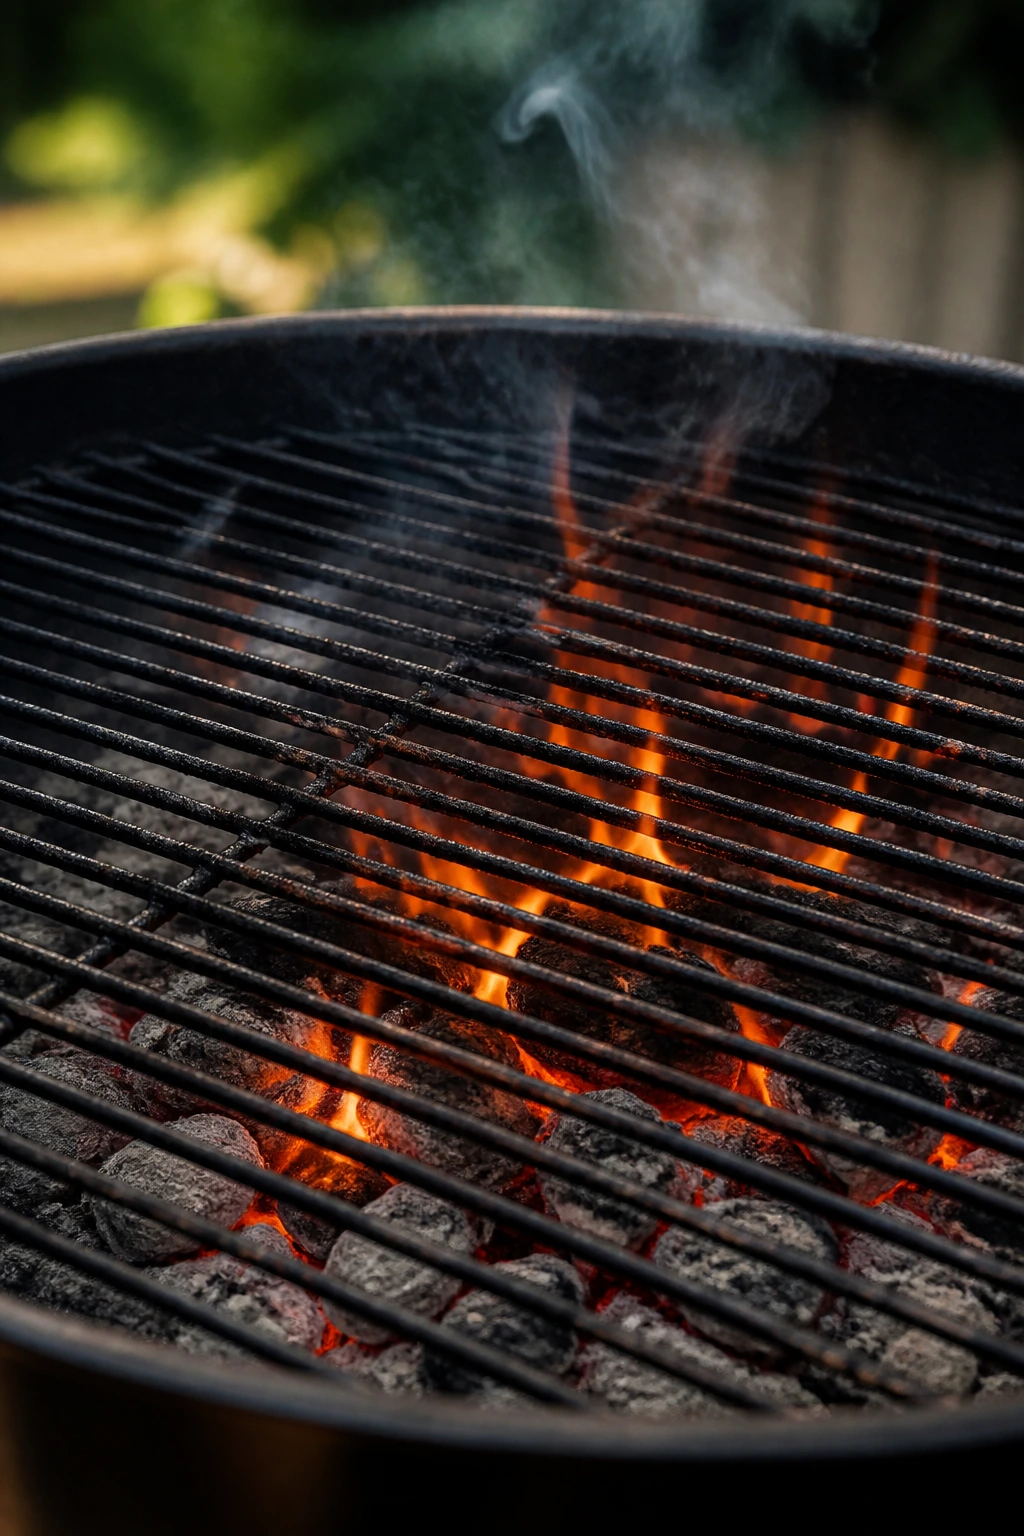
A good Fourth of July dinner smells like smoke before anyone takes a bite. The first burst off the grill should be sharp and a little sweet—charred onion, hot metal, a splash of citrus, maybe a drip of fat hitting the coals. That’s the sound and smell people remember. Not a fussy plate. Not a kitchen packed with pots. Just food that can take a little fire and come out better for it.
That’s why grilled dinners work so well for this holiday. They keep the heat outside, they scale up without much drama, and they let you cook in layers: fast shrimp on one side, slow ribs on the other, vegetables tucked into the warm edges where they can soften without collapsing. A grill also rewards good instincts. If you know when to move food, when to leave it alone, and when to pull out an instant-read thermometer, you’re already ahead.
The menu below leans into that idea. Some dishes are quick and bright. Some are sticky and bold. A couple are the kind of thing you put on a board and let people build themselves. All of them bring smoke, char, and enough color to look right at home next to paper plates, cold drinks, and a patio table covered in napkins.
Why These Grilled Dinners Earn Their Spot on the Holiday Table
-
They feed a crowd without hogging the kitchen: Most of these recipes can be cooked outdoors while the oven stays off, which matters when the rest of the meal is already fighting for space.
-
They mix quick cooks with slower mains: Shrimp, burgers, and fish move fast; ribs and bone-in pork can hold the grill for longer. That balance keeps the menu from feeling repetitive.
-
They taste like a cookout, not a weeknight repeat: Citrus, smoke, fresh herbs, charred vegetables, and sticky glazes give each dish a holiday feel without making the prep complicated.
-
They work as plates, platters, or sandwiches: Some are best stacked on buns, some sliced for serving boards, and some turn into tacos or skewers. That flexibility saves you from a rigid menu.
-
They play nicely with classic sides: Corn, slaw, potato salad, watermelon, baked beans, and grilled bread all fit beside these dinners without fighting them.
-
They make a backyard table feel finished: A handful of sauces, a few herbs, and one good side dish can turn even simple grilled food into something people linger over.
1. Honey-Lime Grilled Chicken Thighs
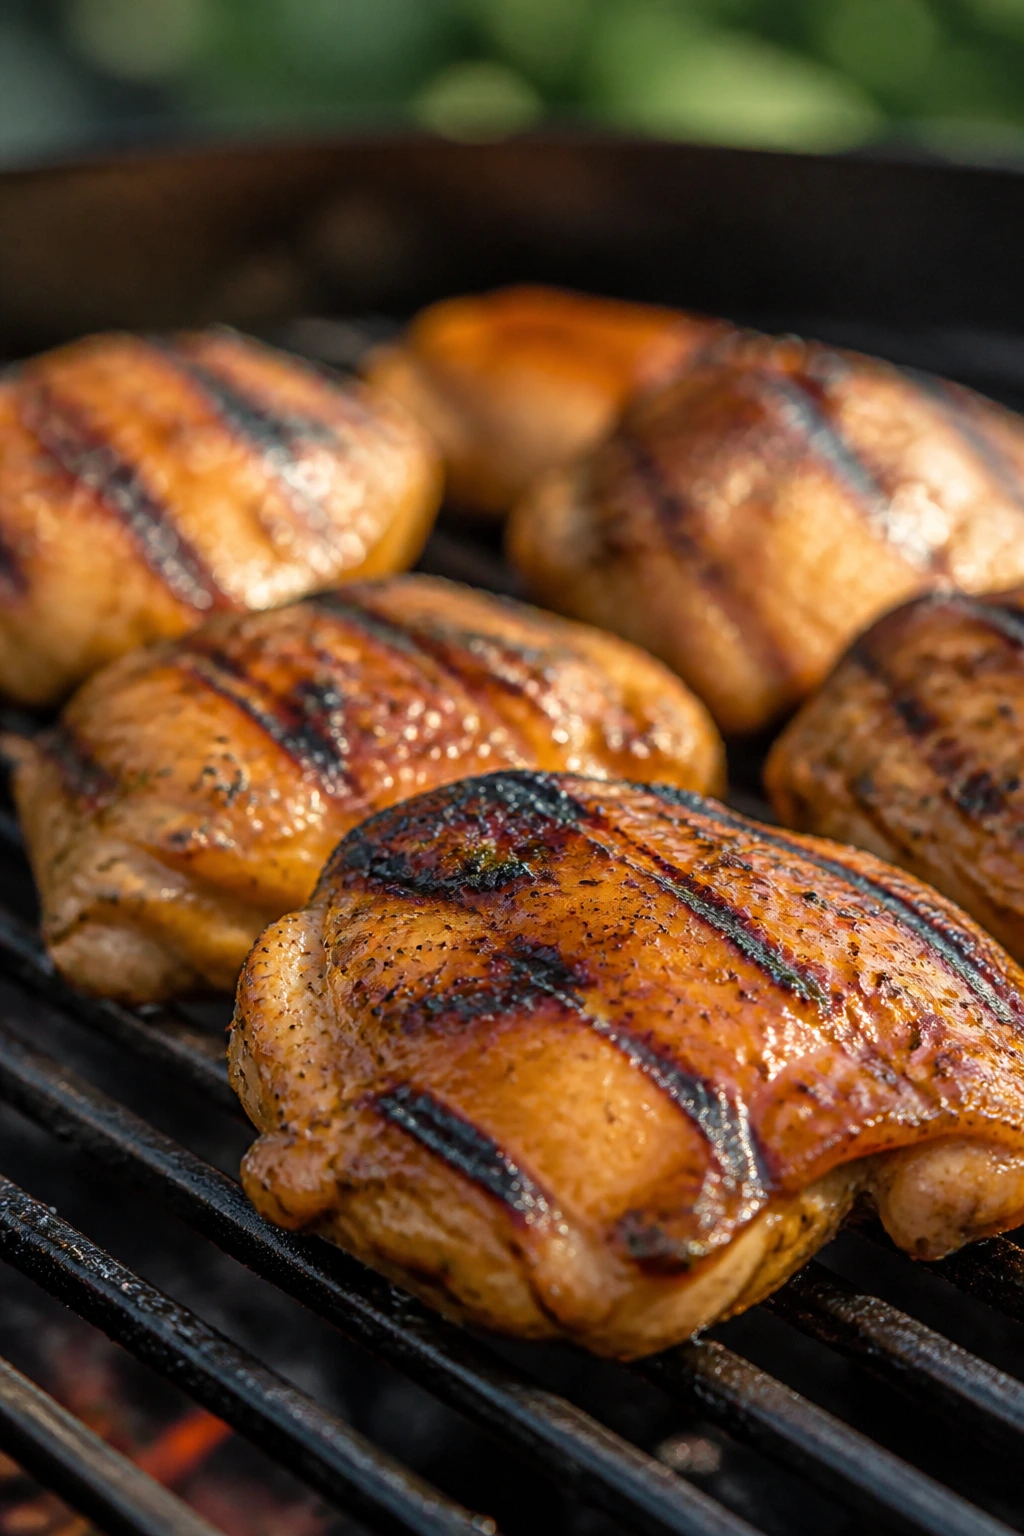
Honey and lime do a specific kind of magic on the grill. The edges turn sticky and bronzed, the garlic gets sweet instead of sharp, and the chicken thighs stay juicy even if the heat runs a little high. This is the sort of grilled dinner that looks casual but tastes like you paid closer attention than you let on.
Why It Works:
Chicken thighs are the right cut here because they forgive a hot grill and still come off tender. The honey in the marinade gives you caramelized edges, while lime juice keeps the sweetness from going flat. If you grill over medium-high heat, around 400°F to 450°F, the chicken picks up color fast without drying out, and the last-minute baste gives it a lacquered finish that feels almost glossy.
Key Ingredients
- 2 1/2 pounds boneless, skinless chicken thighs — the fat in thighs keeps the meat from drying out on hot grates.
- 3 tablespoons olive oil — helps the marinade cling and keeps the surface from sticking.
- 3 tablespoons honey — gives the chicken its sticky, char-friendly finish.
- Juice and zest of 2 limes — the bright edge keeps the glaze from tasting heavy.
- 3 garlic cloves, minced — add them fresh so they stay sweet instead of bitter.
- 2 teaspoons kosher salt — seasons the meat all the way through.
- 1 teaspoon smoked paprika — adds color and a little campfire note.
- 1/2 teaspoon black pepper — enough bite to keep the glaze from tasting flat.
- 1/4 teaspoon cayenne, optional — use it if you want a small kick.
- 2 tablespoons chopped cilantro, for serving — brings freshness at the end.
Quick Steps
- Whisk the olive oil, honey, lime juice, lime zest, garlic, salt, paprika, pepper, and cayenne in a bowl until smooth.
- Toss the chicken thighs in the marinade, cover, and chill for 30 minutes to 4 hours. Do not leave it much longer than that or the lime can start to soften the meat too much.
- Preheat the grill to medium-high, about 400°F to 450°F, and oil the grates.
- Grill the chicken for 5 to 7 minutes per side, closing the lid between flips, until the surface is browned and the thickest part reaches 165°F.
- Brush on a little extra marinade during the last 2 minutes of cooking, then move the chicken to a plate.
- Rest for 5 minutes before serving, then finish with chopped cilantro and an extra squeeze of lime.
Tips and Variations
- Swap in boneless drumsticks if that’s what you have; just give them a few more minutes over indirect heat after the first sear.
- Add grilled corn or a cucumber salad on the side so the plate has some crunch.
- If limes are too sharp, replace one with orange juice for a softer, rounder glaze.
2. Classic Cheeseburgers with Grilled Onions
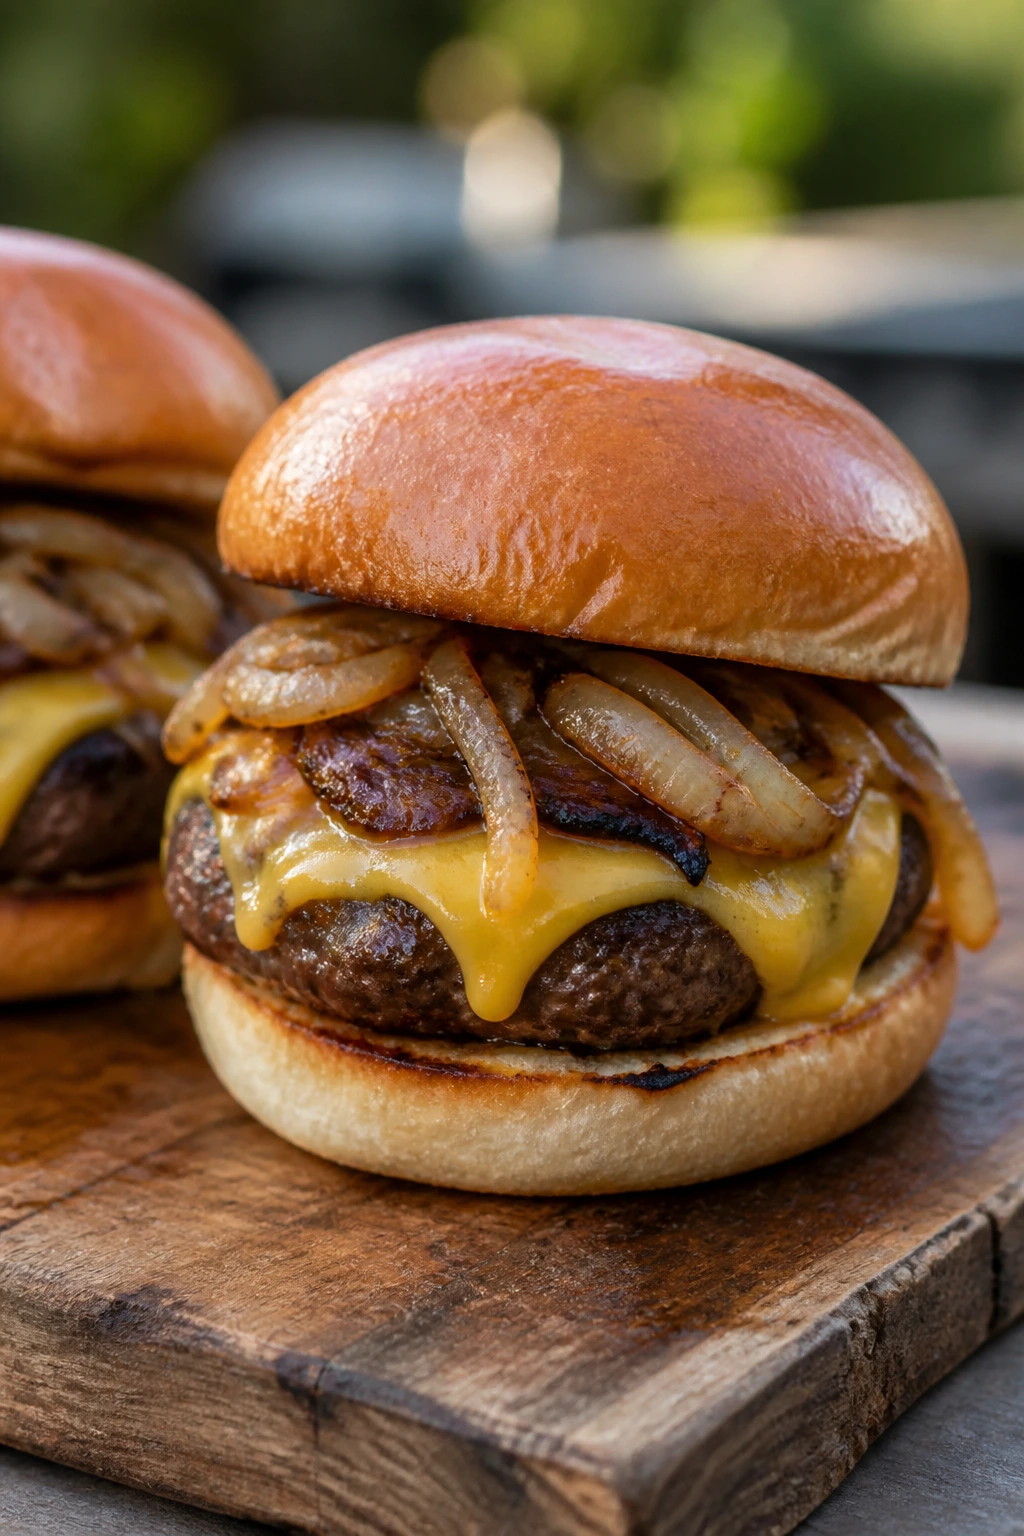
A burger done right still feels like the center of the table. The onion rings soften on the grates, the beef picks up a crust without turning dry, and the cheese melts just enough to coat the patty instead of sliding off in a sad little sheet. This is one of those grilled dinners that sounds basic until you bite into a properly seasoned, properly hot burger.
Why It Works:
Eighty-twenty ground beef gives you enough fat for flavor and juiciness, which matters more than people want to admit. A loose hand is the whole game here—overworking the meat turns burgers tight and bouncy. Grilling the onions first brings out their sweetness, and melting the cheese in the final minute gives you a soft, gooey layer without overcooking the beef. Hit 160°F in the center, and you’re in the safe zone for ground meat.
Key Ingredients
- 2 pounds ground beef, 80/20 — the fat content keeps the burgers juicy on high heat.
- 1 tablespoon Worcestershire sauce — adds a deep savory note.
- 1 1/2 teaspoons kosher salt — seasons the meat without making it dense.
- 1 teaspoon black pepper — keeps the flavor clean and direct.
- 1 large yellow onion, sliced into 1/2-inch rings — grills into soft, sweet rounds.
- 6 slices cheddar cheese — sharp cheddar gives the most flavor.
- 6 burger buns — potato buns or brioche buns hold up well.
- Lettuce leaves, tomato slices, and pickle chips — the usual toppings, but they matter.
- 2 tablespoons mayonnaise, plus ketchup and mustard — keep the condiments ready.
- 1 tablespoon neutral oil — helps the onion slices and grate stay from sticking.
Quick Steps
- Divide the beef into 6 portions and shape them into patties about 1/2 inch thick. Press a shallow dimple into the center of each one so they cook flat instead of puffing.
- Season both sides with salt and pepper, then brush the onion rings lightly with oil.
- Preheat the grill to medium-high and oil the grates well.
- Grill the onions for 4 to 5 minutes per side until softened and browned. Move them to a cooler spot if they start to burn.
- Grill the burgers for 3 to 4 minutes on the first side, flip once, then cook 2 to 3 minutes more for medium. Add the cheese during the last minute and close the lid so it melts.
- Toast the buns for about 30 seconds cut-side down.
- Build the burgers with lettuce, tomato, pickles, grilled onion, and your condiments, then serve at once.
Tips and Variations
- Keep the patties cold until they hit the grill; warmer meat smears and loses shape.
- Swap cheddar for American if you want a softer melt and a more classic diner-style burger.
- If you want a bigger cookout moment, top each burger with a spoonful of warm grilled onions and a slice of tomato seasoned with salt.
3. Garlic Butter Shrimp Skewers
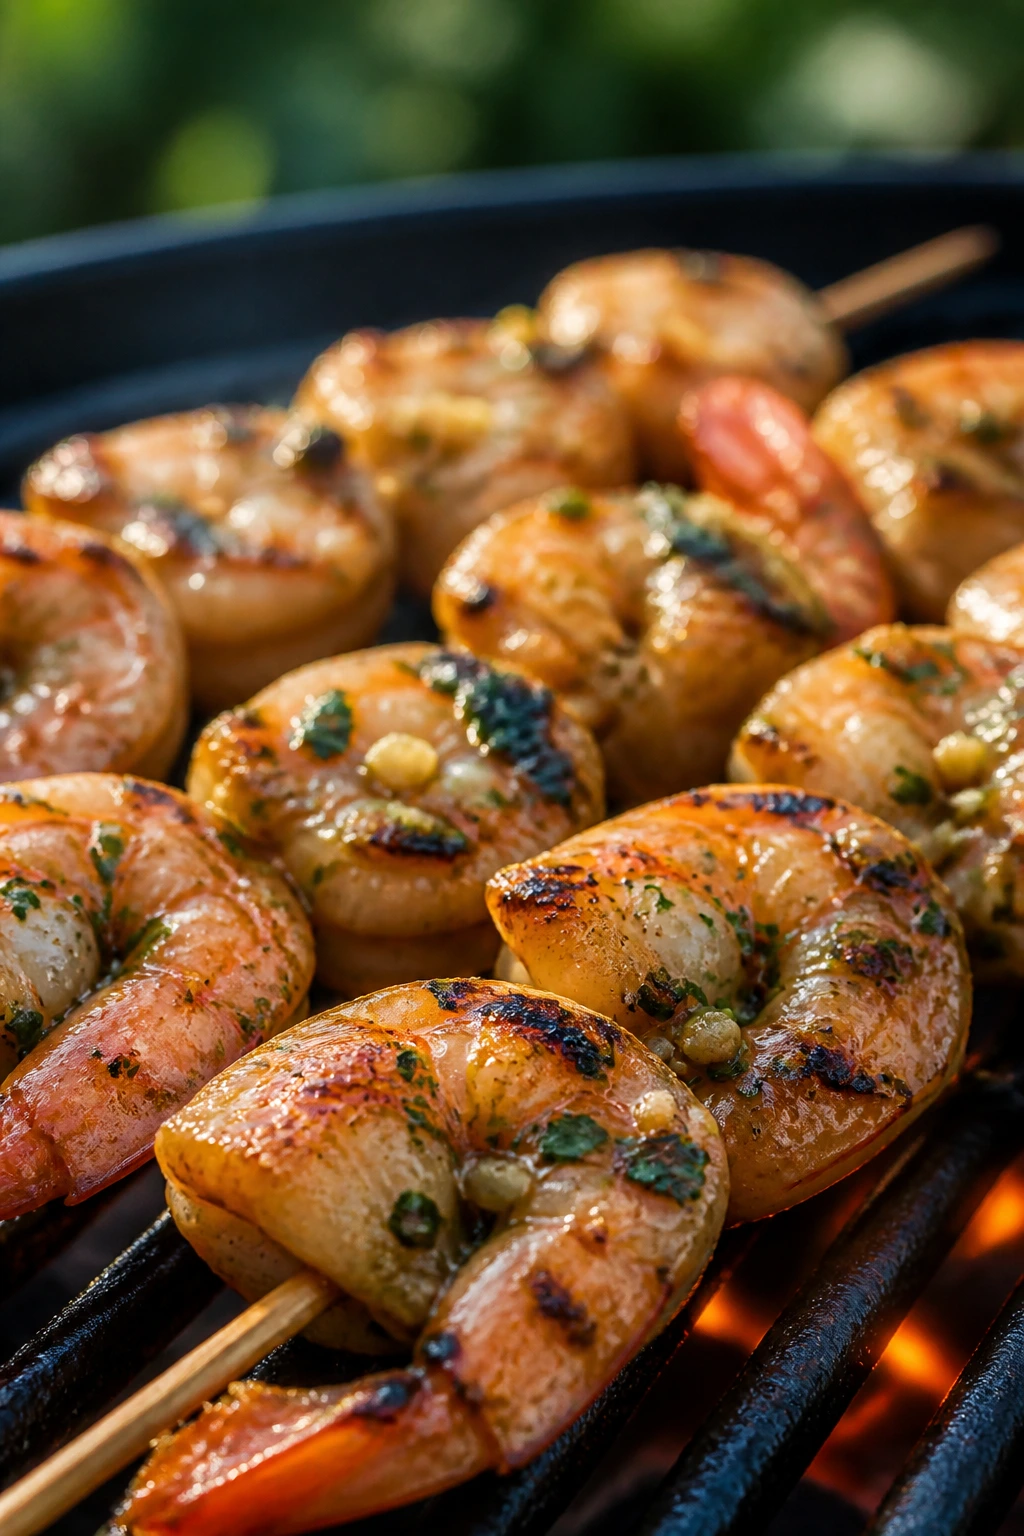
Shrimp are the easiest way to make a grill smell expensive. The garlic hits first, then the butter, then that quick snap of seafood just turning opaque over the flame. These skewers are fast, which is exactly why they belong in a holiday lineup—people show up hungry, and shrimp do not make anyone wait long.
Why It Works:
Shrimp need high heat and short timing, nothing more. A 400°F to 450°F grill gives them color without turning them rubbery, and skewers keep them from falling through the grate or overcooking in random spots. The butter goes on at the end, not the beginning, so it stays silky and doesn’t burn. This is a good recipe for guests who want something lighter than steak but still plenty satisfying.
Key Ingredients
- 2 pounds large shrimp, peeled and deveined — large shrimp are easier to grill evenly.
- 2 tablespoons olive oil — coats the shrimp before they go over the flame.
- 3 tablespoons unsalted butter, melted — brushed on at the end for shine and flavor.
- 4 garlic cloves, minced — fresh garlic gives the best flavor here.
- Juice and zest of 1 lemon — brightens the butter and cuts the richness.
- 1 teaspoon paprika — adds color and a little depth.
- 1 teaspoon kosher salt — seasons the shrimp evenly.
- 1/2 teaspoon black pepper — keeps the flavor from going flat.
- 2 tablespoons chopped parsley — for a fresh finish.
- Metal skewers or 8 wooden skewers, soaked — keeps the shrimp easy to turn.
Quick Steps
- Pat the shrimp dry, then toss them with olive oil, paprika, salt, and pepper.
- Thread the shrimp onto skewers, using two skewers per row if you want them to stay flatter on the grill.
- Preheat the grill to medium-high and oil the grates.
- Grill the shrimp for 2 to 3 minutes per side, turning once, until they’re pink, curled, and opaque in the center.
- Stir the melted butter with garlic, lemon zest, and lemon juice while the shrimp grill.
- Brush the garlic butter over the shrimp in the last 30 seconds, then move them off the heat.
- Finish with parsley and serve right away with extra lemon wedges.
Tips and Variations
- If you’re serving a big group, grill the skewers in batches and keep them in a warm oven, covered loosely with foil.
- A spoonful of chopped chili or a pinch of red pepper flakes turns this into a sharper, more aggressive version.
- These are excellent over rice, couscous, or a tomato-cucumber salad if you want them to feel more like a full plate.
4. Cedar-Plank Salmon with Dijon Maple Glaze
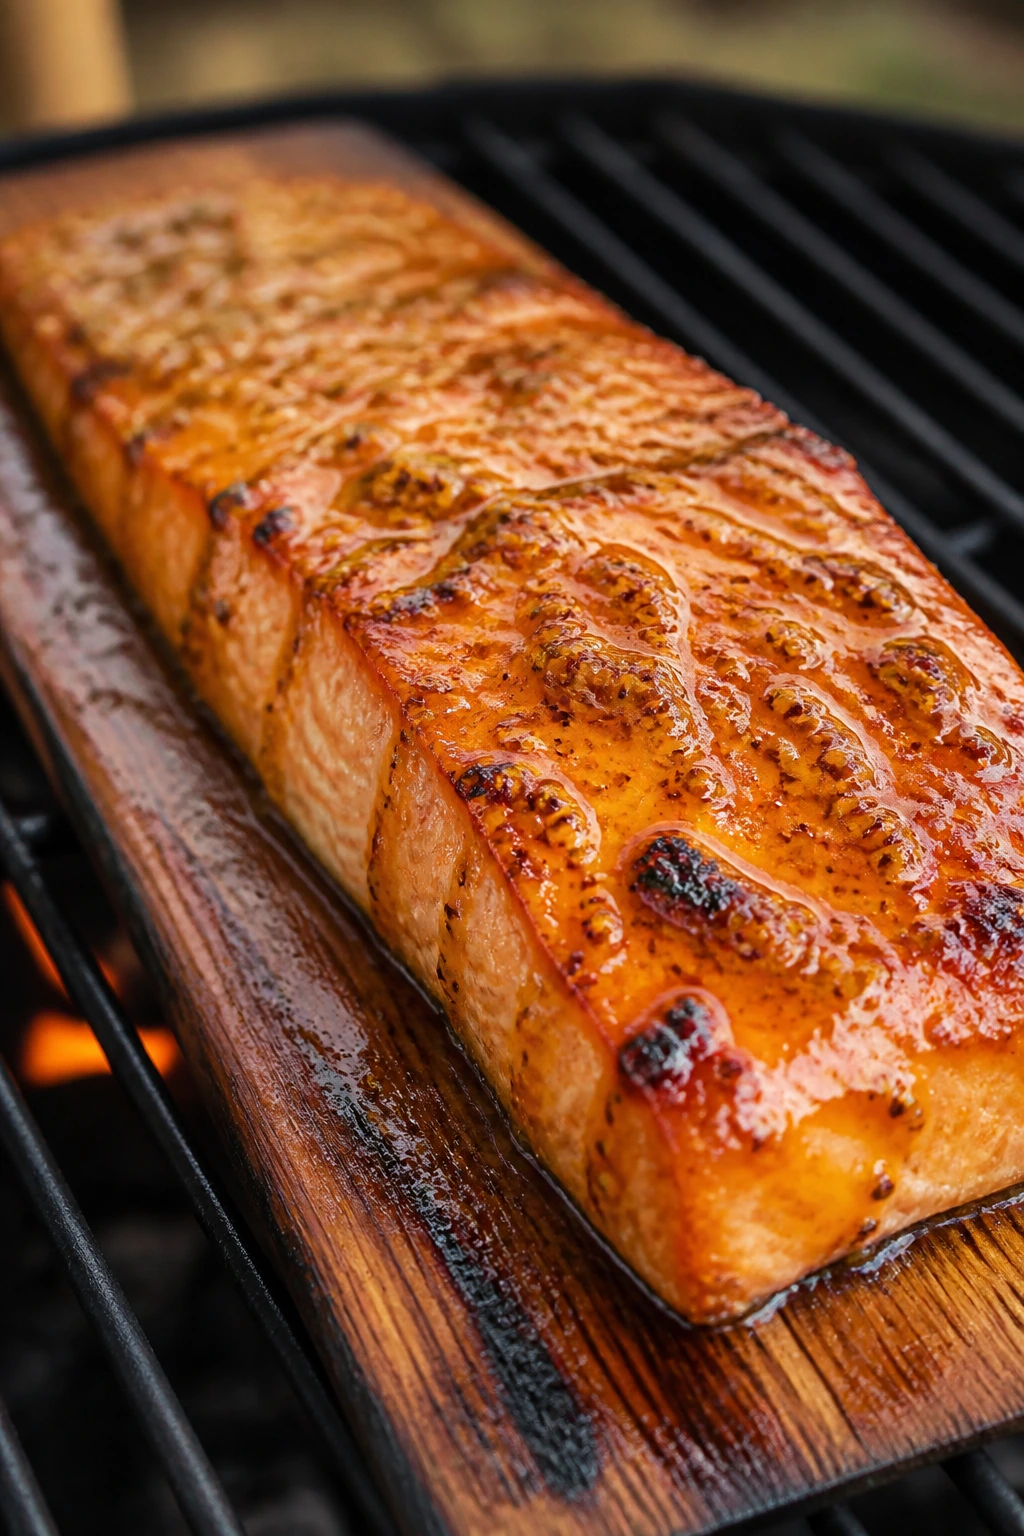
Salmon on a cedar plank has a way of making the whole patio smell like a campsite in the best possible sense. The plank protects the fish from direct flare-ups, the glaze turns shiny and slightly sticky, and the fish stays silky in the middle instead of overcooking at the edges. It feels a little special without asking much from you.
Why It Works:
Salmon is rich enough to stand up to sweet glaze and light smoke. A cedar plank gives you gentle heat and a clean wood aroma, which is much more forgiving than trying to land a delicate fillet directly on the grates. Dijon and maple bring a sharp-sweet balance that suits the fish without drowning it. Grill it over indirect medium heat, around 375°F to 400°F, and pull it when the center still looks a touch glossy.
Key Ingredients
- 2 cedar planks — soak them for at least 1 hour so they don’t burn up fast.
- 2 pounds salmon fillet, skin on — a center-cut piece holds together well on the plank.
- 3 tablespoons Dijon mustard — gives the glaze backbone.
- 2 tablespoons maple syrup — adds gentle sweetness.
- 1 tablespoon olive oil — helps the glaze spread.
- 1 teaspoon kosher salt — seasons the fish before it goes on the grill.
- 1/2 teaspoon black pepper — keeps the glaze from tasting one-note.
- 1 lemon, sliced — tucks under or around the fish for brightness.
- 2 tablespoons chopped dill — a fresh finish that works with salmon.
Quick Steps
- Soak the cedar planks in water for at least 1 hour, then drain them well.
- Whisk the Dijon, maple syrup, olive oil, salt, and pepper into a smooth glaze.
- Heat the grill for indirect medium heat, about 375°F to 400°F, with one zone cooler than the other.
- Set the salmon skin-side down on the plank and brush the top generously with the glaze.
- Grill the plank with the lid closed for 12 to 16 minutes, until the salmon flakes easily and the center reaches about 125°F to 130°F for medium.
- Let the salmon rest for 3 minutes, then scatter dill and lemon slices over the top.
- Serve it straight from the plank if you want the dramatic version.
Tips and Variations
- No plank? A grill-safe pan works, but you lose the cedar aroma that makes this dish feel different.
- Add a few thin slices of red onion or fennel under the salmon if you want a little extra sweetness underneath.
- Don’t walk away during the last few minutes; salmon goes from glossy to dry faster than steak does.
5. Steak Kabobs with Peppers and Red Onion
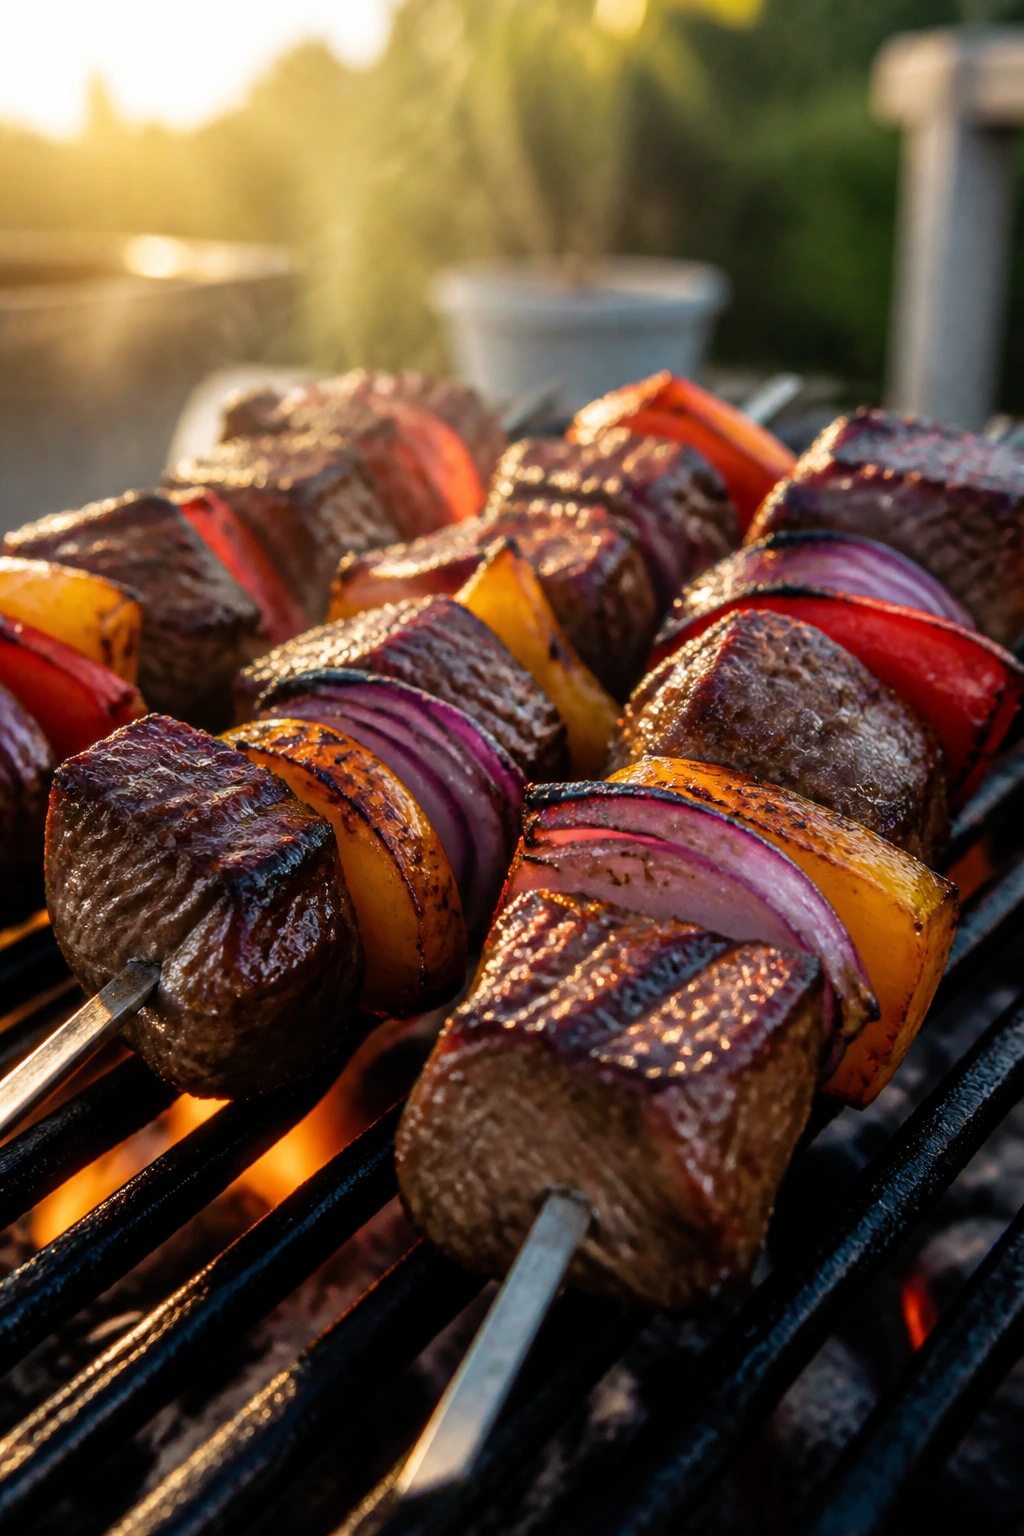
Steak kabobs are the move when you want the grill to look busy and generous. The skewers bring color, the beef gets little caramelized corners, and the vegetables pick up just enough char to taste like they belong there. It’s the kind of dinner people circle first when they see the platter coming out.
Why It Works:
Sirloin or strip steak cuts into tidy cubes and stays tender when you grill it hot and fast. The vegetables need to be cut to the same size so nothing burns while something else stays raw. A short marinade gives the beef some savory depth without masking the meat. Cook these over medium-high heat, and you get a mix of browned edges and juicy centers in about ten minutes.
Key Ingredients
- 2 pounds sirloin steak, cut into 1 1/2-inch cubes — a good balance of tenderness and structure.
- 2 bell peppers, cut into chunks — red and yellow give the kabobs color.
- 1 large red onion, cut into wedges — grills sweet and soft.
- 8 ounces button or cremini mushrooms — add a meaty bite and soak up marinade.
- 1/4 cup olive oil — carries the marinade.
- 3 tablespoons soy sauce — adds salt and savory depth.
- 2 tablespoons Worcestershire sauce — deepens the beef flavor.
- 2 garlic cloves, minced — gives the marinade bite.
- 1 teaspoon dried oregano — keeps the whole mix from tasting flat.
- 1 teaspoon black pepper — enough to show up through the smoke.
Quick Steps
- Whisk the olive oil, soy sauce, Worcestershire, garlic, oregano, and pepper in a bowl.
- Toss the steak cubes in the marinade and let them sit for 30 minutes to 2 hours in the fridge.
- Thread the steak, peppers, onion, and mushrooms onto skewers, keeping the pieces snug but not jammed together.
- Preheat the grill to medium-high and oil the grates.
- Grill the kabobs for 8 to 10 minutes total, turning every 2 to 3 minutes, until the steak is browned outside and still juicy inside.
- Rest the skewers for 5 minutes before serving.
- Slide the pieces off the skewers and onto rice, potatoes, or a big platter with herbs.
Tips and Variations
- Soak wooden skewers for 30 minutes so they don’t scorch and snap.
- Use flank steak instead of sirloin if that’s what you have; just keep the cubes a little larger so they don’t overcook.
- A spoonful of chimichurri over the finished kabobs makes them feel brighter and less heavy.
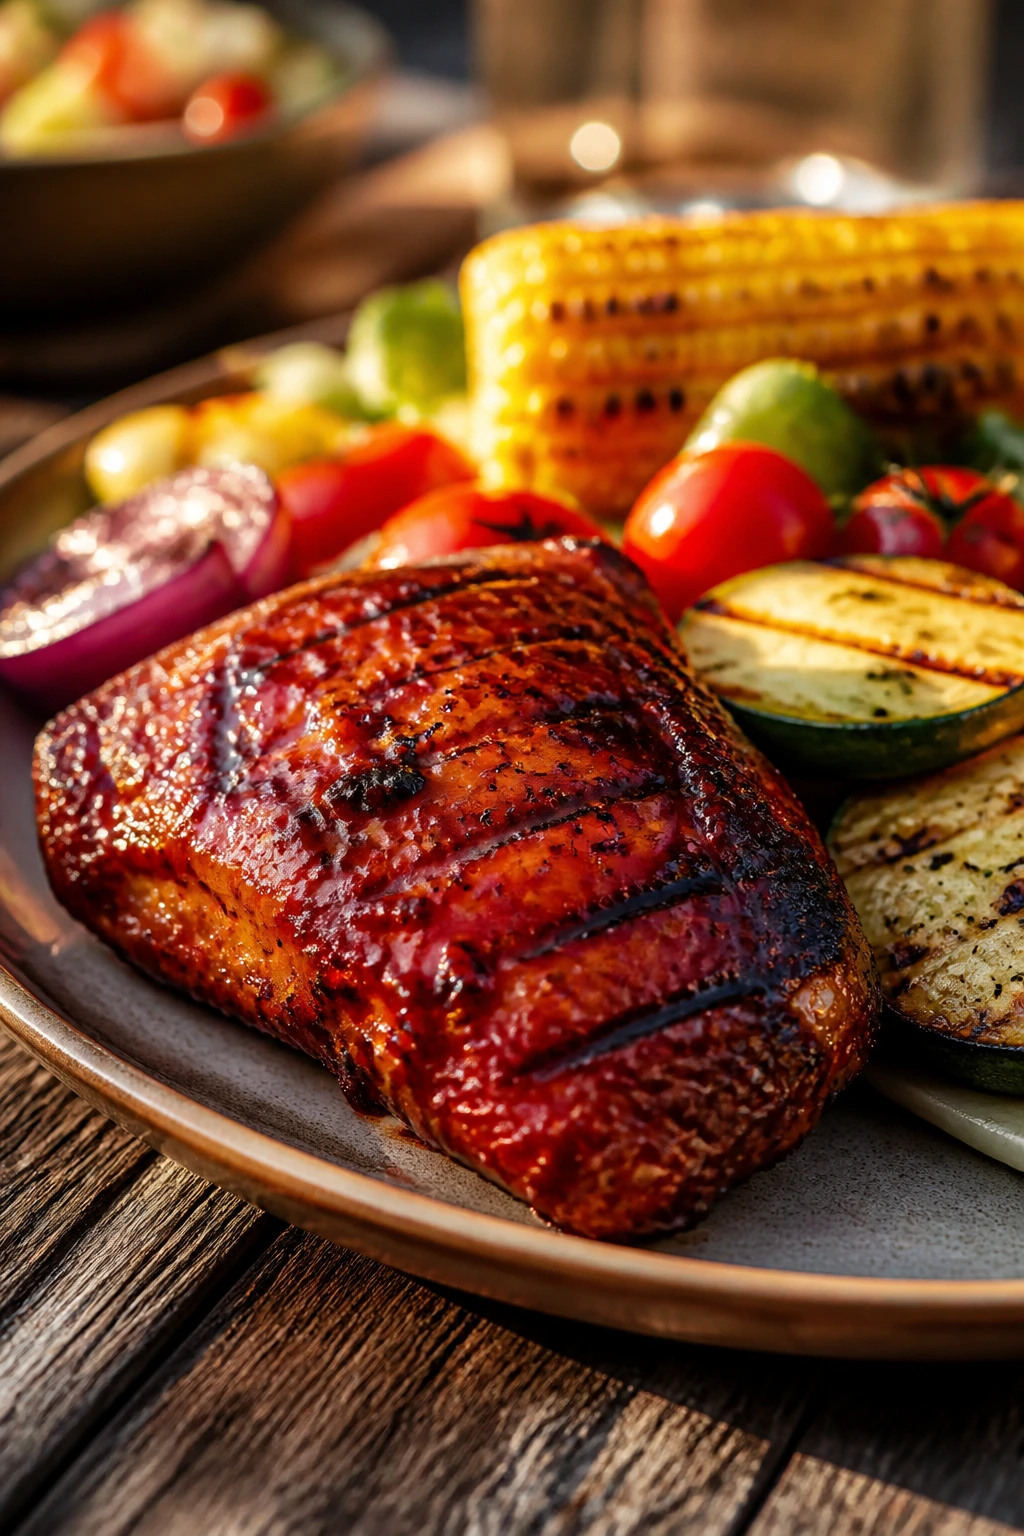
6. BBQ Pork Chops with Charred Peach Salsa
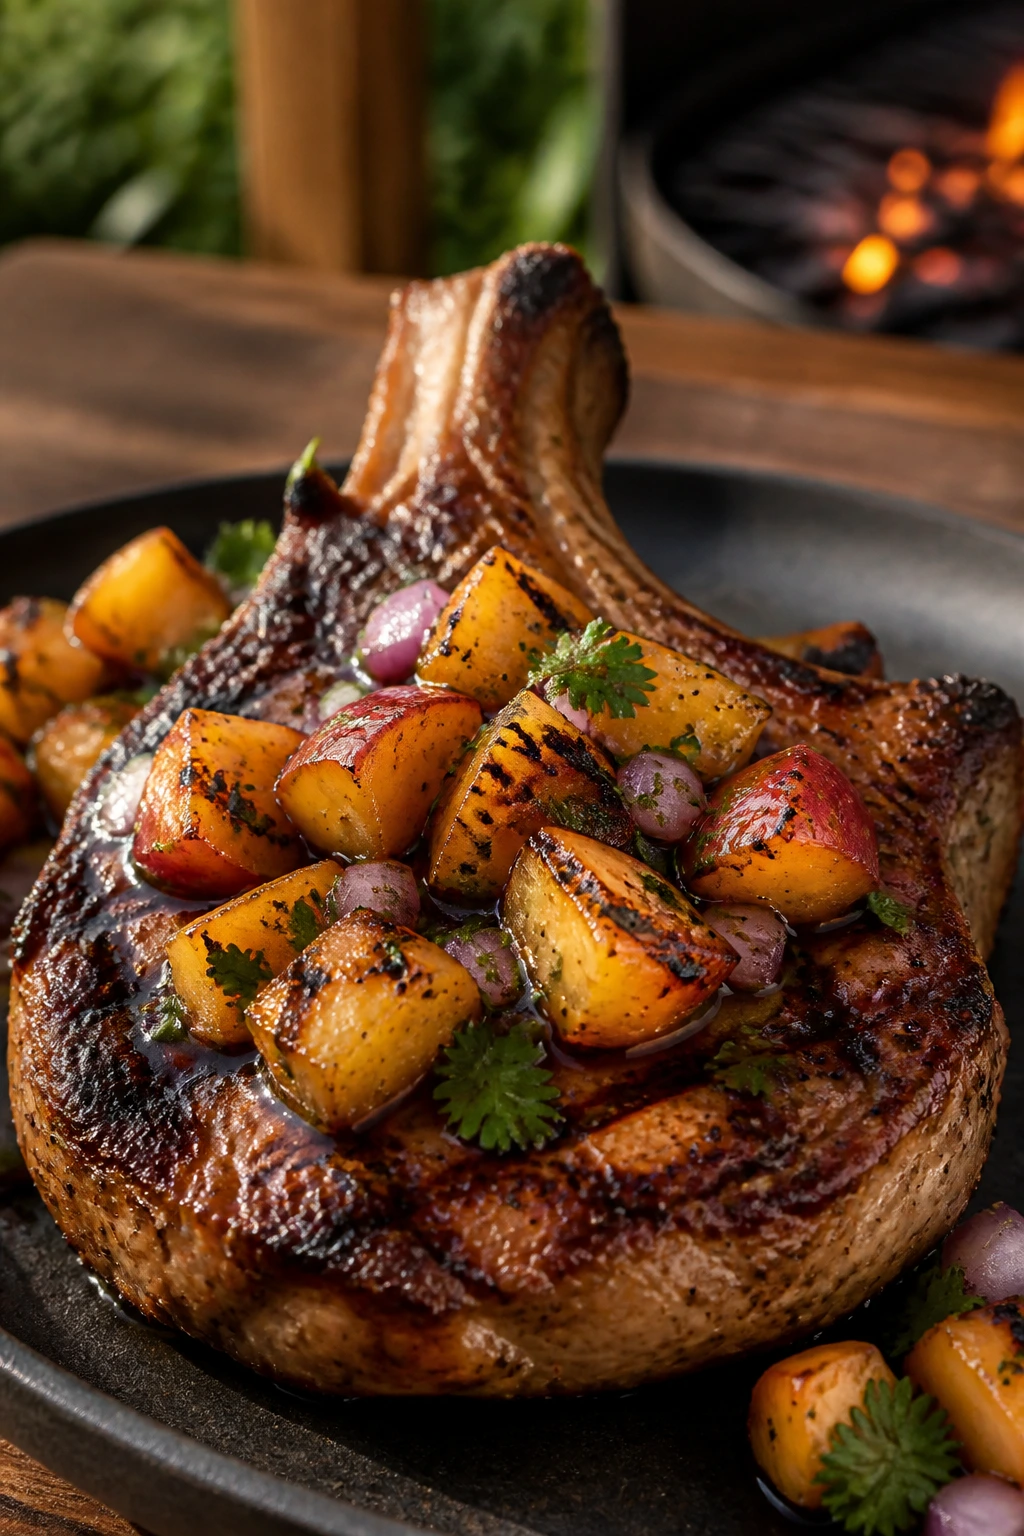
Sweet fruit and smoky pork belong together, and peach season gives the pairing a little holiday glow. The chops get a crust from the grill, the salsa brings juice and acid, and the whole plate tastes like someone paid attention to the weather. It’s a smart dinner when you want something that feels summery without turning into a salad.
Why It Works:
Bone-in pork chops handle direct heat better than thin boneless ones because the bone helps them cook more evenly. A dry seasoning or short salt rest keeps the meat from tasting flat, and the barbecue sauce goes on near the end so the sugars don’t burn. The peaches add a bright, soft sweetness that cuts through the pork’s richness. Cook to 145°F in the thickest part, then rest the chops so the juices stay where they belong.
Key Ingredients
- 6 bone-in pork chops, about 1 inch thick — thick chops are easier to grill without drying out.
- 2 teaspoons kosher salt — seasons the pork all the way through.
- 1 teaspoon black pepper — gives the meat a clean bite.
- 2 tablespoons olive oil — keeps the surface from sticking.
- 3/4 cup barbecue sauce — brush it on late so it glosses instead of burns.
- 2 ripe peaches, halved and pitted — char them for the salsa.
- 1/4 cup finely chopped red onion — adds crunch and sharpness.
- 1 small jalapeño, seeded and minced — optional, but nice if you want some heat.
- 2 tablespoons chopped cilantro — brings freshness.
- Juice of 1 lime — keeps the salsa bright.
Quick Steps
- Season the pork chops with salt and pepper, then let them sit at room temperature for 20 minutes.
- Preheat the grill to medium-high, about 400°F, and oil the grates.
- Grill the peach halves cut-side down for 2 to 3 minutes, then chop them once they’re cool enough to handle.
- Mix the peaches with red onion, jalapeño, cilantro, and lime juice to make the salsa.
- Grill the pork chops for 5 to 6 minutes per side, brushing with barbecue sauce during the last 2 minutes.
- Pull the chops when the center reaches 145°F, then rest them for 5 minutes.
- Spoon the charred peach salsa over the top and serve.
Tips and Variations
- If your peaches are firm, grill them a little longer so they soften enough to chop cleanly.
- Swap barbecue sauce for mustard sauce if you want a sharper, tangier finish.
- These are excellent with grilled corn and a scoop of potato salad, which gives the plate some cool relief.
7. Teriyaki Chicken and Pineapple Skewers
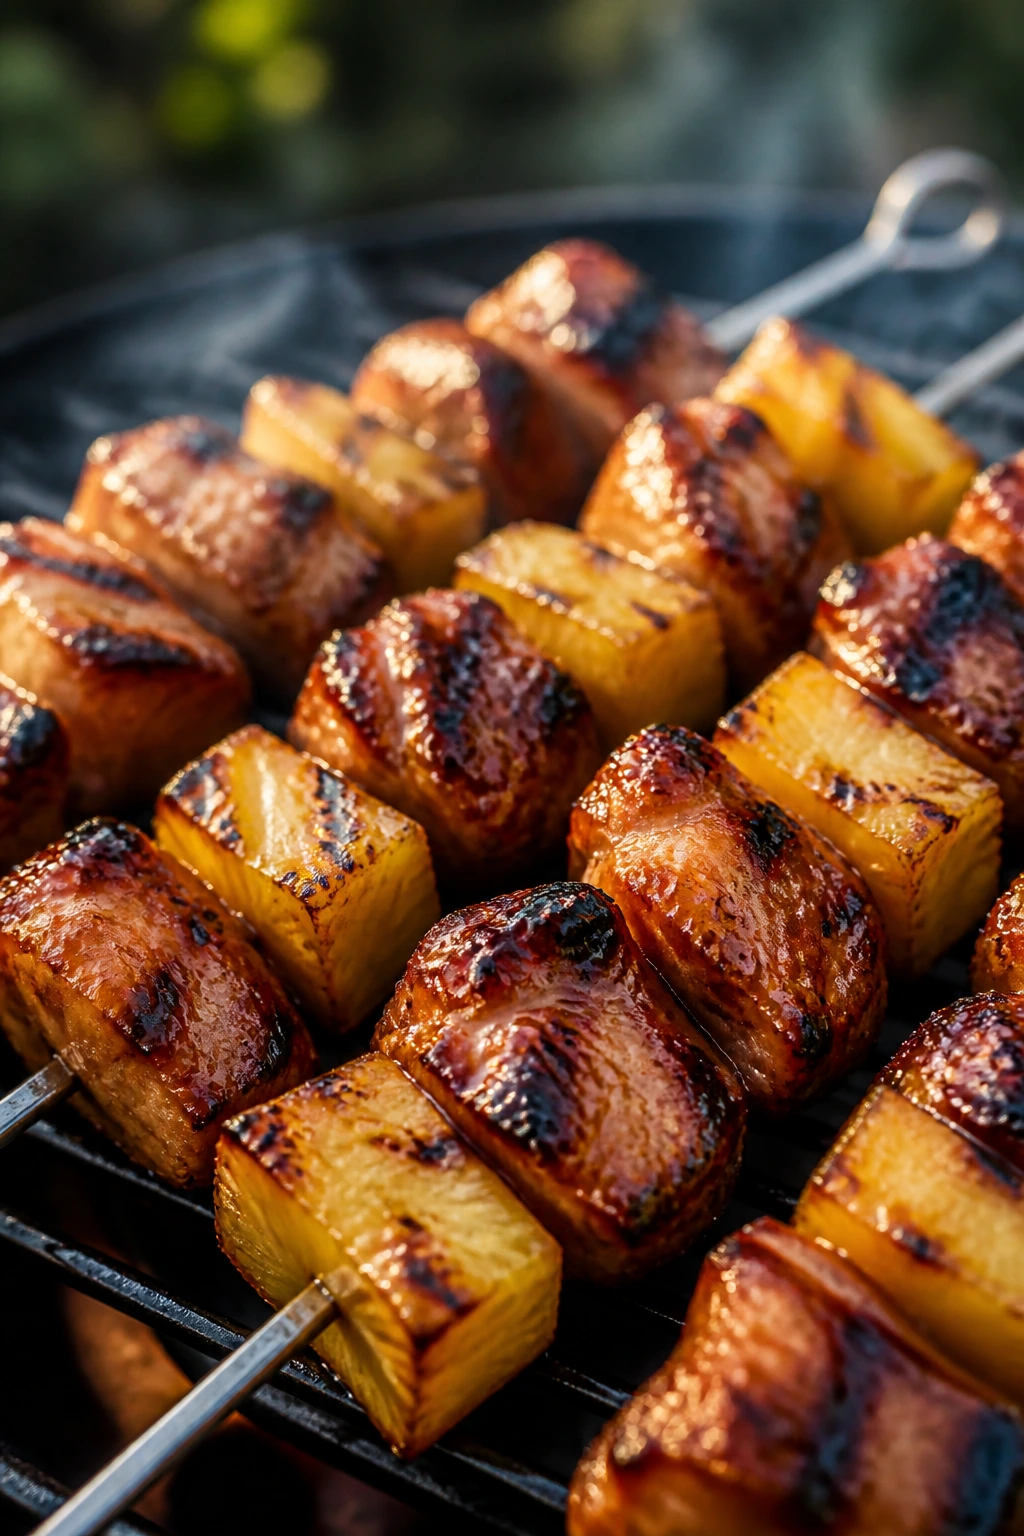
This is the skewer that always looks happier than the others. The pineapple gets caramelized at the edges, the chicken takes on that glossy brown teriyaki sheen, and the whole thing tastes sweet, salty, and a little smoky in the way backyard food should. It’s cheerful food. No pretending otherwise.
Why It Works:
Teriyaki and pineapple are built for the grill because the sugars caramelize fast and the acid keeps the chicken from feeling heavy. Chicken thighs are the safest pick if you want tenderness, though breasts work if you keep the cubes even and pull them on time. A quick simmered glaze helps you control the sweetness instead of leaning on bottled sauce alone. Grill at medium-high and watch for the edges of the pineapple to brown—that’s when the flavor really wakes up.
Key Ingredients
- 2 pounds boneless chicken thighs, cut into 1 1/2-inch cubes — thighs stay juicier than breasts.
- 2 cups fresh pineapple chunks — fresh fruit chars better than canned.
- 1 red bell pepper, cut into chunks — adds color and a little crunch.
- 1 small red onion, cut into wedges — softens and sweetens on the grill.
- 1/2 cup soy sauce — forms the savory base of the glaze.
- 1/4 cup pineapple juice — echoes the fruit on the skewers.
- 3 tablespoons brown sugar — gives the teriyaki its sticky finish.
- 2 tablespoons rice vinegar — keeps the glaze from getting cloying.
- 2 garlic cloves, minced — adds depth.
- 1 teaspoon grated fresh ginger — brings the glaze to life.
Quick Steps
- Simmer the soy sauce, pineapple juice, brown sugar, rice vinegar, garlic, and ginger in a small saucepan for 4 to 5 minutes until slightly thickened.
- Cool the glaze, then marinate the chicken cubes in half of it for 30 minutes to 1 hour.
- Thread chicken, pineapple, pepper, and onion onto skewers, keeping the pieces close in size.
- Preheat the grill to medium-high and oil the grates.
- Grill the skewers for 10 to 12 minutes total, turning every few minutes and brushing with the remaining glaze.
- Pull the skewers when the chicken reaches 165°F and the pineapple has browned at the edges.
- Serve with rice or grilled rice noodles if you want to stretch them farther.
Tips and Variations
- If you use fresh pineapple in the marinade, keep the marinating time short so the chicken doesn’t get mushy.
- A sprinkle of sesame seeds and sliced scallions makes the skewers look finished fast.
- Chicken breasts work too, but they need close attention and a shorter grill time.
8. Grilled Sausage, Peppers, and Onions Hoagies
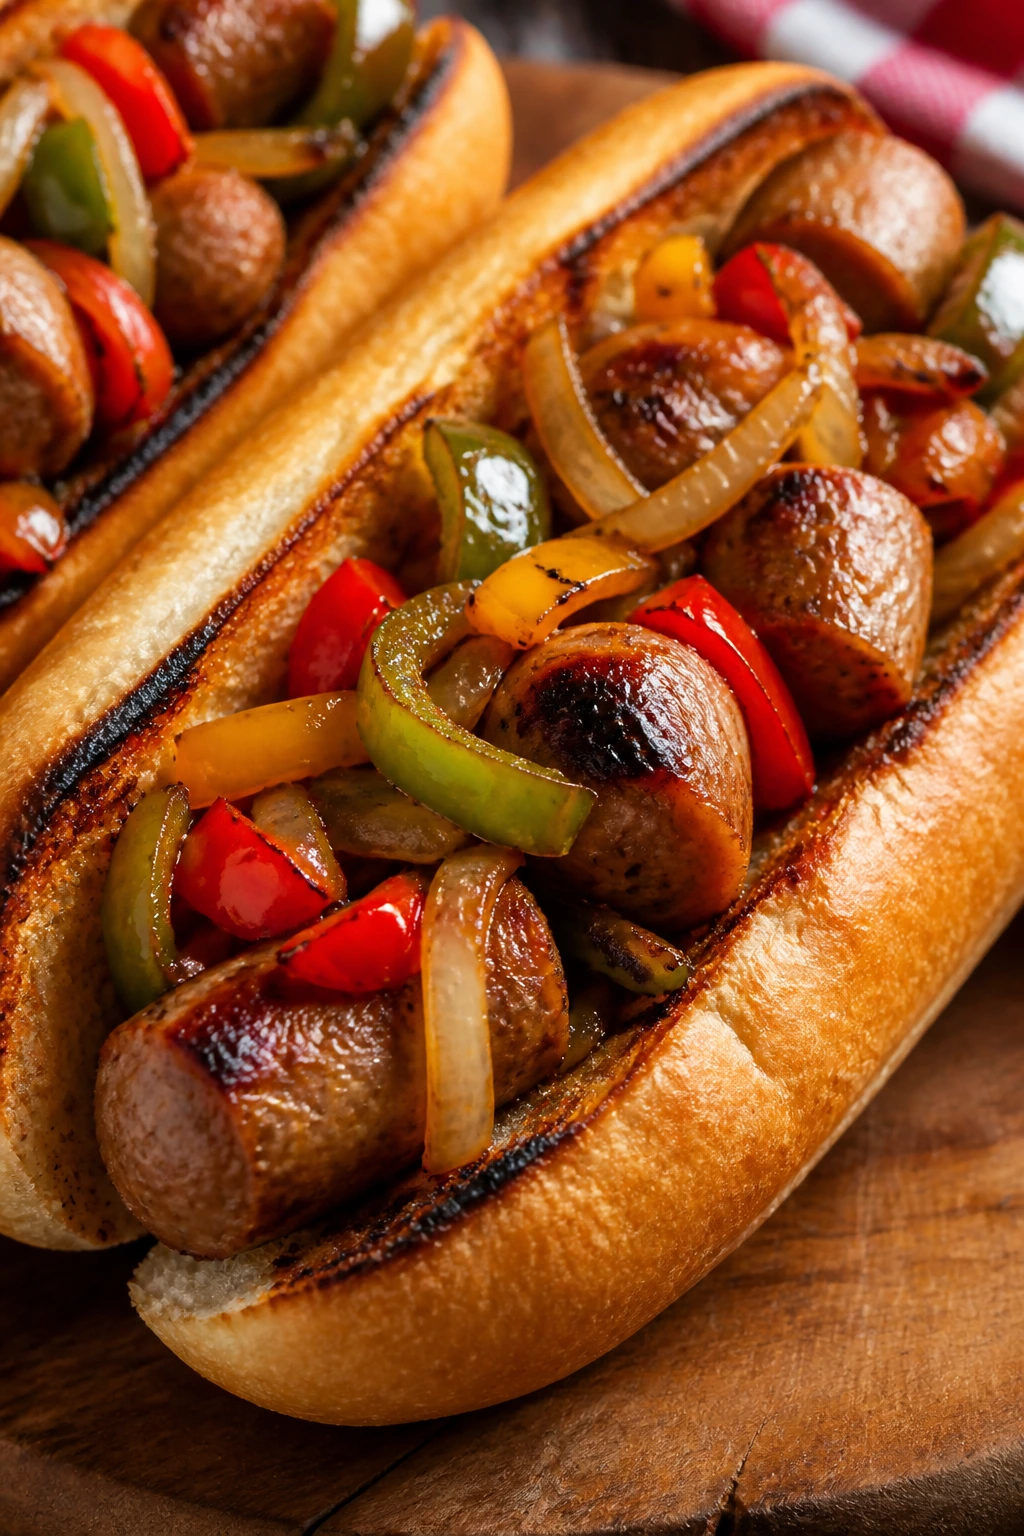
Some dinners don’t need to be subtle. This one comes out loud, hot, and a little greasy in the best way, with blistered peppers sliding into toasted rolls and sausage that snaps when you cut into it. It’s picnic food with a backbone, and it feeds people who want something sturdy after a long day outside.
Why It Works:
Sausage does most of the work here because it brings fat, seasoning, and built-in flavor. The peppers and onions caramelize on the grates or in a grill basket, which gives the whole sandwich a sweet edge that balances the meat. Toasting the rolls matters more than people think; a warm, sturdy roll keeps the filling from turning into a mess after the first bite. Keep the grill at medium heat so the sausages cook through without splitting open.
Key Ingredients
- 6 Italian sausages — sweet or hot, depending on your crowd.
- 3 bell peppers, sliced into strips — mix colors if you want the platter to pop.
- 2 large onions, sliced — they turn soft and sweet on the grill.
- 2 tablespoons olive oil — coats the vegetables.
- 1 teaspoon kosher salt — helps the vegetables soften.
- 1/2 teaspoon black pepper — keeps the flavor sharp.
- 1 teaspoon dried oregano — gives the vegetables a little herbal lift.
- 6 hoagie rolls — choose sturdy ones that won’t cave in.
- 6 slices provolone cheese — melts neatly over the hot filling.
- 2 tablespoons mustard or marinara, optional — use one or both if you like a little sauce.
Quick Steps
- Toss the peppers and onions with olive oil, salt, pepper, and oregano.
- Preheat the grill to medium heat, around 350°F to 375°F.
- Grill the sausages for 12 to 15 minutes, turning often, until browned and cooked to 160°F inside.
- Grill the vegetables in a grill basket or on skewers for 8 to 10 minutes until soft and lightly charred.
- Split the hoagie rolls and toast them cut-side down for 30 to 45 seconds.
- Fill each roll with a sausage, a pile of peppers and onions, and a slice of provolone.
- Let the cheese melt for a minute or two under the closed lid or in a tent of foil.
Tips and Variations
- If you want the neatest result, keep the sausage links on the cooler side of the grill after the initial sear.
- Add a spoonful of mustard under the sausage for a sharper bite, or use marinara for a more Italian-style sandwich.
- Leftover peppers and onions make a strong topping for eggs the next morning.
9. Halloumi and Vegetable Skewers with Lemon Oregano
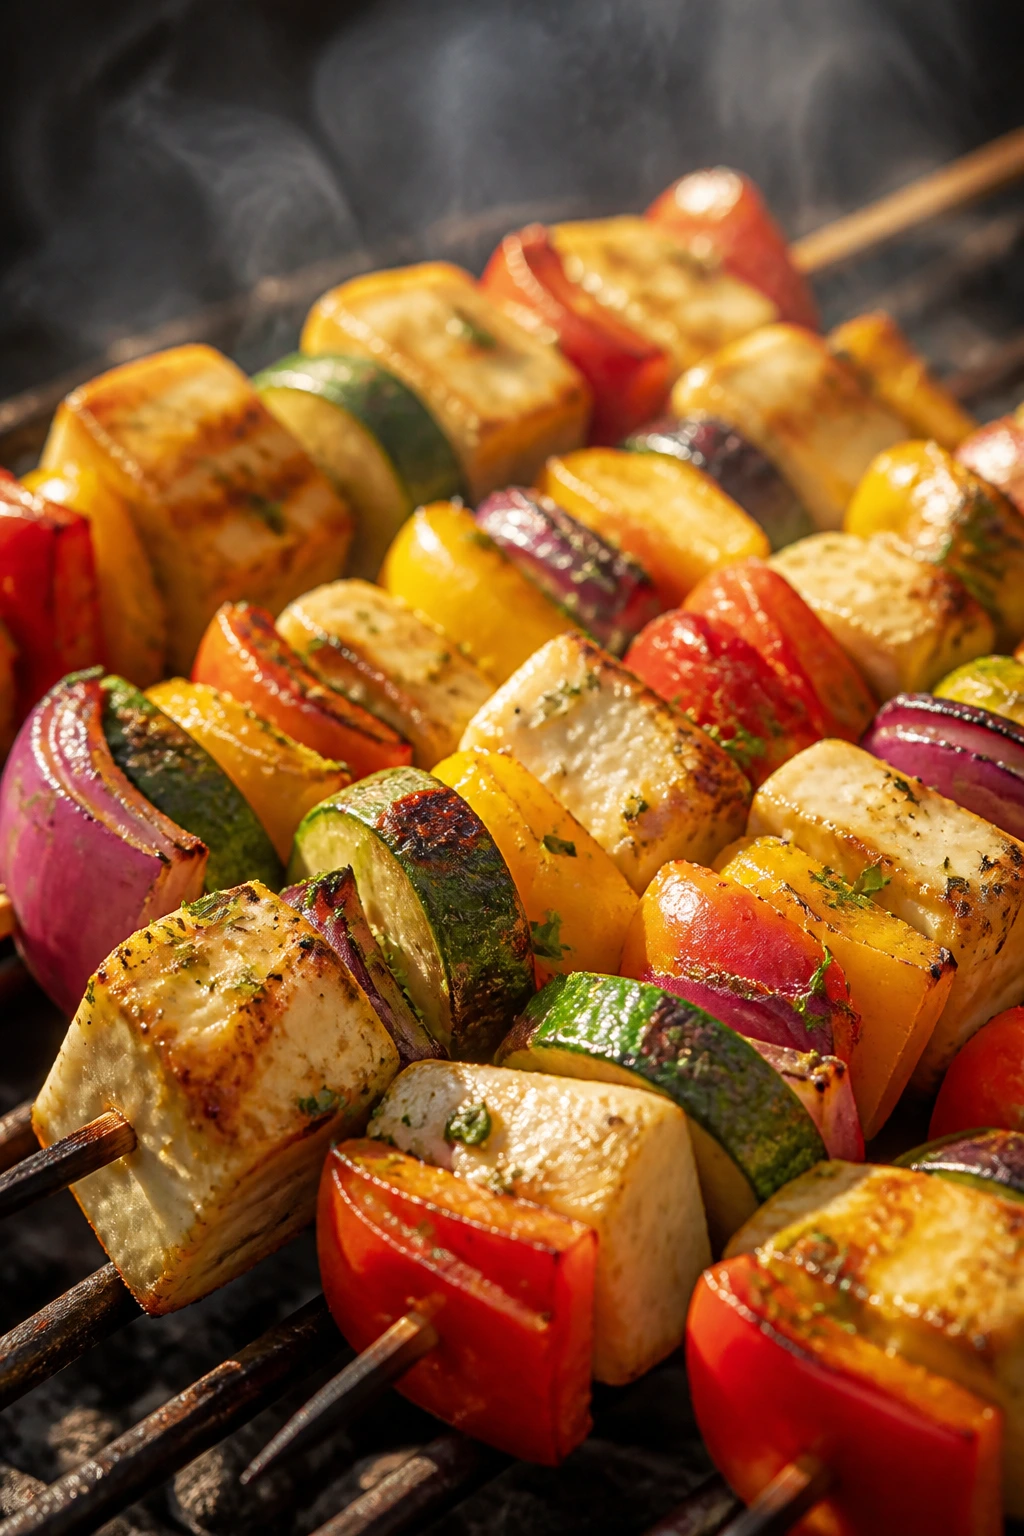
Vegetarian grilled dinners get ignored too often, which is a shame, because halloumi can hold its own on a hot grate better than most meats. It browns instead of melting away, and the vegetables around it—zucchini, pepper, onion, tomato—pick up just enough smoke to taste like they belong at the center of the table. Salty cheese, bright lemon, and herbs. That combination never feels like an afterthought.
Why It Works:
Halloumi has a firm texture that turns golden when grilled, so it gives you satisfying bite instead of collapse. Matching the vegetable sizes means the skewers finish together instead of leaving you with burnt tomatoes and raw zucchini. Lemon and oregano keep the whole thing from getting heavy, which matters when the menu already includes rich meats and saucy sides. Grill these over medium-high heat, and you’ll get color fast without losing shape.
Key Ingredients
- 14 ounces halloumi cheese, cut into 1-inch cubes — the block should be firm enough to skewer.
- 2 zucchini, sliced into thick half-moons — they soften quickly.
- 2 bell peppers, cut into chunks — bring sweetness and color.
- 1 large red onion, cut into wedges — grills into soft, sweet layers.
- 1 cup cherry tomatoes — add them near the edges of the skewers.
- 3 tablespoons olive oil — helps the vegetables and cheese brown.
- 2 tablespoons lemon juice — adds brightness after grilling.
- 1 teaspoon lemon zest — gives the dish a cleaner citrus note.
- 1 teaspoon dried oregano — a classic match for halloumi.
- 1 garlic clove, minced — optional, but worth it.
Quick Steps
- Toss the zucchini, peppers, onion, and tomatoes with olive oil, lemon zest, oregano, garlic, salt, and pepper.
- Thread the halloumi and vegetables onto skewers, keeping the cheese pieces spaced so they can brown on all sides.
- Preheat the grill to medium-high and oil the grates well.
- Grill the skewers for 8 to 10 minutes total, turning every 2 to 3 minutes, until the vegetables are tender and the halloumi is deeply golden.
- Move the skewers to a platter and drizzle with lemon juice while they’re still hot.
- Serve with pita, rice, or a tomato salad if you want to turn them into a larger plate.
Tips and Variations
- If your halloumi seems extra salty, soak the cubes in water for 10 minutes, then pat them dry before grilling.
- A spoonful of chopped mint at the end makes the dish taste cooler and brighter.
- These skewers can work as a main for one or two vegetarians, or as a colorful side beside chicken or steak.
10. Grilled Fish Tacos with Lime Slaw
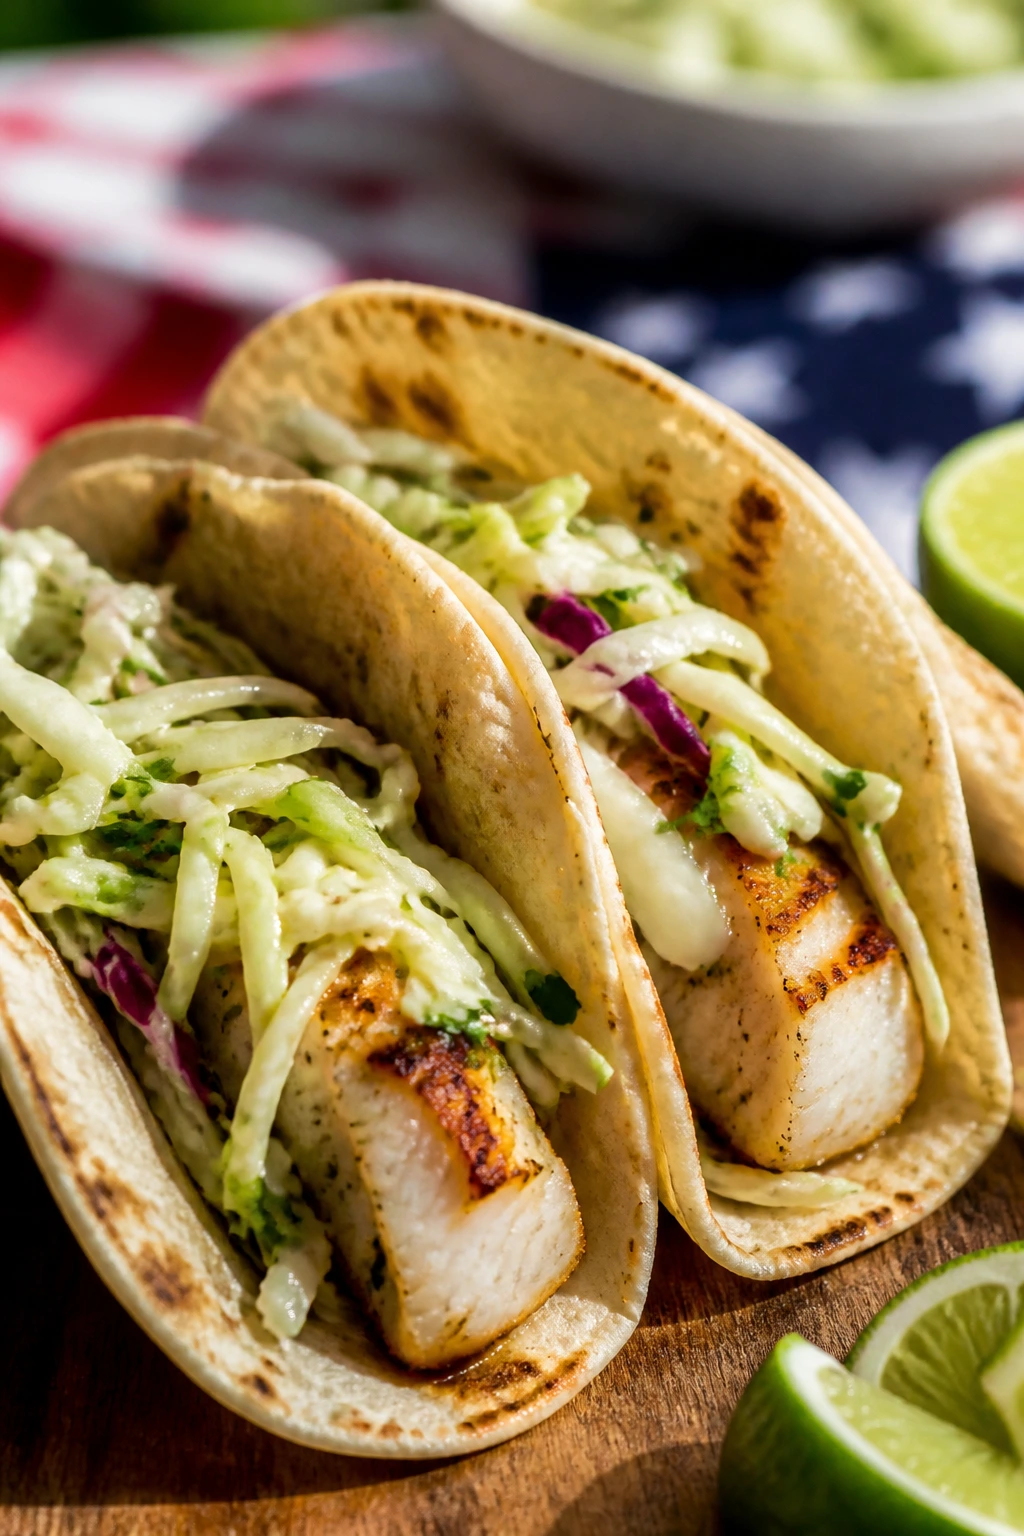
Fish tacos are the kind of dinner that makes the grill feel lighter. The fish flakes apart under a fork, the slaw stays crisp, and the warm tortillas catch everything that falls through the cracks. They’re clean, quick, and sharp with lime, which is a nice change of pace after a few richer grilled plates.
Why It Works:
Thick white fish fillets—mahi-mahi, halibut, cod, or similar—hold together better on the grill than thin, fragile pieces. A simple spice rub gives them color without covering up the flavor. The slaw brings crunch and acid, which keeps the tacos from feeling soft or heavy. Grill over medium-high heat, and if the fish sticks for a moment, leave it alone until it releases cleanly.
Key Ingredients
- 2 pounds white fish fillets, cut into large pieces if needed — choose firm fillets that won’t tear.
- 2 tablespoons olive oil — keeps the fish from clinging to the grate.
- 1 teaspoon chili powder — adds warmth.
- 1 teaspoon cumin — gives the fish a rounded, earthy base.
- 1/2 teaspoon garlic powder — keeps the spice mix simple.
- 1 teaspoon kosher salt — seasons the fish.
- 8 small corn or flour tortillas — warm them before serving.
- 4 cups shredded green cabbage — the slaw’s crunch.
- 1/3 cup mayonnaise or plain Greek yogurt — makes the slaw creamy.
- Juice of 2 limes — brightens the whole taco.
- 1/4 cup chopped cilantro — adds freshness.
- Avocado slices or salsa, optional — useful if you want more richness.
Quick Steps
- Mix the cabbage, mayonnaise or yogurt, lime juice, cilantro, and a pinch of salt to make the slaw.
- Pat the fish dry, then rub it with olive oil, chili powder, cumin, garlic powder, and salt.
- Preheat the grill to medium-high and oil the grates well.
- Grill the fish for 3 to 4 minutes per side, depending on thickness, until it flakes easily and turns opaque through the center.
- Warm the tortillas for about 20 seconds per side on the grill.
- Flake the fish into pieces and tuck it into the tortillas with slaw and any extra toppings.
- Serve immediately with lime wedges.
Tips and Variations
- Use a grill basket if your fish is delicate or if your grates are wide.
- A splash of hot sauce in the slaw gives the tacos more bite without making them heavy.
- If you want a stronger grilled flavor, brush the tortillas with a little oil before warming them.
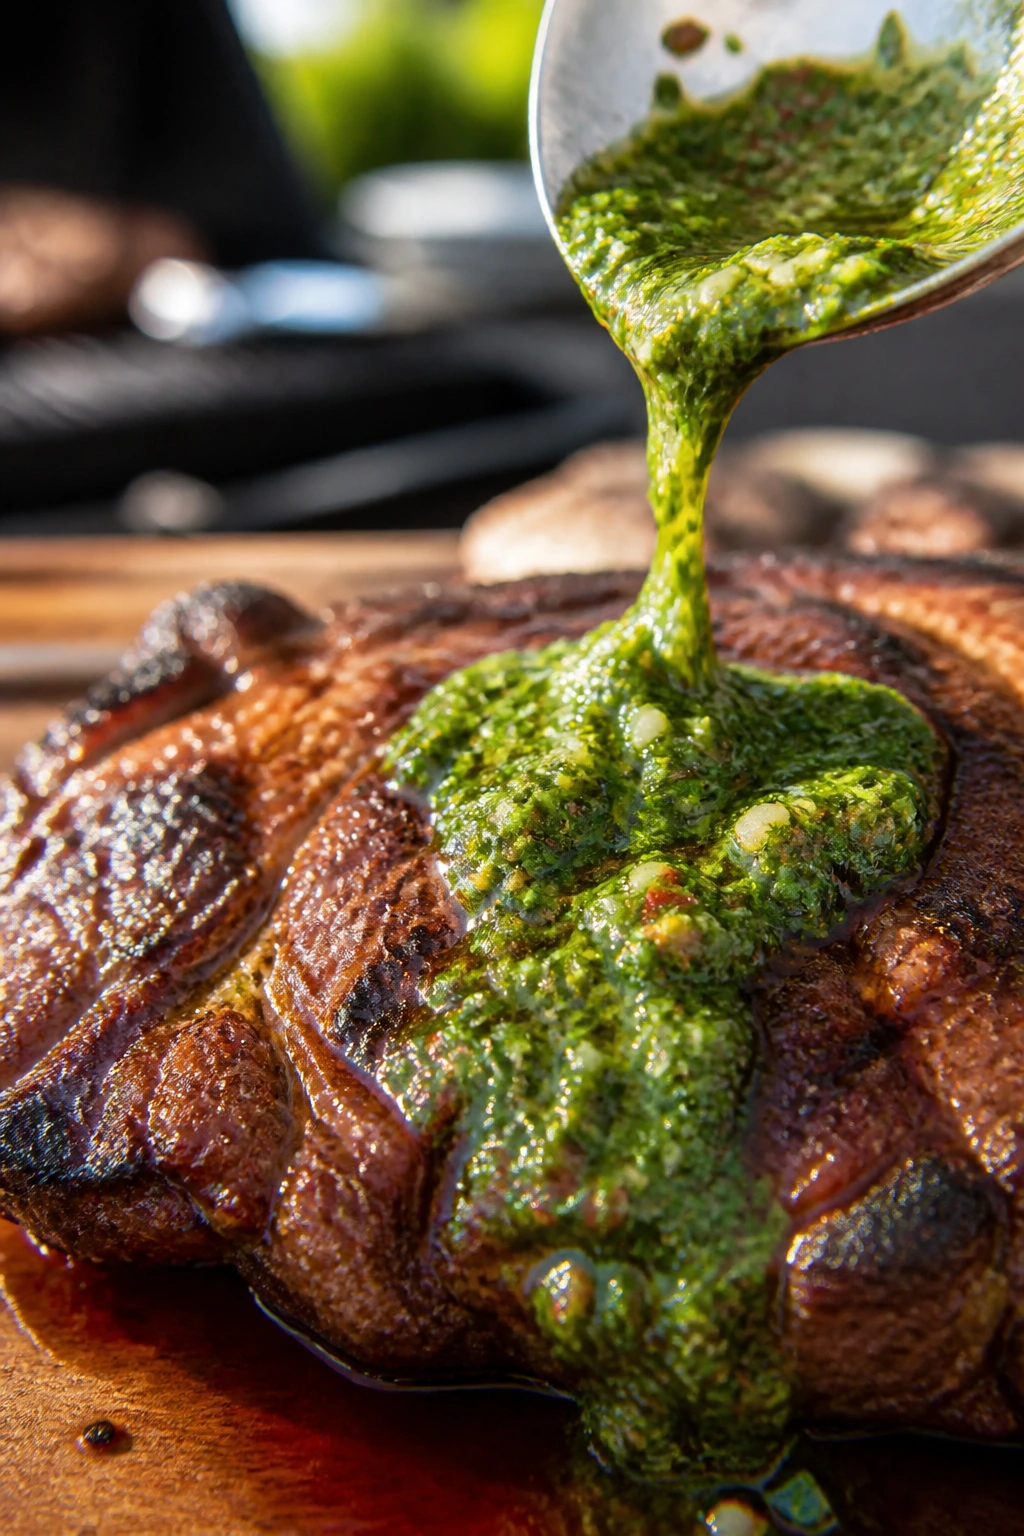
11. Flank Steak with Chimichurri
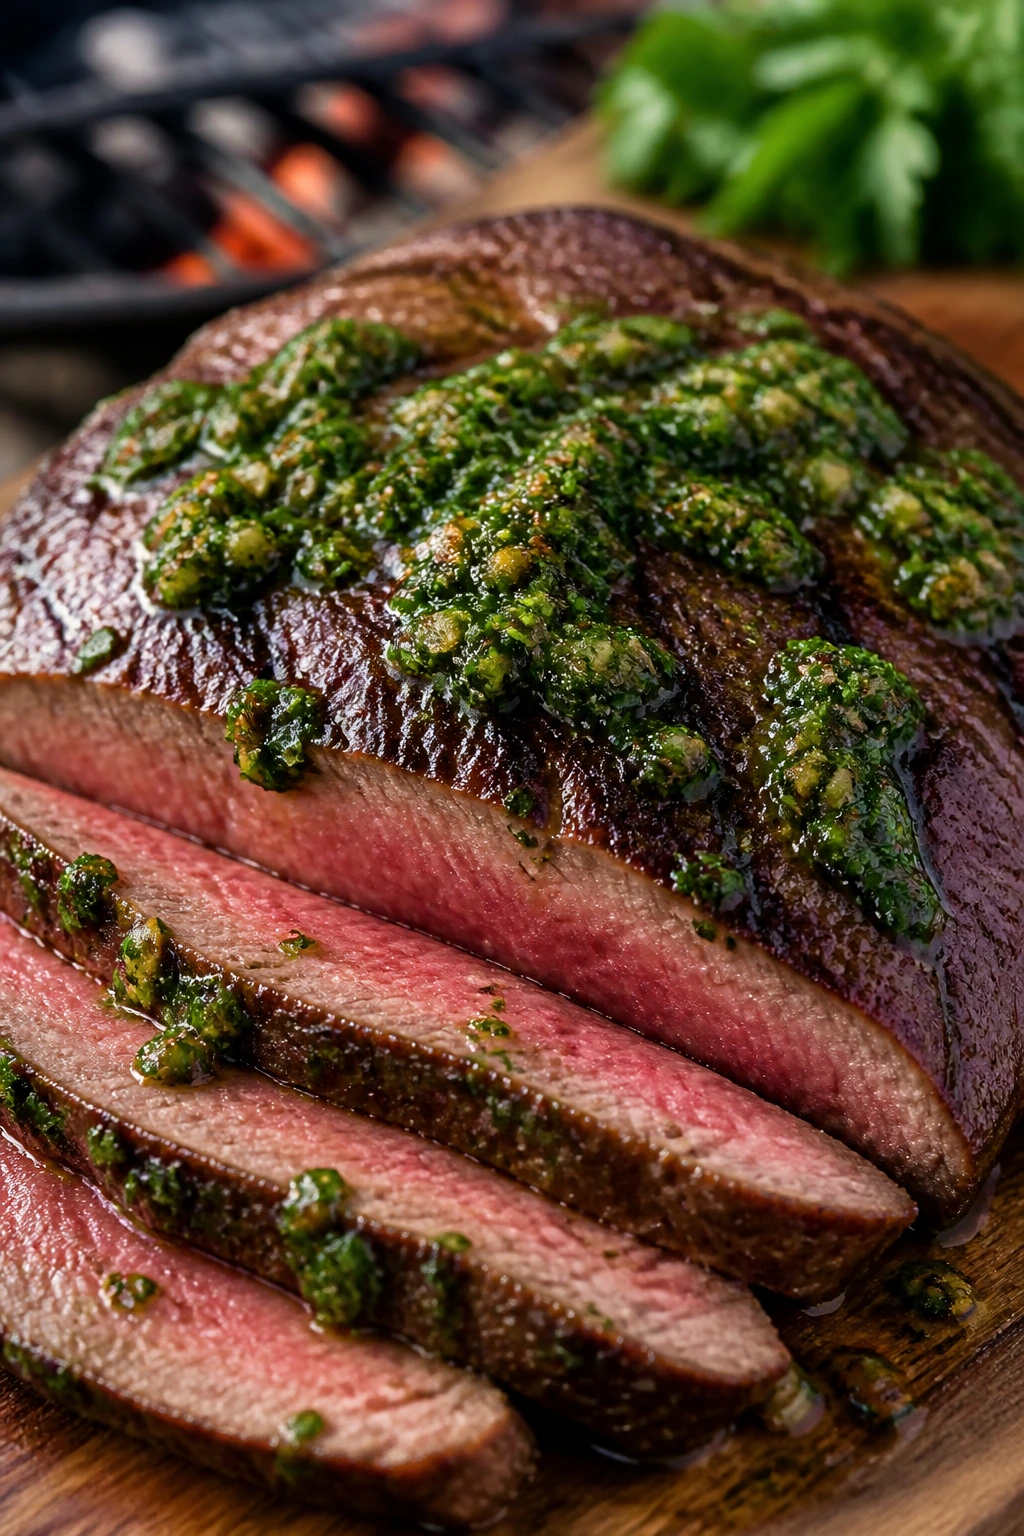
Flank steak is all about confidence. High heat, short time, and no fuss. The grill gives the meat a dark crust, and the chimichurri brings the whole thing back to life with herbs, garlic, vinegar, and pepper. It’s bold without being complicated, which is a nice change when the rest of the holiday menu is already pulling in five directions.
Why It Works:
Flank steak loves a hot grill because it’s thin, lean, and built for a quick sear. If you cook it past medium, it starts to tighten up, so timing matters more here than almost anywhere else in the list. Chimichurri is the right sauce because it cuts through beef fat and gives you freshness instead of another heavy glaze. Slice the steak thinly across the grain, and the texture suddenly feels a lot more tender.
Key Ingredients
- 2 pounds flank steak — trim off any extra surface fat.
- 2 tablespoons olive oil — helps the seasoning cling.
- 2 teaspoons kosher salt — enough to season the surface well.
- 1 teaspoon black pepper — gives the crust some bite.
- 1 teaspoon smoked paprika — adds color and a touch of smoke.
- 1 cup fresh parsley, finely chopped — the base of the chimichurri.
- 1/2 cup fresh cilantro, finely chopped — adds brightness.
- 3 garlic cloves, minced — sharp and punchy.
- 2 tablespoons red wine vinegar — gives the sauce its edge.
- 1/2 cup olive oil — makes the chimichurri spoonable.
- 1/2 teaspoon red pepper flakes — use more or less depending on taste.
Quick Steps
- Pat the steak dry, then rub it with olive oil, salt, pepper, and smoked paprika.
- Stir the parsley, cilantro, garlic, red wine vinegar, olive oil, and red pepper flakes together to make the chimichurri.
- Let the sauce sit for 10 to 15 minutes so the garlic softens a bit.
- Preheat the grill to high heat and oil the grates.
- Grill the flank steak for 4 to 6 minutes per side for medium-rare, or until it reaches 130°F to 135°F in the center.
- Rest the steak for 10 minutes before slicing.
- Cut it thinly against the grain and spoon chimichurri over the top.
Tips and Variations
- If you marinate the steak, keep the acid light and the time short—too much vinegar can turn the surface mushy.
- Leftover chimichurri is good on potatoes, grilled vegetables, or eggs the next day.
- If you want a more crowd-friendly version, slice the steak first and serve it on a platter with the sauce on the side.
12. Grilled Flatbread Pizza with Tomato, Mozzarella, and Basil
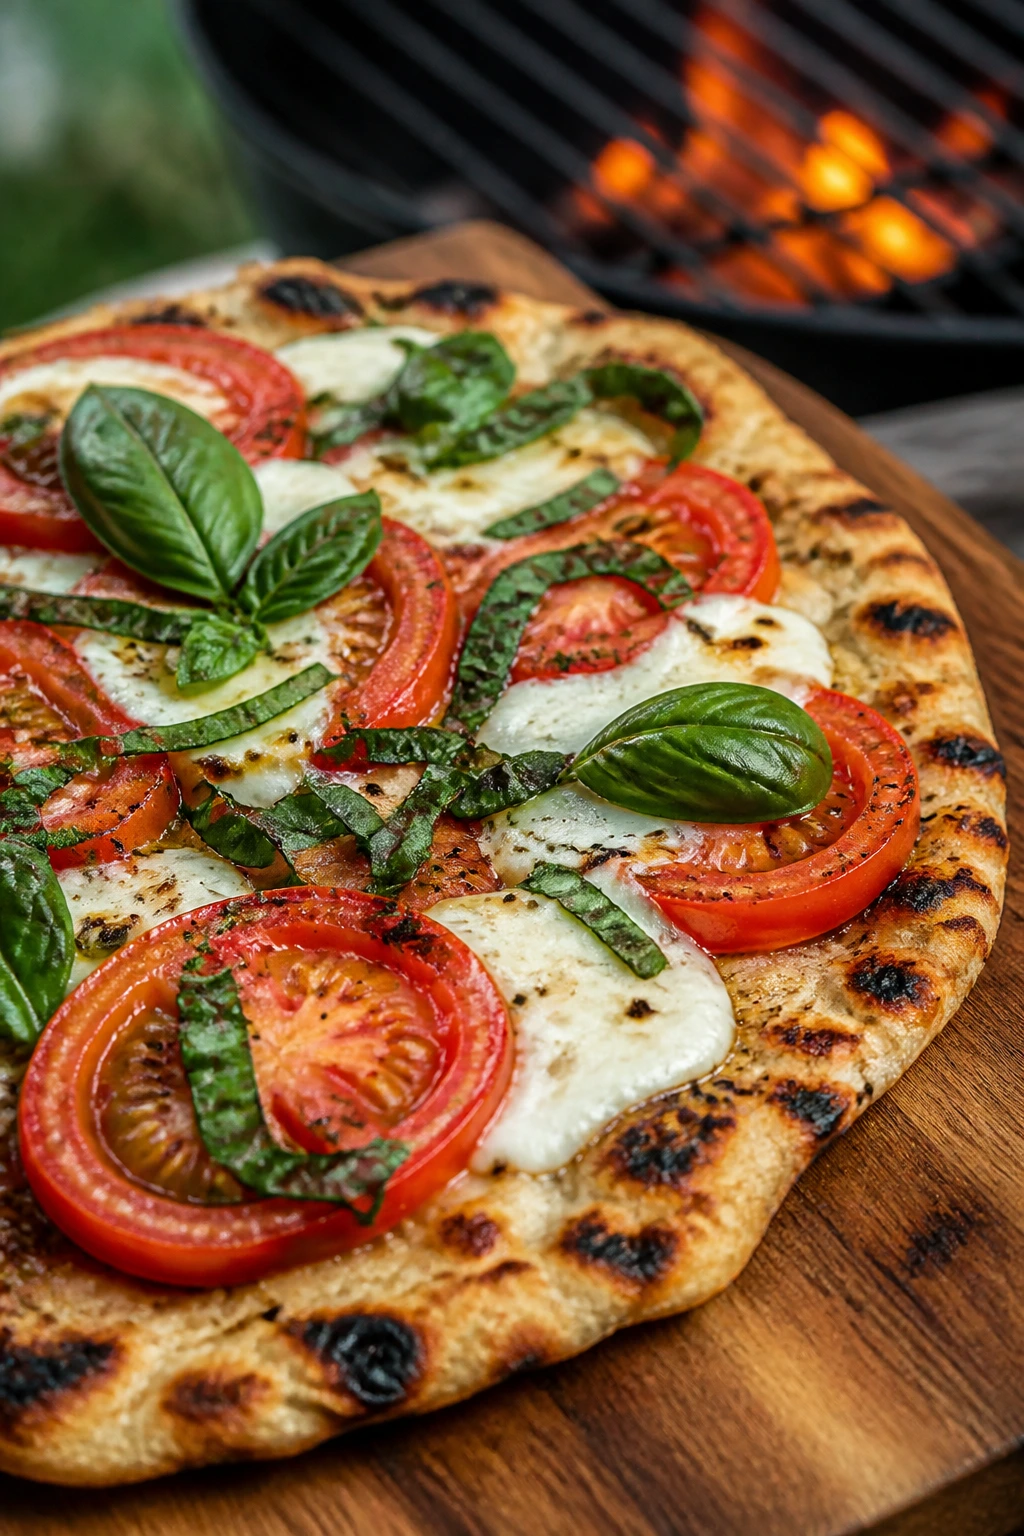
Grilled pizza has a slightly reckless energy, which makes it a strong fit for a holiday cookout. The dough blisters, the cheese melts fast, and the tomatoes soften just enough without turning watery. It tastes like summer bread with smoke attached. That’s a hard thing to dislike.
Why It Works:
The grill gives pizza crust a fast, direct blast of heat that mimics a brick oven more than a kitchen oven does. The trick is to keep the toppings light and cook the first side of the dough before you add anything wet. Once the crust is set, the cheese melts quickly under a closed lid and the bottom stays crisp instead of soggy. Less topping, more heat, better texture.
Key Ingredients
- 1 pound pizza dough, room temperature — store-bought or homemade both work.
- 2 tablespoons olive oil — keeps the dough from sticking.
- 1/2 cup cornmeal or flour, for dusting — helps the dough move easily.
- 2 medium tomatoes, thinly sliced — use firm ones so they don’t flood the crust.
- 1 1/2 cups shredded mozzarella — melts smoothly across the flatbread.
- 1 garlic clove, finely grated — adds a little backbone.
- 1/4 cup fresh basil leaves — tuck them on at the end.
- 1/2 teaspoon kosher salt — seasons the tomatoes and cheese.
- 1/4 teaspoon black pepper — gives the pizza some bite.
- Balsamic glaze, optional — nice if you want a sweet finish.
Quick Steps
- Divide the dough if needed and stretch or roll it into a thin oval or round on a lightly floured surface.
- Brush both sides with olive oil and dust one side lightly with cornmeal or flour.
- Preheat the grill to medium-high and oil the grates.
- Lay the dough on the grill, oiled side down, and cook for 2 to 3 minutes until the bottom is set and marked.
- Flip the dough, add garlic, cheese, tomato slices, salt, and pepper, then close the lid.
- Cook for 3 to 4 minutes more until the cheese melts and the crust is crisp underneath.
- Finish with basil and a thin drizzle of balsamic glaze if you like.
Tips and Variations
- Keep the toppings light—too much tomato or cheese will weigh the crust down and make it hard to flip.
- If you want a little extra richness, add thin slices of fresh mozzarella instead of only shredded cheese.
- This is a good place for leftover grilled vegetables, especially zucchini or peppers.
13. Turkey Burgers with Avocado and Pickled Onion
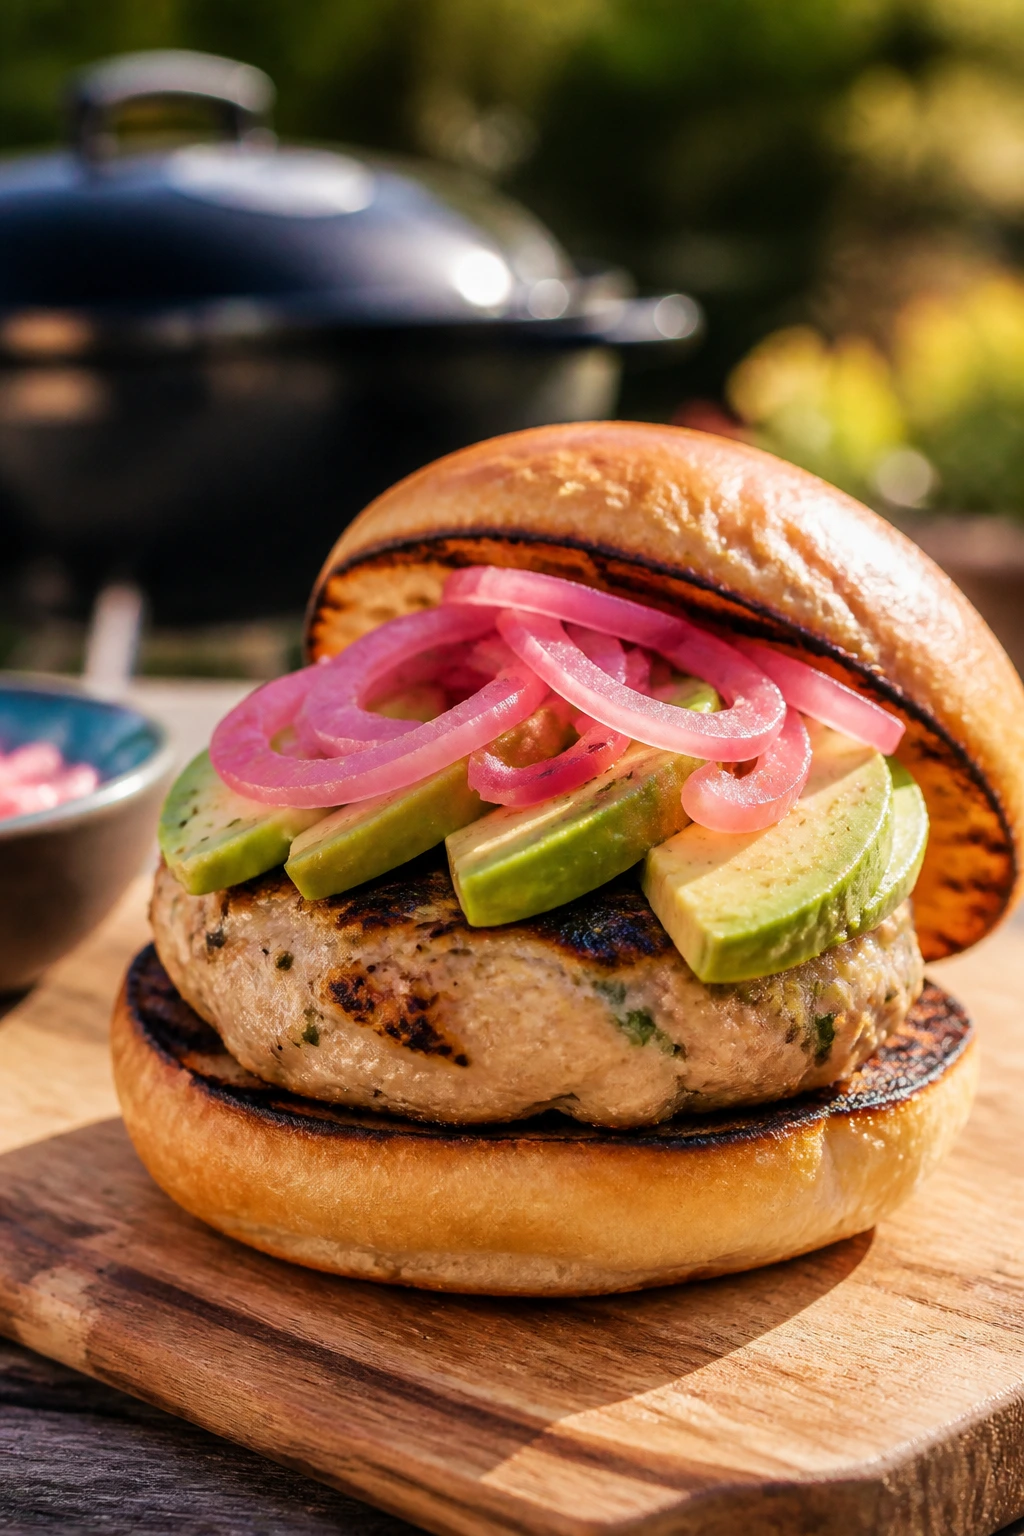
Turkey burgers get a bad name when they’re dry and overworked. Done well, they’re lean, juicy enough, and a little cleaner on the palate than beef, which can be useful when the rest of the table is full of richer food. The avocado brings creaminess, the pickled onion brings sharpness, and the whole thing tastes much more deliberate than the name suggests.
Why It Works:
Ground turkey needs a binder and gentle handling or it falls apart and dries out. An egg and breadcrumbs keep the patties from cracking, and a short chill helps them hold shape on the grill. Avocado fills the fat gap, while pickled onion brings acid and crunch so the burger doesn’t feel bland. Cook turkey all the way to 165°F, and you’re covered on safety and texture.
Key Ingredients
- 2 pounds ground turkey, preferably 93/7 — lean enough for flavor, not so lean that it turns chalky.
- 1 large egg — helps the patties bind.
- 1/2 cup breadcrumbs — keeps the burgers tender.
- 1/4 cup finely minced onion — adds moisture and a little bite.
- 1 tablespoon Worcestershire sauce — gives the meat some depth.
- 1 teaspoon garlic powder — keeps the seasoning even.
- 1 1/2 teaspoons kosher salt — enough to season the whole batch.
- 1/2 teaspoon black pepper — adds a little edge.
- 2 avocados, sliced — brings richness.
- 1/2 cup pickled red onions — sharp, bright, and very useful.
- 6 burger buns — toast them so they hold up.
Quick Steps
- Mix the turkey, egg, breadcrumbs, minced onion, Worcestershire, garlic powder, salt, and pepper gently in a large bowl.
- Shape the mixture into 6 patties and press a shallow dimple into the center of each one.
- Chill the patties for 15 minutes so they firm up.
- Preheat the grill to medium-high and oil the grates.
- Grill the burgers for 5 to 6 minutes per side, turning once, until the center reaches 165°F.
- Toast the buns during the last minute of grilling.
- Build each burger with avocado, pickled onion, and any greens you want.
Tips and Variations
- Don’t mash the turkey mixture into paste; a light mix keeps the burgers tender.
- A slice of tomato and a little mayonnaise make these feel fuller without making them heavy.
- If you want a sharper edge, add a teaspoon of Dijon to the mix.
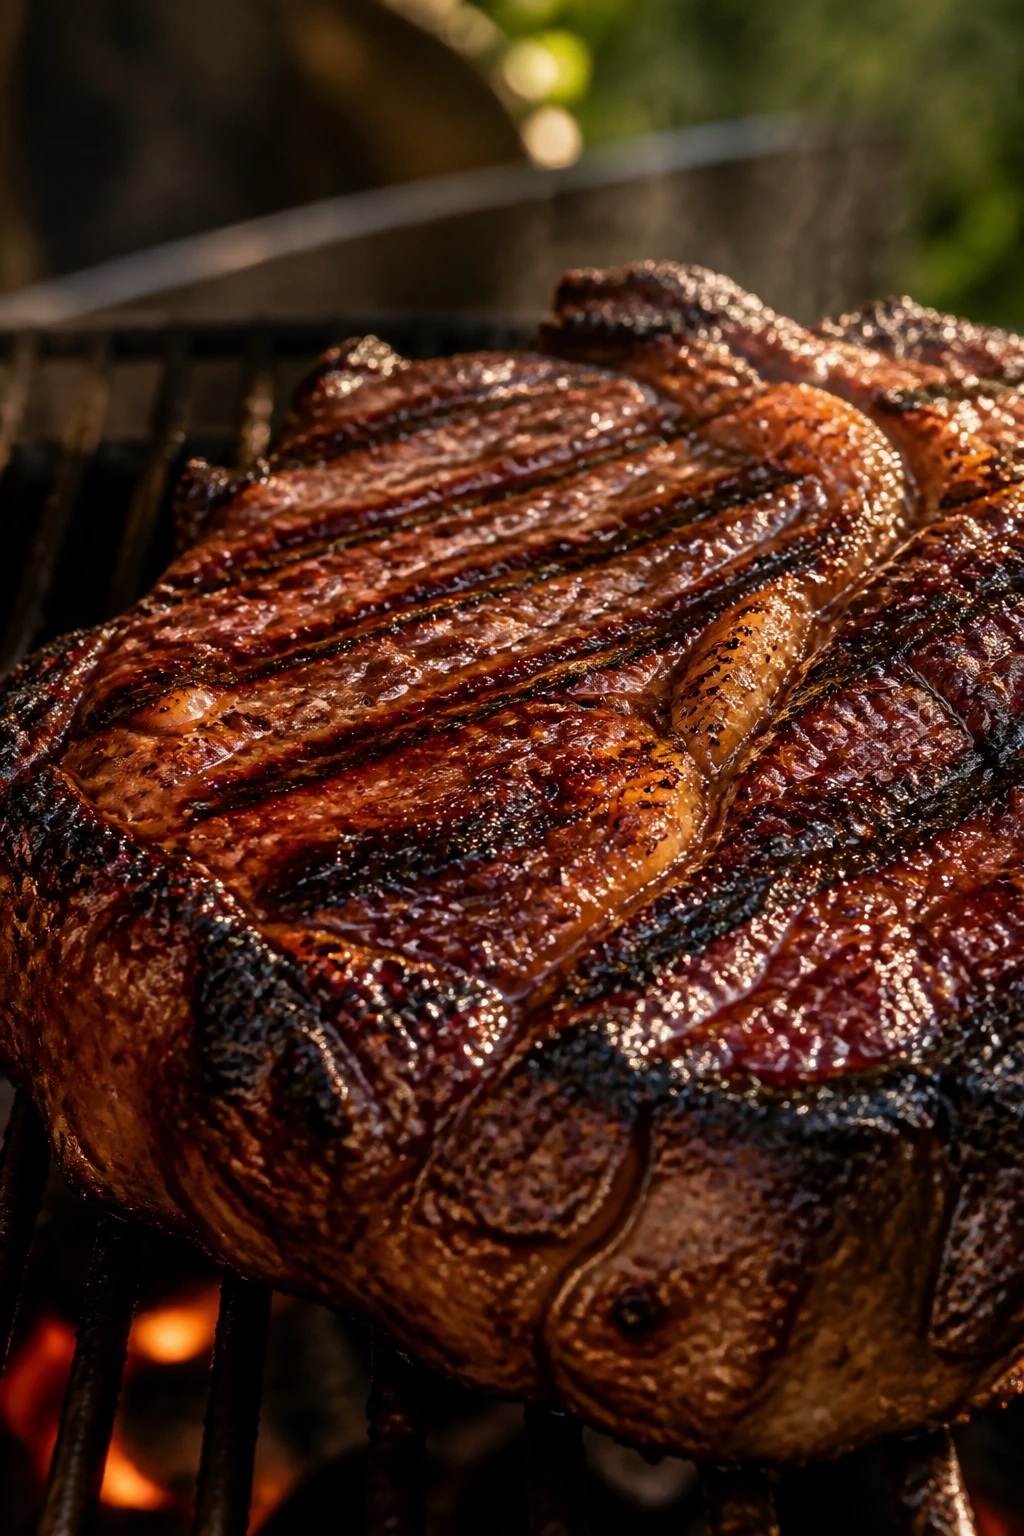
14. Baby Back Ribs with Dry Rub and Tangy Glaze
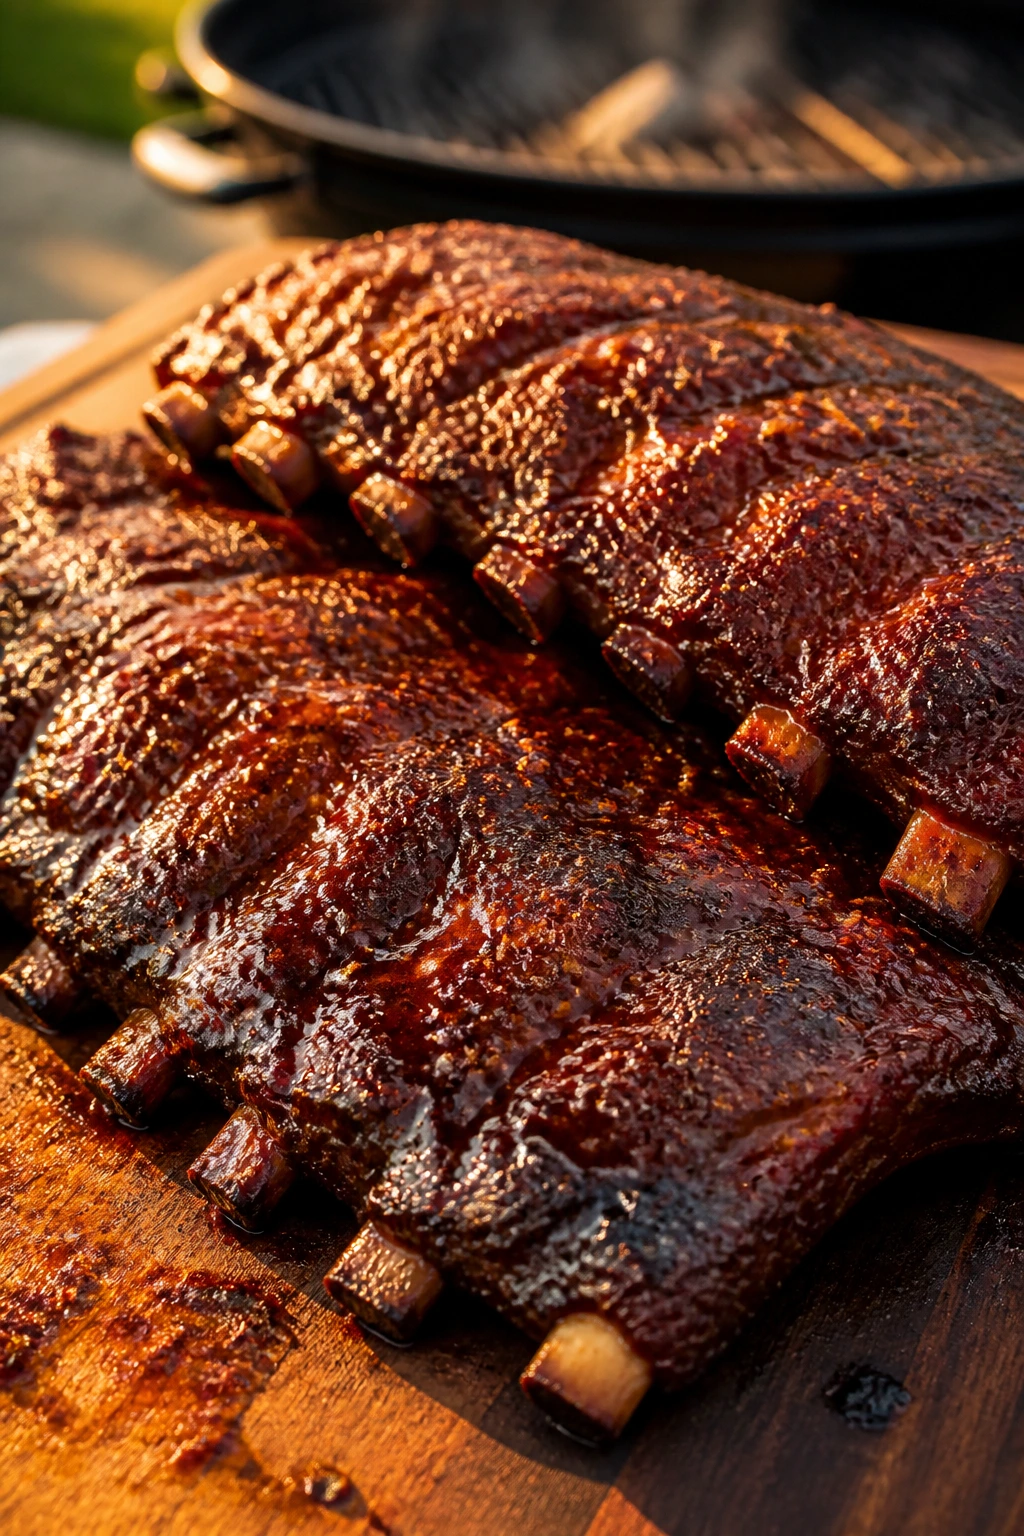
Ribs are the one dish on this list that asks for patience, and they earn every minute of it. The meat turns tender without falling apart, the bark gets dark and a little sticky, and the glaze clings in layers instead of turning into a syrupy mess. If you want one centerpiece that feels unmistakably like a holiday cookout, this is it.
Why It Works:
Baby back ribs like gentle, steady heat, not a blast of flames. Indirect grilling keeps the meat from drying out while the fat slowly renders, and a dry rub builds a crust that tastes smoky and spiced before the sauce even shows up. Wrapping the ribs partway through traps steam and helps the meat loosen from the bone, while the final saucing step gives you shine and a little tackiness. Keep the grill around 275°F to 300°F for the whole ride, and don’t rush it.
Key Ingredients
- 2 racks baby back ribs — about 4 to 5 pounds total.
- 2 tablespoons brown sugar — helps the rub caramelize.
- 2 tablespoons paprika — gives the ribs color.
- 1 tablespoon kosher salt — seasons the meat.
- 1 tablespoon black pepper — adds a mild bite.
- 2 teaspoons garlic powder — builds savory depth.
- 2 teaspoons onion powder — keeps the rub rounded.
- 1 teaspoon cayenne, optional — use less if you want milder ribs.
- 1 tablespoon yellow mustard — helps the rub stick.
- 1 cup barbecue sauce — for the sticky finish.
- 2 tablespoons apple cider vinegar — loosens the sauce and brightens it.
Quick Steps
- Peel off the thin membrane from the back of the ribs, then rub the ribs lightly with mustard.
- Mix the brown sugar, paprika, salt, pepper, garlic powder, onion powder, and cayenne into a dry rub.
- Coat the ribs all over with the rub and let them sit while you heat the grill.
- Set up the grill for indirect heat at 275°F to 300°F.
- Grill the ribs bone-side down for 2 to 2 1/2 hours, adding a handful of wood chips if you want more smoke.
- Wrap the ribs in foil with a splash of apple cider vinegar for the last 30 to 45 minutes if you want them softer.
- Unwrap, brush with barbecue sauce, and grill for 10 to 15 minutes more until the glaze sets.
- Rest for 10 minutes, then slice between the bones.
Tips and Variations
- Keep a spray bottle of water nearby if the ribs start to darken too fast at the edges.
- If you like a firmer bite, skip the foil wrap and just cook them unwrapped a little longer.
- Ribs are easiest to slice with a sharp knife that has a thin blade; a heavy knife crushes the bark.
15. Portobello Mushroom Burgers with Garlic Aioli
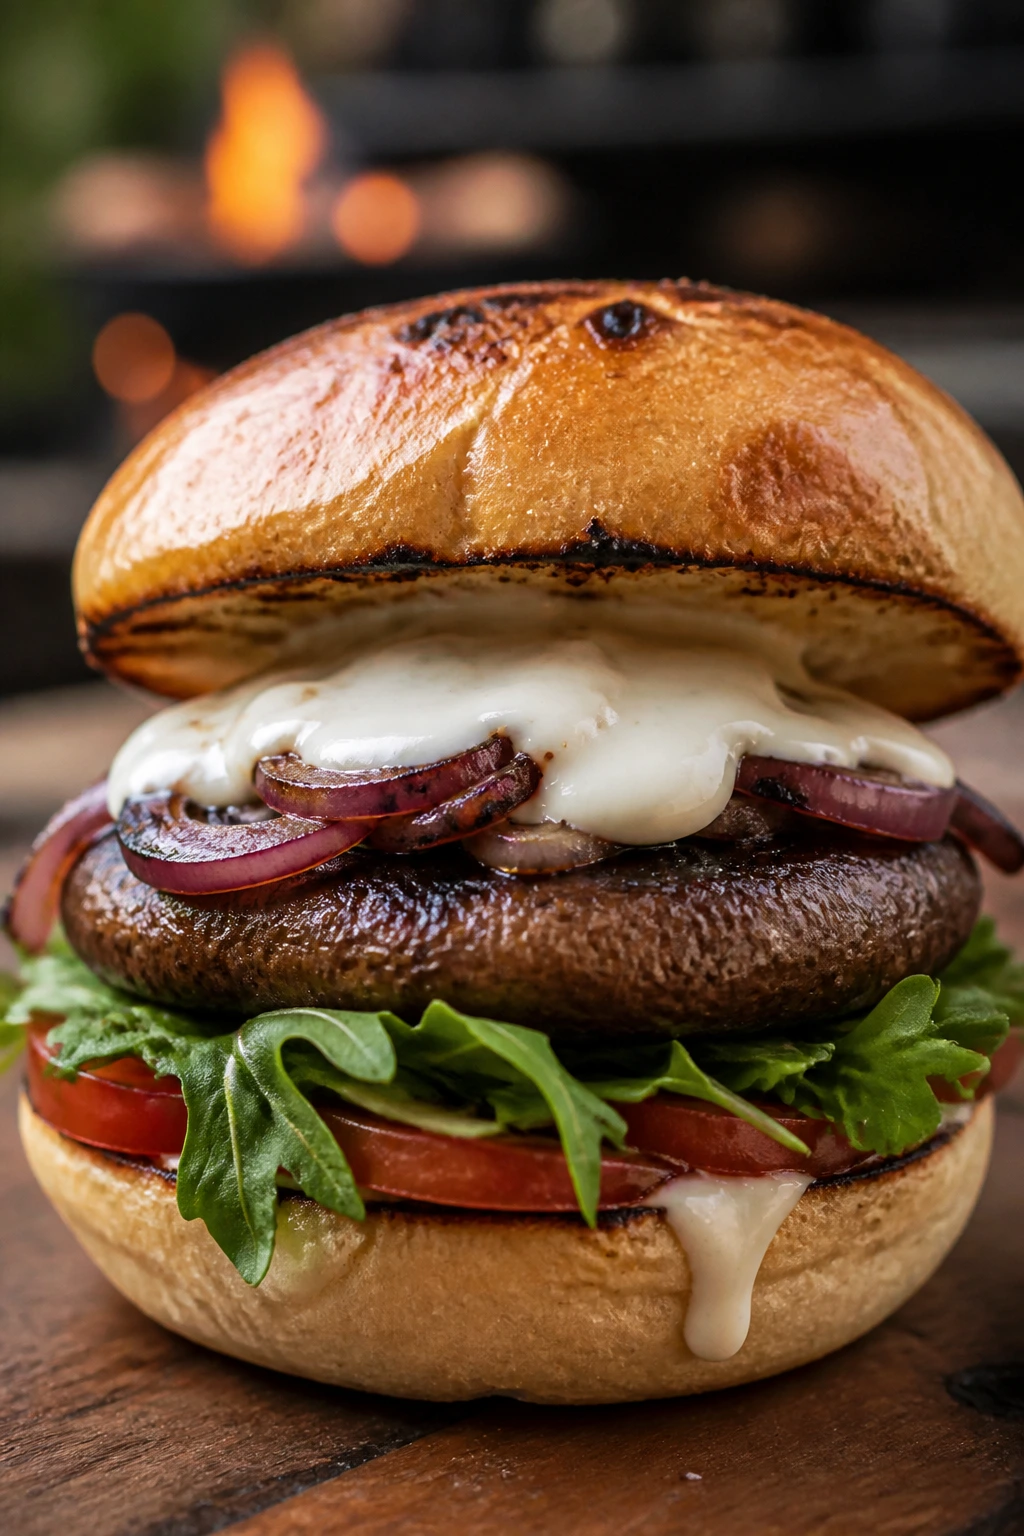
Portobellos give you that big, savory grill flavor without asking for meat. The caps soak up the marinade, the grill turns their edges mahogany-dark, and the garlic aioli makes the whole sandwich feel richer than it really is. This is the vegetarian burger that doesn’t apologize for being a mushroom.
Why It Works:
Portobello caps are meaty enough to satisfy, but they need a little help so they don’t taste watery. A short marinade seasons them and pulls out extra moisture, which is exactly what you want before they hit the grill. High heat caramelizes the surface fast, and a garlic aioli adds the fat and gloss that make the sandwich feel finished. You still want the caps tender, not collapsed, so stay close and flip once.
Key Ingredients
- 6 large portobello mushroom caps — wipe them clean and remove the stems.
- 3 tablespoons olive oil — carries the marinade.
- 2 tablespoons balsamic vinegar — gives the mushrooms a sweet-sharp edge.
- 1 tablespoon soy sauce — adds savory depth.
- 2 garlic cloves, minced — flavor for the marinade.
- 1/2 teaspoon black pepper — enough to season the caps.
- 1/2 teaspoon kosher salt — go light because soy sauce is salty.
- 1/2 cup mayonnaise — the base for the aioli.
- 1 teaspoon lemon juice — wakes up the aioli.
- 1 garlic clove, finely grated — for the aioli.
- 6 burger buns — toast them so they don’t go soggy.
- Arugula and tomato slices, optional — useful for a fresher finish.
Quick Steps
- Whisk the olive oil, balsamic vinegar, soy sauce, minced garlic, salt, and pepper in a shallow dish.
- Coat the mushroom caps in the marinade and let them sit for 15 to 20 minutes.
- Stir the mayonnaise, lemon juice, and grated garlic together to make the aioli.
- Preheat the grill to medium-high and oil the grates.
- Grill the mushroom caps for 4 to 5 minutes per side until softened and deeply browned.
- Toast the buns during the last minute on the grill.
- Build the burgers with aioli, mushrooms, arugula, tomato, and the top bun.
Tips and Variations
- Pat the caps lightly after marinating if they seem too wet; dry surfaces brown better.
- Add a slice of Swiss or provolone on top during the last minute if you want the sandwich richer.
- These are also good chopped and piled onto grilled bread with aioli and herbs, which is a nice trick for mixed crowds.
Why the Grill Handles a Holiday Crowd Better Than the Oven
The grill does a job the oven never quite manages: it makes dinner feel active. People can see the flames, smell the smoke, and watch the food change in real time, which turns waiting into part of the experience. That matters on a holiday when the meal is as much about hanging around as it is about eating.
There’s also the practical side. A grill lets you build temperature zones, which is a fancy way of saying you can cook fast stuff and slow stuff at the same time without juggling six pans. Burgers and shrimp can live over direct heat. Ribs, salmon, and thicker pork chops can move to the cooler side while they finish. One grill. Two moods.
Hot grates need a little respect, though. Give the grill 10 to 15 minutes to preheat, clean the grates, and oil them before anything goes on. That small bit of prep is the difference between food that releases cleanly and food that tears apart because it wasn’t ready to move. And yes, the thermometer matters. Guessing is how you end up with dry chicken, gray steak, or fish that looks cooked from the outside and isn’t there yet in the middle.
Gear That Makes the Grill Easier
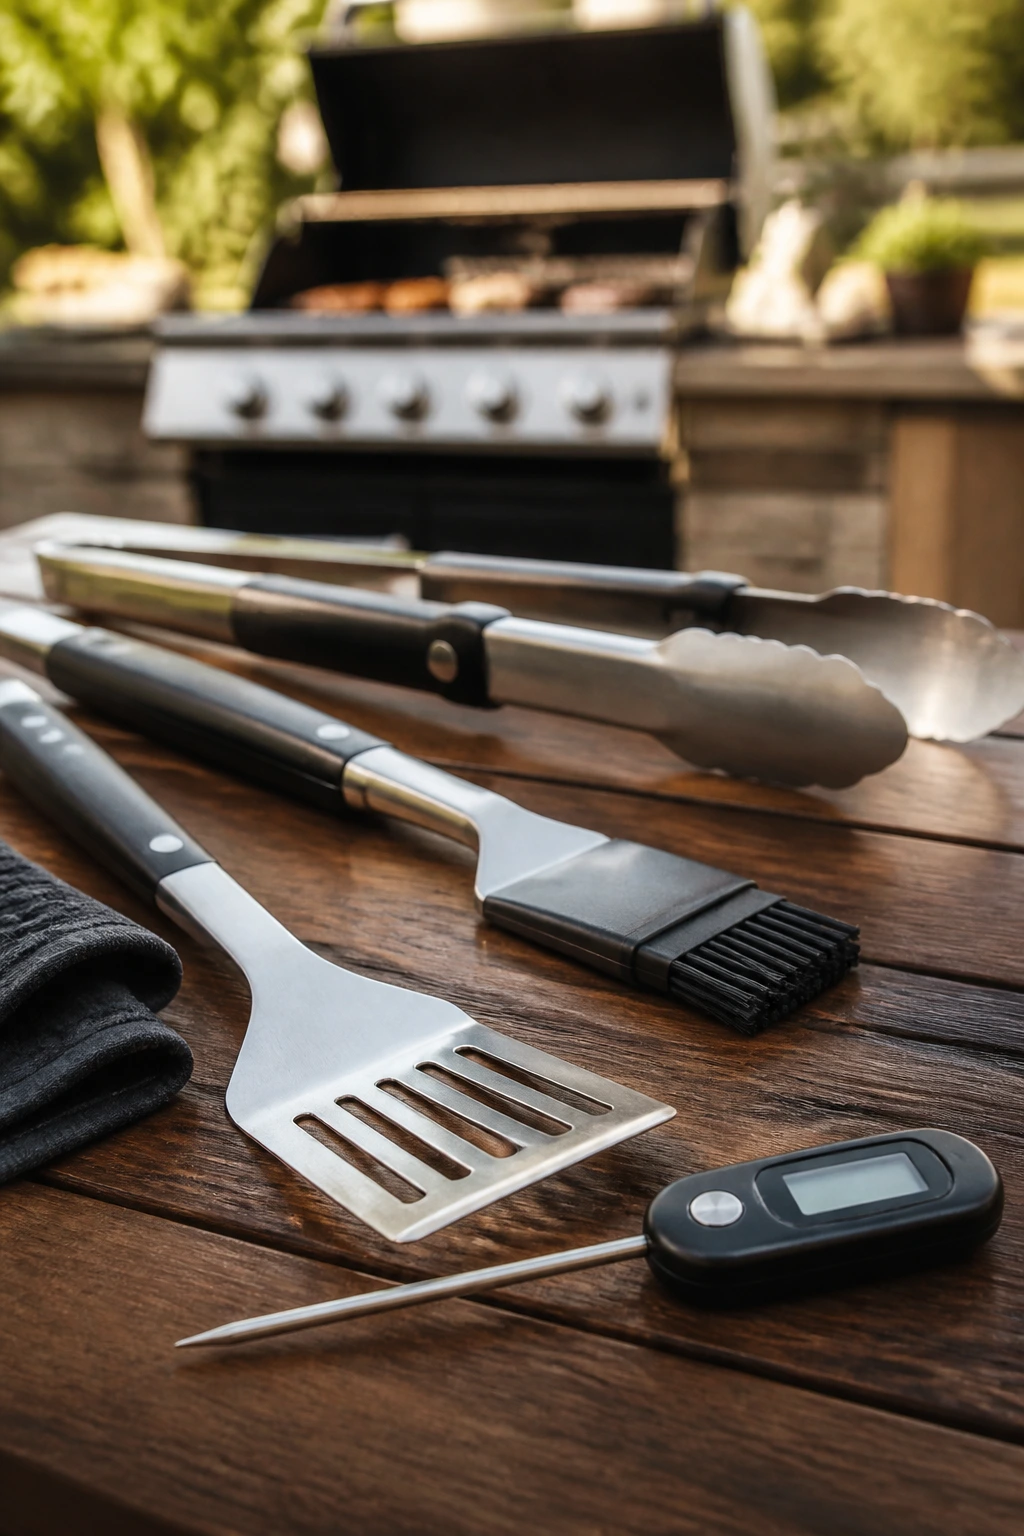
- Long-handled tongs: The safest way to turn burgers, chicken, skewers, and vegetables without crowding the heat.
- Instant-read thermometer: The fastest way to know if chicken, pork, steak, or fish is done without guessing.
- Grill brush or scraper: Clean grates release food better and give you better marks.
- Basting brush: Useful for sauce, glaze, or a thin coat of oil.
- Metal spatula: Better than flimsy tools for fish fillets, burgers, and flatbread.
- Skewers: Metal skewers are easiest; wooden skewers need soaking for at least 30 minutes.
- Cedar plank: Worth it for salmon because it adds smoke and keeps delicate fish steady.
- Grill basket: Helpful for peppers, onions, cherry tomatoes, or anything small enough to fall through the grates.
- Rimmed sheet pans: Good for carrying seasoned food to and from the grill.
- Foil: Handy for resting, wrapping ribs, or setting up a quick warm zone.
- Cutting board for raw meat: Keep one board separate so you don’t cross-contaminate.
- Serving platters: Wide, shallow platters make grilled food look intentional instead of piled up.
What to Buy Before You Light the Grill
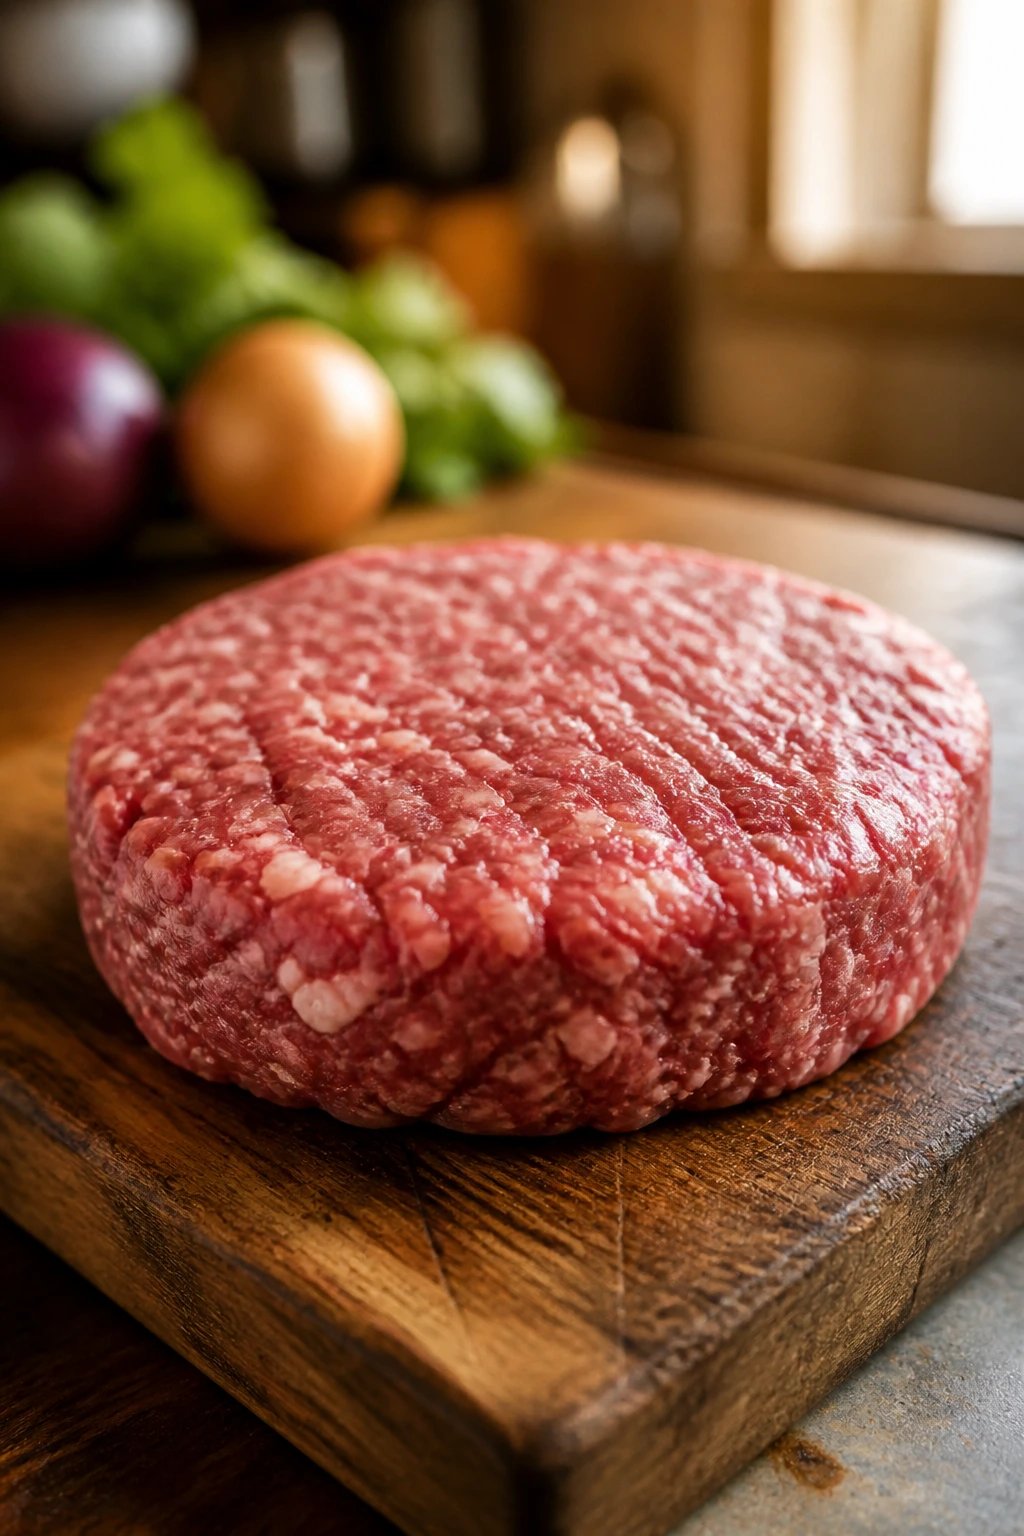
Buying well makes a bigger difference on the grill than it does in a lot of other cooking. With high heat, small quality issues show up fast. Thin chops dry out. Watery tomatoes collapse. Ground beef with too little fat turns chalky. Good shopping doesn’t need to be fancy—it just needs to be a little deliberate.
For burgers, look for 80/20 ground beef. That fat ratio keeps the patties juicy and gives you flavor without adding a bunch of extras. For turkey burgers, don’t go ultra-lean; a modest amount of fat and a binder like egg and breadcrumbs keeps the patties from turning crumbly. Chicken thighs are easier to grill than breasts because they’re more forgiving, while bone-in pork chops give you more room to cook without drying them out.
Seafood deserves a quick check at the counter. Shrimp should smell clean, not fishy, and large shrimp—something in the 16/20 range—are easier to skewer and grill evenly. Salmon fillets with the skin on hold together better on a plank or the grates. For fish tacos, choose a firm white fish that will flake without dissolving the moment you flip it.
Produce matters too. Pick peaches that smell sweet but still feel slightly firm, so they can char without turning mushy. Buy bell peppers with shiny skin and solid walls. Onions should feel heavy for their size. Herbs should look crisp, not damp or wilted. And if you’re buying buns, go for something sturdy—potato buns, brioche buns, hoagie rolls with some backbone. Soft bread looks nice until the juices hit it.
Frozen shrimp, frozen fish, and frozen berries for salsa can all work well if thawed properly in the fridge. That’s a useful backup when the store is low on good-looking seafood. Fresh is lovely. Frozen is often smarter.
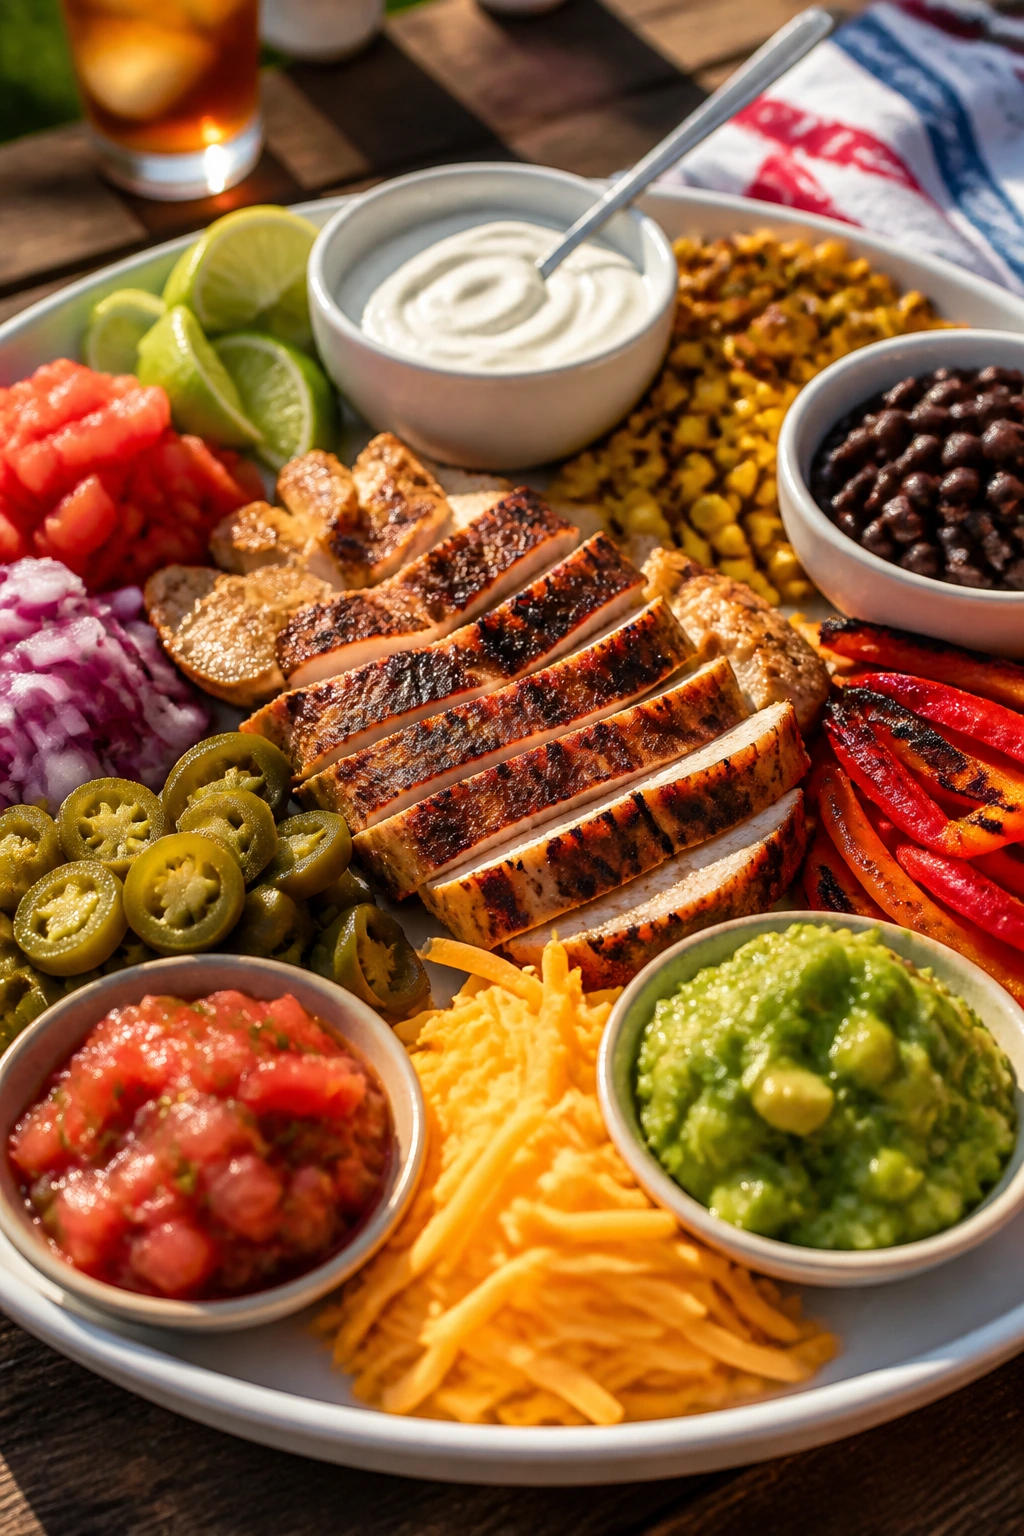
How to Plate the Meal So It Feels Like a Feast
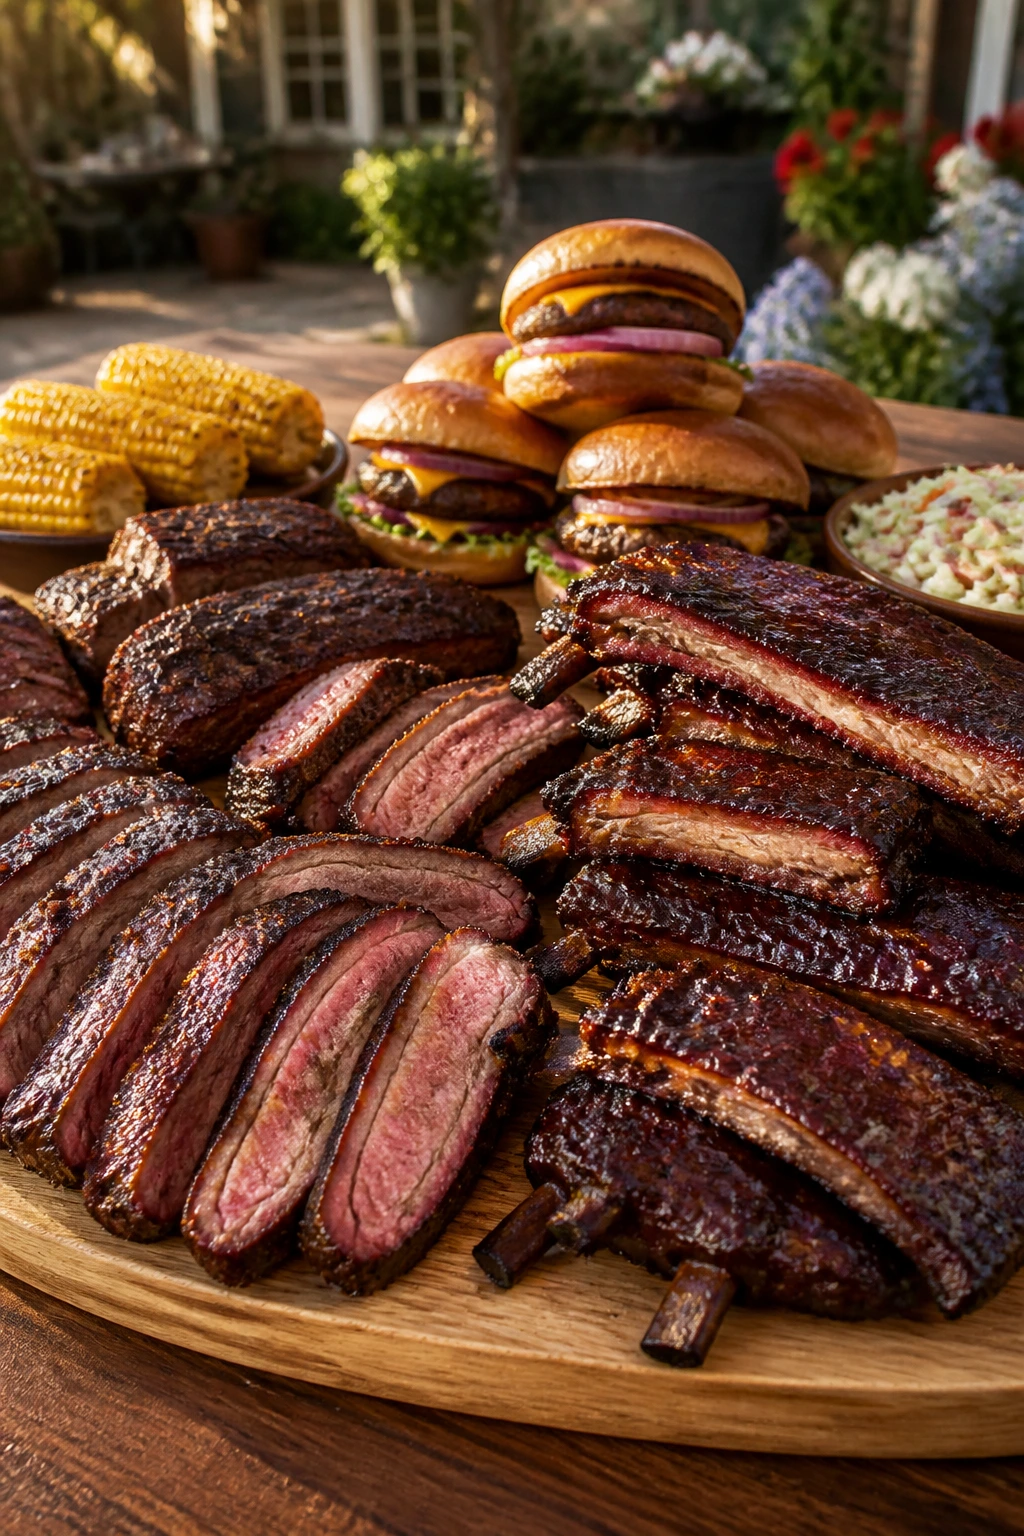
Presentation: Put the grilled food on one or two large platters instead of scattering it across small plates. A board lined with lettuce, herbs, or lemon wedges makes burgers, skewers, and sliced steak look more abundant. Salmon can stay on its plank, ribs should be sliced before they hit the table, and tacos are easier when the fillings are arranged in separate bowls.
Accompaniments: The safe partners are the classics: grilled corn, potato salad, coleslaw, baked beans, tomato salad, watermelon, and crusty bread. For the lighter dishes—shrimp, fish tacos, halloumi skewers—a sharp slaw or chilled cucumber salad keeps the plate lively. For the heavier ones—burgers, ribs, pork chops—something acidic and cool helps more than a second starch ever will.
Portions: Plan one burger per adult, one thick pork chop per person, two skewers for a main-course serving, or about 6 to 8 ounces of cooked steak or fish. Ribs are easiest when you think in sections: two to three bones as a generous serving, more if they’re the only main. If you’re building a mixed grill spread, smaller portions of three different dishes usually feel more generous than one oversized plate.
Beverage Pairing: Iced tea with lemon is the safest all-purpose choice. Lemonade works well with chicken, shrimp, and halloumi. For drinks with a little more edge, light lager or pilsner fits burgers, ribs, and sausage, while sparkling water with lime keeps seafood and fish tacos crisp. Cold rosé also plays nicely with grilled salmon and vegetables, especially when the evening starts to lean warm and slow.
Small Tweaks That Change the Whole Cookout
Flavor Enhancement: Finish chicken, pork, steak, or ribs with something bright right after they come off the grill—chimichurri, herb butter, hot honey, or a squeeze of lime. Heat opens the flavor and makes the finish smell bigger than it looks. A small spoonful goes a long way.
Customization: Add charred scallions to burgers, sliced avocado to tacos, fresh basil to pizza, or pickled onions to almost anything. Those little extras don’t just decorate the plate; they change the taste in the first bite. If you want one signature move, make a quick herb sauce and use it across the menu.
Serving Suggestions: Garnish shrimp with parsley and lemon, salmon with dill, pork chops with peach salsa, and steak with a snowfall of flaky salt. The finishing touch should do more than look tidy. It should wake up the food right before the plate hits the table.
Make-It-Yours: For gluten-free guests, use corn tortillas, gluten-free buns, and tamari instead of soy sauce. For dairy-free cooks, swap butter for olive oil and use a dairy-free mayo in the aioli. For lower-sodium plates, lean on citrus, vinegar, herbs, garlic, and pepper instead of piling on salt. For spice lovers, keep sliced jalapeños, hot sauce, or red pepper flakes on the table and let people build their own heat.
Keeping the Leftovers in Good Shape
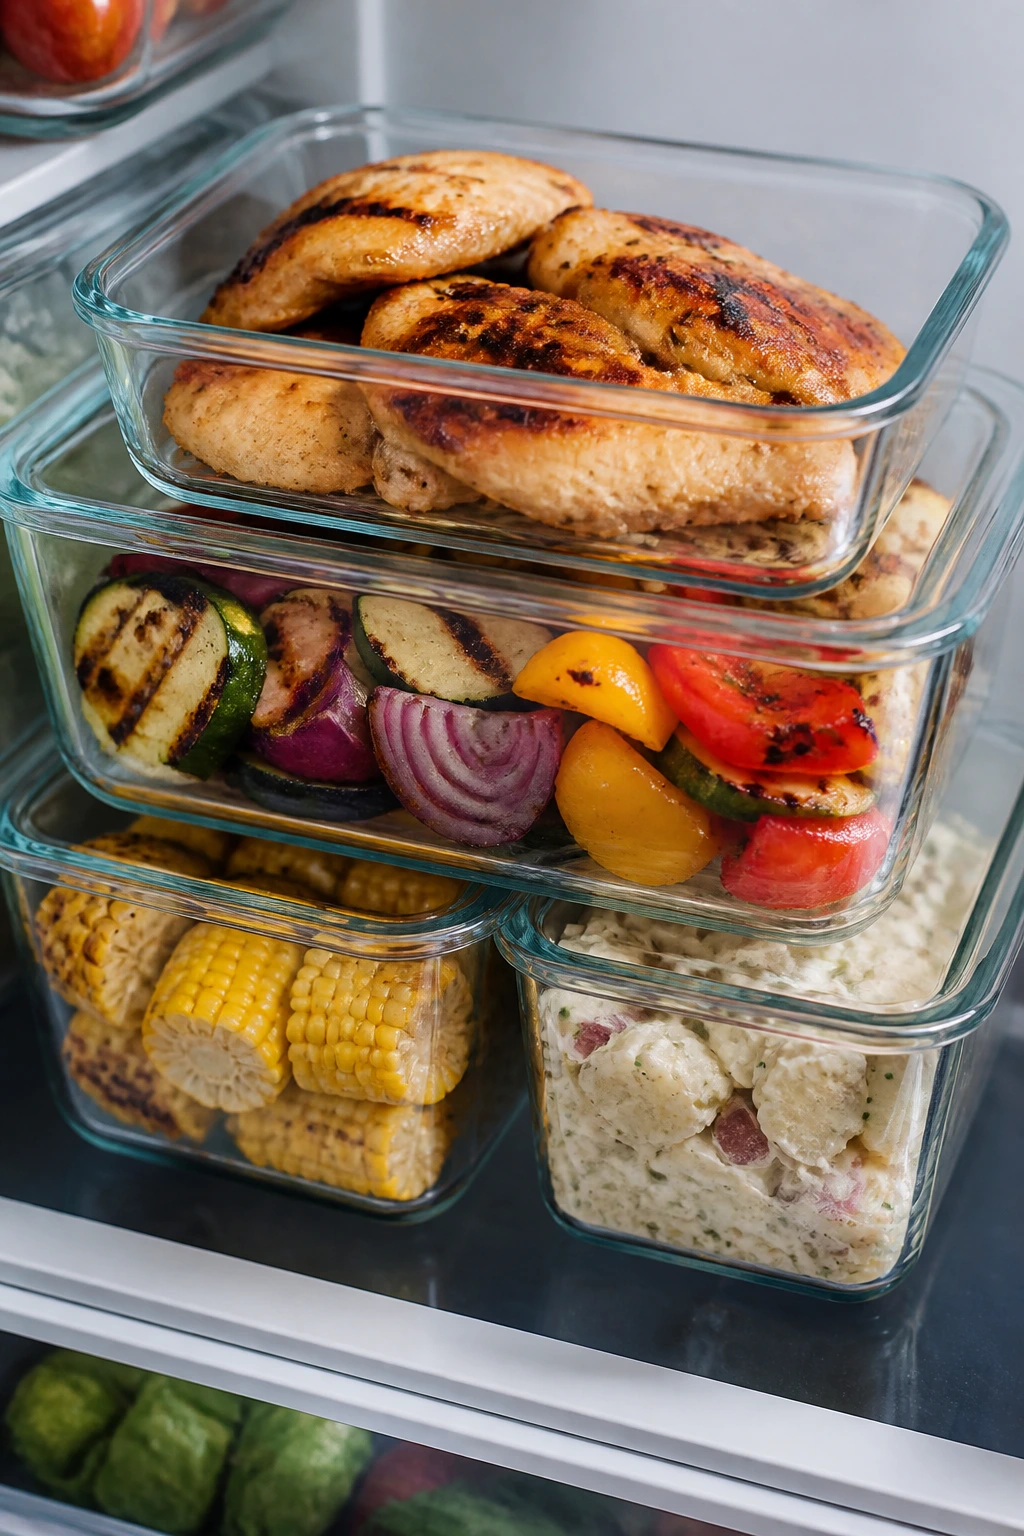
Most grilled meats keep well for 3 to 4 days in the refrigerator if they’re cooled quickly and stored in shallow containers. Fish is tighter—plan on 1 to 2 days for salmon and white fish. Grilled vegetables usually stay good for 3 to 4 days, though their texture softens a bit. Ribs, chicken, pork chops, burgers, and steak all freeze reasonably well for up to 2 months if wrapped tightly; turkey burgers can stretch to 3 months if you keep freezer burn off them.
The best make-ahead move is to separate components. Make marinades, rubs, chimichurri, slaw dressing, pickled onions, and burger toppings a day or two ahead. You can slice peppers, onions, and mushrooms early and keep them refrigerated in airtight containers. For seafood, keep the seasoning simple and do the actual grilling close to serving time. That’s not fussiness. That’s texture.
Reheating depends on the food. Chicken, pork, ribs, and steak do well in a 300°F oven, covered loosely with foil, until warmed through. A skillet with a splash of water works well for shrimp or sausages if you want to avoid drying them out. Fish should be reheated gently or, better yet, eaten cold in tacos or flaked into a salad. Burgers are best reheated only until warm; overcooking them a second time turns the texture strange.
One more thing that matters outdoors: don’t leave perishable food sitting out for more than 2 hours, and 1 hour is the safer window if the weather is very warm. That rule sounds boring until you’re standing around talking and the platter has been ignored for too long. Then it stops being boring and starts being useful.
Ways to Bend the Menu to Your Crowd
Gluten-Free Grill Night: Use corn tortillas for tacos, gluten-free buns for burgers, and tamari in place of soy sauce. Most of the menu already fits naturally; the bread is usually the only issue. Even the skewers work fine without any change.
Dairy-Free Backyard Spread: Skip butter on the shrimp and use olive oil instead. For burgers and fish tacos, choose a dairy-free mayo or leave the creamy sauces off the table. Halloumi is the one recipe that needs a full swap—firm tofu, extra mushrooms, or more vegetables can stand in cleanly.
Mild and Kid-Friendly Plates: Leave out cayenne, hot peppers, and heavy spice rubs, then put the sharper sauces on the side. Honey-lime chicken, burgers, sausage hoagies, and grilled pizza usually get the fewest complaints from picky eaters. Kids also tend to like anything they can assemble themselves.
Fire-Lover’s Version: Add chipotle to the burger mix, jalapeño to the peach salsa, red pepper flakes to chimichurri, or hot honey over the chicken thighs. Keep a second, milder sauce nearby so the whole table doesn’t have to eat at the same heat level. That’s the real trick.
Lower-Sodium Cookout: Build more flavor from acid and herbs—lime, lemon, vinegar, garlic, cilantro, parsley, oregano—then cut back on the salt a touch. Use unsalted butter if you’re finishing shrimp or vegetables. A peppery dry rub often gives enough character that you don’t miss the extra sodium.
Where Holiday Grill Dinners Go Wrong
The grill isn’t hot enough. Food sticks, gets pale, and tastes steamed instead of grilled. The fix is simple: preheat longer than feels necessary, then oil the grates right before the food goes on.
Sauce goes on too early. Sugar burns faster than people expect, especially on chicken, pork, and ribs. Brush glazes on near the end, then give them only a few minutes to set.
The thermometer gets ignored. Guessing leads to dry chicken and underdone pork, or steak that’s overcooked because you were waiting for a color cue that never came. Pull the number, not the mood.
The grill gets crowded. Too much food on one set of grates drops the temperature and makes everything sweat instead of sear. If the menu is big, cook in rounds and keep finished food warm, covered lightly with foil.
Food gets cut too soon. Juices run out before they settle back into the meat. Rest chicken, pork, steak, and ribs for a few minutes before slicing or serving.
Delicate foods are treated like burgers. Fish, shrimp, and flatbread need faster attention and cleaner grates. If they tear, stick, or dry out, the issue is usually too much time or not enough prep, not the recipe itself.
Questions People Ask Before Firing Up the Grill

Can I make these grilled dinners on a gas grill and a charcoal grill?
Yes. Gas gives you steady control, while charcoal gives you a little more smoke and a hotter finish if you want it. The recipes work either way as long as you build at least one cooler zone for items that need indirect heat.
What if my grill has hot spots?
Treat that as useful information, not a defect. Put burgers or steak over the hotter side, move chicken and ribs to the cooler side, and rotate skewers or vegetables a little more often. Hot spots become much less annoying once you know where they live.
Which recipes should I make if I’m cooking for the first time?
The shrimp skewers, cheeseburgers, chicken thighs, and sausage hoagies are the easiest to land well. They forgive small timing mistakes, and the visual cues are simple: color, firm texture, and a thermometer reading. Ribs and grilled pizza ask for more attention.
Can I prep anything the day before?
Absolutely. Marinades, rubs, chimichurri, peach salsa, pickled onions, slaw dressing, and chopped vegetables can all be made ahead. For the best texture, keep the actual grilling for the last minute.
How do I keep shrimp and fish from overcooking?
Use medium-high heat, dry the surface before seasoning, and pull them as soon as they turn opaque and flake easily. Shrimp usually need only a few minutes per side; fish needs a little more depending on thickness. A grill basket or foil pan can help if the pieces are fragile.
What if I want to serve everything buffet-style?
Choose at least one quick protein, one slower protein, and one vegetarian option so guests can build their own plates. Keep sauces in bowls, not poured over the food, and rest the grilled items in a warm covered spot so they stay presentable. You do not need to serve every dish at the same second.
Can I use store-bought sauce and still make these taste good?
Yes, and that’s often the smart move. A good bottled barbecue sauce, store-bought teriyaki, or jarred chimichurri can save time as long as you finish it with something fresh—lemon juice, chopped herbs, or a little hot sauce. Convenience is fine when the rest of the meal is done with care.
Which leftovers reheat the best?
Pork chops, chicken thighs, and ribs hold up the best. Burgers are fine if you reheat them gently, and steak is better sliced thin and warmed just enough to take the chill off. Fish is the least forgiving, so plan on eating it cold or barely reheated.
A Backyard Table That Feels Easy
The nicest thing about a holiday grill menu is that it doesn’t need to look polished to feel generous. A little char, a few bright sauces, one cold side, one crisp salad, and the whole table starts to look intentional. That’s the real appeal of these grilled dinners for Fourth of July: they give you room to cook with fire without making the evening feel like a kitchen project.
Pick two or three mains if you want to keep it simple. Add one sauce that cuts through the smoke, one fresh vegetable, and one side that can sit on ice or in the shade while people wander in and out. That’s enough. Honestly, it’s more than enough.