
Hidden veggie meals have a useful kind of trick to them: you get the sweetness of carrots folded into a sauce, the silk of cauliflower hiding inside cheese, or a handful of spinach disappearing into a skillet of pasta, and nobody at the table starts bargaining over bites. That matters on a weeknight when the clock is loud, the pantry looks a little random, and dinner needs to feel like dinner — not a negotiation.
The best versions don’t taste like a compromise. They taste like the dish your family already wants, only with more body, more color, and a little more staying power. A good hidden veggie dinner should still brown, bubble, and smell like comfort when it hits the table.
A lot of recipes promise to “sneak in” vegetables and then stop at the least interesting part: a few shreds of zucchini dumped into a batter and hope for the best. That’s not the move here. The meals below use real technique — fine grating, blending, slow sautéing, roasting, and smart seasoning — so the vegetables disappear into the background without turning the dish watery, bland, or oddly sweet.
Why These Dinners Pull Their Weight
-
They use vegetables as structure, not decoration: Grated zucchini, cauliflower purée, mushrooms, and carrots do actual work here — thickening sauces, keeping meatballs tender, and adding moisture where a weeknight dinner usually goes dry.
-
They keep the bite people expect: No one wants a bowl of baby food with cheese on top. These recipes hide vegetables while still giving you browned edges, noodles with chew, or a crisp top under the broiler.
-
They stretch a package of groceries further: A few carrots, a head of cauliflower, a bag of spinach, and a couple of pantry staples can turn into a full dinner with leftovers.
-
They play nicely with picky eaters: The vegetables are there for body and flavor, but they’re cut small, cooked soft, or blended smooth enough that the texture stays familiar.
-
They hold up in the fridge: Most of these dinners taste even better after a night of mingling, which is a small gift when you’re packing lunch or reheating a second round.
-
They’re flexible without getting sloppy: Swap turkey for beef, beans for lentils, or dairy for a cashew-style sauce in a few places and the recipe still works.
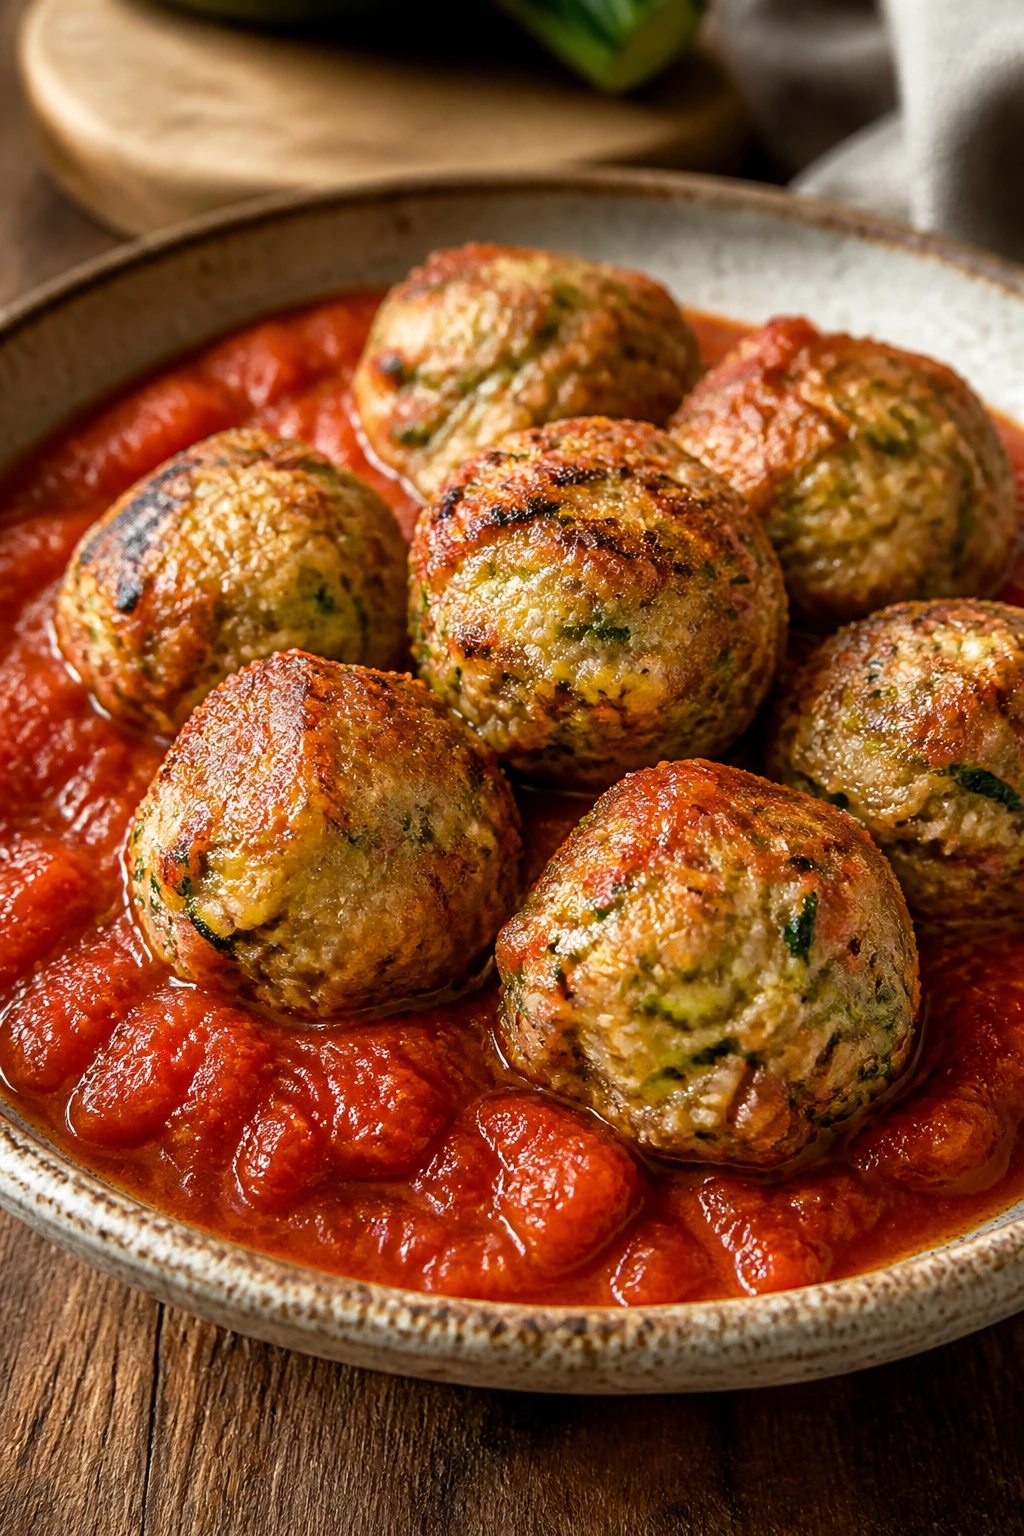
1. Turkey-Zucchini Meatballs with Marinara
The first thing you notice is the smell. Garlic, browned turkey, and tomato sauce all hit at once, and the zucchini never announces itself as a vegetable — it just keeps the meatballs soft in the center and juicy at the edges. If you’ve ever made turkey meatballs that turned dry and a little chalky, this version fixes that problem fast.
These meatballs are the kind of thing I like to keep in the back pocket for pasta night, sub sandwiches, or a quick bowl with roasted broccoli. The carrot and zucchini vanish into the mix once they’re grated fine and squeezed dry, which is the whole point. You get more moisture, a little sweetness, and no obvious vegetable chunks.
Why It Works:
Turkey needs help. It’s lean, so it dries out if you treat it like beef. The grated zucchini and carrot add moisture without making the meatballs loose, and the breadcrumbs give the mix enough structure to hold a proper round shape. Baking at 425°F gives the outside a little color before the meatballs finish in marinara, which keeps the texture springy instead of dense.
Key Ingredients:
For the Meatballs:
- 1 lb ground turkey
- 1 cup grated zucchini, squeezed very dry
- 1/2 cup finely grated carrot
- 1/2 cup plain breadcrumbs
- 1 large egg
- 2 garlic cloves, minced
- 1 teaspoon kosher salt
- 1/2 teaspoon black pepper
- 1 teaspoon dried Italian seasoning
For the Pan Finish:
- 1 tablespoon olive oil
- 2 cups marinara sauce
- 2 tablespoons grated Parmesan, for serving
Hidden Veg Blend
- What to use: 1 cup zucchini and 1/2 cup carrot give the meatballs moisture, a little sweetness, and enough bulk to make a pound of turkey go farther.
- Preparation: Grate the zucchini on the small holes of a box grater, then squeeze it in a clean towel until it feels almost dry; the carrot can stay lightly moist.
- Substitutions: Grated yellow squash works in place of zucchini, and a small handful of finely chopped spinach can stand in for part of the carrot.
- Tips: If the zucchini still feels damp, the meatballs can go soft instead of tender, so squeeze harder than feels polite.
Meatball Mix
- What to use: Ground turkey, breadcrumbs, egg, garlic, salt, pepper, and Italian seasoning build the base.
- Preparation: Mix with your hands just until the ingredients hold together; stop the second the mixture looks even.
- Substitutions: Ground chicken works the same way, and gluten-free breadcrumbs behave fine here.
- Tips: Overmixing turns turkey meatballs tight and bouncy in the wrong way.
Sauce and Finish
- What to use: 2 cups marinara and a little Parmesan finish the skillet.
- Preparation: Warm the sauce in the same pan or a shallow skillet so it picks up the browned bits left behind.
- Substitutions: A jarred tomato-basil sauce or a garlicky crushed-tomato sauce both work.
- Tips: A sauce that tastes flat before the meatballs go in will still taste flat later, so season it with a pinch of salt before serving.
Quick Steps:
- Preheat the oven to 425°F and line a rimmed baking sheet with parchment paper.
- Grate the zucchini, then squeeze out as much liquid as possible with a towel.
- Mix the turkey, zucchini, carrot, breadcrumbs, egg, garlic, salt, pepper, and Italian seasoning in a large bowl until just combined.
- Shape the mixture into 16 meatballs, each about 1 1/2 inches wide, and set them on the baking sheet with a little space between each one.
- Brush or drizzle with olive oil and bake for 12 to 14 minutes, until the meatballs are lightly browned and the centers reach 165°F.
- Warm the marinara in a skillet, add the meatballs, and simmer for 3 to 5 minutes so the sauce clings to the surface.
- Finish with Parmesan and serve hot.
Equipment for This Recipe:
- Rimmed baking sheet
- Parchment paper
- Box grater
- Large mixing bowl
- Shallow skillet or saucepan
How to Serve This Dish:
Pile these meatballs over spaghetti, tuck them into toasted rolls, or serve them with garlicky rice and a simple salad. A deep bowl with extra sauce is the way I’d do it if nobody’s in a rush. A little basil on top makes the whole thing smell like you worked harder than you did.
Pro Tips for This Recipe:
- Squeeze the zucchini dry enough that it feels almost fluffy, not wet.
- If the mixture feels sticky, chill it for 10 minutes before shaping.
- Bake on parchment, not foil, so the bottoms brown instead of steaming.
- Simmering them in sauce for a few minutes after baking gives the turkey a softer, more finished texture.
Variations on This Dish:
- Spicy Calabrian Version: Stir 1 teaspoon Calabrian chile paste into the marinara for a hotter, brighter sauce.
- Beef-Turkey Blend: Use 1/2 lb ground beef and 1/2 lb turkey for a richer meatball that still stays tender.
- Gluten-Free Swap: Replace the breadcrumbs with almond flour or gluten-free breadcrumbs in the same amount.
Common Mistakes to Avoid with This Dish:
- Leaving the zucchini wet: The meatballs can slump on the tray and turn soft in the middle. Squeeze harder, even if it feels excessive.
- Packing the meatballs too tightly: Dense mixing makes them bounce instead of staying tender. Fold the mixture just until even.
- Skipping the sauce simmer: Meatballs straight from the oven taste fine, but a short simmer ties the flavor together and softens the exterior.
2. Creamy Cauliflower Mac and Cheese with White Beans
This is the mac and cheese I make when I want a sauce that feels lush but doesn’t sit like a brick. The cauliflower melts into the cheese base, the white beans disappear into the background, and the pasta stays coated instead of drowning. It tastes like the kind of dinner that should have taken longer than it did.
I like this one because it doesn’t ask you to choose between comfort and a little substance. The beans bring a soft, creamy body that keeps the sauce thick without needing a huge amount of cheese, and the cauliflower gives the whole thing a subtle sweetness that keeps the cheddar from tasting sharp in a bad way. It’s rich, but not clumsy.
Why It Works:
Cauliflower and white beans both blend into a smooth base that thickens the cheese sauce without making it gluey. A quick roux gives the sauce stability, and sharp cheddar brings the flavor so you don’t have to lean on extra salt. If you bake it for the last few minutes, the top gets a little bronzed while the inside stays spoonable.
Key Ingredients:
For the Pasta and Veg Base:
- 12 oz elbow macaroni
- 4 cups cauliflower florets
- 1 can (15 oz) cannellini beans, drained and rinsed
- 2 cups milk
- 2 tablespoons unsalted butter
- 2 tablespoons all-purpose flour
For the Cheese Sauce:
- 2 cups shredded sharp cheddar
- 1 cup shredded mozzarella
- 1 teaspoon Dijon mustard
- 1 teaspoon kosher salt
- 1/2 teaspoon smoked paprika
- 1/4 teaspoon black pepper
Cauliflower Base
- What to use: 4 cups cauliflower florets become the thick, mild backbone of the sauce.
- Preparation: Steam or simmer the florets until they’re soft enough to mash with a fork, about 8 minutes.
- Substitutions: Frozen cauliflower florets work well if you cook off the extra water first.
- Tips: Undercooked cauliflower will leave tiny grainy bits in the sauce, which is a little annoying in mac and cheese.
Bean Cream
- What to use: One can of cannellini beans adds body without a bean flavor that shouts across the room.
- Preparation: Rinse them well so the sauce stays clean-tasting.
- Substitutions: Great northern beans or navy beans work too.
- Tips: Beans help the sauce stay creamy after reheating, which is why they earn their place here.
Cheese and Seasoning
- What to use: Sharp cheddar gives the sauce its main flavor, and mozzarella smooths out the melt.
- Preparation: Shred the cheese from a block if you can; it melts cleaner than the bagged kind.
- Substitutions: Monterey Jack, fontina, or a mild smoked cheddar all fit.
- Tips: Add the cheese off the heat so it melts silky, not grainy.
Quick Steps:
- Preheat the oven to 400°F and grease a 9-inch baking dish.
- Cook the macaroni in salted water until just shy of al dente, adding the cauliflower florets to the pot for the last 6 to 8 minutes. Drain well.
- Blend the cooked cauliflower, beans, and milk until completely smooth.
- Melt the butter in a saucepan over medium heat, whisk in the flour for 1 minute, then slowly pour in the cauliflower-bean purée and cook until thickened, about 4 minutes.
- Stir in the mustard, salt, paprika, pepper, cheddar, and mozzarella until the sauce is glossy and fully melted.
- Fold in the pasta, spread into the baking dish, and bake for 12 to 15 minutes until the top bubbles at the edges.
- Let it sit for 5 minutes before serving so the sauce settles.
Equipment for This Recipe:
- Large pot
- Blender or immersion blender
- Saucepan
- Colander
- 9-inch baking dish
How to Serve This Dish:
Serve it as the main event with a green salad dressed in lemon and olive oil, or spoon it beside roasted chicken if you want a bigger dinner. A little black pepper on top matters more than it sounds like it should. The sauce should clings to the noodles, not pool around them.
Pro Tips for This Recipe:
- Salt the pasta water well; bland noodles make the whole dish feel flat.
- Blend the cauliflower mixture longer than you think you need to. Lumps are not charming here.
- If the sauce feels too thick before baking, loosen it with 1/4 cup milk.
- Let it stand after baking, or the sauce will run when you scoop it.
Variations on This Dish:
- Broccoli Cheddar Swap: Replace half the cauliflower with steamed broccoli florets for a greener, more assertive version.
- Smoky Bacon Addition: Stir in 1/2 cup cooked bacon crumbles if you want a salty edge.
- Dairy-Light Version: Use 1 1/2 cups cheddar and 1 cup unsweetened oat milk for a lighter sauce that still holds.
Common Mistakes to Avoid with This Dish:
- Leaving water in the cauliflower: Watery florets make the sauce thin and faintly sad. Drain or steam them dry.
- Adding cheese while the sauce is boiling: High heat can make it grainy. Pull the pan off the burner first.
- Overbaking: Ten extra minutes dries the top before the inside sets. Stop when the edges bubble.
3. Hidden Veggie Chicken Quesadillas
These quesadillas are built for speed, but they’re not lazy. The vegetables go in finely chopped and soft-cooked, which means you still get the crisp tortilla shell, the stretchy cheese, and that satisfying pull when you cut the wedges. The filling tastes familiar in the best way — chicken, cheese, a little heat — with extra body from the vegetables tucked inside.
The trick here is balance. Too much veg and the filling turns damp. Too little, and you’re basically making chicken and cheese with a token shred of color. The sweet spot is a quick sauté that cooks off moisture before everything gets folded into the tortillas.
Why It Works:
Finely chopped zucchini, bell pepper, and spinach cook fast and disappear into the chicken filling without taking over the texture. A dry skillet gives the tortillas a browned, crisp exterior, while the cheese acts as glue. If you season the vegetables before the chicken goes in, the filling tastes layered instead of like leftovers in a wrapper.
Key Ingredients:
For the Filling:
- 2 cups cooked shredded chicken
- 1 small zucchini, finely grated and squeezed dry
- 1/2 red bell pepper, finely diced
- 1 cup baby spinach, chopped
- 1 cup shredded Monterey Jack
- 1 cup shredded cheddar
For Seasoning and Assembly:
- 1 tablespoon olive oil
- 1 teaspoon taco seasoning
- 1/2 teaspoon kosher salt
- 4 large flour tortillas
- Salsa, sour cream, or guacamole, for serving
Hidden Veg Base
- What to use: Zucchini, bell pepper, and spinach give the filling a softer, juicier texture without obvious vegetable chunks.
- Preparation: Chop everything finely so it folds into the chicken instead of falling out at the seam.
- Substitutions: Yellow squash works for zucchini, and chopped kale can replace spinach if you cook it a little longer.
- Tips: Squeeze the zucchini well or the quesadillas will steam instead of crisp.
Cheese and Chicken
- What to use: A mix of Monterey Jack and cheddar gives you melt and flavor in the same bite.
- Preparation: Shred the chicken into small pieces so the filling spreads evenly.
- Substitutions: Leftover rotisserie chicken works without any special treatment.
- Tips: If your chicken is cold from the fridge, warm it with the vegetables so the quesadilla cooks evenly.
Quick Steps:
- Warm the olive oil in a skillet over medium heat.
- Add the zucchini and bell pepper with the salt and taco seasoning, and cook for 3 to 4 minutes until the vegetables soften and most of the moisture evaporates.
- Stir in the spinach and chicken, then cook for 1 minute more until everything is hot.
- Remove the skillet from the heat and fold in the cheese.
- Lay one tortilla in a clean skillet over medium heat, add half the filling to one side, fold it over, and cook for 2 to 3 minutes per side until golden and crisp.
- Repeat with the second tortilla, then slice into wedges and serve with salsa.
Equipment for This Recipe:
- Large skillet
- Box grater
- Cutting board and knife
- Spatula
- Small bowl for serving sauces
How to Serve This Dish:
Cut the quesadillas into triangles and stack them slightly off-center on the plate so the melted cheese shows. I like them with salsa on the side rather than on top; a soggy quesadilla is a tiny tragedy. Add a quick cabbage slaw if you want the dinner to feel fuller.
Pro Tips for This Recipe:
- Cook the vegetables until the pan looks almost dry before you add the cheese.
- Use medium heat, not high heat, or the tortilla will darken before the cheese melts.
- Let the quesadilla sit for 30 seconds before cutting so the filling doesn’t spill out.
- A sharp knife gives cleaner wedges than a pizza cutter here.
Variations on This Dish:
- Bean-Heavy Version: Swap 1 cup chicken for 1 cup drained black beans if you want a more vegetarian-leaning filling.
- Poblano Kick: Use diced poblano instead of bell pepper for a deeper, slightly smoky flavor.
- Breakfast Quesadilla: Add scrambled egg to the filling and serve with hot sauce in the morning or at dinner.
Common Mistakes to Avoid with This Dish:
- Wet filling: The tortillas steam and turn limp. Cook off the moisture first.
- Too much cheese near the edges: It leaks out and burns on the pan. Keep the cheese in the center.
- Cutting too soon: The filling rushes out and the wedge loses shape. Give it half a minute to settle.
4. Lentil-Mushroom Bolognese
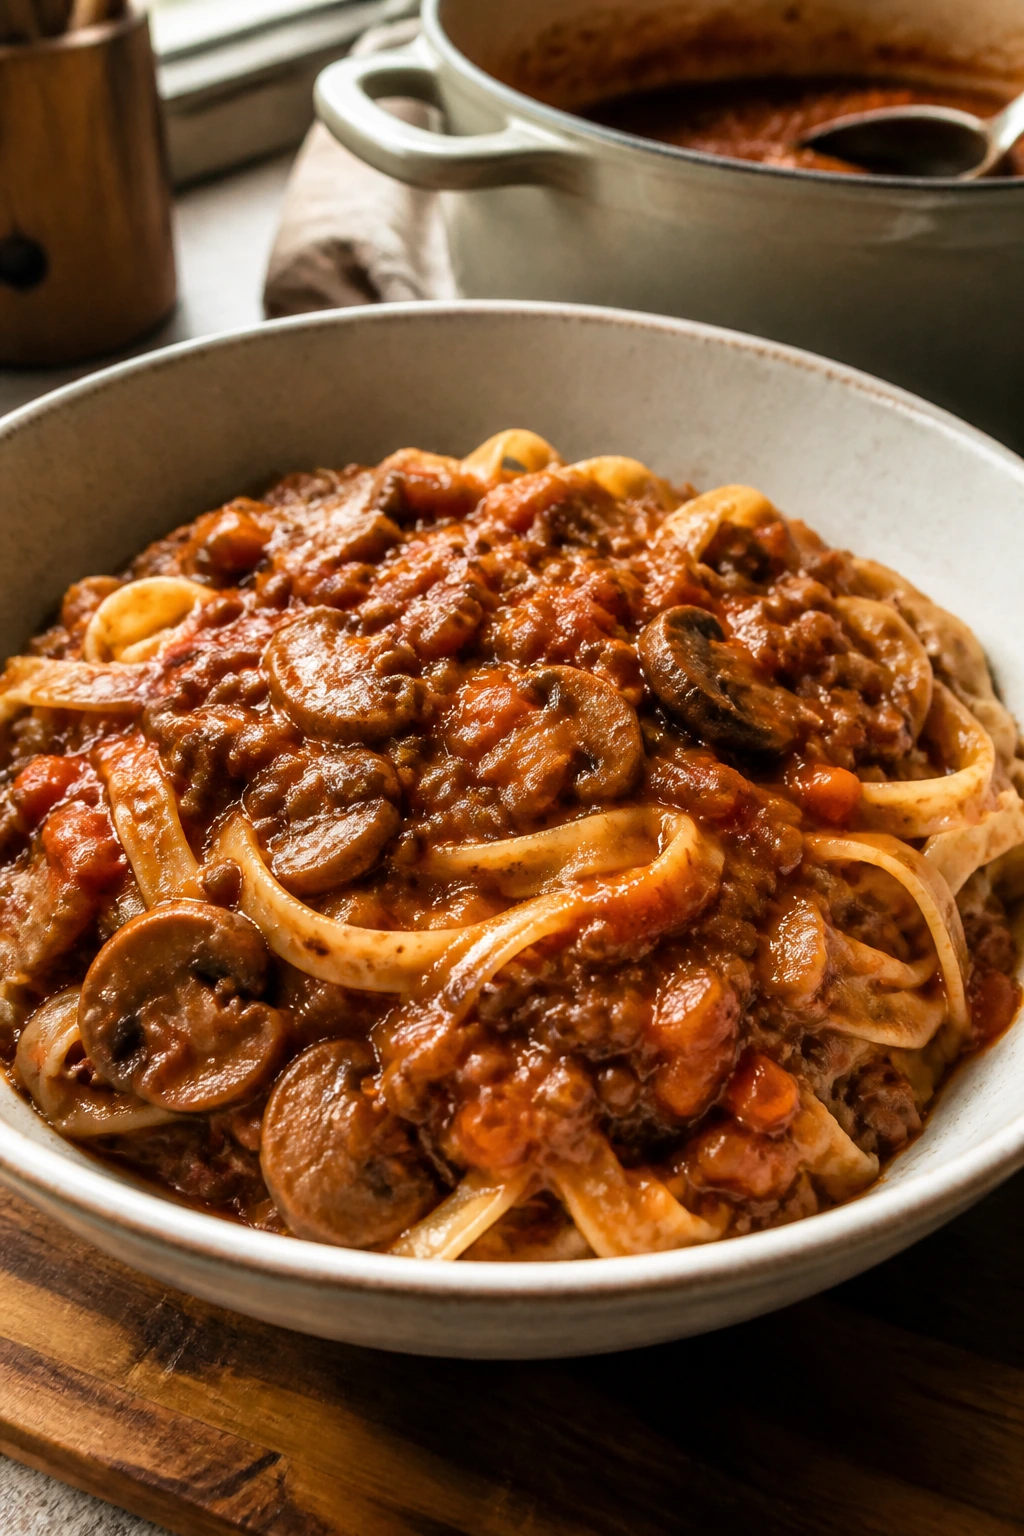
This is the sauce I make when I want a red sauce with real depth but no need to babysit a pot of meat. The mushrooms bring the savory part, the lentils bring the heft, and the carrots and onion get cooked down until they taste sweet instead of raw. It’s the sort of pasta sauce that fills the kitchen with that slow-cooked smell, even though it’s weeknight simple.
People get nervous about vegetarian bolognese because they expect it to taste thin. It won’t, if you cook the vegetables long enough and let the tomatoes simmer with the lentils. The sauce should be thick enough to sit in a spoon, not slide off like soup.
Why It Works:
Finely chopped mushrooms create a meaty base once they lose their water and brown in the pan. Brown or green lentils hold their shape better than red lentils, which means the sauce gets texture instead of mush. A splash of pasta water at the end loosens everything just enough to coat the noodles without turning the sauce into a puddle.
Key Ingredients:
For the Sauce:
- 2 tablespoons olive oil
- 8 oz cremini mushrooms, finely chopped
- 1 small onion, finely diced
- 1 carrot, finely diced
- 1 celery stalk, finely diced
- 3 garlic cloves, minced
- 1 cup dry brown lentils, rinsed
- 1 can (28 oz) crushed tomatoes
- 2 tablespoons tomato paste
- 2 cups vegetable broth
For Seasoning and Serving:
- 1 teaspoon dried oregano
- 1 teaspoon kosher salt
- 1/2 teaspoon black pepper
- 12 oz spaghetti or rigatoni
- Parmesan, for serving
Mushroom Base
- What to use: 8 oz cremini mushrooms give the sauce a darker, savory backbone.
- Preparation: Chop them finely so they blend into the sauce rather than sitting like obvious bits.
- Substitutions: Button mushrooms work fine, and a mix of mushrooms adds more depth if you have them.
- Tips: Let the mushrooms brown before adding liquid; that’s where the flavor happens.
Lentil and Tomato Body
- What to use: 1 cup brown lentils plus crushed tomatoes and broth makes a sauce that feels hearty and spoonable.
- Preparation: Rinse the lentils and pick out any little pebbles before cooking.
- Substitutions: Green lentils are a good stand-in, though they may take a few extra minutes.
- Tips: If the sauce tastes sharp before the lentils soften, give it another 10 minutes; the tomato edge mellows as it cooks.
Quick Steps:
- Warm the olive oil in a large pot over medium heat.
- Add the mushrooms, onion, carrot, and celery, then cook for 8 to 10 minutes, stirring often, until the vegetables release their moisture and start to brown.
- Stir in the garlic and tomato paste, and cook for 1 minute until the paste darkens slightly.
- Add the lentils, crushed tomatoes, broth, oregano, salt, and pepper. Bring to a simmer, then cook uncovered for 25 to 30 minutes, stirring occasionally, until the lentils are tender and the sauce is thick.
- Cook the pasta in salted water until al dente, then reserve 1 cup of pasta water before draining.
- Toss the pasta with the sauce and a splash of pasta water until the noodles are coated.
Equipment for This Recipe:
- Large pot or Dutch oven
- Chef’s knife
- Cutting board
- Wooden spoon
- Colander
How to Serve This Dish:
Pile the sauce over twisted pasta if you want the lentils to catch in the grooves, or use spaghetti if you like a cleaner twirl. Parmesan on top helps, but a drizzle of olive oil matters too. A crisp green salad with sharp vinaigrette cuts through the richness nicely.
Pro Tips for This Recipe:
- Chop the mushrooms small enough that they melt into the sauce.
- Let the vegetable base brown a little before adding liquid; pale vegetables make pale sauce.
- If the sauce gets too thick, loosen it with pasta water in small splashes.
- Salt the pasta water well or the whole bowl will taste muted.
Variations on This Dish:
- Turkey Bolognese Blend: Add 1/2 lb ground turkey with the mushrooms if you want more protein.
- Rosemary Version: Stir in 1 teaspoon chopped rosemary near the end for a piney edge.
- Spaghetti Squash Bowl: Serve the sauce over roasted spaghetti squash if you want a lower-carb plate.
Common Mistakes to Avoid with This Dish:
- Rushing the mushrooms: If they don’t brown, the sauce tastes flat. Give them time.
- Using red lentils: They break down too much and make the sauce pasty.
- Skipping the pasta water: A little starch helps the sauce cling to the noodles instead of sliding off.
5. Shepherd’s Pie with Lentils and Cauliflower Mash
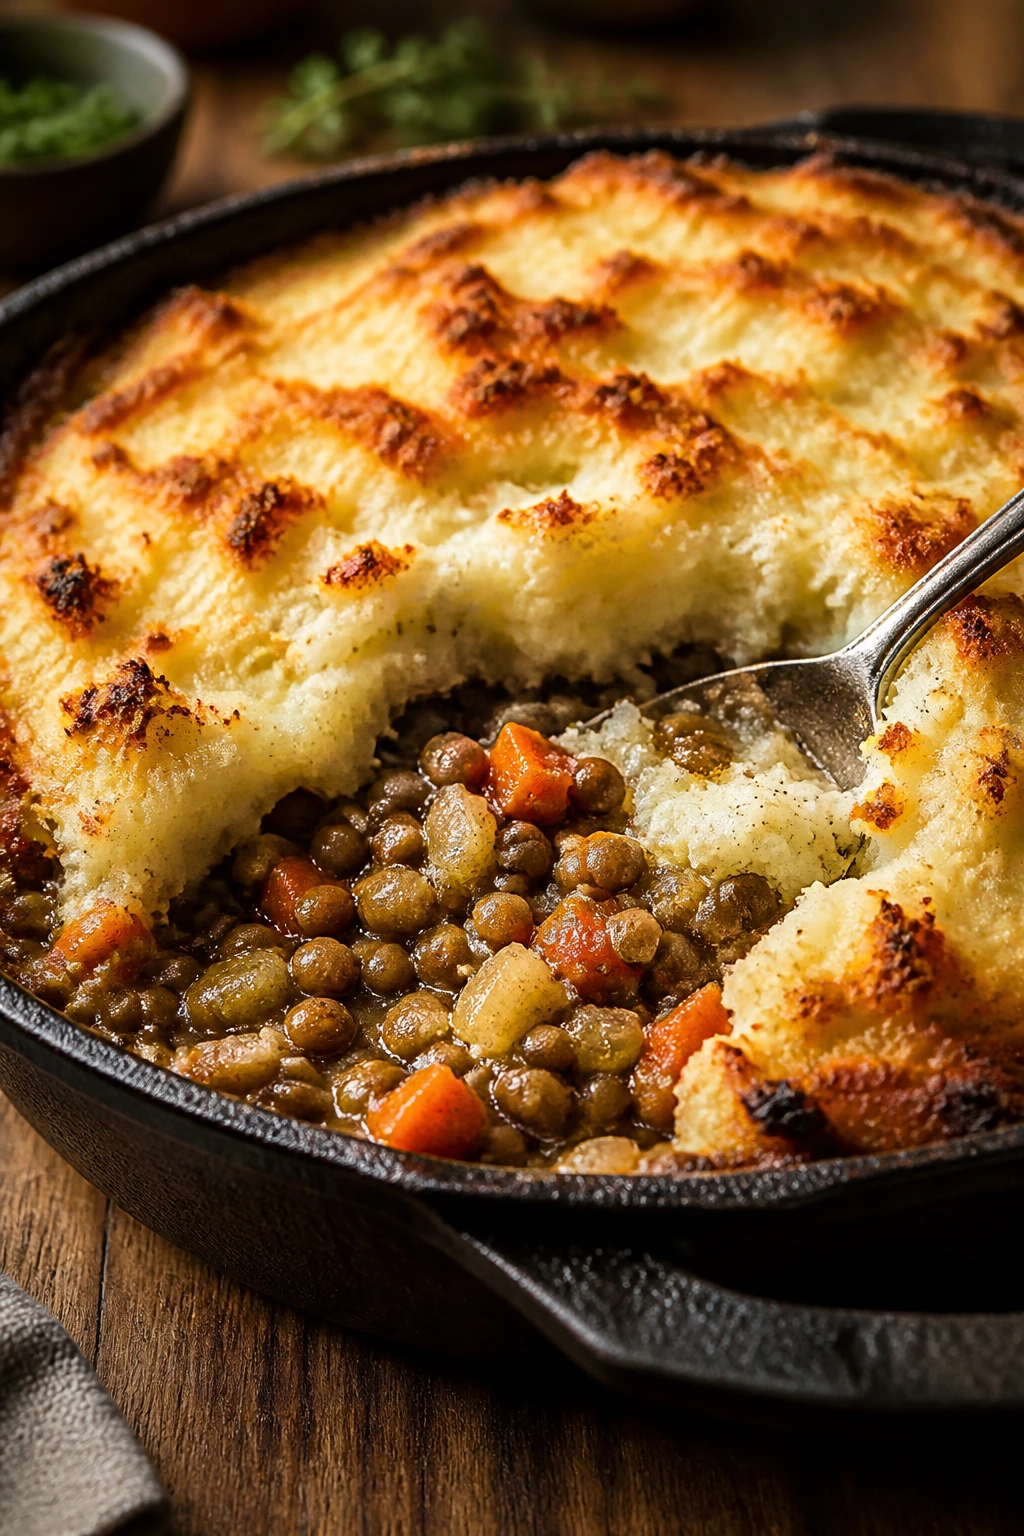
Shepherd’s pie usually gets talked about like a heavy winter thing, but it’s really just a layered skillet dinner with a good top. This version leans on lentils and a cauliflower-potato mash, which keeps it creamy without feeling dense. You still get the browned peaks on top and the soft, savory filling underneath.
I like this one because it scratches the same itch as the classic version without requiring a giant slab of meat. The cauliflower disappears into the mash and quietly lightens the potatoes, while carrots and peas give the filling color and small bits of sweetness. It’s familiar, only a little less blunt.
Why It Works:
Lentils hold the filling together without making it crumbly, and they soak up the broth and tomato paste so the base tastes seasoned all the way through. Cauliflower in the mash cuts the starchiness of straight potatoes and still pipes or spreads smoothly over the top. Baking the whole dish at high heat gives you those browned ridges that make shepherd’s pie worth eating in the first place.
Key Ingredients:
For the Filling:
- 2 tablespoons olive oil
- 1 onion, diced
- 2 carrots, diced small
- 1 cup brown or green lentils, rinsed
- 2 tablespoons tomato paste
- 2 cups vegetable broth
- 1 cup frozen peas
- 1 teaspoon Worcestershire sauce
- 1 teaspoon kosher salt
- 1/2 teaspoon black pepper
For the Mash:
- 2 large russet potatoes, peeled and chopped
- 3 cups cauliflower florets
- 2 tablespoons butter
- 1/4 cup milk
- Salt to taste
Lentil Filling
- What to use: Brown or green lentils give the filling enough texture to feel substantial.
- Preparation: Rinse them first, and dice the carrots small so they soften at the same rate.
- Substitutions: Canned lentils work if you reduce the simmer time, though they’ll be softer.
- Tips: Tomato paste needs a minute in the pan or it can taste raw.
Cauliflower Mash
- What to use: A mix of potatoes and cauliflower keeps the topping fluffy but not heavy.
- Preparation: Boil both until they’re completely tender, then drain very well before mashing.
- Substitutions: Yukon Gold potatoes make a creamier mash, and a splash of cream can replace some of the milk.
- Tips: If the mash seems watery, let it sit in the hot pot for a minute to steam off extra moisture.
Quick Steps:
- Preheat the oven to 425°F.
- Boil the potatoes and cauliflower in salted water until soft, about 15 minutes, then drain well and mash with butter, milk, and salt.
- While that cooks, warm the olive oil in a skillet over medium heat. Add the onion and carrots and cook for 5 minutes until the onion turns soft.
- Stir in the tomato paste and lentils, then add the broth, Worcestershire, salt, and pepper. Simmer for 20 to 25 minutes until the lentils are tender and most of the liquid is absorbed.
- Stir in the peas, spread the filling in a baking dish, and top with the cauliflower mash.
- Bake for 20 minutes until the edges are bubbling, then broil for 1 to 2 minutes until the top browns in spots.
Equipment for This Recipe:
- Large skillet
- Medium pot
- Potato masher or ricer
- 9-inch baking dish
- Slotted spoon
How to Serve This Dish:
Scoop it into shallow bowls so you get both layers in one bite. A spoonful of tangy pickles on the side sounds odd until you try it. The filling should be saucy, not runny, and the top should have a few crisp ridges.
Pro Tips for This Recipe:
- Drain the potatoes and cauliflower thoroughly before mashing.
- If the filling looks dry, add a splash more broth before baking.
- A fork dragged across the top creates little peaks that brown better than a perfectly smooth lid.
- Let it stand for 10 minutes before serving so the layers settle.
Variations on This Dish:
- Beef-and-Lentil Hybrid: Add 1/2 lb cooked ground beef to the filling for a richer version.
- Sweet Potato Top: Use half sweet potatoes and half cauliflower for the mash if you want more color and a little sweetness.
- Mushroom Gravy Edition: Stir in 1 cup finely chopped mushrooms with the carrots for a darker, more savory base.
Common Mistakes to Avoid with This Dish:
- Watery mash: It slides off the filling instead of holding shape. Drain well and steam off moisture.
- Undercooked lentils: They should be tender before the pie goes into the oven.
- Skipping the broil: That last blast gives the top the browned finish that makes the whole dish feel finished.
6. Tomato-Red Lentil Soup with Grilled Cheese
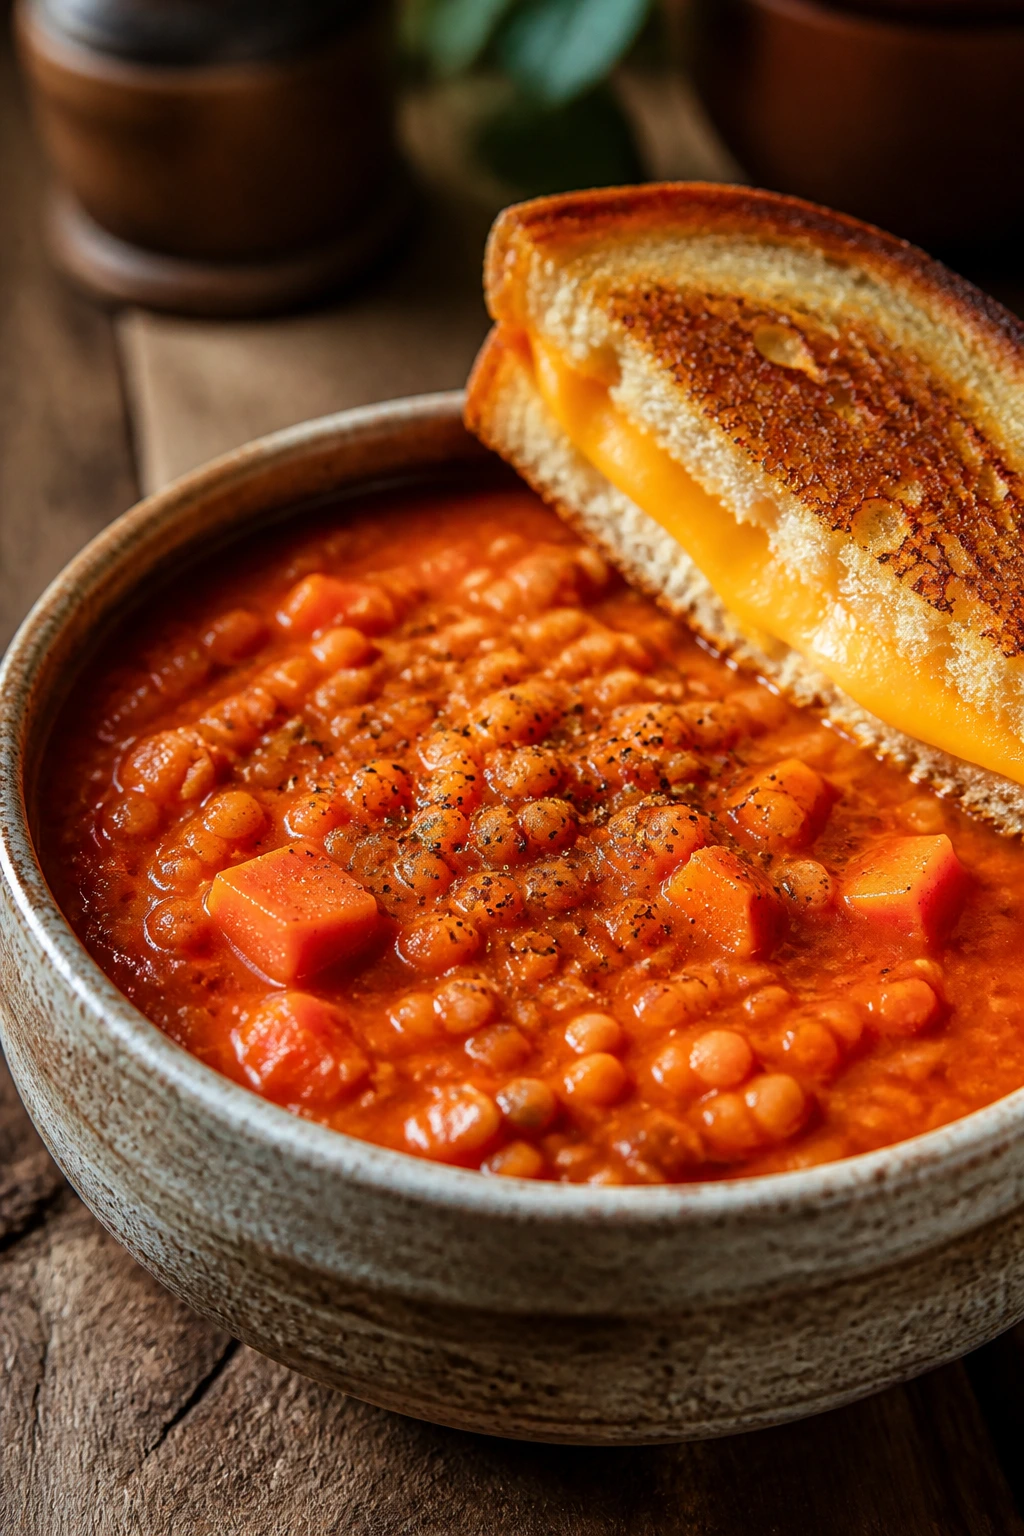
A good tomato soup should taste like more than warmed tomatoes. The carrots and red lentils make this one thicker, smoother, and a little sweeter, which helps the acidity of the tomatoes behave. It’s the kind of soup that works on a tired night because the pot does most of the work while you toast the bread.
Red lentils are useful here because they break down fast and give the soup body without any fuss. The carrot disappears into the blend, adding sweetness and a softer orange color that makes the bowl look richer than plain tomato soup usually does. Serve it with grilled cheese, and the whole meal feels more complete than the effort suggests.
Why It Works:
Red lentils cook down until they nearly vanish, so they thicken the soup naturally. Carrots and onion bring sweetness that rounds out canned tomatoes, which keeps the soup from tasting sharp or thin. A quick blend at the end makes the texture smooth, but you still get a little body from the lentils instead of a completely loose broth.
Key Ingredients:
For the Soup:
- 1 tablespoon olive oil
- 1 onion, chopped
- 2 carrots, chopped
- 3 garlic cloves, minced
- 1 cup red lentils, rinsed
- 1 can (28 oz) crushed tomatoes
- 4 cups vegetable broth
- 1 teaspoon kosher salt
- 1/2 teaspoon black pepper
- 1 teaspoon dried basil
For Serving:
- 1/4 cup cream or whole milk, optional
- Grilled cheese sandwiches
- Fresh basil or parsley, optional
Carrot and Lentil Base
- What to use: 2 carrots and 1 cup red lentils thicken the soup without making it heavy.
- Preparation: Chop the carrots small so they soften quickly, and rinse the lentils so the soup stays clean-tasting.
- Substitutions: Split red lentils work, and a small sweet potato can replace one carrot if that’s what you have.
- Tips: The carrots should be tender before blending; otherwise the soup can taste grainy.
Tomato and Finish
- What to use: Crushed tomatoes keep the texture smooth and easy to blend.
- Preparation: Use a wide pot so the soup reduces a bit as it simmers.
- Substitutions: Diced tomatoes will work, but the soup will need a longer blend to turn silky.
- Tips: A small splash of cream at the end softens the edge if the tomatoes taste sharp.
Quick Steps:
- Warm the olive oil in a large pot over medium heat.
- Add the onion and carrots and cook for 5 to 6 minutes until the onion softens.
- Stir in the garlic and cook for 30 seconds, then add the lentils, tomatoes, broth, salt, pepper, and basil.
- Bring to a boil, reduce to a simmer, and cook uncovered for 20 to 25 minutes until the lentils fall apart and the carrots are tender.
- Blend the soup with an immersion blender until smooth, or leave a little texture if you like it rustic.
- Stir in cream if using, then serve hot with grilled cheese.
Equipment for This Recipe:
- Large soup pot
- Immersion blender or countertop blender
- Cutting board and knife
- Ladle
- Skillet for grilled cheese
How to Serve This Dish:
Pour it into wide bowls and lean the grilled cheese against the rim so it can dunk as you eat. A little basil on top gives the soup a fresh smell right before the spoon hits it. If you want more crunch, add croutons, though I still prefer toast on the side.
Pro Tips for This Recipe:
- Stir the pot once or twice so the lentils don’t stick on the bottom.
- Blend carefully if the soup is hot; splashes are not worth it.
- Taste before adding cream, because some tomato brands are sweeter than others.
- Salt the soup at the end, after blending, for better control.
Variations on This Dish:
- Roasted Garlic Version: Roast a head of garlic and blend the soft cloves into the soup for a deeper flavor.
- Spicy Red Pepper Twist: Add 1/2 teaspoon red pepper flakes with the garlic.
- Herby White Bean Swap: Replace half the lentils with cannellini beans for a creamier, softer soup.
Common Mistakes to Avoid with This Dish:
- Not cooking the lentils long enough: The soup stays thin and grainy. Keep simmering until they’re falling apart.
- Adding too much cream: It can dull the tomato flavor. A small splash is enough.
- Skipping the blend: The vegetables do hide, but not if you leave the soup chunky.
7. Mushroom-Carrot Sloppy Joes
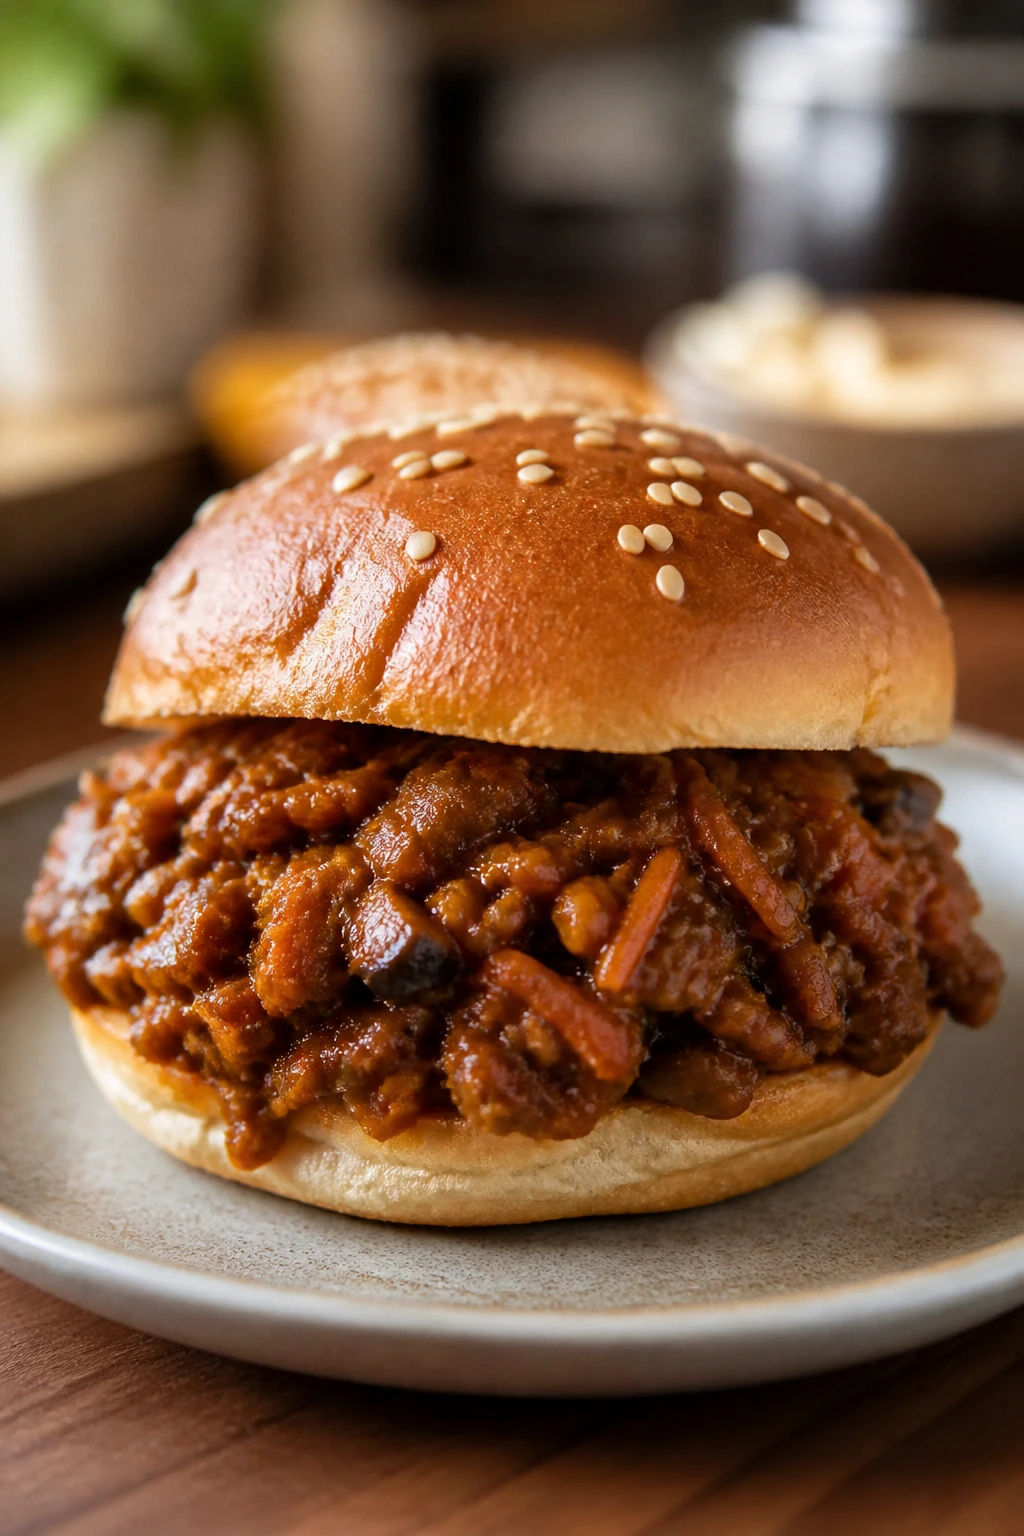
Sloppy joes should be messy, sweet, and a little tangy. This version keeps all of that while sneaking in finely chopped mushrooms and carrots that cook down into the sauce. The mushrooms do most of the heavy lifting, giving the filling a dark, savory base that makes ground turkey or beef stretch farther.
The carrots are there for sweetness and texture, but they don’t stay visible for long. After a few minutes in the pan, they soften into the sauce and blend with the tomato and mustard. You end up with a filling that tastes old-school in the best possible way.
Why It Works:
Mushrooms mimic the savory, meaty flavor you want in a sloppy joe filling, especially when they’re cooked until their water evaporates and the edges brown. Carrots round out the tang of ketchup and tomato paste, so the sauce tastes fuller. A soft bun is still the right choice — sturdy enough to hold the filling, but not so firm that it fights back.
Key Ingredients:
For the Filling:
- 1 tablespoon olive oil
- 1 small onion, diced
- 8 oz mushrooms, finely chopped
- 1 carrot, grated
- 1 lb ground turkey or beef
- 1/2 cup ketchup
- 2 tablespoons tomato paste
- 1 tablespoon yellow mustard
- 1 tablespoon Worcestershire sauce
- 1/2 teaspoon kosher salt
- 1/4 teaspoon black pepper
For Serving:
- 4 to 6 hamburger buns
- Pickles, optional
Mushroom-Carrot Base
- What to use: Finely chopped mushrooms and grated carrot melt into the sauce and build body.
- Preparation: Chop small enough that the filling looks textured, not chunky.
- Substitutions: Finely chopped zucchini can replace part of the carrot if you want less sweetness.
- Tips: Cook the mushrooms until the pan is mostly dry before adding the meat.
Sauce Balance
- What to use: Ketchup, tomato paste, mustard, and Worcestershire create the sweet-sour-salty balance.
- Preparation: Stir the sauce together before it hits the pan if that makes life easier; sloppy joe filling rewards efficiency.
- Substitutions: Barbecue sauce can replace part of the ketchup for a smokier flavor.
- Tips: If the sauce tastes flat, a teaspoon of vinegar wakes it up fast.
Quick Steps:
- Warm the olive oil in a large skillet over medium heat.
- Add the onion, mushrooms, and carrot, and cook for 6 to 8 minutes until the mushrooms lose their moisture and start to brown.
- Add the ground turkey or beef, breaking it apart with a spoon, and cook until no pink remains.
- Stir in the ketchup, tomato paste, mustard, Worcestershire, salt, and pepper.
- Simmer for 5 minutes until the sauce thickens and clings to the meat.
- Spoon the mixture onto toasted buns and serve hot.
Equipment for This Recipe:
- Large skillet
- Wooden spoon
- Box grater
- Knife and cutting board
- Small bowl for sauce mixing
How to Serve This Dish:
Toast the buns lightly so they don’t collapse the second the filling lands. A pile of kettle chips or cucumber spears keeps the plate from feeling too soft all the way through. If you like pickles, use them — their bite fits the sweet sauce.
Pro Tips for This Recipe:
- Let the mushrooms brown before adding the meat, or the filling can taste watery.
- Simmer uncovered if the mixture looks loose.
- Toasted buns matter here; soft buns go soggy fast.
- A tiny splash of vinegar at the end sharpens the flavor if the sauce tastes too sweet.
Variations on This Dish:
- Smoky Chipotle Version: Add 1 minced chipotle in adobo for heat and smoke.
- Bean Stretch Version: Stir in 1 cup drained pinto beans for a thicker, more budget-friendly filling.
- BBQ Night Swap: Replace half the ketchup with barbecue sauce and use brioche buns.
Common Mistakes to Avoid with This Dish:
- Adding sauce before the meat browns: The filling tastes boiled instead of savory.
- Using raw mushroom pieces too large: They stay obvious instead of melting into the mix.
- Skipping the toast: The buns absorb the sauce and fall apart in your hands.
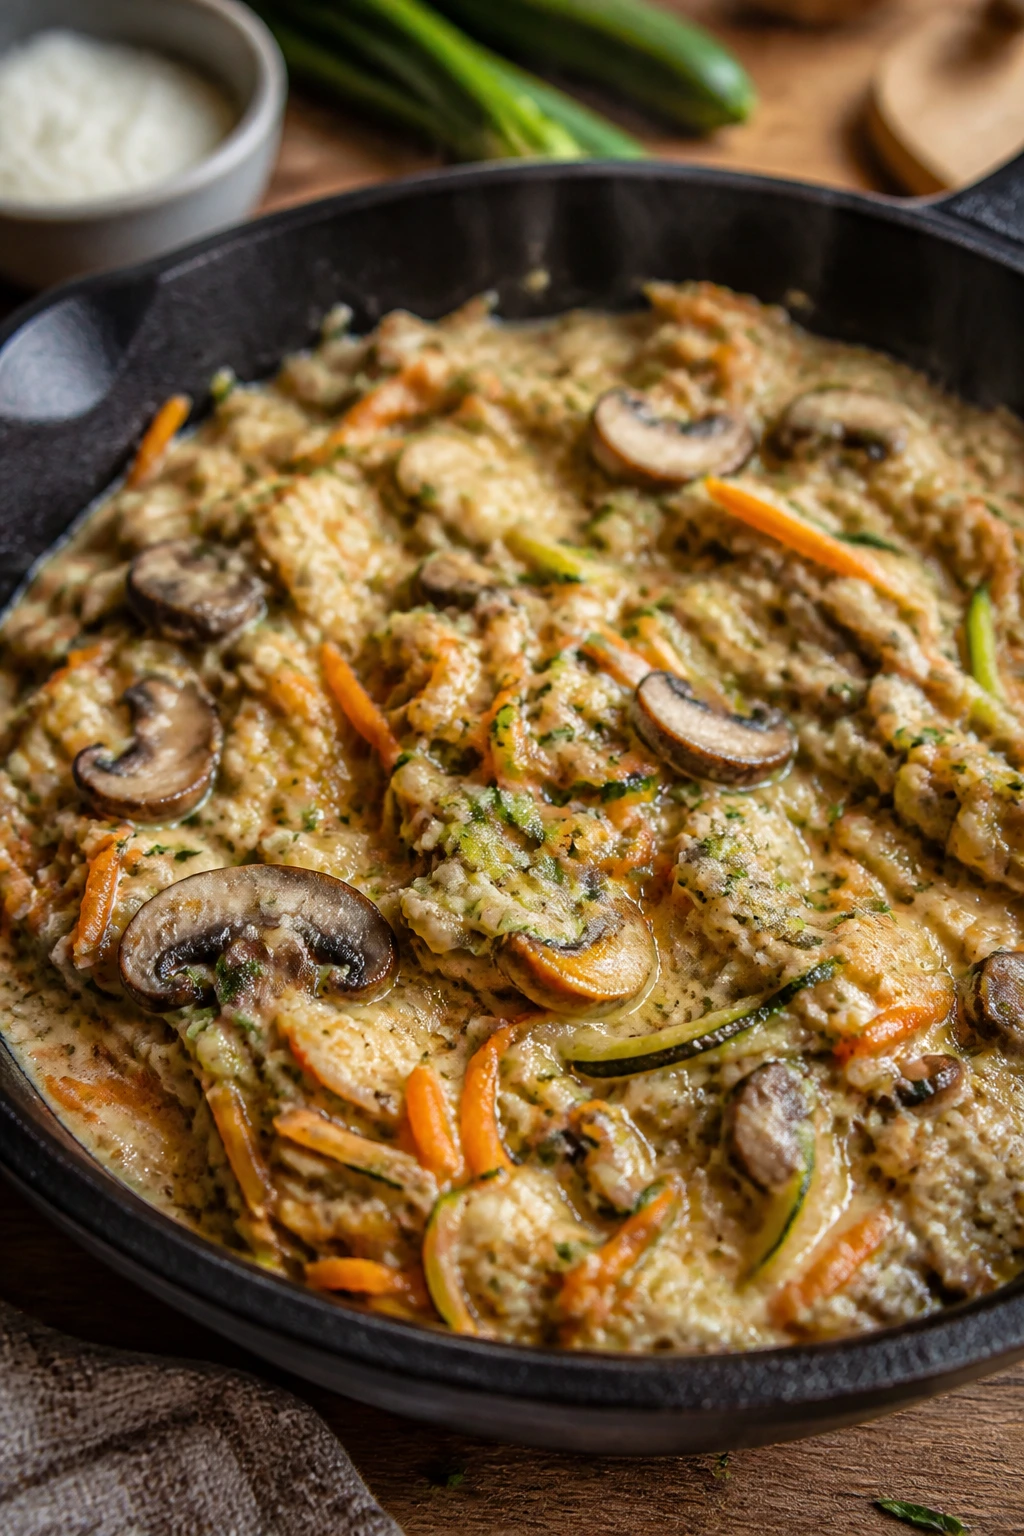
8. Cauliflower Veggie Fried Rice
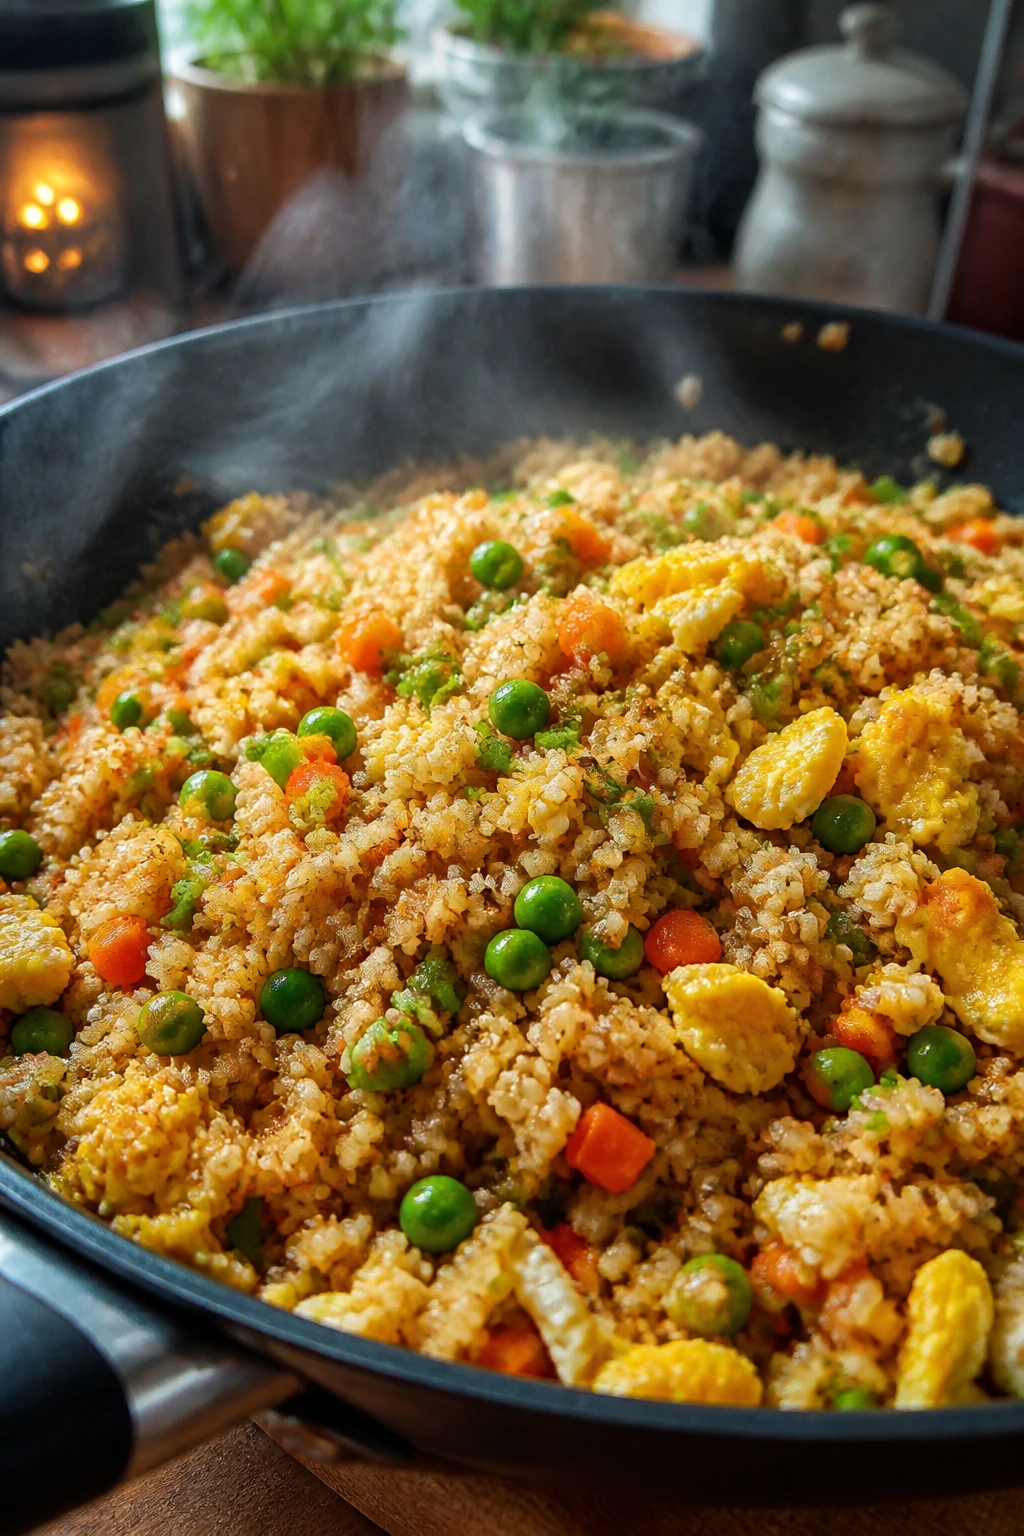
Fried rice is one of the easiest places to hide vegetables because the whole point is a mixed pan of things that look like they belong together. Here, actual rice and cauliflower rice share the pan, which keeps the texture satisfying but sneaks in extra volume. Peas, carrots, and eggs round it out so the skillet feels like a full meal rather than a side dish pretending to be dinner.
The best fried rice is a little dry on the outside and fragrant with sesame oil. That only happens if the pan stays hot and you don’t crowd it with wet vegetables. This version respects that rule, which is why it works.
Why It Works:
Cauliflower rice adds bulk without turning the pan heavy, and day-old rice gives the dish the chew that fresh rice can miss. The egg cooks into little soft ribbons, the vegetables stay small, and the soy sauce seasons the whole thing without drowning it. High heat helps the mixture fry instead of steam.
Key Ingredients:
For the Fried Rice:
- 2 tablespoons neutral oil
- 2 eggs, lightly beaten
- 2 cups cooked, cooled rice
- 2 cups cauliflower rice
- 1 cup frozen peas and carrots
- 2 scallions, sliced
- 2 garlic cloves, minced
- 2 tablespoons soy sauce
- 1 teaspoon sesame oil
- 1/2 teaspoon black pepper
Rice and Cauliflower Base
- What to use: Day-old rice plus cauliflower rice gives you the classic fried rice bite with extra veg.
- Preparation: Break up clumps of rice with your fingers before it hits the pan.
- Substitutions: Brown rice works, and frozen cauliflower rice is fine if you thaw and squeeze it first.
- Tips: Fresh rice tends to clump and go gummy, so plan ahead if you can.
Seasoning and Egg
- What to use: Soy sauce, sesame oil, garlic, and eggs make the pan taste complete.
- Preparation: Beat the eggs lightly so they cook into soft curds instead of a solid sheet.
- Substitutions: Tamari handles gluten-free cooking, and chili crisp can replace part of the sesame oil for heat.
- Tips: Add sesame oil at the end; if it cooks too long, the flavor flattens out.
Quick Steps:
- Heat 1 tablespoon of oil in a large skillet or wok over medium-high heat.
- Pour in the eggs and scramble them for 30 to 45 seconds until just set, then move them to a plate.
- Add the remaining oil, then stir-fry the garlic, peas, carrots, and cauliflower rice for 3 to 4 minutes until hot and no longer icy.
- Add the rice and cook for 3 to 5 minutes, pressing and stirring so the grains heat through and pick up a little color.
- Stir in the eggs, scallions, soy sauce, sesame oil, and pepper.
- Cook for 1 minute more and serve immediately.
Equipment for This Recipe:
- Large skillet or wok
- Spatula
- Bowl for beating eggs
- Cutting board and knife
- Measuring spoons
How to Serve This Dish:
A bowl is the natural move here, though a deep plate works if you want the rice to cool a little faster. Add a squeeze of lime or a spoonful of chili crisp if the table likes heat. This is one of those dinners that tastes best straight from the pan.
Pro Tips for This Recipe:
- Keep the pan hot so the rice fries instead of soaking.
- Use frozen cauliflower rice only after squeezing out excess moisture.
- Don’t overload the skillet; cook in batches if yours is small.
- A few extra scallions at the end brighten the whole bowl.
Variations on This Dish:
- Egg-Free Version: Skip the eggs and add edamame or cubed tofu for protein.
- Pineapple Fried Rice: Add 1/2 cup chopped pineapple for a sweet-savory twist.
- Kimchi Swap: Stir in chopped kimchi at the end for a sharper, more punchy version.
Common Mistakes to Avoid with This Dish:
- Using wet cauliflower rice: It steams and makes the rice soft. Thaw and squeeze it dry.
- Crowding the pan: The grains won’t fry properly. Split it into two batches if needed.
- Adding soy sauce too early: It can make the rice wet before it has a chance to brown.
9. Sweet Potato Enchilada Skillet
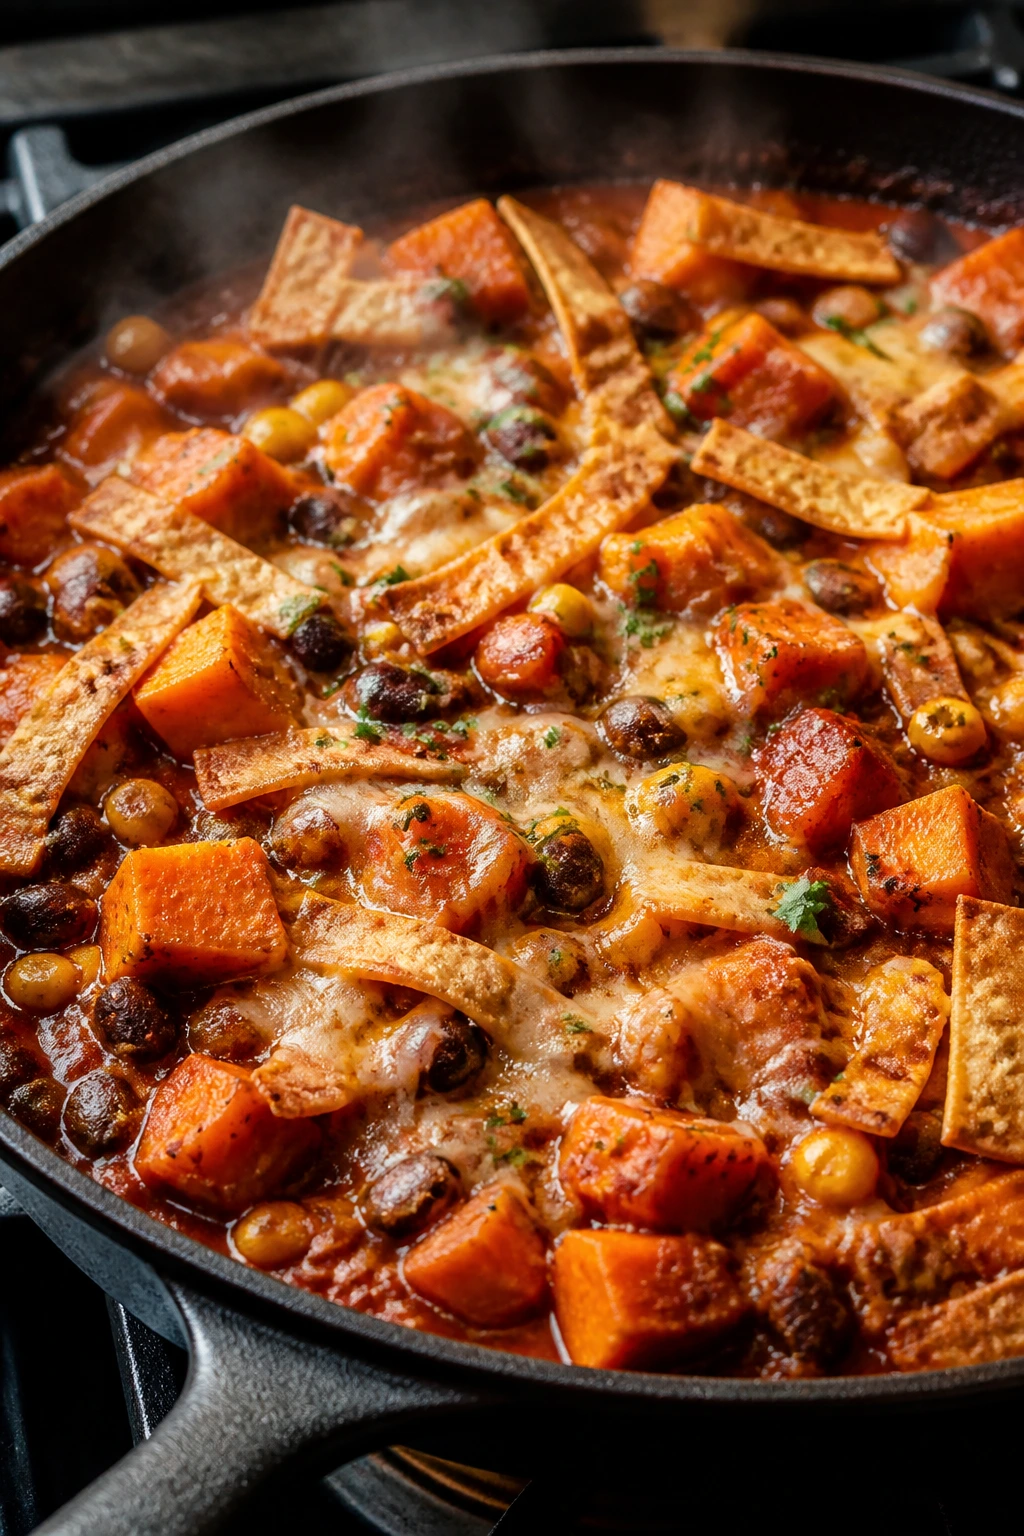
This skillet dinner feels like enchiladas without making you roll a single tortilla. The sweet potato softens into the sauce, the beans add bite, and the tortillas soak up the red enchilada sauce without falling apart. It’s a layered pan of soft, saucy, cheesy things, and it disappears quickly.
Sweet potato does useful work here because it brings body and a little sweetness that balances the chile sauce. You still get the cheese pull and the bubbling edges on top, which is the part everyone waits for. I’d call this a weeknight casserole if I wanted to make it sound tame, but it’s more fun than that.
Why It Works:
Small cubes of sweet potato cook through fast enough to fit a weeknight and soften into the sauce so they don’t read as a separate vegetable. Black beans give the skillet heft, and tortilla strips layer in a little chew. The enchilada sauce ties everything together, while the cheese keeps the top from drying out.
Key Ingredients:
For the Skillet:
- 1 tablespoon olive oil
- 1 medium sweet potato, peeled and diced small
- 1 onion, diced
- 1 can (15 oz) black beans, drained and rinsed
- 1 cup corn, frozen or fresh
- 2 cups red enchilada sauce
- 6 small corn tortillas, cut into strips
- 1 1/2 cups shredded Mexican blend cheese
- 1 teaspoon kosher salt
- 1/2 teaspoon cumin
Sweet Potato Filling
- What to use: One medium sweet potato gives the skillet sweetness and body.
- Preparation: Dice it small, about 1/2-inch pieces, so it softens on schedule.
- Substitutions: Butternut squash works well and cooks in about the same time if cut small.
- Tips: If the cubes are too large, the top will be done before the center is tender.
Sauce and Tortilla Layers
- What to use: Red enchilada sauce and tortilla strips give the dish its casserole feel.
- Preparation: Cut the tortillas into strips before you start cooking so the layering moves fast.
- Substitutions: Flour tortillas can work, but corn tortillas keep the texture more interesting.
- Tips: Let some tortilla edges peek above the sauce; they crisp a little in the oven and taste great.
Quick Steps:
- Preheat the oven to 400°F.
- Warm the olive oil in a large oven-safe skillet over medium heat. Add the sweet potato and onion with the salt and cumin, and cook for 8 minutes, stirring often.
- Stir in the black beans, corn, and enchilada sauce, then simmer for 3 minutes.
- Fold in half the tortilla strips and half the cheese.
- Top with the remaining tortilla strips and cheese, then bake for 12 to 15 minutes until bubbly and browned at the edges.
- Rest for 5 minutes before serving.
Equipment for This Recipe:
- Large oven-safe skillet
- Cutting board and knife
- Wooden spoon
- Measuring cups
- Oven mitts
How to Serve This Dish:
Spoon it into wide bowls and top with cilantro, sour cream, or sliced avocado if you have them. A squeeze of lime sharpens the sweet potato nicely. I’d keep the side dishes simple: lettuce, rice, or nothing at all.
Pro Tips for This Recipe:
- Dice the sweet potato small enough to soften quickly.
- Use an oven-safe skillet so you’re not transferring hot filling into a second dish.
- If the sauce looks dry before baking, add 1/4 cup water or broth.
- Let the skillet rest so the layers don’t slide apart.
Variations on This Dish:
- Chicken Enchilada Version: Add 1 cup shredded chicken if you want more protein.
- Green Sauce Swap: Use green enchilada sauce and add a handful of chopped spinach.
- Cornbread Top: Scatter a few spoonfuls of cornbread batter over the top for a more casserole-like finish.
Common Mistakes to Avoid with This Dish:
- Leaving the sweet potato too chunky: It won’t cook through in time.
- Using too little sauce: The tortillas dry out instead of softening.
- Serving immediately: The layers need a short rest or they’ll slide.
10. Chicken Pot Pie Skillet with Cauliflower Cream

Chicken pot pie is usually treated like an all-day project, which is a shame. In skillet form, it becomes a practical dinner with all the right markers: creamy filling, soft chicken, peas, carrots, and a browned top. The hidden vegetable here is cauliflower, blended into the sauce so the filling tastes rich without depending on a heavy amount of cream.
The best part is the smell when the biscuits or pastry top browns. That’s the moment the whole kitchen starts acting hungry. The cauliflower doesn’t announce itself; it simply makes the filling thicker, smoother, and a little less clumsy on the spoon.
Why It Works:
Cauliflower can be blended into a silky base that behaves a lot like cream, especially once it’s mixed with broth and a little milk. Carrots and celery soften into the filling and add familiar pot-pie flavor. Biscuit tops bake faster than a full crust, which makes the whole dish weeknight friendly without losing the pot-pie feel.
Key Ingredients:
For the Filling:
- 1 tablespoon butter
- 1 small onion, diced
- 2 carrots, diced
- 1 celery stalk, diced
- 2 cups cooked chicken, chopped
- 2 cups cauliflower florets
- 1 1/2 cups chicken broth
- 1/2 cup milk
- 1 cup frozen peas
- 1 teaspoon kosher salt
- 1/2 teaspoon black pepper
For the Top:
- 1 can refrigerated biscuit dough or 1 sheet puff pastry, thawed
- 1 egg, beaten, for brushing if using pastry
Cauliflower Cream Base
- What to use: Cauliflower, broth, and milk create the creamy filling without a heavy roux.
- Preparation: Cook the cauliflower until very soft before blending.
- Substitutions: Half cauliflower and half potato works if you want a thicker base.
- Tips: Blend until the sauce is smooth enough to coat a spoon, or the texture can feel rough.
Chicken and Vegetables
- What to use: Cooked chicken, carrots, celery, and peas make the classic filling.
- Preparation: Chop the chicken into bite-size pieces so each spoonful feels balanced.
- Substitutions: Turkey works after a roast, and rotisserie chicken is the fast path here.
- Tips: Don’t skip cooking the onion, carrot, and celery first; they need that soft base flavor.
Quick Steps:
- Preheat the oven to 400°F.
- Melt the butter in a large oven-safe skillet over medium heat, then cook the onion, carrots, and celery for 5 to 6 minutes until softened.
- Add the cauliflower florets and broth, cover, and simmer for 10 minutes until the cauliflower is tender.
- Blend the cauliflower mixture with the milk until smooth, then stir it back into the skillet with the chicken, peas, salt, and pepper.
- Arrange biscuit dough or puff pastry on top and bake for 15 to 18 minutes, until the topping is golden and the filling bubbles around the edges.
- Rest for 5 minutes before scooping.
Equipment for This Recipe:
- Large oven-safe skillet
- Blender or immersion blender
- Cutting board and knife
- Wooden spoon
- Pastry brush, if using puff pastry
How to Serve This Dish:
Serve it in shallow bowls so the filling and topping stay together in each bite. A peppery salad is enough on the side. If you’re using biscuits, I like to crack one open and let the steam out before spooning the filling over it.
Pro Tips for This Recipe:
- Blend the cauliflower base longer than feels necessary.
- If using puff pastry, score the top lightly so steam can escape.
- Keep the skillet filling thick; a loose filling can make the topping soggy.
- The filling can be made a day ahead and topped right before baking.
Variations on This Dish:
- Turkey Pot Pie: Use chopped turkey instead of chicken.
- Mushroom Pot Pie: Add 1 cup chopped mushrooms with the onion for a deeper savory flavor.
- Cheddar Biscuit Top: Stir a handful of shredded cheddar into biscuit dough for a sharper crust.
Common Mistakes to Avoid with This Dish:
- Watery filling: The top bakes before the center sets. Simmer the cauliflower long enough and blend it smooth.
- Undercooked vegetables: Carrots and celery should soften before the pastry goes on.
- Skipping the rest: The filling thickens a little as it sits, which makes serving cleaner.
11. Spinach-Zucchini Lasagna Roll-Ups
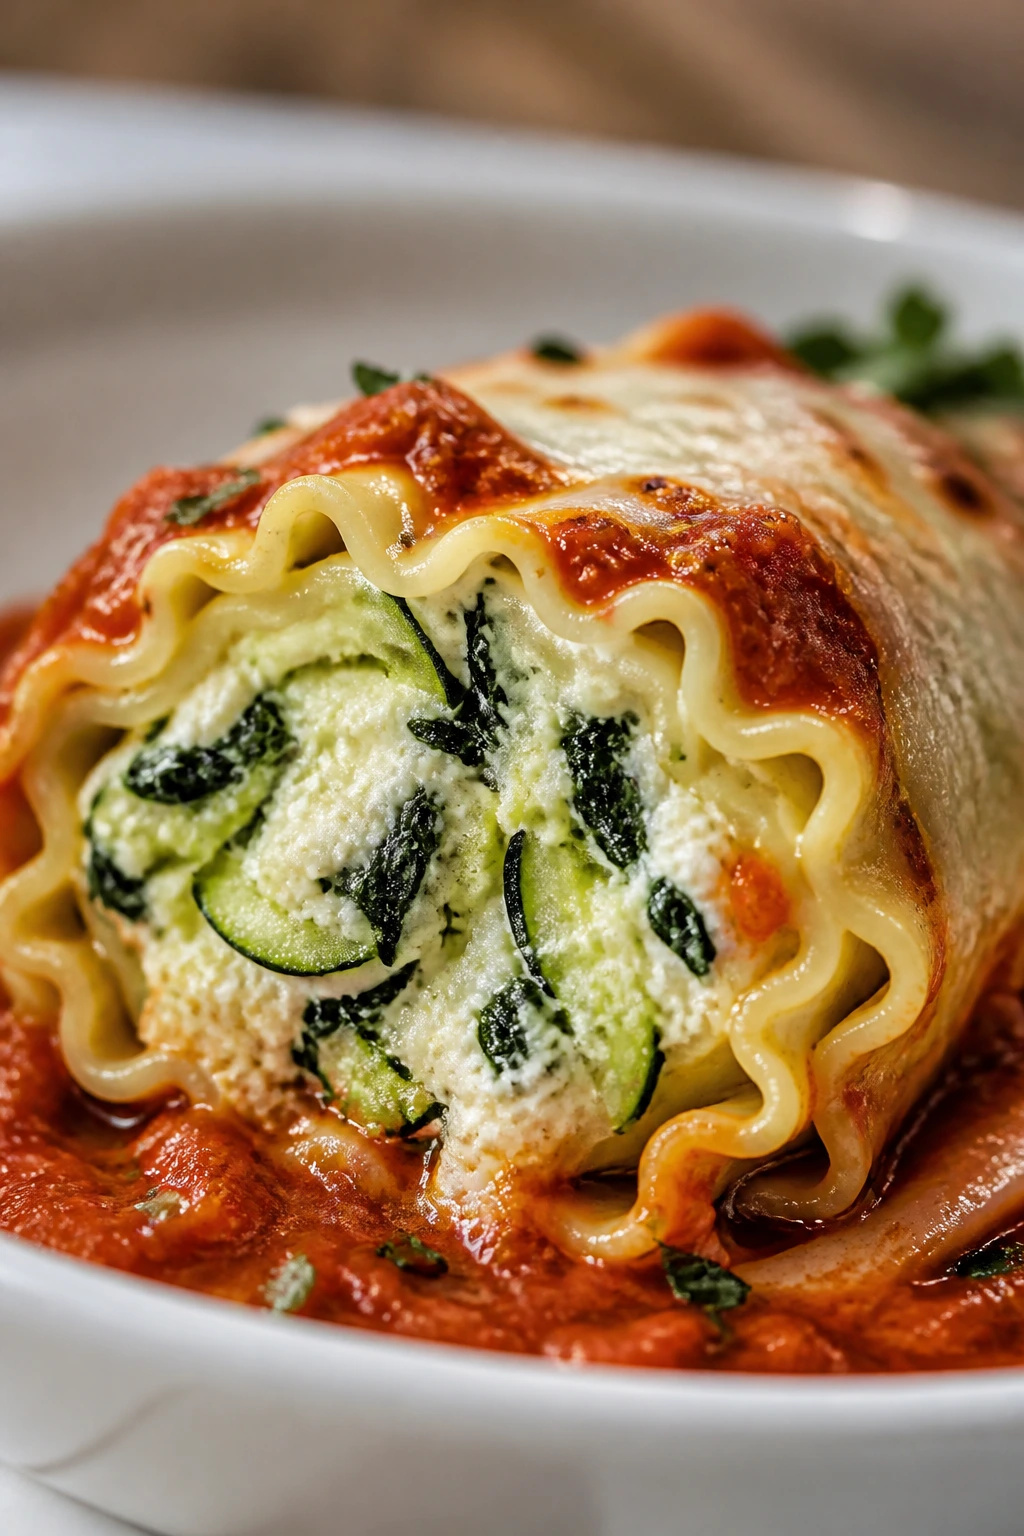
Lasagna roll-ups solve the big lasagna problem: too many layers, too much waiting, and a pan that can slide apart if you rush it. These roll-ups give you the same cheesy, saucy comfort in neat little bundles. Spinach and zucchini disappear into the ricotta filling, which makes the pasta feel less heavy without losing the part that matters.
There’s something practical about roll-ups. You can portion them cleanly, freeze them more easily, and avoid the drama of serving a giant slab that collapses on the plate. The zucchini needs to be squeezed dry, though — otherwise the filling turns loose and the noodles slip.
Why It Works:
Ricotta is a good carrier for hidden vegetables because it stays creamy even after baking. Spinach folds in without changing the texture much, and grated zucchini adds moisture without requiring extra sauce. Rolling the noodles instead of stacking them means every portion gets sauce, cheese, and filling in the same bite.
Key Ingredients:
For the Filling:
- 12 lasagna noodles
- 15 oz ricotta cheese
- 1 cup shredded mozzarella
- 1/2 cup grated Parmesan
- 1 cup spinach, chopped
- 1 small zucchini, grated and squeezed dry
- 1 egg
- 1 teaspoon kosher salt
- 1/2 teaspoon black pepper
For Assembly:
- 2 cups marinara sauce
- 1 cup shredded mozzarella, for topping
Spinach and Zucchini Filling
- What to use: Ricotta, spinach, and zucchini make a creamy filling that still has structure.
- Preparation: Squeeze the zucchini hard and chop the spinach small so the mixture stays tight.
- Substitutions: Swiss chard or thawed frozen spinach can replace fresh spinach if well drained.
- Tips: A dry filling is easier to roll and less likely to leak in the oven.
Sauce and Pasta
- What to use: Marinara and lasagna noodles keep the dinner familiar.
- Preparation: Cook the noodles until flexible but not mushy; they’ll soften more in the oven.
- Substitutions: No-boil noodles can work if you soak them briefly in hot water first.
- Tips: Lay the noodles flat on a lightly oiled sheet pan so they don’t stick together.
Quick Steps:
- Preheat the oven to 375°F.
- Boil the lasagna noodles until just tender, then drain and lay them flat on a lightly oiled surface.
- Mix the ricotta, mozzarella, Parmesan, spinach, zucchini, egg, salt, and pepper in a bowl.
- Spread a thin layer of filling along each noodle, roll it up, and place seam-side down in a baking dish coated with marinara.
- Spoon the remaining sauce over the top and scatter with the extra mozzarella.
- Bake for 25 minutes, then broil for 1 to 2 minutes until the cheese browns at the edges.
Equipment for This Recipe:
- Large pot
- Mixing bowl
- 9×13-inch baking dish
- Slotted spoon or tongs
- Box grater
How to Serve This Dish:
Two or three roll-ups make a solid dinner portion, especially with salad on the side. I like to spoon a little extra marinara over the plate so the noodles don’t feel bare. Garlic bread is optional, but it does make the table feel happy.
Pro Tips for This Recipe:
- Salt the pasta water well so the noodles don’t taste flat.
- Drain the ricotta a little if it’s wet.
- Roll the noodles snugly, not tightly; overstuffing makes them split.
- Let the dish rest before serving so the filling firms up.
Variations on This Dish:
- Meaty Version: Add 1 cup cooked ground turkey or sausage to the ricotta mixture.
- Pesto Roll-Ups: Stir 2 tablespoons pesto into the filling for a greener flavor.
- Gluten-Free Option: Use gluten-free lasagna noodles and make sure the sauce is gluten-free too.
Common Mistakes to Avoid with This Dish:
- Not squeezing the zucchini: The filling can leak into the dish.
- Overcooking the noodles: They tear when you roll them.
- Skipping the broil: A little browning on top makes the dish feel finished.
12. Taco Stuffed Peppers with Cauliflower Rice
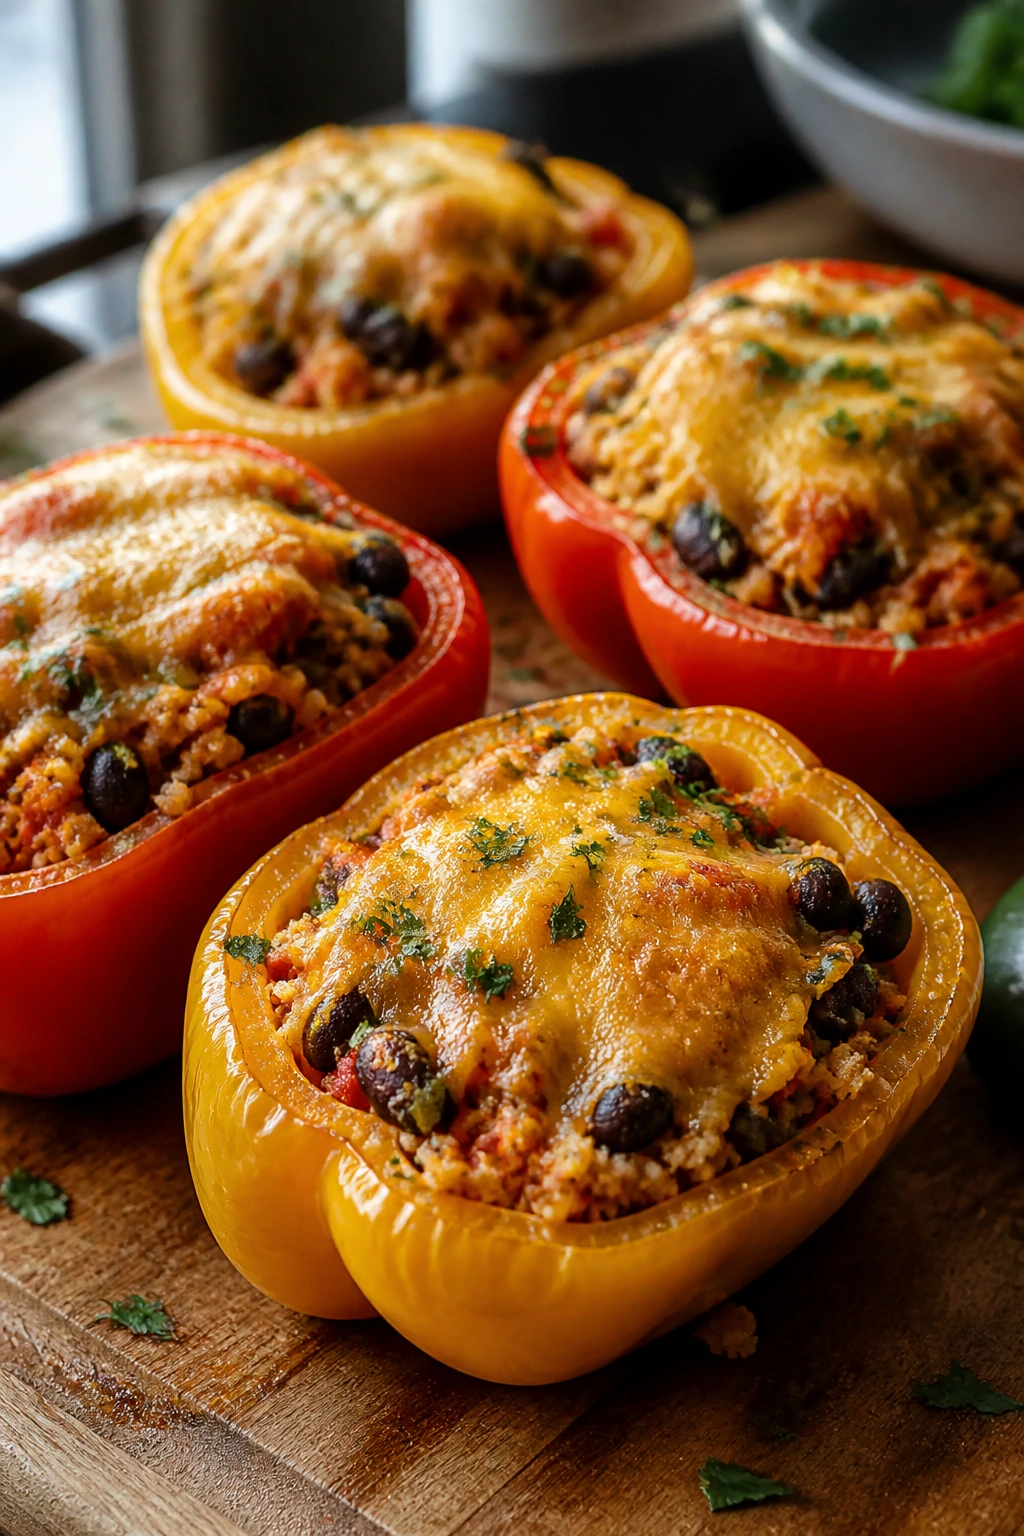
Stuffed peppers can be a little too earnest if you let them. This version loosens up the whole idea by leaning into taco flavor, which gives the filling enough personality to carry the vegetables hidden inside it. The cauliflower rice disappears once it’s mixed with beans, seasoning, and cheese, and the peppers themselves act like edible bowls.
The thing I like most here is the contrast: soft, seasoned filling inside a sweet roasted pepper shell. The pepper doesn’t have to be the star, but it gives you structure and color. The cauliflower rice only adds body, and that’s exactly the job I want it to do.
Why It Works:
Cauliflower rice absorbs taco seasoning and salsa, so it blends into the filling instead of standing out as a separate texture. Black beans give the stuffing enough heft to feel complete, while the peppers soften in the oven without turning mushy. Cheese on top seals the whole thing together and keeps the filling from drying out.
Key Ingredients:
For the Peppers:
- 4 large bell peppers, halved and seeded
- 1 tablespoon olive oil
- 1 lb ground turkey or beef, or 2 cups extra black beans
- 1 1/2 cups cauliflower rice
- 1 can (15 oz) black beans, drained and rinsed
- 1 cup salsa
- 1 teaspoon taco seasoning
- 1 cup corn
- 1 1/2 cups shredded cheddar or Mexican blend cheese
- Salt to taste
Cauliflower Rice Filling
- What to use: Cauliflower rice bulks up the filling without taking over the taco flavor.
- Preparation: If using frozen cauliflower rice, thaw it and cook off excess water first.
- Substitutions: Finely chopped zucchini can stand in for part of the cauliflower rice.
- Tips: The filling should be thick enough to mound in the peppers, not soupy.
Pepper and Topping
- What to use: Large bell peppers hold the filling and roast into a sweet, tender shell.
- Preparation: Trim the bottoms only if they need to sit flat in the dish.
- Substitutions: Poblano peppers work if you want a greener, slightly more savory finish.
- Tips: Roast until the pepper edges blister a little; that’s where the flavor shows up.
Quick Steps:
- Preheat the oven to 400°F.
- Arrange the pepper halves in a baking dish and brush lightly with olive oil.
- Cook the ground turkey or beef in a skillet until browned, then stir in the cauliflower rice, black beans, salsa, taco seasoning, and corn. Cook for 4 to 5 minutes until the filling is thick.
- Spoon the filling into the peppers and top with cheese.
- Cover loosely with foil and bake for 20 minutes, then uncover and bake 10 minutes more until the peppers are tender and the cheese is melted.
- Let them cool for 5 minutes before serving.
Equipment for This Recipe:
- Large skillet
- 9×13-inch baking dish
- Knife and cutting board
- Spoon for stuffing
- Foil
How to Serve This Dish:
Serve two pepper halves per person with a spoonful of sour cream or salsa on the side. A small scoop of rice is optional, but not necessary. The filling should stay compact enough that the peppers can be lifted with a fork and knife without collapsing.
Pro Tips for This Recipe:
- Cook out the moisture from the cauliflower rice before stuffing.
- If the peppers are very thick, give them 5 extra minutes under foil.
- Add cheese only after the filling is hot so it melts cleanly.
- A squeeze of lime wakes up the taco seasoning at the end.
Variations on This Dish:
- Vegetarian Bean Bowl: Skip the meat and add 1 extra can of beans.
- Southwest Cornbread Top: Spoon a little cornbread batter over the filling before baking.
- Spicy Salsa Verde Version: Use salsa verde instead of red salsa for a sharper finish.
Common Mistakes to Avoid with This Dish:
- Wet filling: The peppers end up watery. Cook the rice and filling down first.
- Underseasoning: Cauliflower needs a little extra help. Taste before stuffing.
- Baking too briefly: The peppers should be tender enough to cut cleanly.
13. Mushroom-Oat Burger Patties
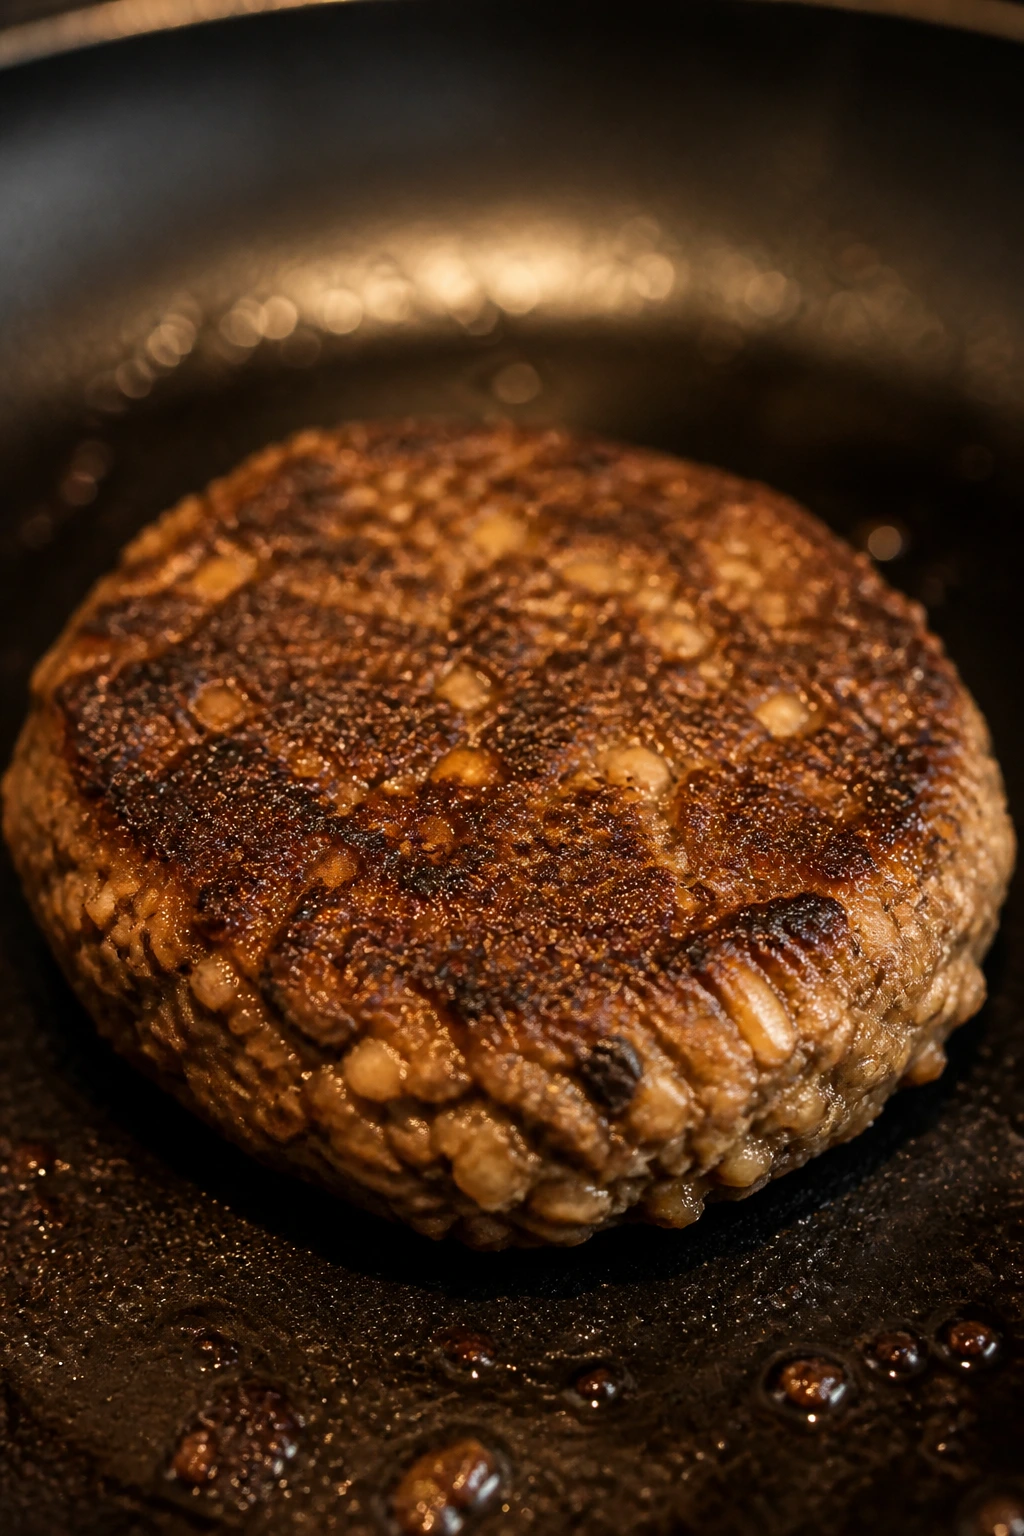
These burgers are built to stay juicy. The mushrooms and grated zucchini bring moisture, the oats help the patties hold together, and the result is a burger that doesn’t collapse into crumbs after one bite. They taste earthy and savory in a way that makes the toppings feel like they’re there to help, not rescue.
I prefer these on a skillet over a grill, because the mushrooms need contact with the pan to brown properly. A burger patty with hidden vegetables should still feel like a burger. That means a proper crust, a soft center, and a bun sturdy enough to do its job.
Why It Works:
Finely chopped mushrooms shrink as they cook and add a deep savory note that makes the burger taste richer. Oats absorb excess moisture and keep the patties from falling apart, which is the usual problem with veggie-leaning burgers. A hot pan creates a browned crust that makes the whole thing read as a real burger rather than a soft patty.
Key Ingredients:
For the Patties:
- 1 lb ground beef or turkey
- 8 oz mushrooms, finely chopped
- 1 small zucchini, grated and squeezed dry
- 1/2 cup rolled oats
- 1 egg
- 1 teaspoon Worcestershire sauce
- 1 teaspoon kosher salt
- 1/2 teaspoon black pepper
- 1 teaspoon garlic powder
For Serving:
- 4 burger buns
- Lettuce, tomato, pickles, or sliced cheese
Mushroom Binder
- What to use: Mushrooms and oats create the structure that keeps the patties juicy and intact.
- Preparation: Chop the mushrooms very fine so they blend into the meat.
- Substitutions: Finely chopped cooked lentils can replace part of the mushrooms if you want a lighter texture.
- Tips: Cook the burgers gently; rushing them can crack the edges before the center cooks through.
Meat and Seasoning
- What to use: Ground beef gives the richest flavor, while turkey stays lighter.
- Preparation: Mix with clean hands just until combined.
- Substitutions: A mix of beef and turkey works nicely if you want both flavor and a lighter finish.
- Tips: Form even patties so they cook at the same speed; lopsided burgers dry out on the thin side.
Quick Steps:
- Mix the meat, mushrooms, zucchini, oats, egg, Worcestershire, salt, pepper, and garlic powder in a large bowl.
- Form into 4 patties, each about 3/4 inch thick, and press a small dimple in the center of each one.
- Heat a skillet over medium heat with a little oil.
- Cook the patties for 4 to 5 minutes per side for beef, or until the internal temperature reaches 160°F for beef and 165°F for turkey.
- Toast the buns, build the burgers, and serve hot.
Equipment for This Recipe:
- Large mixing bowl
- Skillet or grill pan
- Spatula
- Measuring cups and spoons
- Knife and cutting board
How to Serve This Dish:
Build the burgers with lettuce, tomato, and pickles if you want a classic stack, or add cheese and caramelized onions if the table wants more drama. A burger this juicy needs a bun that can hold its ground. Potato wedges or a chopped salad finish the plate without much fuss.
Pro Tips for This Recipe:
- Squeeze the zucchini dry so the patties don’t fall apart.
- Let the patties rest for a couple of minutes before serving.
- Use medium heat so the crust browns without burning.
- A dimple in the center helps the burgers stay flatter.
Variations on This Dish:
- Smash-Style Patties: Make smaller patties and press them thin in a hot skillet for extra crust.
- Cheddar-Stuffed Center: Hide a small cube of cheese inside each patty for a molten middle.
- Veggie-Only Burger: Use cooked lentils and mushrooms in place of meat, plus one extra egg.
Common Mistakes to Avoid with This Dish:
- Too much moisture: The patties crack or slide around in the pan. Squeeze the vegetables dry.
- Flipping too early: The crust hasn’t set yet. Wait until the first side releases easily.
- Using heat that’s too high: The outside burns before the center cooks.
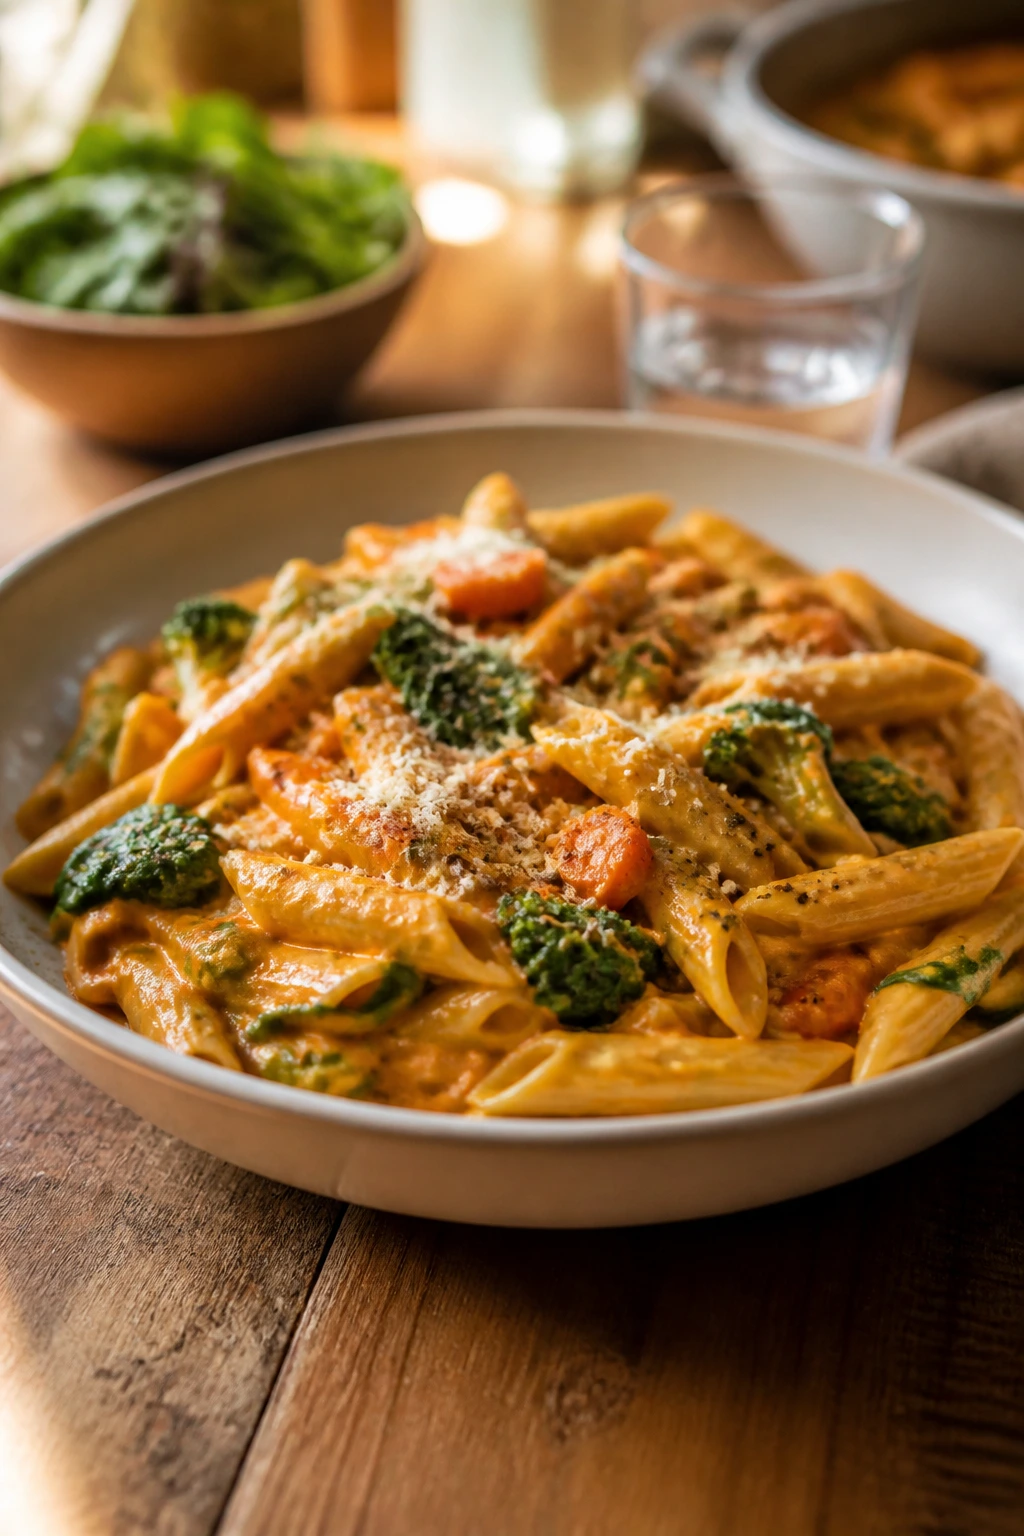
14. Pumpkin Alfredo Pasta with Roasted Cauliflower
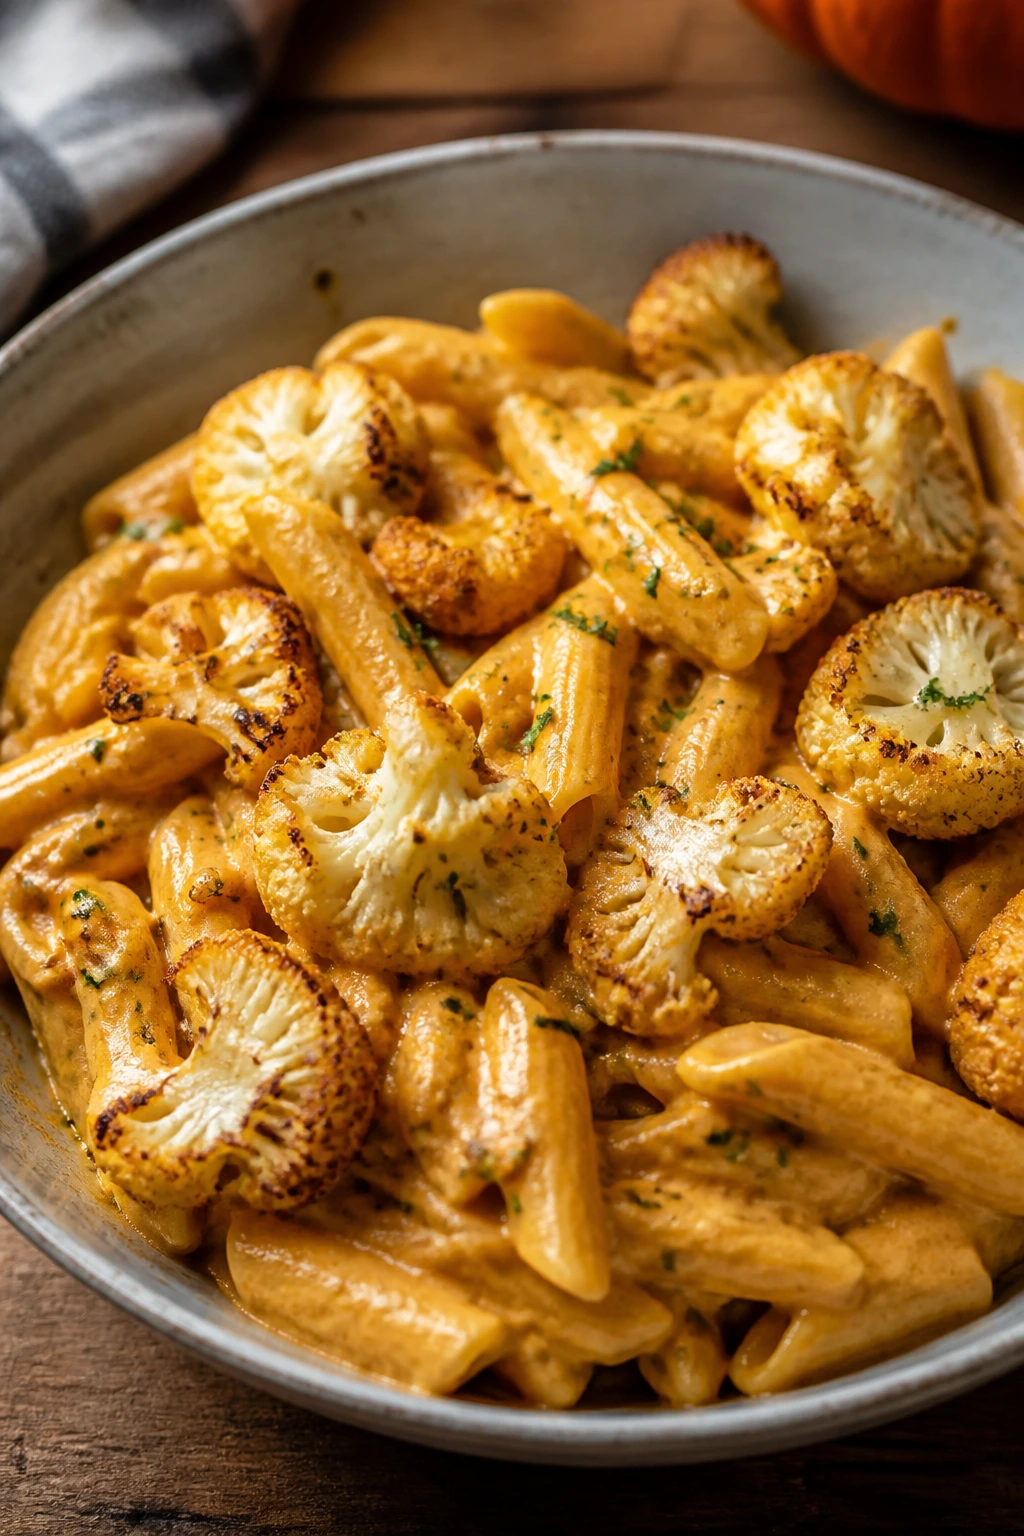
Pumpkin Alfredo sounds fancier than it is. What it really gives you is a creamy sauce with a soft orange color, a little sweetness, and enough body to cling to pasta without feeling heavy. Roasted cauliflower folded through the bowl adds those browned edges and a nutty flavor that keeps the sauce from tasting one-note.
I like this recipe because it behaves like comfort food but doesn’t lean on a giant amount of cream. The pumpkin disappears into the sauce, the cauliflower gives you chew, and the Parmesan keeps everything salty and sharp. It’s a good example of a hidden veggie dinner that doesn’t try too hard.
Why It Works:
Pumpkin purée thickens Alfredo-style sauce naturally and gives it a smooth texture. Roasted cauliflower adds contrast, since roasted vegetables bring a deeper flavor than steamed ones ever will. A touch of nutmeg and garlic keeps the sauce from reading as sweet.
Key Ingredients:
For the Pasta and Cauliflower:
- 12 oz fettuccine or penne
- 1 small head cauliflower, cut into florets
- 2 tablespoons olive oil
- Salt and pepper
For the Sauce:
- 1 tablespoon butter
- 3 garlic cloves, minced
- 1 cup pumpkin purée
- 1 cup heavy cream or half-and-half
- 3/4 cup grated Parmesan
- 1/4 teaspoon ground nutmeg
- 1/2 teaspoon kosher salt
- 1/4 teaspoon black pepper
Pumpkin Sauce
- What to use: Pumpkin purée creates a creamy base that’s thick but not gluey.
- Preparation: Use plain purée, not pie filling, and stir it until smooth before adding cheese.
- Substitutions: Butternut squash purée works almost the same way.
- Tips: Keep the sauce at a low simmer so the dairy doesn’t split.
Roasted Cauliflower
- What to use: Cauliflower florets roasted until browned give the pasta a stronger savory flavor.
- Preparation: Toss them in oil, salt, and pepper before roasting.
- Substitutions: Broccoli works if you want a more assertive green note.
- Tips: Don’t crowd the pan or the cauliflower steams instead of browning.
Quick Steps:
- Preheat the oven to 425°F and roast the cauliflower florets for 20 minutes until browned at the edges.
- Cook the pasta in salted water until al dente, then reserve 1 cup of the cooking water.
- Melt the butter in a large skillet over medium heat, add the garlic, and cook for 30 seconds.
- Stir in the pumpkin purée and cream, then simmer gently for 2 to 3 minutes.
- Add the Parmesan, nutmeg, salt, and pepper, then loosen with a splash of pasta water if needed.
- Toss the pasta with the sauce and roasted cauliflower, then serve hot.
Equipment for This Recipe:
- Rimmed baking sheet
- Large pot
- Large skillet
- Colander
- Wooden spoon
How to Serve This Dish:
A bowl of long pasta twirled with roasted cauliflower looks especially good with extra Parmesan and black pepper on top. If you want a bright counterpoint, serve a lemony salad on the side. The sauce should coat the pasta in a thin, glossy layer rather than sit in the bottom of the bowl.
Pro Tips for This Recipe:
- Roast the cauliflower until you see browned edges; pale cauliflower tastes flat.
- Add pasta water in small splashes so the sauce stays silky.
- Use nutmeg lightly — too much makes the sauce taste strange.
- Pull the skillet off the heat before adding Parmesan if the sauce looks too hot.
Variations on This Dish:
- Sage Version: Fry a few sage leaves in the butter before adding the garlic.
- Chicken Pasta Bowl: Add cooked chicken if you want a heartier plate.
- Dairy-Free Version: Use unsweetened oat cream and a good dairy-free Parmesan-style topping.
Common Mistakes to Avoid with This Dish:
- Using sweetened pumpkin products: They throw the whole sauce off.
- Not salting the pasta water: The sauce alone won’t fix bland noodles.
- Overheating the cream: It can separate. Keep the simmer gentle.
15. Creamy Peanut Sesame Noodles with Hidden Veg Sauce
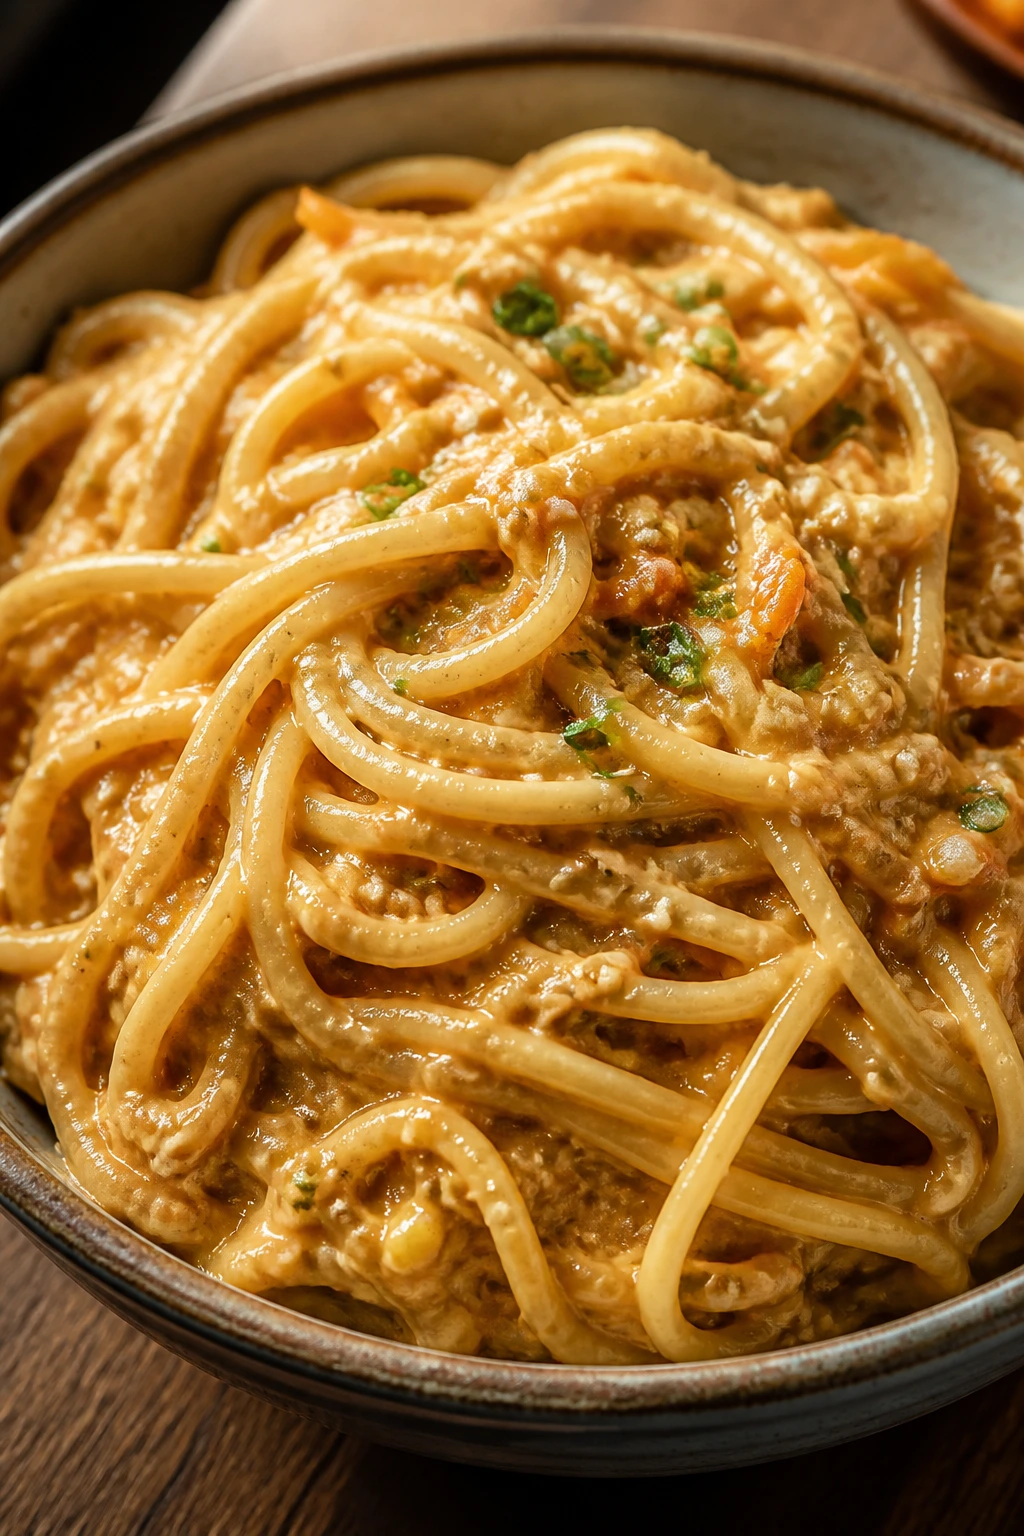
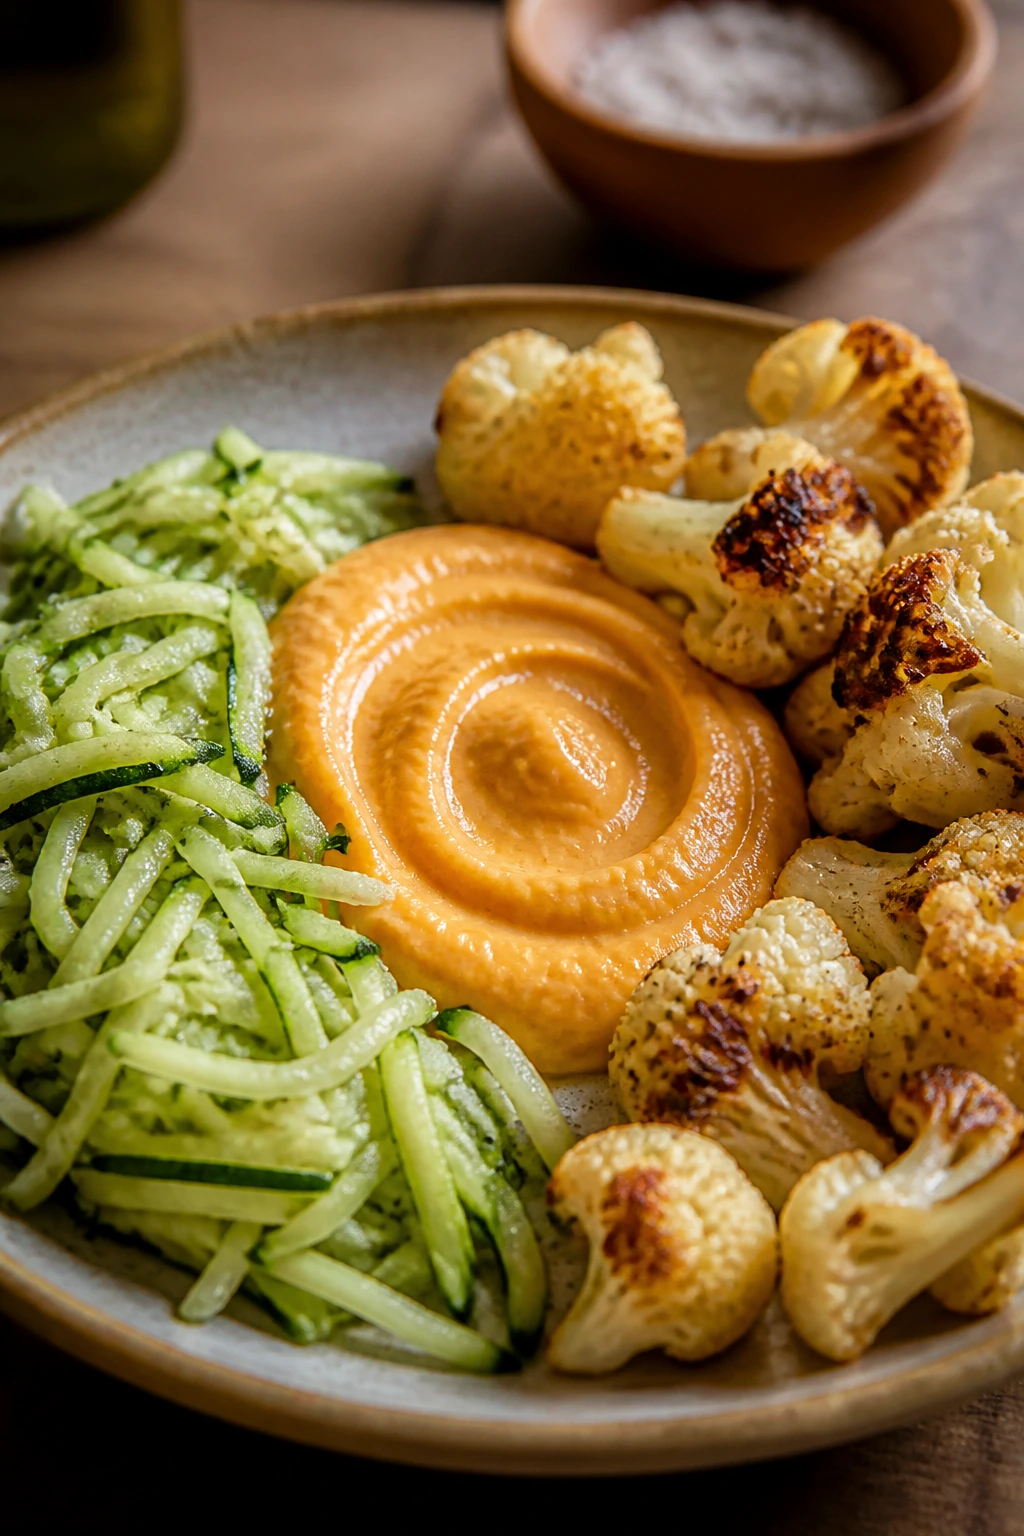
This is the kind of noodle bowl that looks fast because it is fast, but the sauce has more going on than the ingredient list first suggests. Steamed cauliflower and carrot blend into the peanut sauce, which gives it body and a little sweetness without making it taste like a vegetable purée. The finished bowl is glossy, savory, and just tangy enough to keep the peanut butter from feeling heavy.
It’s also one of the easiest dinners here to scale up. Extra noodles, extra sauce, more cucumber, more edamame — all of it works. The hidden vegetable angle is especially useful because the sauce gets thicker and silkier instead of watery, which is the whole game in a noodle dinner.
Why It Works:
Cauliflower and carrot blend smoothly into the peanut sauce once they’re cooked soft. Peanut butter gives the sauce richness, soy sauce brings salt, and rice vinegar keeps the bowl from tasting flat. Tossing the noodles while they’re still warm helps the sauce coat every strand.
Key Ingredients:
For the Noodles:
- 12 oz soba, linguine, or rice noodles
- 1 cup cauliflower florets
- 1 carrot, chopped
- 2 tablespoons peanut butter
- 2 tablespoons soy sauce
- 1 tablespoon rice vinegar
- 1 teaspoon sesame oil
- 1 teaspoon honey or maple syrup
- 1 garlic clove
- 1/2 teaspoon grated ginger
- 1/4 cup warm water, plus more as needed
For Serving:
- 1 cup shelled edamame
- 1/2 cucumber, sliced thin
- Sliced scallions, sesame seeds, and chili flakes
Hidden Veg Sauce
- What to use: Cauliflower and carrot blend into the peanut sauce and make it thicker, not thinner.
- Preparation: Steam or simmer them until very soft before blending.
- Substitutions: Zucchini can replace part of the cauliflower if you want a milder finish.
- Tips: Blend until the sauce is smooth, or the texture will remind people it used to be vegetables.
Noodles and Toppings
- What to use: Soba or linguine holds the sauce well, and cucumber gives the bowl crunch.
- Preparation: Cook the noodles until just tender, then rinse briefly if needed so they don’t clump.
- Substitutions: Rice noodles work if you like a softer bite, and shredded cabbage can replace cucumber.
- Tips: Keep the toppings crisp; the sauce is rich, so crunch matters.
Quick Steps:
- Cook the noodles according to the package directions, then drain.
- Simmer the cauliflower and carrot in a small pot of water until very soft, about 8 minutes, then drain.
- Blend the cooked vegetables with peanut butter, soy sauce, rice vinegar, sesame oil, honey, garlic, ginger, and warm water until smooth.
- Toss the sauce with the noodles and edamame while everything is still warm.
- Top with cucumber, scallions, sesame seeds, and chili flakes.
- Serve immediately.
Equipment for This Recipe:
- Medium pot
- Blender or food processor
- Colander
- Large bowl
- Knife and cutting board
How to Serve This Dish:
Serve it in a wide bowl so the noodles can be tossed at the table if needed. A few cucumber slices on top keep the bowl from feeling dense. If you like extra heat, chili crisp is the move — just a little, not a flood.
Pro Tips for This Recipe:
- Blend the sauce while the vegetables are still warm for the smoothest texture.
- Add warm water a spoonful at a time until the sauce coats the noodles.
- Don’t overcook the noodles or they’ll go mushy once sauced.
- Toasted sesame seeds add more than garnish; they add a faint nutty crunch.
Variations on This Dish:
- Thai-Style Twist: Add lime juice and a little sriracha to the sauce.
- Noodle Salad Version: Chill the noodles and serve them cold with extra cucumber.
- Tofu Bowl: Add crisp tofu cubes if you want the dish to feel more substantial.
Common Mistakes to Avoid with This Dish:
- Sauce too thick: It clumps on the noodles. Thin it with warm water a little at a time.
- Overcooking the vegetables before blending: They can pick up too much water. Drain well.
- Skipping the acid: A touch of rice vinegar keeps the peanut sauce from feeling heavy.
How Grating, Blending, and Roasting Make Vegetables Behave
The hidden veggie trick works because different vegetables disappear in different ways, and each method changes what they do in the dish. Grated zucchini melts into meatballs and burgers because it spreads through the mixture in tiny threads. Cauliflower disappears when it’s steamed and blended, which is why it shows up so often in mac and cheese, Alfredo-style sauces, and pot pie filling. Mushrooms are a little different; they don’t vanish completely, but they shrink hard once the water cooks out, leaving behind the savory part that makes a sauce or patty taste deeper.
Roasting matters more than people give it credit for. A raw cauliflower floret tastes blunt. Roast it until the edges brown and the sweetness shows up, and suddenly it feels like part of the dish rather than a vegetable side that wandered in by mistake. Same with carrots and onions. If you cook them slowly enough to brown in the pan, they stop tasting like “health food” and start tasting like the base of dinner.
The other thing that matters is moisture control. That’s the unglamorous part, and it decides whether your dinner turns out silky or soggy. Zucchini needs squeezing. Cauliflower rice needs draining. Mushrooms need time in the pan. When you handle those three things well, hidden veggie dinners stop feeling sneaky and start feeling normal, which is a much better trick.
Essential Equipment for These Meals
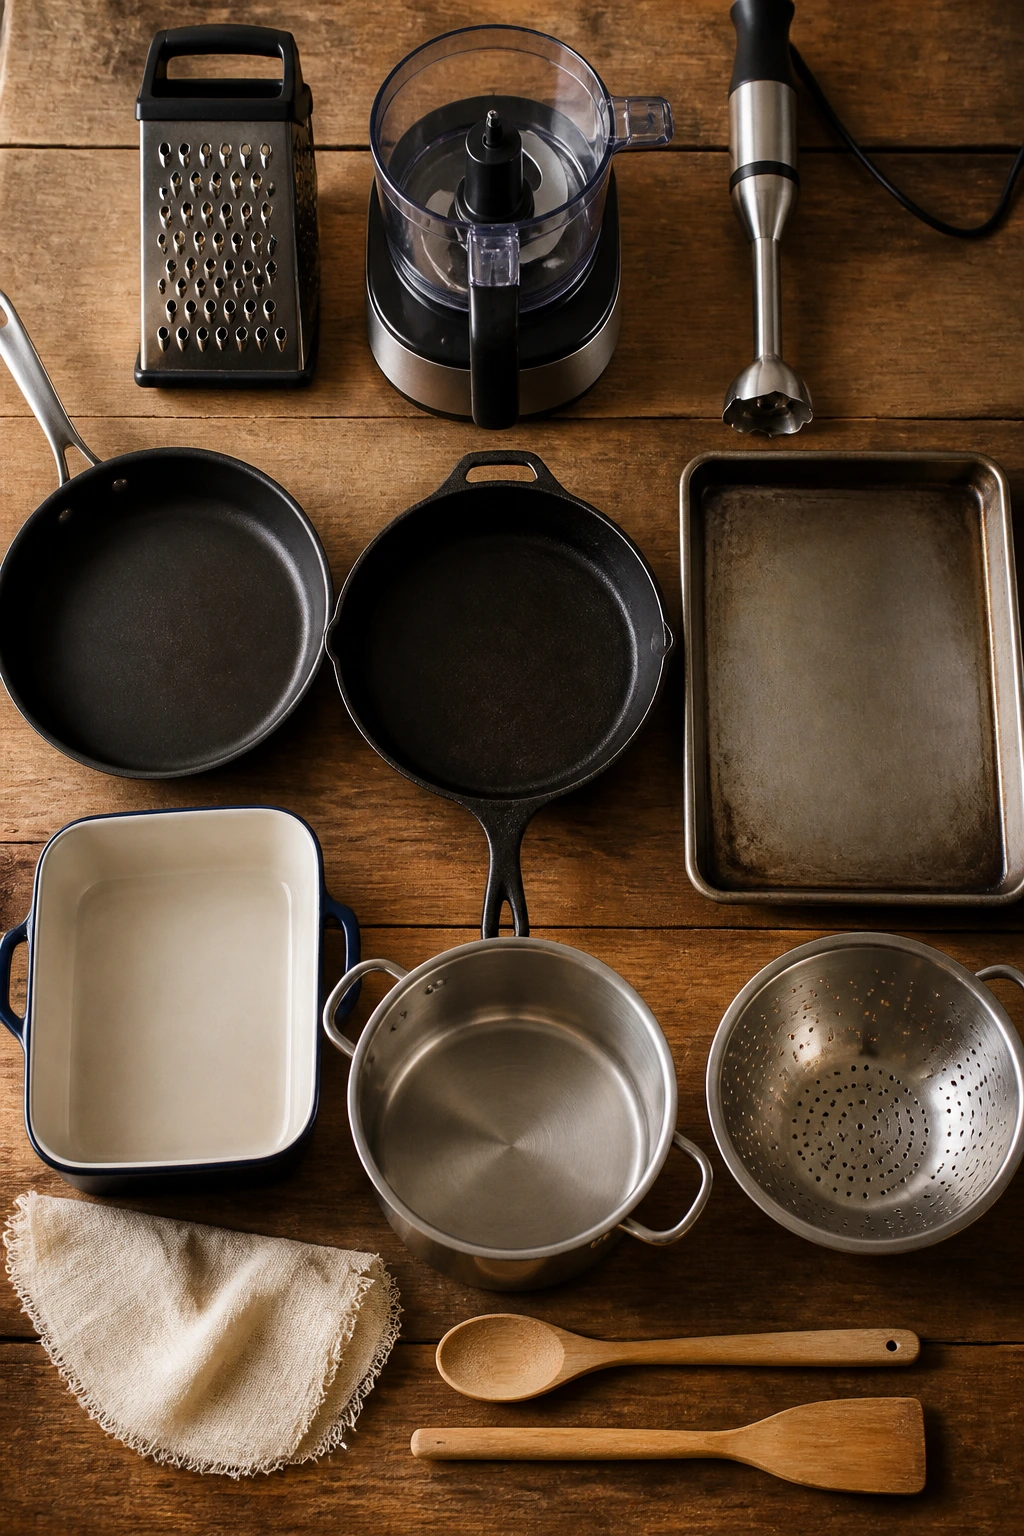
- Box grater: The fastest way to shred zucchini, carrots, and cheese without turning the kitchen into a project.
- Food processor: Useful for fine-chopping mushrooms, onions, or cauliflower when you want the texture to disappear fast.
- Immersion blender or countertop blender: Needed for the soup, cauliflower sauces, and peanut noodles; an immersion blender is less mess.
- Large skillet or sauté pan: The workhorse for quesadillas, fried rice, sloppy joes, and skillet casseroles.
- Oven-safe skillet or Dutch oven: Handy for enchilada skillets, pot pie, and anything that starts on the stove and ends in the oven.
- Rimmed baking sheet: Best for meatballs, roasted cauliflower, and anything that needs space to brown.
- 9×13-inch baking dish: Good for roll-ups, casseroles, and baked pasta dishes.
- Large pot: Needed for pasta, soup, and boiling vegetables together.
- Colander: You’ll use it more than you think, especially when a recipe needs dry vegetables or drained pasta.
- Clean kitchen towel or cheesecloth: The difference between “grated zucchini” and “wet grated zucchini” is this one tool.
- Wooden spoon and spatula: Better than metal for mixing sauces and scraping browned bits from the pan.
- Sharp chef’s knife: Hidden vegetables work best when they’re cut small and evenly, not hacked into random chunks.
Smart Shopping and Ingredient Tips
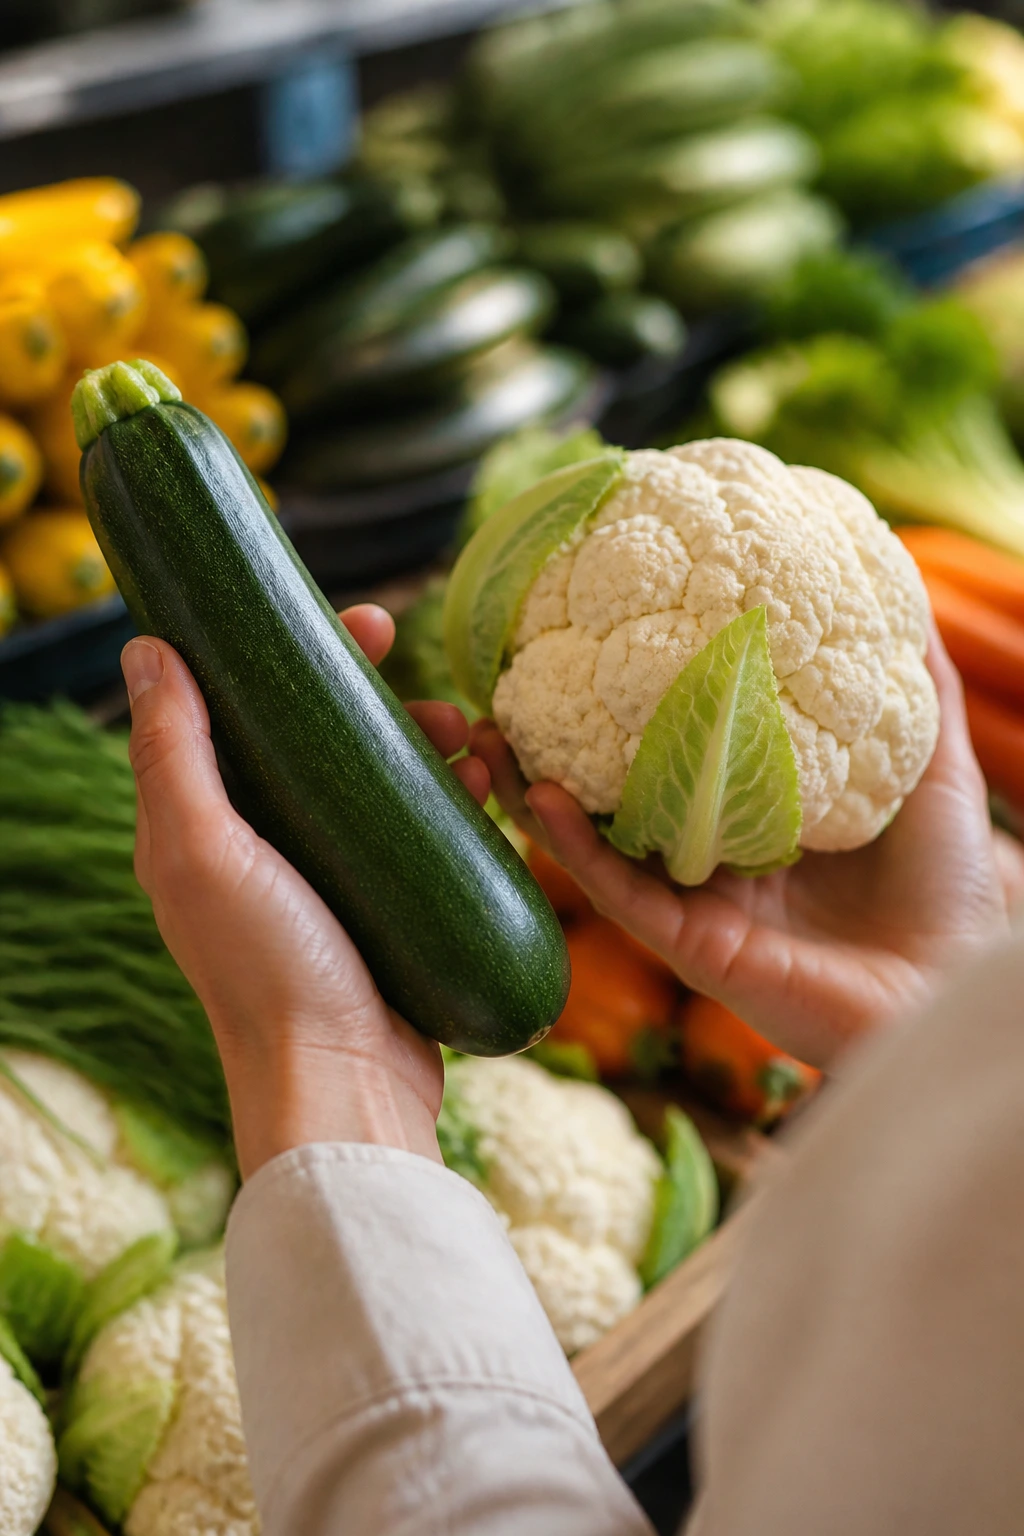
Start with vegetables that are easy to hide without losing their flavor. Zucchini, cauliflower, carrots, mushrooms, spinach, sweet potatoes, and onion are the all-stars here because they either soften fast or blend smoothly. If a vegetable stays crunchy for a long time, it’s a poor fit for a hidden-veggie dinner unless you cook it down first.
Fresh produce matters most when the vegetable is supposed to disappear into the texture. Zucchini should feel firm and light for its size, not floppy. Cauliflower should have tight, pale florets with no wet brown patches. Mushrooms should look dry and smooth rather than slimy. Carrots can be a little old and still behave fine once grated, which is why they’re such a good pantry-to-fridge bridge ingredient.
Canned and frozen ingredients deserve more respect than they get. Canned tomatoes, beans, and enchilada sauce are the backbone of several dinners here, and frozen peas, cauliflower rice, and corn can save a Tuesday. Just watch the water content. Frozen vegetables often need a short cook-off in the pan, or the sauce turns thin and the filling goes limp.
Cheese quality matters, but not in a precious way. A block of cheddar, Jack, mozzarella, or Parmesan usually melts better than the pre-shredded bag because it doesn’t have the extra anti-caking powder. If a recipe depends on a silky sauce, shred from a block if you can. If you’re throwing cheese on top for a bake, the bagged stuff is usually fine.
For proteins, pick the cut that suits the method. Ground turkey likes moisture from vegetables. Rotisserie chicken saves time in quesadillas and pot pie. Beef does well in burgers and sloppy joes, where browning is part of the flavor. Beans and lentils are useful when you want the dinner to stay plant-based without getting too loose. The best hidden veggie meals keep the shopping list short and the technique simple enough that the vegetables can do their quiet work.
How to Serve These Recipes
Presentation:
Serve the saucy dishes in shallow bowls so the vegetables, pasta, and sauce all show up in one scoop. Skillet bakes look better when you bring the whole pan to the table and let people serve themselves. For roll-ups and stuffed peppers, a little extra sauce on the plate keeps the edges from looking dry.
Accompaniments:
Sharp greens help a lot here. Think lemony salad, cabbage slaw, cucumber salad, or roasted broccoli with a squeeze of citrus. Garlic bread, toasted buns, and warm tortillas work for the saucier meals, while rice, roasted potatoes, or a simple green salad fit the bowls and bakes. Keep the sides plain enough that they don’t compete with the hidden vegetables already doing their job.
Portions:
Most of these dinners feed 4 people comfortably, though the pot pie, mac and cheese, and lasagna roll-ups can stretch to 6 with a side dish. For hungrier eaters, add bread or a salad and count on 3 big servings from a casserole or skillet. For lighter dinners, half-portions with a salad are usually enough.
Beverage Pairing:
A chilled sparkling water with lime handles almost everything here. If you want something with a little more character, try a dry cider with the tomato-based dishes or an iced tea with the cheesy casseroles. The point is refreshment, not competition.
Additional Tips and Flavor Boosters
Flavor Enhancement:
A small hit of acid at the end changes hidden veggie meals more than most people expect. A squeeze of lemon, a splash of vinegar, or a spoonful of pickled pepper brine can brighten cauliflower sauces, lentil bolognese, and creamy noodle bowls without making them taste sharp.
Customization:
If you want the meals to skew meatier, add ground turkey to the lasagna filling, the enchilada skillet, or the burger patties. If you want them more plant-based, swap the protein for beans or lentils and lean harder on mushrooms and cheese for flavor. Both routes work because the vegetables are already helping with texture.
Serving Suggestions:
Fresh herbs matter most on the richer dishes. Basil over pasta, parsley over meatballs, cilantro over enchiladas, and scallions over fried rice keep the plate from feeling heavy. A spoonful of yogurt or sour cream on spicy recipes adds coolness and helps the flavors settle.
Make-It-Yours:
For gluten-free eating, choose gluten-free pasta, tortillas, buns, and breadcrumbs where needed; the hidden vegetables don’t care. For dairy-free versions, use a plant-based cream sauce or a well-melted dairy-free cheese only where a recipe truly needs it. For extra protein, add beans, chicken, or tofu rather than piling on more cheese — the balance stays cleaner that way.
Make-Ahead, Storage, and Reheating Guidance
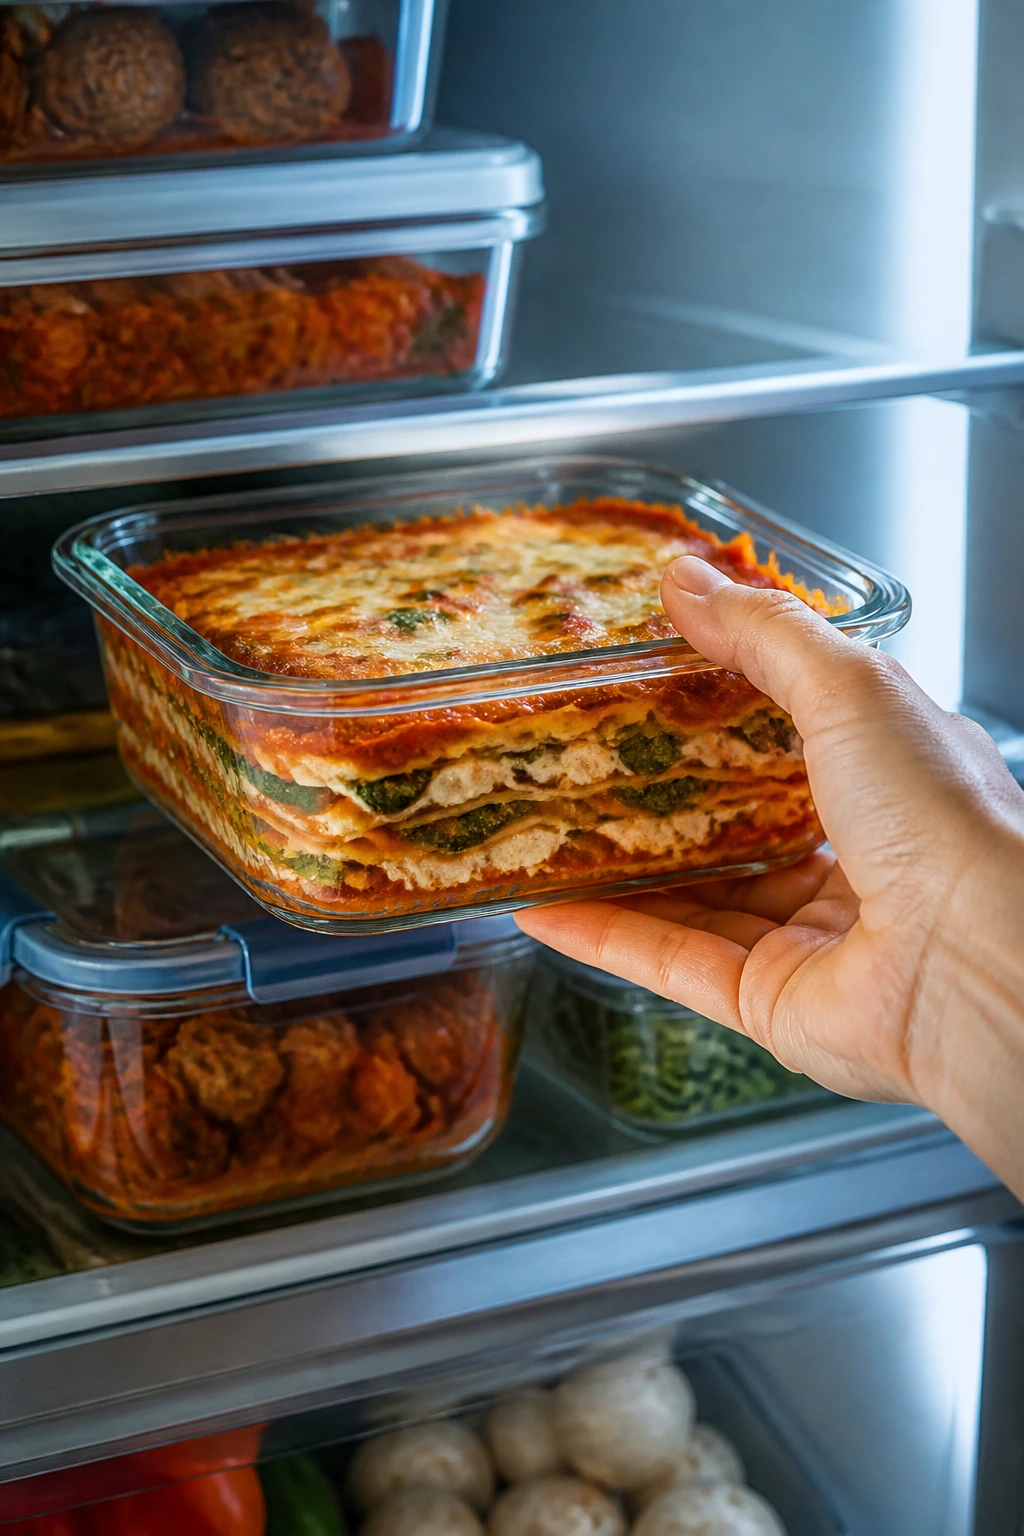
Most of these hidden veggie meals keep well in the fridge for 3 to 4 days in airtight containers. The saucy ones — bolognese, soup, sloppy joes, enchilada skillet — usually taste even better the next day because the seasonings settle in. Casseroles and baked pasta can firm up overnight, which makes them easier to portion.
For freezing, aim for up to 2 months on meatballs, bolognese, soup, shepherd’s pie, and pot pie filling. Mac and cheese and noodle dishes can be frozen, but the texture changes a little; they’re still fine, just not as silky as fresh. If you know you’re freezing a dish with dairy, undercook it slightly before freezing so it doesn’t go past its best texture when reheated.
Reheat skillet meals in a pan over medium-low heat with a splash of water or broth. That works especially well for fried rice, sloppy joes, and noodle bowls. Bakes and casseroles do better in a 350°F oven, covered loosely with foil until heated through. Soup needs gentle reheating on the stove, not a hard boil. Meatballs warm nicely in sauce, which keeps them from drying out.
If you’re making ahead, prep the vegetables early. Grate the zucchini, chop the carrots, and even blend the cauliflower sauce a day in advance if you want to save time. Just keep the wet ingredients separate from anything meant to stay crisp until cooking day. A little organization here saves a lot of scrambling later.
Variations and Adaptations to Try
Gluten-Free Pantry Night:
Swap in gluten-free pasta, tortillas, buns, breadcrumbs, and flour where needed. The hidden vegetables still do their job, and most of these recipes don’t rely on gluten for flavor, only for structure. The one thing to watch is moisture in the binder; gluten-free crumbs can need an extra egg or a little more cheese to hold together.
Dairy-Free Comfort Bowl:
Use olive oil instead of butter, and replace cream sauces with blended cauliflower, oat milk, or cashew cream. The cauliflower mac, tomato soup, and peanut noodles adapt especially well because the hidden vegetables already carry body. Skip the dairy-free cheese if it tastes plasticky; a sharp sauce can do more for the meal than a weak substitute.
Higher-Protein Dinner Shift:
Add shredded chicken, turkey, beans, lentils, tofu, or edamame to the recipes that can take it. The meatballs, enchilada skillet, fried rice, and noodle bowls all handle extra protein without changing their shape. That’s useful if you’re feeding people who want dinner to feel a little more substantial.
Kid-First Texture Fix:
If texture is the battle, lean into the smoothest versions of the recipes. Blend the cauliflower sauce extra well, chop mushrooms finer, and keep onions soft instead of browned and chunky. Kids who dislike “green bits” often do fine when the vegetables are cooked completely into the dish.
Lower-Sodium Swap:
Use low-sodium broth, no-salt-added tomatoes, and rinse canned beans well. Then season in layers with garlic, onion, acid, and herbs rather than dumping in more salt at the end. The vegetables help carry flavor, so you can get away with less sodium if you taste carefully.
Spice-Level Adjustment:
Keep the base mild, then let the table add heat with chili crisp, hot sauce, red pepper flakes, or pickled jalapeños. That’s easier than making the whole pan fiery and hoping everyone agrees. Hidden veggie dinners work best when the seasoning is modular.
Common Mistakes to Avoid
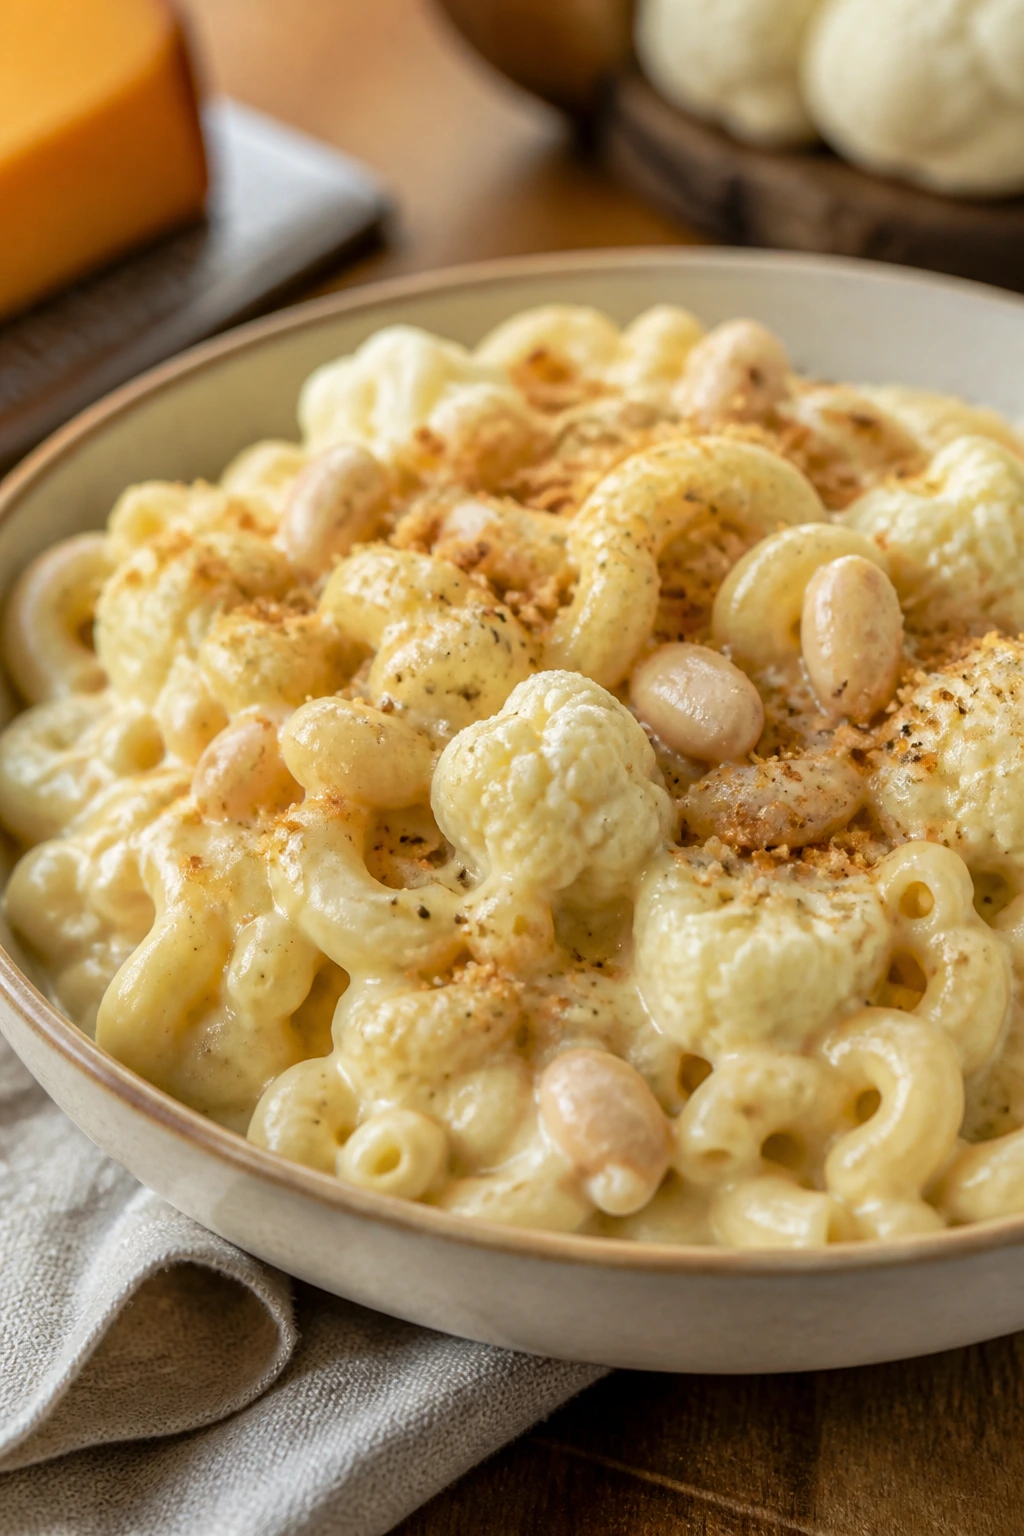
Too much moisture in the vegetables:
This is the biggest one. Wet zucchini, frozen cauliflower rice that hasn’t been drained, and mushrooms that never cooked off their water all turn dinner soft or soupy. Squeeze, drain, and brown first, then mix.
Underseasoning because the vegetables are hiding:
A lot of people pull back on salt and spices when they add vegetables, and the result tastes flat. Hidden vegetables still need seasoning, sometimes more than you’d expect, because they dilute the flavor a little. Taste before serving and finish with acid if needed.
Cooking everything on high heat:
High heat can scorch cheese sauces, burn tortillas, and dry out turkey or chicken before the vegetables soften. Medium heat is usually the better bet. Brown first, then finish gently.
Leaving the vegetables too visible or too chunky:
If the whole point is a hidden veggie dinner, the cut size matters. Fine grating, small dice, and proper blending make a big difference. Big pieces don’t hide, and they also cook at a different speed.
Forgetting that texture needs contrast:
A hidden-veggie meal still needs a little crunch, browned top, or crisp edge. Without that, the dish can feel flat even if the flavor is fine. Toast the bun, broil the cheese, roast the cauliflower, or crisp the tortilla.
Trying to hide the wrong vegetables in the wrong dish:
Broccoli florets don’t disappear the way cauliflower does. Raw mushrooms behave very differently from sautéed mushrooms. Pick vegetables that either melt, blend, or soften into the base; otherwise you’ll spend the whole meal explaining why the texture is strange.
Frequently Asked Questions

What vegetables hide best in weeknight dinners?
Zucchini, cauliflower, mushrooms, carrots, spinach, and sweet potato are the easiest to work with. They either grate fine, blend smooth, or cook down quickly enough that they stop looking like separate ingredients. If you want the least noticeable texture, cauliflower and zucchini usually disappear fastest.
Do I need a food processor for these recipes?
No, but it helps for mushrooms, cauliflower rice, and very fine chopping. A box grater and a knife cover a lot of ground, and an immersion blender can handle sauces and soups just fine. If you only buy one extra tool, I’d pick the box grater first.
How do I keep picky eaters from noticing the vegetables?
Keep the cut size tiny, cook the vegetables until soft, and match them to familiar flavors. Taco seasoning, marinara, cheese sauce, and peanut sauce all do a good job of covering the veggie base without making the dish taste masked or odd. Texture is usually the bigger issue than flavor, so smooth sauces help.
Can I use frozen vegetables instead of fresh?
Yes, especially for cauliflower rice, peas, corn, spinach, and carrots. Just cook off the extra moisture before the ingredients go into a sauce or skillet. Frozen zucchini is less dependable because it can turn mushy, so I’d stick with fresh there.
Which of these recipes is best for making ahead?
The meatballs, bolognese, soup, shepherd’s pie, and enchilada skillet hold up especially well. They reheat cleanly and often taste deeper the next day. Fried rice and quesadillas are better fresh, though the filling can still be prepped in advance.
How do I stop hidden veggie sauces from tasting bland?
Brown the vegetables first, season in layers, and finish with something acidic. Salt alone won’t fix a sauce that tastes sleepy. A little vinegar, lemon, mustard, or tomato paste can wake it up fast.
Can I freeze casseroles with hidden vegetables?
Yes, especially shepherd’s pie, pot pie filling, meatballs, and enchilada skillet. Let the dish cool fully, wrap it well, and freeze in portions if possible. Creamy pasta dishes freeze less neatly, but they can still work if you reheat them gently with a splash of liquid.
What if my sauce gets too thick after blending?
Add broth, milk, pasta water, or plain water a splash at a time until it loosens. This happens a lot with cauliflower and bean sauces because they keep thickening as they sit. Thin it slowly so you don’t overshoot and end up with soup.
Can I make these meals vegetarian without losing the texture?
Yes. Mushrooms, lentils, beans, and cauliflower do a lot of the same structural work that meat usually does. The lentil bolognese, mac and cheese, fried rice, enchilada skillet, and noodle bowl all work well without meat if you season them properly.
The Weeknight Shortcut That Still Feels Like Dinner
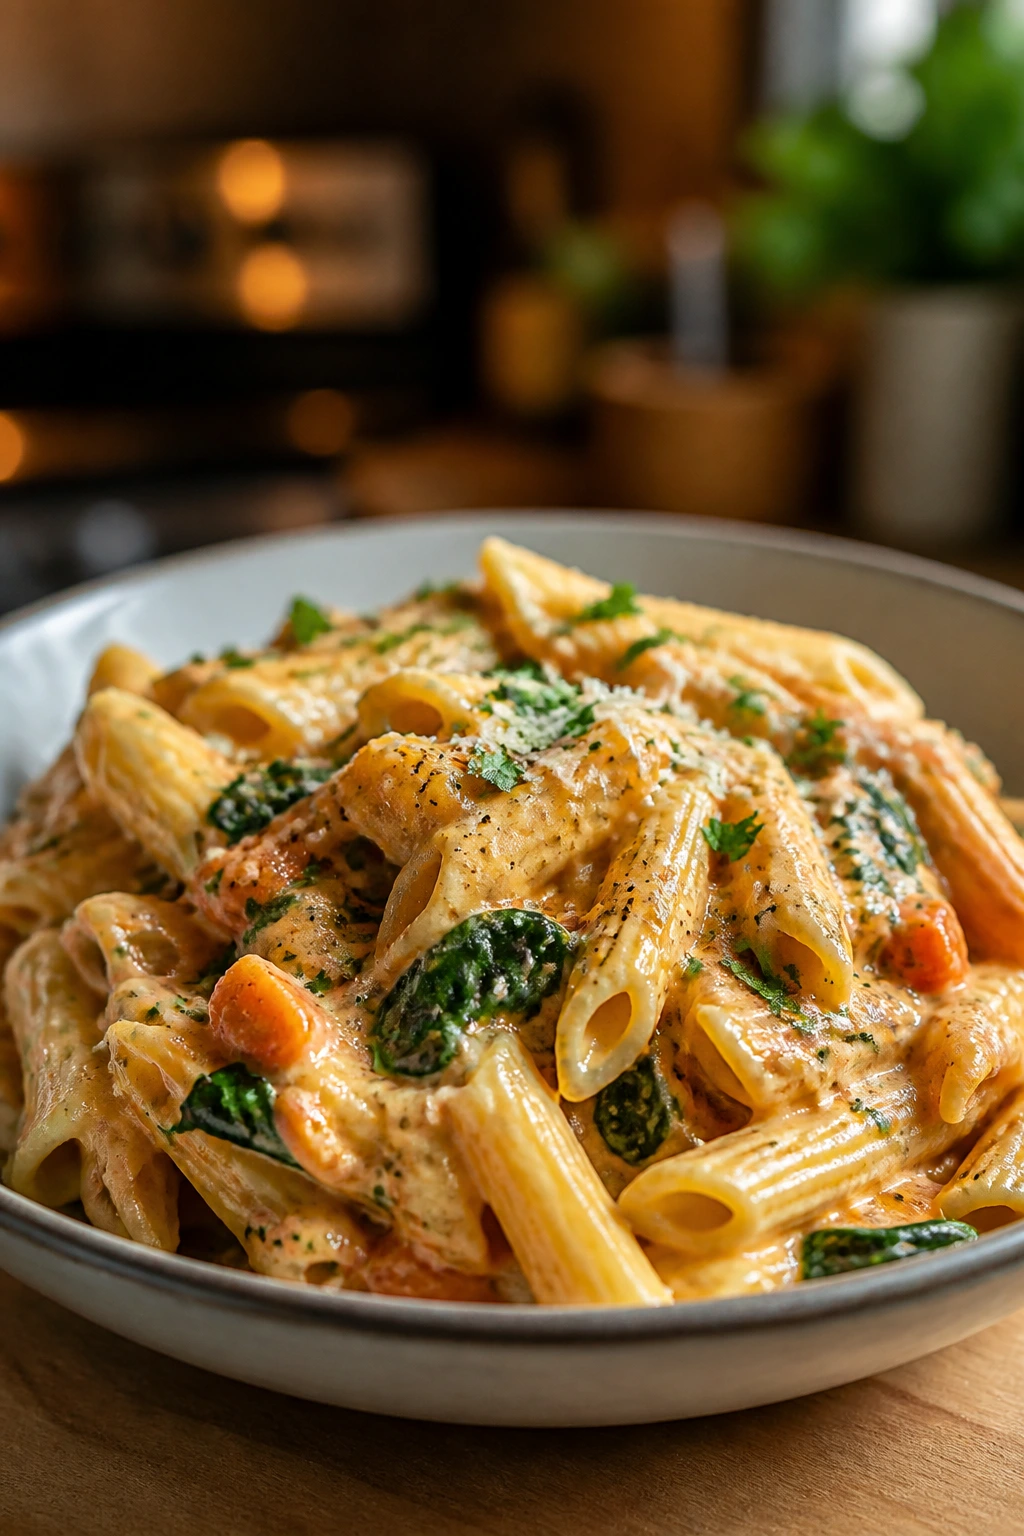
Hidden veggie meals are useful because they solve two problems at once. They give you a dinner that feels familiar enough for the pickiest person at the table, and they make the meal a little sturdier without demanding a second pan full of side dishes.
The trick is not to hide the vegetables badly. It’s to cook them in a way that earns their place — grated, blended, roasted, or browned until they do something useful. That’s the part that makes these dinners worth keeping around.
If your weeknight routine could use a few less arguments and a little more quiet bubbling from the stove, start with one of these and see which vegetables disappear best in your kitchen.