
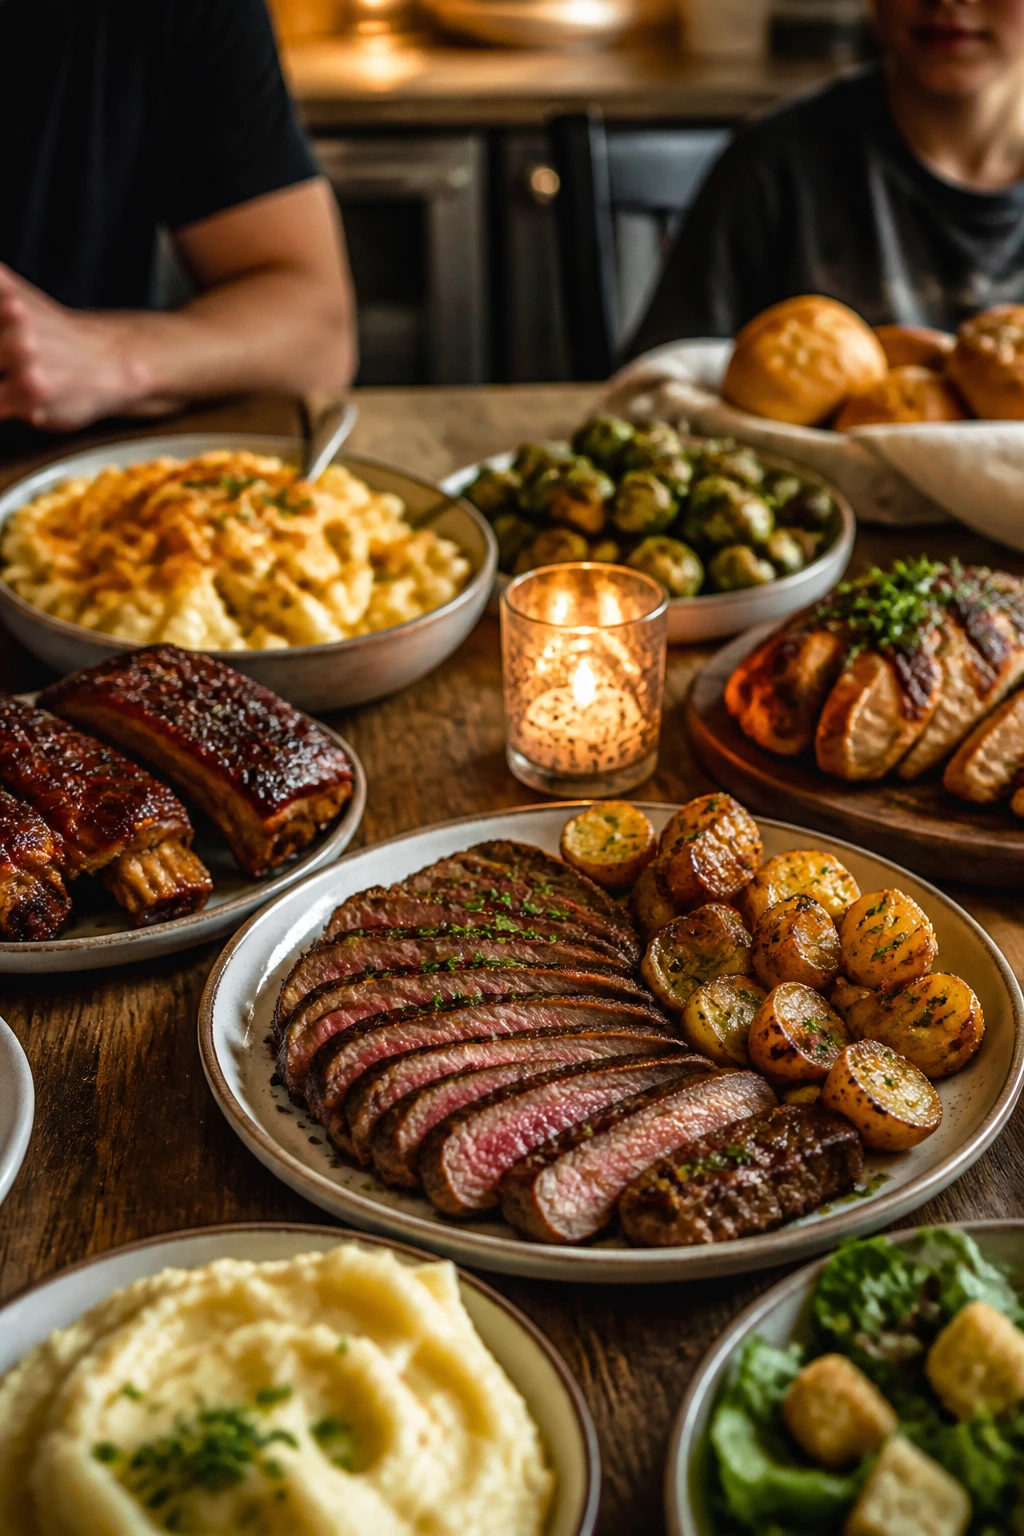
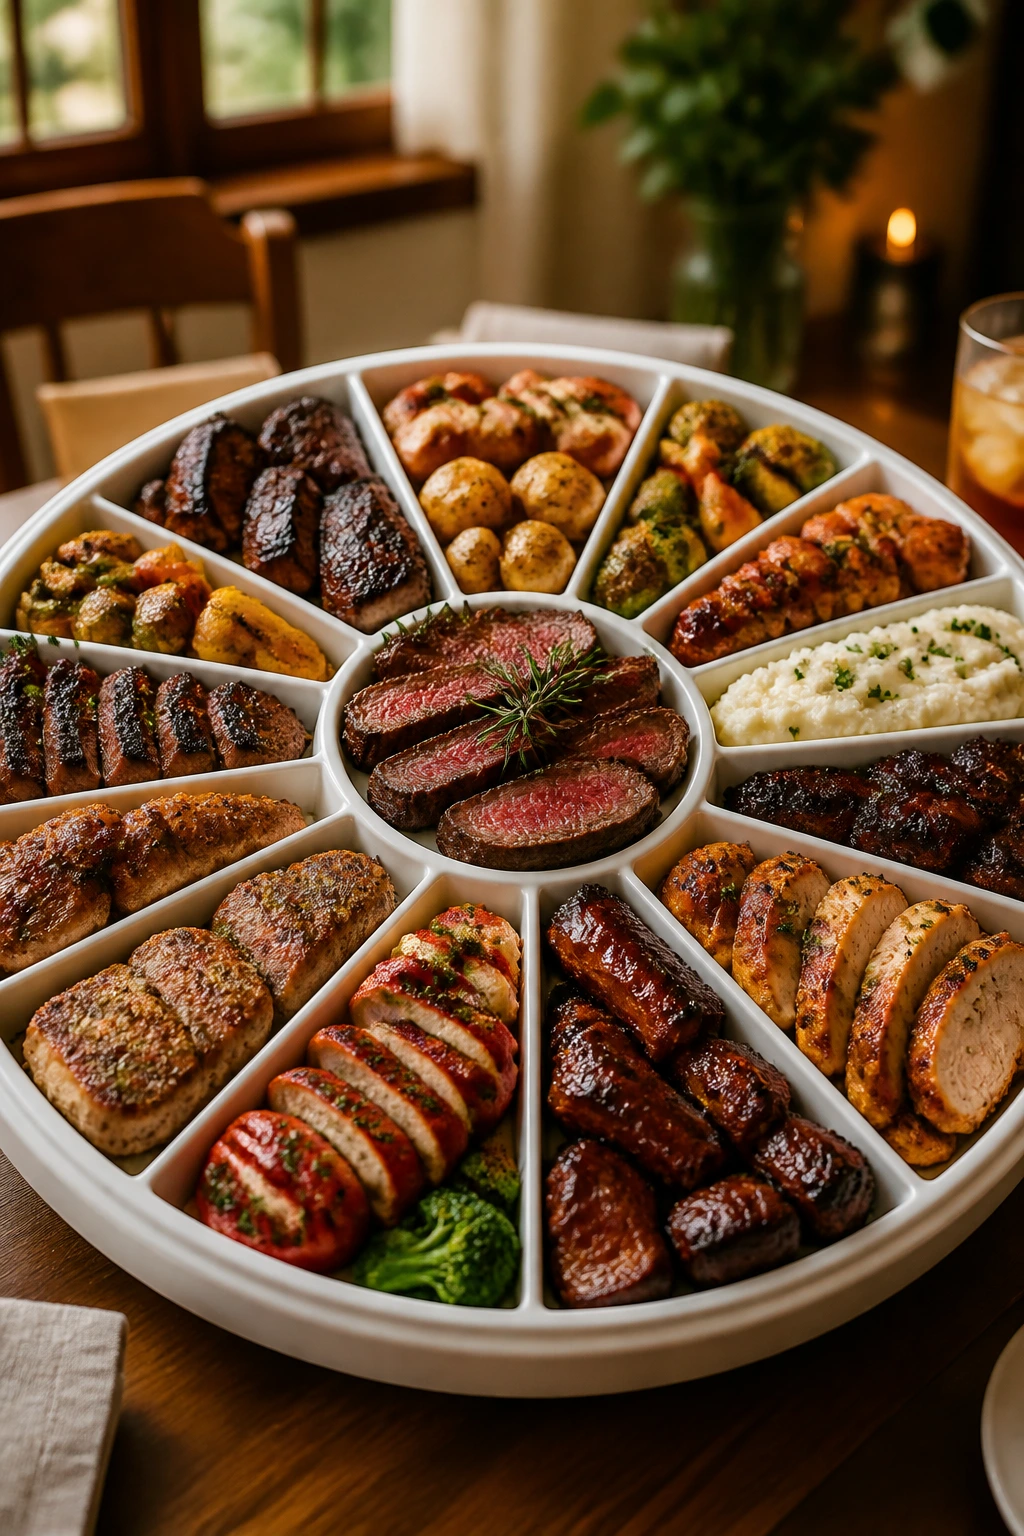
A Father’s Day dinner lands best when it feels generous, a little indulgent, and not fussy enough to keep anyone trapped in the kitchen. The plate should have some weight to it. A little smoke, a little char, a sauce worth chasing with bread, and maybe one dish that makes Dad pause for a second before he says anything at all.
That is why Father’s Day dinner ideas work best when they mix comfort with a bit of celebration. Some dads want a thick steak and garlic butter. Others want ribs that come off the bone cleanly, pulled pork piled high, or a pan of pasta that bubbles over with cheese and sauce. The smartest menu choices are the ones that feel special without turning the cook into a short-order grill jockey for three hours.
I’ve always thought the sweet spot sits somewhere between “restaurant-worthy” and “actually doable.” That means building from familiar flavors, using cuts that reward a little patience, and keeping the sides sturdy enough to stand up to the main dish. A properly seared ribeye, a glossy peach-glazed pork chop, or a skillet full of sausage and peppers can all hit the right note if you handle them with care.
Why These 16 Dinners Work on a Father’s Day Table
Big-Finish Energy: These dishes look and taste like you put thought into the meal, even when the technique is straightforward and the ingredients are easy to find.
Dad-Friendly Flavors: Steak, bacon, barbecue, garlic, lemon, mushrooms, and peppers show up here for a reason—they’re the flavors people tend to come back for.
Fast and Slow Options: Some dinners hit the table in 30 minutes, while others braise or smoke low and slow for the dads who treat dinner like an event.
Easy to Scale: Most of these recipes serve 4 to 6, and the ones built for a crowd can stretch without falling apart.
No Strange Shopping List: You can make every dinner here from normal grocery-store ingredients, which matters more than people admit.
Leftovers That Still Matter: Pulled pork, meatloaf, short ribs, and sausage dishes reheat well, so the second round doesn’t feel like punishment.
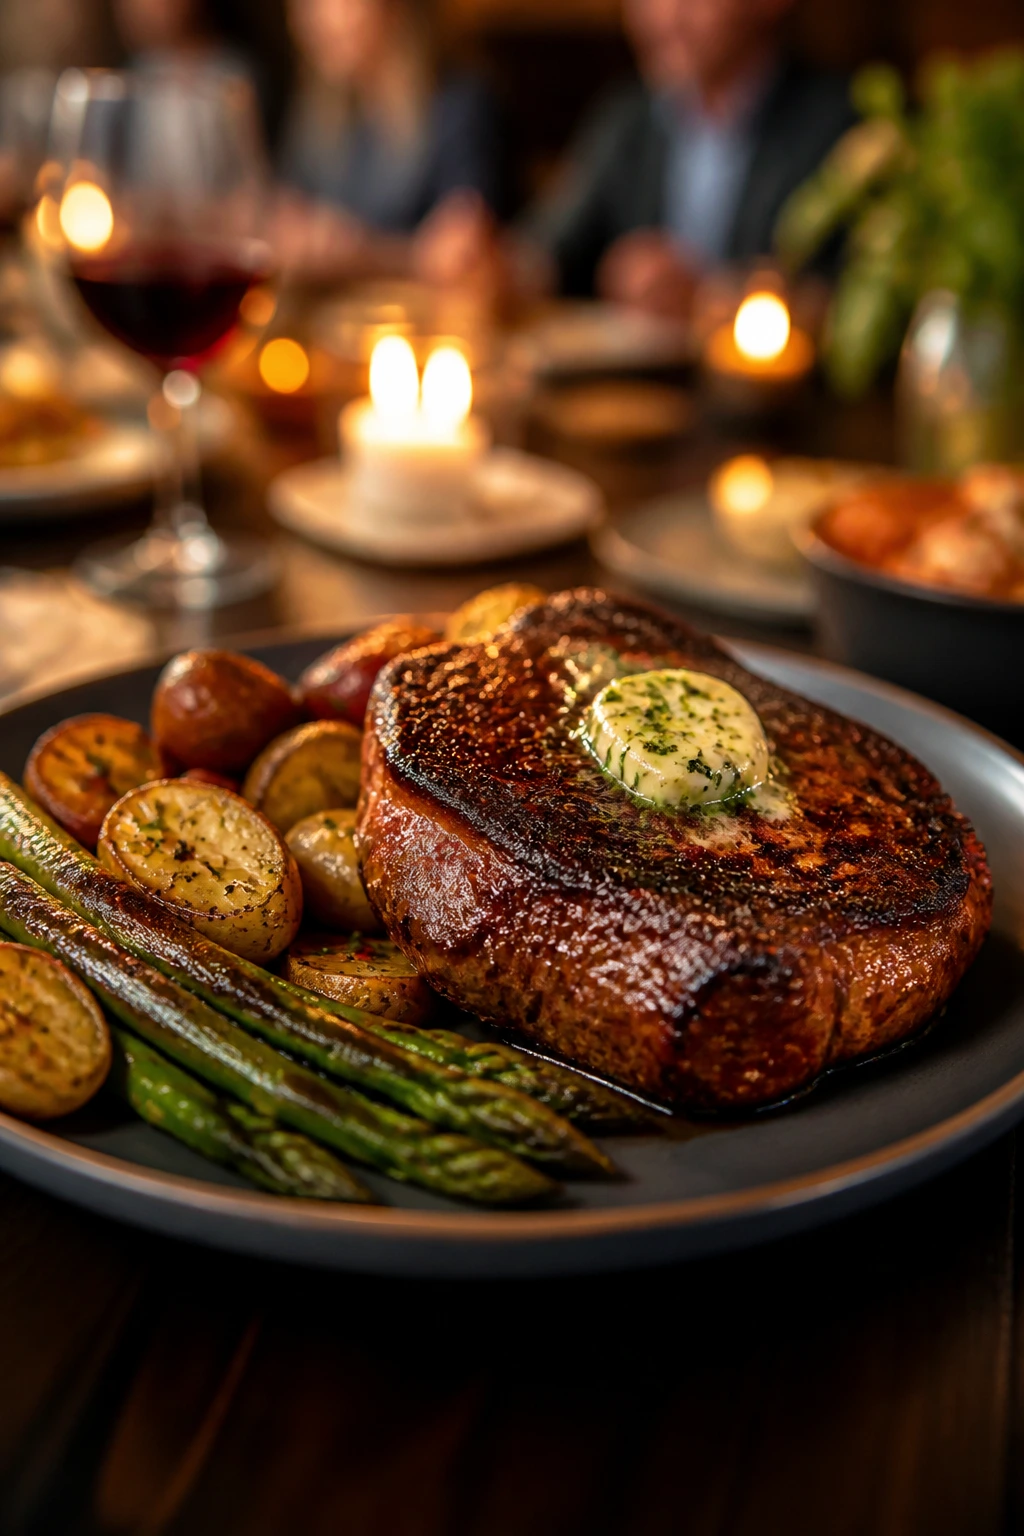
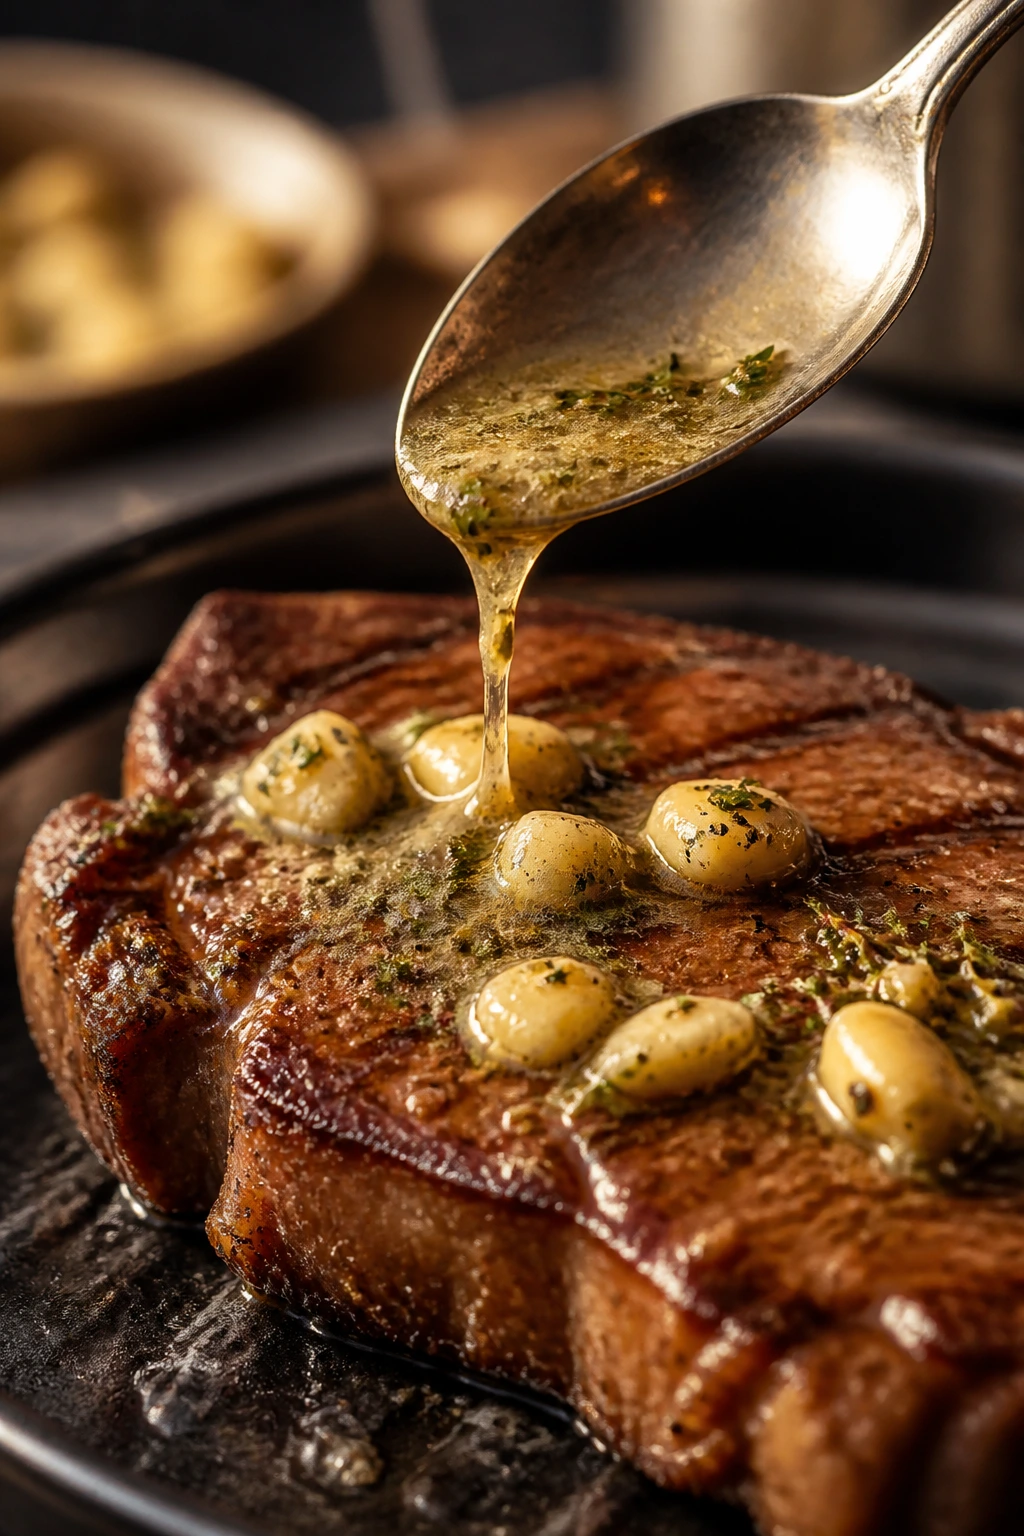
1. Ribeye Steak with Garlic Herb Butter
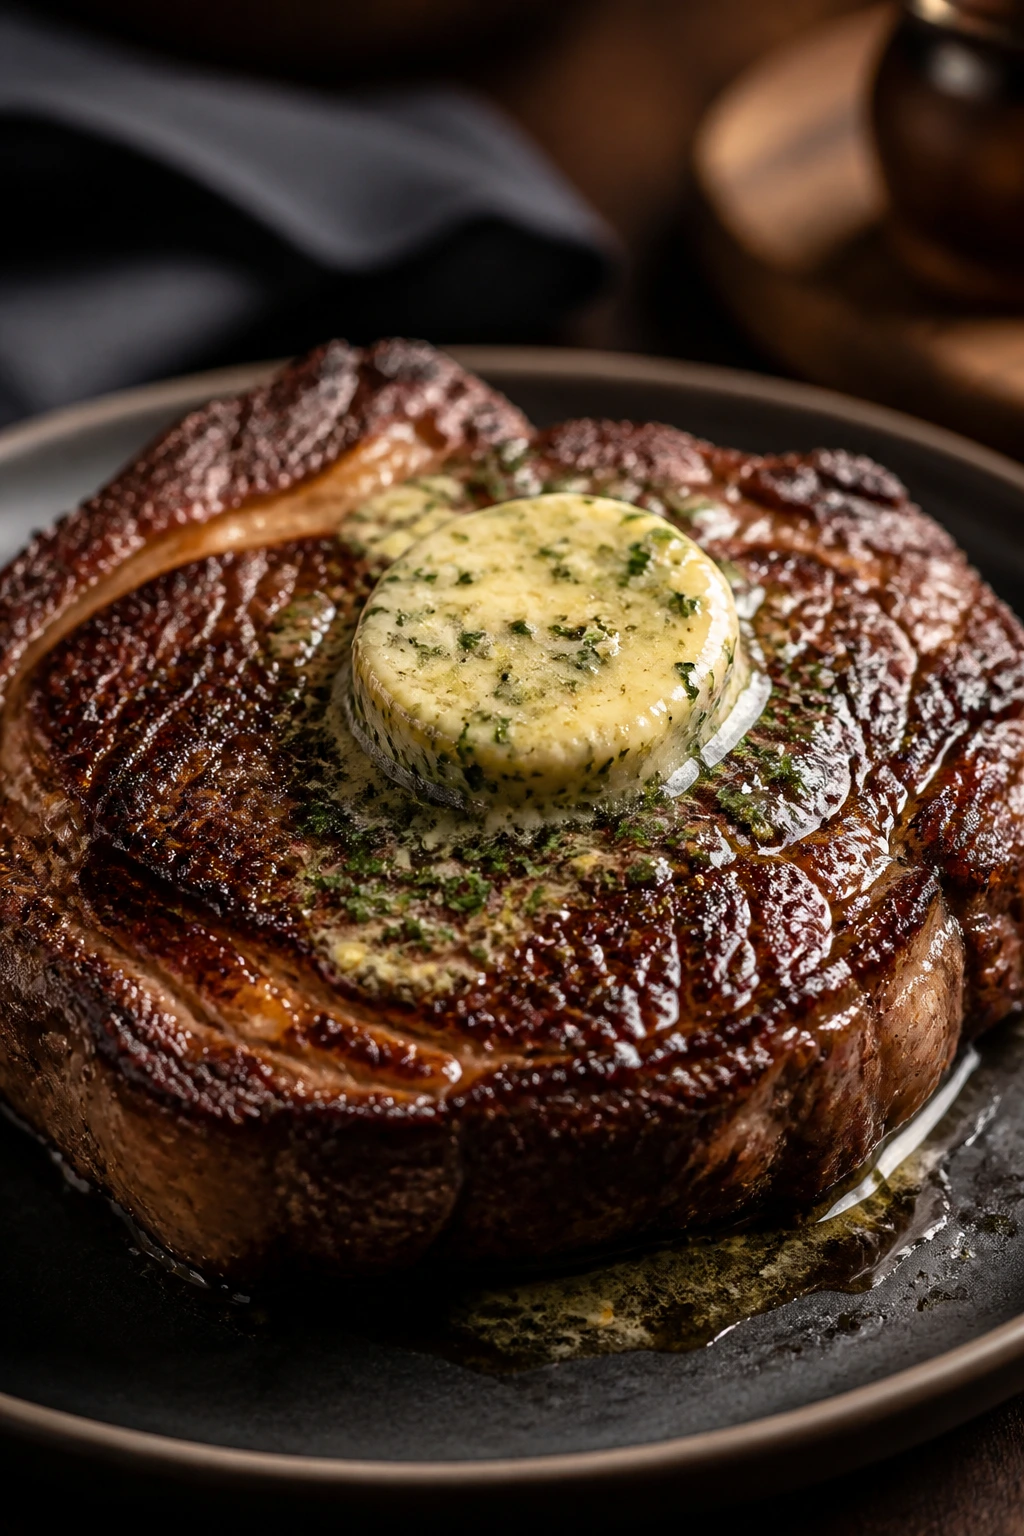
A good ribeye has a kind of swagger to it. The fat melts into the meat as it cooks, the crust goes dark and savory in a hot pan, and the garlic herb butter turns into a glossy puddle that you’ll want to spoon over everything on the plate. This is the dinner you make when you want the room to go quiet for a minute.
The trick is keeping it simple. Ribeye does not need a long marinade or a fancy rub. It needs salt, heat, a proper rest, and butter that smells like garlic and rosemary when it hits the pan. That’s it. Mess with it too much and you lose the point.
Why It Works:
Ribeye is rich enough to feel like a treat, but it cooks quickly if you start with a thick cut, about 1½ inches. The combination of a hard sear and a brief oven finish gives you a crust without overcooking the center. Garlic herb butter adds shine and depth at the end, not during the sear, which keeps the butter from burning.
Key Ingredients:
- 2 ribeye steaks, about 1¼ to 1½ pounds each, 1½ inches thick — thick enough to sear well and still stay juicy.
- 2 teaspoons kosher salt — seasons the meat all the way through.
- 1 teaspoon freshly ground black pepper — gives the crust a sharp edge.
- 1 tablespoon avocado oil — handles the high heat better than butter.
- 4 tablespoons unsalted butter — melts into the steak at the end.
- 3 cloves garlic, minced — adds the classic steakhouse smell.
- 1 tablespoon chopped fresh rosemary or thyme — keeps the butter from tasting flat.
- 1 teaspoon lemon zest — optional, but it brightens the fat beautifully.
Quick Steps:
- Season the steak: Pat the ribeyes dry, then season both sides with salt and pepper. Let them sit at room temperature for 20 to 30 minutes so they cook more evenly.
- Preheat the pan: Heat a cast-iron skillet over medium-high heat until it is hot enough that a drop of water sizzles on contact. Add the avocado oil and swirl.
- Sear hard: Place the steaks in the skillet and cook for 3 to 4 minutes without moving them, until a deep brown crust forms. Flip and cook the second side for 2 to 3 minutes.
- Finish in the oven: Transfer the skillet to a 400°F oven for 4 to 6 minutes, until the internal temperature reaches 125°F for medium-rare or 135°F for medium.
- Baste with butter: Return the skillet to the stove, add butter, garlic, and herbs, and spoon the melted butter over the steaks for 30 to 45 seconds.
- Rest and slice: Move the steaks to a board and rest for 8 to 10 minutes before slicing. The juices settle back into the meat instead of running all over the cutting board.
Equipment for This Recipe:
- Cast-iron skillet — best for a hard sear and oven finish.
- Tongs — lets you flip without piercing the meat.
- Instant-read thermometer — the easiest way to avoid guesswork.
- Cutting board with a rim — catches resting juices.
How to Serve This Dish:
Slice the ribeye against the grain and spoon the garlic butter over the top. Serve with mashed potatoes, a simple green salad, or grilled asparagus so the plate feels complete but not crowded. This is a two-fork dinner, not a tiny-portion dinner.
Pro Tips for This Recipe:
- Dry the steaks with paper towels before seasoning; moisture kills the crust.
- Don’t add the butter before searing. It burns fast.
- If the steak is very thick, give it a 10-minute rest after seasoning and before cooking.
- Pull it a few degrees before your target; carryover heat finishes the job.
Variations on This Dish:
- Peppercorn Ribeye: Add crushed black peppercorns to the seasoning for a sharper crust and a more steakhouse feel.
- Blue Cheese Finish: Crumble a little blue cheese over the hot steak during the rest; it melts into the butter and turns the whole plate punchier.
- Grilled Ribeye: Swap the skillet for a hot grill and cook over direct heat, then move to indirect heat to finish.
Common Mistakes to Avoid with This Dish:
- Don’t cook a cold steak straight from the fridge. The center lags behind and the outside overcooks.
- Don’t crowd the pan with more than two steaks unless your skillet is huge; the temperature drops too fast.
- Don’t skip the rest. Cut too soon and you lose the juices you worked for.
2. Classic BBQ Baby Back Ribs
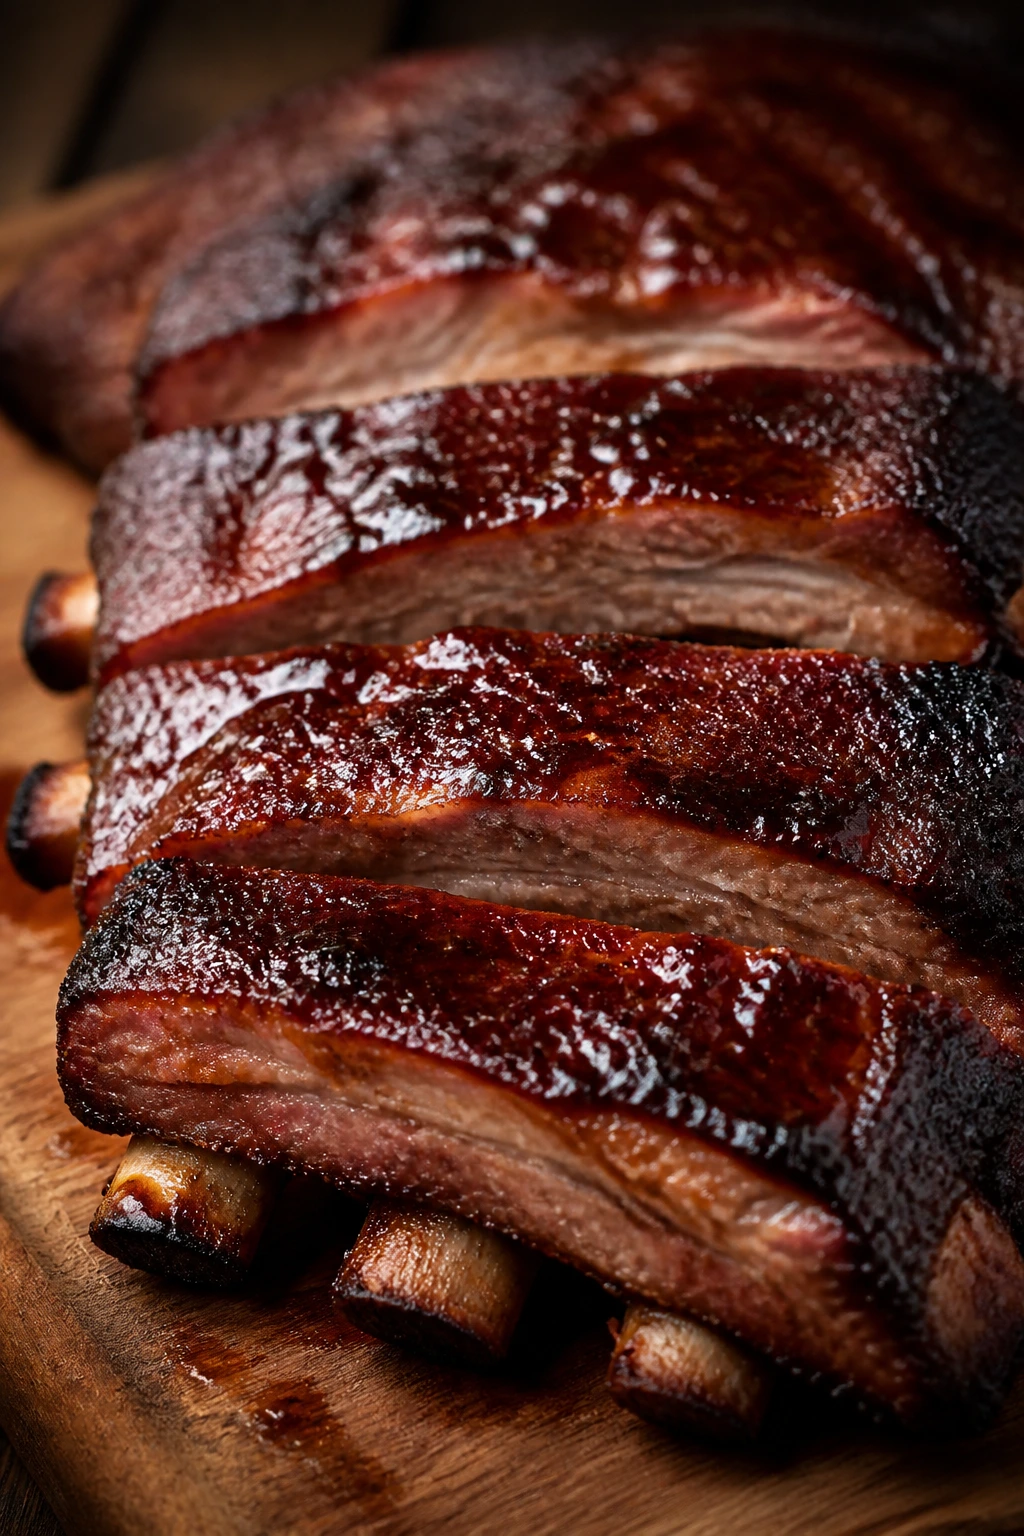
Ribs are a time commitment, but they pay you back in a big way. The meat turns tender, the edges get sticky, and the sauce caramelizes into that dark, lacquered finish that looks like it belongs at a backyard feast. This is the dinner that makes the whole house smell like something worth waiting for.
I like baby back ribs for Father’s Day because they feel festive without demanding a smoker or a pile of specialty gear. A low oven does most of the work. A short blast under high heat or on the grill at the end gives you the sticky finish that people remember.
Why It Works:
Baby back ribs are leaner than spare ribs, so they cook a little faster and need wrapping to stay moist. A dry rub seasons the meat deep down, while a foil wrap traps steam and softens the connective tissue. The final sauce stage adds texture and shine, which is what keeps the ribs from tasting flat.
Key Ingredients:
- 2 racks baby back ribs, about 4 to 5 pounds total — choose racks with even thickness.
- 2 tablespoons brown sugar — helps the rub caramelize.
- 1 tablespoon paprika — gives the ribs color and mild sweetness.
- 1 tablespoon kosher salt — seasons the meat well.
- 2 teaspoons black pepper — adds a little bite.
- 1 teaspoon garlic powder — rounds out the rub.
- 1 cup apple juice — keeps the wrapped ribs moist.
- 1 to 1½ cups barbecue sauce — use your favorite style; sweeter sauces glaze well.
Quick Steps:
- Prep the ribs: Remove the thin membrane from the back of each rack. Pat the ribs dry so the rub sticks.
- Mix the rub: Stir together brown sugar, paprika, salt, pepper, and garlic powder, then coat both sides of the ribs evenly.
- Wrap tightly: Place each rack on heavy-duty foil with a splash of apple juice. Seal the packets well so the steam stays in.
- Bake low and slow: Cook at 300°F for about 2½ hours, until the meat is tender and a toothpick slides in with little resistance.
- Sauce and finish: Open the foil, brush the ribs with barbecue sauce, and return them to the oven or grill for 10 to 15 minutes, until the sauce is sticky and browned in spots.
- Rest before cutting: Let the ribs sit for 10 minutes, then slice between the bones.
Equipment for This Recipe:
- Rimmed baking sheet — holds the foil packets securely.
- Heavy-duty aluminum foil — helps trap steam.
- Pastry brush — for clean sauce application.
- Sharp chef’s knife — makes neat cuts between bones.
How to Serve This Dish:
Pile the ribs on a large platter and cut them into single or two-bone pieces. Coleslaw, cornbread, and baked beans all make sense here. This plate wants a napkin and a grin.
Pro Tips for This Recipe:
- Peel the membrane or the ribs can turn chewy in a way that never feels right.
- Use a sauce with enough sugar to glaze, but not so much that it burns in the final blast.
- If you like a firmer bark, uncover the ribs for the last 20 minutes before saucing.
- A little apple cider vinegar in the sauce wakes up the sweetness.
Variations on This Dish:
- Spicy Dry-Rub Ribs: Add cayenne and chili powder to the rub if Dad likes heat with the smoke.
- Honey-Mustard Ribs: Swap part of the barbecue sauce for honey mustard in the finish for a tangier profile.
- Grill-Only Finish: After baking, finish over medium heat on the grill for a charred edge.
Common Mistakes to Avoid with This Dish:
- Don’t skip the foil wrap unless you want tougher ribs. Baby backs need moisture.
- Don’t sauce too early. Sugar burns before the meat finishes tenderizing.
- Don’t rush the rest. The juices settle and the slices hold together better.
3. Bacon Cheeseburger Sliders
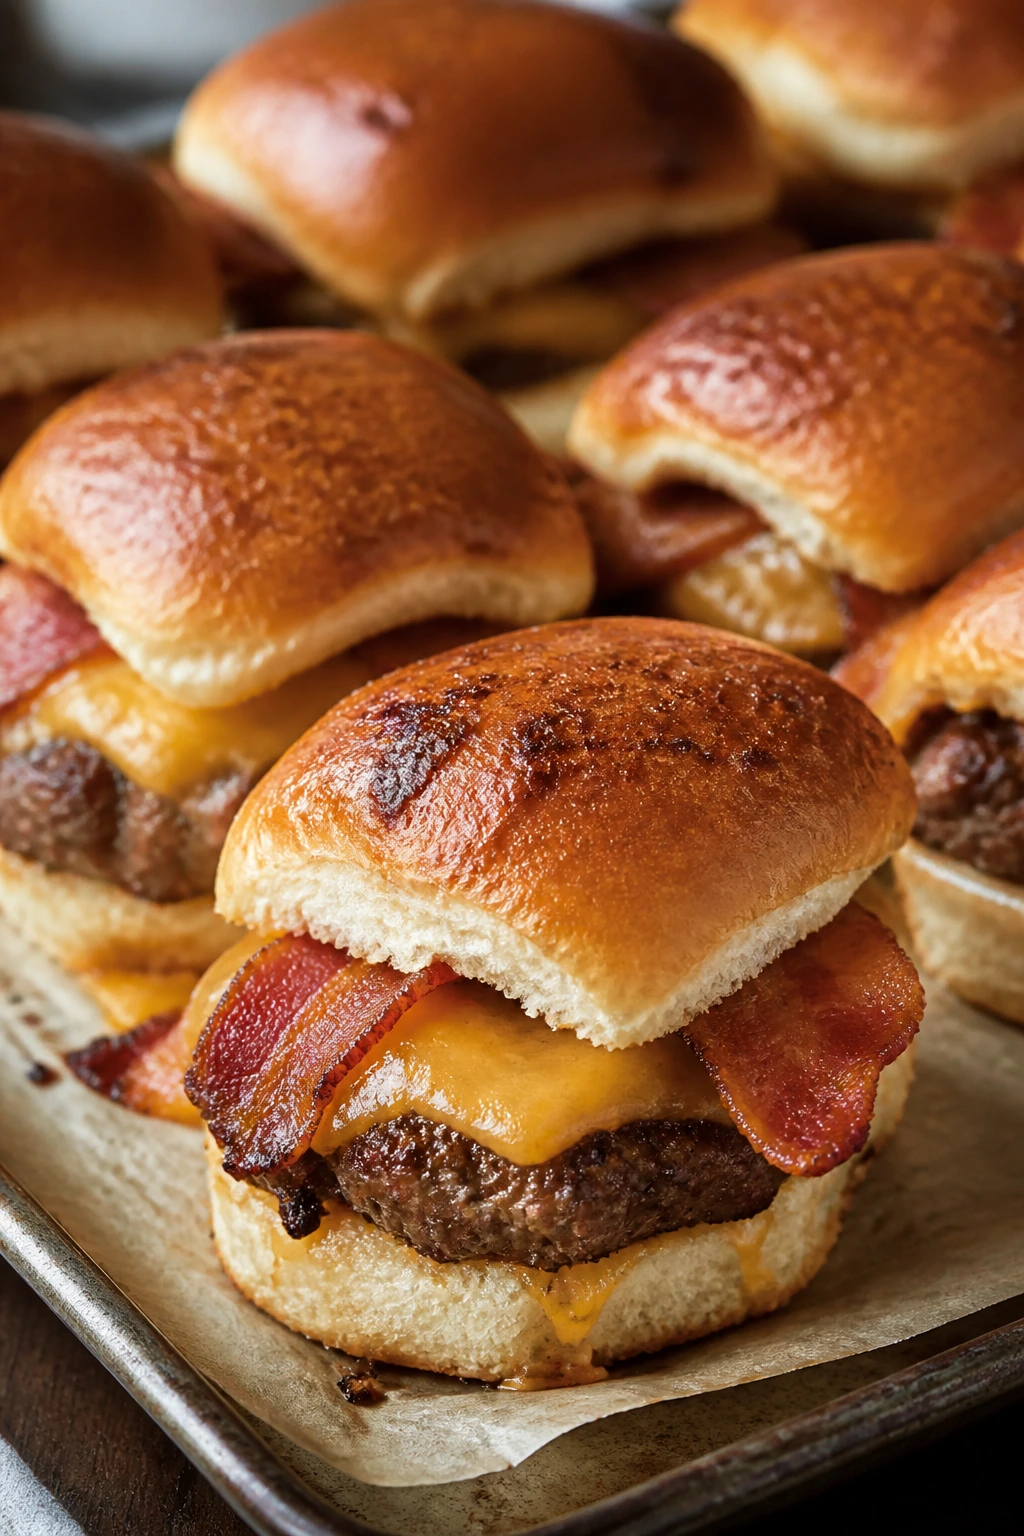
These sliders hit a sweet spot between backyard cookout food and a proper dinner. The beef is juicy, the cheese melts into the meat, the bacon brings the salty crunch, and the soft buns soak up just enough of the drippings to keep things honest. No one complains when a dinner smells like a burger joint in the best way.
The beauty here is scale. You can feed a crowd without standing over a grill for an hour, and sliders feel fun in a way full-sized burgers sometimes don’t. The sheet pan method also keeps the assembly tidy, which matters when you’d rather be sitting down than juggling patties.
Why It Works:
Ground beef mixed with a little seasoning and pressed into one even layer stays juicy and cooks evenly. Baking the sliders together melts the cheese across the whole pan, so every bite gets beef, bacon, and bun. A buttered top gives you that soft, golden finish that makes slider trays disappear fast.
Key Ingredients:
- 2 pounds ground beef, 80/20 — enough fat to keep the sliders juicy.
- 1 teaspoon kosher salt — seasons the meat without overdoing it.
- 1 teaspoon black pepper — gives the beef some edge.
- 8 slices bacon, cooked and chopped — brings smoke and crunch.
- 12 slider buns — soft dinner rolls or potato buns work well.
- 8 slices cheddar or American cheese — melts cleanly.
- 1 small onion, finely diced and sautéed — adds sweetness and depth.
- 2 tablespoons melted butter — brushed on top for color and flavor.
- Pickles and burger sauce — optional, but they give the sliders real burger character.
Quick Steps:
- Cook the bacon: Fry the bacon until crisp, then drain and chop it into small pieces.
- Form the beef layer: Season the ground beef with salt and pepper, then press it into a sheet pan or skillet in one even layer.
- Cook the beef: Bake or sear the beef until nearly done, about 10 to 12 minutes, then drain any excess fat.
- Assemble the sliders: Place the bottom buns in a baking dish, add the beef, scatter the bacon and onion over the top, then layer on the cheese and bun tops.
- Brush and bake: Brush the tops with melted butter and bake at 375°F for 8 to 10 minutes, until the cheese melts and the buns turn golden.
- Slice and serve: Cut along the bun seams and serve immediately while the cheese is still stretchy.
Equipment for This Recipe:
- Rimmed baking sheet or 9×13-inch pan — holds the slider slab together.
- Large skillet — useful if you cook the beef on the stove.
- Spatula — for moving the beef layer cleanly.
- Pastry brush — for the butter finish.
How to Serve This Dish:
Serve the sliders with potato chips, fries, or a crunchy slaw. Stack them on a board and let people grab their own; these are meant to be eaten with both hands. They also make a strong case for extra pickles on the side.
Pro Tips for This Recipe:
- Press the beef into an even layer so it cooks at the same pace everywhere.
- Don’t pile on watery toppings before baking; they can make the buns soggy.
- If you use onion, cook it first until soft and sweet. Raw onion can bully the whole sandwich.
- A little burger sauce made from mayo, ketchup, mustard, and relish takes five seconds and helps a lot.
Variations on This Dish:
- Jalapeño Bacon Sliders: Add sliced jalapeños and pepper jack cheese for a sharper, hotter bite.
- BBQ Onion Sliders: Stir barbecue sauce into the beef and top with caramelized onions instead of pickles.
- Turkey Slider Swap: Use ground turkey, but add a little olive oil so the filling stays moist.
Common Mistakes to Avoid with This Dish:
- Don’t overcook the beef before the cheese and buns go in. It keeps cooking in the oven.
- Don’t use dry, stale buns; they break apart and feel dusty.
- Don’t skip draining fat if the pan looks greasy. The sliders will slide around instead of holding together.
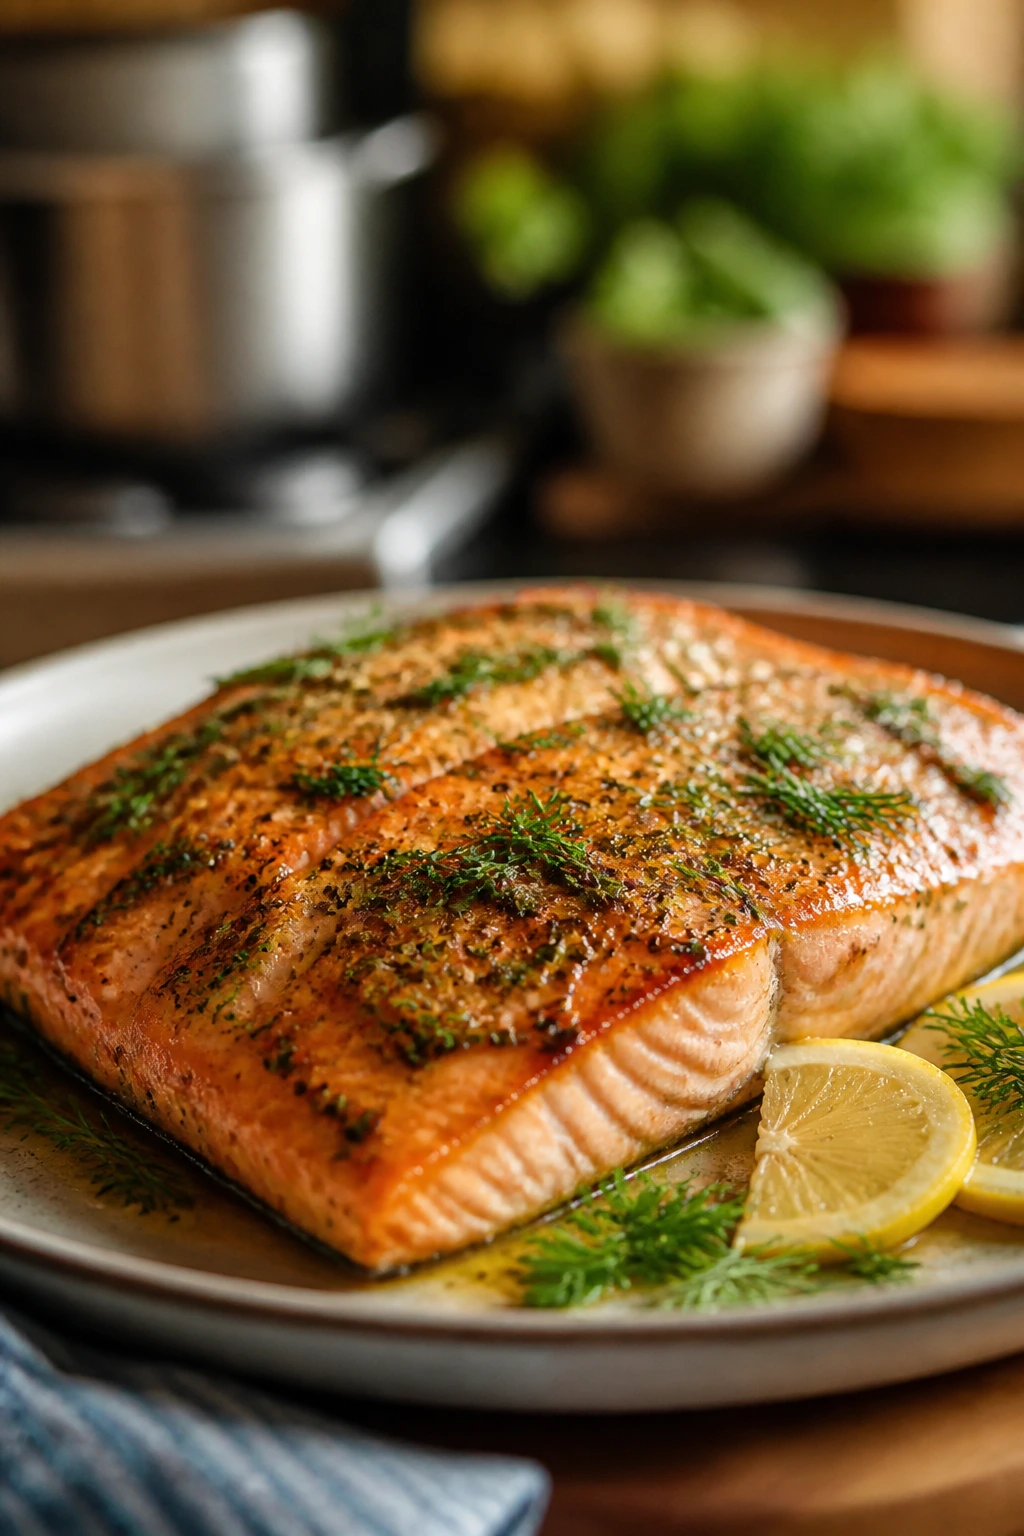
4. Lemon Butter Salmon with Asparagus

This dinner is lighter than the steak-and-ribs crowd, but it still feels special. The salmon turns silky in the center, the asparagus softens at the tips while staying snappy at the stems, and the lemon butter gives everything a clean, glossy finish. It’s the kind of plate that looks calm and composed without being fussy.
What I like most here is the speed. You can get dinner on the table in about half an hour, and almost everything cooks on one sheet pan or in one skillet. That matters when you want a dinner that feels polished but not exhausting.
Why It Works:
Salmon has enough fat to stay moist under high heat, which makes it forgiving. Asparagus cooks in the same time if you choose medium spears and trim the woody ends. The butter and lemon sauce adds richness, but the lemon keeps the whole thing from feeling heavy.
Key Ingredients:
- 4 salmon fillets, 6 ounces each — skin-on is useful if you like a crisp bottom.
- 1 pound asparagus — choose spears that are similar in thickness.
- 1 tablespoon olive oil — helps the vegetables roast.
- 2 tablespoons unsalted butter — forms the sauce base.
- 2 cloves garlic, minced — gives the butter a savory backbone.
- 1 lemon, zested and juiced — brightens the fish.
- 1 tablespoon chopped dill or parsley — adds a fresh finish.
- Salt and black pepper — season the fish and vegetables well.
Quick Steps:
- Preheat the oven: Heat to 425°F and line a sheet pan with parchment for easy cleanup.
- Prep the vegetables: Trim the asparagus, then toss it with olive oil, salt, and pepper. Spread it on the pan.
- Season the salmon: Pat the fillets dry and season both sides with salt and pepper. Place them on the pan beside the asparagus.
- Roast: Bake for 10 to 12 minutes, until the salmon flakes at the edges and reaches about 125°F to 130°F in the center for medium.
- Make the butter sauce: Melt butter in a small pan, add garlic for 30 seconds, then stir in lemon juice and zest.
- Finish and serve: Spoon the sauce over the salmon, scatter on the herbs, and serve immediately.
Equipment for This Recipe:
- Sheet pan — keeps the cooking simple.
- Parchment paper — helps the fish lift cleanly.
- Small saucepan — for the lemon butter.
- Instant-read thermometer — keeps the salmon from drying out.
How to Serve This Dish:
Serve the salmon over rice, mashed potatoes, or just as it is with crusty bread. A slice of lemon on the side never hurts. The plate should look bright, with the asparagus tucked in neatly and the butter pooling around the fish.
Pro Tips for This Recipe:
- Dry the salmon well before seasoning so it roasts instead of steaming.
- If the asparagus spears are thin, add them halfway through so they don’t collapse.
- Pull the fish a touch early; salmon goes from silky to dry faster than people expect.
- Add the lemon juice at the end so the butter stays smooth.
Variations on This Dish:
- Dijon Salmon: Brush the fillets with Dijon before roasting for a more savory bite.
- Honey-Lemon Salmon: Add a teaspoon of honey to the butter sauce for a sweeter finish.
- Garlic Herb Potatoes Version: Swap the asparagus for baby potatoes roasted for 20 minutes before the fish goes in.
Common Mistakes to Avoid with This Dish:
- Don’t overbake the salmon. It loses its soft texture fast.
- Don’t crowd the asparagus too tightly or it steams and turns limp.
- Don’t add herbs too early; they lose their fresh flavor in the oven.
5. Garlic Parmesan Chicken Thighs
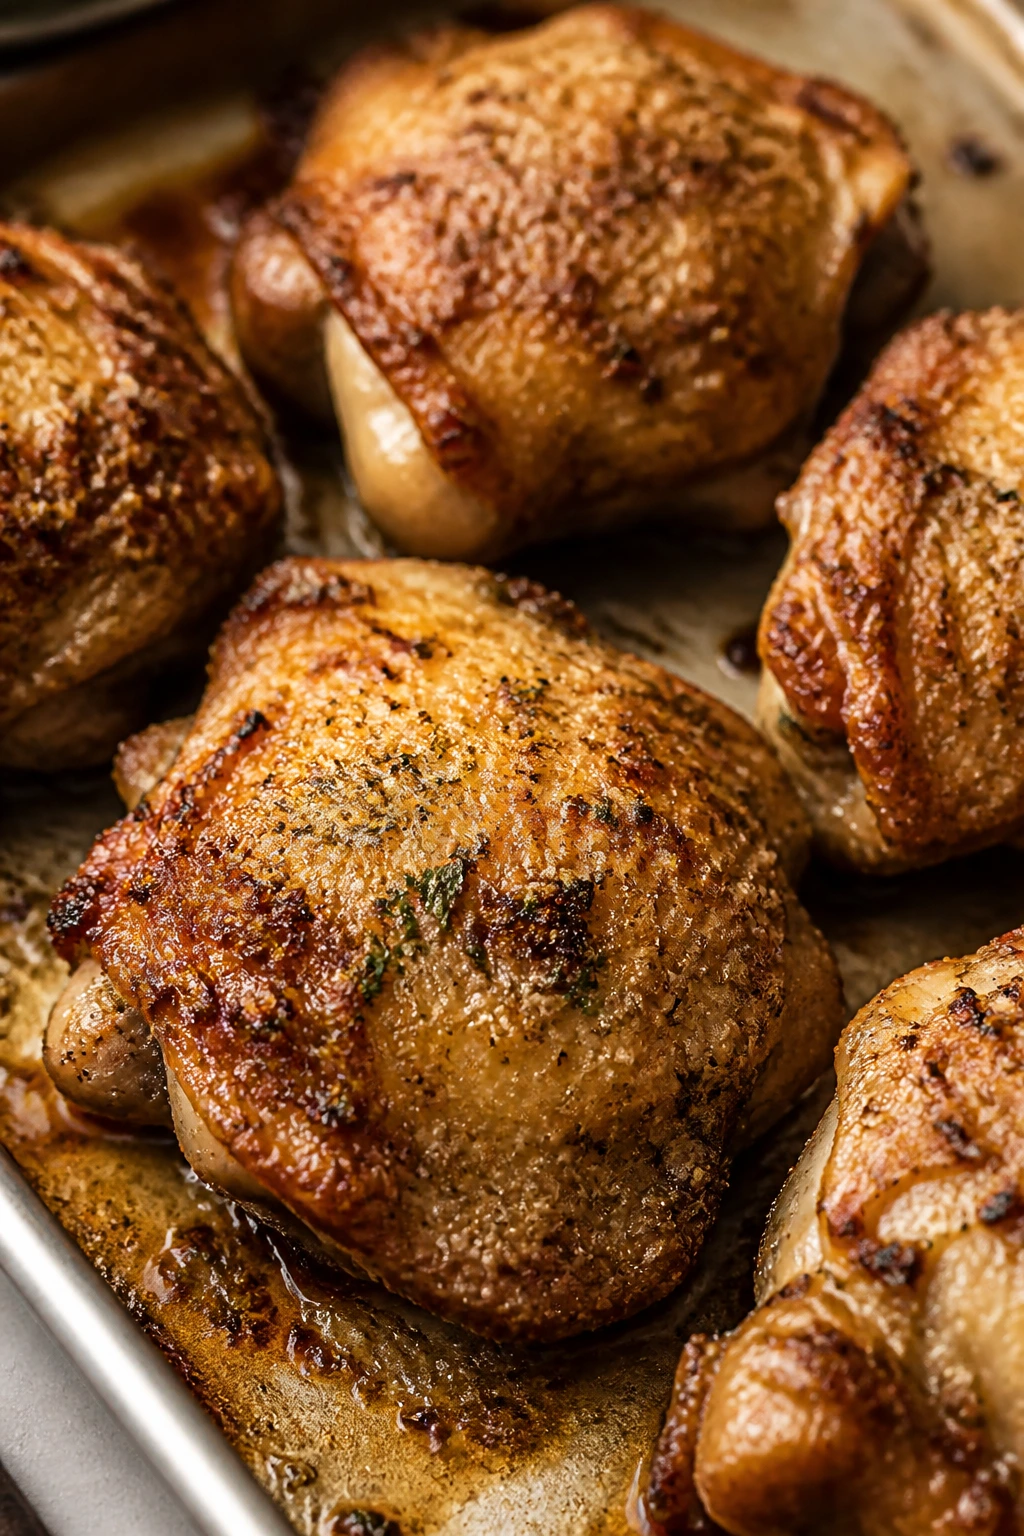
Chicken thighs are the unsung hero of a Father’s Day dinner because they cook up juicy, handle high heat without complaint, and take on bold flavors easily. Here, the garlic and parmesan form a savory crust that turns golden and a little crisp around the edges. It’s the kind of dinner that feels generous without asking for much from you.
Bone-in, skin-on thighs are my pick. They stay moist, and the skin gets a better finish than boneless cuts ever will. You can roast them on one pan and still have enough time to make a side dish without feeling like the meal is running you.
Why It Works:
Thigh meat has more fat than chicken breast, so it tolerates a longer roast without drying out. Parmesan adds salt and a nutty crust, while panko gives the surface a little structure. A quick blast at higher heat at the end helps the skin crisp instead of staying soft.
Key Ingredients:
- 8 bone-in, skin-on chicken thighs, about 3 pounds — the best cut for juicy results.
- 1 teaspoon kosher salt — seasons the meat under the crust.
- 1 teaspoon black pepper — keeps the flavor from tasting flat.
- 4 cloves garlic, minced — gives the topping its backbone.
- 1 cup grated parmesan — finely grated works better than big shreds.
- ½ cup panko breadcrumbs — helps the crust brown.
- 2 tablespoons mayonnaise or olive oil — helps the coating stick.
- 1 tablespoon chopped parsley — freshens the finish.
Quick Steps:
- Preheat the oven: Set it to 400°F and line a baking sheet with foil or parchment.
- Season the chicken: Pat the thighs dry, then season with salt and pepper on both sides.
- Mix the topping: Combine parmesan, garlic, panko, and mayonnaise or oil in a bowl until it looks like wet sand.
- Coat and roast: Spread the topping over the thighs, then place them skin-side up on the pan. Roast for 25 to 30 minutes, until the skin is browned and the thighs reach 165°F in the thickest part.
- Crisp briefly: If you want deeper color, broil for 1 to 2 minutes, watching closely so the cheese does not burn.
- Rest and garnish: Let the chicken rest for 5 minutes, then scatter parsley on top.
Equipment for This Recipe:
- Rimmed baking sheet — catches drips and keeps the chicken in one layer.
- Mixing bowl — for the crust mixture.
- Tongs — make handling the thighs easier.
- Instant-read thermometer — chicken needs accuracy, not guesswork.
How to Serve This Dish:
Serve these thighs with roasted potatoes, green beans, or a simple Caesar salad. Spoon any pan juices over rice if you want a little extra comfort. The chicken should land on the plate with a crisp top and a glossy bottom.
Pro Tips for This Recipe:
- Dry the skin before seasoning; moisture weakens the crust.
- Grate the parmesan finely so it melts into the topping instead of falling off.
- Put the chicken on a rack if you want more all-around crispness.
- Let the thighs rest; the juices stay in the meat better.
Variations on This Dish:
- Lemon Pepper Version: Add lemon zest and extra black pepper for a brighter profile.
- Spicy Parmesan Thighs: Mix in red pepper flakes and a pinch of cayenne.
- Boneless Shortcut: Use boneless thighs and cut the cook time to about 20 minutes.
Common Mistakes to Avoid with This Dish:
- Don’t use thick parmesan shreds; they brown unevenly and fall off.
- Don’t bake skin-side down. The crust will sog out.
- Don’t assume the chicken is done because the topping looks brown; check the thickest part.
6. Grilled Pork Chops with Peach Glaze
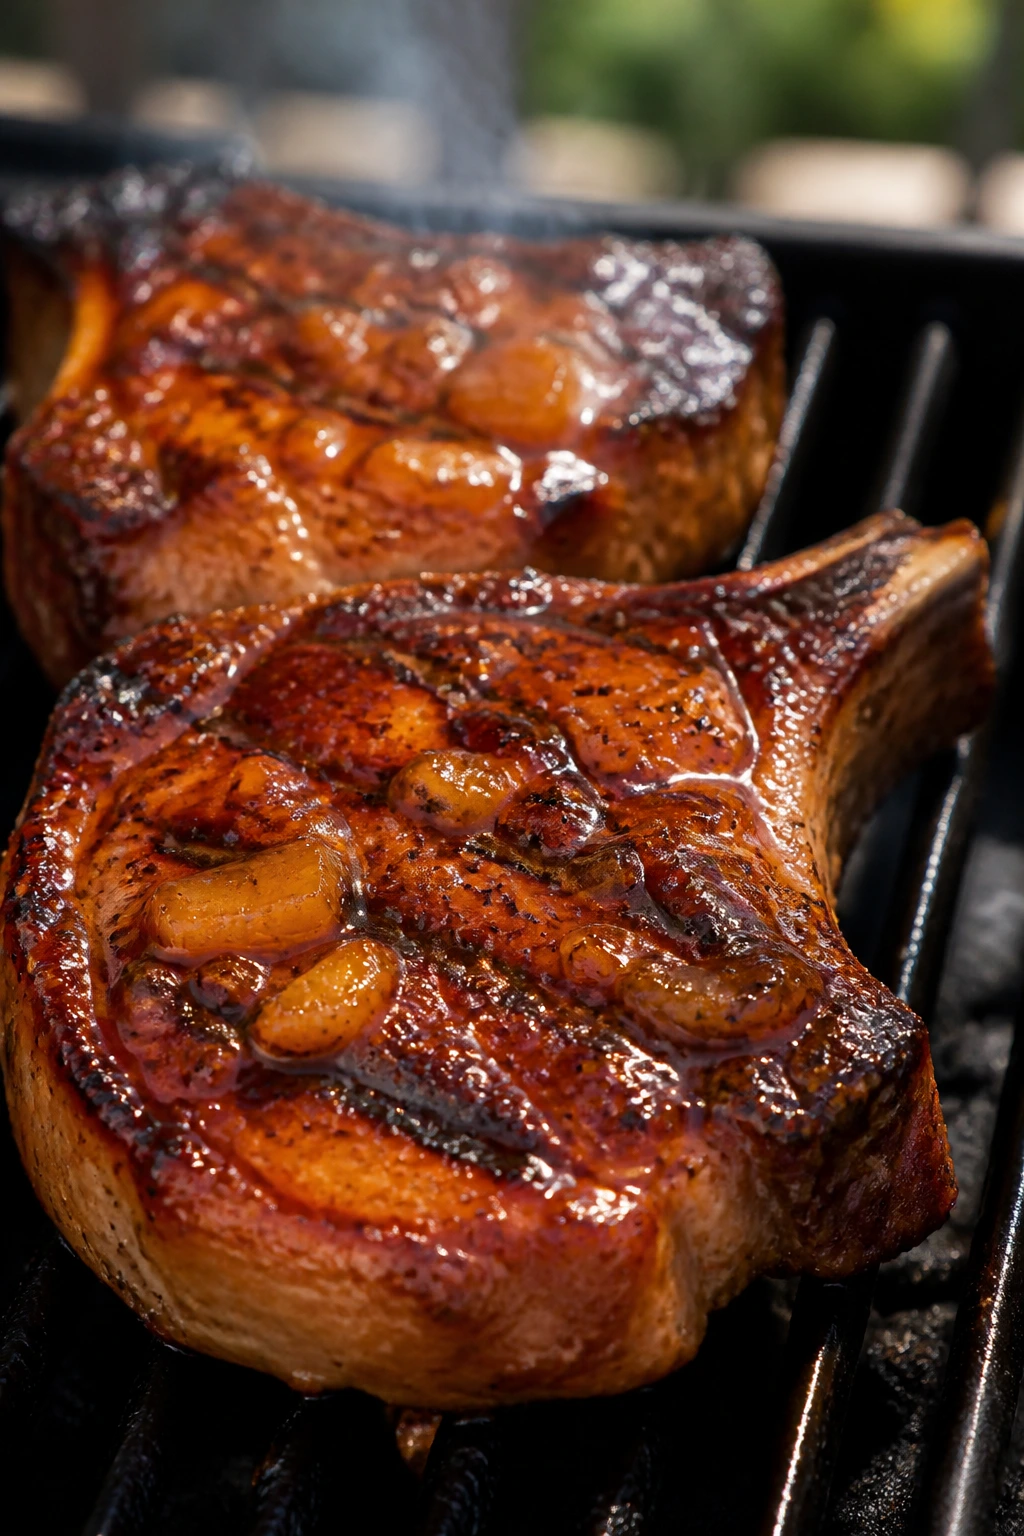
Pork chops and fruit glaze can sound a little too tidy on paper, but on the grill they make perfect sense. The chops pick up char, the peach glaze turns sticky and fragrant, and the meat stays juicy if you stop cooking it before it gets tight. It’s a dinner that feels bright without losing its backbone.
I like bone-in chops here because they’re more forgiving over heat. The glaze is where the fun lives, and it gives you that sweet-salty finish that makes people keep cutting “one more piece.” That’s usually the sign you did well.
Why It Works:
Bone-in pork chops handle the grill better than thin boneless ones because the bone slows down the heat. Peach preserves make a fast glaze without needing a long reduction, and Dijon keeps the sweetness from turning cloying. A little vinegar sharpens the edges and keeps the plate awake.
Key Ingredients:
- 4 bone-in pork chops, about 1 inch thick — thick enough to stay juicy.
- 1 teaspoon kosher salt — seasons the pork through.
- ½ teaspoon black pepper — keeps the flavor balanced.
- ½ cup peach preserves — forms the glaze.
- 1 tablespoon Dijon mustard — adds sharpness.
- 1 tablespoon apple cider vinegar — cuts the sweetness.
- 1 teaspoon minced garlic — gives the glaze some depth.
- 1 tablespoon olive oil — helps prevent sticking.
Quick Steps:
- Make the glaze: Stir peach preserves, Dijon, vinegar, and garlic together in a small bowl.
- Season the chops: Pat the pork dry, brush lightly with oil, and season both sides with salt and pepper.
- Heat the grill: Preheat to medium-high and clean the grates well.
- Grill the pork: Cook the chops for about 4 to 5 minutes per side, until the internal temperature reaches 145°F and the outside has good grill marks.
- Glaze at the end: Brush on the peach mixture during the last 2 minutes of cooking so it thickens without burning.
- Rest and serve: Rest the chops for 3 to 5 minutes, then spoon over any extra glaze.
Equipment for This Recipe:
- Grill or grill pan — gives the chops their char.
- Small saucepan or bowl — for the glaze.
- Tongs — for easy flipping.
- Instant-read thermometer — pork is best when it hits the right temp, not when it looks done.
How to Serve This Dish:
These chops sit well next to grilled corn, rice pilaf, or a bitter green salad. A few extra peach slices on the plate make the meal look deliberate. Keep the glaze on the side if you want extra spooning at the table.
Pro Tips for This Recipe:
- Bring the chops up a bit before grilling so they cook more evenly.
- Don’t sauce too early or the sugars blacken before the pork finishes.
- If the grill runs hot, move the chops to a cooler spot for the last minute or two.
- A small pinch of chili flakes in the glaze gives it a better edge.
Variations on This Dish:
- Apricot Mustard Chops: Swap peach preserves for apricot preserves and keep the mustard.
- Maple Bourbon Chops: Use maple syrup and a spoon of bourbon in place of the fruit glaze.
- Herb-Grilled Version: Rub the chops with rosemary and thyme instead of glaze for a drier finish.
Common Mistakes to Avoid with This Dish:
- Don’t overcook pork chops. Dry pork chops are a sad meal.
- Don’t use paper-thin chops unless you love chasing overcooked edges.
- Don’t pour glaze on from the start; it burns before the meat finishes.
7. Shrimp Scampi with Linguine
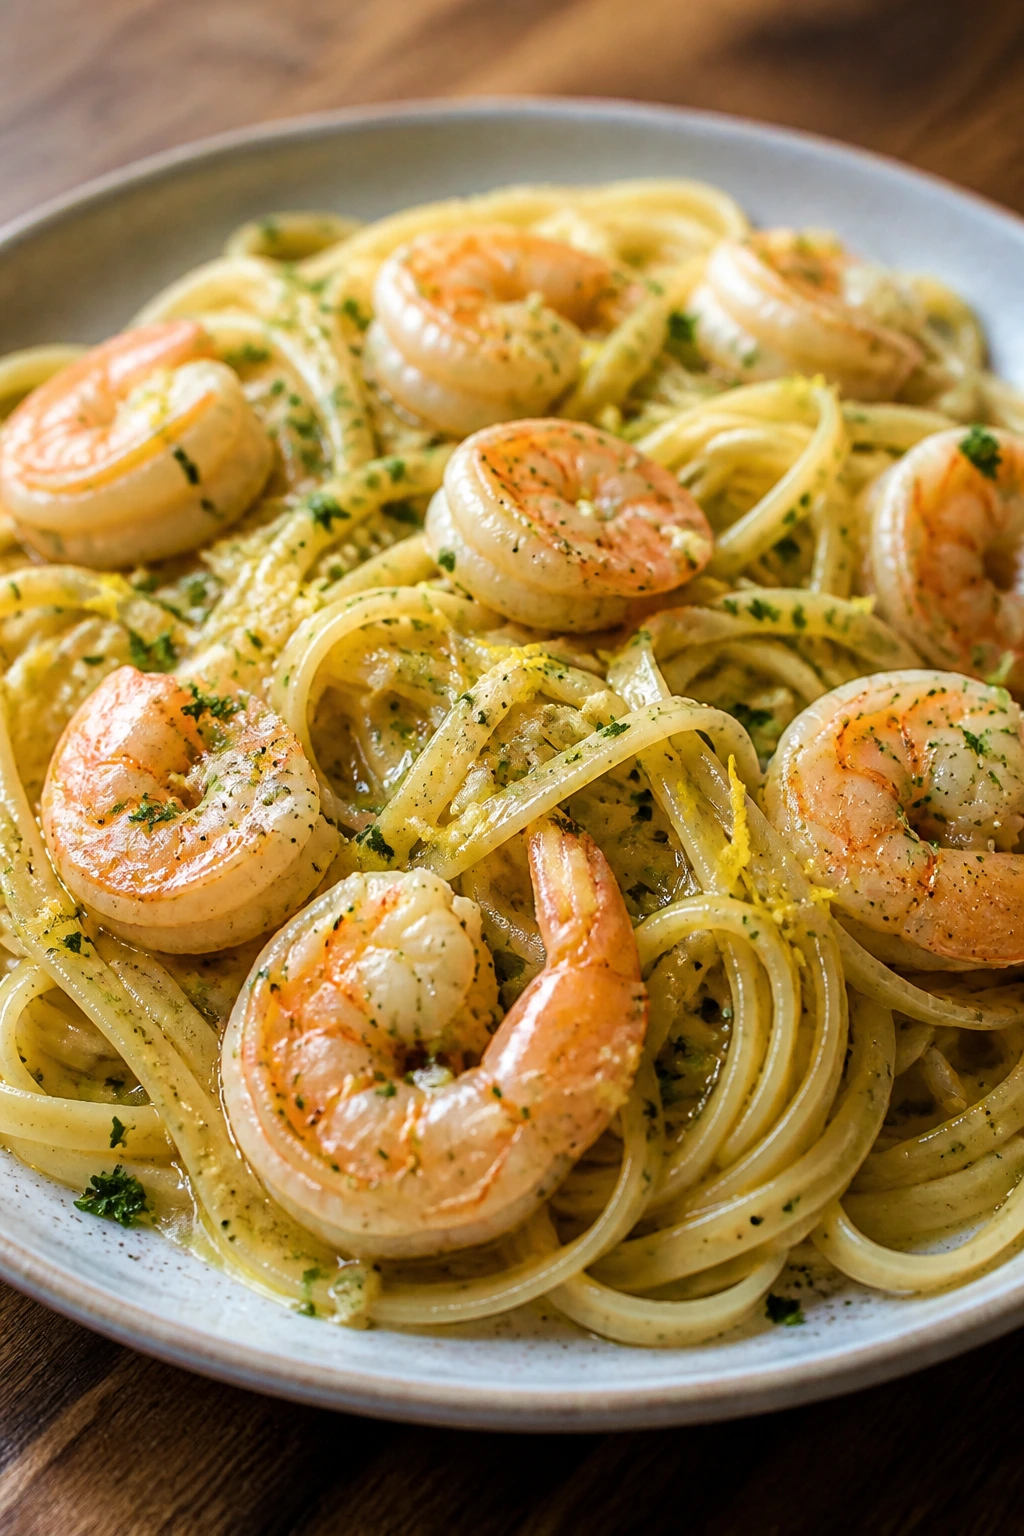
Shrimp scampi feels like a dinner that belongs in a nice restaurant, except it lands on your table in about 30 minutes. The sauce is buttery and garlicky, the shrimp stay plump if you cook them fast, and the pasta catches every drop of the lemony pan sauce. It’s a strong choice when you want something lighter but not skimpy.
The key is speed and heat. Shrimp turn rubbery when they linger, so this is a dinner where you set everything up first and cook like you mean it. Once you get the timing right, the whole thing moves fast.
Why It Works:
Shrimp cook in just a few minutes, which makes the dish feel quick without tasting rushed. Linguine gives the sauce enough surface area to cling to, and a splash of white wine or stock loosens the butter into something silky. Lemon keeps the sauce bright, which matters because shrimp and butter can get heavy fast.
Key Ingredients:
- 1 pound linguine — sturdy enough to hold the sauce.
- 1½ pounds large shrimp, peeled and deveined — look for firm, dry shrimp.
- 4 tablespoons unsalted butter — the base of the sauce.
- 2 tablespoons olive oil — keeps the butter from browning too fast.
- 5 cloves garlic, minced — this is garlic-forward on purpose.
- ¼ cup dry white wine or chicken stock — adds depth and helps deglaze.
- 1 lemon, zested and juiced — keeps the sauce sharp.
- ¼ cup chopped parsley — adds freshness at the end.
- Red pepper flakes — optional, but a pinch helps.
Quick Steps:
- Cook the pasta: Boil the linguine in salted water until al dente, then reserve 1 cup of pasta water before draining.
- Sauté the garlic: Heat butter and olive oil in a wide skillet over medium heat, then cook the garlic for about 30 seconds until fragrant, not brown.
- Cook the shrimp: Add the shrimp in a single layer and cook for 1 to 2 minutes per side, until pink and just curled. Remove them if needed so they do not overcook.
- Build the sauce: Pour in the wine or stock, lemon juice, and zest, scraping up the pan bits. Let it simmer for 1 to 2 minutes.
- Toss everything together: Add the pasta and a splash of reserved pasta water, then toss until the sauce coats the noodles. Return the shrimp and parsley to the pan.
- Serve hot: Taste for salt, add a pinch of pepper flakes if you want heat, and serve right away.
Equipment for This Recipe:
- Large pot — for the pasta.
- Wide skillet — gives the shrimp room.
- Tongs — useful for tossing the noodles.
- Microplane or zester — handy for the lemon.
How to Serve This Dish:
Serve the scampi with garlic bread and a simple salad. Twirling the pasta onto warmed plates helps the butter sauce stay silky. This is one of those dinners that looks more impressive than it is hard.
Pro Tips for This Recipe:
- Dry the shrimp well before cooking so they sear instead of steaming.
- Keep the garlic pale; brown garlic tastes bitter.
- Save more pasta water than you think you’ll need.
- If the sauce tightens up, a spoon or two of hot pasta water brings it back.
Variations on This Dish:
- Tomato Scampi: Add halved cherry tomatoes for a little sweetness and color.
- Spicy Scampi: Increase the red pepper flakes and finish with a squeeze of extra lemon.
- Gluten-Free Version: Use gluten-free linguine and keep the rest the same.
Common Mistakes to Avoid with This Dish:
- Don’t overcook the shrimp. Once they curl into tight little rings, they’re done.
- Don’t skip the pasta water; it helps the sauce cling.
- Don’t drown the dish in cream. Scampi should taste like butter, garlic, and lemon.
8. Meatloaf with Tangy Glaze
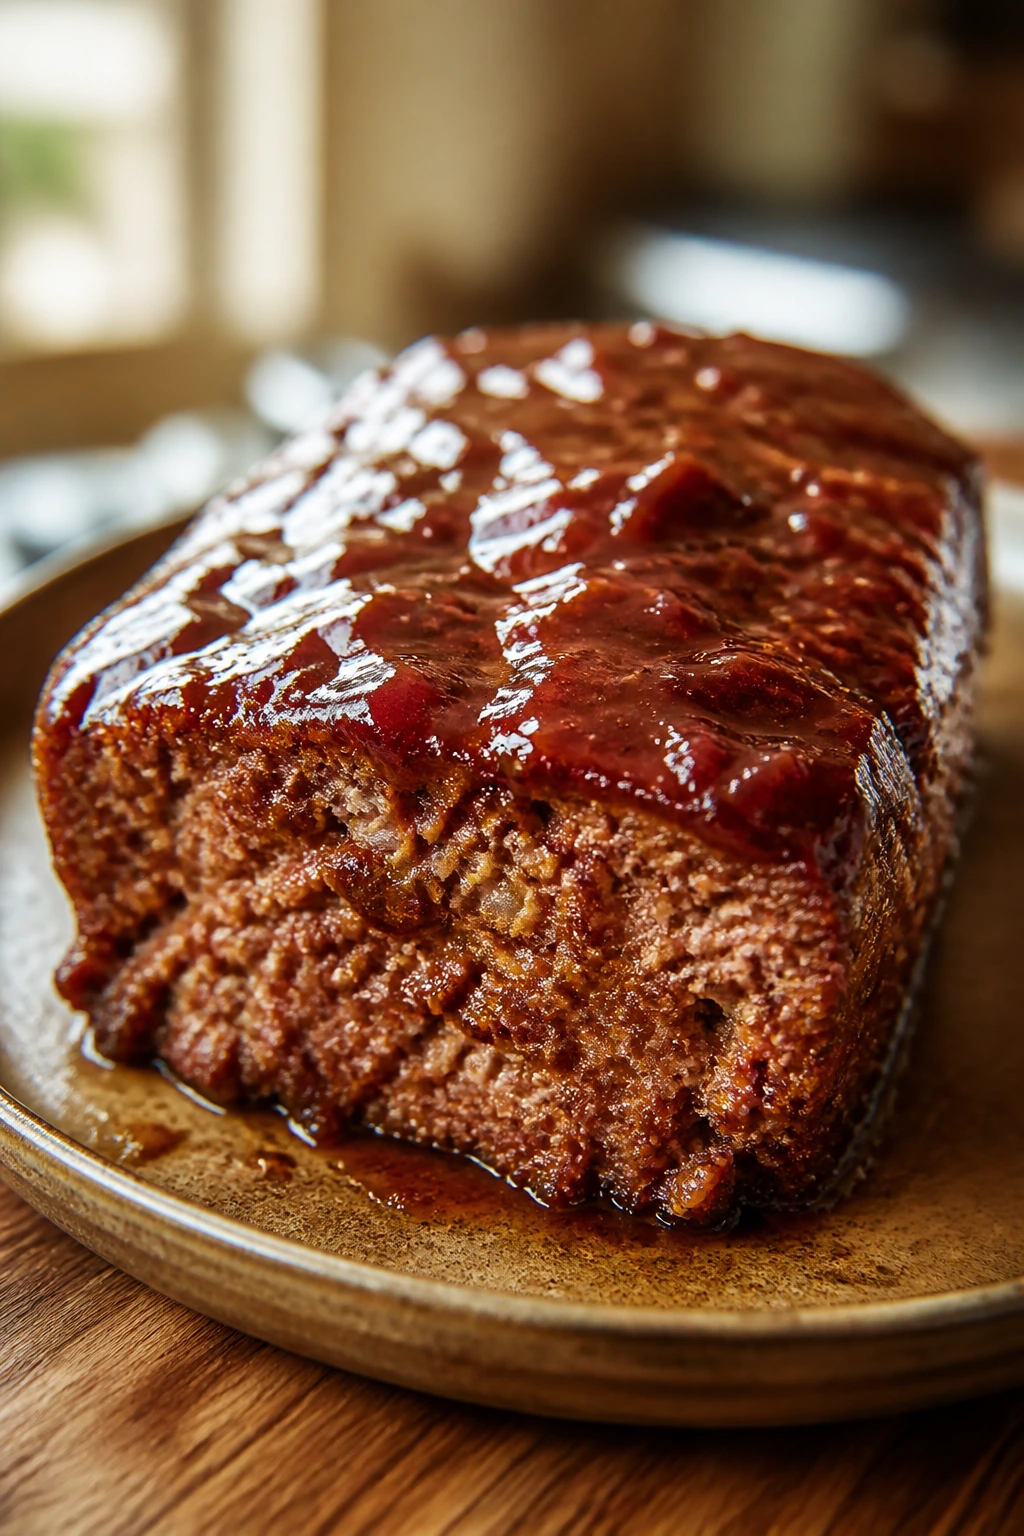
Meatloaf gets unfairly treated like a boring Tuesday dinner, which is nonsense when it’s done right. A good loaf is tender in the middle, browned on the edges, and covered in a sweet-tangy glaze that soaks into the top just enough. It slices cleanly and eats like comfort food that knows how to wear a tie.
For Father’s Day, meatloaf makes sense if your crowd likes old-school dinners and real leftovers. It also travels well on the table, which is useful when you’re juggling sides and drinks and the rest of the meal wants some breathing room.
Why It Works:
A mix of beef and pork gives the loaf better flavor and a softer texture than beef alone. Breadcrumbs and milk keep it from compacting into a brick, while onions and Worcestershire add savory depth. The glaze on top keeps the surface from drying out and gives you that sticky finish people look for.
Key Ingredients:
- 1½ pounds ground beef — choose 80/20 for flavor.
- ½ pound ground pork — adds tenderness and richness.
- 1 cup breadcrumbs — binds the loaf without making it heavy.
- 2 eggs — hold the mixture together.
- 1 small onion, finely diced — adds moisture and sweetness.
- ½ cup milk — softens the crumbs.
- 2 tablespoons Worcestershire sauce — deepens the meat flavor.
- 1 cup ketchup — base for the glaze.
- 2 tablespoons brown sugar — sweetens the glaze.
- 1 tablespoon Dijon mustard — keeps the glaze from tasting flat.
Quick Steps:
- Preheat the oven: Heat to 375°F and line a baking sheet with parchment or foil.
- Mix gently: Combine the meats, breadcrumbs, eggs, onion, milk, and Worcestershire in a bowl. Mix only until combined.
- Shape the loaf: Form the mixture into a loaf on the pan, about 9 by 5 inches, and smooth the top.
- Add the glaze: Stir ketchup, brown sugar, and Dijon together, then spread half over the loaf.
- Bake: Cook for 50 minutes, then brush on the remaining glaze and bake for another 10 to 15 minutes, until the center reaches 160°F.
- Rest before slicing: Let it sit for at least 10 minutes so the slices hold together.
Equipment for This Recipe:
- Rimmed baking sheet — better than a loaf pan for browning.
- Mixing bowl — for the meat mixture.
- Small bowl — for the glaze.
- Instant-read thermometer — keeps the center safe and juicy.
How to Serve This Dish:
Meatloaf loves mashed potatoes, peas, and roasted carrots. Slice it thick and spoon any glaze from the pan over the top. It should look sturdy, not dense, and the edges should have a little caramelization.
Pro Tips for This Recipe:
- Mix the meat with your hands, but stop as soon as the ingredients come together.
- Grate the onion if you want it to disappear into the loaf instead of standing out.
- Use a baking sheet rather than packing it into a loaf pan; you get better browning.
- Let the loaf rest or the slices will crumble.
Variations on This Dish:
- Bacon-Wrapped Meatloaf: Wrap the loaf in bacon strips before baking for a smokier finish.
- BBQ Meatloaf: Swap the ketchup glaze for barbecue sauce and a little brown sugar.
- Turkey Meatloaf: Use ground turkey and add a tablespoon of olive oil to keep it moist.
Common Mistakes to Avoid with This Dish:
- Don’t overmix or the texture turns dense.
- Don’t skip the glaze; it keeps the top from drying out.
- Don’t slice too soon. Meatloaf needs a short rest to settle.
9. Chicken Parmesan Bake
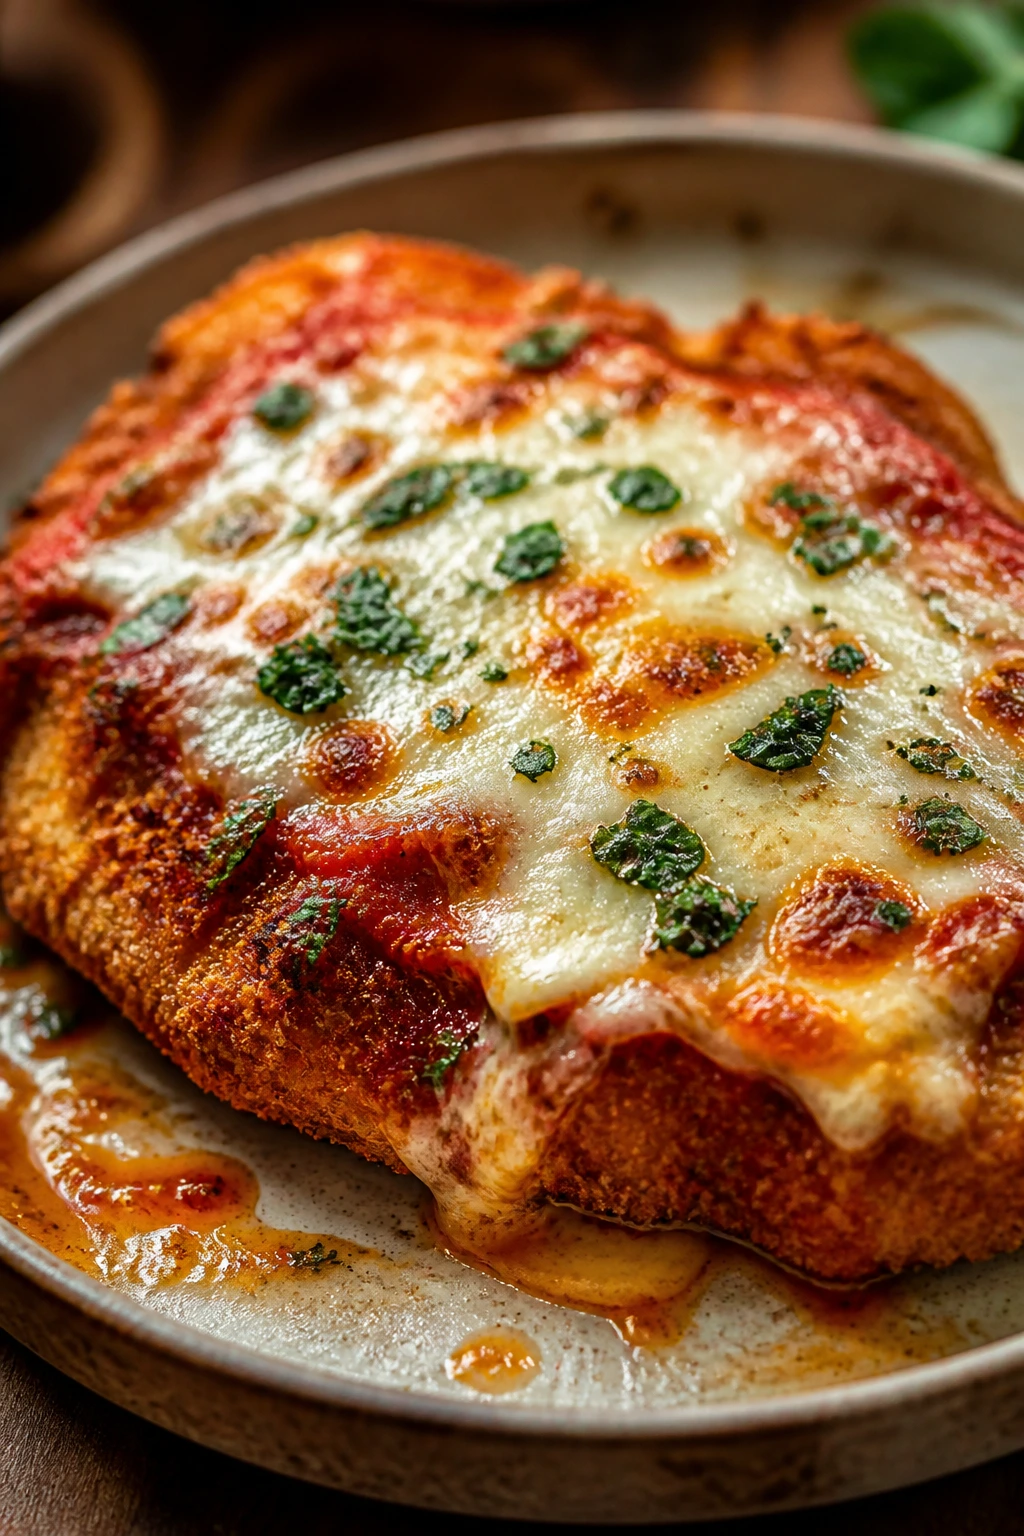
Chicken Parmesan can feel like a project, but the baked version is much more forgiving and still gives you the crunch, sauce, and cheese pull people want. The breaded chicken stays crisp enough under the marinara, the mozzarella melts into a smooth cap, and the whole dish smells like a very good Italian restaurant.
This is a nice Father’s Day dinner when you want something classic that still feels like you made an effort. Serve it with pasta or a salad, and it suddenly feels like a full occasion rather than a weeknight fallback.
Why It Works:
Pounding the chicken to even thickness helps it cook at the same pace, so the thin edges do not dry out before the center is done. A quick breadcrumb coating brings texture, and baking the chicken before saucing keeps the crust from turning soggy. Sauce and cheese go on late, which is the whole trick.
Key Ingredients:
- 4 boneless, skinless chicken breasts, about 6 ounces each — pound to even thickness.
- 1 cup flour — helps the egg stick.
- 2 eggs, beaten — form the binder.
- 2 cups panko breadcrumbs — gives a crisp coating.
- 1 cup grated parmesan — mixes into the crust.
- 2 cups marinara sauce — use a sauce you actually like.
- 2 cups shredded mozzarella — melts well.
- 2 tablespoons olive oil — helps the breading brown.
- Salt and black pepper — season every layer.
Quick Steps:
- Preheat and prep: Heat the oven to 425°F and line a baking sheet with parchment.
- Bread the chicken: Dredge each breast in flour, then egg, then the panko-parmesan mixture. Press gently so the crumbs cling.
- Bake the chicken: Set the chicken on the pan, drizzle with oil, and bake for 18 to 20 minutes, until the coating is golden and the chicken is nearly cooked through.
- Add sauce and cheese: Spoon marinara over each piece, then top with mozzarella.
- Finish baking: Return to the oven for 8 to 10 minutes, until the cheese melts and the chicken reaches 165°F.
- Rest and serve: Let it stand for 5 minutes before serving so the sauce settles.
Equipment for This Recipe:
- Baking sheet — for crisping the chicken.
- Three shallow bowls — for flour, egg, and crumbs.
- Meat mallet or rolling pin — for pounding the chicken.
- Thermometer — for safe, juicy chicken.
How to Serve This Dish:
Serve with spaghetti, garlic bread, or roasted broccoli. A little extra parmesan at the table is never wasted. The cheese should be melted in a thick layer, not browned into a shell.
Pro Tips for This Recipe:
- Pound the chicken to even thickness so the breading cooks evenly.
- Season the flour, not just the crumbs, or the coating tastes dull.
- Don’t drown the chicken in sauce or the crust gives up.
- Use shredded mozzarella, not the fresh wet kind, if you want a better melt.
Variations on This Dish:
- Eggplant Parmesan Bake: Swap the chicken for breaded eggplant slices.
- Spicy Arrabbiata Version: Use a hotter tomato sauce and add red pepper flakes.
- Gluten-Free Chicken Parm: Use gluten-free crumbs and flour.
Common Mistakes to Avoid with This Dish:
- Don’t skip the pre-bake on the chicken. Raw breading plus sauce makes a mess.
- Don’t over-sauce the dish. A little restraint keeps the crust alive.
- Don’t cut before resting; the cheese and sauce need a minute to settle.
10. Sheet Pan Steak Fajitas
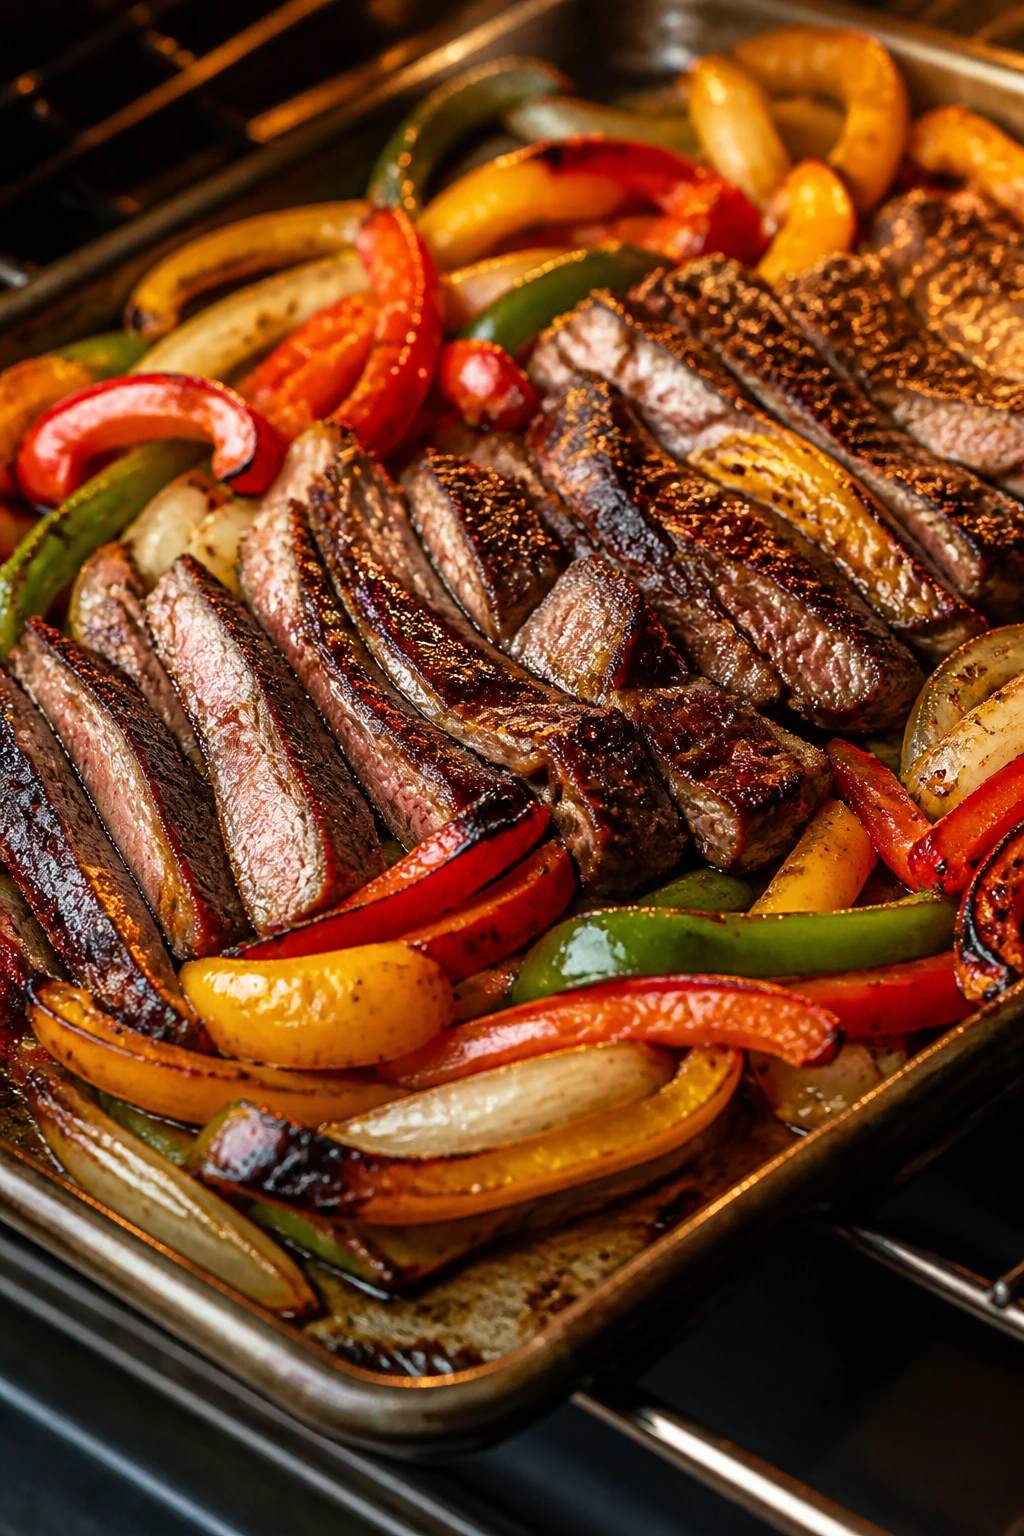
Steak fajitas have a built-in party feel, which makes them a smart Father’s Day dinner idea when you want something lively but easy. The meat gets charred edges, the peppers soften and sweeten, and the onions go silky around the edges. Put the pan in the middle of the table and people start building their own dinner, which is half the fun.
Sheet pan fajitas also spare you the usual stovetop juggling. One hot pan, one quick toss, and you’re done. That makes them a good choice if you want steak flavor without making steak night feel precious.
Why It Works:
Flank steak or skirt steak cooks fast when sliced against the grain and given a high-heat roast. Bell peppers and onions need the same roasting temperature, so everything comes together on one pan. A lime finish adds enough brightness to keep the meal from feeling heavy.
Key Ingredients:
- 1½ pounds flank steak — slice it thin after cooking.
- 3 bell peppers, sliced — use mixed colors for sweetness and color.
- 1 large onion, sliced — softens and sweetens in the oven.
- 2 tablespoons olive oil — helps the vegetables roast.
- 2 teaspoons chili powder — gives the fajitas their base flavor.
- 1 teaspoon cumin — adds warmth.
- 1 teaspoon garlic powder — keeps the seasoning simple.
- 1 lime — for juice at the end.
- 8 small flour or corn tortillas — for serving.
Quick Steps:
- Preheat the oven: Set it to 450°F and line a large sheet pan.
- Season the vegetables: Toss the peppers and onion with oil, chili powder, cumin, garlic powder, salt, and pepper. Spread them out on the pan.
- Add the steak: Rub the flank steak lightly with oil and the same spice mix, then place it beside the vegetables.
- Roast: Cook for 12 to 15 minutes, until the steak reaches about 130°F for medium-rare and the vegetables have browned edges.
- Rest and slice: Let the steak rest for 5 to 10 minutes, then slice thinly against the grain.
- Serve hot: Squeeze lime over the meat, then pile into warm tortillas.
Equipment for This Recipe:
- Large rimmed sheet pan — gives everything space to roast.
- Sharp knife — needed for thin slicing.
- Cutting board — for slicing the steak after rest.
- Foil — helpful for wrapping tortillas to warm them.
How to Serve This Dish:
Set out salsa, sour cream, guacamole, and shredded cheese. Let people build their own fajitas. A cold beer or lime soda works nicely beside the smoky, peppery filling.
Pro Tips for This Recipe:
- Don’t cut the steak before roasting; whole pieces stay juicier.
- Give the vegetables room so they roast instead of steam.
- Slice the steak across the grain or it eats like rope.
- Warm the tortillas before serving. Cold tortillas make the whole thing feel unfinished.
Variations on This Dish:
- Chicken Fajita Version: Use boneless thighs or breasts and roast them the same way.
- Smoky Chipotle Fajitas: Add chipotle powder or adobo sauce to the seasoning.
- Vegetarian Fajitas: Swap the steak for portobello mushrooms and extra peppers.
Common Mistakes to Avoid with This Dish:
- Don’t overcrowd the pan or nothing browns properly.
- Don’t skip resting the steak. The juices need to settle back in.
- Don’t overbake the meat; flank steak dries out fast.
11. Slow Cooker Pulled Pork Sandwiches
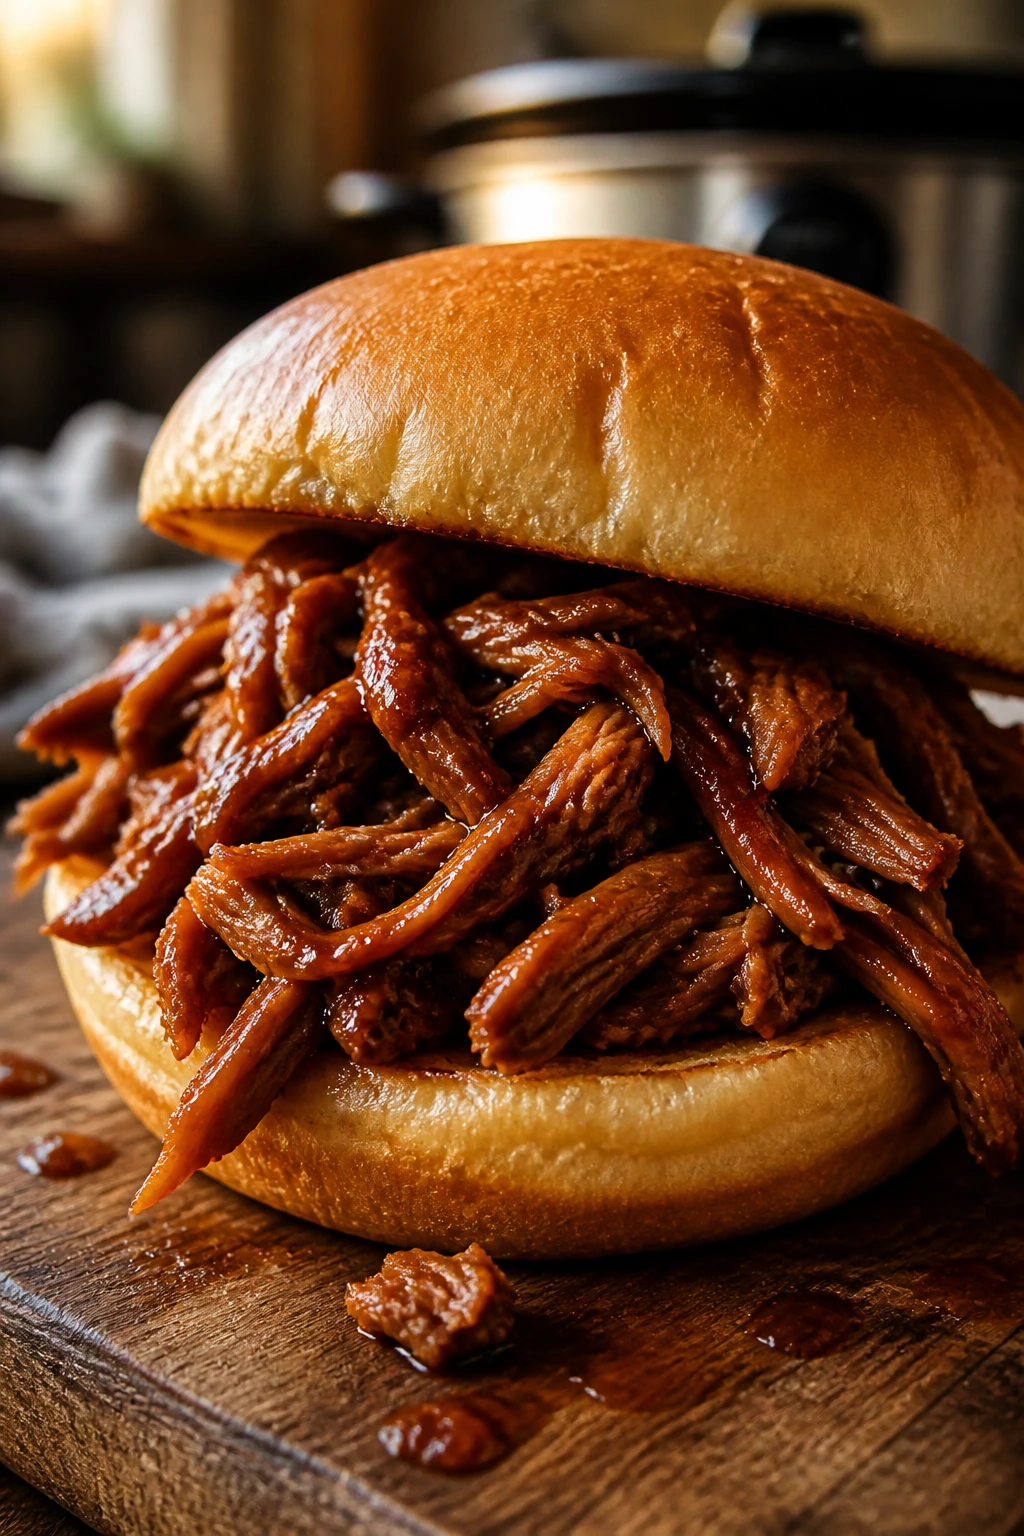
Pulled pork has a way of making a dinner feel like a gathering, even if the table only has a few people around it. The meat turns soft enough to shred with a fork, the seasoning sinks all the way through, and barbecue sauce clings to every strand. Stack it on a bun and you get a dinner that tastes like a long afternoon well spent.
This is the most hands-off option in the group, which is not the same as boring. It lets the slow cooker do the heavy lifting while you handle sides, drinks, or just sit down for once. That’s a pretty nice trade.
Why It Works:
Pork shoulder has enough fat and connective tissue to turn tender after a long cook. A spice rub and a little liquid build flavor from the start, then the meat gets shredded and mixed back into its own juices. The result is rich, soft, and easy to pile high without falling dry on the bun.
Key Ingredients:
- 4 pounds pork shoulder or pork butt — choose a well-marbled piece.
- 2 tablespoons brown sugar — helps the rub caramelize a bit.
- 1 tablespoon paprika — gives color and smoke.
- 1 tablespoon kosher salt — seasons deeply.
- 2 teaspoons black pepper — adds balance.
- 1 teaspoon garlic powder — rounds out the rub.
- 1 onion, sliced — adds sweetness as it cooks.
- 1 cup barbecue sauce — mixed in at the end.
- ½ cup chicken stock or apple cider vinegar — keeps the pot moist.
- 8 buns — for serving.
Quick Steps:
- Mix the rub: Combine brown sugar, paprika, salt, pepper, and garlic powder. Rub it over the pork shoulder.
- Set up the slow cooker: Place the sliced onion in the bottom, then set the pork on top. Pour in the stock or vinegar.
- Cook low and slow: Cover and cook on low for 8 hours or until the pork shreds easily with a fork.
- Shred the meat: Move the pork to a board, shred it, and discard any large pieces of fat.
- Sauce it: Return the pork to the cooker with barbecue sauce and enough cooking liquid to keep it moist. Stir well.
- Serve on buns: Toast the buns lightly and pile on the pork.
Equipment for This Recipe:
- Slow cooker — the entire method hinges on it.
- Two forks — for shredding.
- Cutting board — for trimming and shredding.
- Slotted spoon — helps lift the pork without dumping too much liquid.
How to Serve This Dish:
Serve the pork on toasted buns with coleslaw, pickles, and maybe a pile of potato salad. A little extra sauce on the side is smart. It should be juicy enough to drip a little, but not so wet that the bun collapses.
Pro Tips for This Recipe:
- Use pork shoulder, not pork loin; loin dries out too easily.
- Don’t add too much liquid at the start. The meat gives off plenty of juice.
- Shred the pork while it is still warm so it pulls apart cleanly.
- Toast the buns. Soft buns plus saucy pork can get soggy fast.
Variations on This Dish:
- Carolina-Style Pulled Pork: Use vinegar sauce instead of a sweet barbecue sauce.
- Spicy Pulled Pork: Add cayenne and a splash of hot sauce to the rub.
- Pulled Pork Nachos: Serve the shredded meat over chips with cheese and jalapeños.
Common Mistakes to Avoid with This Dish:
- Don’t use lean pork. It turns stringy and dry.
- Don’t shred it cold unless you enjoy fighting the meat.
- Don’t drown the pork in sauce before it cooks; the flavor gets muddy.
12. Cast-Iron Chicken Marsala
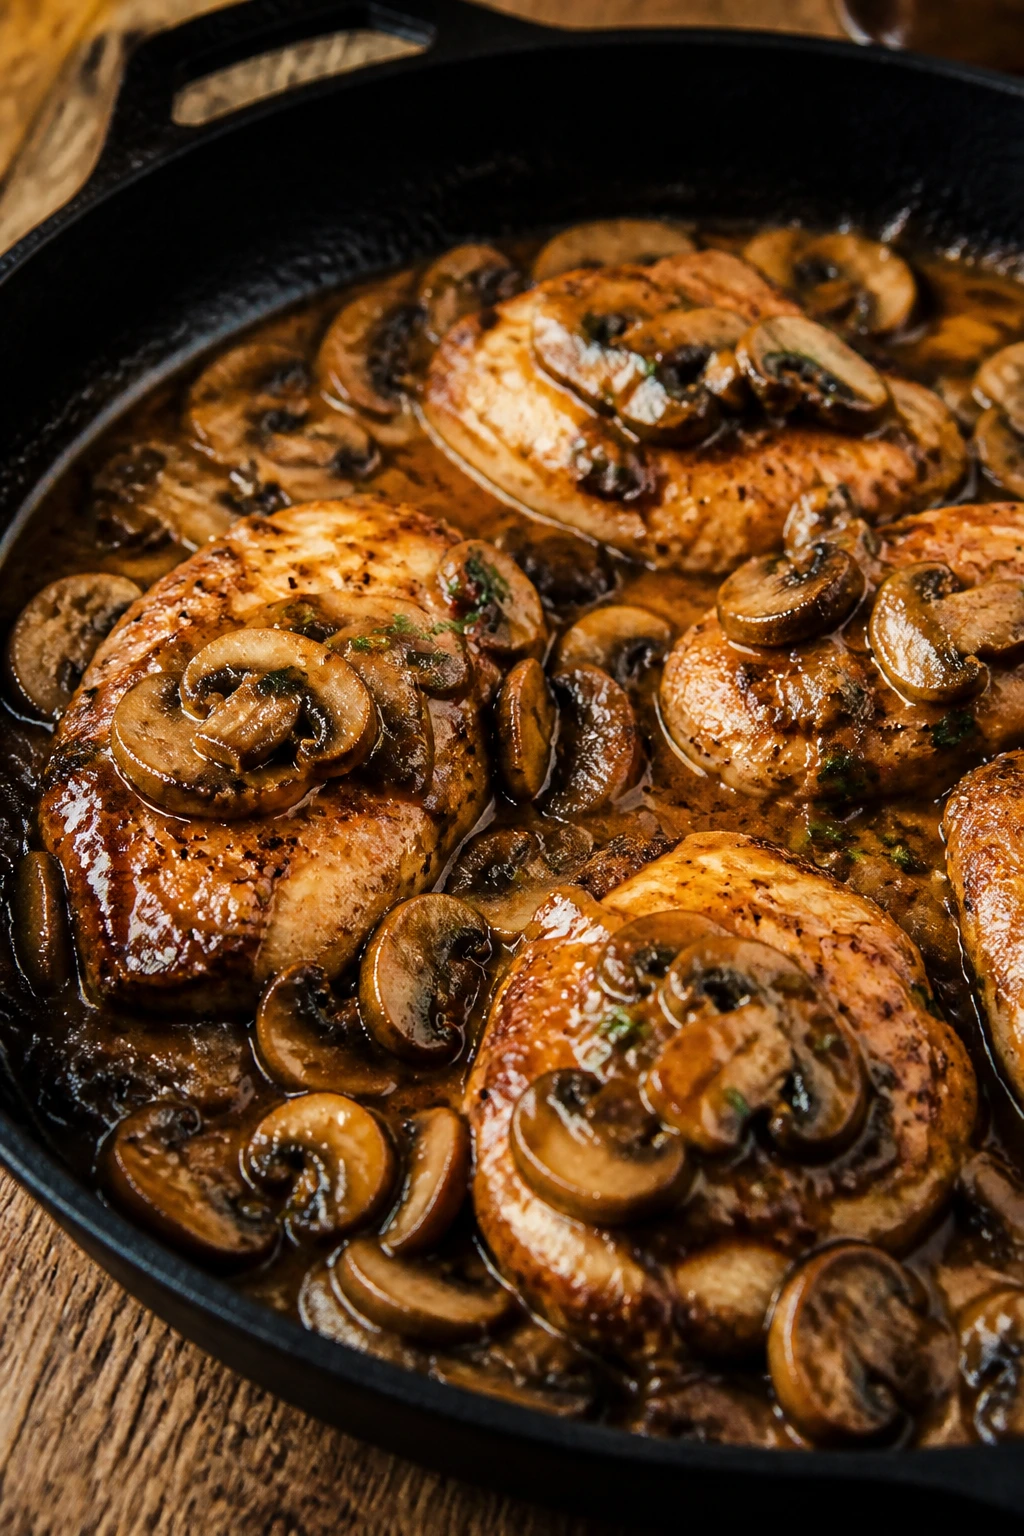
Chicken Marsala has that old-school dinner energy that still feels special when you cook it well. The mushrooms turn brown and earthy, the Marsala wine reduces into a sauce with a deep, slightly sweet smell, and the chicken stays tender under a light flour coating. It’s a dinner that looks more complicated than it is.
I like it for Father’s Day because it has a little polish without becoming precious. Serve it with mashed potatoes, and the sauce practically takes care of the rest.
Why It Works:
Thin chicken cutlets cook fast and stay juicy. Browning the mushrooms first builds flavor in the pan, and Marsala wine deglazes all those browned bits into the sauce. A small amount of cream or butter rounds out the finish, but the dish should still taste wine-forward and savory.
Key Ingredients:
- 1½ pounds chicken cutlets — pound chicken breasts thin if needed.
- ½ cup flour — for a light coating.
- 1 teaspoon salt — seasons the chicken.
- ½ teaspoon black pepper — balances the sauce.
- 8 ounces cremini mushrooms, sliced — they bring the earthy flavor.
- 1 shallot, minced — sweeter than onion here.
- ¾ cup Marsala wine — forms the sauce base.
- ¾ cup chicken broth — stretches and smooths the sauce.
- 2 tablespoons butter — finishes the sauce.
- 2 tablespoons olive oil — for browning the chicken.
Quick Steps:
- Coat the chicken: Season the cutlets, then dust them lightly in flour. Shake off the excess.
- Brown the chicken: Heat oil in a cast-iron skillet and cook the cutlets for 3 to 4 minutes per side until golden. Remove them.
- Cook the mushrooms: Add the mushrooms and shallot to the pan and cook until browned and soft, about 5 minutes.
- Build the sauce: Pour in the Marsala and broth, scraping the pan. Simmer until the sauce reduces by about one-third.
- Finish the chicken: Return the chicken to the pan and simmer for 3 to 4 minutes until heated through and coated. Stir in butter.
- Serve hot: Spoon sauce over the top and serve right away.
Equipment for This Recipe:
- Cast-iron skillet — holds heat well for browning.
- Tongs — for turning the chicken.
- Measuring cup — for the Marsala and broth.
- Knife and cutting board — for slicing mushrooms and shallot.
How to Serve This Dish:
Mashed potatoes, buttered noodles, or polenta all make sense here. The sauce should pool around the chicken in a way that makes the plate look generous. A little parsley at the end adds color without fuss.
Pro Tips for This Recipe:
- Don’t crowd the pan or the chicken will steam instead of brown.
- Brown the mushrooms well; pale mushrooms make a weak sauce.
- Use dry Marsala if you want the classic savory profile.
- Add the butter at the end so the sauce feels round instead of thin.
Variations on This Dish:
- Creamy Marsala: Add ¼ cup cream at the end for a softer sauce.
- Veal Marsala: Swap chicken for veal cutlets if you want a more traditional version.
- Mushroom-Heavy Version: Double the mushrooms and serve it over toast for a richer plate.
Common Mistakes to Avoid with This Dish:
- Don’t use whole thick chicken breasts; they cook unevenly.
- Don’t let the wine reduce to nothing or the sauce gets sticky and harsh.
- Don’t skip scraping the pan. That browned fond is half the flavor.
13. Sausage and Peppers Hoagies
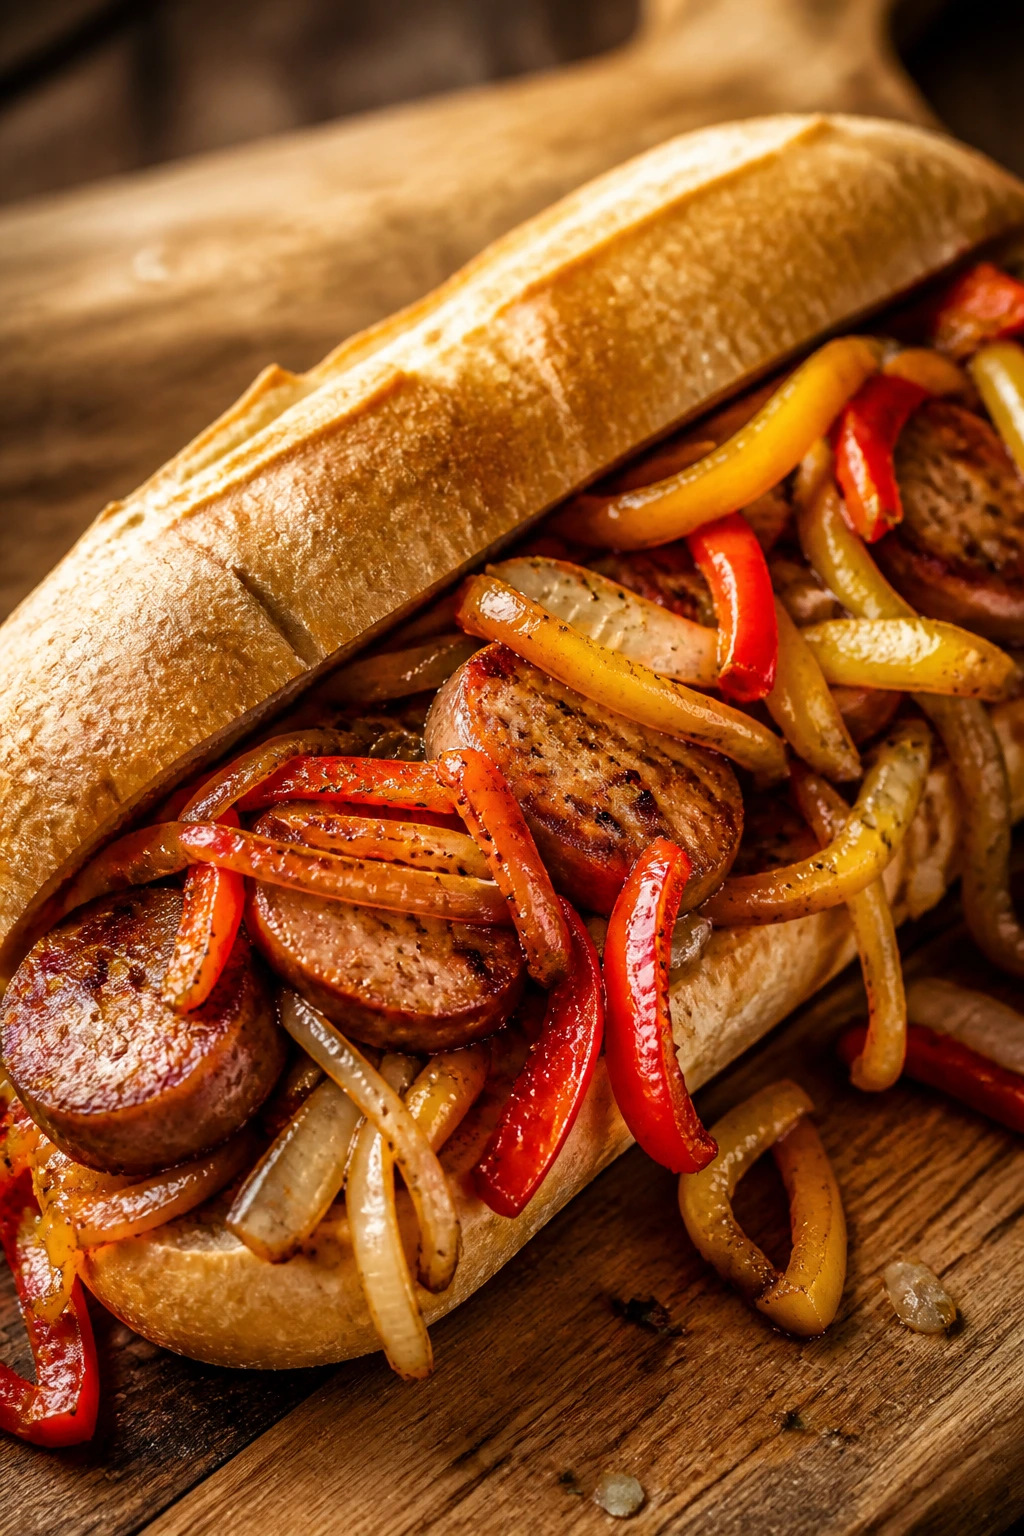
Sausage and peppers is the kind of dinner that feels casual in the best possible way. The sausage gets browned and juicy, the peppers soften into sweetness, and the onions melt into the sauce so the whole sandwich tastes like it came from a deli that knows what it’s doing. It’s hearty without being clumsy.
This is a good Father’s Day option when you want big flavor and manageable cleanup. A single skillet or baking pan does most of the work, and the hoagie rolls turn the whole thing into a proper meal without needing much else.
Why It Works:
Italian sausage already brings seasoning and fat, so you don’t need to build much from scratch. Peppers and onions soak up the drippings, which turns them from side dish into part of the sandwich filling. A little marinara ties everything together and keeps the hoagies from tasting dry.
Key Ingredients:
- 1½ pounds Italian sausage links — sweet, hot, or a mix.
- 3 bell peppers, sliced — use red, yellow, or green.
- 2 large onions, sliced — they soften into the sauce.
- 2 tablespoons olive oil — helps the vegetables brown.
- 1 cup marinara sauce — just enough to coat.
- 4 to 6 hoagie rolls — sturdy rolls hold the filling best.
- 4 slices provolone — optional, but useful.
- Salt and pepper — only if your sausage needs it.
Quick Steps:
- Brown the sausage: Heat oil in a large skillet and brown the sausage links on all sides, about 6 to 8 minutes total. Remove them.
- Cook the vegetables: Add peppers and onions to the same skillet and cook until softened and slightly browned, about 10 minutes.
- Add the sauce: Stir in the marinara and let it simmer for 2 to 3 minutes.
- Finish the sausage: Return the sausage to the pan and cover until cooked through, about 8 to 10 minutes, or until the internal temperature reaches 160°F for pork sausage.
- Assemble the hoagies: Split the rolls, tuck in sausage and peppers, and top with provolone if using.
- Toast if you like: Pop the assembled sandwiches under the broiler for 1 to 2 minutes, just until the cheese melts.
Equipment for This Recipe:
- Large skillet or sauté pan — the whole filling needs room.
- Tongs — for browning and turning sausage.
- Wooden spoon — useful for stirring the peppers.
- Sheet pan — handy if you want to broil the sandwiches.
How to Serve This Dish:
Serve with potato wedges, chips, or a sharp chopped salad. These hoagies are filling enough to stand alone, but they also work with a simple pickled vegetable plate. Keep napkins close; this one drips in the right way.
Pro Tips for This Recipe:
- Brown the sausage first so the pan picks up flavor before the vegetables go in.
- Choose sturdy rolls, not soft sandwich bread.
- Let the peppers cook long enough to lose their raw crunch.
- If you want less grease, blot the sausage briefly after browning.
Variations on This Dish:
- Spicy Italian Hoagies: Use hot sausage and extra red pepper flakes.
- Cheesy Bake Version: Layer the filling in a baking dish with provolone and broil it.
- Chicken Sausage Swap: Use chicken sausage for a lighter version.
Common Mistakes to Avoid with This Dish:
- Don’t undercook the peppers or they stay crunchy in a way that fights the sandwich.
- Don’t use flimsy rolls; they collapse under the juices.
- Don’t skip resting the sausage for a minute after cooking, or the filling runs all over the board.
14. Beef and Broccoli Stir-Fry
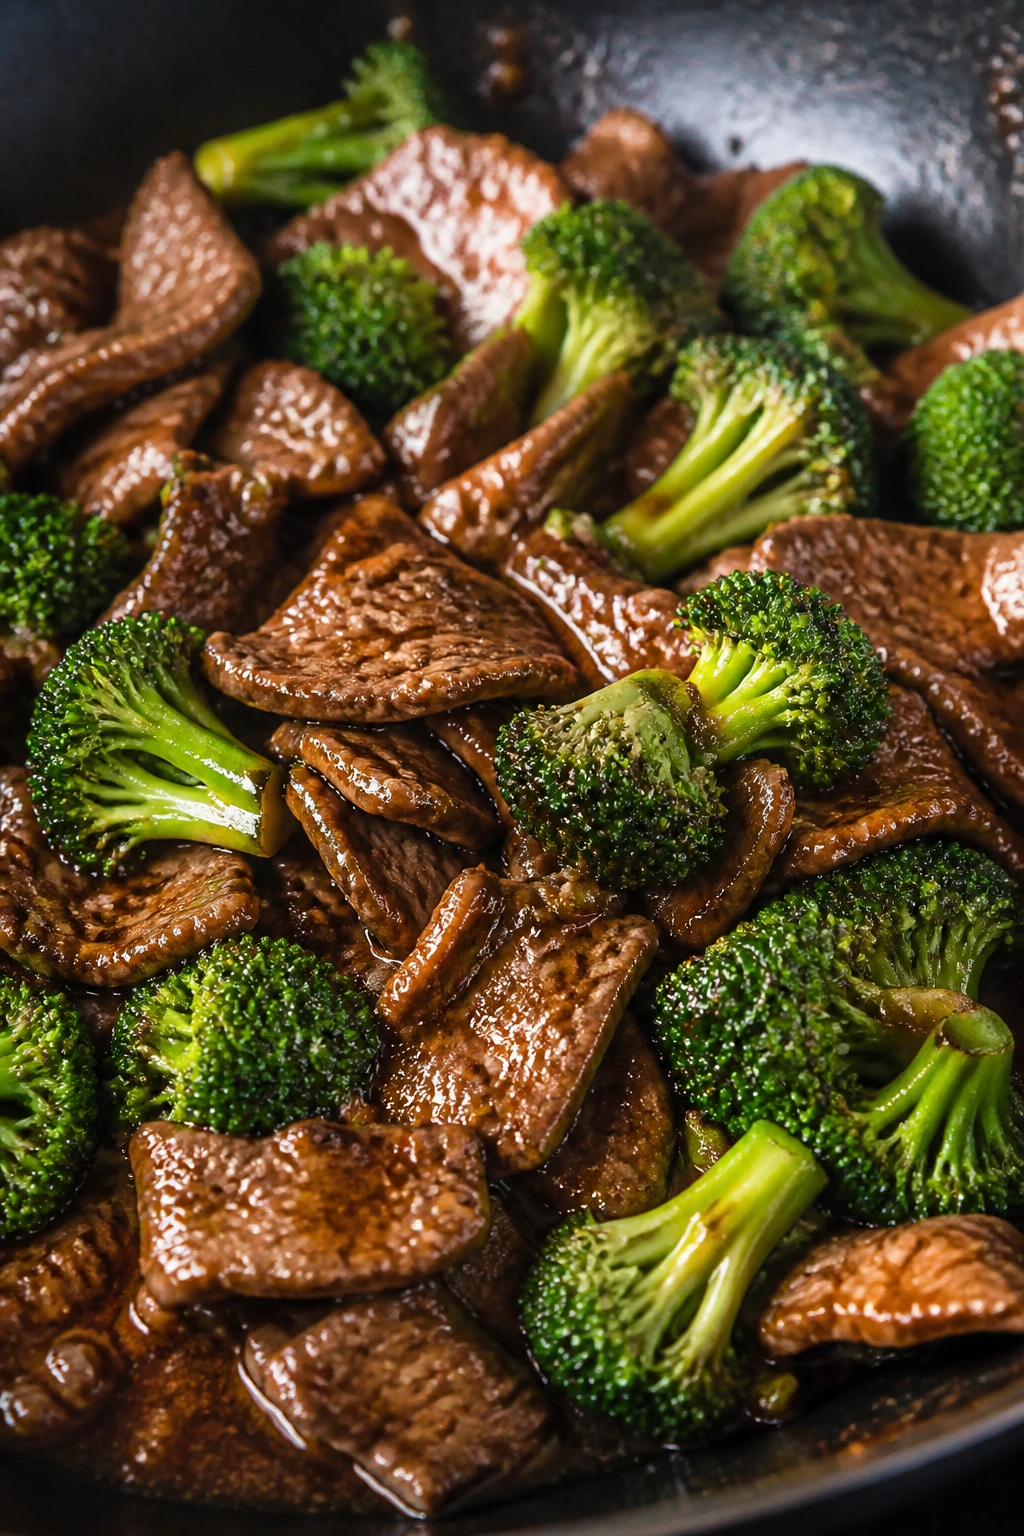
This is one of those dinners that proves you do not need a long ingredient list to get a strong result. The beef gets seared fast, the broccoli stays bright and crisp-tender, and the sauce clings in a glossy way that makes you want rice under every bite. It’s fast, sturdy, and not at all boring.
Beef and broccoli works especially well for a Father’s Day dinner because it gives you takeout comfort with more control over the seasoning and texture. The whole pan comes together quickly, which means you can spend your energy elsewhere.
Why It Works:
Thin slices of flank steak cook fast and stay tender if you slice against the grain. Broccoli florets need only a short steam or stir-fry to stay green and snappy. The sauce thickens with cornstarch just enough to coat the beef instead of pooling at the bottom.
Key Ingredients:
- 1½ pounds flank steak — slice it thin and across the grain.
- 4 cups broccoli florets — cut them into even pieces.
- 2 tablespoons soy sauce — seasons the beef.
- 3 cloves garlic, minced — adds sharp flavor.
- 1 tablespoon grated ginger — brings warmth.
- ½ cup beef broth — forms the sauce base.
- 2 tablespoons oyster sauce — gives depth and shine.
- 1 tablespoon cornstarch — thickens the sauce.
- 2 tablespoons neutral oil — for searing.
- Cooked rice — for serving.
Quick Steps:
- Marinate briefly: Toss the sliced beef with soy sauce, half the garlic, and a teaspoon of cornstarch. Let it sit while you prep the broccoli.
- Sear the beef: Heat oil in a large skillet or wok, then sear the beef in batches for 1 to 2 minutes per side. Remove it.
- Cook the broccoli: Add the broccoli with a splash of water and cook until bright green and just tender, about 3 to 4 minutes.
- Build the sauce: Stir together broth, oyster sauce, the remaining garlic, ginger, and cornstarch. Pour it into the pan and simmer until glossy and thick.
- Return the beef: Add the beef back to the pan and toss until coated and heated through.
- Serve over rice: Spoon the stir-fry over hot rice right away.
Equipment for This Recipe:
- Large skillet or wok — gives the beef room to sear.
- Sharp knife — needed for thin slicing.
- Mixing bowl — for the quick marinade.
- Rice cooker or saucepan — for the rice.
How to Serve This Dish:
Serve over steamed rice or noodles with sesame seeds on top if you like a little crunch. A side of simple cucumber salad keeps the meal fresh. This is a good “clean plate” kind of dinner.
Pro Tips for This Recipe:
- Freeze the steak for 15 minutes first if slicing it thin feels slippery.
- Don’t crowd the pan when you sear the beef or it steams.
- Keep the broccoli bright; overcooked broccoli makes the dish feel tired.
- Stir the cornstarch into cold liquid before adding it to the hot pan or it clumps.
Variations on This Dish:
- Spicy Garlic Beef: Add chili paste or red pepper flakes to the sauce.
- Chicken and Broccoli: Swap the steak for boneless chicken thighs.
- Sesame Version: Finish with toasted sesame oil and scallions.
Common Mistakes to Avoid with This Dish:
- Don’t slice the beef with the grain. It turns chewy fast.
- Don’t let the sauce boil hard after the cornstarch goes in, or it can get gummy.
- Don’t overcook the broccoli; crisp-tender is the target.
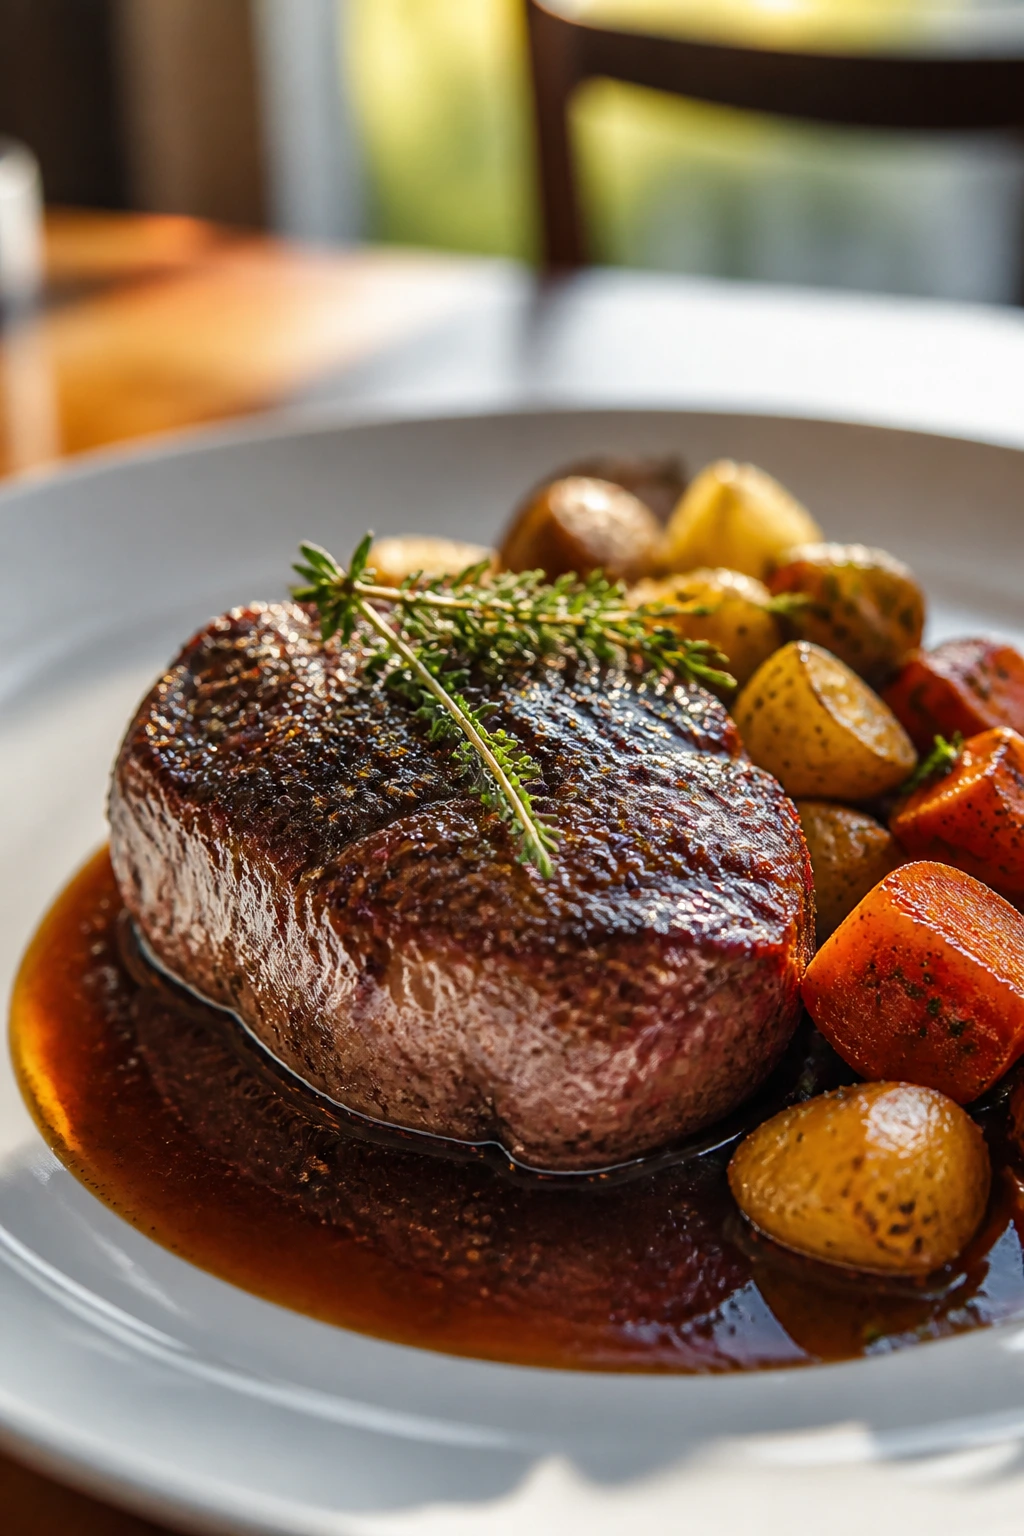
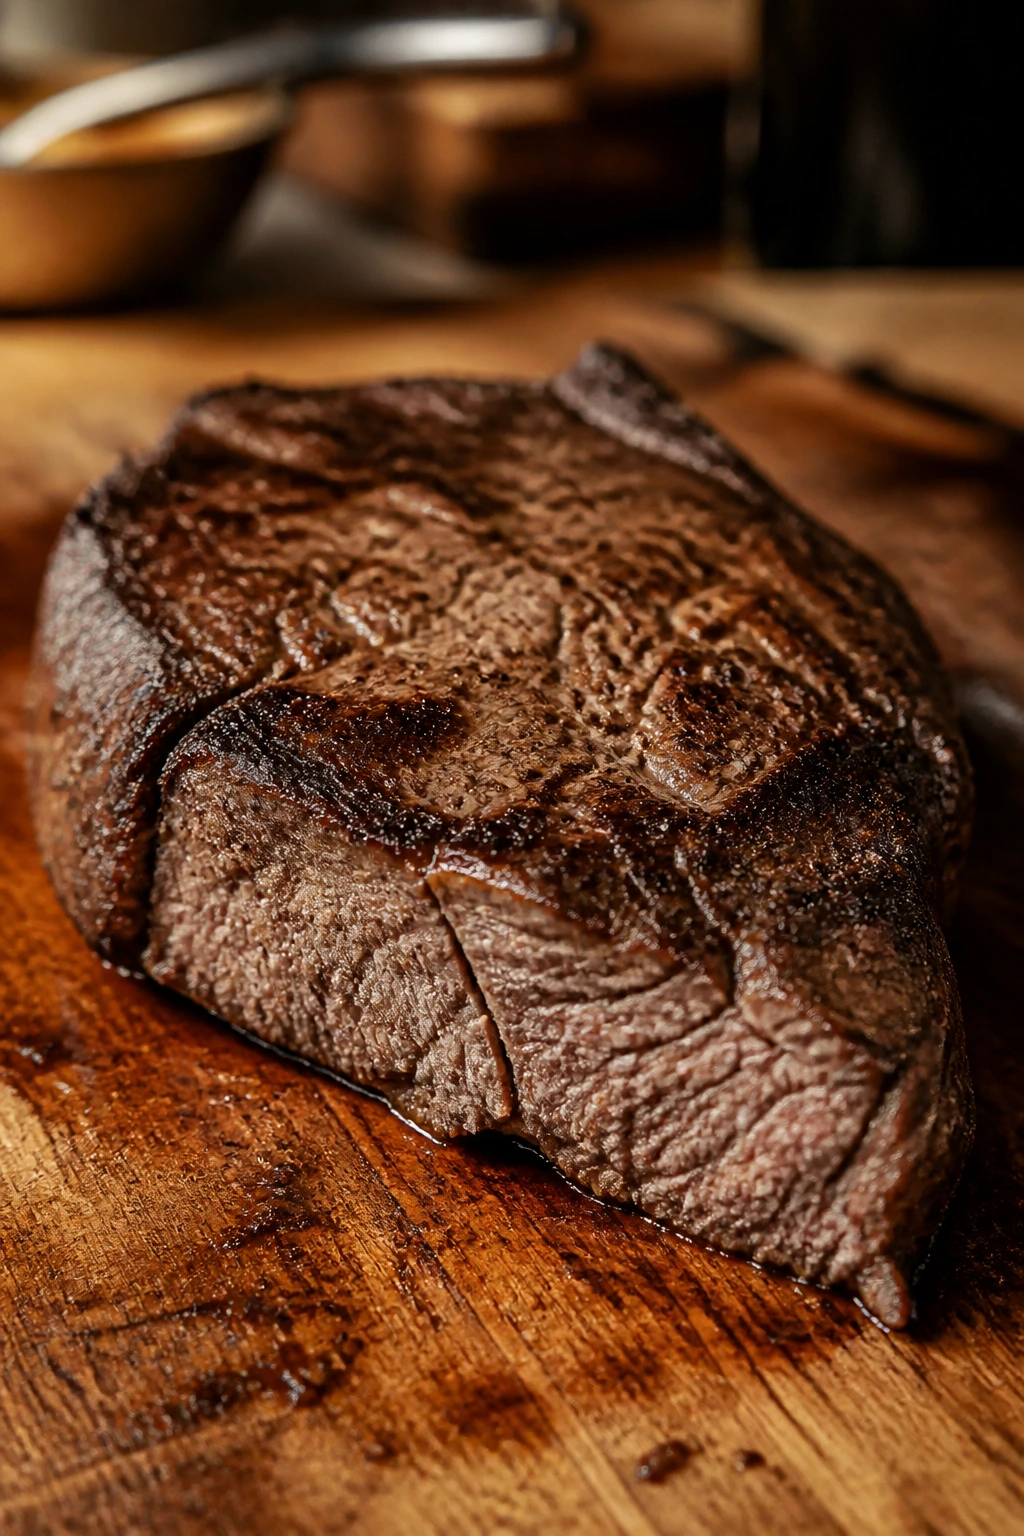
15. Beer-Braised Short Ribs with Mashed Potatoes
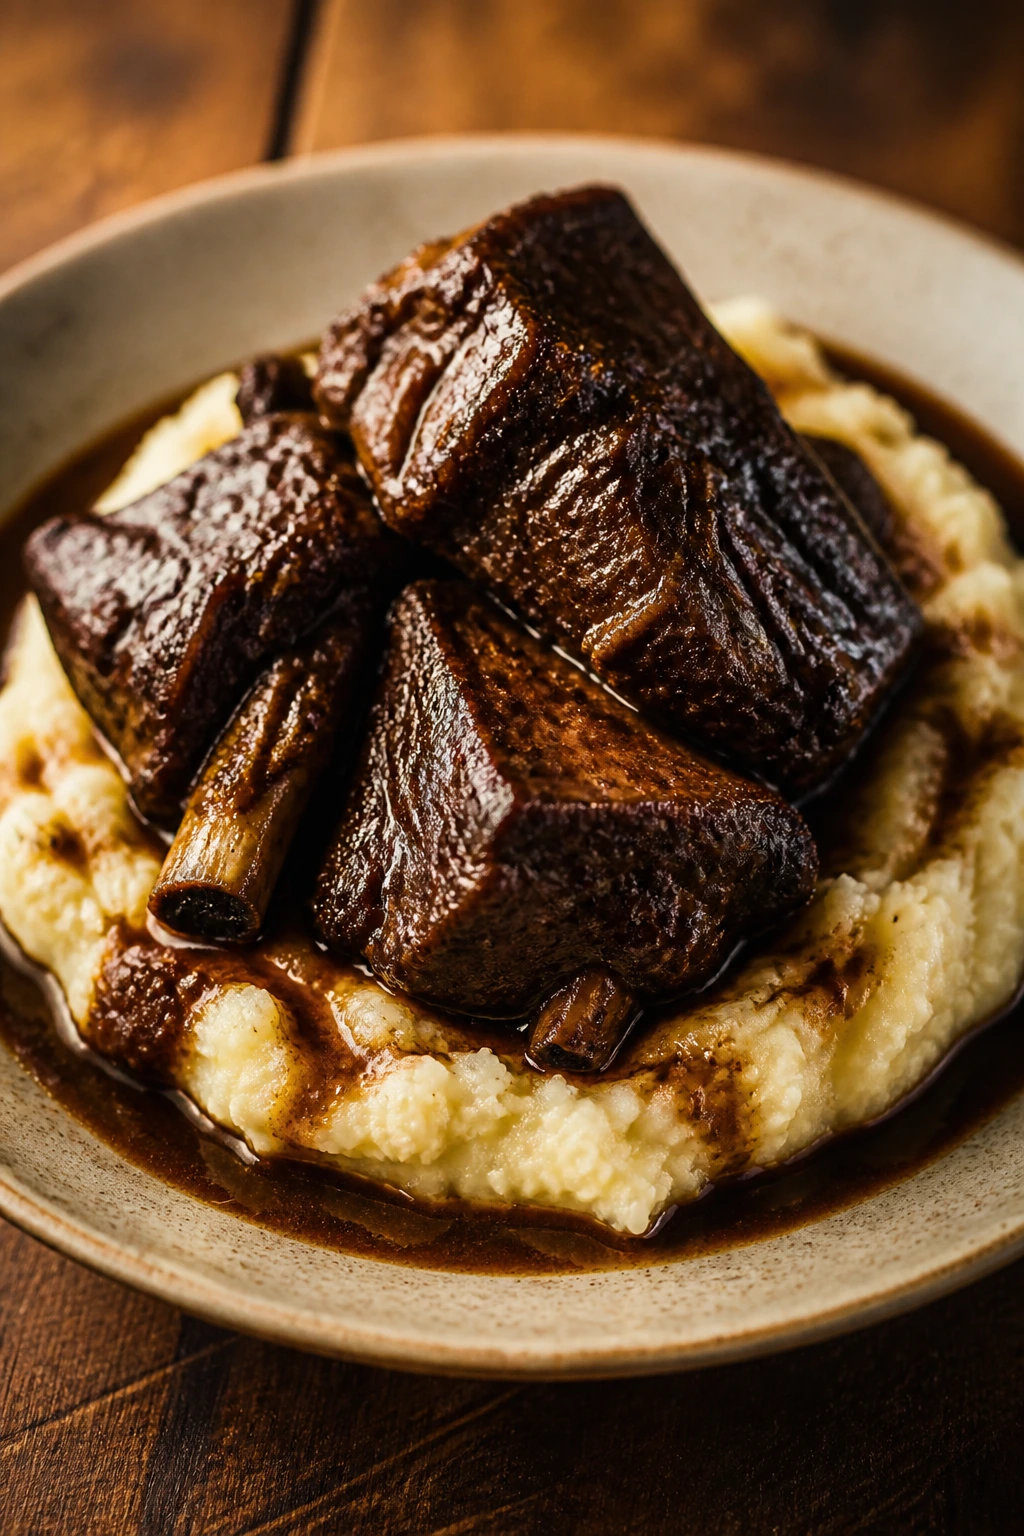
Short ribs are what you make when you want Father’s Day dinner to feel like an event instead of a schedule. The meat braises until it falls apart with almost no pressure, the sauce turns dark and savory, and the whole thing tastes richer than the ingredients look at the start. It’s slow food, but not in a precious way.
I love short ribs for a special dinner because they give you that deep, beefy flavor that people usually associate with restaurants. You do need time, though. There’s no cheating the braise, and honestly, that’s part of the charm.
Why It Works:
Short ribs have collagen and fat that break down into silky texture during a long braise. Beer adds malt and a little bitterness, while stock and aromatics round out the sauce. Serving them over mashed potatoes gives you something to catch every bit of the braising liquid.
Key Ingredients:
- 4 pounds bone-in beef short ribs — look for meaty pieces with good marbling.
- 1 tablespoon kosher salt — seasons deeply.
- 1 teaspoon black pepper — gives the beef some snap.
- 2 tablespoons oil — for searing.
- 1 onion, chopped — adds sweetness to the braise.
- 2 carrots, chopped — build the base flavor.
- 2 celery stalks, chopped — part of the classic mirepoix.
- 2 tablespoons tomato paste — adds color and depth.
- 1 bottle beer, about 12 ounces — choose a brown ale or lager.
- 2 cups beef stock — keeps the braise moving.
- 2 pounds potatoes, peeled and chopped — for the mash.
- 4 tablespoons butter and ½ cup milk — for the potatoes.
Quick Steps:
- Season and sear: Pat the short ribs dry, season them well, and sear them in oil in a Dutch oven until browned on all sides. Remove them.
- Cook the vegetables: Add onion, carrots, and celery to the pot and cook until softened, about 6 minutes. Stir in tomato paste for 1 minute.
- Deglaze: Pour in the beer and scrape up the browned bits from the bottom. Add beef stock and return the short ribs to the pot.
- Braise slowly: Cover and cook at 325°F for about 2½ to 3 hours, until the meat is fork-tender.
- Make the potatoes: While the ribs braise, boil the potatoes until tender, then mash with butter, milk, salt, and pepper.
- Serve together: Spoon the braising liquid over the ribs and potatoes right before serving.
Equipment for This Recipe:
- Dutch oven with a lid — ideal for braising.
- Tongs — for turning the ribs.
- Potato masher — for the sides.
- Ladle — for the sauce.
How to Serve This Dish:
Pile the mashed potatoes in the center of a shallow bowl and set the ribs on top. Spoon the sauce over everything and add a little chopped parsley if you want color. This is a fork-and-knife dinner with serious comfort built in.
Pro Tips for This Recipe:
- Brown the ribs well; color on the meat means depth in the sauce.
- Keep the braise at a gentle simmer, not a hard boil.
- Use a beer you’d actually drink. Harsh beer makes harsh sauce.
- Short ribs often taste even better the next day, so make extra if you can.
Variations on This Dish:
- Red Wine Short Ribs: Swap beer for red wine and add a bay leaf.
- Garlic Herb Short Ribs: Add rosemary and thyme for a more aromatic version.
- Polenta Swap: Serve the ribs over soft polenta instead of potatoes.
Common Mistakes to Avoid with This Dish:
- Don’t rush the braise. Tough meat needs time.
- Don’t let the liquid boil hard or the ribs can tighten up.
- Don’t skim off all the fat before serving; a little of it carries the flavor.
16. Skillet Sausage, Potatoes, and Green Beans
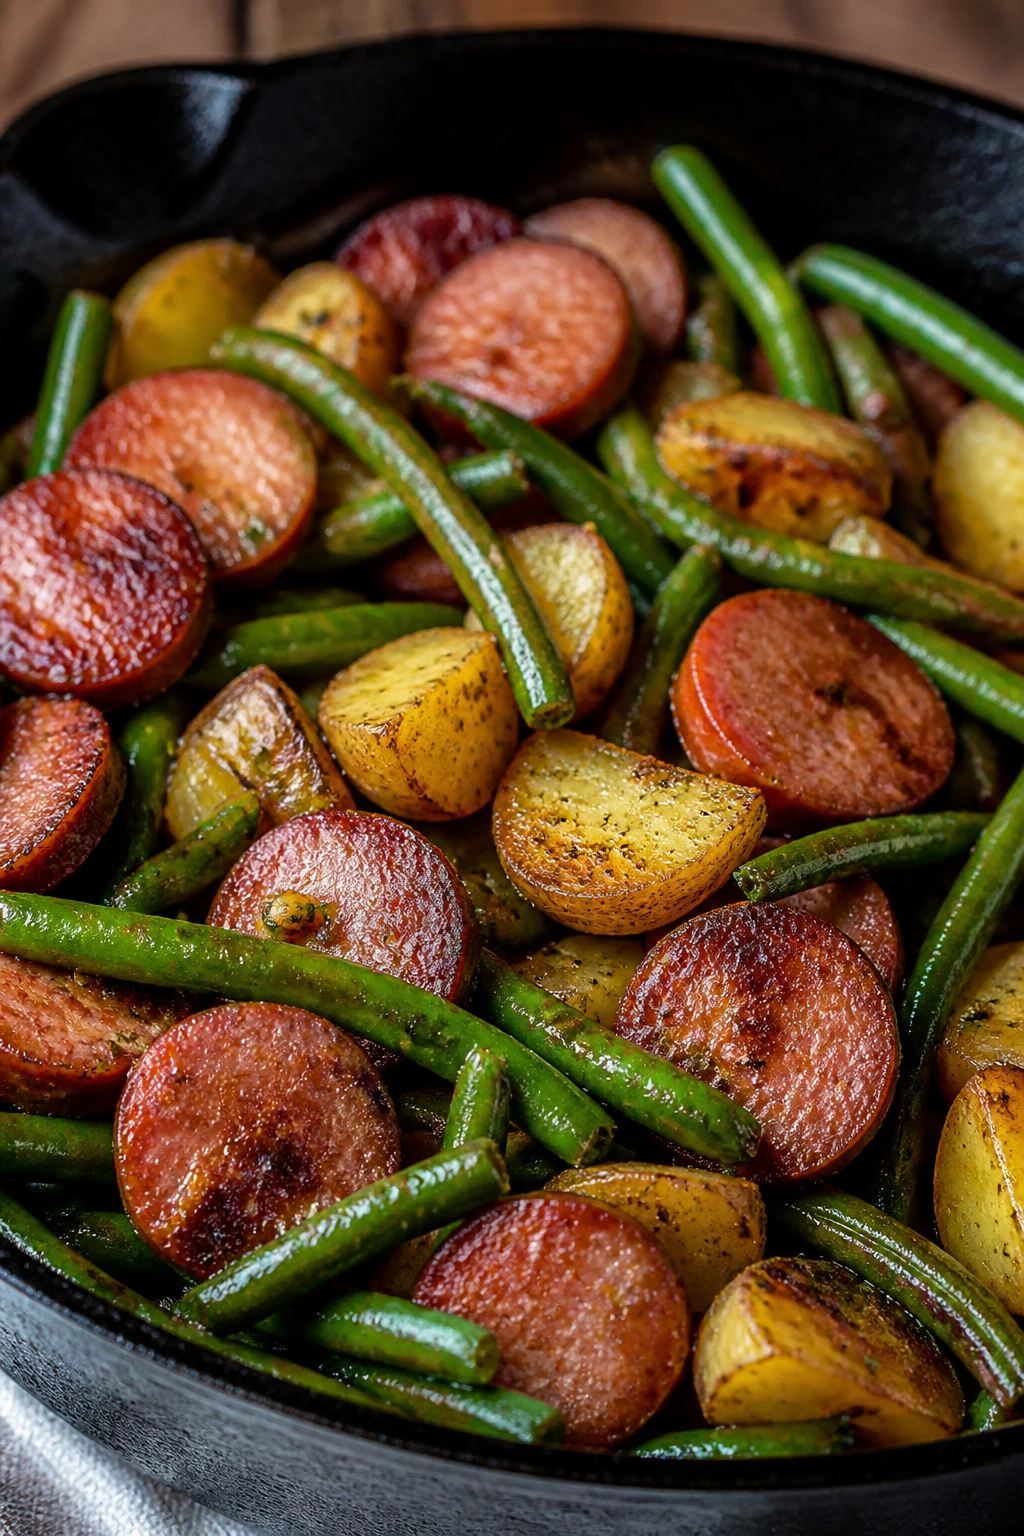
This dinner feels humble until you taste it. The sausage browns, the potatoes pick up a crisp edge, and the green beans stay bright enough to keep the plate from feeling heavy. It’s a one-pan dinner that still lands with plenty of flavor.
I like this as the closing recipe in the list because it’s the one that proves Father’s Day dinner does not need to be elaborate to be good. If you want something hearty, fast, and cleanup-friendly, this is hard to beat.
Why It Works:
Smoked sausage is already seasoned and cooked, so it brings instant flavor to the skillet. Baby potatoes brown nicely if you give them a head start, and green beans fit in near the end so they stay crisp. A little garlic and paprika ties everything together without turning the pan into a spice cabinet.
Key Ingredients:
- 1½ pounds smoked sausage, sliced into coins — kielbasa or andouille both work.
- 1½ pounds baby potatoes, halved — small enough to cook evenly.
- 12 ounces green beans, trimmed — fresh ones hold up best.
- 1 medium onion, sliced — sweetens as it cooks.
- 2 tablespoons olive oil — helps the potatoes brown.
- 2 cloves garlic, minced — adds savory depth.
- 1 teaspoon paprika — gives warmth and color.
- Salt and black pepper — season to taste.
Quick Steps:
- Par-cook the potatoes: Boil the halved potatoes for 8 minutes until just barely tender, then drain them.
- Brown the sausage: Heat oil in a large skillet and cook the sausage coins until browned, about 4 to 5 minutes. Remove them.
- Cook the potatoes and onion: Add the potatoes and onion to the pan and cook until the potatoes get crisp edges and the onion softens, about 8 to 10 minutes.
- Add garlic and seasoning: Stir in garlic, paprika, salt, and pepper for 30 seconds.
- Finish with green beans and sausage: Return the sausage to the pan, add the green beans and a splash of water, cover for 4 to 5 minutes, then uncover and cook until the beans are crisp-tender.
- Serve straight from the skillet: That’s the move here.
Equipment for This Recipe:
- Large skillet — big enough to hold everything in one layer.
- Pot for boiling potatoes — the par-cook step matters.
- Slotted spoon — handy for moving sausage.
- Lid — useful for finishing the beans.
How to Serve This Dish:
Serve the skillet right at the table with mustard on the side or a simple pan sauce drizzled over the top. A green salad or crusty bread turns it into a full meal. It should look rustic in a way that feels deliberate, not lazy.
Pro Tips for This Recipe:
- Par-cooking the potatoes saves time and helps them brown.
- Don’t add the green beans too early or they lose their snap.
- Use smoked sausage with a good snap to the casing; it holds up better in the pan.
- A splash of stock or water at the end creates steam and finishes the beans evenly.
Variations on This Dish:
- Spicy Cajun Skillet: Use andouille and a Cajun seasoning blend.
- Honey Mustard Version: Stir a spoon of honey mustard into the pan right before serving.
- Roasted Alternative: Roast everything on a sheet pan if you want less stove time.
Common Mistakes to Avoid with This Dish:
- Don’t skip the potato par-cook or they stay hard while everything else finishes.
- Don’t crowd the pan; browned potatoes need contact with the surface.
- Don’t overcook the beans. They should still have a bite.
Why These Dinners Feel Right for the Occasion
A Father’s Day meal works best when it feels like you chose it with intent. Not random comfort food. Not a rushed backup plan. A dinner with enough flavor to feel like a reward and enough simplicity that the cook still gets to sit down and enjoy it.
That’s why this mix works. You have steak and ribs for the dads who love a bold plate, lighter options like salmon and scampi for the ones who prefer a cleaner finish, and big comfort dishes like meatloaf, pulled pork, and short ribs for anyone who thinks a good dinner should leave a memory and a nap behind it.
Essential Equipment for These Recipes
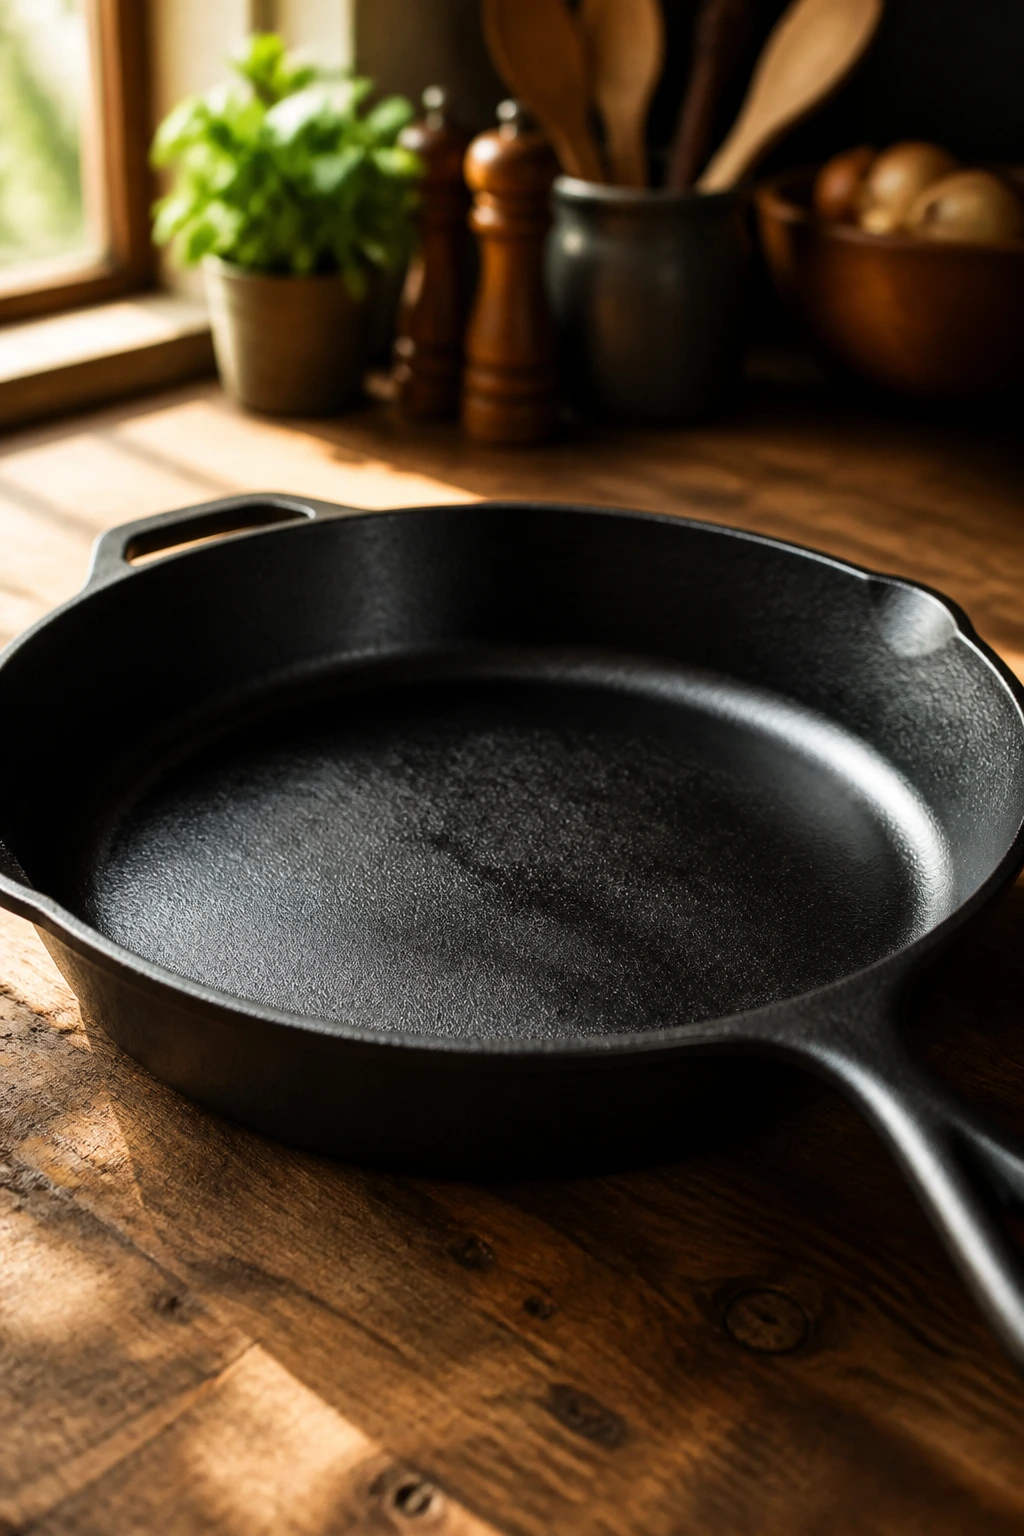
- Cast-iron skillet: Best for steak, chicken, and anything that needs serious browning.
- Rimmed baking sheets: Useful for sliders, chicken parm, salmon, and sheet pan fajitas.
- Dutch oven or heavy braising pot: Needed for ribs and short ribs.
- Large skillet or sauté pan: Good for scampi, Marsala, sausage and peppers, and stir-fry.
- Instant-read thermometer: The single most useful tool in this whole collection.
- Tongs: Better than forks for turning meat without losing juices.
- Sharp chef’s knife: Essential for slicing steak, peppers, onions, and pork.
- Cutting board with a rim: Keeps juices from running everywhere.
- Mixing bowls: You’ll need at least two or three for rubs, glazes, and breading.
- Foil and parchment paper: Small thing, big cleanup win.
- Slotted spoon: Handy for shredded pork, sausage fillings, and braised vegetables.
- Potato masher: Only for the dinners that ask for mash, but worth having.
Smart Shopping and Ingredient Tips
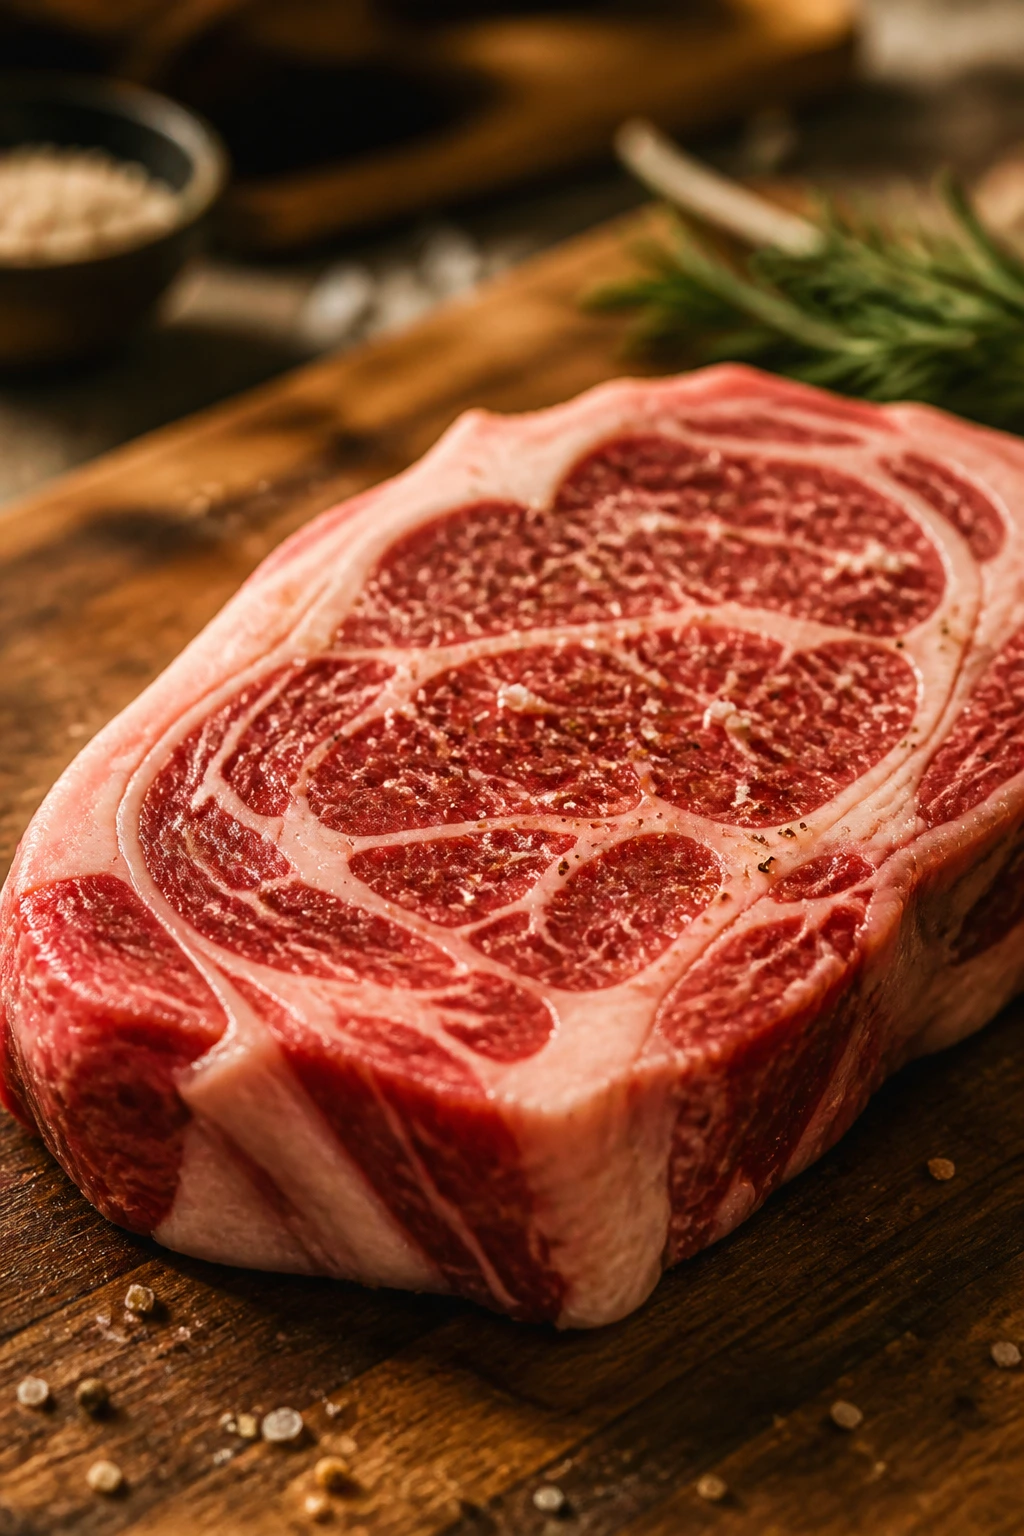
The cuts matter more than most shoppers think. For steak, choose ribeyes with good marbling and thick edges rather than thin, flat pieces that overcook before the crust forms. For pork chops, bone-in is safer and juicier than boneless. For chicken thighs, skin-on pieces give you more room for crisping and flavor.
Seafood needs a little more care. Salmon should look moist and firm, not dull or dry around the edges. Shrimp should smell clean, not fishy, and feel firm in the bag. If you buy frozen shrimp, thaw them in the fridge or under cold water and dry them well before cooking; wet shrimp steam in the pan.
For the saucy dinners, use condiments and sauces you’d actually eat on their own. A weak barbecue sauce makes ribs taste flat. A tired jar of marinara can drag down chicken Parmesan. Even mustard and preserves matter here; sharp Dijon and good fruit preserves keep glazed dishes from getting syrupy and one-note.
Ground meat deserves a little attention too. For burgers and meatloaf, 80/20 beef gives flavor and keeps things moist. Leaner meat can work, but you need to be gentler with it and compensate with a little fat or a moist binder. Pork shoulder for pulled pork should have visible marbling. If it looks too lean, pass.
And here’s one shopping rule I never budge on: buy more herbs, lemon, and onions than you think you need. Those are the pieces that make the food taste finished. They’re cheap, they keep the meal from feeling heavy, and they rescue dishes that lean too hard on fat and salt.
How to Serve These Recipes
Presentation:
Build the plate around the main event instead of treating it like a lone object. Steak and short ribs want a small pool of sauce or butter beneath them. Sliders and hoagies look better on a board with pickles and chips nearby. Braised dishes feel more inviting in shallow bowls, while grilled fish and fajitas benefit from a little height and color from herbs or lime.
Accompaniments:
The reliable sides here are mashed potatoes, roasted vegetables, slaw, corn, rice, garlic bread, and simple salads. For richer mains like ribs or short ribs, add something crisp or acidic. For lighter mains like salmon or scampi, bring in starch and bread so the plate doesn’t feel airy. I’d rather serve two good sides than four dull ones.
Portions:
Most of these dinners serve 4 to 6, which is enough for a family meal without becoming a buffet. Steak, salmon, and pork chops usually land at one portion per person. Pulled pork, meatloaf, sausage, and sliders stretch farther because people tend to take seconds. If you’re feeding a bigger group, scale the sides first; that’s usually easier than doubling every protein.
Beverage Pairing:
A cold lager or pale ale goes with ribs, burgers, sausage, and pulled pork. For steak or short ribs, a medium-bodied red wine or a dark beer works better. Lemon-heavy dishes like salmon and scampi pair nicely with sparkling water, dry white wine, or a simple citrus soda if you want something nonalcoholic.
Additional Tips and Flavor Boosters
Flavor Enhancement:
A finishing sauce changes more than people expect. A spoon of garlic butter over steak, a squeeze of lemon over salmon, or a drizzle of barbecue sauce over pulled pork makes the whole plate taste more thought-through. Small finishing moves matter here because they hit the nose first.
Customization:
If Dad likes heat, keep red pepper flakes, hot sauce, or chipotle powder in reach. If he prefers milder food, lean on herbs, lemon, mustard, and browned onions. You can push most of these recipes toward smoky, sweet, sharp, or savory without changing the structure.
Serving Suggestions:
Fresh parsley, chopped chives, lemon wedges, pickled onions, and sliced scallions all earn their place on this table. They add color and a bit of lift. A little garnish goes a long way when the main dishes are rich.
Make-It-Yours:
For gluten-free eaters, swap in gluten-free pasta, breadcrumbs, tortillas, or buns where needed. For dairy-free plates, use olive oil instead of butter in the scampi, steak, and salmon recipes, and skip the cheese where it is decorative rather than structural. For lower-sodium versions, rely more on citrus, garlic, and herbs than on extra salt.
Make-Ahead, Storage, and Reheating Guidance

A few of these dishes are best the minute they leave the stove. Steak, salmon, and fried chicken-style coatings fall into that camp. They lose texture if they sit too long. For those, do your prep ahead—season, chop, mix sauces, get sides ready—and cook right before serving.
The make-ahead winners are pulled pork, ribs, meatloaf, short ribs, and sausage-based dishes. Pulled pork keeps well in the fridge for 3 to 4 days and freezes for up to 2 months. Reheat it covered in a low oven at 300°F with a splash of cooking liquid or barbecue sauce so it stays moist. Meatloaf lasts 3 to 4 days refrigerated and reheats well in slices. Short ribs can be chilled in their sauce for 3 to 4 days and often taste better the next day; warm them gently so the sauce stays silky.
For chicken Parmesan, Marsala, sausage and peppers, and beef and broccoli, refrigeration for 3 to 4 days is standard. Reheat chicken Parmesan in a 350°F oven so the crust does not go limp. Marsala and sausage dishes warm nicely in a skillet over low heat with a spoonful of broth or water. Beef and broccoli reheats fast in a hot pan, but stop as soon as it’s heated through or the beef gets tough.
Ribs are a little special. They can be cooked ahead, chilled, and reheated wrapped in foil at 300°F until hot, then sauced and finished briefly under high heat. They are not fragile, but they do want a gentle hand. Same with the slow cooker pork: keep the meat and sauce together if possible, because the liquid protects the texture.
Avoid reheating seafood more than once if you can help it. Salmon and shrimp are best cooked fresh and eaten at the first pass. If you have leftovers, warm them only until just heated through. A microwave can work in a pinch, but use low power and short bursts.
Variations and Adaptations to Try
The Lighter Plate:
Build a menu around salmon, scampi, grilled pork chops, or chicken thighs, then lean on vegetables and grains instead of heavy starches. This works well when you want the meal to feel complete without leaving everyone stuffed. A salad with a sharp vinaigrette helps cut through the richness.
The Smokehouse Route:
Use the ribs, pulled pork, burgers, sausage, and short ribs as your base and add smoked paprika, barbecue sauce, pickles, and slaw. You do not need a smoker to make this feel barbecue-adjacent. A hot oven and a little char at the end can fake a lot.
The Creamy Comfort Version:
Short ribs with mashed potatoes, meatloaf, chicken Marsala, and chicken Parmesan all fit here. The trick is not to make everything soft. Add something crisp on the side—a salad, green beans, or roasted broccoli—so the plate still has contrast.
The Quick-Cook Swap:
If the schedule is tight, go with sliders, scampi, fajitas, fish, or the skillet sausage dinner. These recipes keep the flavor high while the timer stays merciful. The fastest dinners only work if you prep everything first, though. Once the pan is hot, you are on the clock.
The Heat-Lover Edit:
For dads who like a little burn, add jalapeños to sliders and fajitas, cayenne to ribs, chipotle to pork, and red pepper flakes to scampi. The goal is warmth and edge, not wrecked taste buds. Heat should sit behind the flavor, not sit on top of it like a bad joke.
The Budget-Smart Menu:
Meatloaf, sausage and peppers, pulled pork, chicken thighs, and chicken Parmesan stretch groceries the farthest. Buy the protein with the most flavor per dollar, then spend a little extra on herbs, cheese, or sauce. That’s usually smarter than buying a pricier cut and starving the rest of the plate.
Common Mistakes to Avoid
The first mistake is overcooking meat because you fear undercooking it. That shows up as dry steak, chalky chicken, tight shrimp, and pork chops that chew like leather. Use a thermometer where it matters. It removes the drama and saves the dinner.
Another common problem is under-seasoning the food before it goes into the pan or oven. A good sauce can help, but it can’t rescue a bland ribeye or plain chicken thigh. Salt the meat, salt the pasta water, season the vegetables, and taste the sauce before you call it done.
Crowding the pan is a sneaky killer. If you pack too much into a skillet or sheet pan, the food steams instead of browns. That means limp peppers, pale chicken, soft potatoes, and no crust on the steak. Cook in batches when you need to. It is boring advice, but it keeps the food from going flat.
Skipping the rest period is another one. Meat needs a few minutes to settle after cooking, whether it’s steak, pork chops, short ribs, or pulled pork. Cut too early and the juices run out onto the board instead of staying in the food. That’s not drama. That’s wasted flavor.
A final trap: too much sauce too early. Glazes burn, breading turns soggy, and braises can taste muddy if you drown everything before the final stage. Add sauces where they belong—at the end for steak, during the final bake for ribs and chicken parm, after shredding for pulled pork. Timing matters more than people want to admit.
Questions People Ask Before Building the Menu

What’s the best Father’s Day dinner if I only have 30 minutes?
Shrimp scampi, salmon with asparagus, steak fajitas, and sliders are all strong picks. They feel finished without demanding a long cook. If you prep the sides first, even a short dinner can feel put together.
Which recipes work best for a crowd?
Pulled pork, ribs, sliders, sausage and peppers, and sheet pan fajitas are easiest to scale. They also hold well if people arrive at different times. That matters more than people think.
Can I make any of these ahead of time?
Yes—pulled pork, meatloaf, ribs, short ribs, and sausage fillings are the easiest make-ahead choices. Sauces can also be mixed earlier in the day. For fish, steak, and shrimp, prep ahead but cook close to serving time.
How do I keep steak and pork chops from drying out?
Start with thicker cuts, use a thermometer, and pull them at the right temperature. Rest them before slicing. Thin cuts and overcooking are the usual culprits.
What if I do not have a grill?
Use a cast-iron skillet, oven, or sheet pan where needed. Ribeyes, pork chops, chicken thighs, fajitas, and even ribs can all be handled indoors with good results. The grill is nice, not mandatory.
Can I make these dinners less rich without losing the point?
Absolutely. Add sharper sides, use more lemon and herbs, and choose salmon or grilled pork chops instead of the heaviest braises. You can also trim some butter or cheese from the finish. The flavor stays; the heaviness eases up.
What is the safest way to know meat is cooked?
Use an instant-read thermometer. Chicken should reach 165°F, ground beef 160°F, pork chops 145°F with a short rest, and steak should be cooked to your preferred doneness after resting. Ribs and short ribs are about tenderness, not just a number.
Do these recipes reheat well for leftovers?
Most of the braised and saucy ones do. Pulled pork, meatloaf, ribs, sausage, and short ribs reheat especially well. Seafood and steak are best fresh, though you can warm leftovers gently if you’re careful.
The Kind of Dinner Dad Remembers

A good Father’s Day dinner does not need a perfect menu. It needs one or two dishes that feel chosen rather than assembled, plus sides that know their job. That’s why steak, ribs, pork chops, salmon, sliders, and braises keep showing up on tables year after year. They have presence.
If you pick one fast dinner and one slower dinner from this list, you already have a strong plan. If you build around Dad’s actual habits—who likes char, who likes sauce, who wants a lighter plate—you end up with a meal that feels personal, not generic. That part matters more than the candles.
Quick Reference for All 16 Dinners
- 1. Ribeye Steak with Garlic Herb Butter — Prep 15 min, Cook 15 min, Total 30 min. Serves 4. Standout: deep crust and glossy herb butter.
- 2. Classic BBQ Baby Back Ribs — Prep 20 min, Cook 185 min, Total 205 min. Serves 4 to 6. Standout: sticky, tender ribs with a true barbecue finish.
- 3. Bacon Cheeseburger Sliders — Prep 20 min, Cook 20 min, Total 40 min. Serves 6. Standout: crowd-friendly sliders with bacon and melted cheese.
- 4. Lemon Butter Salmon with Asparagus — Prep 15 min, Cook 15 min, Total 30 min. Serves 4. Standout: bright, fast, and polished on one pan.
- 5. Garlic Parmesan Chicken Thighs — Prep 15 min, Cook 30 min, Total 45 min. Serves 4. Standout: crisp, savory crust on juicy chicken.
- 6. Grilled Pork Chops with Peach Glaze — Prep 15 min, Cook 20 min, Total 35 min. Serves 4. Standout: sweet-savory glaze with grill marks.
- 7. Shrimp Scampi with Linguine — Prep 15 min, Cook 15 min, Total 30 min. Serves 4. Standout: buttery pasta with a fast lemon-garlic sauce.
- 8. Meatloaf with Tangy Glaze — Prep 20 min, Cook 60 min, Total 80 min. Serves 6 to 8. Standout: old-school comfort with a sticky top.
- 9. Chicken Parmesan Bake — Prep 20 min, Cook 30 min, Total 50 min. Serves 4 to 6. Standout: crisp chicken under bubbling cheese.
- 10. Sheet Pan Steak Fajitas — Prep 15 min, Cook 20 min, Total 35 min. Serves 4. Standout: sizzling steak and peppers with almost no cleanup.
- 11. Slow Cooker Pulled Pork Sandwiches — Prep 20 min, Cook 480 min, Total 500 min. Serves 8. Standout: hands-off pork that shreds into sauce.
- 12. Cast-Iron Chicken Marsala — Prep 15 min, Cook 30 min, Total 45 min. Serves 4. Standout: mushroom-rich sauce with restaurant style.
- 13. Sausage and Peppers Hoagies — Prep 15 min, Cook 25 min, Total 40 min. Serves 4 to 6. Standout: hearty sandwich filling with a deli feel.
- 14. Beef and Broccoli Stir-Fry — Prep 20 min, Cook 15 min, Total 35 min. Serves 4. Standout: glossy takeout-style dinner in a skillet.
- 15. Beer-Braised Short Ribs with Mashed Potatoes — Prep 25 min, Cook 180 min, Total 205 min. Serves 6. Standout: fork-tender beef with a deep braising sauce.
- 16. Skillet Sausage, Potatoes, and Green Beans — Prep 15 min, Cook 35 min, Total 50 min. Serves 4 to 6. Standout: one-pan comfort with crisp edges and no drama.