
A simple dessert can still look as if somebody fussed over it for an hour. The trick is usually not skill. It’s clean layers, glossy fruit, a sharp line of white cream, a little height, and one crisp contrast that makes the plate look intentional the second it hits the table. That’s why the best-looking sweets are often the least complicated ones.
I keep coming back to desserts that hold their shape. Parfaits in clear glasses. Strawberries dipped in dark chocolate. Panna cotta trembling just enough to catch the spoon. Puff pastry that puffs into golden ridges around fruit. They don’t need elaborate piping, sugar sculptures, or a pastry chef’s patience. They need smart assembly and a few details that make the colors pop.
If you’ve ever wanted a simple dessert almost too pretty to eat, the sweet spot is right here: fruit, cream, chocolate, pastry, and light-handed finishes that make every bite feel polished. Some of these are cold and silky. Some are crisp at the edges. Some are old-fashioned in the best way. All of them look like they belong on a special plate, even when you made them on an ordinary weeknight.
Why These Desserts Look So Polished Without Much Fuss
-
Clear layers do half the work: Parfaits, jars, and cups look finished because you can see every stripe of cream, crumb, and fruit through the glass.
-
Fruit carries the color: Raspberries, strawberries, blackberries, peaches, and orange zest give you bright reds, blush pinks, and deep golds without dye or decoration.
-
A little garnish goes a long way: Mint, pistachios, powdered sugar, or flaky salt changes the whole look in seconds.
-
The textures do the styling: Glossy chocolate, crisp puff pastry, soft whipped cream, and set custards create contrast that photographs itself, honestly.
-
Most of these use pantry basics: Sugar, cream, eggs, fruit, cookies, and pastry dough are enough to make dessert feel dressed up.
-
They’re easier to portion cleanly: Jars, tartlets, pots, bark, and shortcakes slice or scoop in a way that looks neat on a plate, which matters more than people admit.
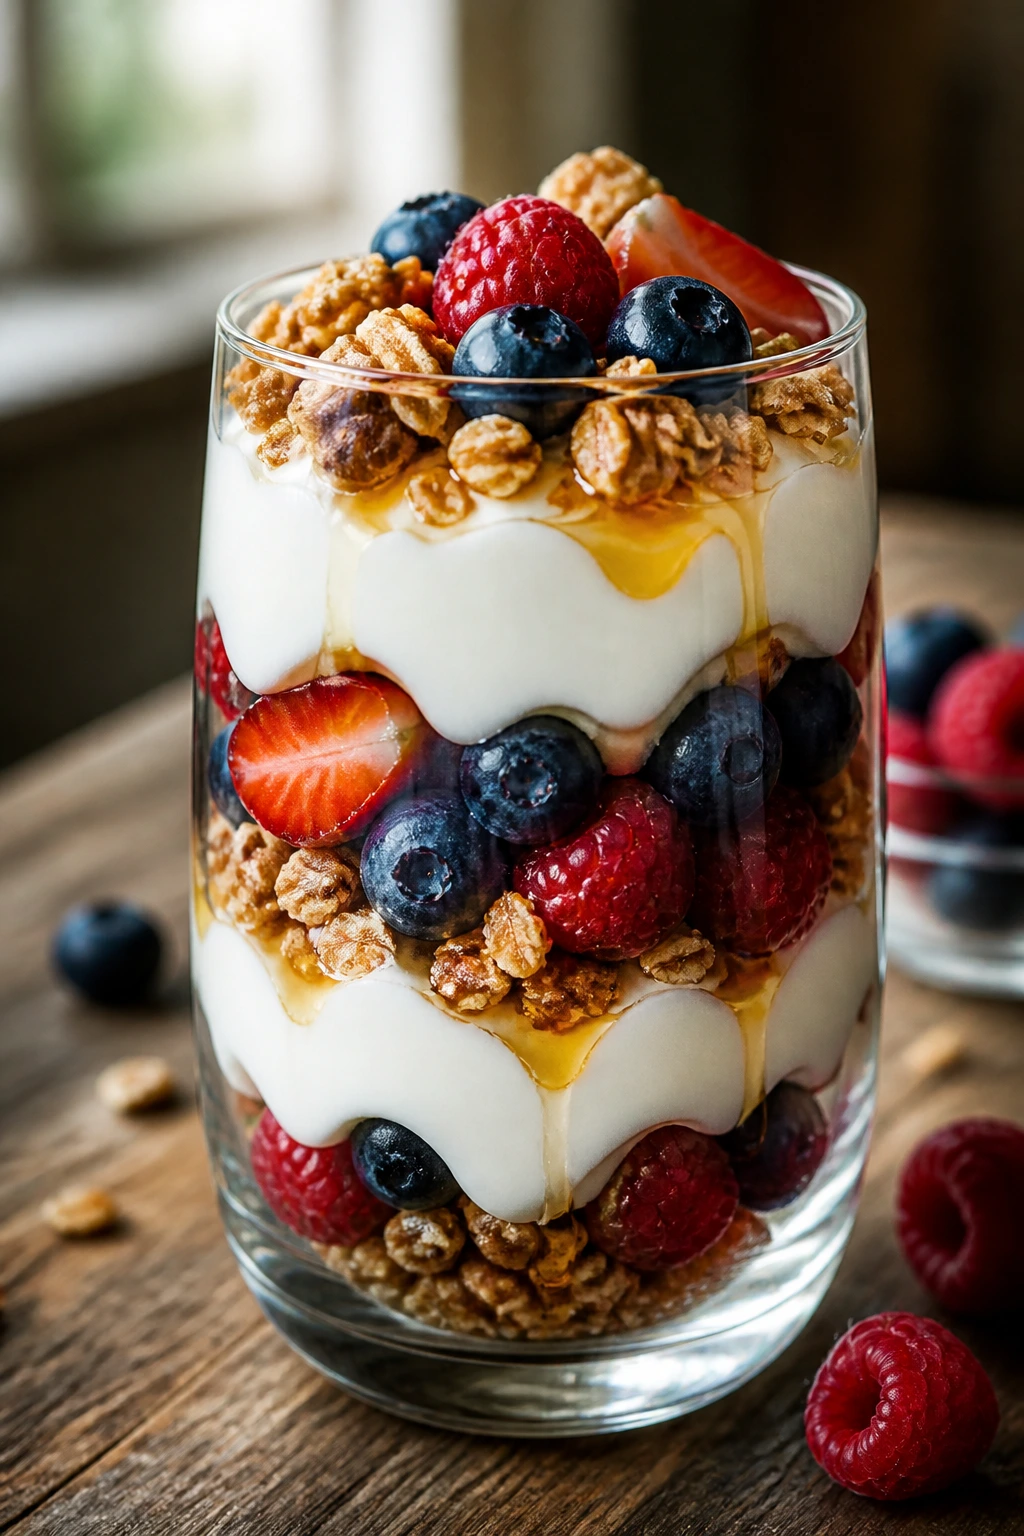
1. Berry Yogurt Parfaits
A parfait like this has that clean, bright look that makes people assume you planned ahead. You didn’t need much more than a spoon and a handful of berries. The berries stay glossy, the yogurt stays white and cool, and the granola gives you a rough edge that keeps the glass from looking too neat.
Why It Works:
The whole trick is contrast: creamy yogurt, juicy fruit, and crunchy granola stacked in a clear glass. It’s the kind of dessert that feels light on the spoon but still reads as finished because the layers are visible. A small drizzle of honey between layers gives the yogurt a sheen, and a 10-minute chill helps the granola settle without going soggy.
Key Ingredients:
- 2 cups plain Greek yogurt — thick enough to hold clean layers.
- 2 tablespoons honey — sweetens the yogurt without making it loose.
- 1 teaspoon vanilla extract — gives the yogurt a dessert note.
- 2 cups mixed berries — use strawberries, blueberries, or raspberries.
- 1 cup granola — choose clusters, not dusty crumbs.
- 1 tablespoon chia seeds — optional, but they add a little body.
- Fresh mint leaves — for a sharp green finish.
Quick Steps:
- Stir the yogurt, honey, and vanilla in a medium bowl until smooth and lightly glossy.
- Hull and slice any large strawberries so every berry layer sits evenly in the glass.
- Spoon 2 tablespoons of yogurt into each glass, then add a layer of berries and a spoonful of granola.
- Repeat the layers once more, ending with berries on top so the colors show through the glass.
- Add mint and a tiny drizzle of honey right before serving. Do not add the granola early if you want crunch.
Equipment for This Recipe:
- 4 clear dessert glasses or jars — the layers matter here.
- Small mixing bowl — for the yogurt base.
- Spoon or small spatula — for neat layering.
- Paring knife — for slicing strawberries.
How to Serve This Dish:
Serve these cold, with the berries facing outward if you can manage it. A short spoon works best, because you want each bite to pick up yogurt, fruit, and crunch together. They’re pretty enough for brunch and casual enough for a last-minute dessert after a roast chicken dinner.
Pro Tips for This Recipe:
- Pat the berries dry after washing. Wet berries slide around and blur the layers.
- Use wide-mouth glasses if you want cleaner stripes and less frustration.
- If your granola is sweet already, cut the honey back to 1 tablespoon.
- Build them no more than 30 minutes ahead if you care about crunch.
Variations on This Dish:
- Citrus Cream Parfaits: Swap the vanilla for 1 teaspoon orange zest and use sliced mandarins instead of berries.
- Dairy-Free Cups: Use thick coconut yogurt and add toasted coconut on top.
- Chocolate Berry Parfaits: Add 1 tablespoon cocoa powder to the yogurt and use raspberries for a sharper flavor.
Common Mistakes to Avoid with This Dish:
- Using watery yogurt: The layers collapse fast and look sloppy. Fix it by choosing Greek yogurt or straining regular yogurt for 20 minutes.
- Building too far ahead: Granola softens and the top loses its crunch. Assemble close to serving time.
- Skipping the dry berries: Moisture smears the glass and makes the parfait look cloudy. Dry the fruit well after rinsing.
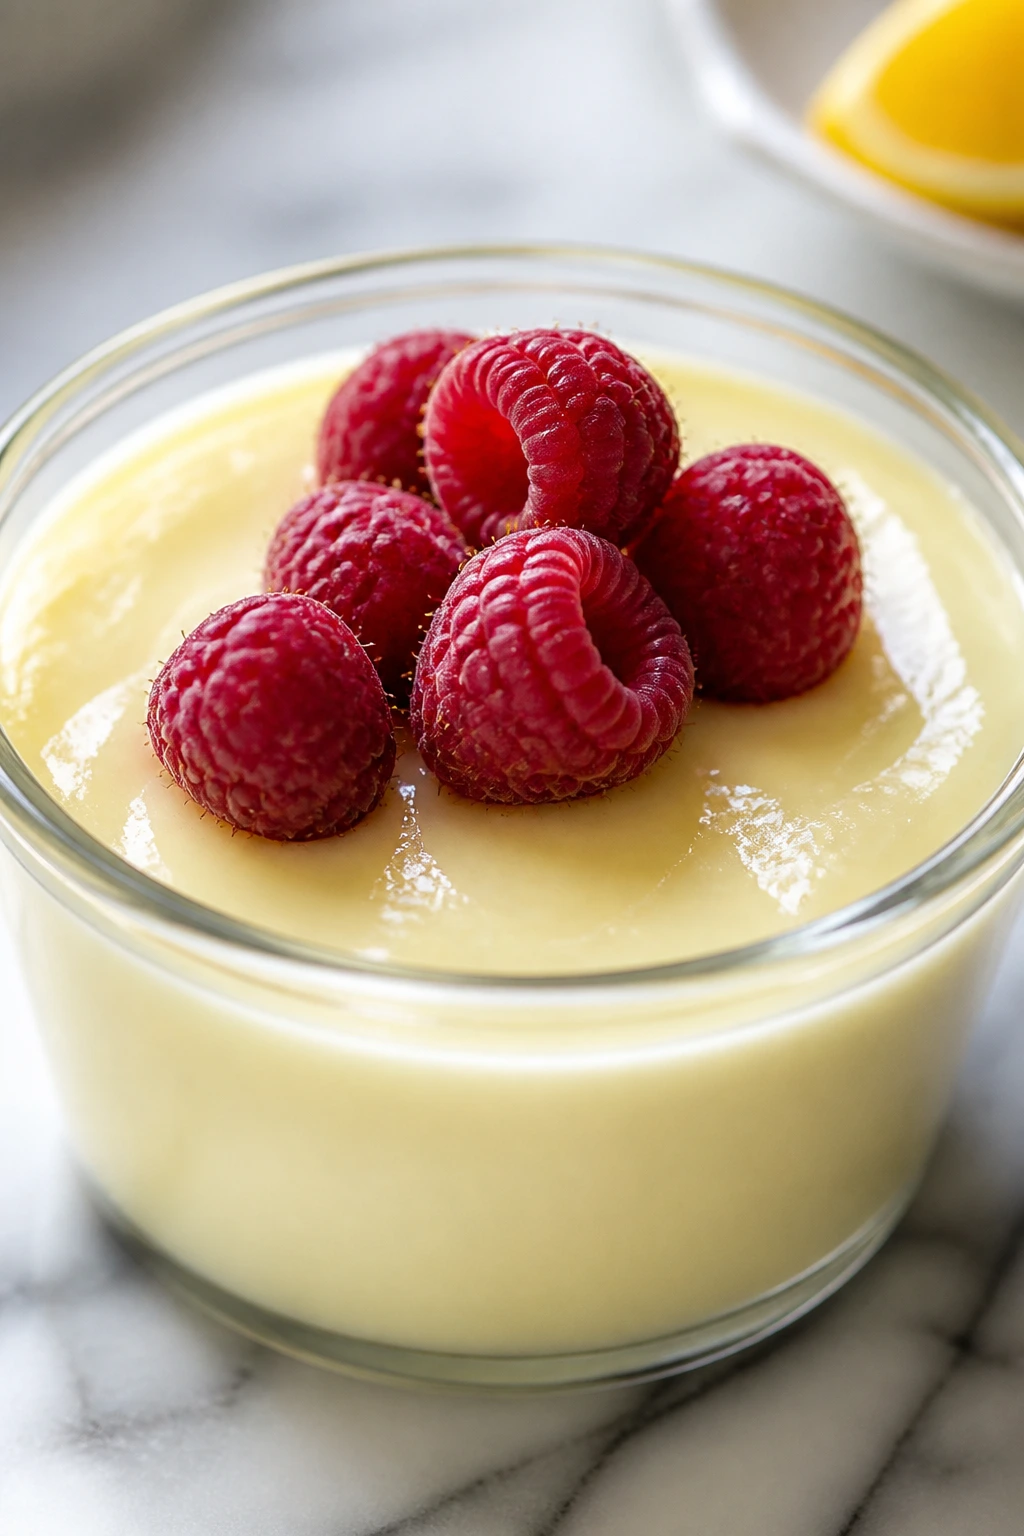
2. Lemon Posset Cups with Raspberries
This dessert is old-school in the best way: three ingredients, a satin-smooth set, and a tart finish that wakes the whole spoon up. It looks delicate because it firms up like a soft custard, then gets topped with berries that sink just slightly into the cream. Fancy-looking? Yes. Fussy? Not even close.
Why It Works:
Lemon posset sets because the acid in the juice thickens the hot cream mixture once it chills. You don’t need eggs, gelatin, or a water bath, which is part of the charm. The result is glossy, pale, and clean-edged in a ramekin or small glass, and raspberries give it the sort of color contrast that makes people lean in.
Key Ingredients:
- 2 cups heavy cream — use the real thing; this is not the place to cut corners.
- 3/4 cup granulated sugar — enough to sweeten the cream without making it cloying.
- 1/2 cup fresh lemon juice — strained, so the texture stays silky.
- Zest of 2 lemons — boosts the fragrance and gives the dessert a brighter edge.
- 1 cup raspberries — fresh is best here.
- Shortbread cookies — optional, but they give you a buttery crunch.
Quick Steps:
- Combine the cream and sugar in a saucepan over medium heat.
- Bring it to a gentle boil, then simmer for 3 minutes, stirring so the sugar dissolves completely.
- Take the pan off the heat and whisk in the lemon juice and zest.
- Strain the mixture through a fine-mesh sieve into 6 small cups or ramekins.
- Chill for at least 4 hours, or until the surface looks set and wobbly like soft custard.
- Top with raspberries and, if you like, a broken shortbread cookie. Do not stir after the lemon goes in.
Equipment for This Recipe:
- Medium saucepan — for heating the cream.
- Whisk — for blending the lemon in smoothly.
- Fine-mesh strainer — keeps the texture pristine.
- 6 ramekins or small glasses — the posset needs a vessel.
How to Serve This Dish:
Serve it cold, straight from the fridge, with the berries added at the last minute. A few shortbread crumbs around the edge make it look deliberate, not improvised. For a dinner party, set each cup on a small plate with one cookie tucked beside it.
Pro Tips for This Recipe:
- Use fresh lemon juice. Bottled juice tastes flat here.
- Simmer the cream, but don’t let it boil over. You want it hot, not scorched.
- Chill overnight if you can; the texture is cleaner and easier to spoon.
- Strain the mixture even if it looks smooth. Tiny bits of zest can make the surface uneven.
Variations on This Dish:
- Lime Posset: Swap lemon for lime juice and top with toasted coconut.
- Orange Posset: Use orange juice plus extra zest for a softer, rounder flavor.
- Herbal Posset: Infuse the cream with a sprig of thyme or rosemary, then strain it out before adding the juice.
Common Mistakes to Avoid with This Dish:
- Boiling too hard: The cream can separate or taste cooked. Keep it to a gentle boil.
- Adding juice while the pan is still over heat: The mixture can turn grainy. Pull it off the burner first.
- Unmolding too early: If you want a clean shape, chill long enough for the posset to set fully.
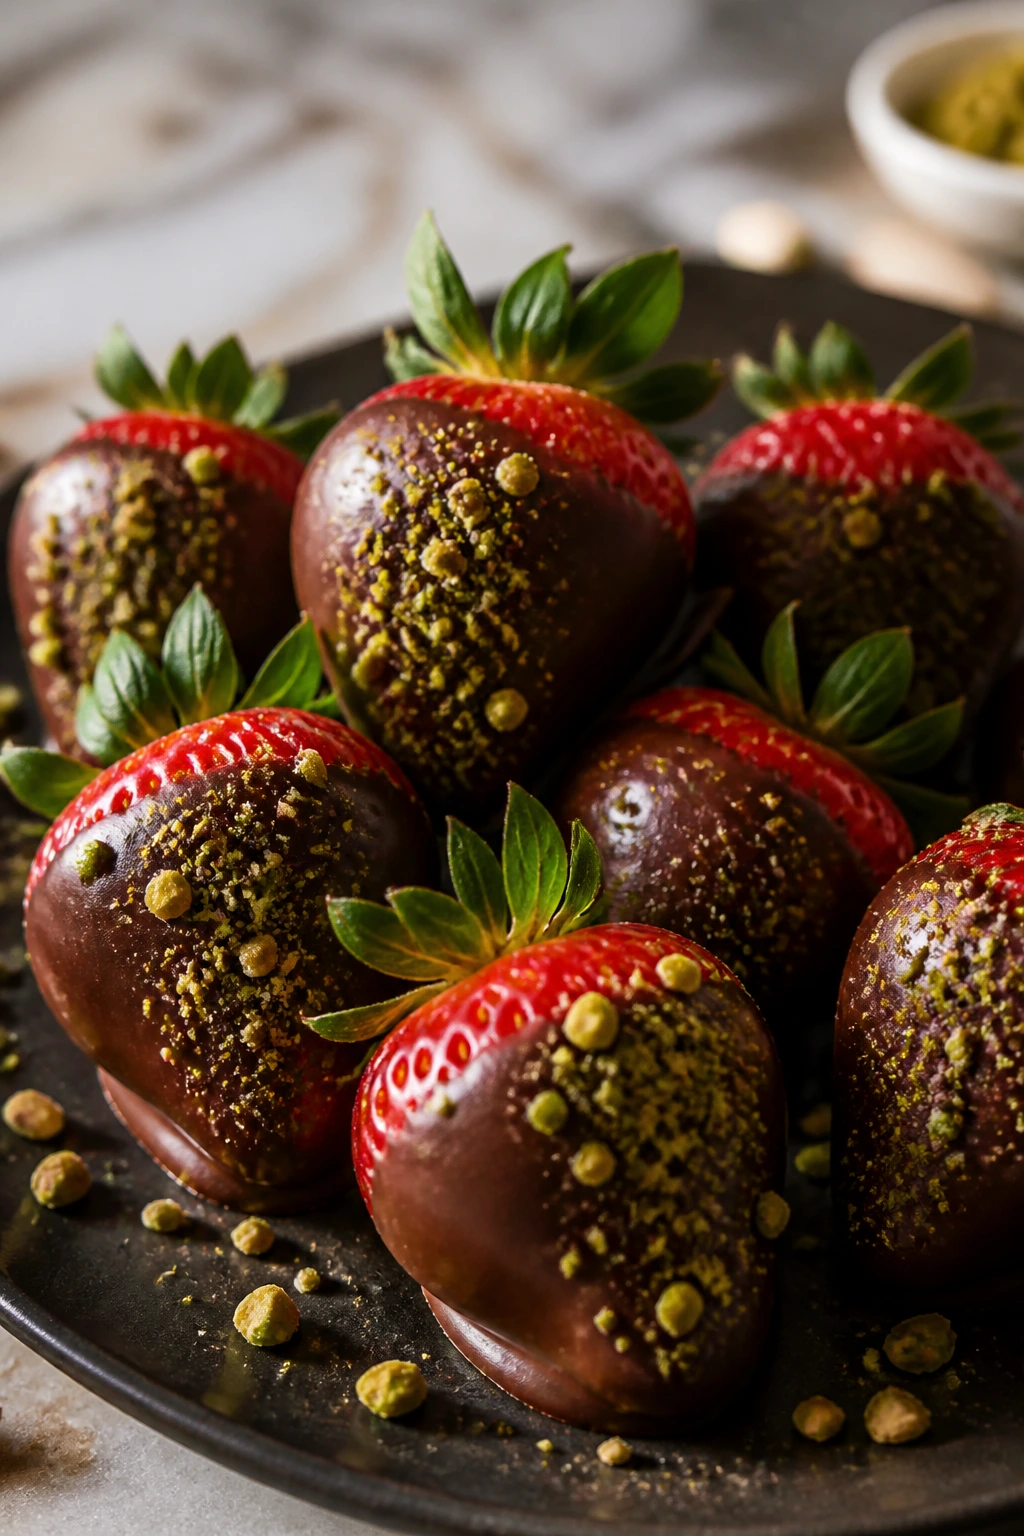
3. Chocolate-Dipped Strawberries with Pistachio Dust
There’s a reason this one keeps showing up at celebrations. It looks like somebody spent real time on it, but the actual work is mostly drying berries and being patient while chocolate sets. The glossy shell, the green flecks of pistachio, and the red berry peeking out from underneath do all the styling for you.
Why It Works:
Chocolate strawberries look expensive because the surface contrast is so strong: deep brown, bright red, and a little green crunch. The key is dryness. If the berries are even slightly wet, the chocolate seizes or slides off. Once they’re properly dried, the chocolate sets with a neat edge, and the pistachios give you texture without making the berries heavy.
Key Ingredients:
- 1 pound fresh strawberries — choose medium berries with intact stems if possible.
- 8 ounces dark chocolate — chopped so it melts evenly.
- 1 teaspoon coconut oil — optional, for a thinner dip.
- 1/3 cup finely chopped pistachios — for color and crunch.
- 1 pinch flaky sea salt — gives the chocolate a sharper finish.
- 2 ounces white chocolate — optional for drizzling.
Quick Steps:
- Wash the strawberries and dry them completely on a towel, then let them sit 15 minutes so every bit of surface moisture disappears.
- Melt the dark chocolate and coconut oil in a heatproof bowl over simmering water or in short microwave bursts.
- Hold each strawberry by the stem and dip it about 2/3 of the way into the chocolate.
- Set the dipped berries on parchment and sprinkle the pistachios over the wet chocolate.
- Drizzle with melted white chocolate if you want extra contrast.
- Let them set at room temperature or chill for 15 minutes. Do not put damp berries into melted chocolate.
Equipment for This Recipe:
- Sheet pan — for setting the berries.
- Parchment paper — keeps them from sticking.
- Heatproof bowl — for melting chocolate.
- Fork or skewer — useful if the berries don’t have stems.
How to Serve This Dish:
Pile them on a white platter or arrange them in a shallow bowl so the green and red colors show up. They’re best eaten the same day, with the chocolate still crisp. If you want to be neat about it, place a small napkin under the berries, because they do drip a little once they warm up.
Pro Tips for This Recipe:
- Choose strawberries with flat bottoms if you want them to stand better.
- Chop the pistachios finely; large pieces fall off too easily.
- Keep the chocolate warm, not hot. Overheated chocolate looks dull.
- If the berries are huge, dip only halfway so the chocolate doesn’t become awkwardly heavy.
Variations on This Dish:
- Coconut Snow Version: Roll the wet chocolate edge in finely shredded coconut.
- Ruby Chocolate Strawberries: Use ruby chocolate for a pink finish that leans festive.
- Orange Salt Version: Add orange zest to the melted chocolate and finish with extra flaky salt.
Common Mistakes to Avoid with This Dish:
- Wet berries: Chocolate seizes or slides off. Dry the fruit until it feels completely dry.
- Overcrowding the tray: The dipped berries can stick together. Leave space between each one.
- Chilling too long: Condensation forms when they come out of the fridge. Fifteen minutes is enough if you need them firm.
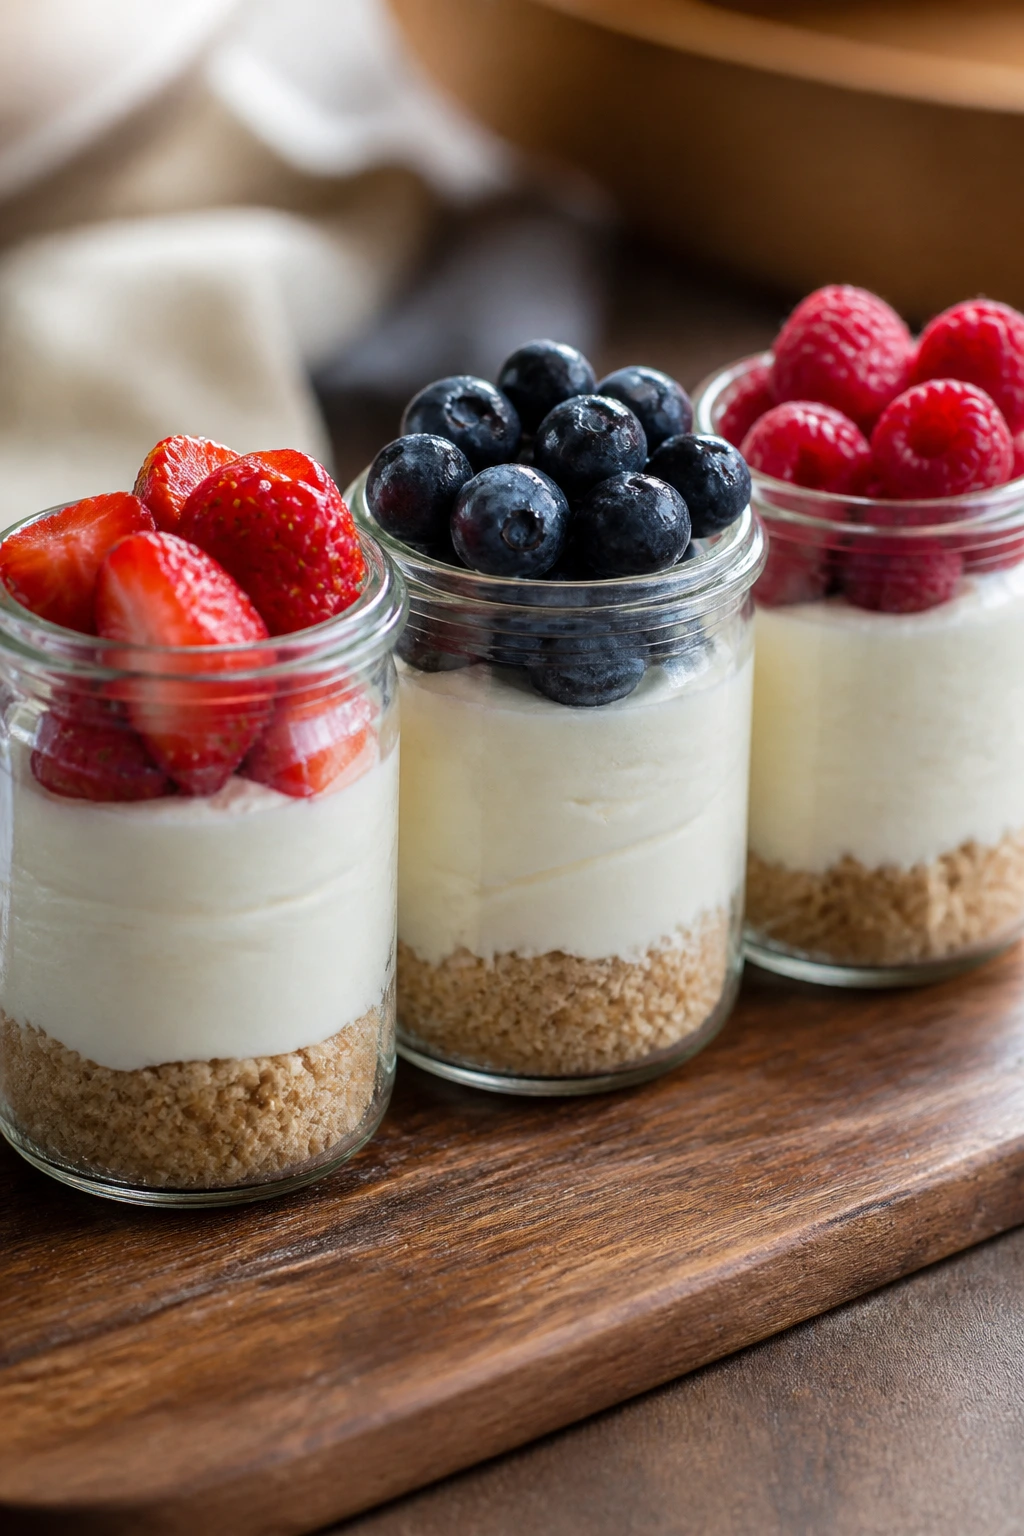
4. Mini No-Bake Cheesecake Jars
If you want a dessert that looks layered and polished without turning on the oven, this is the one I reach for. The jars give you straight lines, the crumb layer looks tidy, and the filling holds its shape in a way that feels more deliberate than it is. The fruit on top does the rest.
Why It Works:
A chilled cheesecake filling stays smooth when the cream cheese is beaten with powdered sugar and folded with whipped cream. The crust goes in first, so each spoonful gets a little crunch before the filling turns cool and airy. Jars make the whole thing look neat because there’s no slicing, no wobble, and no fight with the serving knife.
Key Ingredients:
- 1 1/2 cups graham cracker crumbs — fine crumbs pack best.
- 5 tablespoons melted butter — binds the crust.
- 16 ounces cream cheese — softened, not cold.
- 1/2 cup powdered sugar — sweetens without graininess.
- 1 teaspoon vanilla extract — for balance.
- 1 cup heavy cream, whipped to soft peaks — lightens the filling.
- 1 cup fruit topping — berries, cherry compote, or sliced peaches.
Quick Steps:
- Stir the graham crumbs and melted butter together until the mixture looks like damp sand.
- Divide the crumbs among 6 small jars and press them down with the back of a spoon.
- Beat the cream cheese, powdered sugar, and vanilla until smooth and fluffy.
- Fold in the whipped cream gently so you keep the filling airy.
- Spoon or pipe the filling over the crust, then top with fruit.
- Chill for at least 2 hours. Do not use cold cream cheese if you want a smooth filling.
Equipment for This Recipe:
- Hand mixer — helps the filling turn smooth fast.
- Mixing bowls — one for the crust, one for the filling.
- 6 small jars — clear jars show the layers best.
- Rubber spatula — for folding without deflating the cream.
How to Serve This Dish:
Serve straight from the fridge with a small spoon. A thin layer of fruit on top keeps the jars from looking heavy, and a mint leaf or lemon zest twist adds a clean finish. They work especially well after a heavy meal because each jar feels measured, not oversized.
Pro Tips for This Recipe:
- Soften the cream cheese all the way to avoid lumps.
- Pipe the filling with a bag if you want cleaner jar sides.
- If you use juicy fruit, spoon it on just before serving.
- Pack the crust firmly so it doesn’t scatter when you dig in.
Variations on This Dish:
- Lemon Cheesecake Jars: Add 1 tablespoon lemon zest and top with lemon curd.
- Oreo Cheesecake Jars: Swap the graham crumbs for crushed Oreos and skip the fruit if you want a darker look.
- Berry-Lavender Jars: Fold a pinch of dried culinary lavender into the whipped cream and top with berries.
Common Mistakes to Avoid with This Dish:
- Lumpy filling: Usually means the cream cheese was too cold. Let it soften first.
- Runny fruit topping: It leaks into the cheesecake and blurs the layers. Use a thicker compote or fresh fruit.
- Pressing the crust too loosely: It falls apart once you spoon into it. Pack it down firmly.
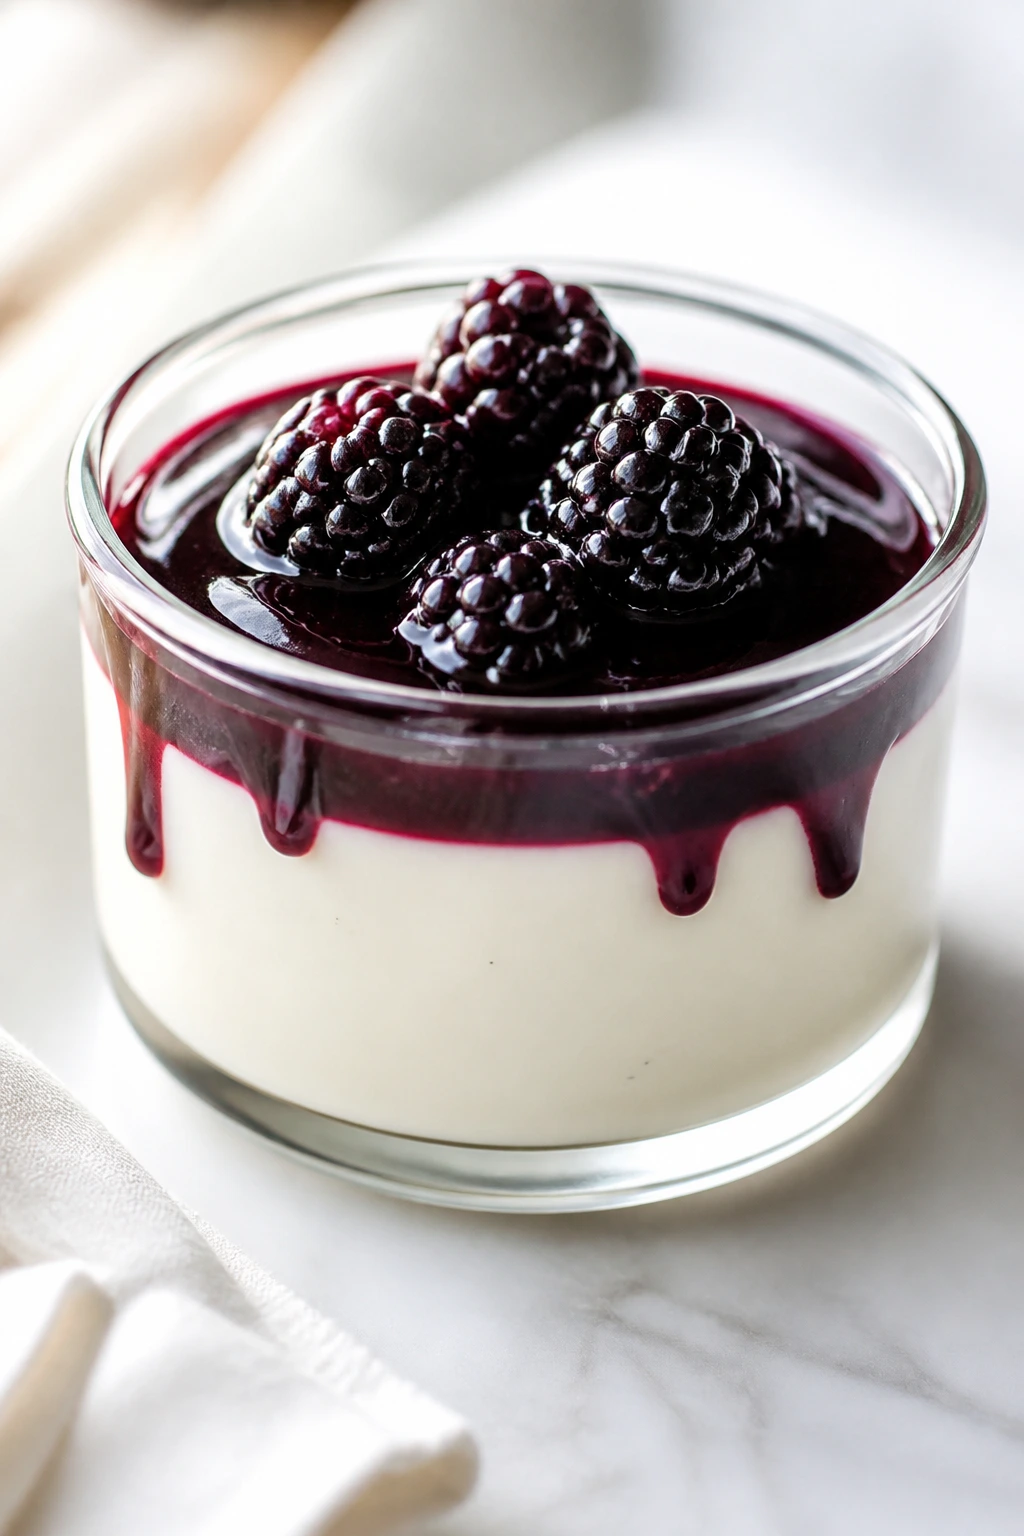
5. Vanilla Panna Cotta with Blackberry Sauce
Panna cotta looks like it took a pastry case and a steady hand, but it’s mostly about heat, gelatin, and patience. The surface should wobble when you tap the ramekin. That slight tremor is the whole point. Add a blackberry sauce on top and the dessert goes from plain white to something that looks tailored.
Why It Works:
Panna cotta sets because gelatin firms the cream once it chills, and the ratio matters more than drama. Too little gelatin gives you cream soup. Too much gives you rubber. Done right, it unmolds with clean sides and a soft center, then the blackberry sauce gives you deep color and a tart edge that keeps the cream from feeling heavy.
Key Ingredients:
- 2 cups heavy cream — the base of the custard.
- 1 cup whole milk — lightens the texture a little.
- 1/3 cup granulated sugar — sweetens the cream.
- 2 teaspoons powdered gelatin — bloomed in cold water.
- 1 teaspoon vanilla extract — or the seeds from 1 vanilla bean.
- 2 cups blackberries — for the sauce.
- 2 tablespoons sugar — for the sauce.
- 1 tablespoon lemon juice — sharpens the fruit.
Quick Steps:
- Sprinkle the gelatin over 3 tablespoons cold water and let it bloom for 5 minutes.
- Heat the cream, milk, and sugar in a saucepan over medium heat until steaming, not boiling.
- Remove the pan from the heat and whisk in the bloomed gelatin until completely dissolved.
- Stir in the vanilla, then pour the mixture into 6 ramekins or glasses.
- Chill for at least 4 hours, or until set with a soft wobble.
- Simmer the blackberries, sugar, and lemon juice for 5 minutes, then cool and spoon over the panna cotta. Do not boil the cream once the gelatin goes in.
Equipment for This Recipe:
- Small saucepan — for the cream and sauce.
- Whisk — for dissolving gelatin.
- Ramekins or dessert glasses — serve in them or unmold later.
- Fine sieve — optional, if you want a seedless sauce.
How to Serve This Dish:
Serve chilled with blackberry sauce spooned over the top. If you unmold it, set the panna cotta on a chilled plate and pour the sauce around the base so the white center stays clean. A few extra berries on the side make the plate look deliberate without doing much.
Pro Tips for This Recipe:
- Bloom the gelatin fully; dry granules leave little lumps.
- Strain the blackberry sauce if you want a smooth, glossy finish.
- Unmold only after the panna cotta has chilled solidly.
- Warm the outside of the ramekin for a few seconds if it won’t release.
Variations on This Dish:
- Coconut Panna Cotta: Replace half the cream with coconut milk and top with mango.
- Honey Thyme Panna Cotta: Swap sugar for honey and steep thyme in the cream.
- Strawberry Sauce Version: Use strawberries and a little balsamic vinegar for a brighter top note.
Common Mistakes to Avoid with This Dish:
- Too much gelatin: The texture turns bouncy instead of silky. Measure carefully.
- Boiling after adding gelatin: That can weaken the set. Keep the heat off.
- Unmolding too soon: The center slumps. Chill long enough for a full set.
6. Peach Puff Pastry Tarts
Puff pastry is a little bit of a cheat, and I mean that kindly. It gives you golden edges, built-in layers, and the kind of crisp, bakery-style look that makes fruit feel special. Thin peach slices arranged in rows look almost too tidy once they bake and gloss over with jam.
Why It Works:
The pastry puffs because the butter layers steam apart in the oven, so you get height without rolling your own dough. Peaches soften and darken at the edges, which gives the tart a warm, sunlit look. A little apricot jam brushed on top adds shine and keeps the fruit from looking dull once it cools.
Key Ingredients:
- 1 sheet puff pastry, thawed — keep it cold until you’re ready.
- 2 ripe peaches — sliced thin.
- 2 tablespoons granulated sugar — for the fruit.
- 1 tablespoon flour or almond flour — helps absorb excess juice.
- 1 egg — beaten for the wash.
- 1 tablespoon milk — mixed with the egg for brushing.
- 1 tablespoon apricot jam — for glazing.
- 1 teaspoon lemon juice — keeps the peaches bright.
- 2 tablespoons sliced almonds — optional, for crunch.
Quick Steps:
- Preheat the oven to 400°F and line a baking sheet with parchment.
- Unfold the puff pastry and cut it into 4 rectangles.
- Score a 1/2-inch border around each piece, then prick the center with a fork.
- Toss the peach slices with sugar, flour, and lemon juice.
- Arrange the peaches inside the border, brush the edges with egg wash, and scatter almonds on top if using.
- Bake for 18 to 22 minutes, until the pastry is deeply golden and puffed.
- Warm the apricot jam and brush it over the fruit while the tarts are still hot. Do not overload the pastry with peach juice.
Equipment for This Recipe:
- Sheet pan — gives the pastry room to puff.
- Parchment paper — prevents sticking.
- Pastry brush — for the egg wash and glaze.
- Sharp knife — for clean peach slices.
How to Serve This Dish:
Serve warm, with the peach slices still slightly soft and the pastry crisp at the edges. A scoop of vanilla ice cream works, but a spoonful of lightly whipped cream keeps the tart looking cleaner. If you want it to look extra neat, cut each tart with a serrated knife.
Pro Tips for This Recipe:
- Keep the puff pastry cold until the oven is ready.
- Slice peaches evenly so they bake at the same pace.
- Don’t skip the border score; it helps the edges rise around the fruit.
- If the peaches are very juicy, add a dusting more flour.
Variations on This Dish:
- Plum Tart Squares: Swap peaches for sliced plums and add a pinch of cinnamon.
- Nectarine Almond Tarts: Use nectarines and increase the sliced almonds on top.
- Pear and Honey Tarts: Replace the stone fruit with thin pear slices and brush with honey instead of jam.
Common Mistakes to Avoid with This Dish:
- Warm pastry before baking: It loses lift and bakes dense. Keep it chilled.
- Too much fruit: The tart gets soggy in the middle. Leave space between slices.
- Glazing too late: The fruit won’t look glossy. Brush the jam on while the tart is hot.
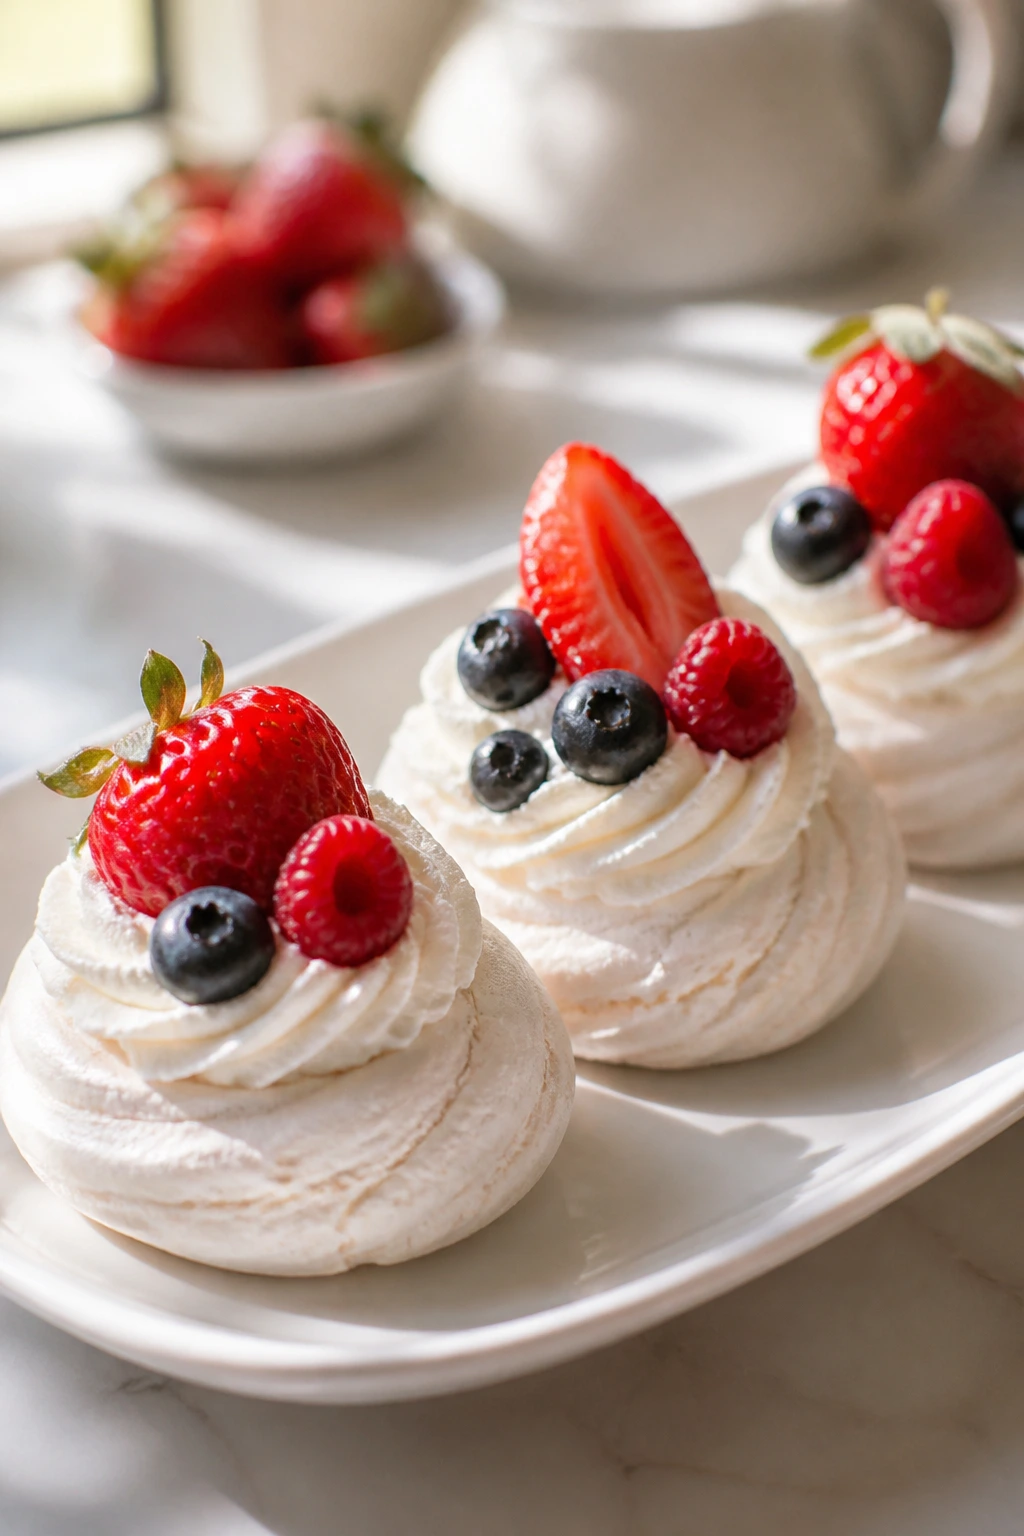
7. Mini Pavlovas with Whipped Cream
Pavlova is one of those desserts that looks delicate in a way that makes people nervous, which is funny because the baking is straightforward if you respect the egg whites. The outside should be crisp, the inside marshmallow-soft, and the berries on top do the decorating for you. It’s a white plate, a bright fruit topping, and not much else. That’s the beauty of it.
Why It Works:
The meringue bakes low and slow so the exterior dries while the center stays soft. Cornstarch and vinegar help keep the middle tender instead of brittle. Once the shells cool, whipped cream and berries create a sharp color contrast, and the whole thing looks much more difficult than it is.
Key Ingredients:
- 4 large egg whites — room temperature helps them whip higher.
- 1 cup granulated sugar — added gradually.
- 1 teaspoon cornstarch — for a soft center.
- 1 teaspoon white vinegar — stabilizes the meringue.
- 1 teaspoon vanilla extract — for flavor.
- 1 cup heavy cream — whipped for filling.
- 2 cups mixed berries — strawberries, raspberries, blueberries.
- Fresh mint — optional, but it brightens the plate.
Quick Steps:
- Preheat the oven to 250°F and line a baking sheet with parchment.
- Whip the egg whites until foamy, then add the sugar a spoonful at a time until the meringue looks thick and glossy.
- Fold in the cornstarch, vinegar, and vanilla.
- Spoon or pipe 6 small rounds onto the parchment, making shallow wells in the center.
- Bake for 55 to 65 minutes, then turn the oven off and let them cool inside with the door closed.
- Top the cooled shells with whipped cream and berries right before serving. Do not fill the pavlovas until the shells are fully cool.
Equipment for This Recipe:
- Stand mixer or hand mixer — essential for the meringue.
- Baking sheet — for the shells.
- Parchment paper — keeps them from sticking.
- Spoon or piping bag — for shaping the rounds.
How to Serve This Dish:
Serve them the moment they’re filled, while the shells still hold their crunch. A few berries spilling off the side look better than overstuffing them. If you’re serving a group, keep the shells and toppings separate until the last minute.
Pro Tips for This Recipe:
- Make sure the bowl is grease-free or the whites won’t whip well.
- Add sugar slowly so it dissolves instead of gritting.
- Keep the oven closed while the shells bake.
- If the air is humid, bake them on a dry day if possible.
Variations on This Dish:
- Chocolate Pavlovas: Fold 1 tablespoon cocoa powder into the meringue.
- Lemon Curd Pavlovas: Replace some cream with lemon curd for a sharper top.
- Tropical Pavlovas: Use kiwi, mango, and passionfruit instead of berries.
Common Mistakes to Avoid with This Dish:
- Opening the oven too early: The shells can crack or collapse. Leave them alone.
- Sugar not fully dissolved: The meringue feels grainy. Whip until it’s glossy and smooth.
- Filling too early: The cream softens the shells fast. Assemble right before serving.
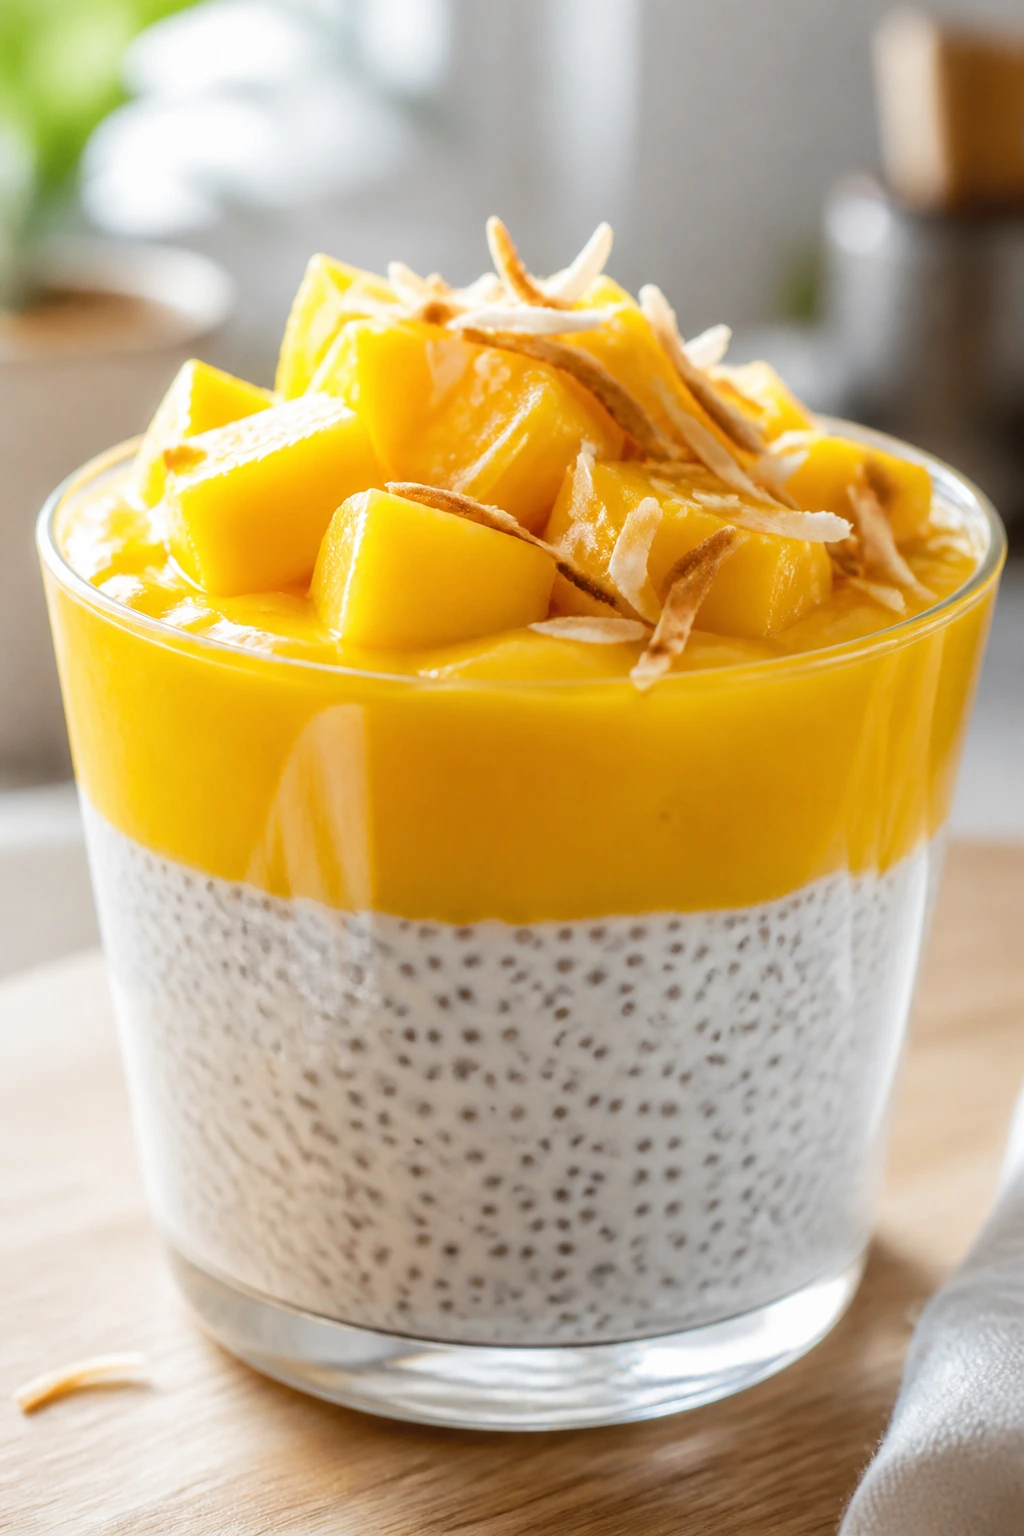
8. Mango Coconut Chia Cups
Chia cups are the sort of dessert that looks carefully assembled because the layers settle into neat, distinct stripes. Coconut white on the bottom, mango gold on top, and a little toasted coconut for finish. They’re cold, creamy, and clean-looking in a way that feels almost tailored.
Why It Works:
Chia seeds thicken liquid as they sit, so the pudding sets without eggs or gelatin. Coconut milk gives it a pale, rich base that pairs naturally with ripe mango. The fruit puree adds a bright, smooth layer that contrasts with the tiny pop of the chia seeds, which is a texture people notice more than they expect.
Key Ingredients:
- 1/2 cup chia seeds — the pudding base.
- 2 cups full-fat coconut milk — for body and flavor.
- 2 tablespoons maple syrup — adds sweetness.
- 1 teaspoon vanilla extract — softens the coconut edge.
- 2 ripe mangoes — peeled and cubed.
- 1 tablespoon lime juice — keeps the mango bright.
- 2 tablespoons toasted coconut — for garnish.
Quick Steps:
- Whisk the chia seeds, coconut milk, maple syrup, and vanilla together in a bowl.
- Let the mixture sit 10 minutes, then whisk again so the seeds don’t clump at the bottom.
- Chill for at least 4 hours, stirring once more halfway through if you want a smoother set.
- Blend the mangoes with lime juice until smooth, or leave them diced if you want a chunkier layer.
- Spoon the chia pudding into 4 glasses and top with mango puree.
- Finish with toasted coconut and a thin slice of lime. Do not skip the second stir.
Equipment for This Recipe:
- Mixing bowl or jar — for the pudding.
- Whisk — breaks up the chia seeds.
- Blender — optional, for the mango puree.
- Small glasses — clear sides show the layers.
How to Serve This Dish:
Serve chilled, with the mango on top and the coconut layer visible underneath. It works well in small glasses because the seeds are rich and the portion doesn’t need to be large. A few cubes of fresh mango on the surface make it look more finished than a smooth puree alone.
Pro Tips for This Recipe:
- Use ripe mangoes; underripe ones taste fibrous and flat.
- Stir twice in the first 15 minutes to prevent clumps.
- If the pudding gets too thick, thin it with a splash of coconut milk.
- Toast the coconut until pale gold, not dark brown.
Variations on This Dish:
- Passionfruit Cups: Replace the mango with passionfruit pulp for a tarter finish.
- Berry Coconut Cups: Use blended strawberries or raspberries instead of mango.
- Almond Coconut Cups: Add 1/2 teaspoon almond extract and top with sliced almonds.
Common Mistakes to Avoid with This Dish:
- Skipping the second stir: The seeds clump into a dense layer. Stir again after 10 minutes.
- Using watery coconut milk: The pudding won’t set cleanly. Choose full-fat canned coconut milk.
- Overloading with puree: The top layer slides and hides the presentation. Keep it thin.
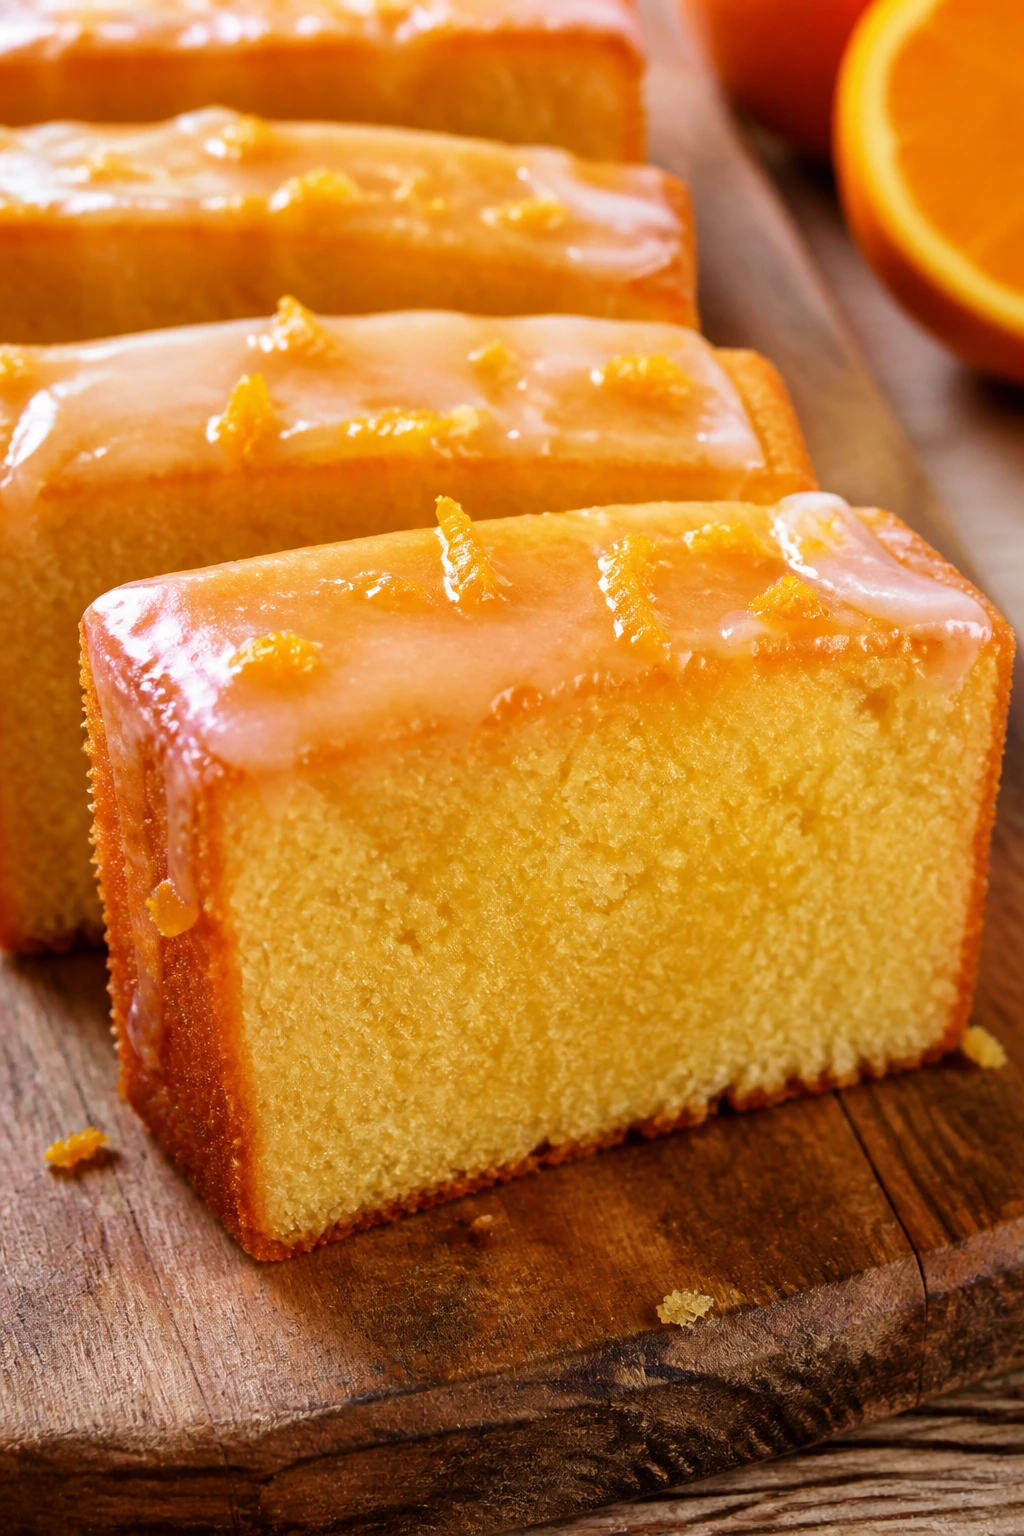
9. Orange Olive Oil Cake Slices with Citrus Glaze
This cake has the kind of golden crumb that looks lovely even before the glaze goes on. Slice it cleanly, and you get a soft, sun-colored interior with a glossy top and little flecks of orange zest. It’s plain in the best sense — elegant without trying too hard.
Why It Works:
Olive oil keeps the crumb moist and gives the cake a fine, tender texture that slices neatly. Orange juice and zest make the flavor bright, while the glaze adds shine and a little snap when it dries. A cake like this looks especially good on a plate because the sides stay clean and the crumb doesn’t collapse when cut.
Key Ingredients:
- 1 1/2 cups all-purpose flour — gives the cake structure.
- 1 teaspoon baking powder — for lift.
- 1/2 teaspoon baking soda — reacts with the citrus and yogurt.
- 1/2 teaspoon salt — keeps the sweetness from flattening.
- 3 large eggs — room temperature.
- 1 cup granulated sugar — for sweetness and crumb.
- 2/3 cup mild olive oil — not peppery or bitter.
- 1/2 cup orange juice — fresh if possible.
- Zest of 2 oranges — for fragrance.
- 1/2 cup plain yogurt — keeps the crumb soft.
Quick Steps:
- Preheat the oven to 350°F and grease a 9-inch round cake pan.
- Whisk the flour, baking powder, baking soda, and salt in one bowl.
- In another bowl, whisk the eggs, sugar, olive oil, orange juice, zest, and yogurt until smooth.
- Fold the dry ingredients into the wet mixture just until no flour streaks remain.
- Bake for 32 to 38 minutes, until the center springs back and a toothpick comes out clean.
- Cool for 15 minutes, then drizzle with a simple orange glaze. Do not use a strong, bitter olive oil here.
Equipment for This Recipe:
- 9-inch cake pan — for a neat slice.
- Whisk — enough for the batter.
- Mixing bowls — one dry, one wet.
- Microplane or zester — for the orange peel.
How to Serve This Dish:
Serve the cake in slim slices, not heavy wedges. A few berries beside the slice keep the plate bright, and a spoonful of yogurt or whipped cream adds contrast if you want it. I like it best at room temperature, when the citrus scent comes through strongest.
Pro Tips for This Recipe:
- Choose a mild olive oil so the cake tastes fruity, not peppery.
- Don’t overmix once the flour goes in; a tight crumb looks dry.
- Glaze the cake while it’s still warm so it absorbs a little.
- Use a fine grater for the zest to avoid large bitter strips.
Variations on This Dish:
- Lemon Olive Oil Cake: Swap orange for lemon and top with powdered sugar.
- Blood Orange Cake: Use blood orange juice for a darker, slightly dramatic glaze.
- Dairy-Free Version: Replace yogurt with unsweetened almond yogurt or another plain dairy-free yogurt.
Common Mistakes to Avoid with This Dish:
- Peppery olive oil: It can overpower the citrus. Choose a mild bottle.
- Overbaking: The crumb turns dry and crumbly. Start checking at 32 minutes.
- Glazing a cold cake: The glaze sits on top instead of soaking in a little.
10. Strawberry Shortcake Biscuits
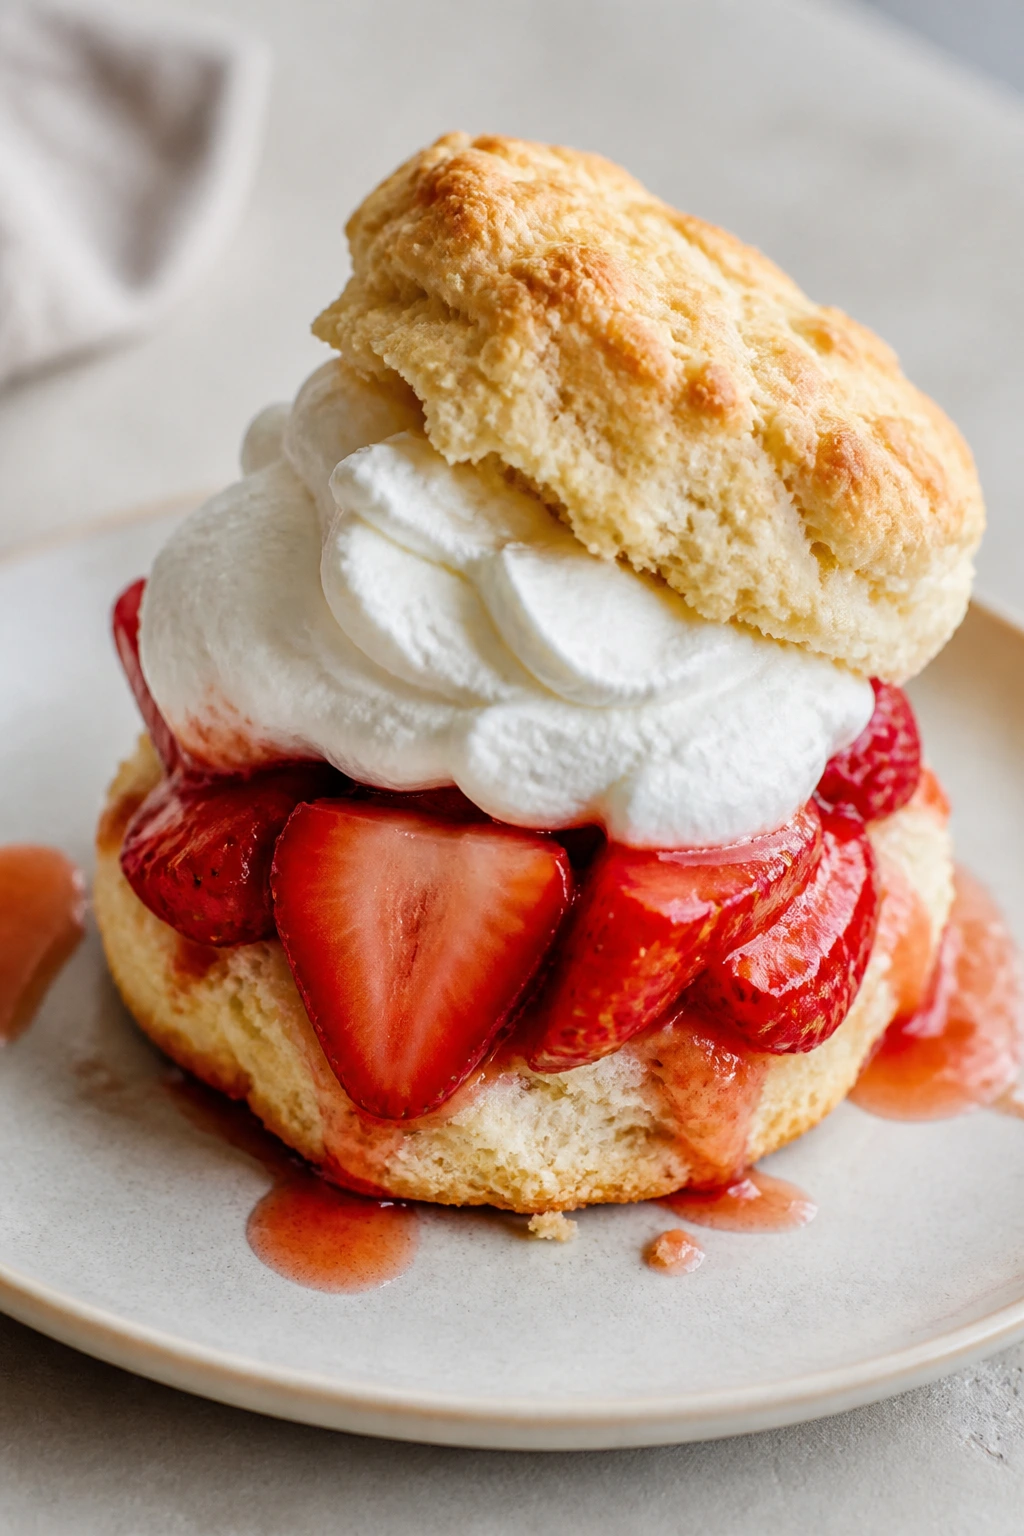
Shortcake is one of those desserts that should look a little messy. A split biscuit, sugared strawberries, and cream sliding down the sides is part of the charm. Still, if you arrange it with a small handful of care, it lands on the plate looking rustic rather than sloppy. That’s the goal.
Why It Works:
The biscuit gives you structure and height, which keeps the dessert from becoming a puddle. Macerated strawberries make their own syrup in the bowl, so you get both fruit and sauce from one bowl of berries. Whipped cream fills the gaps and gives the whole thing a soft, pale center that plays well against the red fruit.
Key Ingredients:
- 2 cups all-purpose flour — for the biscuits.
- 1/4 cup granulated sugar — lightly sweetens the dough.
- 1 tablespoon baking powder — helps the biscuits rise.
- 1/2 teaspoon salt — balances the flavor.
- 6 tablespoons cold unsalted butter — cut into cubes.
- 3/4 cup buttermilk — adds tenderness.
- 1 pound strawberries — sliced.
- 2 tablespoons sugar — for the berries.
- 1 cup heavy cream, whipped — for filling.
Quick Steps:
- Toss the strawberries with 2 tablespoons sugar and let them sit while you make the biscuits.
- Heat the oven to 425°F and line a baking sheet with parchment.
- Mix the flour, sugar, baking powder, and salt, then cut in the butter until the mixture looks like coarse crumbs.
- Stir in the buttermilk just until the dough comes together, then pat it into a 1-inch slab and cut 6 biscuits.
- Bake 12 to 15 minutes, until golden on top.
- Split the warm biscuits, spoon berries and syrup over the bottom halves, and finish with whipped cream. Do not twist the cutter when you cut the biscuits.
Equipment for This Recipe:
- Baking sheet — for the biscuits.
- Parchment paper — keeps the bottoms clean.
- Pastry cutter or fingers — for the butter.
- Large bowl — to keep the dough cool.
How to Serve This Dish:
Serve it while the biscuits are still warm and the cream is just starting to melt into the berry juice. Put the top biscuit on at an angle if you want a more relaxed look. A shortcake like this can be assembled at the table, which is half the fun.
Pro Tips for This Recipe:
- Keep the butter cold so the biscuits rise in layers.
- Don’t overwork the dough; shaggy is good here.
- Slice the strawberries thin if you want more syrup.
- Serve immediately after assembling, before the cream disappears into the crumbs.
Variations on This Dish:
- Peach Shortcake: Use sliced peaches with a tiny pinch of cinnamon.
- Lemon Shortcake: Add lemon zest to the biscuit dough and the whipped cream.
- Whole Wheat Shortcake: Replace half the flour with whole wheat flour for a nuttier crumb.
Common Mistakes to Avoid with This Dish:
- Warm butter in the dough: Biscuits spread and lose lift. Keep the butter cold.
- Overmixing: The biscuits turn tough. Stop once the dough holds together.
- Assembling too early: The biscuits soak through. Build them just before serving.
11. Almond Financiers with Glazed Cherries
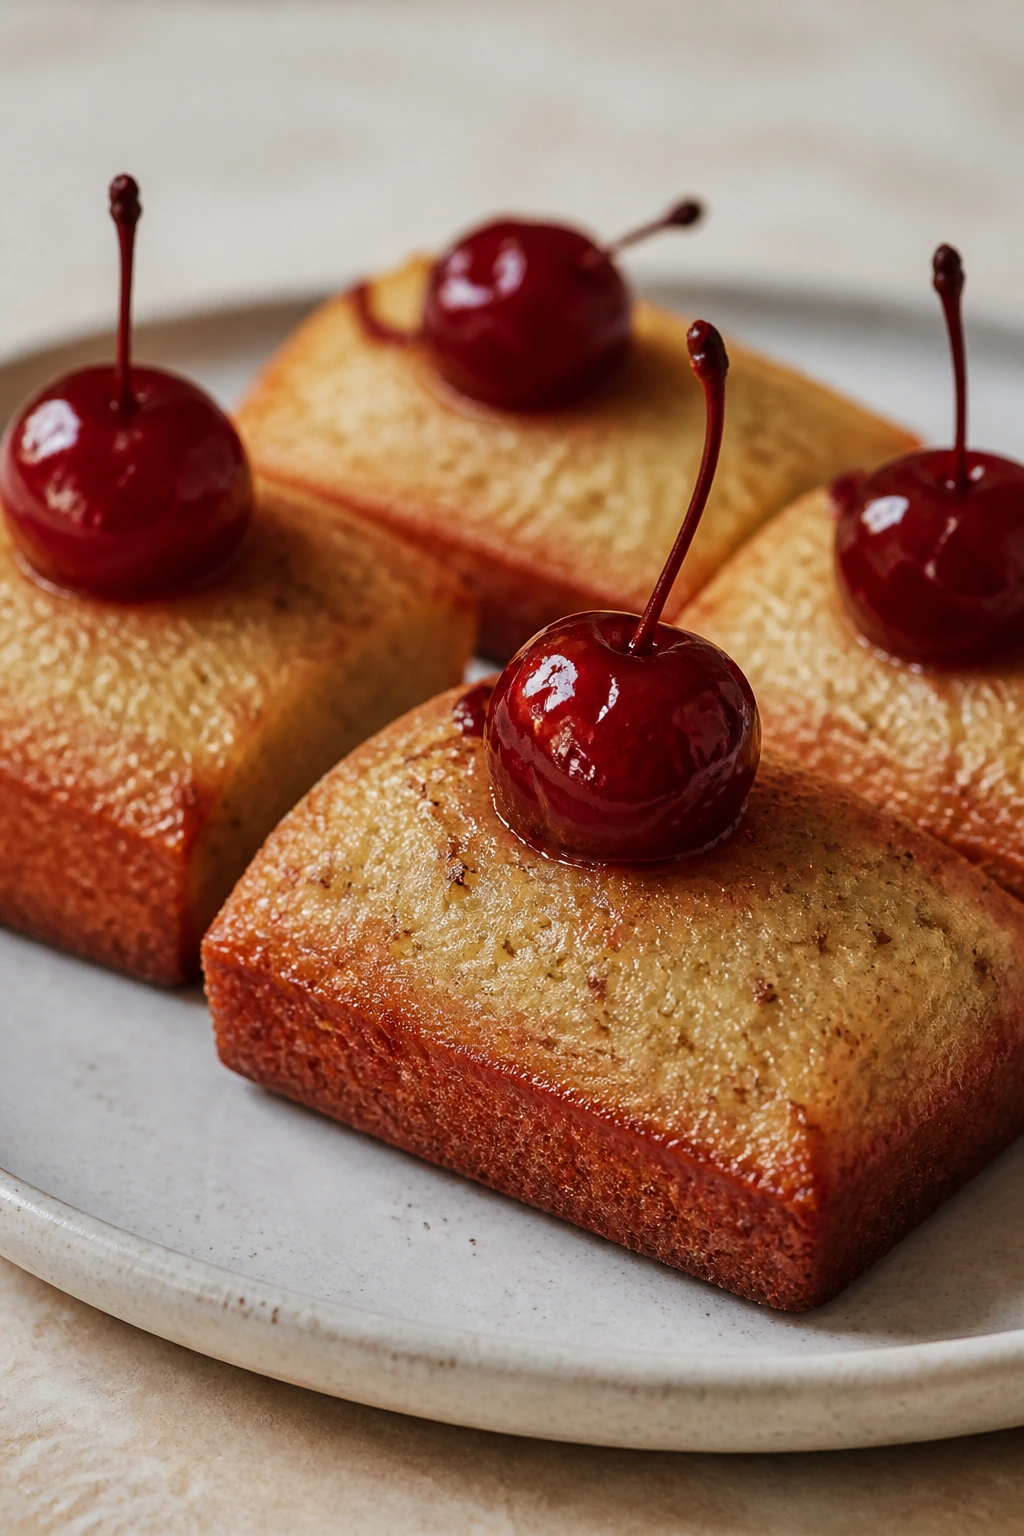
Financiers are small, rich, and a little fancier than their ingredient list suggests. The almond base bakes into a tender cake with crisp edges, and the glossy cherries on top make the whole thing look like it came from a pastry counter. They’re one of my favorite “looks complicated, isn’t” desserts.
Why It Works:
Almond flour keeps the crumb soft and gives the cakes a pale, speckled surface that feels polished. Brown butter adds a toasted smell that deepens the flavor without extra work. Cherries bring a jewel-like top, and the apricot glaze makes them shine so they catch the light without looking greasy.
Key Ingredients:
- 1/2 cup almond flour — for flavor and tenderness.
- 1/2 cup powdered sugar — helps the crumb stay fine.
- 1/4 cup all-purpose flour — gives structure.
- 4 large egg whites — unbeaten, just loose.
- 1/2 cup unsalted butter — browned until nutty.
- 1 teaspoon vanilla extract — for warmth.
- 1 cup fresh cherries, pitted — halved if large.
- 2 tablespoons apricot jam — for glazing.
- 1 tablespoon water — thins the jam if needed.
Quick Steps:
- Brown the butter in a small pan until it smells nutty and the milk solids turn amber.
- Whisk the almond flour, powdered sugar, and all-purpose flour together.
- Stir in the egg whites, vanilla, and browned butter until smooth.
- Divide the batter among a greased mini muffin pan or financier molds.
- Top each one with a cherry half and bake at 375°F for 12 to 15 minutes, until the edges are golden.
- Warm the jam with water and brush it over the cherries once the cakes cool slightly. Do not burn the butter; brown is the target, black is not.
Equipment for This Recipe:
- Small saucepan — for the brown butter.
- Whisk — for the batter.
- Mini muffin pan or financier mold — for the shape.
- Pastry brush — for the glaze.
How to Serve This Dish:
Serve them on a narrow plate or a small cake stand, because their size makes them look precious without trying. A few extra cherry halves scattered around the plate keep the look loose. They’re good with tea, coffee, or a tiny spoonful of crème fraîche.
Pro Tips for This Recipe:
- Brown the butter until it smells like toasted nuts, not caramel.
- Let the batter rest 20 to 30 minutes if you have the time; the crumb settles nicely.
- Pit the cherries carefully so the tops stay clean.
- Use a small mold. Large muffins lose the delicate look.
Variations on This Dish:
- Raspberry Financiers: Swap cherries for raspberries and skip the glaze.
- Pistachio Financiers: Replace half the almond flour with ground pistachios.
- Lemon Financiers: Add lemon zest and use blueberries instead of cherries.
Common Mistakes to Avoid with This Dish:
- Burning the butter: The flavor turns bitter. Watch the color and smell.
- Too much batter in each mold: The cakes rise over the sides and lose their neat shape.
- Glazing while too hot: The jam slides off. Brush it on when the cakes are just warm.
12. Raspberry Meringue Cookies
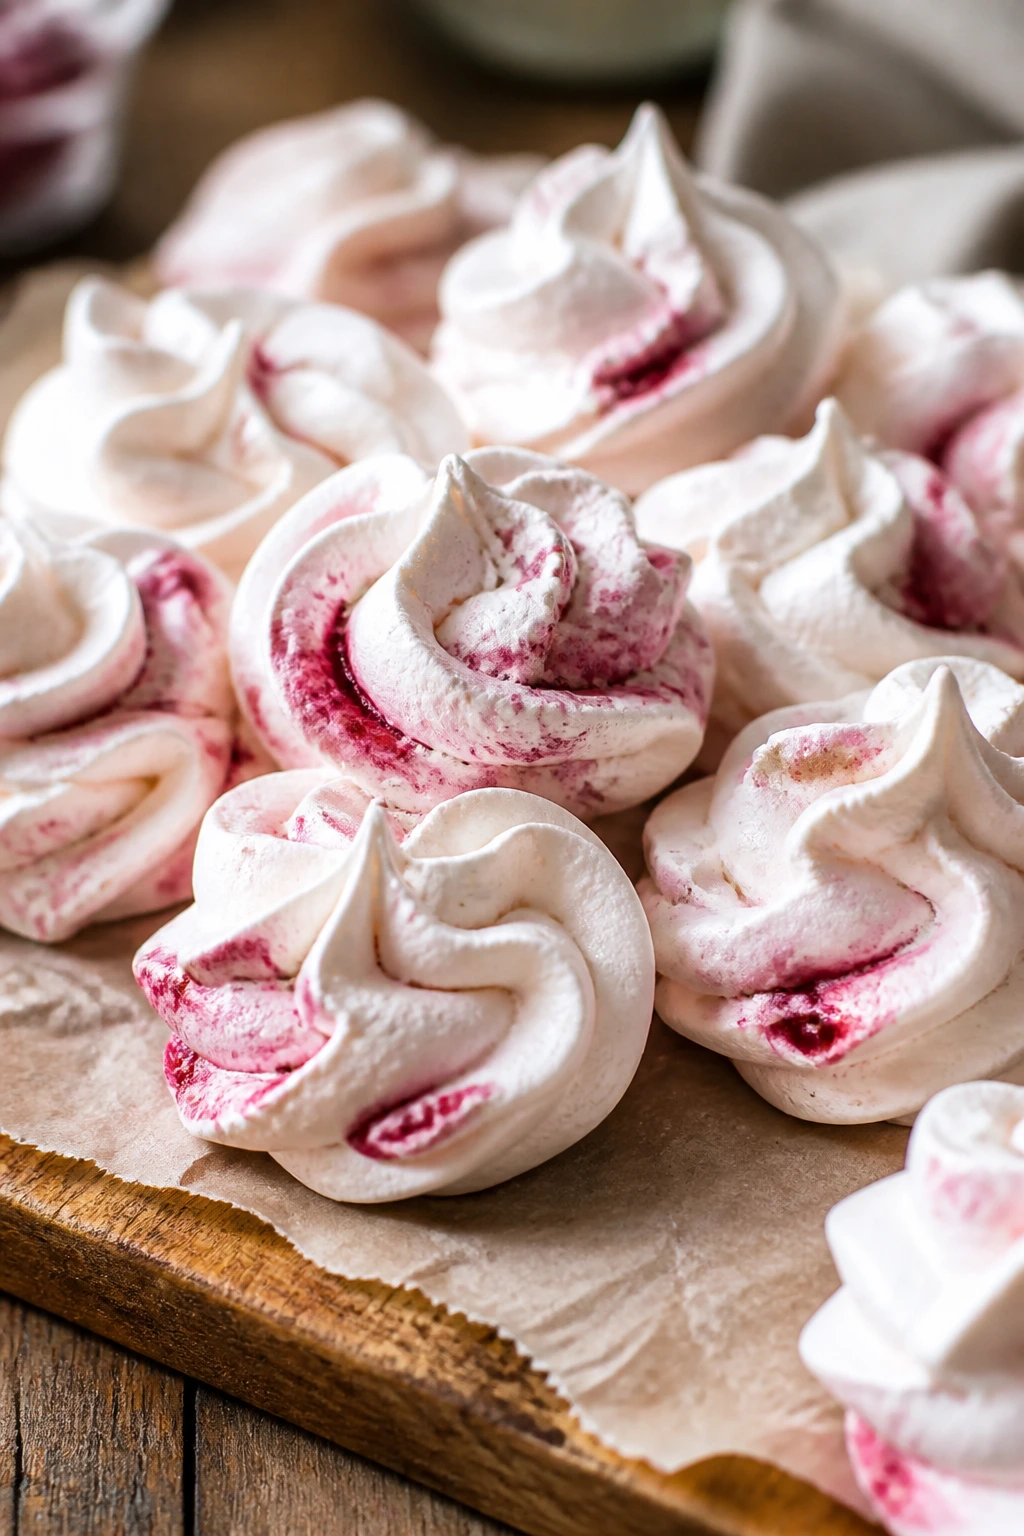
These are the kind of cookies that look like little clouds with a pink streak running through them. They’re crisp, dry, and airy, and the raspberry swirl makes them look more deliberate than a plain meringue ever could. Put them in a bowl and they disappear fast.
Why It Works:
Meringue cookies bake at low heat so they dry out instead of browning. The raspberry swirl gives you a soft streak of color without weighing down the whites. Because they’re so light, the shape matters more than size, and a small swirl or peak makes them look cleaner than a big, messy dollop.
Key Ingredients:
- 4 large egg whites — room temperature.
- 1 cup granulated sugar — added gradually.
- 1/2 teaspoon cream of tartar — stabilizes the whites.
- 1 teaspoon vanilla extract — optional but helpful.
- 1/3 cup raspberry puree — strained so it’s smooth.
- Pinch of salt — brightens the sweetness.
Quick Steps:
- Heat the oven to 225°F and line 2 baking sheets with parchment.
- Beat the egg whites, cream of tartar, and salt until soft peaks form.
- Add the sugar 1 tablespoon at a time until the meringue turns thick and glossy.
- Fold in the vanilla, then drizzle the raspberry puree over the top and swirl it once or twice with a spatula.
- Pipe or spoon small mounds onto the sheets.
- Bake 75 to 90 minutes, then turn the oven off and let them cool inside with the door closed. Do not over-swirl or the color disappears.
Equipment for This Recipe:
- Mixer — to whip the whites.
- Baking sheets — for the cookies.
- Parchment paper — keeps them from sticking.
- Piping bag or spoon — for shaping.
How to Serve This Dish:
Serve them in a dry bowl or on a plate lined with parchment if you’re worried about stickiness. They’re pretty next to fresh berries or a scoop of ice cream, though I like them plain with coffee. Keep them uncovered only while serving; humidity is the enemy.
Pro Tips for This Recipe:
- Make sure your bowl is grease-free.
- Add the sugar slowly so the meringue stays smooth.
- Use strained puree so raspberry seeds don’t speckle the cookies.
- Let them cool fully before you touch them; they’re fragile while warm.
Variations on This Dish:
- Cocoa Swirl Meringues: Swirl in a teaspoon of cocoa for a marbled look.
- Strawberry Meringues: Swap the raspberry puree for strawberry puree.
- Peppermint Meringues: Add 1/4 teaspoon peppermint extract for a sharper finish.
Common Mistakes to Avoid with This Dish:
- Greasy bowl or whisk: The whites won’t whip properly. Wipe everything clean and dry.
- High oven heat: The cookies brown and crack. Keep the temperature low.
- Storing in a humid kitchen: They soften and go sticky. Put them in an airtight tin.
13. Tiramisu Cups
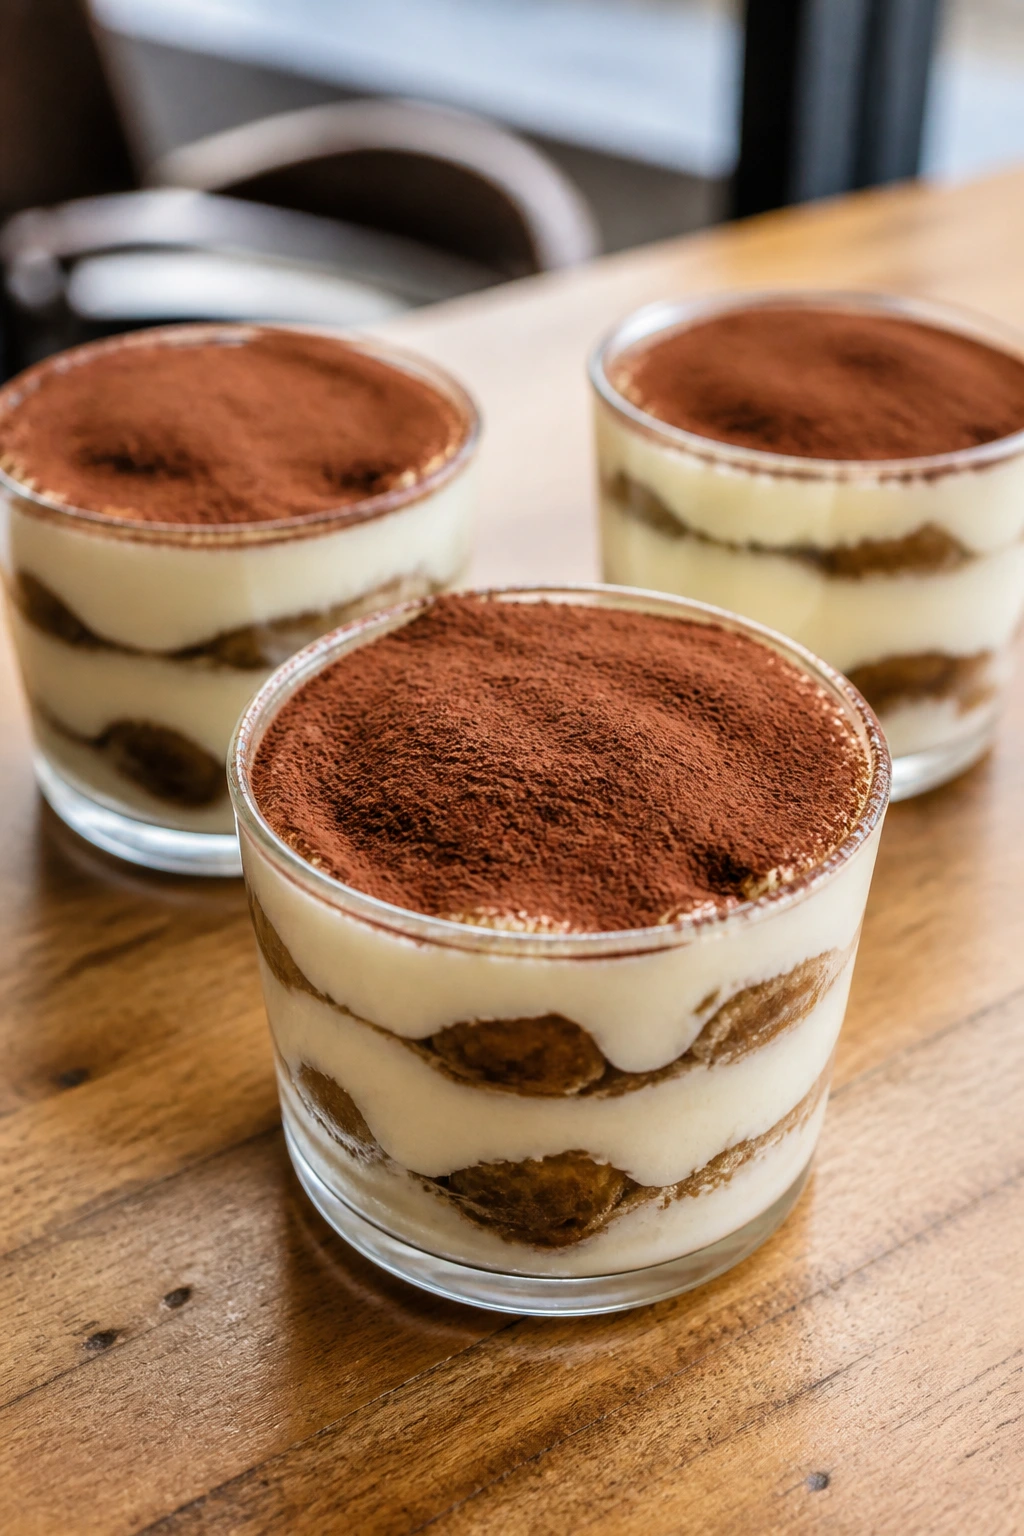
Tiramisu in cups is less about rustic slices and more about neat layers with a tidy cocoa top. The cream sits pale and soft, the coffee-soaked ladyfingers make dark lines through the glass, and the cocoa dusting gives the whole thing a restaurant look. It’s rich, but the cup keeps it under control.
Why It Works:
The mascarpone filling stays smooth and luxurious without baking, and the coffee-soaked ladyfingers soften just enough to taste like cake without turning to mush. Individual cups keep the layers straight, which matters a lot when the dessert is as visually simple as this. A clean cocoa dusting right before serving gives you the final contrast.
Key Ingredients:
- 1 cup strong espresso, cooled — the soaking liquid.
- 2 tablespoons sugar — for the coffee, optional.
- 1 cup mascarpone cheese — softened.
- 1 cup heavy cream — whipped.
- 1/2 cup powdered sugar — sweetens the filling.
- 1 teaspoon vanilla extract — rounds it out.
- 24 ladyfingers — enough for 6 cups.
- Unsweetened cocoa powder — for dusting.
Quick Steps:
- Stir the espresso with sugar if you want it a little sweeter, then cool it completely.
- Beat the mascarpone, powdered sugar, and vanilla until smooth.
- In a separate bowl, whip the cream to soft peaks and fold it into the mascarpone.
- Dip each ladyfinger quickly into the espresso — one second per side is enough.
- Layer the ladyfingers and cream in 6 small cups, repeating once.
- Chill for at least 4 hours, then dust with cocoa just before serving. Do not soak the ladyfingers until they fall apart.
Equipment for This Recipe:
- Hand mixer — for the filling.
- Shallow dish — for dipping the ladyfingers.
- Small glasses or cups — for the layers.
- Sifter — for the cocoa finish.
How to Serve This Dish:
Serve chilled, with the cocoa dusted on at the very end so it stays dark and dry. A few chocolate shavings can sit on top, but don’t pile them on; the layered look is part of the appeal. Small spoons make the cups feel more refined.
Pro Tips for This Recipe:
- Use cooled espresso, not hot coffee.
- Dip the cookies quickly or the bottom layer turns heavy.
- Chill long enough for the cream to set around the cookies.
- Dust cocoa right before serving so it doesn’t melt into the cream.
Variations on This Dish:
- Amaretto Tiramisu: Add a splash of amaretto to the coffee.
- Berry Tiramisu: Layer in strawberries or raspberries instead of coffee-heavy layers.
- Decaf Tiramisu: Use decaf espresso if you want the same look without the caffeine.
Common Mistakes to Avoid with This Dish:
- Over-soaked ladyfingers: The cups collapse into sludge. Dip fast.
- Loose filling: Usually means the cream wasn’t whipped enough. Beat to soft peaks before folding.
- Dusting too early: The cocoa turns damp and dull. Finish right before serving.
14. Apple Roses in Puff Pastry

Apple roses look like something complicated, then you bite into one and realize it’s mostly thin apple slices, pastry, and a little patience. The petals curl as they bake, the edges turn coppery, and the finished pastries look like they were arranged by hand. They’re the prettiest use of puff pastry I know.
Why It Works:
The apple slices soften just enough in hot water or the microwave to roll without cracking, and their red skins become the “petals.” Puff pastry does the rest, puffing around the fruit and holding the shape in the muffin tin. A little apricot jam gives them shine and makes the roses look fresh from the oven even after they cool a bit.
Key Ingredients:
- 1 sheet puff pastry, thawed — keep it cold.
- 2 red apples — thinly sliced.
- 2 tablespoons lemon juice — keeps the apple slices bright.
- 2 tablespoons sugar — for a little sweetness.
- 1 teaspoon cinnamon — optional, but classic.
- 2 tablespoons apricot jam — for glazing.
- Flour for dusting — helps with rolling.
Quick Steps:
- Heat the oven to 375°F and grease a 6-cup muffin tin.
- Slice the apples very thin, then soften them in a bowl with lemon juice and a splash of water for 45 seconds in the microwave.
- Cut the puff pastry into 6 long strips and brush each strip with a little apricot jam.
- Arrange the apple slices along the top edge of each strip so the red skin peeks above the pastry, then sprinkle with sugar and cinnamon.
- Fold the bottom of the pastry up over the apples and roll each strip into a spiral.
- Place each rose in the muffin tin and bake 35 to 40 minutes, until golden. Do not use thick apple slices; they crack when you roll them.
Equipment for This Recipe:
- Muffin tin — holds the rose shape.
- Sharp knife or mandoline — for thin slices.
- Microwave-safe bowl — for softening the apples.
- Pastry brush — for the jam.
How to Serve This Dish:
Serve warm or at room temperature, with the spiral facing up so the rose shape shows. A light dusting of powdered sugar makes the edges look frosted, and a small spoonful of whipped cream gives a softer landing for the pastry. They’re a little dramatic in the best way.
Pro Tips for This Recipe:
- Use red-skinned apples for the most convincing rose petals.
- Slice the apples paper thin so they bend instead of snapping.
- Don’t skip the jam; it helps the pastry brown and adds gloss.
- Roll tightly enough that the petals hold their shape in the tin.
Variations on This Dish:
- Pear Roses: Swap pears for apples if you want a softer look.
- Cranberry Apple Roses: Add a thin line of cranberry sauce under the apples.
- Almond Rose Pastries: Spread a little almond paste on the pastry before layering the fruit.
Common Mistakes to Avoid with This Dish:
- Too-thick apple slices: They crack and stick out awkwardly. Cut them thin.
- Loose rolls: The roses fall apart in the oven. Roll tightly.
- Overbrowning the edges: Check them near the end and cover loosely with foil if needed.
15. Crème Brûlée Pots
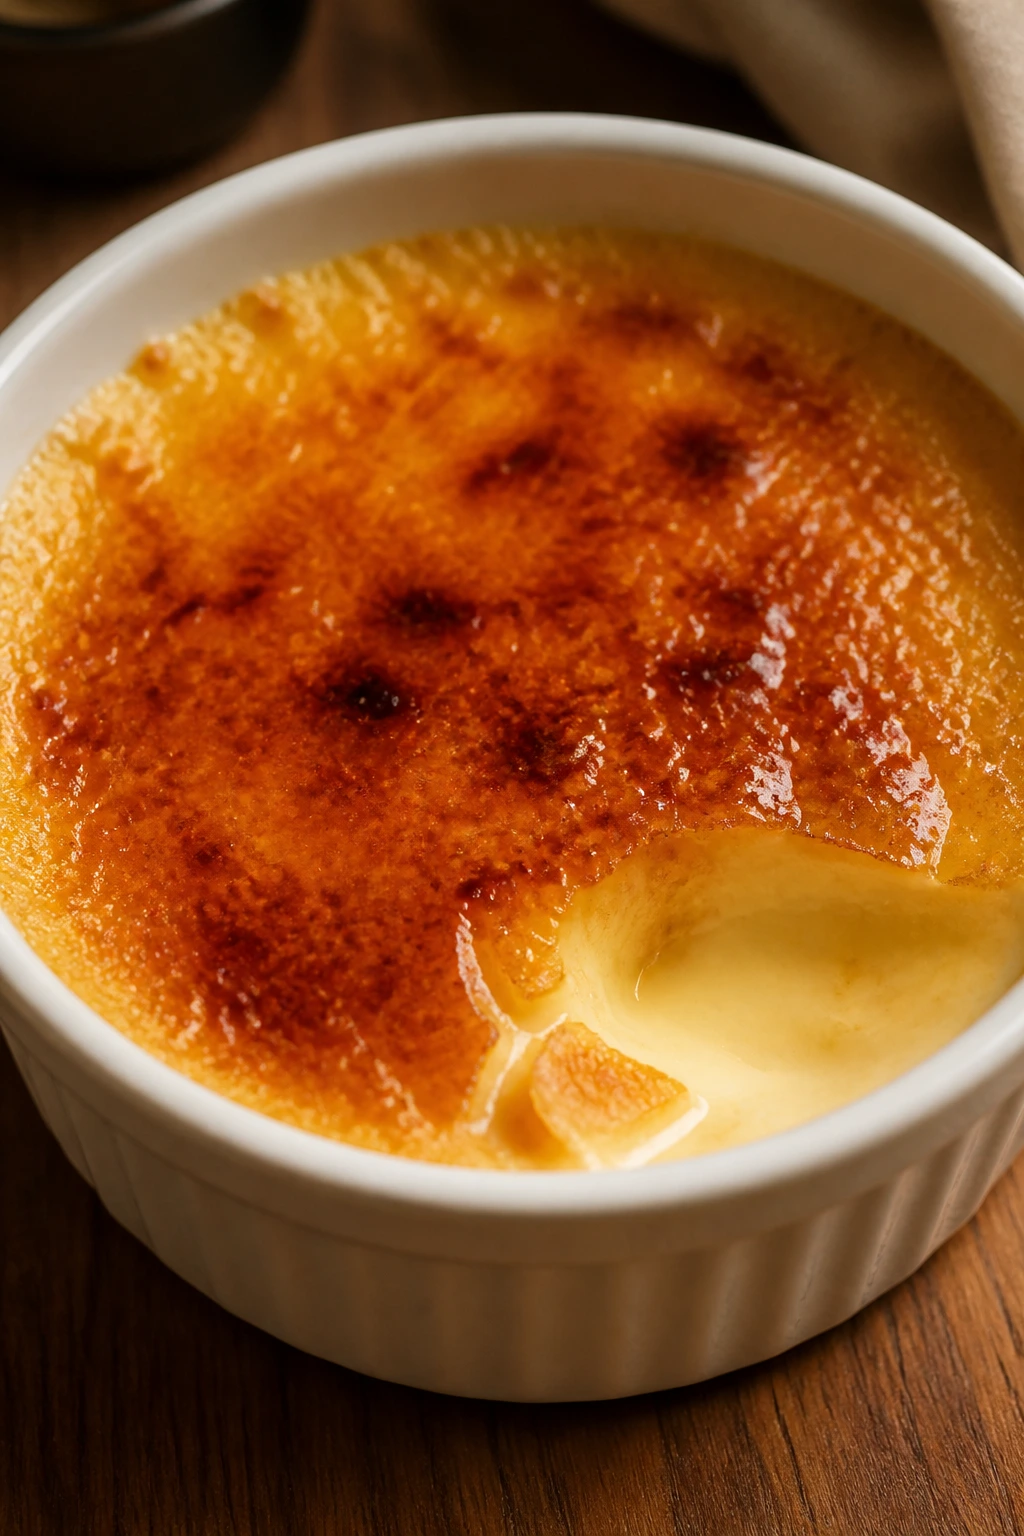
Crème brûlée has a reputation for being theatrical, mostly because of the crackly sugar top. The custard itself is quiet, smooth, and pale, which is why it looks so handsome in a shallow ramekin. You tap the sugar shell, it cracks, and the whole thing suddenly feels more special than a dessert this simple has any right to be.
Why It Works:
The custard bakes slowly in a water bath, which keeps the eggs from scrambling and gives you that satin texture. The top sugar layer caramelizes into a brittle shell that contrasts with the soft custard underneath. It’s the clash between hard and soft that makes it feel finished.
Key Ingredients:
- 2 cups heavy cream — the custard base.
- 1 vanilla bean or 2 teaspoons vanilla extract — for flavor.
- 5 large egg yolks — for richness and set.
- 1/2 cup granulated sugar — in the custard.
- Pinch of salt — sharpens the sweetness.
- 2 tablespoons granulated sugar — for the brûlée top.
- Fresh berries — optional for serving.
Quick Steps:
- Heat the oven to 300°F and set 4 ramekins in a roasting pan.
- Warm the cream and vanilla until steaming, then let it sit 5 minutes if using a bean.
- Whisk the yolks, sugar, and salt until smooth, then slowly pour in the hot cream while whisking.
- Strain the custard into the ramekins and pour hot water into the roasting pan halfway up the sides.
- Bake 28 to 35 minutes, until the edges are set and the center still jiggles.
- Chill for at least 4 hours, sprinkle sugar on top, and torch until amber and crackly. Do not overbake the custard or it turns grainy.
Equipment for This Recipe:
- Ramekins — shallow ones work best.
- Roasting pan — for the water bath.
- Fine sieve — for a smooth custard.
- Kitchen torch — for the sugar top.
How to Serve This Dish:
Serve the custard cold with the sugar torched right before it hits the table. A few berries on the side are enough; the caramel shell is the show. If you wait more than a few minutes after torching, the sugar softens, so timing matters.
Pro Tips for This Recipe:
- Strain the custard so it stays silky.
- Use shallow ramekins for more surface area on the sugar top.
- Torch in short passes until the sugar turns deep gold, not black.
- Chill overnight if you want the cleanest texture.
Variations on This Dish:
- Orange Brûlée: Add orange zest to the cream.
- Espresso Brûlée: Steep a spoonful of espresso powder into the warm cream.
- Coconut Brûlée: Replace part of the cream with coconut milk for a softer flavor.
Common Mistakes to Avoid with This Dish:
- Boiling the cream too hard: It can taste cooked. Warm it gently.
- Skipping the water bath: The custard bakes unevenly. Use it.
- Too much sugar on top: The shell turns thick and awkward to crack. Keep it thin.
16. Dark Chocolate Bark with Candied Orange and Sea Salt
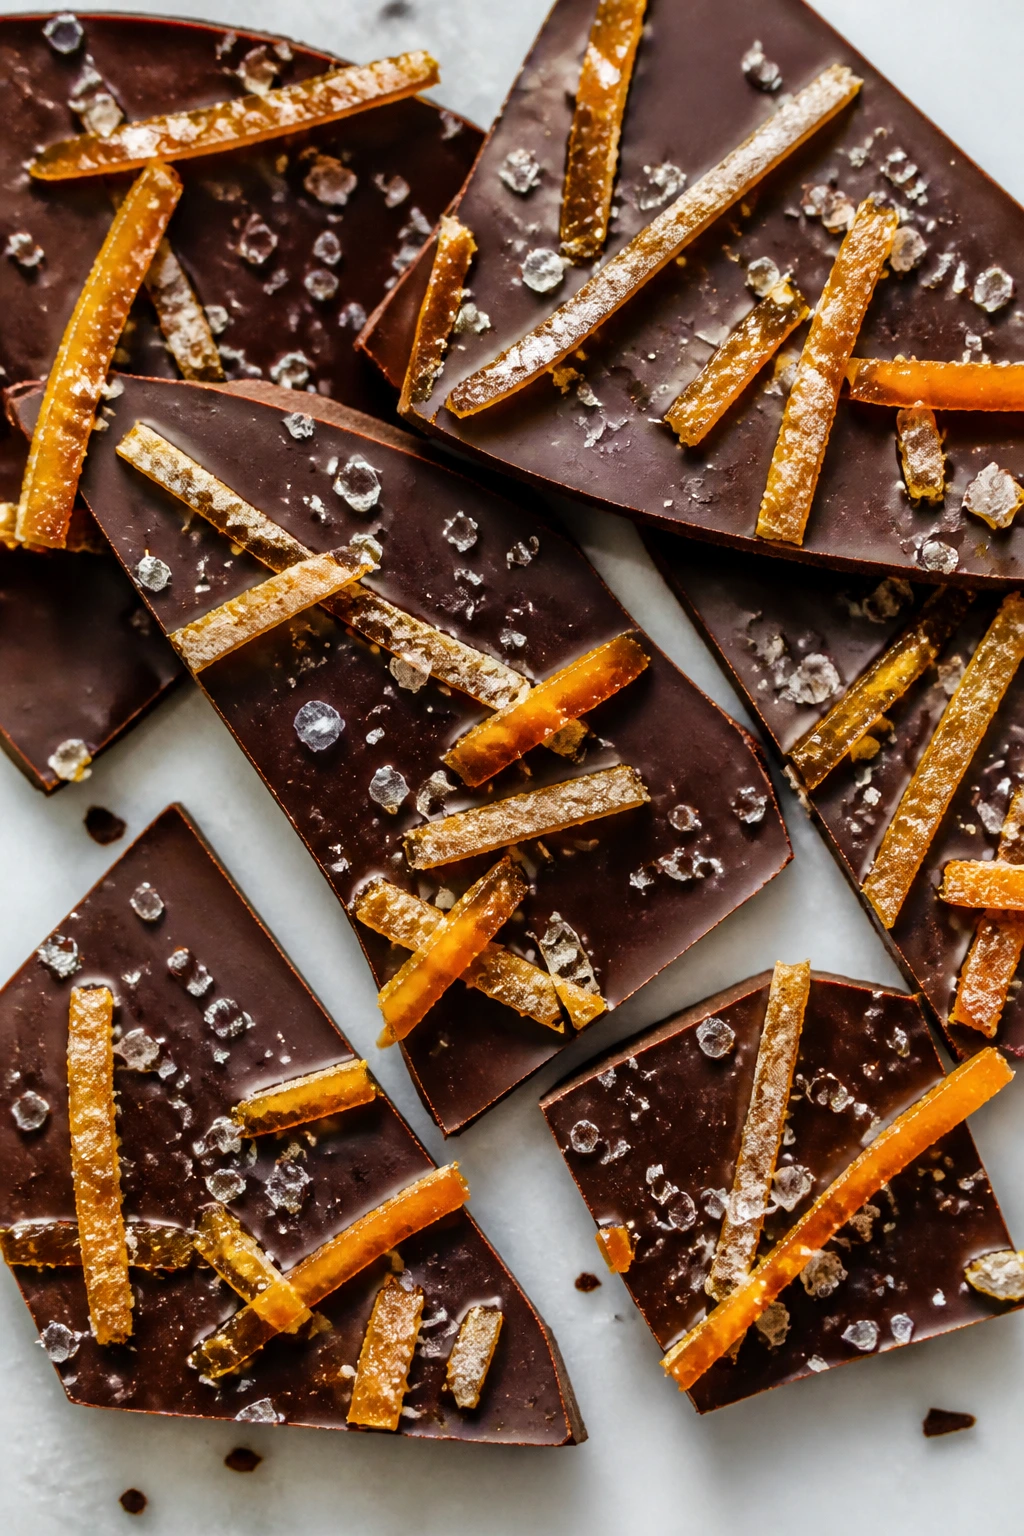
Chocolate bark is barely a recipe, which is why I like it so much. Melt, spread, top, chill, break. Done. And yet the look is sharp: dark chocolate, bright orange peel, little green pistachio bits if you want them, and a scatter of salt that makes the surface look deliberate.
Why It Works:
Bark looks polished because the toppings stay in place while the chocolate is still soft, then lock into a glossy sheet once it cools. Candied orange gives you color and chew, and sea salt keeps the sweetness from flattening out. Break it into uneven pieces and it starts to look like a boutique candy instead of an afterthought.
Key Ingredients:
- 12 ounces dark chocolate — chopped for even melting.
- 1/2 cup candied orange peel — cut into thin strips.
- 1/4 cup chopped pistachios — optional, for green contrast.
- 1 teaspoon flaky sea salt — for the finish.
- 2 tablespoons dried cranberries — optional, for extra color.
Quick Steps:
- Line a baking sheet with parchment paper.
- Melt the chocolate gently, stirring until smooth and glossy.
- Spread it into a thin rectangle about 1/4 inch thick.
- Scatter the candied orange, pistachios, and cranberries over the surface while the chocolate is still soft.
- Finish with flaky sea salt, then chill for 20 minutes or until firm.
- Break into shards by hand. Do not spread the chocolate too thick or the bark turns chunky instead of crisp.
Equipment for This Recipe:
- Baking sheet — for setting the bark.
- Parchment paper — helps with easy removal.
- Heatproof bowl — for melting the chocolate.
- Spatula — for spreading the layer thinly.
How to Serve This Dish:
Pile the shards in a bowl or lean them upright in a tin for a more dressed-up look. It’s good after dinner, but it also works as a gift if you tuck the pieces between sheets of parchment. The broken edges catch the light in a way that makes the chocolate look almost sculptural.
Pro Tips for This Recipe:
- Use good chocolate; the ingredient list is tiny, so quality matters.
- Add the salt while the chocolate is still soft so it sticks.
- Keep the bark thin for a cleaner snap.
- Store it away from heat or the surface will bloom and lose its shine.
Variations on This Dish:
- White Chocolate Cranberry Bark: Swap in white chocolate and use dried cranberries.
- Peppermint Bark: Add crushed peppermint candies on top.
- Sesame Chocolate Bark: Sprinkle toasted sesame seeds for a nutty edge.
Common Mistakes to Avoid with This Dish:
- Warm toppings sinking: The chocolate is too hot, or the toppings are too heavy. Let it cool a minute before decorating.
- Thick slabs of chocolate: The bark breaks unevenly and looks clumsy. Spread it thin.
- Poor storage: Heat makes it soft. Keep it sealed in a cool, dry place.
Why Layered and Chilled Desserts Look So Good on a Small Plate
The prettiest desserts in this group share a habit: they hold their shape. A clean layer of yogurt in a glass, a tall puff pastry tart, a custard with a shiny top — all of them rely on one visual rule, which is that edges matter. If the side of the dessert stays neat, the whole thing reads as thoughtful before anyone even tastes it.
That’s why I’m partial to chilled desserts and fruit-forward bakes when I want something that looks pulled together. They give you color without decoration overload. They also forgive a slightly imperfect hand. A crooked strawberry slice or a puff pastry edge that leans a little? Fine. The dessert still looks intentional because the shape, color, and texture do the heavy lifting.
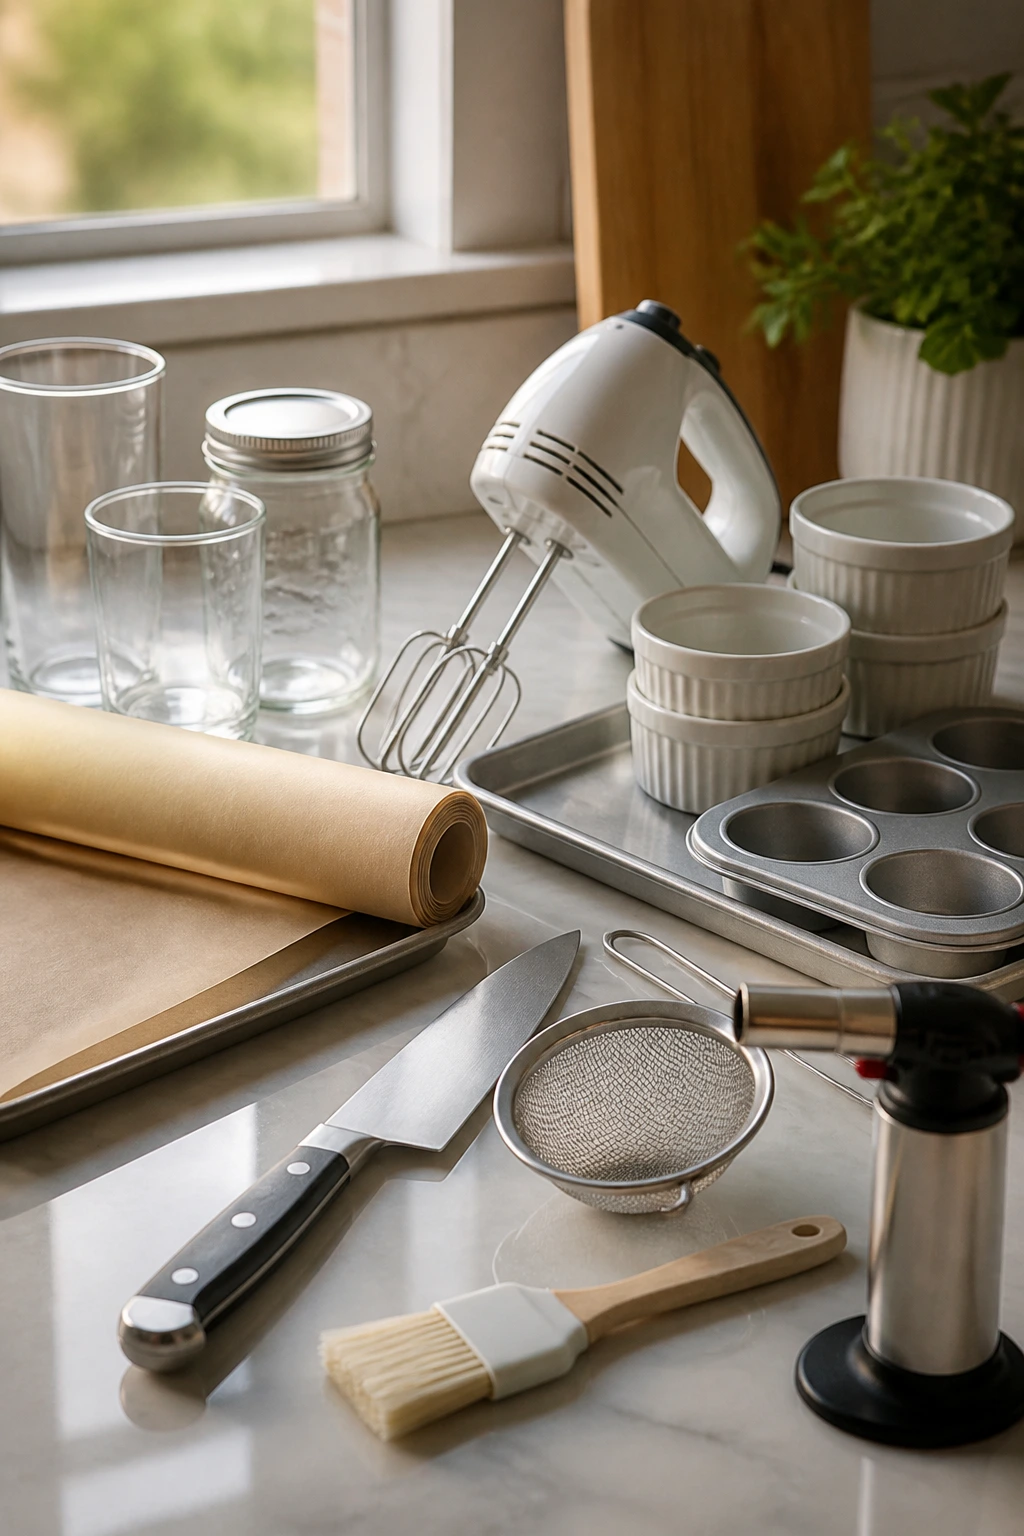
Essential Equipment for These Pretty Desserts
-
Clear glasses and jars: Best for parfaits, cheesecake cups, panna cotta, chia pudding, and tiramisu because the layers become part of the presentation.
-
Parchment paper: Keeps chocolate bark, pavlovas, and puff pastry from sticking, and it saves you from scraping delicate edges off a baking sheet.
-
Hand mixer or stand mixer: Needed for whipped cream, meringue, cheesecake filling, and tiramisu cream. A whisk will do in a pinch for some fillings, but your arm will complain.
-
Ramekins and small dessert cups: Useful for posset, crème brûlée, and panna cotta. Shallow vessels show off the surface better than deep ones.
-
Sharp knife or mandoline: Thin apple and peach slices make the difference between graceful and awkward. Thin fruit curls and fans better.
-
Sheet pans and muffin tins: These handle tartlets, pavlovas, roses, and biscuits. Muffin tins are especially handy when pastry needs support.
-
Fine-mesh strainer: Worth it for lemon posset, panna cotta, blackberry sauce, and custard if you want the texture to stay smooth.
-
Pastry brush: Handy for jam glazes, egg washes, and anything that needs a clean sheen.
-
Kitchen torch: Only necessary for crème brûlée, but if you make it more than once, you’ll be glad you own it.
Smart Shopping and Ingredient Tips
The fruit matters more than people think. For strawberries, look for berries with a bright red color all the way to the stem and no soft white patches near the top. For peaches and mangoes, the fragrance tells you a lot; if they don’t smell like much, they probably won’t taste like much either. Apples for the rose pastry should be firm and red-skinned so the petals keep their color in the oven.
Cream and dairy need a quick glance too. Heavy cream with a high fat content behaves better in whipped fillings, panna cotta, and posset. If a recipe asks for mascarpone or cream cheese, let it soften on the counter first so you don’t end up with lumps that refuse to smooth out. Cold dairy is fine for whipping later, but not when you need a silky base.
Chocolate should be the sort you’d actually eat on its own. Bark and dipped strawberries need good flavor because there isn’t much else in the recipe to hide behind. For orange peel, buy candied peel from a source you trust or make it yourself if you like a firmer bite. And when a recipe calls for puff pastry, choose an all-butter version if you can find it; the flavor and color are worth it.
How to Serve These Recipes
Presentation:
Use small plates, clear glasses, or shallow bowls so the dessert has room to breathe. A single mint leaf, a dusting of powdered sugar, or a few berry halves placed with intention can make a dessert look finished without crowding it. If the recipe has layers, serve it in glass so the structure stays visible.
Accompaniments:
Shortbread, crisp biscotti, vanilla ice cream, lightly whipped cream, and fresh berries work across most of this collection. Citrus-based desserts take well to plain tea or espresso. The richer cups and custards handle a tiny spoon of crème fraîche or a few toasted nuts if you want contrast.
Portions:
These desserts are at their best in smaller servings than people usually make. A ramekin, a 4-ounce jar, one tartlet, two shortcake biscuits, or a few shards of bark is plenty. If you’re serving a crowd, build extra garnishes rather than larger portions; that keeps the look tidy.
Beverage Pairing:
Espresso suits tiramisu, almond cakes, and financiers. Sparkling wine or a dry rosé works with berry desserts and strawberry shortcake. Tea — especially Earl Grey, chamomile, or mint — pairs neatly with panna cotta, posset, and lemon desserts.
Additional Tips and Flavor Boosters
Flavor Enhancement: A strip of lemon or orange zest, added at the very end, wakes up cream-based desserts more than extra sugar ever will. For chocolate desserts, a pinch of flaky salt or espresso powder sharpens the flavor without making the dessert taste like coffee.
Customization: Swap berries based on what looks best at the market. Strawberries and raspberries make the prettiest red top layers, while blackberries give you deeper color. If you want a more muted look, use sliced pears, peaches, or mangoes and keep the garnish simple.
Serving Suggestions: Think in threes. One color, one texture, one finish. That could mean cream, berries, and mint; or chocolate, orange peel, and salt; or pastry, fruit, and a light sugar dusting. That formula keeps the plate from looking cluttered.
Make-It-Yours: Use coconut yogurt for a dairy-free parfait, almond milk and chia for a lighter chilled cup, or gluten-free cookies for the cheesecake crust. The prettiest part of these desserts is often the top layer, which means the swaps don’t need to be complicated.
Make-Ahead, Storage, and Reheating Guidance
The chilled desserts in this collection hold up best when the parts are kept separate. Parfaits, cheesecake jars, panna cotta, posset, and tiramisu cups can usually be made 1 to 2 days ahead and stored covered in the refrigerator. Wait to add crunchy toppings, cocoa dusting, fresh berries, or mint until right before serving, because those details lose their edge once they sit in moisture.
Baked desserts like orange olive oil cake, financiers, shortcake biscuits, puff pastry tarts, and apple roses keep well for 2 to 3 days at room temperature if they don’t have cream in them. If they do have cream, move them to the fridge once cooled. Most of the fruit and cream desserts are best eaten within 24 to 48 hours, while the less delicate baked items can freeze for up to 2 months if wrapped tightly and stored in airtight containers.
Meringues and chocolate bark are the exception. Keep meringues in an airtight tin at room temperature in a dry place for up to 1 week, though they start softening sooner in humid kitchens. Chocolate bark holds for about 2 weeks in a cool, dry spot. If anything needs warming, use a 300°F oven for 5 to 8 minutes — puff pastry, shortcake biscuits, and fruit tarts benefit most from that gentle heat. Don’t try to reheat custards, whipped fillings, or meringues. They’ll betray you.
Variations and Adaptations to Try

Dairy-Free Swaps: Coconut yogurt, coconut cream, and almond milk work well in parfaits, chia cups, and some chilled desserts. Use dairy-free dark chocolate for bark and dipped strawberries, and choose coconut-based whipped topping if you want a similar look without cream.
Gluten-Free Finishes: Skip the graham crust or use gluten-free cookies, replace shortcake biscuits with a gluten-free biscuit dough, and lean on naturally gluten-free desserts like panna cotta, posset, bark, meringues, and chocolate-dipped strawberries. The presentation stays just as polished.
Lower-Sugar Versions: Rely more on ripe fruit and less on syrup or glaze. In berry desserts, cut the sugar by 25 to 30 percent and let the fruit carry the color and sweetness. Lemon and lime desserts can also handle a lighter hand because the citrus keeps them lively.
Extra-Crisp Treatments: If you want more texture, add toasted nuts, granola clusters, or cookie crumbs to the chilled desserts. Pistachios on strawberries, almonds on peach tarts, and crisp crumbs under cheesecake jars all help the plate look more layered.
Bright Citrus Versions: Lemon, orange, and lime work across almost every dessert here. They’re useful when a dessert feels too heavy or too plain. A little zest in the cream or glaze can make the whole thing look and taste brighter without changing the structure.
Common Mistakes to Avoid
The first mistake is making every dessert too tall or too busy. A pile of fruit, a mound of cream, and three garnishes rarely looks better than one clean garnish and a visible shape. The eye wants a pause. Give it one.
Another frequent problem is moisture. Wet berries blur parfaits, soften crusts, and make chocolate slip. Damp fruit also ruins the crisp top on meringues and pavlovas faster than people expect. Dry the fruit. Let glazes cool slightly. Add crunchy toppings last.
Don’t ignore temperature. Warm cream cheese makes cheesecake filling smooth, but warm whipped cream collapses. Cold pastry puffs better than room-temperature pastry. Chilled custards slice cleaner, and torched sugar on crème brûlée should happen right before serving, not half an hour early. Temperature is the difference between a tidy dessert and a sad one.
The last trap is overworking simple things. Overmix the biscuit dough and the shortcake turns tough. Overwhip the cream and it gets grainy. Overbake the cake and the slice loses its clean edge. These desserts are pretty because they stay light, soft, and structured. Push them too far and the look goes with the texture.
Frequently Asked Questions
Can I make these desserts the day before serving?
Yes, but choose the right ones. Cheesecake jars, panna cotta, posset, tiramisu cups, and olive oil cake all do well overnight. Save final garnishes, crunchy toppings, and whipped cream for the last minute so the surface stays clean.
What desserts in this collection travel the best?
Chocolate bark, meringue cookies, financiers, olive oil cake slices, and dipped strawberries travel best if they’re packed carefully. Use parchment between layers, keep them cool, and avoid stacking anything soft on top of fruit or cream.
How do I keep fruit from making the dessert watery?
Dry the fruit after washing, use ripe but not overripe fruit, and add it right before serving when possible. For berries and peaches, a small spoonful of sugar can help create a sauce without flooding the base. If the fruit is very juicy, drain off excess liquid before layering.
Can I use frozen fruit in these recipes?
Frozen fruit works best in sauces, compotes, and purées, where texture matters less than flavor. It’s not ideal for toppings that need to look neat, because thawed berries leak juice and soften the layers. If you use frozen fruit, thaw and drain it first.
What if I don’t have a kitchen torch for crème brûlée?
You can place the sugared custards under a hot broiler for a short time, but watch them constantly. The sugar can go from pale to burnt in a blink. A torch gives you more control, which is why it’s the better tool if you make brûlée more than once.
How do I keep meringues from getting sticky?
Bake them low and slow, then store them in an airtight container once they’re fully cool. Humidity is the enemy, so don’t leave them uncovered on the counter. If the kitchen is damp, they’ll soften faster than you want.
Can I scale these recipes up for a party?
Most of them scale well, especially parfaits, jars, bark, tartlets, and bark-style desserts. Meringues and crème brûlée need a little more care because oven space and custard timing matter. If you’re serving a crowd, make the base in advance and finish with toppings close to serving time.
What dessert is best if I want the prettiest result with the least work?
Chocolate-dipped strawberries and berry parfaits give you the strongest visual payoff for the least effort. If you want something that feels a bit more special, lemon posset and chocolate bark are both fast and polished. The cleanest-looking desserts usually come from one good contrast, not a long ingredient list.
Small Effort, Clean Lines
Pretty desserts do not need to be complicated to earn a place on the table. A glass with neat layers, a tart with glossy fruit, a custard with a sugar shell, or a handful of bark shards with orange peel and salt can look more refined than desserts that took twice as long and ended up looking crowded. That’s the part I always come back to: restraint reads as care.
Keep a few dependable ingredients around — berries, cream, chocolate, puff pastry, lemons, yogurt, and a couple of jars — and dessert stops feeling like a project. It becomes a quick assembly with good bones. And once you start thinking that way, you’ll notice how often the simplest sweet things are the ones people lean toward first.