
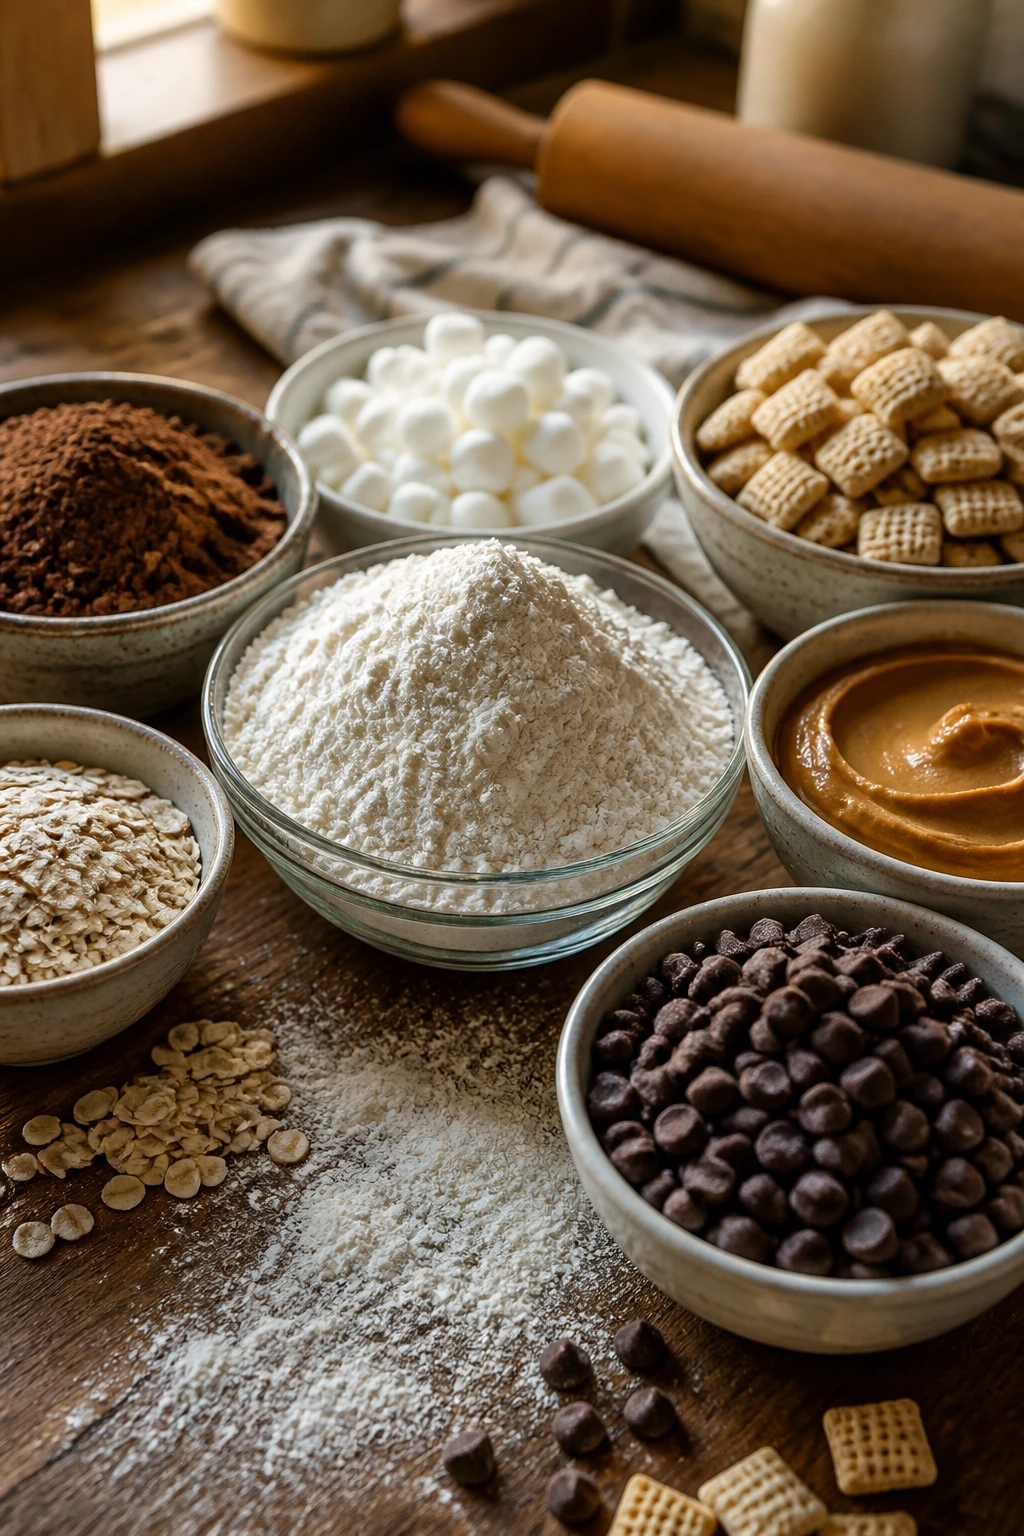
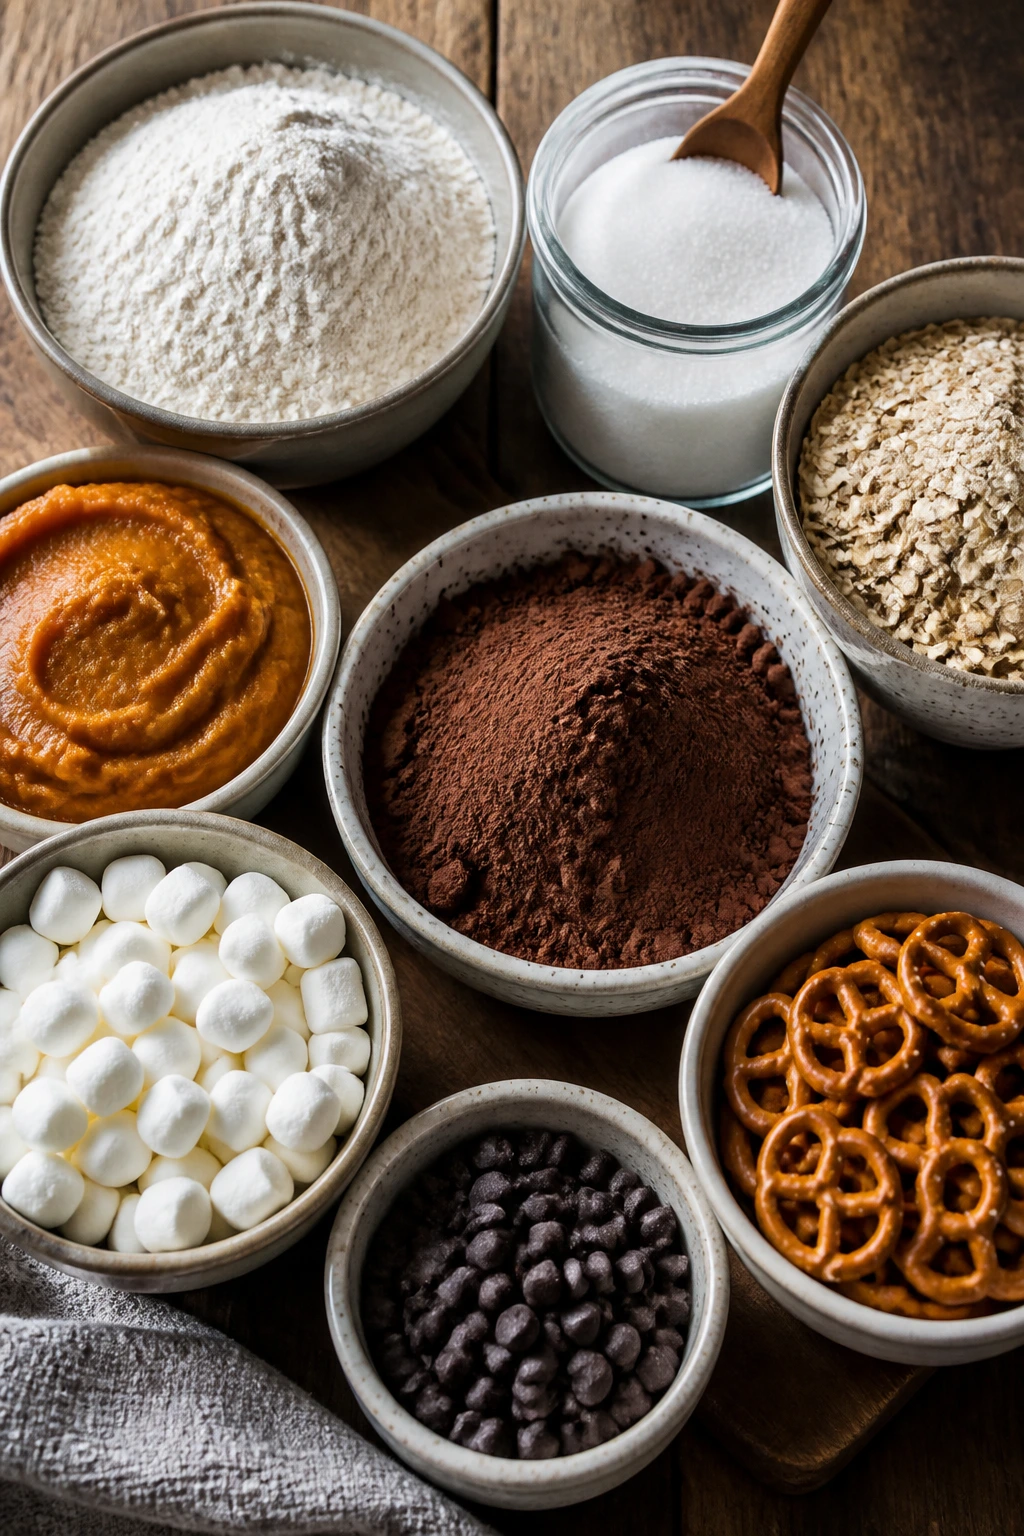
The best Halloween desserts are rarely the ones that ask for a special trip to three different stores. They’re the ones you can make when the candy bowl is half-empty, the kids are due in an hour, and the pantry is doing that familiar little dance of “maybe I’ve got enough.” Flour. Cocoa. Peanut butter. Oats. Marshmallows. Chocolate chips. A bag of pretzels that’s been open since who-knows-when. That’s plenty.
Halloween dessert ideas get more interesting when you stop chasing complicated decorations and start working with shelf-stable basics. A brownie gets a spiderweb. A cookie gets a pair of candy eyes. Bark becomes a mummy bandage. Suddenly the spooky part is the finish, not the shopping list.
And that’s the real charm here: you can make desserts that look festive, taste like something people will actually eat, and still keep the whole thing grounded in cupboard ingredients. Some are no-bake. Some lean on one bowl. A few need a quick whisk and a hot oven, which is about as much drama as I want from a weeknight dessert anyway.
Why These Pantry Treats Pull Their Weight
-
No Panic Shopping: Most of these desserts start with flour, sugar, cocoa, oats, cereal, marshmallows, peanut butter, or chocolate chips, so the base is likely already sitting in your kitchen.
-
Decorating Does the Heavy Lifting: The Halloween look comes from spiderwebs, candy eyes, chocolate drizzles, and cookie tombstones, not from complicated pastry work.
-
Mix-and-Bake Pace: Several recipes are done in under 30 minutes of active time, which matters when you’re also carving a pumpkin or wrangling costumes.
-
Kid Help Makes Sense Here: Little hands can crush cookies, place candy eyes, or drizzle bark without wrecking the whole dessert.
-
Cheap Ingredients Hold Up Well: Pantry desserts tend to be forgiving. A brownie made with cocoa and butter still tastes like dessert even if the frosting spiderweb is a little crooked.
-
Easy to Scale: These recipes stretch neatly for bake sales, classroom trays, or a table full of neighbors who “just stopped by.”
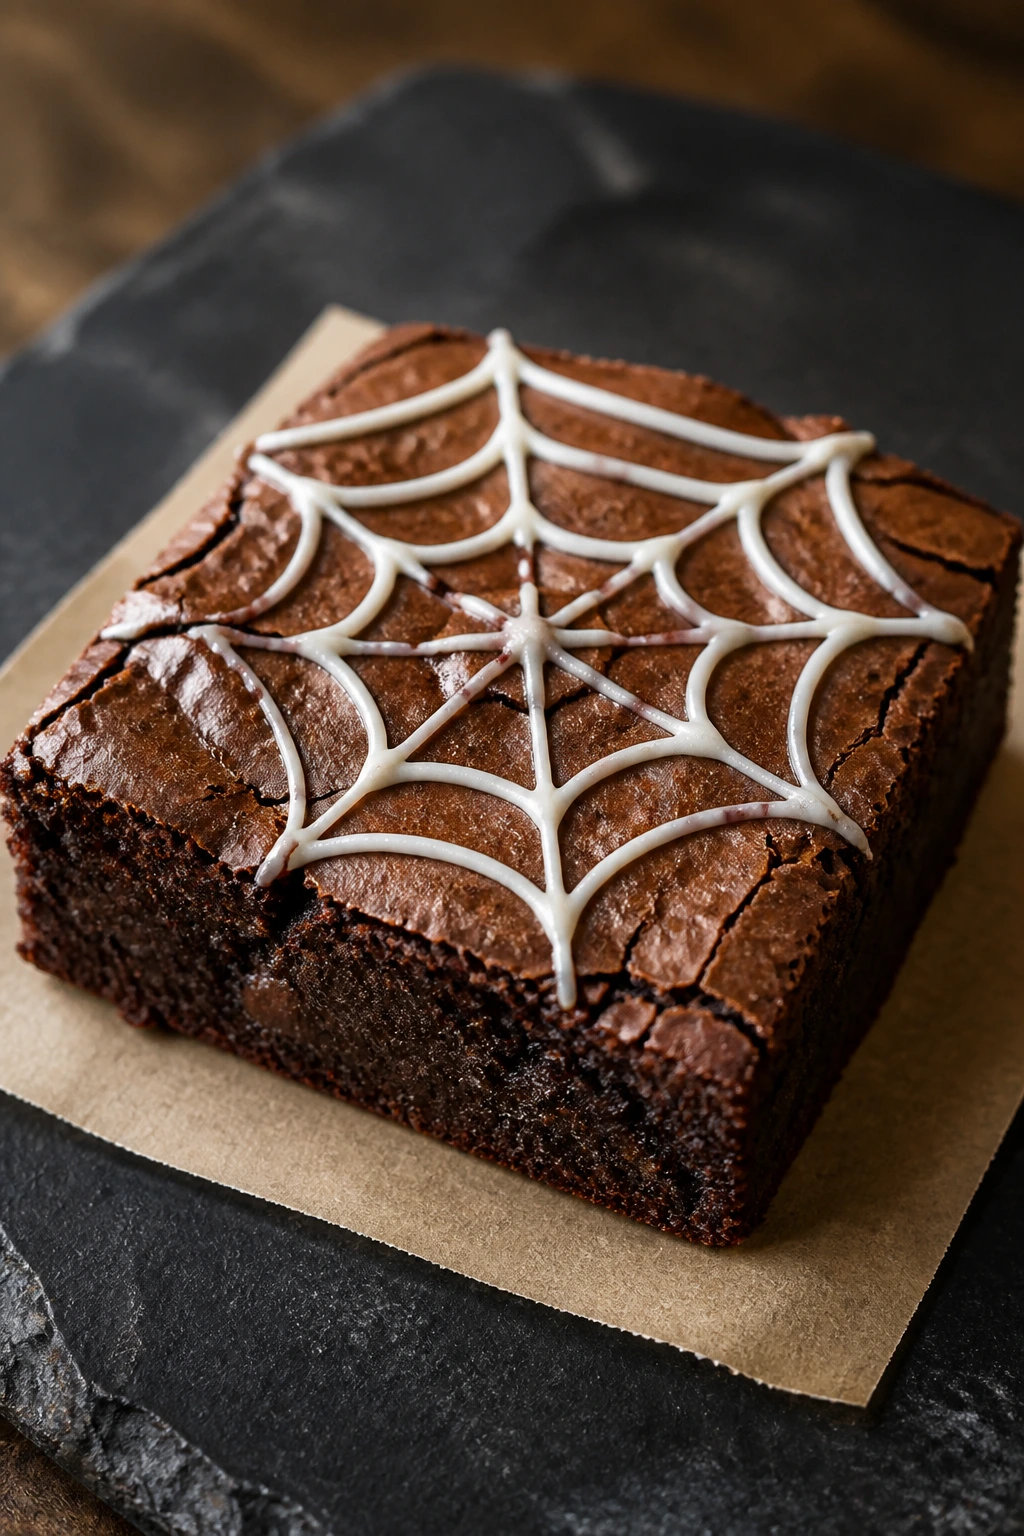
1. Spiderweb Brownies
A pan of spiderweb brownies is the kind of Halloween dessert that looks fancier than it is. The base stays fudgy and a little dense in the middle, the top takes on that crackly brownie skin people always chase, and the white chocolate web sits on top like a tiny piece of edible theater.
What I like most is the contrast. Dark cocoa, sweet white chocolate, and that little bite of salt on the edge of the pan. It’s the sort of dessert that disappears fast because people keep breaking off “just one more corner.”
Why It Works:
The brownie itself is built on pantry basics, which means you get rich chocolate flavor without needing melted bittersweet bars or a mixer. The web decoration goes on after the brownies cool, so the lines stay crisp instead of sinking into warm batter. A 350°F oven and a short bake time keep the center soft; if you leave them in until the middle looks dry, you’ve already gone too far.
Key Ingredients:
- 1/2 cup unsalted butter, melted
- 1 cup granulated sugar
- 2 large eggs
- 1 teaspoon vanilla extract
- 3/4 cup all-purpose flour
- 1/2 cup unsweetened cocoa powder
- 1/2 teaspoon fine salt
- 1/4 teaspoon baking powder
- 1/3 cup white chocolate chips, melted for the web
Quick Steps:
- Preheat the oven to 350°F and line an 8×8-inch baking pan with parchment, leaving a little overhang on two sides.
- Whisk the melted butter and sugar together until glossy, then beat in the eggs and vanilla for about 30 seconds.
- Stir in the flour, cocoa, salt, and baking powder just until no dry streaks remain. Do not overmix; brownie batter should look thick and slightly dull, not airy.
- Spread the batter into the pan and bake for 22 to 25 minutes, until the center is set but still a little soft when pressed lightly.
- Cool completely, then pipe melted white chocolate in concentric circles and drag a toothpick from the center outward to form the web.
Equipment for This Recipe:
- 8×8-inch baking pan
- Parchment paper
- Mixing bowl and whisk
- Toothpick or skewer for the web
How to Serve This Dish:
Cut the brownies into small squares and stack them on a dark plate so the white web stands out. A scoop of vanilla ice cream makes the chocolate taste deeper, and a few flakes of salt on top help the brownie flavor land.
Pro Tips for This Recipe:
- Let the brownies cool all the way before decorating. Warm brownies blur the web into a pale smear.
- Melt the white chocolate slowly in short bursts; overheated white chocolate turns grainy fast.
- Use a zip-top bag with the corner snipped off if you don’t have a piping bag.
Variations on This Dish:
- Peanut Butter Web: Swap the white chocolate web for melted peanut butter chips and a few chopped peanuts on top.
- Salted Caramel Edge: Drizzle a teaspoon of caramel sauce around the border before serving.
- Gluten-Free Swap: Use a cup-for-cup flour blend and bake until the center still has a faint wobble.
Common Mistakes to Avoid with This Dish:
- Don’t bake until the top looks bone dry; brownies finish setting as they cool.
- Don’t draw the web on warm brownies or the lines will sink and disappear.
- Don’t use chocolate that’s too hot for the decoration or it will look thin and messy instead of crisp.
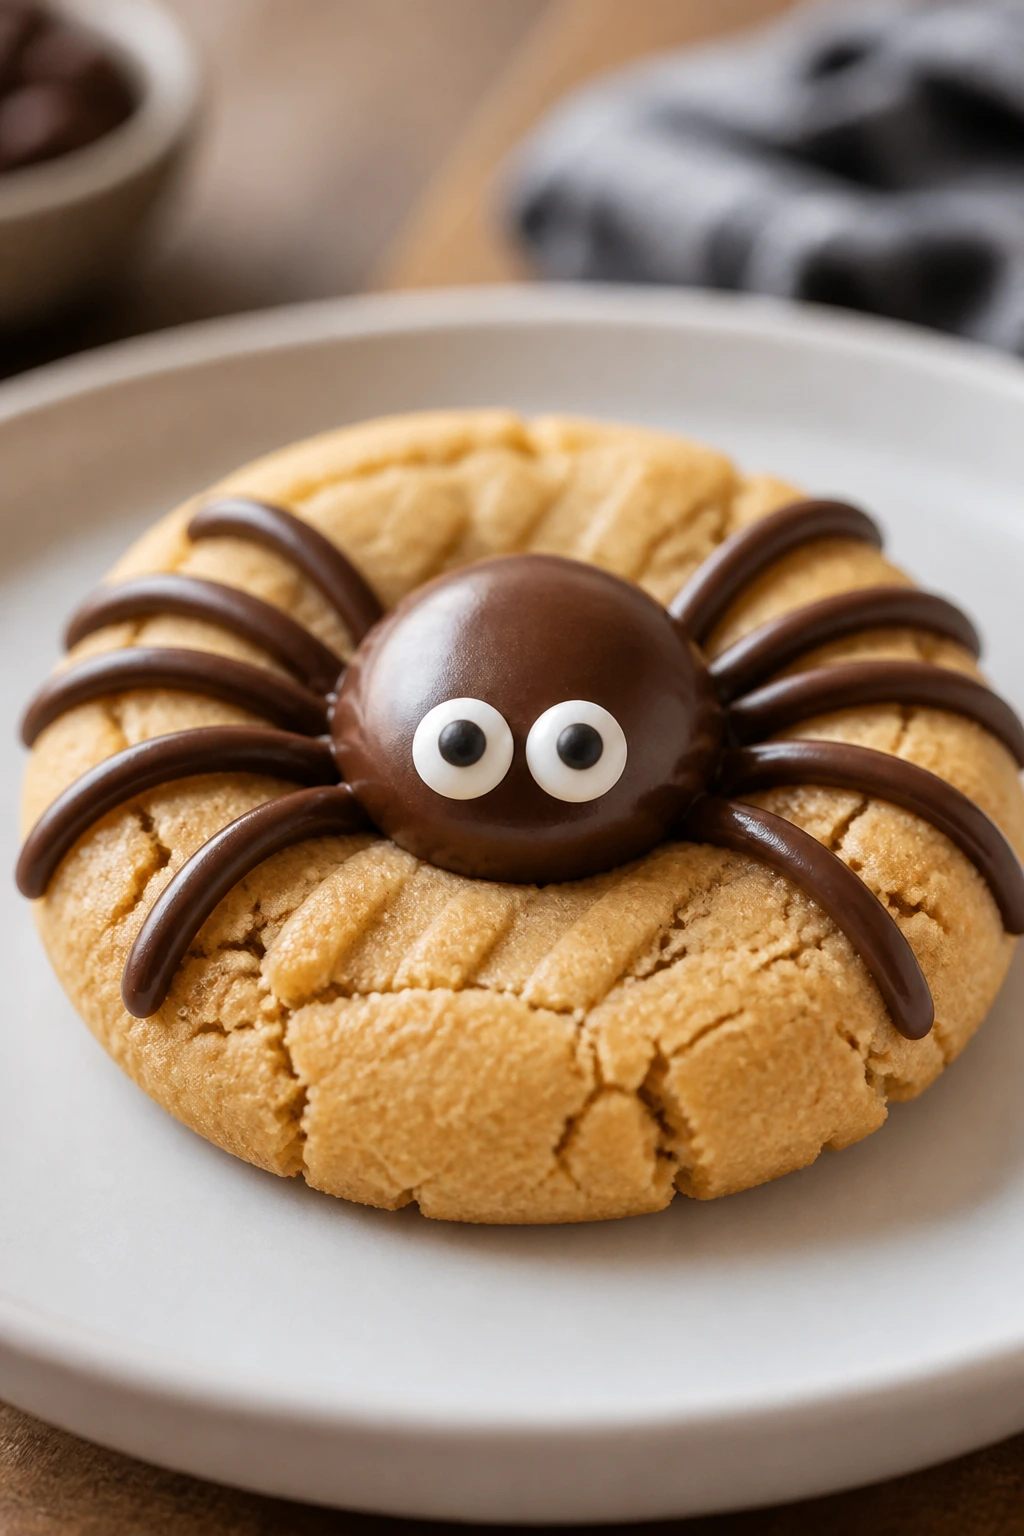
2. Peanut Butter Spider Cookies
These are the cookies people remember because they look playful and taste like the peanut butter jar got dressed up for Halloween. The base bakes up soft and sandy at the edges, then the candy body goes right in the center and the chocolate legs turn the whole thing into a tiny edible spider.
They’re a little nostalgic, which is half the appeal. Peanut butter, brown sugar, a hit of vanilla, and chocolate never needed much help in the first place.
Why It Works:
Peanut butter cookie dough holds shape well, so the cookies stay sturdy enough to support the spider body without collapsing. Pressing the candy into the center while the cookies are still warm helps it settle without cracking. A 350°F oven gives you a tender cookie that still has enough structure for decorating.
Key Ingredients:
- 1/2 cup unsalted butter, softened
- 1/2 cup creamy peanut butter
- 3/4 cup packed light brown sugar
- 1/4 cup granulated sugar
- 1 large egg
- 1 teaspoon vanilla extract
- 1 1/4 cups all-purpose flour
- 1/2 teaspoon baking soda
- 1/2 teaspoon fine salt
- 24 mini peanut butter cups or chocolate candies
- 1/2 cup semisweet chocolate chips, melted for the legs
Quick Steps:
- Preheat the oven to 350°F and line two baking sheets with parchment.
- Beat the butter, peanut butter, brown sugar, and granulated sugar until smooth and a little fluffy.
- Mix in the egg and vanilla, then stir in the flour, baking soda, and salt until a soft dough forms.
- Scoop the dough into 1 1/2-inch balls, bake for 10 to 12 minutes, and pull them when the edges look set but the centers still look pale.
- Press one mini peanut butter cup into the center of each cookie, cool for 10 minutes, then pipe four chocolate legs on each side.
Equipment for This Recipe:
- Baking sheets
- Parchment paper
- Hand mixer or sturdy whisk
- Small piping bag or zip-top bag
How to Serve This Dish:
Pile the cookies on a tray with a little crumpled parchment underneath so the spider legs don’t snap as people grab them. They’re good warm, but I think they taste best after the chocolate has set and the peanut butter flavor settles in.
Pro Tips for This Recipe:
- Chill the dough for 20 minutes if your kitchen is warm; it keeps the cookies from spreading too much.
- Press the candy body in right after baking so it fuses with the cookie instead of sitting on top like a loose hat.
- If the melted chocolate for the legs is too thick, stir in 1 teaspoon of neutral oil.
Variations on This Dish:
- Chocolate Spider Cookies: Replace 1/4 cup of the flour with cocoa powder for a darker cookie base.
- Nut-Free Web Crawlers: Use sunflower seed butter and sunflower butter cups if peanut butter is off the table.
- Extra-Salty Finish: Sprinkle the cookies with a few grains of flaky salt right after the candy goes on.
Common Mistakes to Avoid with This Dish:
- Don’t overbake the cookie base or it will crack when you press in the candy.
- Don’t wait too long to add the peanut butter cups; cooled cookies won’t hold the shape as well.
- Don’t pipe thick chocolate legs. Thin lines look cleaner and dry faster.
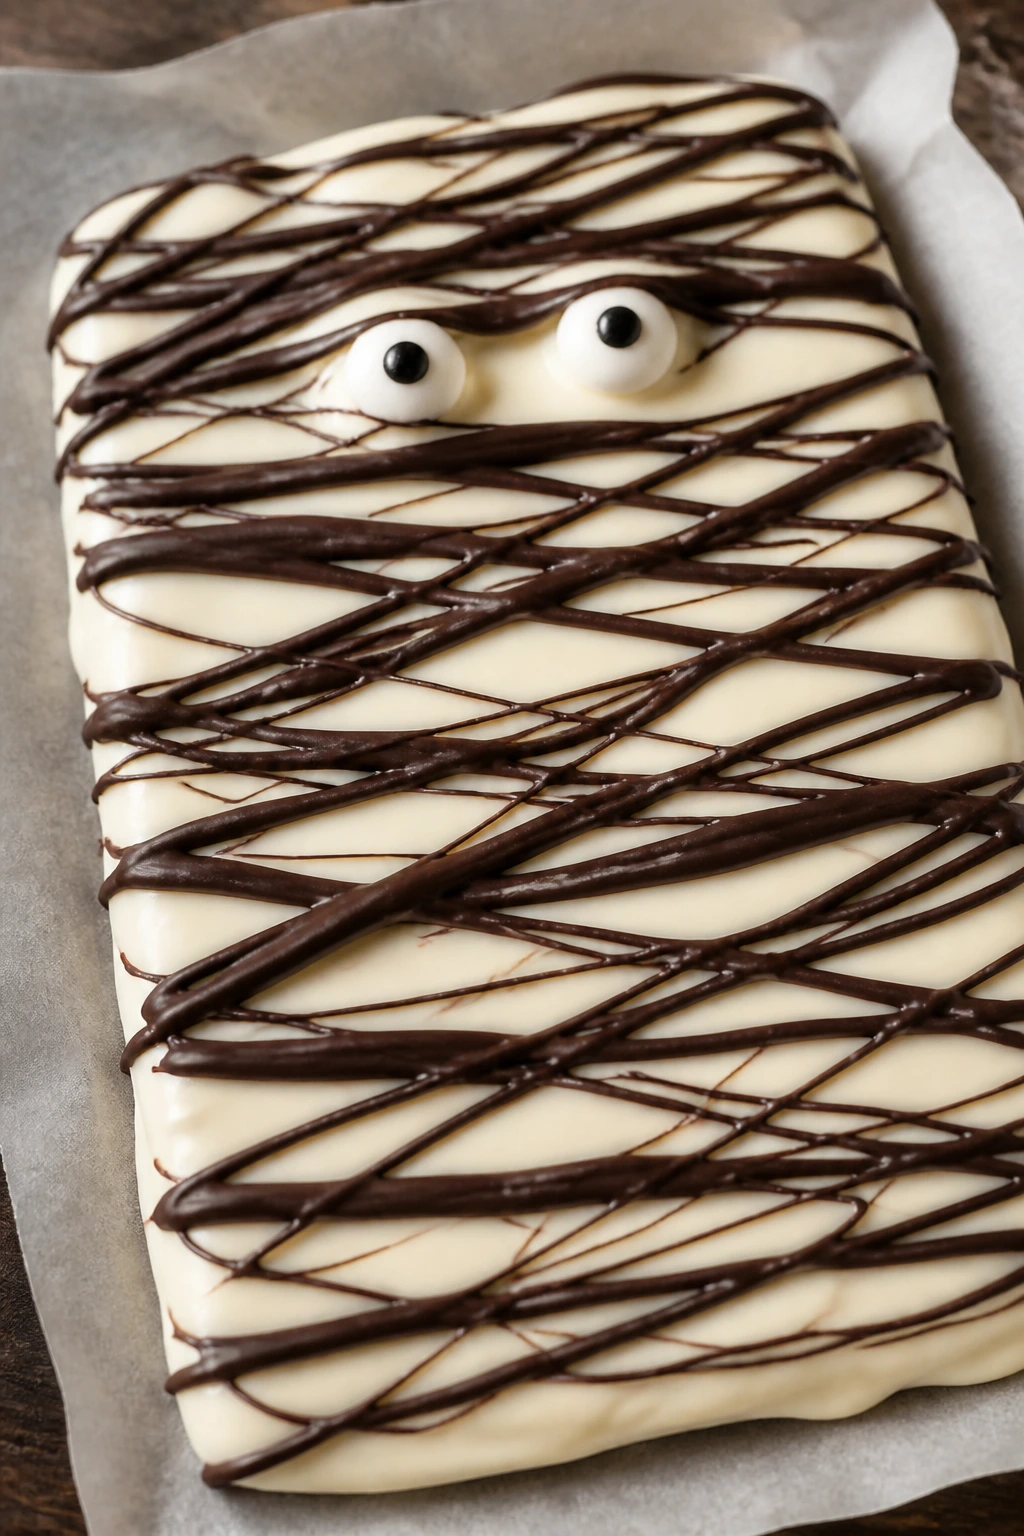
3. Mummy Chocolate Bark
Mummy bark is one of those desserts that makes people grin before they even take a bite. The white chocolate gives you a smooth, sweet base, the dark chocolate drizzles across it like crooked bandages, and the candy eyes pop out in the best possible way.
It’s also the kind of recipe that saves you when you need something festive and don’t want to turn on the oven. Melt, spread, decorate, chill. Done.
Why It Works:
Bark is forgiving because it doesn’t depend on perfect tempering or a fussy crumb structure. White chocolate sets into a firm slab that breaks into sharp, craggy pieces, which is exactly what you want for a Halloween tray. The dark drizzle creates the mummy wrap effect, and the eyes should go on while the chocolate is still tacky so they stay put.
Key Ingredients:
- 12 ounces white chocolate chips
- 4 ounces semisweet chocolate chips
- 1 teaspoon coconut oil or neutral oil, divided
- 2 tablespoons candy eyes or mini chocolate chips
- 1/4 teaspoon flaky salt
- 1/4 cup crushed pretzels or cookies, optional for crunch
Quick Steps:
- Line a baking sheet with parchment paper.
- Melt the white chocolate with 1/2 teaspoon of oil, stirring until smooth, then spread it into a thin layer about 1/4 inch thick.
- Melt the semisweet chocolate with the remaining oil and drizzle it over the white chocolate in loose zigzags.
- Drag a toothpick through the drizzles in a few spots to create messy mummy bandages, then press on the eyes.
- Sprinkle with flaky salt and a few pretzel crumbs, then chill for 20 minutes until firm.
Equipment for This Recipe:
- Baking sheet
- Parchment paper
- Microwave-safe bowls
- Toothpick or skewer
How to Serve This Dish:
Break the bark into uneven shards and scatter it in a wide bowl. The jagged edges are part of the look, and honestly, the messier pieces are the ones people reach for first.
Pro Tips for This Recipe:
- Melt the chocolate in short bursts; white chocolate can seize if you rush it.
- Keep the bark thin so it snaps cleanly. Thick bark tastes heavy and looks clumsy.
- Add the candy eyes before the chocolate fully sets or they’ll fall off when you break the bark.
Variations on This Dish:
- Cookies-and-Crumbs Mummy Bark: Swap pretzels for crushed chocolate sandwich cookies.
- Dark Mummy Bark: Use all semisweet chocolate and add white chocolate bandages on top.
- Peppermint Ghost Bark: Stir a tiny pinch of peppermint extract into the white chocolate and use red sprinkles for a weird little Halloween twist.
Common Mistakes to Avoid with This Dish:
- Don’t overheat the white chocolate; grainy bark never looks as good.
- Don’t spread the chocolate too thick or it will be harder to break into neat shards.
- Don’t wait until the bark is hard to add the eyes. They need something tacky to stick to.
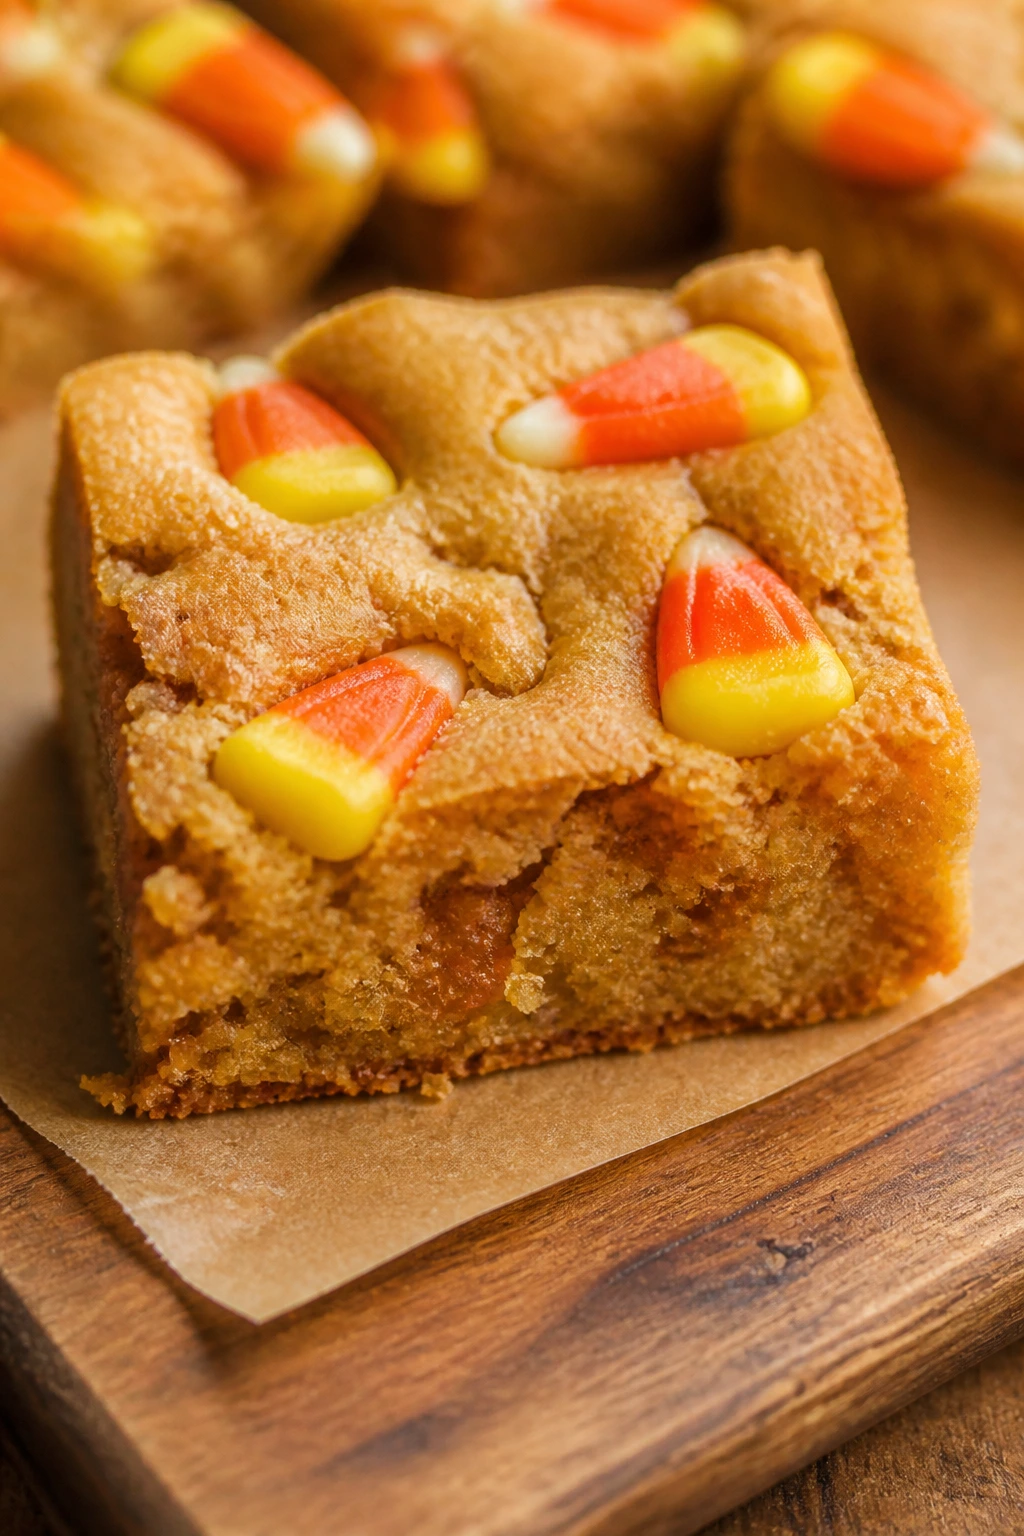
4. Candy Corn Blondies
Candy corn blondies are sweet in the way Halloween candy is sweet, which is to say: unapologetically. The brown sugar base gives you that caramel note, the edges bake up chewy, and the candy corn on top melts just enough to look glossy and festive without disappearing completely.
I like these when I want something bar-like and low-stress. One bowl, one pan, no piping bag, no drama.
Why It Works:
Blondies depend on brown sugar and butter for their flavor, so they’re already halfway to a caramel dessert before you add the candy. Putting some of the candy corn on top halfway through baking keeps it visible and stops it from dissolving into a sticky orange puddle. An egg yolk adds a little extra chew, which I think matters here.
Key Ingredients:
- 1/2 cup unsalted butter, melted
- 1 cup packed light brown sugar
- 1 large egg
- 1 large egg yolk
- 1 teaspoon vanilla extract
- 1 1/4 cups all-purpose flour
- 1/2 teaspoon baking powder
- 1/2 teaspoon fine salt
- 3/4 cup candy corn
- 1/4 cup white chocolate chips, optional
Quick Steps:
- Preheat the oven to 350°F and line an 8×8-inch pan with parchment.
- Whisk the melted butter and brown sugar until smooth, then beat in the egg, yolk, and vanilla.
- Stir in the flour, baking powder, and salt just until the batter comes together, then fold in half the candy corn and the white chocolate chips if you’re using them.
- Spread the batter into the pan and bake for 12 minutes.
- Scatter the remaining candy corn over the top and bake 10 to 14 minutes more, until the center is set and the edges are deep golden.
- Cool completely before cutting so the bars hold their shape.
Equipment for This Recipe:
- 8×8-inch baking pan
- Parchment paper
- Mixing bowl and spatula
- Cooling rack
How to Serve This Dish:
Cut the blondies into small squares; they’re rich, and the candy corn makes them feel sweeter than they look. A plain mug of coffee or a cold glass of milk keeps the whole thing from tipping into sugar overload.
Pro Tips for This Recipe:
- Use candy corn sparingly in the batter. Too much and the bars turn sticky in the middle.
- Pull them before the center looks fully dry; blondies finish as they cool.
- A pinch of flaky salt on top makes the brown sugar flavor stand out more.
Variations on This Dish:
- Peanut Butter Patch Bars: Swirl 1/3 cup peanut butter through the batter before baking.
- Chocolate Chip Cauldron Blondies: Swap half the candy corn for semisweet chips.
- Pumpkin Spice Blondies: Add 1 teaspoon pumpkin pie spice and skip the white chocolate chips.
Common Mistakes to Avoid with This Dish:
- Don’t overbake until the center feels firm in the oven. That’s how blondies end up dry.
- Don’t bury all the candy corn in the batter or you lose the Halloween look.
- Don’t slice them warm unless you want a sticky mess on the knife.
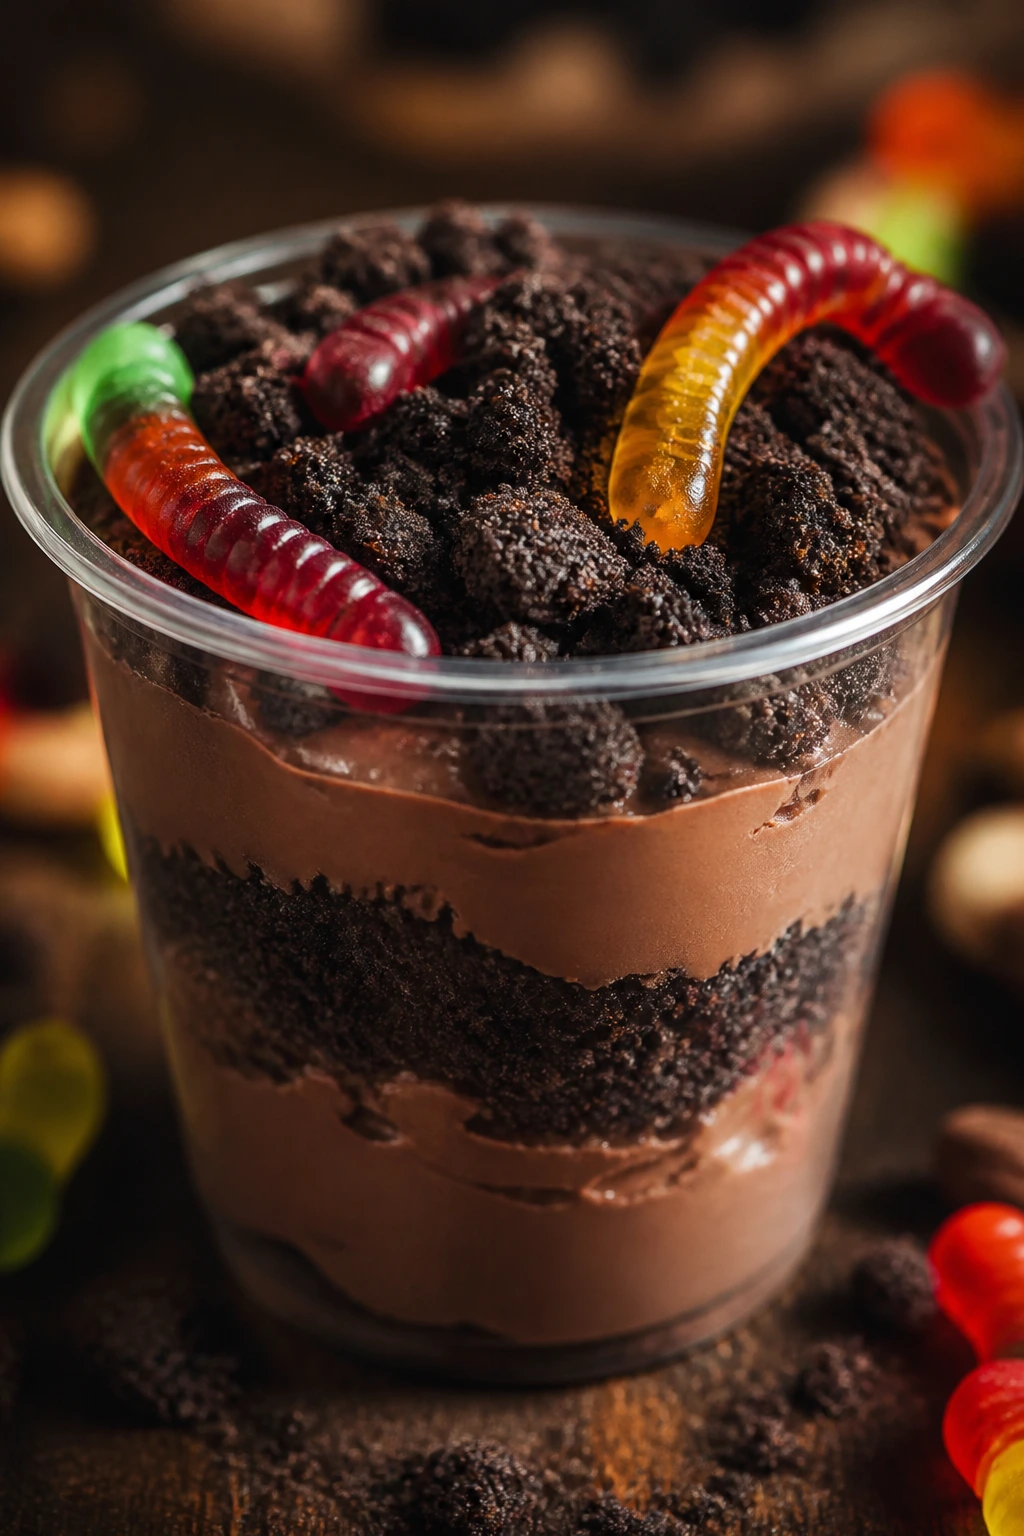
5. Graveyard Dirt Cups
Dirt cups are the Halloween dessert equivalent of a costume that never goes out of style. Chocolate pudding, cookie crumbs, a few gummy worms, and a cookie tombstone make a dessert that’s playful, cold, and exactly the right kind of messy.
The texture does all the work here: soft pudding, sandy cookie crumbs, and that little squish from the worms if you decide to go full graveyard. Kids love the look, but adults tend to sneak seconds, which tells you enough.
Why It Works:
The dessert builds in layers, so every spoonful hits chocolate in a different way. Instant pudding keeps the recipe fast, and folding in whipped topping makes the filling lighter and smoother. The cookie crumbs should stay a little uneven; fine dust looks flat, while rough crumbs feel more like “dirt.”
Key Ingredients:
- 2 boxes instant chocolate pudding mix, 3.9 ounces each
- 3 cups cold milk
- 8 ounces whipped topping, thawed
- 30 chocolate sandwich cookies, crushed
- 12 shortbread cookies or graham crackers for tombstones
- 1/4 cup mini chocolate chips
- 1/2 cup gummy worms
Quick Steps:
- Whisk the pudding mix and cold milk for 2 minutes, then let it stand for 5 minutes until thick.
- Fold in the whipped topping until the mixture looks smooth and mousse-like.
- Crush the sandwich cookies into coarse crumbs.
- Layer crumbs, pudding, more crumbs, and a few chocolate chips into cups or a trifle dish.
- Write “RIP” on the cookie tombstones with melted chocolate or icing, then tuck them into the top with a few gummy worms.
- Chill for at least 30 minutes before serving.
Equipment for This Recipe:
- Mixing bowl and whisk
- Rubber spatula
- Clear cups or a trifle dish
- Zip-top bag or food processor for crushing cookies
How to Serve This Dish:
Serve dirt cups in clear glasses so the layers show through. I like using small mason jars for parties because they’re sturdy, easy to hand out, and less likely to tip when people get excited around the dessert table.
Pro Tips for This Recipe:
- Use cold milk straight from the fridge so the pudding thickens on time.
- Make the crumb layer uneven; a little variation makes the “soil” look more realistic.
- Add gummy worms right before serving if you want them to stay glossy instead of sticky.
Variations on This Dish:
- Peanut Butter Graves: Stir 1/2 cup peanut butter into the pudding before folding in the topping.
- Cookies-and-Cream Cemetery: Use vanilla pudding and crushed chocolate cookies instead of all-chocolate layers.
- Single-Serve Shot Cups: Build the same dessert in tiny cups for a dessert board or classroom treat.
Common Mistakes to Avoid with This Dish:
- Don’t skip the chill time; warm pudding slides around and the layers blur.
- Don’t crush the cookies into powder unless you want mud, not dirt.
- Don’t write on the tombstones until just before serving or the lettering can smear.
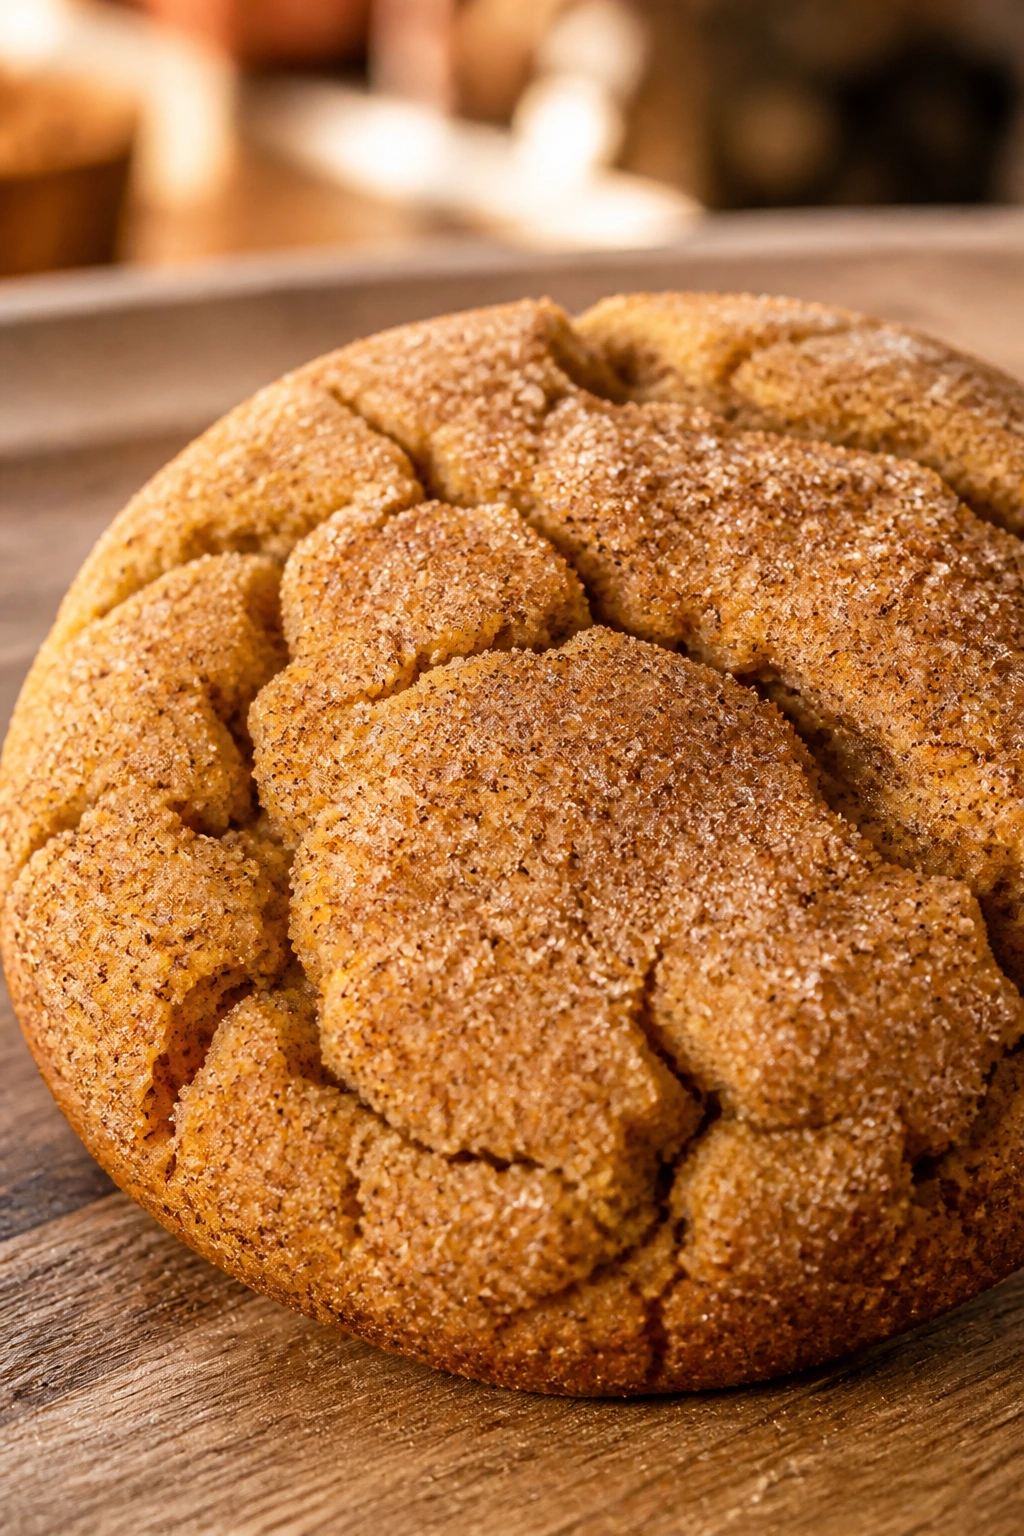
6. Pumpkin Spice Snickerdoodles
These are the kind of cookies that make a kitchen smell like a bakery that knows what it’s doing. The cinnamon sugar shell cracks slightly as you bite in, and the center stays soft with that pumpkin-spice warmth that feels right for Halloween without getting too cute about it.
They’re also better than a lot of pumpkin cookies because they behave like a cookie, not a muffin disguised in cookie shape. That matters.
Why It Works:
Pumpkin adds moisture and flavor, but too much of it can make cookies cakey and flat. That’s why this dough uses only a small amount of pumpkin puree and asks for a chill before baking. Cream of tartar gives snickerdoodles their mild tang and helps the cookies spread in a controlled way.
Key Ingredients:
- 1/2 cup unsalted butter, softened
- 1/2 cup shortening or more butter
- 3/4 cup granulated sugar
- 1/4 cup packed light brown sugar
- 1/3 cup pumpkin puree, blotted dry
- 1 large egg yolk
- 1 teaspoon vanilla extract
- 2 cups all-purpose flour
- 1 teaspoon cream of tartar
- 1/2 teaspoon baking soda
- 1/2 teaspoon fine salt
- 1 teaspoon cinnamon
- 1/2 teaspoon nutmeg
- 1/4 cup sugar mixed with 2 teaspoons cinnamon, for rolling
Quick Steps:
- Blot the pumpkin puree on a paper towel for a minute to remove extra moisture.
- Beat the butter, shortening, sugar, and brown sugar until creamy, then mix in the pumpkin, egg yolk, and vanilla.
- Stir in the flour, cream of tartar, baking soda, salt, cinnamon, and nutmeg until a soft dough forms.
- Chill the dough for 30 minutes, then roll it into 1 1/2-inch balls and coat each one in cinnamon sugar.
- Bake at 350°F for 10 to 12 minutes, until the edges are set and the centers look slightly underdone.
- Cool on the pan for 5 minutes before moving them to a rack.
Equipment for This Recipe:
- Mixing bowls
- Hand mixer
- Baking sheets
- Cookie scoop or tablespoon
How to Serve This Dish:
Stack these on a platter with a few cinnamon sticks or a small bowl of candy corn beside them. They’re best still slightly warm, when the centers are soft and the spice coating smells loud in the best way.
Pro Tips for This Recipe:
- Blotting the pumpkin matters. Skip it and the dough gets too soft to roll well.
- Chill the dough even if it feels annoying; it keeps the cookies from spreading into flat pancakes.
- Pull them when the centers still look a little puffy. They firm up on the pan.
Variations on This Dish:
- Chai Snickerdoodles: Add 1/2 teaspoon cardamom and a pinch of clove.
- Plain Cinnamon Ghosts: Skip the pumpkin and use the same dough for a classic snickerdoodle with more cinnamon.
- Gluten-Free Version: Use a cup-for-cup flour blend and watch the bake time closely.
Common Mistakes to Avoid with This Dish:
- Don’t use wet pumpkin puree straight from the can without blotting.
- Don’t bake until the tops look fully done or they’ll turn dry.
- Don’t skip the cinnamon sugar coating; that crust is the point.
7. Monster Rice Krispie Treats
Monster Rice Krispie treats are all about texture and attitude. You get that soft, chewy marshmallow base, the snap of cereal, and then the fun part: candy eyes, chocolate bits, and whatever spooky face you want to give them.
These are the sort of treats that let you be a little sloppy and still look intentional. That’s Halloween baking at its nicest.
Why It Works:
Rice Krispie treats are dependable because the marshmallow mixture binds fast and sets quickly. A little vanilla deepens the flavor, and adding the decorations while the top is still warm makes them stick without extra glue. If you press the mixture too hard into the pan, though, you lose the light chew and get a brick.
Key Ingredients:
- 6 cups crisp rice cereal
- 1 bag mini marshmallows, about 10 ounces
- 3 tablespoons unsalted butter
- 1/2 teaspoon vanilla extract
- 1/2 cup mini chocolate chips
- 1/2 cup candy eyes
- 1/2 cup Halloween sprinkles or colored candy melts
- Pinch of salt
Quick Steps:
- Grease a 9×13-inch pan lightly with butter or nonstick spray.
- Melt the butter in a large pot over low heat, then add the marshmallows and salt and stir until smooth.
- Remove from the heat, stir in the vanilla, then fold in the cereal until every piece is coated.
- Press the mixture gently into the pan with a buttered spatula, then scatter on the chocolate chips, candy eyes, and sprinkles while the top is still warm.
- Cool for 20 minutes, cut into squares, and add extra decoration if you want the monsters to look extra chaotic.
Equipment for This Recipe:
- Large saucepan
- 9×13-inch pan
- Rubber spatula
- Buttered spoon or spatula for pressing
How to Serve This Dish:
Cut them into big squares and let the eyes face every direction. A stack of these on a tray looks better when the pieces aren’t perfectly neat; monster treats should look like they wandered in from a different planet.
Pro Tips for This Recipe:
- Use fresh marshmallows. Old ones melt slower and make the texture tougher.
- Butter your hands or spatula before pressing the mixture into the pan.
- Add candy decorations quickly; once the top cools, they won’t stick as well.
Variations on This Dish:
- Peanut Butter Monsters: Stir in 1/2 cup peanut butter with the melted marshmallows.
- Chocolate Monster Bars: Use cocoa-flavored cereal or add 2 tablespoons cocoa powder to the melted marshmallow mixture.
- Mini Monster Bites: Press the mix into a smaller pan and cut into bite-size squares for a snack tray.
Common Mistakes to Avoid with This Dish:
- Don’t use high heat. Marshmallows can scorch and taste burnt fast.
- Don’t pack the mixture down hard or the bars become dense.
- Don’t wait too long to decorate; the top needs to be warm enough to hold the candy.
8. Saltine Toffee Boo Bark
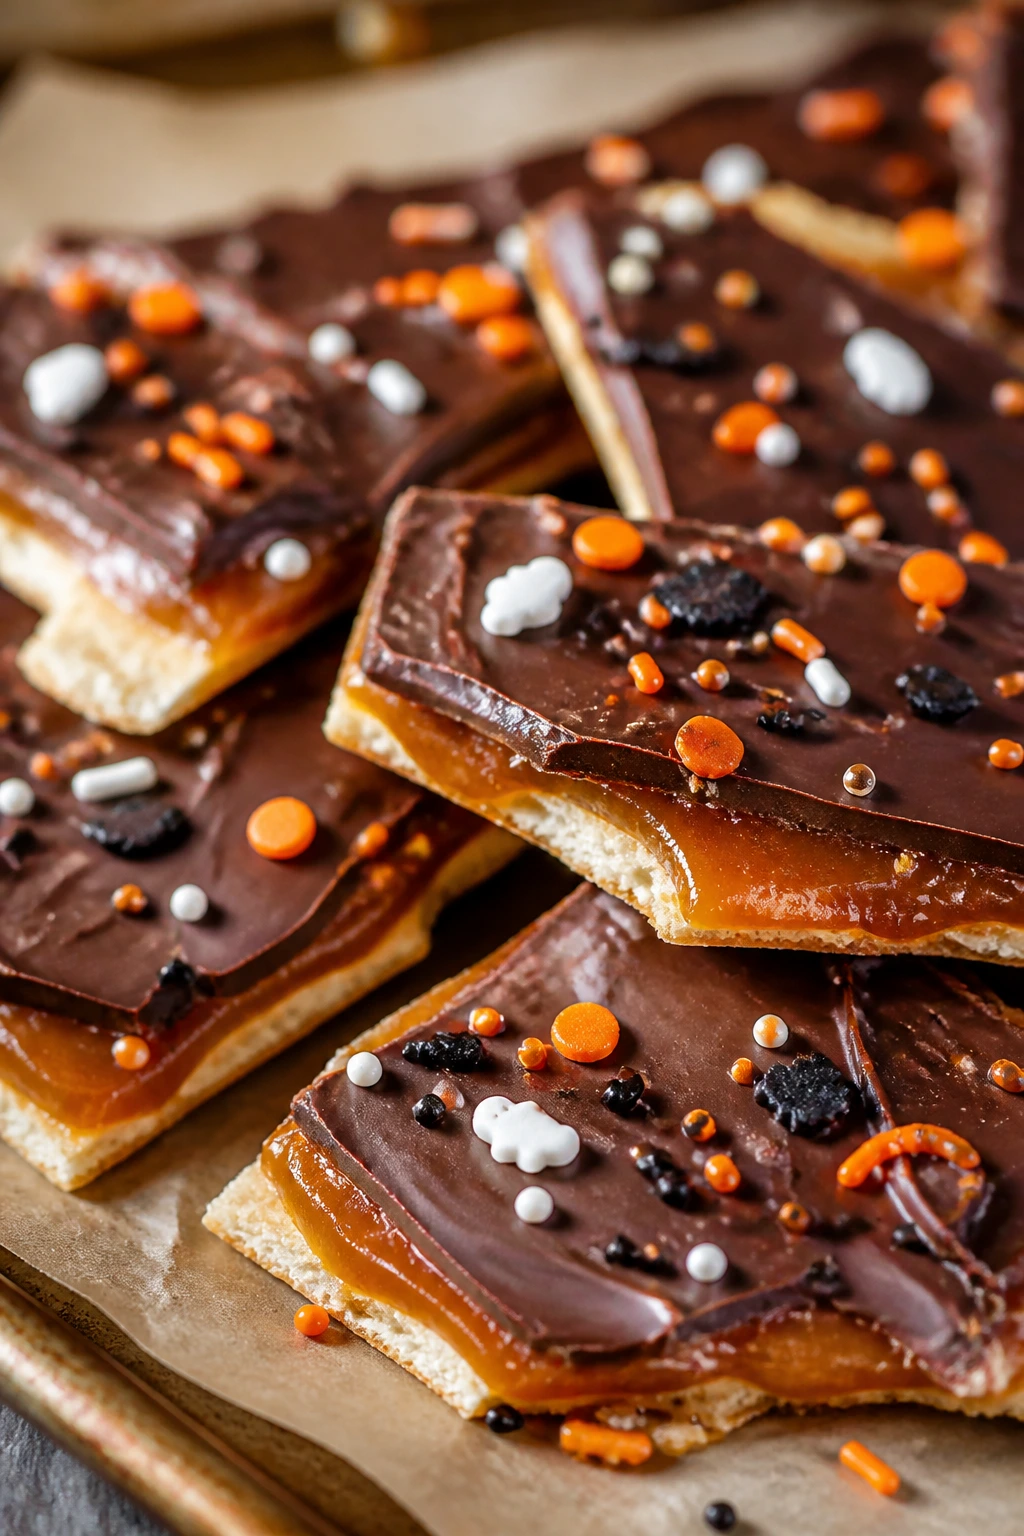
Saltine toffee is the dessert people pretend is a “quick little recipe” and then go back for a second square before the pan is cool. The cracker base gives you salt and crunch, the caramelized butter-sugar layer turns glassy and rich, and the chocolate on top smooths the whole thing out.
For Halloween, a few sprinkles and candy corn are enough. The pan does the rest.
Why It Works:
Saltines are the secret weapon here because they stay crisp under the caramel and give the toffee a clean, snappy bite. The butter and brown sugar mixture needs to bubble for a few minutes so it reaches the point where it can set into a proper candy layer. Chocolate melts on top from the heat of the toffee itself, which means less fuss and fewer dishes.
Key Ingredients:
- 40 saltine crackers
- 1 cup unsalted butter
- 1 cup packed light brown sugar
- 2 cups semisweet chocolate chips
- 1/2 cup white chocolate chips, optional for drizzle
- 1/2 cup Halloween sprinkles or candy corn
- Pinch of flaky salt
Quick Steps:
- Preheat the oven to 400°F and line a rimmed baking sheet with parchment.
- Arrange the saltines in a single layer to cover the pan.
- Melt the butter and brown sugar in a saucepan, bring it to a steady boil, and cook for 3 minutes while stirring.
- Pour the hot mixture over the crackers, spread it quickly, and bake for 5 minutes until bubbling.
- Scatter the chocolate chips over the top, wait 2 minutes, then spread the melted chocolate into a smooth layer.
- Add sprinkles, candy corn, and a pinch of salt, then chill until set and break into pieces.
Equipment for This Recipe:
- Rimmed baking sheet
- Parchment paper
- Saucepan
- Offset spatula or back of a spoon
How to Serve This Dish:
Break the bark into irregular pieces and pile it high in a bowl. The jagged edges and uneven chocolate layer are part of the look, and the shiny candy on top does the Halloween work for you.
Pro Tips for This Recipe:
- Keep the caramel moving in the saucepan so it doesn’t scorch on the bottom.
- Spread the chocolate after it softens from the hot toffee; that’s easier than trying to melt it in the oven.
- Chill fully before breaking, or the toffee layer can stay soft and bend instead of snap.
Variations on This Dish:
- Dark Chocolate Crackle Bark: Use dark chocolate and skip the candy corn for a sharper, less sweet finish.
- Peanut Toffee Bark: Scatter chopped peanuts over the chocolate before it sets.
- Graham Cracker Swap: Replace the saltines with graham crackers for a softer, sweeter base.
Common Mistakes to Avoid with This Dish:
- Don’t underboil the caramel or it stays sticky and never really sets.
- Don’t walk away after the chocolate goes on; it spreads fast and can cool unevenly.
- Don’t skip the parchment unless you enjoy scraping candy off the pan.
9. Black Cocoa Crinkle Cookies
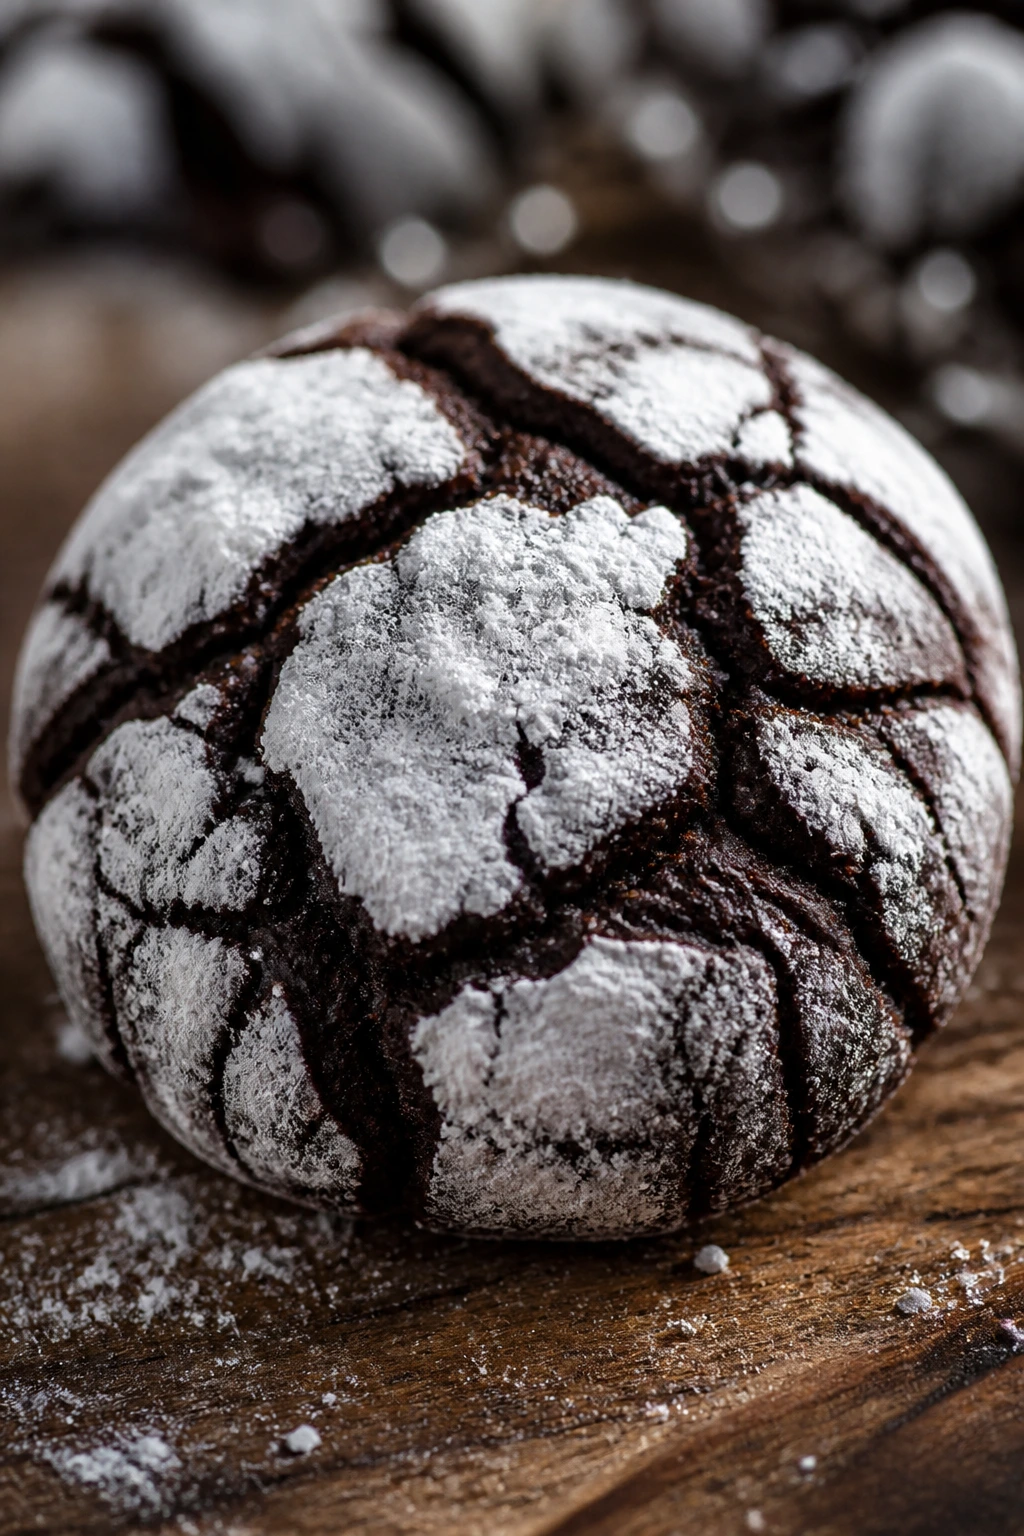
These cookies look like they belong in a haunted bakery window. The black cocoa gives them a deep, almost midnight color, and the powdered sugar cracks open as they bake so each cookie ends up looking like a little dusted moon.
They taste like a richer, darker chocolate cookie, which is the real reason to make them. The Halloween look is a bonus; the flavor is the point.
Why It Works:
Black cocoa has an intense color and a very dry, deeply roasted chocolate flavor, which is why the cookies look so dark without needing food coloring. Chilling the dough gives the flour time to hydrate and helps the cookies keep a crinkled, rounded shape in the oven. The powdered sugar coating sticks best when the dough balls are cold and dry on the outside.
Key Ingredients:
- 1/2 cup unsalted butter, softened
- 1 cup granulated sugar
- 2 large eggs
- 1 teaspoon vanilla extract
- 1 cup all-purpose flour
- 1/2 cup black cocoa powder or Dutch-process cocoa
- 1 teaspoon baking powder
- 1/2 teaspoon fine salt
- 1/2 cup powdered sugar
- 1/4 teaspoon espresso powder, optional
Quick Steps:
- Beat the butter and sugar until smooth, then add the eggs and vanilla.
- Stir in the flour, cocoa, baking powder, salt, and espresso powder until a thick dough forms.
- Chill the dough for at least 1 hour.
- Scoop into balls, roll each one in powdered sugar, and place them on lined baking sheets.
- Bake at 350°F for 10 to 12 minutes, until the tops are cracked and the centers are just set.
- Cool on the pan for 5 minutes before moving them.
Equipment for This Recipe:
- Mixing bowl
- Hand mixer
- Baking sheets
- Cookie scoop
How to Serve This Dish:
Serve them with a cold glass of milk or a small dish of whipped cream for dipping. The contrast between the black cookie and the white sugar coating is so strong that you don’t need much else on the plate.
Pro Tips for This Recipe:
- Chill the dough thoroughly; soft dough won’t crinkle the same way.
- Roll generously in powdered sugar. Thin coating means faint cracks.
- Pull them when the centers still look slightly soft. The edges should be set, not hard.
Variations on This Dish:
- Orange-Stripe Cookies: Add a little orange zest and use a tiny pinch of cinnamon.
- Double Chocolate Version: Fold in 1/3 cup chocolate chips for extra richness.
- Regular Cocoa Swap: If you don’t have black cocoa, use Dutch-process cocoa and accept a lighter cookie.
Common Mistakes to Avoid with This Dish:
- Don’t skip the chill or the cookies will flatten too much.
- Don’t dust them lightly with powdered sugar; you want visible white cracks.
- Don’t bake until they look dry in the center. They keep cooking on the tray.
10. Hot Cocoa Fudge Squares
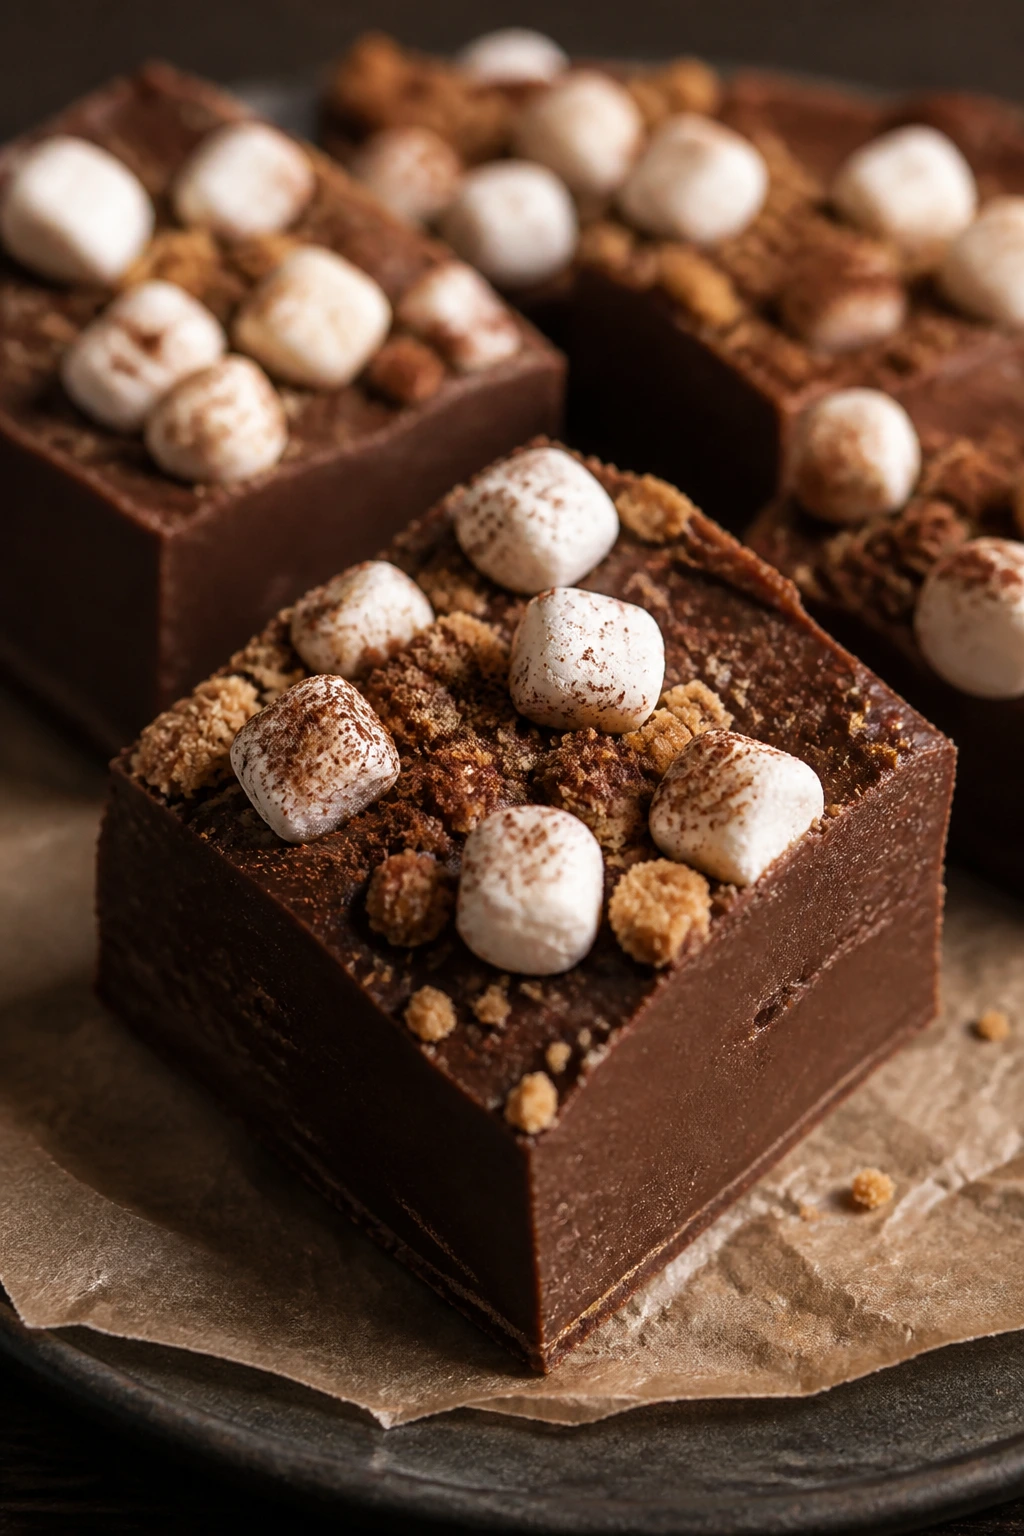
Hot cocoa fudge tastes like a mug of chocolate got condensed into a square. It’s dense, smooth, and just soft enough to melt on the tongue, with mini marshmallows and graham crumbs giving it that winter-campfire feel that sneaks neatly into Halloween season.
This is the dessert I make when I want a tray that slices cleanly and travels well. Fudge is useful like that. It doesn’t care if it’s being set out beside a bowl of candy corn or packed into little paper cups.
Why It Works:
Sweetened condensed milk gives the fudge a creamy body without needing a candy thermometer. Chocolate chips melt into a smooth base, and a little butter keeps the texture from feeling waxy. Marshmallows and graham crumbs are added at the end so they keep their shape and give the top a hot-cocoa look instead of dissolving into the chocolate.
Key Ingredients:
- 3 cups semisweet chocolate chips
- 1 can sweetened condensed milk, 14 ounces
- 2 tablespoons unsalted butter
- 1 teaspoon vanilla extract
- 1/2 teaspoon fine salt
- 1 cup mini marshmallows
- 1/2 cup crushed graham crackers
- 2 tablespoons unsweetened cocoa powder, optional for a stronger chocolate note
Quick Steps:
- Line an 8×8-inch pan with parchment paper.
- Melt the chocolate chips, condensed milk, and butter together over low heat, stirring until glossy and smooth.
- Remove from the heat and stir in the vanilla, salt, and cocoa powder if using.
- Spread the fudge into the pan, then sprinkle the mini marshmallows and graham crumbs across the top.
- Chill for at least 2 hours before cutting into squares.
Equipment for This Recipe:
- Saucepan
- Spatula
- 8×8-inch pan
- Parchment paper
How to Serve This Dish:
Cut the fudge into small squares; it’s rich enough that a little goes a long way. If you want to lean into the hot cocoa theme, add one mini marshmallow on top of each square right before serving so the tray looks tidy.
Pro Tips for This Recipe:
- Keep the heat low when melting the chocolate so the mixture stays smooth.
- Press the toppings lightly into the fudge so they don’t fall off when you cut it.
- Chill fully before slicing or the squares will smear.
Variations on This Dish:
- Peppermint Mug Fudge: Add 1/4 teaspoon peppermint extract and crushed peppermint candy.
- S’mores Fudge: Use crushed chocolate cookies instead of graham crumbs.
- Peanut Butter Swirl: Swirl 1/4 cup peanut butter through the top before chilling.
Common Mistakes to Avoid with This Dish:
- Don’t overheat the chocolate or the texture gets grainy.
- Don’t cut before it’s fully cold. Warm fudge is a sticky mess.
- Don’t pile on too many toppings; the bars need a clean cut to hold together.
11. Witch Hat Cookies
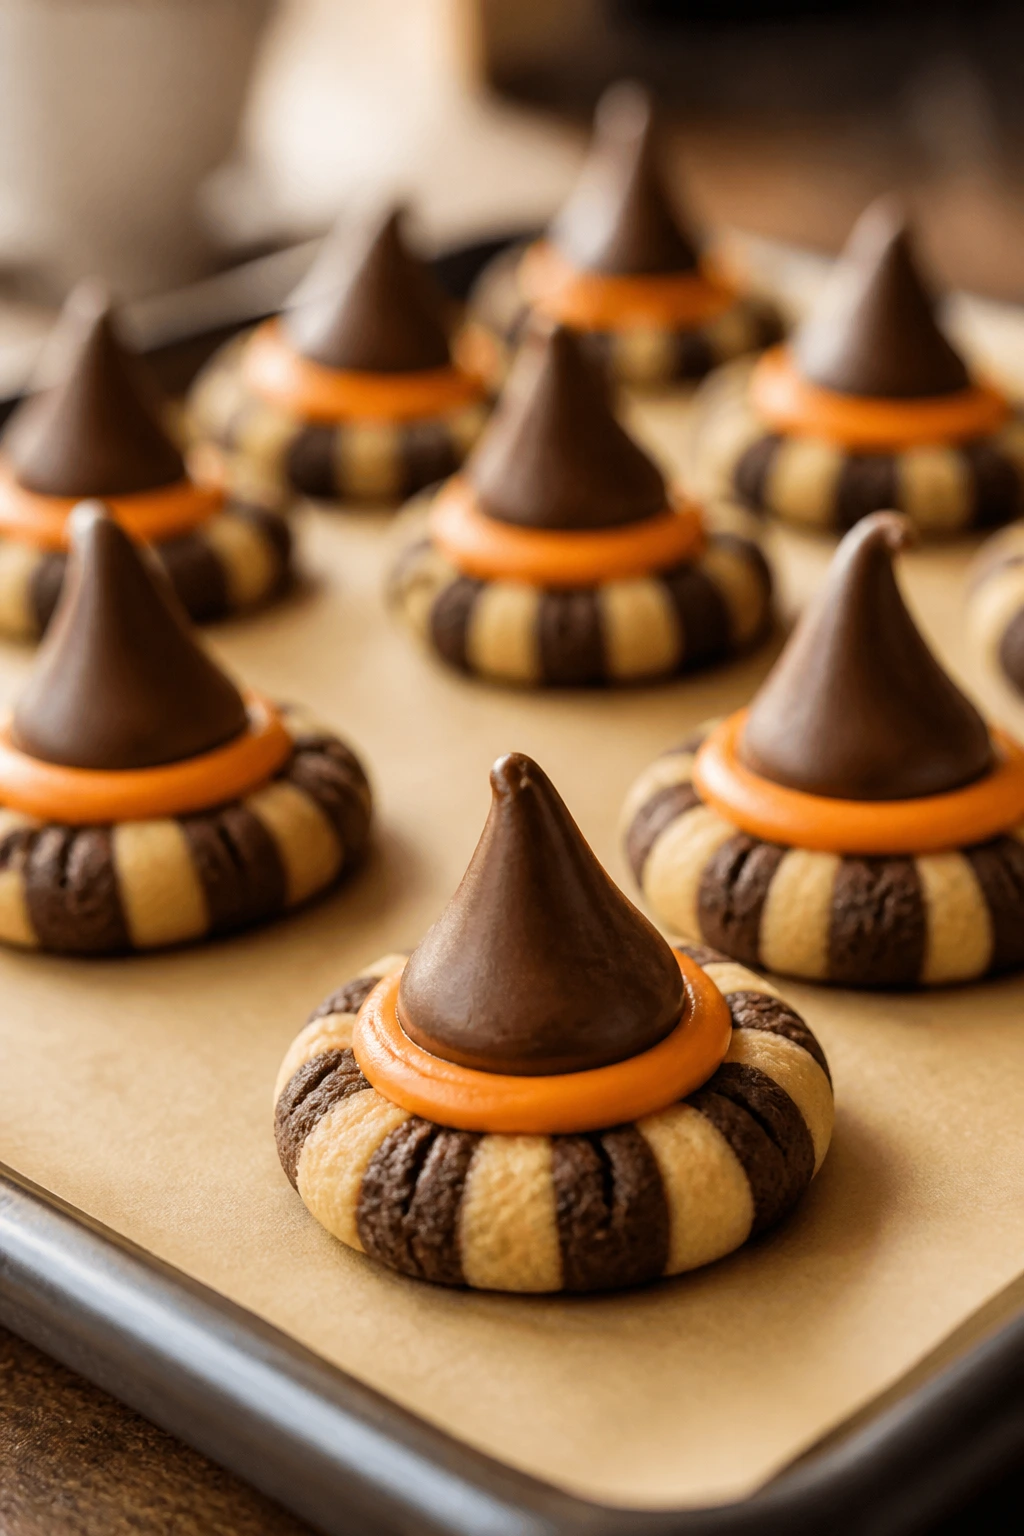
Witch hat cookies look like you planned them for hours, which is funny because they’re assembled from a few shelf-stable parts. The fudge-striped cookie becomes the brim, the chocolate kiss becomes the point, and the orange frosting band finishes the whole thing with the exact kind of goofy charm Halloween needs.
They’re also a smart party dessert. No baking, no knife, no waiting around for a glaze to set.
Why It Works:
The shape works because every component already looks like a hat piece. Fudge-striped cookies have a flat base, kisses give you the cone, and a dab of frosting acts like edible glue. Since the cookies are assembled rather than baked, the only real trick is making the frosting thick enough to hold the kiss without sliding.
Key Ingredients:
- 24 fudge-striped cookies
- 24 chocolate kisses, unwrapped
- 1/2 cup orange frosting or orange candy melts
- 1/4 cup Halloween sprinkles
- 1 teaspoon coconut oil, optional if using candy melts
Quick Steps:
- Arrange the cookies on a tray, stripe side down.
- Pipe or spread a small circle of orange frosting in the center of each cookie.
- Press a chocolate kiss into the frosting so it stands upright.
- Add a thin frosting band around the base of the kiss and press on sprinkles if you want extra color.
- Let the hats sit for 10 to 15 minutes so the frosting firms up.
Equipment for This Recipe:
- Tray or platter
- Piping bag or zip-top bag
- Small offset spatula or spoon
- Measuring spoon
How to Serve This Dish:
These are best set out in a single layer so the hats don’t knock into one another. I like them on a black tray or a plate lined with parchment, because the orange frosting band stands out more against a dark background.
Pro Tips for This Recipe:
- Unwrap the kisses before you start; once your hands are sticky, the process gets annoying fast.
- Use a thick frosting or the kiss will wobble.
- If candy melts are too stiff, a tiny bit of coconut oil smooths them out.
Variations on This Dish:
- Peanut Butter Hat Cookies: Use peanut butter cups instead of chocolate kisses.
- Mini Moon Hats: Swap the fudge-striped cookies for vanilla wafers if you want a lighter look.
- Dark Witch Hats: Use dark chocolate kisses and black frosting for a sharper, moodier version.
Common Mistakes to Avoid with This Dish:
- Don’t use too much frosting or it will squeeze out the sides.
- Don’t stack the cookies before the tops set or the hats flatten.
- Don’t forget to unwrap the kisses first. It’s a tiny task that becomes a big one halfway through.
12. Oreo Truffle Eyeballs
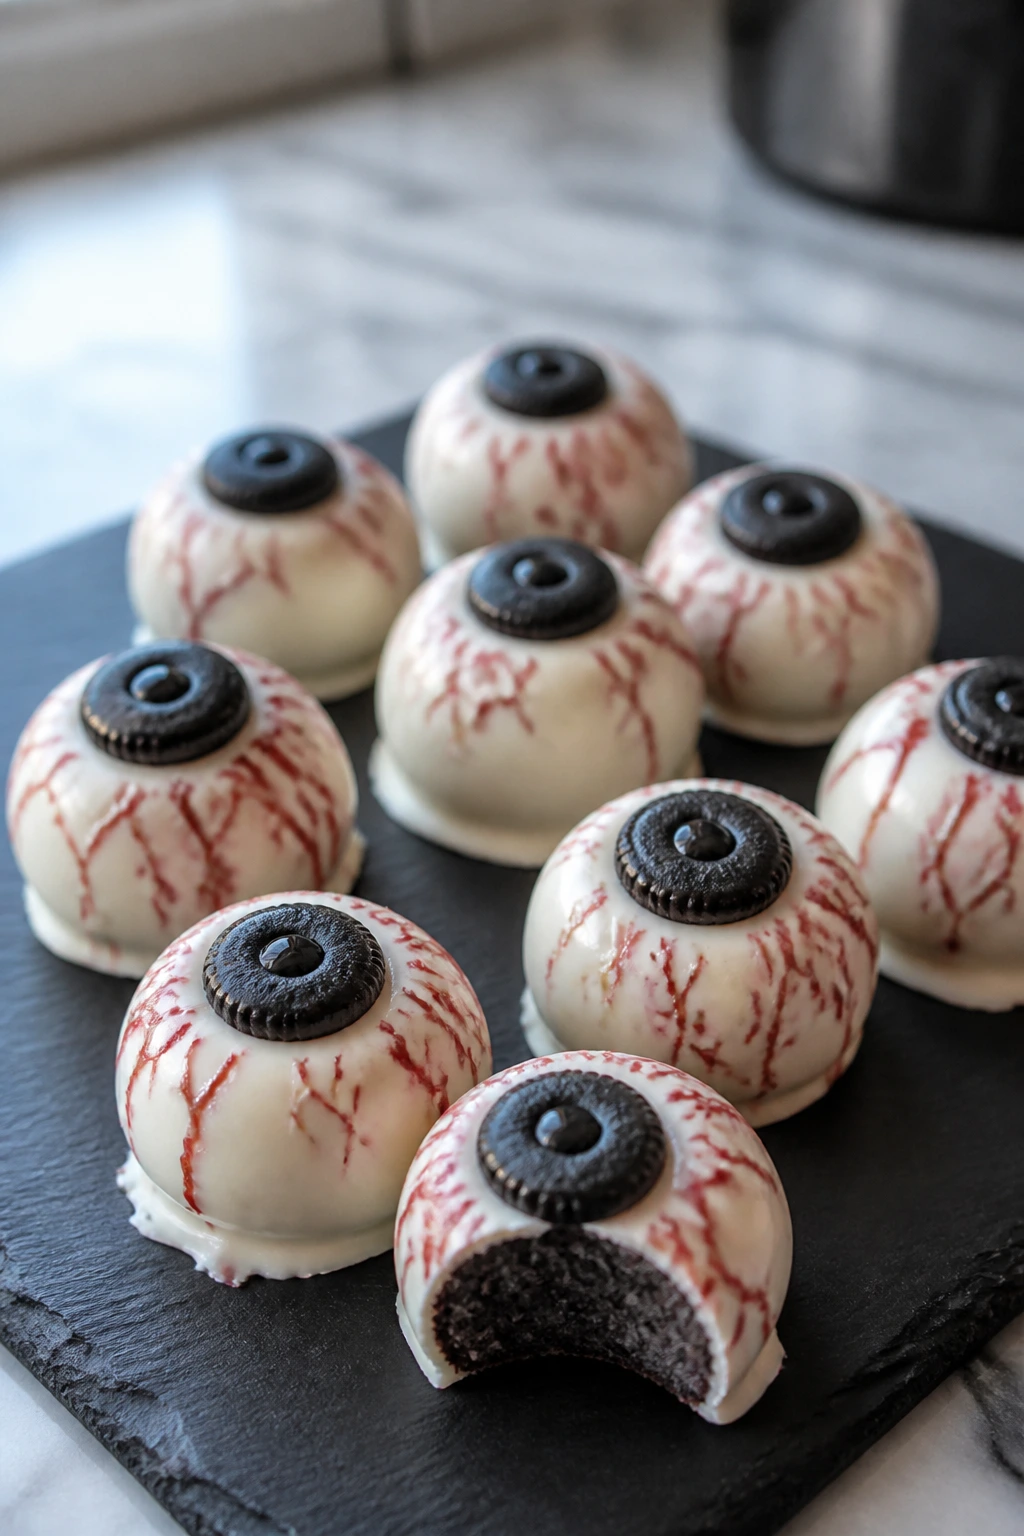
These truffle eyeballs are equal parts creepy and elegant, which is more than I can say for a lot of Halloween candy. The filling is dense, creamy, and chocolate-heavy, then the white shell and red gel turn each piece into a little edible stare.
They’re also surprisingly easy. The fridge does most of the work.
Why It Works:
Crushed Oreos and cream cheese make a dough that rolls smoothly and sets firmly once chilled. The white coating hardens around the truffle, giving you a clean canvas for the pupil and red veins. If the centers are too warm, the coating slides and the eyes lose their shape, so chilling is not optional here.
Key Ingredients:
- 36 Oreo cookies
- 8 ounces cream cheese, softened
- 12 ounces white chocolate chips or candy melts
- 1 teaspoon coconut oil, optional
- 2 tablespoons red decorating gel or melted dark chocolate
- 1/4 cup mini chocolate chips, for pupils if needed
Quick Steps:
- Crush the cookies into fine crumbs, then mix them with the softened cream cheese until no pale streaks remain.
- Chill the mixture for 20 minutes, then roll it into 1-inch balls.
- Freeze the balls for 10 minutes so they’re firm enough to dip.
- Melt the white chocolate with a little coconut oil and coat each truffle.
- Add a mini chocolate chip or dot of dark chocolate for the pupil, then draw a few red veins with gel.
Equipment for This Recipe:
- Food processor or zip-top bag and rolling pin
- Mixing bowl
- Baking sheet lined with parchment
- Fork or dipping tool
How to Serve This Dish:
Serve them chilled on a white platter so the red veining stands out. A few of these scattered between other Halloween candies makes the dessert spread look more deliberate and a little mischievous.
Pro Tips for This Recipe:
- Chill the truffle centers well before coating or they’ll soften and fall apart.
- If the coating is thick, thin it with a teaspoon of oil.
- Make the pupils slightly off-center for a more unsettling, spooky look.
Variations on This Dish:
- Peanut Butter Eyeballs: Use peanut butter sandwich cookies instead of Oreos.
- Monster Eyes: Add green candy coating and use a larger pupil.
- Dark Cocoa Centers: Mix in a tablespoon of cocoa powder for a deeper filling.
Common Mistakes to Avoid with This Dish:
- Don’t skip the chill or the truffles will melt in the coating.
- Don’t overfill them into giant balls. Smaller eyeballs look neater and set faster.
- Don’t rush the pupil step while the coating is still wet and sliding.
13. Brown Sugar Popcorn Balls
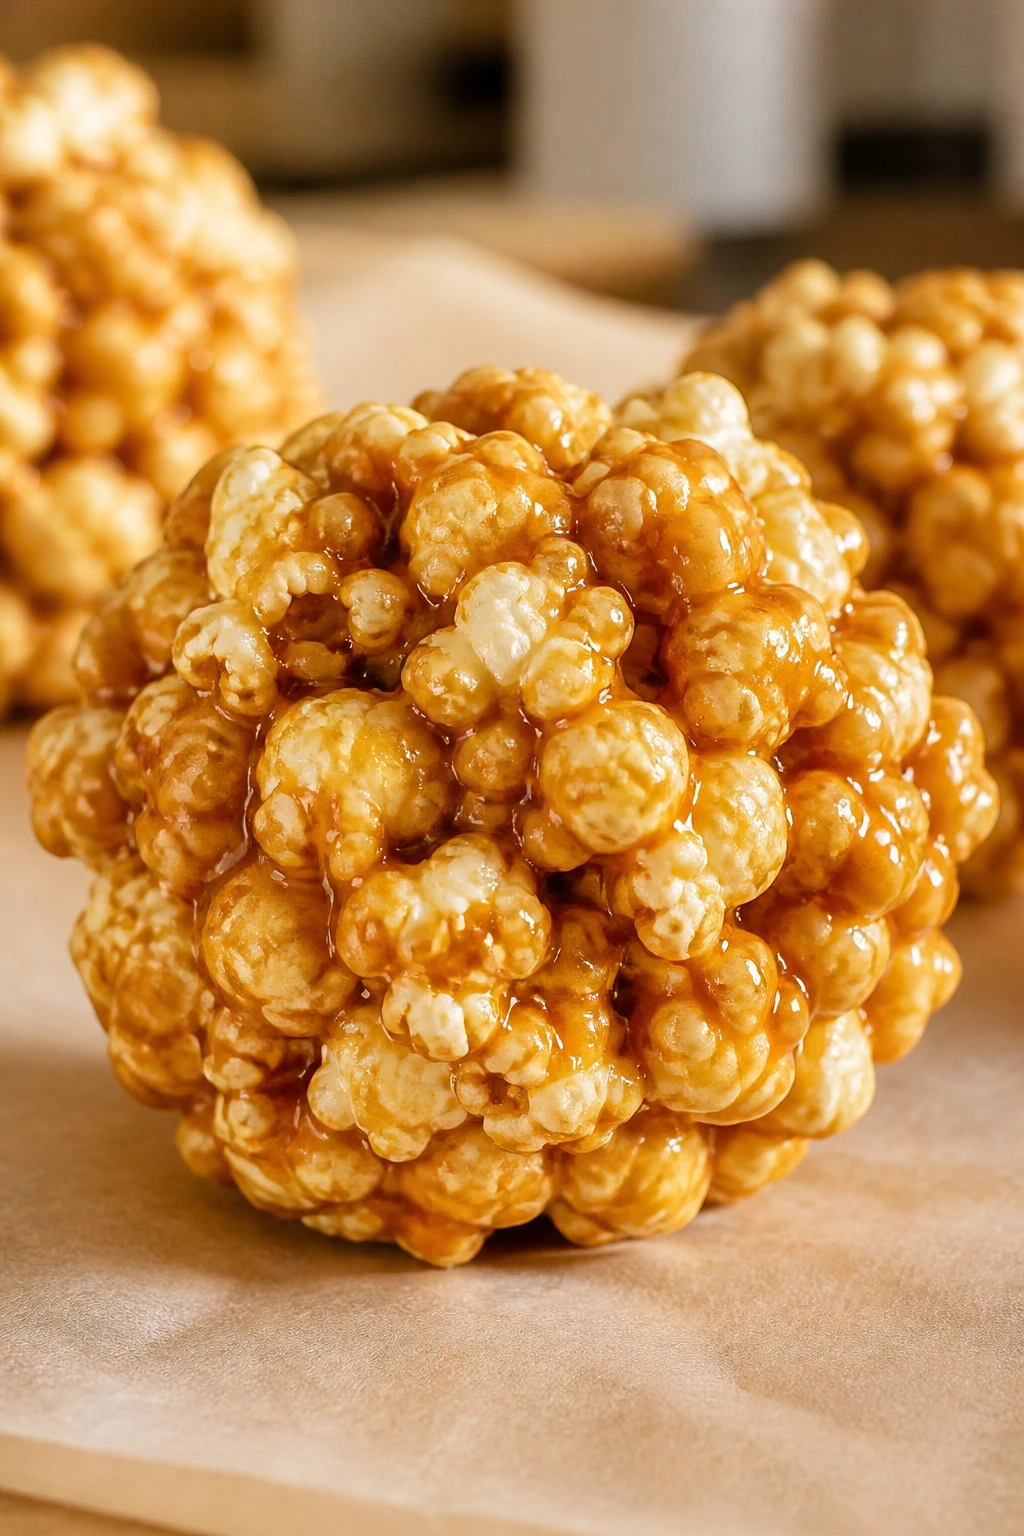
Popcorn balls have that old-school Halloween party feel, and I mean that as praise. The brown sugar syrup coats every kernel with a shiny caramel shell, then the candy pieces or candy corn give the whole batch a bright little snap of color.
These are hand-held, cheap, and weirdly addictive. You can make a whole batch from pantry basics and end up with a tray that looks cheerful enough to fool people into thinking you worked harder than you did.
Why It Works:
The syrup needs to cook long enough to cling to the popcorn without turning into hard candy. Brown sugar and corn syrup keep the texture chewy instead of brittle, while a little baking soda makes the syrup lighter and easier to work with. Shaping them while the mix is still warm is the part that matters most.
Key Ingredients:
- 12 cups popped popcorn
- 1 cup packed light brown sugar
- 1/2 cup light corn syrup
- 1/4 cup unsalted butter
- 1/2 teaspoon fine salt
- 1 teaspoon vanilla extract
- 1/2 teaspoon baking soda
- 1/2 cup candy corn or Halloween candies
Quick Steps:
- Place the popcorn in a very large bowl and remove any unpopped kernels.
- In a saucepan, melt the butter with the brown sugar, corn syrup, and salt, then boil for 3 minutes.
- Remove from the heat, stir in the vanilla and baking soda, and watch the syrup foam a little.
- Pour over the popcorn and stir quickly until coated, then fold in the candy corn.
- Grease your hands and shape the mixture into balls while it’s still warm. Let them cool on parchment.
Equipment for This Recipe:
- Large mixing bowl
- Saucepan
- Wooden spoon
- Parchment paper
- Buttered hands or gloves
How to Serve This Dish:
Wrap each popcorn ball in wax paper or tuck it into a paper cupcake liner. That keeps the sticky edges under control and makes them feel like little old-fashioned Halloween gifts.
Pro Tips for This Recipe:
- Have everything ready before the syrup is done; it cools fast.
- Grease your hands generously, then re-grease between balls if needed.
- Use plain popcorn, not heavily buttered movie popcorn, or the syrup won’t cling as well.
Variations on This Dish:
- Maple Popcorn Balls: Swap half the corn syrup for maple syrup.
- Chocolate-Crunch Balls: Add mini chocolate chips once the mixture cools slightly.
- Nutty Pumpkin Balls: Stir in chopped pecans and a pinch of cinnamon.
Common Mistakes to Avoid with This Dish:
- Don’t let the syrup cook too long or the balls turn hard instead of chewy.
- Don’t forget to remove unpopped kernels; nobody wants that surprise.
- Don’t shape the balls after the mixture cools or it will crack apart.
14. Spooky Sugar Cookie Bars

Sugar cookie bars are the low-effort answer to decorated cookies. You press the dough into one pan, bake it once, frost the whole thing, and suddenly you have a tray that can be cut into neat squares or left messy if that’s more your style.
Halloween gives you permission to be a little loud with the frosting. Orange, black, sprinkles, maybe a few candy eyes if you’re feeling silly.
Why It Works:
Bar cookies are easier than cutouts because the dough doesn’t need rolling, chilling, or flouring the counter. Butter and sugar make the base tender, while the baking powder keeps it from turning into a dense slab. The trick is to bake just until the center sets, because bars keep cooking from the residual heat in the pan.
Key Ingredients:
- 1 cup unsalted butter, softened
- 1 1/4 cups granulated sugar
- 2 large eggs
- 2 teaspoons vanilla extract
- 3 cups all-purpose flour
- 1 teaspoon baking powder
- 1/2 teaspoon fine salt
- 1/2 cup Halloween sprinkles
- 4 ounces unsalted butter, softened, for frosting
- 2 cups powdered sugar
- 2 tablespoons milk
- Orange and black food coloring
Quick Steps:
- Preheat the oven to 350°F and line a 9×13-inch pan with parchment.
- Cream the butter and sugar until pale, then beat in the eggs and vanilla.
- Stir in the flour, baking powder, and salt until a soft dough forms, then fold in the sprinkles.
- Press the dough evenly into the pan and bake for 18 to 22 minutes, until the edges are just turning golden.
- Cool completely, whip the frosting ingredients together, tint half orange and half black, then spread and swirl on top before cutting into squares.
Equipment for This Recipe:
- 9×13-inch baking pan
- Mixing bowl and hand mixer
- Offset spatula
- Parchment paper
How to Serve This Dish:
Cut the bars into rectangles and stack them in alternating directions so the frosting stripes show. They work well on a tray with napkins because the frosting is part of the charm and a little bit of it will come off on fingers.
Pro Tips for This Recipe:
- Press the dough evenly so the corners don’t bake faster than the middle.
- Cool the bars fully before frosting or the icing will melt and slide.
- Use gel food coloring if you want strong Halloween colors without thinning the frosting.
Variations on This Dish:
- Frosted Monster Bars: Add candy eyes to the top while the frosting is still soft.
- Cinnamon Sugar Bars: Mix 1 teaspoon cinnamon into the dough and skip the bright frosting.
- Orange Cream Version: Add 1 teaspoon orange zest to the frosting.
Common Mistakes to Avoid with This Dish:
- Don’t overbake until the bars feel dry in the center.
- Don’t frost warm bars. The icing will melt into a shiny puddle.
- Don’t cut before the frosting has set or the squares will smear.
15. Pumpkin Chocolate Chip Muffins
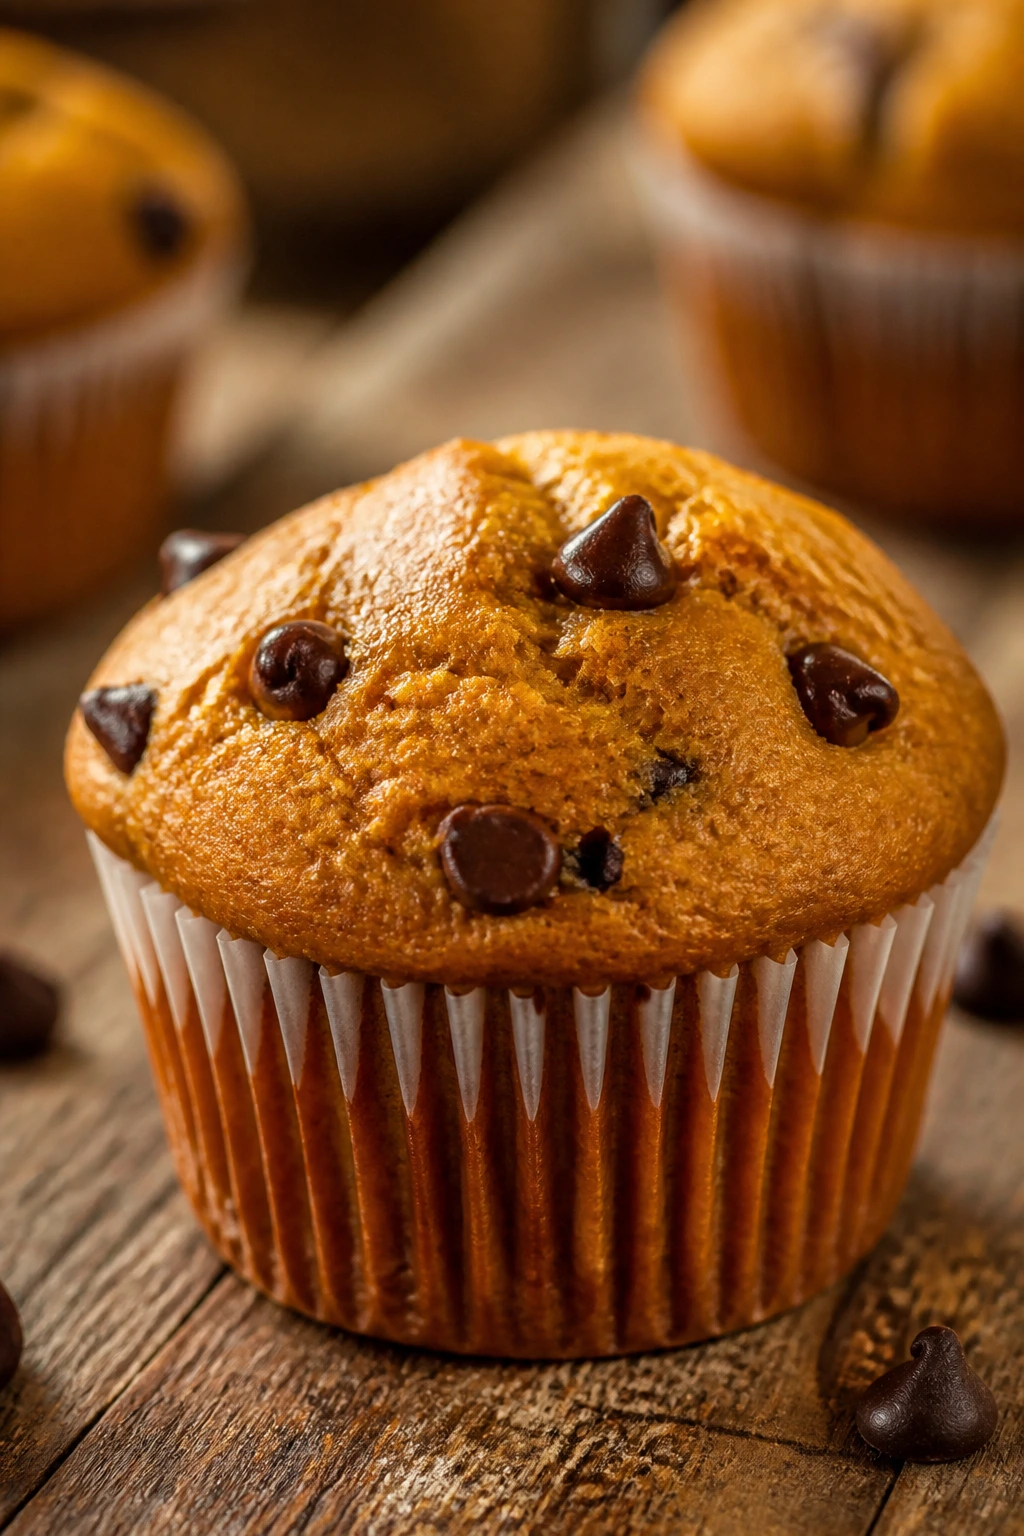
Pumpkin chocolate chip muffins are the one Halloween bake that can pass for breakfast and dessert without anyone complaining. They smell like cinnamon the second they hit the oven, and the melted chocolate pockets give each bite a little surprise.
They’re also good for feeding a crowd without turning your kitchen into a costume of flour dust and chaos. Muffins are workhorses.
Why It Works:
Canned pumpkin keeps the crumb moist and gives you consistent texture without needing fresh purée. Oil helps the muffins stay soft for days, and chocolate chips cut through the spice with something a little richer. A hot oven jump-starts the rise, which gives you those round, bakery-style tops.
Key Ingredients:
- 1 can pumpkin puree, 15 ounces
- 2 large eggs
- 1/2 cup neutral oil or melted butter
- 1 cup granulated sugar
- 1/2 cup packed light brown sugar
- 1 teaspoon vanilla extract
- 1 3/4 cups all-purpose flour
- 1 teaspoon baking soda
- 1/2 teaspoon baking powder
- 1/2 teaspoon fine salt
- 1 1/2 teaspoons cinnamon
- 1 teaspoon pumpkin pie spice
- 1 cup chocolate chips
Quick Steps:
- Preheat the oven to 375°F and line a 12-cup muffin tin with paper liners.
- Whisk the pumpkin, eggs, oil, sugars, and vanilla until smooth.
- Stir in the flour, baking soda, baking powder, salt, cinnamon, and pumpkin pie spice just until combined.
- Fold in the chocolate chips and scoop the batter into the muffin cups, filling each about 3/4 full.
- Bake for 18 to 22 minutes, until the tops spring back when touched and a toothpick comes out with a few moist crumbs.
Equipment for This Recipe:
- Muffin tin
- Paper liners
- Mixing bowl and whisk
- Ice cream scoop or spoon
How to Serve This Dish:
Serve them warm enough that the chocolate is still soft. A smear of salted butter on the split top makes them feel more bakery-like, but they’re solid on their own.
Pro Tips for This Recipe:
- Don’t overmix after adding the flour or the muffins get tough.
- Start checking early; overbaked pumpkin muffins dry out faster than you’d think.
- Use mini chocolate chips if you want cleaner distribution in every bite.
Variations on This Dish:
- Muffin-Top Streusel: Add a brown sugar-oat streusel before baking.
- Nutty Pumpkin Muffins: Fold in 1/2 cup chopped walnuts or pecans.
- Mini Party Muffins: Bake in a mini muffin tin for 10 to 12 minutes.
Common Mistakes to Avoid with This Dish:
- Don’t use pumpkin pie filling instead of pumpkin puree; the spices and sugar throw off the balance.
- Don’t fill the cups to the top or the batter spills over.
- Don’t skip the paper liners if you want clean release and easier serving.
16. Peanut Butter Pumpkins
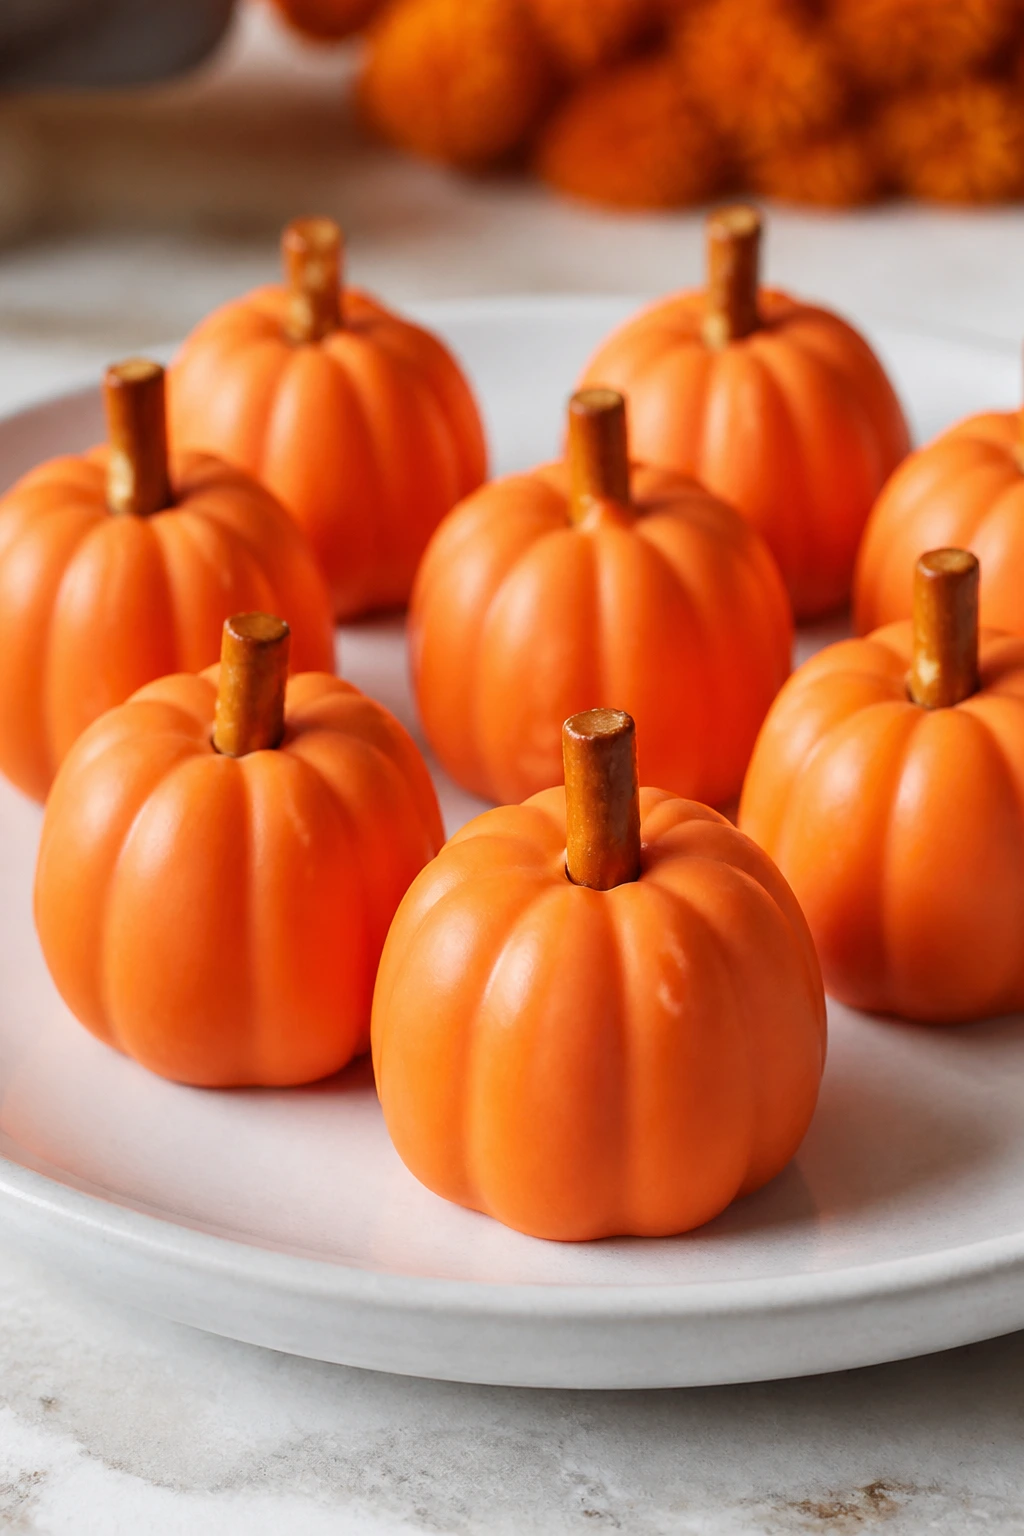
Peanut butter pumpkins are Halloween candy in dessert form, and they hit that sweet-salty line people keep reaching for. The filling tastes like a softer, fresher version of a peanut butter cup, and the orange coating gives each piece the obvious pumpkin look without requiring sculpting skills.
These are also the first thing to disappear from a party plate. People see the shape, laugh, and then they taste one and come back for three.
Why It Works:
A peanut butter and powdered sugar filling firms up well in the fridge, which makes it easy to shape into little pumpkins. Chilling before coating keeps the centers from wobbling in the candy shell. A smooth candy coating gives you that bright orange finish, and the tiny stem on top seals the whole illusion.
Key Ingredients:
- 1/2 cup unsalted butter, softened
- 1 cup creamy peanut butter
- 3 cups powdered sugar
- 1 teaspoon vanilla extract
- 1/4 teaspoon fine salt
- 12 ounces orange candy melts or orange coating chocolate
- 24 small pretzel pieces or green icing for stems
Quick Steps:
- Beat the butter and peanut butter together until smooth.
- Add the powdered sugar, vanilla, and salt, then mix until the dough is thick and moldable.
- Chill for 20 minutes, then roll into balls and gently press the sides to suggest pumpkin ridges.
- Freeze for 10 minutes, then dip or spoon orange coating over each one.
- Before the coating hardens, press in a pretzel stem or pipe a little green icing on top.
Equipment for This Recipe:
- Mixing bowl
- Hand mixer
- Baking sheet lined with parchment
- Fork or dipping tool
How to Serve This Dish:
Arrange them in a shallow bowl lined with parchment or shredded paper so they look like a tiny pumpkin patch. They’re rich, so one or two per person is usually enough unless your guests have a serious peanut butter habit.
Pro Tips for This Recipe:
- Chill the filling before shaping. Warm dough sticks to everything.
- Use gloves or lightly powdered hands if the mixture clings too much.
- Work in small batches when coating so the pumpkins keep their shape.
Variations on This Dish:
- Chocolate Pumpkin Patch: Dip the centers in dark chocolate instead of orange coating.
- Sunflower Seed Version: Swap the peanut butter for sunflower seed butter for a nut-free tray.
- Maple Peanut Pumpkins: Add 1 tablespoon maple syrup for a slightly deeper flavor.
Common Mistakes to Avoid with This Dish:
- Don’t coat the pumpkins while the centers are soft or they’ll slump.
- Don’t make them huge; small pumpkins are easier to dip and serve.
- Don’t skip the stem. It’s a tiny detail, but it sells the whole look.
17. Chocolate Covered Pretzel Rods
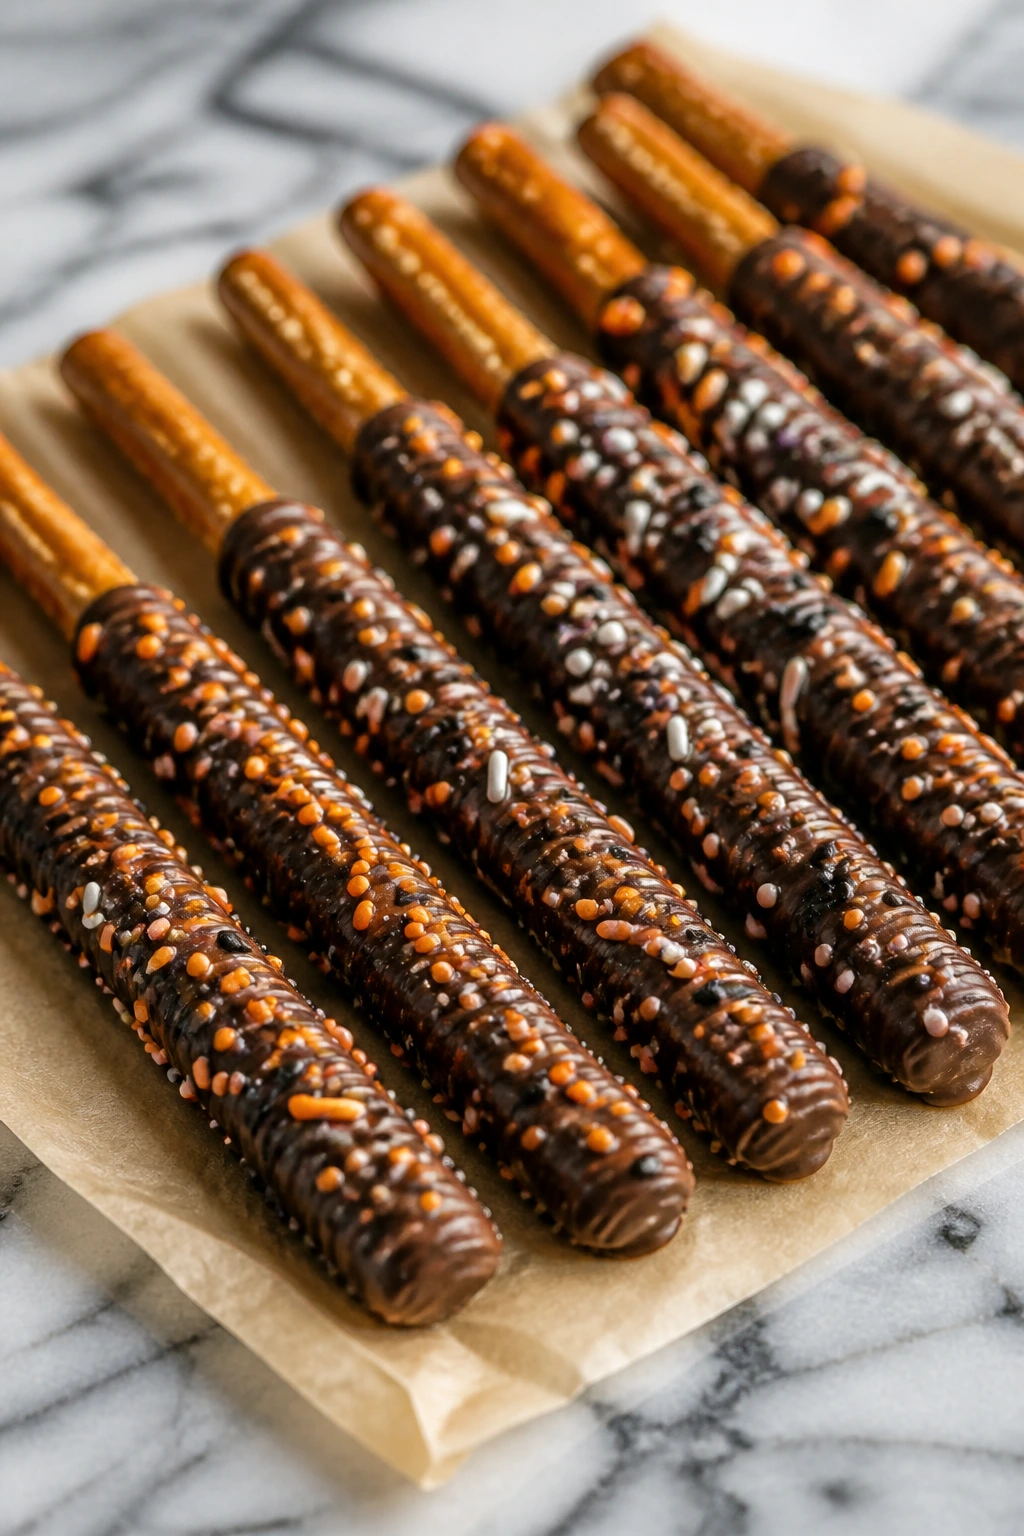
Chocolate-covered pretzel rods are the easiest way to make a tray look finished. You get crunch, salt, and chocolate in one line, and the sprinkles or drizzles make them feel like they came from a candy shop instead of your pantry.
They also pack well. If you need treats for class, work, or a neighbor drop-off, these are a good bet because they don’t collapse on the drive over.
Why It Works:
Pretzel rods give you a built-in handle and enough length for a clean chocolate dip. The chocolate coating locks on quickly, and the toppings stick best while it’s still wet. A little coconut oil helps the melted chocolate glide instead of clumping, which makes the finish cleaner.
Key Ingredients:
- 12 pretzel rods
- 12 ounces semisweet chocolate chips
- 1 teaspoon coconut oil
- 12 ounces orange candy melts or white chocolate for drizzling
- 1/2 cup Halloween sprinkles
- 1/4 cup crushed cookies or chopped peanuts, optional
Quick Steps:
- Line a baking sheet with parchment paper.
- Melt the semisweet chocolate with the coconut oil until smooth.
- Dip each pretzel rod about 2/3 of the way into the chocolate, letting the excess drip off.
- Set the rods on parchment and add sprinkles or crushed toppings right away.
- Drizzle with orange candy melts once the first coat starts to set, then let everything harden fully.
Equipment for This Recipe:
- Baking sheet
- Parchment paper
- Microwave-safe bowl
- Spoon for drizzling
How to Serve This Dish:
Stand the pretzel rods upright in a tall glass or jar if you want a display that looks cleaner than laying them flat. They make a nice border around a dessert tray, too.
Pro Tips for This Recipe:
- Dry the pretzels if they’ve been in a humid kitchen, or the coating won’t grab well.
- Use a narrow bowl for dipping so you don’t waste chocolate.
- Add toppings in one pass; the coating sets faster than most people expect.
Variations on This Dish:
- Ghost Pretzel Rods: Use white chocolate and two mini chocolate chips for eyes.
- Double Drizzle Rods: Layer orange and dark chocolate over the semisweet base.
- Crunchy Cookie Rods: Roll the wet coating in crushed chocolate cookies instead of sprinkles.
Common Mistakes to Avoid with This Dish:
- Don’t overheat the chocolate or it gets thick and dull.
- Don’t add toppings after the coating sets. They’ll bounce right off.
- Don’t try to dip wet pretzels; moisture ruins the finish.
18. Marshmallow Ghost S’mores Dip
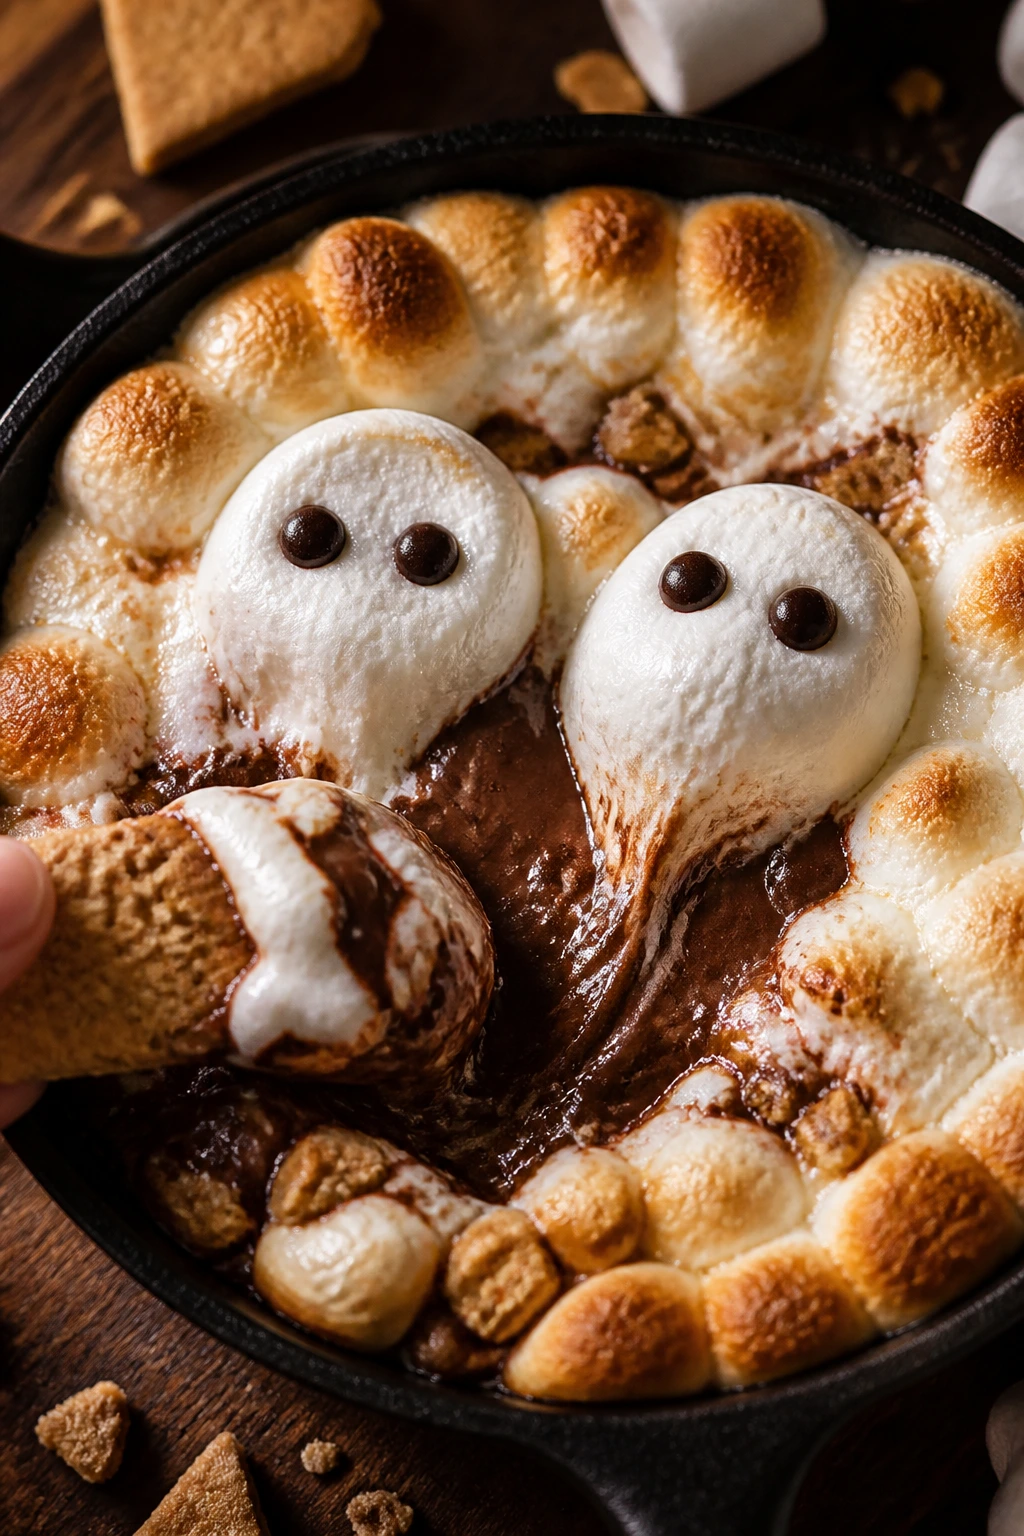
This is the dessert people hover around with graham crackers in hand. The chocolate melts into a deep pool, the marshmallows puff up and toast at the edges, and once you add a couple of chocolate-chip eyes, the whole skillet turns into a tiny Halloween campfire scene.
It’s warm, messy, and best eaten fast. Which, frankly, is part of the appeal.
Why It Works:
Chocolate and marshmallow are already a natural pairing, and the skillet format keeps the dip hot long enough for a crowd to dig in. The chocolate layer goes underneath so it doesn’t dry out under the broiler, and the marshmallows on top brown in minutes. The “ghost” faces are simple, but they make the dip feel like a real Halloween project instead of just a bowl of melted candy.
Key Ingredients:
- 1 cup semisweet chocolate chips
- 1/4 cup heavy cream or whole milk
- 1 tablespoon unsalted butter
- 1 teaspoon vanilla extract
- 1/4 teaspoon fine salt
- 2 cups mini marshmallows
- 1/4 cup mini chocolate chips, for faces
- Graham crackers for dipping
Quick Steps:
- Preheat the oven broiler and place an oven-safe skillet or small baking dish on a sheet pan.
- Warm the chocolate chips, cream, butter, vanilla, and salt together until smooth, then spread the mixture in the skillet.
- Scatter the marshmallows over the chocolate in a tight layer.
- Broil for 1 to 2 minutes, watching closely, until the tops are golden and puffed. Do not walk away; marshmallows go from toasted to burnt fast.
- Add mini chocolate chip eyes and serve immediately with graham crackers.
Equipment for This Recipe:
- Oven-safe skillet or baking dish
- Sheet pan
- Spatula
- Broiler-safe oven
How to Serve This Dish:
Put the skillet on a trivet and serve it straight from the pan with graham crackers, vanilla wafers, or pretzels. It’s the sort of thing that belongs in the center of the table, because people will gather around it without any prompting.
Pro Tips for This Recipe:
- Preheat the broiler before the chocolate is ready so the marshmallows toast quickly.
- Use mini marshmallows, not giant ones; they brown more evenly.
- Add the eyes right after broiling so they melt into place without sliding off.
Variations on This Dish:
- Peanut Butter Lava Dip: Swirl 1/4 cup peanut butter into the chocolate layer.
- Cookies-and-Cream S’mores: Use crushed chocolate sandwich cookies on the bottom.
- Pumpkin Patch Dip: Stir pumpkin pie spice into the chocolate and use orange candies on top.
Common Mistakes to Avoid with This Dish:
- Don’t use a dish that isn’t broiler-safe.
- Don’t overbroil or the marshmallows turn bitter.
- Don’t wait to serve. Once this cools, it stops being a dip and starts being a brick.
19. Cocoa Oatmeal No-Bake Cookies
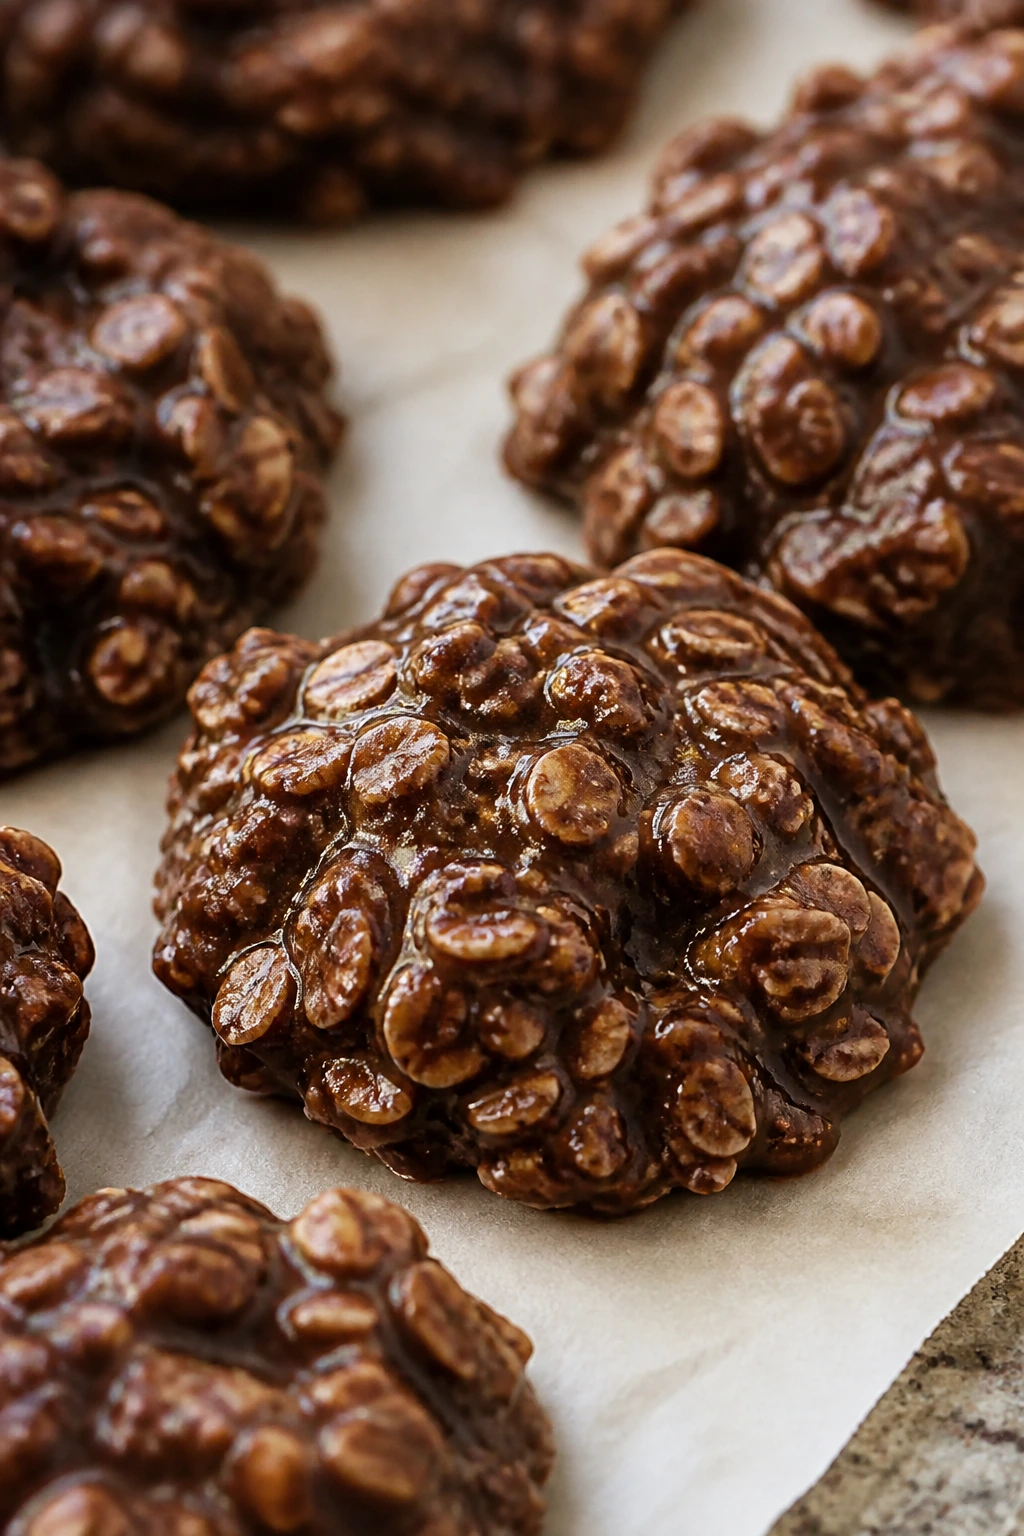
No-bake cookies are the kind of dessert that feels almost suspiciously simple, and I mean that in the best way. You boil, stir, drop, and let the tray cool. The result is a chewy little cookie with cocoa, peanut butter, and oats holding hands in a way that never gets old.
They fit Halloween because they’re fast enough to make between other tasks, and because a plate of dark chocolate cookies feels a little moody in the right light.
Why It Works:
The sugar mixture needs to boil long enough to bind the oats without turning grainy. Cocoa gives the cookies their dark color and rich flavor, while peanut butter helps the cookies set into a chewy, cohesive mound. Quick oats are the better choice here because they absorb the syrup more evenly than old-fashioned oats.
Key Ingredients:
- 2 cups granulated sugar
- 1/2 cup unsalted butter
- 1/2 cup milk
- 1/4 cup unsweetened cocoa powder
- 3 cups quick oats
- 1/2 cup creamy peanut butter
- 1 teaspoon vanilla extract
- Pinch of salt
Quick Steps:
- Line two baking sheets or trays with parchment paper.
- Combine the sugar, butter, milk, cocoa, and salt in a saucepan and bring to a full boil.
- Boil for 60 seconds exactly, then remove from the heat.
- Stir in the peanut butter and vanilla until smooth, then fold in the oats.
- Drop spoonfuls onto the parchment and let them cool until firm, about 20 minutes.
Equipment for This Recipe:
- Saucepan
- Wooden spoon
- Parchment-lined trays
- Cookie scoop or spoon
How to Serve This Dish:
Pile them into a shallow bowl so they look casual and a little old-fashioned. They don’t need frosting, sprinkles, or anything else; the rough, craggy tops already give them enough personality.
Pro Tips for This Recipe:
- Time the boil carefully. Too short and the cookies stay soft; too long and they turn crumbly.
- Use quick oats for the cleanest texture.
- Drop the cookies fast once the oats go in, because the mixture firms up as it cools.
Variations on This Dish:
- Coconut Crawlies: Add 1/2 cup shredded coconut with the oats.
- Espresso Cocoa Cookies: Stir in 1 teaspoon instant espresso powder.
- Nut-Free Version: Swap peanut butter for sunflower seed butter.
Common Mistakes to Avoid with This Dish:
- Don’t eyeball the boil time. A minute matters here.
- Don’t use old-fashioned oats if you want a softer chew.
- Don’t make the mounds too large or they won’t set evenly.
20. Caramel Corn Clusters with Candy Eyes
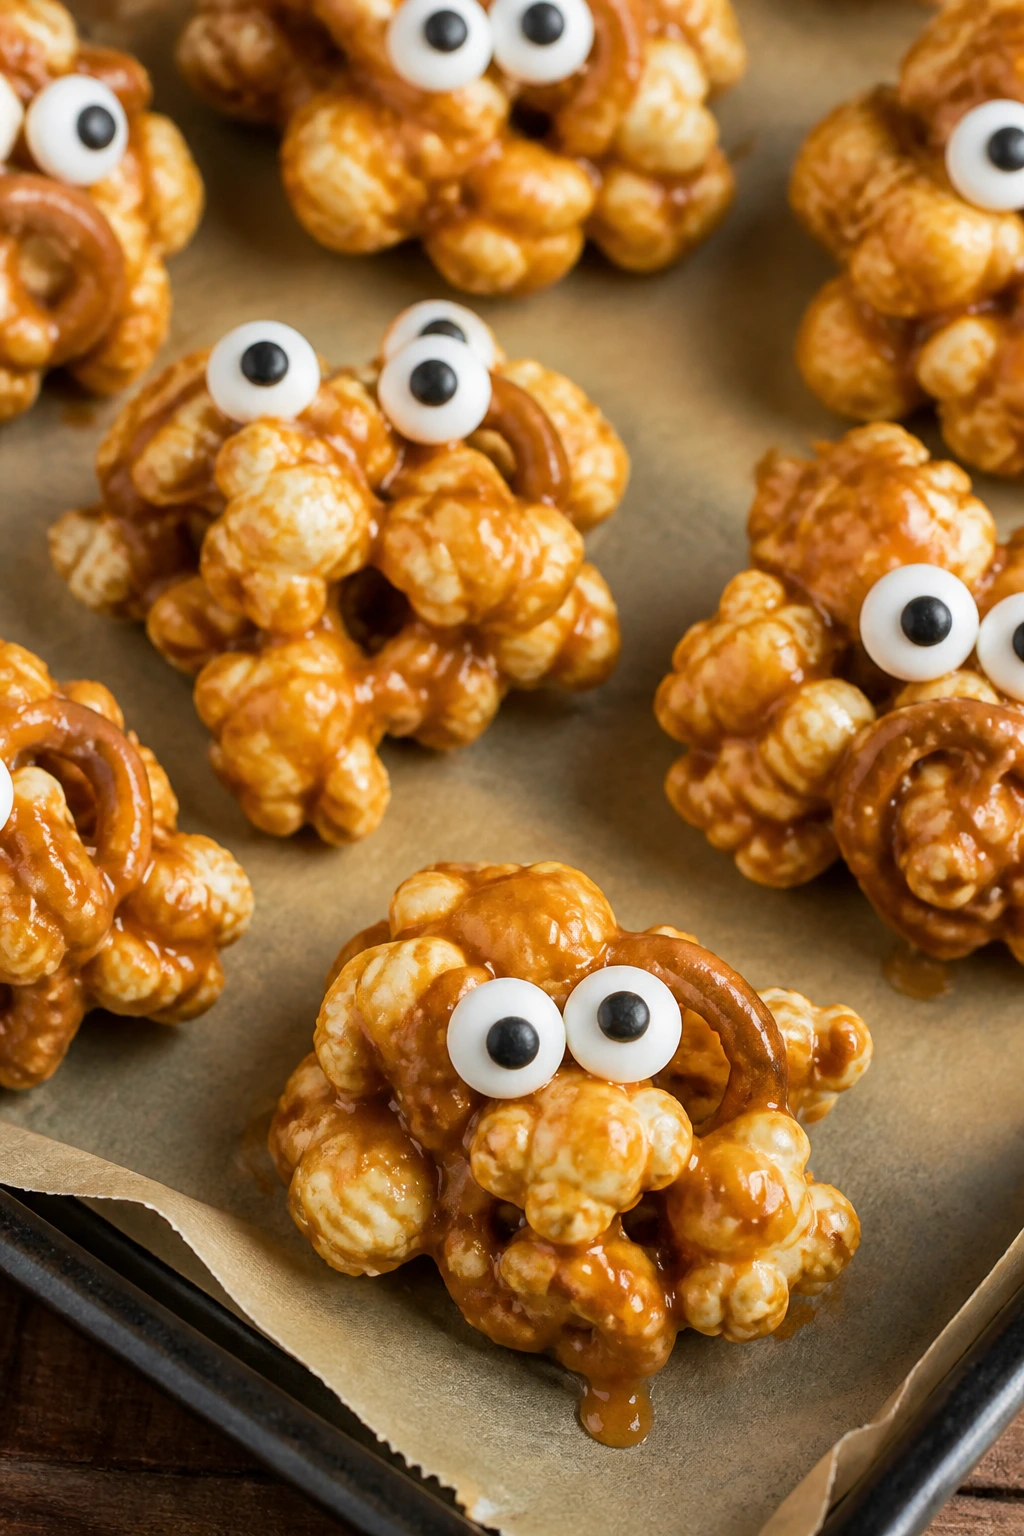
These clusters sit somewhere between popcorn ball and candy bar, which is exactly why they work. The caramel clings to popcorn and pretzels, the clusters harden into bite-size lumps, and the candy eyes make the whole thing look like a little pile of edible chaos.
I like them for parties because nobody needs a fork. Or manners, really.
Why It Works:
The caramel needs enough heat to coat the popcorn but not so much that it turns brittle on contact. Baking the mixture low and slow helps dry it just enough to make clusters instead of sticky strands. Candy eyes go on after cooling so they stay bright and don’t melt into the caramel.
Key Ingredients:
- 10 cups popped popcorn
- 1 cup mini pretzels, lightly crushed
- 1/2 cup salted peanuts, optional
- 1 cup packed light brown sugar
- 1/2 cup unsalted butter
- 1/4 cup light corn syrup
- 1/2 teaspoon salt
- 1/2 teaspoon baking soda
- 1 teaspoon vanilla extract
- 1/2 cup candy eyes
Quick Steps:
- Preheat the oven to 250°F and line a baking sheet with parchment.
- Mix the popcorn, pretzels, and peanuts in a large bowl.
- Cook the brown sugar, butter, corn syrup, and salt in a saucepan until it comes to a steady boil, then boil for 3 minutes.
- Remove from the heat, stir in the baking soda and vanilla, and quickly pour over the popcorn mixture.
- Toss to coat, spread the mix on the baking sheet, and bake for 30 to 45 minutes, stirring once or twice.
- Cool, break into clusters, and press on candy eyes.
Equipment for This Recipe:
- Large bowl
- Saucepan
- Baking sheet
- Parchment paper
How to Serve This Dish:
Serve the clusters in little paper cups or a wide bowl with a scoop for grabbing. They look especially fun when paired with other orange and black treats, because the candy eyes make everything feel busier in a good way.
Pro Tips for This Recipe:
- Line the pan before you start; the caramel gets sticky fast.
- Stir once during baking to prevent one corner from turning too dark.
- Add eyes only after the clusters are cool and broken apart.
Variations on This Dish:
- Pumpkin Spice Clusters: Add 1 teaspoon pumpkin pie spice to the caramel.
- Chocolate Drizzle Clusters: Drizzle cooled clusters with melted chocolate.
- Nut-Free Clusters: Skip the peanuts and add more pretzels instead.
Common Mistakes to Avoid with This Dish:
- Don’t overcook the caramel or the clusters become hard instead of crisp-chewy.
- Don’t skip the baking step if you want real clusters instead of sticky popcorn.
- Don’t add candy eyes while the mixture is hot or they’ll melt.
21. Meringue Ghost Kisses
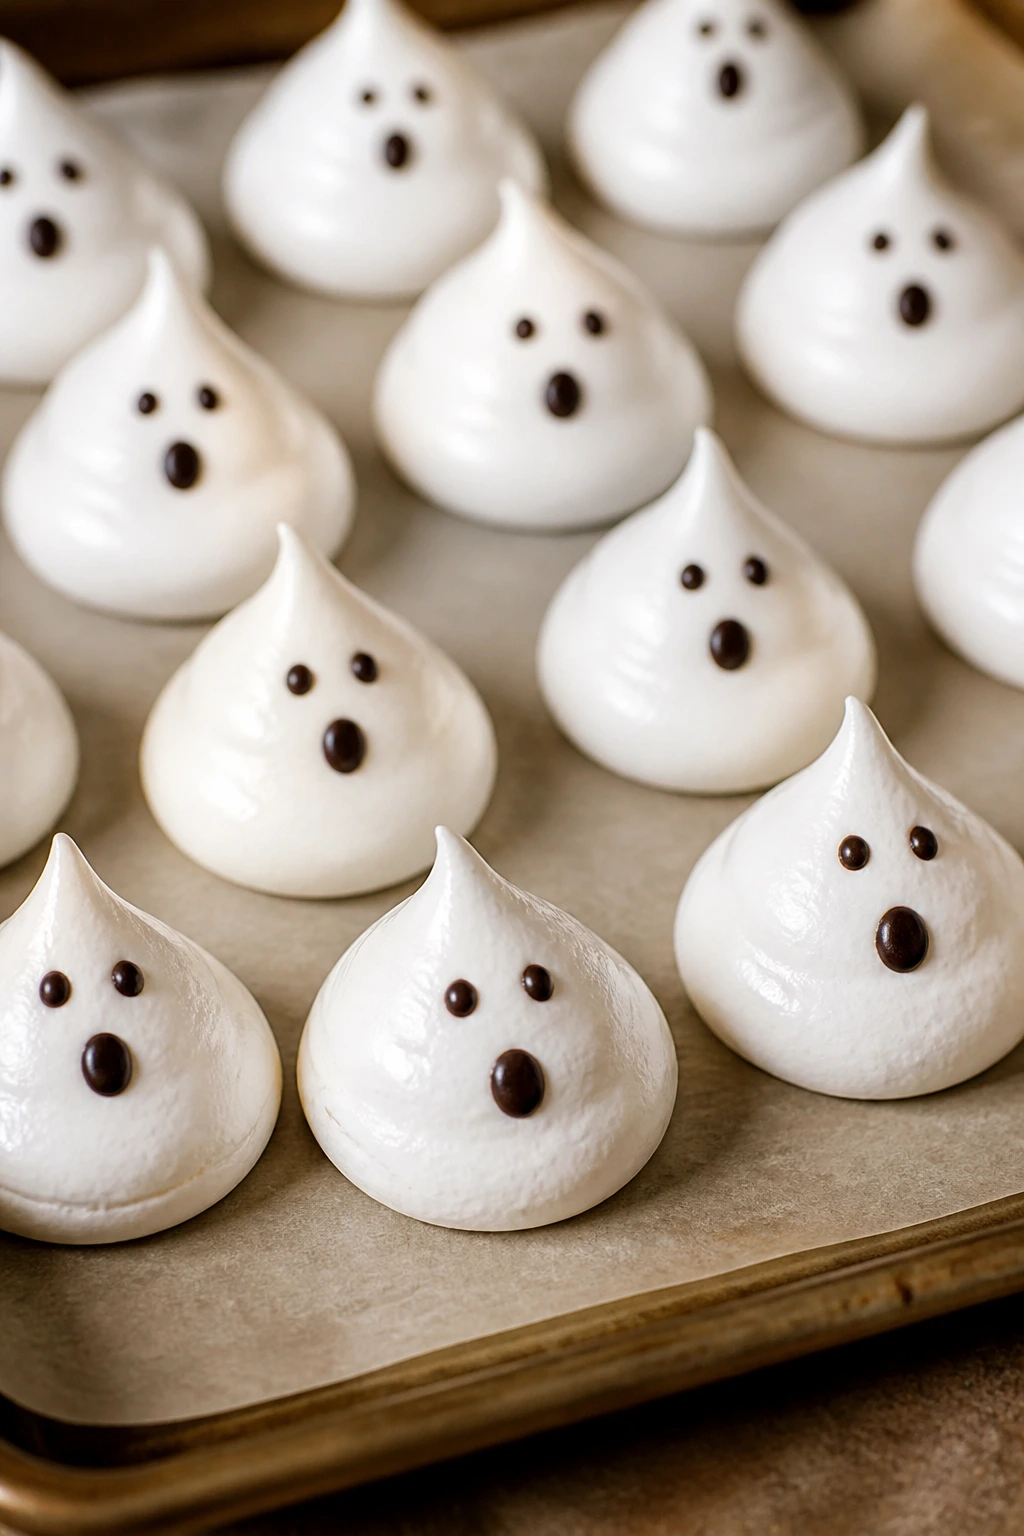
Meringue ghosts are light as air and a little theatrical, which is a nice change from the heavier Halloween desserts on a party table. They crackle softly when you bite them, then dissolve into sweet vanilla sugar almost immediately.
They also look far more fussy than they are. Egg whites, sugar, and patience do most of the work.
Why It Works:
Meringue depends on clean bowls, stable foam, and slow baking. Cream of tartar helps the egg whites hold their shape, and the sugar should dissolve enough to give you a glossy mixture before it ever goes in the oven. Low heat dries the kisses instead of browning them, which is what keeps the ghosts pale and spooky.
Key Ingredients:
- 4 large egg whites
- 1 cup granulated sugar
- 1/4 teaspoon cream of tartar
- Pinch of fine salt
- 1 teaspoon vanilla extract
- Mini chocolate chips for eyes or mouths
Quick Steps:
- Preheat the oven to 200°F and line two baking sheets with parchment.
- Beat the egg whites, cream of tartar, and salt until soft peaks form.
- Add the sugar gradually, then beat until the meringue is glossy and holds stiff peaks.
- Beat in the vanilla, pipe ghost shapes onto the parchment, and add chocolate chip faces if you want them.
- Bake for 1 hour and 15 minutes, then turn the oven off and leave the ghosts inside for another hour to dry.
Equipment for This Recipe:
- Stand mixer or hand mixer
- Parchment-lined baking sheets
- Piping bag with a round tip or zip-top bag
- Clean metal or glass bowl
How to Serve This Dish:
Set the ghosts on a dark platter so they really look like little white figures floating on the tray. They’re fragile, so don’t pile them on top of one another unless you want a box of broken meringue clouds.
Pro Tips for This Recipe:
- Make sure the bowl is grease-free; even a little fat can sabotage the foam.
- Add the sugar slowly so the meringue stays glossy instead of grainy.
- Keep humidity low if you can. Moist air softens meringues fast.
Variations on This Dish:
- Cocoa Ghosts: Swirl in a teaspoon of cocoa powder at the end.
- Peppermint Spirits: Add a tiny drop of peppermint extract instead of vanilla.
- Orange-Scented Ghosts: Use a little orange zest for a bright note.
Common Mistakes to Avoid with This Dish:
- Don’t use a plastic bowl, which can hold grease.
- Don’t bake too hot or the ghosts brown and collapse.
- Don’t store them in an open humid kitchen; they soften fast.
22. Chocolate Chip Cookie Skillet with Candy Eyes
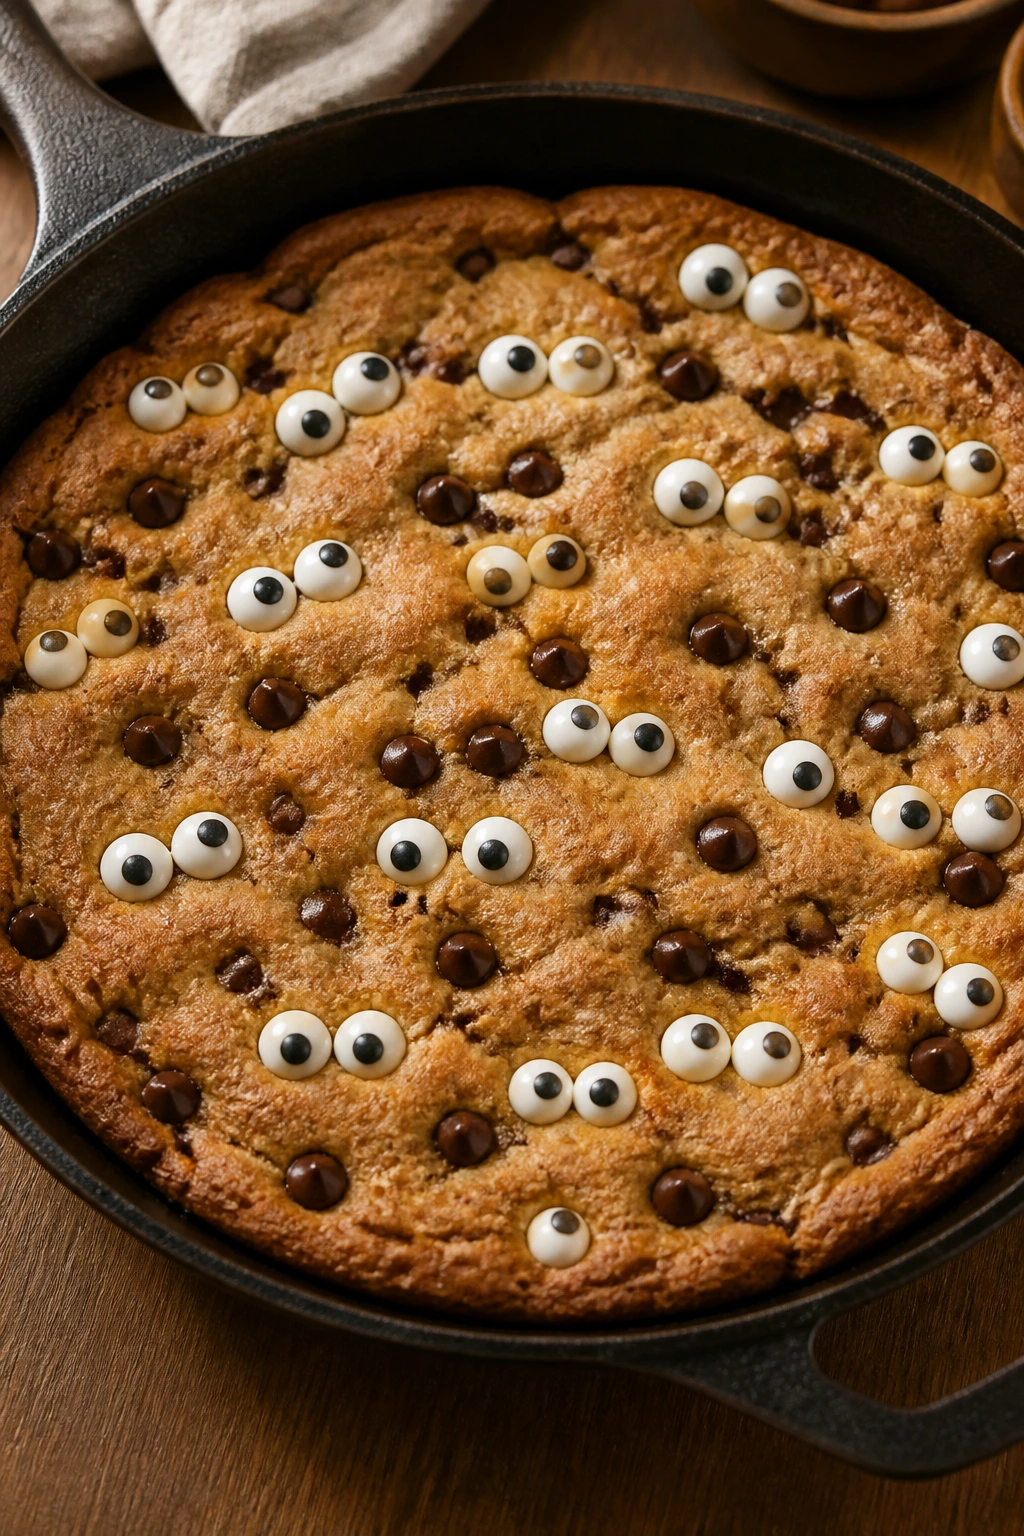
A chocolate chip skillet cookie is already a good idea. Add candy eyes and you’ve got a Halloween dessert that feels like a warm, gooey center-of-the-table event. The edges set, the middle stays soft, and a scoop of ice cream melting into the top makes it smell like a bakery at full volume.
This is the one I’d make when guests are around and I don’t want to fuss with scooping cookies onto trays. One skillet. One spoon. Very little cleanup.
Why It Works:
A skillet cookie bakes more slowly around the edges and stays gooey in the middle, which gives you that dramatic contrast people love. Brown sugar deepens the flavor, and the cast-iron pan holds enough heat to keep the cookie warm at the table. Candy eyes go on while it’s still hot, so they nestle into the surface instead of rolling off.
Key Ingredients:
- 1/2 cup unsalted butter, softened
- 1/2 cup packed light brown sugar
- 1/4 cup granulated sugar
- 1 large egg
- 1 teaspoon vanilla extract
- 1 1/2 cups all-purpose flour
- 1/2 teaspoon baking soda
- 1/2 teaspoon fine salt
- 1 cup semisweet chocolate chips
- 2 tablespoons candy eyes or Halloween candies
Quick Steps:
- Preheat the oven to 350°F and grease a 10-inch cast-iron skillet.
- Beat the butter and sugars until creamy, then mix in the egg and vanilla.
- Stir in the flour, baking soda, and salt until just combined, then fold in the chocolate chips.
- Press the dough into the skillet and sprinkle the candy eyes over the top.
- Bake for 20 to 24 minutes, until the edges are golden and the center still looks soft.
- Cool for 10 minutes before serving straight from the pan.
Equipment for This Recipe:
- 10-inch cast-iron skillet
- Mixing bowl and spatula
- Oven mitts
- Spoon for serving
How to Serve This Dish:
Serve it warm with vanilla ice cream or a little whipped cream in the center. The skillet goes straight to the table, which makes the whole thing feel relaxed and a little dramatic in the best way.
Pro Tips for This Recipe:
- Don’t overbake; the center should still jiggle slightly when you pull it out.
- Grease the skillet well so the edges release cleanly.
- Add the candy eyes before baking so they sink just enough to stay put.
Variations on This Dish:
- Double Chocolate Skillet: Replace 1/4 cup flour with cocoa powder.
- Peanut Butter Chip Skillet: Swap half the chocolate chips for peanut butter chips.
- Gluten-Free Skillet: Use a cup-for-cup flour blend and watch the center closely.
Common Mistakes to Avoid with This Dish:
- Don’t serve it straight from the oven or the middle will run everywhere.
- Don’t bake until the center is firm; skillet cookies are supposed to stay soft.
- Don’t skip greasing the pan, especially around the sides where the dough likes to stick.
Why Pantry Staples Work So Well for Halloween Baking
The funny thing about Halloween desserts is that the spooky part usually isn’t the hard part. A spiderweb is just melted chocolate dragged with a toothpick. A mummy is bark with a few lines of drizzle. A ghost is a meringue dollop with chocolate-chip eyes. Once you see the pattern, the whole holiday starts to feel friendly instead of fussy.
Pantry staples help because they behave predictably. Flour, sugar, cocoa, oats, cereal, crackers, pretzels, chocolate chips, marshmallows, and canned pumpkin all have clear jobs. Structure. Sweetness. Crunch. Color. Binding. That’s why these desserts can look playful without needing a long ingredient list or a last-minute store run for a special candy mold you’ll use once and forget about.
I also like that pantry baking leaves room for rough edges. Halloween does not need every dessert to look polished. A crooked web reads as handmade. A messy dirt cup looks more like a graveyard. A bark shard with a broken corner still gets eaten. Maybe especially that one.
And then there’s the practical side. Shelf-stable ingredients keep longer, cost less per batch, and let you bake on your schedule. If you’re the person who likes to keep cocoa powder, brown sugar, powdered sugar, and a bag of marshmallows on hand, you’re always closer to dessert than you think.
Essential Equipment for These Recipes
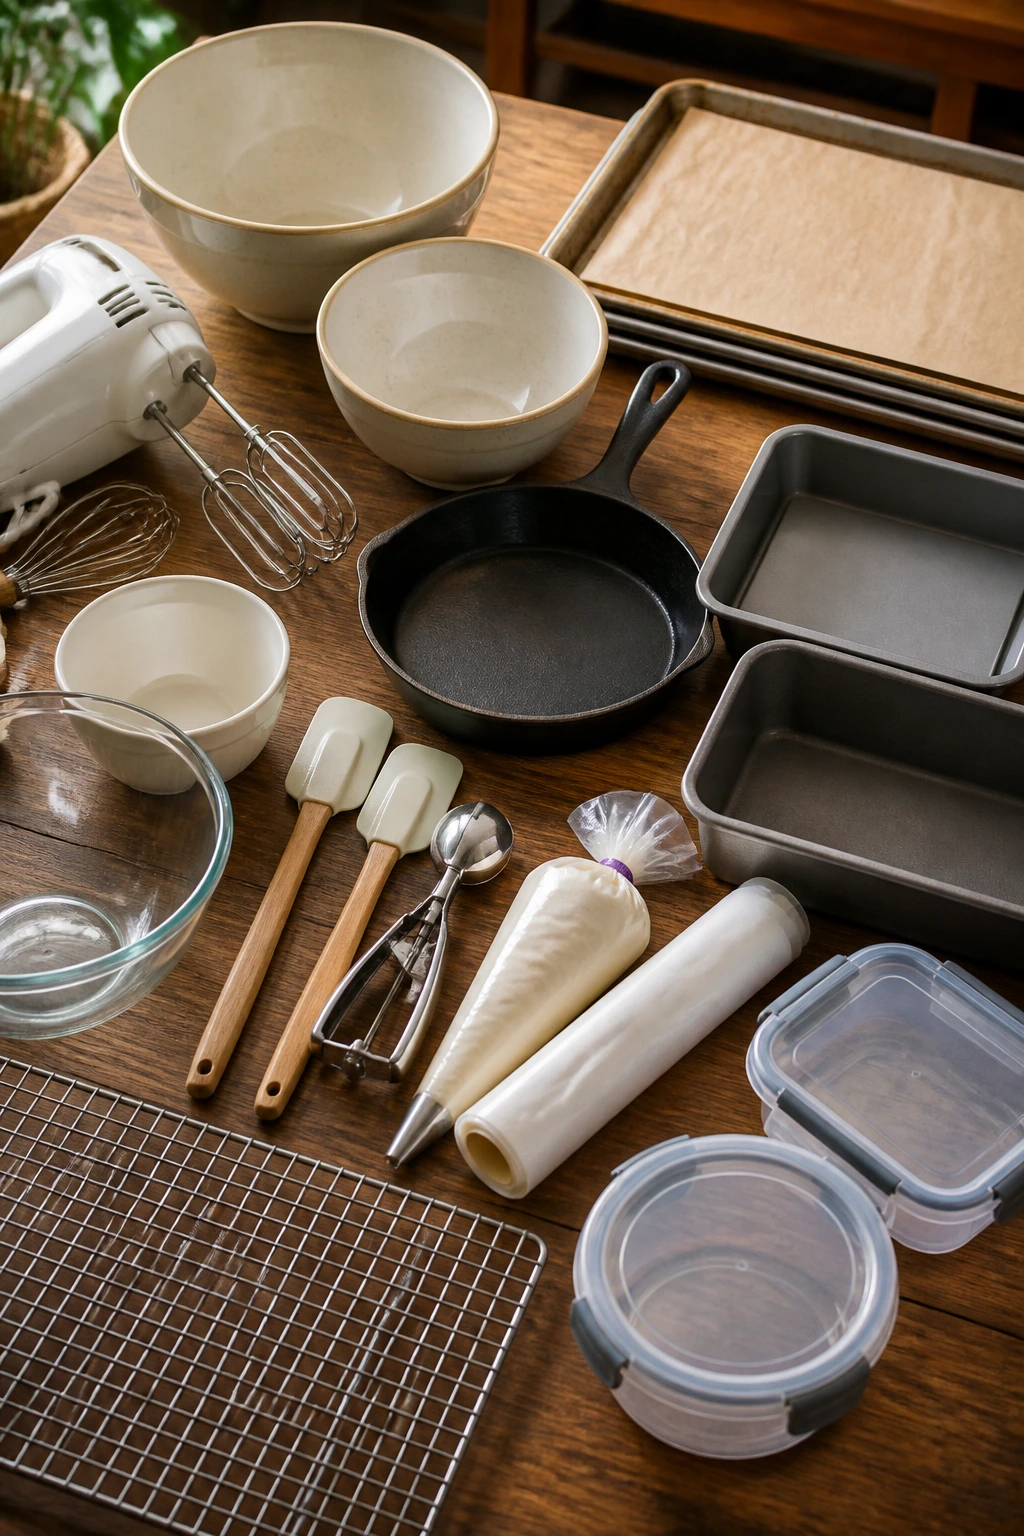
- Mixing bowls in two or three sizes: You’ll want one large bowl for batters and one smaller bowl for decorations or glazes.
- Rubber spatulas: Better than spoons for scraping thick brownie batter, marshmallow mixtures, and fudge.
- Baking sheets with parchment: Essential for bark, cookies, and anything sticky.
- 8×8-inch and 9×13-inch pans: These cover most bars, brownies, and fudge.
- Cast-iron skillet or oven-safe skillet: Worth having for the s’mores dip and skillet cookie.
- Whisk and hand mixer: The whisk handles simple batters; the mixer helps with frosting, meringue, and fluffy dough.
- Cookie scoop: Useful for neat, even cookies, popcorn balls, and truffles.
- Microwave-safe bowls: Handy for melting chocolate without making a mess.
- Parchment paper or wax paper: Makes cooling and cleanup easier, especially for no-bake treats.
- Piping bag or zip-top bag: Not fancy, just useful for spiderwebs, frosting bands, and mummy drizzle.
- Cooling rack: Helps brownies, bars, and cookies set without getting soggy underneath.
- Airtight storage containers: Keep brittle, chewy, and fudgy desserts from picking up fridge smells or going stale.
Smart Shopping and Ingredient Tips
Buy chocolate with the recipe in mind. Semisweet chips are the safest all-around choice because they melt well and don’t turn the desserts cloying, while white chocolate chips are useful for spiderwebs, mummy lines, and coating truffles. If you like a deeper chocolate flavor, keep one bag of Dutch-process or black cocoa in the pantry; it does more work than a lot of people expect.
Canned pumpkin is worth keeping around because it’s stable, consistent, and already smooth. Don’t buy pumpkin pie filling when a recipe asks for puree. The filling comes sweetened and spiced, which throws off cookies and muffins faster than you’d think. Pure pumpkin lets you control the cinnamon, nutmeg, and sugar yourself.
For candies and decorations, think shelf life and shape. Candy eyes, candy melts, Halloween sprinkles, and candy corn all hold up well in the pantry, but they behave differently. Candy melts are best for coating and drizzle. Candy corn is best used sparingly so it doesn’t turn into sticky sugar sludge. Sprinkles matter less in flavor than in finish, so use the ones with the boldest color contrast.
A quick note on marshmallows: fresh marshmallows matter. Old bags can be sticky in the wrong way and reluctant to melt. The same goes for cereal. If the box has been open too long, the texture in Rice Krispie treats turns flat instead of crisp-chewy. Little details. Big difference.
How to Serve These Recipes
Presentation:
Use dark platters, parchment-lined trays, or clear cups to make the colors stand out. Brownies, bark, and bars look sharper when they’re cut into clean squares and grouped tightly, while dirt cups and popcorn balls look better a little loose and uneven. Halloween desserts can be playful without looking sloppy, and a few smart serving containers do most of that work.
Accompaniments:
Cold milk works with almost everything here. Coffee suits brownies, blondies, and fudge. For the warm desserts — the skillet cookie and the s’mores dip — vanilla ice cream is the obvious match, but I also like plain whipped cream because it doesn’t fight with the chocolate or pumpkin.
Portions:
Bars and brownies cut best into small squares, especially when they’re rich or dense. Truffles, meringues, and popcorn balls should stay bite-size unless you want a sugar crash at the table. For parties, I usually plan one or two pieces per person if there are several desserts on the tray, and three or four if it’s the only sweet thing around.
Beverage Pairing:
Hot chocolate fits the meringues, cookies, and pumpkin muffins. Cold milk fits the brownies, cookie bars, and peanut butter treats. If you want one beverage that works across the whole spread, strong coffee or a simple espresso does the job without making the table feel too sweet.
Additional Tips and Flavor Boosters
Flavor Enhancement: A small pinch of flaky salt on brownies, bark, blondies, or fudge makes the chocolate taste deeper without changing the recipe much. It’s a tiny move, and it works.
Customization: If you like a stronger Halloween color palette, use orange candy melts, black cocoa, and candy eyes as your visual anchors. If you want the desserts to lean less sweet, dark chocolate and salted nuts are the quickest fix.
Serving Suggestions: Dust meringues with a whisper of cocoa powder, scatter a few extra candy eyes around the tray, or tuck pretzel rods into a jar like spooky breadsticks. A little height and texture on the plate matters more than people think.
Make-It-Yours: For nut-free trays, stick to cookie bars, bark, meringues, and popcorn-based desserts without peanut butter. For gluten-free guests, the easiest swaps are flour blends in brownies and cookies, plus naturally gluten-free options like fudge, meringues, and truffles made with safe cookies.
Make-Ahead, Storage, and Reheating Guidance
Most of these desserts keep well, which is one more reason I like them. Brownies, blondies, bars, and fudge hold at room temperature for 2 to 3 days if they’re covered tightly, and they keep in the fridge for about a week. Bark can sit in a cool pantry for several days, but if your kitchen runs warm, refrigerate it so the chocolate doesn’t soften.
Cookies vary a bit more. Peanut butter spider cookies, crinkle cookies, pumpkin snickerdoodles, and chocolate chip skillet leftovers all keep for 3 to 4 days in an airtight container. If they’re soft cookies, tuck a piece of parchment between layers so the decorations don’t rub off. Meringues are the opposite: keep them in a dry container at room temperature and do not refrigerate them, because humidity makes them sticky.
No-bake treats are usually the most sensitive. Dirt cups should be assembled and chilled, then eaten within 2 days for the best texture. Oreo truffle eyeballs and peanut butter pumpkins keep in the fridge for up to 5 days, and they can be frozen for a month if you skip the decorative faces until after thawing.
Reheating matters for the warm desserts only. Skillet cookie and s’mores dip should be warmed briefly in a 300°F oven until just soft, not molten. If you reheat the skillet cookie, do it for 6 to 8 minutes and add the ice cream after, not before. Fudge, bark, and truffles don’t need reheating at all; they taste better chilled or at room temperature depending on the texture you want.
Variations and Adaptations to Try
The Candy-Bowl Rescue Plan:
Use whatever leftover Halloween candy you already have for mix-ins and toppings. Chopped peanut butter cups, mini marshmallows, candy corn, and sprinkles can all replace part of the decoration in brownies, bars, bark, and cookies. This is the easiest way to clear out the bowl without making the dessert feel random.
The One-Bowl Shortcut:
Brownies, blondies, cookie bars, and muffin batters can all be mixed in one bowl if you’re careful about order. Melted butter or oil helps the wet ingredients combine quickly, and the fewer bowls you dirty, the more likely you are to make the dessert again.
The Dark-Chocolate Table:
If your crowd likes less sweetness, lean on dark chocolate chips, black cocoa, salted pretzels, and plain meringues. Candy corn can stay in the background, but it doesn’t need to dominate the whole tray. A darker palette also makes the orange pieces stand out more.
The Kid-Decorator Version:
Set up a tiny decorating station with candy eyes, sprinkles, melted chocolate, and parchment squares. Let kids finish bark, truffles, popcorn balls, and sugar cookie bars. The trick is to give them simple assembly tasks instead of open-ended frosting freedom, which usually ends in enthusiasm and sticky counters.
The Gluten-Free Mix:
Use gluten-free flour blends in brownies, blondies, cookie bars, and crinkle cookies; the texture holds up best in rich, chocolate-heavy desserts. Keep an eye on the bake time, because some blends dry out faster than standard flour. Naturally gluten-free picks like fudge, meringue, popcorn balls, and bark can anchor the whole tray.
Common Mistakes to Avoid
The first mistake is treating Halloween desserts like they’re all about decoration. Decoration matters, sure, but if the brownie is dry or the popcorn ball is hard, nobody remembers the candy eyes. Fix the base first.
The second mistake is rushing the cooling time. Brownies need to cool before webbing. Bark needs to set before breaking. Fudge needs to chill before slicing. Truffles need to freeze before coating. A lot of Halloween dessert problems come from trying to decorate something that is still soft and warm.
The third mistake is using stale pantry ingredients and expecting the same result. Old marshmallows don’t melt smoothly, old cereal loses its crunch, and old baking powder can leave you with flat cookies. If a recipe depends on lift or texture, fresh ingredients matter more than people want to admit.
The fourth mistake is overloading everything with sweet toppings. Candy corn, frosting, chocolate drizzle, and sprinkles all have a place, but if they all show up at once, the dessert gets muddled. Pick one or two finishing moves and let the main recipe taste like itself.
The fifth mistake is forgetting that some of these desserts are meant to be handled, not sliced. Popcorn balls, pretzel rods, truffles, and meringues need trays, liners, or containers that suit their shape. A clever dessert still needs a sensible serving plan.
Frequently Asked Questions
Can I make most of these Halloween dessert ideas ahead of time?
Yes, and that’s one of the best parts of this collection. Brownies, bars, fudge, bark, cookies, and truffles all benefit from being made a day ahead, while fresh decorations like candy eyes or frosting bands can be added closer to serving.
What pantry staples should I keep on hand for Halloween baking?
Flour, sugar, brown sugar, cocoa powder, powdered sugar, chocolate chips, marshmallows, oats, cereal, peanut butter, canned pumpkin, pretzels, graham crackers, and sprinkles cover a lot of ground. If you keep those around, you can make at least half of this list without a store run.
Which recipes are best if I don’t want to turn on the oven?
Mummy bark, dirt cups, Oreo truffle eyeballs, peanut butter pumpkins, chocolate-covered pretzel rods, and popcorn balls are the easiest no-bake choices. Fudge and s’mores dip only need a quick melt or broil, which is still less work than a full bake.
How do I keep chocolate coating smooth and not clumpy?
Melt it slowly in short bursts and stir between each burst. A teaspoon of coconut oil or neutral oil helps the chocolate loosen, but don’t add so much that the coating stays soft after it sets.
Can I use regular cocoa instead of black cocoa?
You can, though the cookies or brownies will look lighter and taste a little less dark and roasted. Dutch-process cocoa gets closer to the deep Halloween color, while regular cocoa gives you a softer chocolate flavor.
What should I do if my marshmallow treats got too hard?
That usually means the marshmallow mixture was cooked too hot or pressed too firmly. Next time, keep the heat low and press the mixture into the pan with a light hand. If they’re already made, a short rest in an airtight container with a slice of bread can soften them a bit.
How do I stop cookies from spreading too much?
Chill the dough, measure the flour carefully, and avoid baking on a hot sheet pan. Peanut butter cookies, snickerdoodles, and skillet cookies all spread a little by design, but if they turn into puddles, the dough was probably too warm.
Can these be adapted for a classroom or party tray?
Yes. The cleanest options are bark, bars, truffles, cookies, and pretzel rods because they portion neatly and travel well. Anything warm and gooey — the skillet cookie or s’mores dip — is better for home or a setup where you can serve it immediately.
What if I want the desserts less sweet?
Use darker chocolate, add a pinch more salt, and lean on cookies or brownies rather than candy-heavy toppings. Meringues, dark bark, and cocoa-based treats give you a lot of Halloween flair without overwhelming the plate with sugar.
Full Treat Tray

Halloween baking gets easier when you stop treating every dessert like a special project. A bag of cocoa, a box of cereal, a handful of chocolate chips, and a few clever decorations can go a long way when you know how to use them.
That’s what I like about a pantry-first Halloween spread: it feels scrappy in a good way. More homemade than store-bought. More fun than fussy. And when the tray is full, nobody asks how many things came from the cupboard and how many came from the store. They just reach in for another piece.